


GazzaS
-
Posts
6,396 -
Joined
-
Last visited
Content Type
Profiles
Forums
Events
Gallery
Posts posted by GazzaS
-
-
Martin,
That looks fabulous!
-
 2
2
-
-
1 hour ago, BlrwestSiR said:
If one was able to stay on a 4x6 section, I could have 9 of us working
My entire bench top is 24 inches by 39 inches. You could sleep 2 US Marines on a 4 X 6 section.
-
 5
5
-
-
On 3/24/2023 at 7:54 AM, BlrwestSiR said:
Just putting the final coat of varnish on my new workbench:
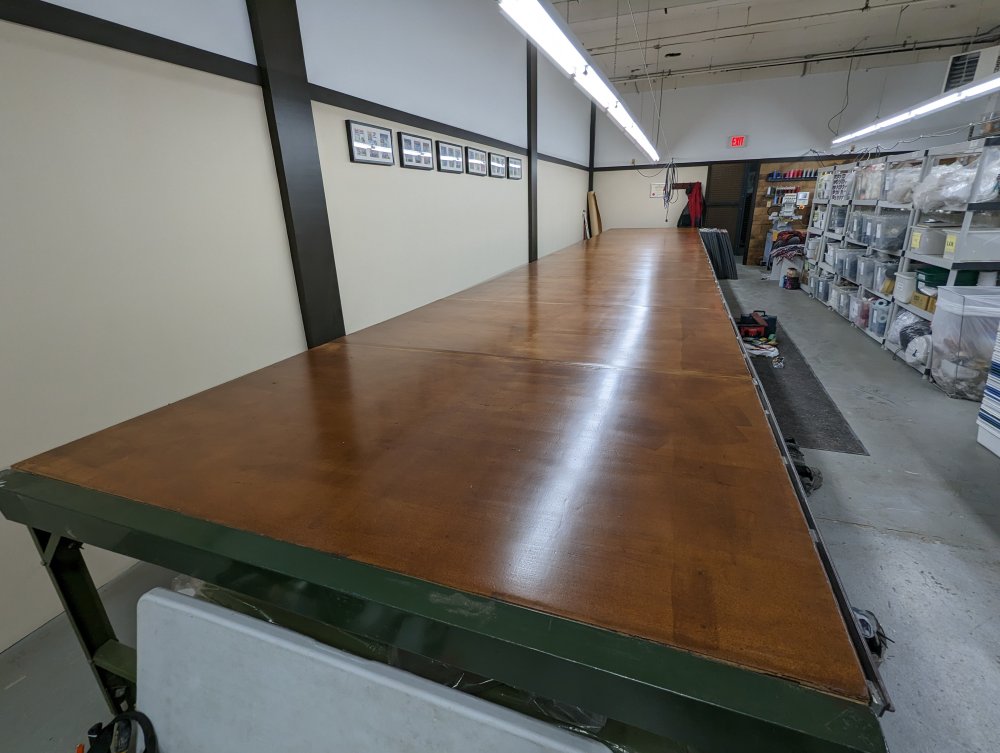
36' long and 6' wide. I think I'll be able to start my entire stash on this one and still have room.

Don't I wish. It's the cutting table at work that I've been refinishing for the last couple weeks.
Now you can invite 6 of your friends to come build with you.
-
1
-
5
-
-
Quite a pad, Harv. How many bed and bathrooms? The living room looks gigantic. Here in Australia, many rooms tend to be smaller. I have 2 and 1/2 bathrooms and 4 bedrooms. But most rooms and bathrooms would be nice walk in closets in the states.
Even the "master bedroom" is only 12ft by 12ft.
-
5
-
-
Wow!
-
2
-
-
Nice work so far... great that it came with a metal barrel and indy links. I never new that the J didn't have vision blocls on the turret side hatches.
-
2
-
-
Just now, PanzerWomble said:
That's a low blow 🤣
I did reiterate that it was only my second spit since 1978.
-
2
-
-
11 hours ago, PanzerWomble said:
Re the spine - for me I'd just fill it.
It will be covered with markings and won't be noticable post paint. Certainly doesn't draw the eye even at this stage unless you're a Spit rivet watcher .
I already filled it with perfect plastic putty.
-
2
-
-
11 hours ago, PanzerWomble said:
That looks a good close fit , but without wishing to be a git , you know it's on backwards in those shots ?
No need to worry... somebody else already point it out at TOS.
-
OK... some enquiring minds minds wanted to know how the Malcolm hood fit in the open position.
The answer is... like a dream. Just dry fitted here...
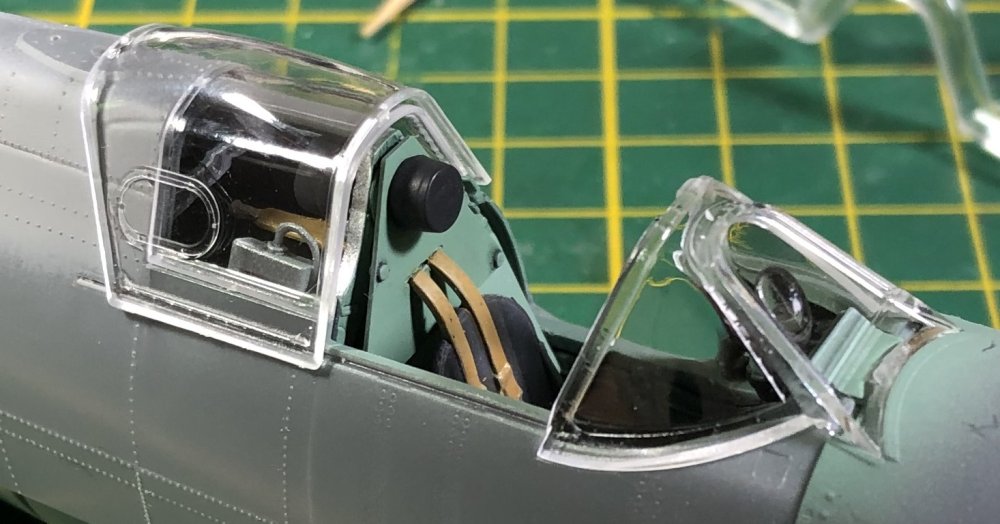
The windscreen seems to want pressing down to fit perfectly. I got a little paint on the joint, so I'll remove that before I begin sanding.
and the engine covers and armored fuel covers... all sweet.
And finally... a solid clear reflector sight. with no seam running down the middle.

I painted a thin layer of clear green around the outside of the glass reticle to give some depth. But my crappy photography kind of nullified the effect.
More thoughtful workmanship by Kotare.
-
12
-
-
Peter,
The engine looks great!
-
3
-
-
39 minutes ago, Peterpools said:
Gaz
I'm looking at a brand new, unbuilt Tamiya Spitfire Mk IXc still in the part bags and the fuselage has both panel lines and very delicate rivets.
The sides have panel lines and the very delicate rivets run through the panels, along the fuselage, not next to any of the panel lines and none vertically. The upper fuselage seam that you have been working on is just a well scribed panel line on the Tamiya kit, with rivets only along the inside edge of the rear, long panel line and where it steps up; no rivets along that portion of the panel line.
I'm not a Spitfire expert, so I have no idea who is right. When I build my Kotare Spitfire, I'm not going to worry about the rivets and the panel lines and build it as Kotare intended.
Thanks, Peter. I'm going to leave it as it is and continue.
-
4
-
-
7 hours ago, JohnB said:
After some consideration I have decided to model this a/c instead of Hartmann's.
Good. I like diversity.
-
5
-
-
Great job, Peter!
-
2
-
-
11 hours ago, PanzerWomble said:

I love deer season. Someone always gets shot in some new way. One I remember in particular is a guy wanted to take a picture of his dog with the rifle and the deer he'd just killed. He failed to unload the rifle and his dog managed to make it fire, killing the owner immediately.
Karma or bad luck?
-
2
-
 1
1
-
-
Nice... That carpet is already saying: "Gimme, Gimme, Gimme!"
-
12
-
-
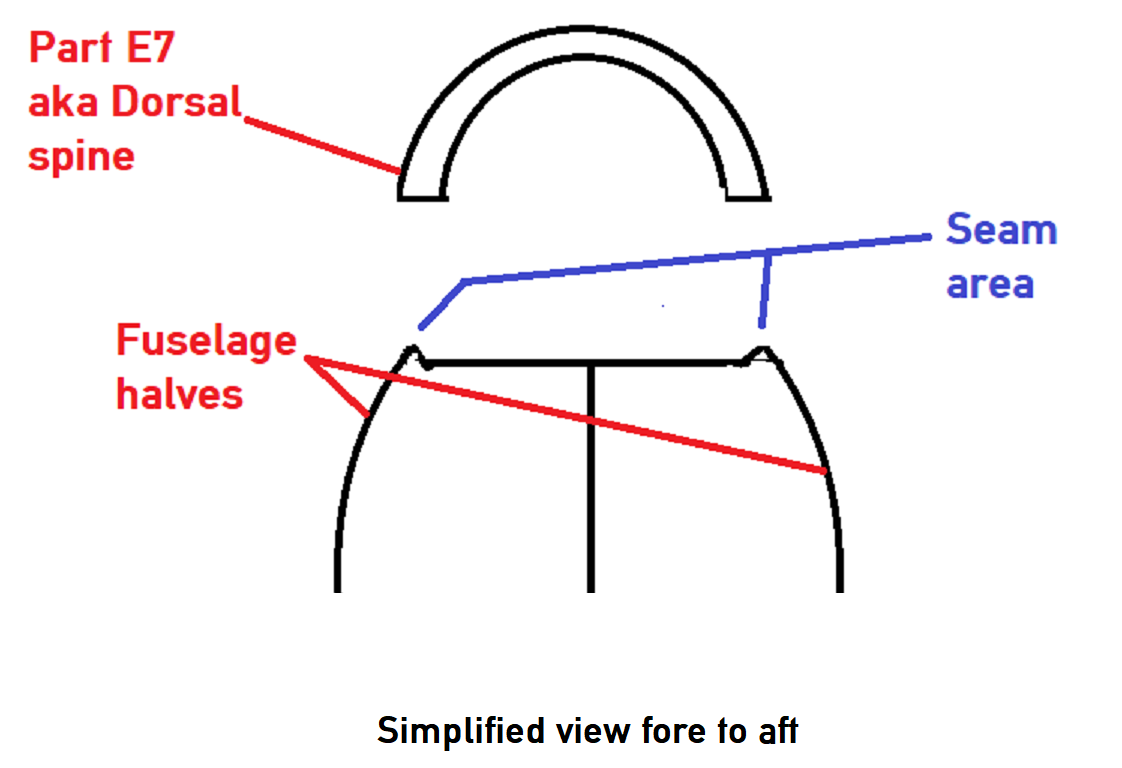
Well, what started as interesting surface detail coupled with an innovative way of dealing with the dorsal seam has put me into a bit of a conundrum.
Here is a diagram to illustrate the way the parts are made and fit. It is not to scale.

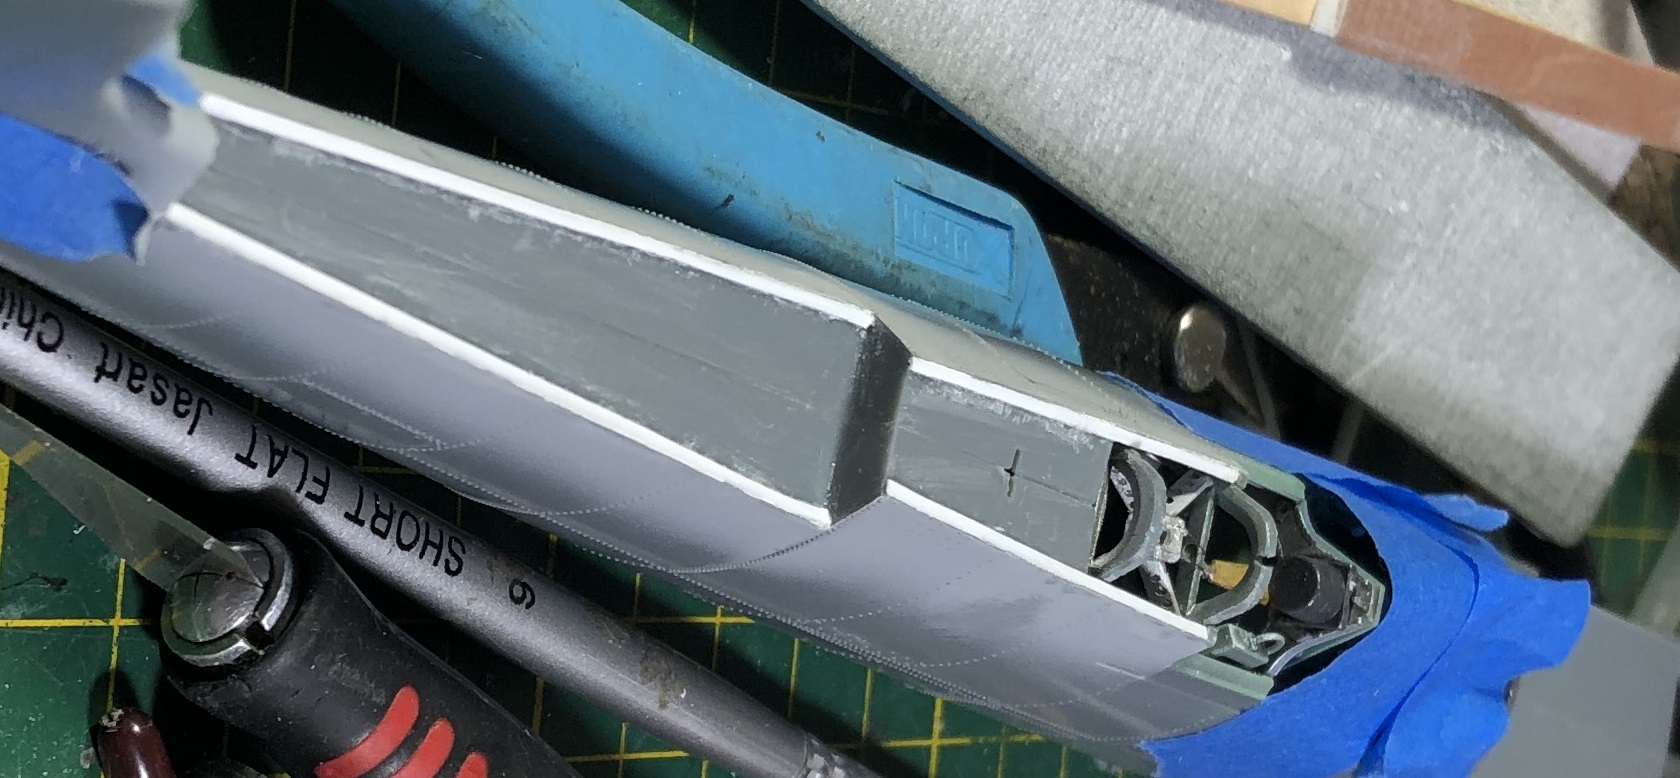
You can see that the fuselage halves are beveled down to a flat area on the interior of the fuselage. while E7, the Dorsal spine has flat mating surfaces. I took some photos to illustrate the parts, but the bevel isn't very easy to see. I have used white arrows to help make the bevel easier to find.

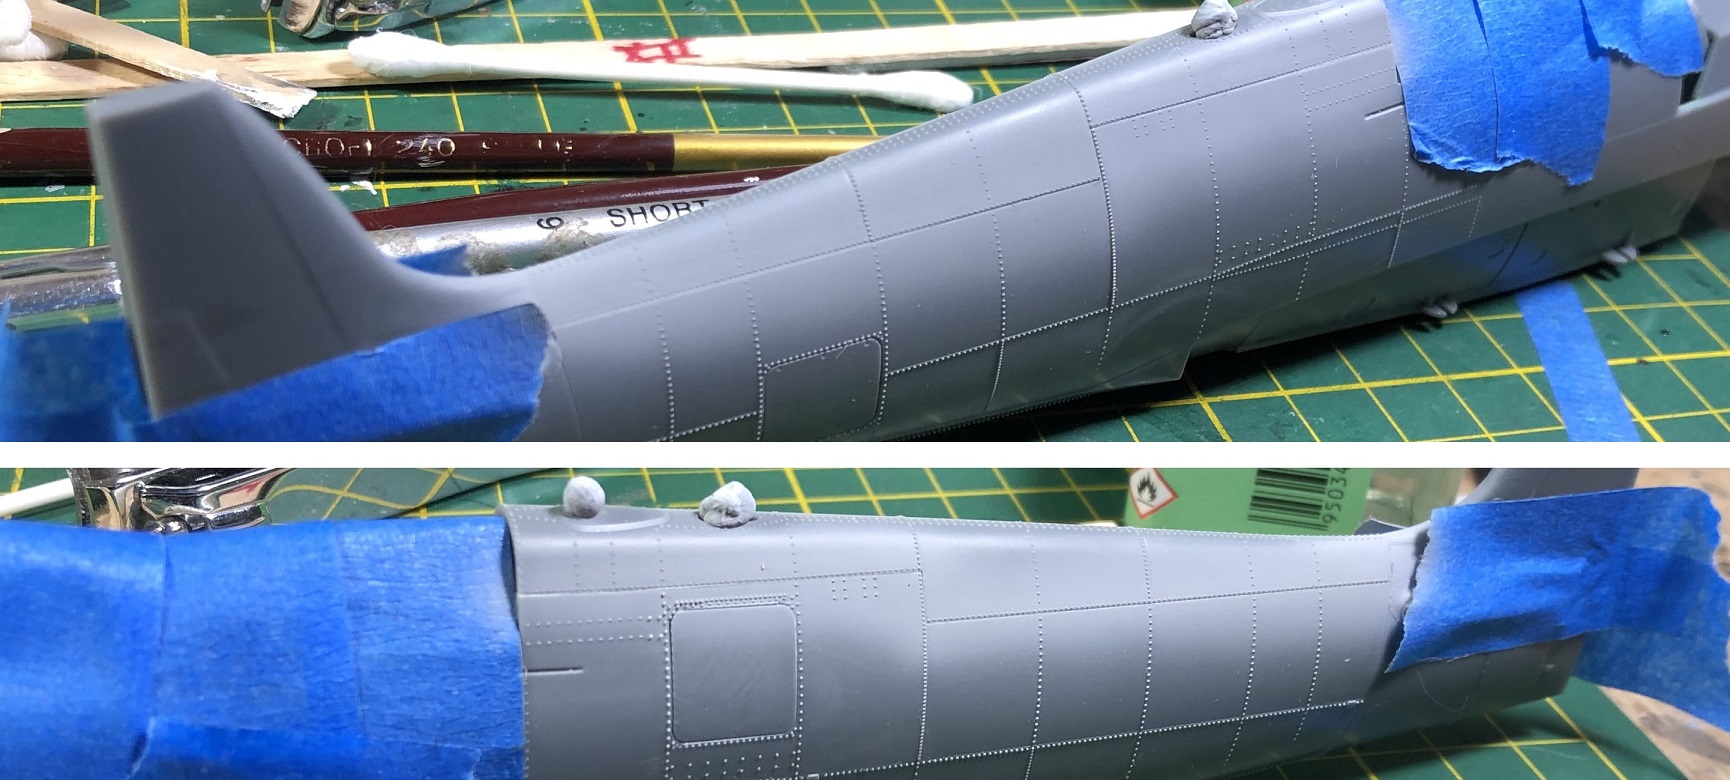
On the first attempt I followed some advice about using CA to tack an area down, then glue the rest with Tamiya Extra Thin Quick Setting. I followed through, and used a bit of PPP to fill the seam, but wasn't happy with the result. ...I tested it with a little gray paint to see what it would look like painted.
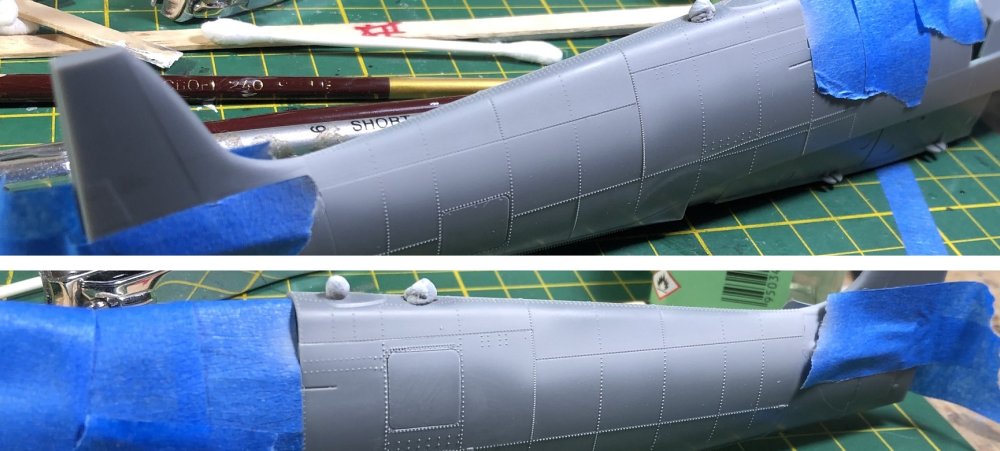
I wasn't happy with the result. Sure, it looks like a panel line. But it's the only one there. If the rest of the fuselage had panel lines, it would fit in. But now it sticks out like a sore thumb.
So, I ripped it off.
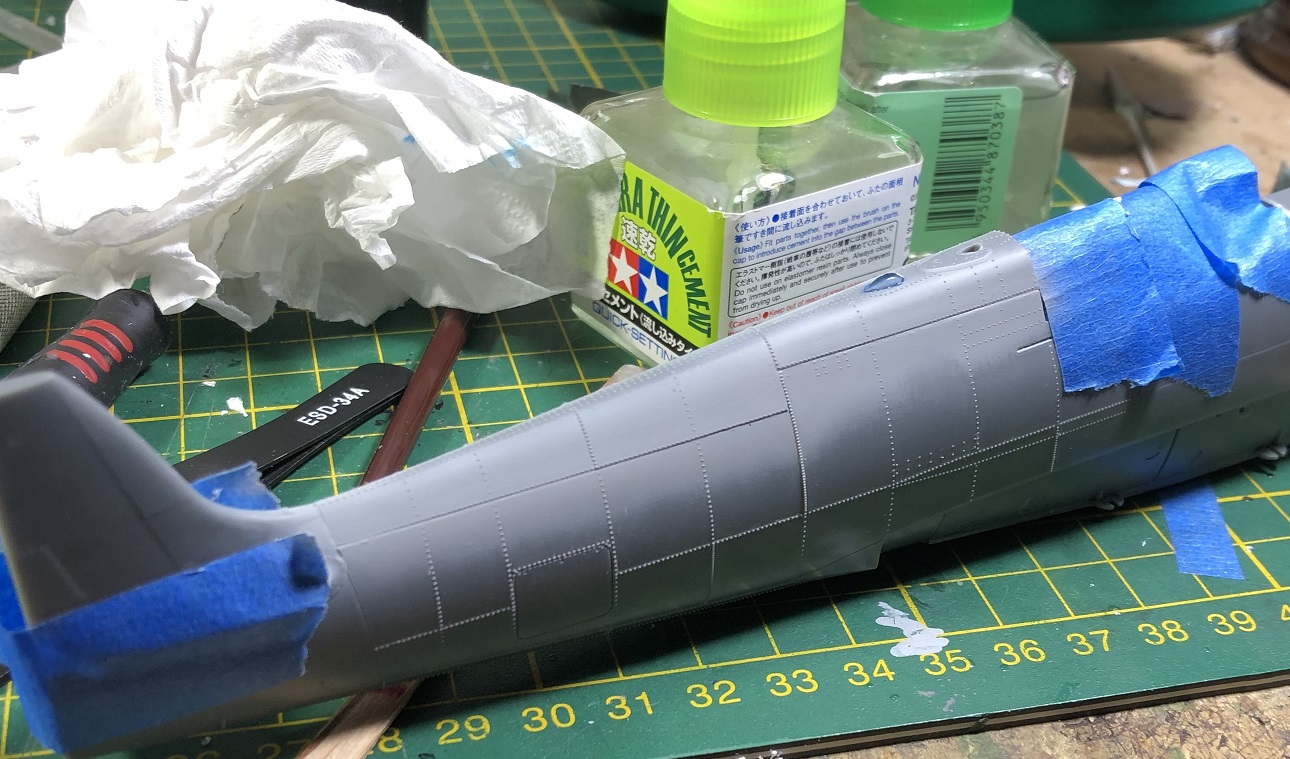
And after a day of thinking, I decided to deal with the beveled area and see if I can get a better fit. I used some Evergreen strip to fill the bevel and give a completely flat surface in hopes of a better fit.
And then I reattached the dorsal spine E7. And then filled the seam with PPP and removed the excess. And then painting it gray.

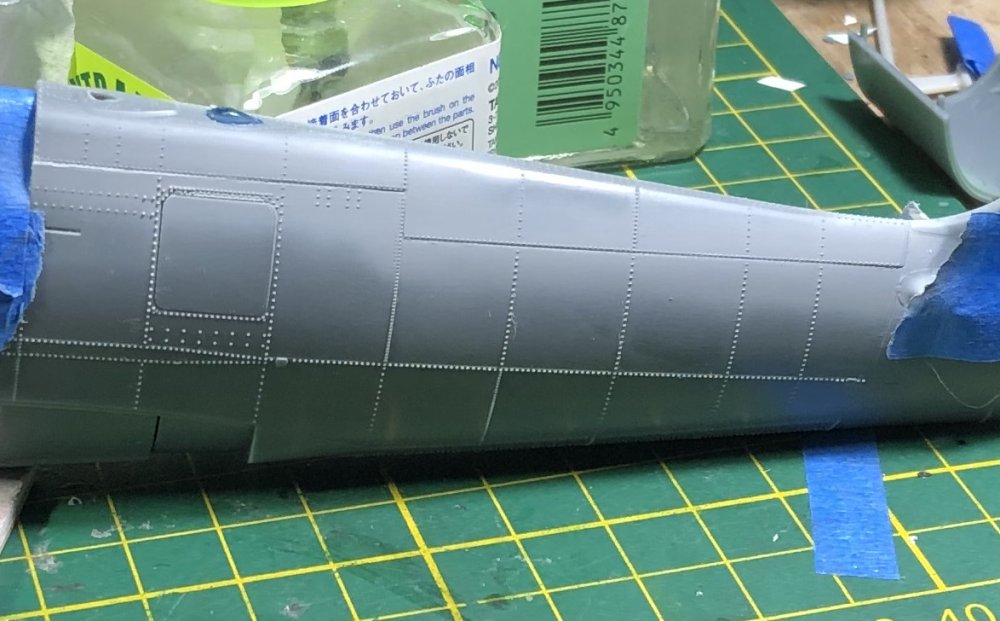
It doesn't look any different.
So, now I have to decide whether to leave it as it is... or come up with another way. There is no other way to fill that seam that I can think of that won't involve ruining the rivets. The only other solution coming to mind at this very moment is to strip the rivets off, fill the seam and then contemplate:
a. No rivets, no panel lines.
b. replacing the rivets with HGW surface rivets which are much smaller.
c. Inscribing panel lines and adding HGW rivets.
Any ideas?
-
2
-
 3
3
-
-
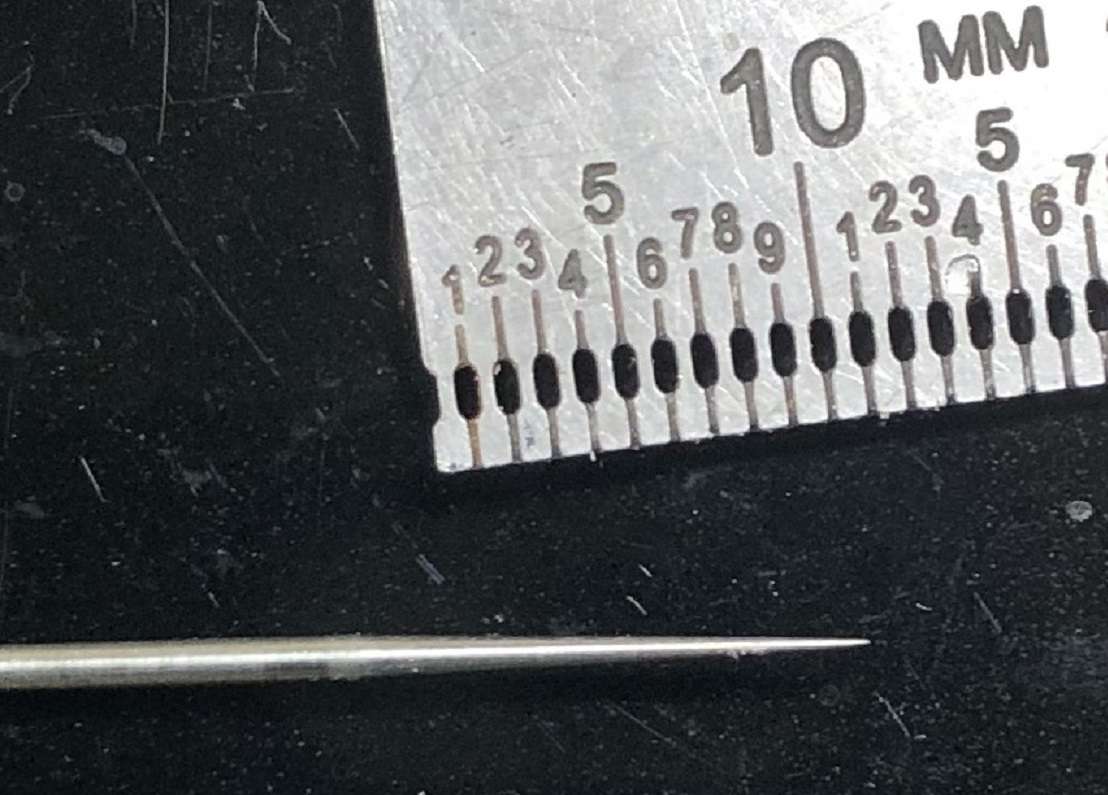
This is my .02 needle after using the Sharpenair...
-
2
-
-
1 hour ago, BlrwestSiR said:
Peter, I have a Sharpenair for my airbrush needles:
https://www.mapleairbrushsupplies.com/products/sharpenair?variant=31380551043
I picked it up a few years ago and it can straighten out a bent needle tip and remove any nicks in one. It's also simple to use.
I have one too. One day while cleaning I dropped the needle and it speared into a piece of pine that my bench is made of. I used the Sharpenair to grind away the new bend on the tip of the needle.
-
2
-
-
Great job, Peter! Very nicely done!
-
2
-
-
I'll wait for the Kotare Hurricane... you know one is coming.
-
5
-
1
-
-
Cockpit looks great. I didn't paint the bullets... or any hidden detail for that matter.
-
3
-
-
Interesting info, Ern. Thanks for sharing.
-
1
-
-
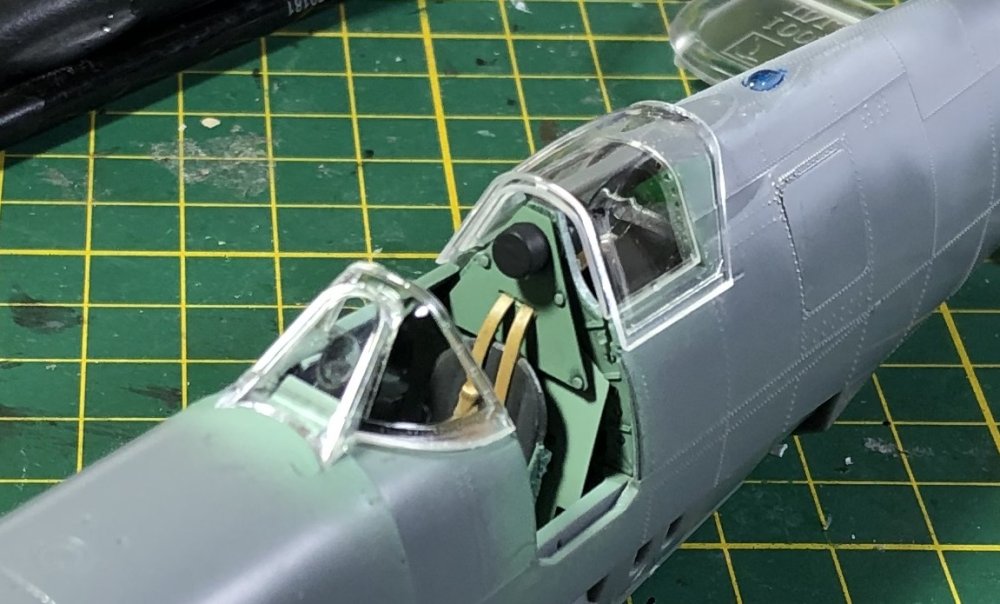
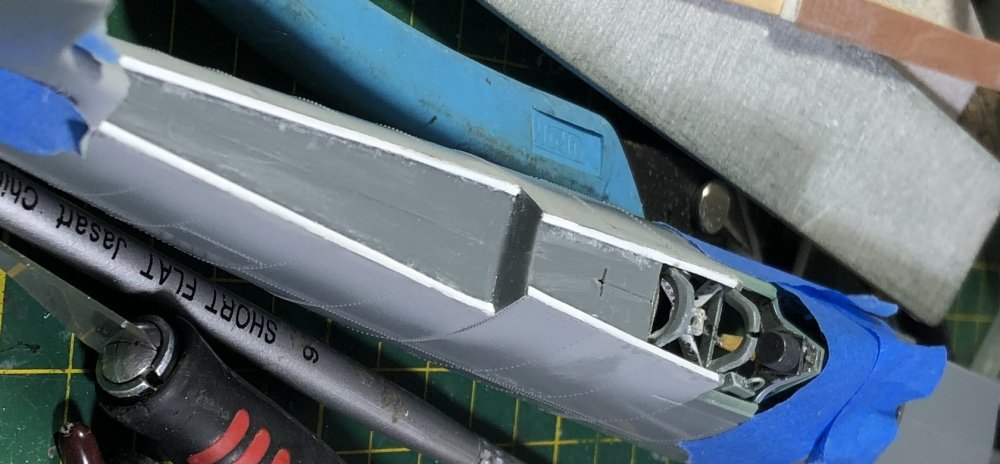
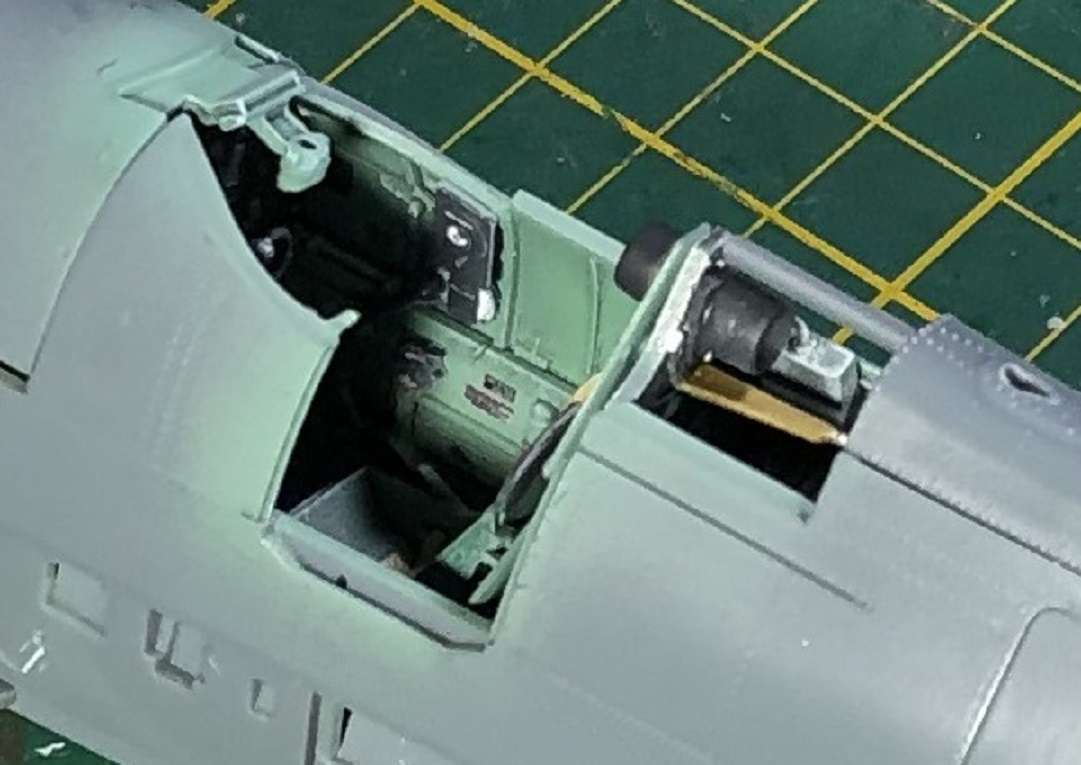
Well...
The last detail to finish in the cockpit was to add the shiny glass pieces over each gauge.
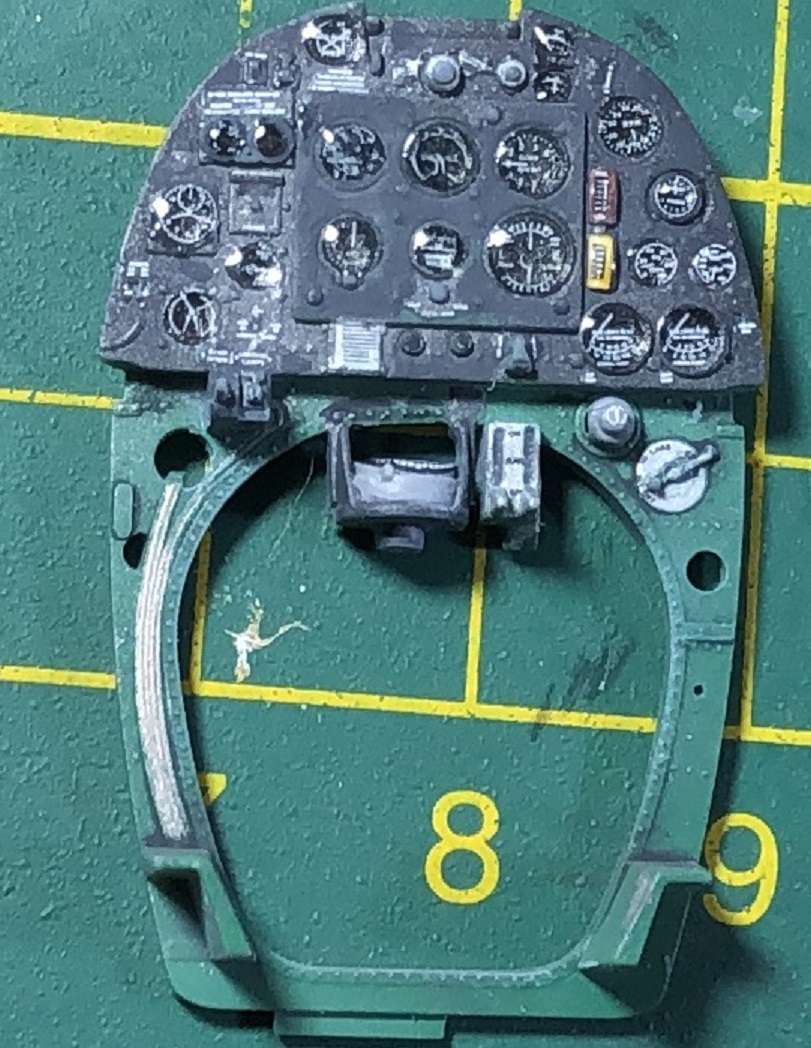
An enlarged view for those that like enlarged things...
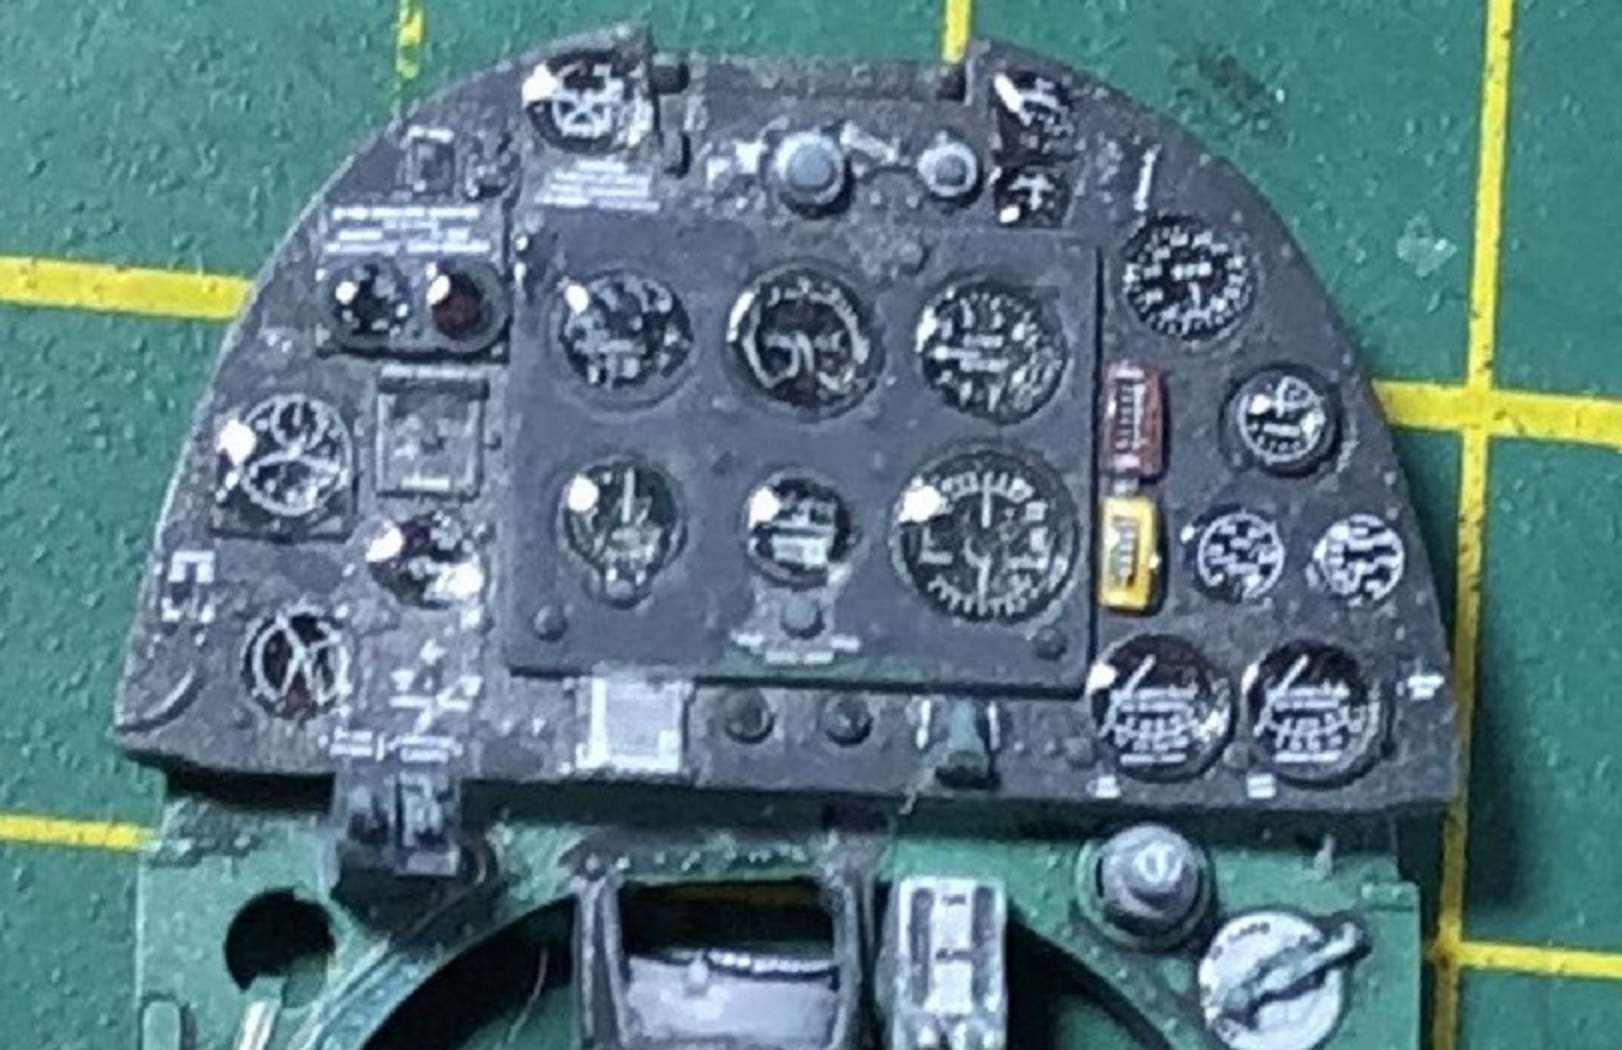
I used that clear resin that hardens under UV light to make the effect.
Anyway... after all of that hard work in the cockpit... including rigging the flying controls with Ushci type stretchy line... I hid it all by buttoning up the cockpit tub and added the fuselage around it.
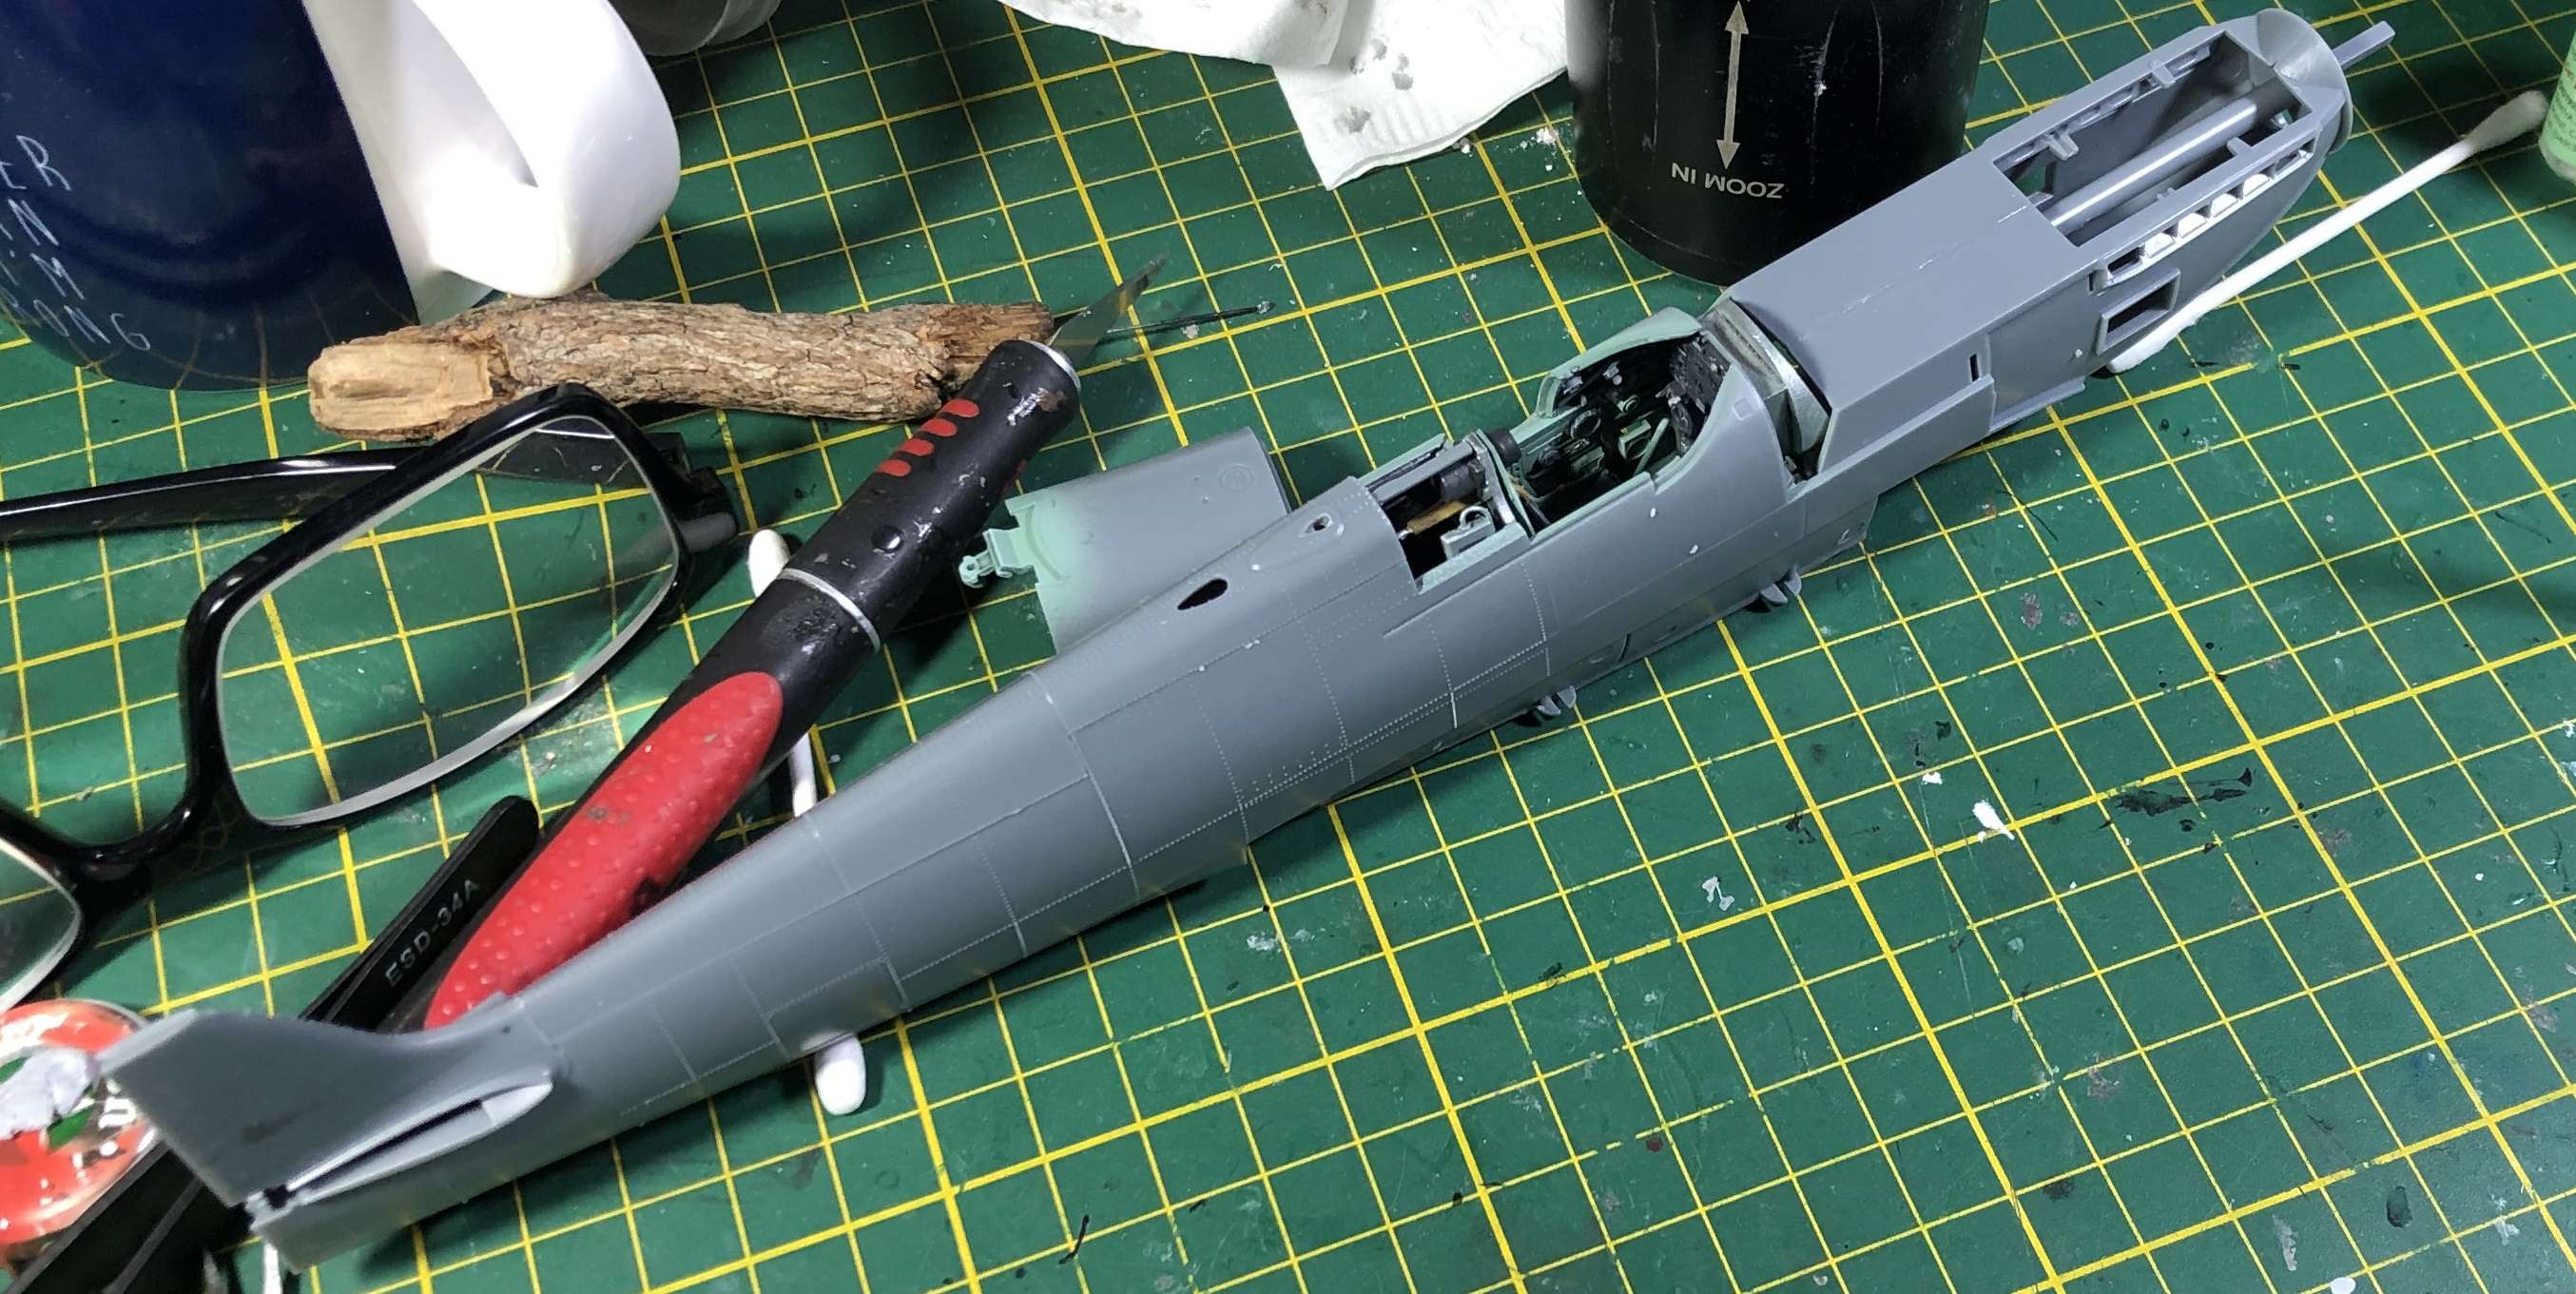
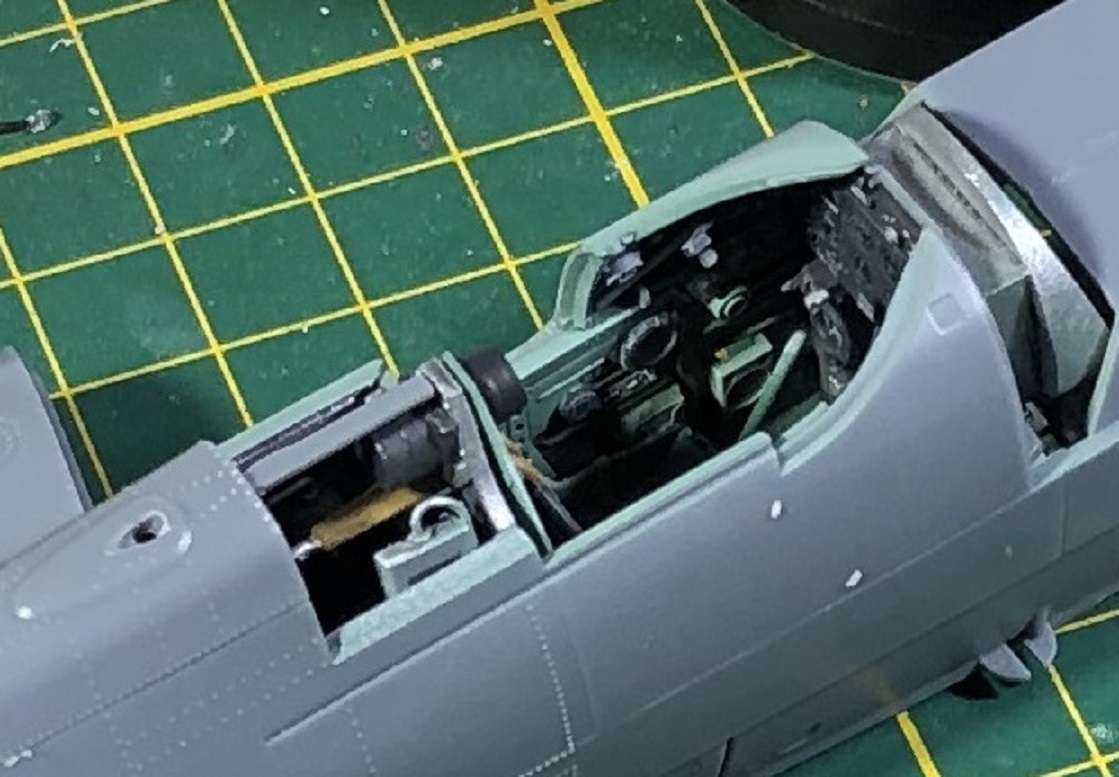
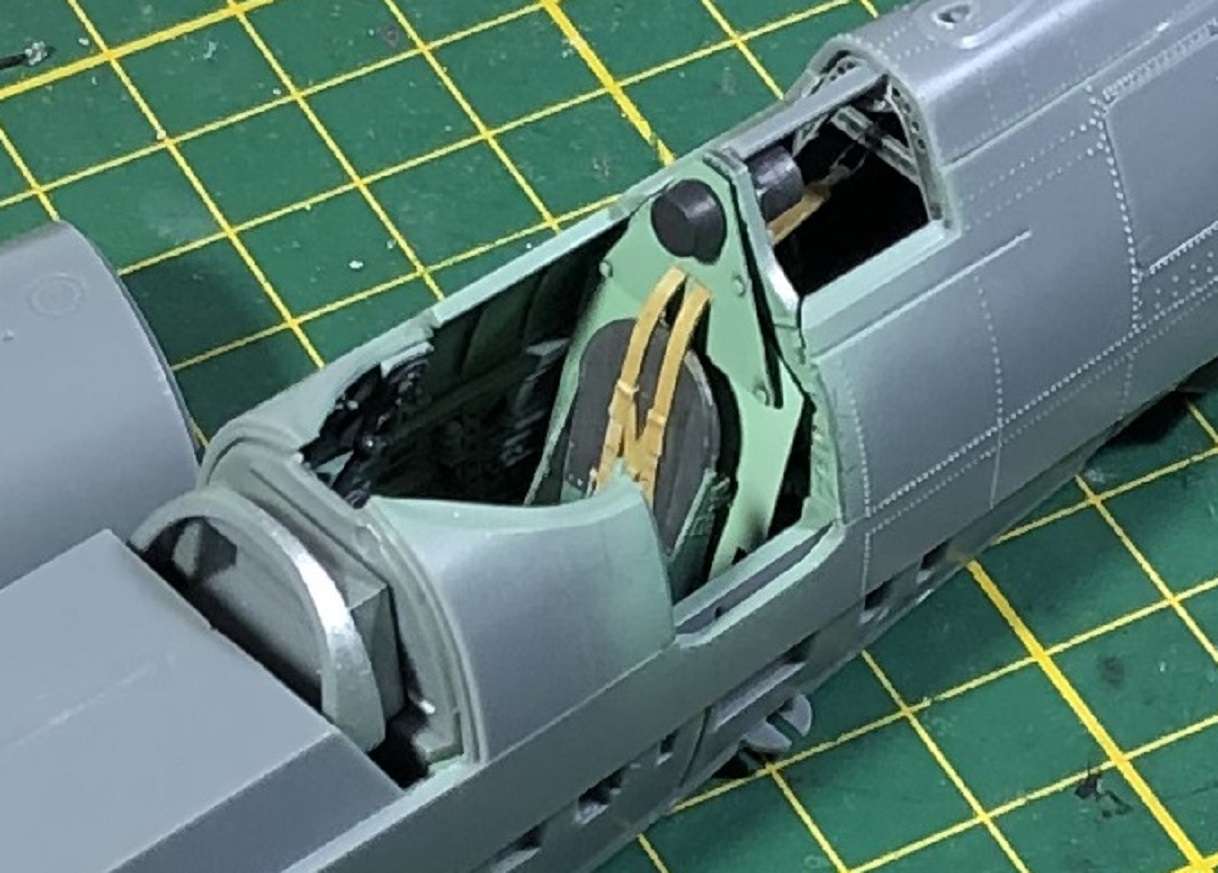
The cockpit tub fit neatly and went together easily. Rigging the flight controls was a pain, and is virtually invisible. But since it's been over 40 years since my last spit... why not?
I'm a little uncertain how to proceed with the dorsal piece.
See the slight gap as it nears the canopy? That can be squeezed tight and held in place long enough for the Extra Thin to dry. However... all of that raised detail... I'm afraid that I'll ruin it with the capillary action of the glue. There is one locator inside, but I don't think gluing it alone will be strong enough.
How would you do it?
-
5
-


Clear the Bench! It's Kotare Spitfire time!
in LSM 1/35 and Larger Work In Progress
Posted
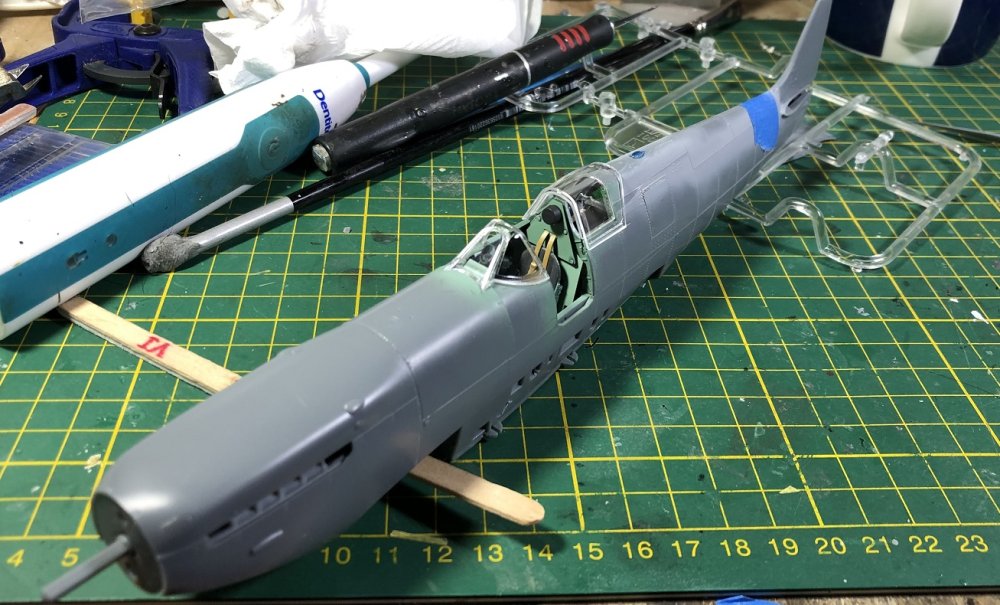
Big moves in the last two days, my friends.
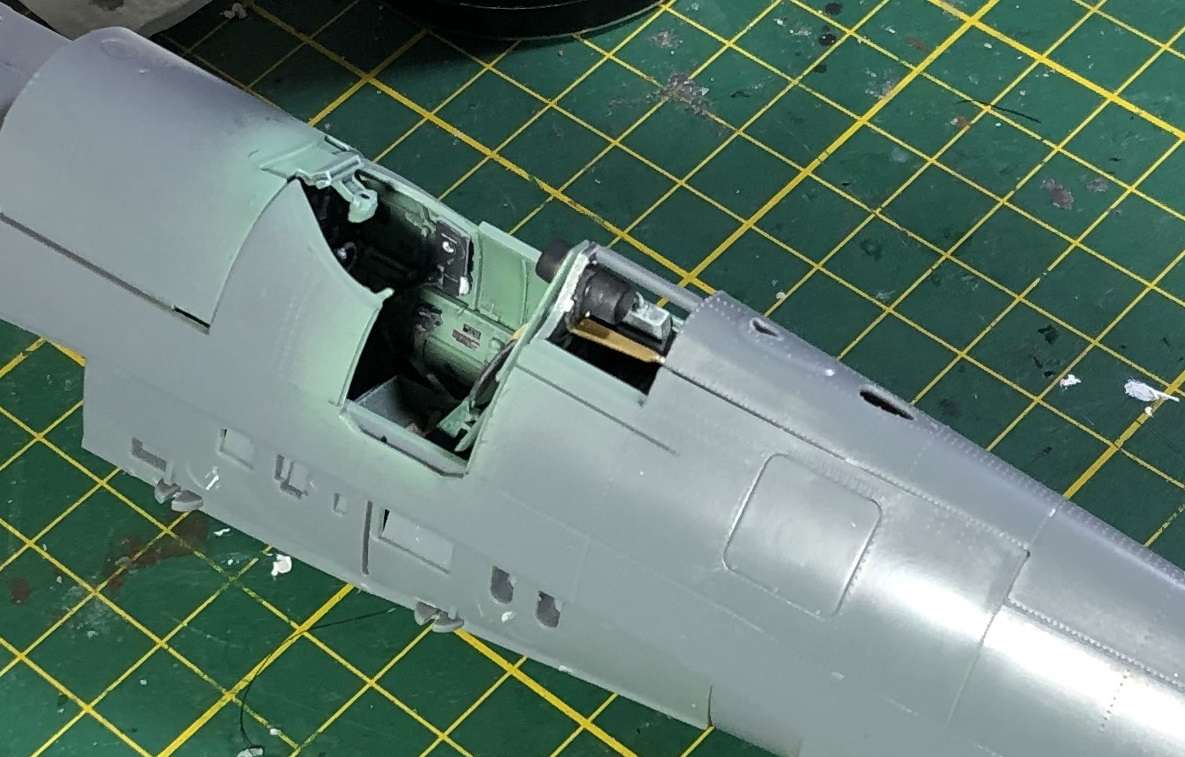
First of all... let me show the canopy with all parts facing the correct way.
Unfortunately my Molotow chrome pen has gone to hell, so the mirror looks more like a Dali painting splashed with silver paint.
And the sliding canopy... it actually has the release mechanism on it.
This reminds me... is there any color to the small window on the Malcolm hood? Colored fasteners, or something?
I've prepared both style of Prop and hub for weathering. I used dark gray paint so I can weather them into black.
I actually dropped one of them and lost 1mm off the length of one blade. Can you tell which one?
I used oils on the LG legs, wheel hubs to give shape to the silvery masses.
They'll need a couple days to dry.
And after putting a metallic base on the resin exhausts, I tried to give them a burnt metal look with brown washes, and blue-black hot areas. Some people paint them rusty. But I'm pretty sure they are made of rust proof alloys. They'll get another acrylic wash to blend the colors a little more once the oils are dry.
Who likes masking?
I've left the rudder off till last. The aerial hook-up piece looks very fragile.
And finally this is what the rudder and elevator look like at factory settings. You can cut off the tabs if you want.
The following pics show the model mostly complete. Perhaps you will find info you want in the pictures... perhaps not.
Anyway... Happy modelling!