


GazzaS
-
Posts
6,396 -
Joined
-
Last visited
Content Type
Profiles
Forums
Events
Gallery
Posts posted by GazzaS
-
-
I did some digging around and discovered that I returned to the hobby back in 2014... June 2014. And the kit I chose was Dragon's Z-39 in 1/350 scale. I hadn't learned much about the hobby since I left it in 1984.
Z-39 wasn't a very famous, or lucky ship. It spent more time in dockyard hands than it did out of it. It didn't take part in any famous sea battles... it just ended up in US hands at the war's end. So the kit came with a US-flagged option.
I bought the kit when I saw it online. I can't even remember who I bought it from. But since it was a Type 36A (mob.) Destroyer, I knew I had to have it even before I knew the history of the ship. Once I knew the history of the ship, I decided to kitbash her into Z-32, another Type 36A (mob.) which was destroyed at the battle of Ushant, 1944.
The main differences between the kit Z-39 and Z-32 the ship were the AA outfits. All of the German destroyers were meant to have the "Barbara" outfit where the number of AA weapons was heavily augmented, with one of the after deck main guns removed. But Z-32 never got the refit.
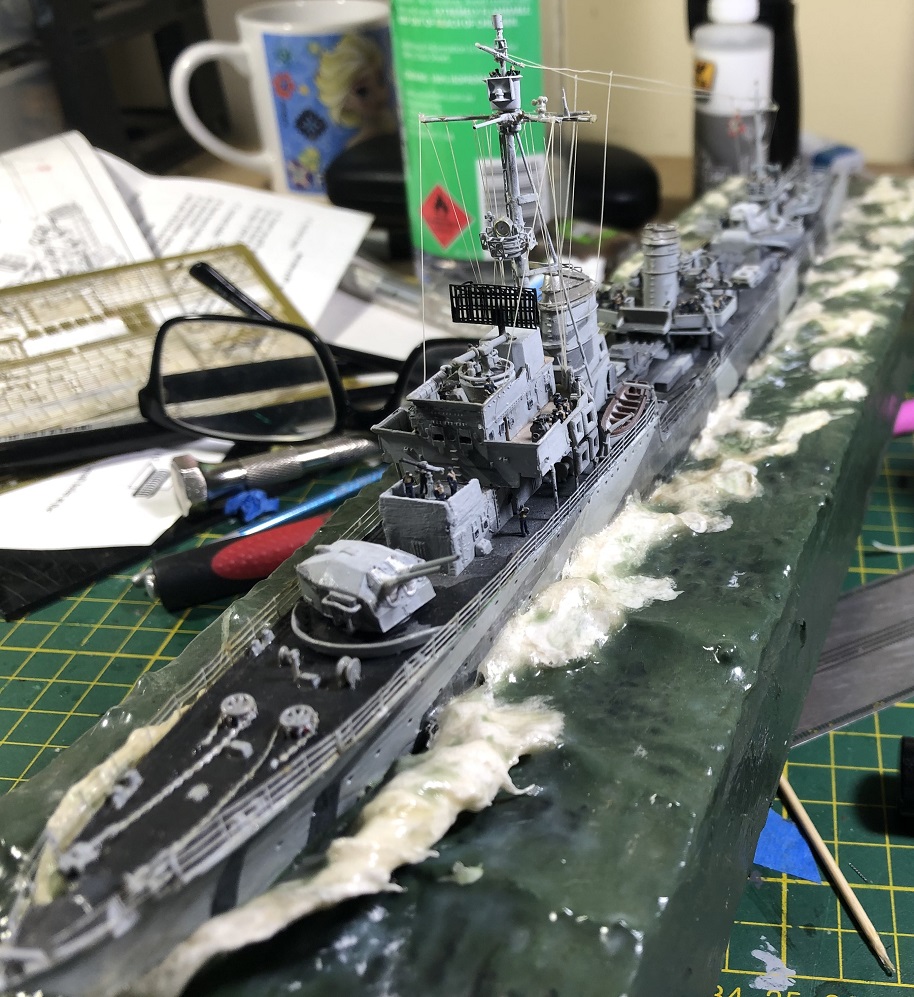
This is one of the pics I took at the end of the build. I downloaded a picture of cloudy skies to set the mood.
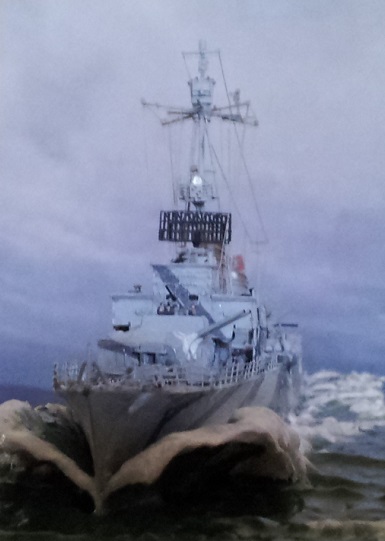
There were a bazillion firsts for this build... and I knew so little when I started it. First water base. First photos. and many others. Some I'll mention as we go along.
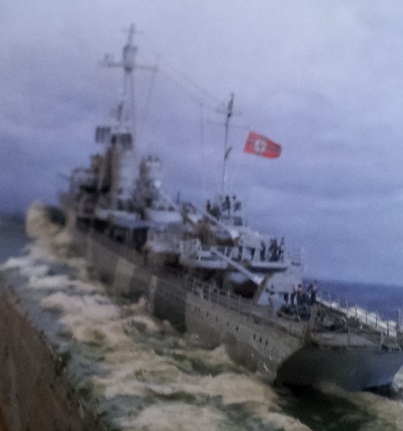
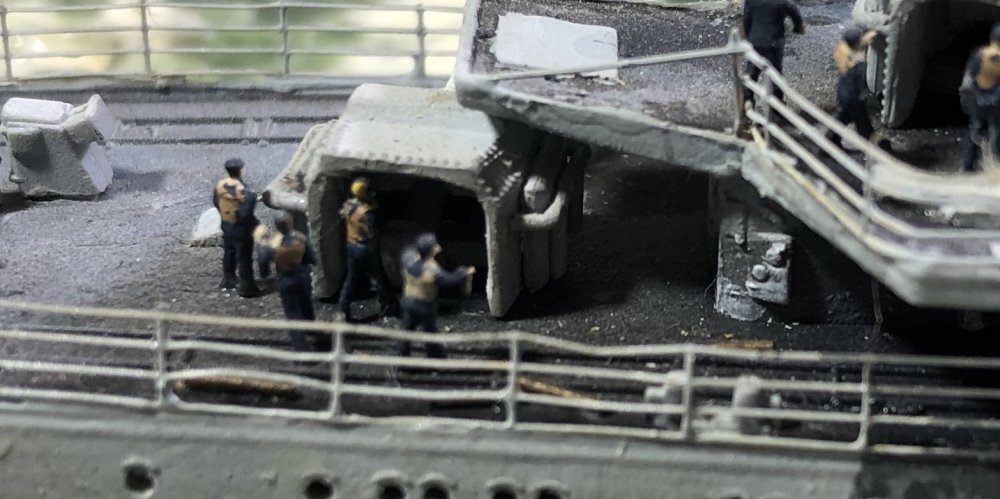
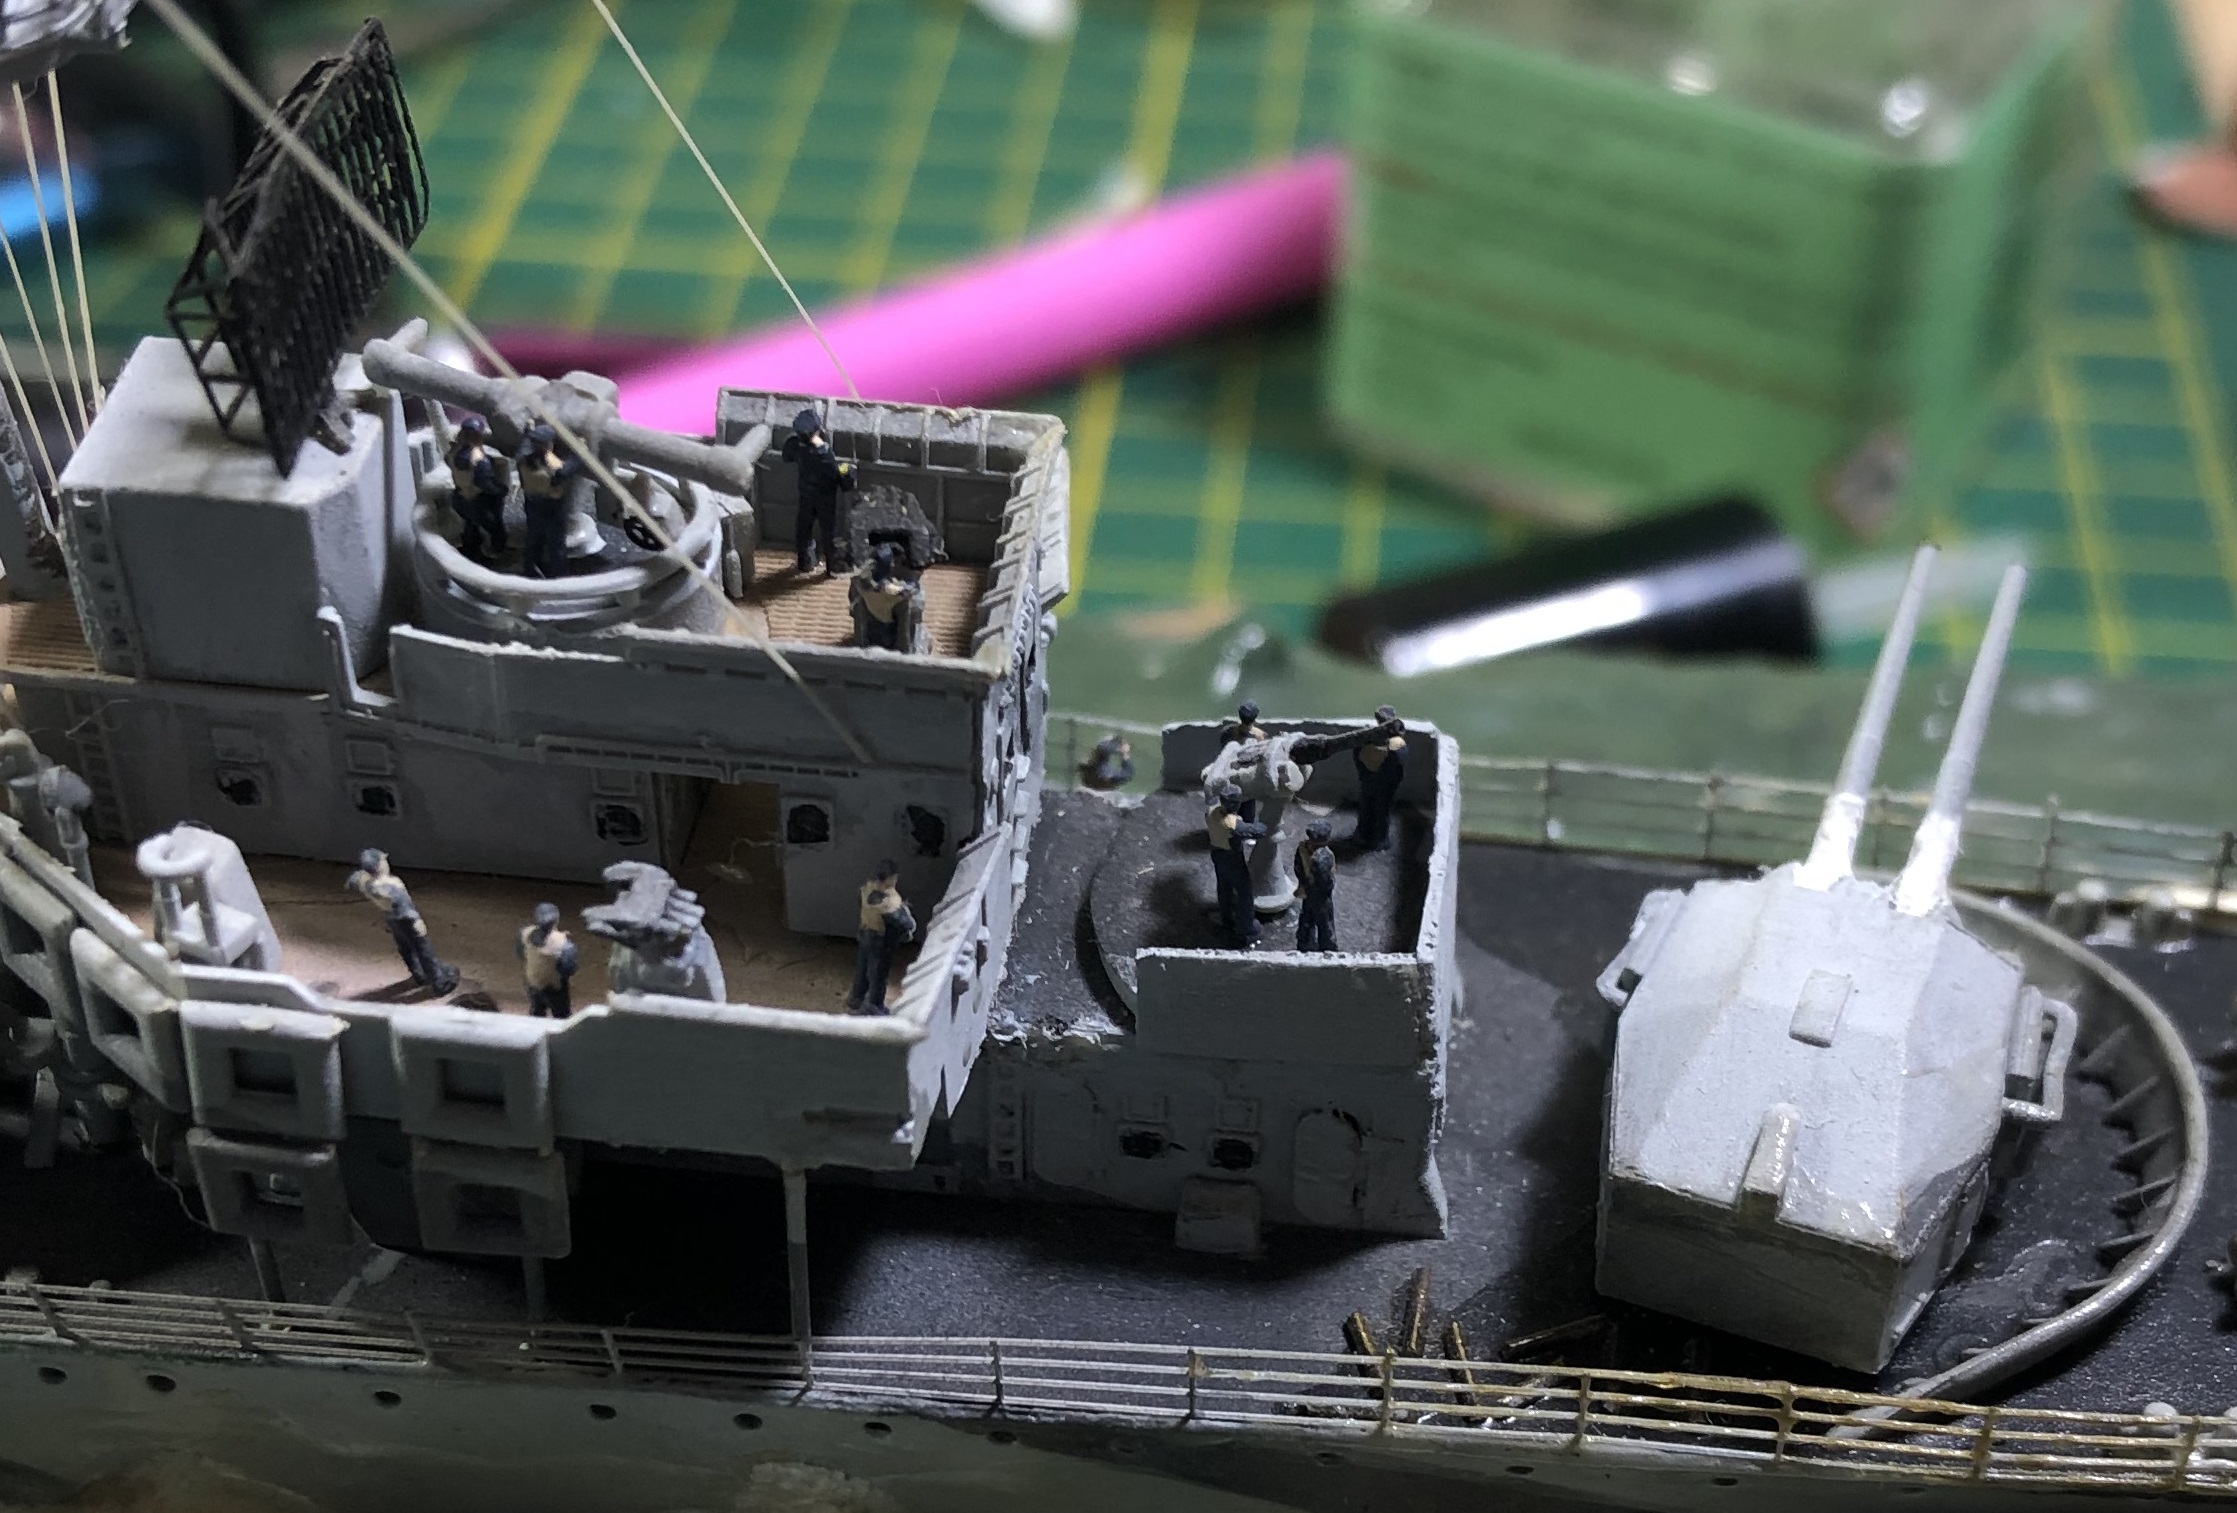
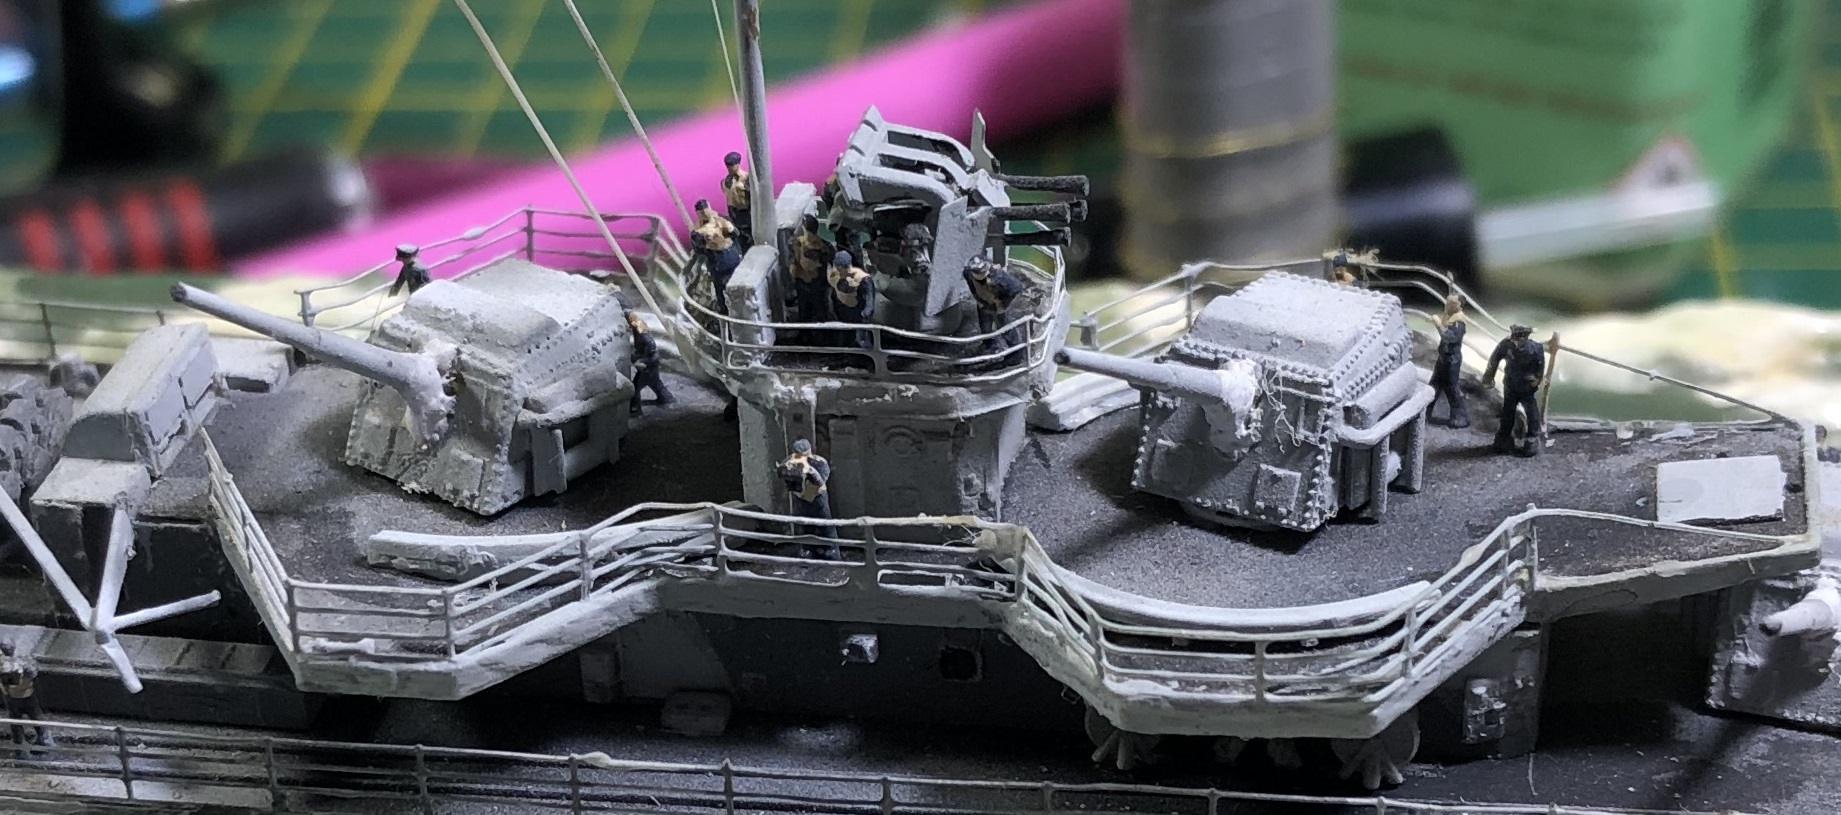
There are 86 men at their action stations on the deck. And the flag is made from cigarette paper which was taped to copy paper, then ran through a printer, cut out and then crumpled into a tiny ball before being glued to stretched sprue... another new thing... to me, anyway. It's looks much more realistic than a decal, with some light passing though it, and a wind-whipped appearance.
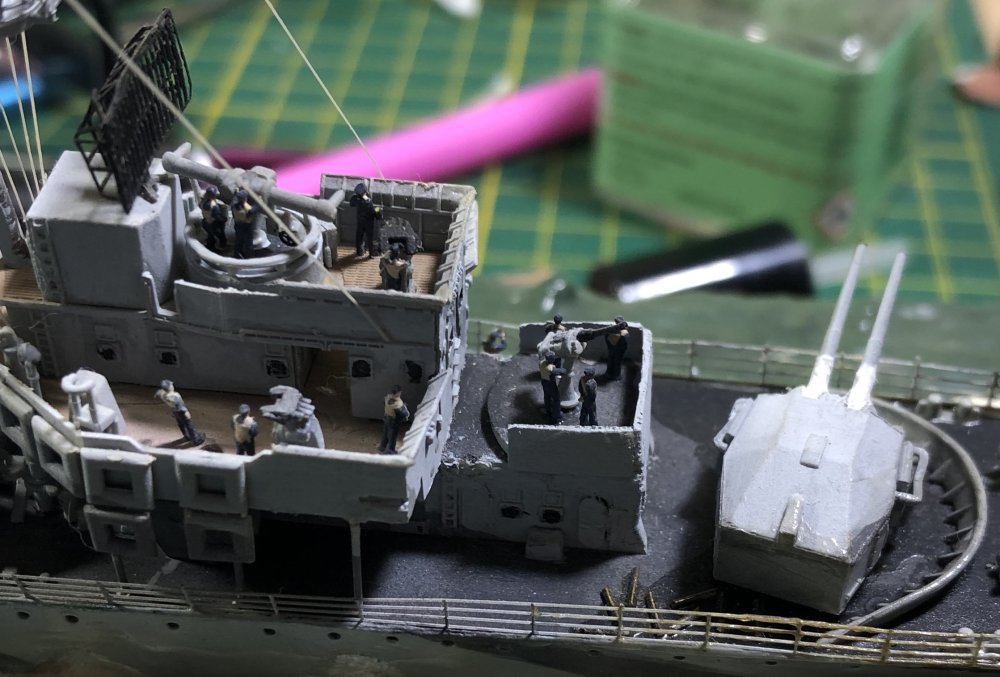
Finding crew members wasn't easy, especially as I wanted guys to look like they were actually in a battle. Luckily I found three sets by Northstar models. Two sets were German, and one set was an American set of a boxing match. But they are so tiny..; once you paint them, they can belong to any navy. I used bits of clipped brass rod to depict empty shell casings.
Nothing looks good in macro. Especially when your crew is falling over the railing, and dust filaments are taking over.
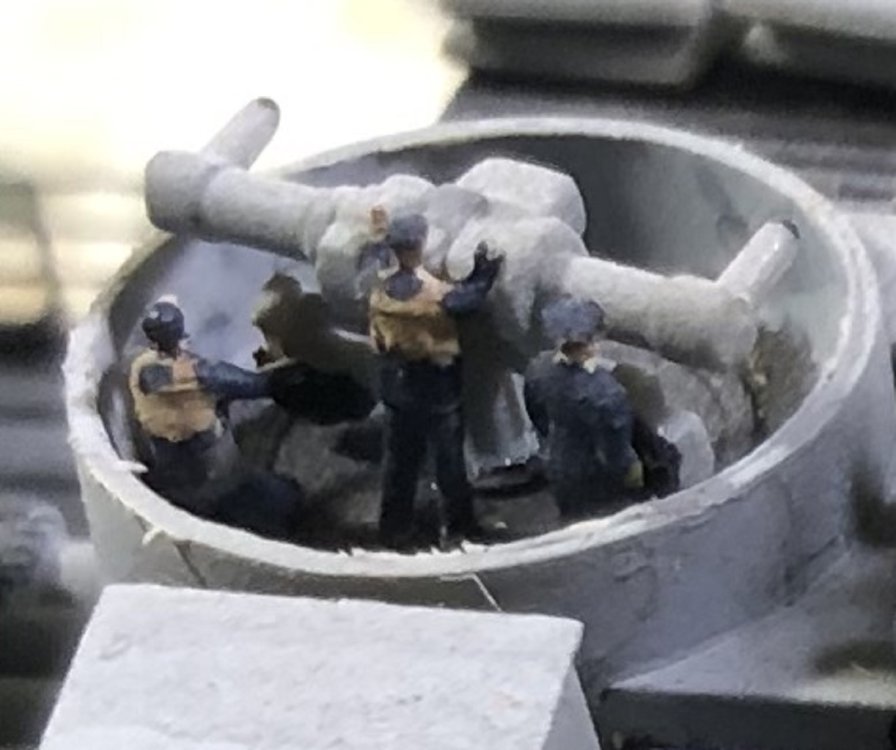
Three men operated the gun directors. the middle guy... who looks like he is busy at his job, is actually from the American set who is cheering the boxers on.
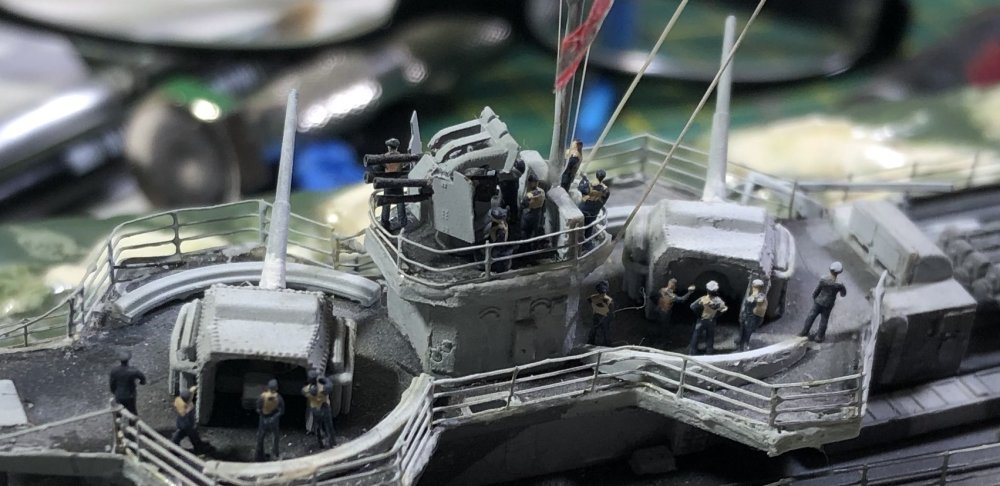
The main battery gun on the right was my first ever resin casting. The curved rails were for ammunition and weren't part of the kit. I scratchbuilt one, and cast the rest. I tried to cast shells, too... but it didn't work. I didn't know anything about using a pressure pot.
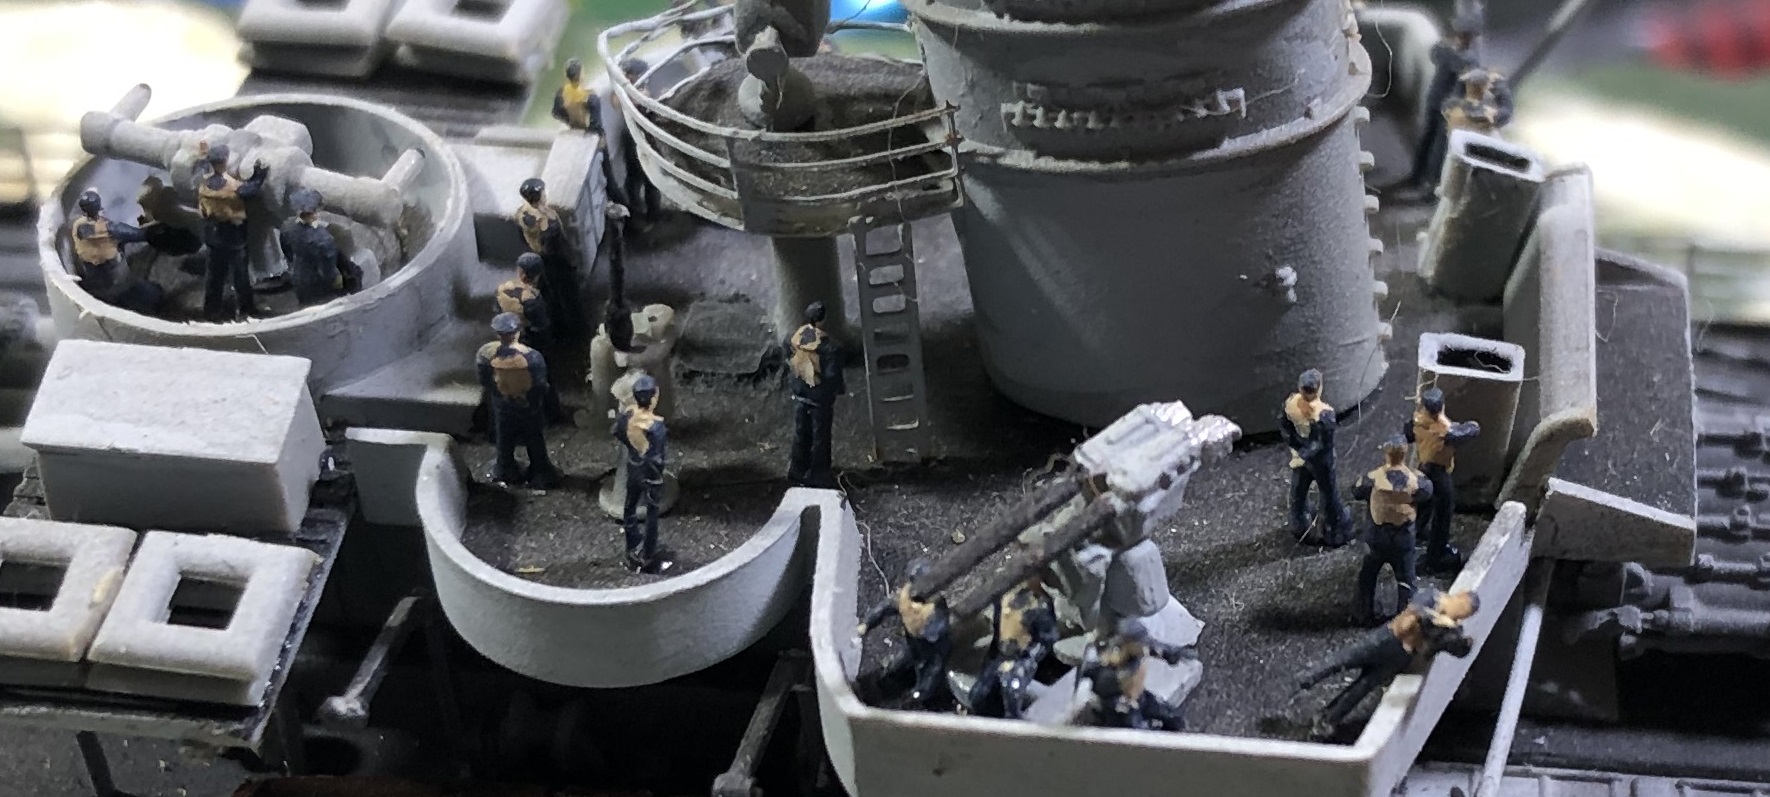
The enemy are out of range of the vierling gunners... So they aren't aimed at anything.
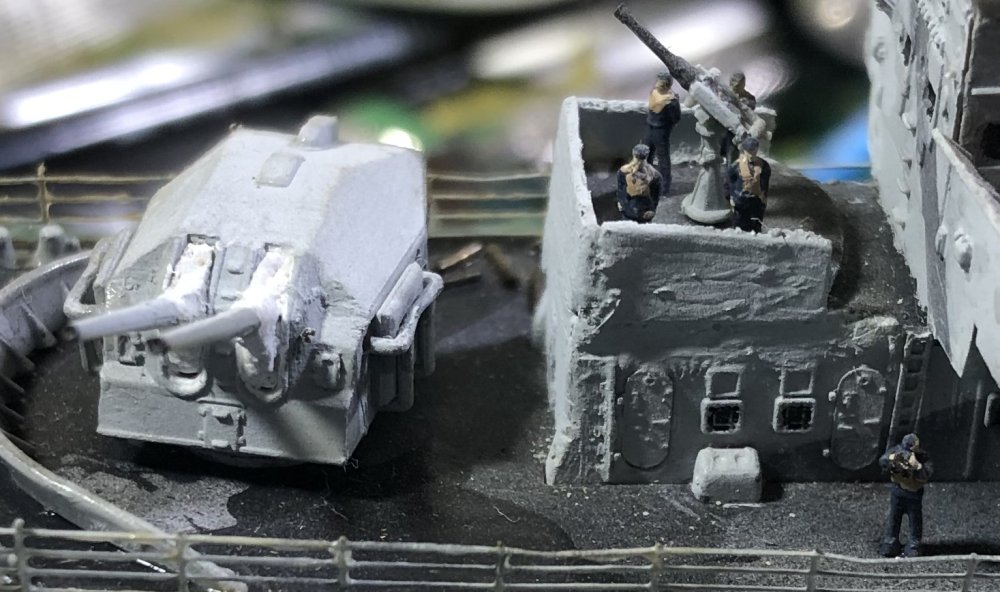
This area behind the main gun had to be reconfigured. And i kept knocking it over and re-gluing it... so it looks really rough up close.
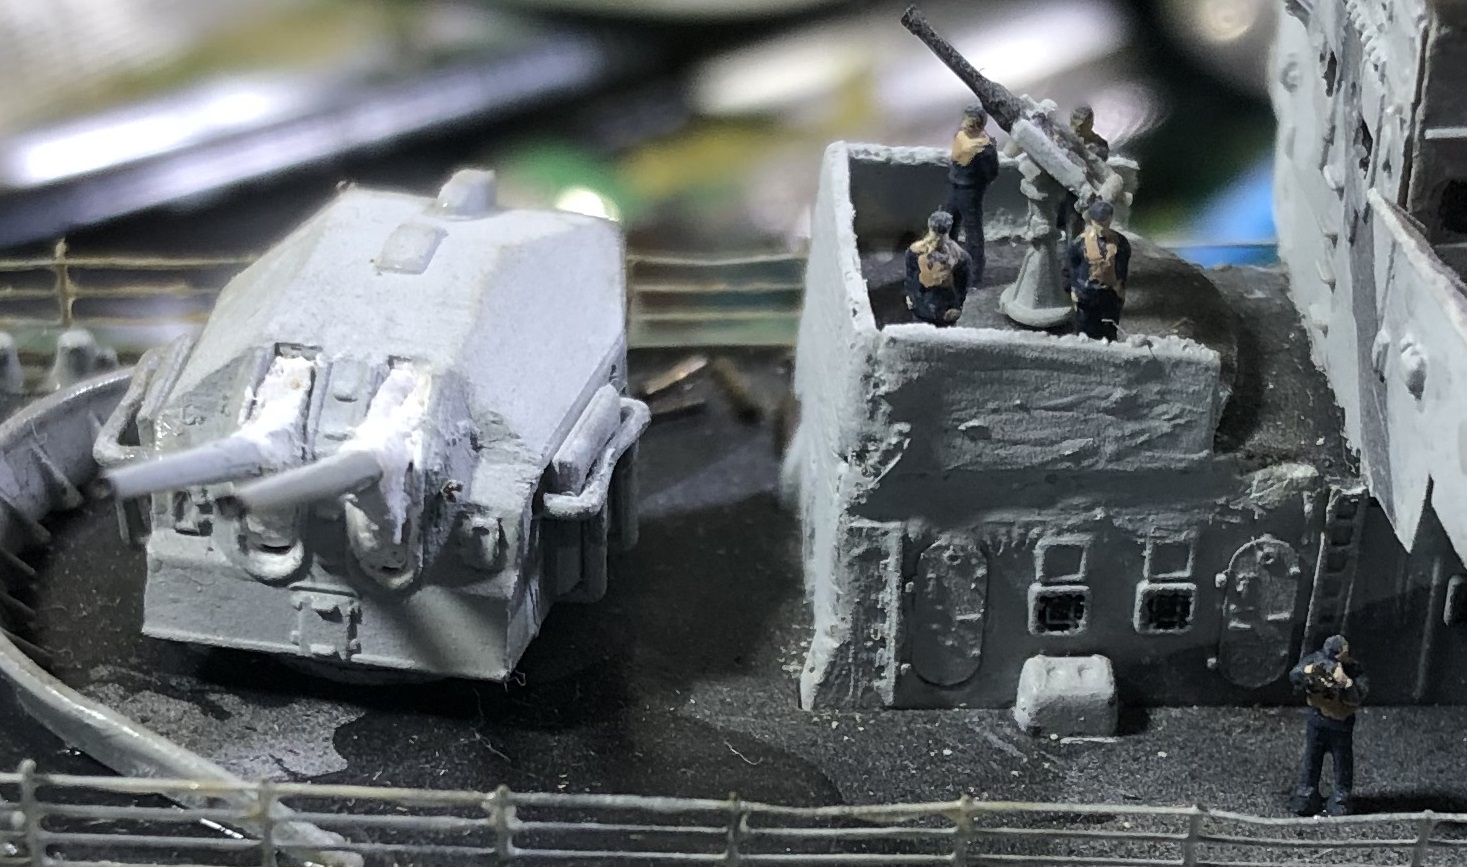
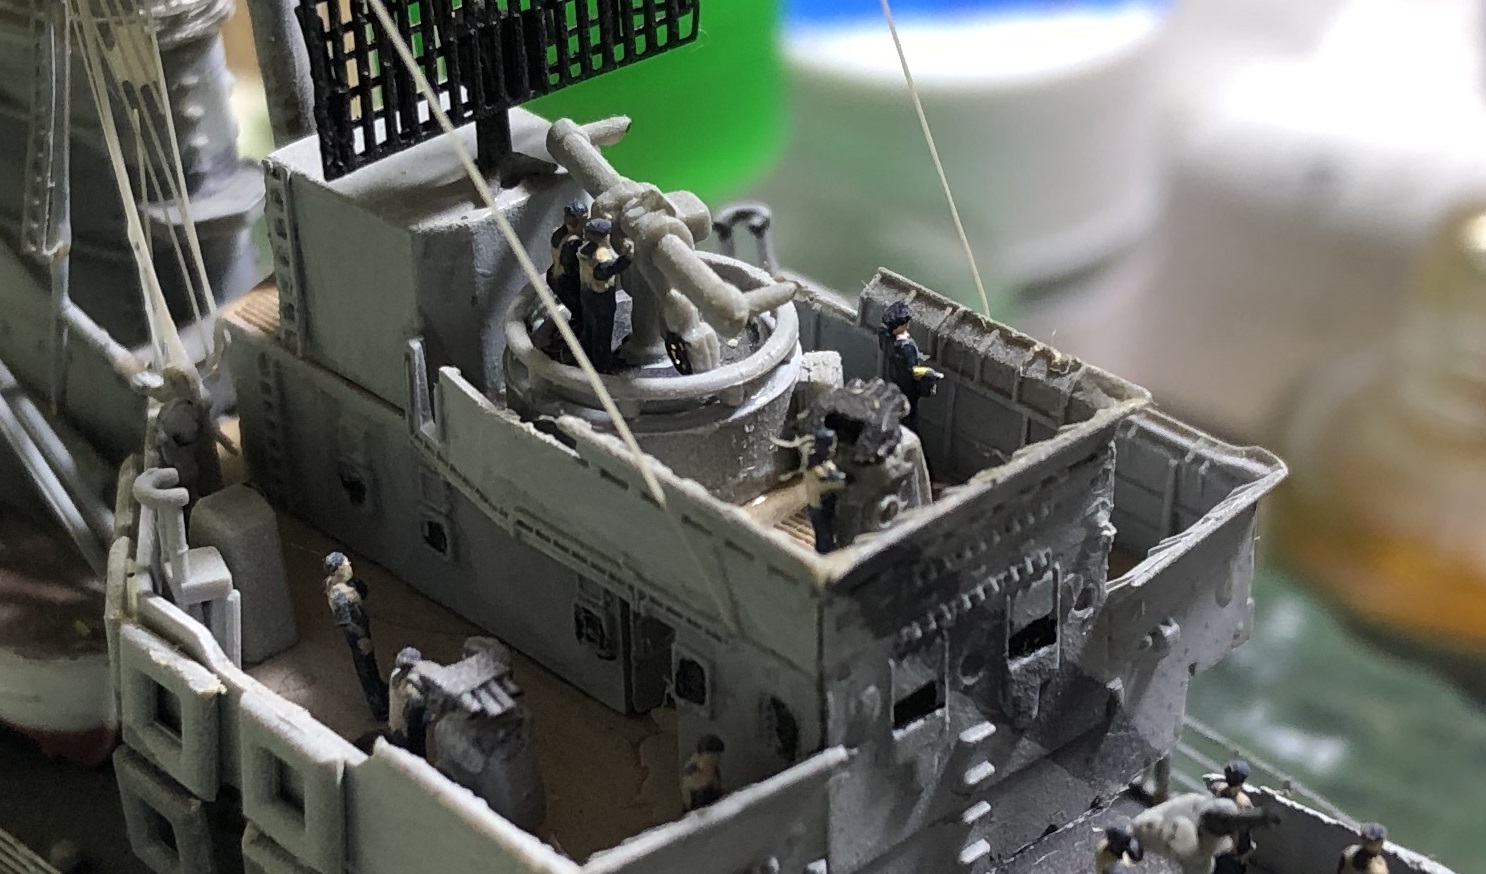
One of the attractive features of this class of ship is the forward turret.

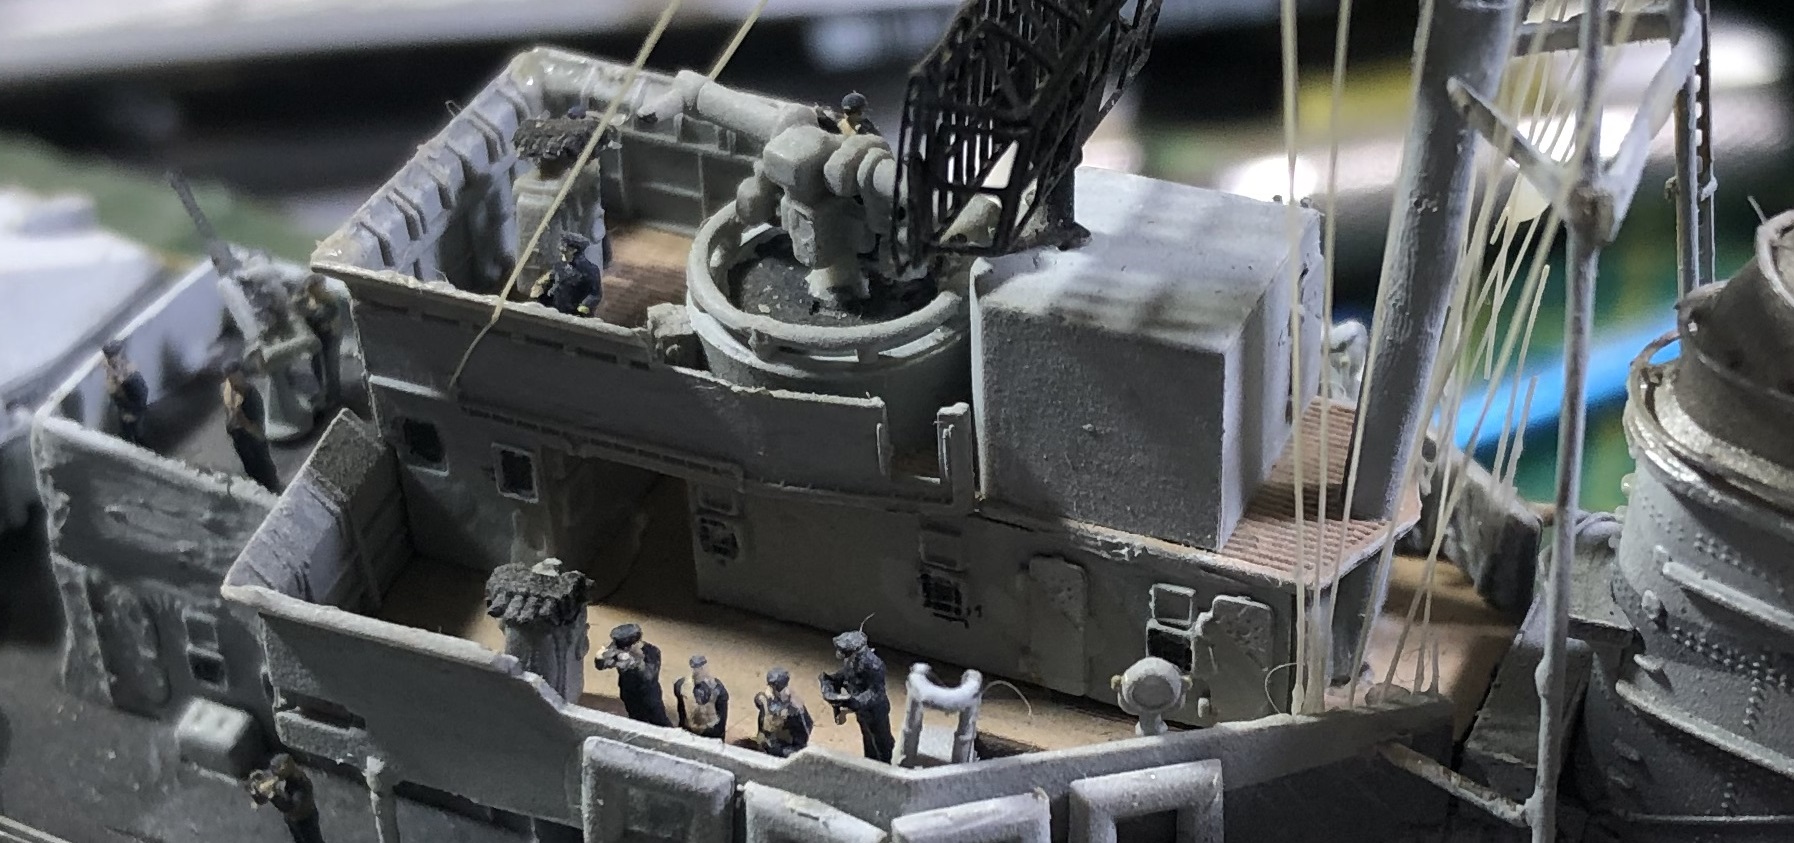
Here on the bridge there are many visual instruments as well as the signal flag station. You can see that my stretched sprue signal lines are looking a bit shabby.
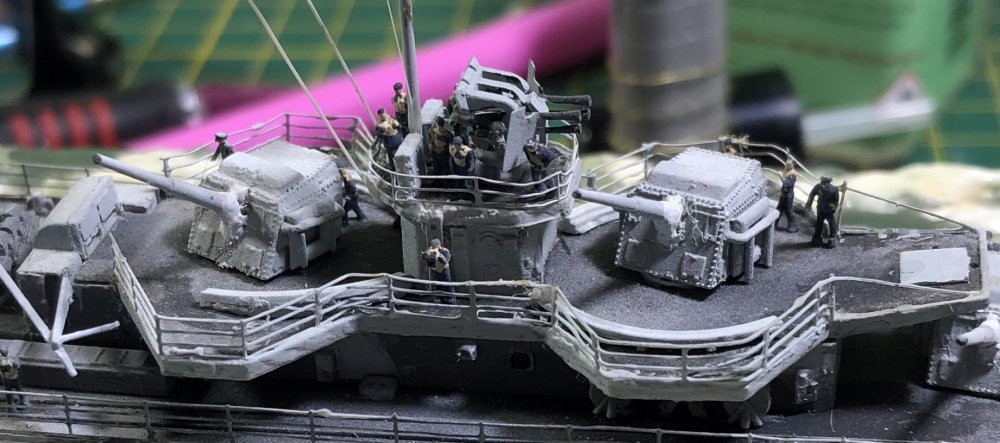
During this build, I wanted to settle the riddle of the railings. When you buy generic railings, they only come with one distance between stanchions. So, your stanchions end up in weird places, instead of at the corners where they belong. And I tried to find a decent way, with my limited knowledge, to get stanchions in the corners where they belonged. In the end, I couldn't find a material that would do the job cleanly with an easy measure of control. For there to be a measure of control, the part had to be long enough to hold long enough for the glue to set. But another piece of railing is too short to control. In the end, I gave up and just did what most other people do.

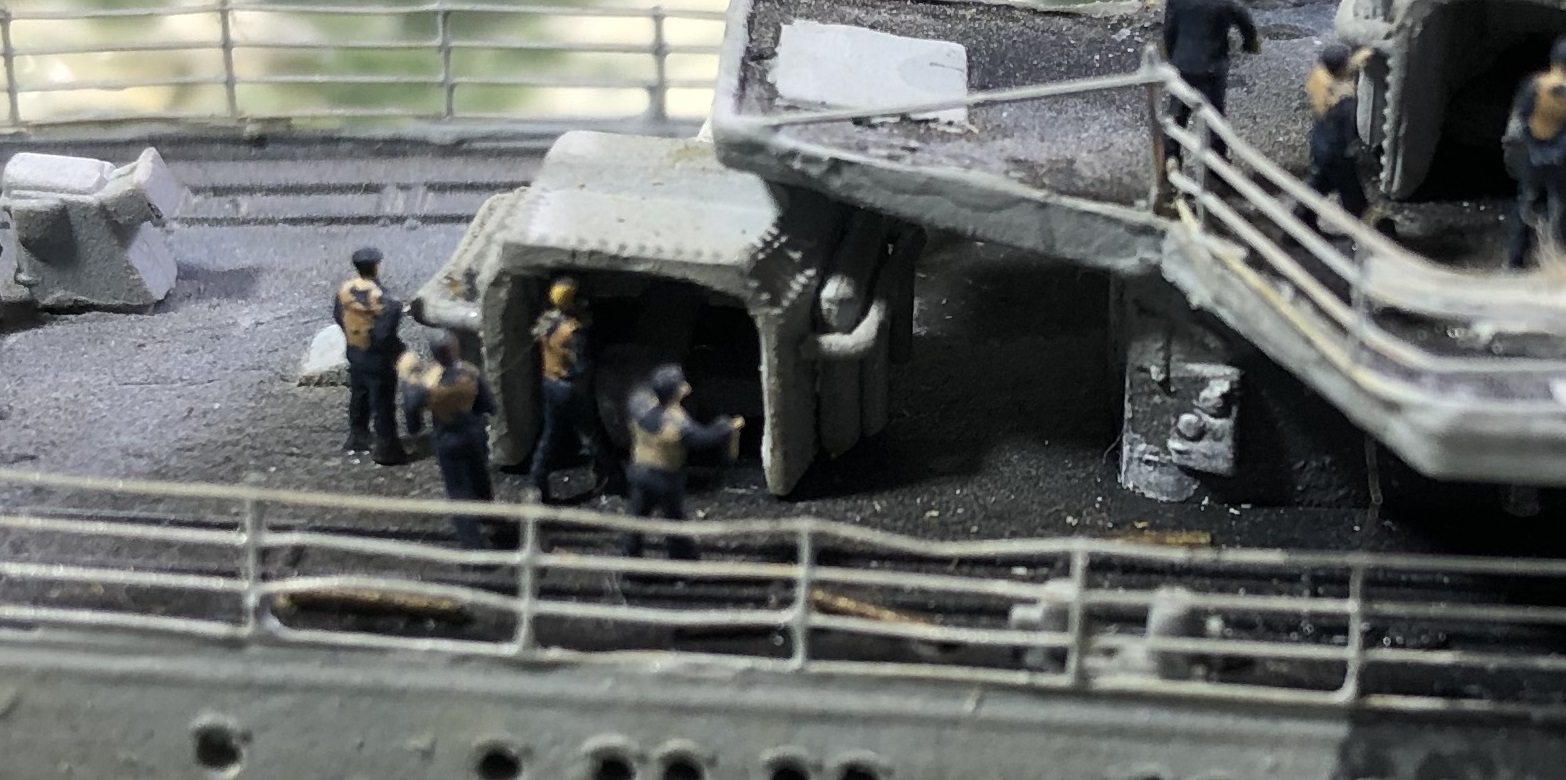
Nothing is pretty in macro.
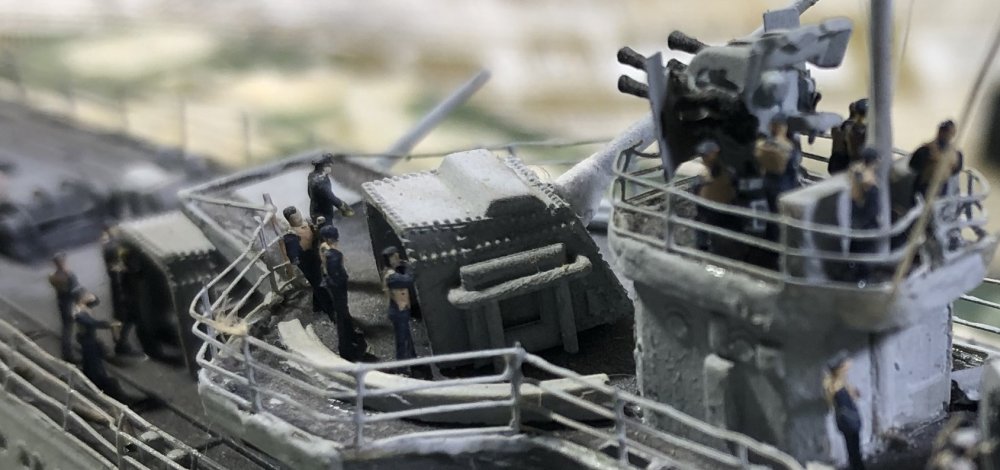
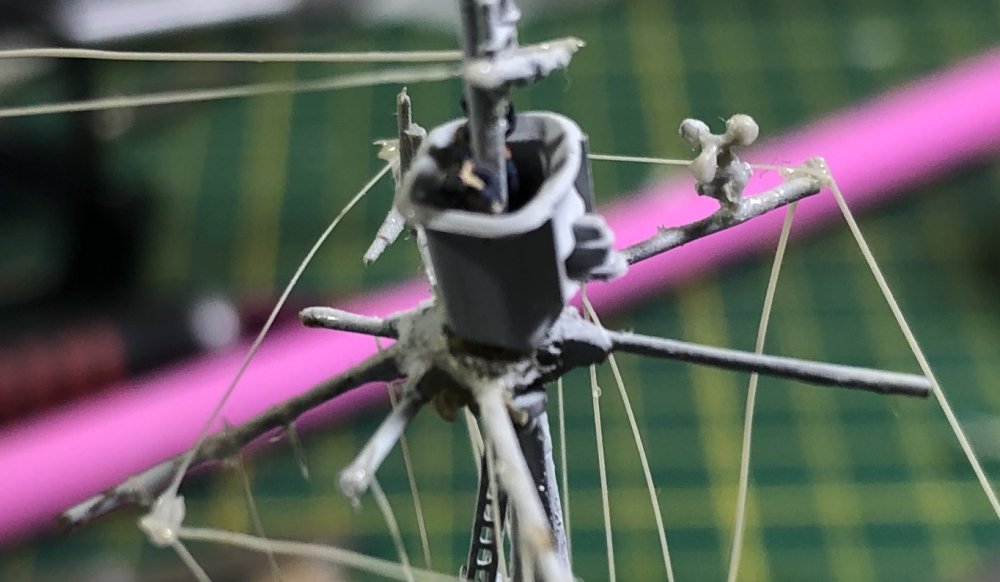
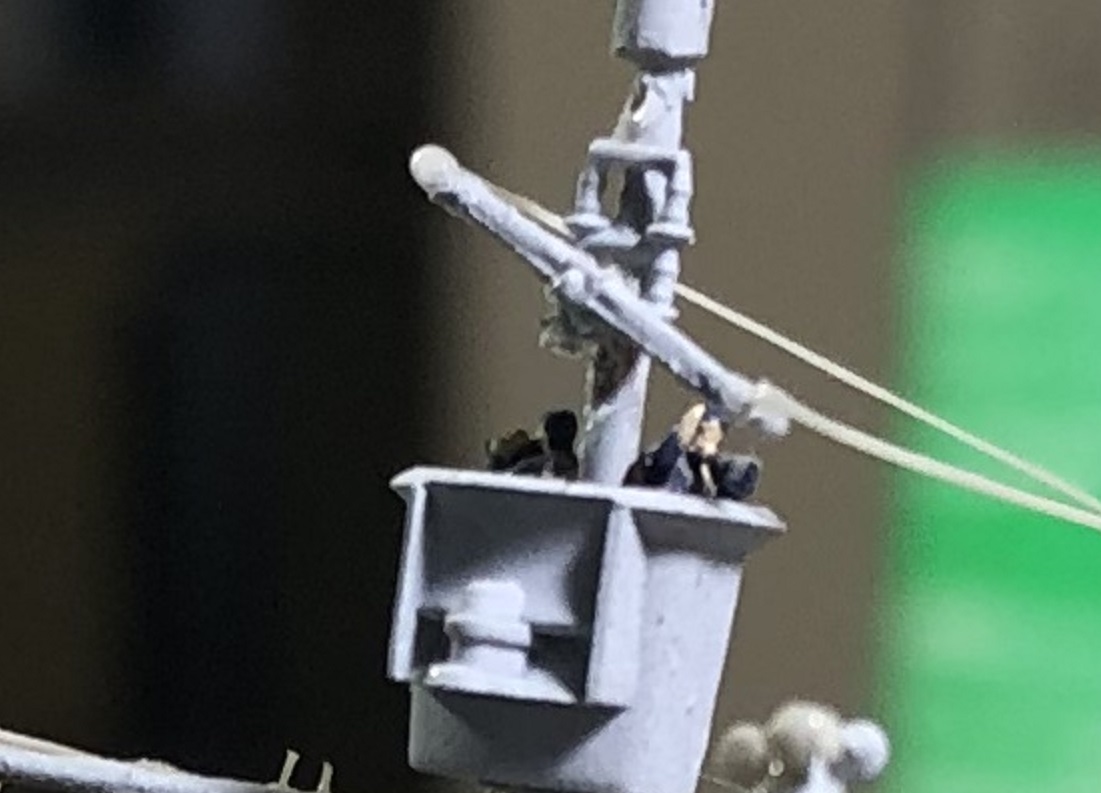
My first solder was the star at the top of this mast. It was a huge soft weld which I filed and sanded down. I'm amazed it's still holding together.

I don't remember the top spar tilting at that angle. Two men in the Crow's nest...
But the rot has set in...
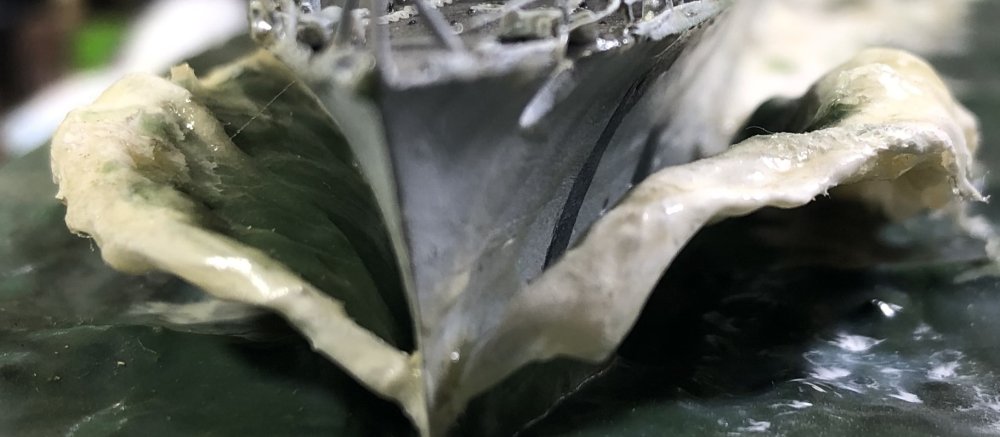
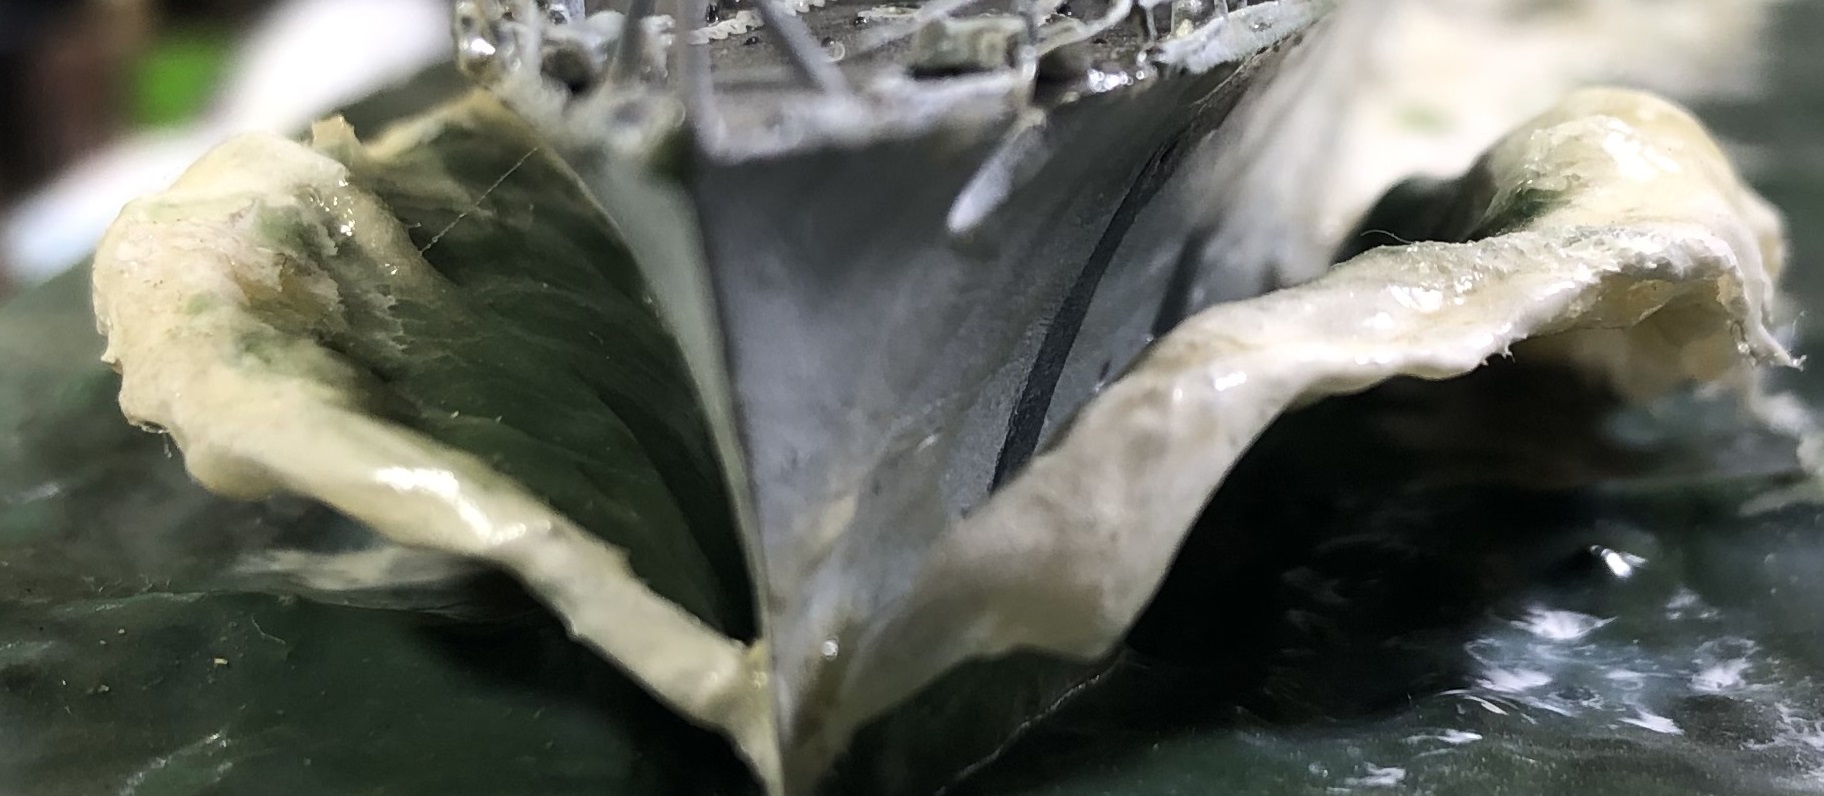
The base was made of acrylic medium, acrylic paints, and cotton balls . But now it looks like a sea of sewage...

My once clean white foam and wave action is turning yellow and brown. She won't be long for the bin, I reckon. But she's kinda been one of the favorite things in my display cabinet.
-
 6
6
-
-
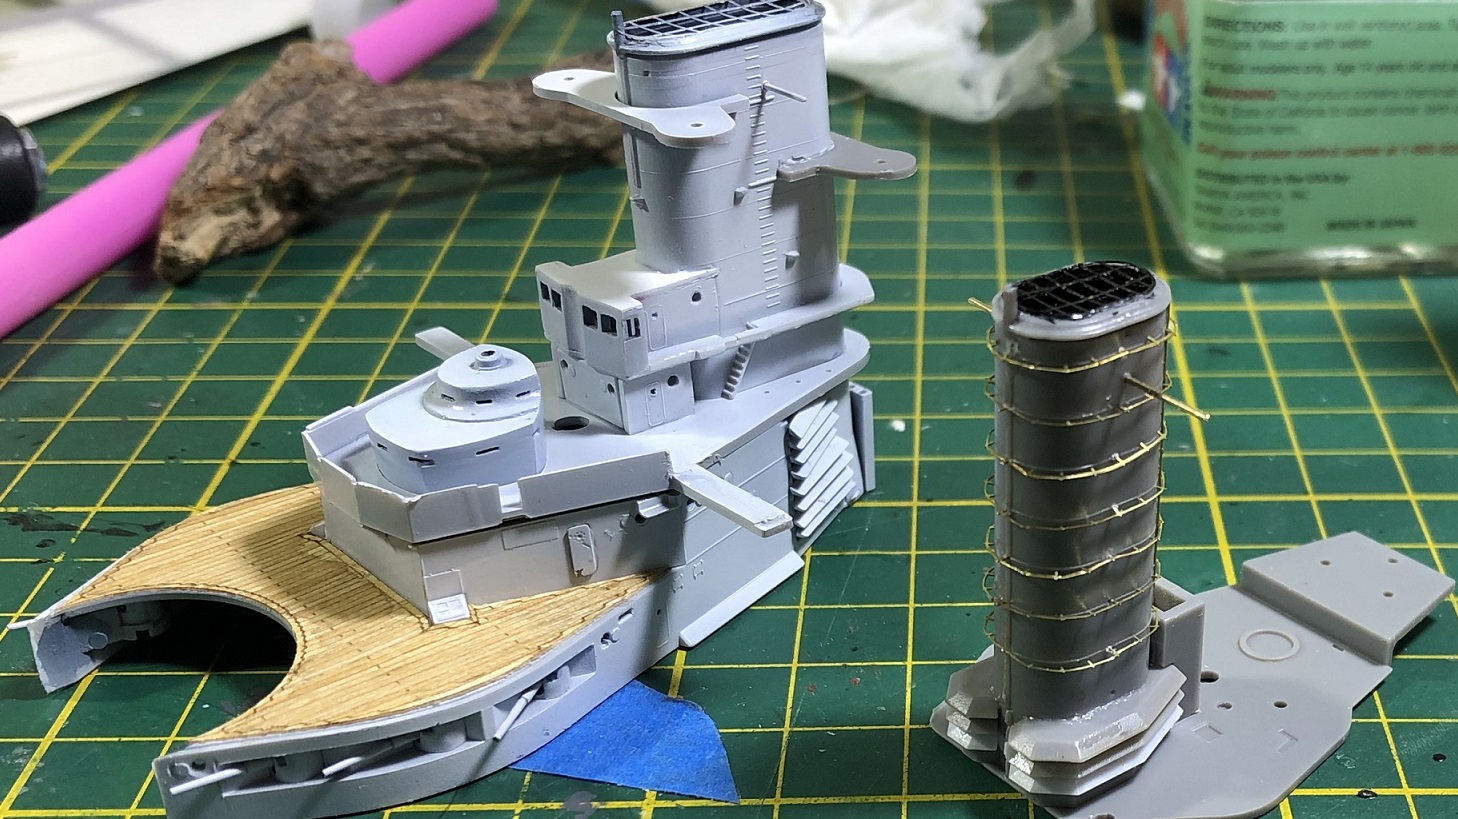
One of those parts of the ship build I have been dreading is the funnel maintenance rings... or whatever the heck they are called.
 On many ships. these bands looped around funnels and sailors used them to access all kinds of places normal men would fear to tread... without a safety rope or a net..
But for me, they represented a task I didn't think I could make look good. And well... they don't. They are by Tom's Modelworks, and went on easily enough... the first few. But then the rest seemed to be some tiny increment too short. If I had to do it all over again, I would have drilled the holes necessary and then thinned the funnel a bit. Hopefully paint and distance will help to make things less awful.
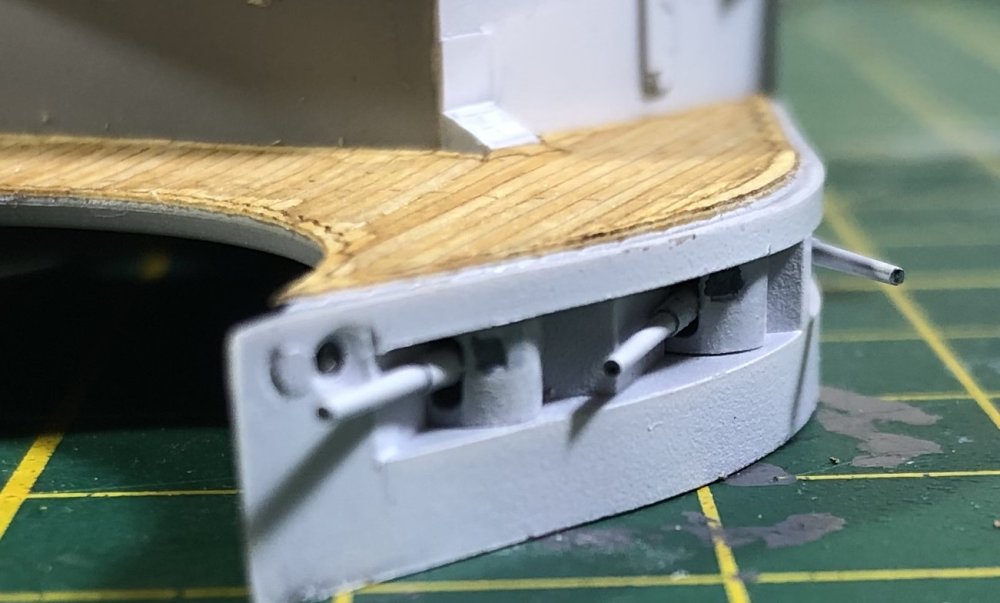 Metal barrels? Always!!
-
4
-
-
Very nice, Guy! When does the swearing begin?
-
2
-
-
8 hours ago, Peterpools said:
Gaz
Right with you. I'm sure I could have gotten the carrier film to disappear but my normal way of working with decals with a lot of carrier film, is to always remove it before application. In this case, my plan failed (my bad). But what really got my goat was the fuselage crosses where the central color was neither printed on the decal nor provided as a second decal (done all the time by everyone on large roundels). Just seems ridiculous. If I hadn't spent so much time on the spinner spiral, I would have absolutely gone the route you and John did and bough AM decals for a different aircraft. I guess buying masks wasn't the smarted of moves considering the cost and the wait (still hasn't been shipped yet) but at least I'll finally get my feet wet using them.
In the end, I just can't understand ZM's thinking and going overboard with the hidden details. It's even called out in the instructions as to what color to paint. My guess it was missed when the decals were designed and the instructions hadn't been finished yet, so they added the note there. For what the kit cost and their reputation, add an additional decal to the kit, as there already is one for the gauges. Bad QC in my book.
I ended up using the re-usable 1 Man Army Masks, which cover even the stencils. Really, Peter... a great way to go. I only had to redo one of them cuz I was way off center.
-
3
-
-
3 hours ago, Artful69 said:
... I mean - to convert the G-6 to a G-10 Erla ... since the G-10 Erla, G-6 and G-2/4 kits are the same basic modular moulds - I thought it might work?
Rog
")
I'd offer you your G10 back if I hadn't already bough a bunch of AM for it.
-
The underwing decals were the only ones I used from the kit excluding interior decals. But yeah... all of that carrier film... no thanks.
-
1
-
-
Back again.
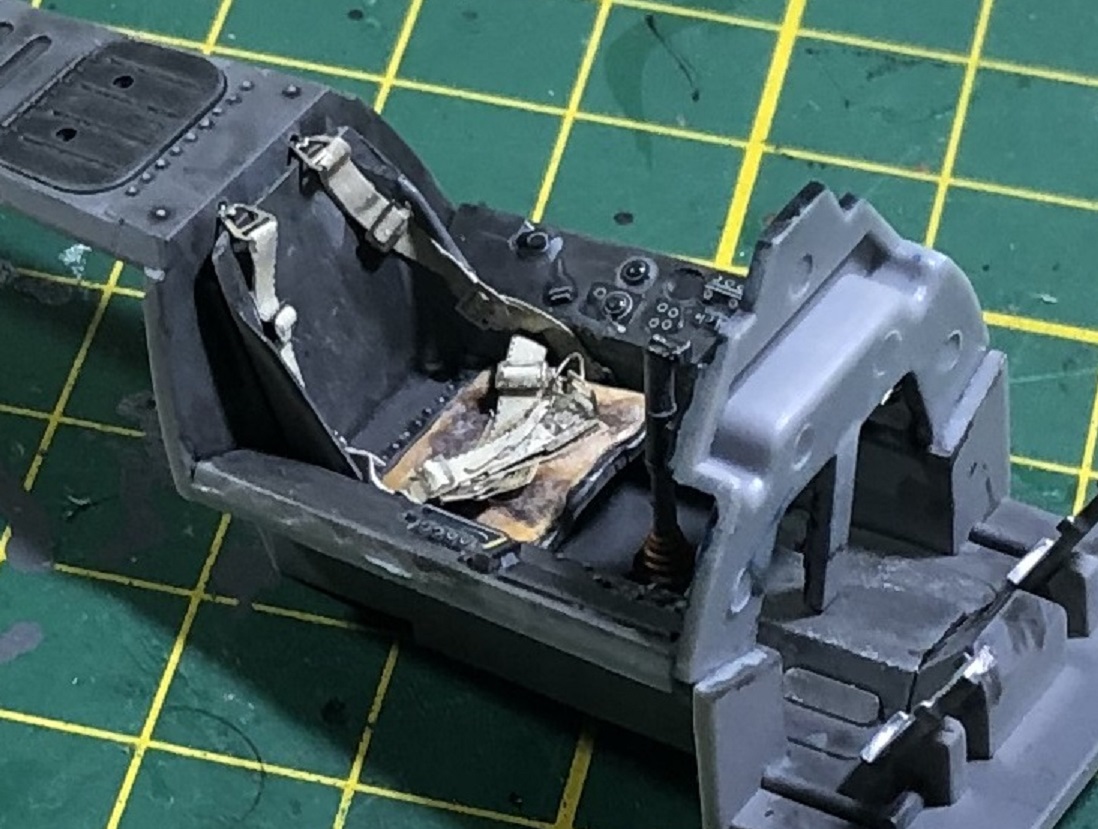
Yesterday the HGW belts got here. And thank goodness you get two sets. Because I totally ruined one with clumsiness and bullheadedness. And since I had today off... scheduled, not a sickee... I knew I would get them done. They took me all morning.

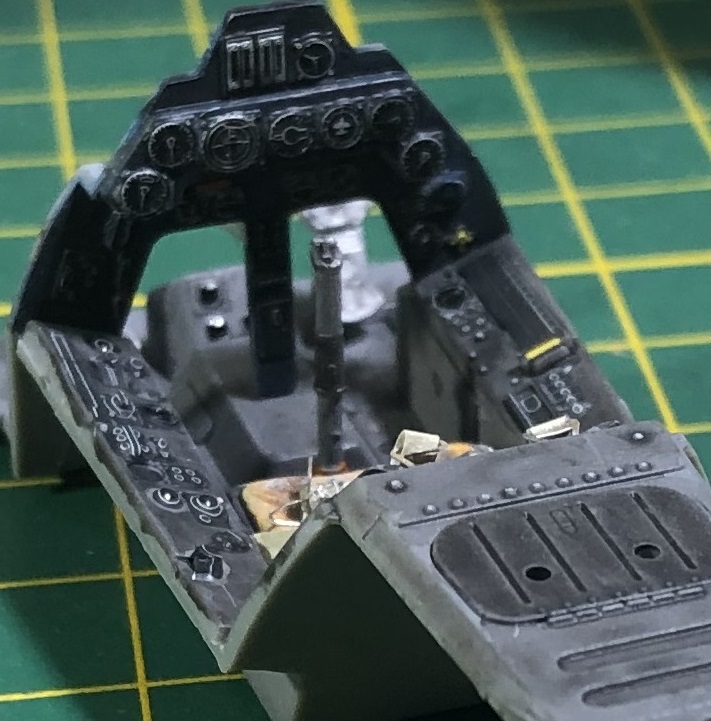
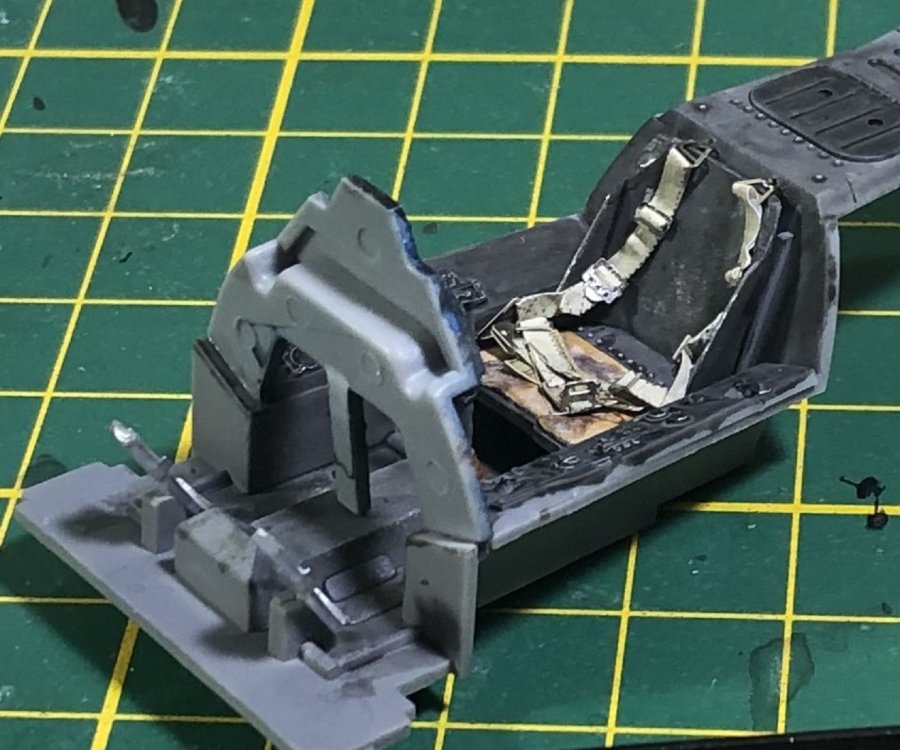
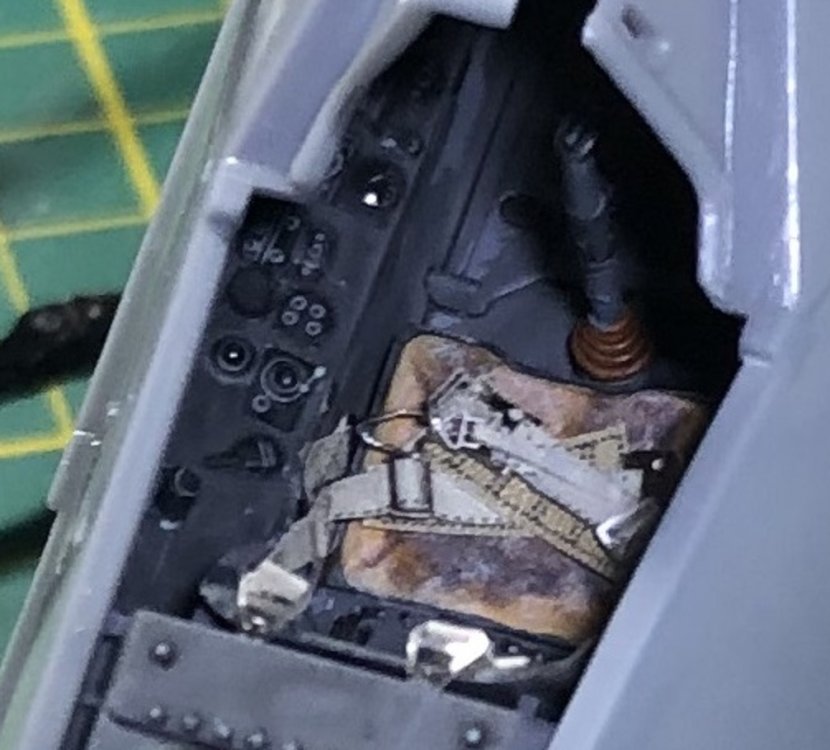
You can see in the last picture that 65% of the detail disappeared when I closed up the fuselage.
Ciao babies!
-
9
-
-
As the white band was prescribed after a certain date, it would have to be applied over the existing paint... I imagine.
-
2
-
-
Toe jam always goes over well at the IPMS hobby shows and conventions. Always in plentiful supply along with BO and mullets.
-
 5
5
-
-
Eww
-
2
-
-
Quite an improvement, John! Glad we are one more step away from the SOD.
-
2
-
-
Is it getting too easy?
I wouldn't say that. it's great to have choice. And it's great to have good kits instead of kits you have to wrestle into submission. It's good that your only choices aren't those three standard bearers of mediocrity: Revell, Italeri, and Airfix, like when I was a kid. I started modelling when I was 12, but didn't get my first Tamiya kit until I was 18
I can live with bad, but fixable fit. What I can't condone is a shape that is obviously wrong and would require re-sculpting beyond the limits of the plastic. Shake and bake is great... Really, who wants to sand and scribe? Masochists?
It's good to see companies making less-modelled subjects.
-
5
-
-
10 hours ago, DocRob said:
Well Gary, uncreative is one thing, boring another
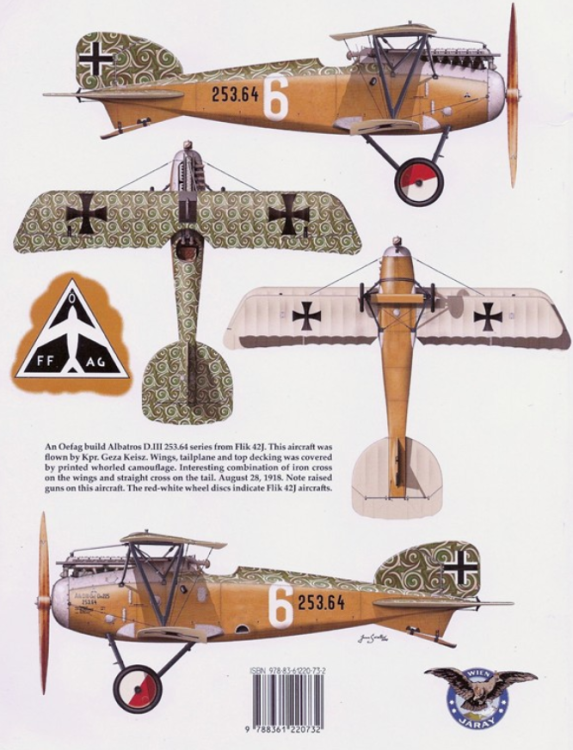
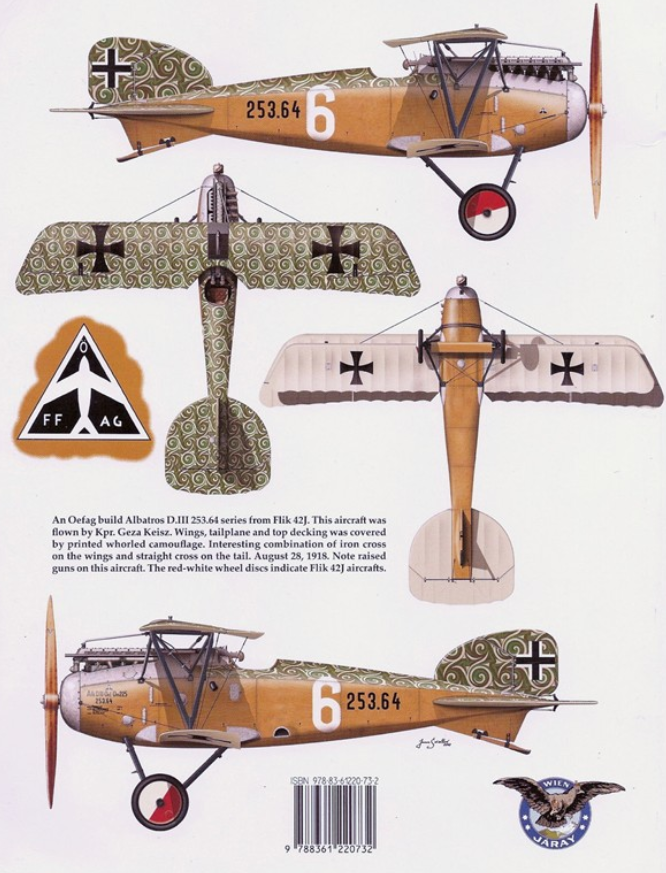
") . I like some of the Oeffags schemes, some are relatively colorful, even with wooden fuselages and the strange camos appeal me. Some more schemes from my Eduard boxing.
. I like some of the Oeffags schemes, some are relatively colorful, even with wooden fuselages and the strange camos appeal me. Some more schemes from my Eduard boxing.
8242AlbatrosDIII_OEFFAG_253_1c_KB.cdr (eduard.com)
Cheers Rob
Thank you for the post and link, Rob. Here is a scheme I could dig,

CDL is one thing I've wanted to do, but not so easy to do if you are doing active aircraft in the service of Kaiser Wilhelm.
-
2
-
-
7 hours ago, Bomber_County said:
Thanks Gaz much appreciated, I need to learn how the rope would have been secured…….
haha... have you ever seen the USN sailor's manual? My uncle was in the USN, and it's quite a thick book. The knot section was huge.
-
2
-
-
6 minutes ago, DocRob said:
That will be my choice for the Eduard 1/48 Oeffag 253, I have. The wings will be decaled with Aviattic's Sworl camo and the fuselage will either be decaled or wood finished with oil colors, boring? Naaaahhhh
Cheers Rob
I have done the large decal thing with wnw... I dunno... feels a bit uncreative to me. Like imagine buying one of those Perfect Props where all you have to do is attach it to the model.
-
1
-
-
-
-
At that big scale, I think the rope looks good. Nice work!
-
2
-
-
Both so tempting. Love that you can see how the Austrians fixed the Alby's diving problem by moving the spar. And the Wurger... Do I need another one?
Austrian Albatros schemes are pretty boring... I know there is the Bromkowski one.... but every man and his dog will be doing it. Of course... if you wanna prove me wrong, would love to see some inspiring pics.
And the A4... you know I never do the in-box scheme...
-
Peter,
Very nice paintwork.
-
1
-
-
Why enamels? They will be a headache to weather if you plan on using oils. Most people are using lacquers or acrylics and weathering over them with oils or enamels.
-
2
-
-
1 hour ago, Peterpools said:
Gaz
After getting back to the bench when I finished chemo, I needed to use paper and worms for doing cammo as my hands weren't steady enough when air brushing. With a lot of practice, I finally reached the point of being able to freehand cammo again. Worms or paper wouldn't have resulted in a more feathered edge then what I have now. Looking at the cammo, there isn't any overspray at all, I was just hoping for a little softer color demarcation between the colors.
If you want to soften demarcation, you can lightly spray the area with a little self-levelling thinner or apply a filter.
-
1
-
-
Very interesting project, Rob! I definitely like the shape of the bird... but the forward view??? I love the photo etch press! Wish we had more for those ambiguous shapes.
-
2
-
 1
1
-
-
6 hours ago, Peterpools said:
Thanks John
Followed your advice as close as possible and the cammo is all free handed and done. I'm in the ballpark but looking at the 109 drying, it's as good as I can get without masking or using worms. I'll see how it looks when the paint is thoroughly dry and then do an update. Have to admit, it's harder then I originally thought.
You really need to use paper and worms. This will give you a more realistic finish with no 1/1 scale overspray. Even for 'late war'.
-
2
-


CAR THREAD ( ..wheeee) :)
in General Discussion
Posted
going out in style....