Sturmbock
-
Posts
18 -
Joined
-
Last visited
Content Type
Profiles
Forums
Events
Gallery
Everything posted by Sturmbock
-
S.M.79 – II „Sparviero” 1:48 Trumpeter
Sturmbock replied to Kriss's topic in LSM 1/48 Work in Progress
Go ahead! Can't wait to see this one started. I have mine stashed years ago... Not seen often.... Lutz -
Hi John! I have wanted to build the Mk XVI for a long time, but I always avoided it! I will watch with interest! Lutz
-
Mitsubishi A6M5c Zero Type 52 1/32 Hasegawa
Sturmbock replied to Sturmbock's topic in LSM 1/35 and Larger Work In Progress
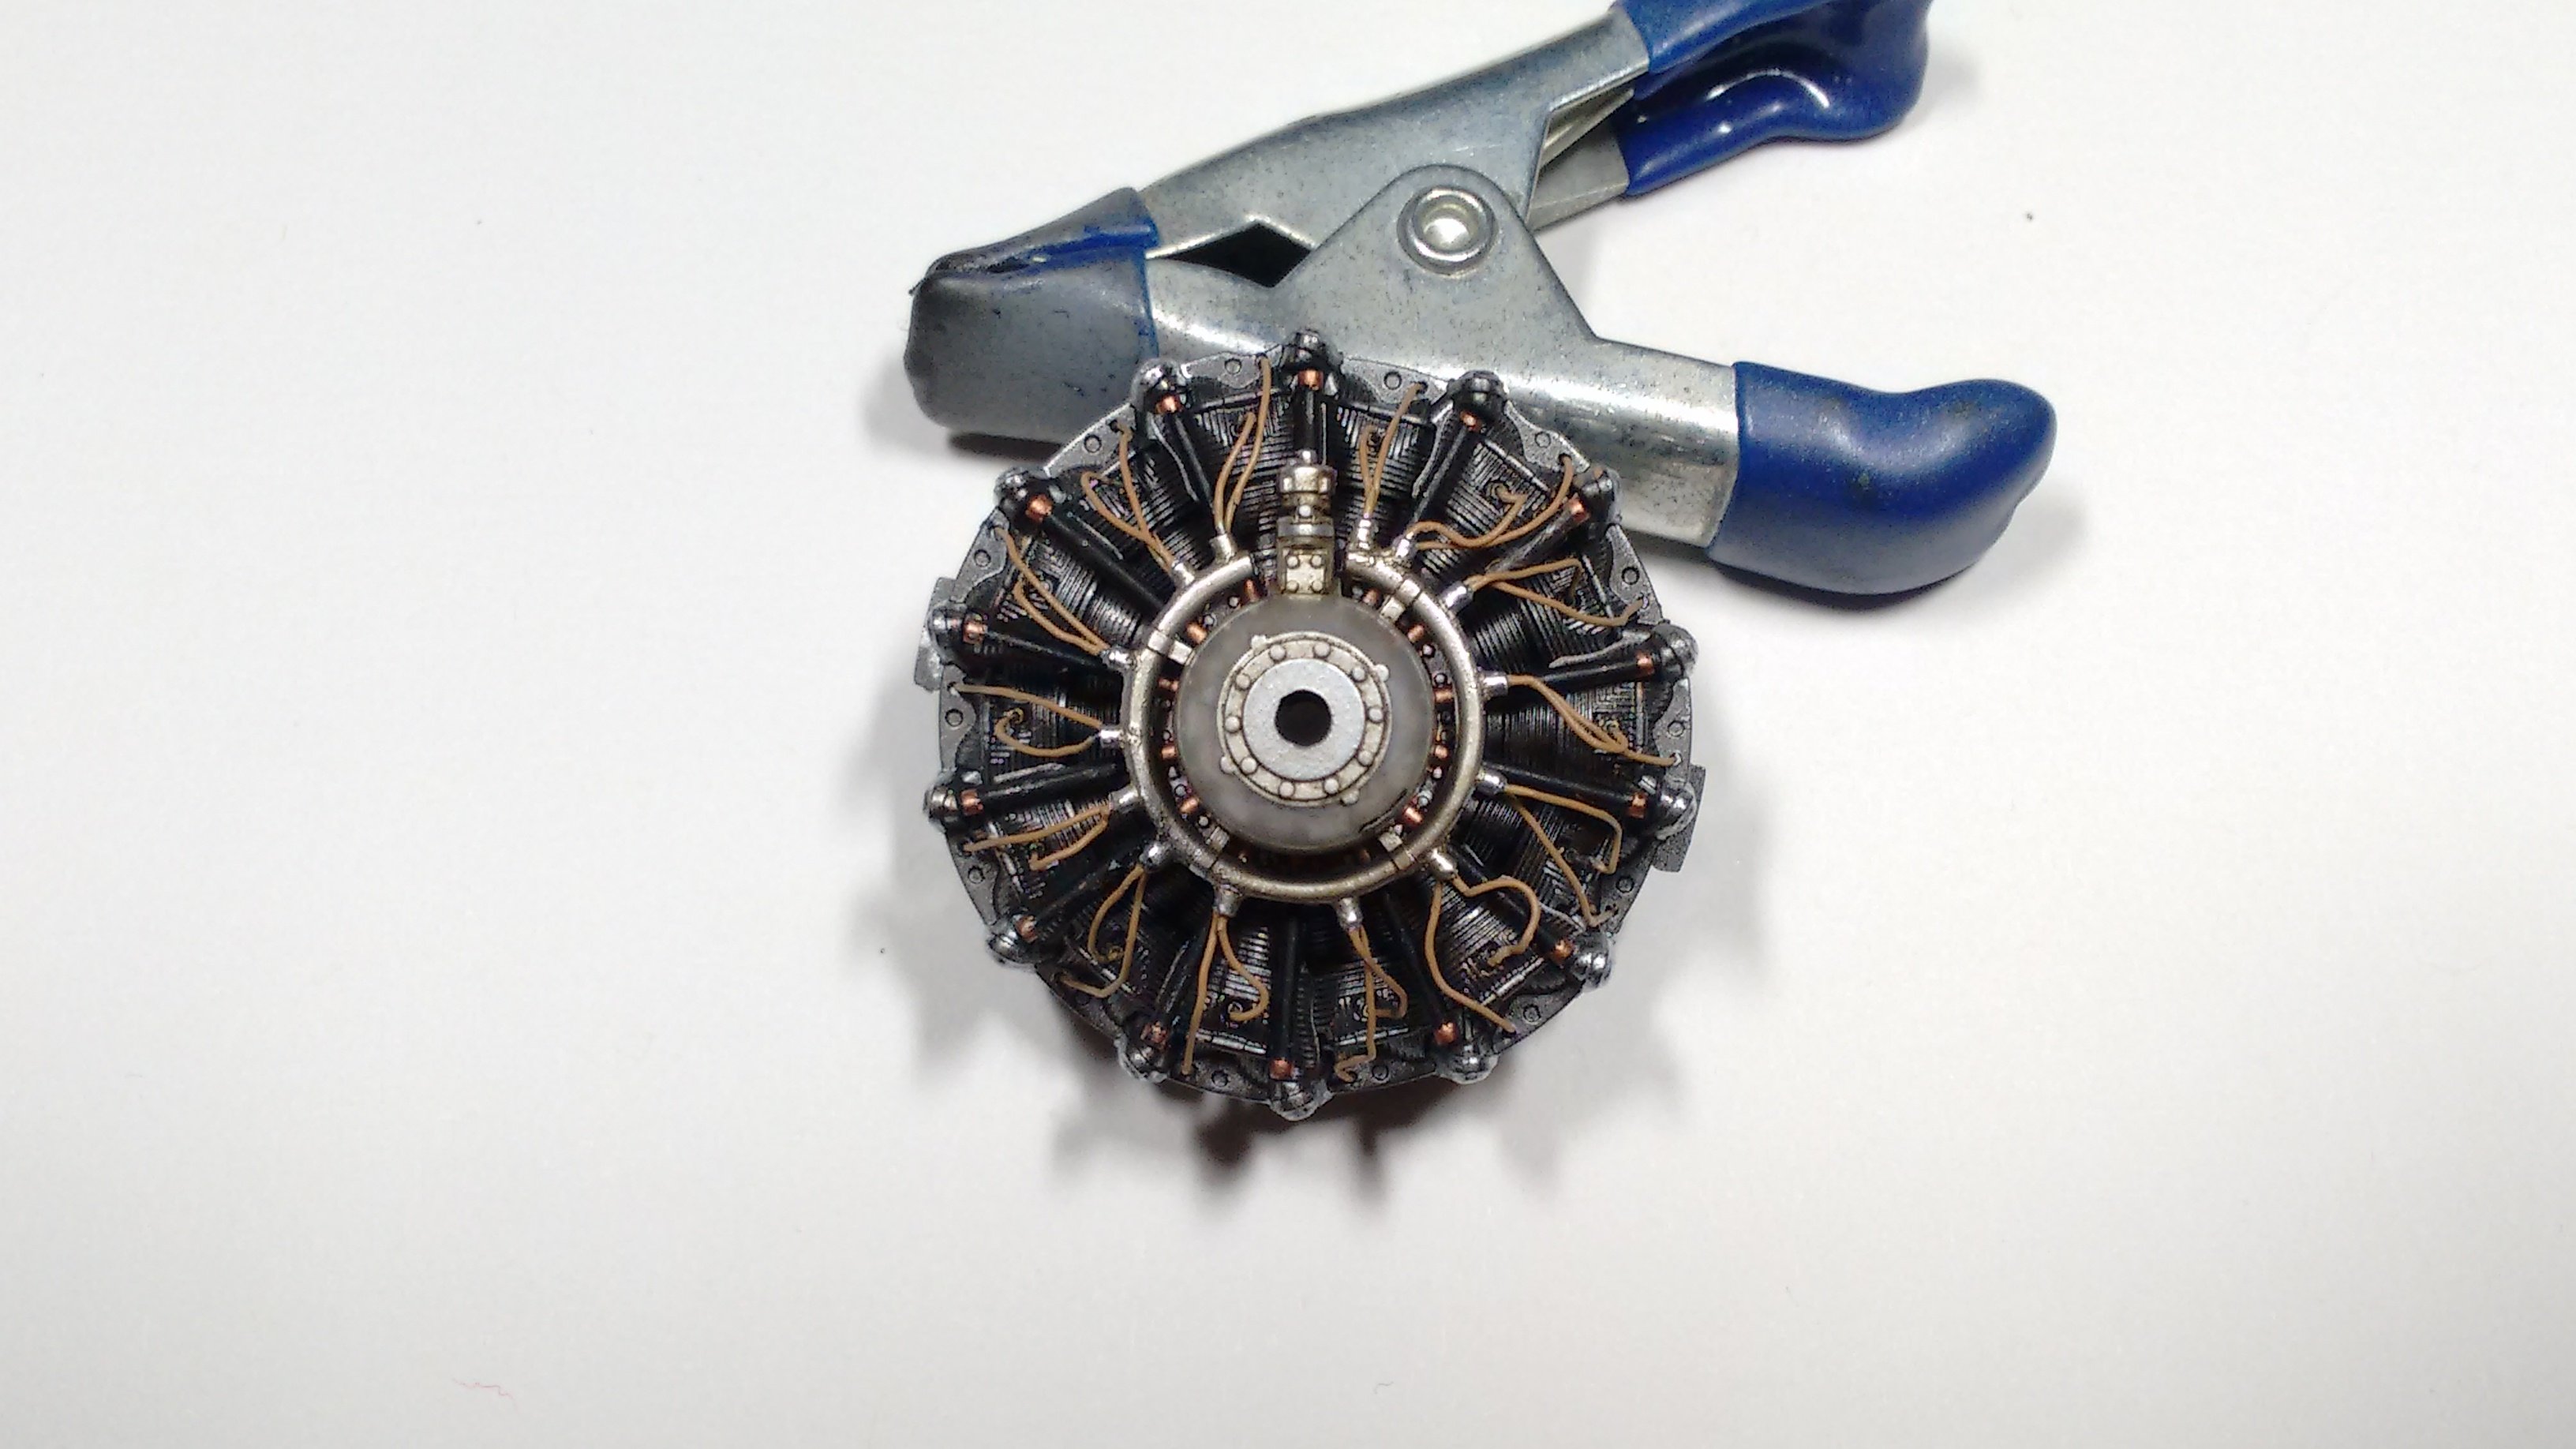
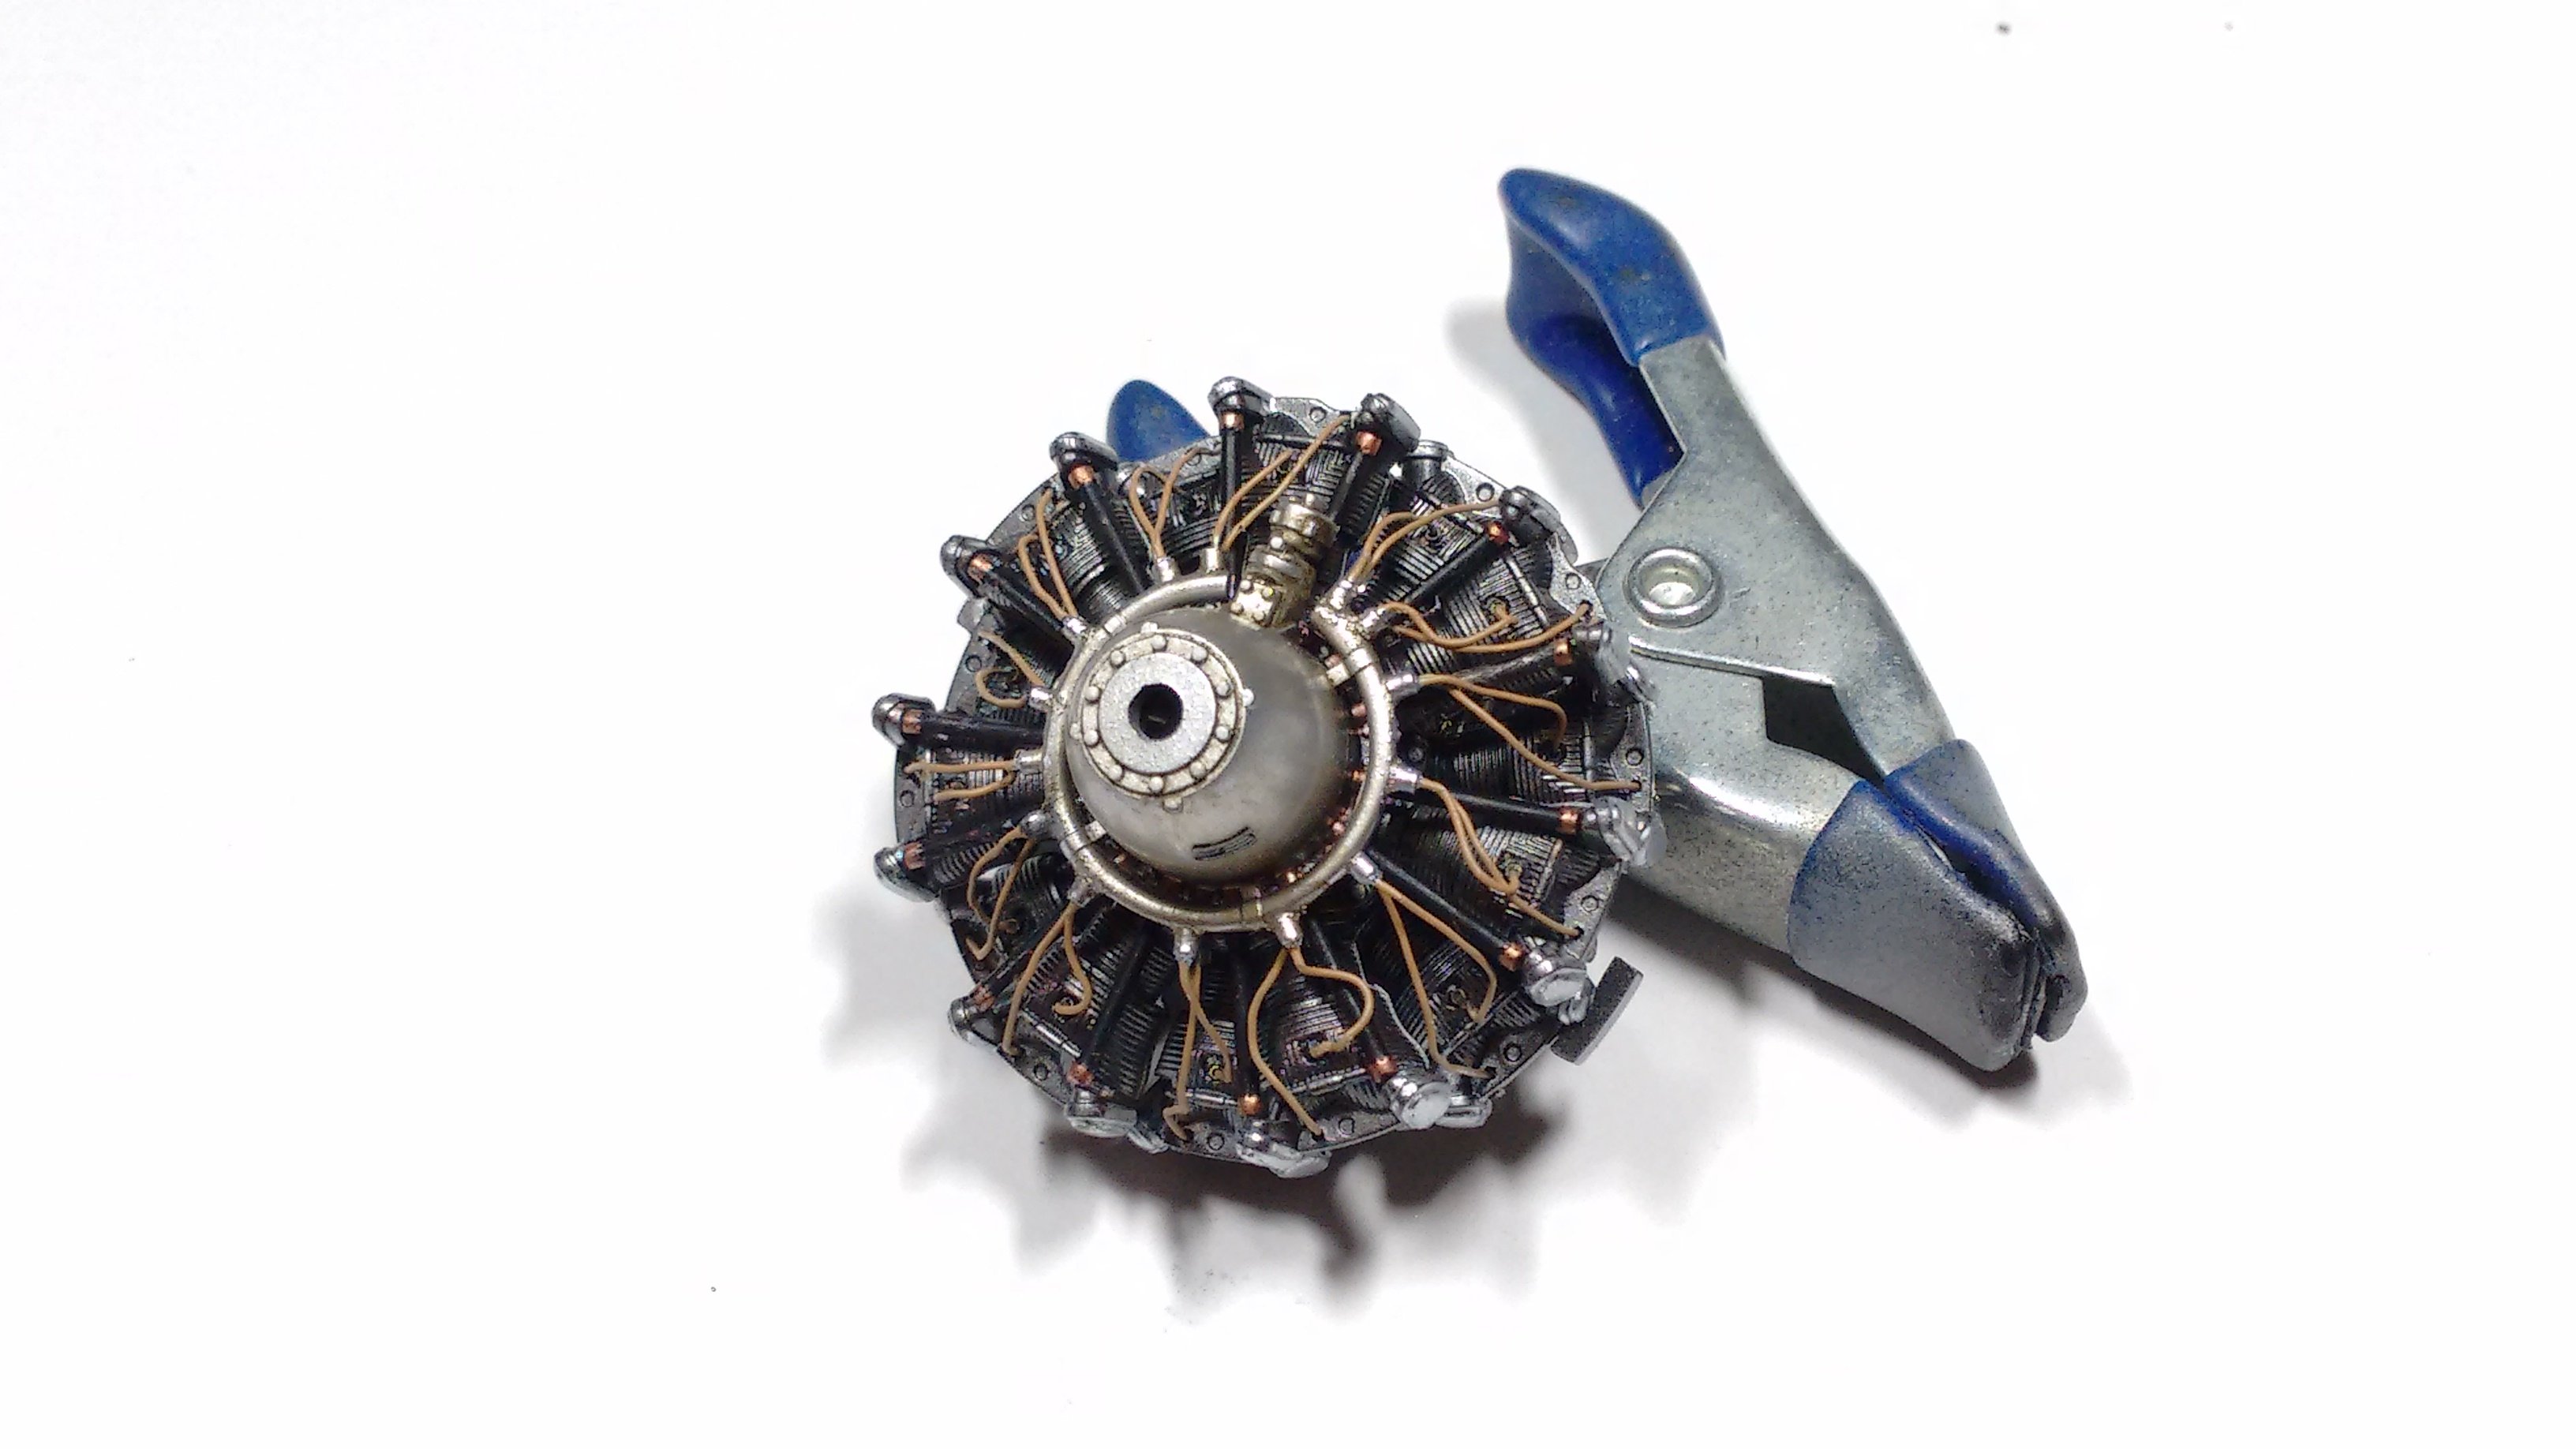
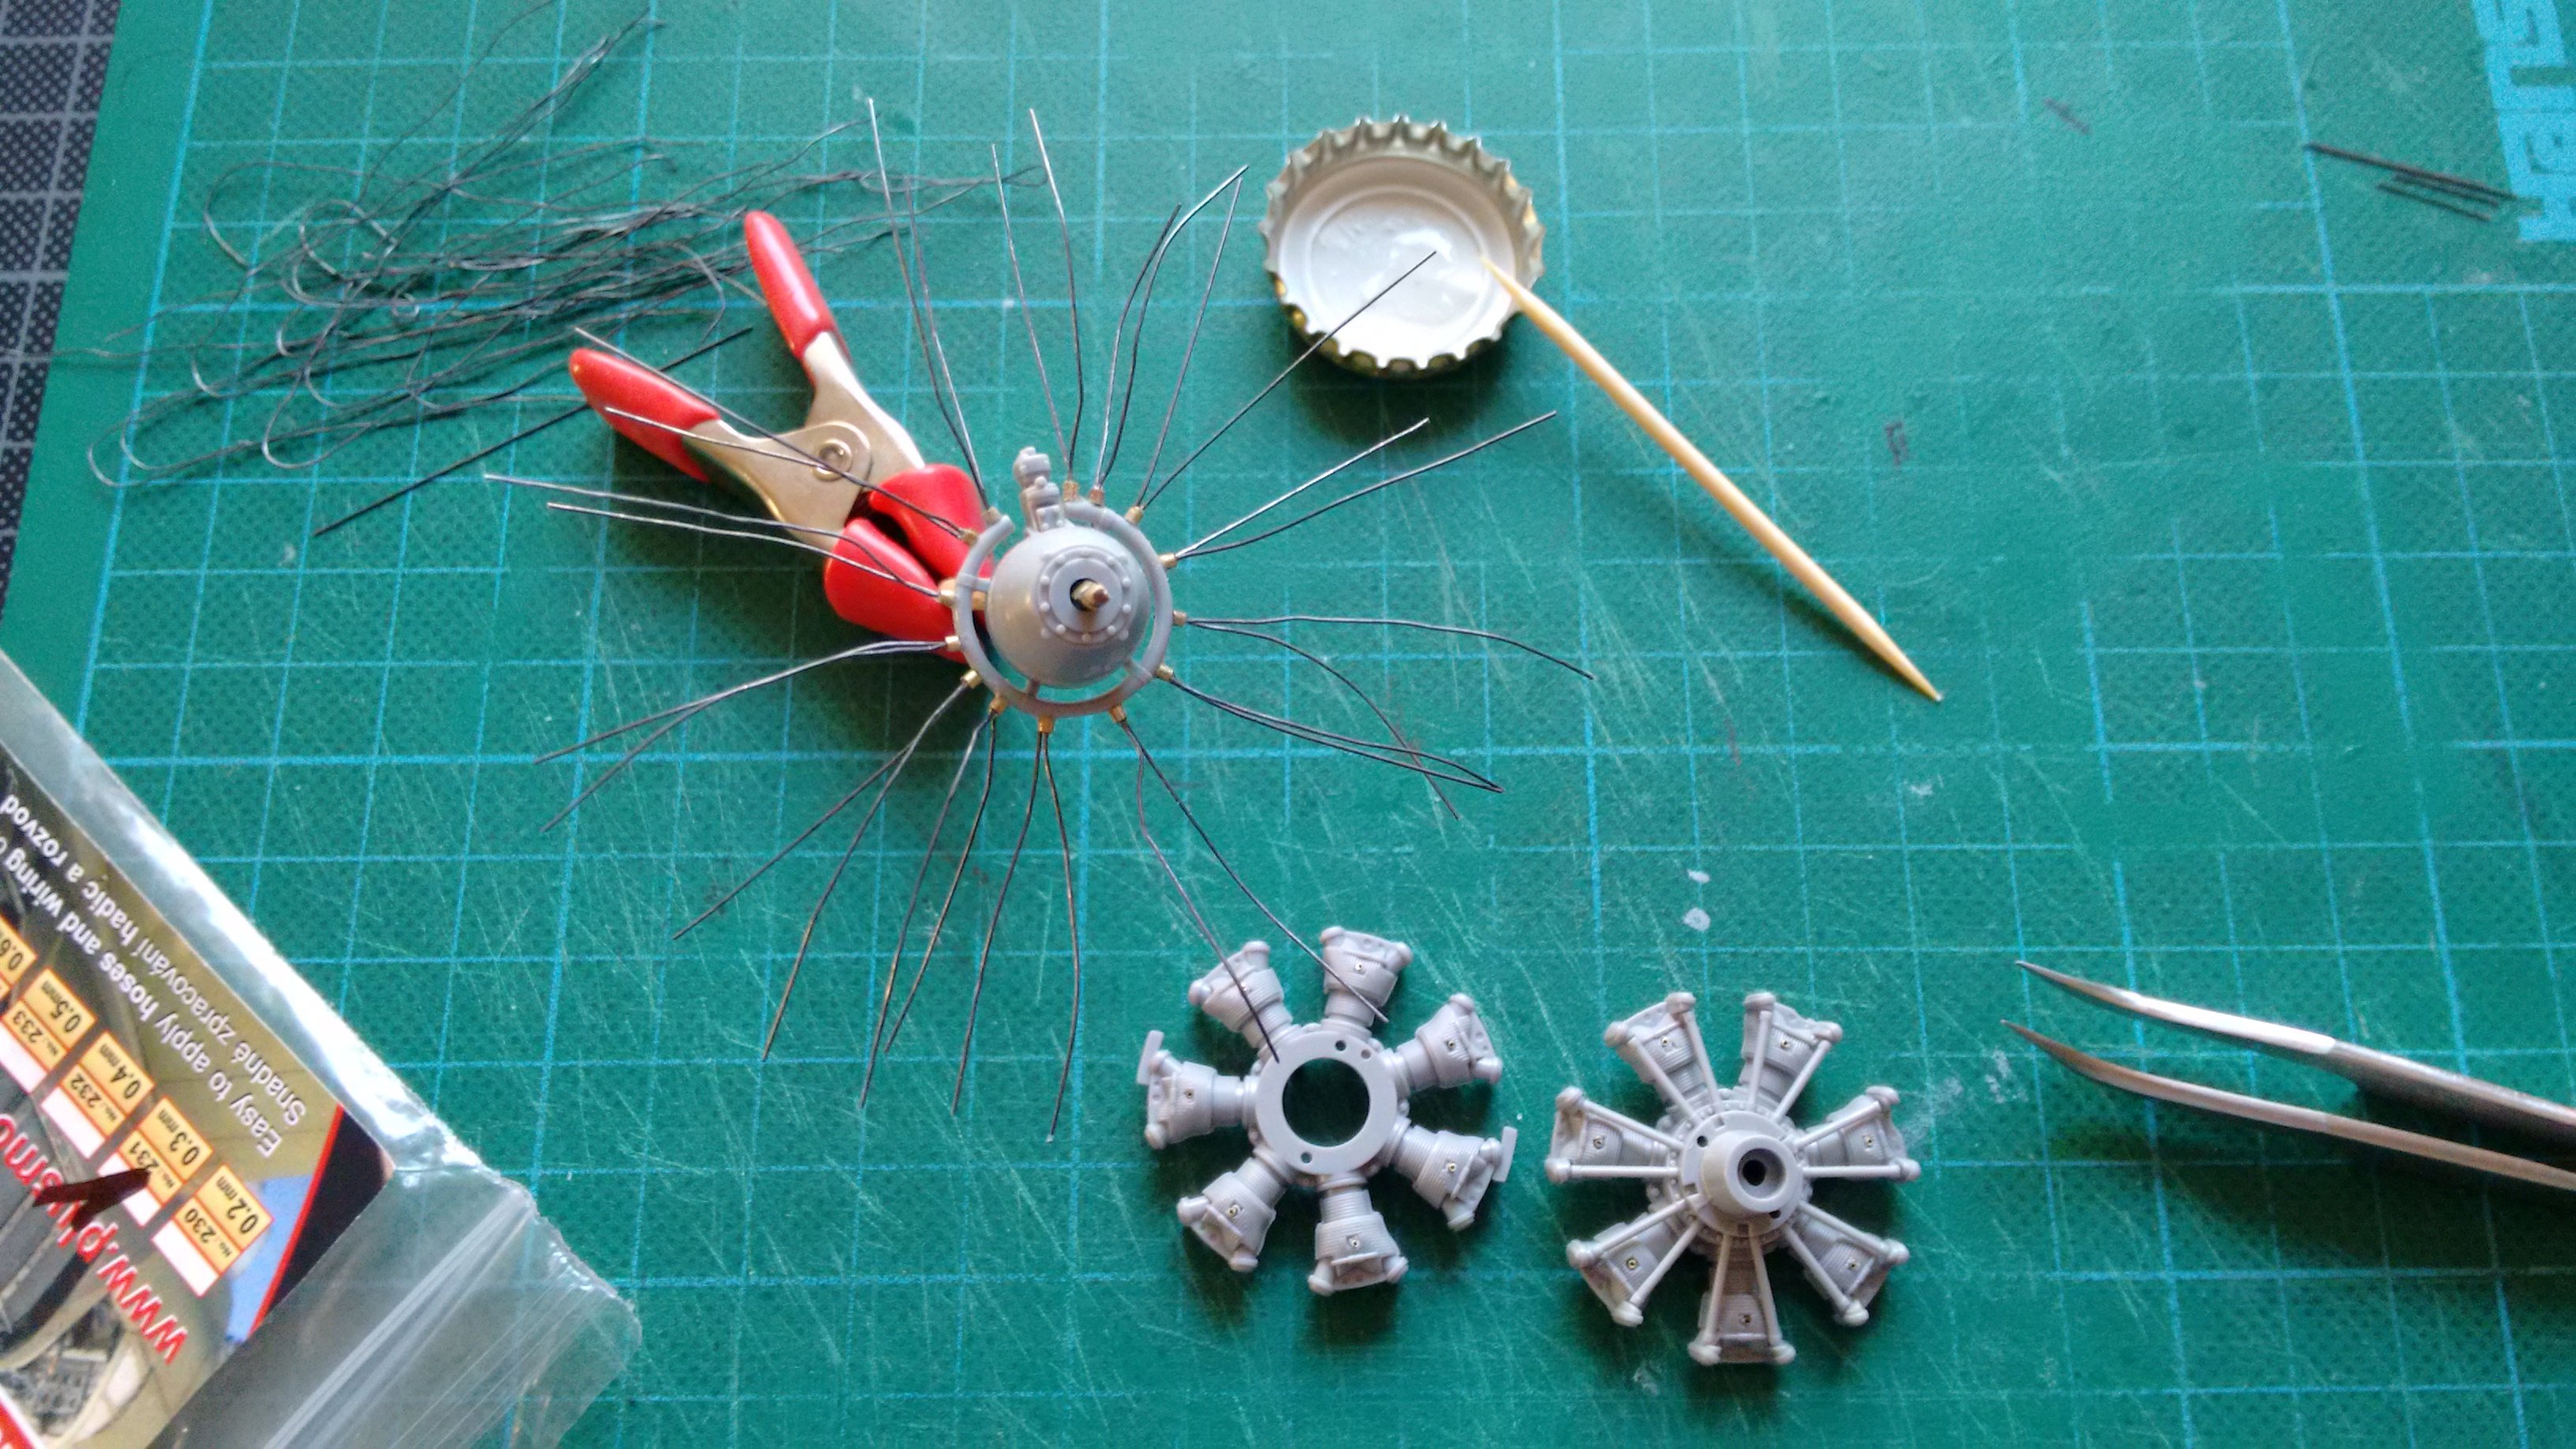
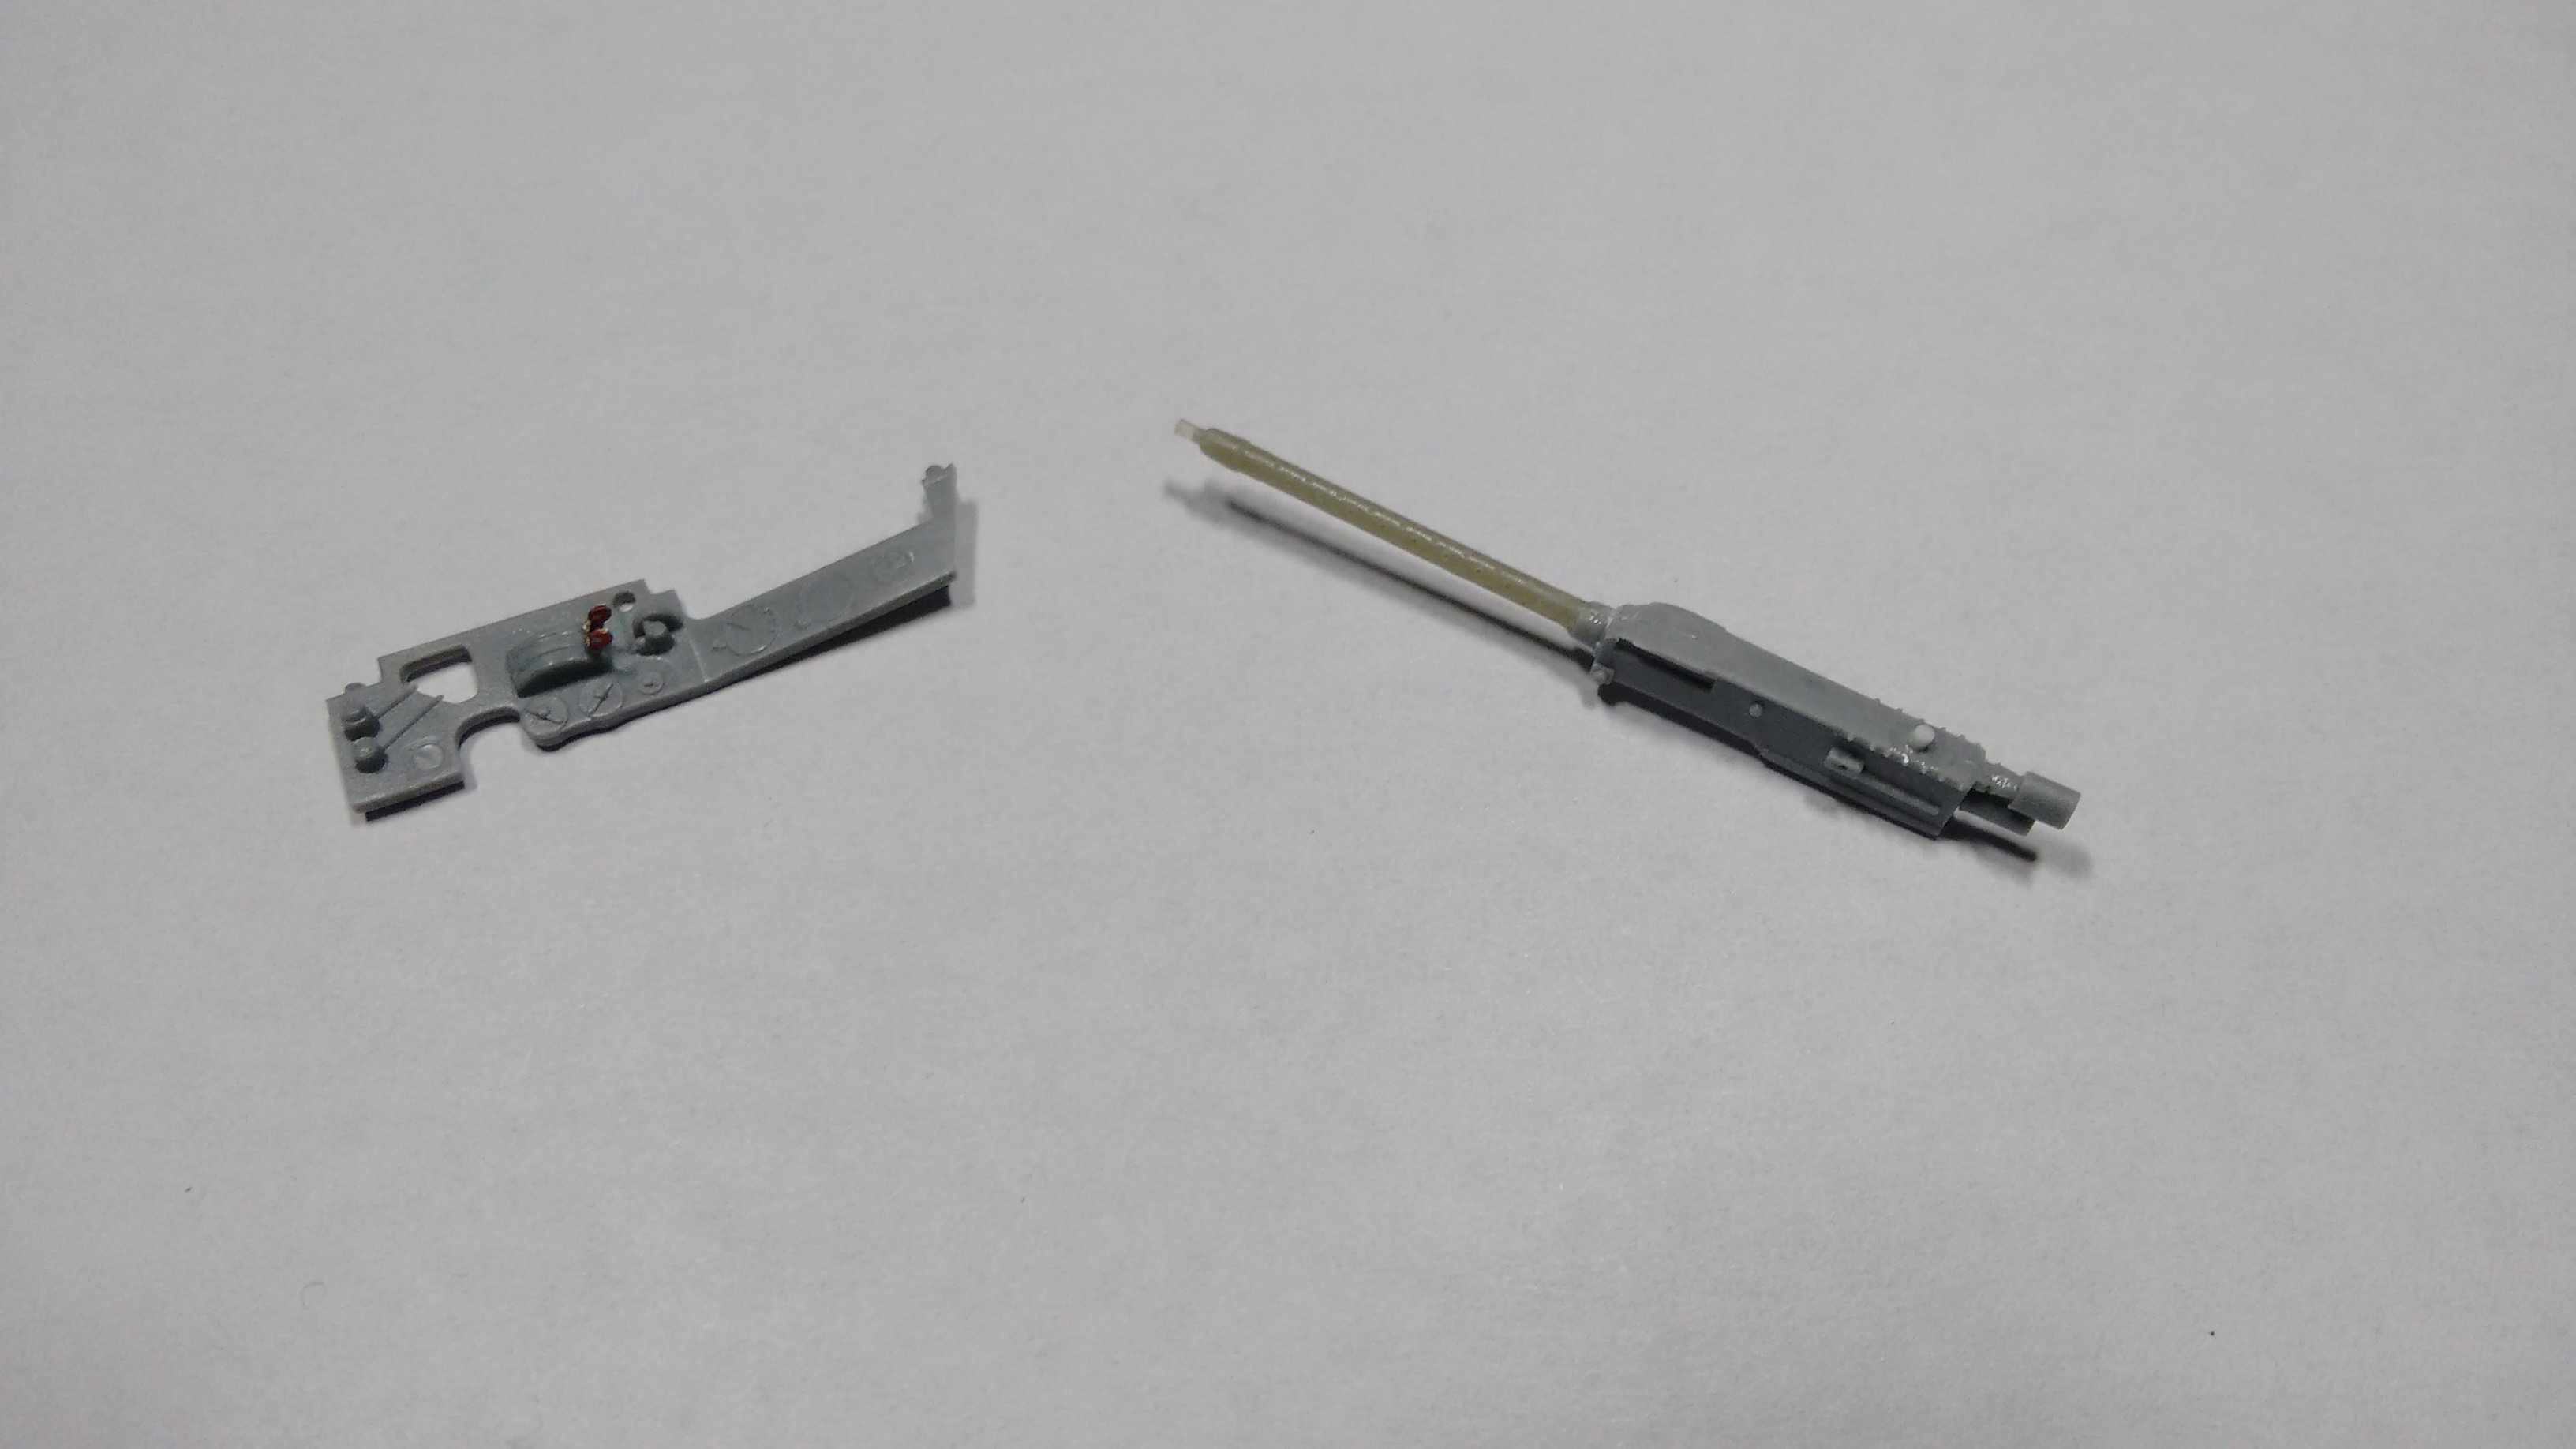
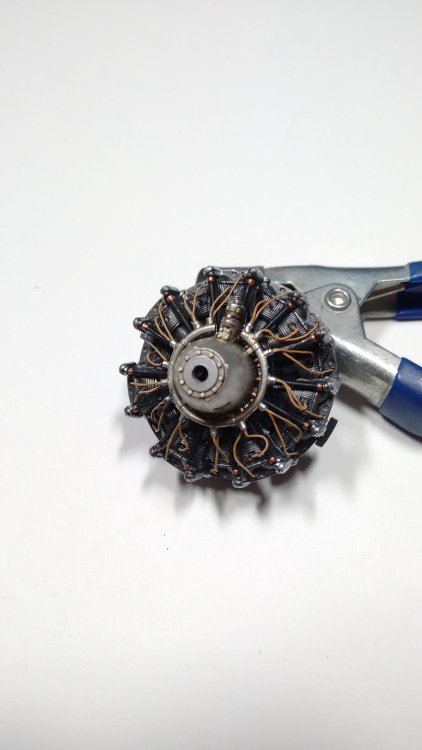
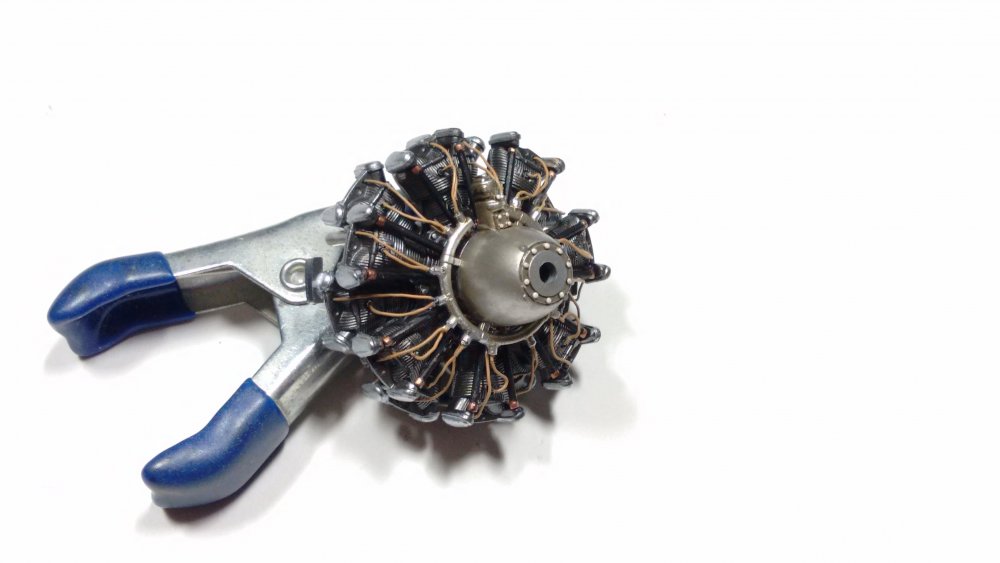
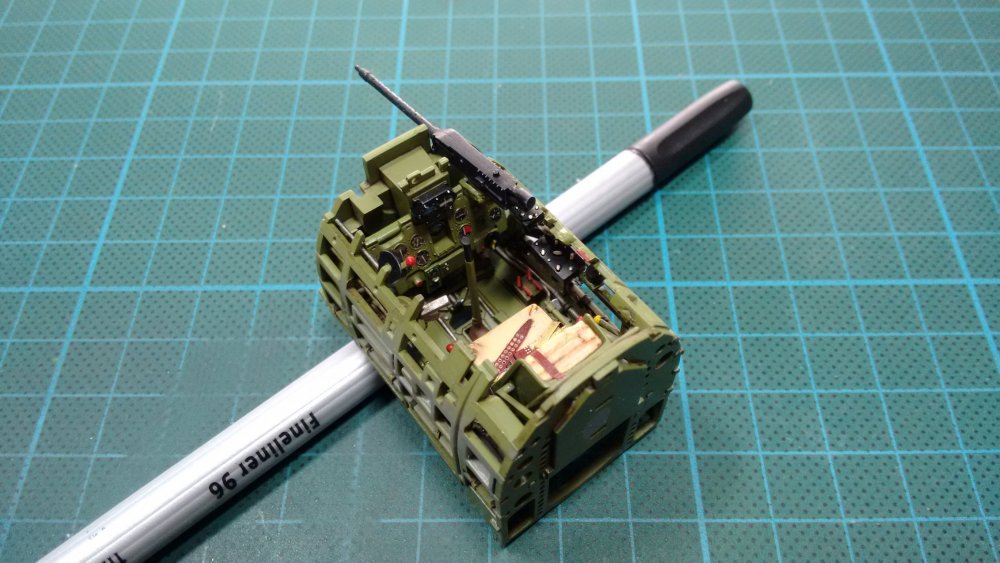
Hey Guy's! Yesterday I 've managed to finish the engine. Hasegawa has reproduced the original well. Maybe a bit simpler than the sakae 21 from tamiya but it looks good in the end. If you don't want to open the engine covers to show the engine, it's enough detail! I only added the ignition cables using lead wire. Cheers! Lutz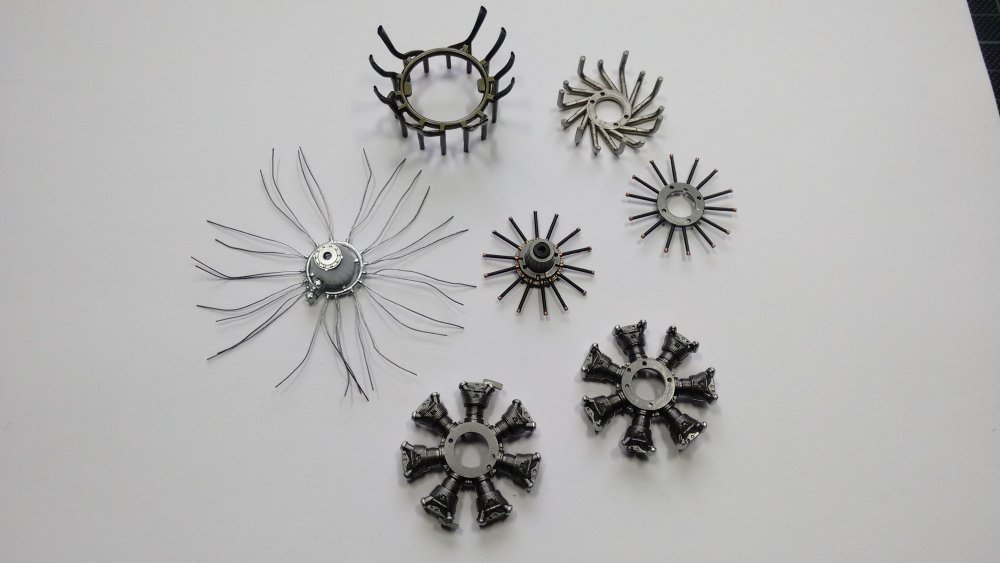


-
That will be interesting! Is it the Hasegawa Kit?
-
Mitsubishi A6M5c Zero Type 52 1/32 Hasegawa
Sturmbock replied to Sturmbock's topic in LSM 1/35 and Larger Work In Progress
Thank you all Guy's! Yes, punching out is maybe the only option when using the kit's own decals. I try to get some dials from airscale next time. Much more convenient and much less effort! Cheer's! -
I would give it a try again! Never give up!!
-
Mitsubishi A6M5c Zero Type 52 1/32 Hasegawa
Sturmbock replied to Sturmbock's topic in LSM 1/35 and Larger Work In Progress
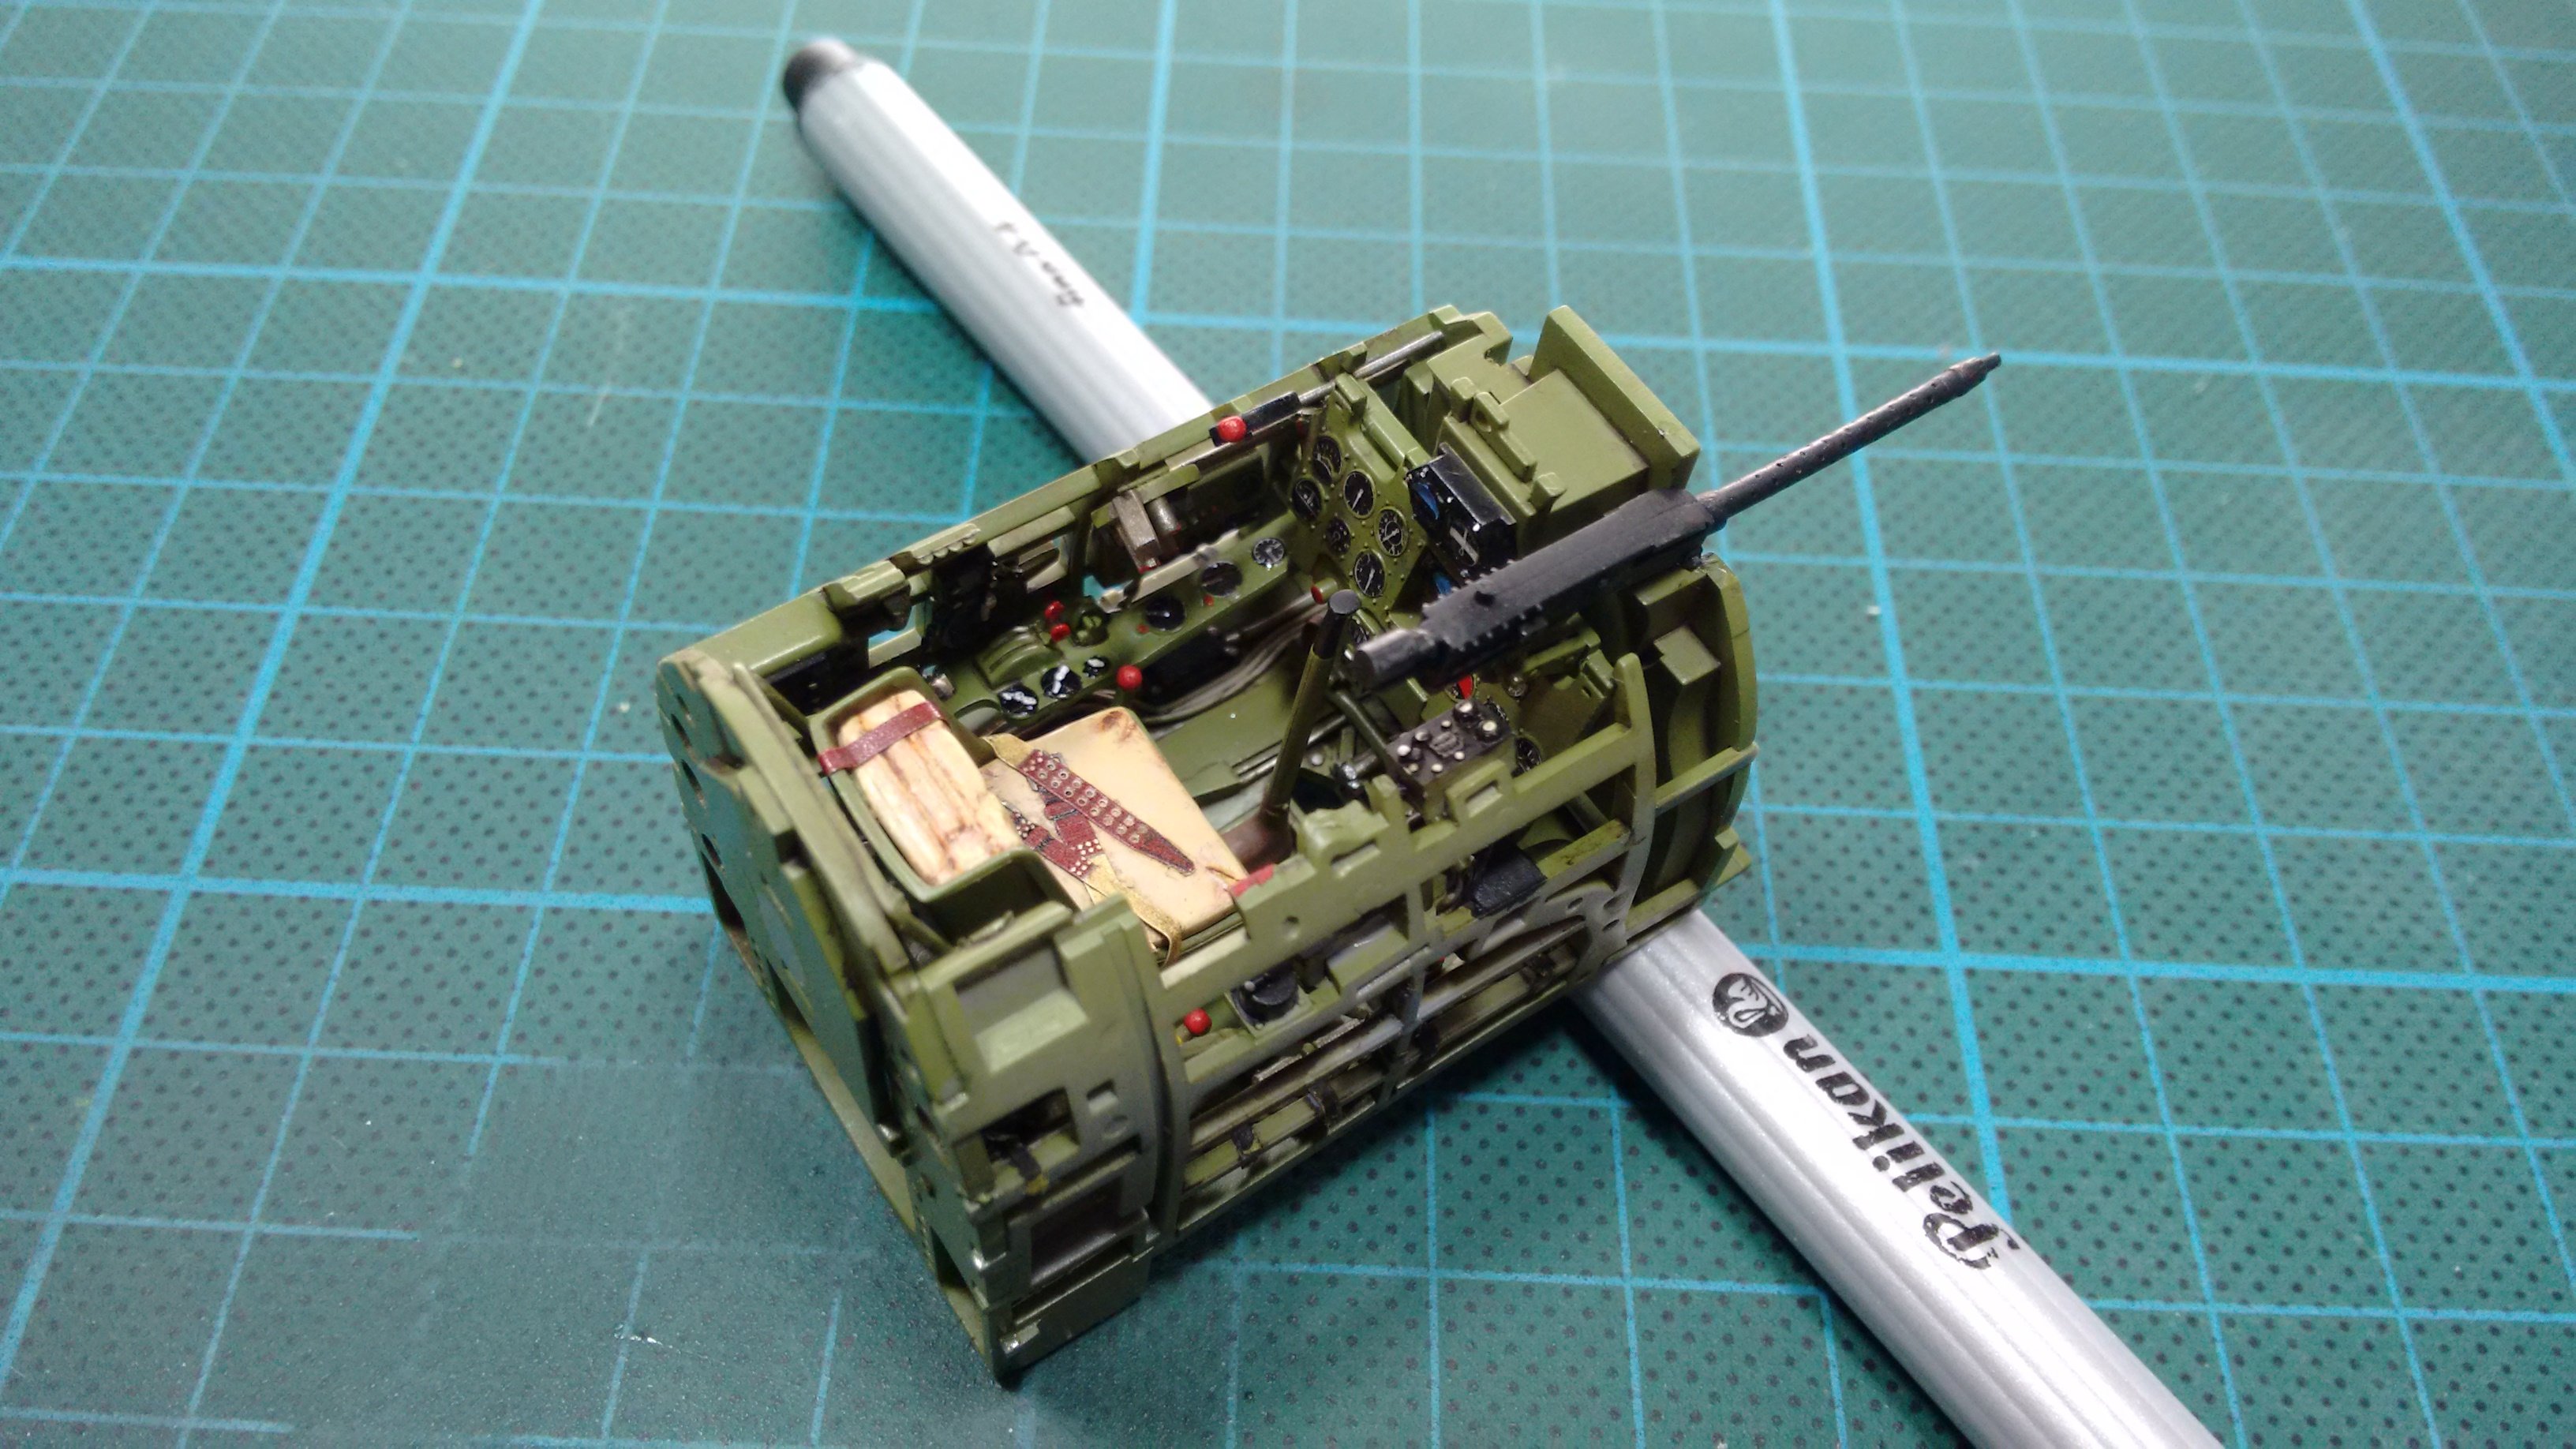
Thank you Harv and GusMac! Now that the front office is ready I can close the fuselage. Let the sanding games beginn... -
1/32 Revell Fw190 F8 converted to G8
Sturmbock replied to AlanG's topic in LSM 1/35 and Larger Work In Progress
Eduards new Steelbelts are really worth trying! You can bend them without peeling of the paint. -
1/32 Revell Fw190 F8 converted to G8
Sturmbock replied to AlanG's topic in LSM 1/35 and Larger Work In Progress
Looks very promising! Love the ignition cables! Cheers! Lutz -
Mitsubishi A6M5c Zero Type 52 1/32 Hasegawa
Sturmbock replied to Sturmbock's topic in LSM 1/35 and Larger Work In Progress
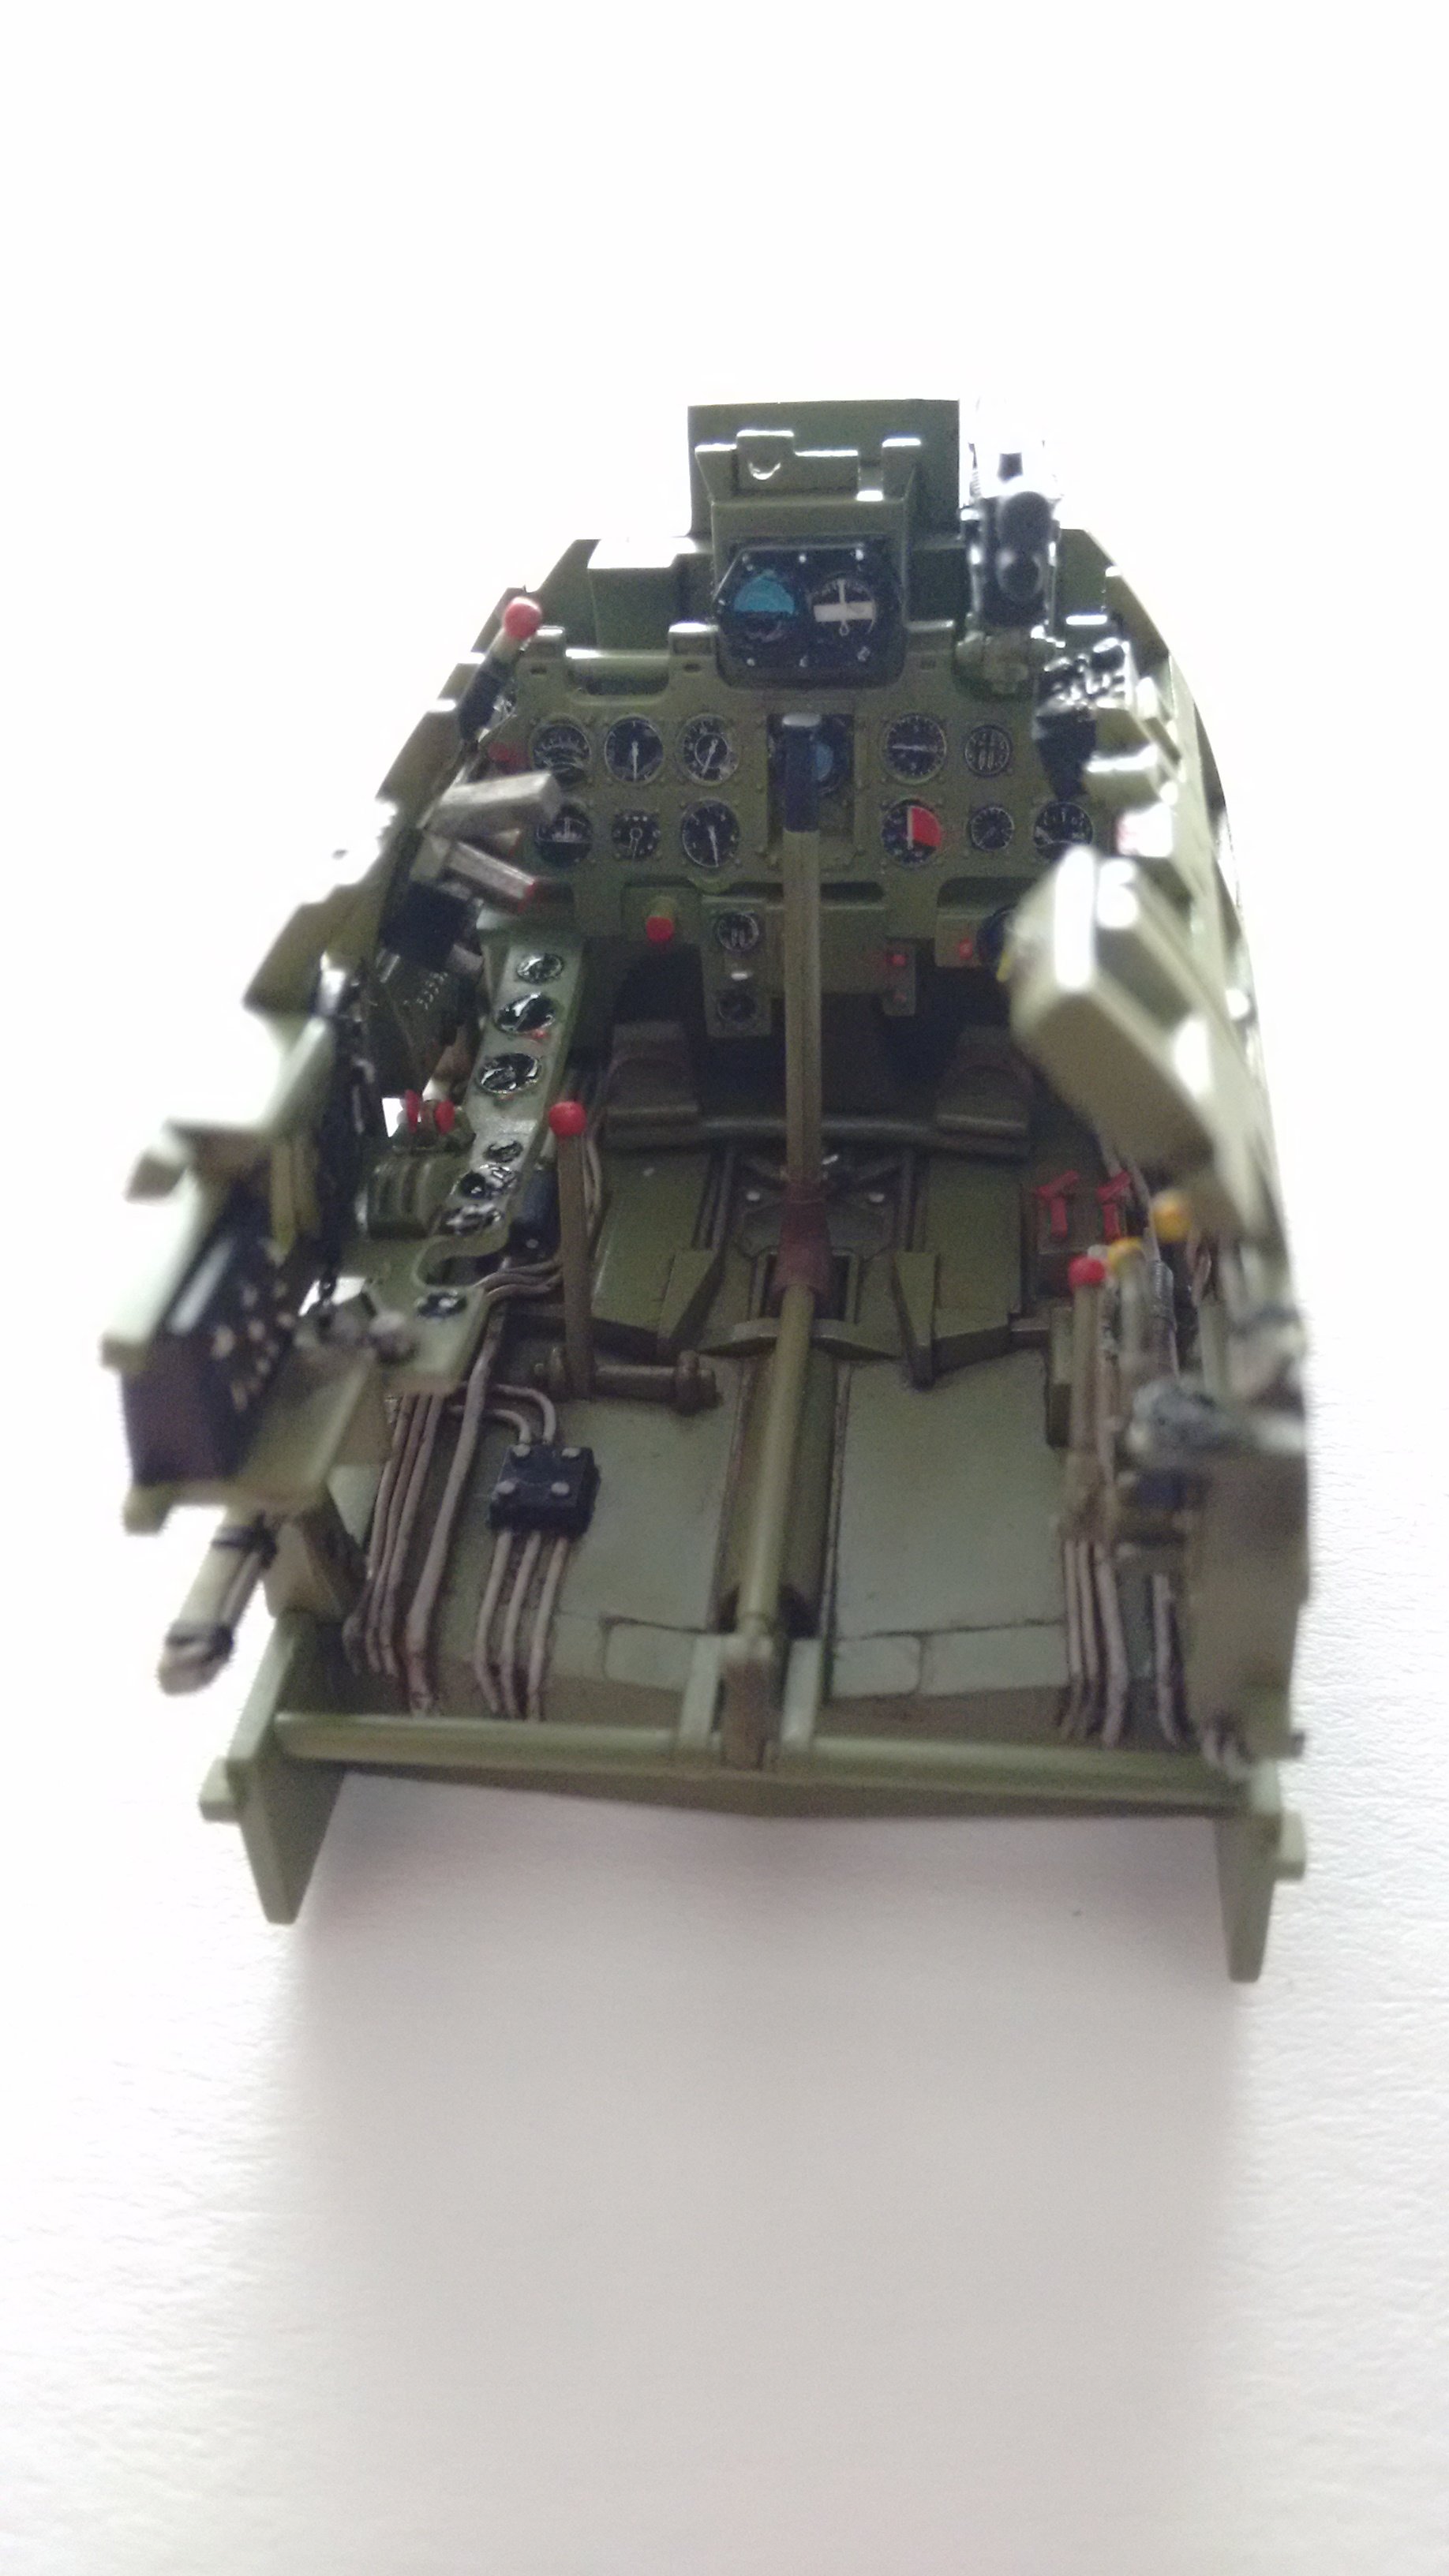
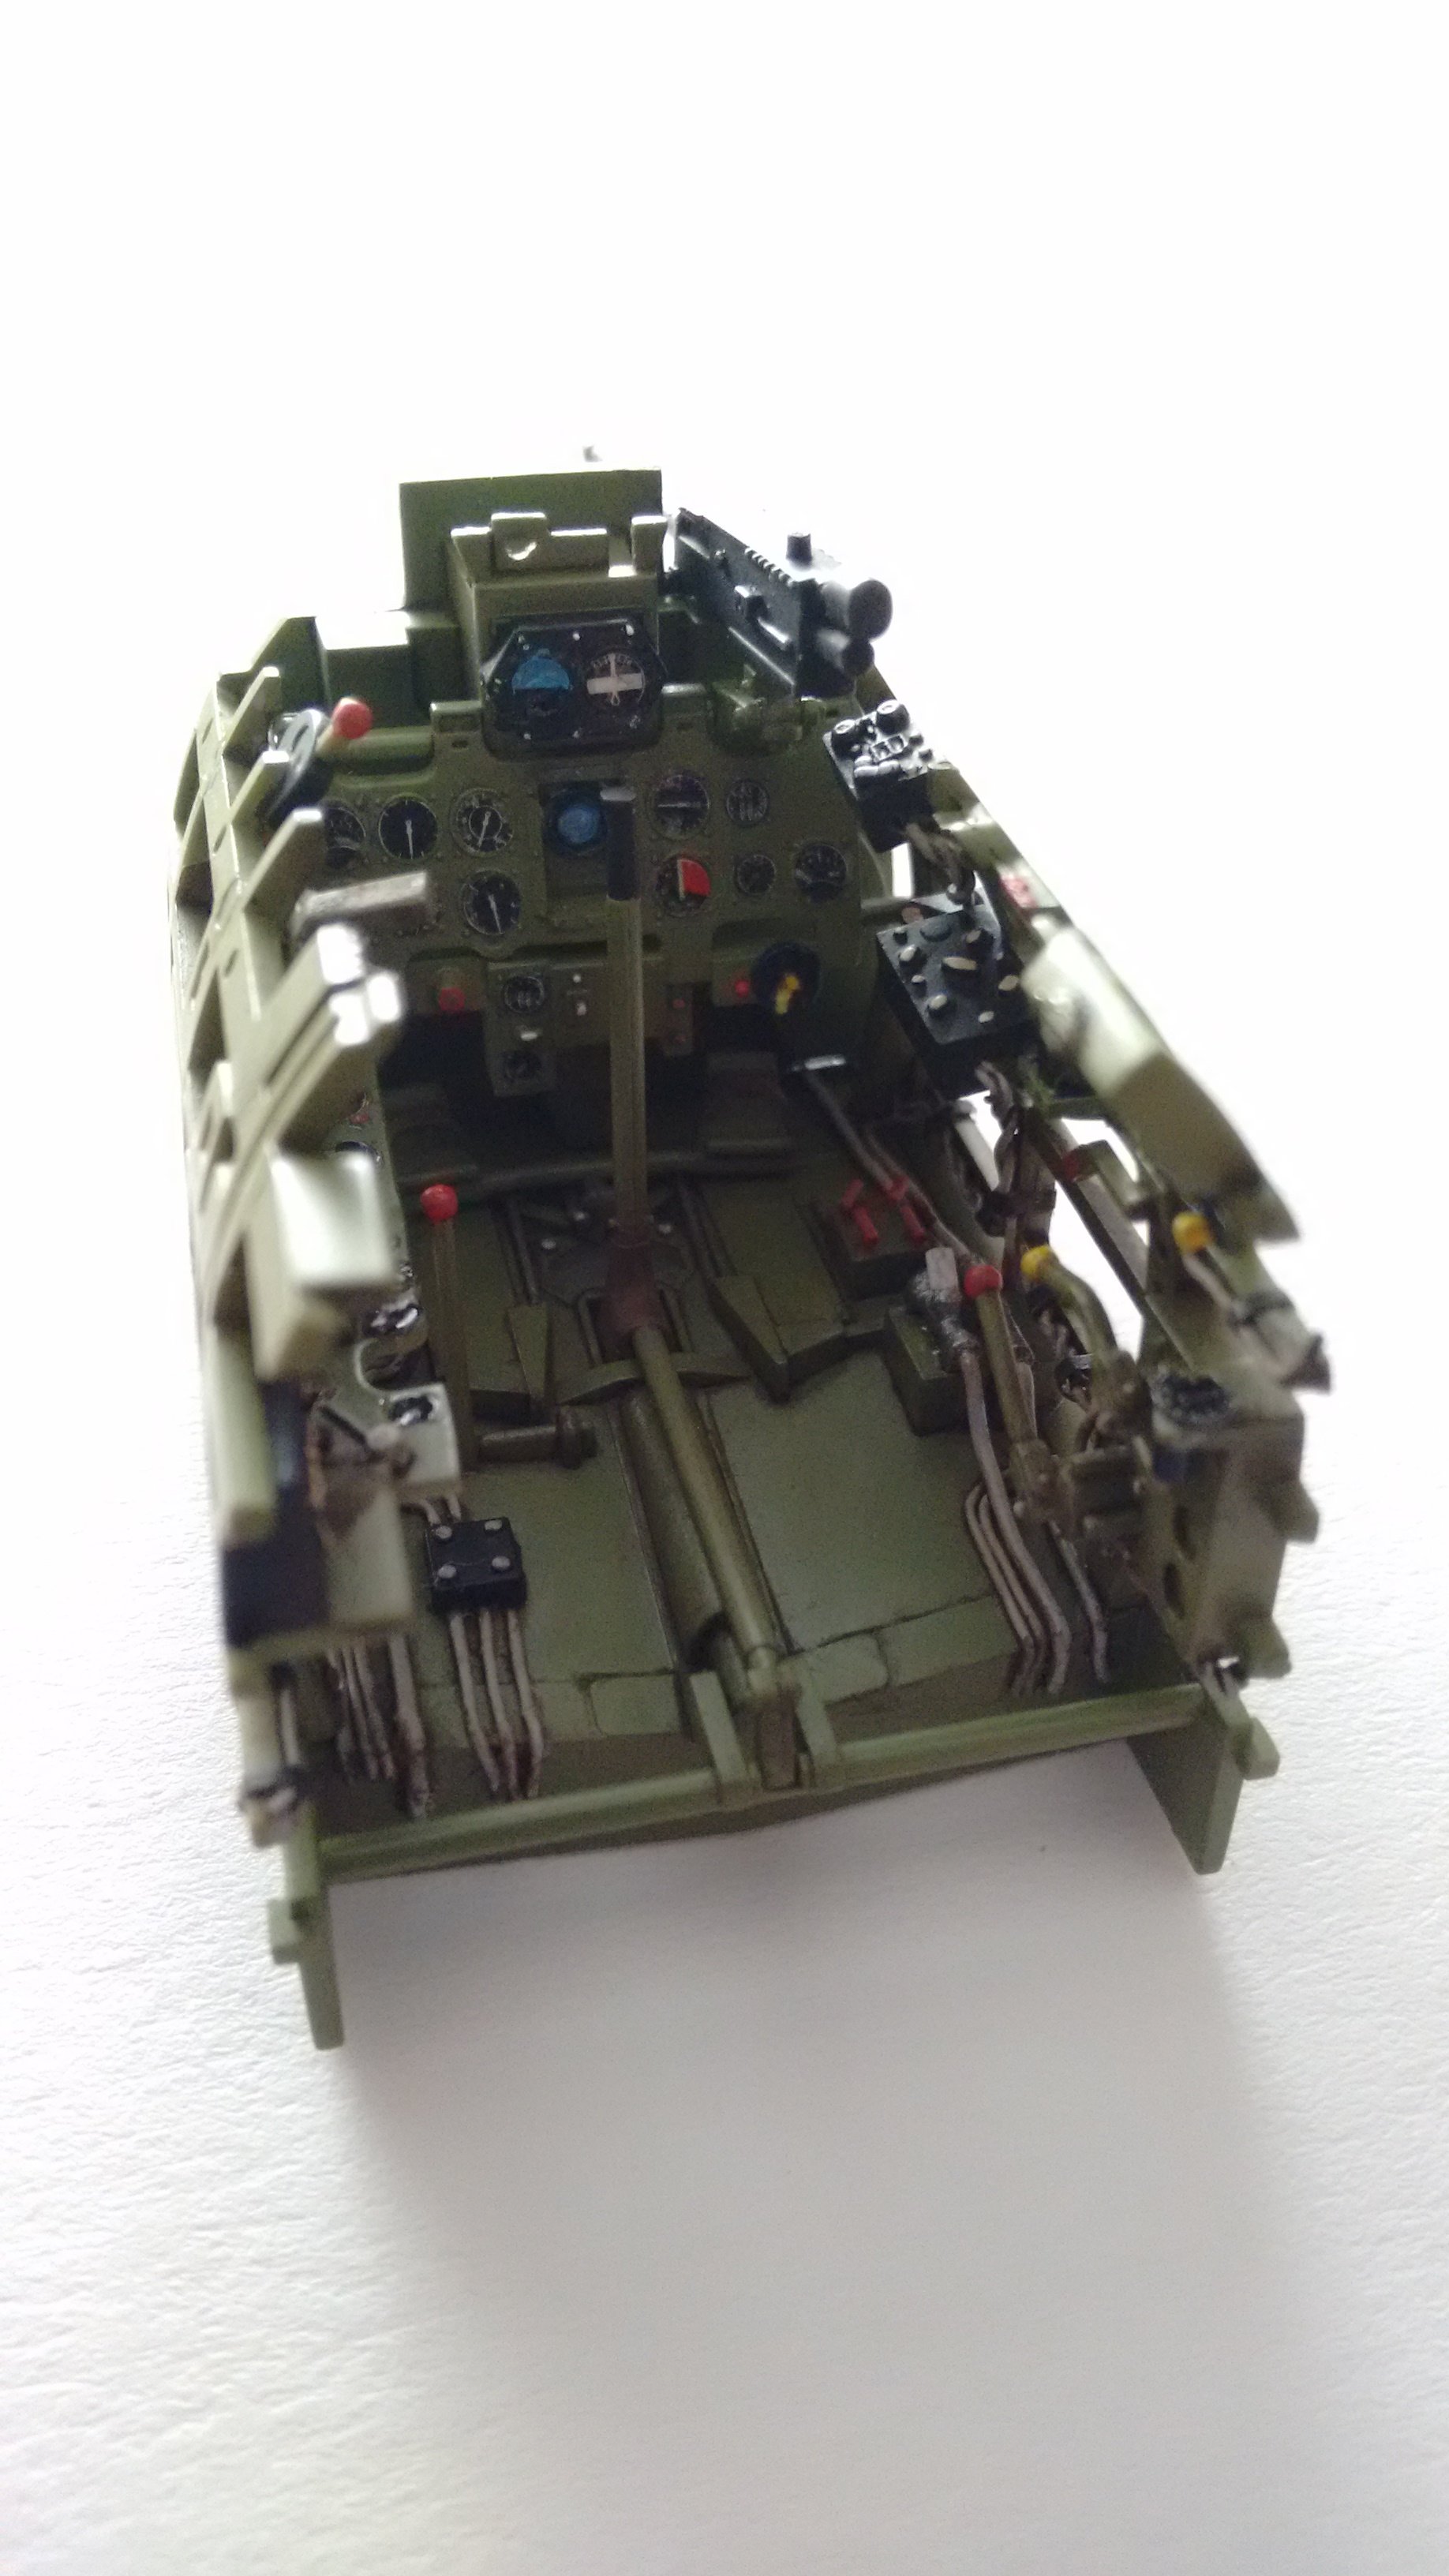
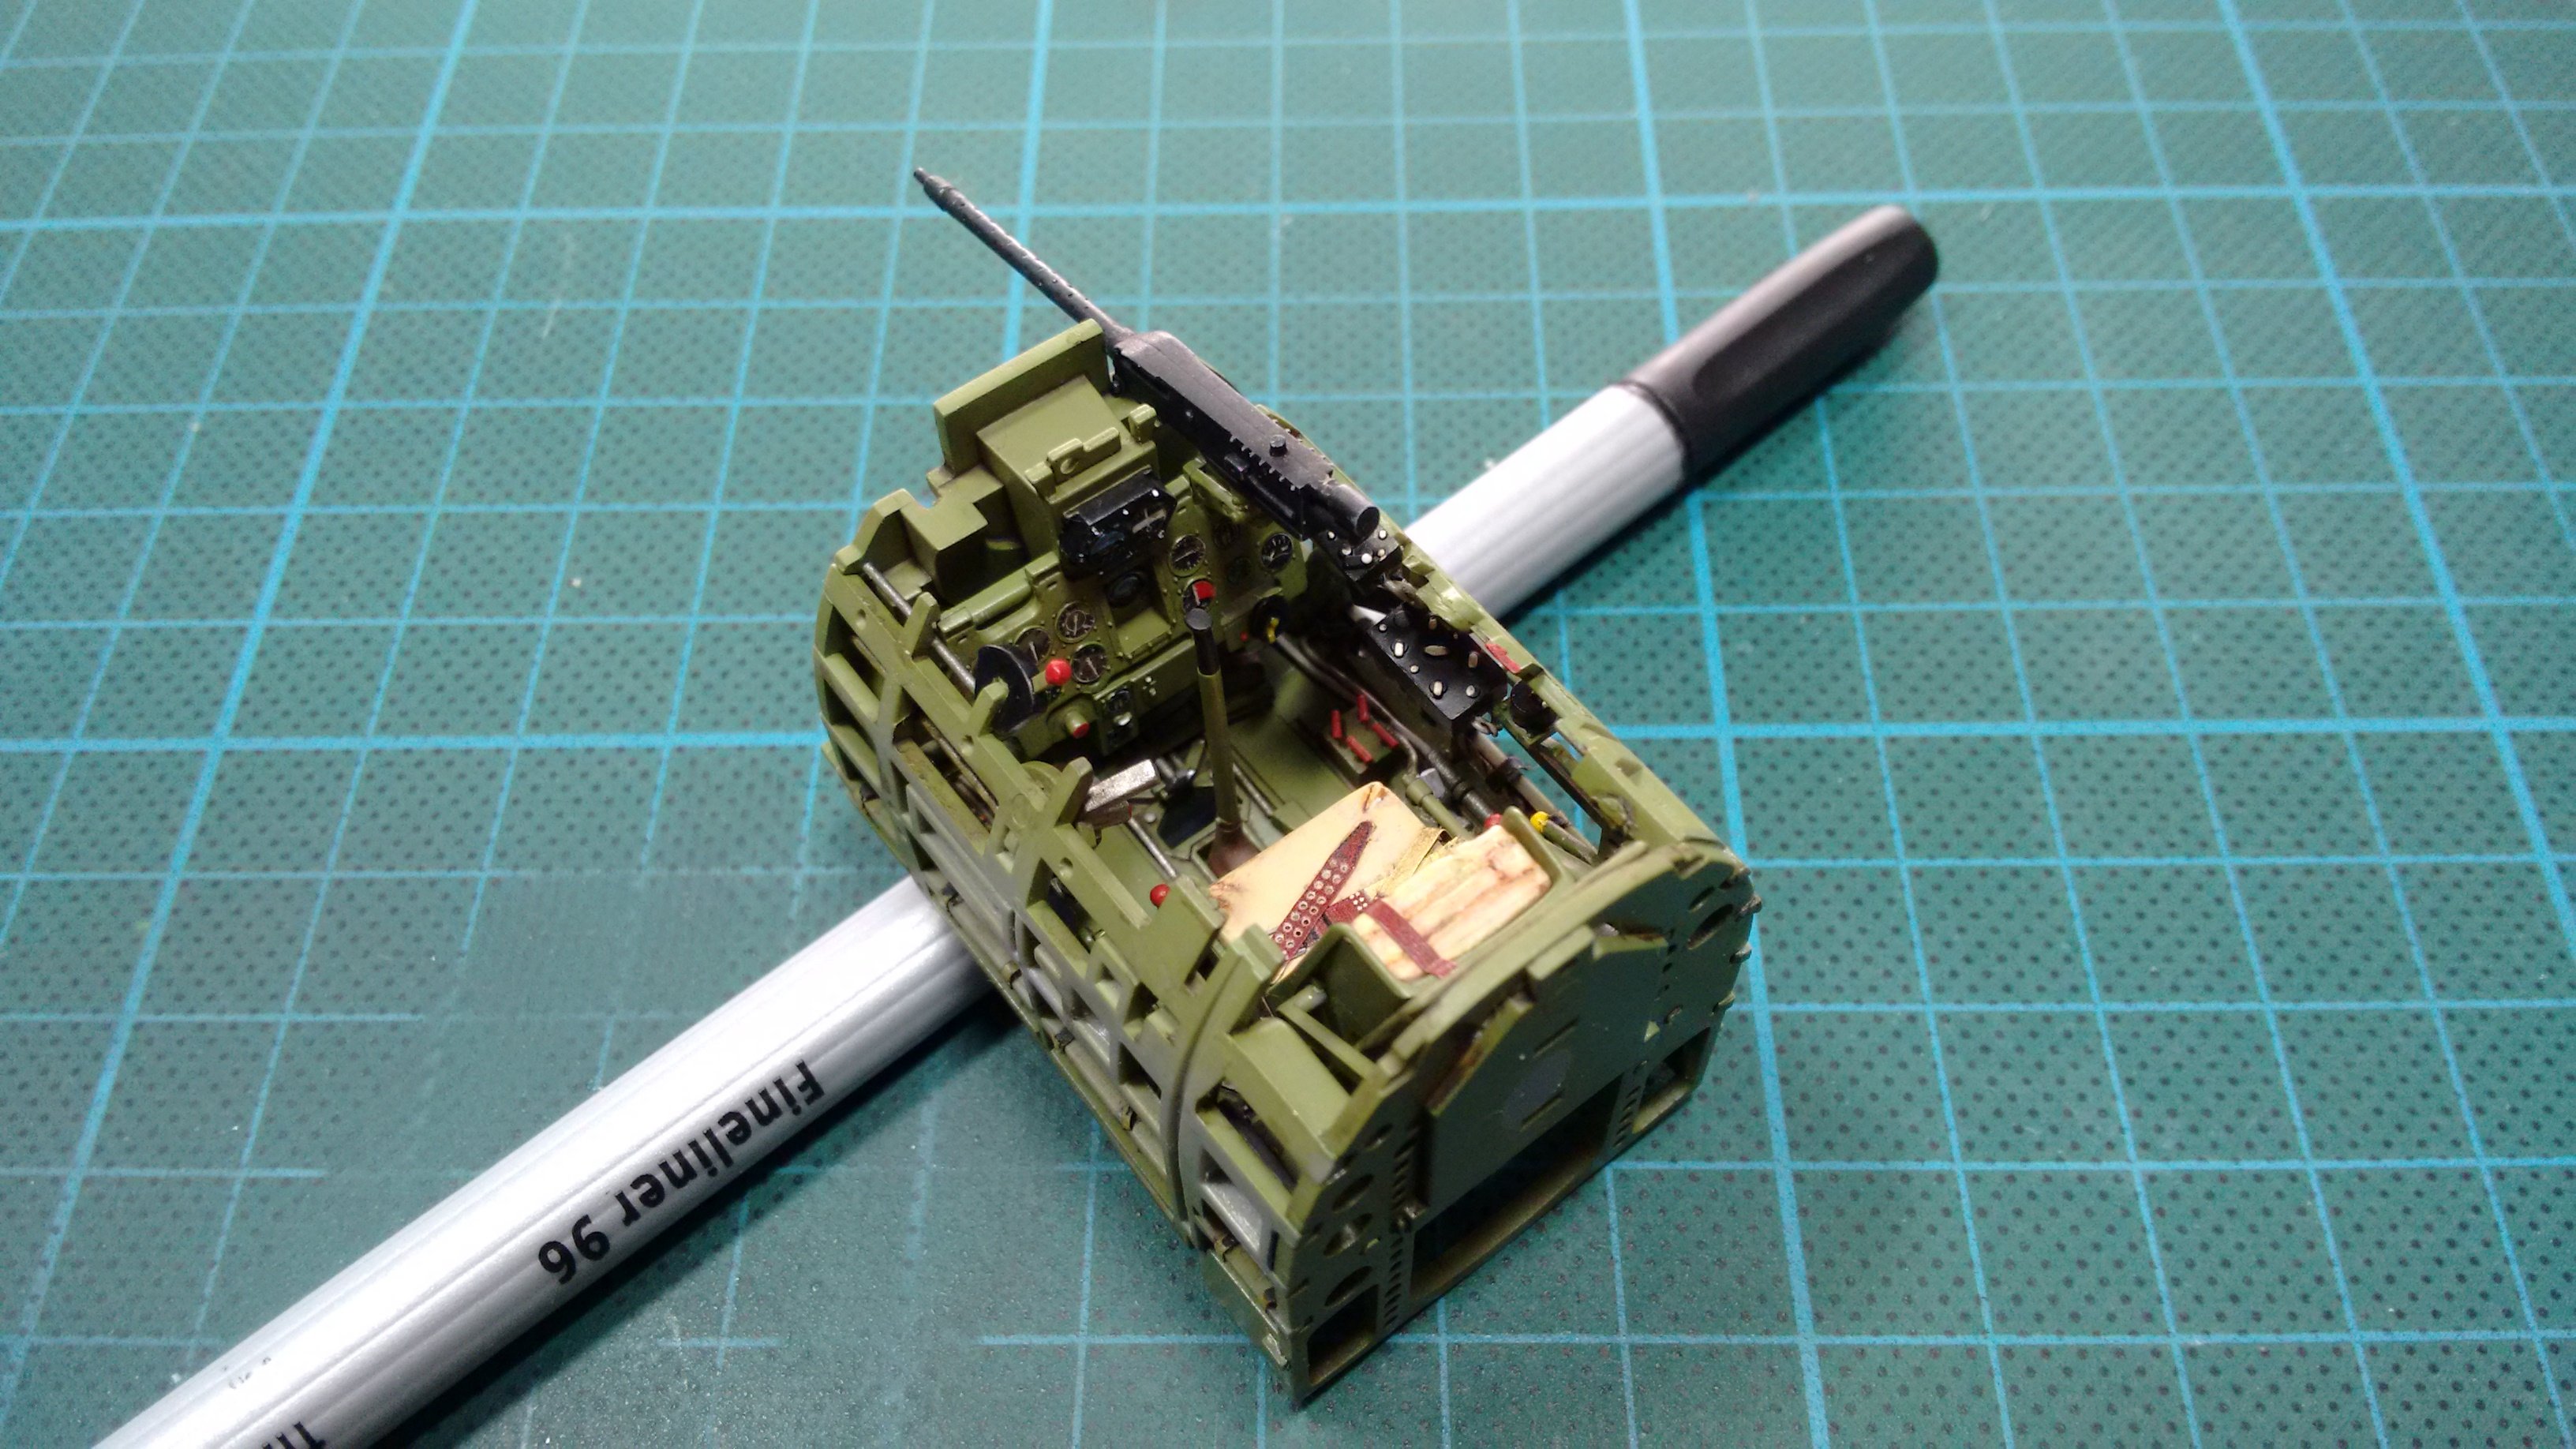
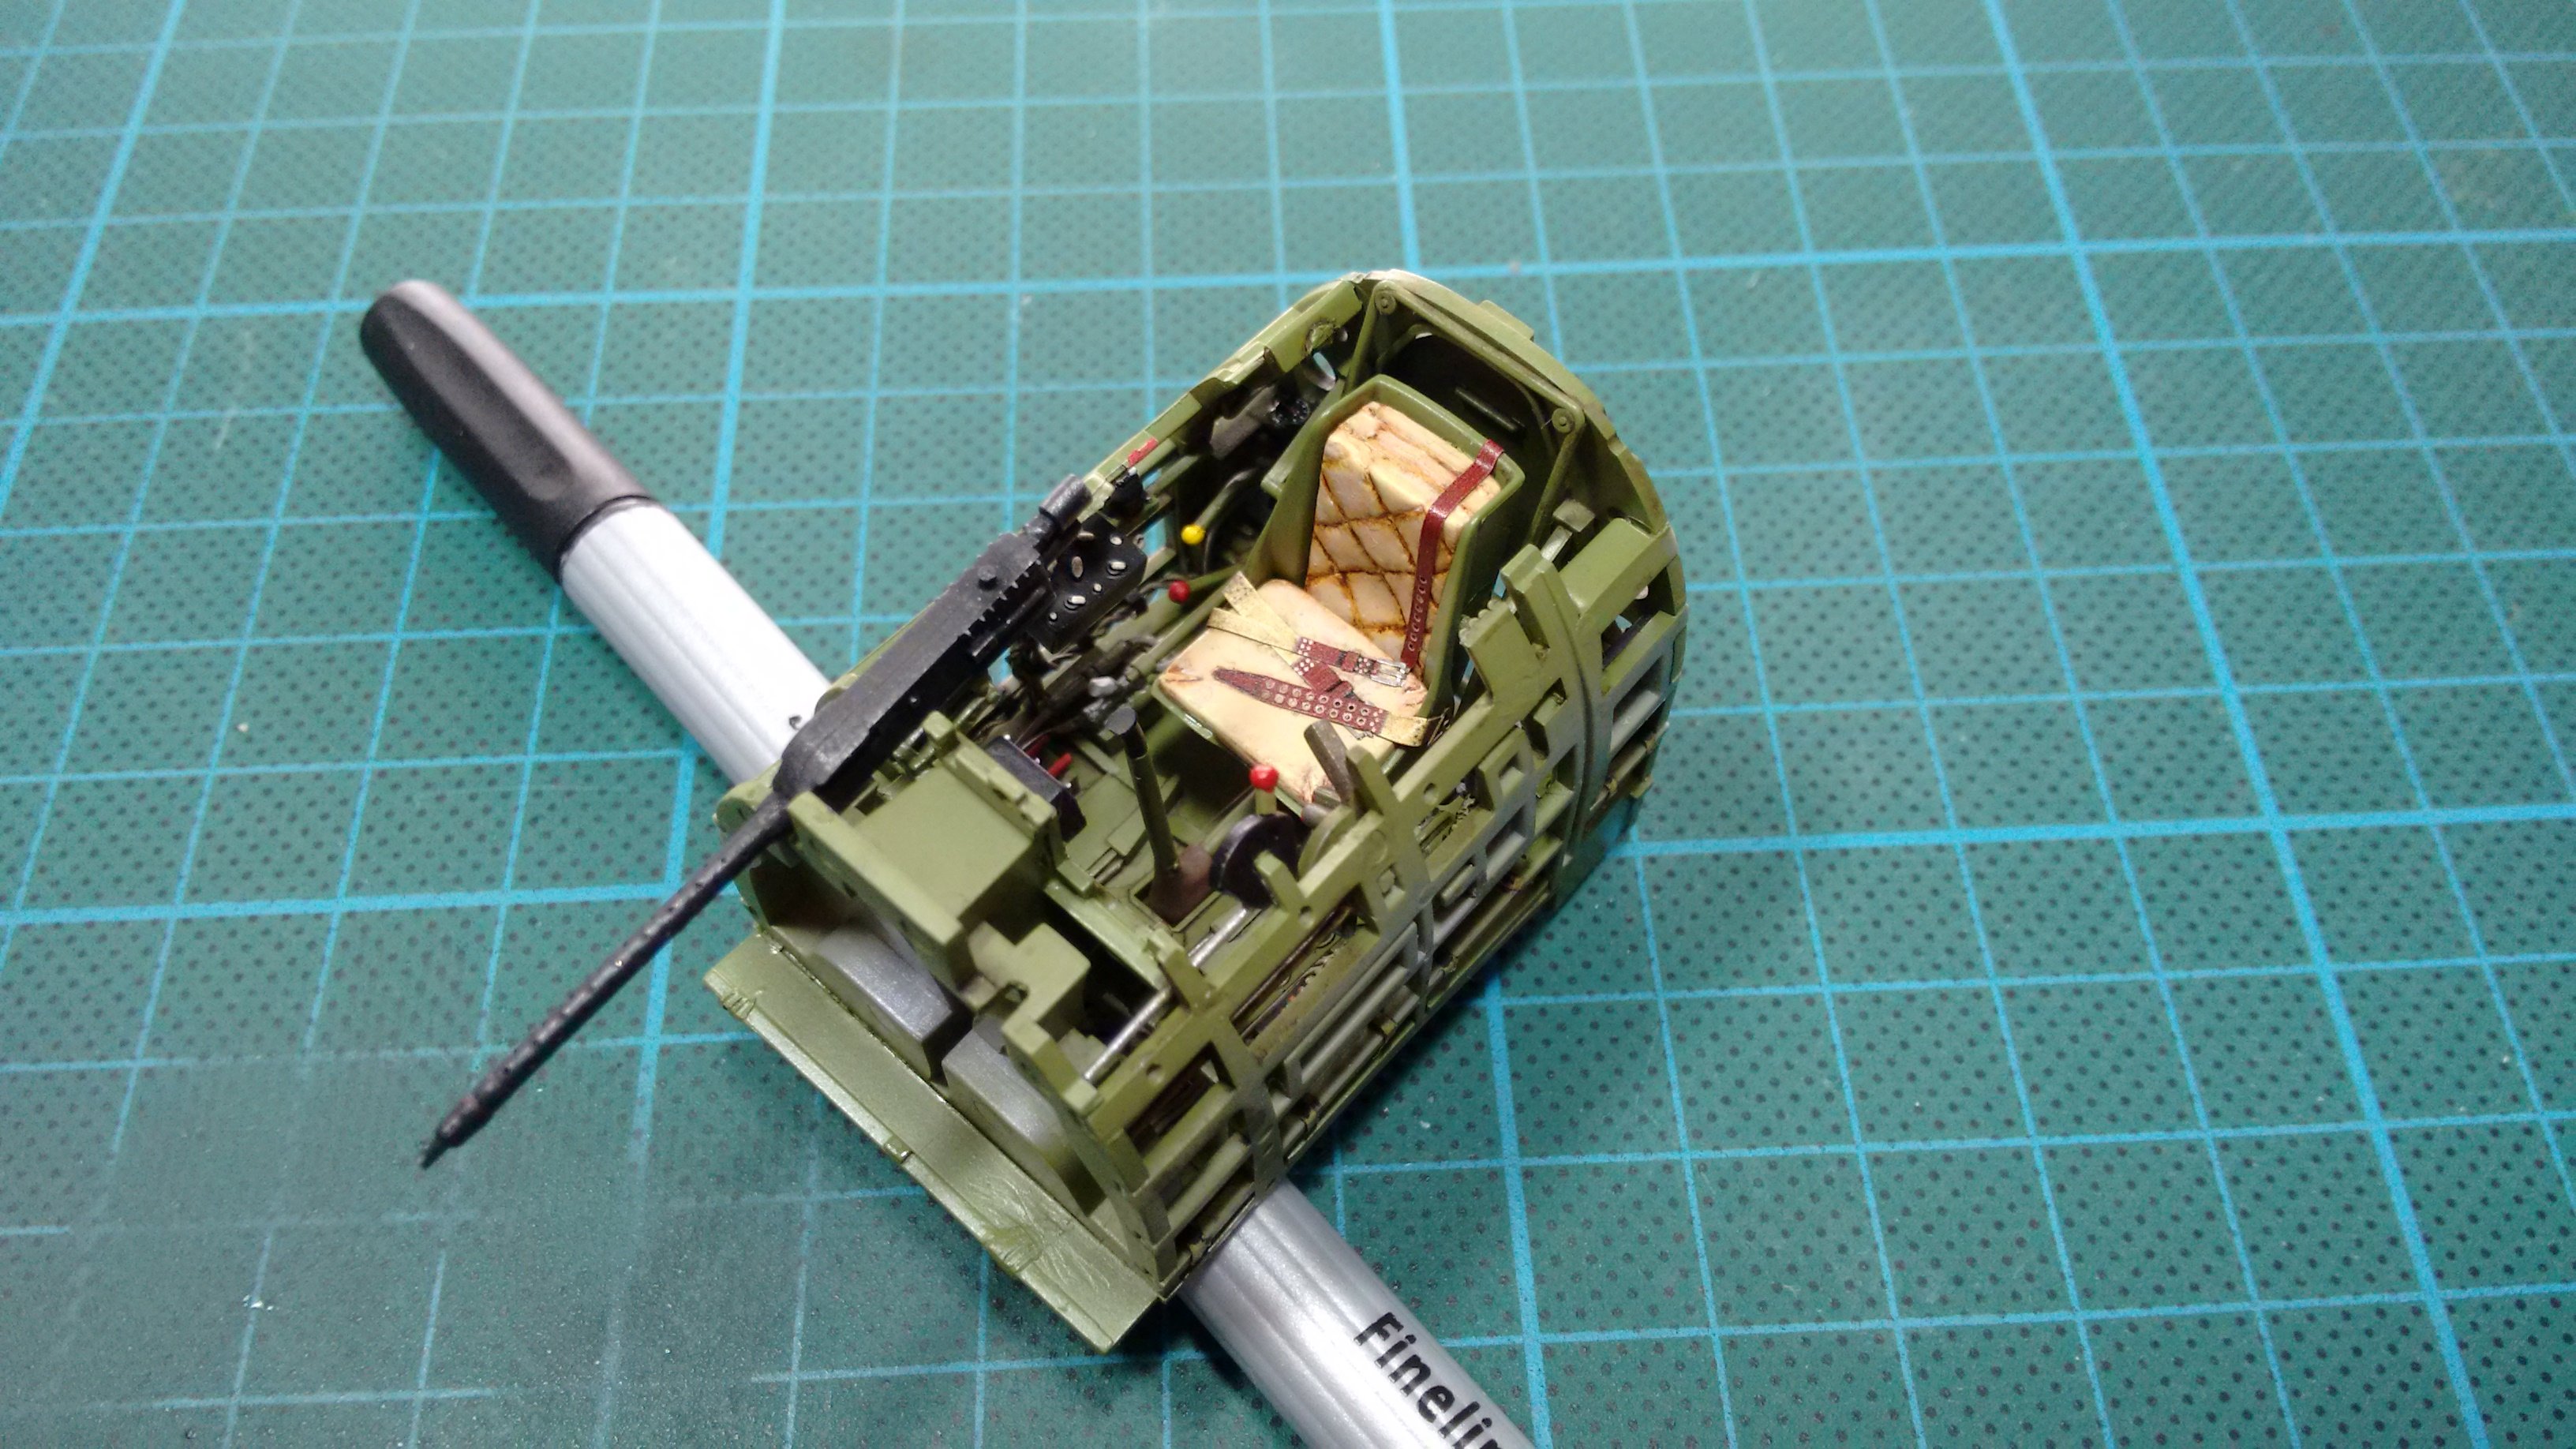
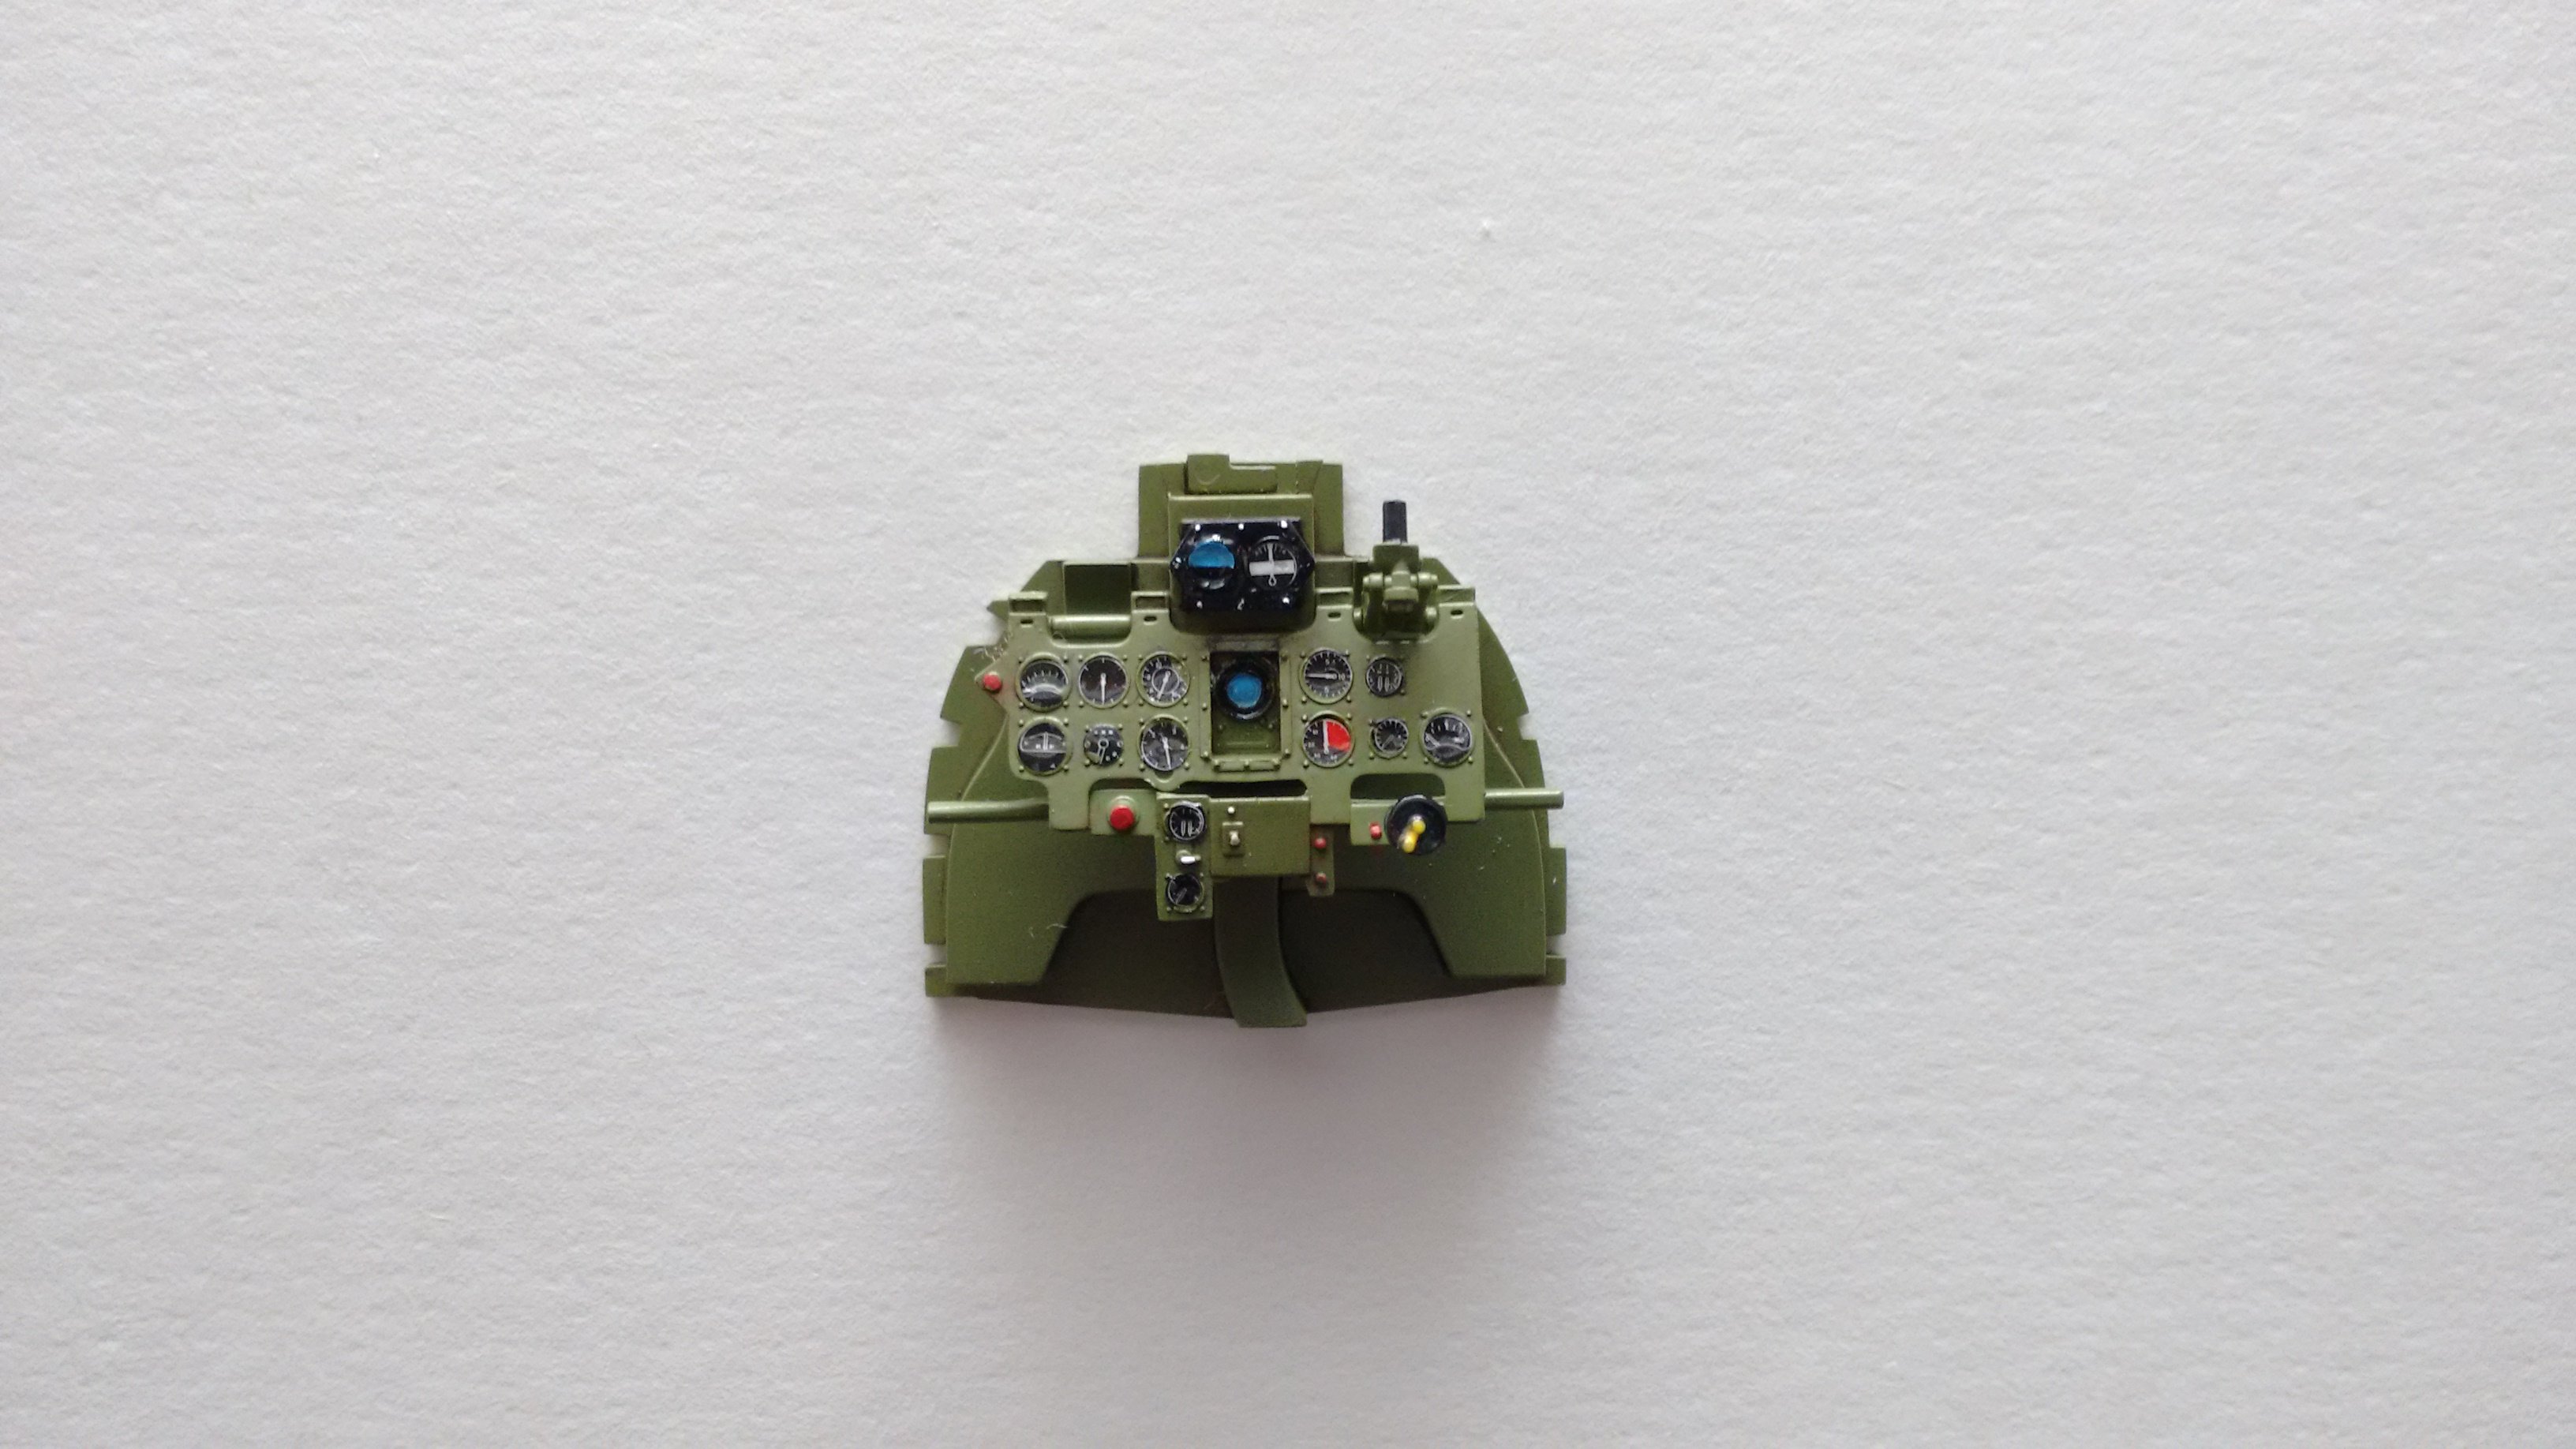
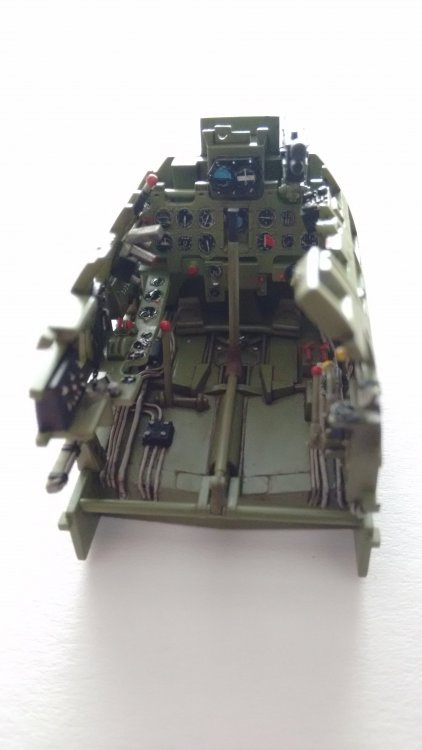
Hi Guy's! Cockpit is ready! I paint it with a mix of Tamiya XF-71 and a good shot of Gunze H-58 to reduce the brightness a little bit. Details where paint with Valejo Acrylics. I've used the dials from the kit, cut them out and placed them one by one to the IP. This is much more work but it looks more convenient imho. At least a washing with Oil's was done. Cherrs!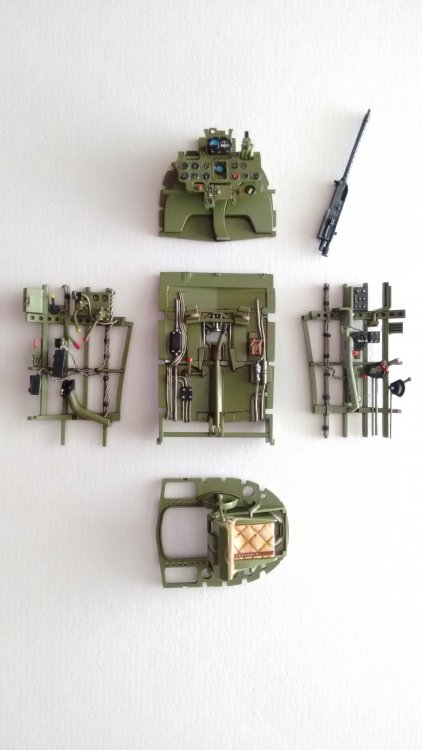


- 30 replies
-
- 11
-

-
Mitsubishi A6M5c Zero Type 52 1/32 Hasegawa
Sturmbock replied to Sturmbock's topic in LSM 1/35 and Larger Work In Progress
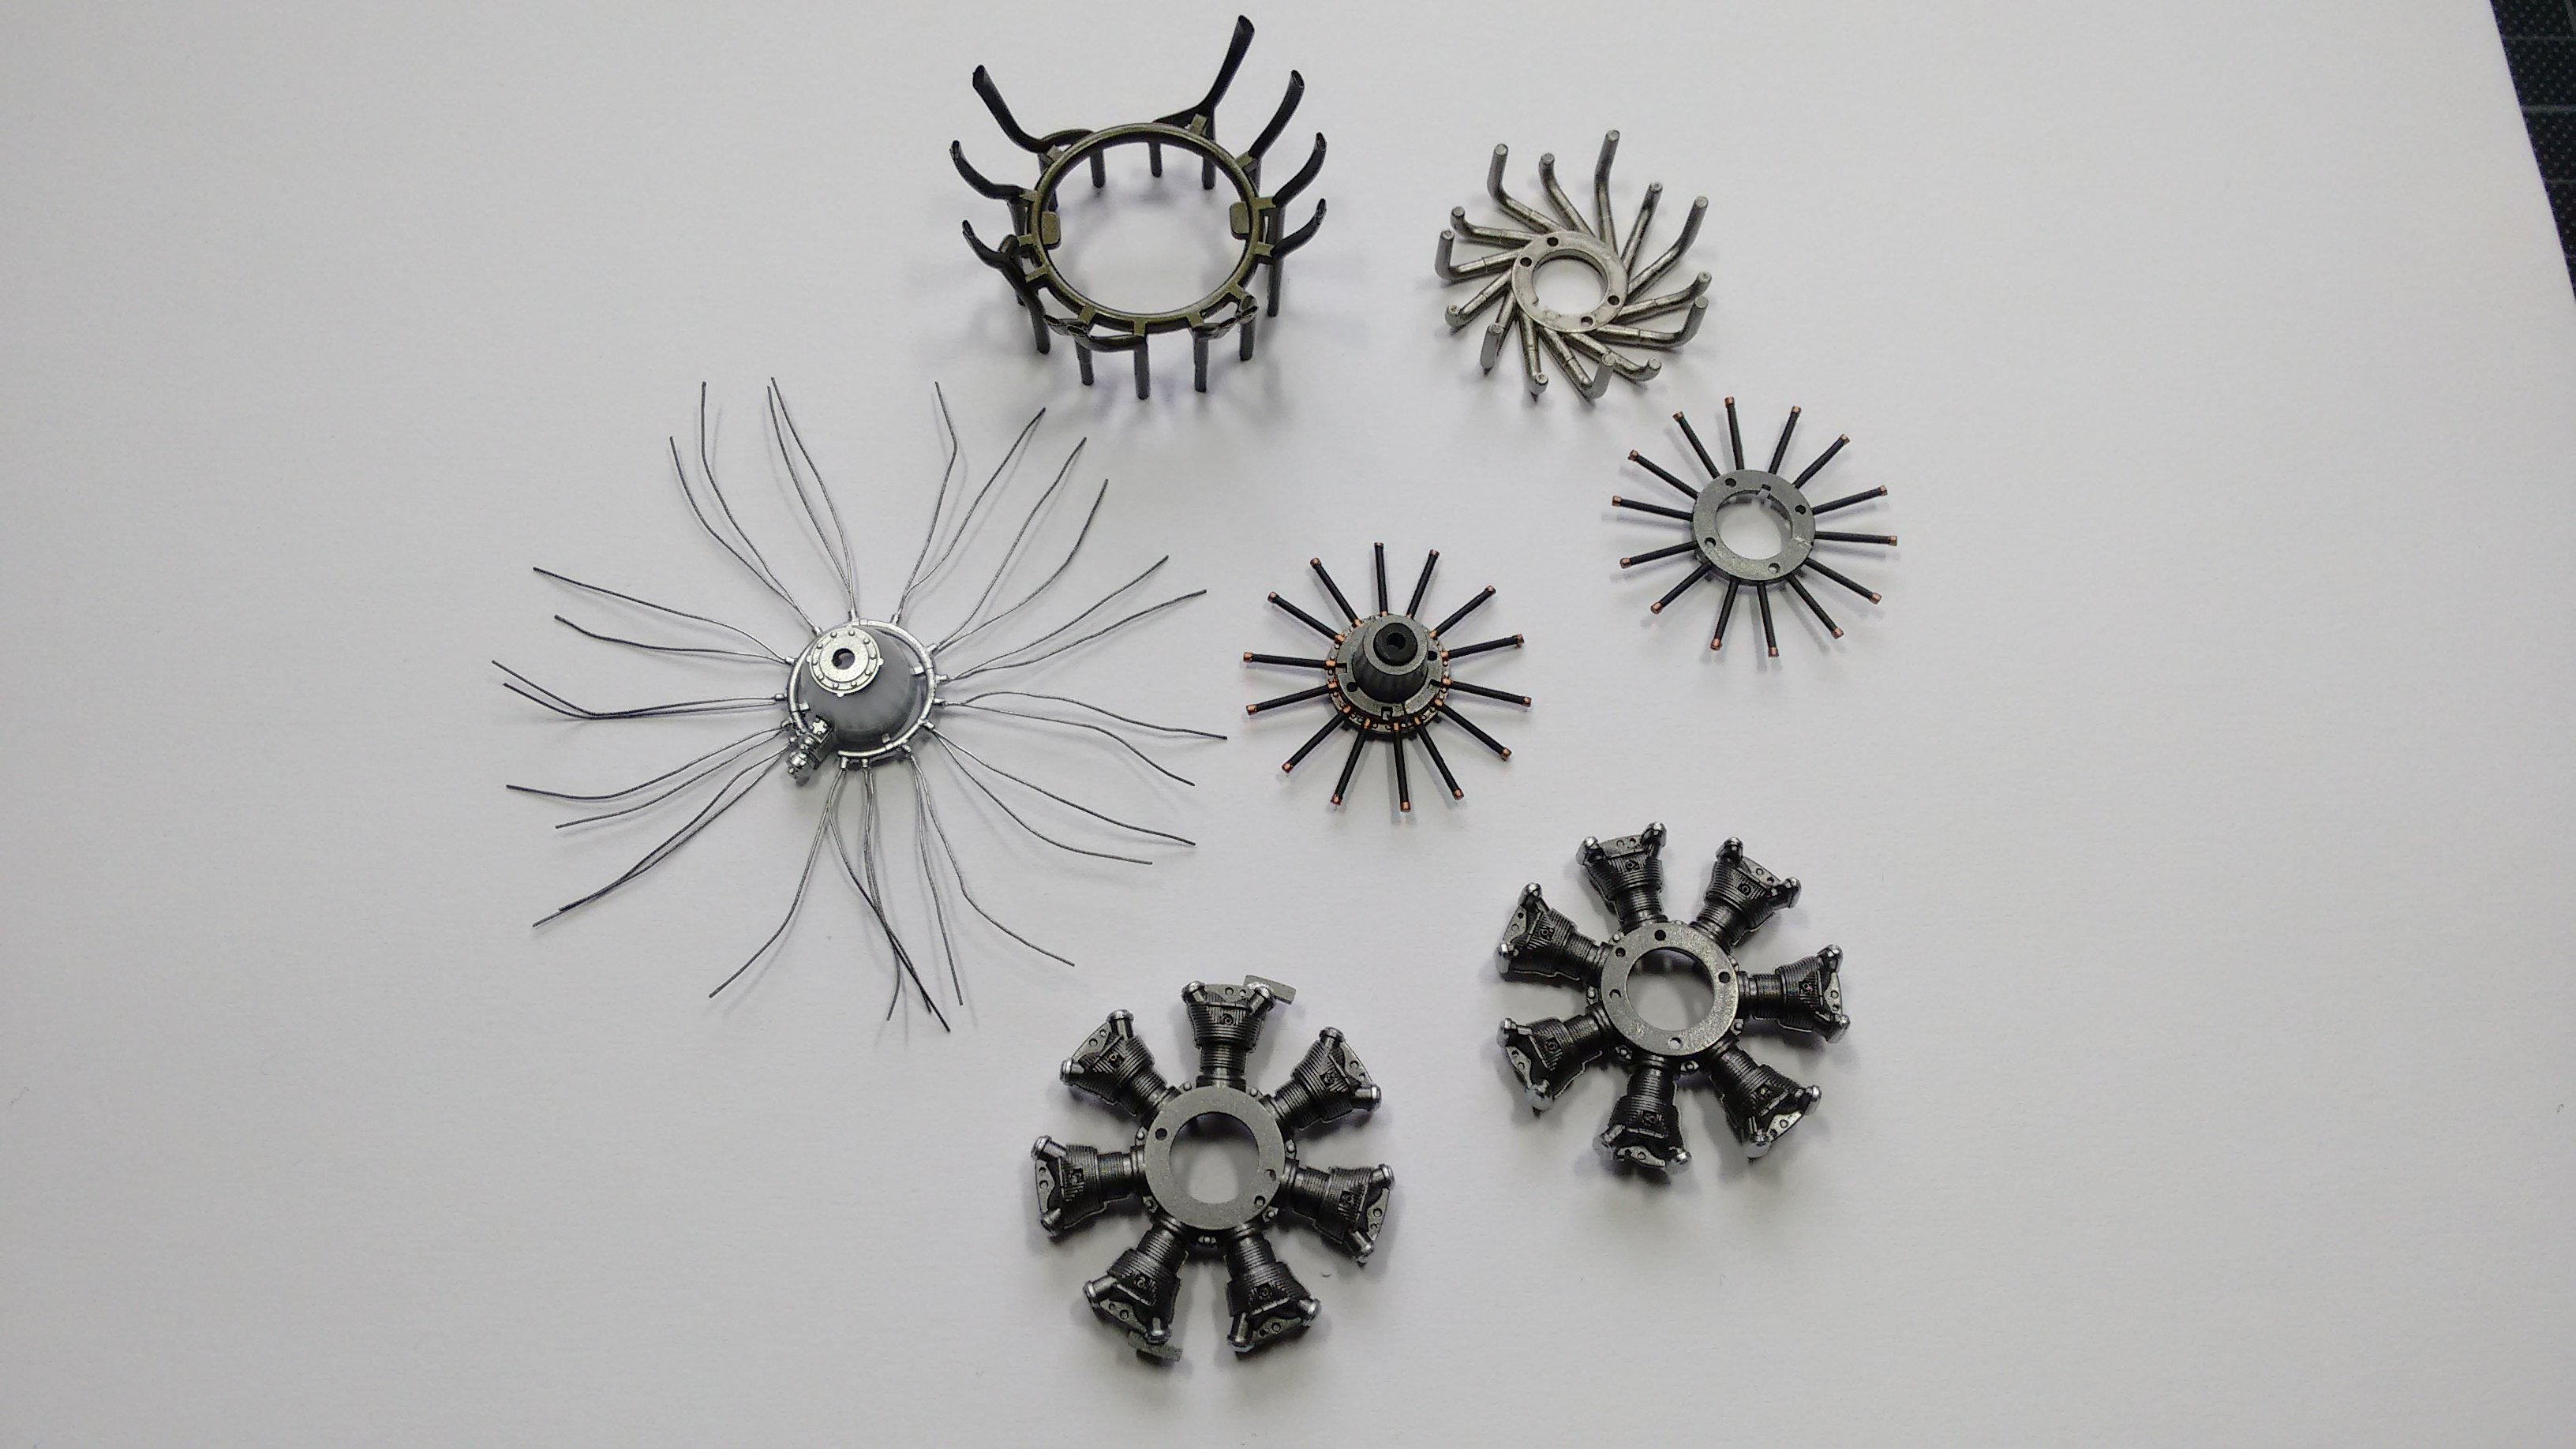
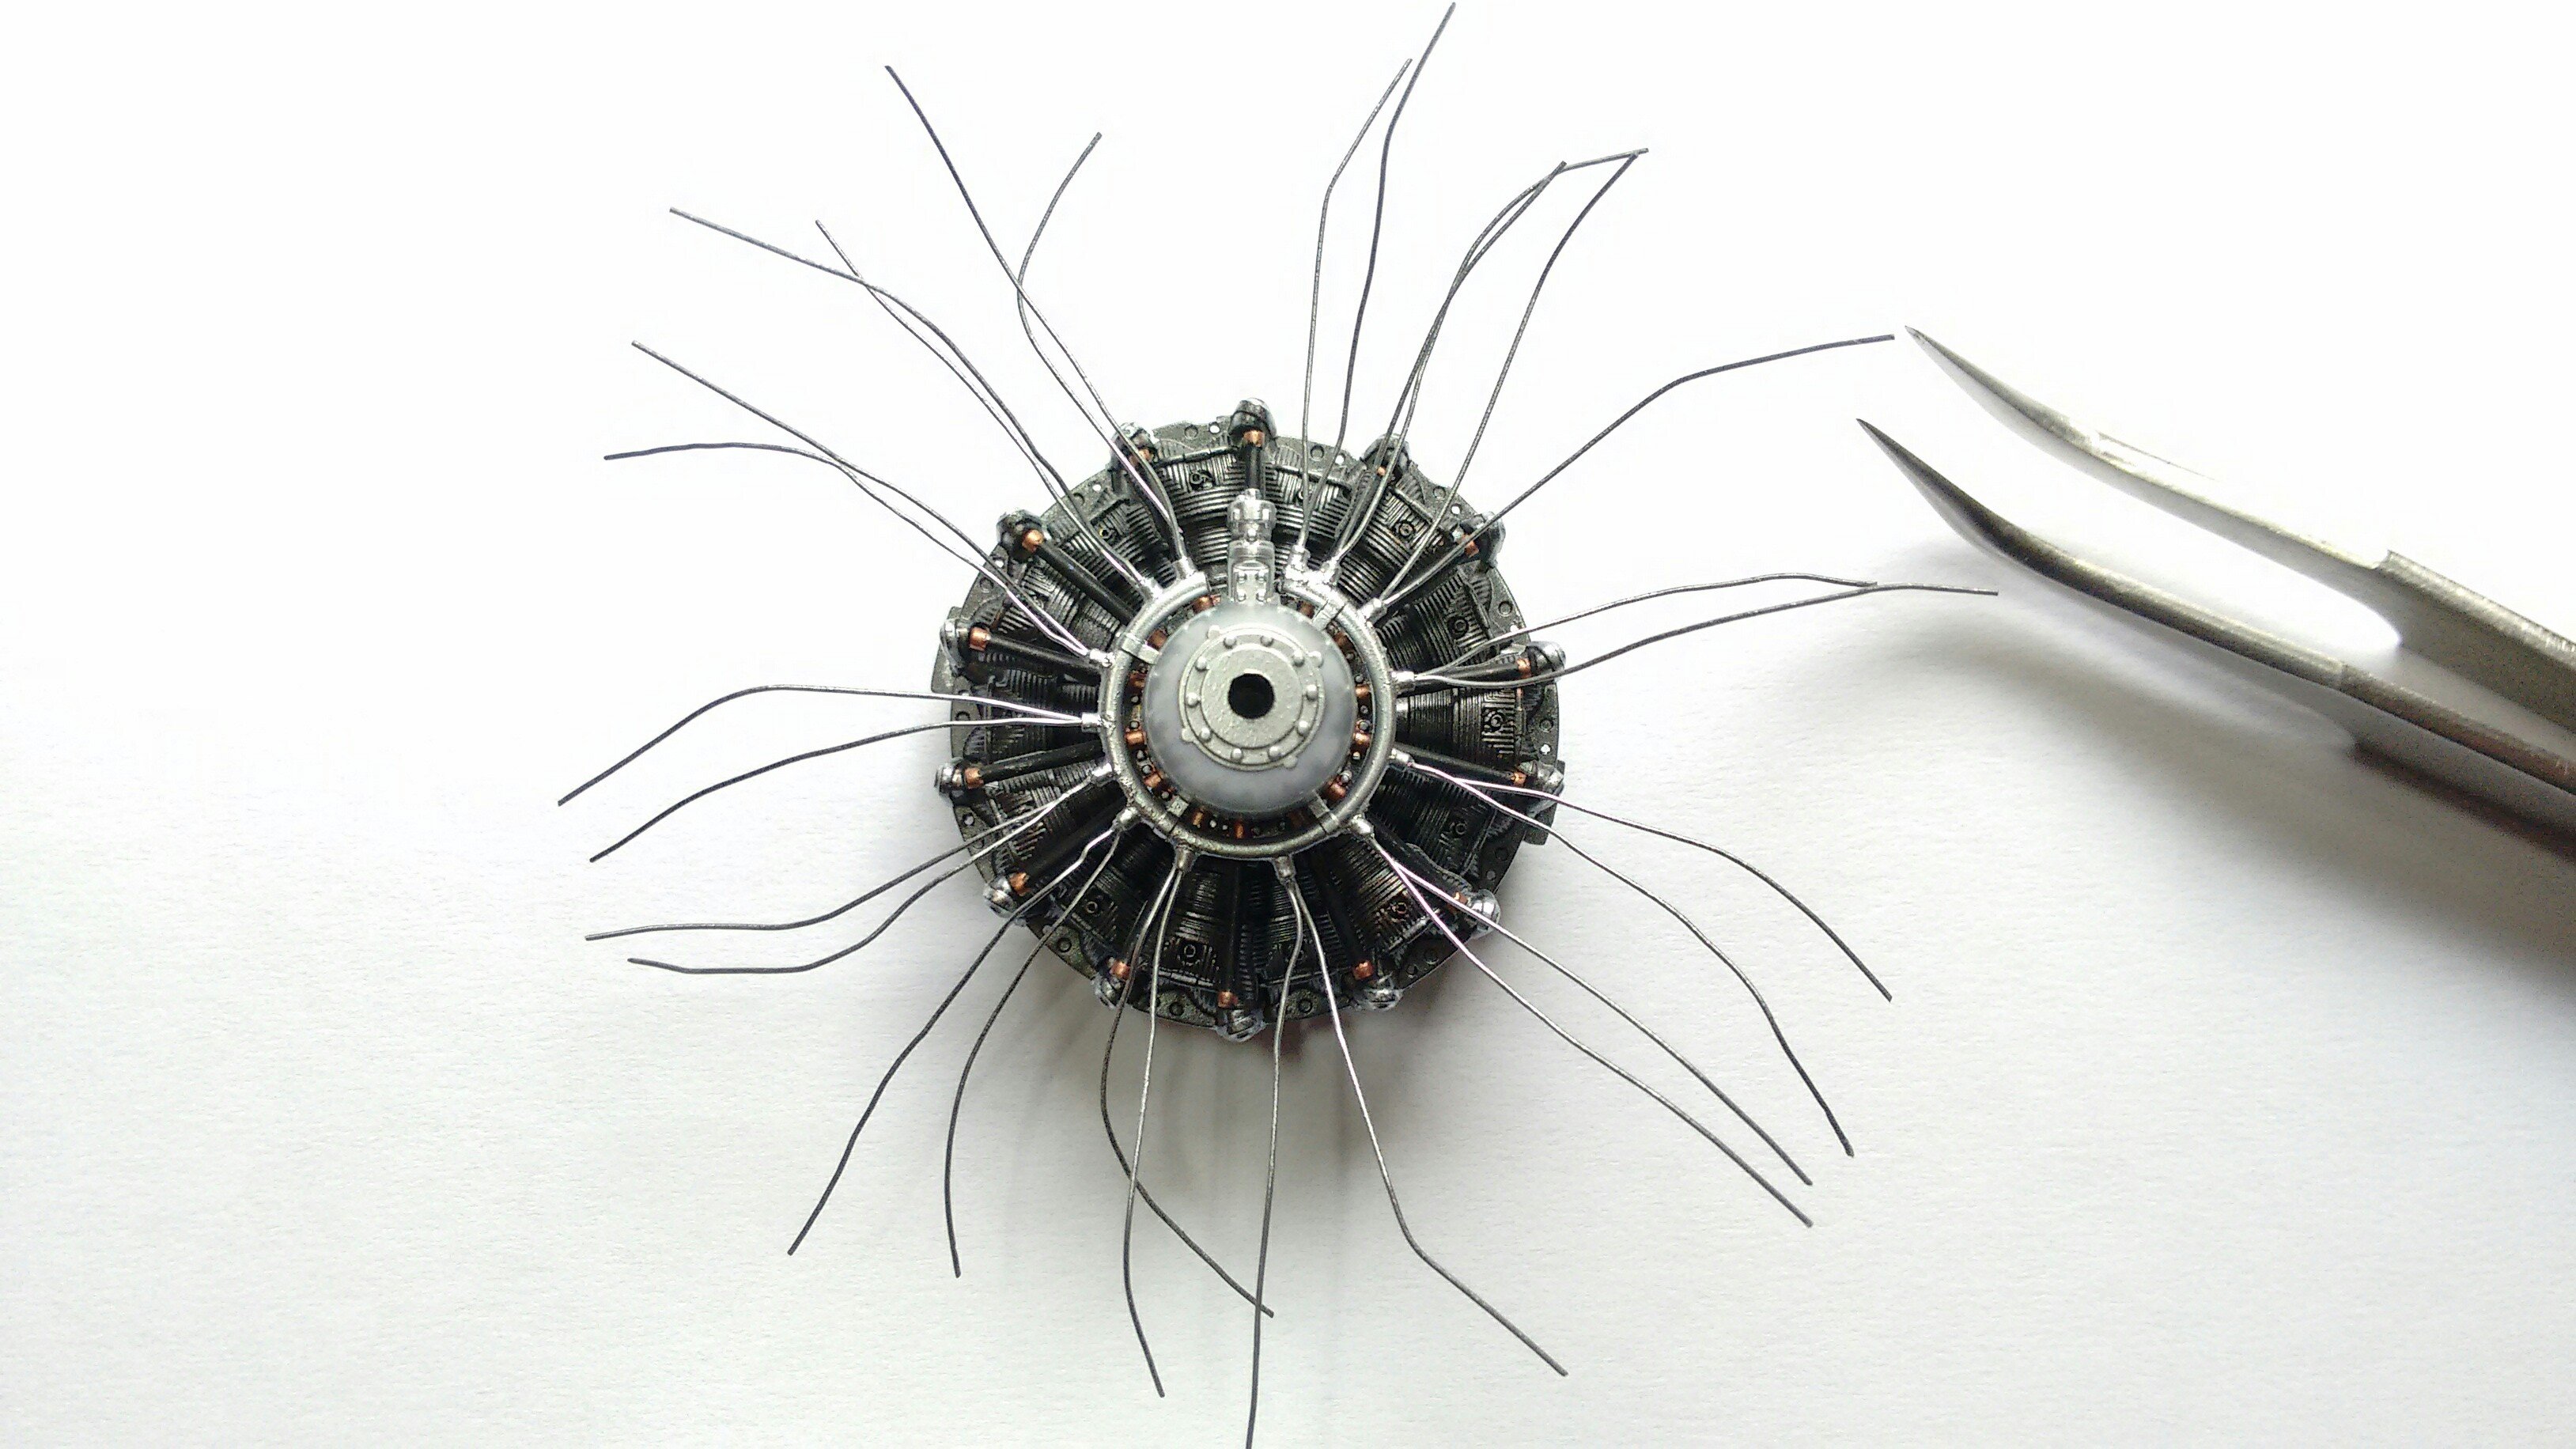
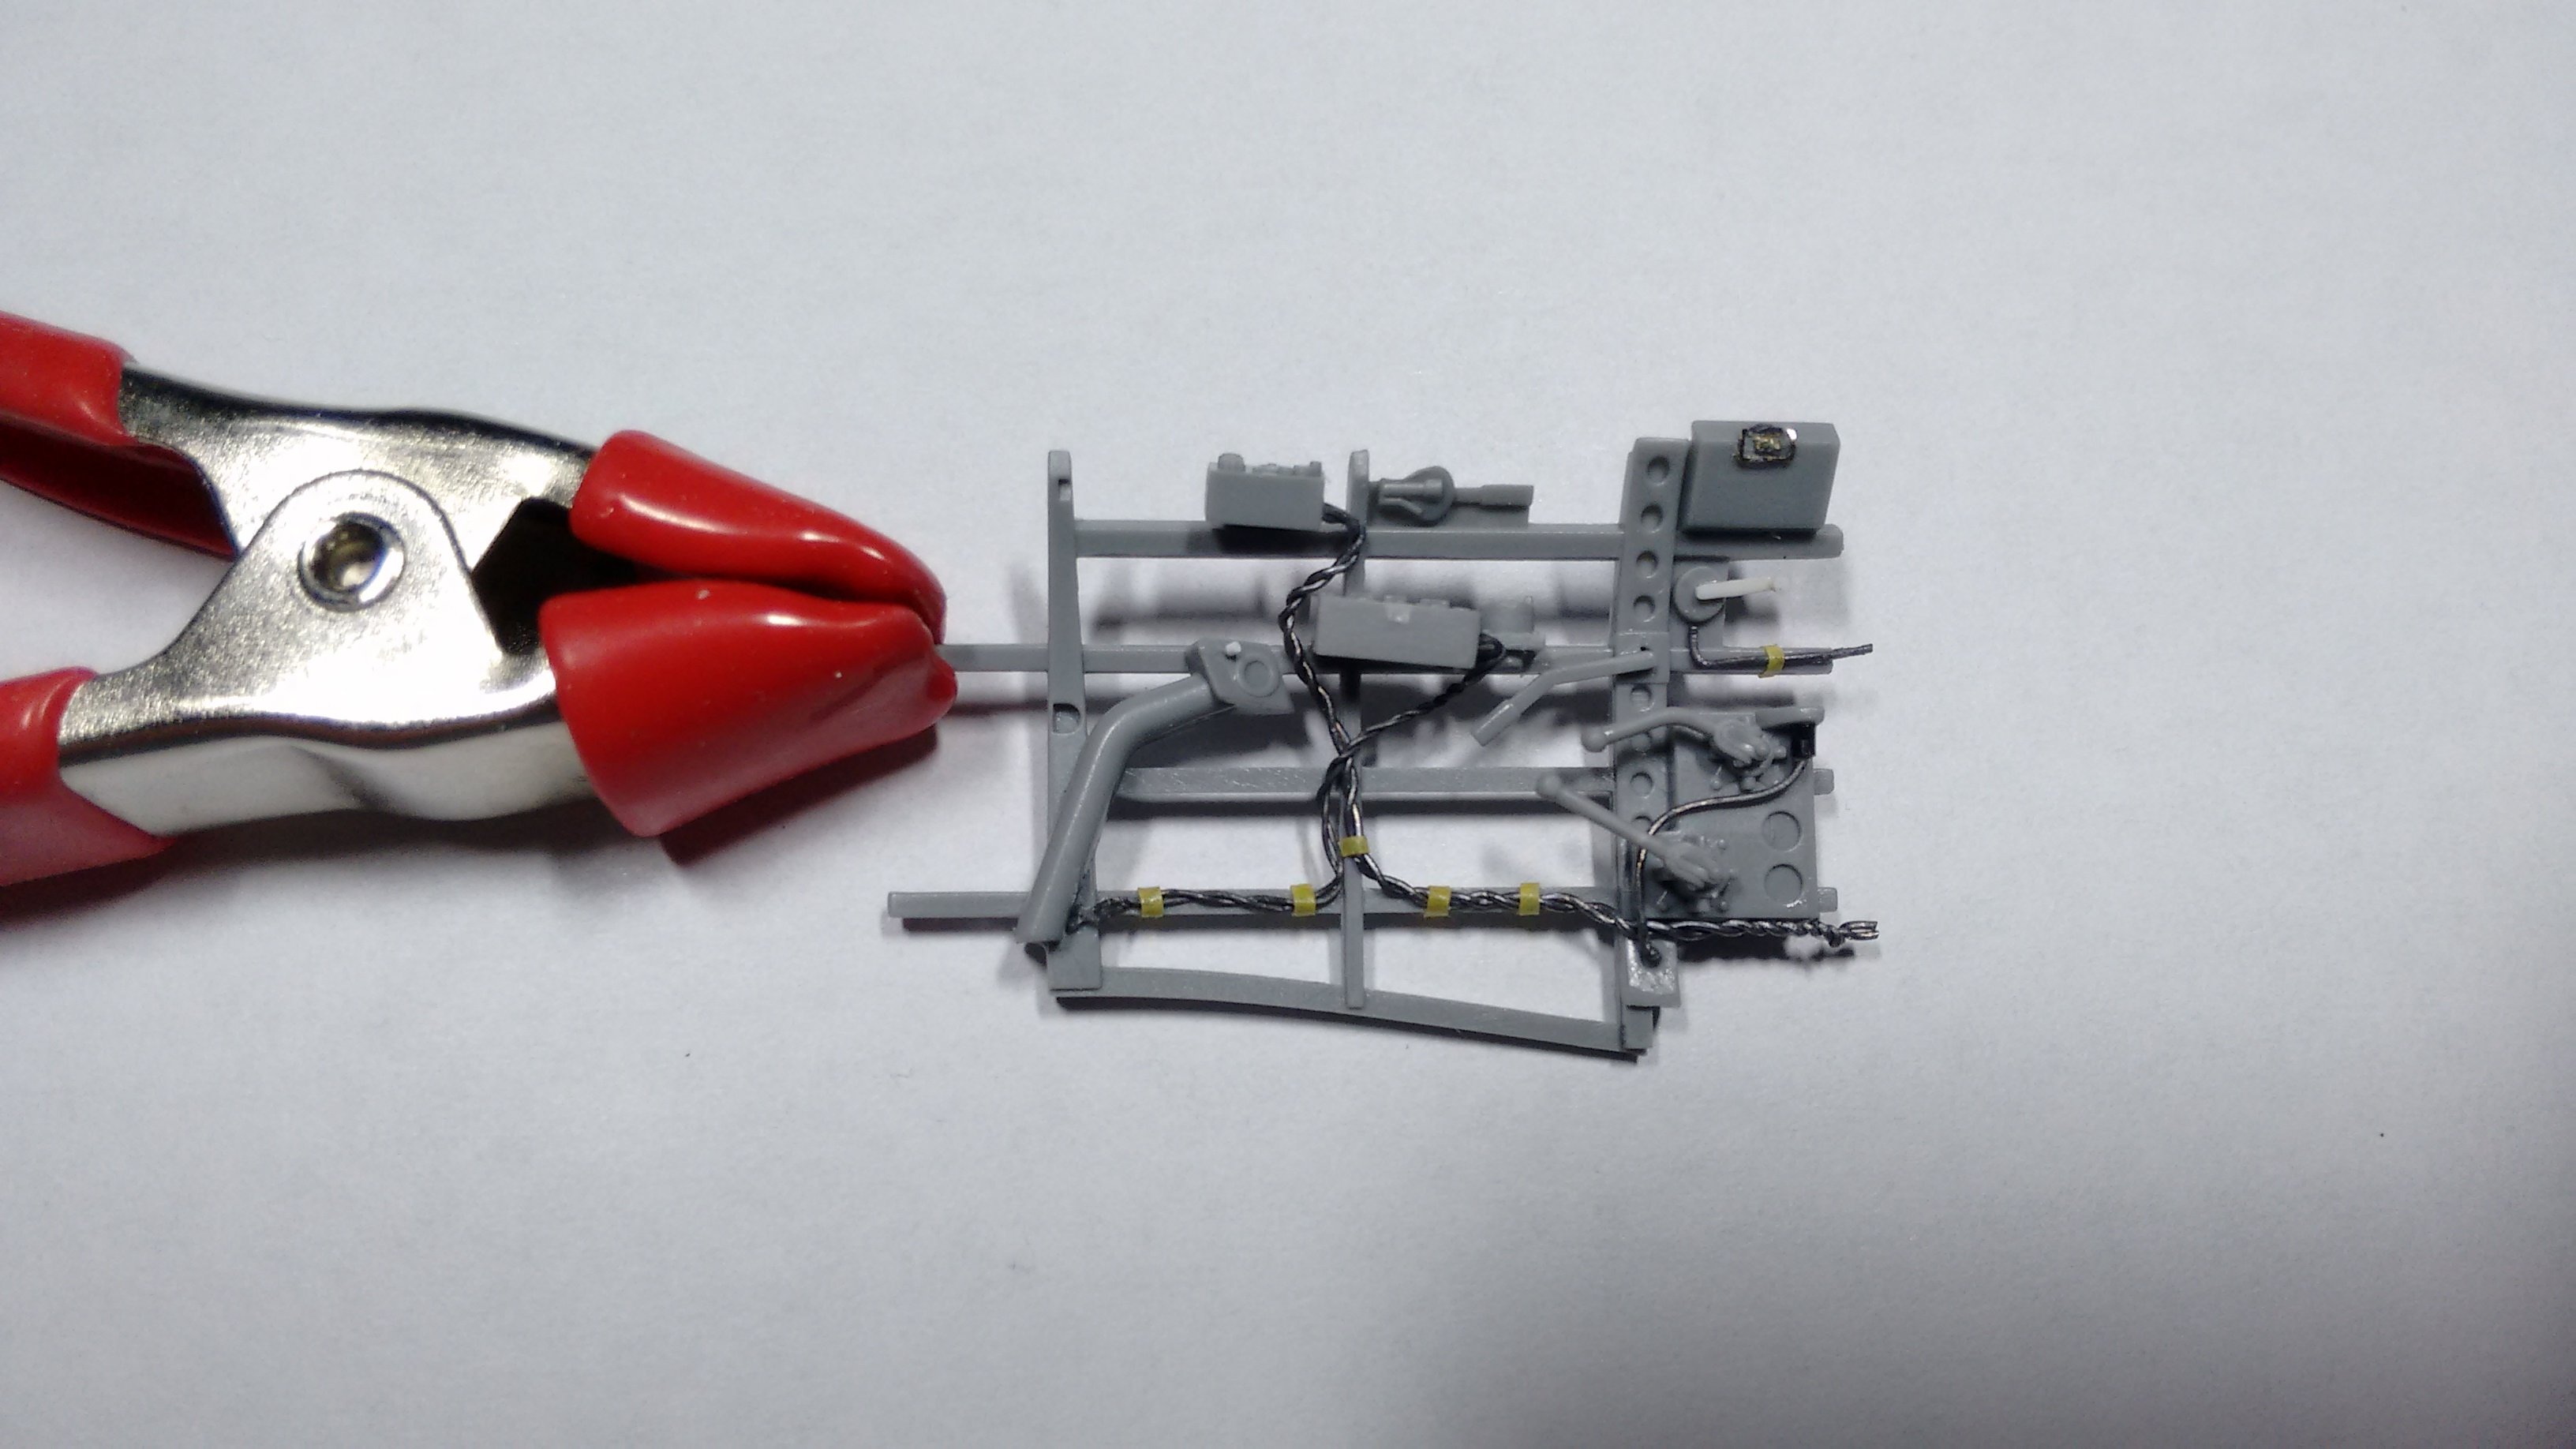
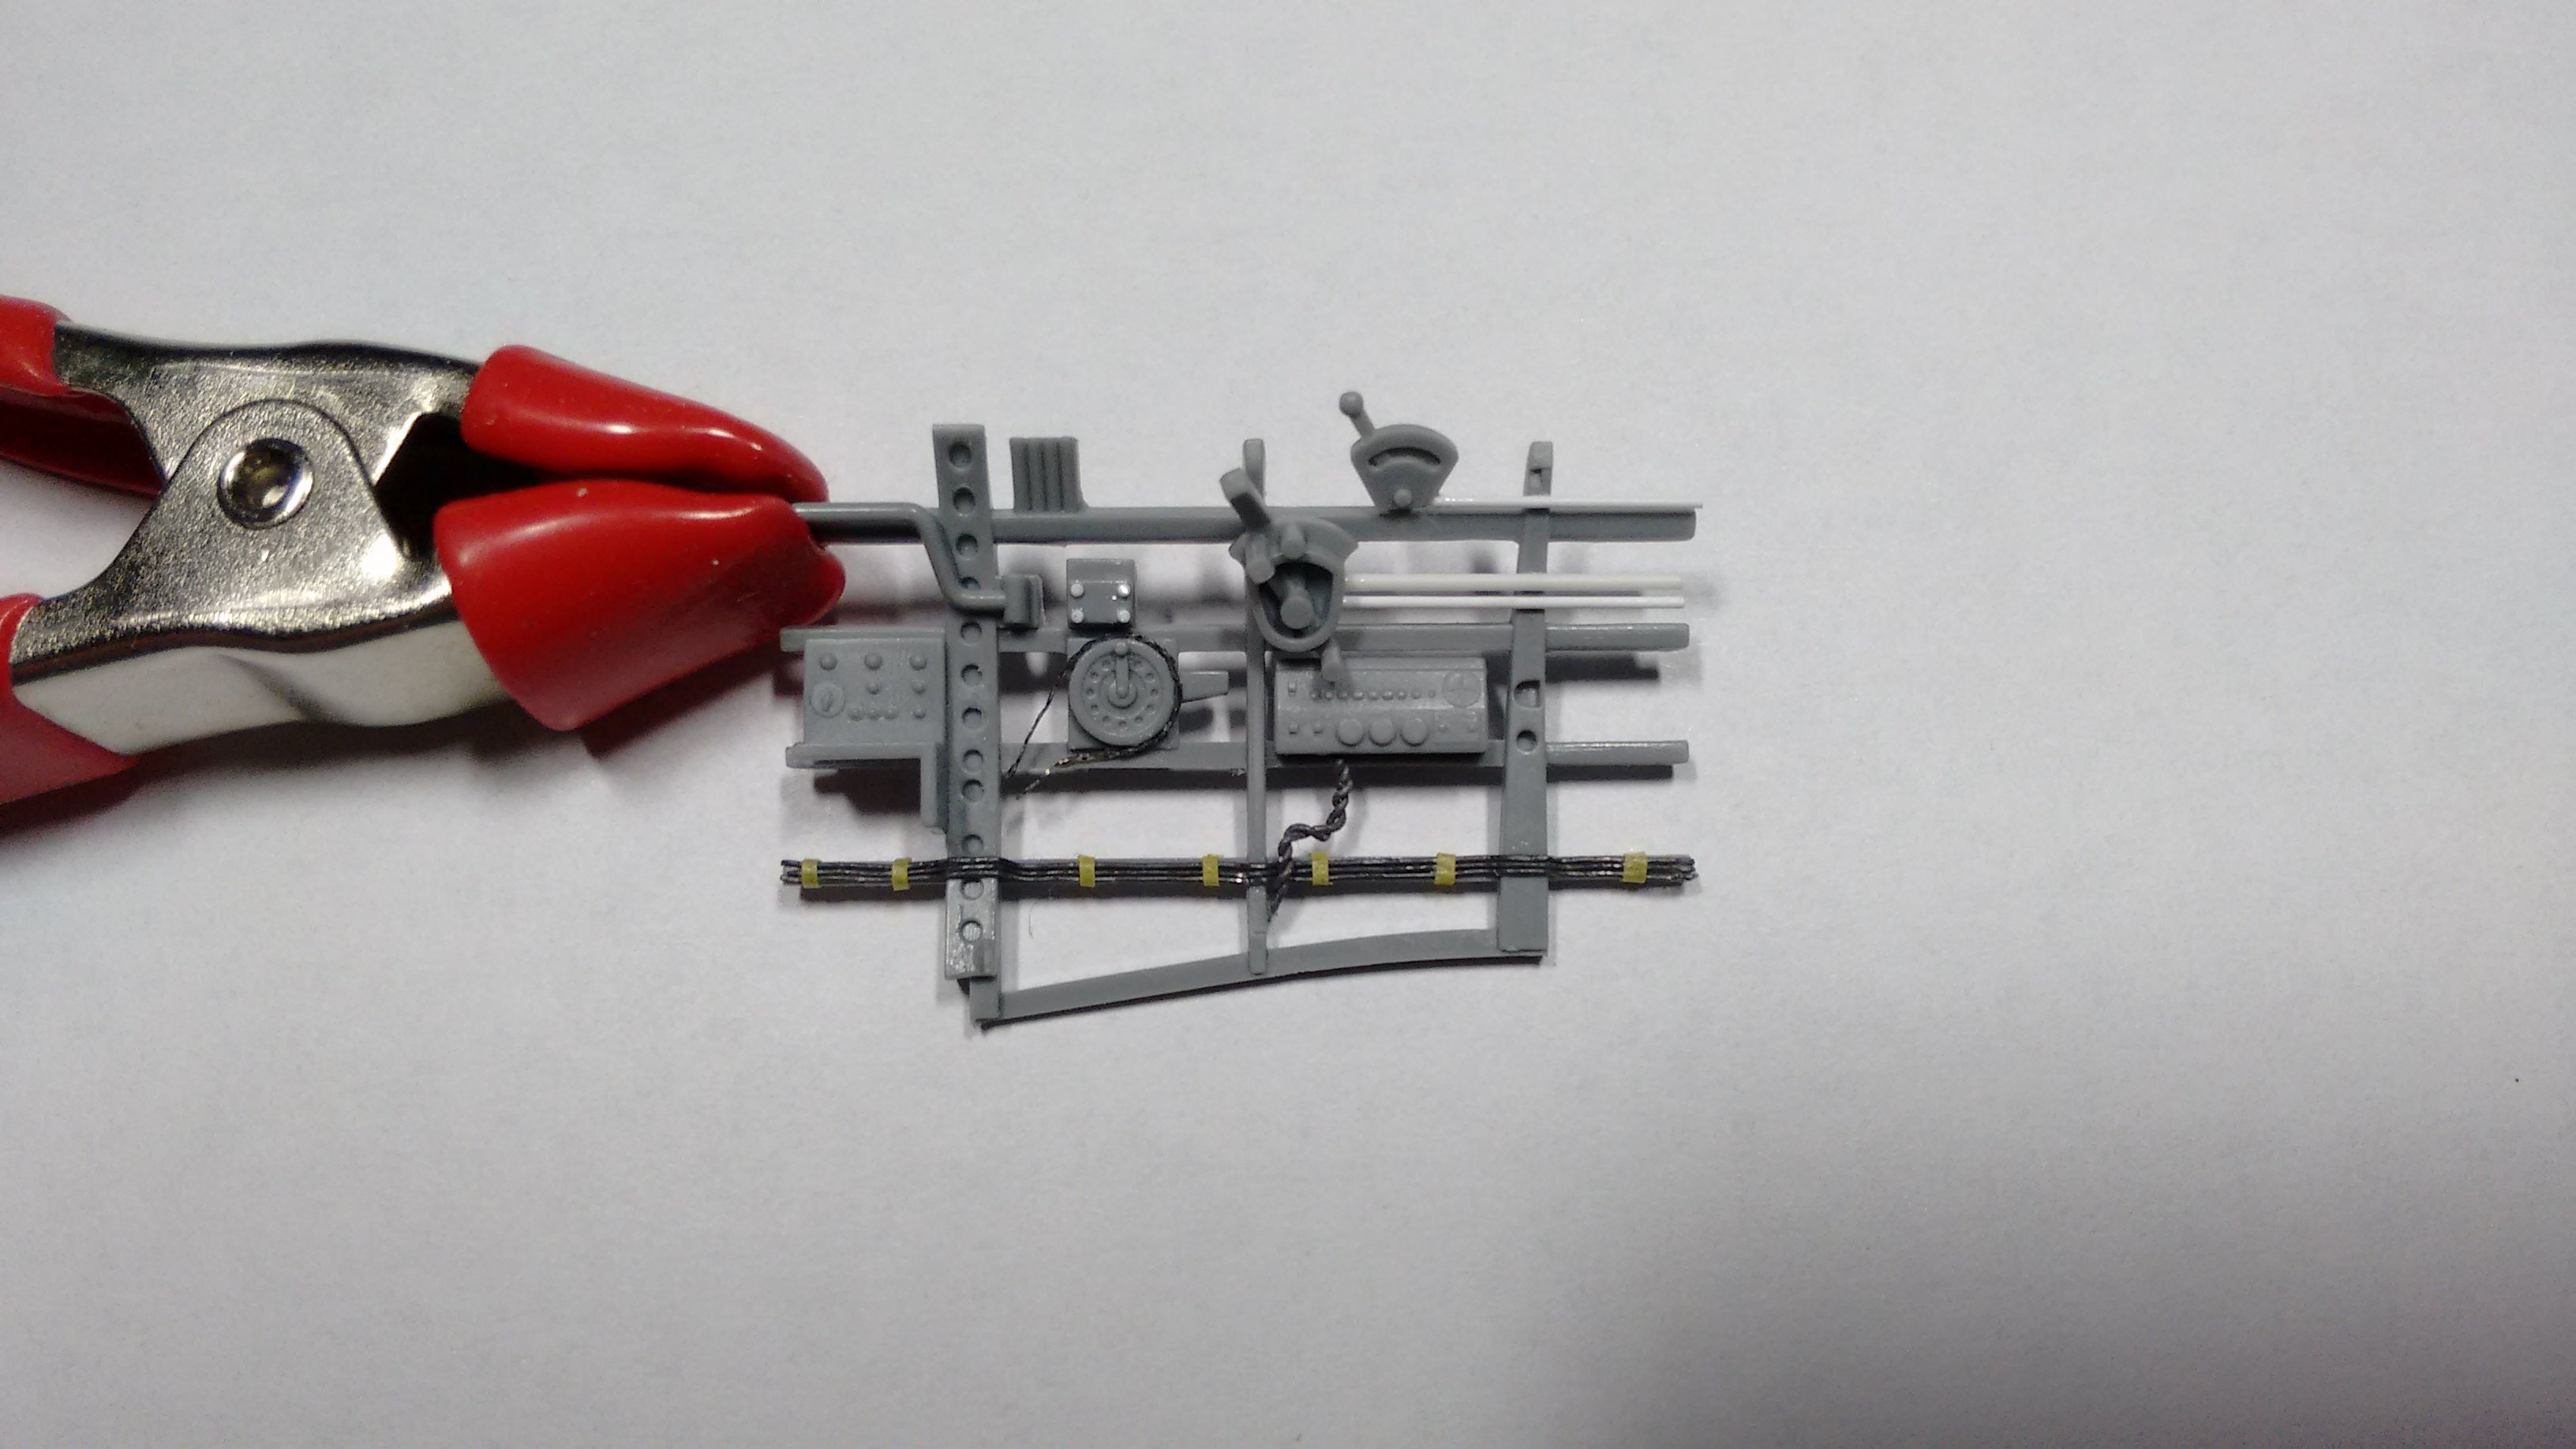
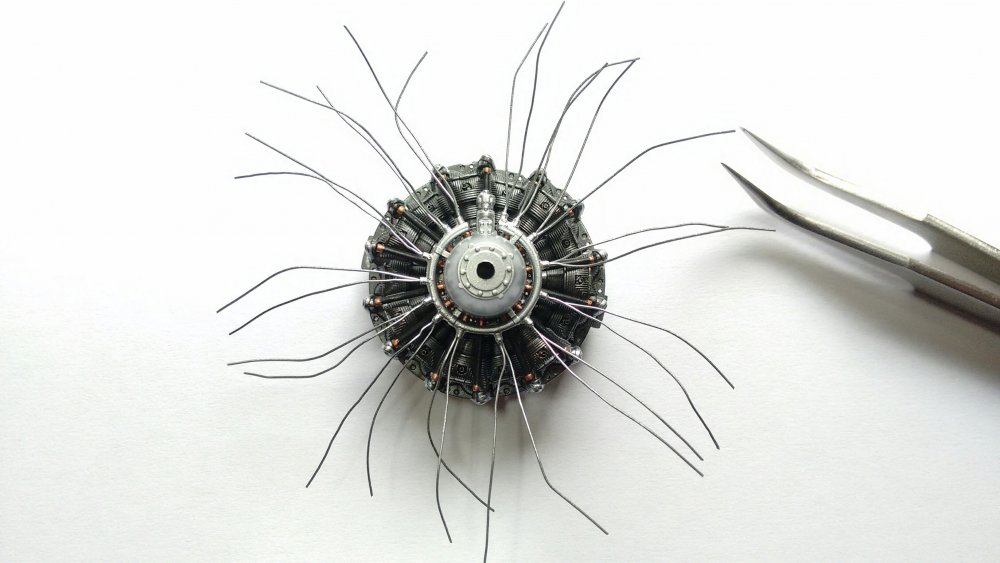
Hi Guy's Beeing very lazy the past days, I managed to do some Ignition wiring on the Sakae today! Not much but....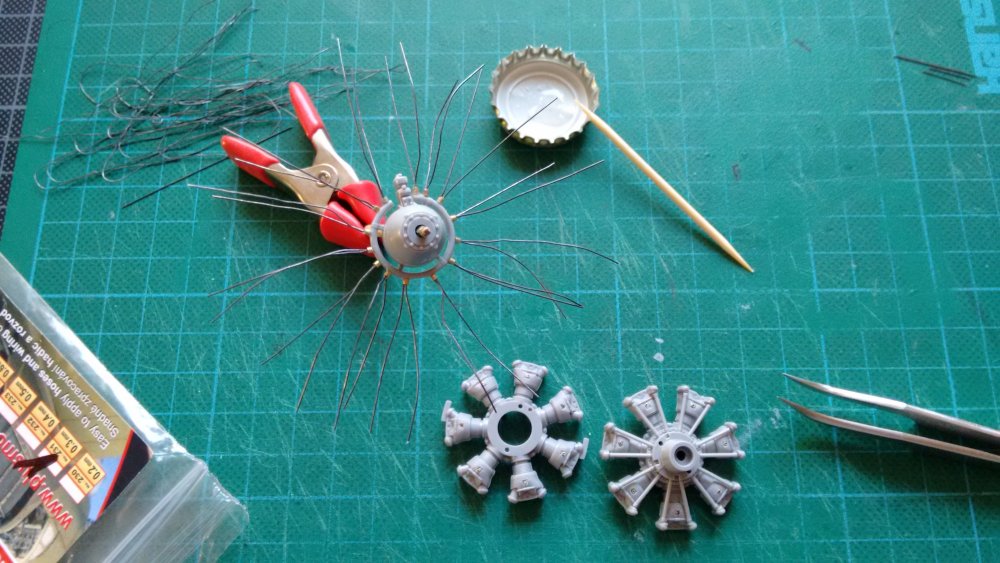
-
Mitsubishi A6M5c Zero Type 52 1/32 Hasegawa
Sturmbock replied to Sturmbock's topic in LSM 1/35 and Larger Work In Progress
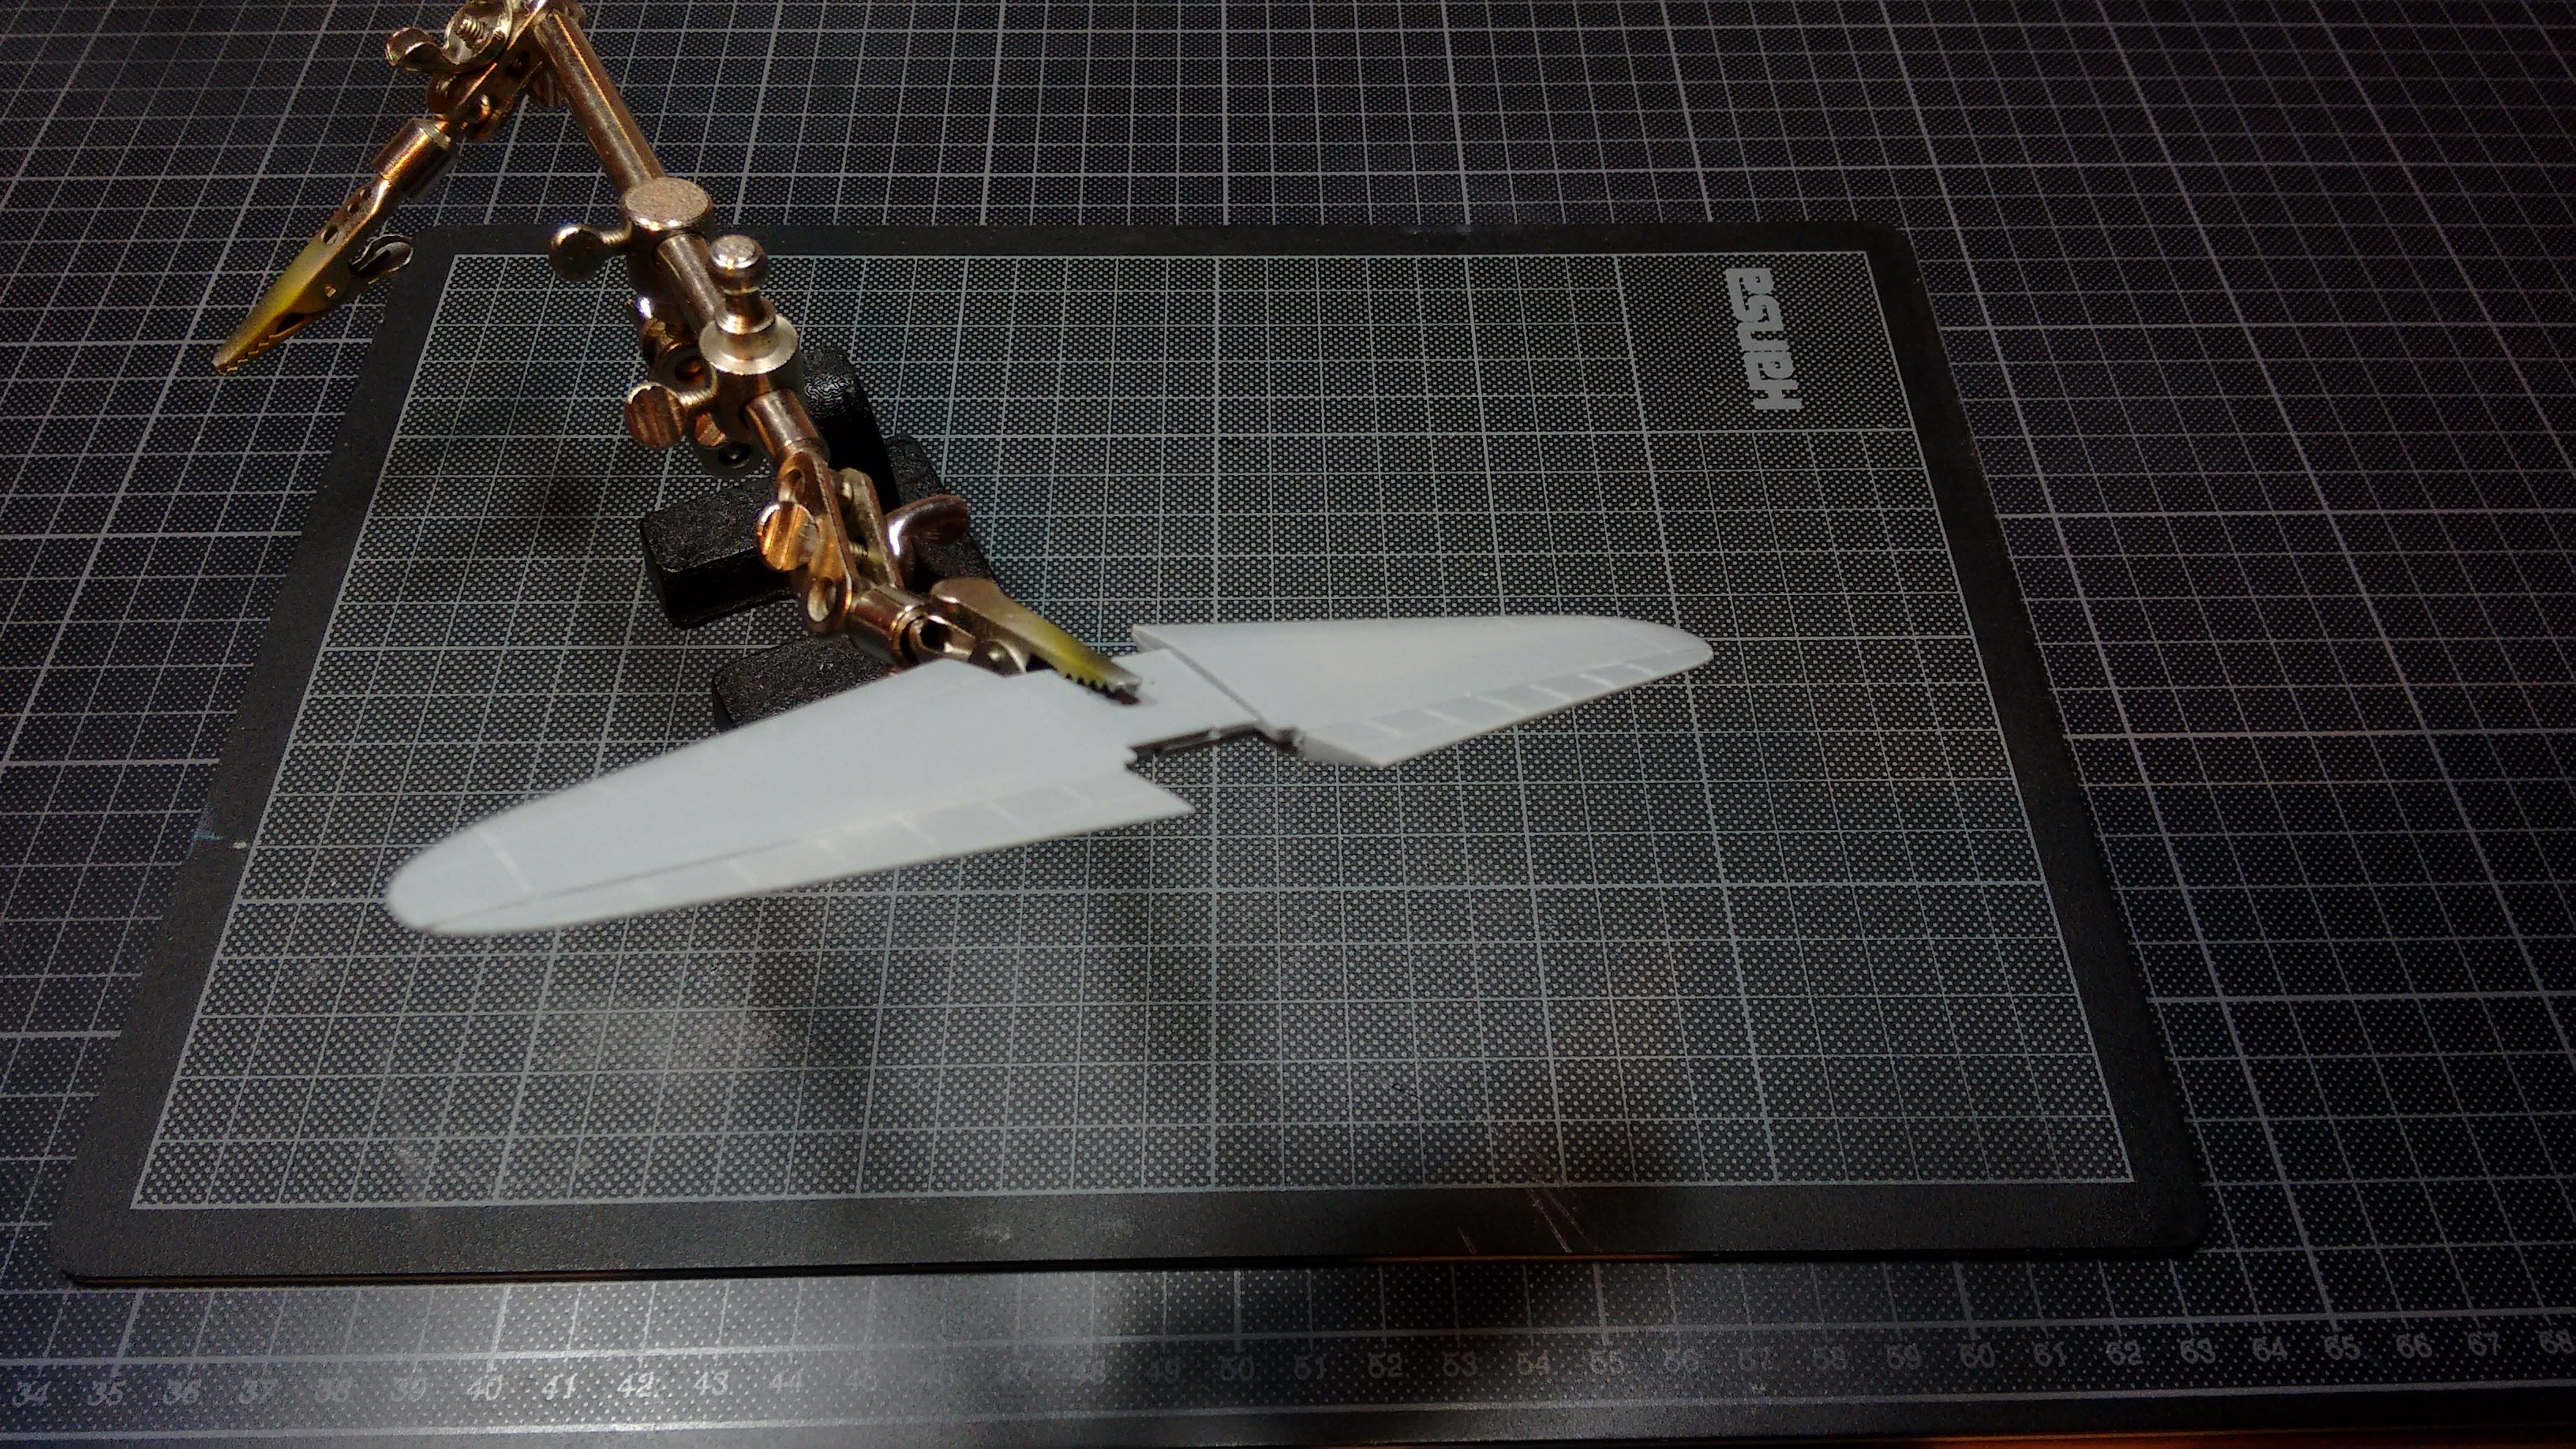
Hahaha, no guys! It's only a new cutting mat because I managed to spill my Tamiya cement all over it... Thanks all! -
Mitsubishi A6M5c Zero Type 52 1/32 Hasegawa
Sturmbock replied to Sturmbock's topic in LSM 1/35 and Larger Work In Progress
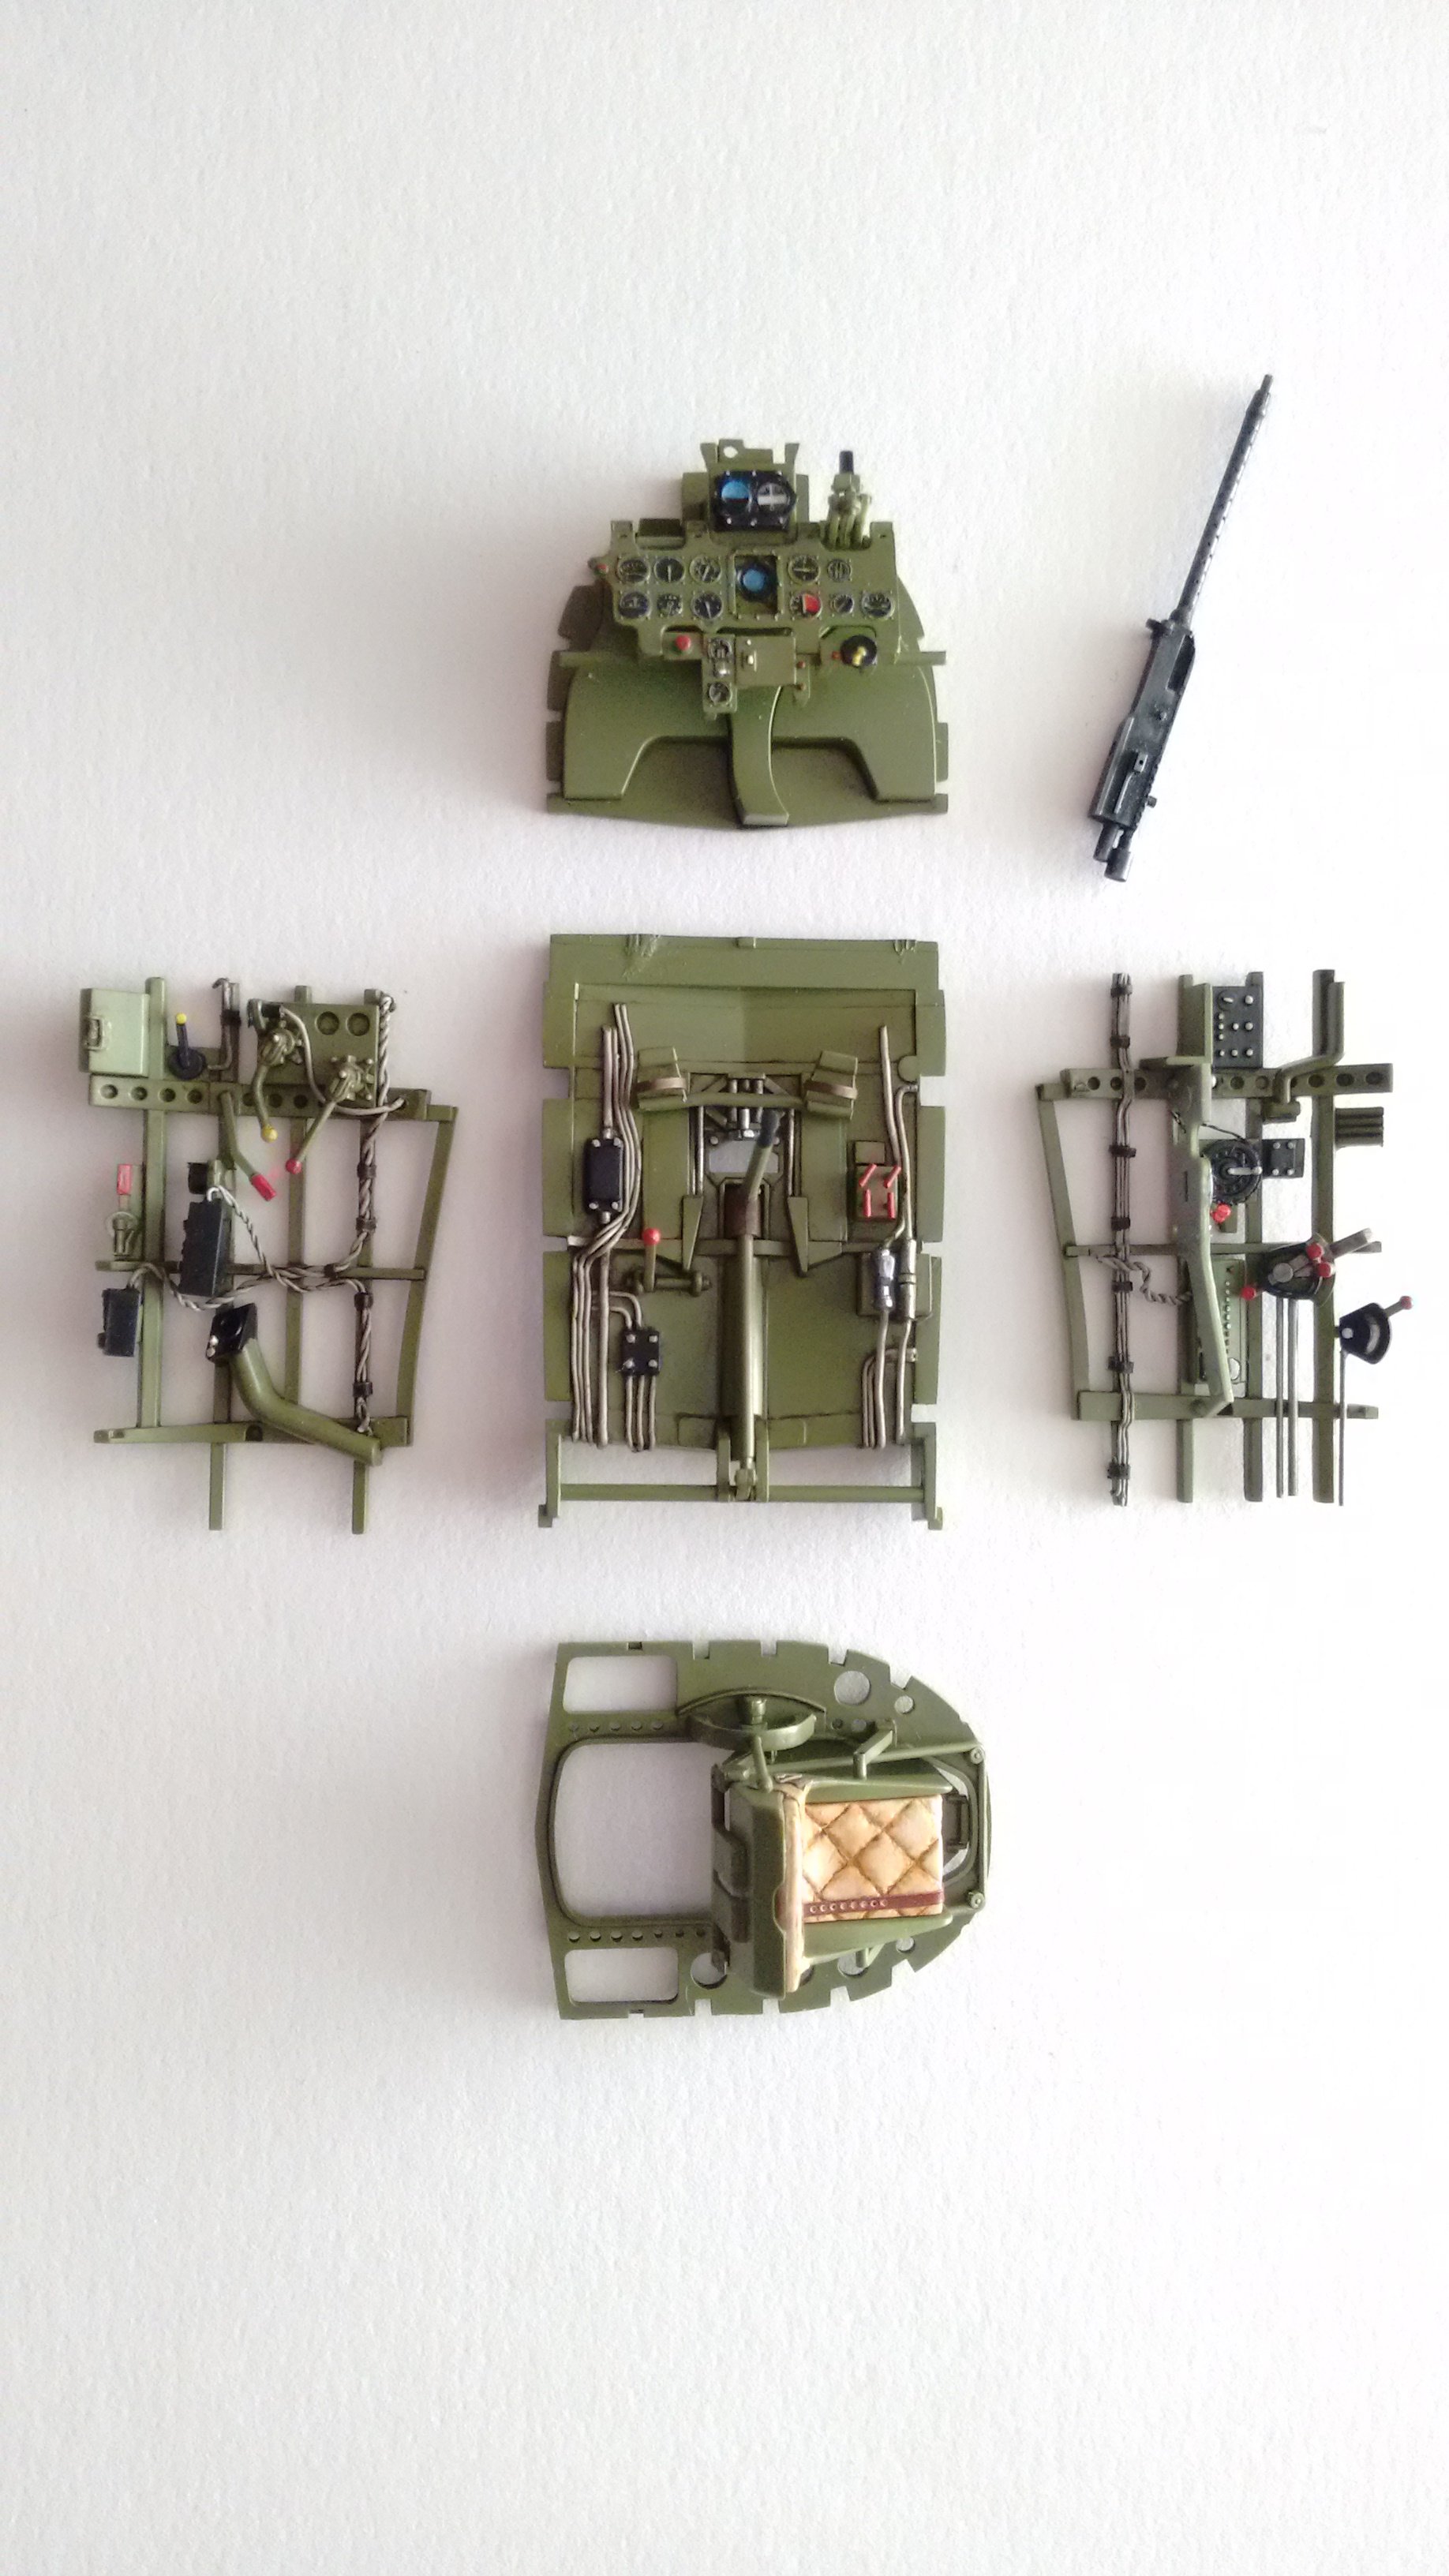
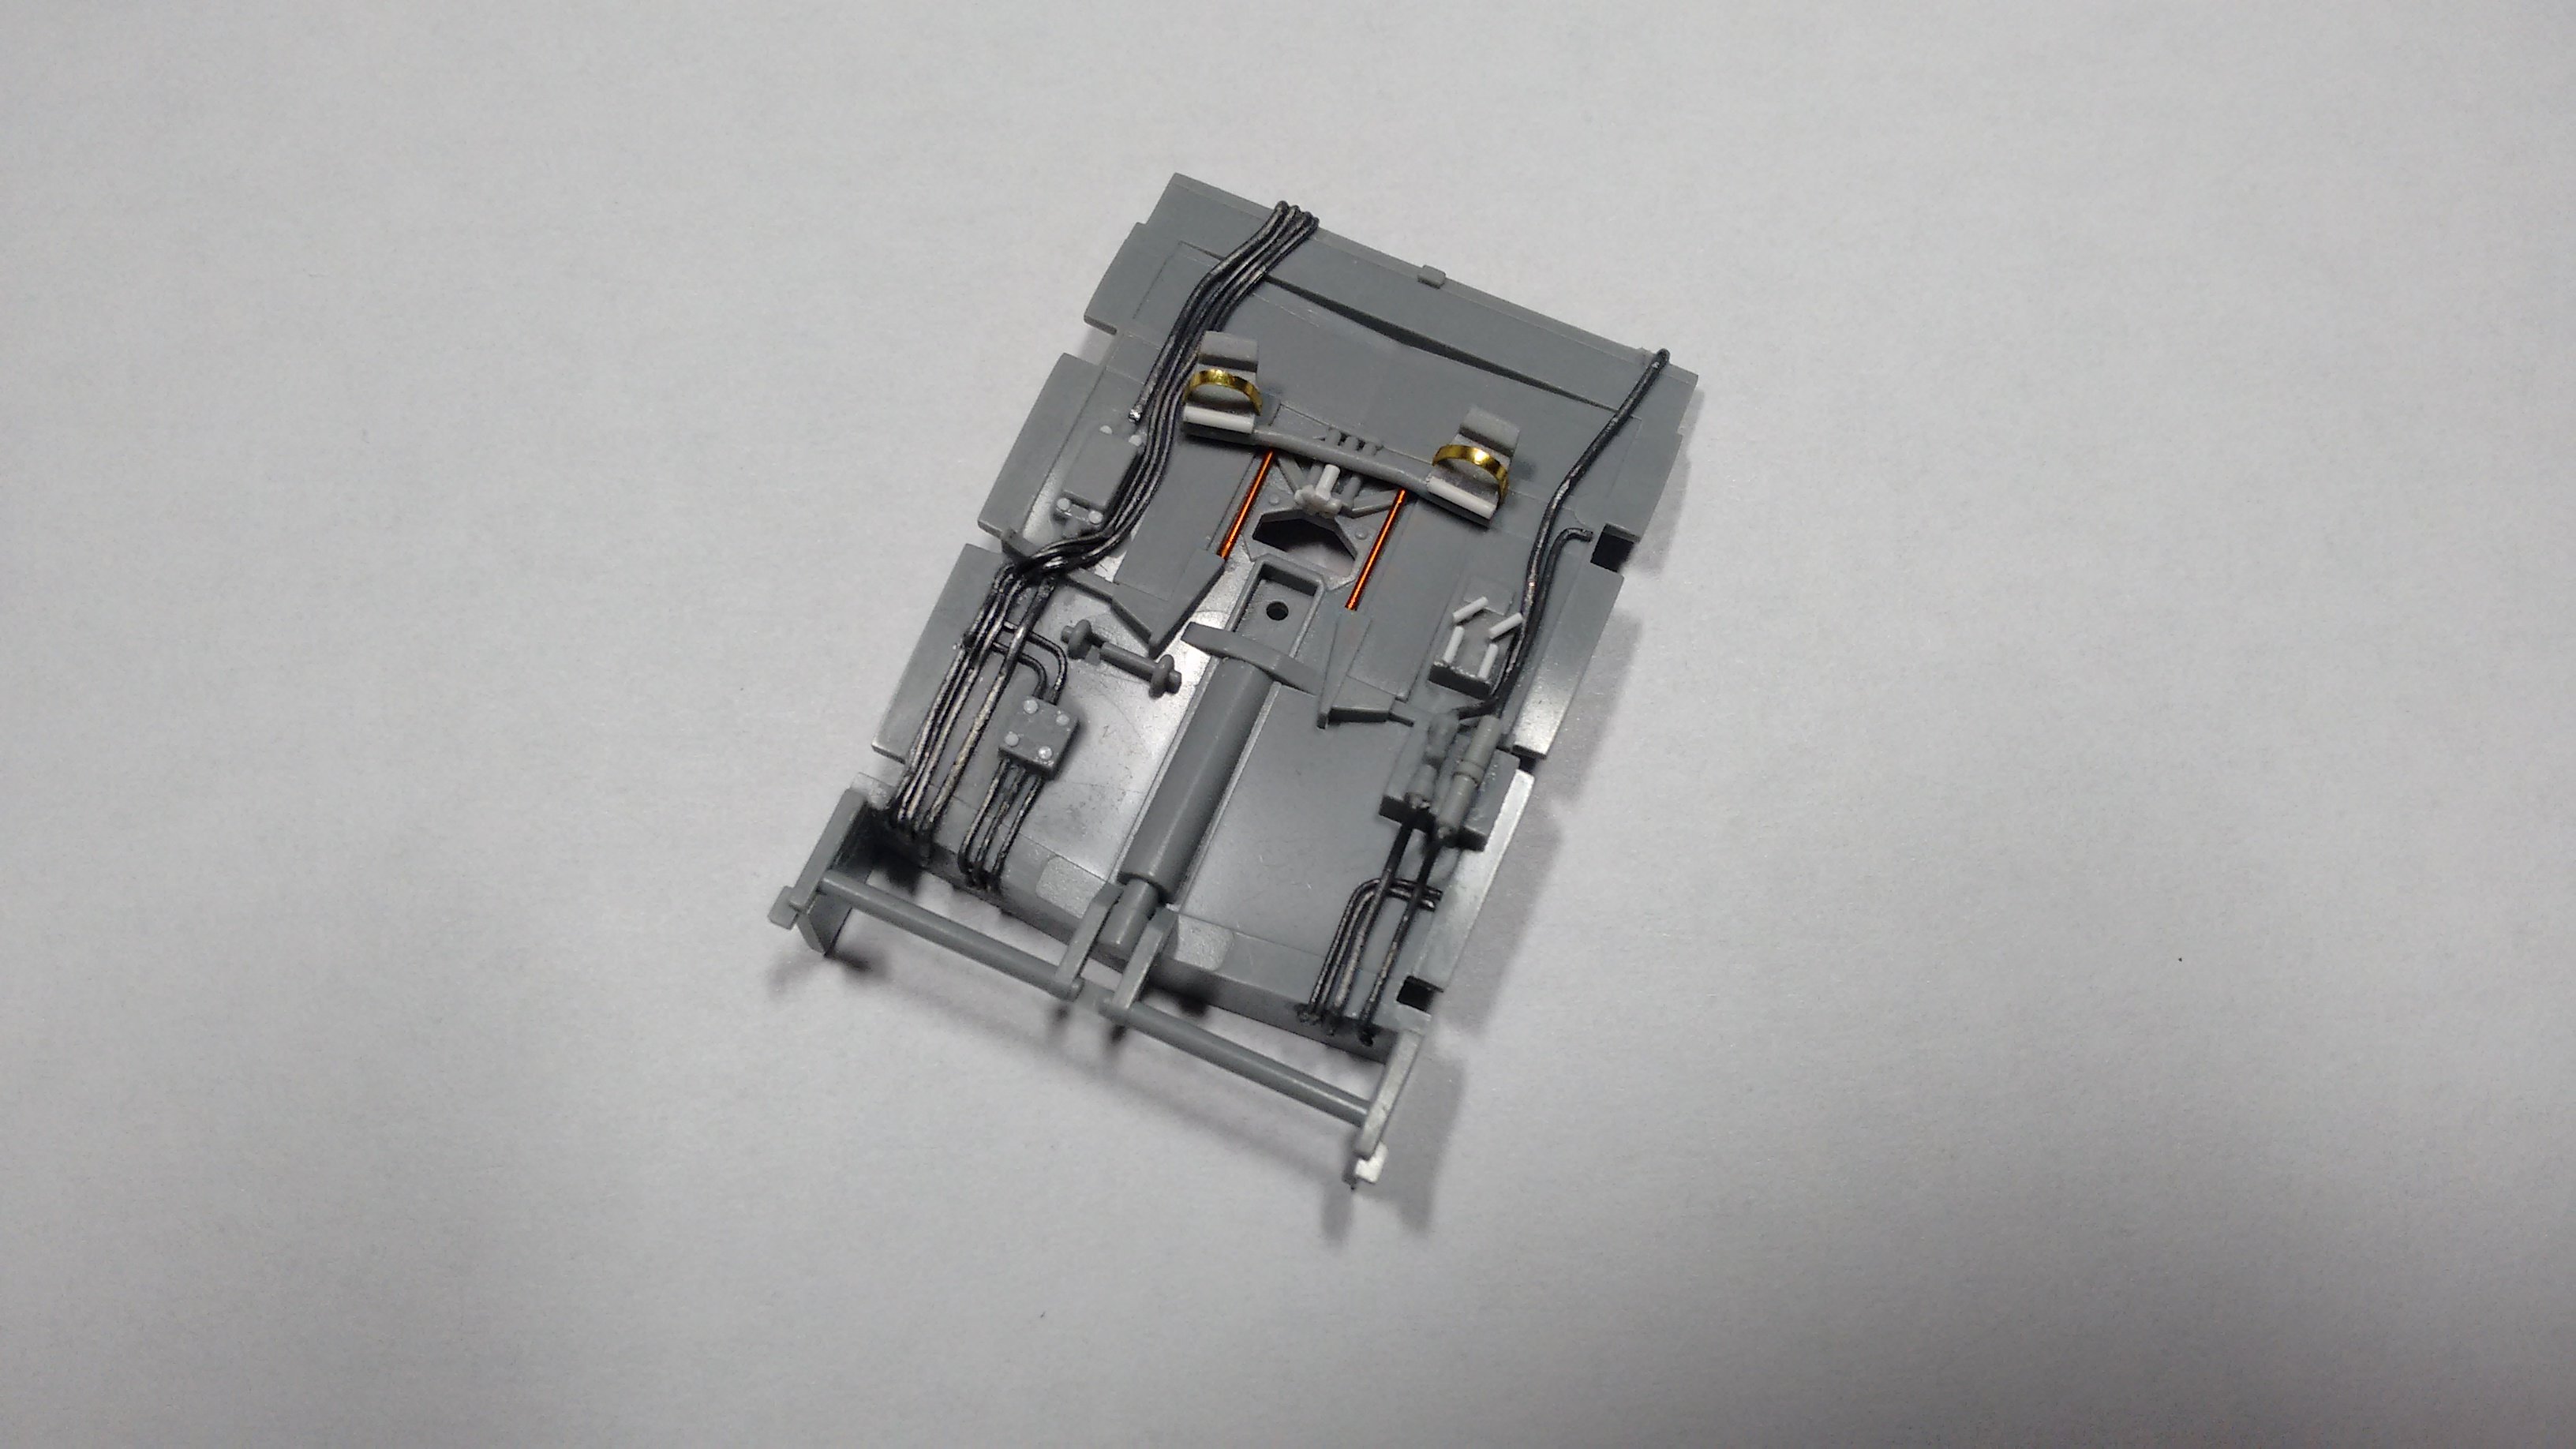
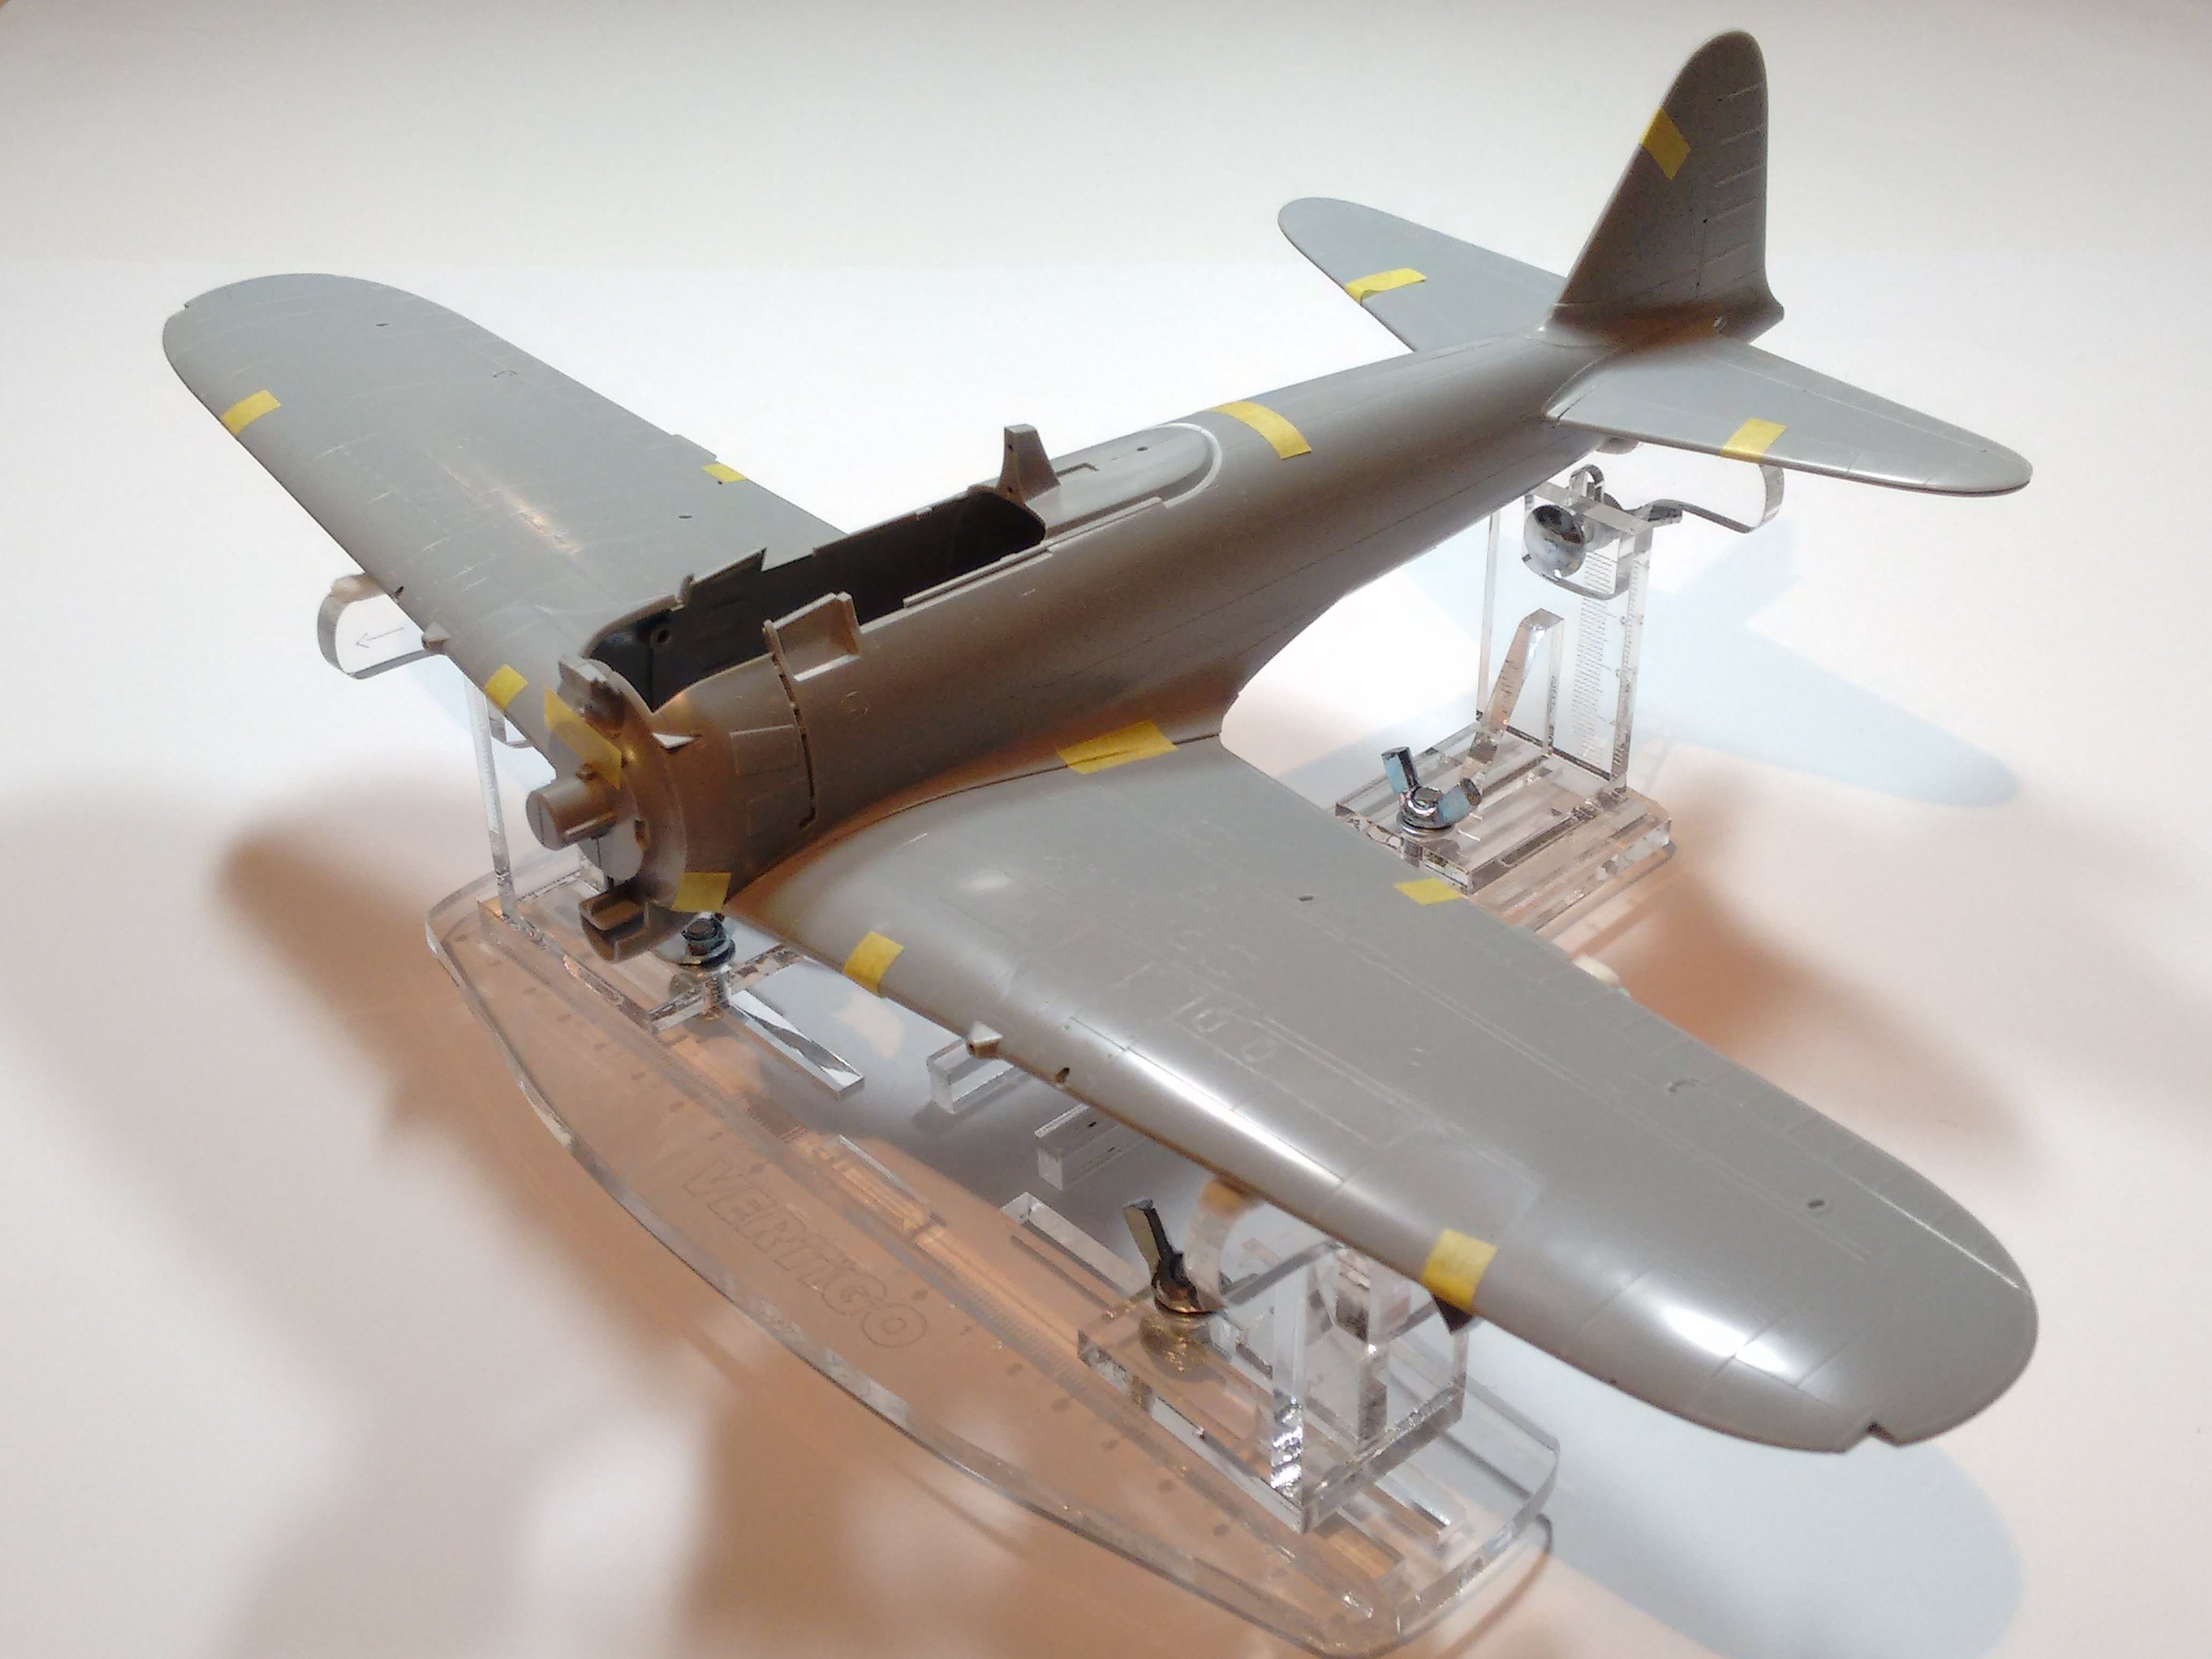
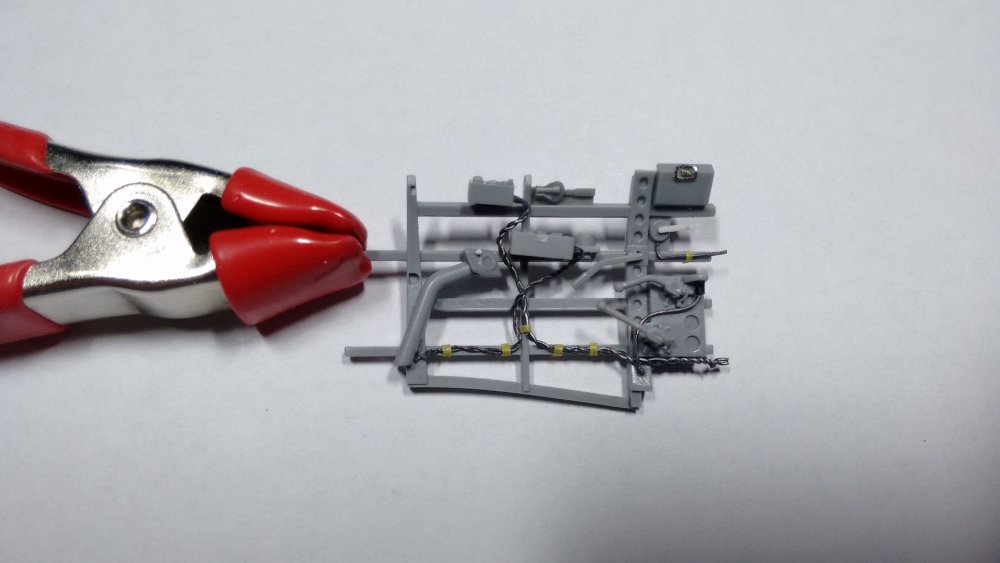
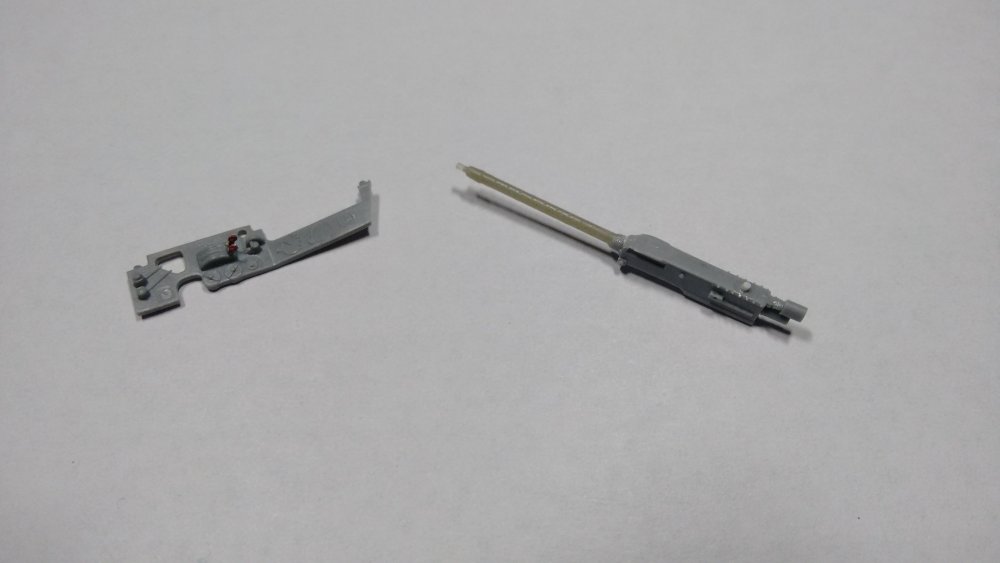
Hi all! Hope you are all doing well! Benchtime was a little bit limited these days so I could not make much progress. I detailed the cockpit with some wiring and plumbing work. Ready for paint! Some pics: Cheers guy's Lutz!

-
Mitsubishi A6M5c Zero Type 52 1/32 Hasegawa
Sturmbock replied to Sturmbock's topic in LSM 1/35 and Larger Work In Progress
Yes Ron, they are! Much nicer in detail and accuracy and I rather would take them but couldn't get them at the moment! -
Mitsubishi A6M5c Zero Type 52 1/32 Hasegawa
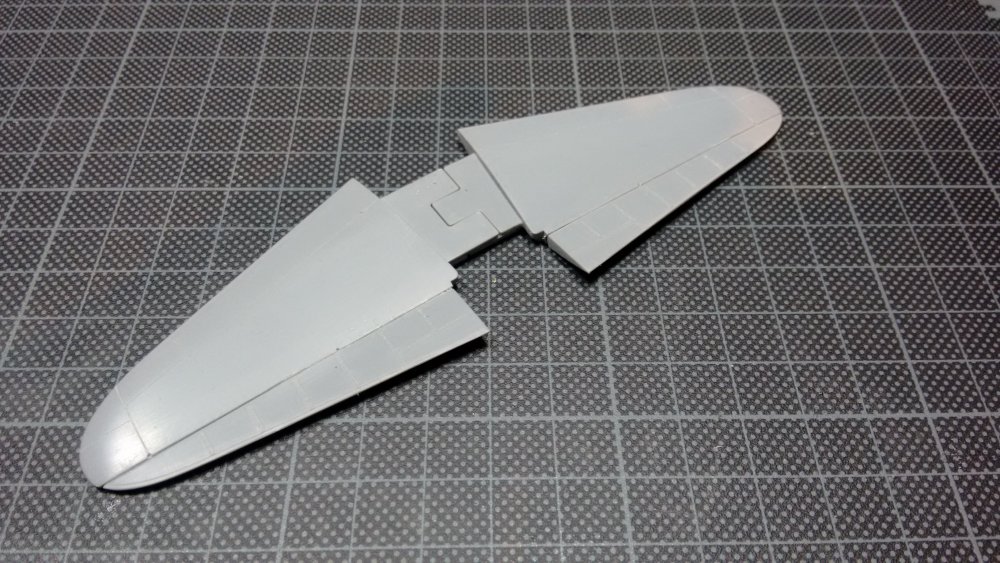
Sturmbock replied to Sturmbock's topic in LSM 1/35 and Larger Work In Progress
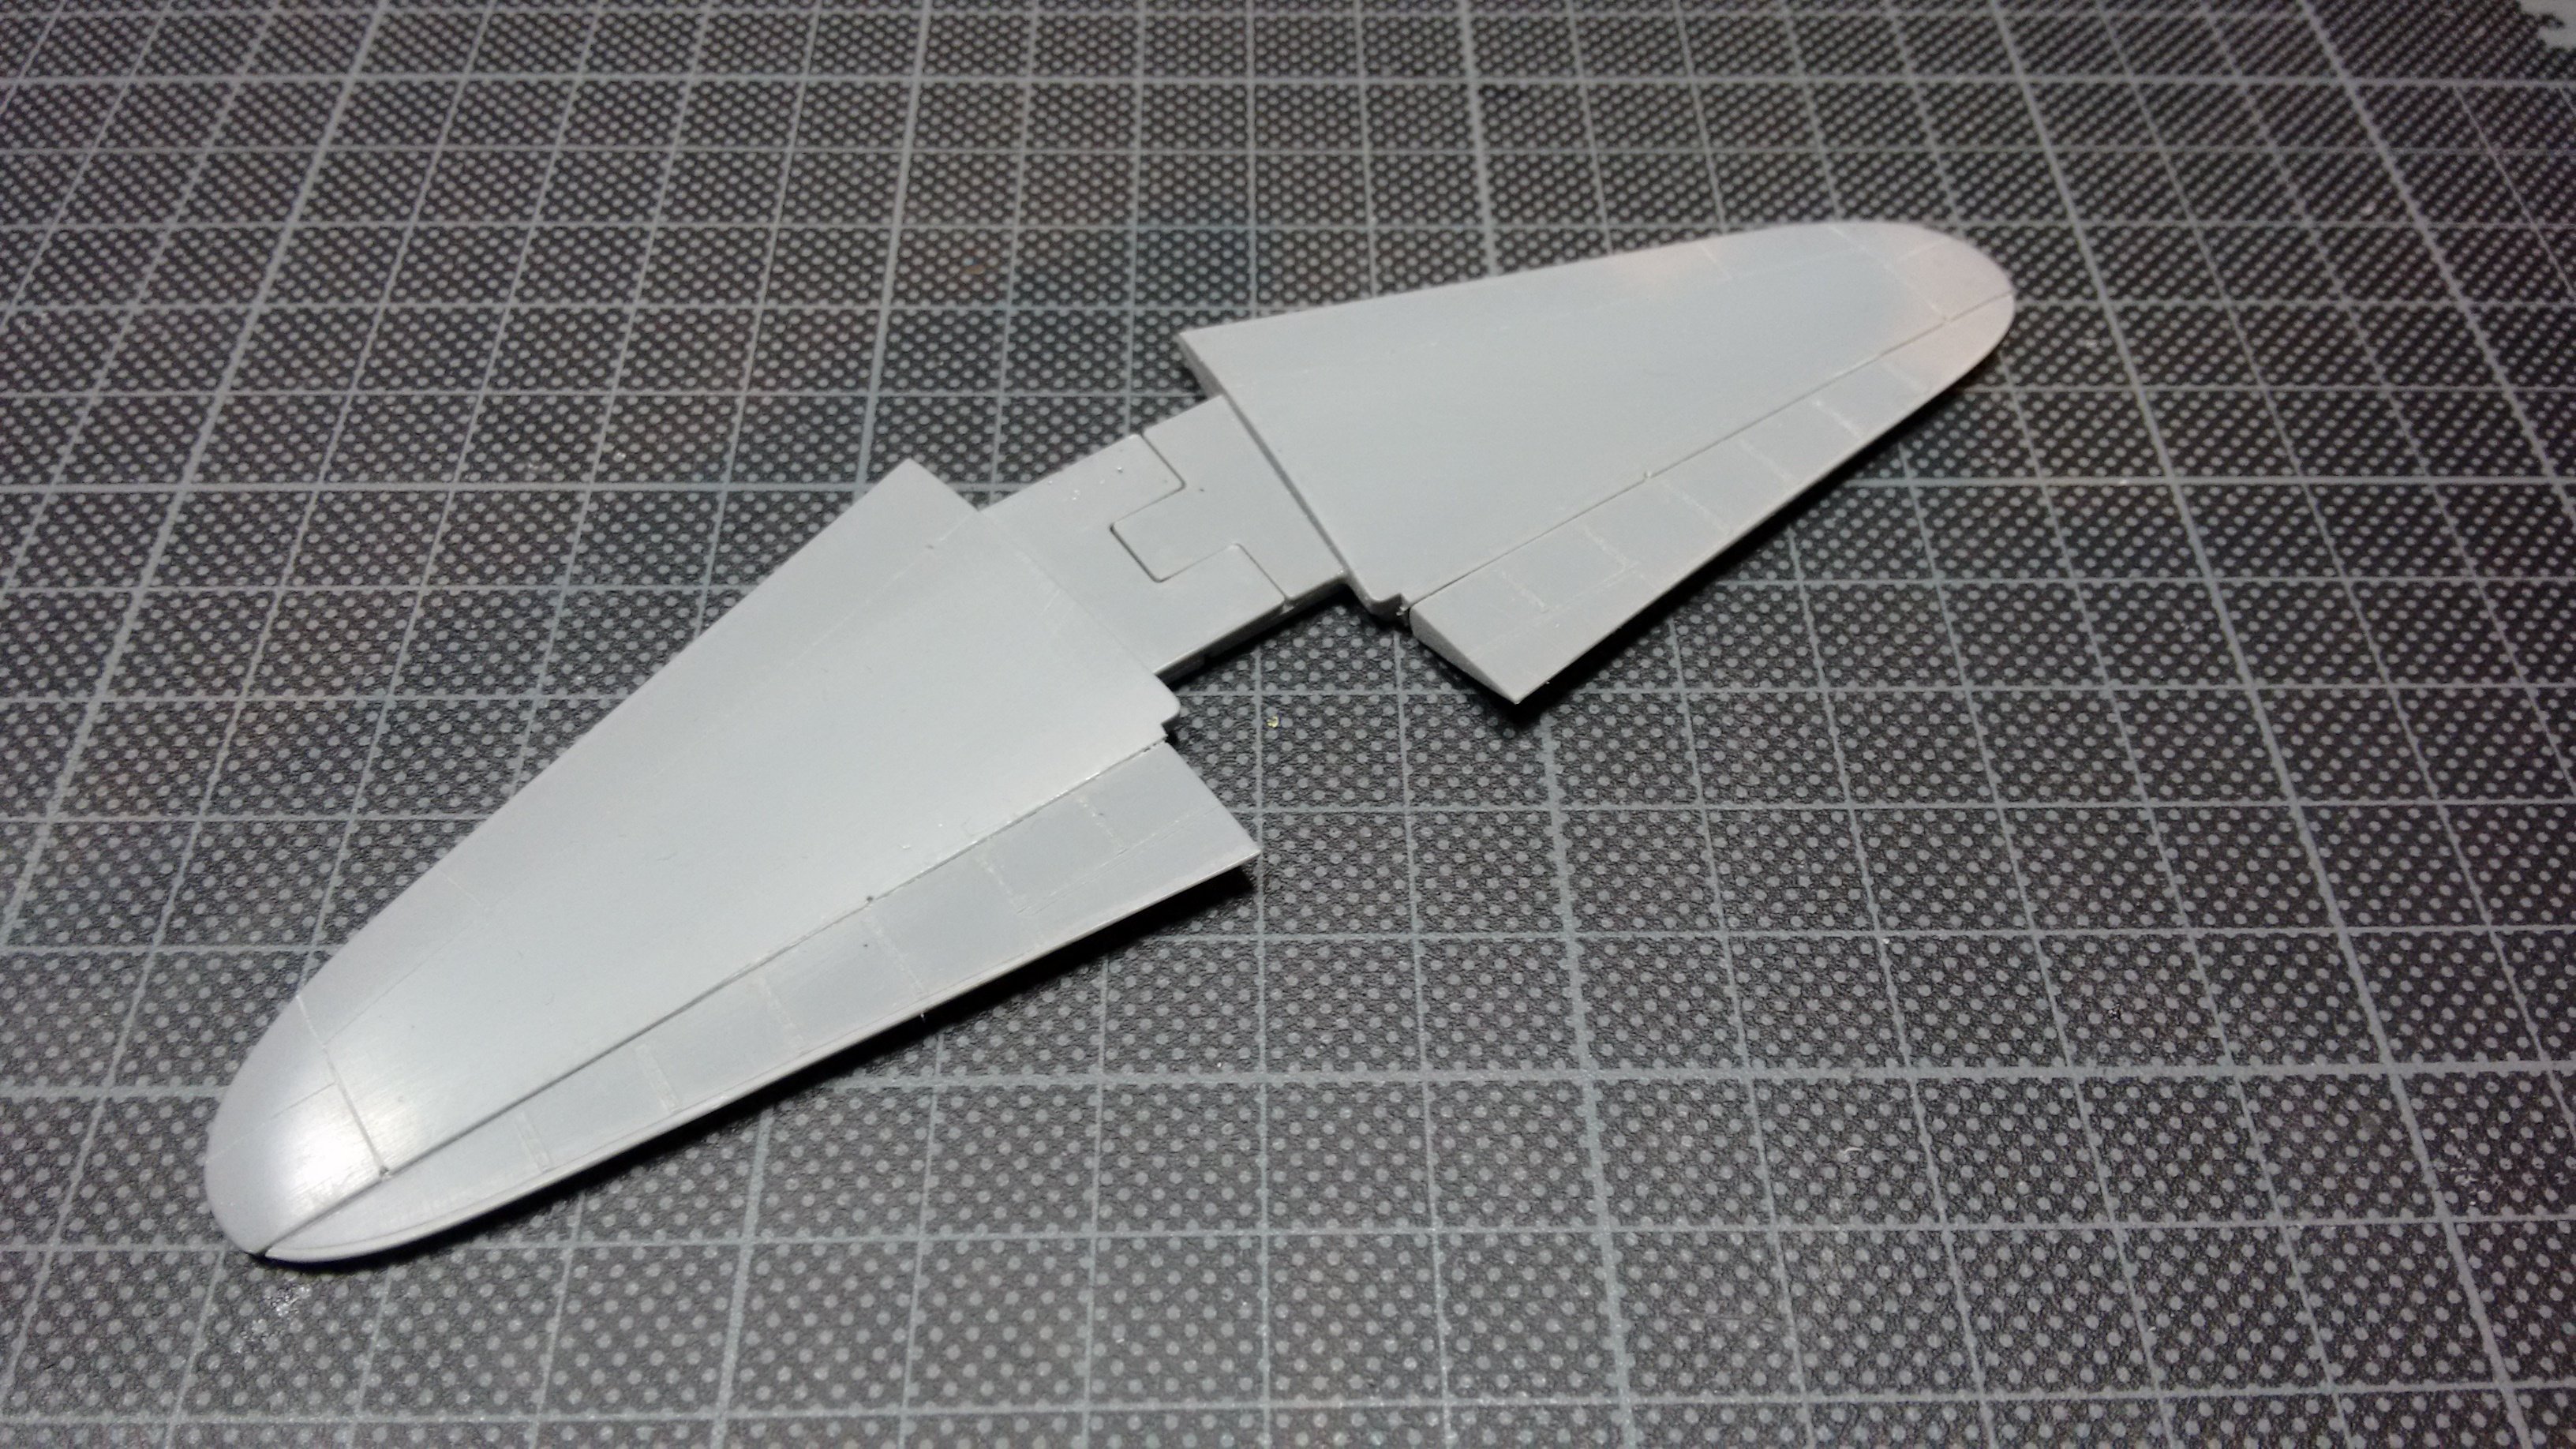
The Instructions begins with the assembly of the pilot and the cockpit but I didn't follow it and I took care on the Horizontal Stabilizer. I cut the flaps of and sand the backside of the Stabilizer where the flaps mounted in a slightly round shape and do the same with the flaps in vice versa! I mounted the flaps in a slight upward position as seen in some pics of the real plane. That's all for now! Cheers! Lutz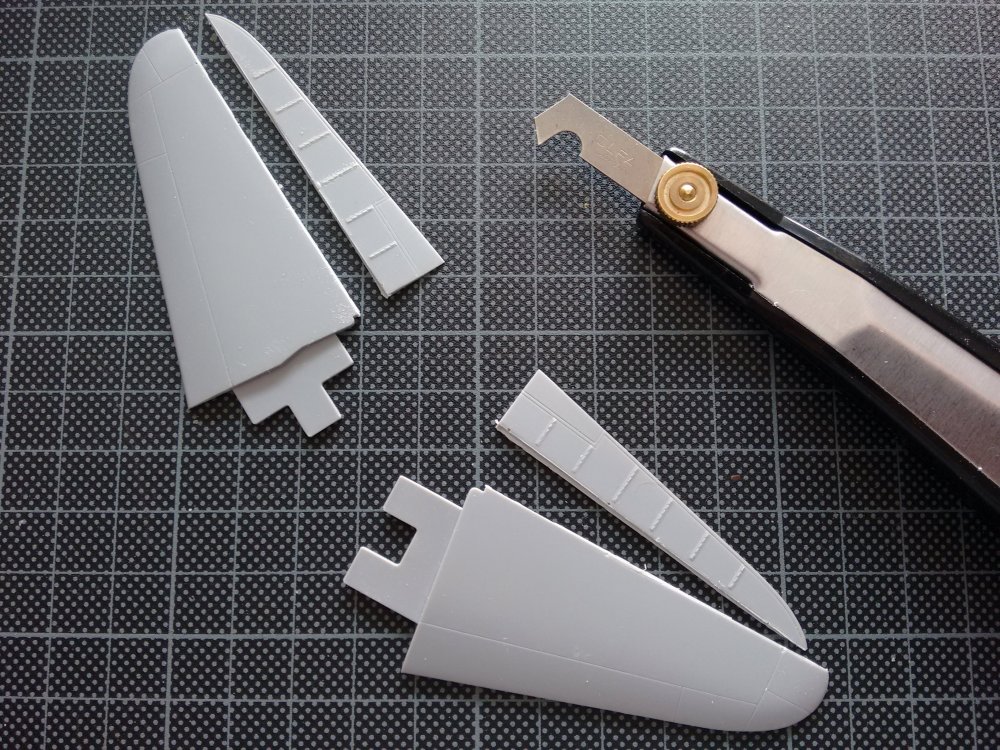

-
Mitsubishi A6M5c Zero Type 52 1/32 Hasegawa
Sturmbock replied to Sturmbock's topic in LSM 1/35 and Larger Work In Progress
Hi there! Thank you guys for your friendly welcomes! I really appreciate that! Today I was able to cut some sprue! Not much, just a little dry fitting.
-
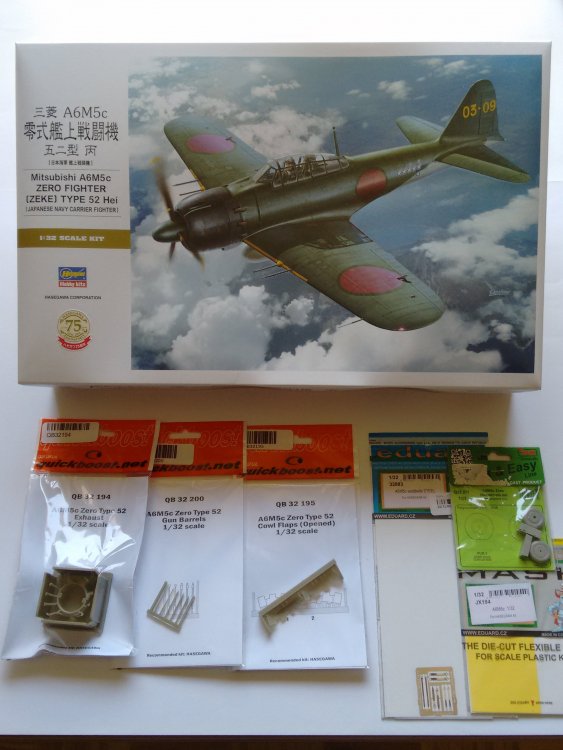
Hi all! I'm new here and watching this forum for quite a while and now I want to start my first WiP here! I am a passionate modeller since I was a young boy ( guess like all of us !) I'm building A/C and AFV as well and my favourite scale is 1/32 but doing also 1/48 from time to time. I want to build Hasegawas beautyfull Zero Type 52 wich one is of the later type with some aftermarket parts but not want to go to crazy! I want to use: -Quickboost Exhaust and opened Cowl flaps. -Quickboost Gun Barrels -Eduard Seatbelts and Masks for the canopy -CMK Resinwheels I am not quite sure about the markings but not want to use the decals from the kit, maybe paint them on but I don't know yet, let's see! Hope to Start soon Cheers! Lutz
-
Trumpeter P-47D Razorback
Sturmbock replied to crazypoet's topic in LSM 1/35 and Larger Work In Progress
Hi Crazypoet! I will follow your build with much interest because I build the Razorback not long ago and now I have Trumpis Bubbletop on the bench! You also must be aware when you fit the wings to the hull, there will be a huge gab on the underwing site, on the topsite there is none, I don't know why!? It is not a big deal because with some plasiticcard you can fix it but it's just time consuming! Cheers Lutz