

Kriss
-
Posts
354 -
Joined
-
Last visited
Content Type
Profiles
Forums
Events
Gallery
Everything posted by Kriss
-
The 1830 Northumbria is the next test model to arrive in my workshop. 3D printed scale 1:35 and the publisher is ‘World from Cardboard’ and this is what it looks like and we will see what comes out of it. By the way, I would like to ask if there are any materials, drawings of this locomotive? Maybe there are also plans of the wagons it could pull? I have something but there are considerable discrepancies in it, or any railway forum worthy of recommendation? Suggestions and suggestions not just for the publisher welcome. Many thanks in advance.
-

(WIP) Curtiss A-8 „SHRIKE” 1:48 Czech Model
Kriss replied to Kriss's topic in LSM 1/48 Work in Progress
Masks done and time to paint the glazing. -
This is the test model of the locomotive ‘Catch me who can’ from 1808 in 1:35 scale made as a 3D print and the publisher is the company ‘World of Cardboard’. It can also be purchased there. I would like to thank the publisher for the model I received for the test.
-
- 3
-

-
(WIP) Curtiss A-8 „SHRIKE” 1:48 Czech Model
Kriss replied to Kriss's topic in LSM 1/48 Work in Progress
I have been looking through archive photos and modelling forums for inspiration on how to make the stretches. There is a lot of material and I will do the tensioning as I always do. So the mounting eyes are done and are already fixed in the model except for the ones on the wings, there they will be only after the decals are applied. -
I'm glad you like it. There is a plan to have another locomotive in the workshop later this week, for now we are not revealing which one it will be. The Penydarren locomotive is now available for sale.
-
This is the last workshop photo of the test model of the locomotive ‘Catch me who can’, the construction went without any problems, the parts fitted and I can't but recommend the model and invite you to the gallery. I would like to thank the company ‘Świat z kartonu’ for the model I received.
-
I'm slowly coming to the end, just two more elements for the controls and a gallery to do.
-
Work continues, the drive mechanism completed. I just replaced the guide elements with metal tubes. The colour is also already there. All that remains is to put the wheels on and connect them to the drive.
-
All prepared for painting, there are a few changes. The guides are cut off because I will replace them with a metal bar, I won't have to paint them.
-
Boiler ready and fitted, so far everything fits so the build goes on.
-
I have been blessed with the opportunity to build another test model this time of the first ‘Catch me who can’ passenger locomotive of 1808. The model is either made or more correctly 3D printed and this is a test print and the final version model will be more refined. The publisher of the model is the company ‘World of Cardboard’ and the scale is 1:35. Below is the build from the test print.
-
(WIP) Curtiss A-8 „SHRIKE” 1:48 Czech Model
Kriss replied to Kriss's topic in LSM 1/48 Work in Progress
Chassis on the workshop ready to be closed, pre-sanded, wheel axles and holes drilled for them, and colour applied. -
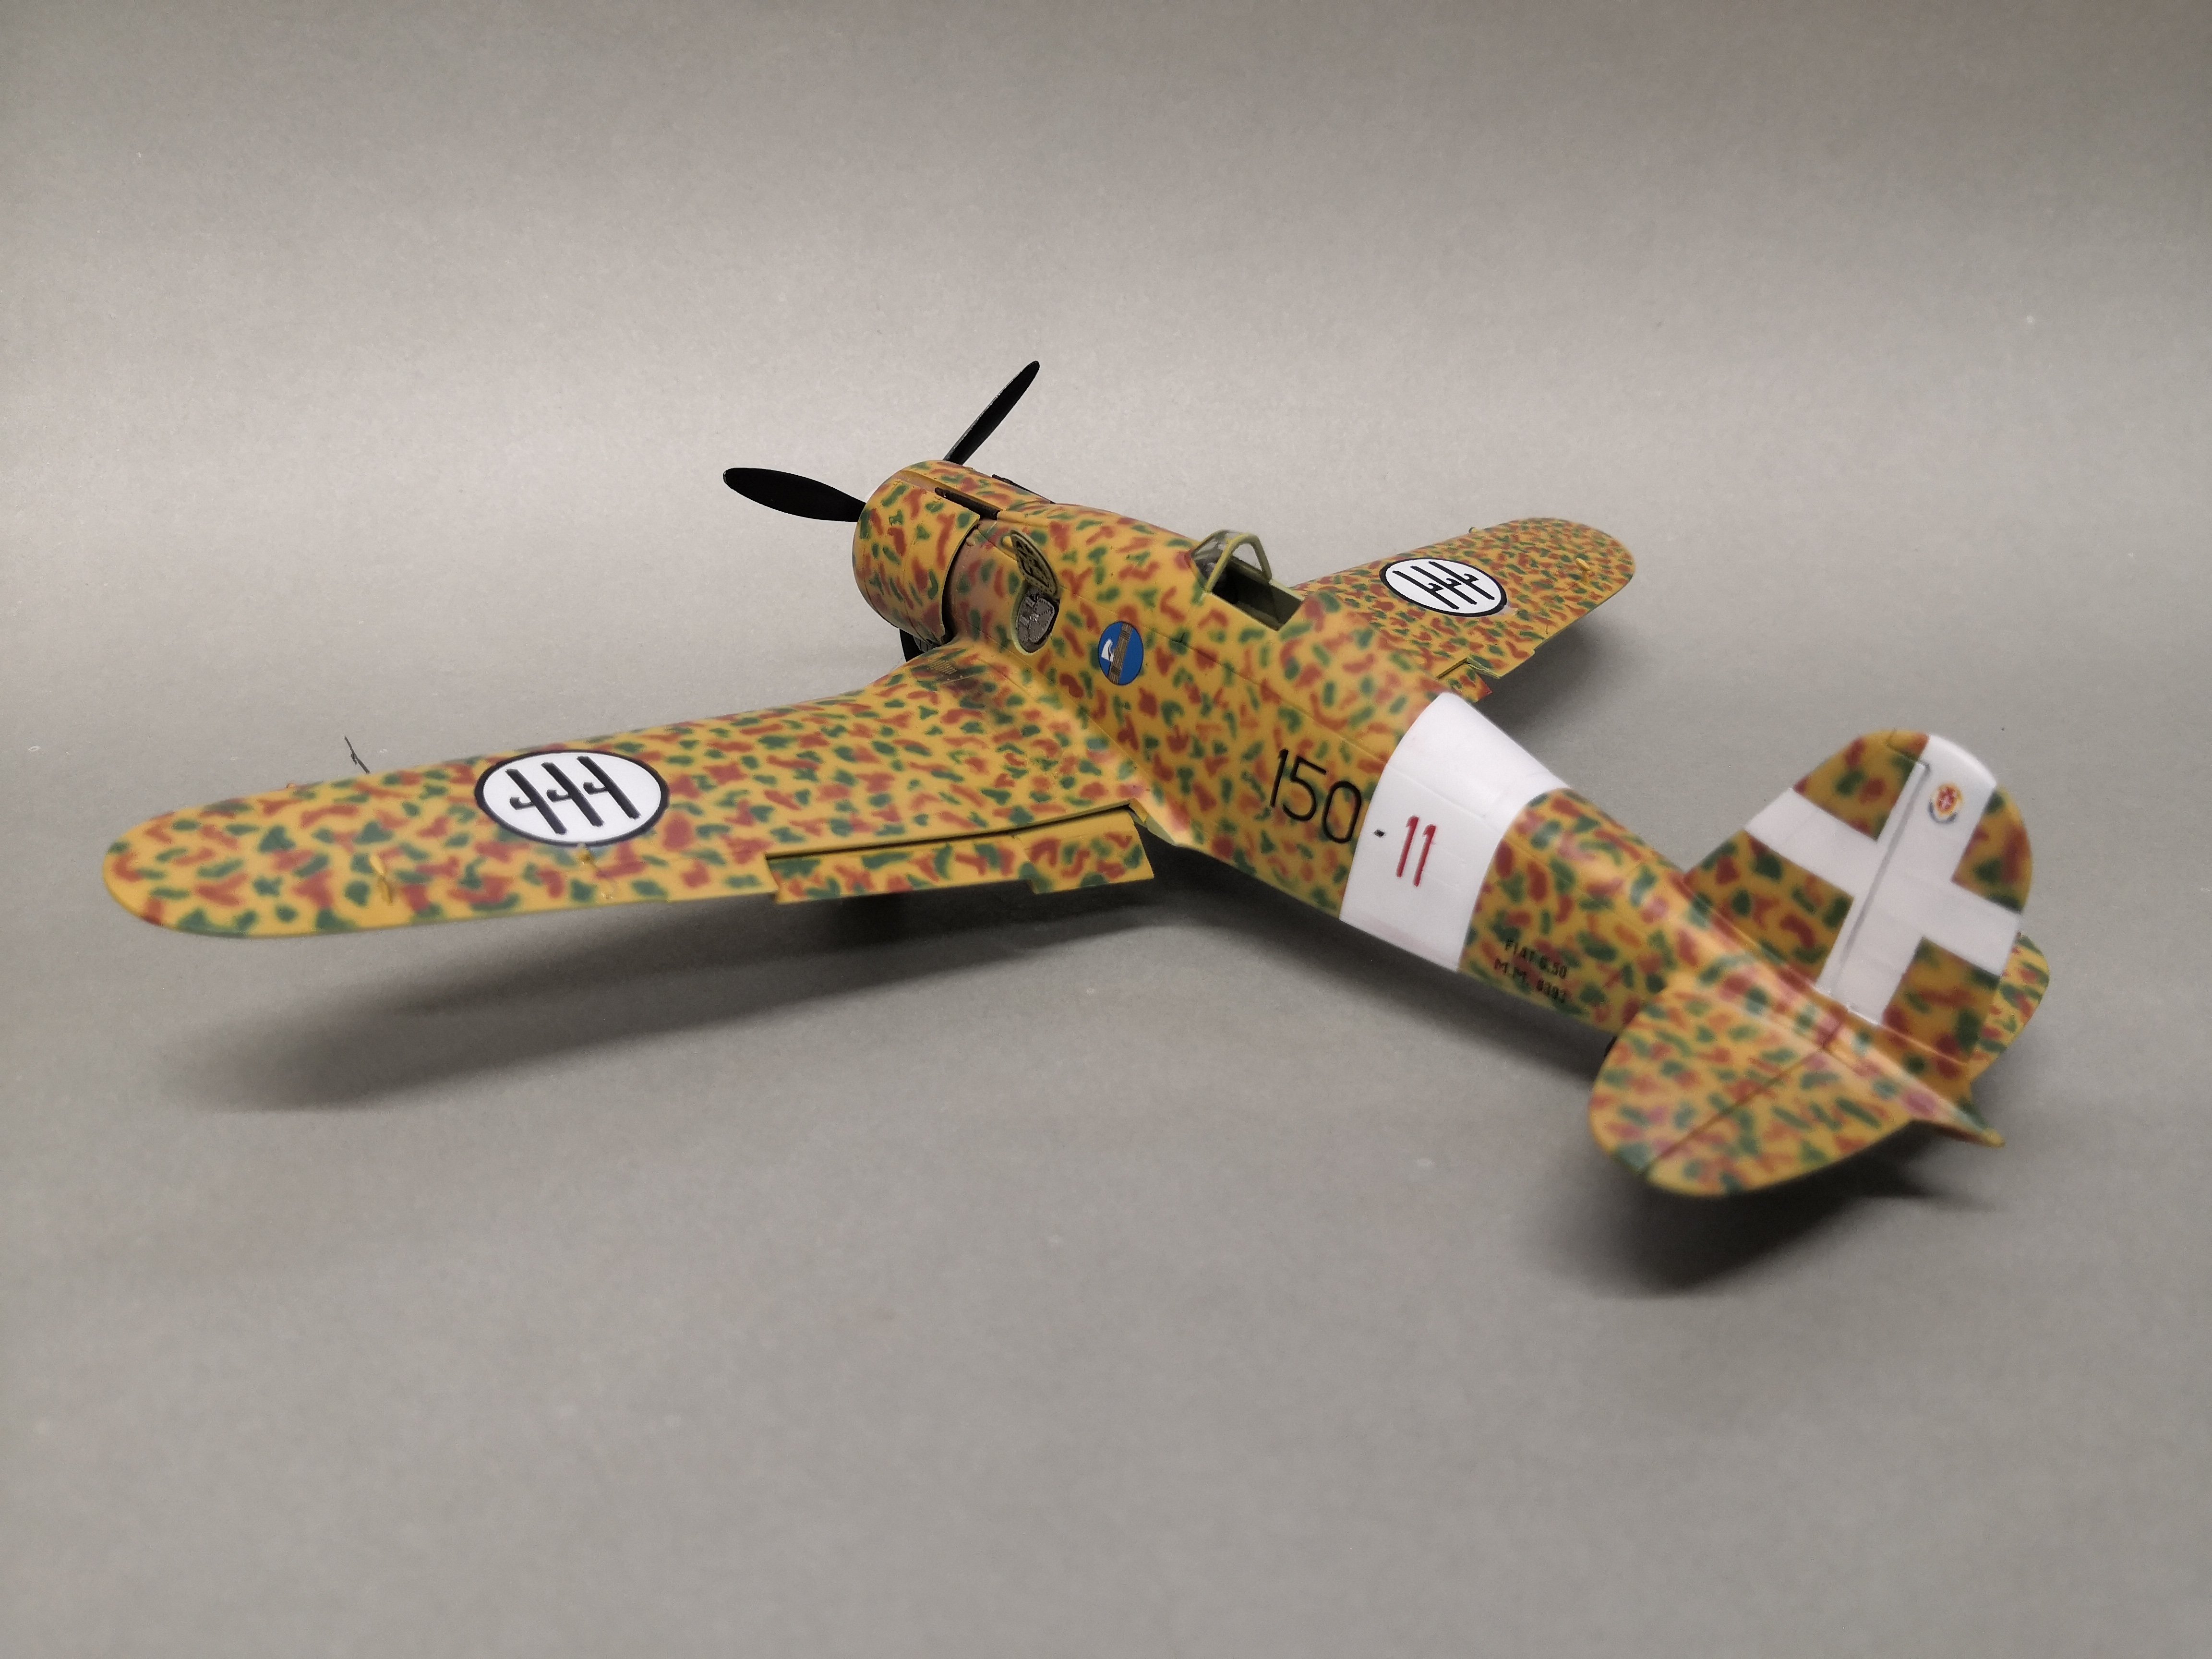
Construction of the test model completed and the Caproni Ca.100 from FLY in 1:72 looks finished like this. The build went without any problems, the parts fit very well, the decal is fine and lays very nicely on the surface of the model. The only thing missing from my decal is the clocks on the instrument panel. For the extras I made the fuel lines from the photos and all the strings. Model of Caproni Ca.100 aircraft, Military School, Italian Air Force, Venice, Italy the 1930's. Thank you to the company “FLY” for providing the model for review.
-
This is the test model of the Penydarren locomotive of 1804 in 1:35 scale made as a 3D printout and the publisher is the company ‘Świat z kartonu’. It can also be purchased there, minor corrections have been made. Soon this locomotive will also be on the workshop. And as far as I know they are already finishing work on the next of the pioneering locomotives.
-
This is the completed test model of the 1804 Penydarren locomotive in 1:35 scale made as a 3D printout and the publisher is the ‘Świat z kartonu’ company. For the rest of the photos, please visit the gallery.
-
I have prepared the locomotive for painting here and it is already on sale on the publisher's website.
-
The reliable LEGO blocks for catching the geometry on my workshop are always at hand and Penydarren is already on the wheels thanks to them being set straight.
-
All the parts cut out and fitted together on the dry model. I know that you can see that not everything is in the axis of symmetry but this is just put together for the photo. The parts fit together perfectly. As I wrote earlier it goes to make a running one because I have just tested it, but as I am making a test model I have to let go of this option and make it as a steadystate model.
-
I managed to attach more parts, as you can see in the picture there are two wire parts but they are replacements for the print parts. I swapped to speed up the build as well as to see if it could be built as a mobile version. The parts fit perfectly. And there are a few parts missing from the print again.
-
First cutting and gluing, the boiler is ready and the parts are missing from the print. So far everything fits perfectly.
-
I have been blessed with the opportunity to build a test model of a PENYDARREN locomotive made or more correctly 3D printed. This is a test and the model in the final version will look a little different, it will be completed with some details and corrections. The publisher of the model is the company ‘Świat z kartonu’ and the scale is 1:35. Below is a test print.
-
(WIP) Curtiss A-8 „SHRIKE” 1:48 Czech Model
Kriss replied to Kriss's topic in LSM 1/48 Work in Progress
Curtiss is taking shape and catching the geometry, moving slowly but forward. -
Thanks very much
- 18 replies
-
- 2
-
-

-
- caproni ca.100
- fly
- (and 1 more)
-
Construction completed and Caproni Ca.100 from FLY in 1:72 ready to be displayed in the gallery. The build went without any problems, the parts fit very well, the decal is delicate and fits very nicely on the surface of the model. For me, the only thing missing on the decal is the clocks for the instrument panel. From the extras I made up the fuel lines based on the photos and all the strings. Model of Caproni Ca.100 aircraft, Military School, Italian Air Force, Venice, Italy the 1930 Thank you to FLY for providing the model for review. p.s. I promised you some words on how I paint. So with me it looks like that the most complicated tool in my model shop is an airbrush or a whole set of them. For such painting I use an airbrush with a nozzle of 0.15mm and to paint you need to be able to paint very narrow lines, for this paint with a very good pigment. I prepare for myself color charts or photos of the airplane I am painting and looking at this I try to reproduce the camouflage on the model. The selection of the parameters of pressure and dilution of paint should be chosen empirically. Here is how it looks like for me, if there are any questions please write boldly I will be happy to answer.
- 18 replies
-
- 1
-
-
- caproni ca.100
- fly
- (and 1 more)
-
When a model assembles like LEGO bricks it's a sheer pleasure, and the Caproni Ca.100 is just so much fun to assemble. I made up the tension cables and fuel lines and here I used the photos of the plane. I'll take another look to see if everything is right, if I didn't forget something during the construction of the Ca.100. And in the next post I'll describe how I paint such camouflage, I'm wondering whether to make a video of painting and set up a channel on YT for myself?
- 18 replies
-
- 6
-
-
-
- caproni ca.100
- fly
- (and 1 more)