

Kriss
-
Posts
354 -
Joined
-
Last visited
Content Type
Profiles
Forums
Events
Gallery
Everything posted by Kriss
-
This company and in fact two companies are together and share a common site. LF Models and Kora Models and they have a lot to offer, I have a lot of models and accessories from them. I just don't know when I'll build it all, for now I'm more collecting than building.
-
A holiday project has just landed on my workshop, namely a German on holiday in Spain. And the protagonist of this workshop is the Heinkel He-112 B-0 in 1:48 from LF Models together with an add-on set like this: LF3D4802 He-112B-0 upgrade set CM4802 He-112 canopy mask PE4807 Heinkel He-112B-0 over Spain EDUARD Seatblts Luftwaffe WWII fighters And this is what the contents of the box look like, the glazing nice and transparent. What more can I add? Everything can be seen in the pictures, and the camouflage painting will be.
-
I would like to present another completed project of the PZL.46 "Sum" in 1:48 scale, which represents the only prototype of this machine, which took part in the defensive war of 1939. The colouring of the chequerwings is presumed, as there is no photo to prove it. Their appearance on the model is only due to the description of the capture of the Polish machine by Lithuanian pilots. 3D printed model, my first and certainly not the last, the construction was quick and efficient, the parts fitted very well and that's it for the plus. Now the downsides, I missed the bombs in the open bomb bay, a little empty in the crew cabin but I know the lack of documents for that. All in all, it's a very nice and enjoyable model and with a bit of willpower you can make a real gem out of it. And in the pictures below you can see how the PZL.46 "Sum" presents itself in all its glory.
-
And at the end of the workshop a photo of the finished model. I know I didn't show its cockpit interior, but I only gave what was available from the manufacturer and from the extras it was only the pilot's belts for the YAHU, all in all it came out a bit empty there. But I had to finish the model quickly because it flew as a gift and now it delights the eyes of my friend. I also plan to make one for my collection, but when that will be I don't know. I now invite you to the gallery.
-
There will also be a PZL P.7a in my collection but I also plan to acquire a PZL P.38 "Wilk" as well as a PZL P.11g "Kobuz" in 48 of course.
-
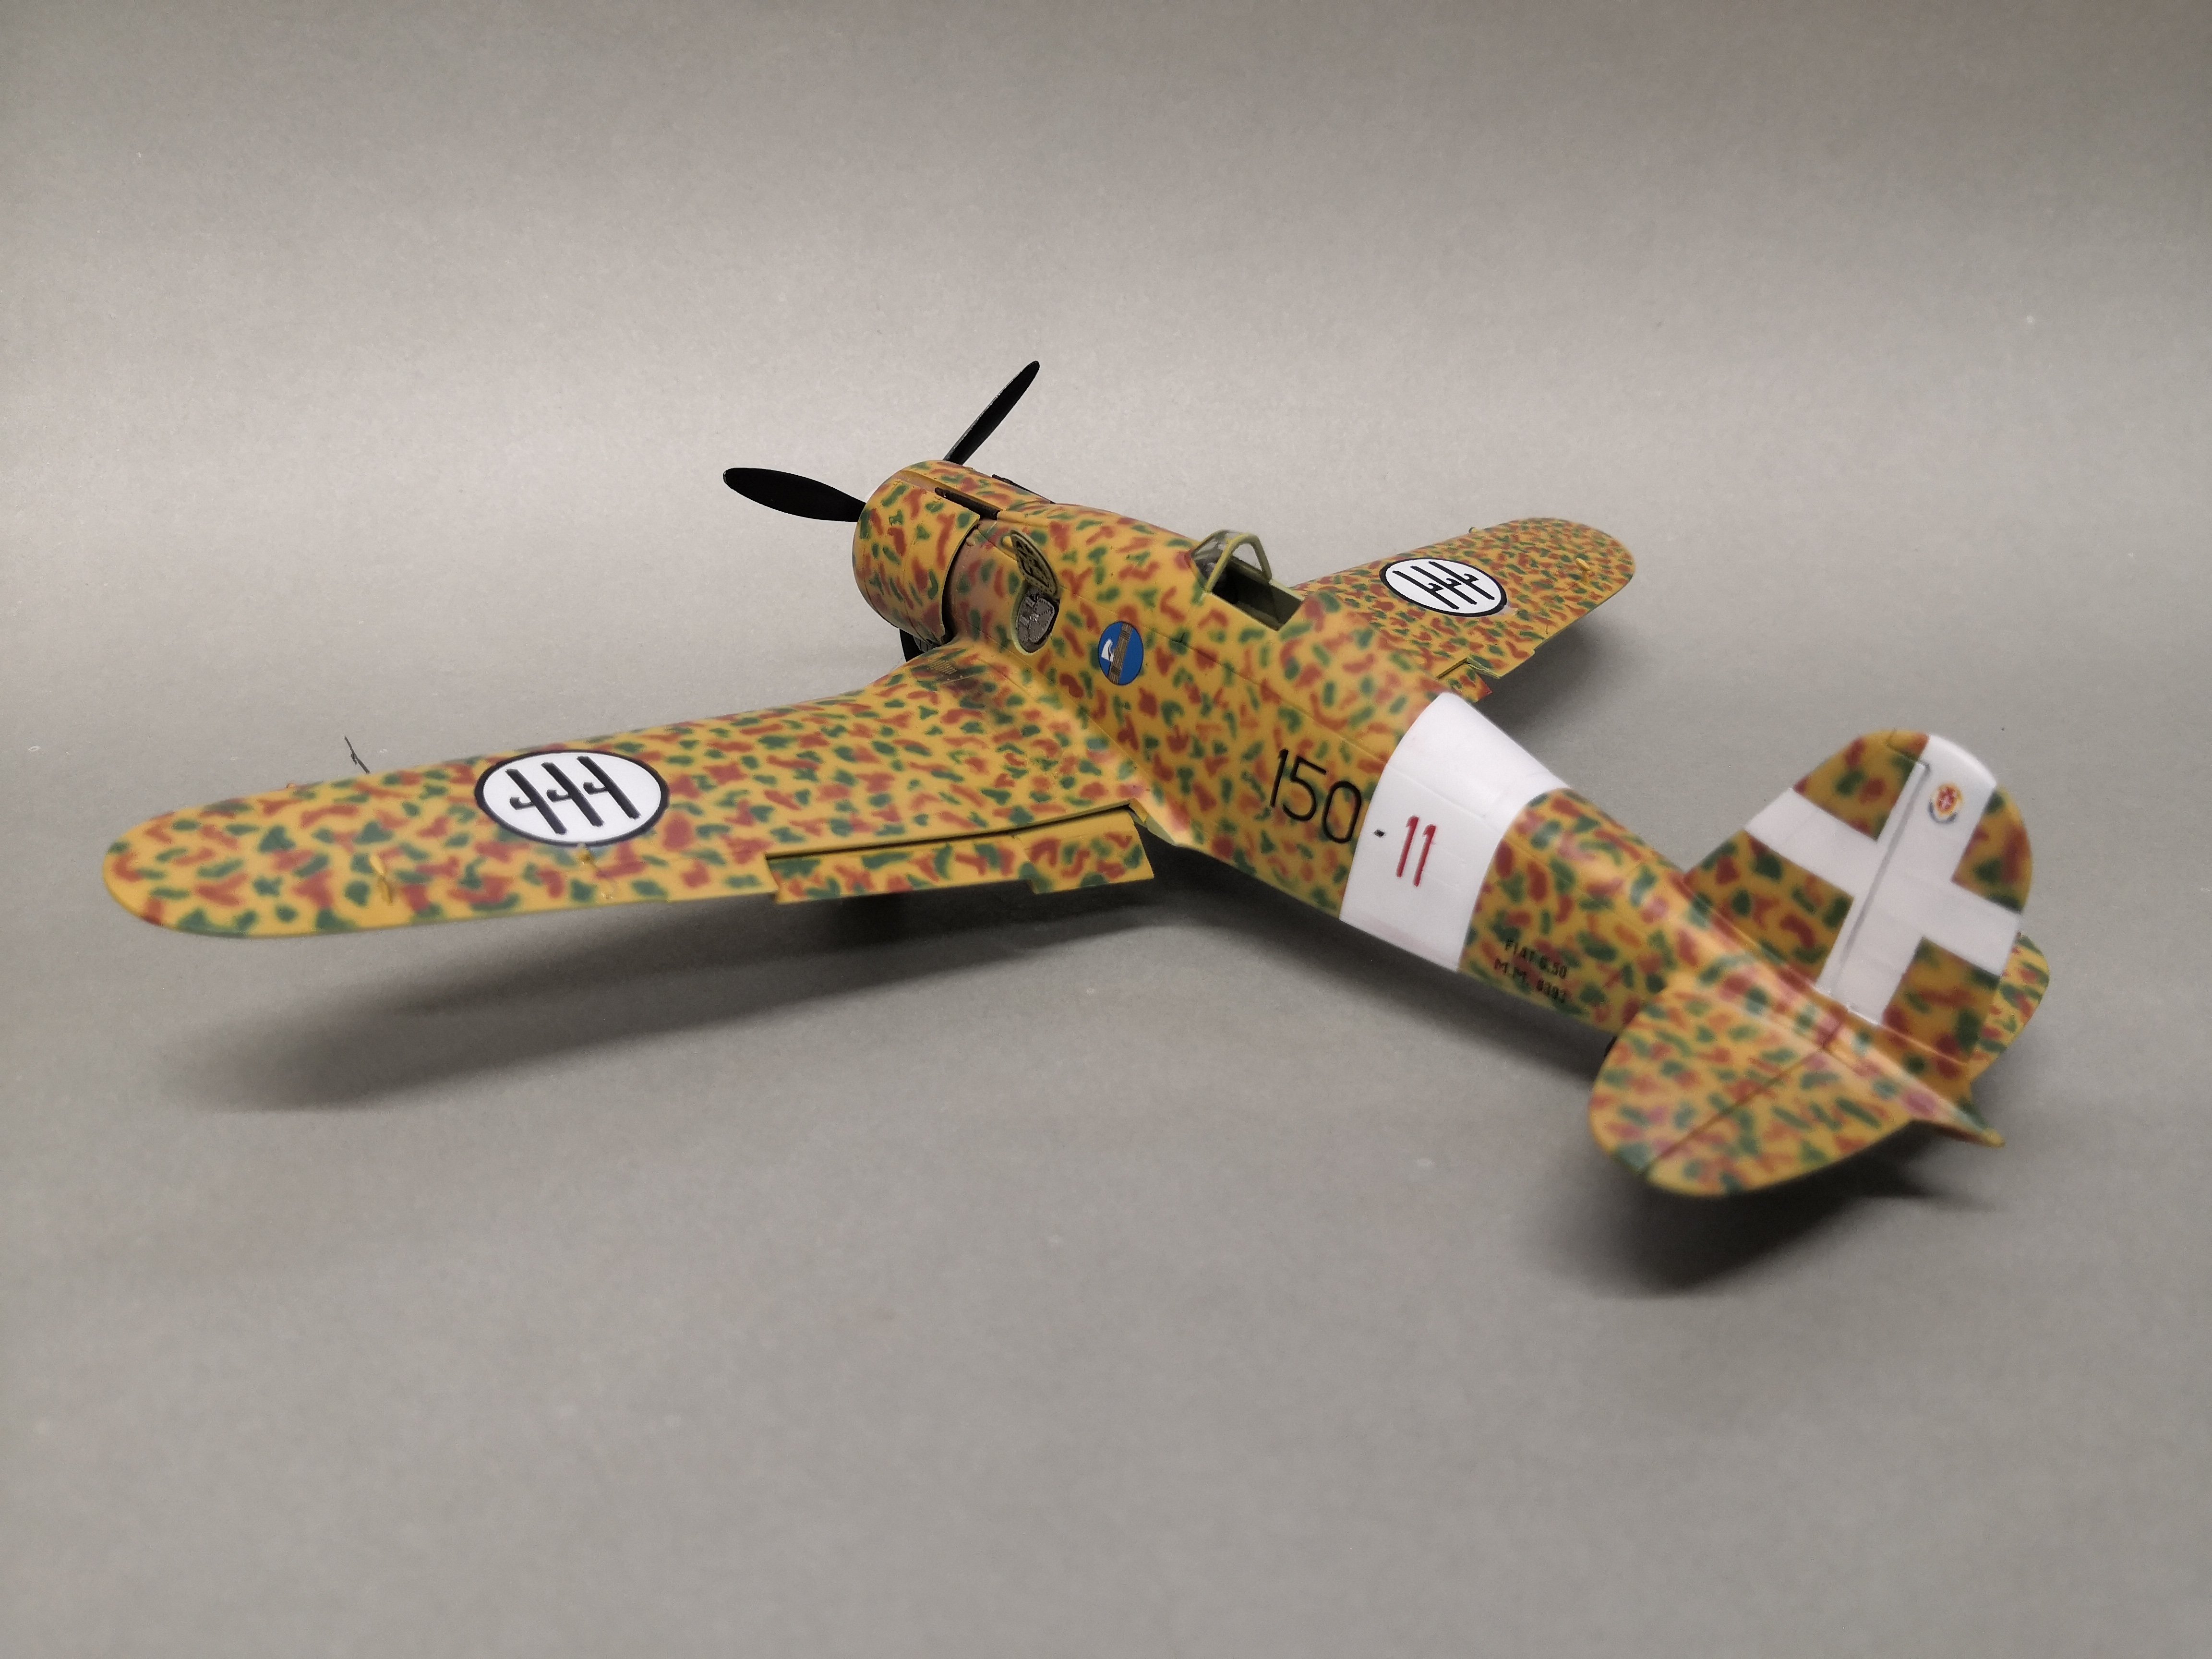
 It's been a while since the last post I made on the workshop but I finally managed to complete the model of the Fiat CR.42 "Falco" and presents the machine CR. 42 Falco, 83 So., 18 Gruppo, 56 Stormo C.T., Ursel, Belgium, November 1940.I added extras from EDUARD, YAHU MODELS and CMK to the model. I also did the riveting based on the drawings posted in KAGERO. Enjoy watching. You can also see something in the cabin. A close-up of the engine. And a close-up of the riveting.
 -
It's been a while since the last workshop post but I finally managed to finish the model. And this is traditionally the last photo here, and for the rest I invite you to visit the gallery.
-
Many thanks.
-
Decal laid down, I modelled it on how the chequers were laid out on other planes. I know that no available photo shows the chequered pattern or other markings or inscriptions. I took my cue from the description of Lithuanian pilots who intercepted the Polish machine on their Dewoitine D.501. In their description, they said they recognised the Pole by the chequered pattern, and the type of aircraft was unknown to them. That is why mine only has the chequered pattern on it.
-
The glazing is from vacu and there is no problem with it fitting perfectly but the headlight and position lights are from print and look tragic. An attempt at polishing did nothing and I made new ones. By the way I am doing the interior of the cab. The bombs and decals have also arrived and they are not included in the kit. The bomb kit is from MIRAGE and the decals are from TECHMOD and they are checkerboard alone.
-
I was wondering what colour to paint the top, Polish dark khaki or Polish export khaki, which the machines were painted in for export. As there was no material on how to paint the top and dark khaki was at hand, I used it to paint the top. Looking at the photos of the "Sum" and comparing it with other machines, I guess this is the colour.
-
I painted the underside with a Polish blue-grey colour. And for the camouflage I used a paint set from HATAKA dedicated to the Polish Air Force of September 1939. In the photo you can already see the beginning of the camouflage, the course of the colour dividing lines can be seen in the original photos from the exhibition in Paris.
-
Thanks for the info but I found a pic from the workshop and painted the engine like that too, shame I didn't ask uncle google. There are a lot of cool pictures there.
-
I prepared the model for painting and it was this kind of painting that I divided into instalments for myself. After masking the inner surfaces I applied khaki colour to the undercarriage shroud part, the manufacturer printed it together with the wing part. Then masking and primer again. Coming back to the model still, we have two headlights in the wings and the pictures only show the one in the left wing and the one in the right wing has been removed.
-
I considered using sheet metal from EDUARD and from PART but the fuselage has different dimensions and shape than the "Karas" and you have to rework these kits a lot to make them even partially applicable. I will definitely use the pilot's belts from YAHU and what else I don't know.
-
I had concerns about whether I would be able to cut out and then paint the engine, which was made as one piece. And I have to admit that these fears turned out to be unnecessary. It took some time to remove these supports from the print, and the rest was painting and masking until I was satisfied with the result. You can see how it worked out for me in the photo below.
-
I wanted to take a shortcut but it didn't work out, looking at the fact that the PZL.46 "Sum" is a development of the PZL.23 "Karas" design I wanted to use the extras from the "Karas" in the "Sum" and it turned out that they didn't fit. There is a big difference in the dimensions of the instrument panel, so the panel from YAHU went to the magazine. And coming back to the model the board is very nicely done and consists of three parts. I have checked in all ways and the best way is to mount it before the engine is mounted, together with the cowl, because once the engine is mounted there is the problem of positioning it.
-
Construction is progressing and the 'Catfish' is starting to take shape. Apart from the flaps, these are all separate surfaces and I will make them pivoted. The fit of the parts is very good and instead of the traditional dowels and holes for joining parts, rectangular grooves and wedges are made. It is very easy to build the model keeping the geometry correct in such a simple way. The only downside is the surface texture, it is not as smooth as the plastic models and polishing alone will not help much. The only option is to lay down a primer and sand it down re-creating the dividing lines and rivets, or skip it altogether and leave the model as it is. You have to look closely to see the surface texture where you can see the print marks. I leave it as it is.
-
Finally I have some free space in the workshop and I also have some time, so I have to continue building the PZL.46 "Sum" model. After cutting out all the supports from the printout, I prepared the model for painting and suggesting from the literature the interior of the model was silver, so it will be the same for me.
-
I have great satisfaction that I managed to finish this Fiat, the model is quite nice and it was fun to build especially as the parts fit perfectly. The biggest challenge I faced with it was how to build it? What to change and improve? Thanks to my friend Marcin, who suggested building it VINTAGE. And that's how I built it, without any changes. It's just a pity that it sat on a cupboard for a few years.
-
The construction of an alternative version of the Polish fighter PZL P.11g "Kobuz" from IBG has come to an end. In the construction of the model I used accessories from YAHU MODELS in the form of YMA7212 Instrument panel kits, YSM7227 Accessoriess. The build had no problems, the parts fitted very well and the decals fitted very nicely on the surface of the model. The only thing that made the construction more difficult for me was to replace the glazing and I embossed a new one and made the frames myself from the sheet metal provided by the manufacturer. The model has the camouflage suggested by the manufacturer and shows an alternative designation from the 1940 pursuit brigade. I would like to thank the IBG MODELS company for the donated model and the YAHU MODELS company for the extras to build the model.
-
The last workshop post from the construction of the PZL P.11g "Kobuz" model, this is how it looks. The rest of the photos in the gallery, feel free to visit.
-
LUBLIN R.XIII D 1:32 LUKGRAPH
Kriss replied to Kriss's topic in LSM 1/35 and Larger Work In Progress
I added something from myself based on the photos, I also did the lines and tensions and this is how the whole truss looks completed with the equipment. It took some time and intermittently but it is moving forward with the work. -
LUBLIN R.XIII D 1:32 LUKGRAPH
Kriss replied to Kriss's topic in LSM 1/35 and Larger Work In Progress
Cannibalism fits most closely to what I was able to do because for the only addition which is the instrument panel from "YAHU" (YMA3231) I still used from the YMS3202 kits the pilot and gunner belts and in addition I used the gyrocompass and this kit is dedicated to the PZL P.11 c. -
LUBLIN R.XIII D 1:32 LUKGRAPH
Kriss replied to Kriss's topic in LSM 1/35 and Larger Work In Progress
It's been a while since my last post here, but I'm still struggling with the model. And to be honest they messed me up a bit with the statue but about that another time. In the pictures in the cockpit on the right there is a control panel of some sort so I decided to make one in the model too, this one came out for me.
