

Kriss
-
Posts
354 -
Joined
-
Last visited
Content Type
Profiles
Forums
Events
Gallery
Everything posted by Kriss
-
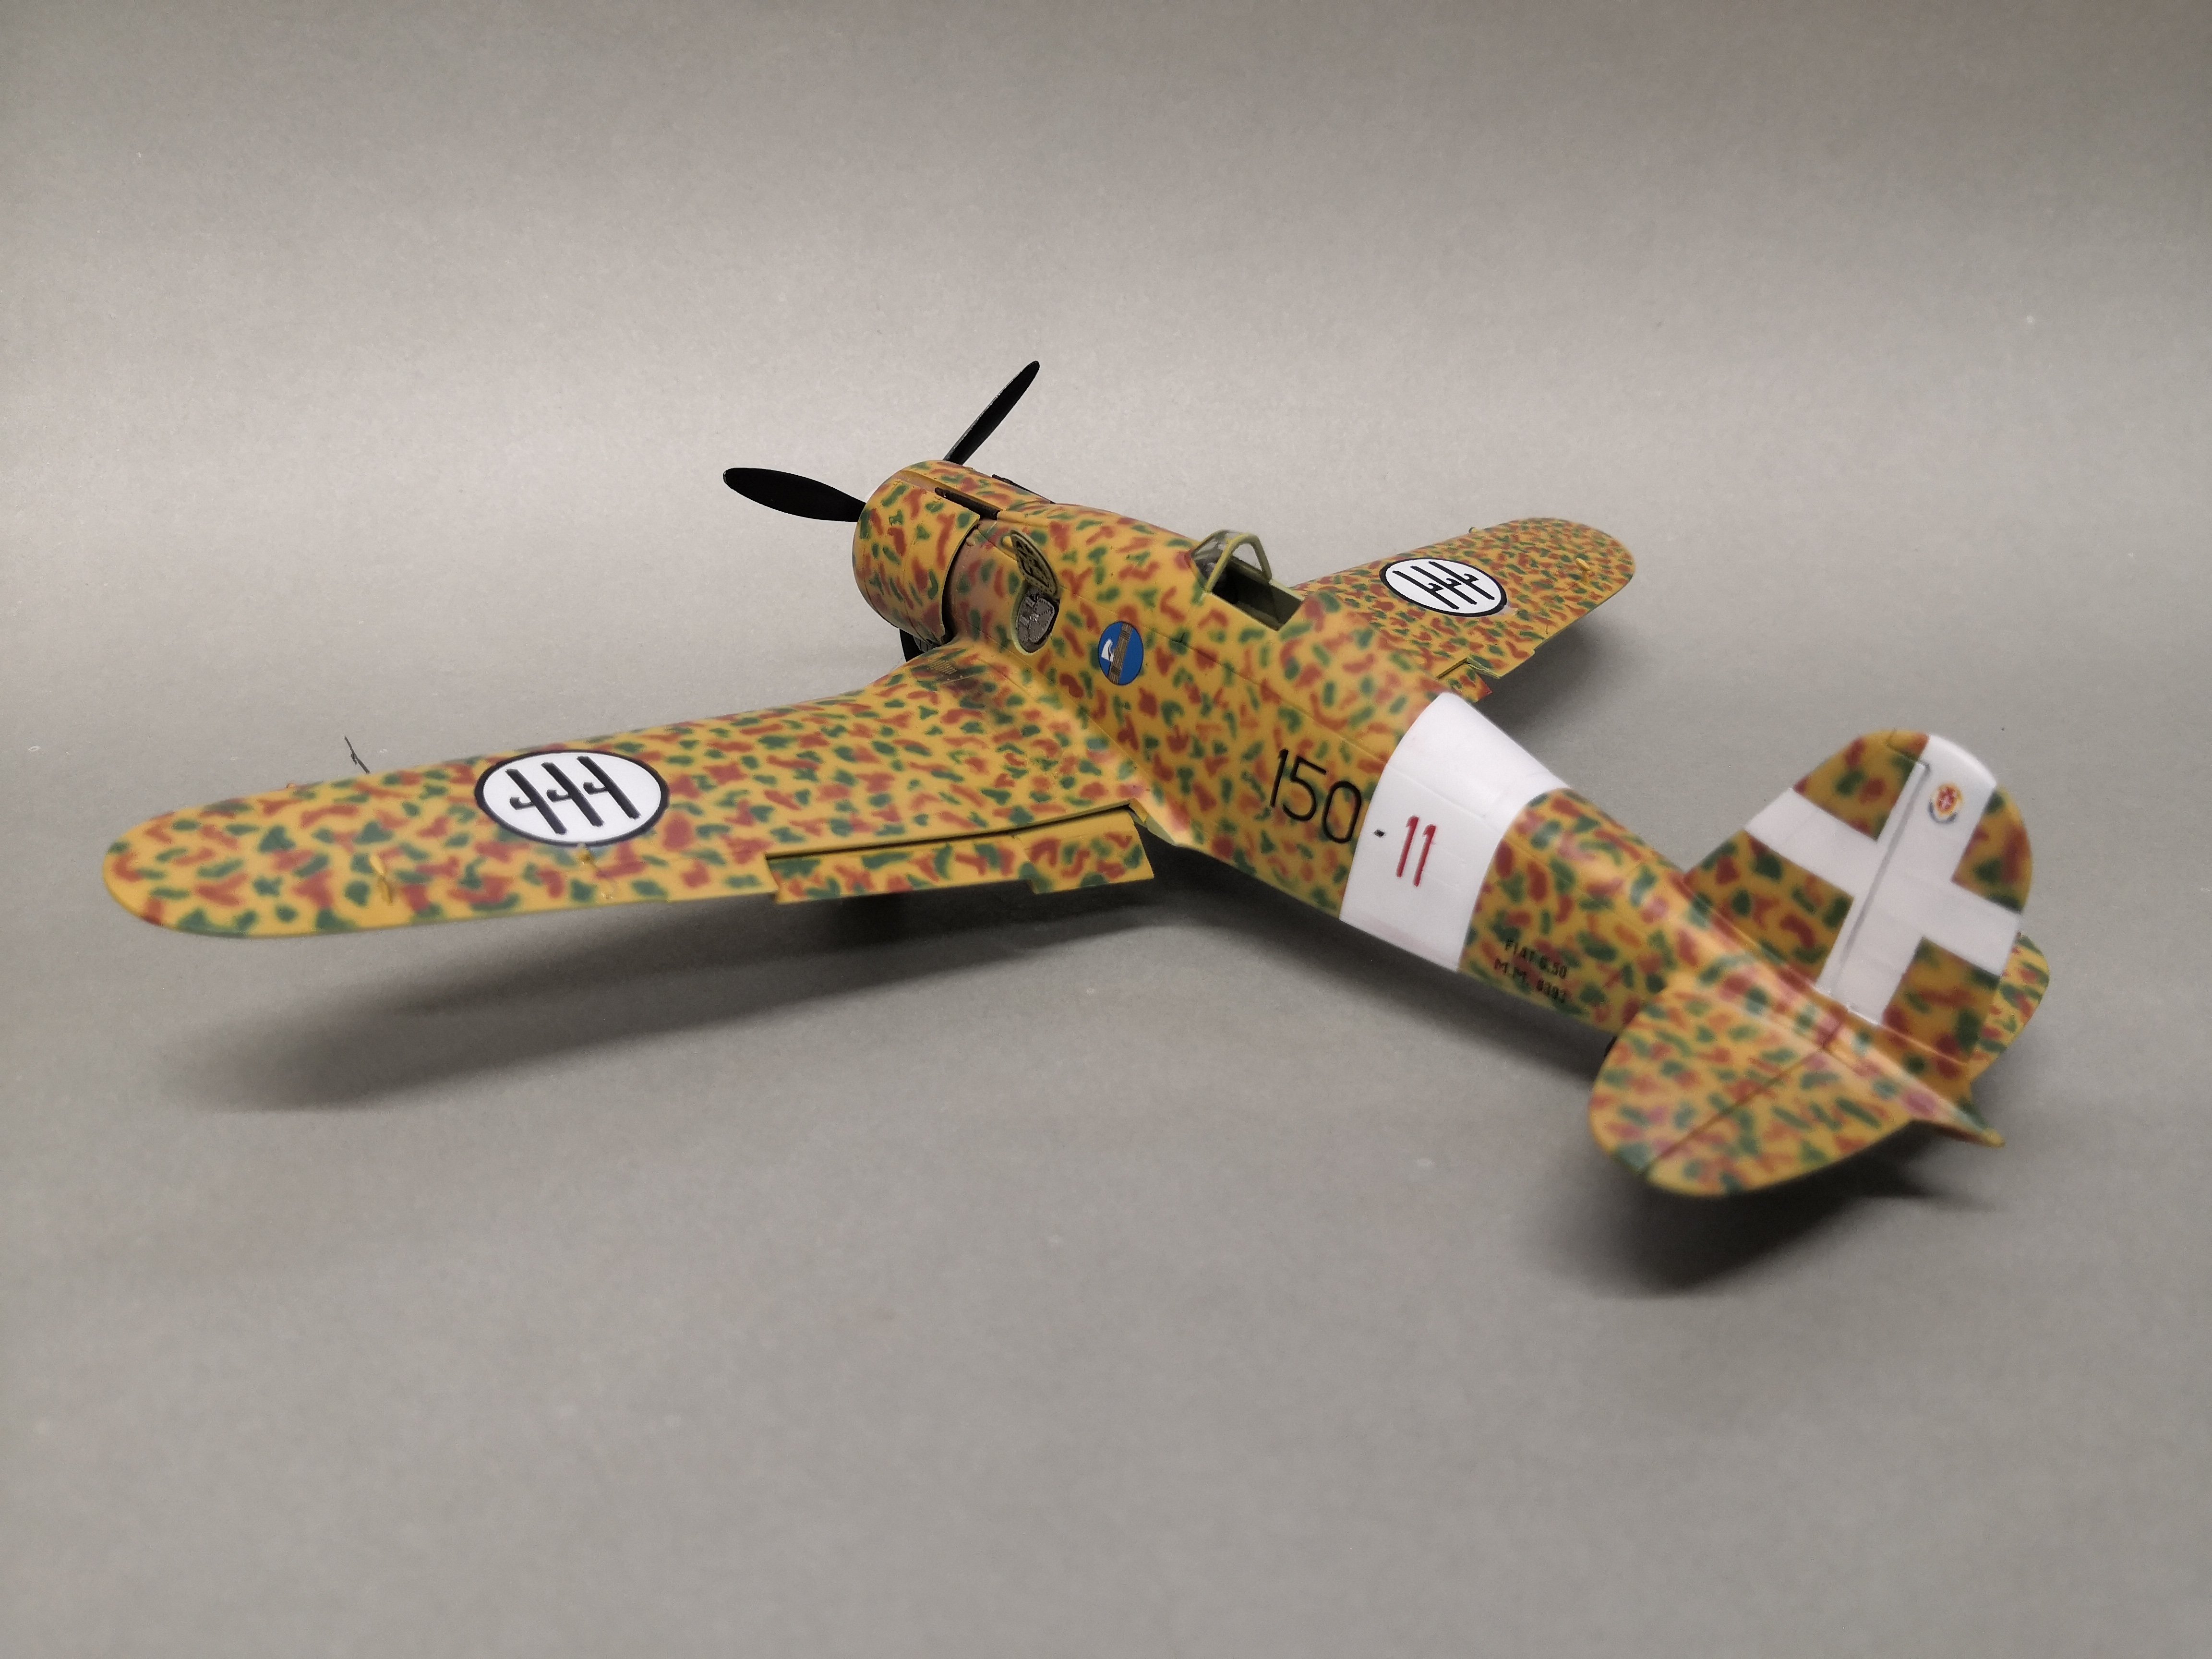
The camouflage is already finished now it's left to me to apply the decals and put everything together. All these spots are painted freehand, without using stencils or masks.
- 18 replies
-
- 4
-

-
- caproni ca.100
- fly
- (and 1 more)
-
Fun to paint camouflage spots like this, one more colour of spots and you can put it all together.
- 18 replies
-
- 6
-

-
-
- caproni ca.100
- fly
- (and 1 more)
-
Another colour of camouflage applied. Actually, the first two colours were a sheer pleasure, and the fun would only start with the other two colours.
- 18 replies
-
- 4
-
-
- caproni ca.100
- fly
- (and 1 more)
-
The first colour of camouflage applied and masked. I still have three colours left to apply.
- 18 replies
-
- 3
-
-
- caproni ca.100
- fly
- (and 1 more)
-
Prepared for painting, so far the build is going without problems and all parts fit.
- 18 replies
-
- 4
-
-
- caproni ca.100
- fly
- (and 1 more)
-
I have already managed to put it together as you can see. The parts fit together like LEGO bricks. I wanted to do it straight out of the box but unfortunately I can't do it that way even though it is a test model. I know that technology does not allow for thinner parts, but I replaced the aileron control cables with thinner ones. They were too eye-catching.
- 18 replies
-
- 4
-
-
- caproni ca.100
- fly
- (and 1 more)
-
Fuselage interior finished, parts fit perfectly. Pilot belts from decals from the kit. The only downside is the lack of clocks on the decal sheet. However, on the plastic parts of the boards the clocks are reproduced very nicely. Just a little work and the effect is complete. I made the boards on a plywood pattern because I saw such in the documentation. I know camouflage painting is a big challenge and it's still in 72.
- 18 replies
-
- 2
-
-
- caproni ca.100
- fly
- (and 1 more)
-
Caproni will be in box camouflage, the prettiest for me. In addition, we still have the following paintwork to choose from: Caproni Ca.100, Military School, Italian Air Force, Venice, Italy the 1930s Caproni Ca.100, original warbird, Bresso (Milan), Italy 2021 Caproni Ca.100, Spanish Air Force, Spain 1937 Caproni Ca.100, No. 450 Sq., RAAF, Agnone, Italy autumn 1943
- 18 replies
-
- 4
-
-
-
- caproni ca.100
- fly
- (and 1 more)
-
I was given a 1:72 scale model of the Caproni Ca.100 Italian school aircraft released by FLY for testing. Four versions were released at once and each in a different box. And I received for the test, in my opinion, the most interesting camouflage version, the fly72034 Caproni Ca.100 Landplane. Isn't the Italian camouflage on the box beautiful? The others are also very interesting and we have other versions to choose from that differ by engine and also on floats. Here they are: fly72055 Caproni Ca.100 Float plane fly72056 Caproni Ca.100 Radial engine fly72057 Caproni Ca.100 Float and radial engine The contents of the box are common to all versions, two frames with parts to make each version. In this we have two sets of wings with or without slots, two engines, etc. We also have injection moulded cockpit covers and for this we have a small sheet and on top of this we have spoke wheels and tension parts. The manual is also common to all versions but has the differences that are between the versions marked.
- 18 replies
-
- 3
-
-
- caproni ca.100
- fly
- (and 1 more)
-
The model is finished and I already invite you to the gallery. I made a few changes to the model compared to what IBG offered in their kit. But these are all cosmetic changes. Based on the photos and plans I made an open cockpit but without the windscreens and in it I added a few small details, on the engine cover I changed the locks for opening it and on the underside of the wings there is a top coloured leading edge and wing tip. I described everything in the workshop thread. Model of a Polish aircraft used by the Bulgarian Air Force. PZL P.24 B, 1st Armejski Orliak (1st Army Squadron), Bozurishte airfield near Sofia 1937. The inscription on the fuselage (Simeon Kniaz Tyrnovskiy) was applied on the occasion of the birth of Tsar Boris's son (16 June 1937) The aircraft in such markings took part, among others, in the ceremonial dedication of the banners of Bulgarian aviation units on 27 June 1937.
-
To conclude the workshop, the last photo is one for the gallery. I made a few changes to the model compared to what IBG offered in their kit. But these are all cosmetic changes. Based on the photos and plans I made an open cockpit but without windscreens and there I added a few small details, on the engine cowling I changed the locks to open it and on the underside of the wings there is a top coloured leading edge and wing tip. I have described everything in the workshop thread. Model of a Polish PZL P.24 B aircraft, 1st Armejski Orliak (1st Army Squadron), Bozhurishte airfield near Sofia 1937. The inscription on the fuselage (Simeon Kniaź Tyrnowski) was applied on the occasion of the birth of Tsar Boris's son (16 June 1937) The aircraft in such markings took part, among others, in the ceremonial consecration of the banners of the Bulgarian aviation units on 27 June 1937.
-
(WIP) Curtiss A-8 „SHRIKE” 1:48 Czech Model
Kriss replied to Kriss's topic in LSM 1/48 Work in Progress
The hull closed, the interiors of both crew compartments fitted almost perfectly. There was a bit of sanding. I also added two panes of glass to the top of the fuselage. Now working on the rest of the model. -
(WIP) Curtiss A-8 „SHRIKE” 1:48 Czech Model
Kriss replied to Kriss's topic in LSM 1/48 Work in Progress
Fuselage and all elements to be found in the fuselage ready. In addition to this, the inlet above the engine is cut out, there are cut-outs in the fuselage for six windows, four of which are already inserted. The two upper windows will be inserted when the fuselage is closed, it will be easier for me to make them. In the horizontal stabilisers I drilled a hole for the locating pins and in the fuselage I also drilled one. That would be it, I am now off to paint the interior and exhaust. -
(WIP) Curtiss A-8 „SHRIKE” 1:48 Czech Model
Kriss replied to Kriss's topic in LSM 1/48 Work in Progress
Compartments of both cabins ready to be fitted into the fuselage. -
Another completed model lands in the display case, namely the Bf-110 G-2/R3 5./ZG 76 Reichsverteidigung, winter 1944. It was a bit of fun fitting a few parts, but otherwise a pleasure. Enjoy watching.
-
(WIP) Curtiss A-8 „SHRIKE” 1:48 Czech Model
Kriss replied to Kriss's topic in LSM 1/48 Work in Progress
After a long hiatus of my absence I have returned. I managed to do the interiors of both cabs, still in parts and am checking the fit of everything. -
I managed to finish another model, photo from the workshop taken at night. Gallery soon, yes I am still thinking about replacing the gun barrels with metal ones. But this will only be cosmetic. The next model in 72 is Ca.100 from FLY, such a quick test model.
-
Work is coming to a close now, the cabin will be open as I planned. The glazing frame shaped, divided and painted. All that remains is for me to glaze it and fit it to the model.
-
The next stage of construction is the glazing of the cabin and we have two options in the box. The first is to make the cab from an injection moulded one or to make it using the sheet metal supplied with the model. For me the injection moulded one is out because I want to make an open cab, it is just too thick so I will make it from sheet metal. The first stage is done, the frames are shaped and waiting to be cut and painted.
-
And we managed to put it on wheels, well almost because the wheels are still separate.
-
The engine cover is done, now it's time for the engine itself. The picture says it all.
-
Still paint the tyres and put decals on them. And I will be able to mount the wheels already on the aircraft.
-
The decals have been applied, I had some fun applying the marks from the bottom due to their positioning at the junction of the corrugated sheet covering. The decal laid out very nicely, the effect can be seen in the photos below.
-
I am just struggling with the decals, wait for the hull lettering in Cyrillic. I can already admire it. And if I succeed, I will upload pics tomorrow after work.
-
Masks removed and it doesn't look too bad, the intended effect achieved 100%. Nice red colour on all parts of the model, painted and not from decals.