

Kriss
-
Posts
354 -
Joined
-
Last visited
Content Type
Profiles
Forums
Events
Gallery
Everything posted by Kriss
-
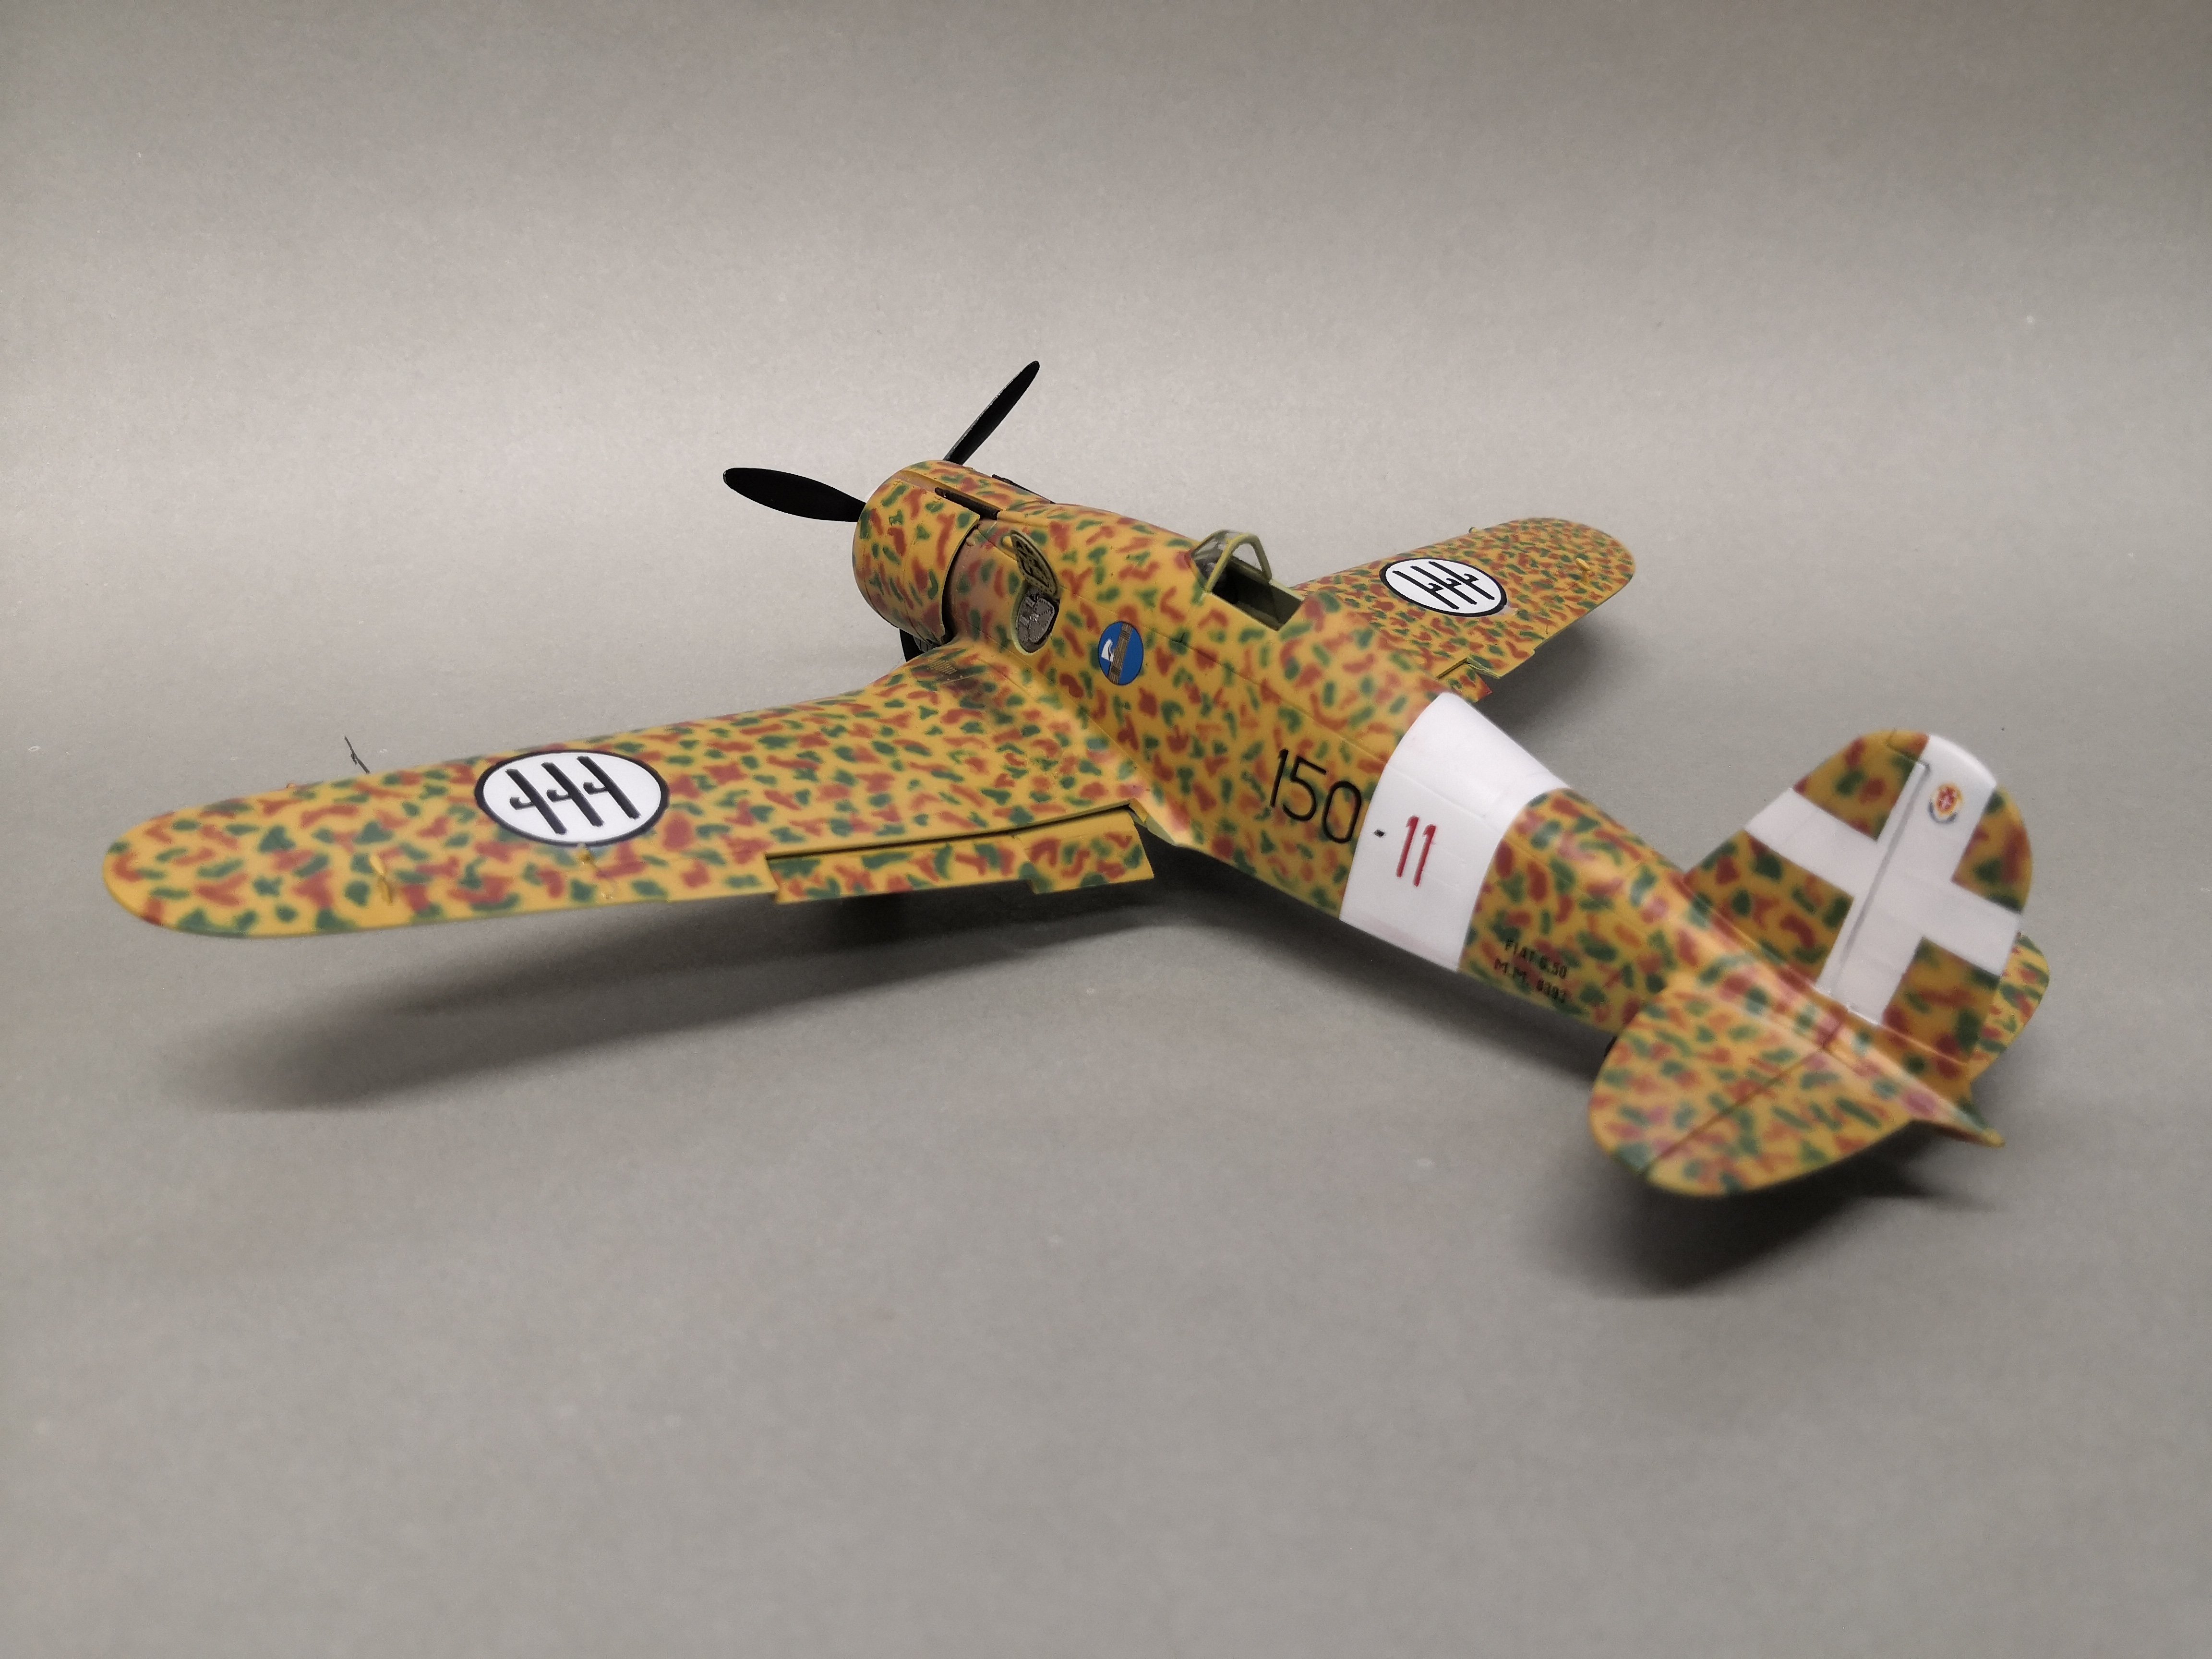
Everything masked off and now it's the turn of the red colour. I approached this to dispense with decals for fear of not matching the correct shade to the engine cover. In order to achieve a uniform red colour, I first painted the whole thing in the base colour and then covered it with masking tape, cutting out a pattern for the wheel covers and on the fuselage I first laid thin strips of 1 mm tape and then glued wider strips to this.
-
Pending masking and red colour. I've swapped decals for masking and painting, the result is not much better.
-
After more than two months of lay-up, the PZL is back in the workshop. The whole thing is already in colour but not what IBG recommends but for green-khaki, the likely colour used on aircraft produced for Bulgaria. And I changed the camouflage scheme and also painted the undersides of the wings as in the photos, this can be seen in the previous post. This is the progress of the work for today.
-

(WIP) Curtiss A-8 „SHRIKE” 1:48 Czech Model
Kriss replied to Kriss's topic in LSM 1/48 Work in Progress
I agree that this 'Shrike' looks to have been built from whatever they happened to have on hand. -
Another model flew into the workshop, one of those that are lingering in the cupboard and I still have a lot of it and my wife is whining about how much of it (good stuff) I still have and when I'm going to do it. So I'm getting on with the build, but one that's straight out of the box and how I'm going to make it. Introducing the Curtiss A-8 ‘SHRIKE’ in 1:48 from Czech Model, for me it's a bit of an exotic theme and there will be such themes between Italian and Polish themes. And this is how the box and its contents look like, and there is only one painting and two markings of the machine 80 and 83.
-
A successful weekend, hard but I managed to do everything I had planned and also had enough time to spend some time with the model. The last workshop photos and the rest is already in the gallery and I invite you to look at it. The next model in 48 will be a bit exotic for me and also from an old box in the wardrobe.
-
I managed to put it together, and you can see the reliable LEGO bricks. The armament compartment in the nose open will be open as will both engines. It's the weekend and I have to clean up in my workshop and in the evening I want to apply the camouflage.
-
And so the interior of the cabin came out, but still without the complete rear gunner's station.
-
Another Bf-110 G-2/R3 in 1:48 from REVELL has just arrived in the workshop, a model I started years ago and which is currently sitting in a box on the cupboard, so the tidying up continues. And if all goes well I might be able to get it done this weekend, I have almost all the parts cut out and ready for assembly and painting. The extras are only the DETAIL SET from AIRESA and the masks from MONTEX-MASK, but only the cabin itself because they were in the box. The model will be in boxed painting and will depict a machine from 5./ZG 76 Reichsverteidigung, winter 1944.
-
(RFI) S.M. 79-II „Sparviero” 1:48 Trumpeter
Kriss replied to Kriss's topic in LSM 1/48 Aircraft Ready for Inspection
I, too, have an Eduard along with accessories and am waiting for my inspiration to build it. -
(RFI) S.M. 79-II „Sparviero” 1:48 Trumpeter
Kriss replied to Kriss's topic in LSM 1/48 Aircraft Ready for Inspection
Yes there are shooting positions there, there are two on the top forward and backward and on the underside too, and on the sides of the fuselage. -
And another model completed and the photos go to the gallery, S.M. 79-II "Sparviero", 283 squadriglia, 130 gruppo autonoma, Mediterranean 1942. feel free to visit the gallery.
-
Model completed, I know there are some inaccuracies but I wanted to do it straight from the box. In summary the build went smoothly, the parts fitted together, a pleasure. Now I have one more "Sparviero" model waiting for me, but this one will be from the EDUARD kit. The last photo is in the workshop and for the rest I invite you to the gallery.
-
Finally managed to take photos for the gallery, I know photos taken quickly but you can see something on them. I invite you to view the gallery of the Northrop P-61 A "Black Widow" model. - "Lady Gen", Florennes, Belgium, december 1944.
-
Some aircraft had a milky radar cover and it could be seen. I had planned to make it like that but unfortunately in place of the radar I had to give a load so that it was standing on the landing gear rather than sitting on the tail.
-
The painting of the markings from the masks as well as the laying of the decals was successful, not everything had to be painted from the masks. The end is near so it is high time to look around for the next model.
-
I finished last night and forgive me but I didn't want to post anymore, I was too sleepy. For now the camouflage has been applied at the ready, I still have to use the paint masks and decals. Ps. Thanks for the hints.
-
This kind of camouflage not yet finished but already happy, I still have some left to finish.
-
The beginning of the game, this is the moment I always enjoy. Painting freehand without masking or stencils. By the way you can see my mess on my makeshift workshop. I am waiting for the end of the renovation at home to move to an already normal workshop.
-
After a long break, the P.24B is also back in the workshop. By reviewing the documentation and available materials and photos, and consulting with colleagues, I changed the colour of the underside to Polish blue instead of silver.
-
After a long break I am slowly getting back to the "Bison", but I already know that the work will go on and on for a long time. And I have a vision of what the finished model should look like. I have already managed to gather all the available documentation, at least I think so. And of the extras that can be added to it are a set of bombs from MIRAGE, pilot belts and rifles. My plan is to build all the Polish aircraft models then I have already bought various rifles in advance as you can see in the picture. So now I'm taking on the lower rear gunner's position.
-
Base on top laid and now it will be fun to play with camouflage.
-
Thanks for the materials provided. The white stripe on the fuselage painted and masked and I did the same with the underside.
-
A bit of fun and the torpedo including the mount is almost ready, one will be suspended and the other on a trolley. This is my plan. And here I have a small problem, namely how to paint the torpedo? I'm asking because I have several different versions and I don't know which is the correct one. And the next problem is does anyone have drawings of the transport trolley for the torpedo? I would be extremely grateful.
-
Undercarriage flaps replaced with new sheet metal. Still a torpedo and it will be possible to start playing with the camouflage.
