
Clunkmeister
-
Posts
7,193 -
Joined
-
Last visited
Content Type
Profiles
Forums
Events
Gallery
Everything posted by Clunkmeister
-

IBG models PZL P.11c. Finished
Clunkmeister replied to Clunkmeister's topic in LSM 1/35 and Larger Work In Progress
Hey Gus, one question, what’s a “jet”? -
IBG models PZL P.11c. Finished
Clunkmeister replied to Clunkmeister's topic in LSM 1/35 and Larger Work In Progress
Thanks Phil. For once I had some bench time to actually produce something. Feels nice, actually -
IBG models PZL P.11c. Finished
Clunkmeister replied to Clunkmeister's topic in LSM 1/35 and Larger Work In Progress
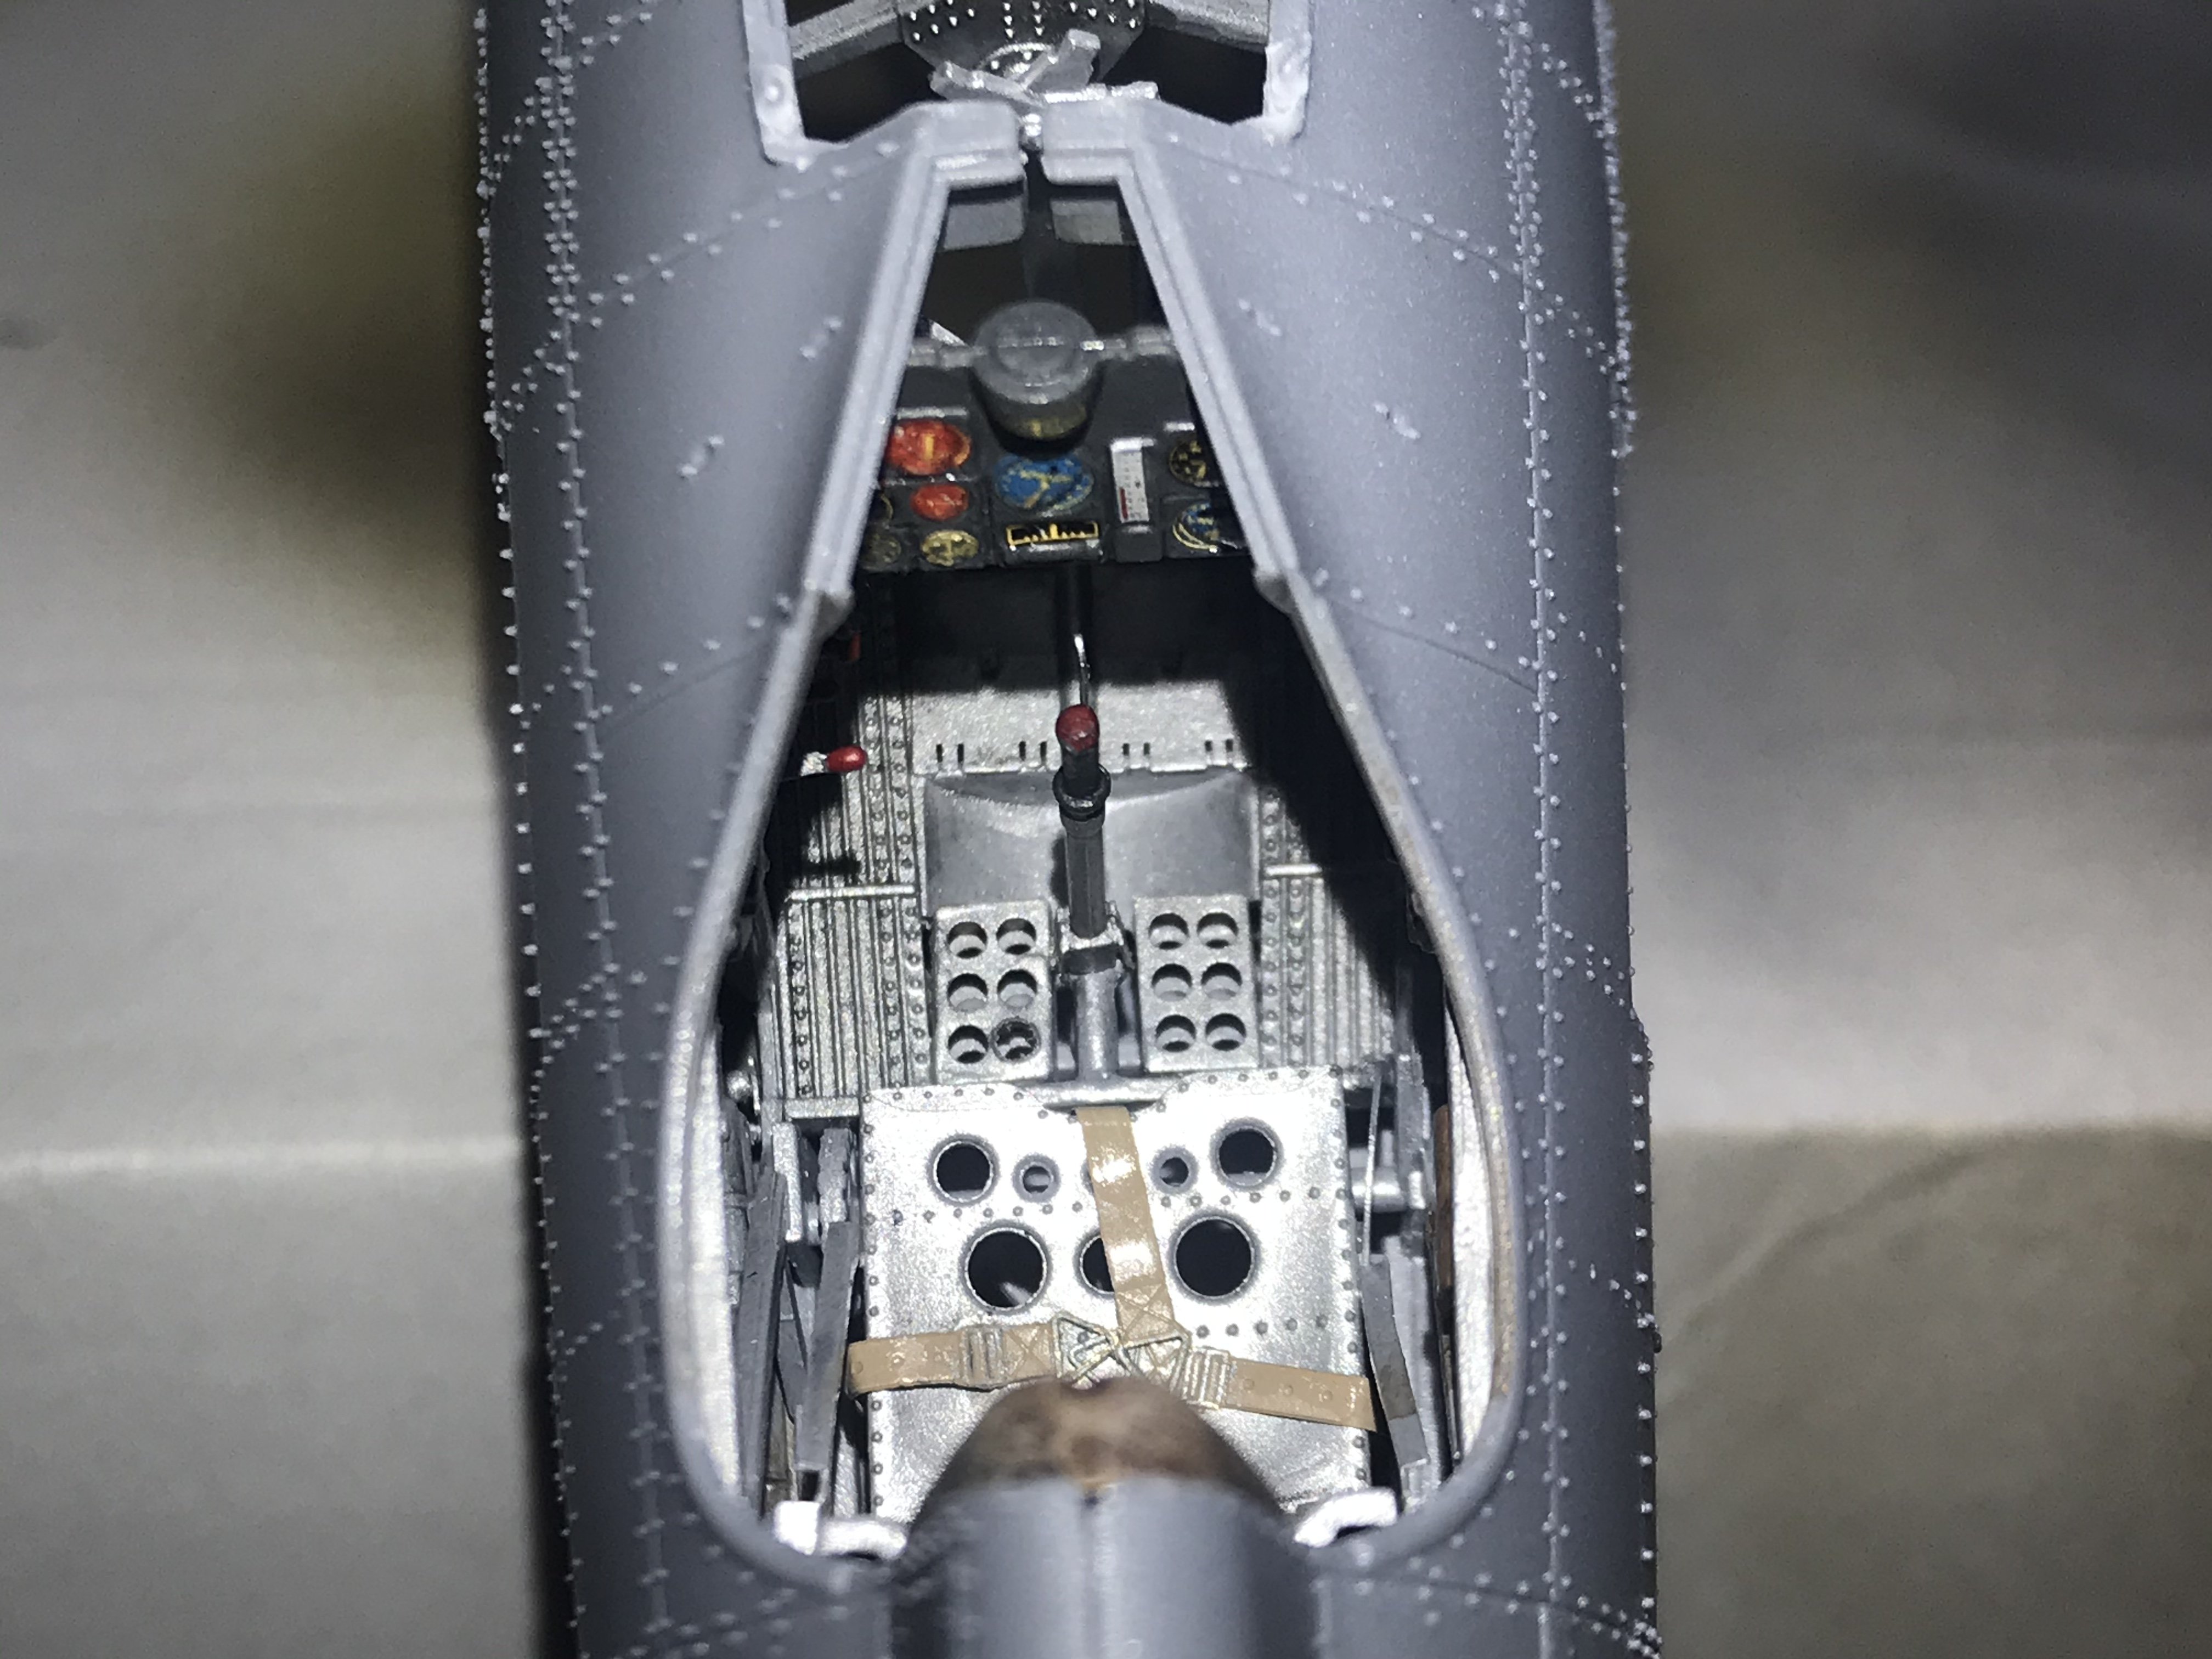
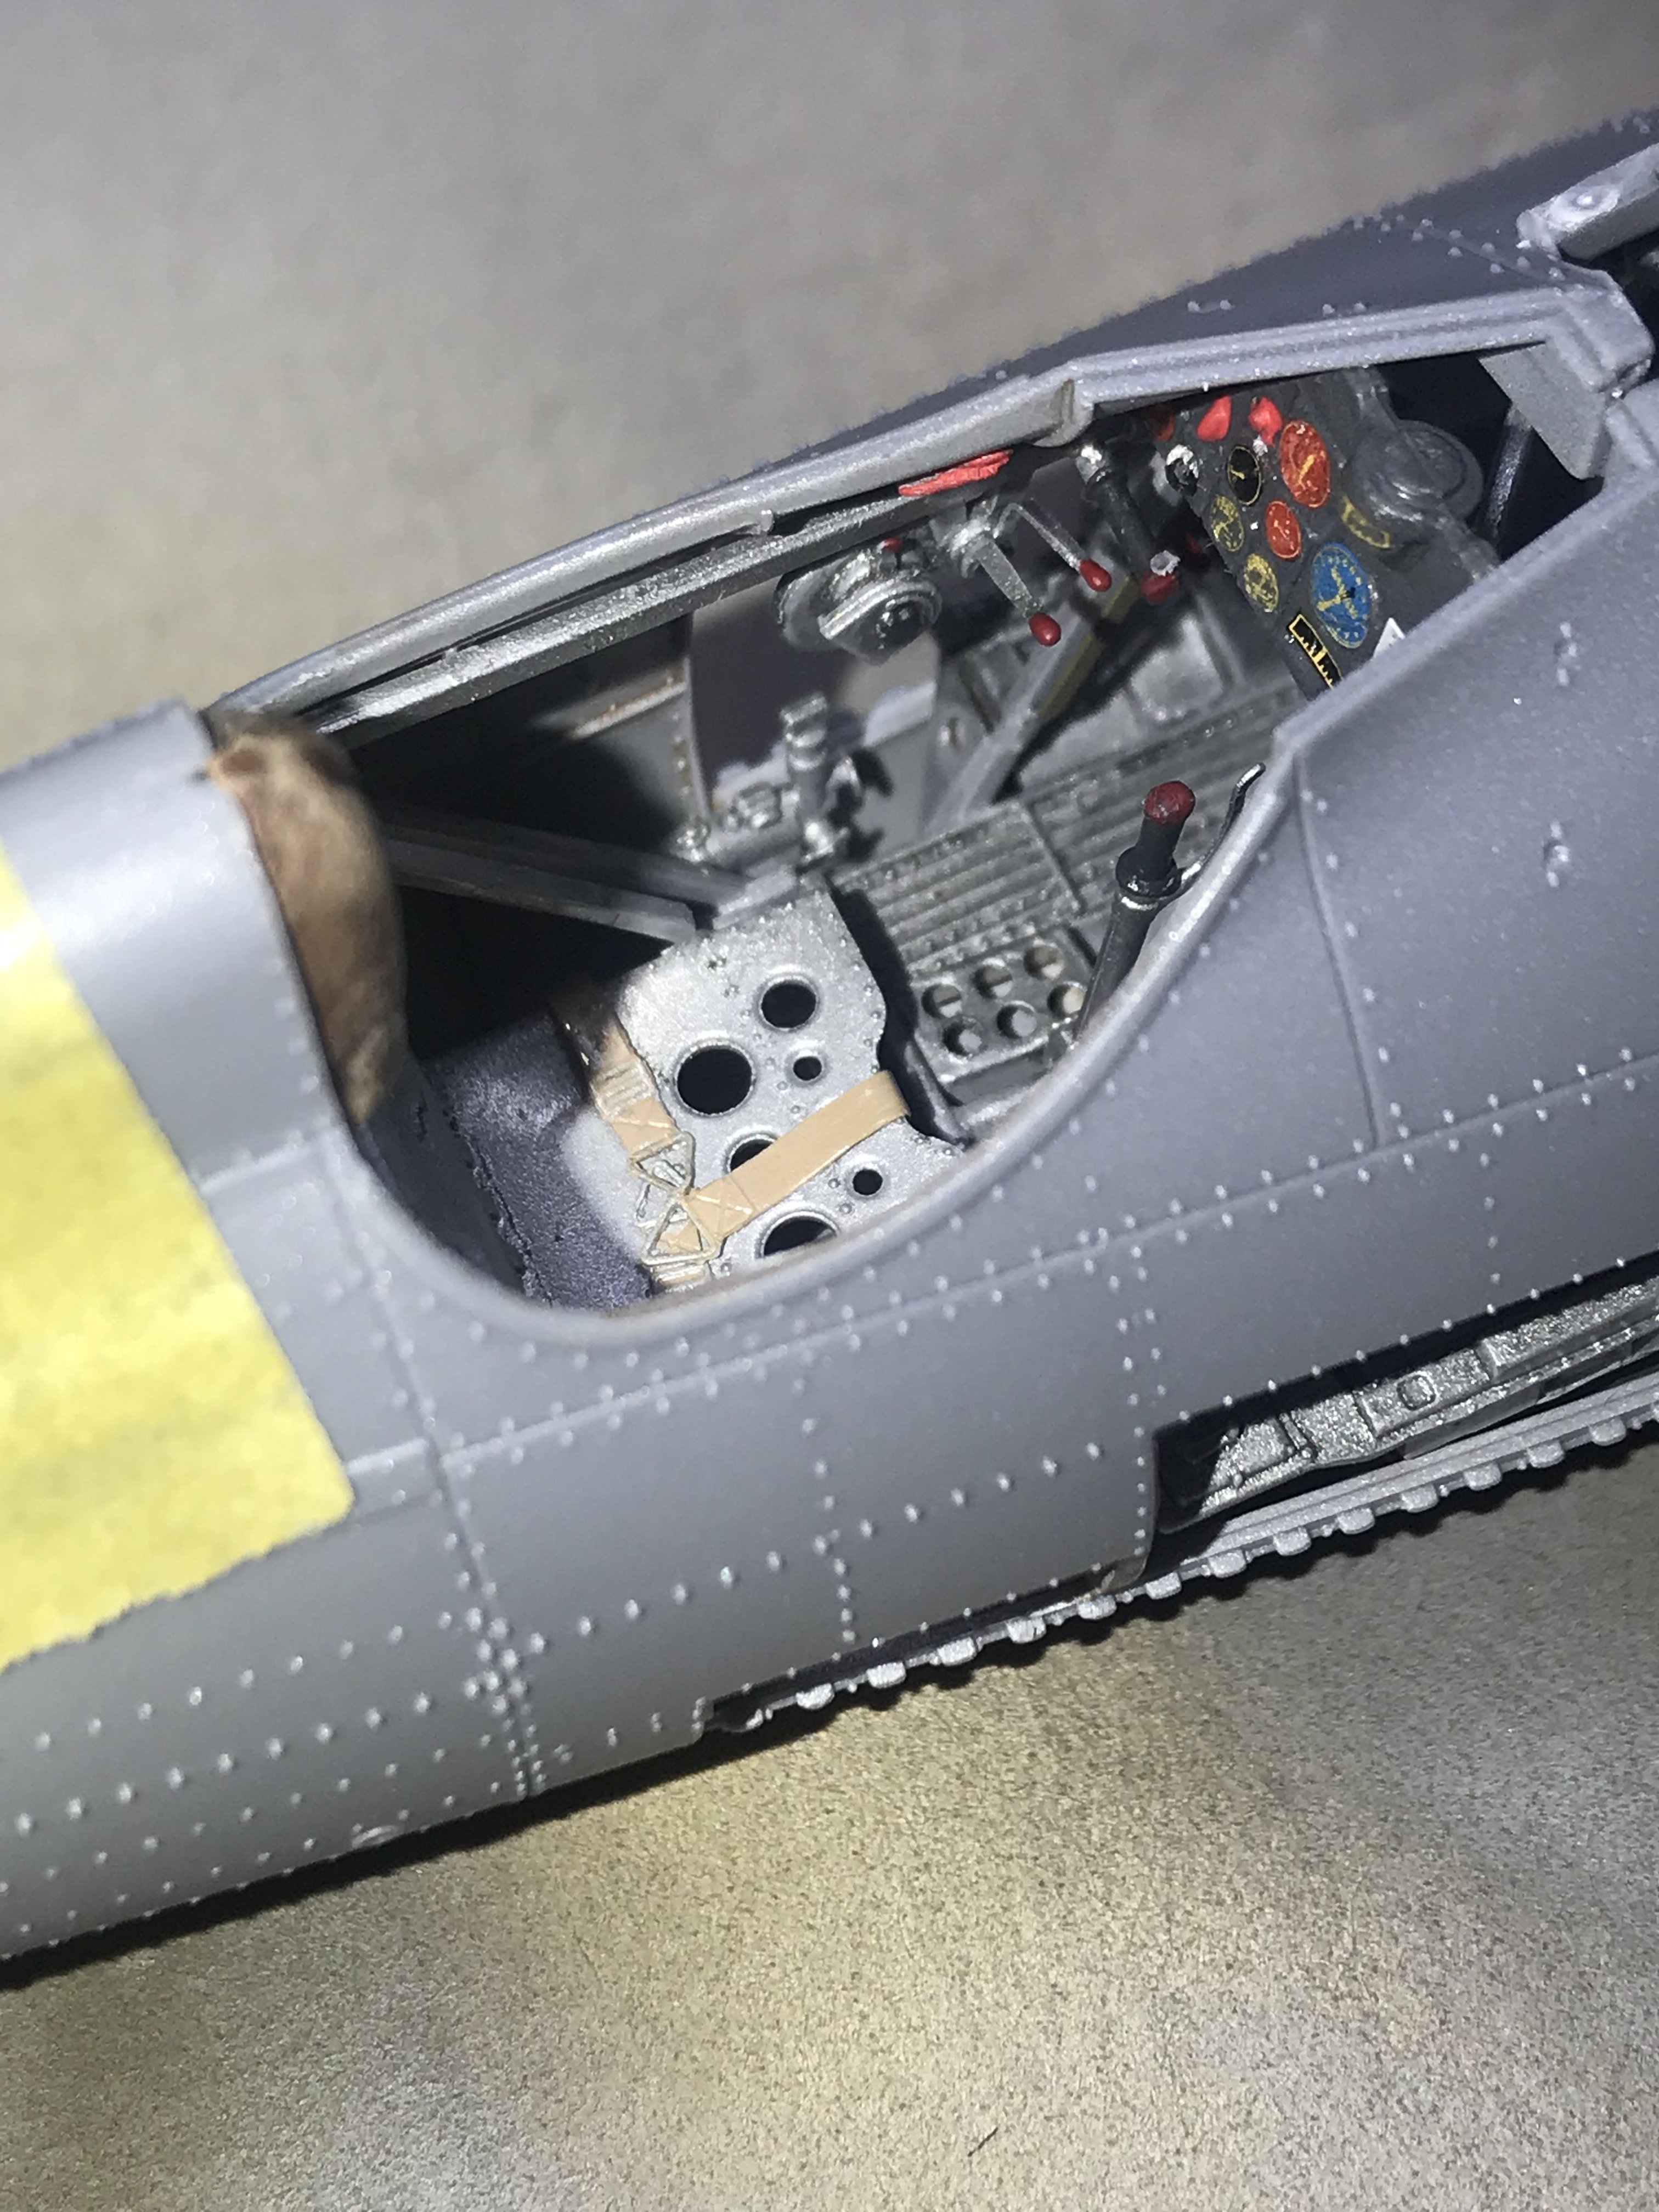
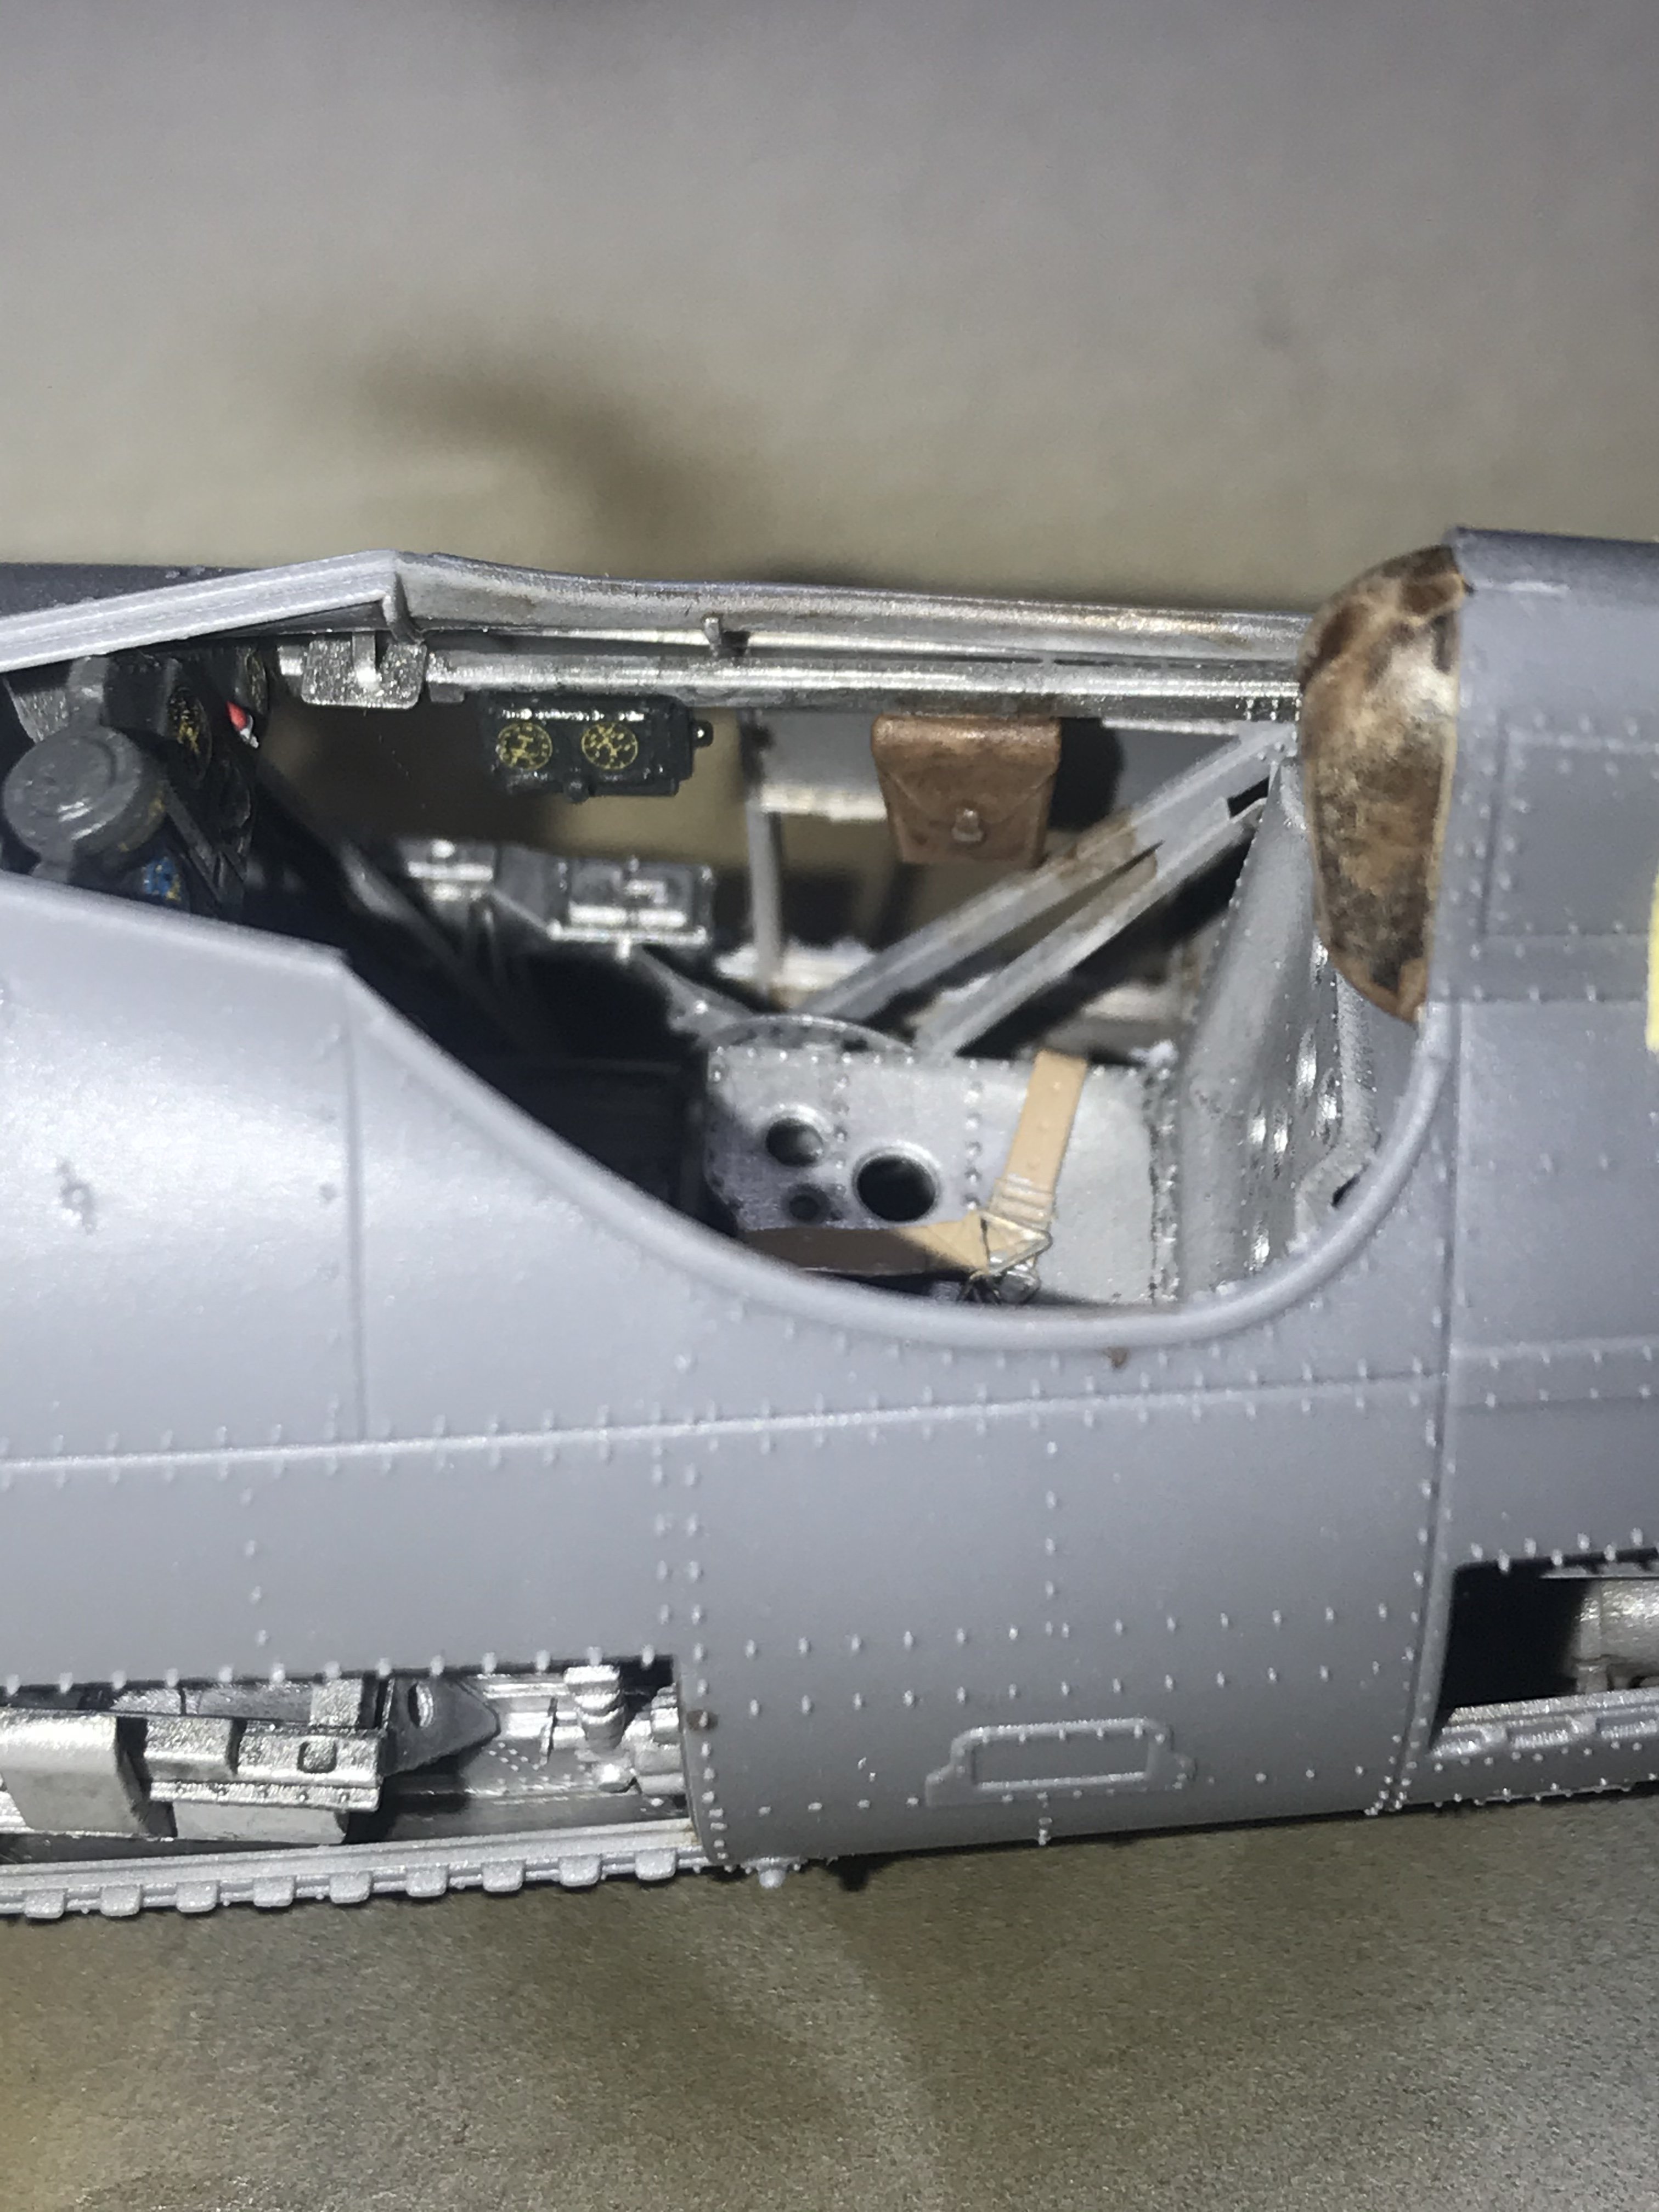
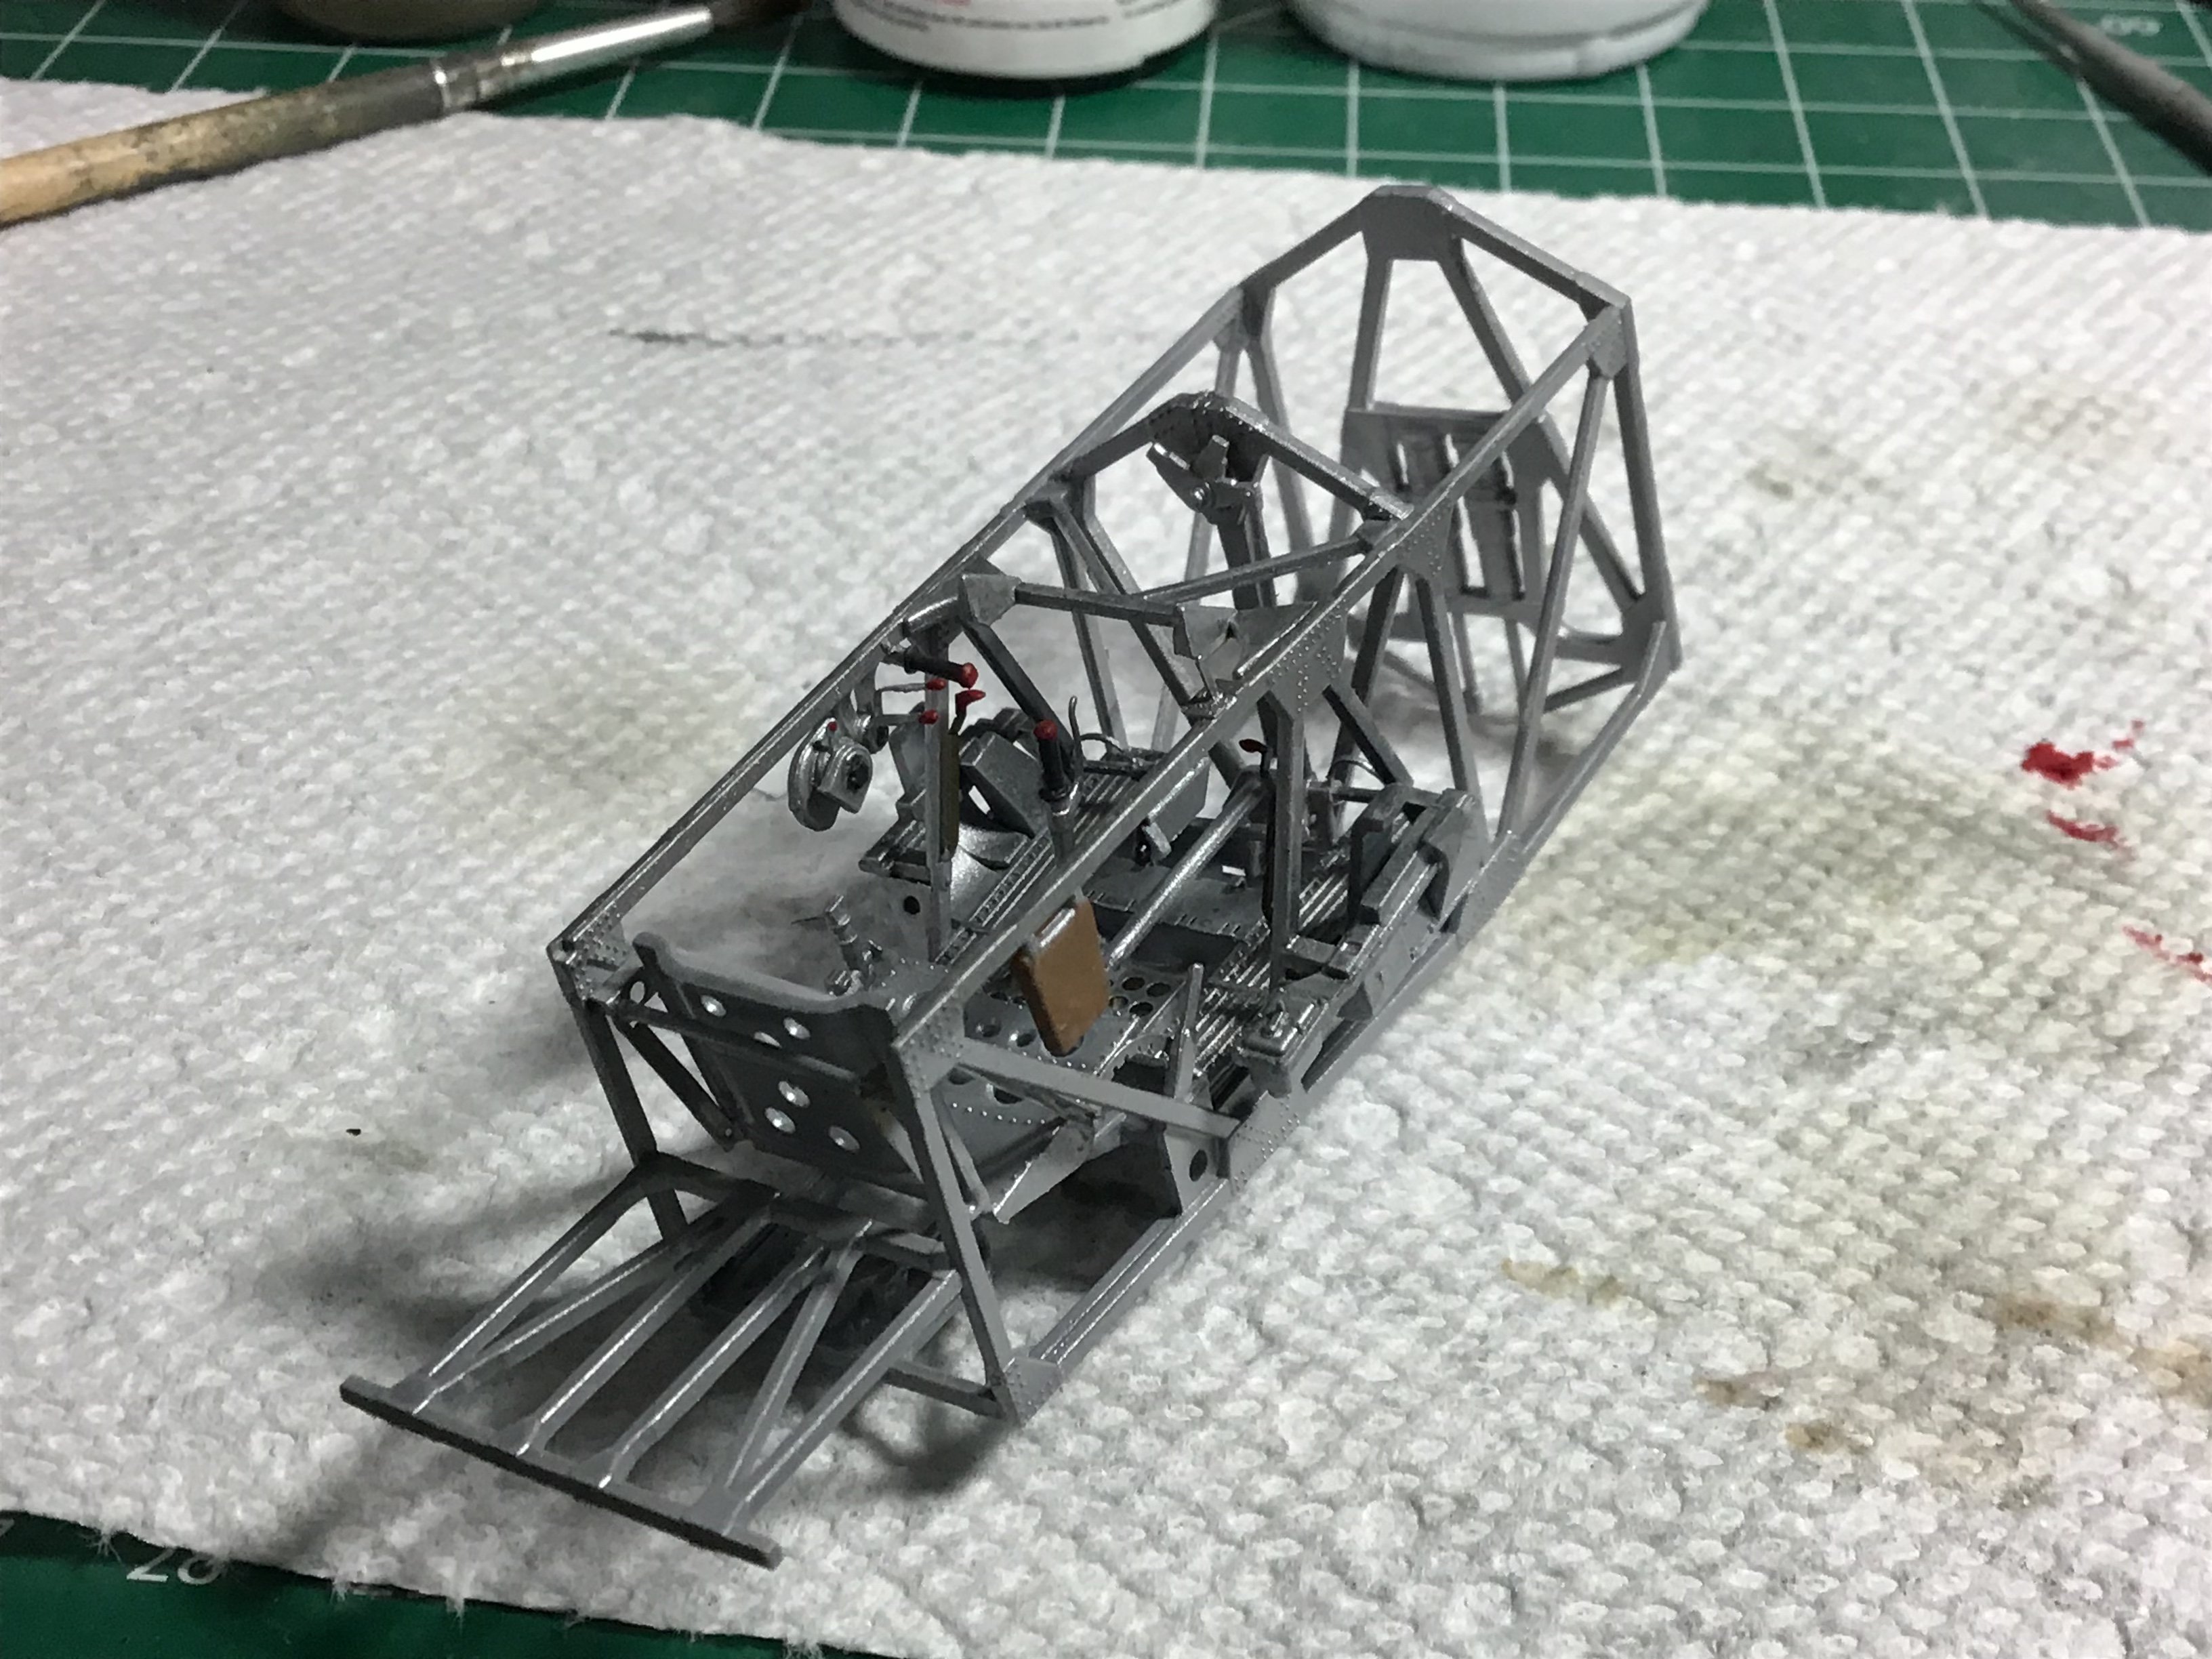
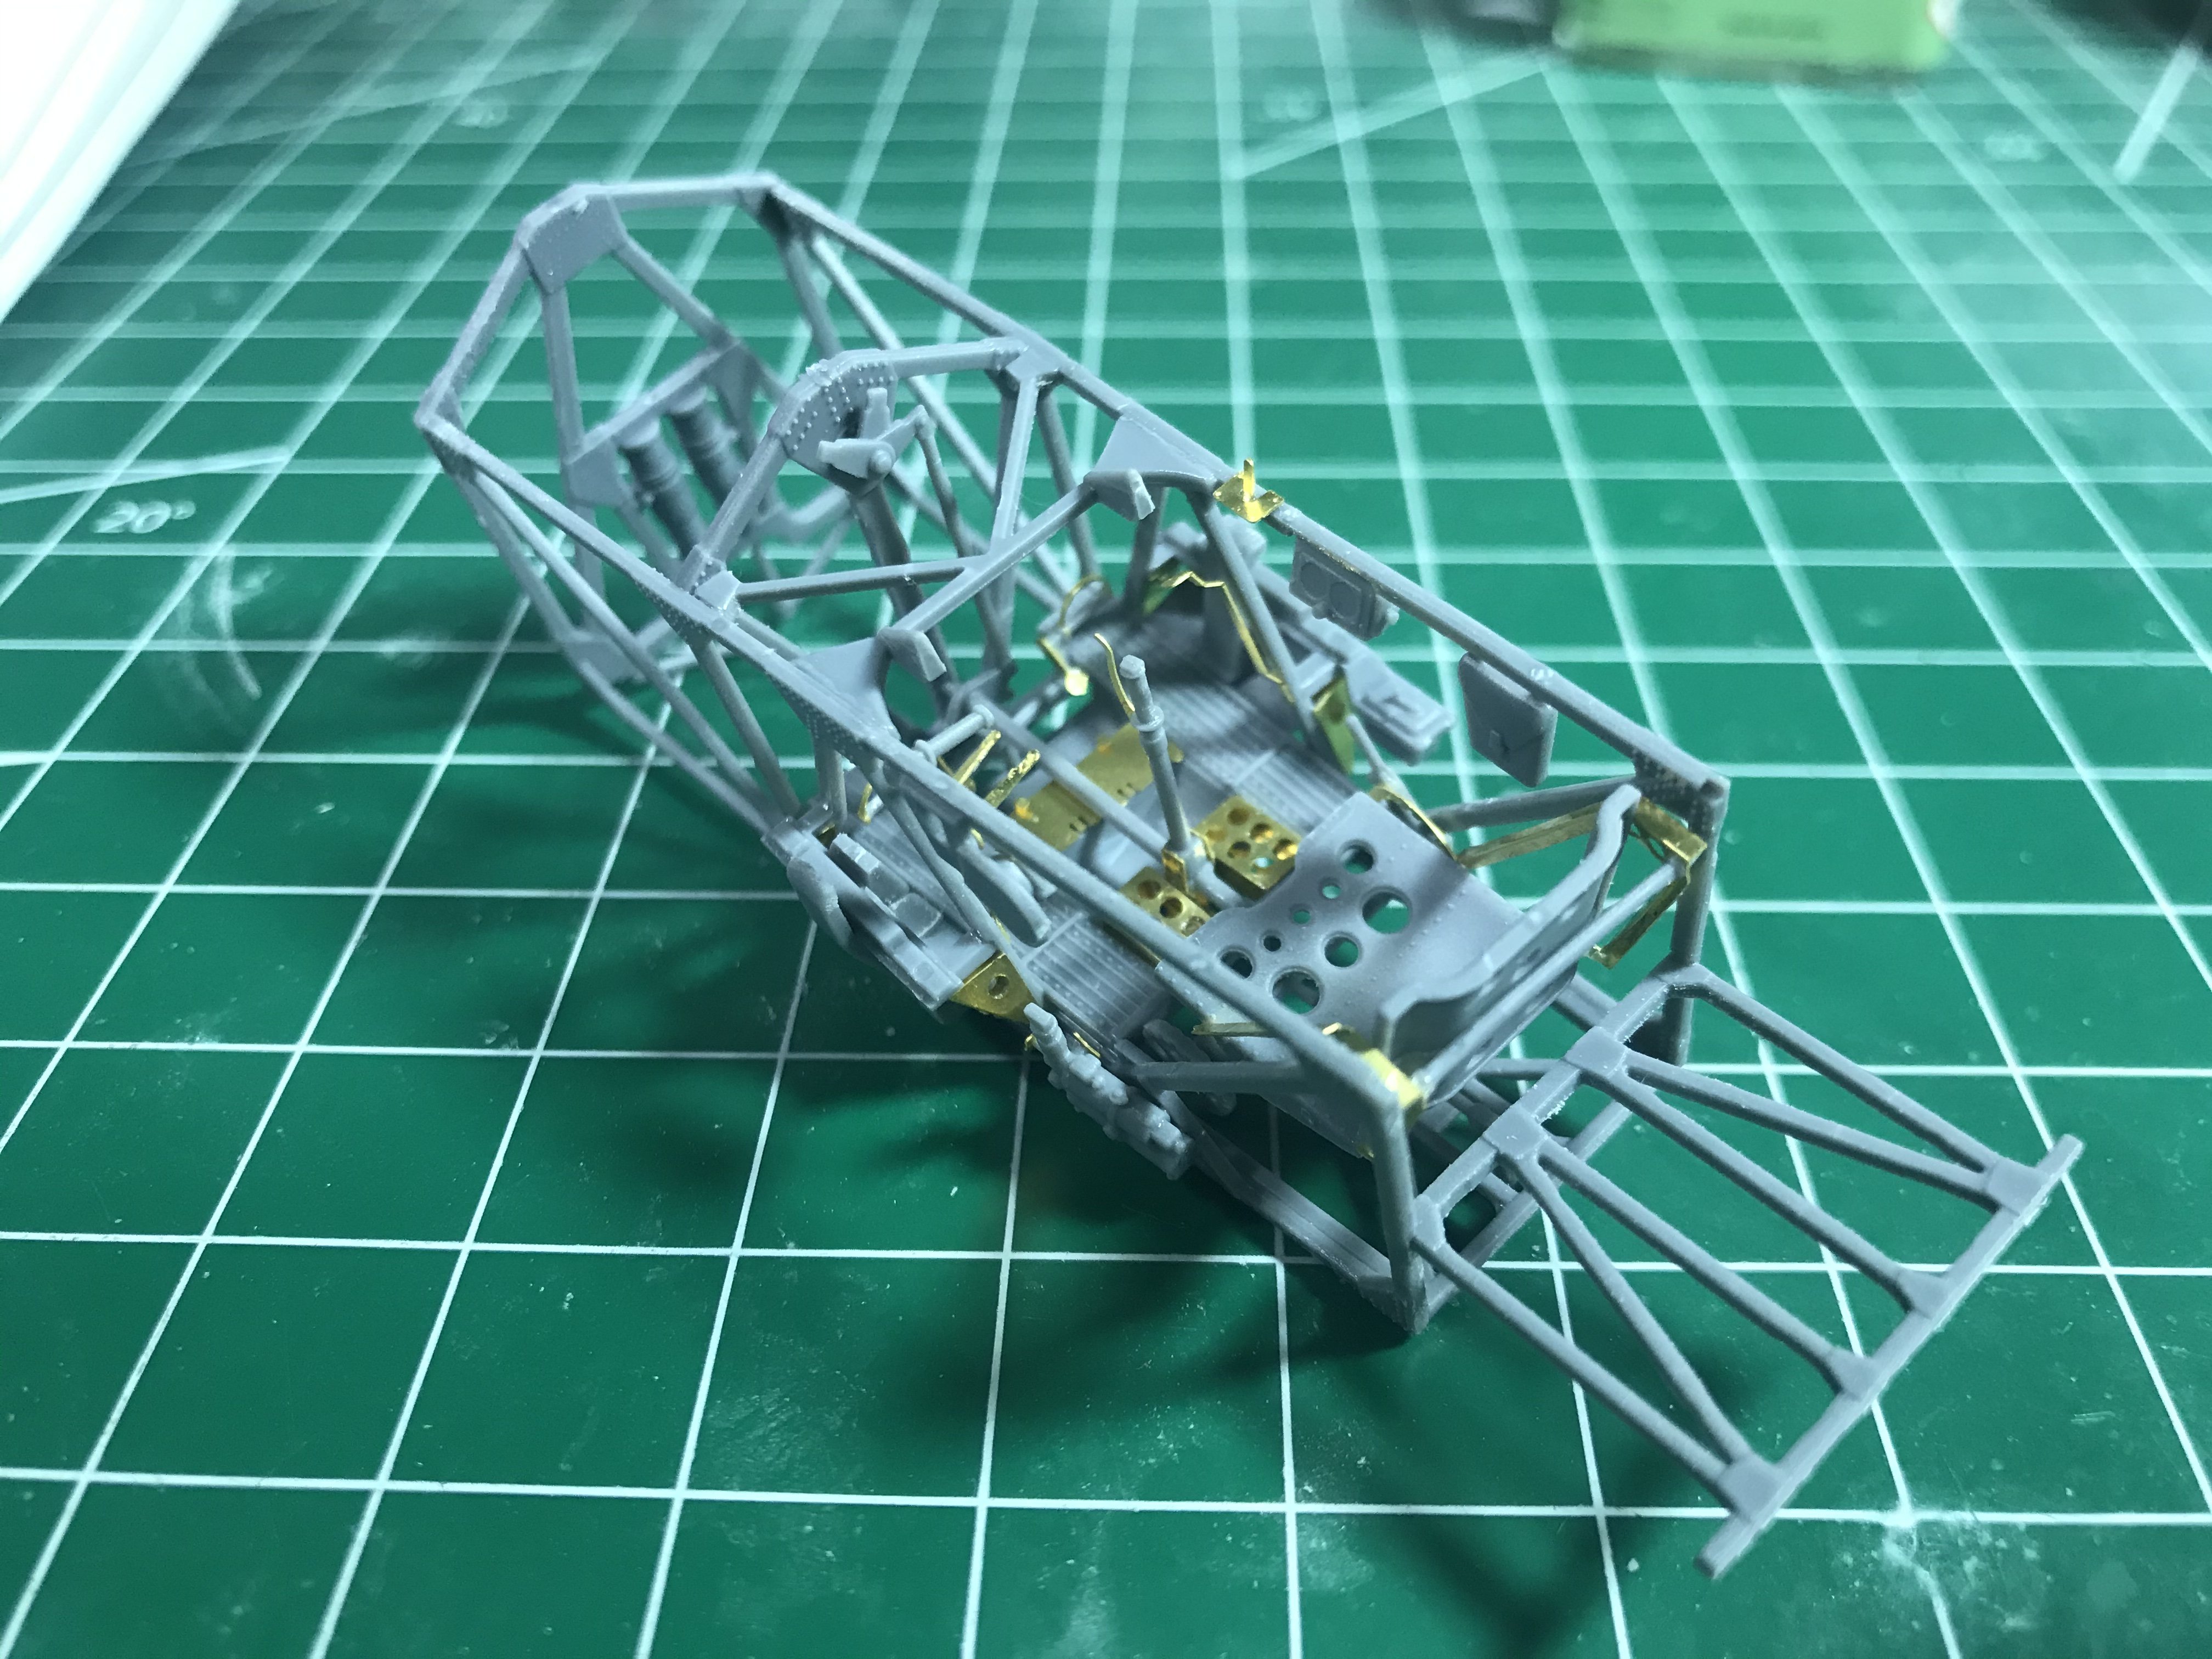
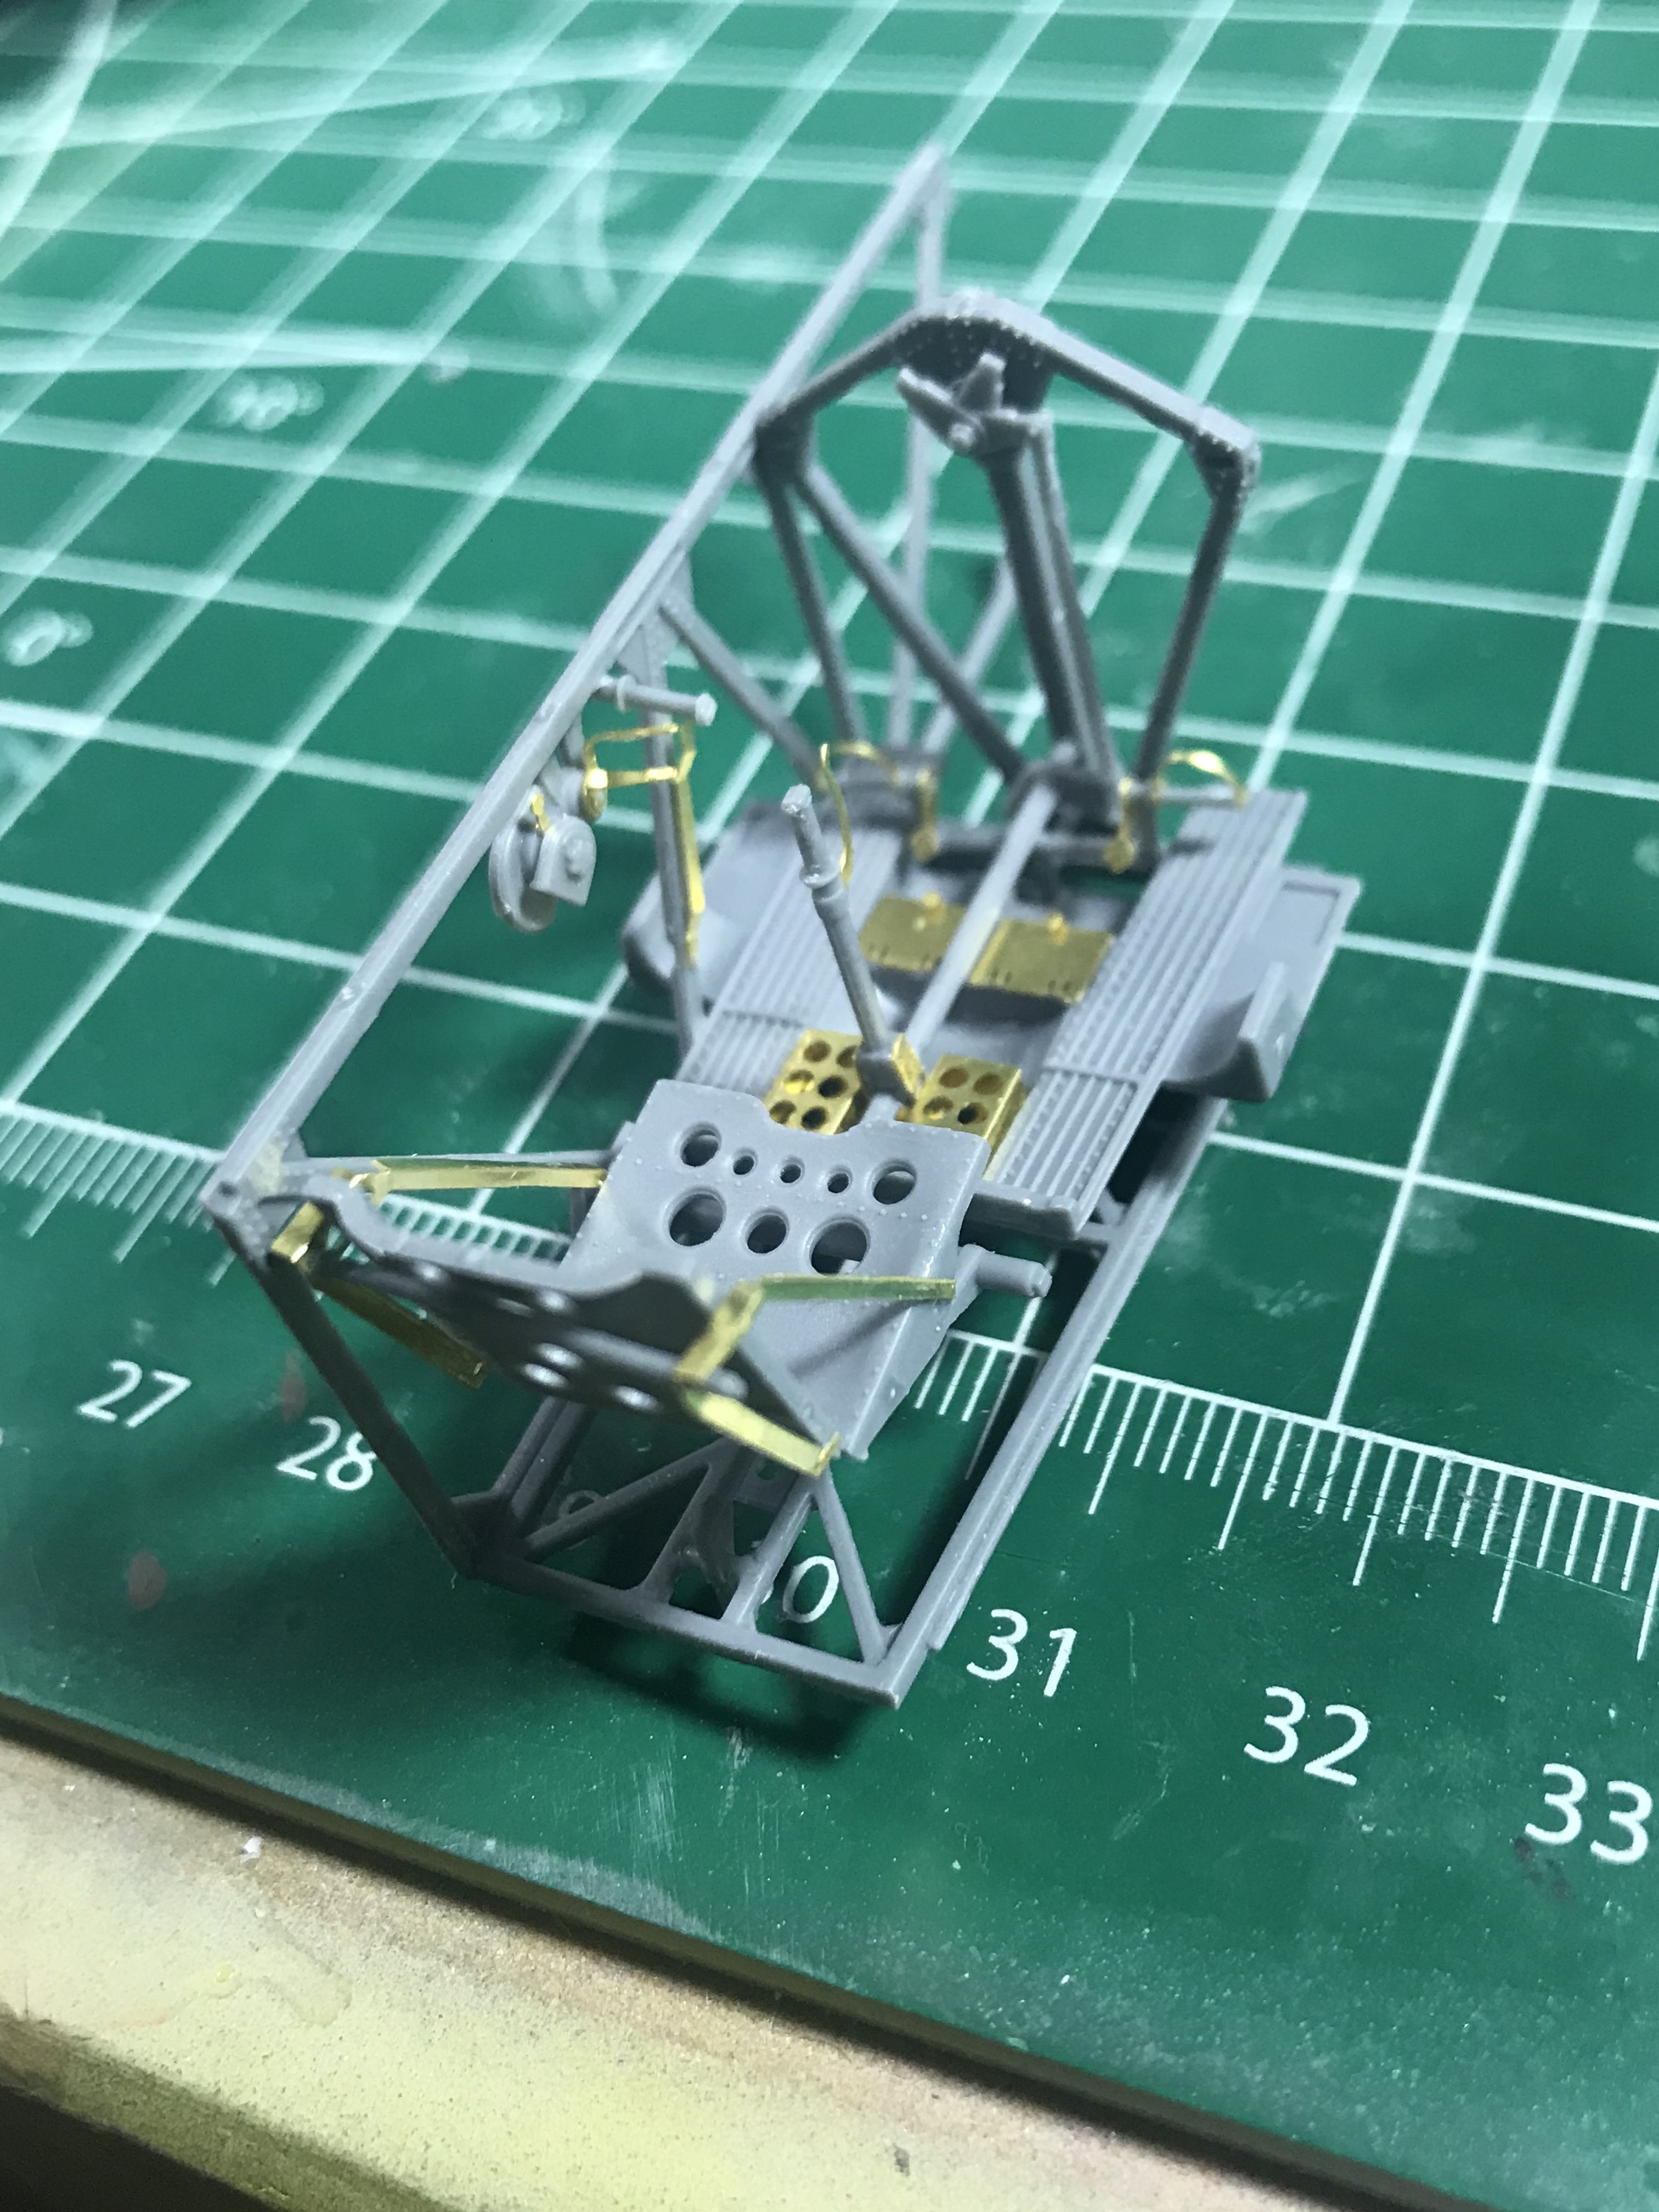
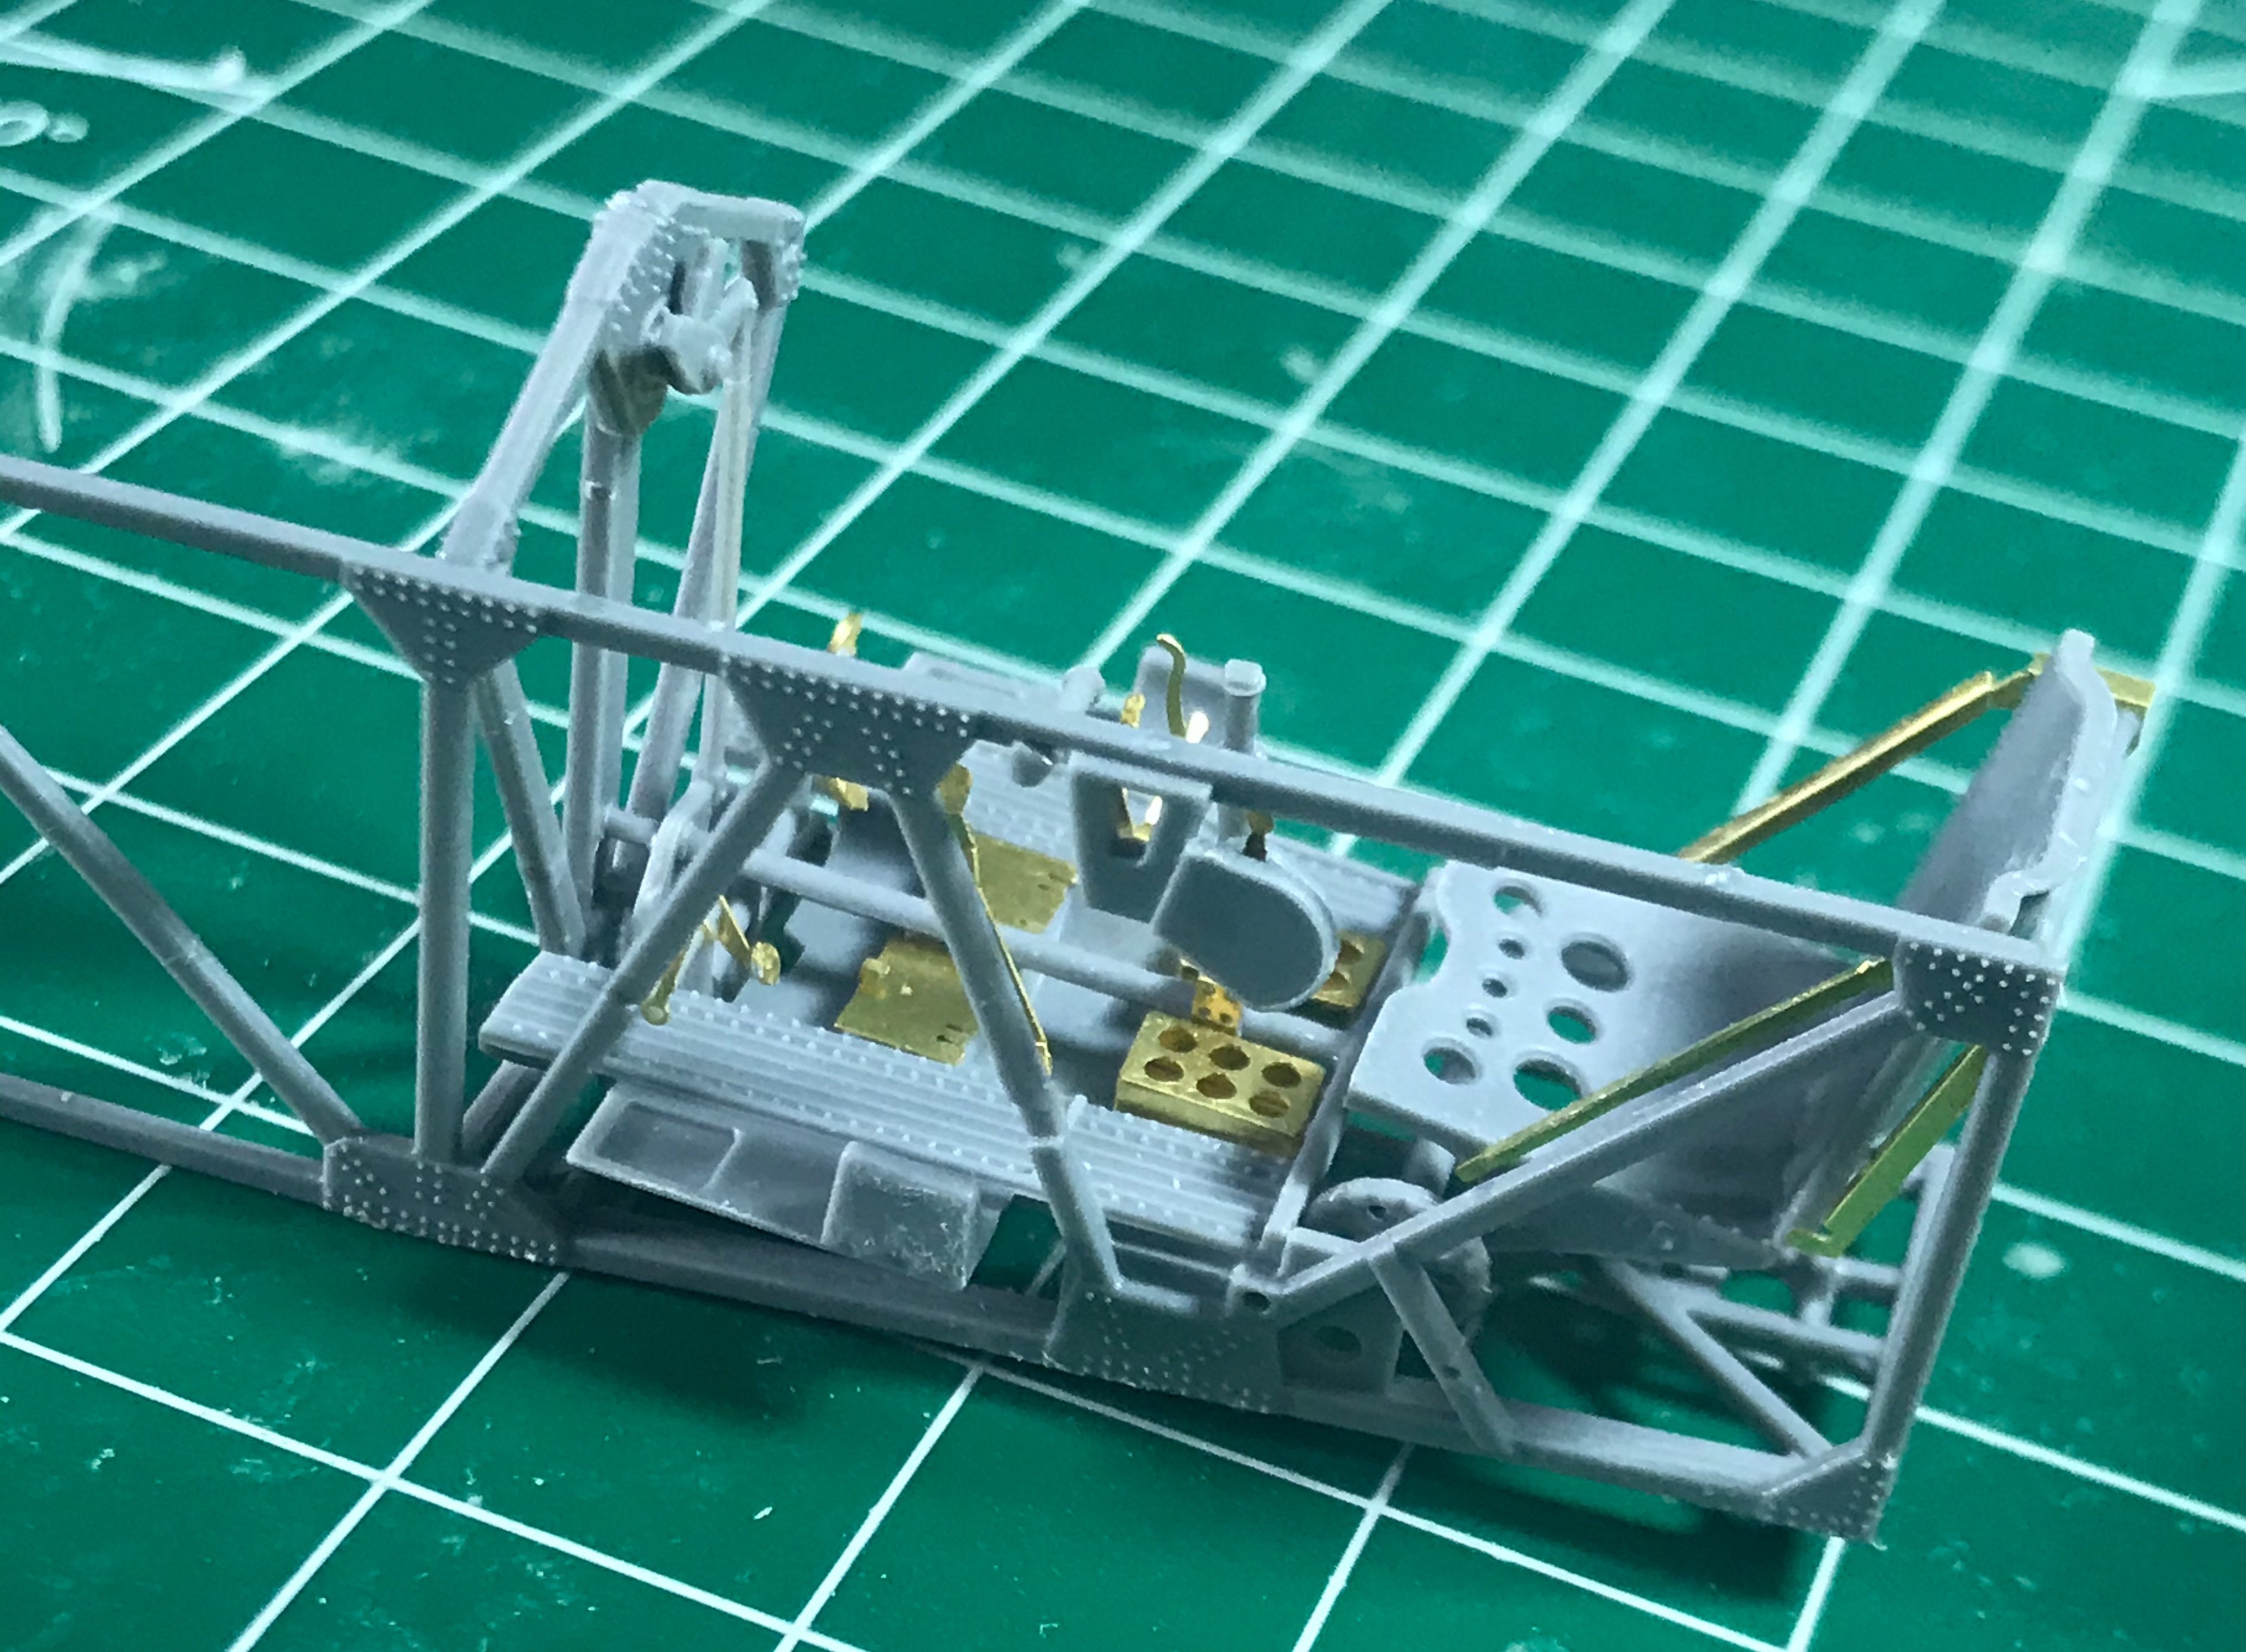
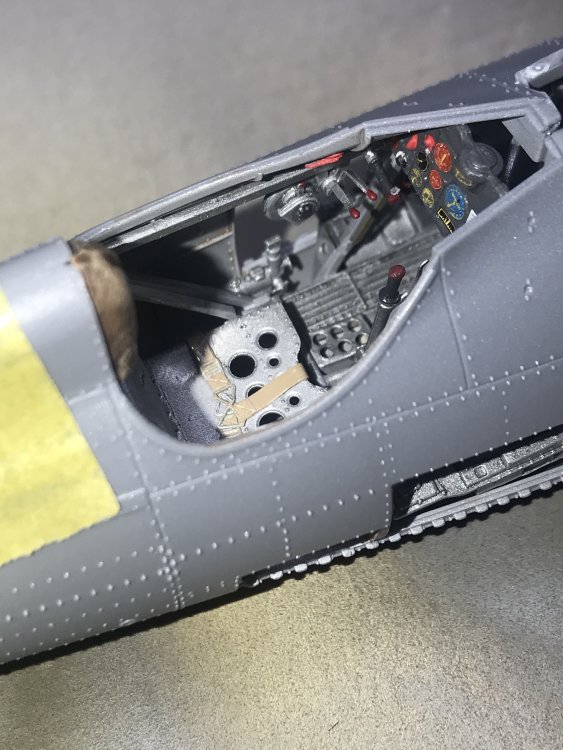
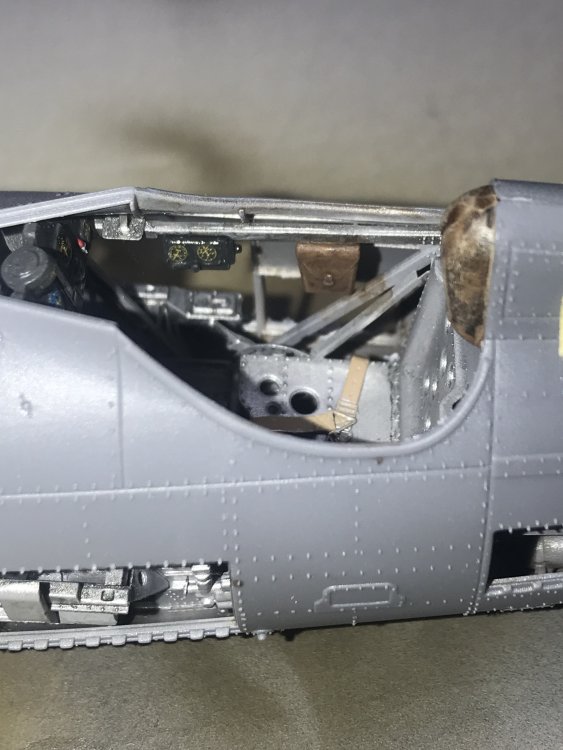
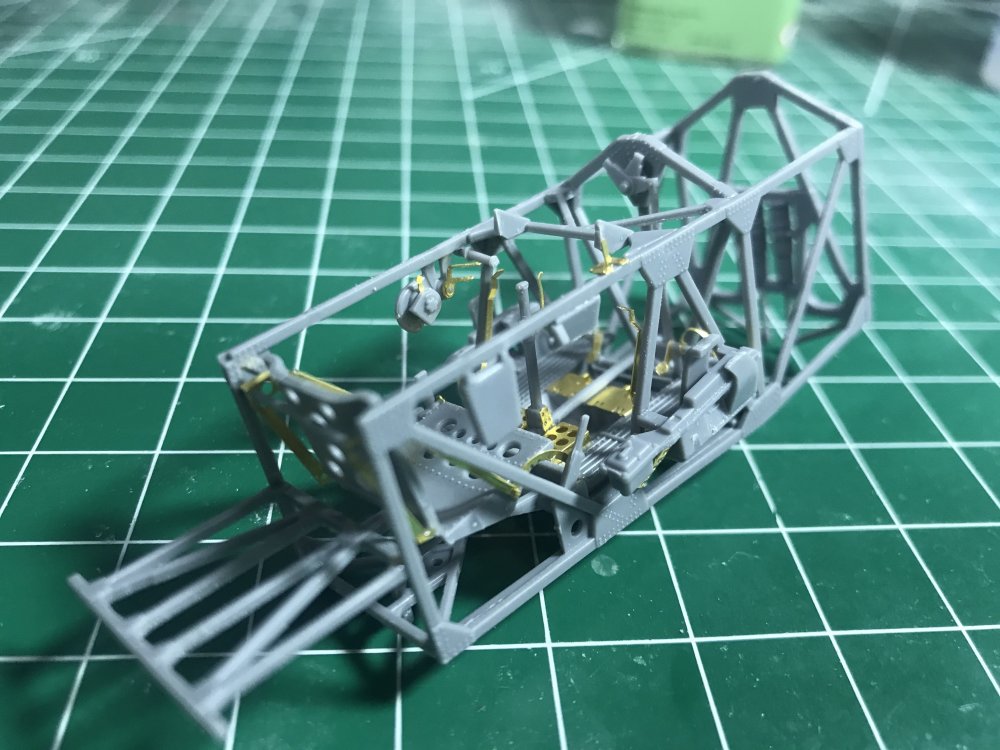
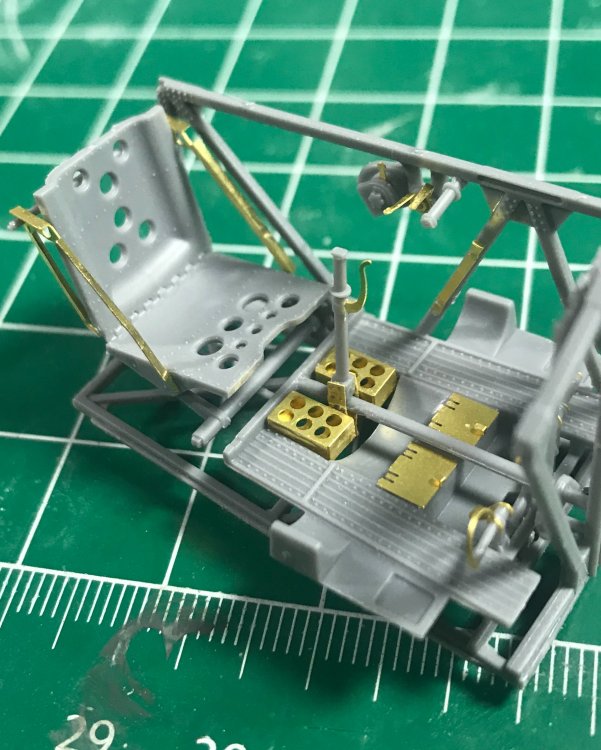
So this afternoon was a productive afternoon. The P-47 is ready for paint, and I worked on the P.11. everything, and I mean everything lines up. Except one compressed air bottle on the inner cockpit wall under the floor that interfered with the floor fit. I obviously got the location wrong, but I pulled it off and will figure out where it belongs. I fit the panel and the headrest, and taped the sides together around it to get the alignment right. The very top of the headrest has a very slight spot where a Sprue attachment point still shows, (my bad), so I’ll prep that better tomorrow and close up the fuselage for good. So far, I’m loving this build. I’m going to also give the seatbelts a slight wash. I used the kit PE belts, and I truly, truly detest PE belts. These look semi OK, though, so for a kit review, I give them high marks compared to some of the junk we see in kits.


-
IBG models PZL P.11c. Finished
Clunkmeister replied to Clunkmeister's topic in LSM 1/35 and Larger Work In Progress
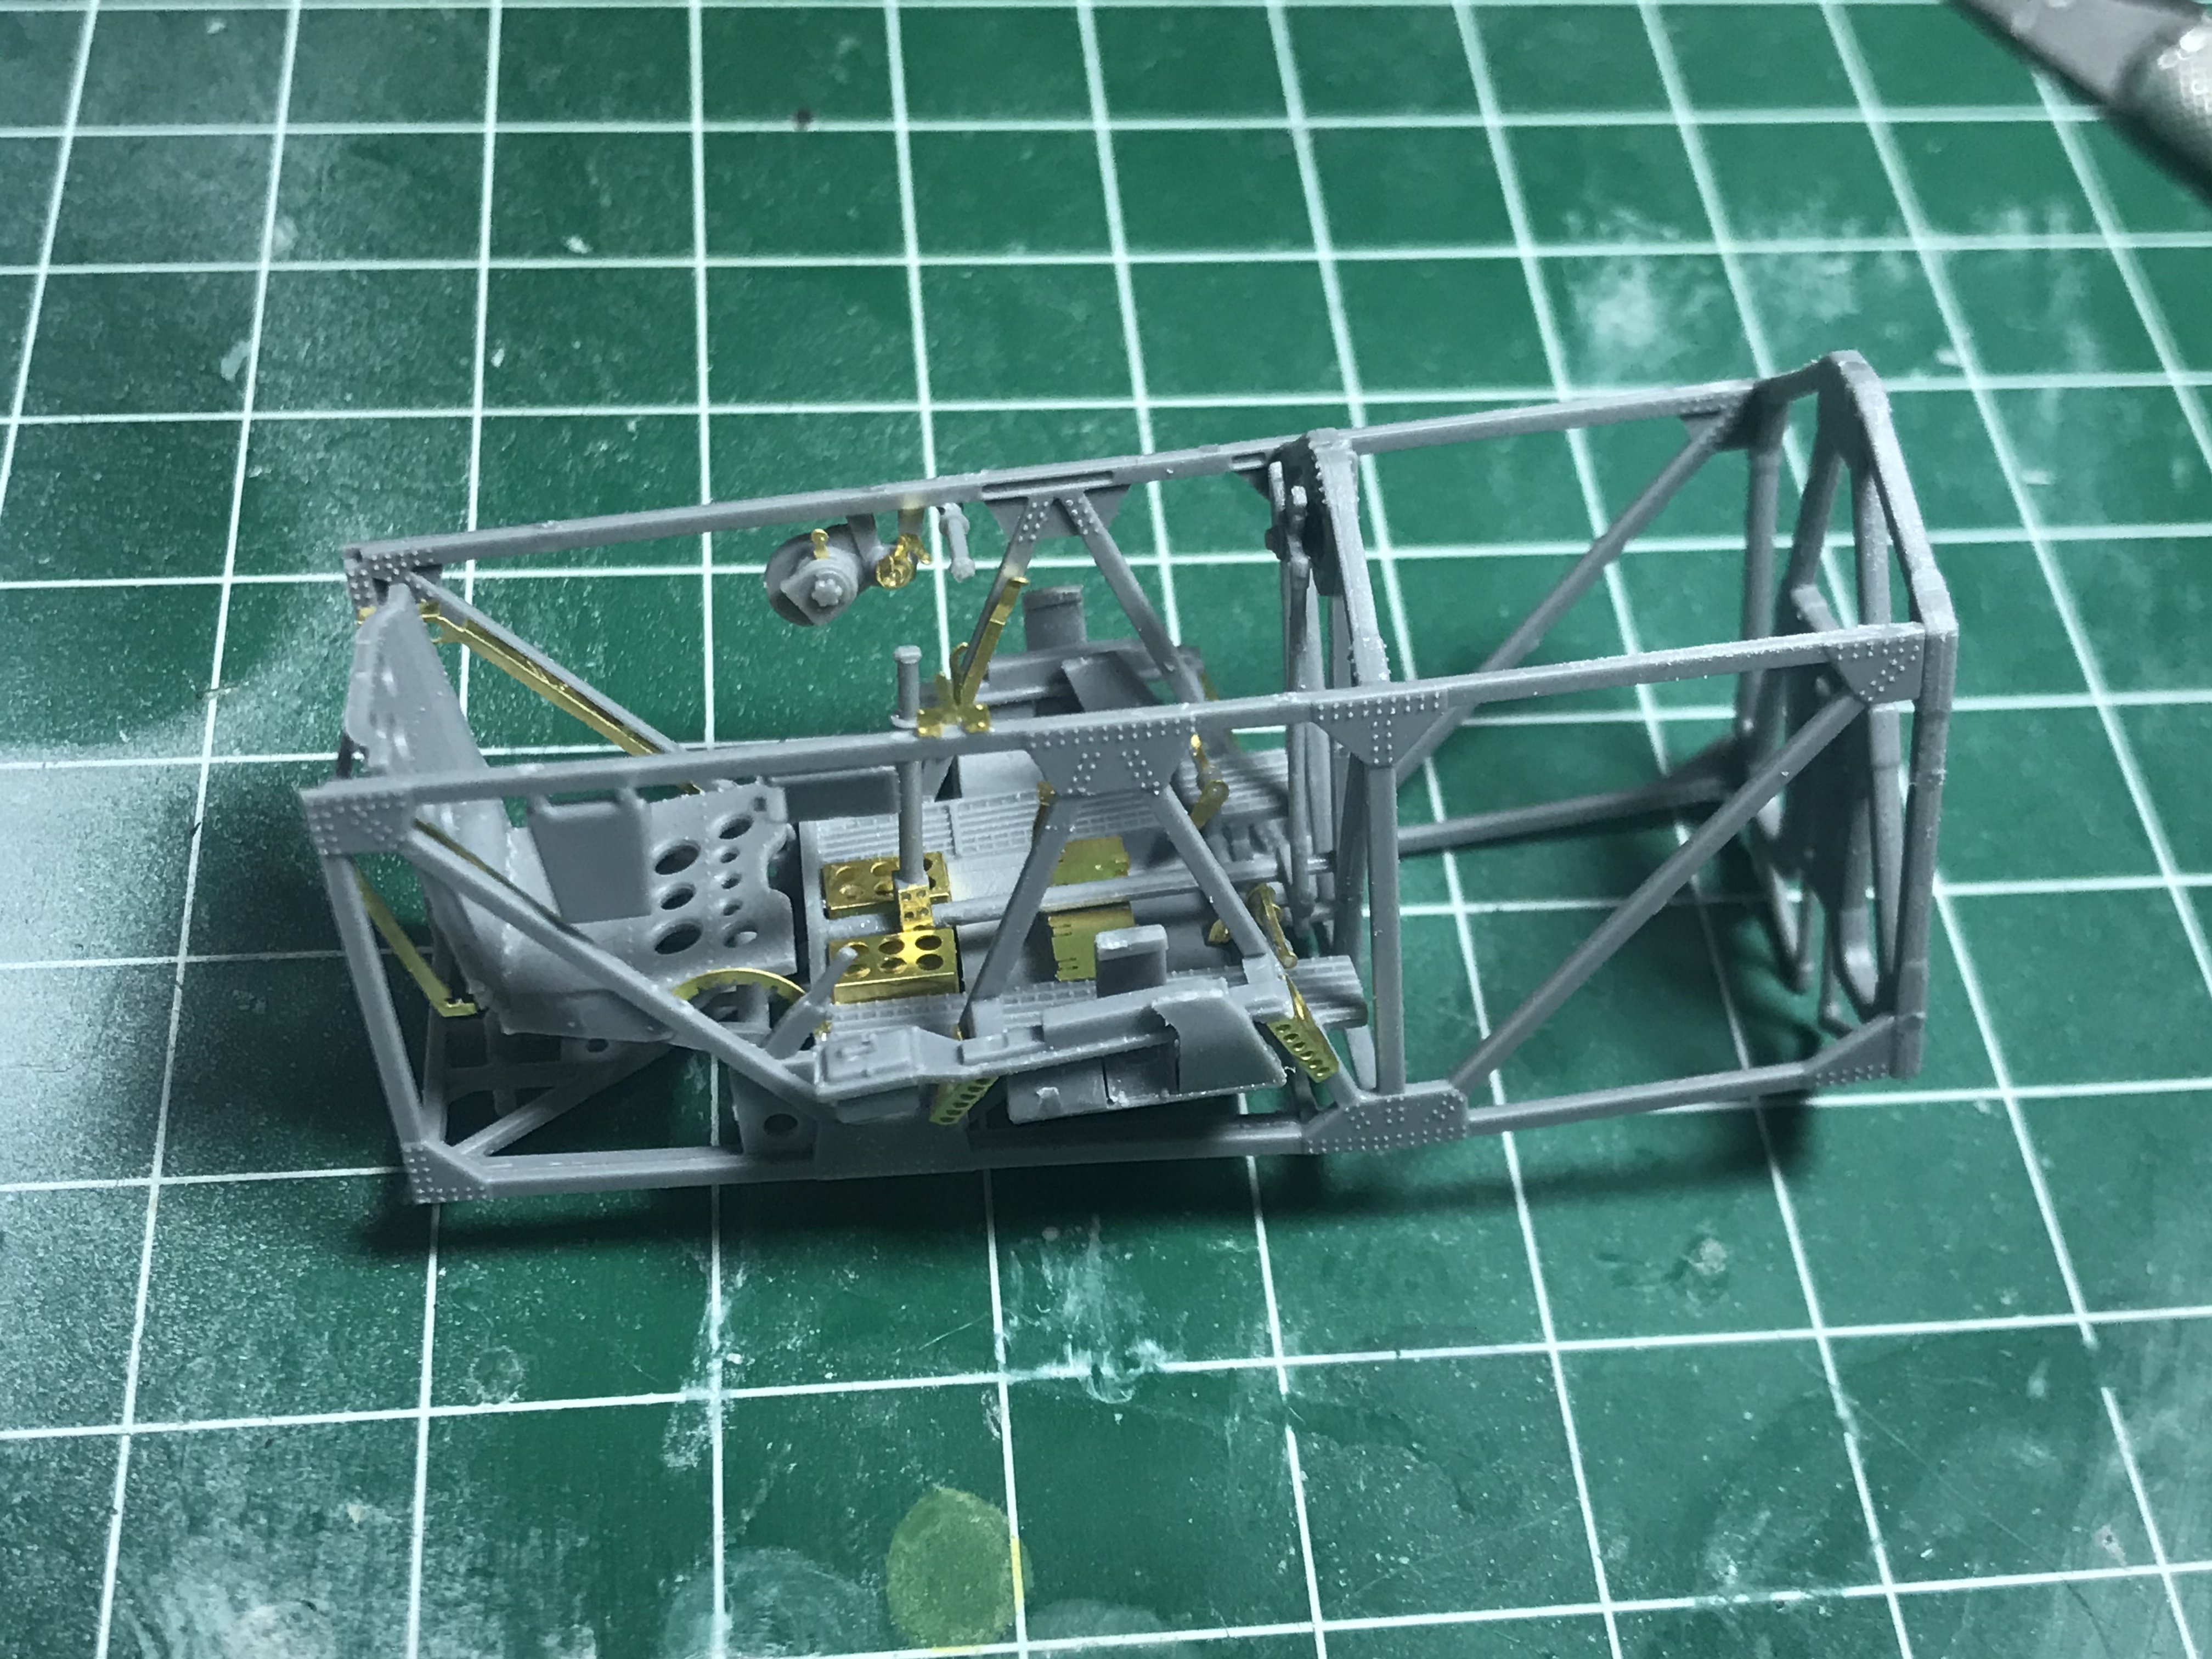
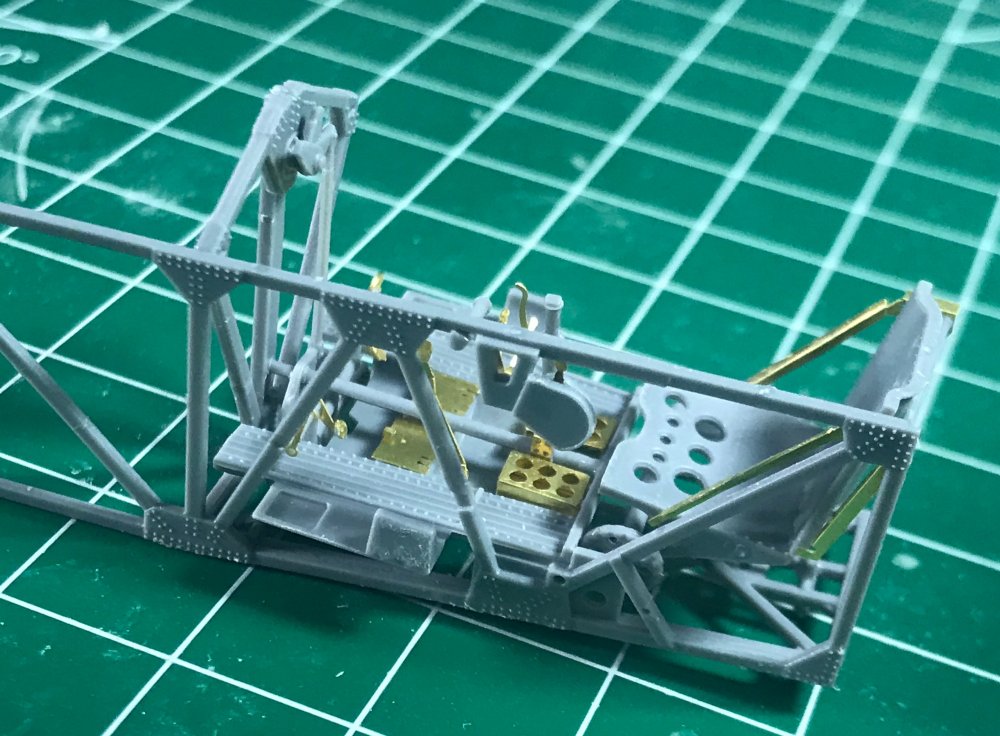
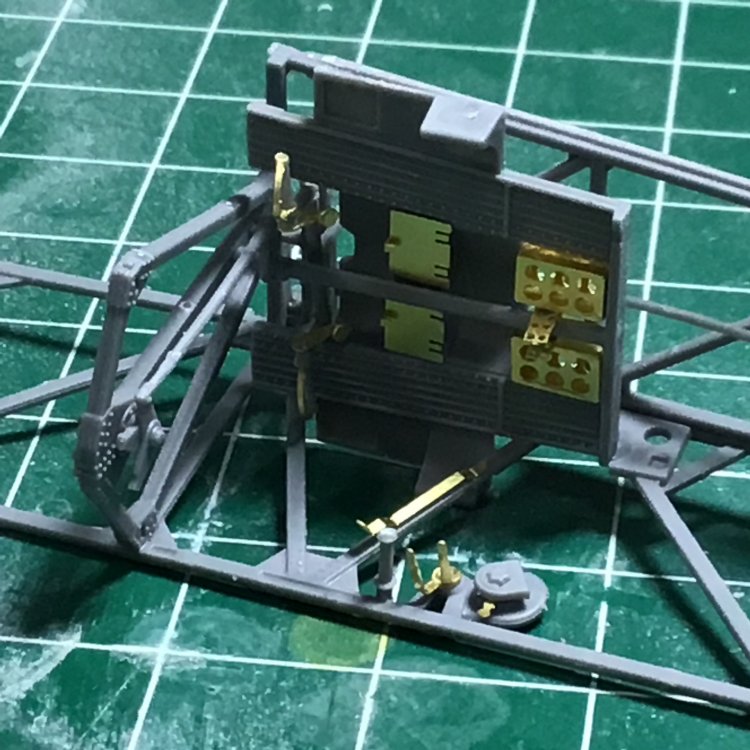
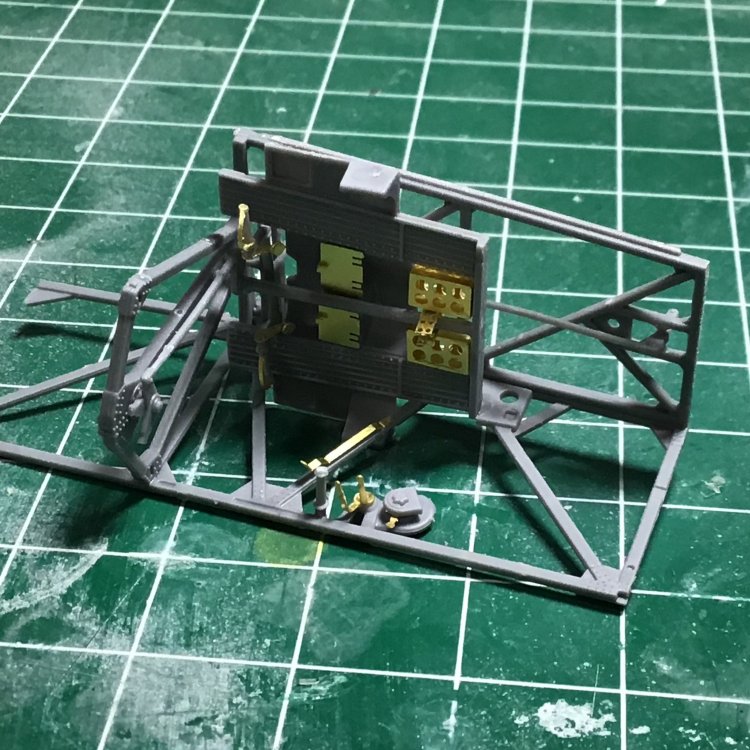
It looks one solid color, but it’s not. This is pretty accurate as far as coloration goes. I’ll do some more picking out around the gun mounts, then mount the panel. I already applied a fairly heavy wash to the floor plates, and since I want to keep it fairly correct, I’m not about to go overboard on color just to get it to look “cute” -
IBG models PZL P.11c. Finished
Clunkmeister replied to Clunkmeister's topic in LSM 1/35 and Larger Work In Progress
Absolutely zero problems so far. Not a shake the box kit, but if a top shelf fully detailed 30s finger could be, this is it.
-
Hasegawa BF109F-4- finished!
Clunkmeister replied to BlrwestSiR's topic in LSM 1/35 and Larger Work In Progress
In my opinion, the F is a he best of the Hasegawa 109s. Superb so far!! -
HK Models Do-335 A-12
Clunkmeister replied to JeroenPeters's topic in LSM 1/35 and Larger Work In Progress
Such is the world of building test shots, Jeroen. As usual, you da man for the job. I can think of no more qualified for this duty. Looking great as usual!! -
IBG models PZL P.11c. Finished
Clunkmeister replied to Clunkmeister's topic in LSM 1/35 and Larger Work In Progress
Hubert you stole my thunder. Haha. We think so much alike my friend, it’s almost uncanny. You and stirred the embers for racers that were glowing deep within and the P.11 prototype demonstrator is our classic Golden Age aviation done right. I’ll be doing a Rumanian bird as well, and one in NMF too. -
IBG models PZL P.11c. Finished
Clunkmeister replied to Clunkmeister's topic in LSM 1/35 and Larger Work In Progress
Absolutely Carl. It’s all over faded old silver on the interior, then pick out the details. Martin, the kit is that decent, it even makes me look good. -
IBG models PZL P.11c. Finished
Clunkmeister replied to Clunkmeister's topic in LSM 1/35 and Larger Work In Progress
Honestly folks, so far, this has been one of the most effortless builds I’ve ever had the opportunity to build. Everything just fits. Perfectly. As in a “click fit”. That’s quite an accomplishment with a 1930s aircraft design. Don’t get me wrong, this by no means a beginners kit. And you’ll need to have a good visor and plenty of lighting, because many of the parts are extremely small . But take your time and it’ll all click into place. If it doesn’t, you did something wrong. So far, kudos and two thumbs up to IBG for designing this kit.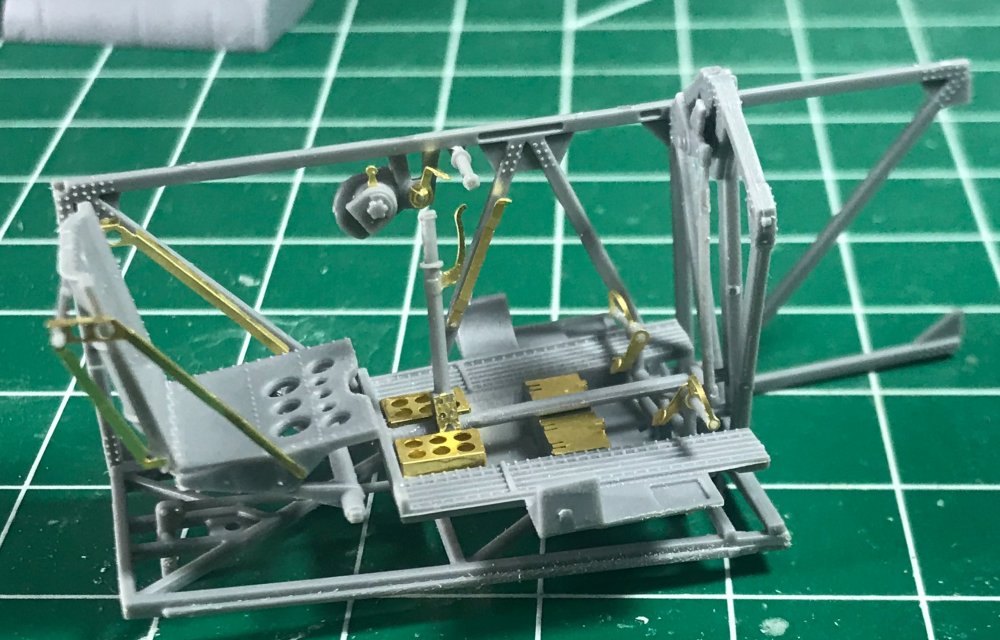


- 236 replies
-
- 10
-

-

-
IBG models PZL P.11c. Finished
Clunkmeister replied to Clunkmeister's topic in LSM 1/35 and Larger Work In Progress
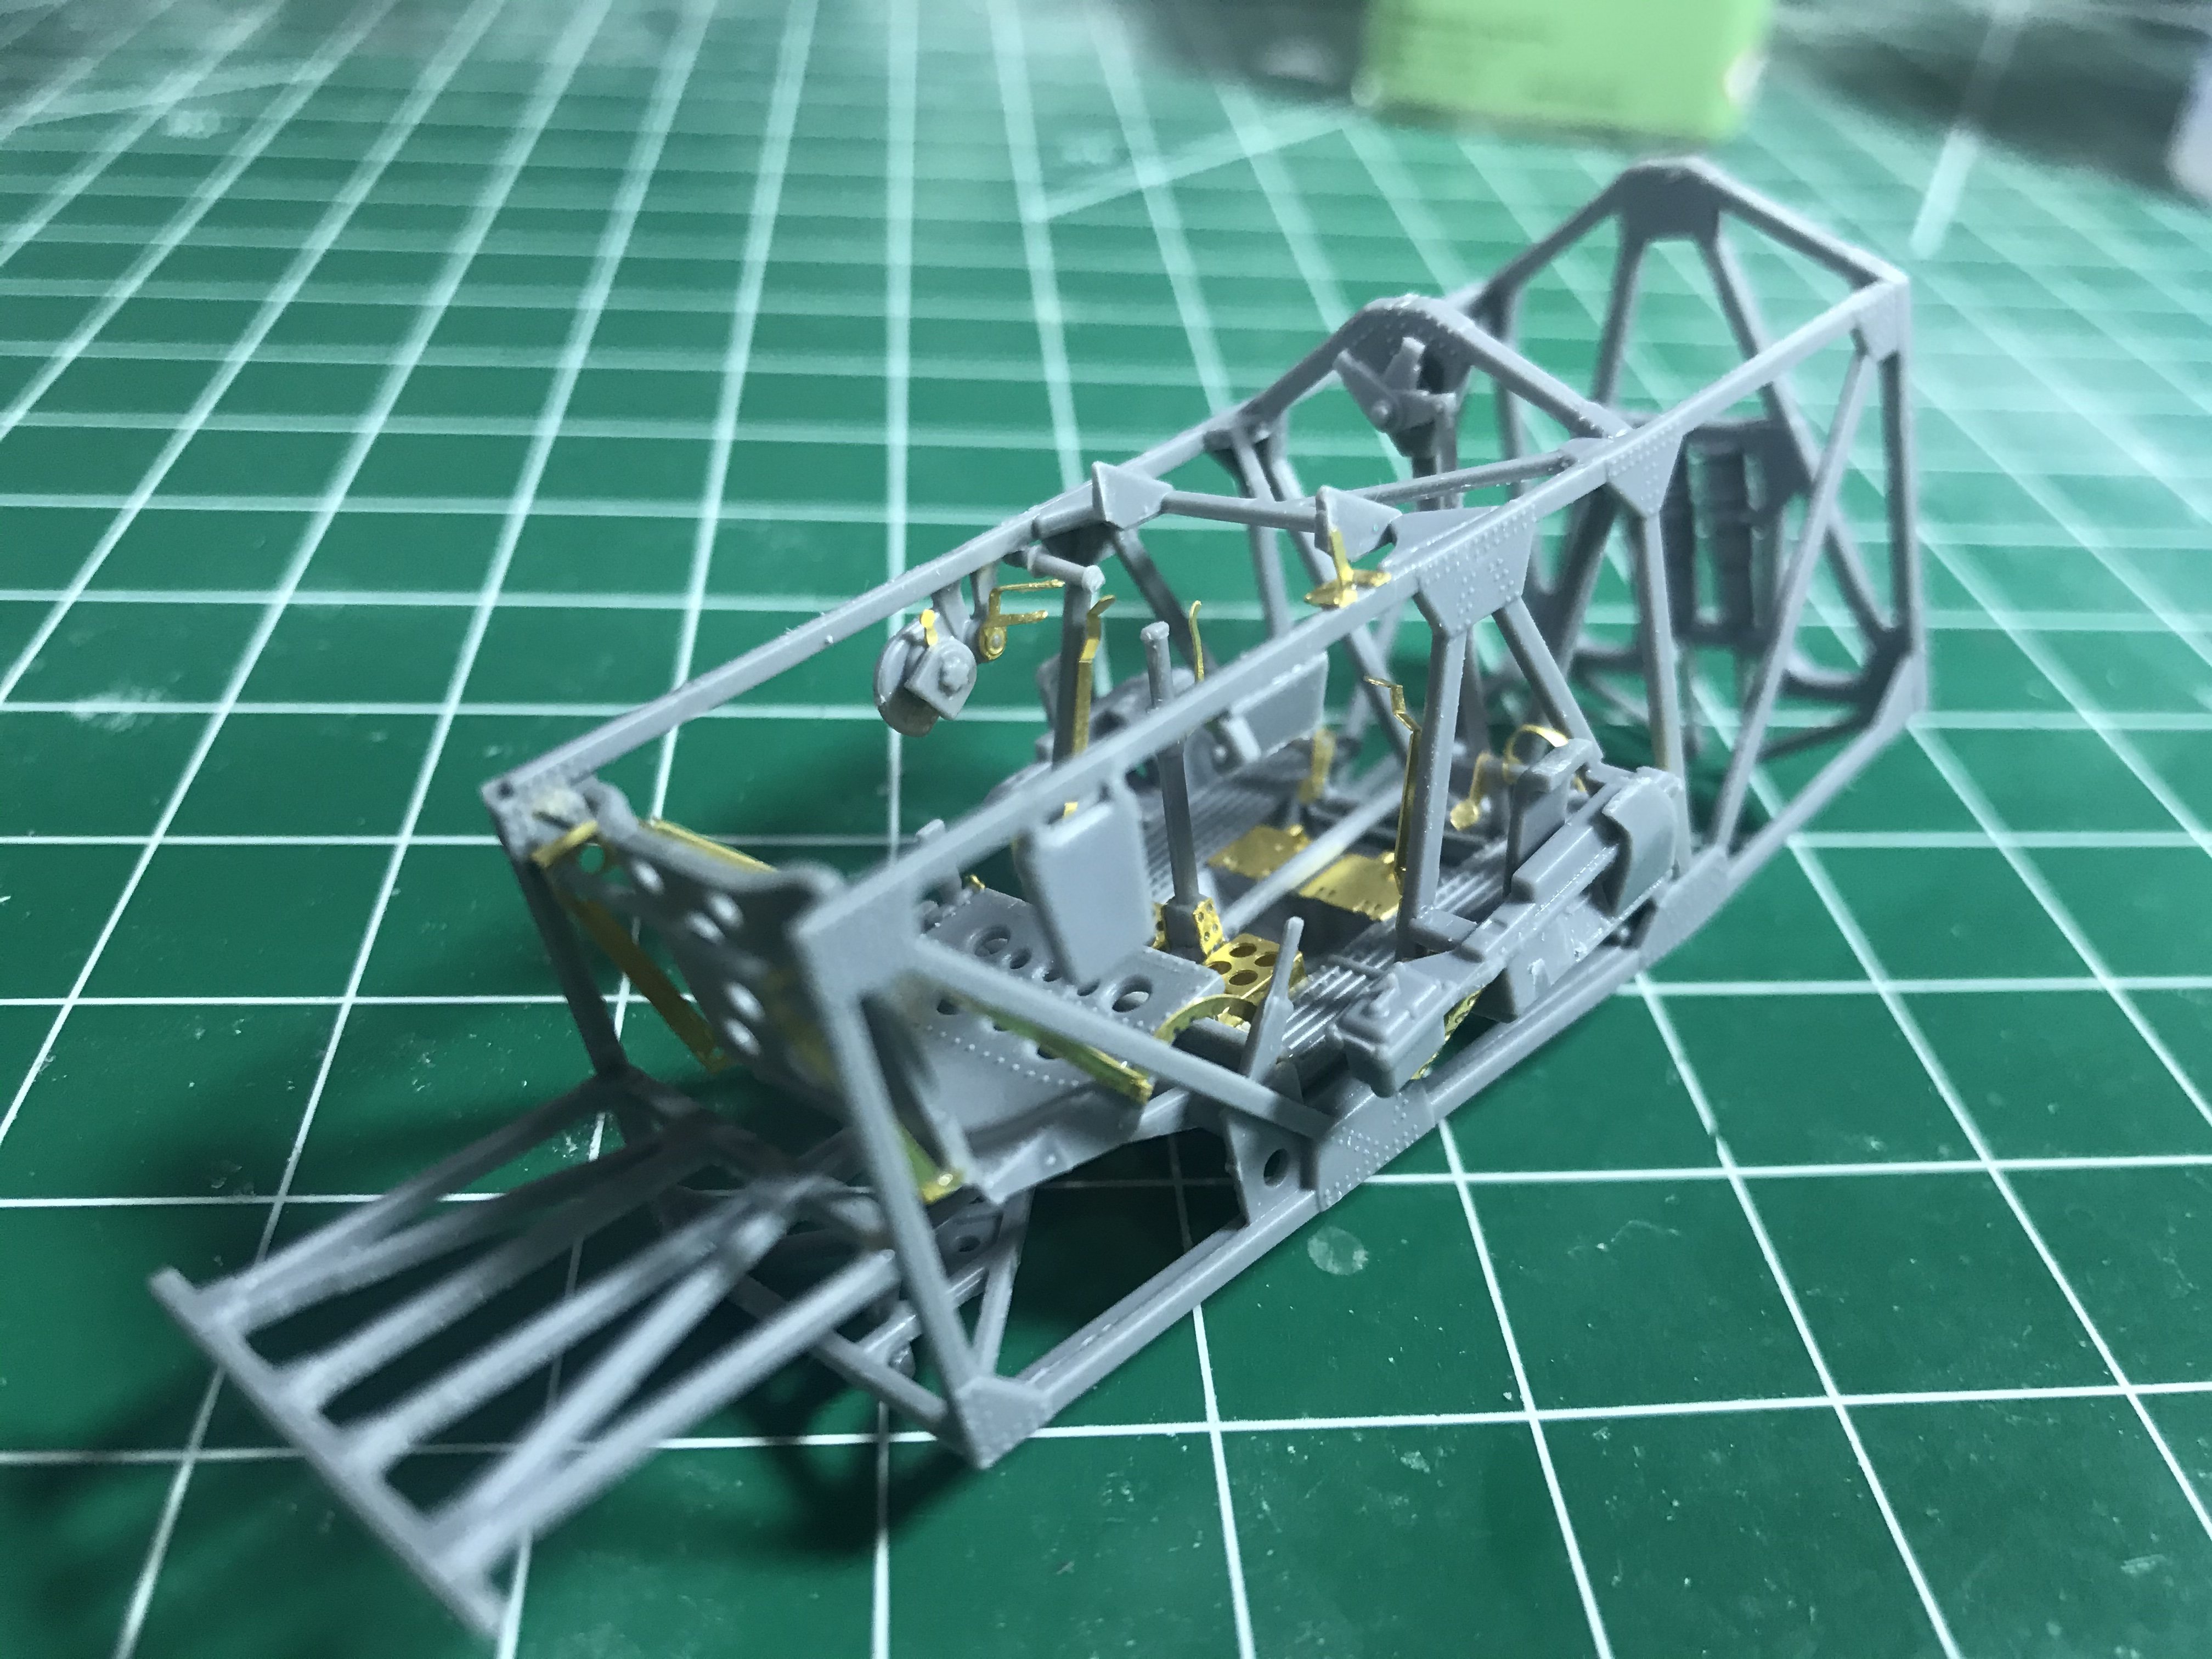
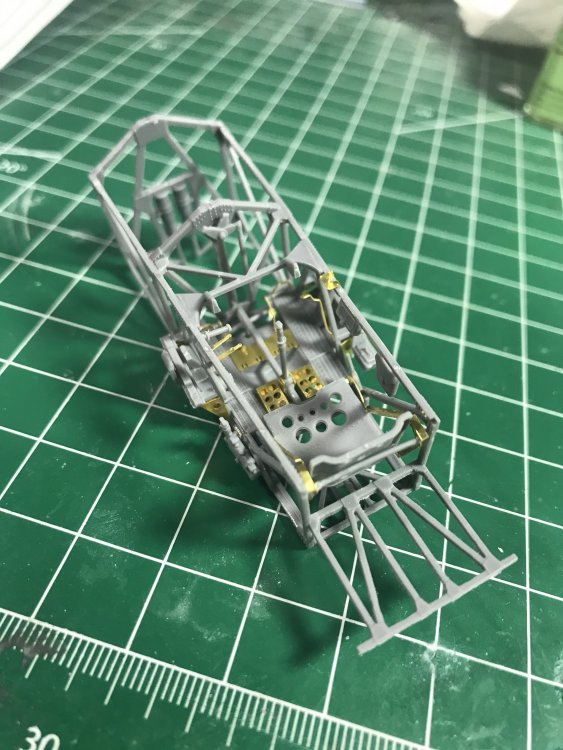
The proper use of PE allows you to get results in a scale like thickness, results like you can’t ever achieve with IM styrene or even resin. After ths drys a bit, I’ll mount the few bits of PE left, the other frame, then give it a shot of Alclad aluminum all over. Detail picking out after that.

-
IBG models PZL P.11c. Finished
Clunkmeister replied to Clunkmeister's topic in LSM 1/35 and Larger Work In Progress
I have started cutting plastic 2-3mm away from the part, and the sanding and trimming it down. No more cavities! -
IBG models PZL P.11c. Finished
Clunkmeister replied to Clunkmeister's topic in LSM 1/35 and Larger Work In Progress
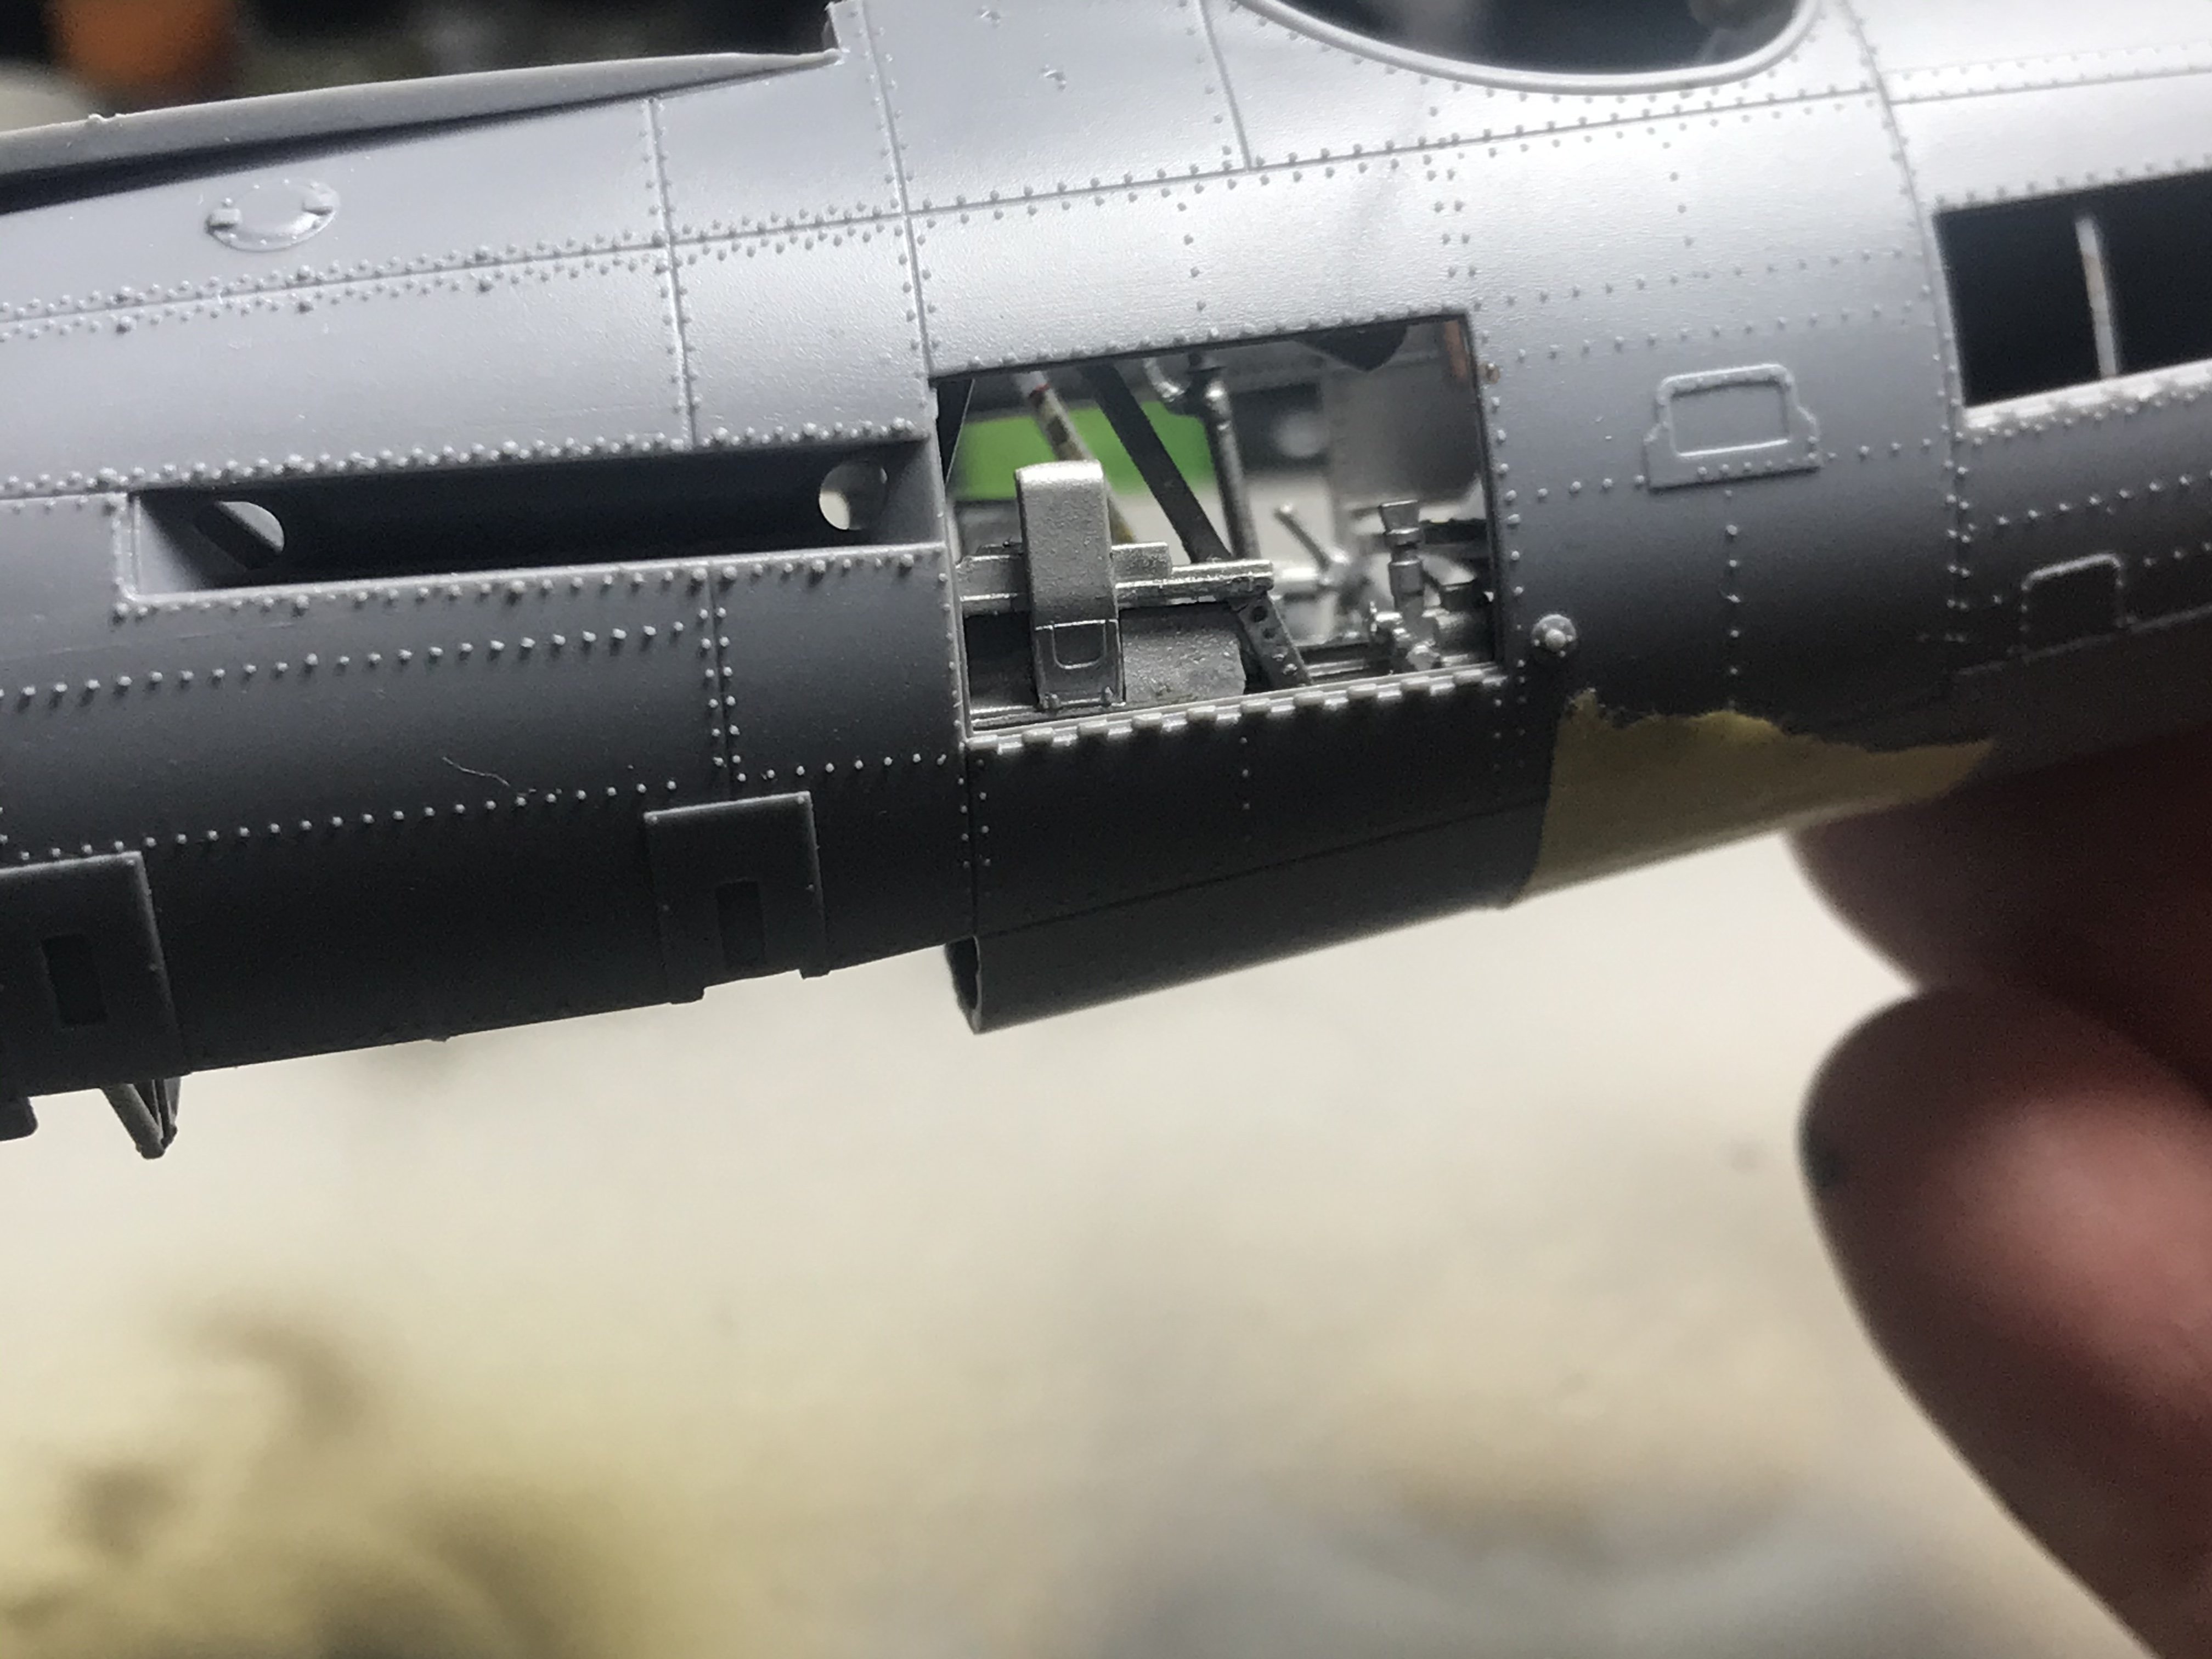
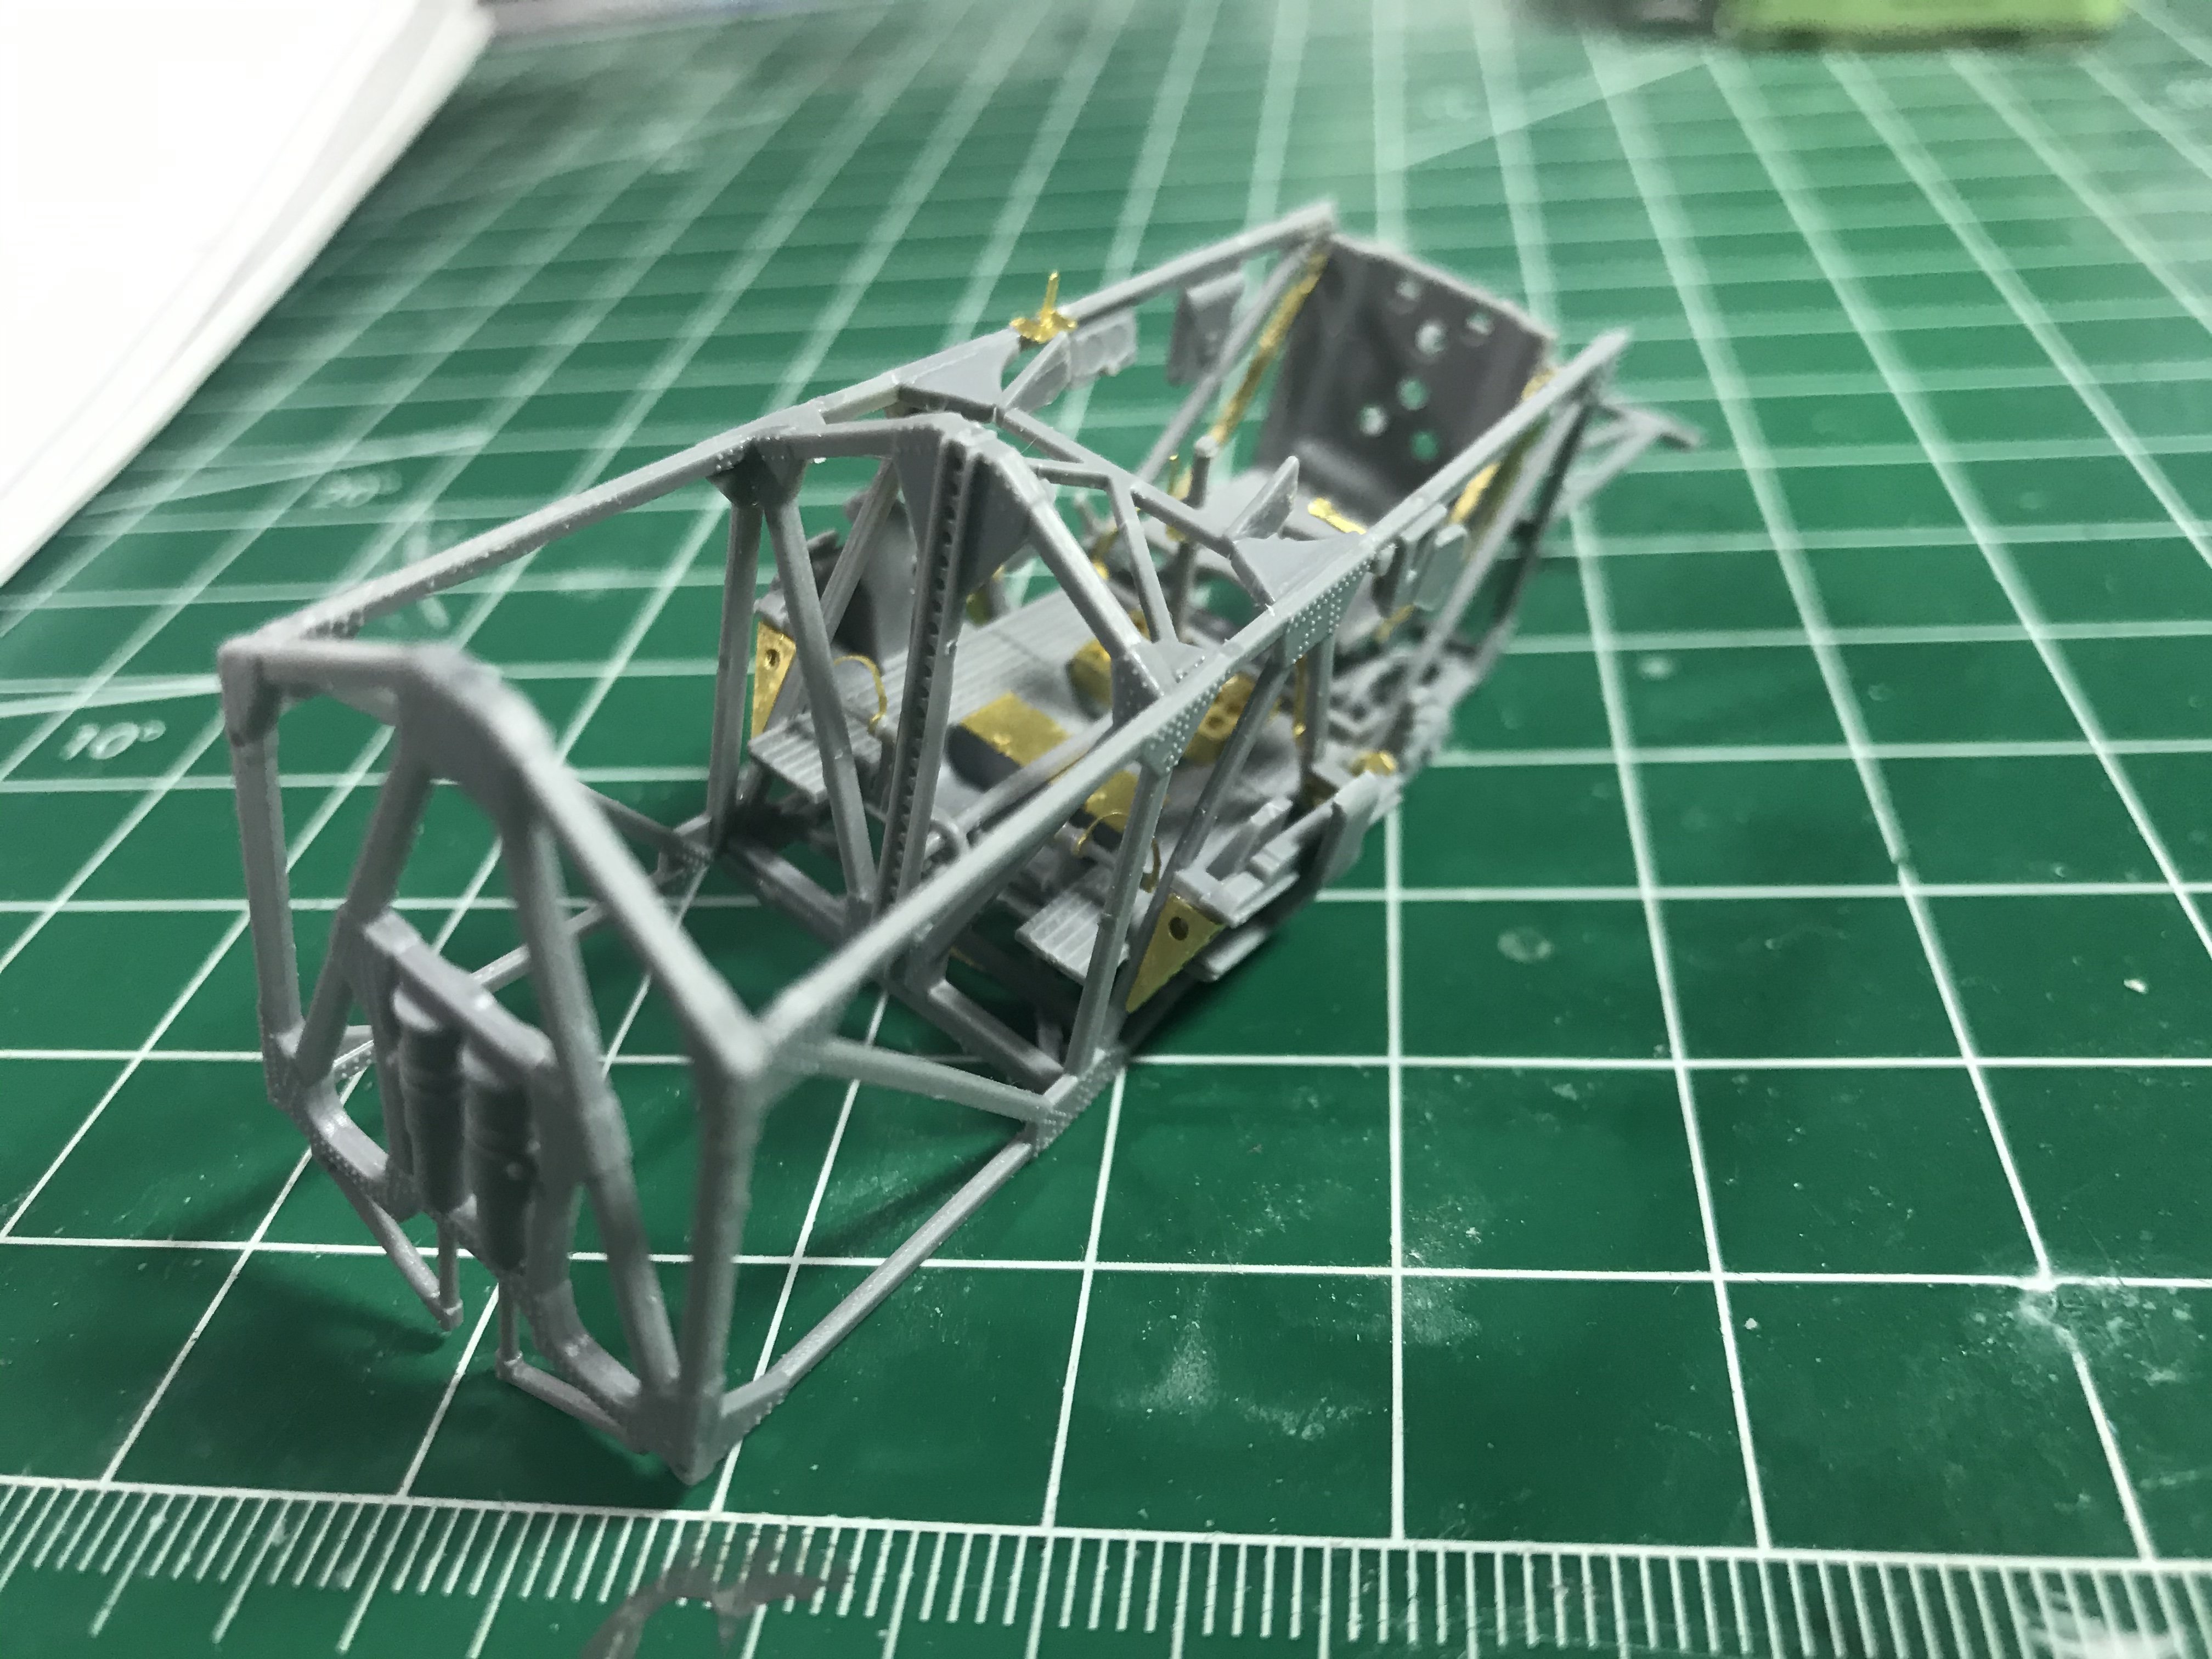
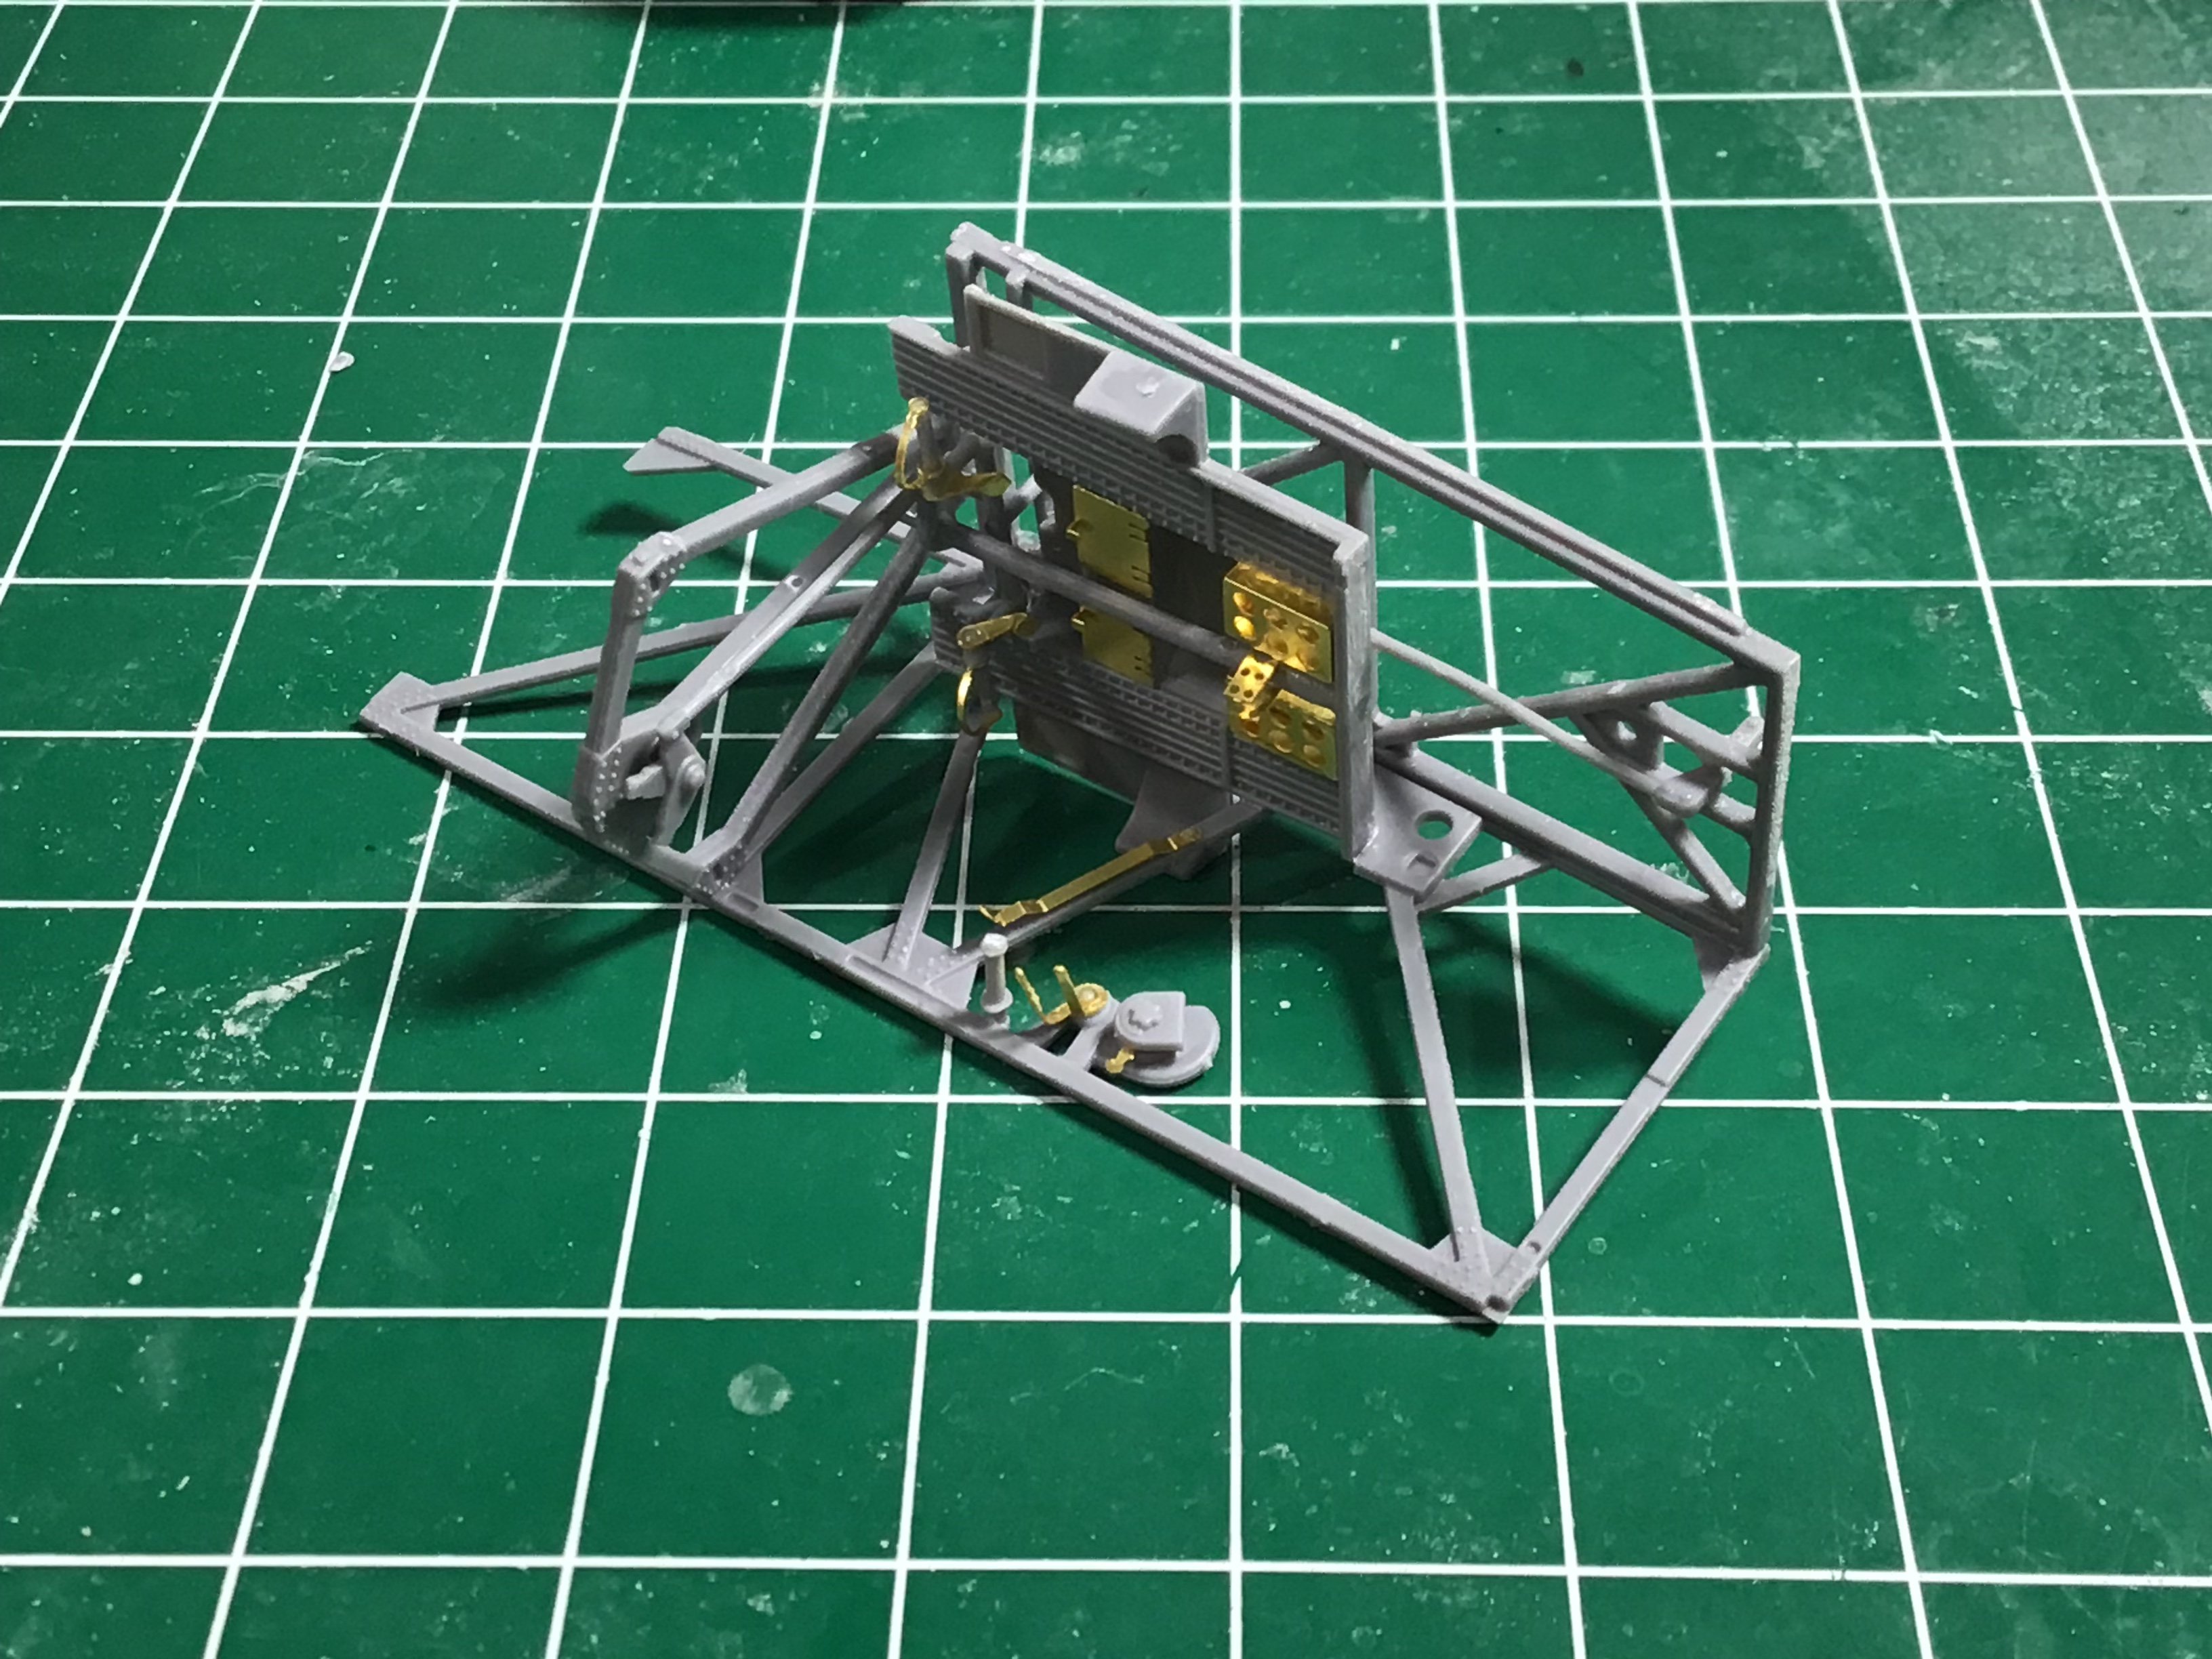
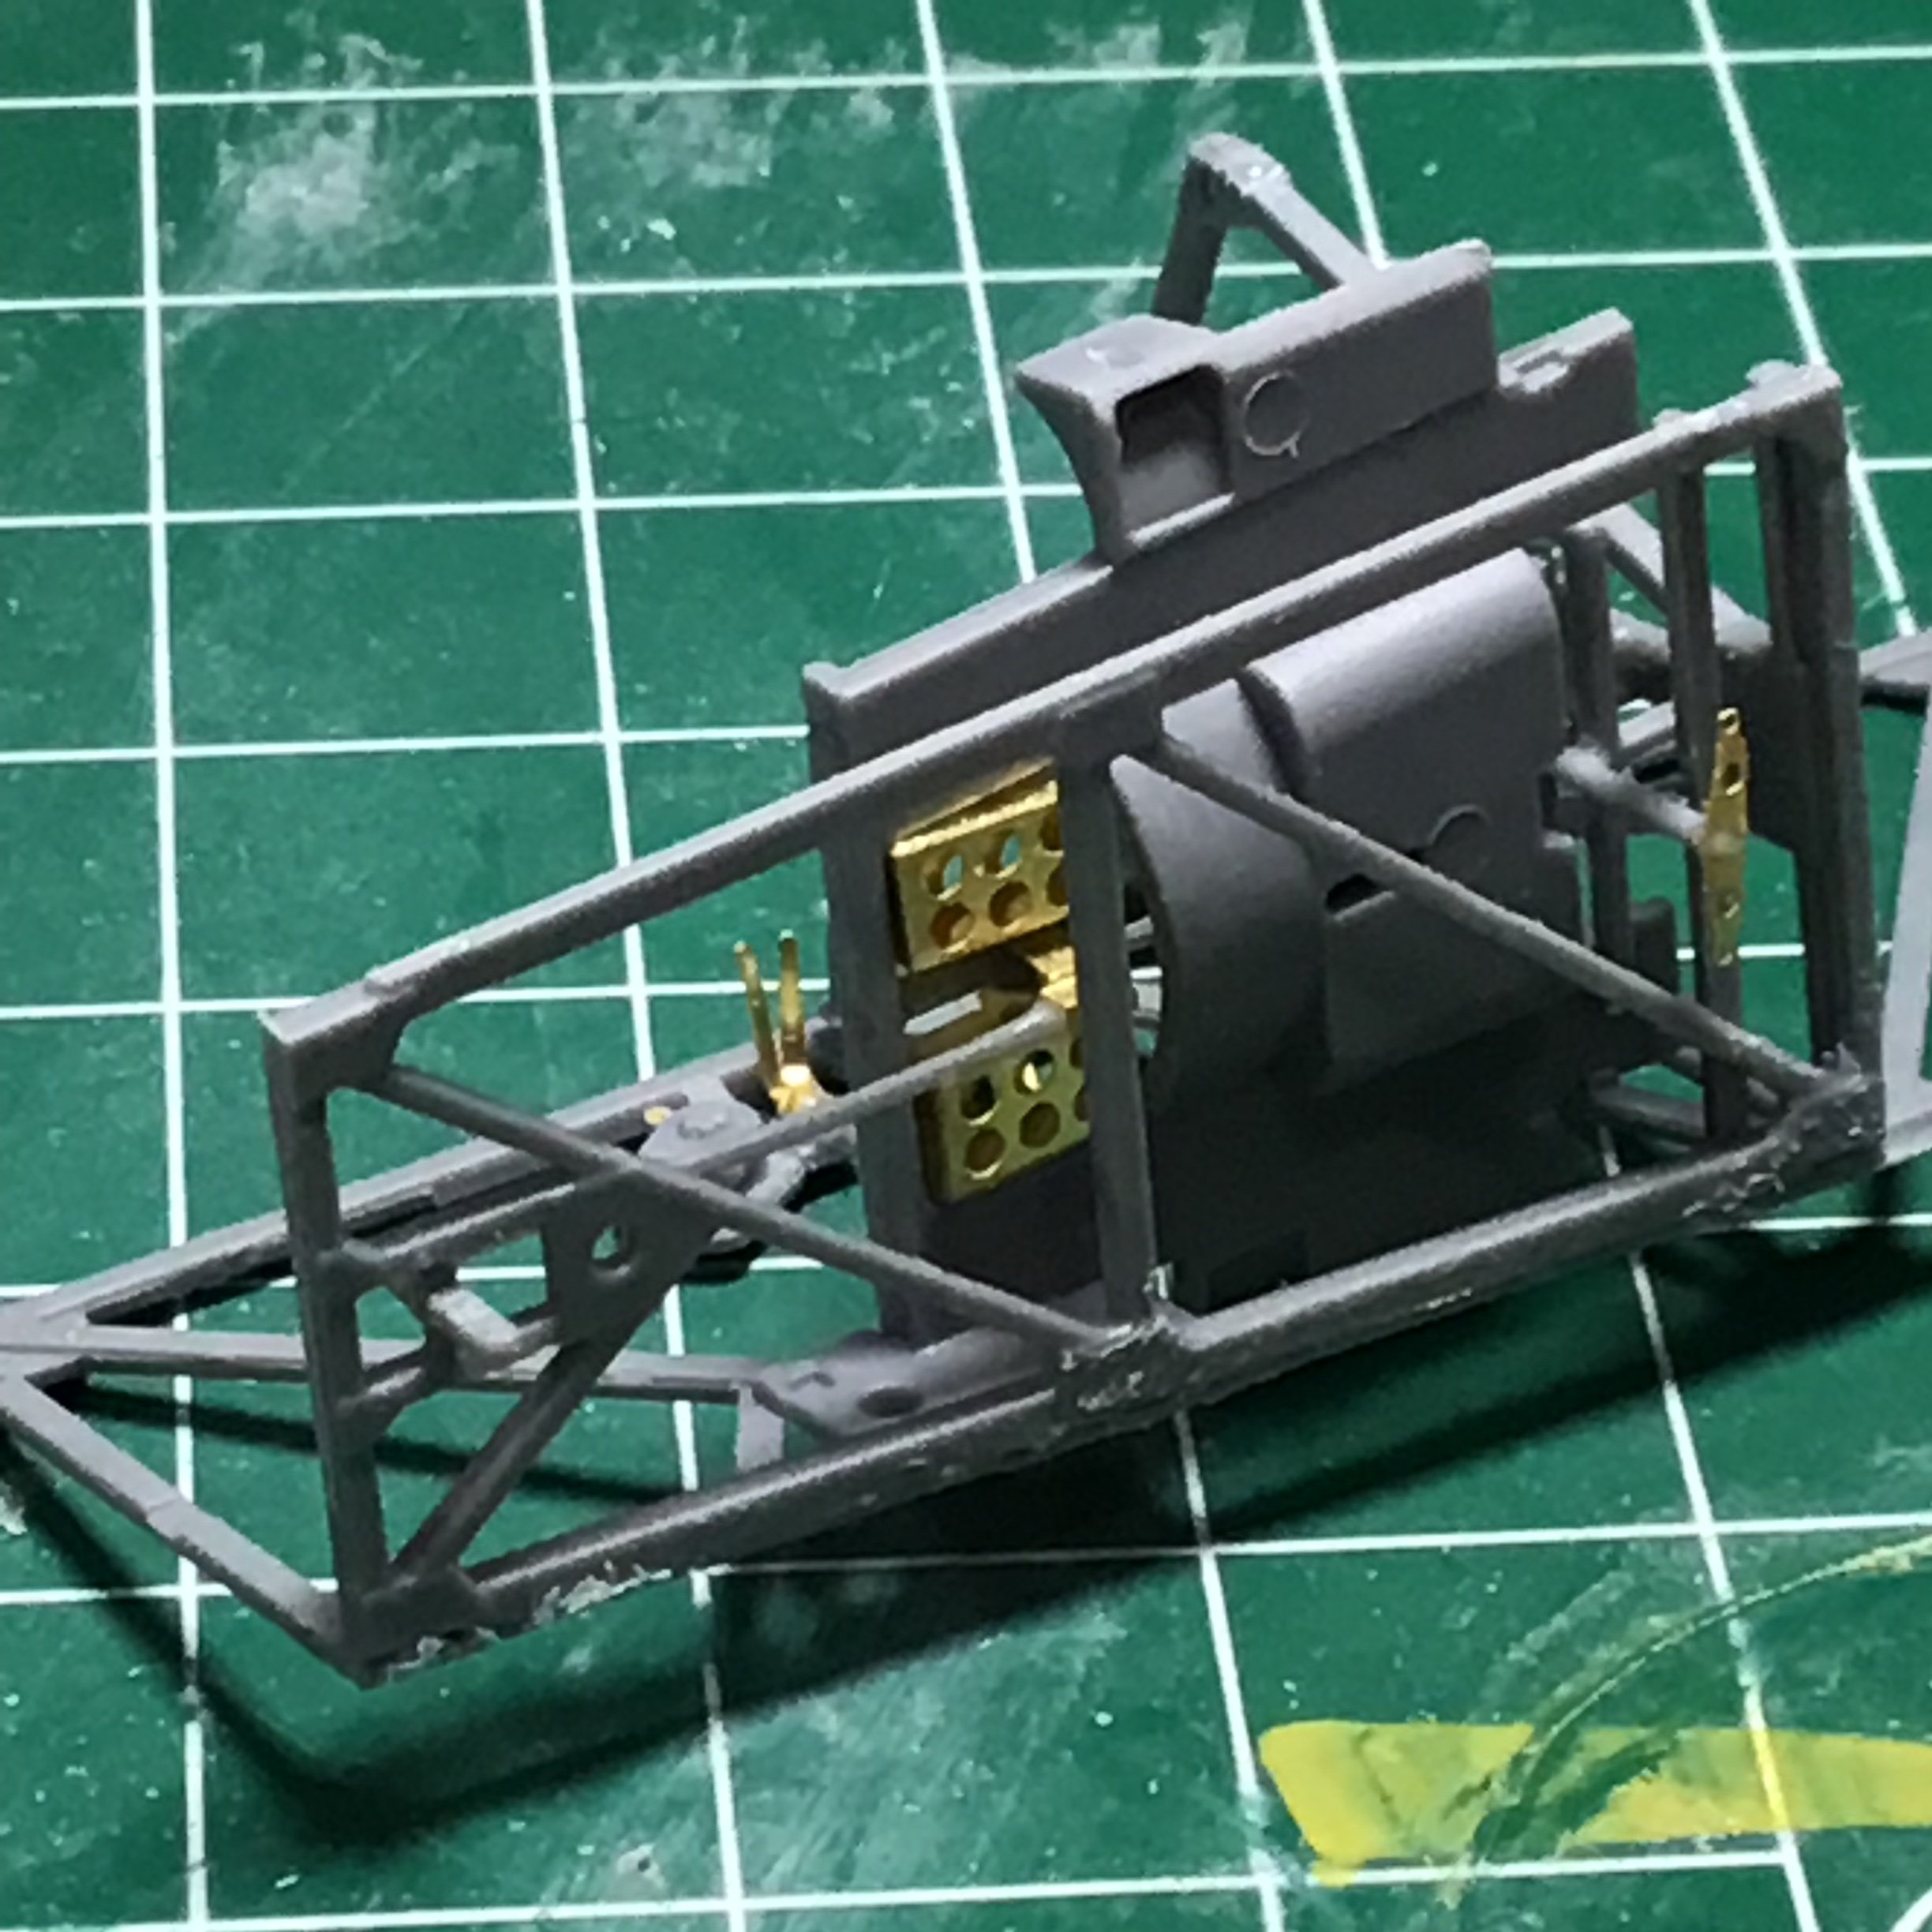
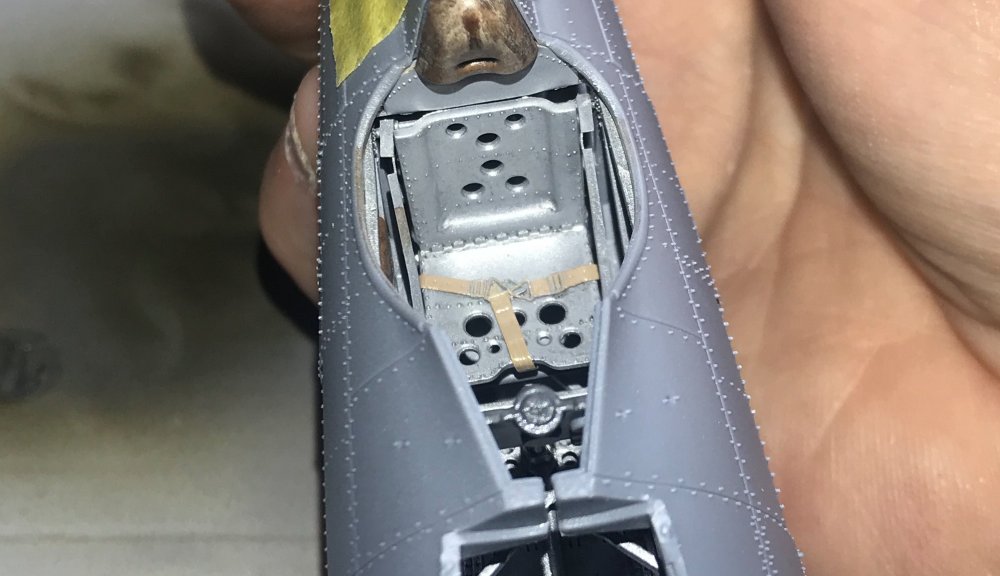
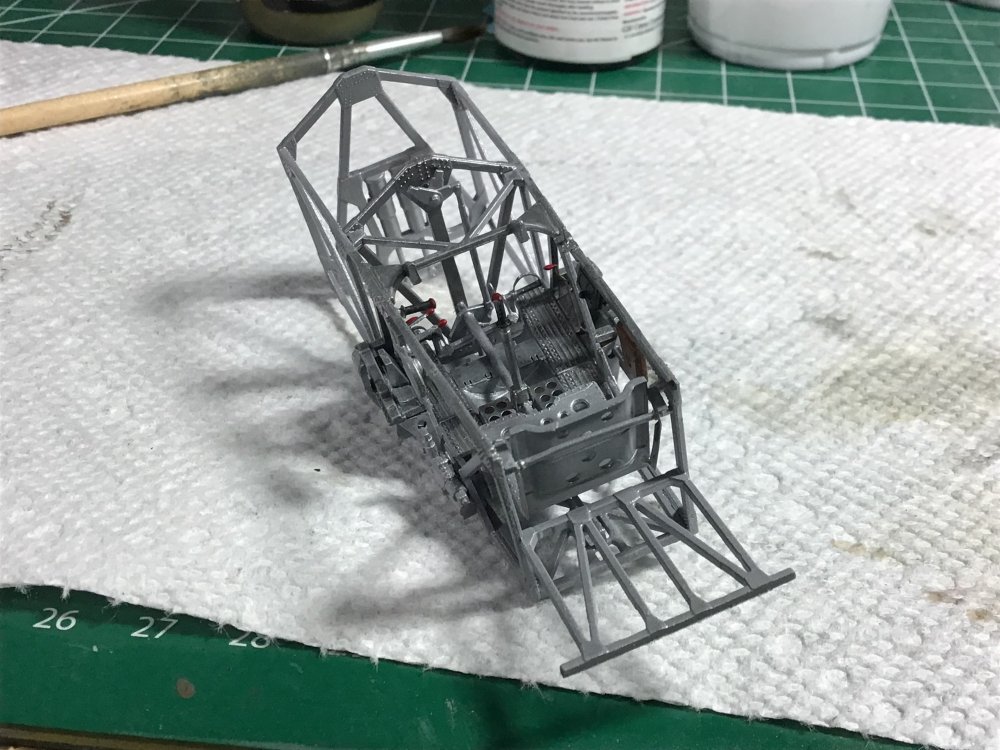
Cockpit coming right along. If you’re not opening the gun doors, all the lower PE under the floor can be left off to simplify construction, but building it on this is seriously quick and easy.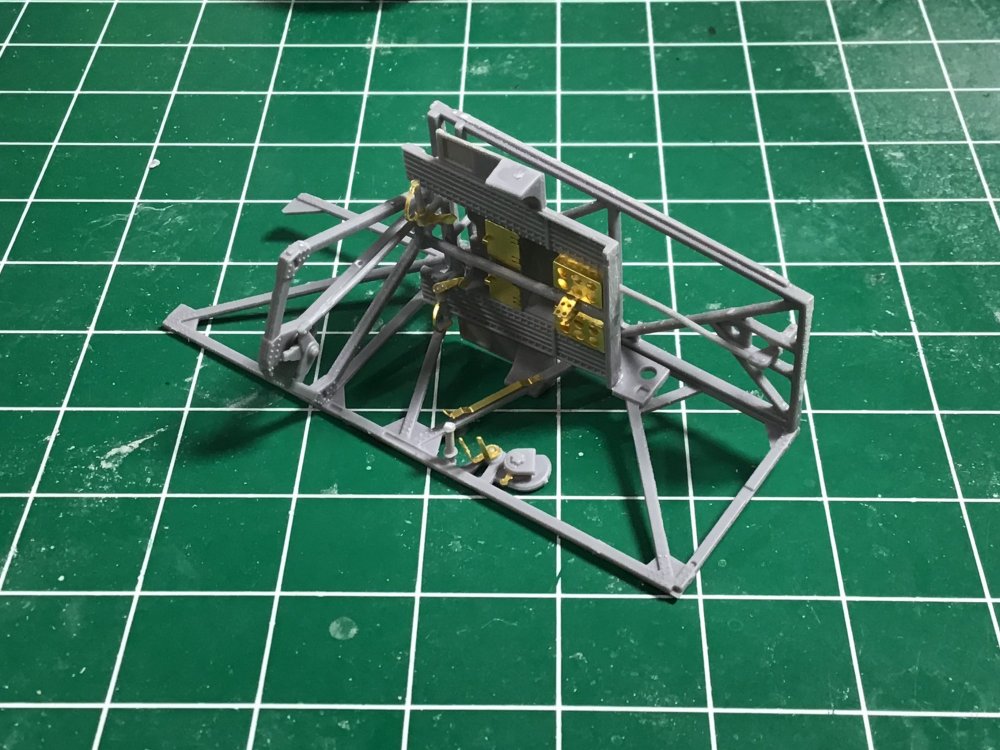

-
IBG models PZL P.11c. Finished
Clunkmeister replied to Clunkmeister's topic in LSM 1/35 and Larger Work In Progress
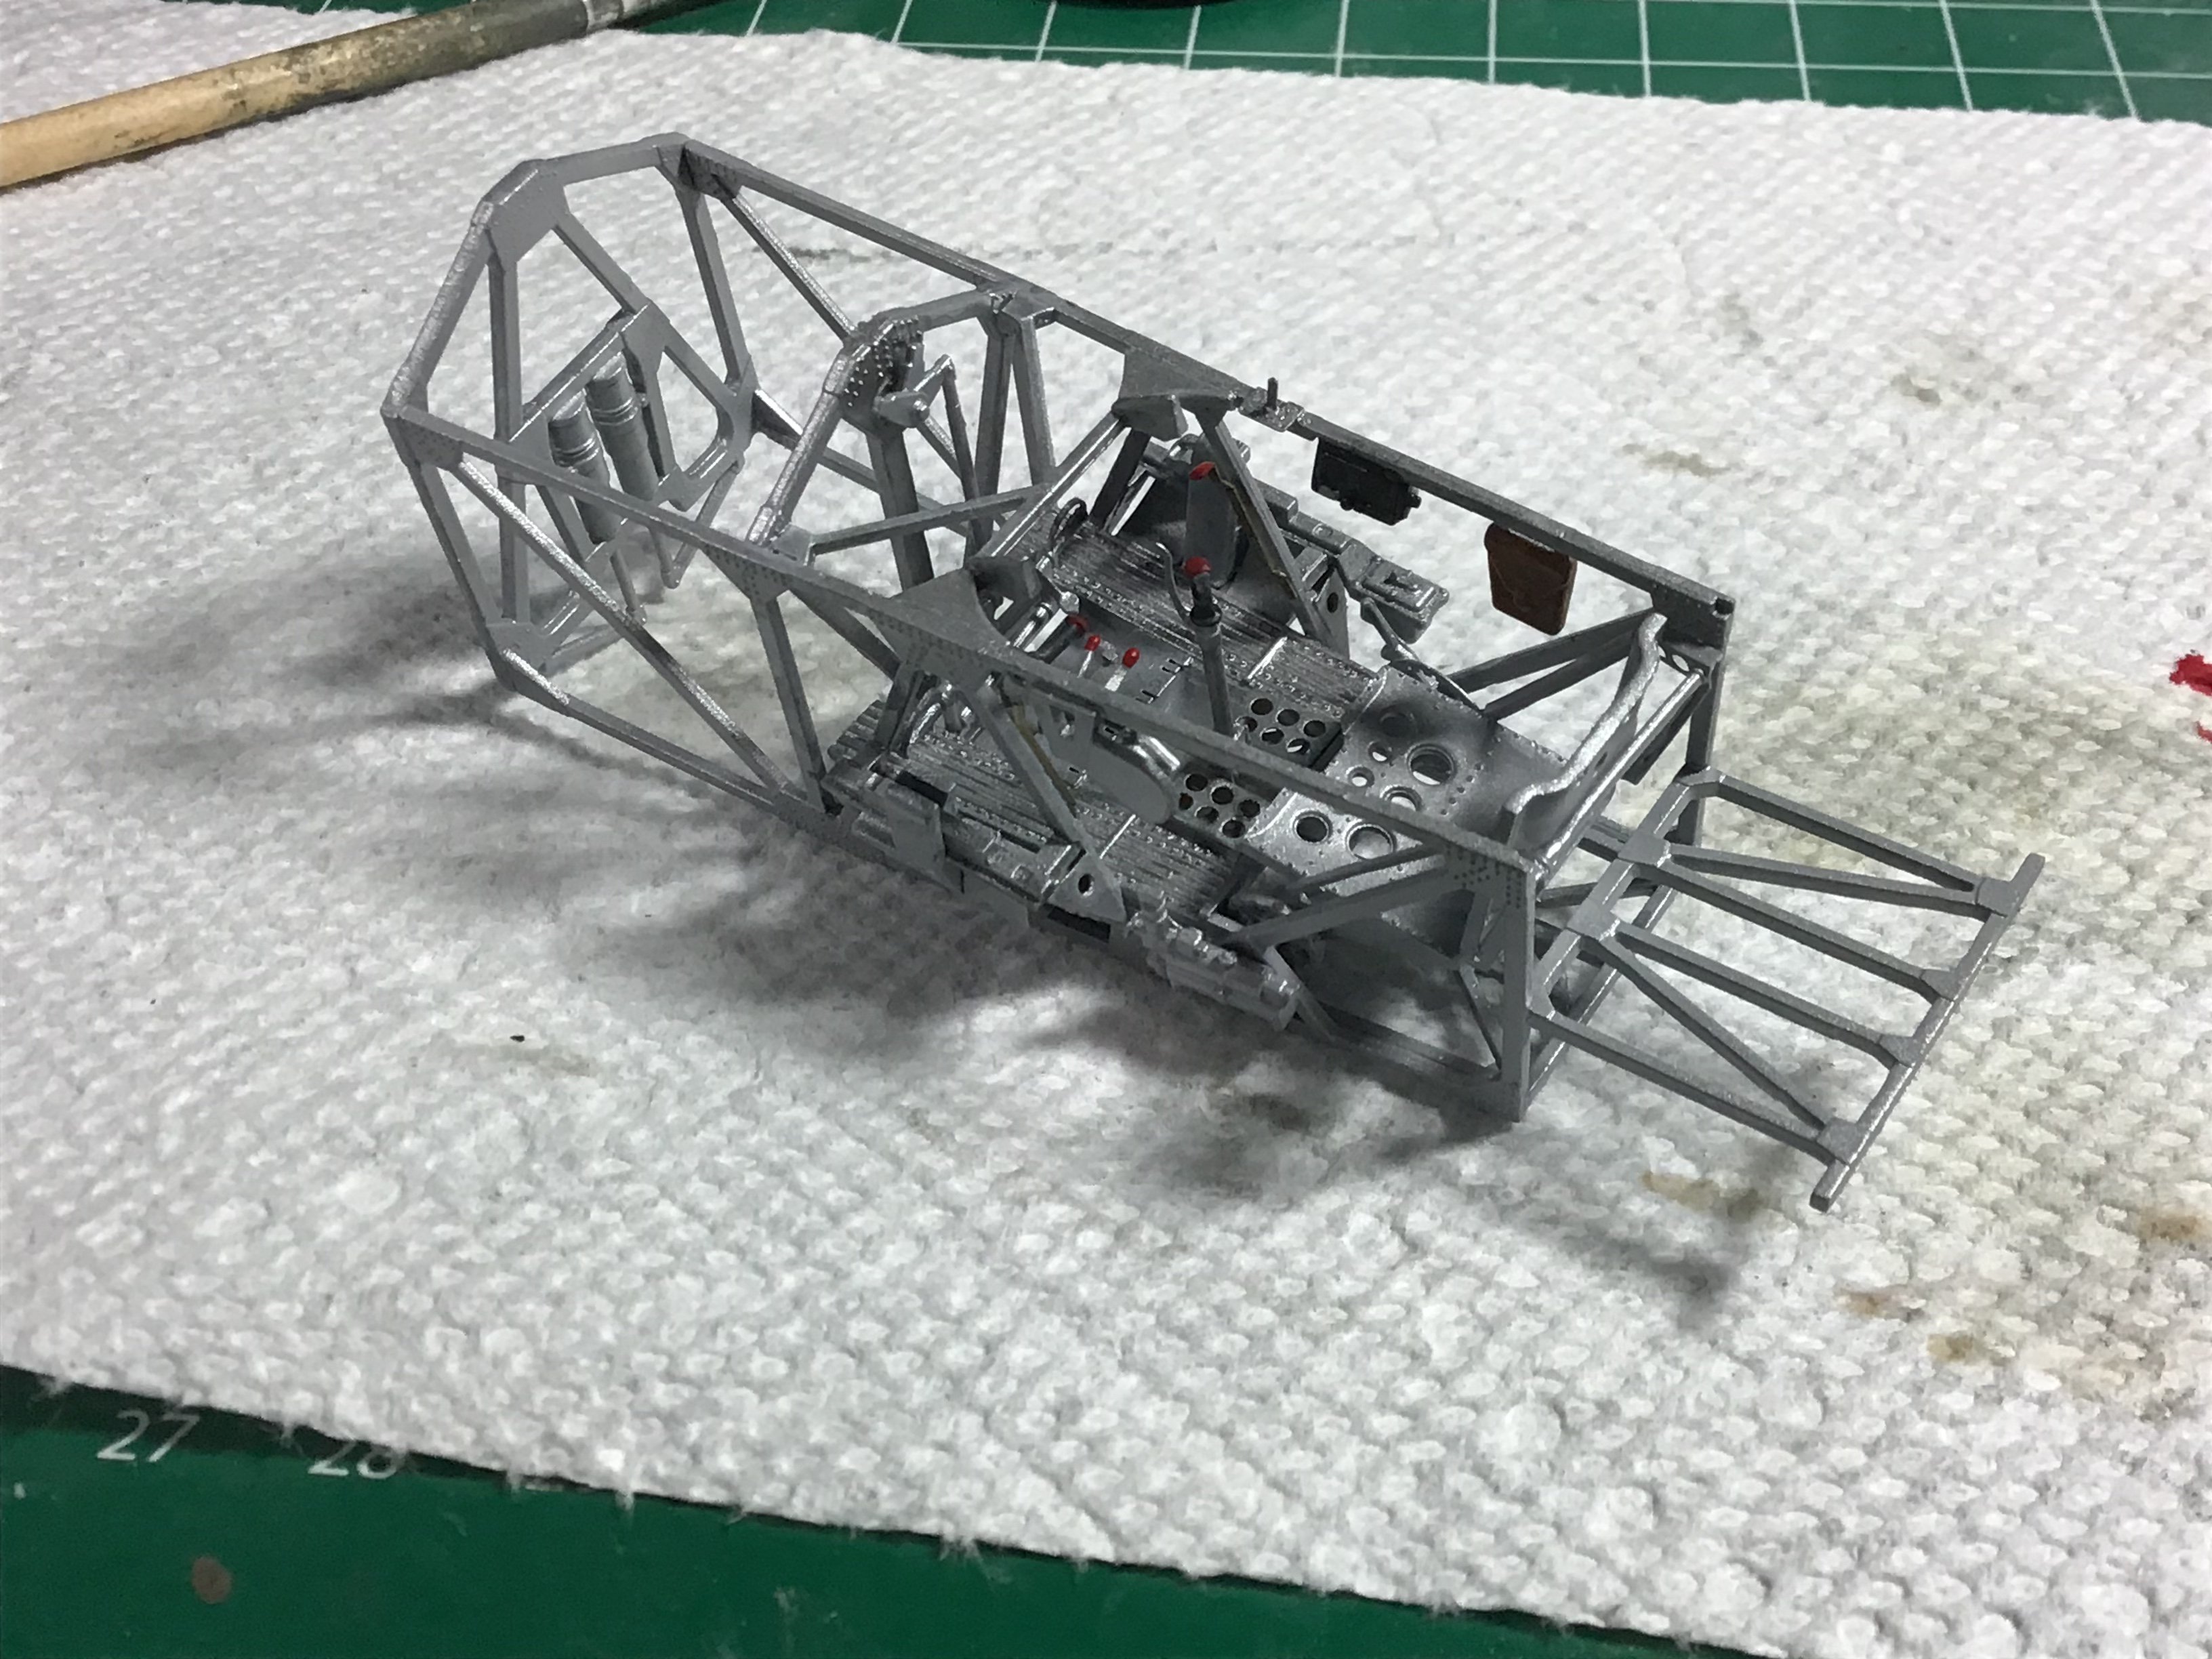
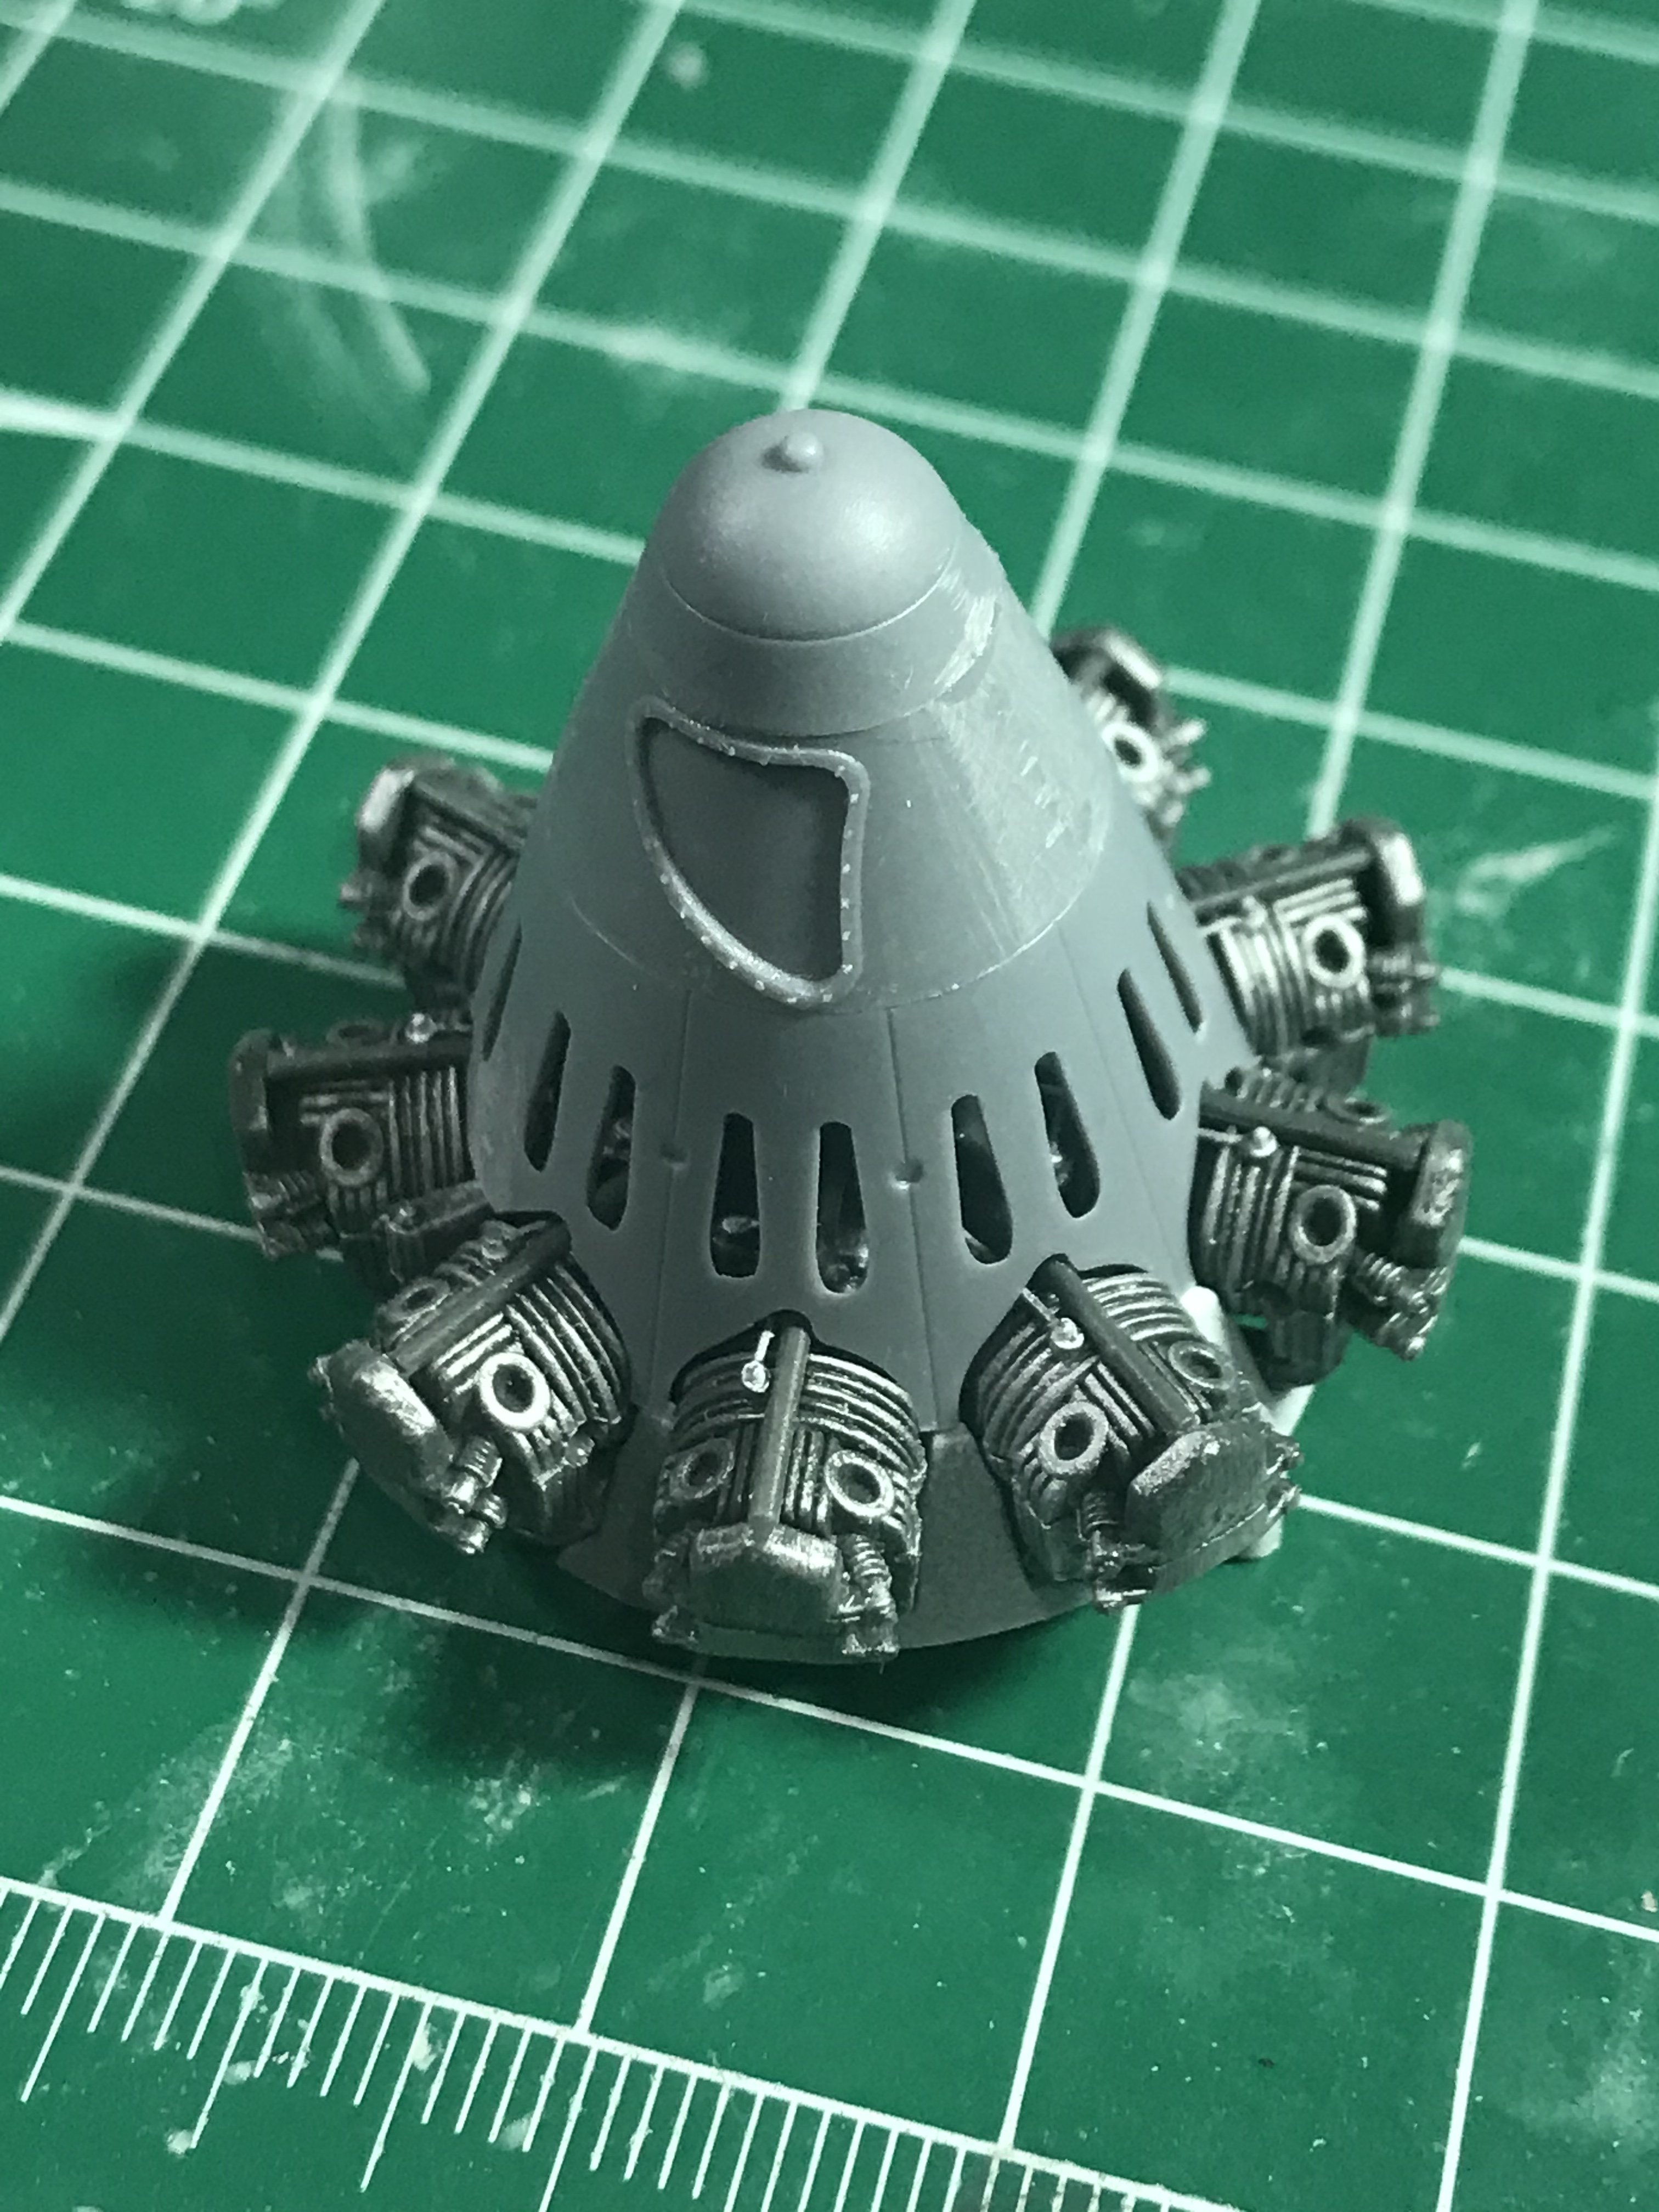
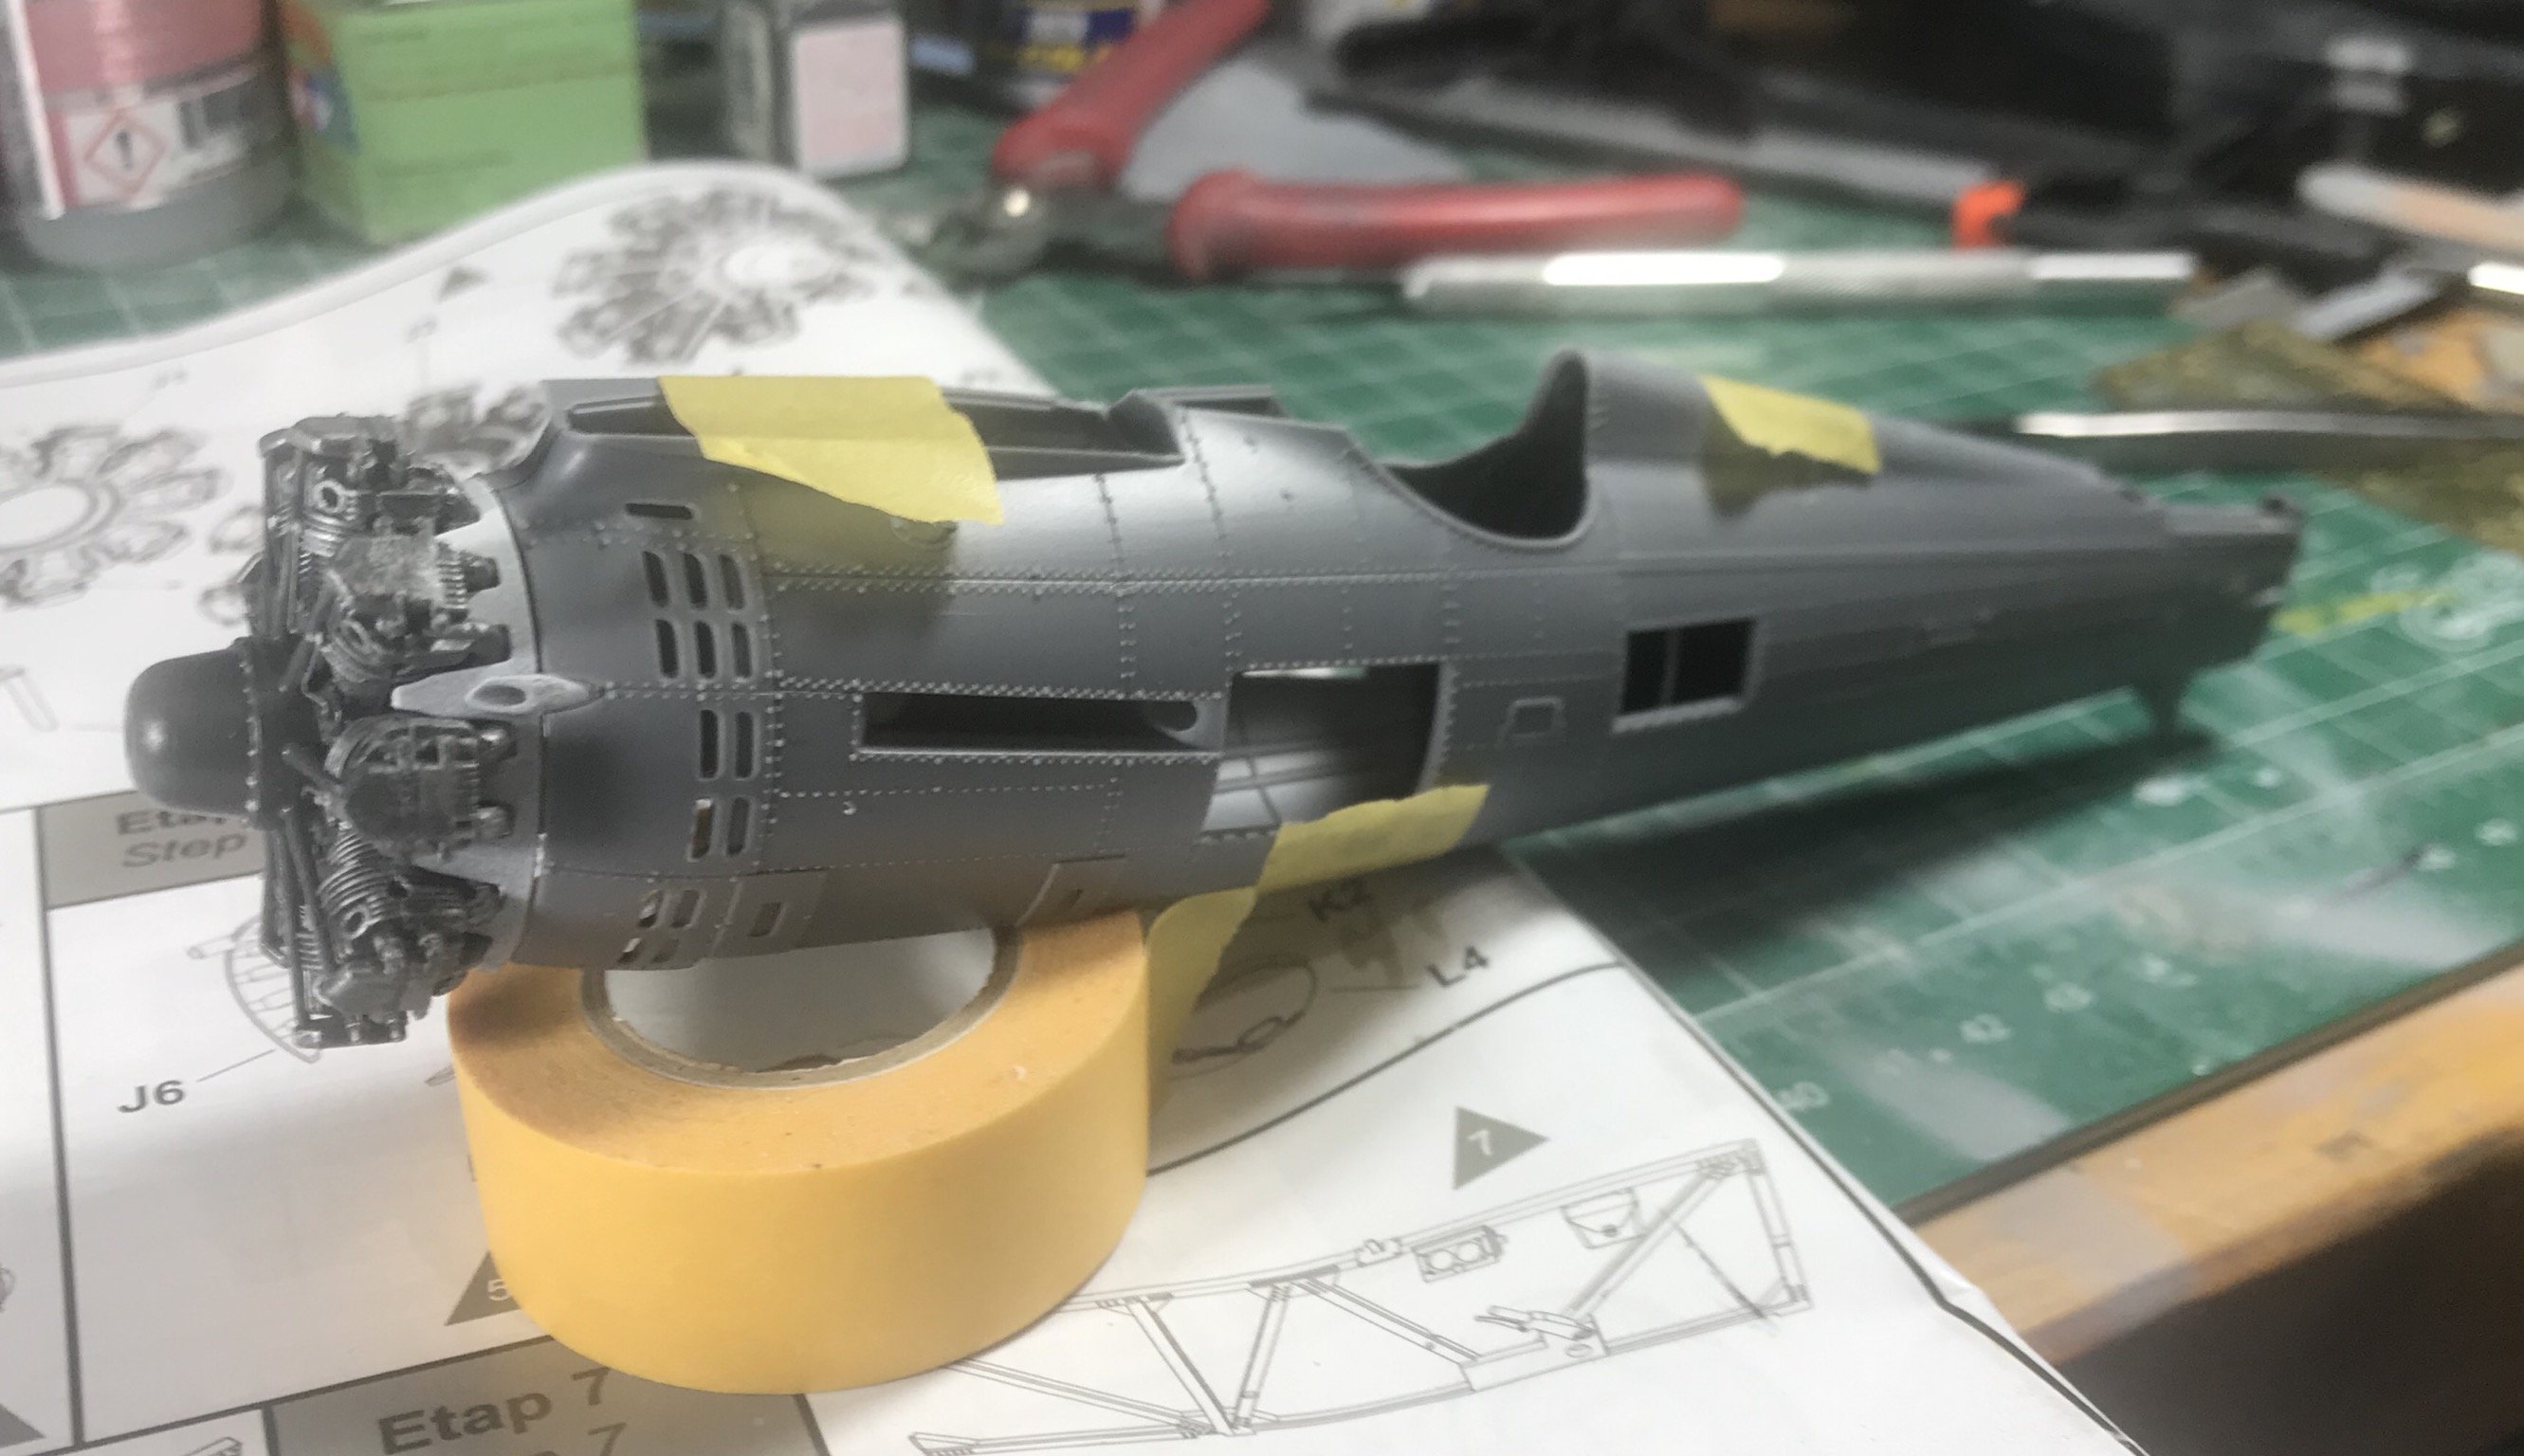
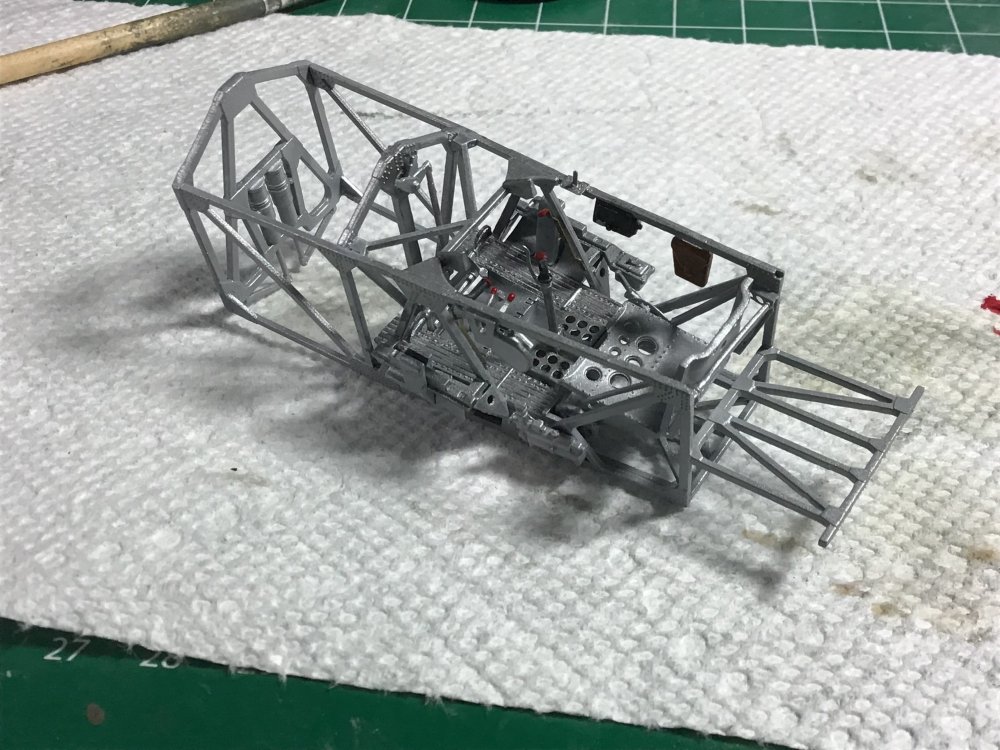
Everyone is asking about the dreaded engine, which was the downfall of many a resin build. This one is utter sweetness with honey and tulip fragrance from your favorite girl. This an exact drop fit. No glue, no swearing, no muss, no fuss. Notice how all the exhaust pipes go into the collector, which is the front of the cowl, and then all the struts supporting the whole thing against the inner cone. This was the downfall of the resin kit. Each of those exhaust pipes is supplied as a vague elbow, your job, figure out where it all rides. A jig is best...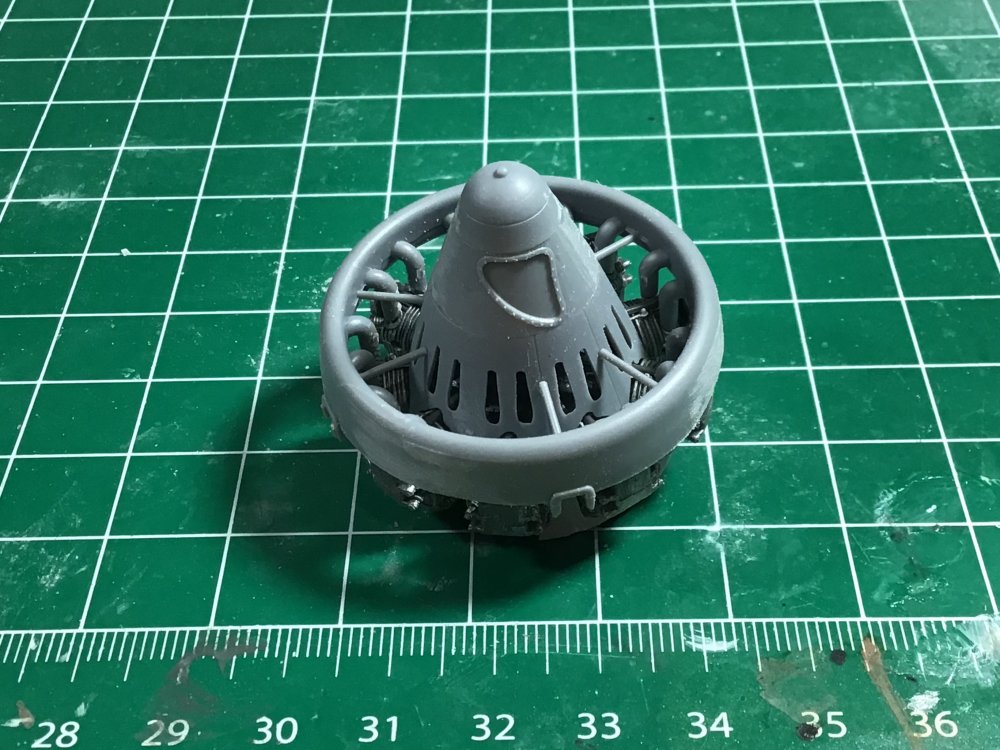
-
IBG models PZL P.11c. Finished
Clunkmeister replied to Clunkmeister's topic in LSM 1/35 and Larger Work In Progress
Still more PE bending tonight, folks. Lots more pics tomorrow, but I can say that even though there is a boatload of PE, it all fits perfectly, and if you take your time, measure three times and cur once, it will fall together like a jigsaw puzzle. This is the nicest building kit I’ve worked on in a long, long time. -
IBG models PZL P.11c. Finished
Clunkmeister replied to Clunkmeister's topic in LSM 1/35 and Larger Work In Progress
Cough cough. A radial powered space capsule. COOL!!! -
IBG models PZL P.11c. Finished
Clunkmeister replied to Clunkmeister's topic in LSM 1/35 and Larger Work In Progress
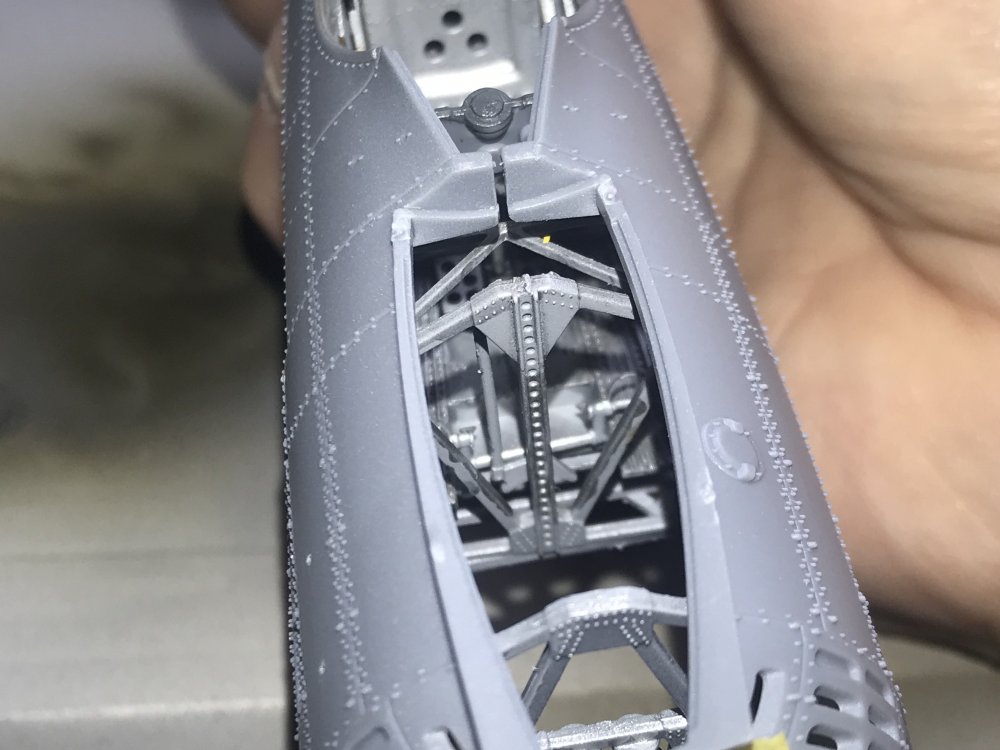
I’m just going to put this here. This is one of the things that the resin kit had issues with.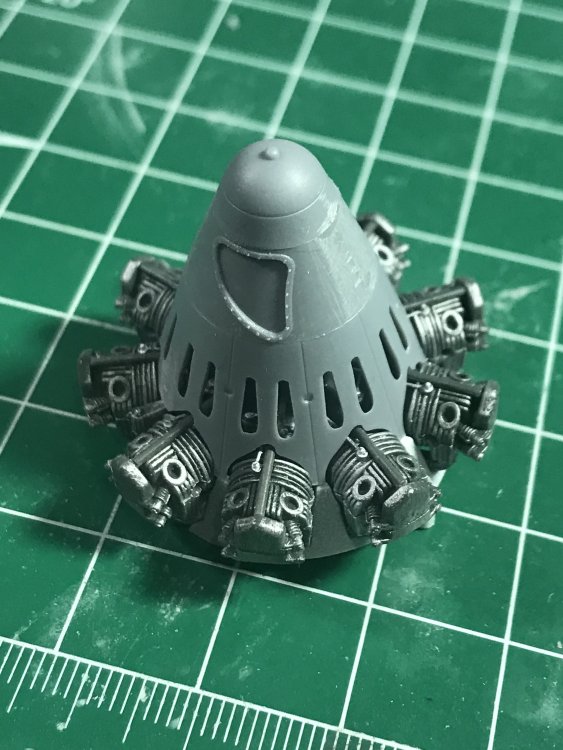
-
IBG models PZL P.11c. Finished
Clunkmeister replied to Clunkmeister's topic in LSM 1/35 and Larger Work In Progress
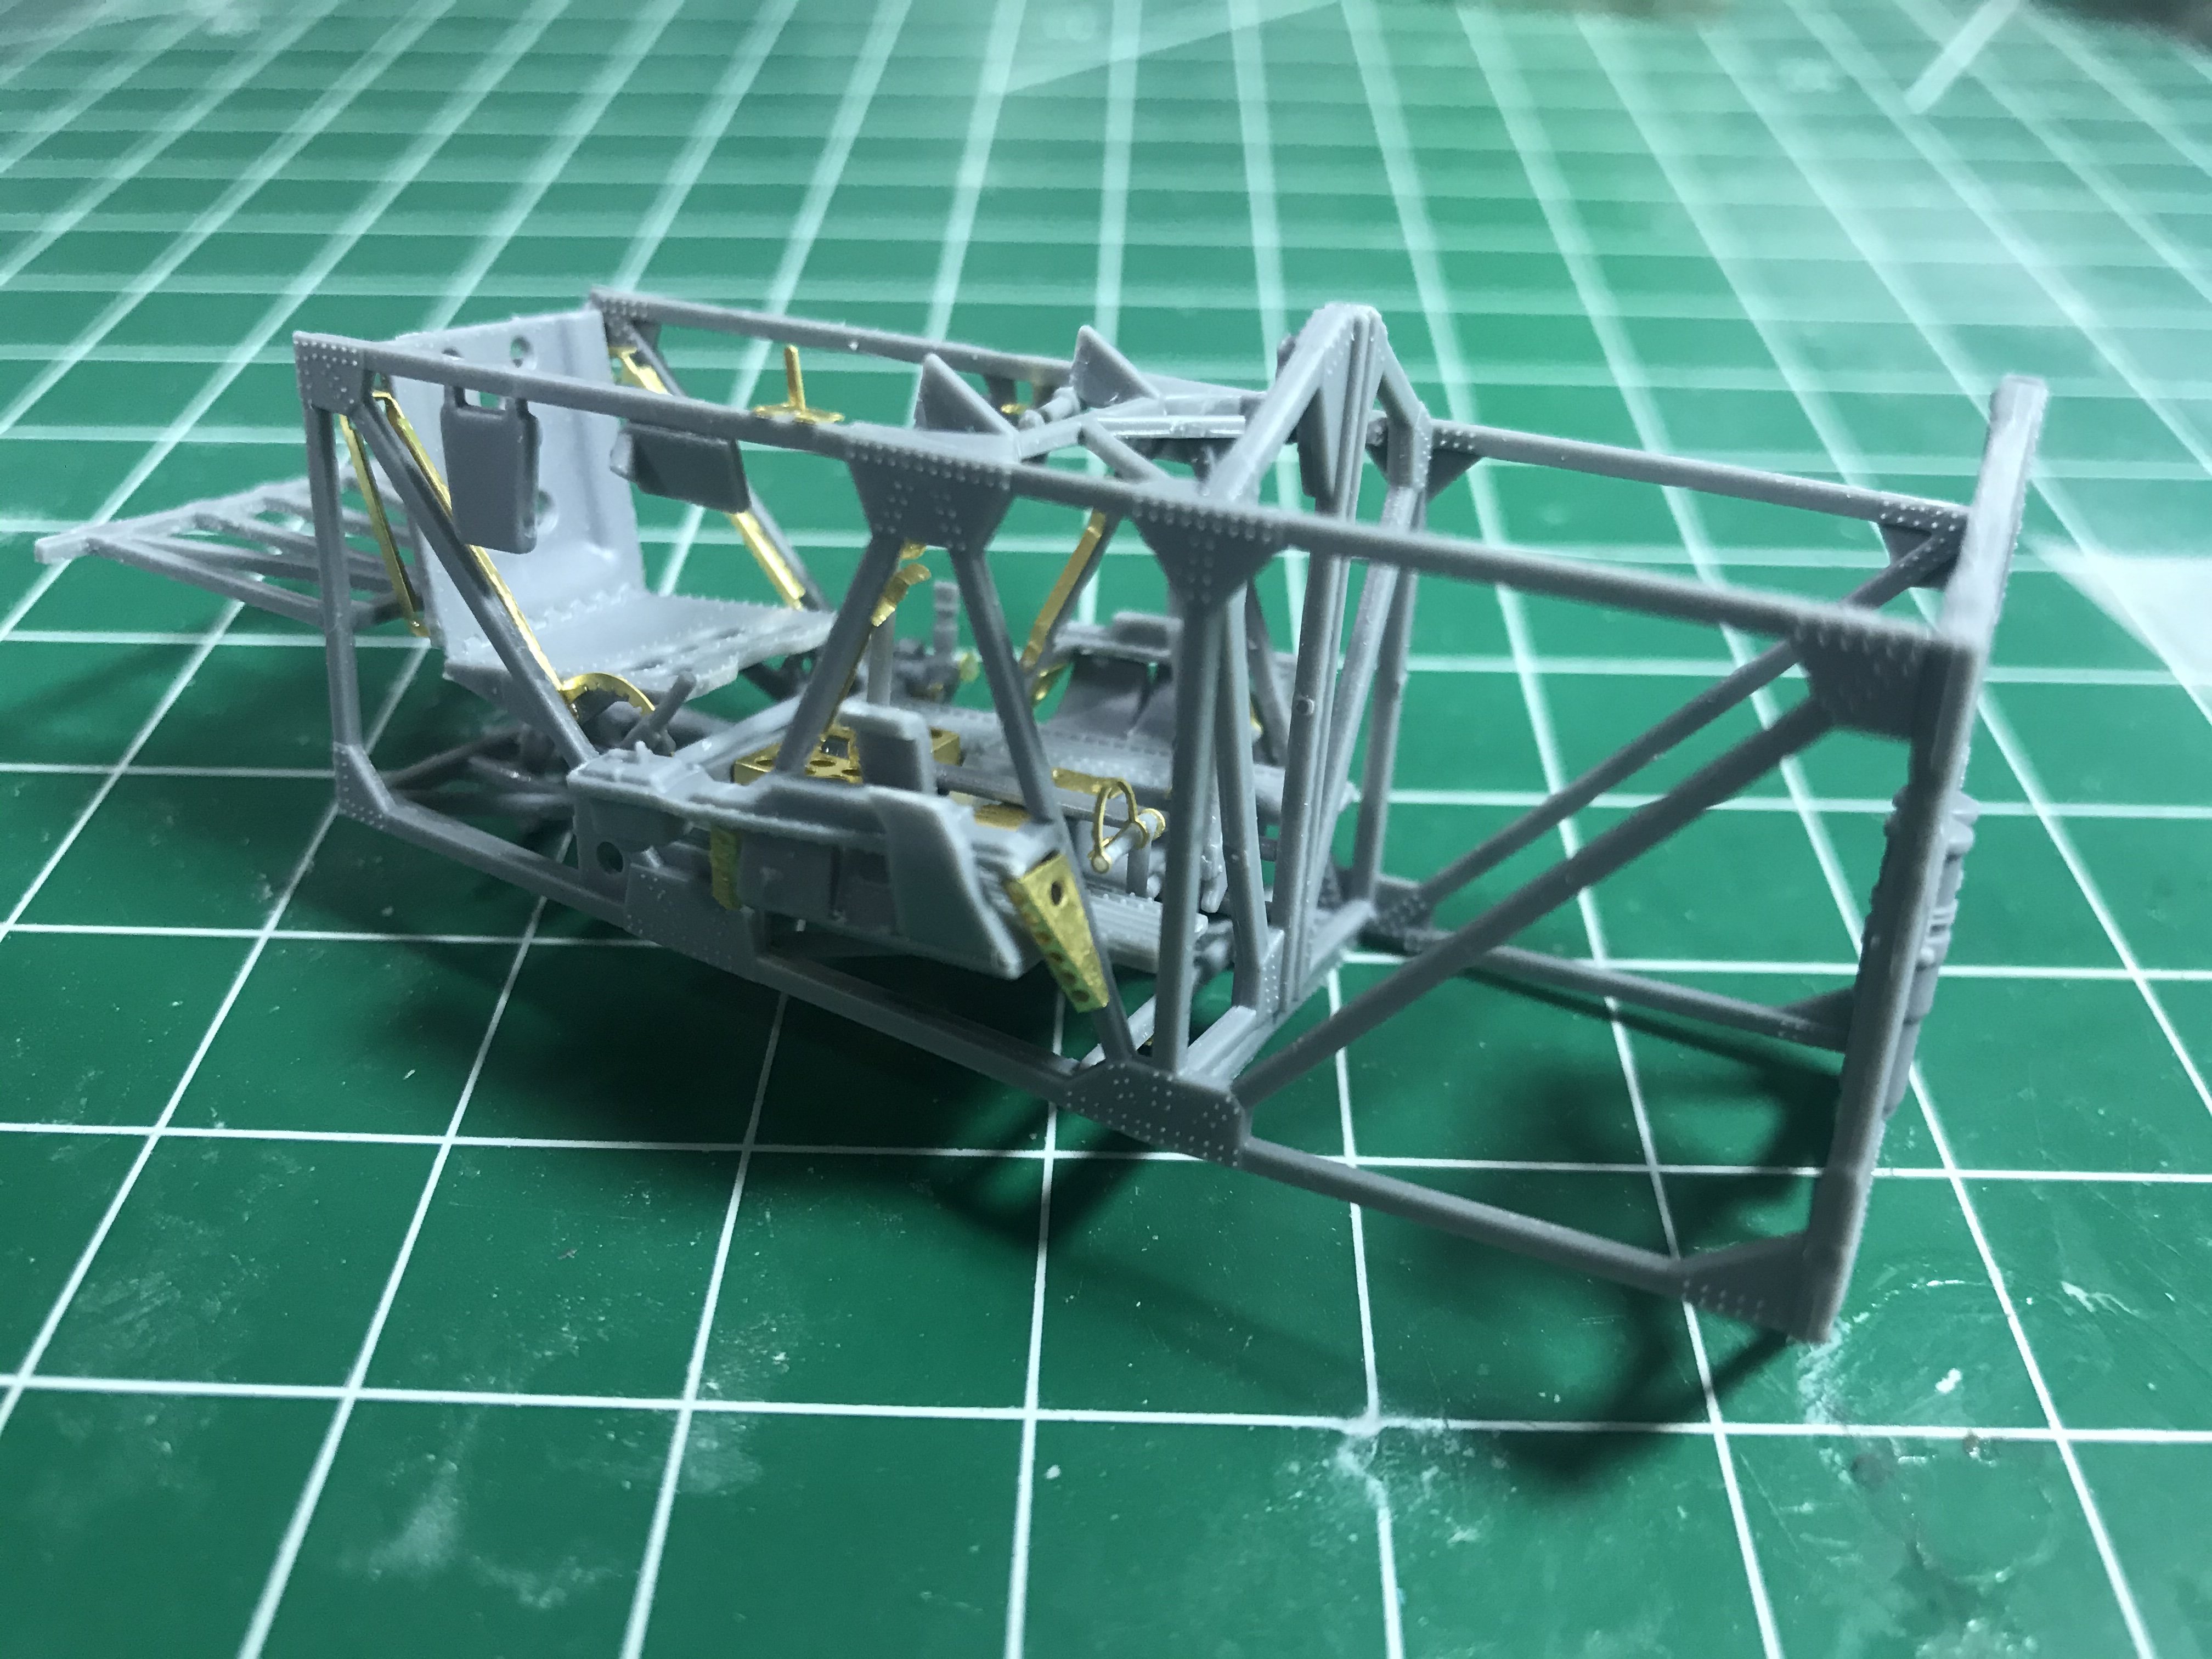
Some have asked me how the fit appears to be on this kit, so I thought I’d take a quick opportunity to show you. This is simple friction fit with tape to keep the sides together. many question? If the rest of the kit is as good as this appears to be, IBG will sell me at least a half dozen more. Y’all notice how we see group builds of massed I-16s at shows? This could be the next step up from that pleasant little build.
-
Someone say T-28? which way did he go, which way did he go..... uh boy uh boy un boy uh boy.....


-
IBG models PZL P.11c. Finished
Clunkmeister replied to Clunkmeister's topic in LSM 1/35 and Larger Work In Progress
Phil, there’s plenty of it, but only in areas where it would be the best medium to use. The design and construction of a typical 1930s cockpit lends itself well to PE improving things and keeping detail a scale size. Just think “T-6, or Harvard”. Metal cladding over metal exterior panels. Lots of tubes, gussets, braces, etc. a detail junkie’s best friend. -
IBG models PZL P.11c. Finished
Clunkmeister replied to Clunkmeister's topic in LSM 1/35 and Larger Work In Progress
It actually builds quite easily, and I’m one who detests PE. But, I’d do just about anything for a good P.11, and this one seems like a GREAT P.11. -
IBG models PZL P.11c. Finished
Clunkmeister replied to Clunkmeister's topic in LSM 1/35 and Larger Work In Progress
I got it from eBay, literally 18 seconds after they became available. Polish Post doesn’t ship anywhere overseas, so for me, eBay was fast and easy without having to sort out UPS with IBG. Hannants carries them, BTW, and Sprue Bros lists them but has no stock. -
Share how COVID-19 Quarantine has affected you.
Clunkmeister replied to 1to1scale's topic in General Discussion
Don’t fall in the water in Australia. The creatures in there will kill you just by looking at you. Probably your whole family at home, too. -
Share how COVID-19 Quarantine has affected you.
Clunkmeister replied to 1to1scale's topic in General Discussion
Ugh! I’ll never unsee that. Where’s the acid wash for the eyes. -
Share how COVID-19 Quarantine has affected you.
Clunkmeister replied to 1to1scale's topic in General Discussion
Get a Louisville Slugger or a 2x2. Clint Eastwood in Pale Rider once said “There’s nothing like a good piece of hickory.”