Clunkmeister
-
Posts
7,203 -
Joined
-
Last visited
Content Type
Profiles
Forums
Events
Gallery
Everything posted by Clunkmeister
-
 Su-24? Yessssssssss!!!!
 -
I would think that this might be a serious candidate for the LEMkit treatment.
-
Hasegawa 32nd P-40M
Clunkmeister replied to Lothar's topic in LSM 1/32 and Larger Aircraft Ready for Inspection
There’s been plenty on all the websites. Yours and Lothar’s are standouts for sure -
Hasegawa 32nd P-40M
Clunkmeister replied to Lothar's topic in LSM 1/32 and Larger Aircraft Ready for Inspection
Lothar, since I’ve seen you last you haven’t missed a trick. looking forward to see more here -
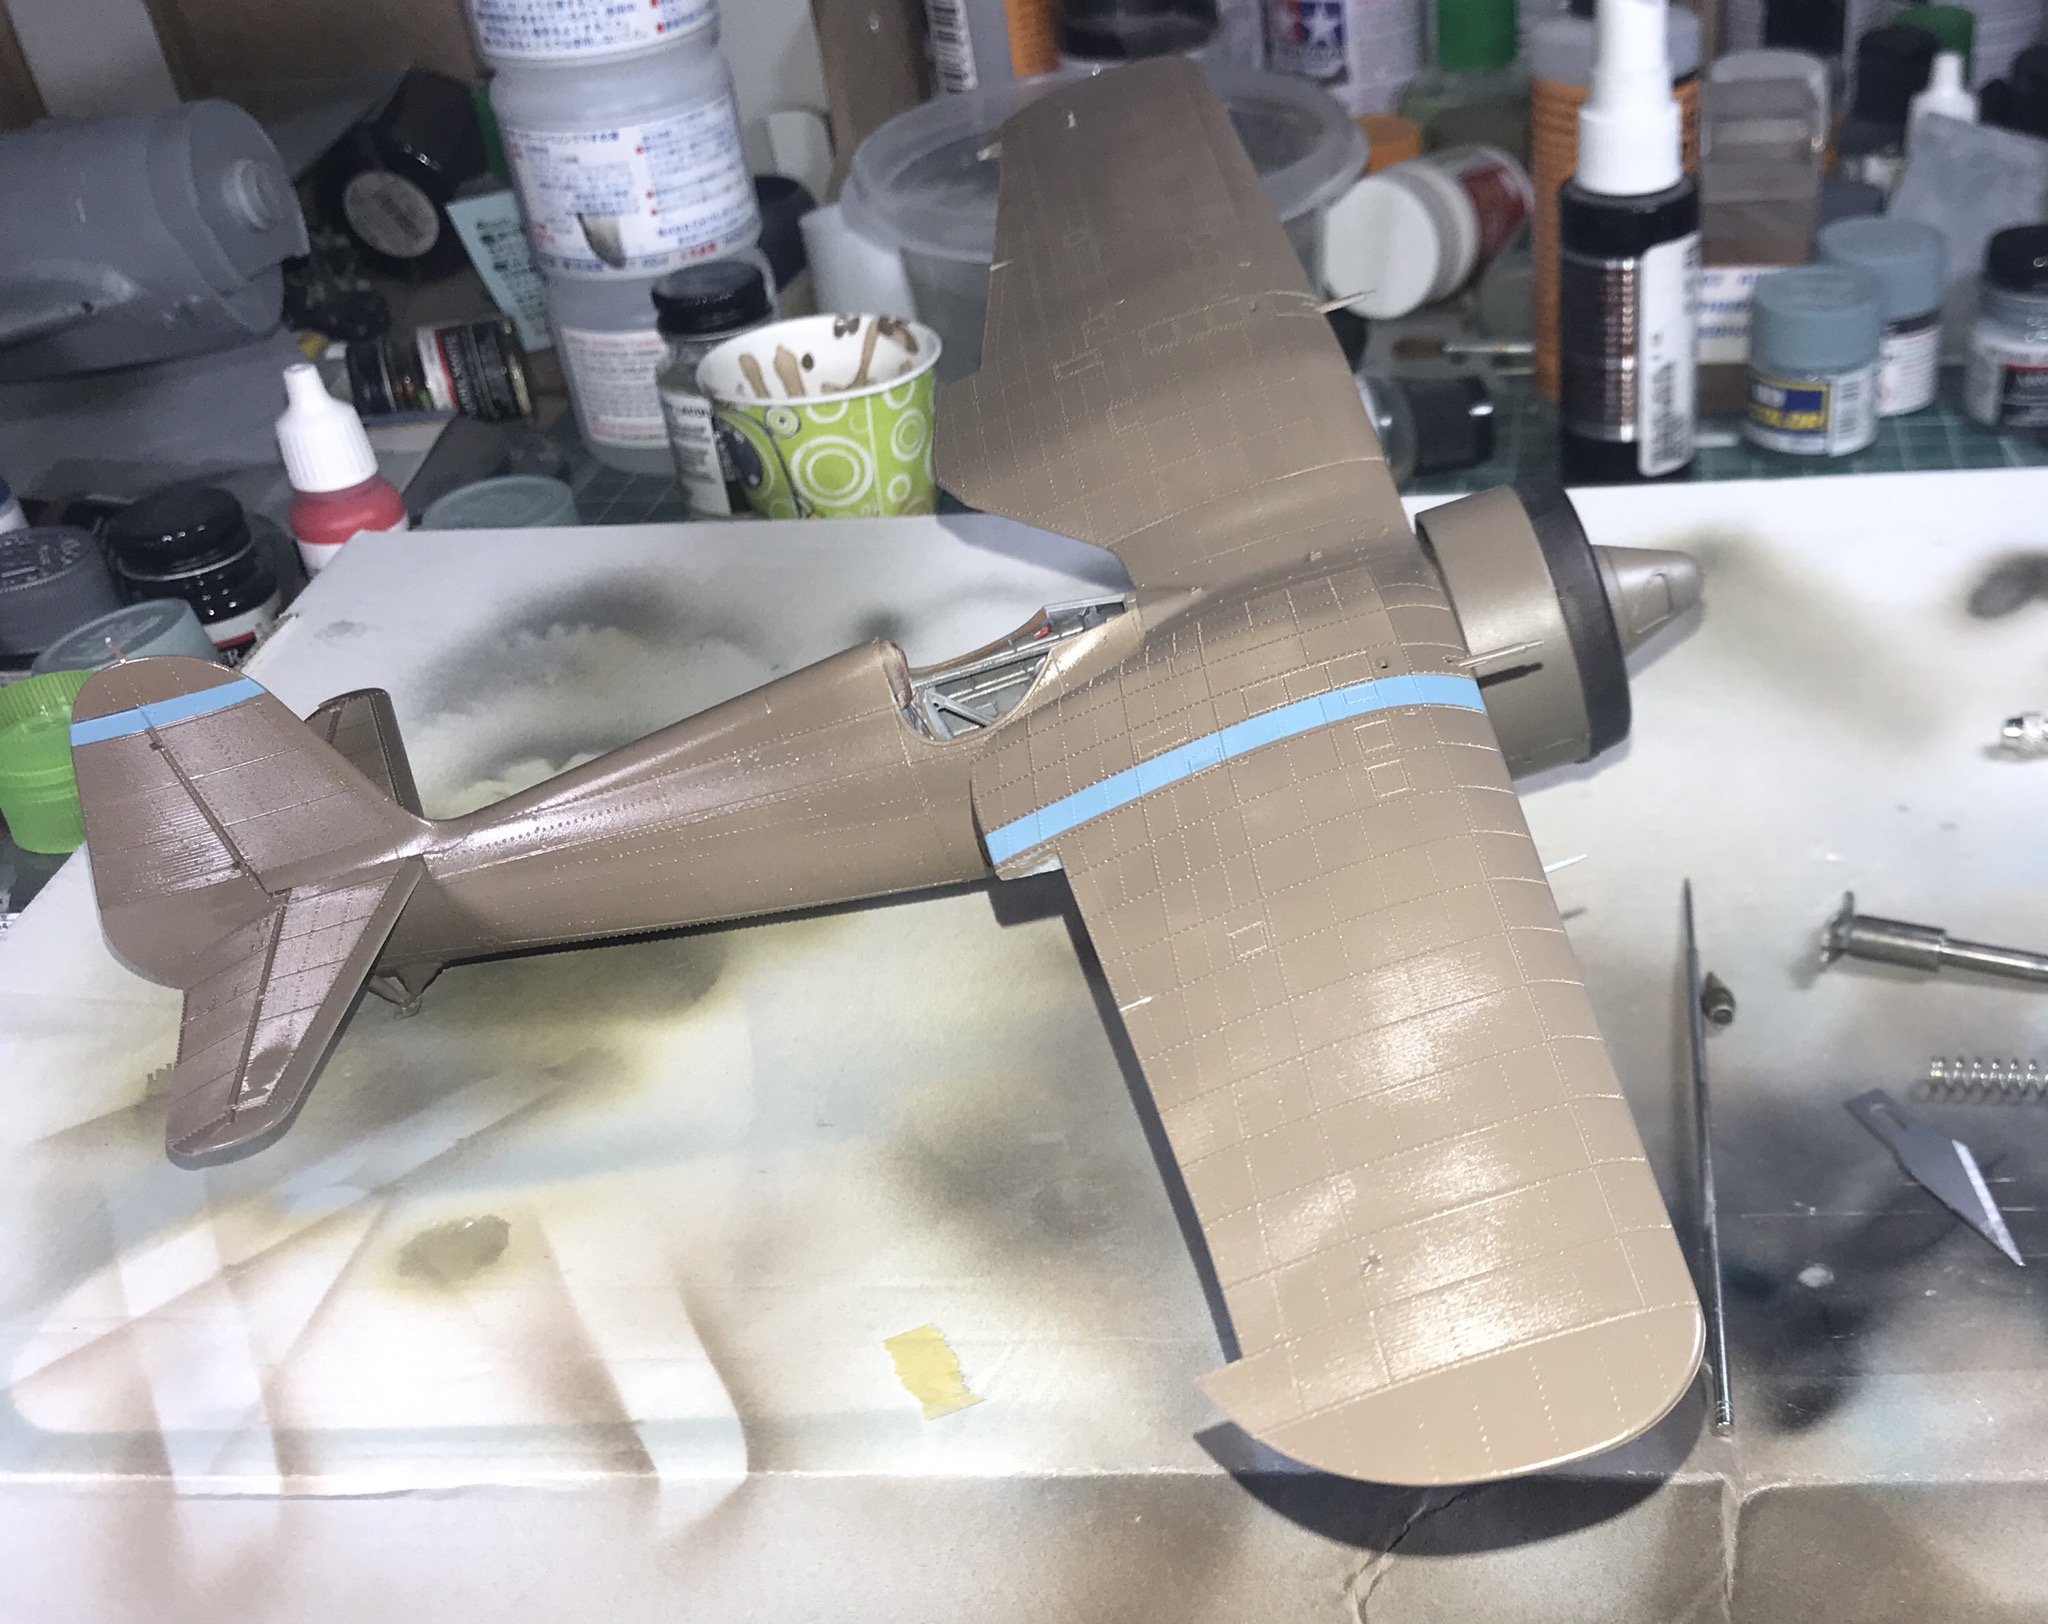
IBG models PZL P.11c. Finished
Clunkmeister replied to Clunkmeister's topic in LSM 1/35 and Larger Work In Progress
Problem disappear. Less than ten minutes, problem gone.

- 236 replies
-
- 10
-

-
IBG models PZL P.11c. Finished
Clunkmeister replied to Clunkmeister's topic in LSM 1/35 and Larger Work In Progress
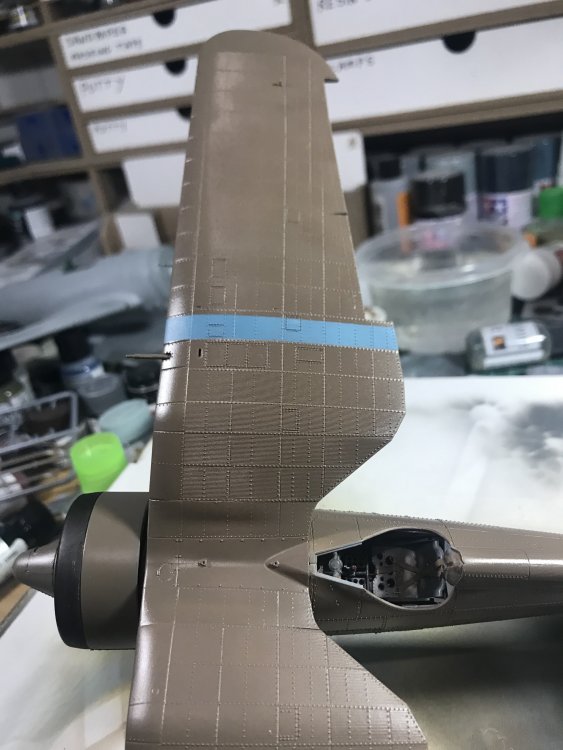
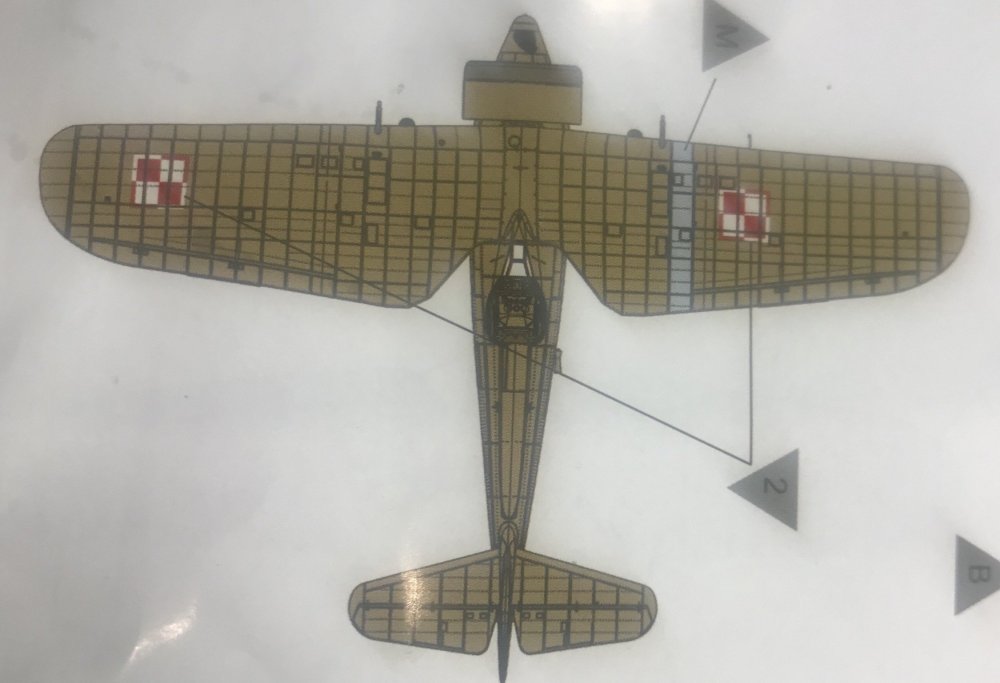
Ok guys, i might be overthinking this, but.. Hataka Orange khaki is lacquer. Blue is Vallejo Air. An acrylic, right? I simply want to mist over the blue, let it set, then do a cover coat. Will Hataka attack Vallejo? My mind says no, as I’ve used plenty of Gunze lacquers over Tamiya acrylics with no issues. I think Hataka is plenty mild, definitely not a “hot” paint, so that is a good thing. The blue stripe is very thin, not much more than a mist, and a simple overpaint is not going to show mask lines. Thoughts? -
IBG models PZL P.11c. Finished
Clunkmeister replied to Clunkmeister's topic in LSM 1/35 and Larger Work In Progress
Yeah, rub it in. Your turn’s coming...... -
IBG models PZL P.11c. Finished
Clunkmeister replied to Clunkmeister's topic in LSM 1/35 and Larger Work In Progress
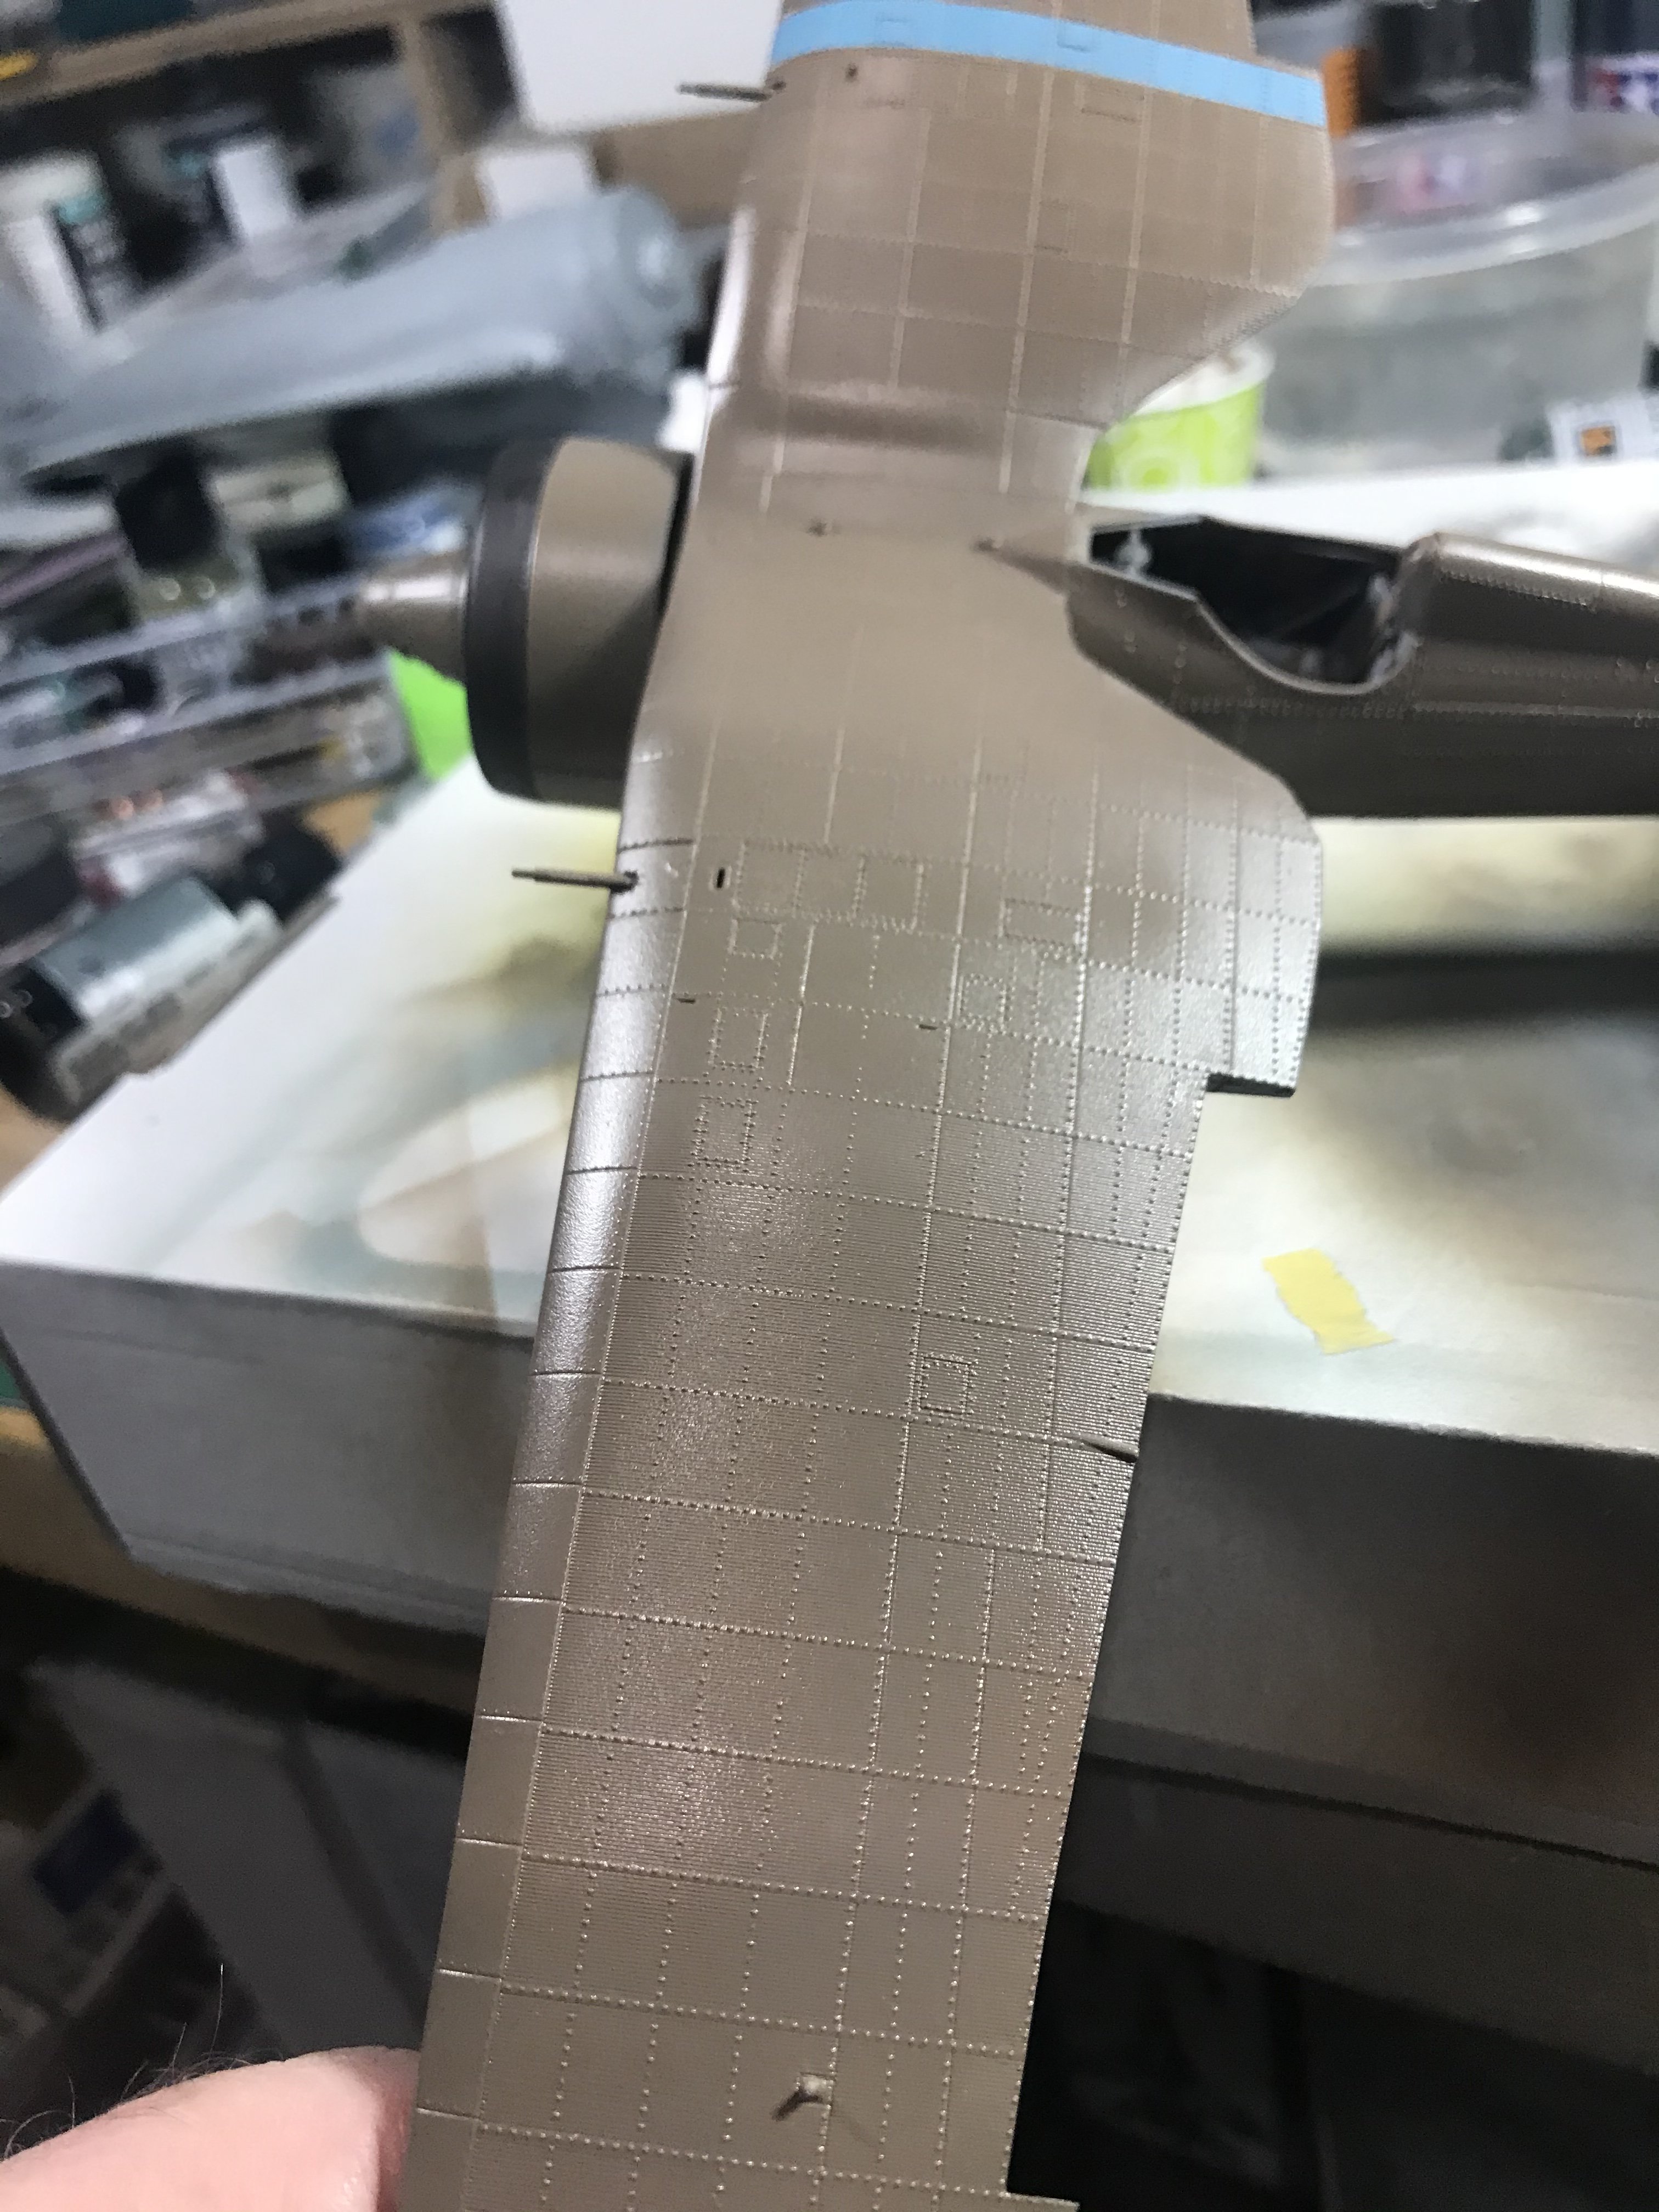
LMAO! It’s been one of those days.... If you can’t laugh at yourself, you truly have no life. I checked and double checked, even triple checked... I didn’t even realize it until I went to place the National markings. Fortunately, it’s an easy fix, but I must be getting a bit soft in the head. -
IBG models PZL P.11c. Finished
Clunkmeister replied to Clunkmeister's topic in LSM 1/35 and Larger Work In Progress
Brain Fart time in Texas. duuuhhhhhhhh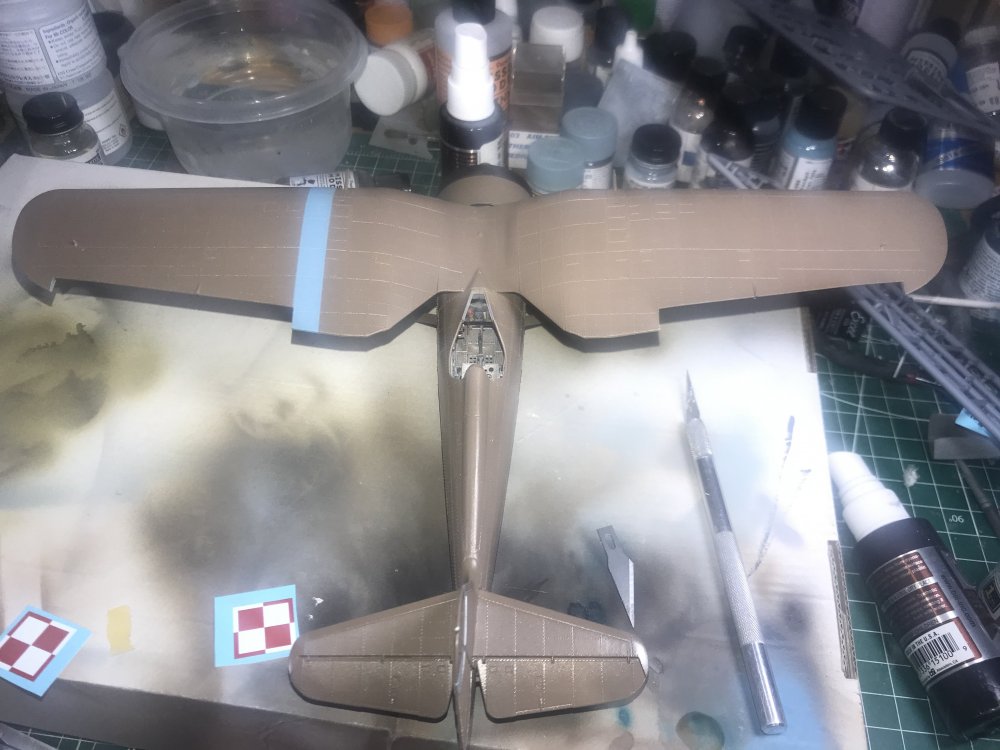
-
Yep, I sure am. I don’t have a whole many hangups, but I’m no fan of that POS.
-
I actually went out to find a couple Albie B.ll’s and will need to go right to NZ for them. Same with AEG late. Funny how that works. Ill grab a few Junkers D.l’s, a couple DFW and Halberstadts, and a Dolphin or two locally. The stuff is selling quickly, so people are buying them up, probably speculating. I never did buy Goering’s D.Vll, and probably never will.
-
IBG models PZL P.11c. Finished
Clunkmeister replied to Clunkmeister's topic in LSM 1/35 and Larger Work In Progress
LMAO! Gazz my friend, you never fail to find the humor in something. Thanks, buddy! I needed that! -
IBG models PZL P.11c. Finished
Clunkmeister replied to Clunkmeister's topic in LSM 1/35 and Larger Work In Progress
Agree Ron, but I’d think a squared off corner anywhere but on the tip of a prop might give someone reason for pause. -
Larry, it’s the LSM page.
-
Dragon 1/35 Hetzer tank destroyer.
Clunkmeister replied to BradG's topic in LSM Armour Finished Work
Brad, this is really nice. I'm not a big armor guy, but even this propeller head can appreciate that! Very nice!! Can I put it up on the Facebook page? -
F-4J Phantom VF-21 'Freelancers'
Clunkmeister replied to a topic in LSM 1/32 and Larger Aircraft Ready for Inspection
I haven't looked through RFI in quite awhile and wow, was that a mistake. Danny, I hope you can display this in front of the appropriate Brain Bucket. Beautiful F-4 -
HpH P-63C
Clunkmeister replied to JohnB's topic in LSM 1/32 and Larger Aircraft Ready for Inspection
The kit certainly has it's challenges, but sure turns into a nice model. Stunning work, John. -
Tim, this is the build of the year so far, as far as I'm concerned. And I look at alot of them. Brilliant, brilliant build, and so perfectly executed. I'd say this is a first place at the Nats.
-
KINETIC 1/32 F-86F-30 SABRE
Clunkmeister replied to k5ikl's topic in LSM 1/32 and Larger Aircraft Ready for Inspection
Jerry, I'd say this is easily the nicest finish I've ever seen you do. You're definitely got the NMF nailed. GORGEOUS, man!! -
VMA-214 A-4C Chu Lai 66/67
Clunkmeister replied to smitty44's topic in LSM 1/32 and Larger Aircraft Ready for Inspection
Smitty this is gorgeous, Man!! Of course I've followed this along throughout it's gestation period, but it turned out nicer than I ever thought it would. -
Hasegawa 32nd P-40M
Clunkmeister replied to Lothar's topic in LSM 1/32 and Larger Aircraft Ready for Inspection
Lothar, this is one of the nicest P-40 builds I've ever seen. Clean, crisp, realistically weathered, and just simply real looking. respect, respect, respect -
Yeah it's a bit of a tricky kit, but oh man are the results stunning. I'm ready to do another, and this may be my scheme. The only thing I'll add is the amazing AMUR Reaver flaps. Are those the kit decals?? Flawless work! Congrats! may I put this on our Facebook page?
-
He's safe in his doghouse. Dick Dastardly is out finding fuel for his pigeon hunting kite
-
IBG models PZL P.11c. Finished
Clunkmeister replied to Clunkmeister's topic in LSM 1/35 and Larger Work In Progress
What is it about a WW2 solid two blade fighter prop that is so hard to get right? I've seen plenty of resin and injected 1/32 kits with very inaccurate looking props that look like they were hand carved with a butter knife -
IBG models PZL P.11c. Finished
Clunkmeister replied to Clunkmeister's topic in LSM 1/35 and Larger Work In Progress
I took a sanding stick to the prop roots already, trying to correct the blocky angles IBG gives me, and they do look a lot better than they did on the Sprue. But we’ll see I guess. And I had my first close look at the oil cooler last night. I’d say yes, it’s one of the few parts that could benefit from the preciseness of a resin casting. I’m looking forward to seeing those wheel spats Hubert. Id certainly be open to purchasing a set or two if you’re reproducing them.