
Clunkmeister
-
Posts
7,162 -
Joined
-
Last visited
Content Type
Profiles
Forums
Events
Gallery
Everything posted by Clunkmeister
-

Trumpeter TBD-1 Devastator
Clunkmeister replied to Clunkmeister's topic in LSM 1/35 and Larger Work In Progress
I love this kit, Hubert. It’s basic, but that’s OK. That just adds to what we can do. The outline seems accurate, yes, the Trumpeter rivet-divots are an issue, but for those who don’t like it, Archer or Quinta will come to the rescue. The only thing that really needs additions is the cockpit, as it’s basic. Trumpeter appears to have fixed a couple of the GWK kit issues. The ENTIRE bombardier control system is missing, but it’s invisible without actually having a mirror and penlight. What’s amazing is how in 1937-38, the TBD was considered the most advanced navy bomber in the world, yet within 3 years, it was woefully obsolete. Credit where credit is due, though. It did well at Coral Sea, and in other battles where it also served as a level bomber. Many of its issues were issues with the torpedo itself. WW2 US aircraft torpedoes were a joke that were never properly developed. Even the Avengers used bombs more than torpedoes. The US torpedoes were a very effective Japanese weapon. -
Trumpeter TBD-1 Devastator
Clunkmeister replied to Clunkmeister's topic in LSM 1/35 and Larger Work In Progress
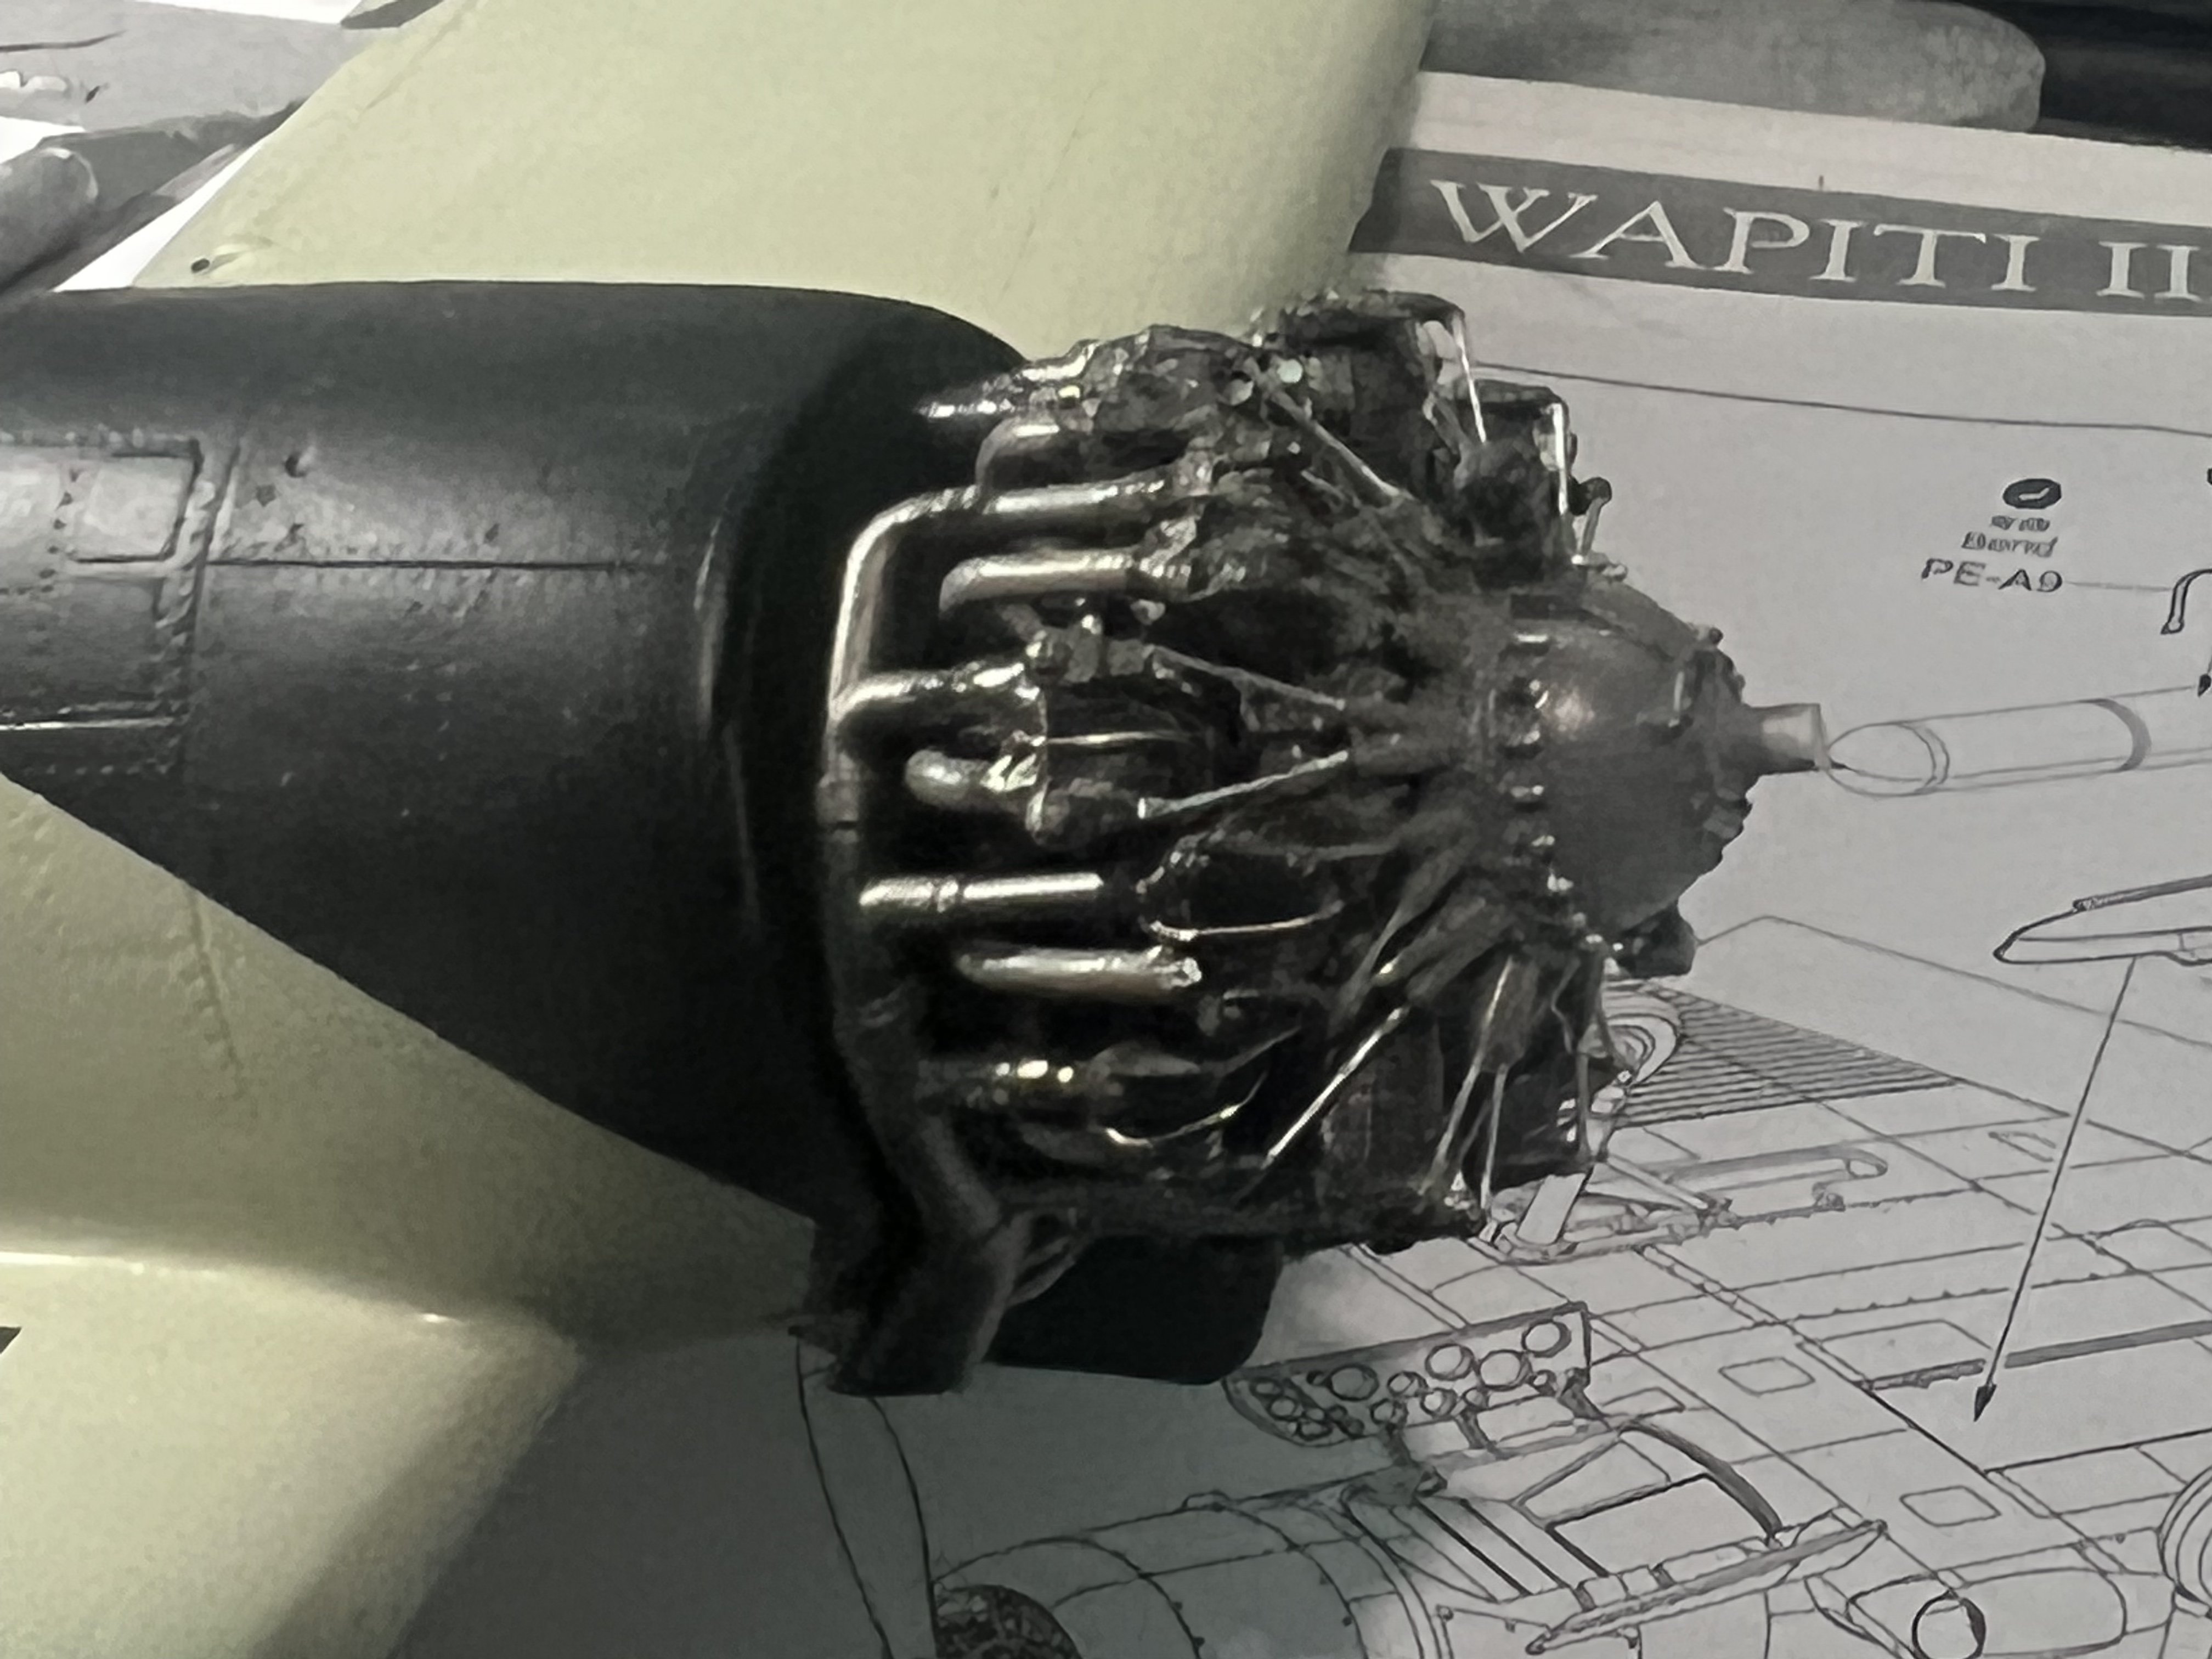
The TBD used a removable crank similar to a 109 to spin the flywheel and start the engine. Being able to show one in place would be cool, but like the 109, it’s never offered in kits. -
Trumpeter TBD-1 Devastator
Clunkmeister replied to Clunkmeister's topic in LSM 1/35 and Larger Work In Progress
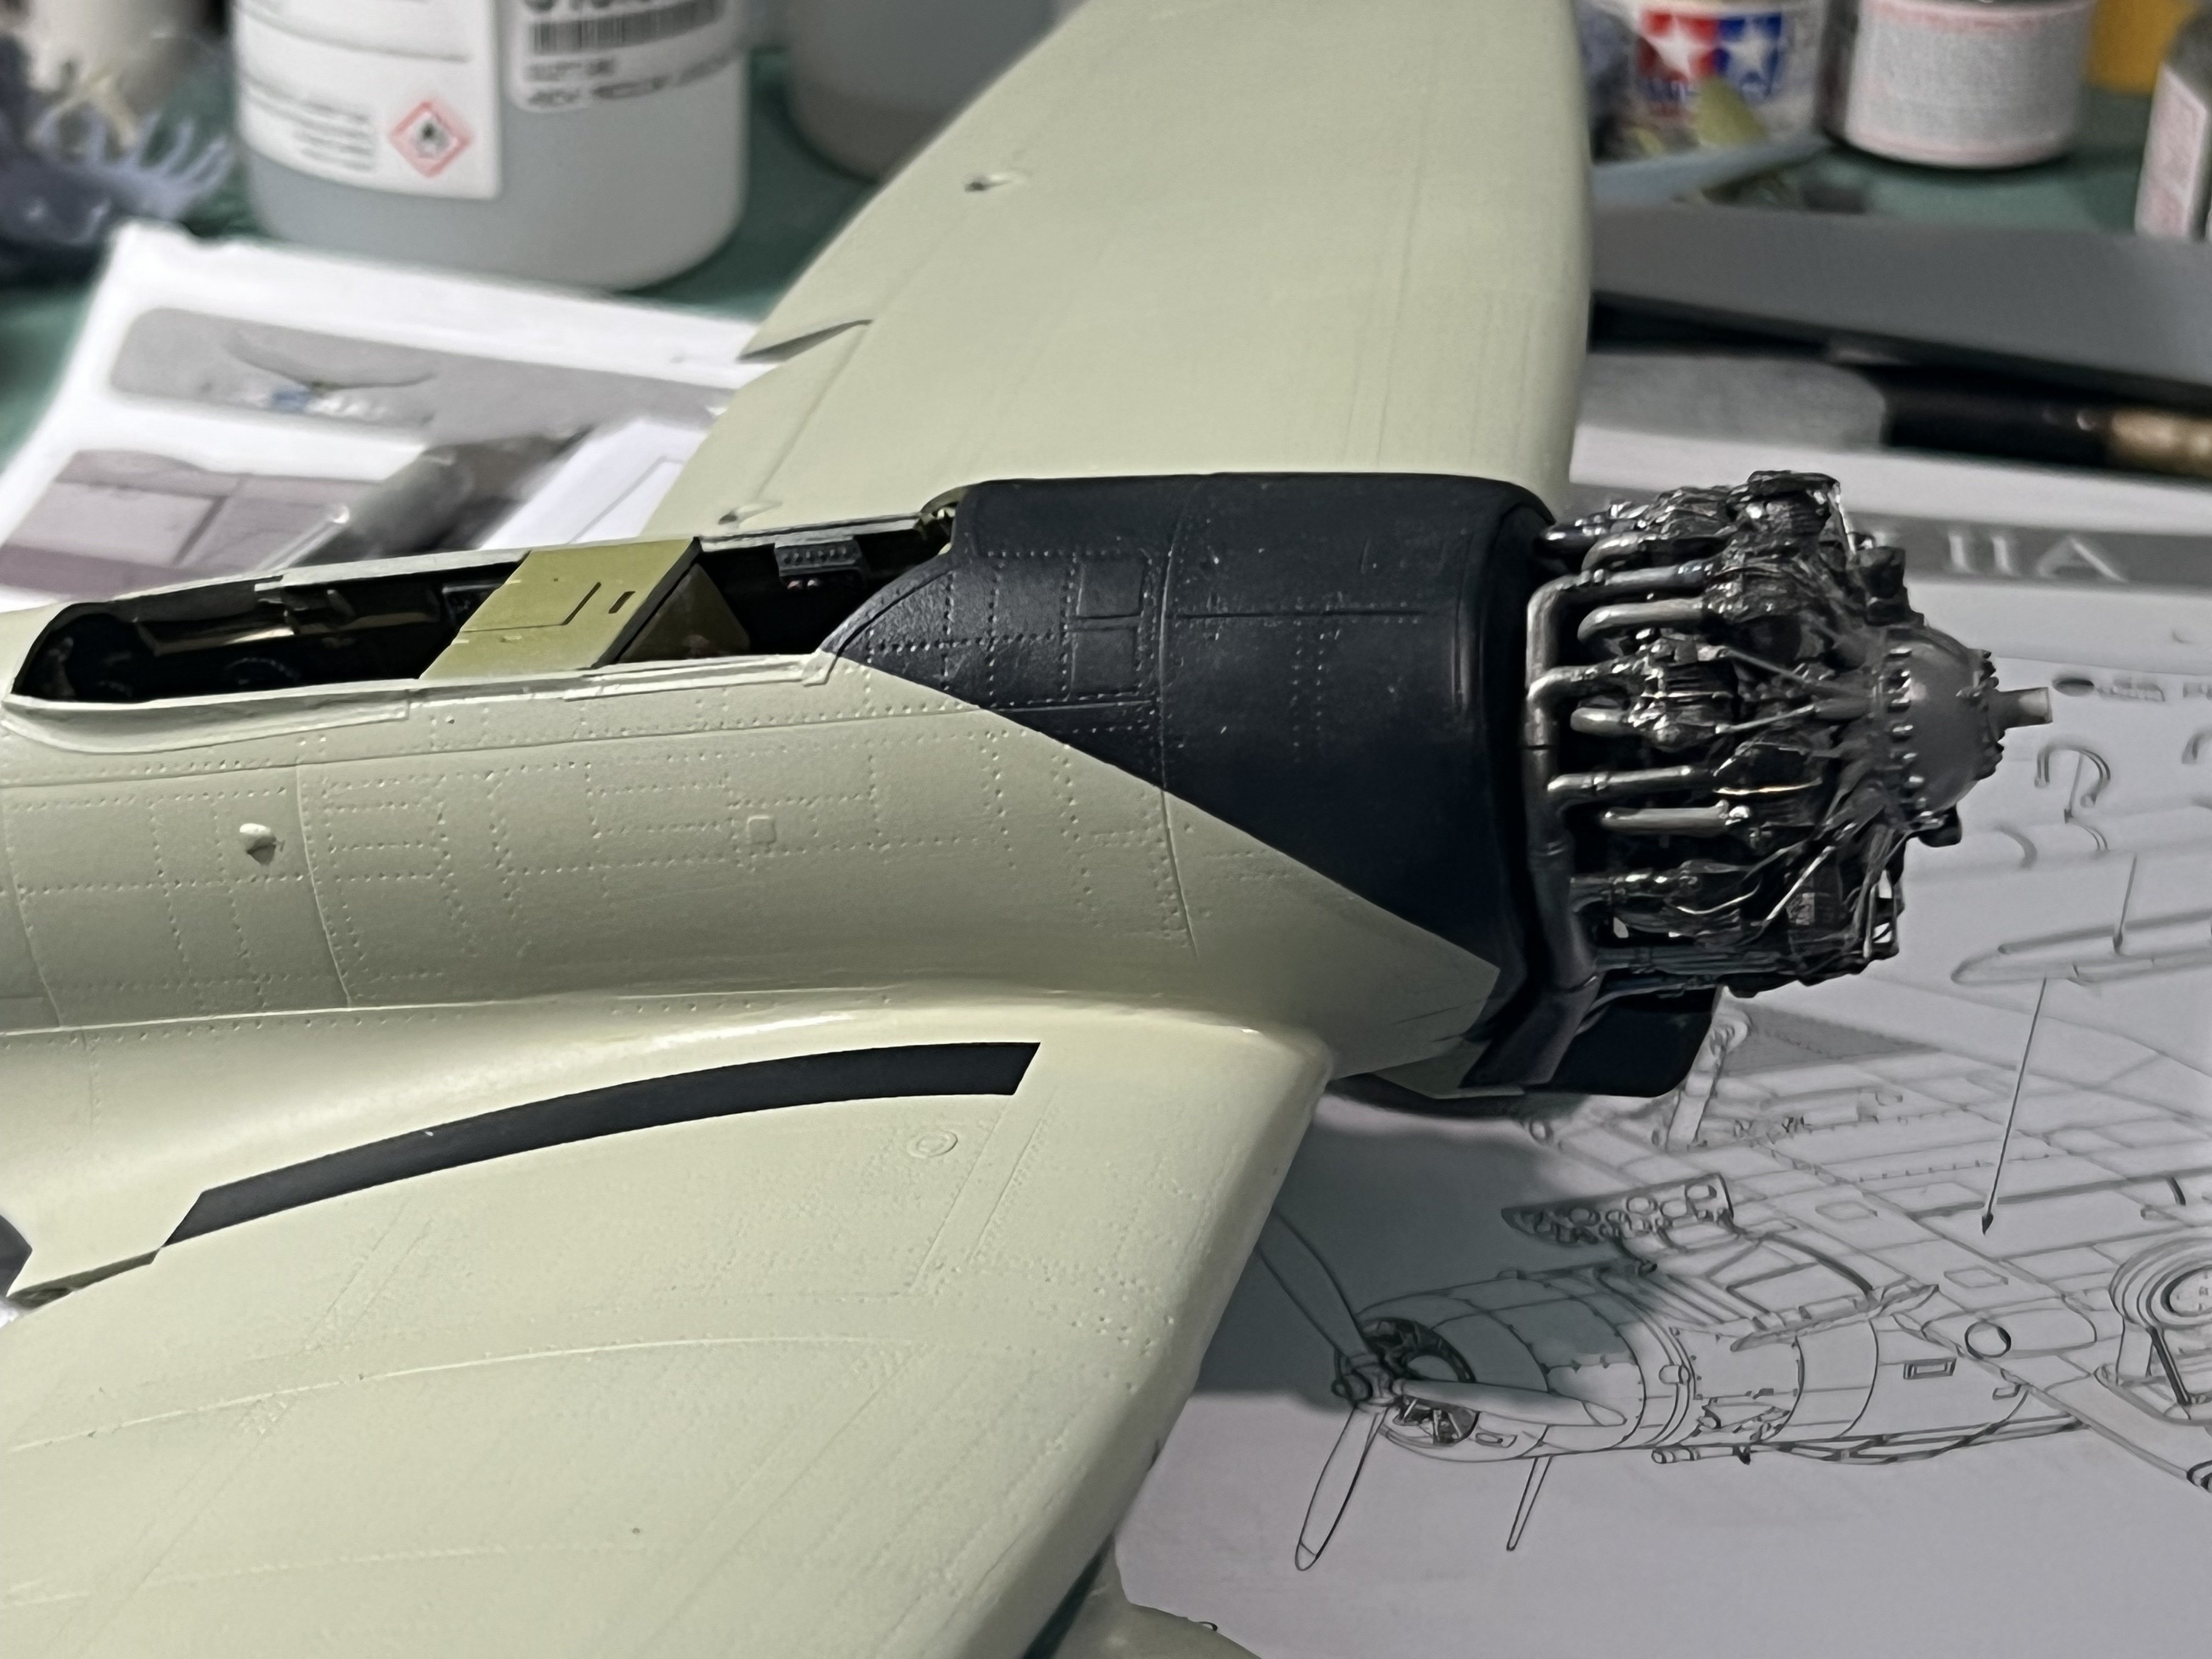
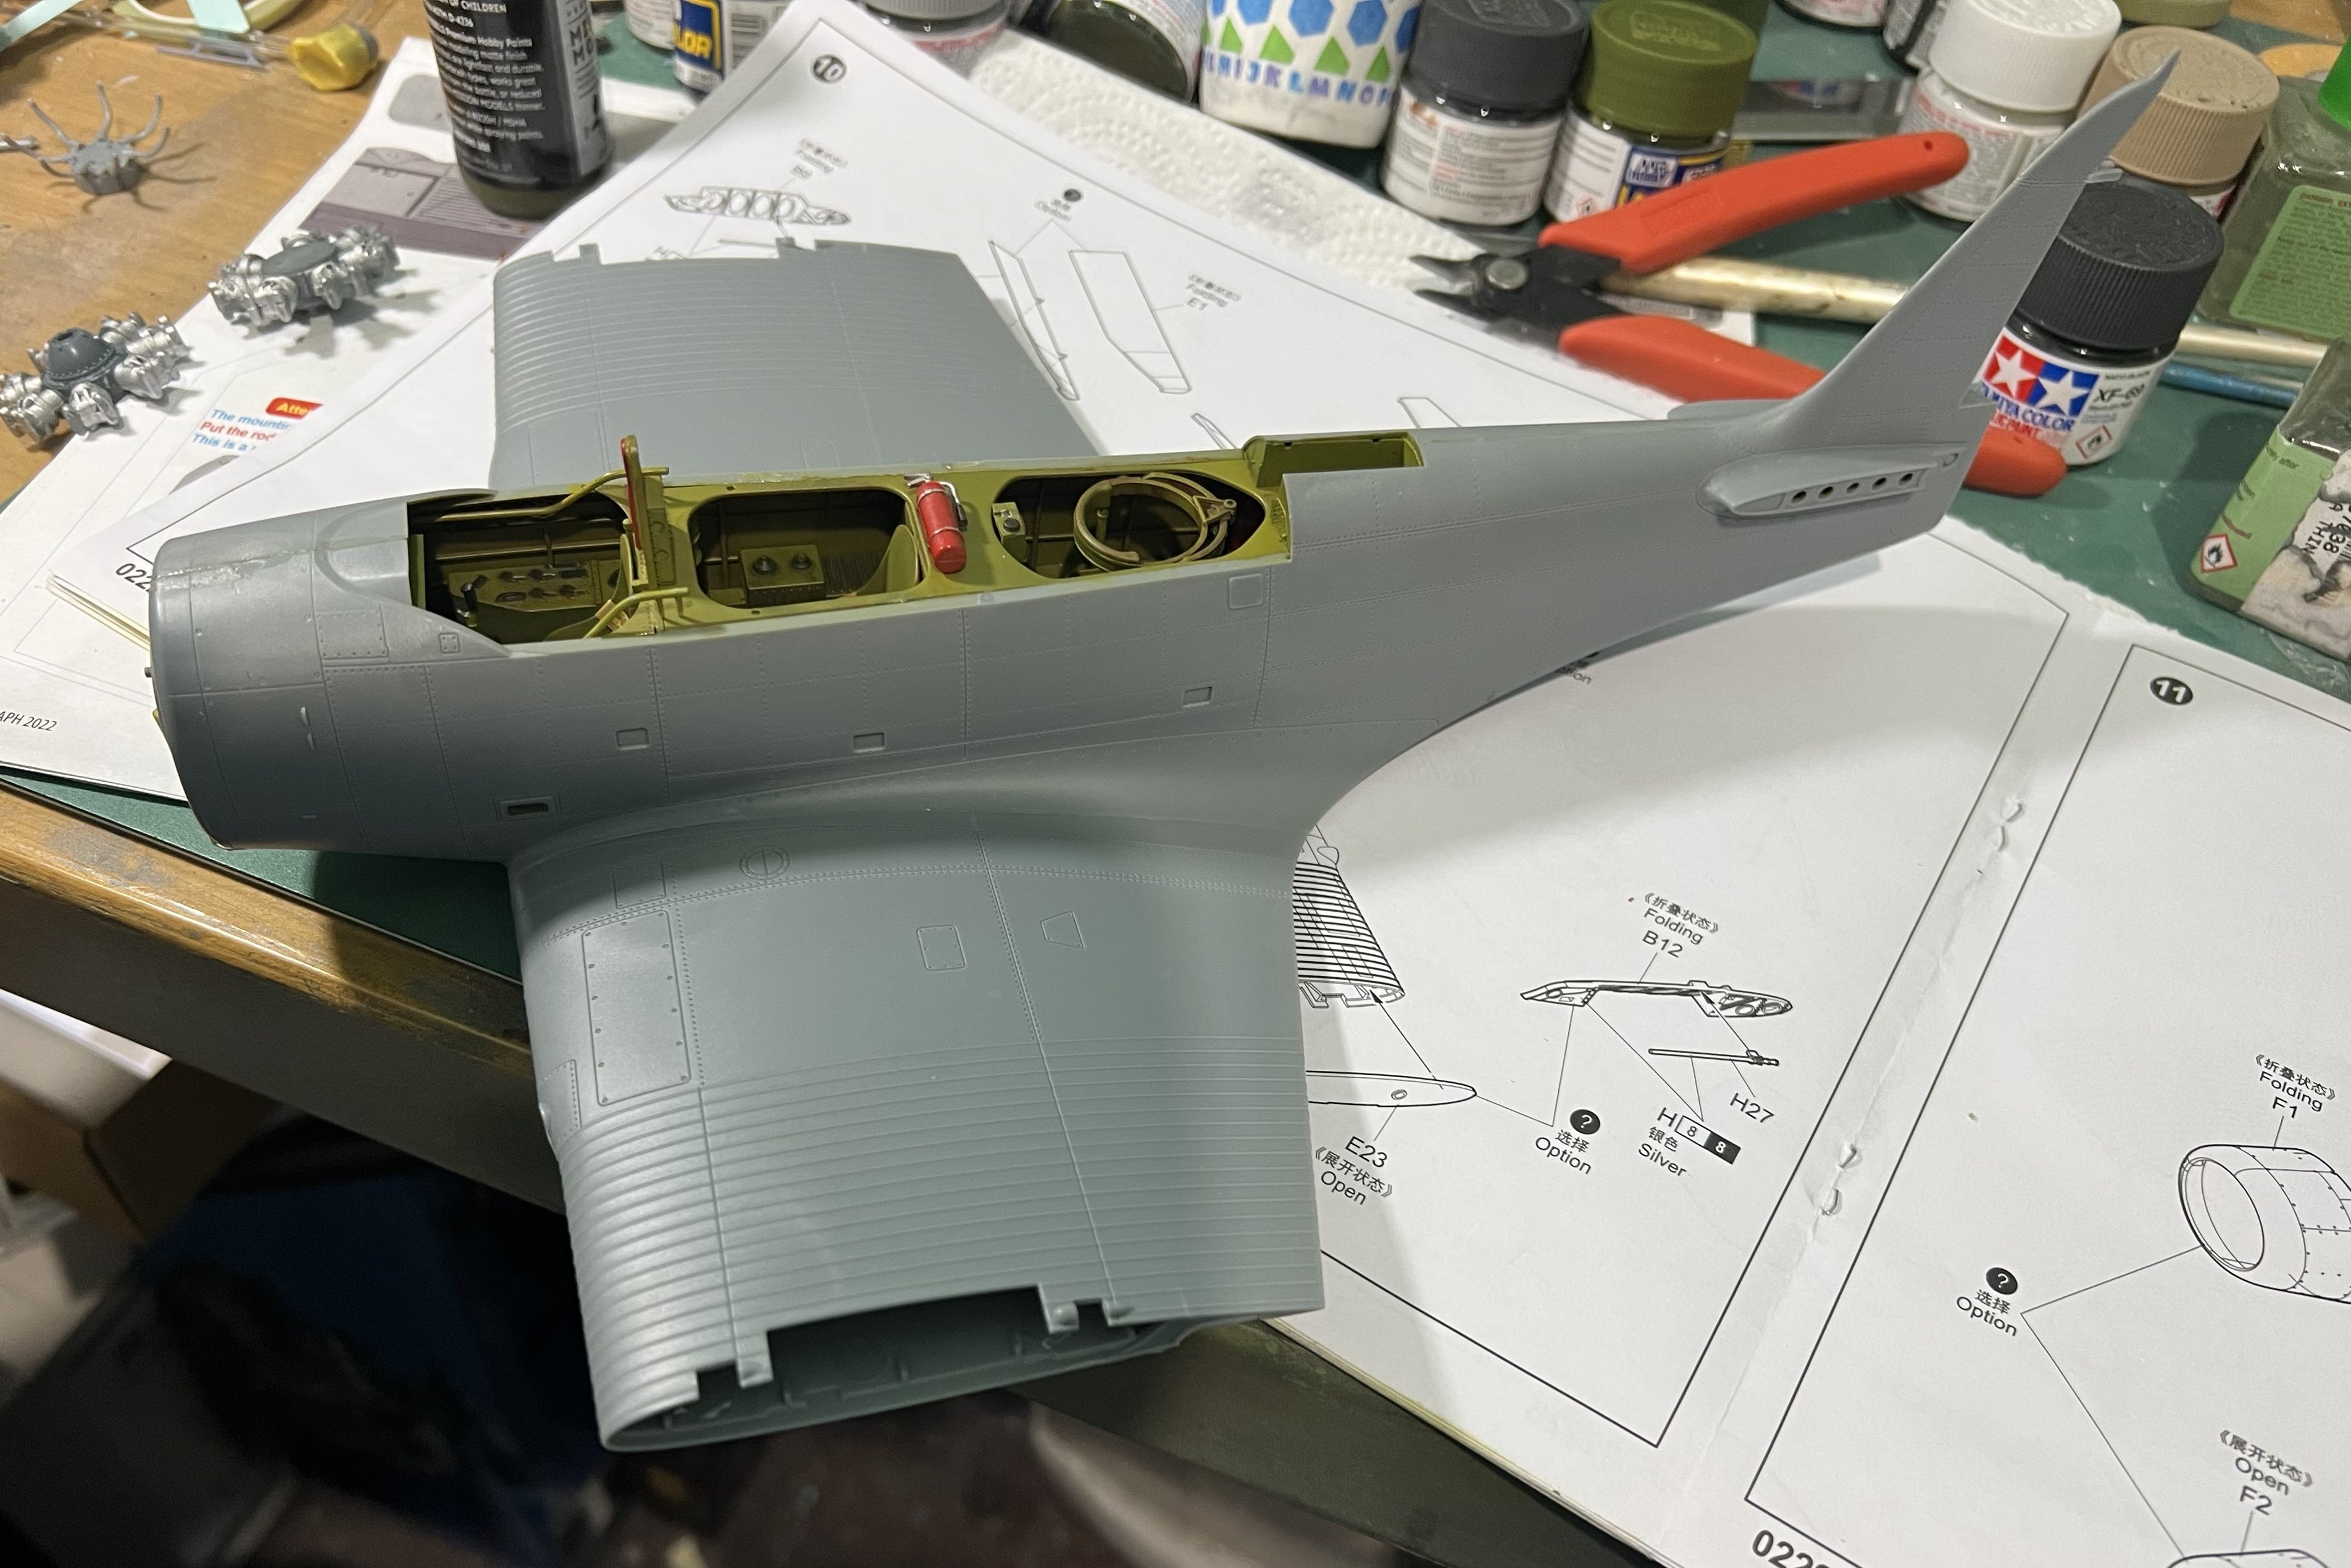
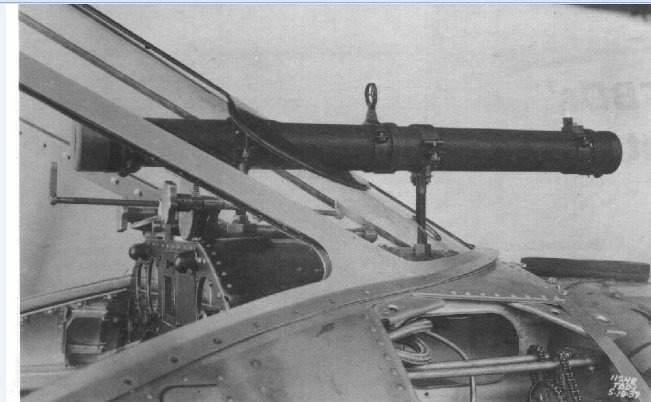
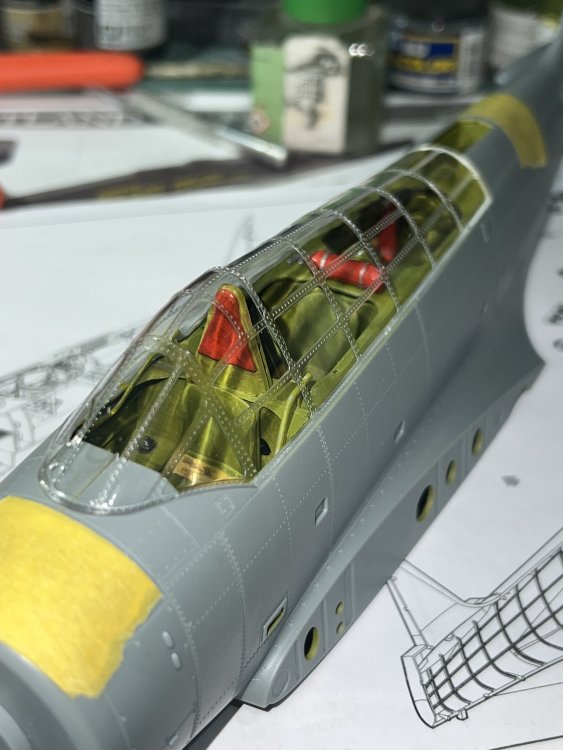
A few things to point out here, guys. 1. Trumpeter correctly depicted the fuselage mounting foot wells. They were slightly recessed and covered by spring loaded covers. Nicely done! GWH depicted them open on their 1/48 kits. 2. The torpedo sight is there, but it is very rudimentary on the kit. The entire mechanical drift compensator is MIA, but it would make for a very nice AM 3D printed component. 3. The windscreen framing is WRONG. Trumpeter chose to depict two internal braces as windshield frames. No biggie: sand, polish, and Future, but Trumpeter totally blew it there. Oops! Sand them off and add them after the windscreen is in place. I WILL be fixing this on this build. I said OOB, but this is a fairly big oops. In the first pic, you can clearly see the torpedo sight and the internal braces. Compare that to the pic of the kit canopy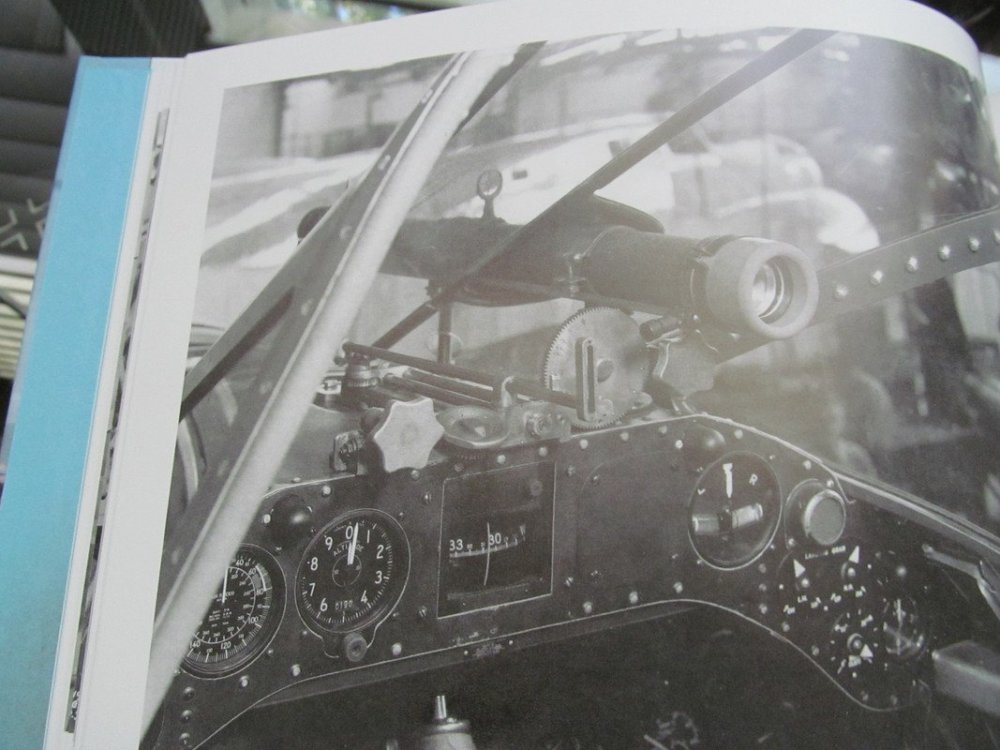
-
Trumpeter TBD-1 Devastator
Clunkmeister replied to Clunkmeister's topic in LSM 1/35 and Larger Work In Progress
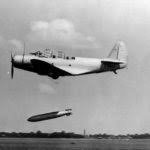
That TBD is gonna chew the tail of that D3A. But I expect if the D3A crew would pull their heads out of their arses, they could pour the coal to her and run away from that TBD. -
Trumpeter TBD-1 Devastator
Clunkmeister replied to Clunkmeister's topic in LSM 1/35 and Larger Work In Progress
Organized semi mass confusion. There is much missing from the cockpit with this kit, but the exterior is wonderful.
-
Trumpeter TBD-1 Devastator
Clunkmeister replied to Clunkmeister's topic in LSM 1/35 and Larger Work In Progress
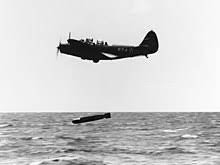
Guys I’m sure you’re all aware, but just in case… The bomb doors on a Devastator are not bomb bay doors, but are bomb aimer doors, used for high altitude level bombing. The bombardier opened the doors on a bomb run so the bombardier could see though a clear windscreen in the belly. He’d then conduct a bomb run using his rudimentary flight instrumentation and his Norden bombsight. The Devastator was quite successful in that role. Those doors were otherwise always closed. IF you’re building a torpedo bomber,Trumpeter would have you open the doors, then add the torpedo. If the torpdo was loaded, the doors could not be opened. They’d hit the torpedo. So, keep them closed, which means minor part surgery. They don’t even come close to fitting, as they’re expecting to be left open.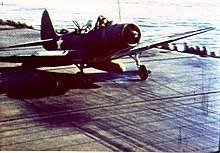

-
I started plowing away at this again. I’d like to have it at the IPMS USA Nationals in a month.


- 125 replies
-
- 10
-

-
Trumpeter TBD-1 Devastator
Clunkmeister replied to Clunkmeister's topic in LSM 1/35 and Larger Work In Progress
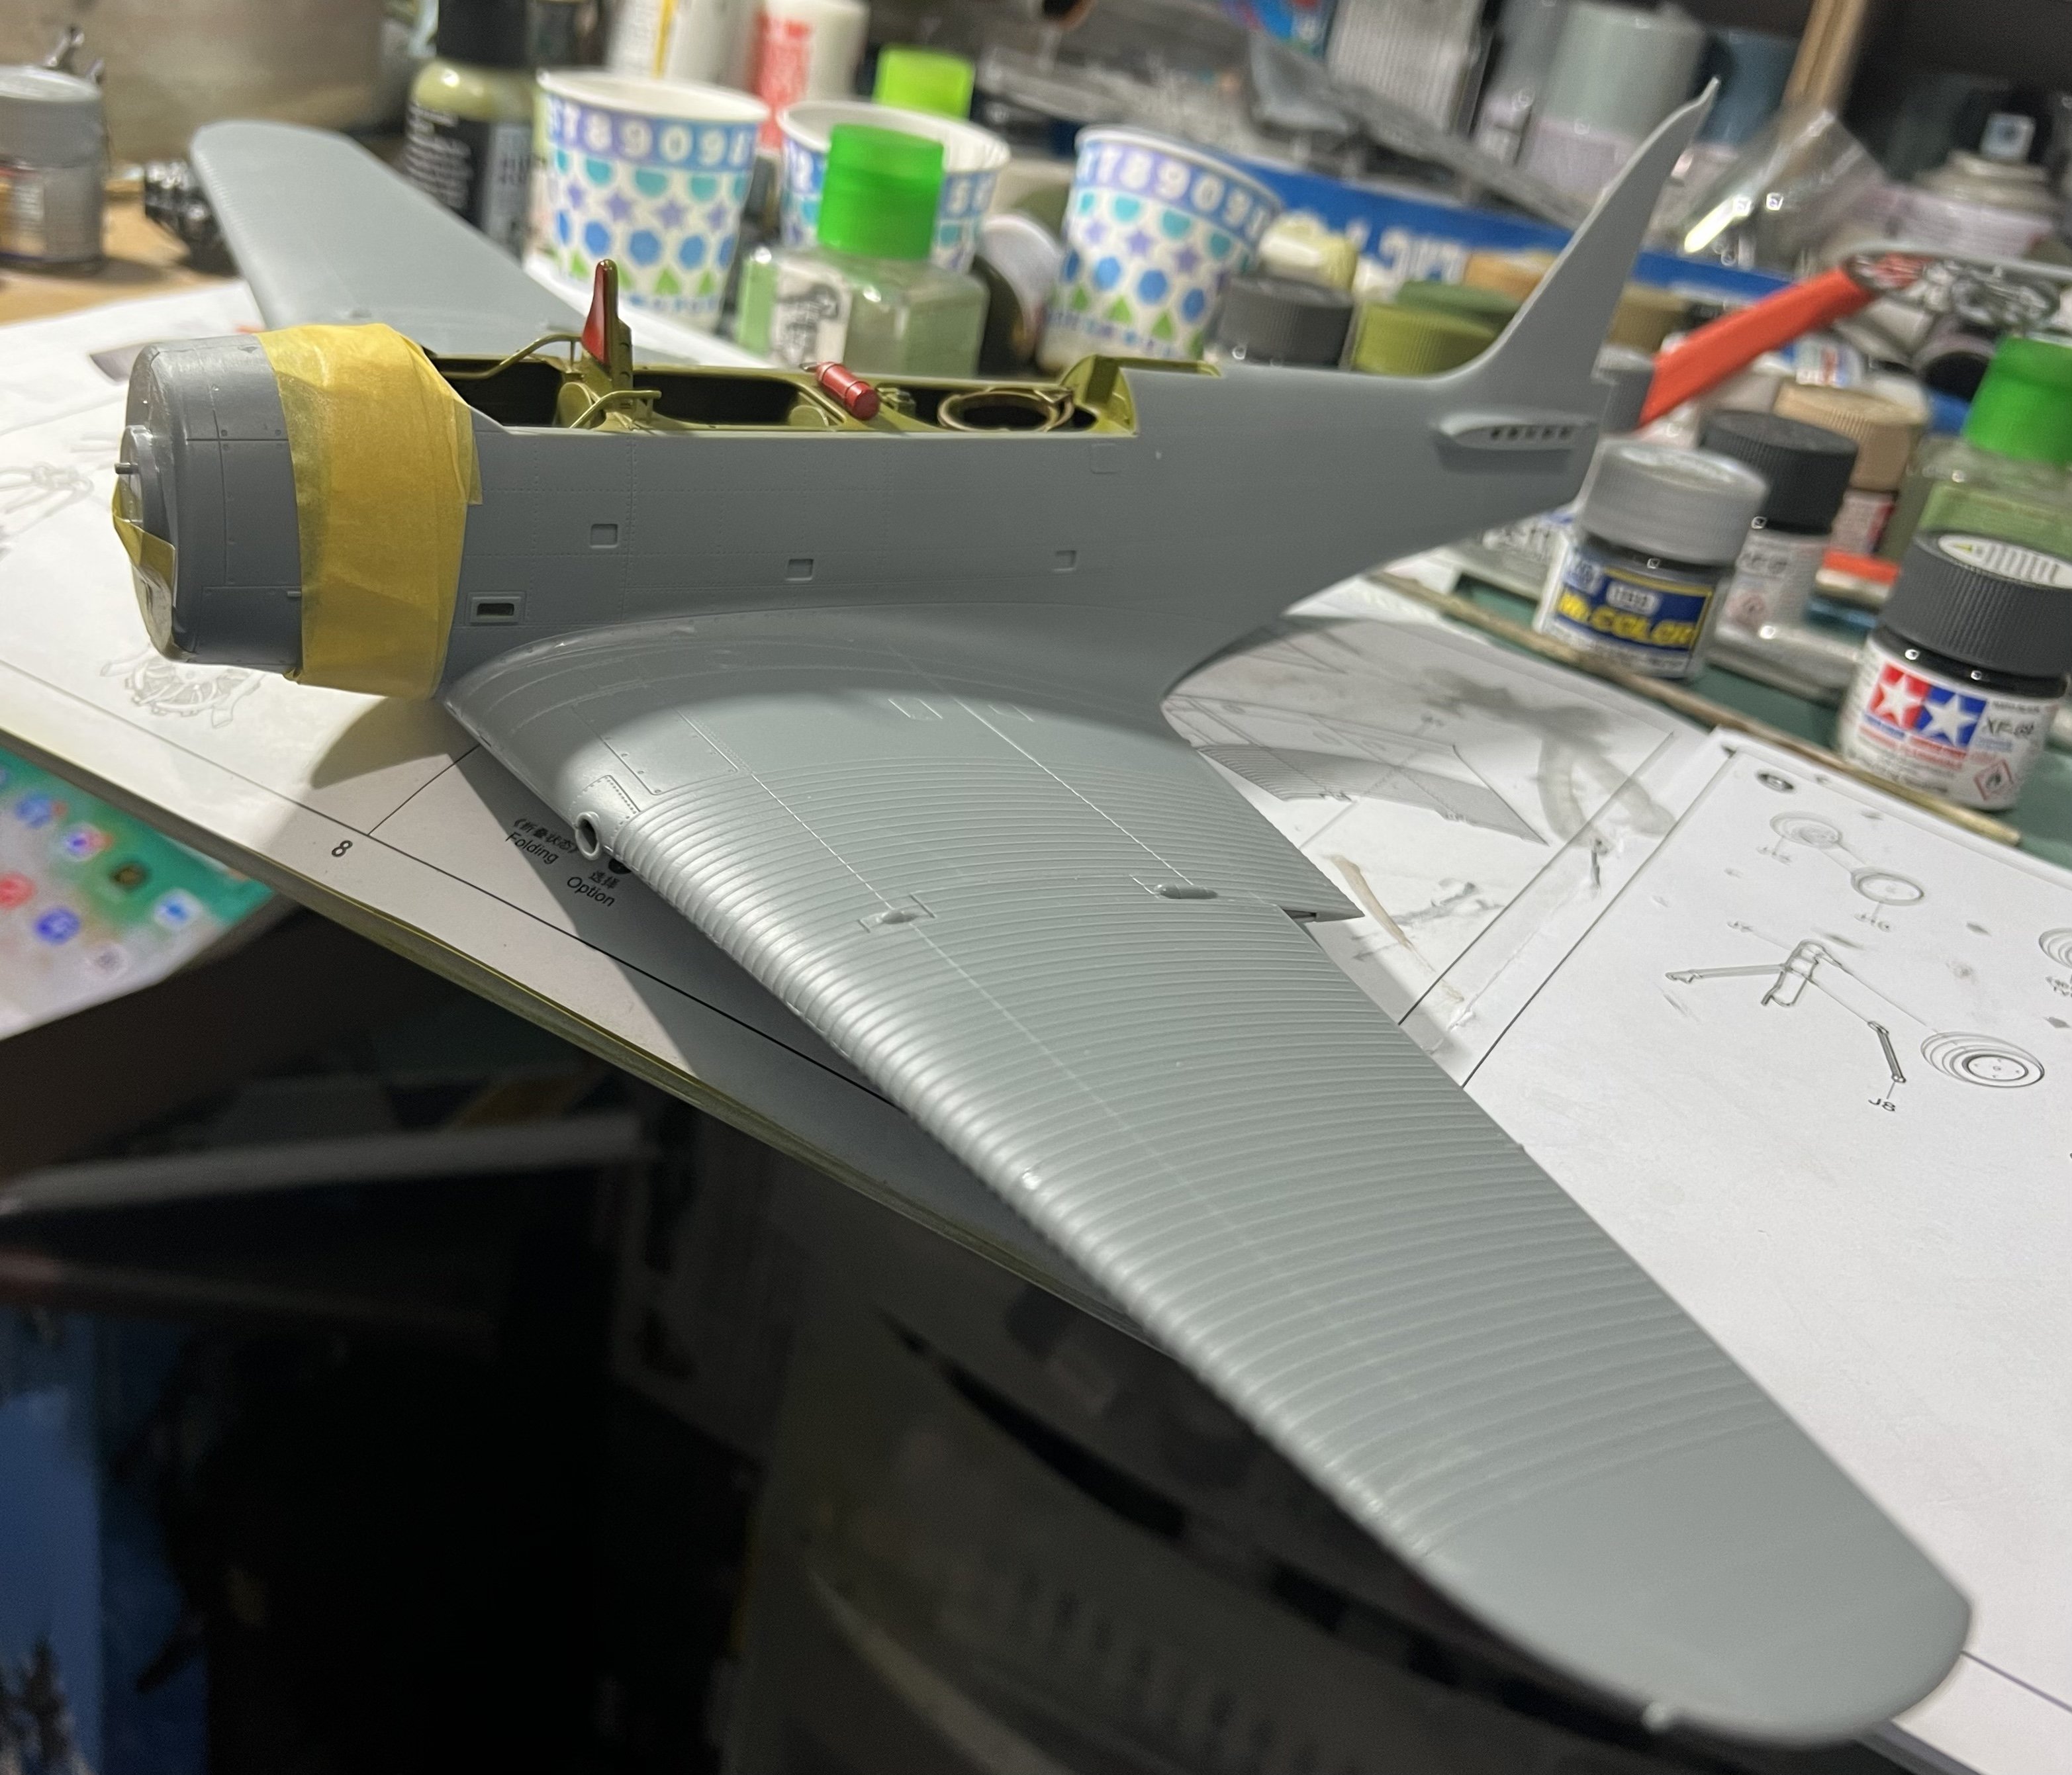
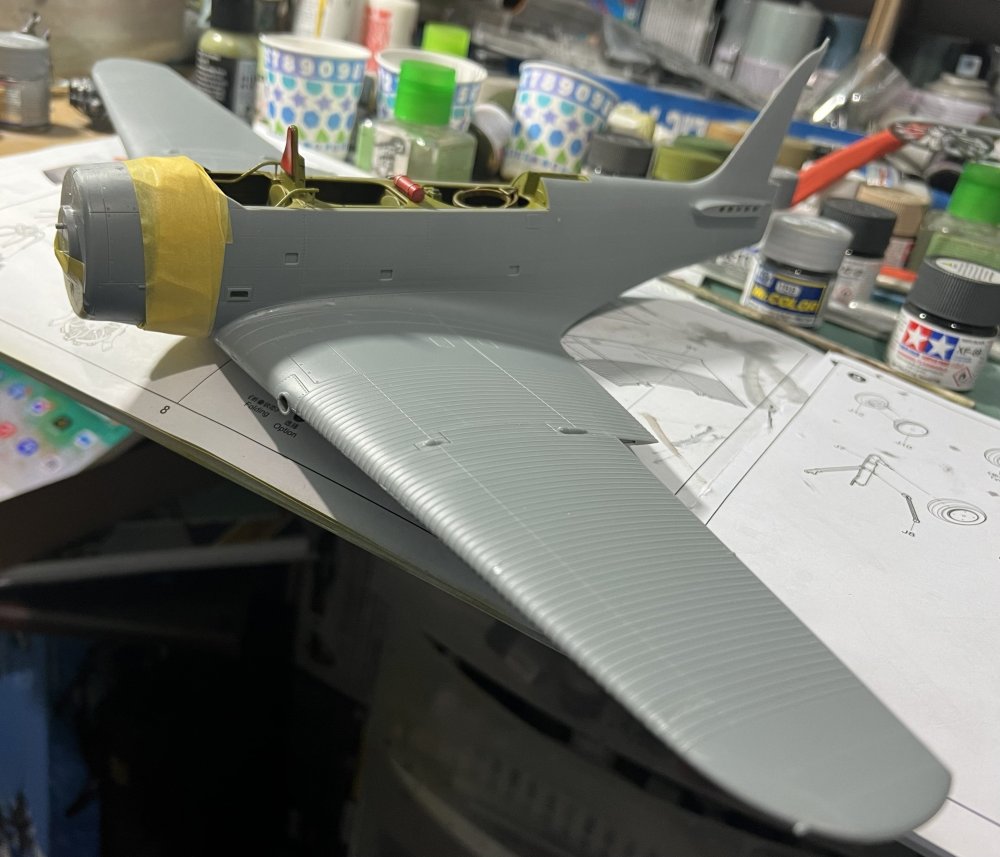
I think it’ll surely help the kit. The corrugations look well done, although I’m loathe to call them corrugations. Hugo Junkers brought us corrugated aluminum, and the Devastator nothing like the Junkers patent. -
Trumpeter TBD-1 Devastator
Clunkmeister replied to Clunkmeister's topic in LSM 1/35 and Larger Work In Progress
I’m looking forward to a long, drawn out Yellow Wings build full of yummy AM goodies. -
Trumpeter TBD-1 Devastator
Clunkmeister replied to Clunkmeister's topic in LSM 1/35 and Larger Work In Progress
Fixing the short shot and you’d think I could find the wheel with “correct” Trumpeter rivet spacing. The ONE wheel missing. 😡😡😡🤬 NOTHING is ever easy. -
Trumpeter TBD-1 Devastator
Clunkmeister replied to Clunkmeister's topic in LSM 1/35 and Larger Work In Progress
I just talked to a guy who has studied the aircraft, and like I had said, he stated the cockpit is sparse, really sparse. So, hopefully soon we’ll get some upgrades. This kit will be OOB, though. -
Trumpeter TBD-1 Devastator
Clunkmeister replied to Clunkmeister's topic in LSM 1/35 and Larger Work In Progress
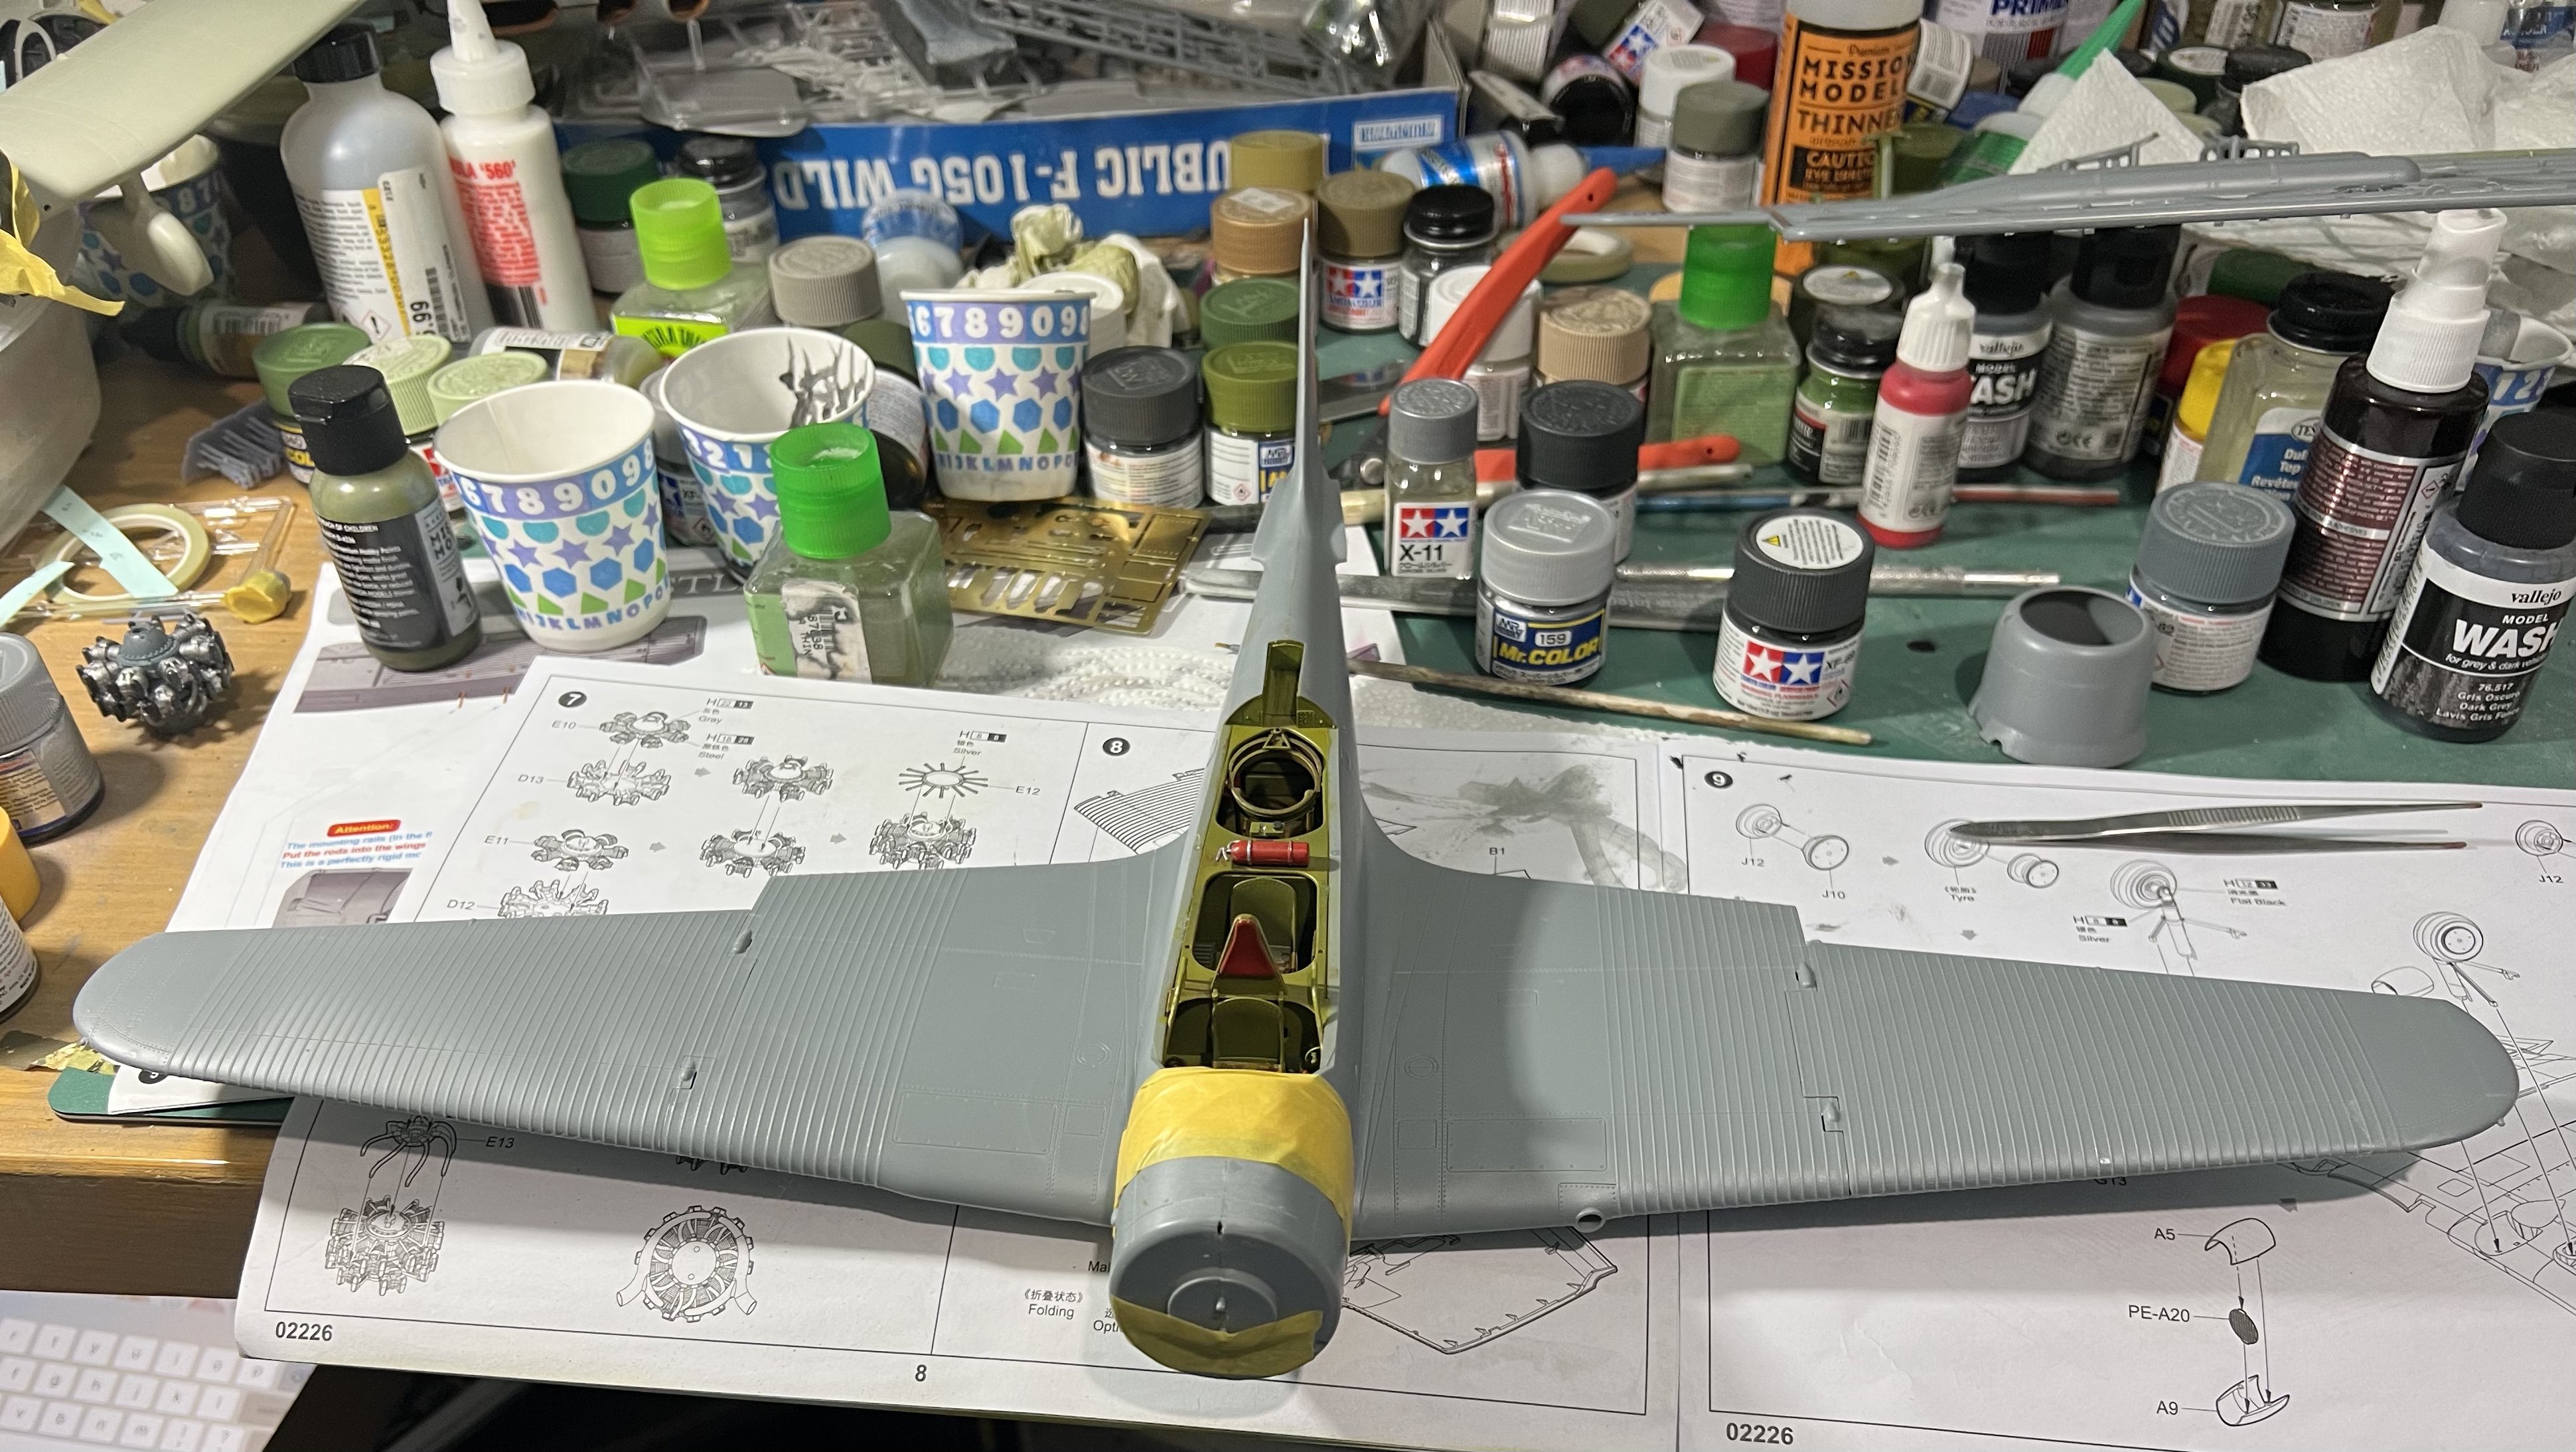
Fuselage is tricky to get aligned, with all the interior bulkheads, etc, but patience will get you there. The wing center section to fuselage fit is sublime. No filler at all, although I may needs a slight swipe in front of the windshield
- 94 replies
-
- 12
-
-
Trumpeter TBD-1 Devastator
Clunkmeister replied to Clunkmeister's topic in LSM 1/35 and Larger Work In Progress
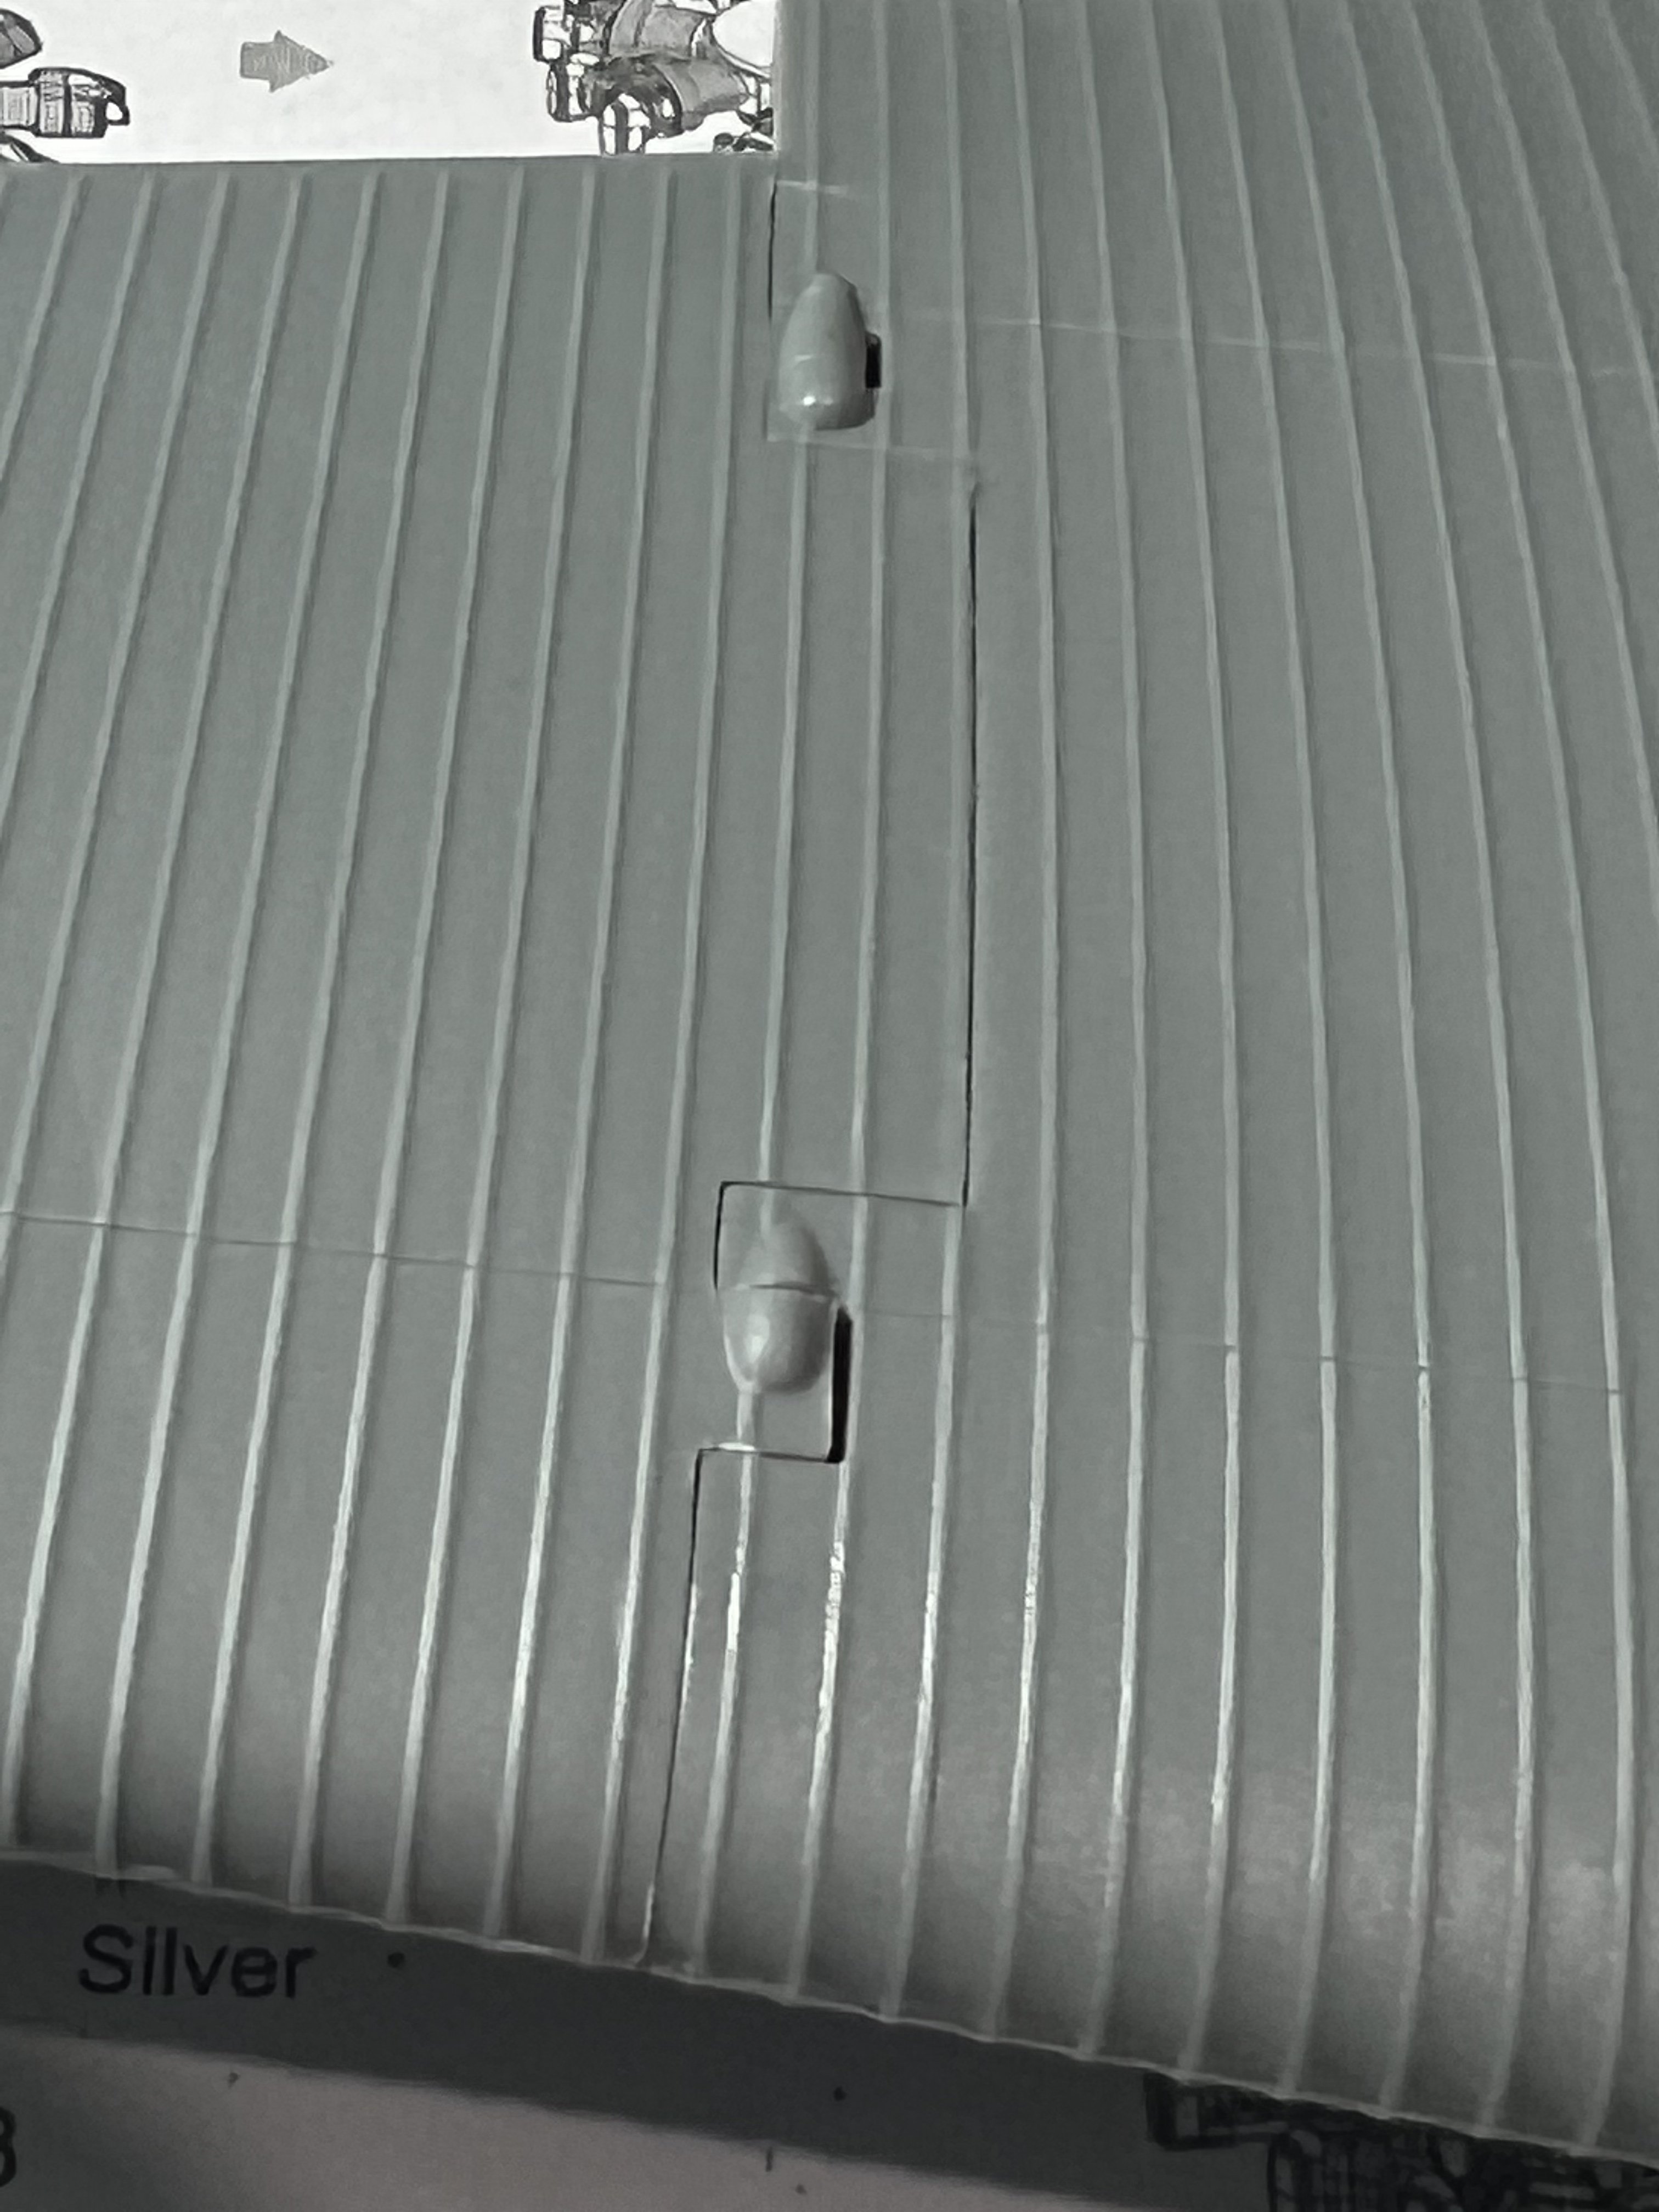
Finally, someone at Trumpeter stepped back from the bong long enough to grow back a few brain cells. No redneck engineering in the wing fold area. This is a press fit. No glue. However, you get folded or extended. Not both. This quick build is getting open wings.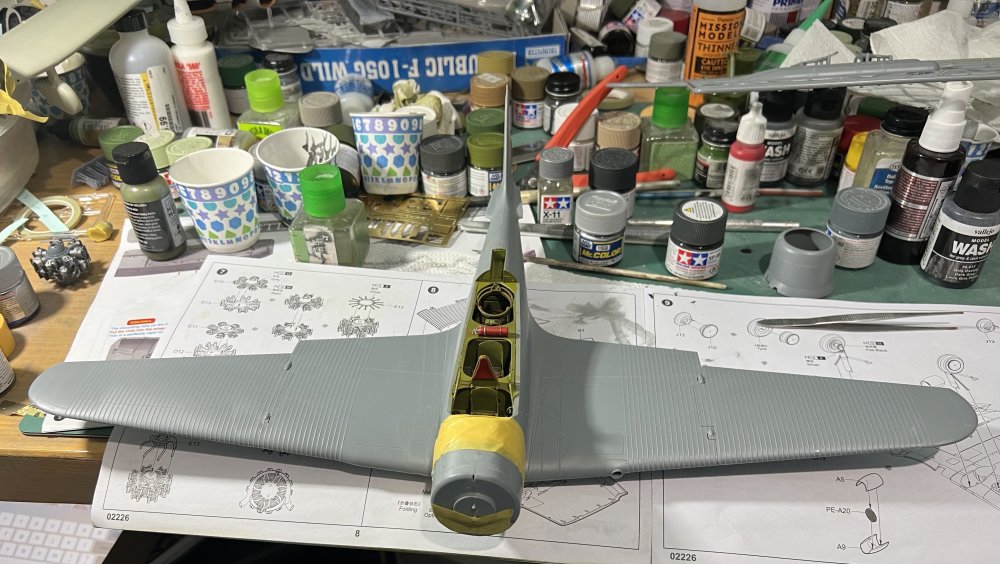


- 94 replies
-
- 10
-
-
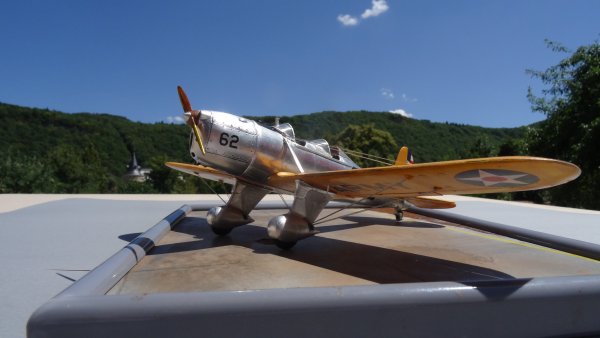
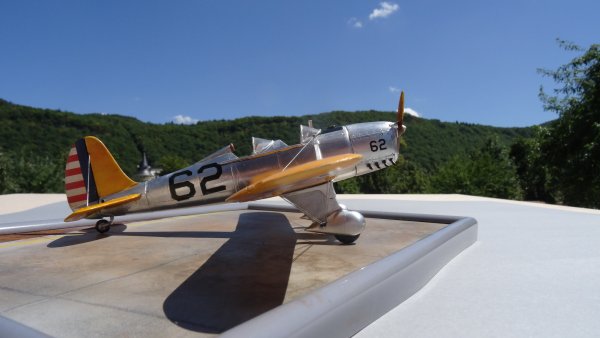
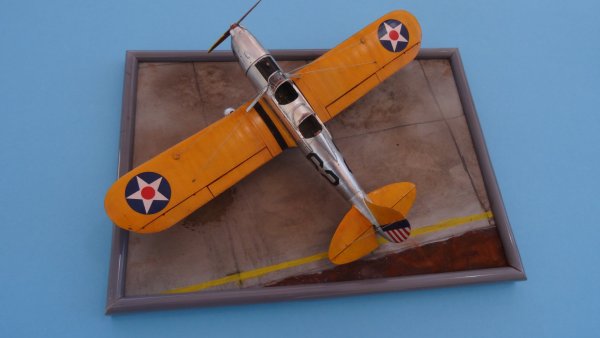
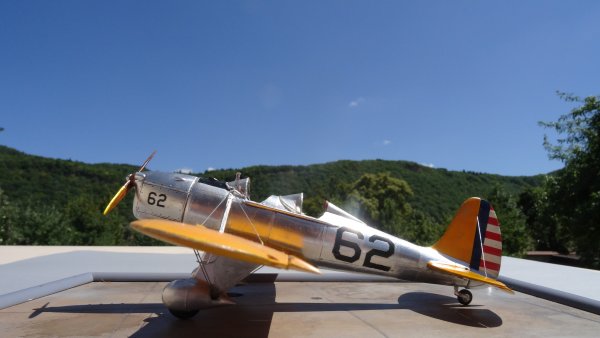
Fisher Ryan ST-M
Clunkmeister commented on HubertB's gallery album in Gallery of COMPLETED Aircraft models
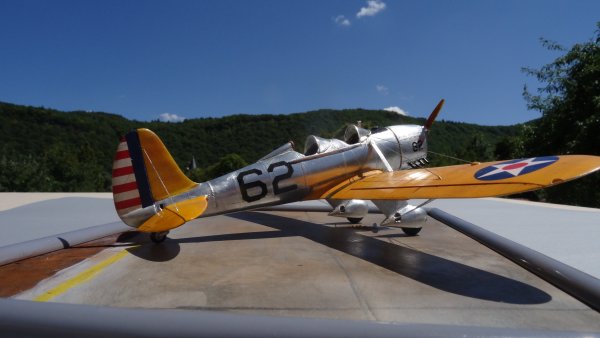
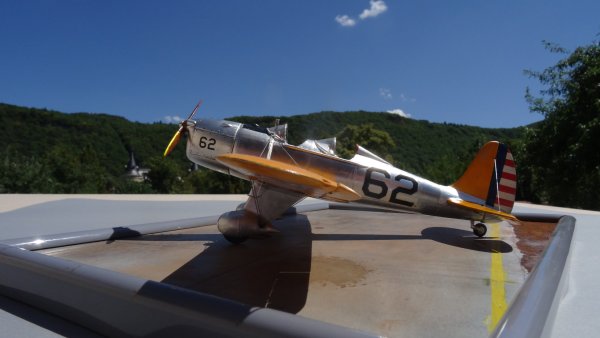
 Hubert, that is truly stunning. I have that kit somewhere and this simply proves that I really need to build and display it. GORGEOUS model of a truly beautiful airplane. Uuuh, turns out mine is the Kinner radial powered version, but that’s OK. It’ll still look good although not quite as classic as the STM.
 -
-
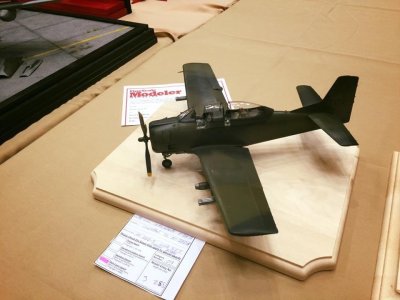
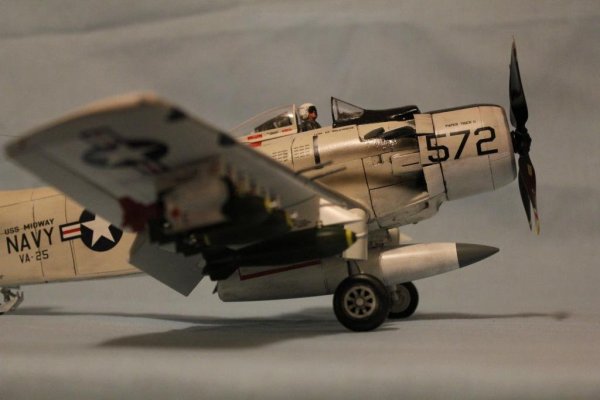
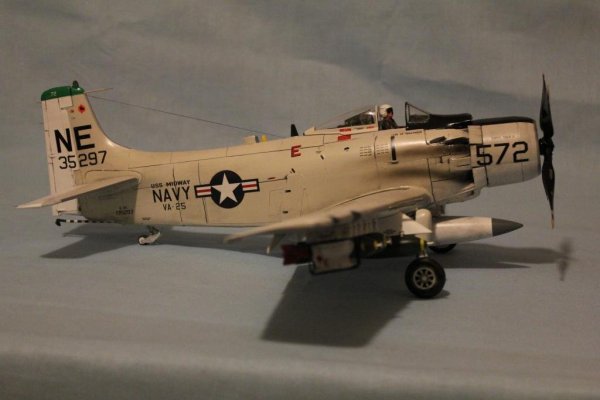
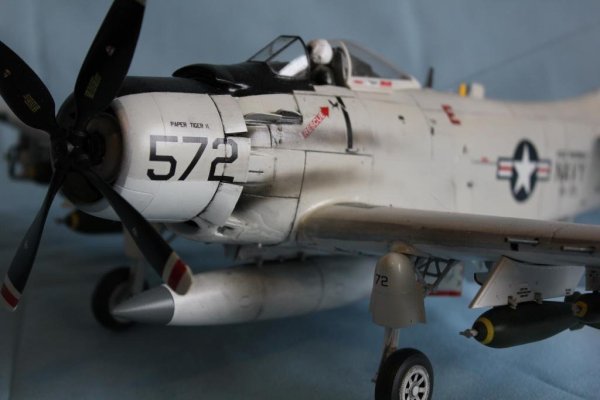
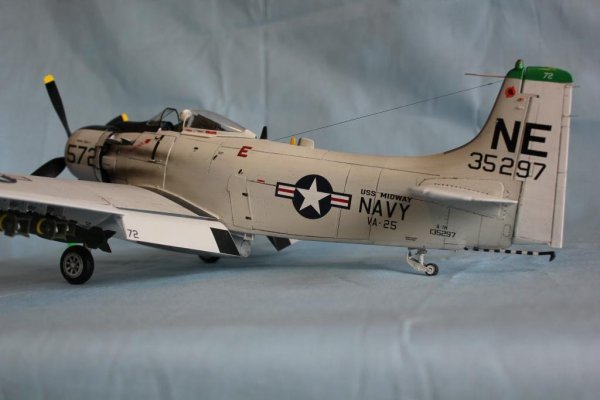
TOILET BOMBER!
Images added to a gallery album owned by Clunkmeister in Gallery of COMPLETED Aircraft models
ZM Skyraider in its iconic scheme. This was my very first Large Scale build after I returned from a 30 year modeling hiatus. Yes, it has its hiccups and bumps, especially in the weathering department, but I actually want to revisit that part of it and dirty up the bottom a bit. Maybe I’ll show it on the display only table in San Marcos this year. -
-
756F36A5-6AAF-4452-A3BA-8CFE48365711.jpeg
Clunkmeister posted a gallery image in Gallery of COMPLETED Aircraft models
From the album: TOILET BOMBER!
-
430A627D-1C3F-4A88-BF97-79A1A3F1F8B1.jpeg
Clunkmeister posted a gallery image in Gallery of COMPLETED Aircraft models
From the album: TOILET BOMBER!
-
92F27C8E-7120-49AE-AA75-03751A64D02C.jpeg
Clunkmeister posted a gallery image in Gallery of COMPLETED Aircraft models
From the album: TOILET BOMBER!
-
9544847B-8A2F-43AF-824A-60A980DFFC37.jpeg
Clunkmeister posted a gallery image in Gallery of COMPLETED Aircraft models
From the album: TOILET BOMBER!
-
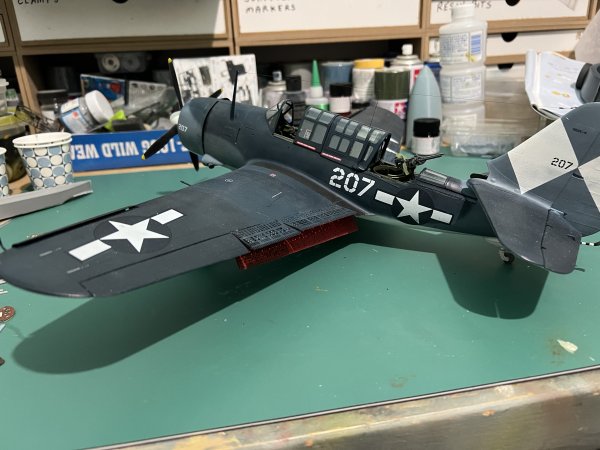
HPH-Infinity SB2C Helldiver.
Images added to a gallery album owned by Clunkmeister in Gallery of COMPLETED Aircraft models
With every bit of aftermarket known to man. I’ll get it blown off and taken outside for more pictures soon enough. This was a tough, but fun and very rewarding build. -
-
520B7DF9-3474-476E-B800-13B2007244B9.jpeg
Clunkmeister posted a gallery image in Gallery of COMPLETED Aircraft models
From the album: HPH-Infinity SB2C Helldiver.
-
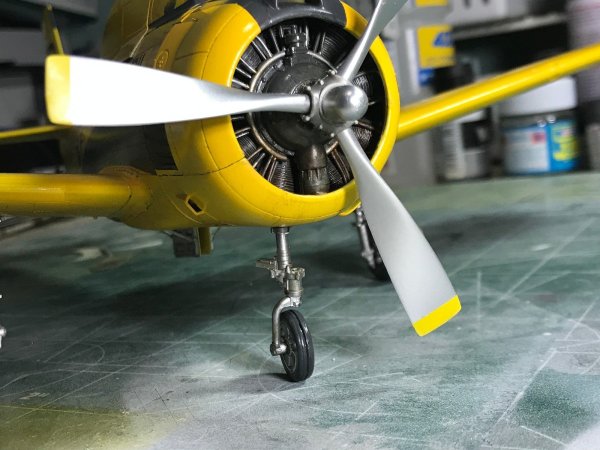
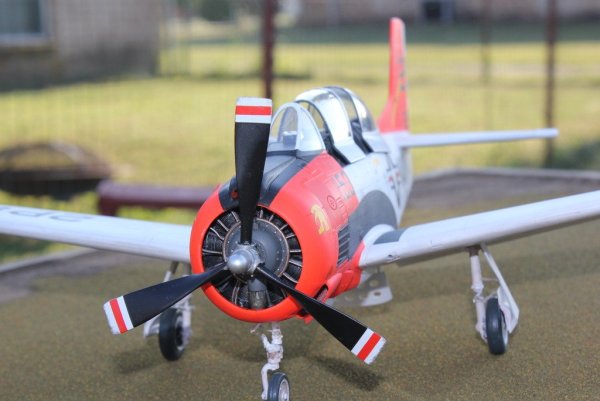
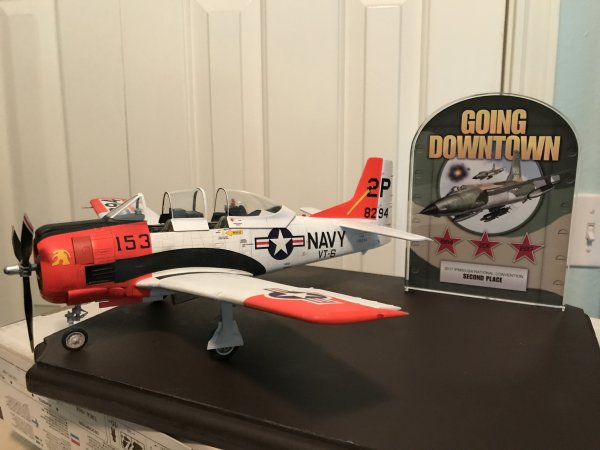
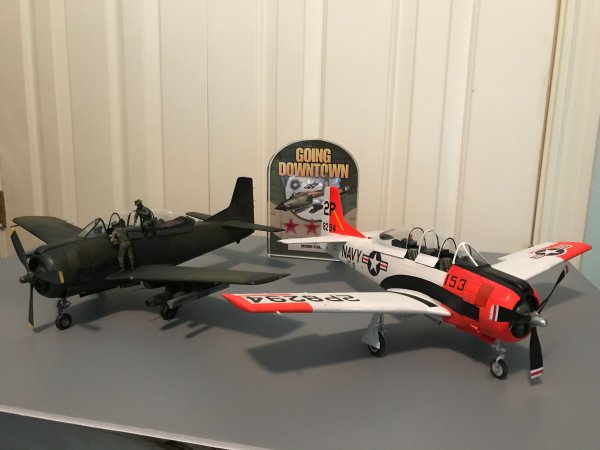
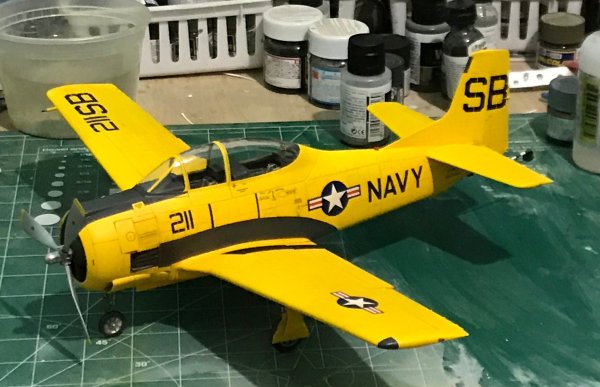
KH T-28B, C, and D-5
Images added to a gallery album owned by Clunkmeister in Gallery of COMPLETED Aircraft models
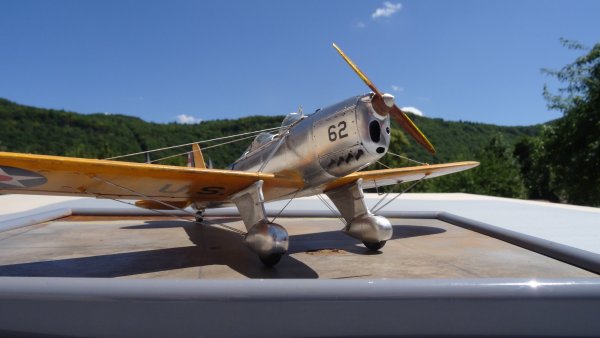
A few T-28s from the great Kitty Hawk kit. The yellow C was a pre production kit built to spec for Kitty Hawk. The B was built OON The D-5 was built from the B kit using AMS resin seats, wheels, armament, armor plate, gunsight, and cockpit additions. -
-
63F5D2DF-F6B7-447A-820A-541754952651.jpeg
Clunkmeister posted a gallery image in Gallery of COMPLETED Aircraft models
From the album: KH T-28B, C, and D-5
-
974EFB9F-2F06-4DE7-A753-405D4997E2F6.jpeg
Clunkmeister posted a gallery image in Gallery of COMPLETED Aircraft models
From the album: KH T-28B, C, and D-5
-
8B9E918D-F633-4046-9450-A202C6CD0158.jpeg
Clunkmeister posted a gallery image in Gallery of COMPLETED Aircraft models
From the album: KH T-28B, C, and D-5