


spliffsecond
-
Posts
60 -
Joined
-
Last visited
Content Type
Profiles
Forums
Events
Gallery
Everything posted by spliffsecond
-
Thank you very much, still following the site. just no space or time to build. Half way trough my house build, hope to finish in the springtime. grtz free
-
“Don’t eat the yellow snow” F. Zappa grt free
-

Yet another Tamiya Corsair Birdcage 1/32
spliffsecond replied to spliffsecond's topic in LSM 1/35 and Larger Work In Progress
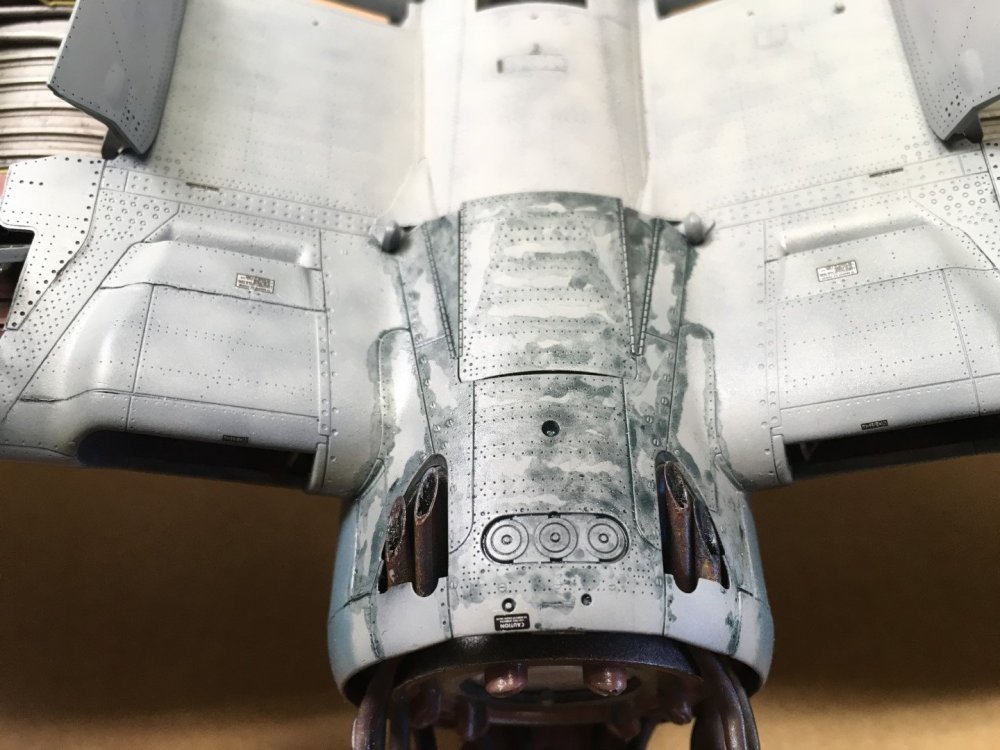
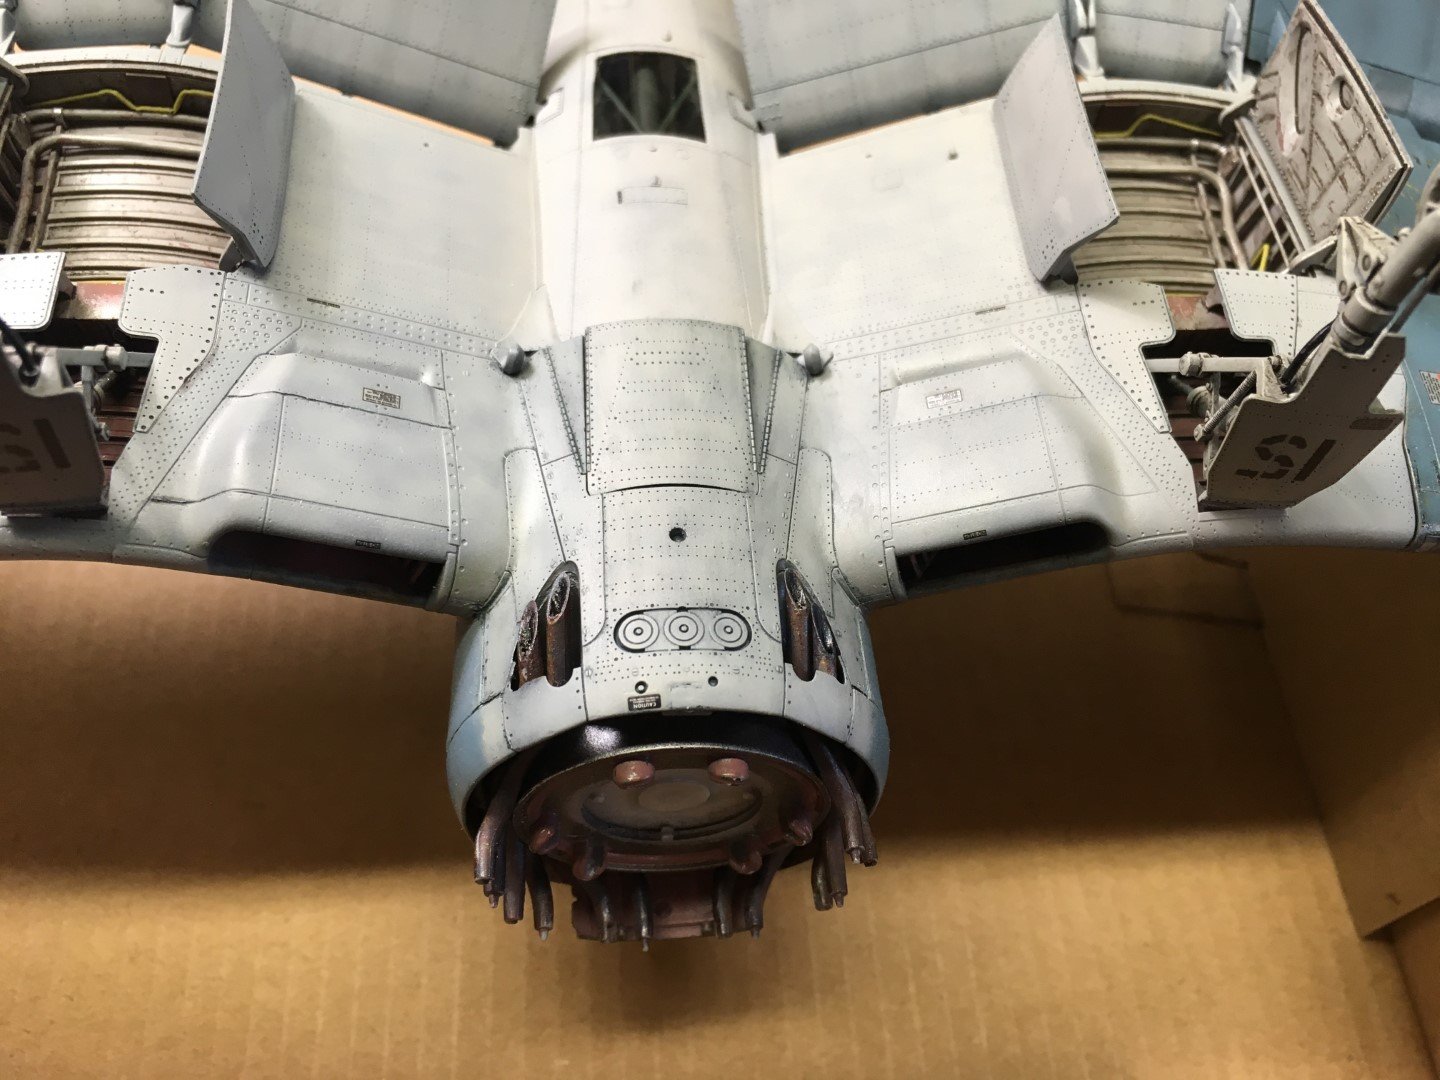
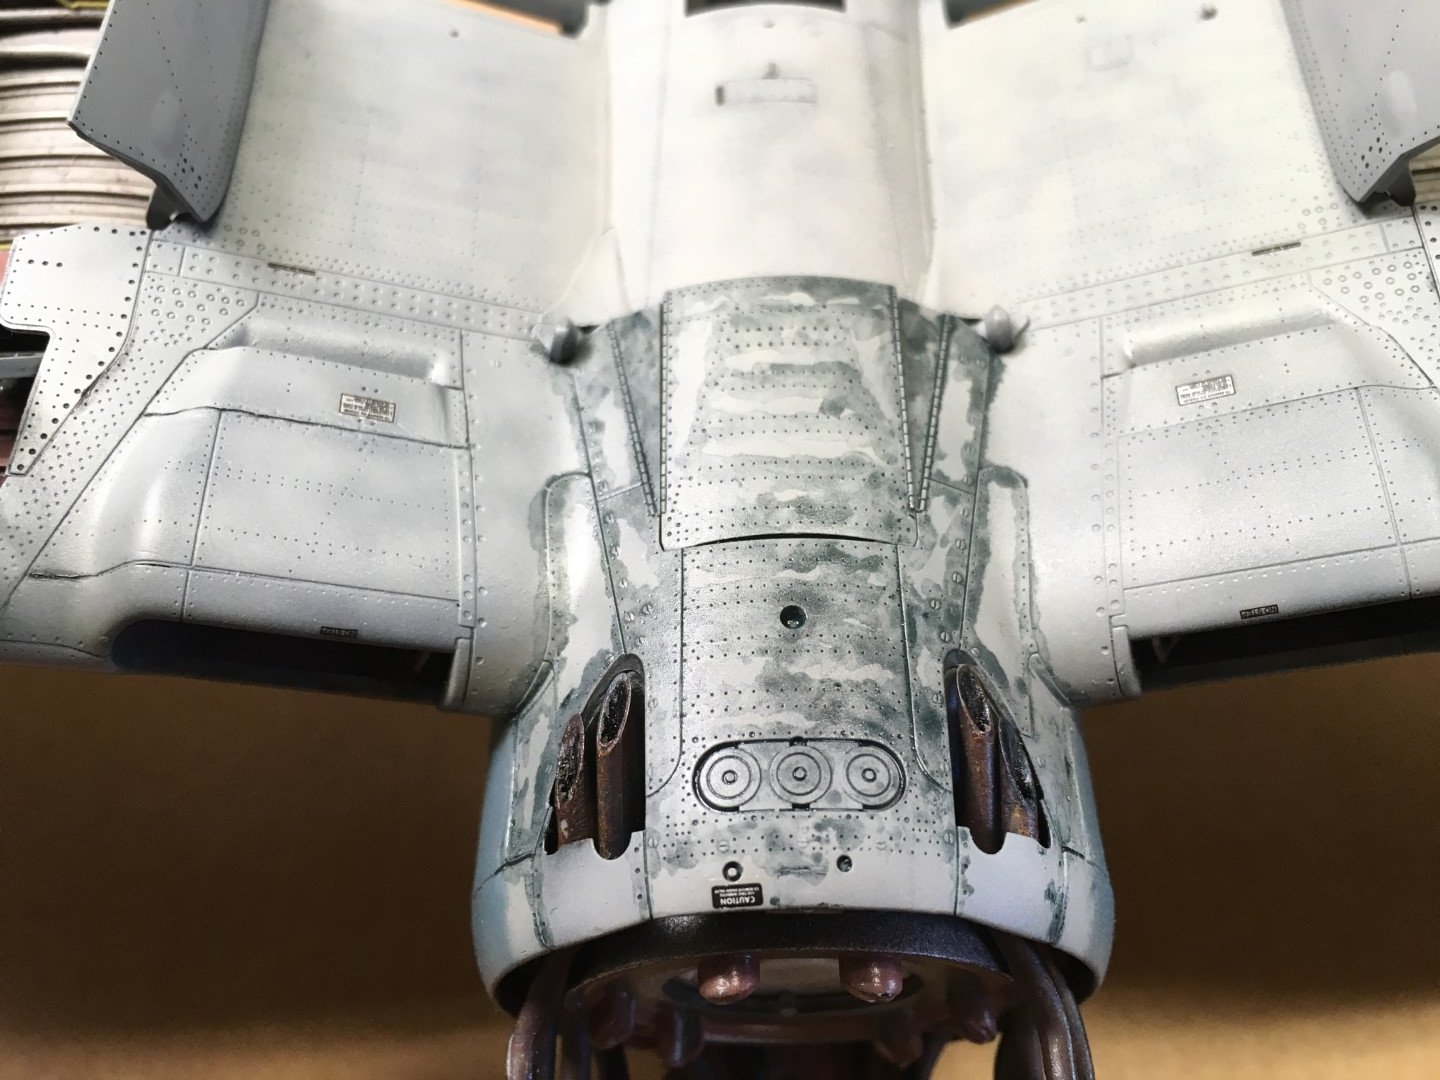
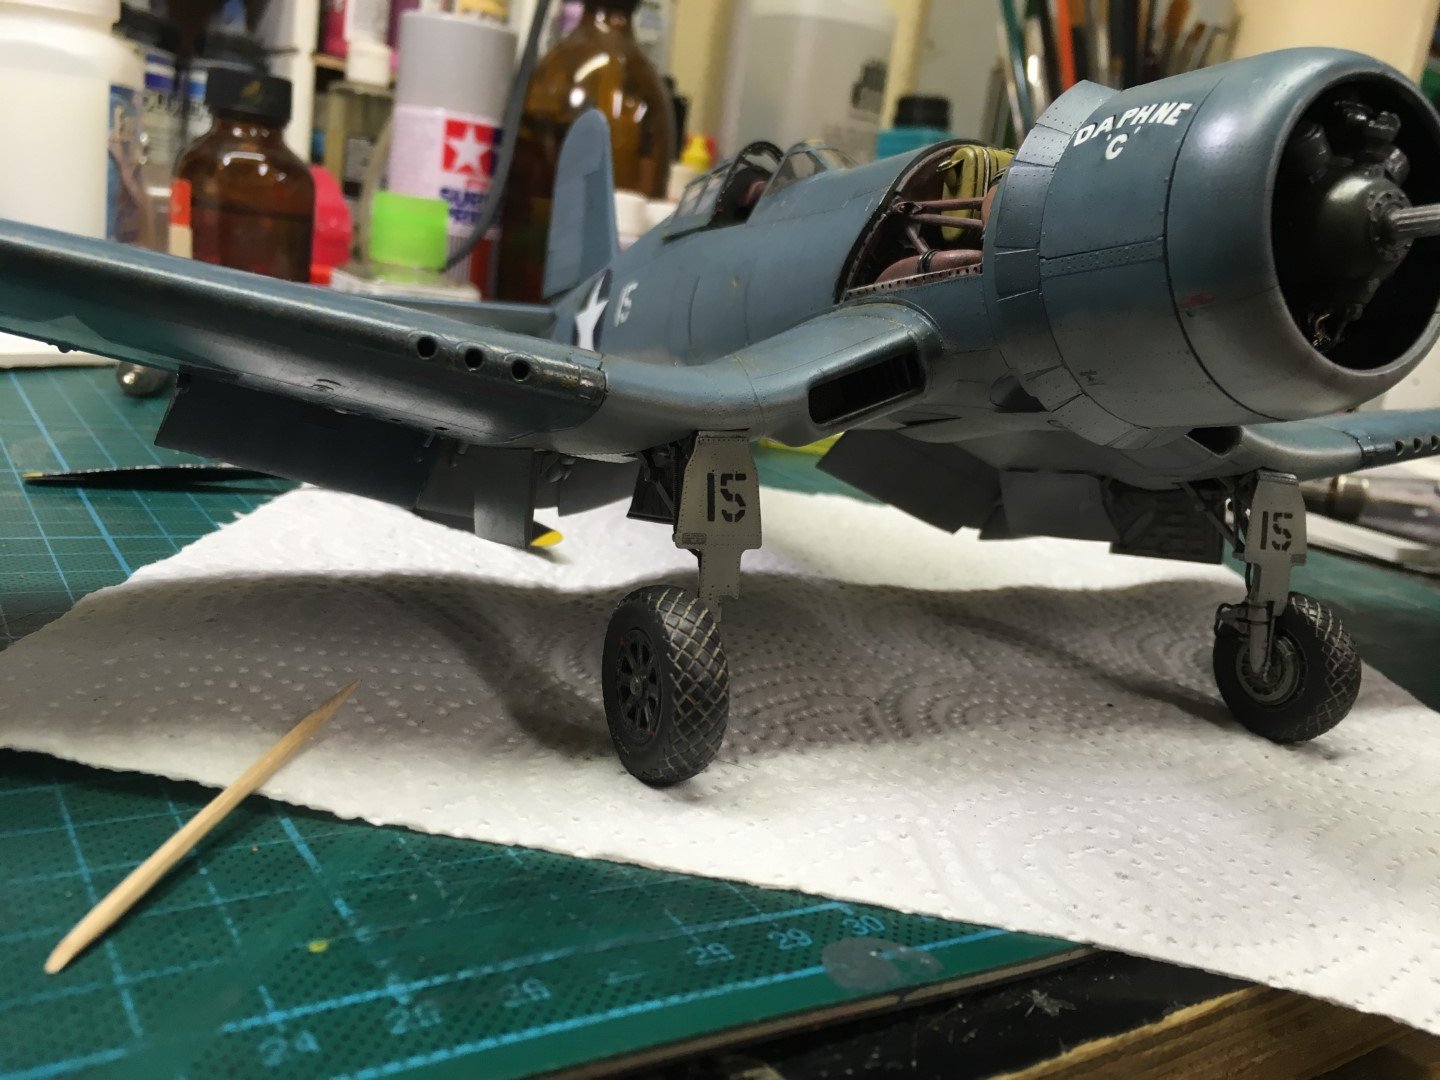
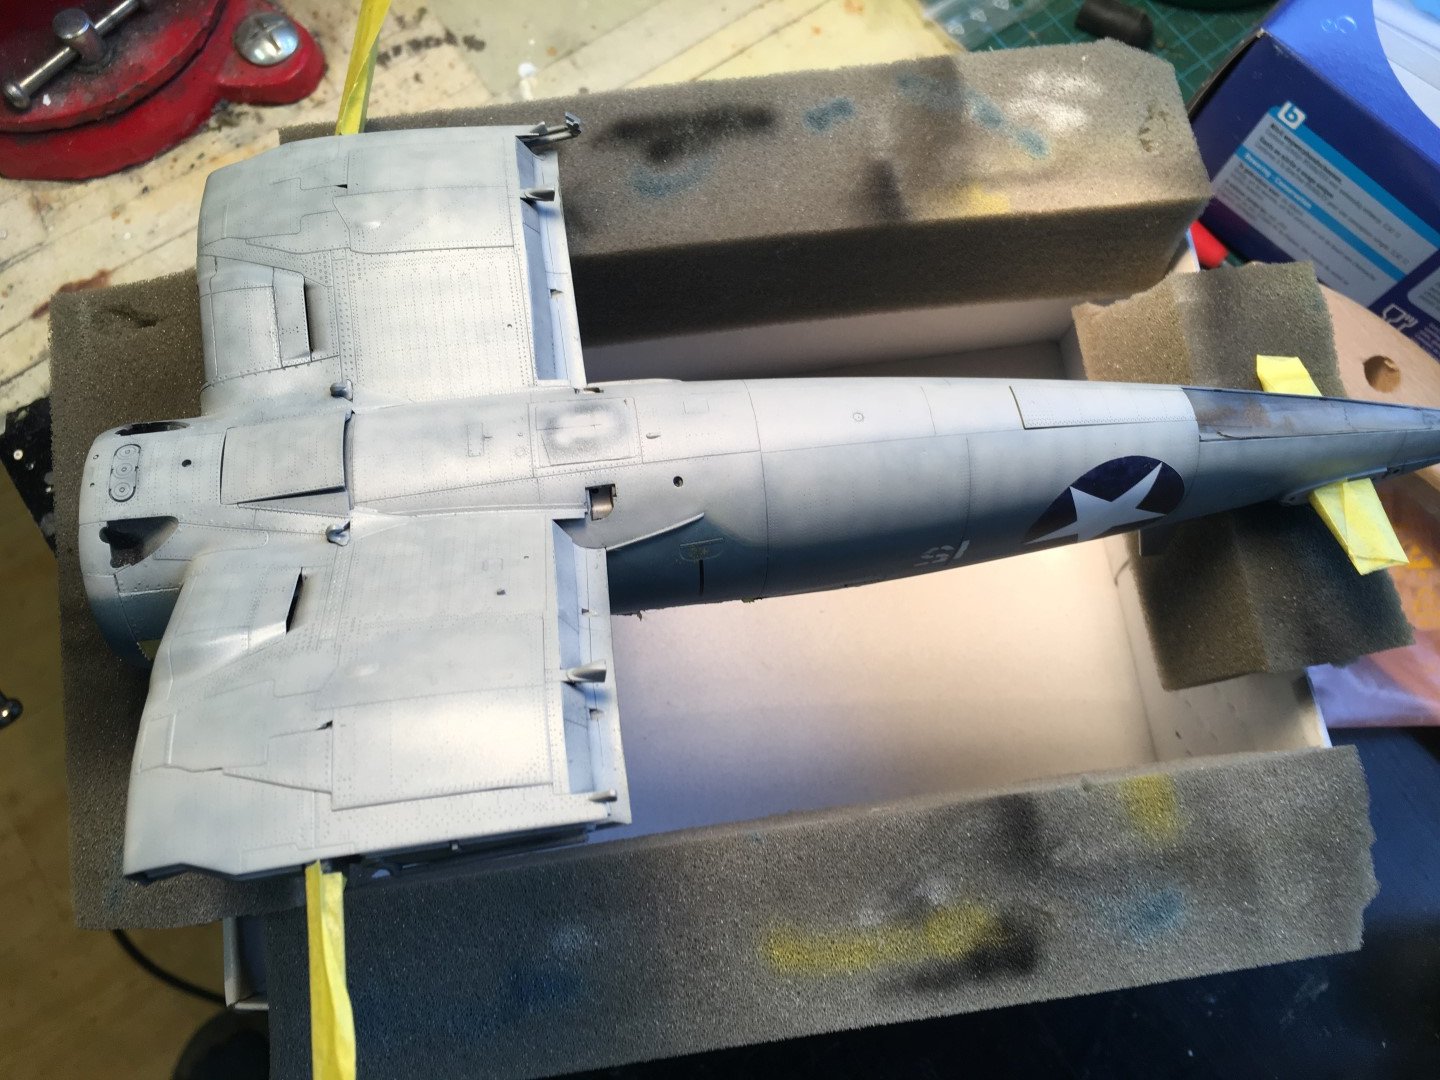
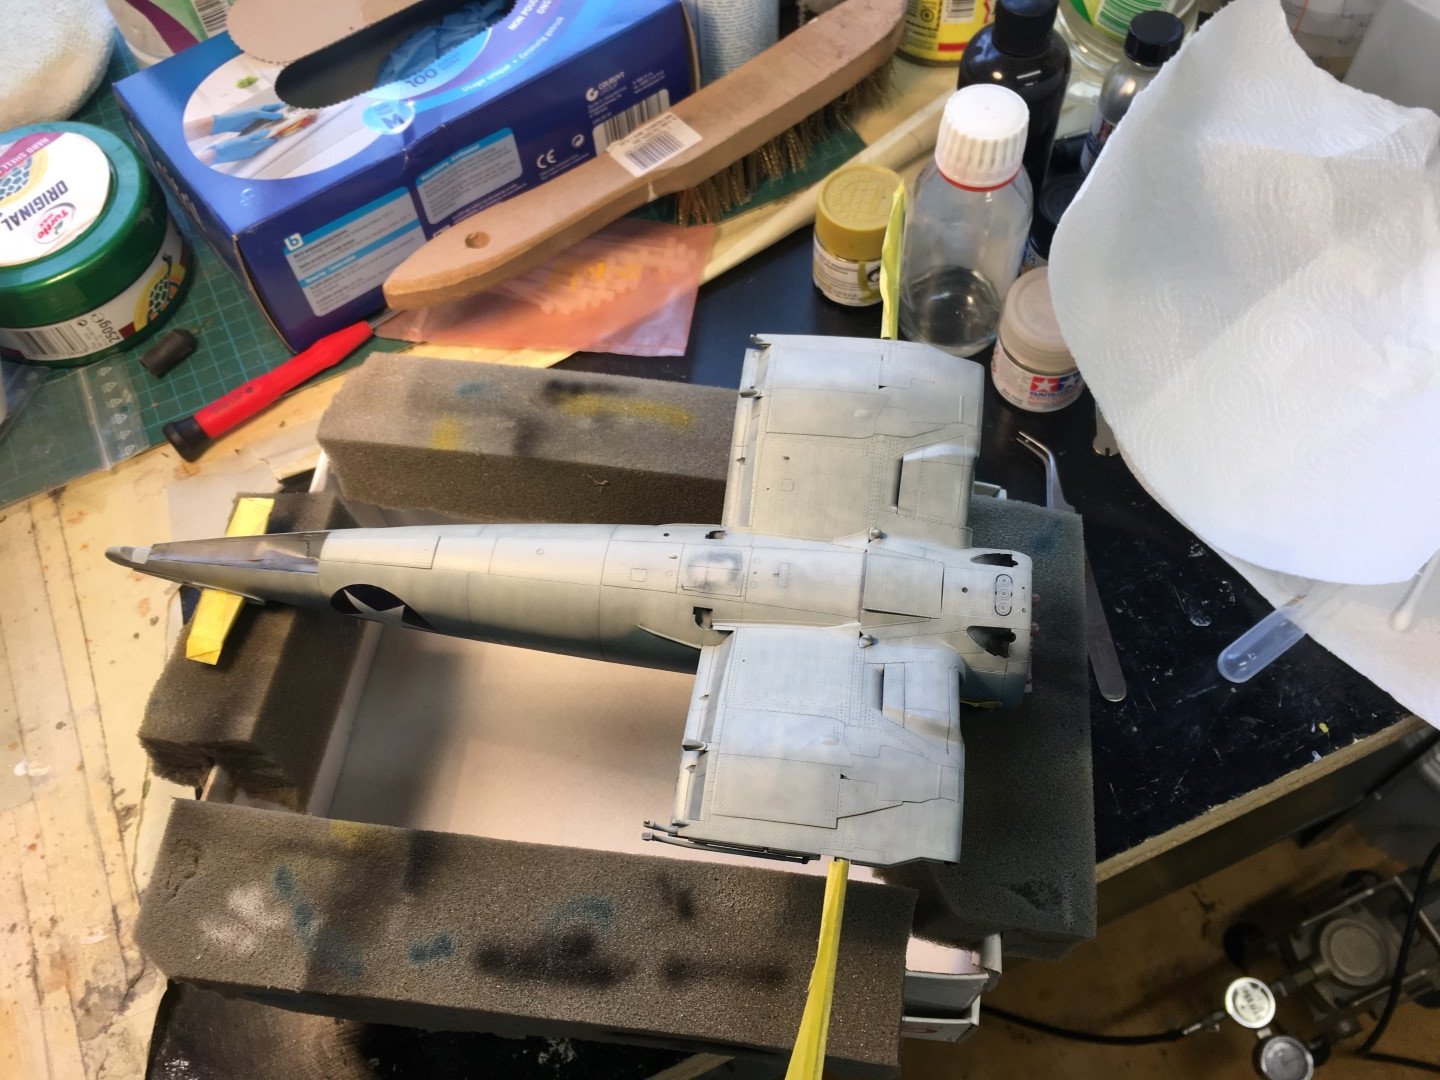
Thanx Rob, The reason for the dustcolor on the underside is that I wasn't shure wich color to use, so I started with dust on the underside, I do like it but there would be to much contrast on the top side so there I went with a dark blue. Meaby I'll ad some dust on the topside to, but not so pronounced as on the underside. Grtz Free -
Yet another Tamiya Corsair Birdcage 1/32
spliffsecond replied to spliffsecond's topic in LSM 1/35 and Larger Work In Progress
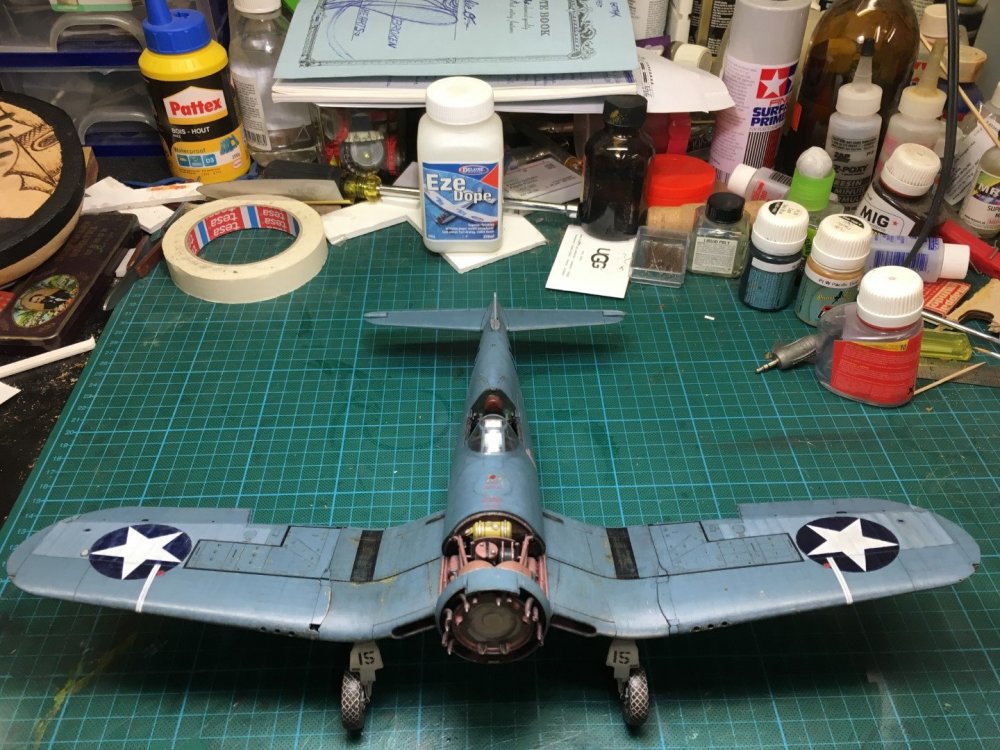
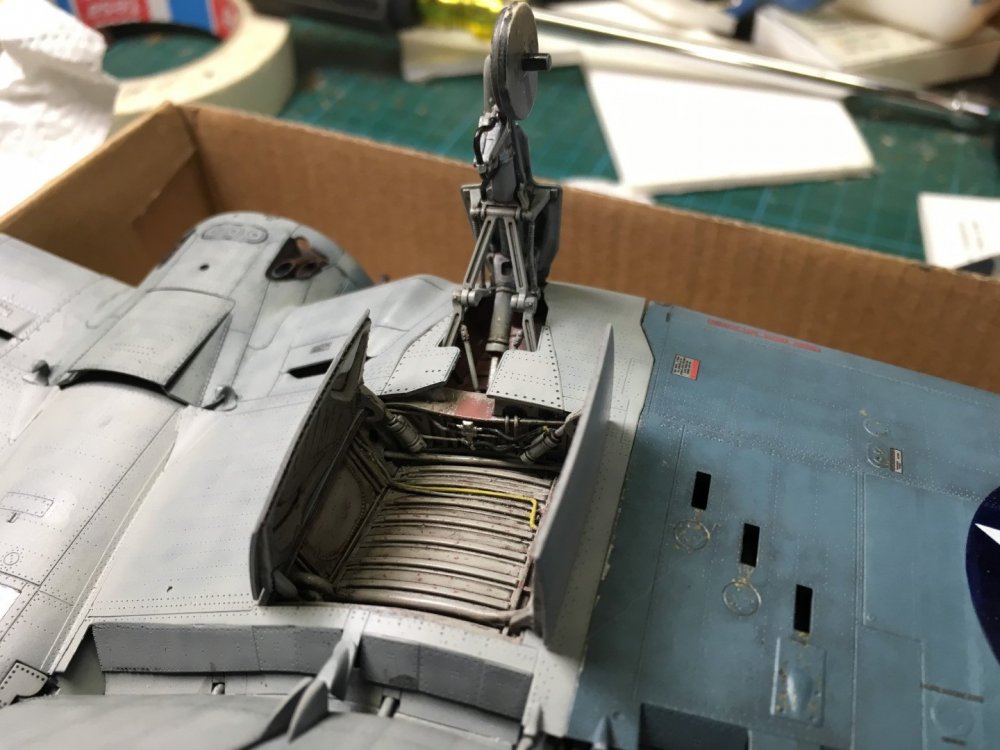
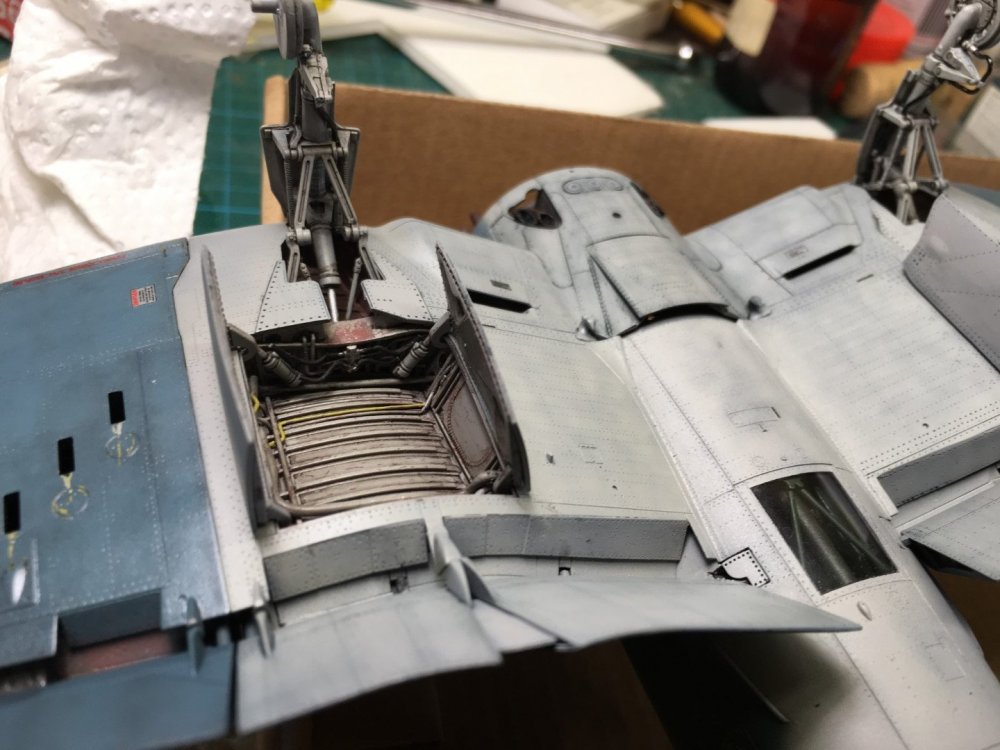
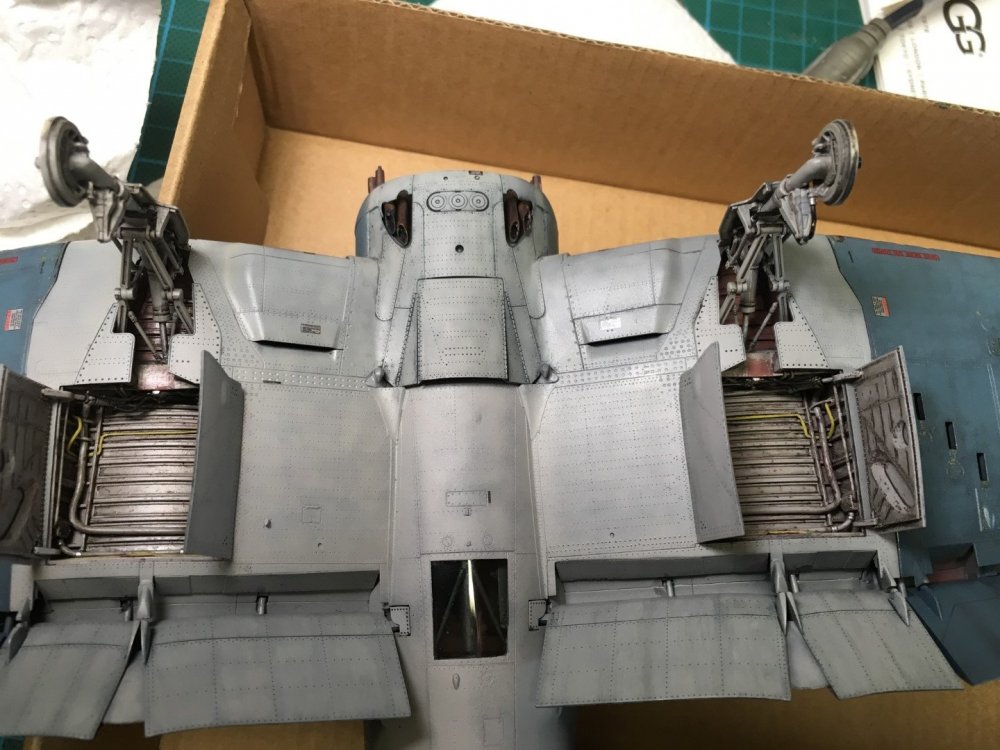
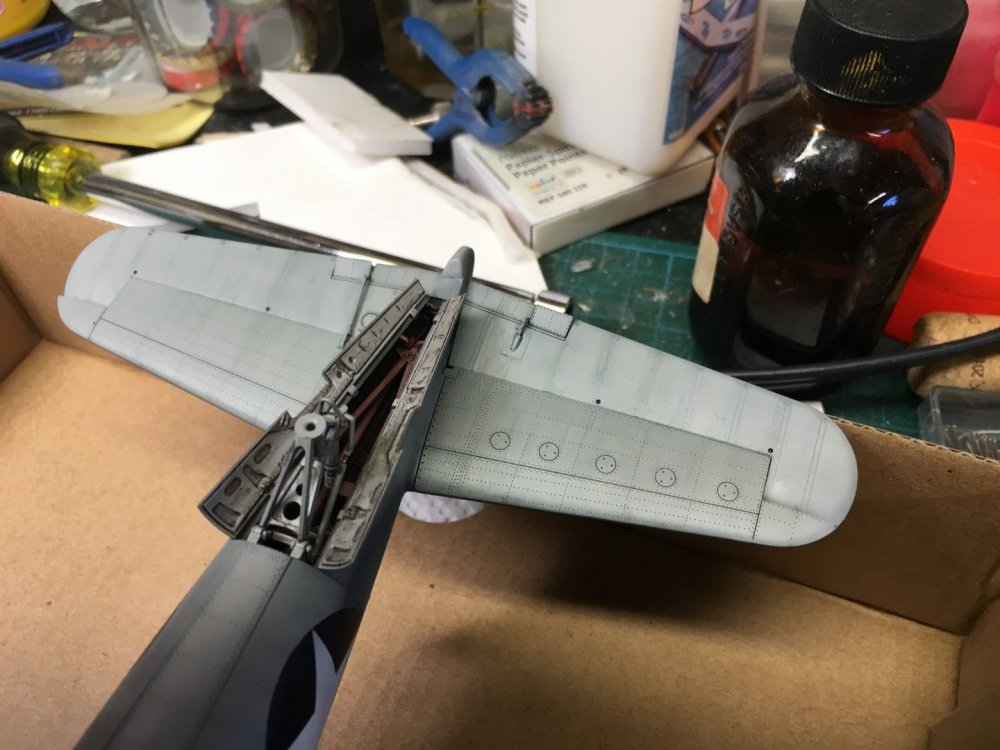
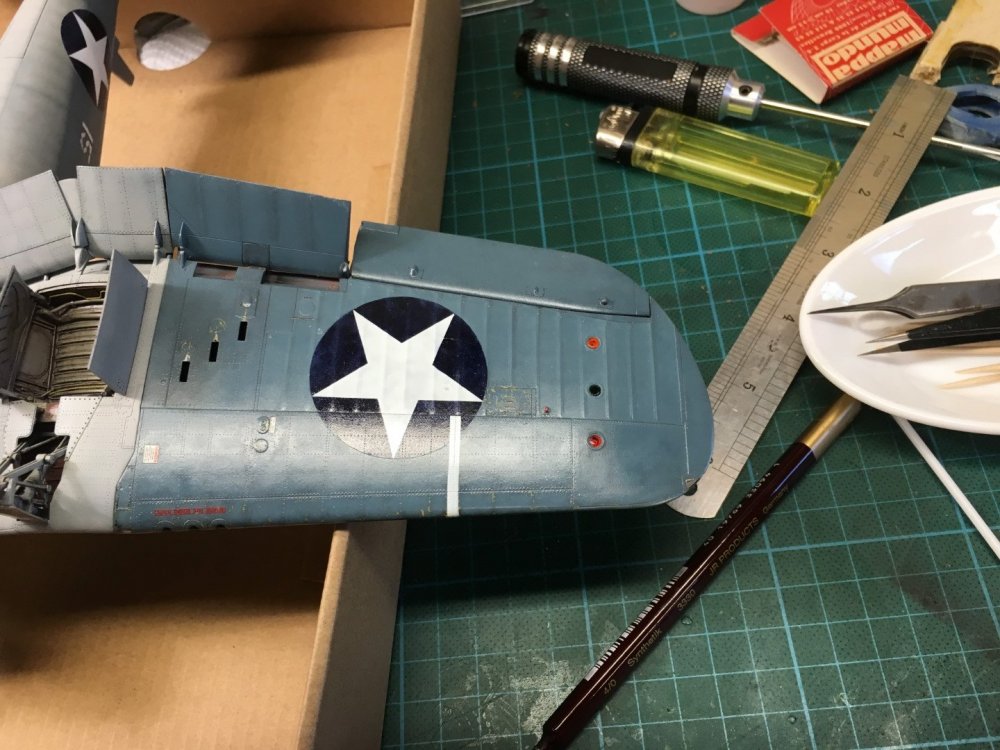
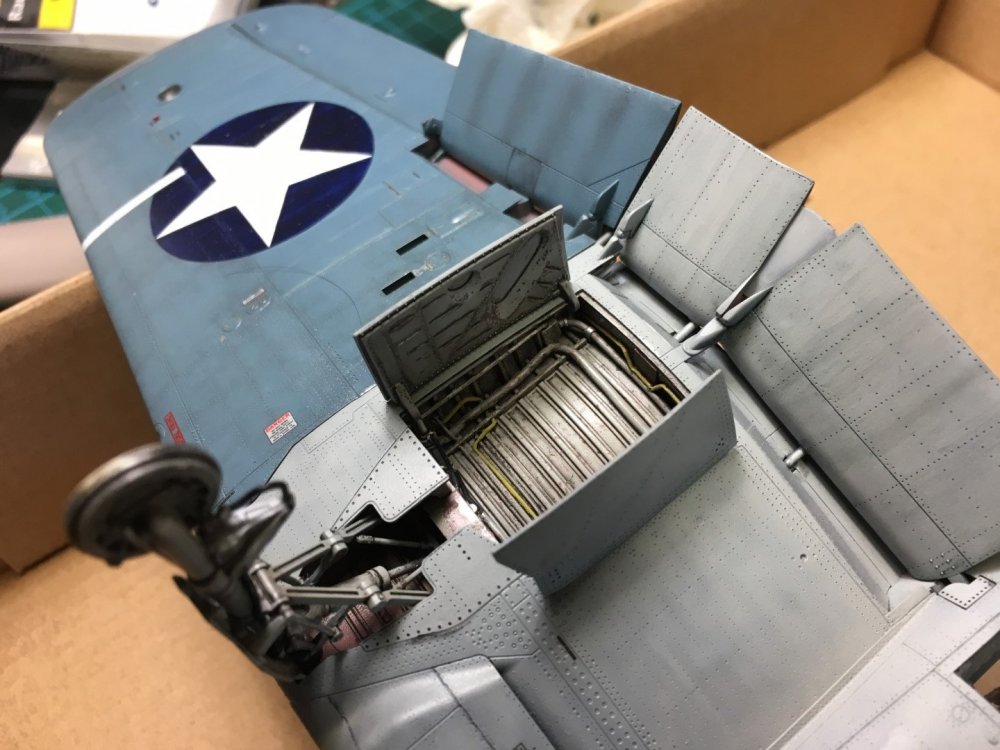
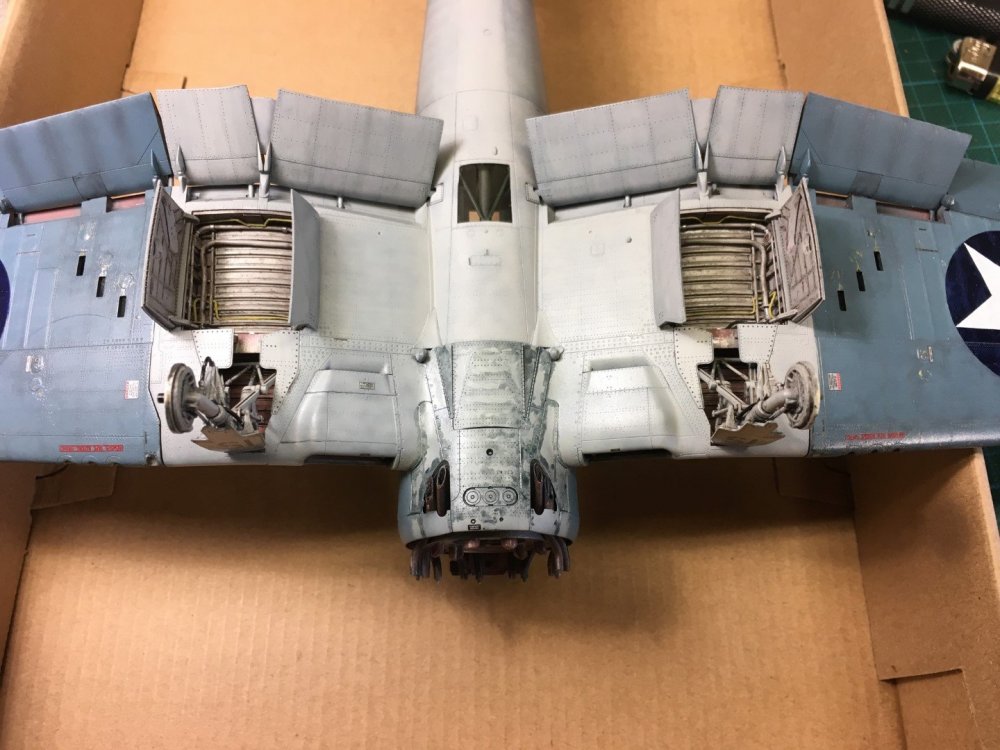
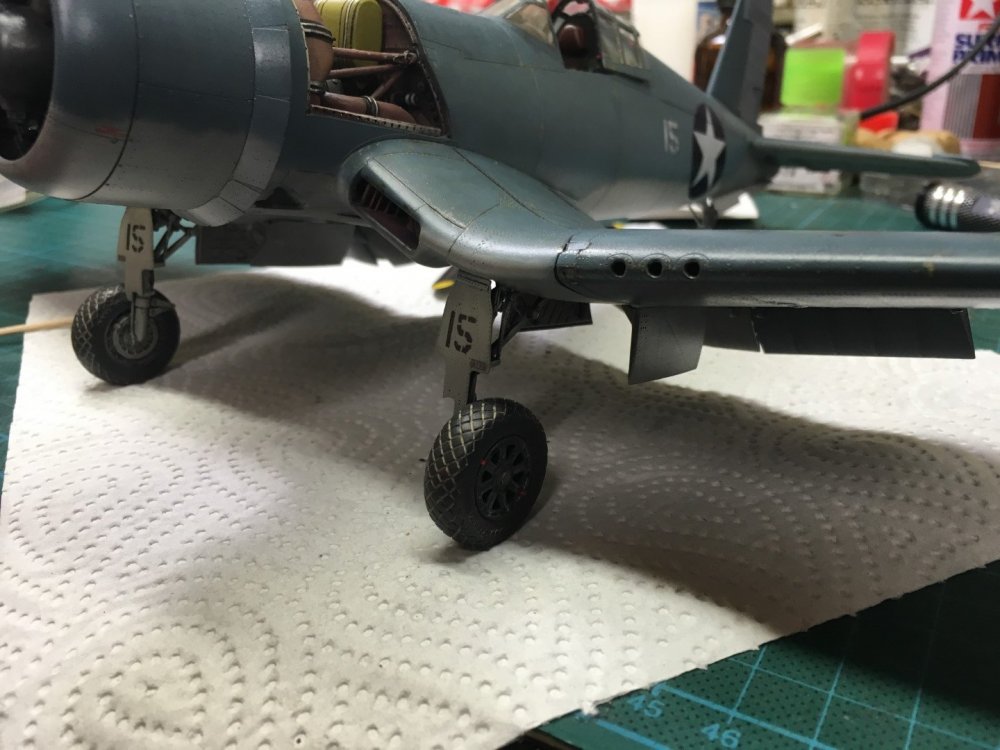
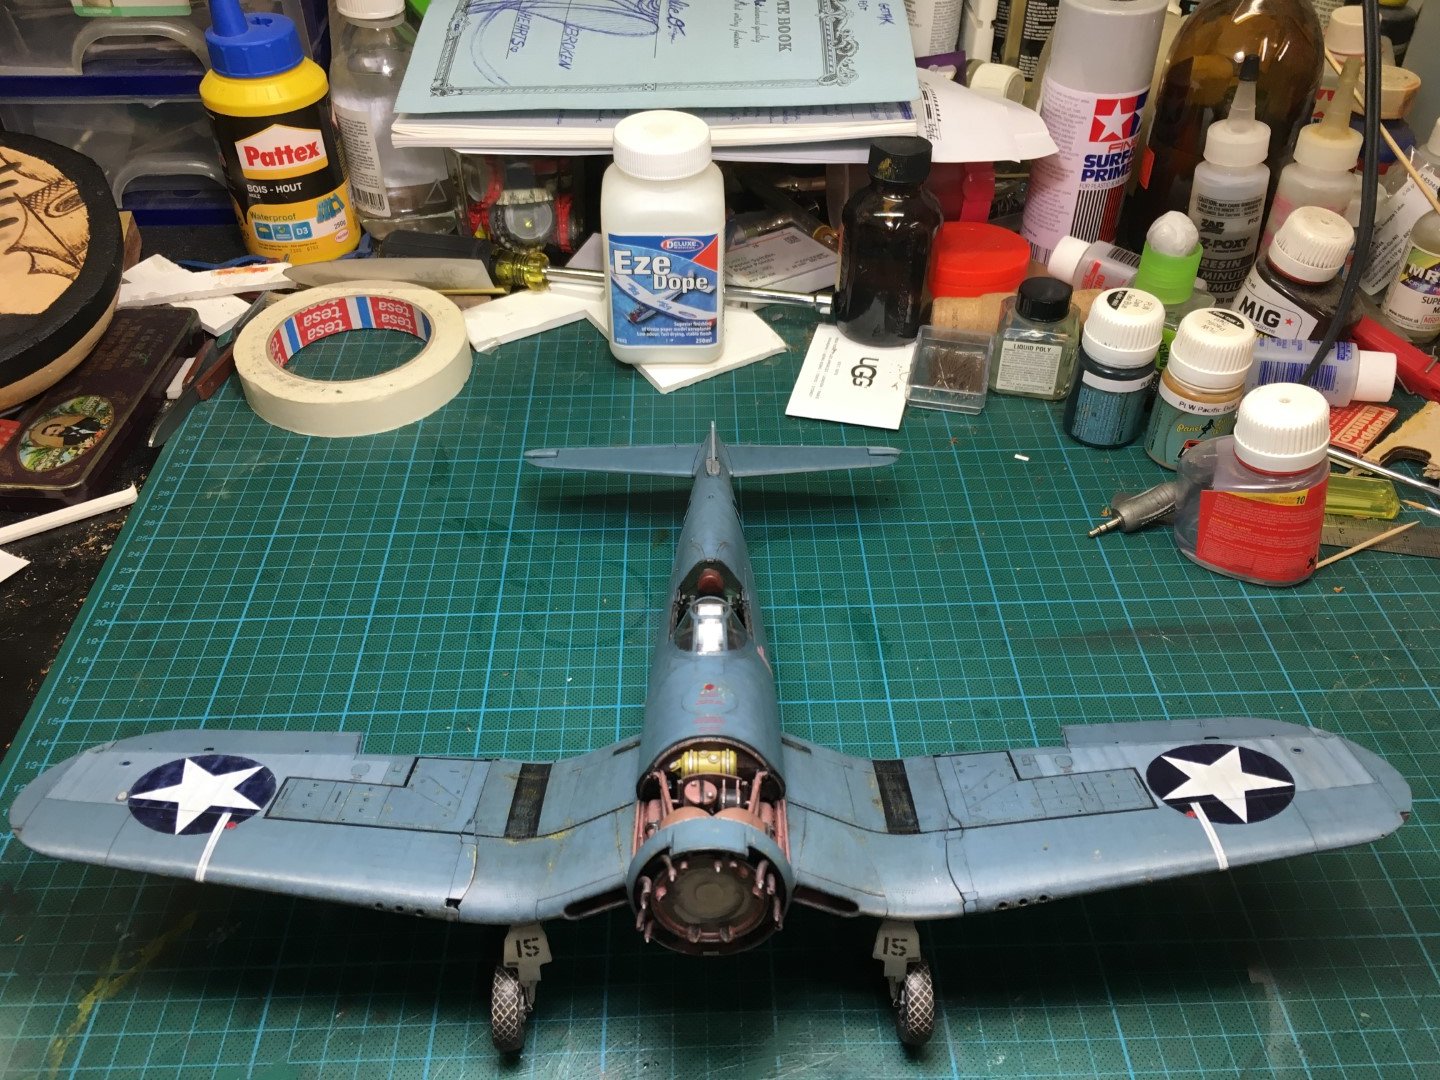
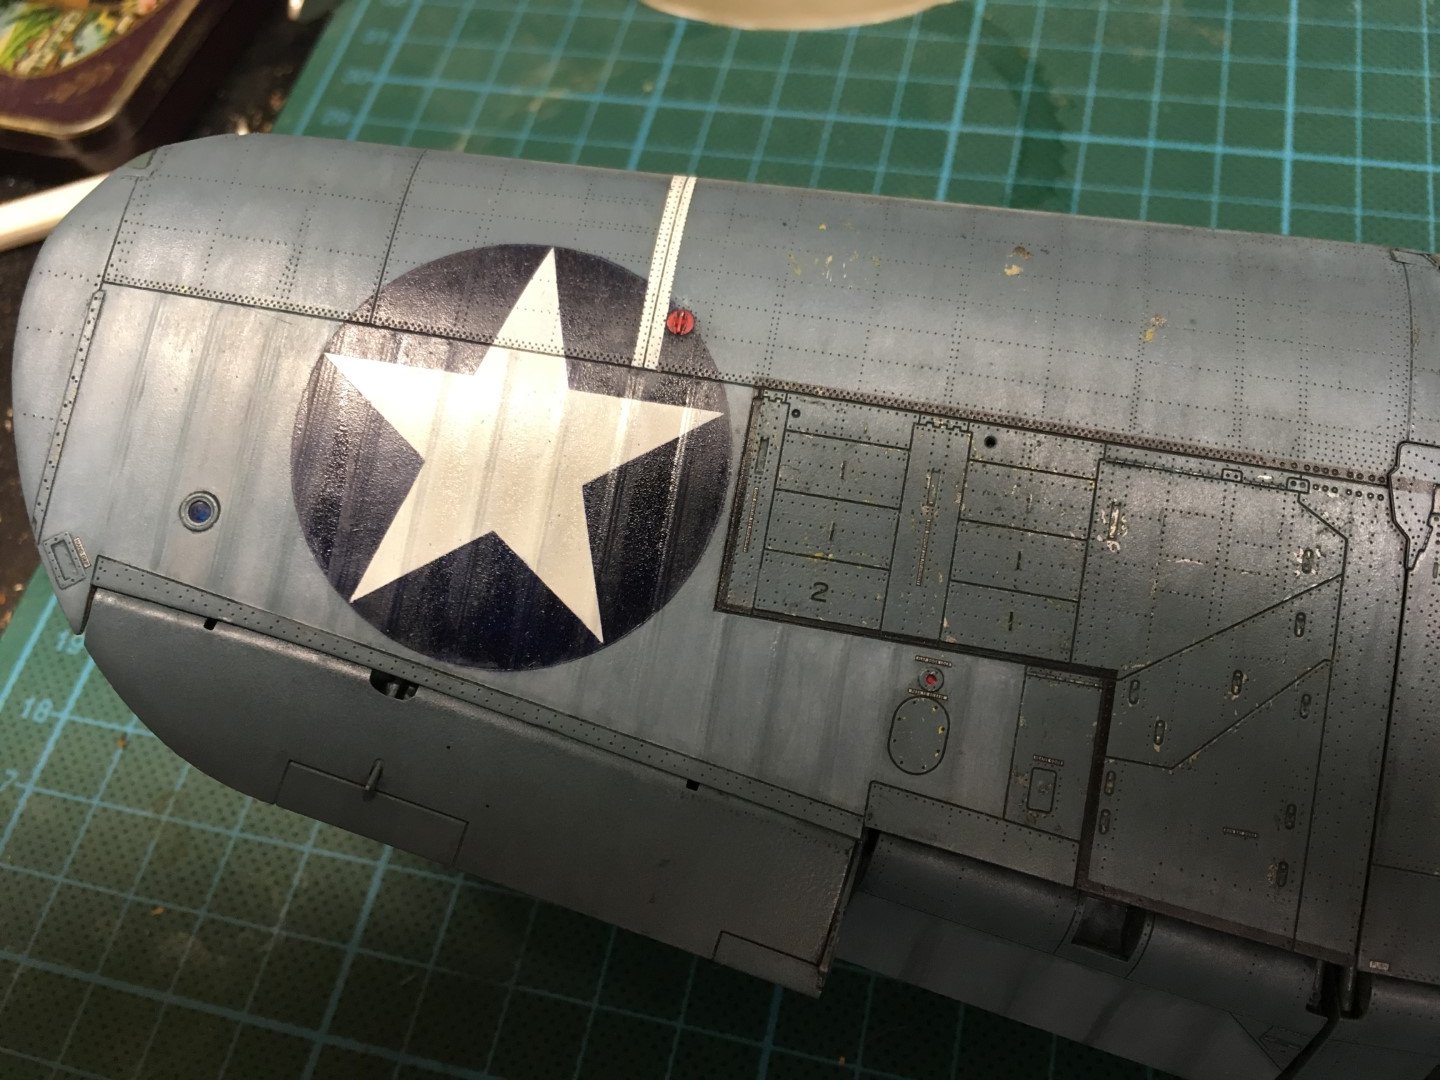
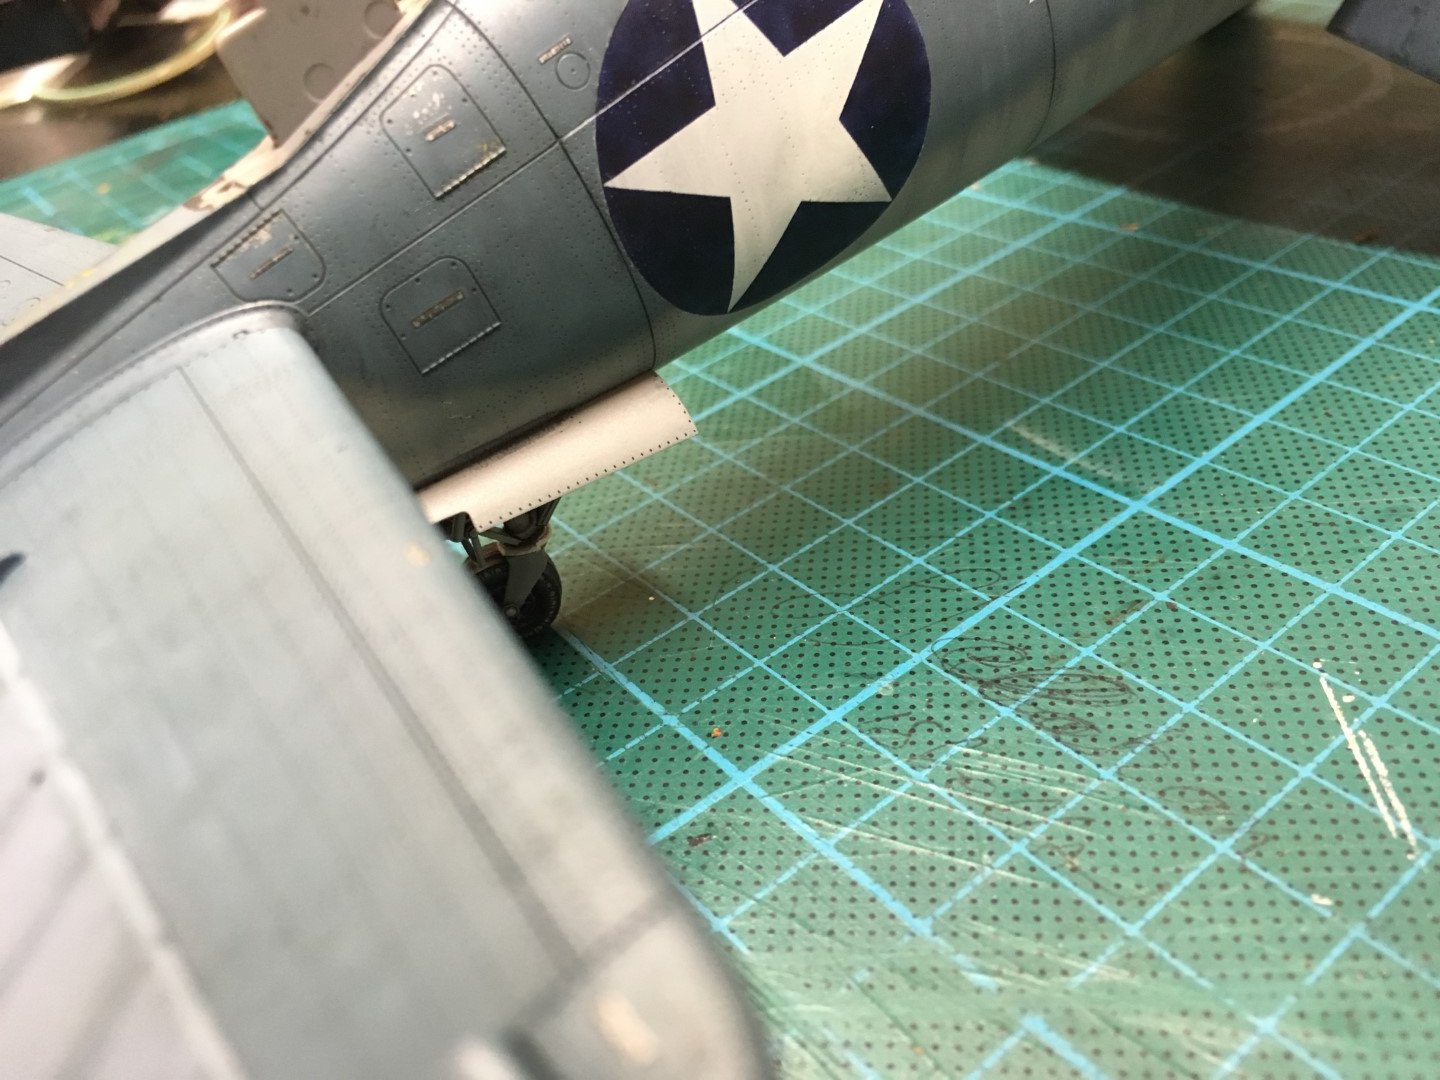
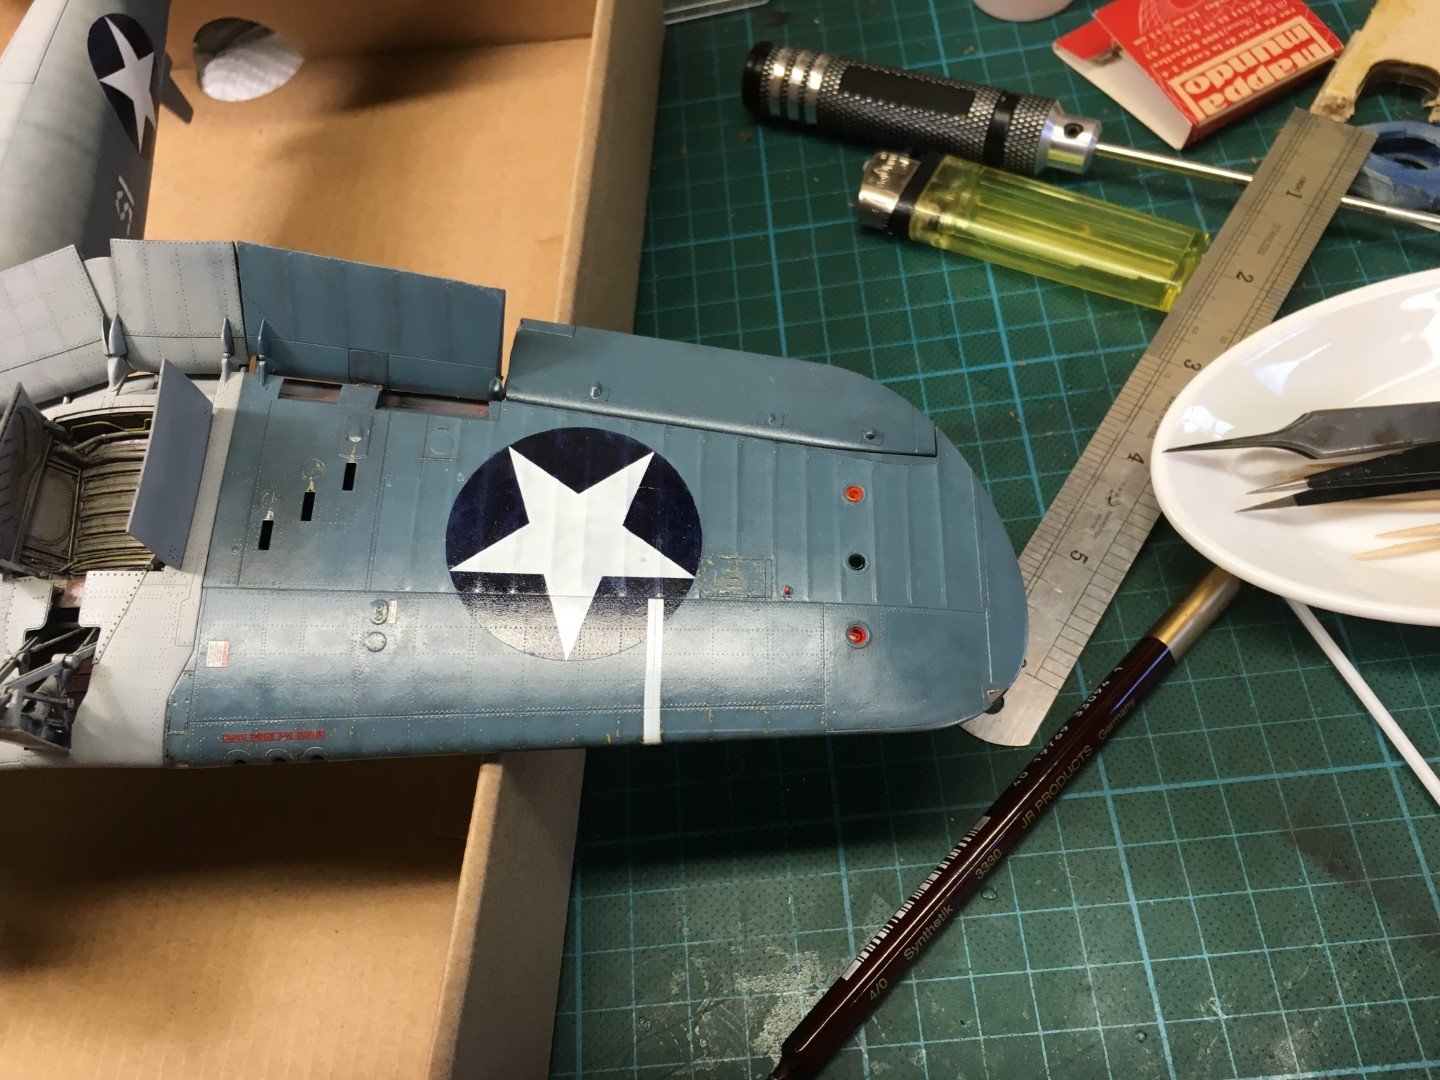
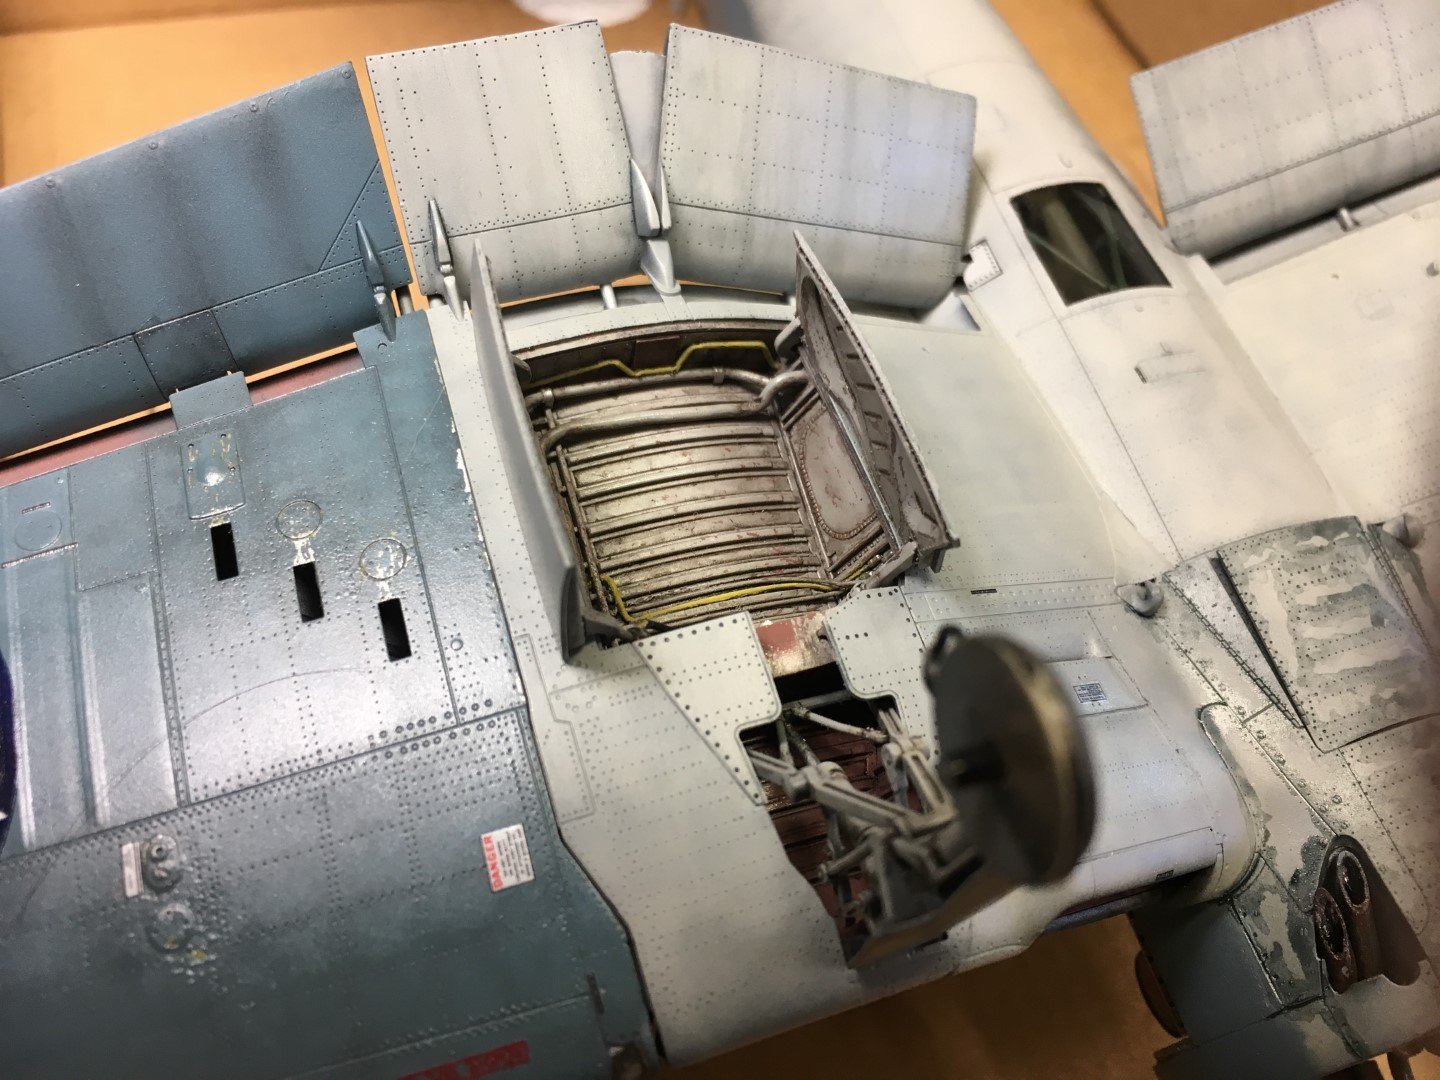
Good evening gents, the underside is more or less finished Topside is getting there, still some clean up to do Left top wing came out great right top wing will have to be hidden under a tarp or something, due to the thick layer of clear I lost all fine rivets and after a wash it just doesn't look right. To bad now I need to detail the auxiliary bay and then it's on to final mat clearcoat and finishing. 4 weeks left, I hope I'll finish her until then Grtz Free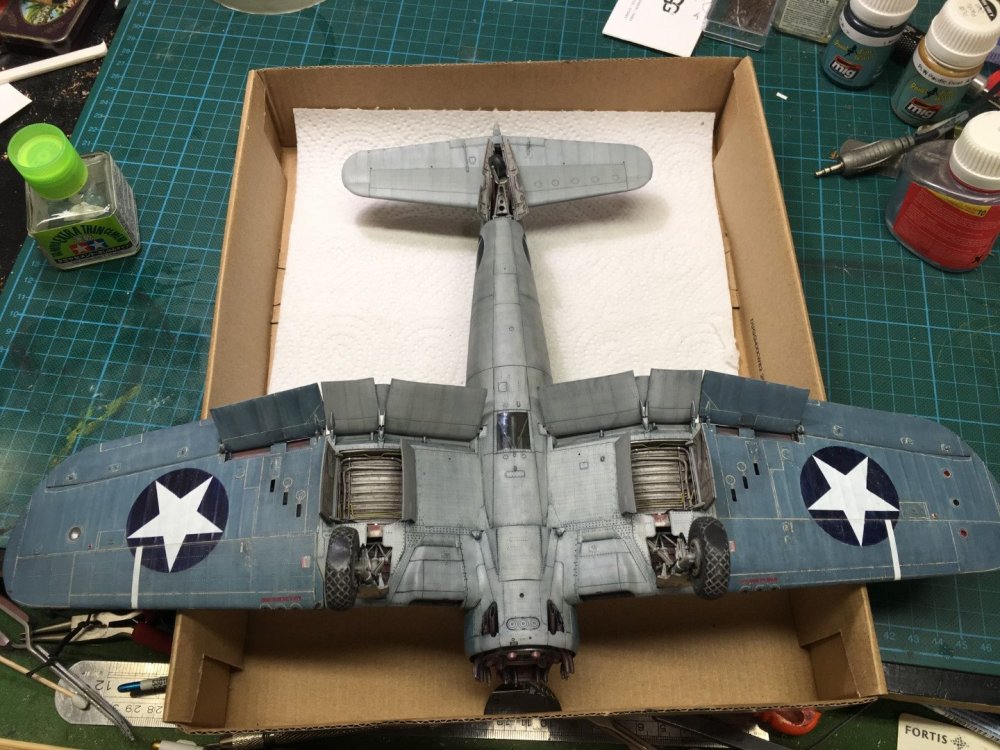


-
Yet another Tamiya Corsair Birdcage 1/32
spliffsecond replied to spliffsecond's topic in LSM 1/35 and Larger Work In Progress
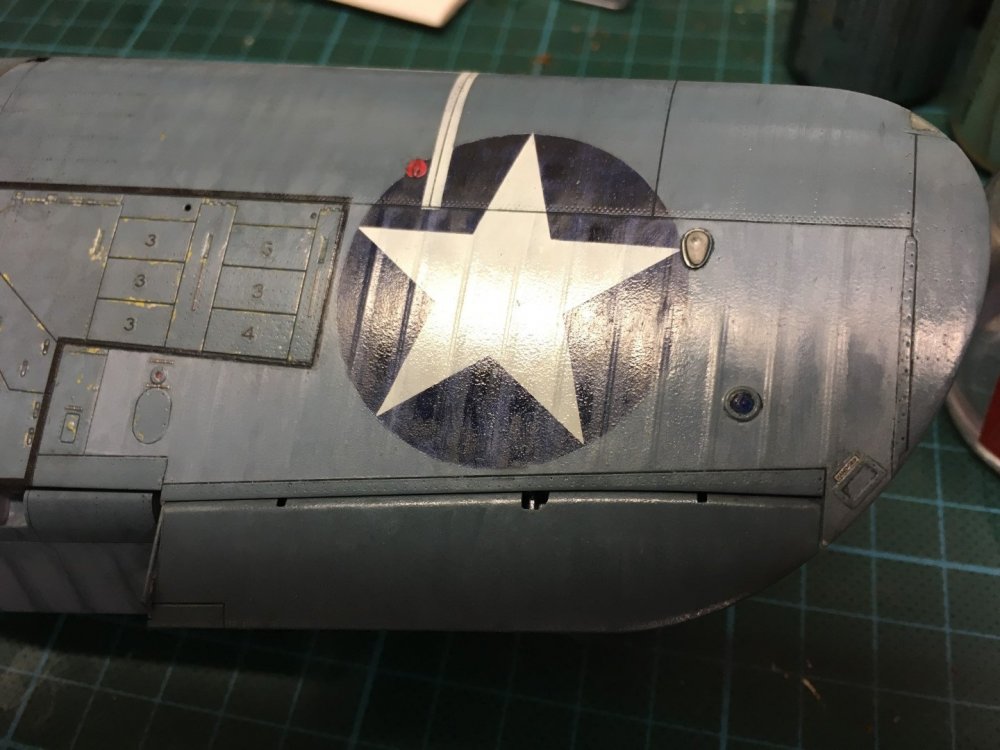
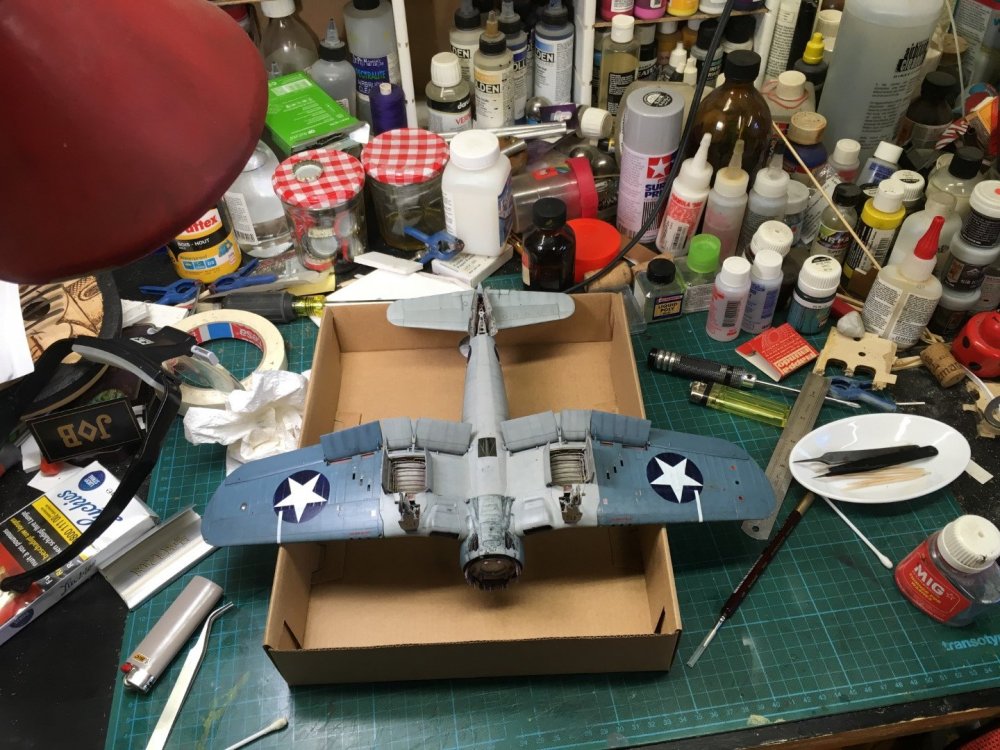
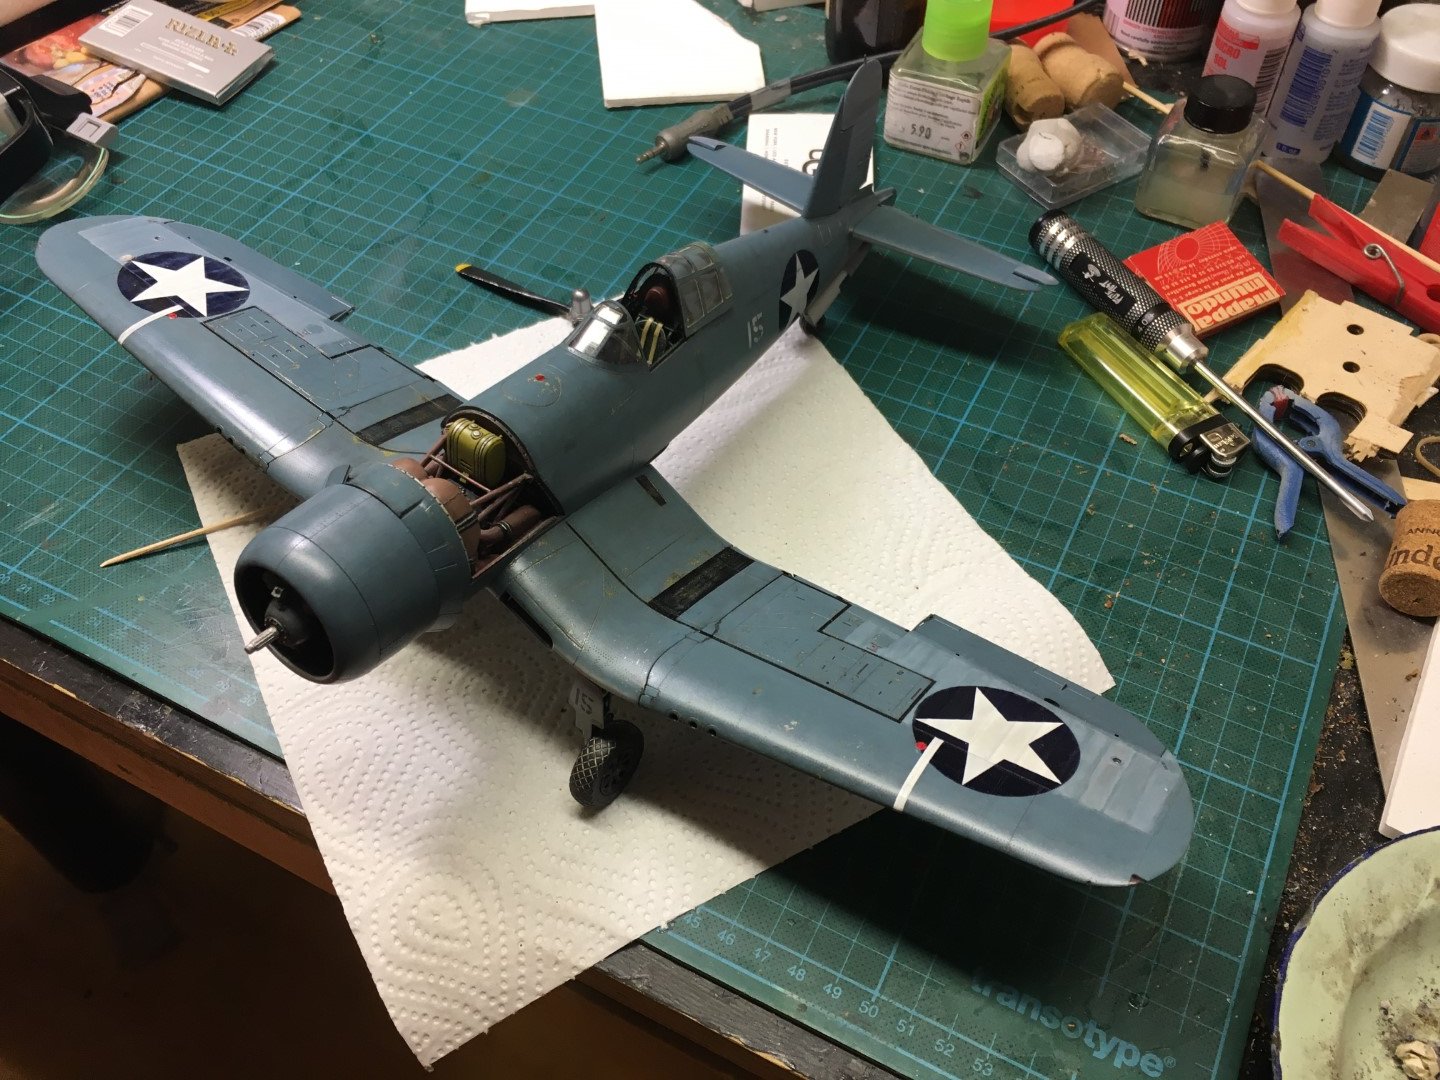
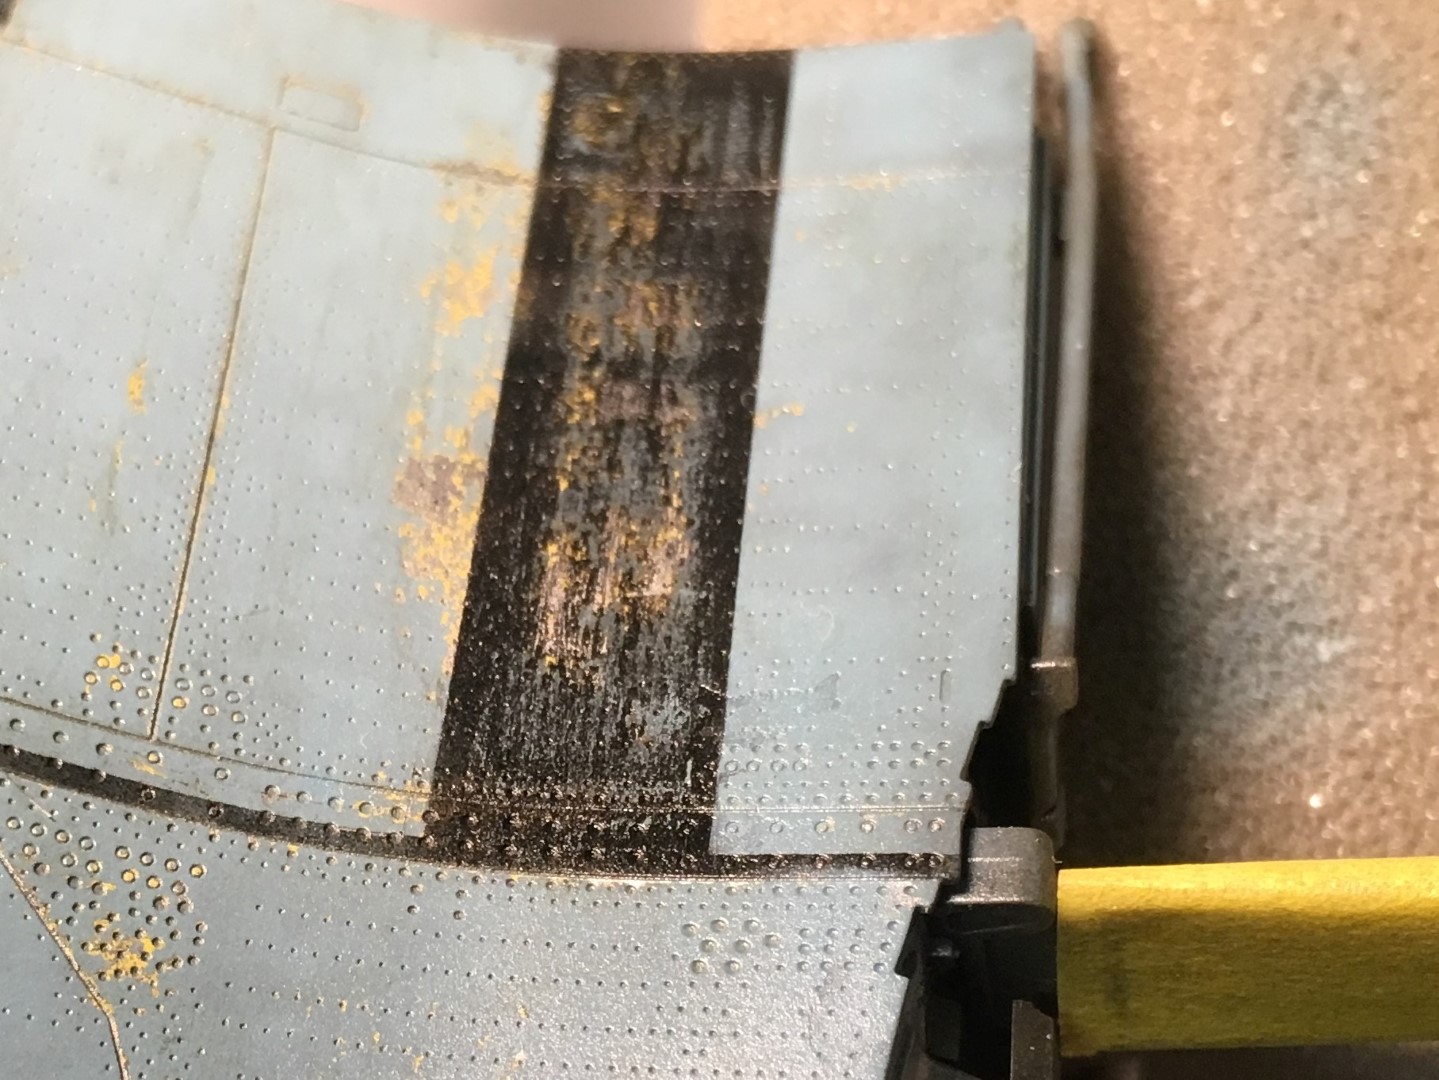
Thank you for the nice comments, I continued glueing and decalling. Made a start on the panel line wash Still lots of small things to paint, adjust and ... My bench at the moment, better start packing it up Untill next time, Grtz free

-
Yet another Tamiya Corsair Birdcage 1/32
spliffsecond replied to spliffsecond's topic in LSM 1/35 and Larger Work In Progress
Hello gentleman, A year has passed and I finally dicided to continue with my Corsair. I have a small window of a few weeks before my workplace needs to be converted to our improvised living space while we demolish our actual home, to construct a new one. So I dicided to start glueing assembly's together and apply the remaining decals. It's slow going because I have to get in the groove again. the gap between the wings seems a bit to wide, it's better on the other side That's all for now. Grtz free PS: a lot of pictures are missing because my provider changed URL's. If my old post could be reopened I could change the URL's and have the pictures reappear.

-
side tracked again, Se5a 1/20 stick and tissue
spliffsecond replied to spliffsecond's topic in Non LSM 'WIP
Thanks guy’s i think the se5a will fly sooner then later the trees are close, but they protect from the wind, so it’s a trade off. @coolboxx you are making nice progress, from wood to covering in under one month is an endavour. Chapeau (hats off) I have found a site with realy helpfull and wise people http://www.hippocketaeronautics.com/hpa_forum/index.php Grtz free -
side tracked again, Se5a 1/20 stick and tissue
spliffsecond replied to spliffsecond's topic in Non LSM 'WIP
Hi gents, I just noticed that post image changed URL's and all my images are not showing, I will try to rectify that. Got some concistend flights with the piper, confidence is growing to try the Se5a rest of the turns after a failed attempt, I like the slow stable flightpath I also made a catapult glider, those are real fun, not really scale. grtz free -
side tracked again, Se5a 1/20 stick and tissue
spliffsecond replied to spliffsecond's topic in Non LSM 'WIP
I am waiting for the winds to die down a bit. I’ll keep you guy’s posted grtz free -
side tracked again, Se5a 1/20 stick and tissue
spliffsecond replied to spliffsecond's topic in Non LSM 'WIP
Nice, looks not so easy for a first build. Take a look around on the forum I posted my build, there are a good number of tips for beginners. Try to start on an magnetic buildingboard ( galvanised plate and magnets from your local DIY) it will make it a lot easyer then with pins. Take your time. Grtz free -
side tracked again, Se5a 1/20 stick and tissue
spliffsecond replied to spliffsecond's topic in Non LSM 'WIP
The rubber band is attached to a hook on the propellor side and the loop goes around a peg in the back. There are a number of possibilities at the propellor side, but I am still a novice. Grtz free -
side tracked again, Se5a 1/20 stick and tissue
spliffsecond replied to spliffsecond's topic in Non LSM 'WIP
It weighs 40 grammes balanced, the same weight as the prototype from the designer. Thats the challenging part, adding scale detail without weight. No resin conversion sets here I really liked the scrathbuilding part. grt free -
side tracked again, Se5a 1/20 stick and tissue
spliffsecond replied to spliffsecond's topic in Non LSM 'WIP
@ docrob : this is a kit from Vintage Model Company, based in England. They have an online shop Here. Altough I added a lot myself, this is how it looks when you follow the building instructions I have a build log here Svenson is a well known brand, my dad build those in the 80’s. But I recall they are more 1/8 scale and up wich is rather big. I have seen scale free flight models who can rival with scale plastic builds. So no excuse there sorry for the brainbug, but I think you will enjoy it. Building is just one aspect, afterwarts you can go outside and have fun with it, witch usually results in more building. grtz free -
side tracked again, Se5a 1/20 stick and tissue
spliffsecond replied to spliffsecond's topic in Non LSM 'WIP
Thanx guys, yes, you can fit an electric motor for free flight. And you can even convert them to rc. Grtz free -
Good evening Gentleman, The corsair is on hold again, because I found something new to me. Free Flight Rubber models. I finished my first one, I scratched all the rigging and armement. And the nice thing is, they fly this is not the Se5a yet, I need some experience so I made a Piper and that one flies already This pleases me a lot so it will be autumn before I resume plastic modeling Grtz Free
-
Yet another Tamiya Corsair Birdcage 1/32
spliffsecond replied to spliffsecond's topic in LSM 1/35 and Larger Work In Progress
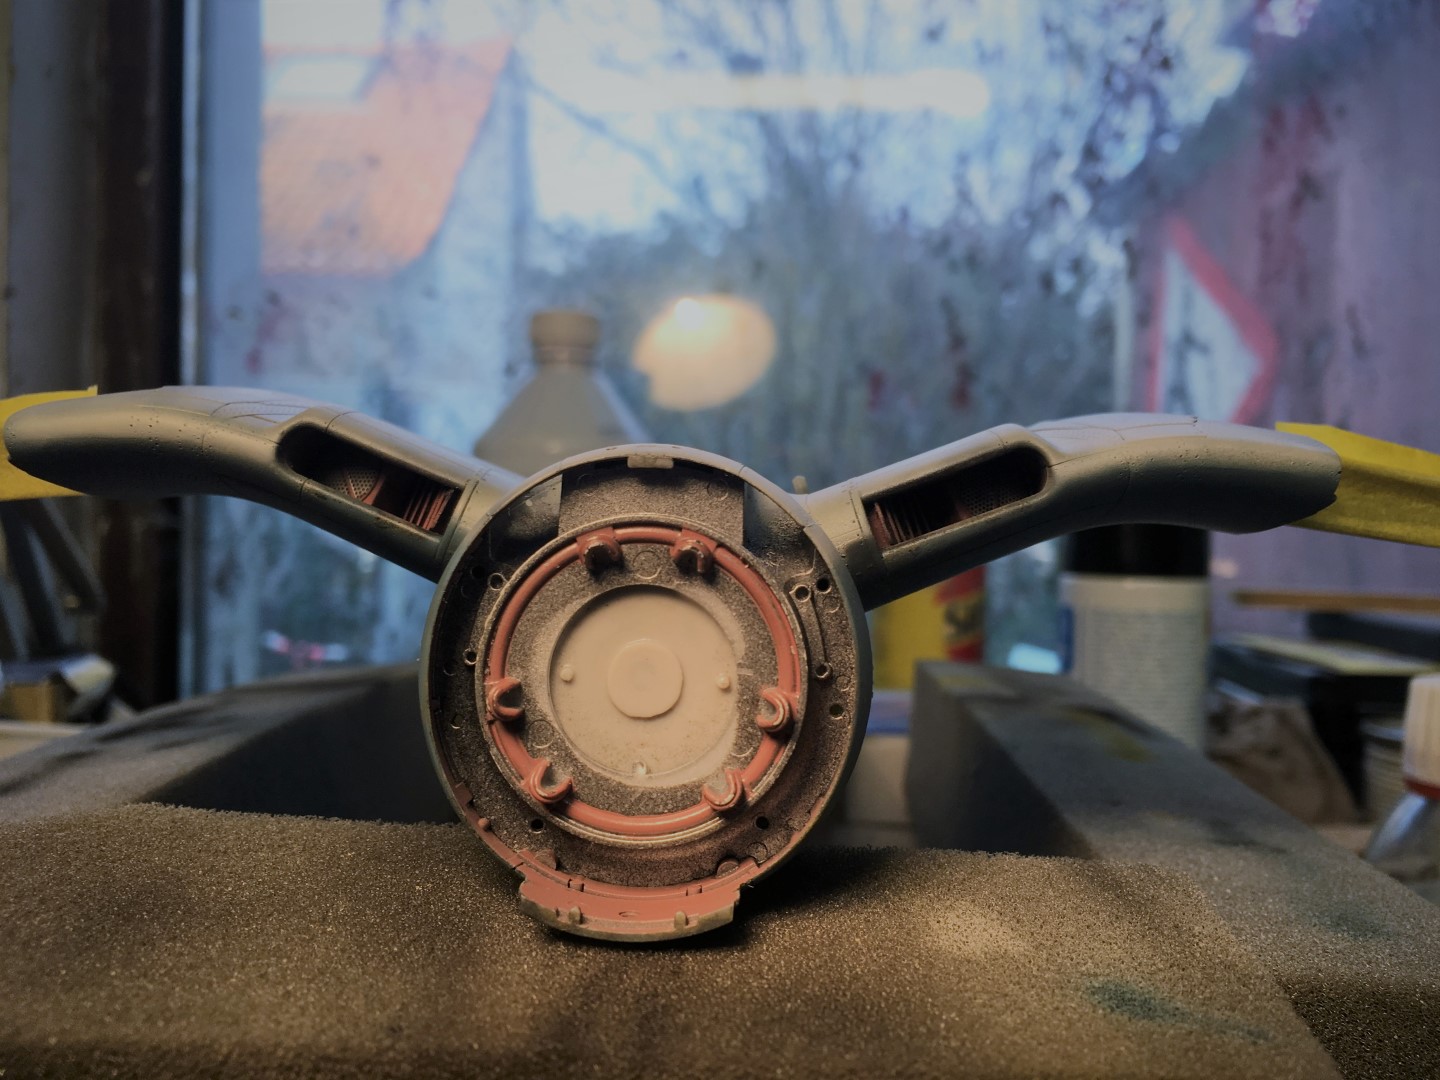
Hi gentleman, found some time to continue, done sanding and masked for spotrepair Primer And painted, i made a mistake by not following a panel line when masking In this picture you 'll see it better There is still a shadow from the repair and while trying to blend the sprayline whit some sanding paper I also scratched the paint (not shown). It is really difficult to have the same translucence on repairs. I am going to think about how to solve this for a while. I think I need to repaint a bigger area, it will be easyer to blend While waiting for paint to dry I did some more fading of the canvas parts. I did all of them but managed to not take pictures, this is the only one I got. Untill next time grtz free -
Yet another Tamiya Corsair Birdcage 1/32
spliffsecond replied to spliffsecond's topic in LSM 1/35 and Larger Work In Progress
Hola Muchachos, I tried to make my own custom sanding stick and it worked Punched a small disk from 400 grid sandingpaper and glued it with superglue to a bamboo scewer. And it did the job just fine, I will repeat this now with 600, 800 and 1000 and then on to paint. Until then Grtz free -
Yet another Tamiya Corsair Birdcage 1/32
spliffsecond replied to spliffsecond's topic in LSM 1/35 and Larger Work In Progress
Yes, I dryfitted many times and although they seem to fit fine it's still unclear how they supposed to line up with the hinges. Before I mount them permanently I'll need to take a look at how it is done on the real deal. But thanks for the heads up. And yes I know that it would be very hard to spot the ejector marks, but once I knew they where there, I just could'n leave them. And you can be shure that once I post the RFI pictures, somebody will point out a glaring mistake I did not correct although it was right in front of me all the time, but thats life. grtz free -
Yet another Tamiya Corsair Birdcage 1/32
spliffsecond replied to spliffsecond's topic in LSM 1/35 and Larger Work In Progress
Hi gentlemen, managed to do some things, hopefully I get back up to steam, i really want to get on with this plane. Hole for flare gun that is not supposed to be there plugged with some streched sprue dipped in liquid cement After pushing hard and let dry for a moment, cut it of and smooth the cut I'll leave this to dry overnight and then hopefully with some carefull sanding and repainting nobody will be non the wiser. In the meantime I attacked something that did not show until I gave it a wash. Ejectorpin marks, I wish I had seen them sooner I sanded them out with a sanding stick cut to size hopefully we wont see them again until then, grtz free -
Yet another Tamiya Corsair Birdcage 1/32
spliffsecond replied to spliffsecond's topic in LSM 1/35 and Larger Work In Progress
Thanks rob, still trying to get back to the bench, but i don't have the energy right now. Hopefully next week .... grt free -
Yet another Tamiya Corsair Birdcage 1/32
spliffsecond replied to spliffsecond's topic in LSM 1/35 and Larger Work In Progress
Hi gents, I am back, still need to get in the mood for modelling. I've started slowly with a pinwash, the moment when you say oh no.... but it turns out ok, close up still needs some finetuning. I am posting this build on an other forum and it was pointed out that in corsair birdcages the blasttube and flaregun where never installed. so i got some filling to do until later, grtz free -
TA-152 Zoukei Moura 1/32, My First ZM
spliffsecond replied to DocRob's topic in LSM 1/35 and Larger Work In Progress
I am feeling really sorry I brought it up. Grtz free -
TA-152 Zoukei Moura 1/32, My First ZM
spliffsecond replied to DocRob's topic in LSM 1/35 and Larger Work In Progress
Nice start, very clean work, looking forward to what follows. it’s a shame that the rasterization passed Eduard’s quality control. Meaby you can put an oil filter on the blue parts, it will hide the rasterisation and you could tone down the blue hue, two birds one stone. I see a stowaway hair on your very nicely build footstraps. I am no expert, but have you mounted the ruder pedals upside down? grt free -
Tamiya F-16C IDF Barak
spliffsecond replied to GusMac's topic in LSM 1/32 and Larger Aircraft Ready for Inspection
Looks very nice, wishing for the same quality finish on my bild. Grtz free -
Yet another Tamiya Corsair Birdcage 1/32
spliffsecond replied to spliffsecond's topic in LSM 1/35 and Larger Work In Progress
So, I said it was a fruitfull Week End, Clearcoat top and bottom went on without a hich and I repaired some overspray Next step will be panelline wash, but i have to test some things first. So I'll be back after the holliday's Grtz free


.thumb.JPG.2494335574ce4aee70a2dbd8c422b5bf.JPG)
.thumb.JPG.3cd91199750854fad1dc9491b9ec3e38.JPG)
.thumb.JPG.3c255c959ad339f8f36be571afa70738.JPG)
.thumb.JPG.df97e0699b3917c6bf041e8a537ae6f3.JPG)

.thumb.JPG.40c28af6396287902662f6f1486cea7a.JPG)
.thumb.JPG.45c1676ef6bd79e854d6cb4caafa7333.JPG)
.thumb.JPG.57547eb72e8f05dcdab053f3219e4403.JPG)
.thumb.JPG.e77616d1526dd15e81bd2130d987a701.JPG)
.thumb.JPG.d3a21c4d8347662829db233a59725dac.JPG)
.thumb.JPG.4ccaaa958588a104f867e456f298569e.JPG)


.JPG.0b2f866d1494ddf420938b0f0710bcac.JPG)
.JPG.ed5991cc990bde364da62f6dade6d4ba.JPG)
.JPG.1cd828063a2d1c489103359526da1160.JPG)
.JPG.a9c8eb093be9501682be219d8623a6d1.JPG)
.JPG.207ec33858c1ebcc4861026527ea36f0.JPG)
.JPG.54d9ca4e9be428d4a98dd0e455efa631.JPG)
.JPG.d5eba715edf8f1f3c8eca6281087aec7.JPG)
.JPG.3e3b8be72bb443c6601768d6d25caaa5.JPG)
.JPG.410971b7089d731097cdede28f0a509b.JPG)
.JPG.8e6959c36e9154cc2ccfbc601d2bdfc6.JPG)