RichO
-
Posts
356 -
Joined
-
Last visited
Content Type
Profiles
Forums
Events
Gallery
Everything posted by RichO
-
Happy Birthday Gus! Now get back to building. Good job.
-
Thanks everyone for tagging along with this slow build. Hey All, A quick report for today. I got Betty up on her knees, and boy what a big butt. I'll be back when I get the front hubs built. Rich
-
Crazypoet, I have been looking a how the cab and components are going to be built. I have run up against some compound curves that look a little scary. Stay Tuned!
-
Thanks Guys for tagging along and leaving nice comments... Hi All, So I'm cruising along waiting for the molds of the back hubs to cure, and needed to work on something else for a bit. I decided to work on the fifth wheel. This was a mini build that I hadn't considered the number of parts for this. The top side looks simple enough... The under side and the mounts took all week to build. Mostly because finding photos up under there is just not happenin', and trying to interpret the paper instructions took a bit of studying. The build... Big Betty is starting to take up some space... After I had been working on this a bit, I began to sense that there are a ridiculous amount of parts to build this thing. Test mounted to the frame... I'm going to leave it at that for now. I want to get back to the wheels and brakes... Be Back Later Rich
-
Hey All, I had a bit of a slow down the last three days...but all is fine with the world (not)...so back to work. I got the plumbing for the brakes finished. I had to install the lines, and then go back to add the retainers to gather the line together. I got everything tucked into the frame nice and deep. Now I don't have to dig around in there for a while. before the painting of the retainers... And after... I have now moved on to making the molds for the inner wheel hubs and while I wait for all that, I have started building the fifth wheel for the back top. Be back shortly with the...what ever is next Rich
-
GusMac, It's not only scratch work but also cutting, bleeding, gouging, scraping....
-
Hey Guys, A quick update today... The rough in plumbing is done... and it's time to put the finishing touches on the plumbing connections and leads. Be back when I get thing cleaned up... Rich
-
Very nice work!
-
Hey Betty watchers, The beginnings of the Brake Plumbing... I should have started a little sooner... Rich
-
Crazypoet, I started with the brake plumbing. What was I thinking! I sure am glad I didn't wait until later, I'd never get things into place. You are correct... "the ever-shrinking space" is right! Rich
-
Thanks everyone for tagging along... Hey You All, It's been a long week of building. I keep finding things I need to do before I install the tires. I almost forgot that I had to install the rear suspension rocker arms before, I install the plumbing, before I install the back hubs... I'm not really sure why this part of the build seemed to take so long to work with. Just a lot of small parts, and a lot of small cuts. I had several rocker arms to choose from as far as the design of the look. I liked the design of the Trumpeter kit part, and to find photos was easy. I just had to adapt the paper patterns to look like the example that I was going to build. The parts... I had to do a bunch of test fitting of these rear parts... These are the pass through collars that support this axle... I used 0.05 rod to line the openings... Punching a really big hole in the side of the frame was a bit stressful to say the least... Dry fit the entire system... A bit of behind weathering... The materials I was waiting for to build the plumbing showed up right in the middle of this chapter. But I needed to finish. I can now get back to my brake line plumbing, I hope... I'll be back when I figure out what I'm doing... Rich
-
Hey All, Tire dressing went quickly. Now just the back hubs to build. Be Back Later All... Rich
-
Hey Guys, I was a little bored with working on tires so I took a break and built the Hot Water tank and Pump for the Internal Cabin Heater. I really had a hard time finding any info on this item. The Model-Kom kit did not include this item. The Trumpeter kit did not include this item. The E63 kit was the only kit that addressed this issue. However I still had no photos of this, so I just sort of went with what the E63 model had described. The build... I guess I'll go back to working on the tires and the back hubs. More photos later. Rich
-

Hasegawa fw 190 A8 Walther Dahl JG 300
RichO replied to coolboxx's topic in LSM 1/35 and Larger Work In Progress
Nice job on the added details. -
Nicely done. Waiting to see some scratchin'.
-
Hey, Thanks everyone for getting me over a thousand views. I've been working on tires this week. I needed to order some more supplies, so brakes are on hold for now. I had a bit of sanding to do on the tires. I wanted the treads to blend into the sidewall, remove the cast seams as good as possible, and just generally clean them up. Nine new tires... filing to get things "used"... A dirty old tire... I'll probably have the tires finished by the time the new supplies show up. I still have the inside wheel cover to design and build, so I can attach the brake lines. Be back with a pile of tires... Rich
-
Hey Guys, So while researching the brake run I discovered an interesting item. I'm guessing some of you guys already knew about this and you were just waiting for me to run over myself with the bad info. The MAZ has an Oil Brake system, not air. I have built two oil tanks, two oil pumps, two oil filters, and an actuator. I also ran across a MAZ factory oil run layout schematic. (for some reason it wont let paste it). I used the MAZ drawing and then I drew my own oil run to scale with my build, using several photos from the junk yard to see where and how the line go. Now that I have the proper info, I have to figure out where the lines are connected on each item, and how to render the line connections. At this point I'm spending more time researching than building. Be back later when I get things worked out. Rich
-
Hey Guys, I have now completed with building the braking components. I felt I wanted to finish off the interior braking items, all the stuff inside the frame, before I get back to dressing the tires. I now have two air tanks, two air pumps, two filters, and the brake actuator. The filters... The two Air Tanks... The two pumps... Lunch... The Brake Actuator... All together now... The install of these items is really straight forward...and then the plumbing between the items... Be Back Later, Rich
-
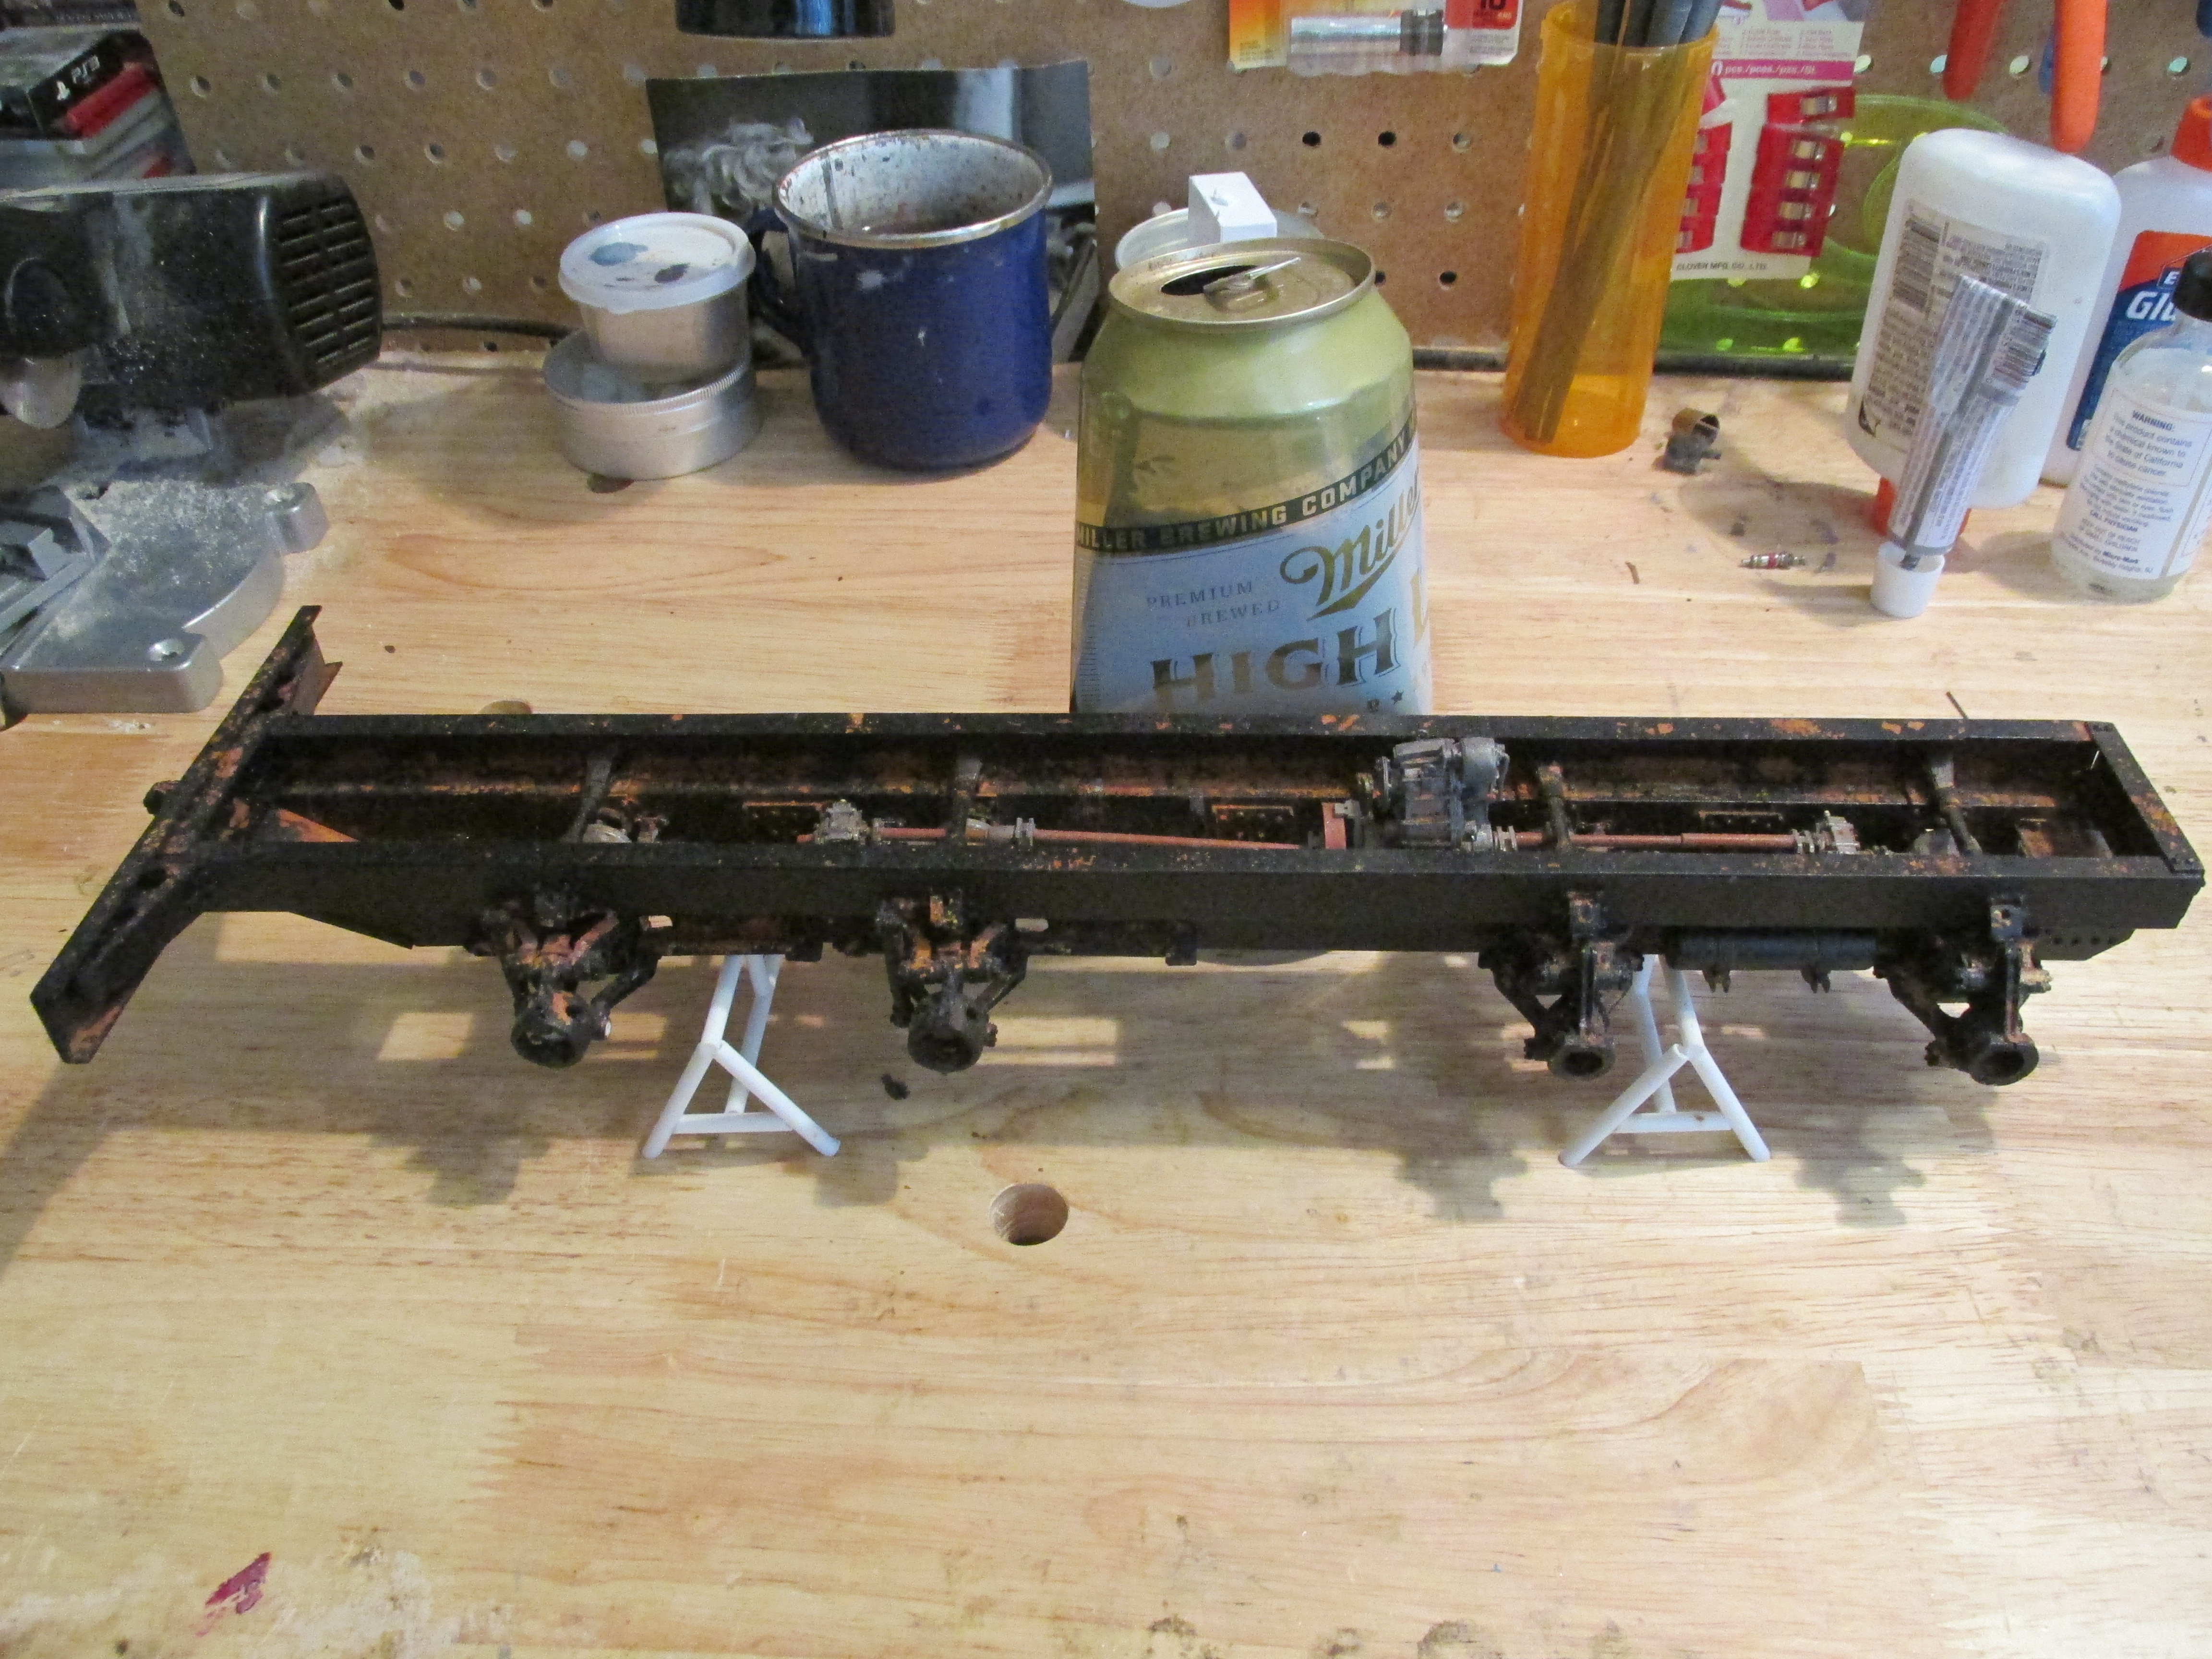
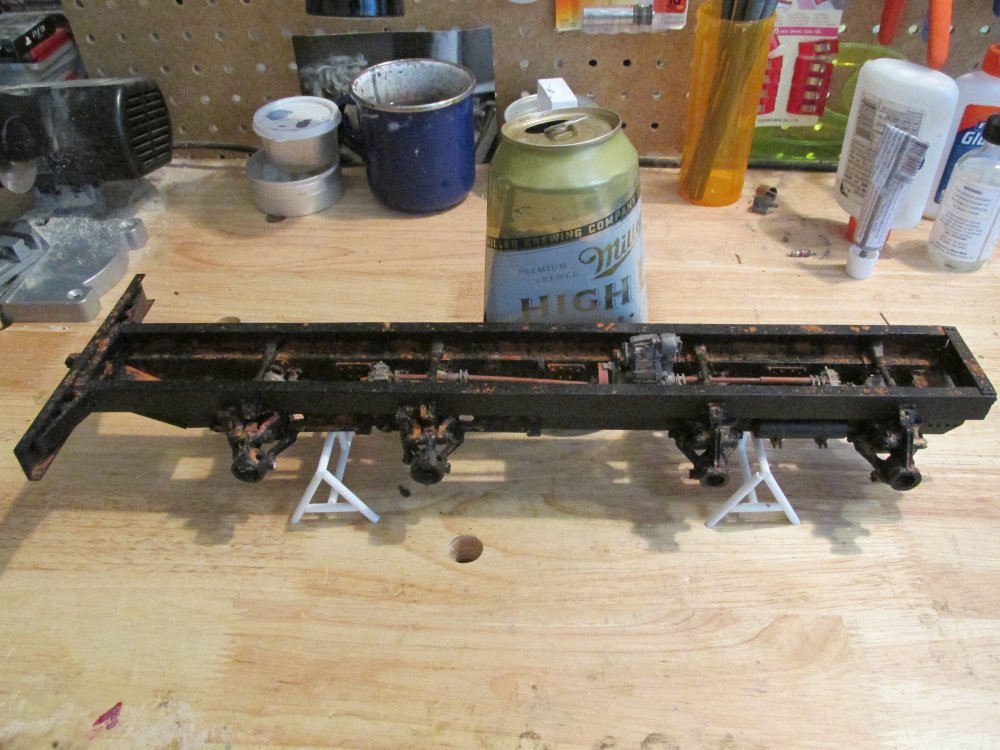
Hey Jeroen, I finally got around to placing a beer can behind the MAZ, the LSM way. Just to show the size... Rich
-
Hey Guys, So I left off with priming the air tanks. I managed to get them installed and weathered. Altho I might make things a bit dirtier under the frame. The install was easy enough. The air lines were in a cramped space, but I managed to get everything secured. That was fun. OMG! The pumps had way more parts than what they looked like they should have. I spent a week just on these two items...what a slow process... Parts... I had to get a little creative again about the pump body. My striped straw ( I have about an inch left to work with) on the inside and a clear straw on the outside, to get the correct outside DIA. Two new air pumps... I next have to build the Moisture Separators for each pump. I have to work on the Braking System before I can install the back side of the wheels. Once the wheels are in the way, things get real tight space wise. Thanks for watching... Rich
-
Hey!, This is sort of a short report for today. I have been spending most of my time dealing with molds and castings. In between all that i have working on the braking system and trying to find photos of the braking components. I started with building the air tanks... The tank mounts... I used a bit of clear straw for the main tank body... New air tanks. I'll run the lines when I get ready to do the install. While my mold are drying I have also started working on the compressors for the line and trying to find photos of how the line is laid out. I have finished with casting the wheel fronts. I have some cleaning up to do, and then these are ready for install. Thanks everyone for watching, be back later Rich
-
OK! That's it. I now have you guys up to date with the postings I have done. You are on the same page as I am with this build. I'll be back in a bit with more work on the tires. Thanks All for looking, Rich
-
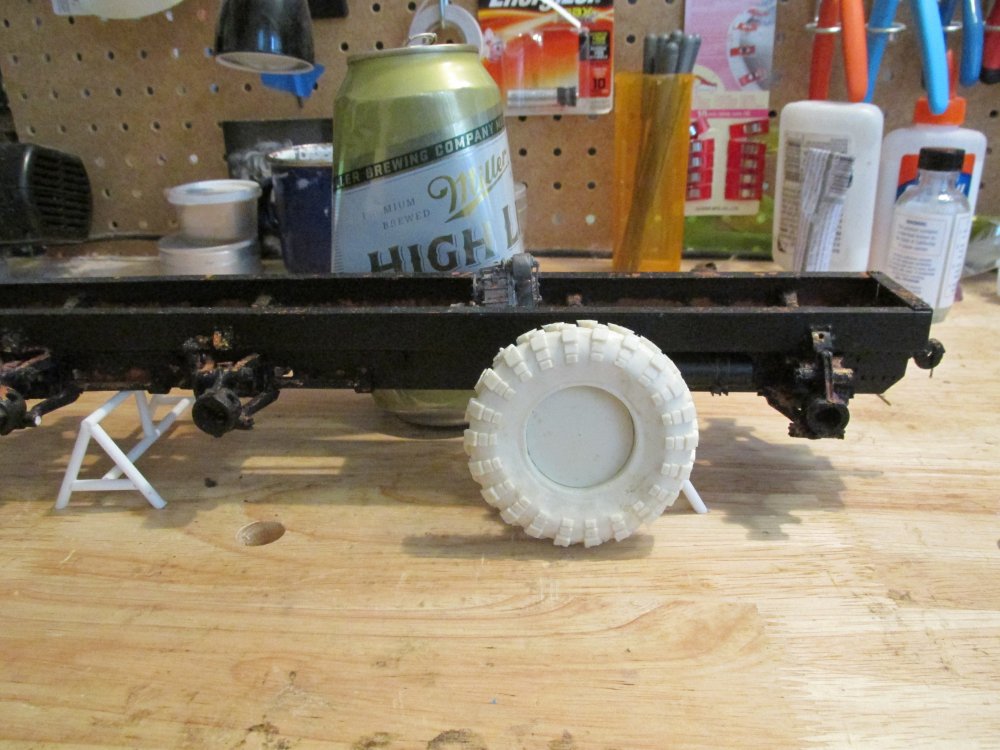
Hey Guys, Round two went great! I had fresh supplies to work with, and I spent a bit of time getting the mold built correctly. A new resin tire...everything looks great. I'll be back with more later...Thanks All, Rich
-
Hey Guys, So I got some new material for round two of casting the tires. I didn't get to work on the build over the weekend, but yesterday and today I have built the wheel. Well half a wheel anyway. Be back with round two... Later, Rich
-
I have finished with the drive axles. These little things took a bit of time to build. The nature of the parts were that I produced each one at a time. Just a lot of filing and finishing. And don't ya know, when I installed these, they can't really be seen... The parts... Eight new Drive Axles... Once I got these installed, a person barley notices 'em... So that's the current state of affares with the frame ...On a different front... I attempted my first mold for the tires...I poured the rubber at 1:00 in the afternoon. I went to bed at around 9 pm. During that time all looked well with the mold, no leaks and all the rubber was still in the mold. I got up in the morning... It took me about an hour to clean up the mess...I ended up with this... I spray varnished the heck out of the original, to the point that the rubber came off with some mineral spirits. It took a bit of time to clean, but I'm ready for round two. More photos to come... Rich