Artful69
-
Posts
1,225 -
Joined
-
Last visited
Content Type
Profiles
Forums
Events
Gallery
Everything posted by Artful69
-
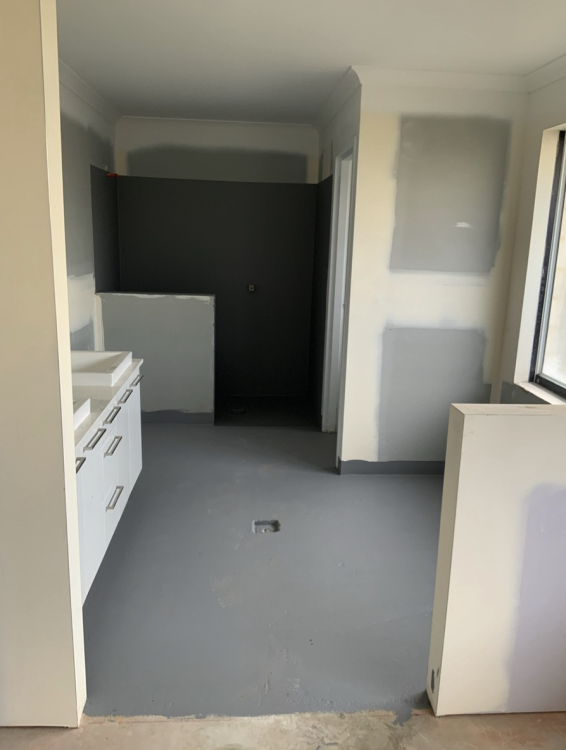
Well … we don’t have Home Depot (Despot 🤣🤣 - I saw what you did there!) … but we do have Bunnings … I will have a go at most things and am reasonably patient … getting epoxy right though requires skill - and if you mess it up there’s no going back!! DIY painting though?? I can do that easy!! I just needed guidance from Dulux as to the correct product. Gas powers the HWS and the stove top … electricity powers the oven and everything else The Dulux expert walked me through what I need to do … so hopefully no peeling paint - though I’ve been advised that theres a 7 day curing period after the top coat Rog
-
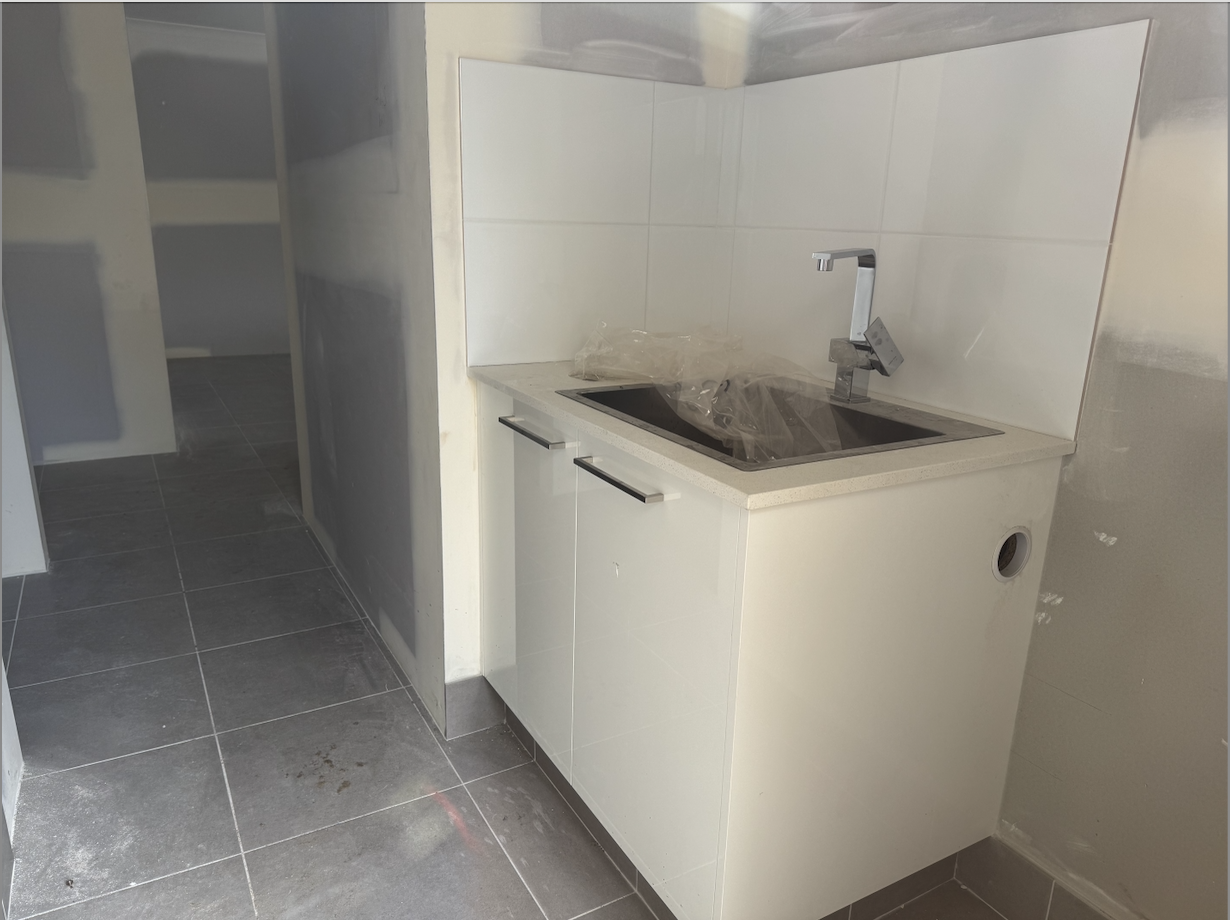
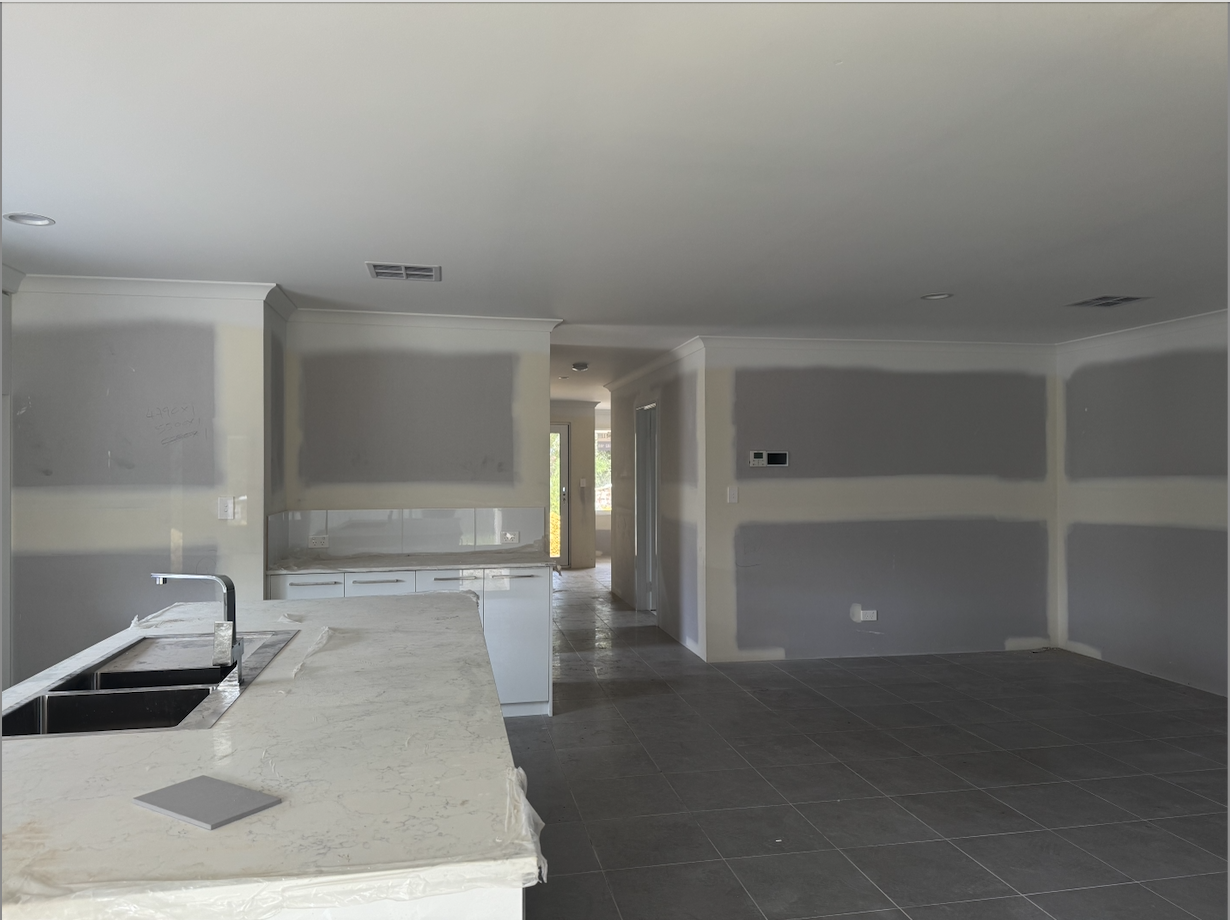
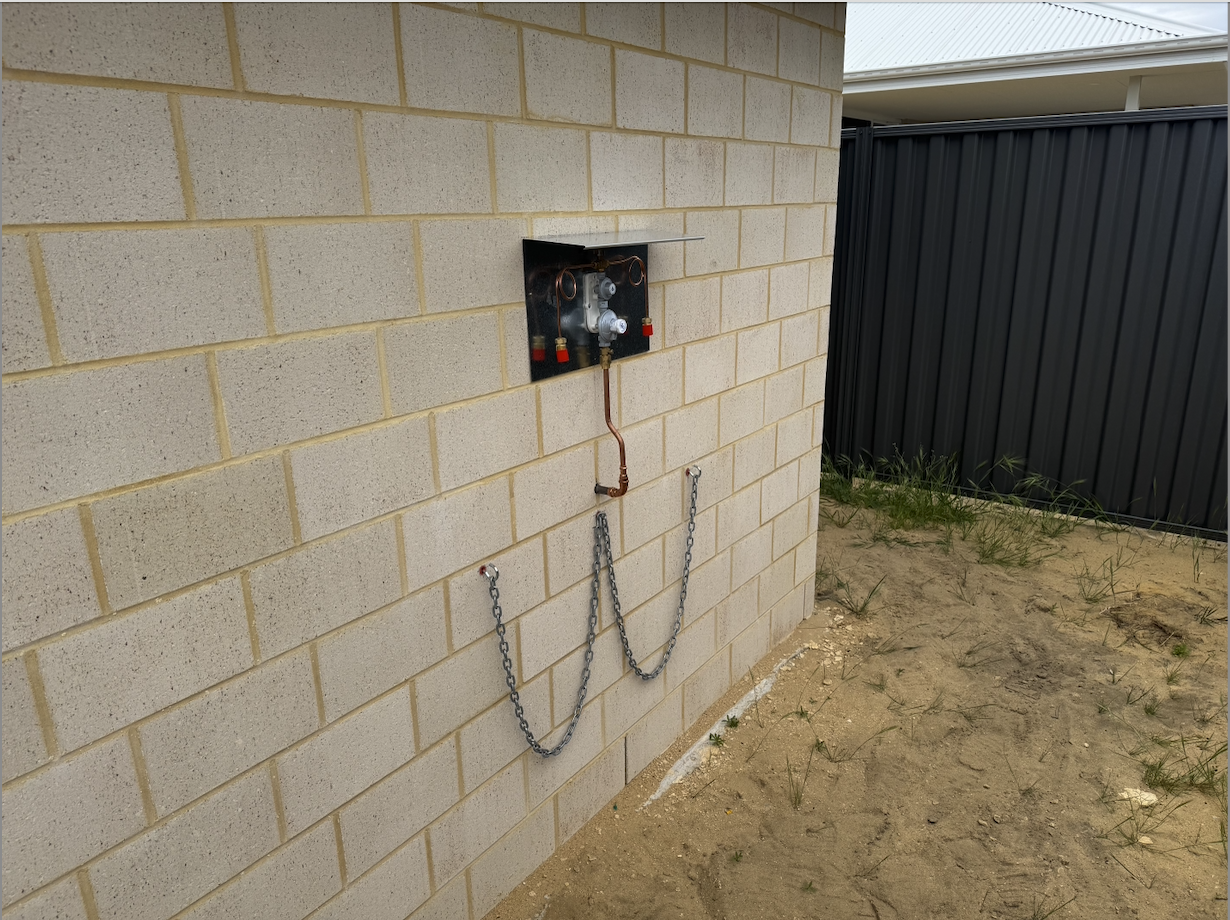
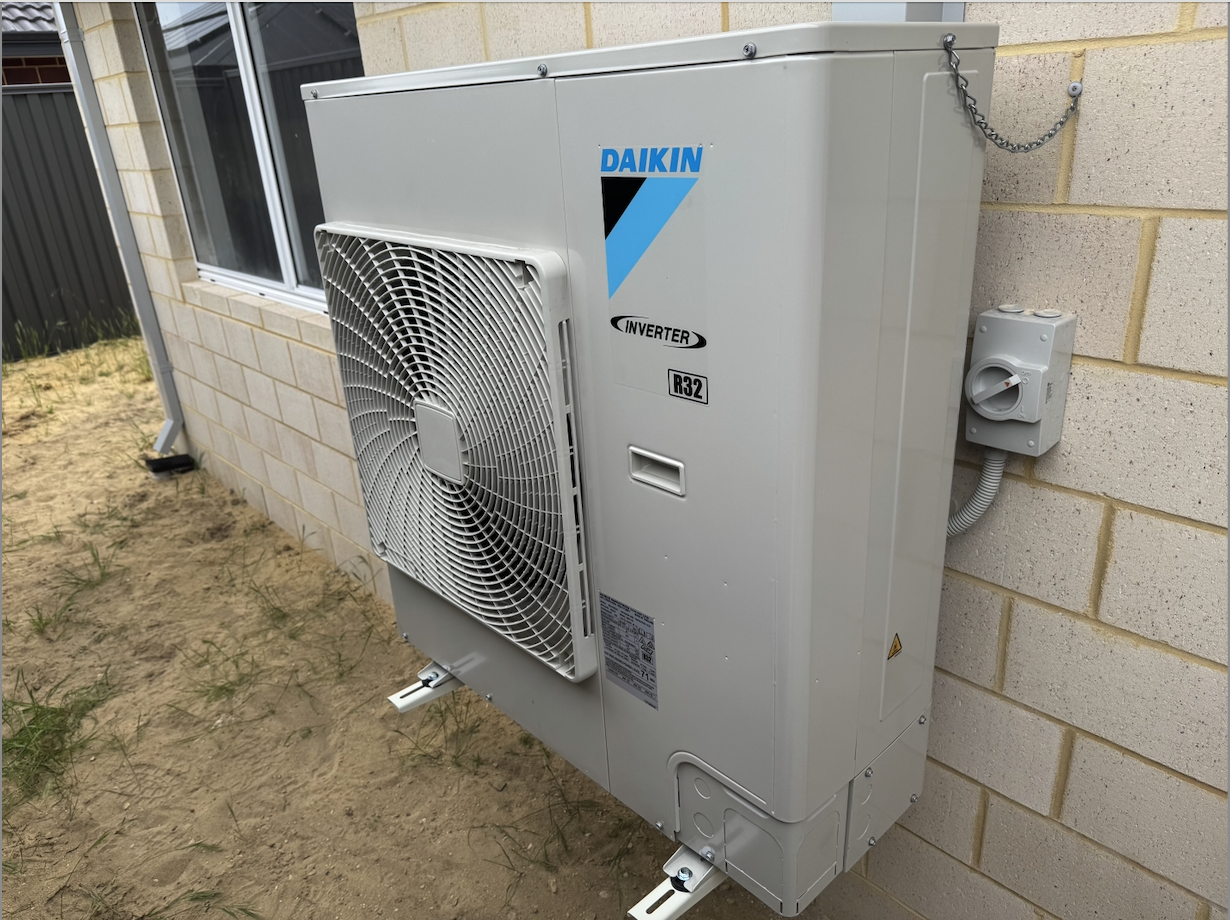
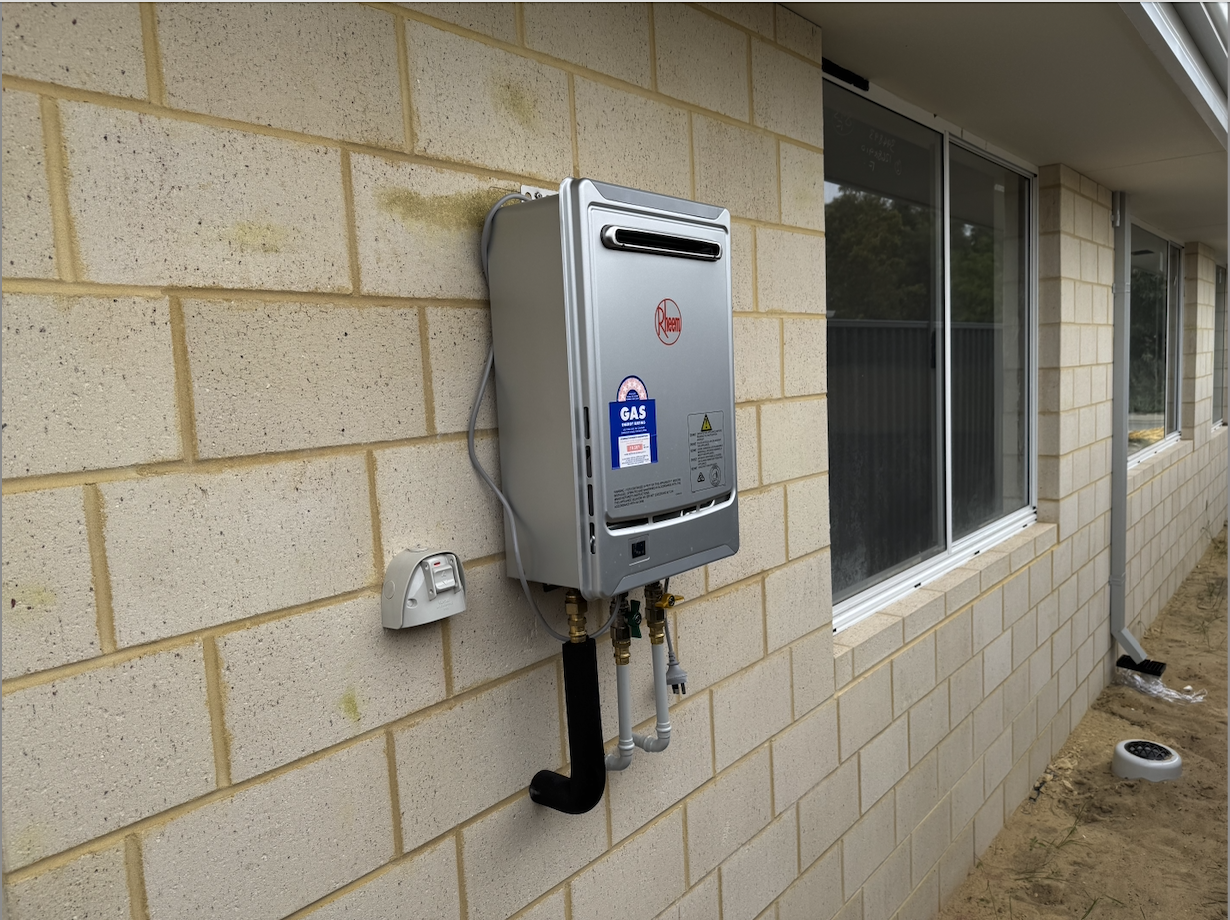
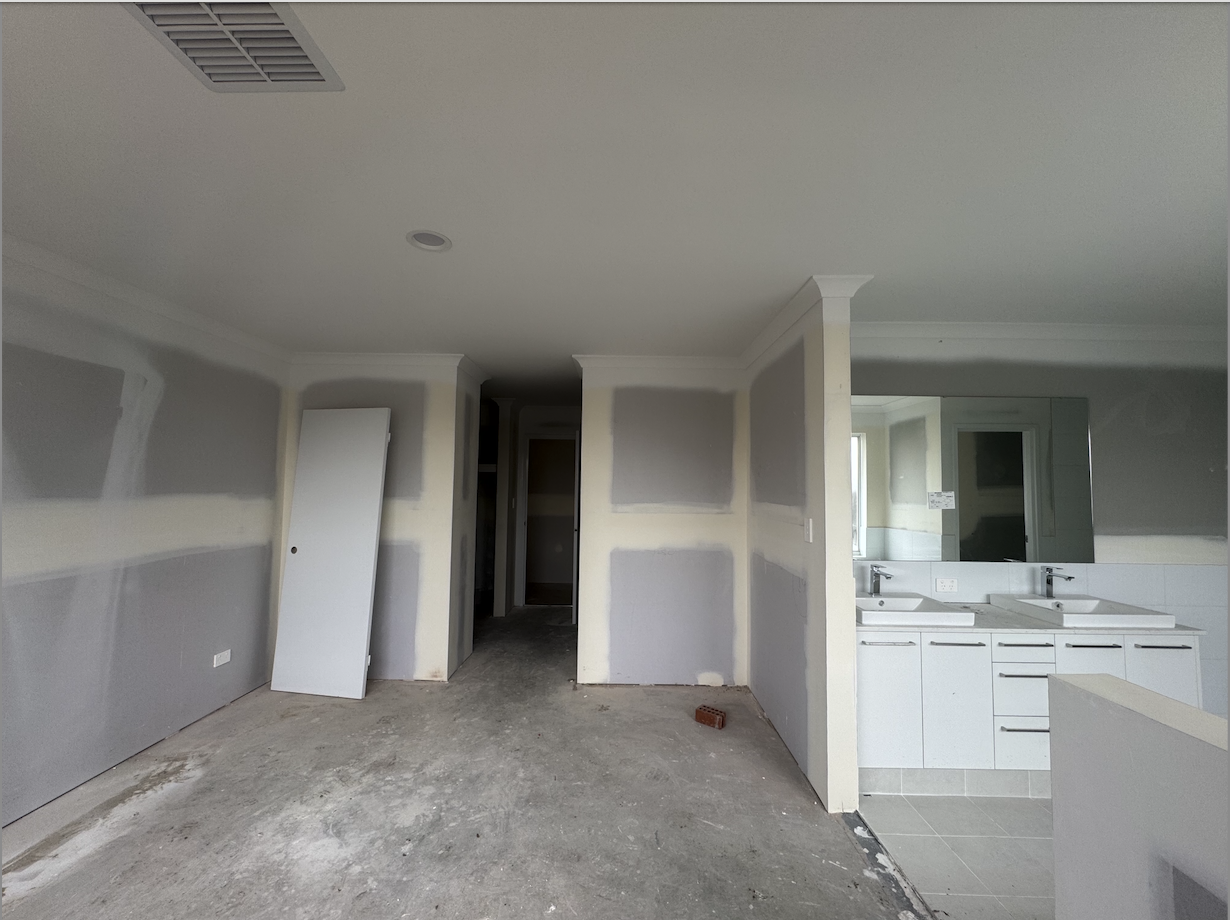
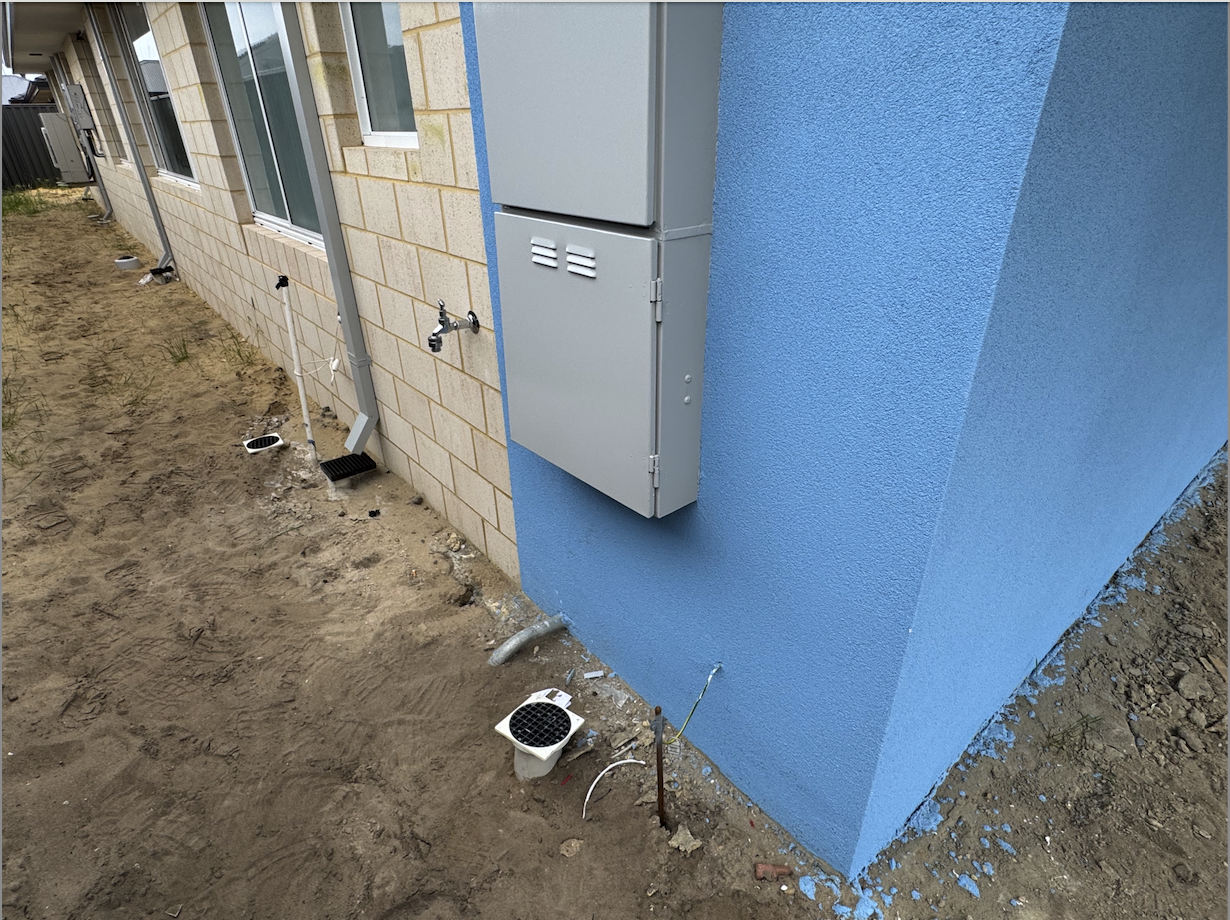
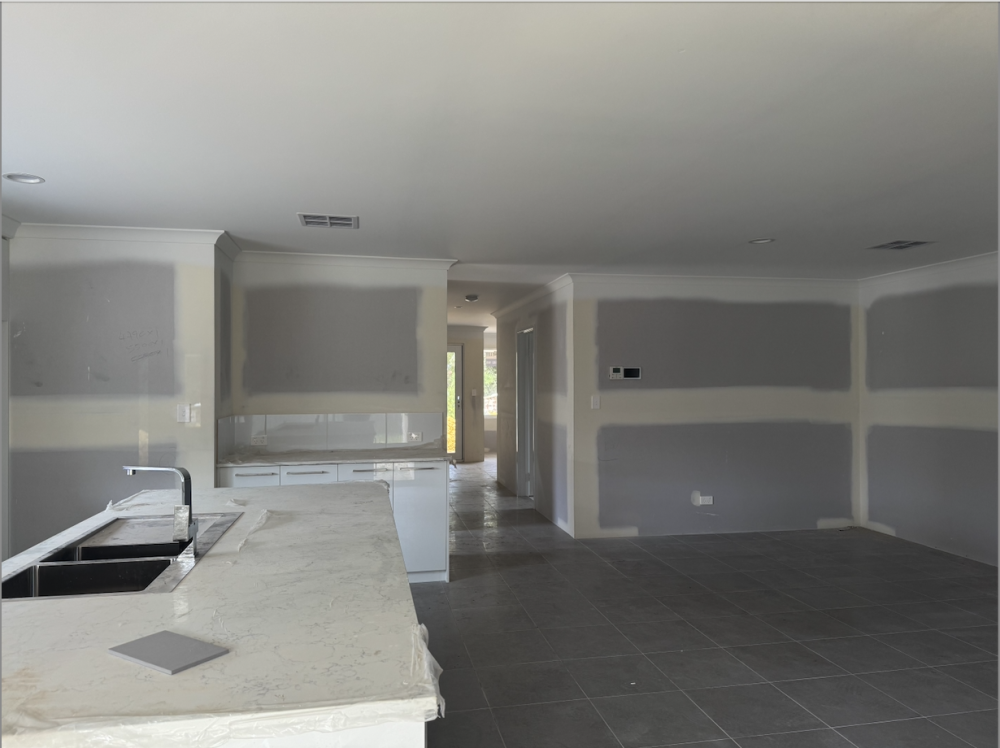
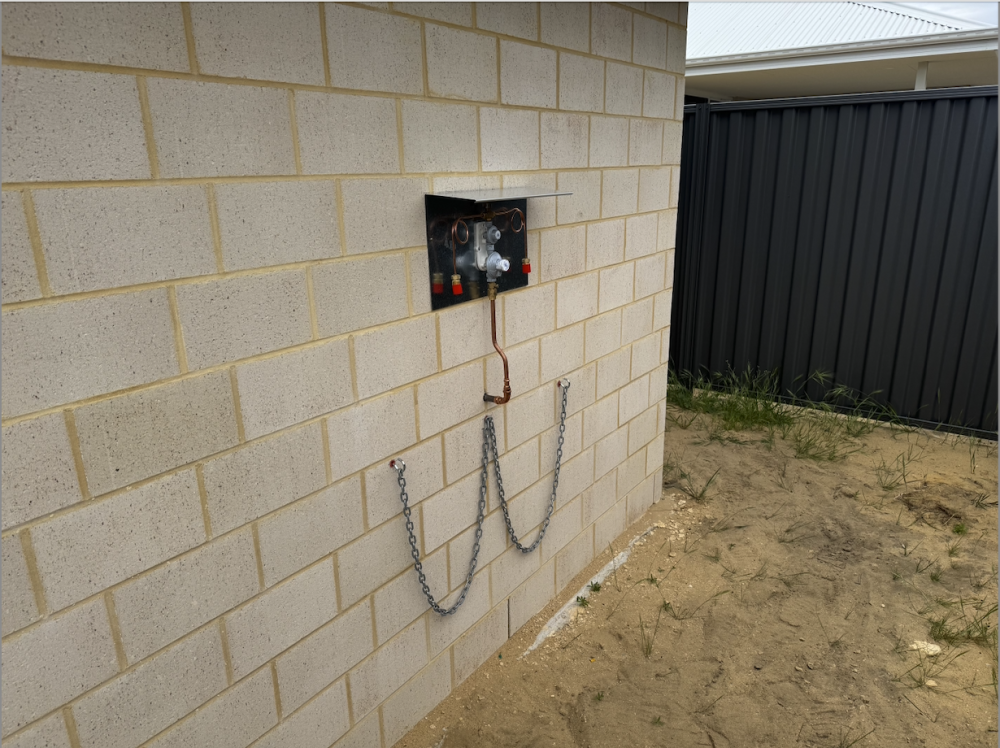
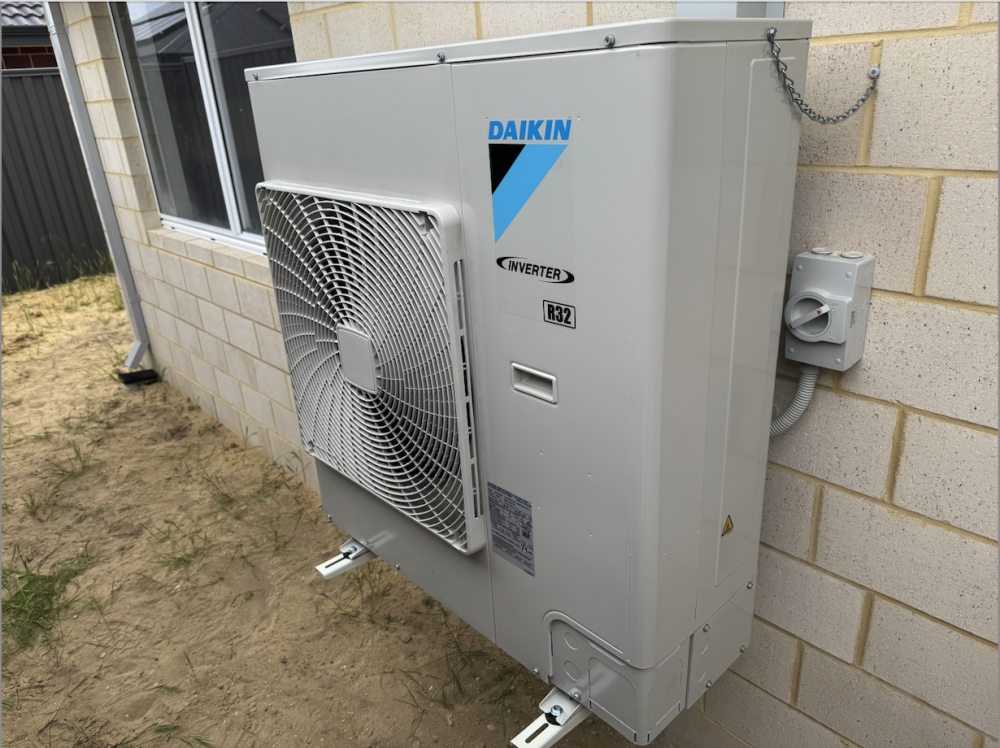
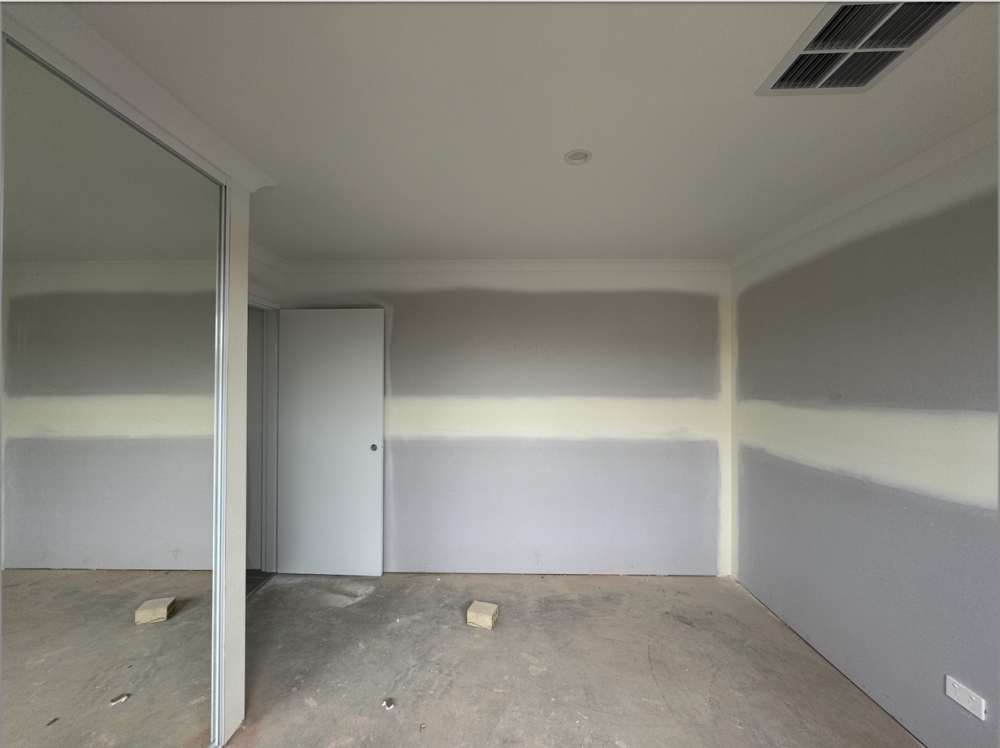
Hey all ... Just back from getting engaged in the Philippines ... I took another visit down to the block ... and there's some subtle changes ... Before the update, though ... just answering a question: I was ... and then the outrageous pricing had me backtracking very quickly!! It's a painting job now! _________________ Rocking up ... there's another dump of brickie's sand at the front ... and it's spread out waiting for paving to be started. The painting looks a little fuller and finished off. A quick look into the laundry has the tap-ware fitted A blurred photo due to the dirty glass not allowing the lens to focus properly ... but enough to show the tap-ware stove and light fittings as well as power-points etc. A clearer image showing aircon vents, light fittings and switches, power-points and the aircon controller on the far wall. External shots of the rear LHS corner where the Gas bottles will go ... and the 10Kw air-conditioner compressor and the instantaneous gas hot water heater. Photos of the rear bedrooms show the aircon vents, power points, LED downlight and the mirrored doors fitted to the wardrobes ... The interior doors also appear to be glossed now ... A wide angled shot through the Master bedroom window shows the tiling, tap-ware, power fittings, lights and aircon vents. Meter boxes painted and external tap fitted ... Toilets were also fitted but I can't get access for photos ... the evidence of them is via the empty boxes at the rubbish bin though Rog


-
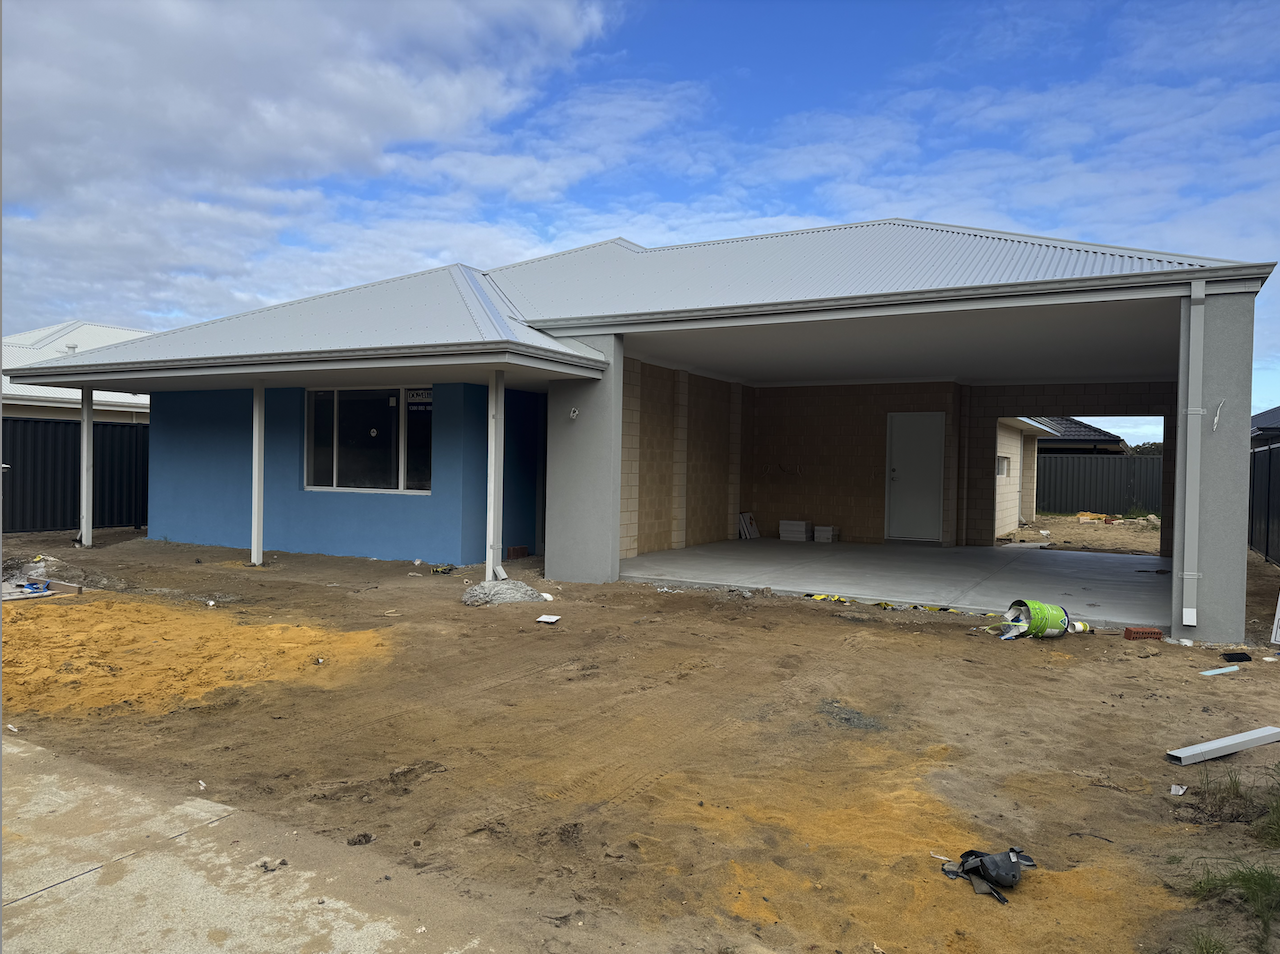
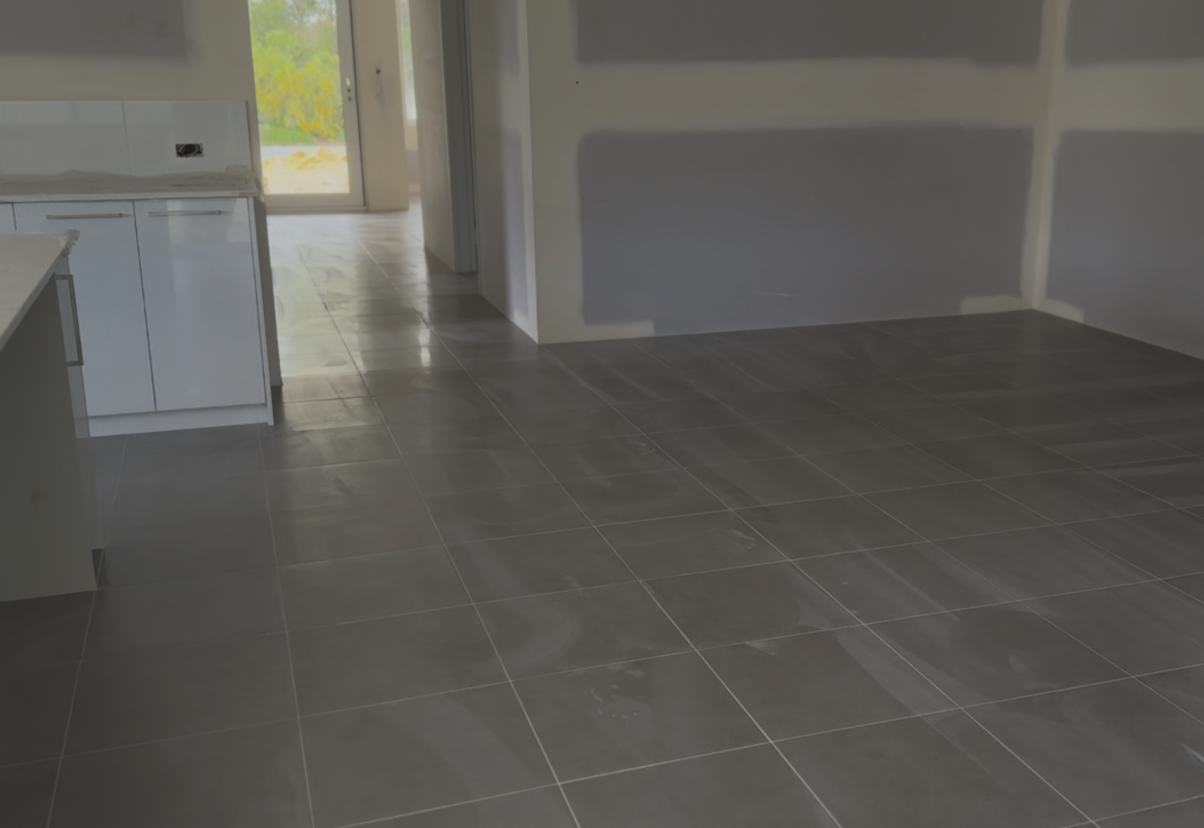
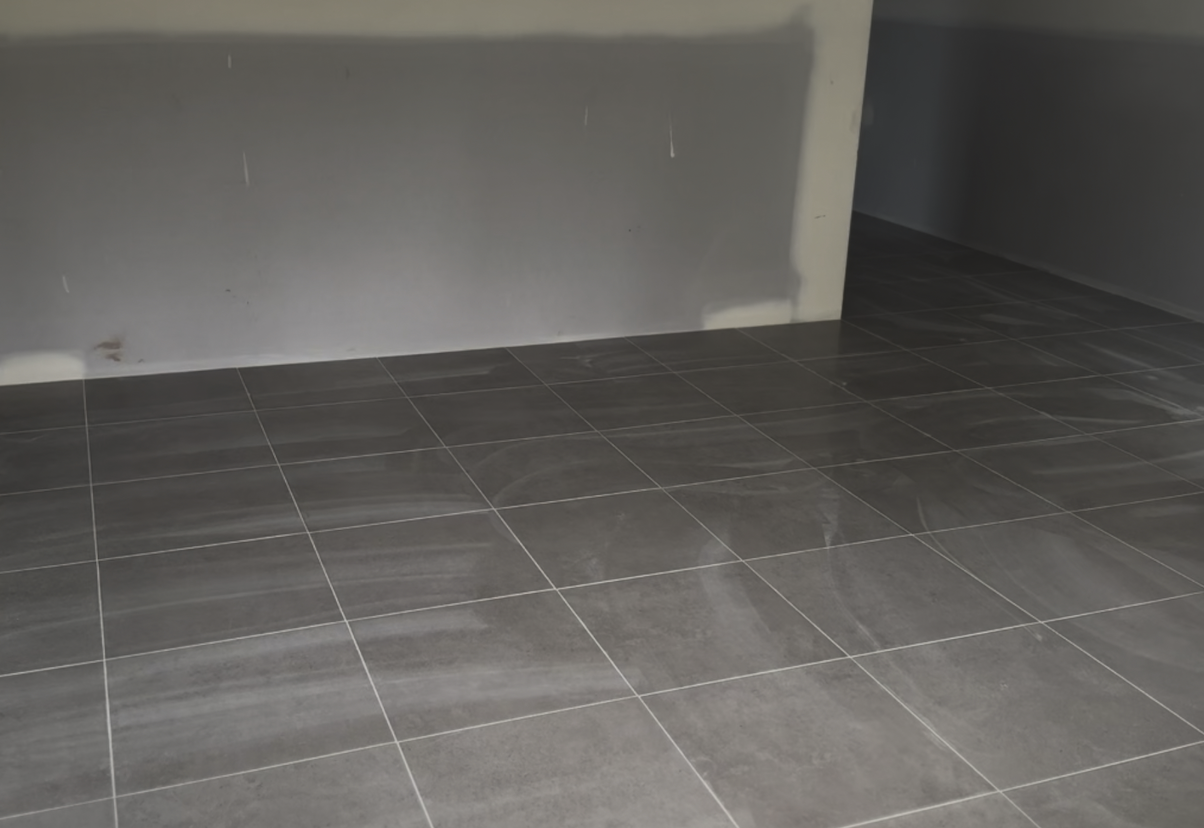
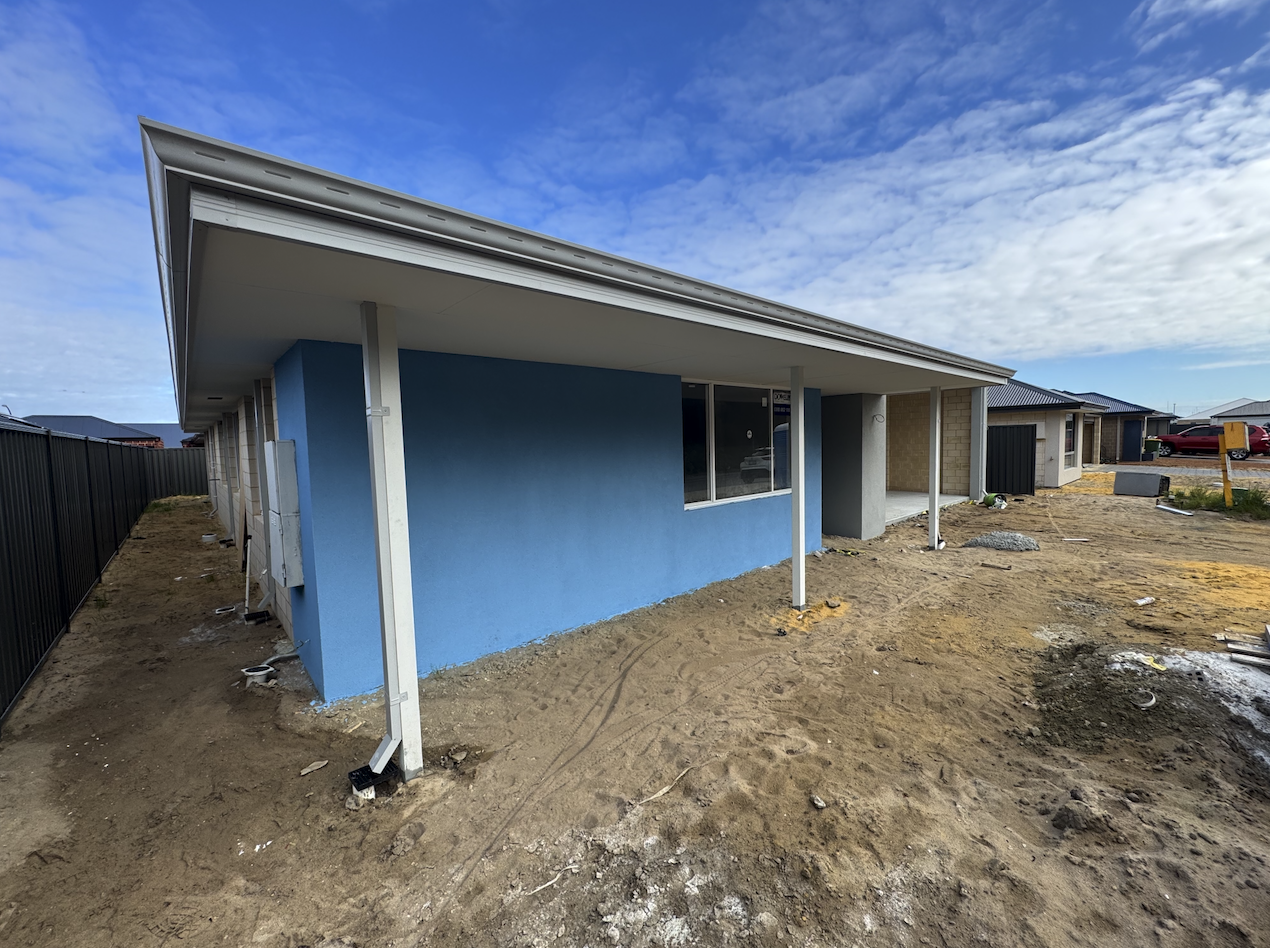
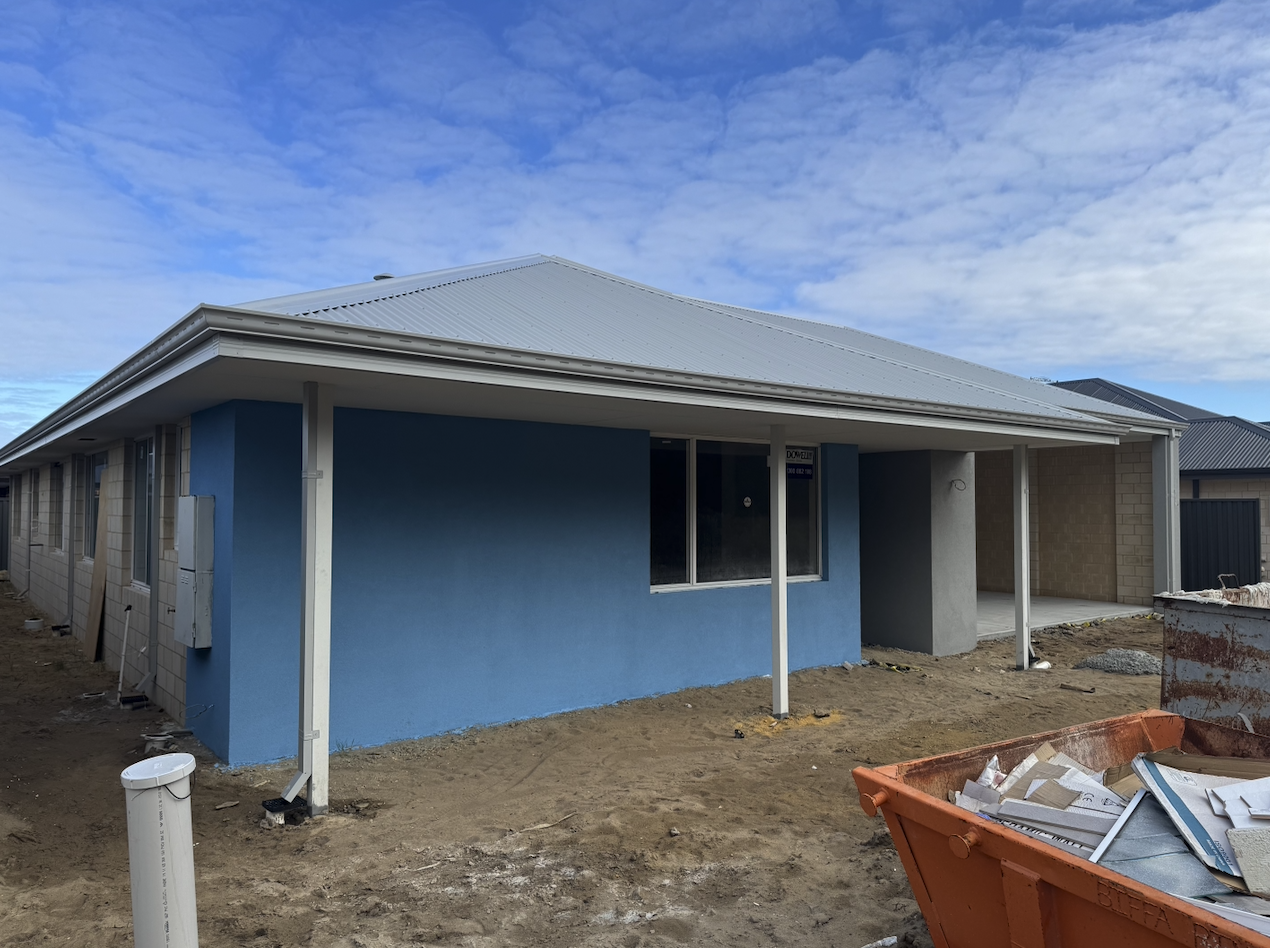
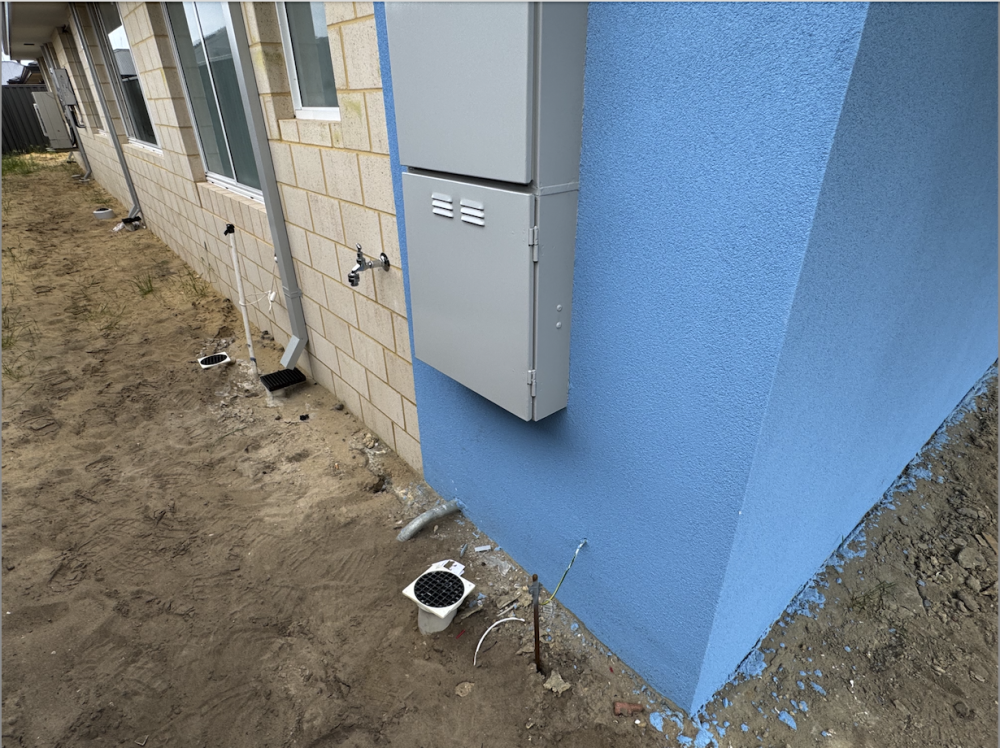
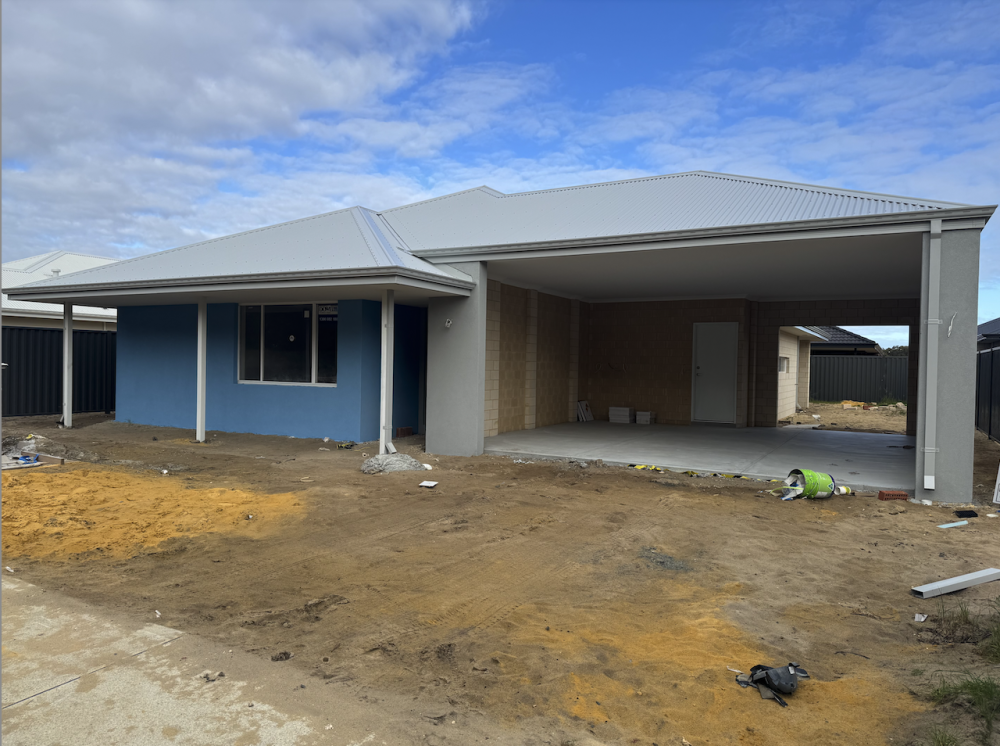
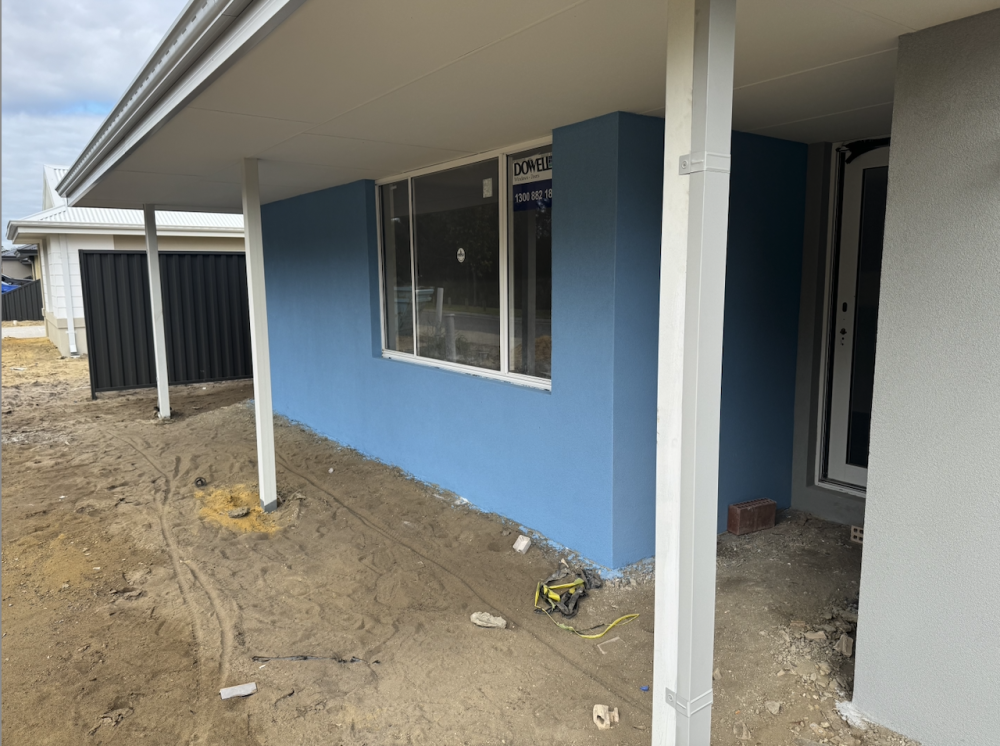
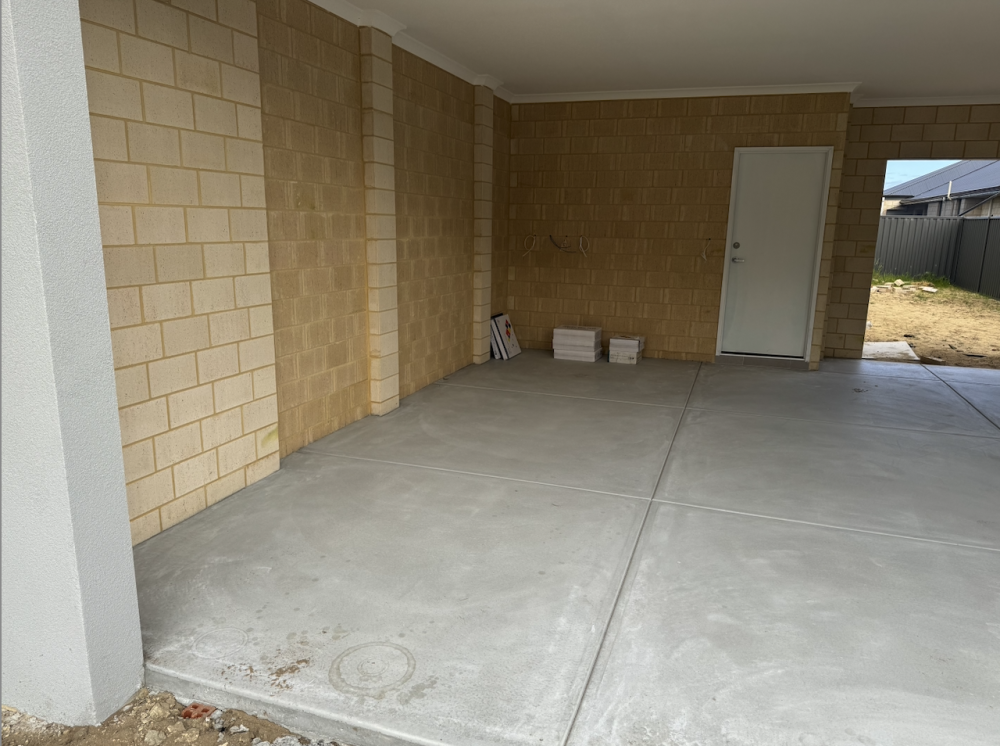
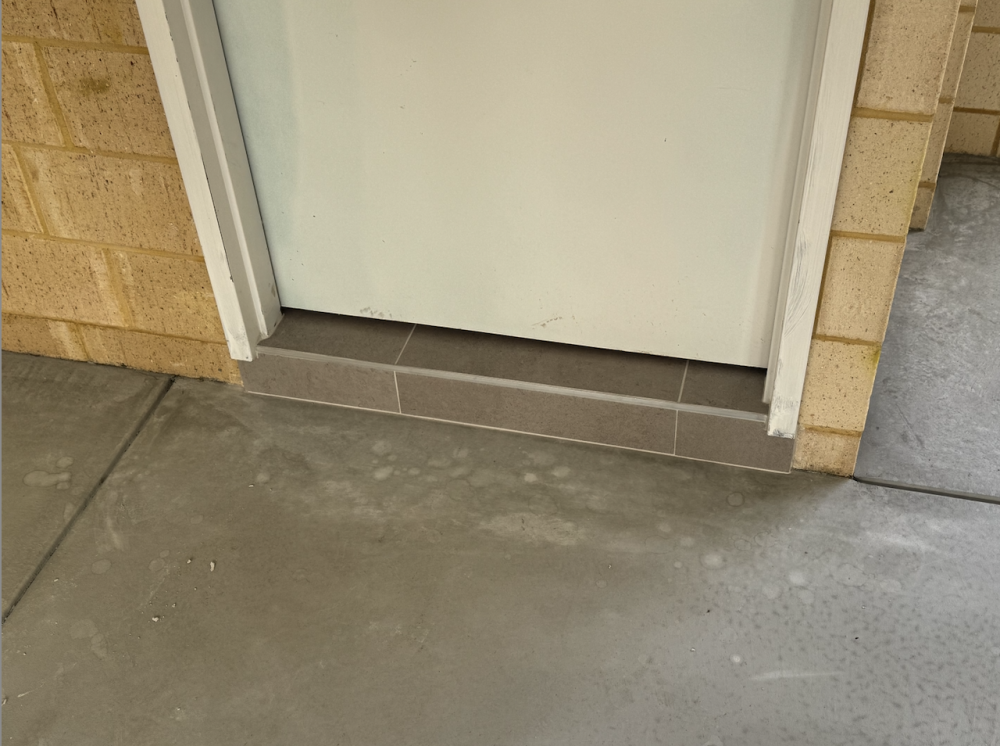
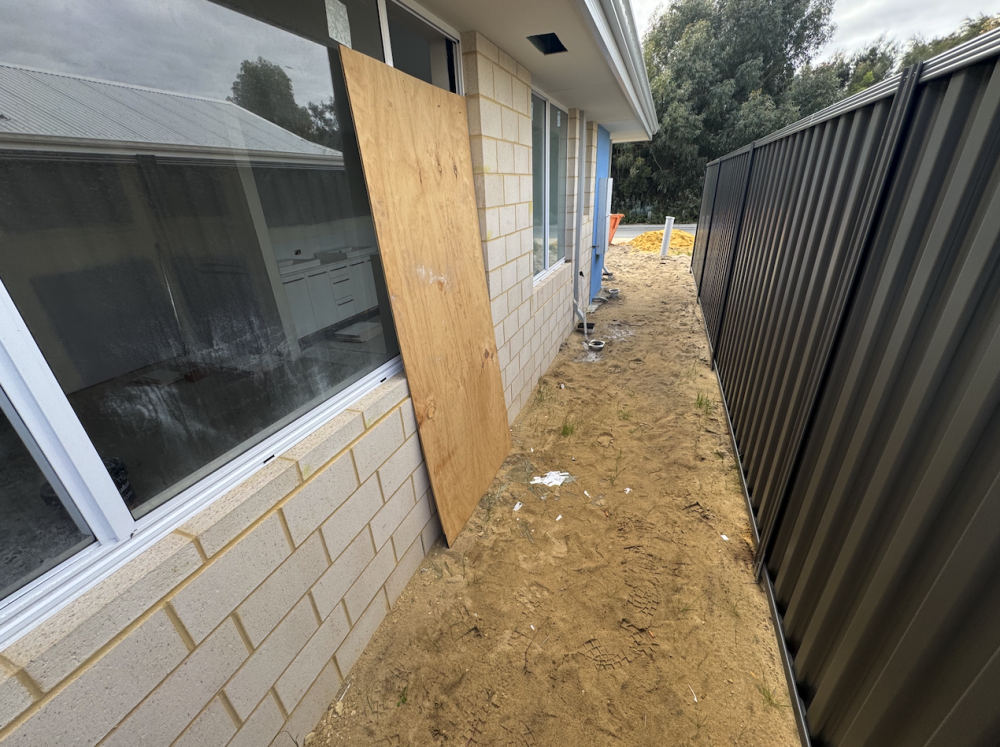
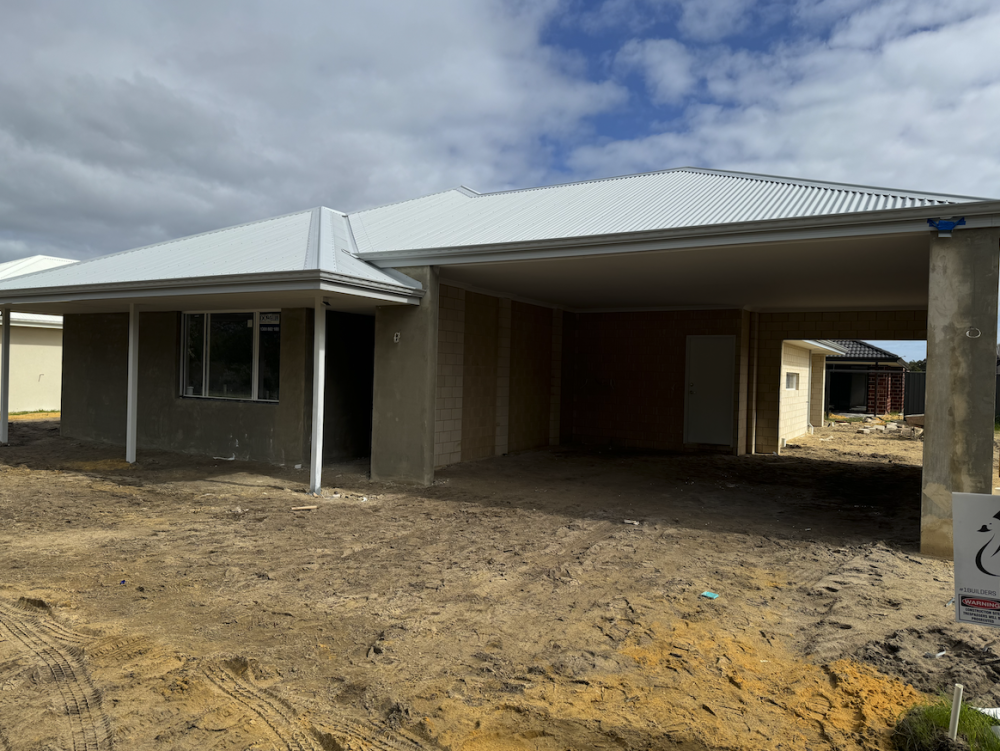
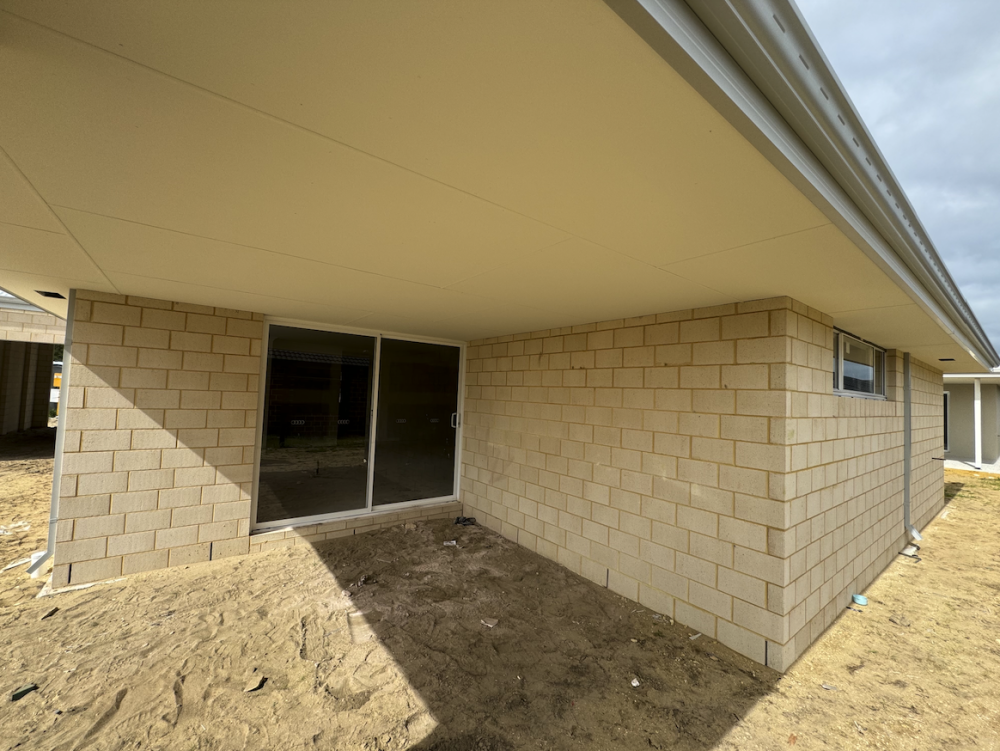
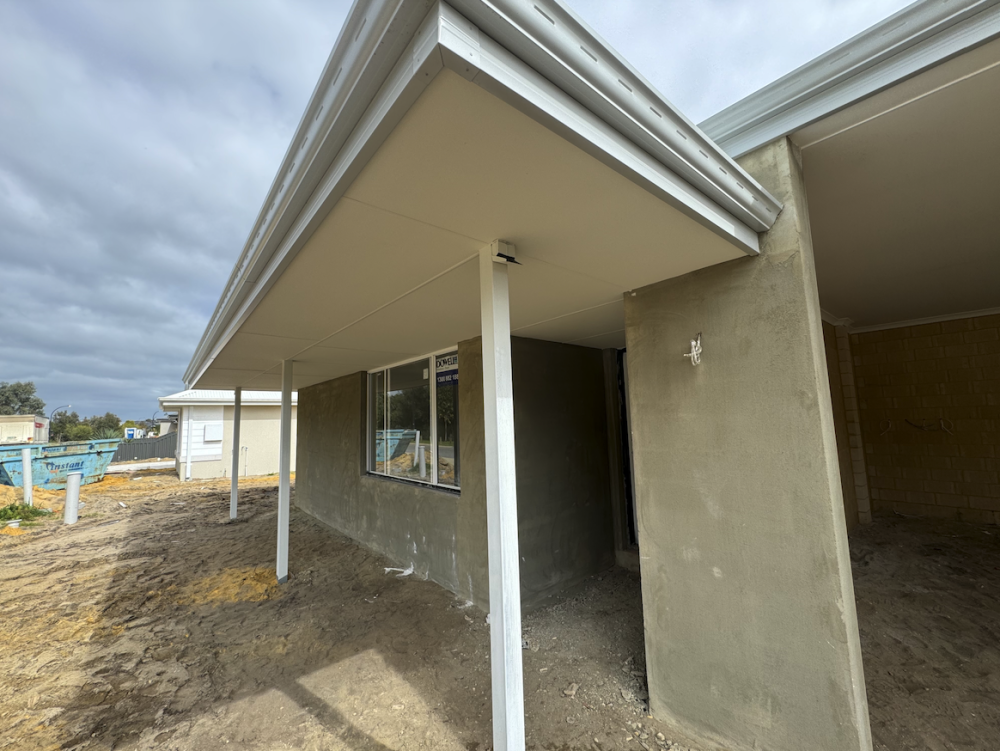
T'was the night before departure .... Well not quite - the morning before ... I took off to the block early this morning to see what had been done in the 2 weeks + since I last went down that way ... We're getting so much closer now! ... The first thing I noticed as I drove up the street was the rendering - finished off now, as the painting had been done ... and as I pulled up to my usual parking spot - I noticed that the garage concrete hardstand had been laid also ... When I originally designed the house facia I did it with "a modern take on a Hamptons design" in mind ... The mix of blue, grey and white does my idea more justice than I thought it would. Judging by the colour of the concrete, it's been down longer than a few days ... The door into the laundry shows the floor tiling done - at least in that area ... Laundry, Kitchen, Main living area are tiled with only cleanup required ... As is the study / office at the front of the building ... The Ensuite is still being done .... Though whether this was a break in - or an accident ... I don't know. The board has been pegged to the opening so it's not going anywhere ... I picked the blue colour for the render to match the sky in fine weather ... I think it does quite well ... Rog


-

New project , 1/16 can you tell what it is yet ?
Artful69 replied to Blimp's topic in LSM 1/35 and Larger Work In Progress
True ... this is some good scratch work! ... As for HB - I would have expected a Hetzer before a field gun but what do I know? 🤷♂️ Rog -
Oh this looks good Ern … taking that tinkering to a whole new level … given the shape I favour the radial … but that’s just me … Start up a You Tube channel and you challenge Mighty Car Mods!! 🤣 Rog
-
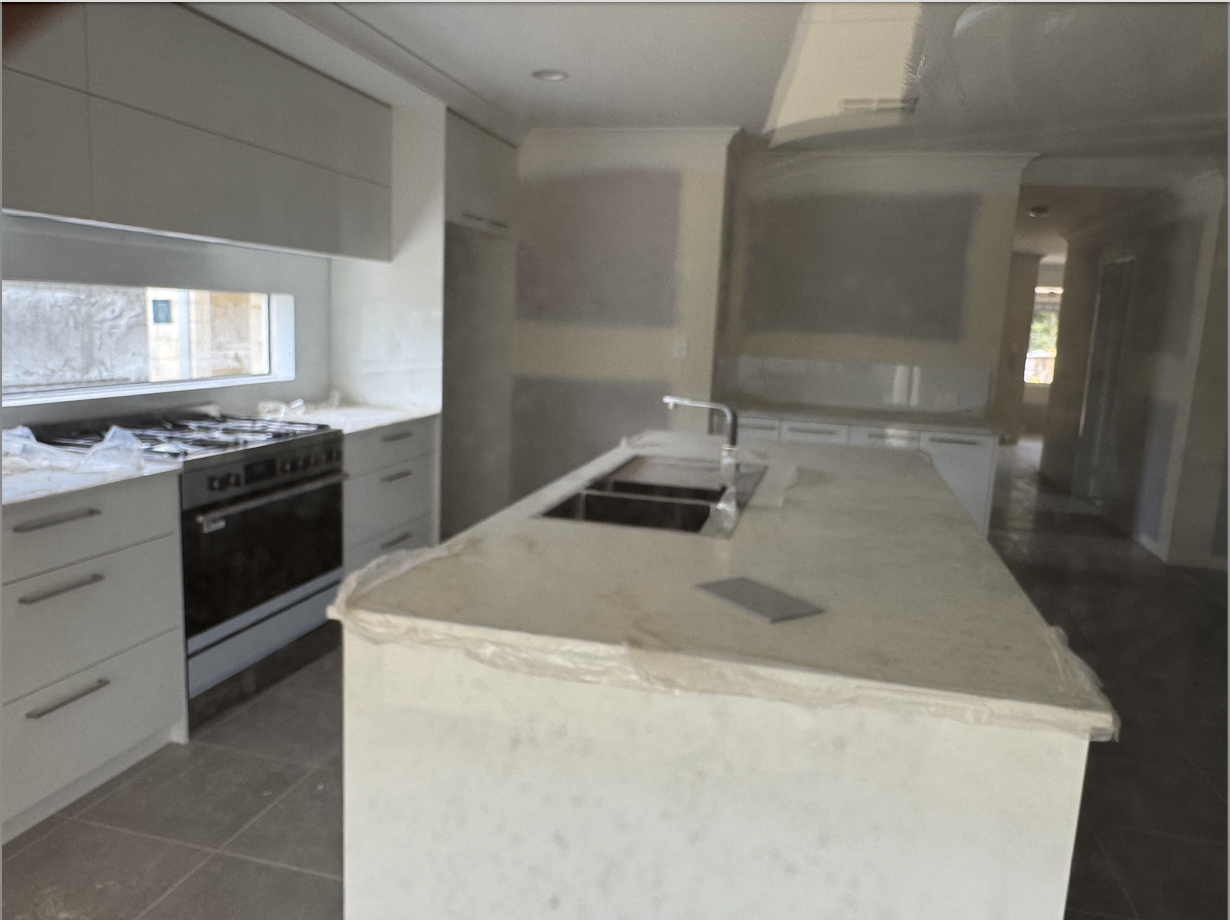
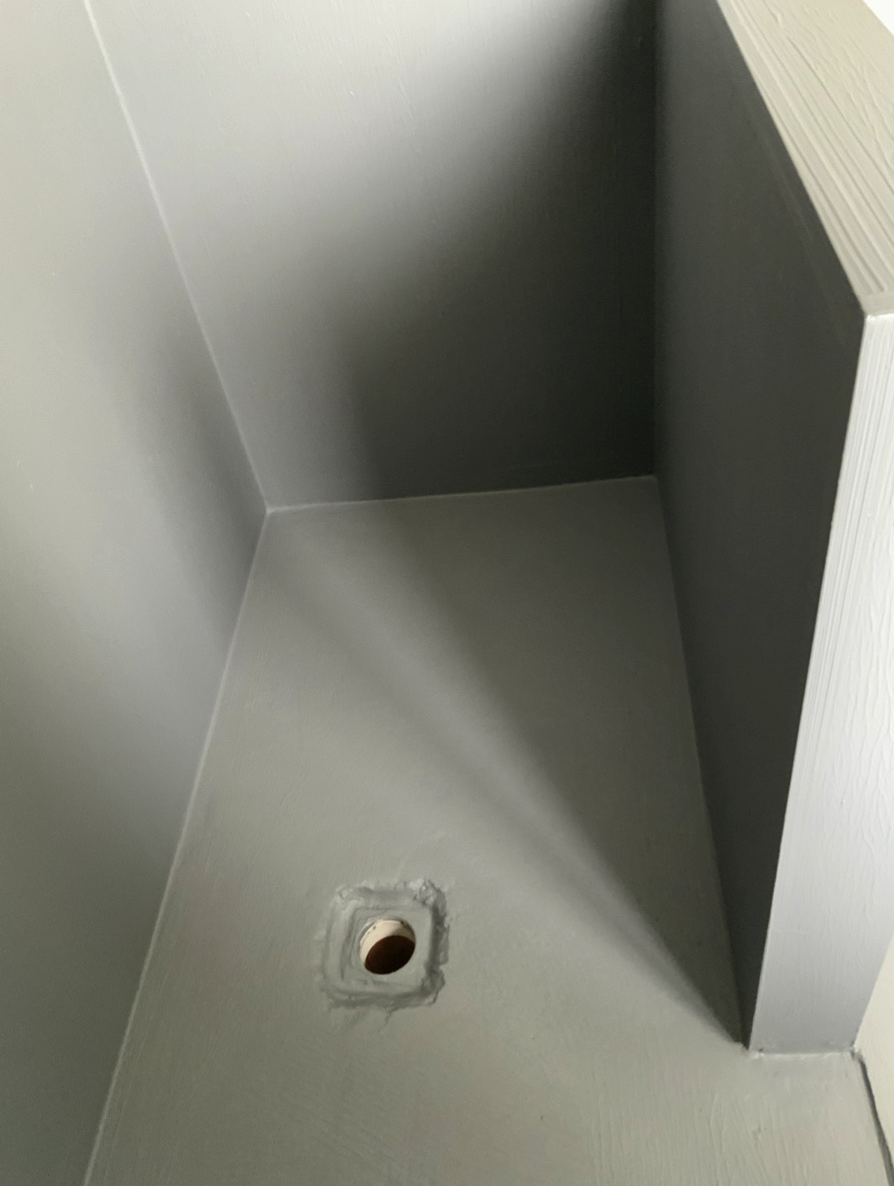
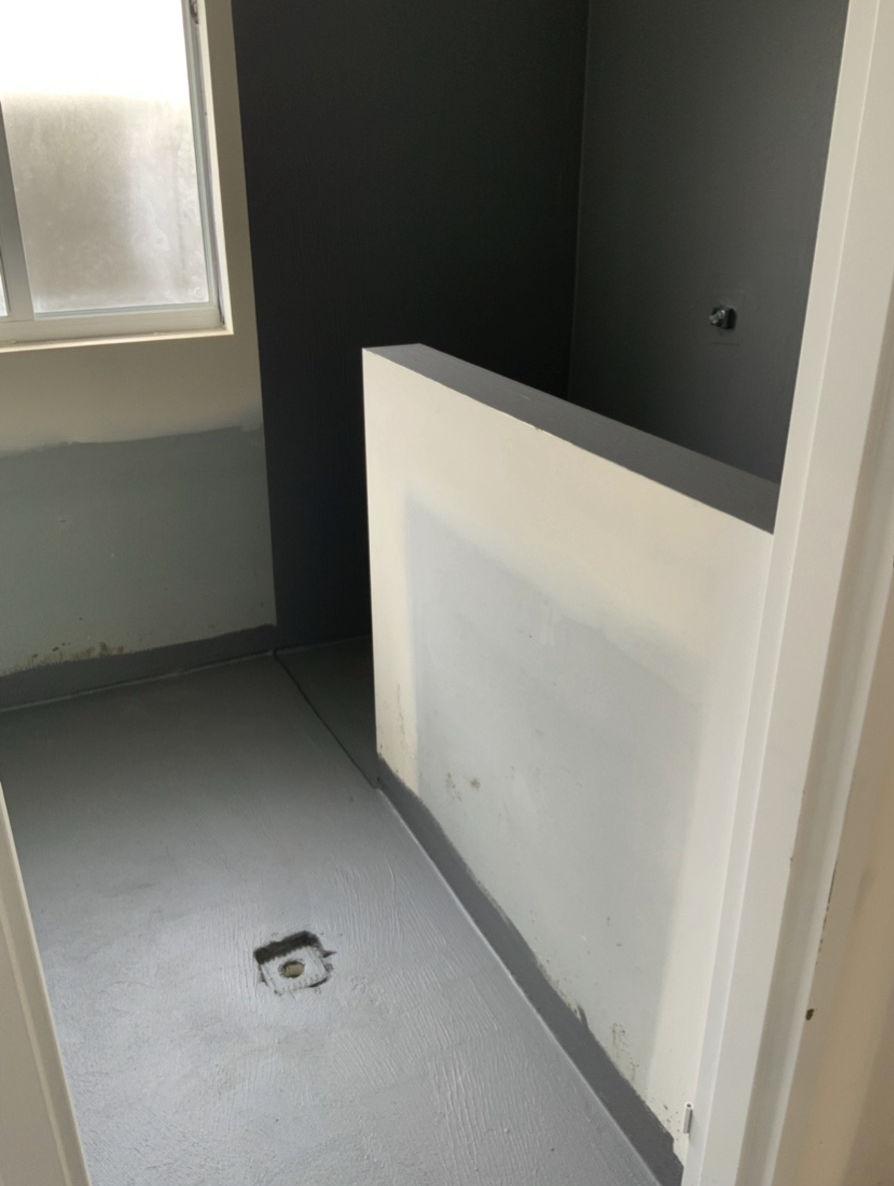
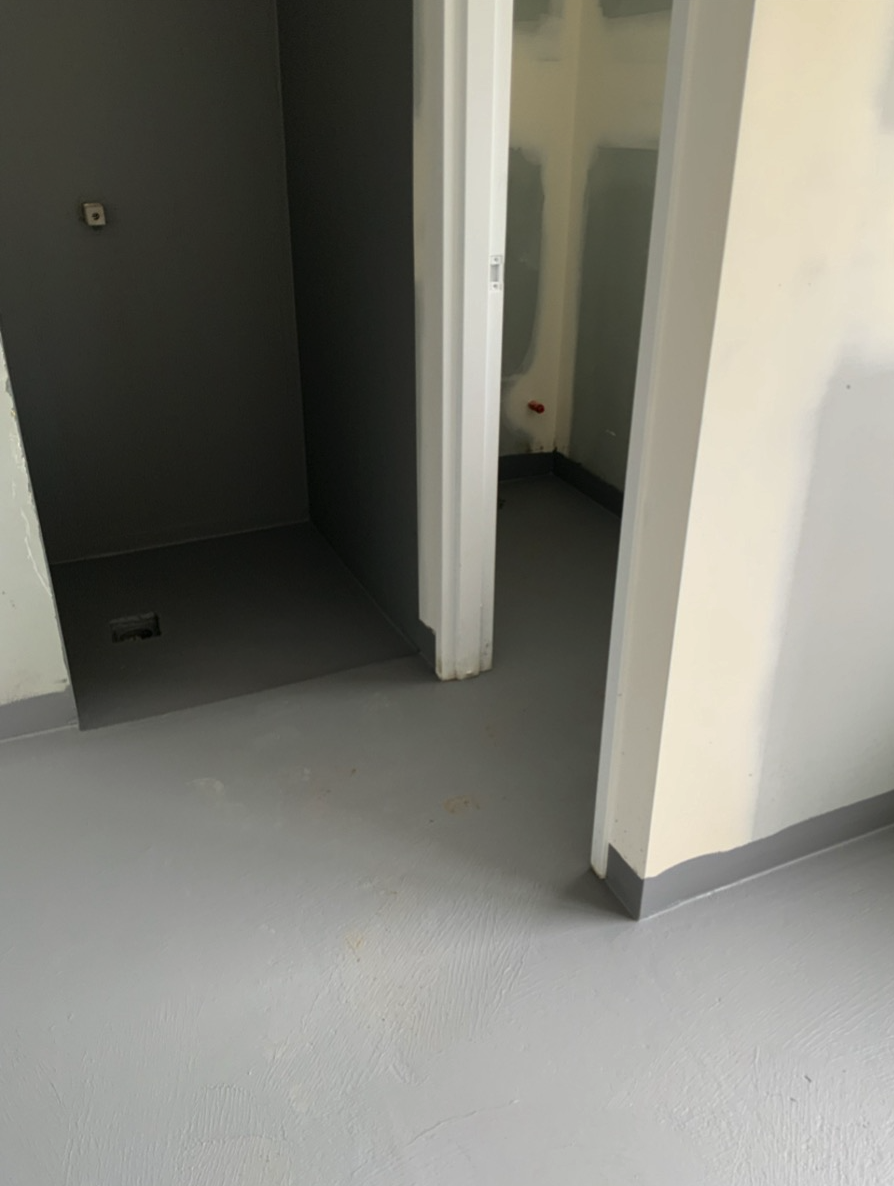
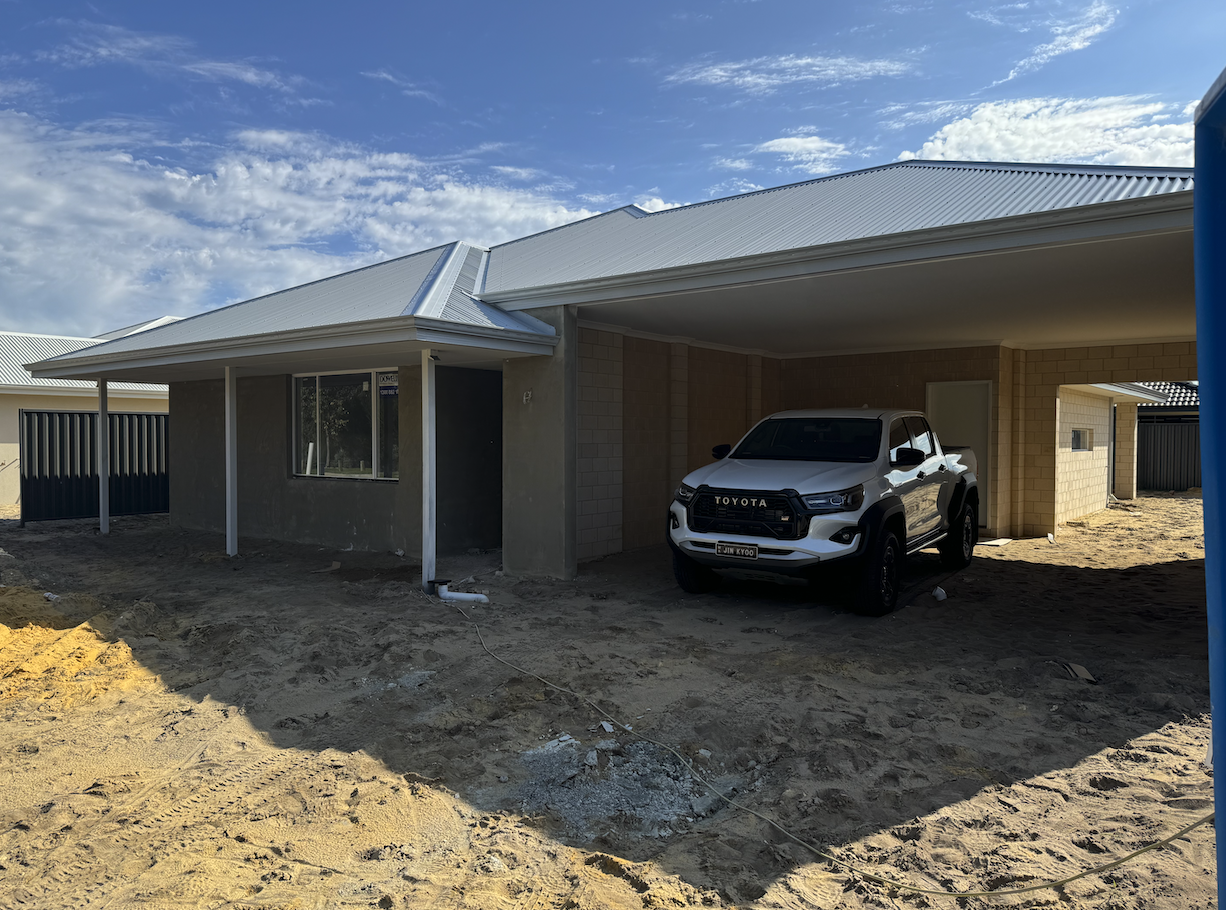
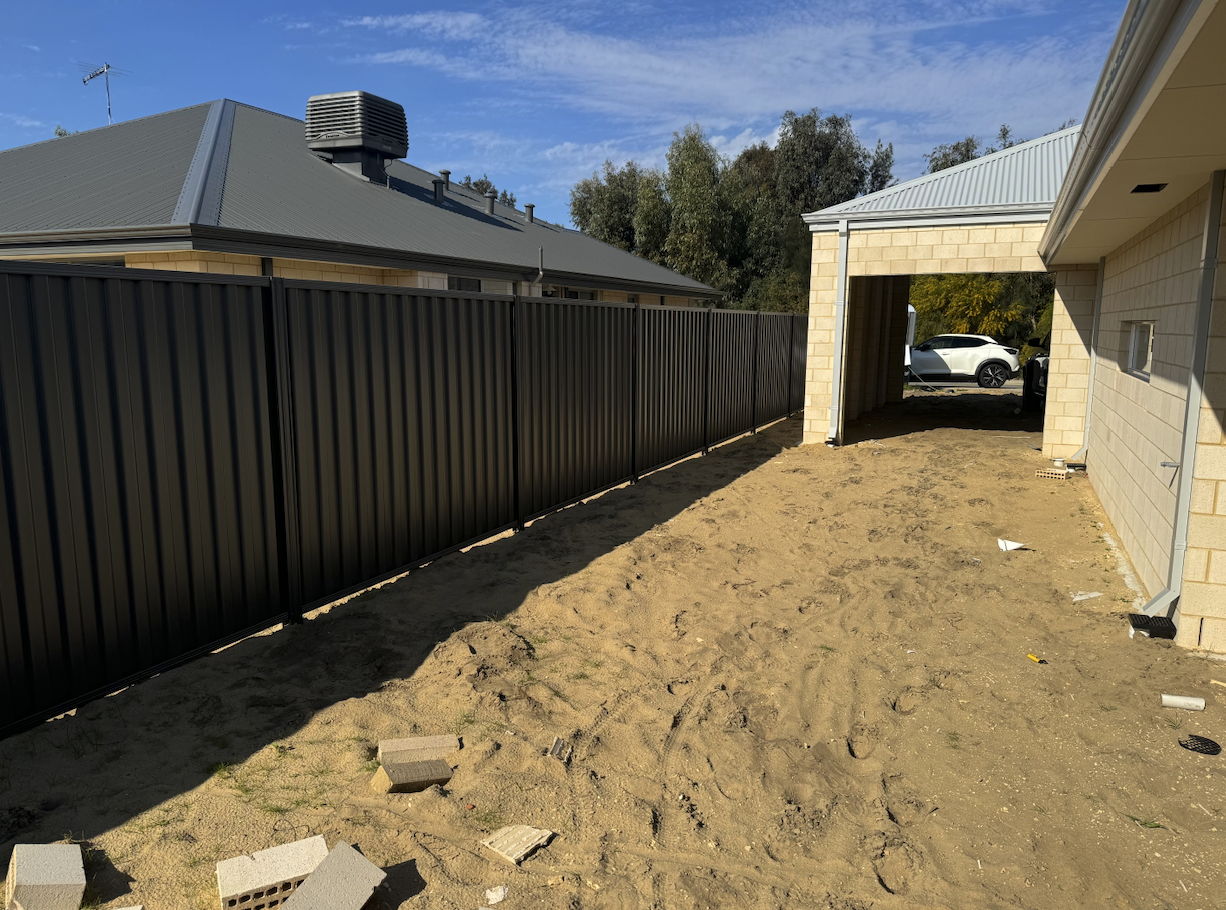
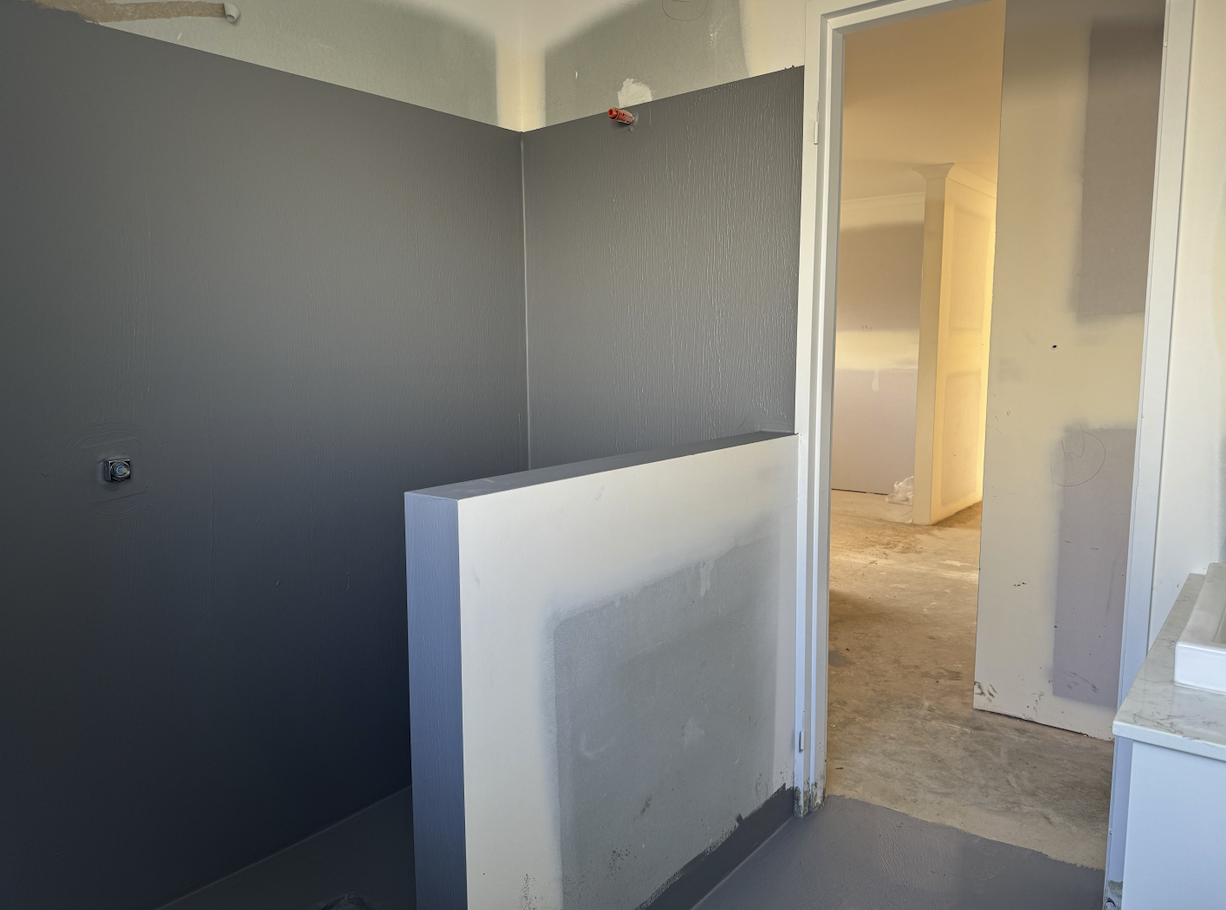
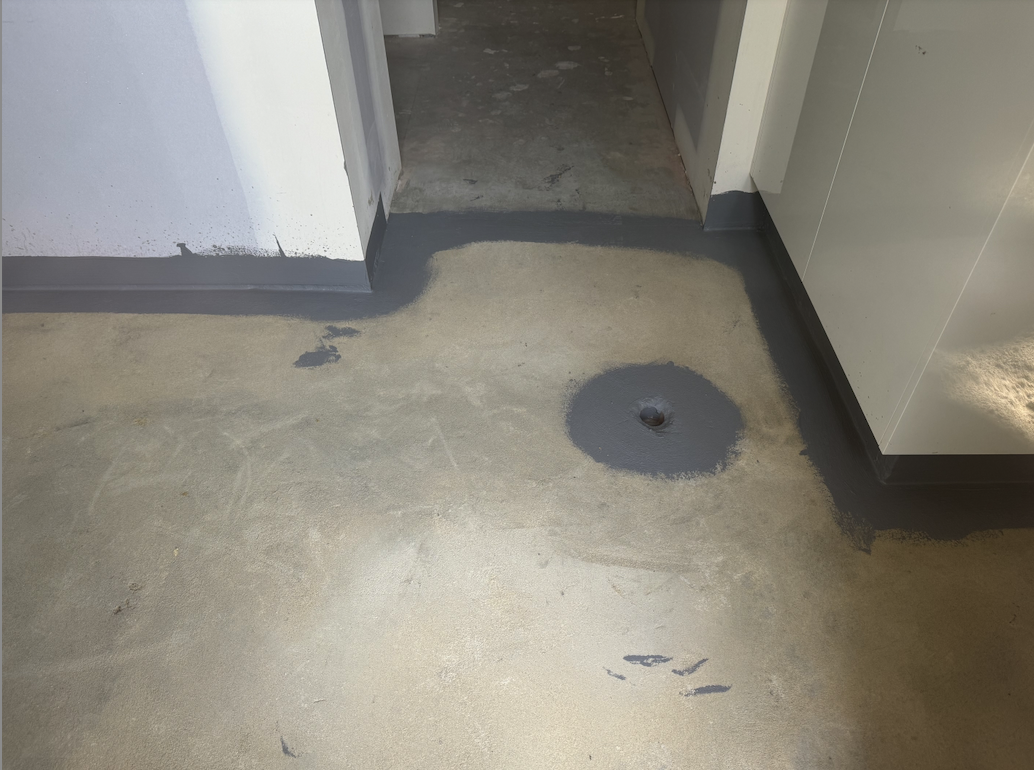
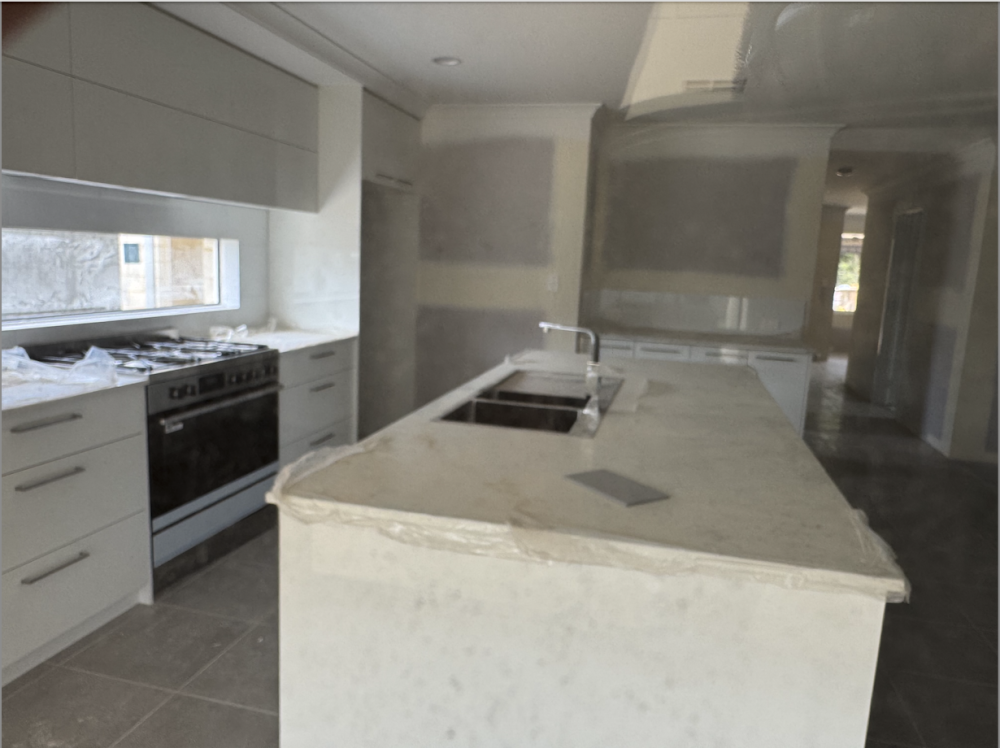
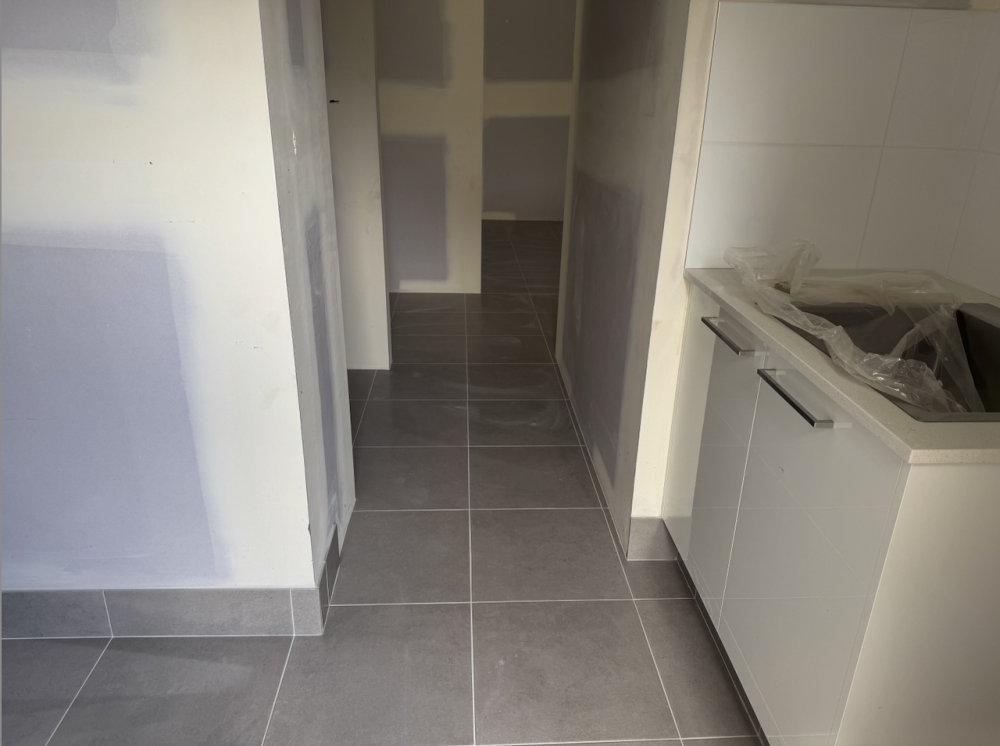
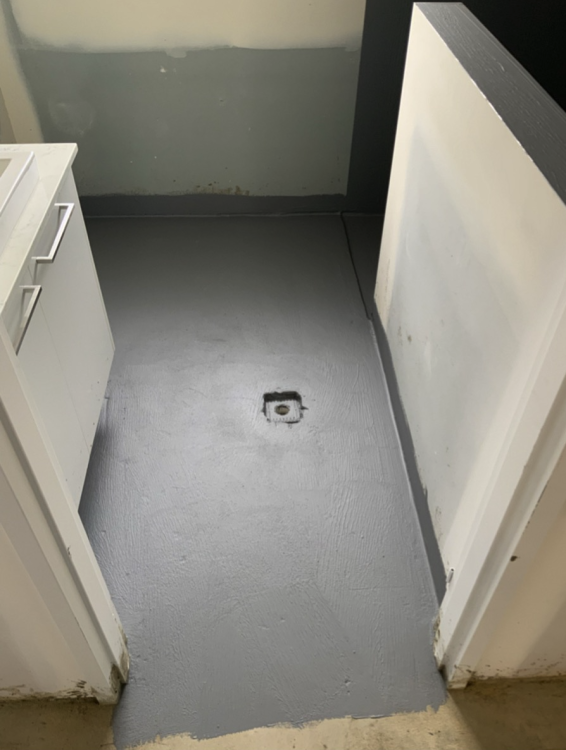
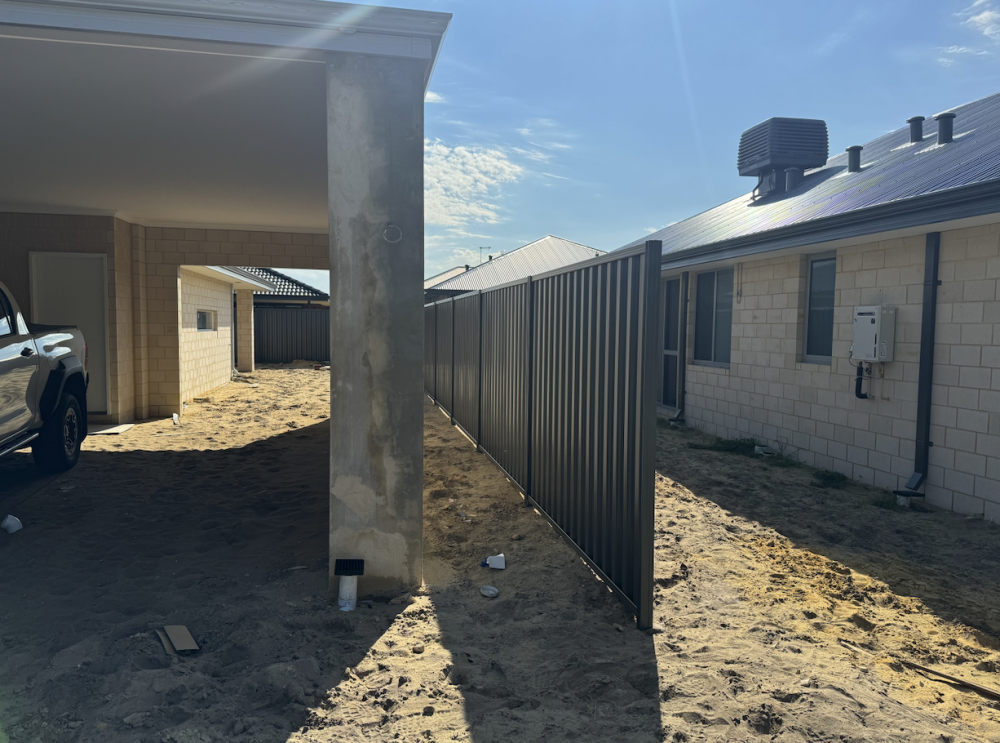
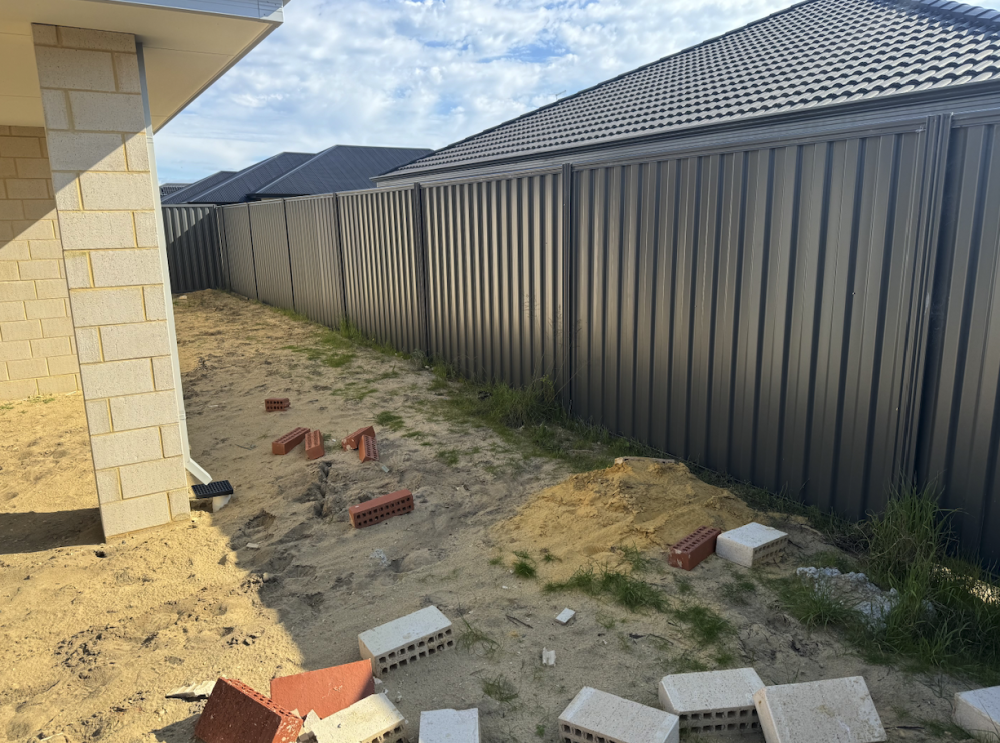
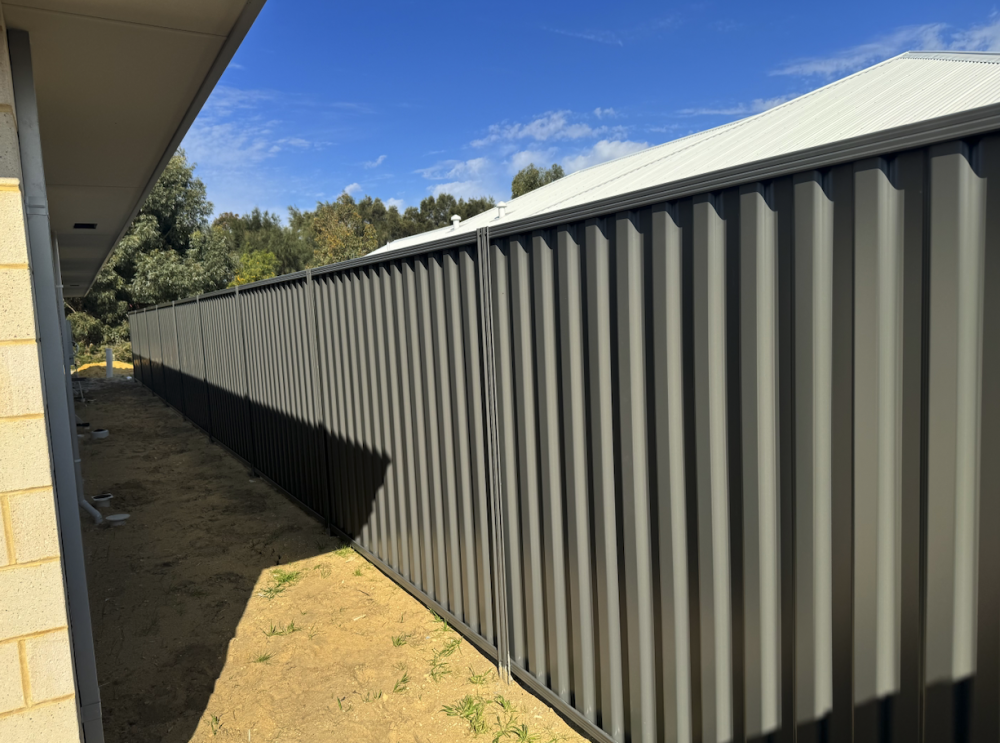
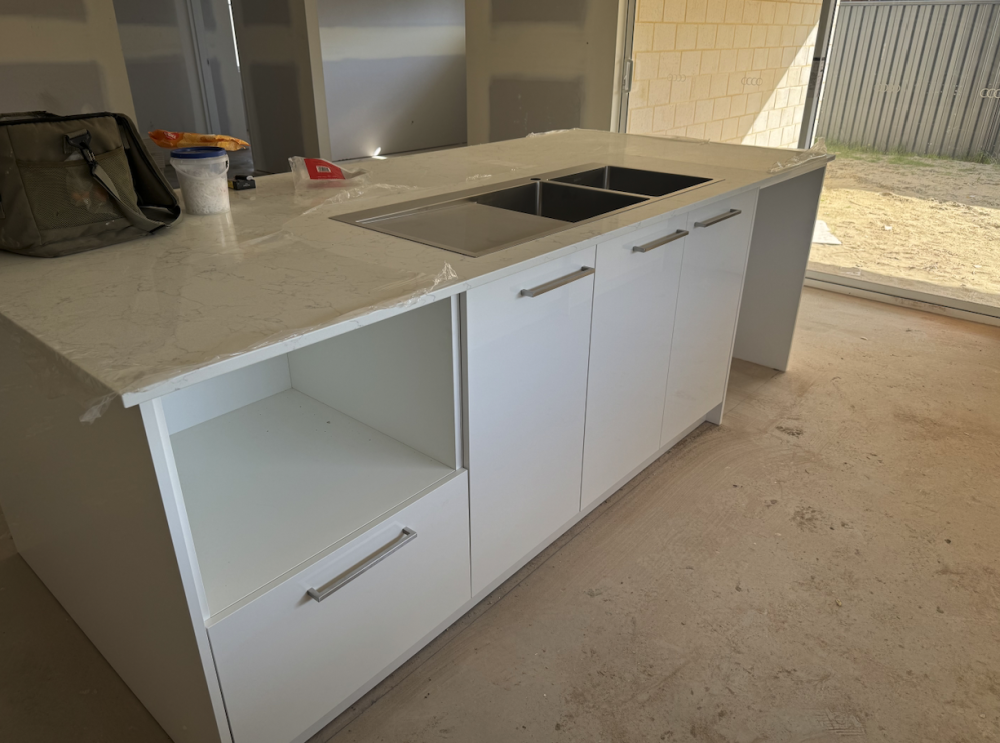
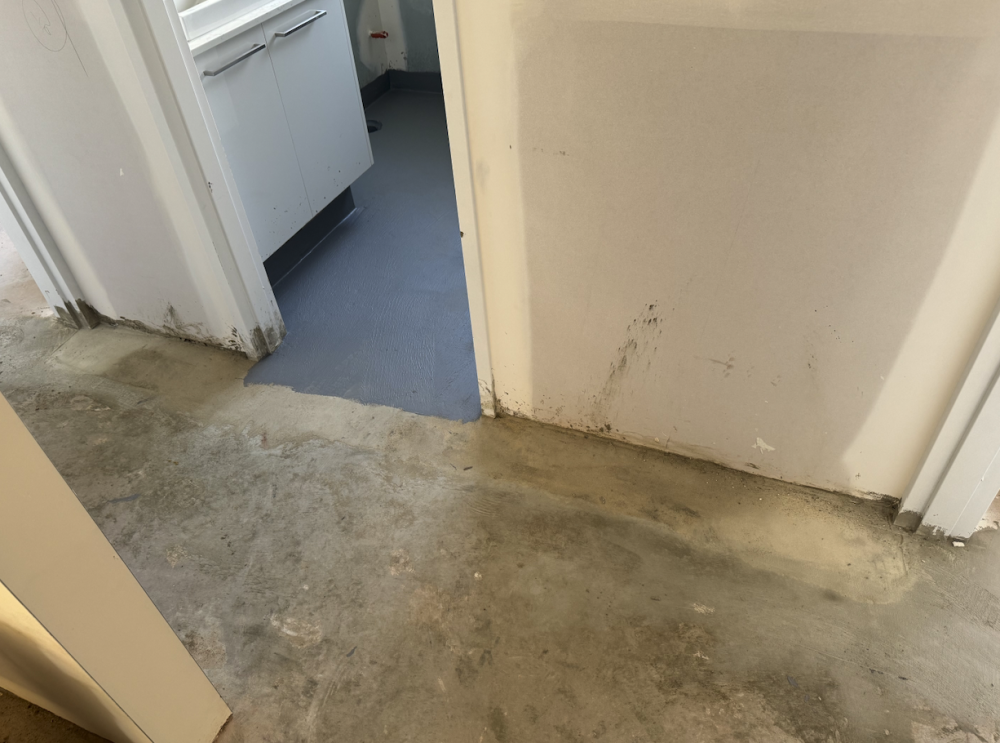
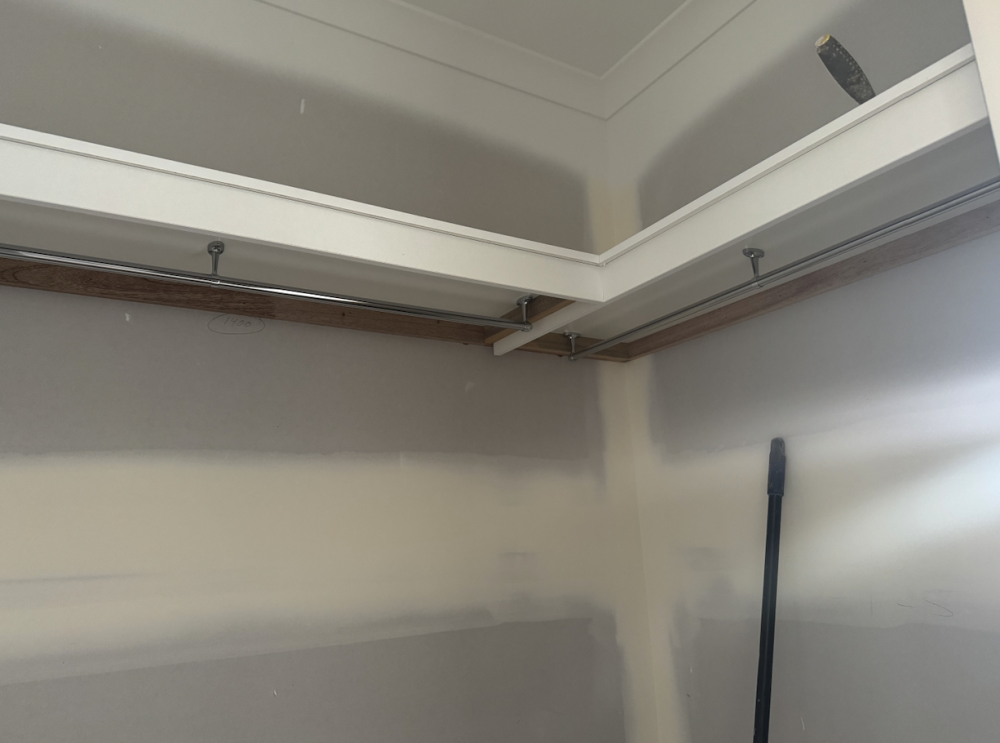
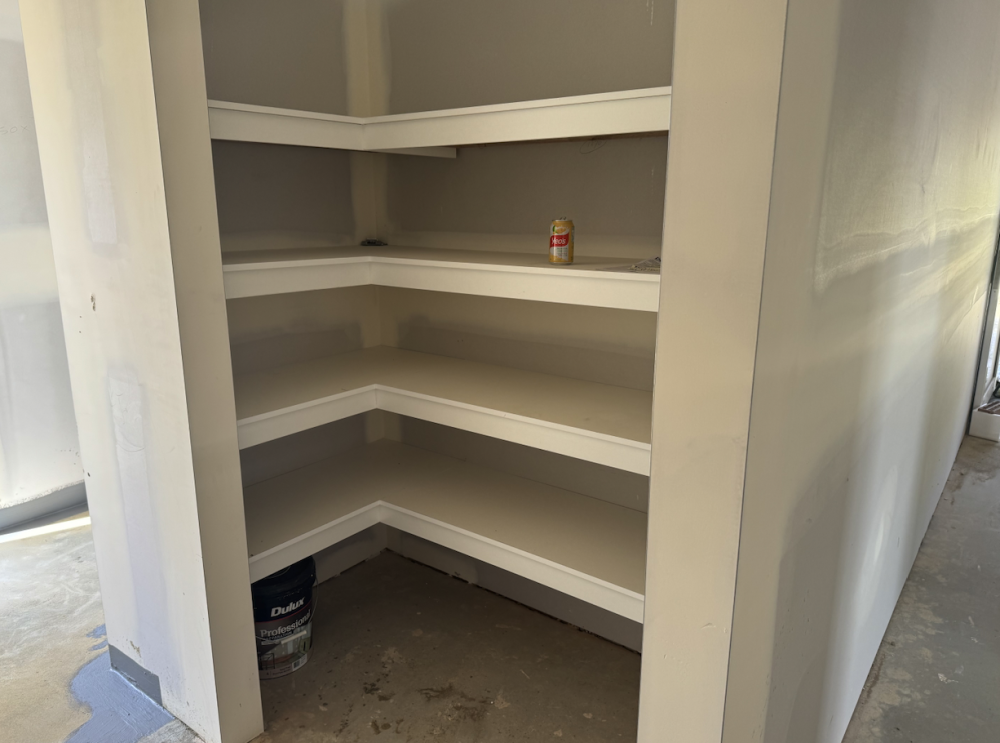
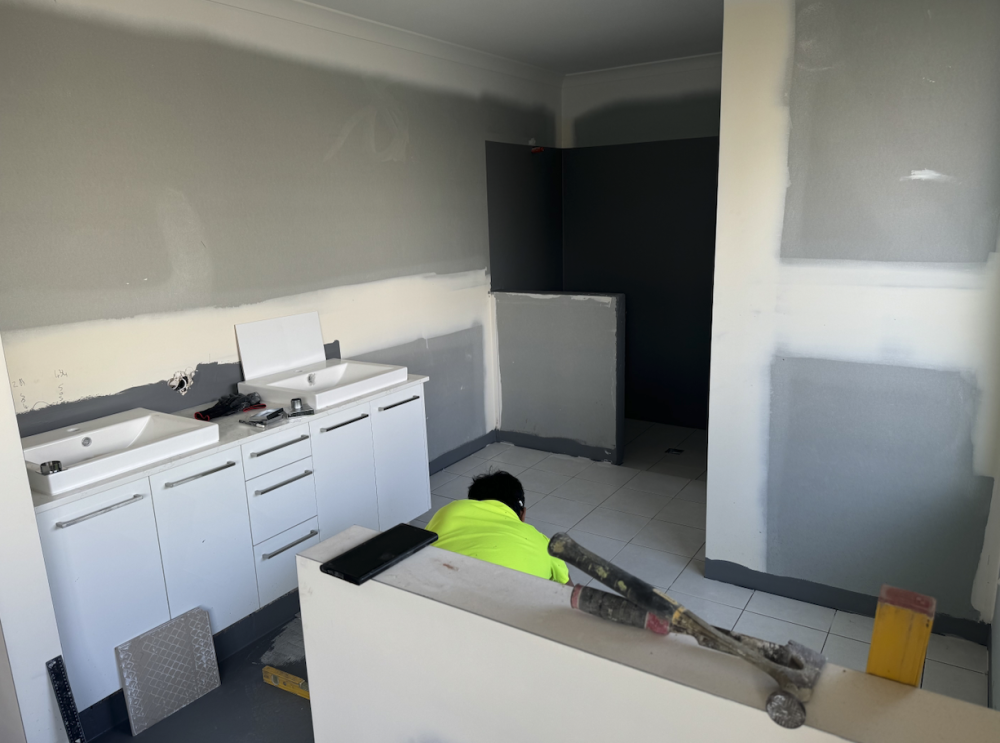
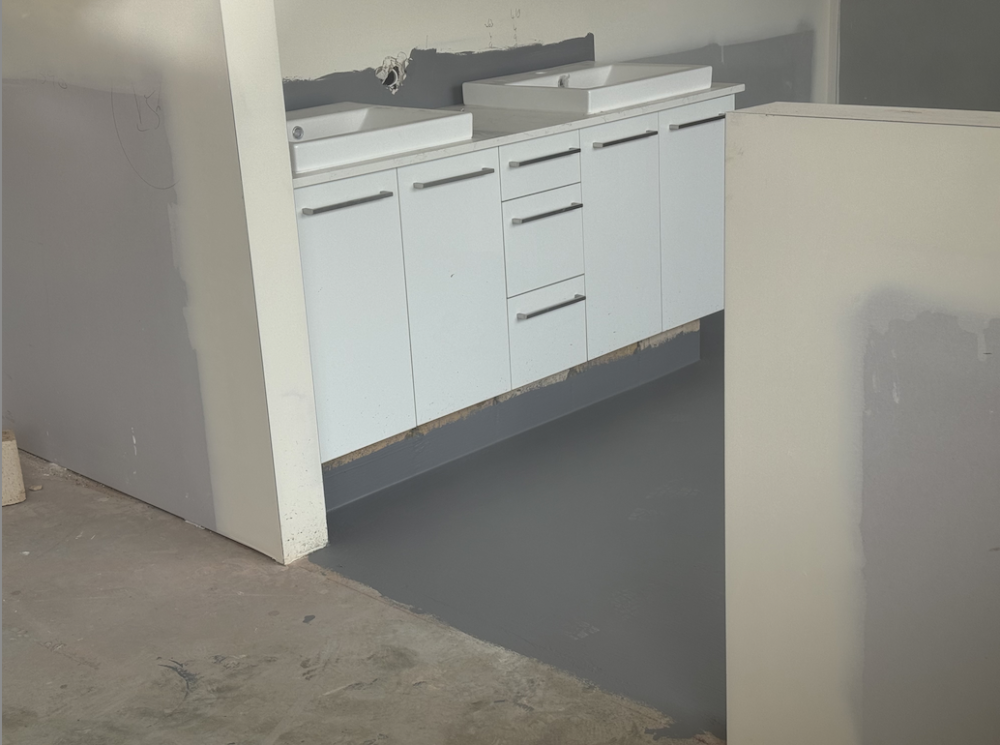
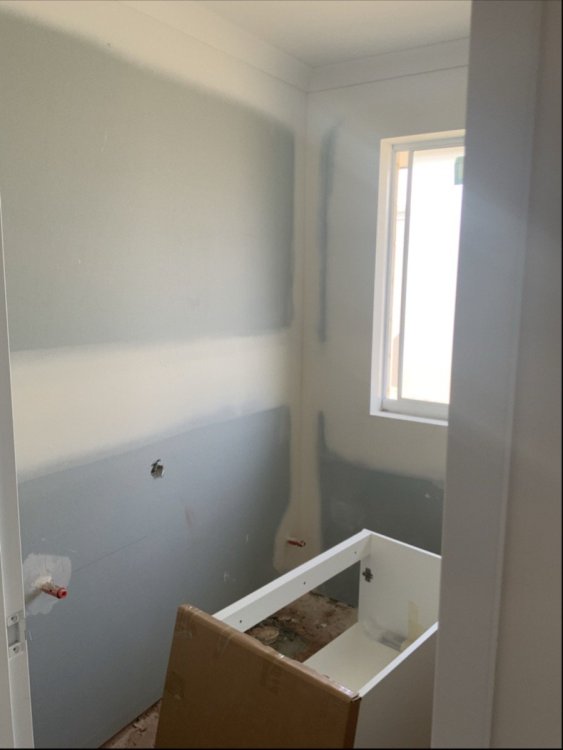
Yesterday, the builder sent through some photos of the waterproofing completed to the wet areas in preparation for the tiling ... Since the photos came through early in the morning I was figuring that the place was probably in the process of being tiled already, so I decided to drive down there today and take a quick look before I fly out to work for the next 2 weeks. First thing I noticed was the Ute parked up in the garage area ... so someone was at work! Next thing I noticed was the completed fencing ... With the front door open ... I figured I'd check areas that I haven't had access to for a while ... The other side of the island bench ... The shelf and robe rail in the Master bedroom WIRs ... Shelving in the WIL ... The concrete leveler fix the rear hallway ... Another photo of the waterproofing - to the rear bathroom ... The tiler is starting on the ensuite ... So ... Probably by the time I get back home in 2 weeks there'll be a couple of other surprises Rog


-
Occ Health and safety at its finest 🤣🤣🤣 Rog
-
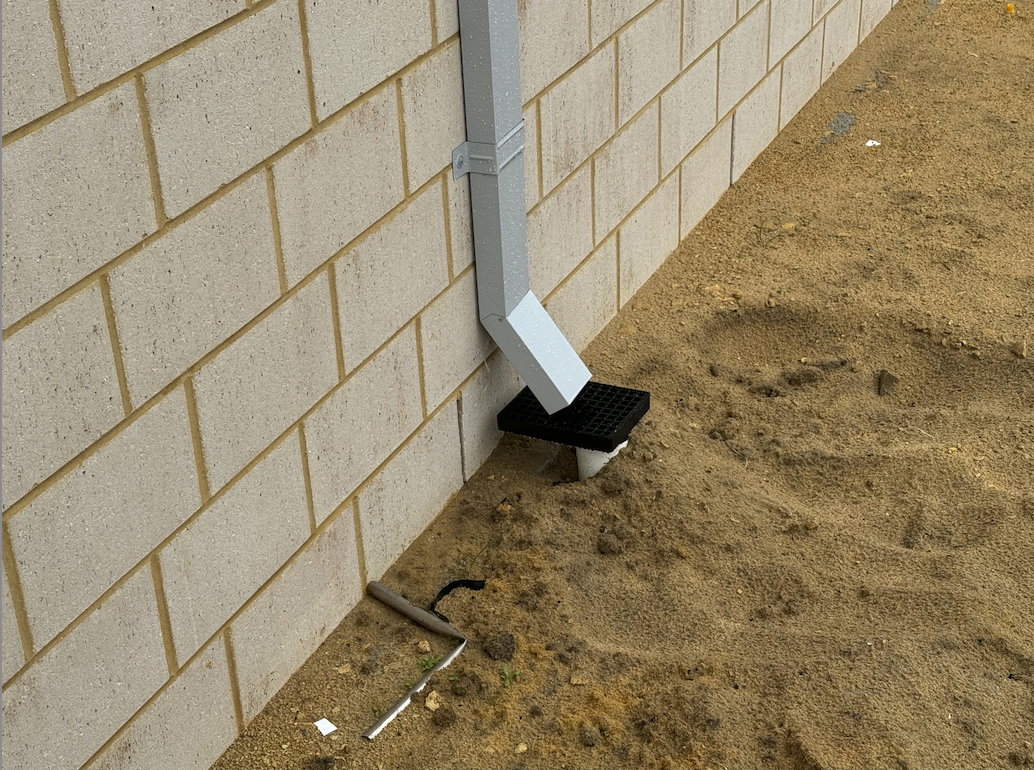
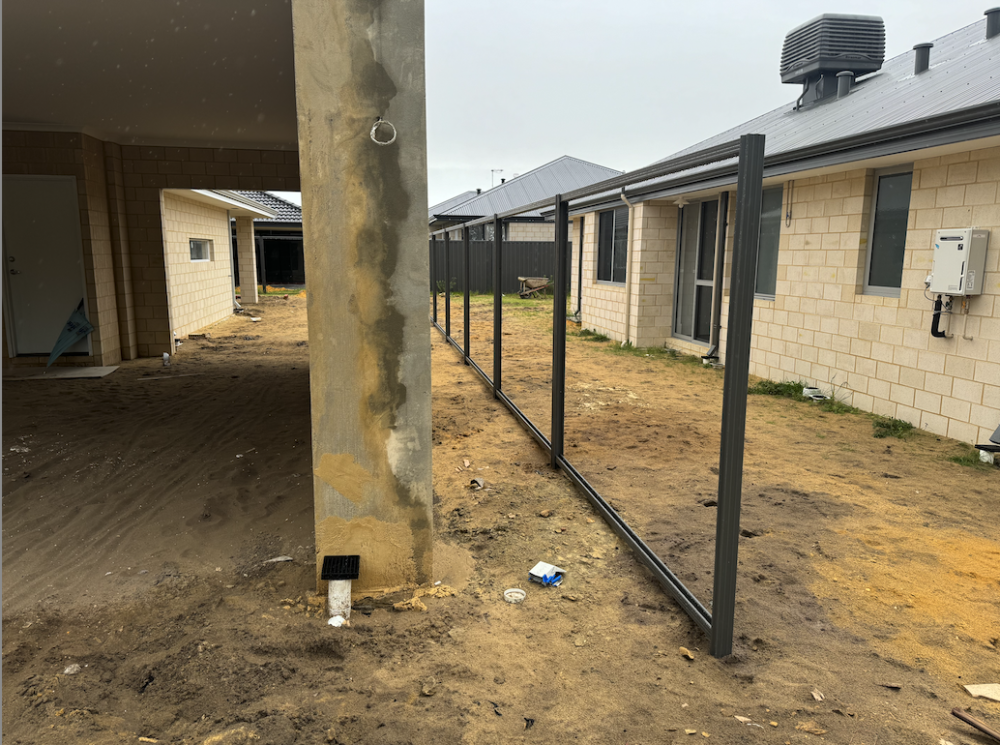
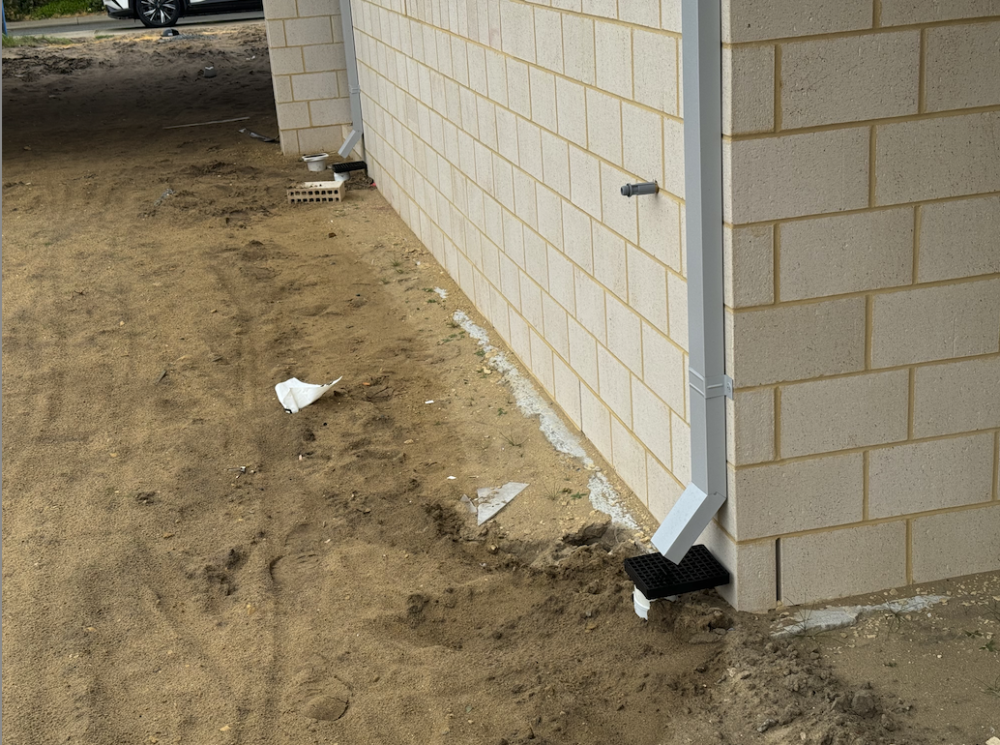
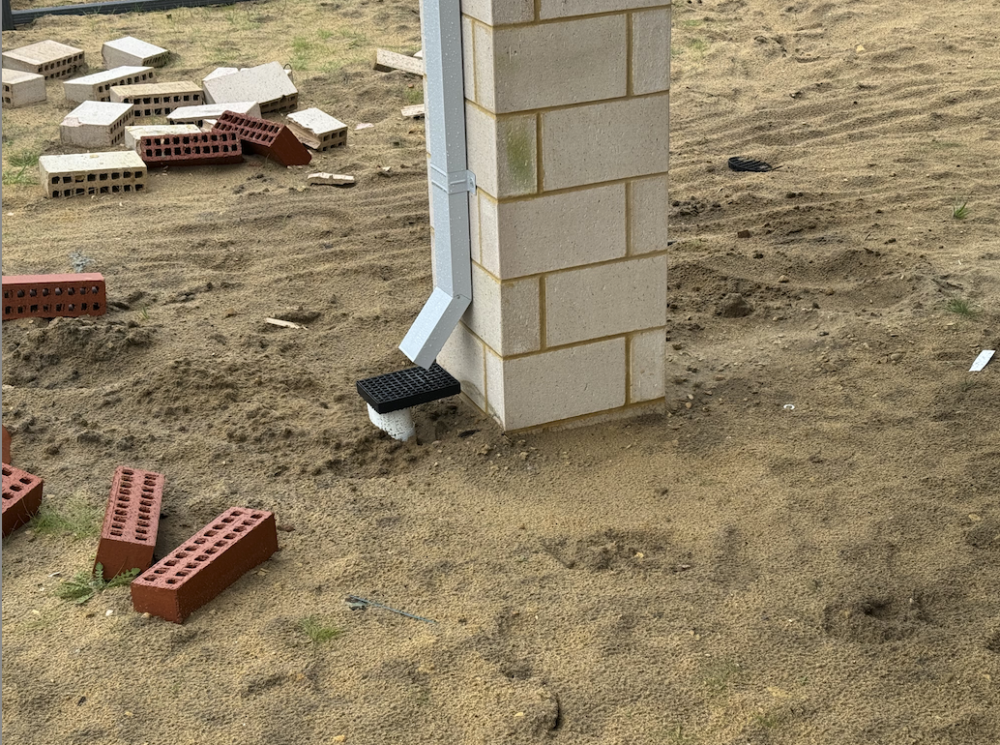
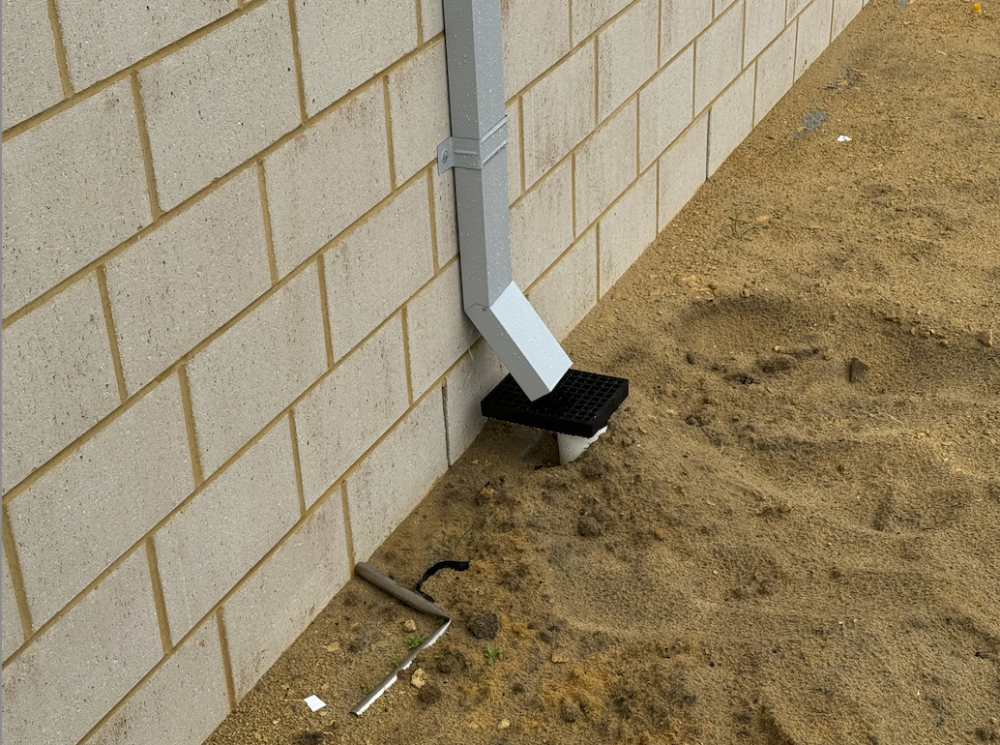
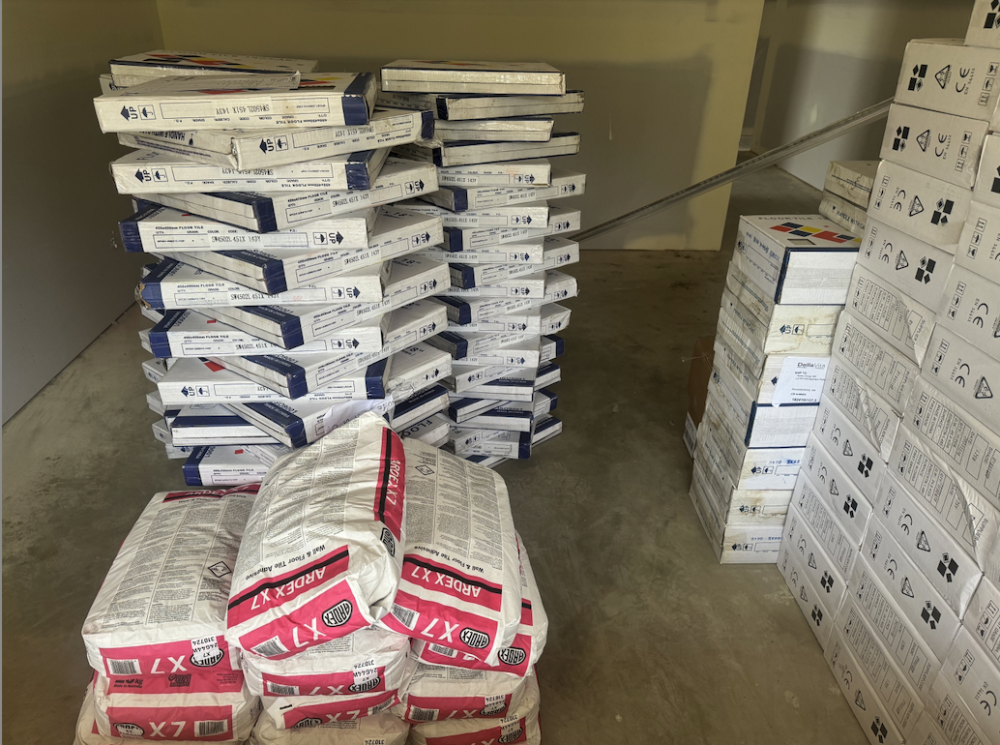
I arrived back home in Perth yesterday ... to a miserable day ... we're supposed to be in spring here now and indeed there are wildflowers everywhere, but yesterday was cold and wet and windy ... Still, I was excited to get down to the block and see if any progress had been made ... The first thing I notice is that the fence framing is installed on either side now ... ... and a quick walk around the perimeter shows that the storm water drainage is now lining up with the downpipes ... A quick look into the study room from the veranda shows that Tiles and grout have been delivered ... A look through the windows shows that wet areas have leveller applied and some sealant ready for tile application. Rog


-
This will be lovely … once the house is built and I can start finishing off my F1 cars I’m gonna go full tilt on a 1/16 build! Rog
-
Well ... Once "Hand Over" happens, there's a few jobs I want taken care of before I move in! ... But yes - It will be nice to have my own place again! Simply put - while a "robe" or wardrobe is a piece of furniture ... a "built-in robe" is a robe that is part of the building (you can see these in the two rear rooms - sans robe rails and sliding doors). A WIR is step further - a built in robe with dimensions deep enough for you to step into to. Most master bedrooms have them in the build designs here, these days. Aircon is not traditionally included in builders specifications here ... in fact not too many "finishings" are! In recent years "Inclusions" have become a distinguishing factor between builders competing for market share in a market demanding value for money! Although my build does include ducted, reverse-cycle air-conditioning ... it is supplied and fitted by a 3rd party contracted by the builder (as so many other things are) ... The system will be fitted during the final 12 weeks of the build. Actually you've reminded me - I need to contact the installer about layout! Rog
-
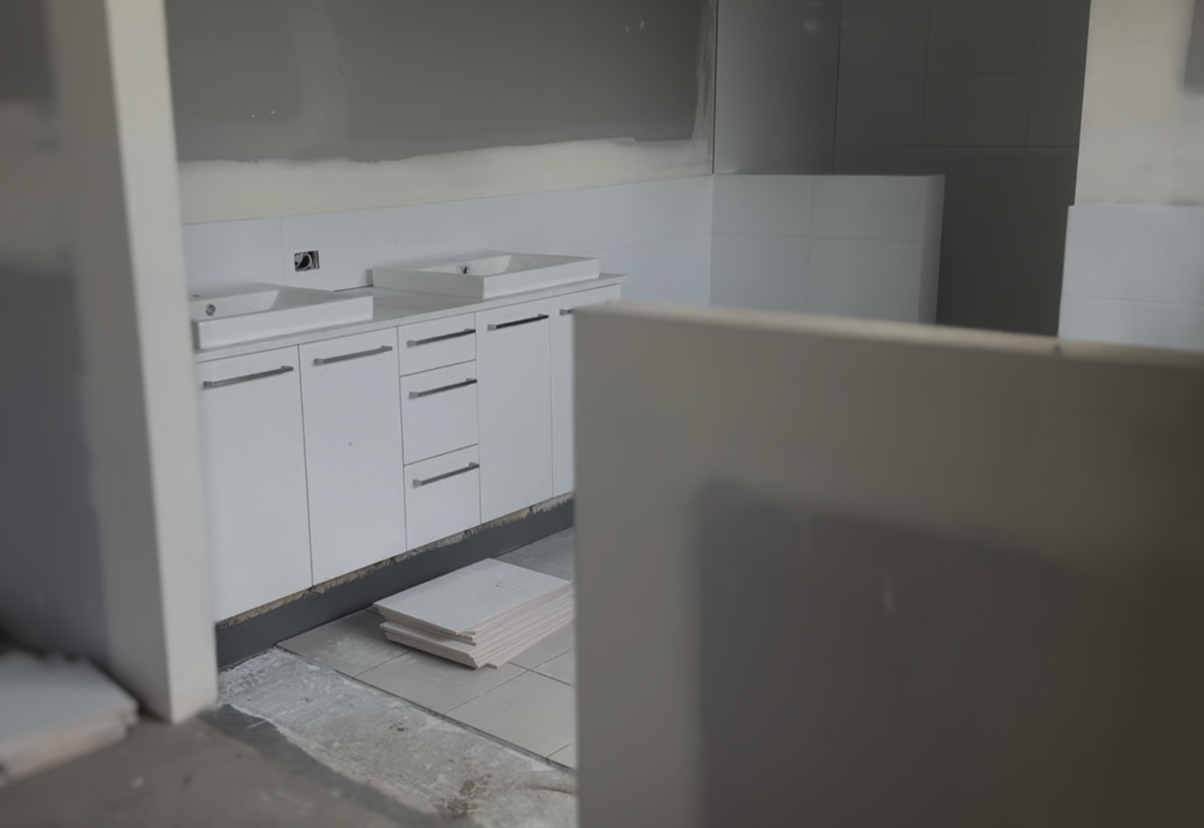
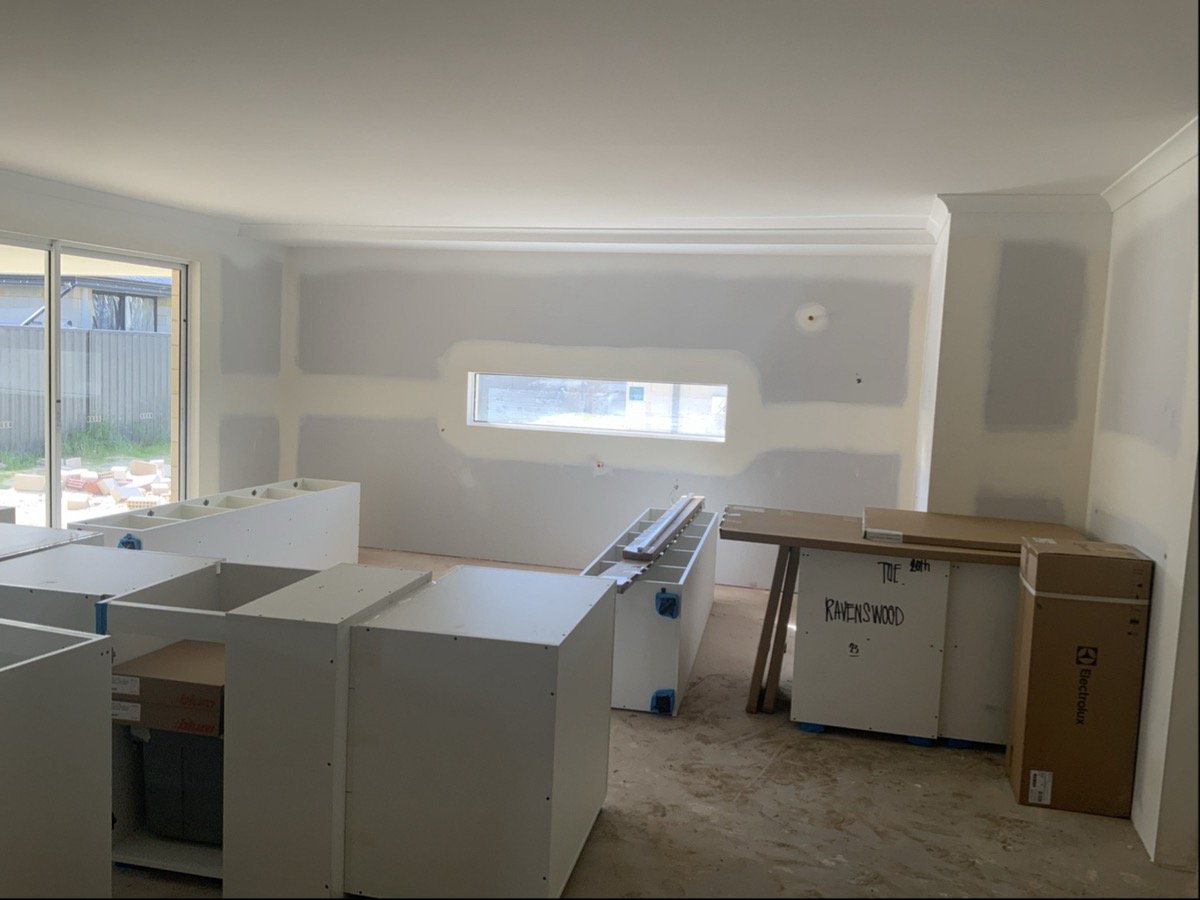
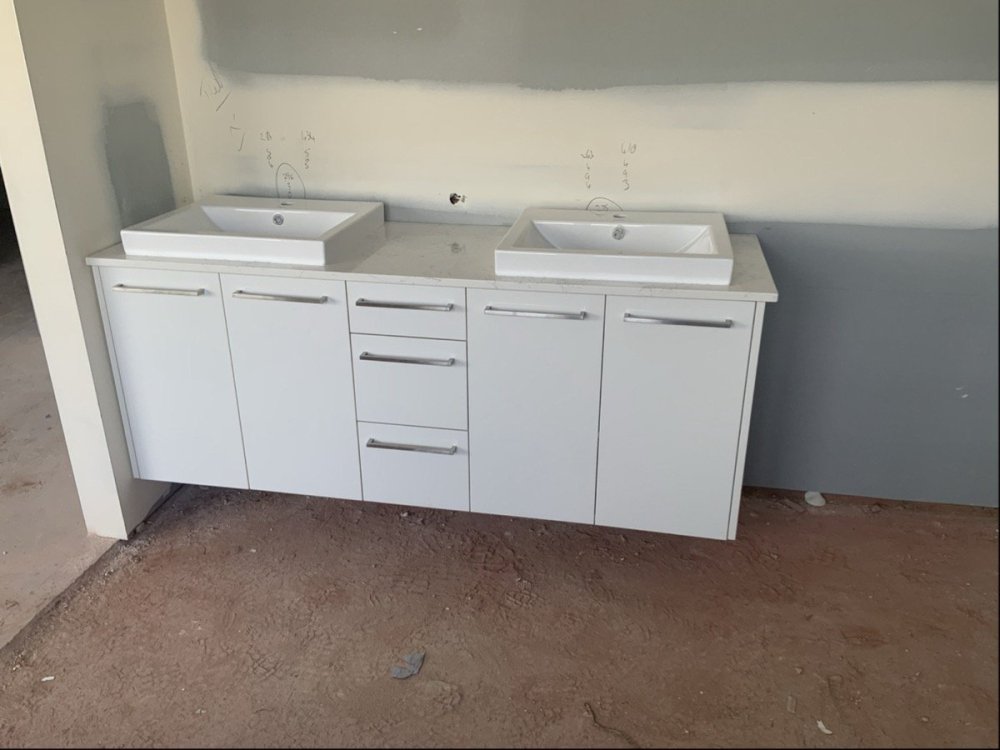
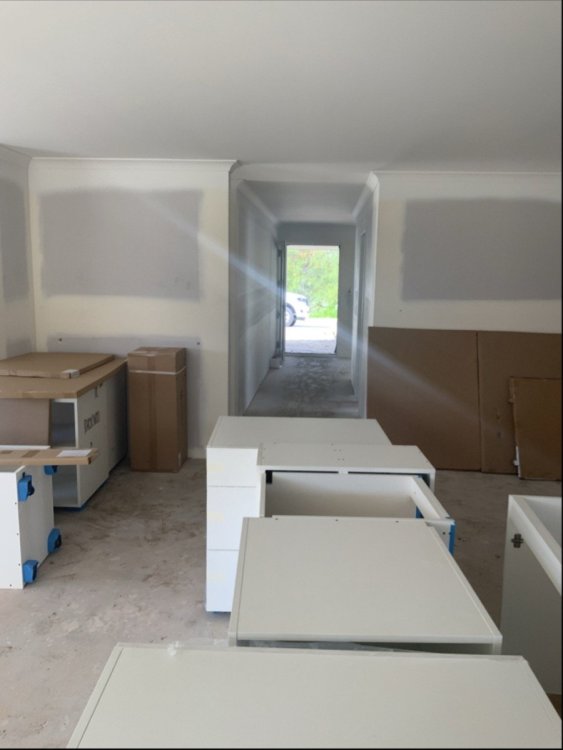
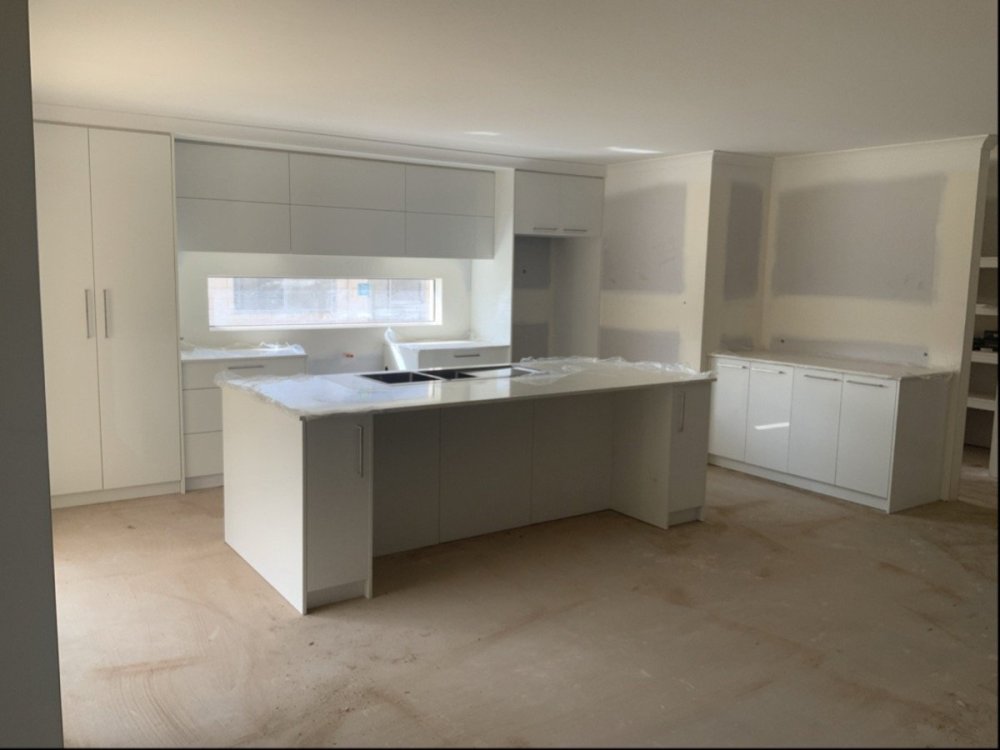
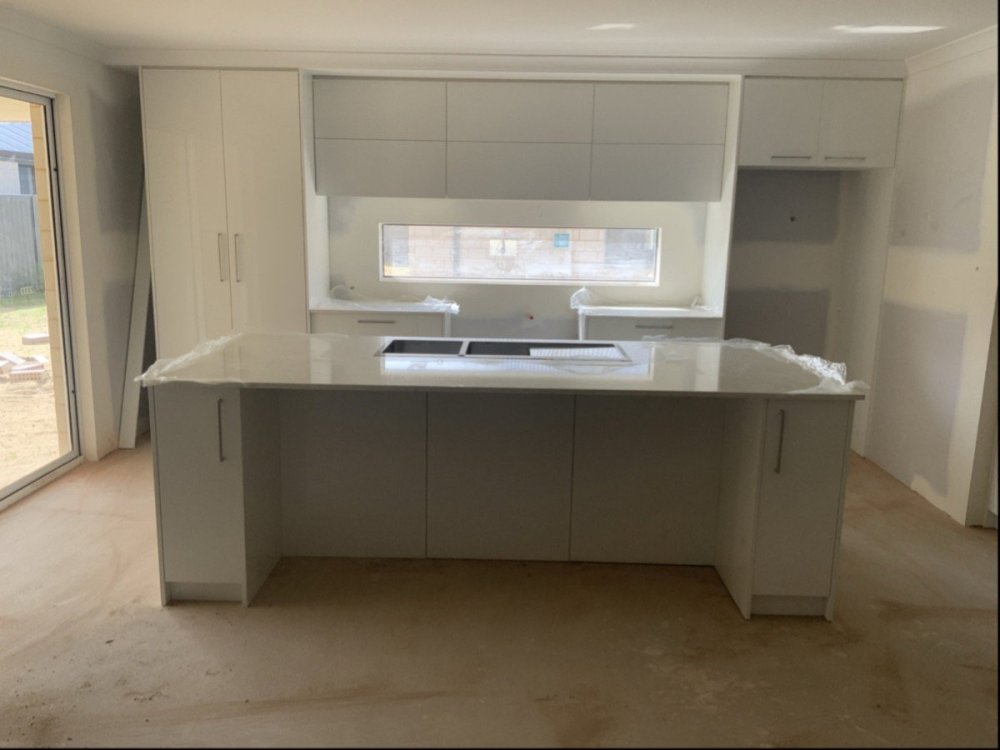
I flew back to work on Wednesday ... and was advised that cabinetry had been delivered ... today, I'm getting photos of assembled stuff! The rear bathroom ... Proper pics of the rear bedrooms ... The Laundry ... With a sneak peak at the WIL (Walk In Linen) A look in at one of the WIRs (Walk In Robes) ... and Ensuite cabinetry ... And finally the Kitchen ... They aren't mucking about! Rog


-
LSM Modelling News 2023 merged Fran and Artful69’s threads
Artful69 replied to Fran's topic in Modelling Discussion
As I can’t find the 2024 thread anywhere, I’ll assume it was merged into this one at some point. Maybe a title change to st “Modelling News / Announcements”? Anyway … the latest HKM Kit announcement is a special edition RAAF Havoc A-20G Rog

-
Back in the day ... when real trades built real houses here (I lived in one that was built in 1901) ... we had 14ft high, pressed tin ceilings. The stair balustrade in the place I was staying was made from an 8in wide hand carved and curved jarrah beam with seamless joins resting on 6in x 6in posts. The rooms were huge ... you could have played tennis in the main living room upstairs. Small bed rooms were 4m x 4m etc etc ... The trend with high ceilings continued through the early 60's here, until more modern housing (concrete slab floor) came into vogue. I think 8ft (approx) was the standard until the last couple of decades and now it's all over the place! I say 'about' 8ft because we generally discuss residential wall height here in terms of brick courses ... I think the norm is 31c? ... with high ceilings coming in at 33c ... I'll need to check. On my spec I was offered 'high ceilings' as part of the package but I swapped it over to just high ceilings in the garage instead. Rog
-
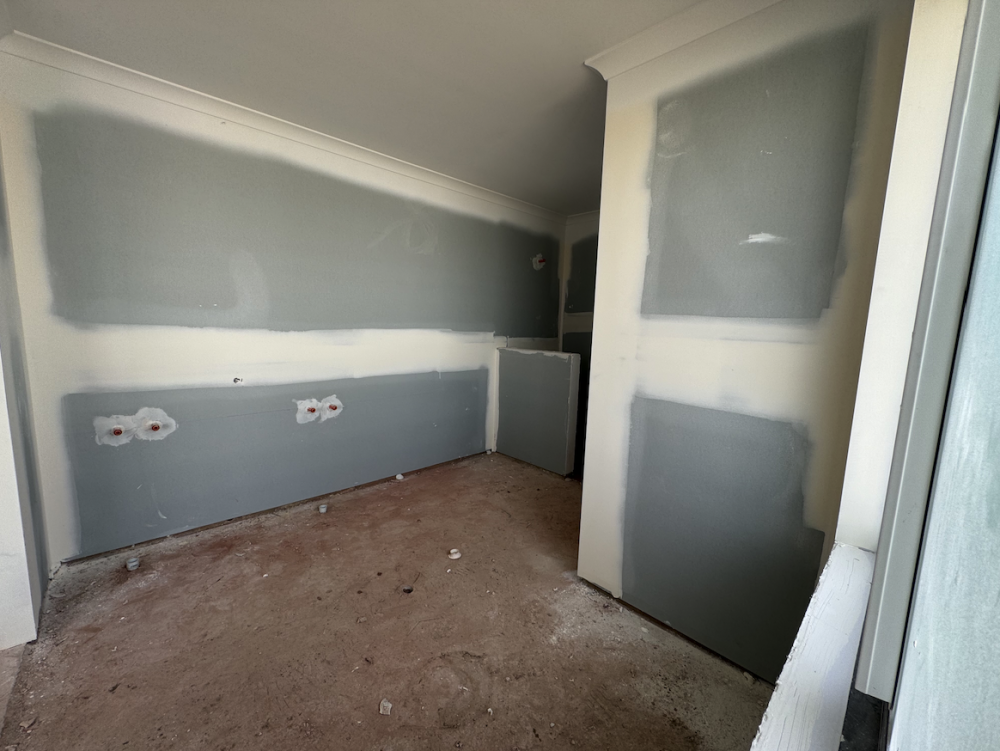
Calm down? ... 🤨 No need for me to calm down as I'm not at all concerned. You suggested there were no electrics - and ... as I can clearly see where they are, I just pointed out where they are visible in previous posts, so that you can see them also - if looking for where they were previously situated before the plasterboard went up it makes it easier to locate (since I don't have any close ups this time around - the holes are a little more difficult to see unless a cable is poking out) ... that was all. I'm quite sure that the builder - and the trades - know exactly what they are doing ... even if I don't! Rog
-
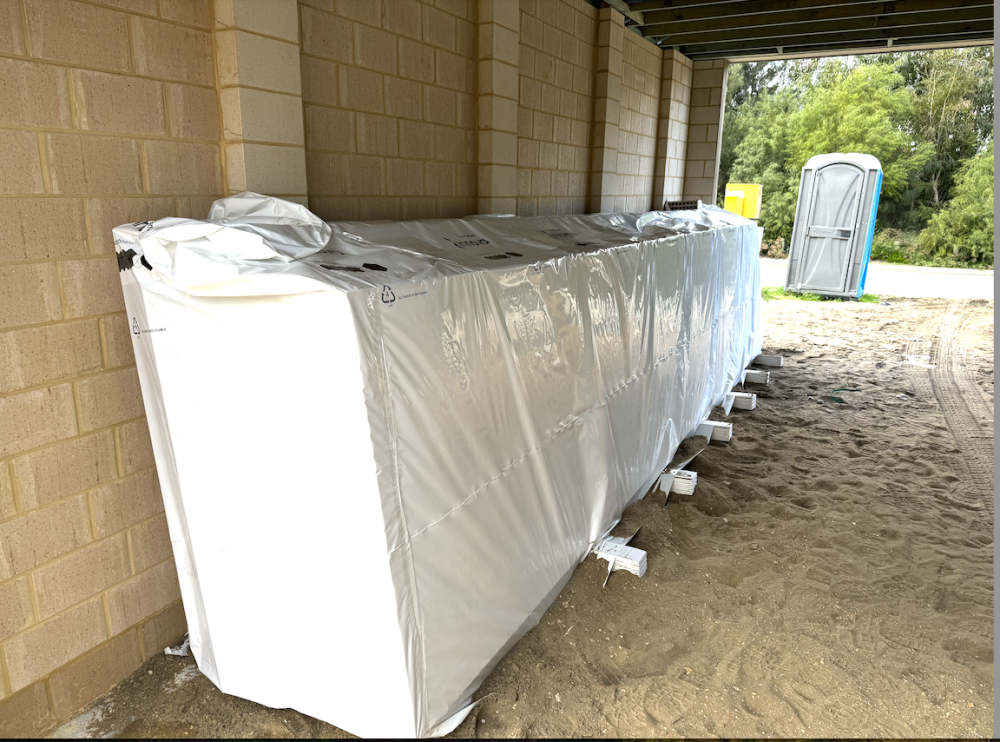
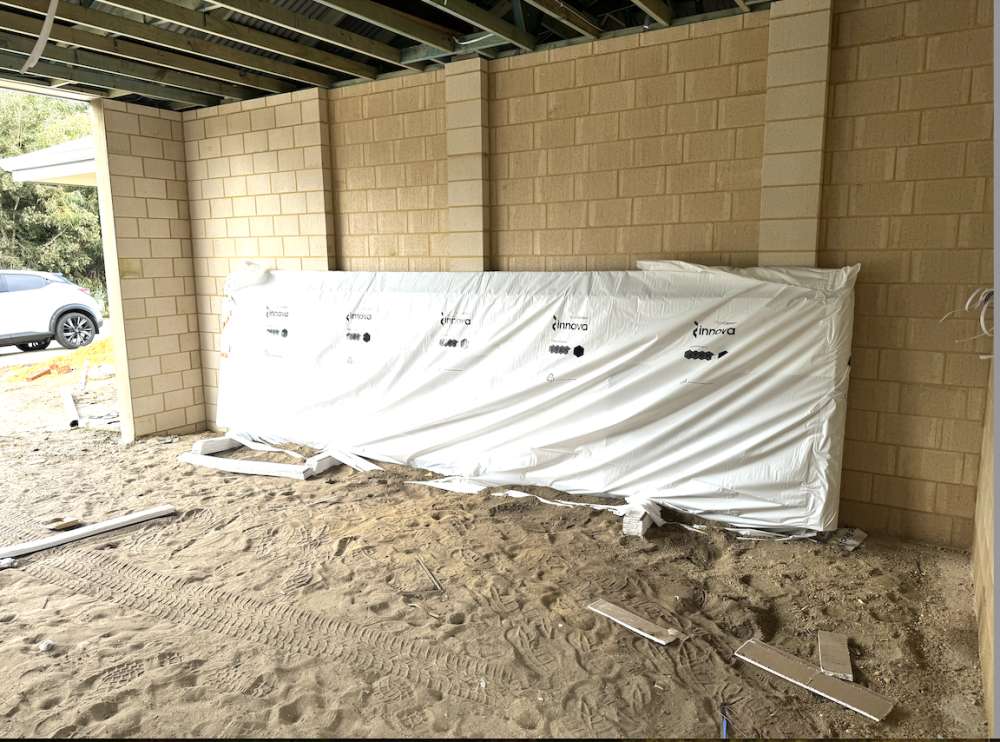
Thanks ... Yes! ... If you look at the previous set of photos with the wrapped up stuff stored in the garage - the sheets are 6m long! ... I guess there aren't too many rooms or other unbroken up walls in a house these days that are longer than 6m. Here, there are a lot of houses built now with 'high' ceilings. The idea is to make the internal space look larger. Personally, I would rather just open up the space ... which I think I have done, with the possible exception of the WIR area entering the master bedroom. With plenty of variation in ceiling height, I'm guessing it would be easier to score and break longer sections of plasterboard? Rog
-
I don't know if you've seen the previous posts? All piping (gas and water) as well as cabling (electrical and communications) was installed after the timber fame was installed to the roof as most of it runs through the roof and is attached to various roof timbers. Then the 'chasing' is completed (cuts into the walls) to install the cables or pipes to where various switches and outlets need to be located. If you compare those previous photos to the ones posted here now, you can see where the cables are installed. Bear in mind that the house is in 'lock up' stage so as I explained in the post, all photos were taken from the outside, looking inward. Even so, I can see the holes in the plasterboard where the wires and piping are located, without enlarging the photos at all. There's even the extra length of wire for the 900mm dual fuel stove and the island bench poking through wall and floor in the kitchen area. When the electrician comes to complete fittings (which will be after the floor tiles, I would imagine) ... They will cut out whatever plasterboard is needed to fit the lights in the ceiling and around the current holes in the walls to fit the switches etc. Rog
-
Nice work Heiz ... The English translation of G.U.P is always hilarious ... Momo - at the beginning of 'Der Film' referring to their team up ... "F*%king Chi-Ha Tan" 🤣 laughed myself silly ... also laughed at the superb trolling work of the 'Continuation' BT-42 ... GUP is an underrated classic! Rog
-
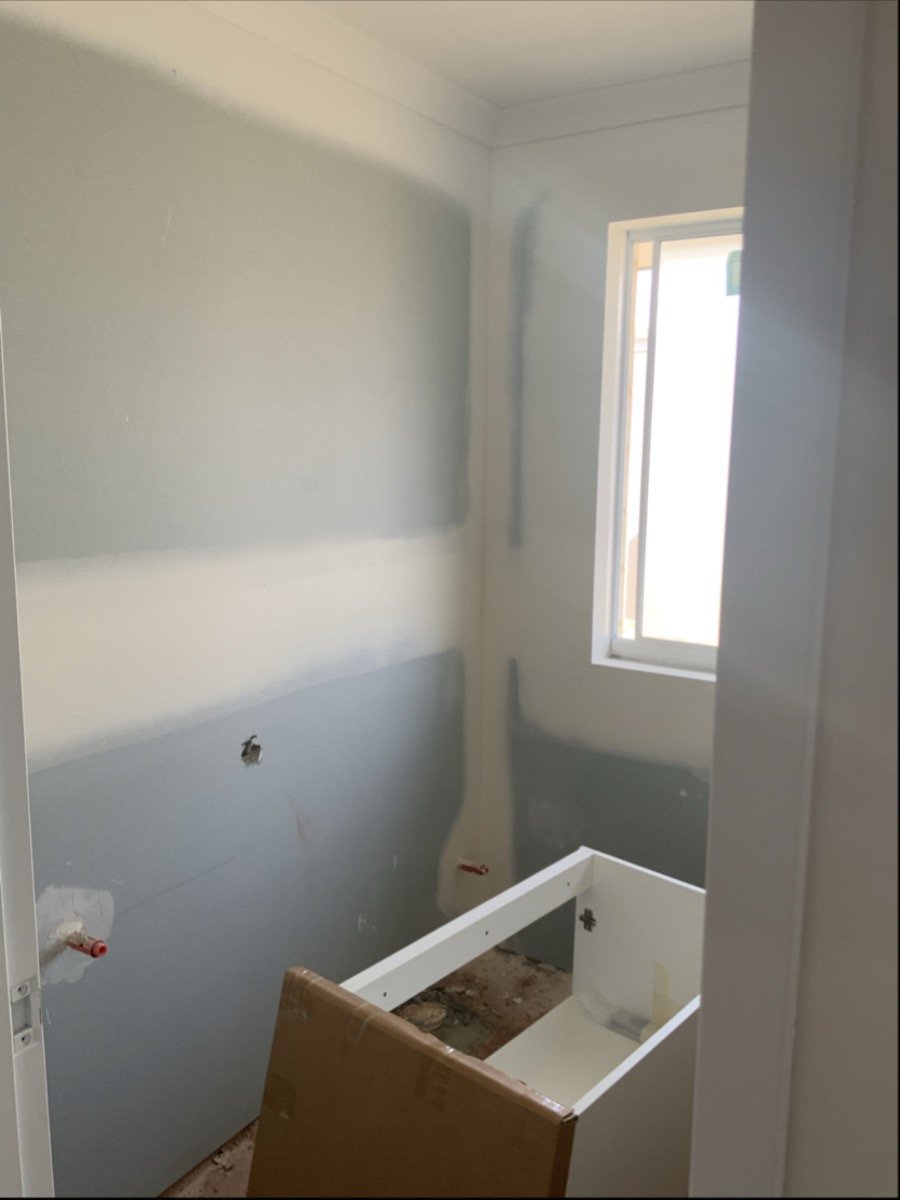
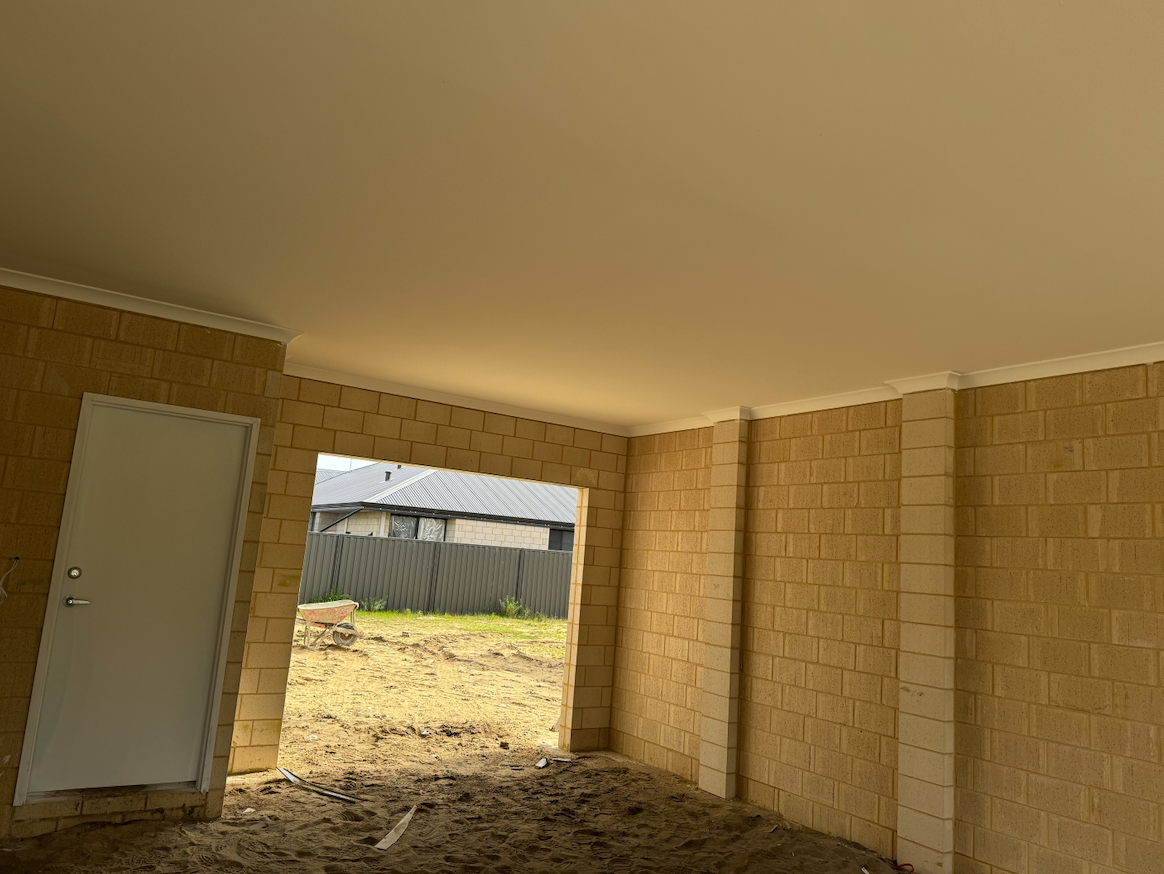
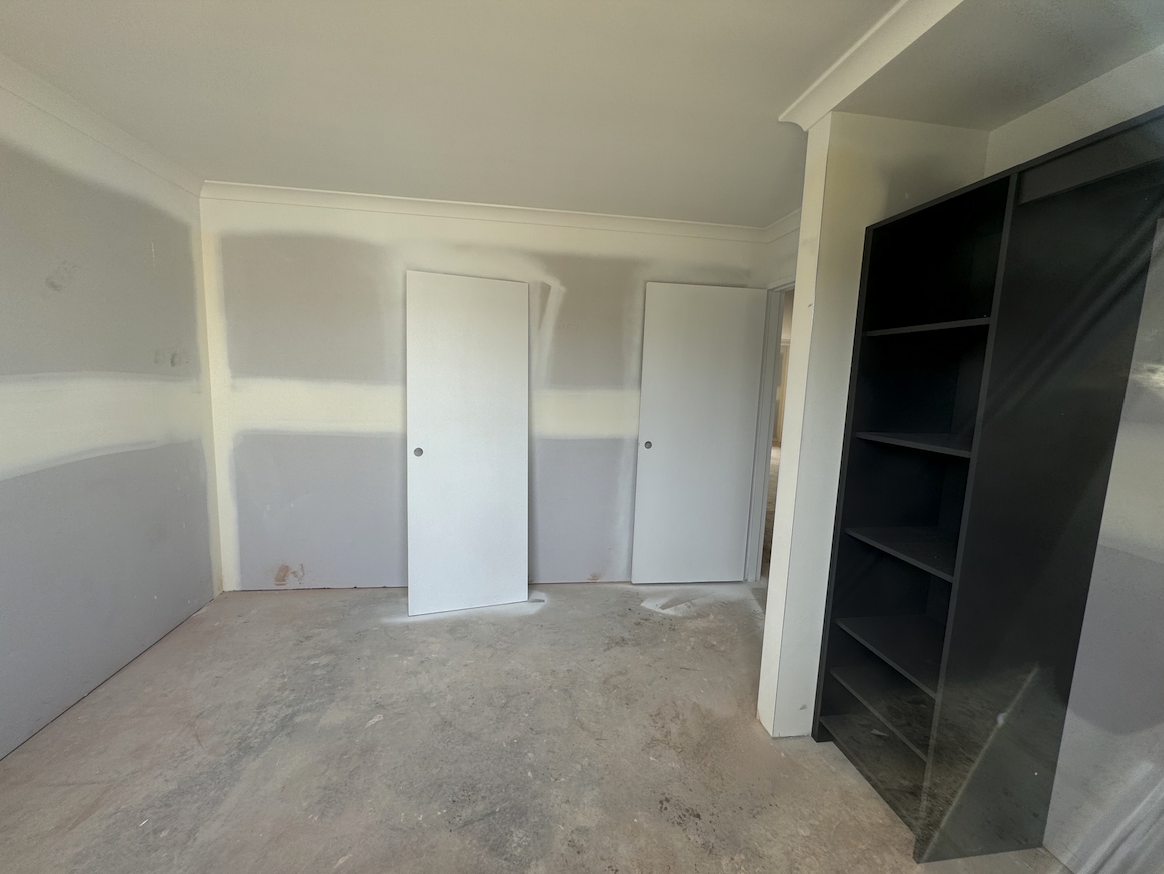
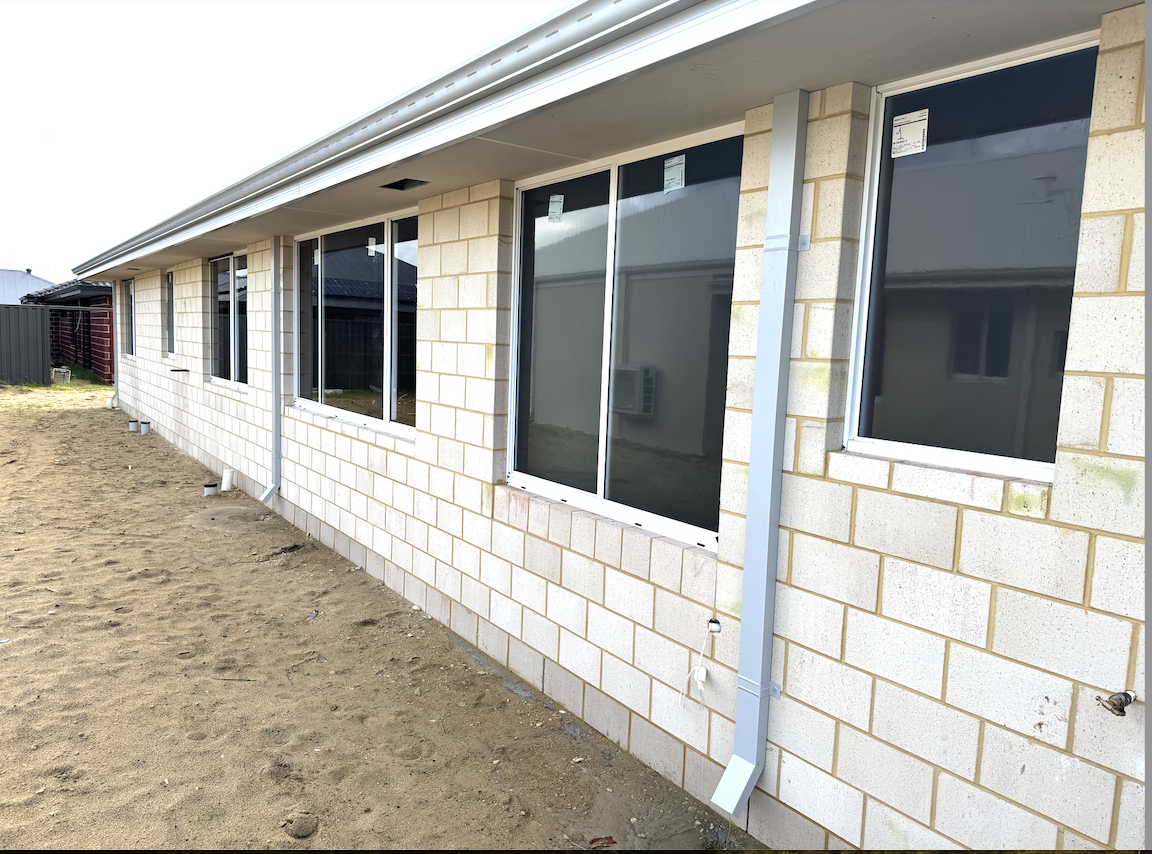
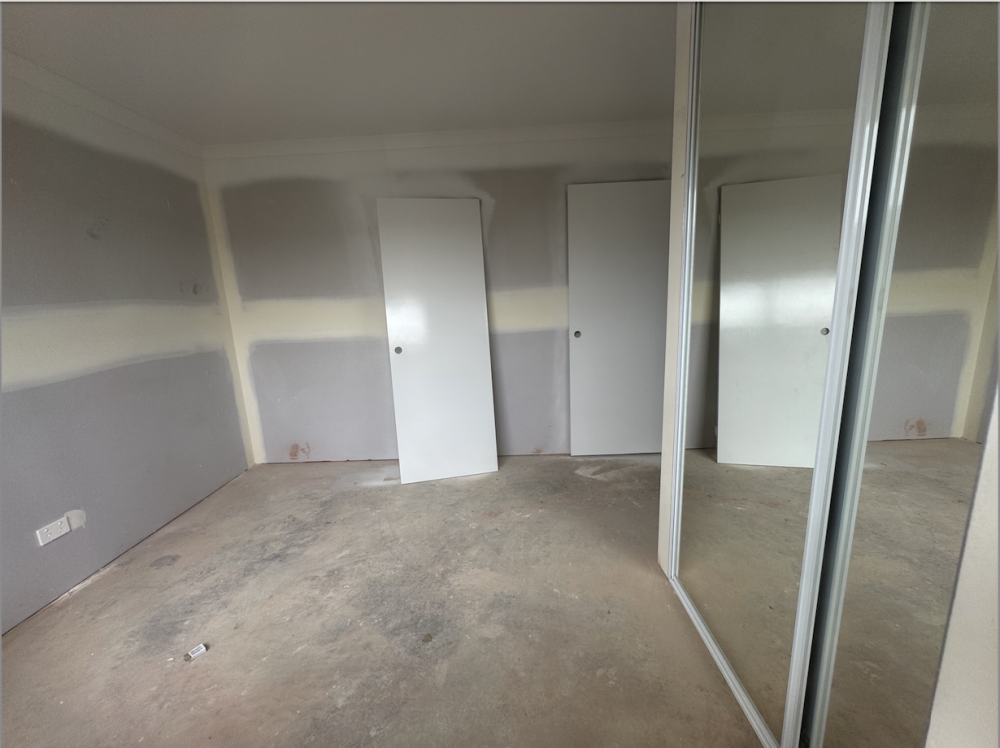
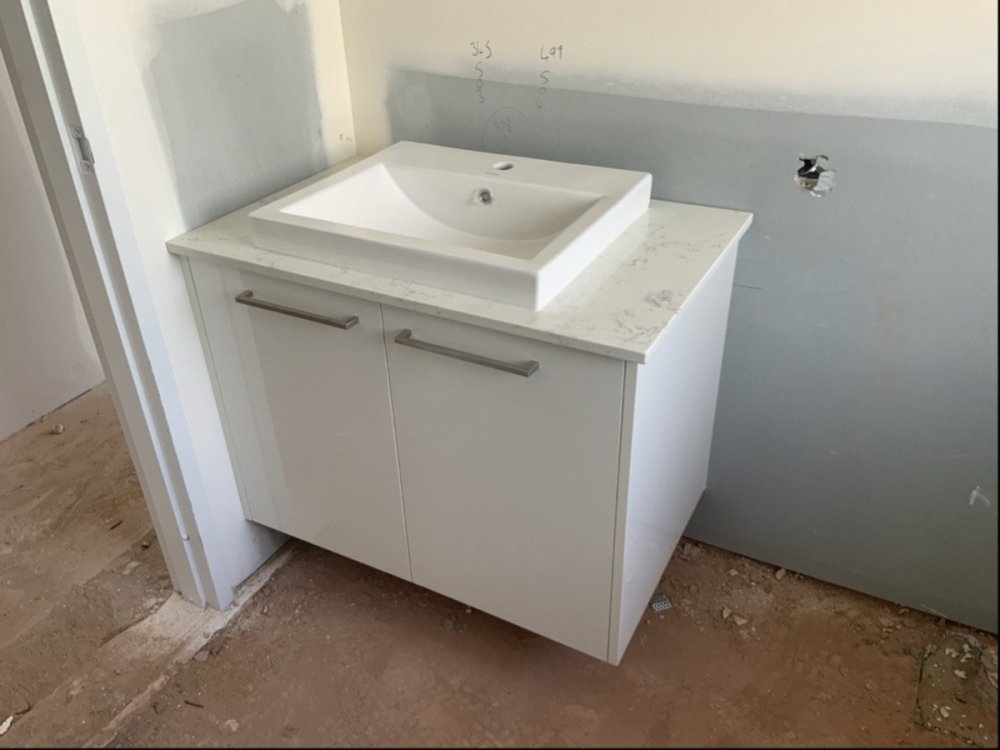
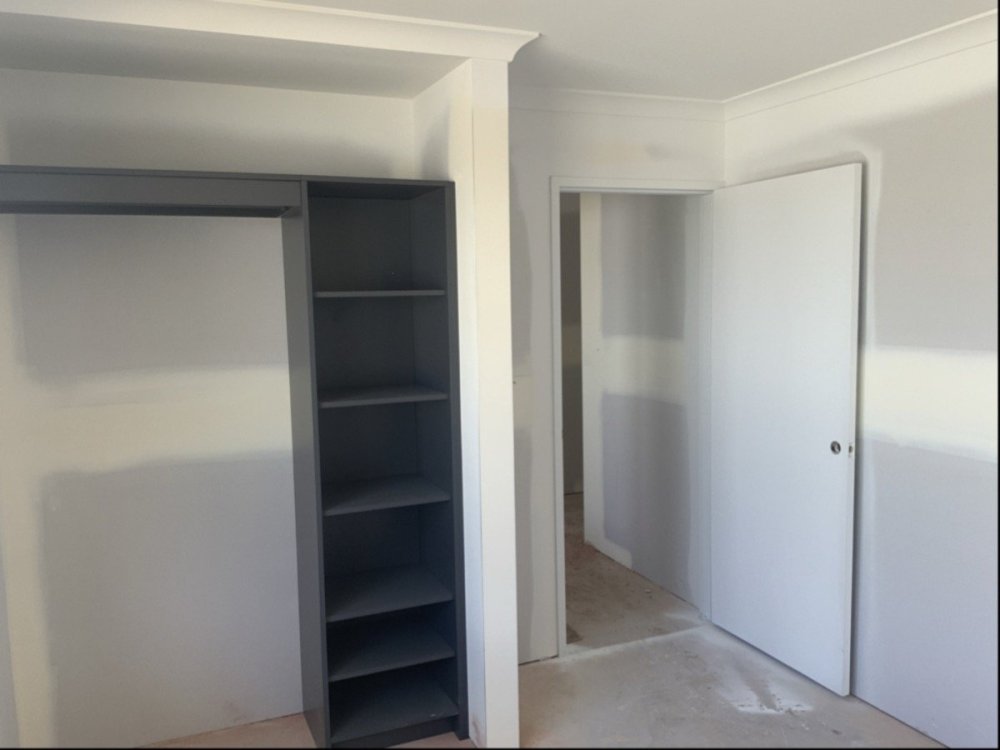
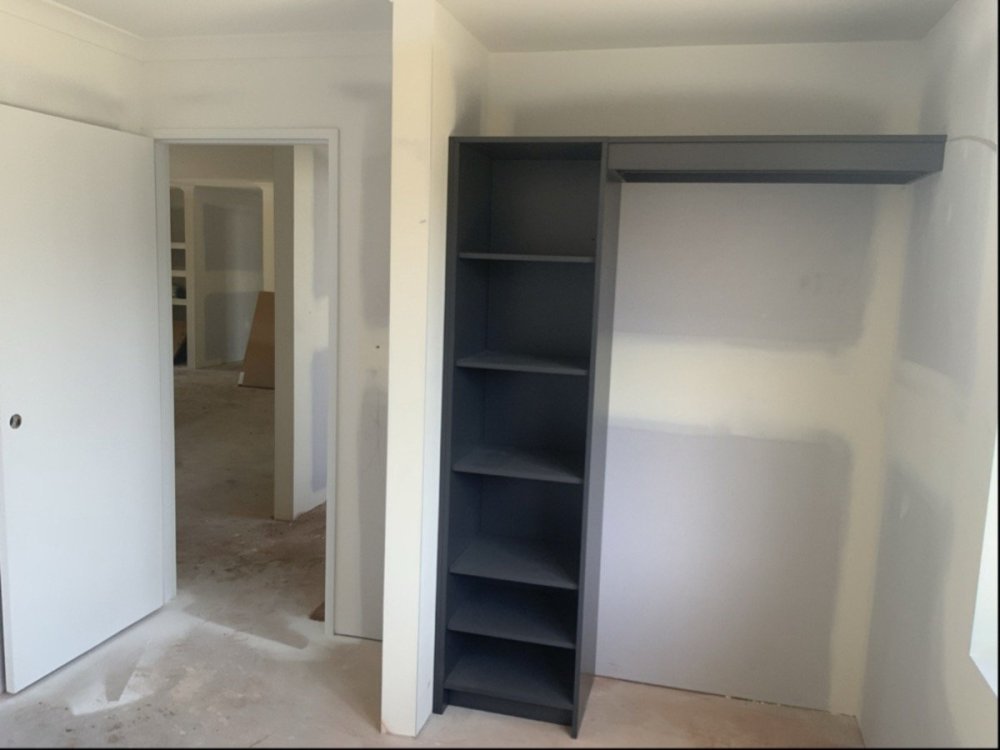
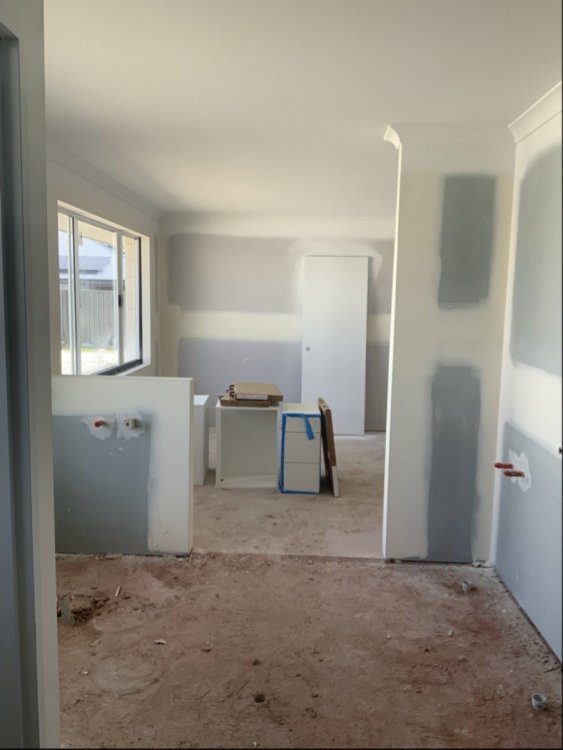
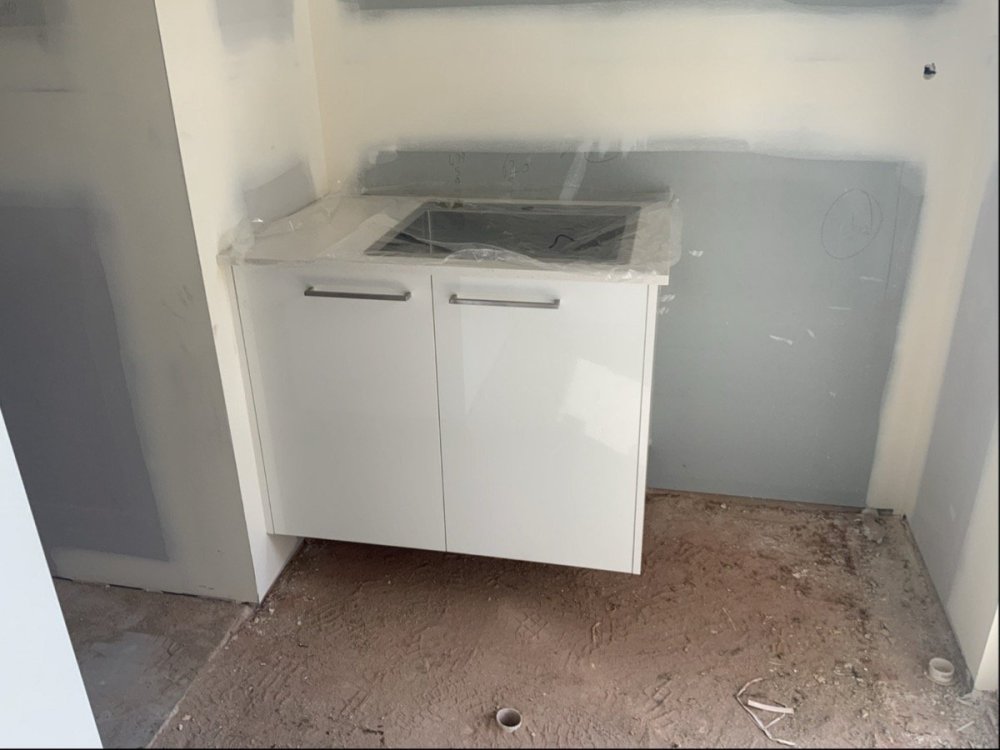
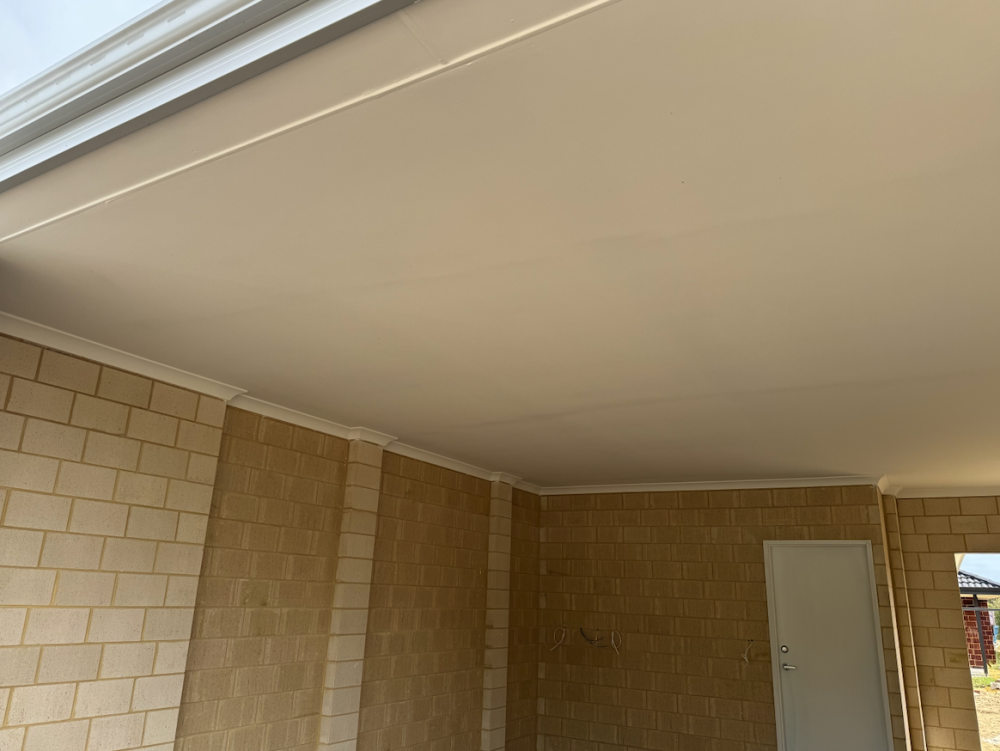
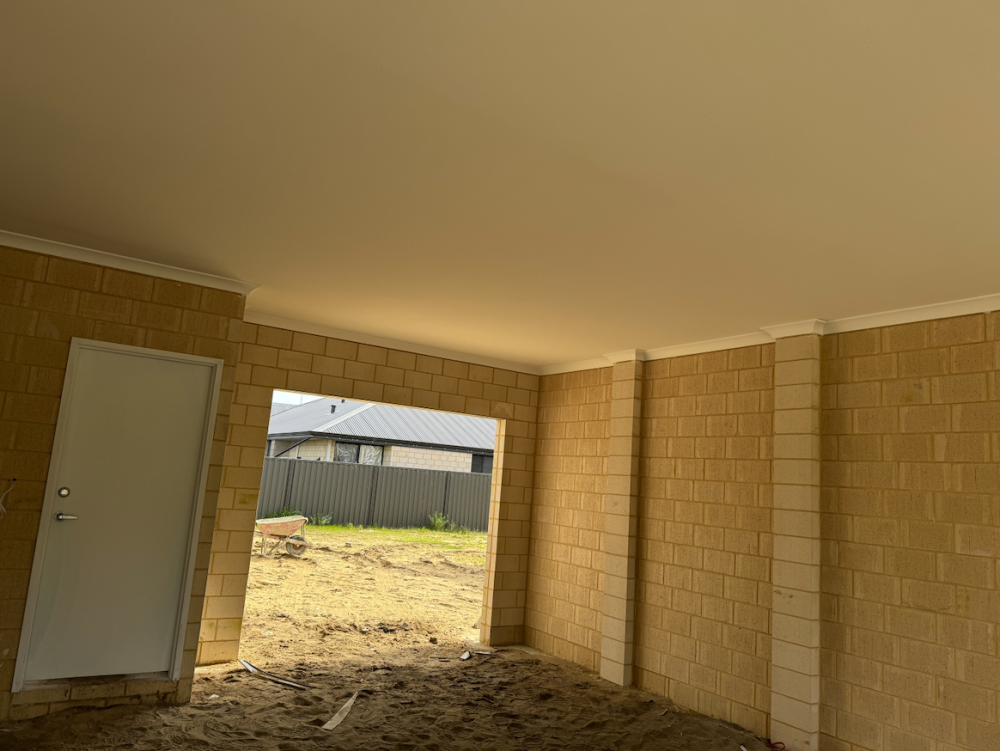
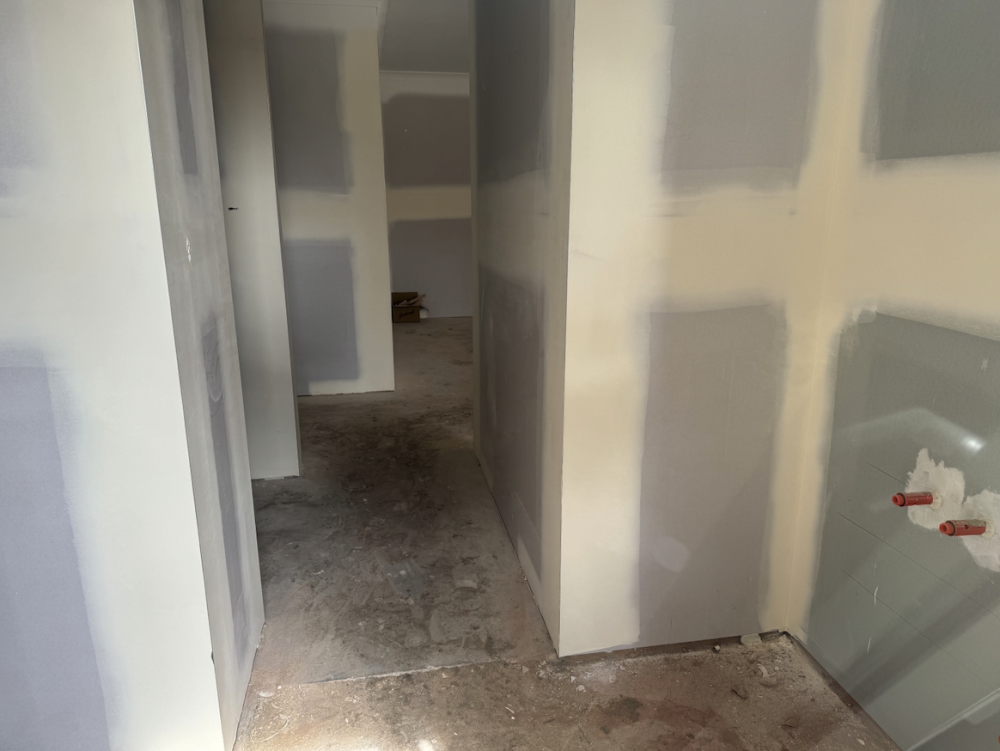
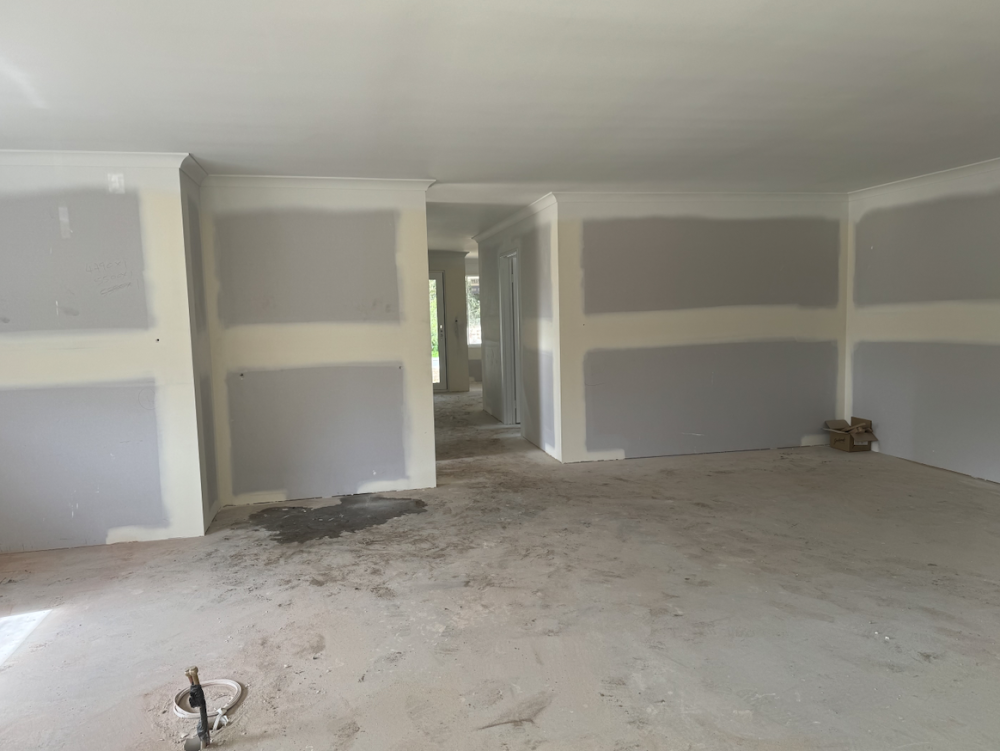
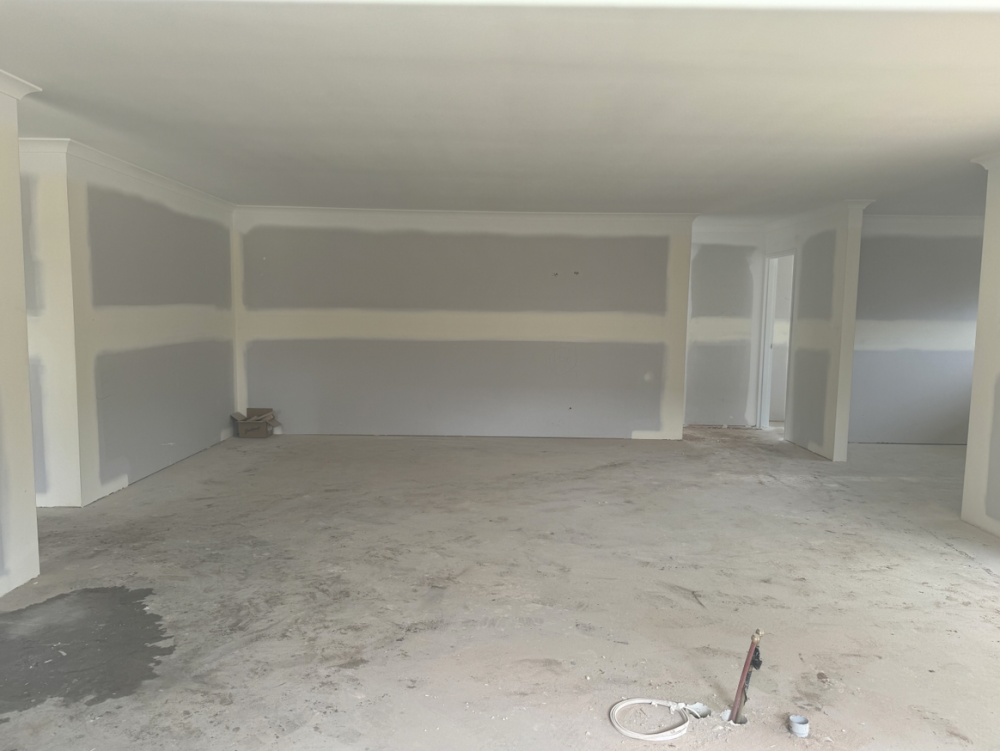
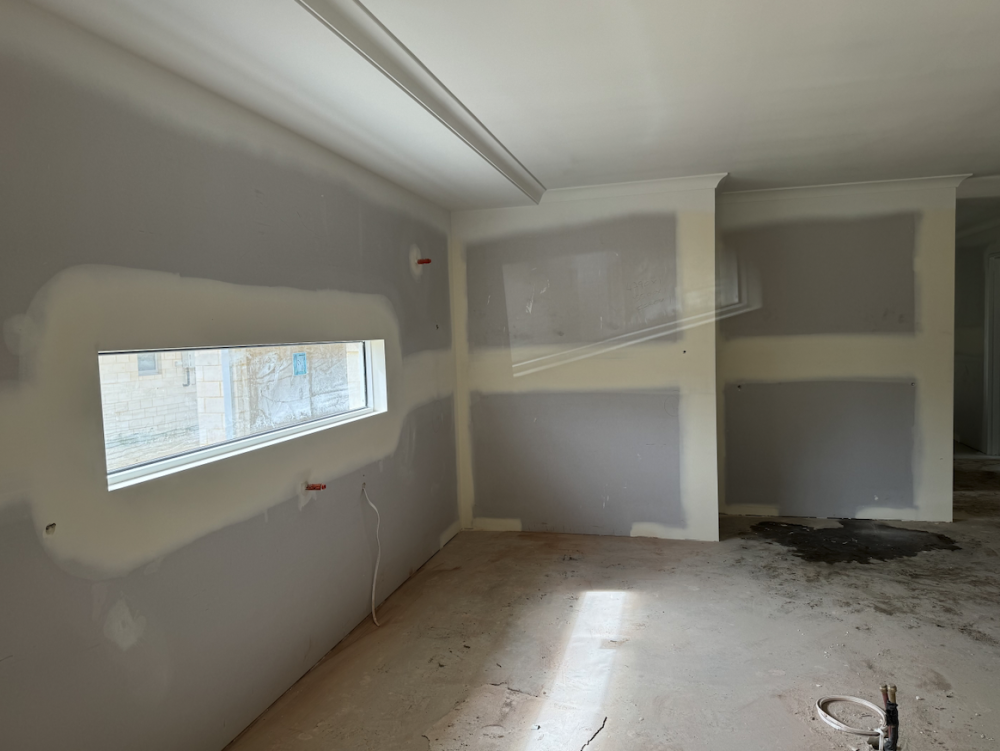
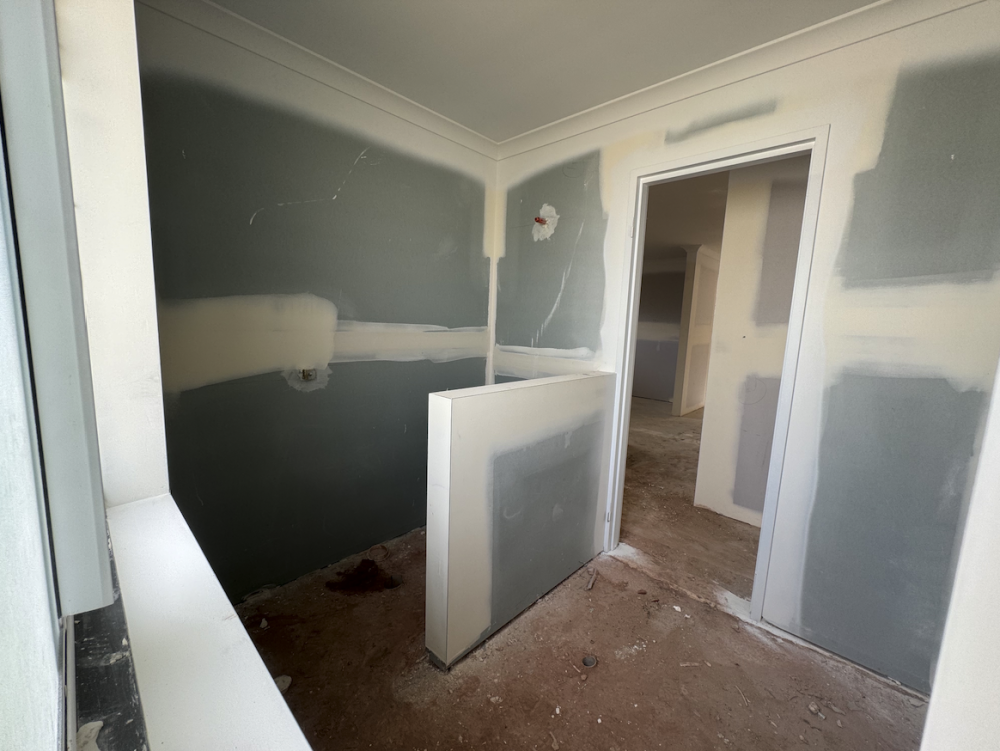
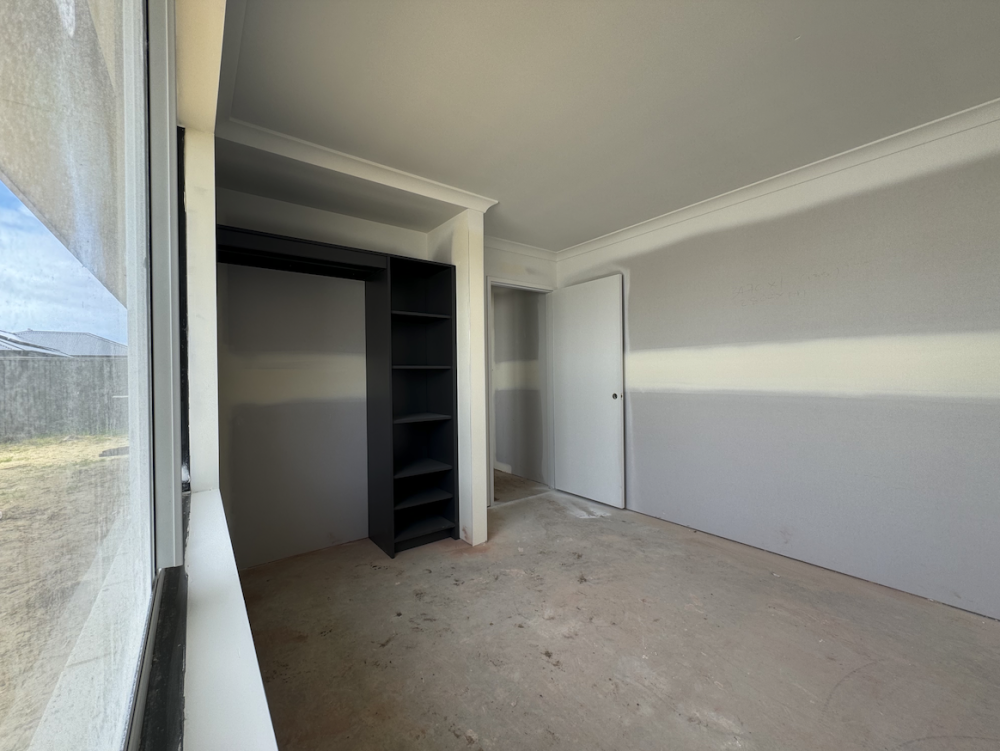
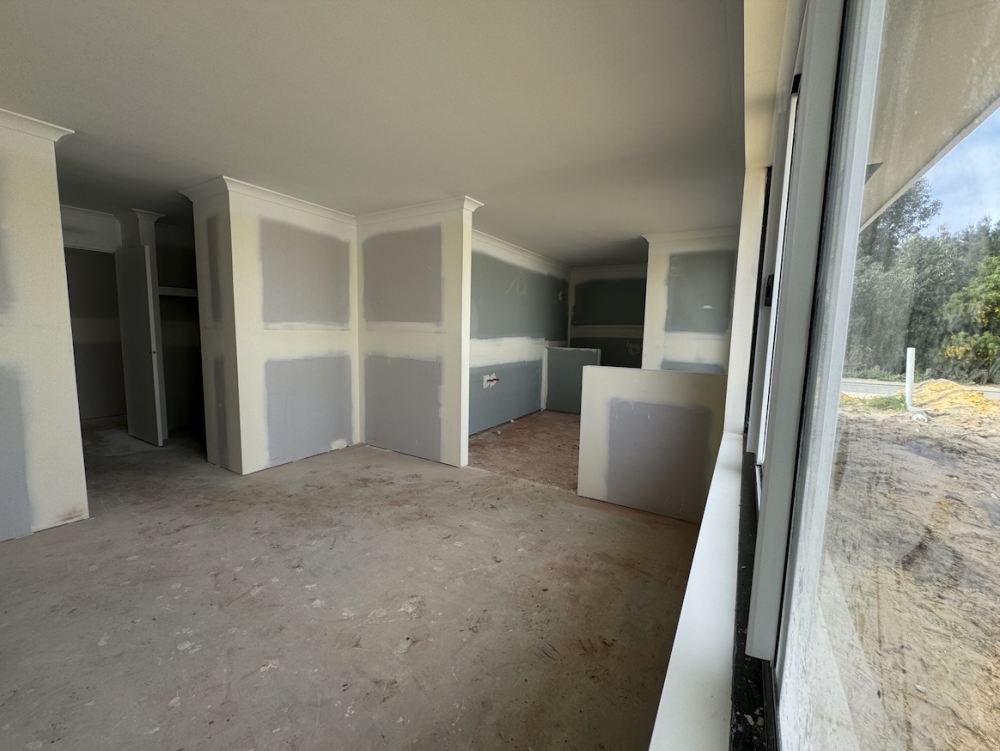
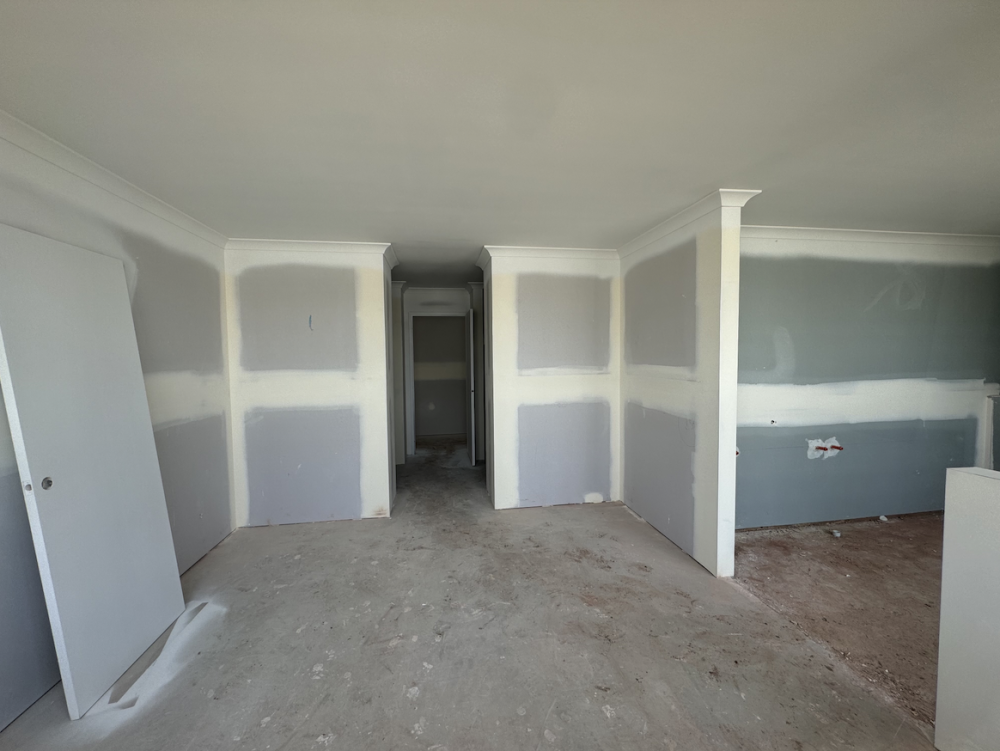
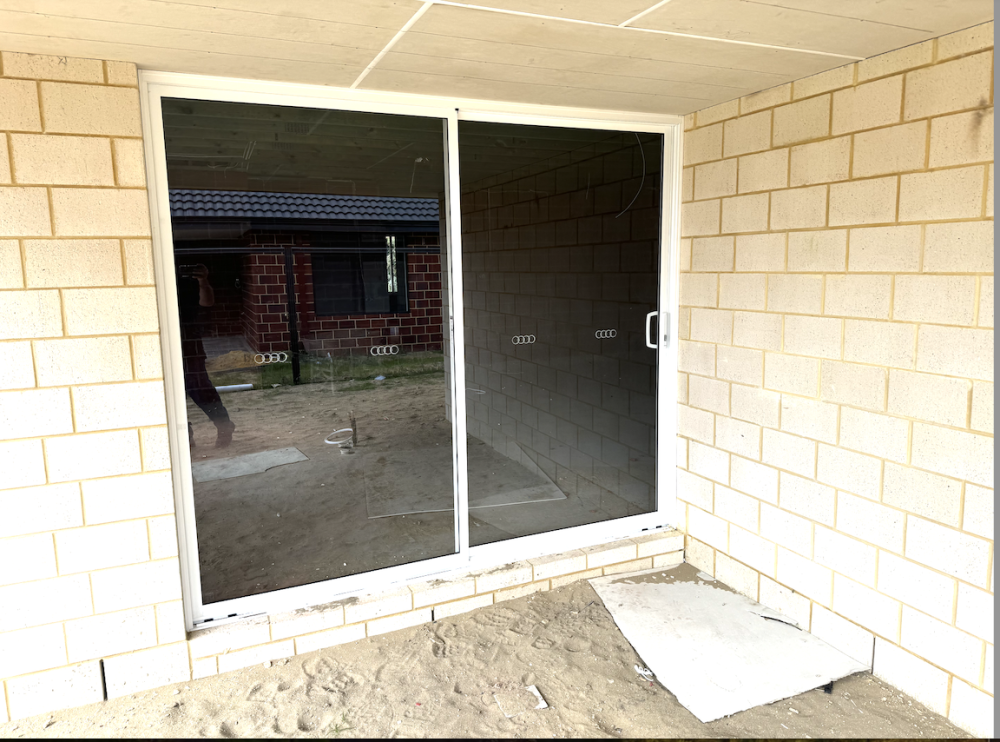
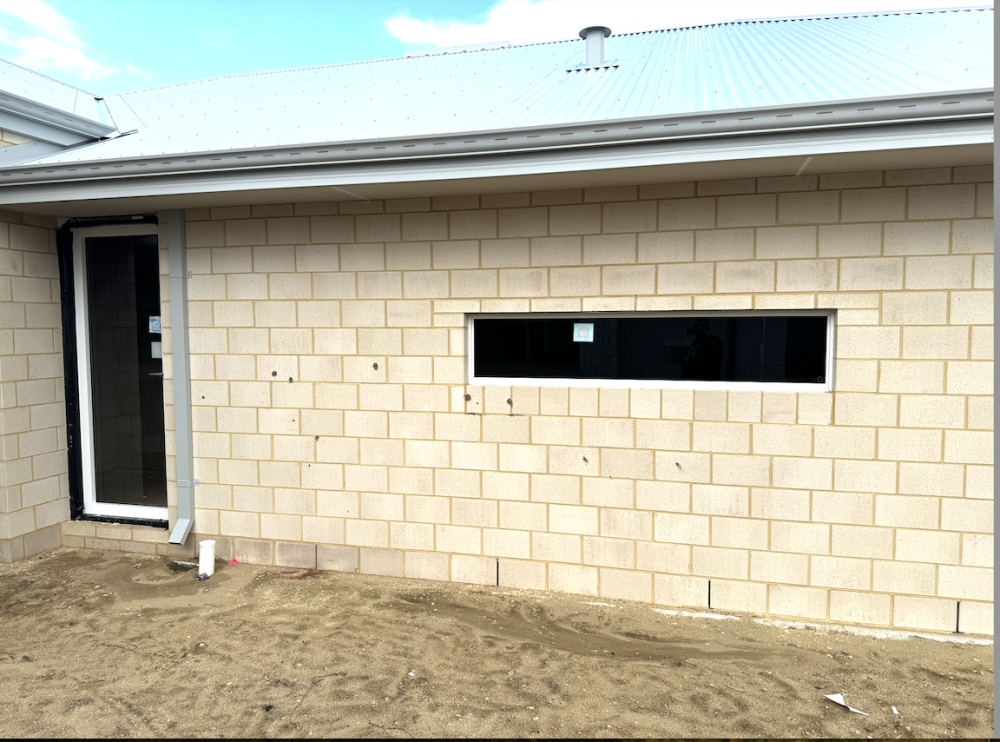
After another glorious 2 weeks of night shift ... I returned home on Wednesday. On the Monday, the builder sent me an email advising that the 'Ceilings' milestone had been completed - which also includes walls and cornice work ... and maybe any other number of activities before 'Lock up' (another milestone) is achieved. As I was drifting off to sleep on Wednesday afternoon (having been awake since about 4.30pm the day before!) an email arrives advising me that 'Lock Up' has been achieved ... Yay! - We're moving along ... but also Bummer! - I wanted to be able to do a walk through before lock up. I sent an email to the builders liaison asking for access but was given a negative response ... So ... Yesterday (Thursday), I headed down to the block, hopeful that I might be able to provide updates regardless. The first thing I noticed on arrival was the door installed to the garage laundry entry. Of course, a closer inspection shows the ceiling installed in the garage also I might not be able to take a walk through the house ... but I have glass entry doors and windows! So I figured I'd take what photos I could from a walk around it ... Surprisingly, the reveals were better than I thought! From the laundry door ... The only disappointment here was that - no matter my viewing location, I can't see the shelving installed to the WIL (Walk In Linen) area off to the left hand side up the walkway there From the kitchen window ... Well, I hate the window, but it's good for something at least! ... A walk around the corner ... and a couple of shots from the sliding door into the alfresco area ... From the Home Theatre window ... Round the corner again to the rearmost bedroom window ... and this is where I noticed that some doors were installed ... some paintwork applied to the doors and the ceilings! ... and the Della-Vita cabinetry has been installed to the bedroom robe. Also ... about this time I noticed that all the windows had been locked open ... probably to allow airflow for drying any remaining damp areas and the paintwork. So I carefully poked the phone into the rear bathroom area to take a snap of that - because the window is opaque. The next bedroom ... which will be mainly used as storage for the stash once painted 😉 The Master bedroom looking toward the ensuite (right) and the corridor (left) with the WIRs (Walk In Robes). Looking directly at the WIRs and corridor to the main entry. I assume the painted door is for the ensuite toilet. A view from the ensuite window - which is situated from above where the bath will be installed ... showing the pipework for the double vanity on the opposite wall and the shower recess off to the right. Now that I've noticed the paintwork on the inside ... it becomes apparent that paint has been applied outside also to the eves, verandah (including posts) and alfresco areas That's all for now ... on the works update front. I have been advised of the next set of scheduled tasks ... to be completed between now (mid August) and the end of September. Plumbing Fittings Painting (Ceilings) Cabinet Delivery Cabinet install Garage concrete Tile material delivery Tiler prep Shower Waterproofing Tiler works (Tile Laying) – mid to end of September Acrylic render (colour coat) Apparently, once the tiler commences works, there is a 12 week expectation before the house is ready for handover. According to their scheduling I should, therefore, receive keys by early to mid December. There will be some works that need to be completed before moving in a painted bathroom, laundry and maybe the kitchen ... but everything else should be ok to start once inside! Rog


-
If you guys fancy a laugh ... In 2006, one of our comedians here made a 'mocumentary' in the great Australian tradition of taking the p&%$ Rog
-
It seems that dodgy building happens everywhere! ... It really pays to engage a builder with a long term reputation of doing things right ... Having satisfied customers etc etc. Back when I was a kid, building was really very simple - Slab, Bricks, Windows, Plaster, Ceilings, Plumbing, Electrical and Cabinets. No Flooring (except rudimentary wet area tiling), Window dressing, Insulation, Aircon, Storm water removal, Telephone connection ... that was all your responsibility for after you moved in. It wasn't until much later that we started getting more 'inclusive' packages and now there are a LOT of trades to be engaged before housing is complete - Plus, of course, the old book of building standards has become a labyrinth resembling the old set of Encyclopaedia Britannica! Building has become a minefield ... so no wonder they're all so skittish!Yes ... I saw the 'photo bomb' when I got back home and started looking through the photos ... but it was the only picture of the front door that I had, so I thought 'F*@# it!' 😆 Rog
-
At this stage, one of the rear bedrooms will be the stash room … until a storage attic can be built into the roof cavity. 🤣🤣🤣 … at this stage there’s no pool … though there may be a spa later on … I am advised that ‘Handover’ will occur sometime between end of February and end of April next year. :) I like big butts and I cannot lie ??? Rog :)
-
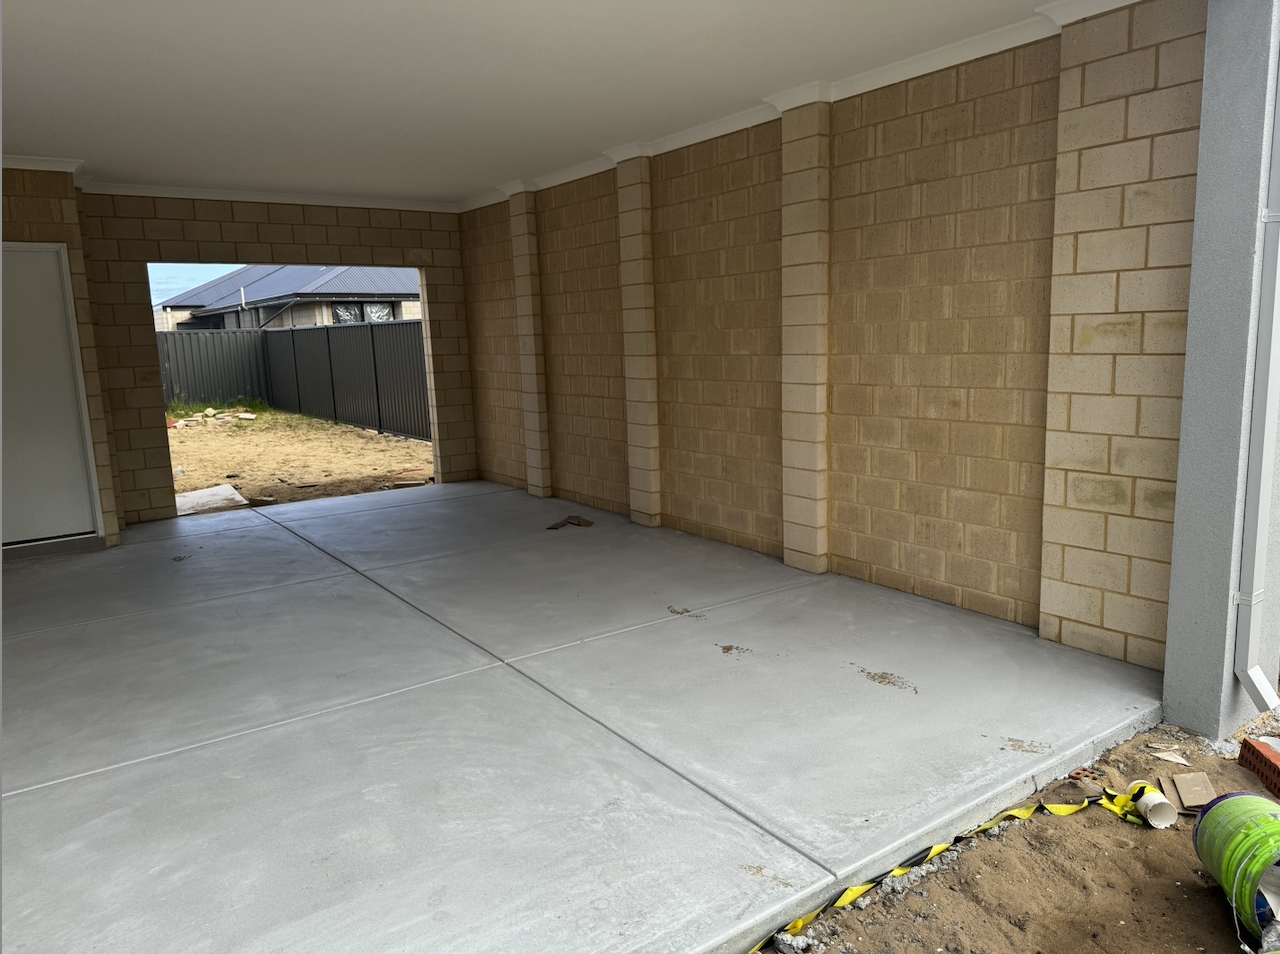
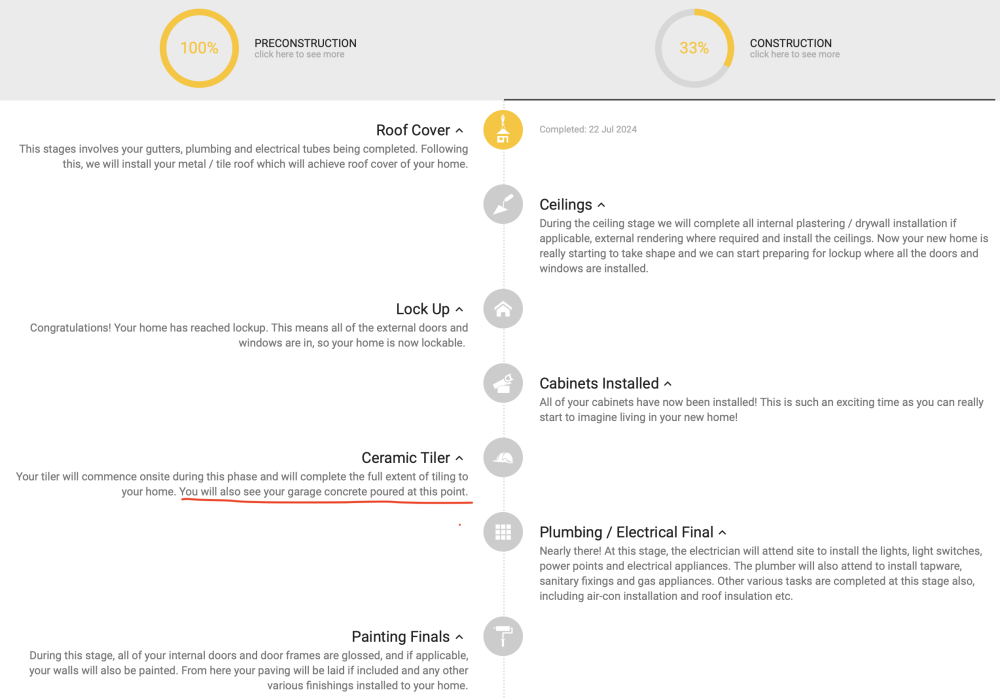
Heya Carl ... To answer your question ... The garage will have a hardstand poured in concrete, yes ... The timing varies but from my client portal below - about when the tiling is done inside the house ... The external brick paving is one of the final jobs from memory. I'm quite a way ahead of the predicted schedule ... so the construction market must be returning to normal, I guess? In Western Australia ... Greater Perth, at least ... Double brick and Tile/iron has been a building staple since way back ... though, there are some varying construction methods (brick veneer, timber/steel frame etc ... even prefab concrete!) Rog
-
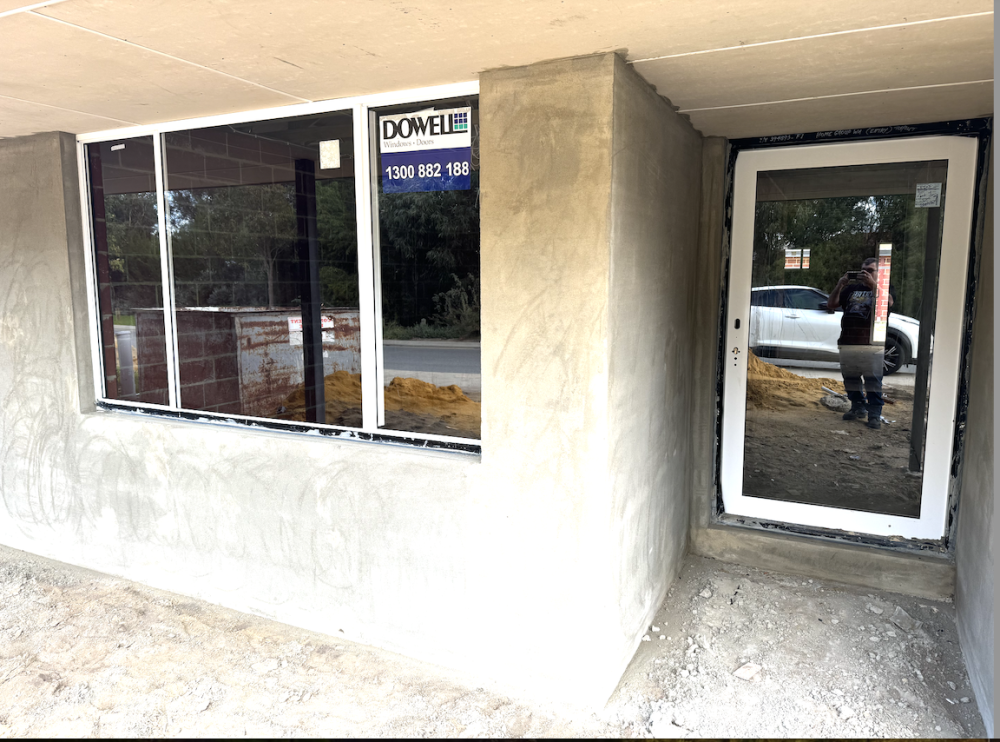
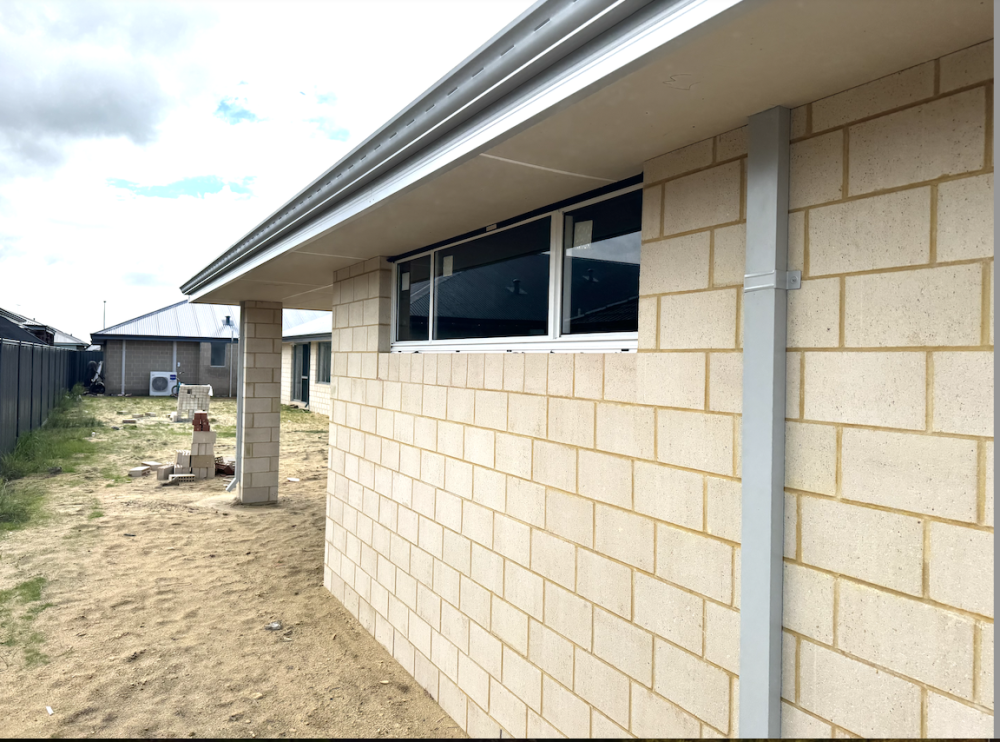
Hey everyone ... Just a quick update ... I decided to take a quick trip down to the block on the day before flying back out to work, as it seems the builder is flying through construction! So ... on Tuesday 30th July I travelled down to see what sort of progress was made. The next building invoice and 'milestone' stage is 'lock up' - so before that happens, the house will need windows and external doors. At the same time, ceilings, walls and cornicing are completed ... and then, just before the final lockable door is installed (Garage) The shelving and rails are set up in the wardrobe and walk-in-linen areas. So ... we have windows! ... and the 1.2m glass front door ... Windows and glass doors everywhere! On both sides, inside the garage, wrapped Gyprock sheeting is neatly stacked, ready for the ceiling and (I assume) wall fixers to do their thing ... I head back home on Wednesday this week (14th Aug) after 2 weeks of night shift ... So I'll probably head down on Thursday again and see how far the plasterwork has progressed! Rog


-
I am hearing mainly good things about these Border 35th scale kits ... would need about 15-20 more kits in this scale before I bought the bullet though ... then I'd probably grab every one! Rog
-
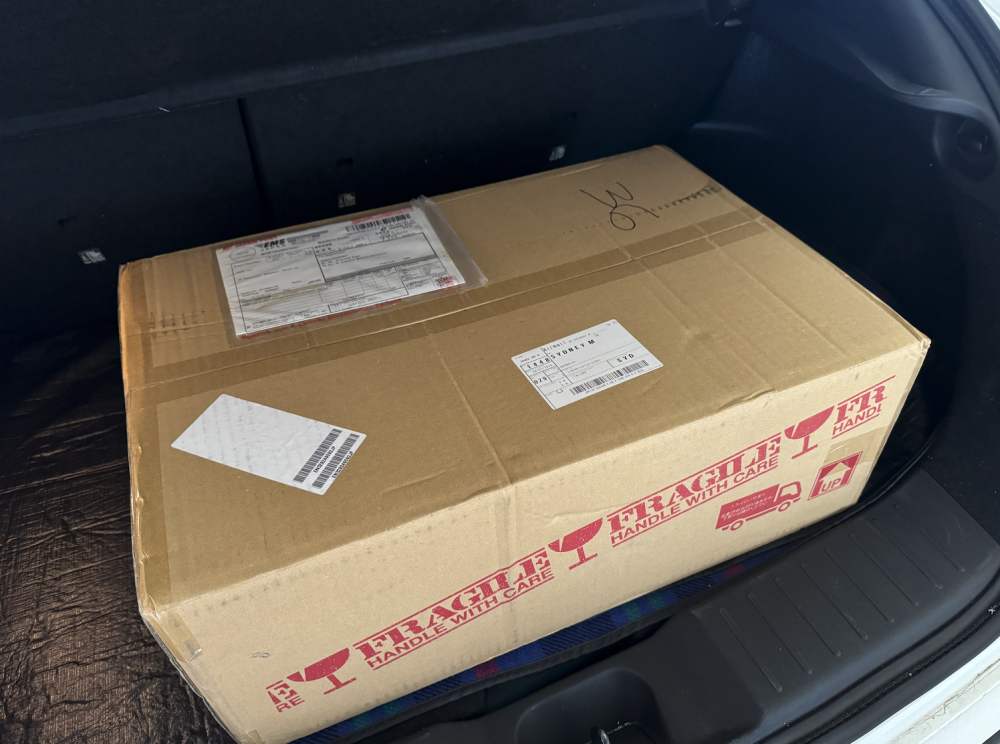
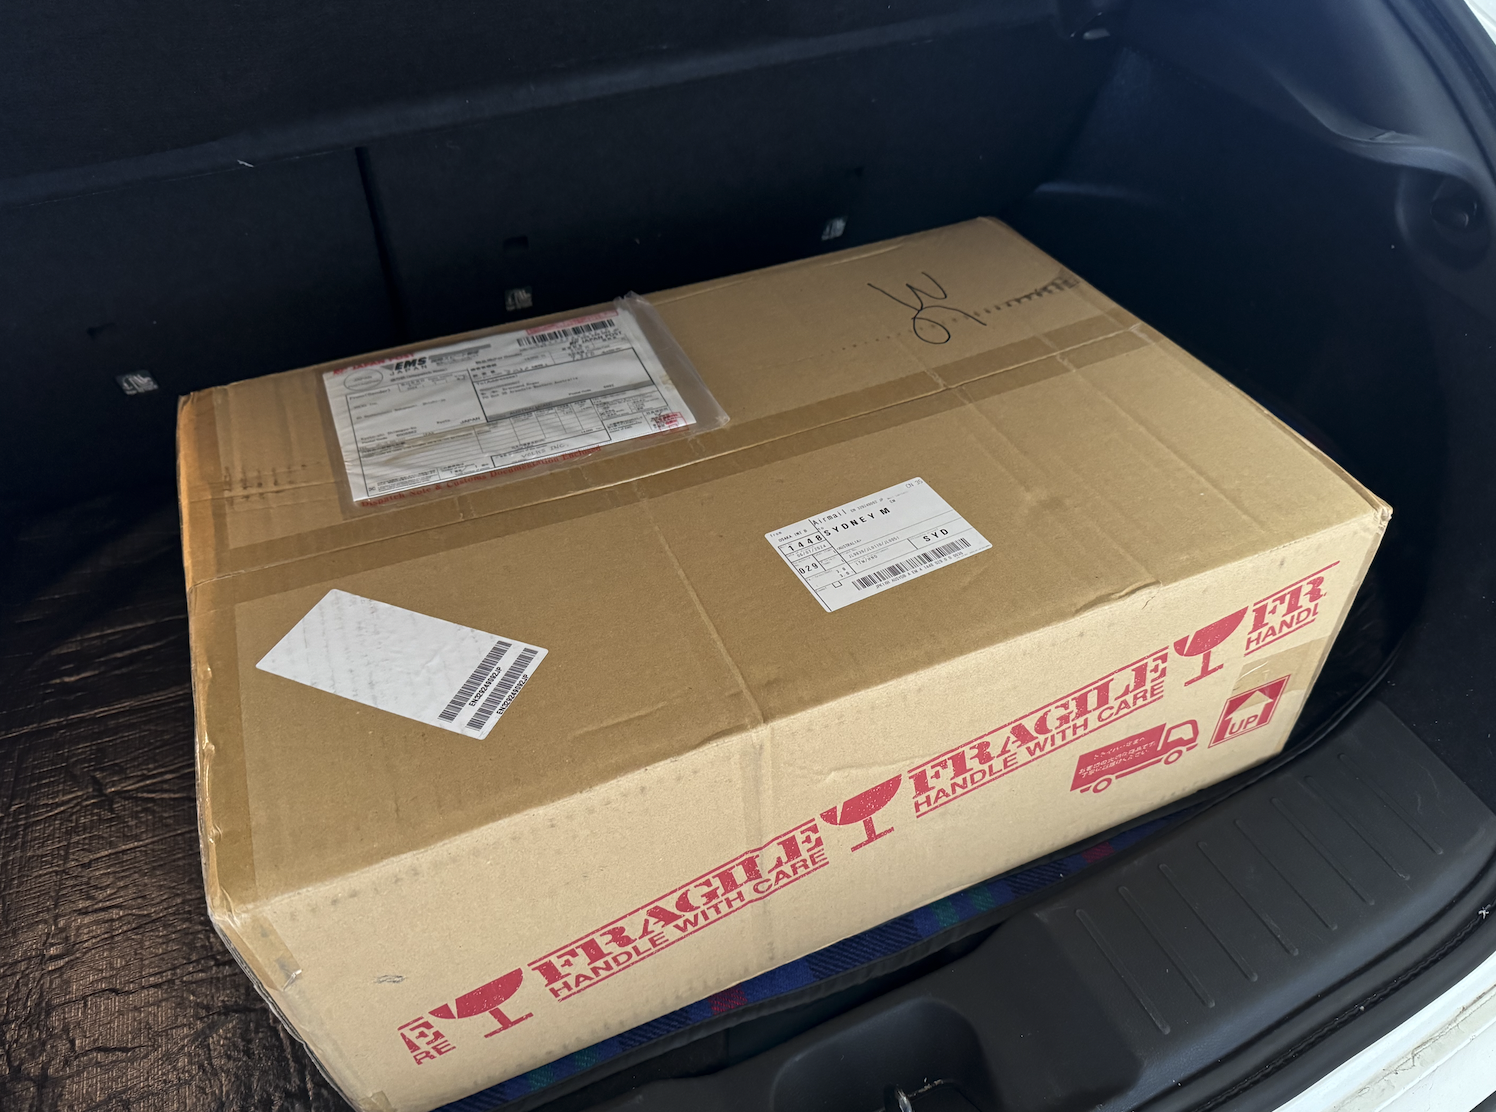
On the way back from the block and house build the other day - stopped by my Australia Post Office to collect this box ... Which contained this very well packed and cared for! Rog