Artful69
-
Posts
1,225 -
Joined
-
Last visited
Content Type
Profiles
Forums
Events
Gallery
Everything posted by Artful69
-
From here, the main stages go on this order: * Lock up * Practical Completion Inspection * Practical Completion * Handover Lock up usually arrives about a month after roof cover and is done before cabinetry, electrical fittings, plumbing fixtures, tiles, carpets etc are fitted … since ceilings and interior doors are painted, this also occurs after lock up. Apparently PCI happens about 3 months after lock up - usually … but we will see!! Short answer is the handover could occur anytime between December and April next year. Rog
-
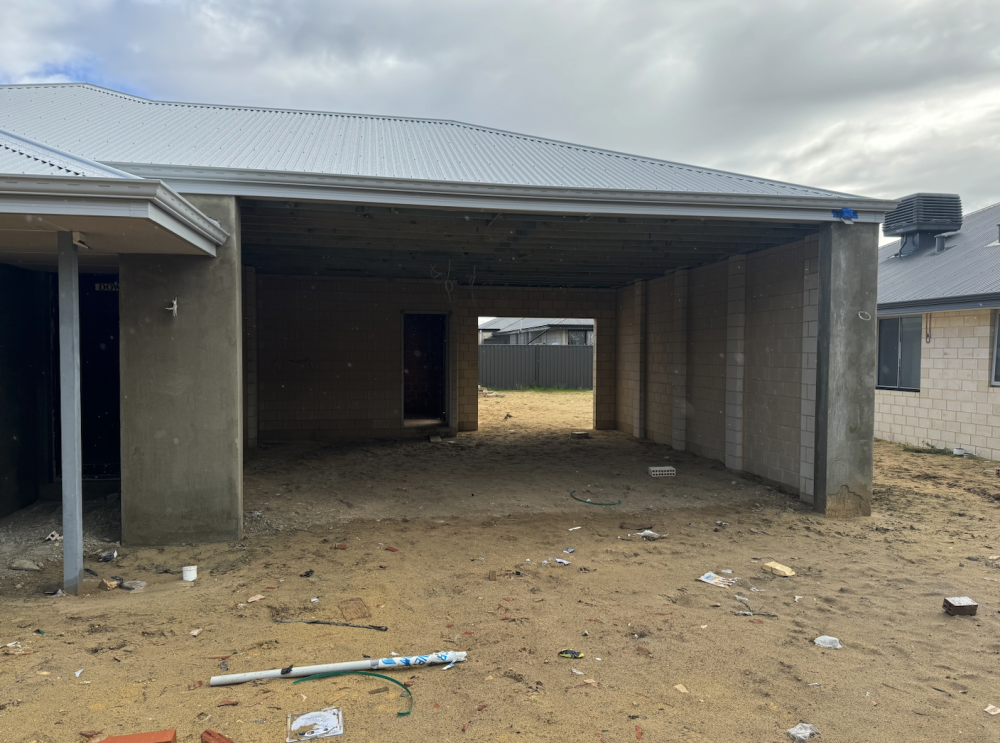
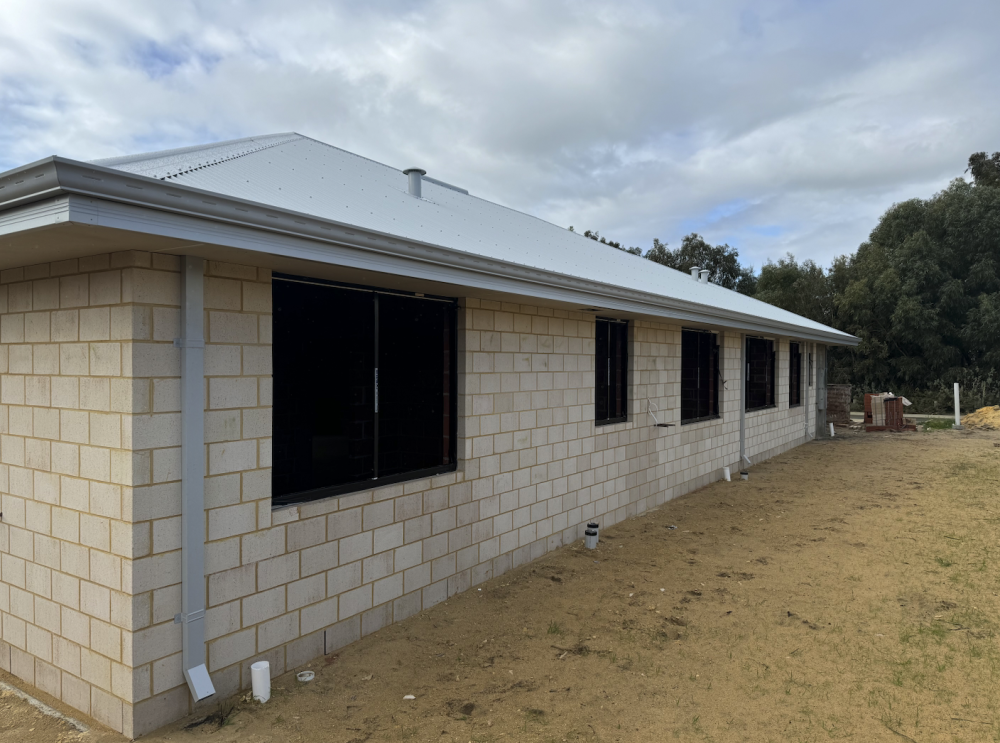
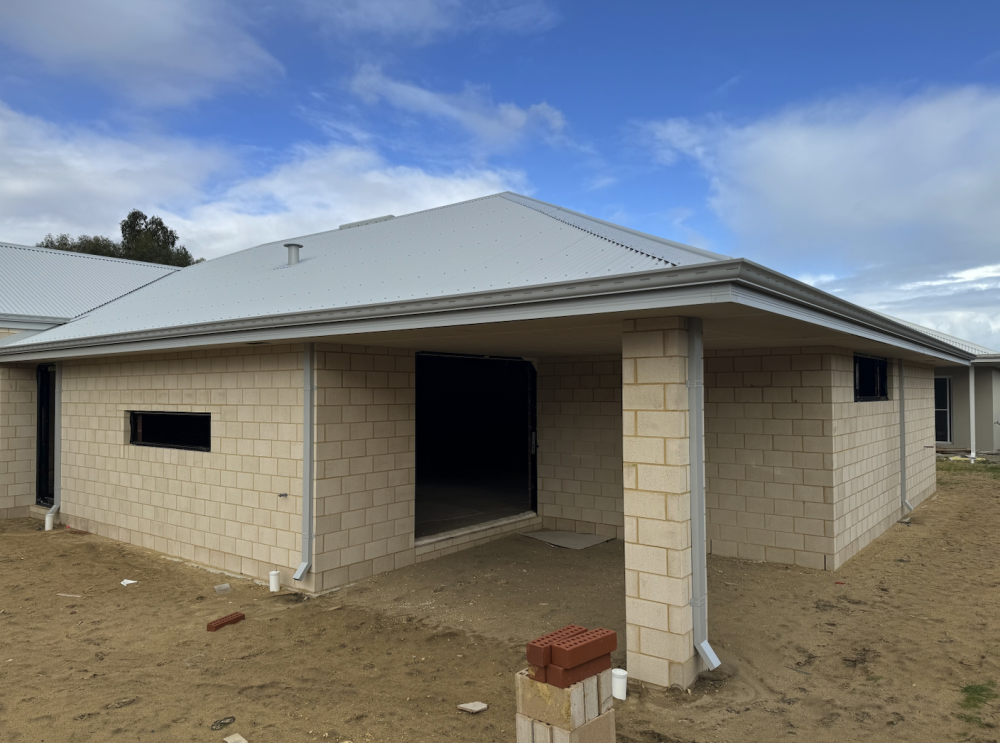
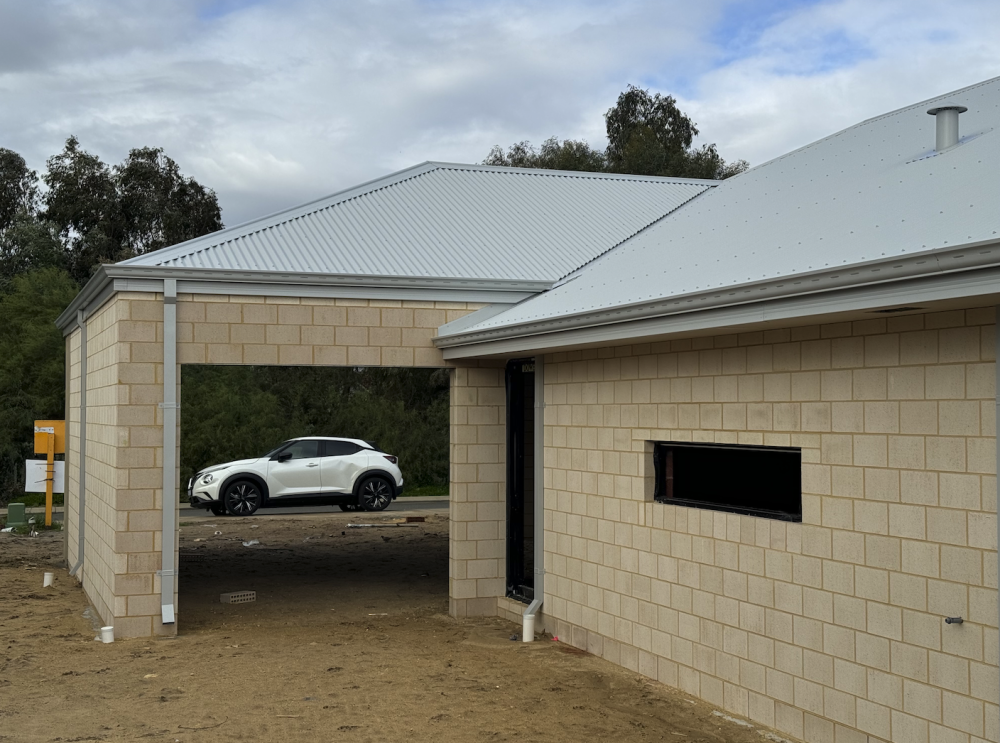
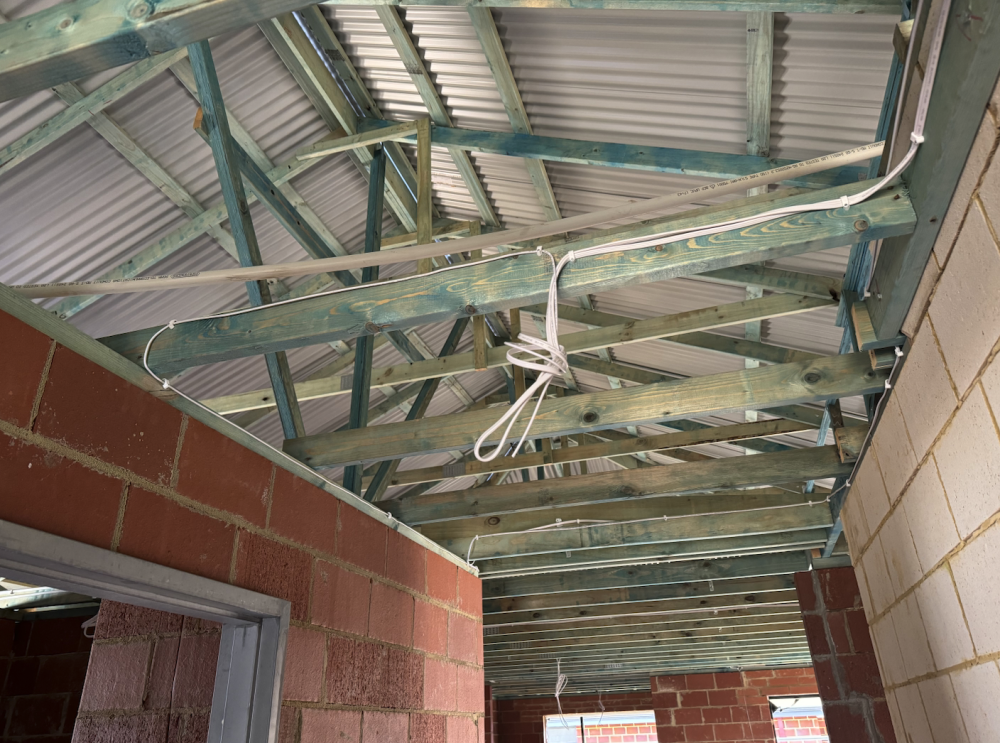
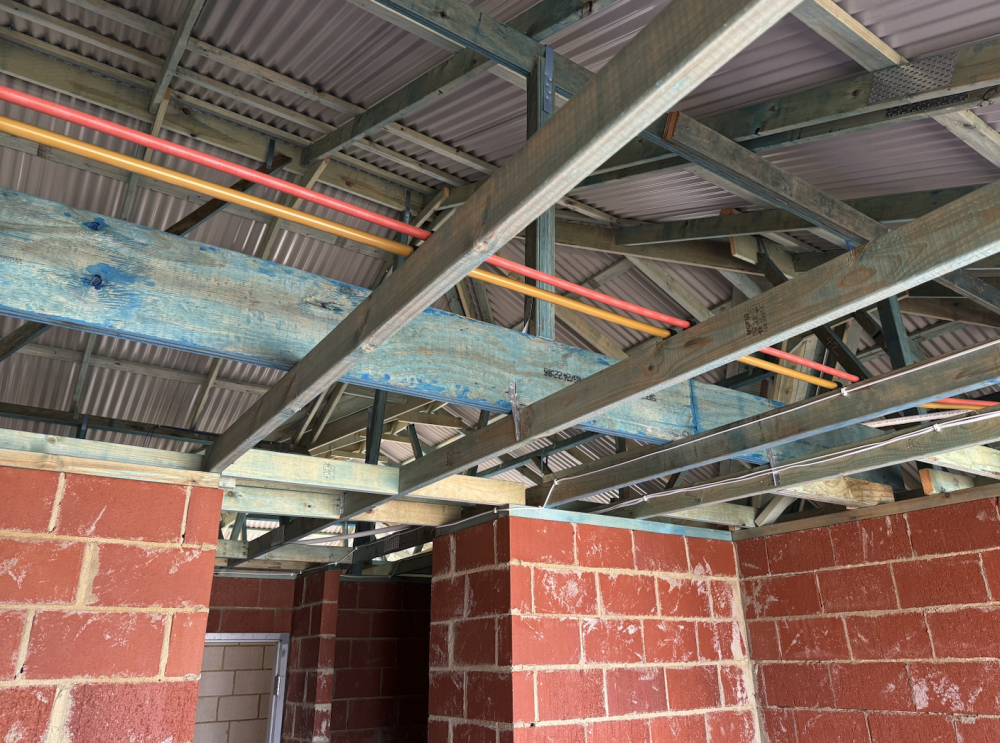
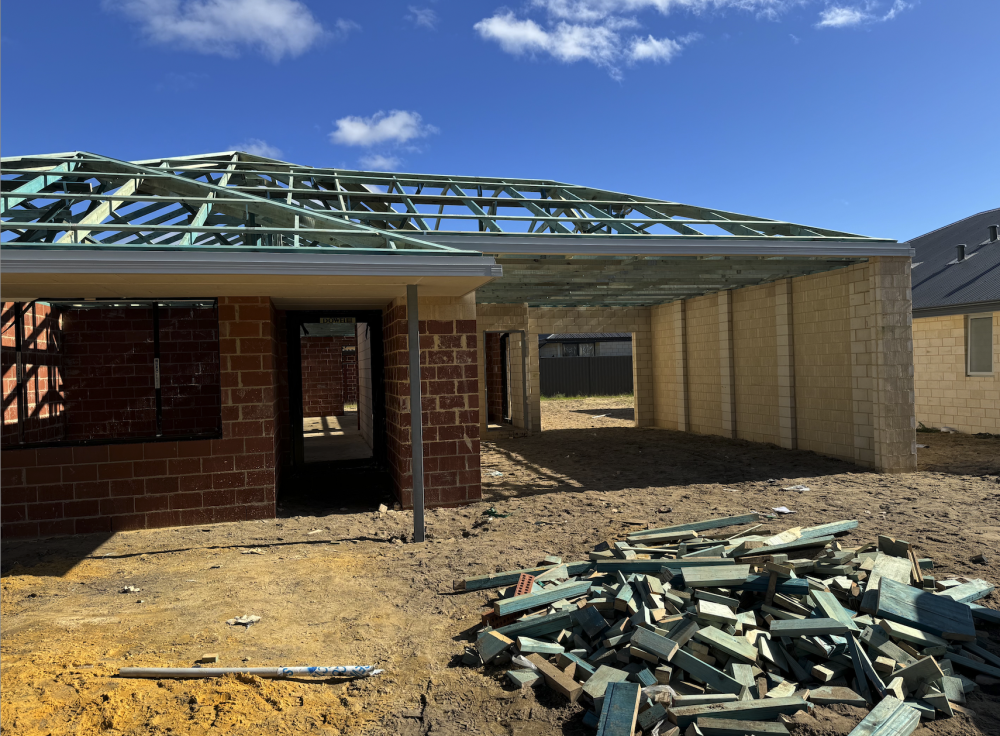
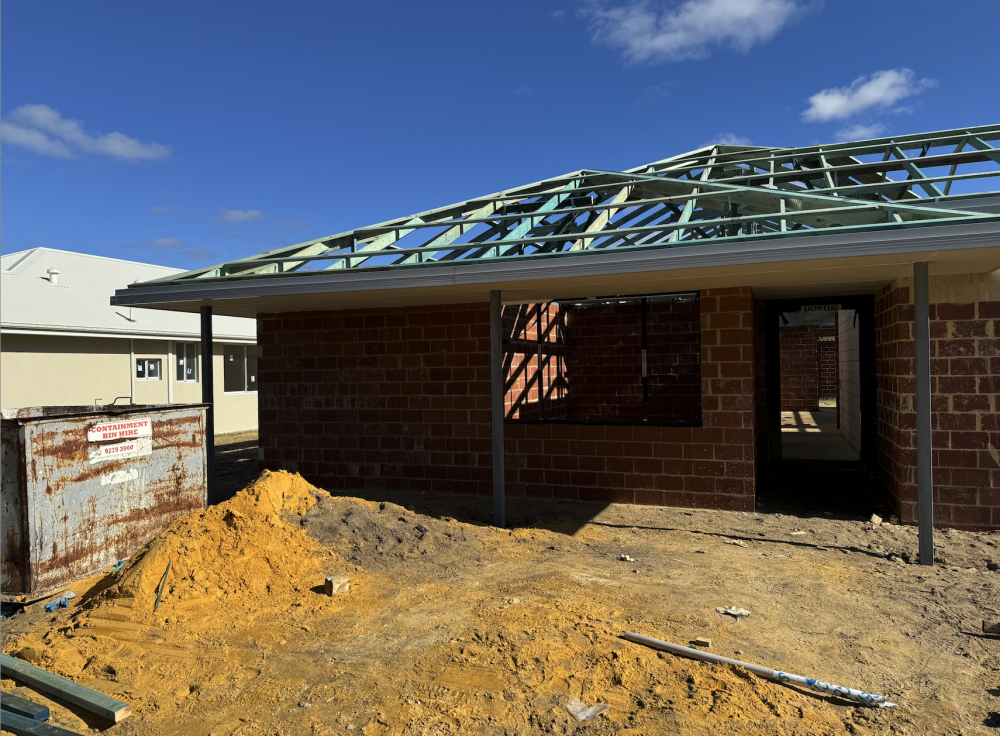
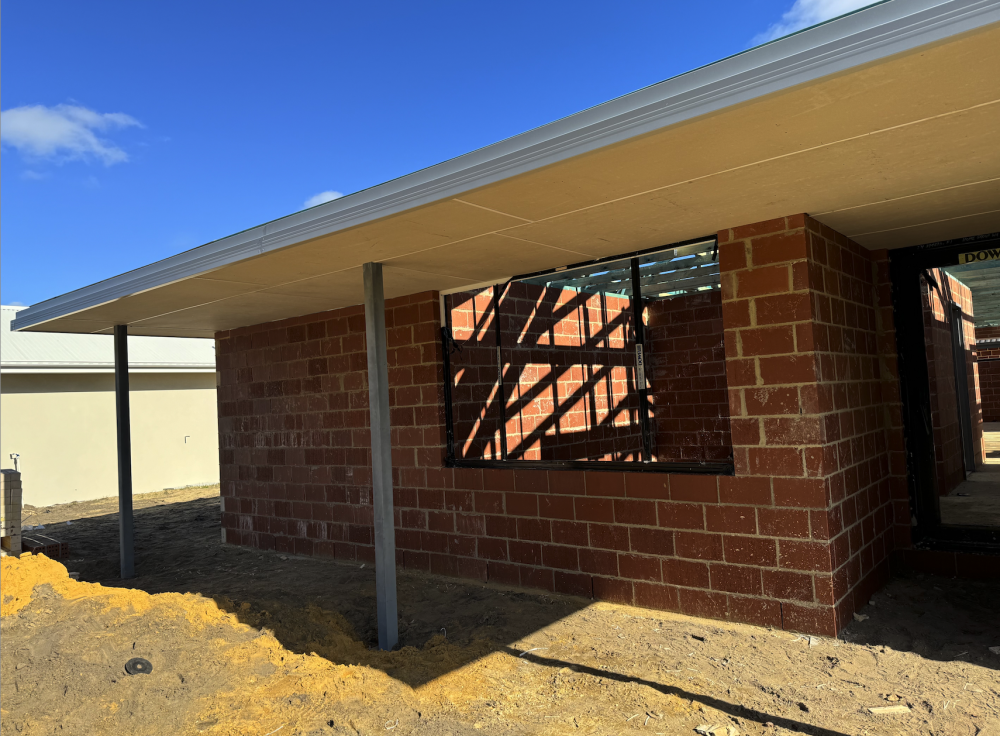
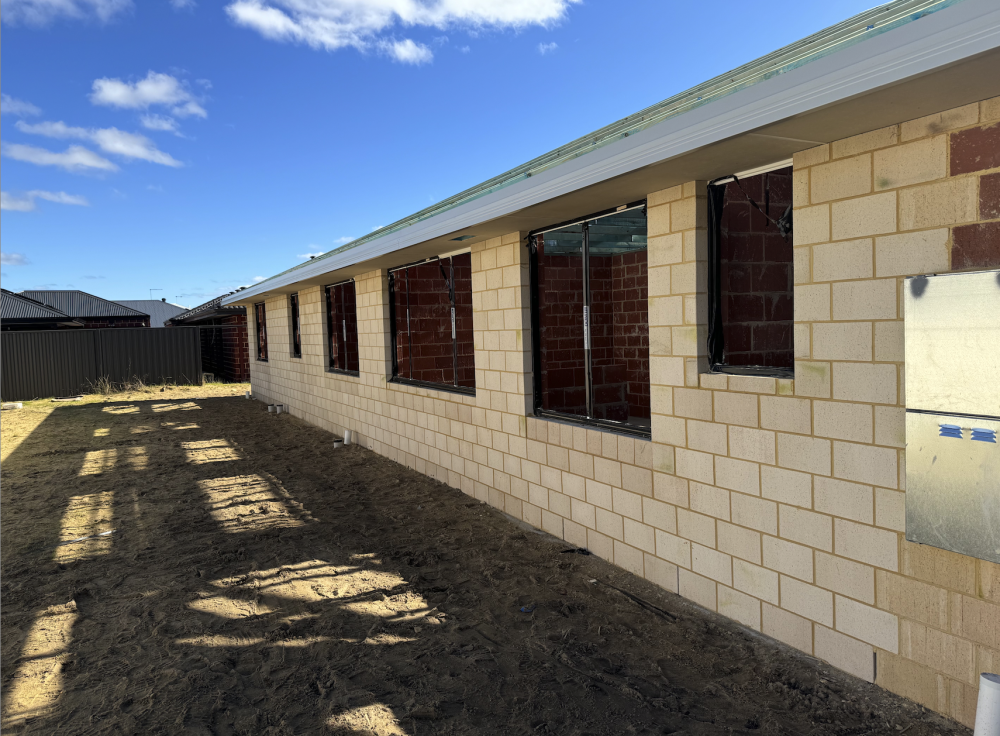
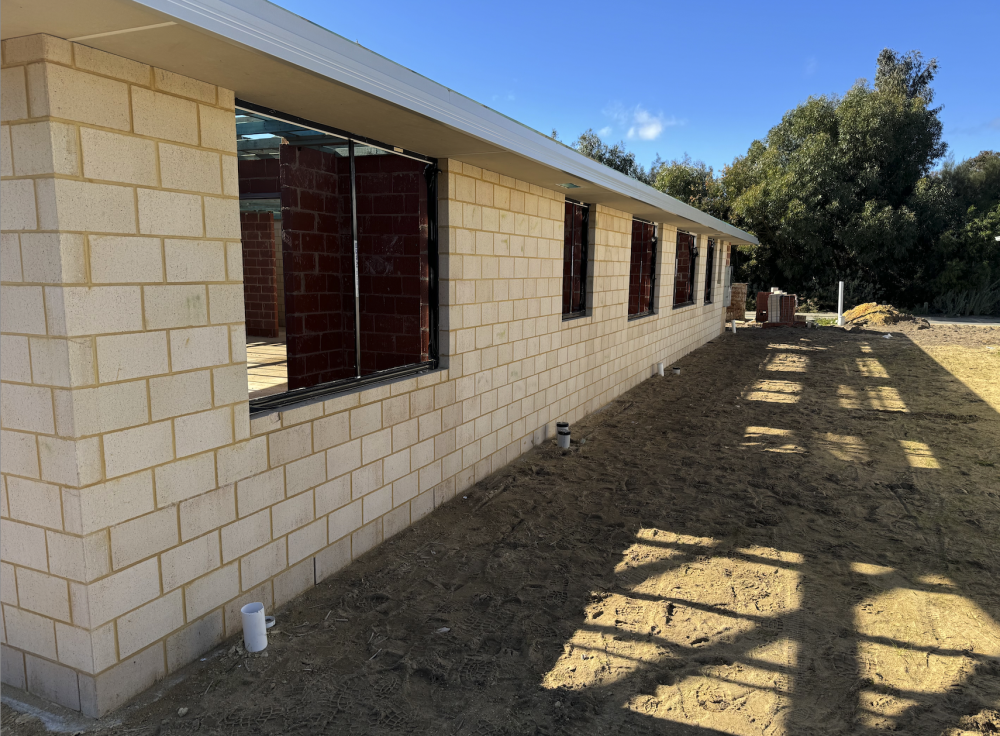
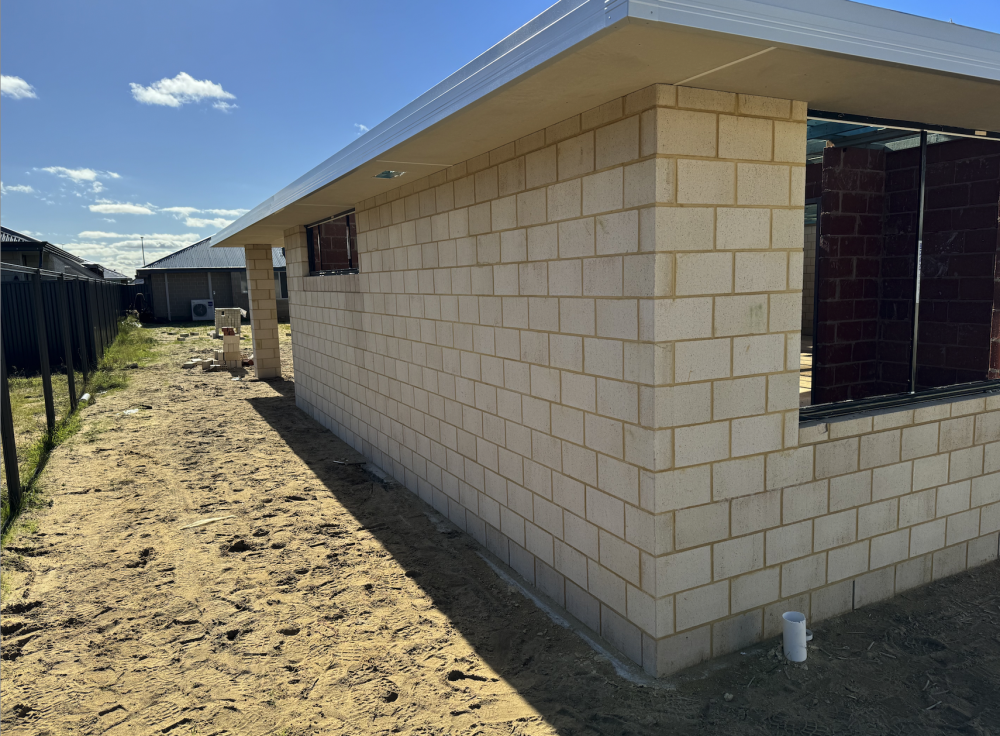
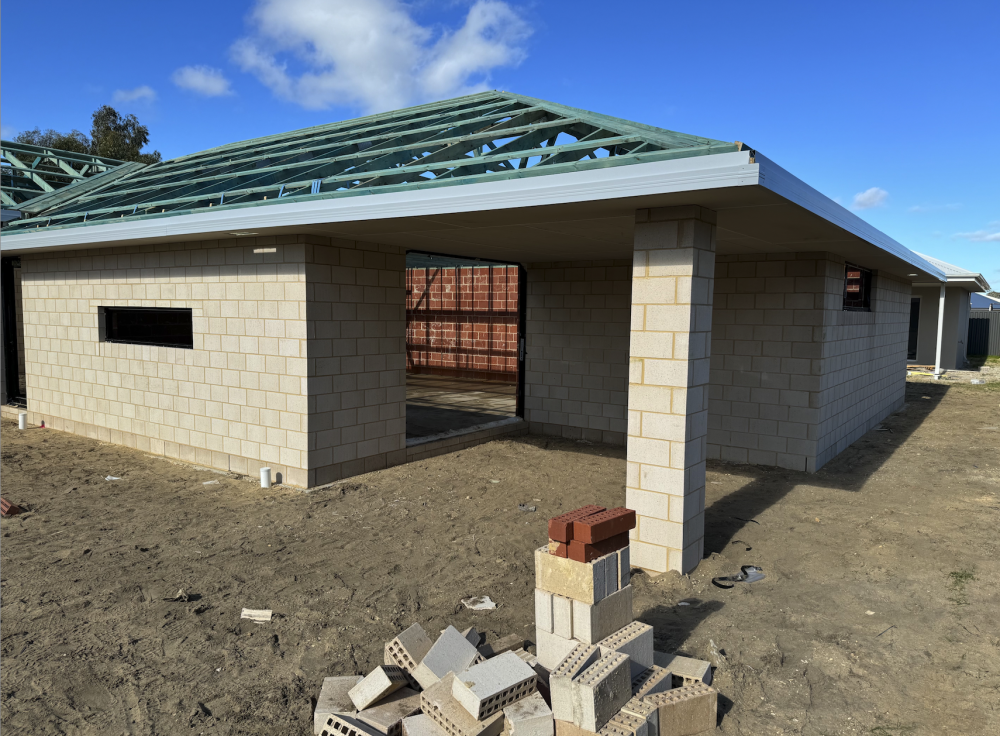
Along with a load of Birthday well wishers via Facebook on Monday, I received an email from the Builder to advise that "Roof Cover" had been achieved - a lovely Birthday gift to be sure! Roof Cover marks a stage of the build process where certain things have happened, including (obviously) - but not limited to - roof cover being completed ... When the roofing cover is installed (Tiles or Colorbond steel) the surrounding guttering and downpipes are also installed ... but prior to that, all interior cabling (electrical or communications) and pipework (gas or water) is installed. Some ancillary items are also dealt with, such as the front facing render on the building and any unfinished work from previous jobs, such as nailing the external fibro-cement boards to the roofing timbers around the eves, alfresco and verandah. Front rendering completed - sans patchwork and sealer ... The below section of the wall will be painted in a light blue colour called Calm Day. A few shots of the Shale Grey coloured Colorbond roofing ... This area of the render will be painted the same colour as the roof ... A few photos of the interior showing cabling and pipe installation Next up they will be fitting the ceilings and the plasterboard apparently ... Rog


-
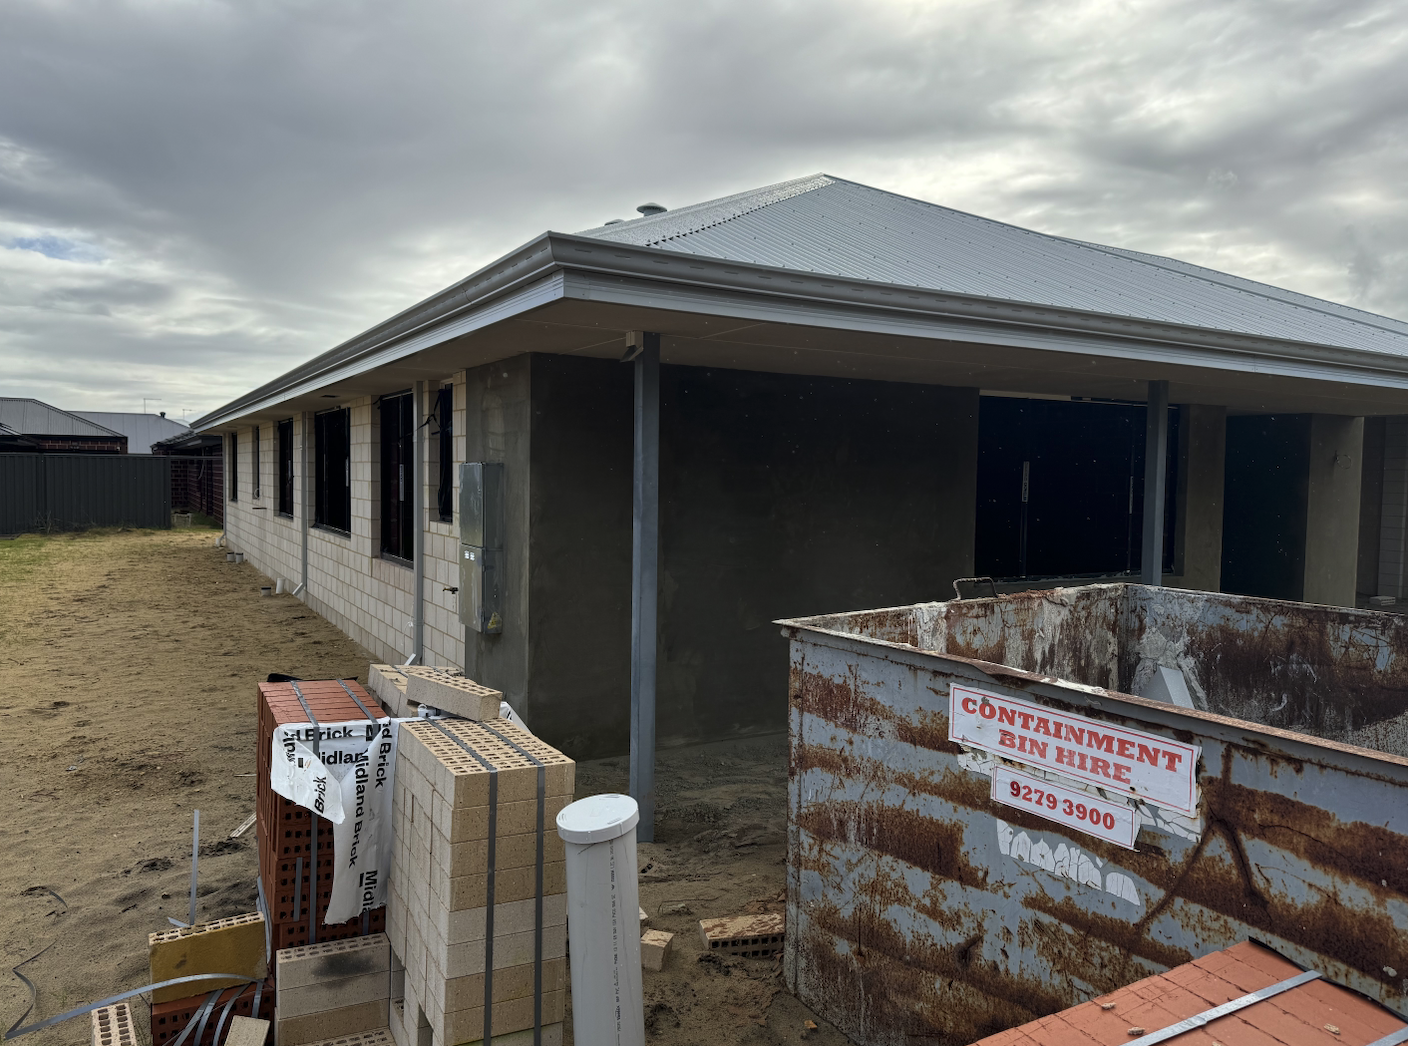
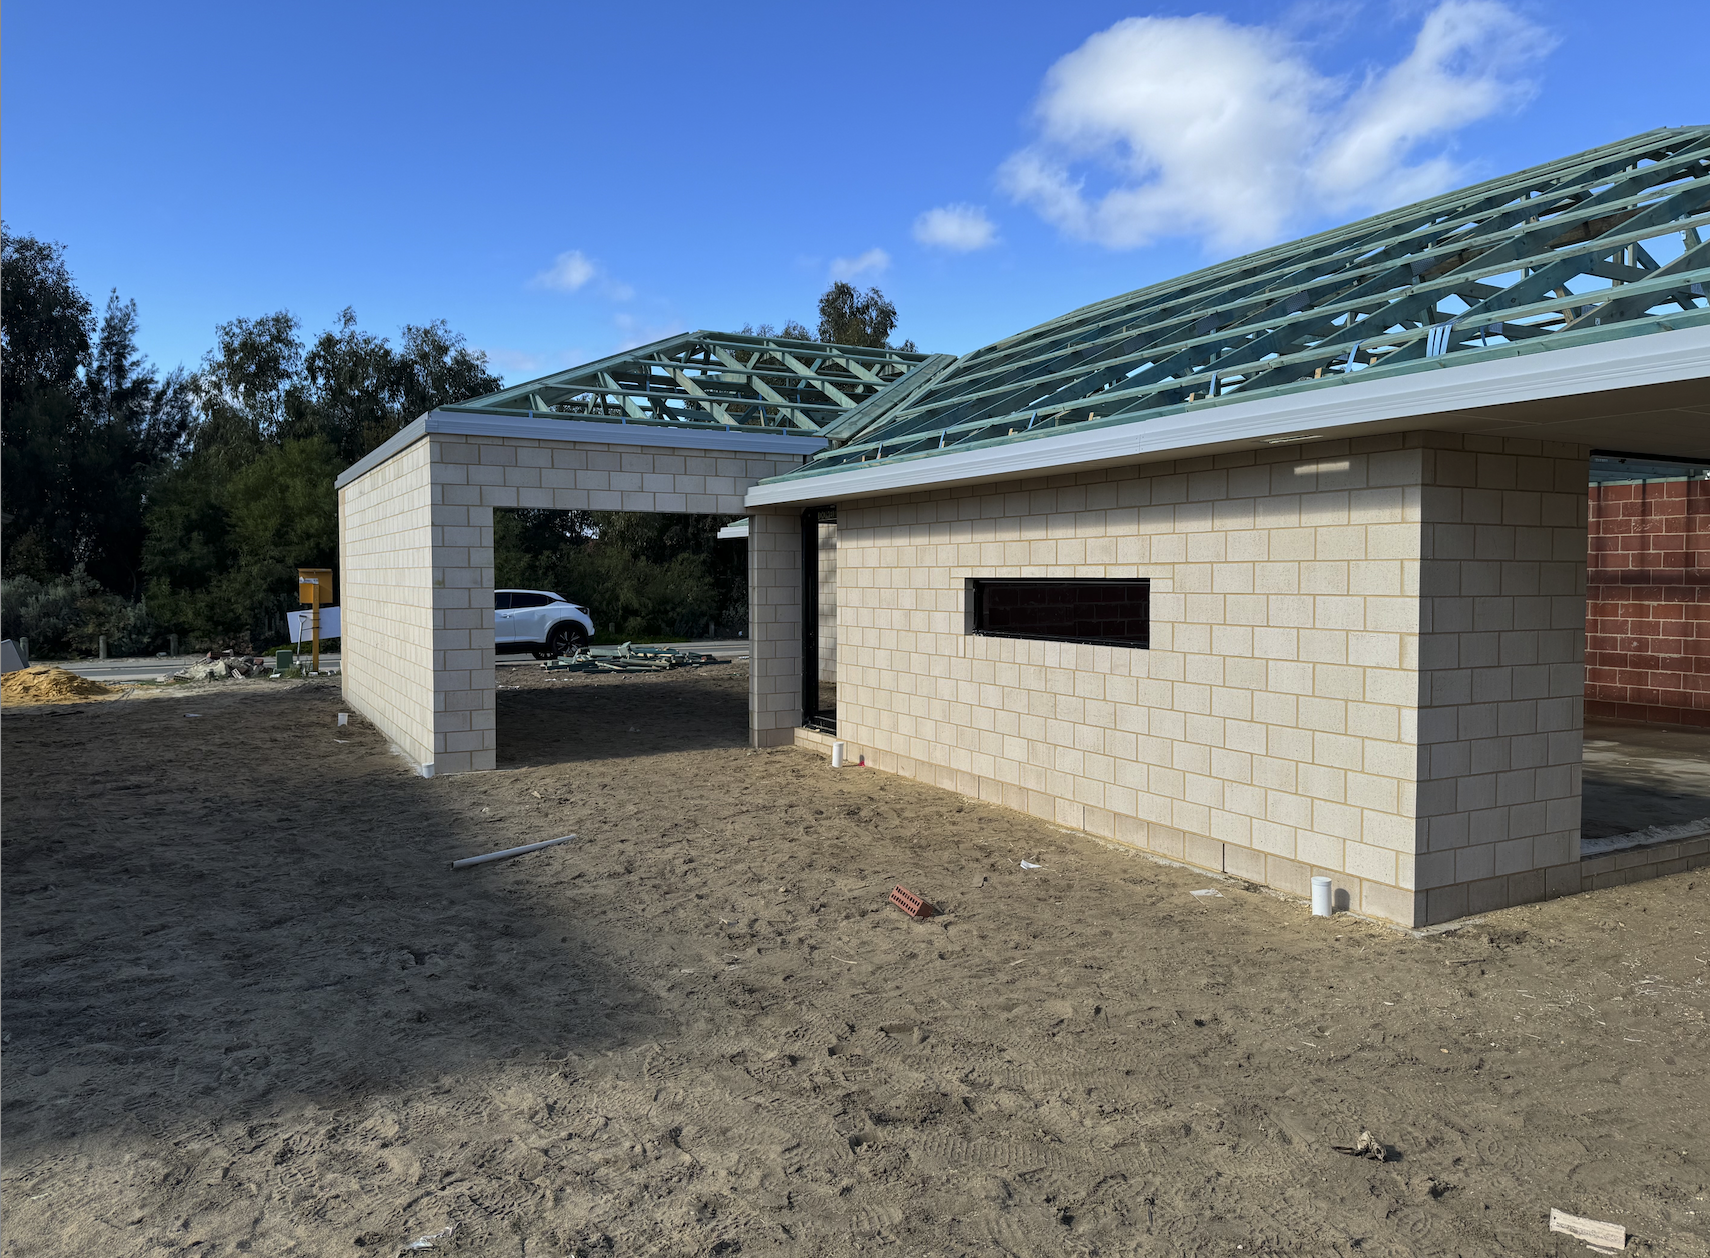
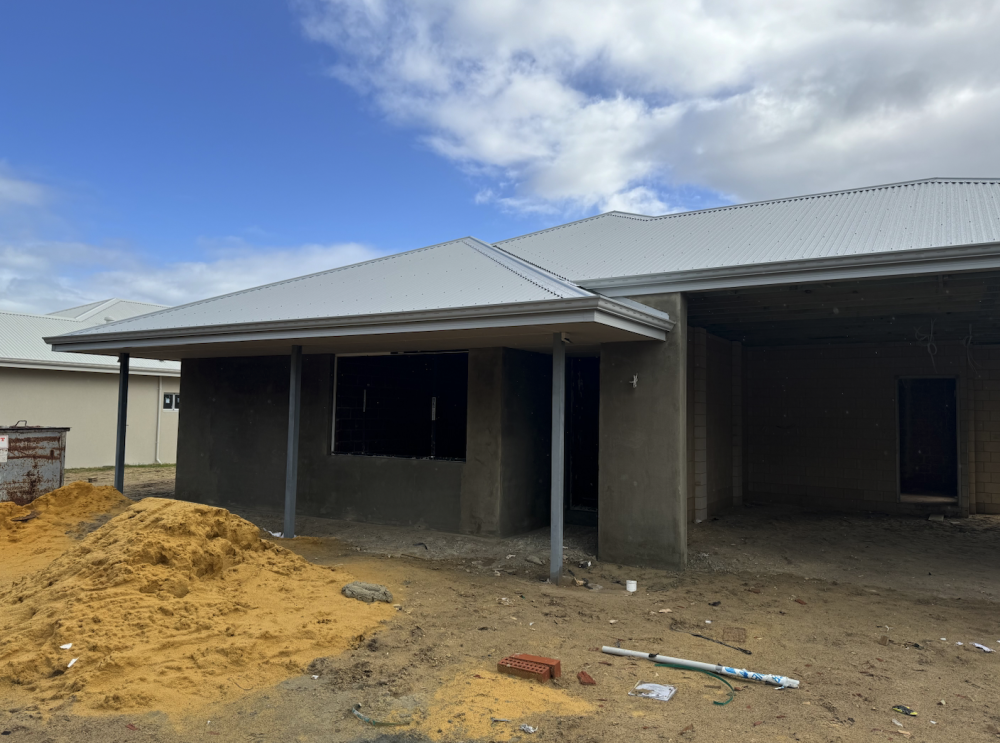
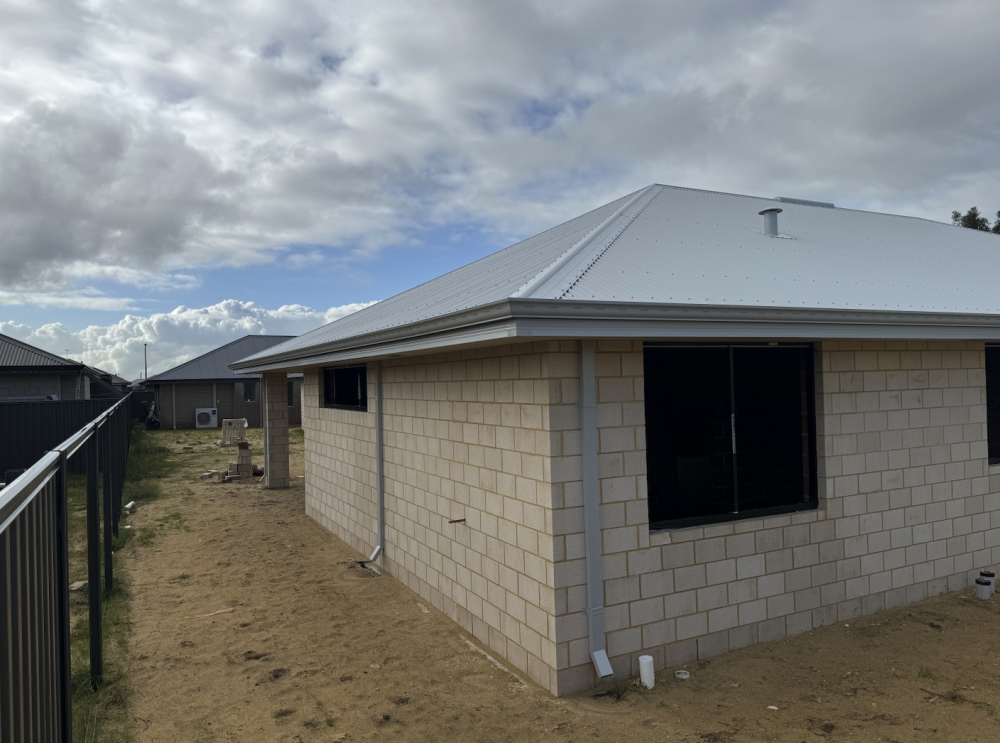
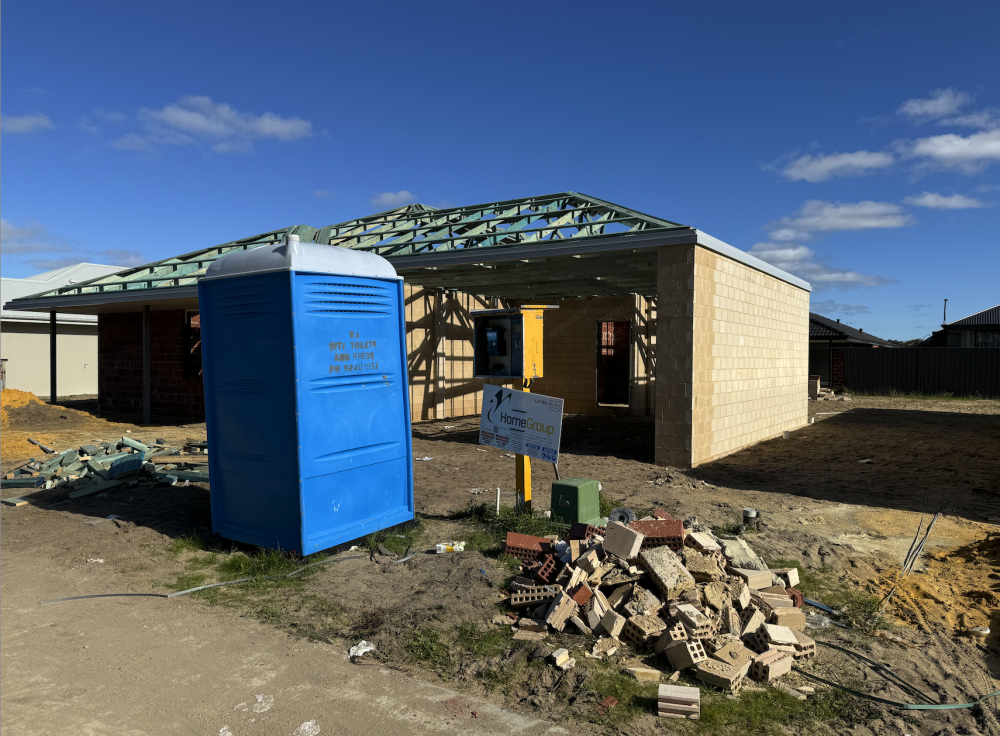
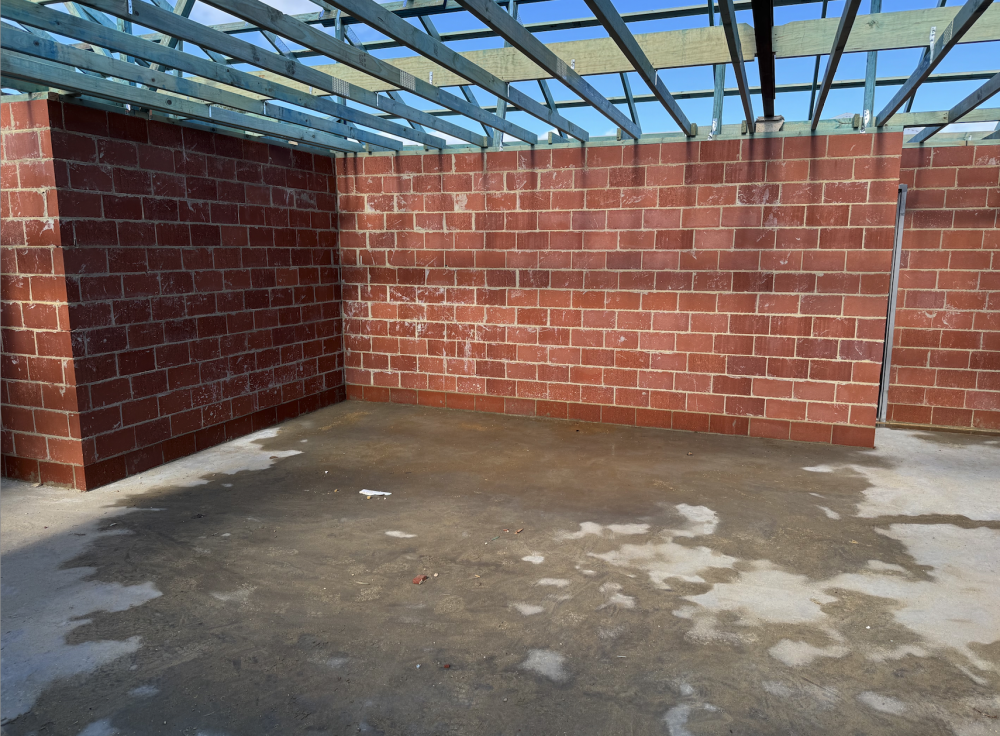
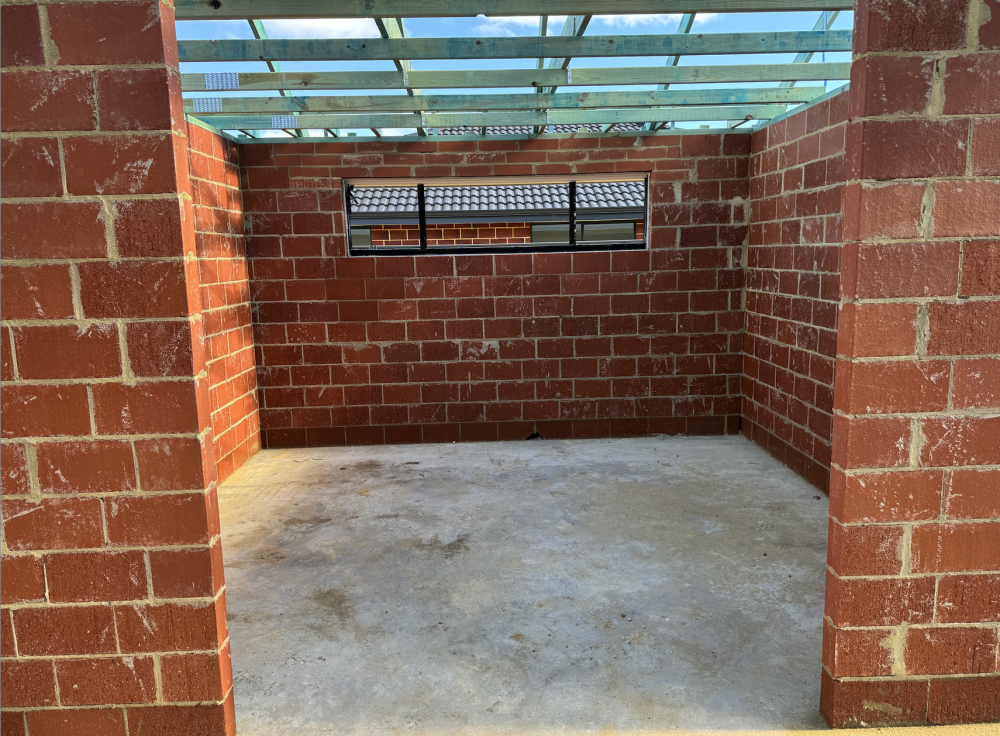
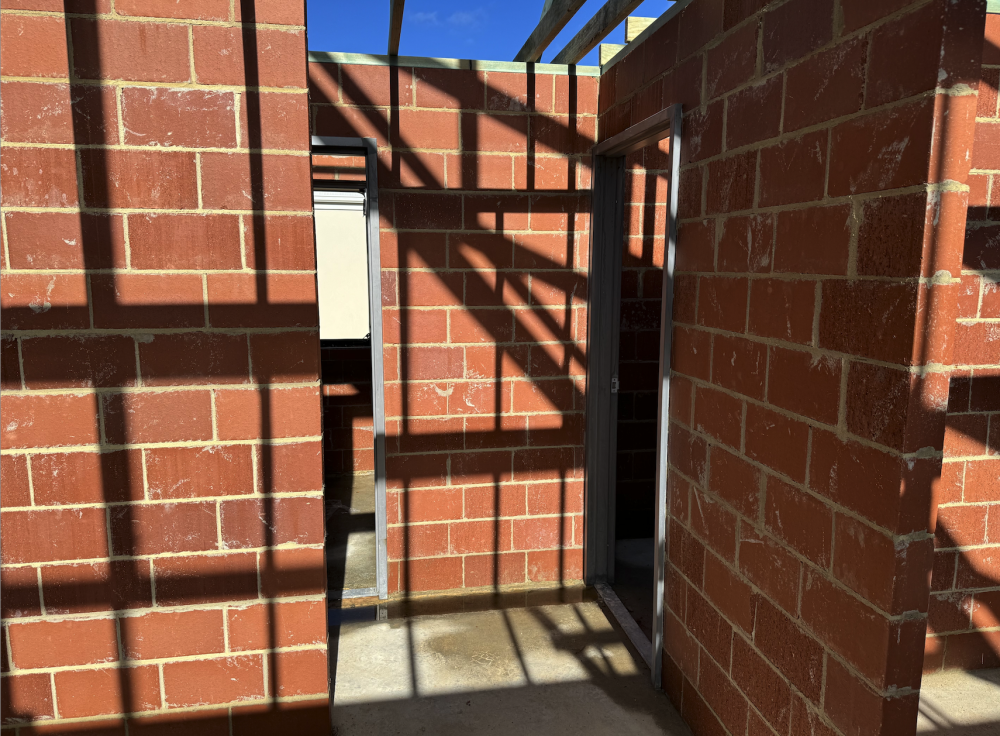
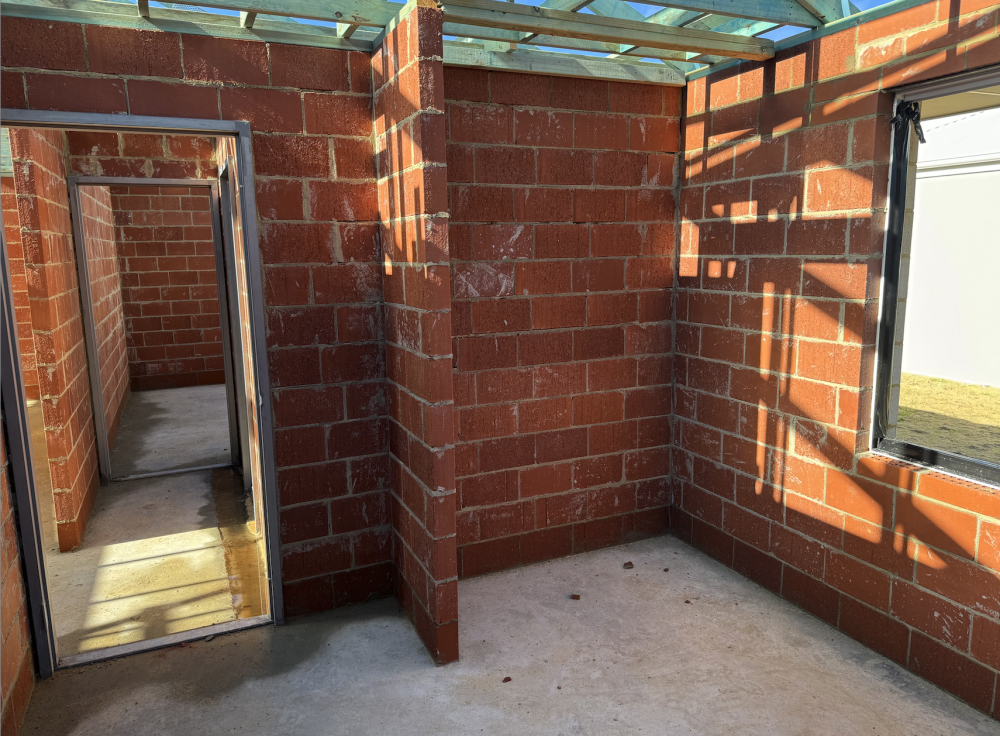
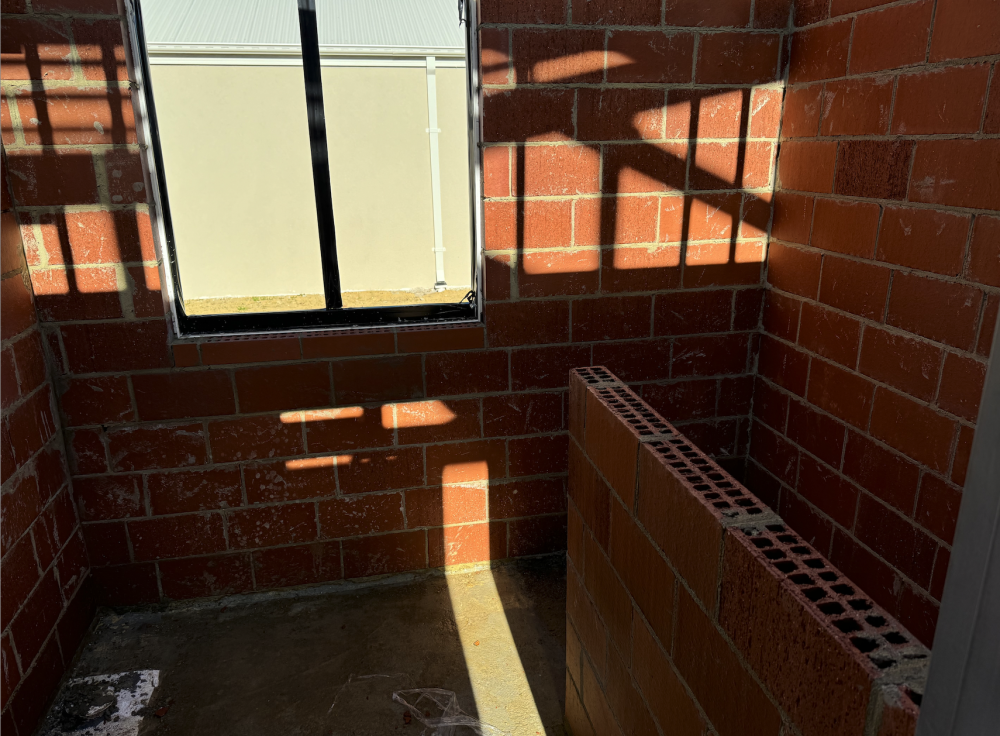
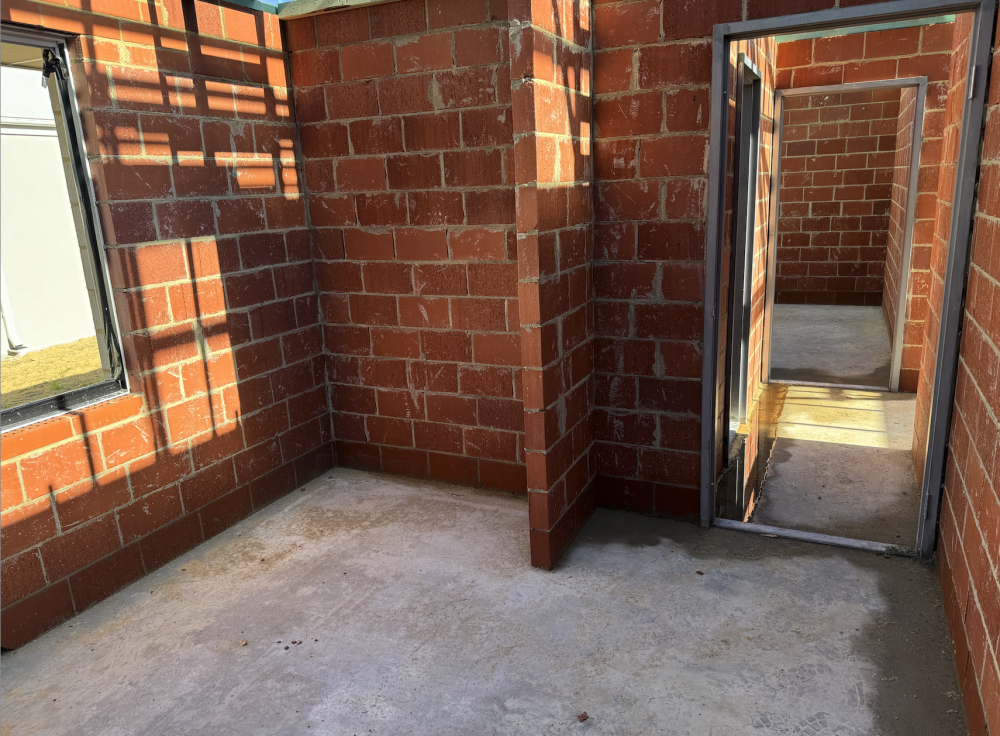
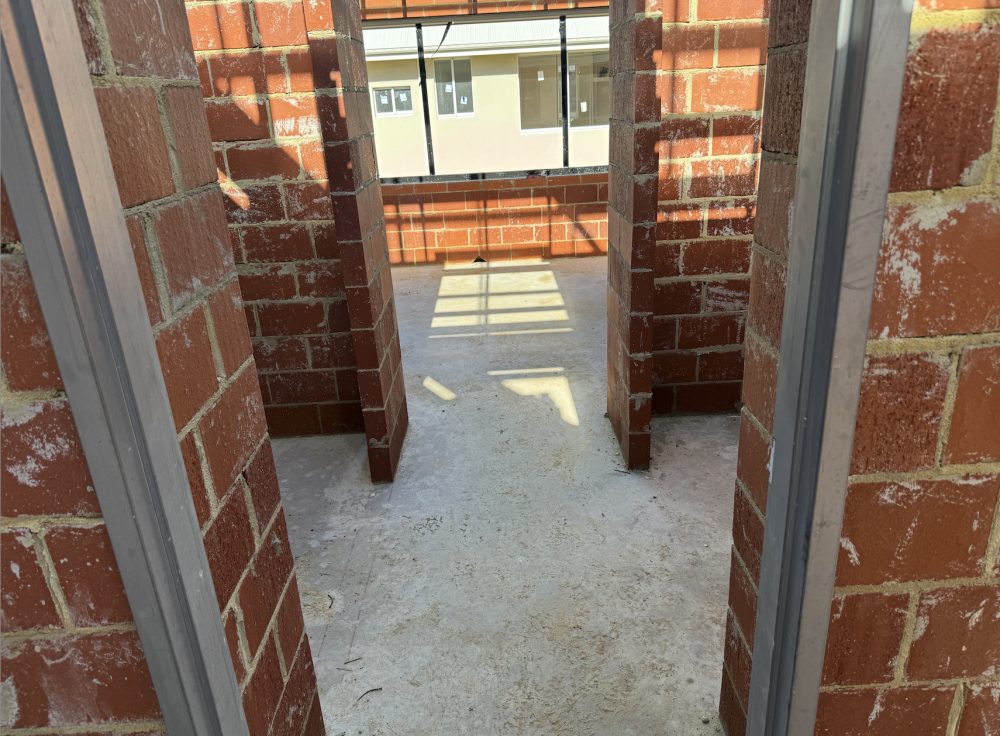
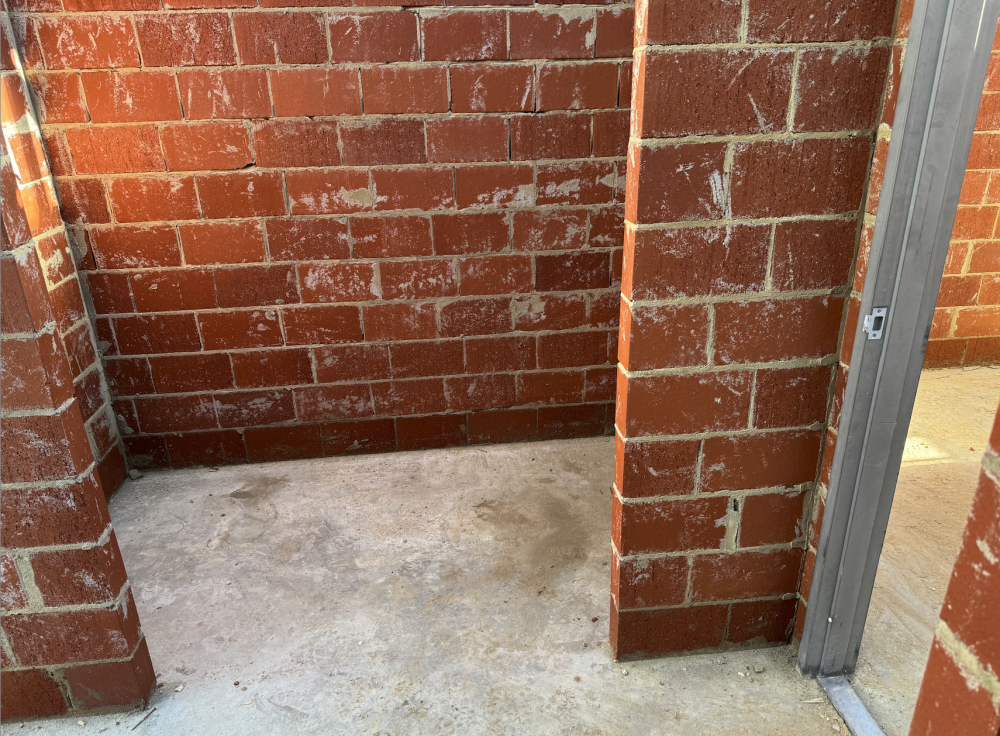
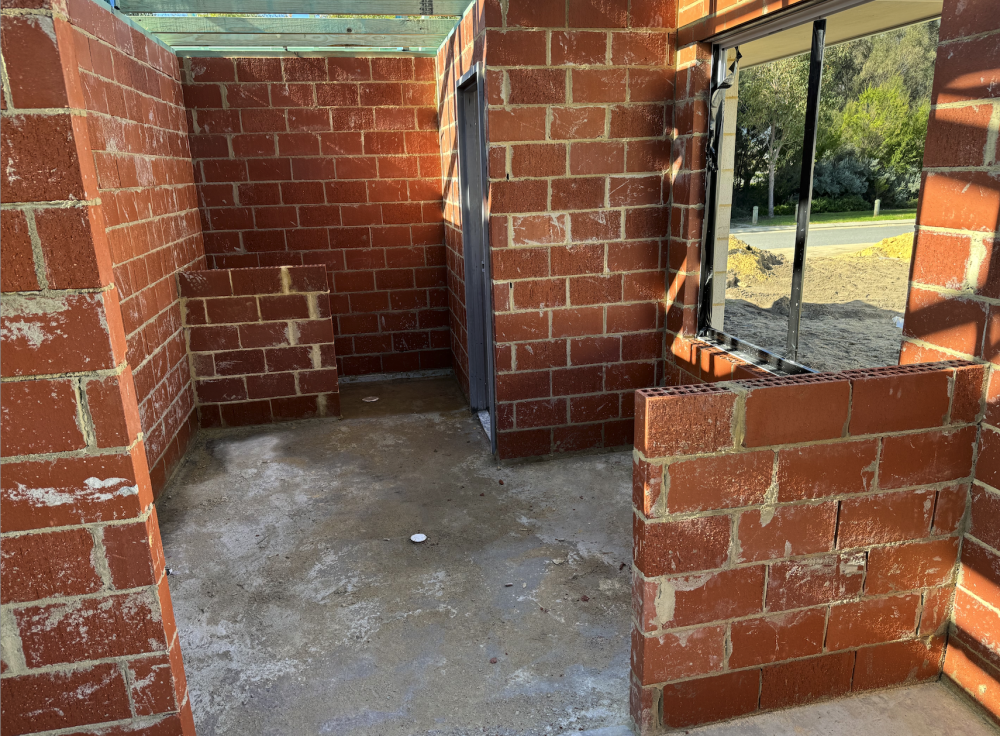
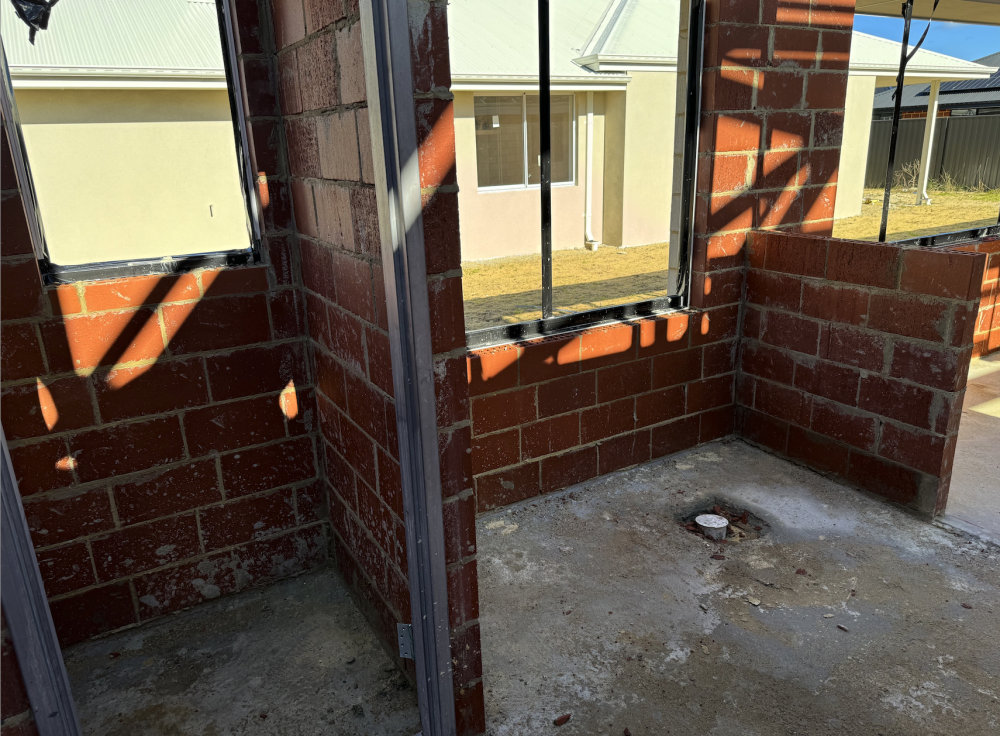
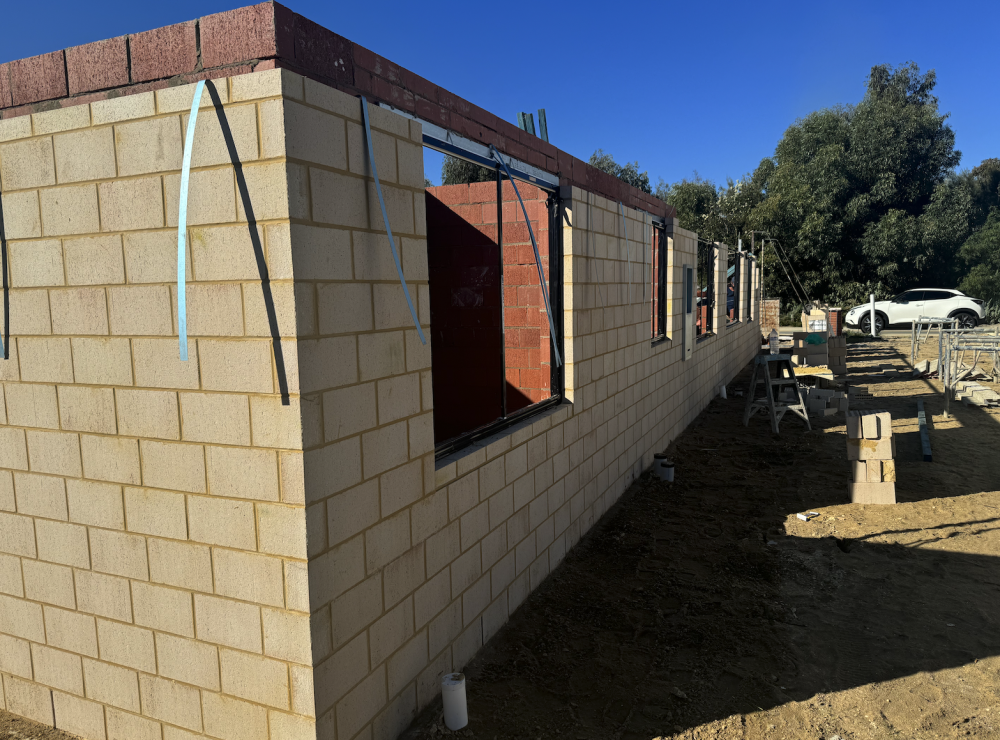
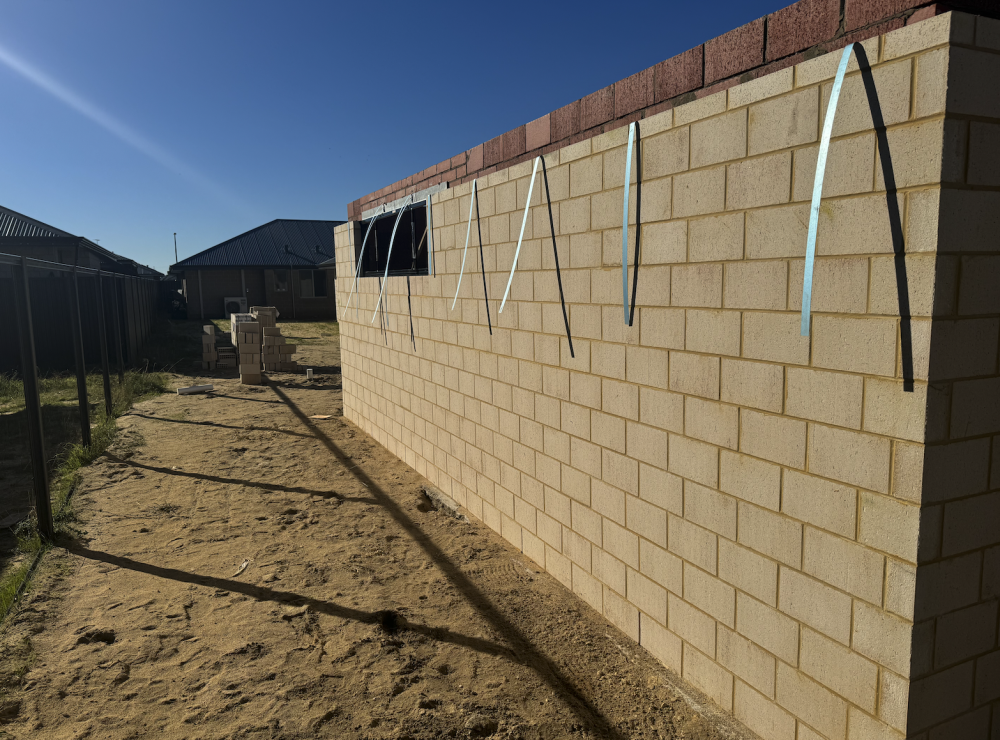
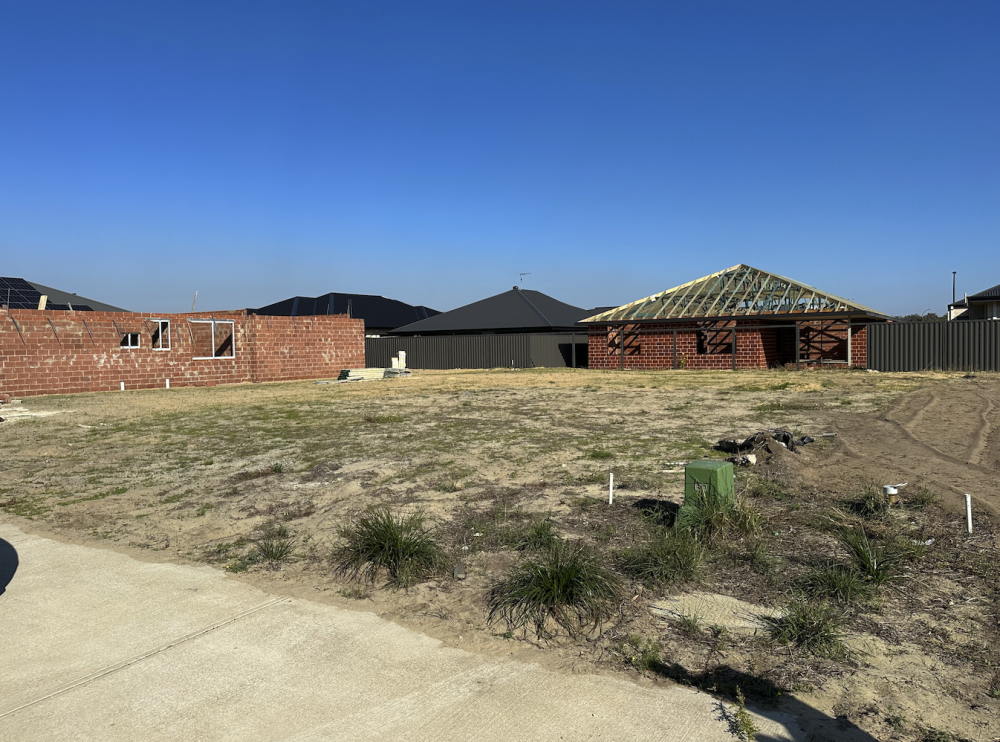
I flew back home on Wednesday after a couple of weeks on night shift. During my swing, I received an email from the builder advising me that 'plate height' (the industry term for brickwork completed) was nearly reached and timber for the roofing frame was scheduled to be delivered to site within the next week. The email came late the previous week ... either Thursday or Friday. So with barely a week passing since the email, I'm expecting walls up and maybe some timber in a neat pile ready to be installed ... Nope ... We're a bit further along from that! The roof carpenter (or 'chippie' as we call them here in Aus) decided not to hang around ... must have slapped this together in a couple of days! If you're really looking, you can see that the garage walls are higher that the main residence walls ... Also - steel posts are in supporting the verandah, Cement fibre sheeting is installed to verandah, eves and alfresco already. Colorbond steel facia in Shale Grey has been installed ... but not the gutters yet ... Gutters, downpipes, Roof sheeting will all be this colour as well as the render from the front door along the (right) front wall to the garage. The wall on the other side of the front door (left) will be a contrasting light blue colour (Calm Day) and the garage door will be a dark blue Colorbond colour called "Deep Ocean". Window frames, external door frames and steel pillars will be white. External walls (not to be rendered) are nicely finished off ... A few shots of the interior ... Laundry ... Theatre room ... Entrance to the Master Bedroom ... with the WIRs on either side ... One of the other bedrooms with the built in robe taking shape ... a couple of pictures of the ensuite ... The main roof won't be far away at this juncture! Rog


-
But … now how so I ‘current day’ this right? ”They identified as Australian” 🇦🇺 😁 Rog
-
I had a t-shirt made with the distinctive outline of Angus Young on the front followed by the line “100% Australian Angus” So many people stopped me wanting to know where I got the shirt from so they could buy one … I just gave them the website of the shirt printer. Rog
-

Meng 1/12 McLaren MP4/4
Artful69 replied to Artful69's topic in LSM 1/35 and Larger Work In Progress
This missing part arrived a few weeks back ... unfortunately the place that I'm staying in at the moment makes any paint operations extremely difficult. That, plus a bout of COVID and some final building pre-construction paperwork to be sorted on my house has left me time-poor when not at work. I hope to recommence soon though Roger -
Lol ... the 'fake' Falcon? ... A modified XB Coupe from memory ... called the Interceptor? Rog
-
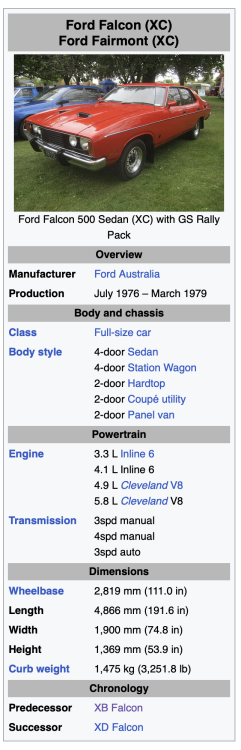
Not sure ... Some stats details below ... Of course in this era the majority of local design and manufacturing was focused on motorsport ... specifically Bathurst. Win Bathurst (or at least finish it ... and strongly) and your sales are exponentially better than your opposition. The XC was the final iteration of that particular Falcon design and recorded the first ever 1-2 finish at the event. Rog

-
That profile looks very similar to the 'X' series falcon coupe's here in Aus built from 1972 to 1979 A '72 Falcon XA GT 'hardtop' A limited edition (400 made for racing homologation) '78 XC GT 'Cobra' Rog


-
On my way back from visiting the block yesterday, I called in at the post office to collect the latest deliveries ... The first two were from Hobbylink Japan ... It's a place I will shop at if the items can't be located anyplace else reliable, because they tend to be more expensive than other suppliers ... This box contained another box! ... The 1st of the Takom Tiger.1 'Big Boxes' ... Only a small sample of these made it to Australia and most of the other sources I found were on e-Bay ... ex-China! ... So I swallowed the extra expense and bought it from HLJ while they still had a few in stock. Of course ... while I was chasing up my order progression on the HLJ site I bought another item as it became available ... This contained the second 'Big Box' set ... Another box - from the Czech Republic ... and covered in plastic to prevent moisture damage - a nice touch! Not having ready access to the (now) HpH Kate, locally ... I logged into the e-Shop and purchased it directly ... On the 'non-modelling' front ... a box of pre-ordered goodies arrived from Rippaverse Comics - a relatively new 'indie' company ... A package bought during the pre-order period for their 4th campaign: 'Yaira #1' I think that's it now until ZM release the next of their Kits ... or until Takom release an 'Early' Tiger 1. Rog
-
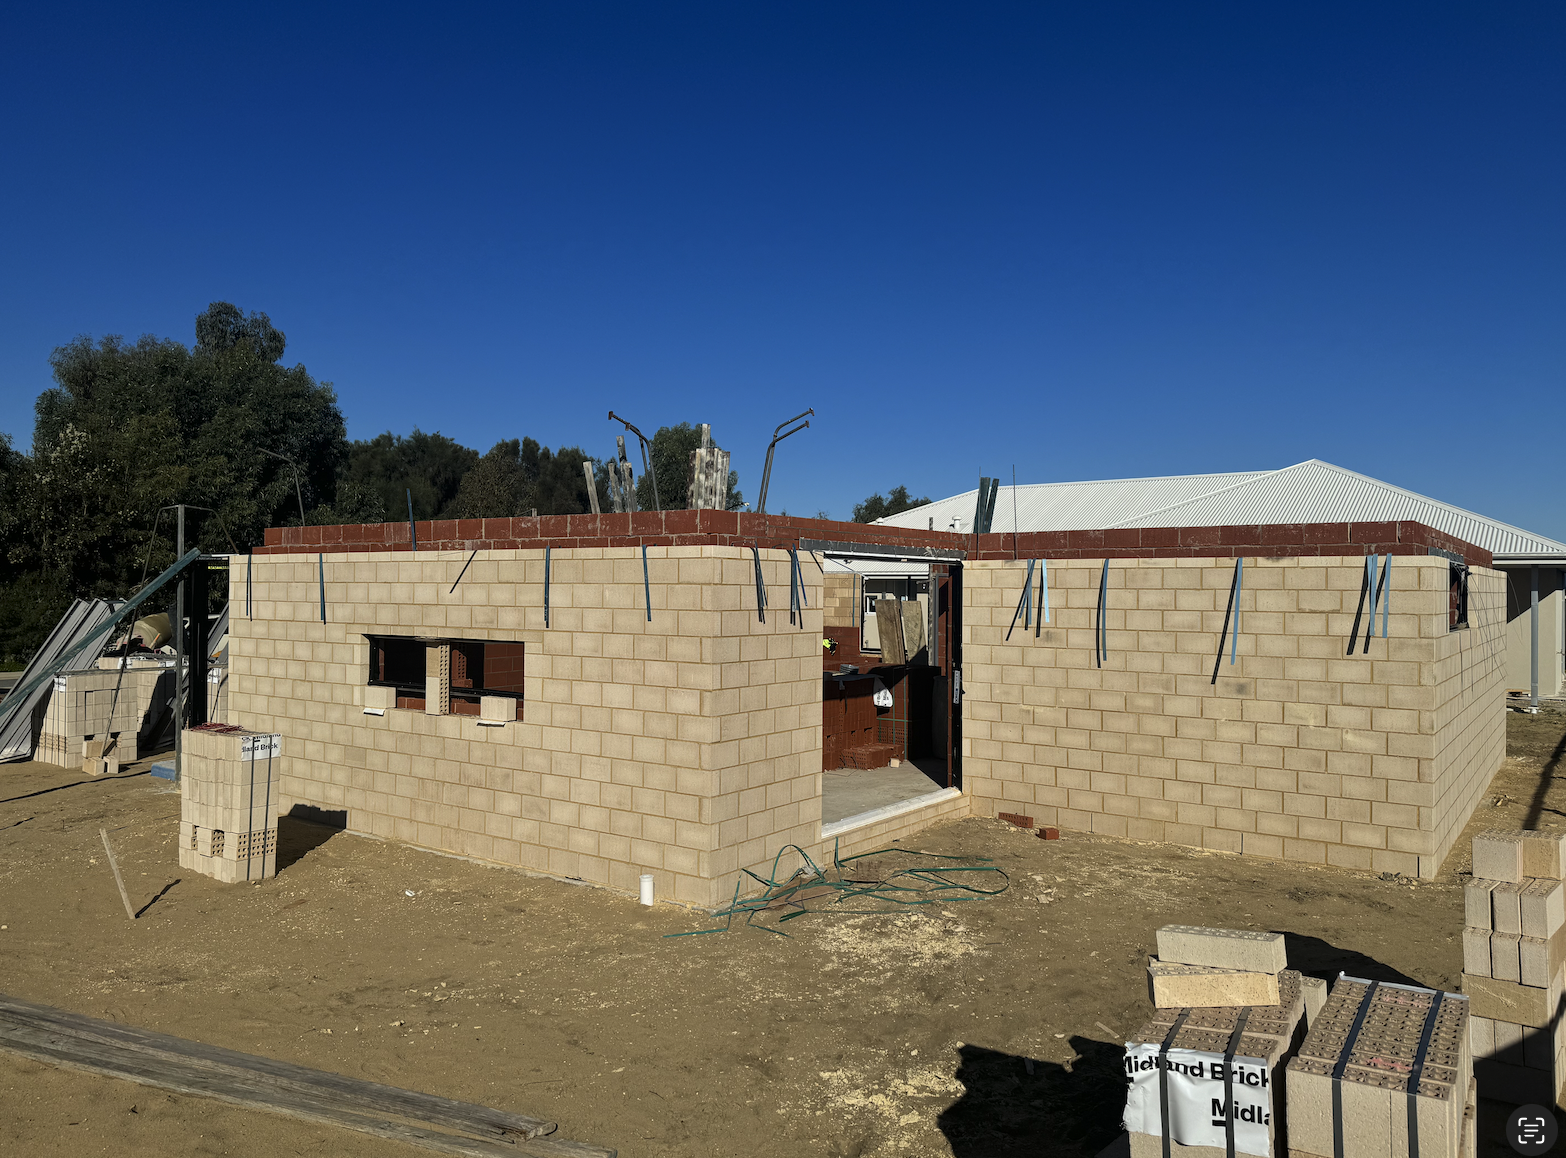
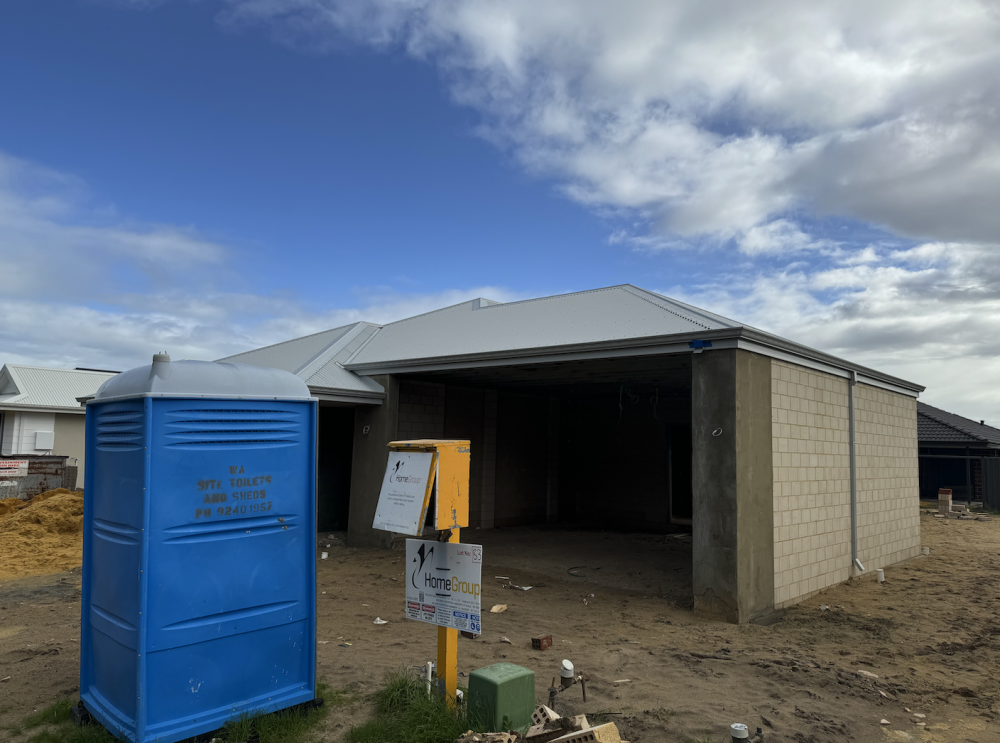
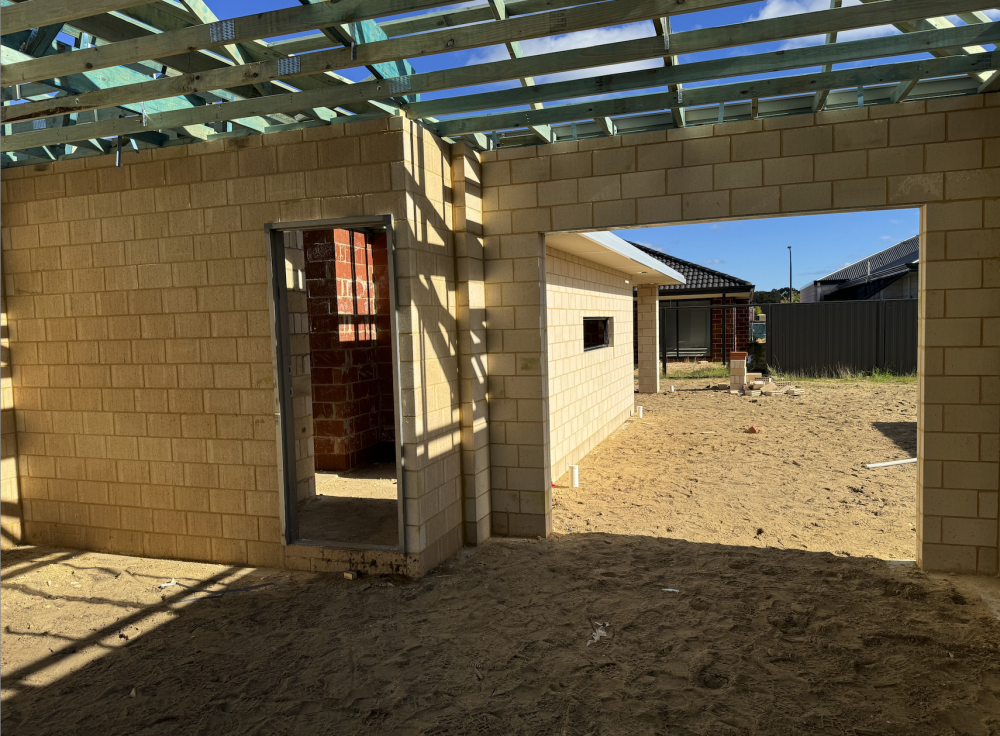
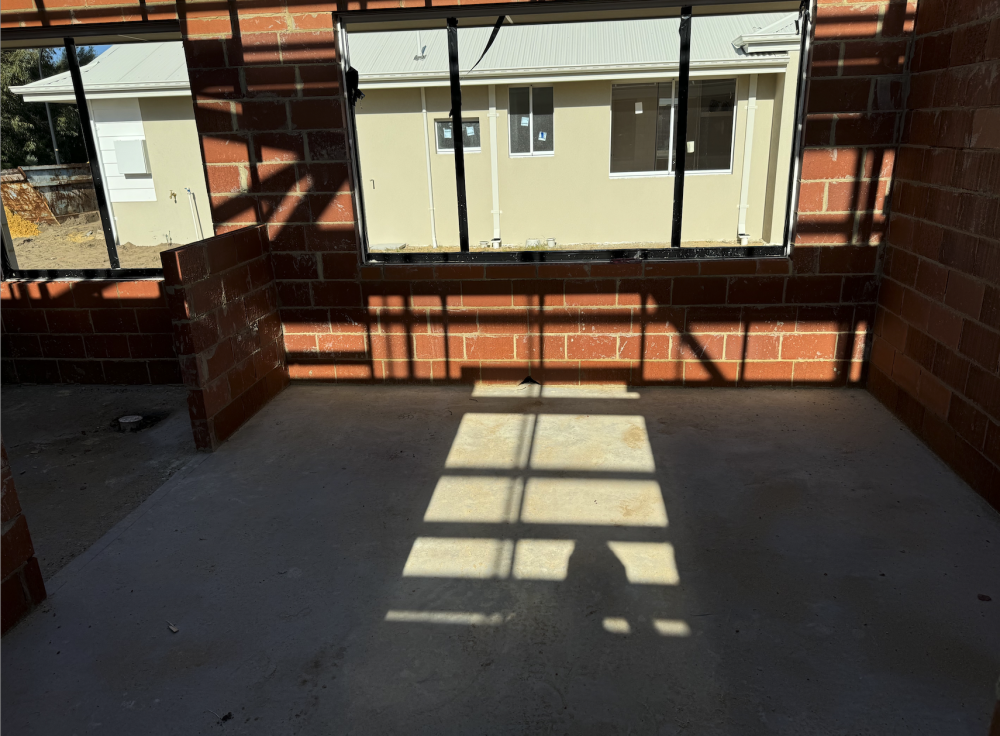
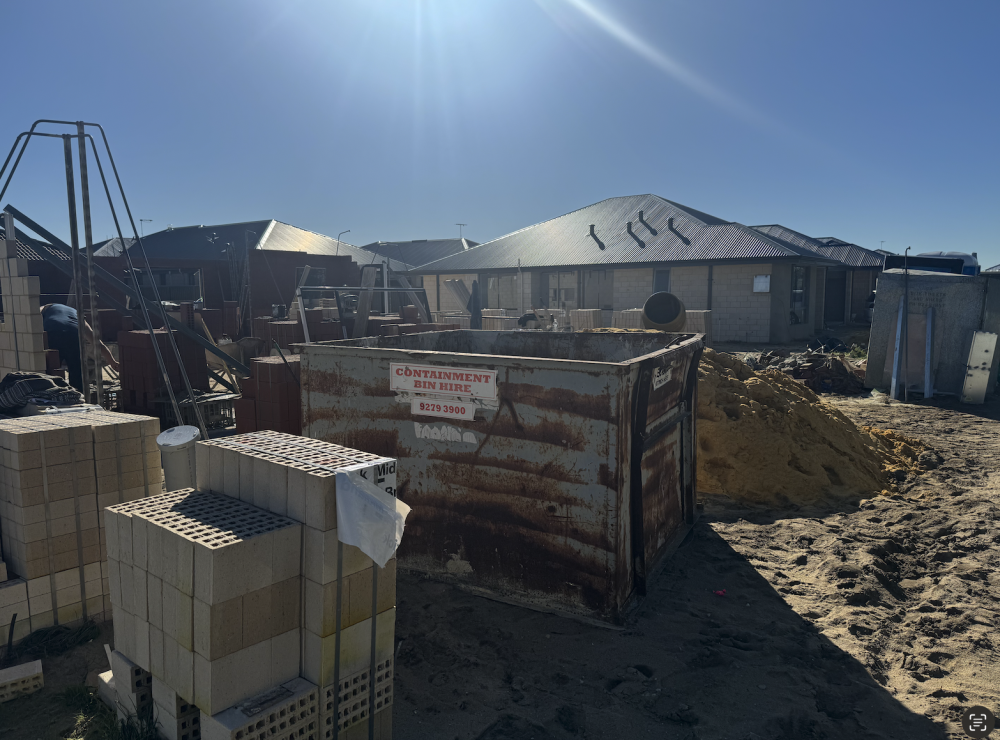
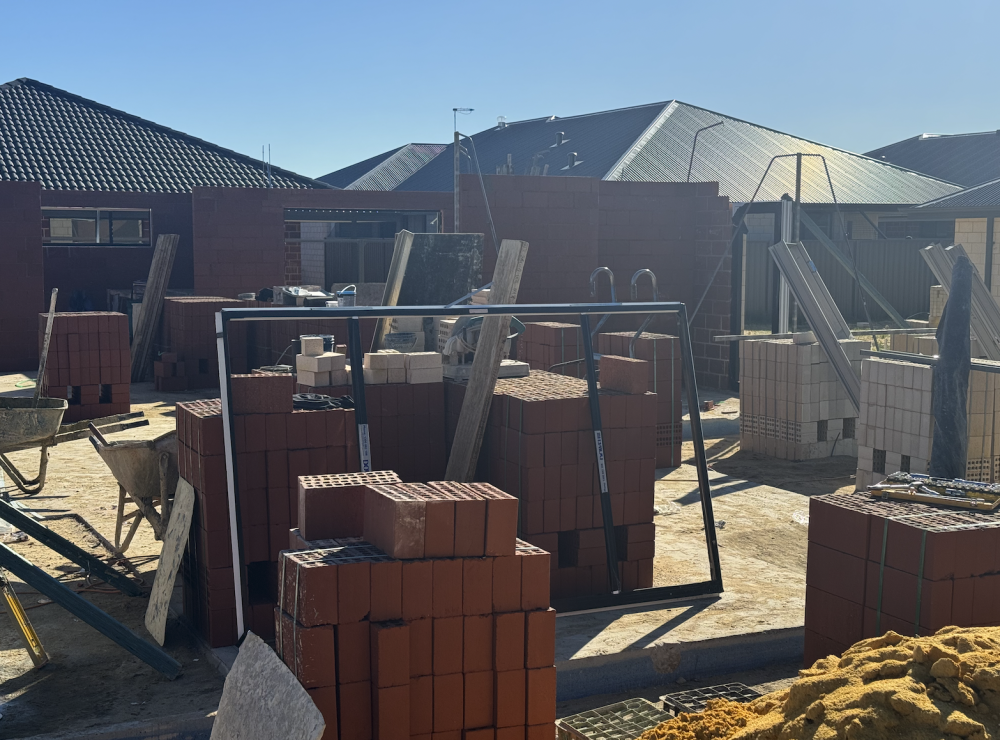
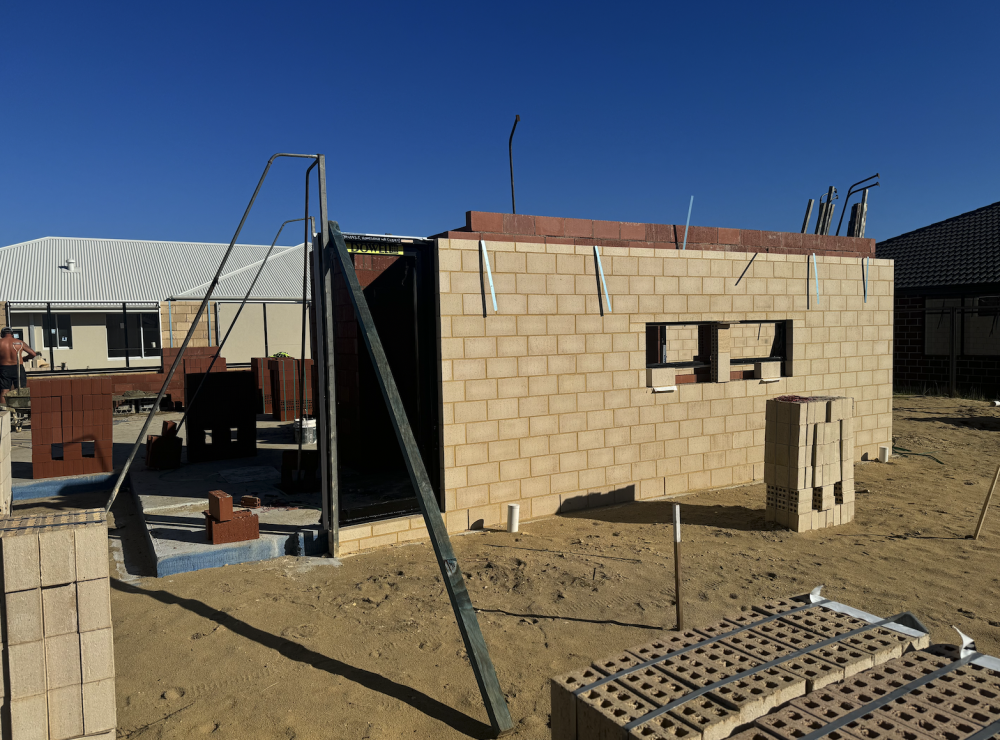
It's that time again! .... After a week of additional convalescence - post R&R - I flew back to site for a week of night shift. I flew home yesterday afternoon ... and slept through until 10.45 this morning - one of the quicker body clock recalibrations. I took a drive down to the block stopping for a drive through lunch on the way. Bricklayers were on site ... and construction is well underway! The bricklayers are starting at the back of the block and working their way toward the front - so obviously the view from here is less than spectacular. A much better result when looking from the rear! Here's a picture of that yucky kitchen window that I have to get fixed once I move in. ... and from the inside ... The laundry and entry off the garage ... At the top right hand side of this photo you can see one of the spare bedrooms at the rear and the bathroom built next to it (in front) In the next bedroom (in front of the bathroom) you can see the recess for the robe already ...formed. ... While on the external walkaround I noticed an error ... There has been a recess created to fit the gas Hot Water System into the wall ... The Building company considered this to be an upgrade on their original drafting plans. However, I 1/ Didn't want an additional 'hole' created in the external wall ... and 2/ Didn't want a space that was restrictive to a potential replacement in the HWS later on (for any reason). ... So I specified on my contract that I wanted the system to be mounted on the surface of the wall. I supposed I wouldn't be so pedantic about it if the builder had been amenable to fixing the kitchen window (by deleting it altogether) ... or fixing the shower recess wall by deleting the extra 100mm off the hob wall and shower screen ... But since they have refused (as they are allowed to do once certain stages of the contract have passed), I'm going to hold them to this part of the contract. That's all for now ... Hopefully more on Tuesday before I fly back out. Rog

-
Lots of times ... always good! ... Buy in bulk - say: 5-6 kits and save big time, even with shipping included! A couple of years back I got some solid savings on Tamiya / Hasegawa kits ... Including postage it worked out to about 70-75% of what I would pay here in Australia. Regards Rog
-
I have no understanding of 'U Values' ... so I'll leave that one to the engineers / drafts-people who have to get these things council approved. I think that there's a thin thermal blanket installed onto the back of the Face Brick, within the cavity walls? ... I have seen it used on buildings but I have no idea if my house fits within that particular building code. I do know that every house built these days has to have some form of roofing insulation installed. But because there is no BAL (Bushfire Attack Level) or soundproofing requirement (highways or close industrial areas etc) registered against my house, it will only have standard ceiling insulation installed (Fibreglass bats) ... I would have liked to get sarking insulation also ... but that was cost prohibitive to my budget and I had other priorities which were more pressing. Rog
-
Sorry, you will need to be more specific? Are you referring to roofing insulation? ... What is a 'U Value'? Rog
-
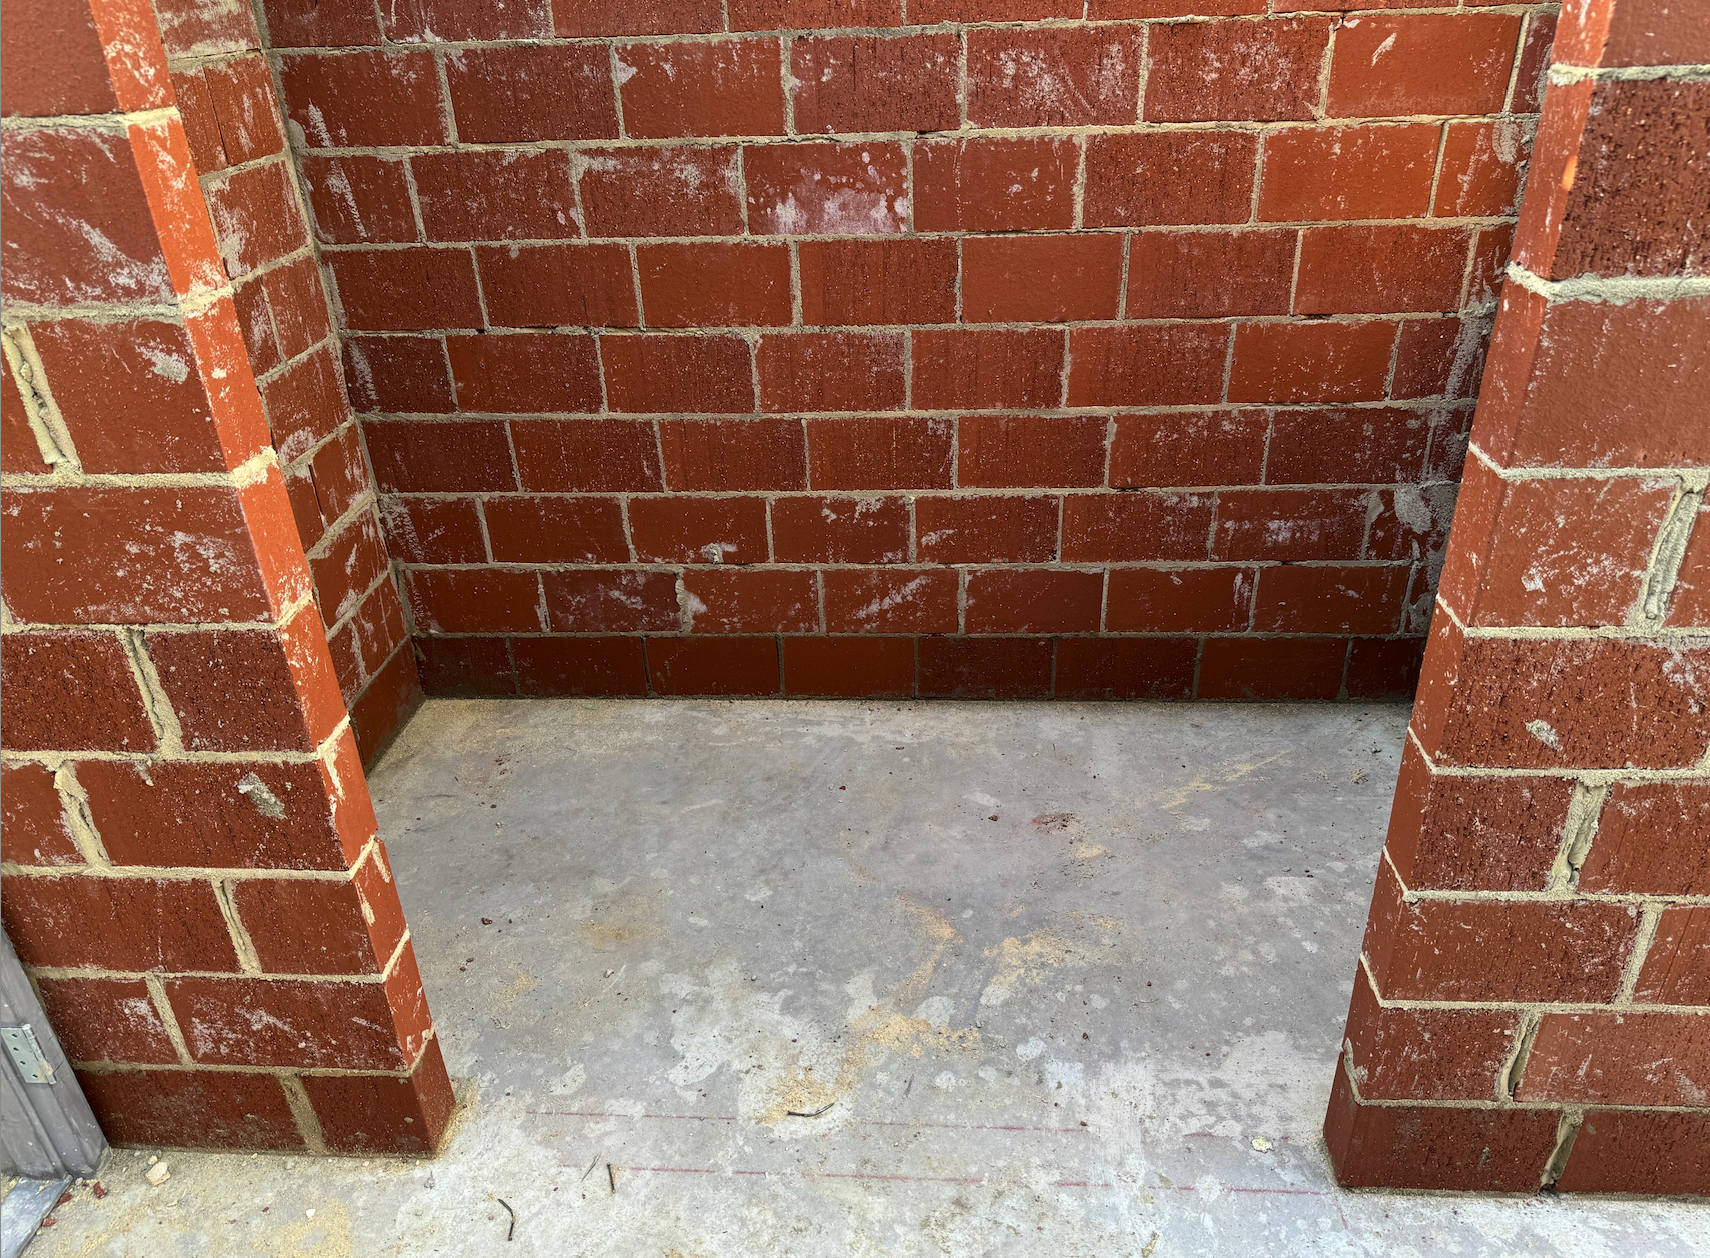
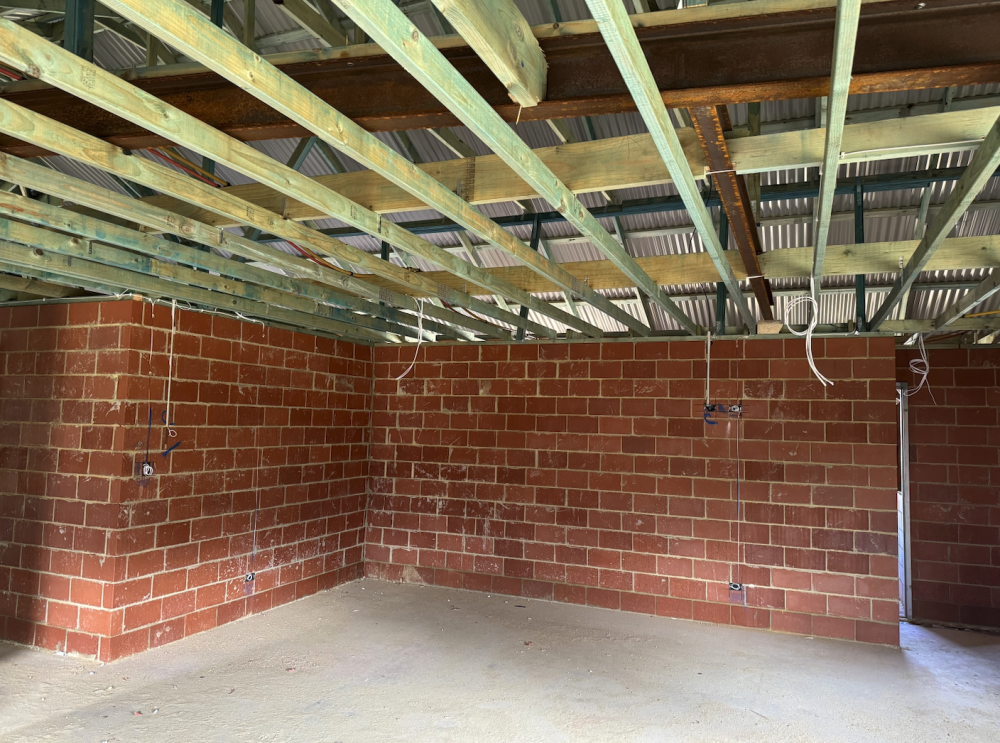
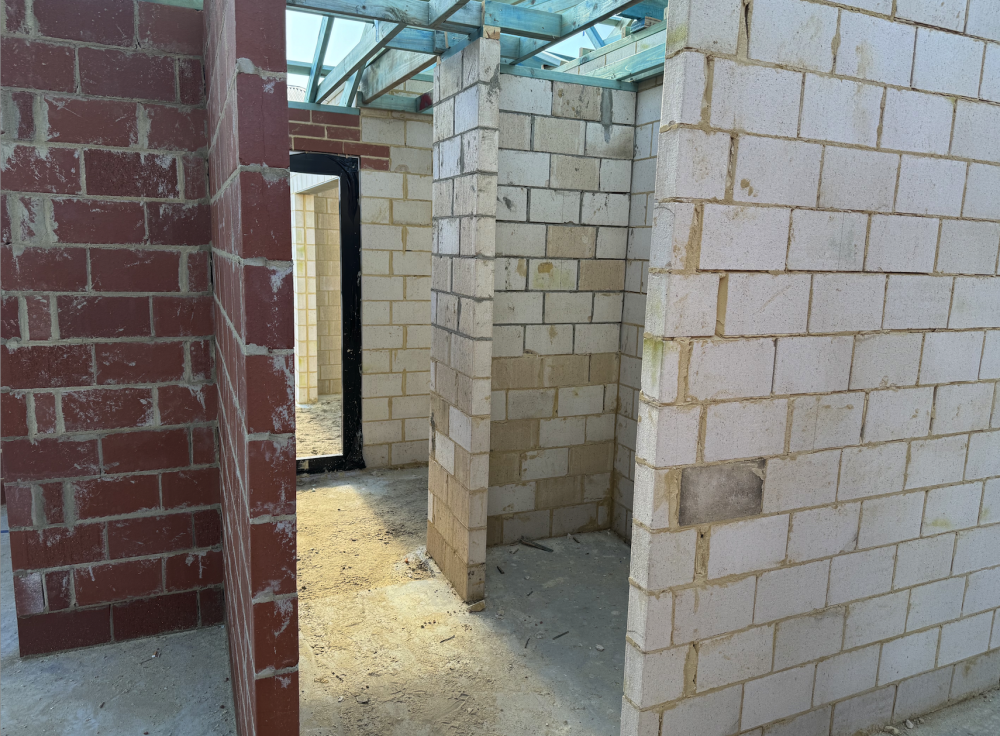
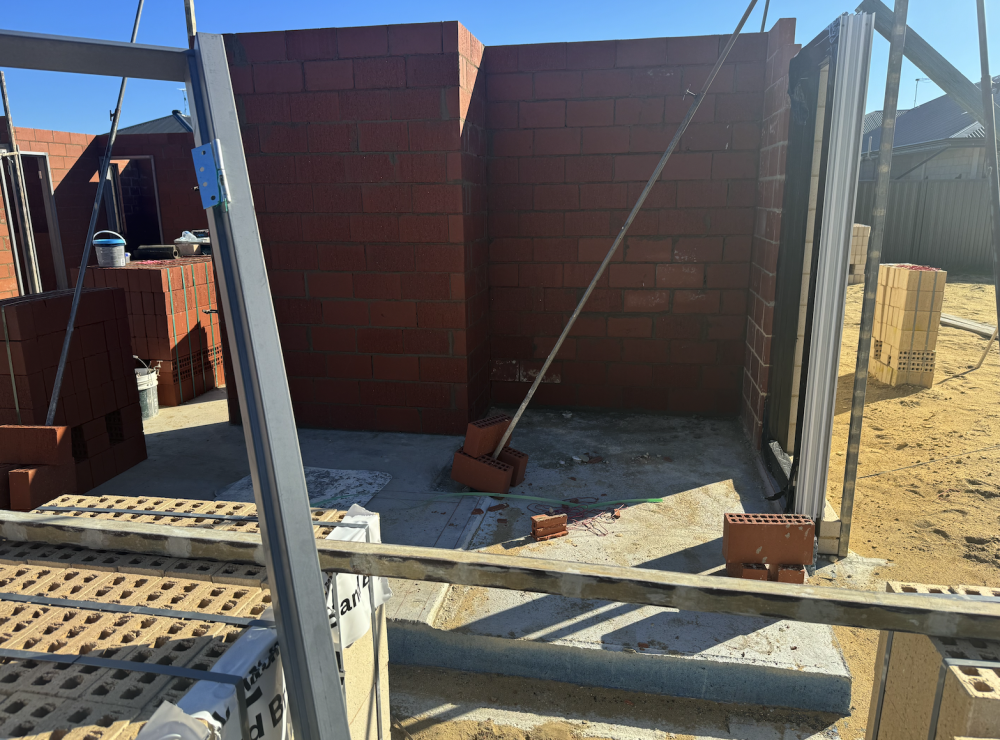
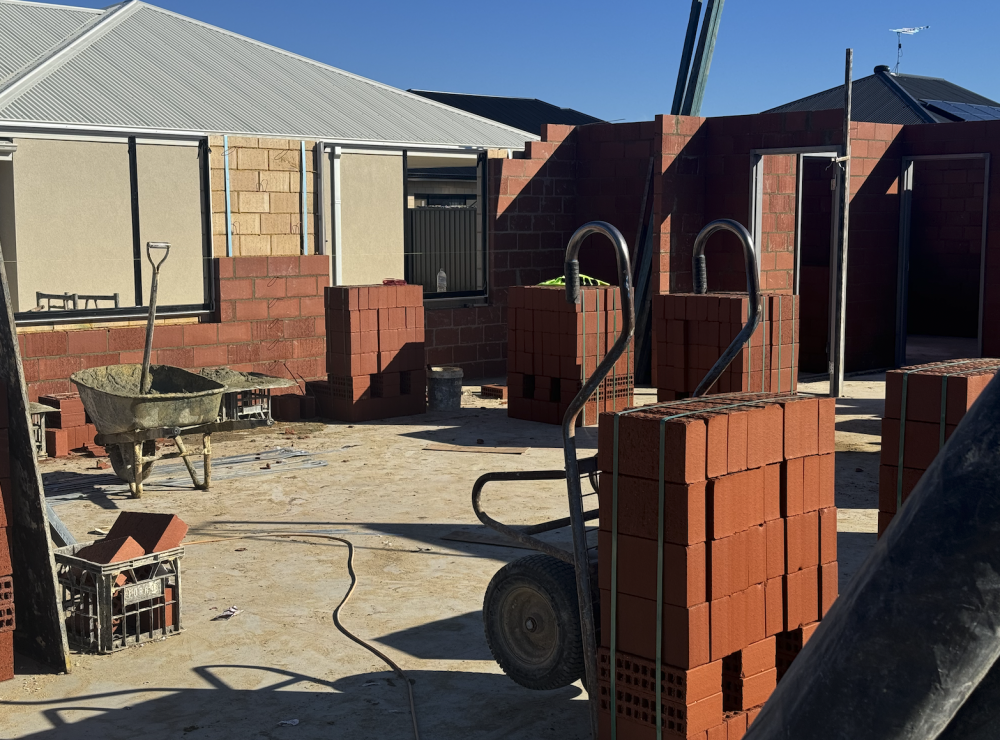
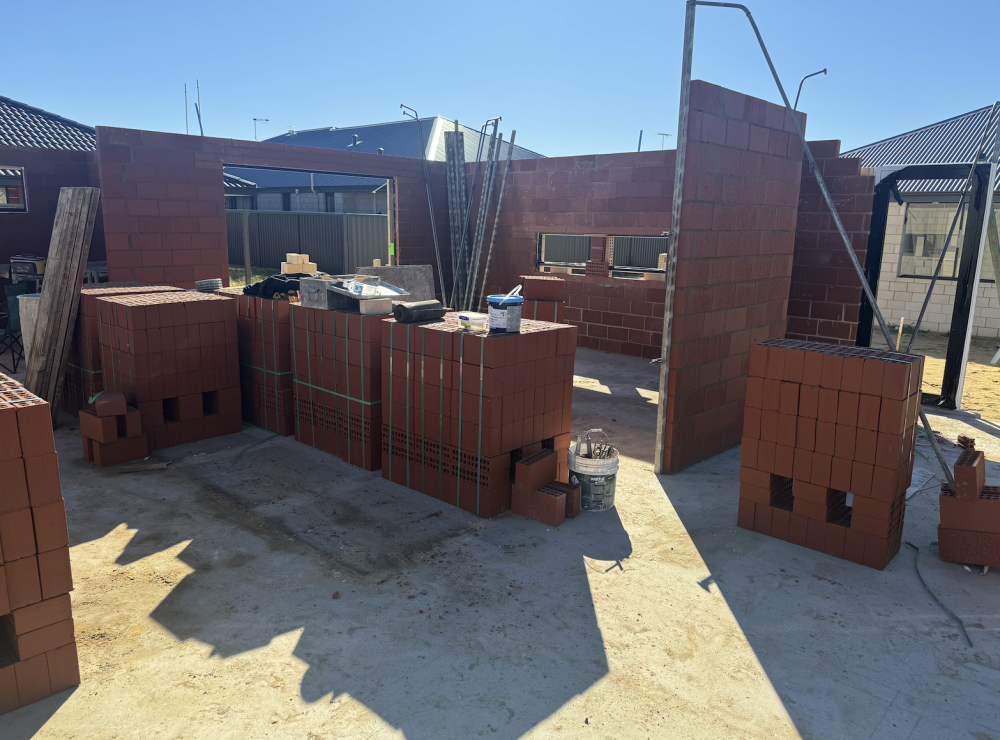
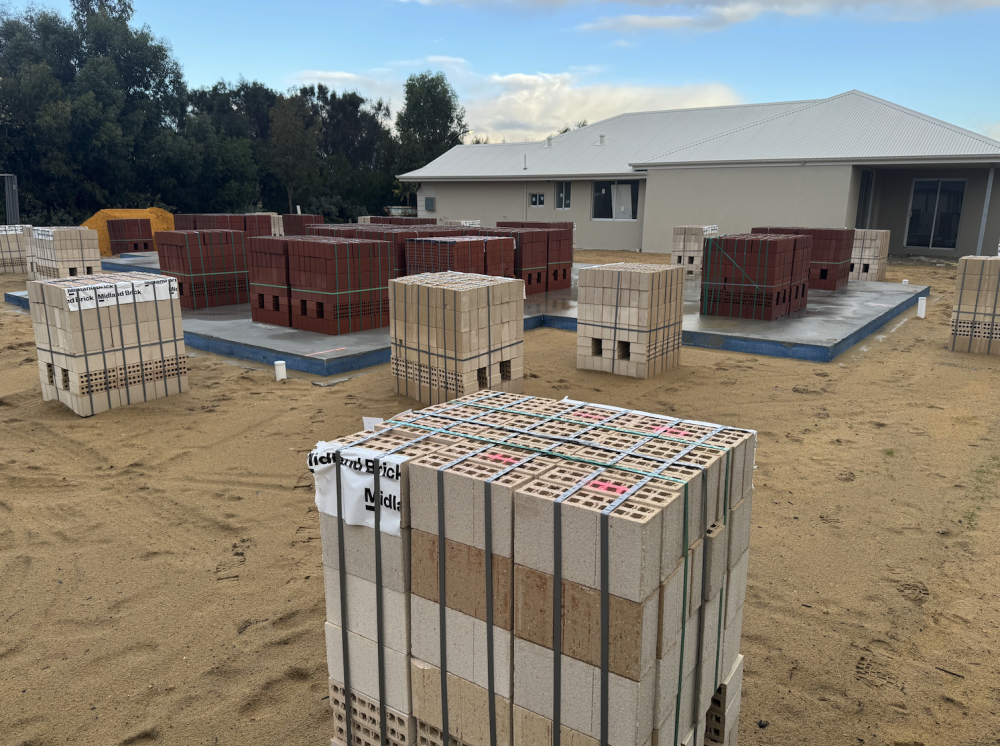
1) Brick design ... the industry 'standard' in Western Australia is double brick ... a standard brick size is 230mm long, 110mm wide and 76mm high ... and these are nowadays defined as a 'single course' brick ... however, looking at my photos, you will notice that most of my bricks are larger - because they are 'double course' bricks. These are becoming somewhat of a 'standard' on their own now ... as easy for bricklayers to lay as standard single course bricks and more 'area' can be laid in a day ... meaning more wall can be assembled in pretty much the same time frame as traditional builds. Of course, we have other methods of construction. These include Brick Veneer a stud framed wall on the inside with a brick wall on the outer. Another is a stud framed wall with plasterboard internal, insulation in the framework and some form of cladding on the exterior (Asbestos used to be used - until that became a no-no - now it's either colour-bond steel (like my corrugated roof will be), Fibero Cement or Hardy-Plank). My walls will be double brick ... as per the construction standard laid out below ... The external wall is laid upon the concrete footing, while the internal wall is laid upon the slab edge. The outward facing brick is known as the 'Face brick' as that is the one that everyone sees when looking at the house ... and in my case those are the limestone coloured ones. The internal brick is traditionally rendered and then covered with a plaster 'set' ... although in my case I had a no cost option to select 'dry wall' plaster board. In this case the interior walls will be 'cleaned' up (no lumps and bumps) and plasterboard will be stuck to the brickwork. When I consulted a painter about the best option he said grab plasterboard if it's not going to cost you extra - no cornice join cracking or paint splintering and only one coat of primer required! Easier to paint also The concrete blocks you refer to are still used here ... we call them 'Cinder Blocks' (for whatever reason?) and although there have been some residential applications ... mostly you see them (if used at all) in commercial applications. 2) Metal door frames have been used here for a long time. Mostly for internal doors (which are paper/wood ply) - while external door frames are still traditionally wood frames, the larger spec (1200mm) entrance door that I have included is all alloy frame and door with a toughened glass (Below - but with a white coloured frame) - I simply asked if my laundry door could be the same style of design. there is, of course, the traditional metal framed sliding door to the Alfresco area. Rog

-
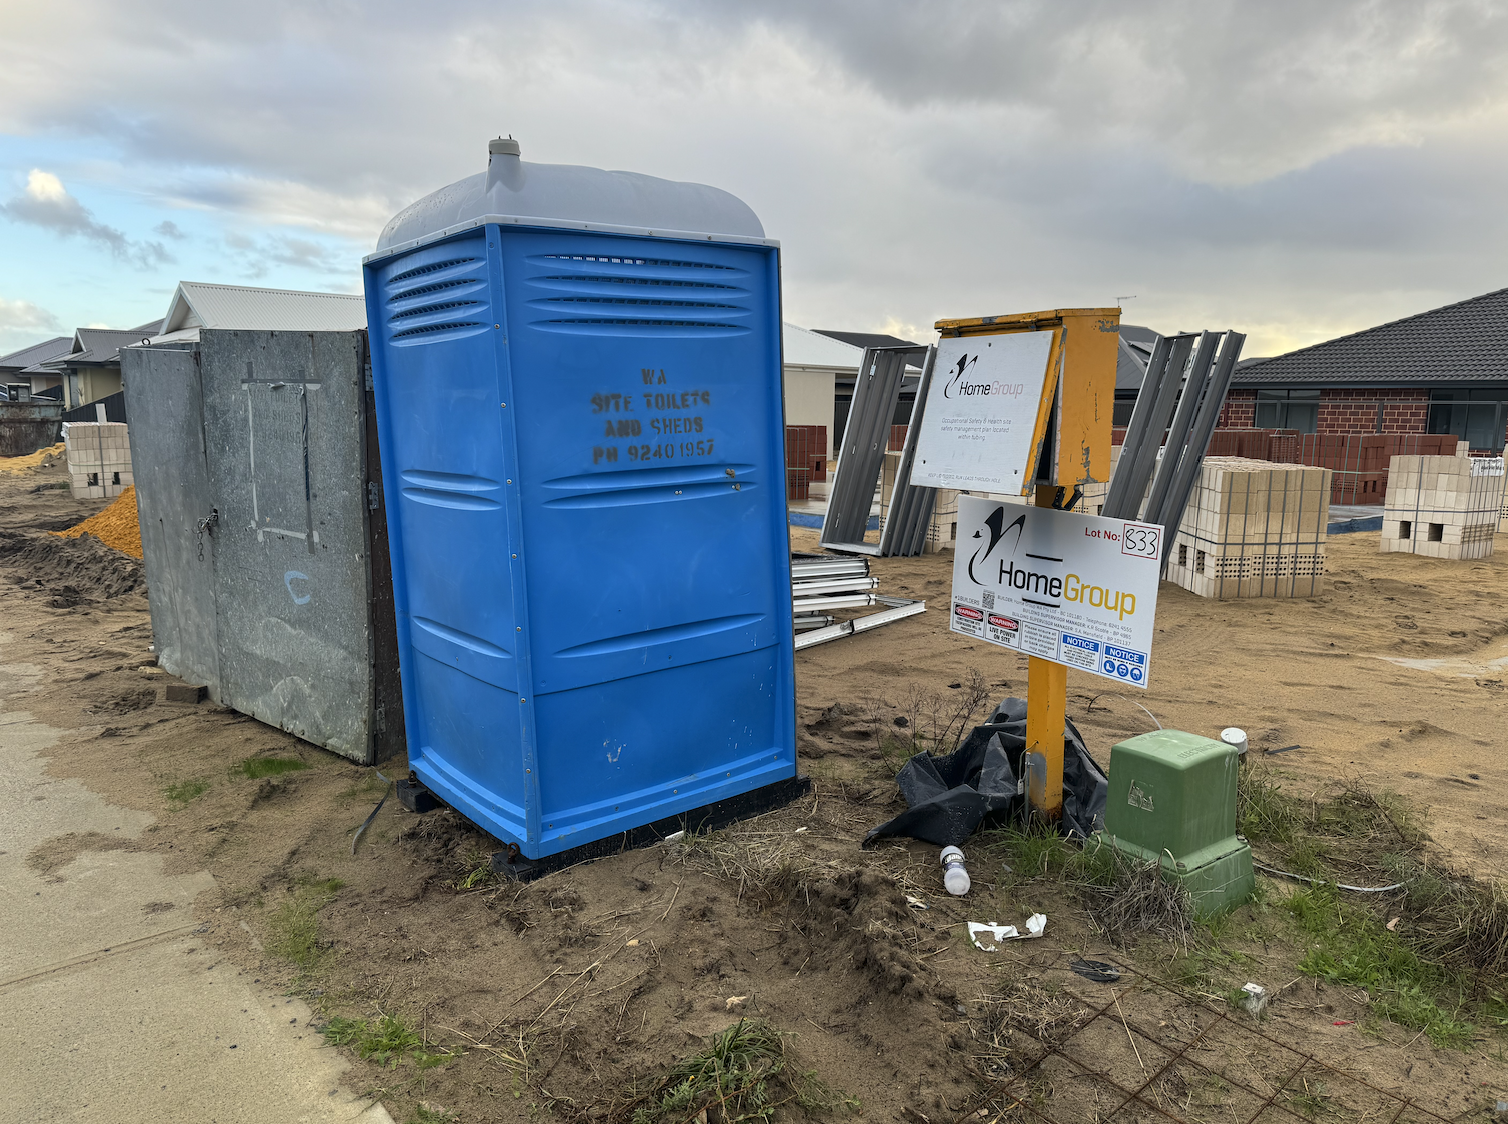
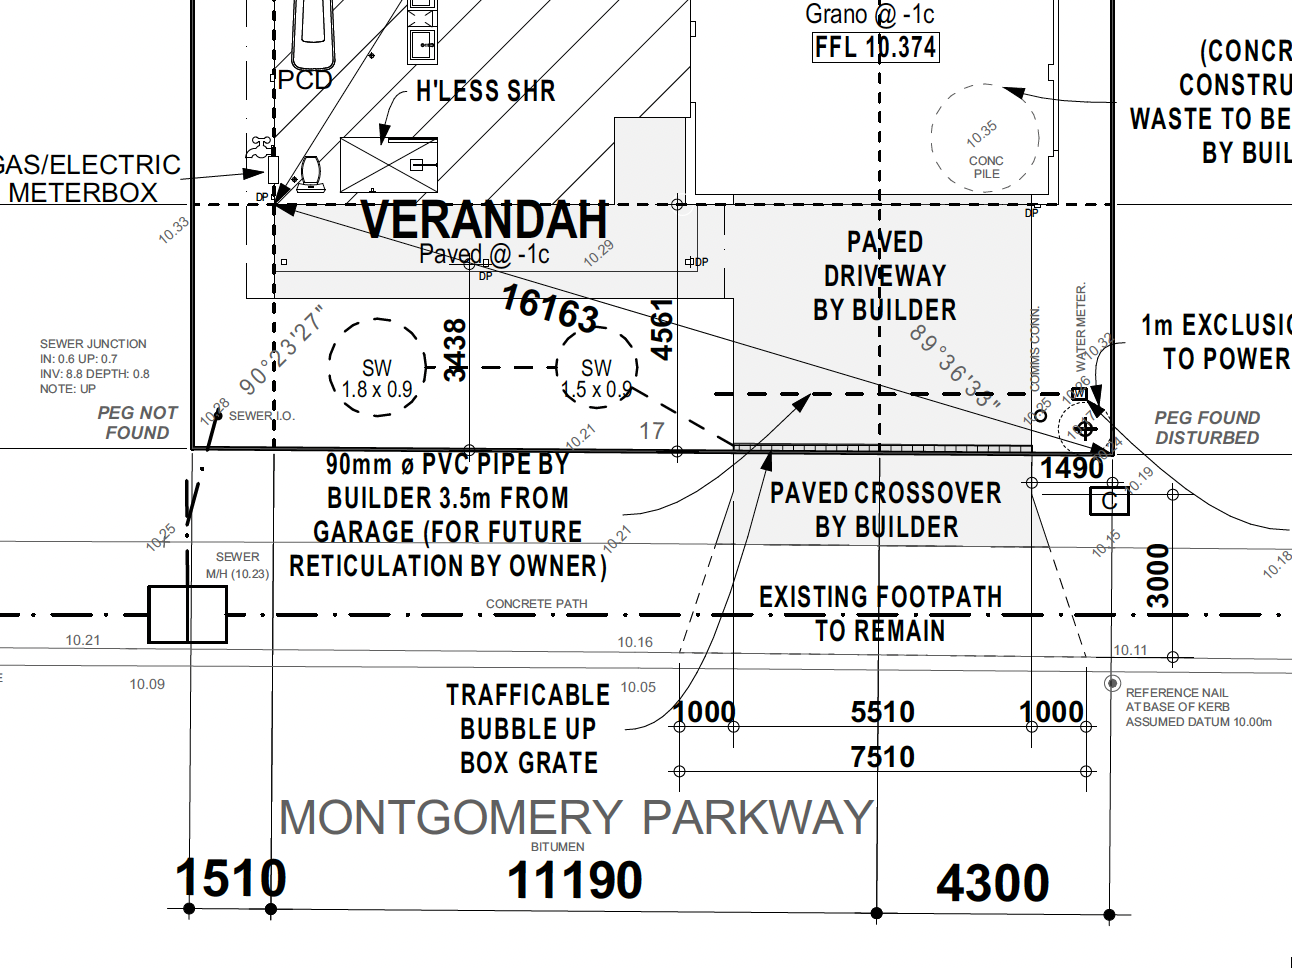
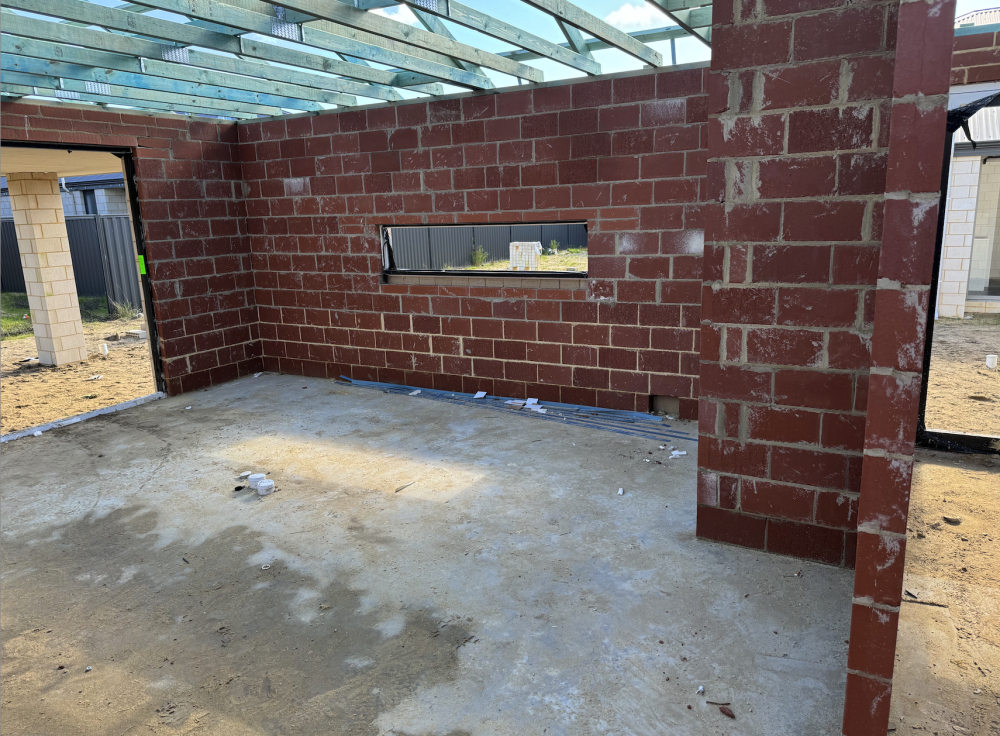
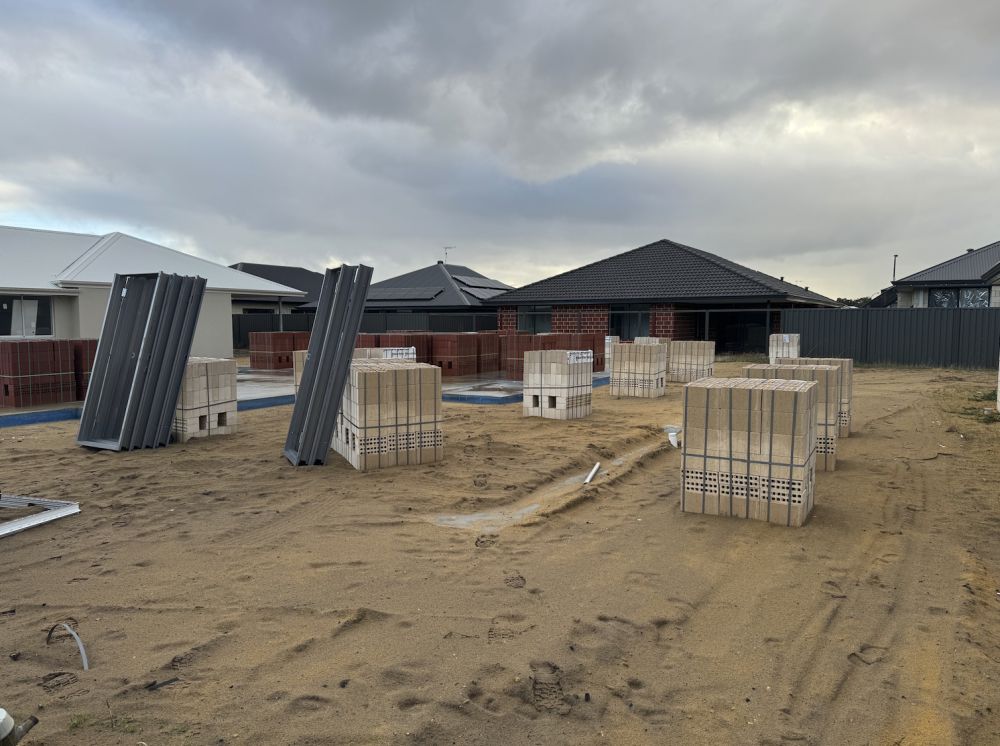
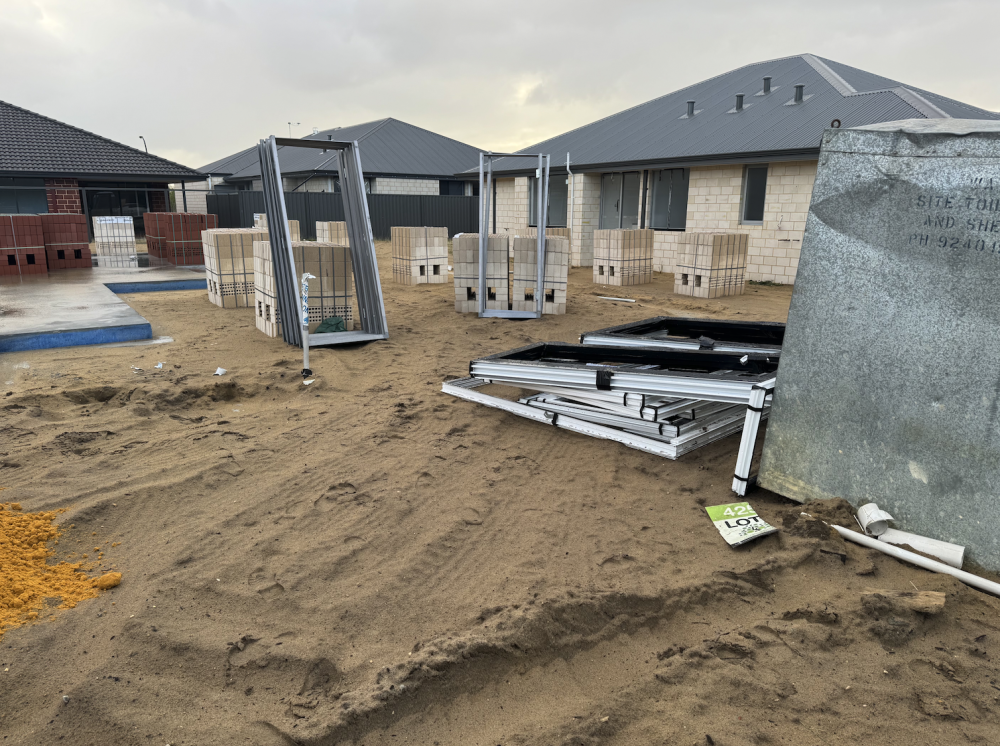
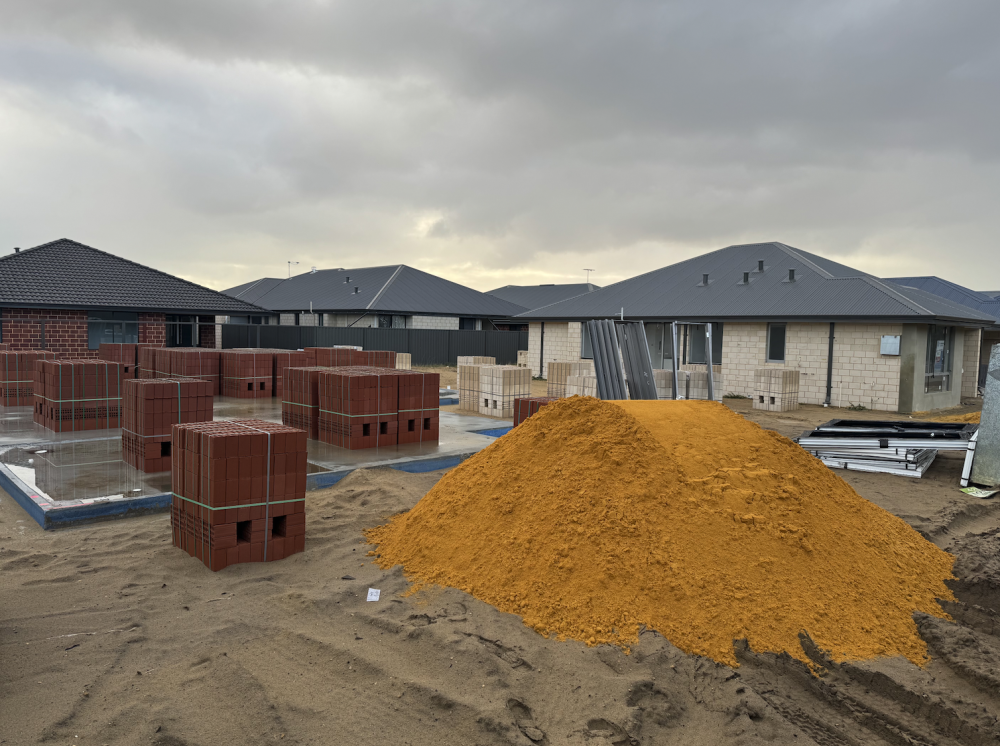
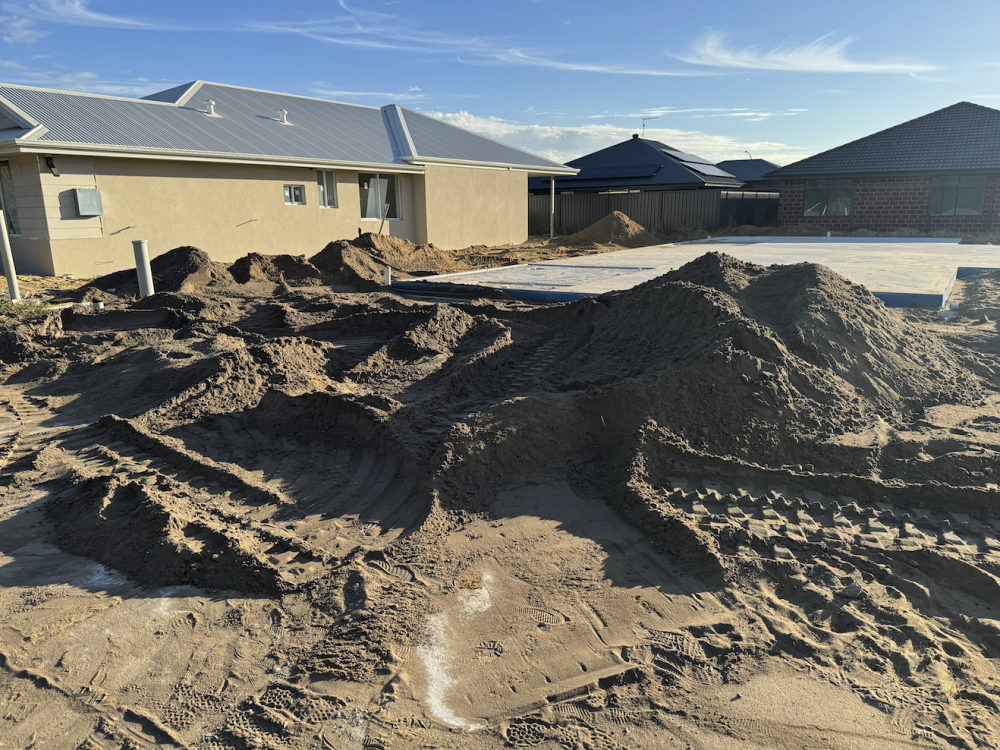
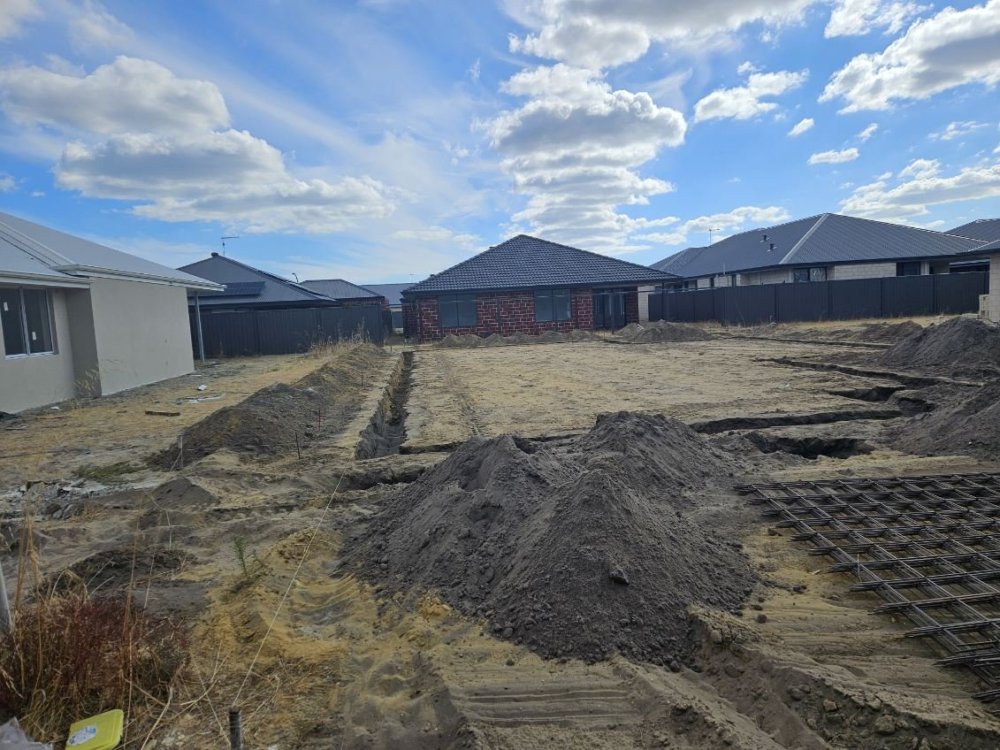
The weather has been patchy here for the last few days ... vacillating between bright and sunny to stormy and rainy. A sure indication that the weather is finally turning toward winter ... unlike a lot of countries or regions where the change incurs freezing temperatures with constant rains or snows, a typical West Australian winter (below the tropics) is characterised by cooler weather than the summer with an increased propensity for rainfall. This is perfect building weather as any cement used will cure at a measured rate ... rather than with extreme rapidity - as in the hot summer. I received a courtesy email a day after my last visit advising me that bricks were due to be delivered to site within the next week. Since I can't fly back to work, I'm stuck home until the COVID symptoms dissipate ... and with the weather being calmer yesterday, I decided to take another trip down to the block and have a look to see if anything had changed. It's actually a nice relaxing drive ... and definitely not "Just around the corner". With the way that the weather has been, I wasn't expecting much to be honest, but I was pleasantly surprised when I arrived. The block has been cleared up, the trench on the RHS rear filled in, the footings cleared and building supplies delivered to site. As I drove around the bend in the road, these are immediately apparent: The portable toilet (also referred to as the "site shitter" or "dunny") along with the portable tool shed (which at this point houses the shrink-wrapped pallet of cement and lime bags. A truckload of "brickies sand" has also been delivered along with the two types of bricks used in the build ... The grey doorframes are those for the interior ... bedrooms etc ... They will be painted much later in the build process at the same time as the attached doors, cornices and the ceilings. The powder coated white frames are plastic coated (to prevent scratching) - these are external window and door frames ... You can see that the site has been well cleared ... Very well done, I think! The bricks have been placed strategically around the site in order for the brickies to have them to hand for building, rather than have to constantly wheel loads of them into the area being worked on. On every wall of the house - except for those at the front (viewed from the road) - The red clay bricks are built up on the slab edge ... while the lighter 'limestone' coloured bricks are built up from the footing as a "face" brick ... this will leave a 50mm "breathing" cavity. At the front of the house, the red bricks will be "Face" bricks also - as a render will be applied to them. In order to get my budget sorted for the rest of the process, I called the builder admin to get some projected timeframes ... From "Slab Down" (beginning of May) to "Plate high" (walls built to roof level) should be around 8 weeks or so ... which means the walls should be up by around the end of the first or second week of July. From the there the next stage is "Roof Cover" which should take around a month after "Plate High" and from there another month until "Lock Up". At that stage all the interior works will be commenced and the next official stage will be "PCI" (Practical Completion Inspection). At "PCI" I will go around the house with the building supervisor and note any issues that will need to be redressed before "Hand Over" ... which is when I take possession of the house. Rog


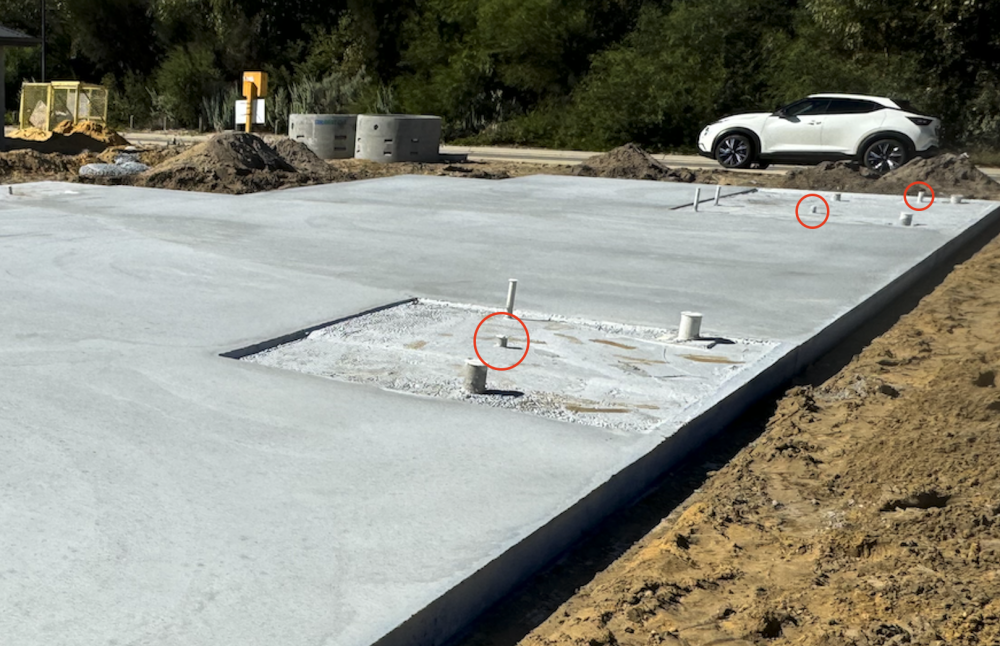
-
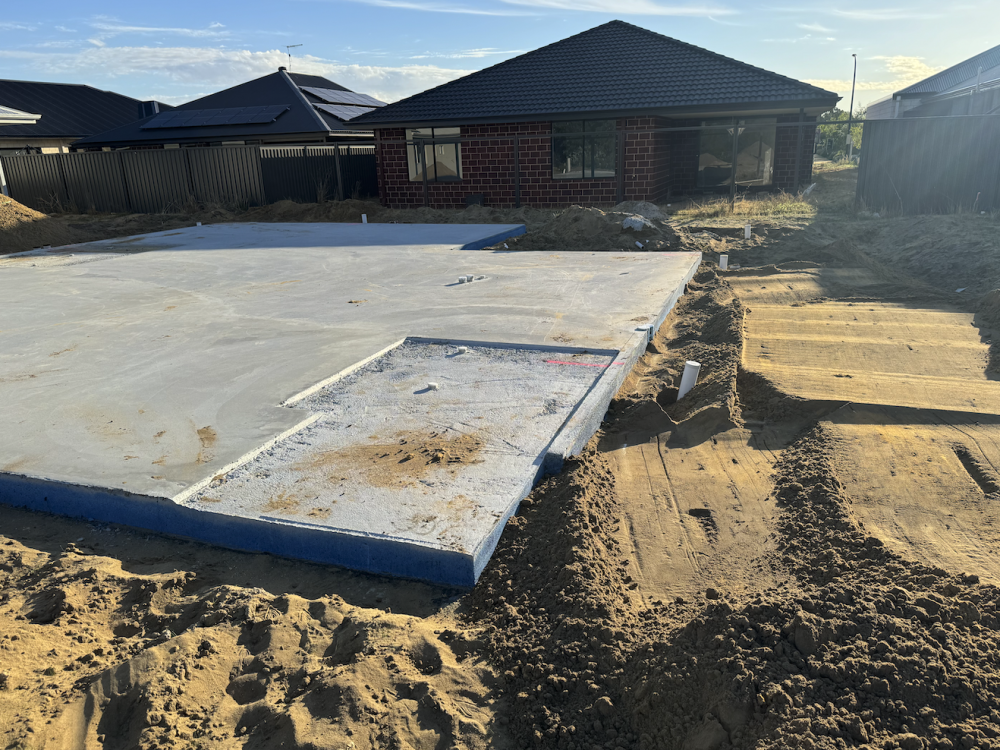
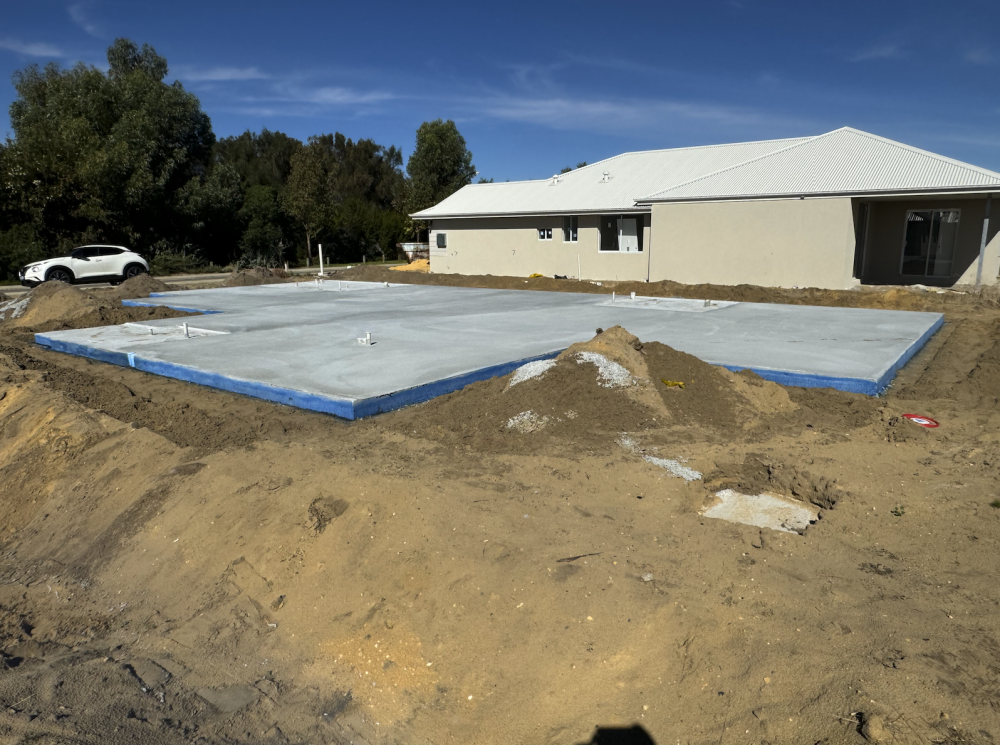
Believe me, within the 'standards' there are 'good' trades and 'poor' trades ... Home Group have a good reputation and inspection of the concrete slab did not disappoint! The surface was skimmed properly - smooth as marble! The wet areas were dug out beautifully and with plenty of depth for the tiler to pitch their desired gradient. The Slab edge was even the whole way around with no blemishes in the slab edge. Daniel (who was doing the parging to the slab edge when I arrived) has been a Termico employee for 20 years and is one of their most trusted employees. The job was done flawlessly - I inspected it afterward ... Looking forward to the next stage in the build now - brick walls!! Rog
-
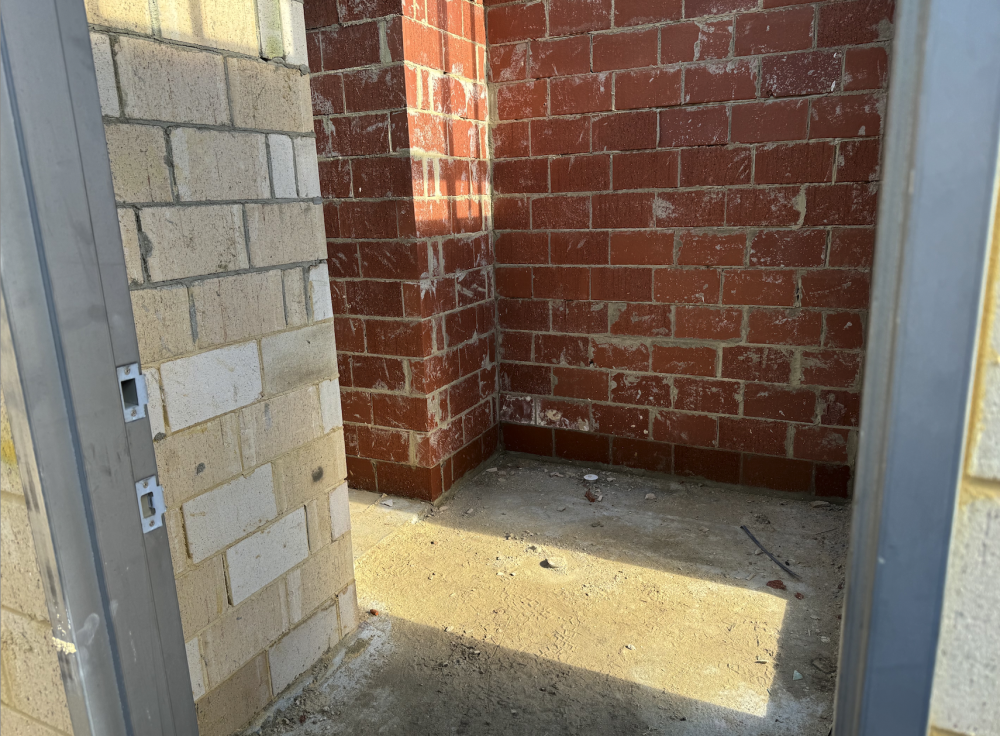
In Australia ... well Western Australia at least ... its a building standard that all wet areas are built with overflow drainage ... This earlier shot shows this drainage piping circled ... The near one is for the minor bathroom at the rear of the house, the next one is for the ensuite bathroom at the front and the last one is for the separate toilet within the ensuite. The reason that the wet areas are 'dug out' is to ensure a gradient can be formed from all directions toward the overflow ... or in the showers case ... toward the shower drainage hole. There is a similar drainage hole in the laundry also. There is actually going to be extensive tiling throughout the house. The only carpeted areas will be the 3 bedrooms and the home theatre. Rog
-
I arrived home at the end of this last swing with my first ever dose of COVID ... I've had minor head colds that were more savage than this thing, which I can only describe as a minor annoyance. Not much to report from the first pass at the block ... It looks a little more messy ... but that's because all the stormwater drainage soak wells and piping have been dug in ... Site should be cleaned up shortly with bricks delivered next ... Rog
-
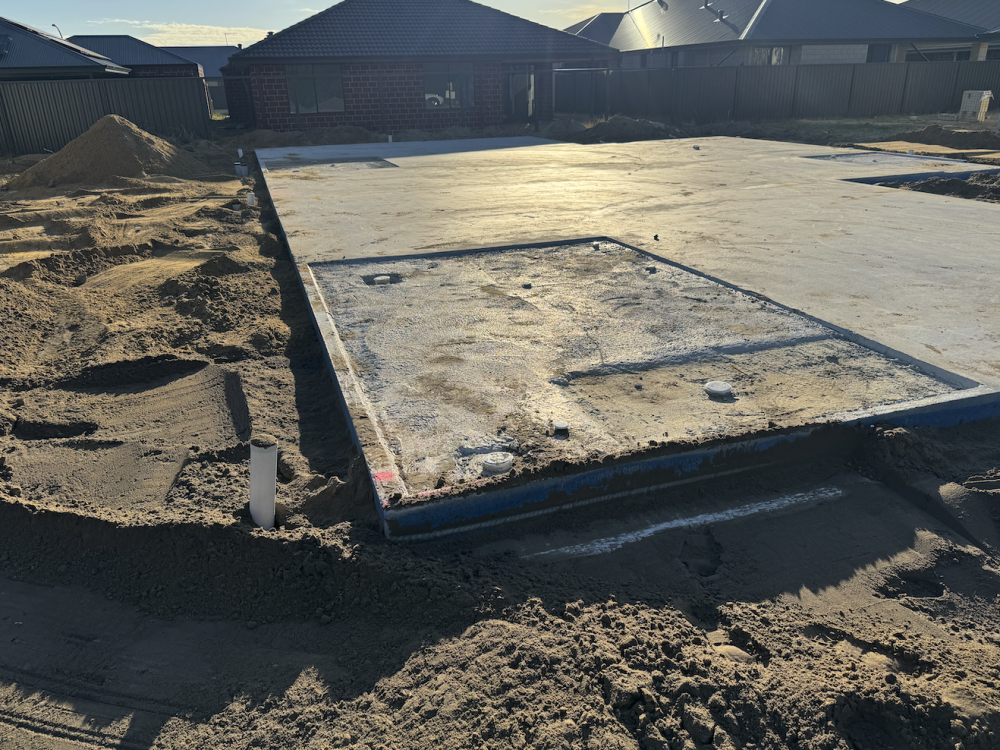
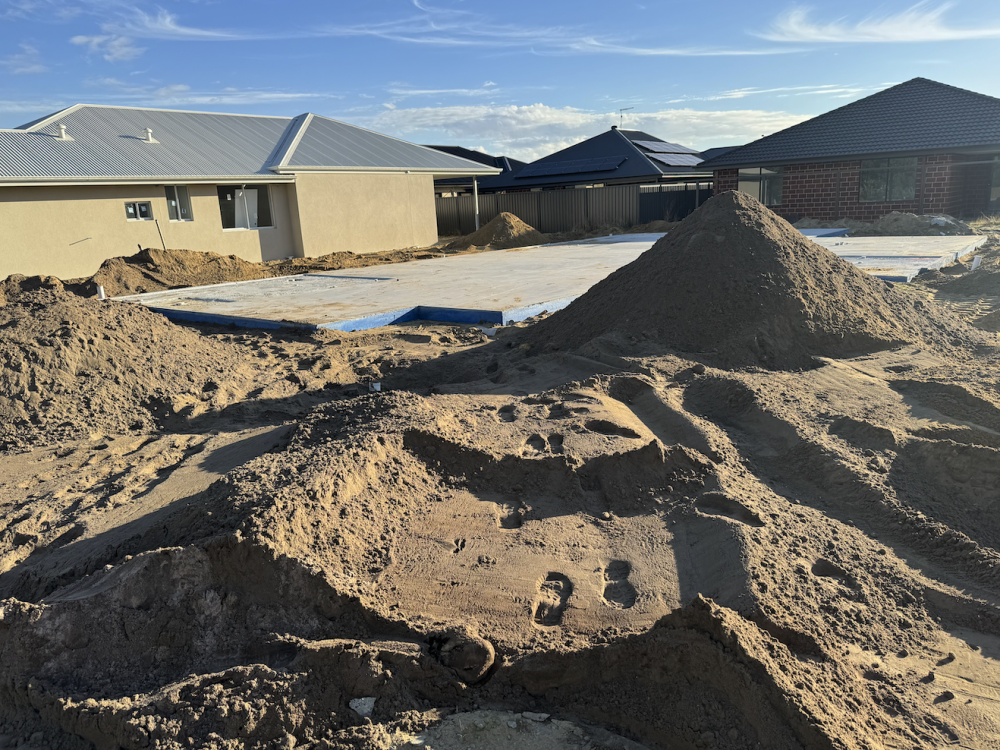
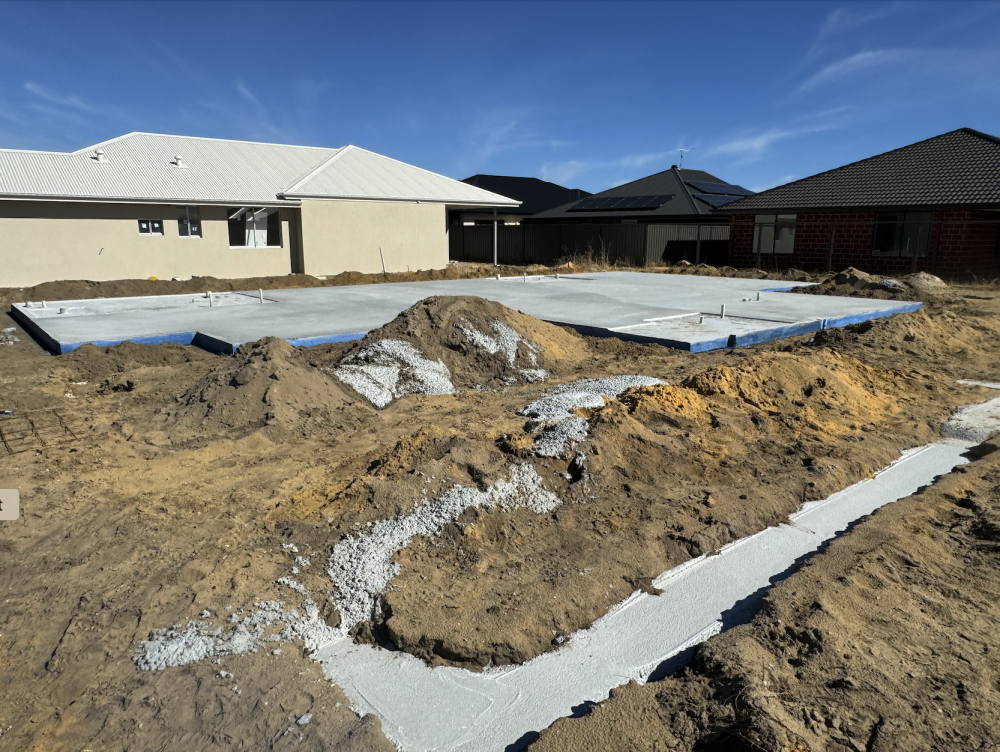
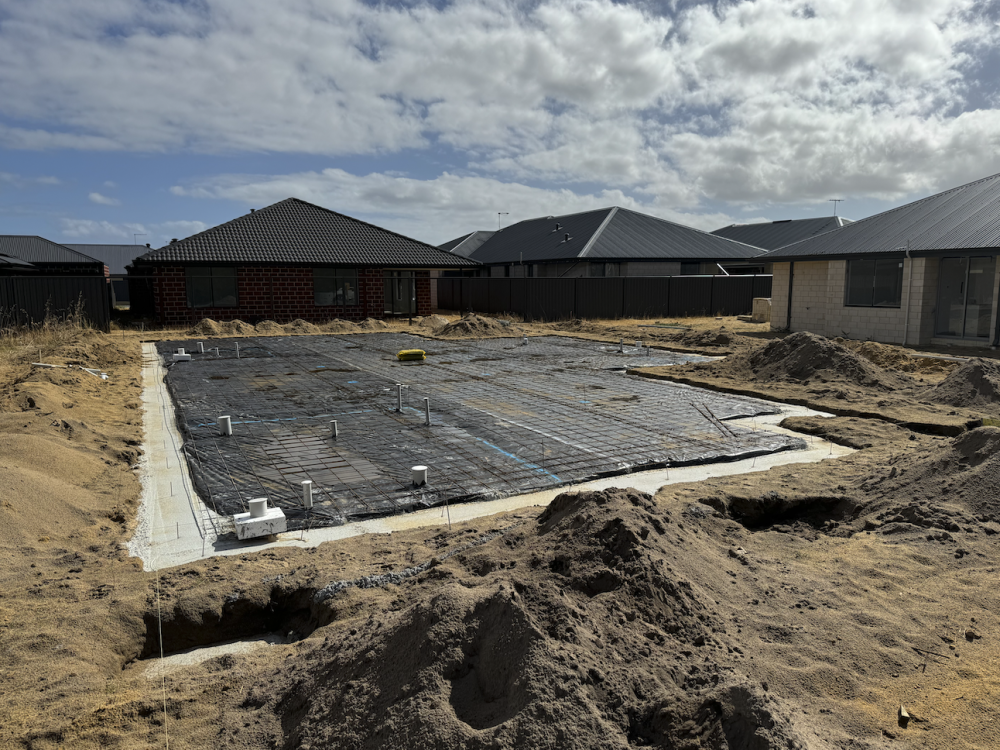
A quick trip down to the block today before flying out to work tomorrow. The slab is down!! I had to wait for photo's as an old work colleague from the pest control company sprayed the slab edge with parging chemical (the blue is actually a dye mixed with the clear chemical so you can see where you've sprayed - and if you've missed any) ... The slab is well poured and finished - a good tradie! The footings poured away from the slab are either for the garage wall or pillar / posts. Rog

-
Ok ... so you see the photo above where the concrete footings have been poured? ... The black polyurethane plastic is the moisture barrier - but before this is rolled out there is a termite barrier spray conducted (pumped through a shower head into the soil) using concentrated Bifenthrin (I know because I used to do it for the company that is doing the termite work here!) ... according the Australian Building Standards that is called the 'Part A' barrier ... 'Part B' is the perimeter barrier sprayed into the soil surrounding the building at the end of the build ... Where a concrete hardstand is poured into the garage (99% of WA houses) a full pretreat is conducted before concrete pour also. Some buildings use a physical barrier system instead. All timber for building here is milled and graded before sale to the builder ... a truck delivers it to site for the chippies. I'll provide details of the different bits as we progress through the build ... Rog
-
Another box arrived at the post office the day before fly out ... Since I had to head down to Ravenswood to check the block I called in to collect it on the way back. The latest ZM 1/48 Phantom II ... the Late E I already pre-ordered two Fw-190A-4's and after the salary goes through tomorrow I'll pre-order the latest Skyraider kit ... They must be good sellers - I have the 1st two ... then the limited edition ones (with weapons sets included in-box) ... now there's this latest one to get! Rog
-
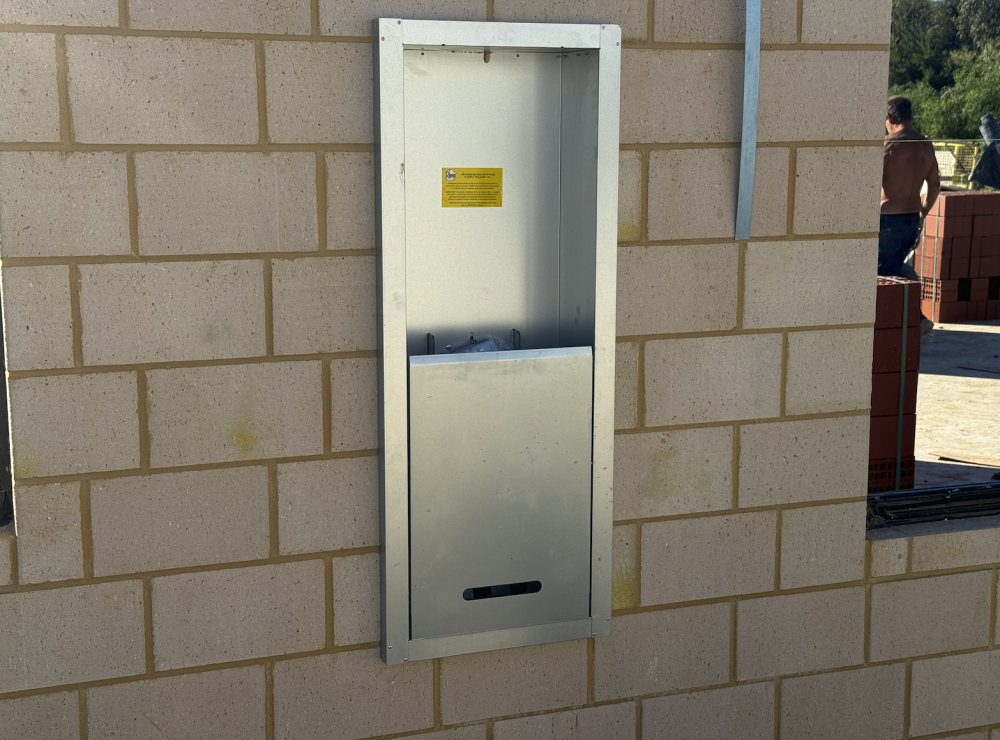
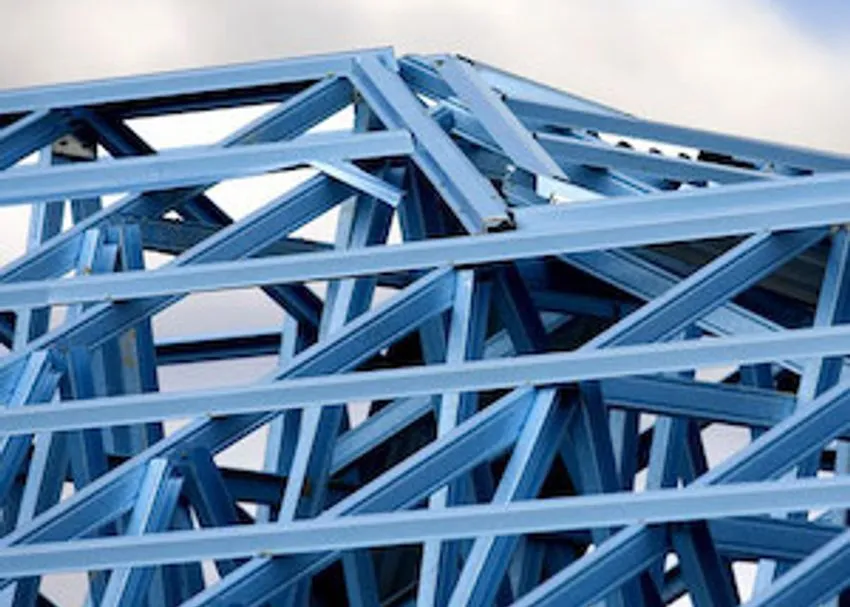
The two concrete tanks are for storm water - soak wells ... They will be buried in the ground at the front of the property in front of the verandah, with PVC pipes laid around the perimeter of the building collecting from the downpipes and running it to the soak wells. Sewerage is handled by pipes deep underground - septics now only exist in remote areas. The only serviced item on the property will be gas ... there are no gas lines to the properties in that region - so bottle delivery it will be for now! The two materials available for roofing structures here are timber or steel ... the steel is a blue colour - due to the protective coating used Depending on the style of construction, steel may be used in wall frame construction also ... my house will be double brick so there will be no occasion for steel, regardless. The other material used, is in fact timber ... Either straight up pine or composite (glued ply) depending on the structural requirement. We have special pine tree farms for the growth of the stuff as the pine grows quite fast ... Most hardwood is now protected under the heritage laws. Sometimes the pesticide coating on the pine will produce a blue or green colour, but all structural timber is pesticide treated due to building regulations regardless now. Rog
-
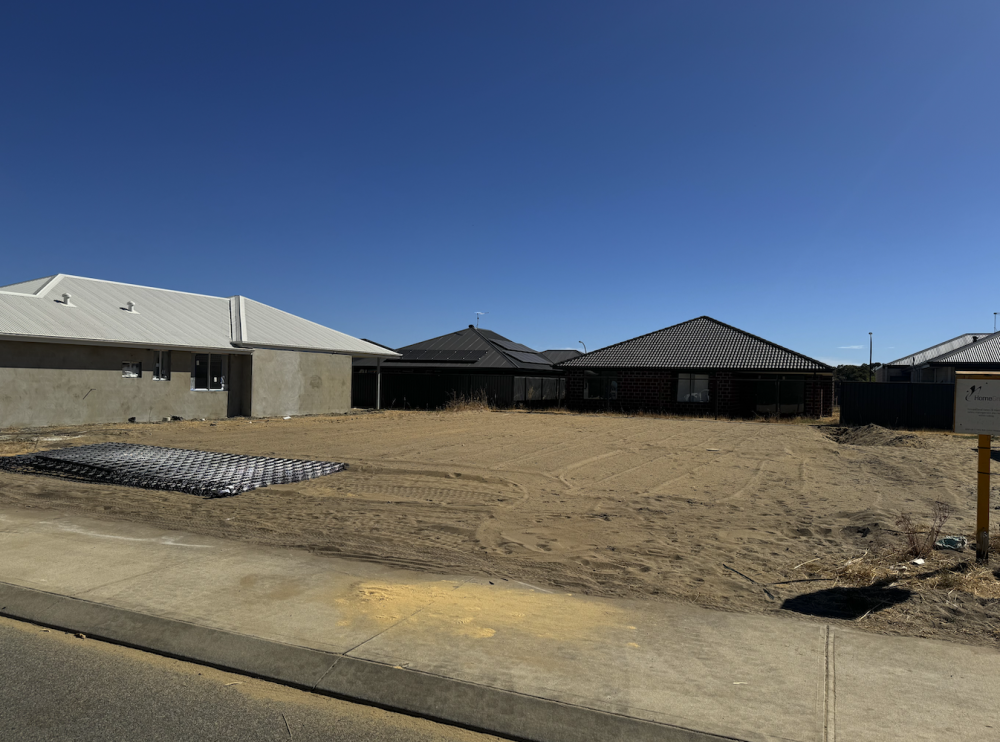
A few pic's of my land from settlement to present day! Rog

-
Absolutely! ... I made a couple of mistakes in the most recent design that I will need to rectify and they can only be done once the house is built now, unfortunately ... I'll explain those later! But otherwise, I couldn't be more impressed. Apart from the design amendments mentioned there will be some additional cabinetry inside that will need doing - largely because their cabinetry is all pre-designed flat pack which is assembled in-situ ... and I need both some 'additional' and amended items installed. Apart from that - all that is required of me internally is painting! as everything else will be done. Externally its a slightly different matter but 🤷♂️ Actually there are strict requirements on building design depending on proximity to other developments and bushland ... I think I'll be all good on that score. My philosophy is minimal maintenance ... so brick paving and artificial turf will be the order of the day ... the absolute LAST thing I want to be doing on my R&R is gardening - yuck! I have a chemical spray backpack for weeds, insects and spiders - and I'm not afraid to use it! Rog