


Woodshedwings
-
Posts
167 -
Joined
-
Last visited
Content Type
Profiles
Forums
Events
Gallery
Everything posted by Woodshedwings
-

BF109G6 Revell 1/32
Woodshedwings replied to Woodshedwings's topic in LSM 1/35 and Larger Work In Progress
While I have no problem using coloured etch (I plan to throw a bunch of it at the Uhu), there's something satisfying about painting your own details, especially in the larger scales, and have them turn out half decent. As you say, you retain the depth which etch sometimes flattens out. -
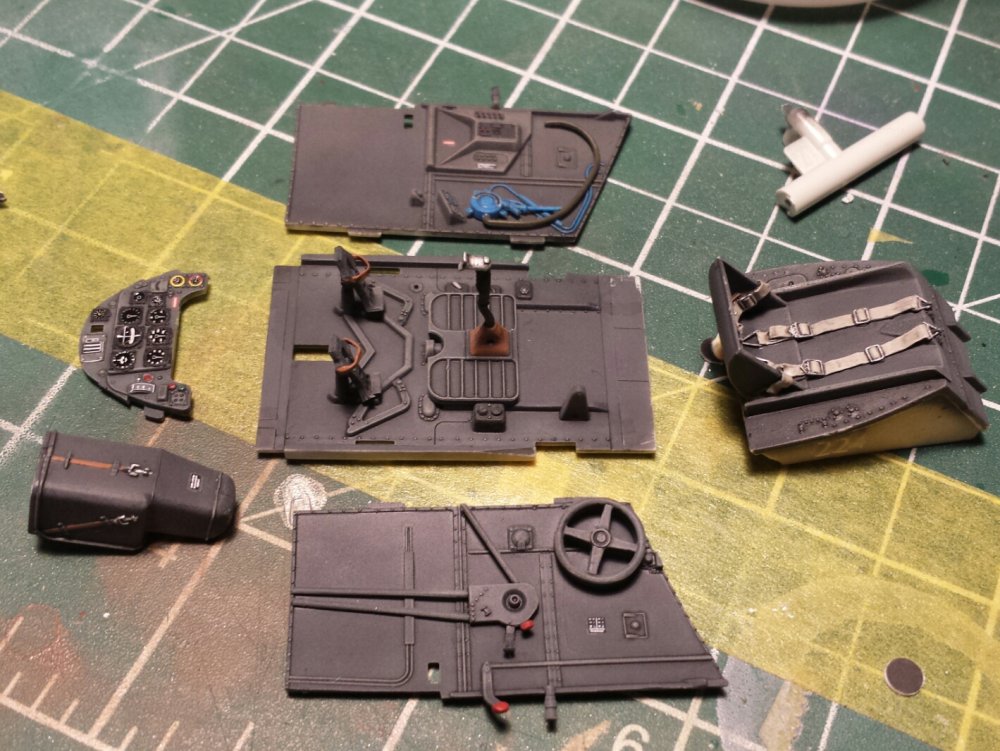
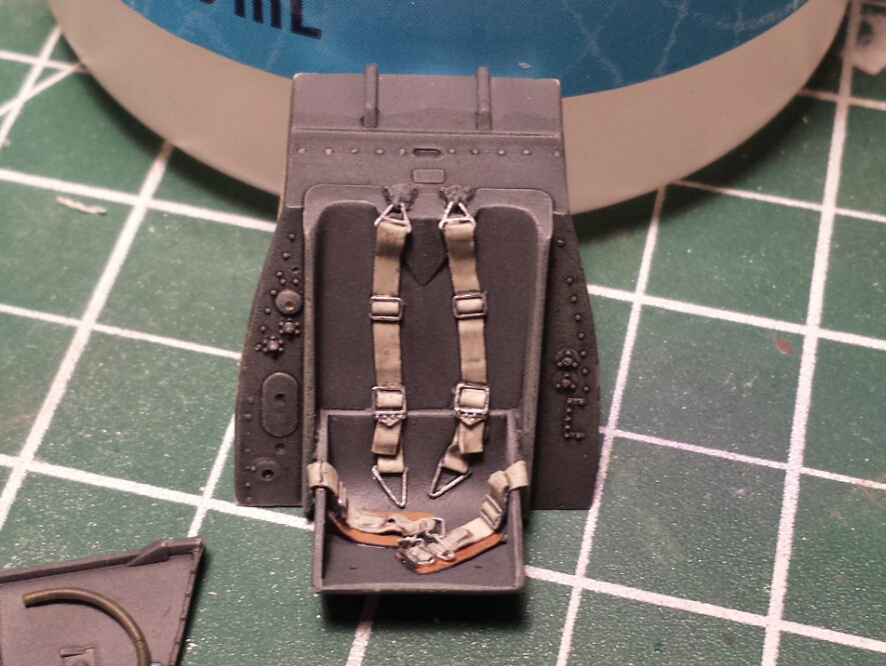
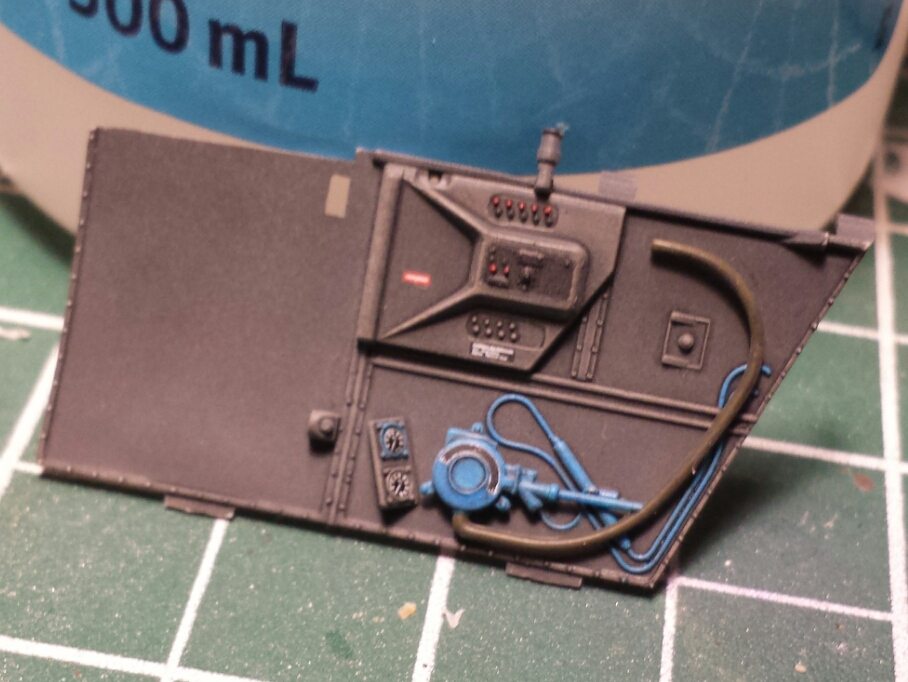
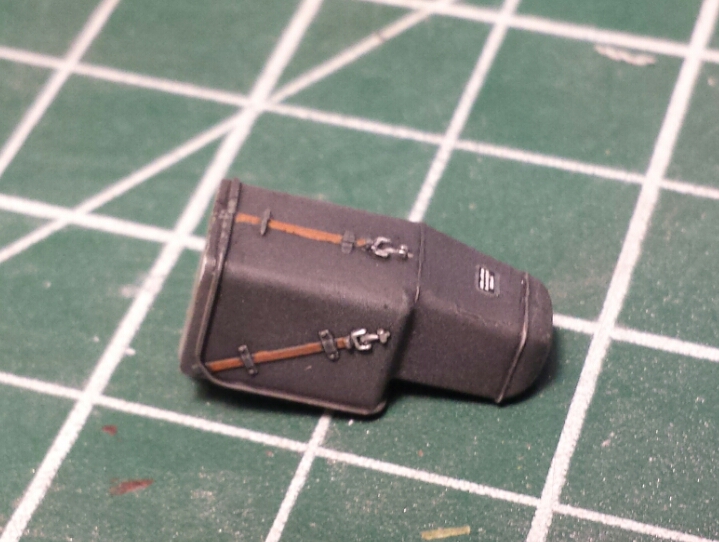
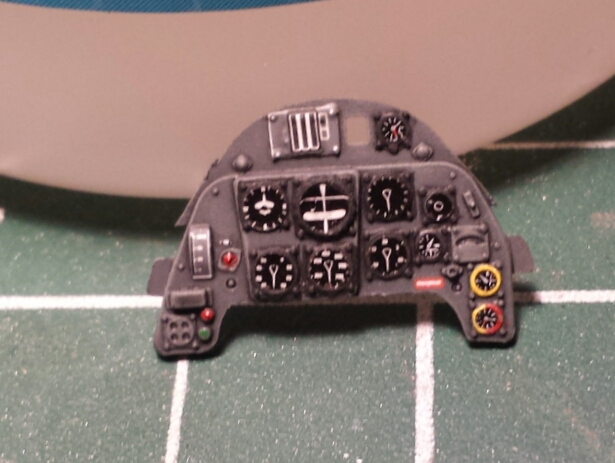
While waiting for some etch to arrive for the Tamiya 1/48 Uhu, I thought I'd start the Revell 109. Built and painted the cockpit using the Barracuda cast seat with integral belts. Used punched out kit decals for the IP alongside some 1/48 dials and placards from Airscale . Dry brushed with light grey enamel. Washed using Klear, water, black paint mix and matted down with Tamiya flat clear with a little flat base for an extra Matt finish. Glazed the dials with a drop of Klear.
-
That looks sweet! Nicely done. I'll have to have a bash at one of those Tamiya Mossies one day.
- 28 replies
-
- 1
-

-
- 1:48
- mosquito pr mk.iv
- (and 1 more)
-
Here are some quick phone pics of my completed 1/48 Tiffie. Hasegawa kit with Ultracast seat, wheels, prop, exhausts and Tempest tailplane. Also used were Aries gun bays, Master cannon barrels and avieologu decals (which were not pleasant to use). I scratched the cuckoo doors intake. This was on my bench for way too long so glad to move it onto the shelf. May just add some exhaust stains at some point.
-
That inspires me to start mine. Great stuff as usual.
-
Hasegawa 1/48 Bubbletop Typhoon 'Sharkmouth'.
Woodshedwings replied to Woodshedwings's topic in Non LSM 'WIP
Next up was to mask and paint the yellow leading edges, wing walks and gun bays. After this was done the model was given a couple of coats of future in preparation for the decals. I hadn't really looked too closely at the decals by Aviaeology, but on closer inspection the colours have a stripey look to them and aren't printed at all well. I thought 'I've come this far' so proceeded to try and apply them. They are so brittle and fragile that the slightest provocation makes them shatter. The sharkmouth became a soggy jig saw puzzle that had to be carefully maneuvered into place with the number of pieces growing as I did so. Much touching up will be needed. trying to get the codes to conform to a vent on the side of the airframe resulted in the same puzzle. Even the roundels, usually the easiest decals to get down, proved tricky. i will not be using any more decals from this manufacturer, which is a shame because they offer some interesting schemes, especially for the PV1, and appear to be well researched. I will persist, but slowly the joy is being sucked out of this project. -
Finally cracking on with this build so thought I'd share some progress pics. Building the famous sharkmouth and using the Aviaeology decals. Using the Aeries gunbay set which, after removing the large pour stubs actually fit quite well. Some modification to the mounting points for the cannons had to be made in order for the guns to sit right. I'm also using the Ultracast seat, large tailplanes and 4 bladed prop. The seat paints up nicely but the prop blades are a bit bent so will need the hot water treatment. Scratch built the 'cuckoo door' air filter. Used Airscale decals for the I.P.
-
I did start a build log but got bogged down with other stuff. So decided to just concentrate on getting it done.
-
Just finished this after many months. Added lots of scratch in the cockpit. Re-modelled the seat cushion, added armor plate from plasticard, used the Barracuda cockpit upgrade and added belts from lead sheet and buckles from the spares box. I removed the crowbar from the kit door and added the release mechanism. Exterior wise I used Barracuda wheels, radiator and oil cooler, and ailerons. I modified the antenna mast and had to scratch build a new pitot tube after knocking off the original and have it vapourise on contact with the floor. To get the hood to sit properly, I deepened the canopy rails and glued thin strips of plasticard to the underside of the hood. I was then able to clip the hood in place.
-
Finally got round to using the masks that Mal Mayfield cut for me. (Starting a new job and trying to get my head around that has left little time for modelling). Following the instructions, I weeded out all the excess parts of the first mask and positioned in place. I sprayed the first colour (red), before removing the mask, but leaving the positioning box in place. I then placed the second mask carefully inside the positioning box and sprayed the second colour (yellow). Removed the mask and voila, Nooky Booky IV flies again. I was impressed at how well these worked. They were easy to use with some care and patience. I will definitley be using masks again in the very near future. Thanks again Mal.
-
Sand by your Manc.
-
So, thanks to the Mighty Mal Mayfield, I should be able to bring this one to a successful close. Mal has cut some masks for the Nooky Booky IV nose art that I so willfully destroyed. I should have them within my sweaty grasp soon. Never used masks before, so really looking forward to trying them out. I've heard though, that once you use paint masks, it's hard to go back to decals. Ah well, add that to the list of addictions.
-
WNW Bristol F2.B Fighter
Woodshedwings replied to Bombardier's topic in LSM 1/35 and Larger Work In Progress
Congratulations on the progress so far. This was also my first WNW kit. I detailed my experiences with it, in an article on Scale Plastic and Rail. It can be found by following this link if you are interested. http://www.scaleplasticandrail.com/kaboom/index.php/92-our-projects/completed-projects/2177-confessions-of-a-wingnut-wings-virgin -
Sure beat the crap outta me!
-
Ha ha ha! Yes Bevan, I actually thought of that as an option.
-
So, just about at the end of my tether with this. I managed to tear off the nooky booky decals on the nose by a mixture of bad planning and bad luck ( you could probably insert the word stupidity in there somewhere and not be far off the mark). This was after spending some time and care detail painting the gear bays. And painting and assembling the prop (another fine example of Dragon engineering). So this is where it stands and will probably remain so. Unless anyone has a spare set of decals for this that they are willing to part with for a small consideration. If not, I can't see myself making much of an effort to finish it. It took all my willpower to get the damn thing onto its wheels. Shame, as I quite fancied getting this past the winning post. Oh well, you can't win 'em all.
-
Revell 1:32 Spitfire IIa
Woodshedwings replied to Mish's topic in LSM 1/35 and Larger Work In Progress
Great stuff! Reminds me I need to crack on with mine. Anyone have a spare couple of hours in the day to lend me? -
I want to build models like that when I grow up. Seriously good and inspiring.
-
Not much time for modelling lately as my time has been taken up with a 1:1 scale kitchen reno, but managed to get a bit done over the last couple of days. Those kill markings. Fiddly, fiddly, fiddly. Honestly! 3 tiny decals for each one! I managed to remove a couple of them accidentaly but luckily have spares. I began the weathering process by applying a dark wash. I am going to try some hot metal effects around the exhausts and top off with exhaust and cordite stains. The landing gear was assembled next which proved to be another fiddly job. They are over complex and the instructions are hopeless. There are multiple parts on the sprue with some parts duplicated so I spent a long time ensuring I had everything aligned and oriented the correct way before committing to glue. They don't look bad when assembled. Unfortunately though, you can't fit them into the holes in the gear bay without trimming some material off the ends of the attachment points. I'm going to deviate from the instructions and hang bombs under the wings as these are included as parts marked 'not for use'. These should look ok when painted and bashed around a bit. Really need this one done so I can crack on with the Mk II Spit.
-
Cheers, Bevan and Cees. Looking out for some good weathering references as we speak.
-
Hi Cees, wouldn't say 'unbuildable' just not a pleasant build. Got some more of the decals on. These went down ok with a little help from a sharp blade and some micro sol. Good thing is, the carrier film almost disappears. Kill markings are going to be a pain. Each one is a seperate piece made from 3 tiny decals. And there are a few of them!
-
I was a bit concerned that the checker markings on the nose would be a right mare but fortunately this proved not to be the case. The 3 part decal (printed by Cartograph) went on fairly easily with some assistance from Micro Sol. I carefully pushed, teased and prodded them into place as they softened. The fit isn't perfect but I am pleased with the result. It feels good to be able to say something nice about this kit
-
Revell 1:32 Spitfire IIa
Woodshedwings replied to Mish's topic in LSM 1/35 and Larger Work In Progress
Well done! Looks like you remembered to fit the prop spindle before cementing the fuselage halves together. I will have to retro-fit mine! -
Yeah I know, but some weren't and some had it removed. I'm depicting one of these latter machines. (I've wasted too much of my life on this stupid model already).
-
Used Alclad alluminium for the NMF. Was surprised to see that the finish came out a bit patchy, but decided that I actually like the worn effect that I accidently achieved. To my eye, it looks like the aircraft has seen some abuse from the elements and has a used, patinated look. Hooray for happy accidents. I'd be interested what others think, but I think I'll leave as is and follow up with some dust dirt and oil after the decals are on.
