GazzaS
-
Posts
6,396 -
Joined
-
Last visited
Content Type
Profiles
Forums
Events
Gallery
Everything posted by GazzaS
-

Clear the Bench! It's Kotare Spitfire time!
GazzaS replied to GazzaS's topic in LSM 1/35 and Larger Work In Progress
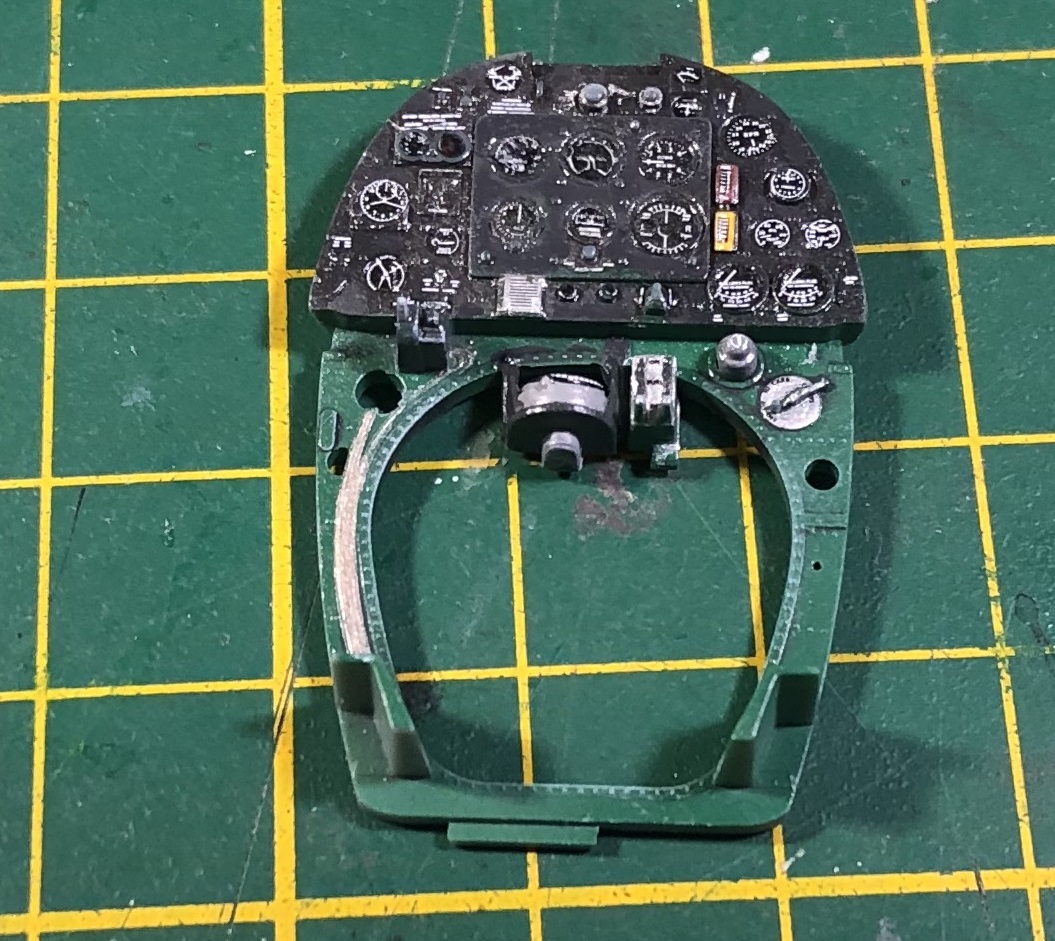
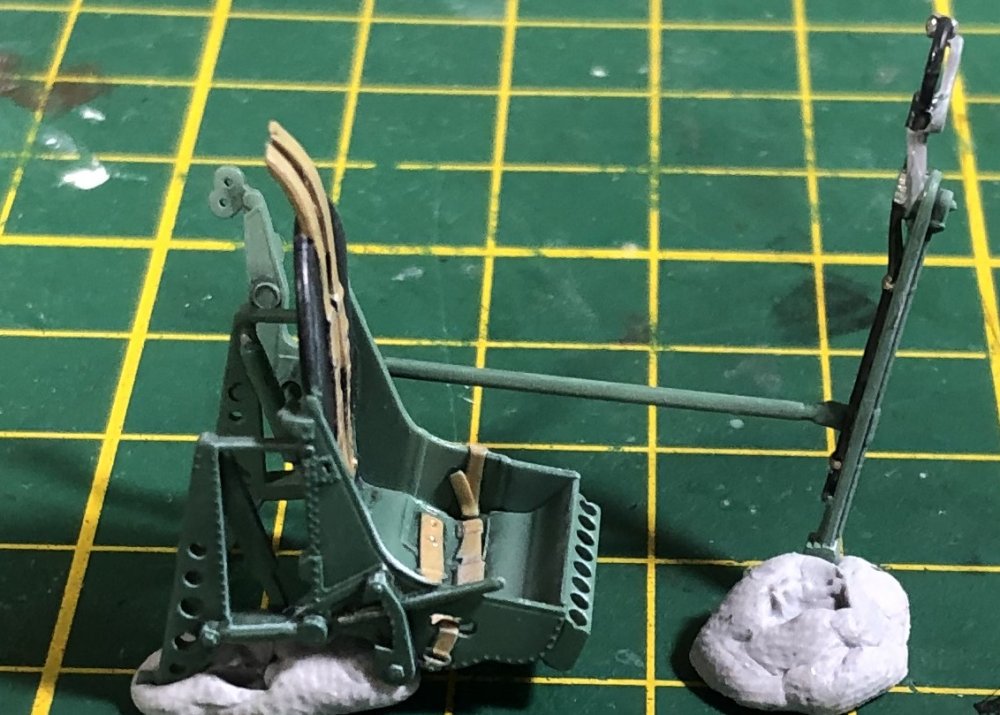
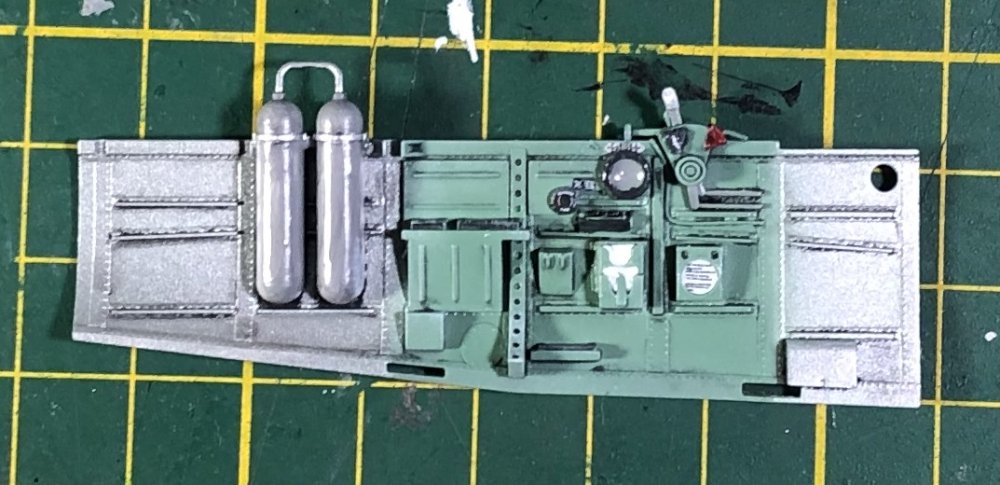
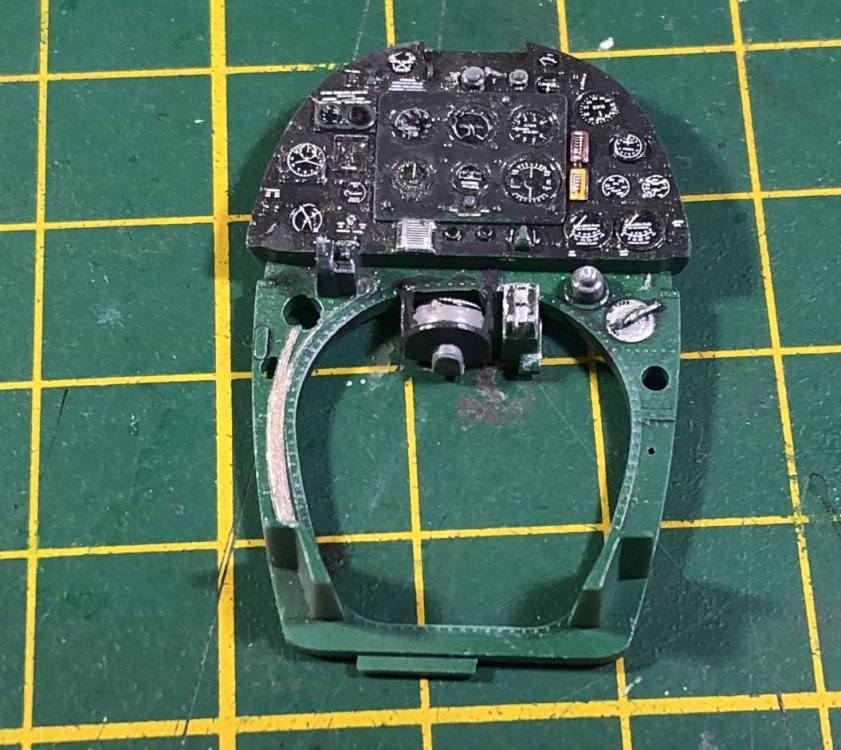
Well... The last detail to finish in the cockpit was to add the shiny glass pieces over each gauge. An enlarged view for those that like enlarged things... I used that clear resin that hardens under UV light to make the effect. Anyway... after all of that hard work in the cockpit... including rigging the flying controls with Ushci type stretchy line... I hid it all by buttoning up the cockpit tub and added the fuselage around it. The cockpit tub fit neatly and went together easily. Rigging the flight controls was a pain, and is virtually invisible. But since it's been over 40 years since my last spit... why not? I'm a little uncertain how to proceed with the dorsal piece. See the slight gap as it nears the canopy? That can be squeezed tight and held in place long enough for the Extra Thin to dry. However... all of that raised detail... I'm afraid that I'll ruin it with the capillary action of the glue. There is one locator inside, but I don't think gluing it alone will be strong enough. How would you do it? -
Clear the Bench! It's Kotare Spitfire time!
GazzaS replied to GazzaS's topic in LSM 1/35 and Larger Work In Progress
If you were a 109 builder, you'd really be enjoying playing the angle game. Because the angles aren't consistent from mark to mark due to continuous weight increases. I've used a lot of different things to hold those gear in place as they dry. And often still had to make final adjustments once the glue had set. Just love that the fit on this spit is more rigid than a drill instructor's spine. -
Clear the Bench! It's Kotare Spitfire time!
GazzaS replied to GazzaS's topic in LSM 1/35 and Larger Work In Progress
There's nothing special about the windscreen/fuselage join on this one. Purely old school. Would have been nice if it were one part with the armored fuel tank cover. hah... funny... I'm pretty lackadaisical when it comes to dry fitting, too. I did it for this kit, mainly because everything is so fascinatingly well made. -
Clear the Bench! It's Kotare Spitfire time!
GazzaS replied to GazzaS's topic in LSM 1/35 and Larger Work In Progress
Well... you are right on there... but Kotare had other plans. Once I learned they were releasing a BoB Spit, I reasoned/hoped that a BoB trio Spit/Hurri/109 would be their path to fortune. And of course, I would have bought all three on pre-order. But the next two releases are later mark spitfires, my hopes have been dashed. I certainly have no plans to buy a Revell Hurri. -
Clear the Bench! It's Kotare Spitfire time!
GazzaS replied to GazzaS's topic in LSM 1/35 and Larger Work In Progress
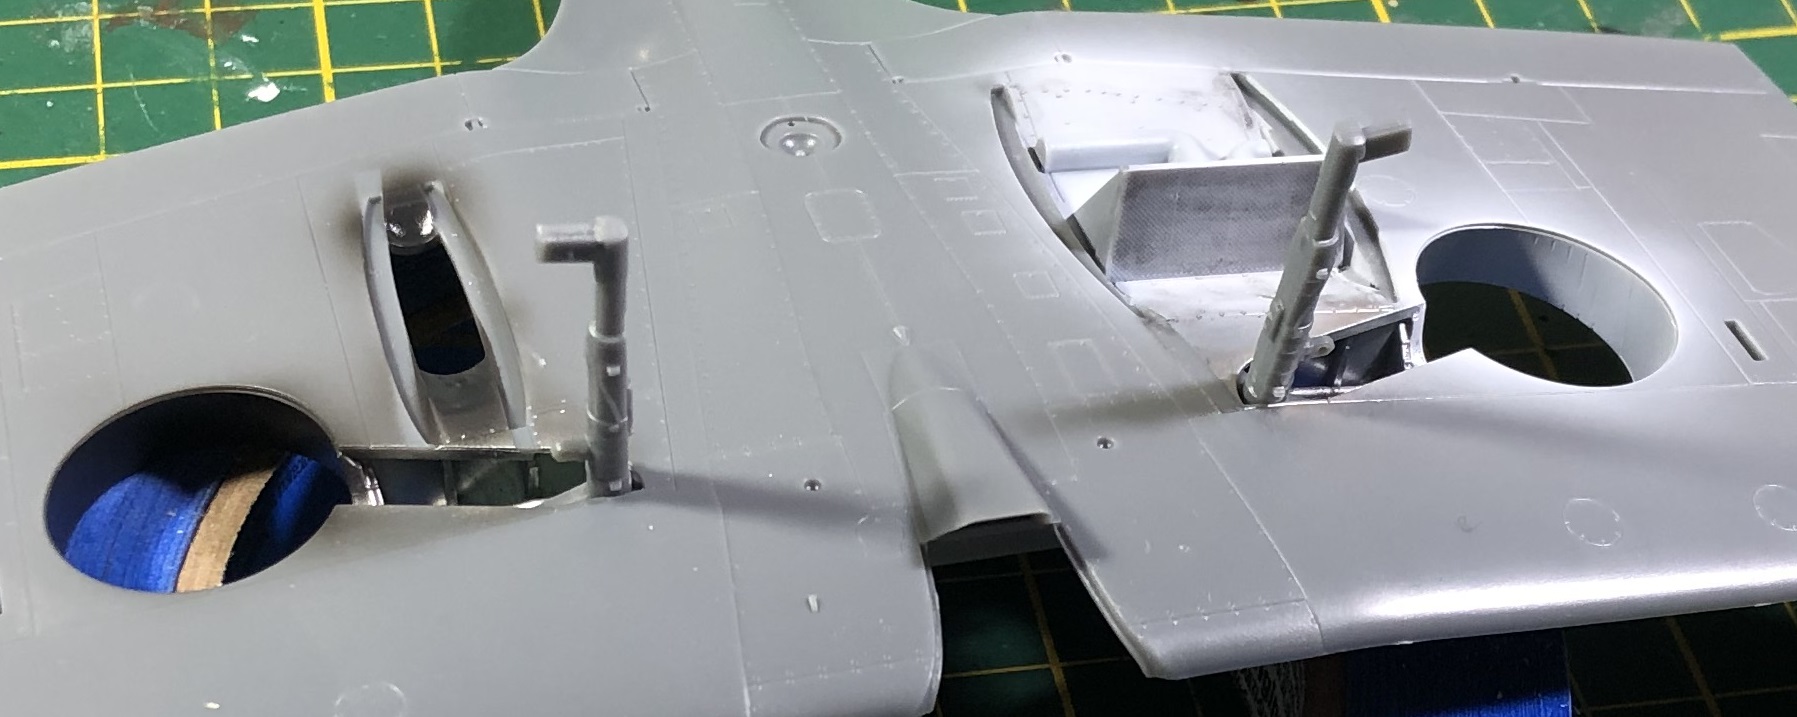
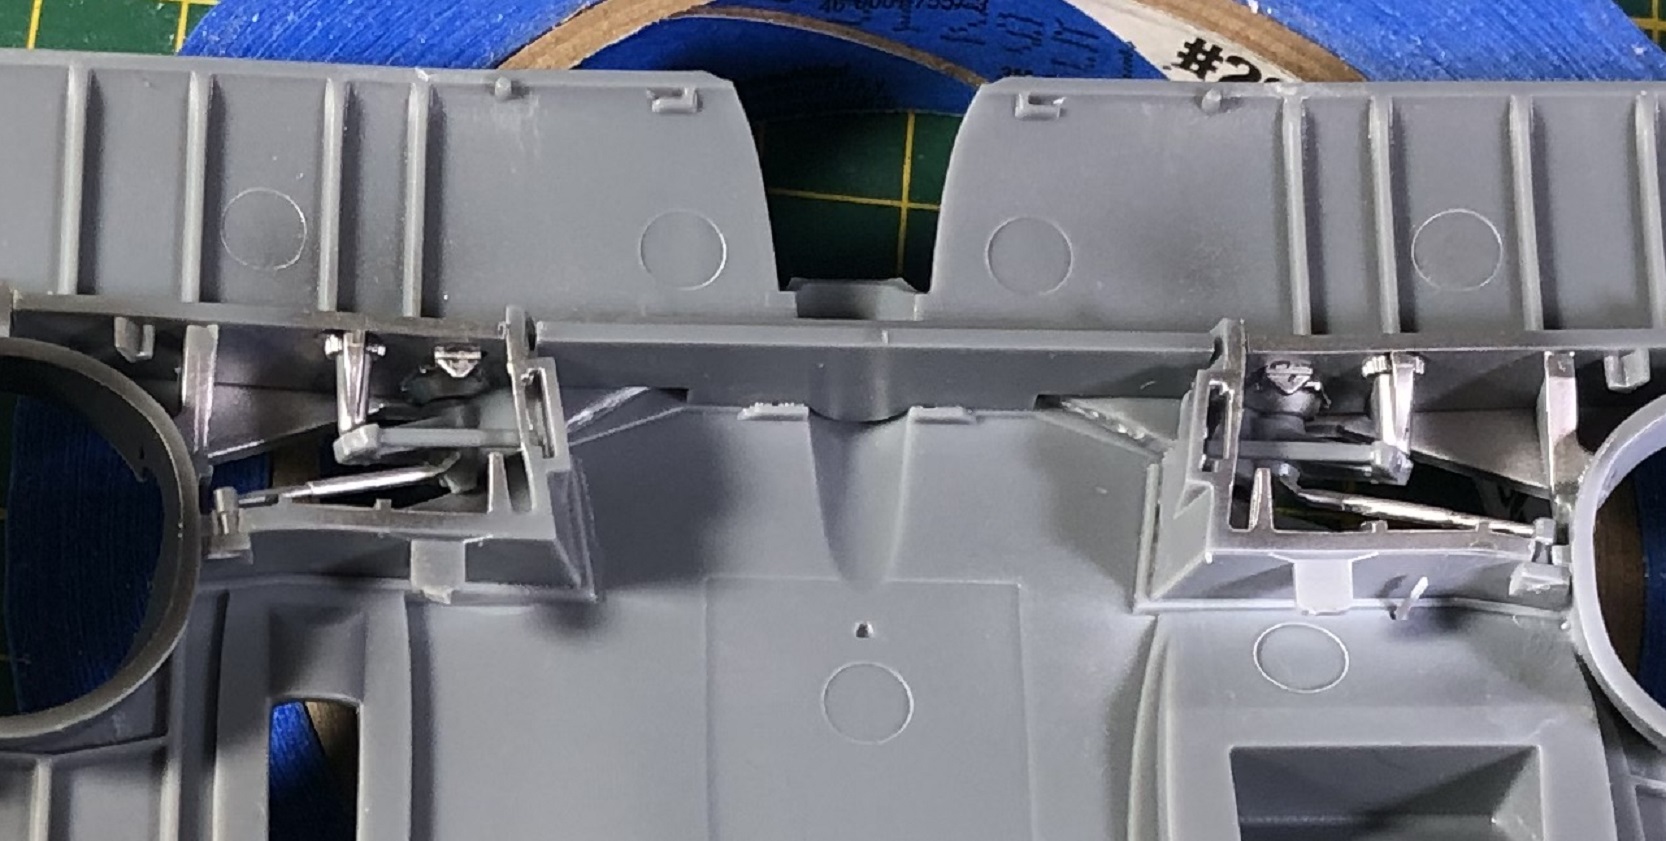
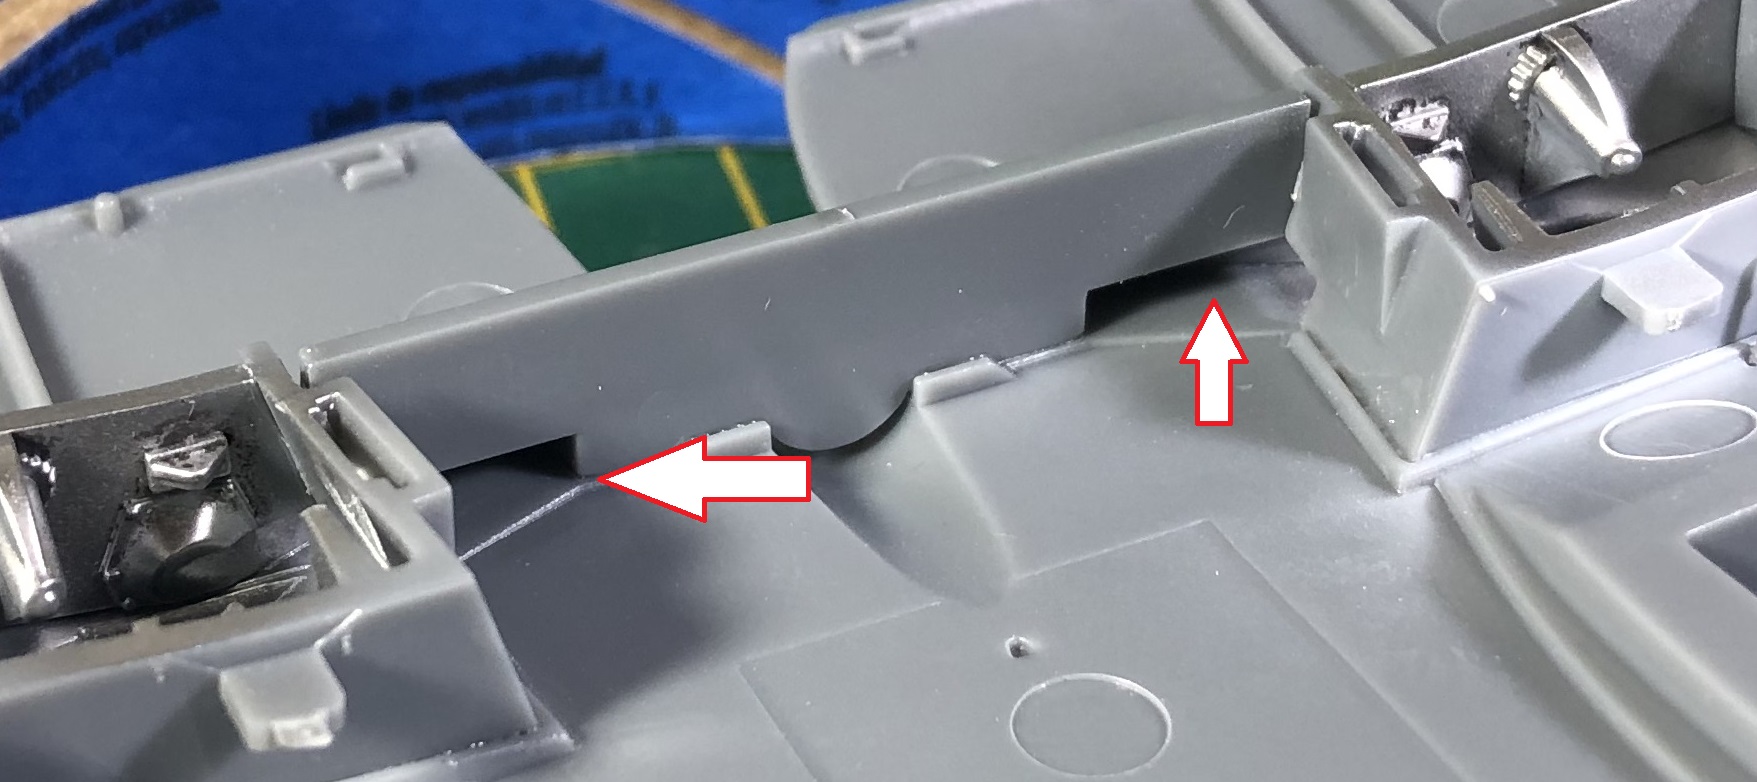
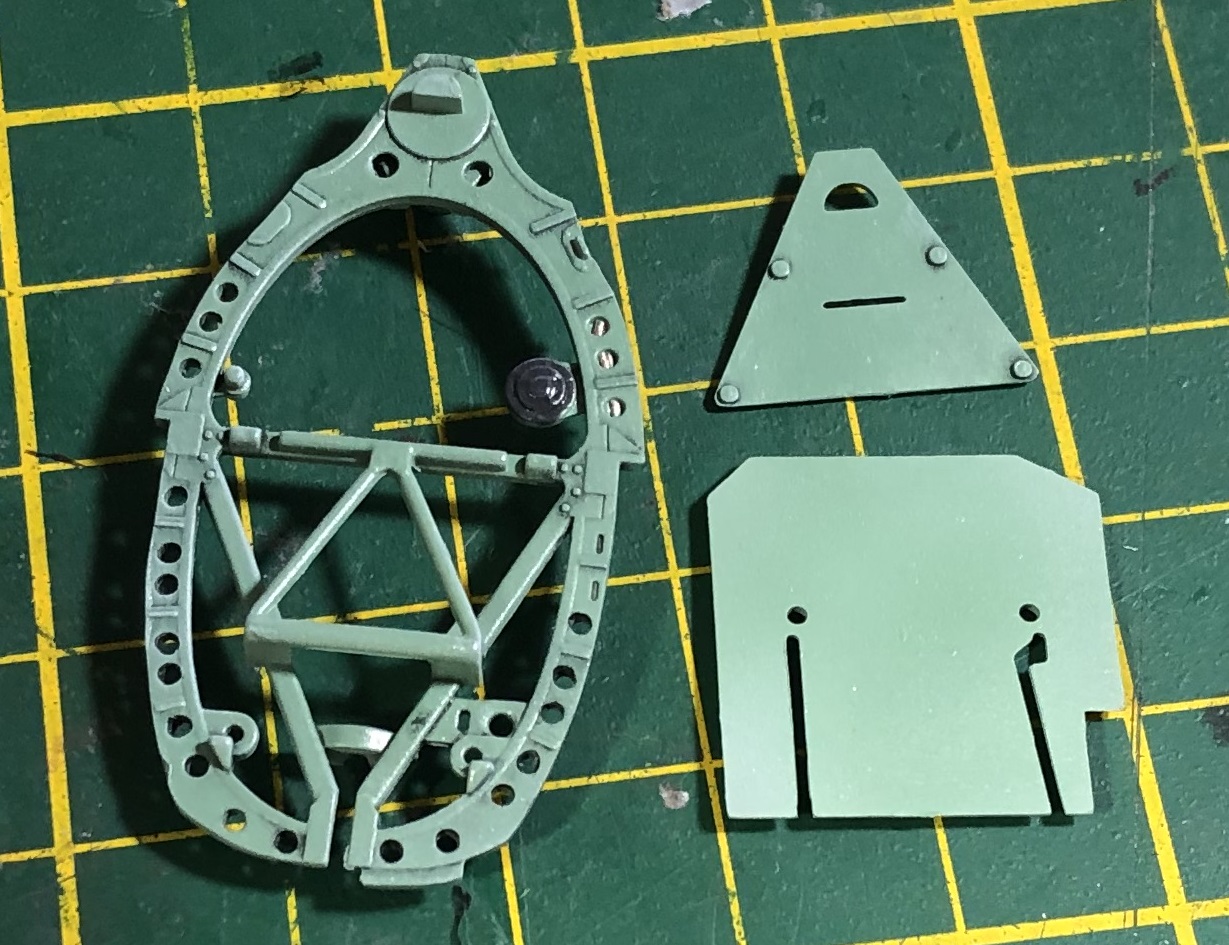
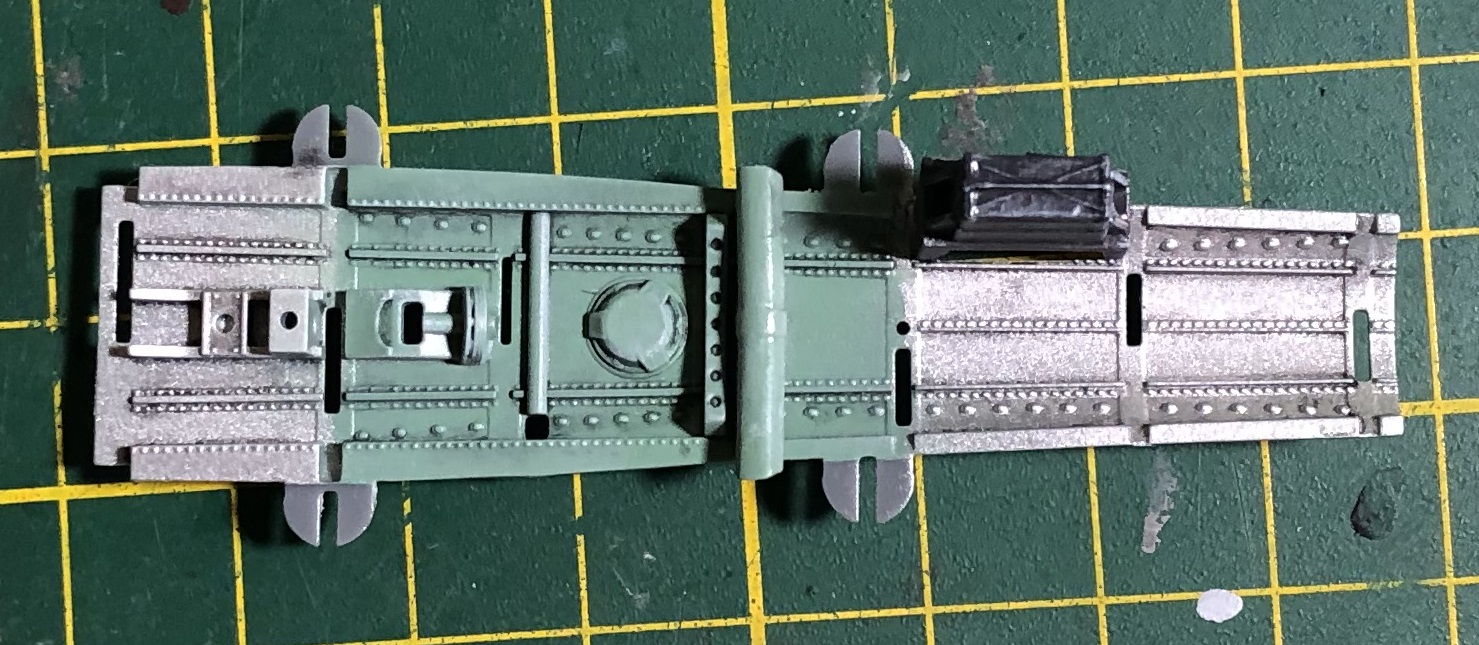
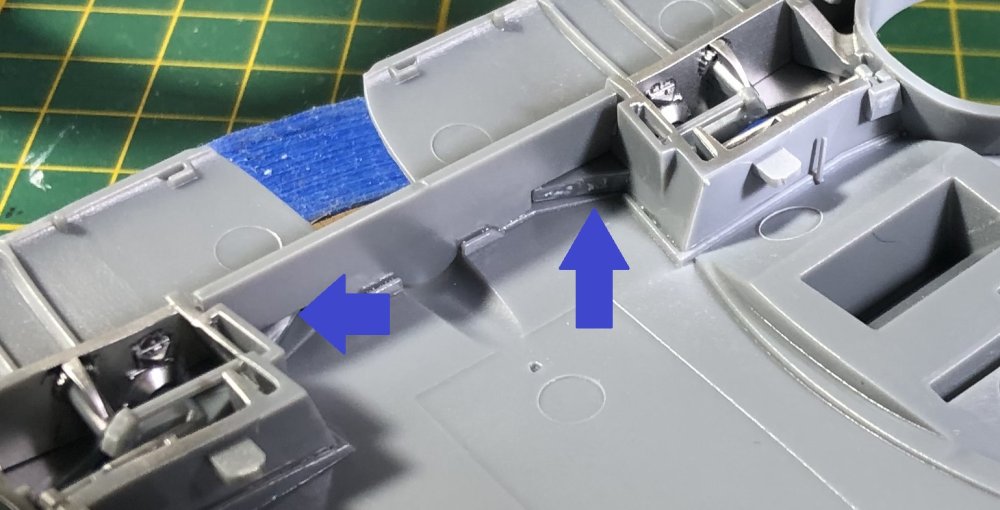
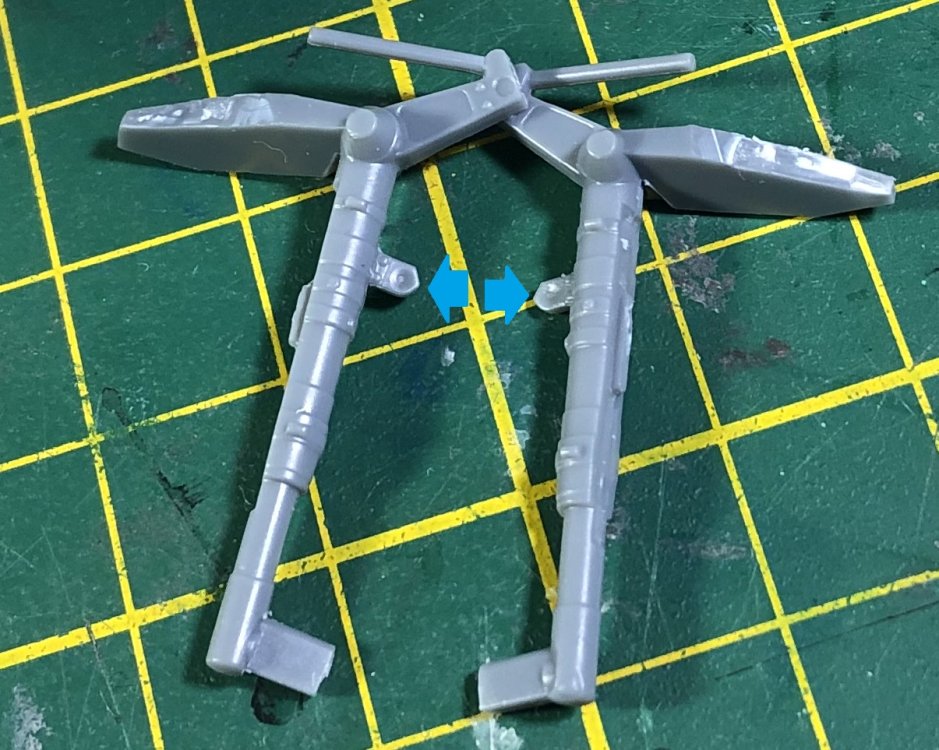
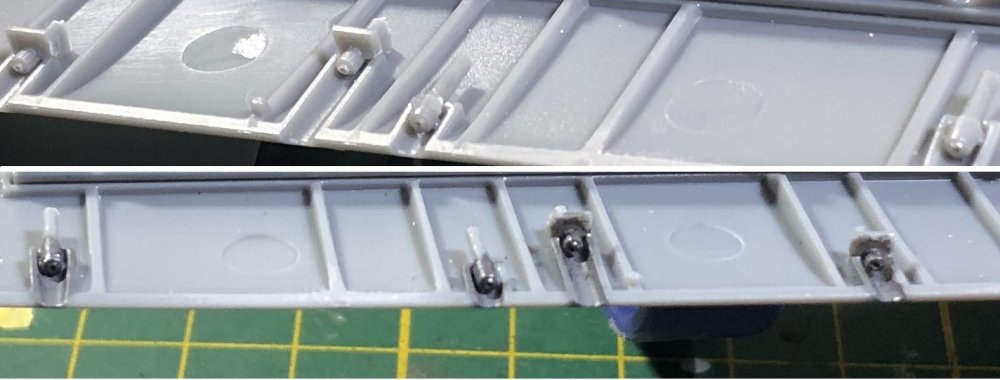
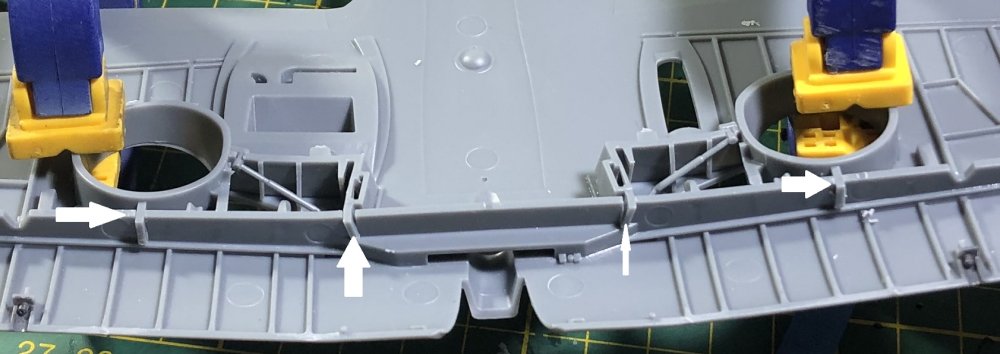
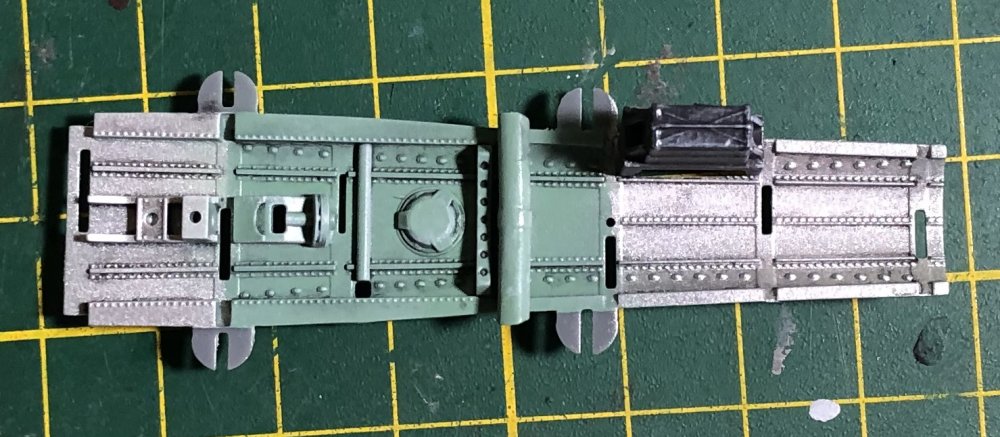
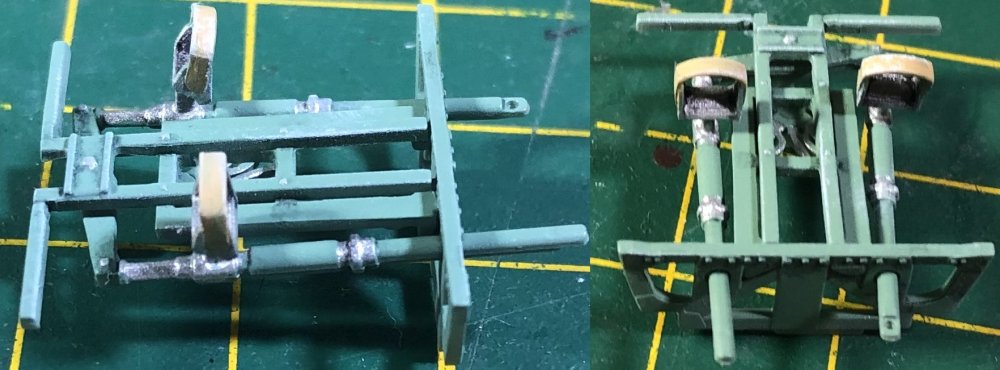
Let's take a moment to further consider Kotare's engineering. BTW... for those who don't know, I bought this kit with my own money and have no connection to anyone who could pay me or offer me free models kits to say nice things about. Anyway... engineering. Landing gear. A lot of nice features to tell you about since I dry fitted them today. First of all, the shape... The are L-shaped and are pushed up into the wheel well and slid sideways. The blue arrows denote holes to be drilled. See the rough bits at the top? trimming was required... The directions tell you where to trim. The flat sides fit wonderfully into the wheel well covers instead of the usual two-point connection of many other kits. Finally the joint with the weighted wheels is a slotted joint. So your wheels won't turn. The upper part of the 'L' is secured into the spar-wing joint.... note the holes by the arrows. And when attached the look like this on the inside. Or from another angle... And from the outside look like this: I really don't know how you would adjust them without completely cutting through the part... so I hope the angles are right. As a 109 guy... I can tell you about fiddling with angles. So.... not much of an update. But interesting nevertheless.


- 104 replies
-
- 10
-

-
1/350 Trumpeter Narvik Class Zerstorer Z30 - Completed
GazzaS replied to PanzerWomble's topic in Let’s Get Wet Group Build.
You need to leave your armor zen and meditate upon the spirit of things 1/350 if you hope to reach warship Nirvana.😄 -
1/350 Trumpeter Narvik Class Zerstorer Z30 - Completed
GazzaS replied to PanzerWomble's topic in Let’s Get Wet Group Build.
Well... I'd hate to try 1/350 railings in plastic, then. I've tried to make various thin things in plastic... but they usually don't have that factory look to them. -
1/350 Trumpeter Narvik Class Zerstorer Z30 - Completed
GazzaS replied to PanzerWomble's topic in Let’s Get Wet Group Build.
PITA for sure. But the only way to get close to scale in many aspects. -
1/350 Trumpeter Narvik Class Zerstorer Z30 - Completed
GazzaS replied to PanzerWomble's topic in Let’s Get Wet Group Build.
Guy, she looks great so far. I find most PE just has to be endured with the final result in mind. I have also started cheating, using tacky canopy glue whenever I can to get the part in place. Then I reinforce it with a bit of CA. re: the railings…. At the model warship forum they recommend attaching them with CA and then running a bead of thinned PVA along the bottom to prevent them from detaching when there are temperature changes. -
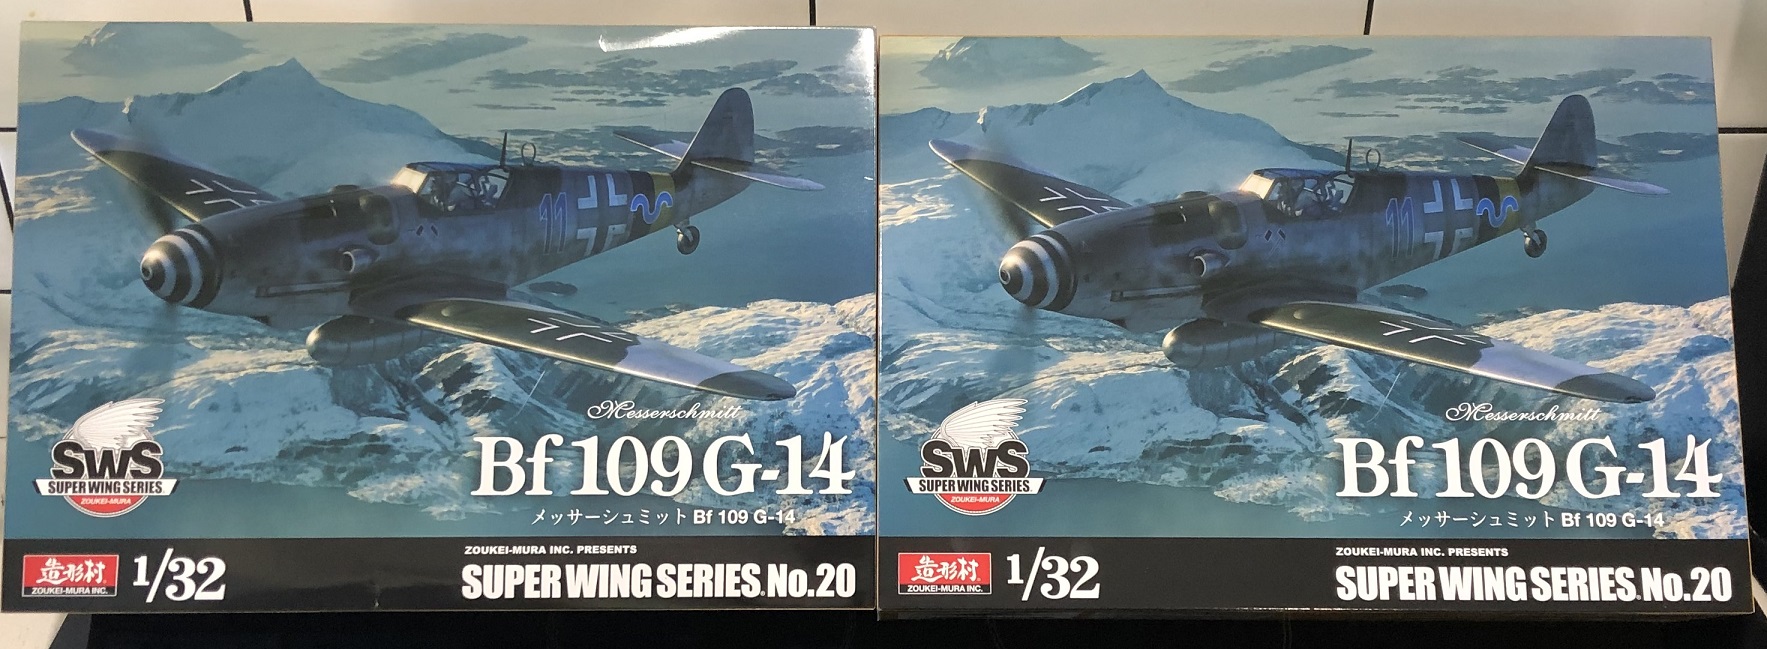
A brace of Gustav's arrived from Volks Japan today. They came with two surprise resin figures. Thank you, Volks. Alas, the figures are cockpit sitters in full gear with oxygen mask. I don't think I will have much use for them as I generally place my aircraft on the ground.
-
Clear the Bench! It's Kotare Spitfire time!
GazzaS replied to GazzaS's topic in LSM 1/35 and Larger Work In Progress
Thank you, Carl. It’s truly a great kit to build. It’s as if we’re built by the company formerly known as WNW. -
Clear the Bench! It's Kotare Spitfire time!
GazzaS replied to GazzaS's topic in LSM 1/35 and Larger Work In Progress
Thank you. If the dry fit is anything to go by, it should be sweet. -
Clear the Bench! It's Kotare Spitfire time!
GazzaS replied to GazzaS's topic in LSM 1/35 and Larger Work In Progress
I don’t mind thread drift as long as the models don’t look better than mine. Thank you for the sobering statistics. -
Clear the Bench! It's Kotare Spitfire time!
GazzaS replied to GazzaS's topic in LSM 1/35 and Larger Work In Progress
Thank you, Phil. I specifically wanted a Mk 1. Which mark is the Tamiya kit? -
Clear the Bench! It's Kotare Spitfire time!
GazzaS replied to GazzaS's topic in LSM 1/35 and Larger Work In Progress
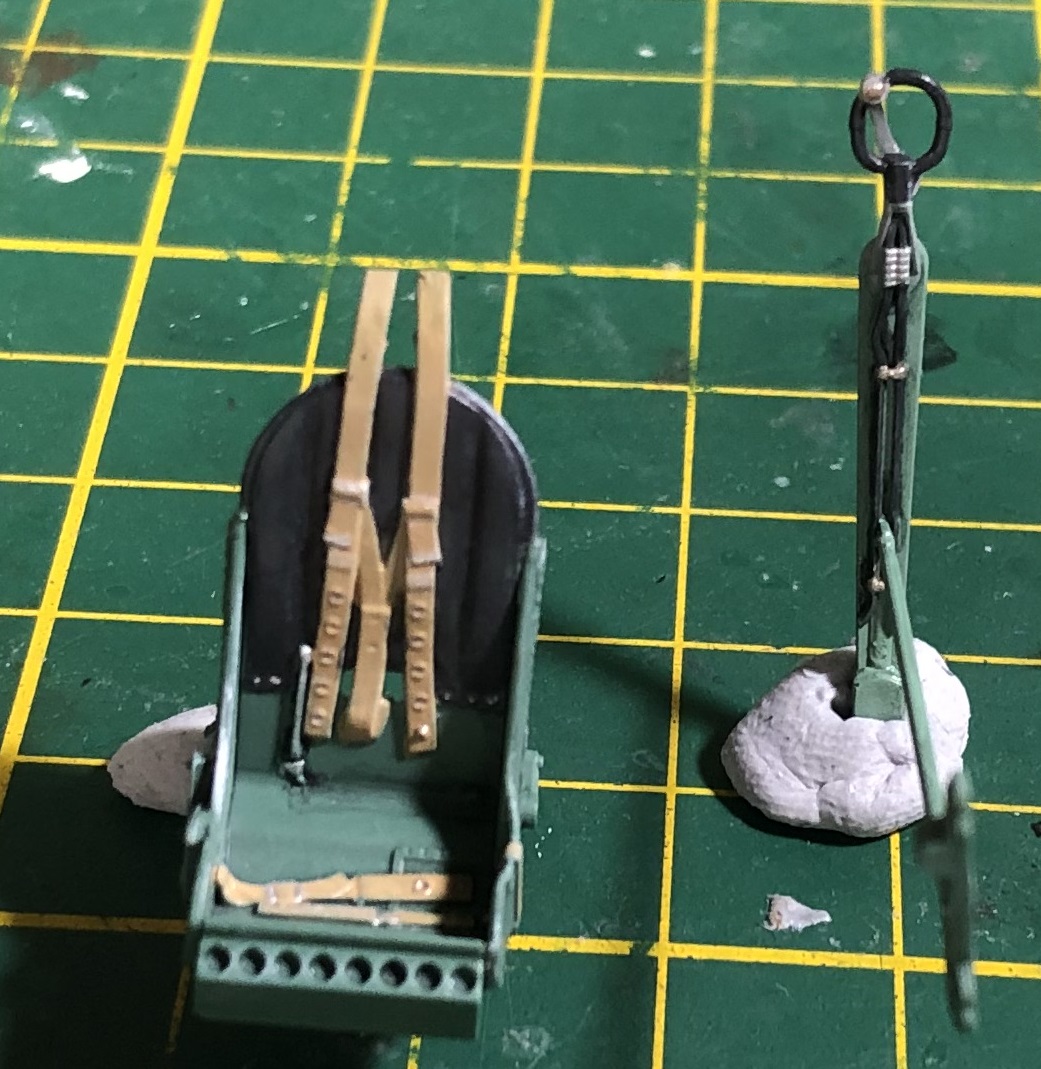
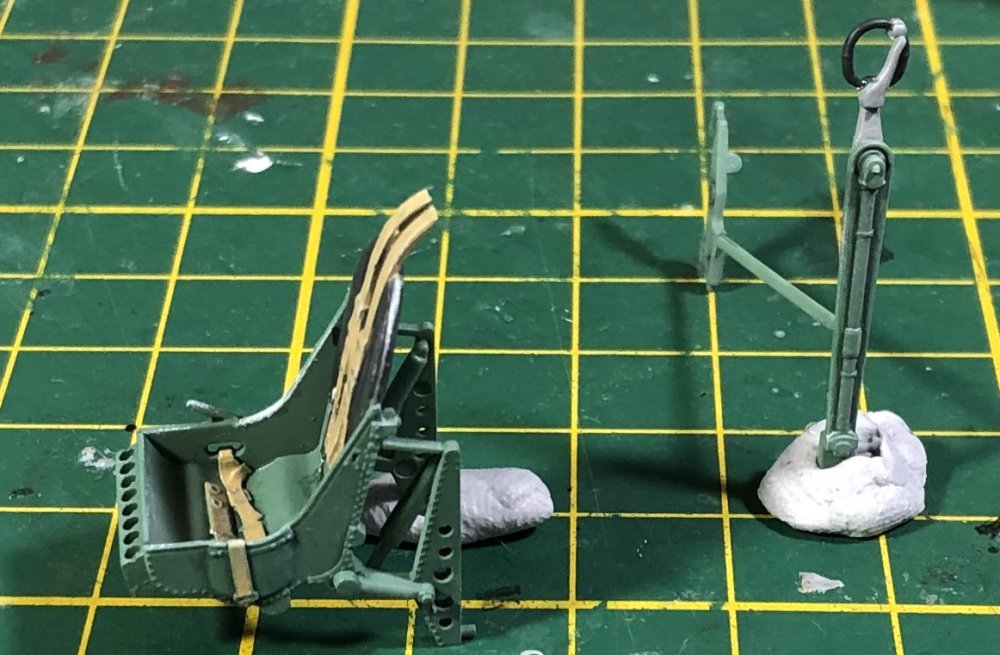
Thank you Rob. The kit offers you two seats. One with belts, one without. You may have overlooked a picture. -
1/350 Trumpeter Narvik Class Zerstorer Z30 - Completed
GazzaS replied to PanzerWomble's topic in Let’s Get Wet Group Build.
Spitfire will be laid up for a couple days while the oils dry. To bed soon... work tomorrow... yuck. -
1/350 Trumpeter Narvik Class Zerstorer Z30 - Completed
GazzaS replied to PanzerWomble's topic in Let’s Get Wet Group Build.
Here is one from aft... I should take some fresh pics.... And thank you!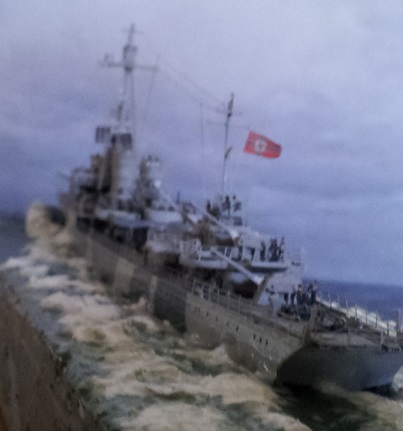
-
ProModeler 1/48 PBY-5A Catalina + Goodies, RFI
GazzaS replied to CANicoll's topic in Let’s Get Wet Group Build.
That looks awesome, Chris. The masking came off great and all the interior view will really add to the kit. -
Clear the Bench! It's Kotare Spitfire time!
GazzaS replied to GazzaS's topic in LSM 1/35 and Larger Work In Progress
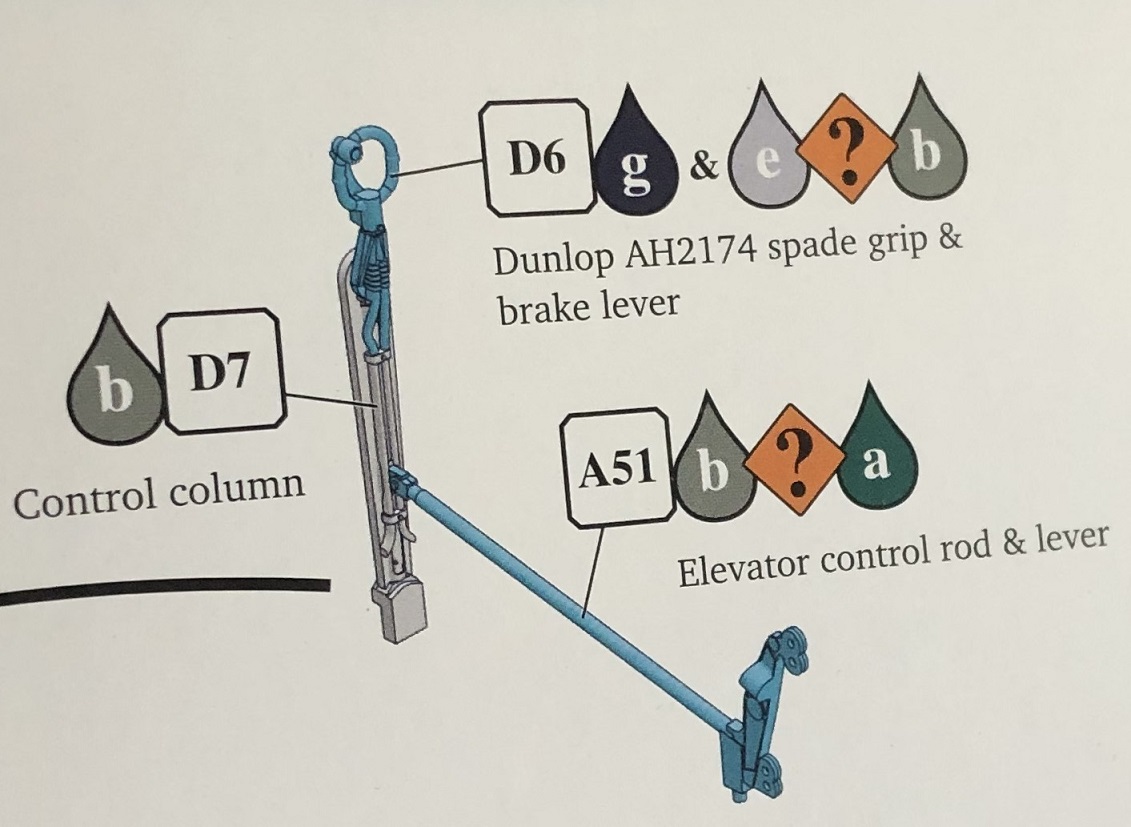
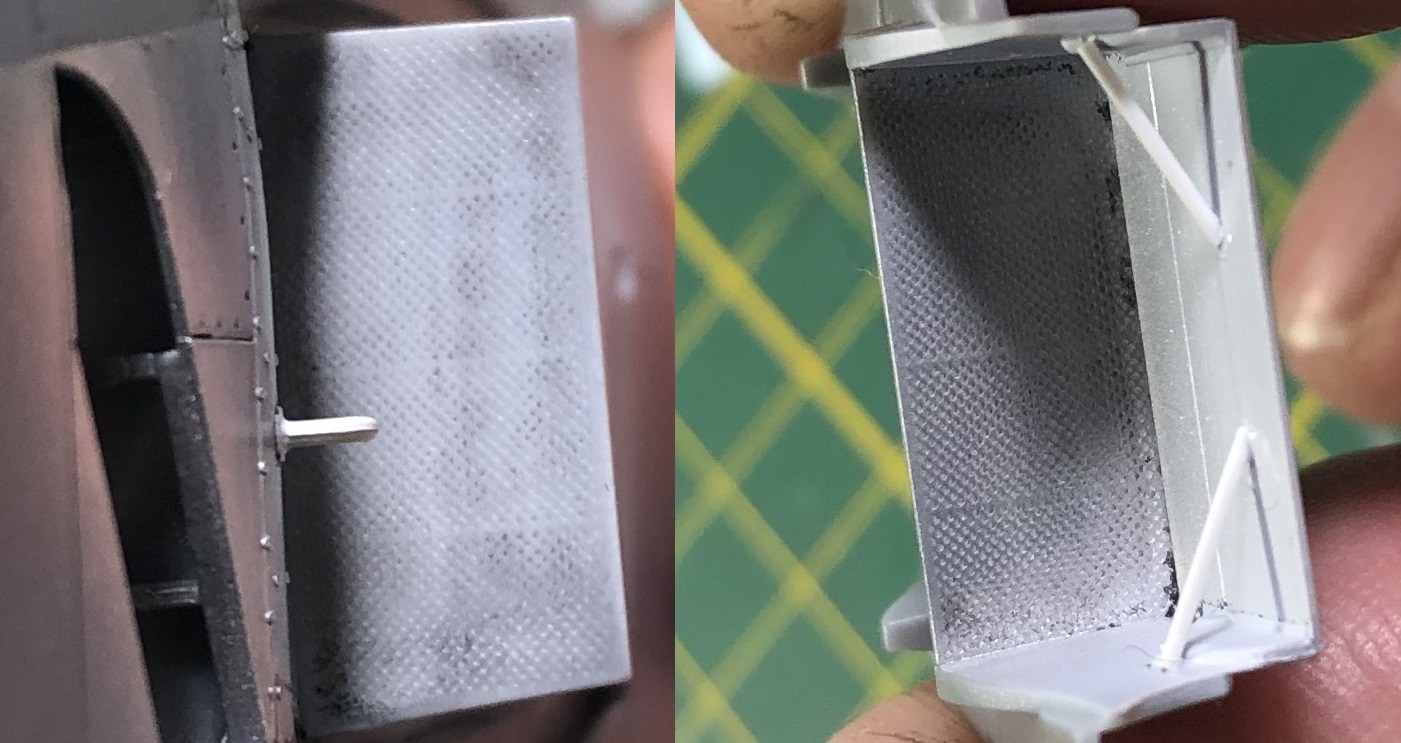
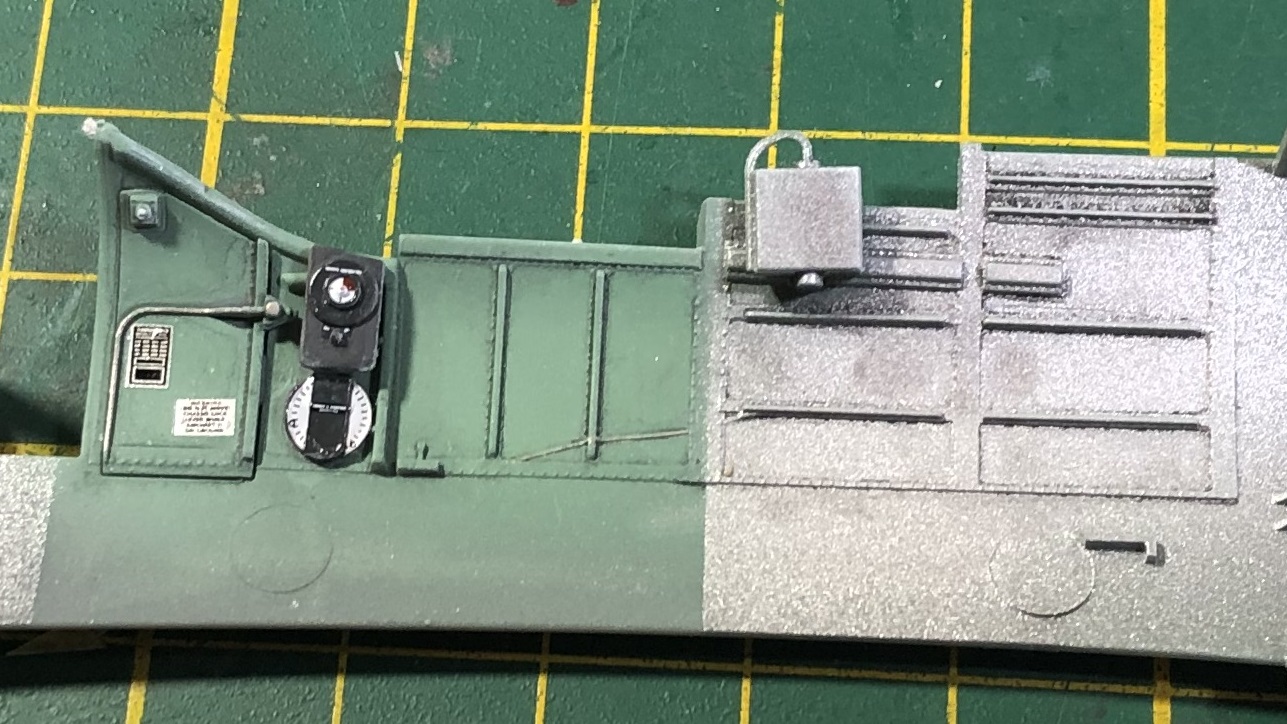
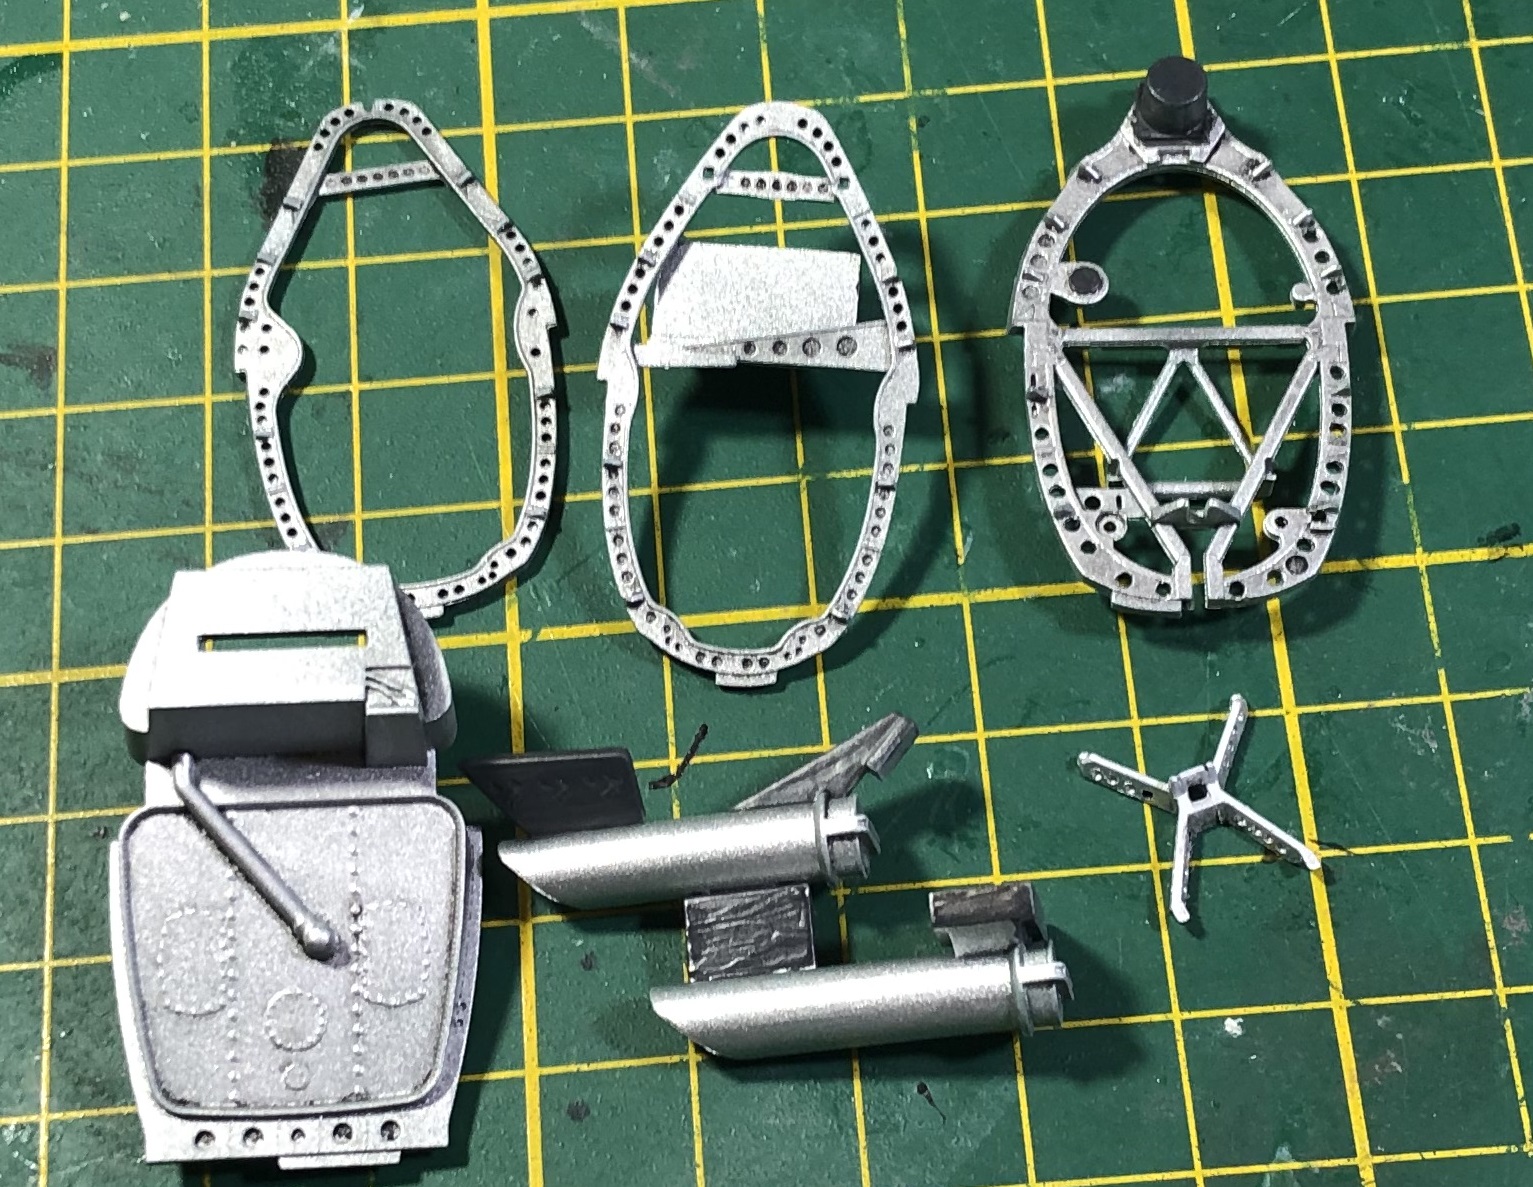
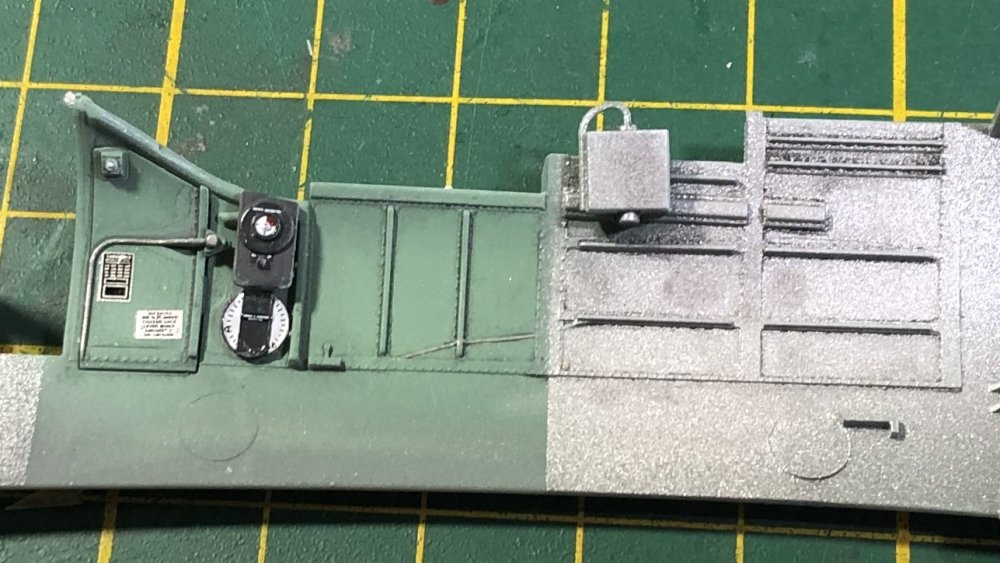
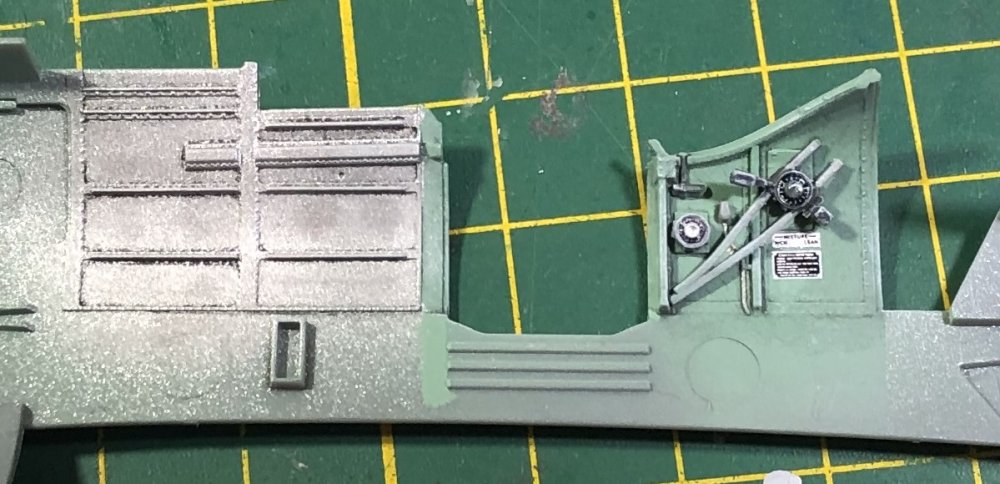
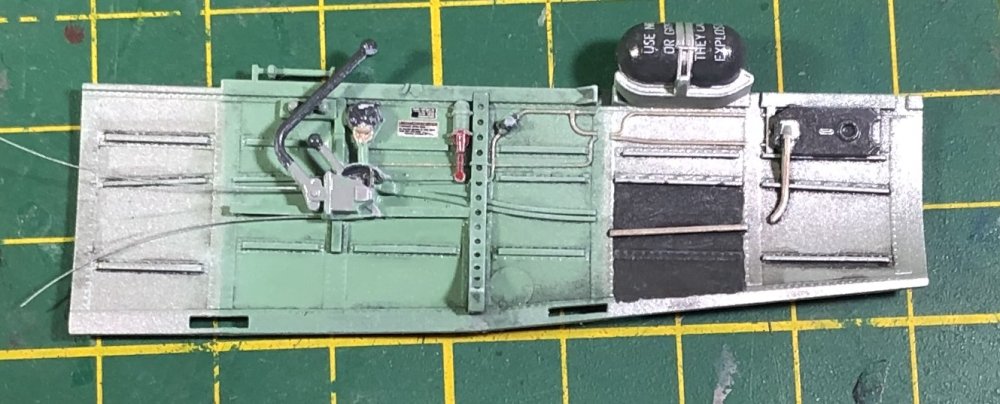
OK... back again. Here are two more reasons why i am digging this build. 1. You don't just get a part called "D6" in the directions. You get a Dunlop AH...etc... that is also part D6. 2. Clever engineering. I just love that the firm base for the reflector sight is molded to a solid chunk of model. I can't tell you how many times I have glued in a reflector sight only to have it slowly yield to gravity and try to disappear inside the cockpit. The eight .303 Brownings are represent by these little barrel ends and bushings. After painting them dark gray, I rubbed them with a pencil and buffed them a wee bit. I had drilled them out before gluing them onto the wing. The landing gear recesses are nice, solid parts. I needed to do a little trimming to get them to sit flush with the spar. The little dovetail joints at the white arrows needed a little paring. Wherever you need rigging, the directions will tell you how thick, and sometimes even how long... just like with these .5mm wide and 6mm long pieces of styrene rod. Now we get to the oils which I did today. For the gray-green areas I used a green darkened with blue and black. I wanted to create shadow... So I prefer sympathetic shades. Were I to use black-brown like on an armor model, it would look dirty. I can worry about dirt later. For the silver-painted areas, I used straight black. Then I used white oil paint to dry brush the raised area and bring them out. Finally the radiator grill detail. It's very fine. Almost too fine to get the paint to stay in. Happy modelling!


- 104 replies
-
- 12
-
-
Awesome job, John!
-
That looks awesome!
-
ProModeler 1/48 PBY-5A Catalina + Goodies, RFI
GazzaS replied to CANicoll's topic in Let’s Get Wet Group Build.
Chris, Looks great! Might be able to weather some dark areas onto that blue and give it a semi-faded look. -
1/350 Trumpeter Narvik Class Zerstorer Z30 - Completed
GazzaS replied to PanzerWomble's topic in Let’s Get Wet Group Build.
haha... you shouldn't drink during ship building. Looks good, though. -
1/350 Trumpeter Narvik Class Zerstorer Z30 - Completed
GazzaS replied to PanzerWomble's topic in Let’s Get Wet Group Build.
Dammit man! You are a machine! My return to the modelling world 5-6 years ago was Dragon's Z-39 with I bashed into Z-32 at Ushant... pardon the picture... It took me forever to finish as I was constantly unsure of what to do. I put 86 crew on deck at actions stations.