


GazzaS
-
Posts
6,396 -
Joined
-
Last visited
Content Type
Profiles
Forums
Events
Gallery
Posts posted by GazzaS
-
-
That is some impressive work, Craig! Hope you have a big tube of aluminum polish for later.
-
 3
3
-
 2
2
-
-
My most recent acquisition. Made the mistake of telling a friend it was one of the last few on my must-have list. So, he showed up at our club meet with one the following month. I got it for an I-O-U of half it's current retail value.
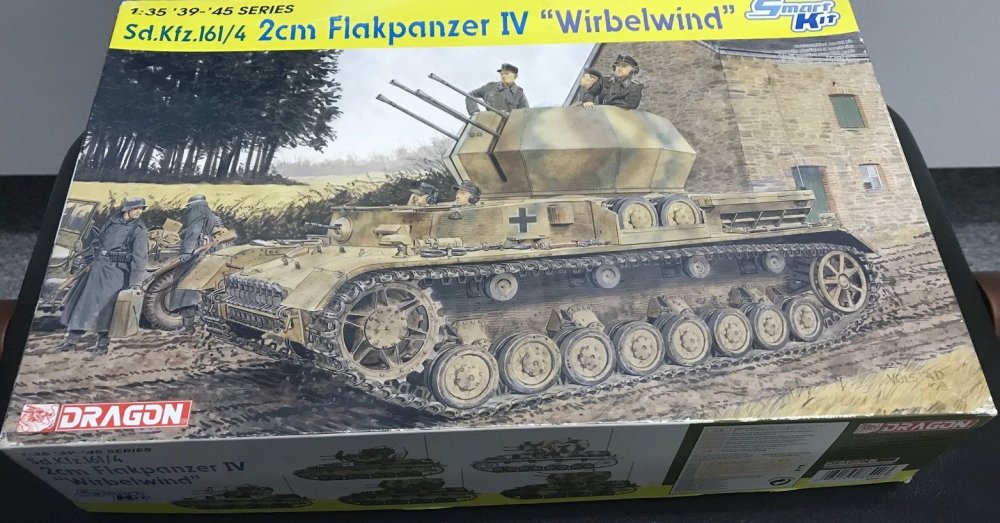
I'll have to put Zimmerit on it... but that's a piece of cake.
-
8
-
-
The best camo schemes require the most work. So, keep up the good work... it;s looking great!
-
4
-
-
I like the dirt effects around cowl and access panels. I've looked for similar fuel stains on the 109F whose filler cap is nearly the same location as the P-40 you've got. Haven't found one, yet. But who is to say it just wasn't photographed.
-
1
-
-
You've done well, Harv! Your patience and determination are admirable.
-
4
-
-
Excellent painting, John! Oh... and decals, too! You're moving too fast! Your next kit should be by Revell.
-
1
-
-
7 hours ago, harv said:
I really like the looks of this. Well done....harv

I appreciate it, Harv!
-
1
-
-
19 hours ago, DocRob said:
The Marder is coming together nicely Gaz. I'd say, that adding a darker dust color in places might be a good idea.
Cheers Rob
12 hours ago, Peterpools said:Gaz
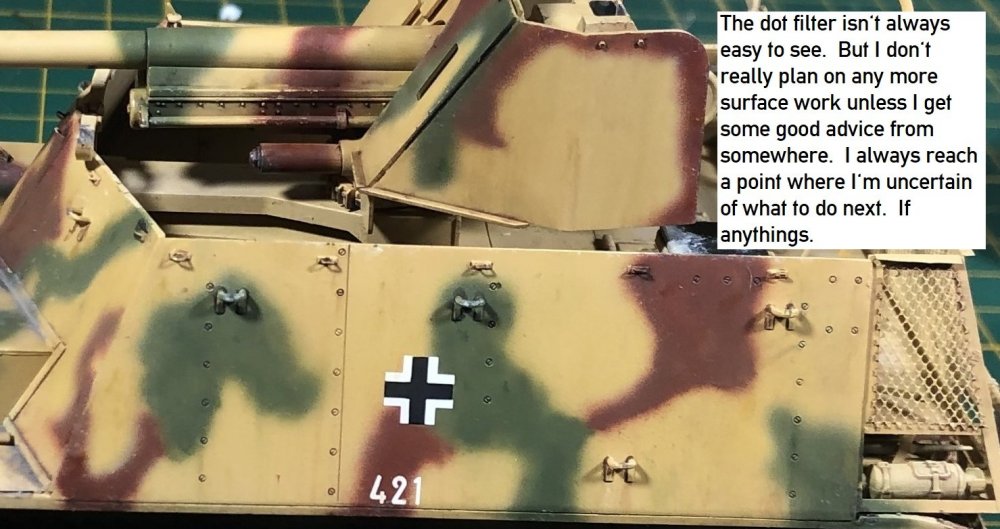
Thank you for the close ups on painting the faces ... absolutely your gentle touch worked very well. The light weathering on the Marder looks very effective and when I look closely, I can see the dot filters. My kind of weathering for sure.
Keep 'em comin
Peter
11 hours ago, Kaireckstadt said:Copy Peter, Gary: Weathering looks spot on to me!
Thank you, fellas!
-
4
-
-
12 hours ago, Peterpools said:
Gaz
Yikes, that sure is a lot of shades of color but it worked very well. On the images I can also see the dot filters, which work so very well.
Keep 'em comin
Peter
Thank you, Peter. It's really only four colors used for the pin wash. Black, Green, brown, and yellow ochre. I don't like to use base colors for the dot filter as they do things I don't like. Especially white and yellow.
11 hours ago, Kaireckstadt said:Great camo Gary. Looks quite convincing to me!
Thank you, Kai!
-
3
-
-
15 hours ago, DocRob said:
Shame on Dragon for using this chemically unreliable stuff
 .
.
Cheers Rob
I blame it on those guys who say that Individual links are too hard. I see them kinda guys on Farcebook all of the time.
-
5
-
-
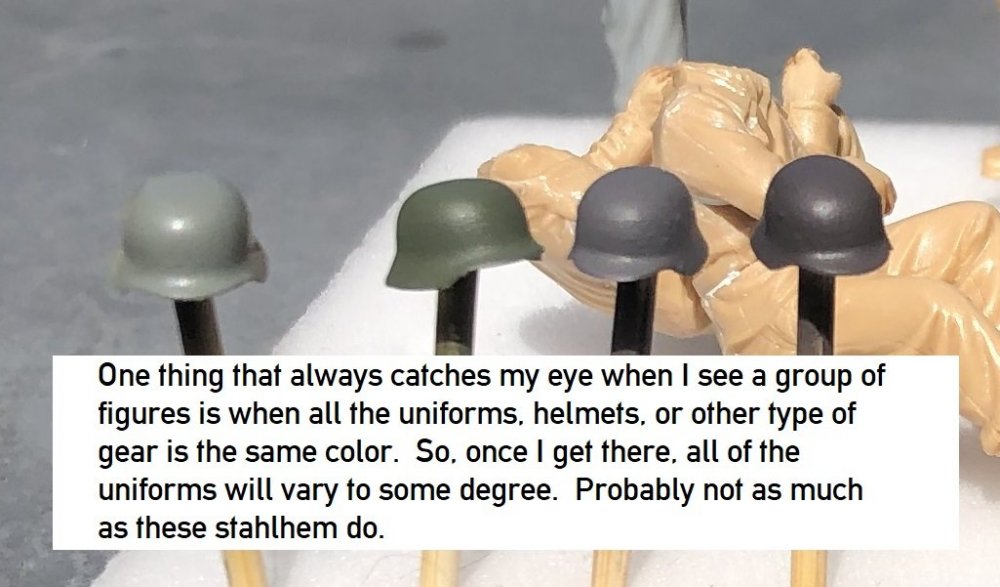
On 11/3/2021 at 7:13 PM, Kaireckstadt said:
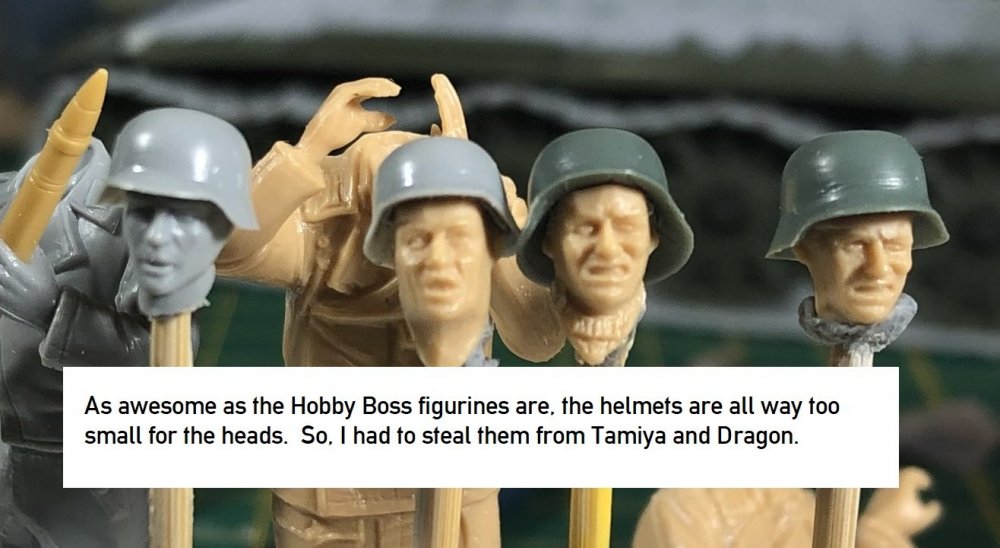
Great start on the figures Gary. Tonal variety for the helmets is a good idea!
Milliput is really great to work with. And you can get it in different colors.
Curious for your next steps!
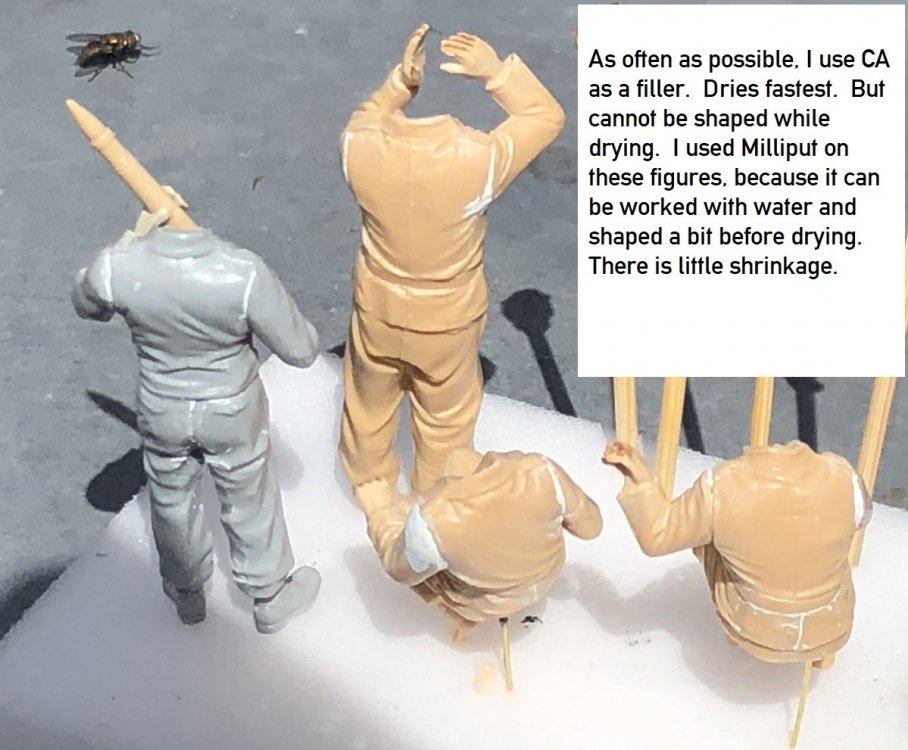
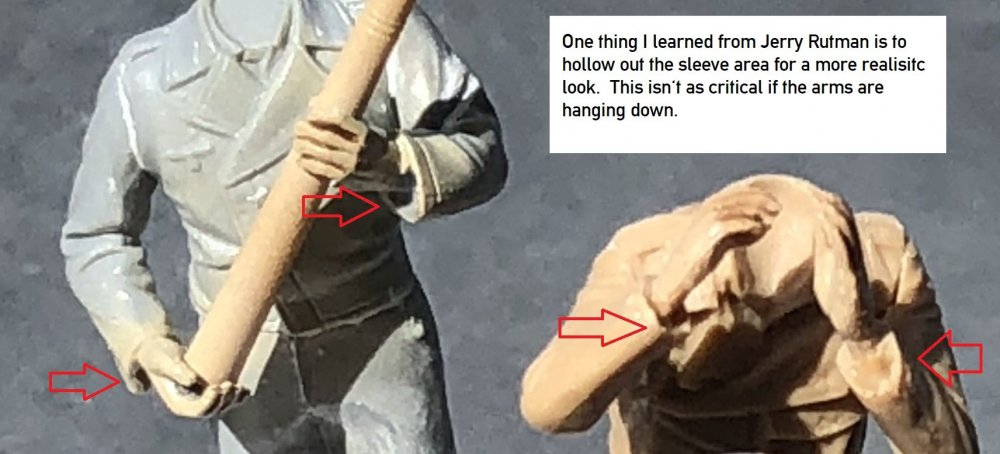
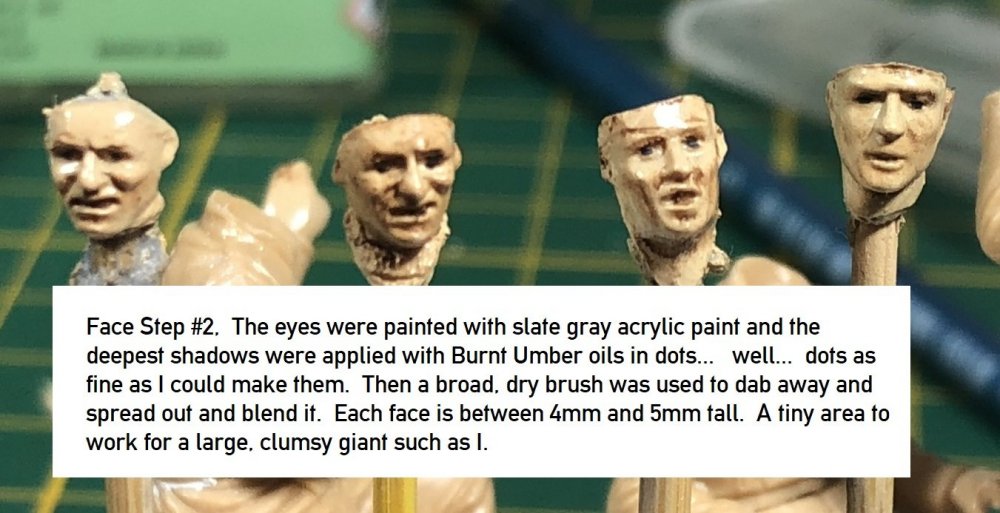
On 11/3/2021 at 7:29 PM, DocRob said:Some good thinking on hollowing the sleeves and slight color variations on multi person displays, I like your approach, Gaz. I will follow your face painting clinic with interest, as I suck in this area, which often keeps me from finishing planned dios with figures.
Cheers Rob
On 11/3/2021 at 10:09 PM, Peterpools said:Gaz
Nice start on the figures and greatly appreciate your comments and how to do’s. Please keep going slow with tiny steps as there is so much learn!
Keep ‘em comin
Peter
On 11/3/2021 at 11:48 PM, harv said:Nice !!.....harv
Thank you for the kind sentiments, my friends.
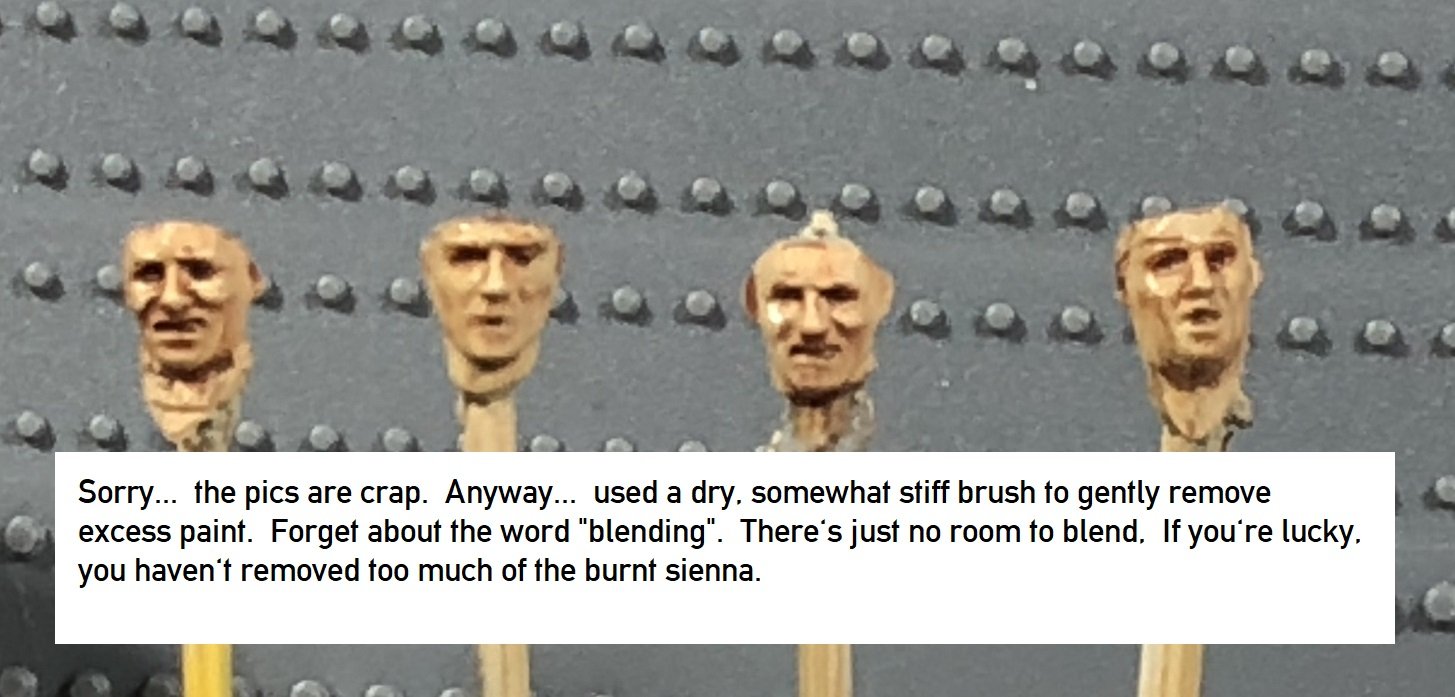
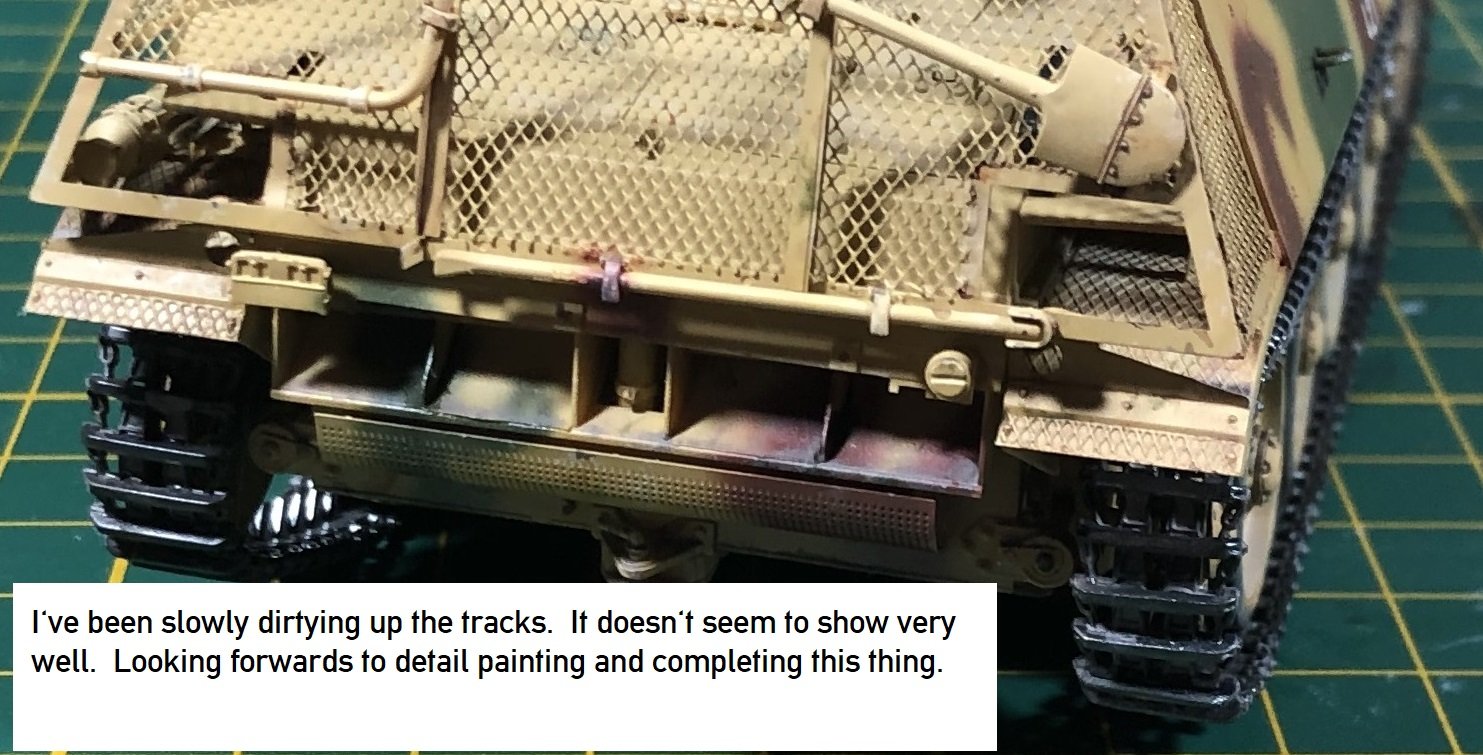
After a week of very minor steps, I got a fair bit done today. The pics are captioned sparing further explanation.
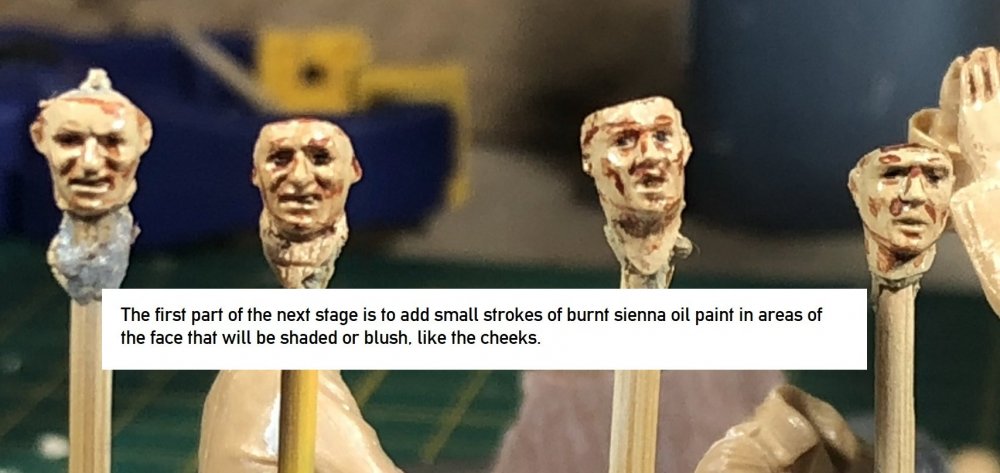

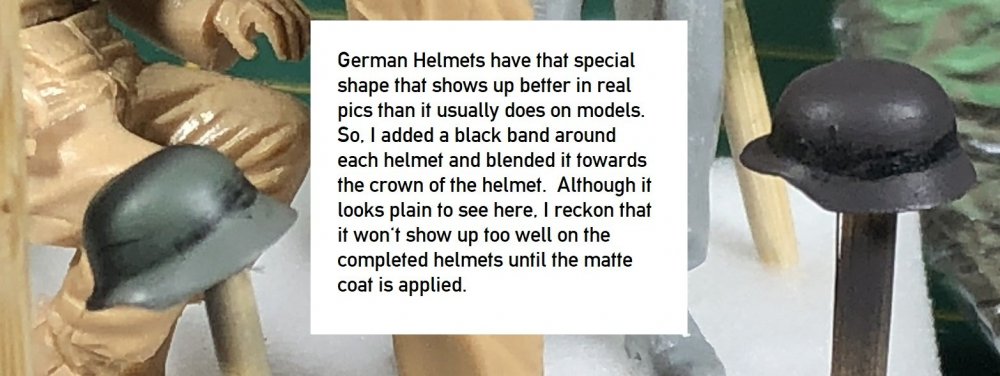
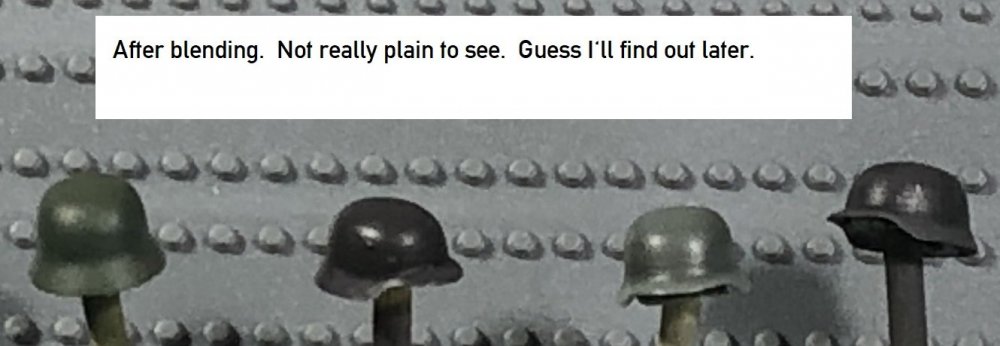

As always... my text editor needs to be sacked.

Sheesh... was I drunk when I did this? Sadly... I have no such excuse.

Happy modelling!
-
6
-
 1
1
-
-
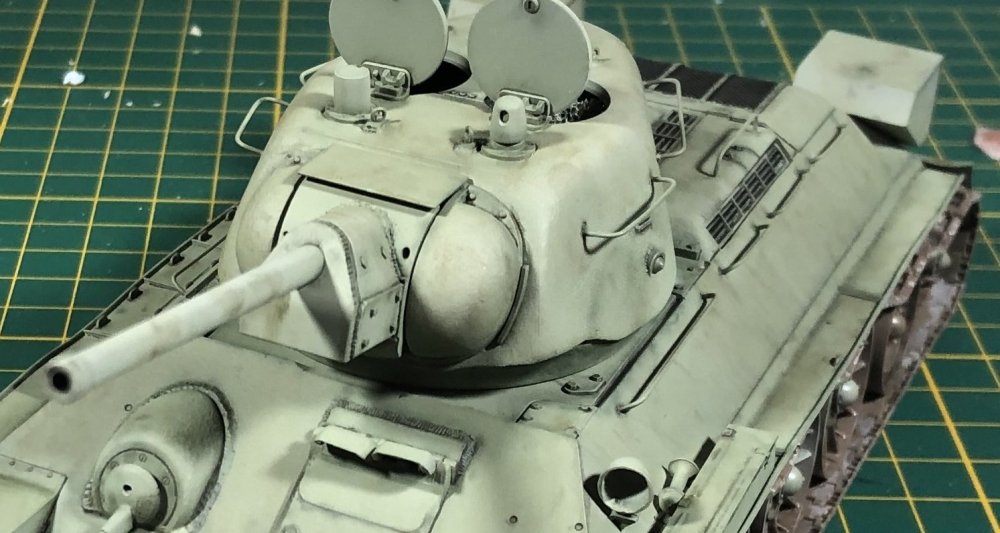
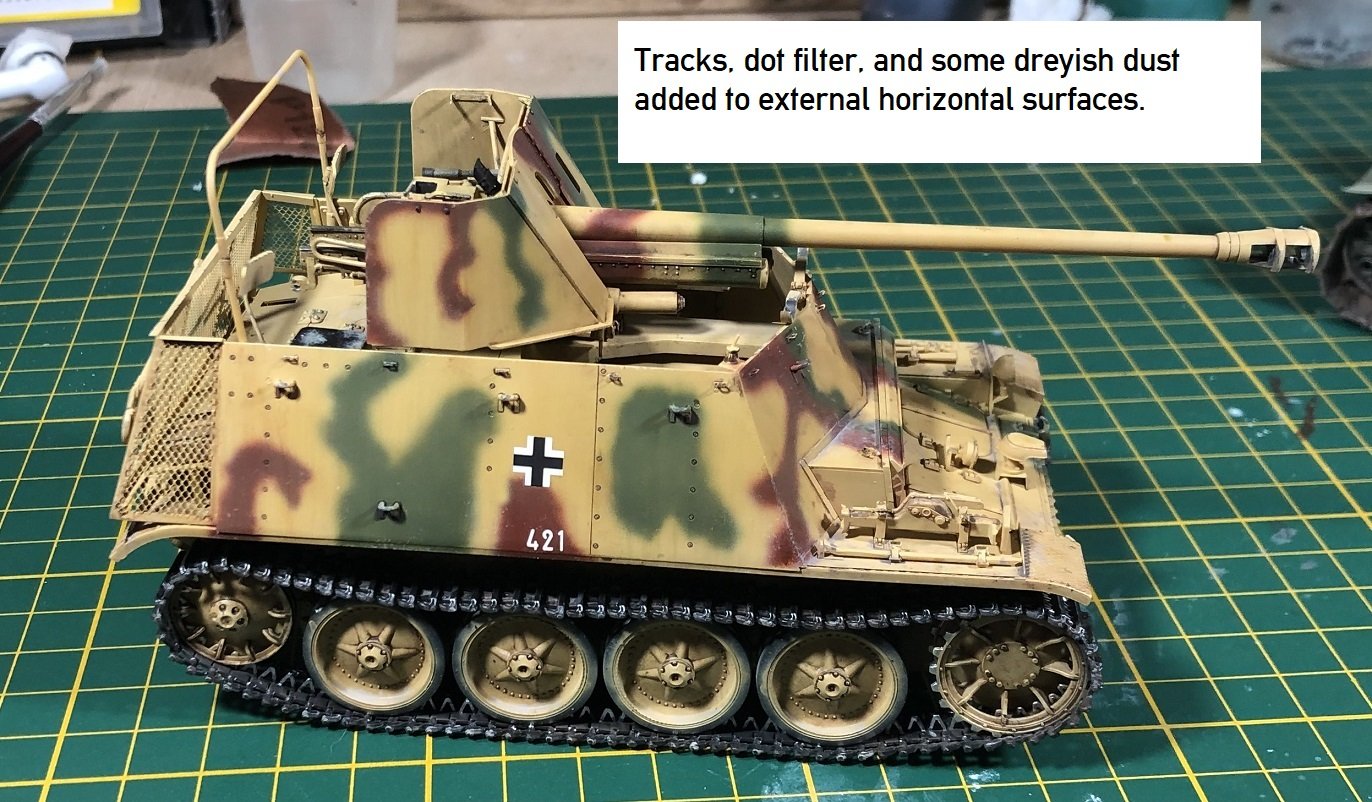
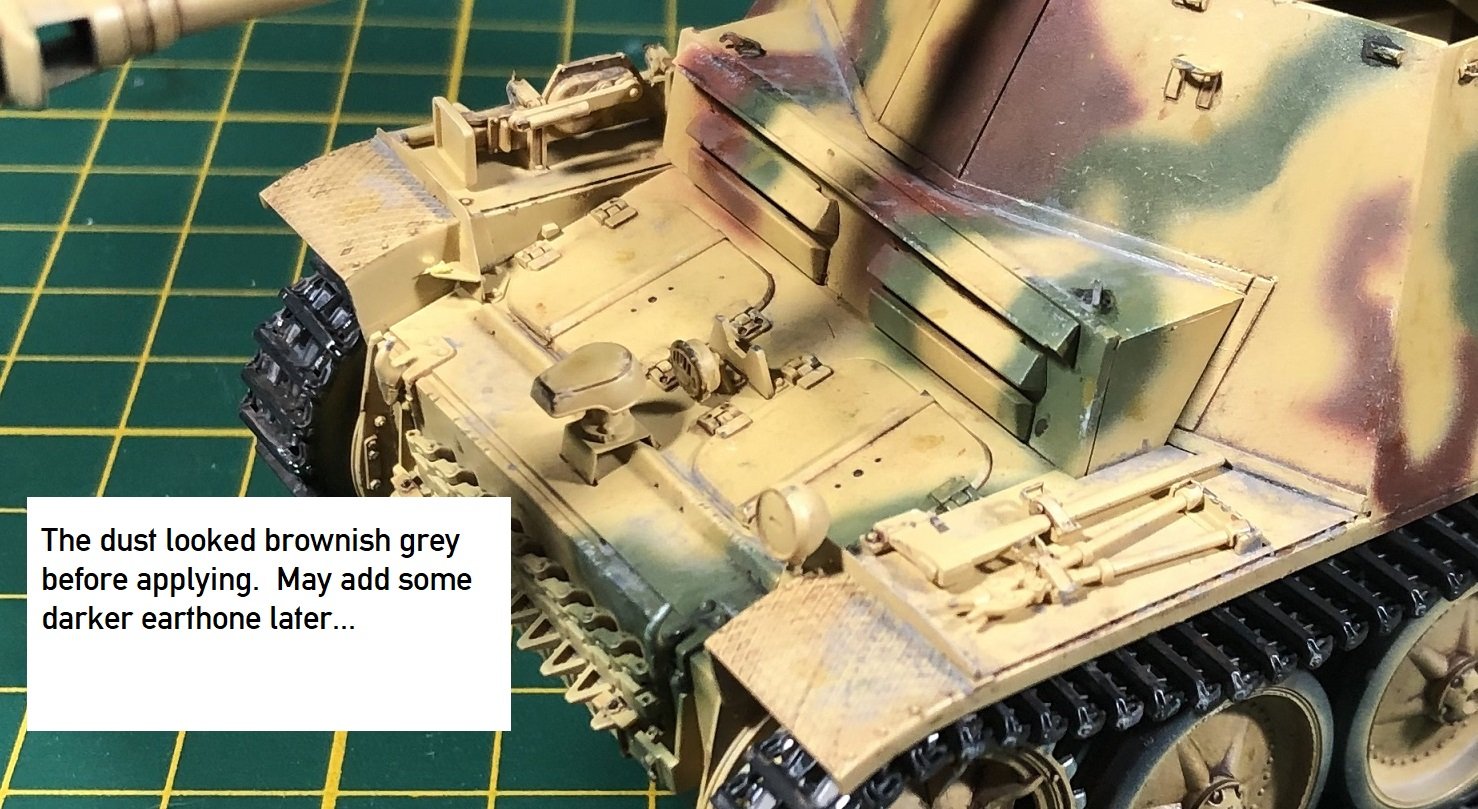
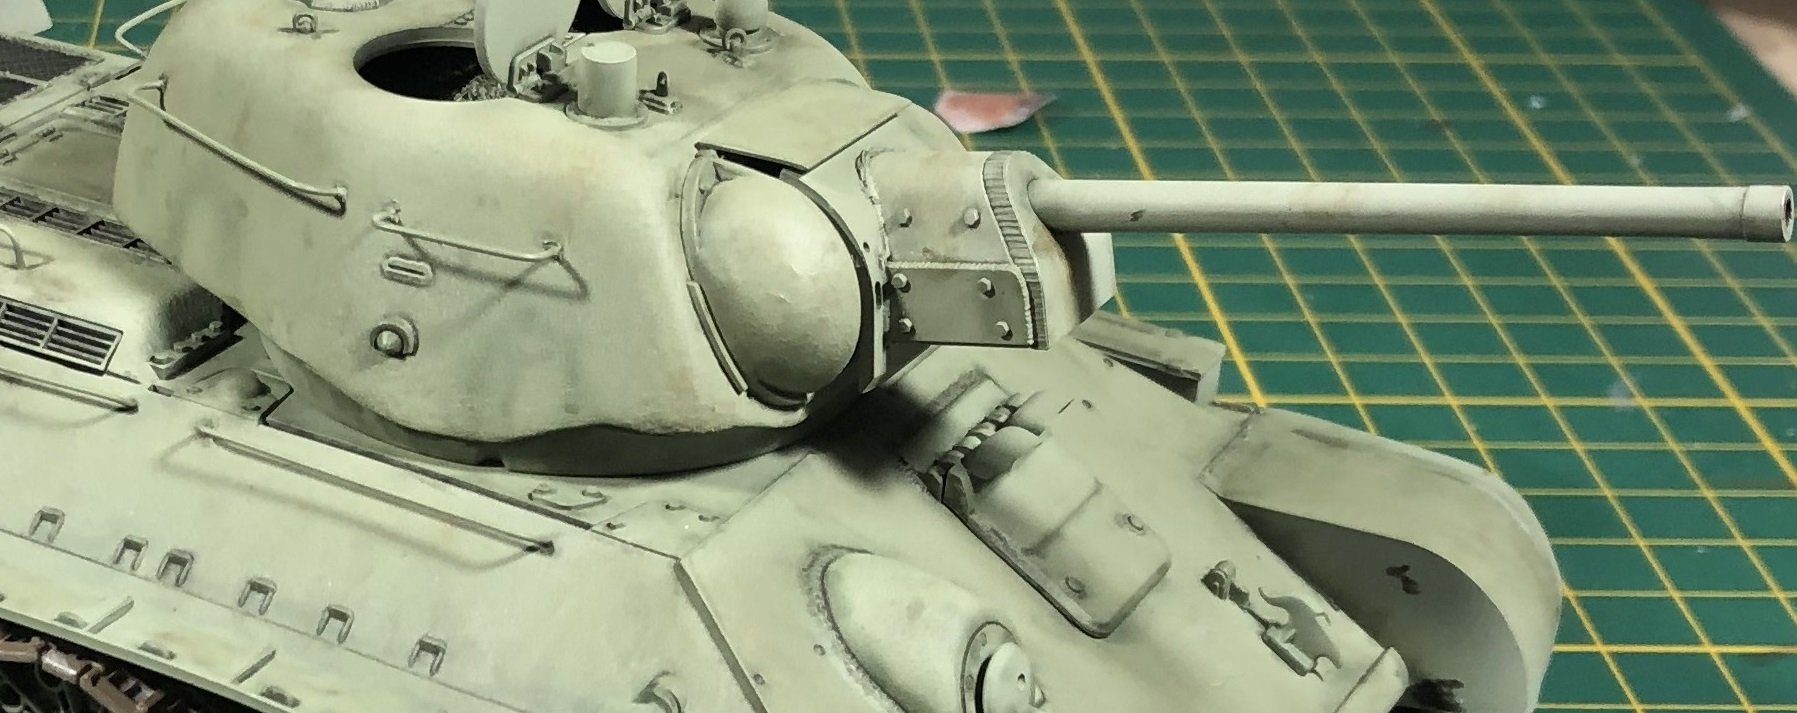
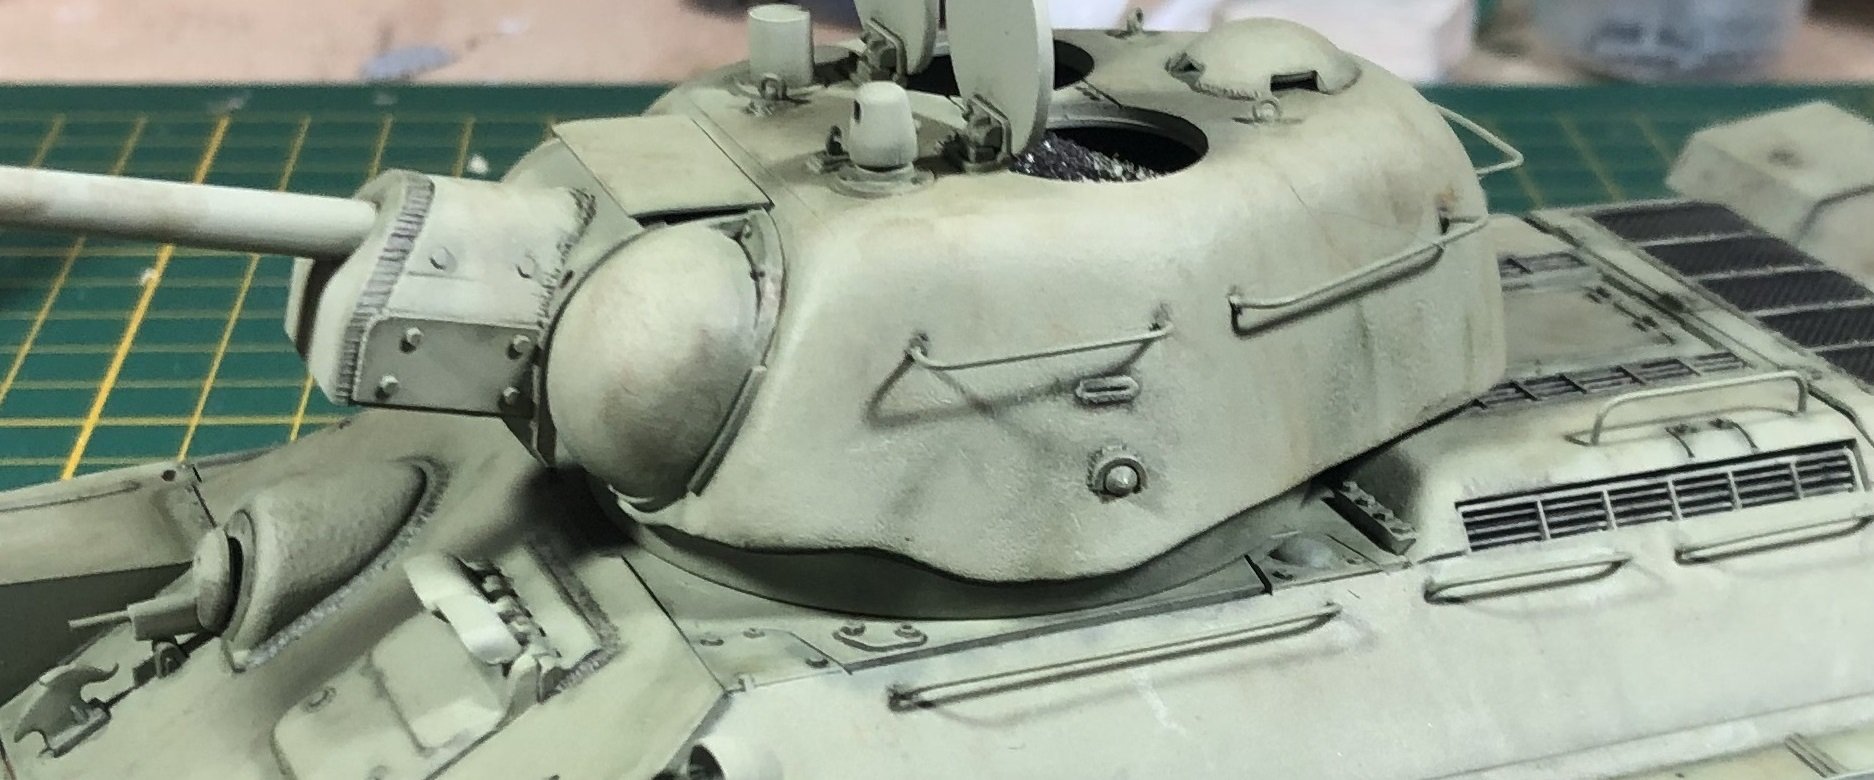
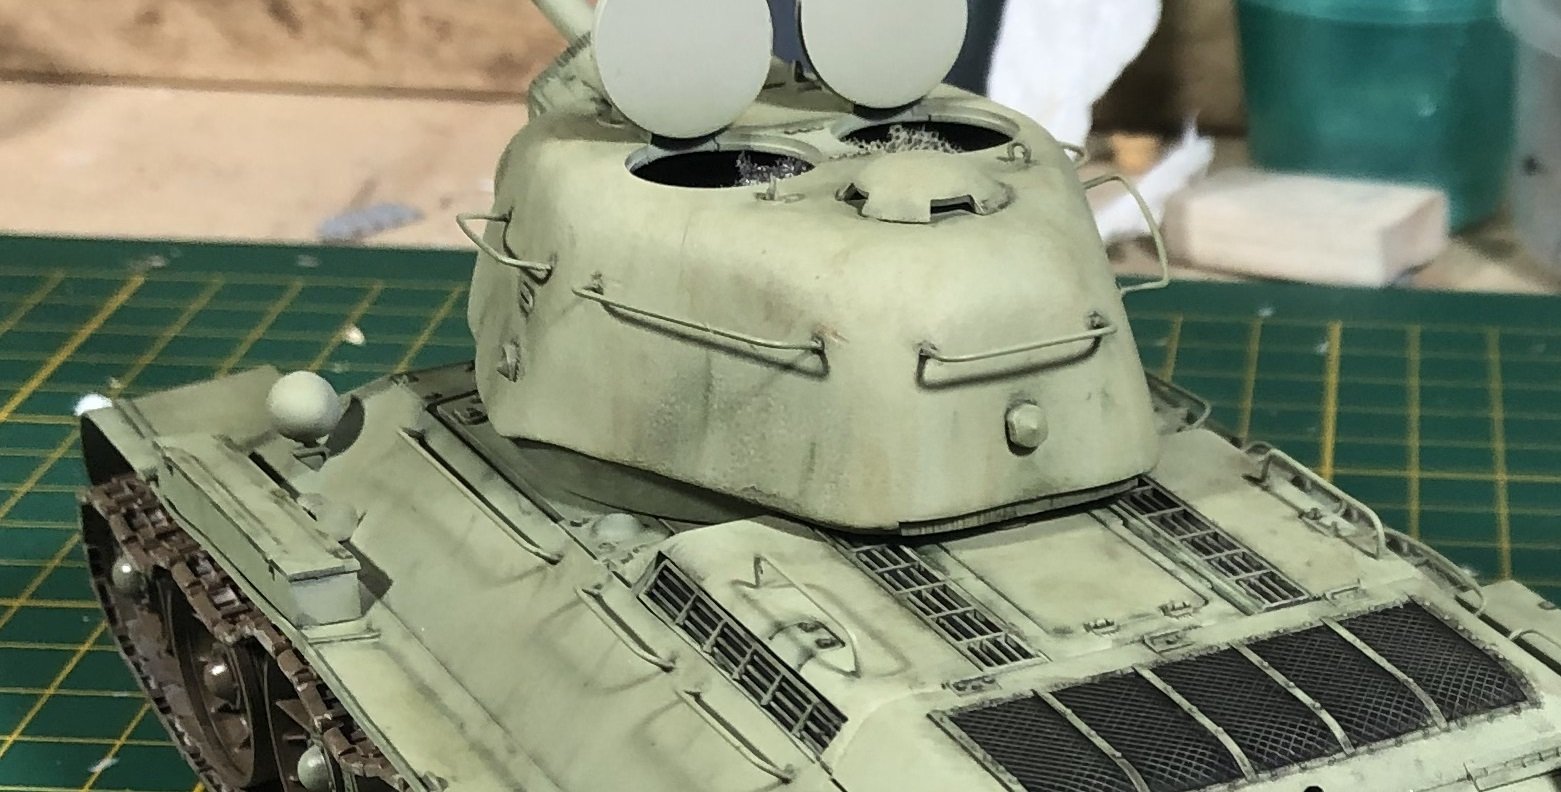
Hello comrades,
Let's see if I can remember what I've done.... After painting it with J.A. Gray, I used a very thinned feldgrau around all of the edges and details. Then I sprayed it with a few very thin layers of JA Gray mixed with Feldgrau. After that I did a pinwash in black and green oils mixed with a little brown. Then finally... today I did a dot filter. Here are some shots.


-
7
-
1
-
-
The cockpit looks great, Rob! Should look great, covered, too.
-
1
-
-
-
2 hours ago, JohnB said:
Isn't Border Models a Red Chinese company?🙄
I thought all Chinese companies were Red.
-
2
-
-
This is a wide known problem, Rob. I have only had one kit with the DS tracks and I painted/weathered them with aqueous acrylics. I did this because I have heard of horror stories when ppl have used regular solvent based paints and weathering materials on them. Sadly, the aqueous acrylics just weren't very durable and wore off in places while handling the model during the final stages of building. Eventually the kit found it's way into the trash though the tracks were still supple.
So, I just avoid kits with DS tracks, now. Incidentally, I have a set of Fruils that move from Tiger to Tiger as I build a new one and round-file the old one. I do have a Dragon E with those wheel well inserts. I dread to see them when I build the kit.
-
5
-
-
2 hours ago, Wumm said:
That's one point of view...
Another is; that a Company operating out of China (where there is no Rule of Law as exists in the Western Hemisphere, and therefore no understanding of such) bought the moulds from the Company which holds them, without bothering to get authorisation from the Individual or Company that paid for the actual design of said moulds.
The Company that holds the moulds may not have generated the original Intellectual Property. If Mr.Jackson holds the original designs and can show that he paid for same, then we may never see this kit sold in the Western Hemisphere.
S
And we always like to assume that in China they just do whatever they want. I don't know if that is really fair to them. It's not like they can jet over to NZ and get the money PJ owes them.
-
PJ is an asshole. I've said it before. He's screwed his employees and screwed the molding companies. Rock on, Border.
-
6
-
-
Excellent!
-
1
-
1
-
-
-
Perfect looking pit, Rob.
-
2
-
-
9 hours ago, krow113 said:
lol
Nobody can beat that lozenge!
-
3
-
-
13 hours ago, HubertB said:
I have one …
")
Hubert
Well... I hope you are receptive to Martin's PM.
-
2
-
1
-
-
Well, friends...
With the day off, I was able to do some work on the figures.
Thanks for looking! Happy modelling!
-
8
-


Франкентанк Т-34 in 1/35 scale
in LSM 1/35 and Larger Work In Progress
Posted
Thank you!
Thank you!