


GazzaS
-
Posts
6,396 -
Joined
-
Last visited
Content Type
Profiles
Forums
Events
Gallery
Posts posted by GazzaS
-
-
Looks great, Kai. Very impressed with your flesh tone work. Congratulations on finishing.
-
 3
3
-
-
Welcome back, friends!
I have to admit that this build defeated my mojo for a while. The time involved, the things that were wrong with the kit, and other things that went wrong along the way contributed to a period of very little modelling. But, I didn;t throw the kit away, though very tempted. I didn't put it in a back room where it could be forgotten. I put it where I could see it from my TV-watching chair with just a slight turning of the head. I'd have to walk past it to get to the rest of the house, too. Meanwhile I continued with another build and even started a third. But eventually I got up the nerve to do things that needed doing.
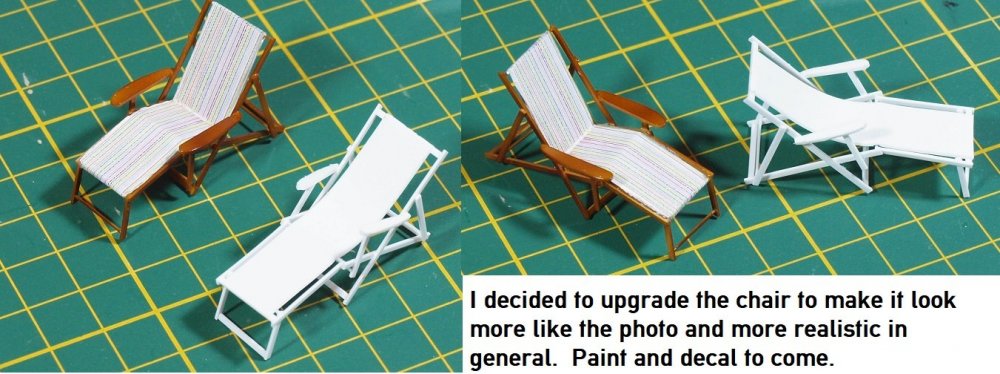
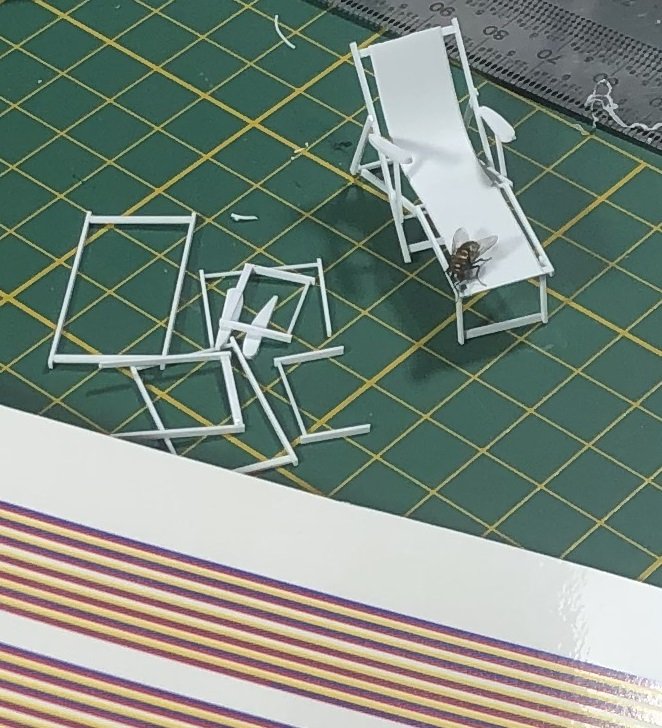
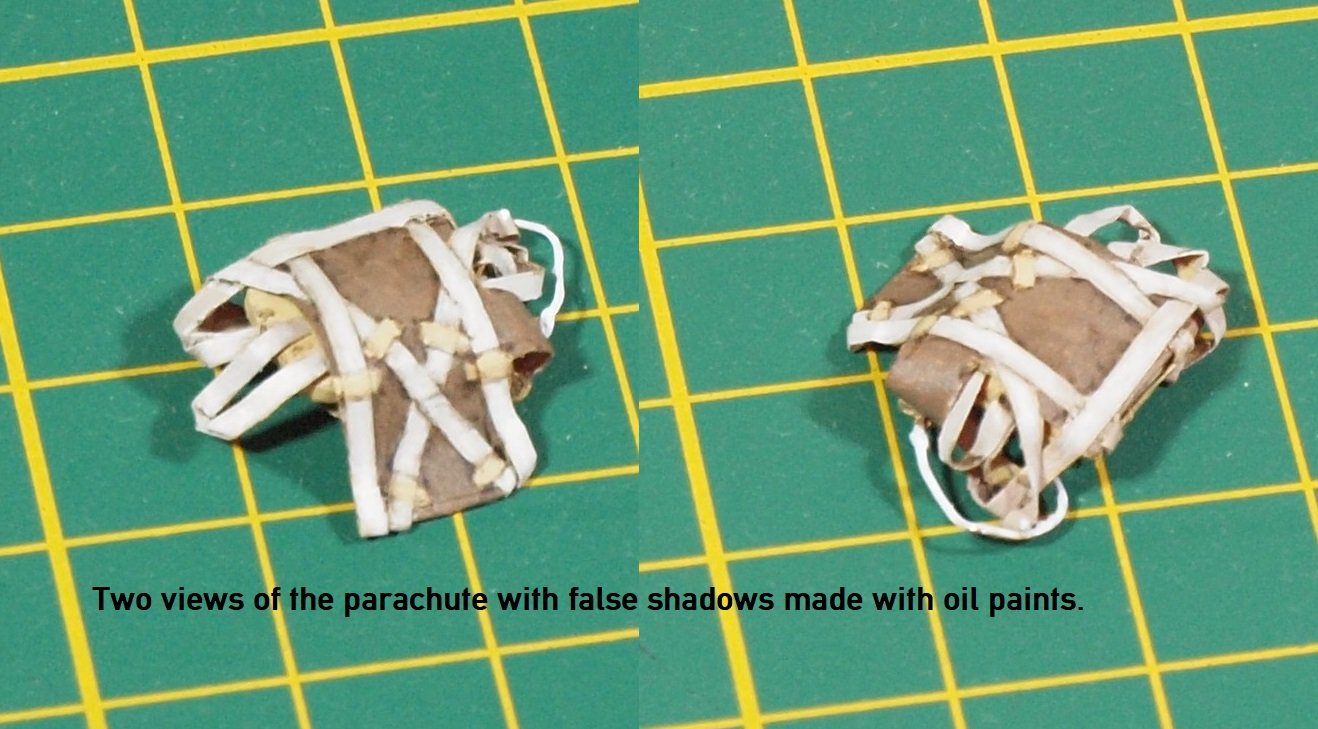
I had to strip a layer of a filter that I added. I won't go into details, but it involved a bit of wet sanding. I also wasn't happy with the chair. A little extra motivation was provided by a friend interested in furniture. I had also built a mental barrier to weathering the parachute... It just seemed like a lot to do for such a tiny addition to the model.
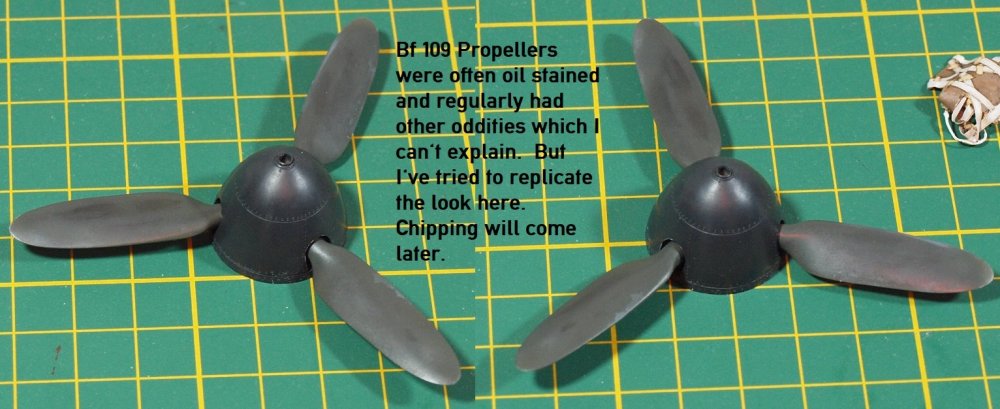
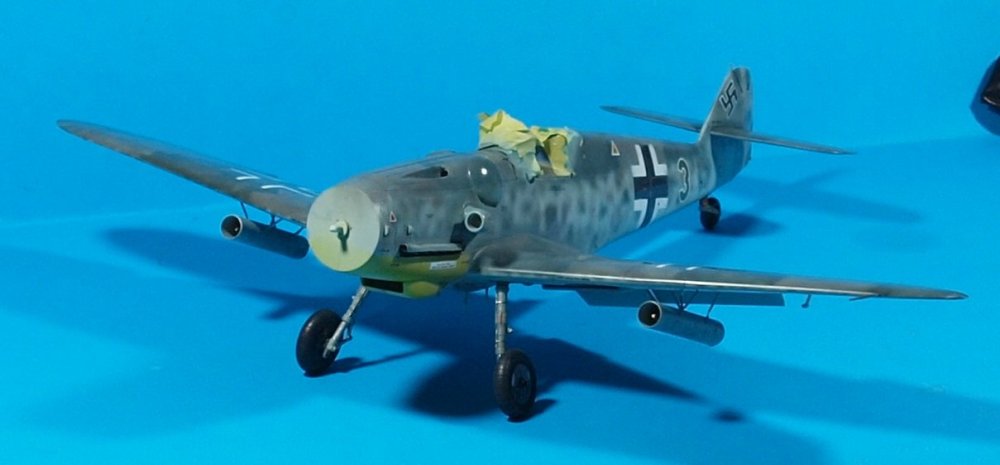
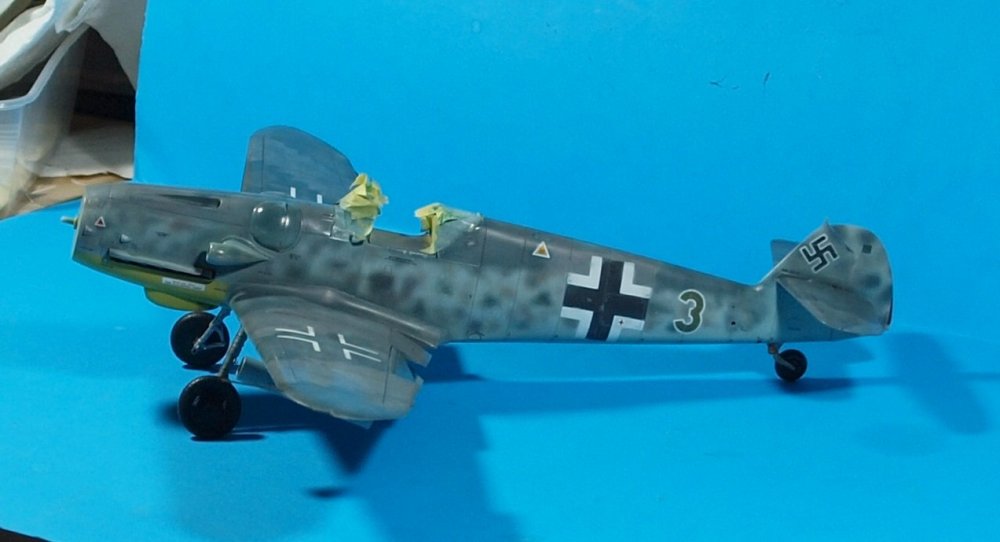
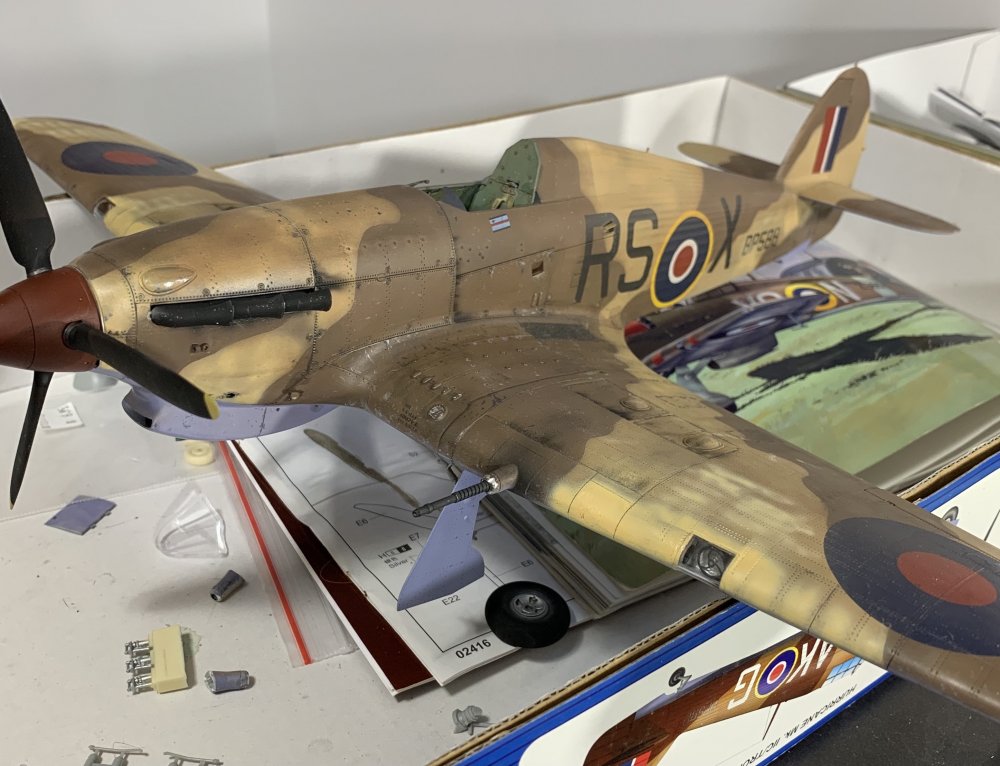
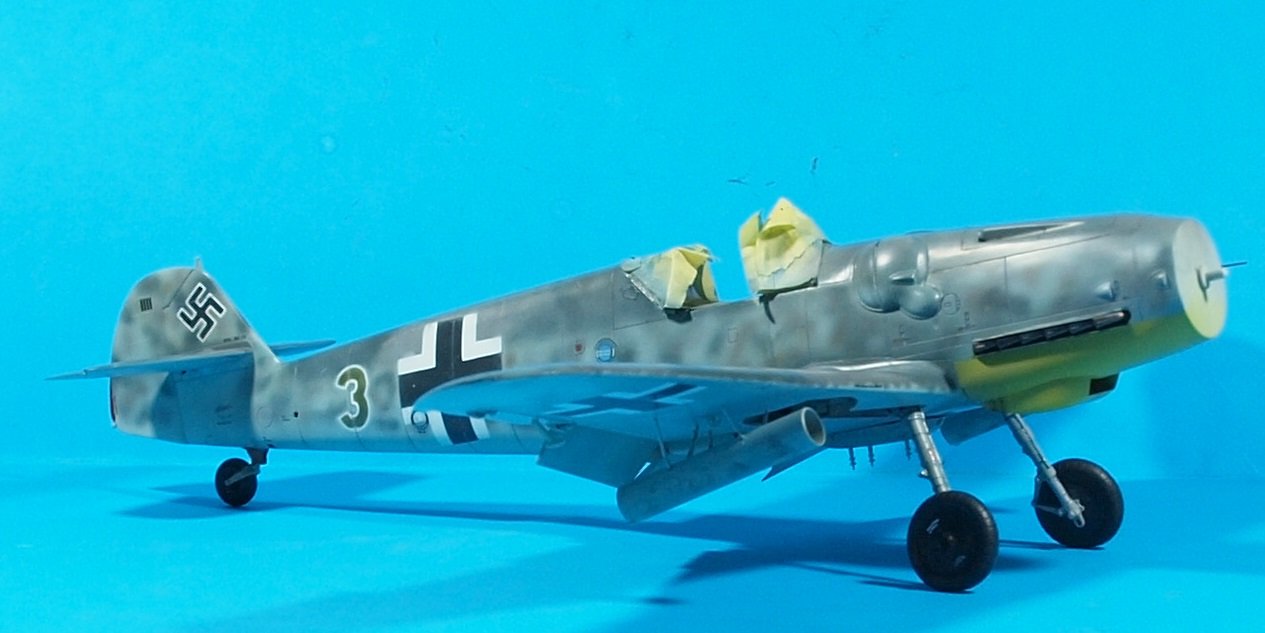
I've decided to limit my weathering to what can be seen from the tops and sides of the build. Messing with the undersides will just add more effort to things that will remain unseen. The aircraft recieved a pinwash and probably won't get much more as I put a lot of effort into stressing and modulating the paint scheme. Probably just some exhaust staining is yet to be done.


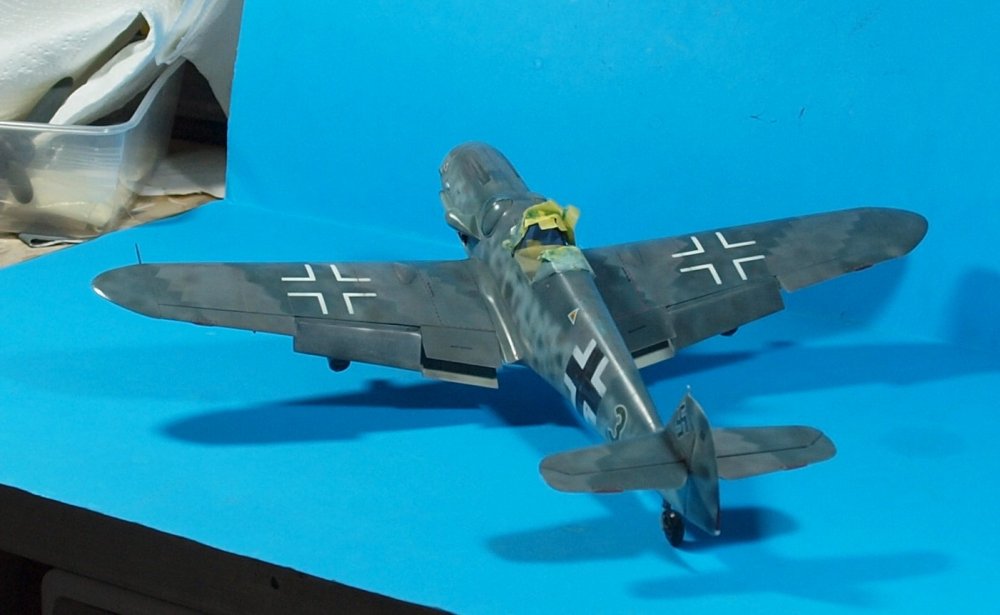
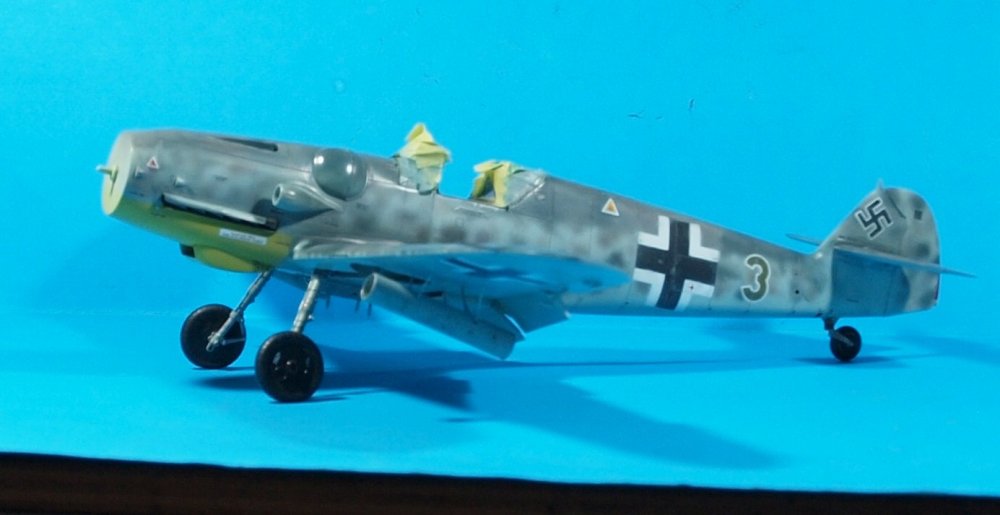

Thanks for looking! Happy modelling!!
Anyway... here are some pre-captioned photos. Heh... and some with no caption at all.
-
8
-
 1
1
-
-
Great result, Mark! I'm glad you finished it. It was worth the suffering.
-
2
-
1
-
-
7 minutes ago, Kaireckstadt said:
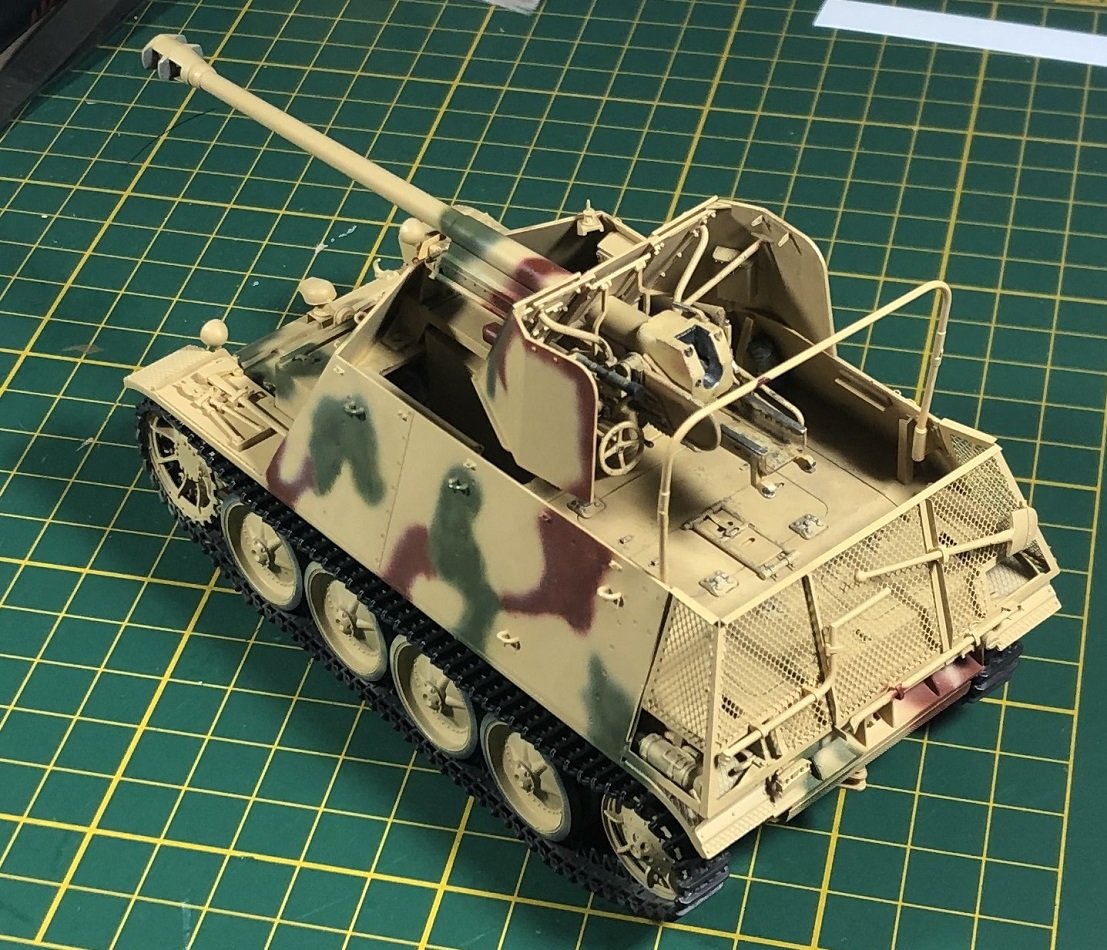
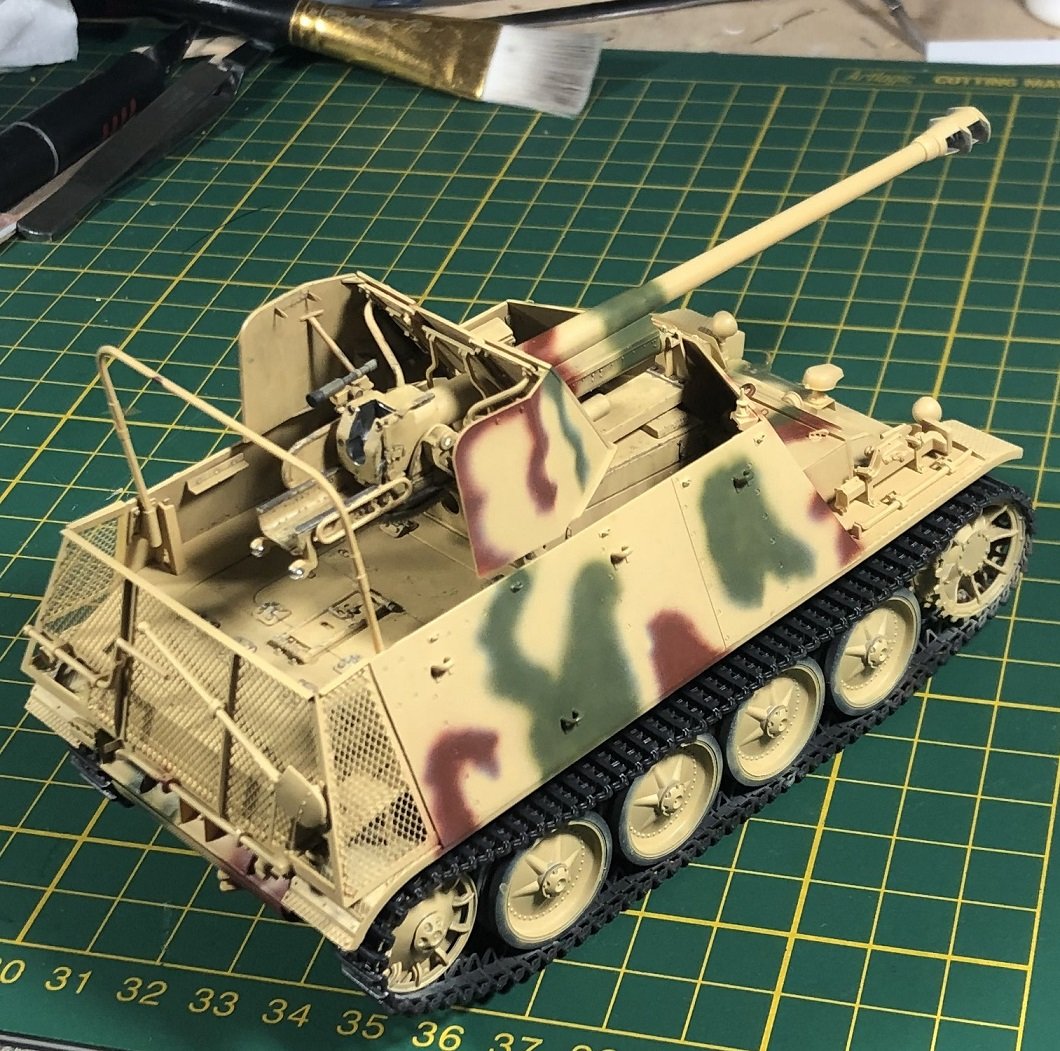
I love this camo Gary. And it’s execution is done perfectly by you. The Marder is so nice because of all the details visible from the outside. Your detail work fully pays off here.
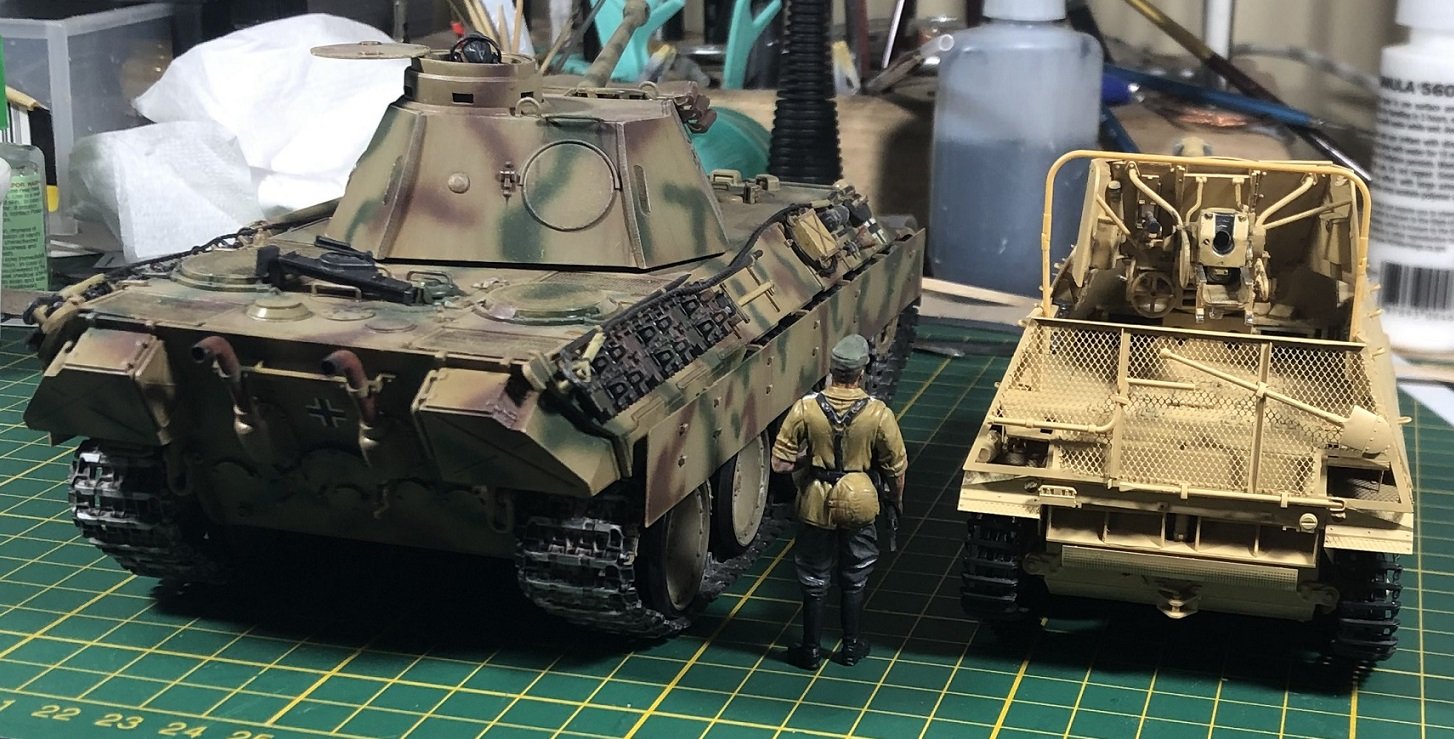
Didn’t know how tiny the Marder was.Thank you, Kai! It's a great little kit, but like all armor needs company to give it scale. Imagine sharing that space with four other men. I imagine they stayed in reserve until needed so wouldn't always carry all of their equipment on the machine. Anyway...there is tons more to do.
-
2
-
-
8 minutes ago, Martinnfb said:
Crashed F-8? Nope
That's not the one I meant... think back a few years.
-
 1
1
-
-
Nice, Martin.
Hey... did you ever finish that FW?
-
2
-
-
Oh no!
-
 1
1
-
-
Happy Birthday, Harv!!
-
1
-
1
-
-
That's beautiful skinning, Craig. Love seeing it come together. It's been a long build.
-
3
-
-
Nice progress, Mark!
-
3
-
1
-
-
2 hours ago, GusMac said:
Nice result Gaz. What paints are you using? I've had a few cusses with that problem using the Ammo paints.
Thank you, Fellas.
The paints are SMS acrylic lacquers. Made in Australia. I'm still trying to master them.
-
3
-
-
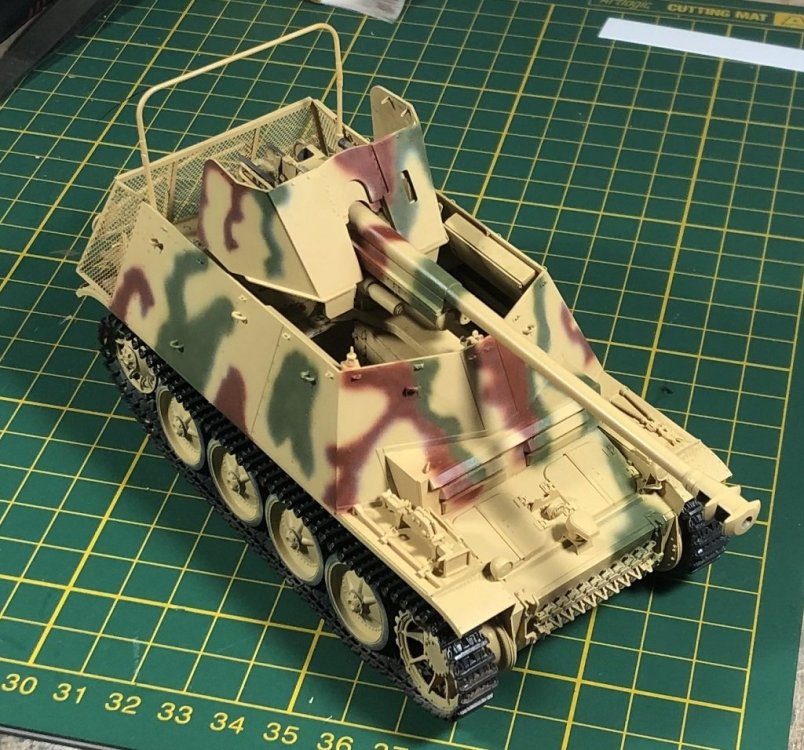
... a few hours and a few hundred epithets later....
I had a lot of trouble with dry tip. Especially with the red brown and to a lessor extent the green. I had to sand some overspray away and touch up with the base color. Anyway... it can have a rest.


-
10
-
1
-
-
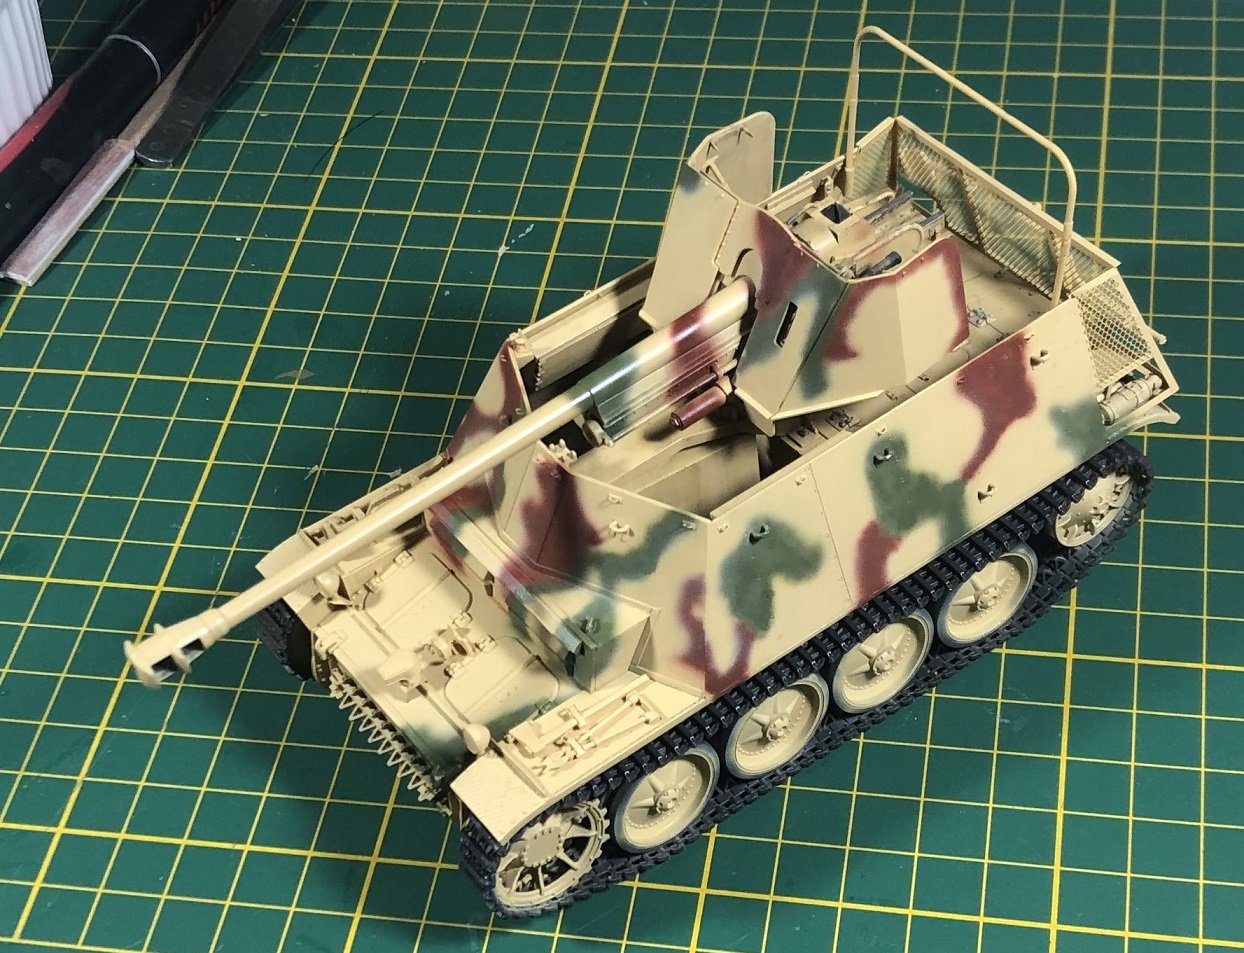
Hello again, everybody. A bit of progress on the Marder. With only a few detail parts to add on, I thought I'd show you how she looks partly painted... and paired with a Tamiya Panther for size comparison.
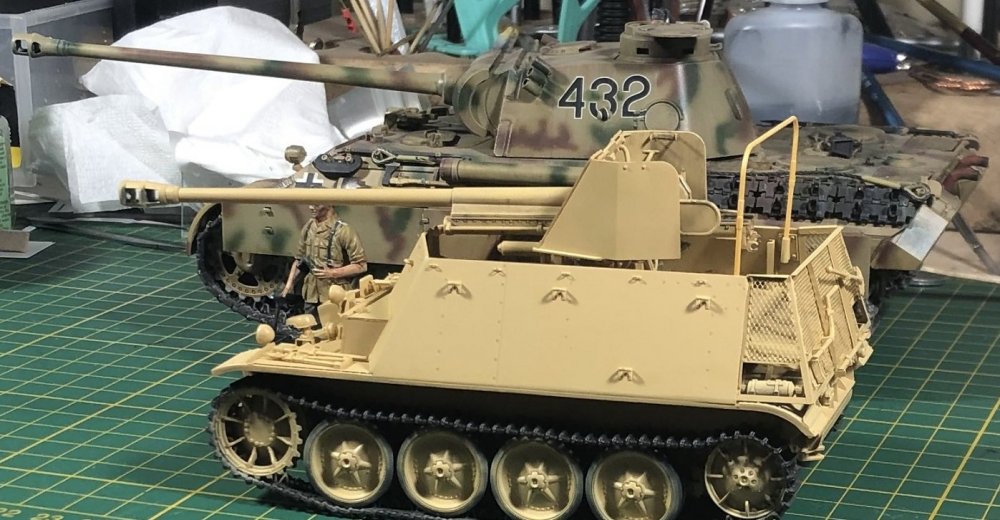
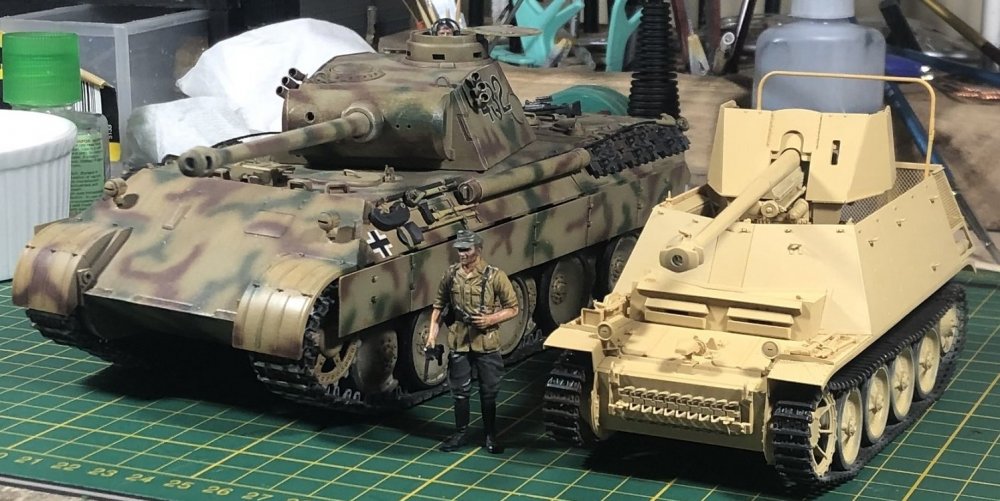

The track assembly with wheels is only dry fitted as is the gun and shield. That leaves the seats, travel-lock, and periscopes left to go.
I'd like to have some storage, but I'm not really liking the idea of messing with it. The main reason is the tarp latches. In just a few minutes of adding parts, three of them came off. I should have deepened the holes with a drill... but didn't as I was afraid of going through.... with a touch of laziness thrown in.
So, next time you see it, it should have it's three color scheme.
...photo-etch and the fragility of CA really makes me leery of trying too much.
Happy modelling!
-
9
-
-
Awesome stuff
-
1
-
-
48 minutes ago, Martinnfb said:
Alright... this is the second recent movie where they control the plane into a controlled crash landing after losing half of it's wing. Don't these dumbasses know that no aircraft can be controlled when that shit happens??
-
1
-
-
On 10/13/2021 at 10:53 AM, Martinnfb said:
I gave up under the pressure of historical facts and removed the outer cannons. The thing is, I forgot the combination of colours I used to mix the filter for the rest of the plane with. It’s still gonna be super awesome, but I’ll be more that happy to build 190 after I’m done with this pesky thing.
Some nice work there, Martin.
-
2
-
-
More chair work... I may find weathering the fly a little difficult.
-
1
-
4
-
-
4 hours ago, DocRob said:
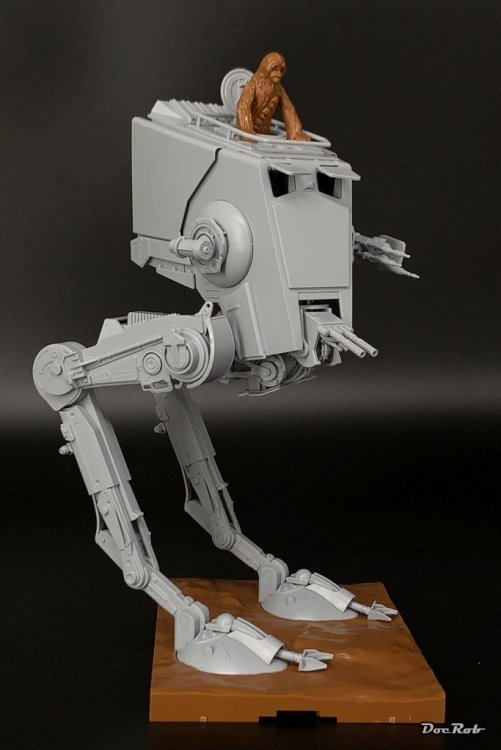
Onto the bench and off in one day as the oils on my PZL dry for a while. This is part one of a strange new project, including a little dio and another kit.
The Bandai AT-ST is easy to build and very detailed. There are no distortions in the plastic and I glued only some tiny parts, the rest is only snapped together and will enable to paint the kit better.
There is no PE or resin included, but the main guns are bored hollow . Chewbacca will be removed and another pilot will be added later. No Ewoks were harmed through the build
  .
.
Cheers Rob
I hated the Ewoks. Should do a build with an Ewok being stepped on by this thing. I found the Ewoks the ultimate insult to military men. Otherwise.... nice work!
-
1
-
3
-
-
Well done, mate!
-
4
-
-
On 10/12/2021 at 3:35 AM, JohnB said:
Coming along very nicely Gaz!!!
") On 10/12/2021 at 6:00 AM, Kaireckstadt said:
On 10/12/2021 at 6:00 AM, Kaireckstadt said:Copy John Gary. This one will be awesome when ready!
30 minutes ago, Martinnfb said:Lovely detail.
Thank you, fellas. Hope to get some done this weekend.
-
2
-
-
Damn, Harv! Get well buddy!
-
2
-
1
-
-
Those tape seat belts look great, Phil. I reckon it's a great substitution for AM belts if your canopy is gonna be closed. Hard thing to master is painting the buckles... mine tend to look like silvery blobs.
-
2
-
-
Some inspiring work, Kent. Keep it up!
-
5
-
-
Excellent job, Rob! Not sure how the color looks like on your end, but things will look more brown if you put it on a grassy base or something.
-
4
-


John B is Recouperating from Covid
in Site & Forum Announcements
Posted
Stay strong Johnny B.