


BlrwestSiR
-
Posts
8,737 -
Joined
-
Last visited
Content Type
Profiles
Forums
Events
Gallery
Posts posted by BlrwestSiR
-
-
2 hours ago, Count0 said:
The Jags for sure. 956/962 are kinda boring, despite how successful they were.
The 956/962 had so many different livery options: Rothmans, Newman, Coca Cola, Lowenbrau, Jagërmeister, etc. Not to mention the constant evolution of the design: short tail, long tail, separate tail. Plus throw in the Group C and IMSA differences and it's almost like the BF109 of race cars. Then there's the last LeMans win with the rule bending Dauer LM: a racecar version of a roadcar converted 962.
-
 1
1
-
-
Great looking build Martin. It makes for a nice comparison to the more typical.V-1.
-
 1
1
-
-
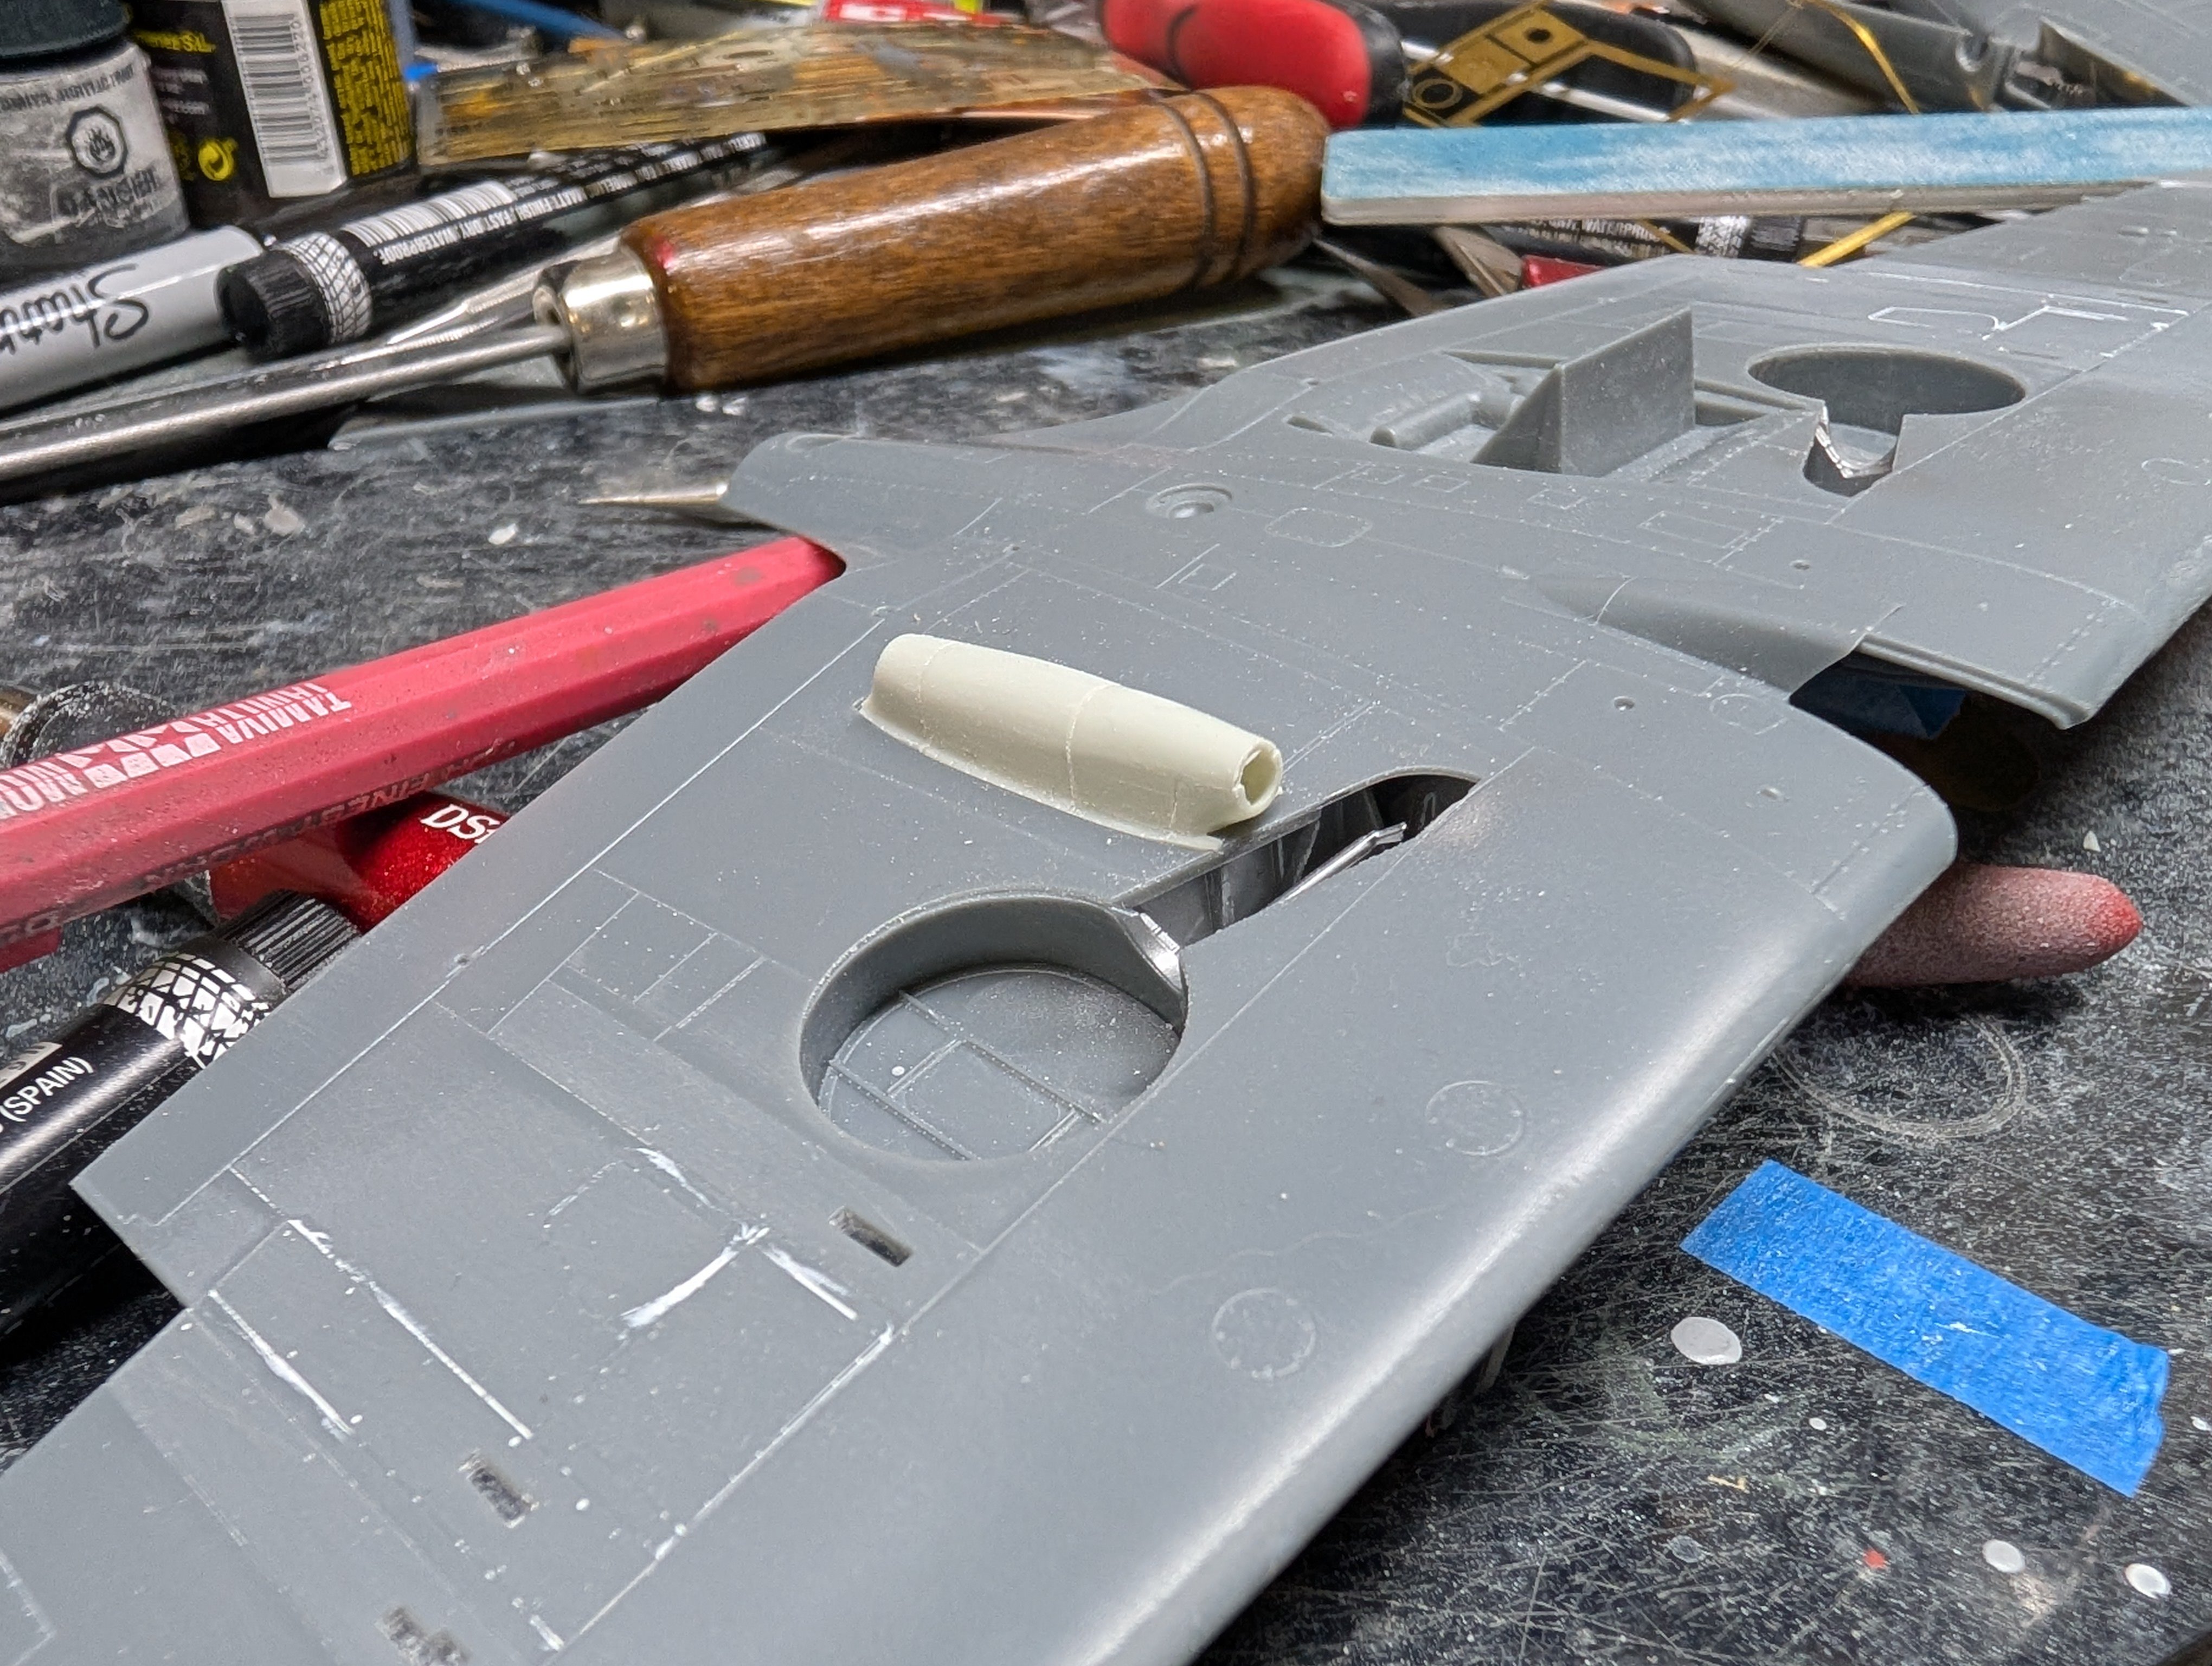
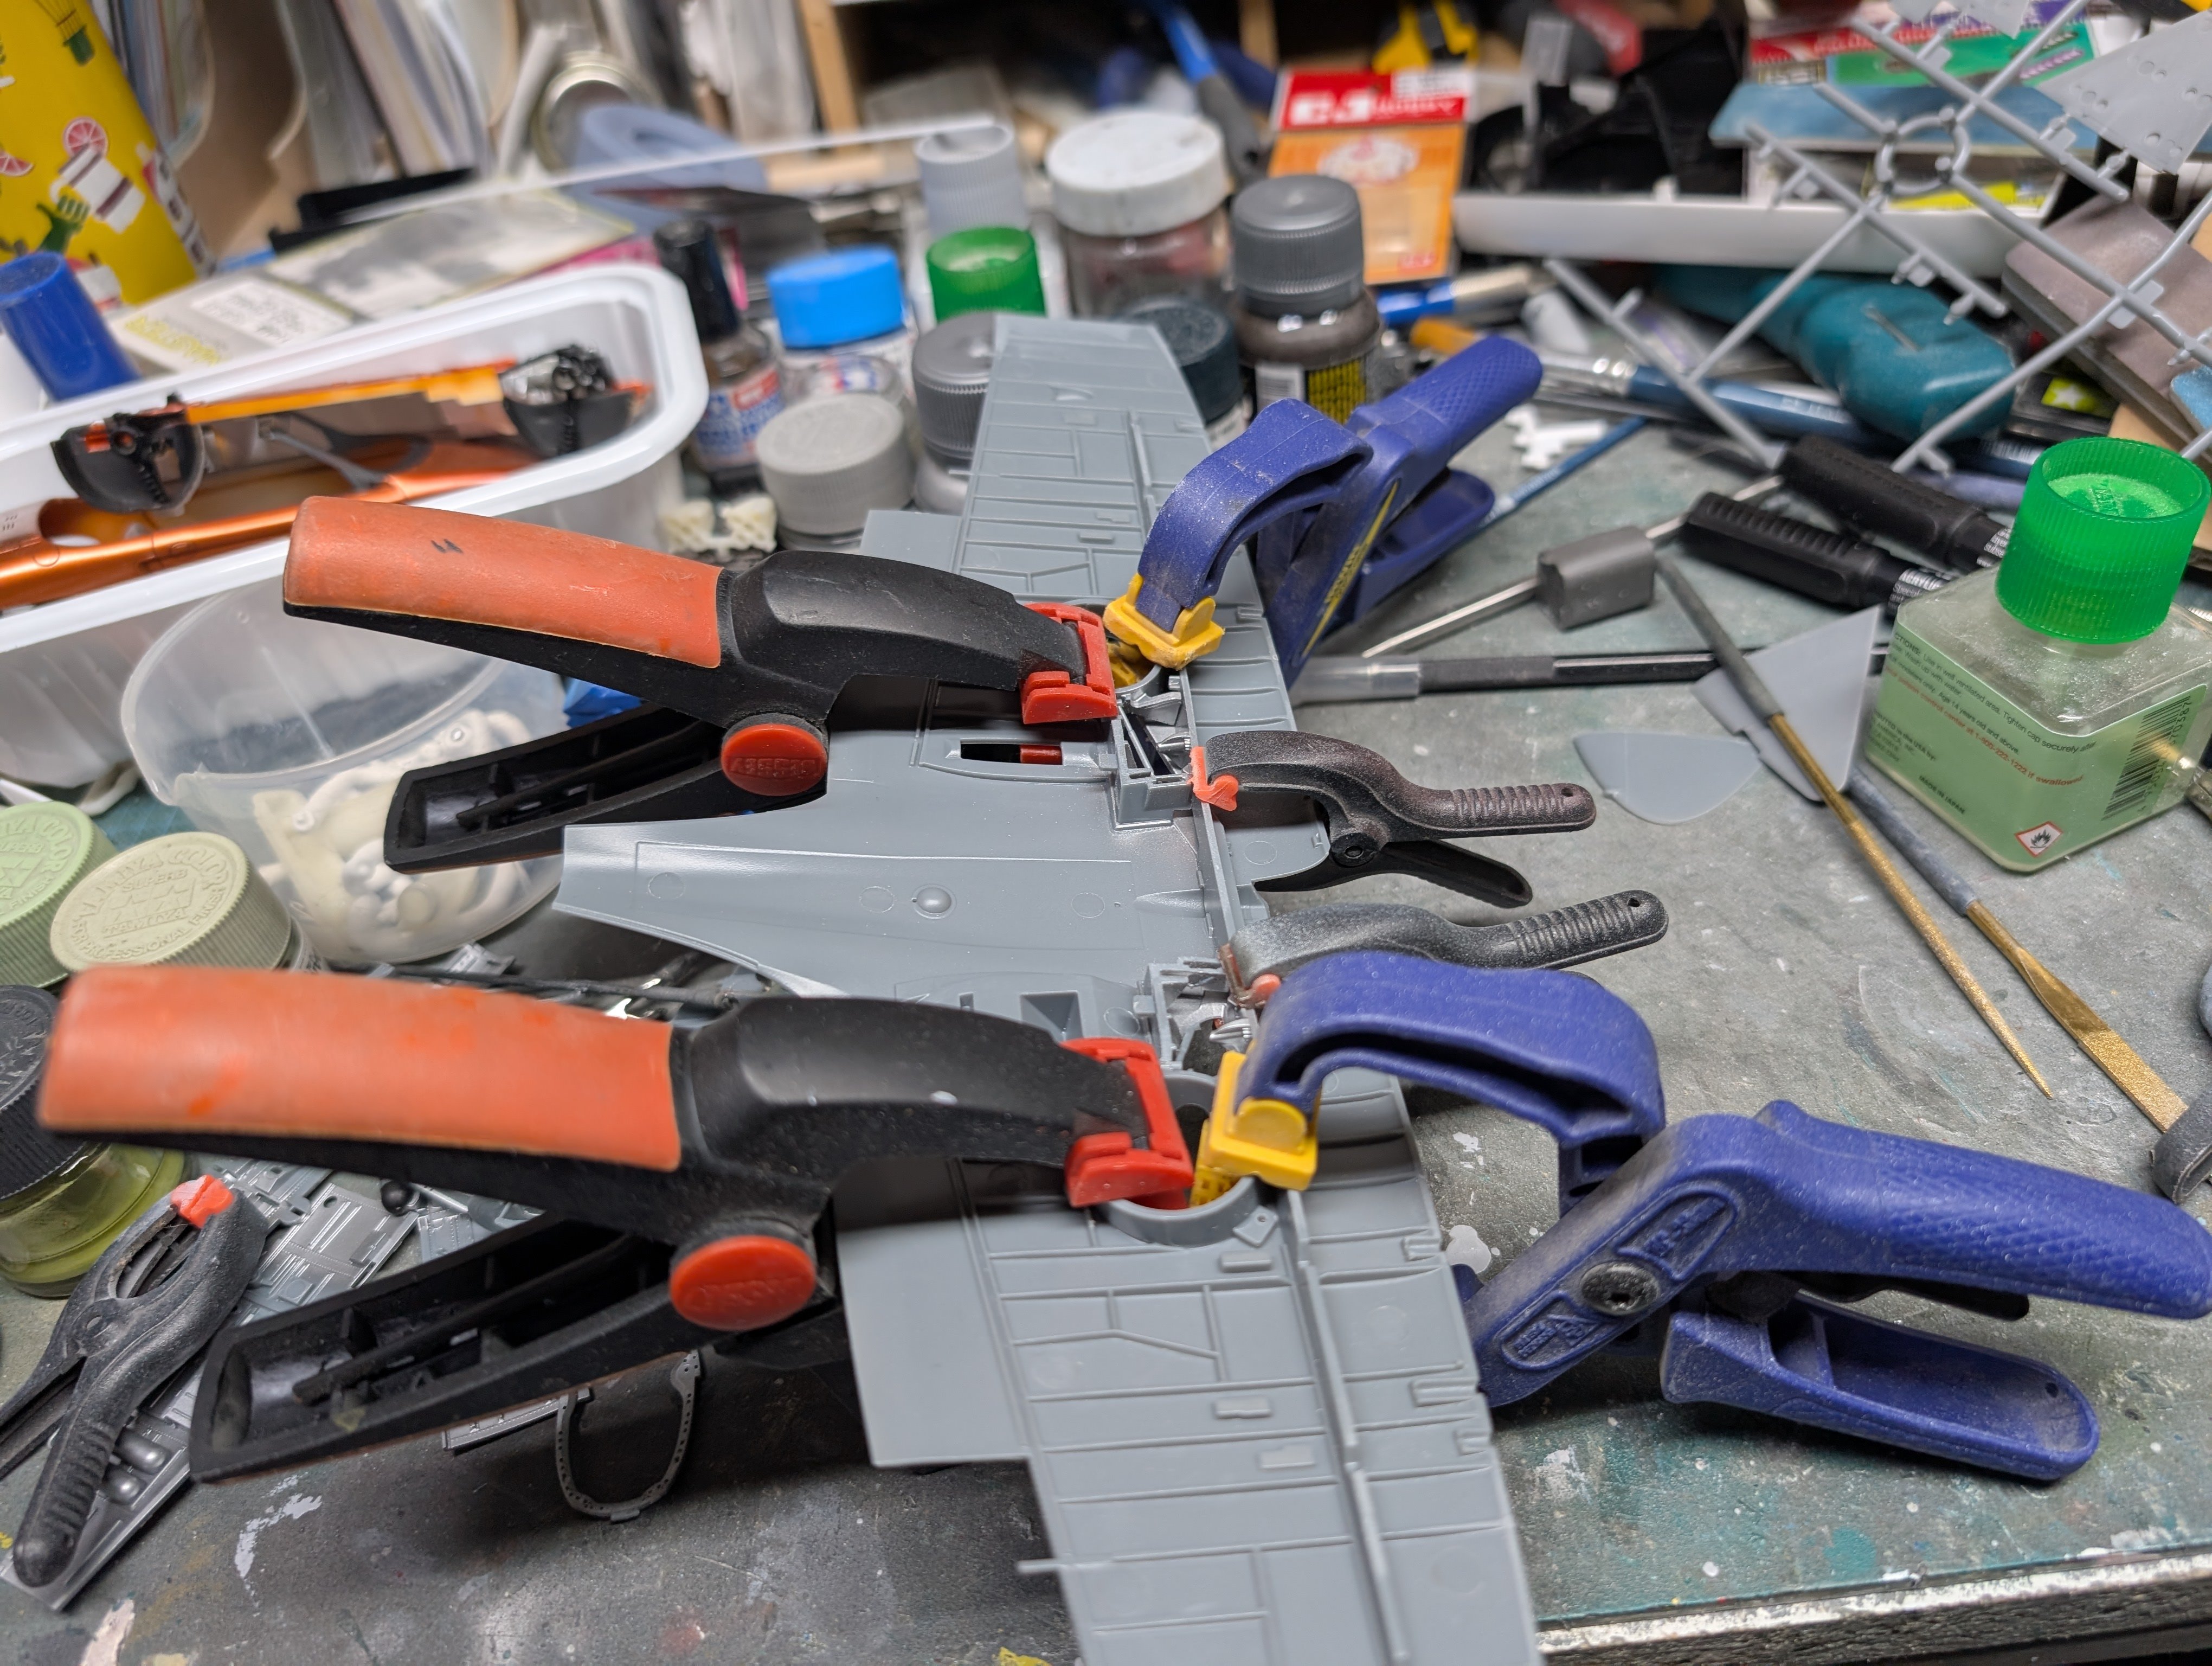
Ugh, I found more wing mods that needed to be done. The PR IV used the later style round oil cooler found on the Spitfire V series and not the semicircular ones on the MkI and II.
First thing that came to mind was getting a Kotare Va kit and swapping out the oil cooler from it. Checking the instructions on Scalemates, the lower wing doesn't change between the two kits, just the oil cooler. So that was the expensive option plus having to wait for the kit to arrive.
I then decided to look into Plan B. This was to take one from the intended base kit, the Revell MkII. That kit kit has a MkV circular oil cooler instead of the semicircular one that it should have. Having a Revell kit in the stash, plus a Barracudacast correction set, I pulled it out to see if it could work.

All glued together.

After some tweaking, I got a decent enough fit.

I also finally filled in the shell ejection ports.

-
5
-
-
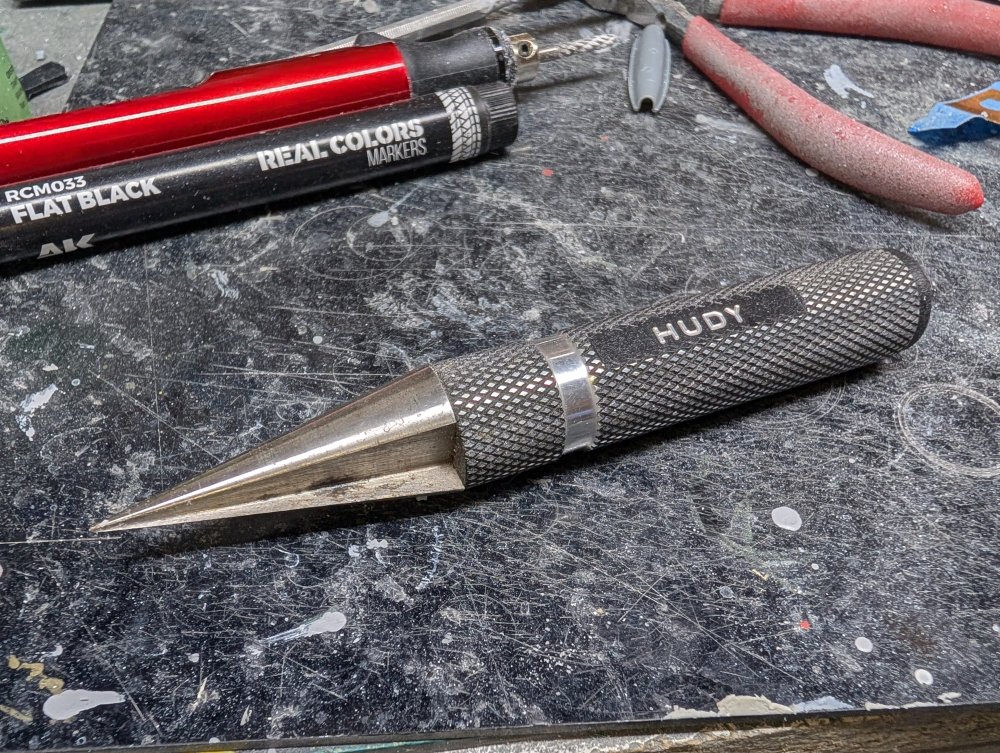
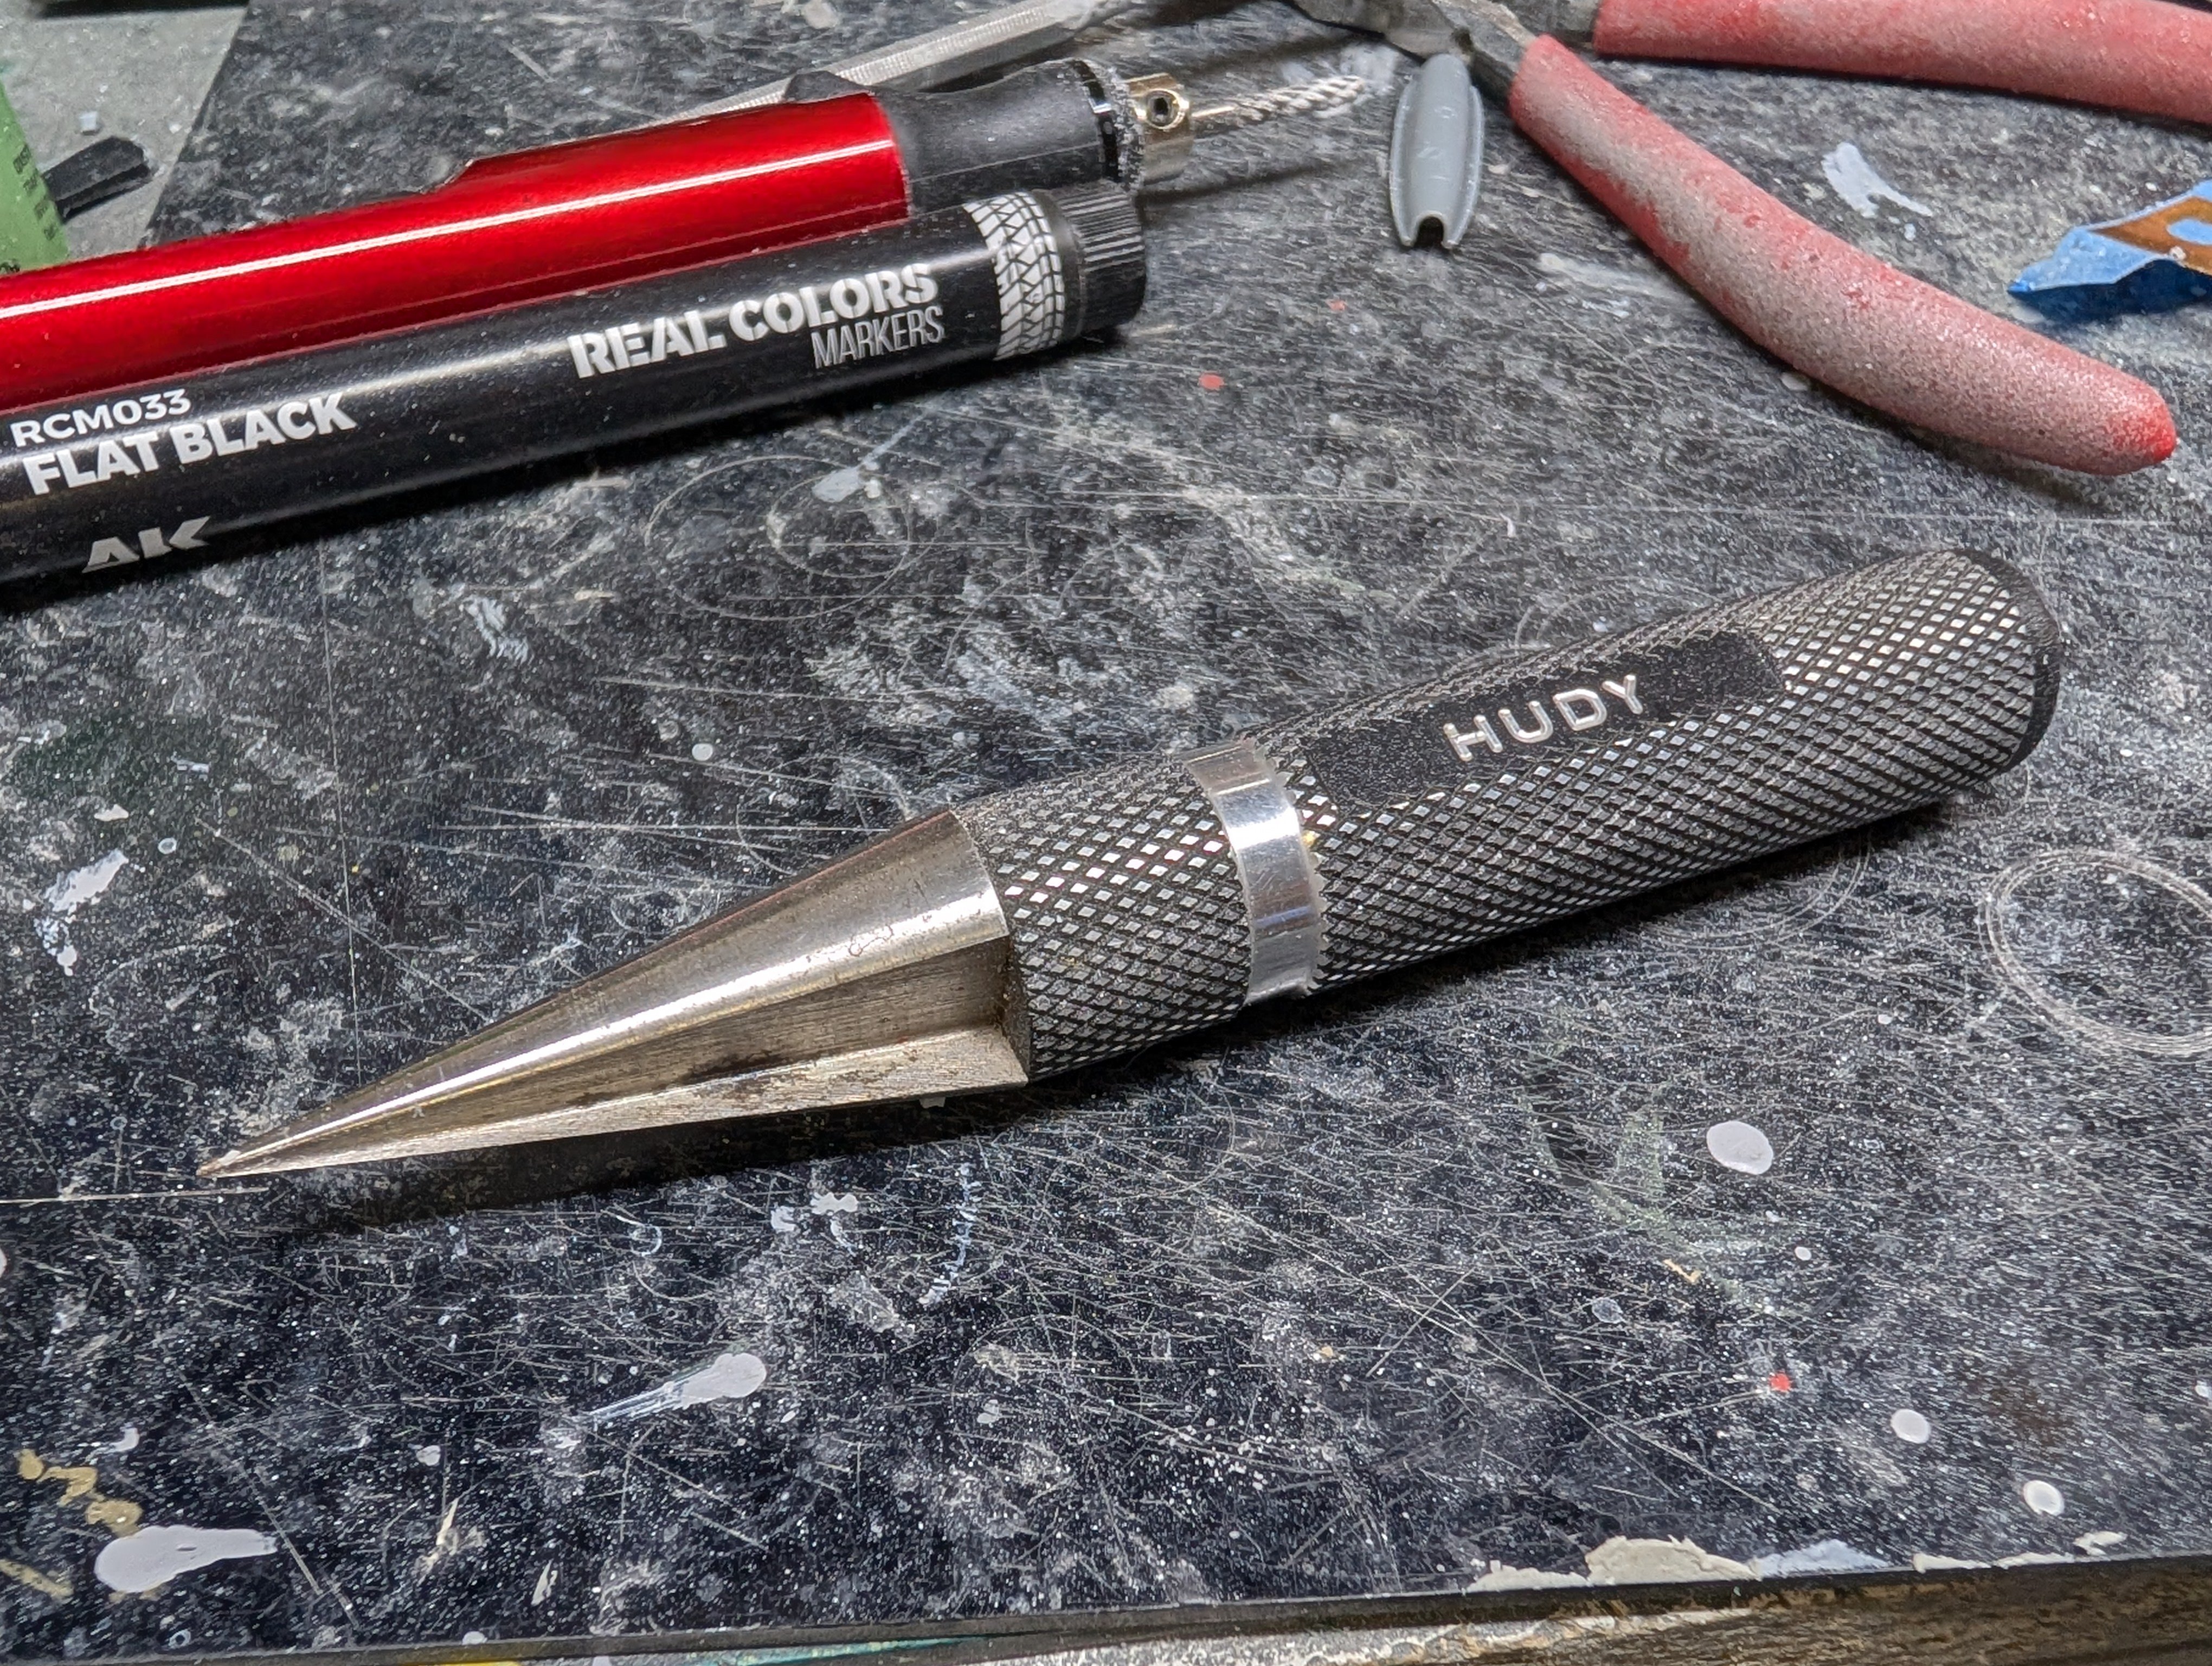
@DocRob, here's the reamer that I use. It's made by Hudy from Slovakia i think. They specialize in tools for RC cars and are part of XRay and Serpent. Both of those are high end RC car brands. They're very nice works of art and I've have a few of them.
-
2
-
2
-
-
And the mounting bracket is just too much to put together. Some of the tabs to hold the brackets together are small than the attachment nubs that hold the part to the PE fret. They look nice but I can't pull it off. I'll use what I can.
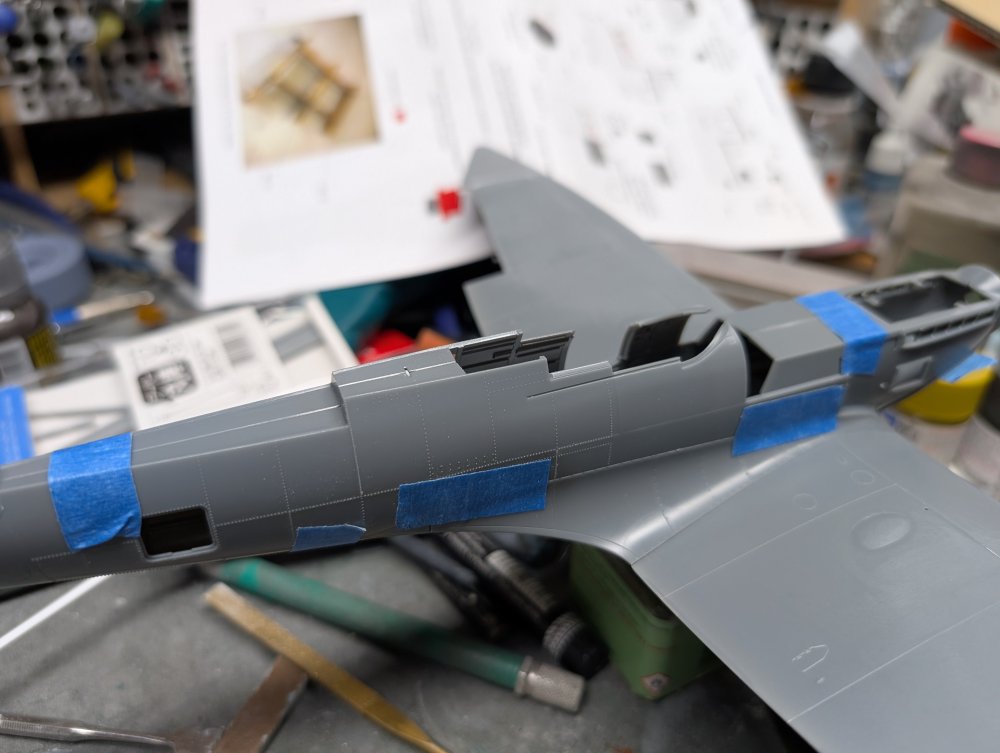
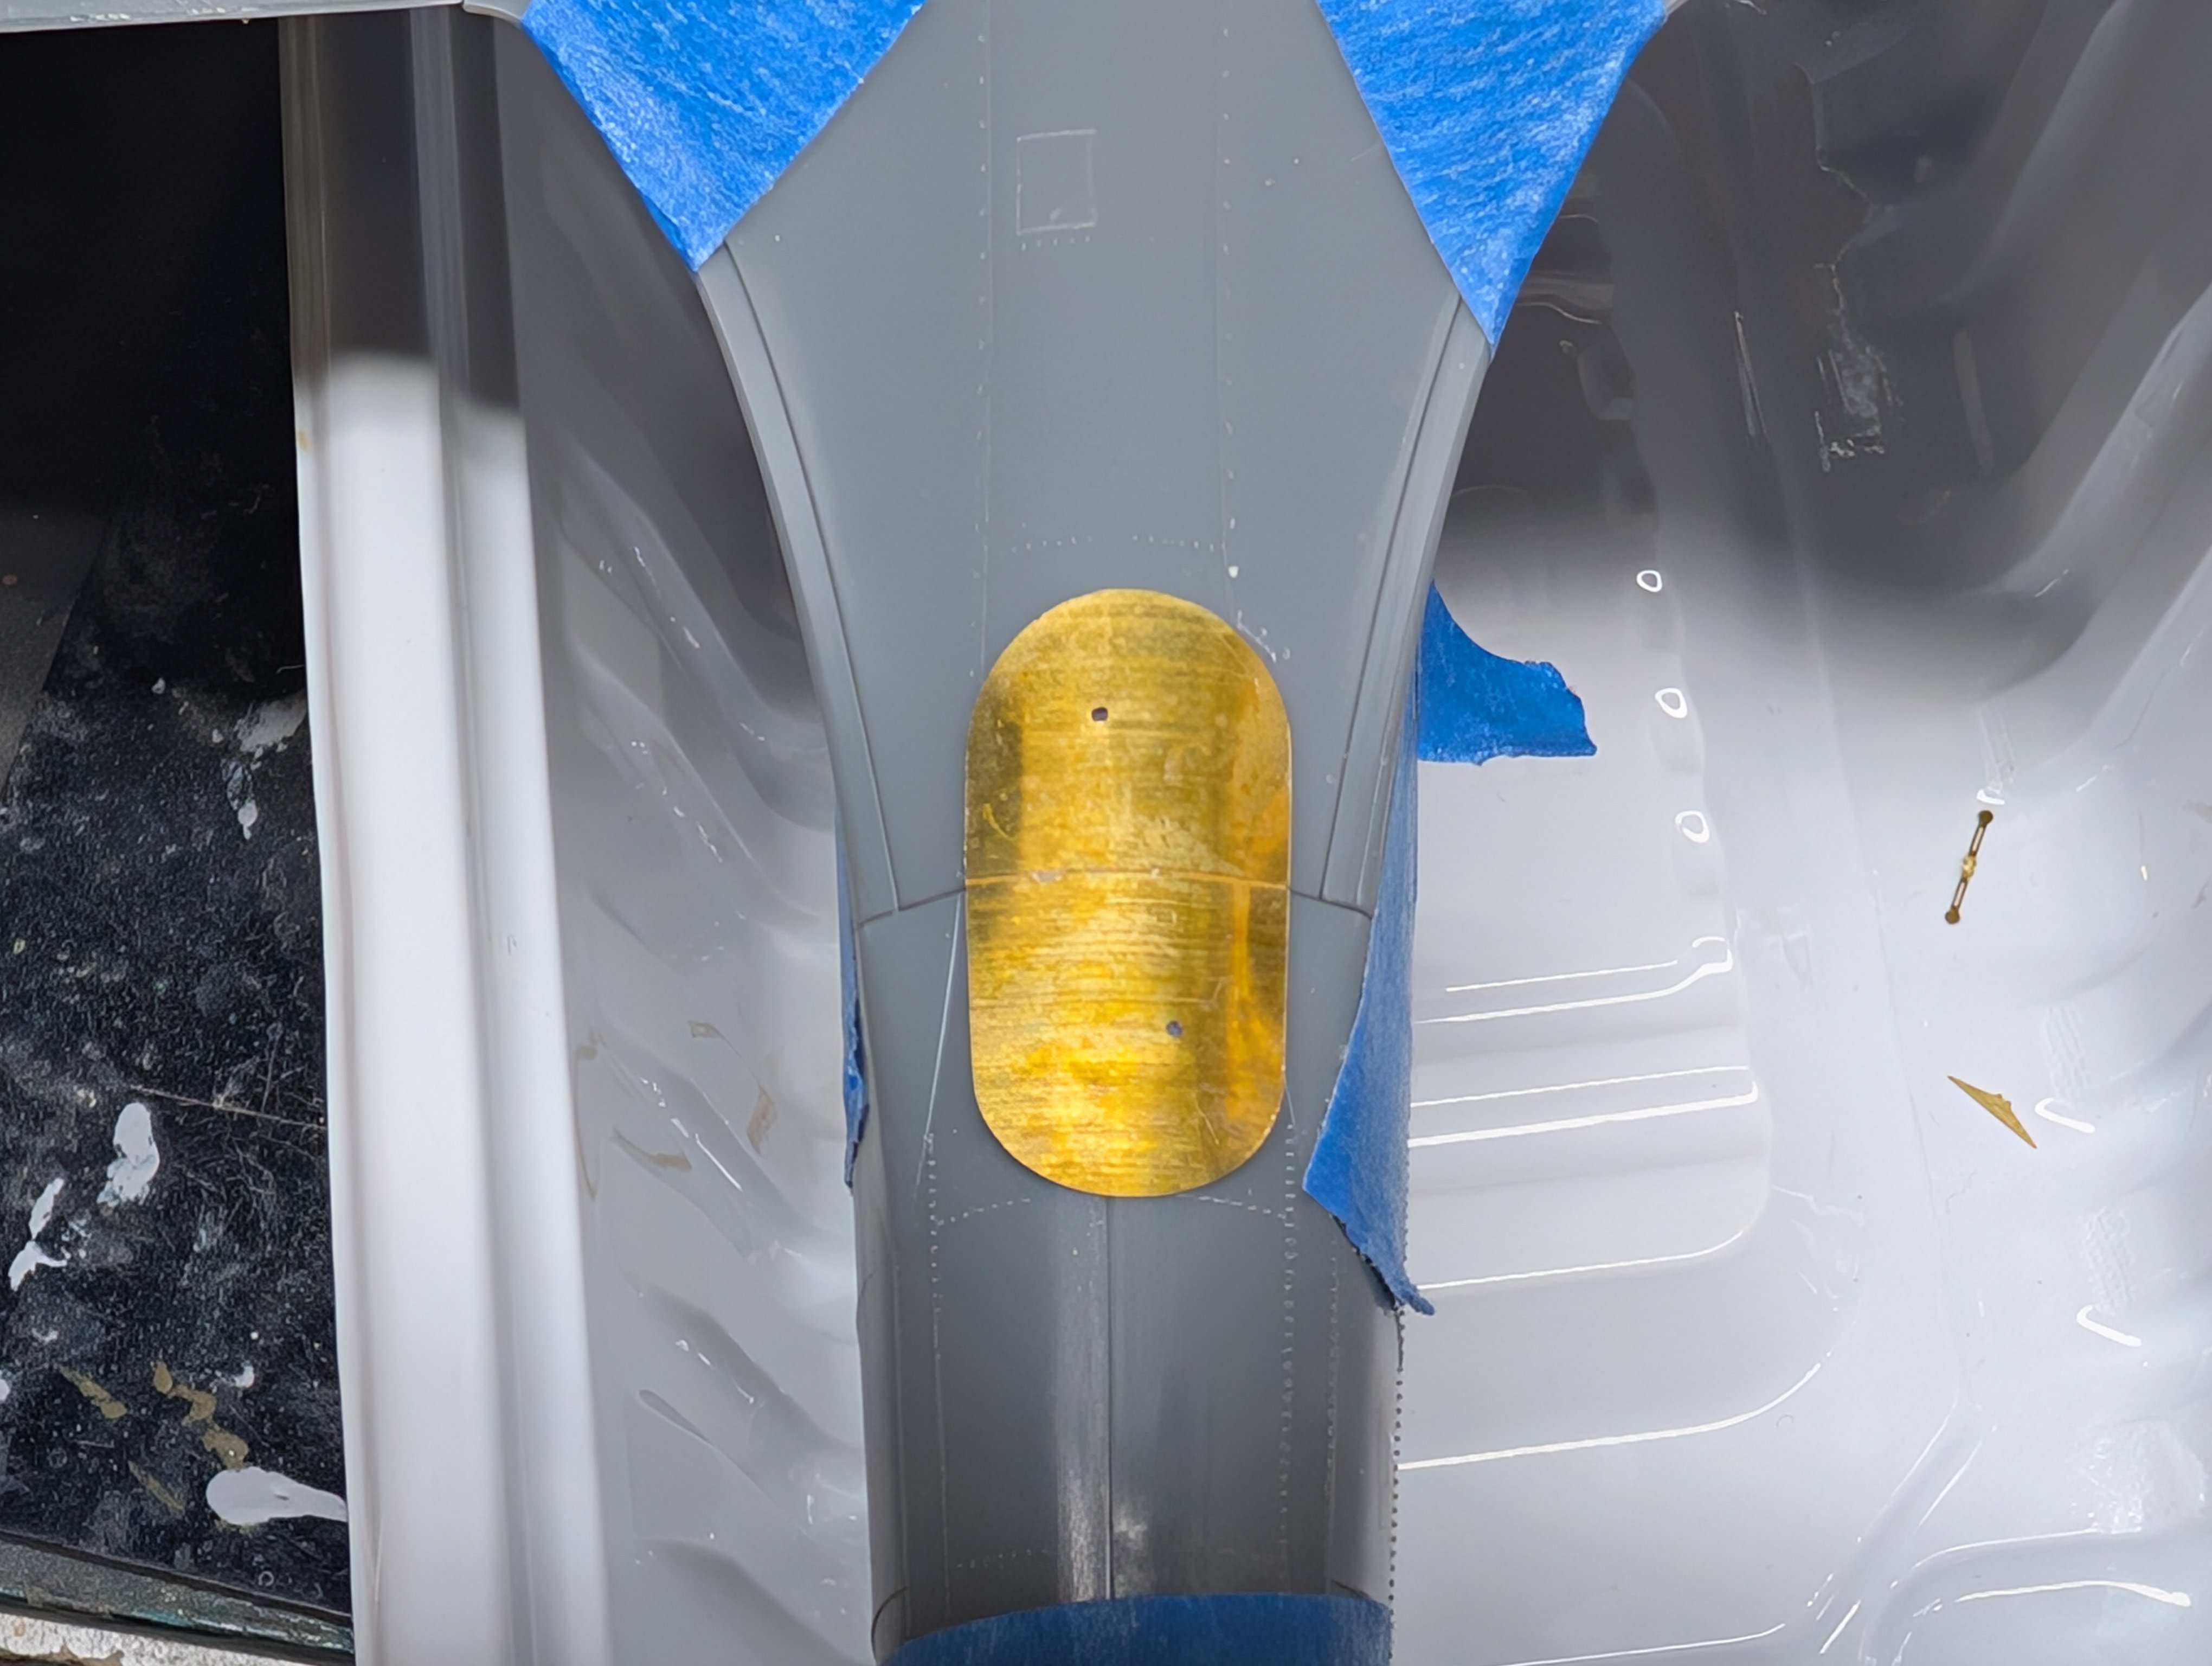
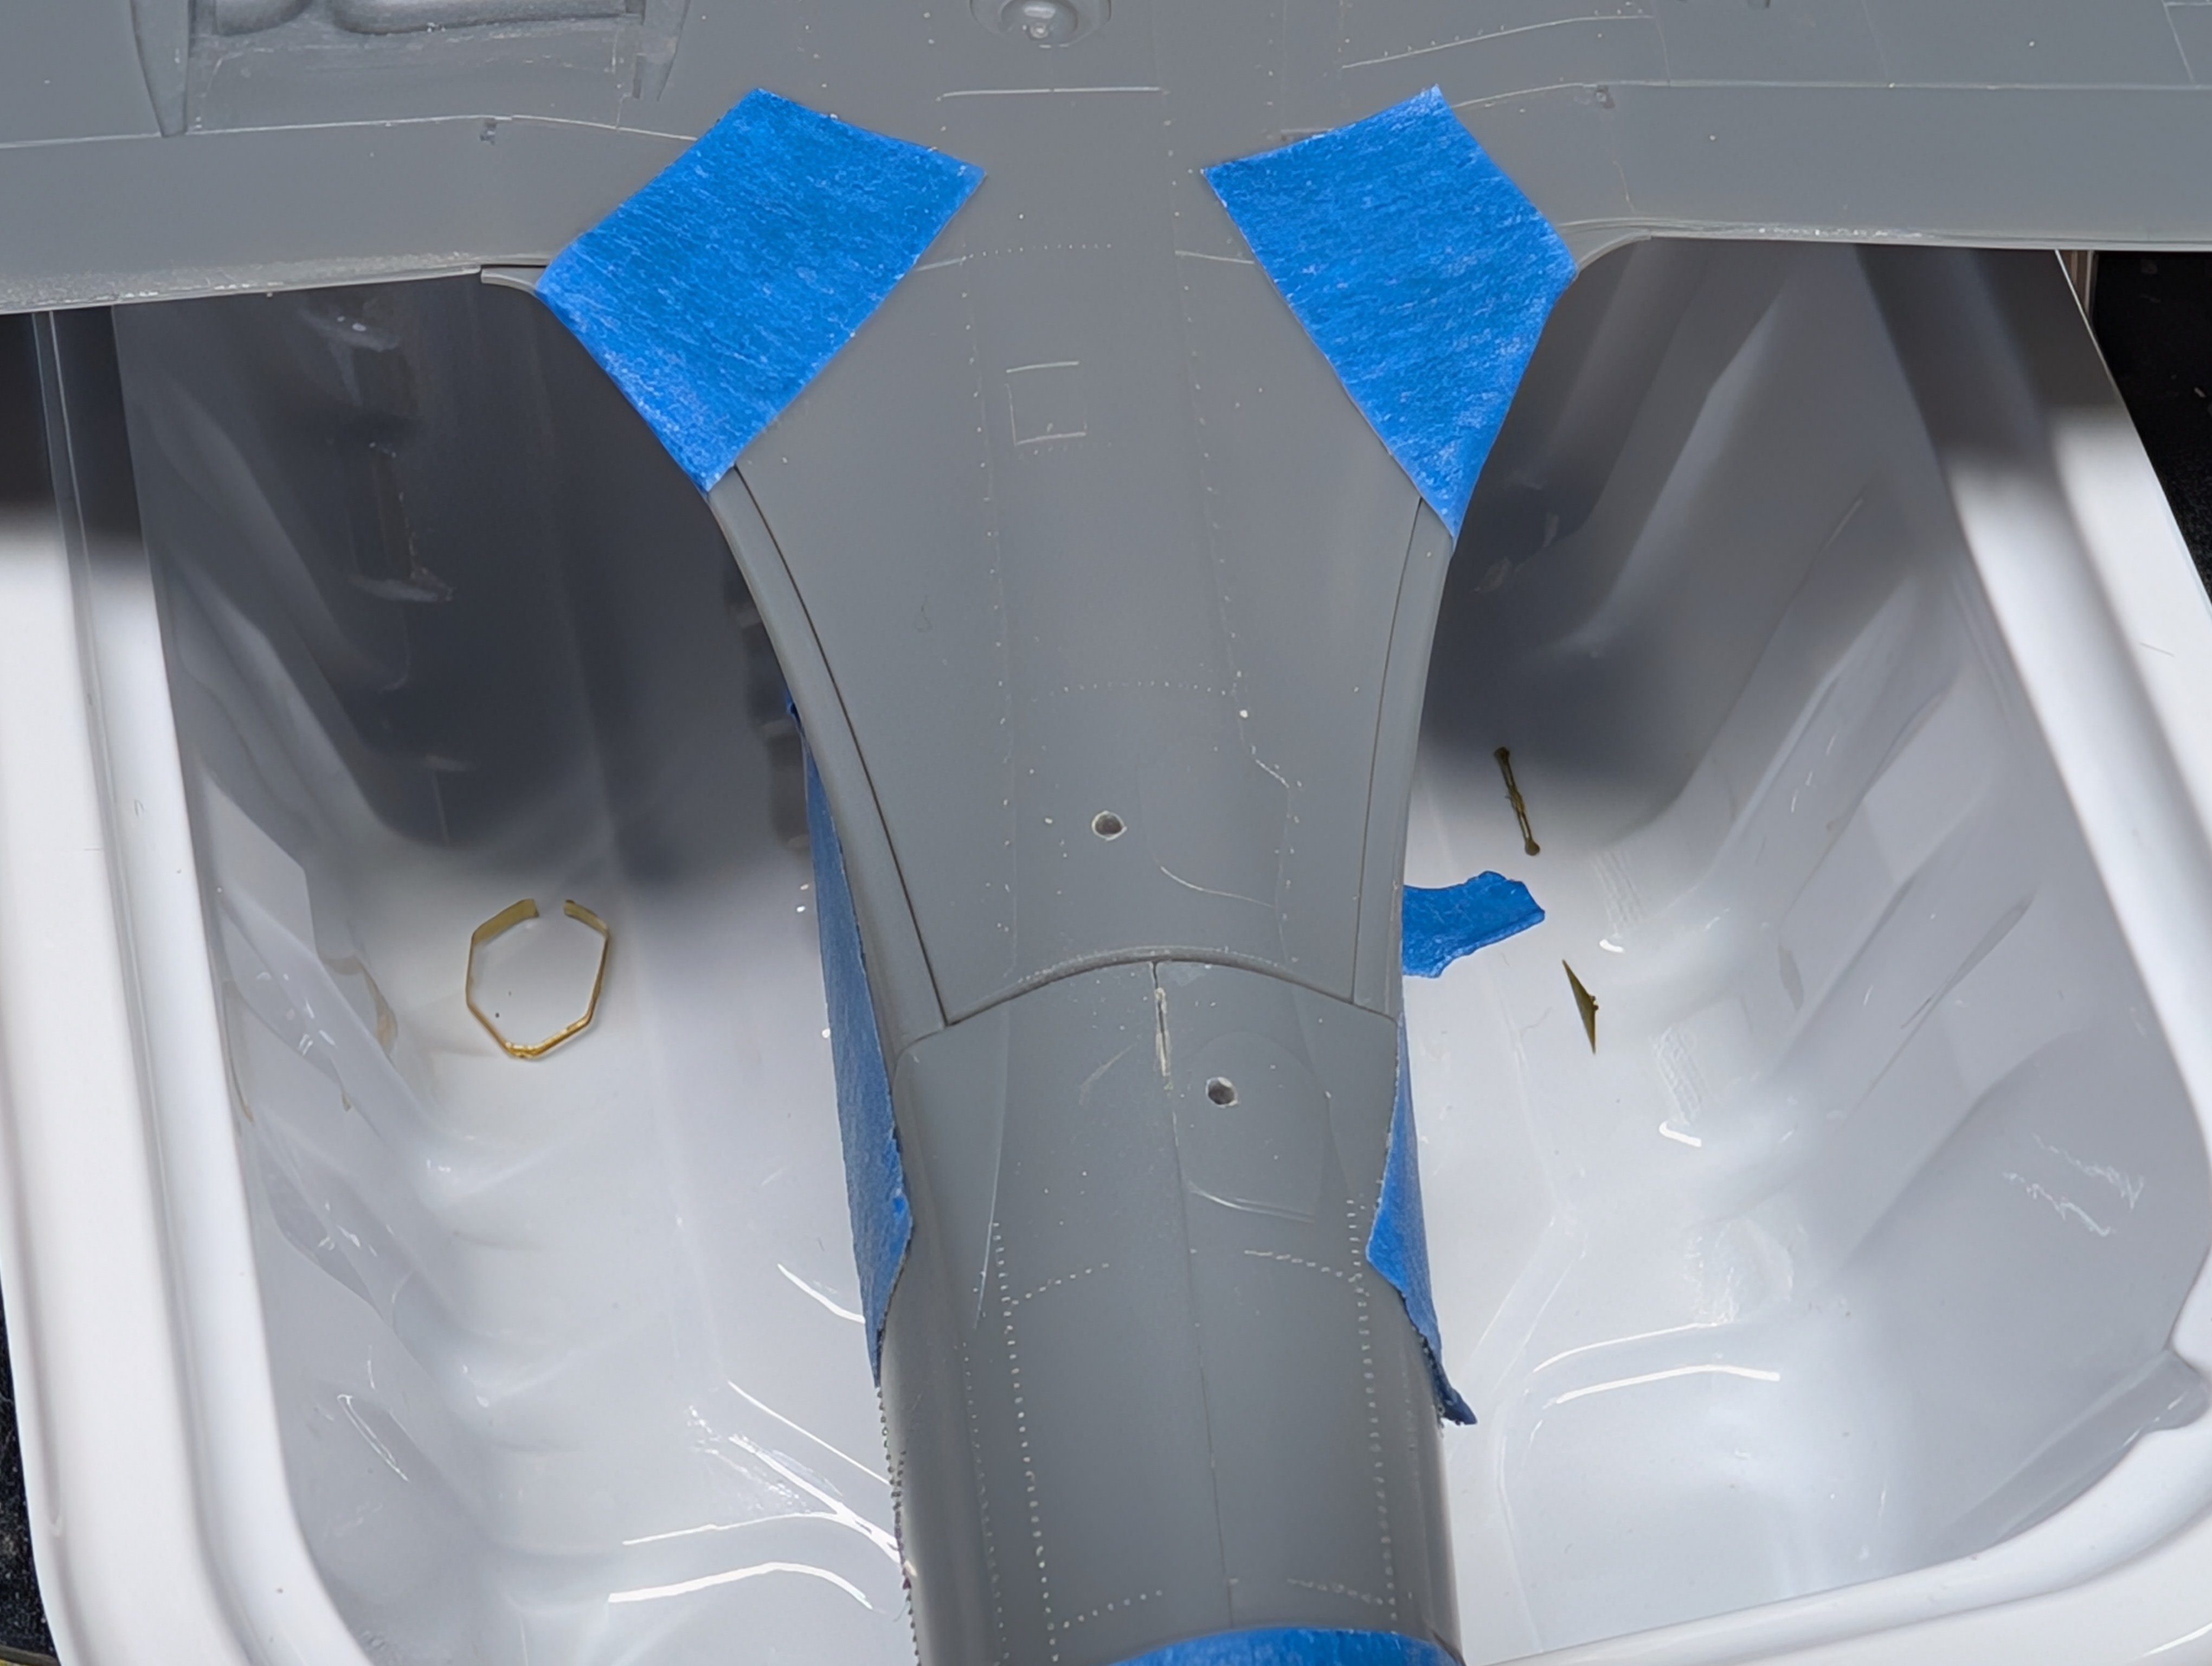
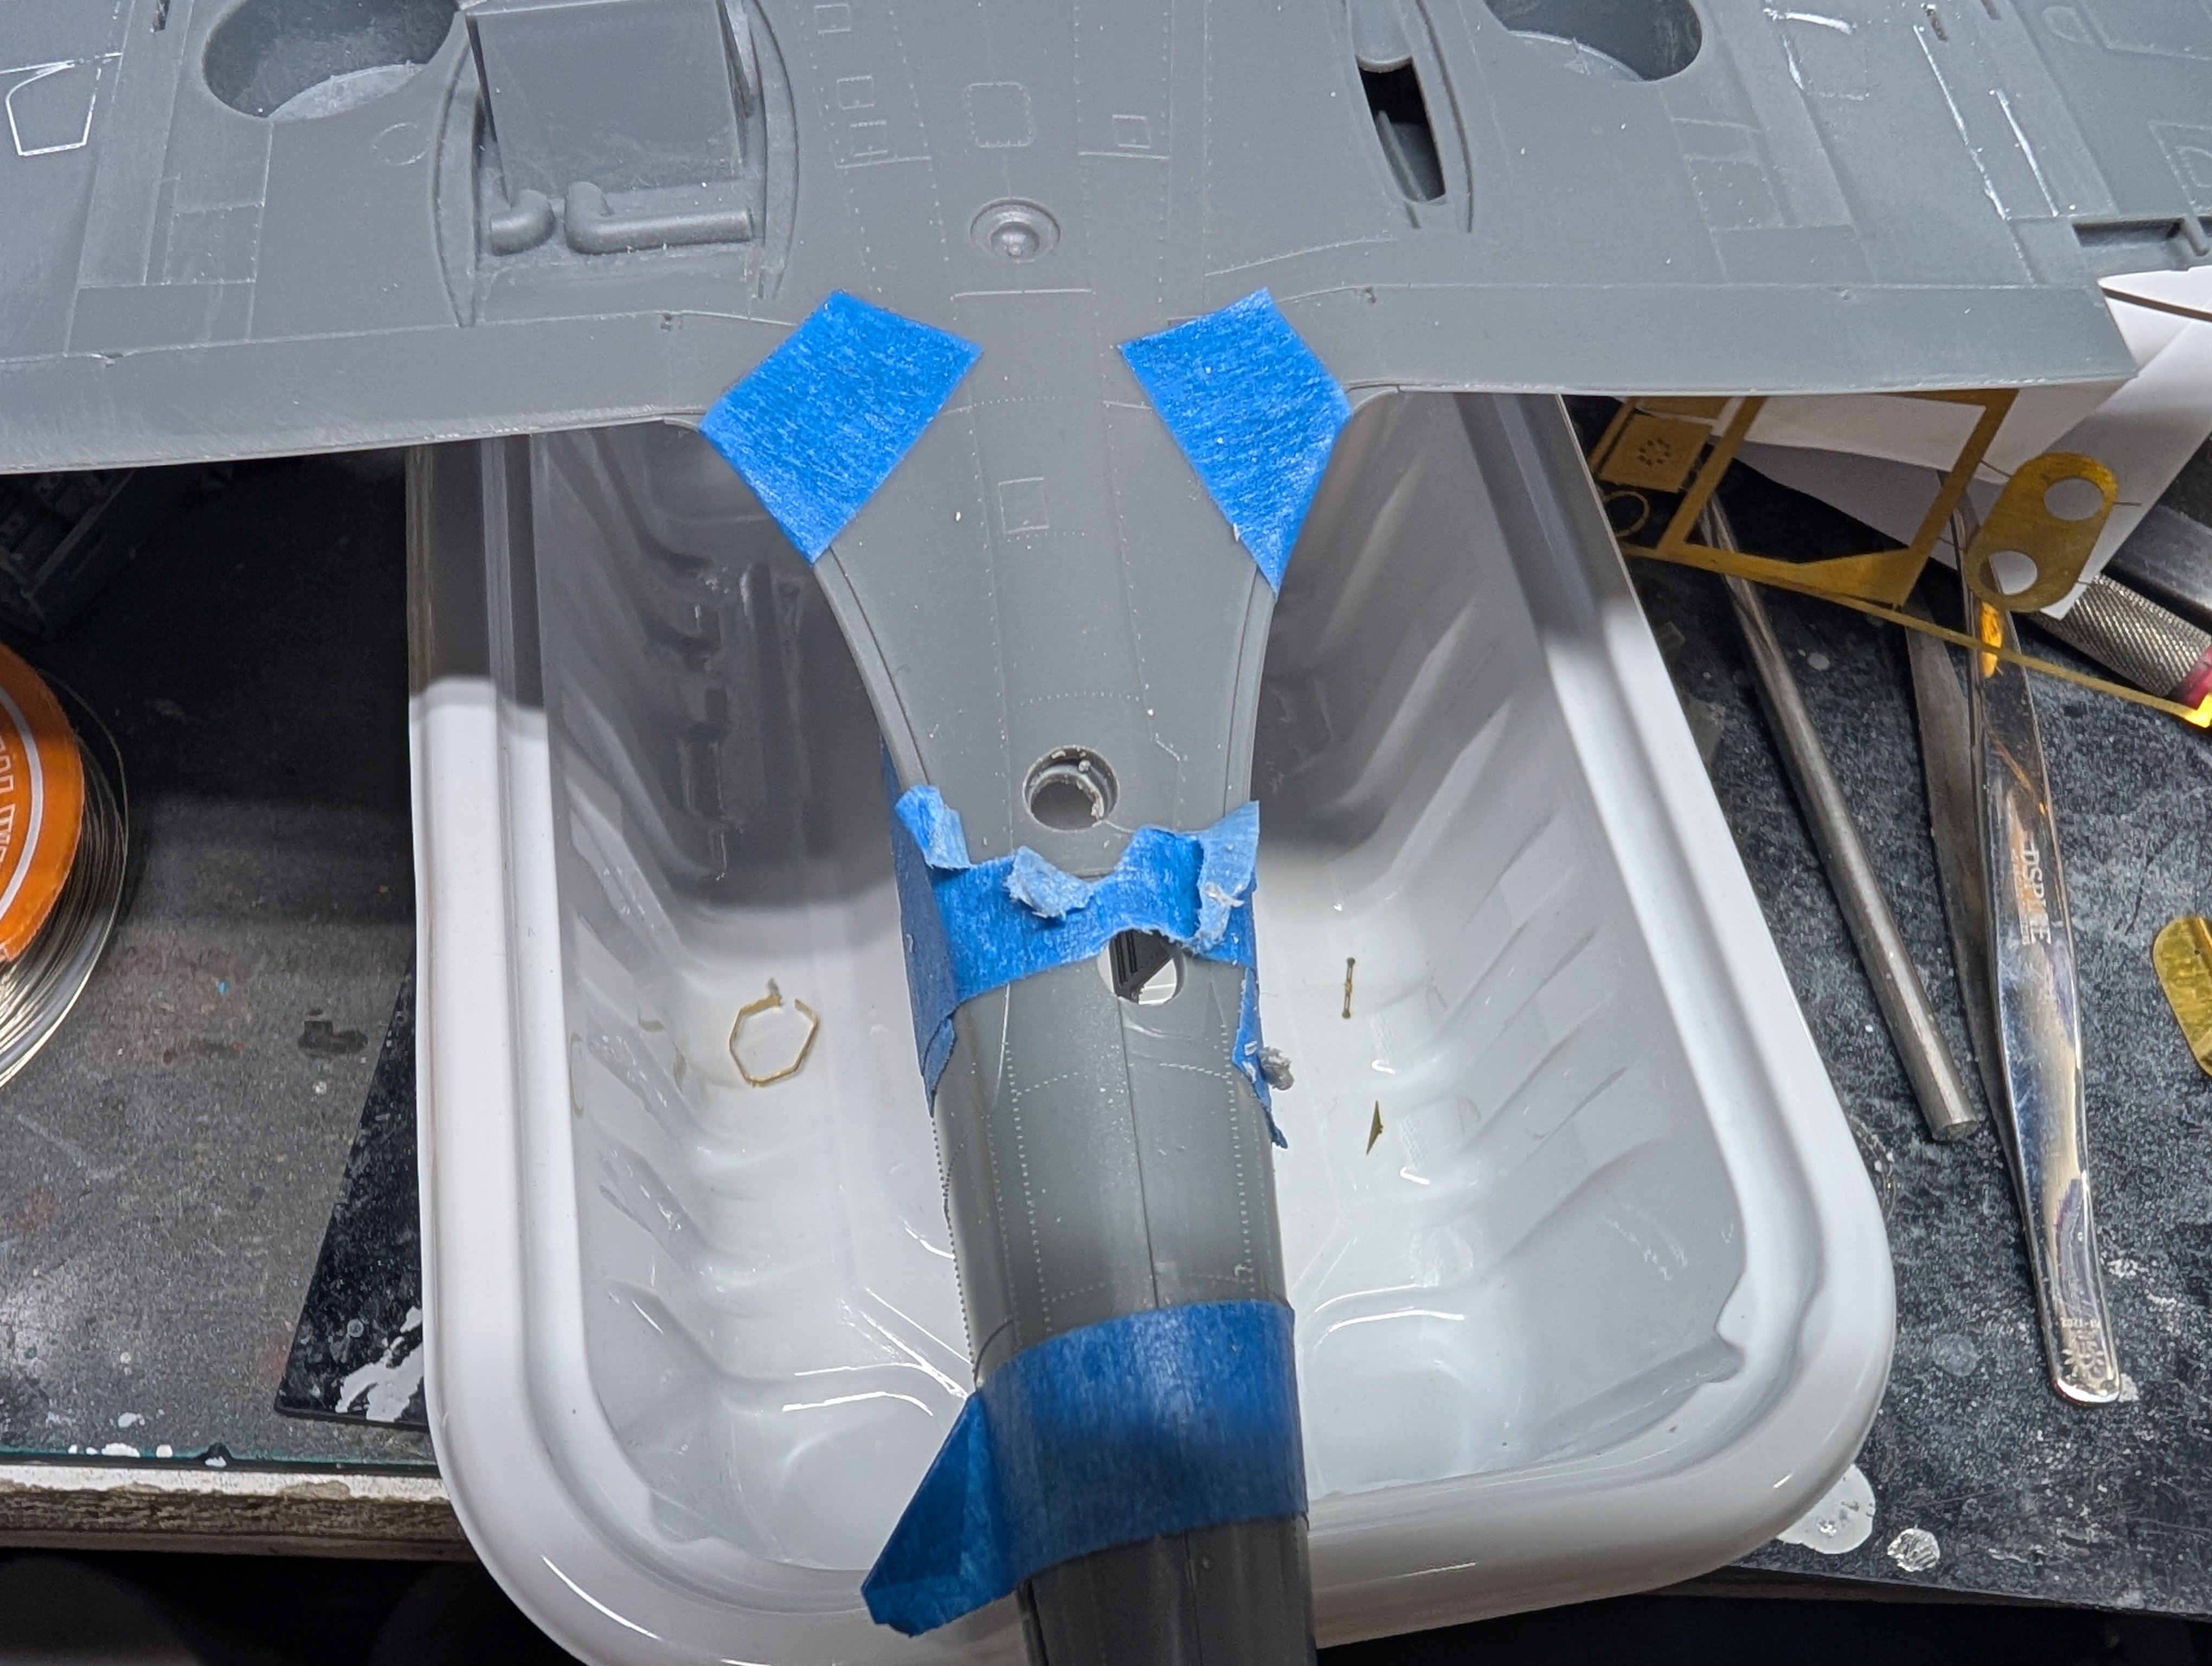
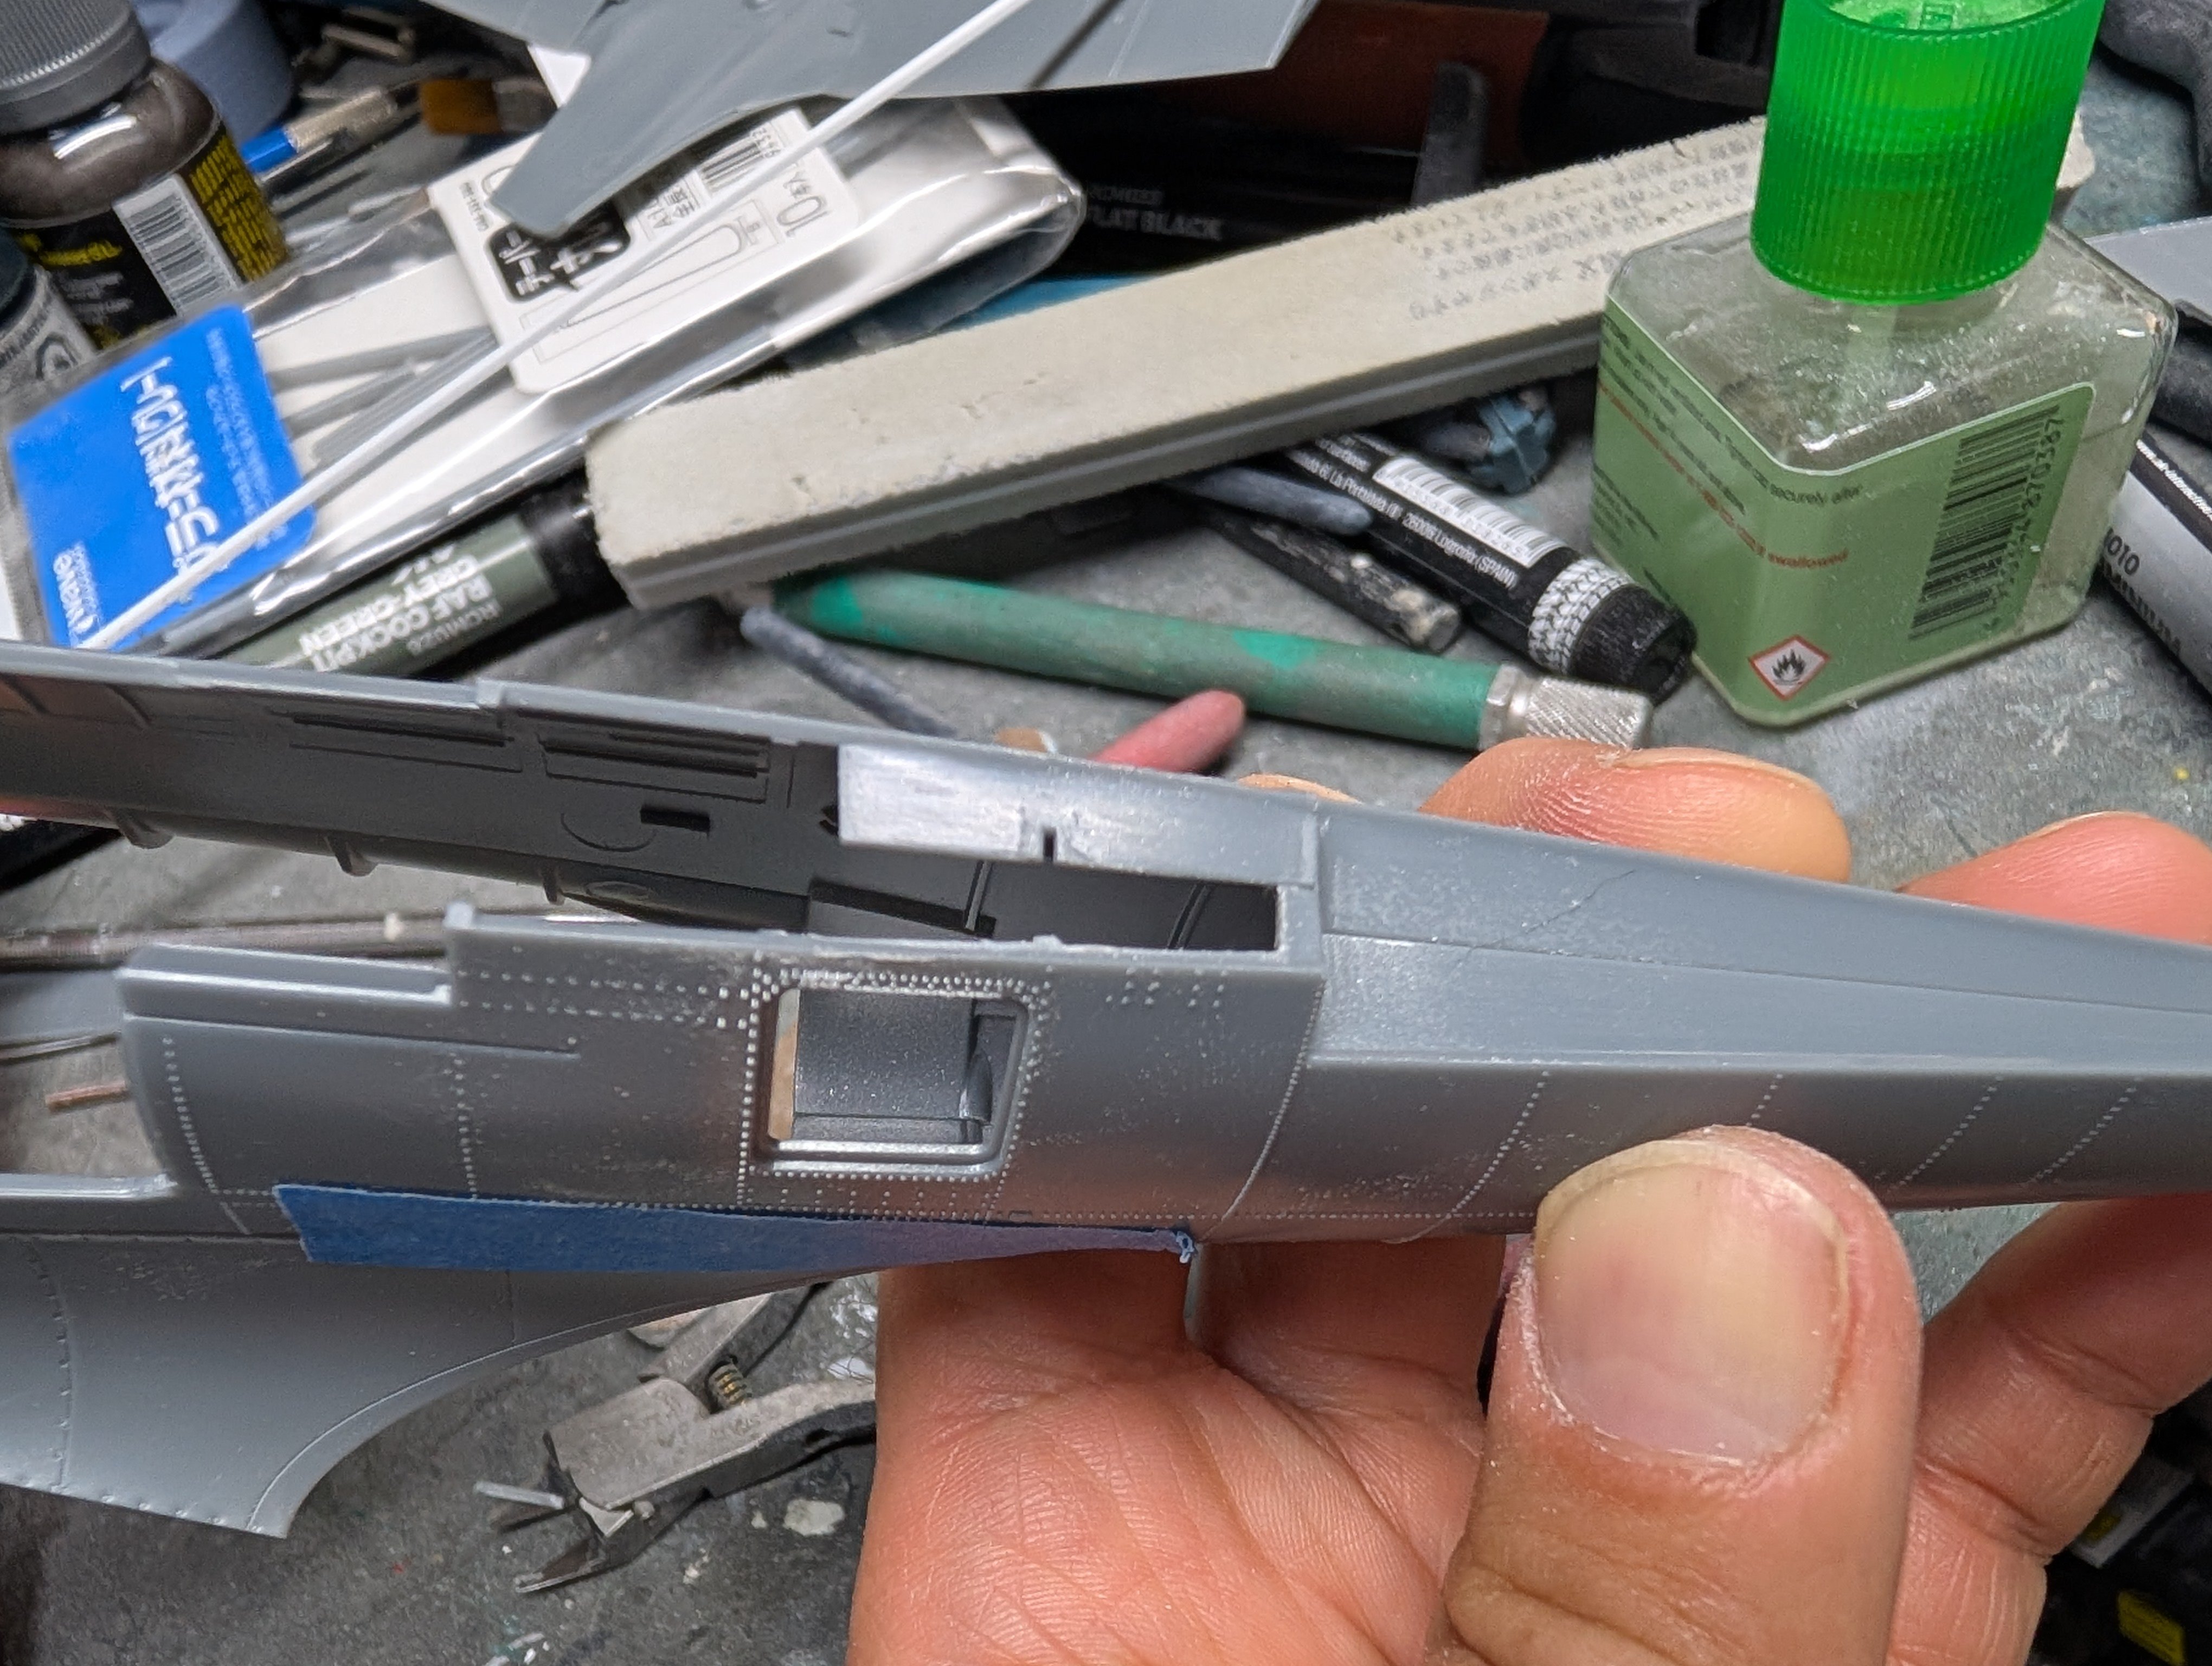
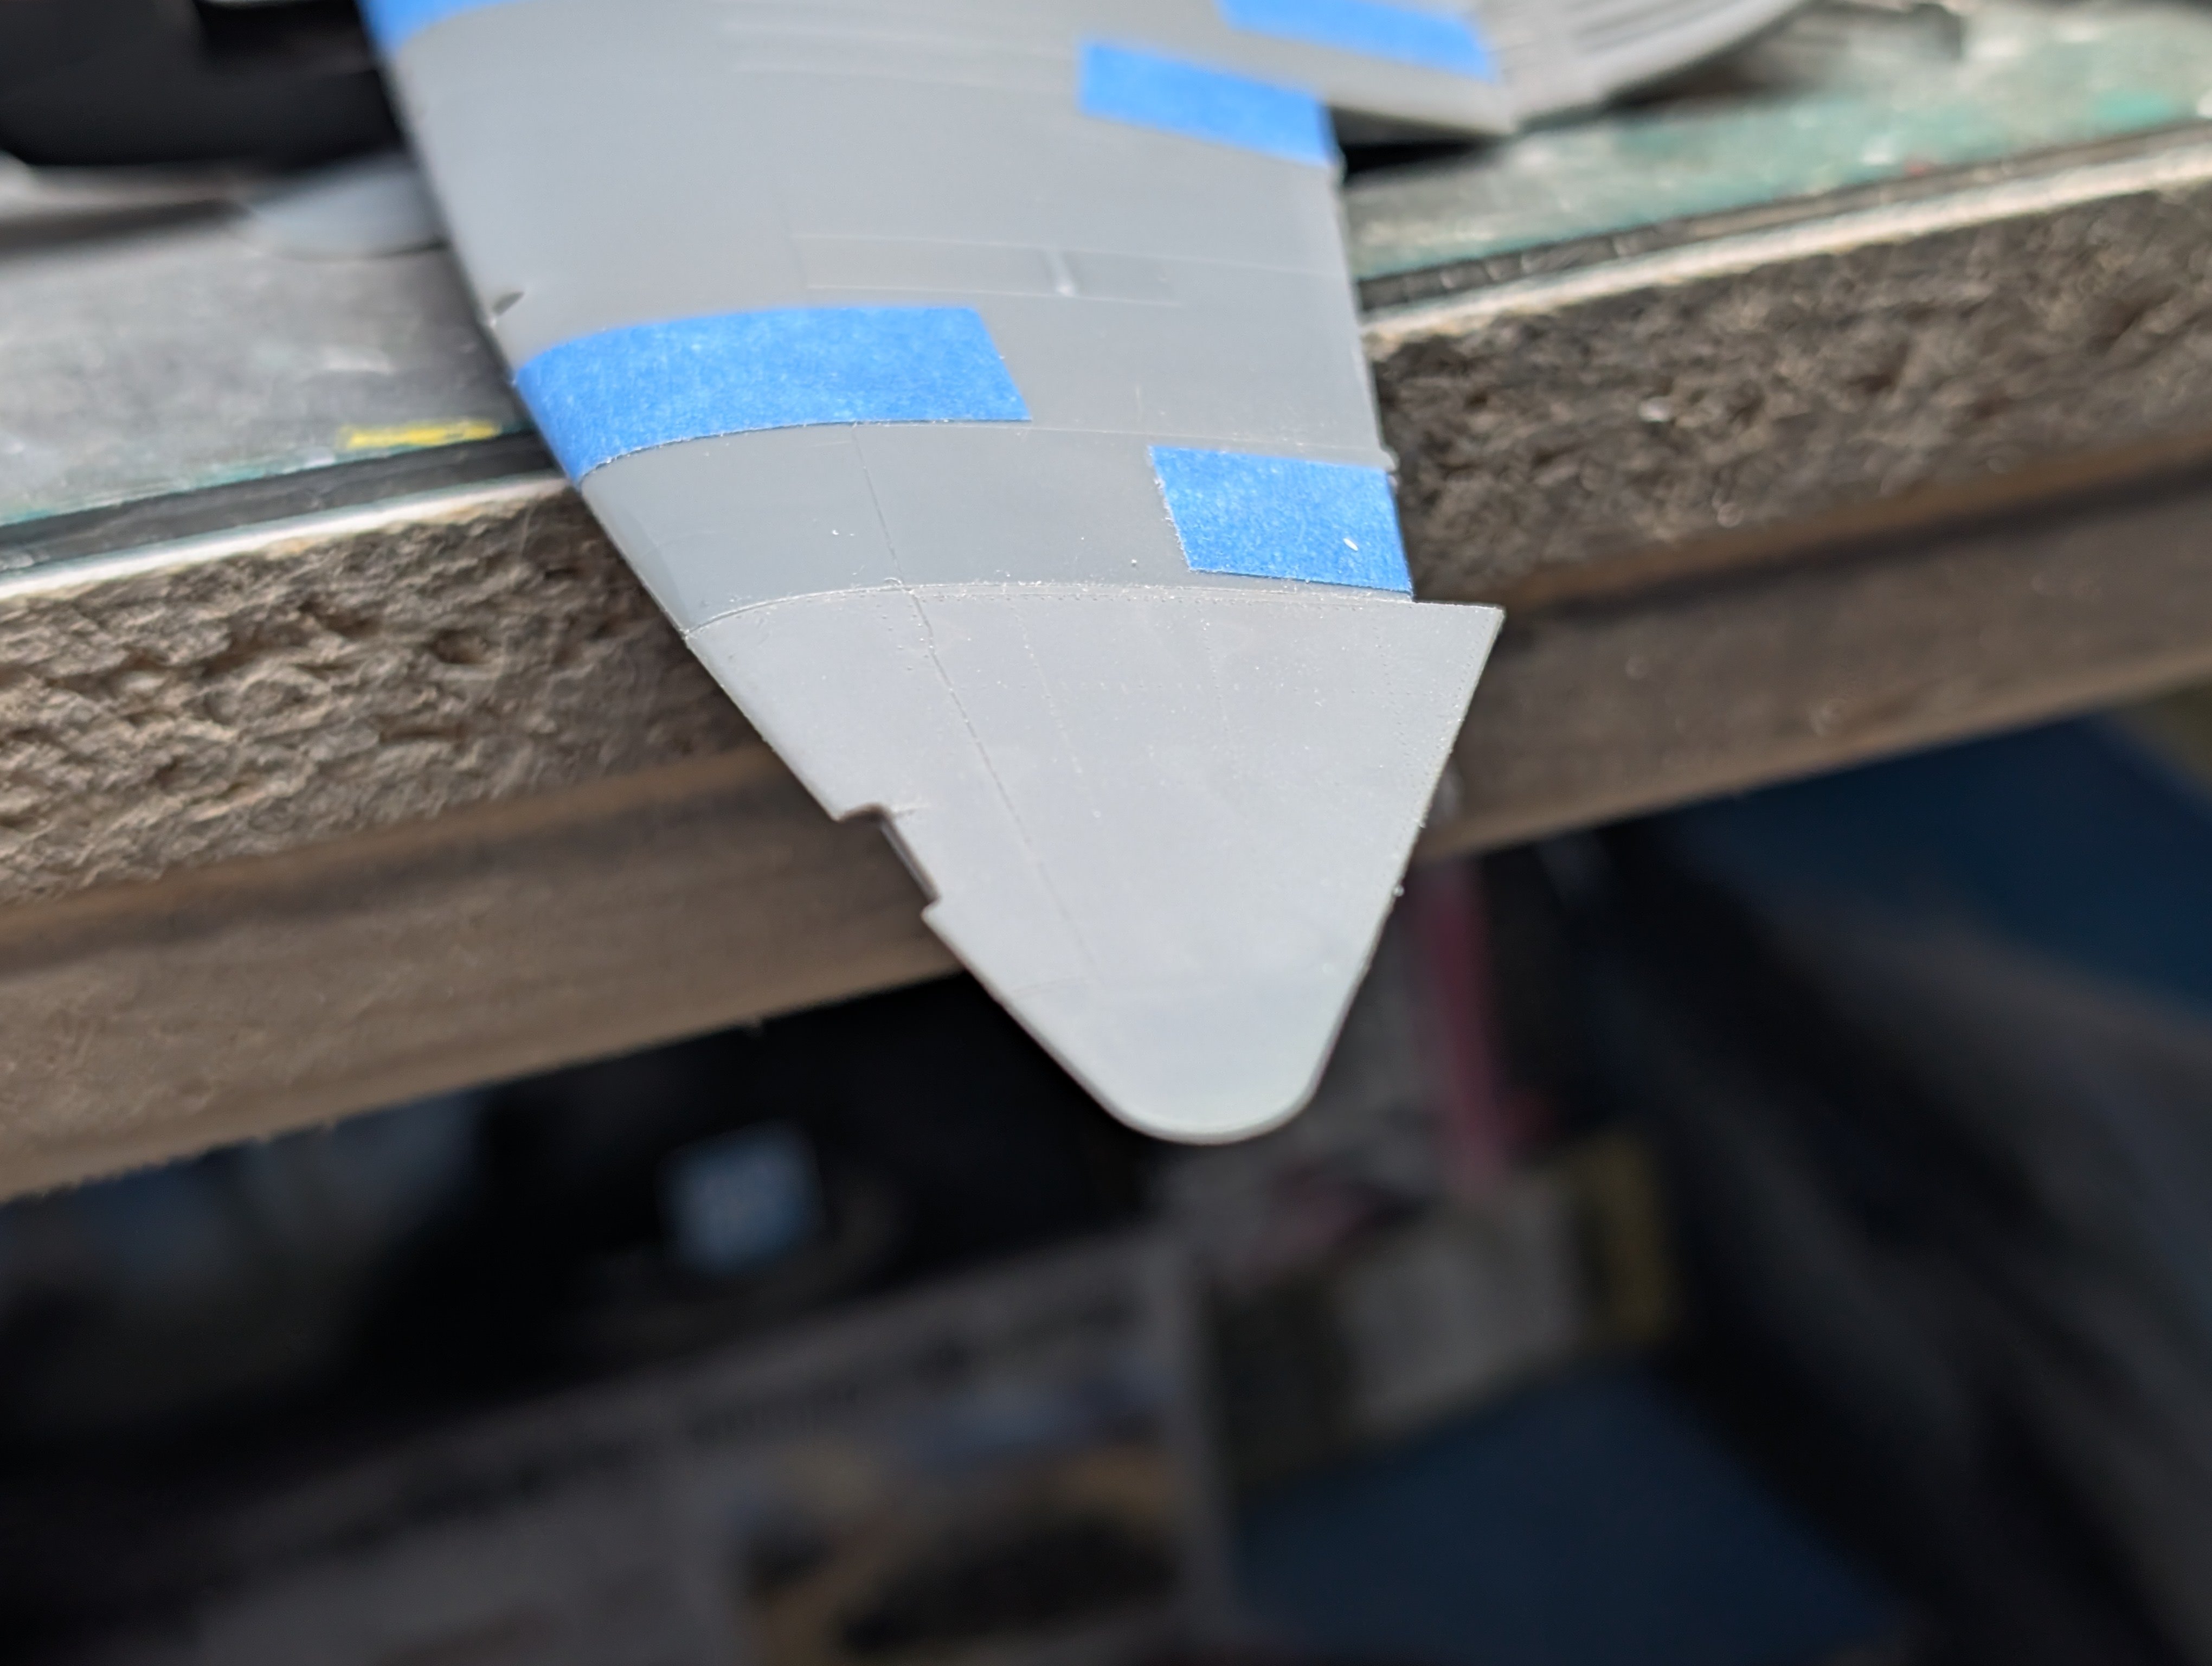
Onto the camera openings. Here I cheated a bit. I have the templates from the Alleycat PR XI conversion left over so I used those to mark the ventral camera ports. They're offset from centre so I had to tape the fuselage and main wings together.

Using the guide holes on the template, I drilled a starter hole for both camera ports.
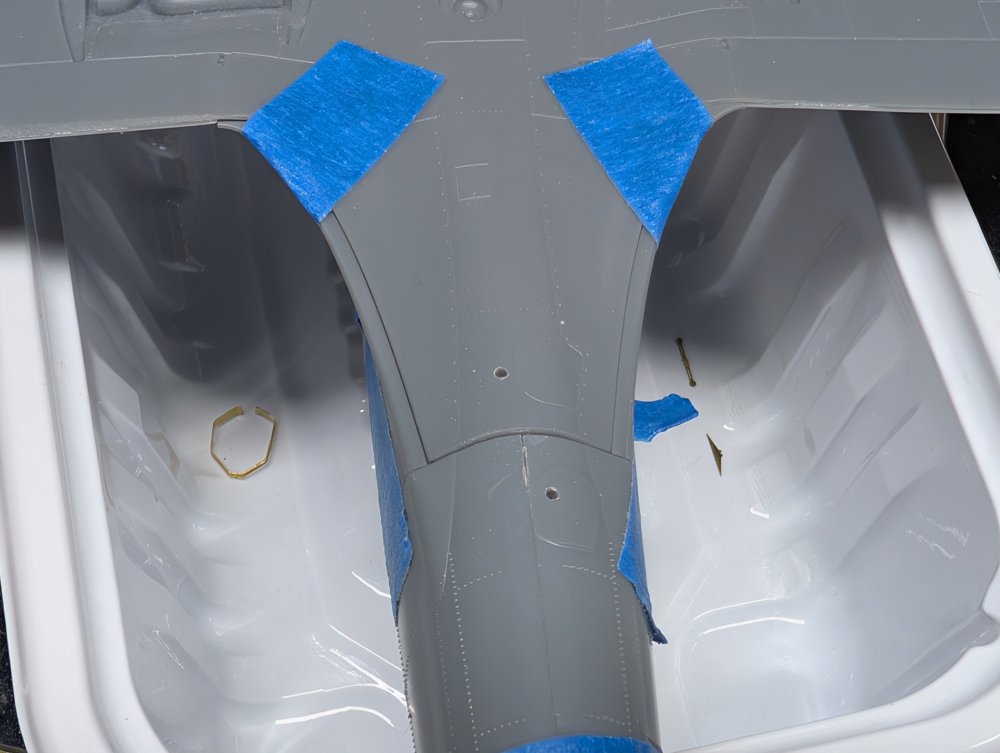
Then I used a reamer to open them up to the correct diameter.

Here you can see the doubled up thickness on the forward port. This is from the way the kit parts are designed. You can see it from the topside.

I decided to cut away some of the excess material and hopefully I won't have fit issues down the road.

-
8
-
-
Calling this one done:

-
7
-
-
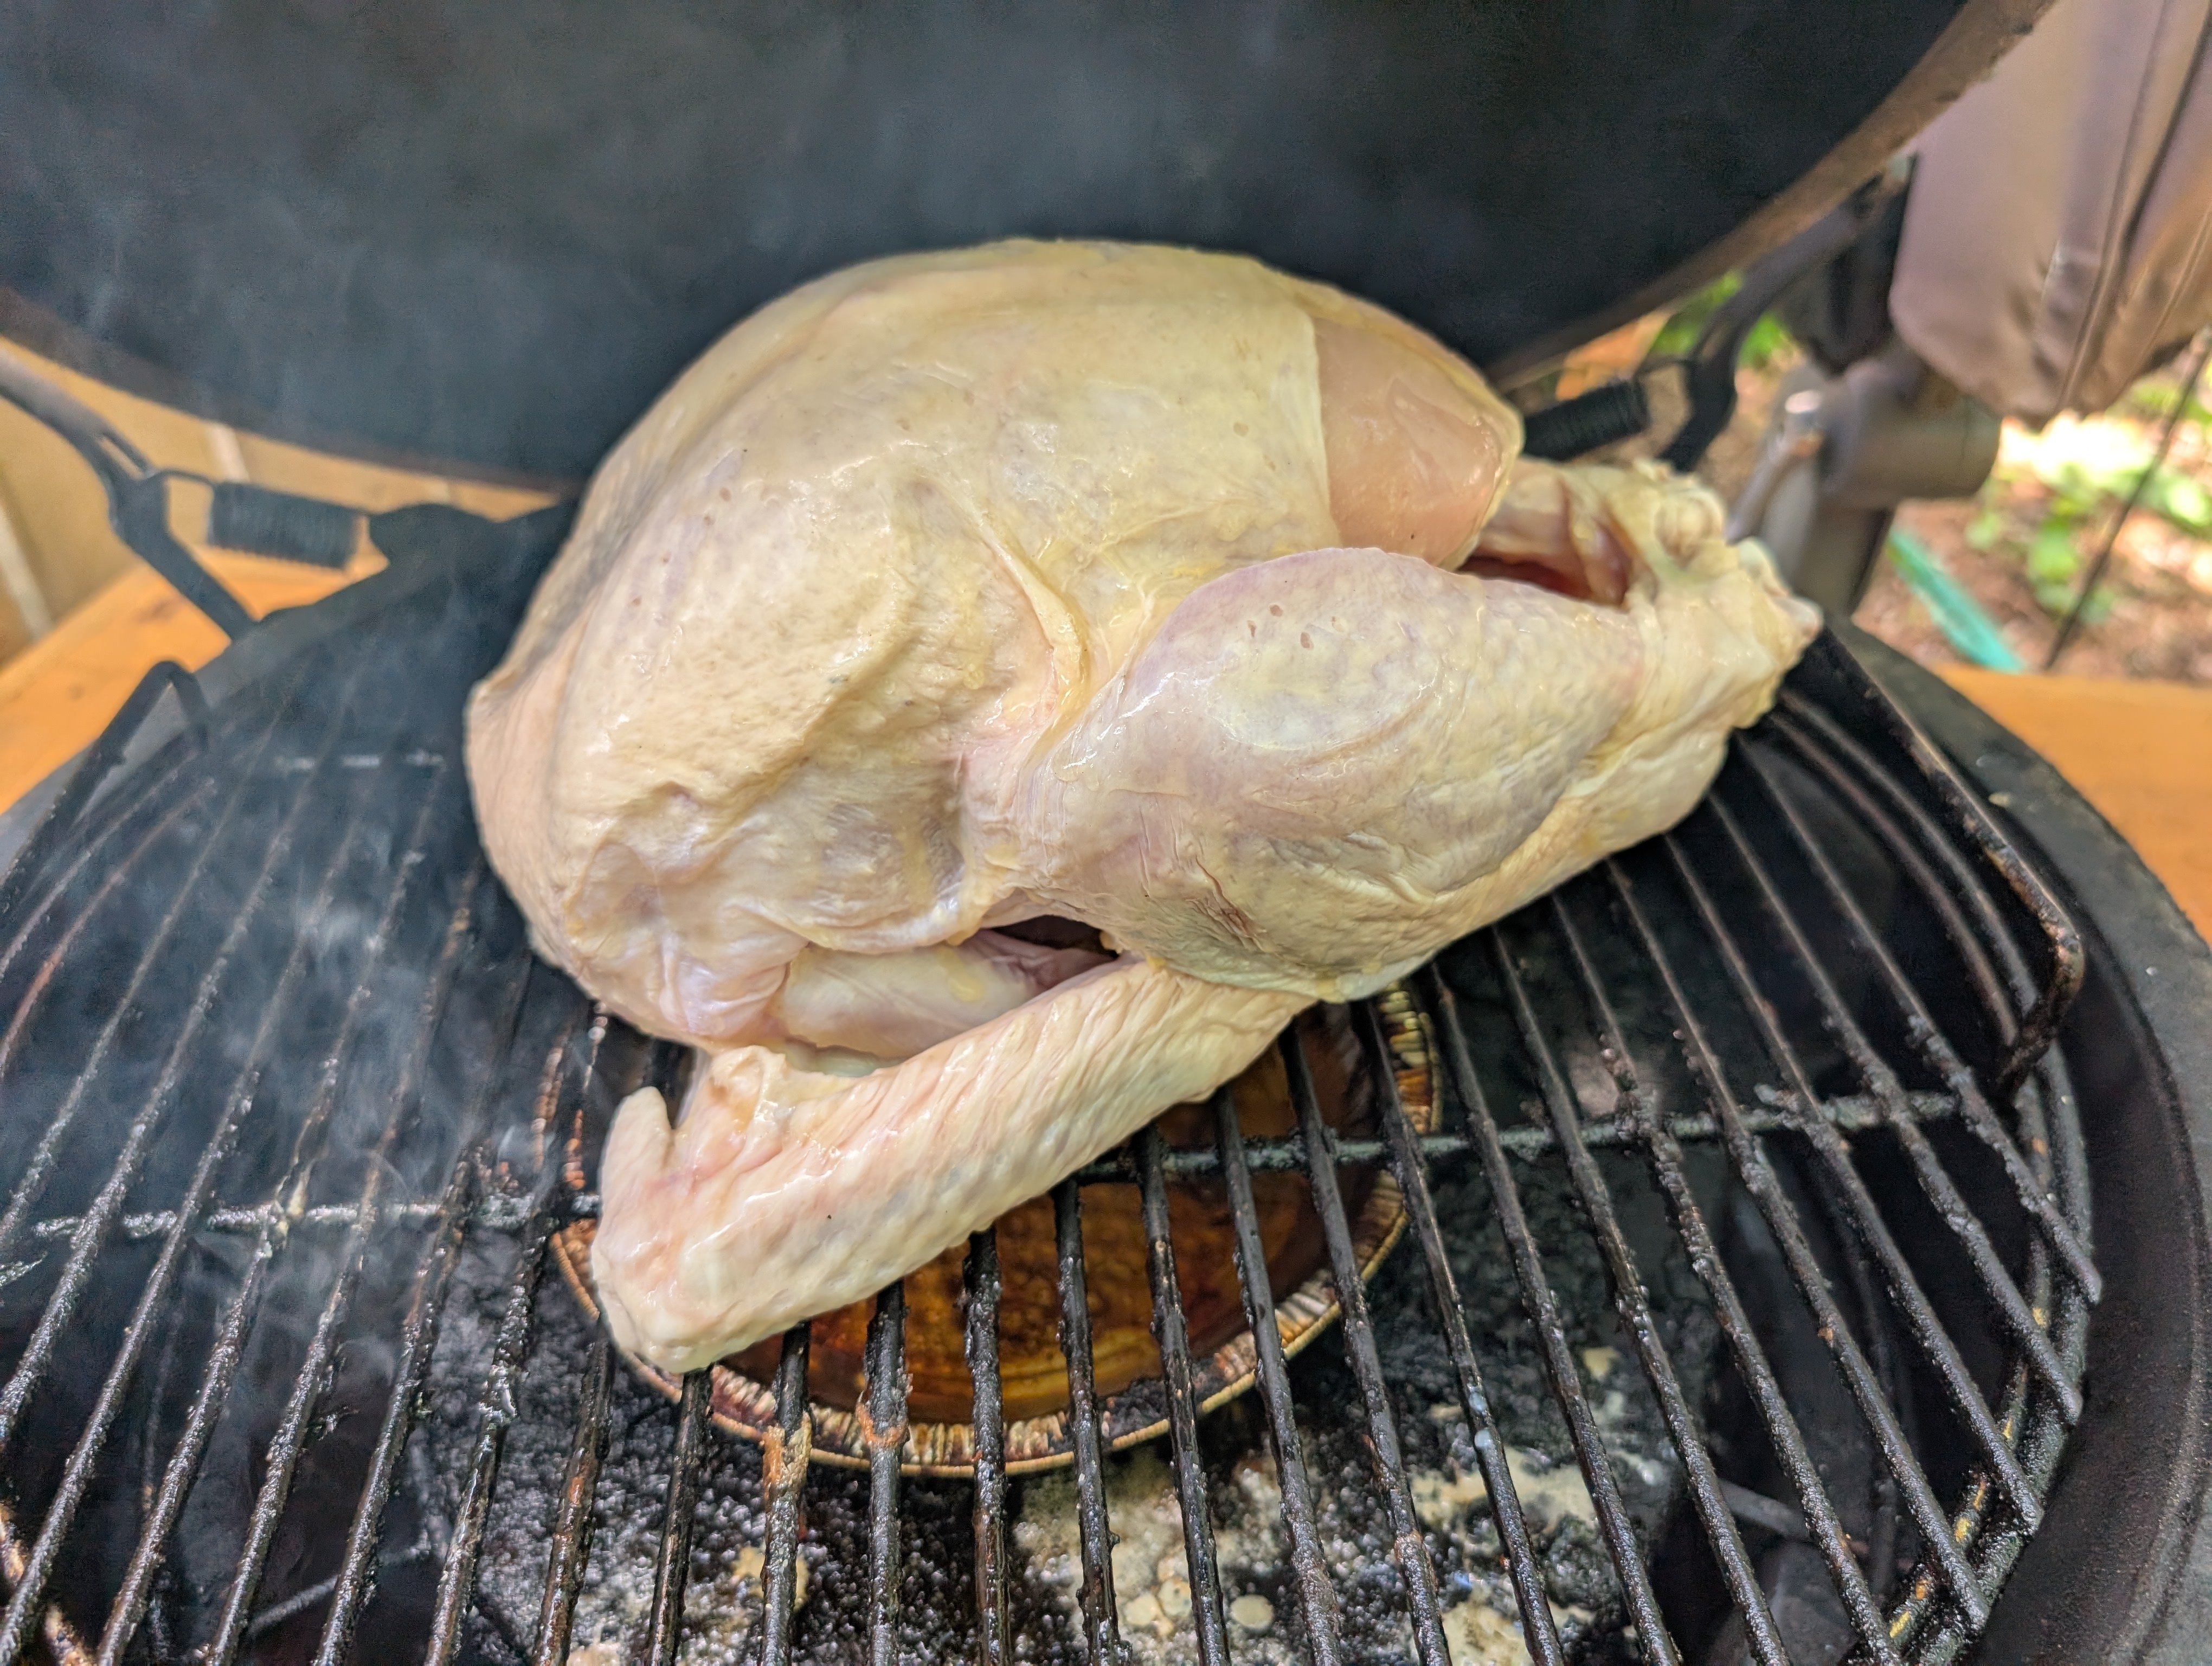
Nothing quite like a Victoria Day weekend smoked turkey.
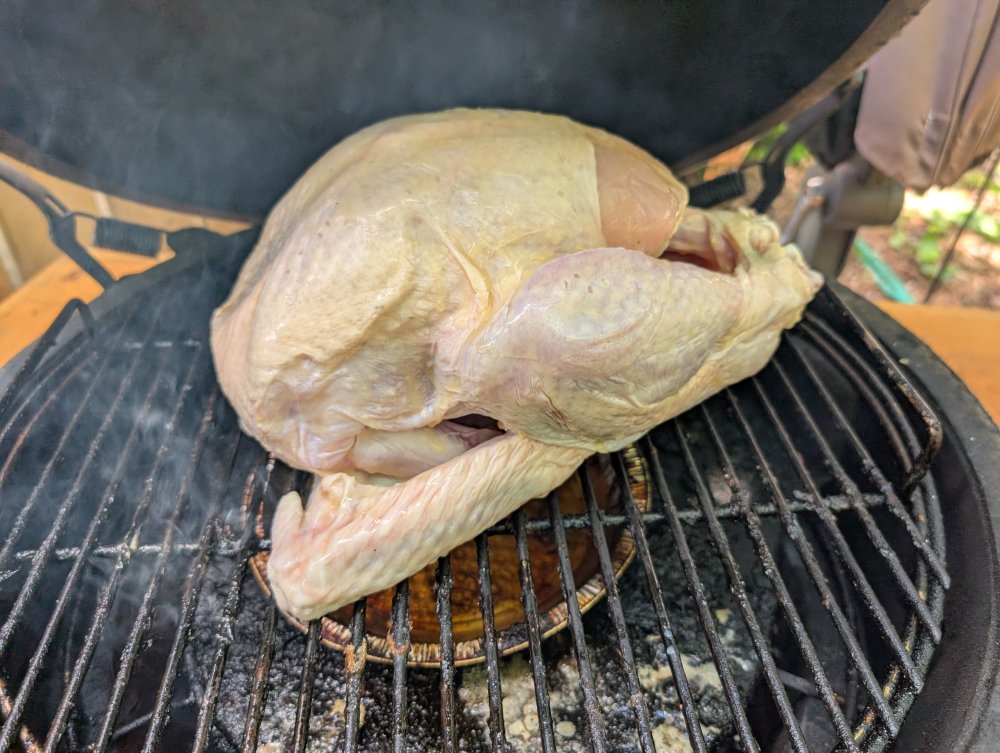
A new tradition?
-
3
-
-
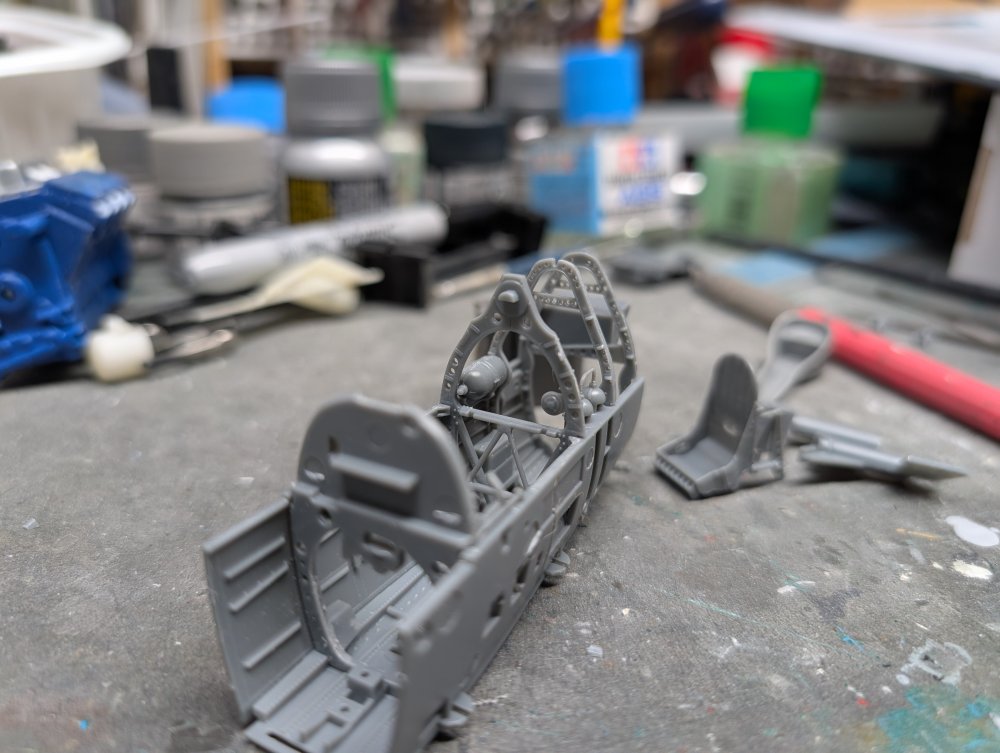
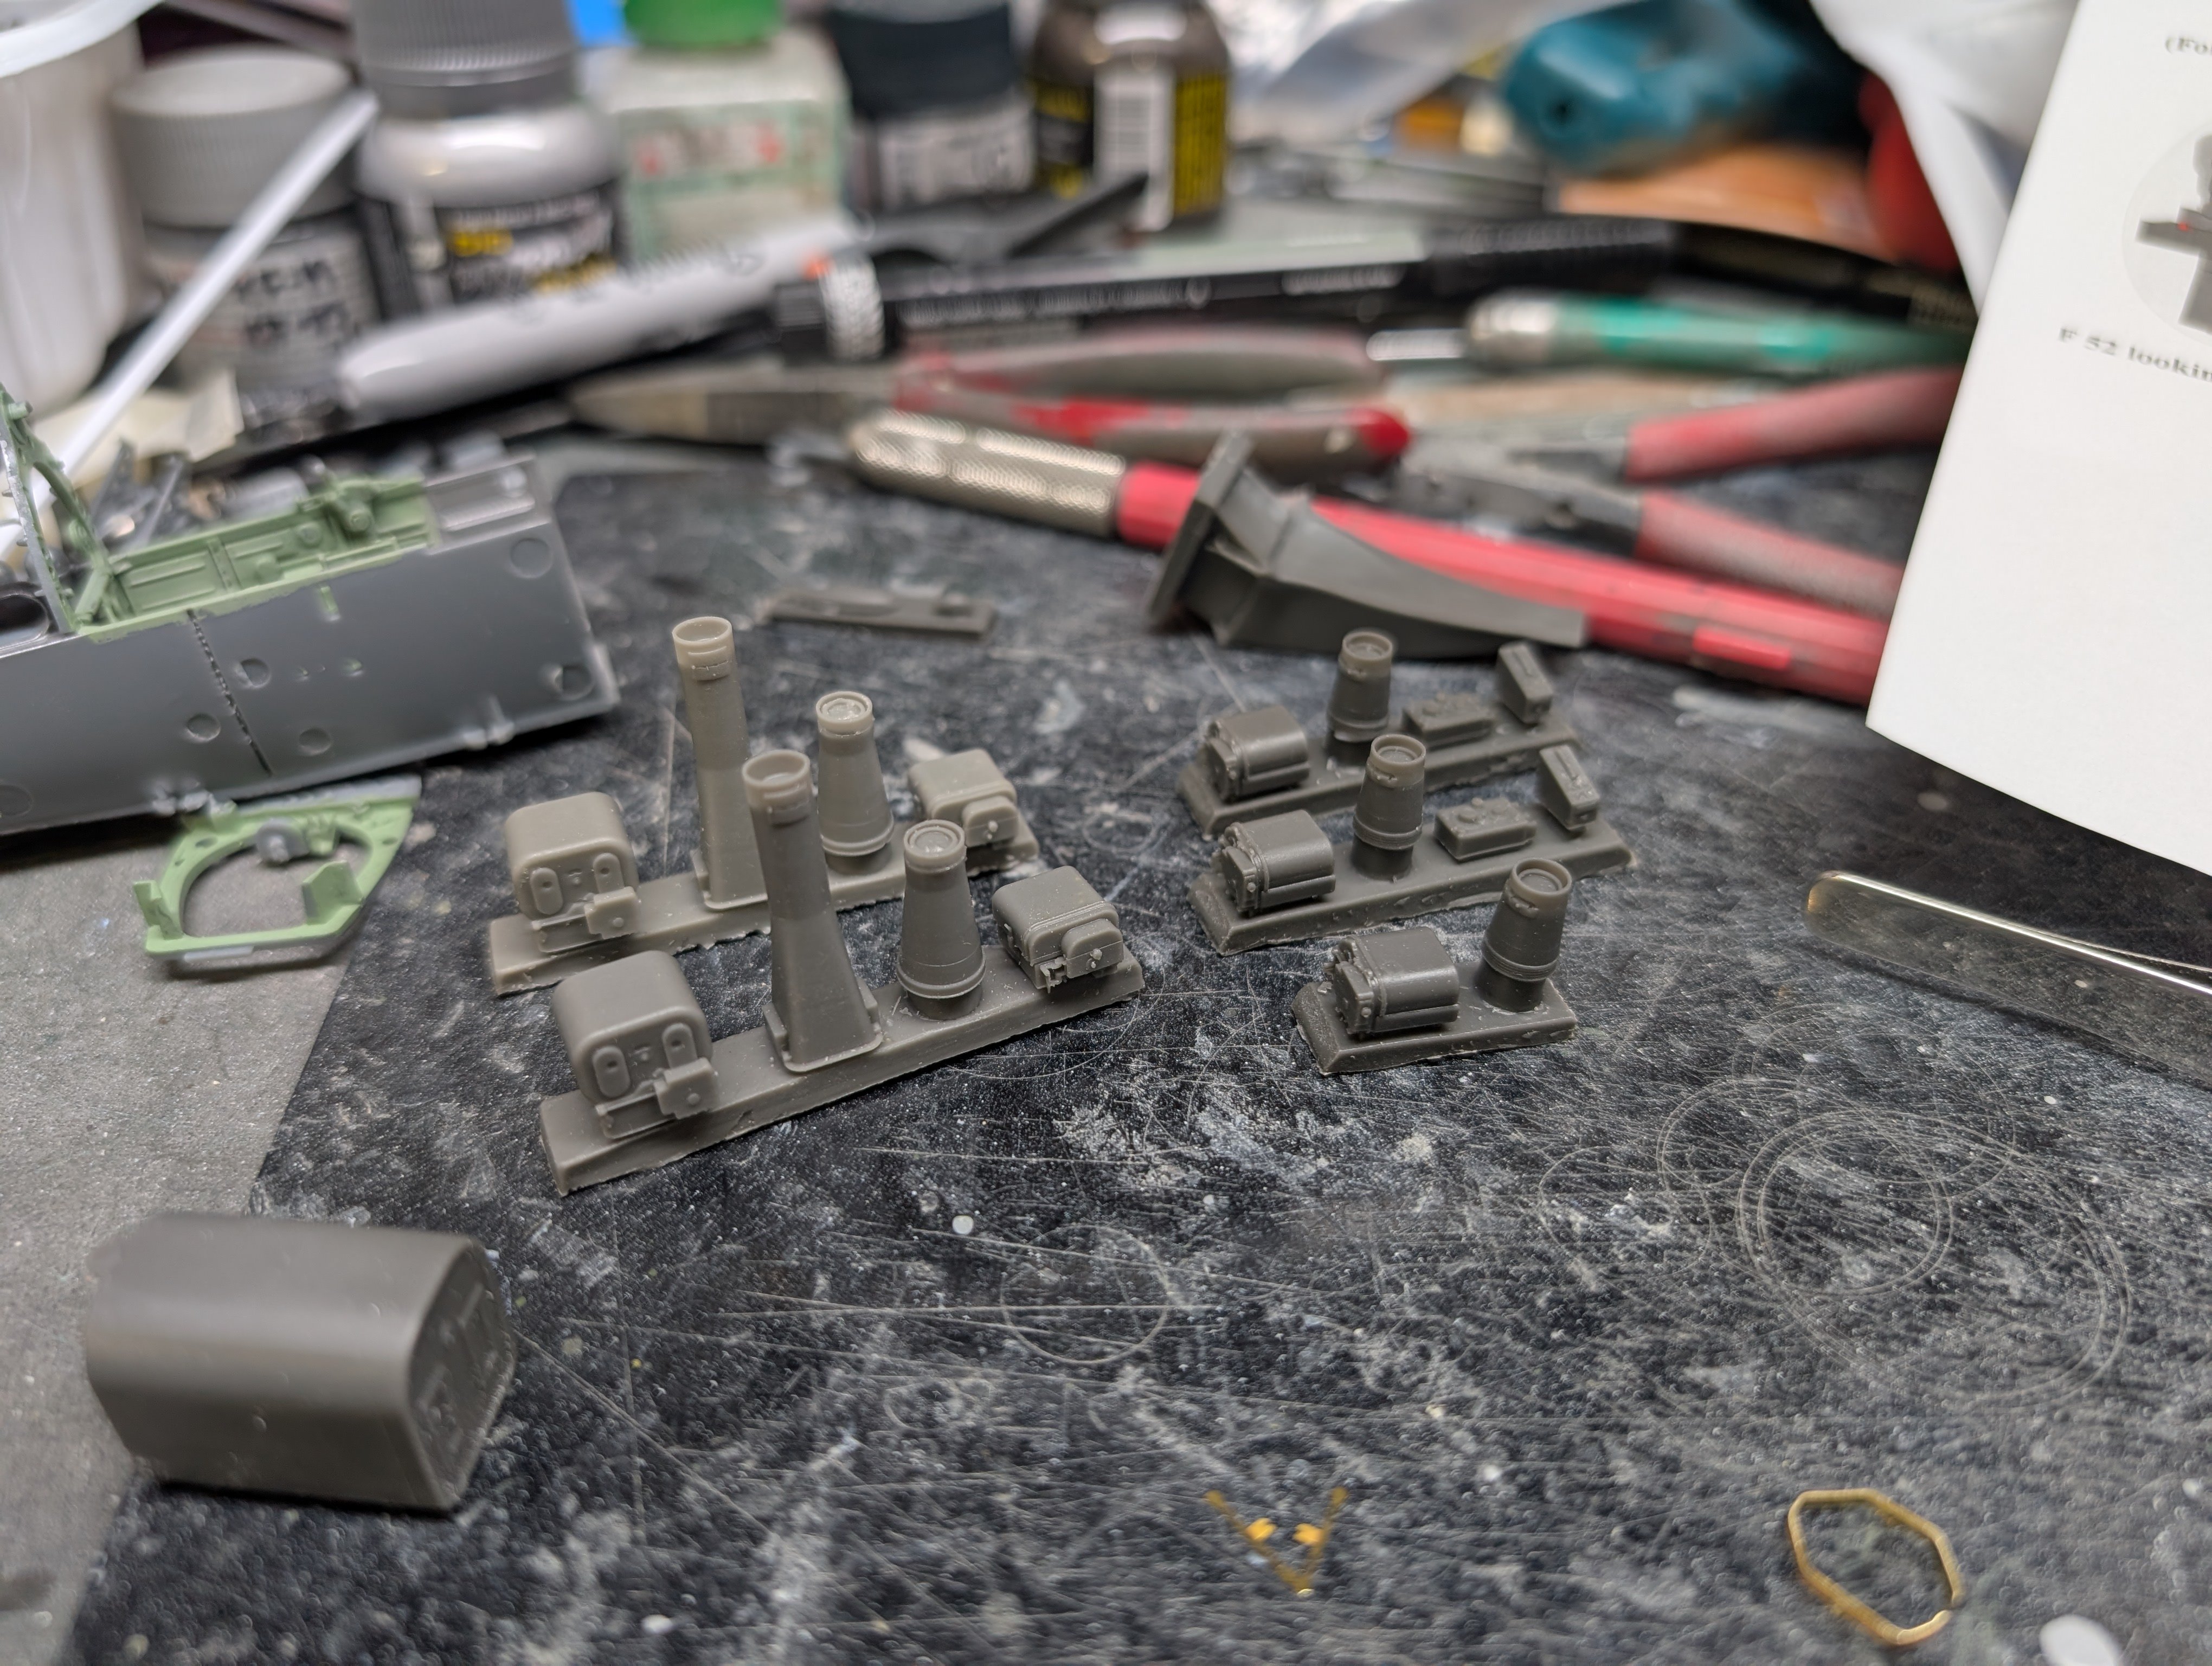
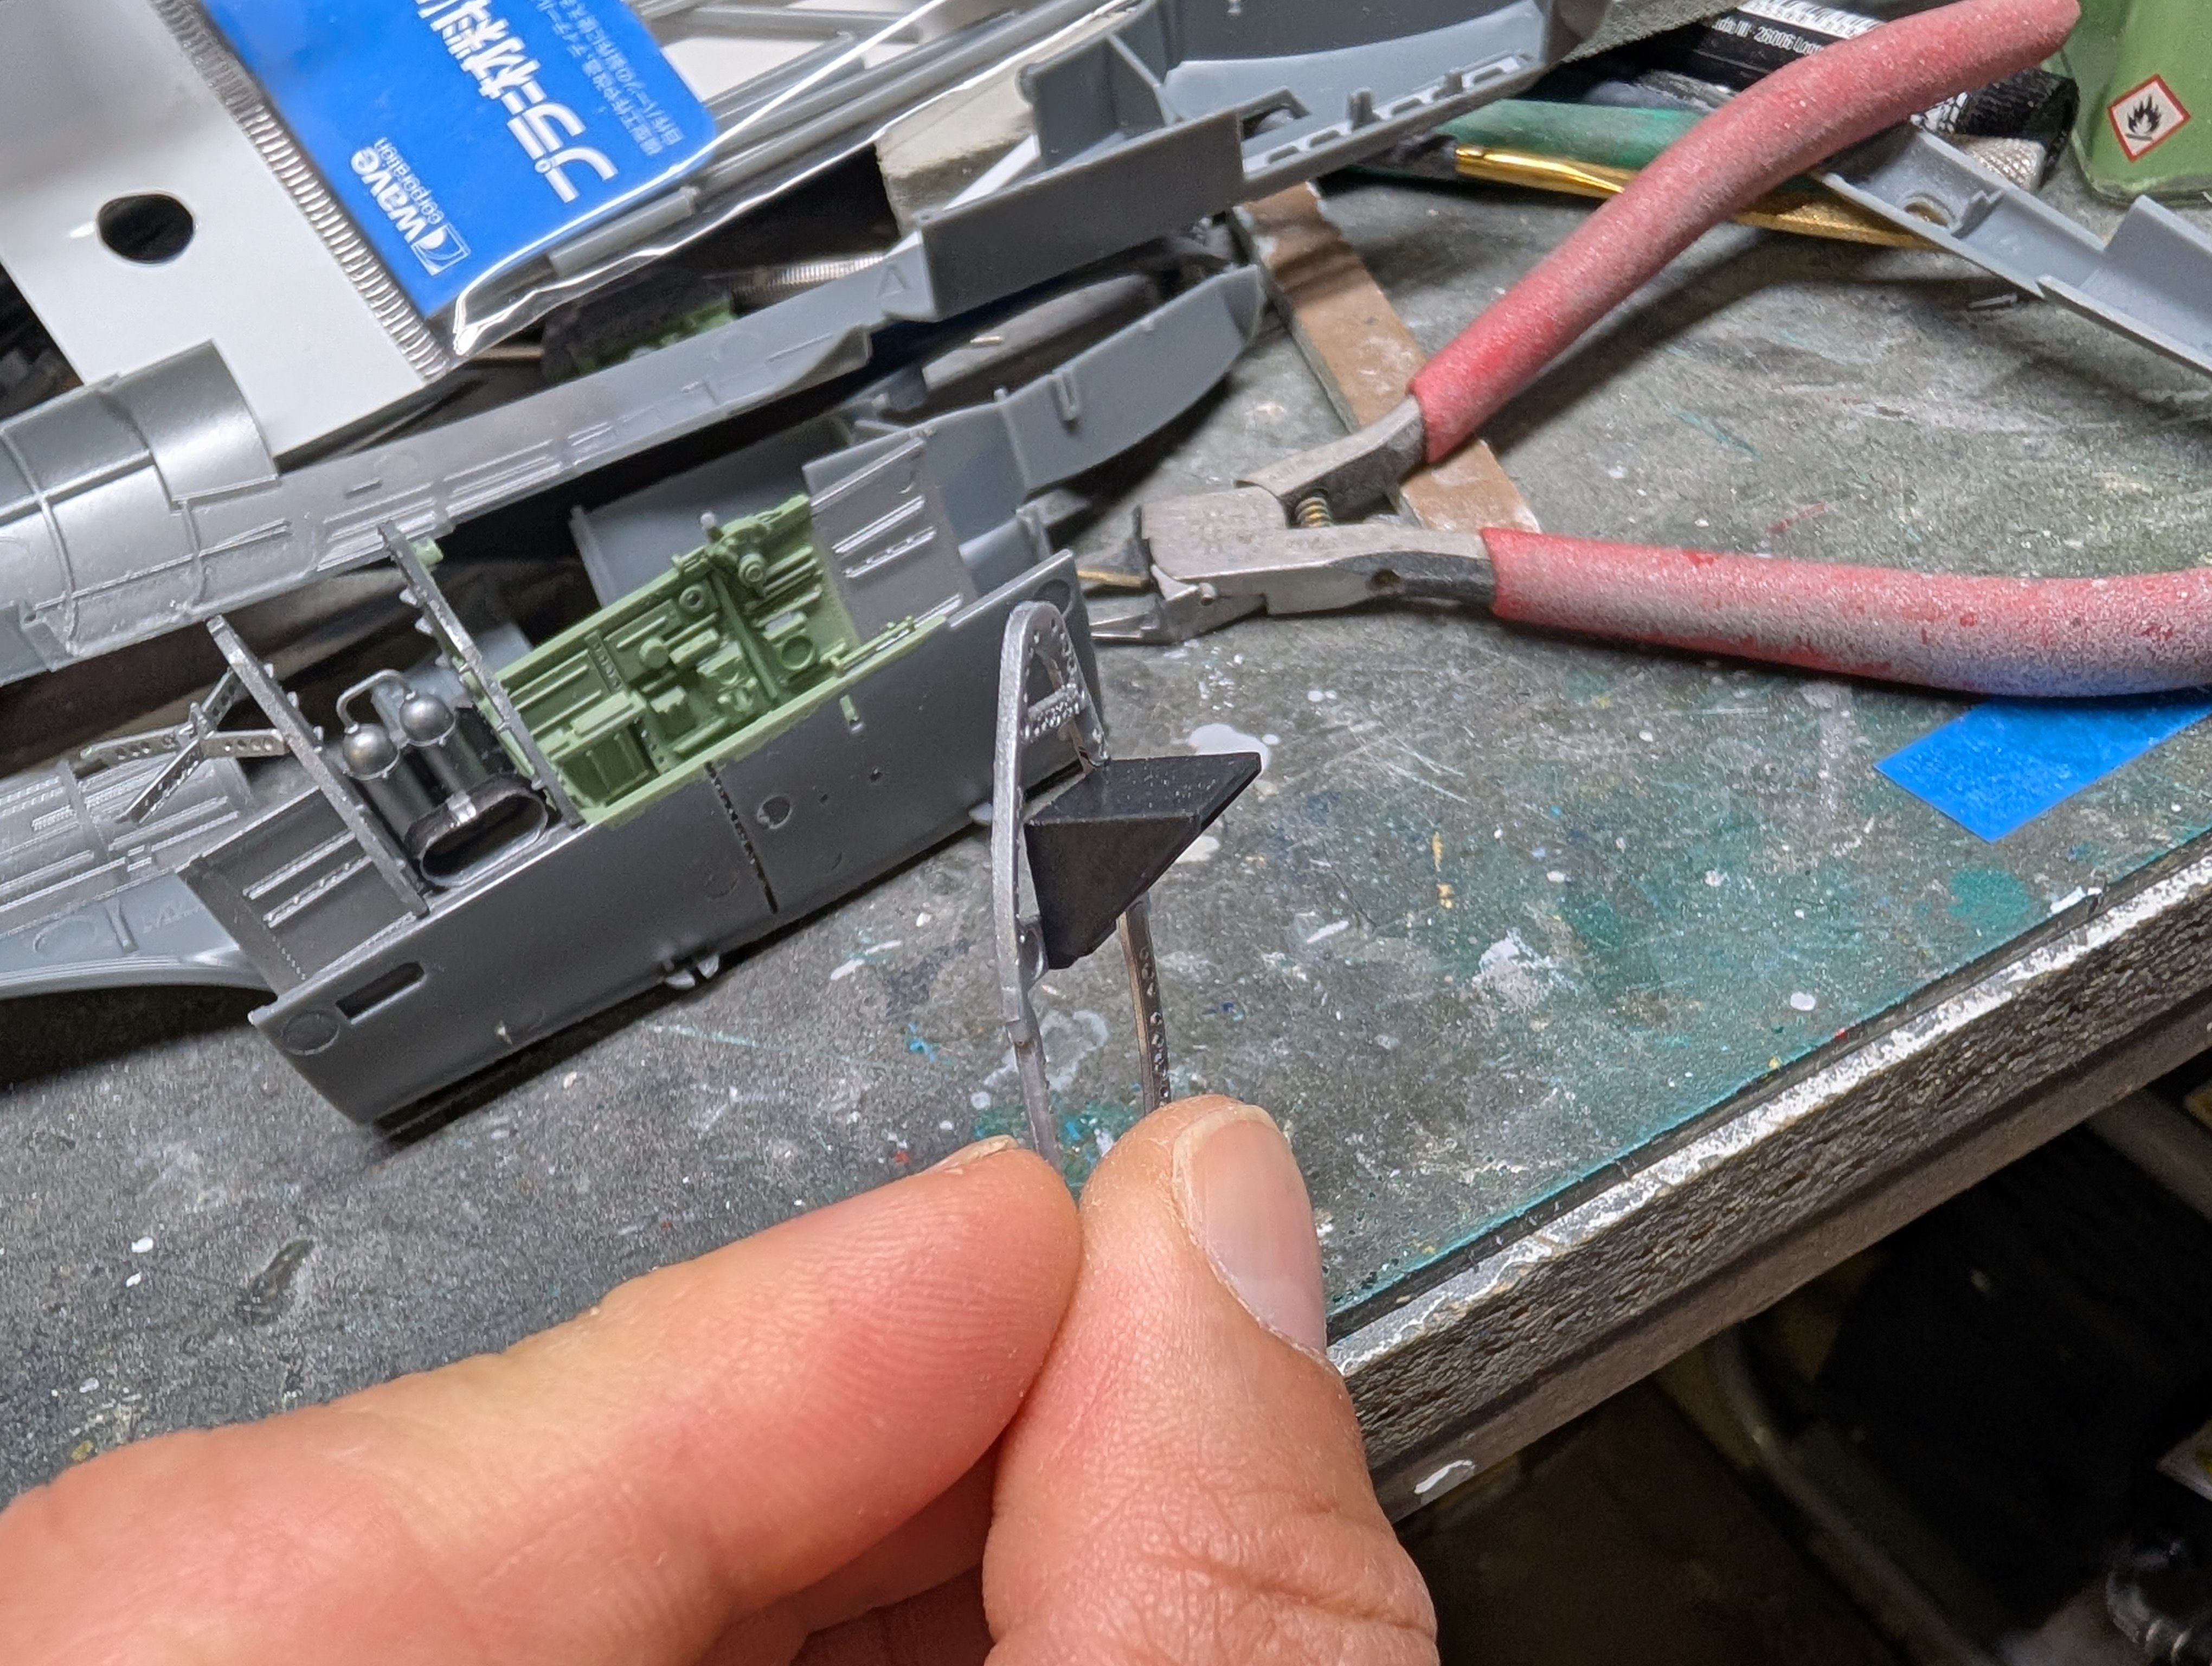
Okay, the camera mounts are fiddly! There's a bunch of very tiny parts. The instructions were a bit unclear so I finally broke down and pulled out the recommended reference book, the old SAM Modellers Datafile. With that, I figured out how the mount goes together. I think.
Here's the oblique camera mount/gimbal. The frame goes around the camera, and the two other bits are just the start to the mount. Not sure how I'm supposed to a) get them together, and b) have the stay together. We'll see I guess.
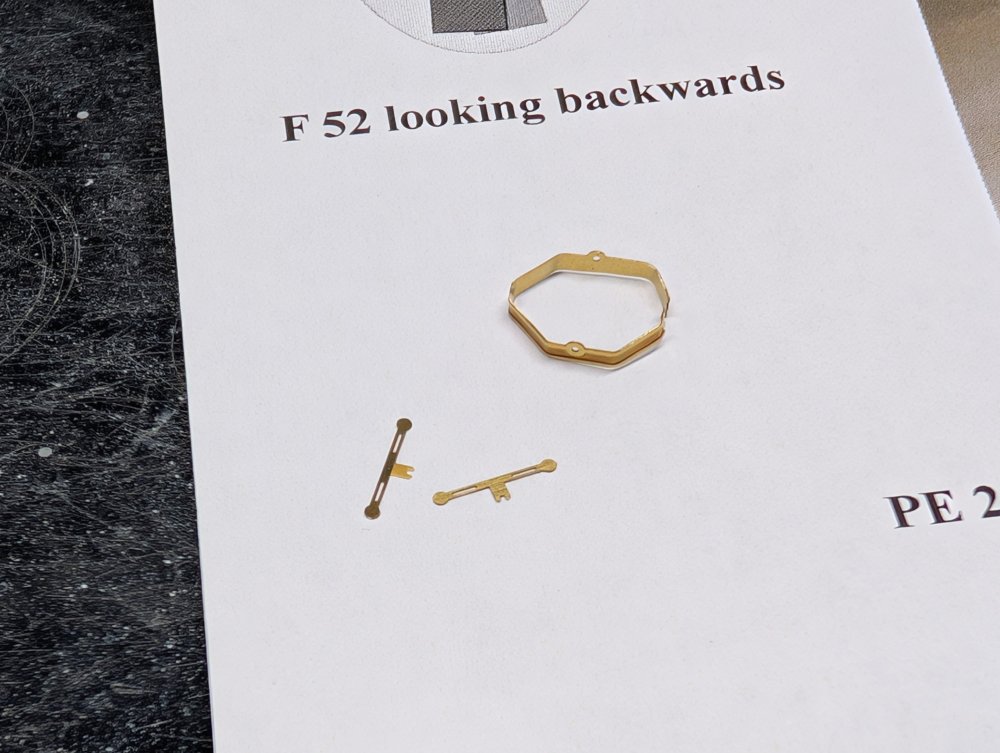
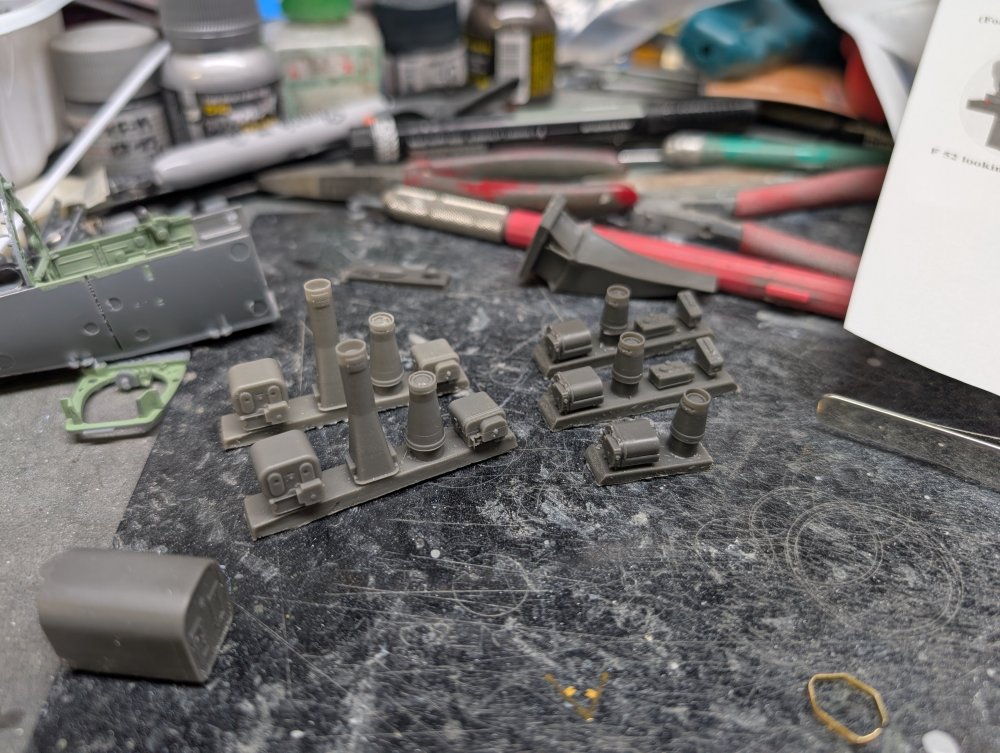
Here's the resin camera bodies. The set contains 3 different types, F8, F24 and F52 cameras.
-
7
-
-
Are you sure you're not plumbing a real engine and pretending it's a model? It looks absolutely like a real one. Just need a bit of oil or grease.
Carl
-
3
-
1
-
-
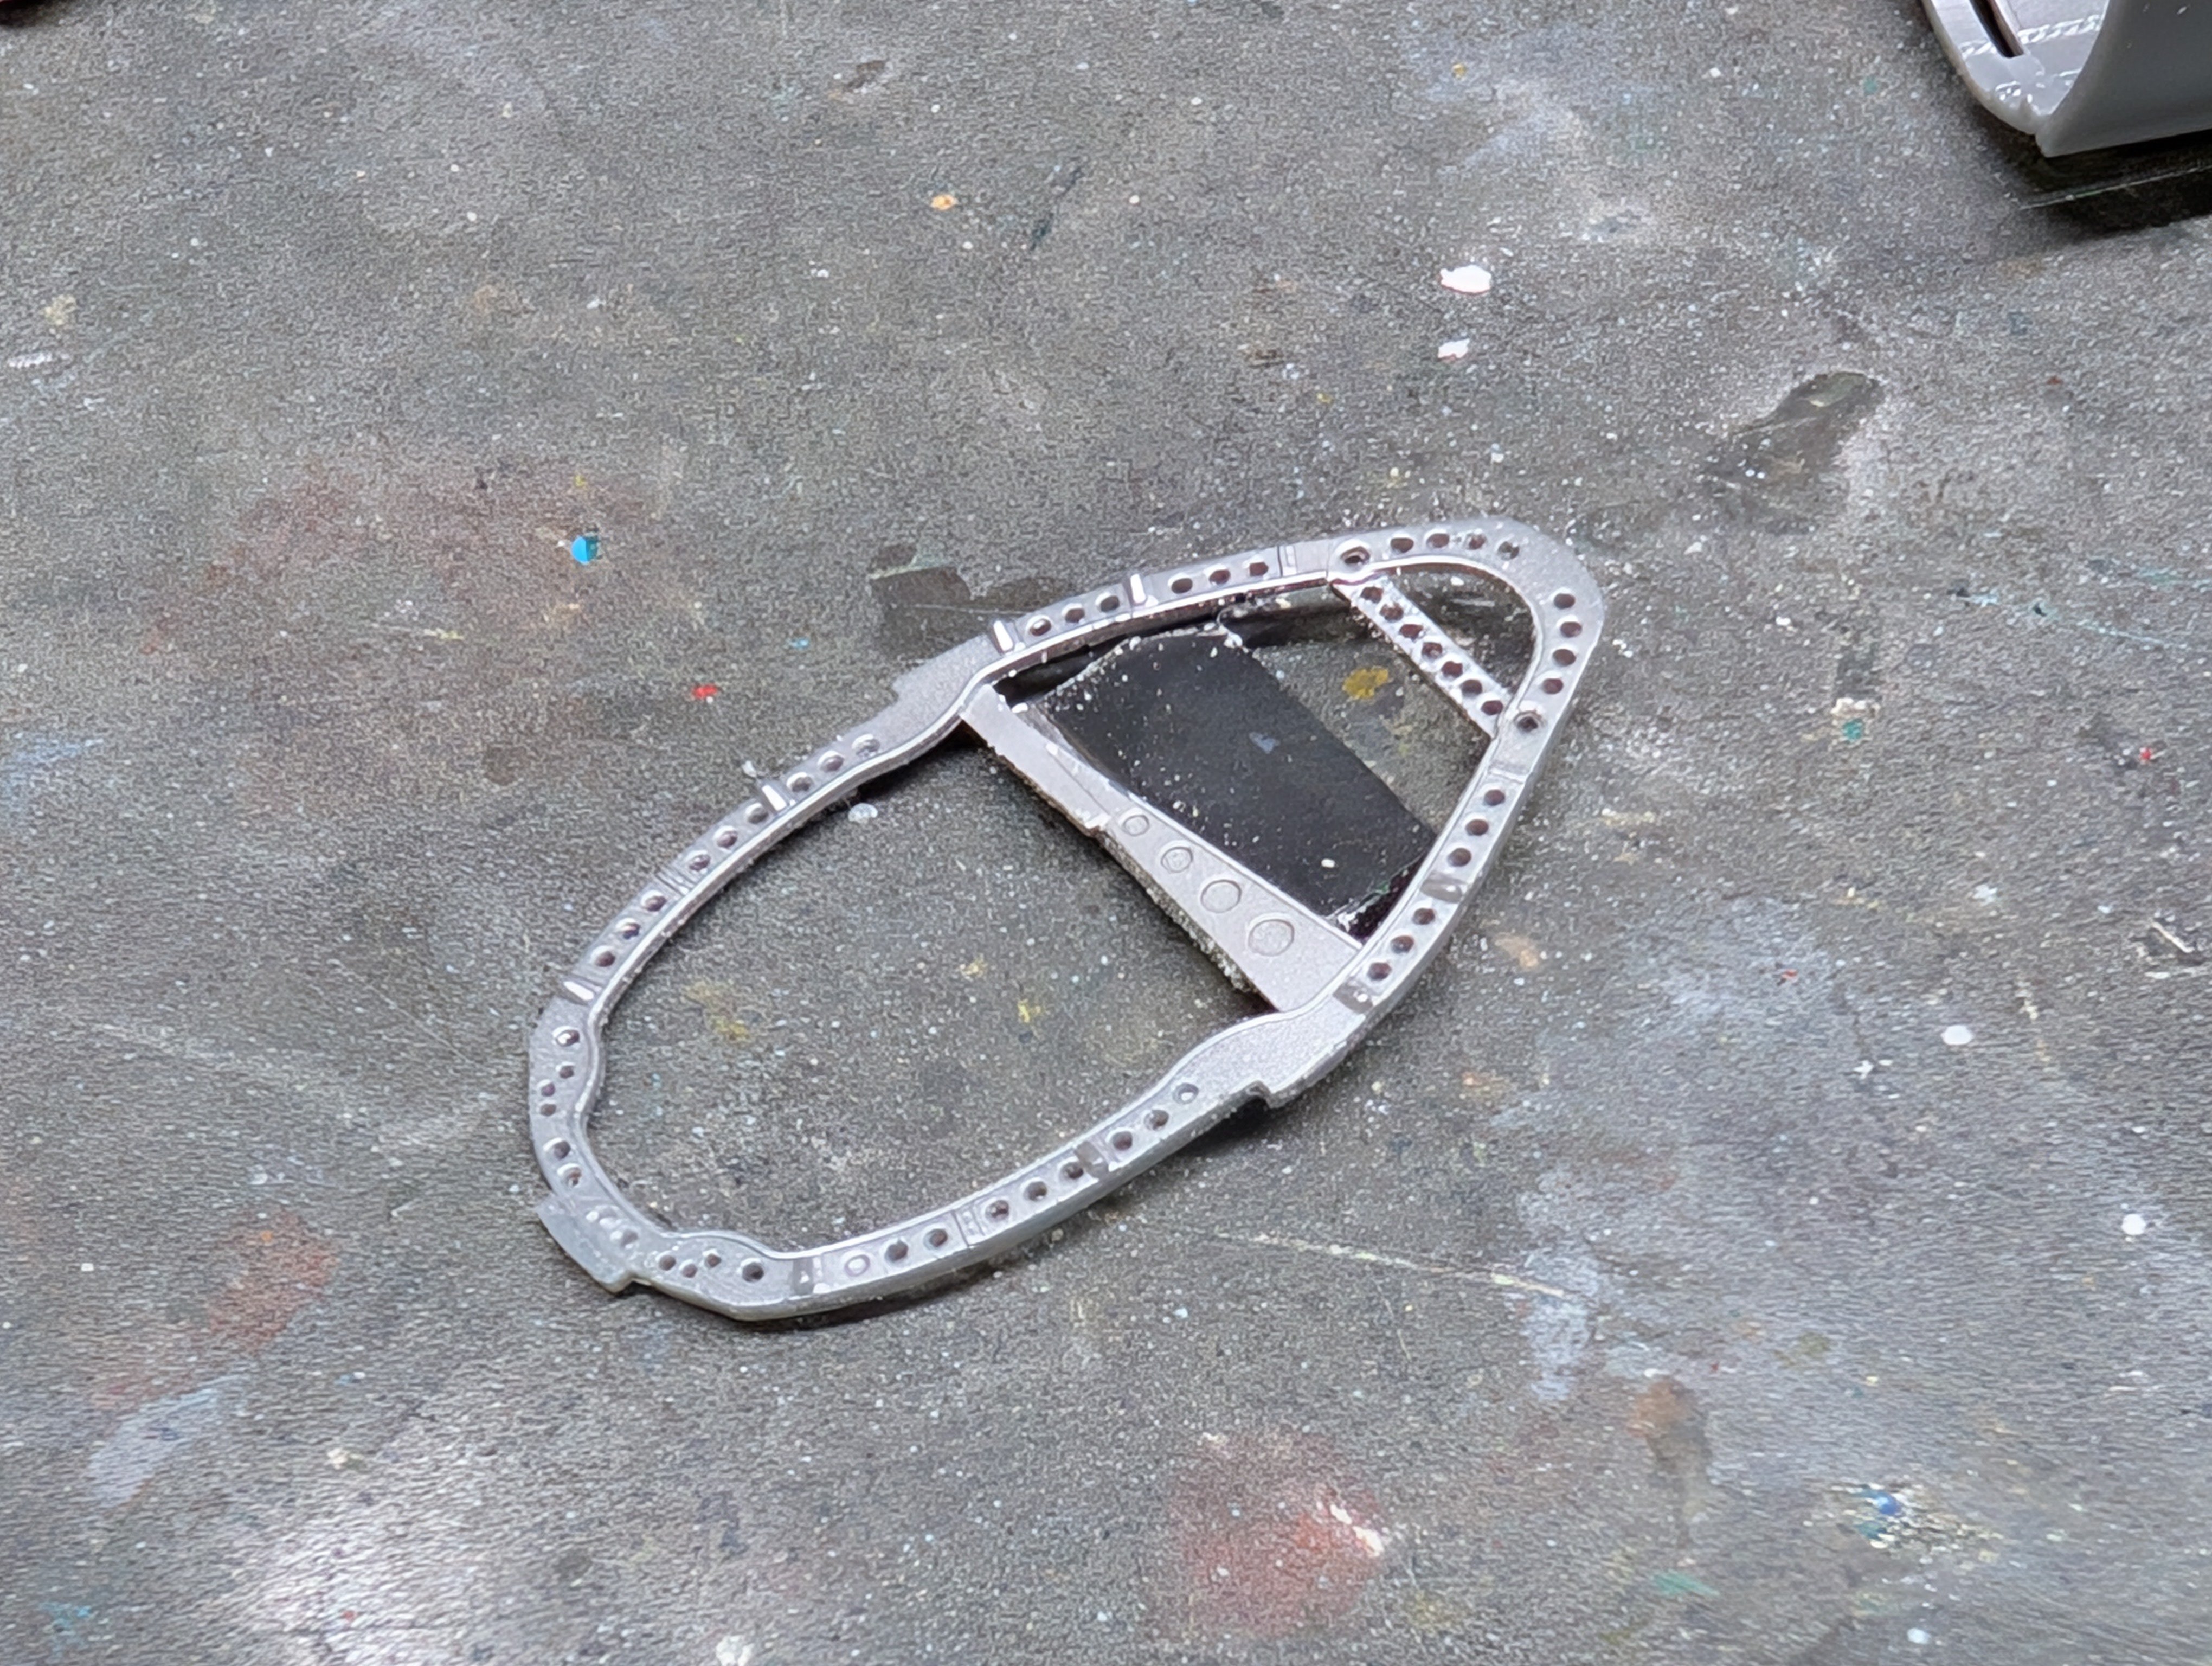
A small but of progress. As mentioned previously, the rack needed to be removed.
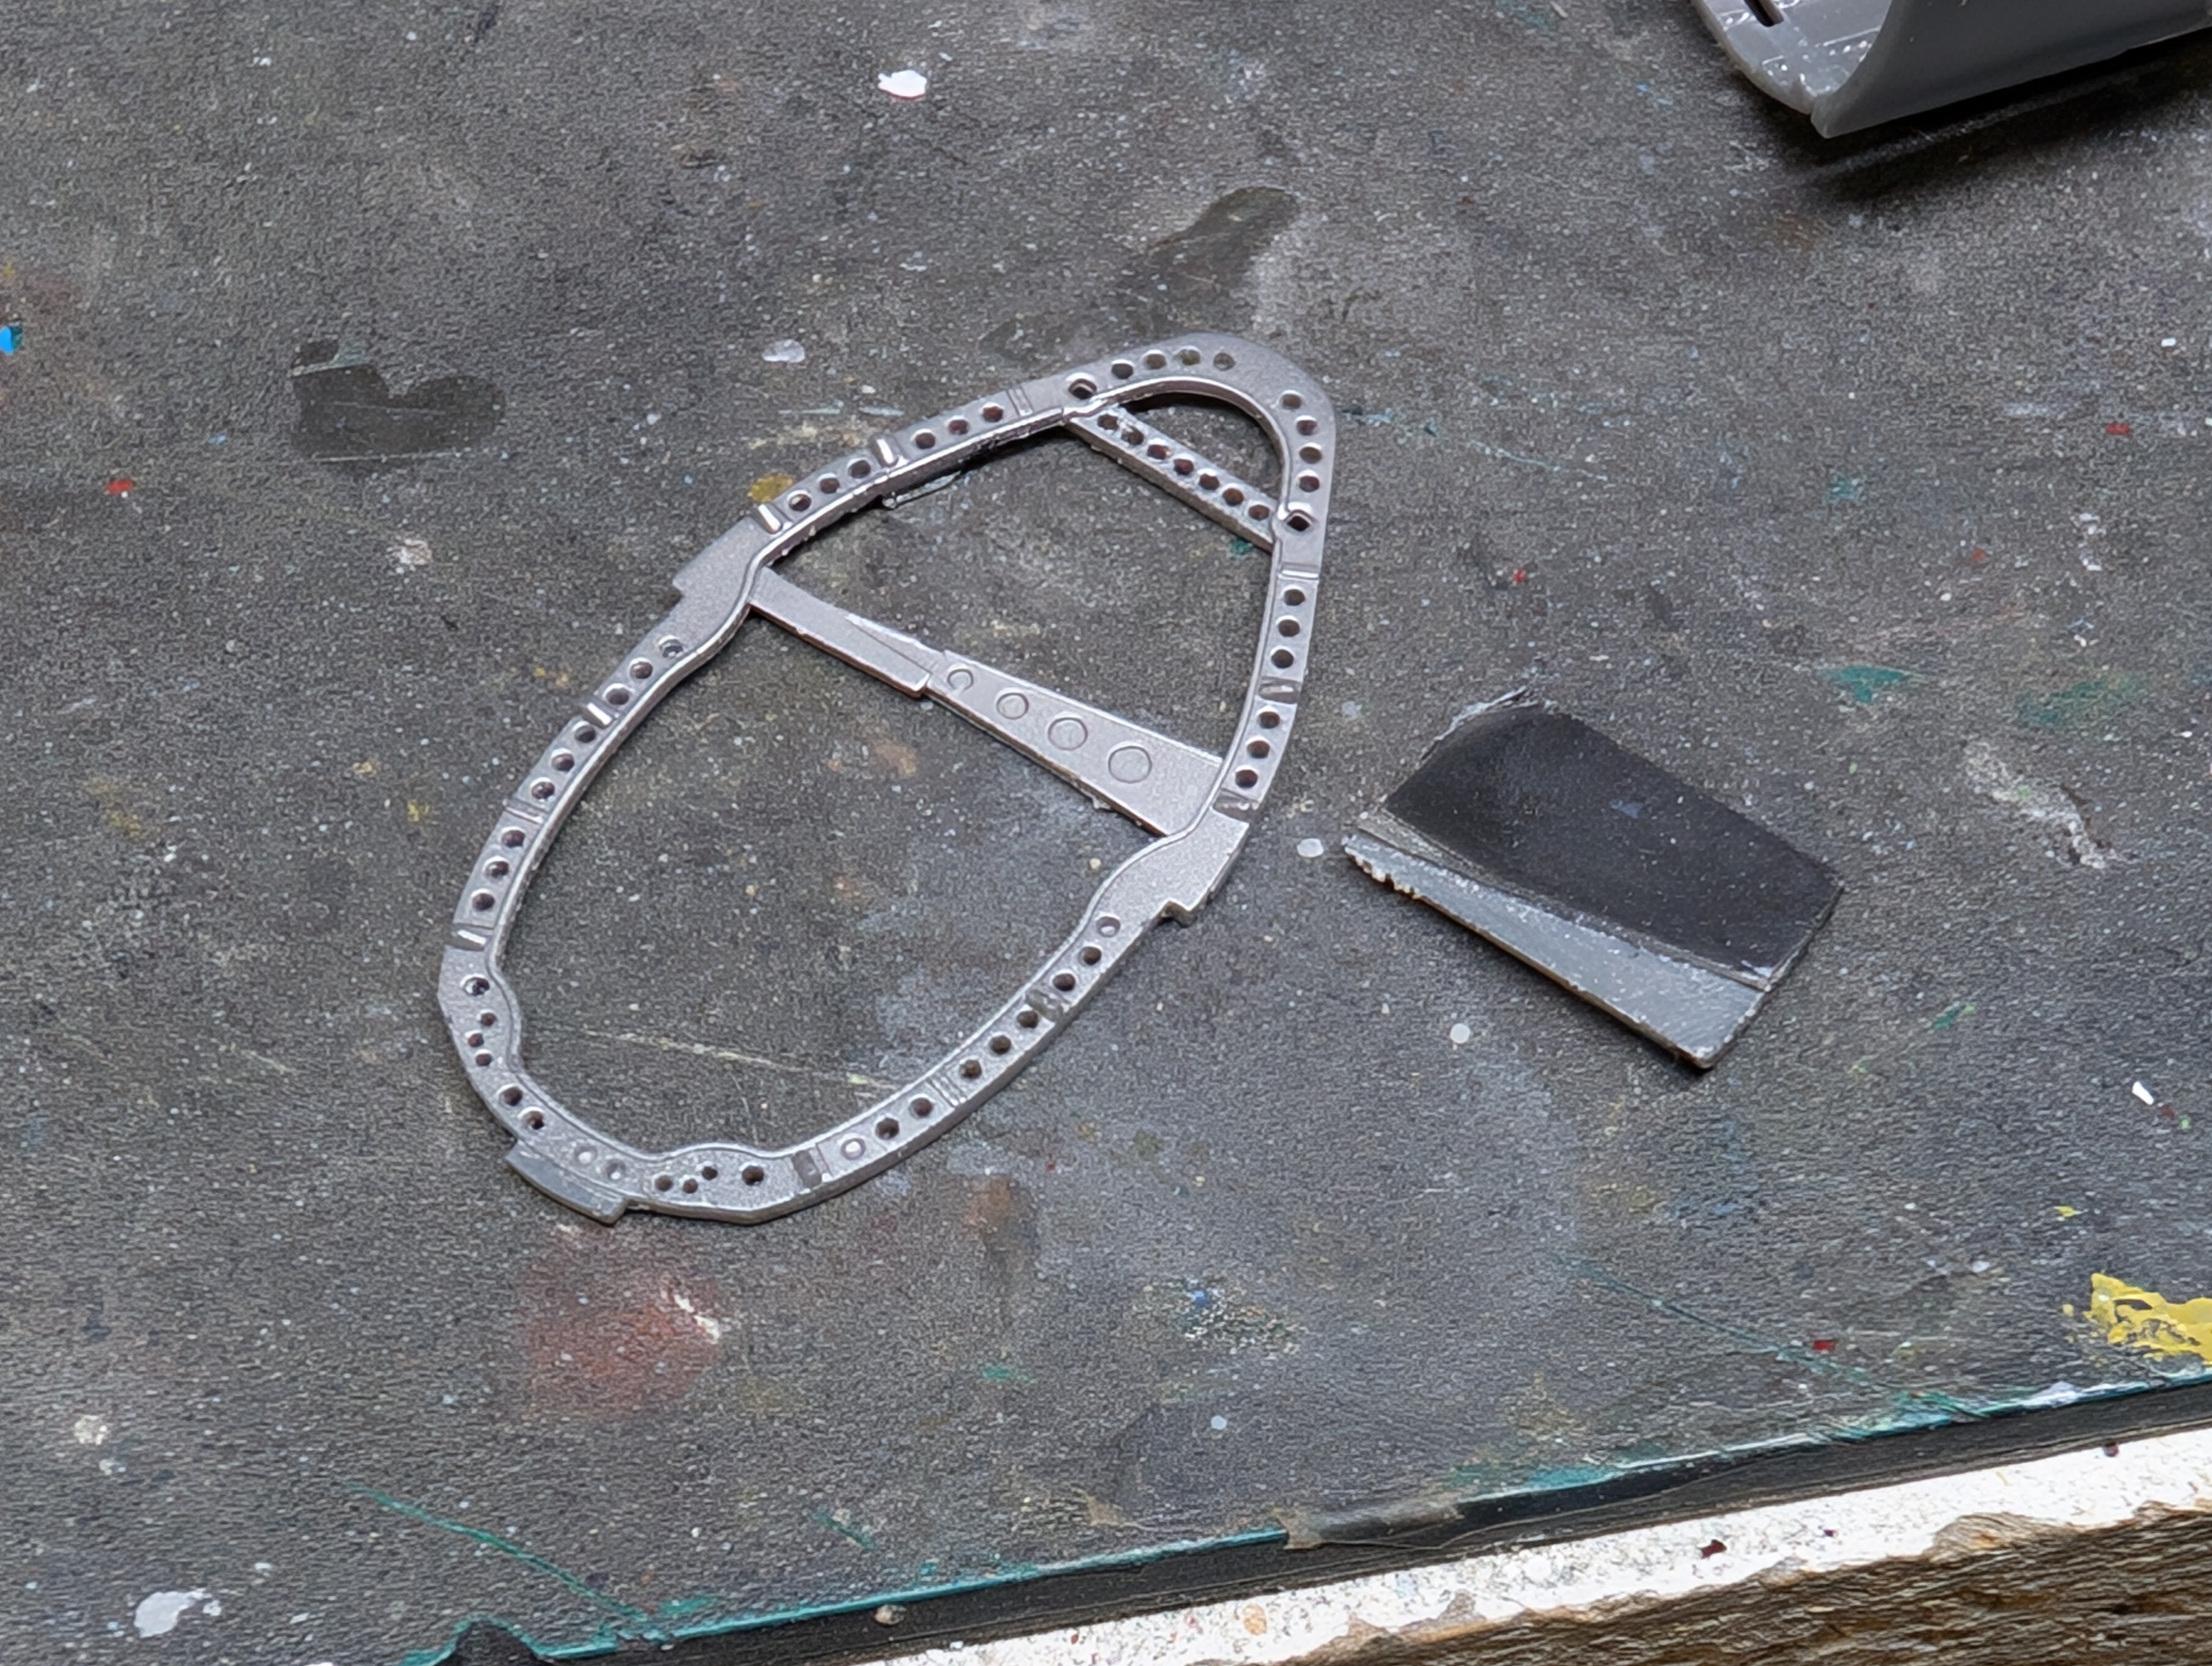
It was a bit of a challenge to figure out the best way to do so but in the end it came off fairly cleanly. I trimmed the back until it was level with the frame.
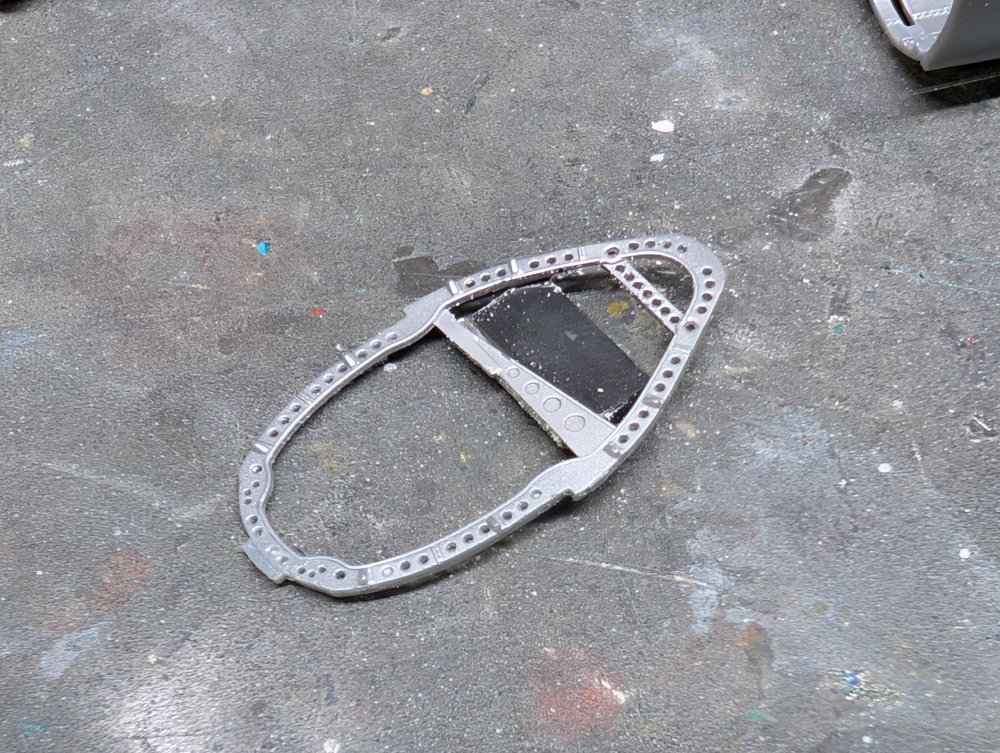
The I used a razor saw to cut the last bit free from the frame.
Now to build a camera mount.
-
8
-
-
1 hour ago, Martinnfb said:
Ok , I pulled the purging trigger once again and drop these babies off at the local hobby store. Both are new , but ginormous and the free space is the priority right now.
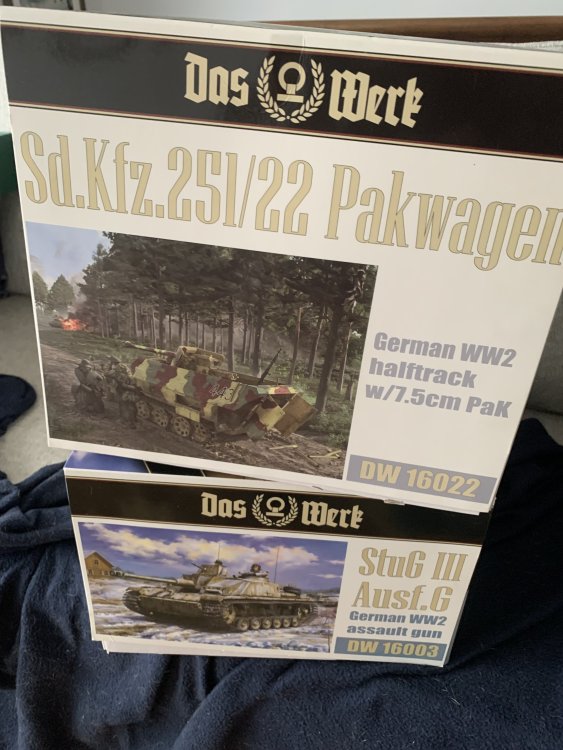
Wow, I have both of those kits in my stash too.
You're right in that they take up a fair bit of space. And yet somehow I can't find the M8 Greyhound that should be in there too.
-
 2
2
-
-
Really nice looking engine Rob.
On the Tamiya Caterham, they did the belts in rubber. It's a bit too thick and slightly long so it's thick.
-
2
-
1
-
-
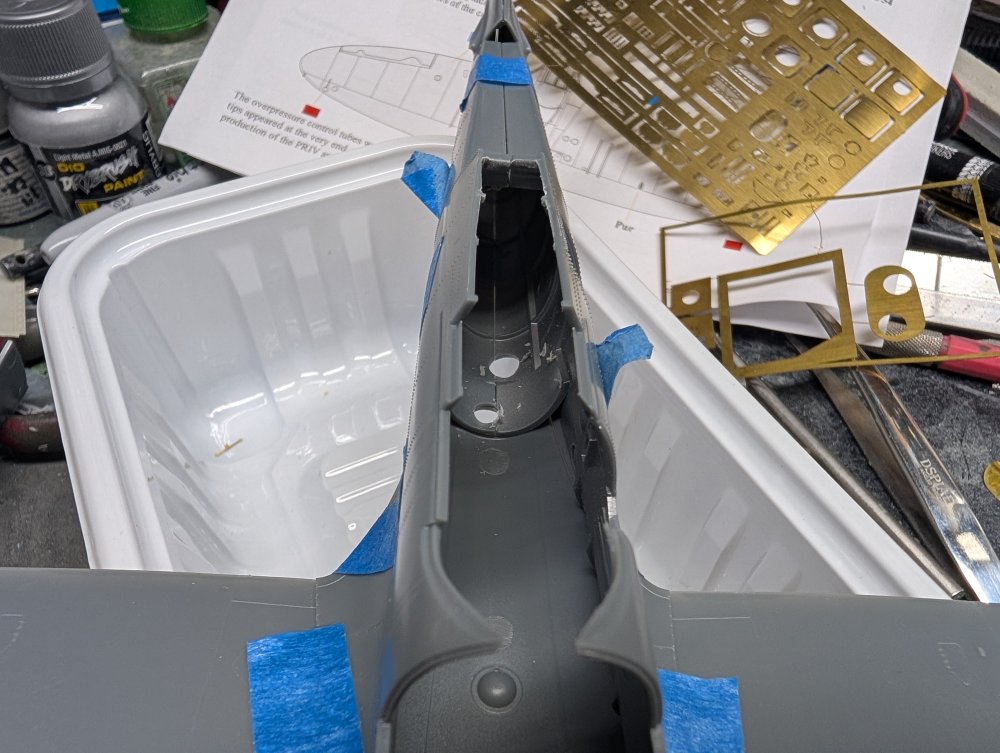
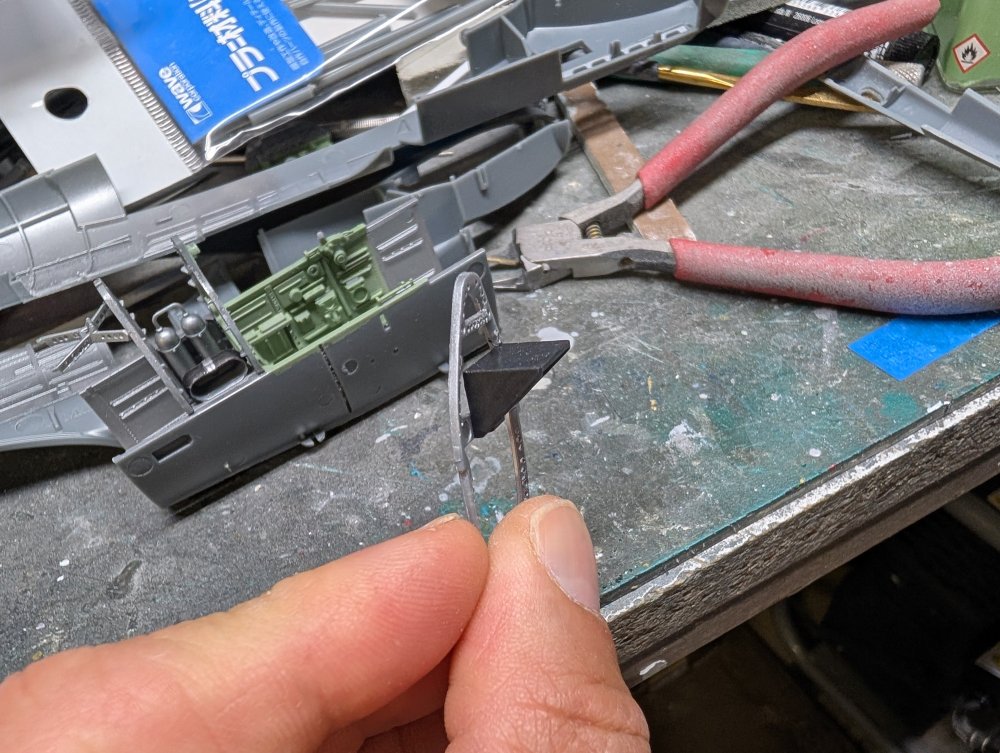
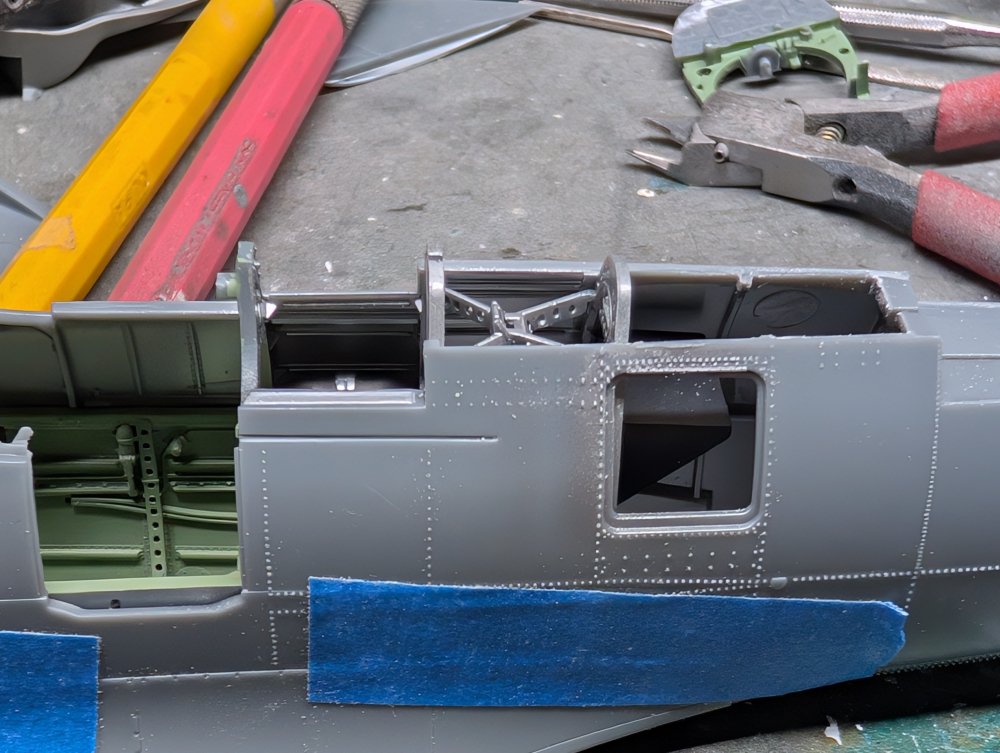
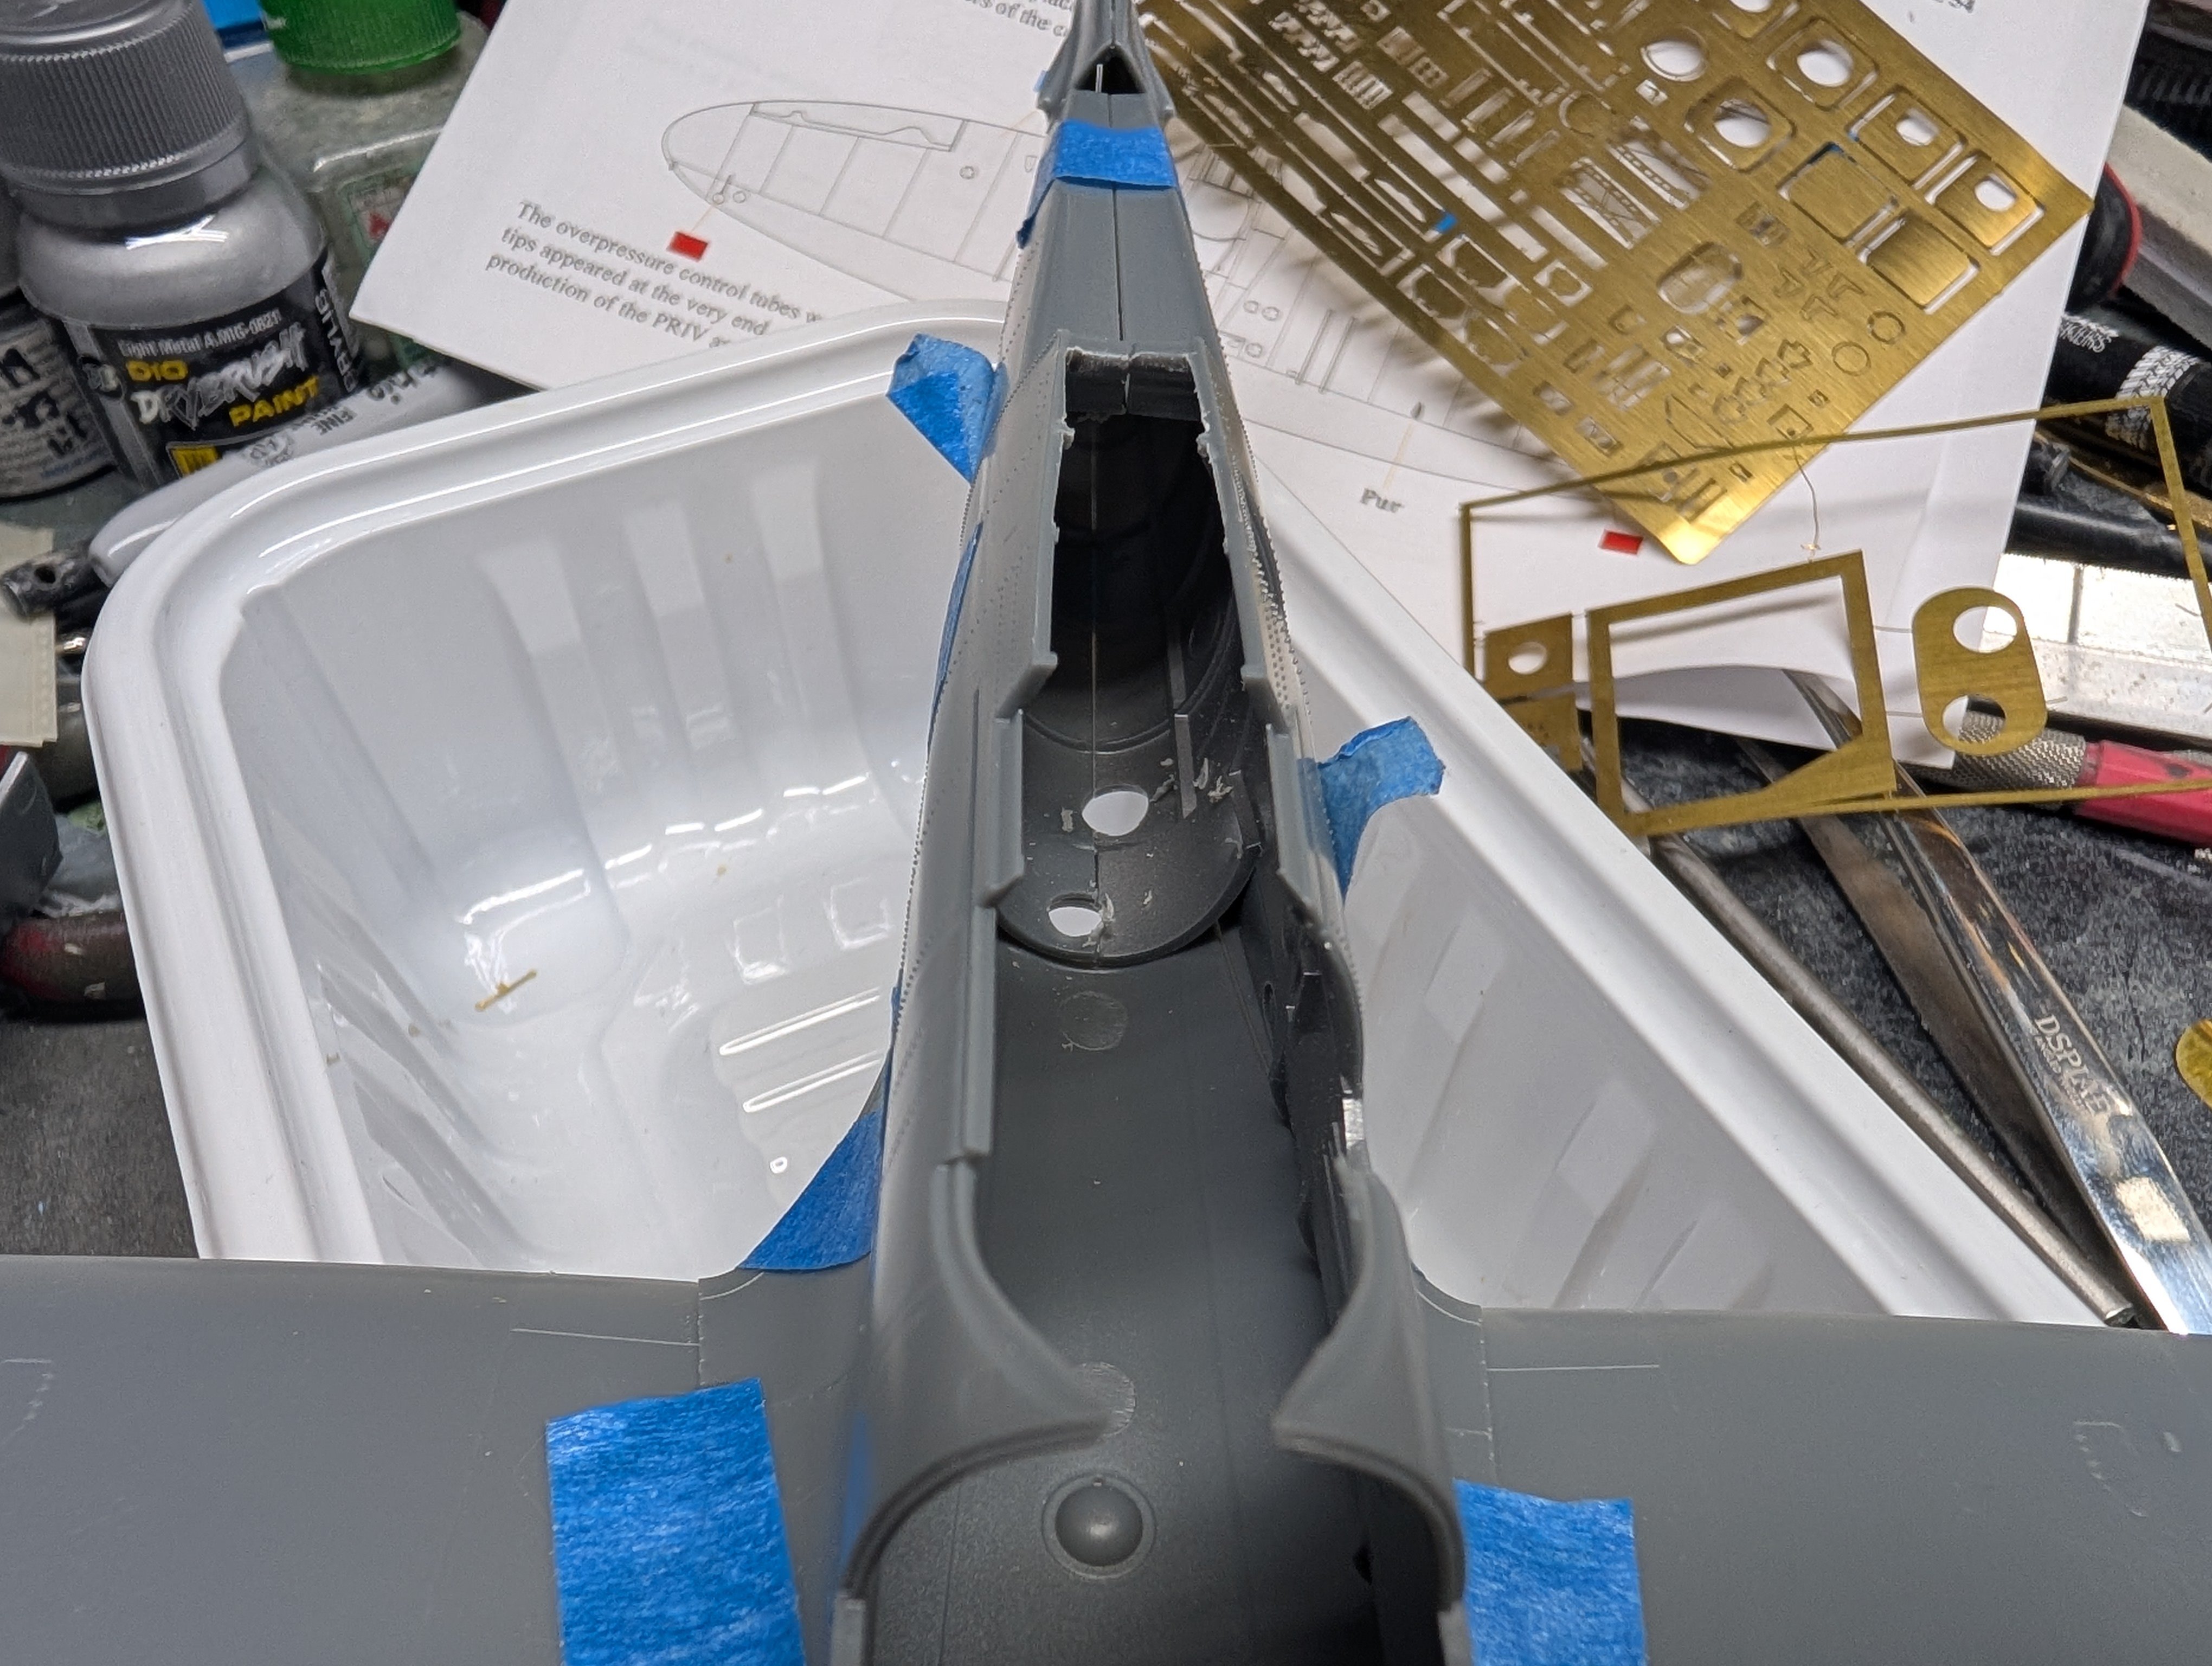
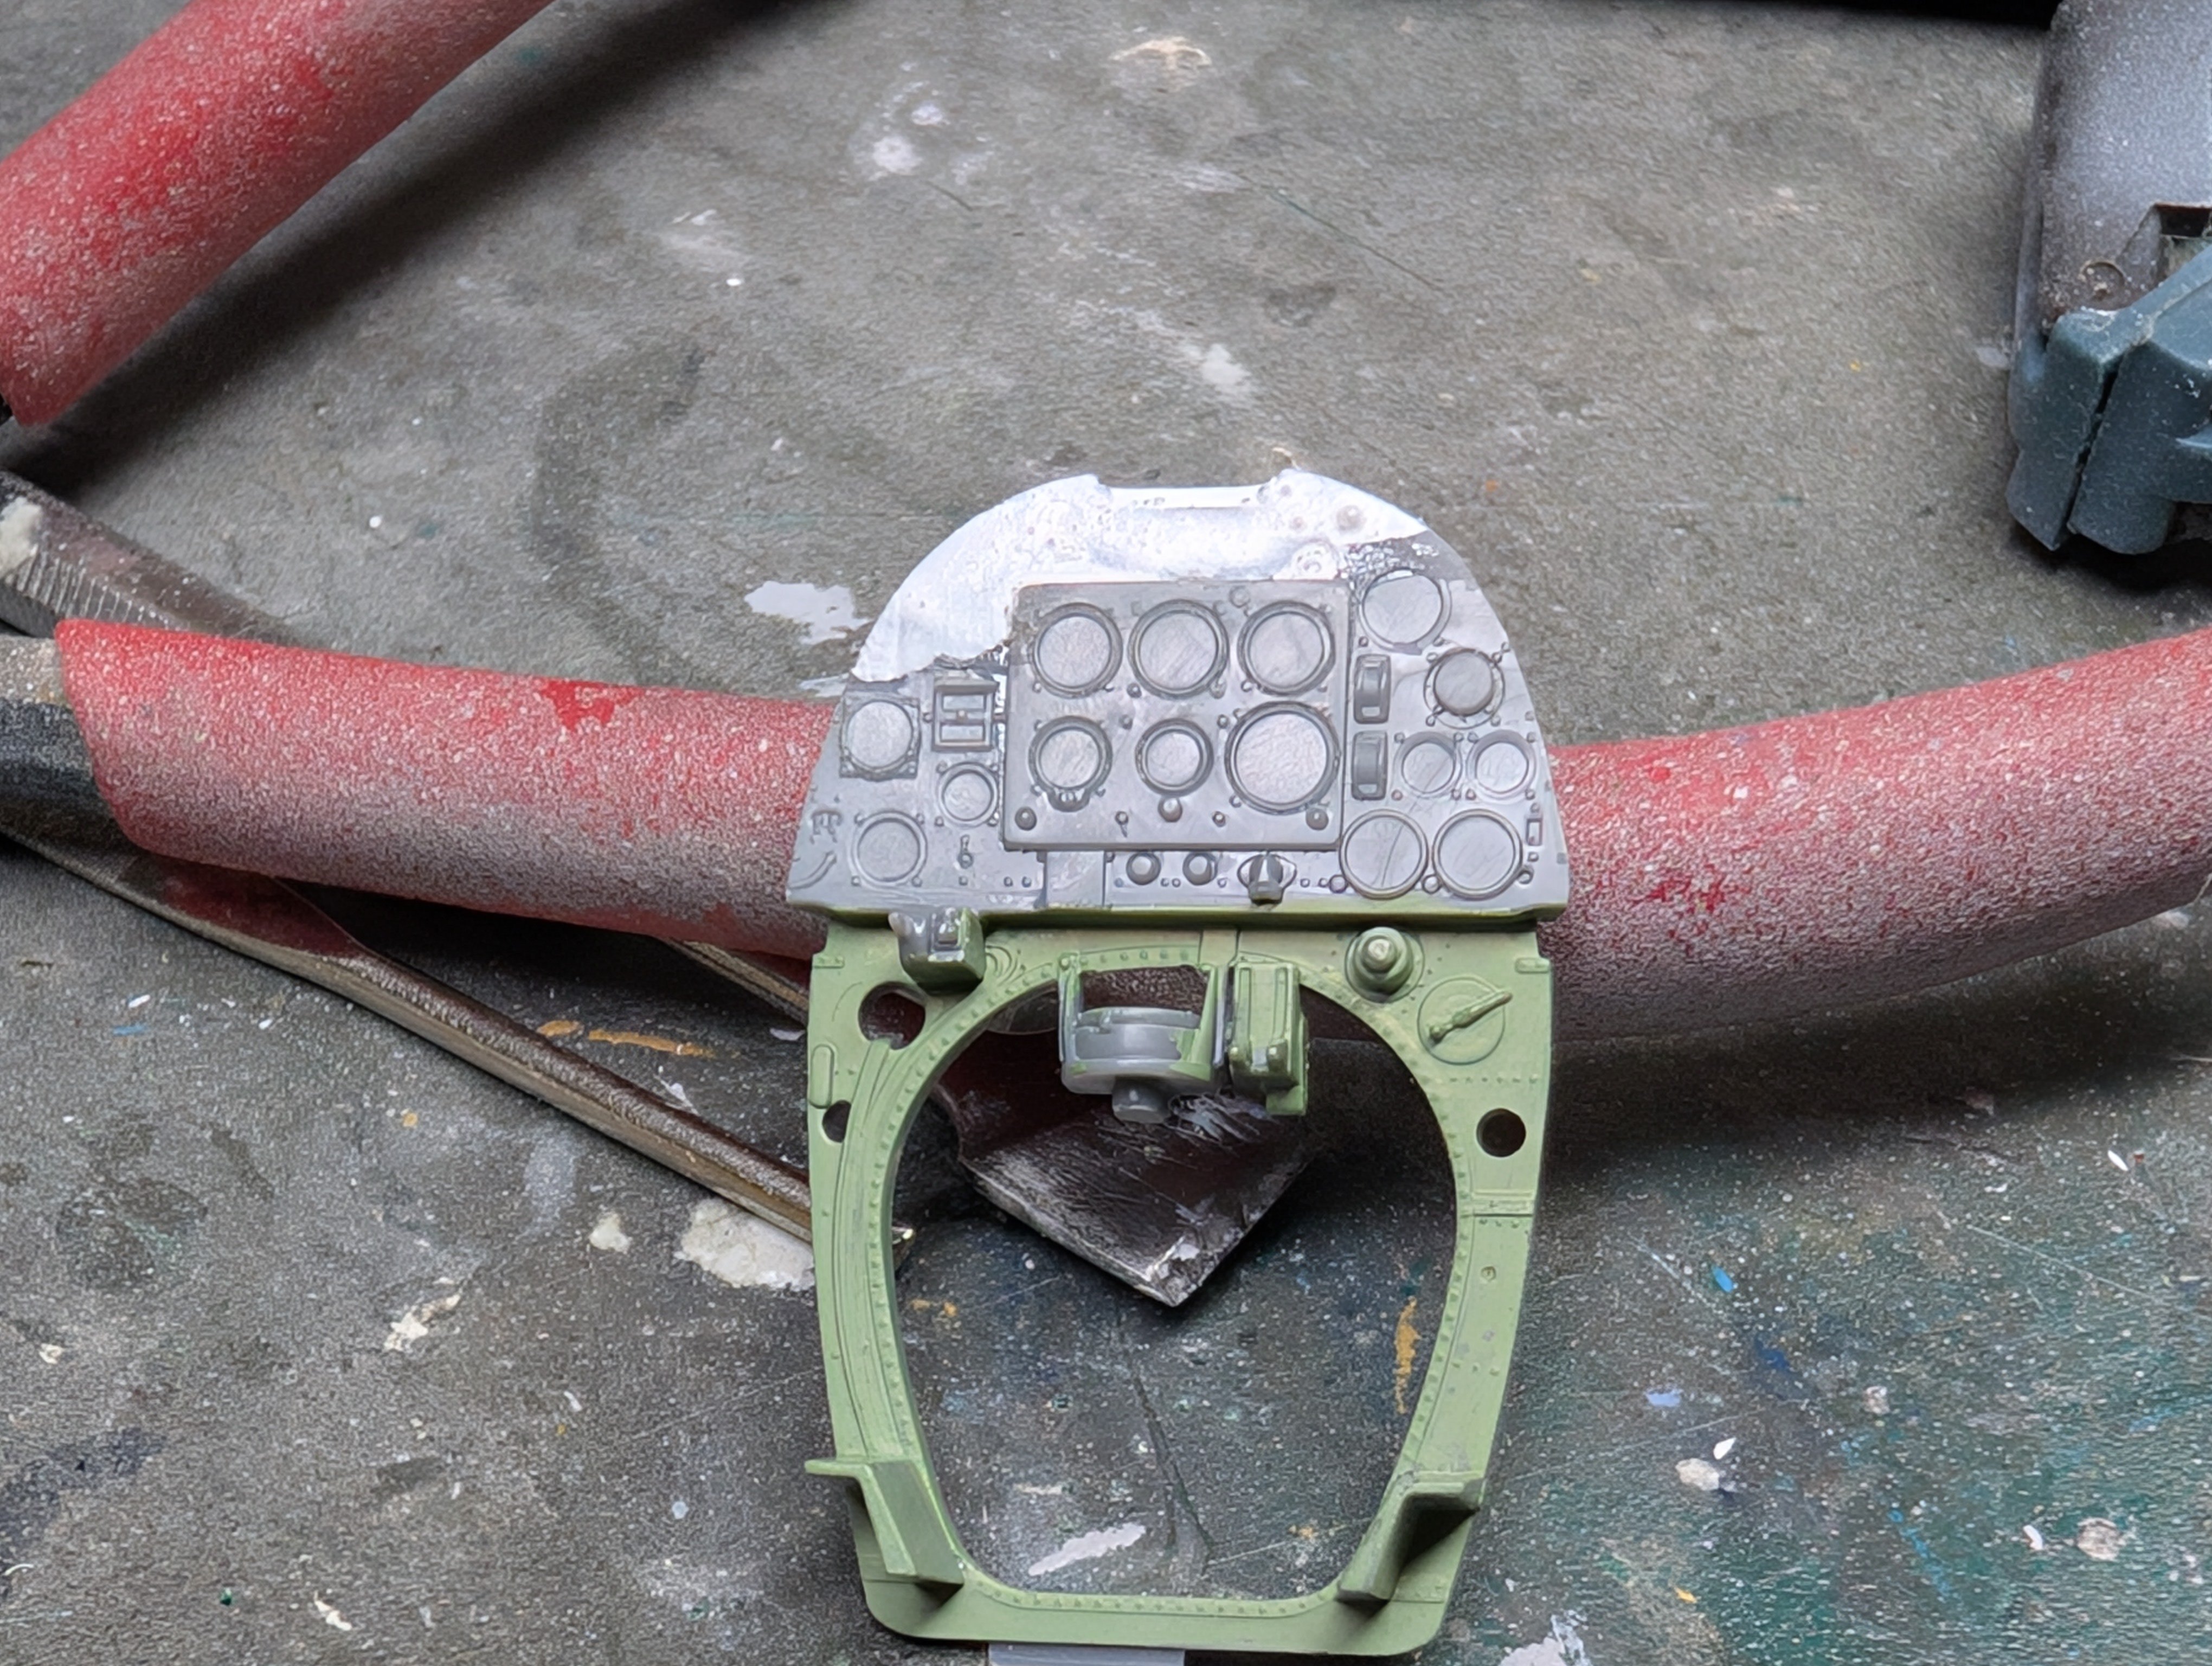
Time to start on the fuselage mods.
First up, I trimmed and test fit the two fuselage halves together. With the way that Kotare designed the fuselage, the upper flat bit above the hatch will need to be removed.
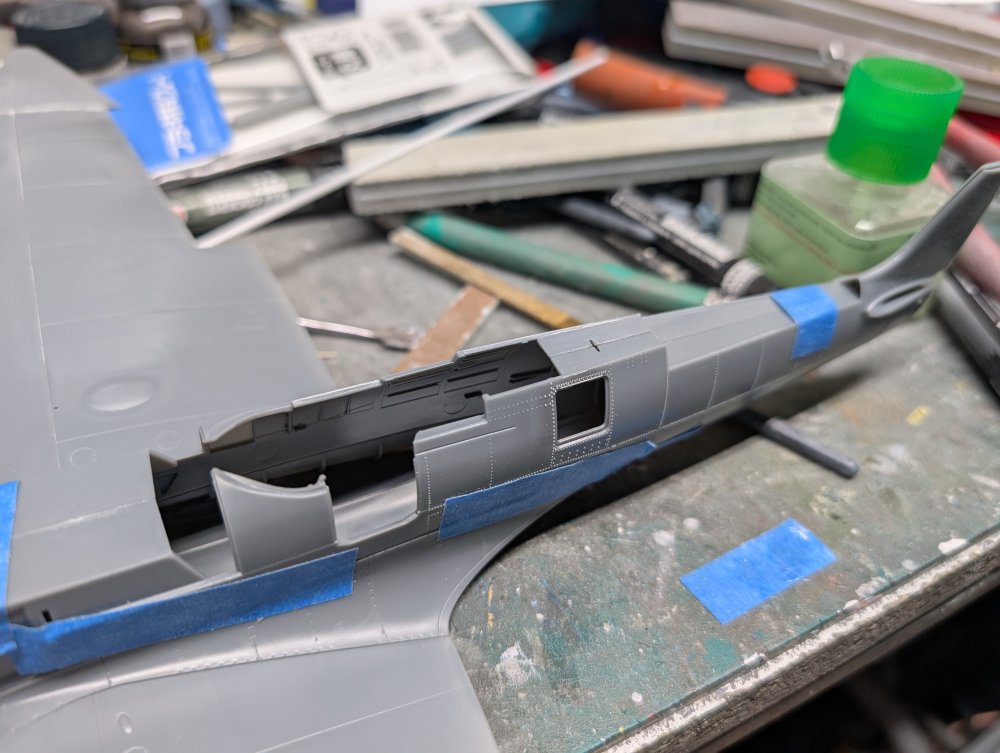
One side done.

Followed by the second.
Then test fitting the cockpit parts, the shelf will also need to go.
-
7
-
-
@DocRob, the markers seem to work best over a matte or satin coat. They're okay on bare plastic but it's a bit too smooth so it has a harder time with coverage. Same with over gloss paint.
-
1
-
1
-
-
Bandai has released pics of their latest Perfect Grade Unleashed Gundam kit, the 1/60 RX-93 v Gundam. It's coming out at the end of the year, early next.
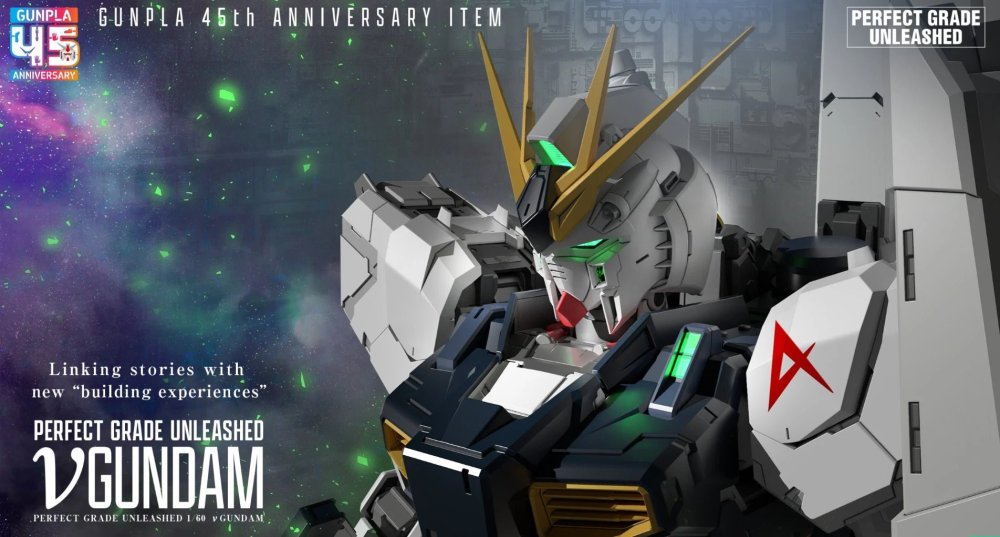
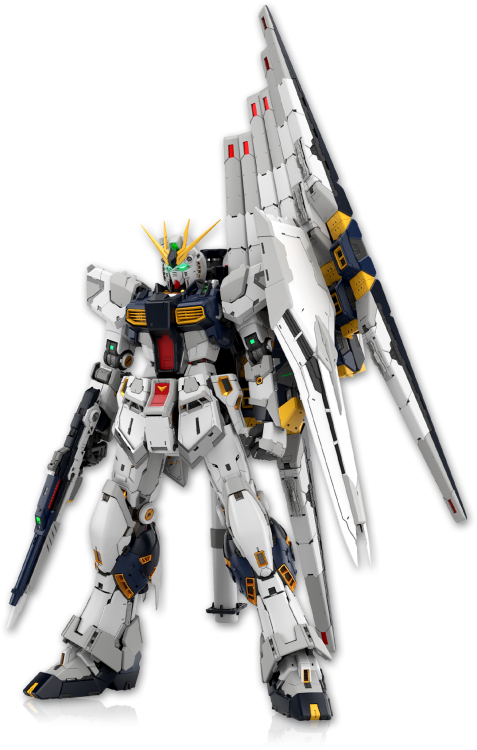
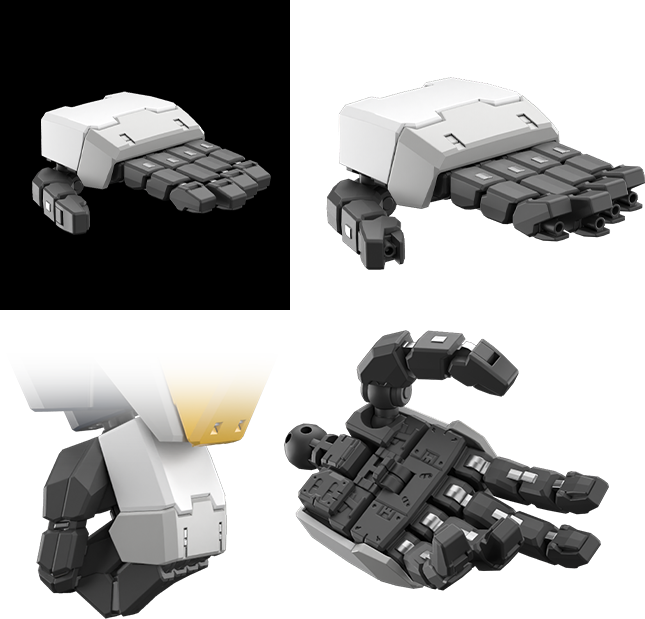
Typical of most Bandai Gundam kits, it'll be moulded in full colour so you could build it to look like the pics without any need for paint. The level of detail is impressive, even the fingertips can be posed open.
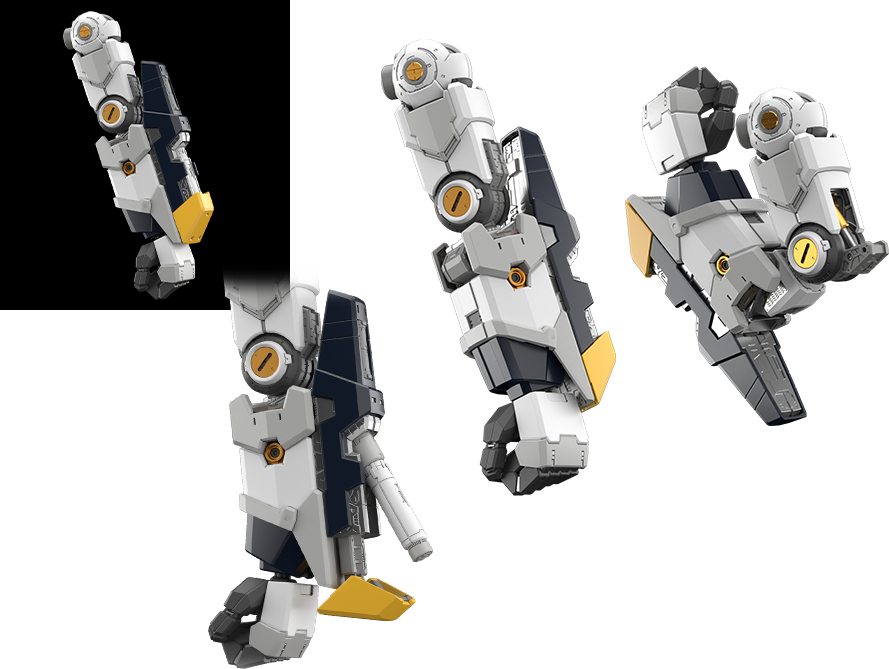
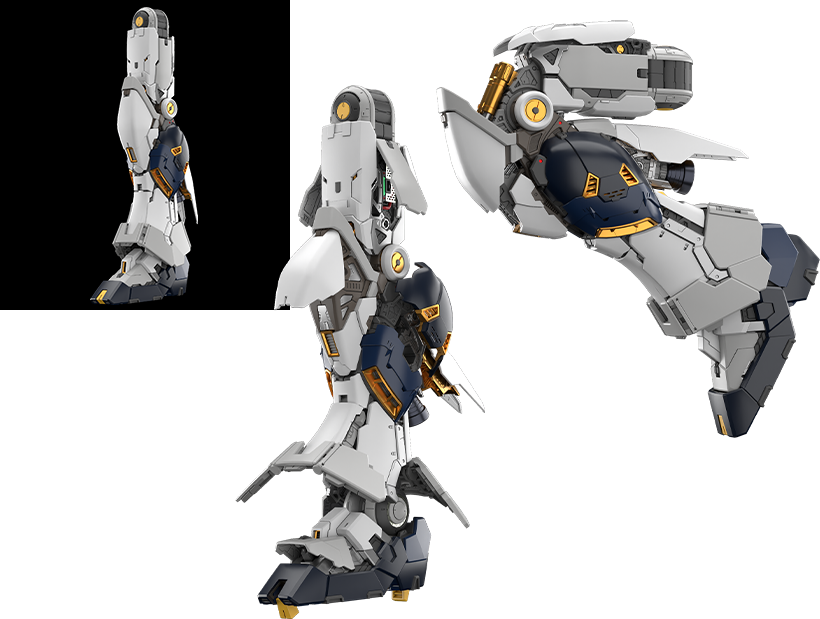
The announced price is ¥60,000. Yep, that's not a typo. So far one online shop in Canada has it listed for pre-order at $769 CAD.
So tempting as it's one of my favourite Gundam designs. Although I'd have to sell one of the kids' kidneys for it.
-
2
-
2
-
-
Great, speedy work there Martin.
-
1
-
1
-
-
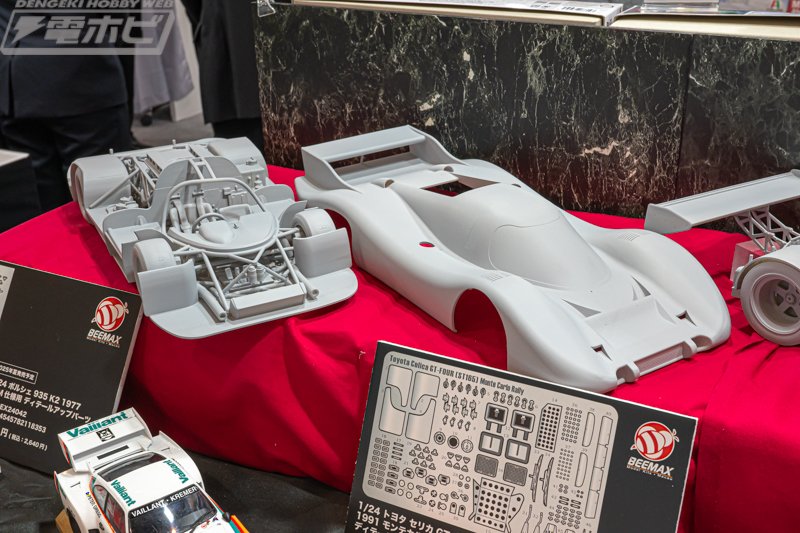
At Shizuoka, BeeMax showed a prototype 1/12 Mazda 787B, the only rotary powered car to win LeMans.
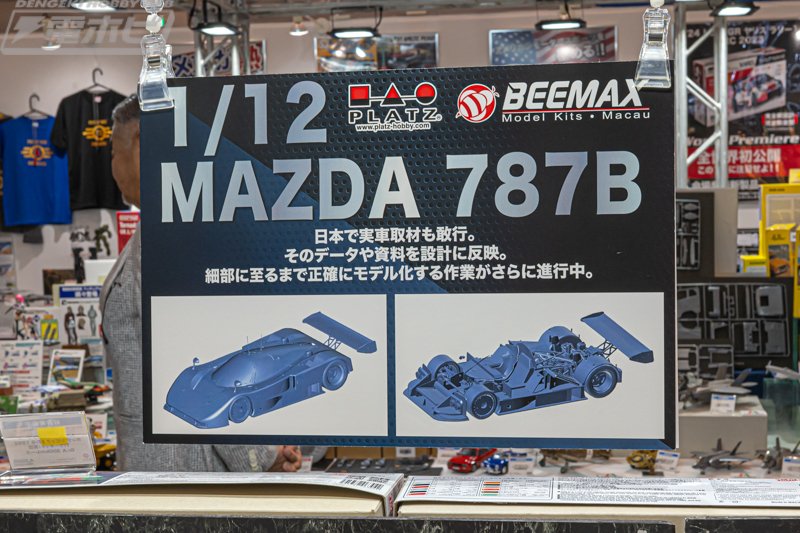
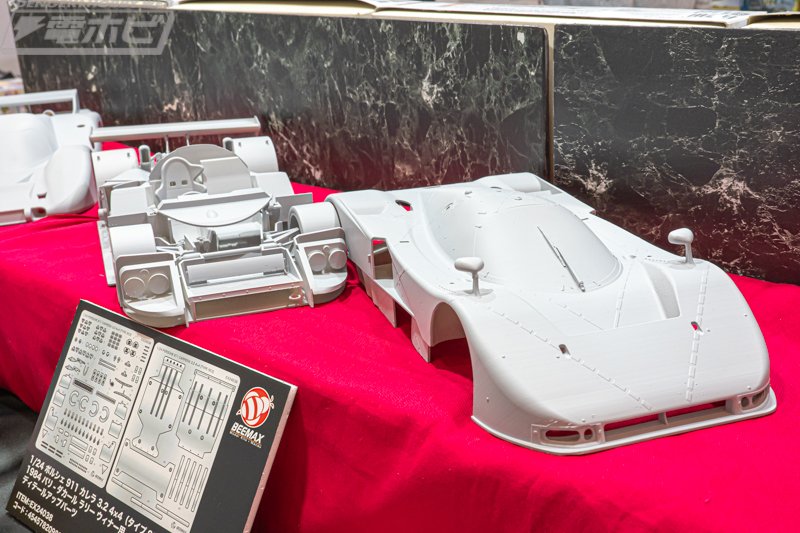
They also announced a 1/12 Porsche 917LH.
-
8
-
-
47 minutes ago, Martinnfb said:
It always feels good when you can get some cash back, to spend it almost immediately on more kits
")
Well, what else are you going to spend it on?
-
2
-
-
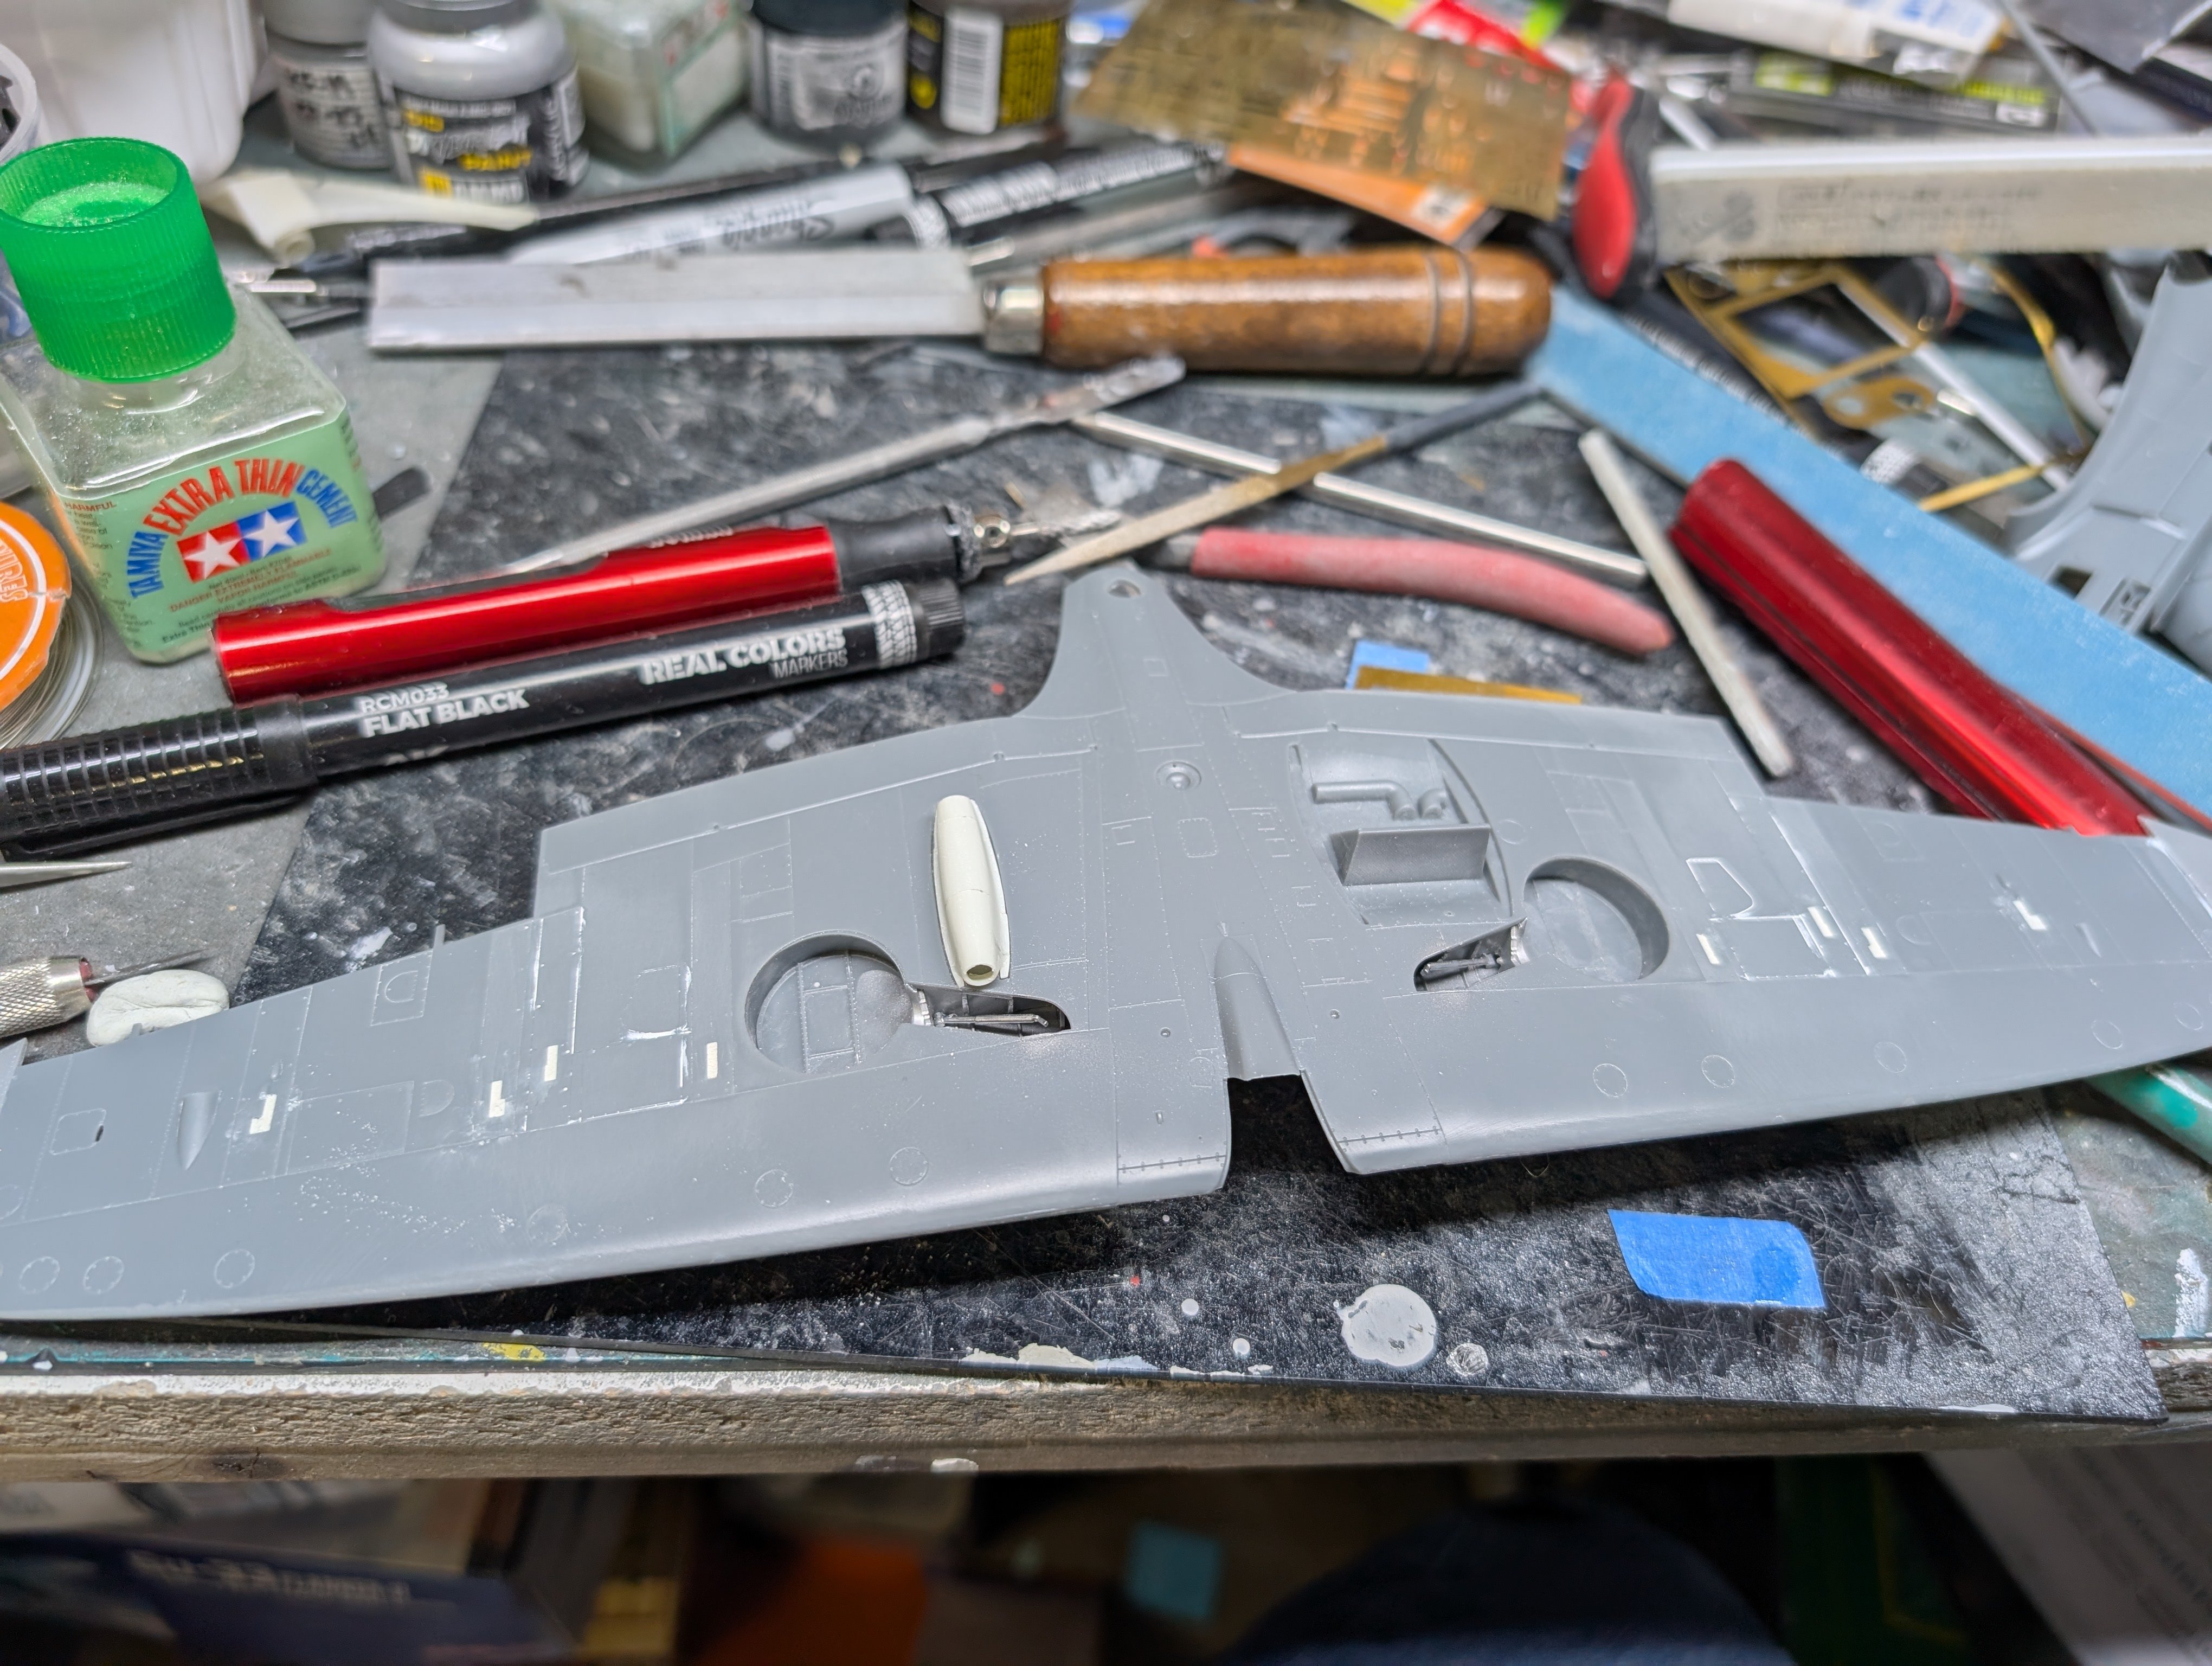
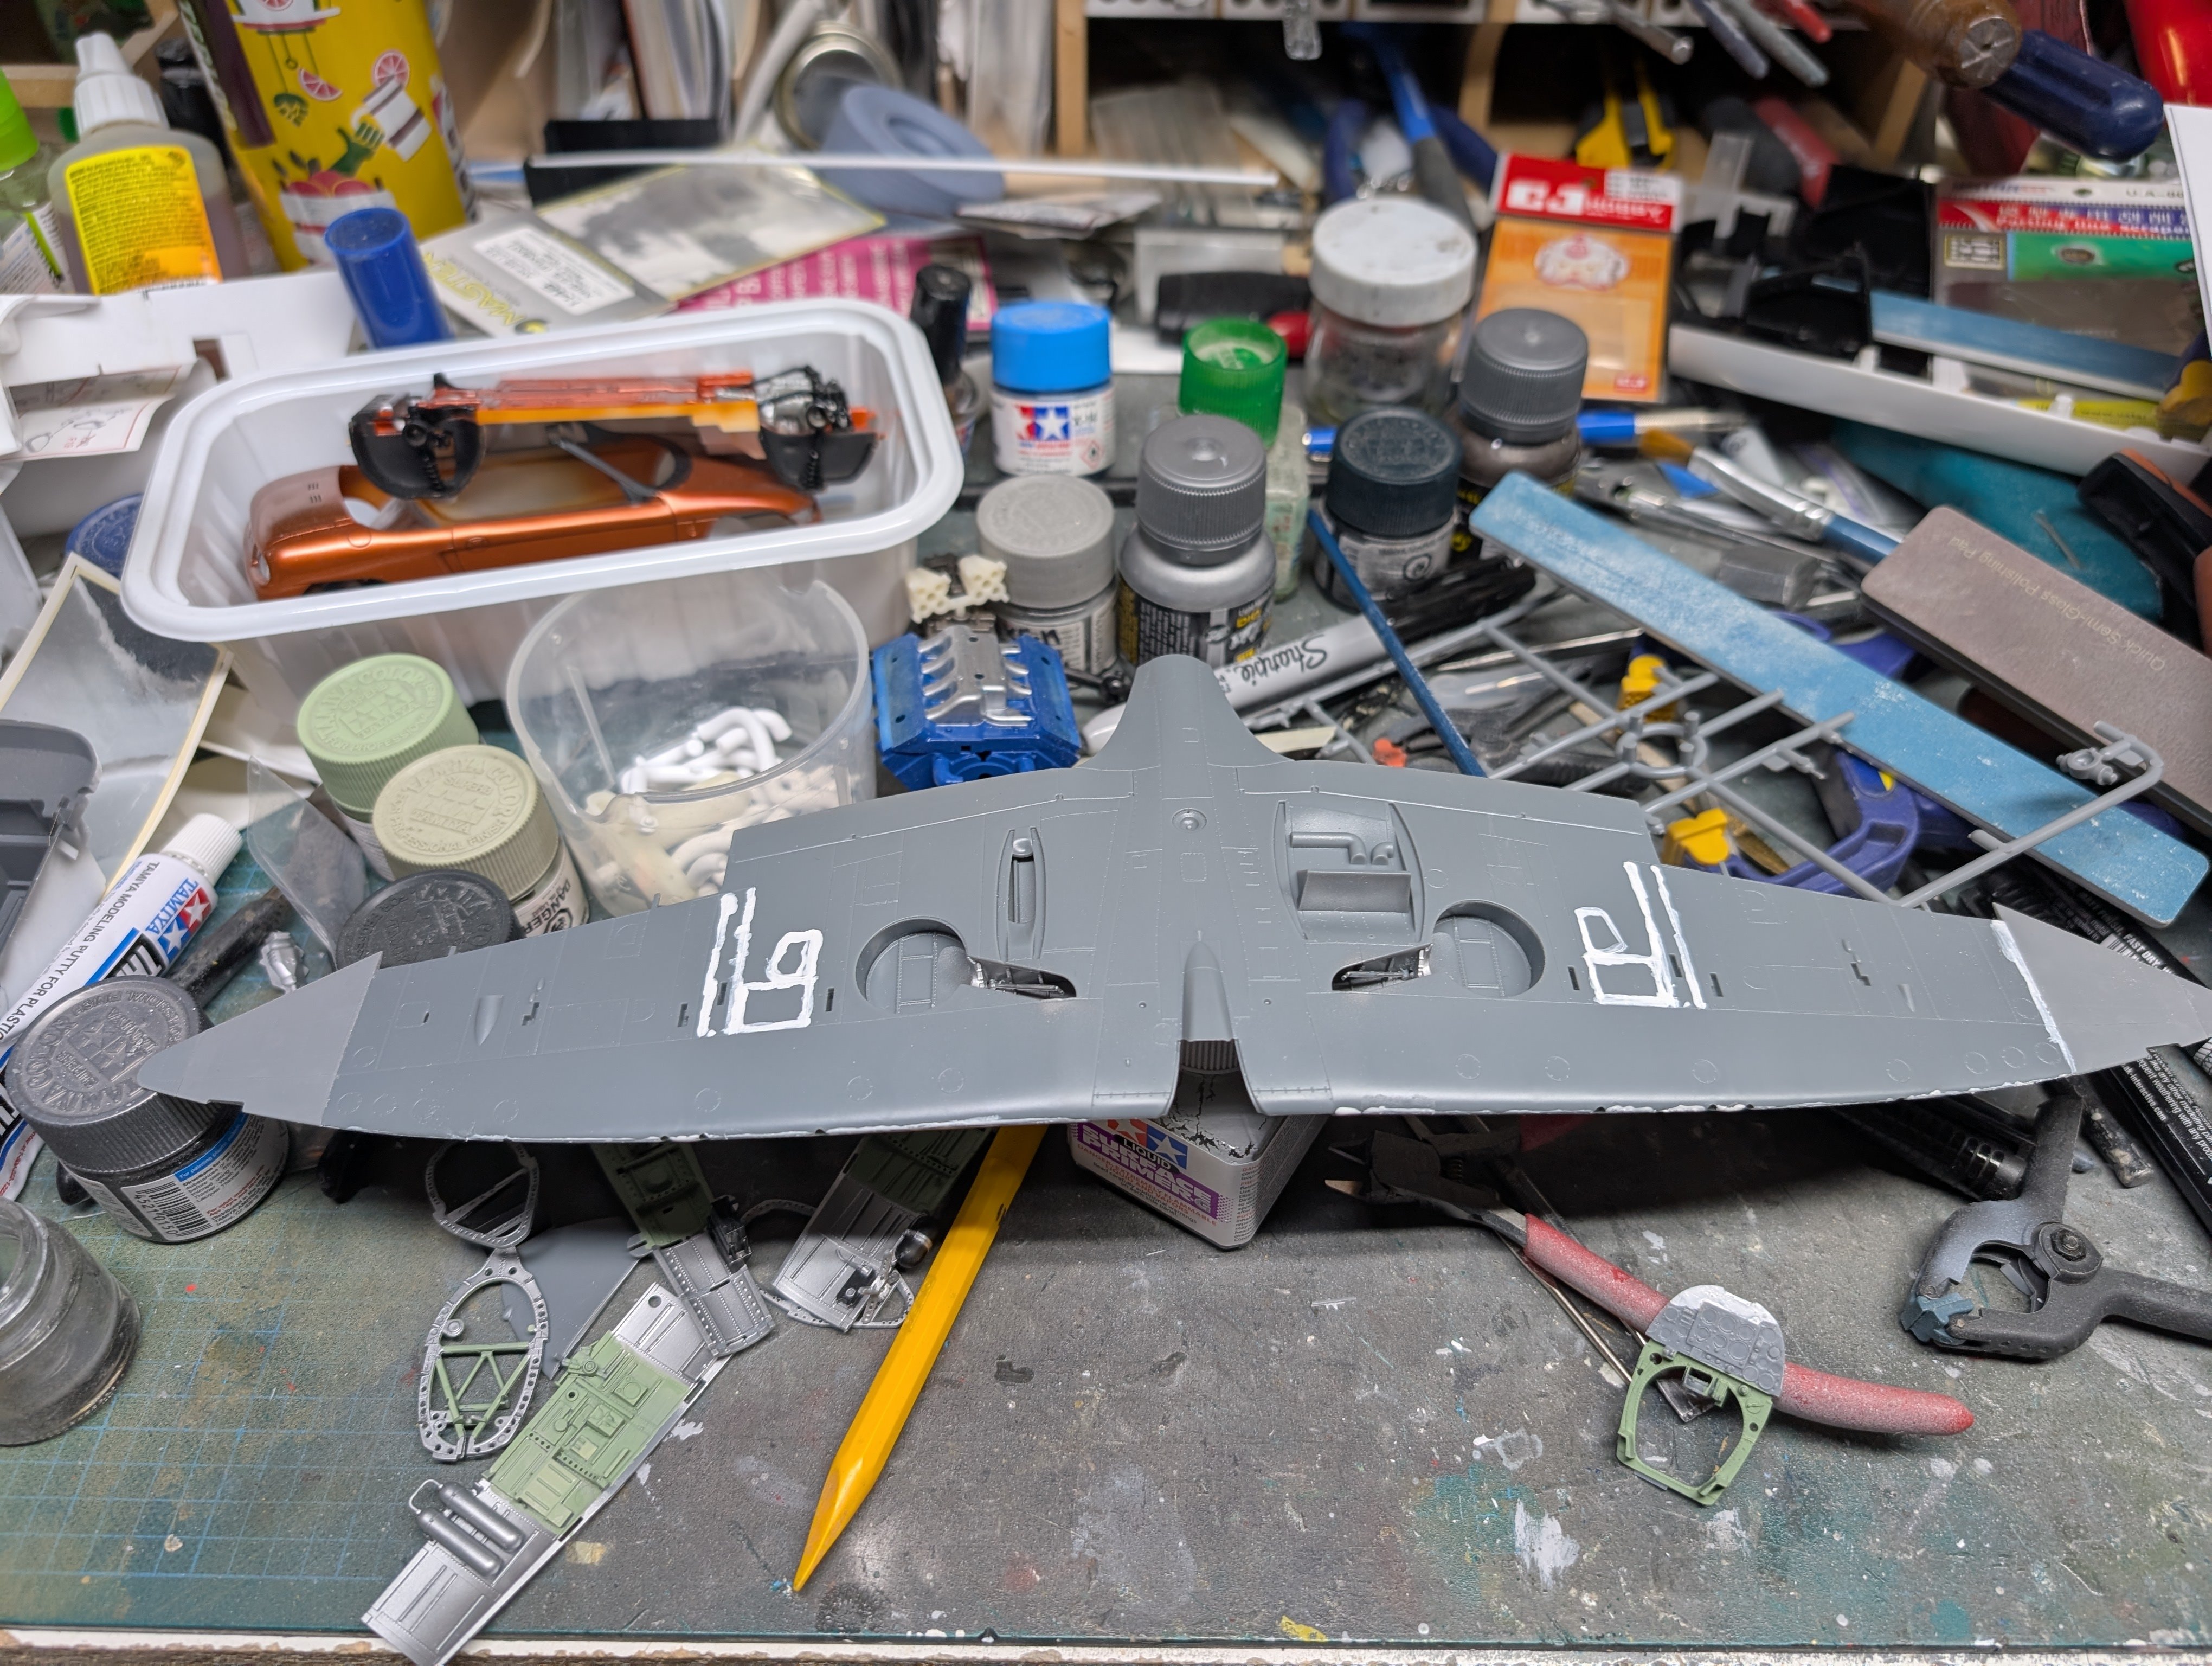
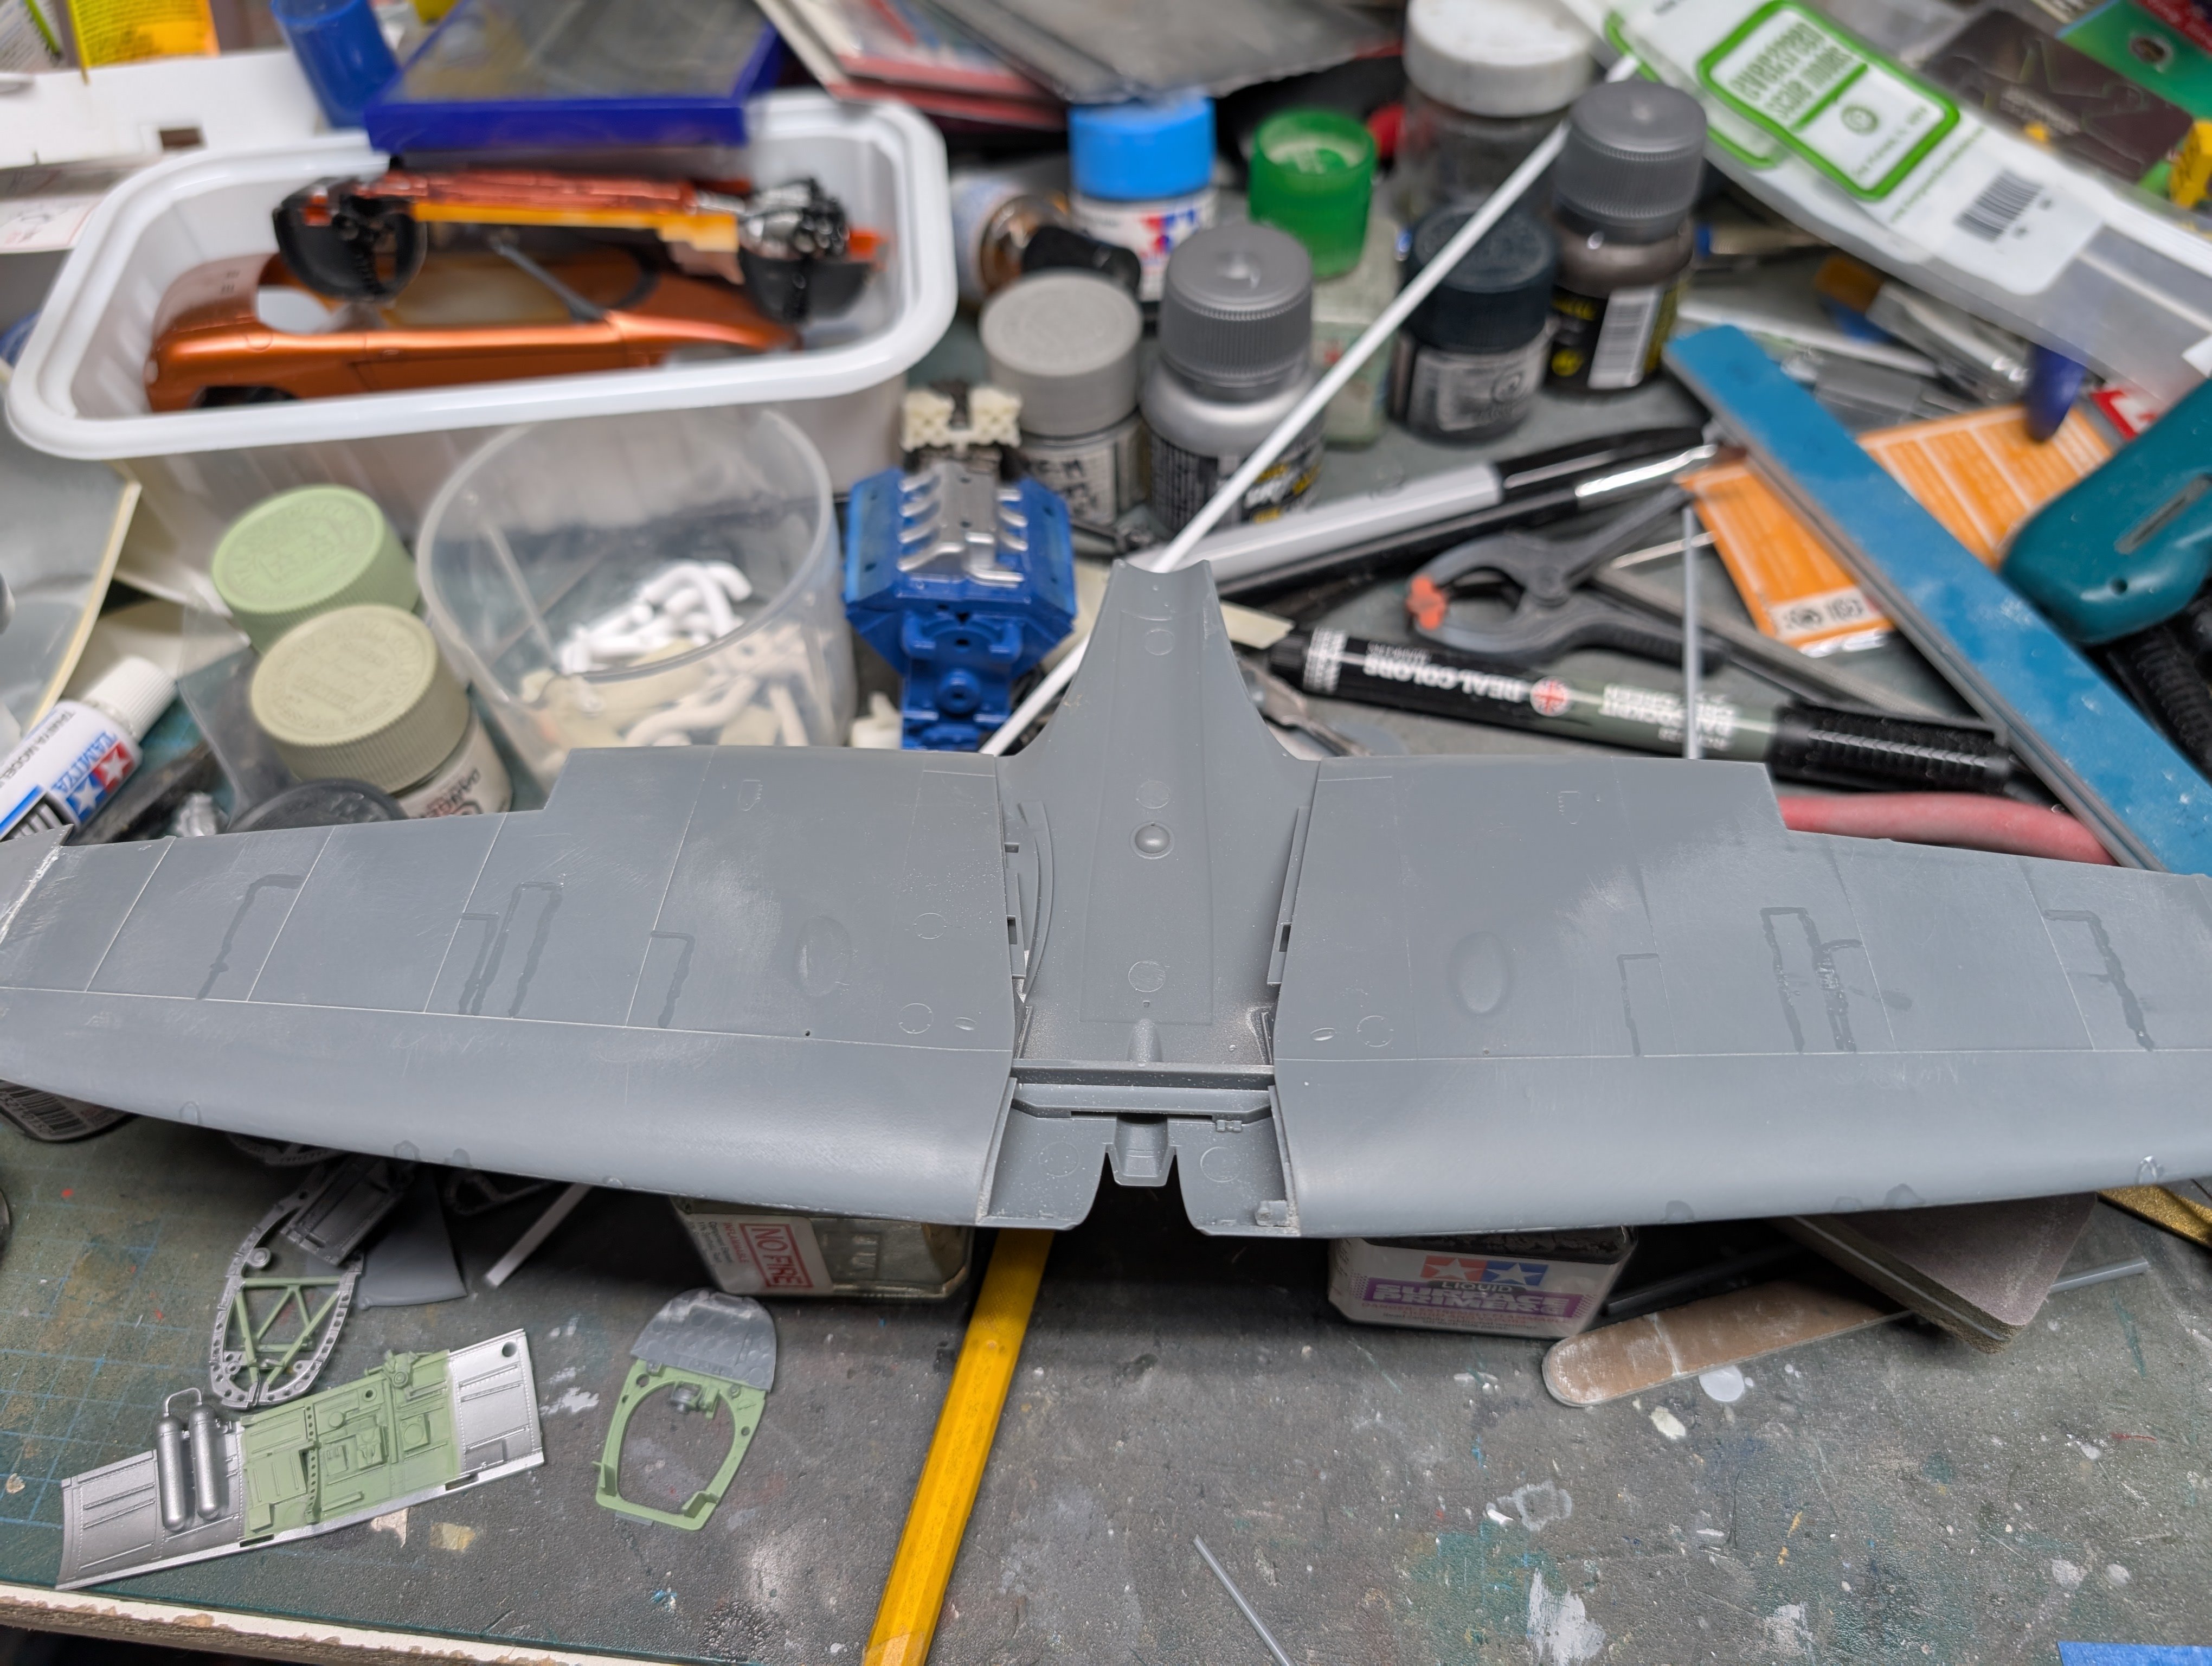
While that was drying, I started on the wings.
The main spar and wheel wells were glued in.
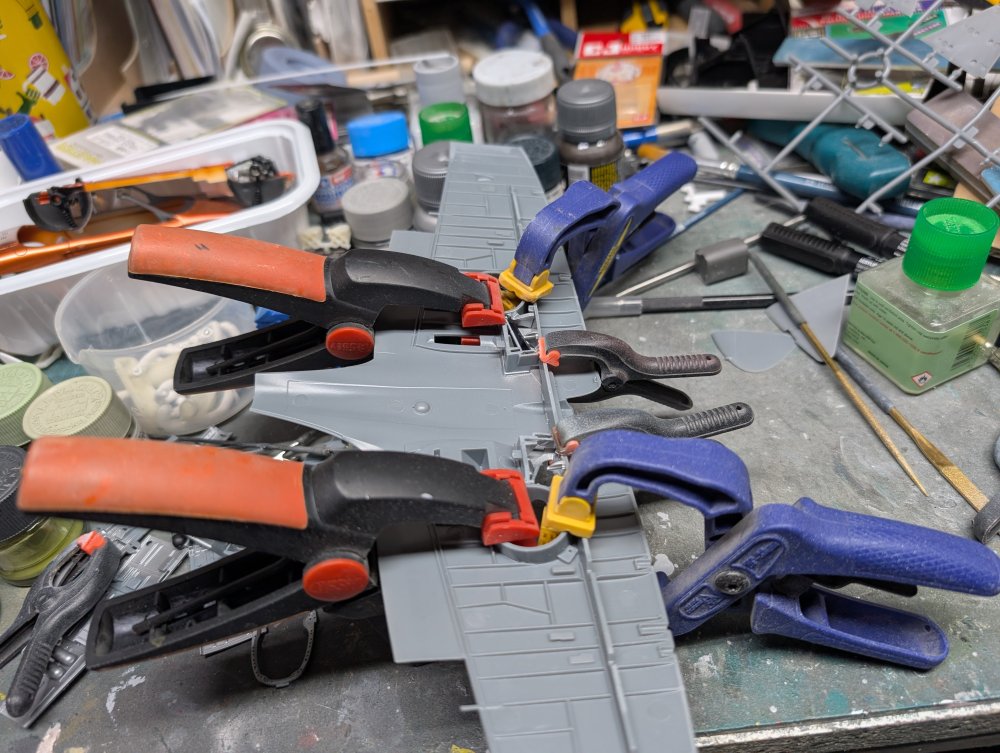
I then added the upper wings. I trimmed off the outer wingtips. Here's one side done.

The Tamiya wingtip is just about a perfect fit.

I then filled in the MG access panels on the lower side. I initially started with Mr Surfacer but switched to CA as it dried faster.

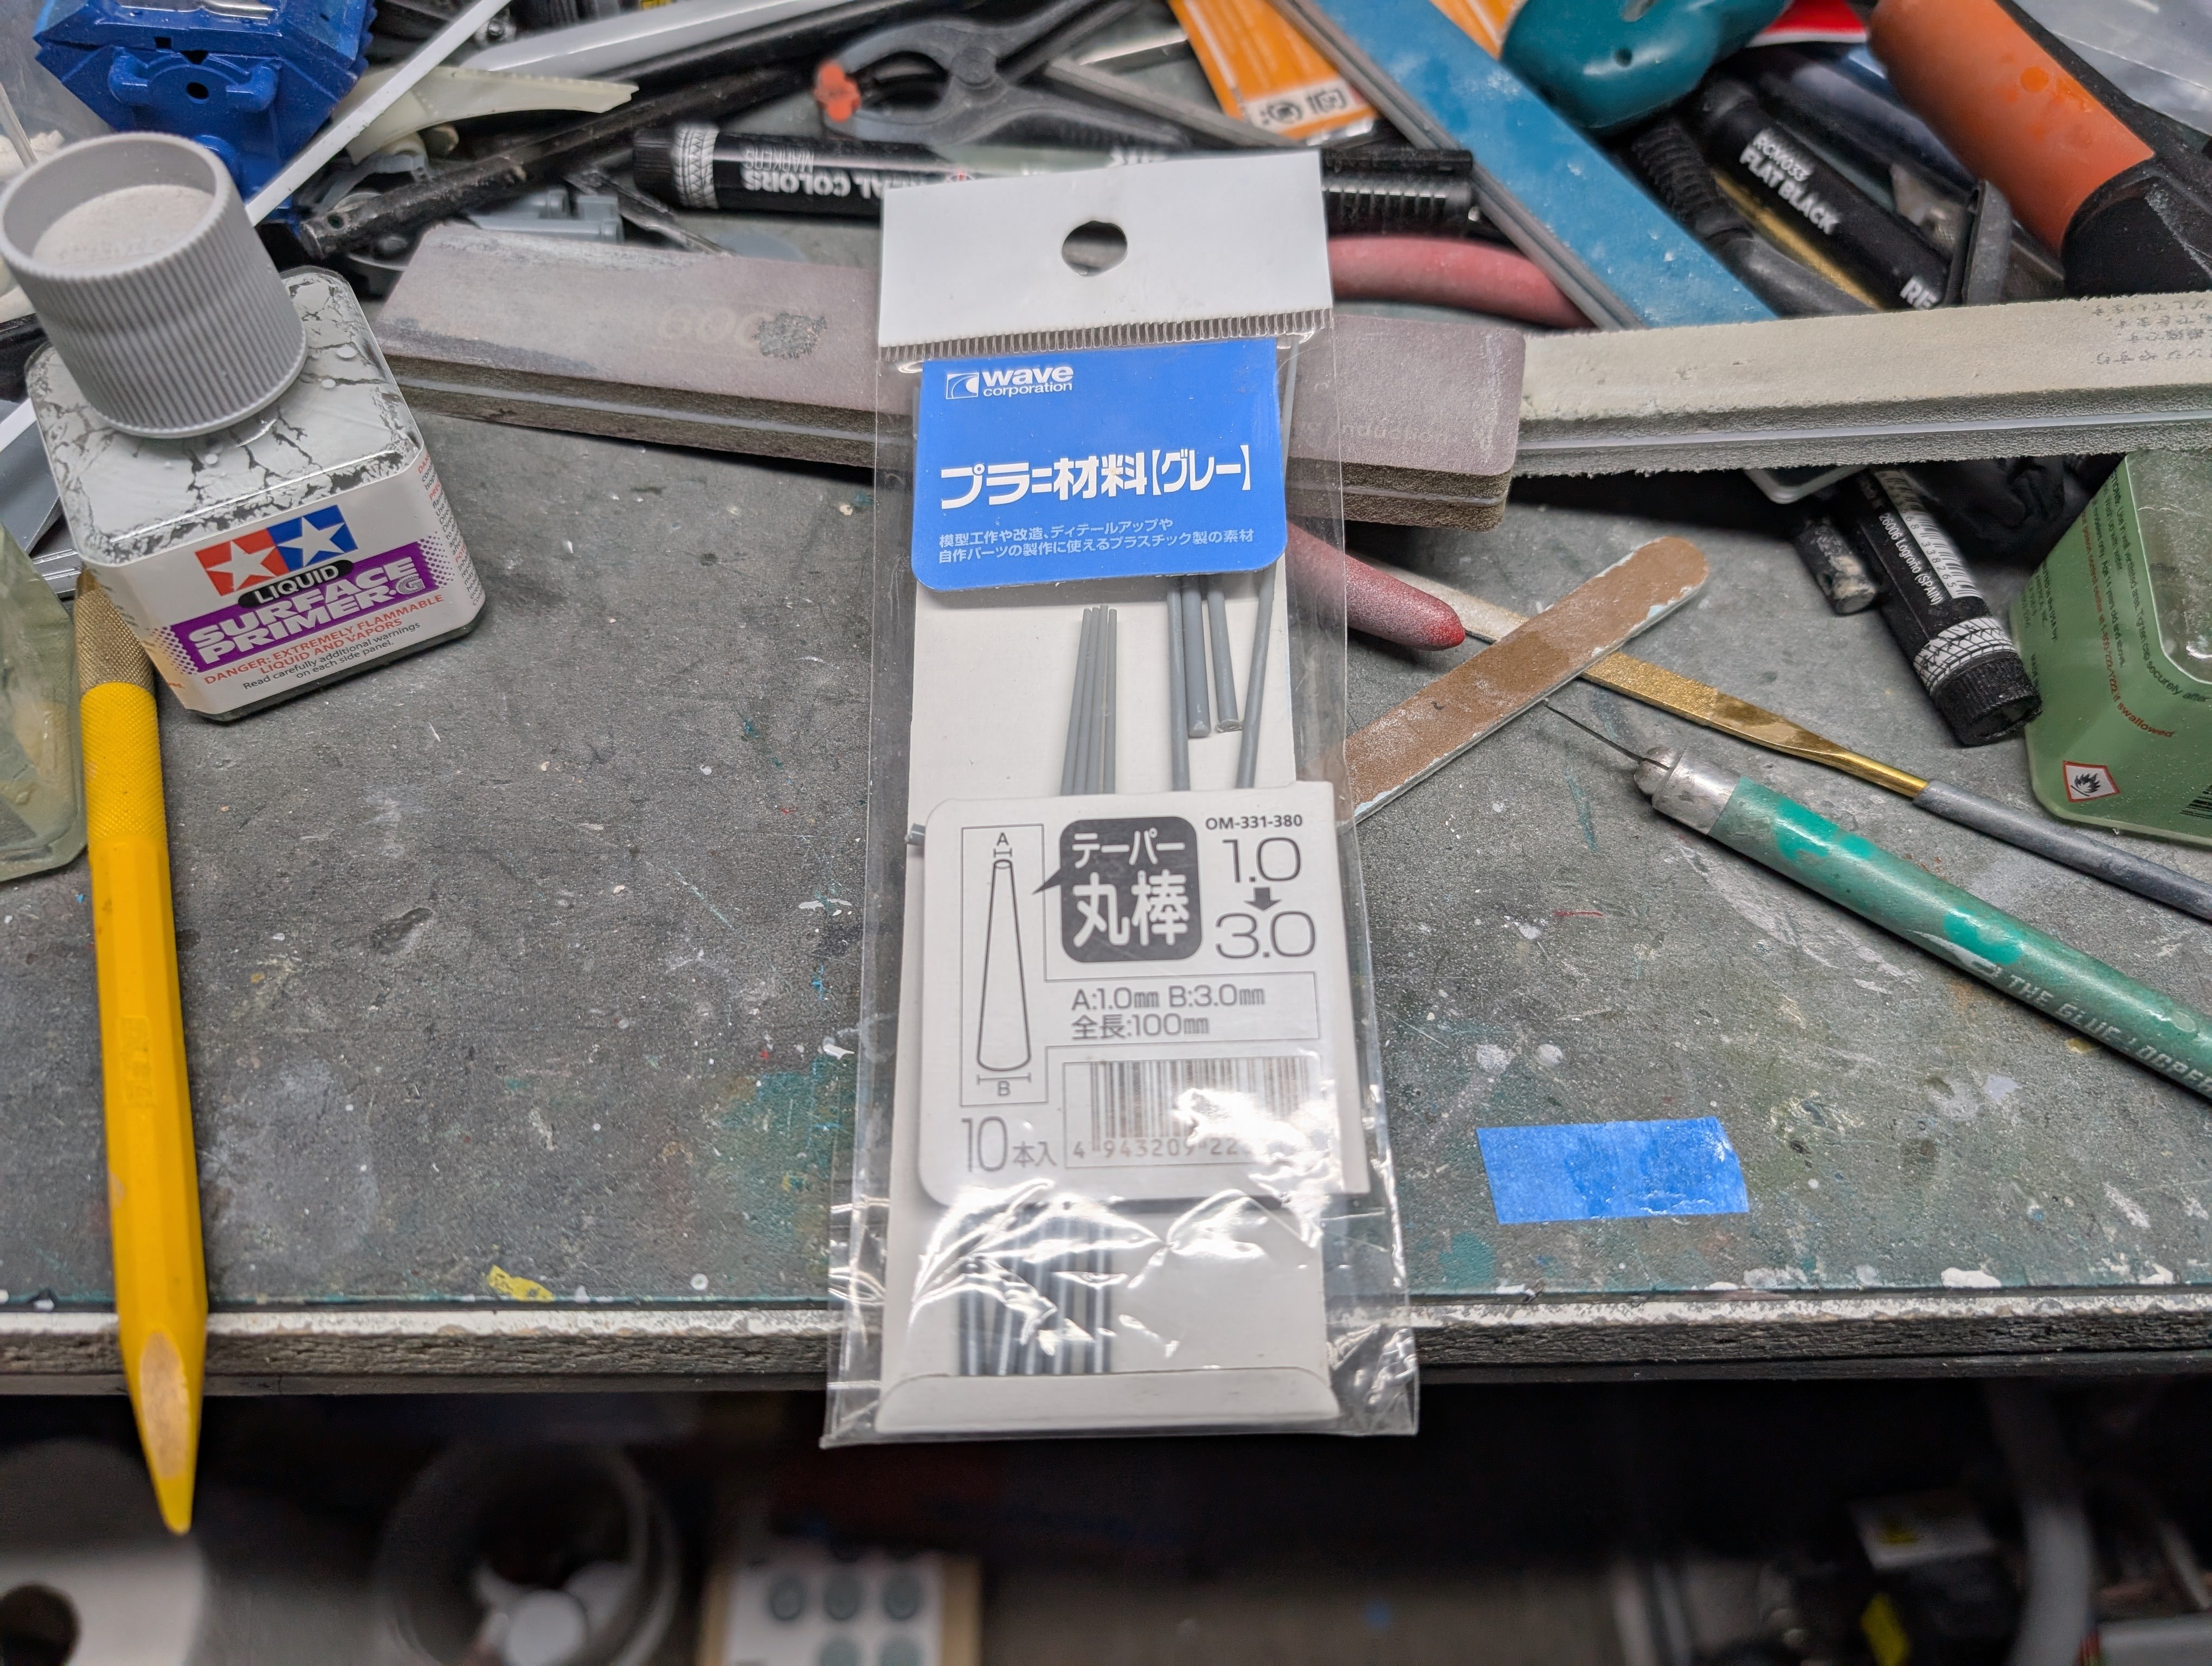
I did the same on the upper side as well as filling in the MG barrel openings. For this I used some Wave tapered plastic rod. It fills the holes perfectly.


-
9
-
-
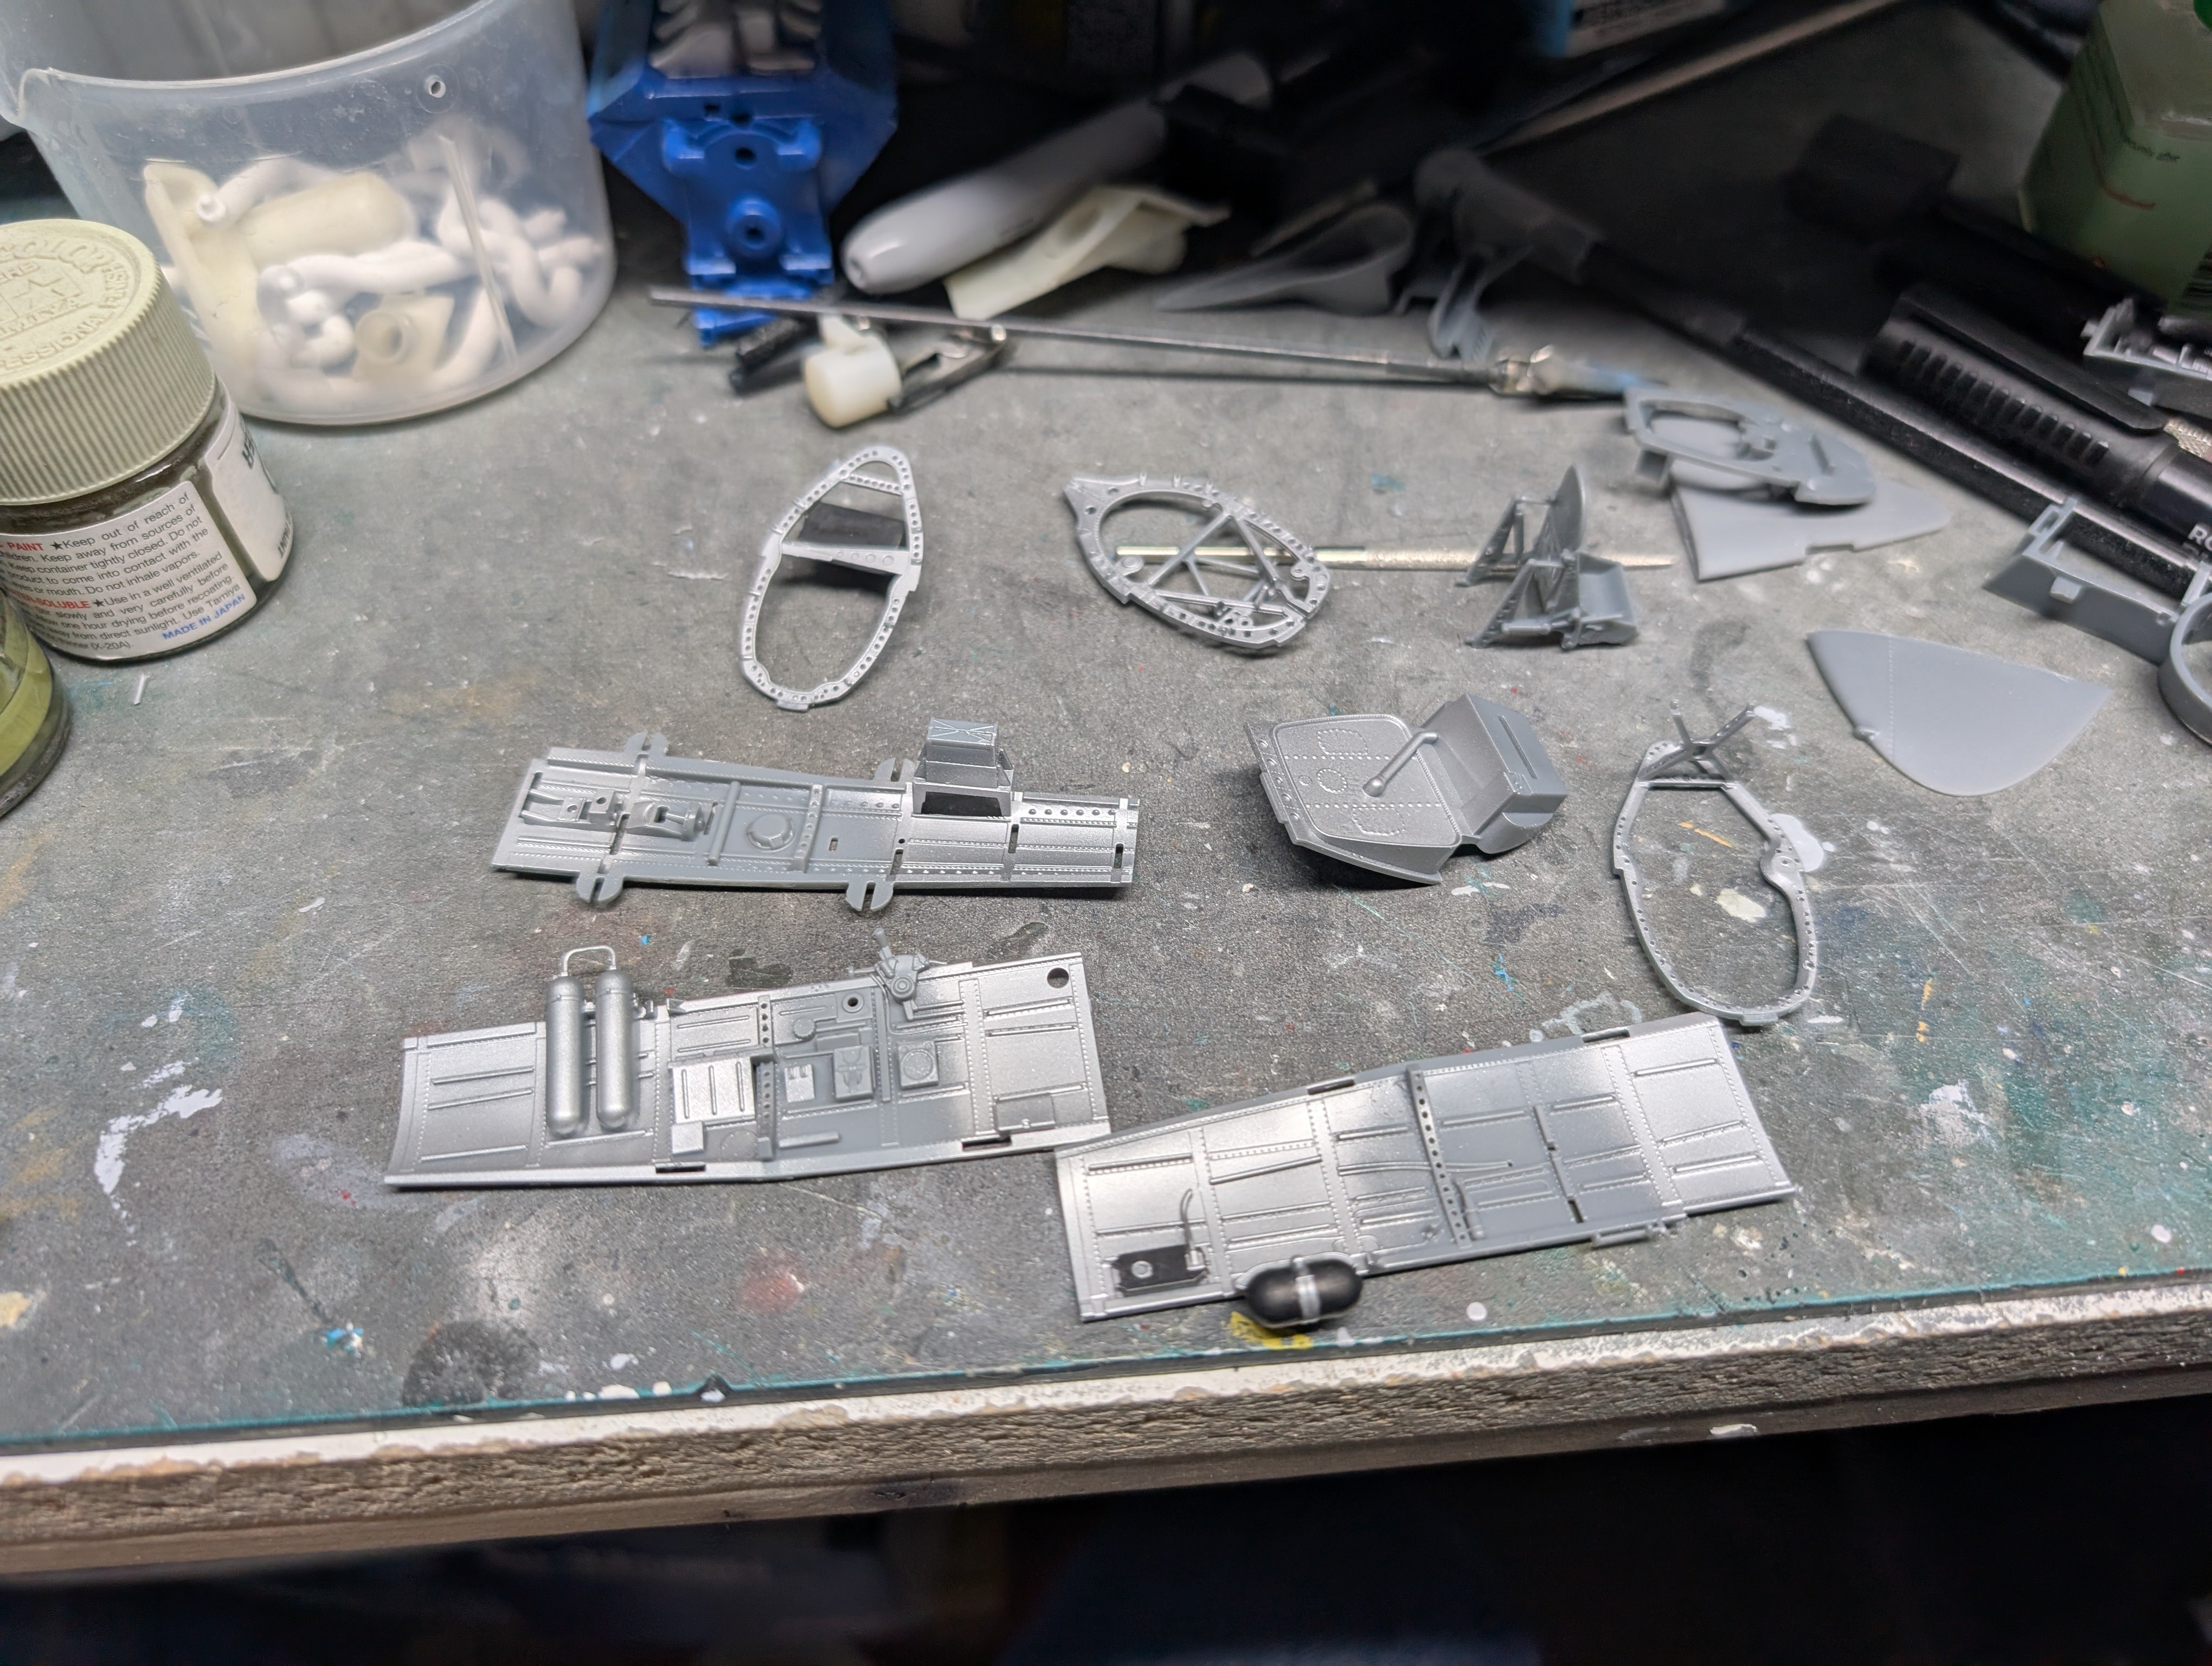
Trying a different approach, I used the new AK Real Color markers for the RAF Grey-Green areas. This was much faster than masking them off.
First coat looks a bit meh:
Much better after a second one:
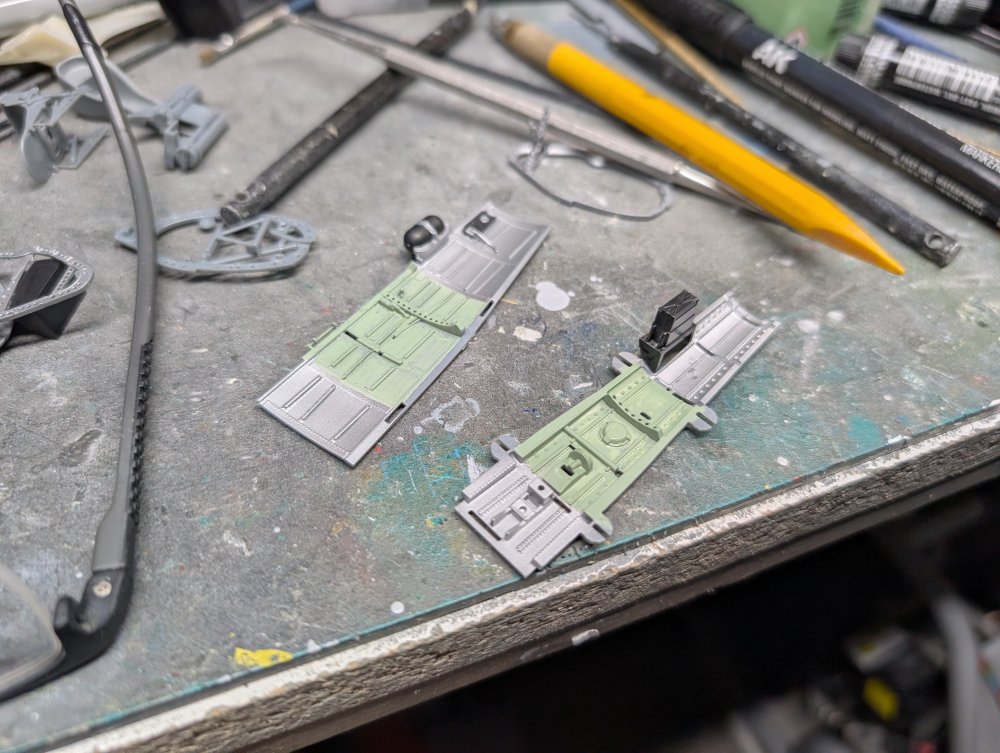
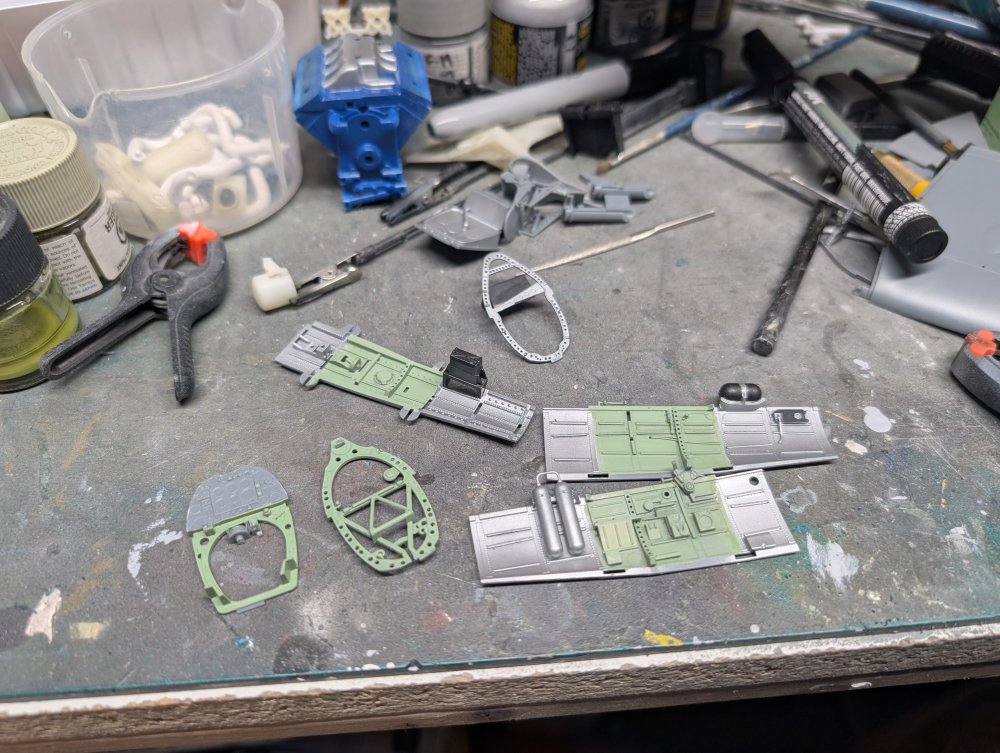
The IP needs a couple instruments removed from the upper side.
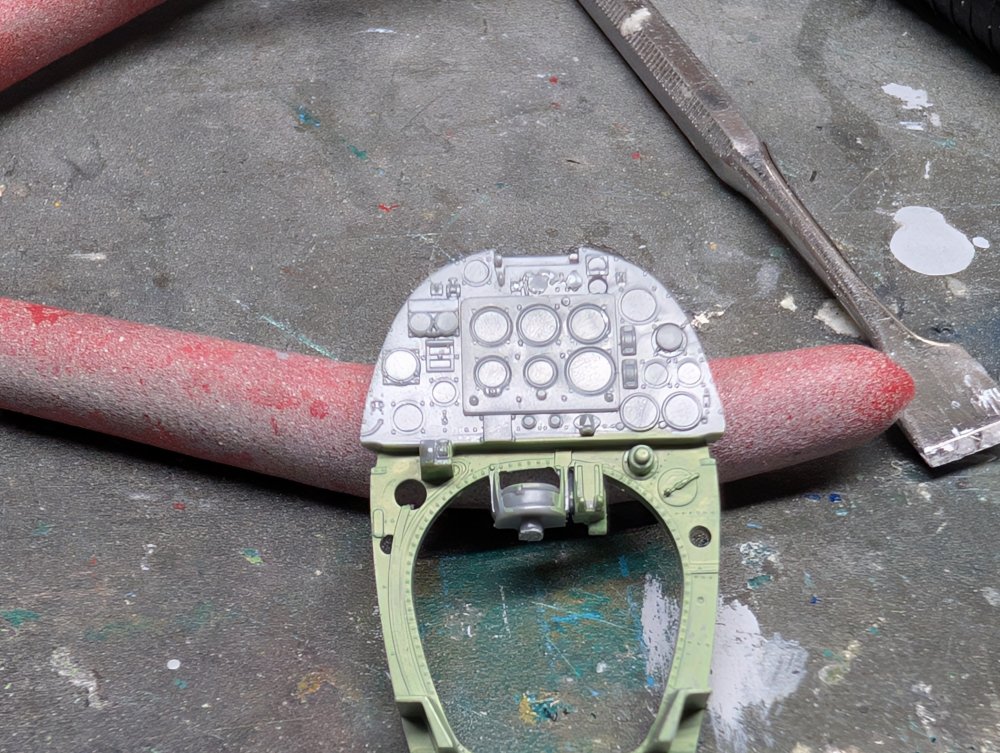
After scraping them off, I did a bit of touch-up with some Mr Surfacer.

-
6
-
-
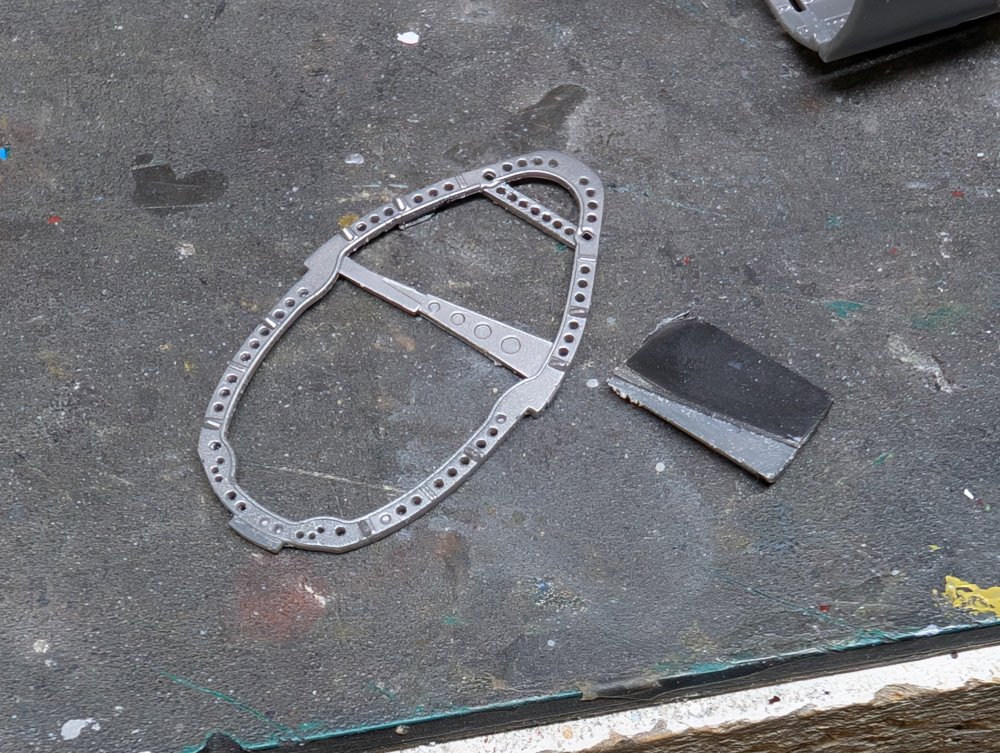
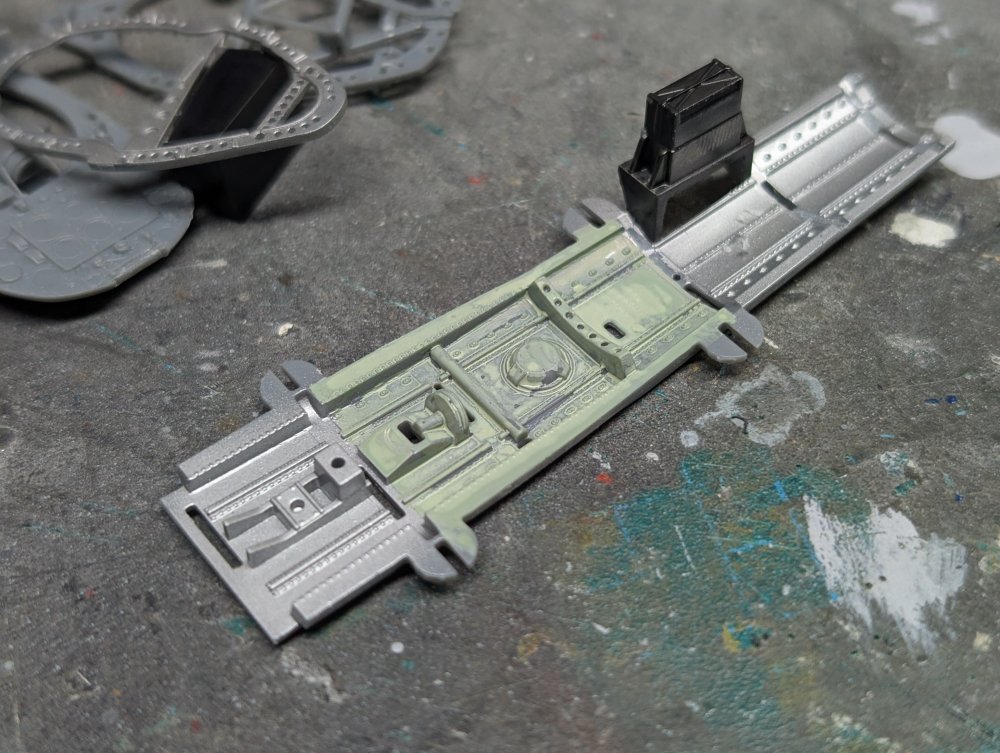
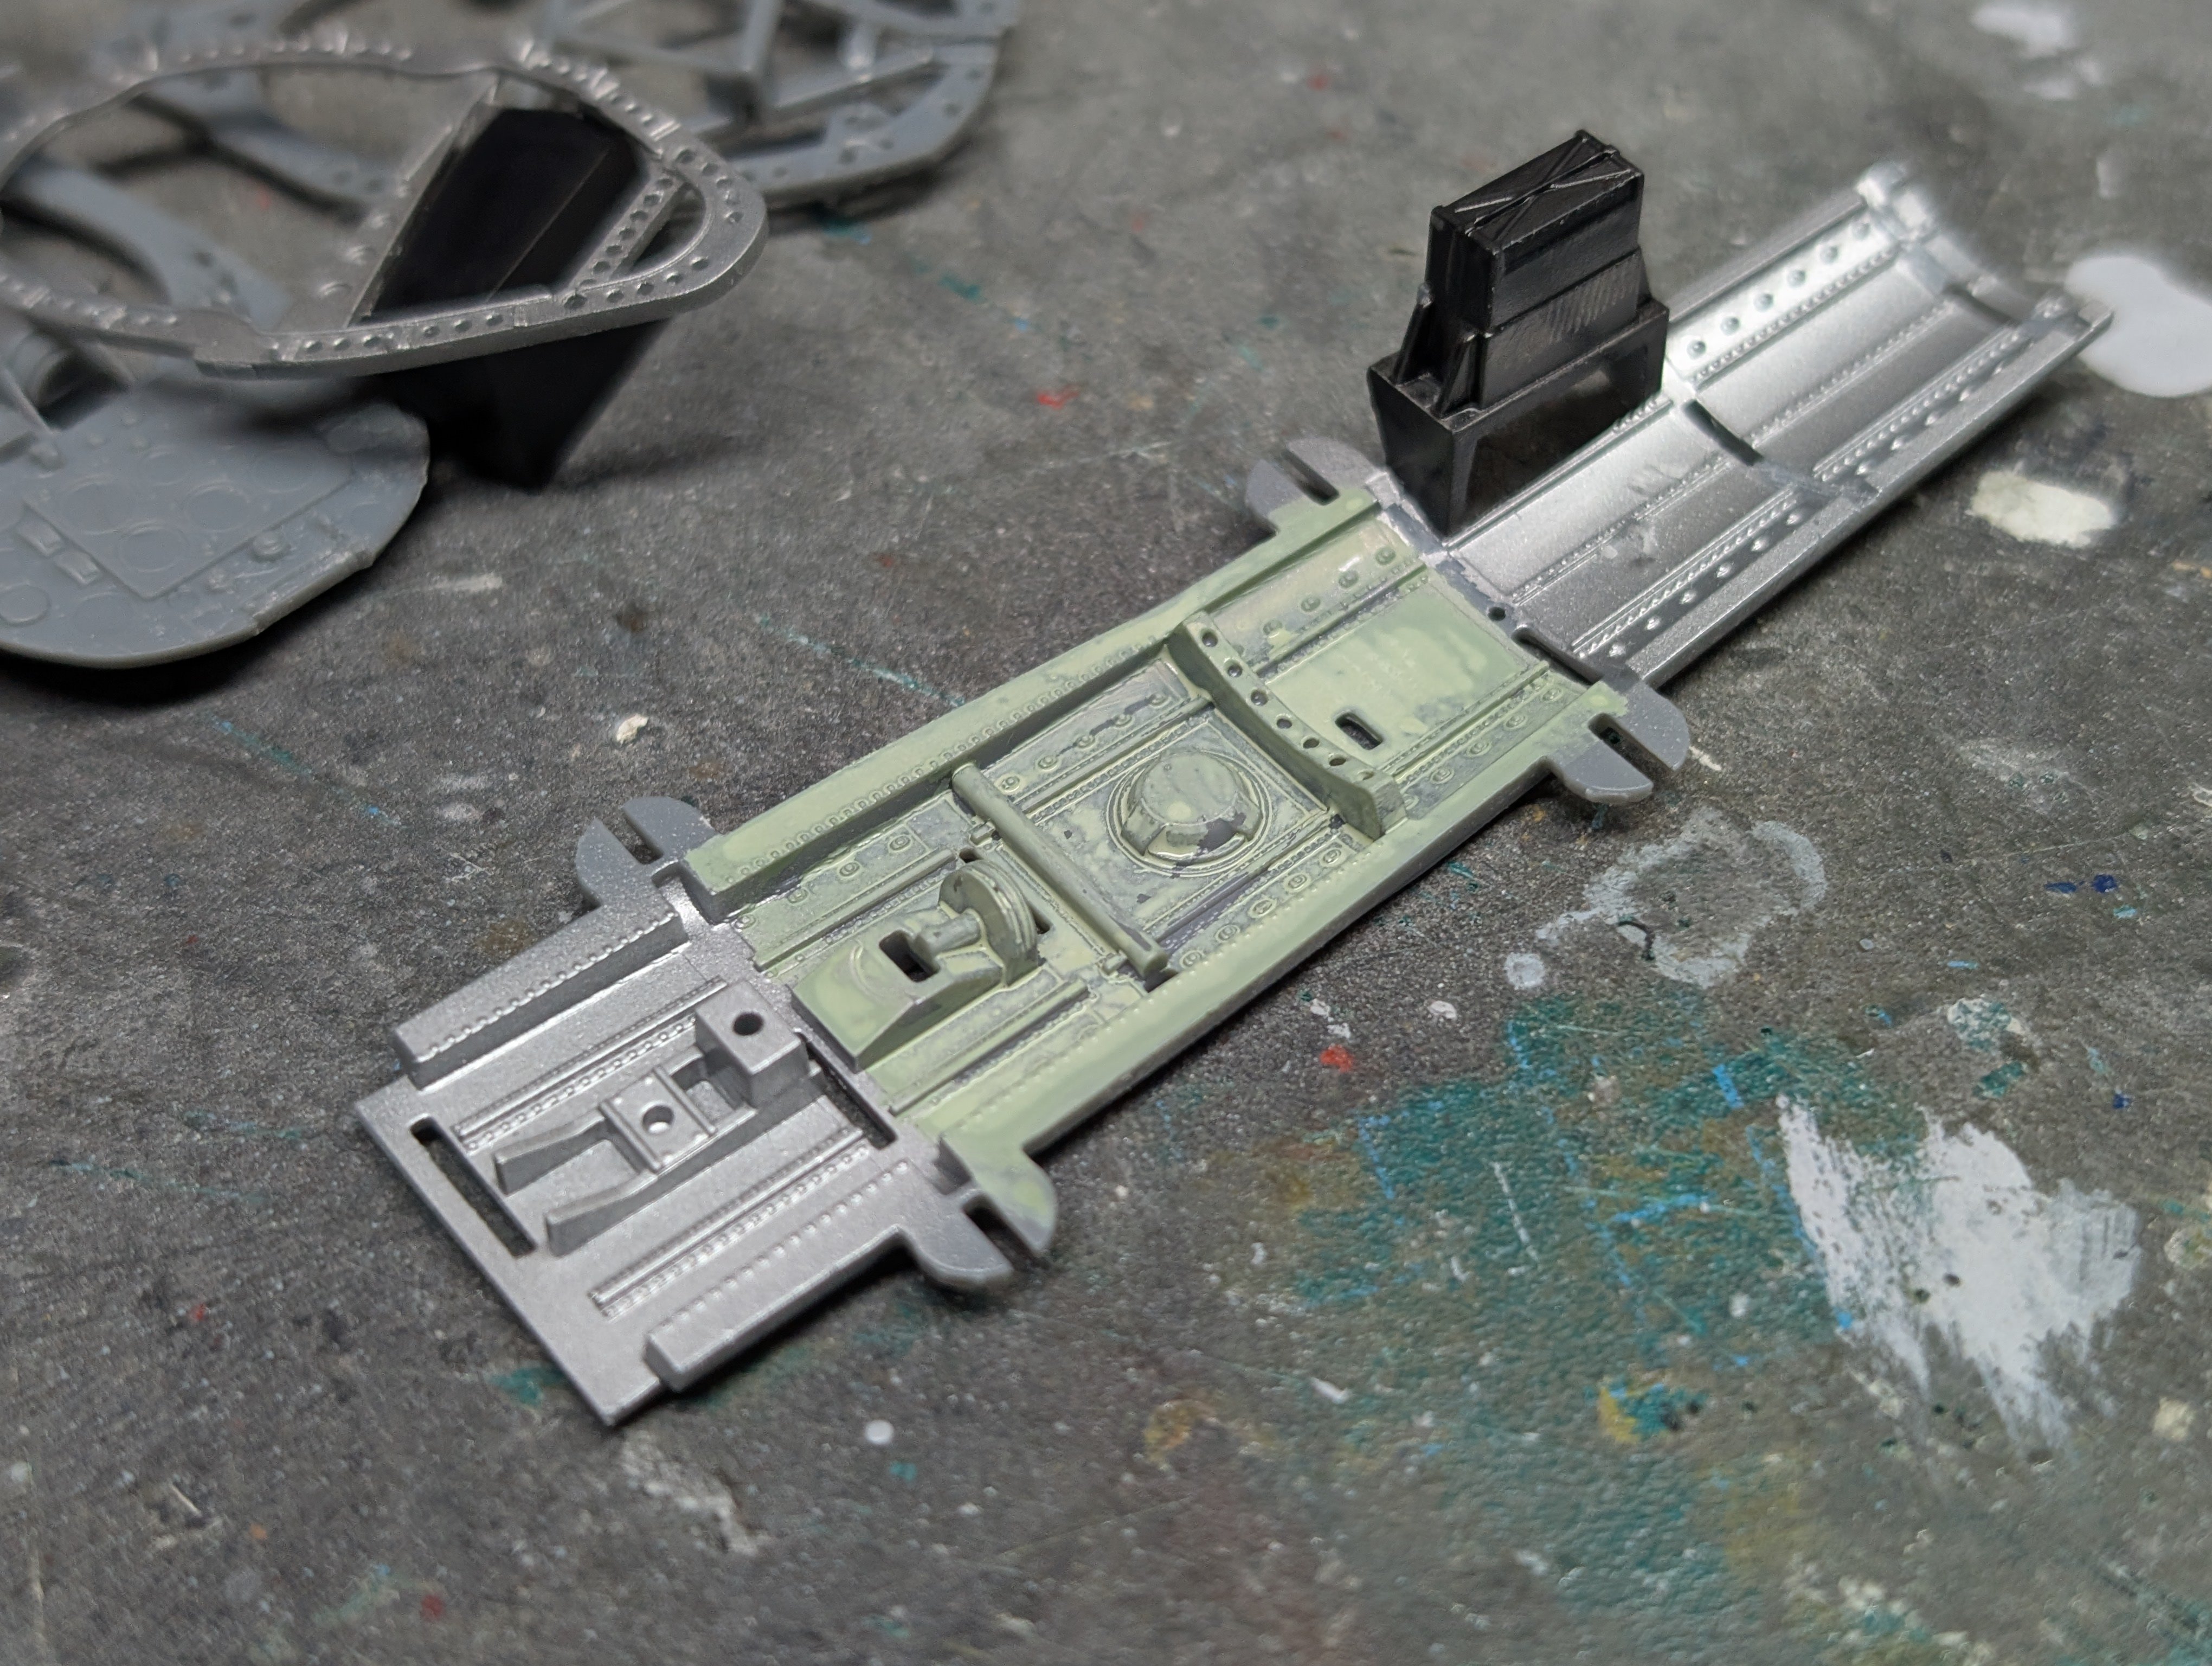
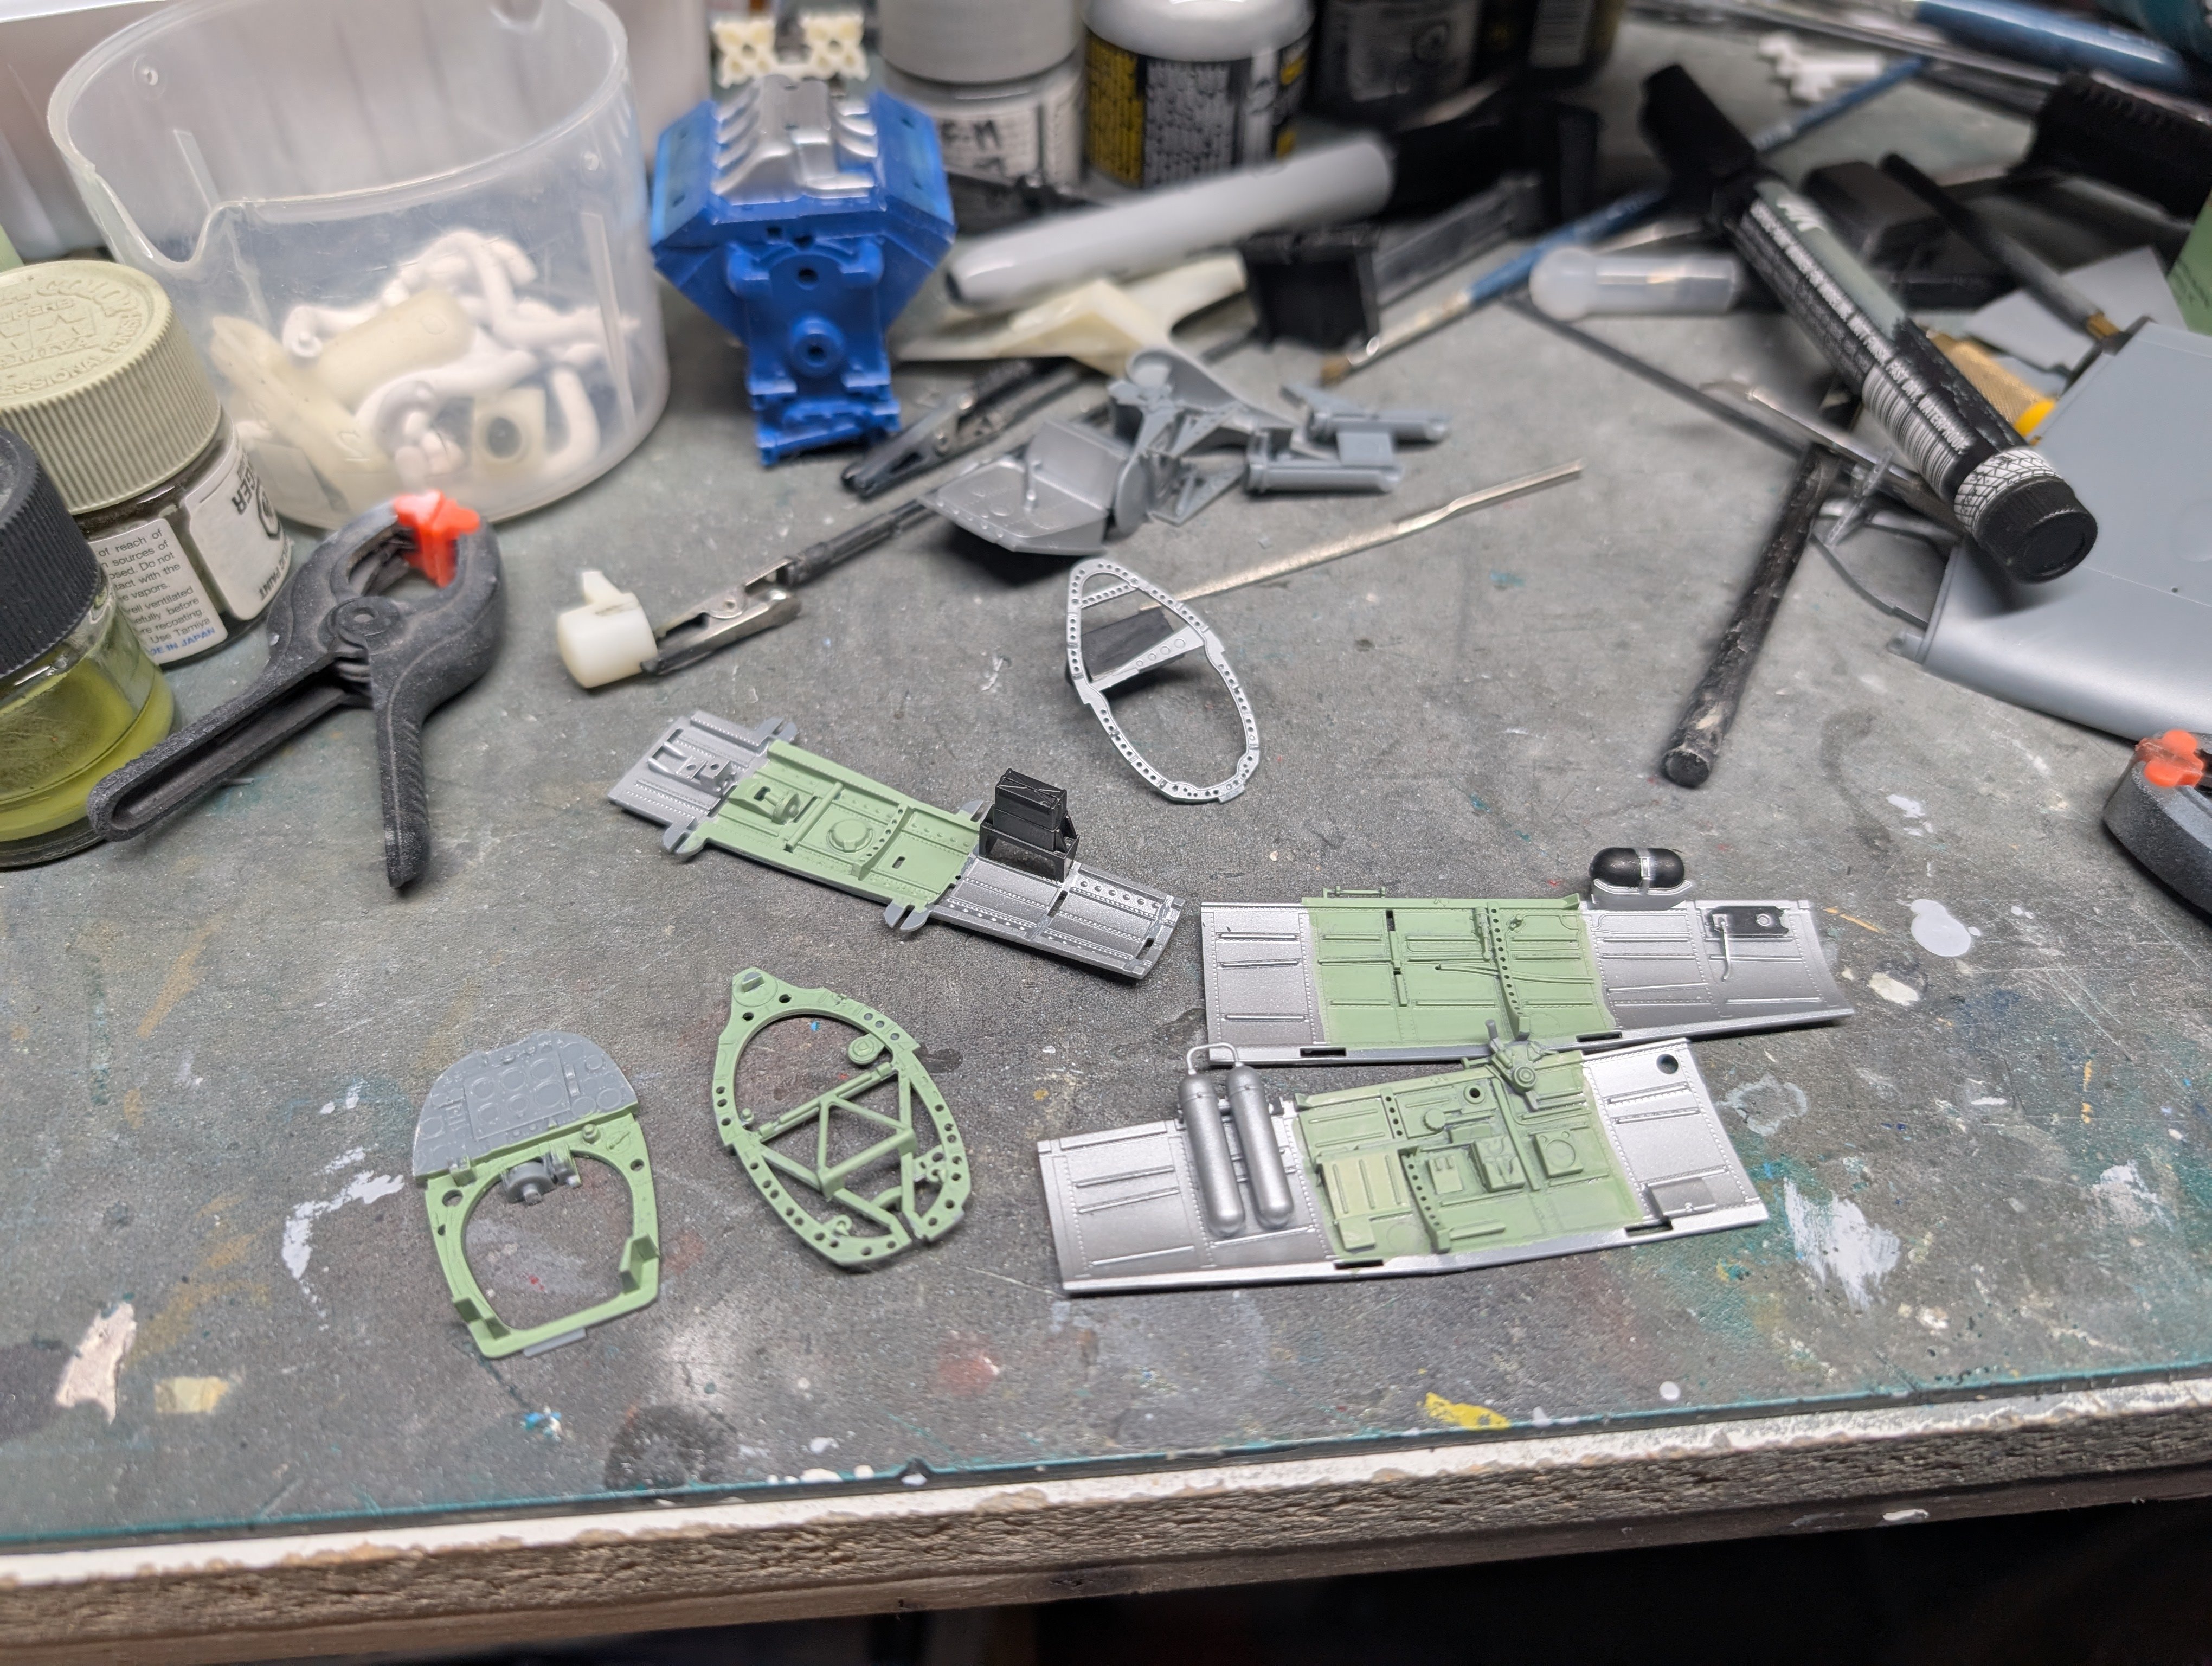
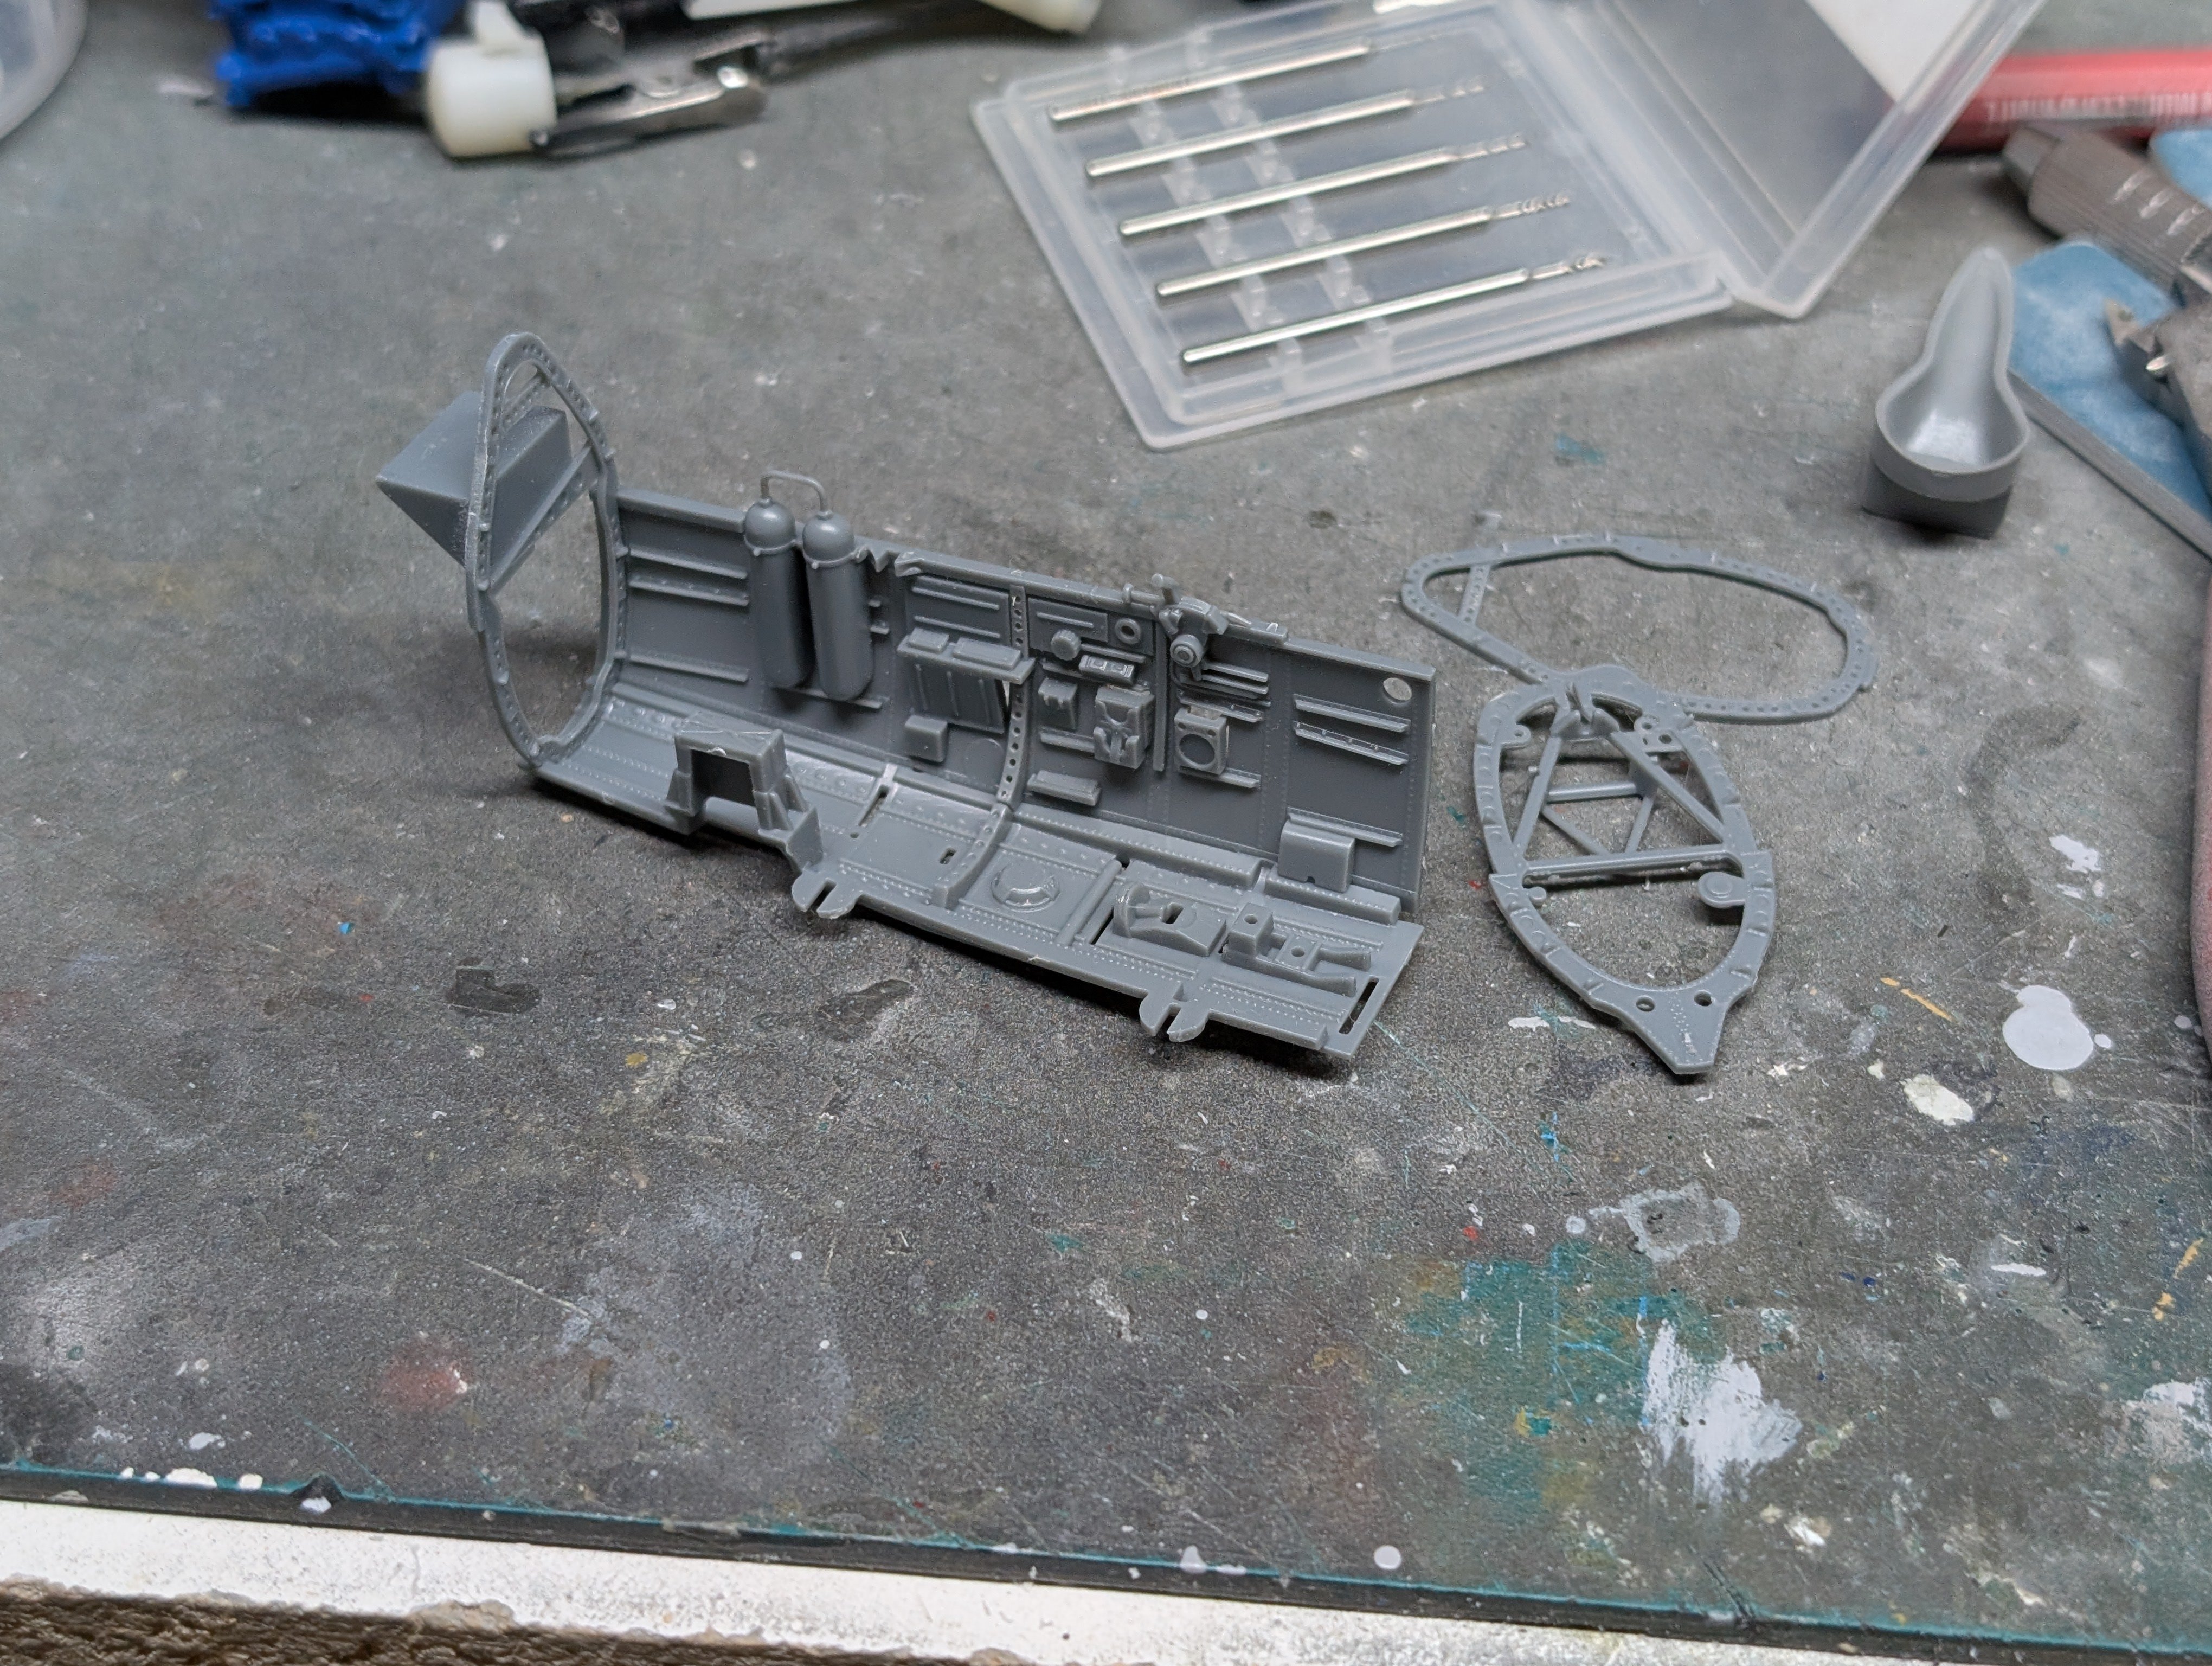
First up, the cockpit. I did a test fit of the major components to see what needed modification, if any.
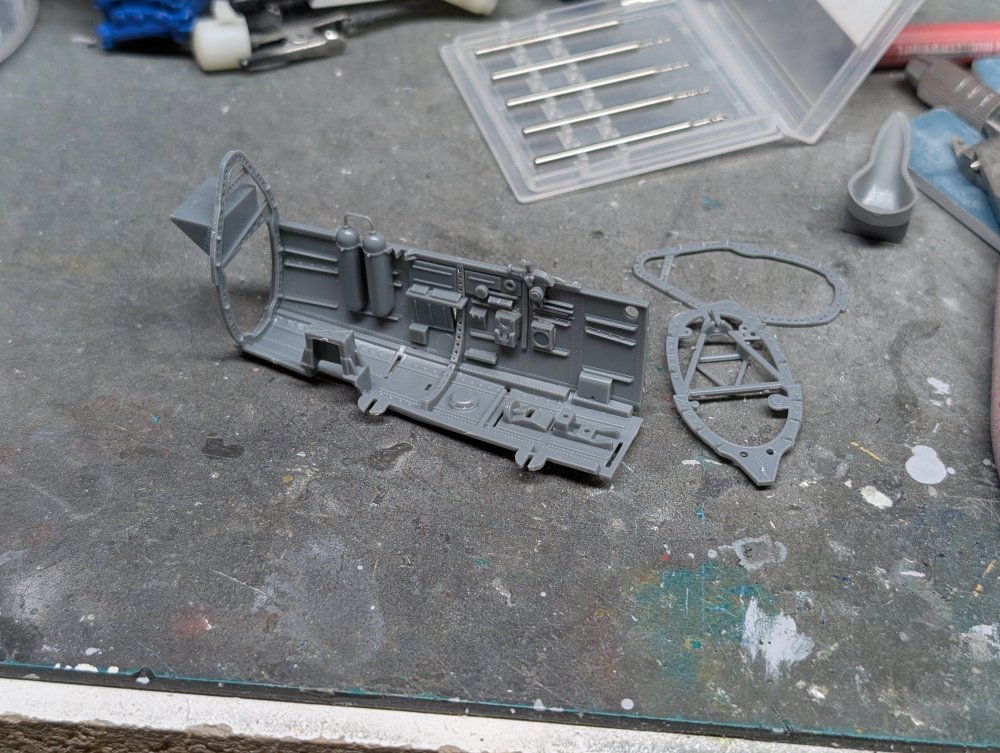
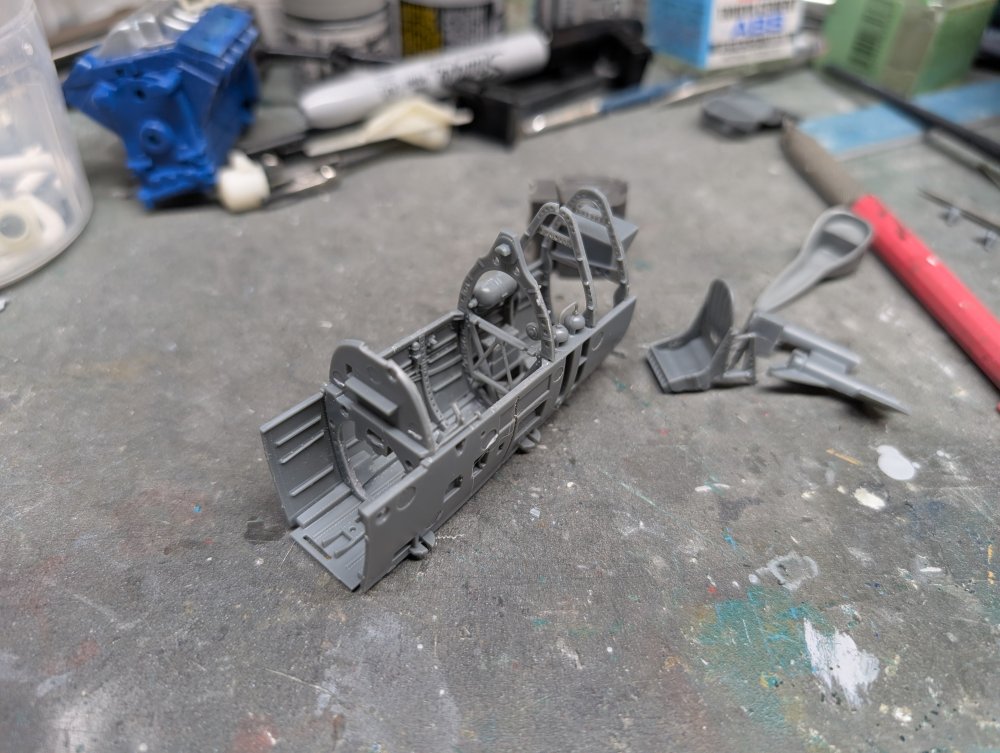
At the same time, I drilled out all the lightening holes in the frames.
Then the relevant areas were painted in silver.

-
4
-
-
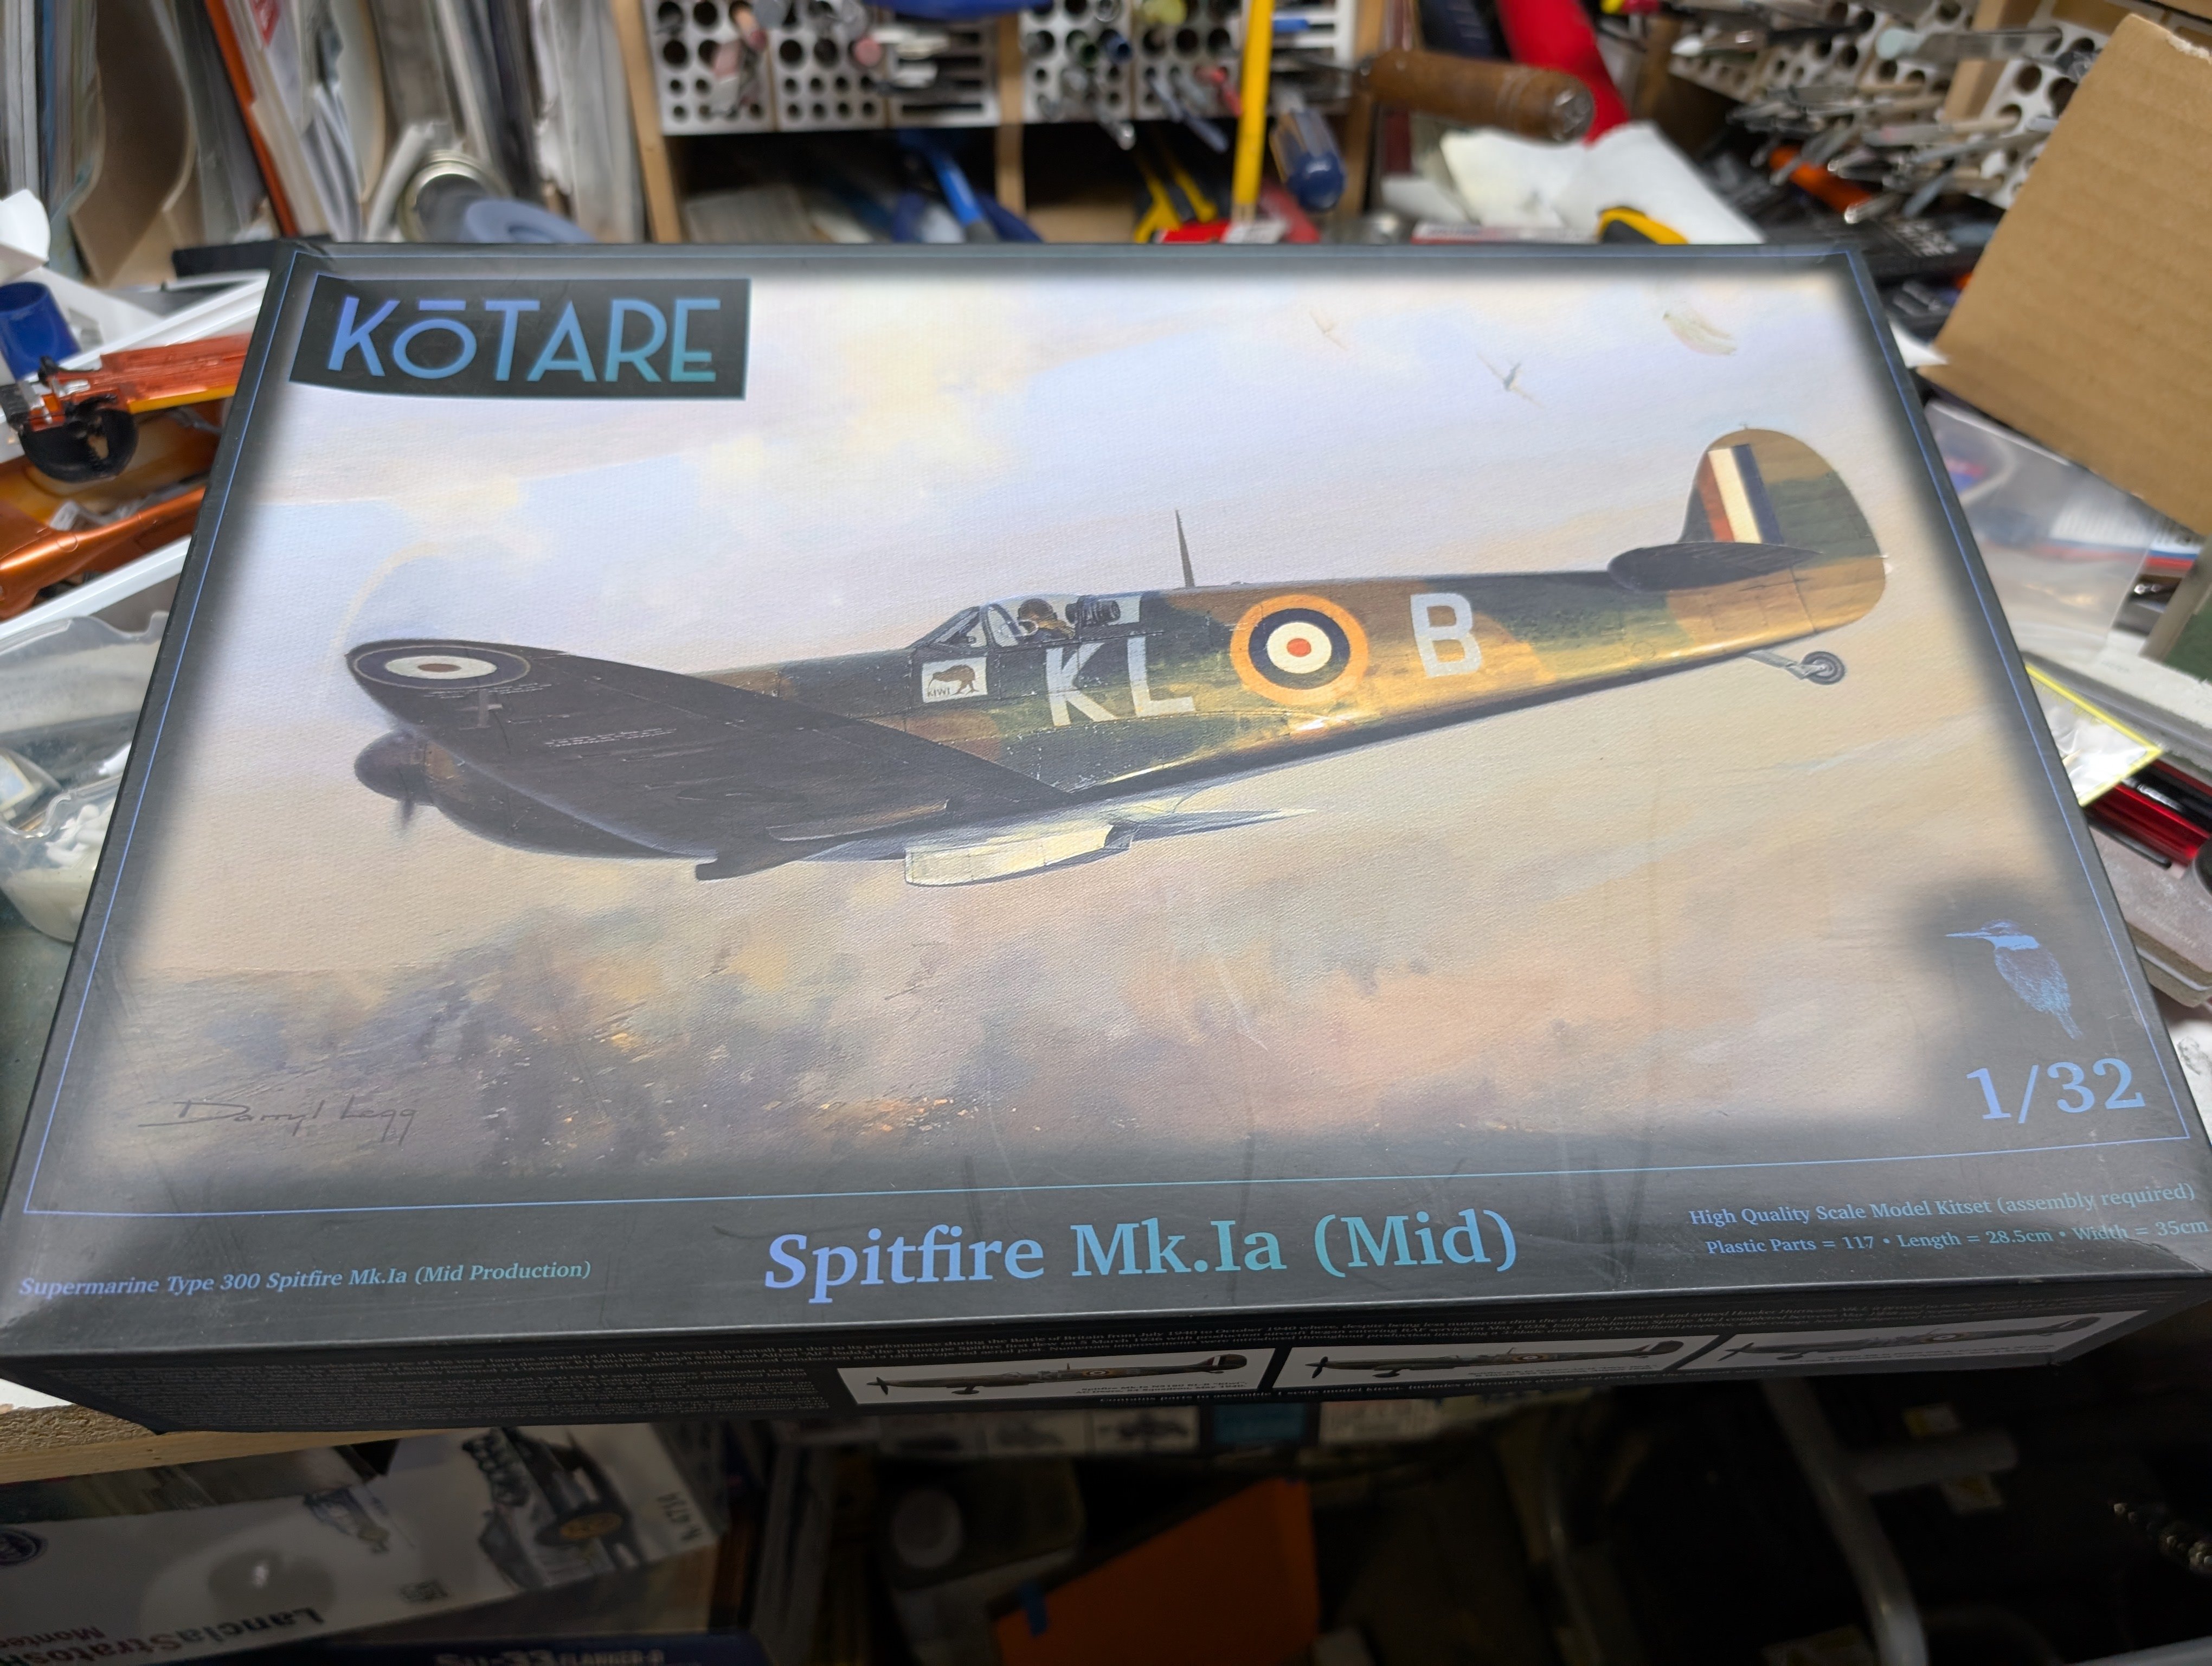
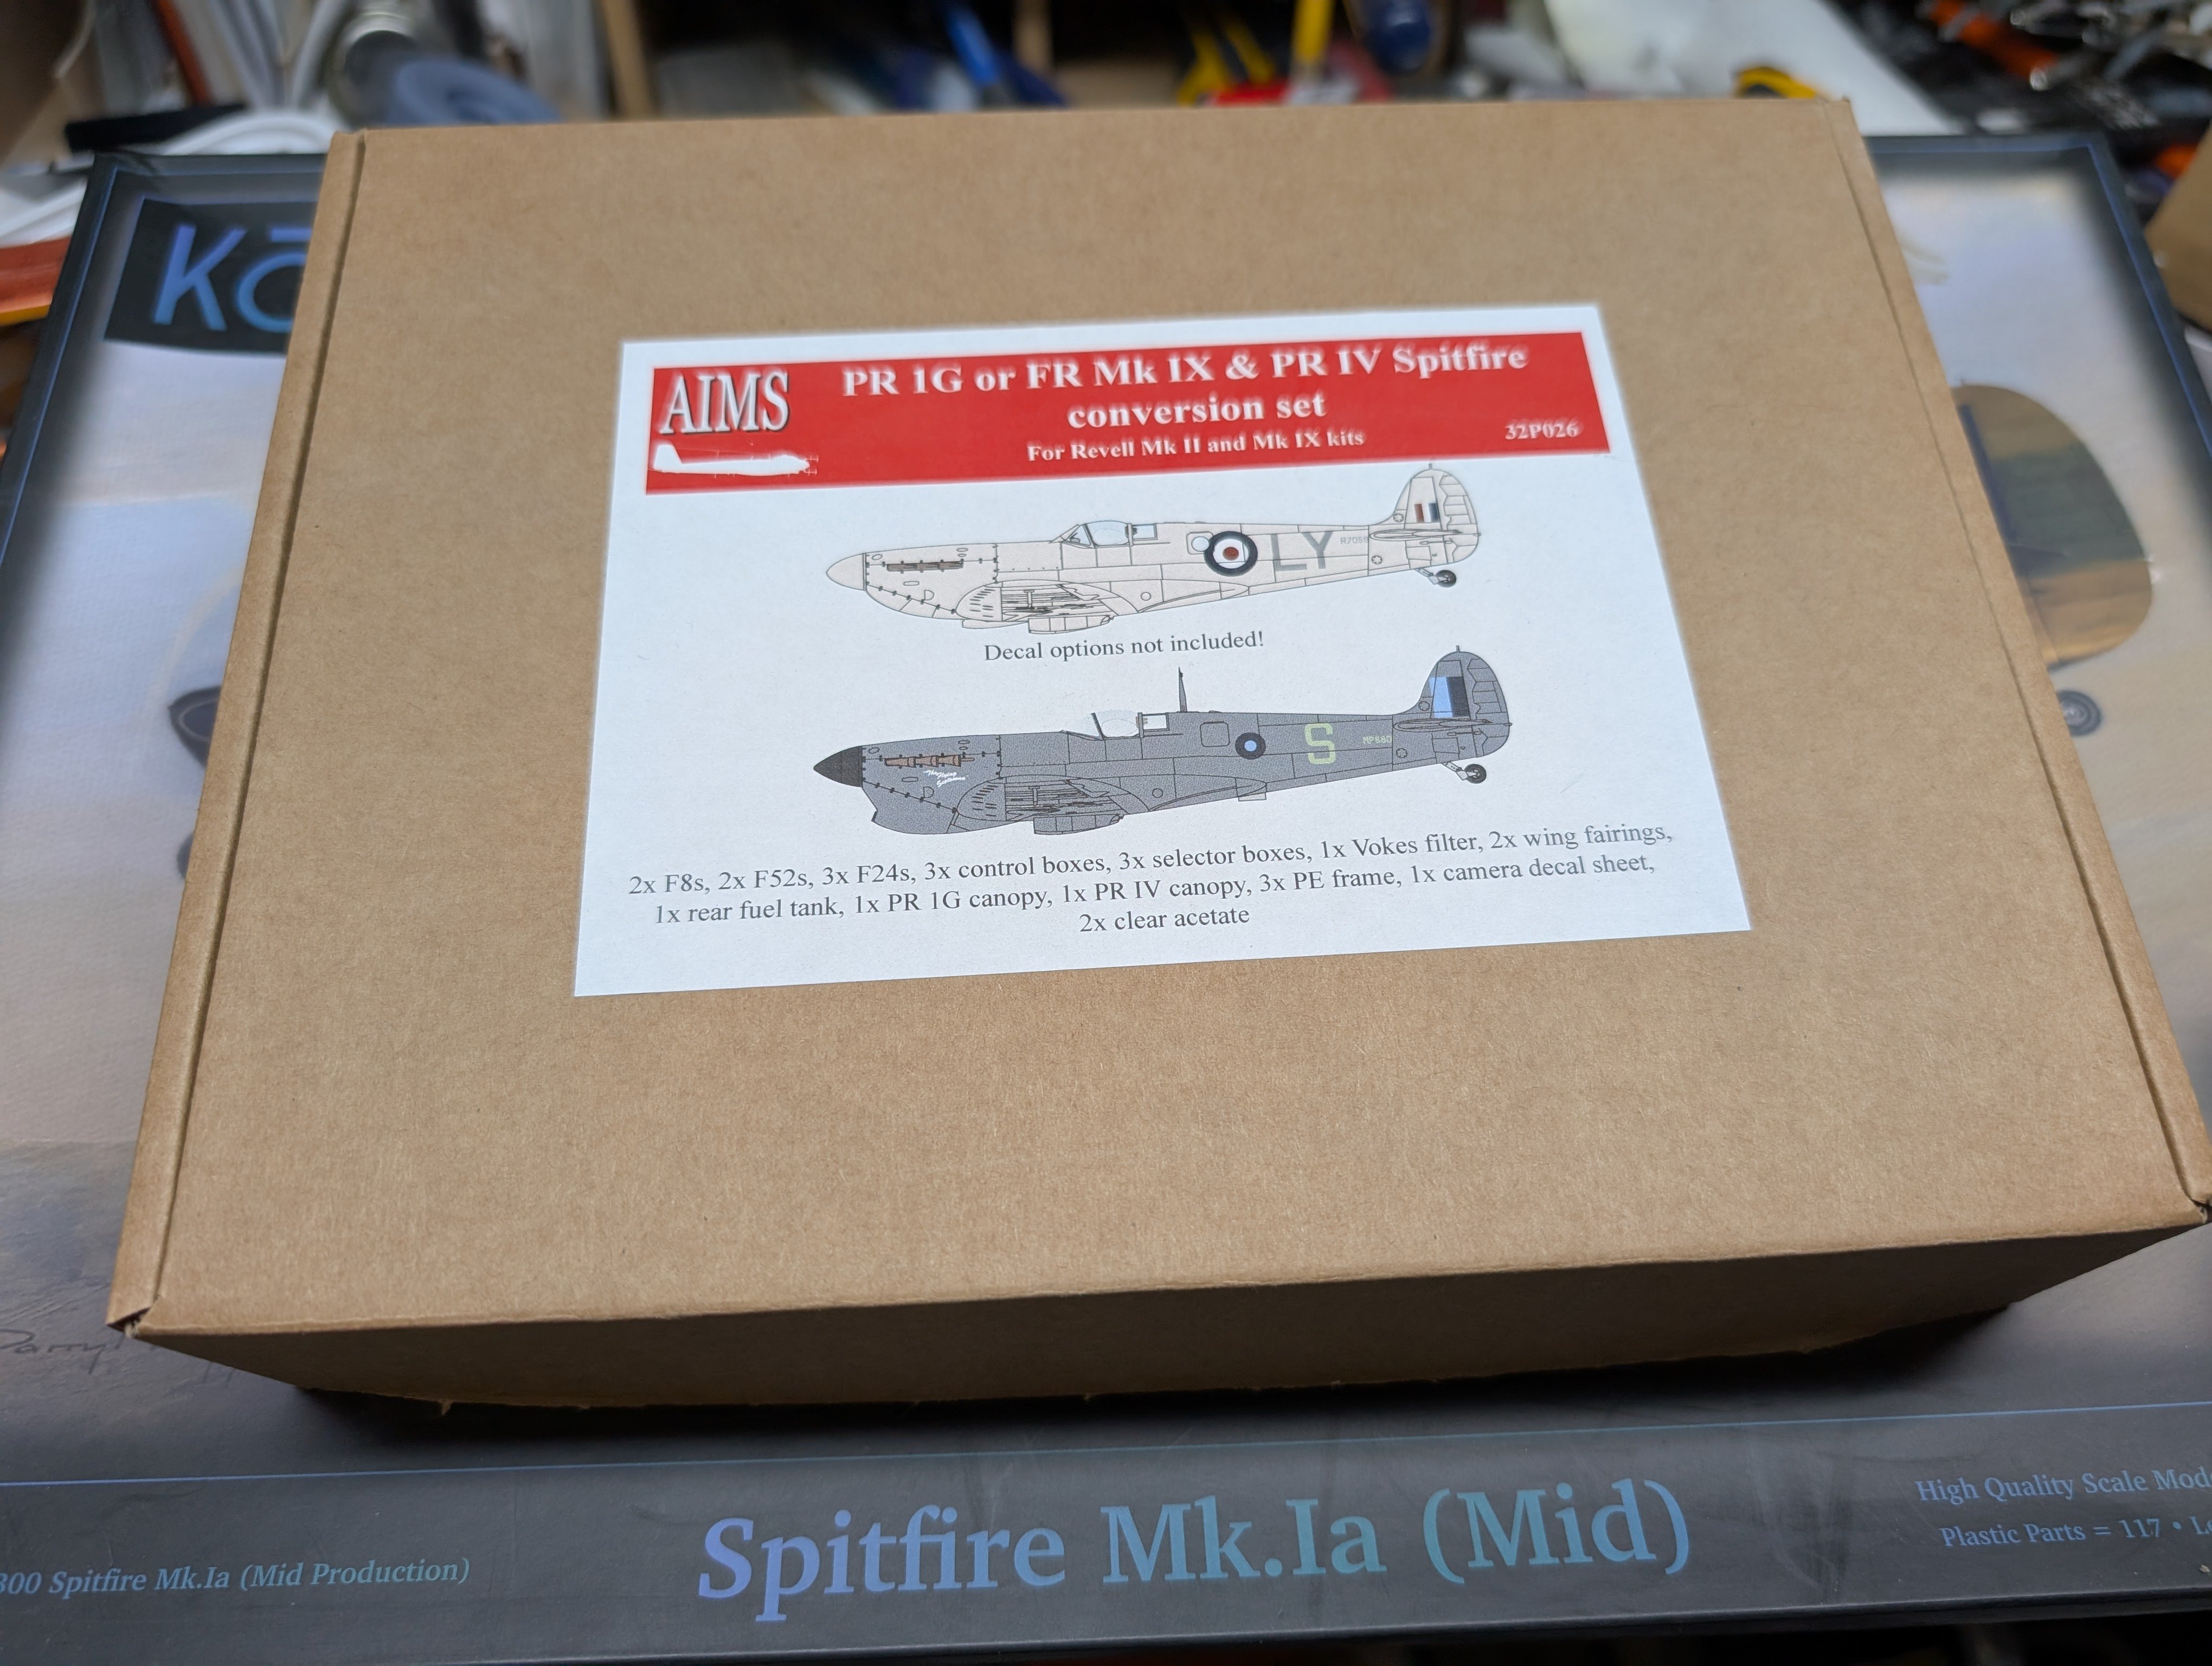
I picked up the AIMS PR Spitfire conversion set when it first came out a couple (more?) years back. It was designed for the Revell Spitfire MkII kit which was at the time the most up to date early Spitfire kit.
Then Kotare came out with their MkI kits. Having picked up a second copy on clear out at one of the local shops, I figured that it might be the better candidate for the AIMS conversion instead. A quick comparison showed that it was definitely feasible.
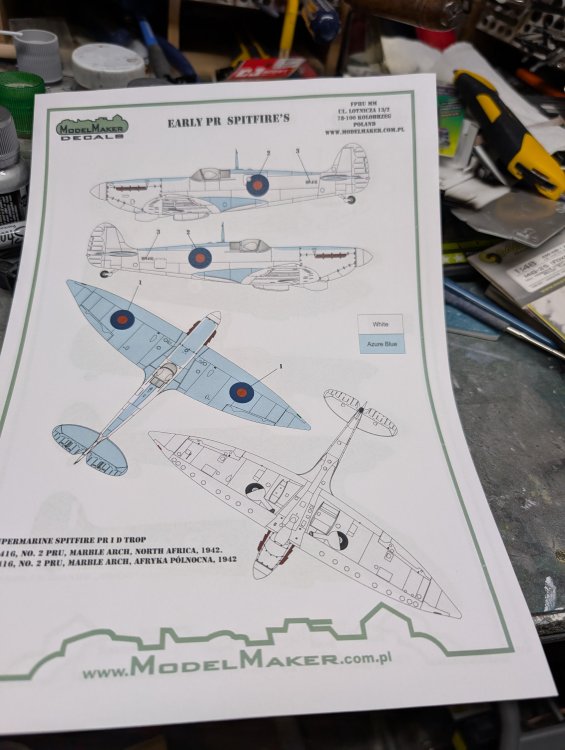
Then more recently, Model Maker released a set of masks for Spitfire BR416. This was a PR IV that services in Malta and carried anl distinctive Blue over White camo scheme. To tip things over the edge, @Martinnfb sent me the Aboukir filter needed.
So here we are.
The kit:

The markings:
The conversion:

The filter:

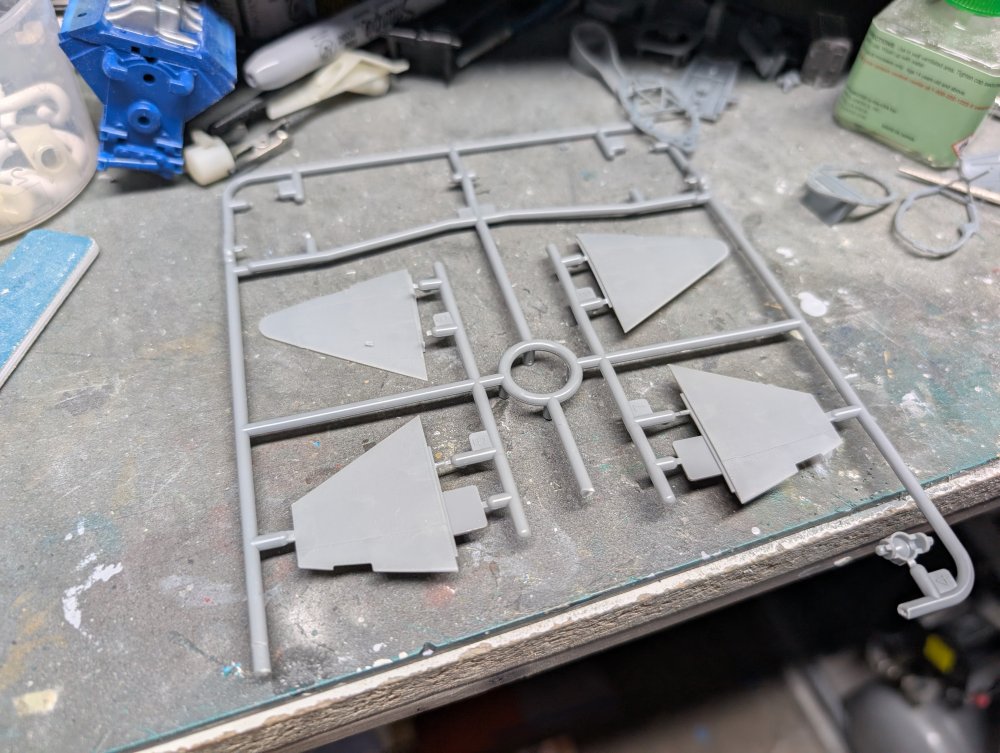
One more piece, the extended wingtips:
-
4
-
-
Looks good there John. The track sag especially is convincing.
-
3
-
-
Really nice work on the Cutlass.
I can completely relate to the feeling of inertia on the build. I've got a similar situation with my Sea Fury.
-
1
-
1
-


Soo.... What did you just get???
in Modelling Discussion
Posted
Paul, I have the same sets of masks. They work great for masking IP dials like you said. If you're careful, you can even re-use them a couple times.
For dials that have a different coloured ring, put the circle on the dial face, then go up a size and put the square part around the outside of the dial.