BlrwestSiR
-
Posts
9,225 -
Joined
-
Last visited
Content Type
Profiles
Forums
Events
Gallery
Everything posted by BlrwestSiR
-

What is on your bench right now ? Share a picture :)
BlrwestSiR replied to Martinnfb's topic in Modelling Discussion
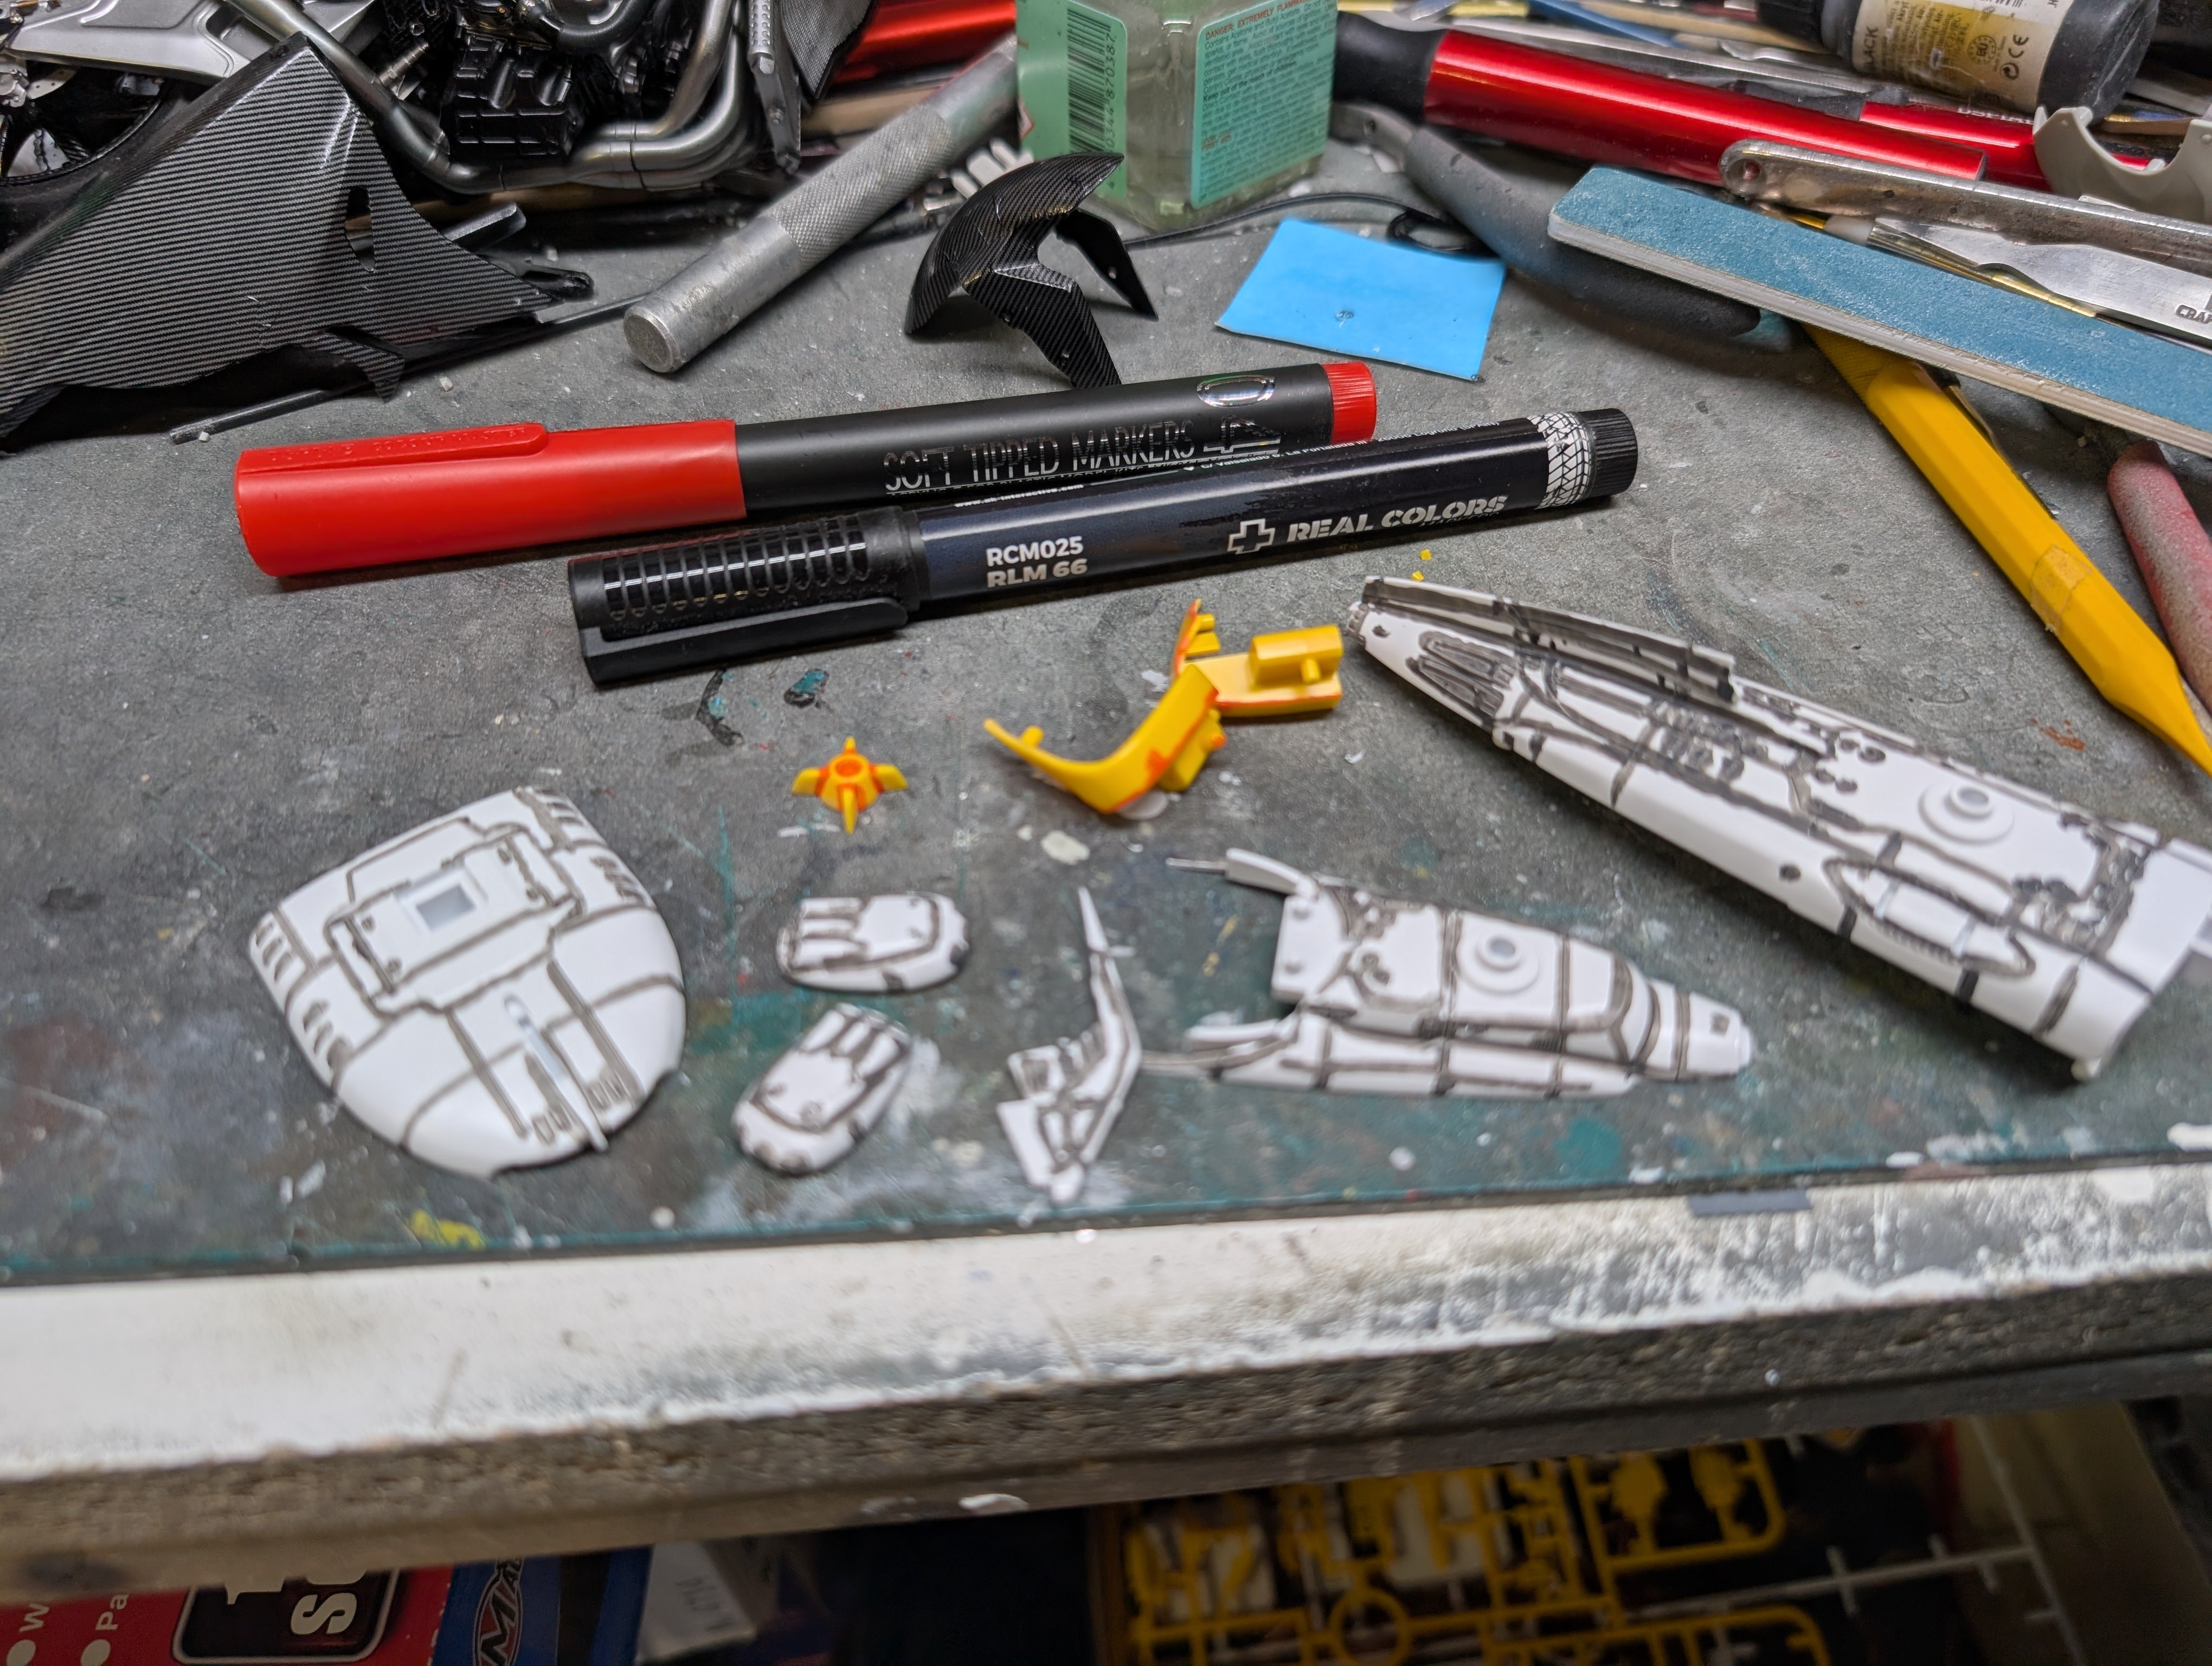
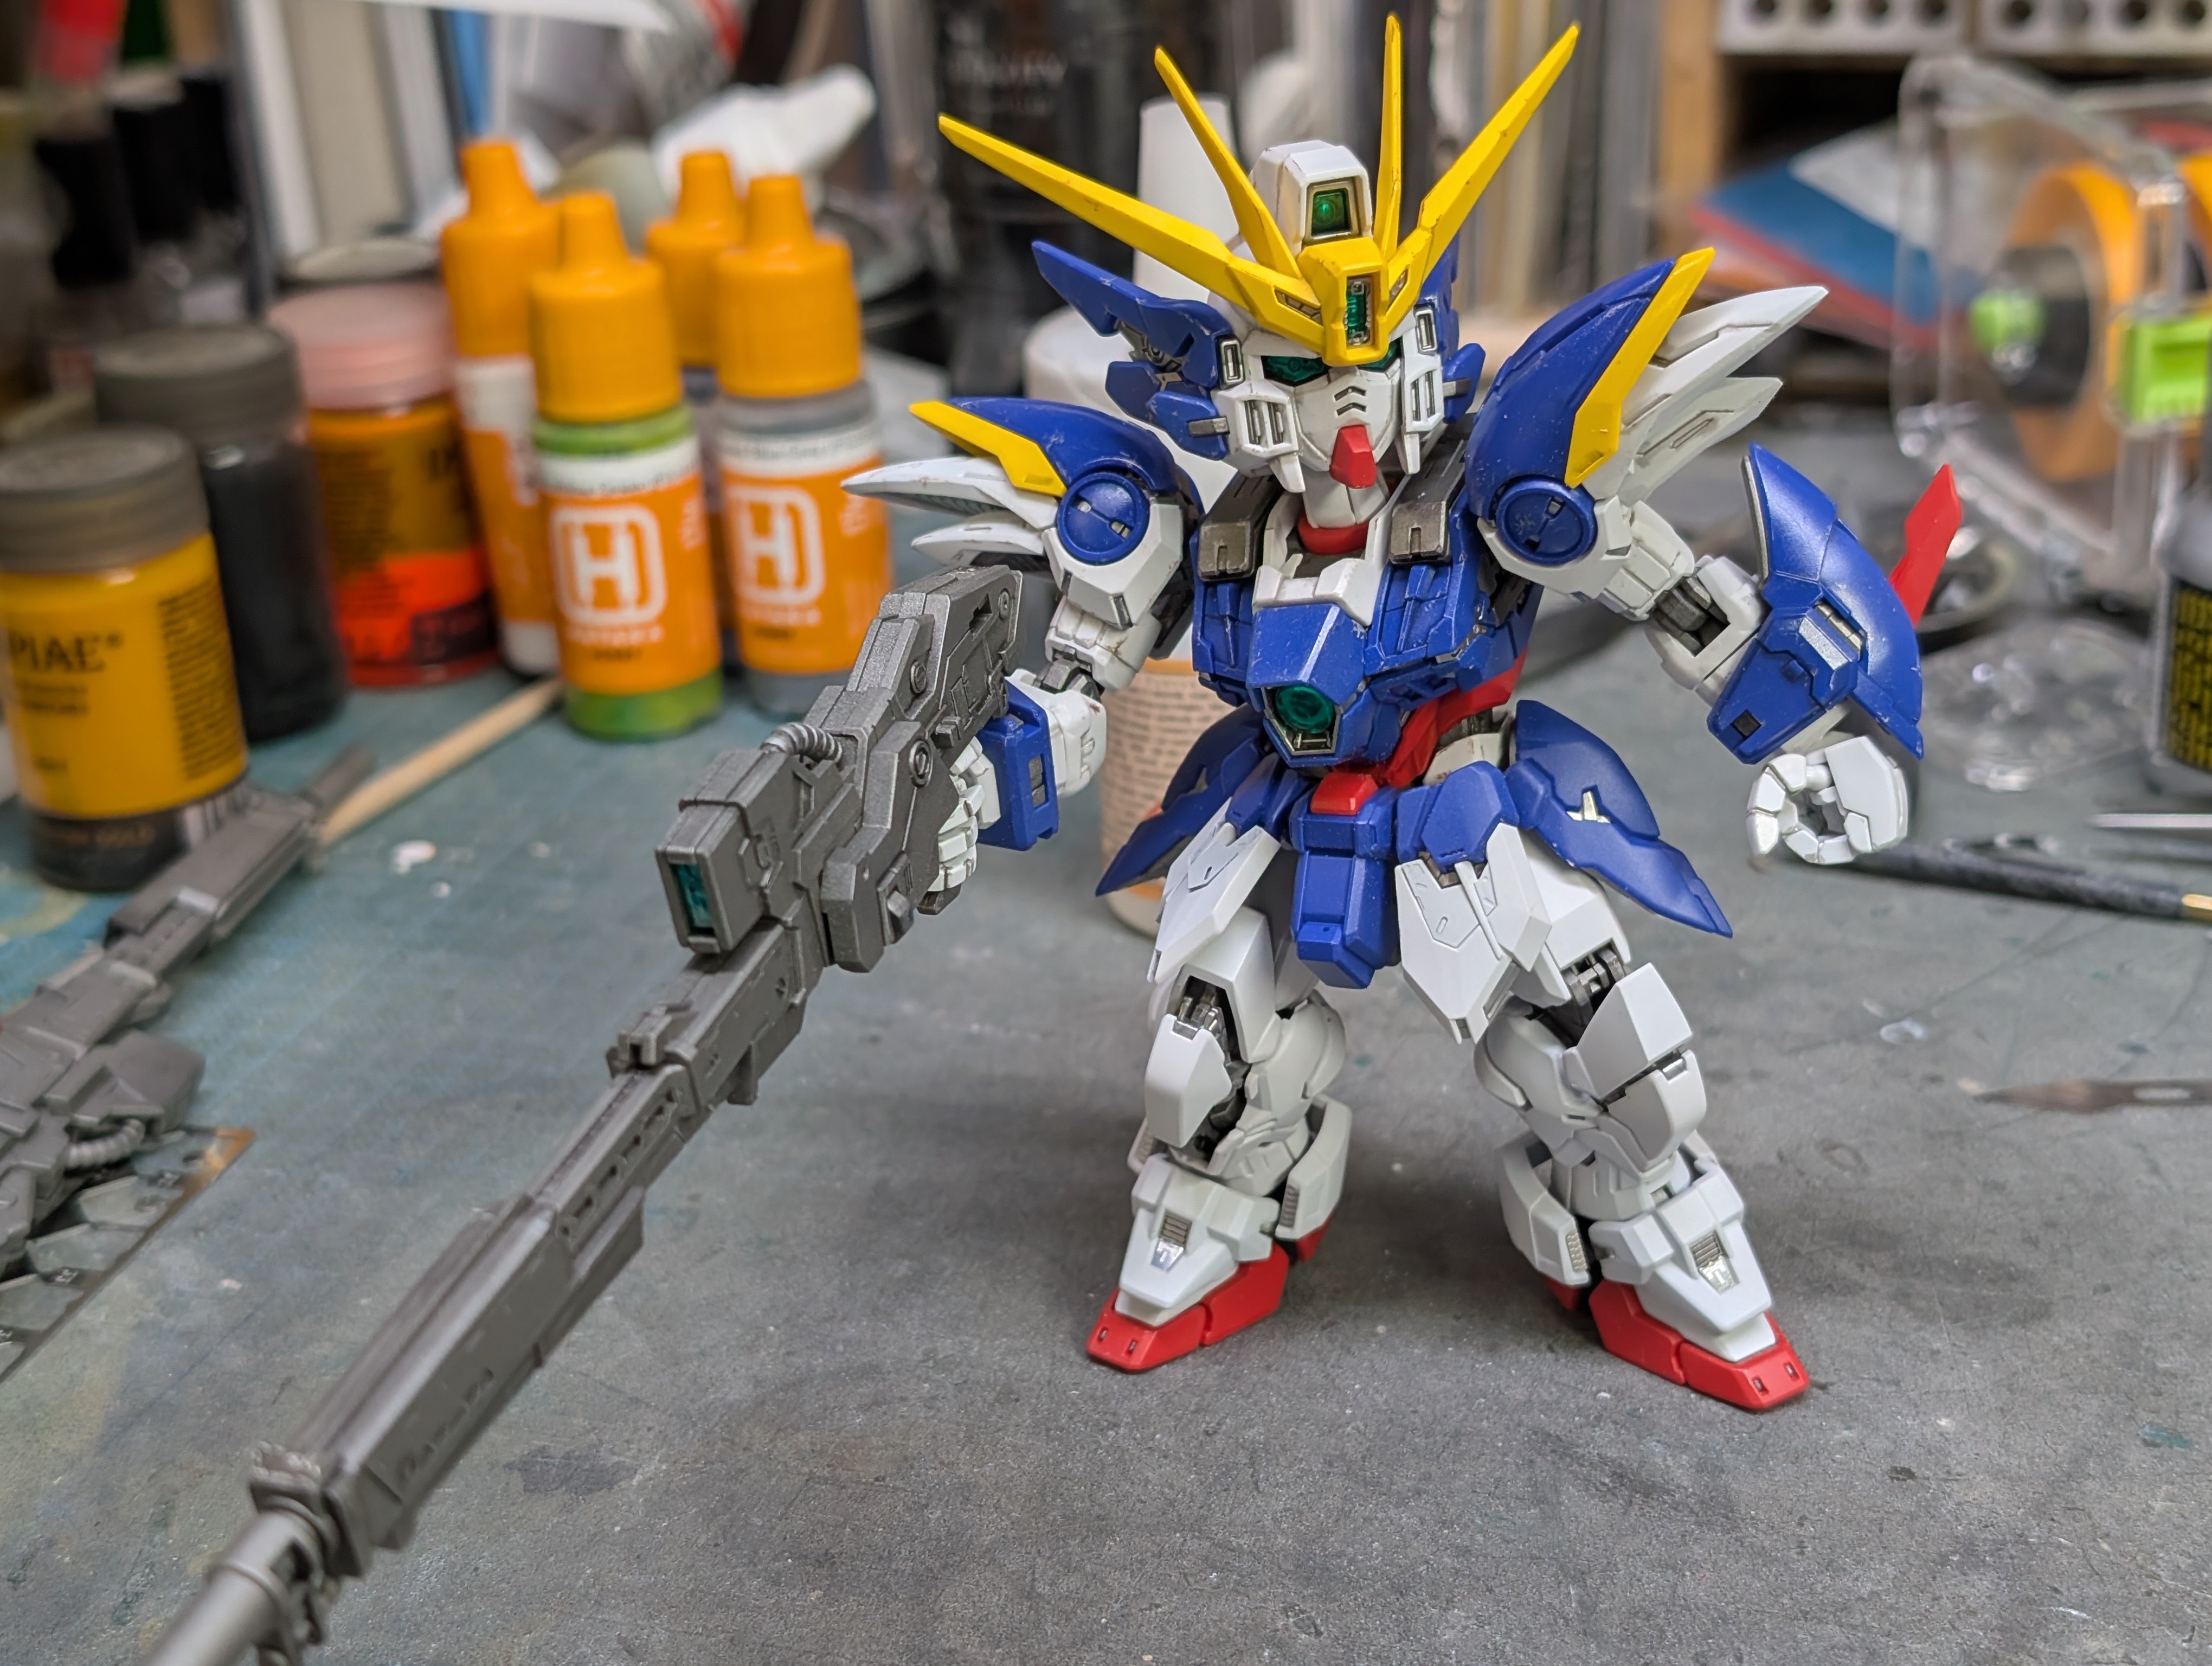
Trying out a paint experiment. After checking out my son's recent Gundam build where he used Gundam markers for panel lining, I decided to see if makers could be used for pre-shading. So I grabbed an SBY kit out of the stash. I removed the parts from the trees and then went over the panel lines with an AK paint marker. Then when the marker had dried, I sprayed the colour coat which was Mr Color Gundam White. It's a bit washed out in the pics but the contrast is there. I thinned the paint a bit too much so the paint went one really thin. Might need a bit more coverage in a couple spots but I would say it worked.


-
Do they have thoughts on big she will get? When we got Jimmy, he was the runt of the litter but he's 120 lbs all grown up. His two sisters who were bigger as pups topped out at 70 lbs.
-
1/32 ME-262A-2a/U2
BlrwestSiR replied to JeroenPeters's topic in LSM 1/35 and Larger Work In Progress
Wow, stunning. -
That's great news Kevin! About the new pup, not so sure on Martin's girlfriend. Although his wife is great. 😆
-
1/32 ME-262A-2a/U2
BlrwestSiR replied to JeroenPeters's topic in LSM 1/35 and Larger Work In Progress
You make CAD design look so easy. ...and here's the next masterpiece in the wings. -
Unicorn Gundam - Bandai - Perfect Grade 1/60 Scale
BlrwestSiR replied to DocRob's topic in LSM 1/48 Work in Progress
Progress may be slow but it's coming along. I've been so tempted to start mine but I really want to finish the bike first. Get something done and off the bench. -
Tamiya Mk VIII Spitfire RAAF Morotai
BlrwestSiR replied to JohnB's topic in LSM 1/35 and Larger Work In Progress
Nice! I never knew that the white leading Edge stripes were so wide. -
What is on your bench right now ? Share a picture :)
BlrwestSiR replied to Martinnfb's topic in Modelling Discussion
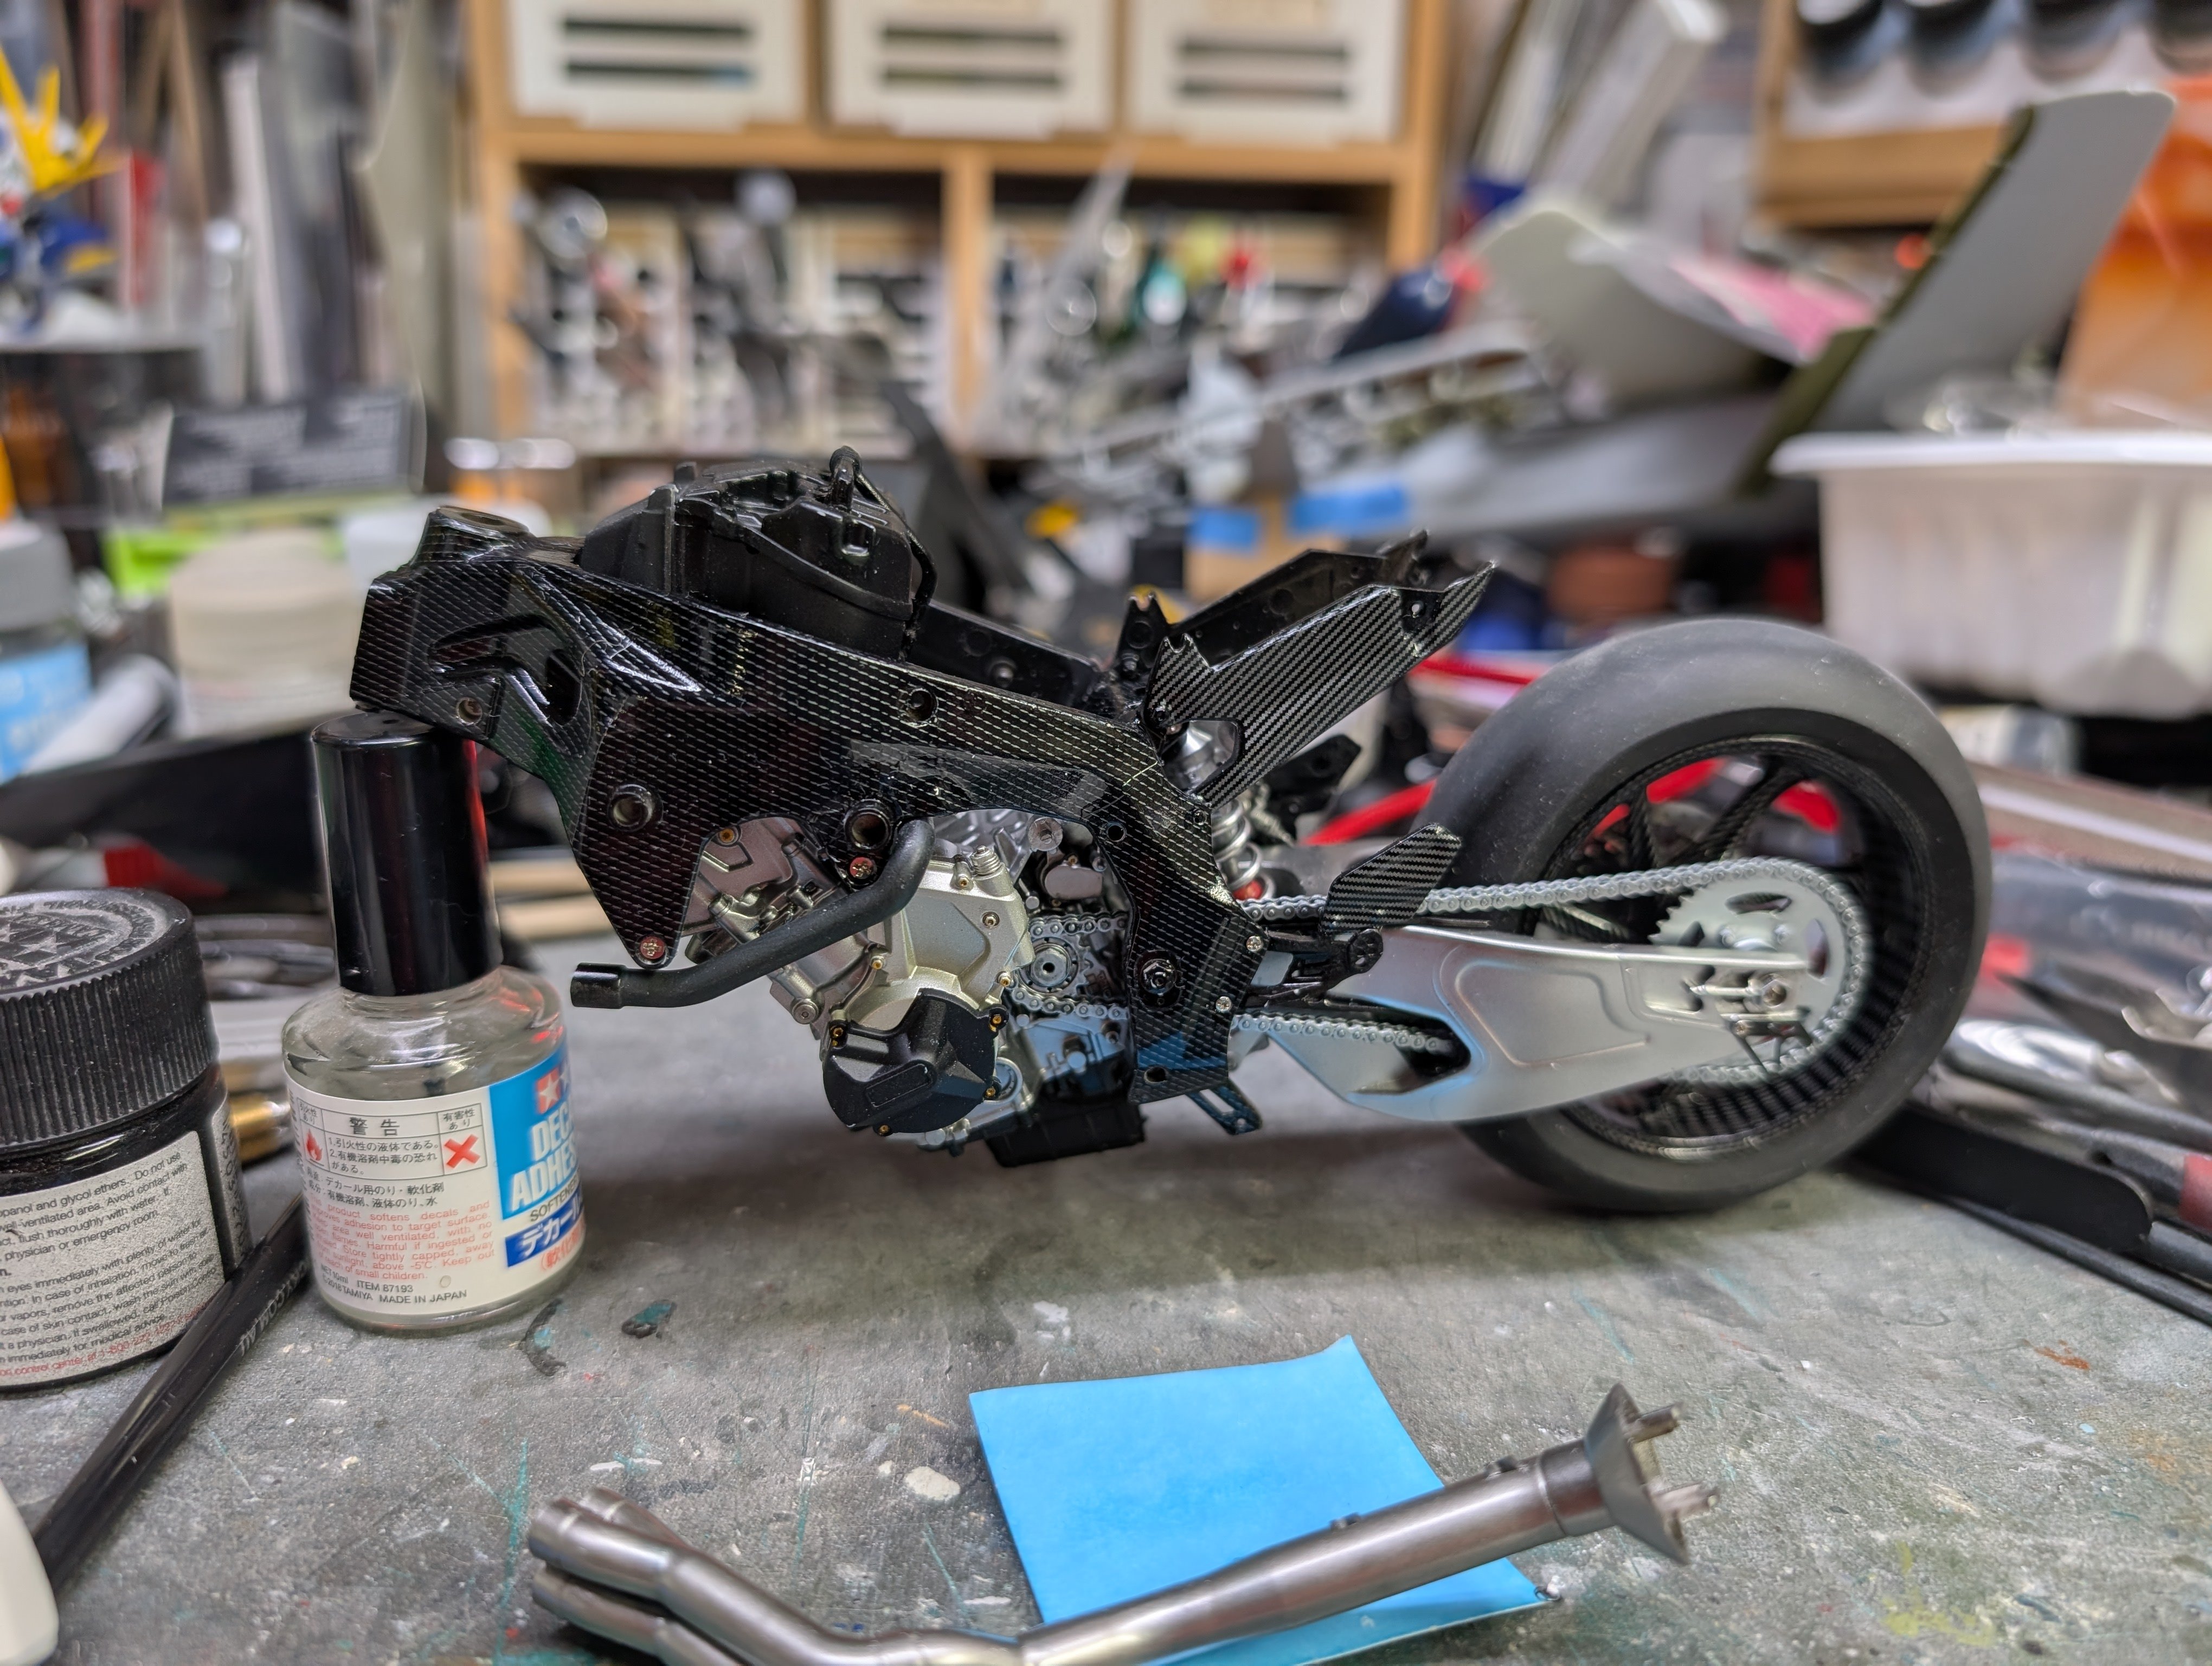
Thanks PW! I'm going to actually try and finish this before I get ahem, sidetracked/distracted by something new. Thanks Rob! I thought about a semi-gloss clear for the carbon as well but decided to go with the gloss as it's exposed and the bodywork will be gloss paint as well. -
What is on your bench right now ? Share a picture :)
BlrwestSiR replied to Martinnfb's topic in Modelling Discussion
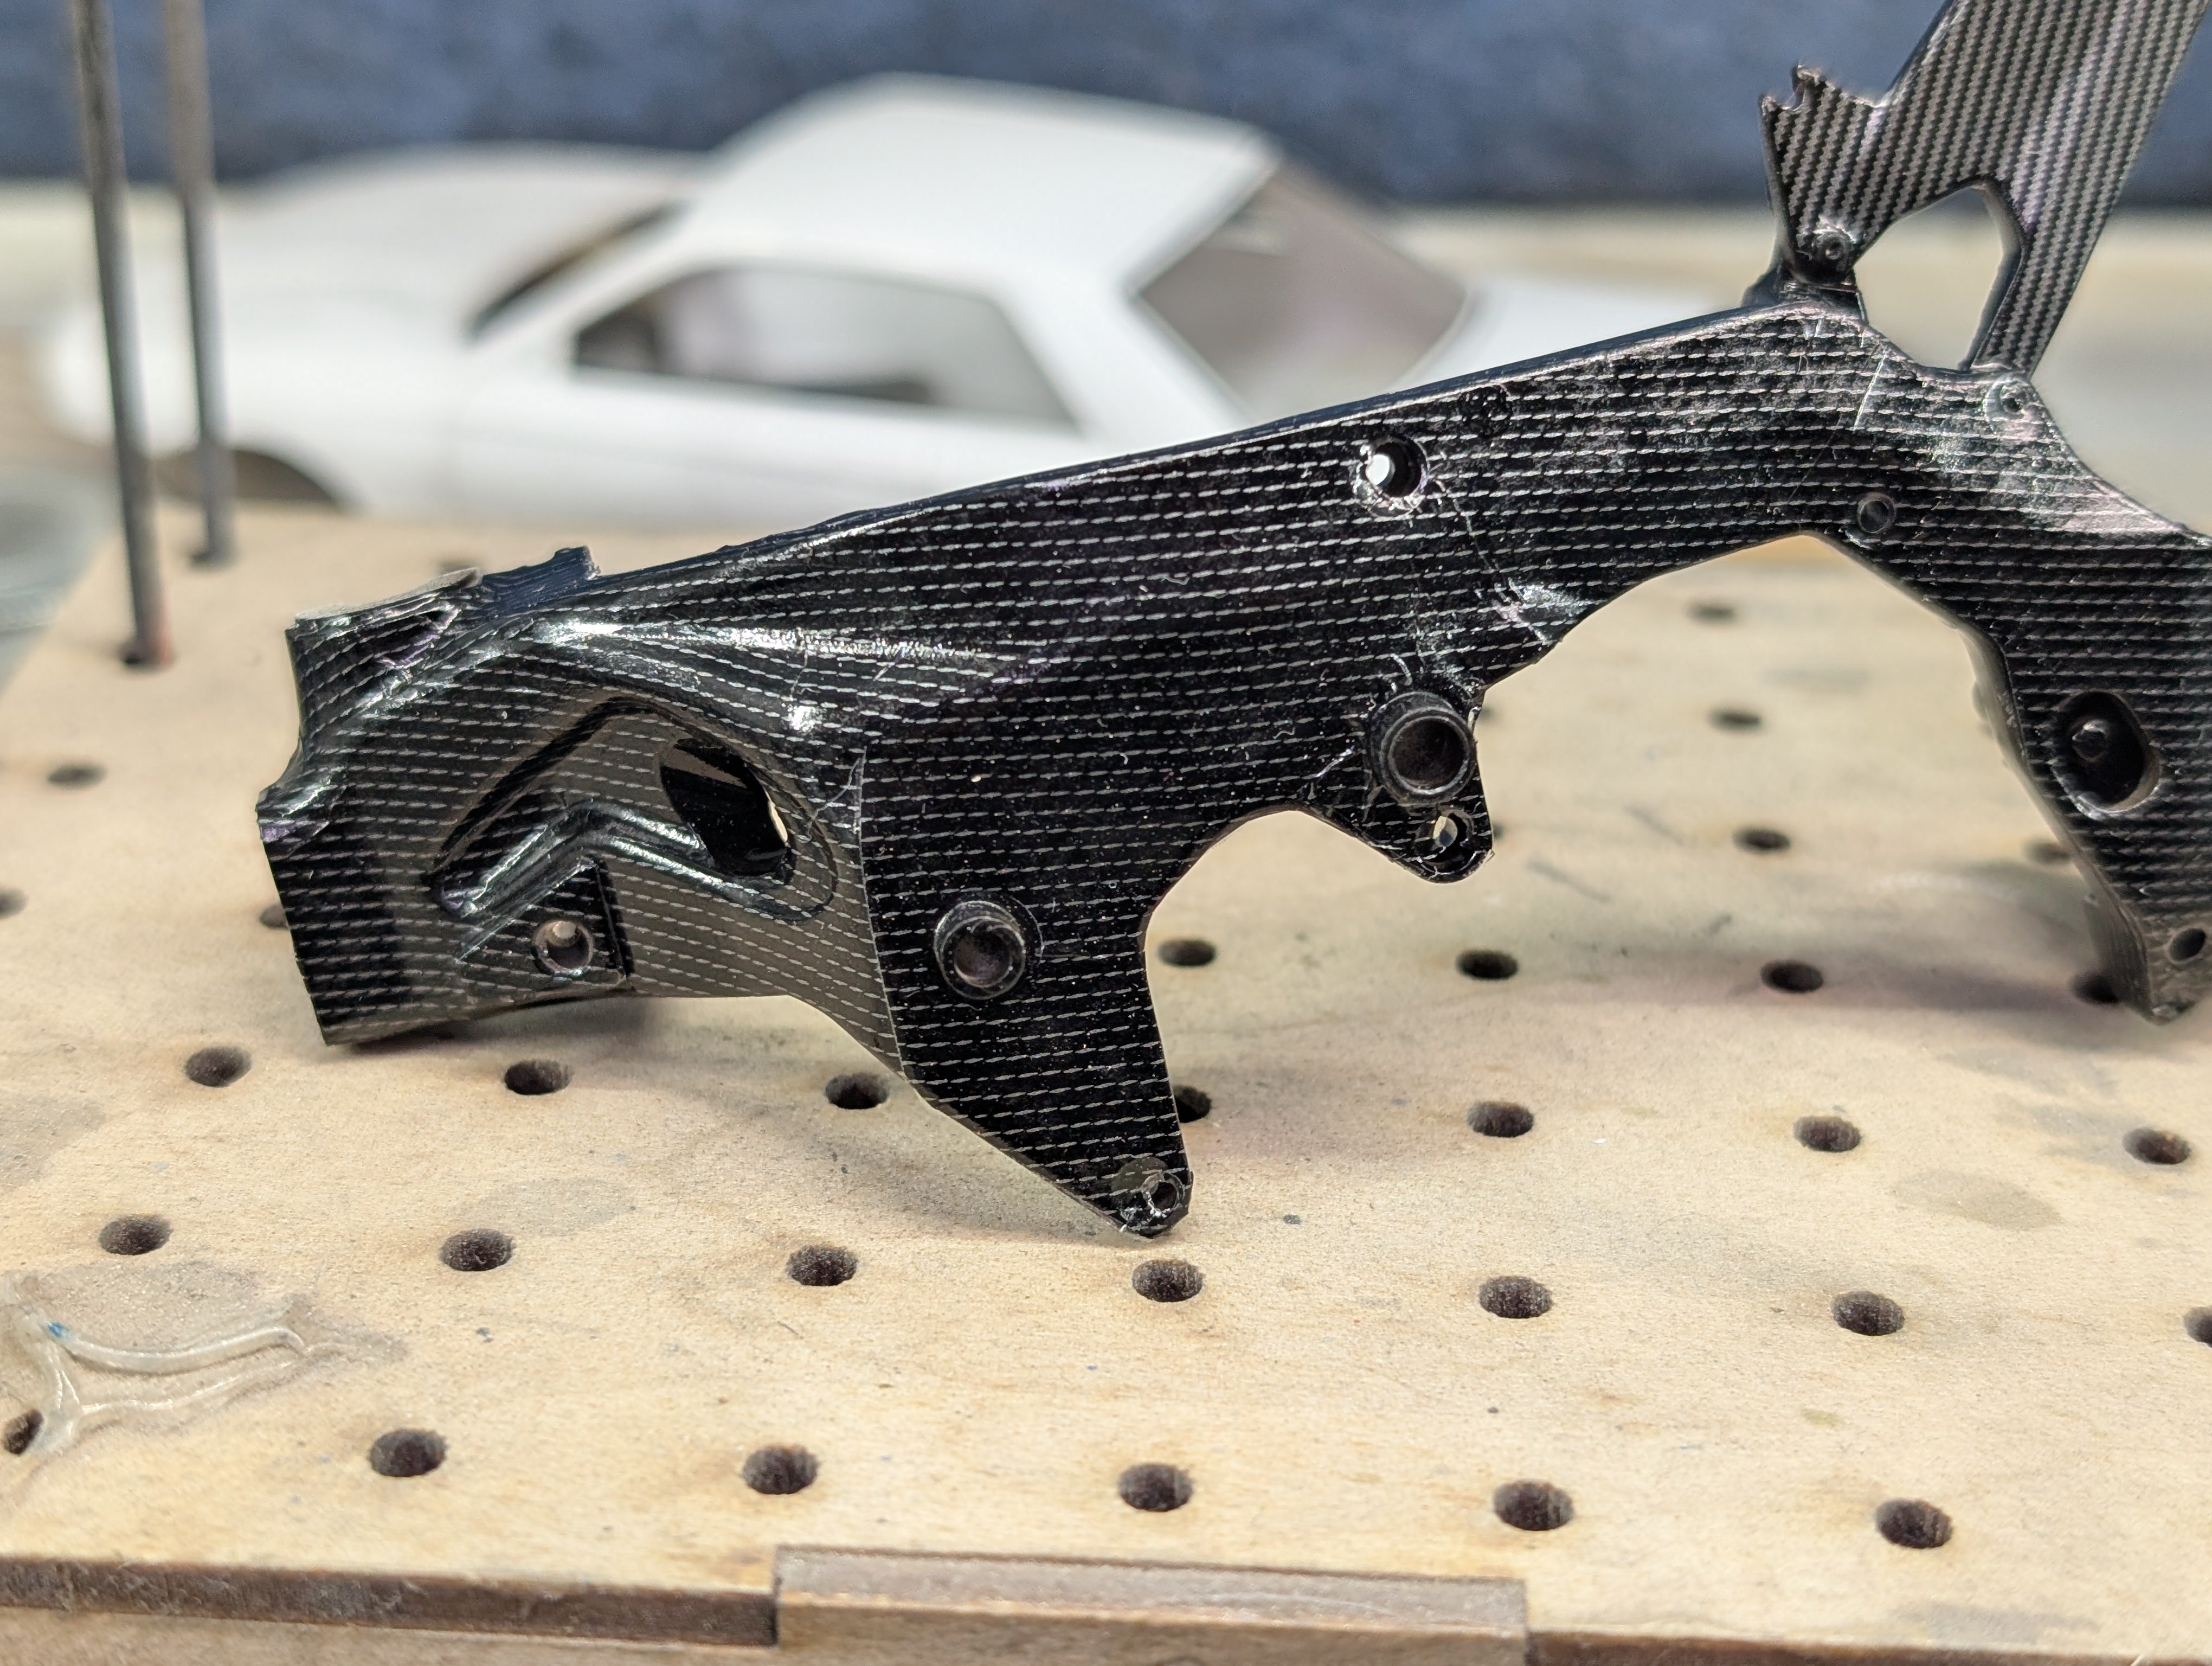
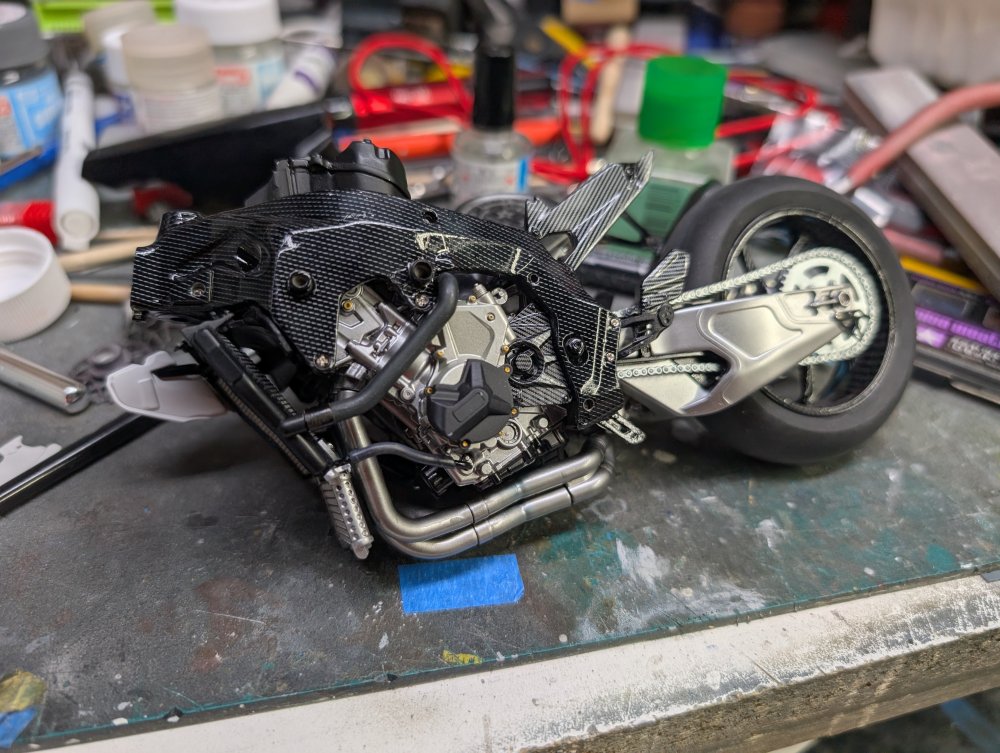
Well, my try at carbon decalling got carried away on the BMW. I decalled the frame, then used some Alclad on the engine and swingarm and ended up with all sorts of subassemblies. Which has led to the frame being almost done.
-
So a follow-up on my Dspiae rotary tool. As some may recall, my first one stopped working for no apparent reason. I can't recall whether it was @belugawhaleman Paul or @Spitfire Dennis that mentioned that they had to use the supplied USB-C charging cord to get theirs to charge. Well, I tried that today and lo and behold, it works just fine. The battery was completely drained and now that it's charged, I have a backup.
-
Tamiya Spitfire VIII converted to a VII
BlrwestSiR replied to denders's topic in LSM 1/35 and Larger Work In Progress
That worked out nicely Dave. Probably the most critical part of the conversion. -
Nice work!
-
Unicorn Gundam - Bandai - Perfect Grade 1/60 Scale
BlrwestSiR replied to DocRob's topic in LSM 1/48 Work in Progress
I've done that a few times but I almost always glue my kits together anyways. The Real Grade, Master Grade and Perfect Grade kits tend to have great colour separation in their parts breakdown. So much less masking ,if any which simplifies painting. For example the most recent Gundam I worked on I haven't had to mask anything. Still a fair bit of painting though.
-
Unicorn Gundam - Bandai - Perfect Grade 1/60 Scale
BlrwestSiR replied to DocRob's topic in LSM 1/48 Work in Progress
Lots of sprues there Rob. Very familiar with that pile. I haven't looked closely at this kit but on the more recent ones, the instructions will tell you when you can get rid of the sprues as all the parts are used on the build. -
Tamiya Mk VIII Spitfire RAAF Morotai
BlrwestSiR replied to JohnB's topic in LSM 1/35 and Larger Work In Progress
Coming along nicely there John. -
Unicorn Gundam - Bandai - Perfect Grade 1/60 Scale
BlrwestSiR replied to DocRob's topic in LSM 1/48 Work in Progress
Nice intro Rob. This is going to be a different build from your usual MFH kits. With the way Bandai kits go together, be careful if you do any test fitting. As they're primarily press fit, separating the parts needs care as the pins are fairly tight and can break off. There are dedicated tools for separating the parts but you can also do it with a thicker bladed hobby knife. The Unicorn Gundam is the primary mecha from the series Gundam Unicorn and is a prototype. There are 2 additional variants, the second called Banshee in black with gold and the third is the Phenix which shows up in the sequel. Carl -
What is on your bench right now ? Share a picture :)
BlrwestSiR replied to Martinnfb's topic in Modelling Discussion
Nice to see what I'll be in for once I start on mine. I've also got the Master Grade Unicorn in its full armour layout. Think of it as Beast Mode. -
Hi Maru, Unfortunately Mike has indeed passed away. There is a thread on LSP about his recent absence from the site. It subsequently turned out that he had passed away in January. I never had any interactions with Mike but he seems to have been a nice guy. Carl
-
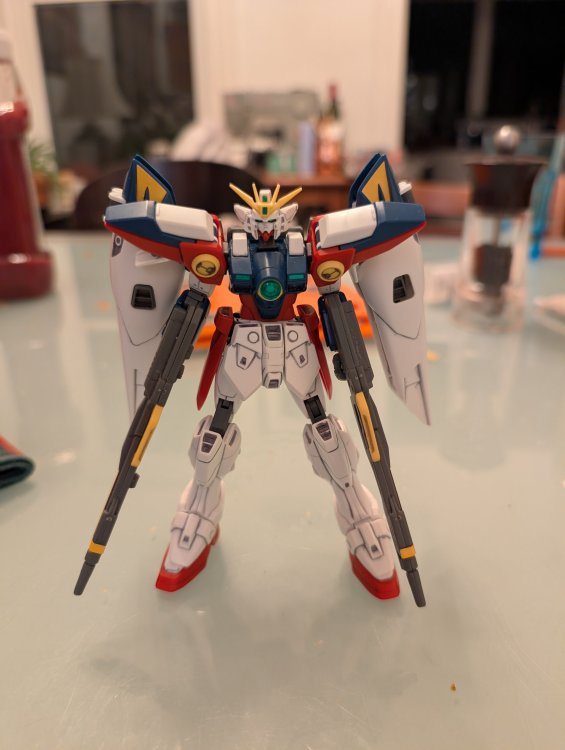
I was thinking about you're not painting it and then I looked at the Gundam kit my son just built. It's from the standard HG series in 1/144. It's much smaller and less detailed and he didn't paint it either, just used a Gundam marker to do some panel lining. It still looks good though.
-
What is on your bench right now ? Share a picture :)
BlrwestSiR replied to Martinnfb's topic in Modelling Discussion
That's a great looking diorama base PW. The step by step pics are great to see how it's made. -
Rob, I can't wait to see you work your magic on the Unicorn Gundam. The only thing to watch out for is that some parts are ABS plastic (mostly the inner frame) and supposedly they don't like lacquer too much. I haven't experienced any issues but I've heard it mentioned several times by reviewers.
-
Sorry to hear about Hannah. It's never easy to say goodbye. We've lost two of ours in the last few years, both of whom were my bench companions and I still miss them. Carl
-
What is on your bench right now ? Share a picture :)
BlrwestSiR replied to Martinnfb's topic in Modelling Discussion
Thanks Paul! I tried the Tamiya Extra Strong decal softener and it didn't do a thing. These are the kit decals so one consolation is they fit the parts. I've used carbon decals from Scale Motorsport before and they worked well with Microset and Sol. -
What is on your bench right now ? Share a picture :)
BlrwestSiR replied to Martinnfb's topic in Modelling Discussion
Thanks! I tried a hairdryer initially but that blew the decals off the wheel. The kit decals are fairly stiff and brittle. I ended up using a cloth that I would wet with hot tap water and then gently press on the decal. This got the decals to conform to shape as well as stay in place. But, it also made the decals take on that shape so it was hard to avoid wrinkles. -
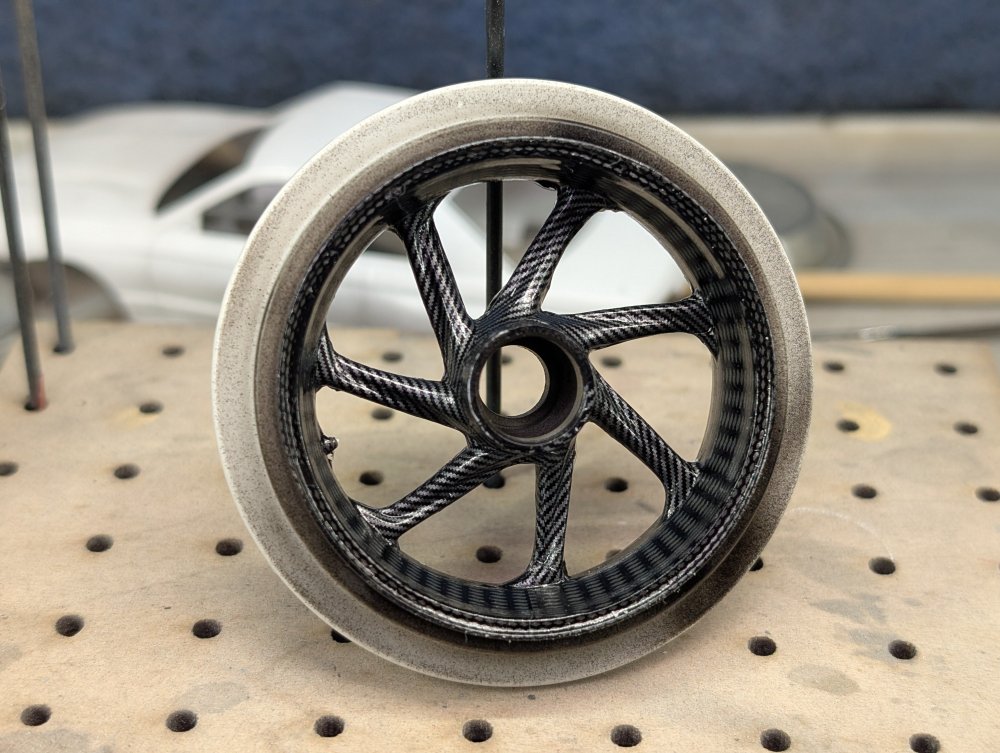
What is on your bench right now ? Share a picture :)
BlrwestSiR replied to Martinnfb's topic in Modelling Discussion
I finished decalling the rear wheel on the HP4. 22 decals in total. I also got one half of the frame decalled. There's a few wrinkles in spots but I'm happy with how it turned out.