


Landlubber Mike
-
Posts
855 -
Joined
-
Last visited
Content Type
Profiles
Forums
Events
Gallery
Posts posted by Landlubber Mike
-
-
Thanks for looking in PW. Yeah, I agree - pretty cool reading about the successes of the Finns!
-
 3
3
-
-
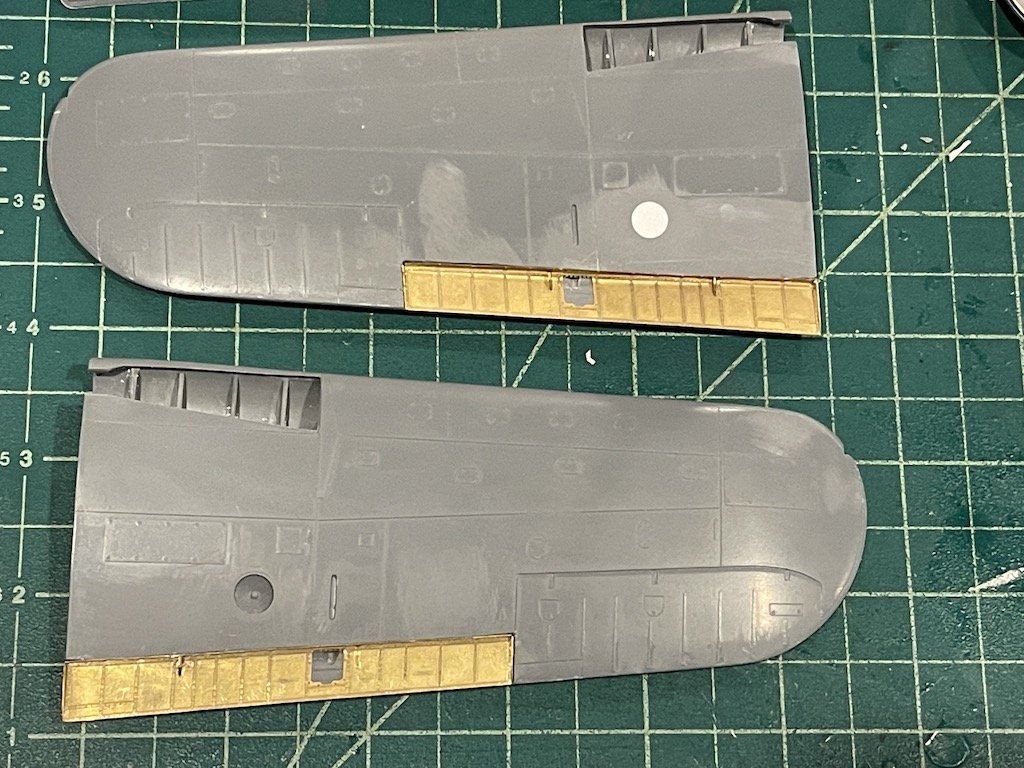
Well since I can't seem to decide on what materials to use to rig my Walrus, I dusted this one off the shelf. I first started with the wings, gluing in the ribs into the landing gear area, filling the extra landing light hole on the right wing, and added the Brengun flaps PE set. All went together fairly well. As I noted in my 1/48 B339-23 build, Brengun had the triangular pieces in the upper part of the wing, while the 1/32 set has them correctly in the flap itself. I thought about removing the ailerons, but given that they are angular where they insert into the wing (the top half and the bottom half are different widths), I thought it safer to just deepen the lines so they look like they are moveable parts of the wing.
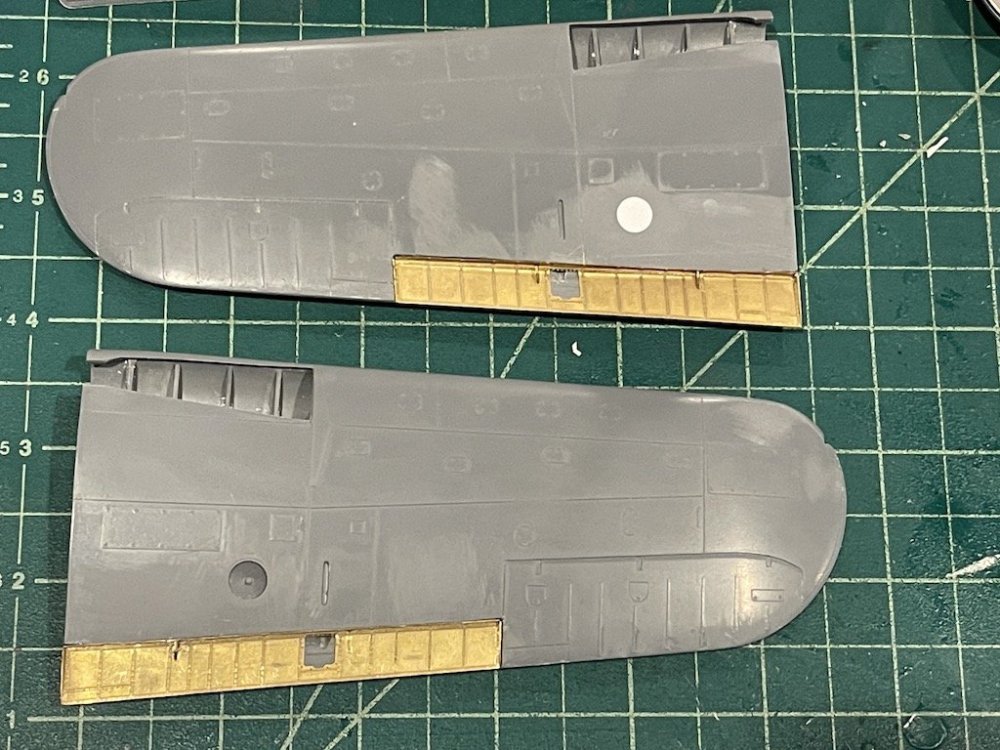
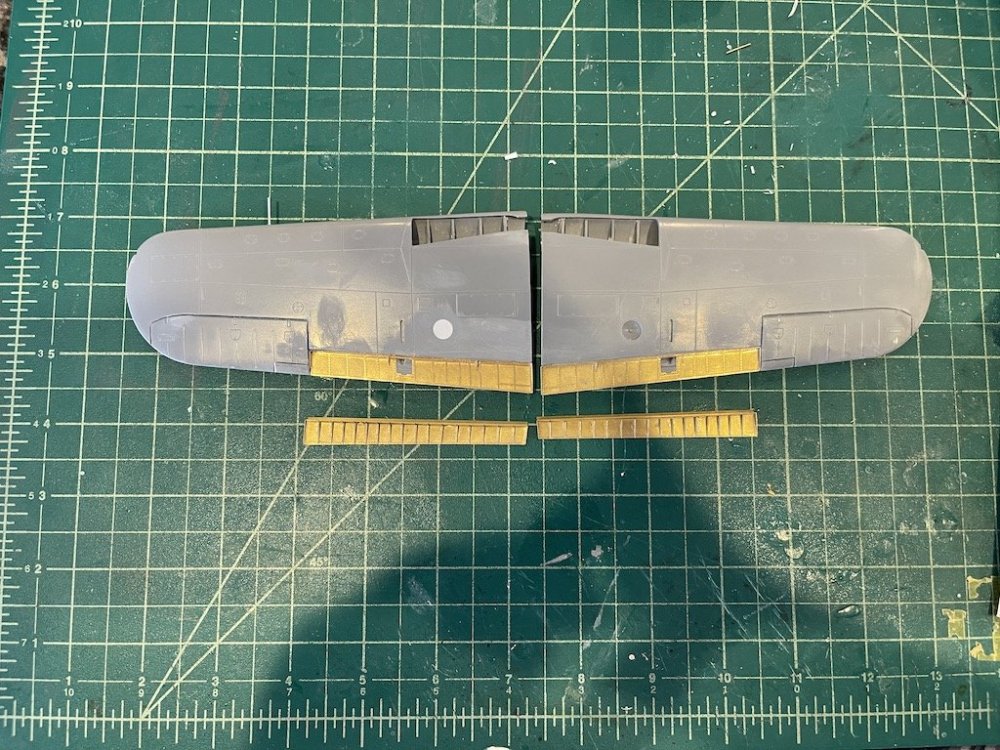
The kit's wing guns looked too large and out of scale, so I decided to go with Master brass barrels. Because the barrels are slightly smaller in diameter relative to the gun opening in the wings, I used my RP Toolz punch set to create small rings that I could inset into the opening to close the gap around the Master barrels. I also added a Master shark fin pitot tube which is more in scale and I think the proper shape on the B239. I epoxied it into the wing, but left off the delicate shark fin end which I will add at the end of the build since it's easy to break off. Learned that lesson on my 1/48 build and had to buy another pitot set to replace the end which broke off and cracked.
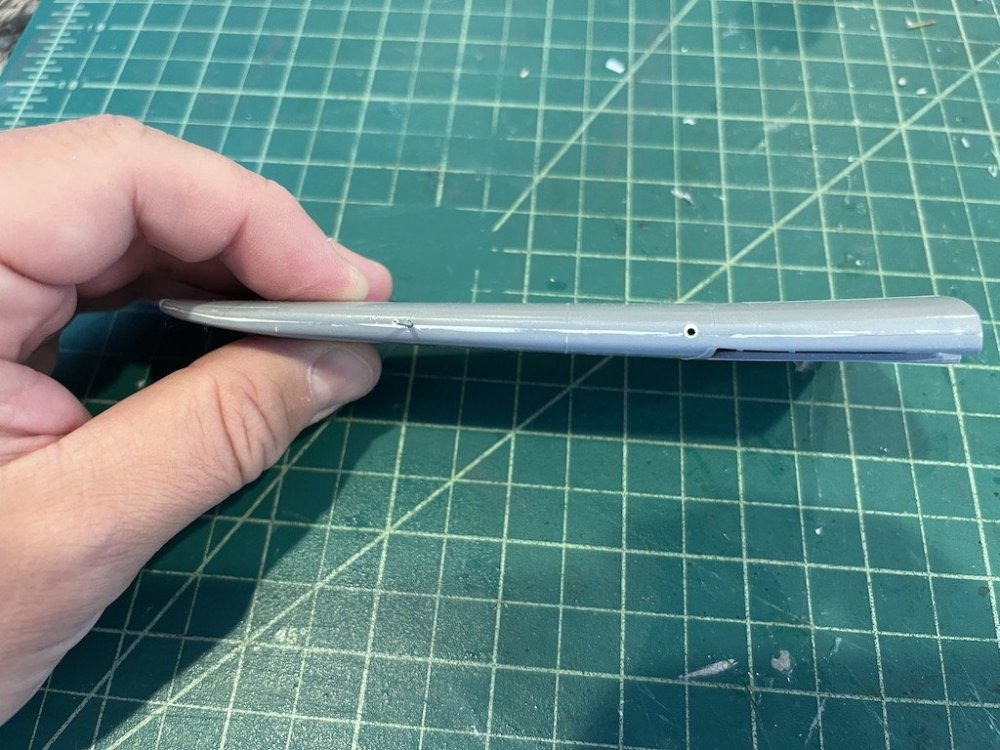
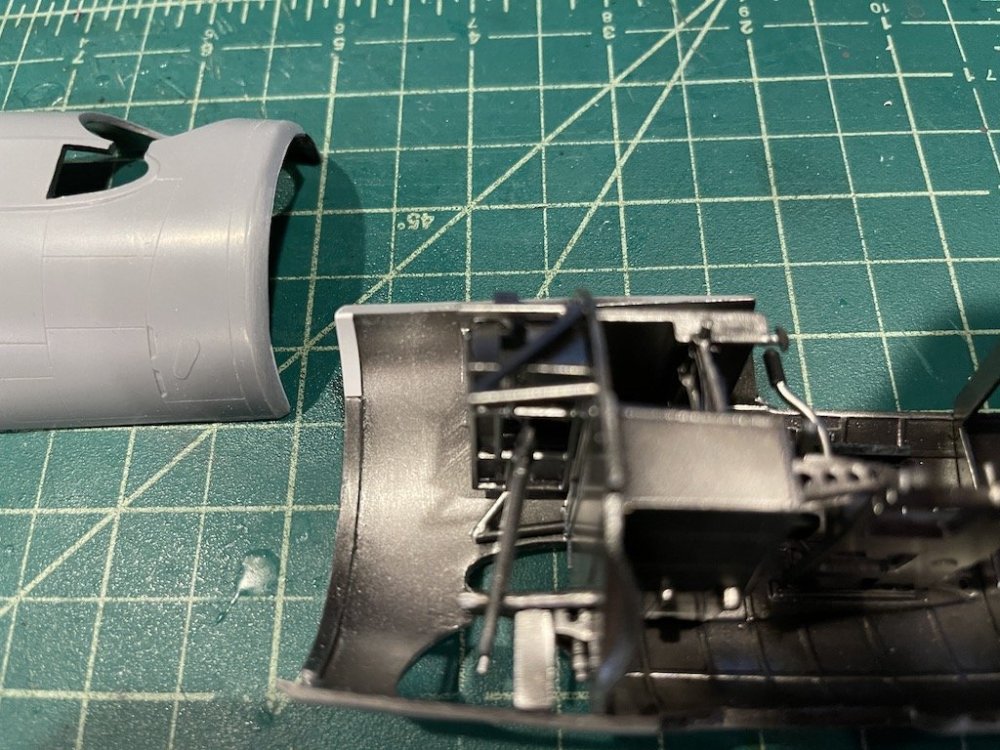
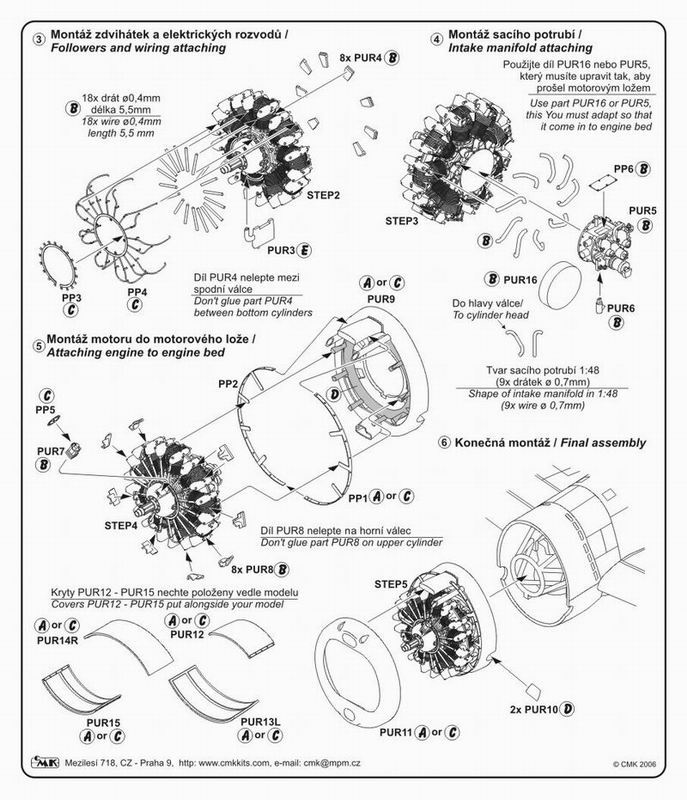
Next I worked on the edge of the fuselage halves before the cowl. With the cowl panels open, I need to replicate part PUR9 in the picture below - the part that goes at the end of the fuselage just before the cowling:
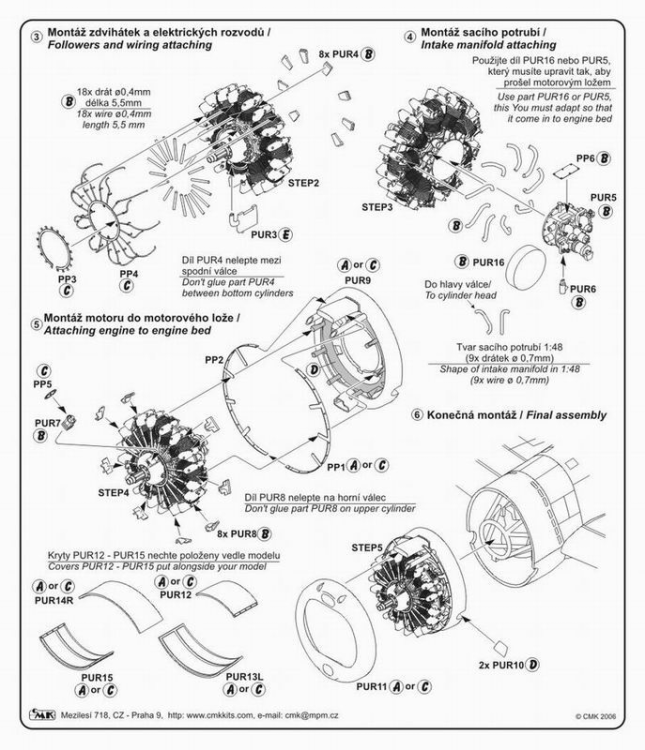
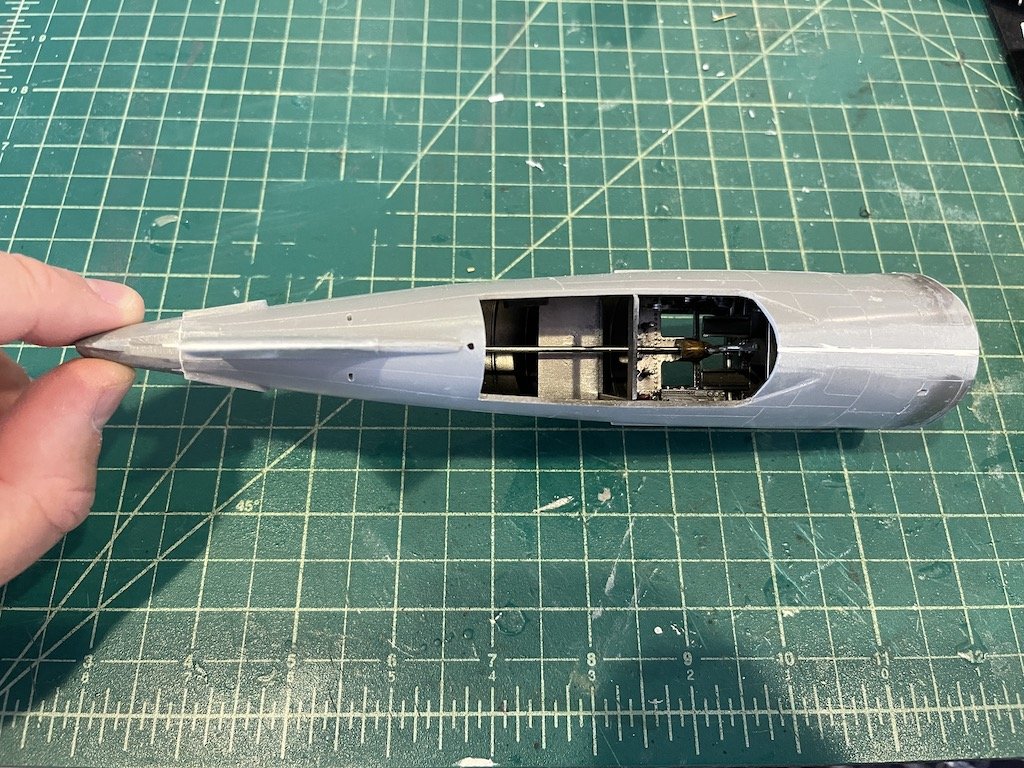
I thought I could work with the kit fuselage halves, but the just don't go far enough forward (see below). So I'll have to scratch build something like PUR9 or just figure a way to add extra material to the end of the fuselage halves to extend another 2-3mm out and cover up/extend past the exhausts. Still working on a solution for this, but I think I have a game plan.
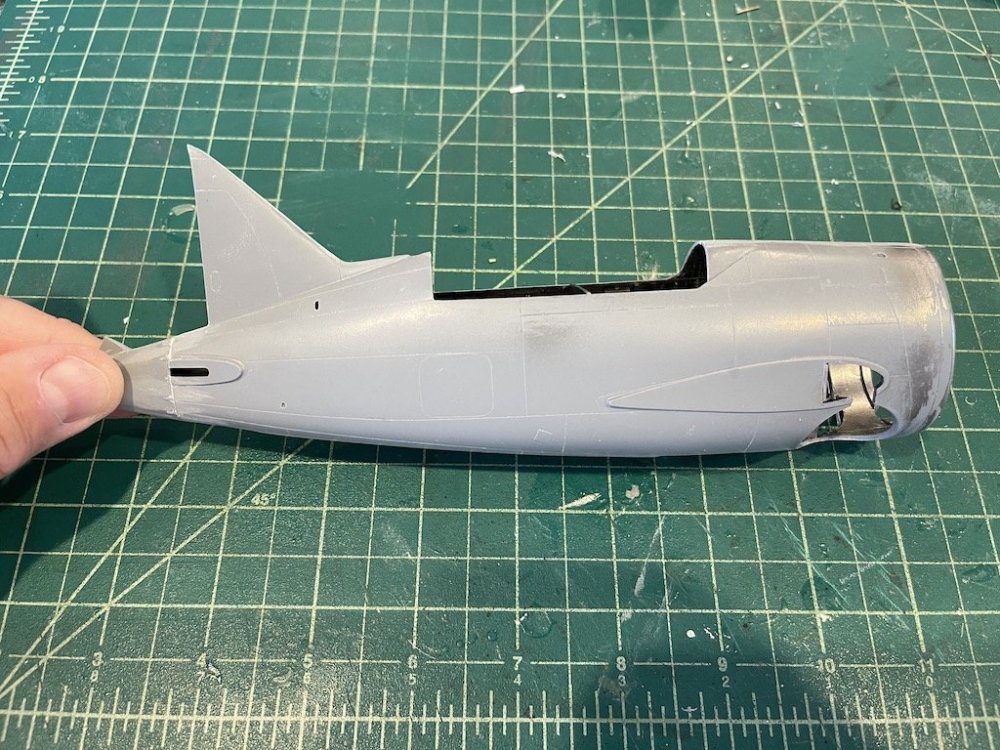
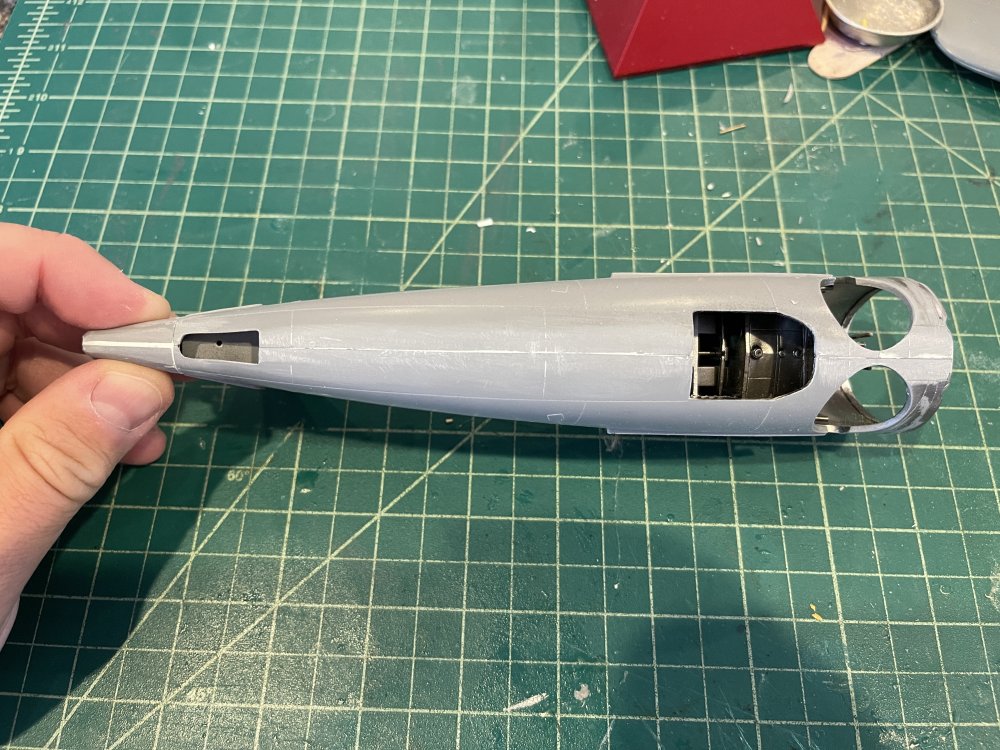
Next I worked on closing up the fuselage. Like other builds I came across online, this was certainly a battle. The fit is poor to say the least, particularly at the front end of the fuselage halves and where the tail is attached. I started by gluing the middle of the halves from the rear of the ventral window towards the back of the plane. Then I worked on the front end, which just wouldn't close. I found the cleanest approach was to first glue the bottom parts together, then when set, add a strip of styrene about 1.25mm across the top in between the two halves. Both sections were glued using two-part epoxy, and three clamps were used for the top to keep the halves not only together, but to push the right side back and in place because it kept having a tendency to slide forward. Was a real pain to say the least!
Then when I went to attach the tail, things were a total mess. The two halves of the tail just don't fit properly against the joined fuselage halves. In particular, the flat section at the tops of the tail halves are wider than the fuselage halves by a good 2mm. So I ended up opening up the gap at the top of the fuselage halves where the rudder sits and adding thin sheets of plasticard until I got the proper width to match the tail halves. Then I glued the tail halves on, connecting them at the top and running them along the fuselage halves sides to follow the fuselage lines. That left a 1mm gap at the bottom of the tail halves which was also filled with plasticard. Thank you Neil @npb748r for the heads up!
So, a lot of work, but the fuselage looks pretty good now I think. Hope these steps help others that might be building this in 1/32.

Thanks for looking in!
-
2
-
 1
1
-
-
Came out great! Very nice!
-
2
-
-
Just saw this build for the first time this morning. Wow Martin, this is modeling at its finest! Amazing job! Hope you pick it back up!
-
3
-
1
-
-
Great job!
-
2
-
-
Wow, that's fantastic!
-
2
-
1
-
-
Nicely done Kevin!
-
1
-
-
On 9/9/2023 at 2:28 PM, Clunkmeister said:
A couple standouts at the show are both in 1/48.
That Ju-52 is absolutely stunning!And the opened up F-14D is an AMK kit. Truly mind blowing is too light a phrase.
It sits beside a Tamiya F-14, and although I’ve always thought the AMK kit blows Tamiya out of the water, these pictures show it all for everyone to see.Great show, thanks for posting the pictures!
I have the AMK kit - was thinking about getting the Black Bird set but it's a bit pricey. Now after seeing the pictures, I might reconsider...hmm...
-
1
-
-
Thanks! Really appreciate it. I've got the catapult painted up now, just need to do a little highlighting, shading and weathering. Eventually I have to turn back to the Walrus itself - having little motivation to working out how to do the rigging. I might just try the AIMS PE rigging as one log I found said it made things much easier -- and then another said some of the rigging lines were too short -- so who knows.
-
2
-
-
On 9/1/2023 at 4:22 PM, KevinM said:
Just ordered Scott but I P/U the RN Roma 1/350 with my coupon to boot for $106
")
Nice pickup Kevin! I have it the Roma in 1/700 scale. I was trying to limit the bigger ship models in the stash. The 1/350 kit works into a fantastic looking model though. I'm jealous!
-
1
-
1
-
-
Looking really good!
-
1
-
-
Harv, we are all pulling for you! Get better soon my friend!
-
3
-
-
Thanks Chris! We'll see how it all comes together. I could try a circular base, just need to find one big enough. Thanks for the suggestion!
-
1
-
-
Glad to see you pushing through with this John. Good luck!
-
2
-
-
6 hours ago, HubertB said:
Why not put them staggered, at a 45 ° angle like that : / / ?
HubertHmm that could work too - hadn't thought of that, thanks!
-
2
-
-
19 hours ago, CANicoll said:
Mike, this looks awesome! You keep finding things I didn't even know were available. Cool stuff.
Chris
Thanks Chris! The Walrus is a bit of a weird bird, so it's kind of cool to be able to model it on the catapult.
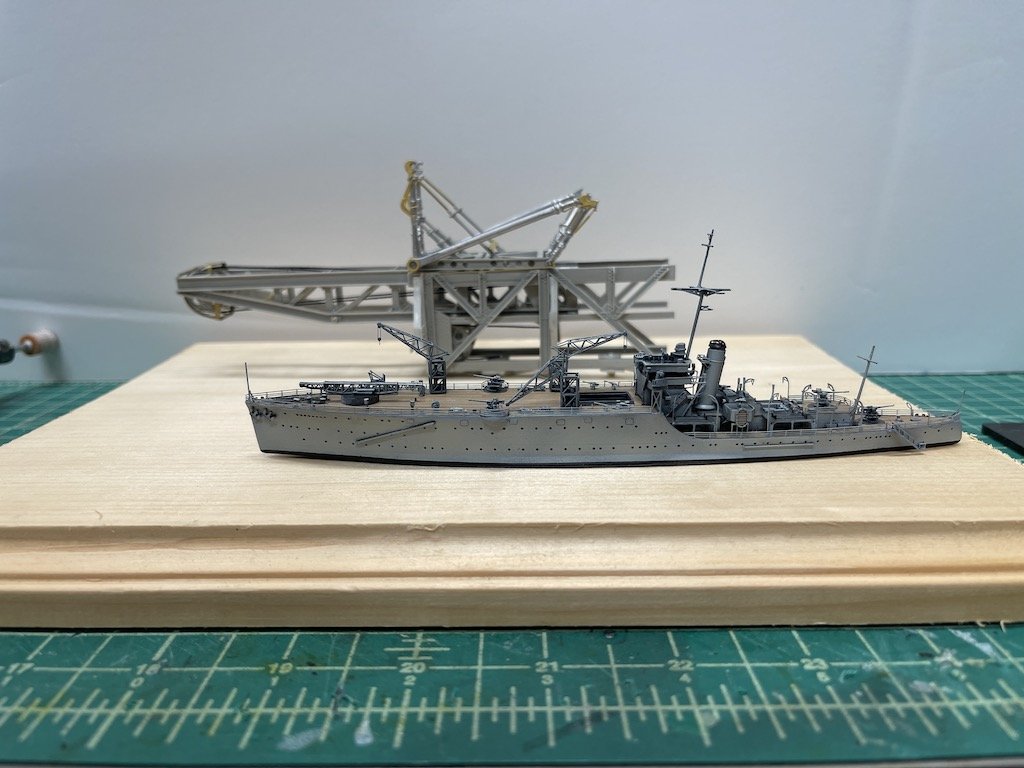
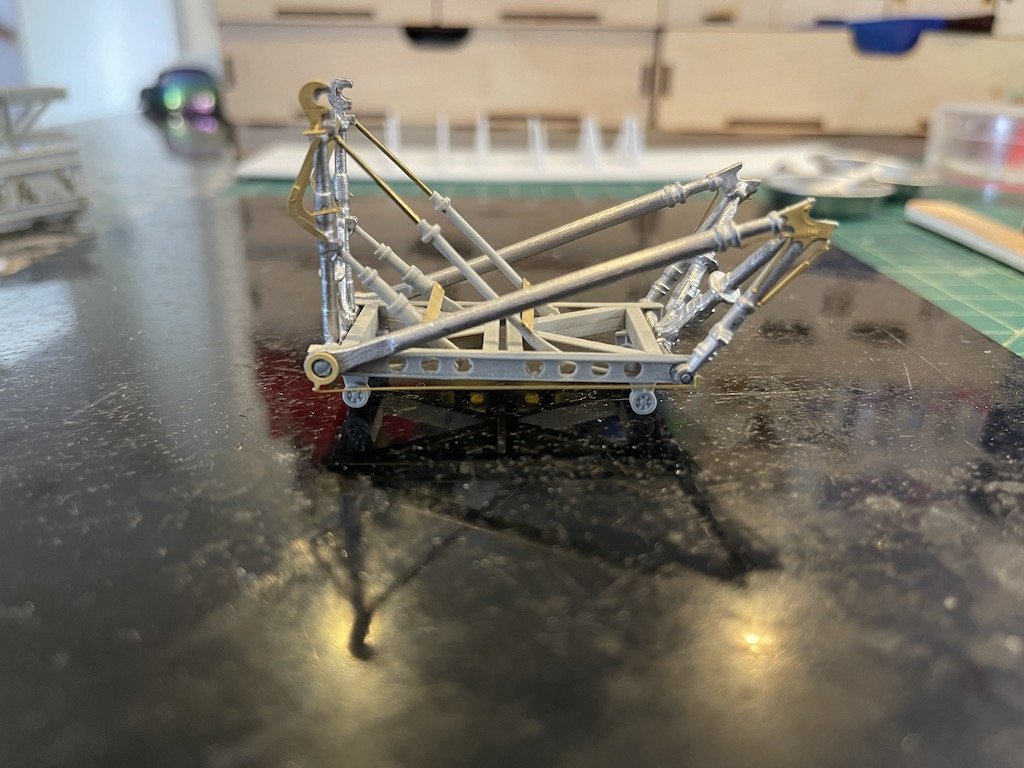
Speaking of the catapult, I ended up attaching the rear extension add-on to the main frame, and added the rigging. I'm really happy with how this is looking. I ended up taking off the wheels on the carriage as they won't be seen, and this is what the combo will look like:

I ended up testing out my display idea. I was thinking about a squarish rectangular base, putting the Walrus on the back side towards one corner, and the Albatross on low brass rod pedestals towards the front side opposite corner. Something like this:
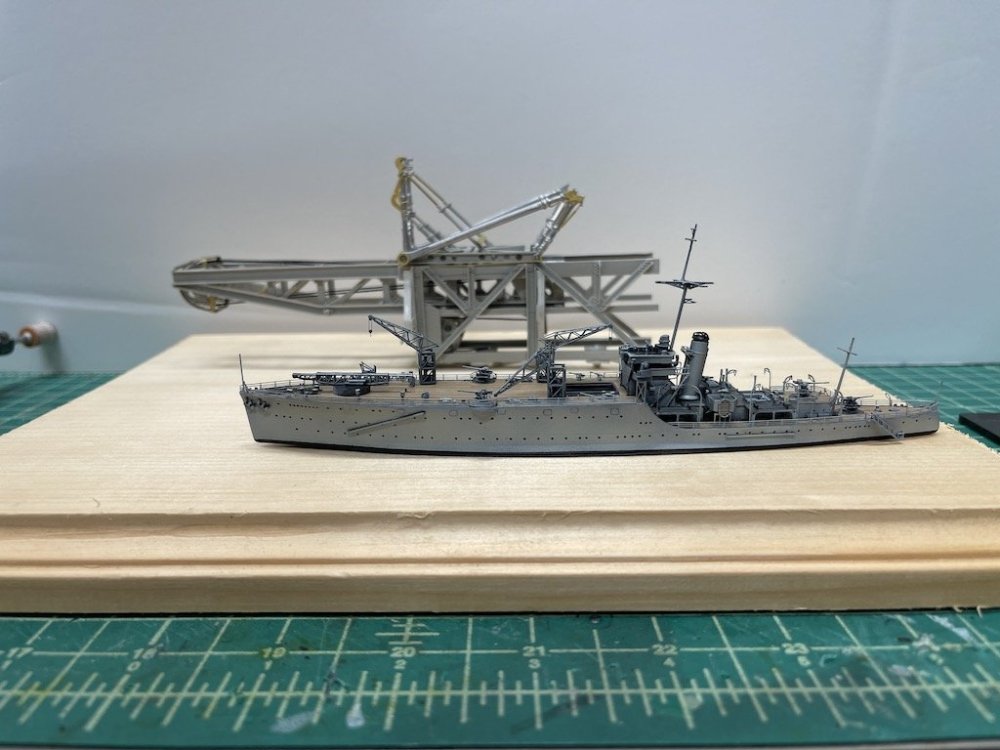
I didn't realize the Albatross was almost as long as the catapult/Walrus, so I'm possibly rethinking how to display the two models. An alternative would just be to put the two models on a longer skinner rectangular base, side by side rather than stacked front and back. That might be a better approach so the Walrus doesn't get hidden by the Albatross as might be the case with my first idea. If anyone has thoughts or suggestions, I'd love to hear them!
-
4
-
1
-
-
3 hours ago, HubertB said:
This is going to look tremendous on the 1/48 deck of the 1/48 Albatros (c’mon, why not a small challenge, now that you have plenty of time 😂 ? )
Hubert
I'm hoping it will! I did a little research and I'm not sure that I will model this on an actual deck. There was some kind of fixed structure on which the catapult framing sat that differed from ship to ship. I can't really find too many reference pictures. Also, the main catapult frame only represents about 1/3 of the full frame. NeOmega sells add-on pieces for the main catapult frame, but I'd need at least two of those, and would have to modify one of them for a full frame, which means I'd probably be better off scratch building the whole thing, which I don't feel like doing. On top of that, there is a lot of the piston hydraulics mechanism inside that I just don't think I have the inclination to figure out.
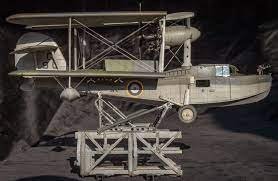
This is what a Walrus looks like on the frame, but without the rear extension add-on:
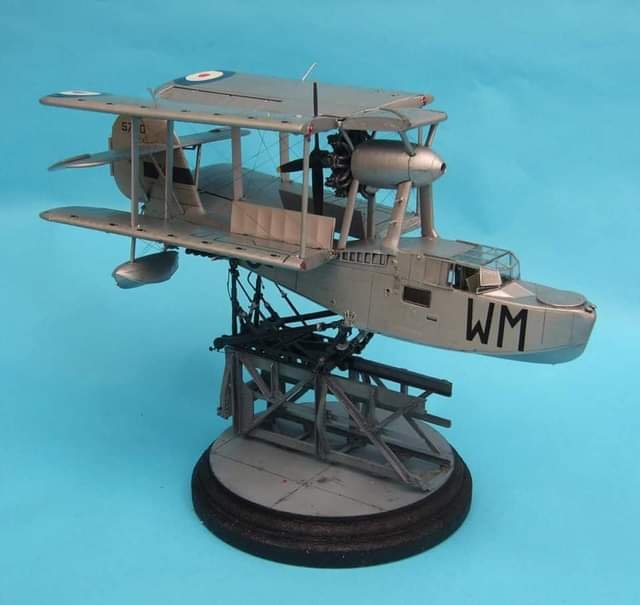
Here is what one modeler did by including it on a circular wooden base:
I think I will just use a plain rectangular wooden base, and have the Walrus sitting on the catapult on the back half of the base towards a corner, and sit the Albatross on two brass rods on the near side opposite corner of the base. Since I'll have the wings folded on my model, and the Walrus will be sitting higher given the catapult, I think having the Albatross sitting on low brass rods should hopefully work.
-
6
-
-
25 minutes ago, DocRob said:
That's a well detailed kit, it seems. Looking very good Mike and will be a showstopper with the Walrus onto it.
Cheers Rob
Thanks! It's a nicely done accessory, should show off the Walrus nicely if I ever get around to finishing it!
1 minute ago, KevinM said:That's looking very good Mike can tell no kiddees around.

Ha! I had all these grand plans, but kids have been home from school for the summer and I've been too busy or tired to do as much modeling as I was thinking I could this month. But, I treasure every moment I have with them so it's not all bad
")
-
3
-
-
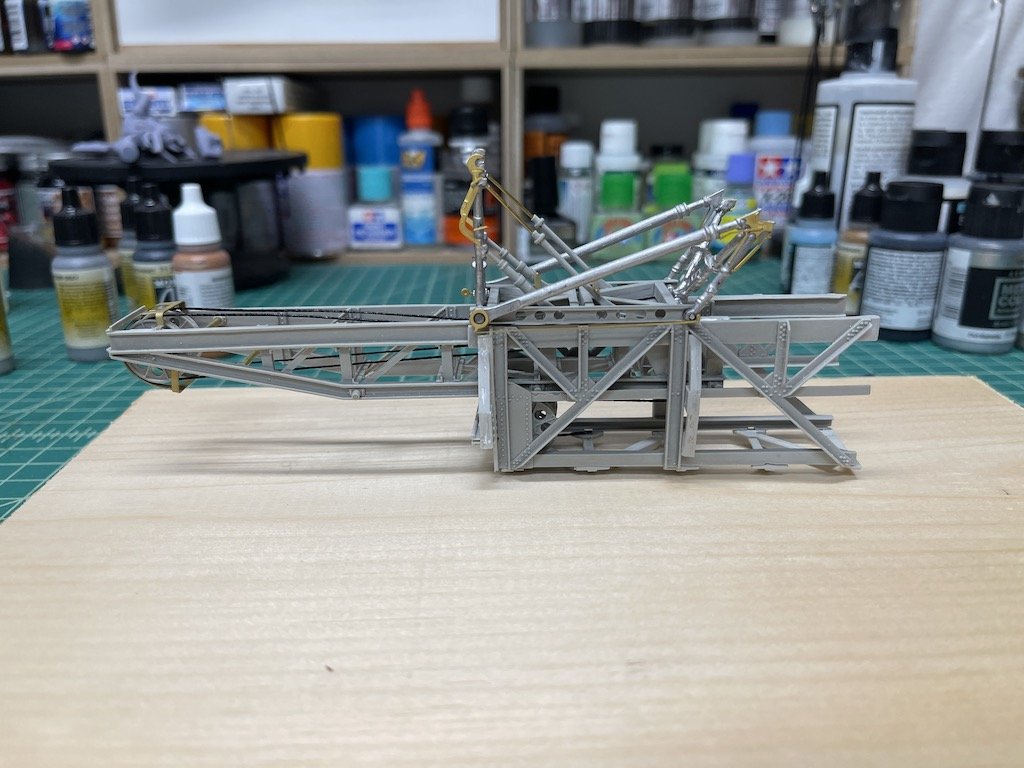
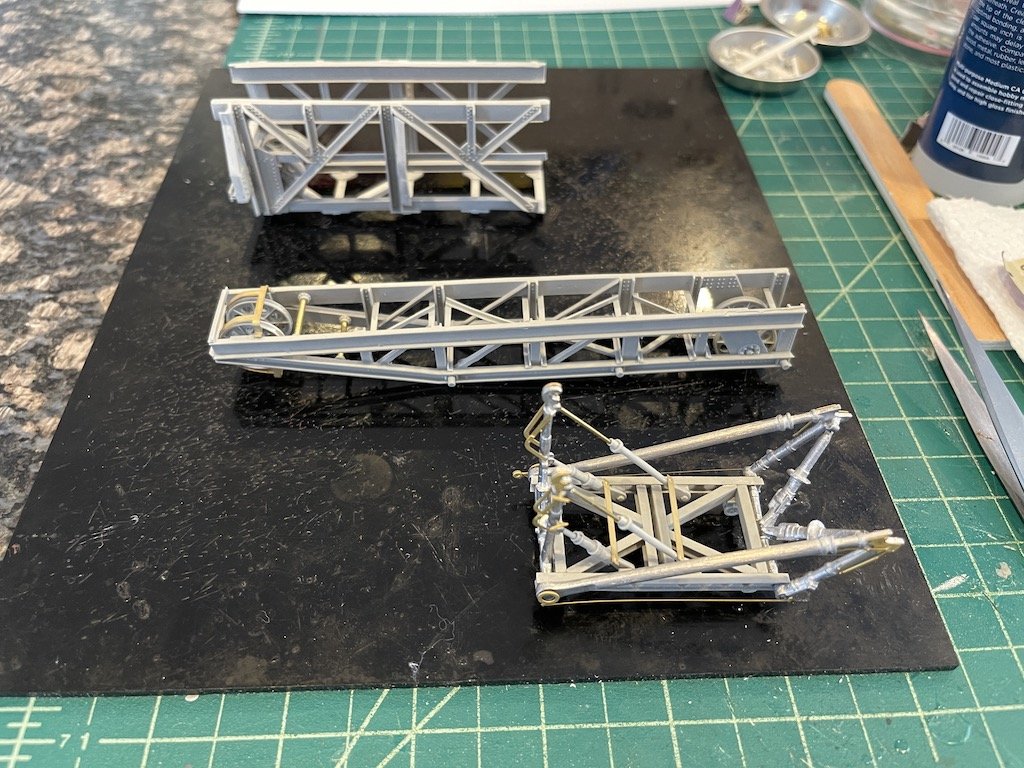
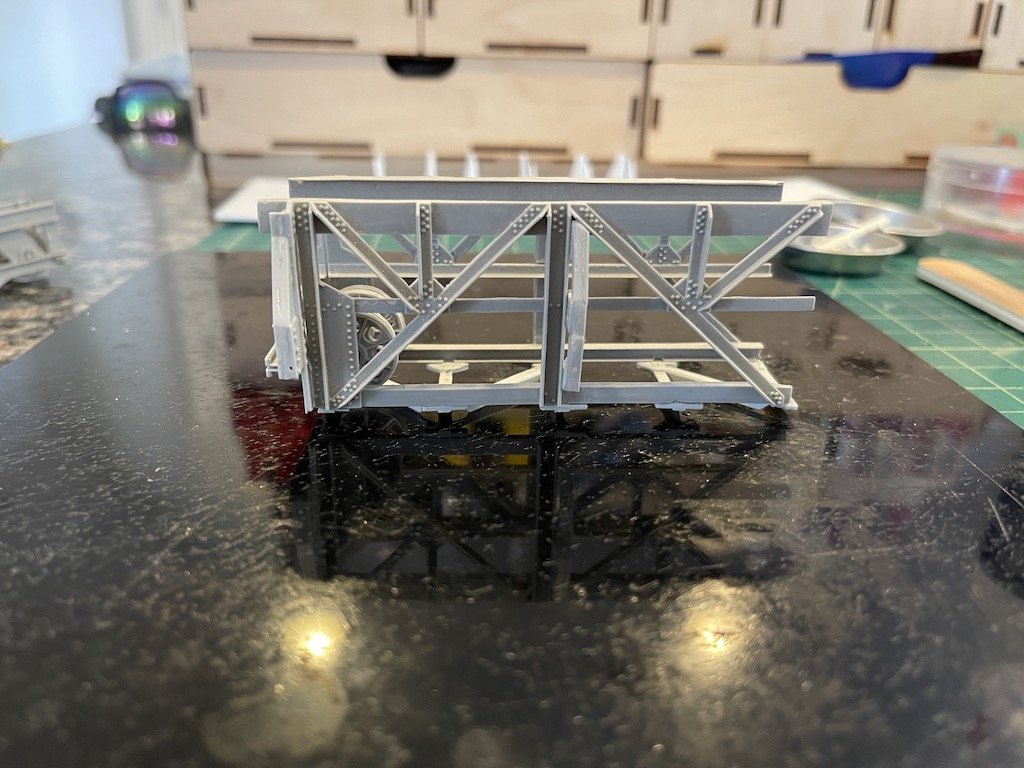
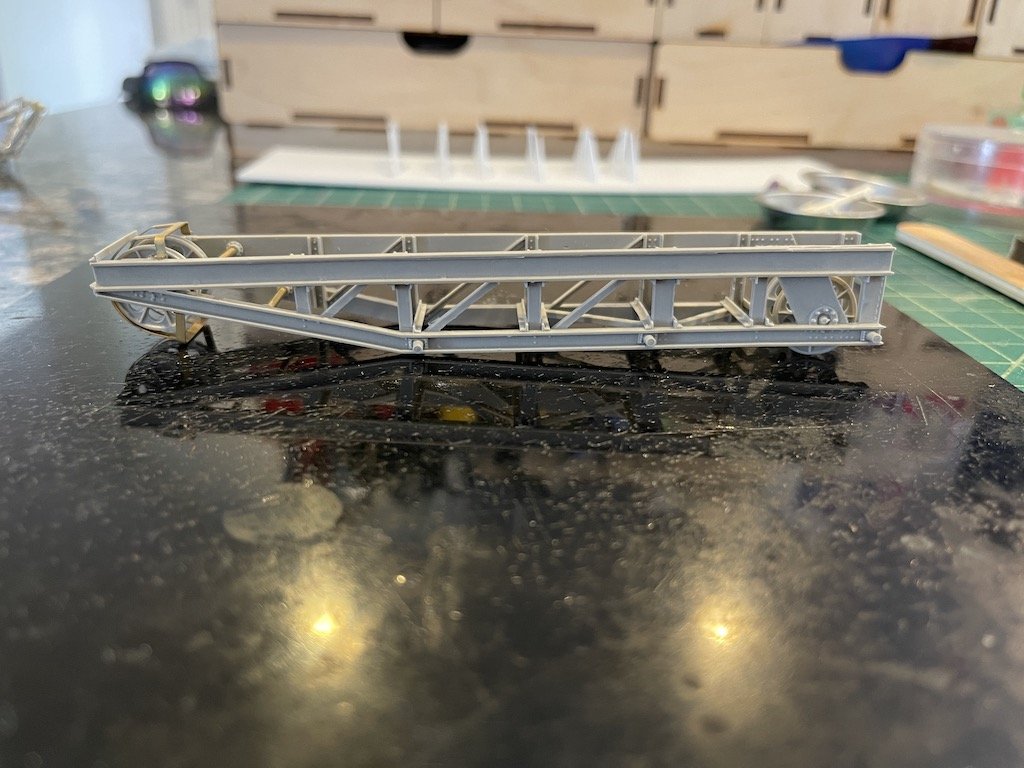
I've managed to put together the sub-assemblies for the NeOmega catapult. Seems like something that should take a day or two, but took me the better part of a week plus! Part of that involved cutting the resin parts off the plugs and cleaning them up, and part was having to go back to the NeOmega site for clearer pictures. All that said, the instructions are pretty clear in retrospect and this goes together very nicely.

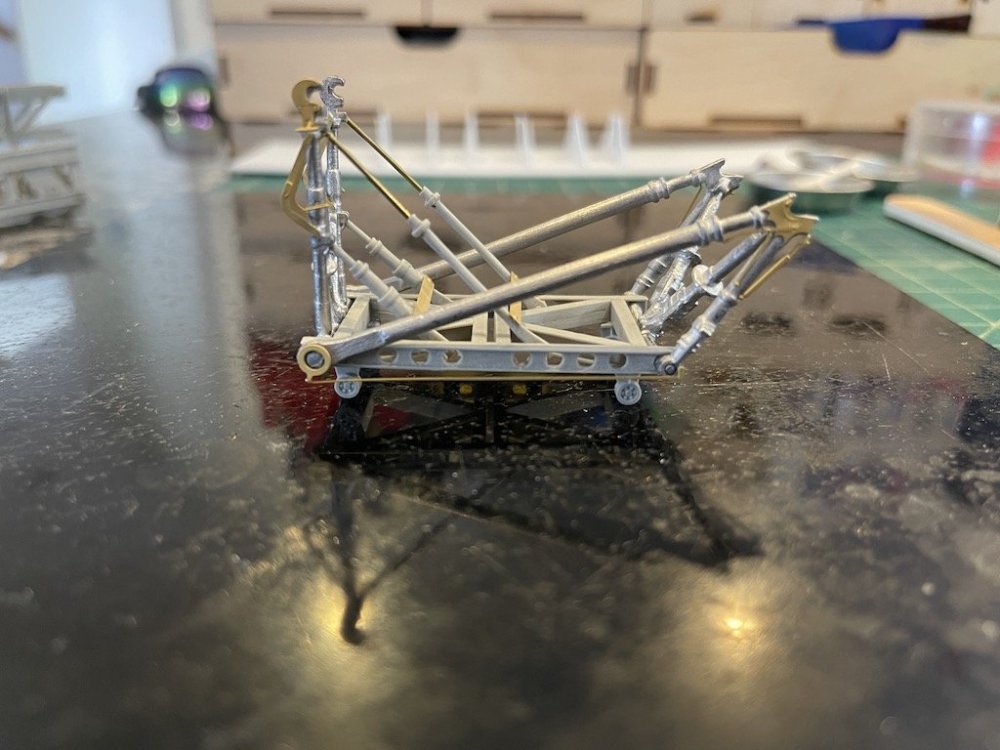
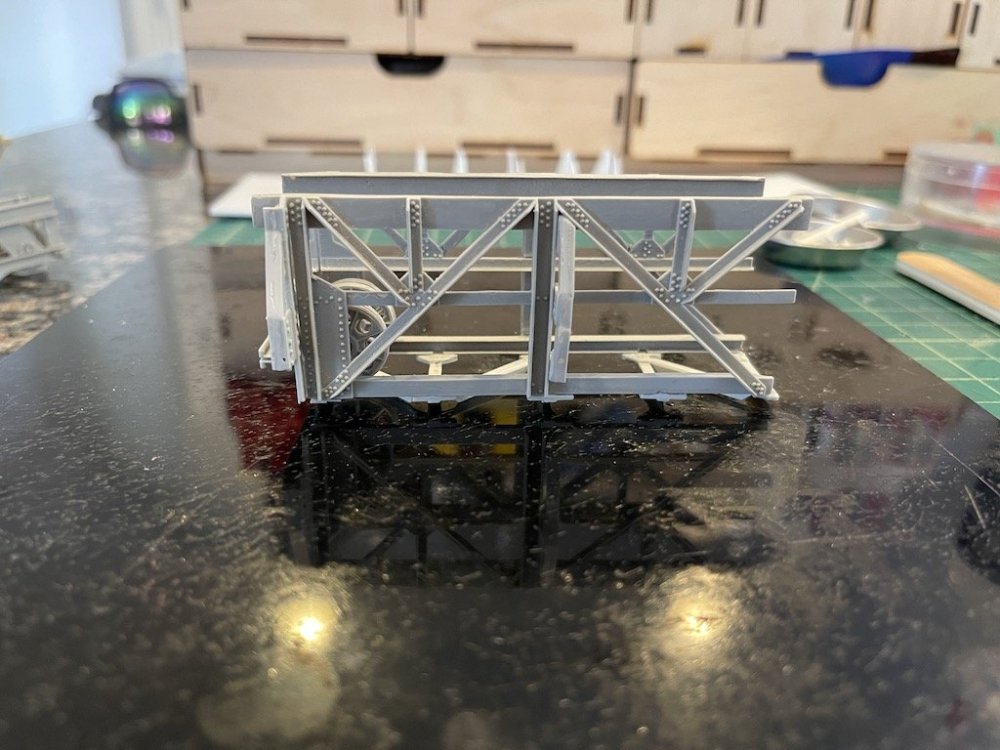

You can see in the background the jig I put together as recommended by NeOmega for the rear extension. At this point, I'm going to rig the cabling and assemble the main frame with the rear extension, add some filler here and there, and the prime the assembly. I'm having a bit of trouble with the wheels fitting into the combined main frame/rear extension when dry fitting, so I'll probably remove the wheels that will be hidden anyway (someone else seemed to have similar issues).
Thanks for looking in!
-
4
-
1
-
-
Great work Scott!
-
3
-
-
Looks great Brad! I'm a big fan of Accurate Miniatures kits. Too bad they are out of business.
-
3
-
-
Sorry to hear this Peter, but sounds like it's for the best! This is supposed to be a fun hobby, and not a self-imposed torture chamber. I binned a wooden model ship kit years ago because I came to realize that to fix all the inaccuracies would take me way longer and would ultimately mean I would need to essentially scratch build the thing. Figured there was no sense in killing myself for many months on it, so instead, I'm hoping to be able to scratch build it down the line.
Looking forward to your next build my friend!
-
1
-
-
That's really great news Peter! Best wishes to your wife!
-
2
-
-
Can you lightly feather some paint on? With all the straight lines on the decal, I'd consider trying that before more extreme measures.
-
4
-


Brewster Buffalo 239 (Finnish) - Special Hobby 1/32 + some AM
in LSM 1/35 and Larger Work In Progress
Posted
Tough people for sure!