
Kriss
-
Posts
354 -
Joined
-
Last visited
Content Type
Profiles
Forums
Events
Gallery
Everything posted by Kriss
-
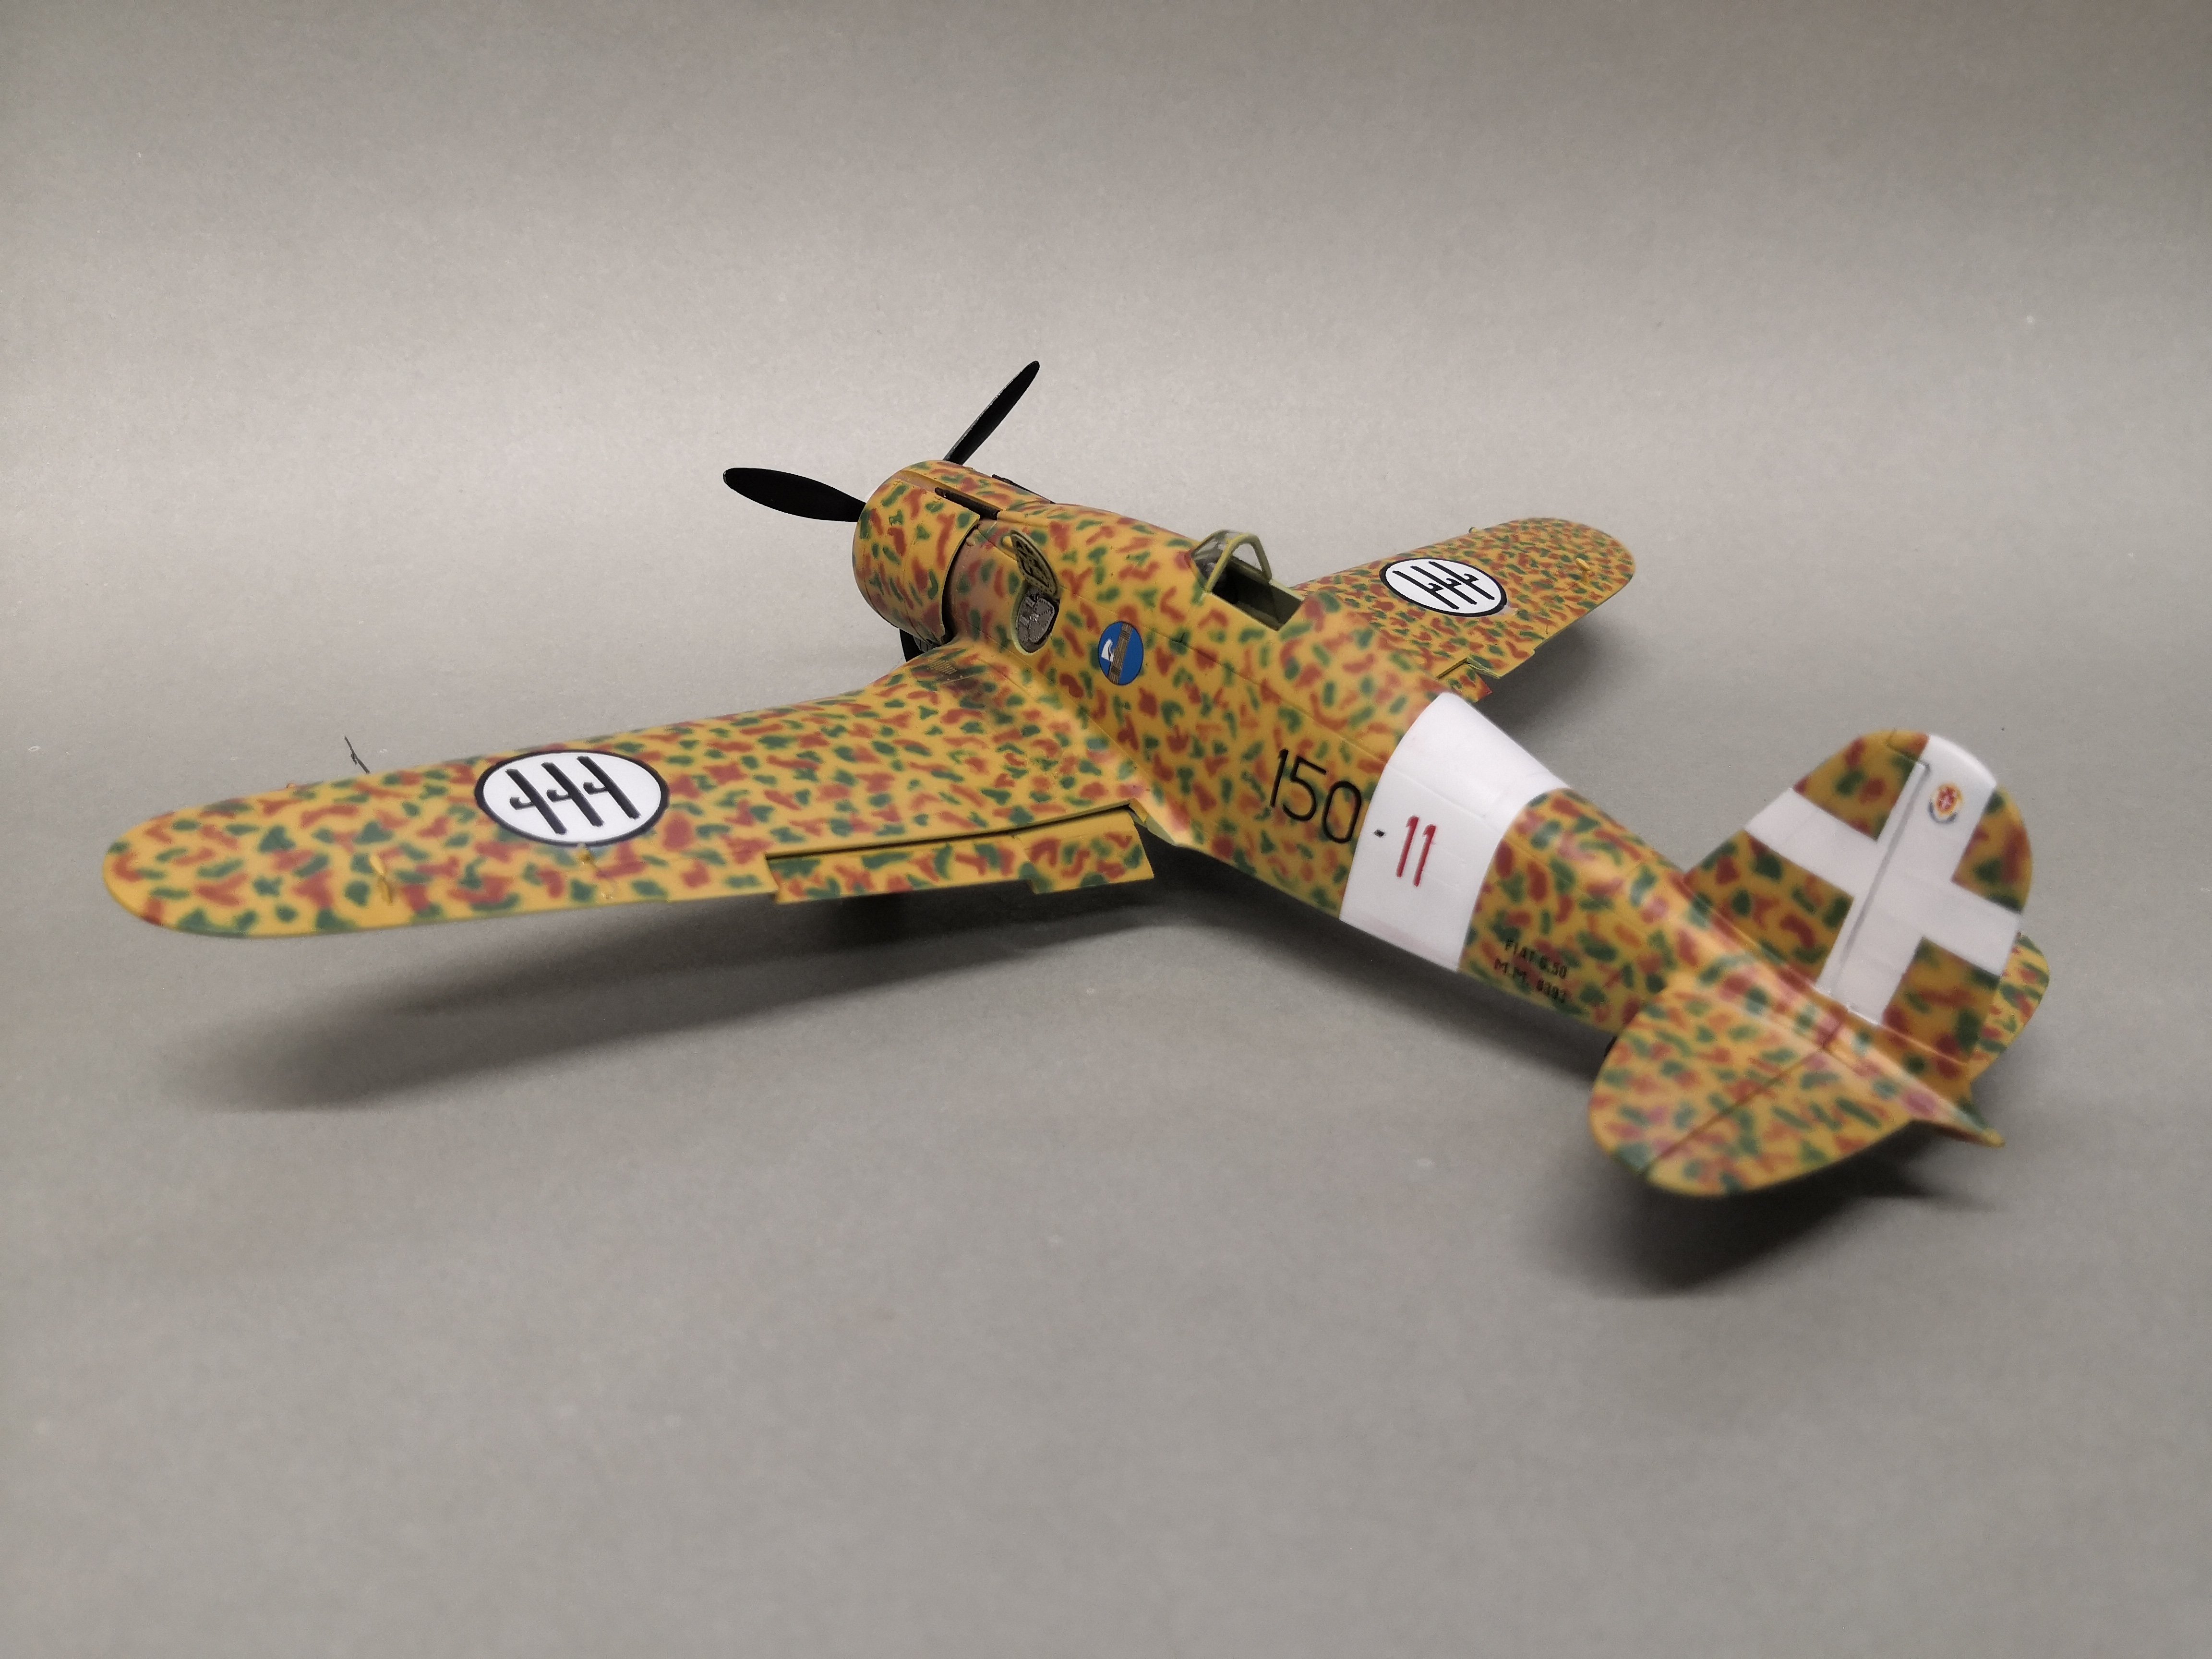
I painted this camouflage from masks out of curiosity, however, I prefer free-hand painting as it comes out more realistic. I once built such a "Veltro".
-
Camouflage painting with masks completed, as it came out you can see in the photos. I, for one, am not entirely satisfied with the result obtained, and how do you see it? Hand-painted they come out very realistic, but it is also time-consuming to apply such camouflage.
-
What should I write? The pictures show everything. The mask great but , well there is just a small but because it does not hold the scale. It's bigger than the model, I've been fiddling a bit with how to apply it and the best option is to cut the masks from the fuselage into several parts and apply them that way. I did so and the effect is below. An interesting addition.
-
So the painting continues and there is a beautiful Italian camouflage left to do. I was already doing free-hand so I decided to change things up and used masks to paint the smoke clouds. Just out of curiosity how they would come out. I hesitated whether it was worth it and acquired such a kit from LF Models dedicated to Macchi MC.205Veltro Camouflage Painting Mask Model: M4811. And this is how it looks, we will see how it fits and how the camouflage will come out.
-
Forgive me, but I scored a gaff, I did not take a picture of the camouflage from underneath. It escaped me. As a consolation, I upload a photo after masking.
-
I made some small parts at the ready.
-
The model is ready for painting, all the parts are in place and the undercarriage recesses are masked as well as the cabin. And this is the mazurka I did before laying down the color.
-
"Veltro" is slowly taking shape, reliable LEGO bricks are always helpful.
-
I enriched the interior of the cabin with some small details made by myself, as well as the pilot's belts. These accouterments are from the Eduard kit. I made the masks for the cabin glazing using Tamiya tape, and there are also masks on the inside. The cabin will be open.
-
On the workshop landed such a small and quick project Mc.205 "Veltro" from Hasegawa in 1:48. The model almost straight out of the box, the rest will come out during construction. As the model has its years this is the start of its construction. Another Italian but in JG77 camouflage.
-
It was a bit of fun, but something came out. Thanks for liking it.
- 13 replies
-
- 2
-

-
- fiat g.55
- specjal hobby
- (and 1 more)
-
After many years I finally managed to find all the parts and complete the model Fiat G.55 "Centauro" Sottoserie 0, MM 91064 "11", 1 Squadriglia "Gigi Tre Osei", 2 gruppo ANR, may 1944 in 1:48 scale published by Special Hobby, the machine is in experimental camouflage. Despite these several years of lying the model I do not remember that there were any problems with it in construction, the fit of parts very good. The only addition is montex-mask masks. Enjoy your viewing.
- 13 replies
-
- 6
-
-
- fiat g.55
- specjal hobby
- (and 1 more)
-
I finally managed to finish it after several years of lying around. Yesterday I fitted all the parts and this is how it looks ready on the workshop, now it remains for me to do a photo shoot and upload it to the gallery. Markings painted with Montex-mask (MM 48280), dedicated to this kit.
- 13 replies
-
- 7
-
-

-
- fiat g.55
- specjal hobby
- (and 1 more)
-
Having a moment of time I'll throw in a few more photos of painting the camouflage. And the "Centauro" is put together.
- 13 replies
-
- 5
-
-
-
- fiat g.55
- specjal hobby
- (and 1 more)
-
Searching the resources of his laptop this I managed to find some pics of the construction, here the interior of the cabin. And the revised underside of the fuselage, the second photo from the old forum where I used to be.
- 13 replies
-
- 8
-
-
-
- fiat g.55
- specjal hobby
- (and 1 more)
-
Lately, my favorite aircraft and their camouflages.
- 13 replies
-
- 3
-
-
- fiat g.55
- specjal hobby
- (and 1 more)
-
While doing some organizing in my modeling stash, I came across a model of a Fiat G.55 "Centauro" sottoserie 0 in 1:48 a published by Special Hobby. The construction of it began a good few years ago. But during some work in the workshop I lost some of the finished parts and couldn't find them, and the model flew to the shelf waiting for me to find the parts. Finally, I managed to complete all the parts and you can move with the end of its construction. In such a state he was waiting for the end of work on him. And here's a set of parts that I lost somewhere for several years.
- 13 replies
-
- 8
-
-
-
- fiat g.55
- specjal hobby
- (and 1 more)
-
The model has been finished for a long time and it is also high time to take photos for the gallery and post them on the forum. I treated it as a typical rest and straight out of the box. It's just a pity that the extras for it are not available from Eduard. That's the way I would have gone over it a bit and pootled it. The model itself was very pleasant to build, well-fitted, the very pluses. By the way Italeri has just reissued it in their range, only the decal is for other camouflages. Gallery below, enjoy.
-
Slowly to the end, it remains to install the engine cover and a few small details and it will be over.
-
Work continues to move forward. I used kit decals, despite their years it laid out very nicely. They went into the recesses perfectly. Dirt came out somehow, too.
-
Hello Landlubber Mike I paint almost everything with an airbrush, I use the brush mainly to paint parts such as knobs, dials, etc., and to apply pigments and nails to the model. That's it in a nutshell what I can do is airbrush. And this is the kind of kit I have to help me paint so that my hand does not shake and my eyes see everything.
-
Now it's time for the engine along with the cowl, still clean. Once it has been valorized and nailed down, it will be mounted and one side cowl will be loose. So that something will be visible from the side.
-
Well, the fun of painting the camouflage is over, now putting everything together has been done. The best fun is over. Thanks for your kind words and the fact that you like my writings.
- 29 replies
-
- 10
-
-
-
Painting continues, something is already visible.
- 29 replies
-
- 10
-
-
-
Thanks, I’m still having a little fun painting.