

Kriss
-
Posts
354 -
Joined
-
Last visited
Content Type
Profiles
Forums
Events
Gallery
Everything posted by Kriss
-
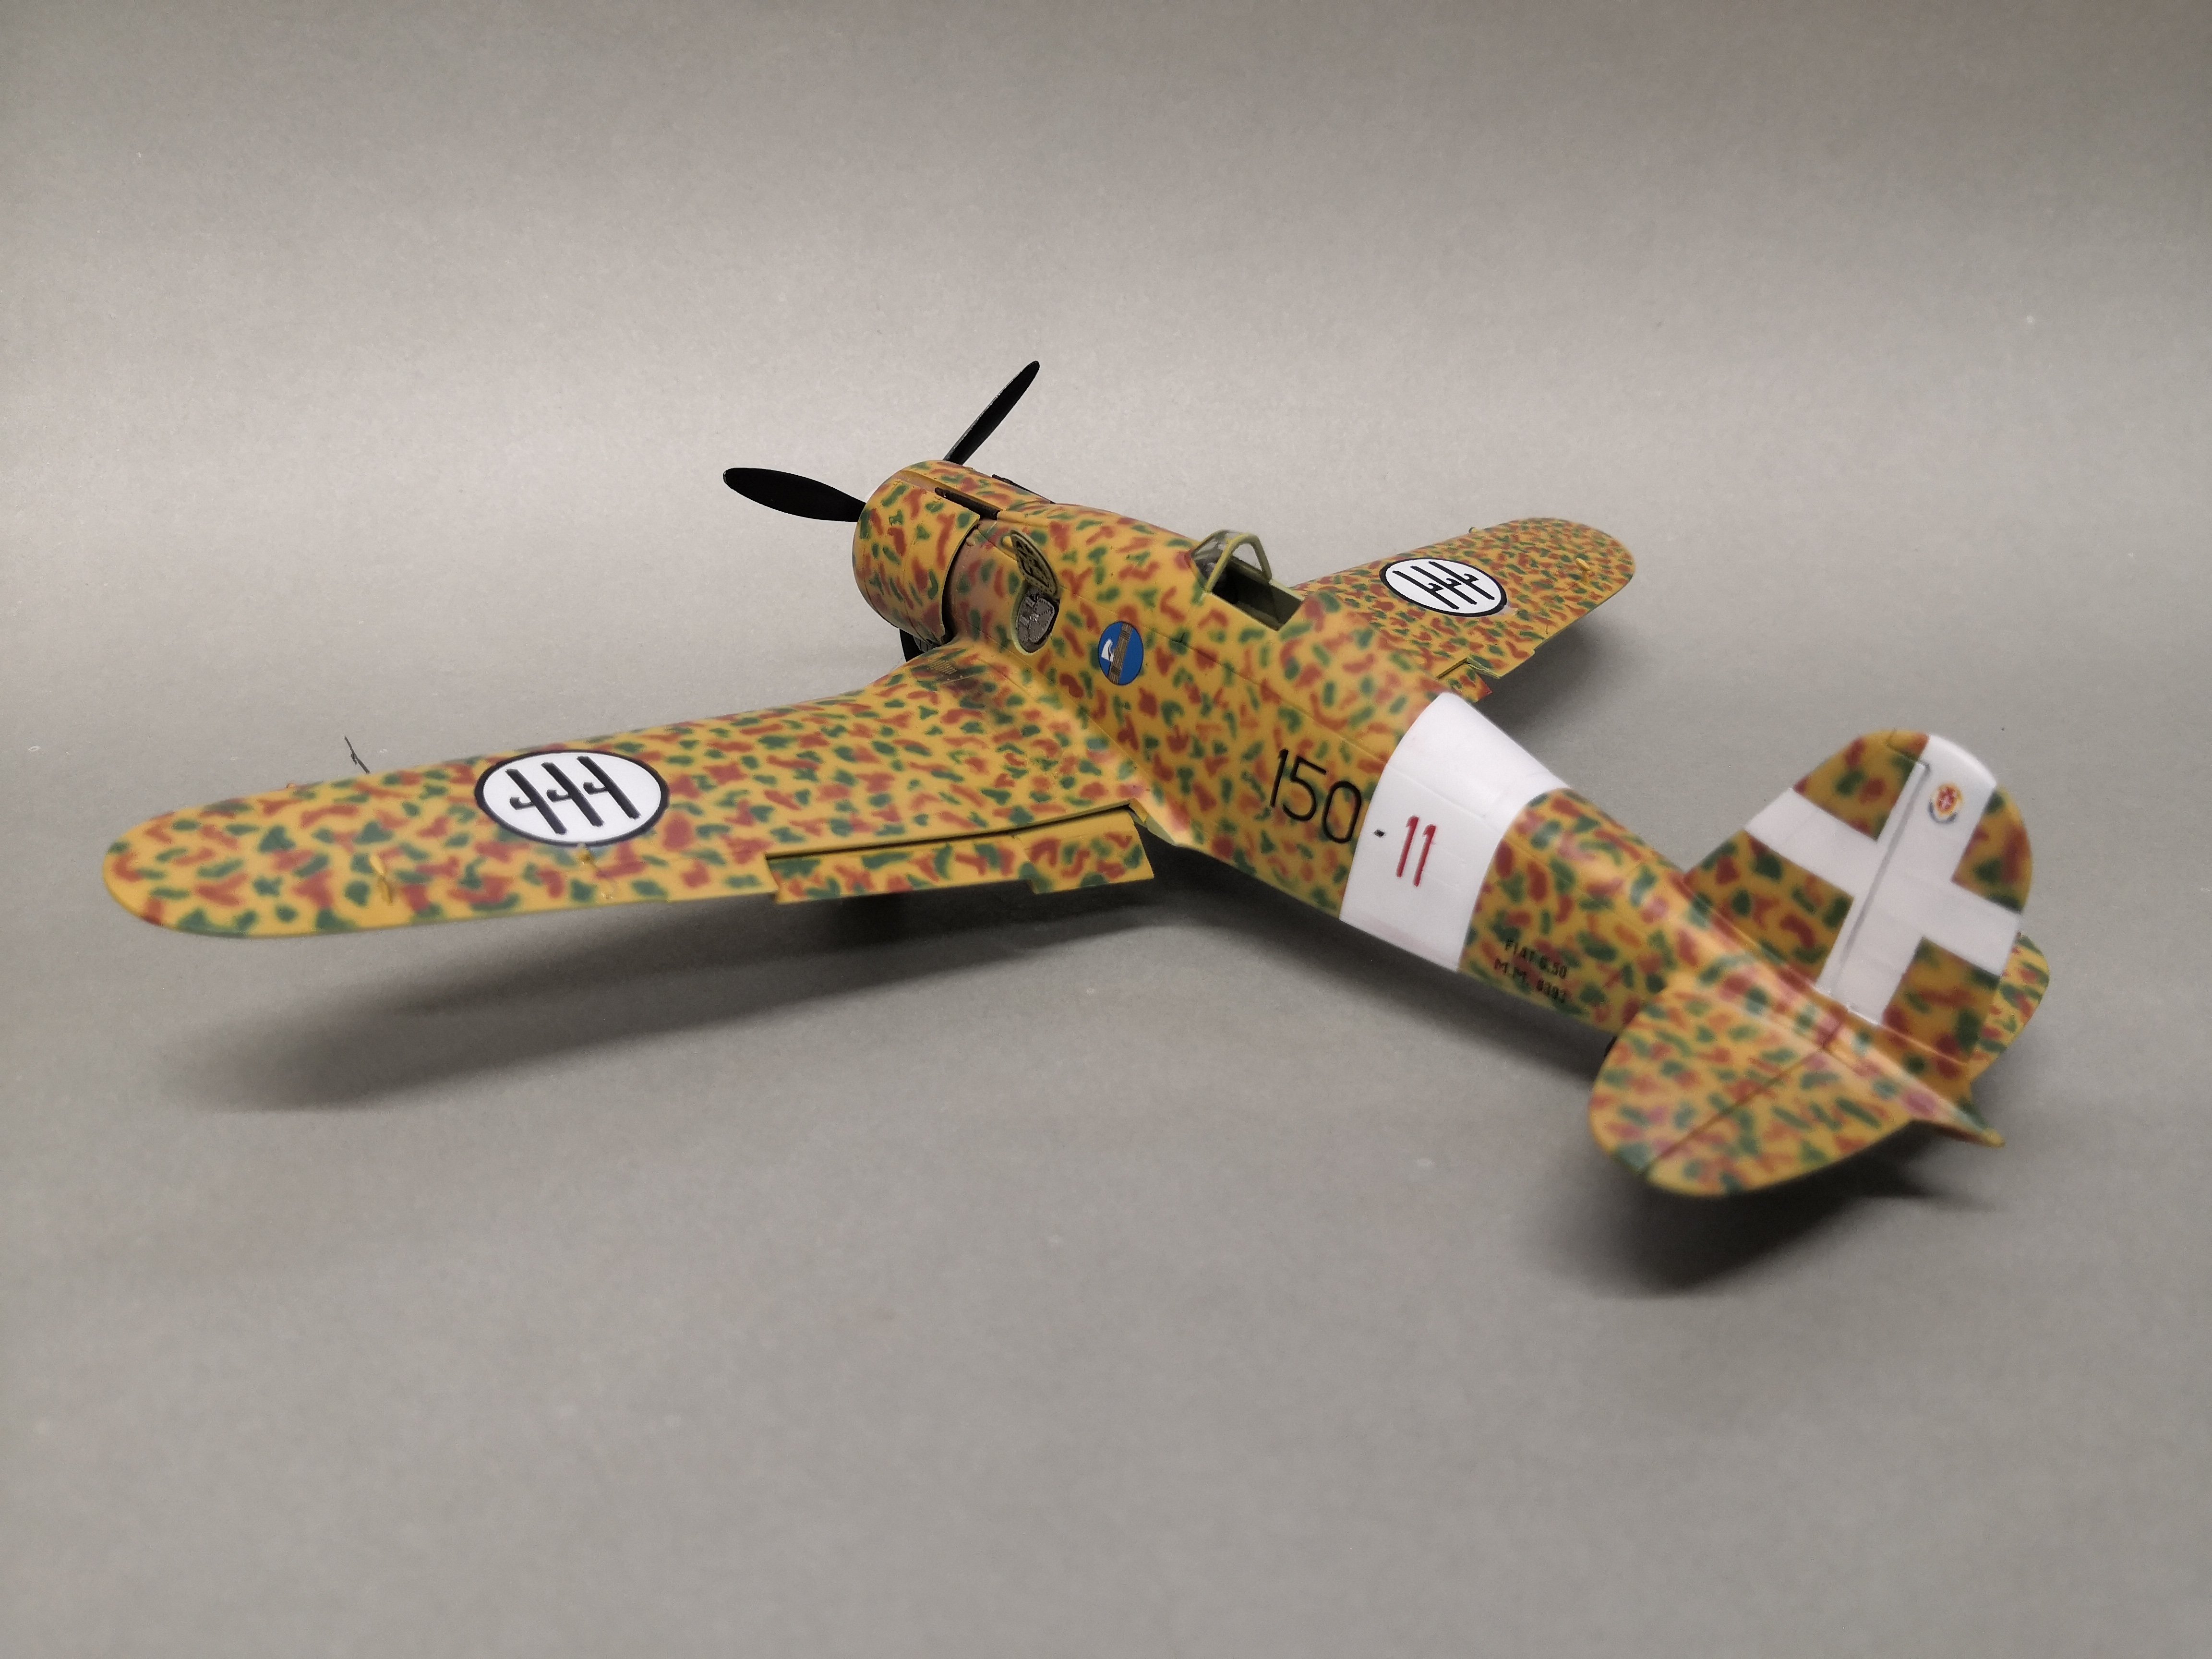
I found such a marvel from "Smer" in my stocks and was wondering what to do with it, a deep valorisation. That is, re-routing the lines and riveting and making the interior from scratch or leaving it as it is. I also wanted to give it just a bit of a facelift and redo the cab and its cowl and also make an inlet and outlet in the radiator and do something to improve the undercarriage. But after discussions with my colleagues it is thanks to Marcin that I will make it in the VINTAGE version, that is, I don't fix anything just put it together. That's my hope for a quick project, sometimes you need to de-stress. There are two camouflage versions in the kit and I had no problem choosing and I am making an Italian for the collection. Below is the in-box of the kit and as the model is years old I think everyone knows it.
-
LUBLIN R.XIII D 1:32 LUKGRAPH
Kriss replied to Kriss's topic in LSM 1/35 and Larger Work In Progress
I replaced the kit instrument panel with one from YAHU Models and this is the only addition dedicated to this model. By the way, I decided to valorise it a bit and replaced the compass with the one from the YAHU kit for the PZL P.11c. Compared to the resin from the kit, this one looks a lot better. -
LUBLIN R.XIII D 1:32 LUKGRAPH
Kriss replied to Kriss's topic in LSM 1/35 and Larger Work In Progress
The belts that come with the kit are very nice but I decided to change them to belts from YAHU Models but dedicated to the PZL P.11c. -
LUBLIN R.XIII D 1:32 LUKGRAPH
Kriss replied to Kriss's topic in LSM 1/35 and Larger Work In Progress
Stretches are being made and various small details are being added. -
LUBLIN R.XIII D 1:32 LUKGRAPH
Kriss replied to Kriss's topic in LSM 1/35 and Larger Work In Progress
Central lubrication system done according to the documentation. The description stated that the hoses were unpainted and made of copper tubing. -
LUBLIN R.XIII D 1:32 LUKGRAPH
Kriss replied to Kriss's topic in LSM 1/35 and Larger Work In Progress
The tensioners from Lukgraph are and this toggle is made of plates of plastic of different thicknesses. -
LUBLIN R.XIII D 1:32 LUKGRAPH
Kriss replied to Kriss's topic in LSM 1/35 and Larger Work In Progress
The tinkering and fiddling continues, such additions according to the documentation. Although the documentation raises more question marks than it answers, I struggle on. -
LUBLIN R.XIII D 1:32 LUKGRAPH
Kriss replied to Kriss's topic in LSM 1/35 and Larger Work In Progress
The work is in progress and I am trying to make tension in the truss, and I purchased the turnbuckles from Lukgraph. -
LUBLIN R.XIII D 1:32 LUKGRAPH
Kriss replied to Kriss's topic in LSM 1/35 and Larger Work In Progress
You could say that the work is finished, now it's up to me to authorise whether everything is as it should be and to do a dry fitting on the pedestal of the monument. Even my son Peter got involved in the work on the monument by painting with me. -
LUBLIN R.XIII D 1:32 LUKGRAPH
Kriss replied to Kriss's topic in LSM 1/35 and Larger Work In Progress
It was time for the chessboards and lasers to go. -
LUBLIN R.XIII D 1:32 LUKGRAPH
Kriss replied to Kriss's topic in LSM 1/35 and Larger Work In Progress
Masking removed and so the camouflage came out, now it's time for the chequers. -
LUBLIN R.XIII D 1:32 LUKGRAPH
Kriss replied to Kriss's topic in LSM 1/35 and Larger Work In Progress
A few pics of painting the camouflage on the wings, the ones that go on the monument. And on the model the work goes on, for now I am doing the interior of the fuselage. -
LUBLIN R.XIII D 1:32 LUKGRAPH
Kriss replied to Kriss's topic in LSM 1/35 and Larger Work In Progress
You have no idea what the look on the face of an employee at a paint-mixing shop when I told him that I needed to buy car paints to paint the plane, specifically the wings. I had to explain everything to him and tell him the story of the fallen crew. I can tell you that he surprised me very pleasantly, I did not expect such an involvement in choosing the right camouflage colours. And the work continues both on the model and on the wing. Today only the progress on the wing. -
LUBLIN R.XIII D 1:32 LUKGRAPH
Kriss replied to Kriss's topic in LSM 1/35 and Larger Work In Progress
What I could manage to do at home on the wings for the memorial is done, the rest will already be done at my work. My boss agreed and I was given a room to paint the wing. I can't help but thank you for your help. -
LUBLIN R.XIII D 1:32 LUKGRAPH
Kriss replied to Kriss's topic in LSM 1/35 and Larger Work In Progress
Work continues to move forward slowly. The truss prepared for painting and the rest of the equipment under construction is. -
Until a few years ago I was exclusively building models in 72, but my eyesight has faded and I have a problem, I'm trying my best, but I think I'll switch to 48 or 32. Currently I'm preparing to emboss the cockpit cover for the "Kobuz" as well as the PZL P.24 because I also have these in my plans to build.
-
LUBLIN R.XIII D 1:32 LUKGRAPH
Kriss replied to Kriss's topic in LSM 1/35 and Larger Work In Progress
So now it's time for that surprise. There was a memorial erected at the site where the plane went down, but the tooth of time has done its work and a new memorial is now being erected. I am also taking part in this personally, I know such a boastful post but sometimes you have to have one. Thanks to the association that took it upon itself to erect the new memorial, we were able to reach the last living witness to the event. We also managed to interview 94-year-old Mrs Ziora, who was 10 years old at the time and was at the site. Mrs Ziora told us a very interesting story about the heroic fight of the Polish crew against the German infantry. Returning to the memorial, I liked the wings that will be placed there. Interview with Mrs Ziora. Wings under construction. And already at my place in front of the workshop.- 28 replies
-
- 11
-

-

-
It is not a problem with the decals, but with their arrangement on the surface of the model, specifically on the wings. In fact, PZL fighter planes from 1 to 24 used corrugated sheet metal on the covering, as in the Ju-52. And there was still a reinforcement of the sheet metal connection underneath. I had a bit of fun with this but managed to apply it. In the next post I'll upload pictures of how it came out, I'm putting it together further.
-
I'm struggling to apply the decals to the corrugated surface of the wing from the top and I'm having an even harder time on the underside due to the reinforcing strips. So decal liquids and forward, nothing else left for me.
-
LUBLIN R.XIII D 1:32 LUKGRAPH It was supposed to be from FLY both "Tunnan" but life has verified the plans as always. As a tribute to the fallen crew there is Lublin R.XIII D in 1:32 from LUKGRAPH. The model will be built in the colours of the 1st Platoon 26 EO (observation squadron) of the 2nd Air Regiment Cracow. The probable designation of the aeroplane is the letter E on the fuselage, the military number of the aeroplane is 56-126 and the under wing number is 16 K. The crew consisted of Lt. obs. Leon Wrzeszcz and Staff Sergeant Pilot Adam Baran. On 1.09.1039 the aircraft was shot down by ground fire and crashed in the village of Piasek near Strzebinia / Lubliniec, the crew died. The deadline for making the model is very short, because I want to make it in time for the unveiling of the newly-made memorial at the site of the plane crash. So much for the story, and now for the model; in the box we have everything we need to build it. From the extras there is an instrument panel available for it in the company YAHU MODELS YMA3231, which I will use in the model. Thanks to the companies LUKGRAPH and YAHU MODELS for their help. ps. There will be a little surprise in the next post.
- 28 replies
-
- 10
-
-
Masks removed after painting with the last camouflage colour, that's how it came out for me.
-
I am just starting to build a collection of Polish wings and there are quite a few in 72, but my eyesight has declined a bit and I am moving to larger scales of 48 and 32. And by the way, the PZL P.23 "Karas" is a beautiful aircraft.
-
For painting I used a kit from "HATAKA" dedicated to the 1939 Polish Air Force, HTK-CS01 from the orange line. The underside and top are already in colours and I am trying to do the camouflage that IBG proposes. For easier painting the model is in parts. Masking done and I only have the green camouflage colour left to apply.
-
Thanks for the reply, that was my guess. There are still plenty at my place but I'm slowly taking them on to finish them.
-
There is a PE in the kit and it's the same for all P.11 and P.24 models, and just out of curiosity I'd like to ask which Polish constructions interest you? Because I am just starting on the 32 model of the Lublin R.XIII D. The rest of the information tomorrow in a post. I think it will be interesting, the wings are placed but not literally. You know corrugated sheet metal is a challenge no matter the scale, but laying down decals is a challenge. Paying attention to the reinforcements of the flap on the lower surface. I have had the pleasure of testing a few models and I know it is meant to be a pleasure. Forgive me for asking but what does 7/9 sets of SOD mean? My English is poor and I use a translator.