
Kriss
-
Posts
354 -
Joined
-
Last visited
Content Type
Profiles
Forums
Events
Gallery
Everything posted by Kriss
-
Cabin assembled, it's now nothing to do but take photos for the gallery and put the model in the collection.
-
In the IBG kit there is a traditional injection-moulded cab cowl as well as an option to make it from sheet metal, the film is also included. The injection-moulded cowl is very transparent and you can see everything nicely through it in the closed option. If you want to make an open cockpit, then the thickness of the walls in 72 is unfortunately too visible; I want to show the inside of the cockpit in mine, so I'm making an open cowl. I will use the injected one as a coping for stamping the new cowl as well as for shaping the cabin frame. Another dilemma is how did the cabin open on the PZL P.24 aircraft? I based my decision on the fact that it is impossible to open it to the side because of the wing, in the literature it is stated that it was broken and there are photos of Greek machines, so I relied on them. The cabin frames are already prepared and painted.
-
Thanks, I'm doing my best.
-
All the parts are ready and I'm starting to assemble it all together, with any luck it will go into the collection today.
-
The antenna is done, so another stage of the work is completed. Just the cab cover to go and there will be another miniature on the shelf for the collection.
-
You know, I was most concerned that these calques from IBG would not lay down on the corrugated surface. And here was such a pleasant surprise. So I still have to build P.11a and c and the whole P.24 series.
-
After a long break it's time to get back to work on the "Kobuz", I have a model lying around that I've started and I'm a bit annoyed by it. I have too many of these started models and I need to build them to completion too. But getting back to the model I have been dosing decal softening liquids all day and have managed to get them very nicely on the wavy surface of the wings. I'm pleased with it myself. This is how it worked out for me I am curious to hear your opinion, Decals offered by the manufacturer IBG Models. I thought about masks but in the end I gave the decals.
-
I did the cap and the end is already bliki. I looked at other manuals and workshops and the white is only a slice the rest is RLM 75 and the spots are in RLM 74.
-
I have done some gentle burns I hope I have not exaggerated.
-
The decals turned out to be sensational, delicate and the backing very thin, and as if the model didn't have convex lines and rivets they would lay perfectly. Almost because once they were laid, any movement proved almost impossible. I also considered using masks, but I was afraid of their adherence to the surface of the models in places of lines and rivets. And after my efforts, one carbon paper broke and I had to make myself a mask. And so with carbon paper and masks the model got the markings.
-
Yesterday I received such a marvel from the company "Fly", so quickly took photos of what is inside the box. So it flies in for a quick test workshop. The "Fly" company has released the Breguat in three boxes, but I will try to write more about them later. My model will be in Polish painting. And this is what it looks like ready with the decals for all three boxes. Thank you to the company 'Fly' for the model received for review.
- 2 replies
-
- 6
-

-

-
- breguet 14
- 1:48
- (and 1 more)
-
Camouflage completed, RLM74 laid as specified by the manufacturer.
-
Work continues, the next colour laid is RLM75. Only RLM74 is still to be applied and the work can be completed.
-
The kit comes with two options for making the cab, in both closed and open versions. The frames are printed in both versions and the glazing is in the vacu version. The model is going to the workshop so the next post will be from the workshop. I've uploaded a photo of the cab glazing, which is how it's made in this kit. I have read what you have written and 3D printed models are the future of our hobby. Especially if you can make niche models, prototypes or if there was only one or two copies. And this is quite an interesting proposition because the manufacturer only prints so much and it is needed. The only thing is that the quality of the print itself could be better, the surface is smooth, but here and there you can see the graduation (teeth) after printing.
-
The central part of the fuselage looks to be the most difficult part of the model to clean, on one side is the crew cabin and underneath we have the open bomb bay and the recess for the retractable gunner/bombardier cradle.
-
So I managed to lay the RLM 76 and it came out quite interesting as you can see, but I like it and I don't know about you.
-
Thanks a lot, sometimes this solution helps too.
-
Such a test there of shading under camouflage, it will be interesting to see how it comes out.
-
When I saw the announcement of the release of the Polish PZL.46 "Sum" reconnaissance-bomber aircraft, I was delighted; dreams do come true. Having it on my shelf is a joy. I have just received my first 3D printed model from the Art of Trans company in the 3D Polish Wings series. They have it in 1:72 / 48 / 32, and I'm going to get it in 32 too. So this is what it looks like inside, instructions in pdf form, vacu glazing. The kit doesn't include decals or bombs and the open bomb bay is begging for them. And I'm happy to get it right away as it's one of many models I've always dreamed of having on my shelf.
-
Peter and Paul I agree with you, these models have their own charm and charm. A memory of young carefree years one could say. And there are quite a few of them at my place and I have to do something with them, because you know the wife doesn't grumble but asks when I'm going to finish a model because the winds are blowing on the shelves for now.
-
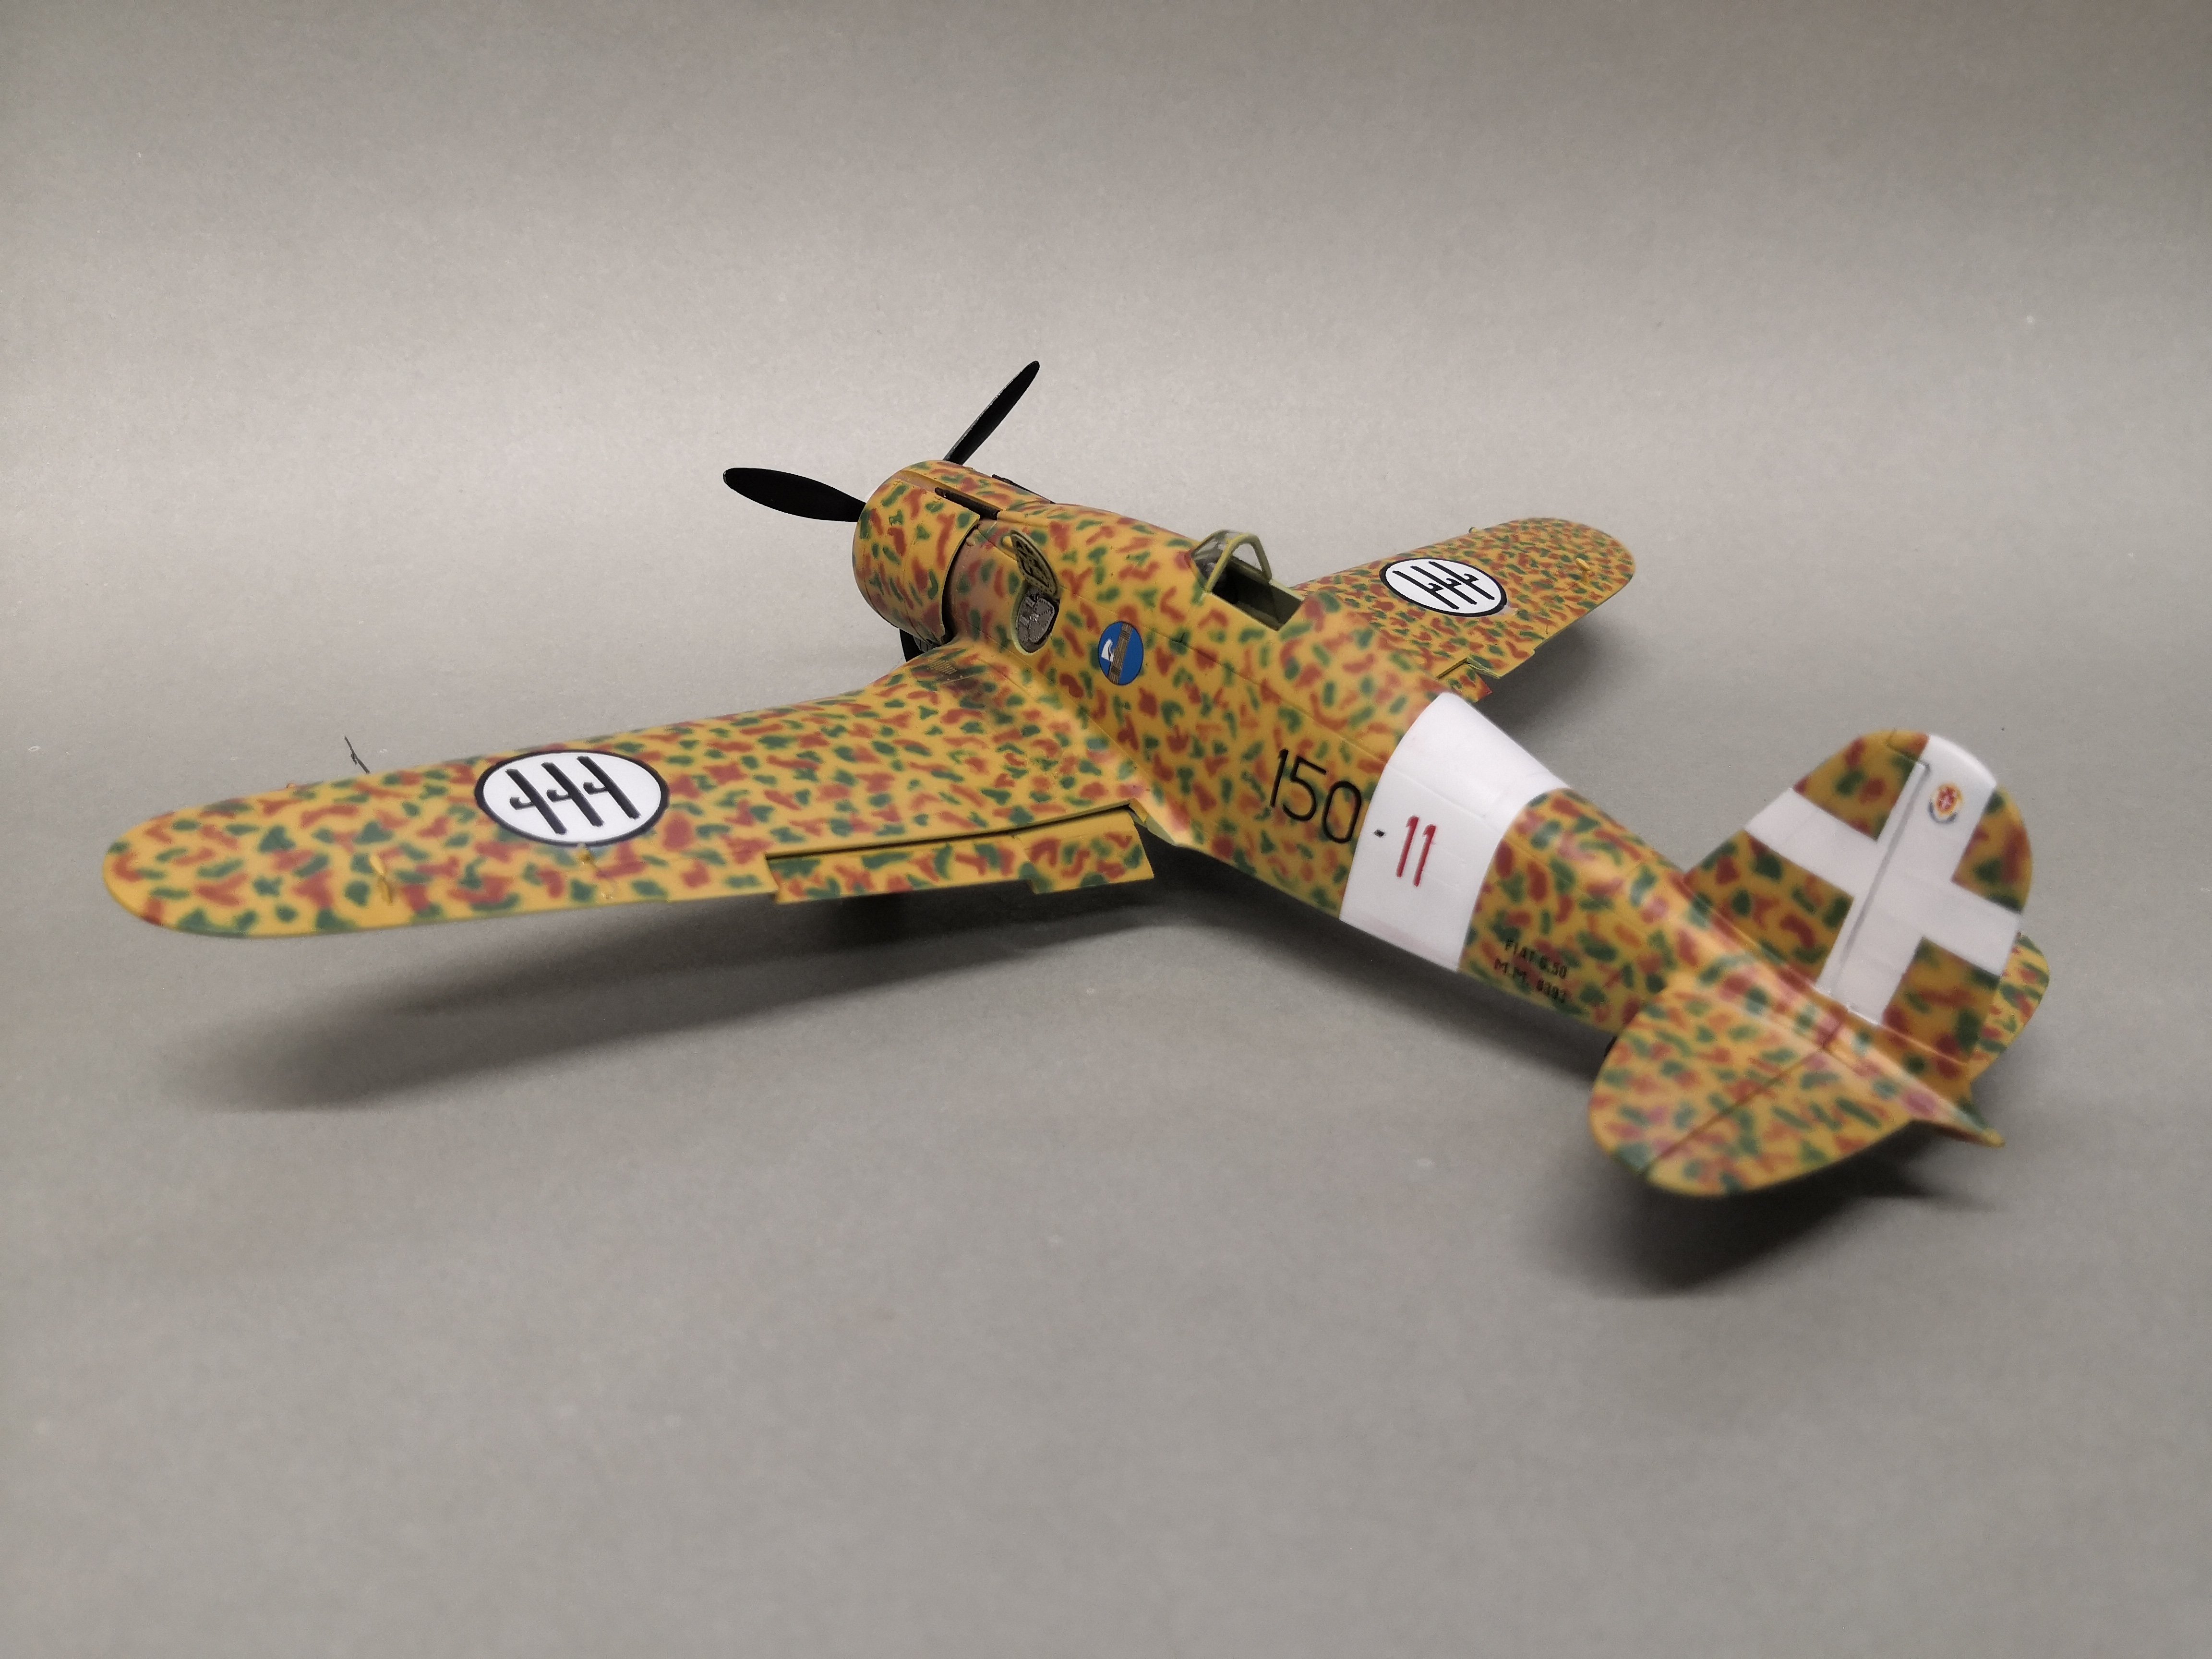
I laid the primer and applied a white stripe on the fuselage as well as the yellow underside of the engine and marked the radiator inlet and outlet with grey. I masked everything off and applied primer once more.
-
And that's my point too.
-
You are right, I have accumulated a lot of models over the years and some of them are started to varying degrees and now I am slowly starting to finish them. Somehow I don't have the energy to bring such models to their present state, i.e. to route lines and rivet and redo them. Sometimes, as a total relaxation, I build a model like this "Centauro".
-
The model as a whole put together and prepared for painting, just masking on the glazing and recesses and it will be great.
-
I spent the weekend at work, but there was also time to work on the model. The interior is complete and rich, as only the seat is there or, to put it another way, something that imitates it. I also fitted the wings and made a place for the landing gear bracket so that it had a place to stand and on the shelf so that it wouldn't come apart after a while.