JeroenPeters
-
Posts
4,867 -
Joined
-
Last visited
Content Type
Profiles
Forums
Events
Gallery
Everything posted by JeroenPeters
-

1/32 Hawker Tempest
JeroenPeters replied to JeroenPeters's topic in LSM 1/35 and Larger Work In Progress
Everywhere and nowhere. Just scored some Whirlwind crash parts. Need to verify their authenticity if possible. Got those from Ebay.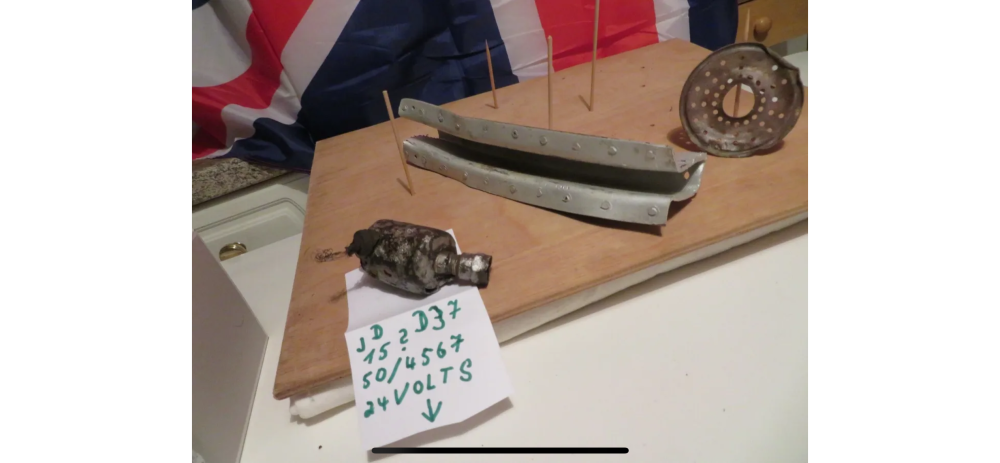
-
1/32 Hawker Tempest
JeroenPeters replied to JeroenPeters's topic in LSM 1/35 and Larger Work In Progress
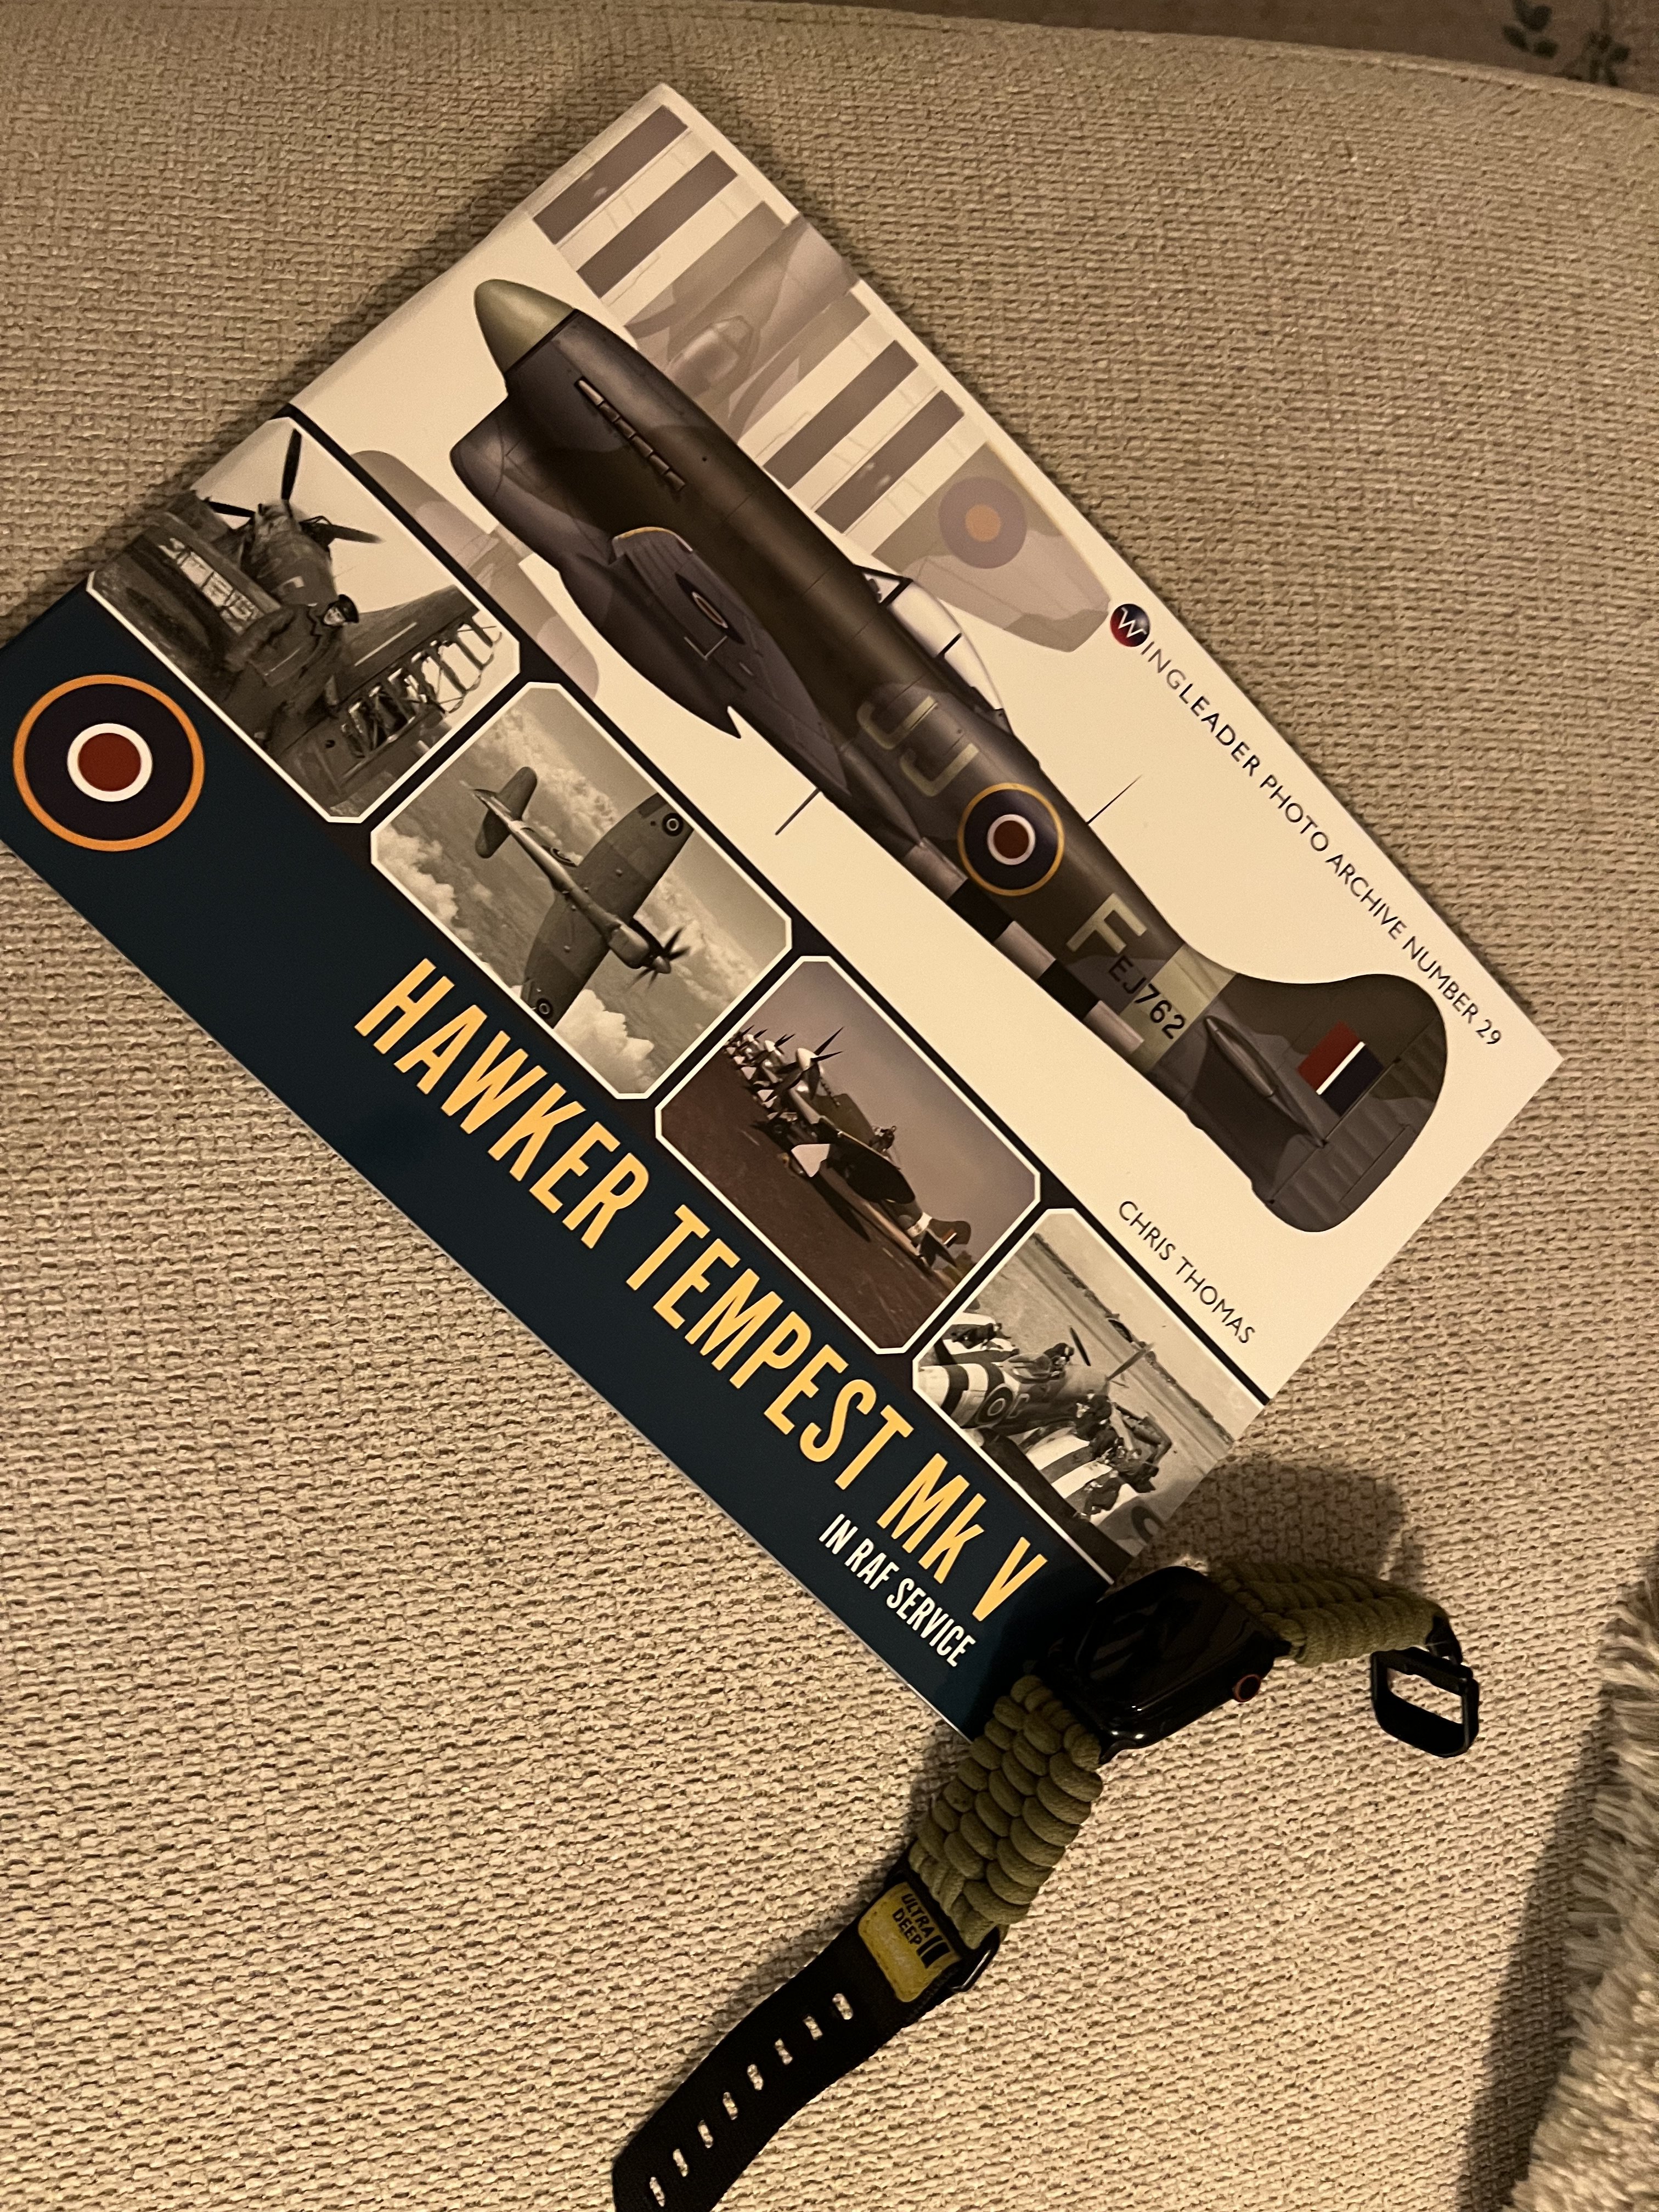
Just got this amazing book. A real must have!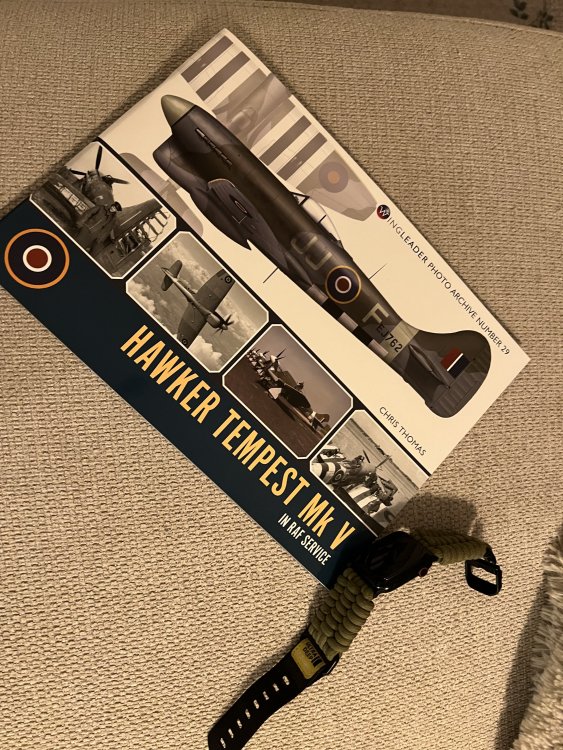
-
1/32 Westland Whirlwind
JeroenPeters replied to JeroenPeters's topic in LSM 1/35 and Larger Work In Progress
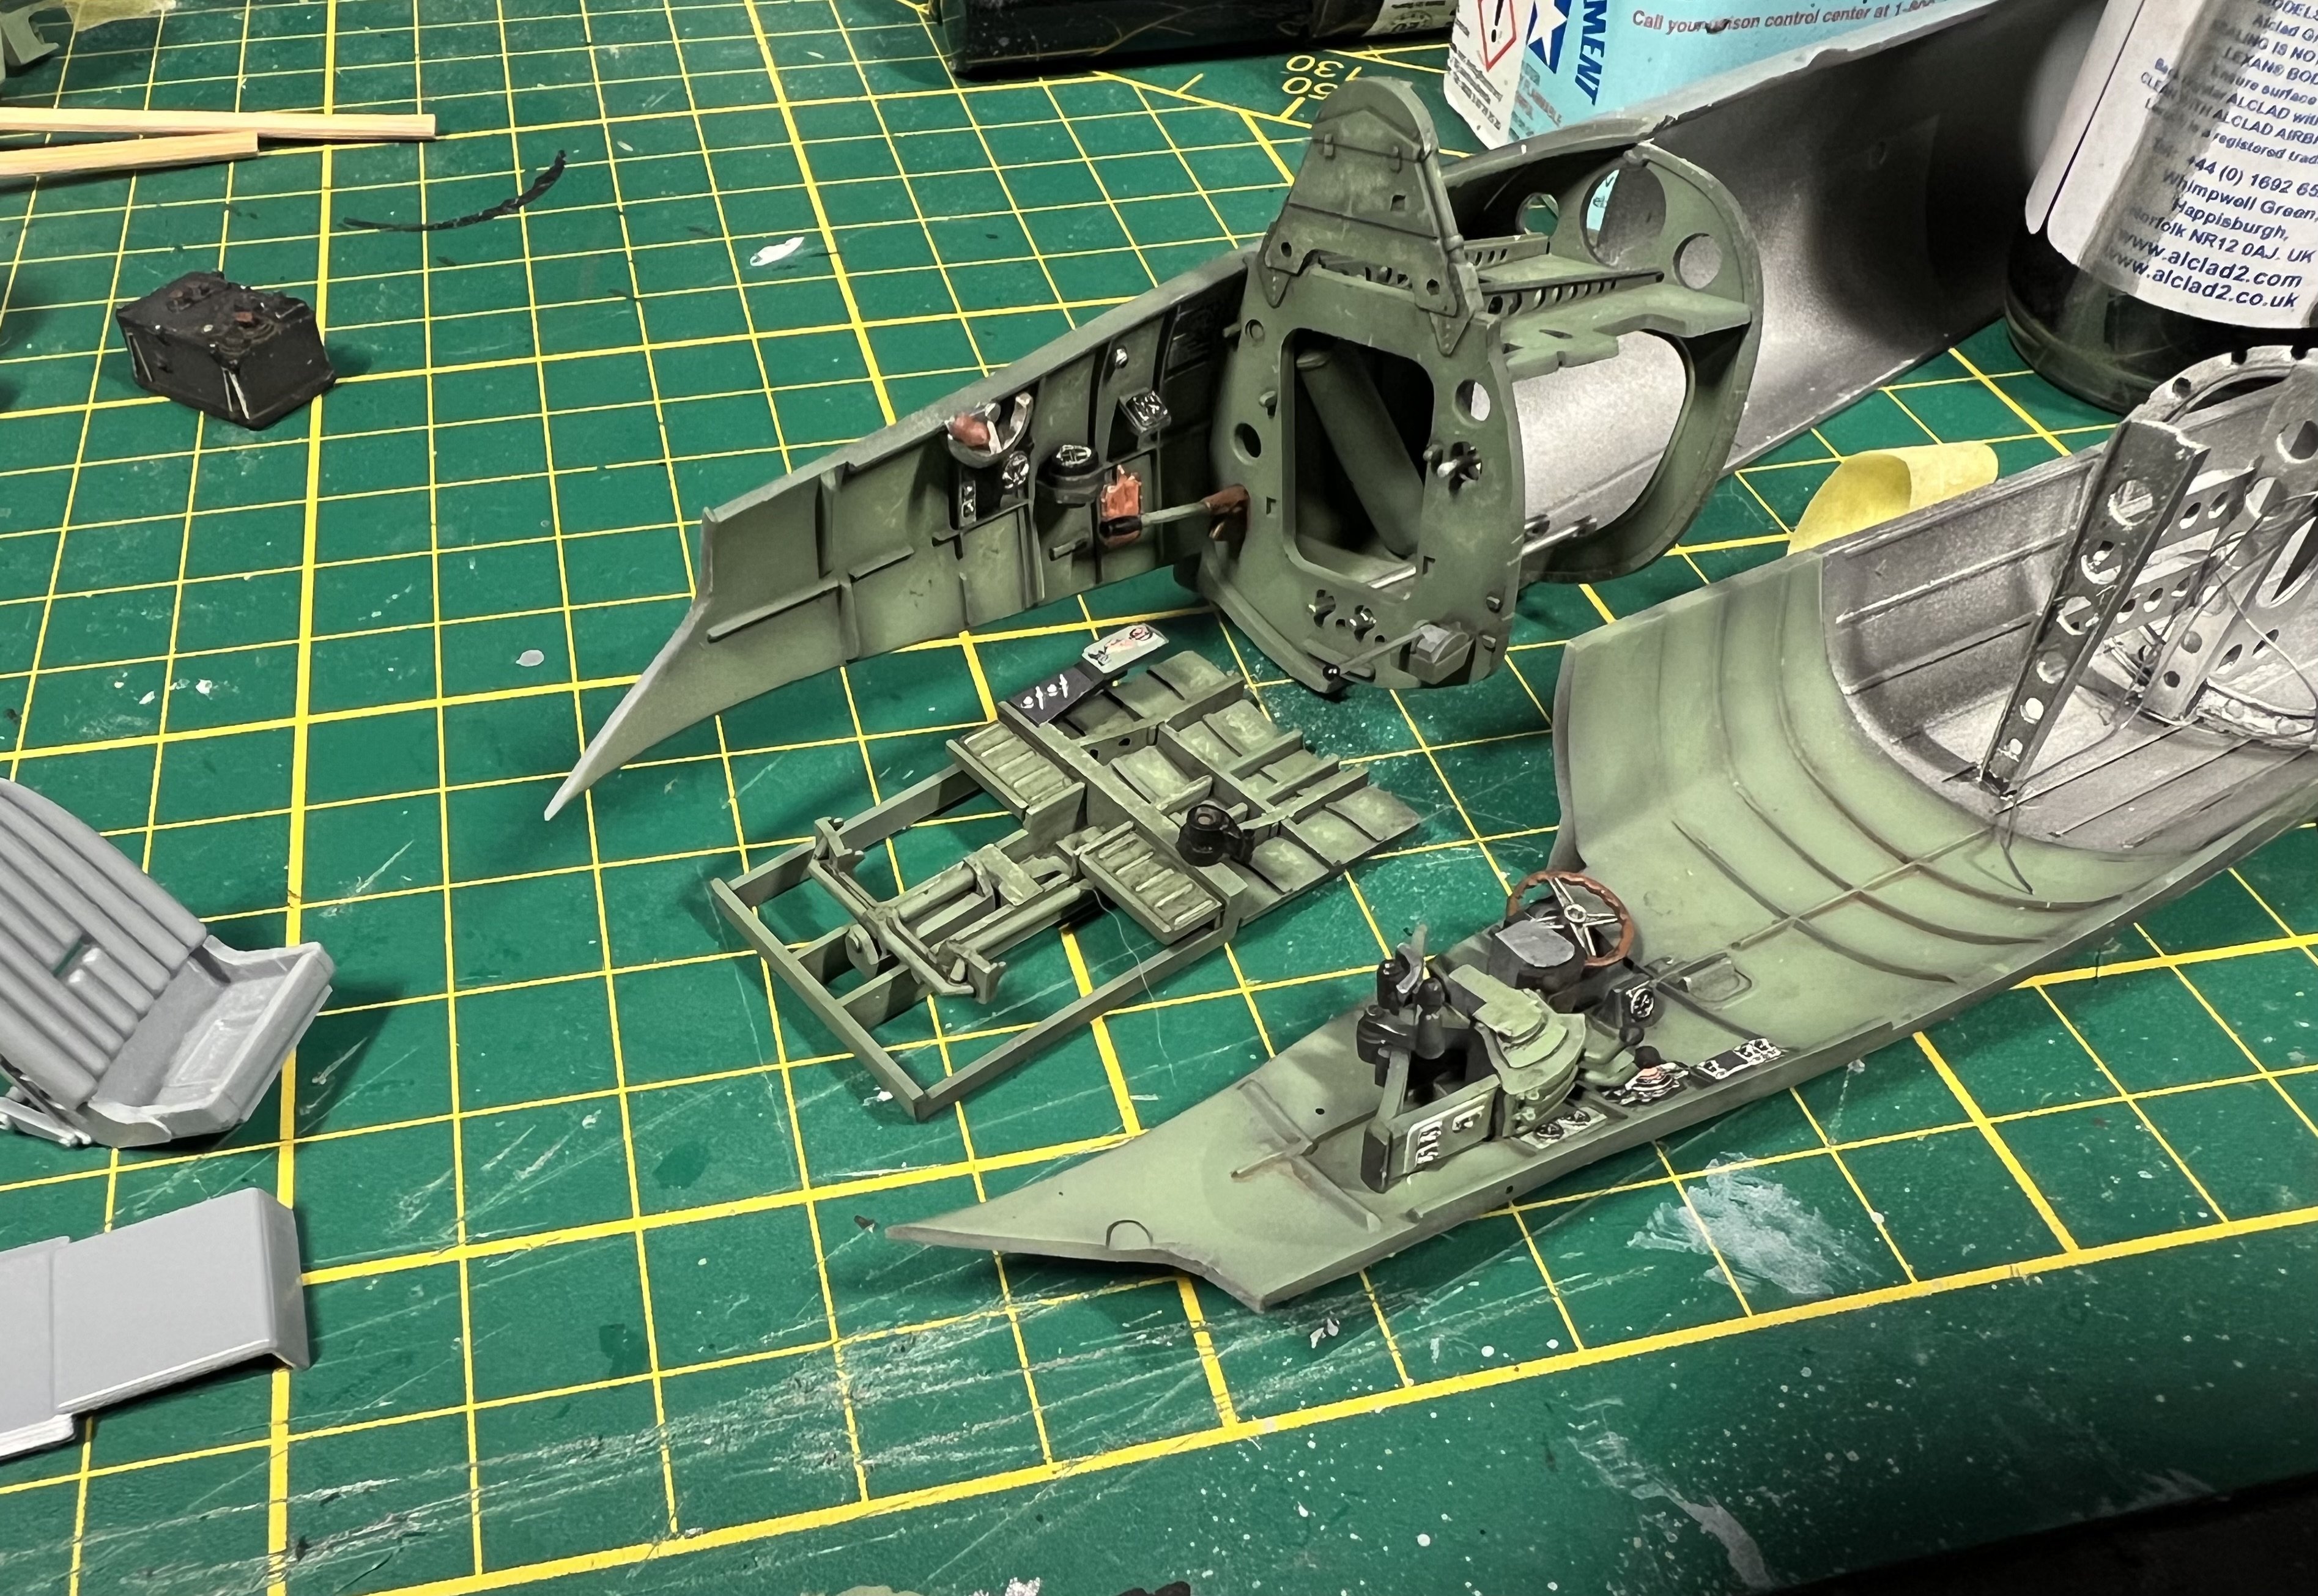
This is my favorite part. Adding life to the pit. Still a long way to go.
-
1/32 Westland Whirlwind
JeroenPeters replied to JeroenPeters's topic in LSM 1/35 and Larger Work In Progress
Slowly bringing life to the cockpit.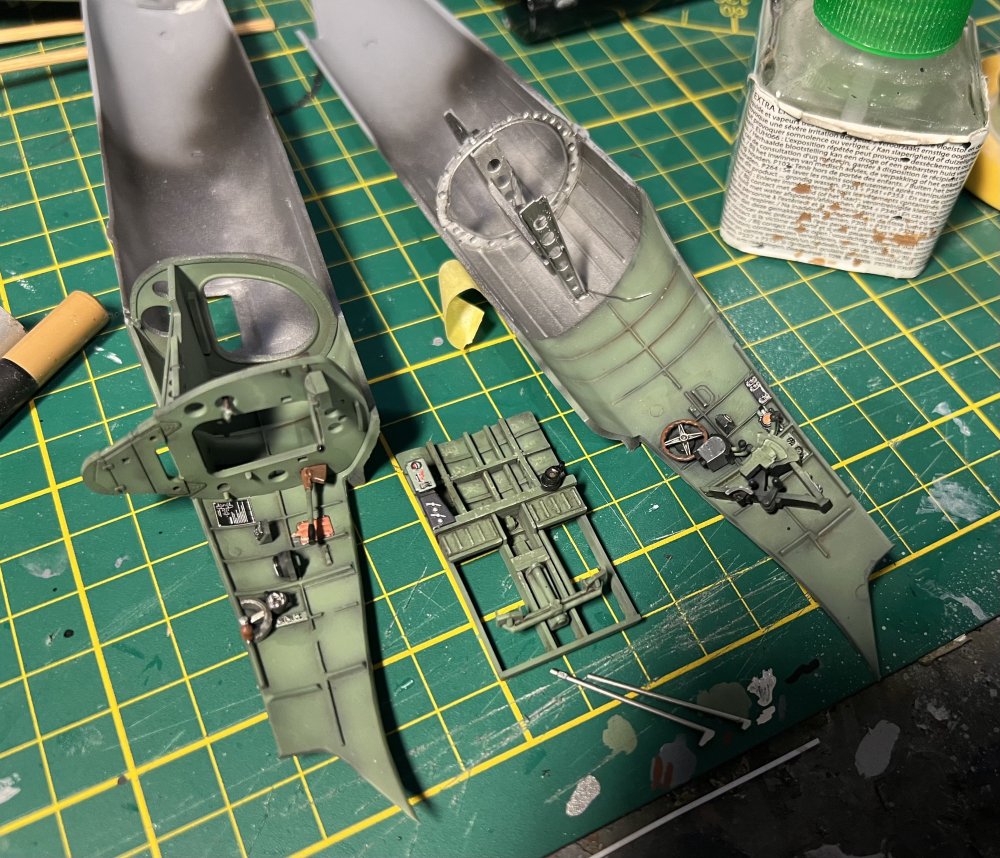
-
1/32 Westland Whirlwind
JeroenPeters replied to JeroenPeters's topic in LSM 1/35 and Larger Work In Progress
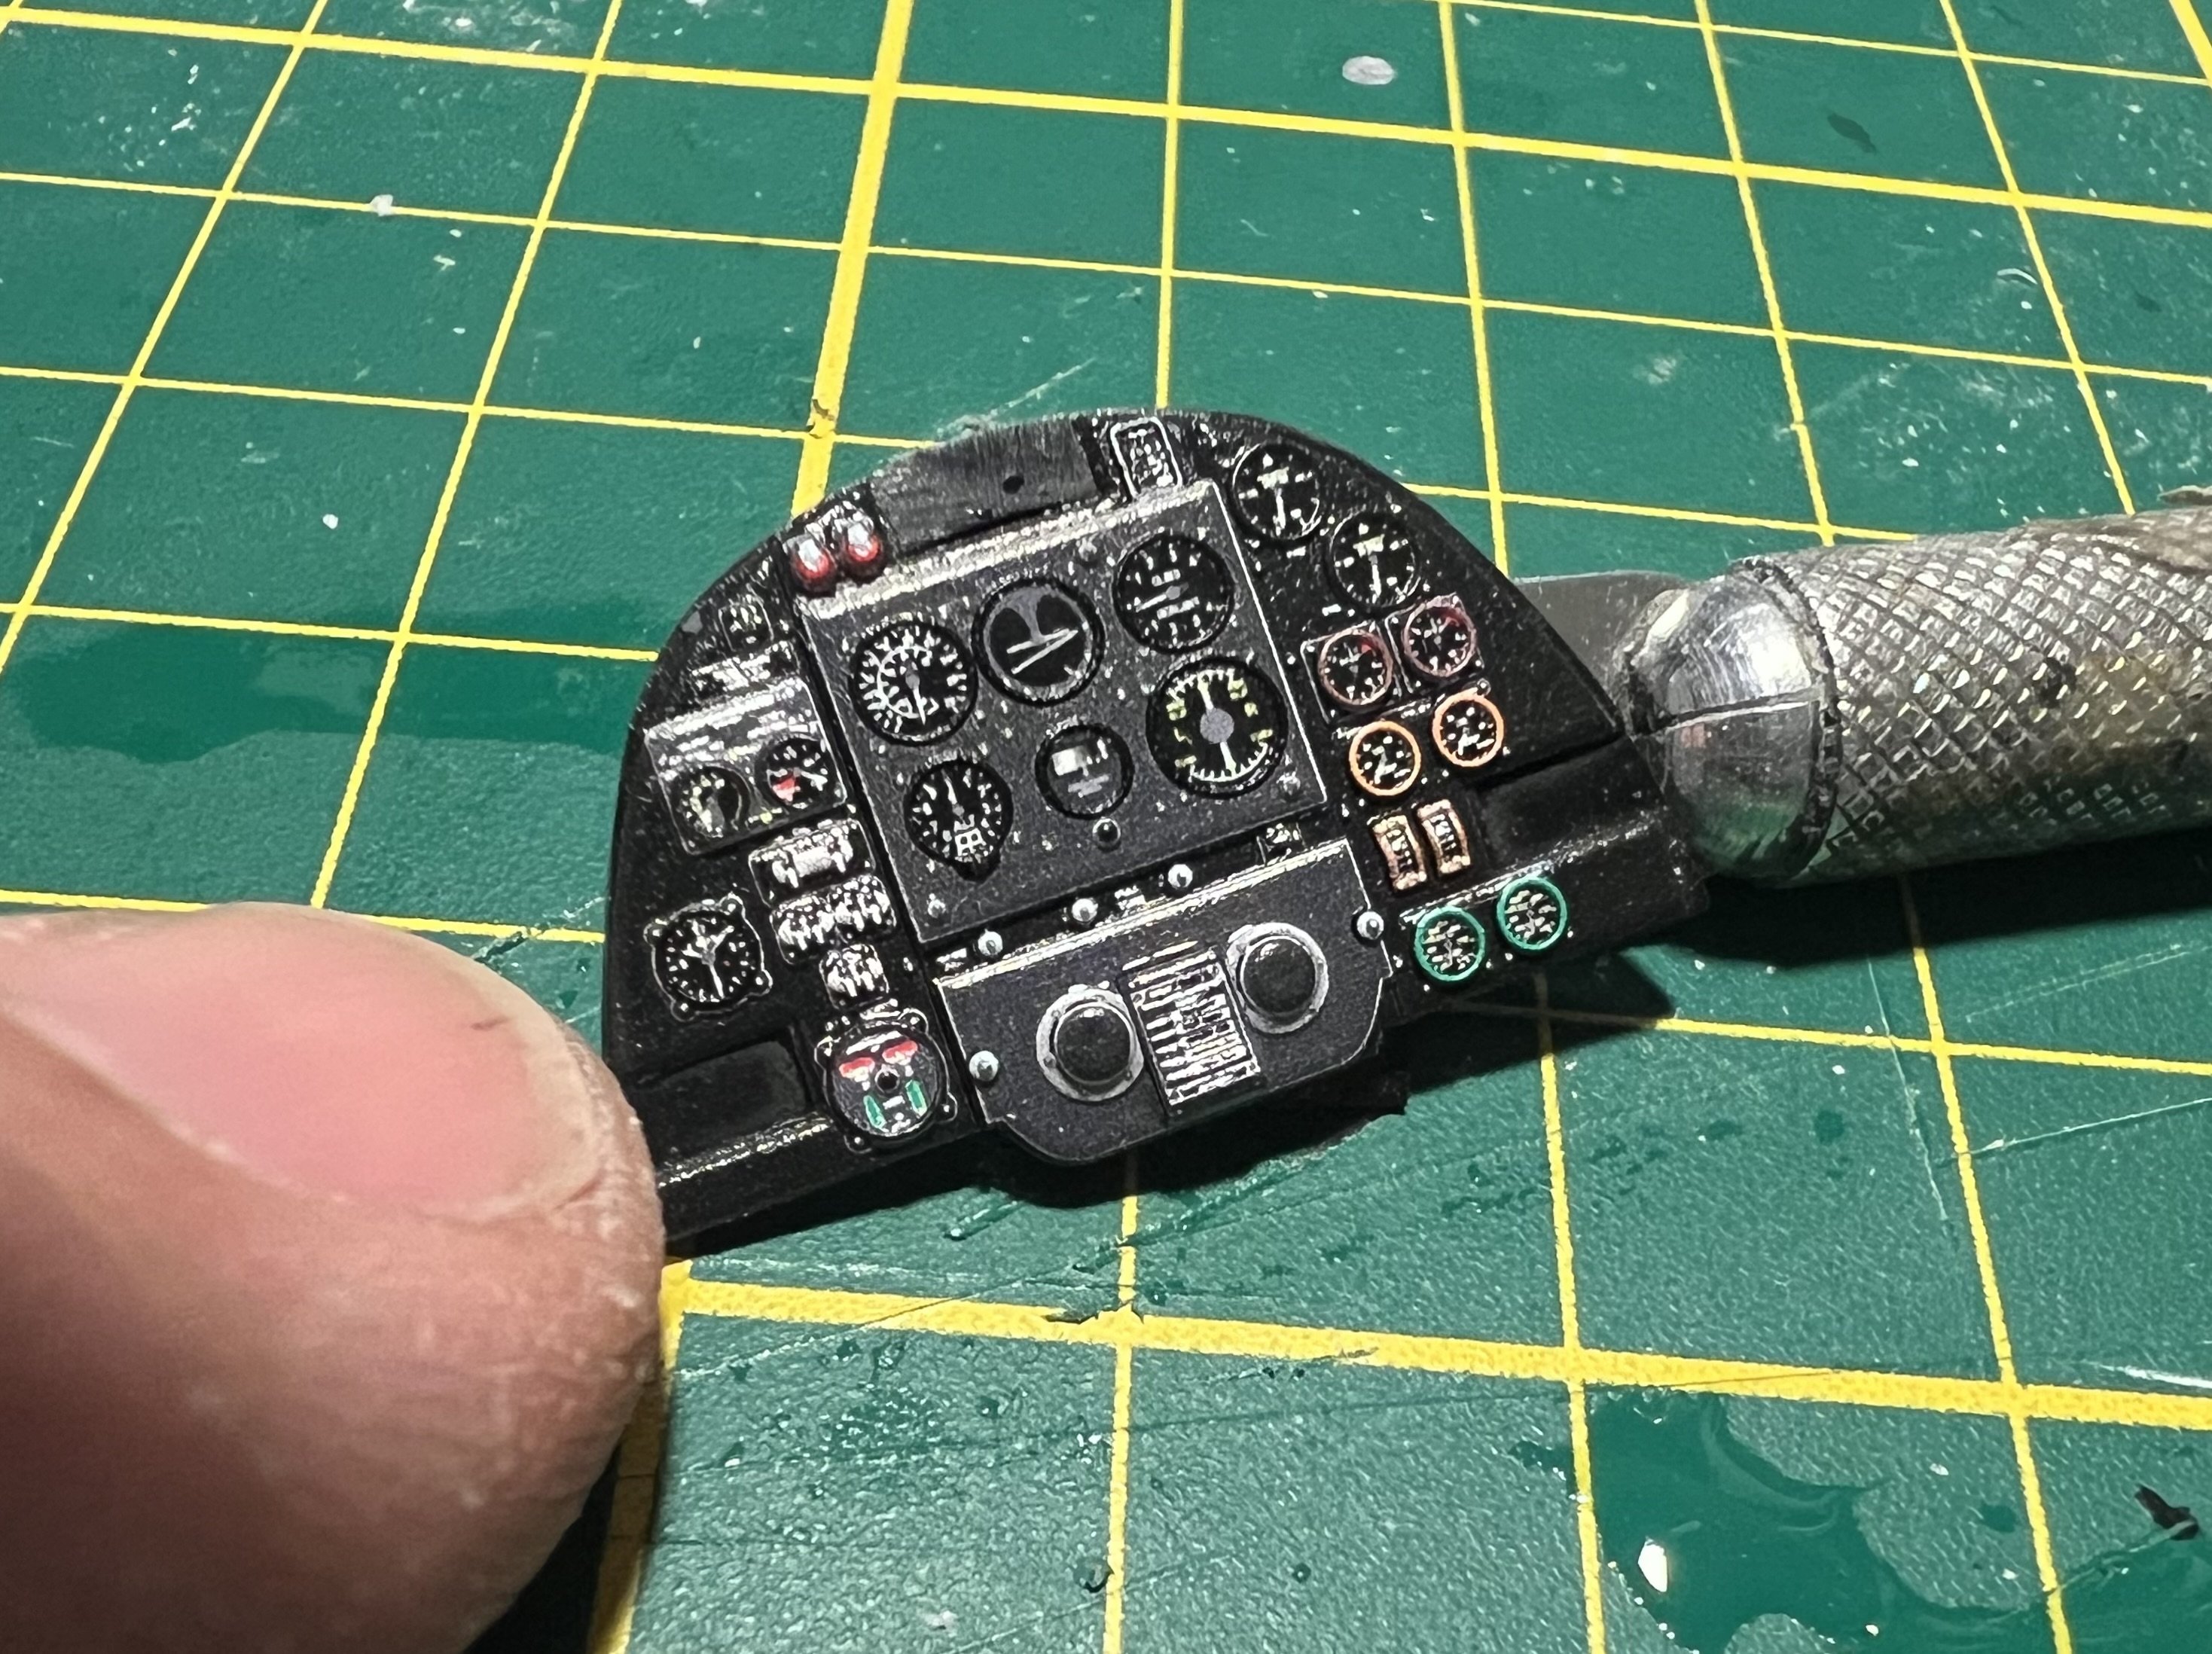
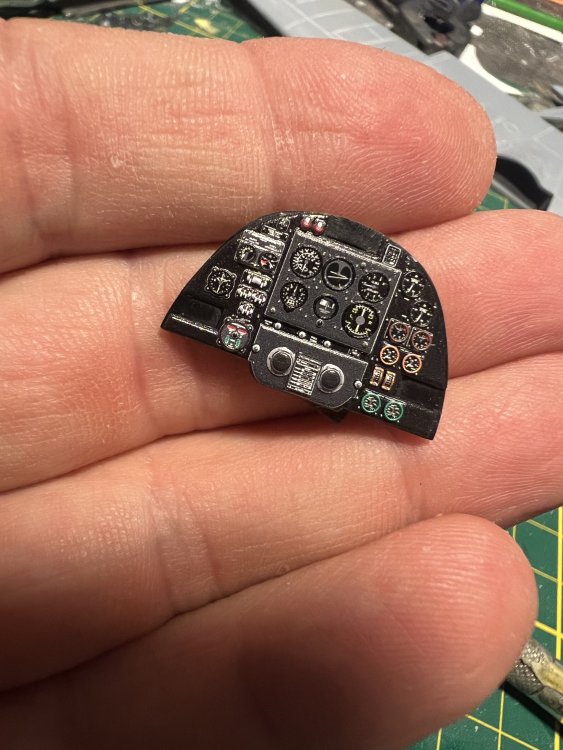
Started adding the Quinta decals and some washes. Lot’s more work to be done!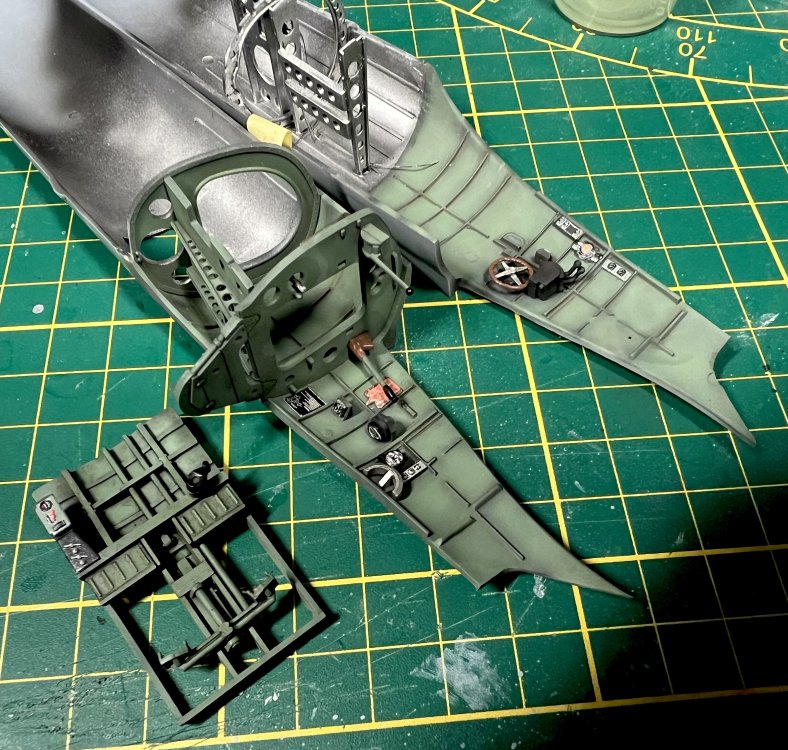
- 439 replies
-
- 10
-

-
1/32 Westland Whirlwind
JeroenPeters replied to JeroenPeters's topic in LSM 1/35 and Larger Work In Progress
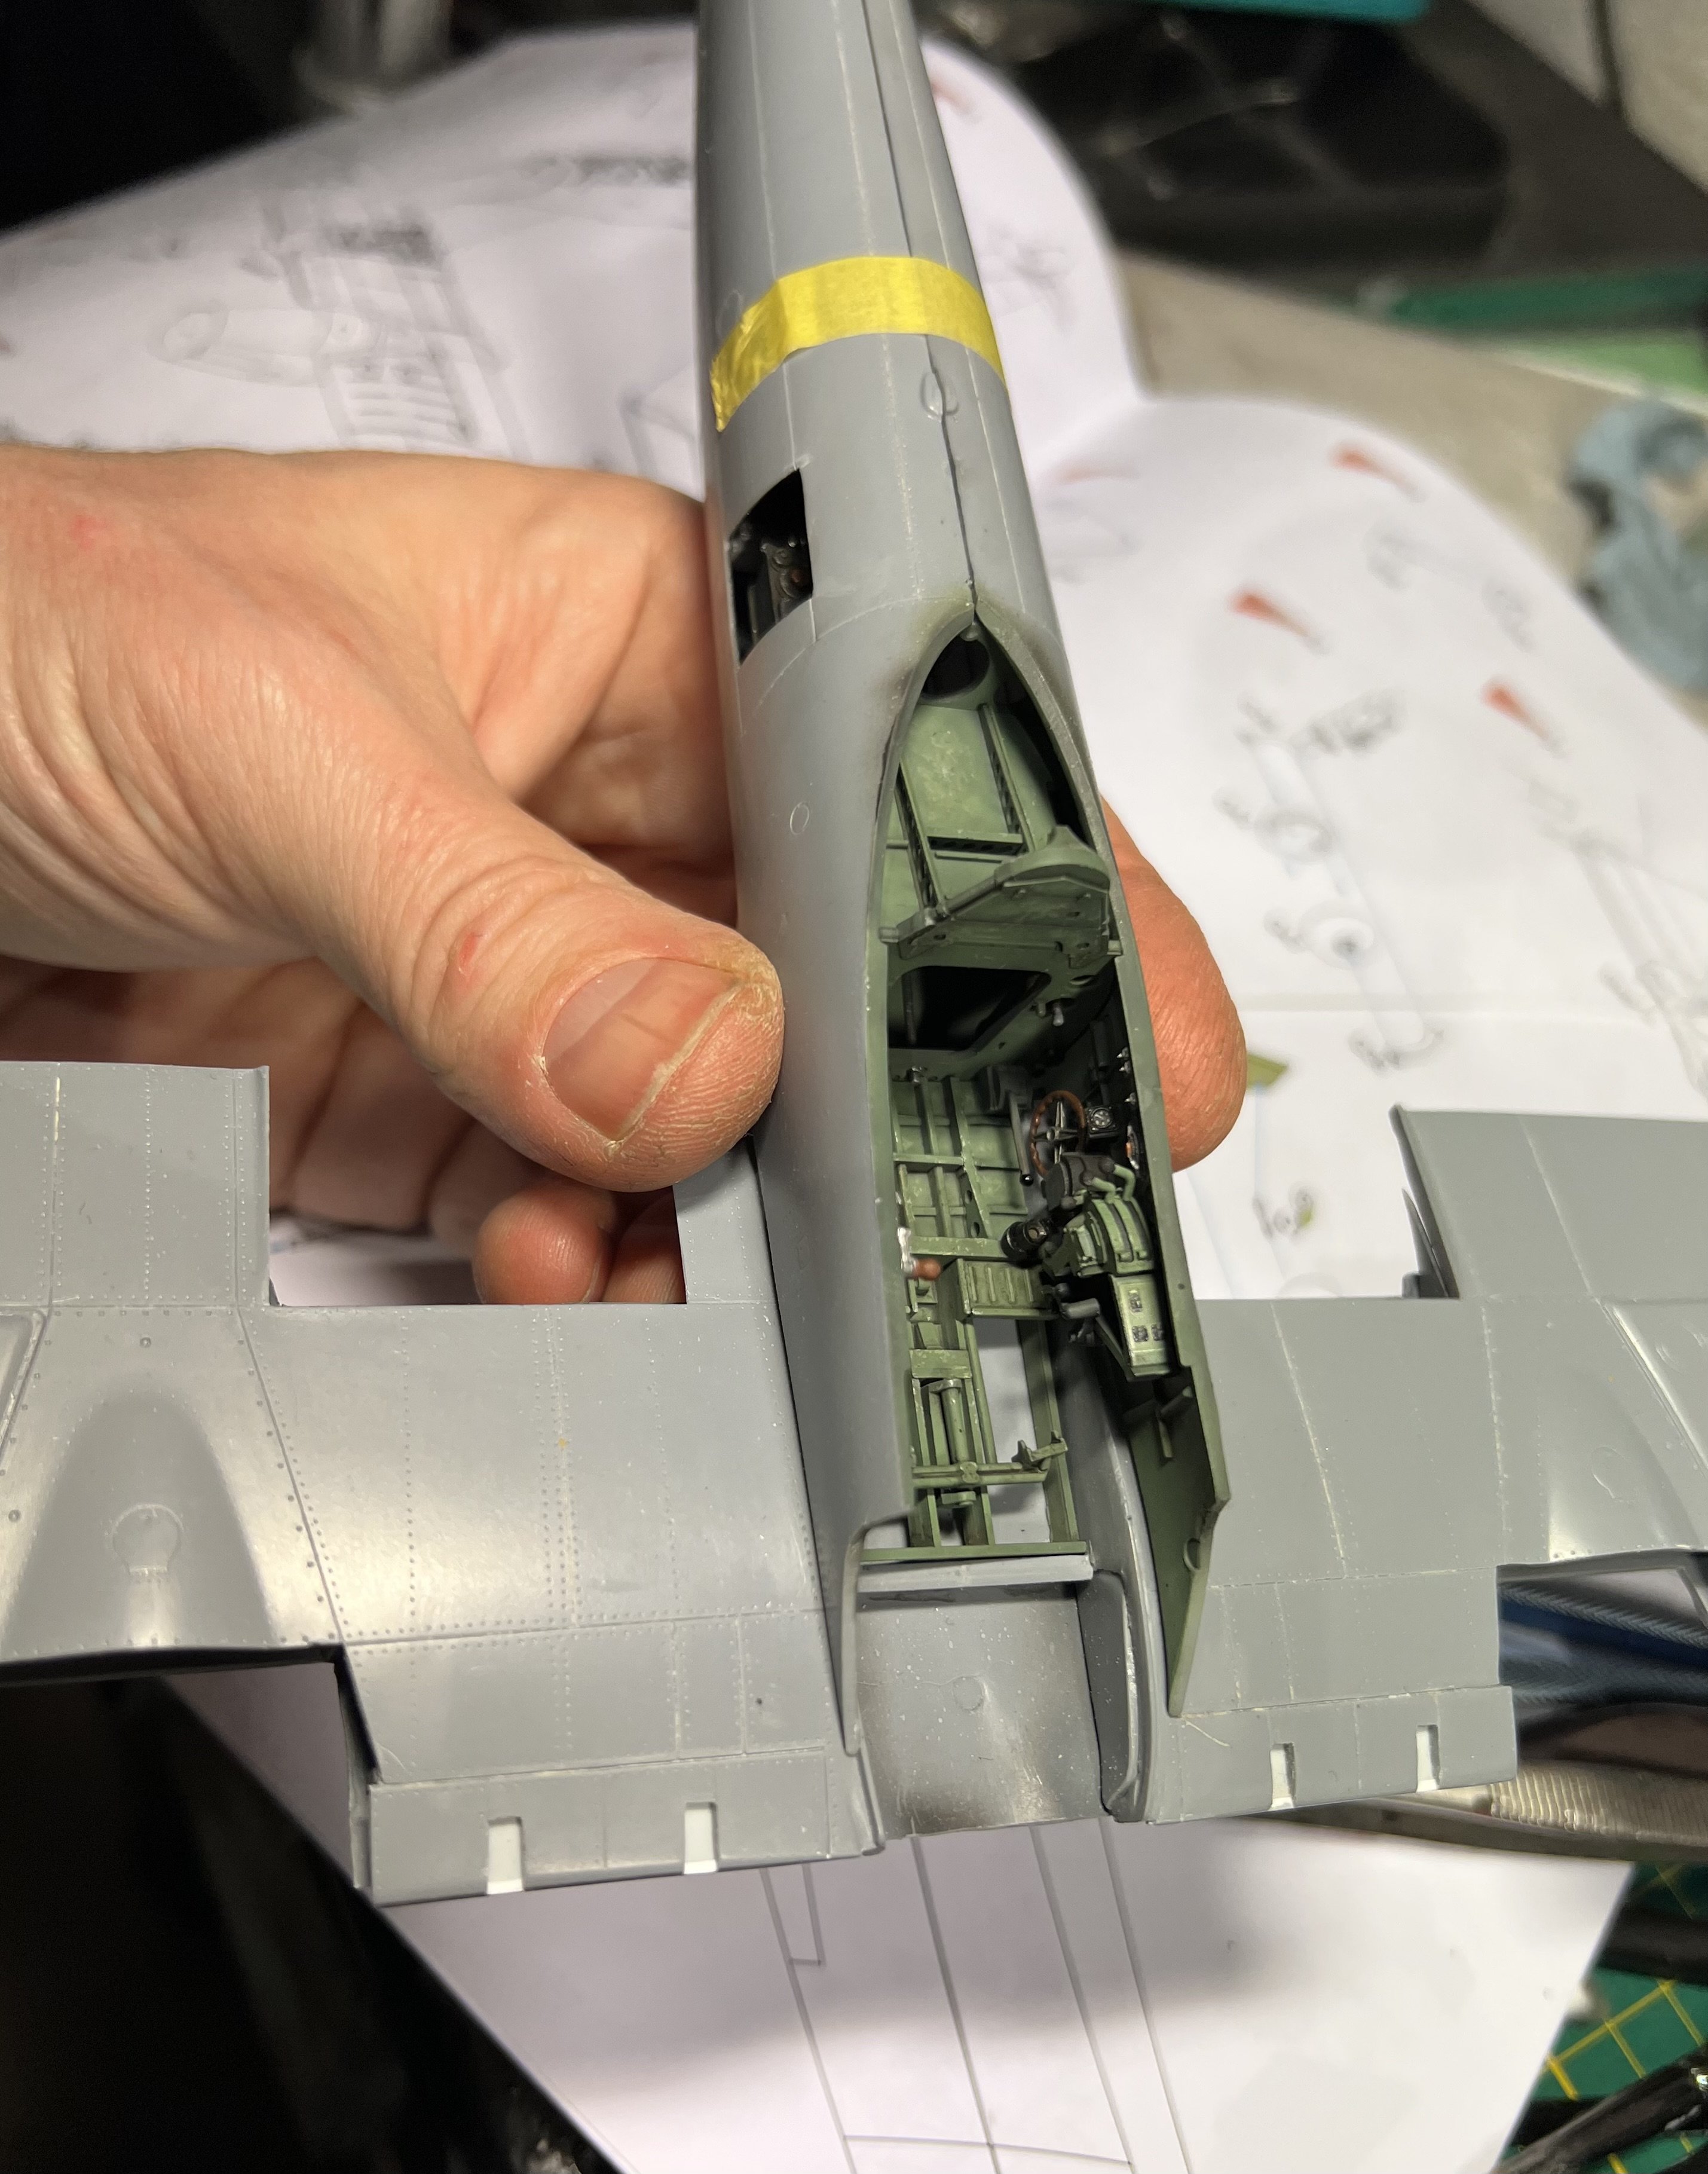
Started to put it all together and add wiring.
-
1/32 Westland Whirlwind
JeroenPeters replied to JeroenPeters's topic in LSM 1/35 and Larger Work In Progress
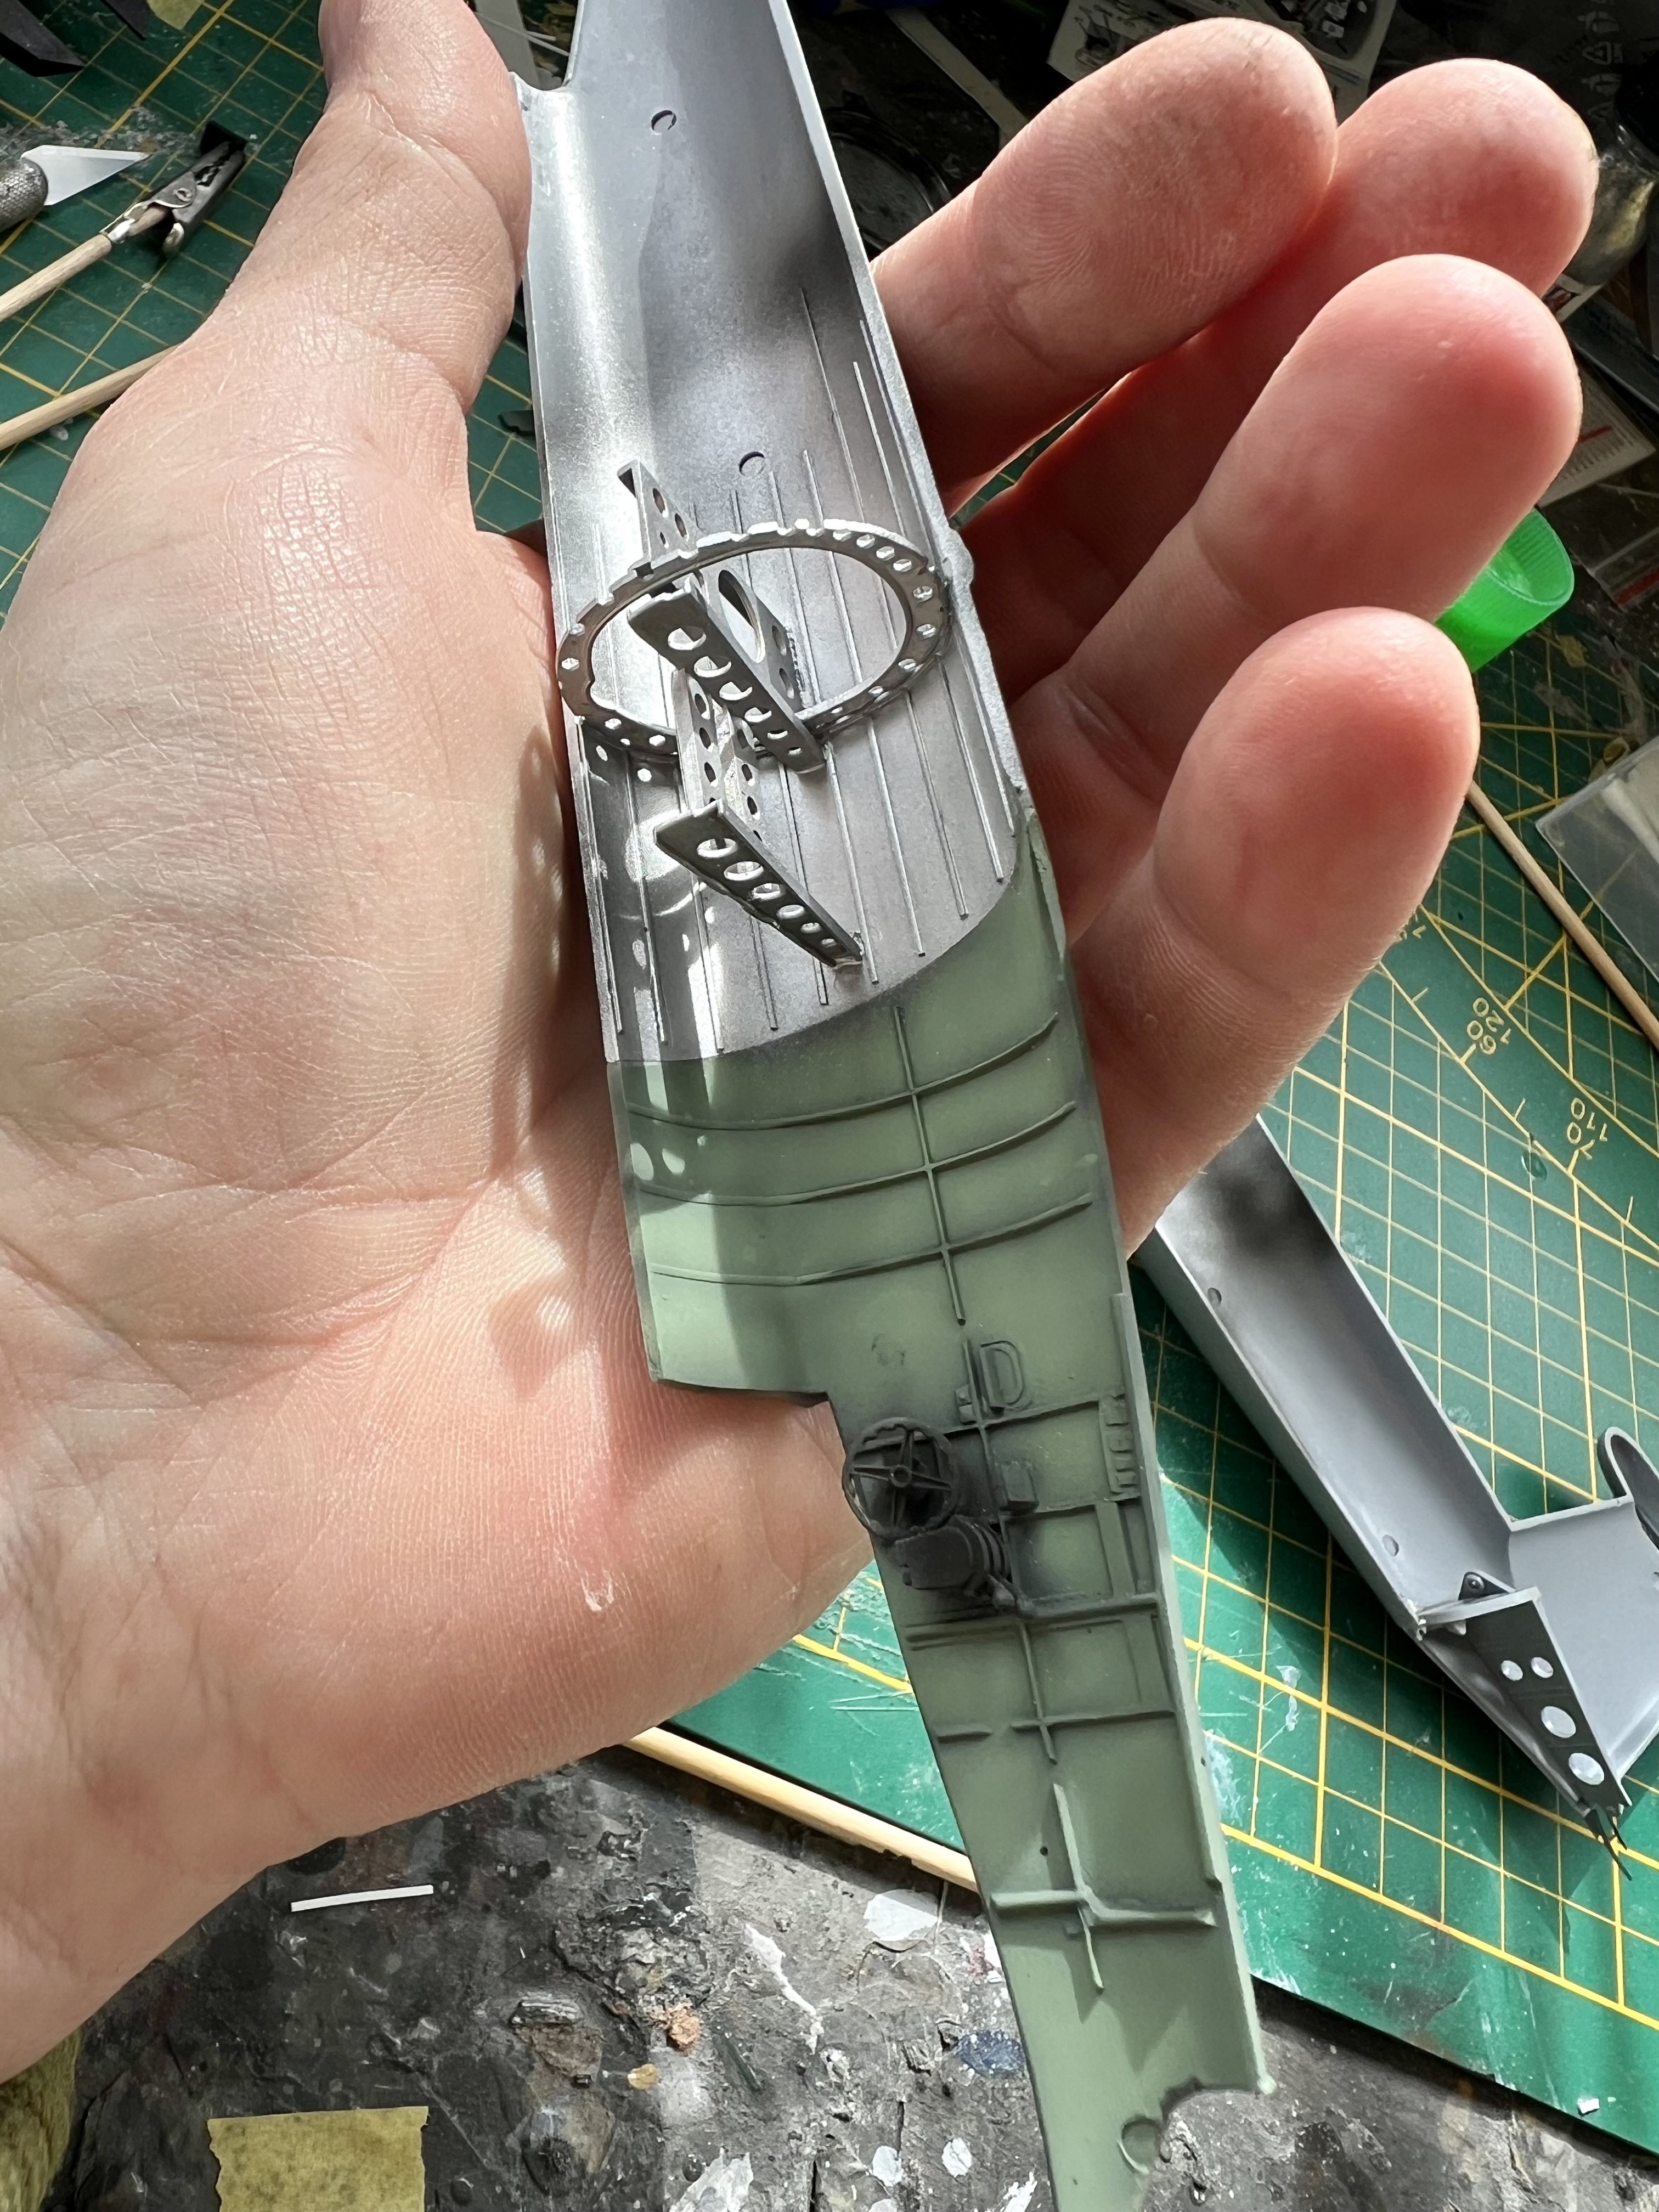
Alclad white aliminium with a bit of chrome is on.
-
1/32 Westland Whirlwind
JeroenPeters replied to JeroenPeters's topic in LSM 1/35 and Larger Work In Progress
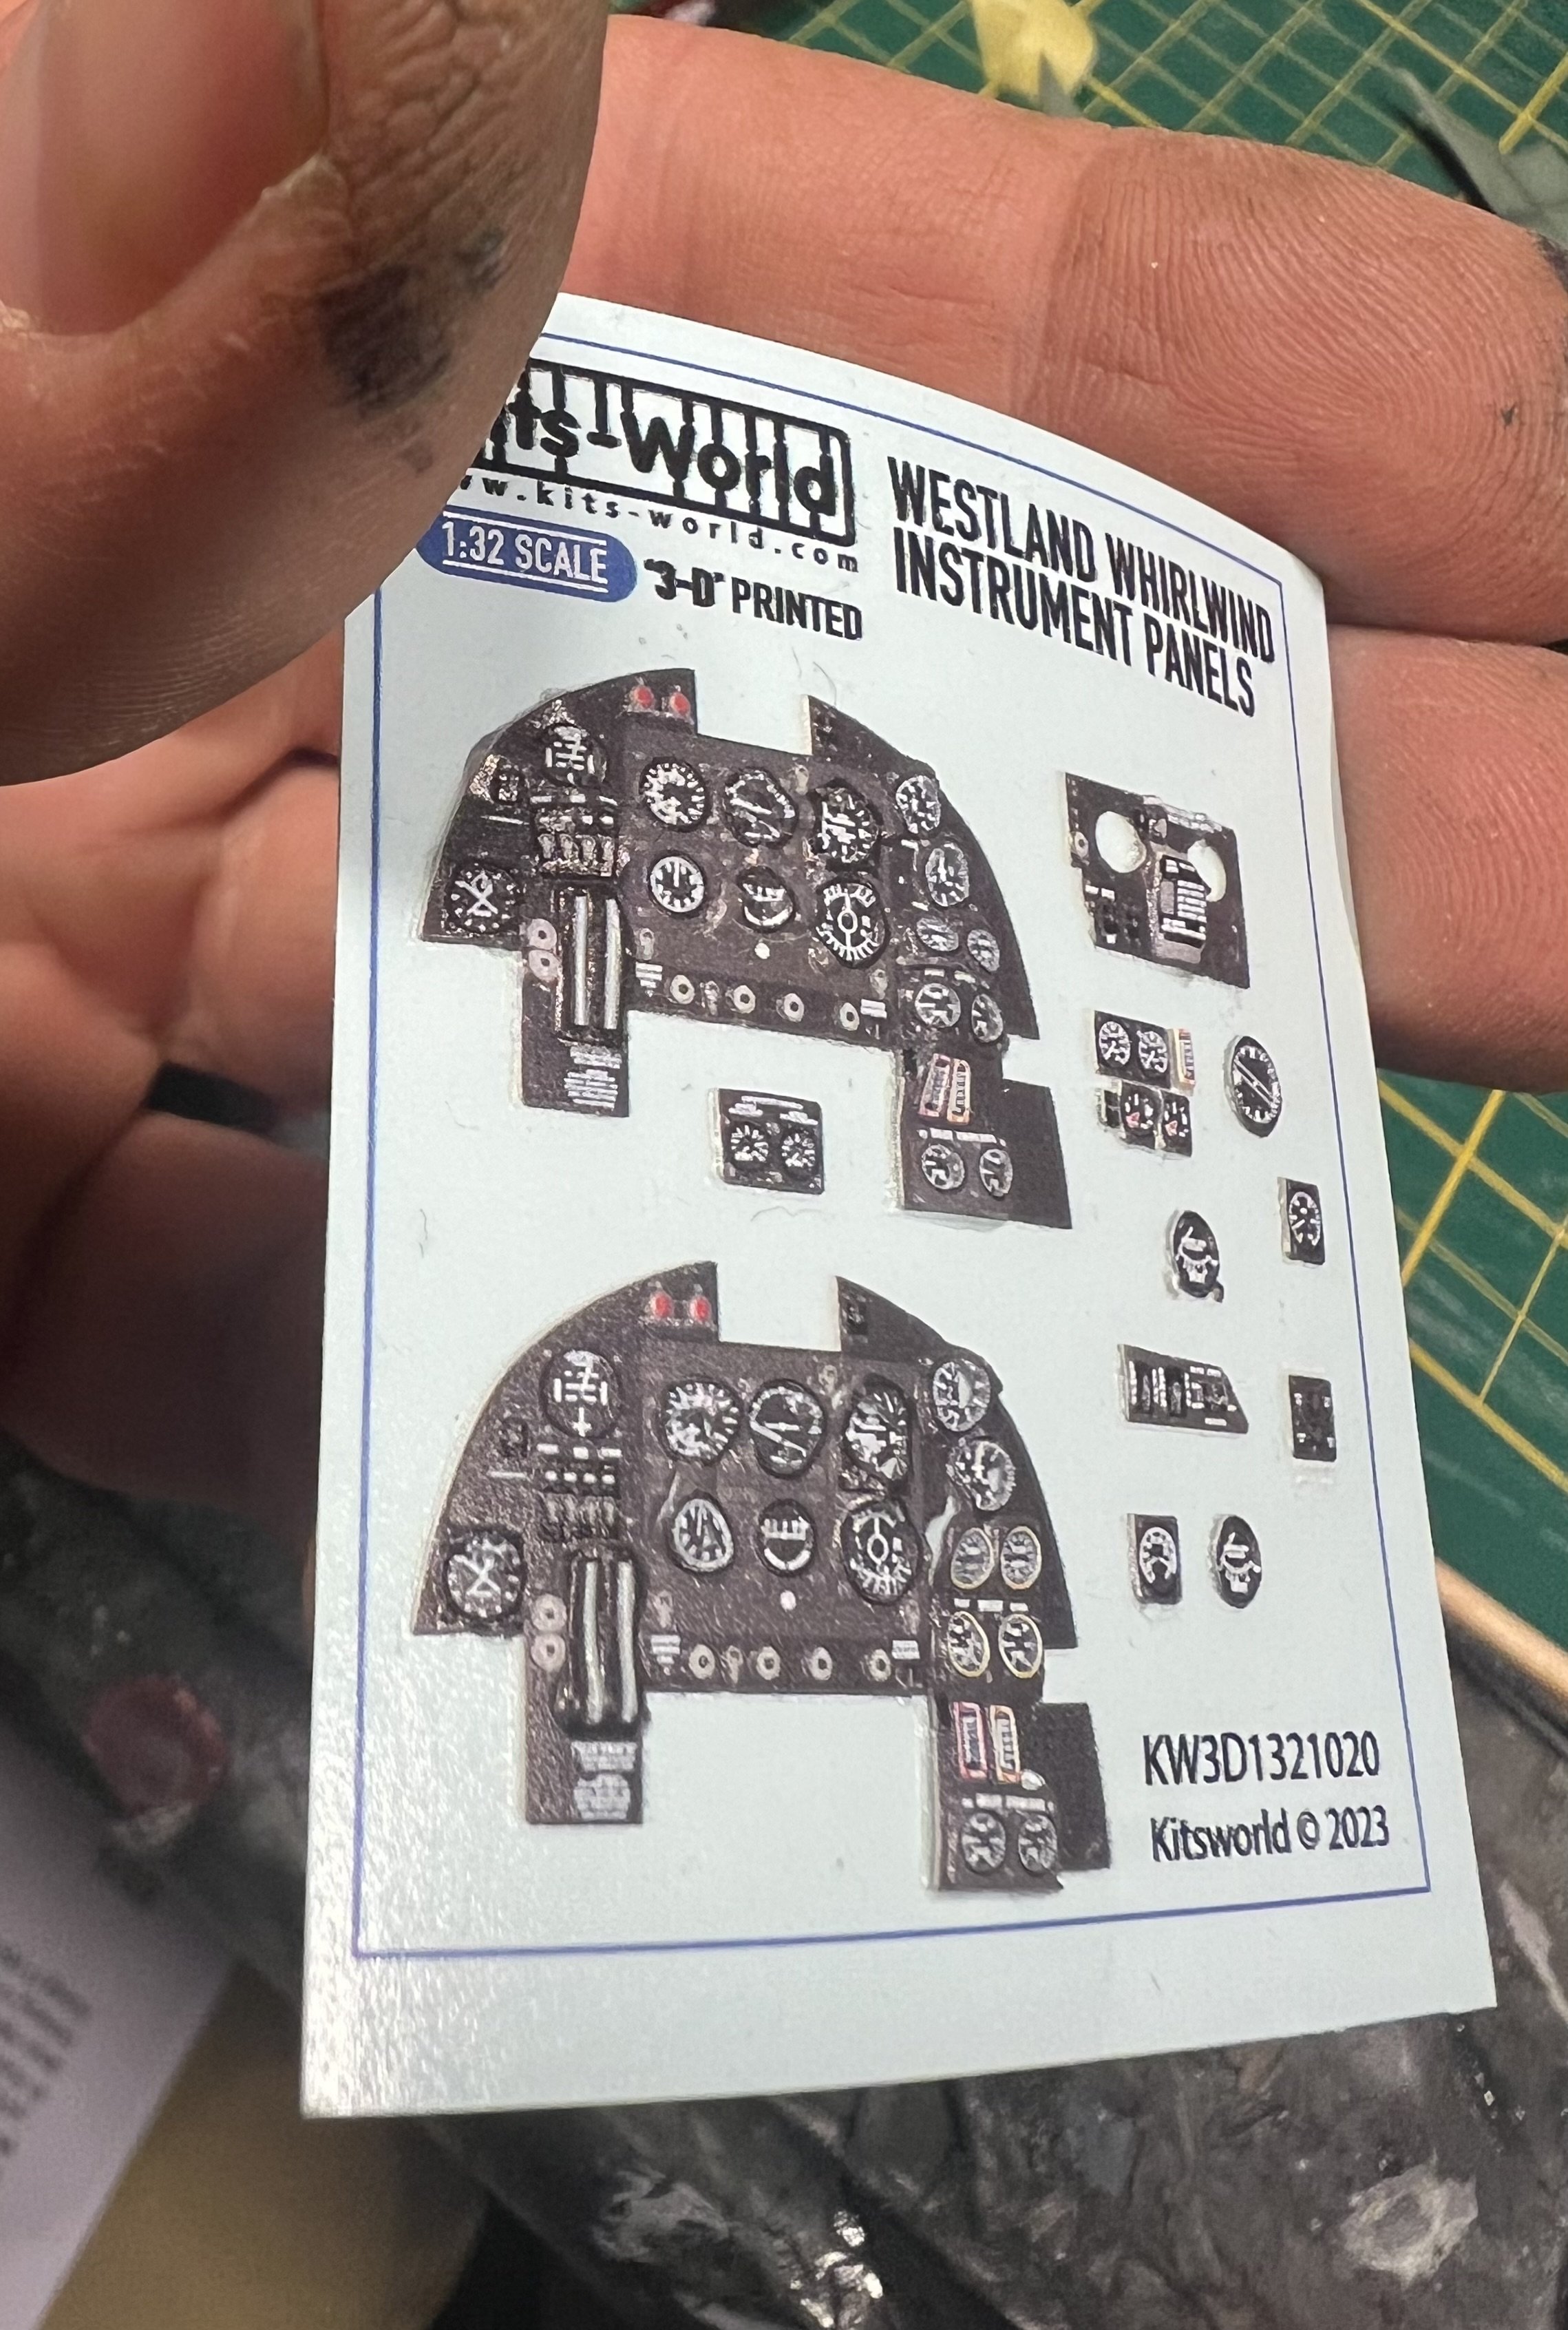
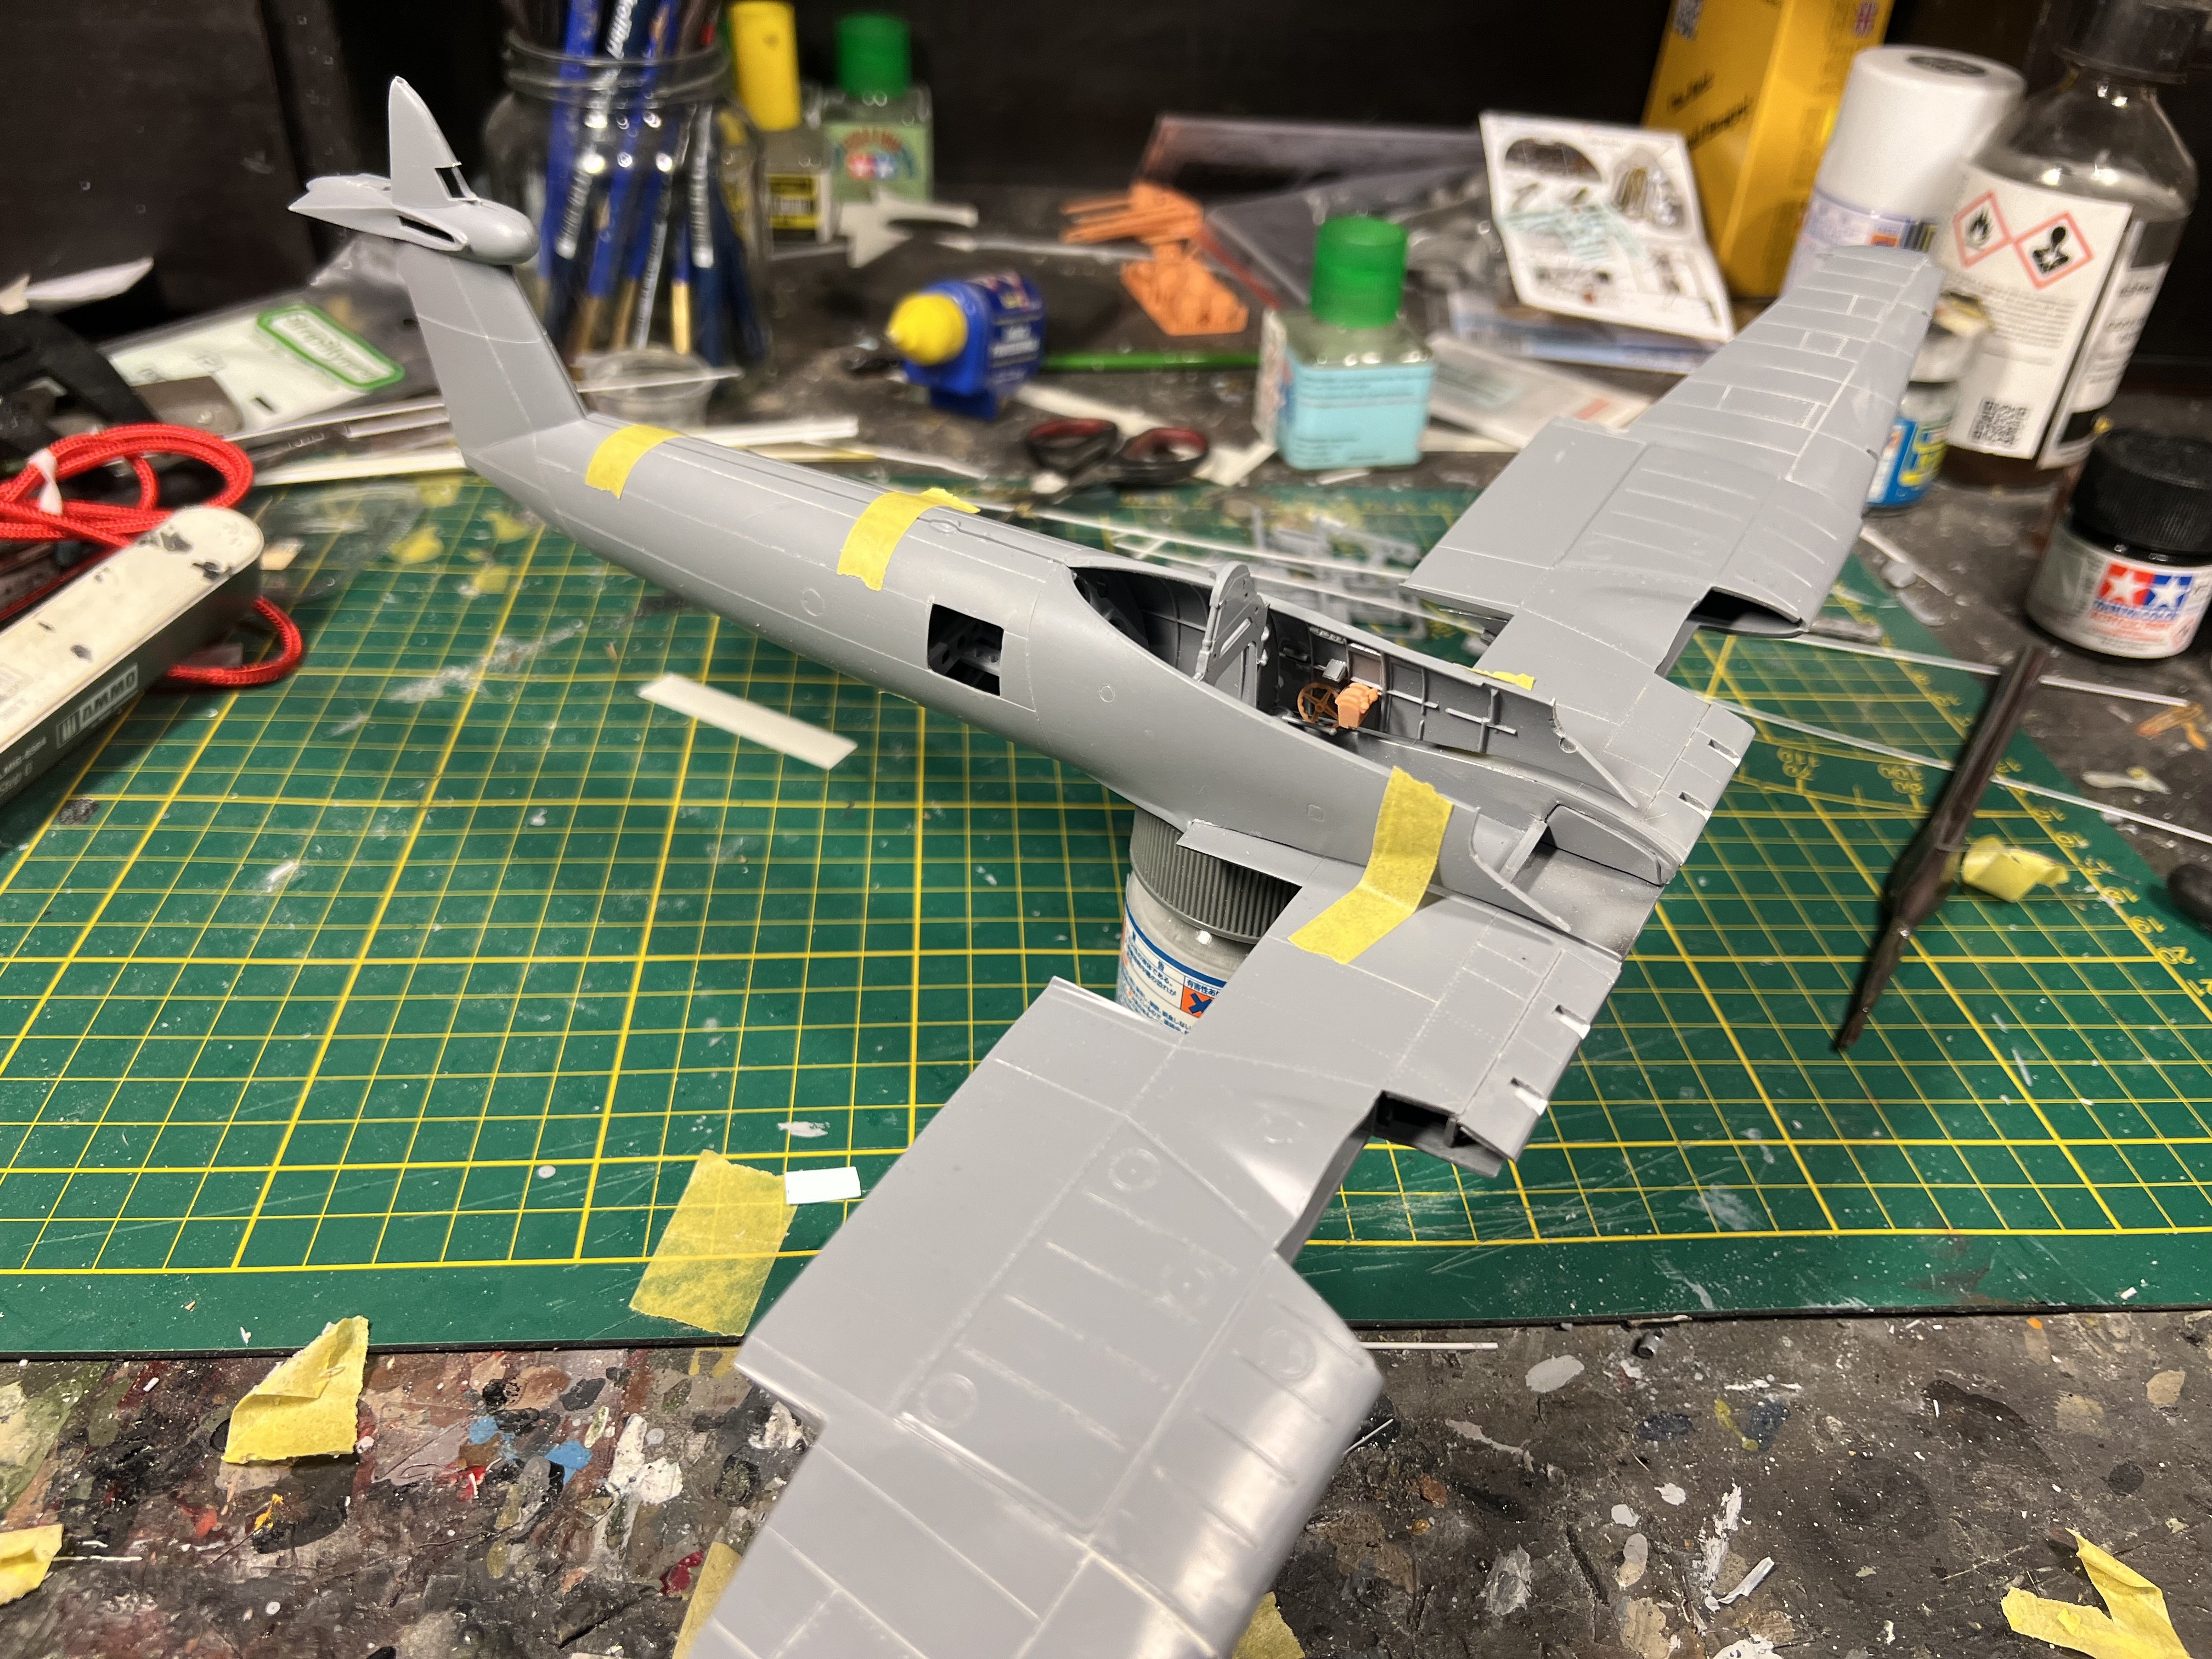
Primed the inside of the fuselage. Check out the Kitsworld detail set. I havent touched it but it’s starting to fall apart. Really poor quality. I would recommend the Quinta Studio set.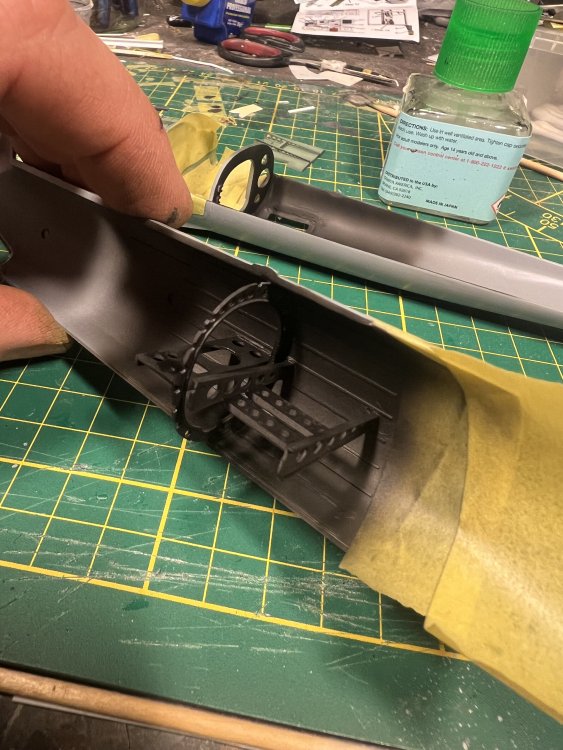

-
Revell 1/32 Bell X-1
JeroenPeters replied to RalphSarc's topic in LSM 1/32 and Larger Aircraft Ready for Inspection
Love it! -
1/32 Westland Whirlwind
JeroenPeters replied to JeroenPeters's topic in LSM 1/35 and Larger Work In Progress
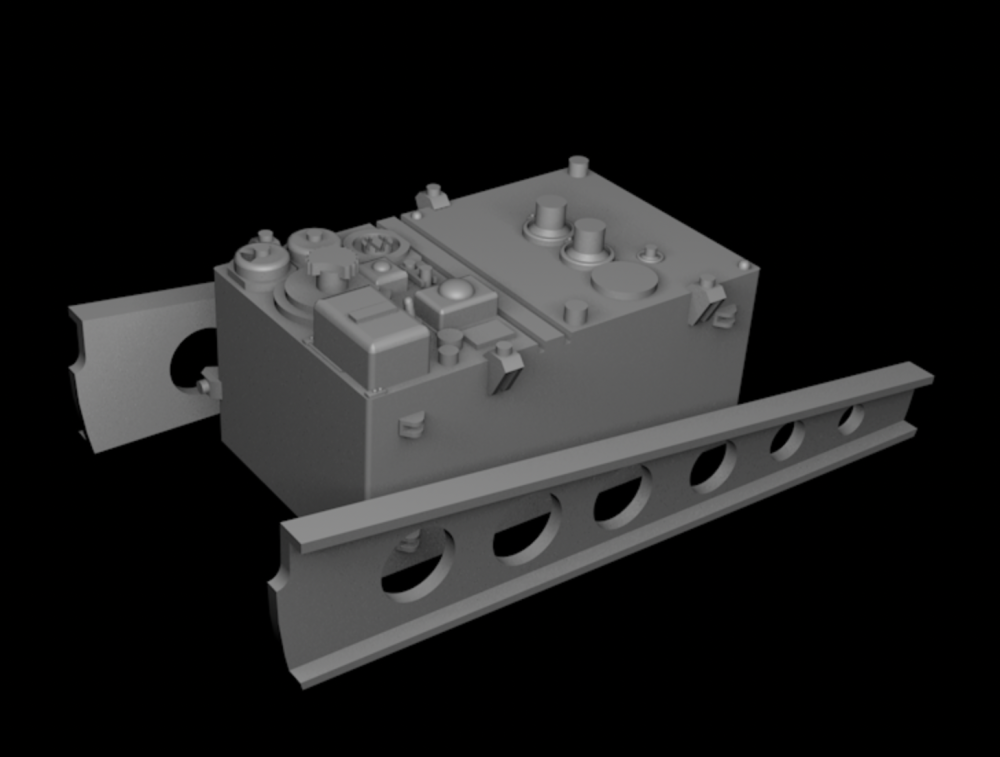
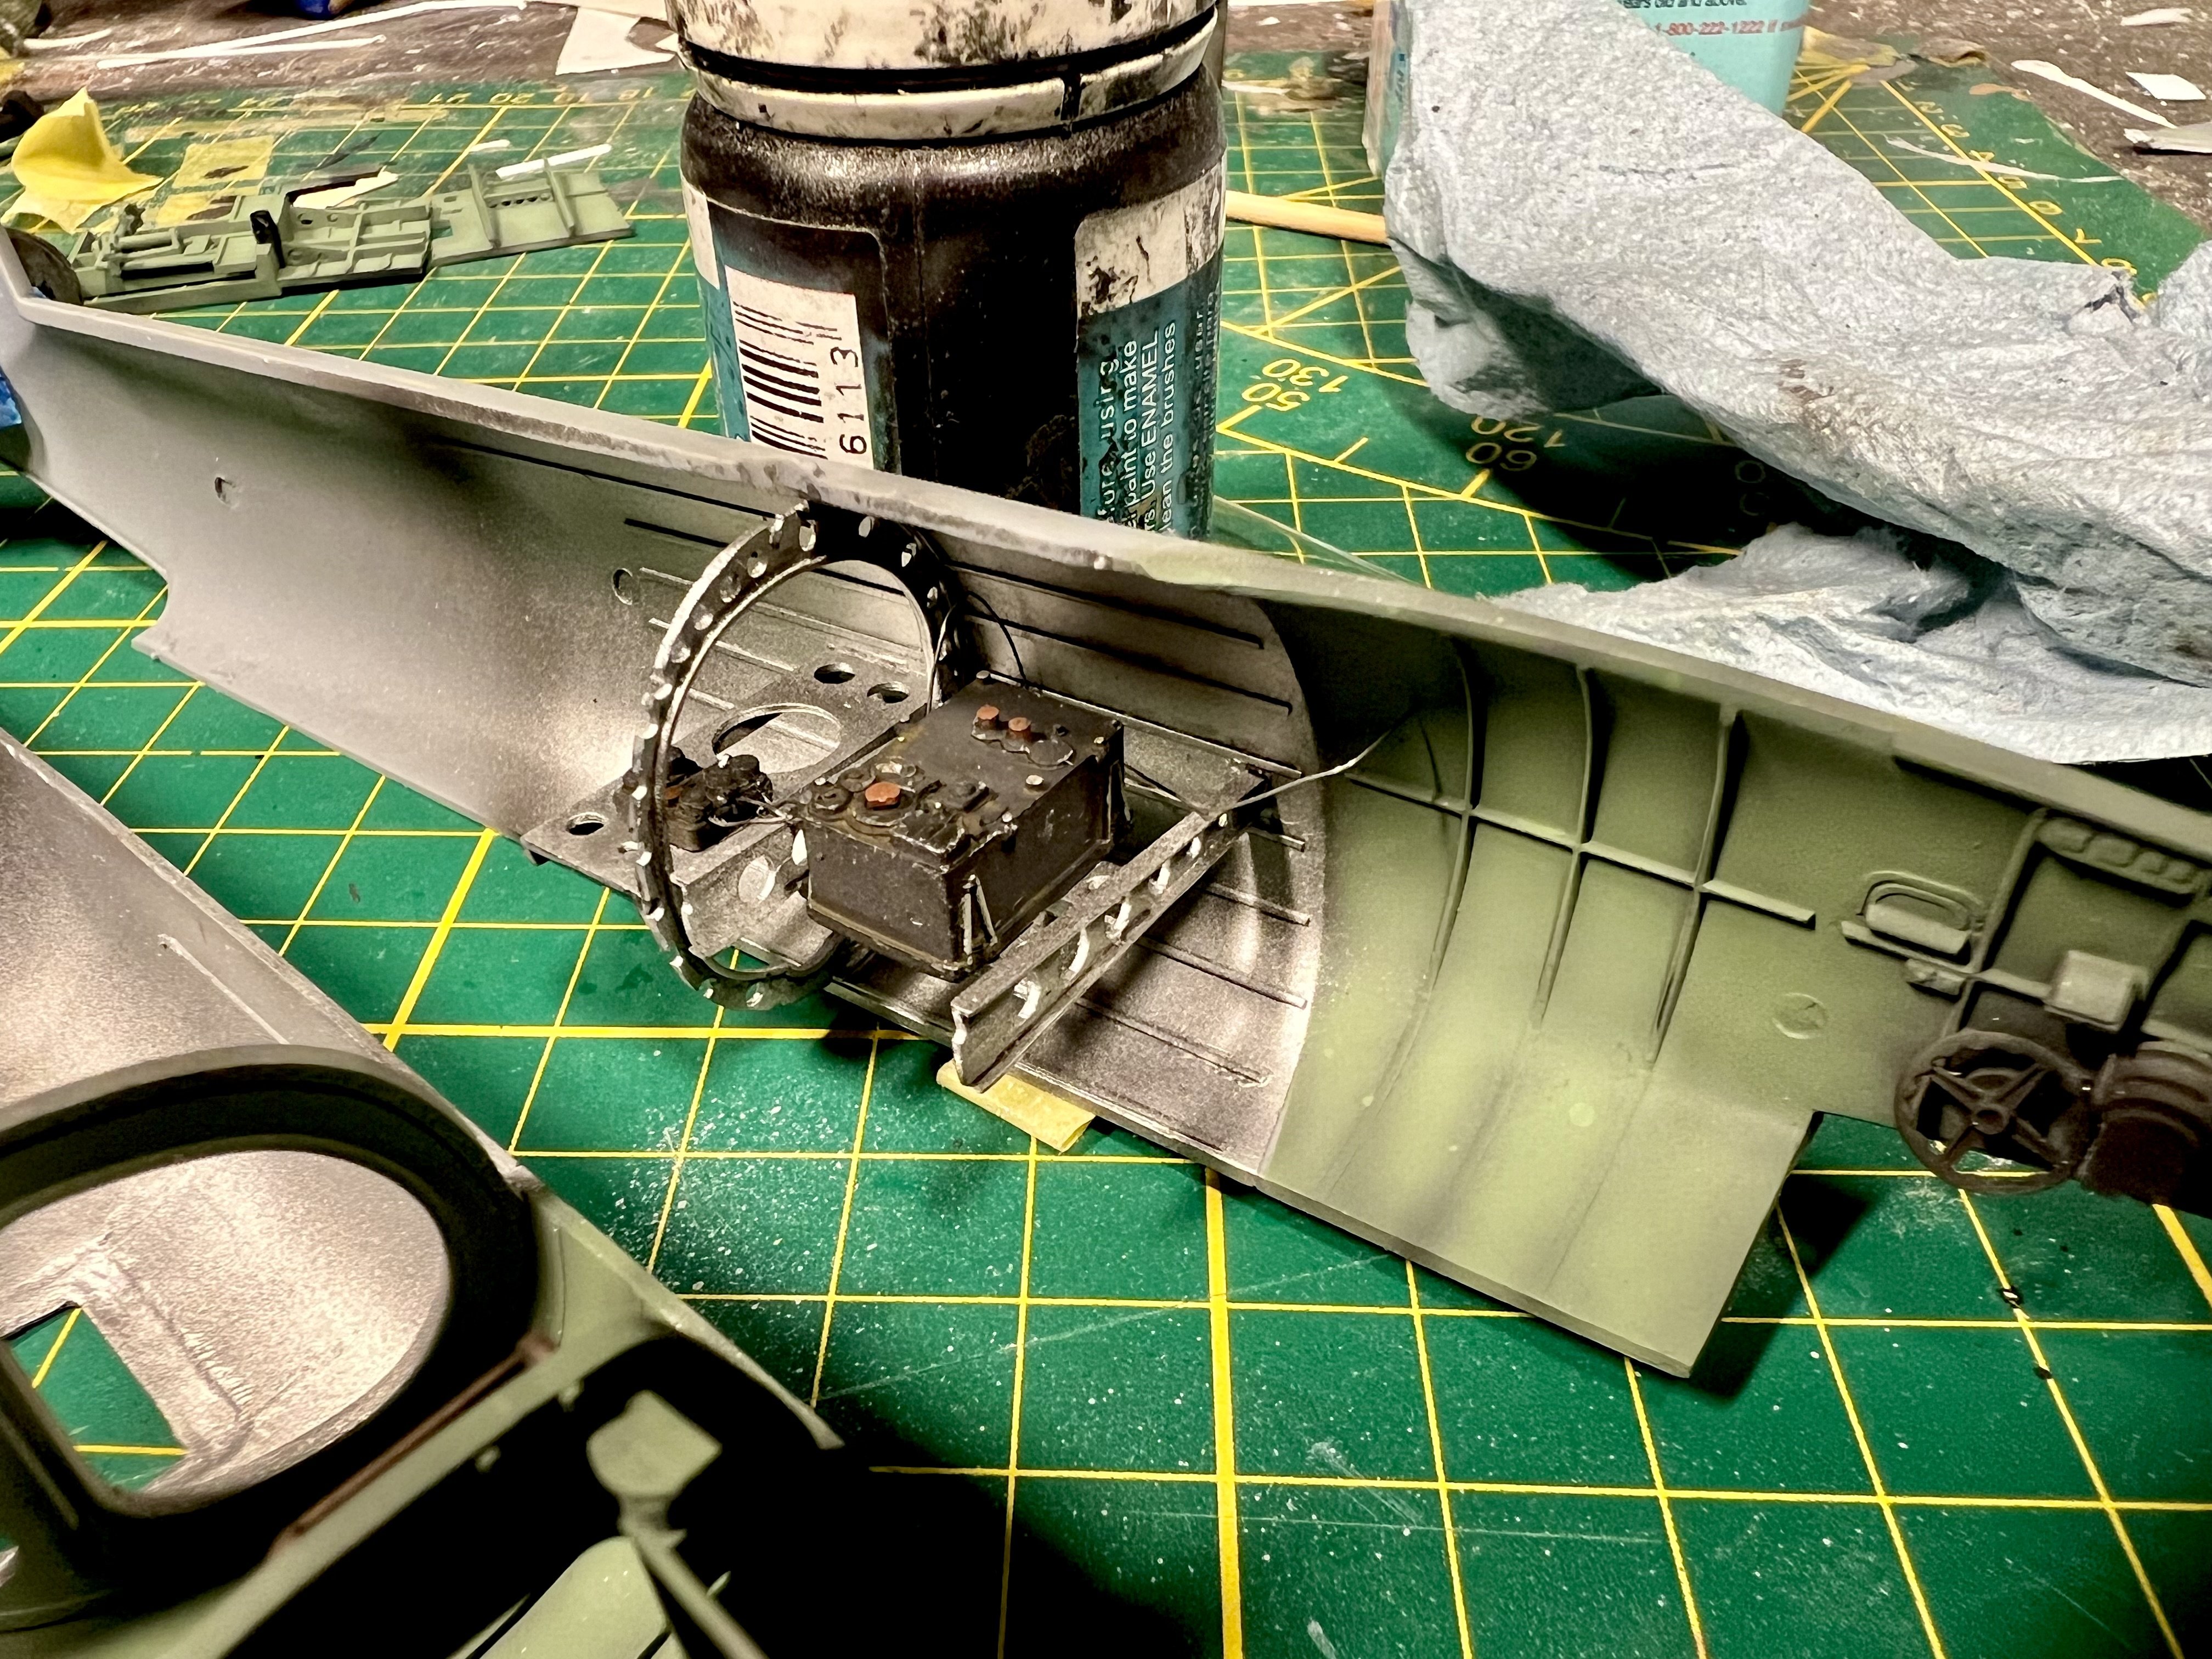
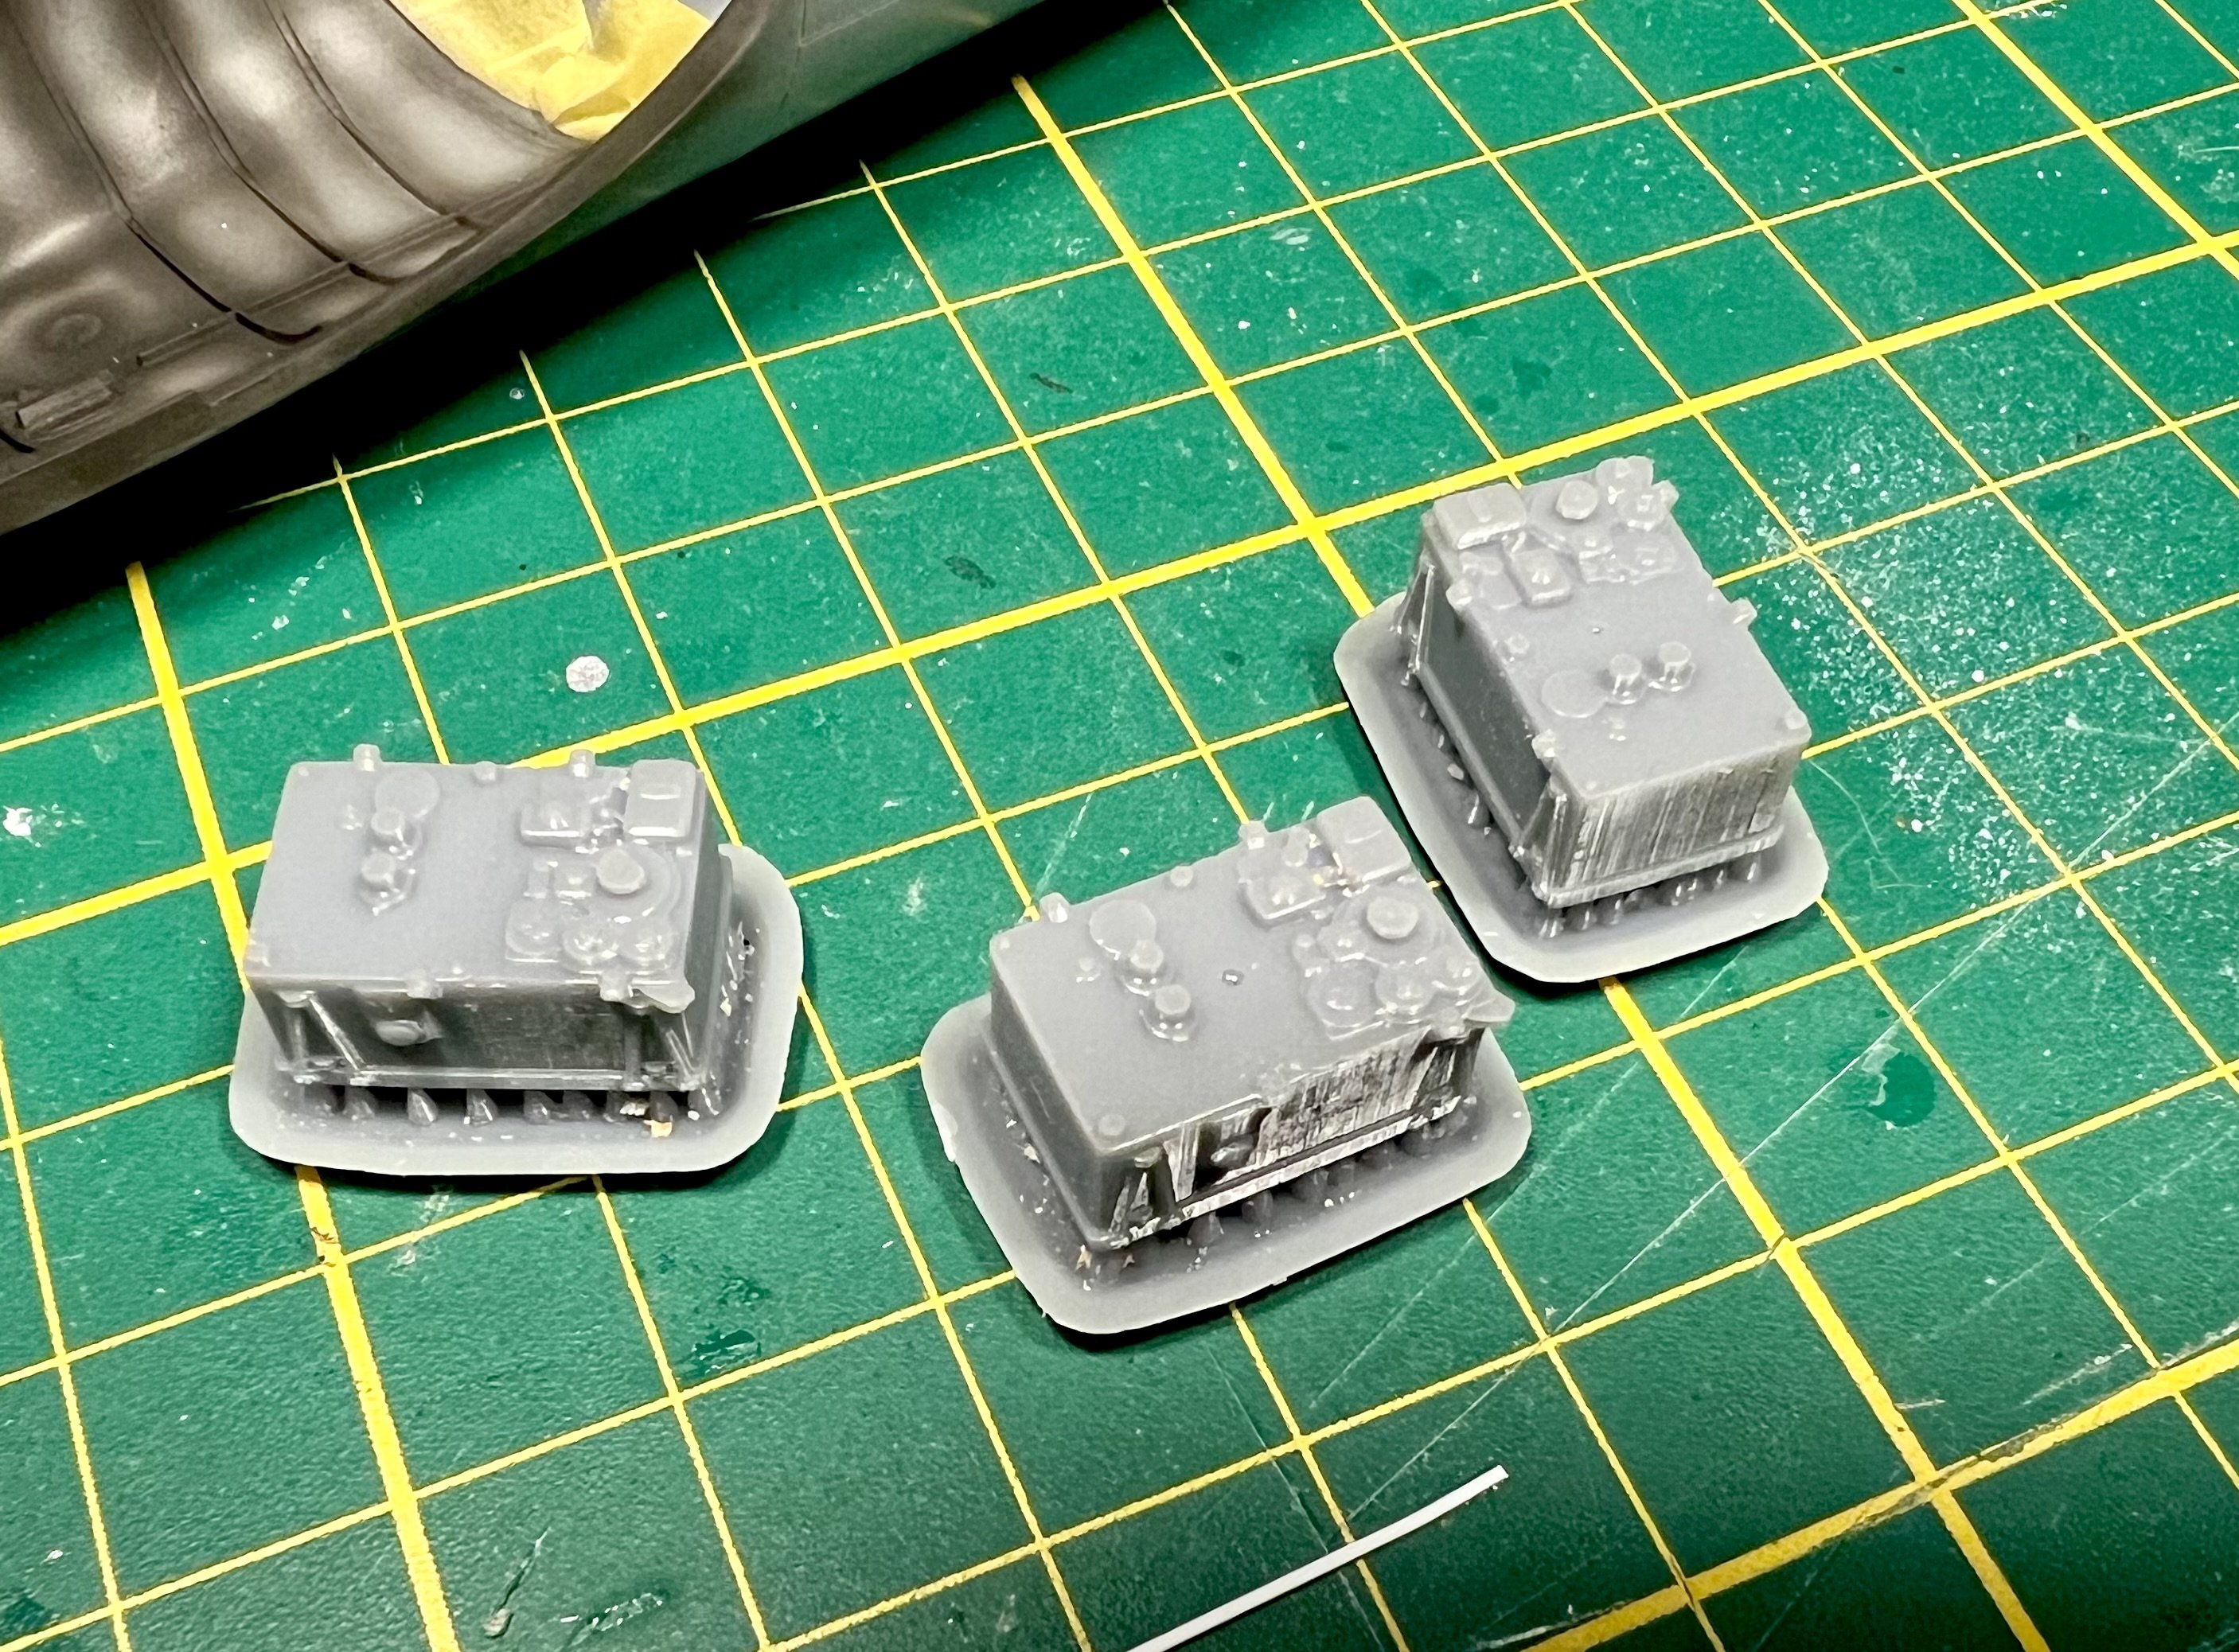
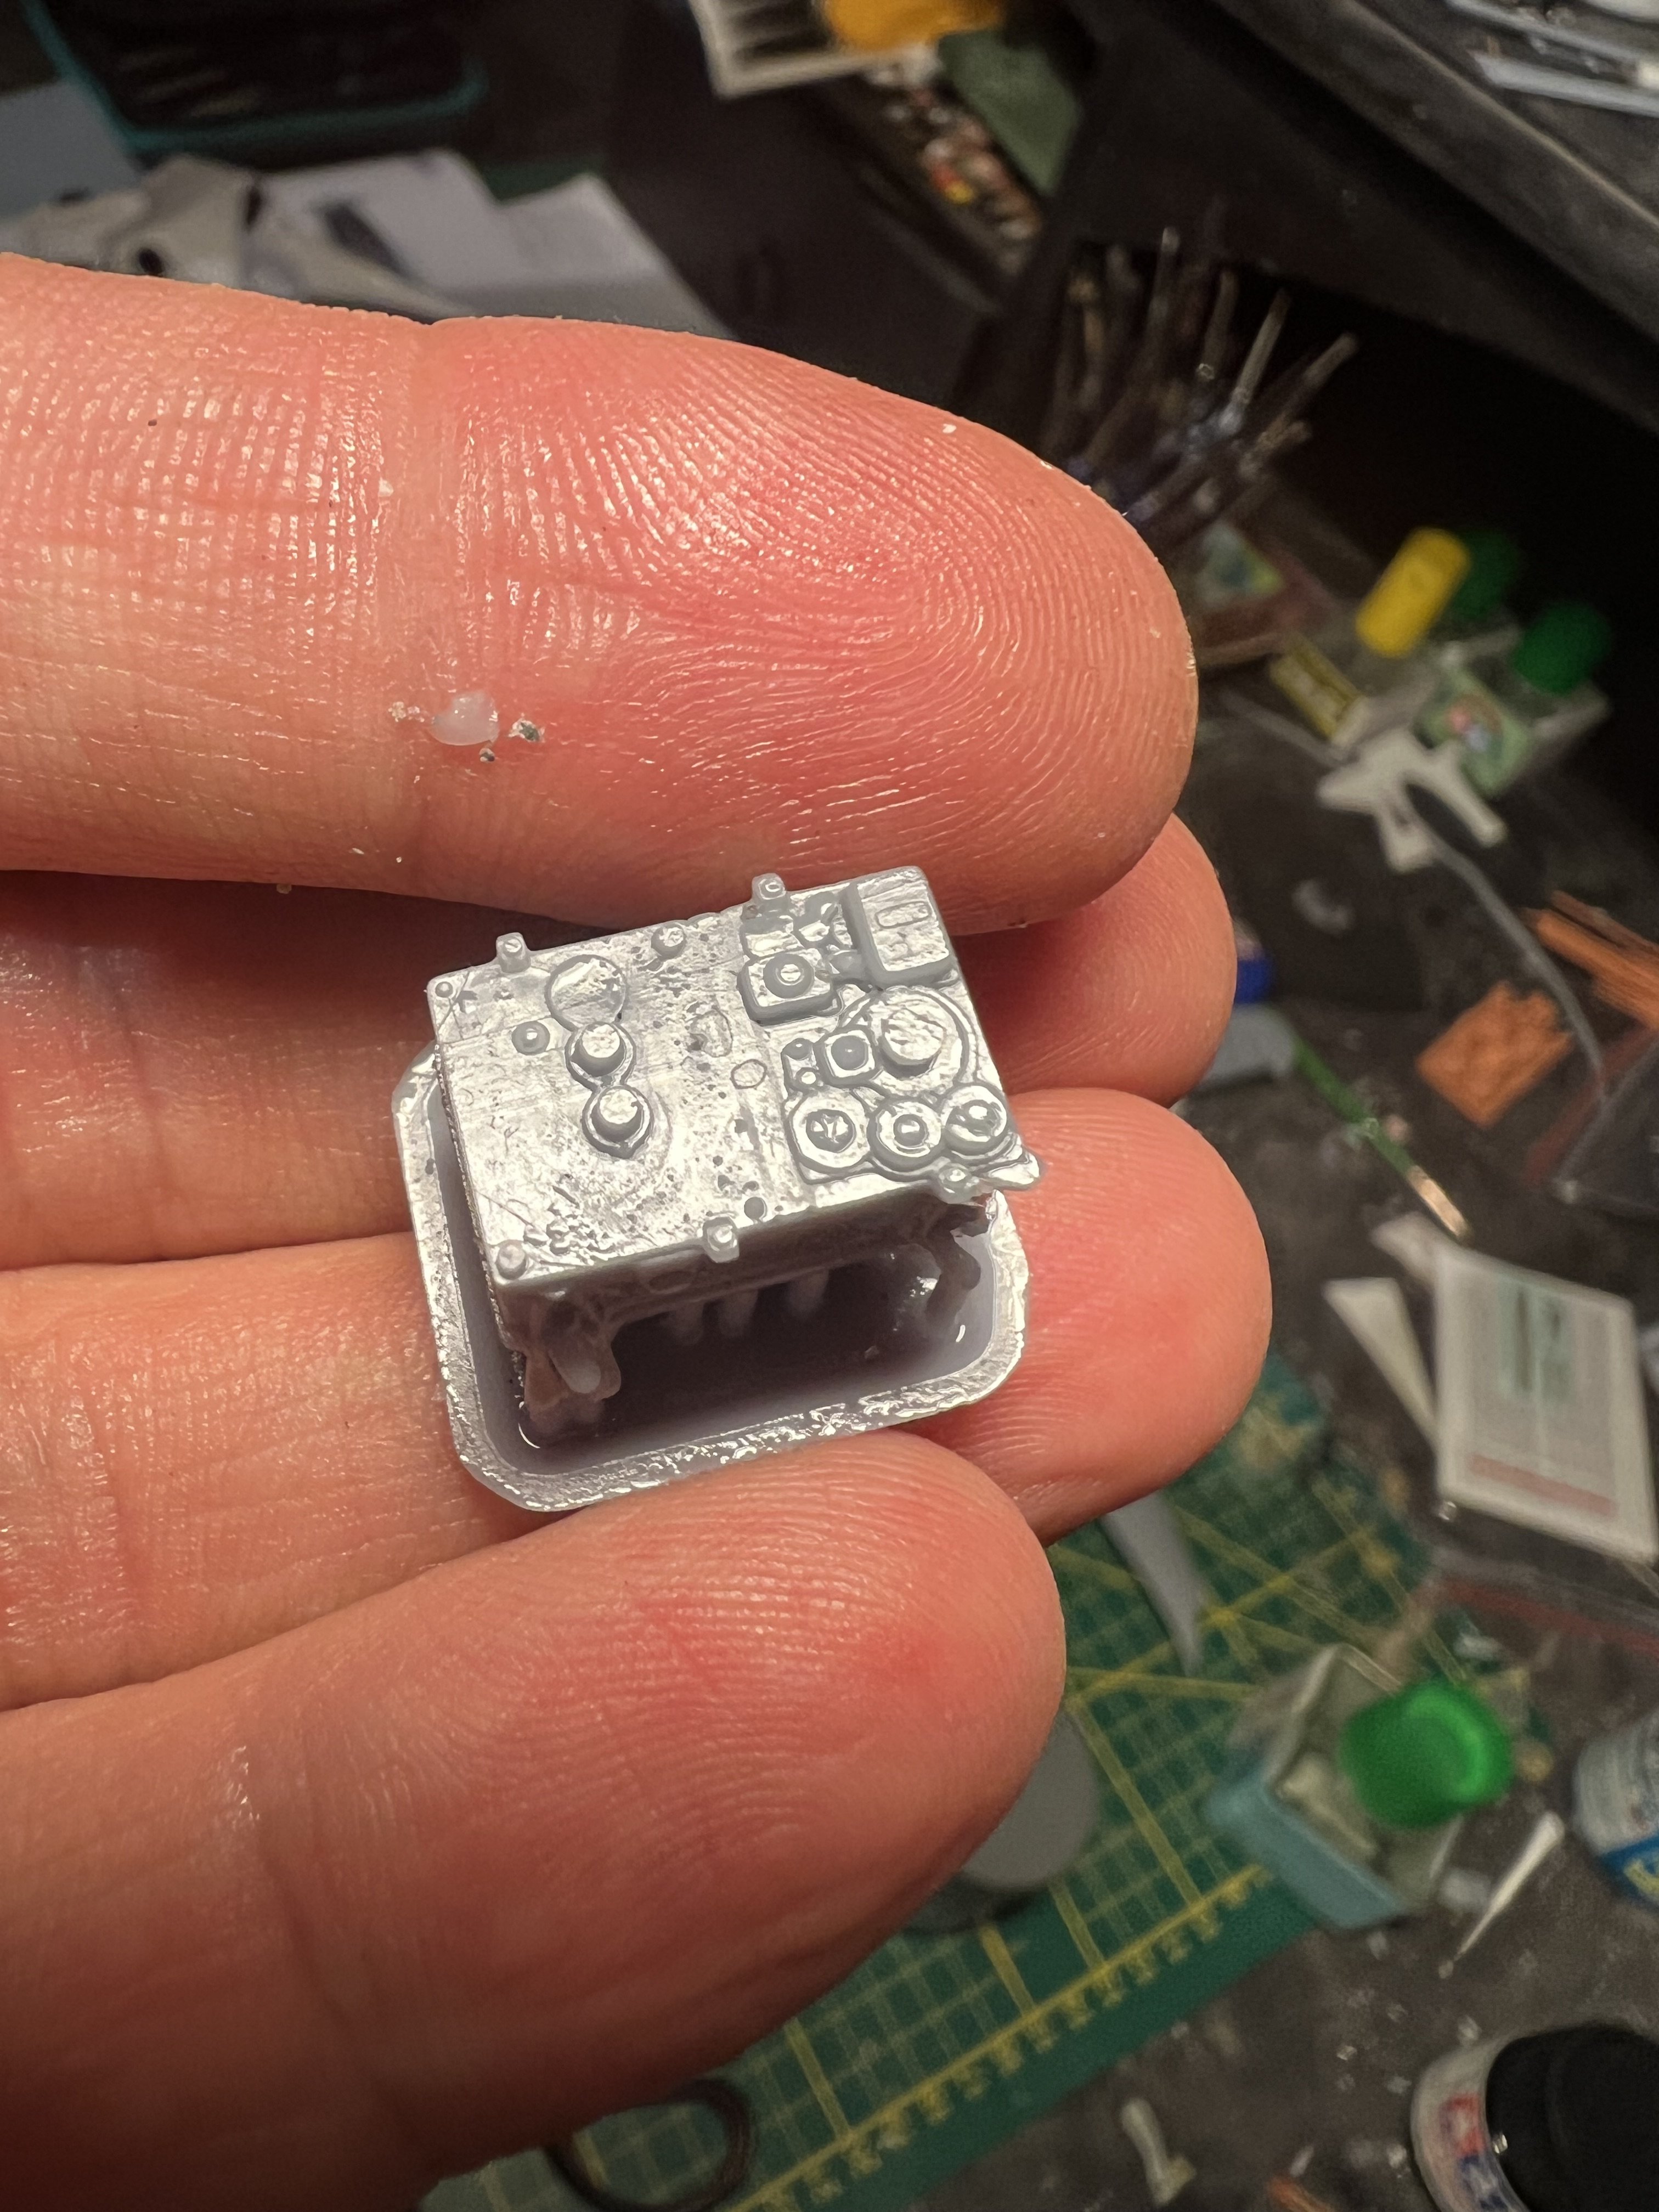
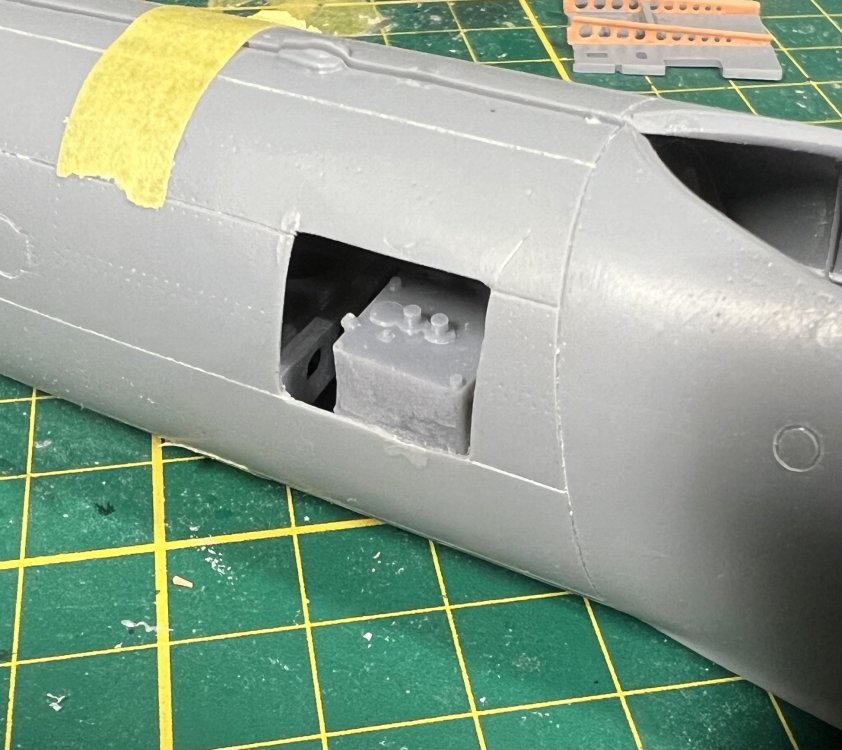
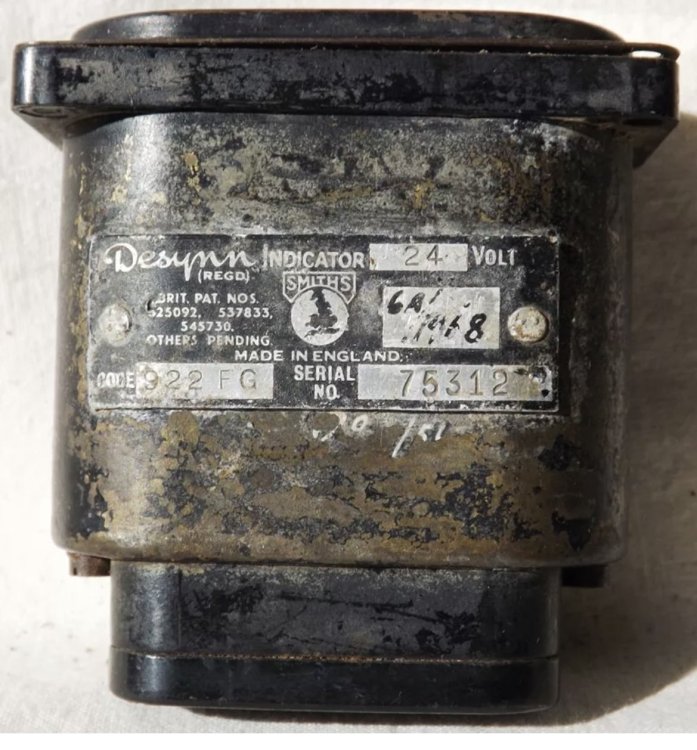
Pretty happy with my new radio print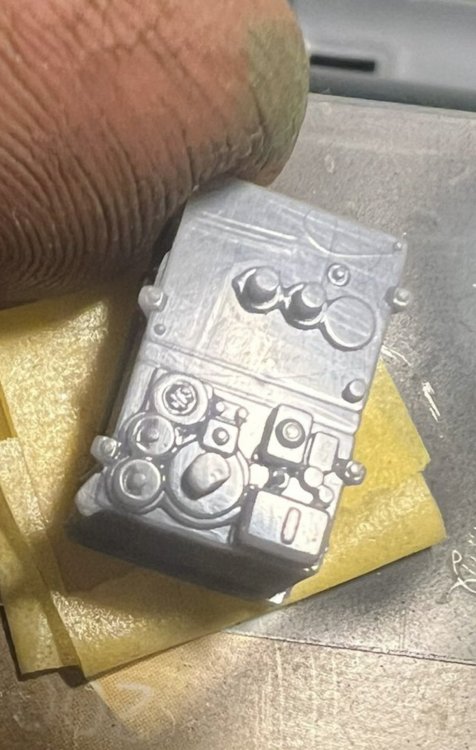
-
1/32 Westland Whirlwind
JeroenPeters replied to JeroenPeters's topic in LSM 1/35 and Larger Work In Progress
First cockpit green.
-
1/32 Westland Whirlwind
JeroenPeters replied to JeroenPeters's topic in LSM 1/35 and Larger Work In Progress
Reprinted the radio. Perfect now. Also started painting the cockpit with some black pre shade.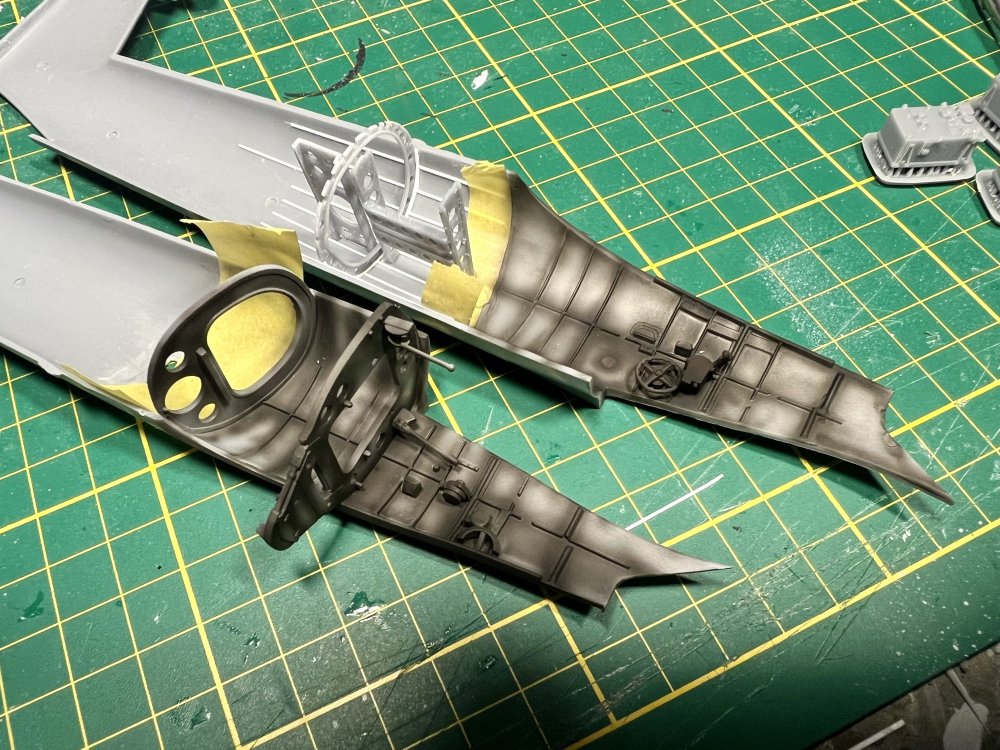
-
1/32 Westland Whirlwind
JeroenPeters replied to JeroenPeters's topic in LSM 1/35 and Larger Work In Progress
It all seems to fit. might reprint the radio, since some supports ruined some details.

-
1/32 Westland Whirlwind
JeroenPeters replied to JeroenPeters's topic in LSM 1/35 and Larger Work In Progress
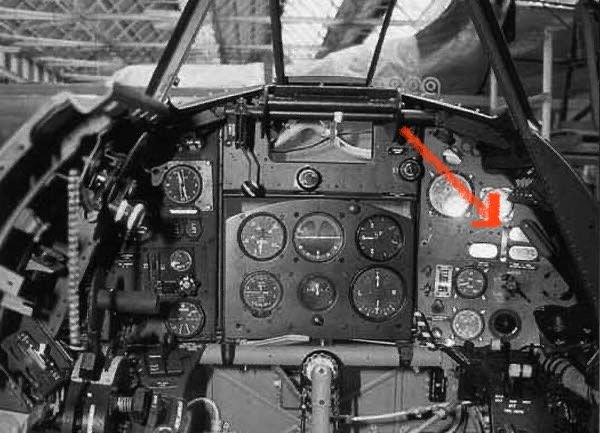
All fitted. A real pain but hopefully worth the effort. I’ll now scratch the panel and face the same dilemma the whirlwind fighter project faces: what was printed on the information panel inside the hatch?
-
1/32 Hawker Tempest
JeroenPeters replied to JeroenPeters's topic in LSM 1/35 and Larger Work In Progress
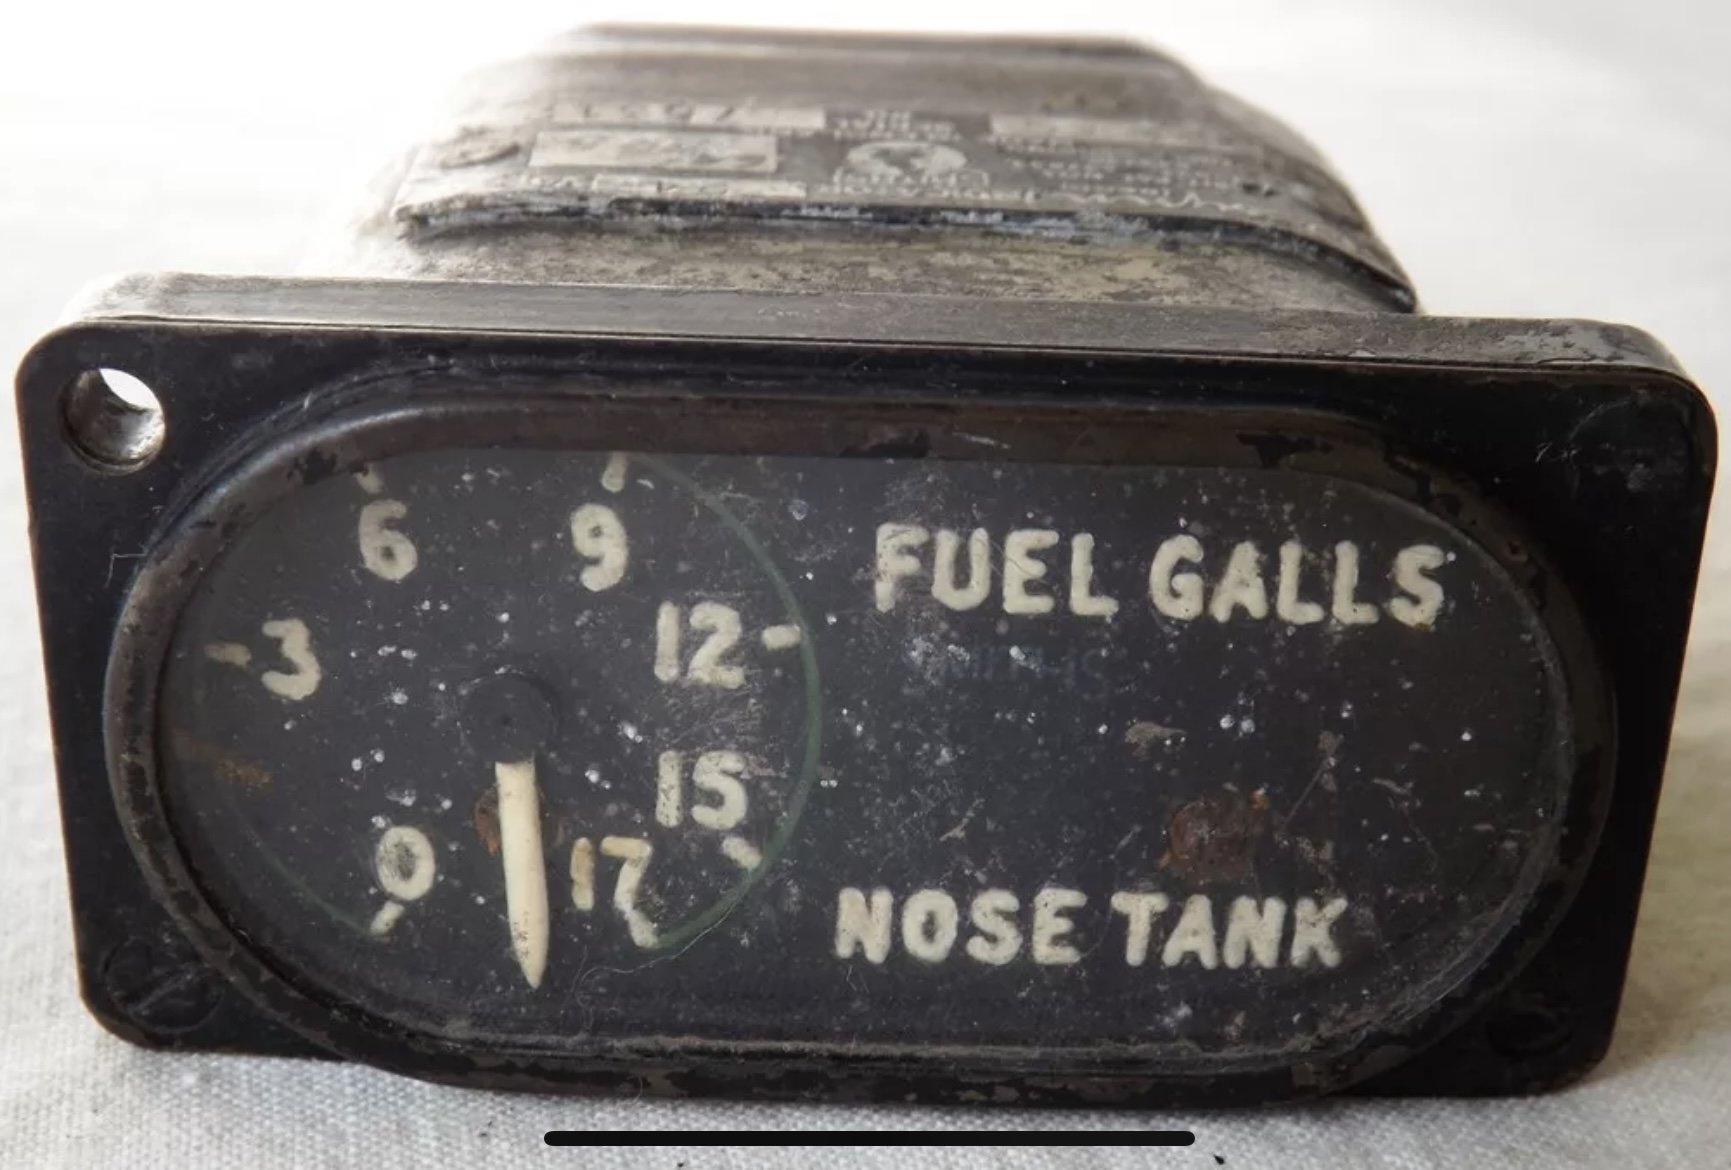
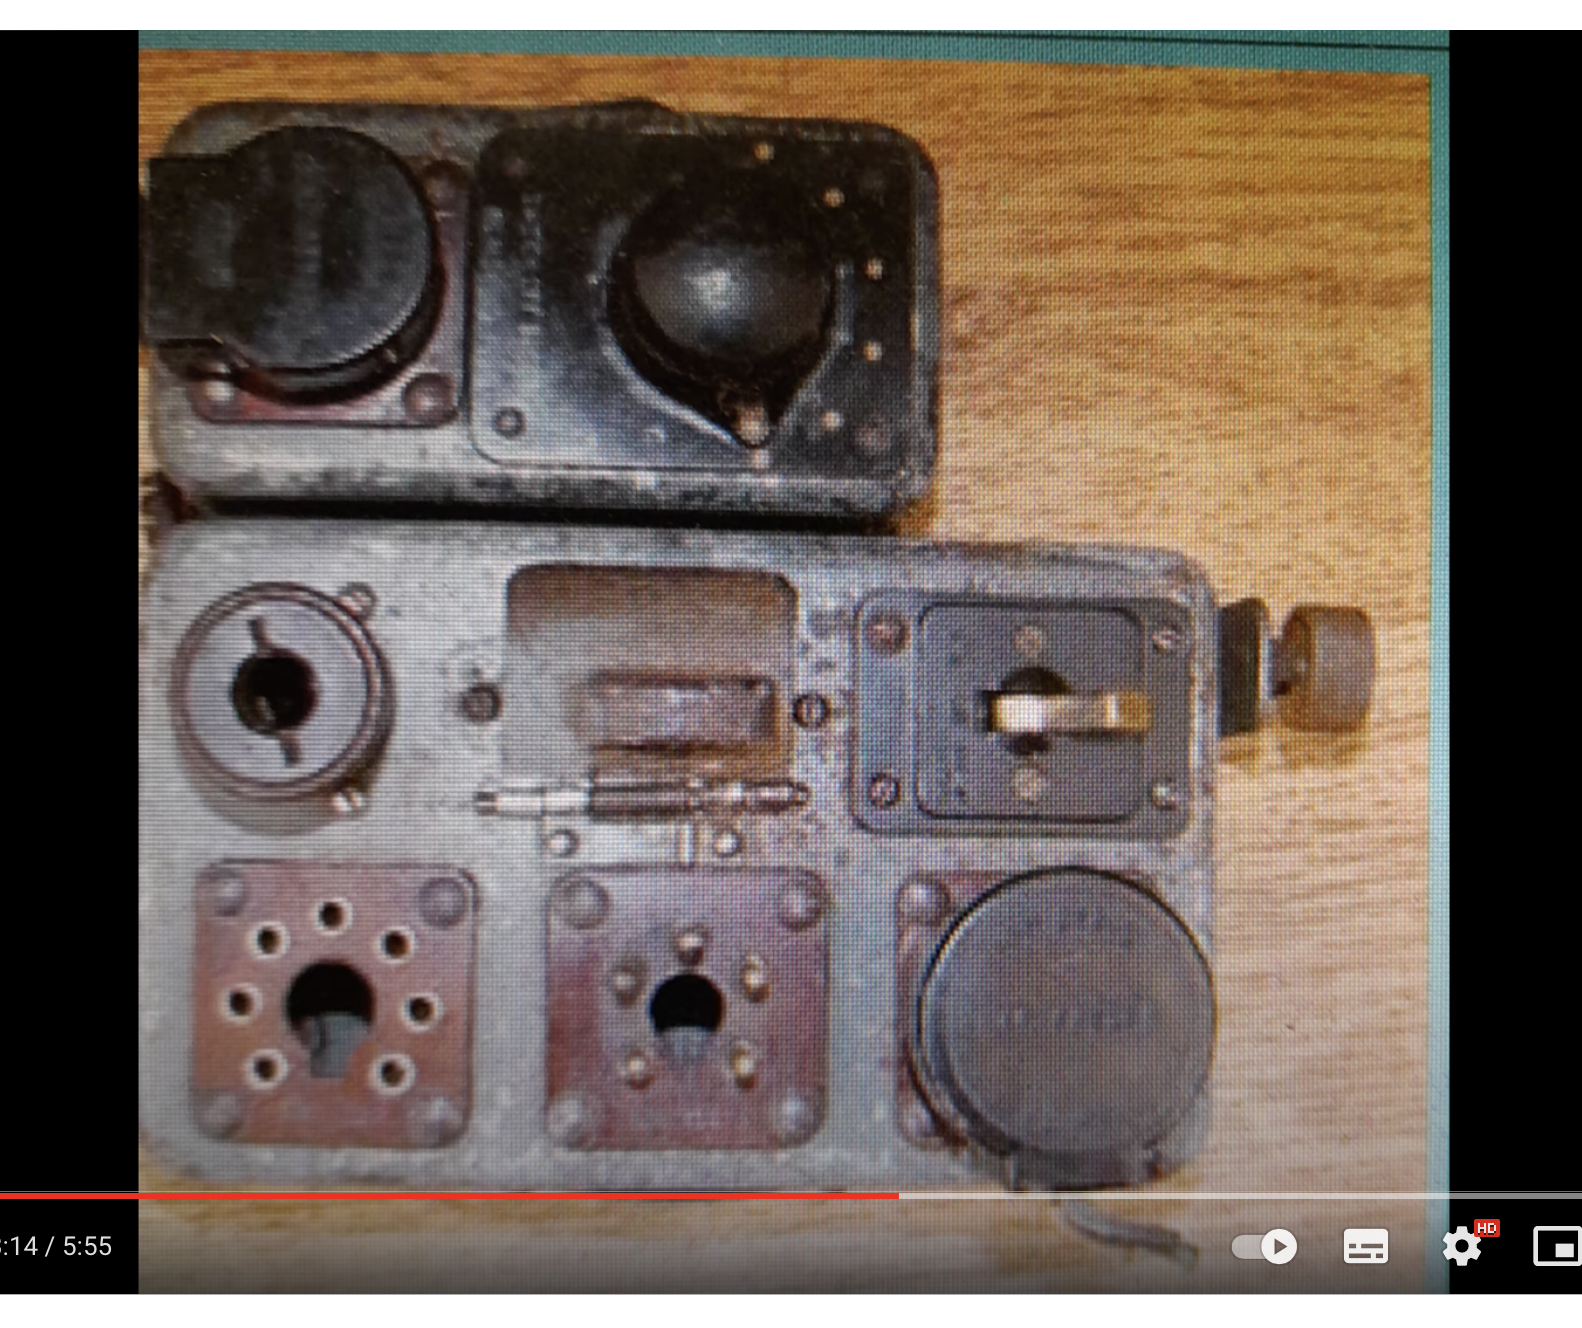
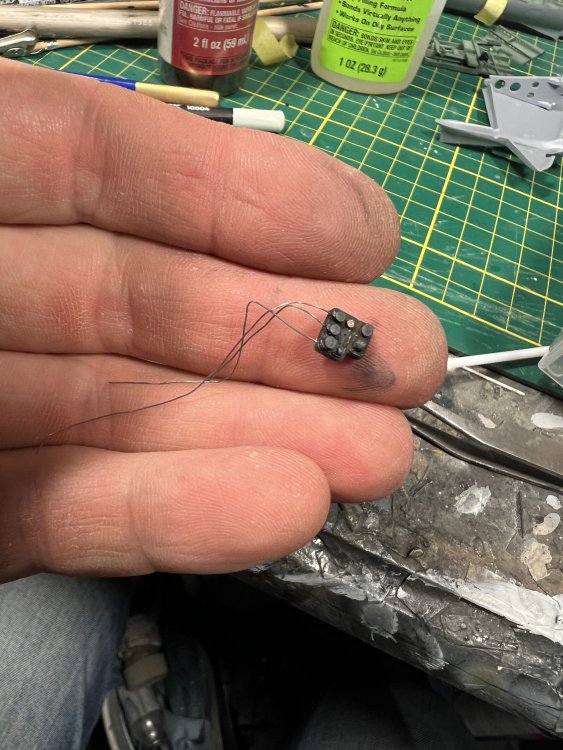
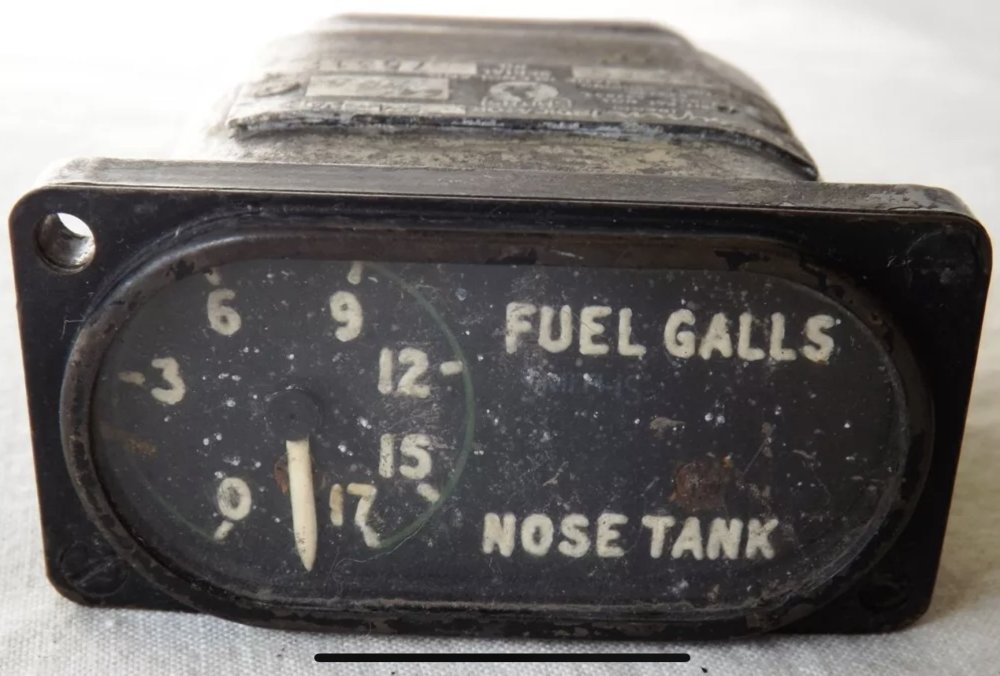
Managed to find a rare fuel gauge from a Hawker Tempest. The Tempest had two. The upper one showing the nose tank contents and the bottom one (with two dials) showing the wing tanks contents.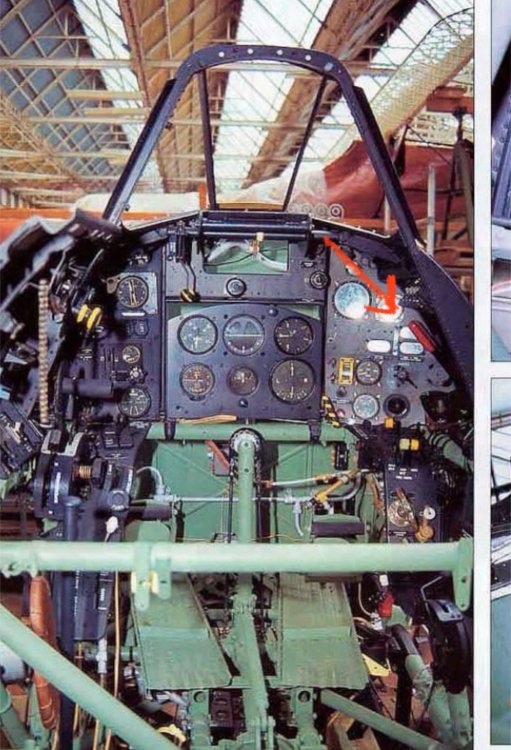
- 100 replies
-
- 12
-
-
1/32 Westland Whirlwind
JeroenPeters replied to JeroenPeters's topic in LSM 1/35 and Larger Work In Progress
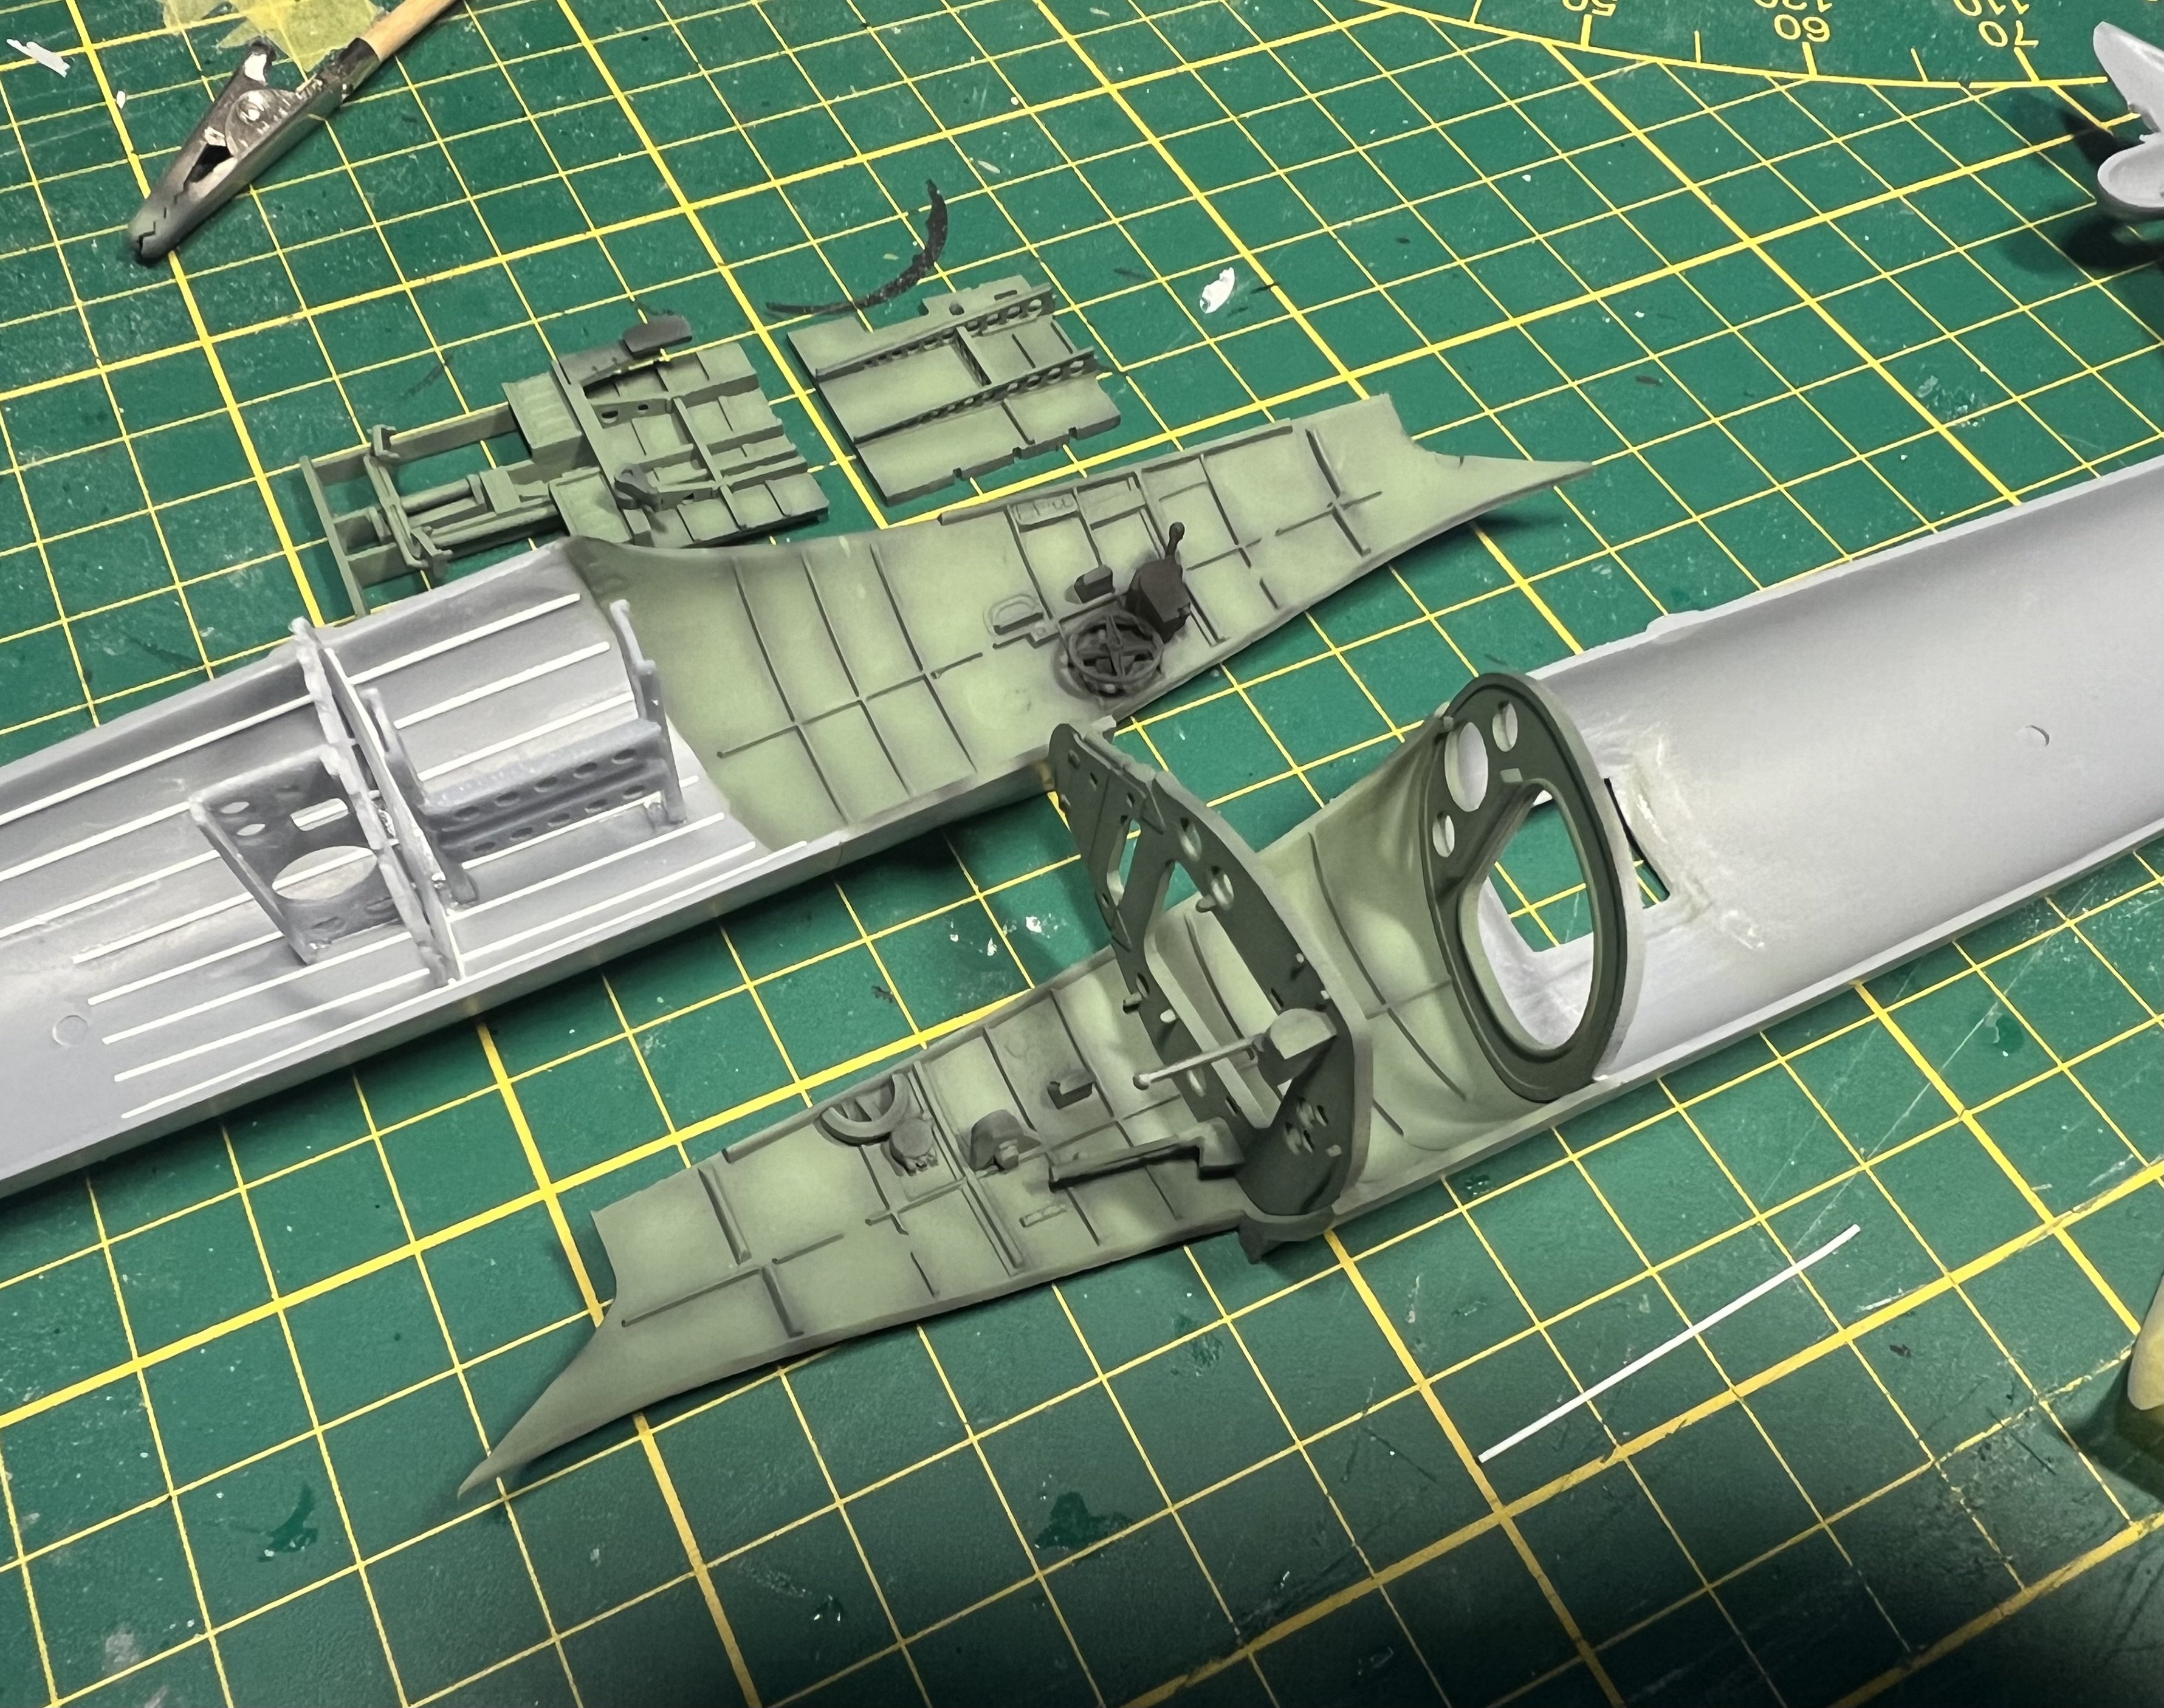
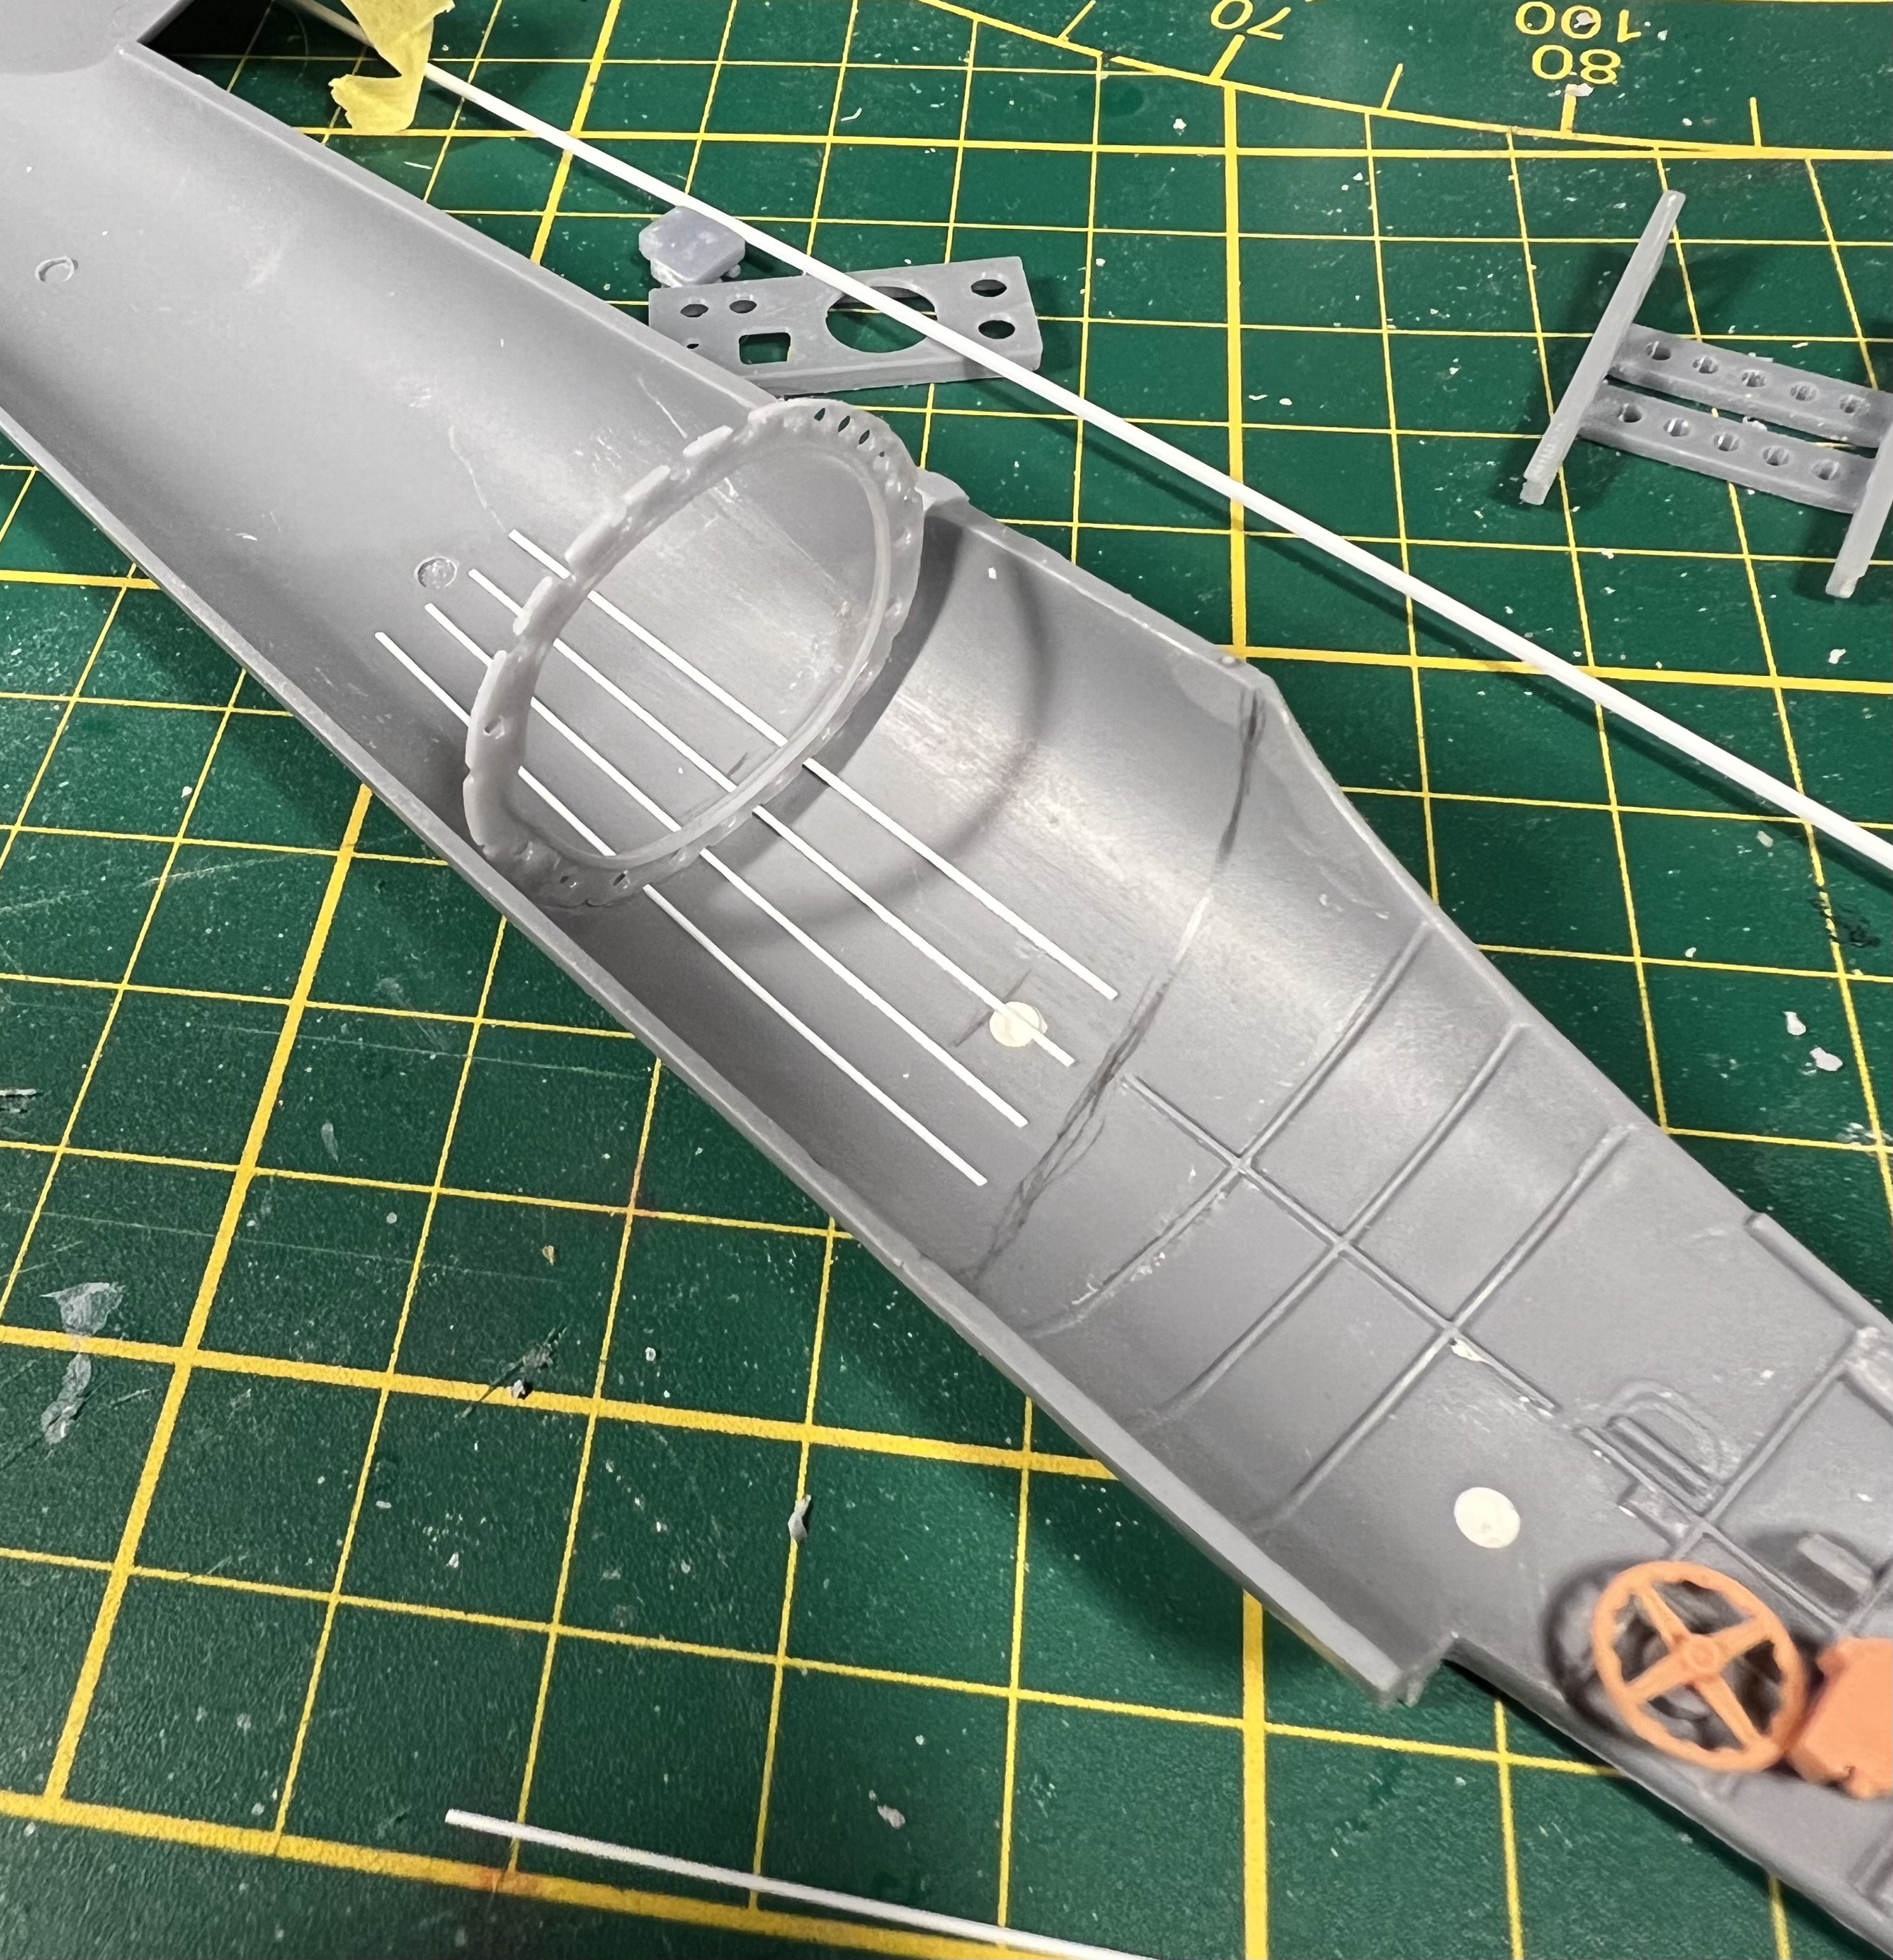
Installing the frame (which needed trimming…) and stringers.
-
1/32 Westland Whirlwind
JeroenPeters replied to JeroenPeters's topic in LSM 1/35 and Larger Work In Progress
I reprinted the frame 1mm bigger to make it fit the fuselage better. I’ll make the wiring with lead wire and stringers with thin rod.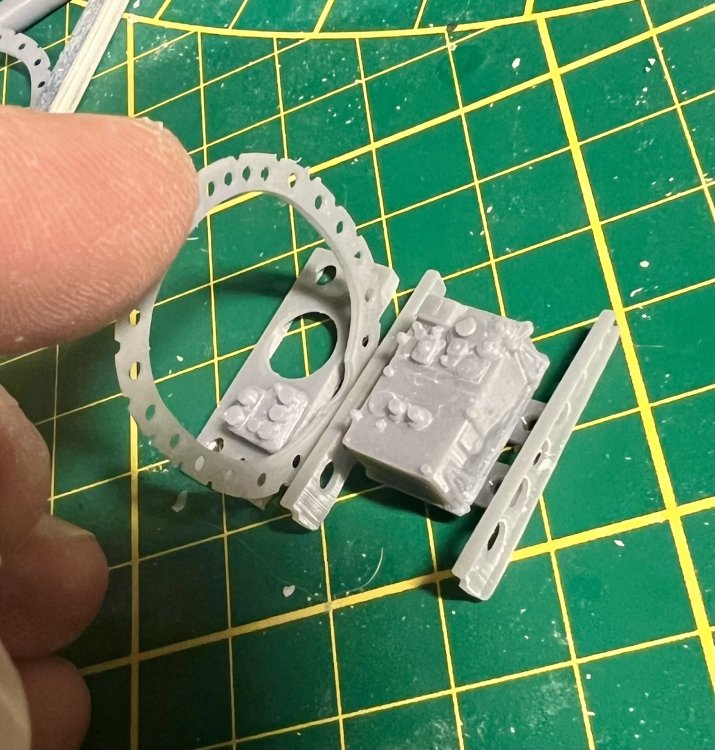

-
1/32 Westland Whirlwind
JeroenPeters replied to JeroenPeters's topic in LSM 1/35 and Larger Work In Progress
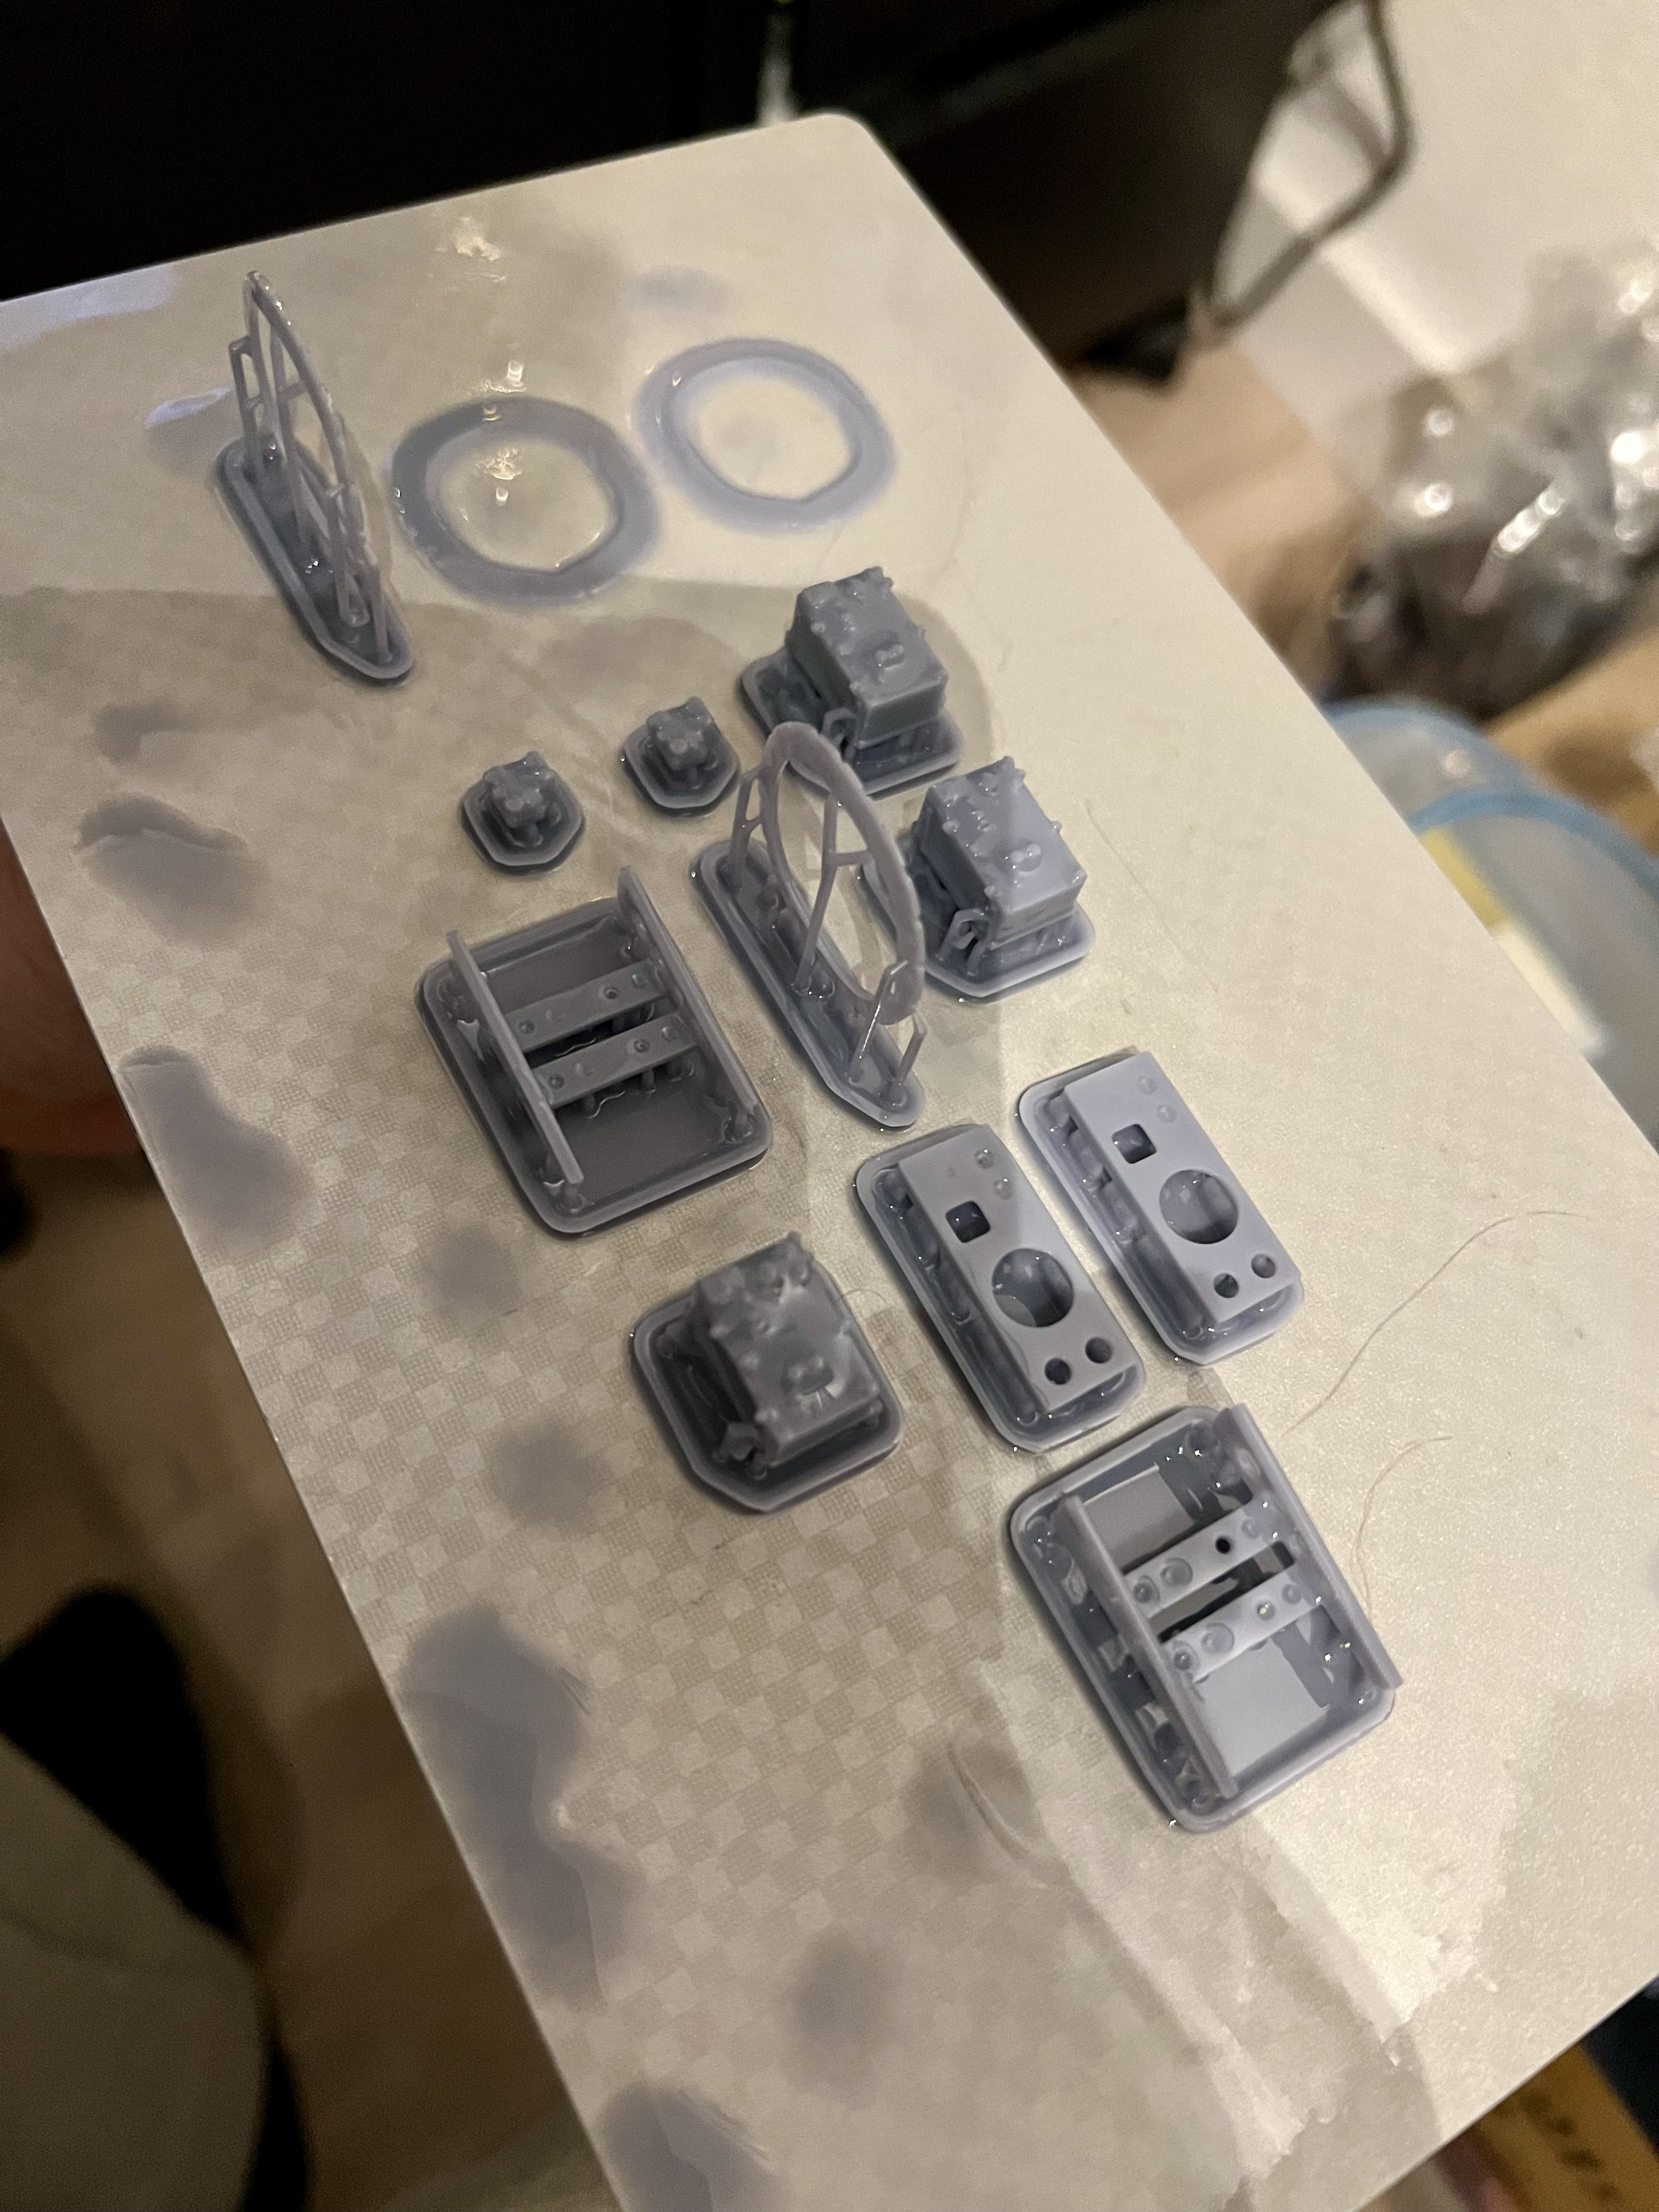
First test print. Looks ok. We’ll see after UV curing.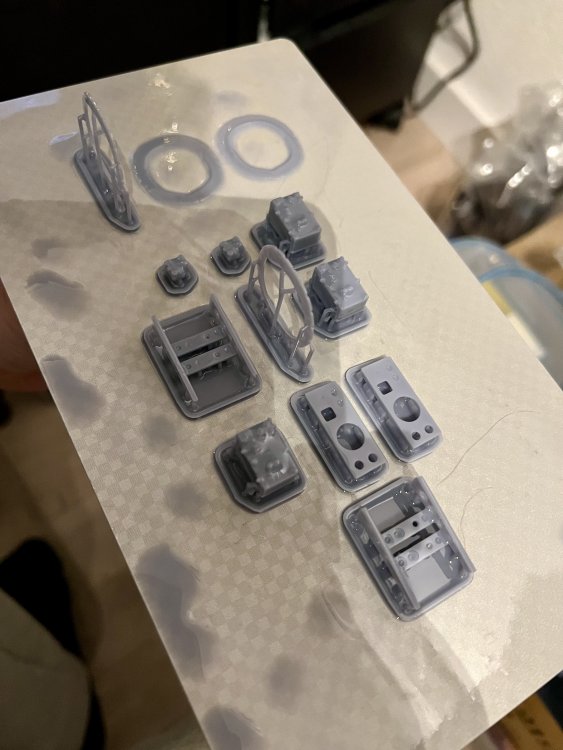

-
1/32 Hawker Tempest
JeroenPeters replied to JeroenPeters's topic in LSM 1/35 and Larger Work In Progress
If you think the engine is one solid chunk of resin. Think again…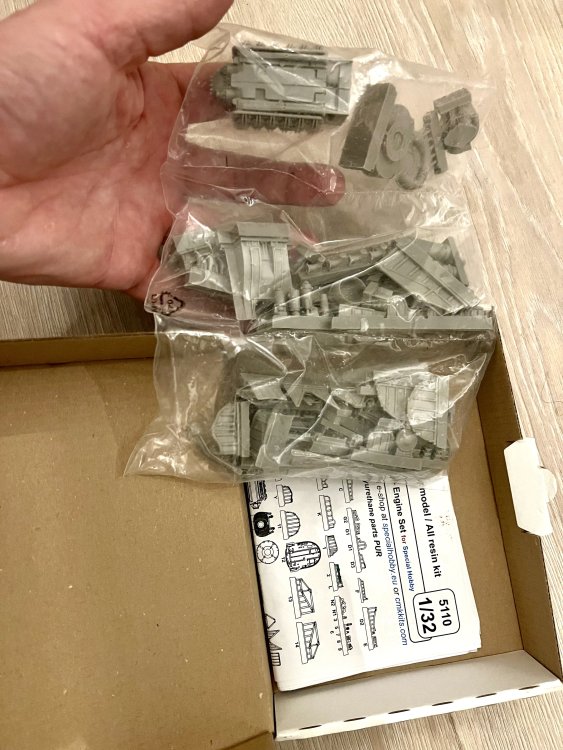
- 100 replies
-
- 13
-

-
-

-
1/32 Westland Whirlwind
JeroenPeters replied to JeroenPeters's topic in LSM 1/35 and Larger Work In Progress
Quinta instrument panel. It only offers you an early version blind flying panel, but it makes up in quality over the Kitsworld version by miles.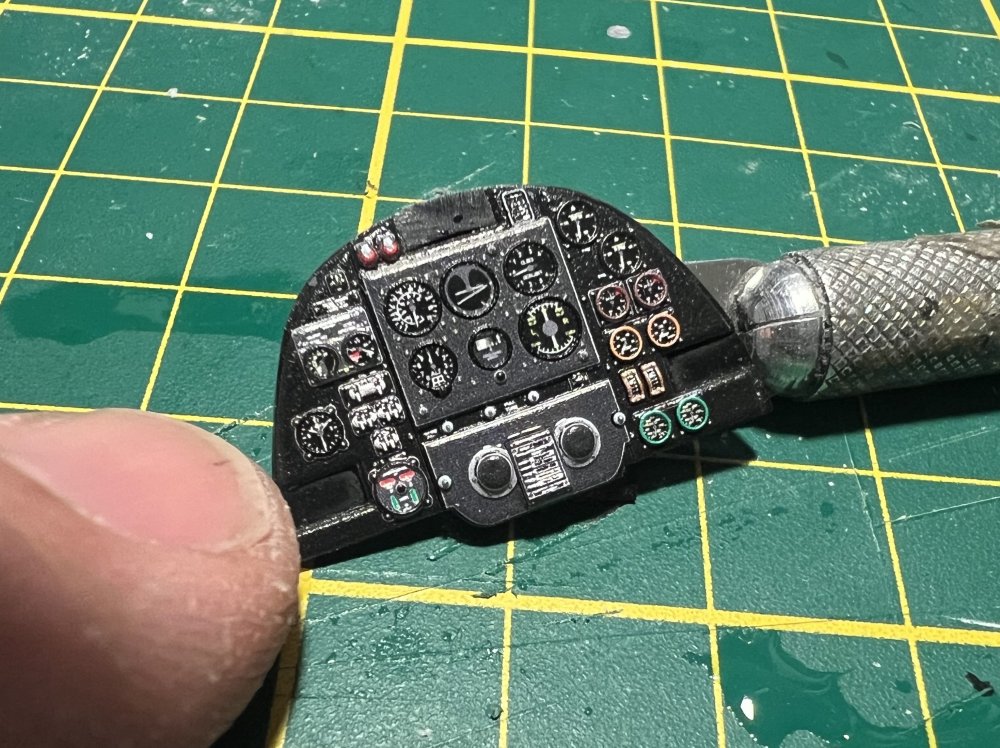

-
1/32 Westland Whirlwind
JeroenPeters replied to JeroenPeters's topic in LSM 1/35 and Larger Work In Progress
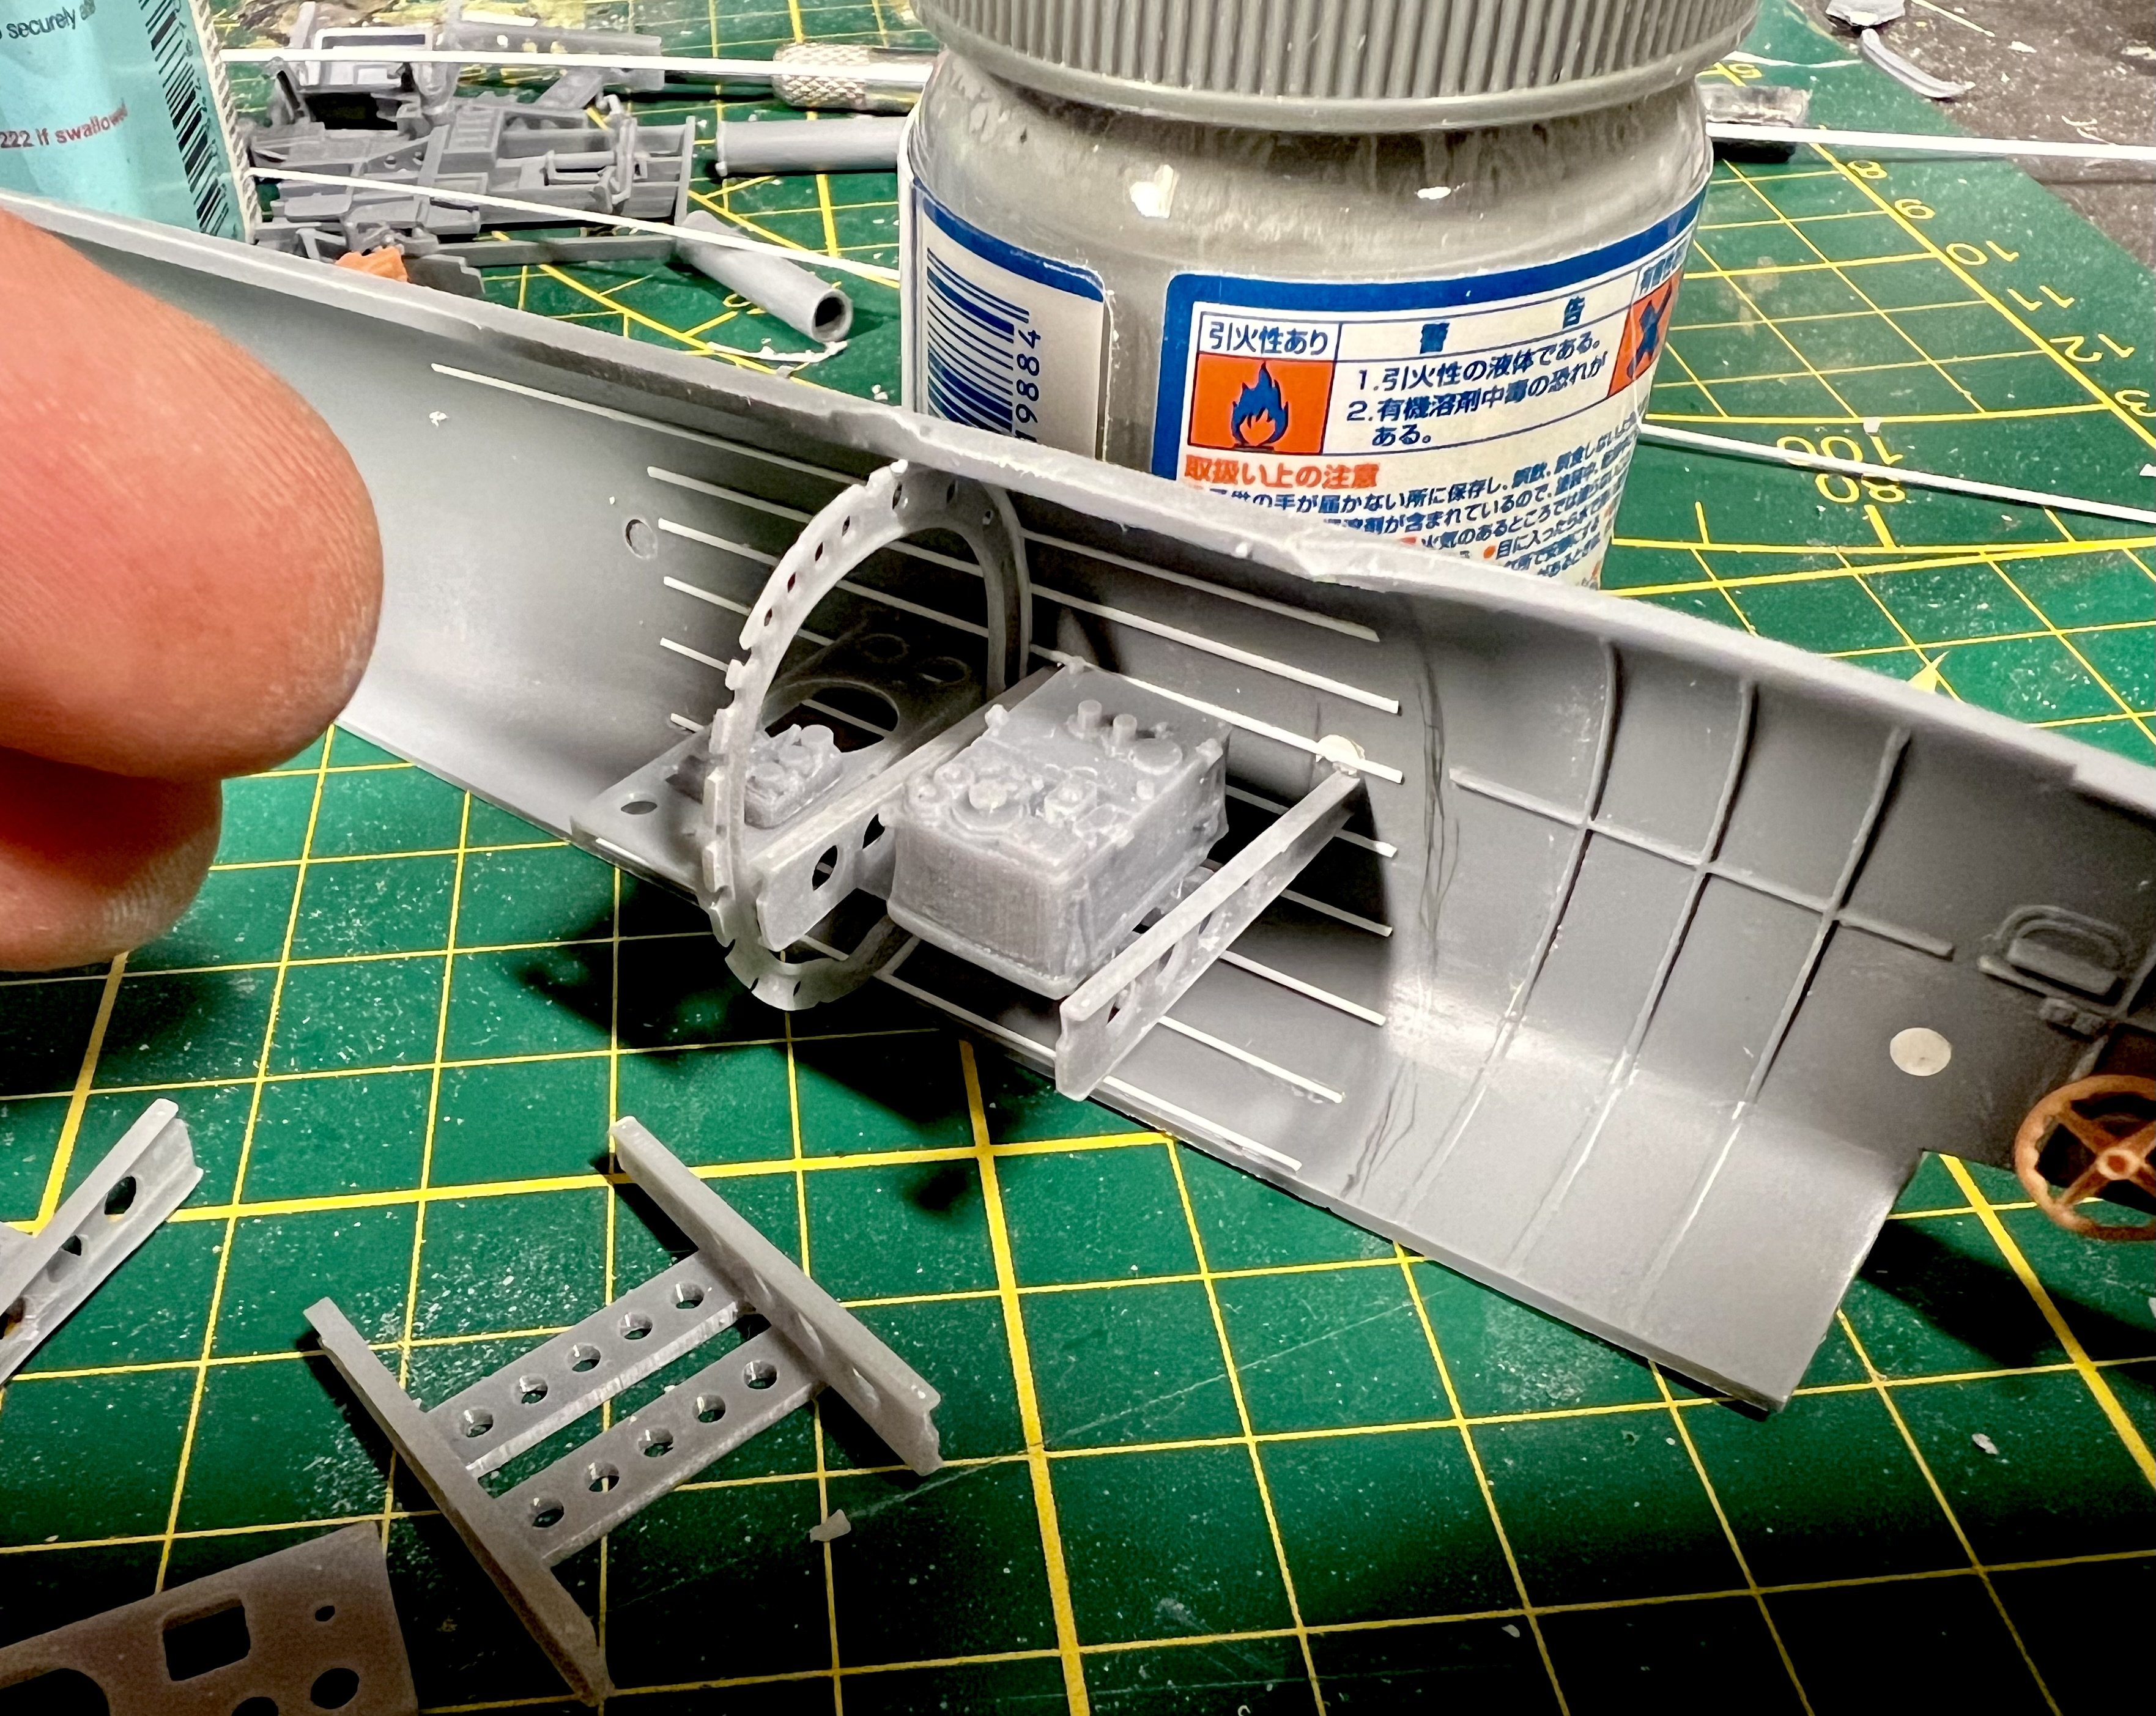
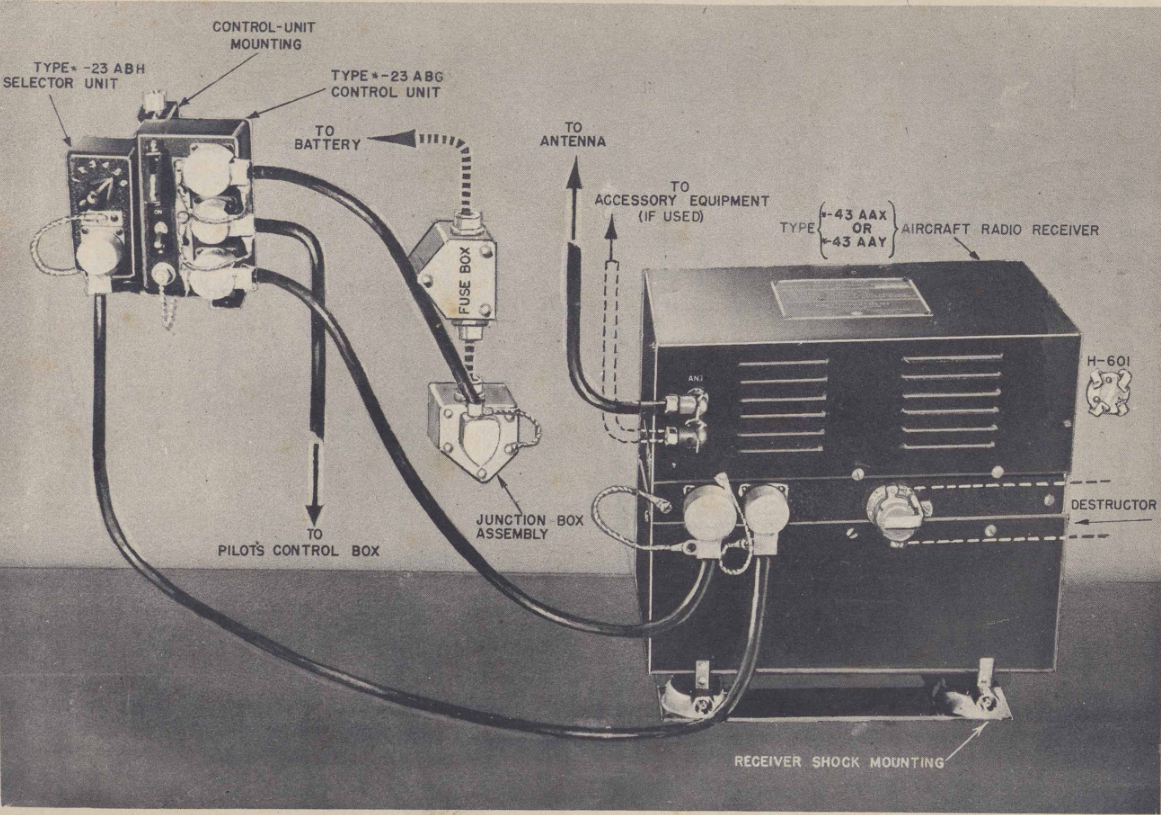
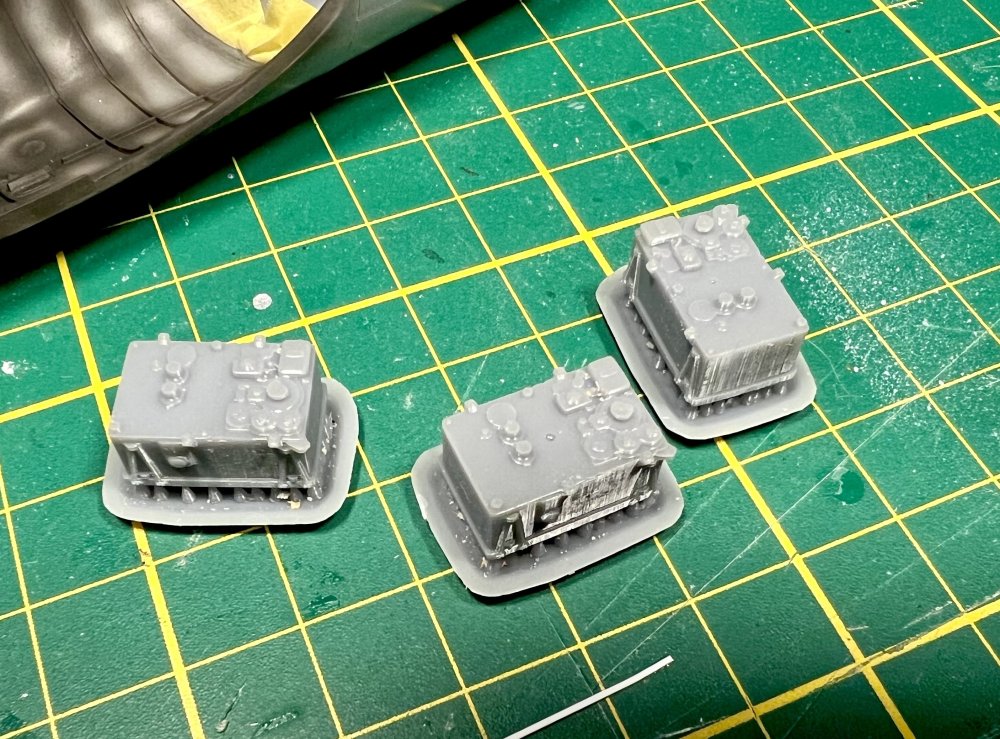
Also drew the TR3003 IFF unit. I think it was placed on the rack behind the radio in the way I drew. Not 100% sure though. Wiring I'll add made from lead wire. Also found a diagram showing the way a similar IFF unit was connected to a radio.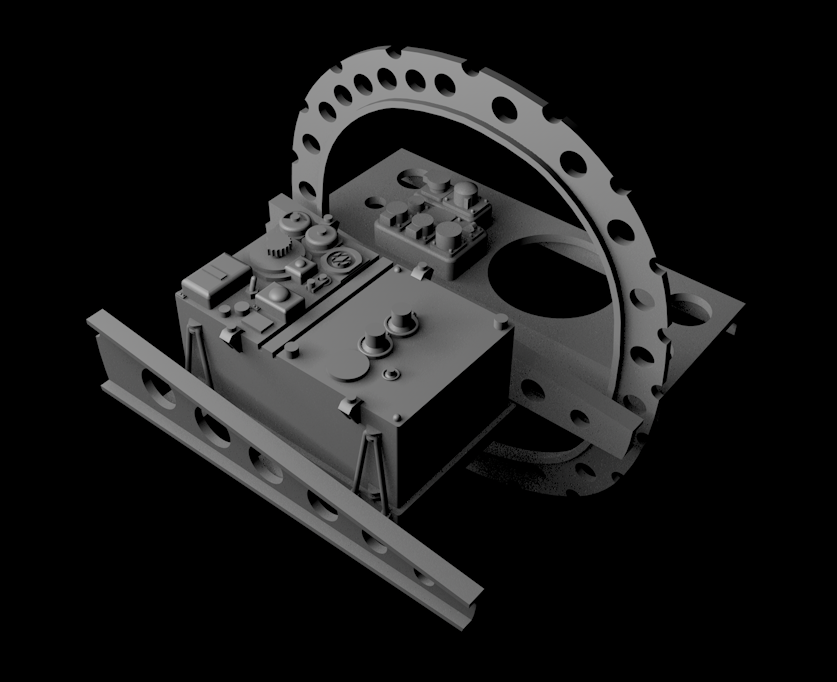


-
1/32 Hawker Tempest
JeroenPeters replied to JeroenPeters's topic in LSM 1/35 and Larger Work In Progress
Special Hobby kits sure can be challenging! Not much of this kit will be used in my build :)))) All panels will be opened and left off. The Napier Sabre engine should land on my doorstep today. Already looked at some online reviews. Always thought it was a one piece resin chunk. But alas... many small parts to clean up and assemble. -
1/32 Westland Whirlwind
JeroenPeters replied to JeroenPeters's topic in LSM 1/35 and Larger Work In Progress
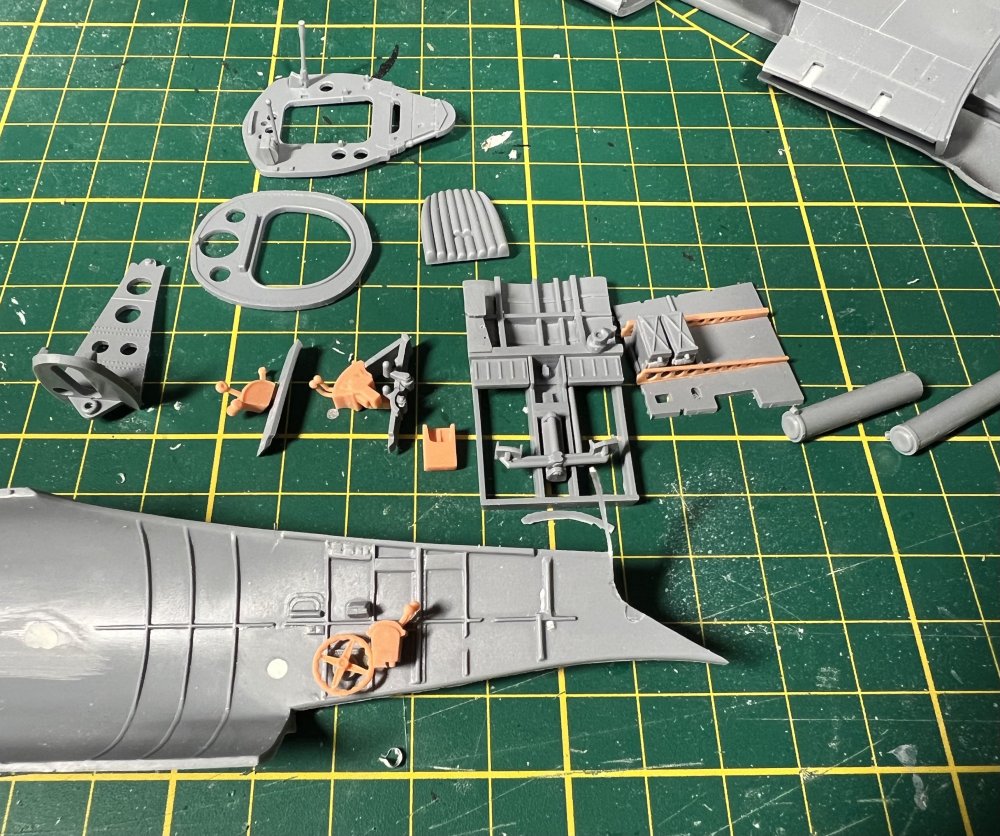
Here we are. Almost ready for a test print. Only need to add plugs and wiring.
-
1/32 Westland Whirlwind
JeroenPeters replied to JeroenPeters's topic in LSM 1/35 and Larger Work In Progress
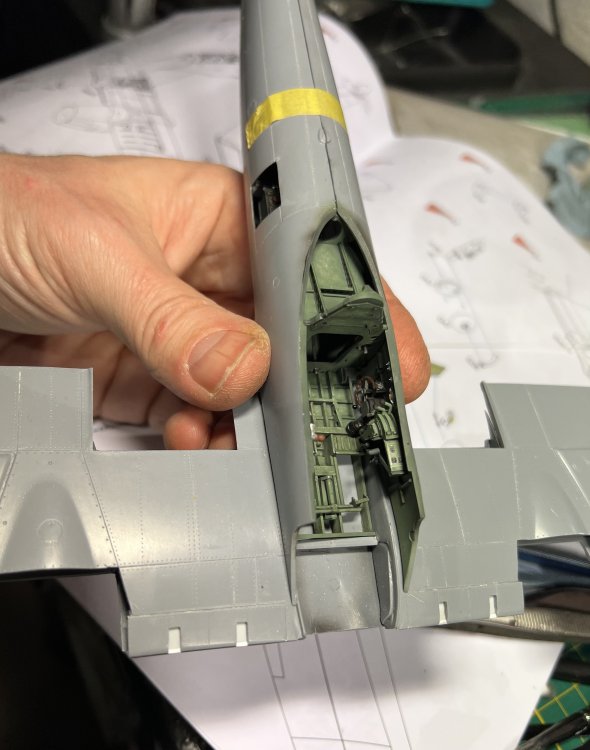
Opened the radio hatch and started thinning the plastic around the edges. Also working on the cockpit. The 3D printed parts look the part. Only need to remove some layer lines here and there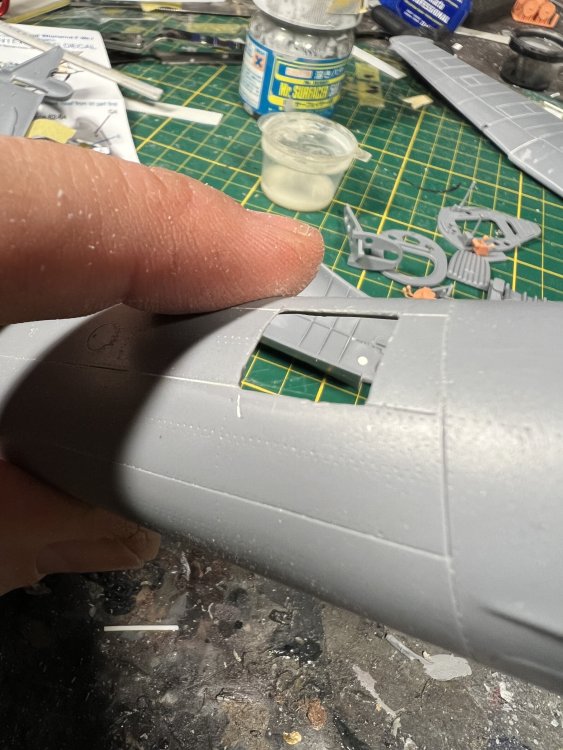
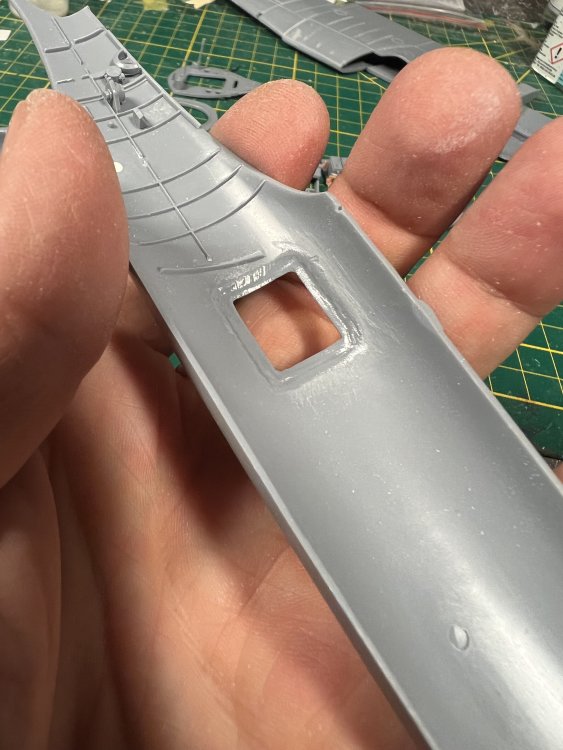
- 439 replies
-
- 10
-
-
1/32 Westland Whirlwind
JeroenPeters replied to JeroenPeters's topic in LSM 1/35 and Larger Work In Progress
working on the frames and spars.