JeroenPeters
-
Posts
4,867 -
Joined
-
Last visited
Content Type
Profiles
Forums
Events
Gallery
Everything posted by JeroenPeters
-

1/32 Hawker Tempest
JeroenPeters replied to JeroenPeters's topic in LSM 1/35 and Larger Work In Progress
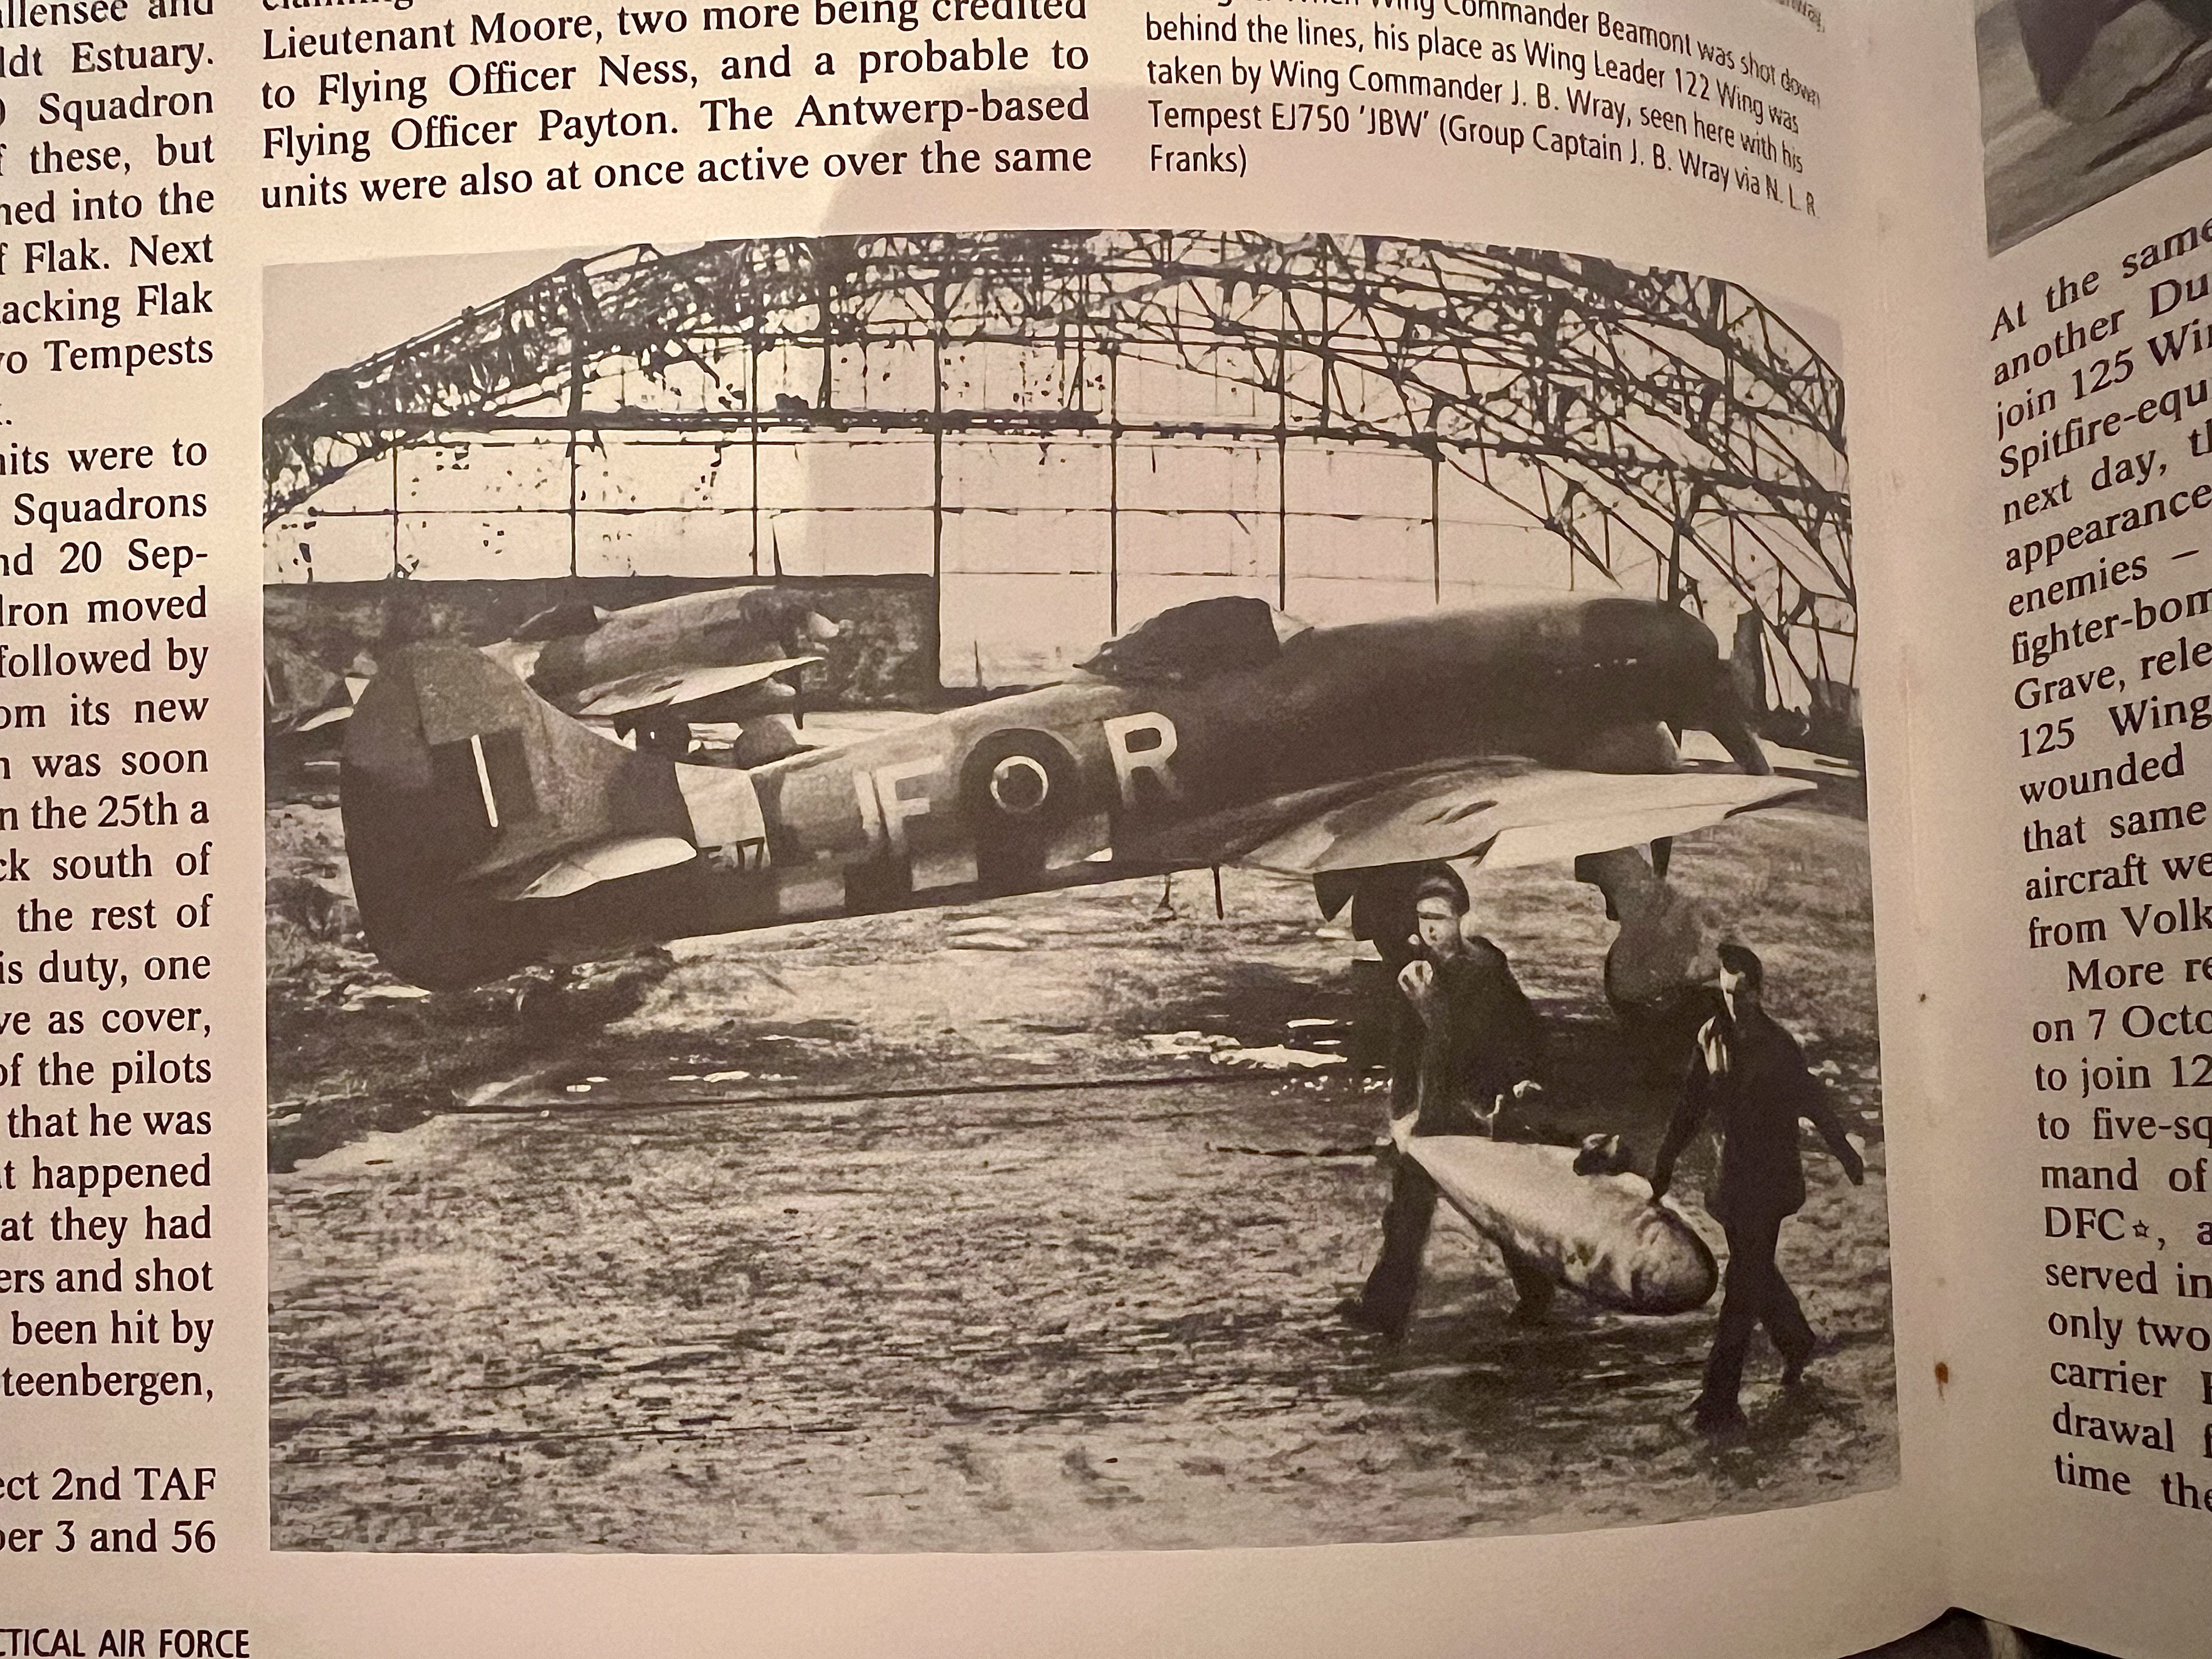
Finally!!! from the start i knew i wanted to make Ron Pottinger’s mount. He downed a few v1’s after he climbed up from infantry to the ranks of RAF pilot. He was shot down over Germany at the end of the war and taken POW. Grew to be very old, wrote a book and i have his signed photo. I knew i had seen a photo of his plane at Volkel (the Netherlands) somewhere. Searched for months. Then found it in a book i have on loan from Cees! Had it on my desk all this time. Goes to show Google isnt always your best friend.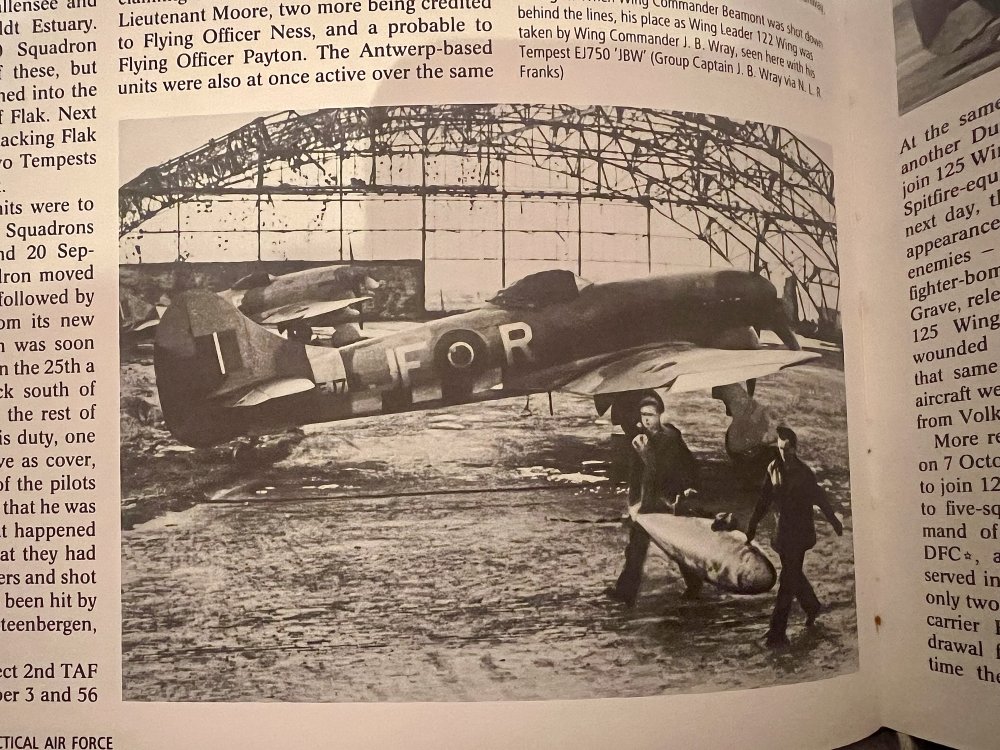

-
1/32 Hawker Tempest
JeroenPeters replied to JeroenPeters's topic in LSM 1/35 and Larger Work In Progress
Almost nothing. Took a bit from the outside of the wheelbays. Had to thin some plastic in order to get the resin bulkhead to fit nicely though -
1/32 Hawker Tempest
JeroenPeters replied to JeroenPeters's topic in LSM 1/35 and Larger Work In Progress
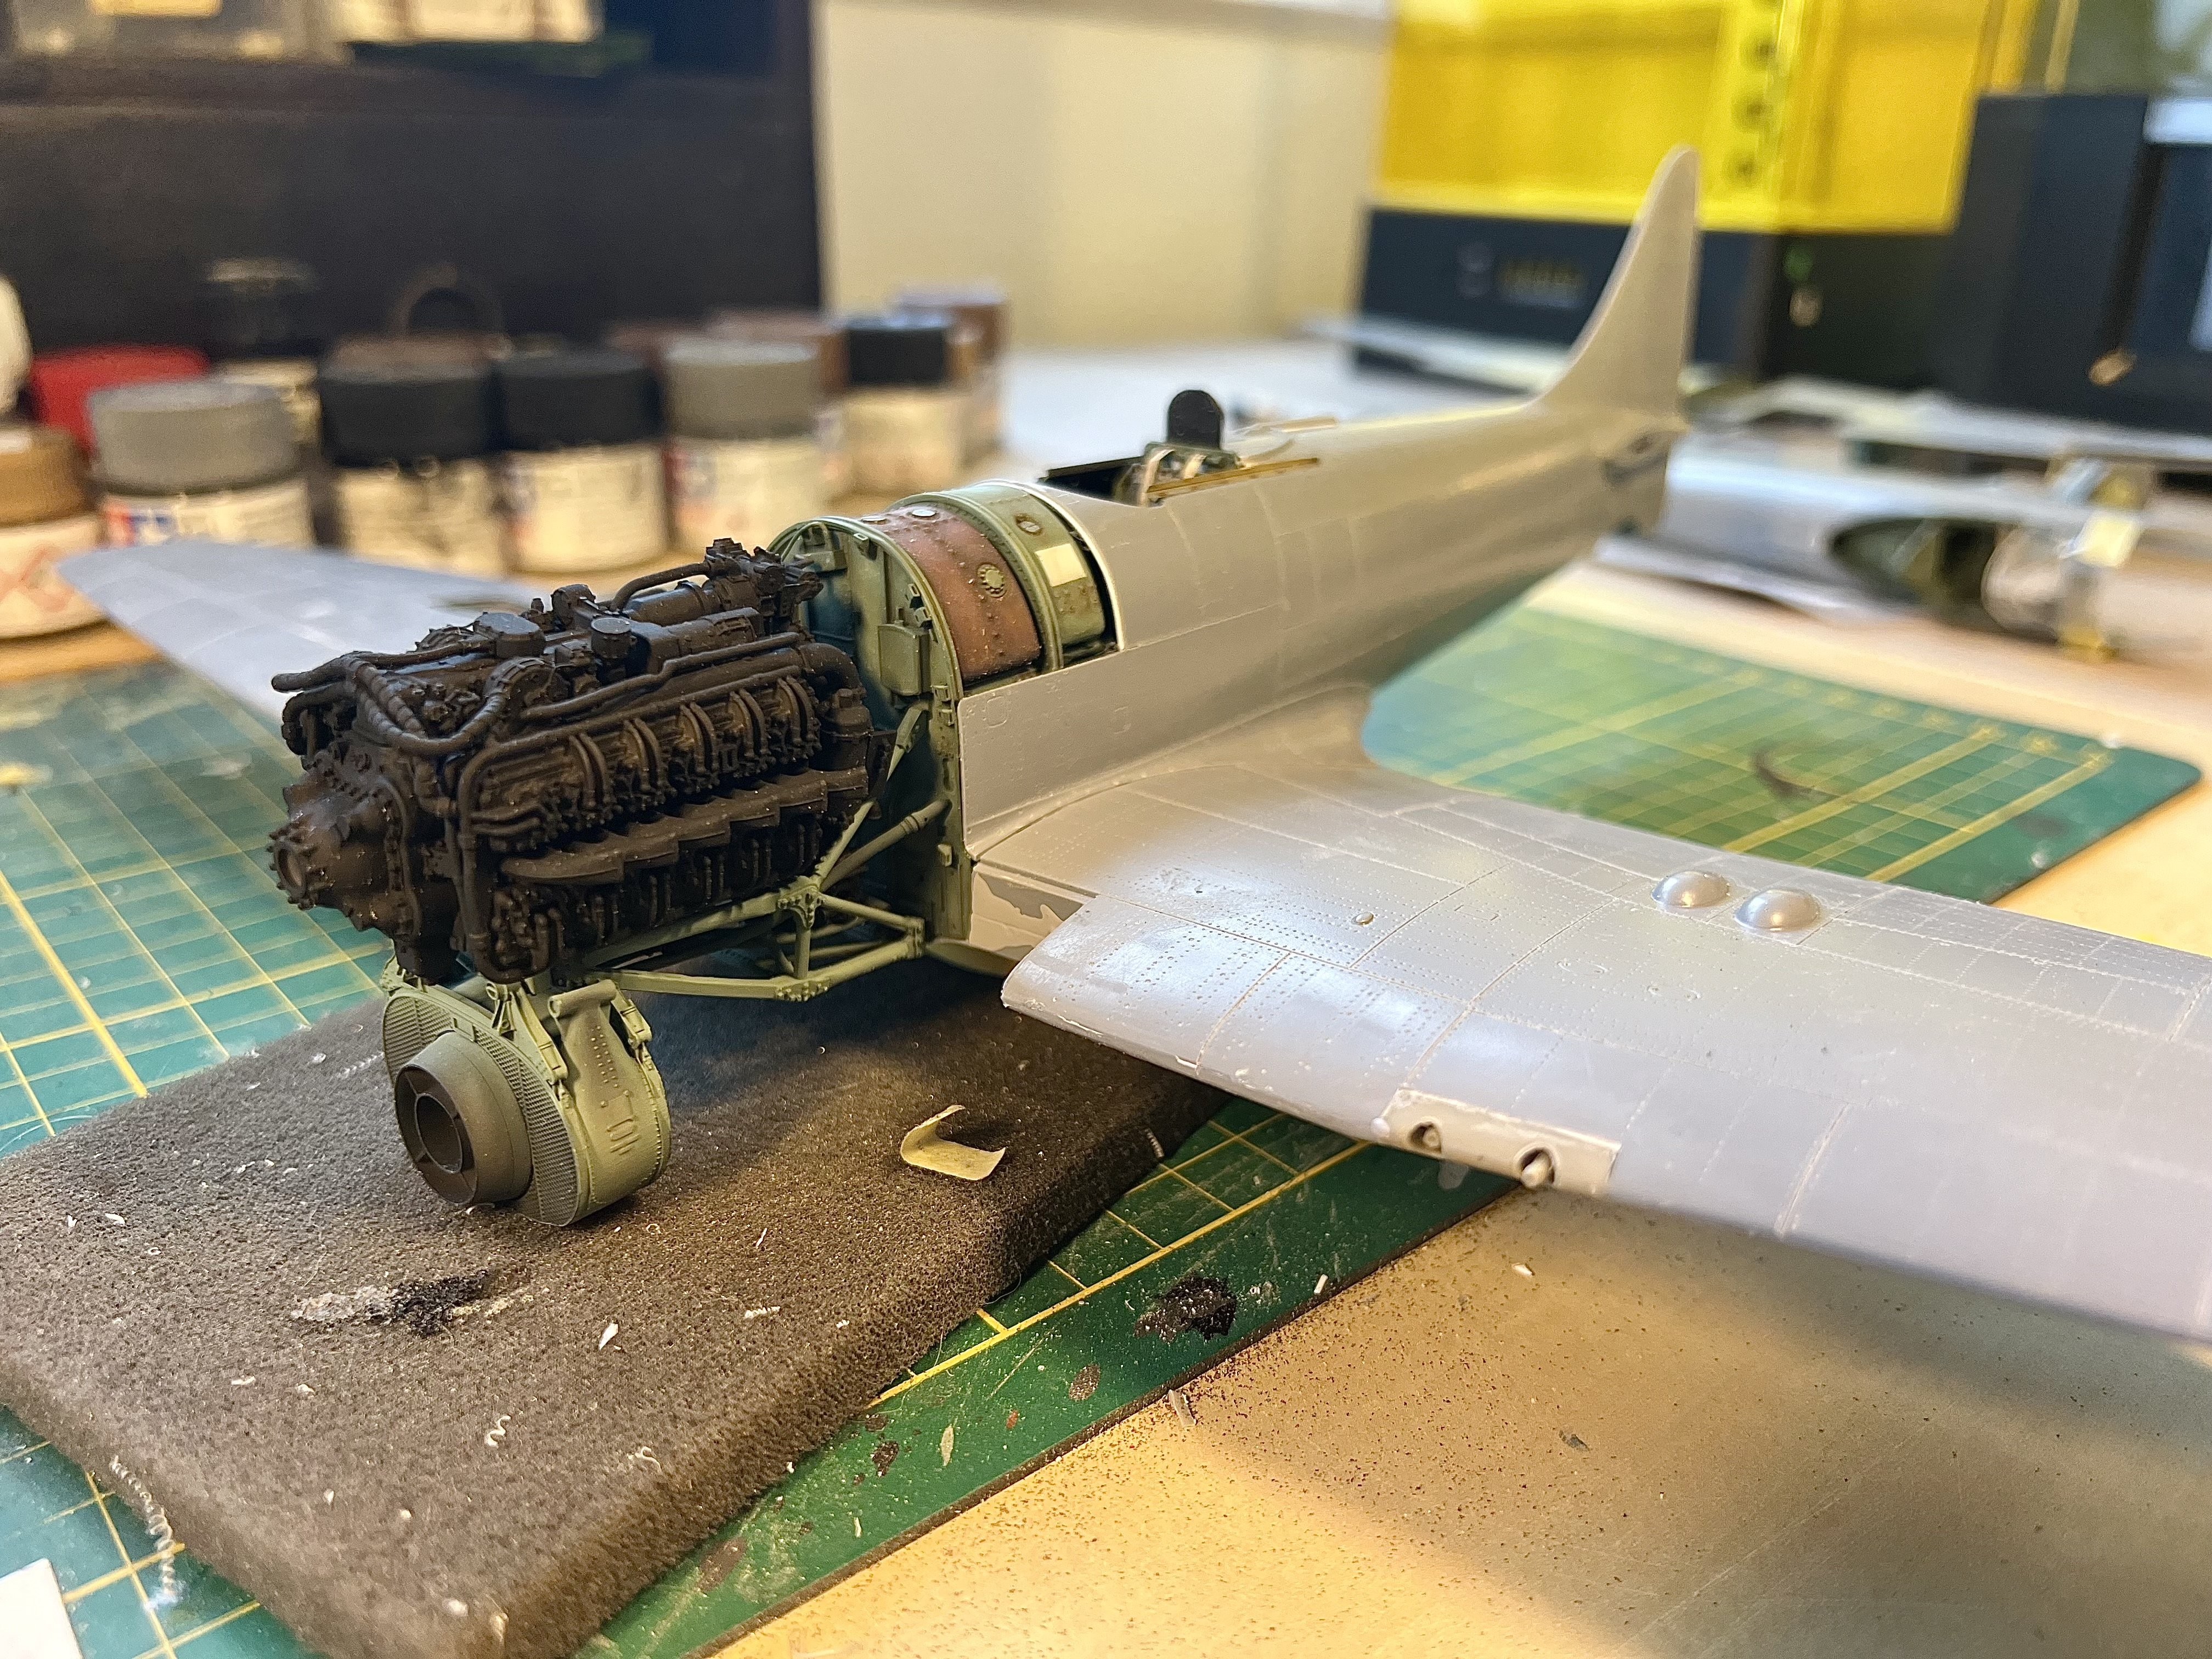
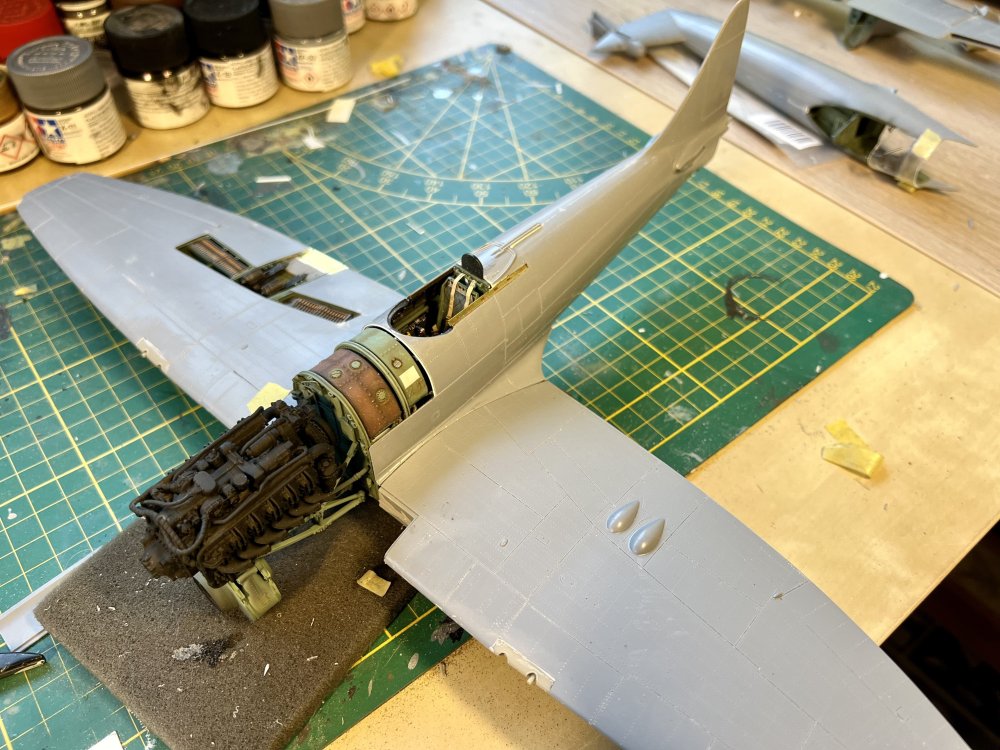
Dryfitting the engine. So far so good. Cees warned me for gulwings if the pit and fuse pushed the wings apart. You see this often with this model turning it into a Stuka. Glad that after a lot of sanding this is averted.
-
1/32 Hawker Tempest
JeroenPeters replied to JeroenPeters's topic in LSM 1/35 and Larger Work In Progress
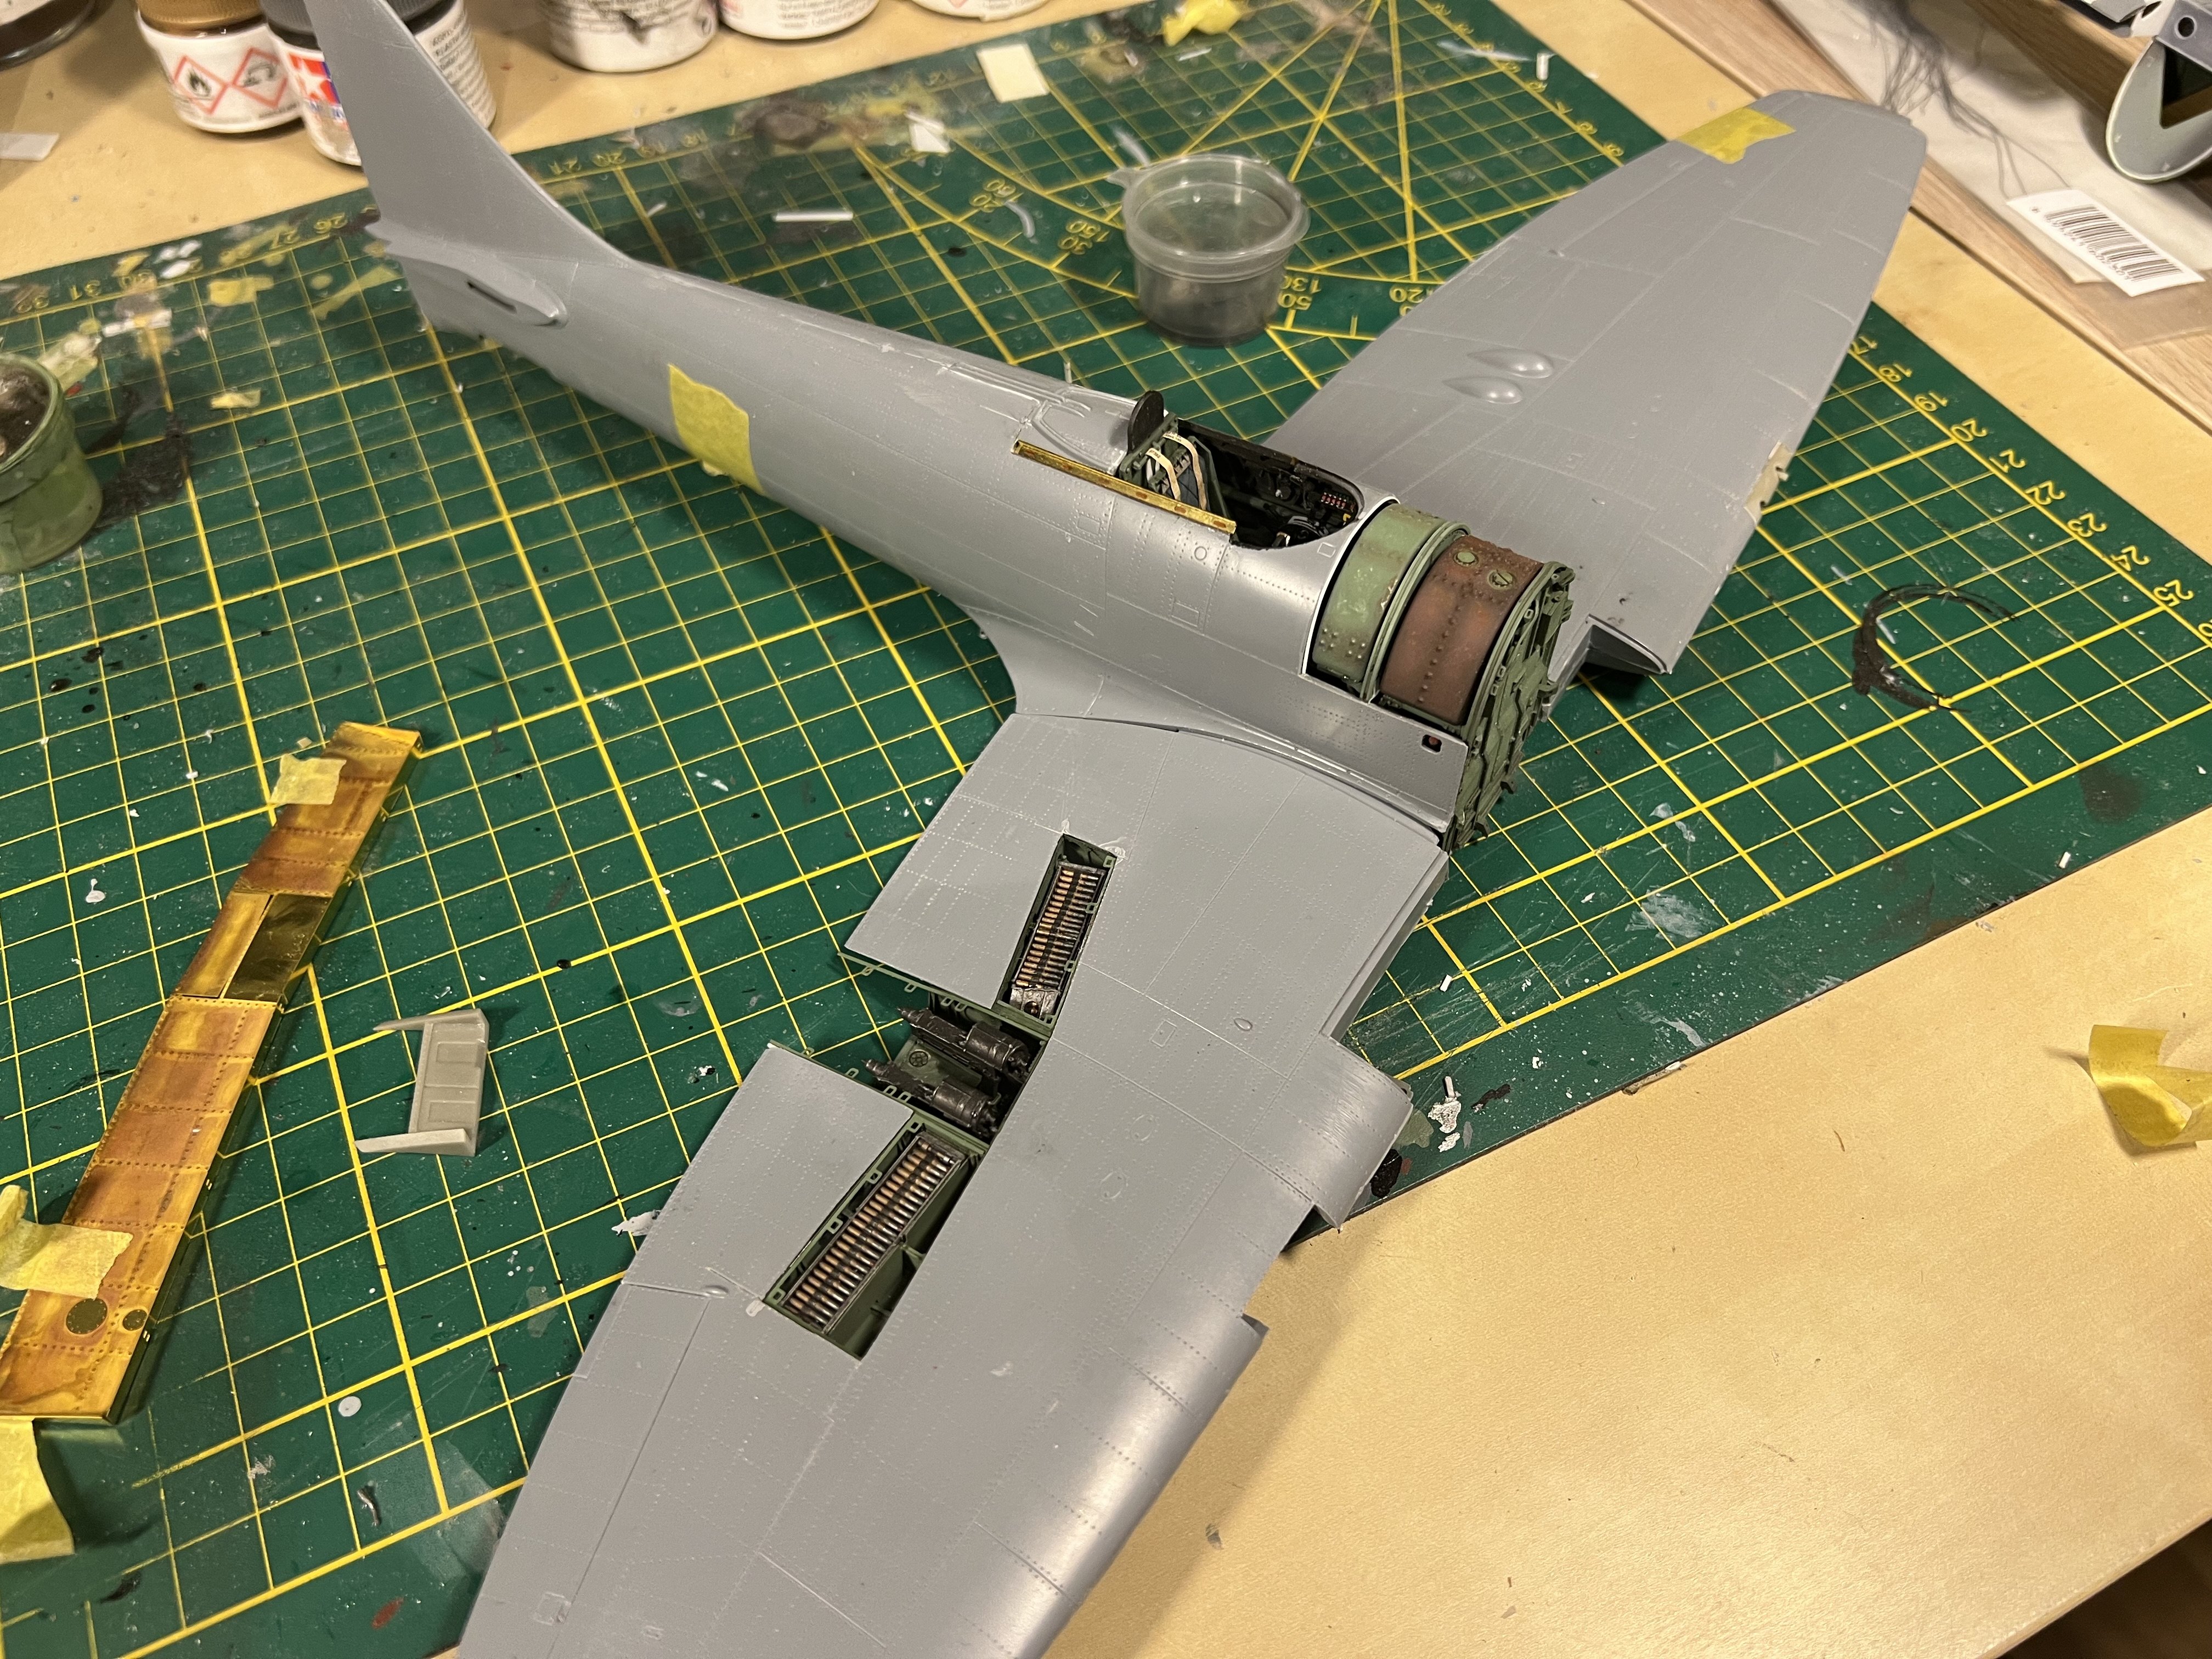
This is by no means shake and bake. A week of sanding, fitting and more sanding got to to a decent fit between fuse and wings.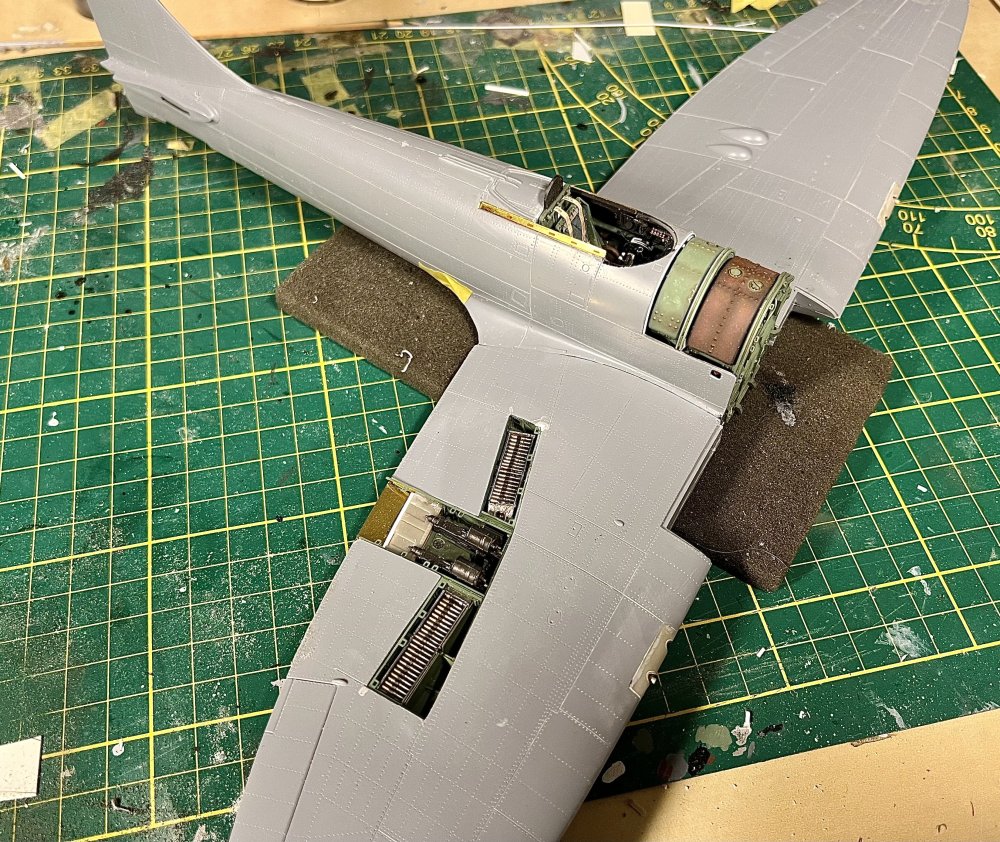
-
1/32 Hawker Tempest
JeroenPeters replied to JeroenPeters's topic in LSM 1/35 and Larger Work In Progress
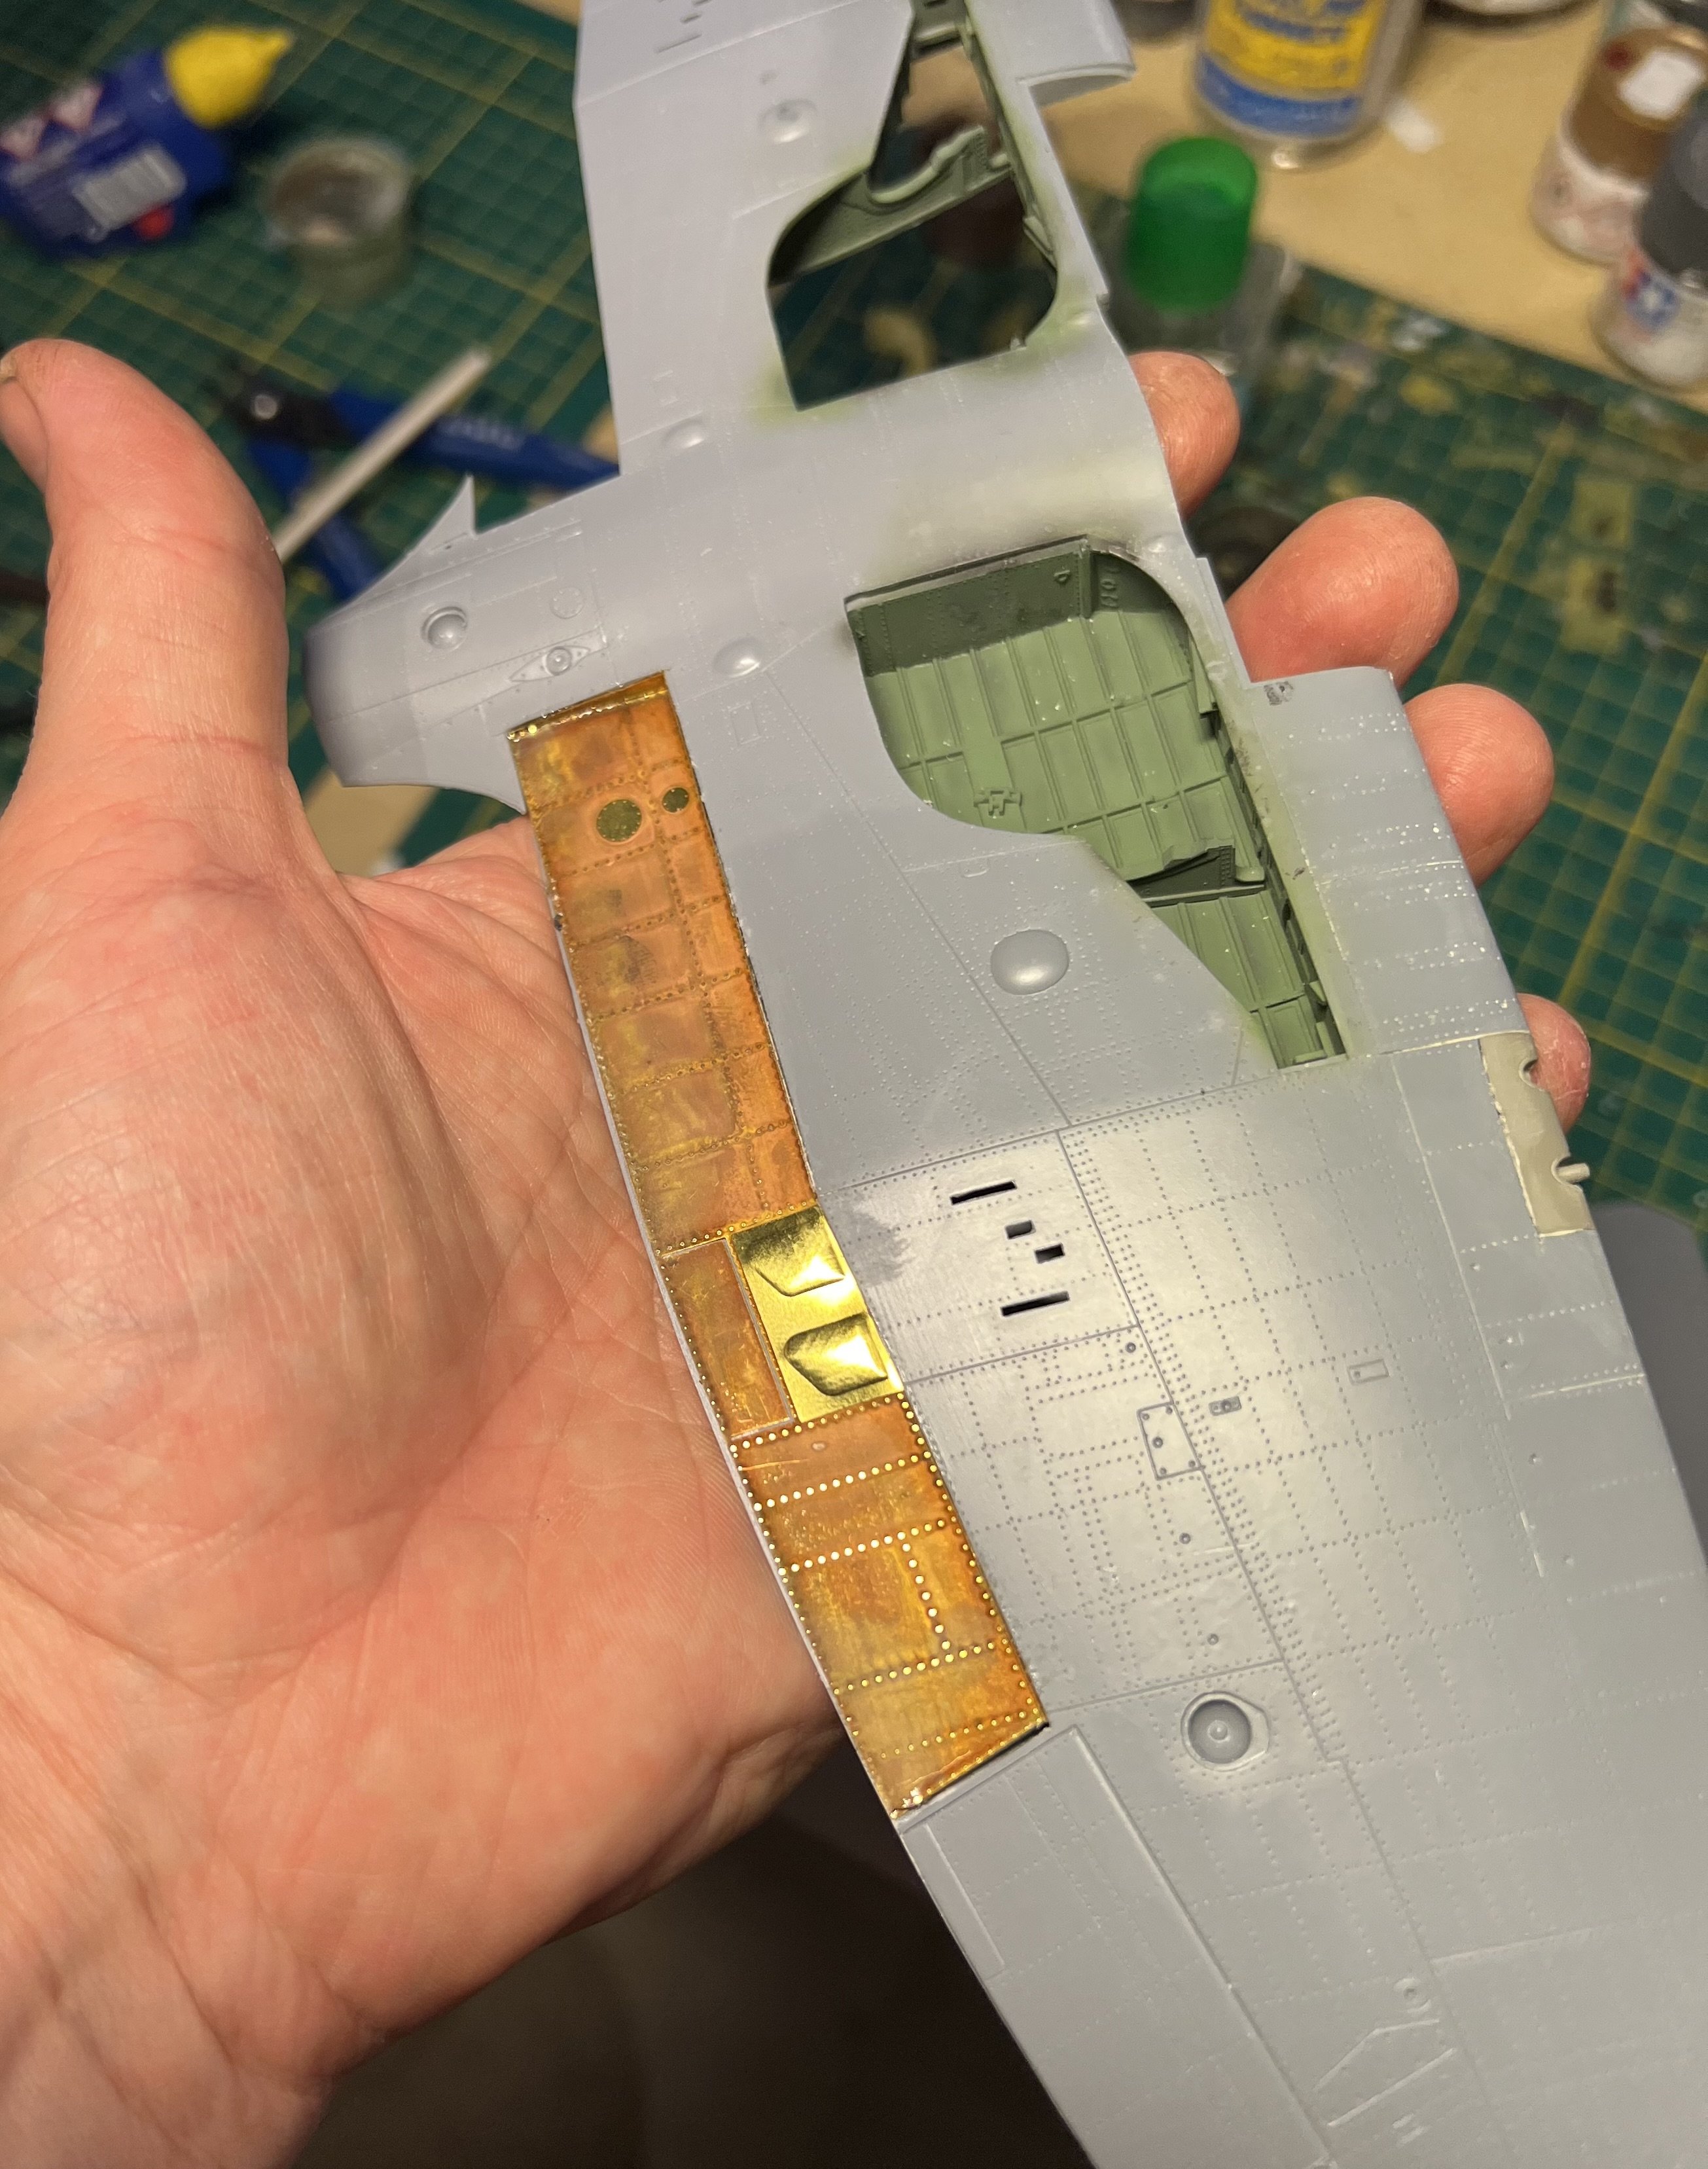
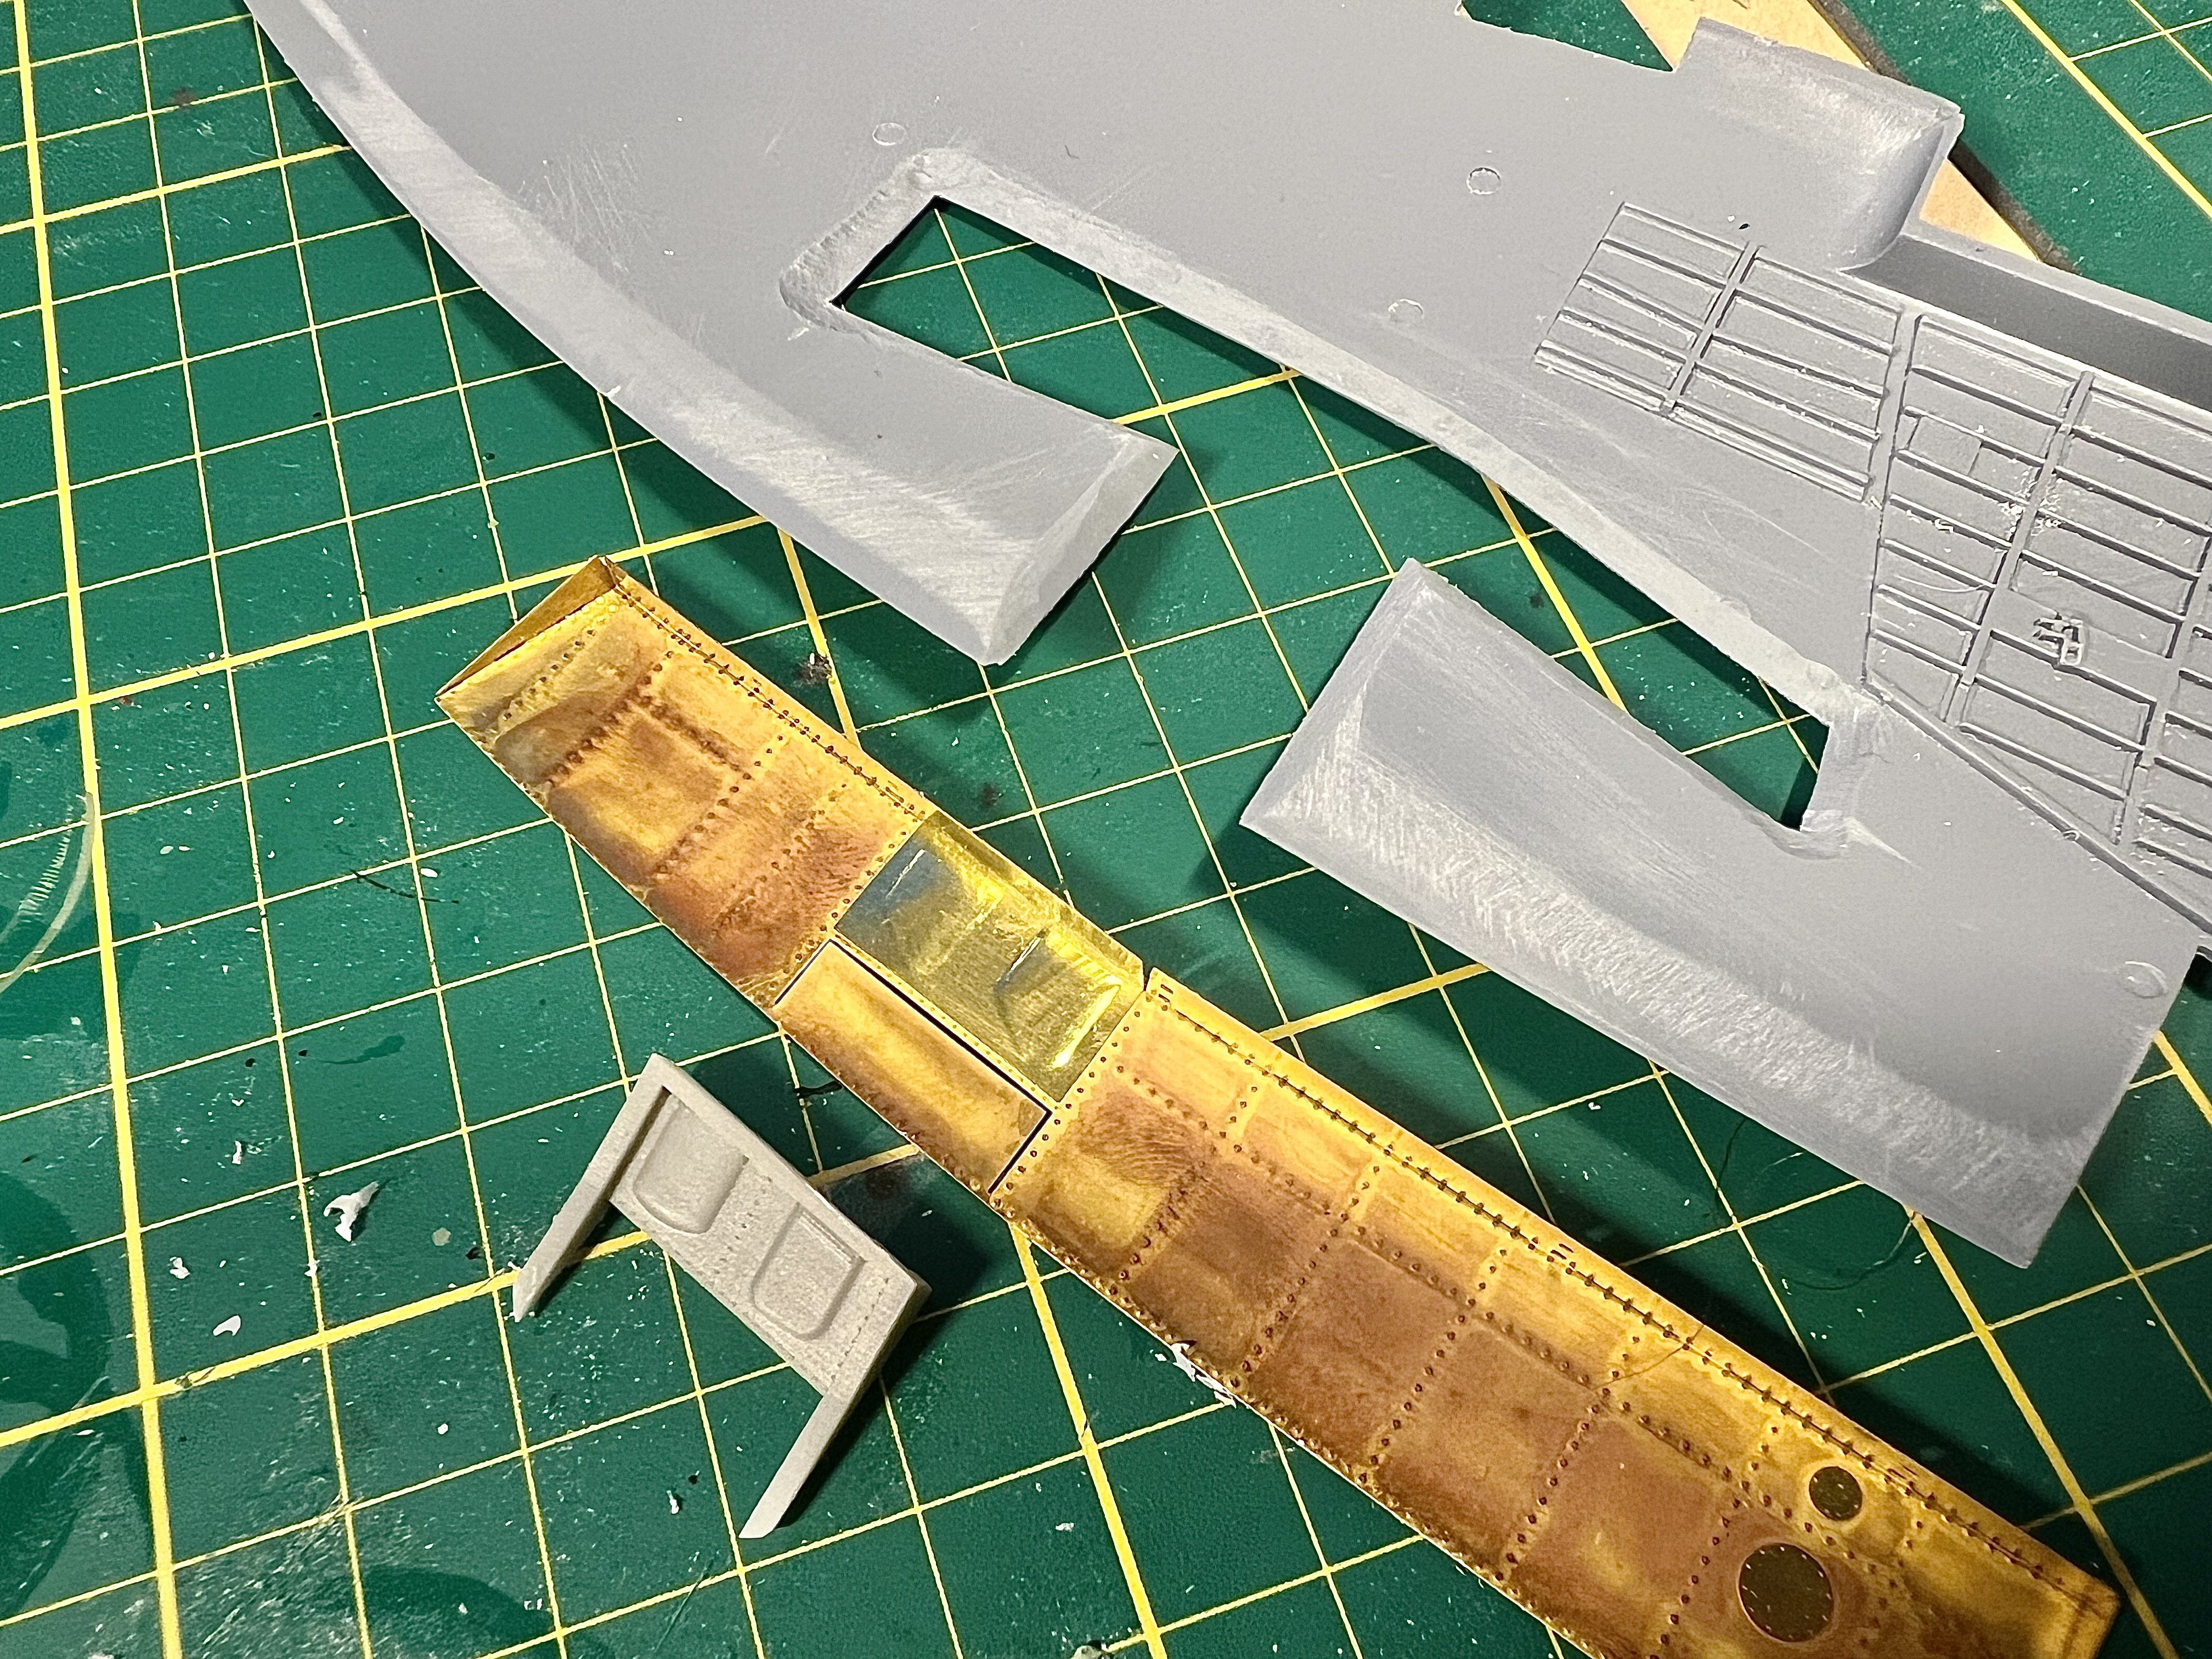
The photo etch flap under the armament bay. To obtain upper detail i’ll need to seriously thin the resin upper part.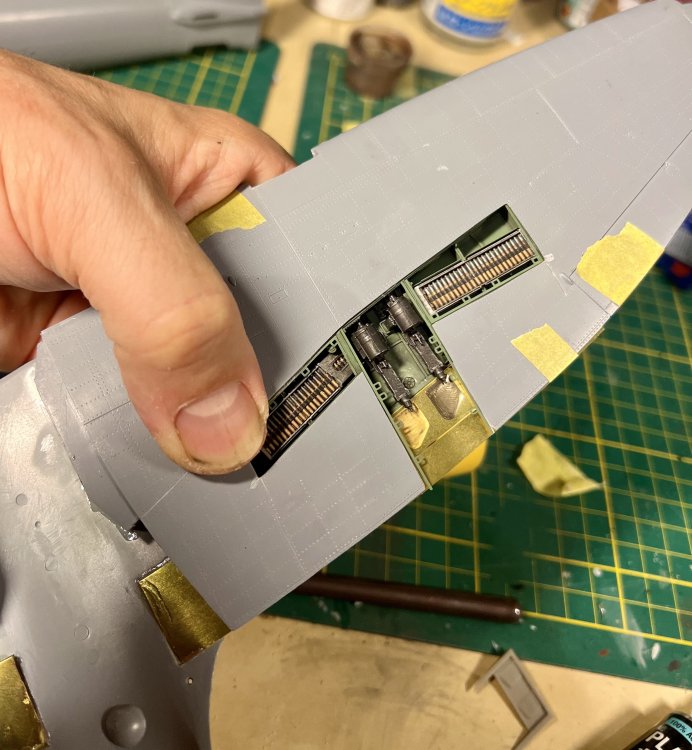
- 100 replies
-
- 10
-

-
1/32 Hawker Tempest
JeroenPeters replied to JeroenPeters's topic in LSM 1/35 and Larger Work In Progress
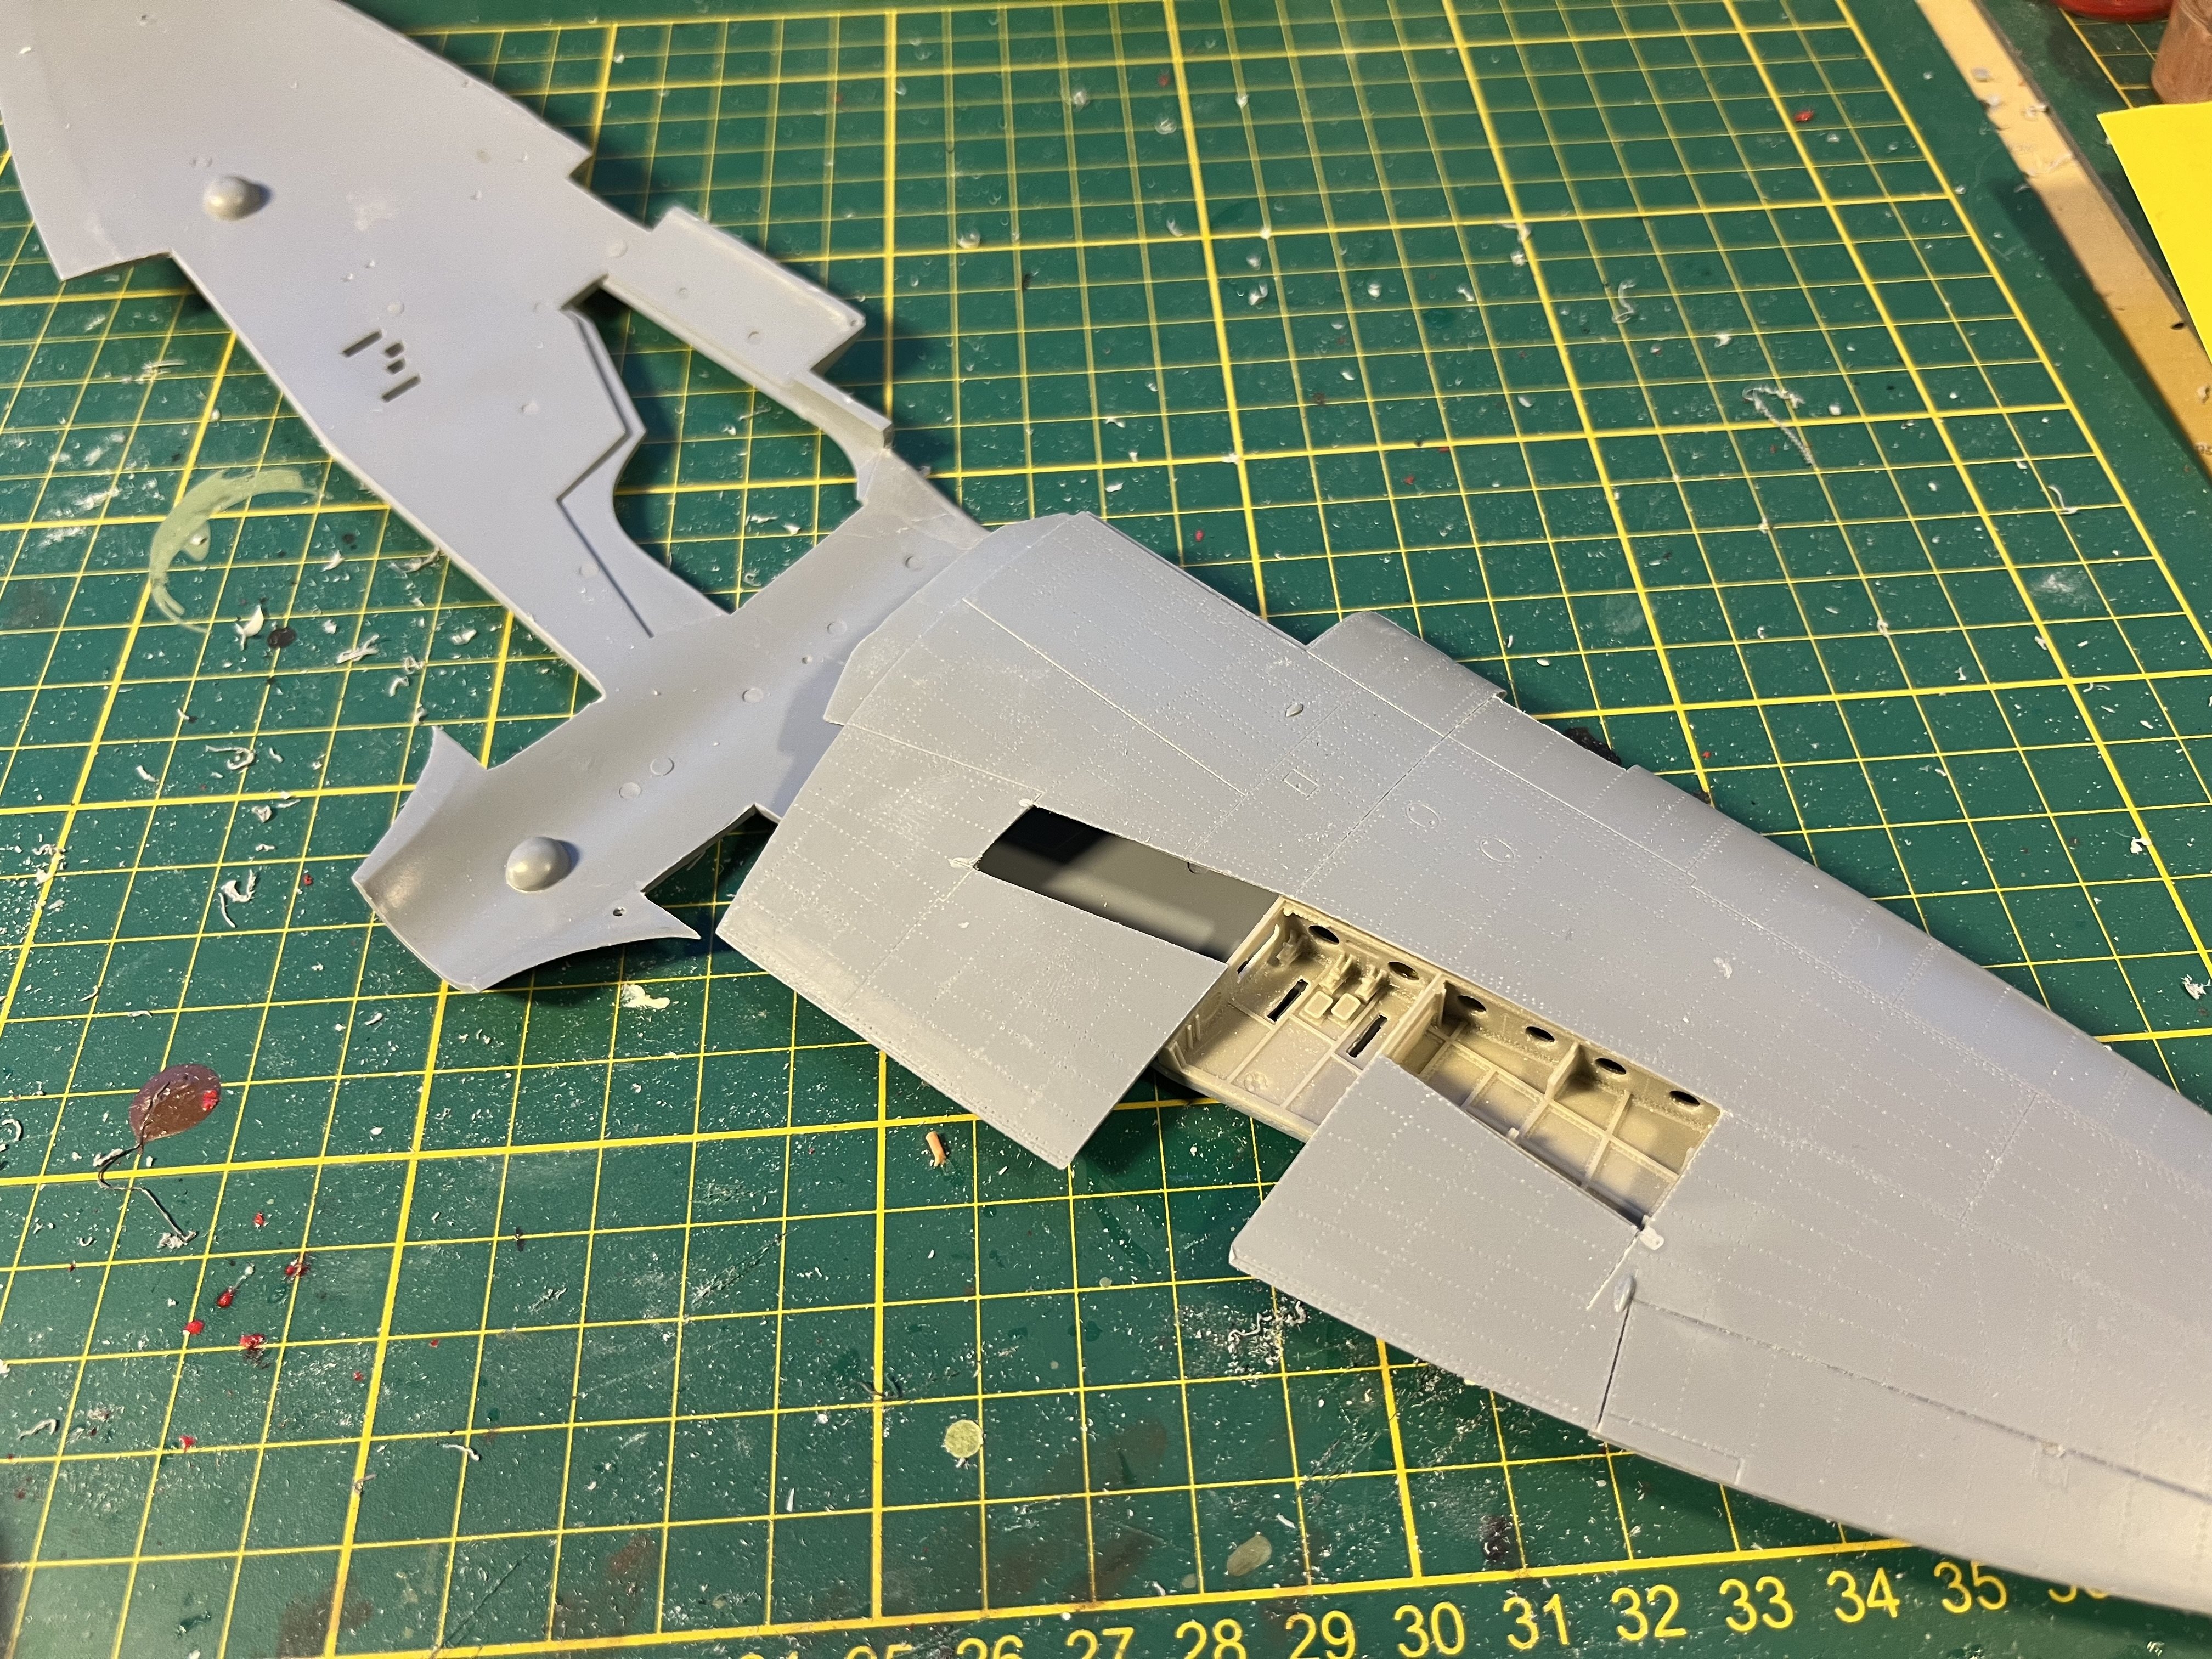
Fitting, sanding and fitting. Armament bay is glued into position.
-
1/32 Hawker Tempest
JeroenPeters replied to JeroenPeters's topic in LSM 1/35 and Larger Work In Progress
Started work on the PE flaps
-
1/32 Hawker Tempest
JeroenPeters replied to JeroenPeters's topic in LSM 1/35 and Larger Work In Progress
Inserted one of the resin CMK gunports.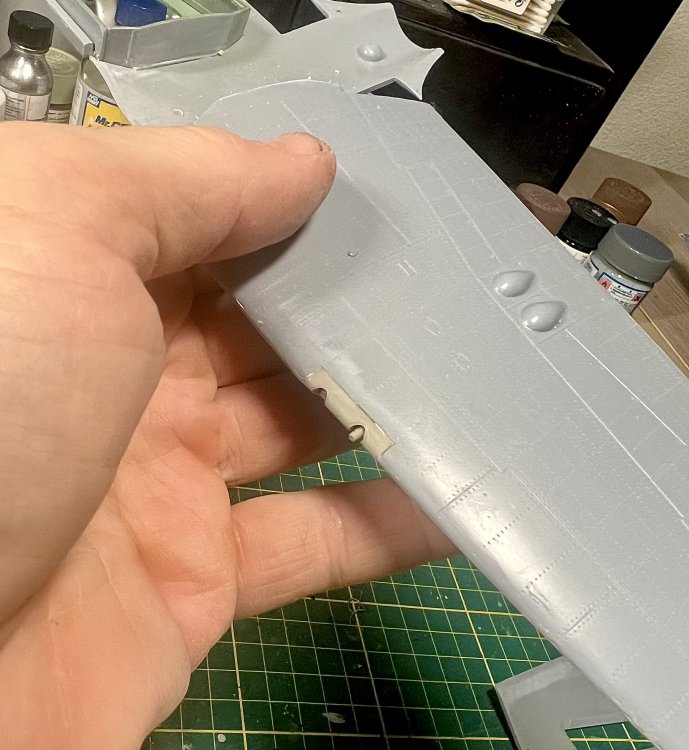
-
1/32 Hawker Tempest
JeroenPeters replied to JeroenPeters's topic in LSM 1/35 and Larger Work In Progress
Getting a better and better fit. Top left wing is glued on. The other will be tricky.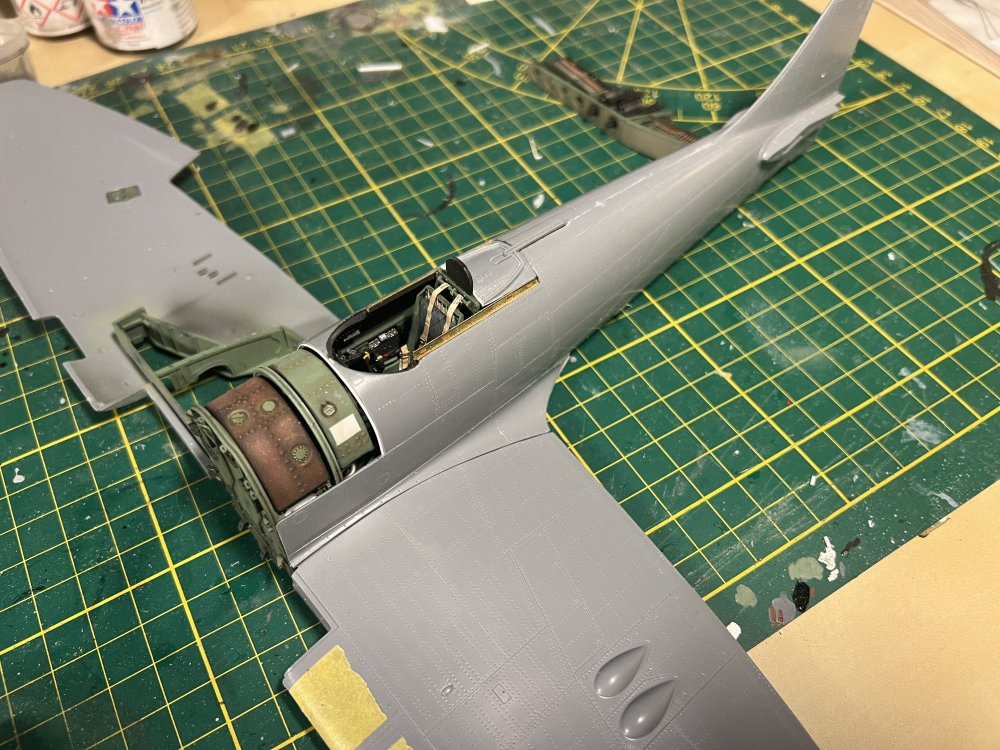
- 100 replies
-
- 10
-
-
1/32 Hawker Tempest
JeroenPeters replied to JeroenPeters's topic in LSM 1/35 and Larger Work In Progress
Getting there. A bit more sanding on the wheelbay sides to get the fuselage to fit.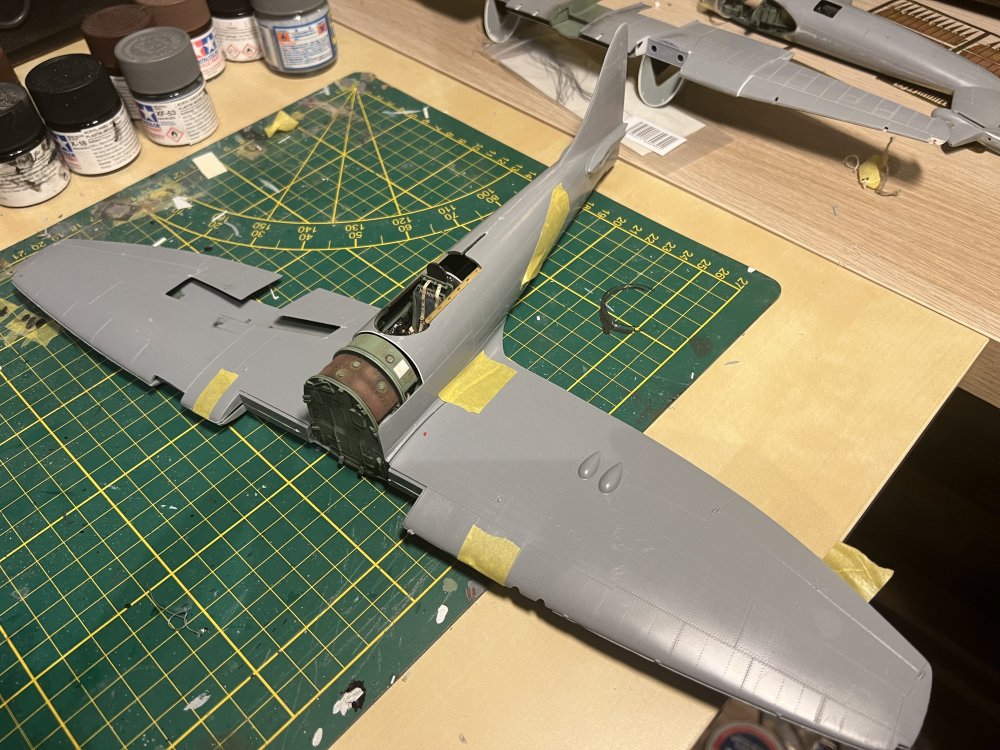
- 100 replies
-
- 10
-
-
1/32 Hawker Tempest
JeroenPeters replied to JeroenPeters's topic in LSM 1/35 and Larger Work In Progress
Painted the armament bay. Just because it’s impossible to do later. Now to the rear of this bay. It needs to be lower Photo etch part and upper cmk resin. This will require a lot of modification. We’ll see…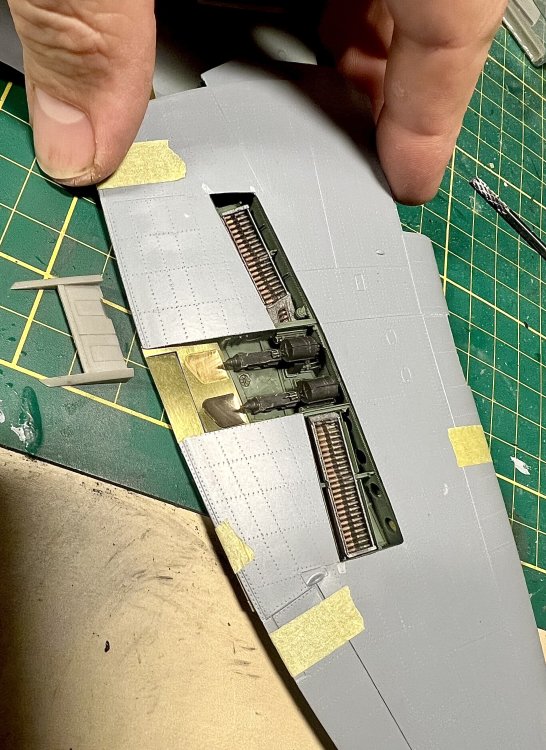
- 100 replies
-
- 10
-
-

-
Dragon Bf110E - Wolfgang Falck - Finished
JeroenPeters replied to denders's topic in LSM 1/35 and Larger Work In Progress
Lovely! Have this kit too in the stash with all the goodies. AND want to build Falck's mount as well. I have several autographs of him, signed photo's and even a hand written letter in which he writes to a pilot he shot down once. Will follow this! -
1/32 Hawker Tempest
JeroenPeters replied to JeroenPeters's topic in LSM 1/35 and Larger Work In Progress
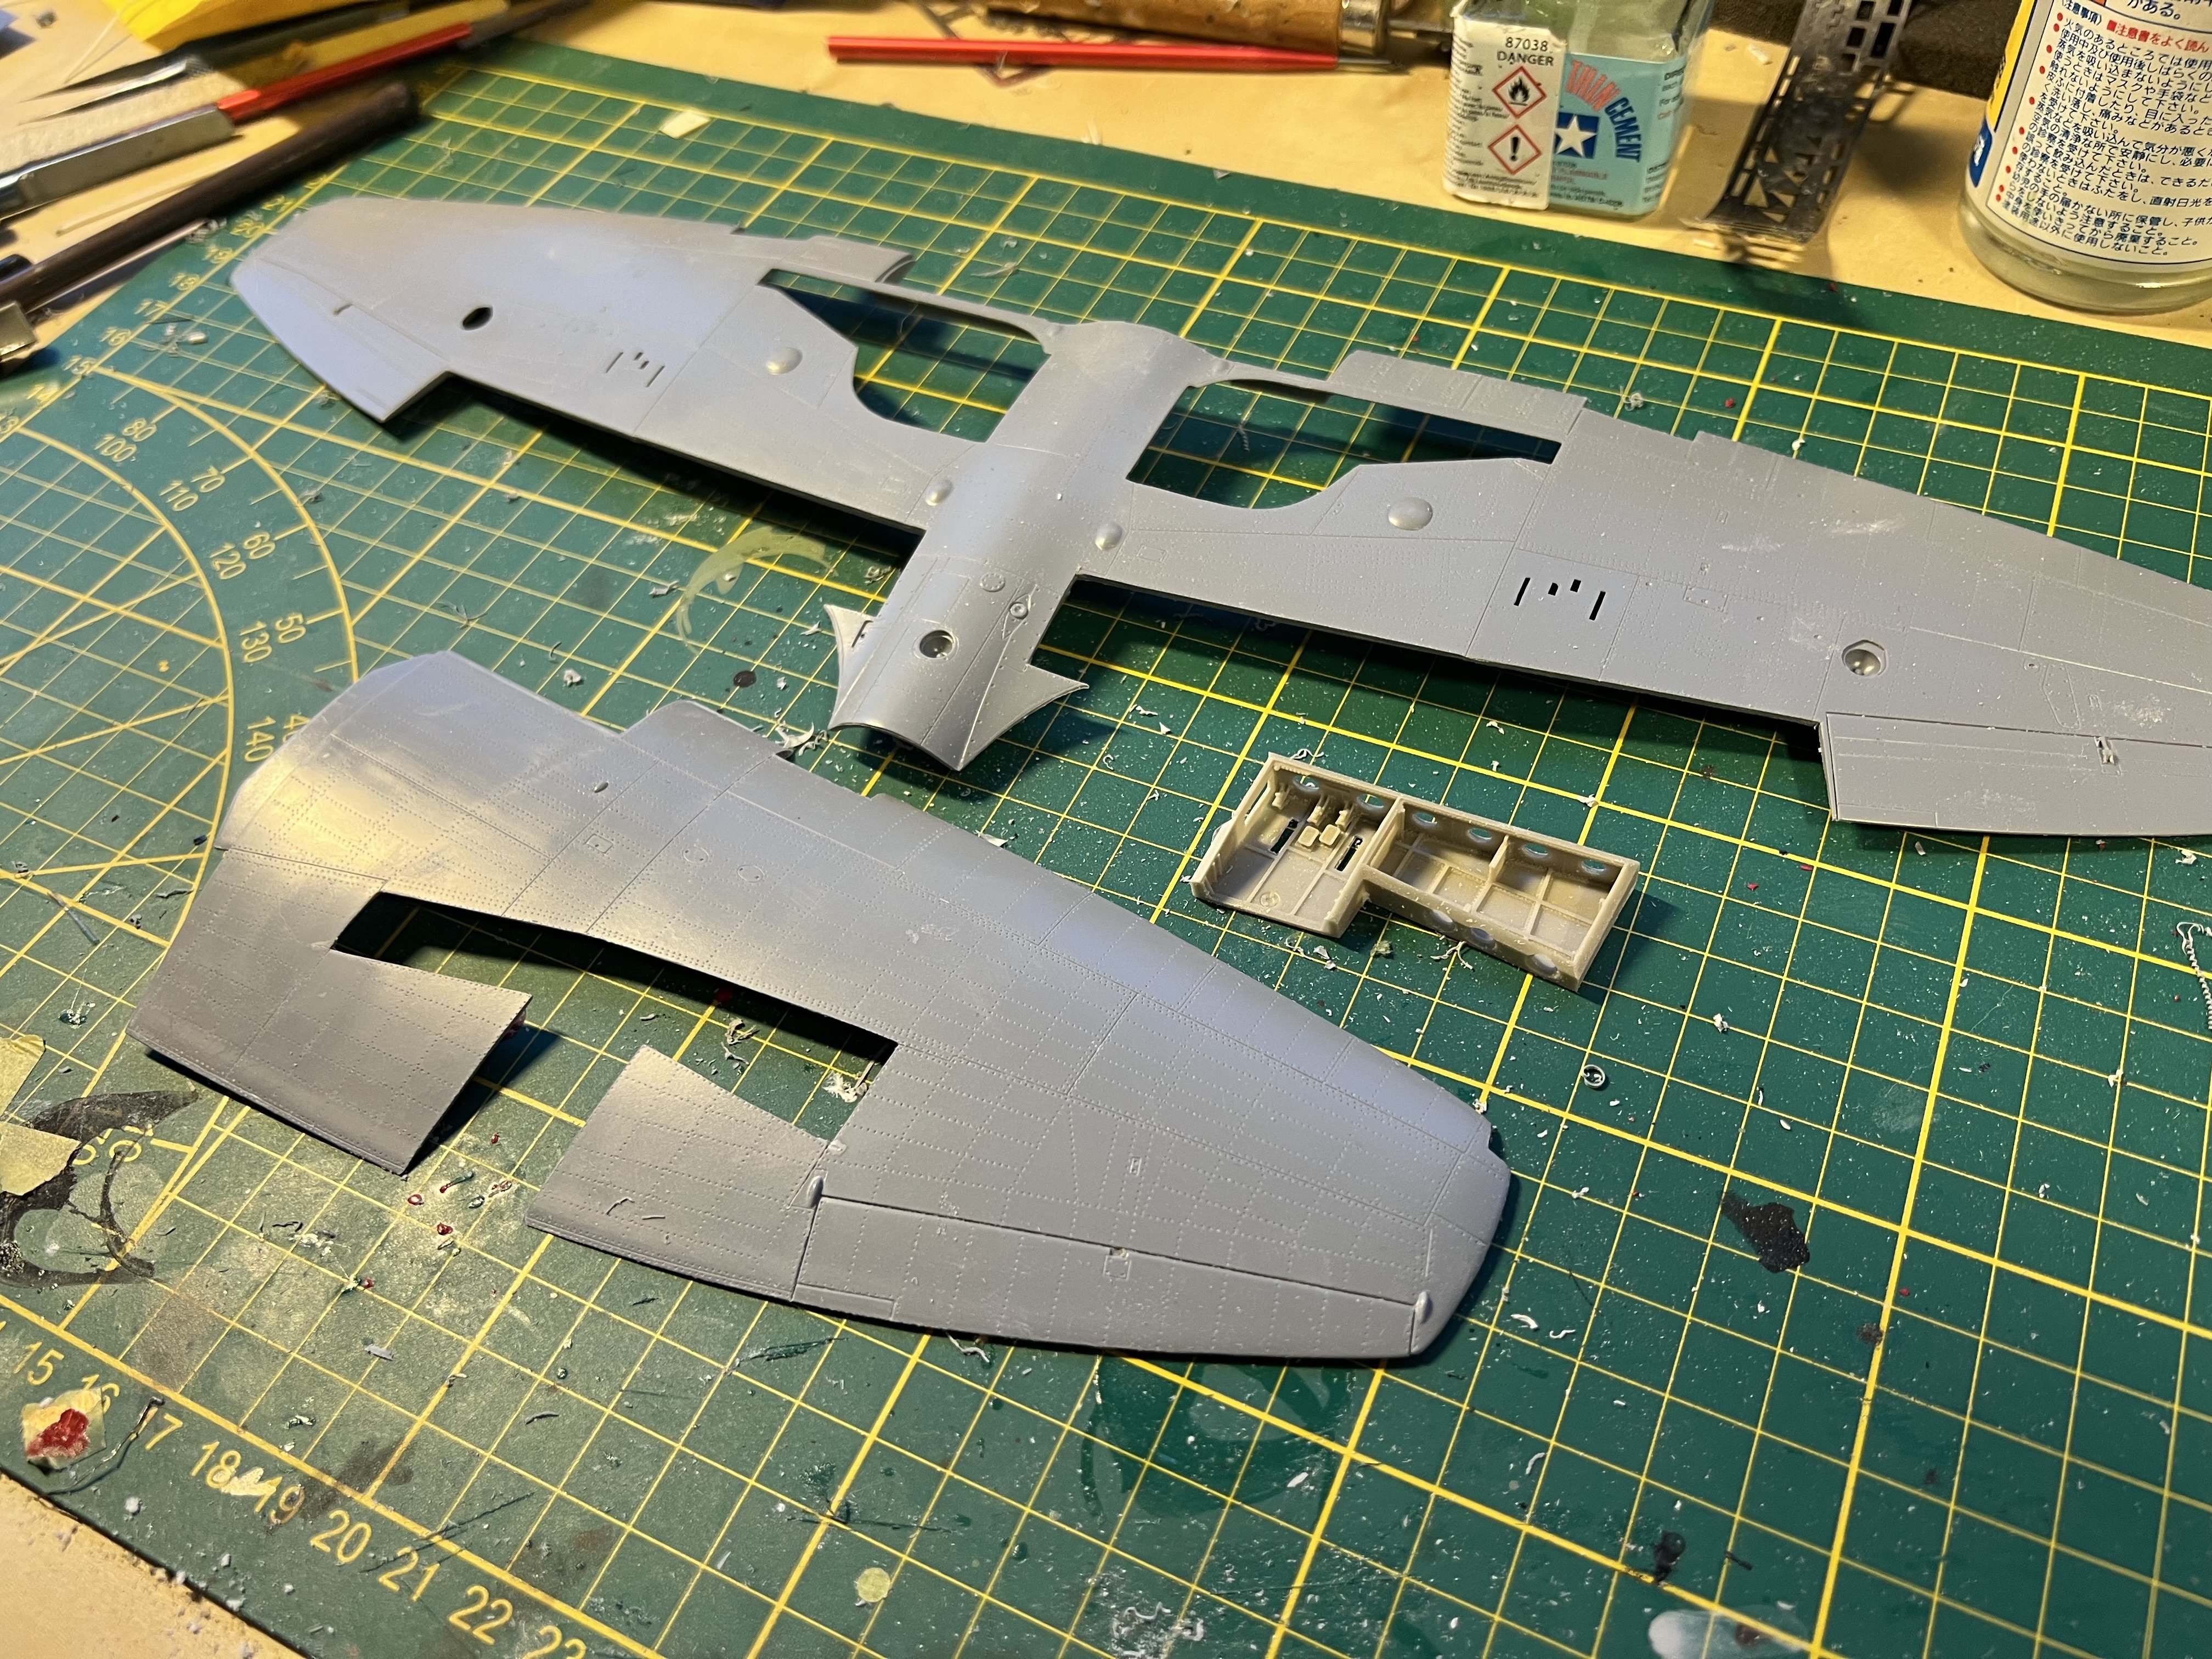
This is where I need to pay attention. The cmk armament set was not designed to go with the eduard flaps. The rear of the armament set is also modelled in the pe flap. So either cut that section from the flap or sand down the bottom resin detail and join the two. Tricky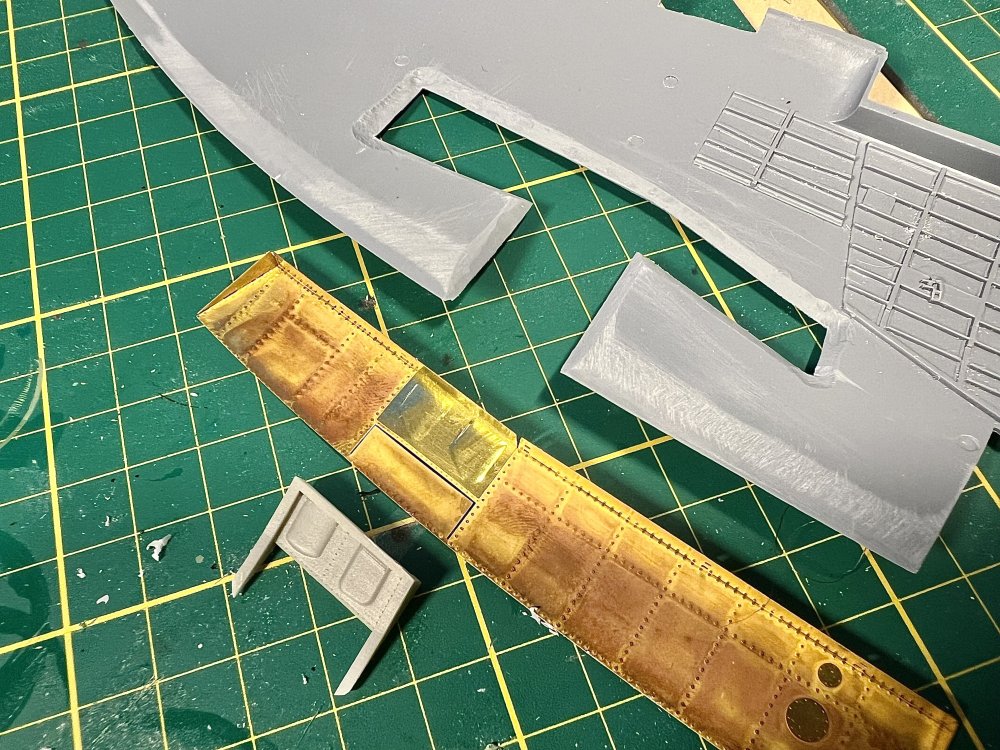
-
1/32 Hawker Tempest
JeroenPeters replied to JeroenPeters's topic in LSM 1/35 and Larger Work In Progress
Added a shim to the front of the pit.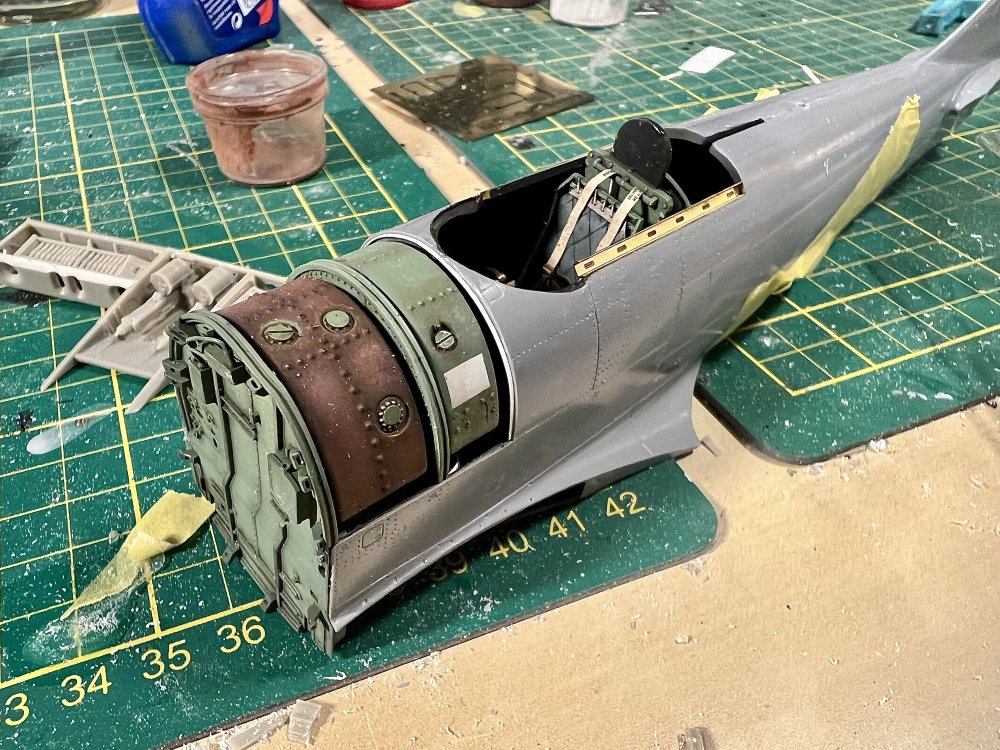
-
1/32 Hawker Tempest
JeroenPeters replied to JeroenPeters's topic in LSM 1/35 and Larger Work In Progress
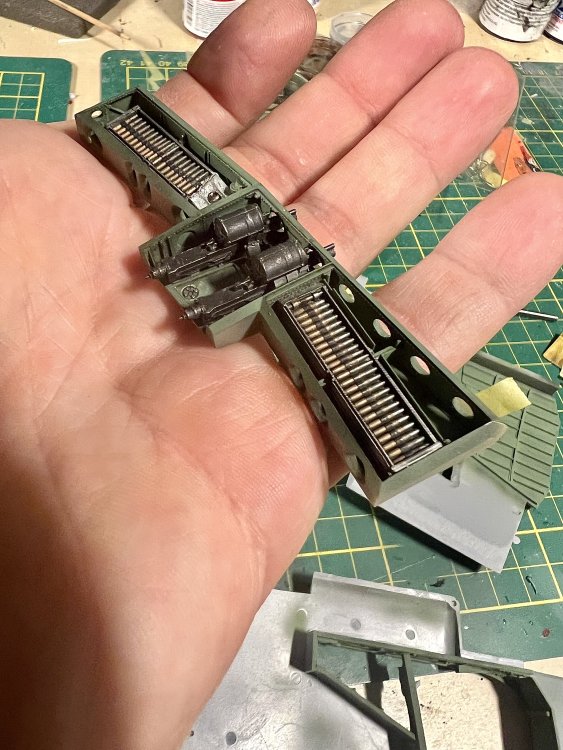
First work on the armament bay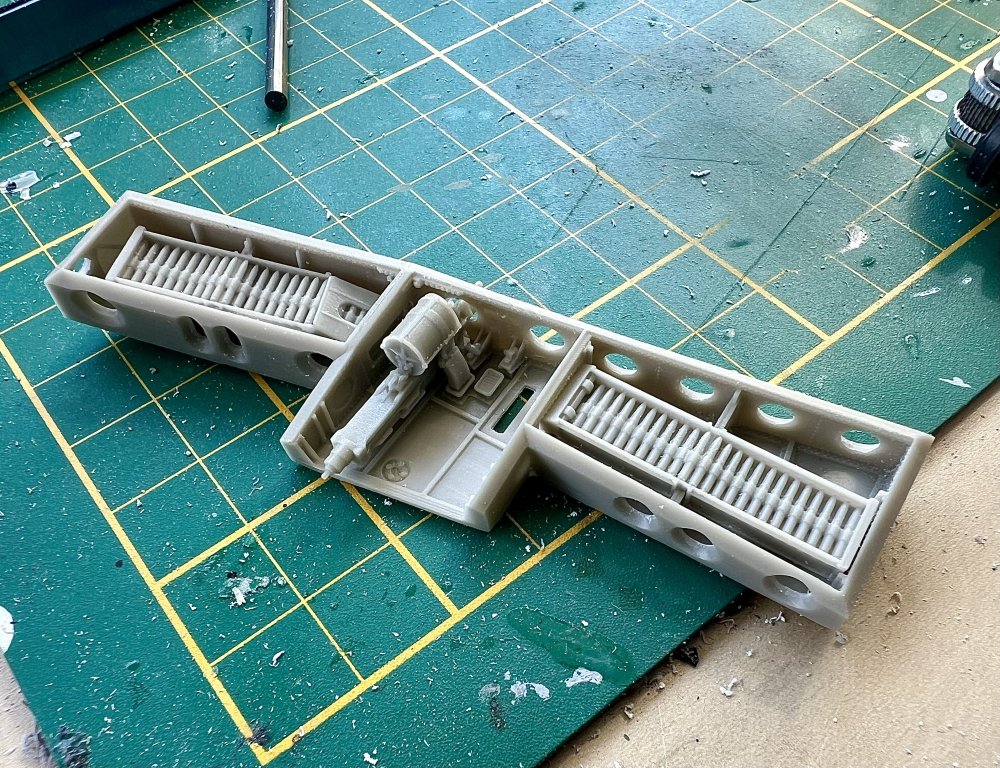
- 100 replies
-
- 10
-
-
1/32 Hawker Tempest
JeroenPeters replied to JeroenPeters's topic in LSM 1/35 and Larger Work In Progress
Spent the day cutting and sanding the armament bay and flaps. Most work goes into the thinning of the plastic around the edges.

-
1/32 Hawker Tempest
JeroenPeters replied to JeroenPeters's topic in LSM 1/35 and Larger Work In Progress
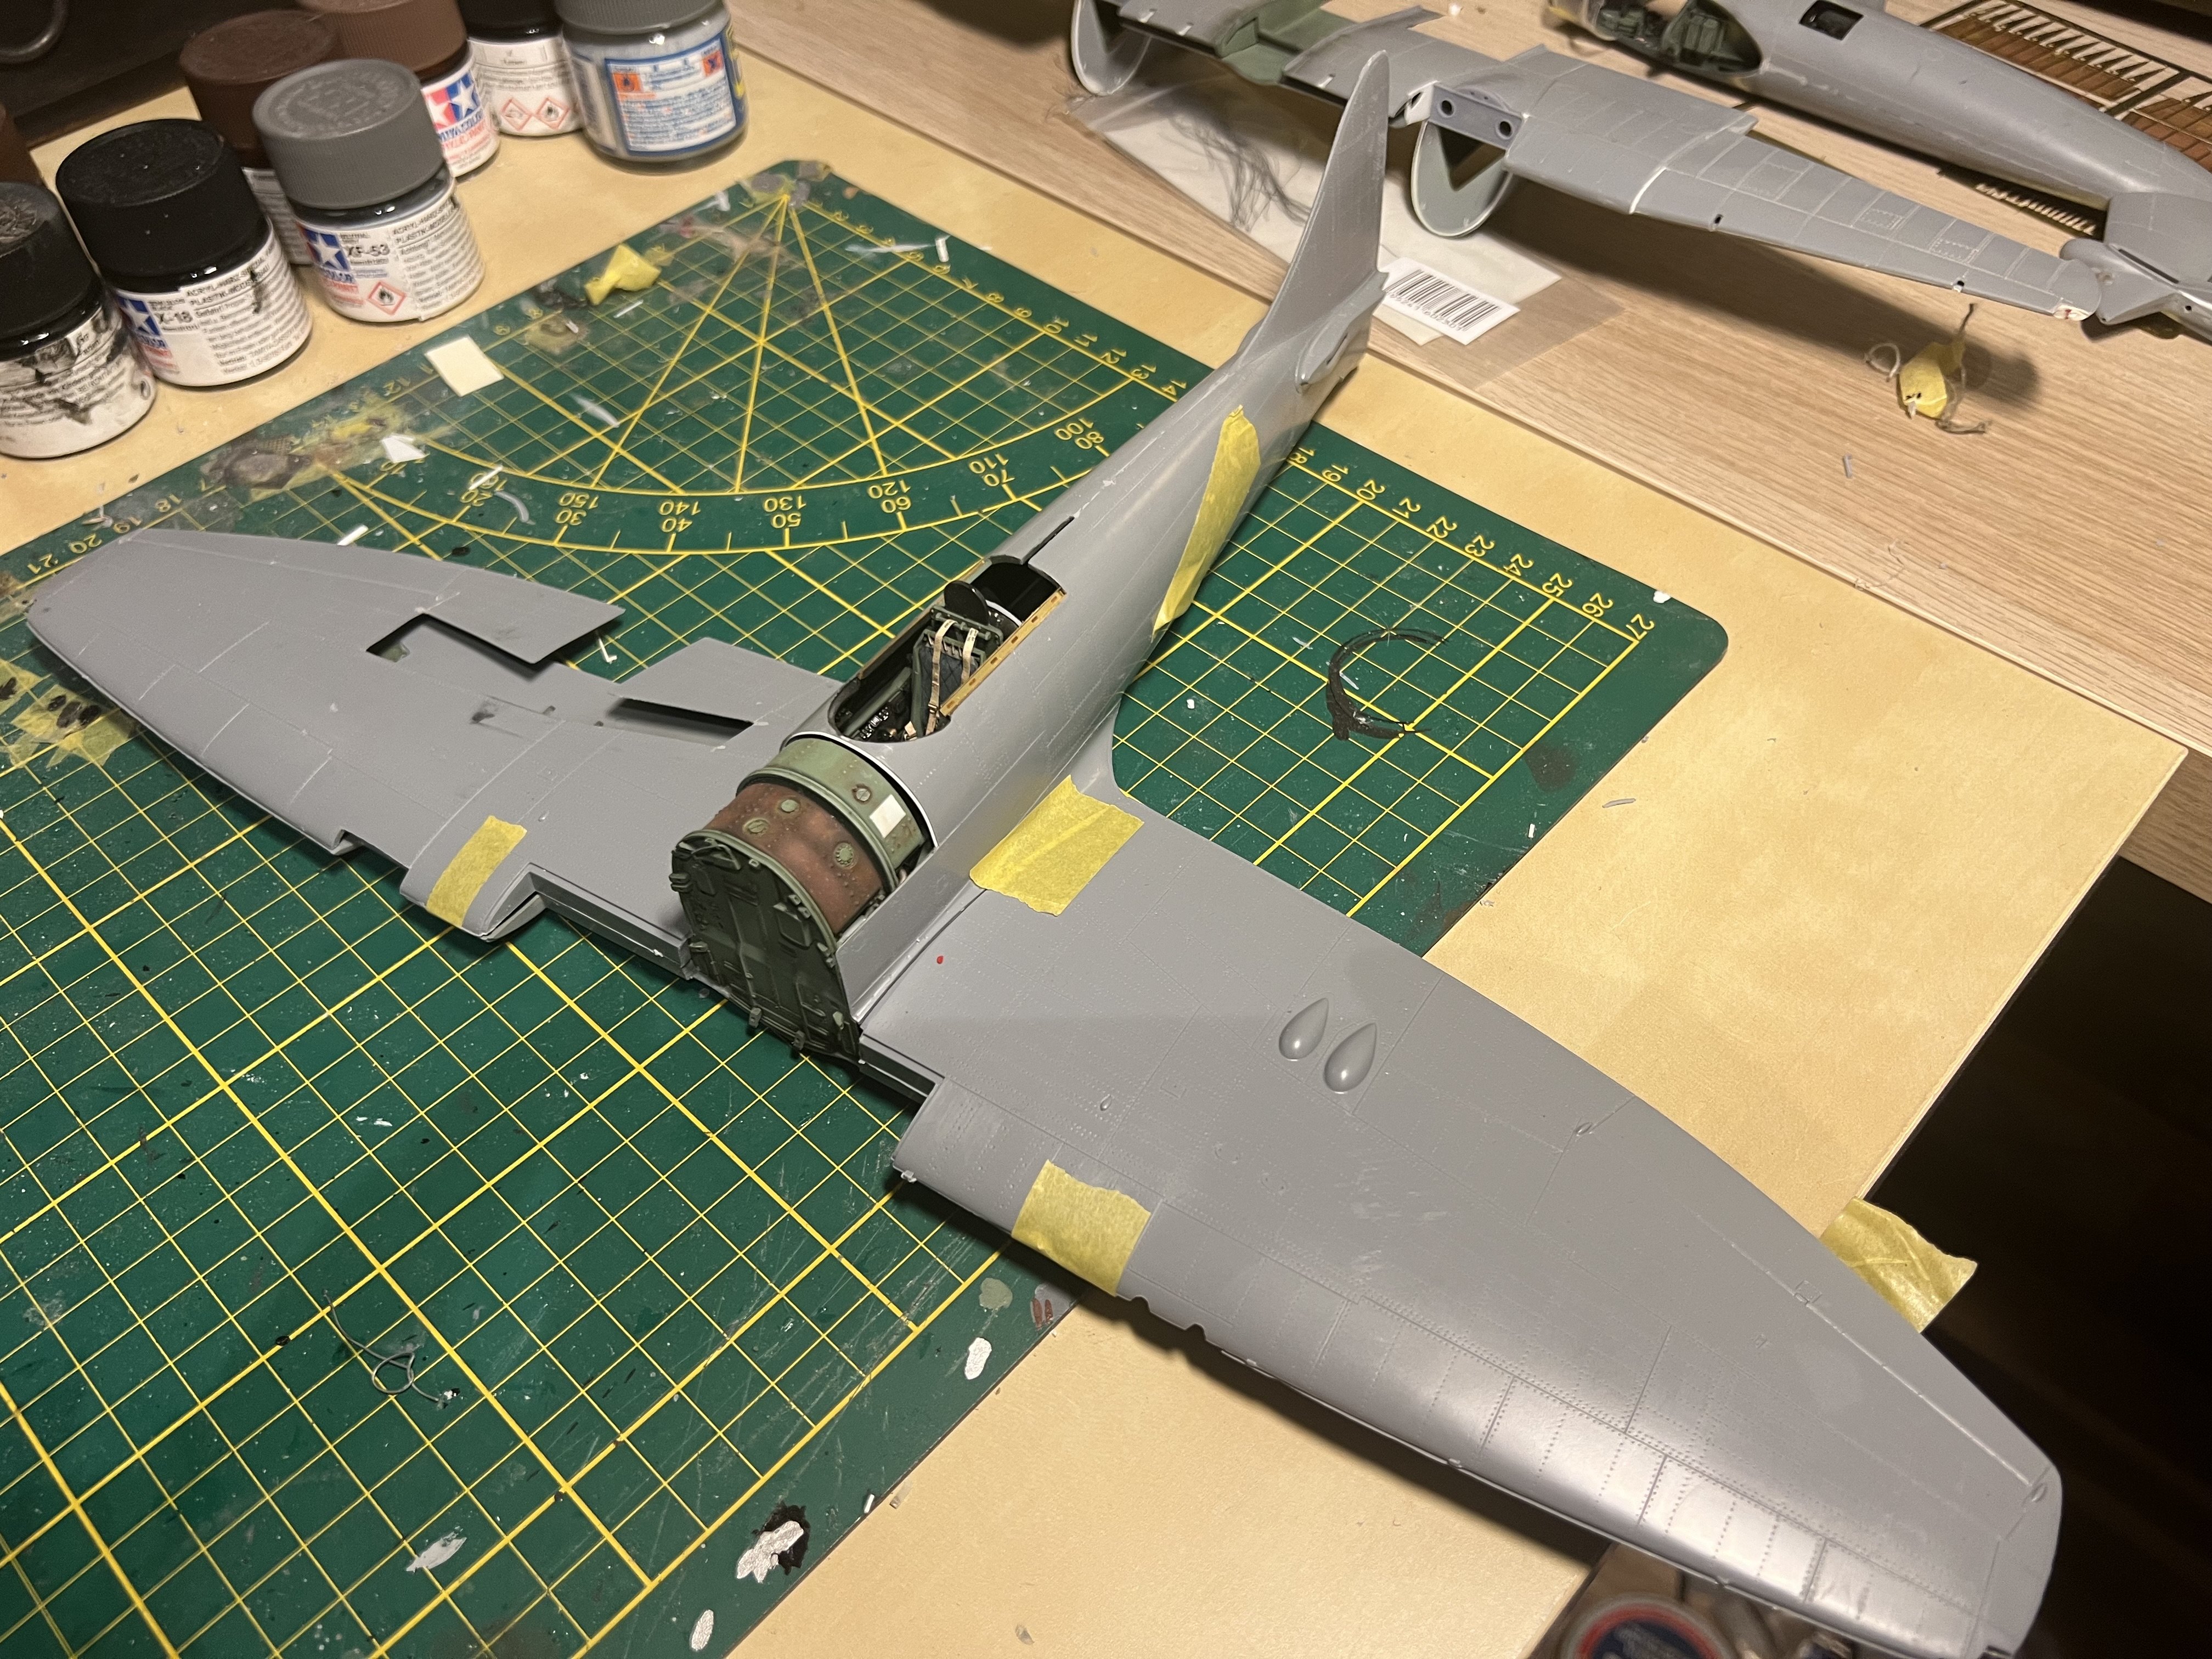
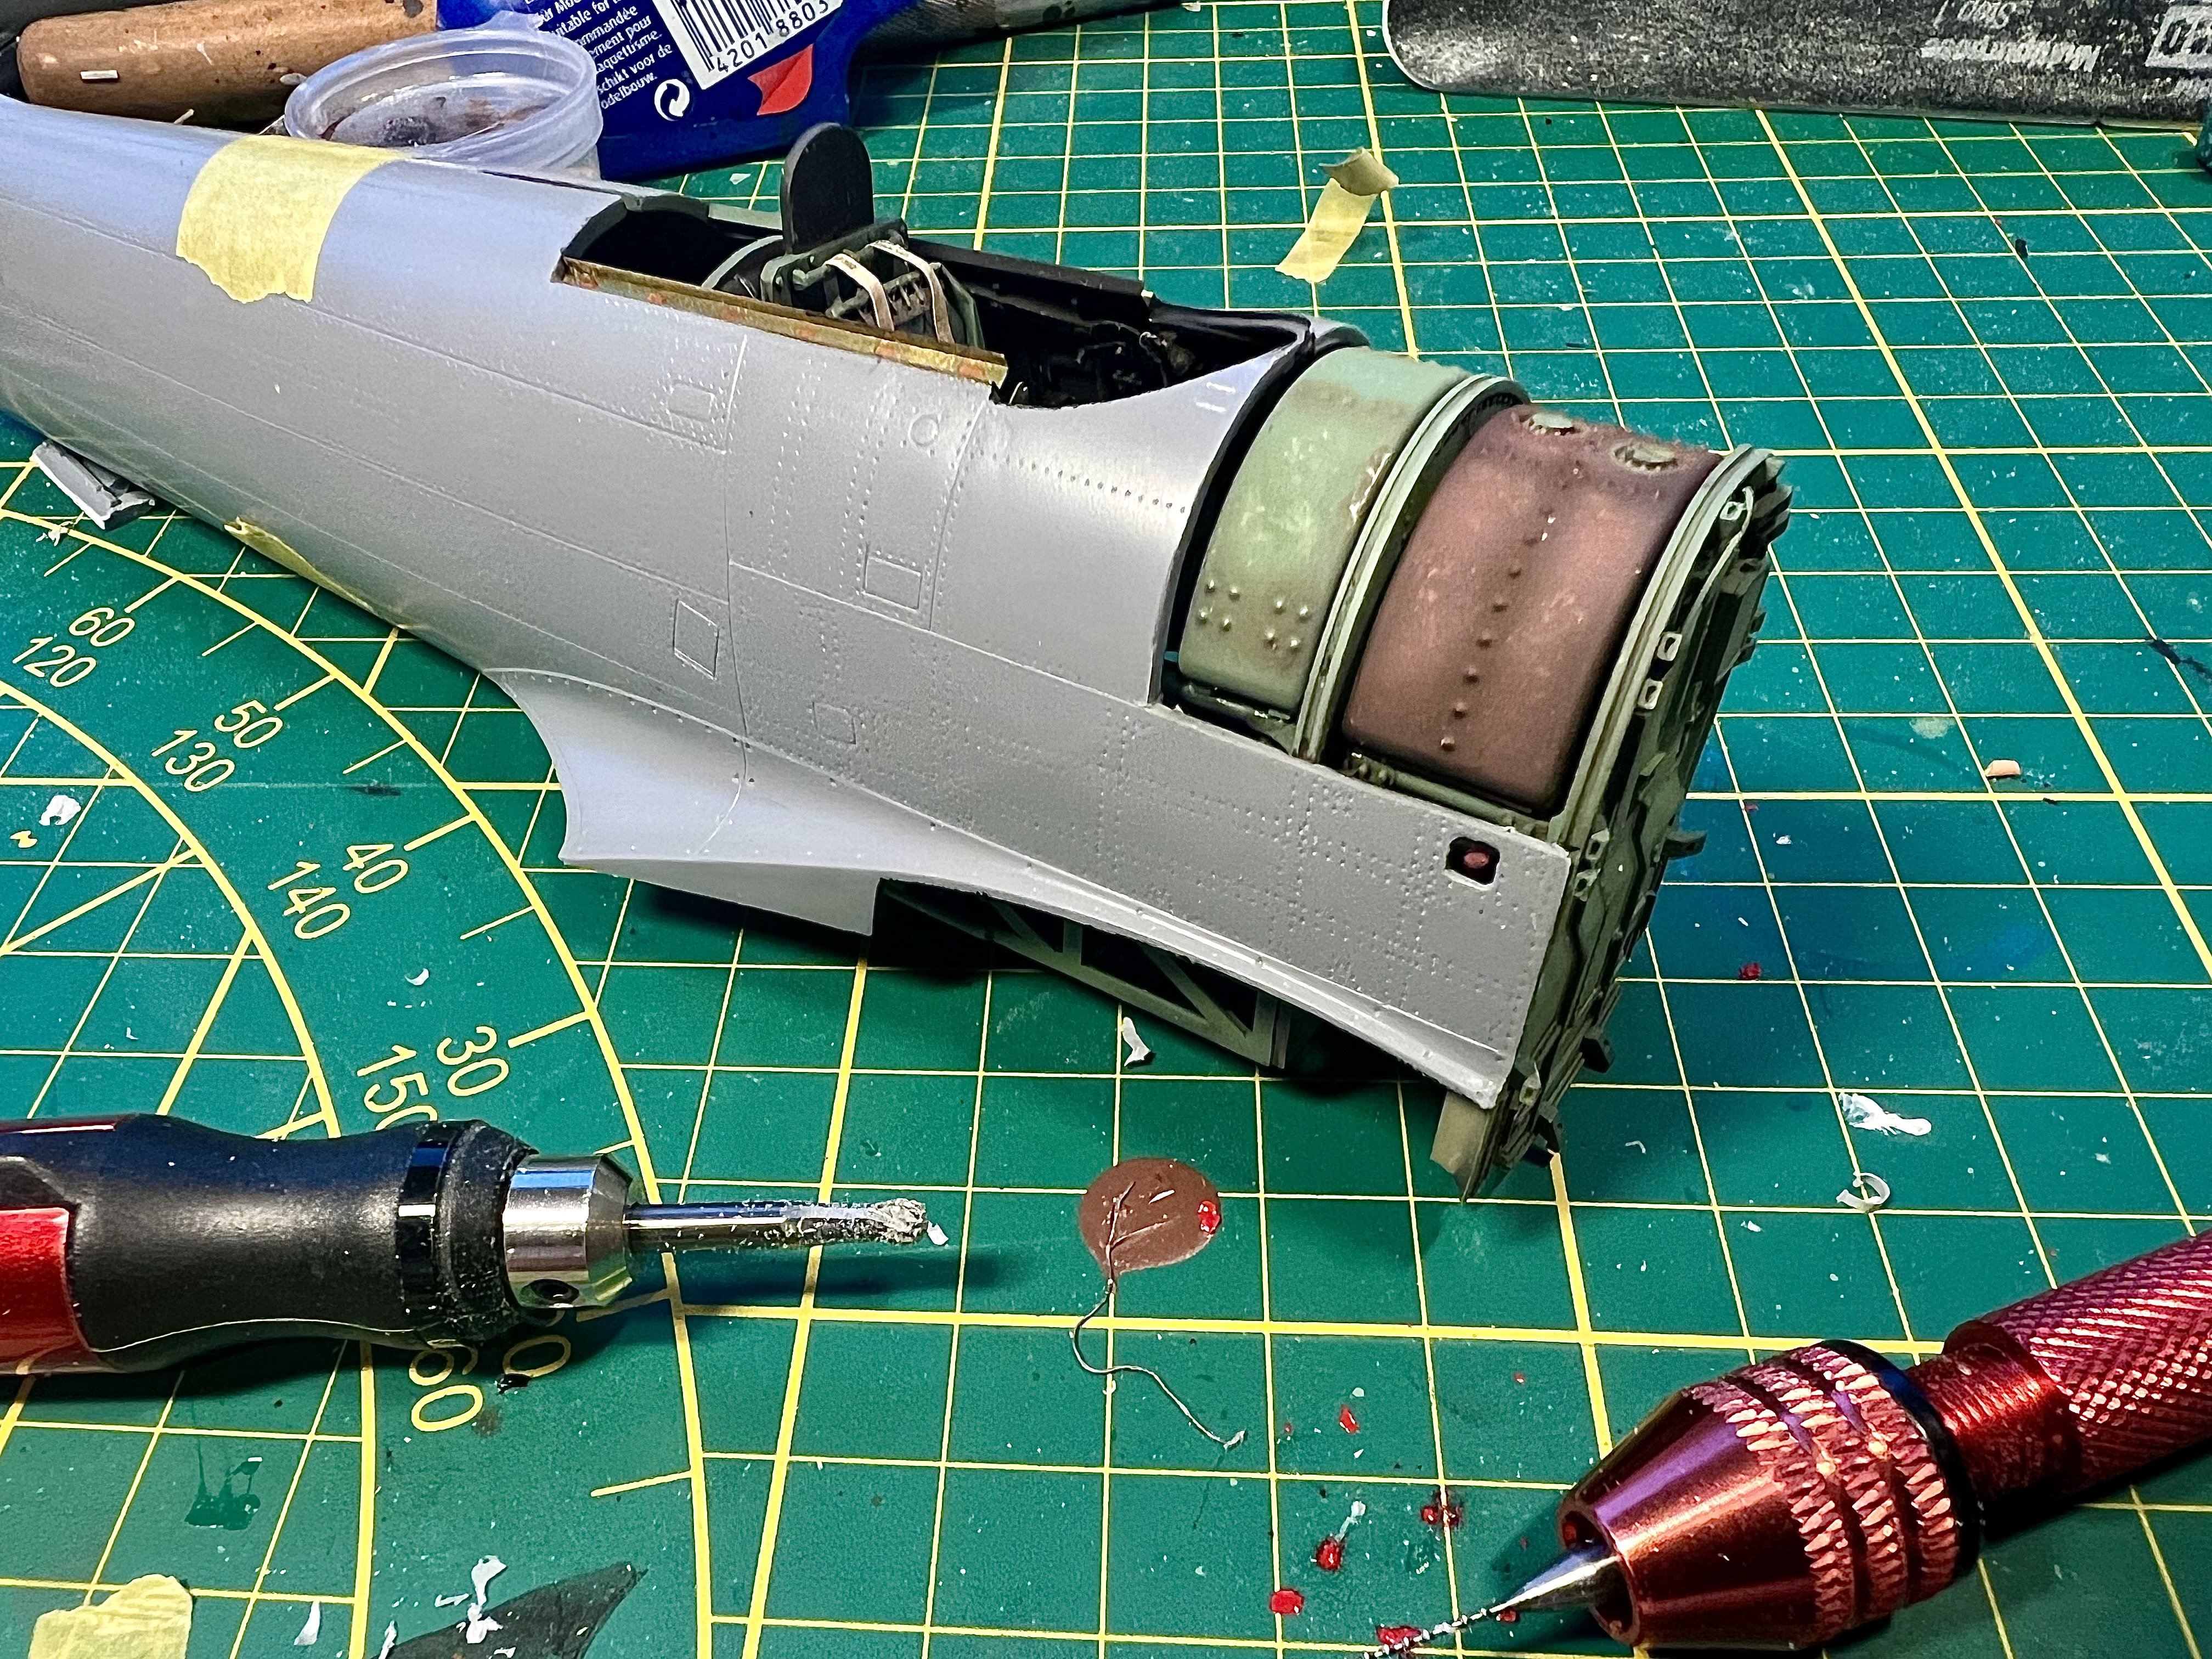
Preparing to close the fuselage. Some weird issues bit nothing i can’t fix. Luckily. It’s Special Hobby and not Tamiya. Just need to keep that in mind. Opened another small hatch to give room to the filler cap of the red small tank on the right side, situated below the fuel tank. Can’t remember what it was for.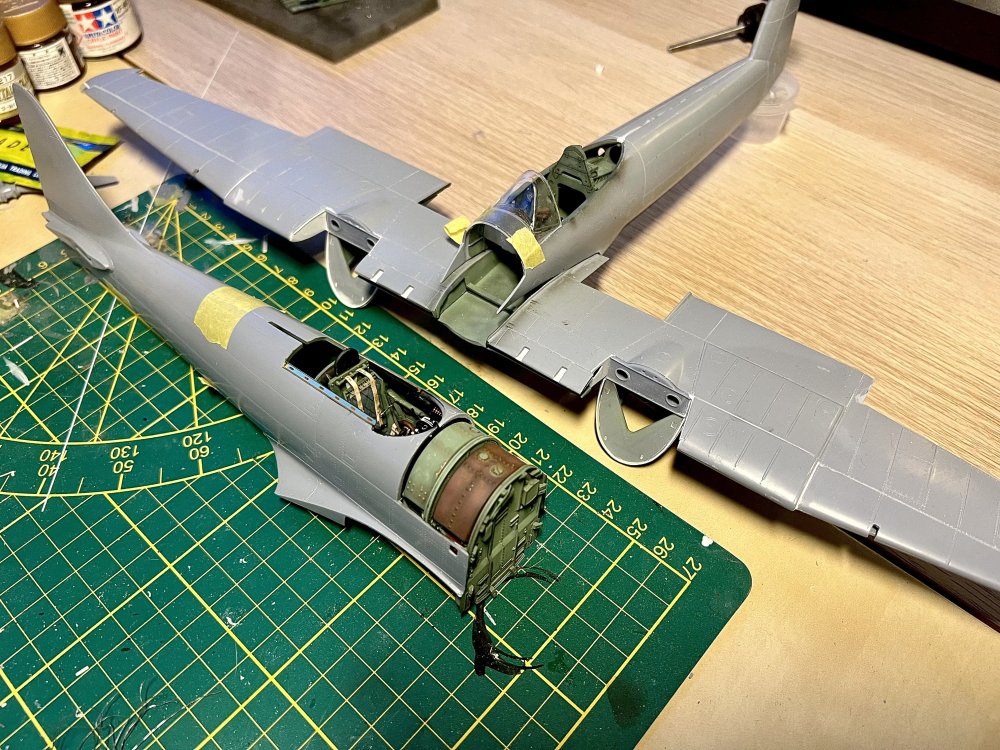

-
1/32 Hawker Tempest
JeroenPeters replied to JeroenPeters's topic in LSM 1/35 and Larger Work In Progress

- 100 replies
-
- 11
-
-
1/32 Hawker Tempest
JeroenPeters replied to JeroenPeters's topic in LSM 1/35 and Larger Work In Progress
I have been warned by Cees Broere and am expecting a battle :)) -
1/32 Hawker Tempest
JeroenPeters replied to JeroenPeters's topic in LSM 1/35 and Larger Work In Progress
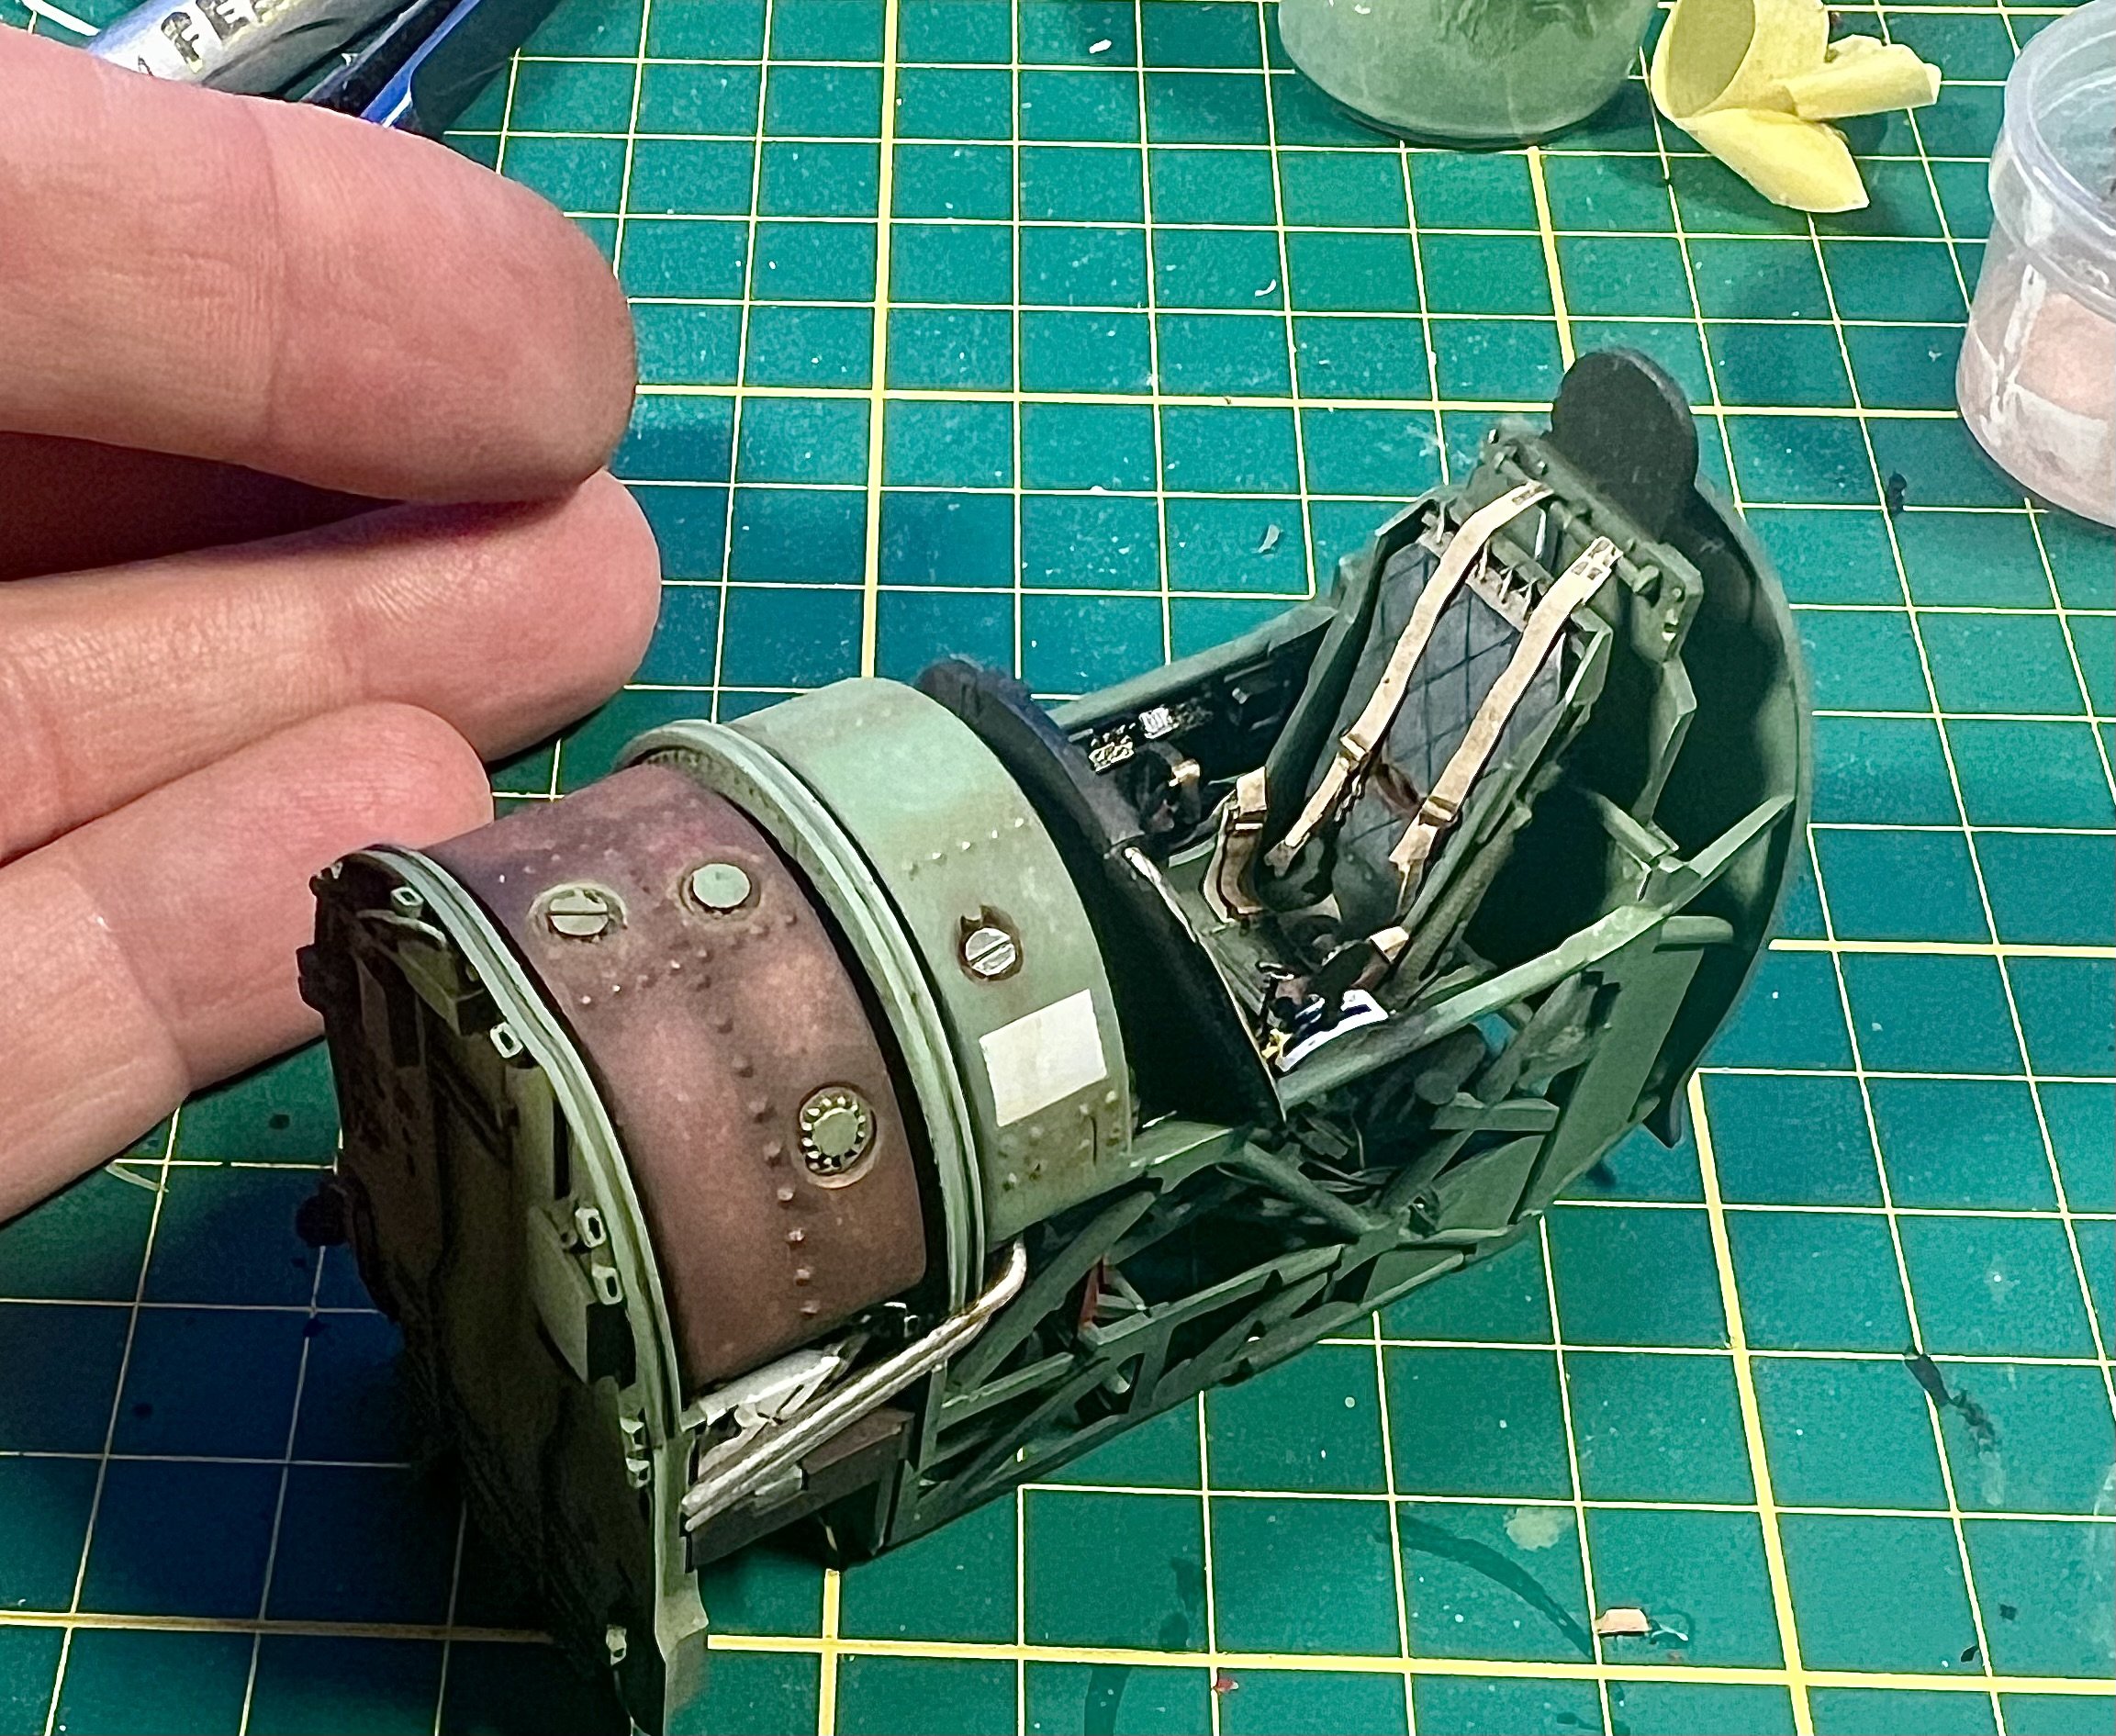
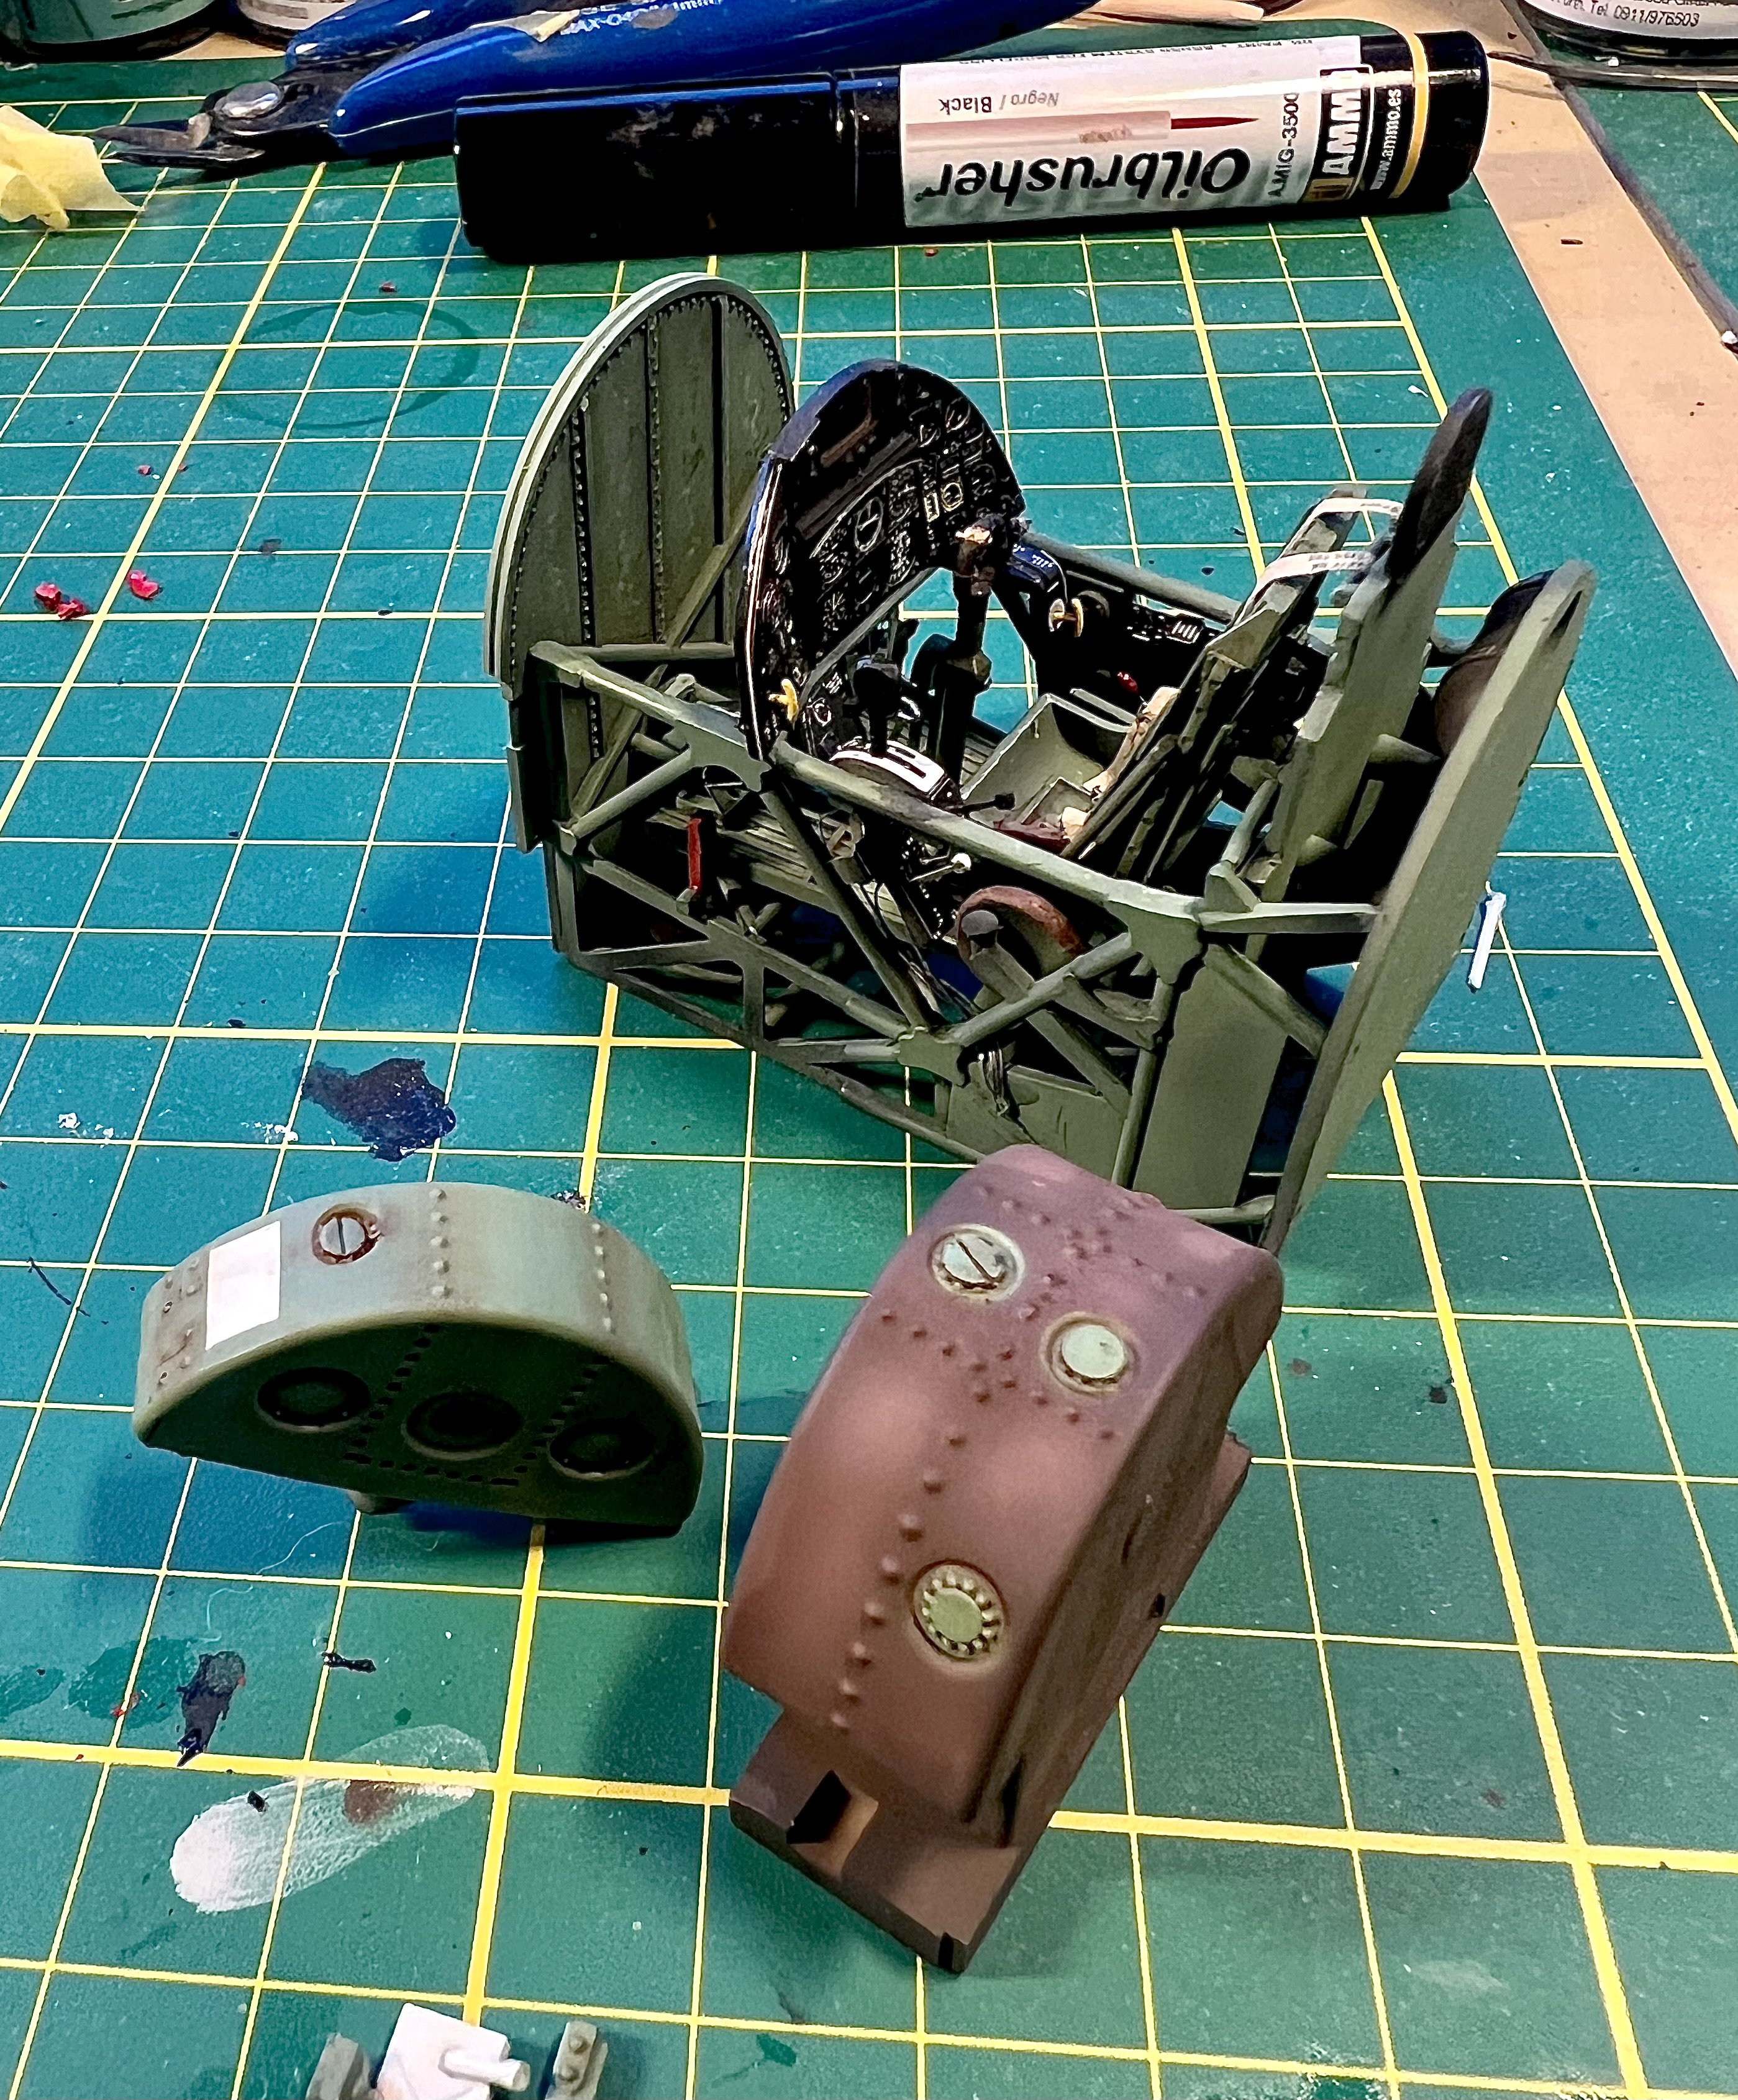
Basic colours are on the oil tank (interior green) and self healing fuel tank (brown. Should be black, but brown is more interesting in the overall scheme i think.)
-
1/32 Hawker Tempest
JeroenPeters replied to JeroenPeters's topic in LSM 1/35 and Larger Work In Progress
The cage is closed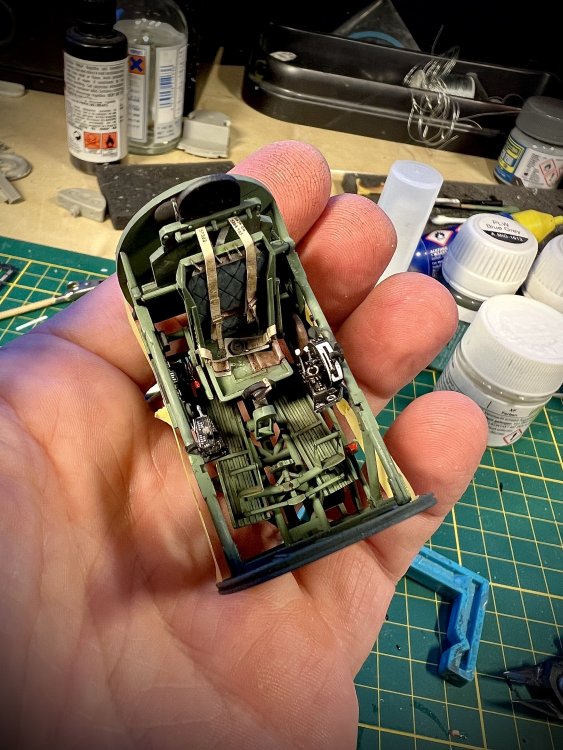
- 100 replies
-
- 10
-
-
-
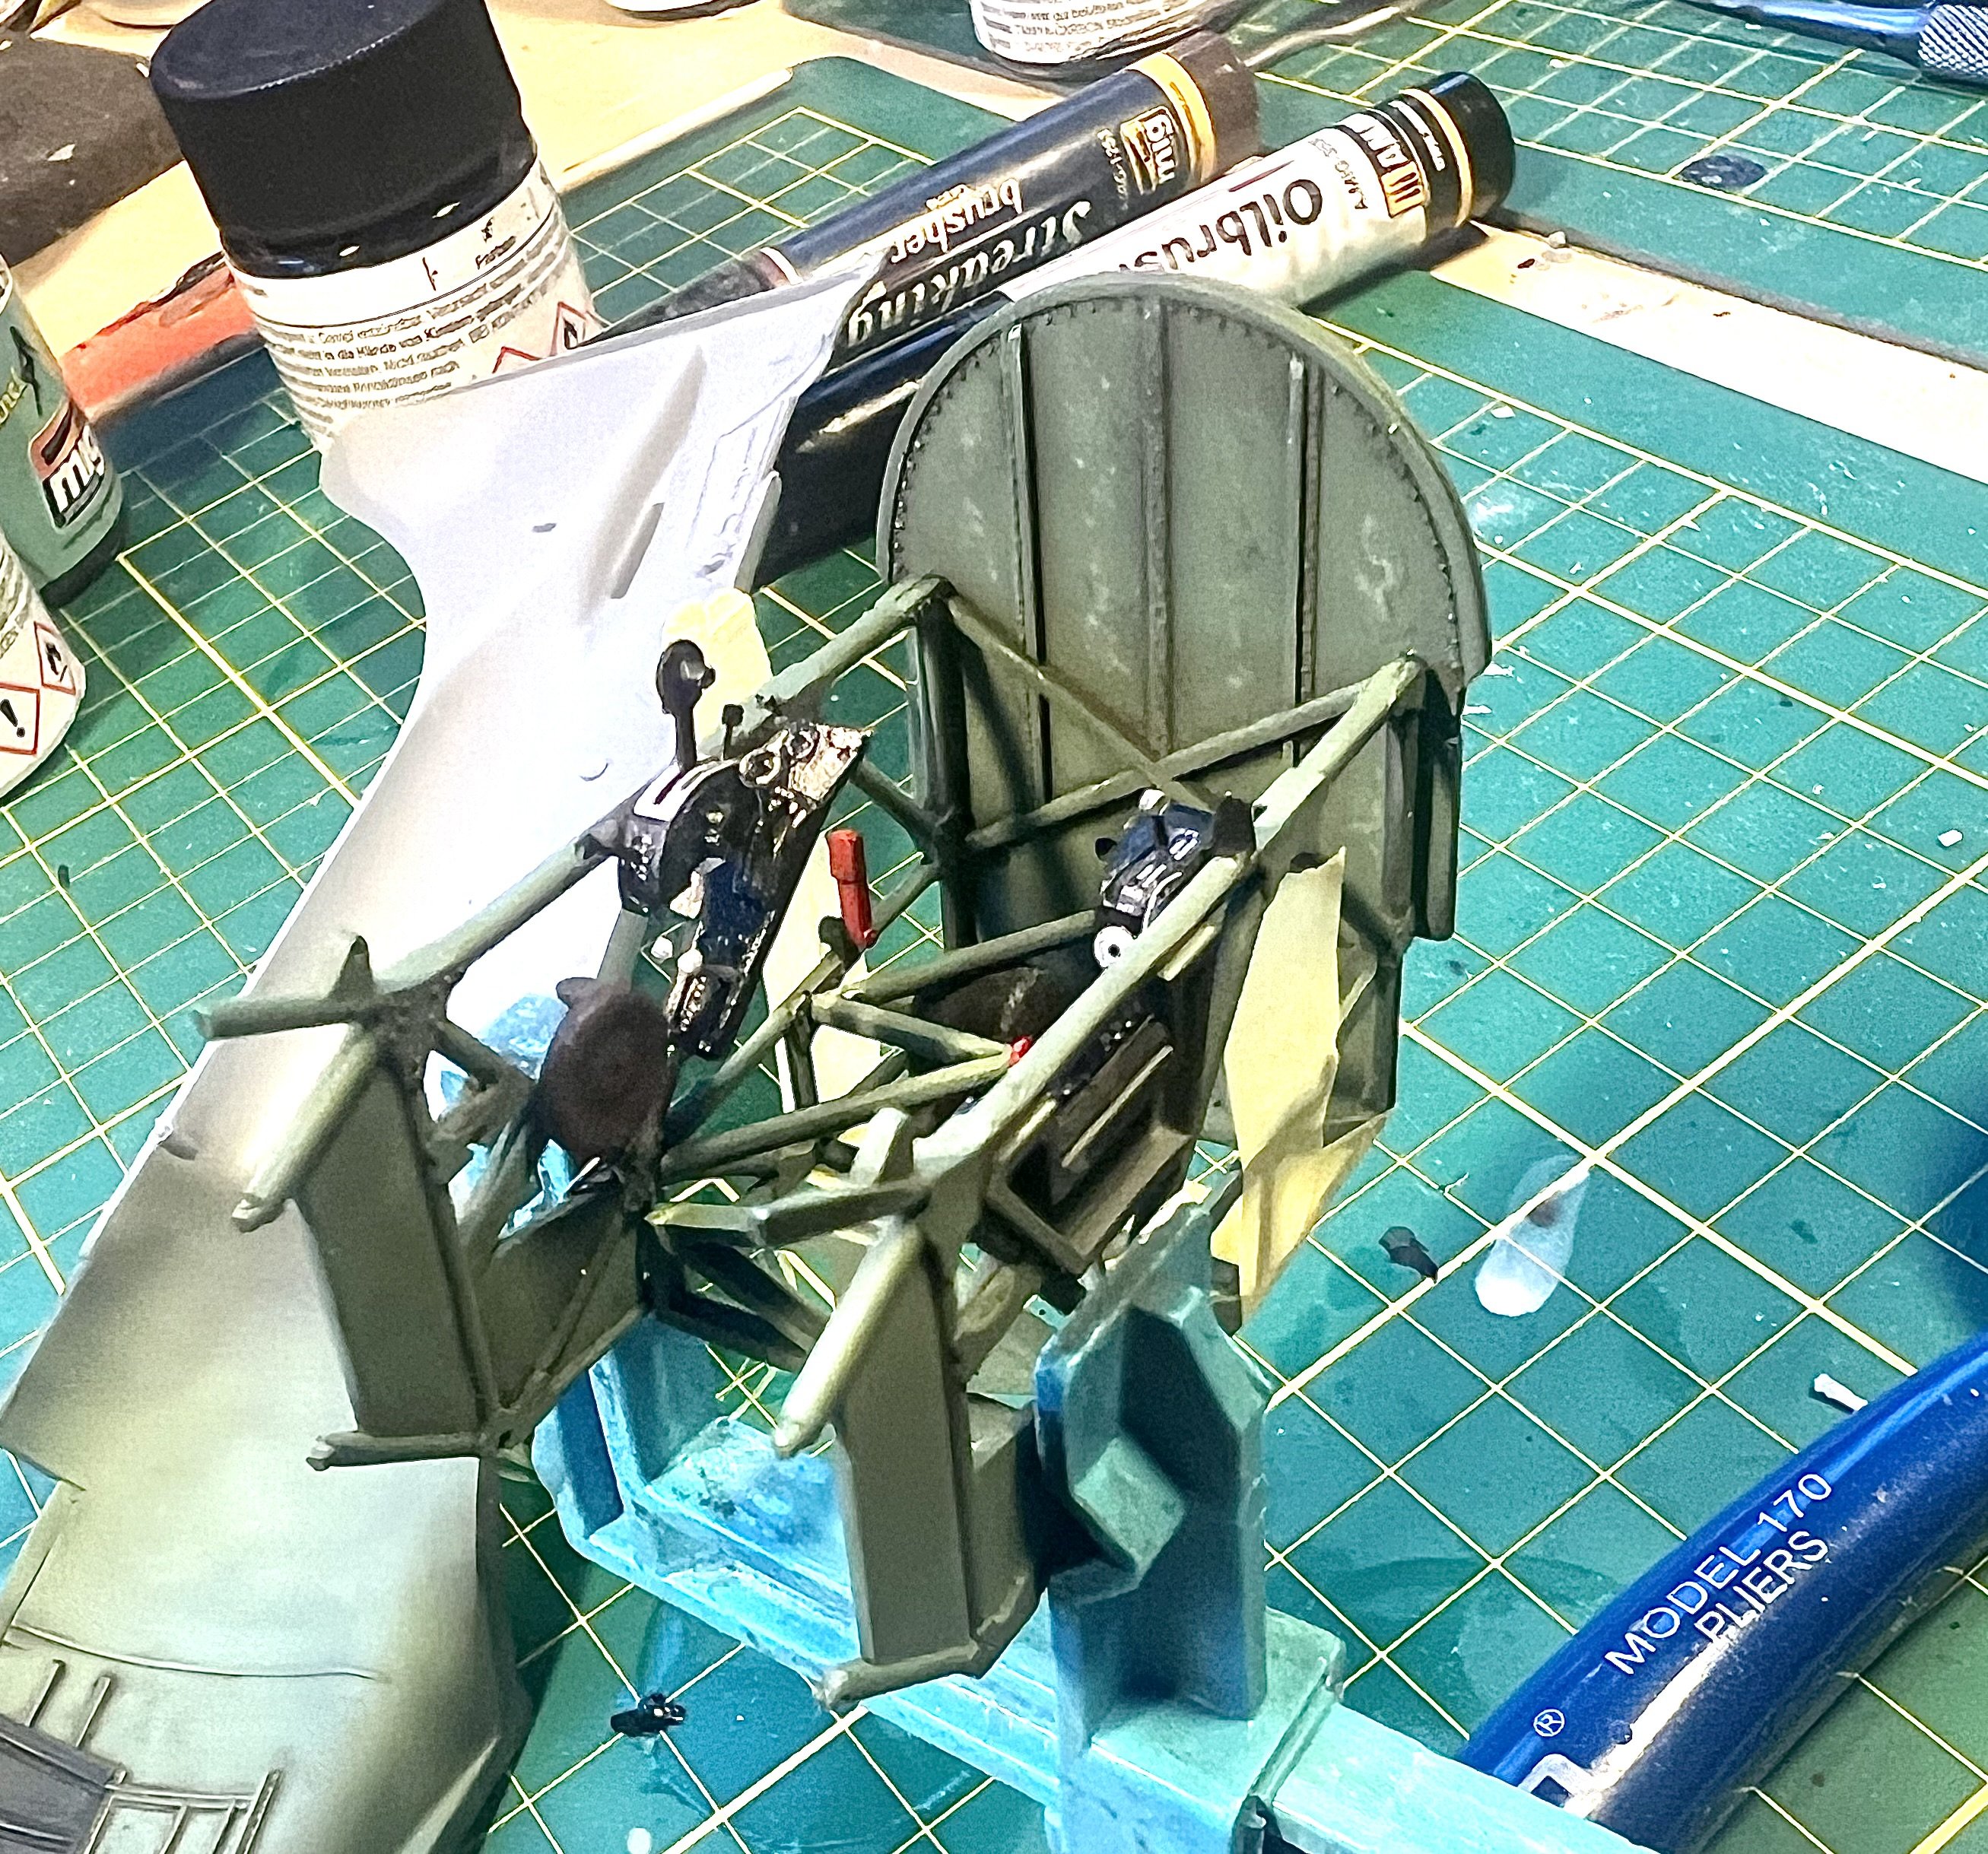
1/32 Hawker Tempest
JeroenPeters replied to JeroenPeters's topic in LSM 1/35 and Larger Work In Progress
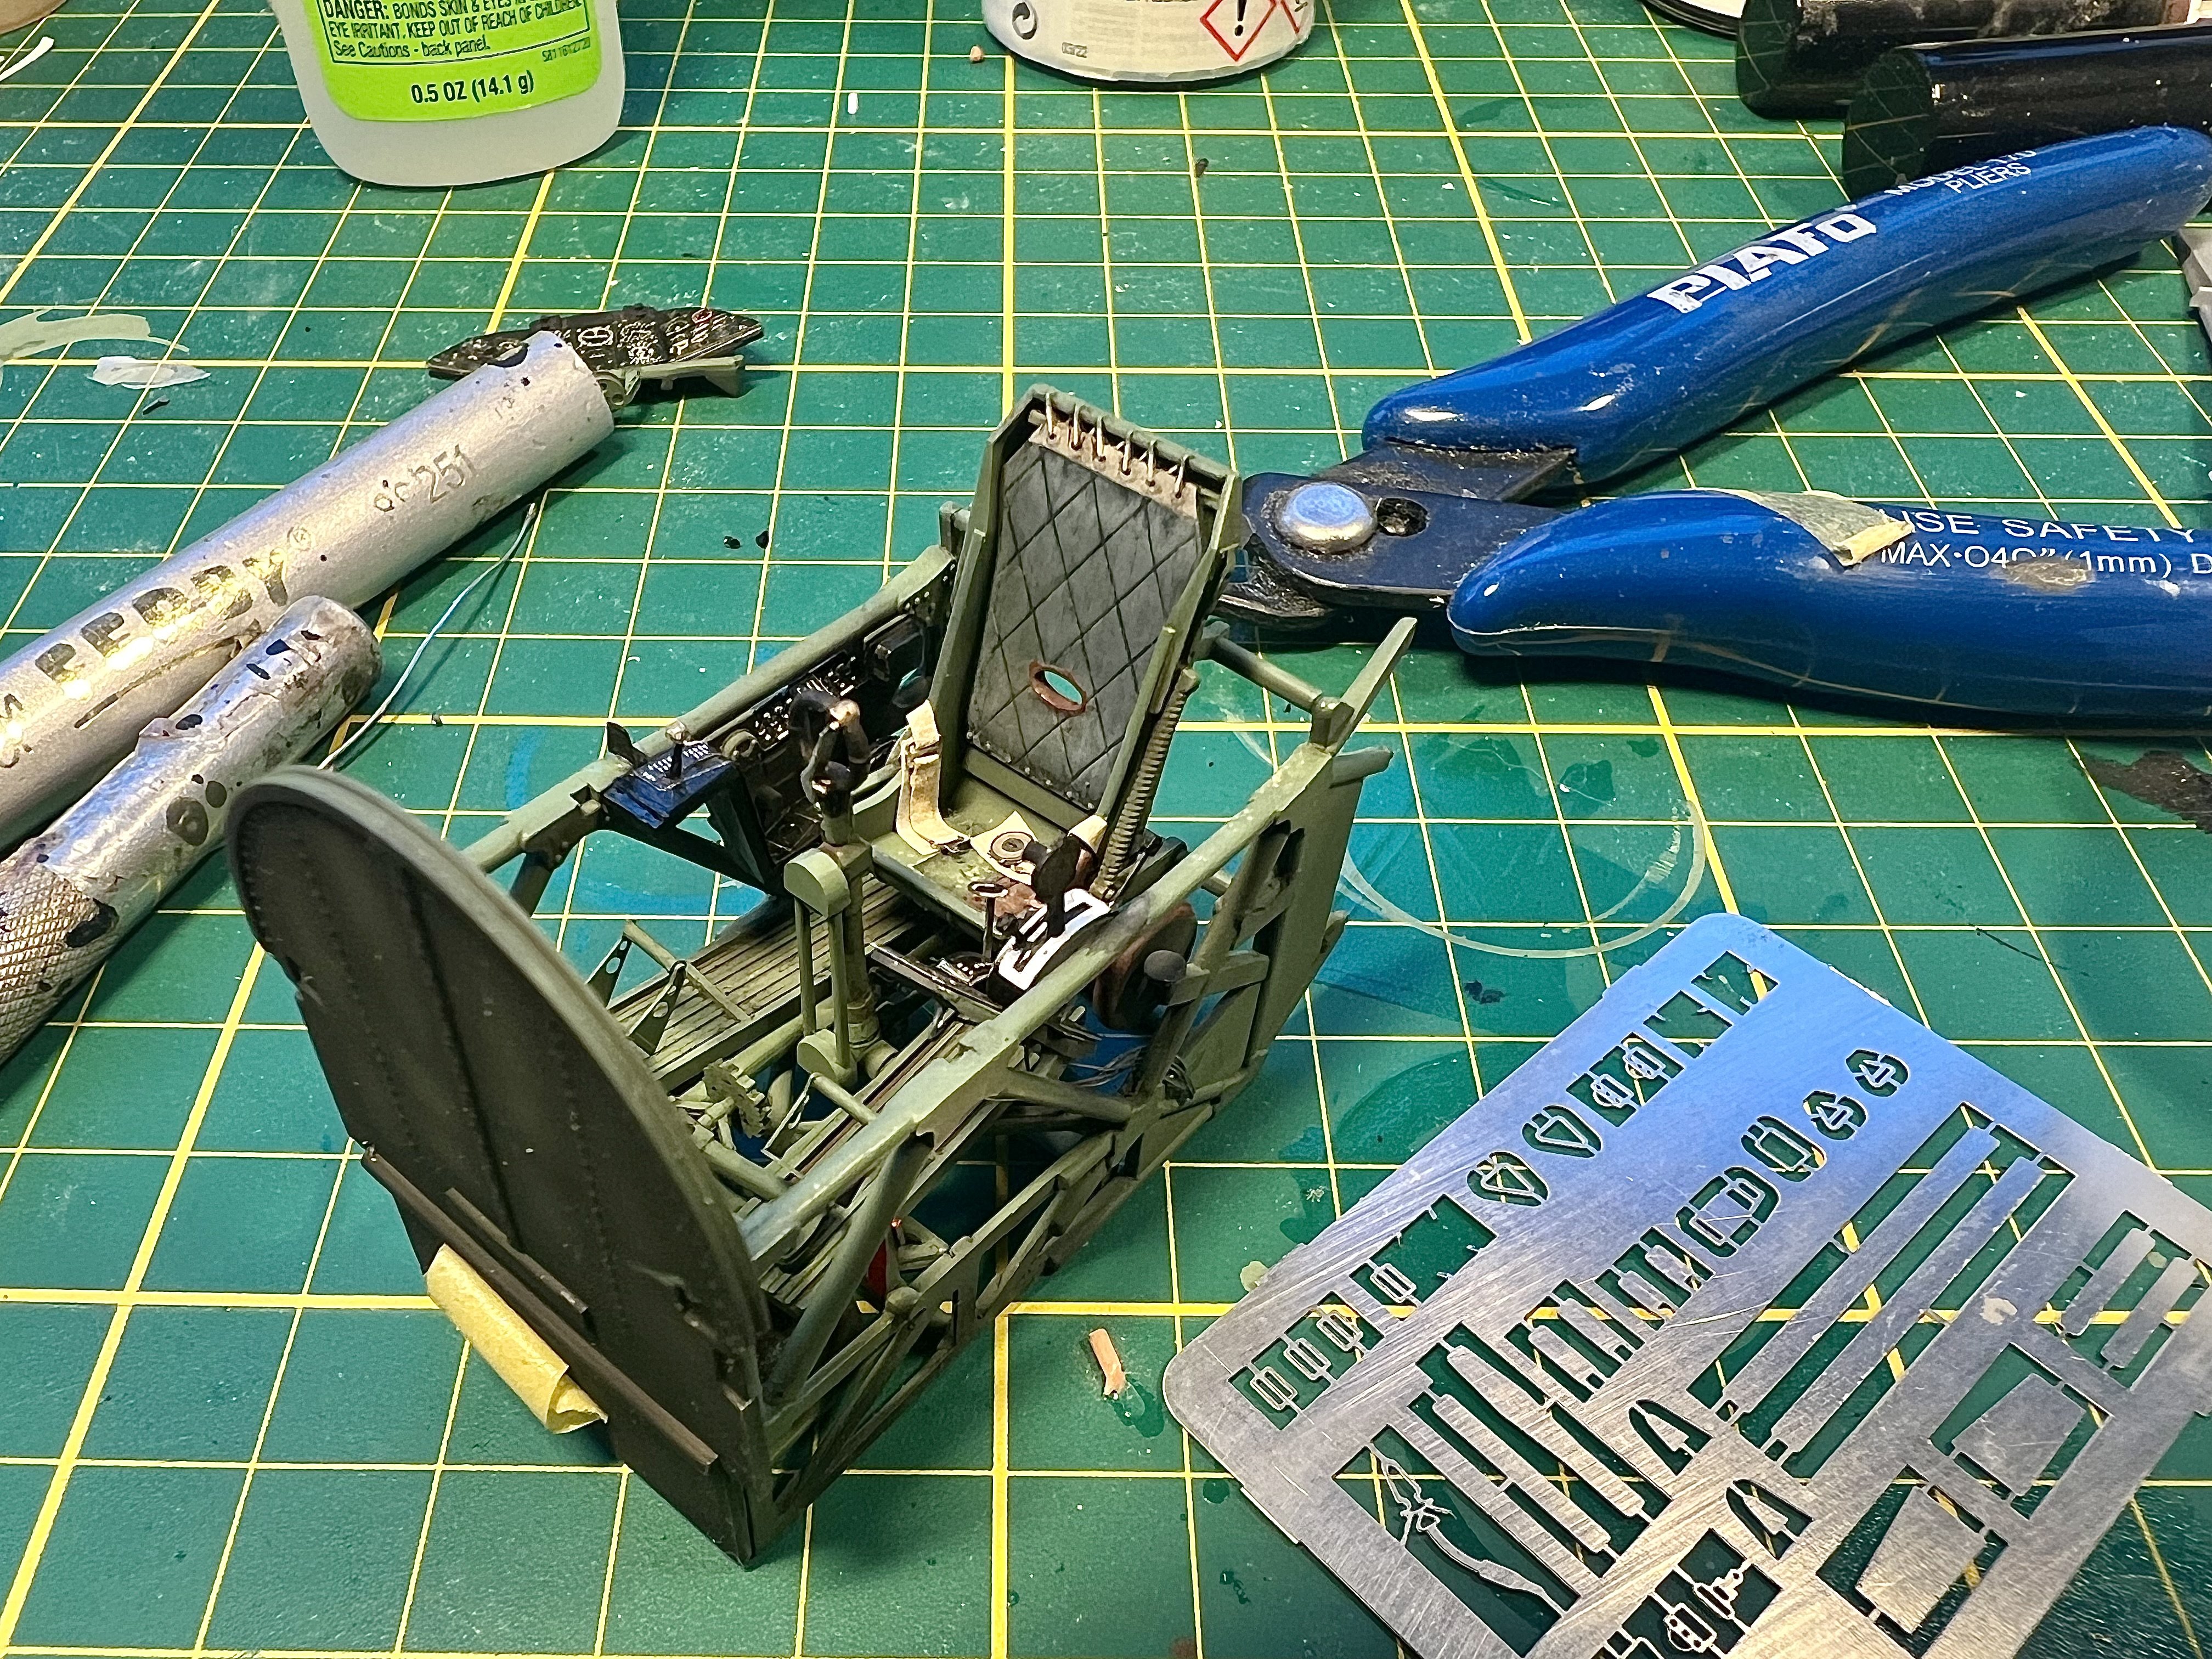
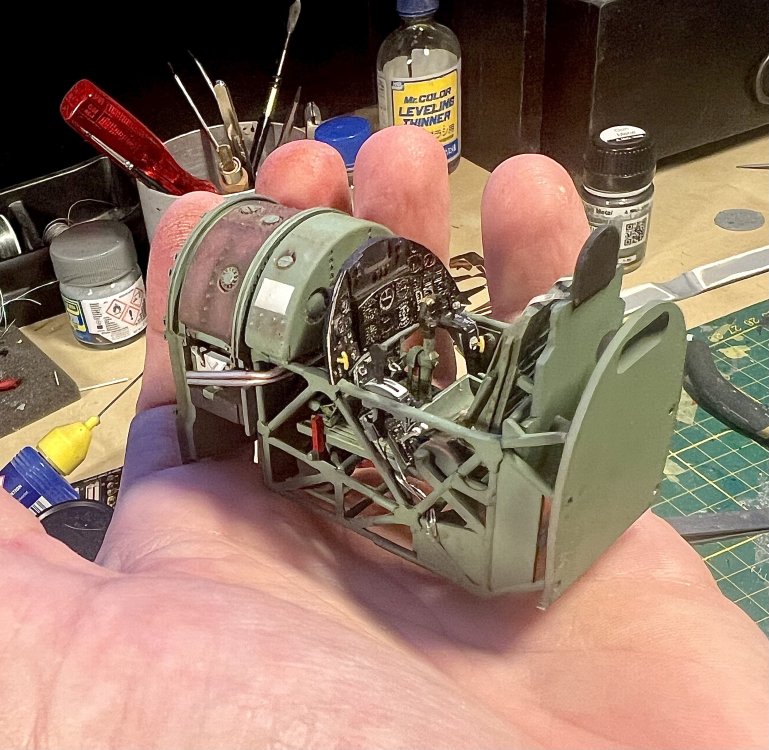
Seat installed. the HGW seatbelts in this case were no treat. Bad fit of buckles, not matching instructions to actual parts. Made them work with spare Luftwaffe buckles.
- 100 replies
-
- 10
-
-
-
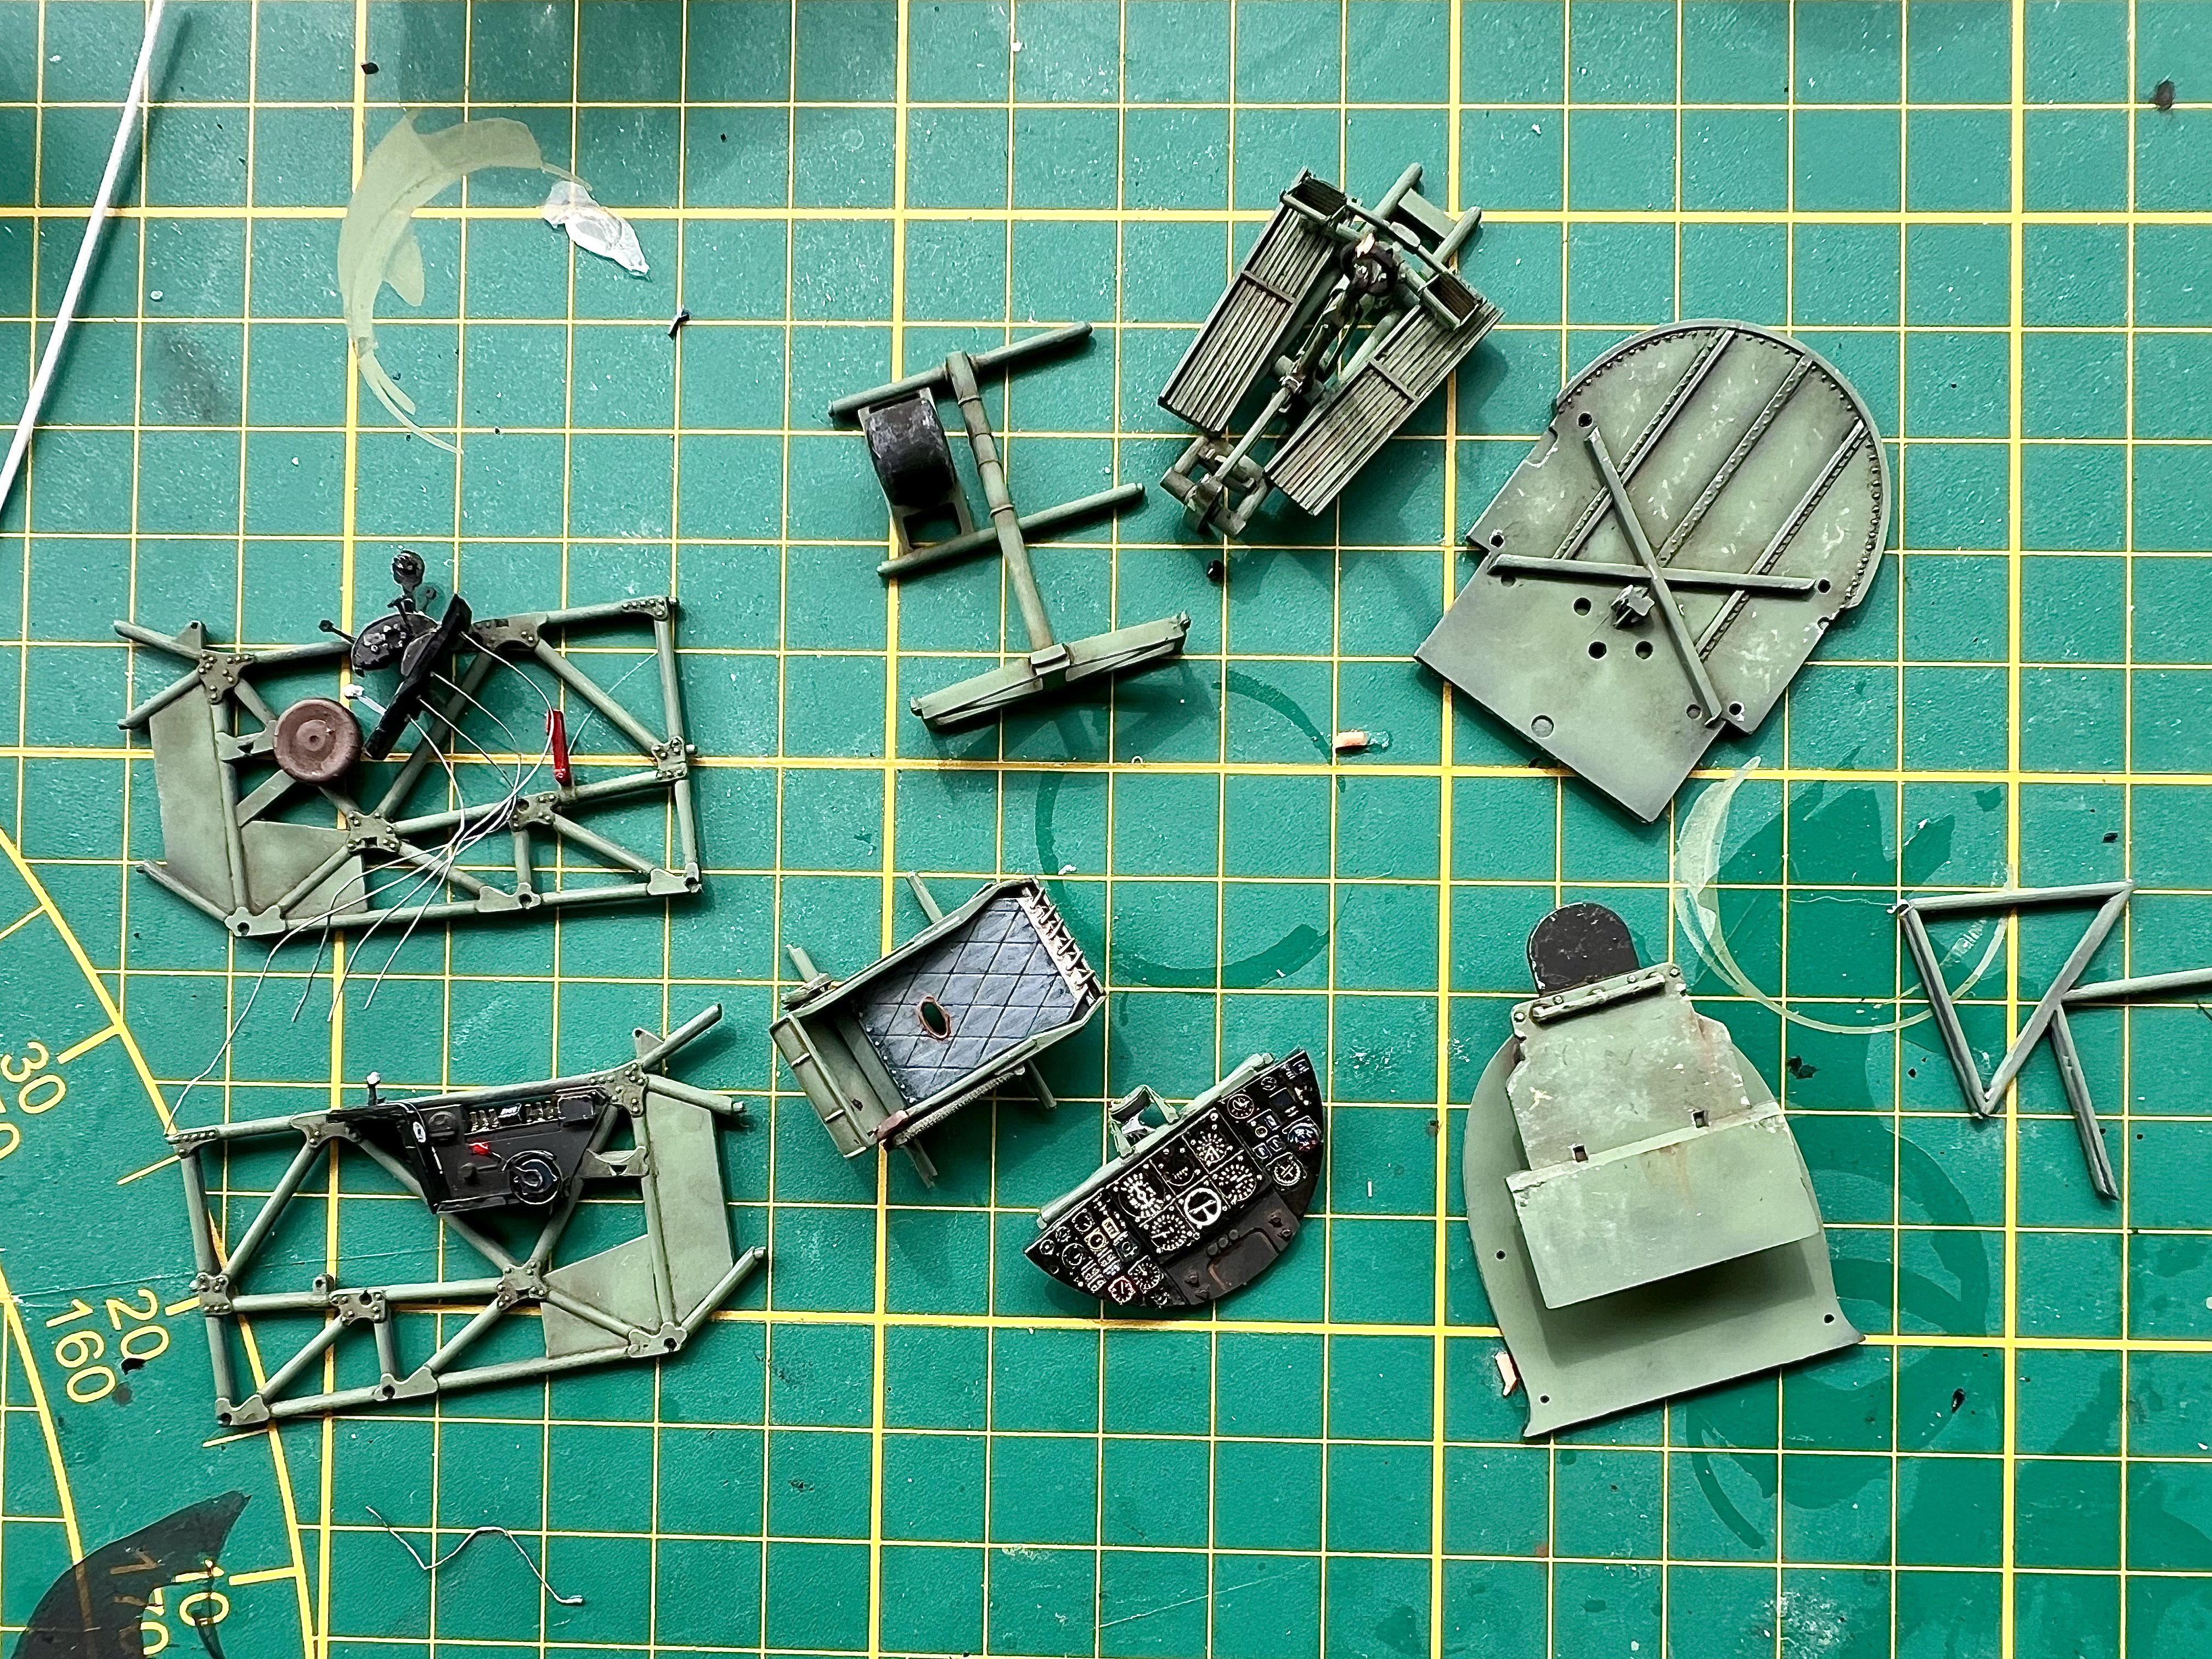
1/32 Hawker Tempest
JeroenPeters replied to JeroenPeters's topic in LSM 1/35 and Larger Work In Progress
And more.
- 100 replies
-
- 11
-
-
1/32 Hawker Tempest
JeroenPeters replied to JeroenPeters's topic in LSM 1/35 and Larger Work In Progress
Taking shape
- 100 replies
-
- 10
-
-
-
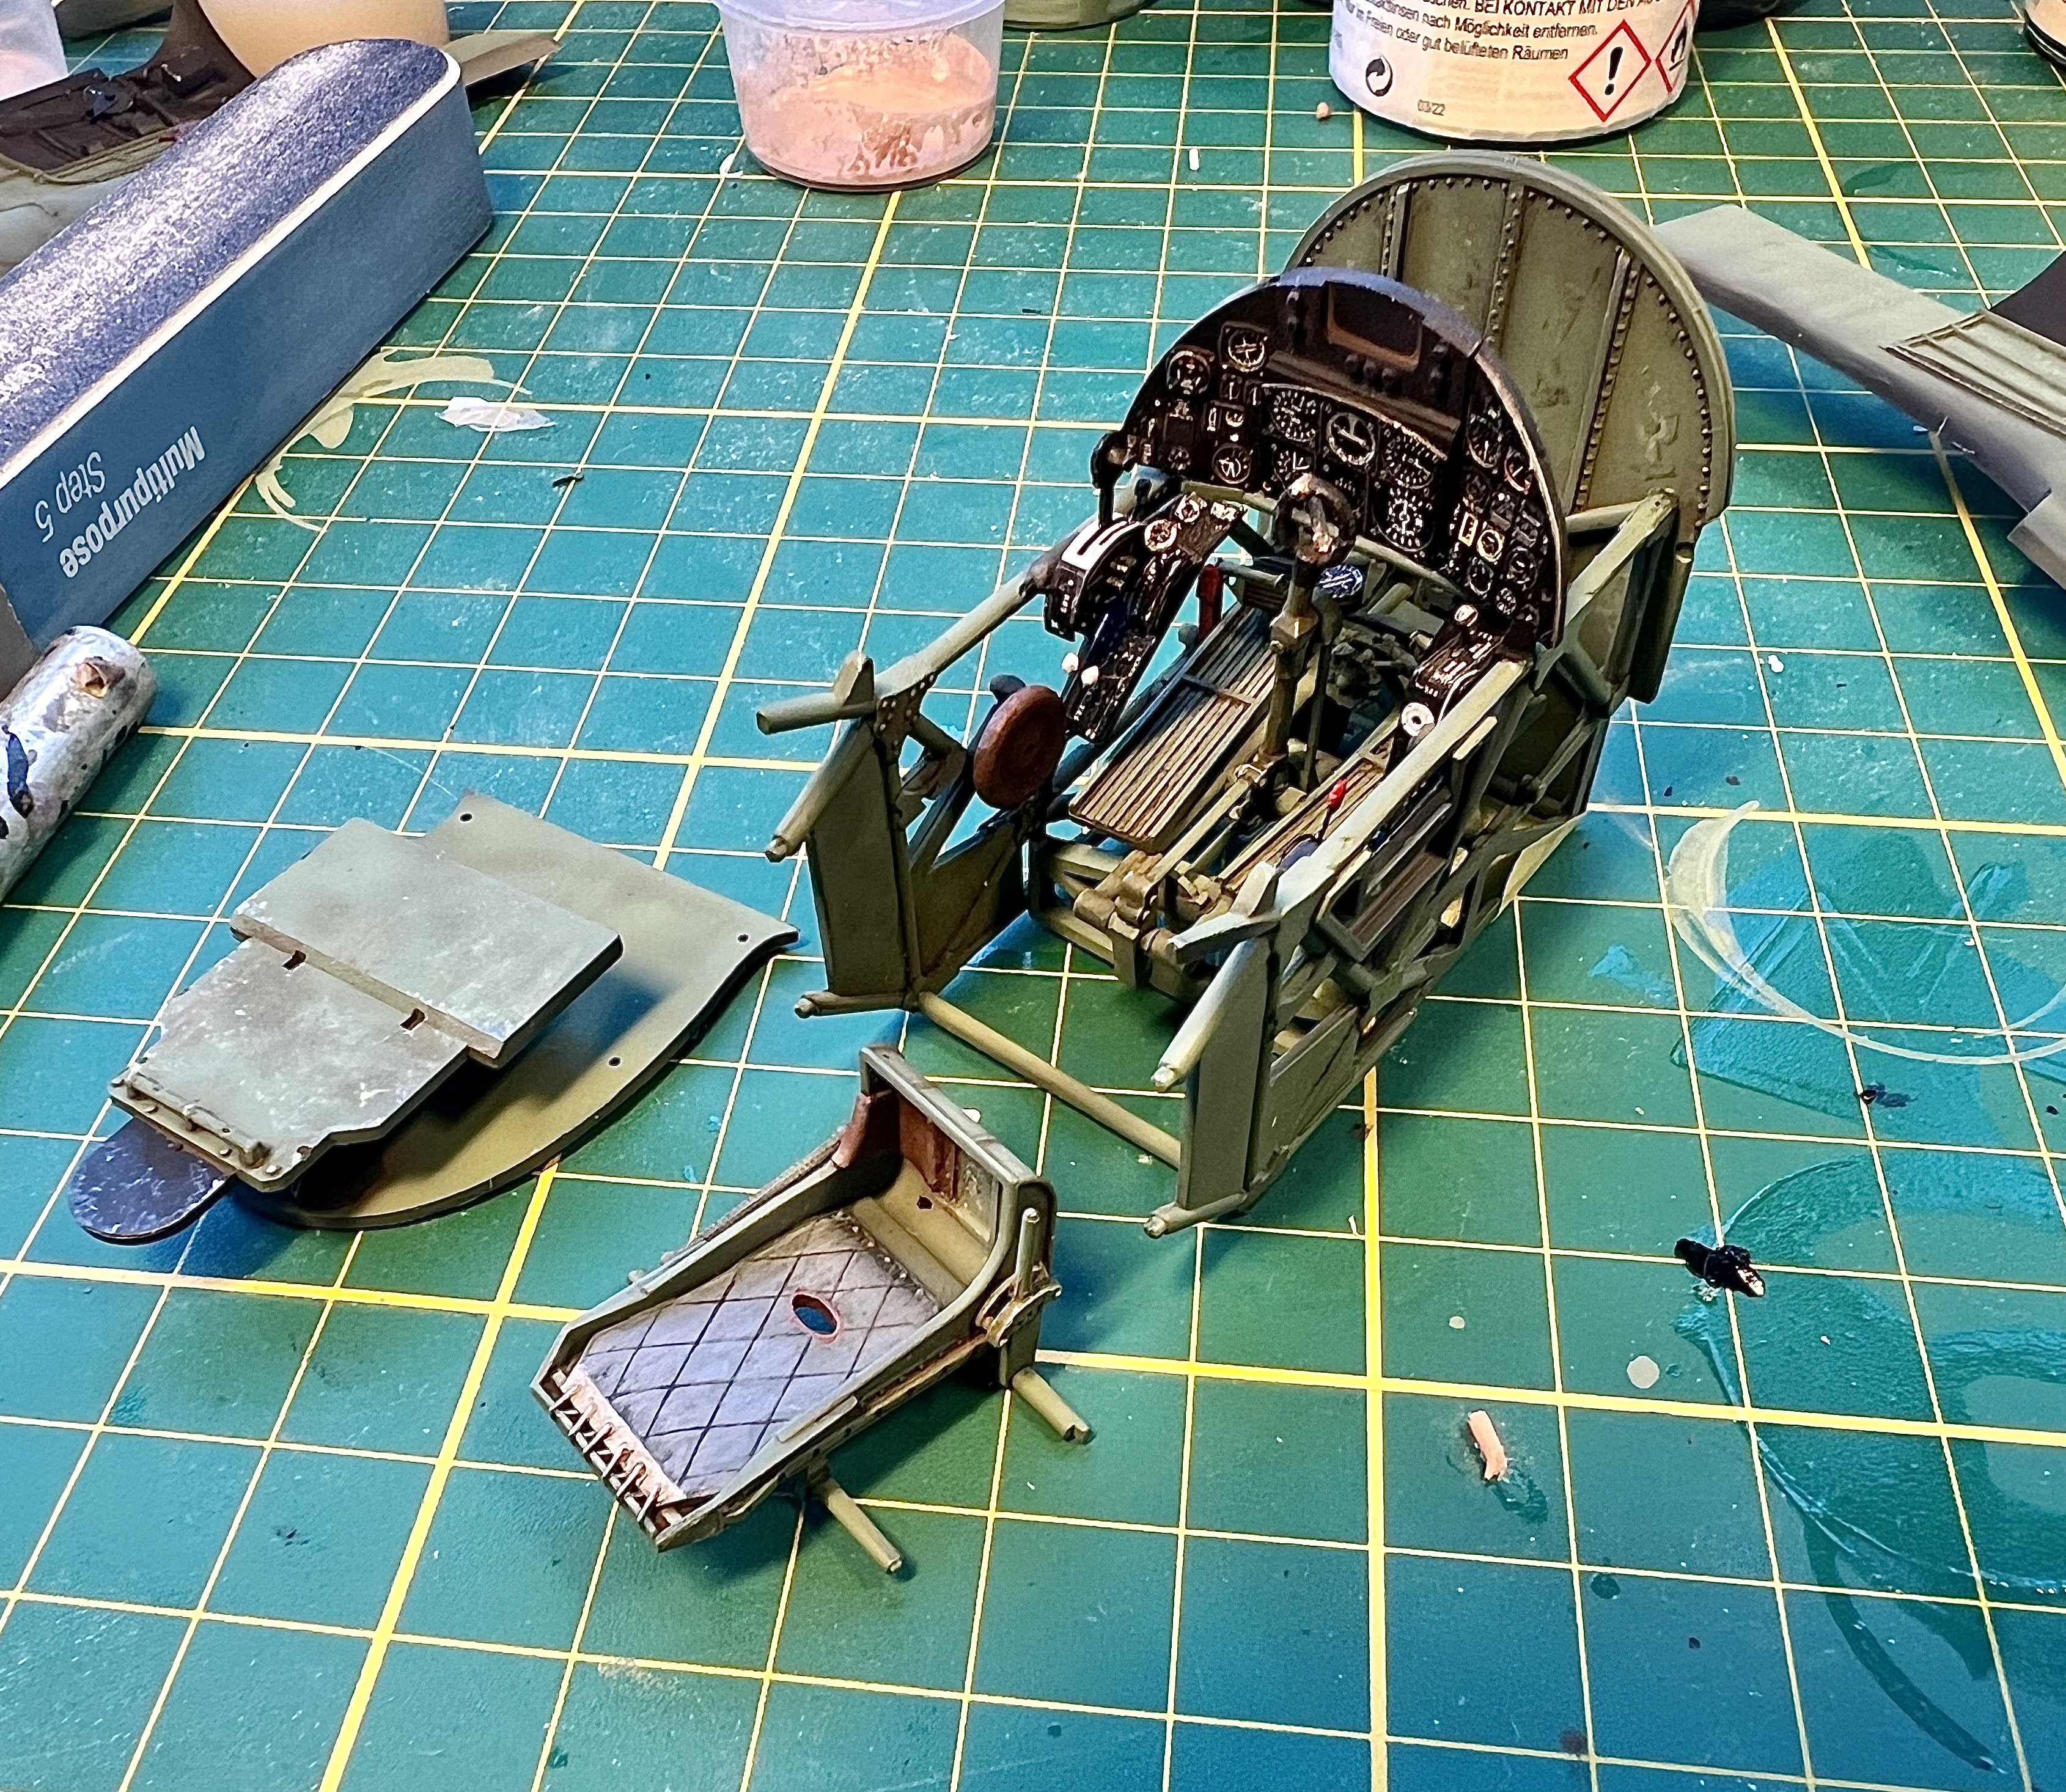
1/32 Hawker Tempest
JeroenPeters replied to JeroenPeters's topic in LSM 1/35 and Larger Work In Progress
Still working on the pit. The seat is a resin seat from CMK. Adding wiring to the instruments now. Can’t wait to close the fuselage and move on!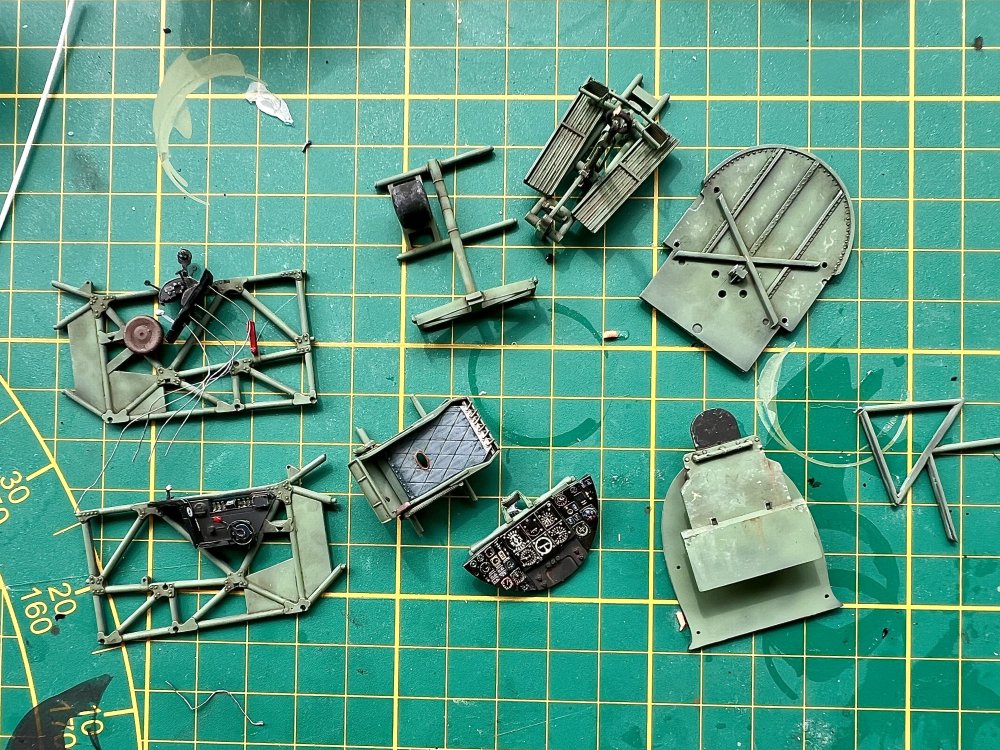
- 100 replies
-
- 10
-