

dr_gn
-
Posts
145 -
Joined
-
Last visited
Content Type
Profiles
Forums
Events
Gallery
Posts posted by dr_gn
-
-
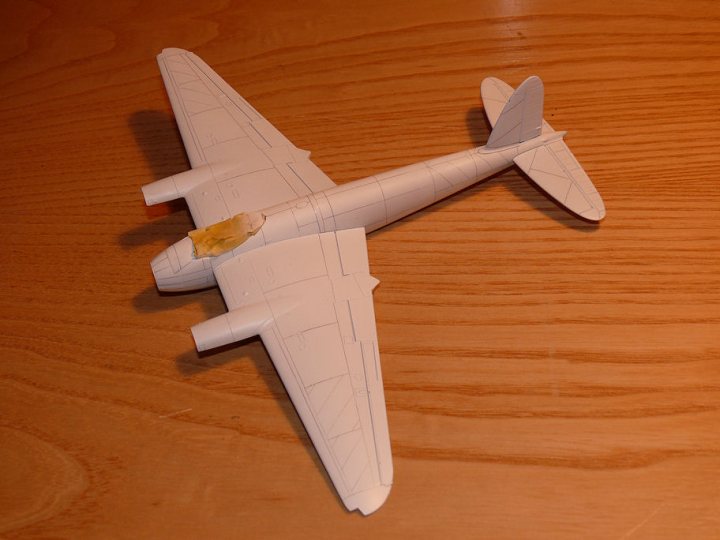
So the wing undersides are done, or at least all the decals ore on. Just the undersides of the tailplanes to go now:

Had a trip to the Yorkshire Air Museum at Elvington today. Really nice place, and they have Mosquito HJ711, which is slowly being restored to taxi-able condition by owner Tony Agar. I asked one of the staff if I could get a closer look, and he was happy to oblige. I was able to put the last pieces of the jigsaw into place i.e the tailcone teardrop/elevator fairings are indeed aluminium: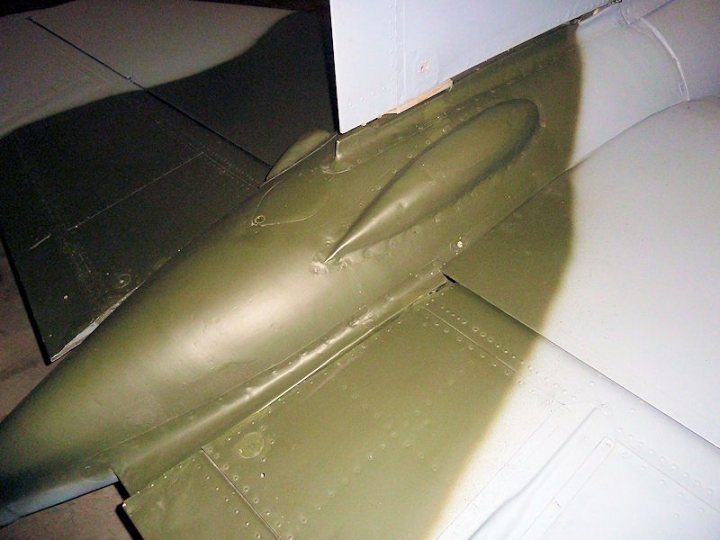
And the rear lamp colours: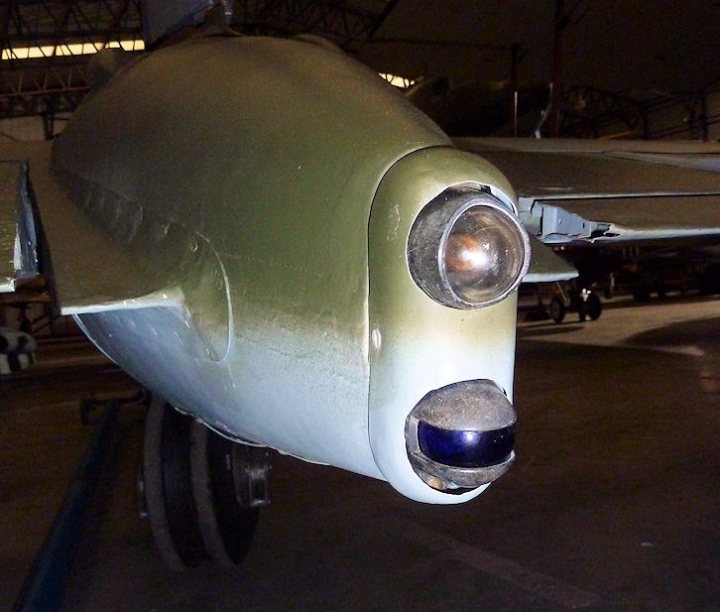
And the mysterious "thing" mounted on the roof of the canopy: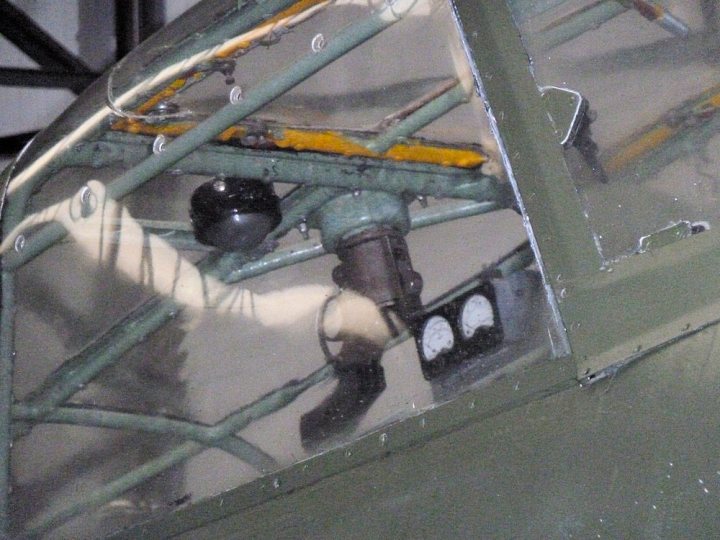
...is a flare pistol.
I also found out the bomb doors are edged in aluminium, not hardwood - a day after I edged them with hardwood decals. Dammit.
Anyway I got quite a few more detail picures of the aircraft. I did ask if I could open the cockpit door, but the guy immediately saw where that line of enquiry was going and politely declined It was worth a try though.
 -
Fuselage finished (more or less):
And most of the wing undersides. I've used a slightly finer and darker grain for the fuel tank covers. Most of the models I've seen have these in aluminium, and it's an easy mistake to make becasue they have loads of fasteners and features within them and around their edges, but a bit of research confirms they are wood: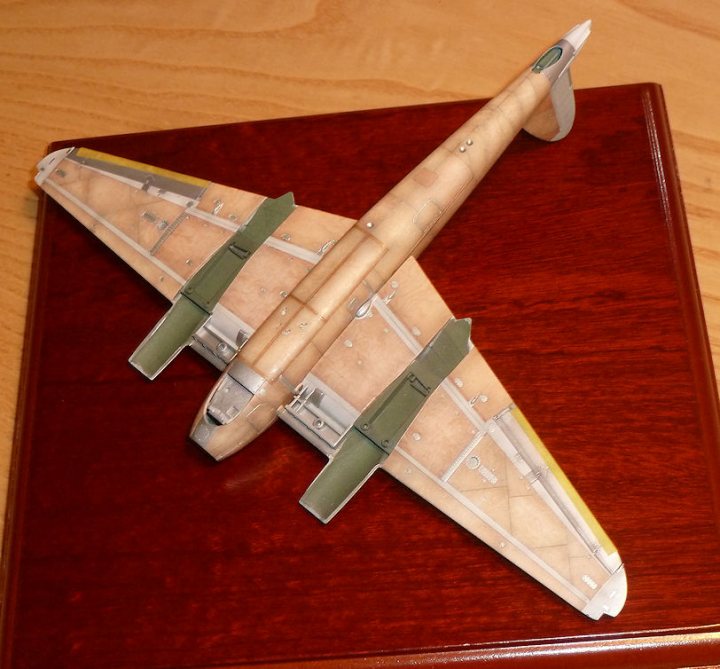
The bomb door edges were made darker by applying a second strip of decal over the first. The ejection ports still need their surrounds darkening like this.-
 1
1
-
-
So this evening there was more cutting templates, cutting decals and PVA-ing them to the fuselage:
I've found that cutting the decals slightly oversize to the templates is best: I can always trim the decals freehand with a #11 blade along the pencil panel lines if they are too big. If they are too small, it's game over for the entire panel... -
Another fine installment in the 'Wood Grain Revisited' manual.
Threads like this should be categorized in a How-To department.
Thanks! Personally I'm not passing judgment until it's done - still a long way to go with various processes, but so far so good.
Finished the other side of the forward fuselage tonight:
I'll do the door when the PVA has fully cured on the surrounding decals. I'll aply it oversize, then trim around the panel lines to get a perfect profile. Hopefully.
-
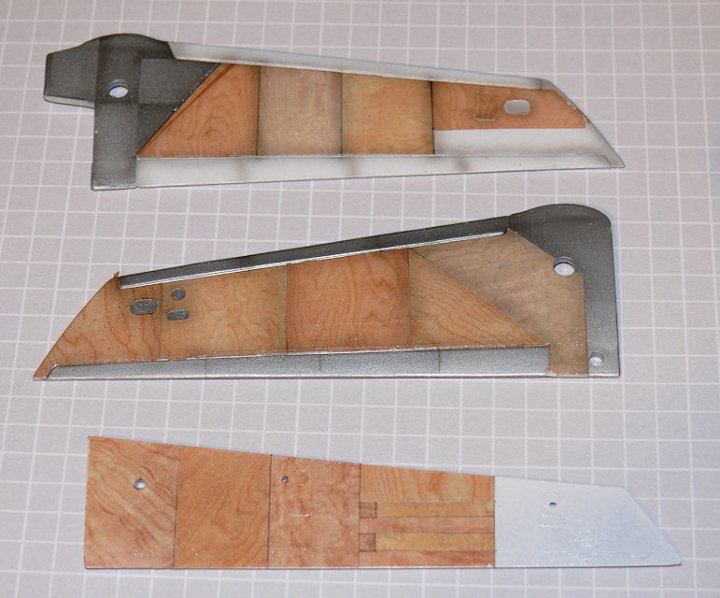
Fins ain't what they used to be:
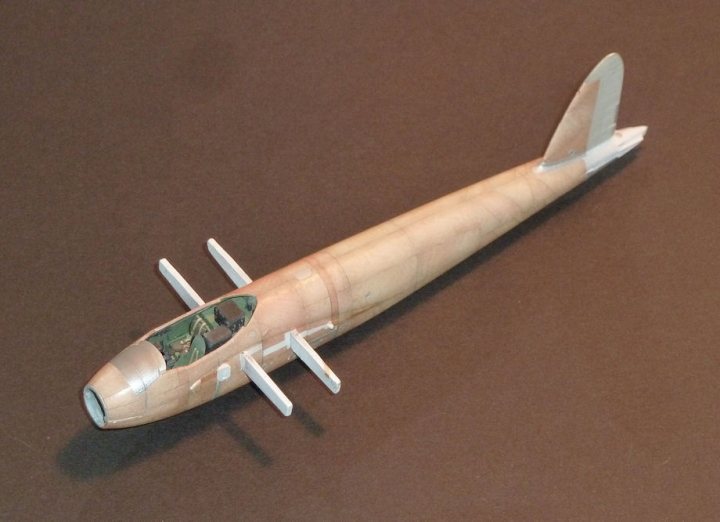
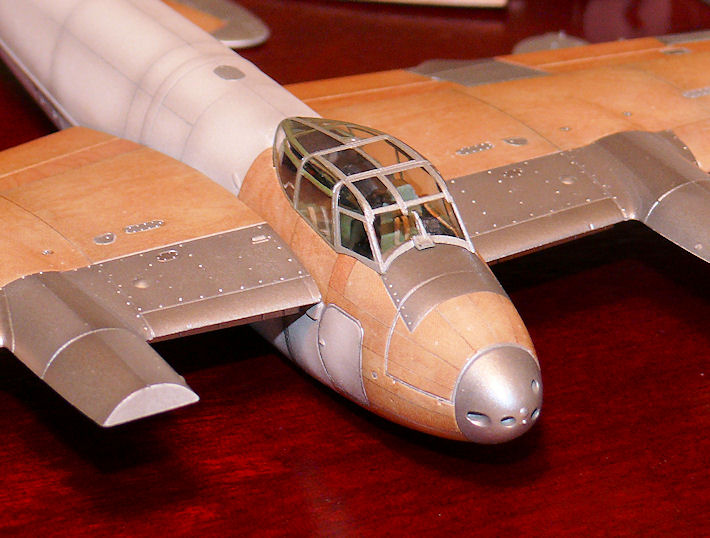
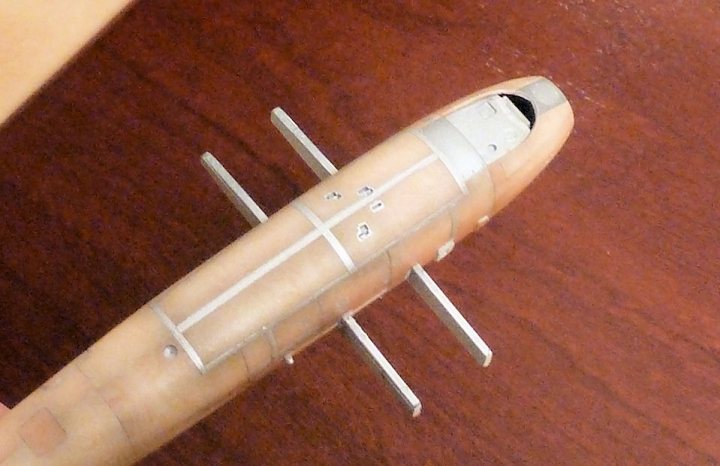
Continued with the fuselage - the nose is similar to a barrel, with narrow sections forming the compound curves: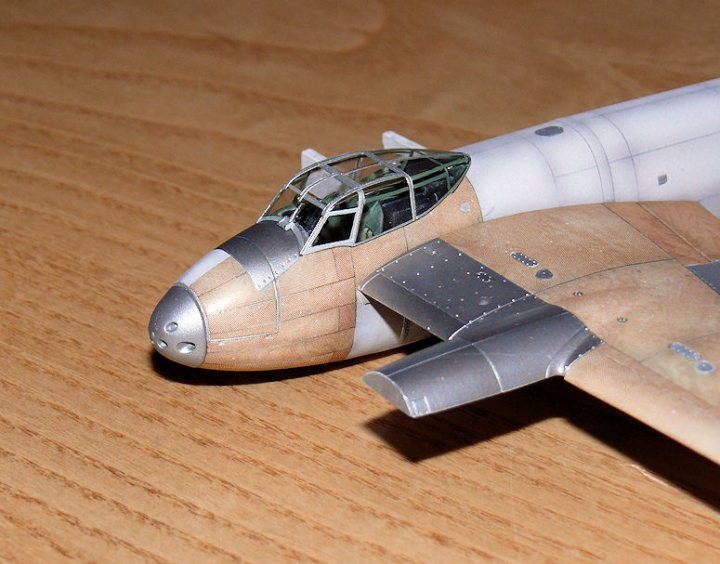
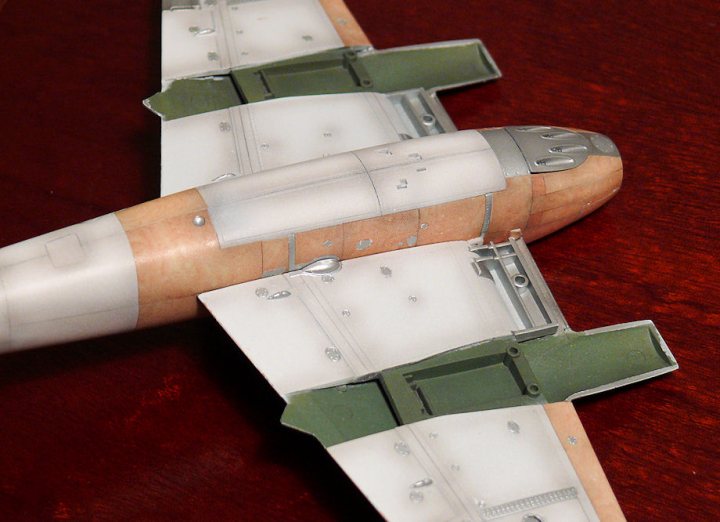
And the underside with the cannon shroud dropped in place: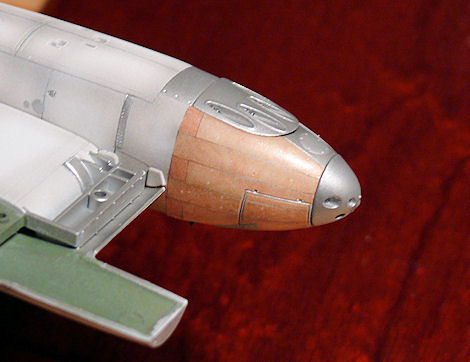
the nose and the herringbone tail sections will be the most time consuming bits, so I thought I'd get them done first.
Also started to experiment with an oil paint "glaze" or filter. This is a strip of Raw Sienna, very thin, mixed with Blitz Dry to speed up the cuting process: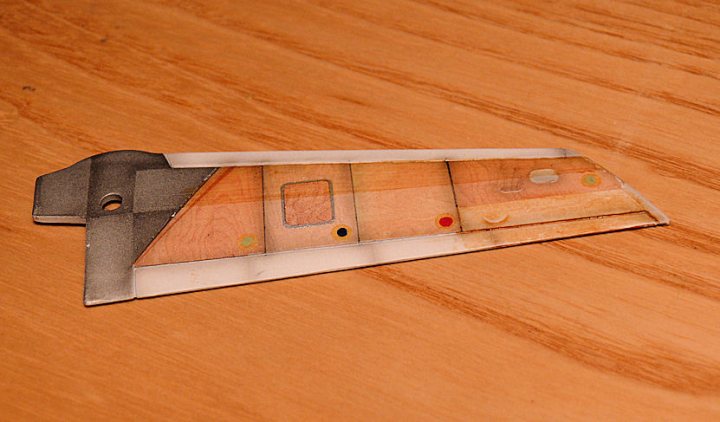
It gives a bit of depth to the colour, and gives the grain more definition. You can also play tunes with the shades of individual panels if necessary. -
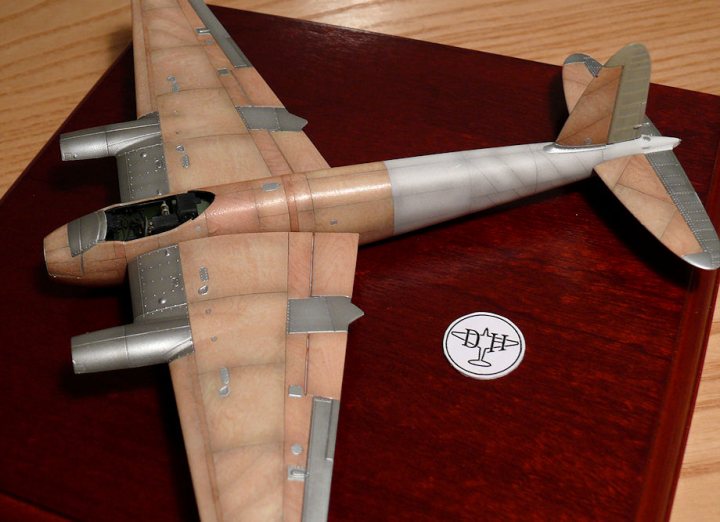
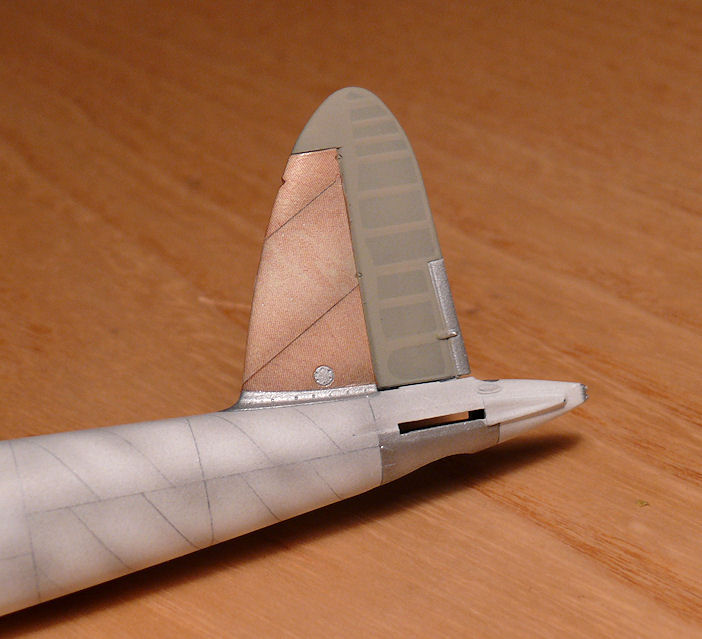
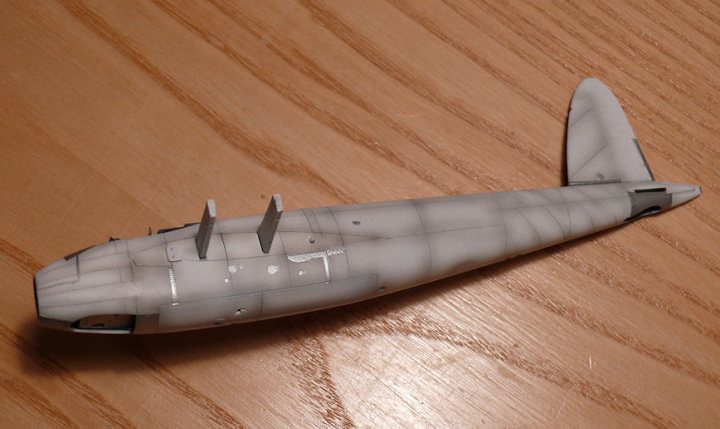
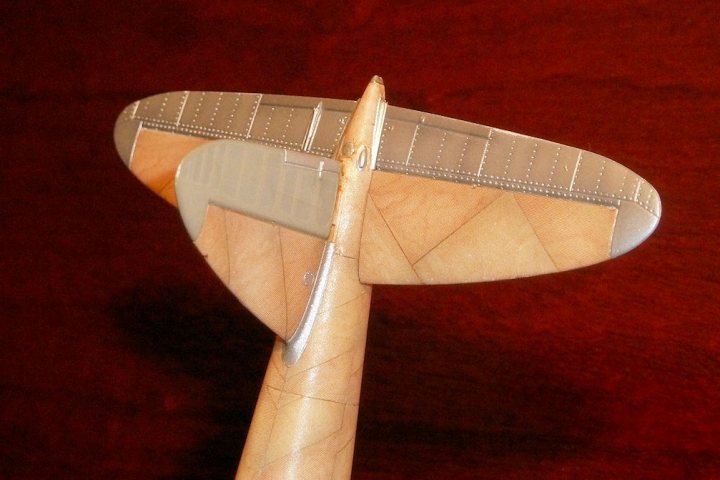
Bit more progress tonight: I painted the fabric rudder in the same colour (Tamiya Deck Tan) than I used for the 'clear doped linen' parts of my SE.5a model. Then masked the solid parts:
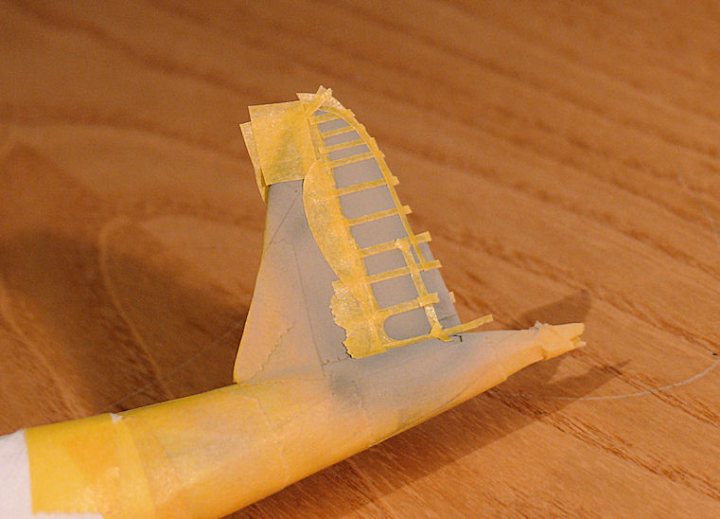
And sprayed a slightly darker mix to give the effect of a 'hollow' substucture. I also sprayed in a couple of aluminium inspection panels I missed first time around: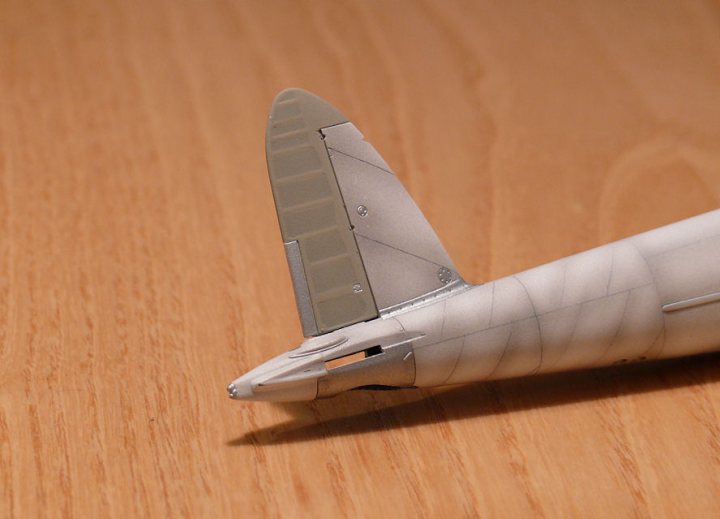
The tailcone is usually assumed to be aluminium judging by the other 'woodgrain' Mosquitos I've seen, but only the lower tailwheel shroud is metallic. I can't find references for the material of the two blisters on top of the cone (presumably fairings for control horns or linkages), but I'm going to assume they are aluminium, and I'll hand paint them. Because of the rather complex geometry, the rest of the tailcone will be finished with oil paint woodgrain. Otherwise, I think the fuselage asembly is now pretty much ready for decalling. -
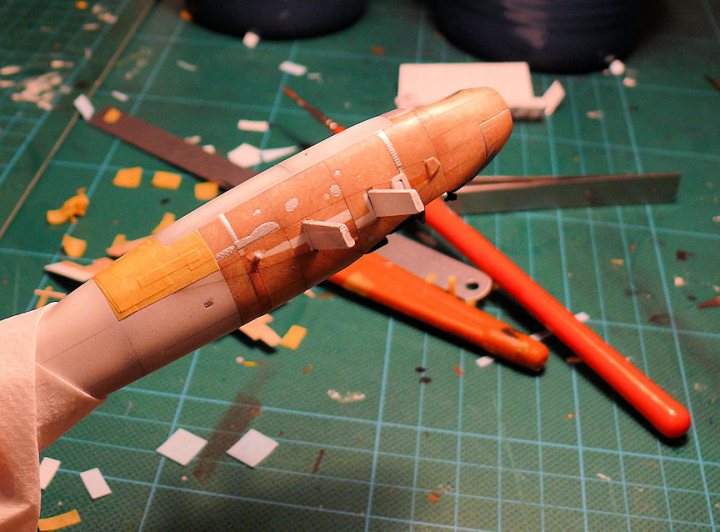
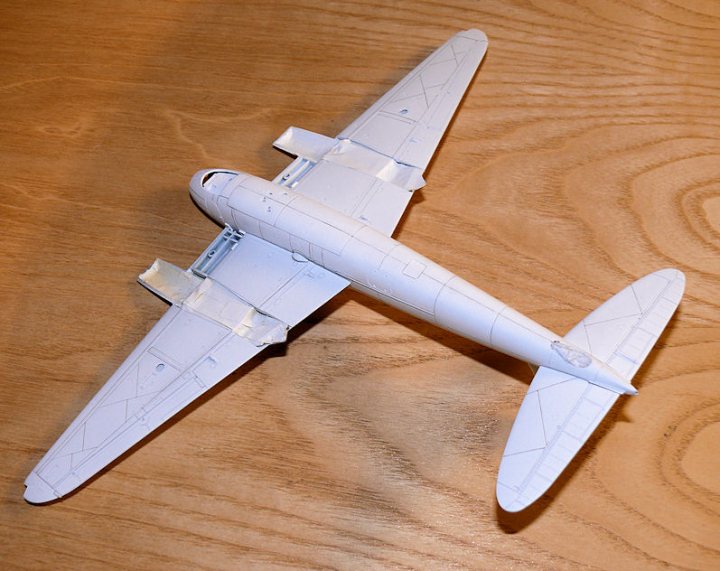
Since the wings weren't a total disaster, I went ahead and masked the fuselage:

Plenty of hole punch action again.
Then sprayed Vallejo silver, preshaded and Tamiya Smoke, as per the wings. Couldn't resist putting the canopy in place: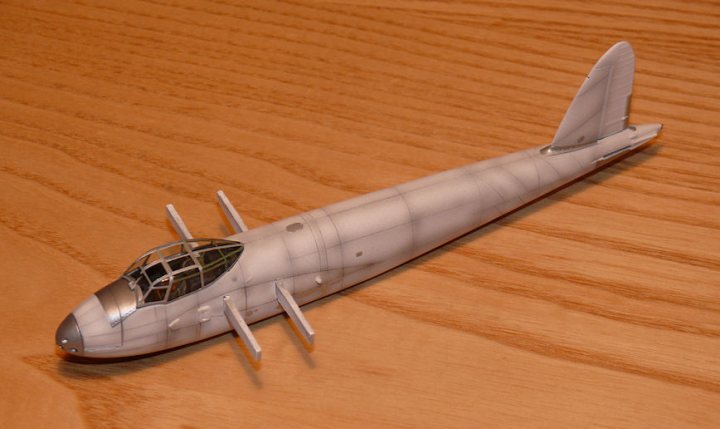
The hatch framings were a particular pain in the arse.
Now for the fabric rudder... -
Meaning scale effect?
Cees
Meaning so long as it looks something like wood, I'll be more than happy!
-
1
-
-
Glynn Powell in New Zealand has been building new Mosquito airframes for several years now. He uses all the original materials and techniques. There are many pics of just the wooden construction on the web. The wood is actually very light of colour.
Perhaps this helps.
Cees
Yes thanks, I've seen the website - I think there are two new-build airframes. I've gathered a loat of reference material, and that is how I arrived at the panel demarcations. Even so, there is a lot of interpretaton becasue even the main panels appear to be sub-divided into smaller panels of various orientations. The wing undersides of the two new Mosquitos have totally different panel patterns as far as I can see.
The wood skin colour (birch) can indeed be very light, but the fact is that without a bit of depth and contrast, the woodgrain on the decals doesn't show up well. I'm aiming for a finish that looks good rather than a 'true' colour. After all, due to the method of assembly and surface treatments, it would be pretty much impossible to ever see a Mosquito as I've modelled it.
-
Is it possible to overspray a very light mist of flesh to tone down the colour?
Cees
TBH if anything, I'd like to richen the colour if possible, and make the grain pop out a bit more; more like the lower image. Not sure what effect the camera settings had, but if I can replicate it using a glaze (filter?) I'll be happy.
Any advice from the experts in woodgraining is welcome of course...
-
Upper wing decals are complete now. It's very difficult to get a decent photo of it that shows what it really looks like. For example, these two are of the model with the upper wings fully decalled, but different lighting makes them look like different models:

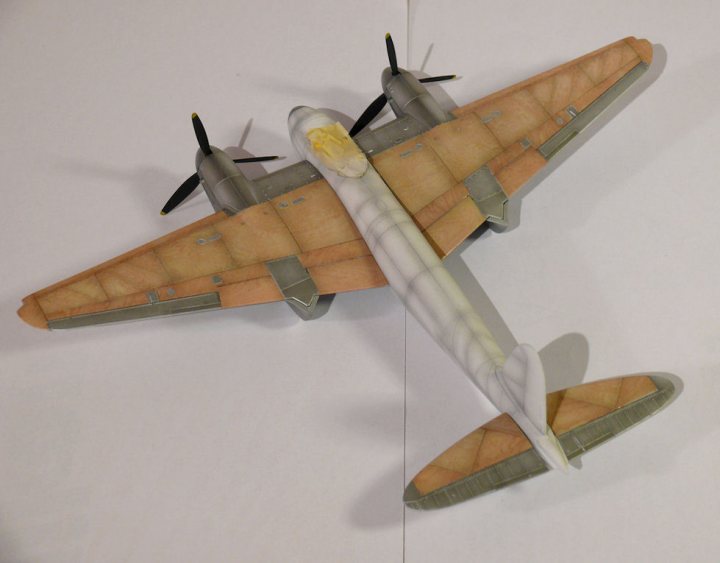
The latter is closer to reality, although the darker port wing is not really like that, I think it must be slightly in shadow.
The pale woodgrain needs deepening a bit to reduce the contrast of the preshading. In fact if it looked more like the first image in reality, I'd be happy with the effect. -
Wing topsides nearly done, just need some slightly darker spanwise strips:
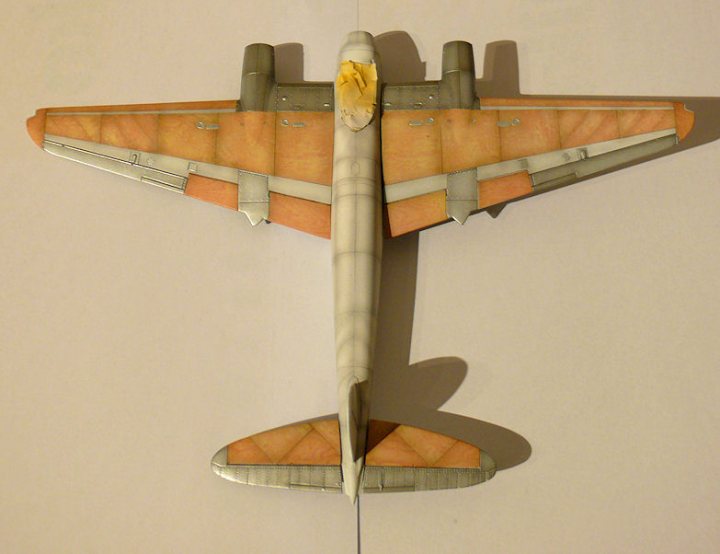
Strange green hue on the preshading, must be the camera getting confused with the combination tungsten/led lights in the office. -
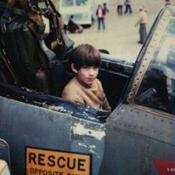
Wish I built and painted like that when I was 8, very nice work.
So do I - then again I don't think my dad could keep up with the number of models I was building, so I had a shallow(er) learning curve!
Either way, so long as he enjoys building despite my constant advice and totally unreasonable expectations, I'm happy!
-
1
-
-
Very nice, built the weekend edition, nice kit and yours looks great.
Thanks Mish!
-
So here we go with the first templates:

They didn't look right...
Close of play: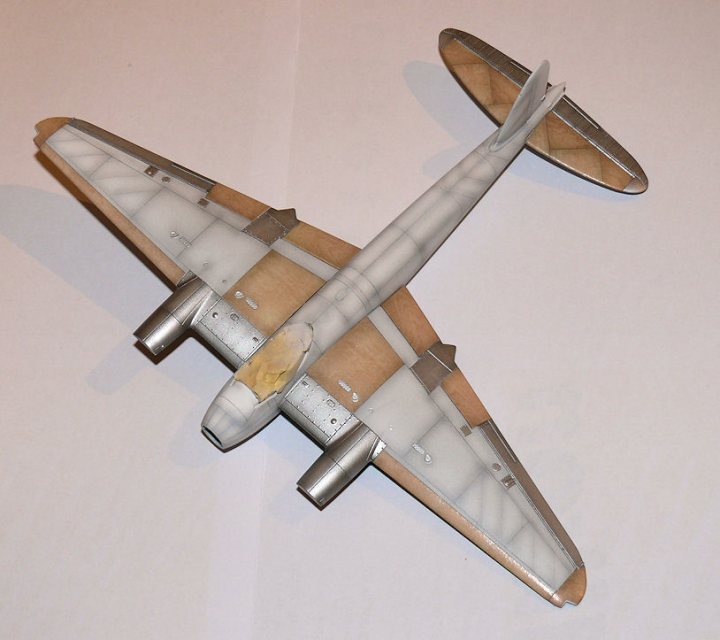
It's a strange process: Adding adjacent panels makes the existing ones look totaly different. The variation in grain on the same sheet also makes a big difference to the results. I'm not even suer of the effect I want to end up with, I'm just trying different decals and seeing which looks best.
Applying the decals is fairly straightforward; cutting them around small details in-situ is surprisingly easy.-
1
-
-
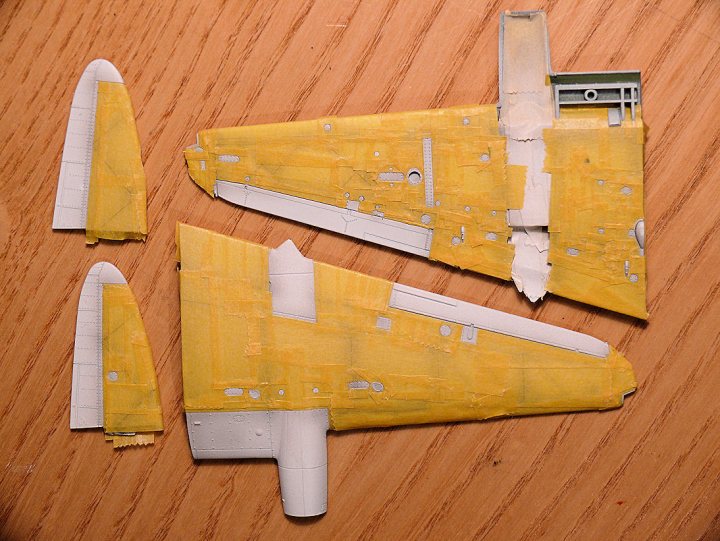
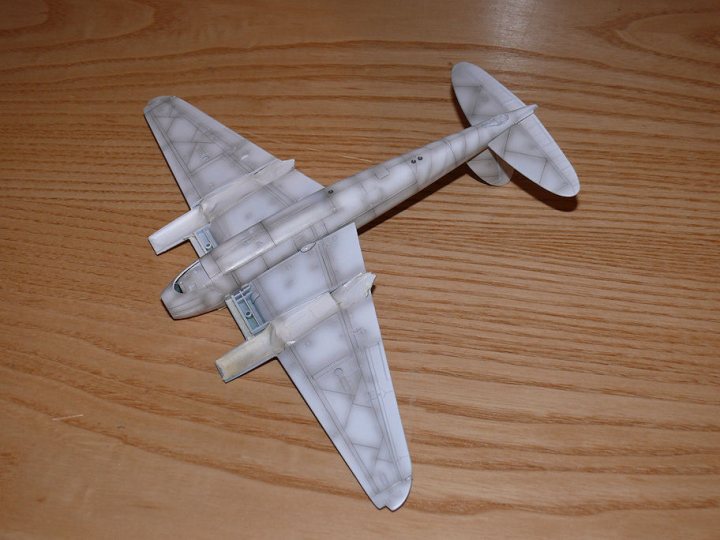
Preshaded silver, then masked various panels for an overspray of Smoke:
Then remove tape: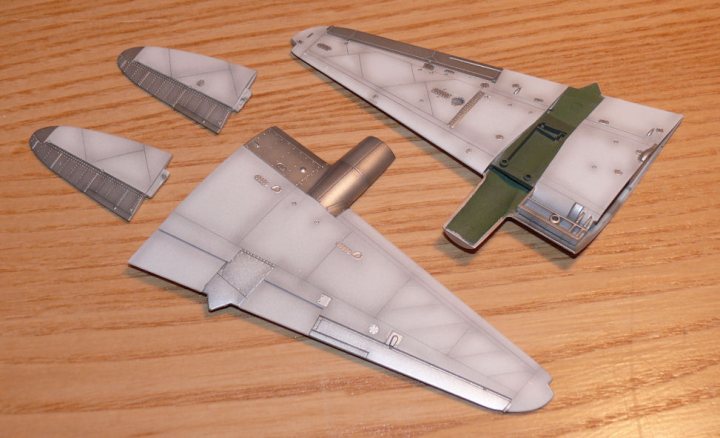
Next will be applying the woodgrain decals and seeing if it looks right or not. -
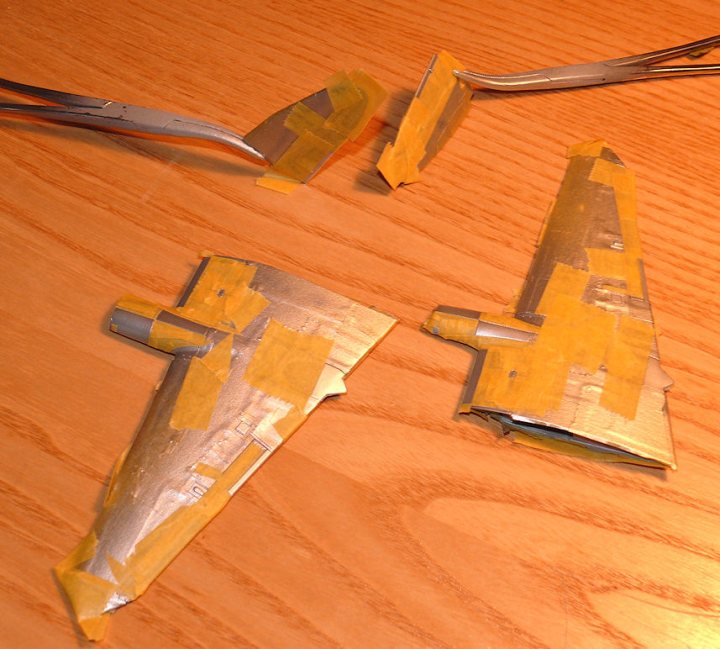
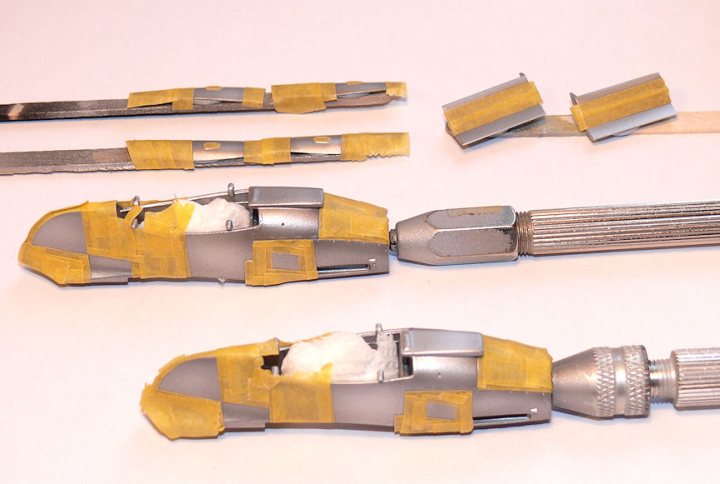
Masking around all the metallic panels was fun:
At least the hole punch sets got some heavy use. Next job is to spray this lot in various shades of Aluminuinm, to match the nacelles. I'll mask the fuselage if the wings look ok when woodgrained. If not I'll quietly retire it think... -
So the demarcations are done:
And the preshading: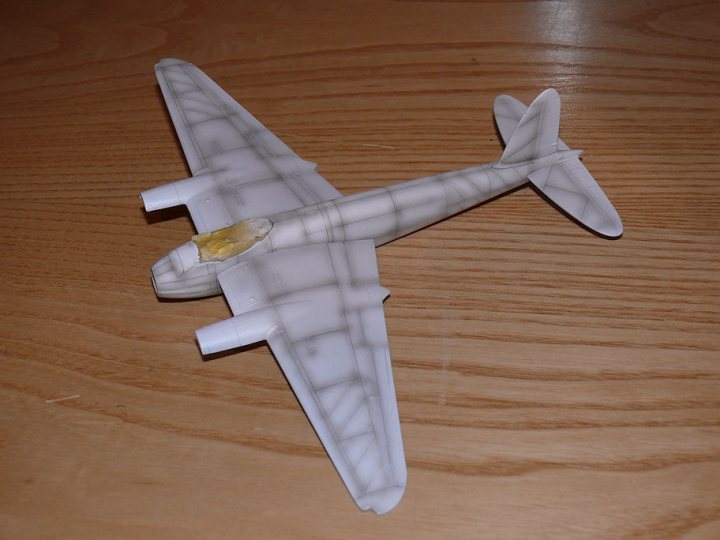
Might give it a very thin dusting of matt white to reduce the contrast, and also give the pva decal adhesive something to key into. -
The main panel demarcations are pencilled in now:

Difficult to judge these because they appear to be slightly different on different aircraft. Even the two images of the new-build Mosquitos I've seen have different skin boundaries. Had a bit of help on the smaller details via. The People's Mosquito, so I thought I'd make a small contribution to their efforts: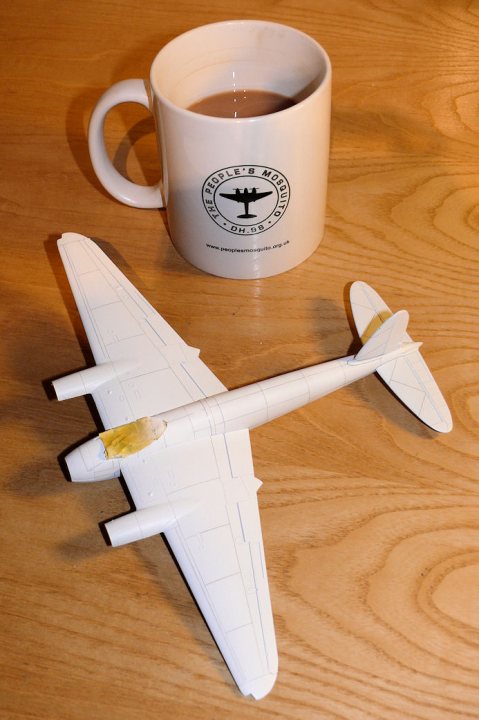
I still need to draw some very fine demarcations for the herringbone sub-panels on the rear fuselage and outer wing panels. They are very obvious on the real thing, but unfortunately the linear grain on the decals isn't obvious enough to replicate the effect.
Also got a couple of new toys in the post today: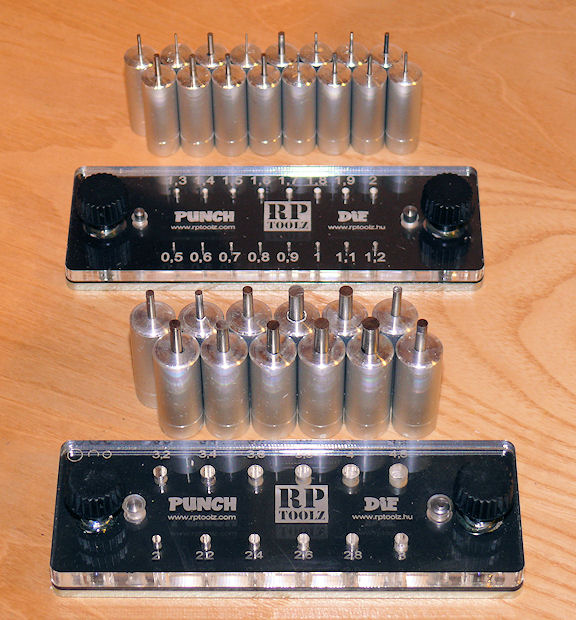
These will be pretty much essential for cutting masks for all the inspection panels on the airframe.-
2
-
-
Thanks Ralph!
Tonight I applied some Tamiya Smoke to the nacelles etc., to give a bit of contrast to the panels. I then overcoated with Mr.Colour Gloss + 10% Tamiya Flat Base to give a satin finish:
Ideally, I'd like it all a bit more matt, so for the final coat of the finished model, I'll probably go to 20% Flat Base.-
1
-
-
I love my Tamiya builds. Just bought the Tamiya 1/48 Lancaster while visiting Germany and just started my Tamiya 1/48 De Havilland Mosquito FB Mk.Vl/NF Mk.ll build!
Looking forward to seeing them on LSM.
-
I've masked the aluminium nacelles ready for overspraying with a slightly darker shade, or maybe clear "smoke" to give a bit of contrast between the panels:
Also made a start on drawing the main wood skin demarcations on the wings and tailplanes: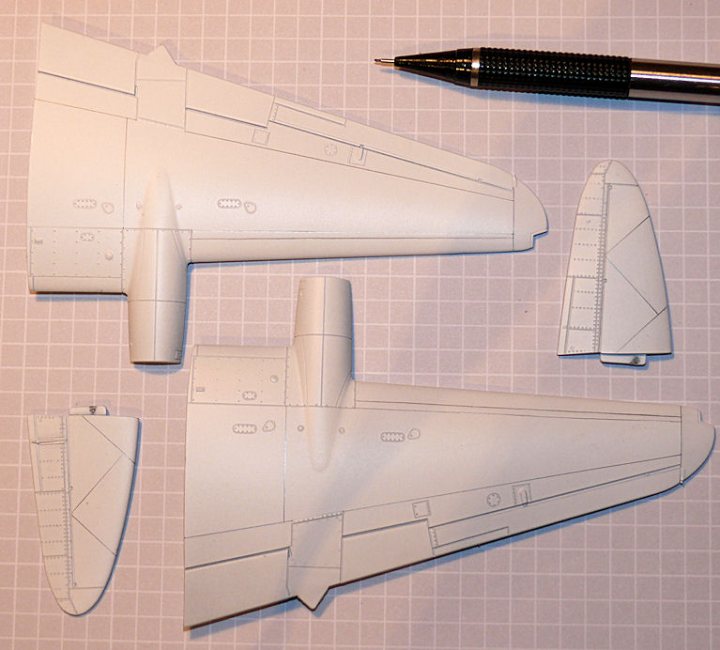
At least these are my best guess based on studying photographs. Another couple of chord-wise lines on the wings, and they'll be done. -
I've been puzzling over how to represent the dinghy hatch behind the canopy:
(image courtesy of "The People's Mosquito" project: http://www.peoplesmosquito.org.uk/)
It was moulded-in on the plastic, but the double lines (representing the metallic framing) around the fuselage joint line area were too fine to re-scribe, and basically I screwed it. I tried several times to re-scribe them, but then opted to simply draw the hatch and framing in pencil. This was also a disaster - trying to get concentric lines at this scale - even using templates - proved impossible.
So I tried this: Forget scribing or drawing the lines on. Cut a rectangle of clear decal paper, and spray aluminium. using that as a guide, cut a slightly smaller rectangle and paint white, and preshade. Finally, cut some woodgrain to suit the white decal: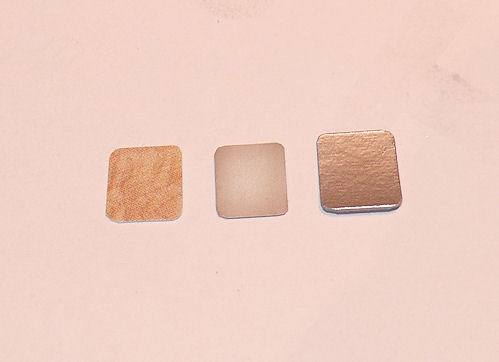
Then apply in sequence to existing plain woodgrain:
Difficult to get a photgraph to match reality, but it worked fine.:
Obviously the geometry on the final model will be much more accurate, and it still needs a small window forming in one corner, but it seems a fairly risk-free way of doing it.
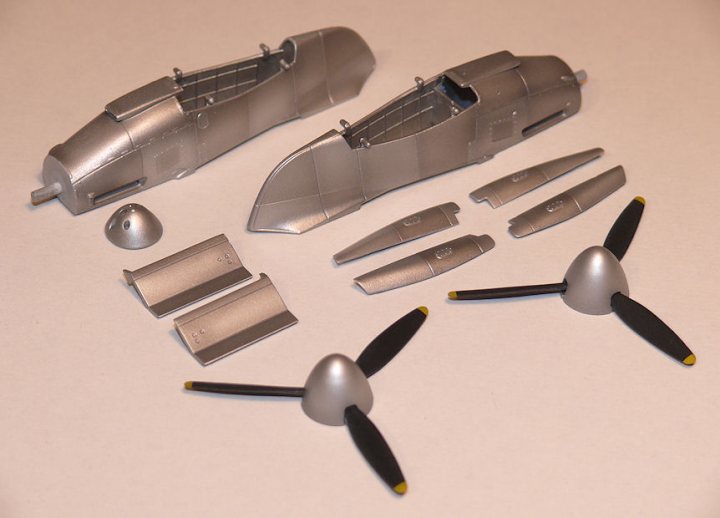
Also made a start on the metallic areas, and got the spinners done: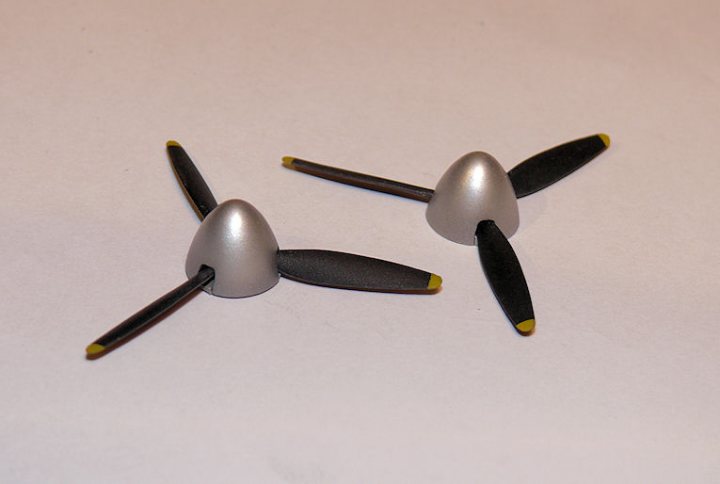
-
Thanks for the comment kahunaminor! Not sure whether it will turn out looking good or bad, but it will certainly be...different, for me at least!
So this is a version (bottom wing) with thicker joint lines that the middle one, but no preshading at all, plus a couple of new grain decals:
Far too MFI kitchen I think.
Looks like there are only two or three grain types that look right, plus it needs a smidge of preshading similar to the middle wing. I think the preshade also hides any slight edge errors - the pure white sticks out a mile.
Next job is to try matching some oil colours to the decals to get a match for the tailcone. I'll use the remaining white bits of wings for this. I've not seen that many woodgrain Mosquitos, but IIRC all of them assumed a metallic tailcone, which, surprisingly given it's complexity, is wrong. I doubt the decals will conform to it, so I'm left with brush painting the grain in that area.
At least doing these decal tests have reassured me that templating and applying them is actually very easy - at least on a flat panel!-
1
-
1:72 Tamiya Mosquito FB Mk. VI (woodgrain finish)
in Non LSM 'WIP
Posted
Tried oil painting the tailcone, but it didn't really work, so I tried agiain using decals. very fiddly, but it looks better than paint. Maybe needs a bit of fettling, but it will have to do:
Also corrected the bomb door surrounds from hardwood to aluminium:
I used off-cuts of the woodgrain carrier film border, sliced into strips and sprayed aluminium. The ejector hole surrounds were hand painted with aluminium.