

dr_gn
-
Posts
145 -
Joined
-
Last visited
Content Type
Profiles
Forums
Events
Gallery
Posts posted by dr_gn
-
-
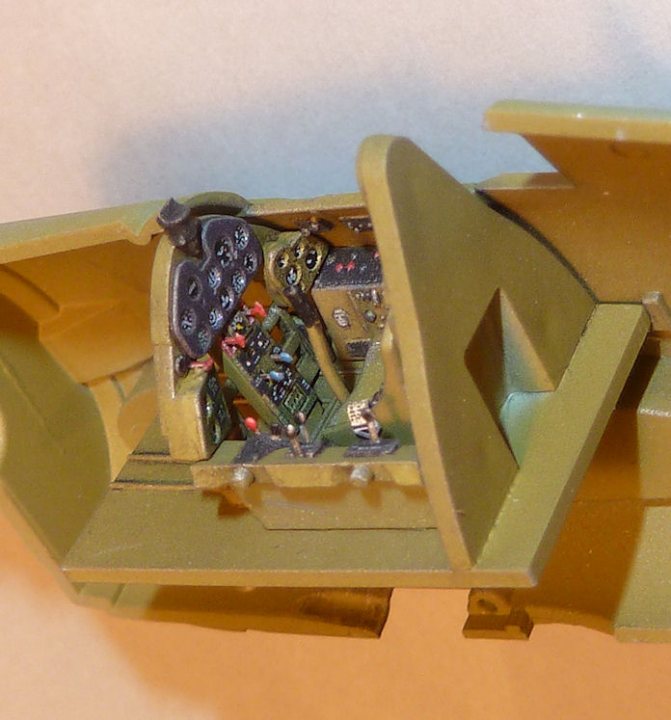
Preliminary detail painting done:
The annoying thing about pre-coloured photo-etch is trying to match the cockpit colour they're printed in. Both times I've used it it's been a mix of Tamiya paints, and even then it's not been spot-on.-
 3
3
-
-
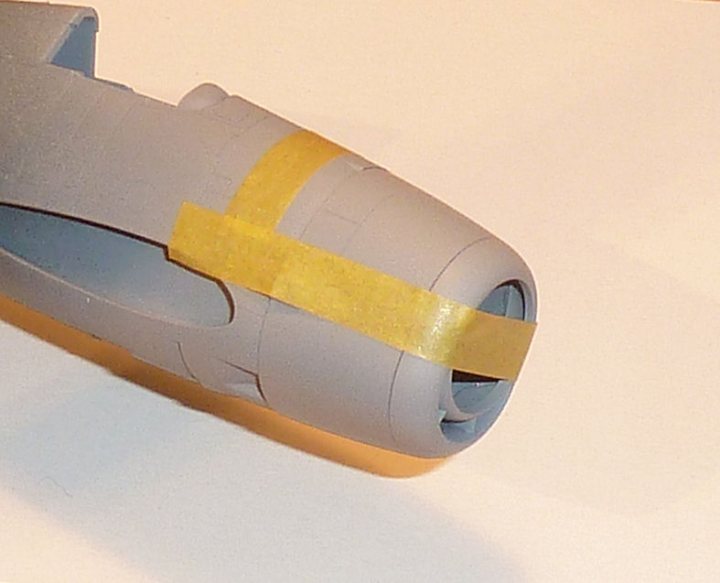
Not much progress: The cowling comprises three parts. Pretty straightforward to put together, and only a few dots of filler needed to make perfect upper and lower joins. Surprising given how long they are:
-
2
-
-
The engine is nicely moulded, and includes p/e ignition leads (which I annealed and bent into shape before priming) and a couple of data/manufacturer plates which are pre-coloured:

The seat base is also p/e and was attached using cyano: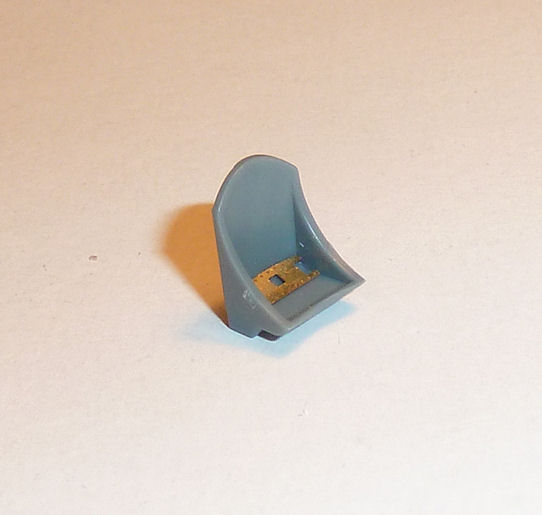
-
2
-
-
Refined a few small details this evening:
Started by cutting a tab of the tailwheel so that I can add it last rather than having to fit it between the fuselage halves and mask it: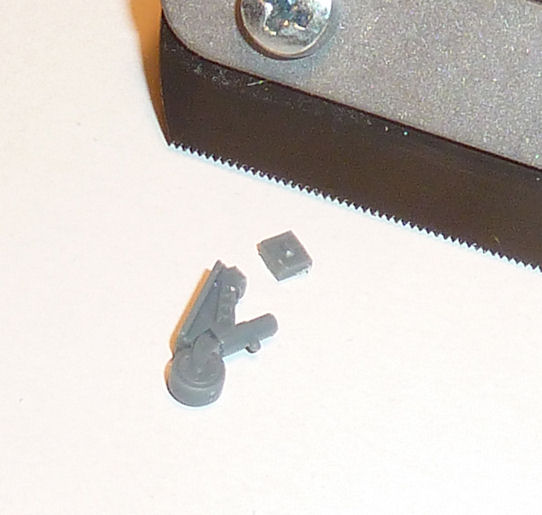
Also drilled out the pockets in the drag link fabrication: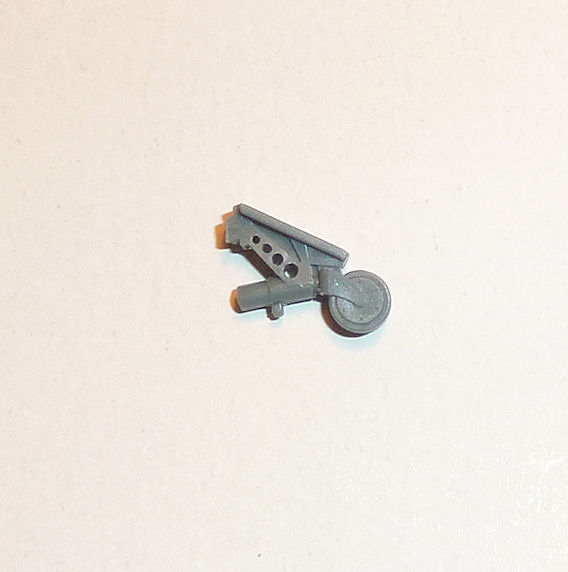
And opened out the moulded-in exhaust stubs: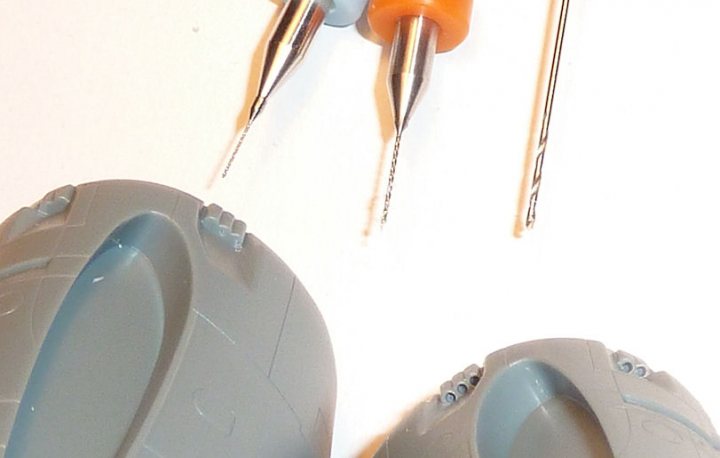
...and the exhaust bulges in the early version cowlings: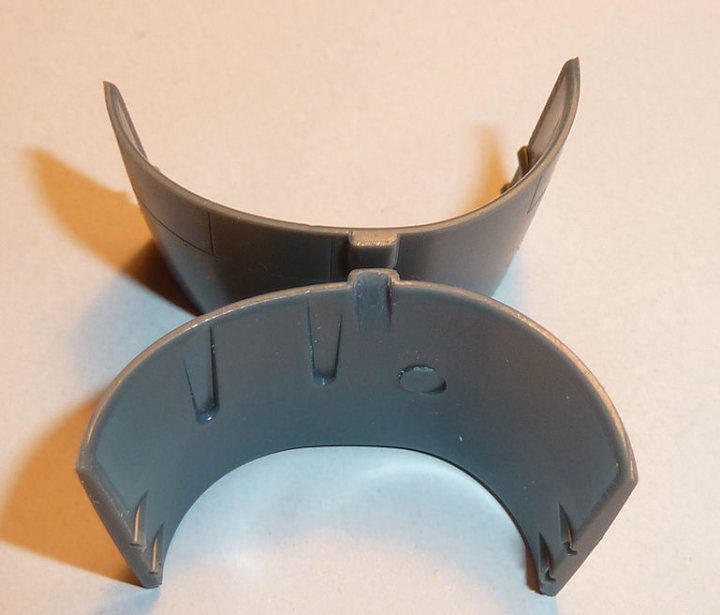
Drilled out the tiny gun barrel inserts: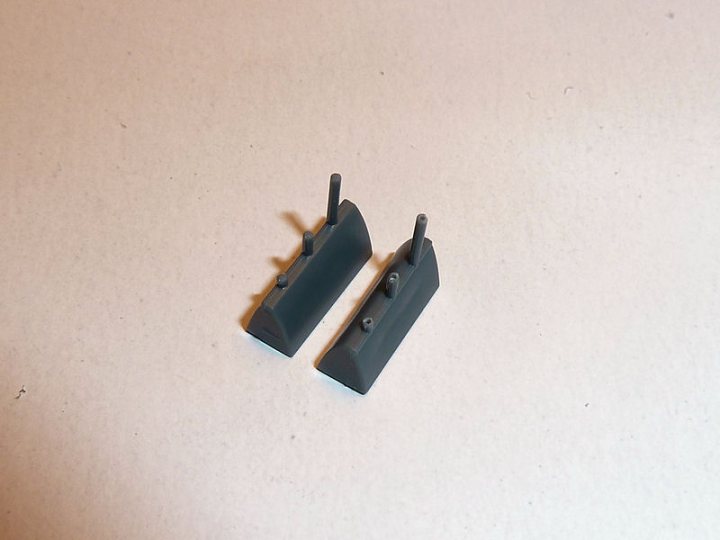
As with the exhausts, it would have been better to fit brass tubes I guess, but it's meant to be OOB, so I'd class refining kit parts as acceptable.
Finally, the gunsight reflector plate is moulded solid: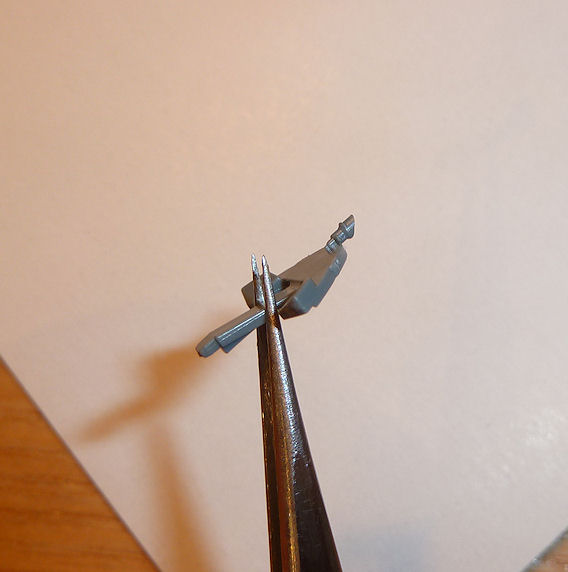
So I notched it and I'll use the resulting stub to mount a shaped bit of spare transparency sprue to represent the glass (it is in the box after all so why not use it):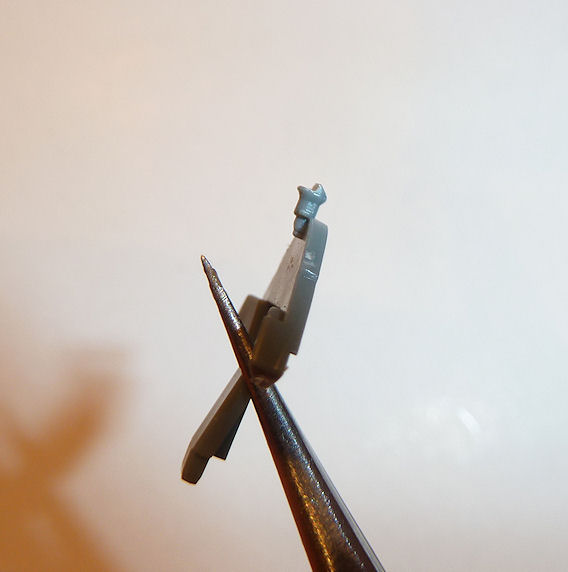
I'm going to wash all the parts in detergent tomorrow ready for painting. I've never really bothered with this before, but I seem to have had increasing issues with both lacquer primer and acrylic paint not sticking. Not sure whetherit's the paint, some kind of mould release agent ar just an inherent property of modern plastics.-
2
-
-
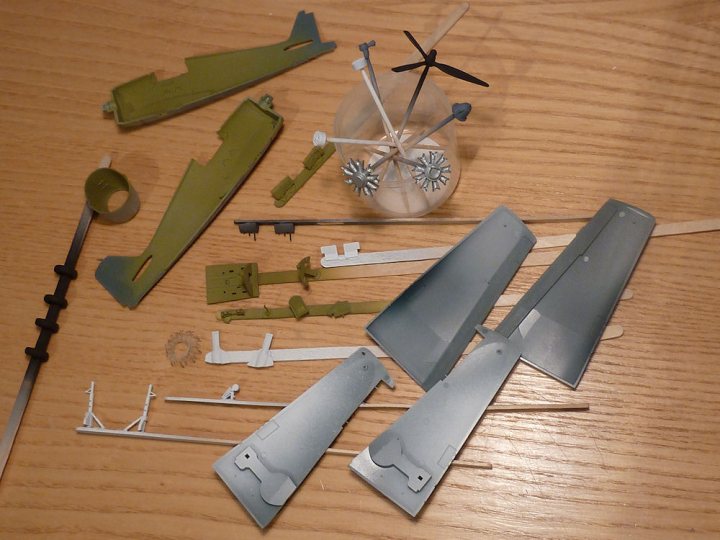
It's not a particularly elaborate kit - only 44 plastic parts:
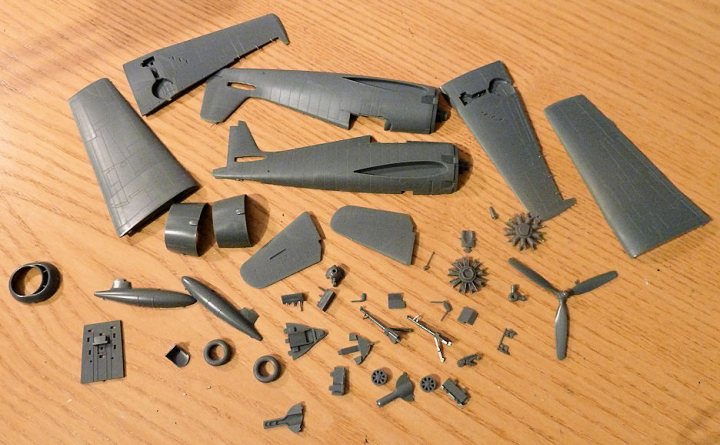
The design is refreshingly simple compared with some needlessly complex recent kits; wings and tailplanes simply push into sockets, which even without glue gives a rigid assembly and is self-aligning:

Doesn't look like any filler will be needed either.-
2
-
-
I thought I'd build a couple of Pacific theatre aircraft to expand the collection a bit. Luckily this Eduard ProfiPack kit, along with Tamiya's new tool Zero are arguably two of the best 1:72 aircraft kits ever made, so I'm looking forward to a couple of straightforward builds.
First the Eduard F6F-3: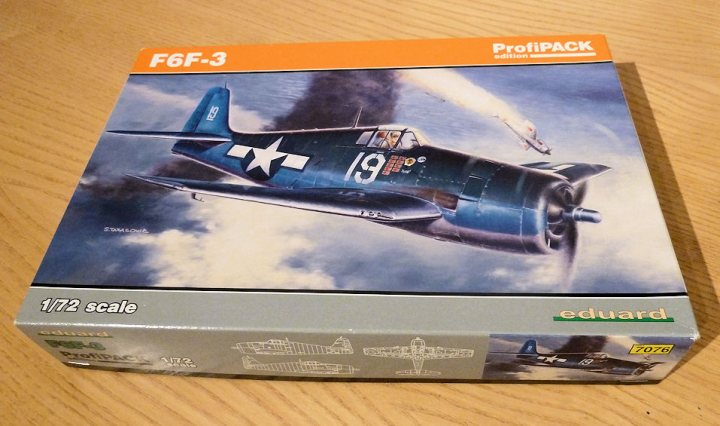
I guess to say I'll build it "out of the box" is true, although the box does include paint masks, and two photo-etch frets, one of which is in colour: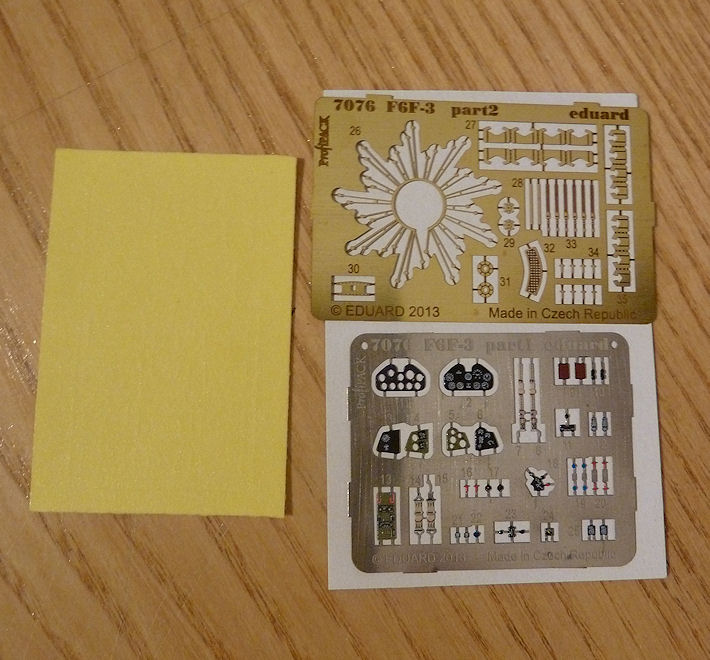
Plastic looks superb, with finely engraved panel lines and no flash:
Excellent instruction booklet, with full colour diagrams for 5 schemes. Decals also look great: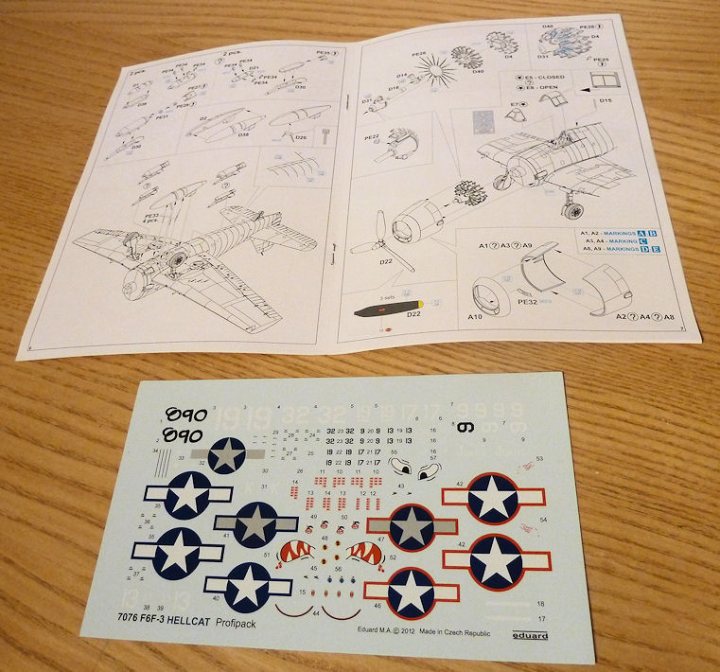
...all for a grand total of £10, brand new.
I'll be finishing it in the early (1943) VF-16 USS Lexington 3 tone scheme, with the red outline insignia - just because I like the look of it: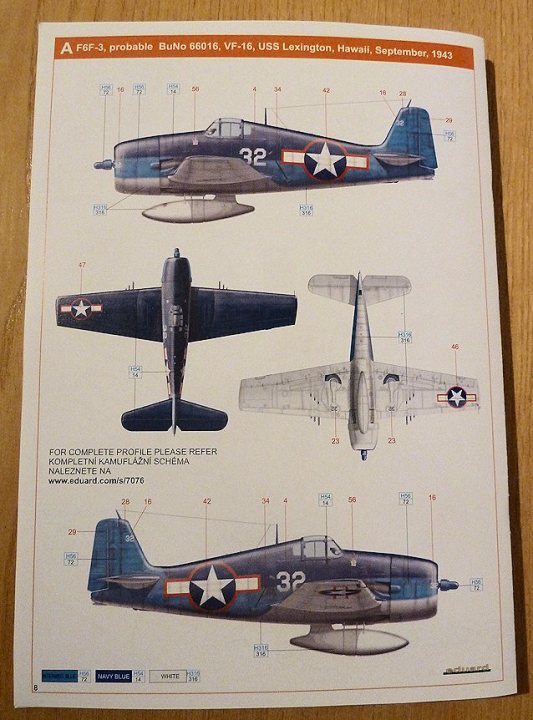
I found what I think are the correct colour codes with Vallejo paint, so hopefully it will be in the right ballpark: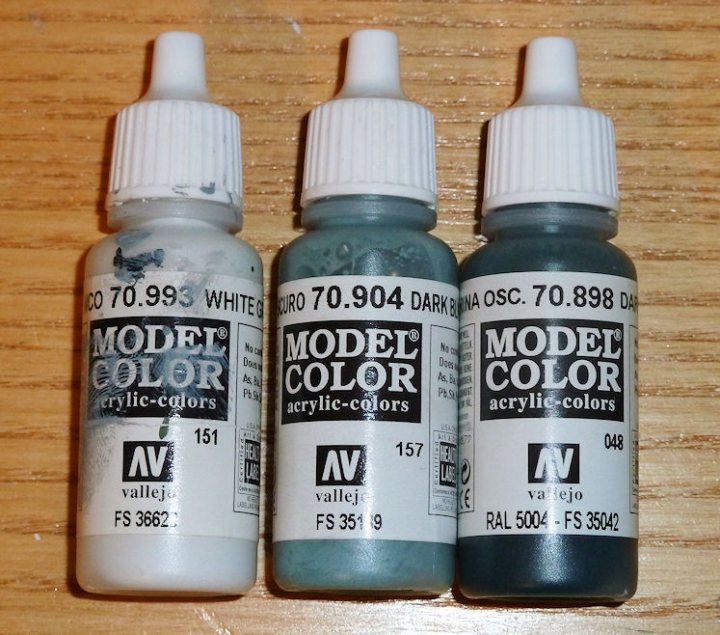
-
1
-
-
Thanks guys - appreciated by the boy and me too.
Yes, he's 8 years old, but is happy to practice and re-do things until they are as good as he can get them. Some folks elsewhere have implied it's too much to expect an 8 year old to go through all this and still enjoy it, but he seems to like the different processes.
All the assembly and painting was his own work, admittedly with a lot of guidance from me. I also did all the paint mixing/thinning as necessary. Also, if any scalpel work needs doing - I do that for him (e.g. canopy frame strips). Paint spraying (airbrush or can) is conducted under very close supervision, but still, it's his own work. He's got decalling down to something of a fine art (for his age!)- even the tiny stencils which he insisted on using.
He would like to enter it in a competition (the kit itself was third prize from the Cosford show). I made a point of explaining to the Cosford judges exactly what help I'd given him for his previous entry, but even so, with this one I think there might be an issue with people not believing it's his own work...
Lego is for 'free' building, plastic kits are for modelling - at least that's my theory!
-
-
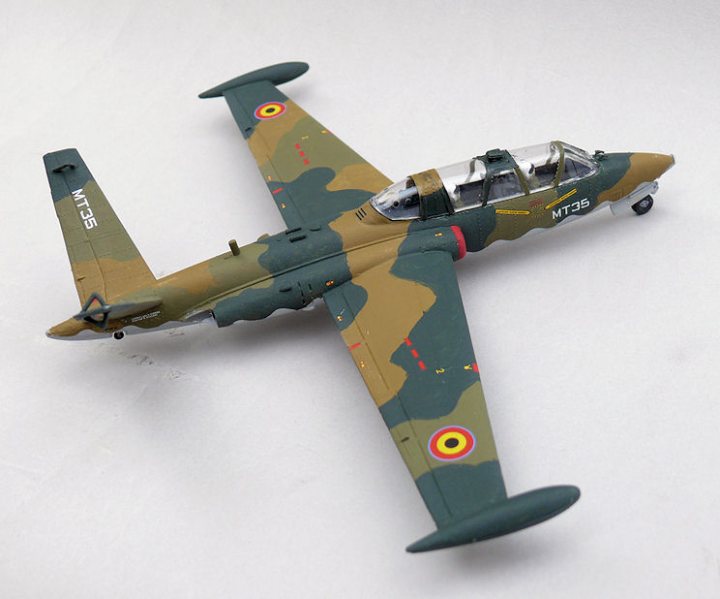
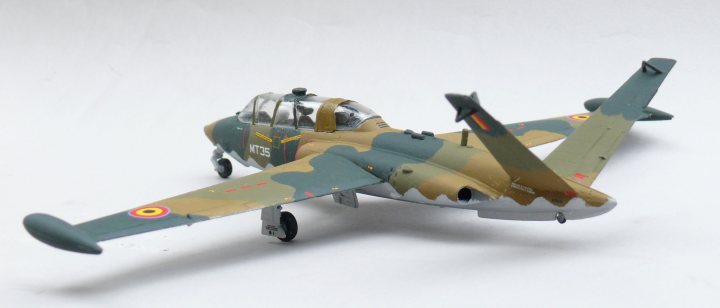
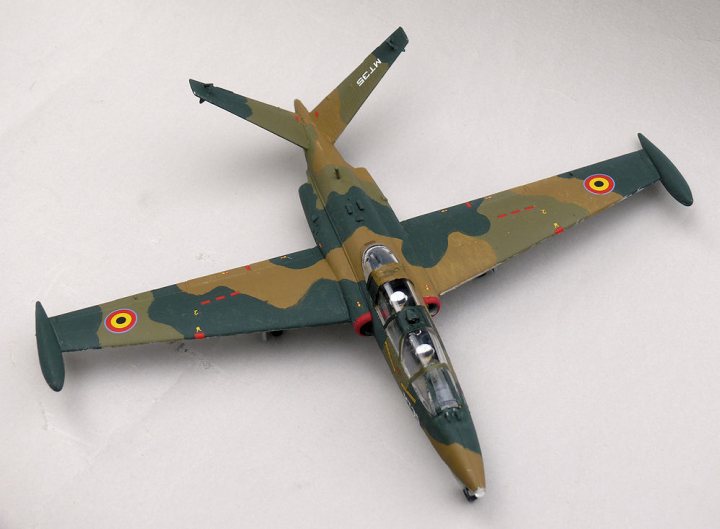
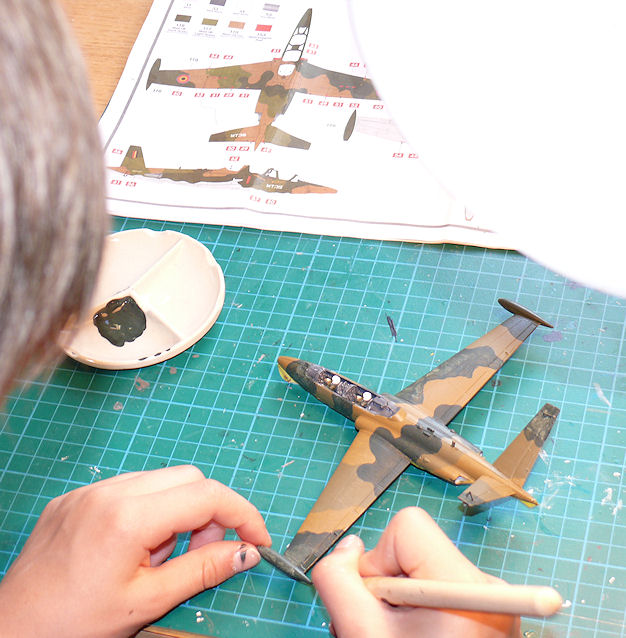
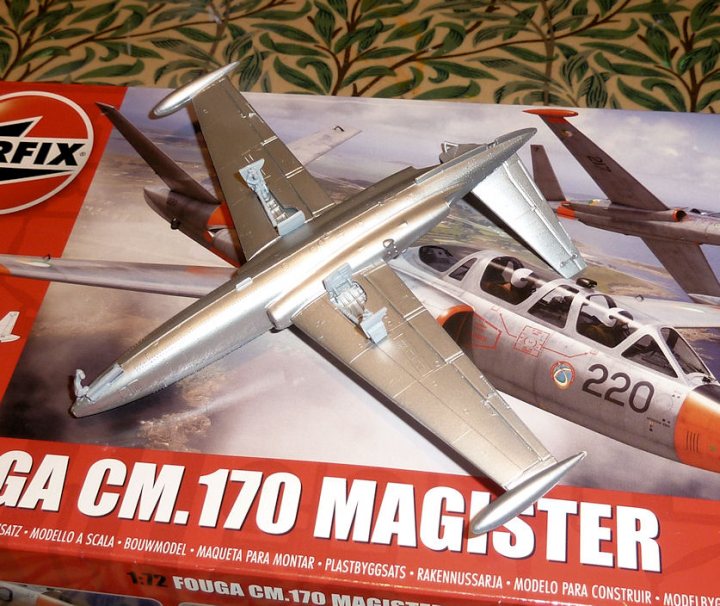
Here is my 8 year old son's Fouga Magister now complete (I donated the grass base!):
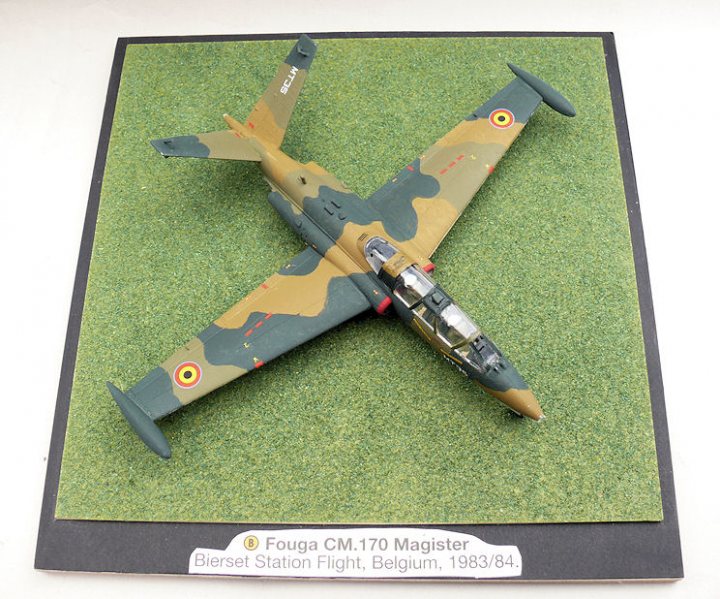

WIP here: http://forum.largescalemodeller.com/topic/3927-airfix-172-fouga-magister/
So thats model No.5 complete. No.6 will be a Matchbox Zero.
-
2
-
-
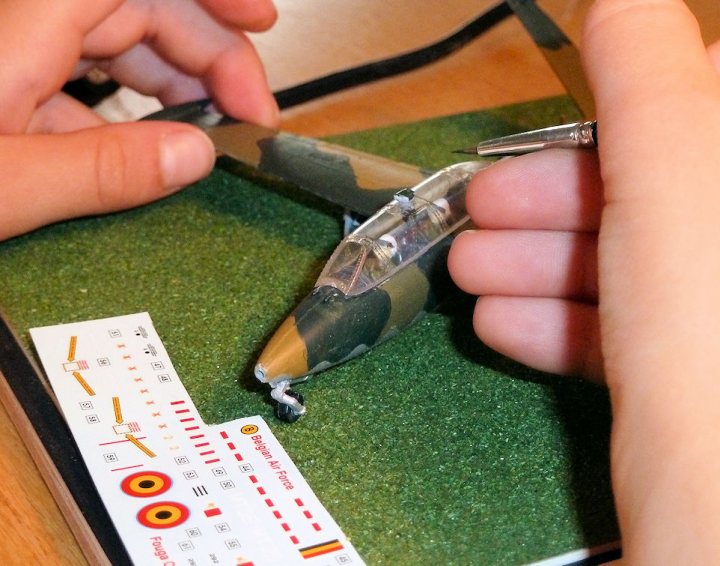
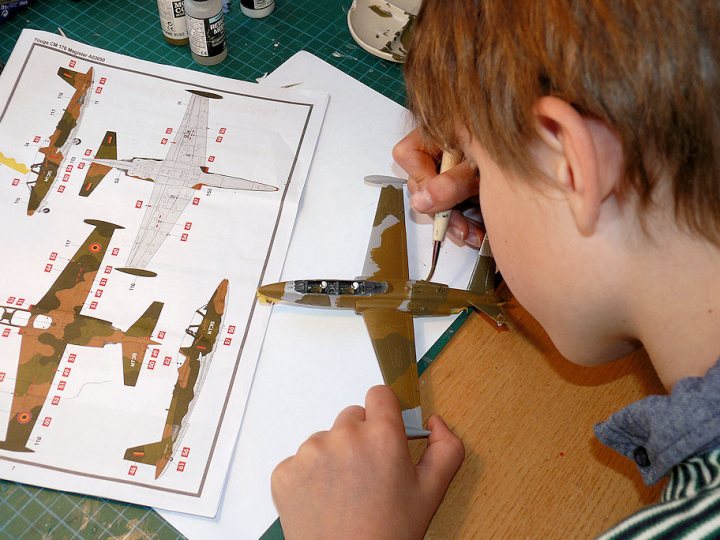
Final decals on - I suggested only using the main ones, but he wanted to do the whole lot. Took several sessions but he got there:
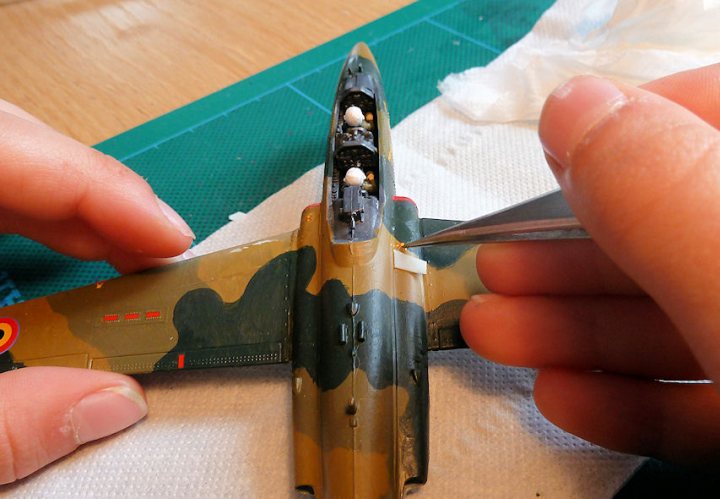
Ended up using painted Tamiya tape for the canopy, which worked well enough. Then after spraying with Humbrol Matt, I found a clear "little Lens" for the nose light; maybe a bit big, but effective enough: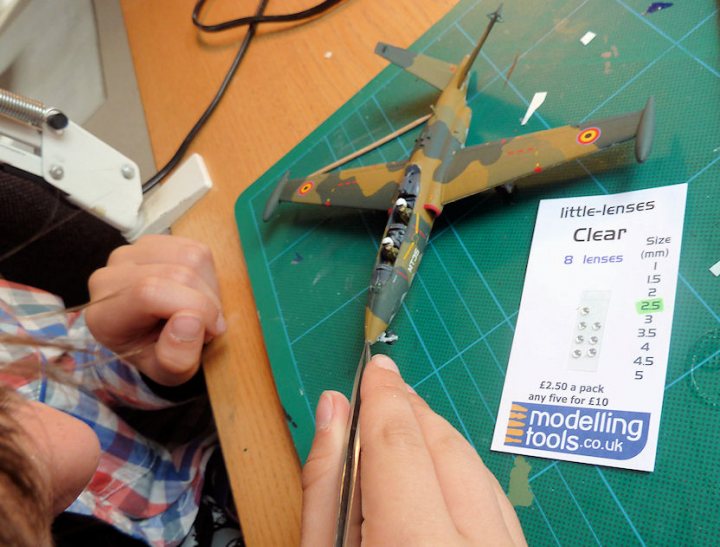
-
Fitted the wheels:
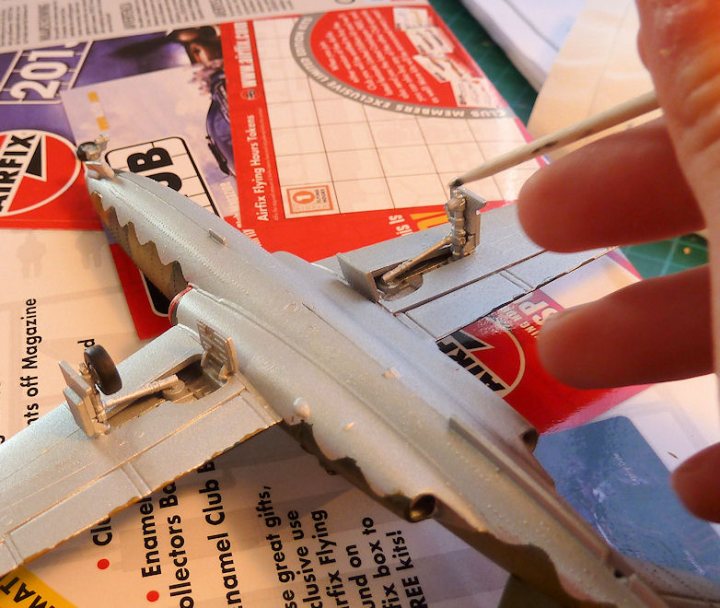
painted and fitted the periscope: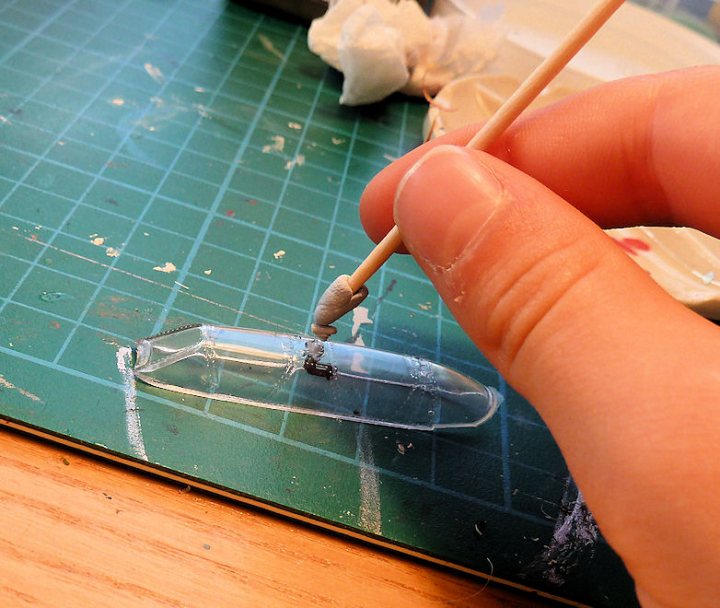
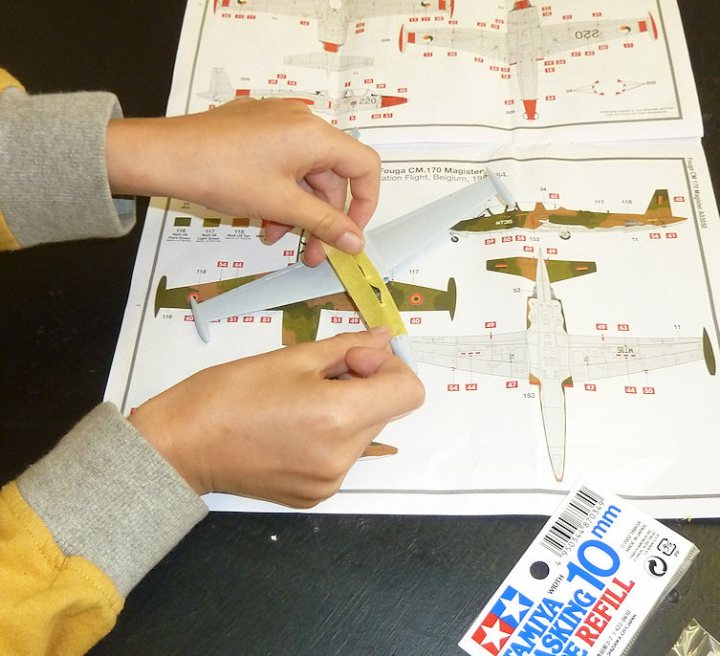
masked and painted the intake edges red. Old hand at masking these days...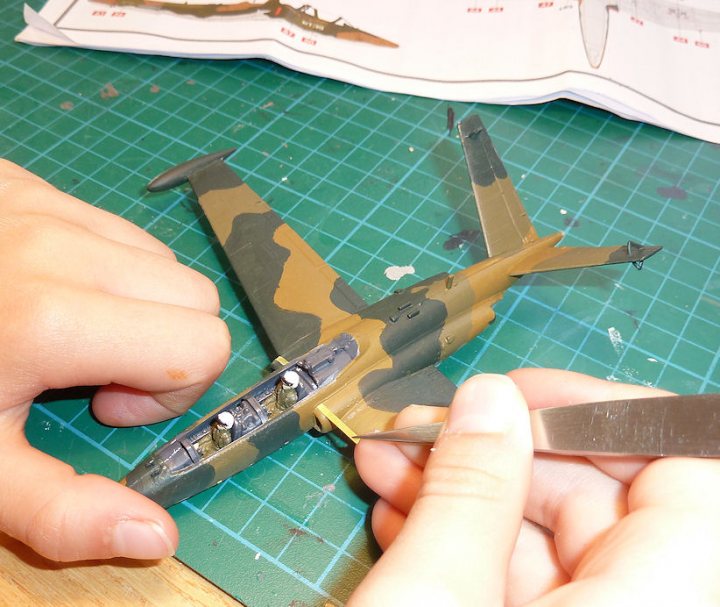
and got half the decals on: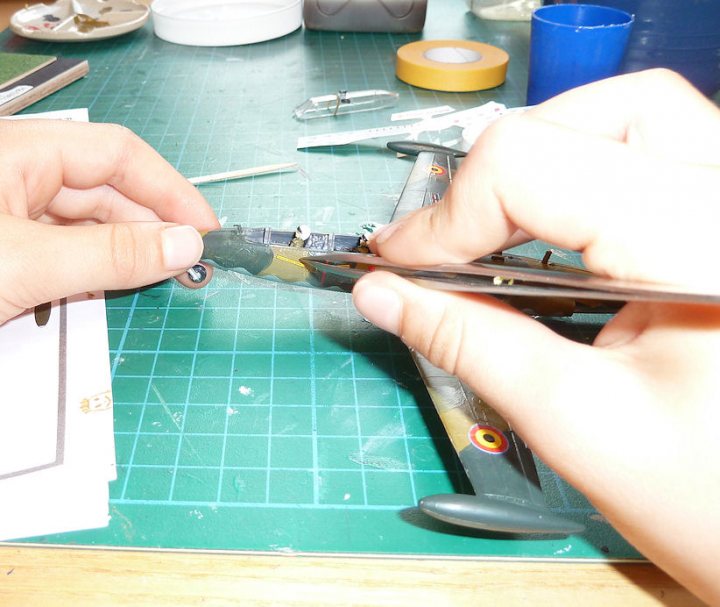
Just the other decals to go, then the dreaded canopy frames; we tried freehand painting them...not good. Not good at all So I sliced some masking tape strips up and he painted them in the three camo colours. I tried one and it looks OK, so we'll see how the rest goes.
I've got some spare "little lenses" so I think they would improve the nose light and maybe the tip tank lamps too. then that'll be it finished. -
Tried the Eduard canopy masks for the first time tonight. As expected they weren't perfect, but at least the ones that were wrong were too big, so I could cut them to size:

Gave it a coat of cockpit green first so that the internal frames are the right colour: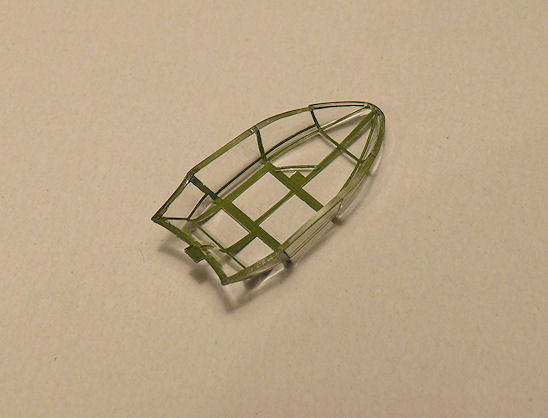
Then sprayed with Vallejo Air Aluminium and matt varnish. After a bit of scraping with a wetted cocktail stick to remove any imperfections, it looks OK: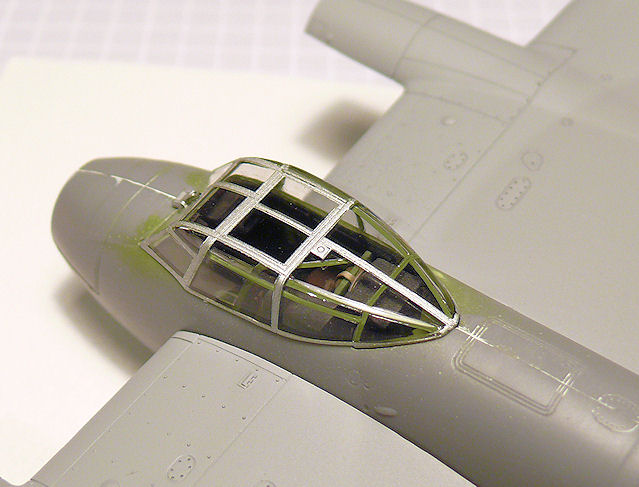
Windscreen wiper needs picking out in black, and a bit of a wash in the small nooks and crannies and it will be ready for fitting. Whenever that might be.-
2
-
-
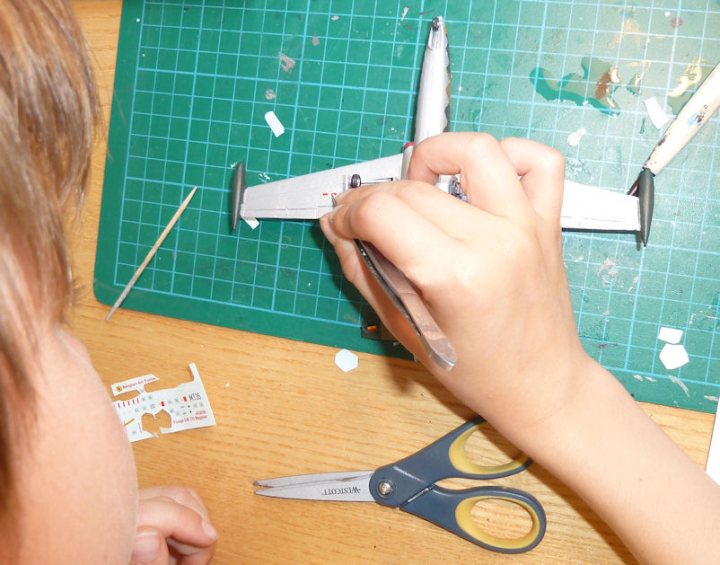
So he's done the dark green today - Two coats of Vallejo Air Black Green, again with retarder:
...and the wheels: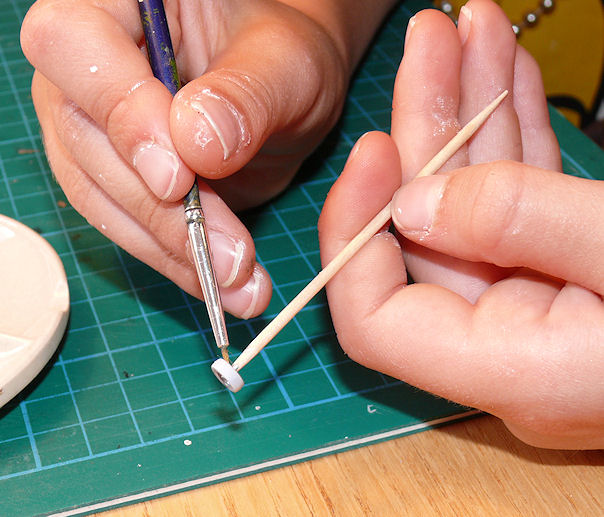
Moment of truth for the dressmaking masking:
Not bad result: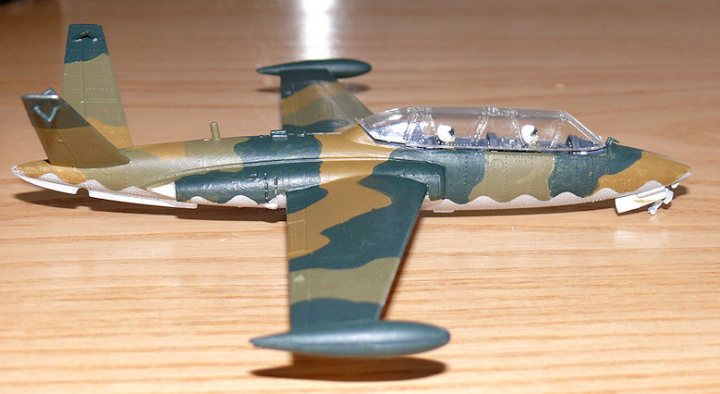
Still undecided about how to paint the canopy. I'm thinking freehand, or painted Tamiya tape. -
Much appreciate the comments guys.
Got a bit distracted by the random Spitfire build, but I'm now getting to grips with ths one again. Modified the nose cone to accommodate the Master Model brass guns. Basically filled it with Milliput and then drilled out some sockets for them to locate into:

-
1
-
-
Camo in progress, just the dark green to add. I gave him a Zoukei Mura brush to try - I'd forgotten how much difference a decent brush makes vs. a Hobbycraft special. I mixed the paints for him using Vallejo Model Colour plus thinners plus Retarder medium to give him a fighting chance of getting a level-ish finish before it dried:
It looks pretty good so far. I'll be interested to see how the wavy demarcation turns out after cutting the masking tape with dressmaking scissors.
Daughter's Gnat is finished: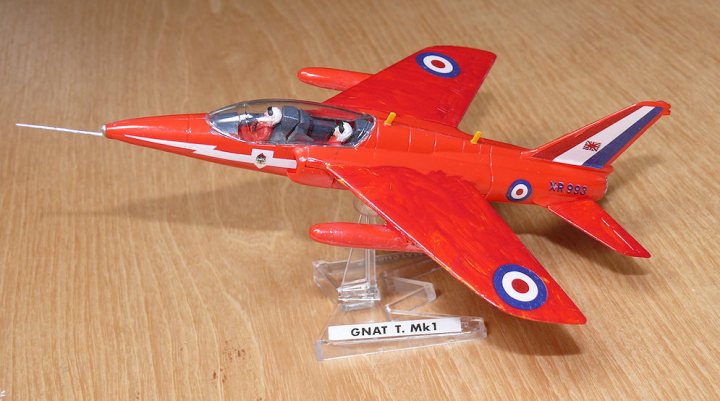
I helped her mostly with decal placement and fitting the pitot tube. I also PVA'd the stand socket into the fuselage.-
1
-
-
Finished pics here:
http://forum.largescalemodeller.com/topic/3945-spitfire-mk-ixc-hasegawa-172/
Thanks guys!
-
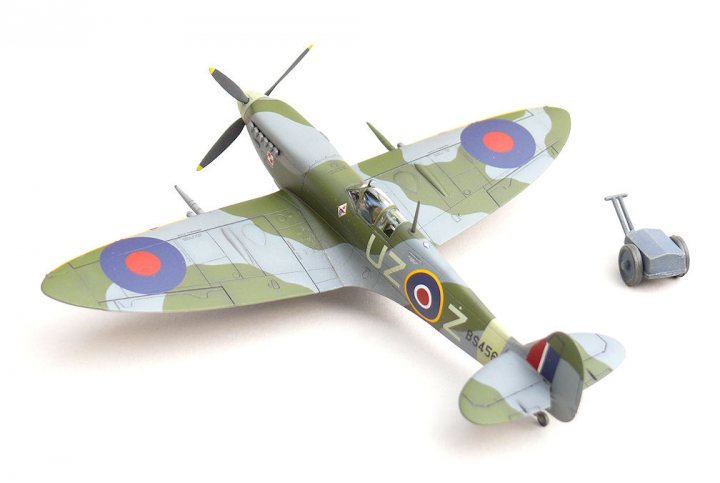
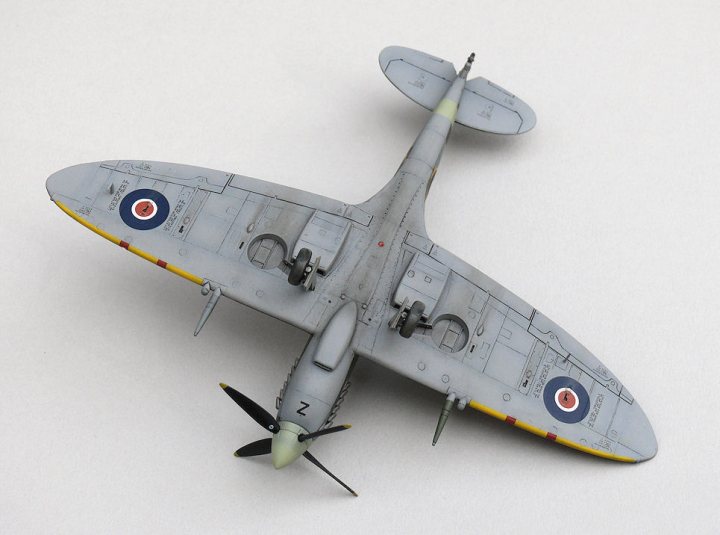
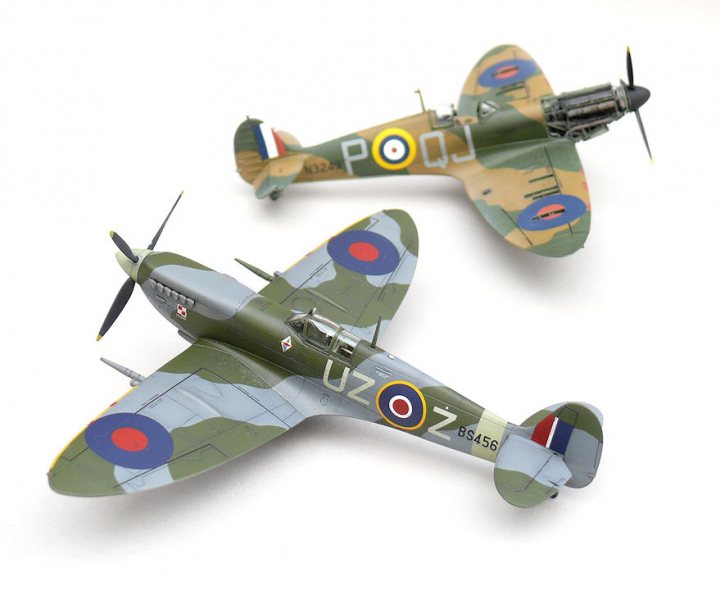
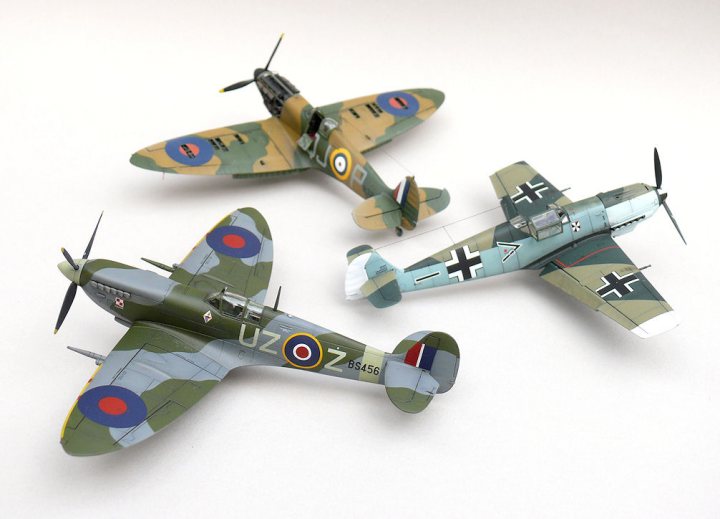
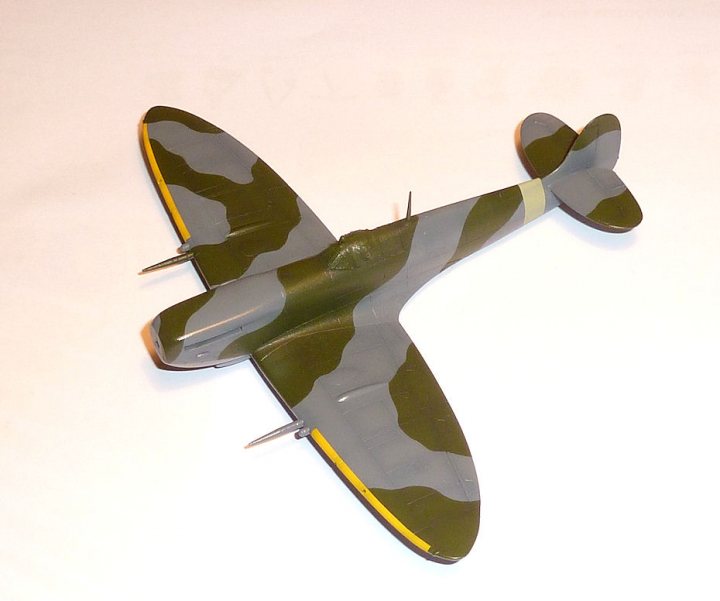
So after a bit of hassle with the wheel covers and alignment(still don't think it's 100%, but not much scope for adjustment)I'm calling this one finished. It's built OOB apart from Eduard belts, acetate gunsight and Techmod decals. Not a bad kit considering its age, but there were some issues with the canopy framing being poorly defined, particularly the rear section which is pretty much DIY. Anyway, here are some pics:
Supermarine Spitfire Mk. IXc, 306 (Polish) Squadron, F/Lt Jozef Zulikowski, RAF Northolt 1942.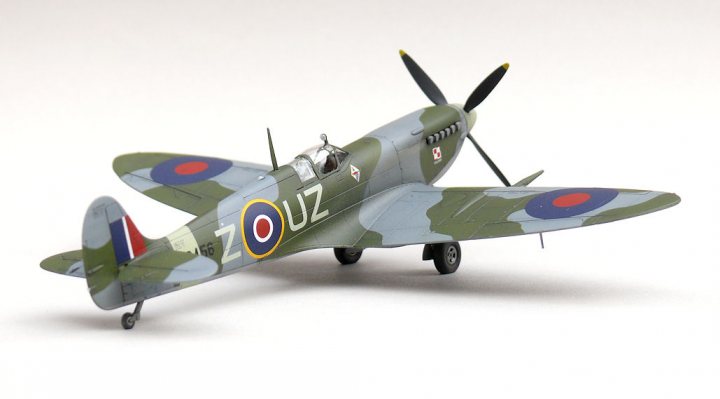


-
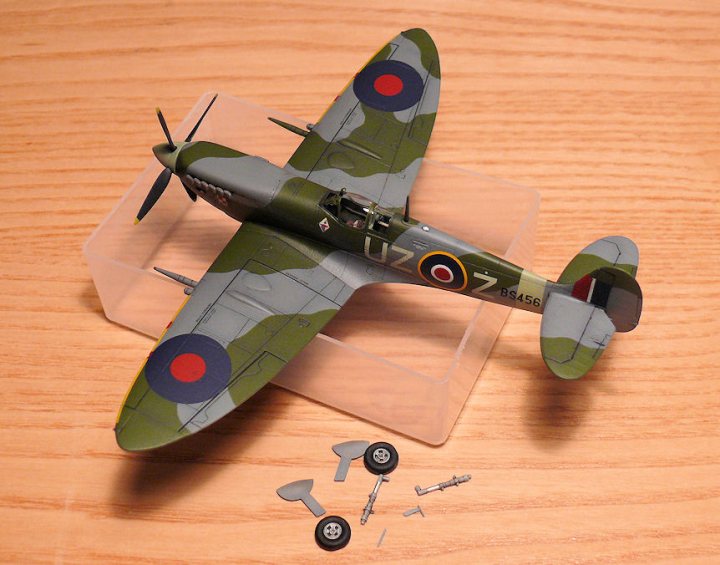
I gave the main panel lines a dark wash, and oversprayed the whole thing with Tamiya Smoke (to knock back the pure white bits of the decals) and then overcoated everything with Humbrol Acrylic Matt. Pushed the propeller into place, fitted teh exhausts and dotted pva over Tamiya Clear acrylics for the navigation lamps/covers. That now just leaves the last few details to fit:
Apparently, the dot over the "Z" in the squadron code signified the surname initial of the pilot (in some cases). Must admit although I've seen pilot's initials on their aircraft before (D-B, JE-J etc.), I've never noticed a dot before. -
Great builds. Your kids must be commended on partaking of the noble art of modelling.
Really reminds me of a time when I build for me and didn't worry about what others thought.
Thanks James. Yup, I remember a time when it was unacceptable to me not to finish a kit within an evening...but I enjoyed it just as much.
-
Undercarriage fitted tonight. No real problems with fitting it, but following the instructions/orientation of parts still seems a bit of a struggle. Still, the instructions appear to be the originals from 1975, and to be fair they aren't too clear:
-
1
-
-
I decided the yellow strips were a bit thick, so I re-masked them and touched in the adjacent upper camo with the airbrush in a low pressure/low viscosity mode. It looks better now, and has the added benefit of the wing upper roundels fitting in - nearly - the correct positions.
Apart from de-masking a Spitfire, the second best thing in modelling must be applying a set of RAF decals to it: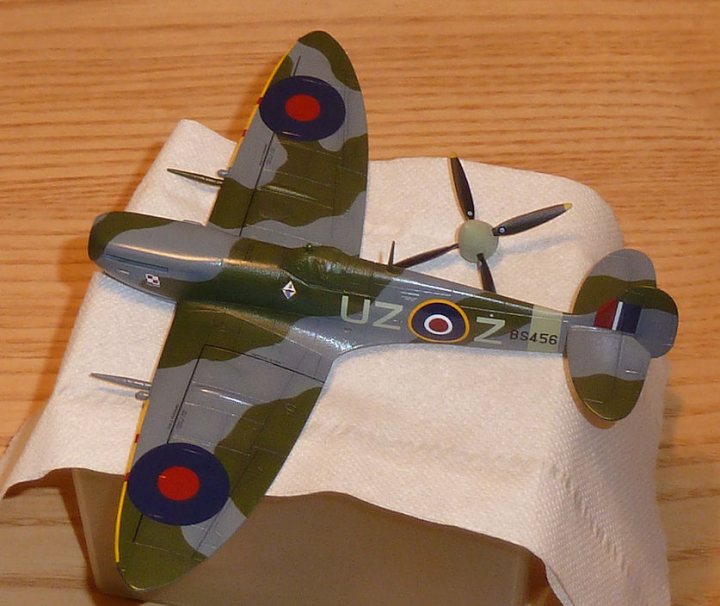
These are for 306 (Polish) Squadron, F/Lt Jozef Zulikowski, RAF Northolt 1942.
The Techmod decals are very comprehensive, and go on pretty well with my tried and tested mix of Microsol and Klear. Still needs most of the stencil decals applying, but enough is enough for this evening. -
End of play tonight and the sky fuselage band is done, along with the leading edge strips. The yellow is a bit sudden, but I'll probably end up giving an overall coat or two of Tamiya smoke to tone down the white in the decals, so that should sort it:
Apart form a couple of bits of overspray, no problens masking this time. -
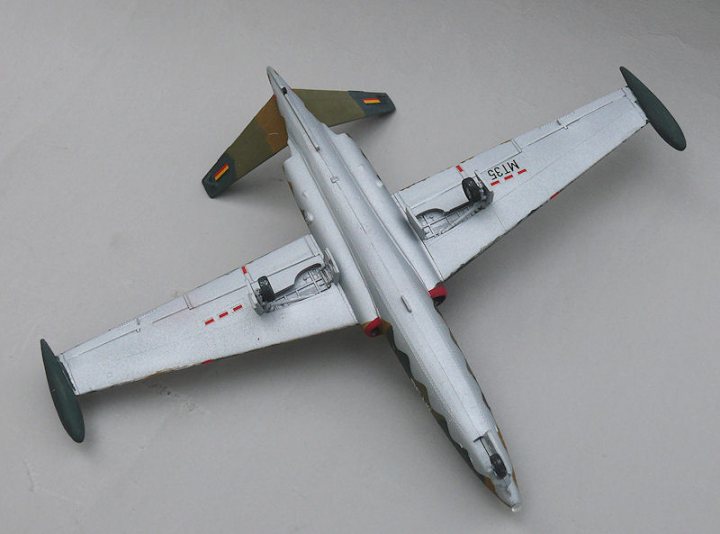
I assumed the undersides were light grey, but on closer examination, they are indicated as silver. Dammit. Since it's impossible to get a decent finish by brush painting, and since I had the airbrush out for the Spitfire paint repair, I thought I might as well give the boy a go at it. After fitting the mask to his face, and the masking tape to the cockpit, he soon got the hang of it:
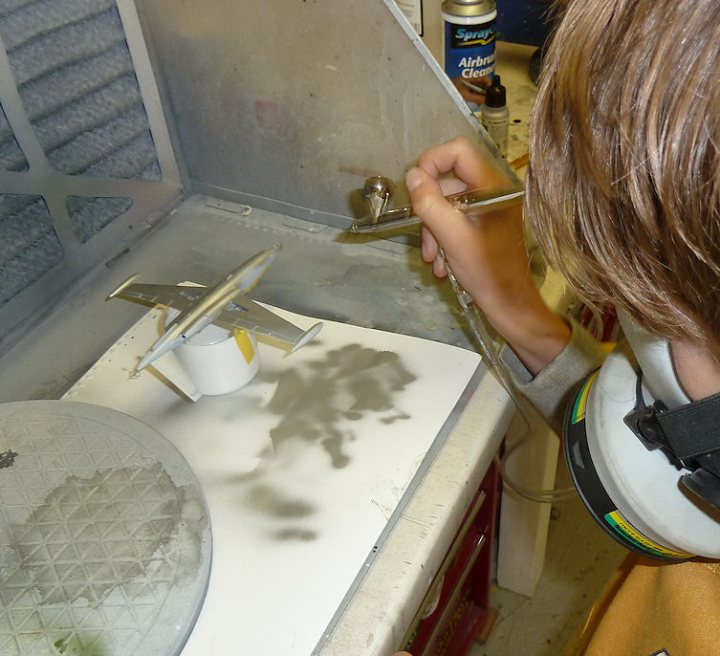
Paint was Vallejo Air Aluminium, straight form the bottle. -
I think with the old enamels, the solvent cleaned or at least slightly keyed to the plastic to some degree, whereas with acrylics it doesn't happen. Having said that, the underside of the model, which was 100% masked, was fine...plus the paint lifted from the Tamiya primer, not the plastic.
No problem I thought, so I partially masked the wings with tissue to protect from overspray, accidentally caught the right hand one and...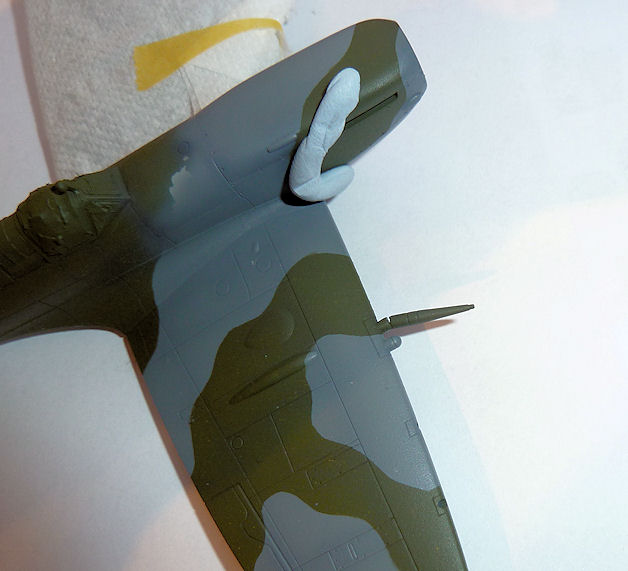
Goodbye cannon fairing repair. Luckily I'd used brass rod to strengthen it, so it went back OK with a dot or cyano. Excellent example of one error compounding to create a total screw-up. Anyway, it's now all repaired, and I gave it a coat of Klear in the hope that it might consolidate the paint a bit for when I mask for the sky band and yellow leading edge stripes.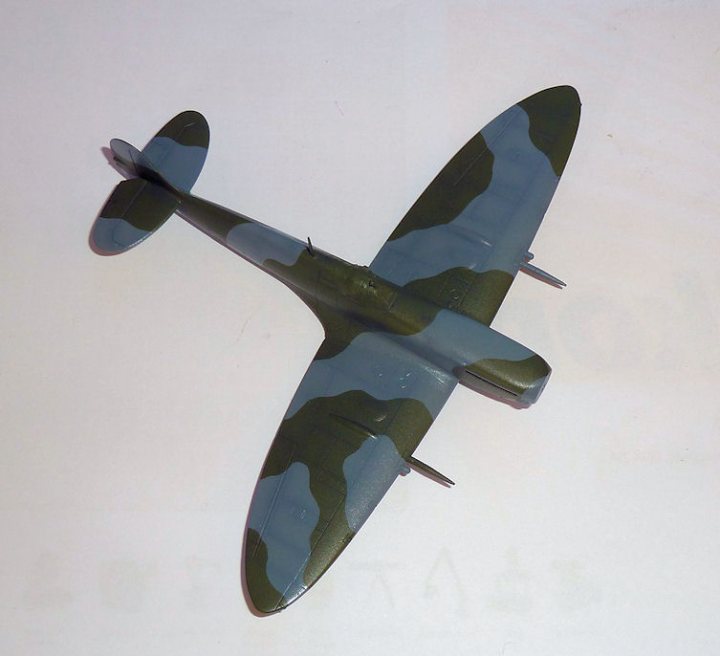
F6F-3 Hellcat, Eduard ProfiPack, 1:72
in Non LSM 'WIP
Posted
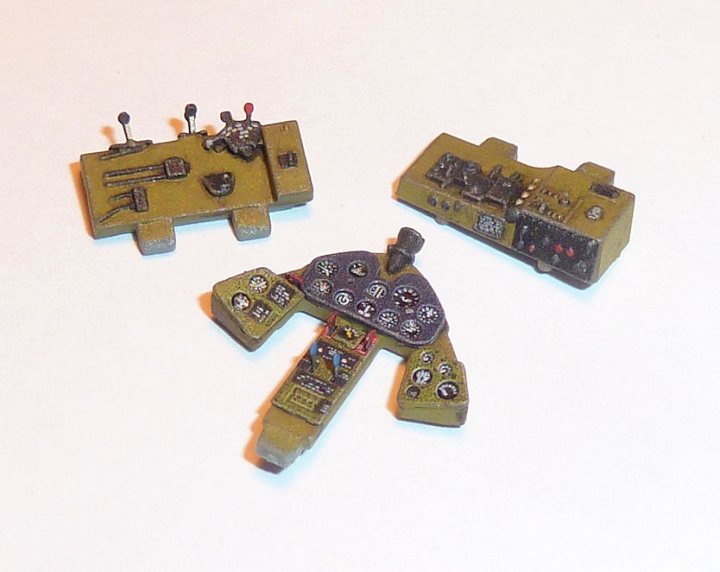
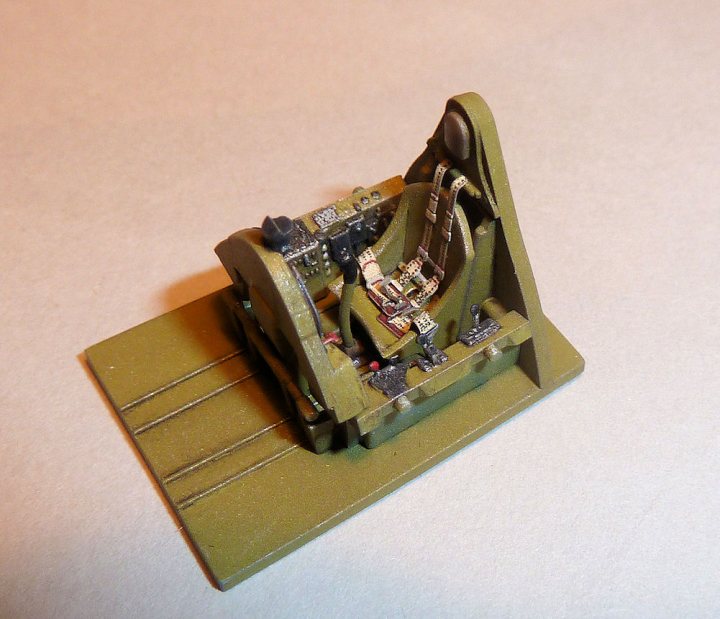
Completed some detail work tonight: Cockpit is finished apart from the transparent gunsight glass which I've not made yet:

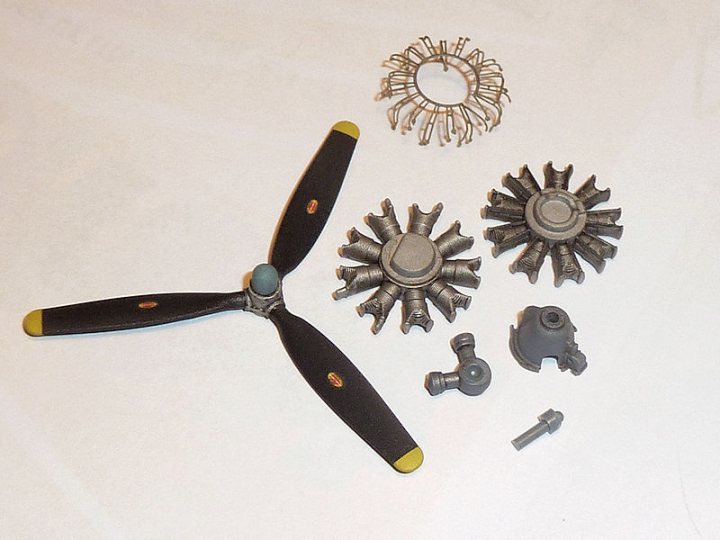
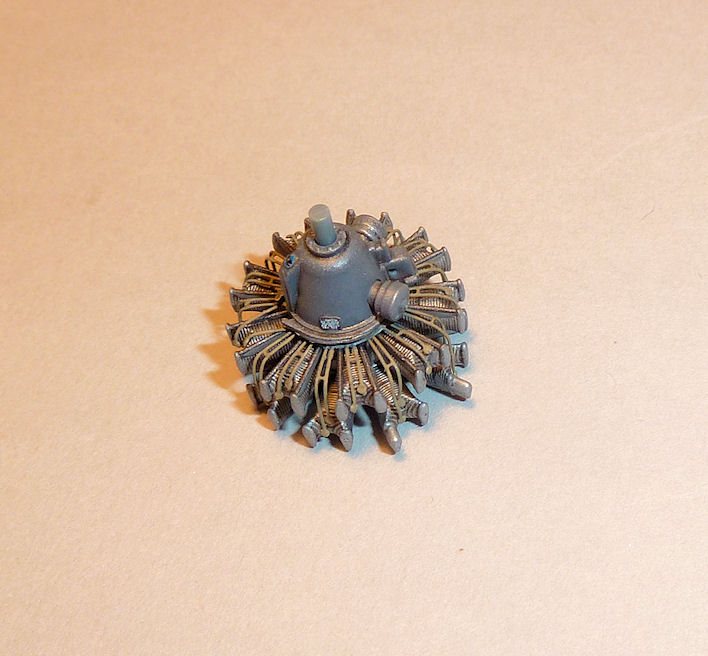
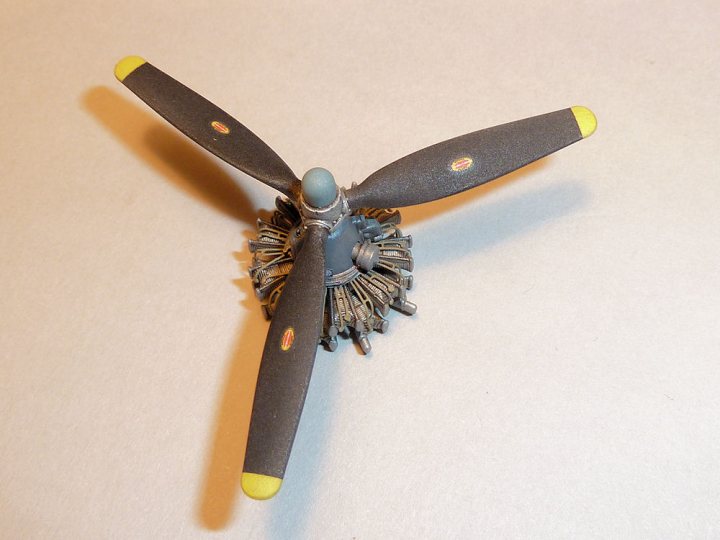
And the engine & propeller:
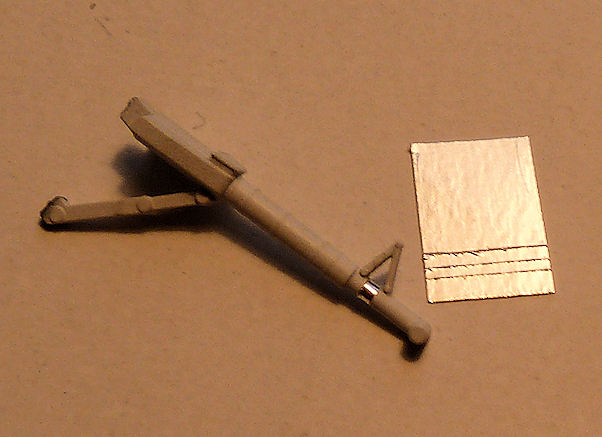
Also applied Bare Metal Foil to the u/c legs to represent the chromium plated sliders; paint never looks right (not that these are too visible when assembled):
Still a few small finishing touches to all of the above, mainly coating some of the balck bits with Klear to remove some of the greyness and give some variation to the rather extensive matt finish, but at least some assembly done.