

dr_gn
-
Posts
145 -
Joined
-
Last visited
Content Type
Profiles
Forums
Events
Gallery
Posts posted by dr_gn
-
-
So having had a chat with Alex from UvanderR about his decals and my issues with them, I tried again following a slightly diffrent technique. The following is definitely not meant to be a "how to", rather a record for myself of my experiments so far!
First, spray with white - in this case Tamiya white primer. Then a bit of my own experimentaton - rather than scribe panel demarcarions, draw them on with a pencil. Then preshade with Tamiya Clear Smoke (preshading with a solid colour over white just means more overcoating to knock the effect back):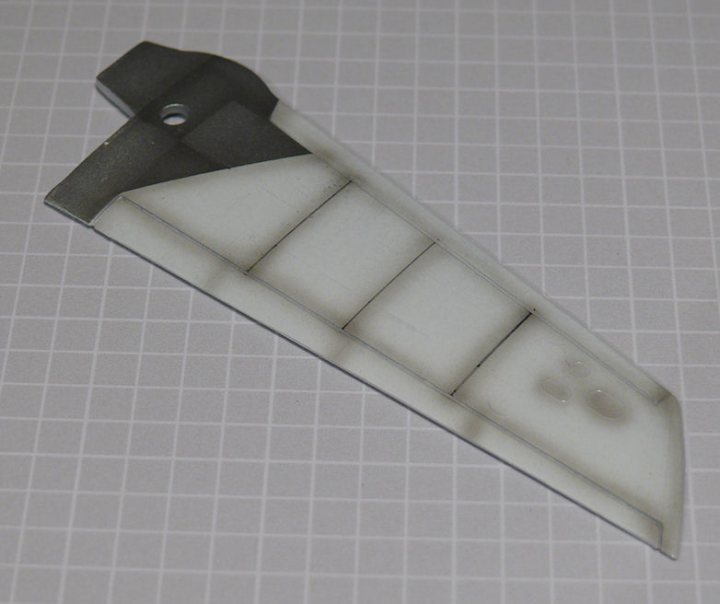
I've also experimented with the Vallejo Air Aluminium and Steel to give some metal panel contrast.
Next, cut Tamiya Tape to form templates for the woodgrain decals: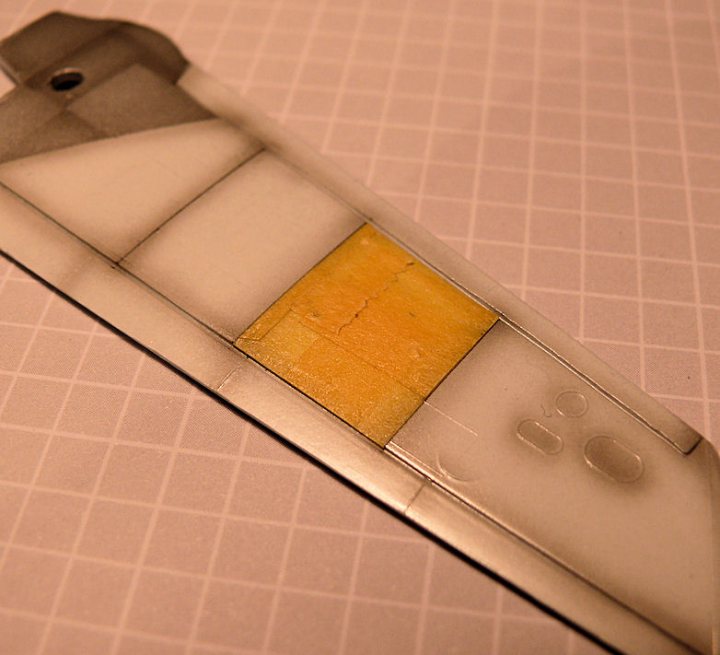
Then transfer the templates to the decal sheets, and cut out the decals: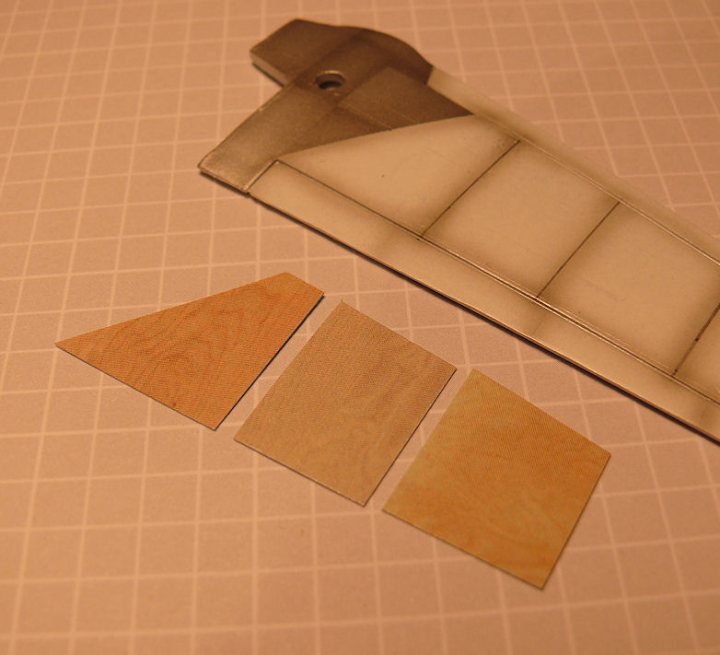
For the record, l-r:
"Horten 229 Special Edition 1 of 6"
"WSGF48B Knotless Pine"
"WSGF48B Knotless Rich"
These dcals are primarily intended for 1:48 scale, but since real woodgrain has a wide dimensional range, it makes little difference accross the smaller scales.
Then apply Klear (I will try Mr.Paint varnish next time since it is apparently more suited to these decals), and apply decals using diluted PVA (the decals themselves don't have enough residual adhesive once removed from their backing sheet):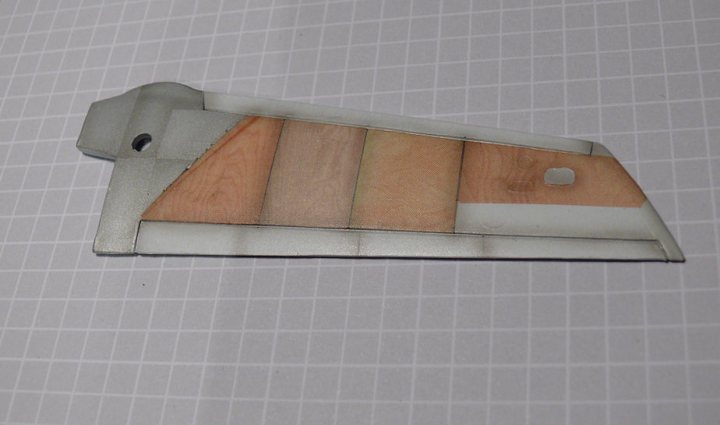
No MicroSol was used this time, and I think this gave a smoother finish than previously. It has a coat of Humbrol matt applied (this will be replaced next time with Mr.Hobby Gloss + Tamiya Flat Base). Obviously the light base coat makes the woodgrain far more visible than when using light browns, and it all looks way better than the last experiment: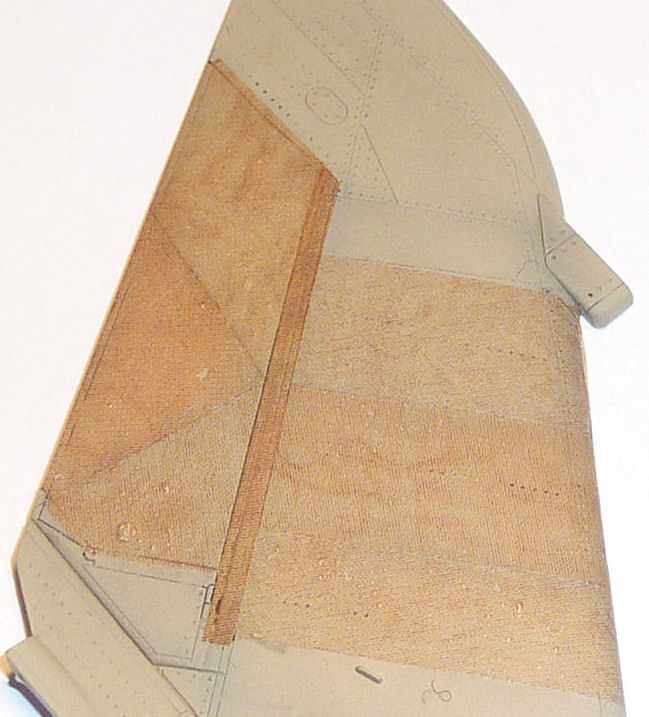
So I went ahead and completed the airframe in white primer, and will now draw the panel breaks on in pencil. In the end I did fill the dinghy hatch and a few other small panel lines, and will represent them with pencil lines: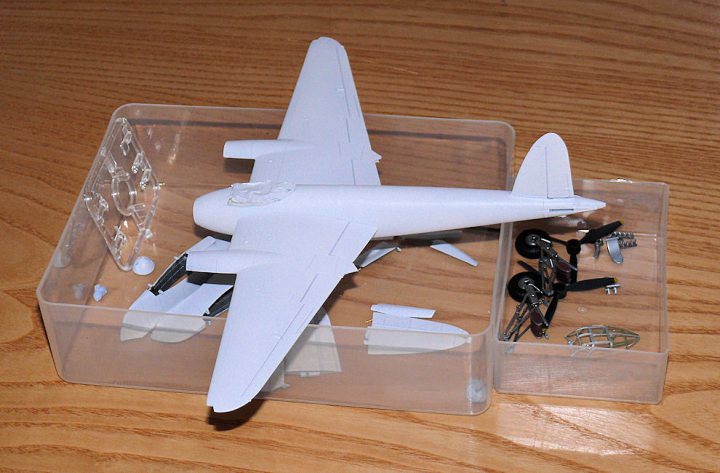
As an aside regarding the Vallejo Air Aluminium/Steel: I saw the new Vallejo "Metal Colour" acrylics (think Alclad without the hassle) at Telford. They look OK, but to my eyes didn't seem a big enough step - if at all - from their "Air" counterparts to be worthwhile. -
Yep, I like that.
-
Now begun applying white primer to the airframe (wings and tailplanes first). Once preshaded with NATO black, this will form the basecoat for the wood decals:
Still rescribing the lost detail on the fuselage resulting from filling the joins: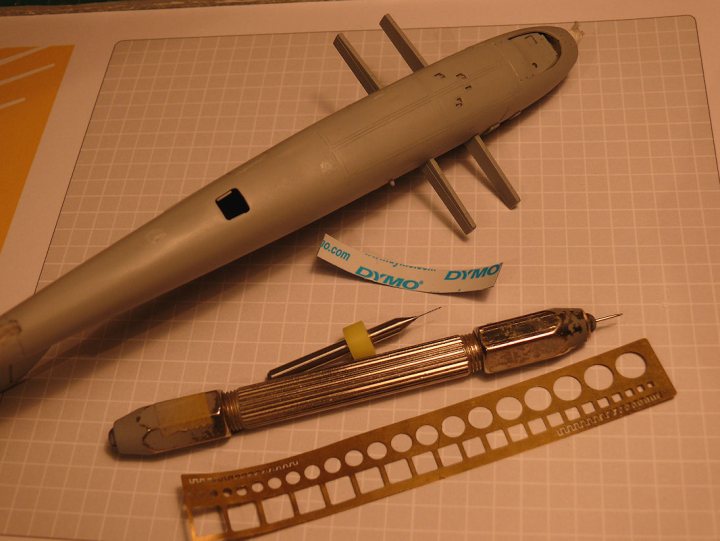
Not even sure if it woud be better to make these panels smooth (dinghy hatch, camera blank plates etc) and represent them with decals later.
TBH I don't really know what I'm doing - despite having had lots of advice, it's still all a bit odd, and I'm not clear as to how the decals will respond to cutting/forming once in place. -
Nice!
Any aftermarket planned for this?
No, apart from maybe some belts. My pal got a resin engine and cockpit - I'll look at them again tomorrow (my son, my pal an I are building three 1:72 Zeros - Two Tamiya and one Matchbox!).
Now toying with the - frankly daft - idea of riveting the whole airframe.
...it would at least break up the monochrome paint scheme.
-
 1
1
-
-
Next one on the list after the Hellcat is its old adversary, the Mitsubishi Zero. This is Tamiya's recent A6M2b version in 1:72:
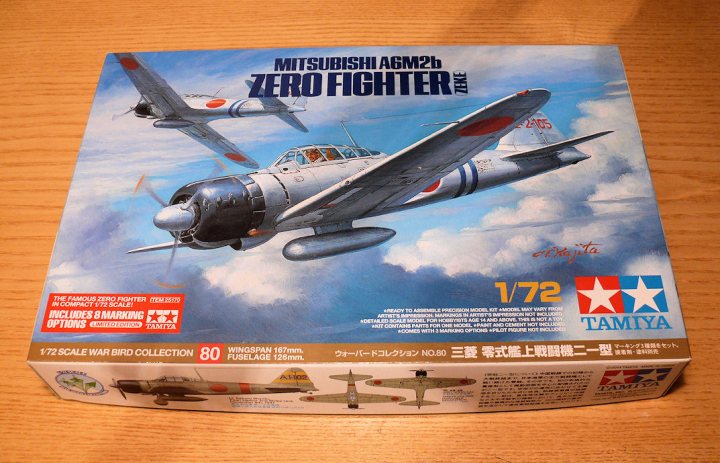
For the connoisseur of injection moulded kits, this one is a masterpiece. The mouldings look perfect, with beautifullly fine surface detail: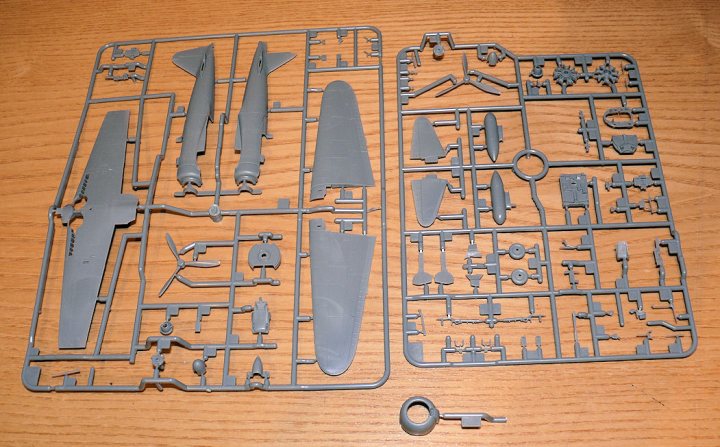
Tiny details are perfectly rendered, with impressively delicate sprue gates:
The cowling is moulded in one-piece thus eliminating any difficult to finish joint lines: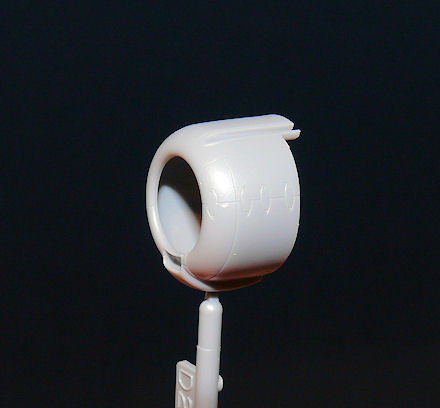
Two canopy options are included: open and closed. The sliding canopy for the open version is thin enough to make a vacform one unnecessary: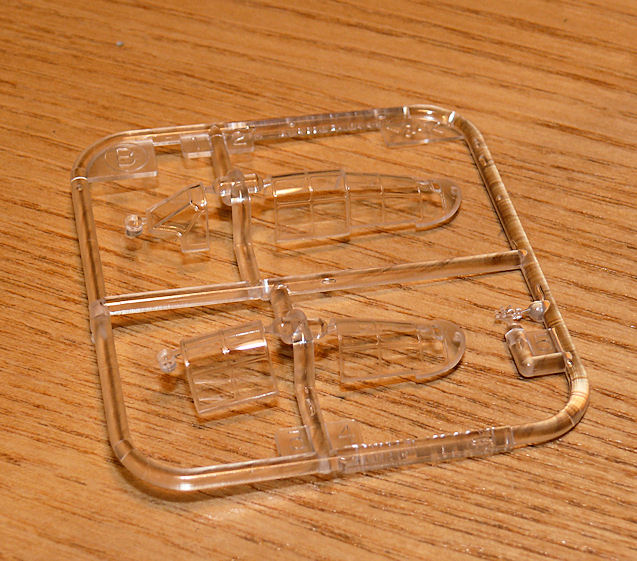
Instructions are comprehensive, and include a sheet containing background information: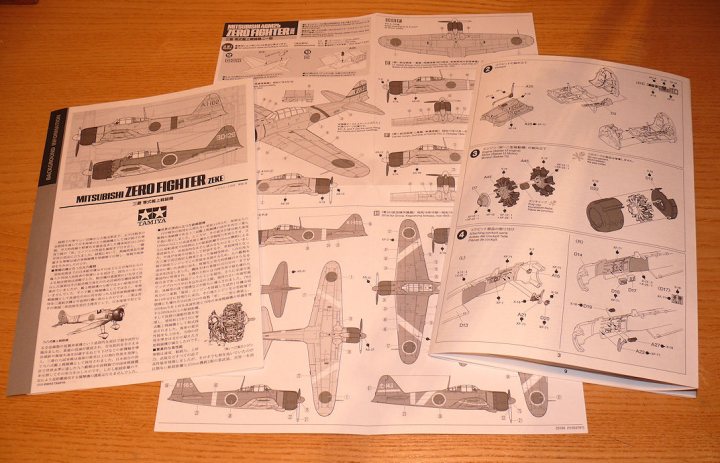
This boxing includes decal options for eight different aircraft: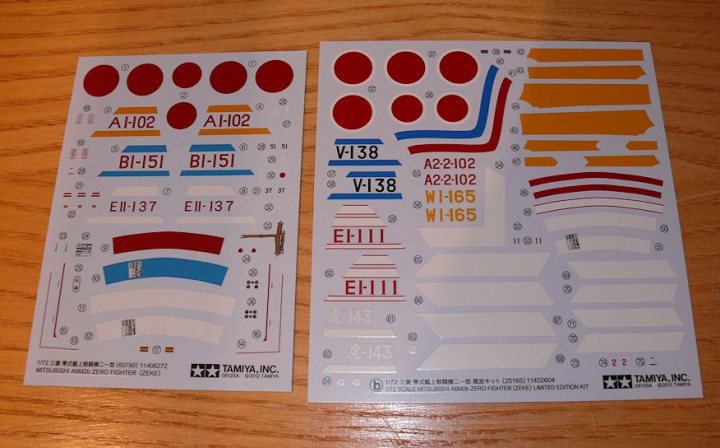
Looking forward to this one...-
2
-
-
Thanks guys!
Tamiya Zero next.
-
'Large Scale' detail in such a small scale build, very impressive.
Love it.
Much appreciated!
-
Thanks all, finished pics here:
http://forum.largescalemodeller.com/topic/4149-grumman-hellcat-f6f-3-eduard-172-profipack/
-
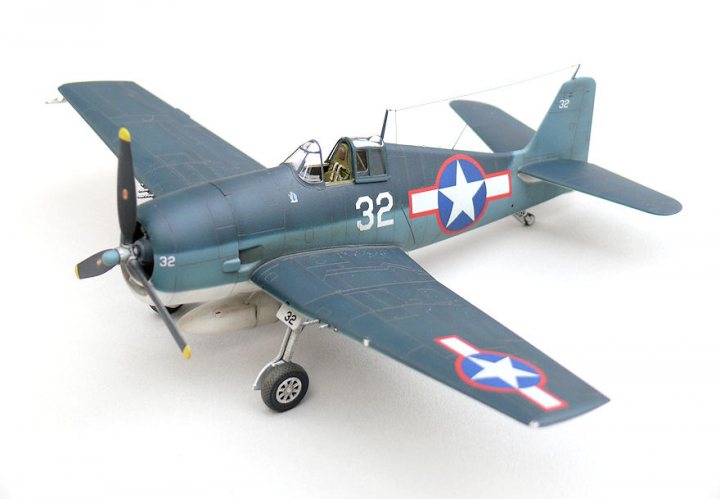
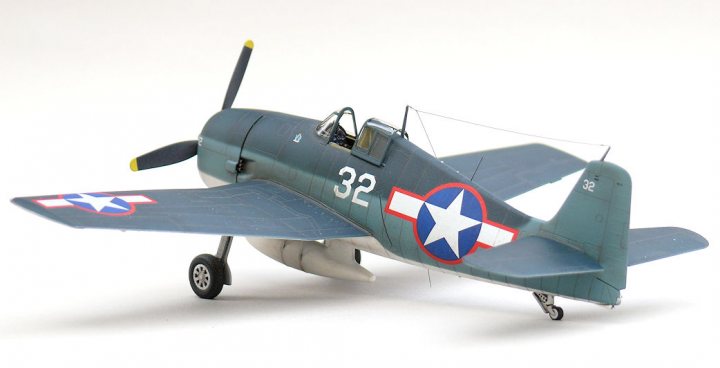
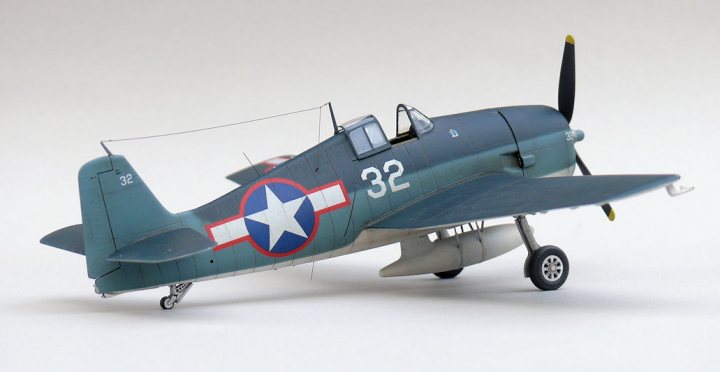
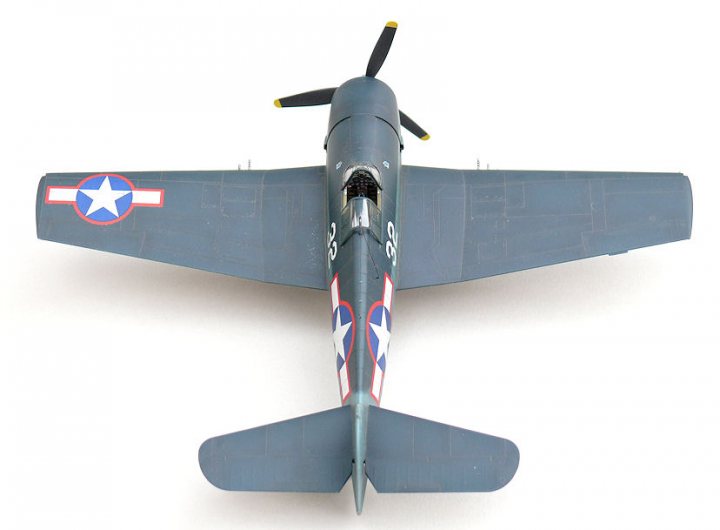
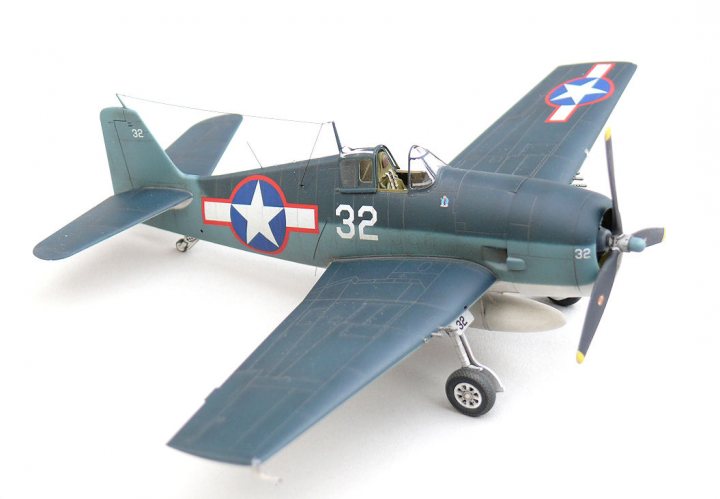
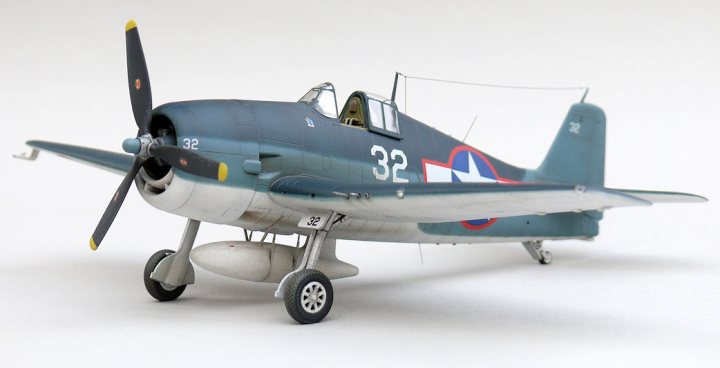
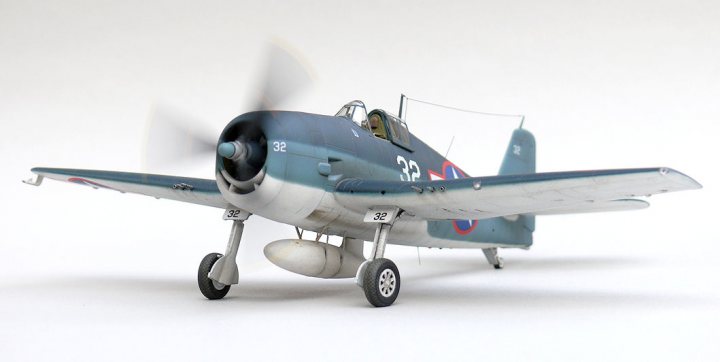
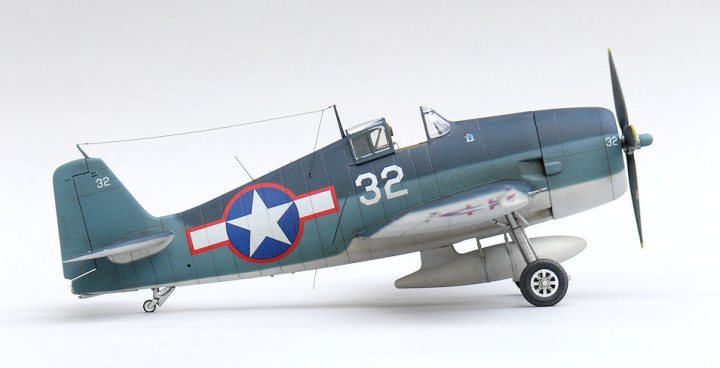
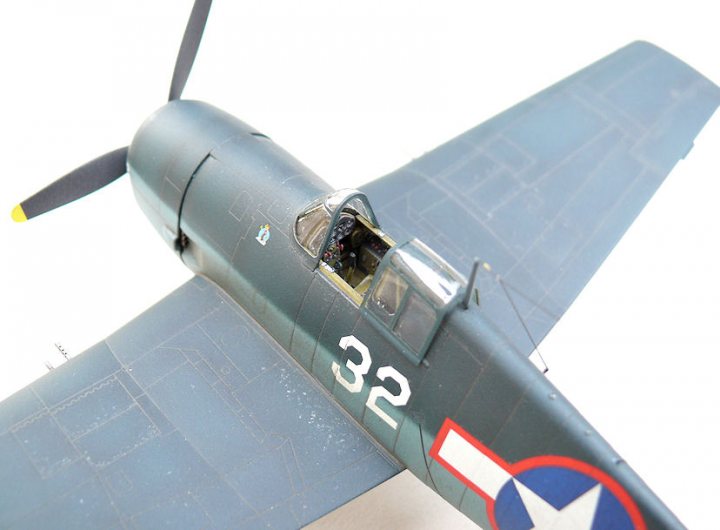
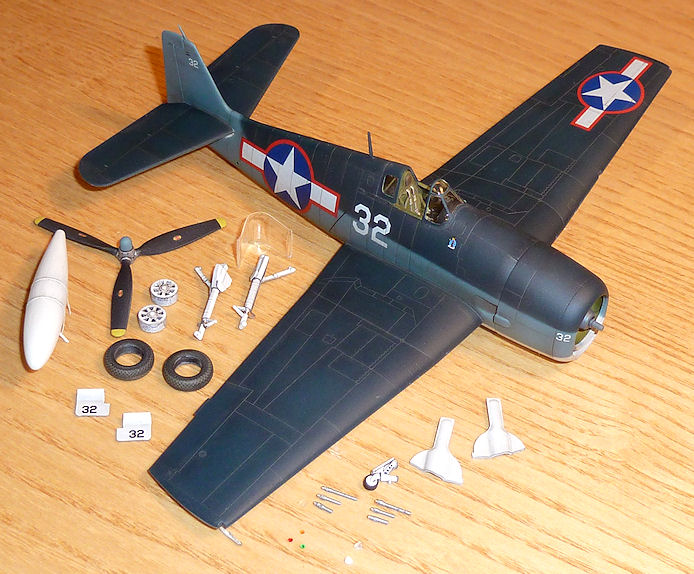
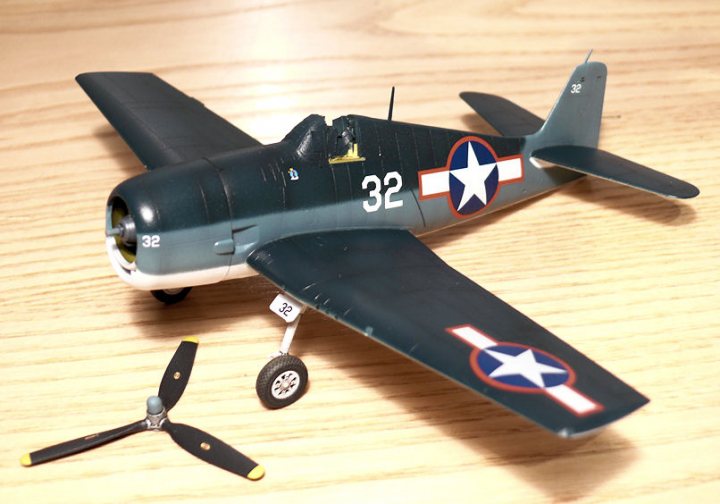
Hellcat F6F-3, VF-16, USS Lexington, Hawaii, September 1943.
1:72 Eduard ProfiPack,
Finished now, took about 1 month to build. It was an excellent kit. Additions included:
Scratchbuilt clear styrene landing / navigation lights.
Little Lens identification lamps.
Stretched sprue IFF & VHF whip aerials.Master Model Brass gun barrels.
Aerial wire stub in fuselage side.
Lead wire wheel brake pipes.
Pitot tube vane (scrap photo-etch).
Drilled out tailwheel drag brace.
Squadron vacform canopy.
Flatted tyres.
Drop tank filler cap decal.
Drilled out exhaust stubs.
Acetate gunsight.
Build thread here:
http://forum.largescalemodeller.com/topic/4049-f6f-3-hellcat-eduard-profipack-172/

-
2
-
-
I used the spare Eduard masks included in the kit (excellent fit):
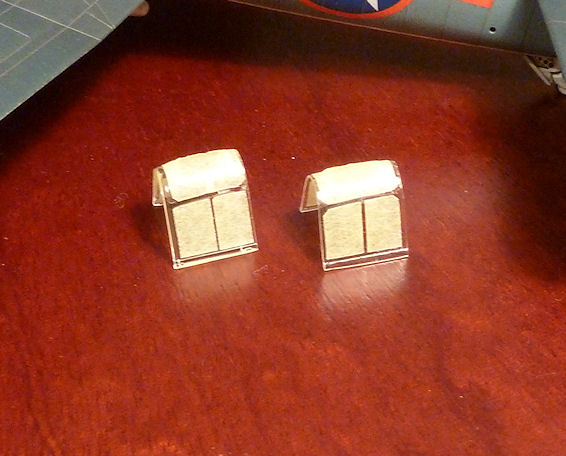
...to make a direct comparison between the original and vacform canopies: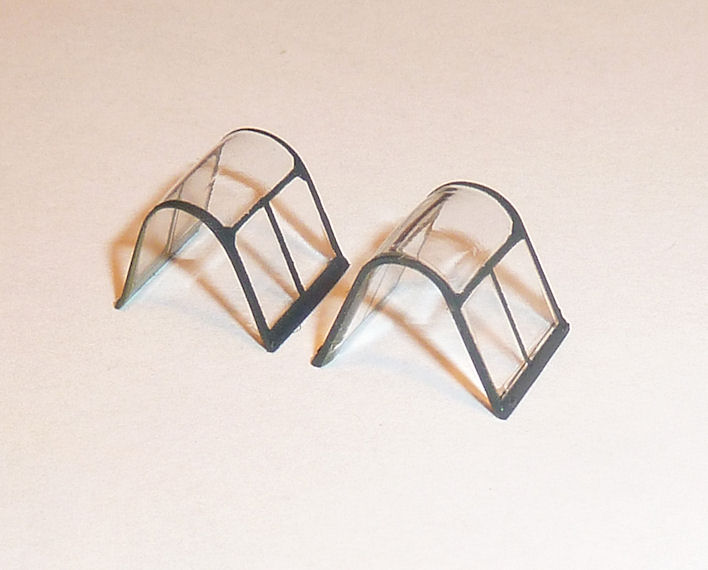
The kit version isn't too bad, but the more delicate looking vacform canopy shades it. As usual, the thinner vacformed acetate also gives less distortion to any features underneath.
Also used some stretched sprue for the aerial wires (I'd already drilled a hole for the flying wire socket in the fuselage side, and fitted a sprue stub), and some buff painted PVA blobs to form the insulators at each end: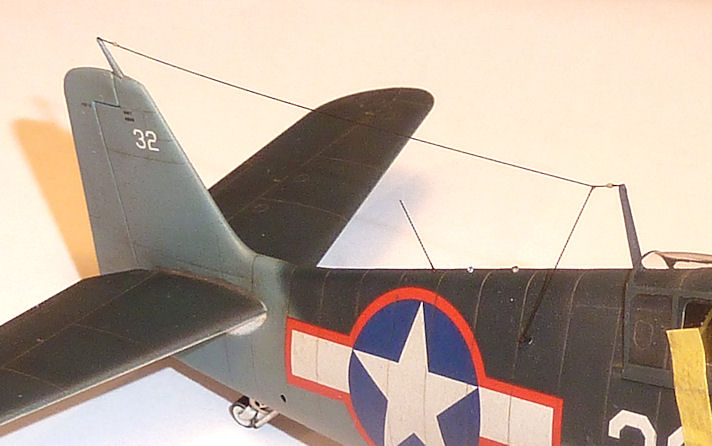
Once the canopy glue is set and the masking tape removed, it'll be finished. -
Nice work - looks good on the base too.
-
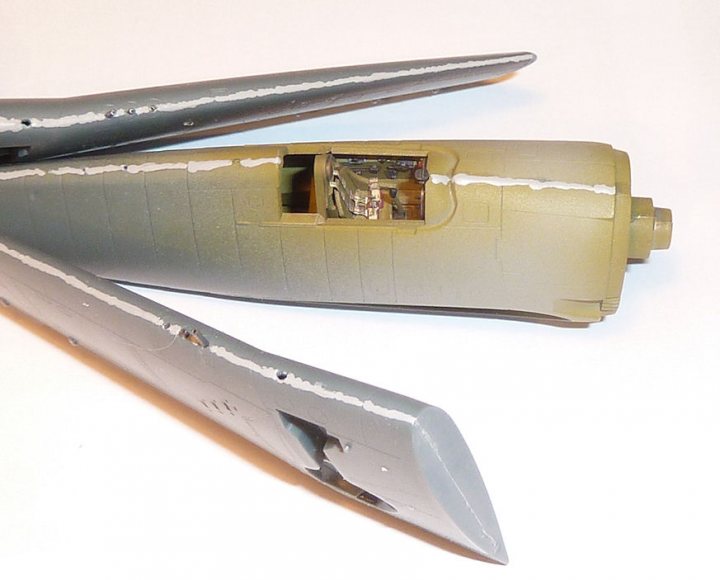
I made some navigation lights by heat stretching clear sprue, then dabbing the ends into the flame to bulb the ends:

They fit into chamfered holes I drilled in the fuselage spine and tail cone.
Also flattted the tyres to simulate some weight on them. My preferred method is to roughly flat them before fitting to the model, then put some wet & dry on a surface plate, and place the model on it with one wheel at a time on a corner of the abrasive. Then hold each wheel in turn while circling the abrasive underneath: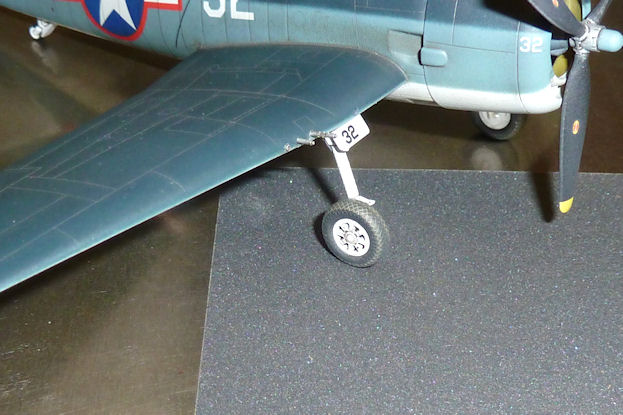
This is an easy way of ensuring pretty much spot-on parallel and level flats: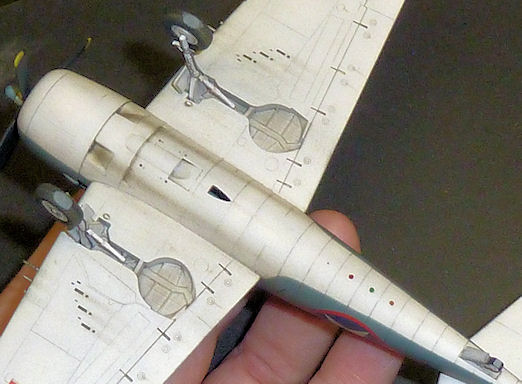
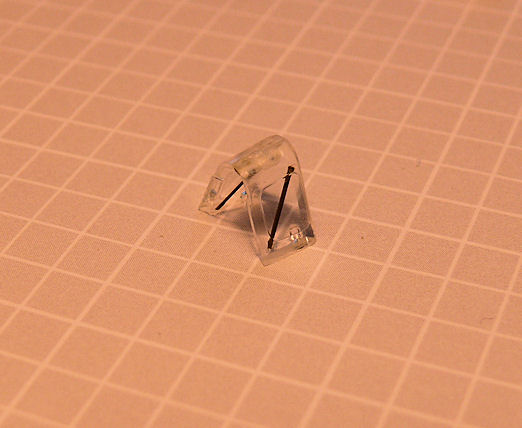
Also noticed that the stbd. wing landing light was missing - probably for an F6F-5 variant of the kit. I used a method I tried on my Curtiss Hawk model, which looked good. First, drill a small hole in the centre of the lamp - this is where the fillament will go: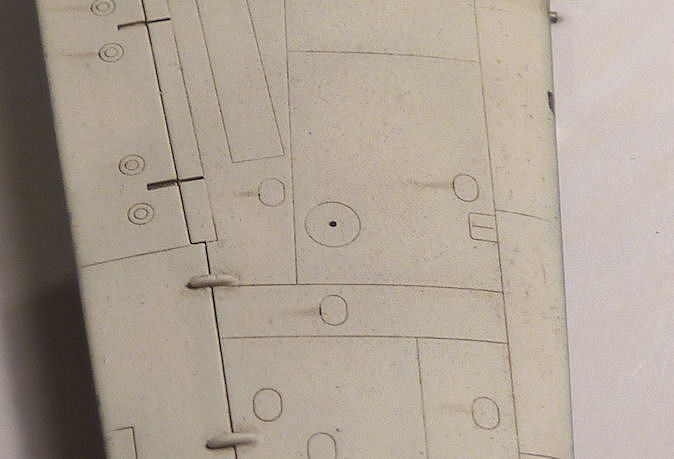
Then make a shallow conical cut with a much larger drill - this forms the reflector: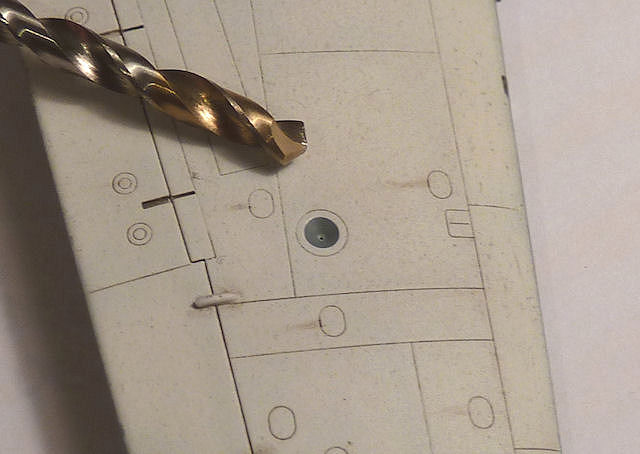
Paint the depression silver, and glue in some black stretched sprue into the small central hole to form the fillament: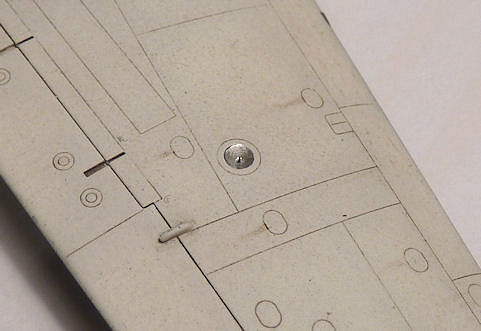
Then fill the whole lot with canopy PVA to form the lens: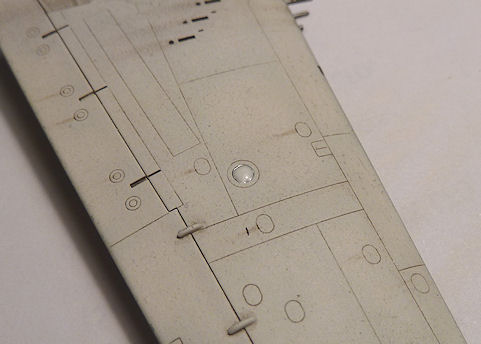
Whan this is set, it dries clear (it's not quite there yet in the photo, but you get the idea):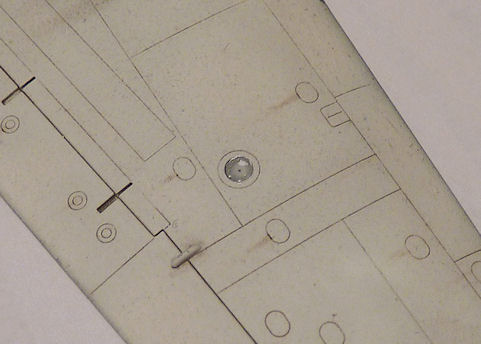
-
1
-
-
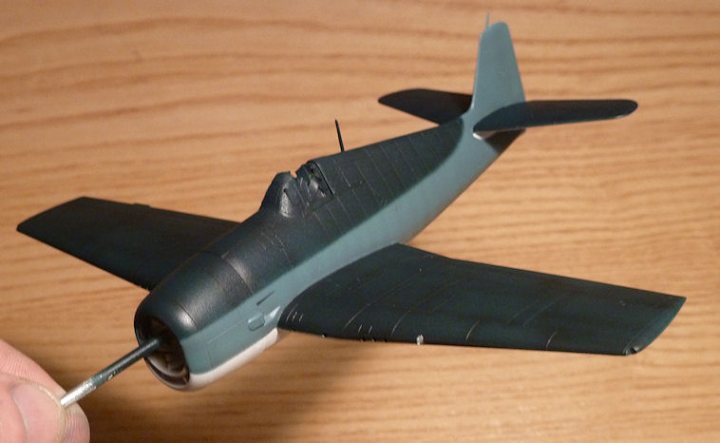
So the weathering is done; I went for MIG neutral wash all over, dark wash in the wheel bays, followed by three thinned coats of Tamiya Smoke to knock back the contrast a bit and give everything a bit of age. I used Tamiya powders for the exhaust and cordite stains, and dots of oil paint streaked back with a cloth in some areas. It still needs some very minor paint chips applying to areas of high wear. As ever, the discretion:valour ratio was high; I didn't have the confidence to do much more with the exhausts so I left them. At some point aircraft are new or get cleaned - that's my excuse...
So now it's the best bit: Final assembly. The drop tank needs the weathering completing, and I've not yet trimmed or painted the vacform canopy, but the model is 90% there now.-
1
-
-
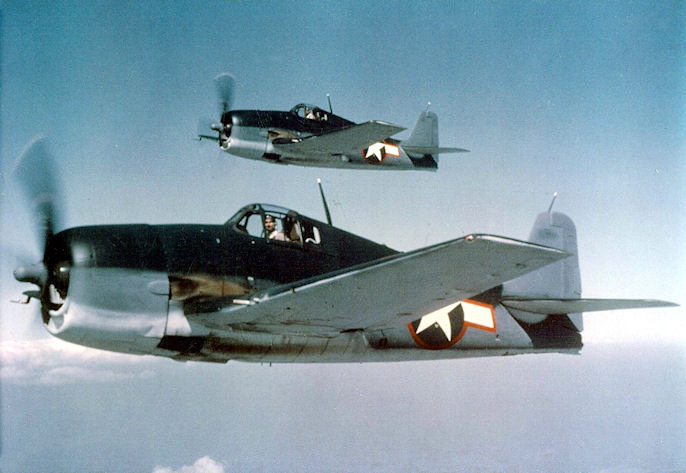
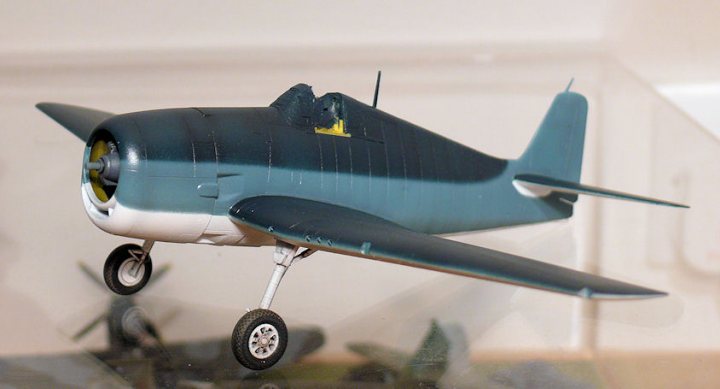
Still needs some of the contrast between colours knocking back, probably with a few coats of Tamiya smoke plus maybe some powder weathering on the blues as per JD1981. Then again the three-tone scheme does seem pretty contrasty in reality:
Decals on tonight: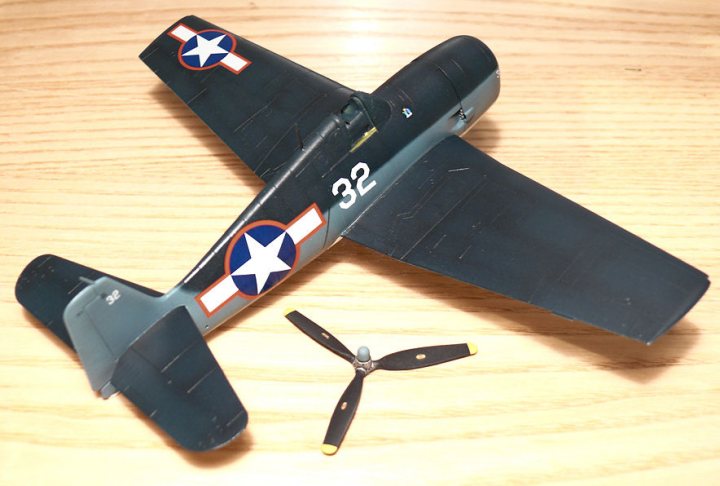
There aren't many of them, but they are big!
-
2
-
-
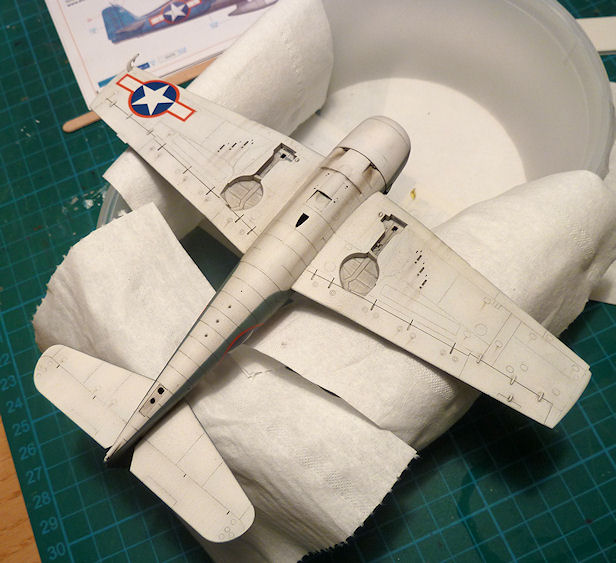
ready for decals now:
-
2
-
-
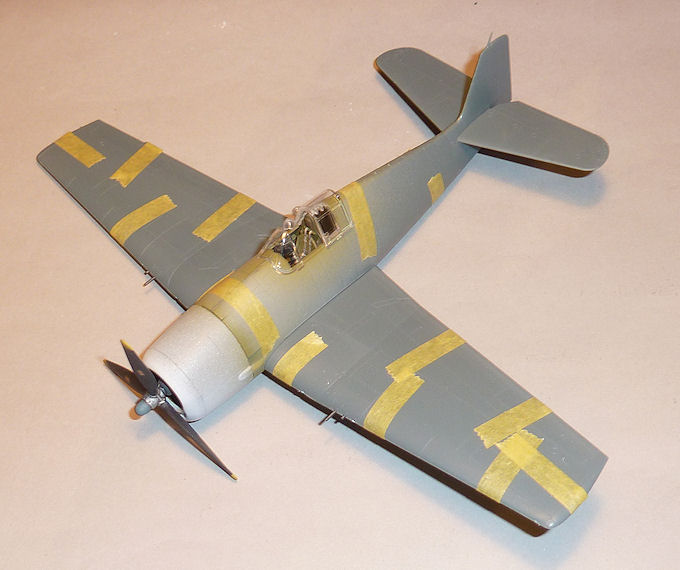
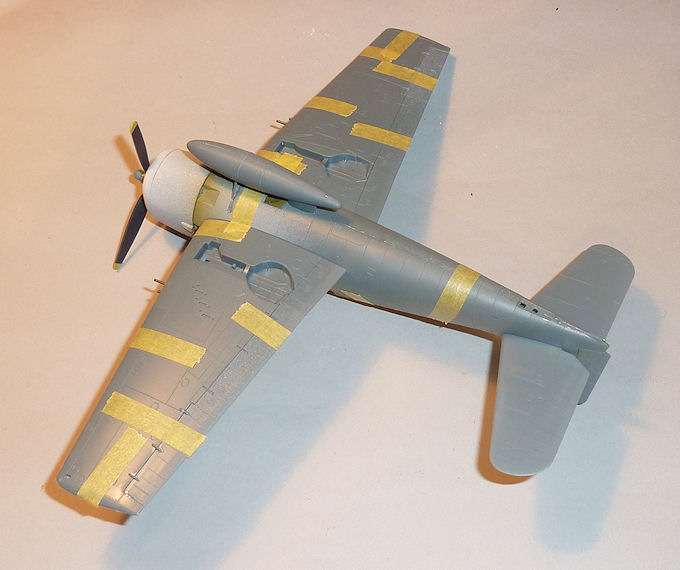
Masking for soft-edged Intermediate Blue:
Then for Dark Sea Blue - fuselage first because the Blu-Tac rolls obscure the wings: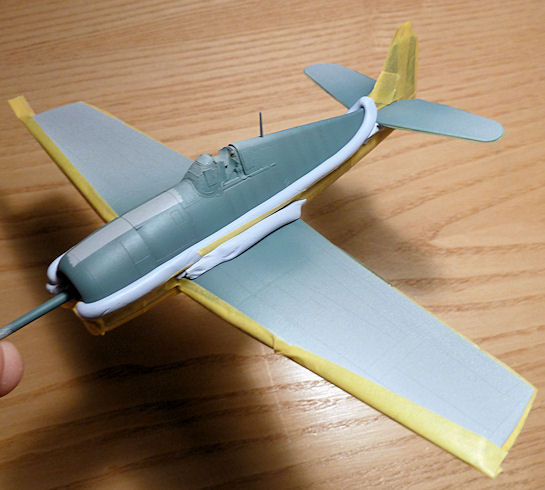
Then mask the fuselage and spray the wing roots: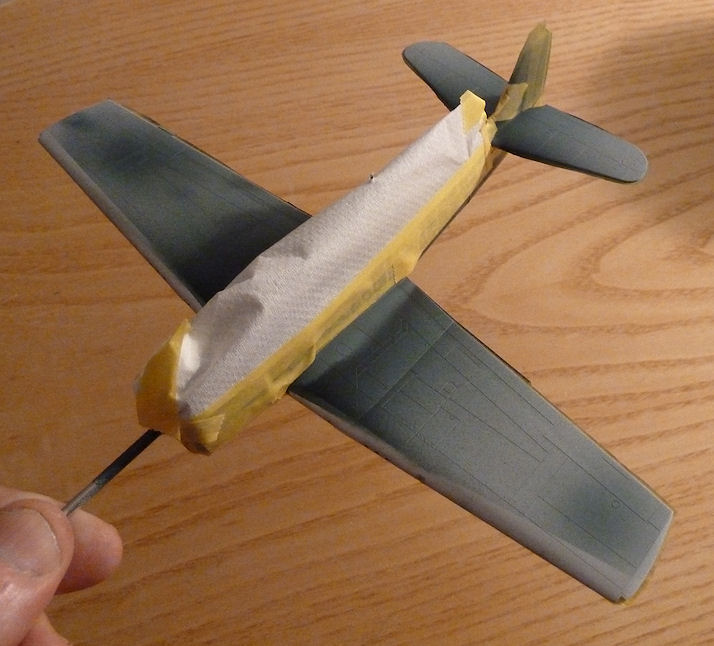
Then remove the masking: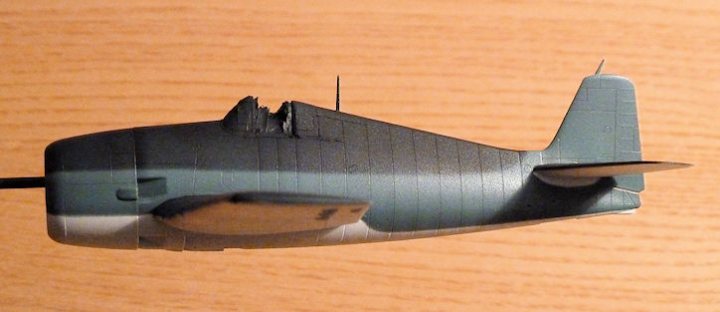
The preshading looks a bit odd or invisible on the photos, but in reality it shows up quite nicely. Needs a bit of corrective work along the leading edges, but apart form that and snapping the aerial mast off (I was wondering how close to completion I'd get before that happened) it looks OK.-
2
-
-
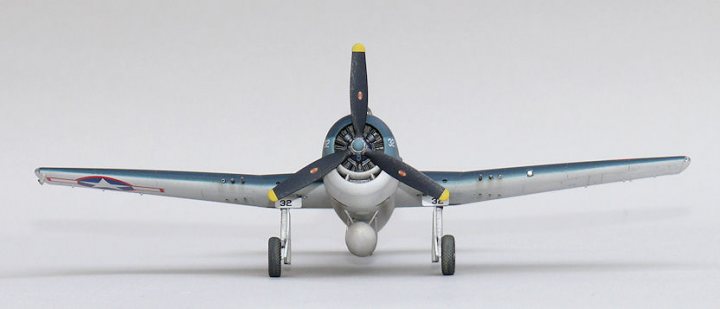
Underside paint finished:
-
2
-
-
Put a smidge of filler around the wing roots, and got some Tamiya Grey primer on the wings. The cowling is still temproarily PVA'd in place for camo painting:
I used Tamiya Fine White Primer on the undersides; Vallejo White covers about as well as milk, but the primer covers everything in a couple of coats and is still very thin. I'll preshade with NATO Black straight over this:
Also primed the brass gun barrels/blast tubes: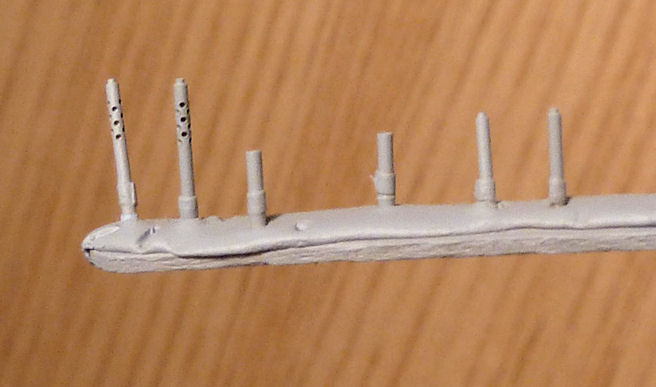
I've wrapped them in a narrow strip of Tamiya tape and cyano so that when they are fitted into the sockets I drilled, they are concentric with the openings in the wings.
I thought a vacform canopy hood might look better than the overly thick plasitc version, so I got the Squadron item. It's designed to fit the Hasegawa Hellcat, but it will do. In the process of trimming the excess: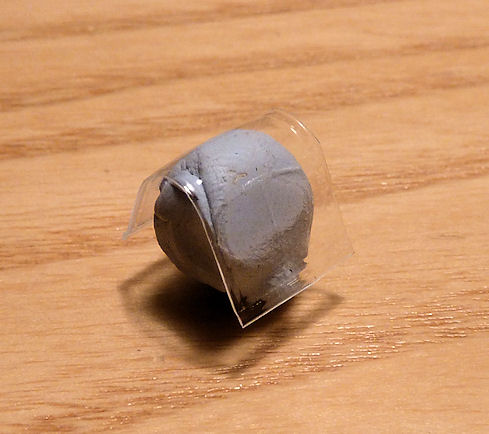
-
2
-
-
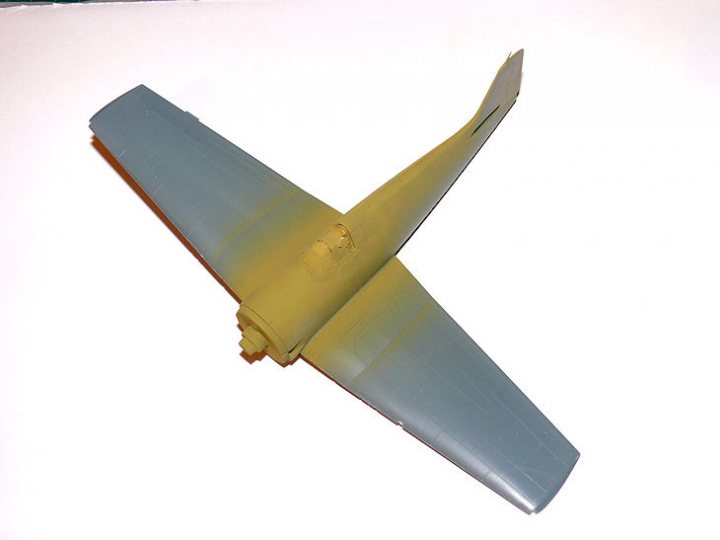
Rescribing done (pin and Dymo tape as a guide, followed by light flatting as usual these days), and wings fitted:
A bit of filler might be needed around the wing-fuselage joints, depends on how it looks in primer.
I got some 1mm "Little Lenses" to try out for te signalling lamps. I peeled the foil off the back of them to make them a bit less sudden. I think they will look good once the drilled indents they are located in are toned down a bit with some dark grey preshade: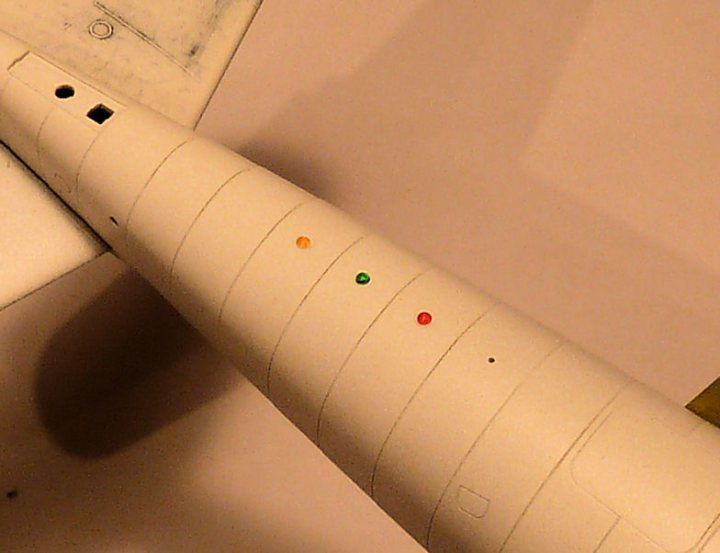
Also made a landing light out of scrap clear styrene after filing the aperture in the wing: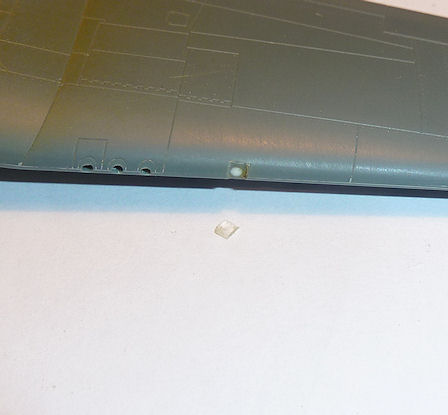
Might put a clear "Little Lens" behind it to represent the lamp reflector.
I also got some MasterModel turned brass barrels (OK so it's no quite OOB anymore, but they are awesome bits of kit for not much outlay):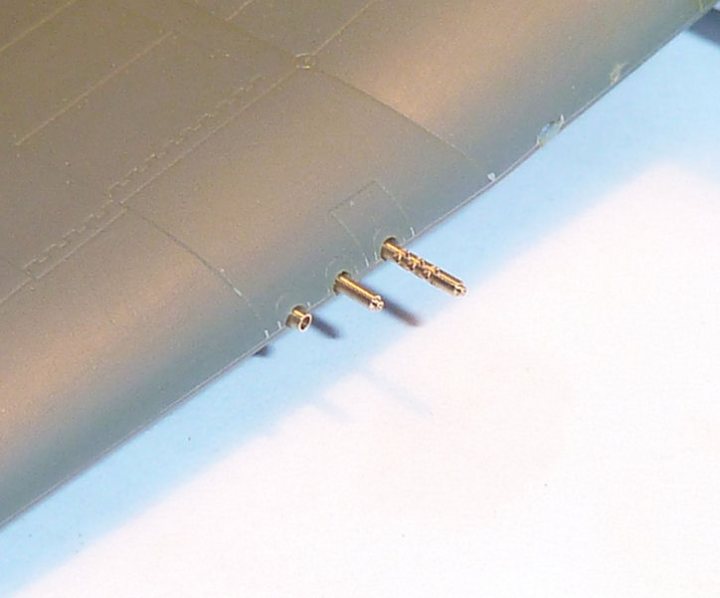
I'm still puzzling over the best way to get woodgrain on my Tamiya Mosquito, so it's still w.i.p., but it's interesting to compare it with the Hellcat: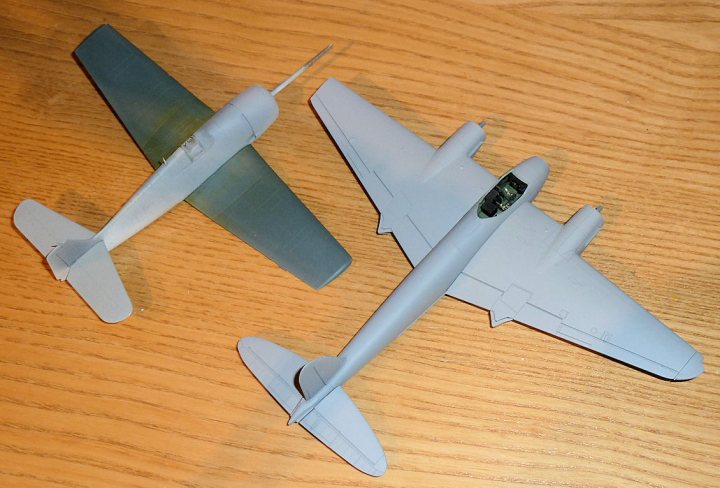
It's a big machine.-
2
-
-
Masked the windscreen and rear screens using the pre-cut masks. As with the Mosquito, most of them weren't exactly right, but could be cut to fit pretty well - hopefully. Then sprayed interior green which will show through on the inside of the framing. I also used this colour as a guide coat to see where any rescribing and filling needs doing. I think it's just rescribing on this one:
-
2
-
-
Finished the main landing gear, just added some brake lines from lead wire:
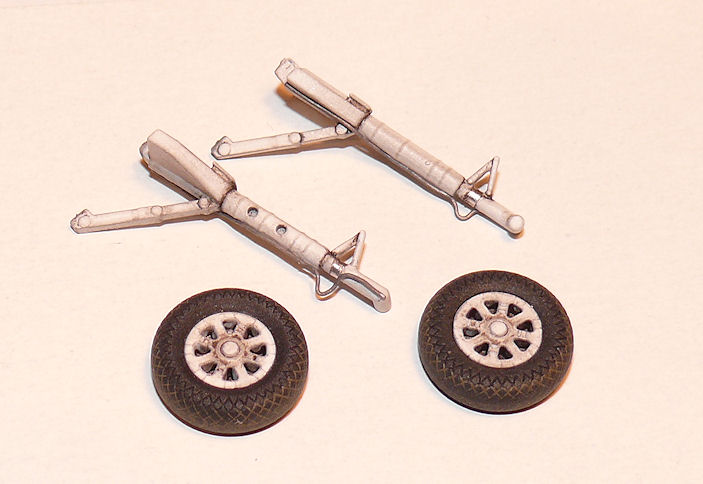
It's great that the wheels and tyres are separate parts.
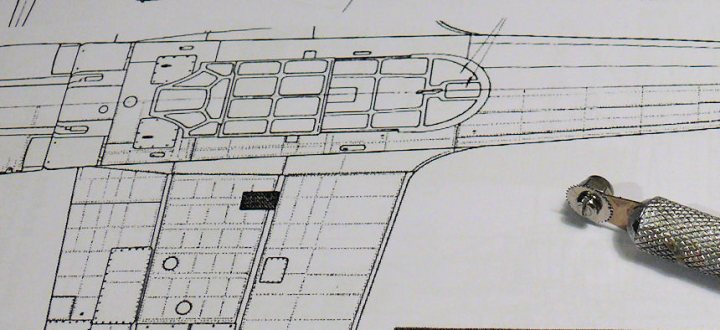
The ventral signalling lamps are shown on the plans, but aren't there on the plastic. I've drilled shallow indents that I will either dot with silver and then clear paint, or use 1mm Little Lenses: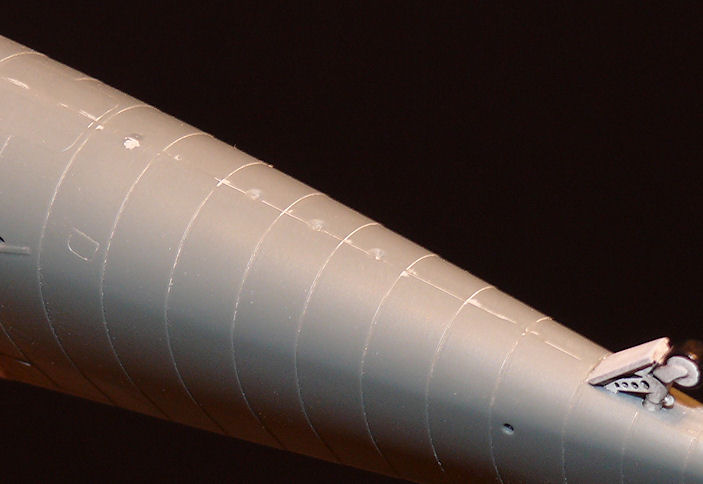
The overlapping fuselage construction is nicely represented, but there will be a lot of rescribing needed along the join lines.
Quite a few bits of brass on the drop tank now: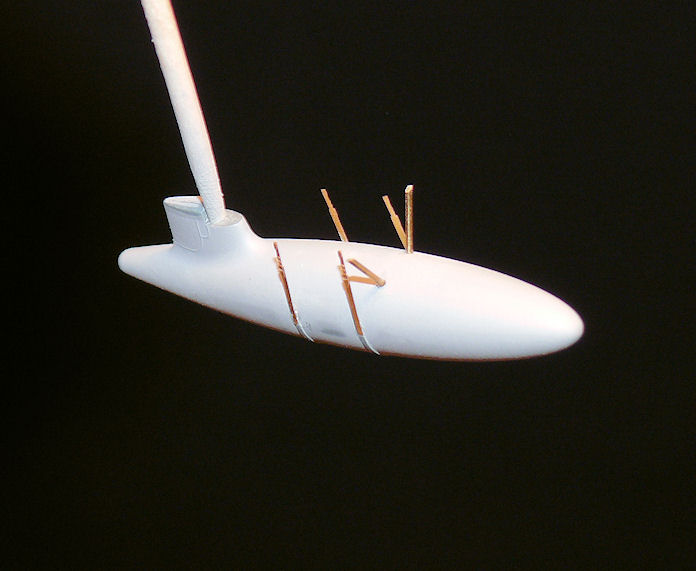
It's getting to that demoralising stage where the airframe looks a disaster. Things usually improve a lot when everything is a uniform colour and all the corrections, filling and sanding is covered up.-
2
-
-
Added the p/e bracing struts to the inside of the rear canopy assembly:
And the gunsight: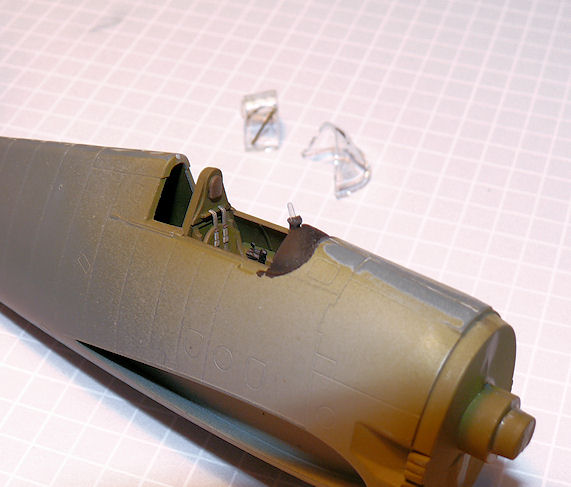
And fitted the front and rear screens with PVA: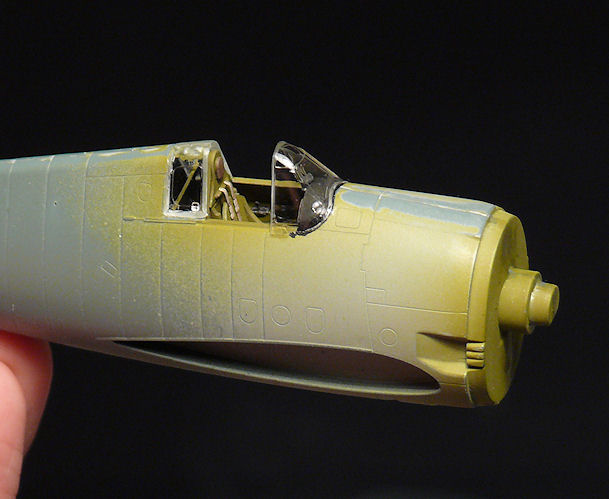
Also ended up snapping the gun barrels off and drilling the wing to accept brass tube to be fitted after painting (there is also a l/e landing light in the process of being opened out in preparation for a clear lens: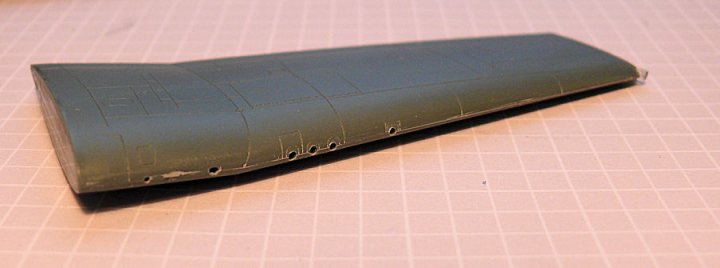
And filed out the solid wingtip lamp covers to replace with scrap clear styrene: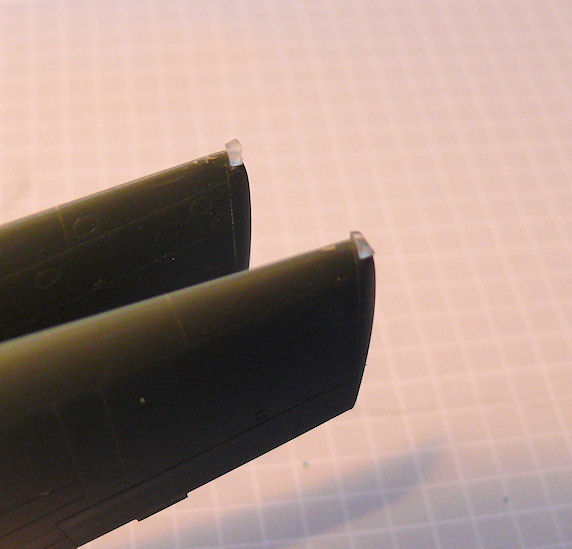
Here's one after profiling and polishing: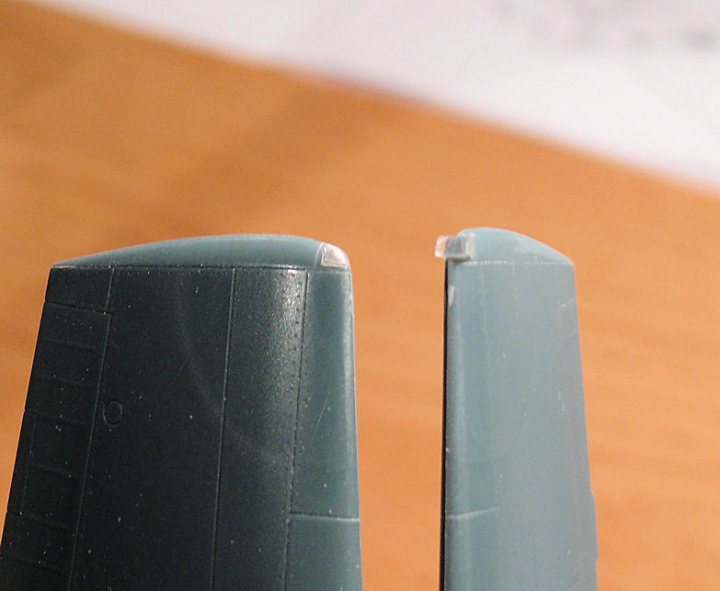
I'll snap them out and add them finally after main painting.
Small details, but they add up to make a big difference to the look of a model at this scale.-
2
-
-
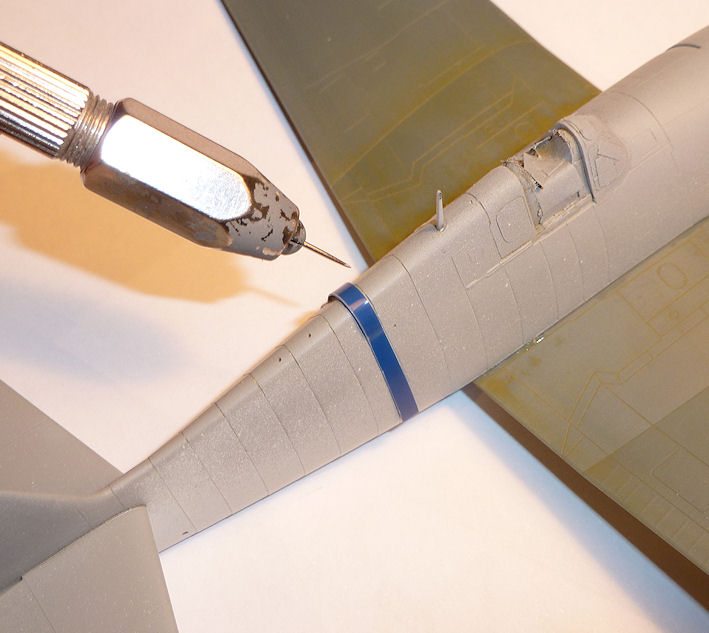
Coated the fuselage and wing joints with Mr.Surfacer just in case there were any gaps (don't think there were, but difficult to see), and filed the cut-outs for the wing-tip navigation lights. I also removed the moulded-in dorsal lamp bumps and drilled pilot holes in preparation for inserting some more realistic clear sprue, and for the VHF whip aerial. There is another hole drilled on the underside for the IFF aerial, and one on the side behind the cockpit for the radio flying lead:
I might yet snap the gun barrels off and use brass tube; as they are they make sanding the l/e joint difficult and will be a nightmare to mask.
Also snapped off the ventral tank struts by being clumsy, so I thought 'sod it' and went for my initial idea which was to drill and use brass tube. Also makes sanding the insert flush much easier:
And fitted the photo-etch mesh into the oil cooler intake:
-
2
-
-
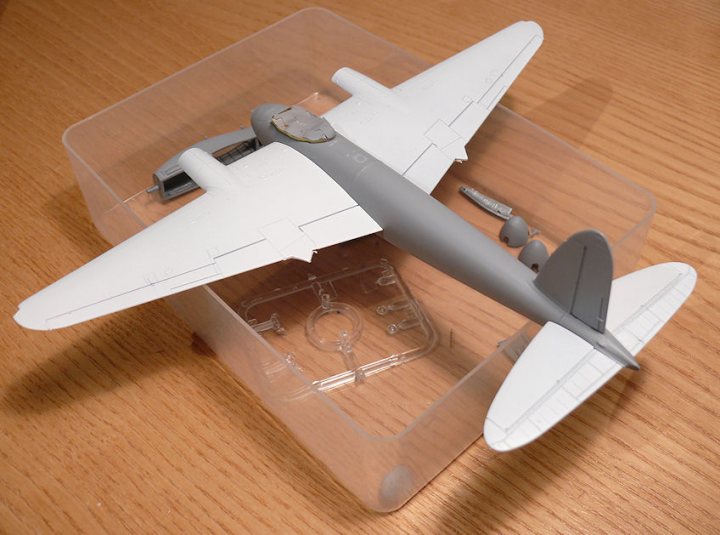
Fuselage and wing halves together tonight, so I thought I'd dry fit the wings and other main bits together to see how it looks. I'll probably leave the cowling loosely fitted for painting so that I don't have to mask the engine, and it will allow me to paint the exhaust stubs much more easily:
The rear glazing is formed as a separate transparent assembly that has to be masked before sparaying the camo. The masks are included in the kit: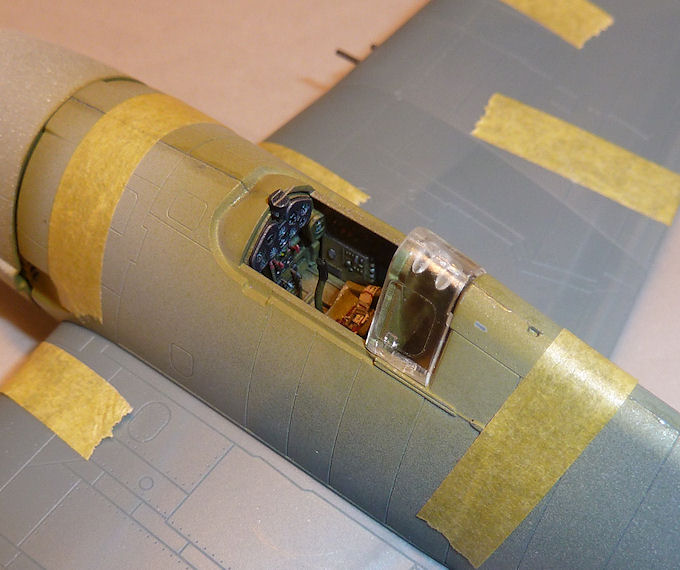
The ventral tank has an insert for the front stays, which are extremely finely moulded. It would have been easier to add them separately, especially since there is a very slight step around the mating surfaces, but...whatever:
I was going to fit bombs, since they have very nice photo-etched fins, but the fins appear to be much too small: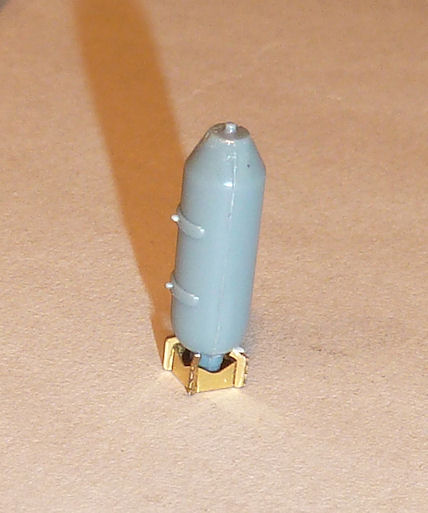
(they are on the wrong end of the bomb in the image!).-
2
-
1:72 Tamiya Mosquito FB Mk. VI (woodgrain finish)
in Non LSM 'WIP
Posted
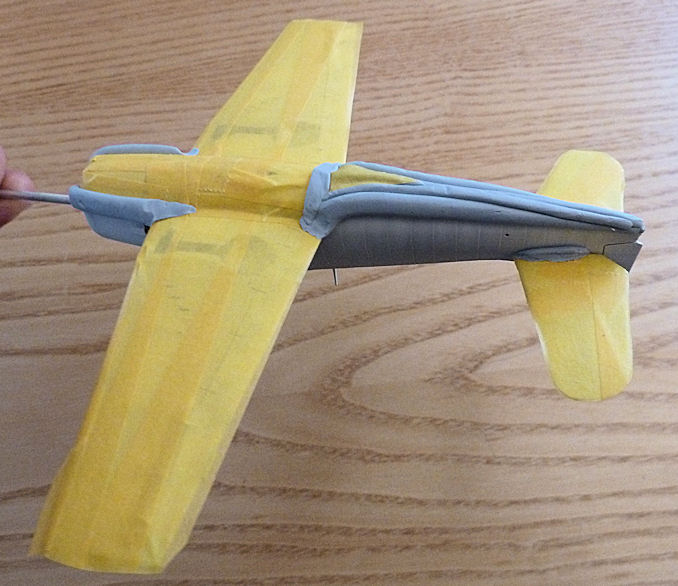
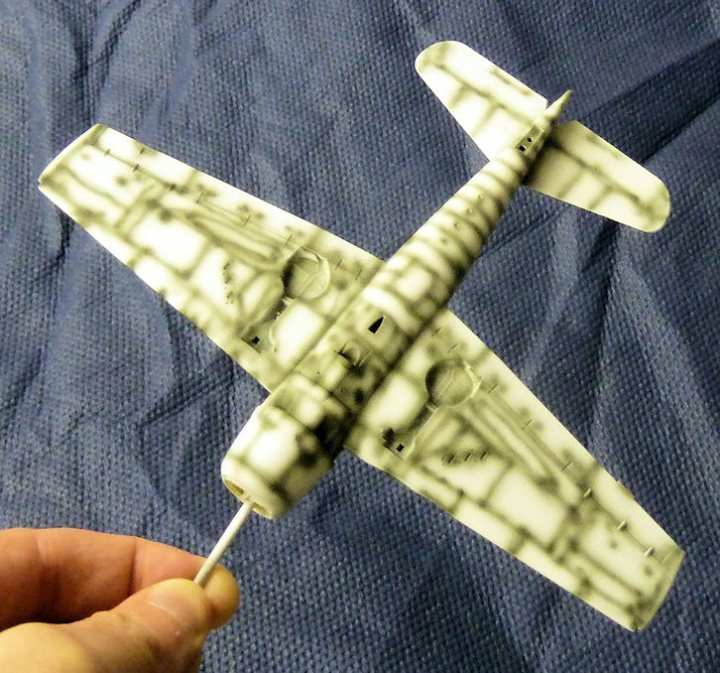
So here's the second test wing (lower image):
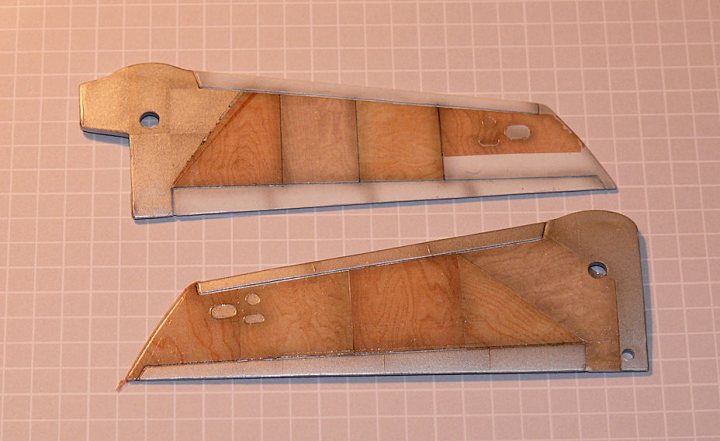
Less preshading and thinner pencil lines.
I'm now thinking it would look better with no preshading at all, and slightly thicker pencil lines.