


One-Oh-Four
-
Posts
1,757 -
Joined
-
Last visited
Content Type
Profiles
Forums
Events
Gallery
Posts posted by One-Oh-Four
-
-
Eduard F-104A cockpit ZOOM-set.
Product-number 33-142.
Available from many online stores or direct from Eduard for €18,75.
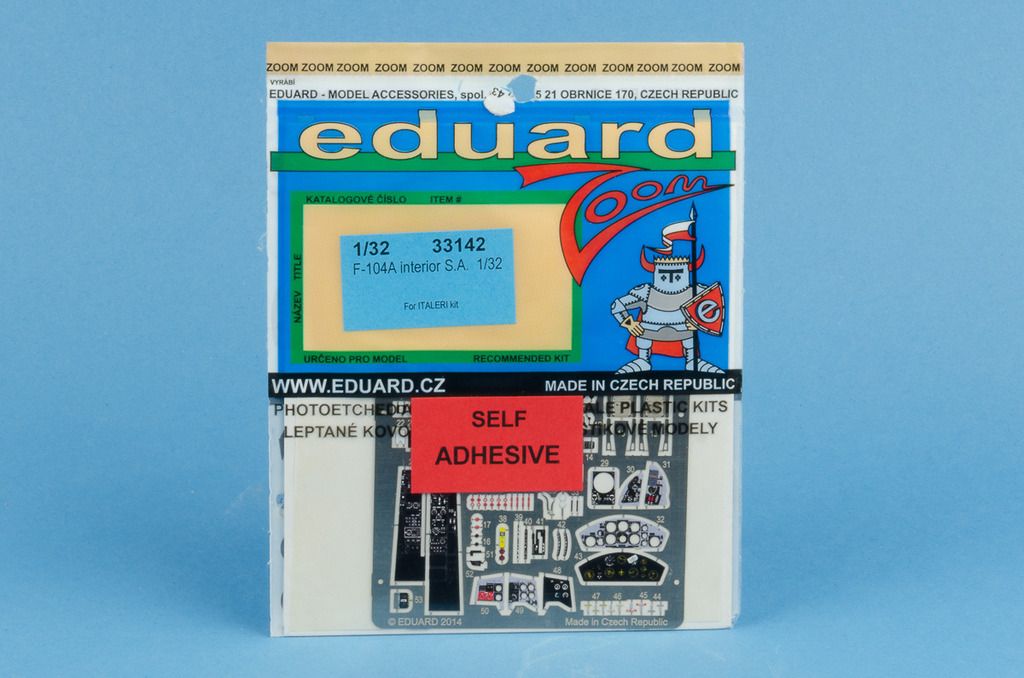
For quite some years now, Eduard gives the modeller the choice between complete interior / cockpit sets or basic sets to only tackle the key parts of the cockpit such as instrument panels and the like. This set is one of the latter; a ZOOM-set. Instead of two frets of PE as in the other Interior-set, you only get the coloured PE fret.
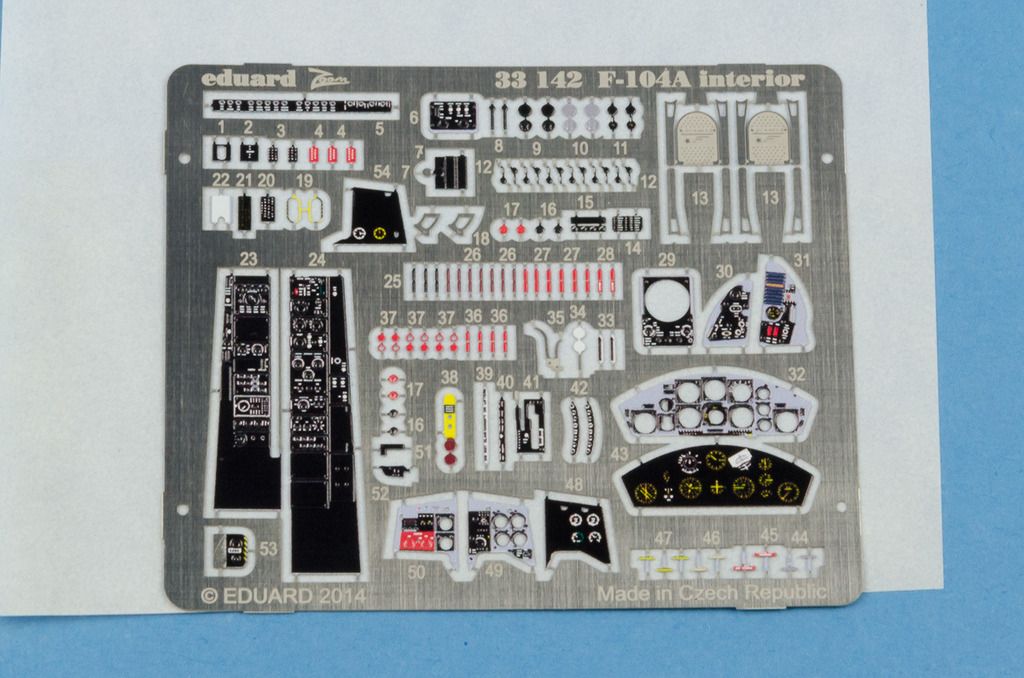
The set does include parts to dress up the cockpit sills and has parts for new rudder pedals however. I don't have too much info on the F-104A cockpit but from looking at the drawings and photo in the "F-104 Starfighter in Detail & Scale" it looks like Eduard did their homework. The Instrument Panel does feature the differences I could see between the F-104A and C for instance. I don't know if the gunsight control panel (part 50) would have been predominantly red, however. The F-104C has the same panel that on F-104C-5-LO 56-914 in the Air Force Museum is completely black. The single B&W-shot of the F-104A cockpit that I have doesn't show a tonal difference between the black panel and the red. But then again, I don't know if a tonal difference would show up between those colours in a B&W photo... It may be that it was because the F-104A flew until 1964 without a gun, but really, that's just guessing on my part.
Dan Siegle from The Dan Zone is or was busy building a 3D model of the F-104A cockpit. In the line of that quest he posted this composite picture of the F-104A cockpit -made from the original manual pictures- on his site:
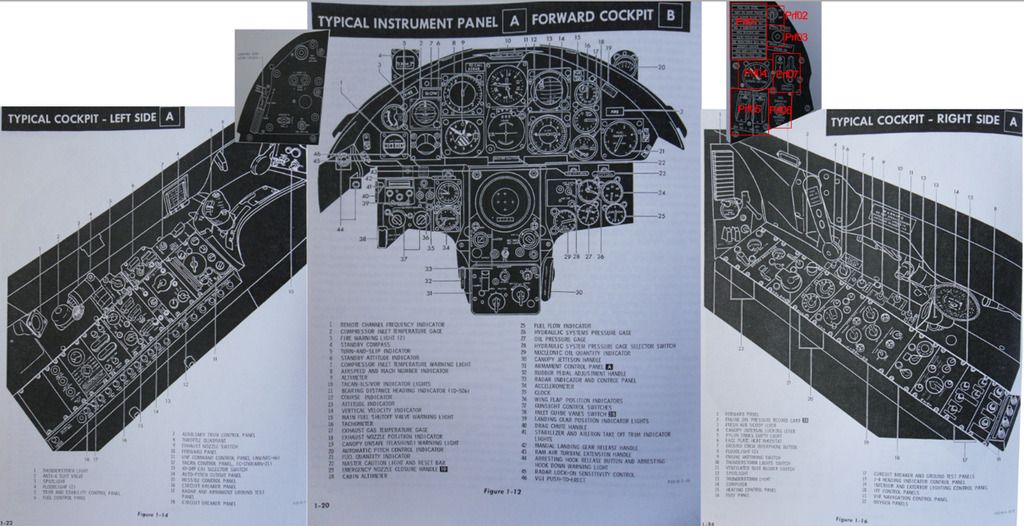
You can use it to check out the basics of the set, regarding the instrument panel and side consoles.
The Eduard instructions give you an idea which parts are incorporated and which areas of the cockpit are treated.
This set will give your F-104A model a boost by significantly upgrading the cockpit.
Highly Recommended!
I like to thank Eduard for providing the review sample.
-
 1
1
-
-
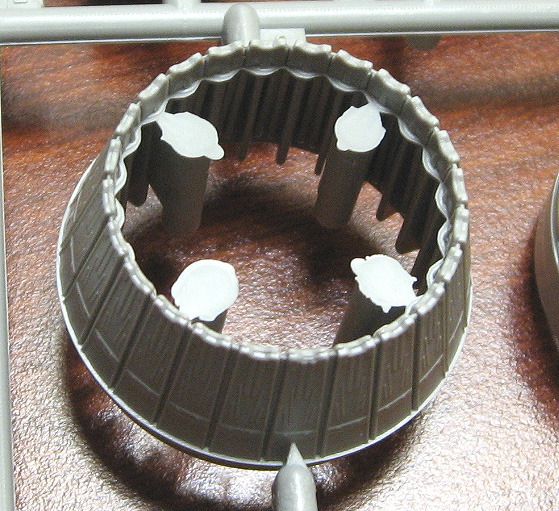
Brassin 1/32 F-104A/C/G "Early" Exhaust Nozzle
Available at many good online-stores or directly from Eduard for €14,95.
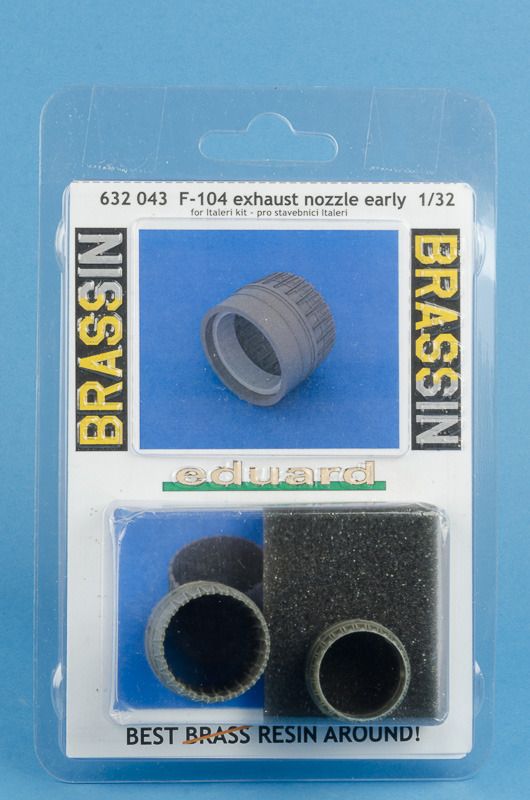
The Starfighters from the YF-104 up to and including the F-104G were fitted with this type of exhaust nozzle. At one time the German Air Force put their F-104G engines through a modification process that also resulted in the adoption of a longer -and different design- of exhaust nozzle. The same type of "late" nozzle was also used on the F-104S. Brassin also has parts for that exhaust, see the review by Jeroen Peters. In any case the Original design has been used on the majority of (T)F-104G's throughout their life and on all F-104A's, F-104B's, F-104C's and F-104D's.
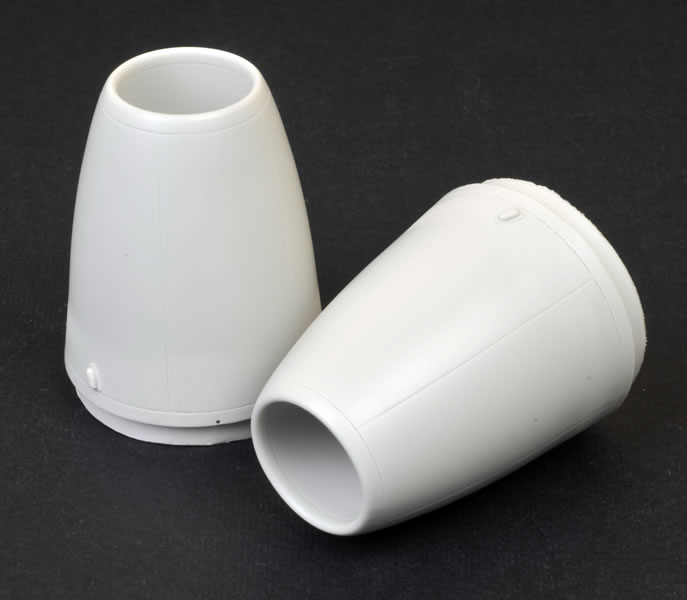
The set is superbly cast with very fine detail. I just consists of 2 parts that are used in conjunction with the afterburner section of the kit.
The outer nozzle:

And the inner nozzle (the one that is responsible for the legendary Starfighter whistle):

Compare that to the original kit part (although that also includes an inner nozzle, not pictured here):
Dave Williams, Largescaleplanes
It's evident that the resin parts are much finer than the kit parts.
Check it out against these photos of the real thing from the SBAP website:
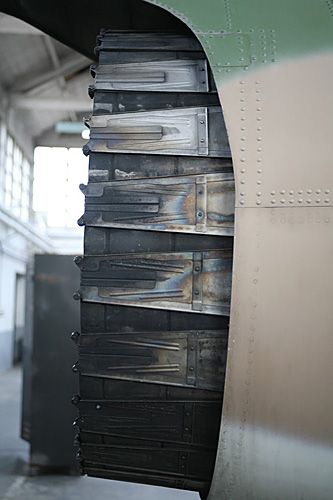
Serge van Heertum / SBAP
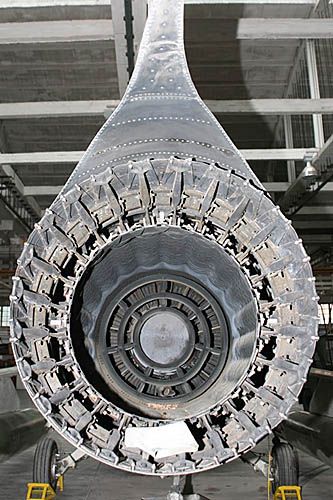
Serge van Heertum / SBAP
SBAP have a very fine walk-around of a Belgian F-104G on their site.
As you can guess, this product from Brassin comes Very Highly Recommended.
My thanks go to Eduard for providing the review sample.
-
1
-
-
Ooooohhh, must have....!
-
What he said.... Magnificent Spit! I especially like the subtle shading on the engine and ancilliary parts, not to forget all the extra details you added!!

-
1
-
-
-
That is NO monster, Eric!!!

Rog

I thought we were supposed to be geeks that are afraid of women?.....

-
1
-
-
EagleCals has some nice decals for the Mk.IV now, too.
-
1
-
-
"What's wrong with knuckle-dragging?" asks Bokito in his usual polite way...

-
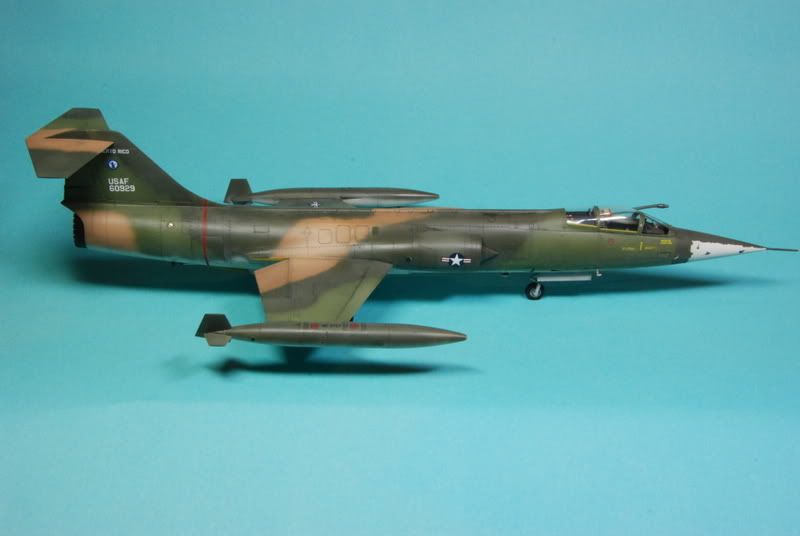
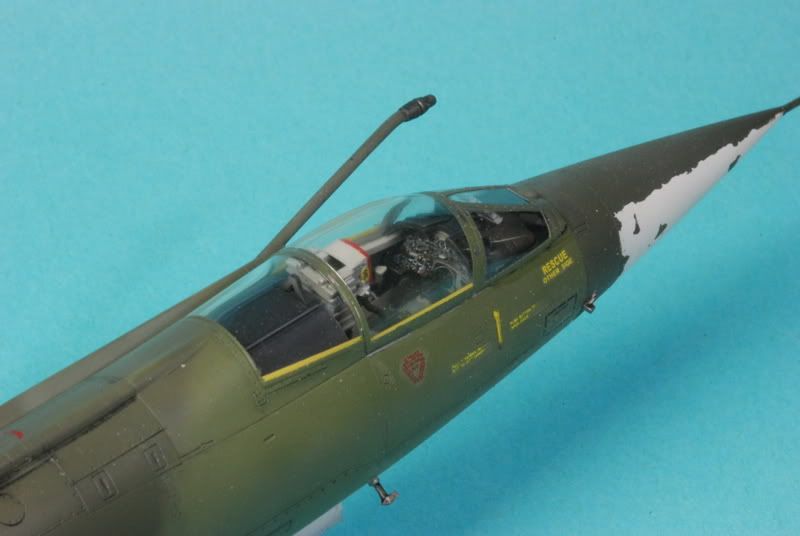
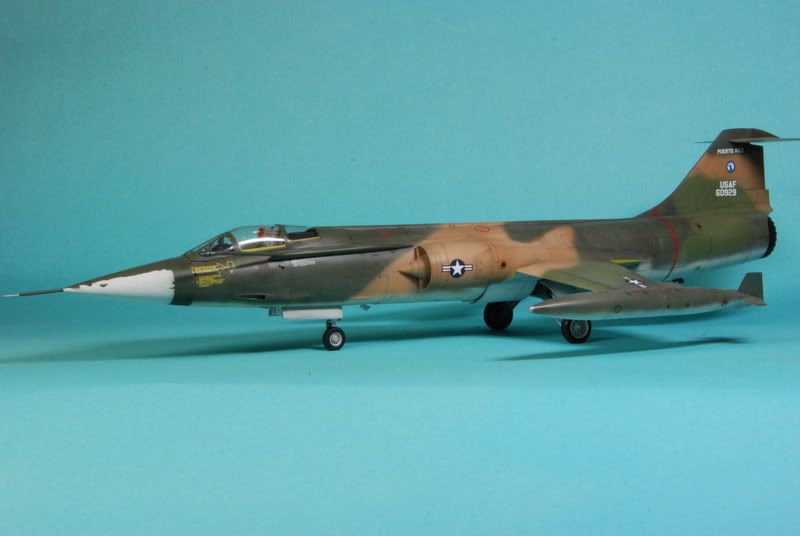
Still my 1/48 F-104C Straighter of the Puerto Rico Air National Guard, I'm afraid...
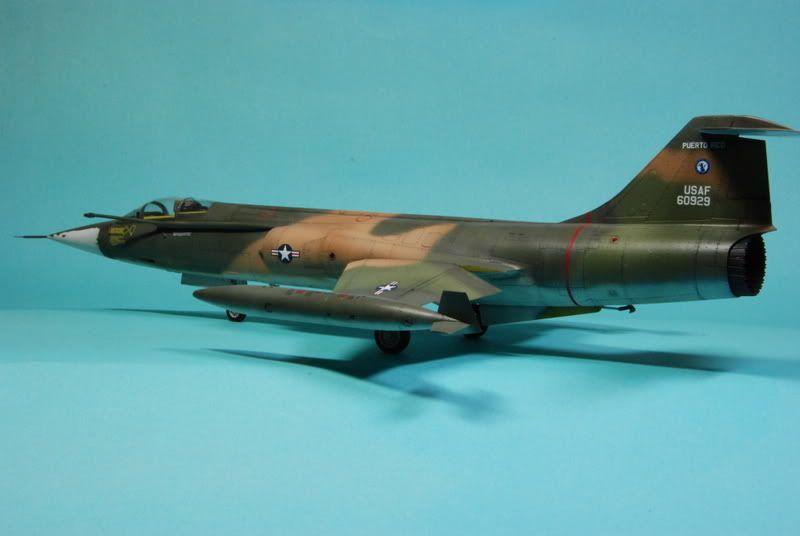
And yeah, I know how to mask a radome, but they DID fly like this...

Cheers,
Erik.
-
10
-
-
Beware of the Vinyl Monster!

-
1
-
-
Looking super!
-
Vette shit, ouwe!
-
I think it was a Roy Sutherland build? At least I have a recollection of him bringing a scorched Mosquito to Scale Modelworld somewhere in the last 14 years...
-
1
-
-
To give you some inspiration:

Photo: Mike Grant
-
9
-
-
Looking good, Ralph!!
-
Ah! I see what you mean!! This one's shaping up really great! I hope you'll bring it to IPMS the Netherlands' "Euro Scale Modelling" show! Will certainly be a contender in the contest! And no, I'm no Judge there anymore...!

-
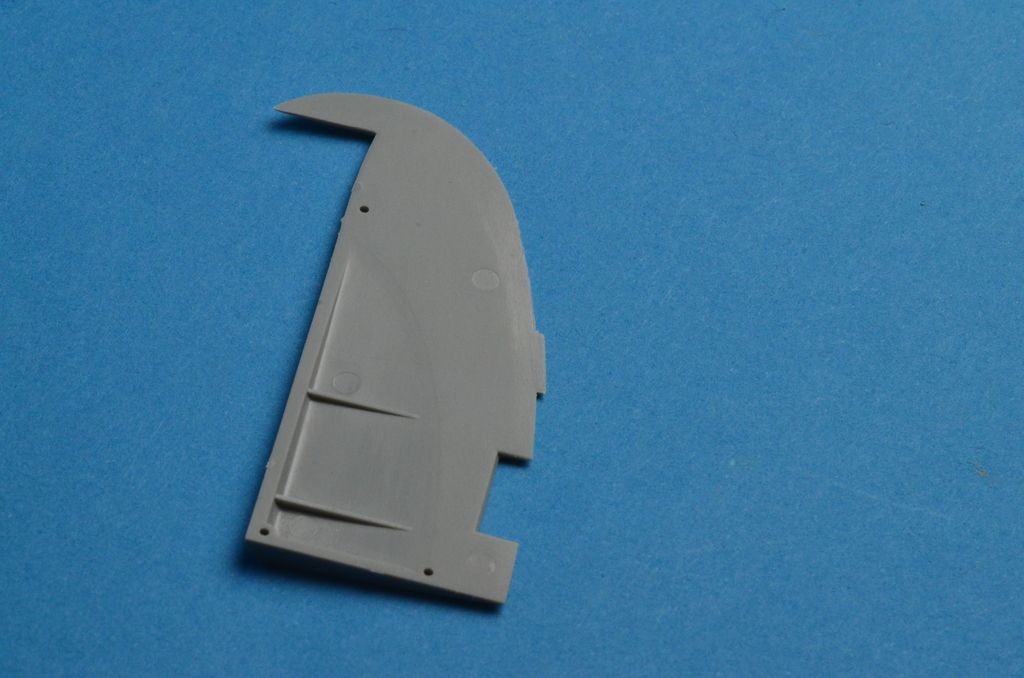
Welllllllll, in the opening post I remarked that it was quite visible that the mating surfaces of the fuselage benefit from a light sanding before assembly. I didn't vector in the consequences of down-sampling the hi-res image by uploading it to Photobucket so:
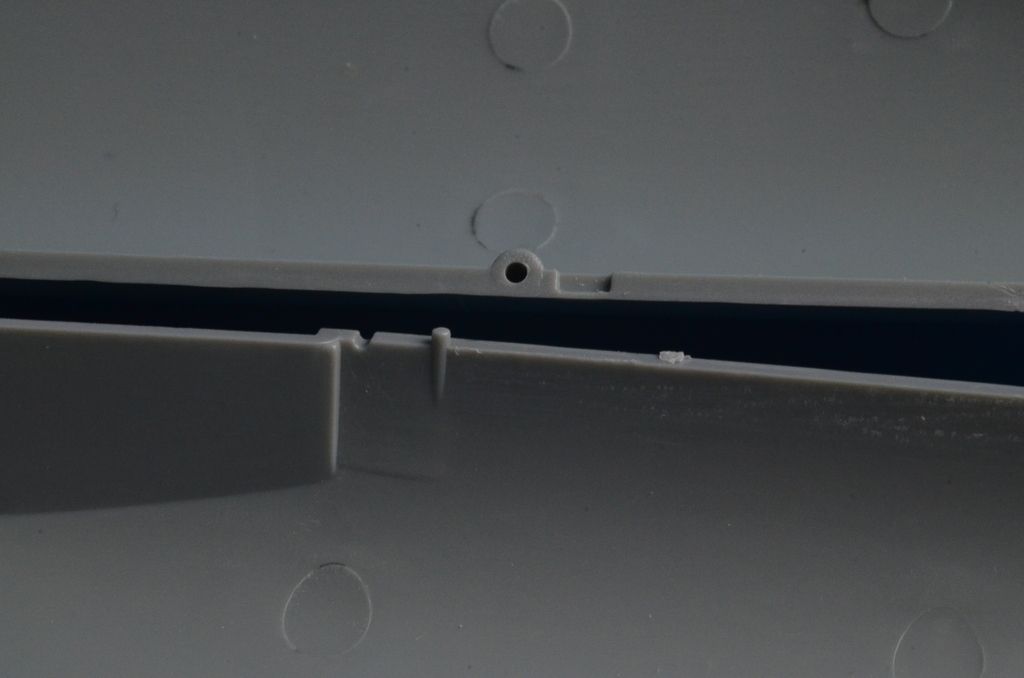
As you can see, the mating surfaces are just slightly uneven. Also, the sprue attachment points are located on the mating surfaces. No problem at all if you are aware of it and devote a little bit of time to making sure that the surfaces are correctly levelled.
I tracked down one of my PCM Hurricanes and nicked it's resin seat. This one will be the furniture of the Meteor's office:
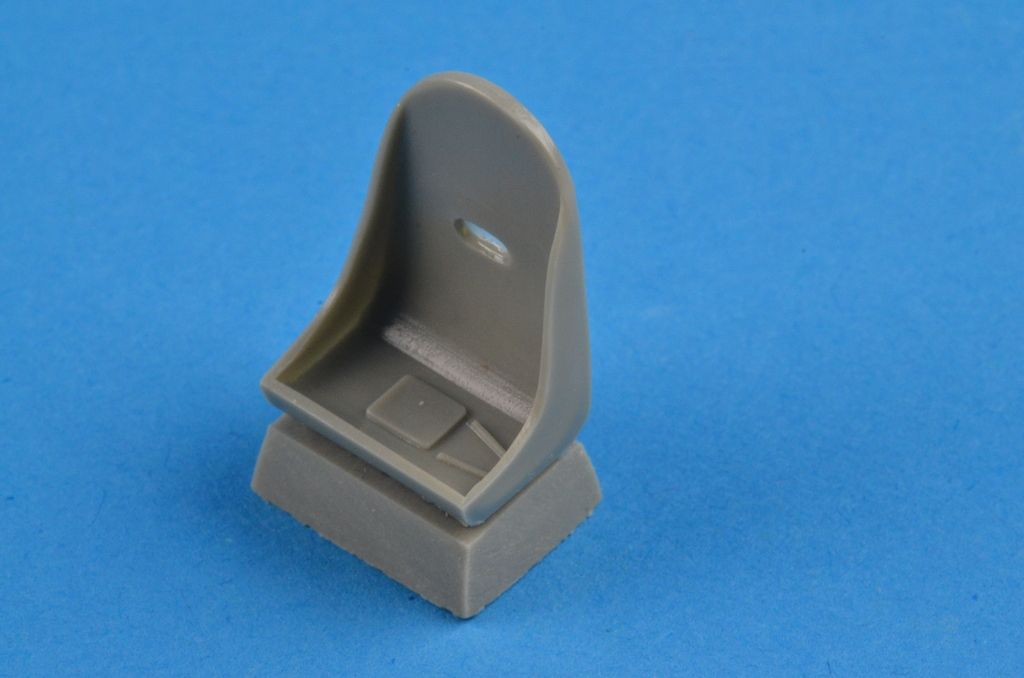
As written earlier; I have been working on the ailerons and rudder. That's because I have the weird preference of finishing as much sub-assemblies prior to starting building and painting cockpits, wheel wells etc. Maybe it's just a form of flight to committing to the serious aspects of modelling!
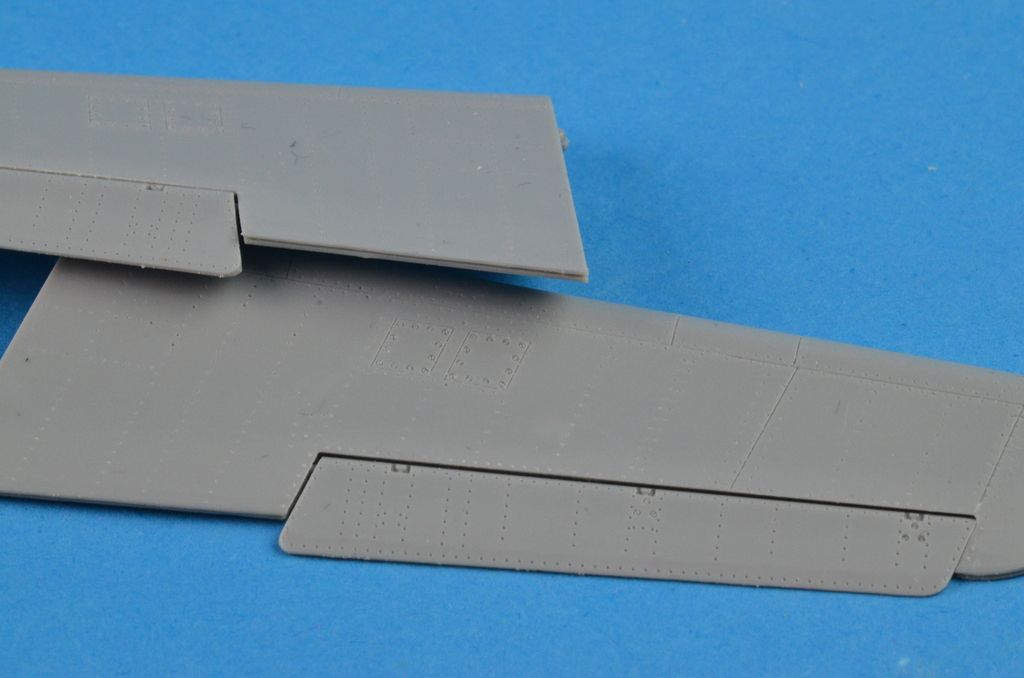
In any case, during my flight a made somewhat of a boo-boo with the ailerons. Fitting them together it's readily apparent that a seam will be visible at the aft end. That's because the insides aren't totally flat but seem "sort of" bevelled at the trailing edge. The elevators show the same problem. I lightly sanded the part and the bevelled edge shows up lighter (above the trim tab) because the sandpaper didn't touch the surface there:
The only solution is really to lightly and evenly sand the part on a piece of sandpaper that is fixed to a piece of glass or something flat & straight like that. Somewhat akin to the sanding done on vacuform models! The only drawback is that that could make the ailerons and elevators somewhat too slim for the wing or horizontal tail...
Otherwise the consequence is a seam at the trailing edge that needs to be filled. getting the trailing edge of the ailerons and elevators thin enough will prove to be difficult without destroying outside detail. Even if the Meteor was built rather sturdy, it didn't have the 1-inch trailing edges like the Javelin for instance had!
In any case, I wanted to be able to position the trim tabs after assembly, so using Gunze or Tamiya Extra Thin cement between the parts was a definite no-no. I used a VERY small amount of CA gel for the trailing mating surfaces, making sure that no glue could reacht the axles of the trim tabs. The fronts and sides of the assemblies could then be glued with a modest amount of Extra Thin cement.
To be continued.
-
1
-
-
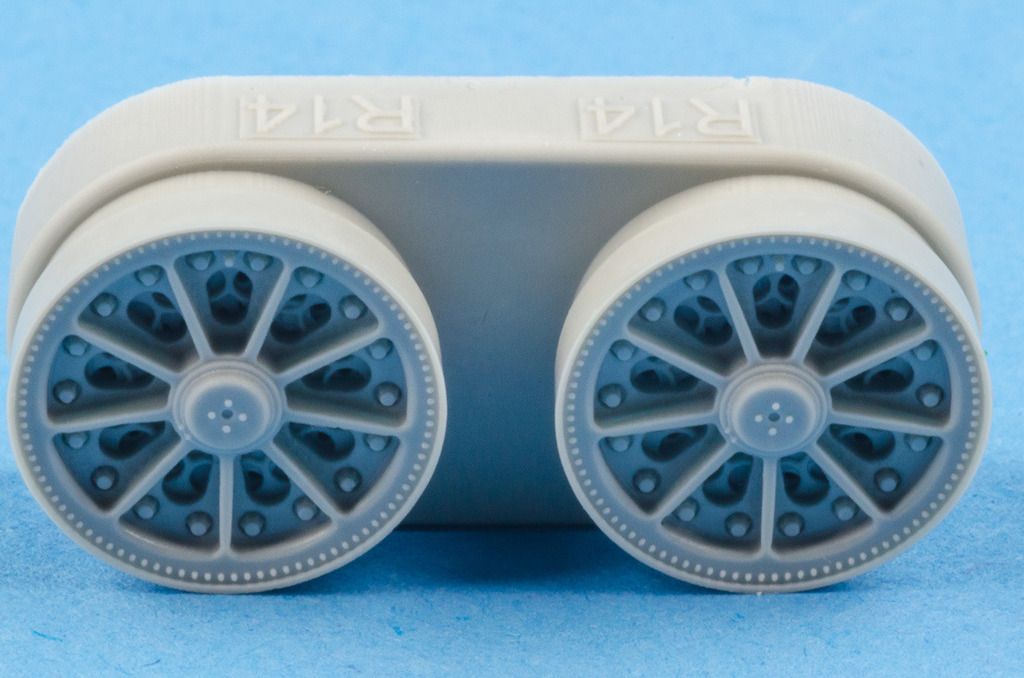
Eduard/Brassin 632 046
F-104G/S wheels
for 1/32 Italeri kit
Available from many online-stores or direct from Eduard for €11,25
With the arrival on the scene of the Lockheed F-104G Starfighter, a wider main wheel was designed as the F-104G was from the outset meant to be not only a point-defence interceptor but also a ground-attack aircraft. As can be understood, extra fuel tanks and air-to-ground weaponry put a larger strain on the landing gear than a clean configuration with two Sidewinders or with only tiptanks and Sidewinders.
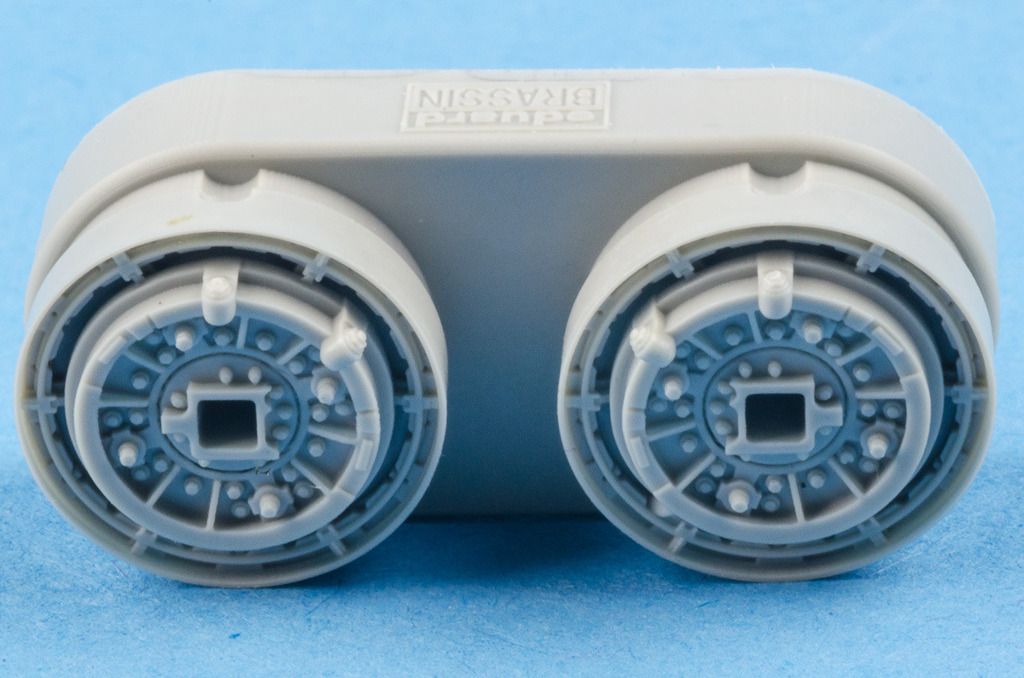
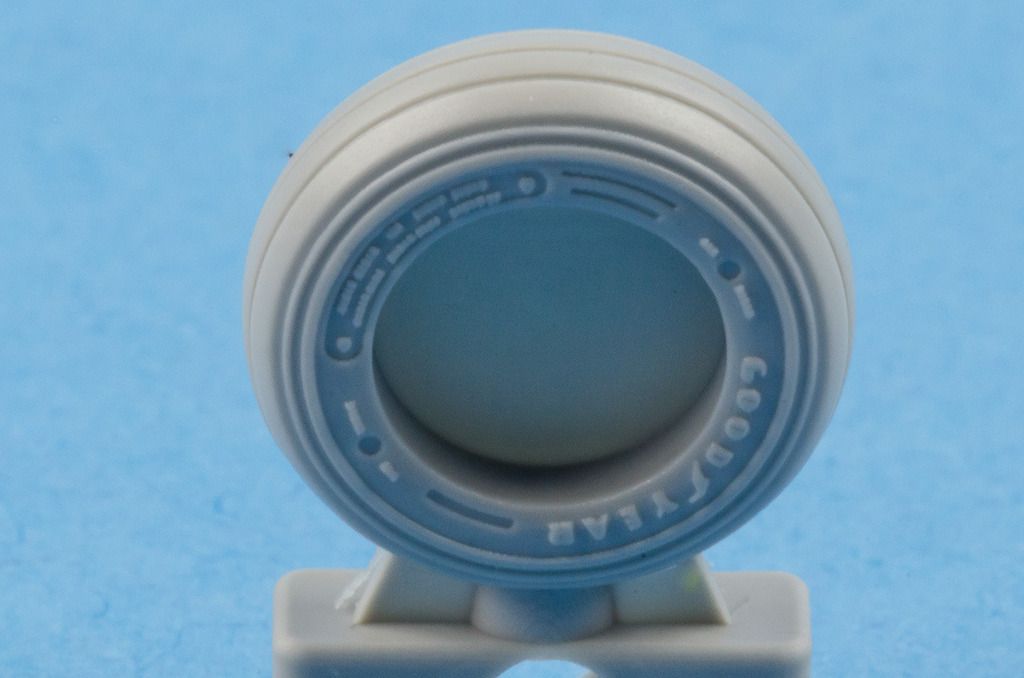
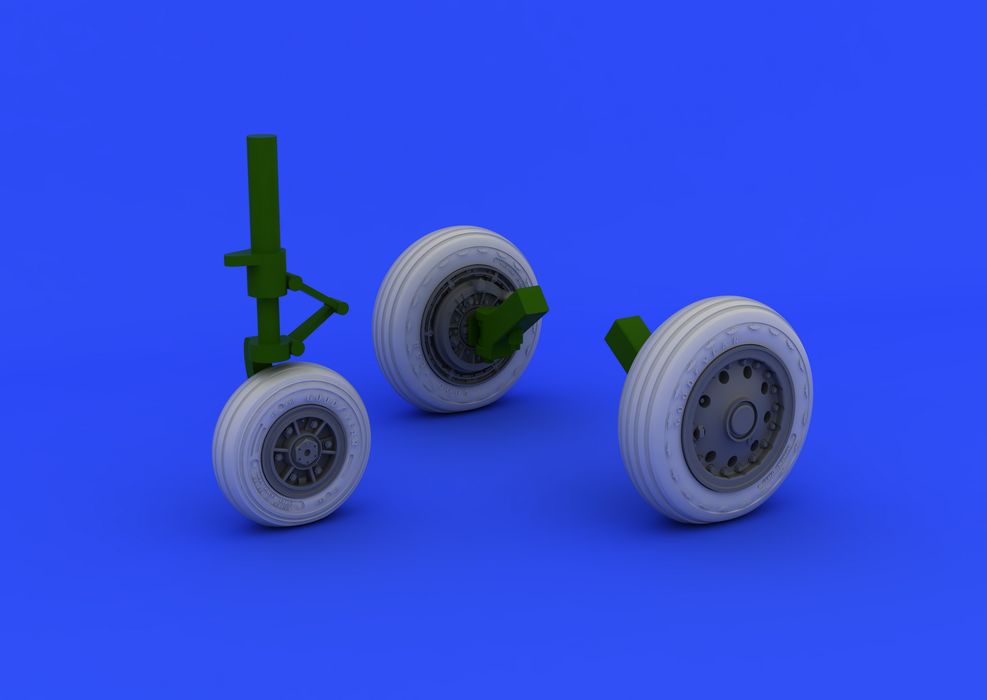
Did the earlier F-104A and F-104C have closed wheel hubs, this variant did feature (cooling) holes in the hubs. The Brassin resin is again stunning in it's detail and features two halves to the hubs and separate tires with excellent tread detail. I think that pictures do say more than 1000 words in this case.
The outside hubs of the main gear:
The insides with the brake details:
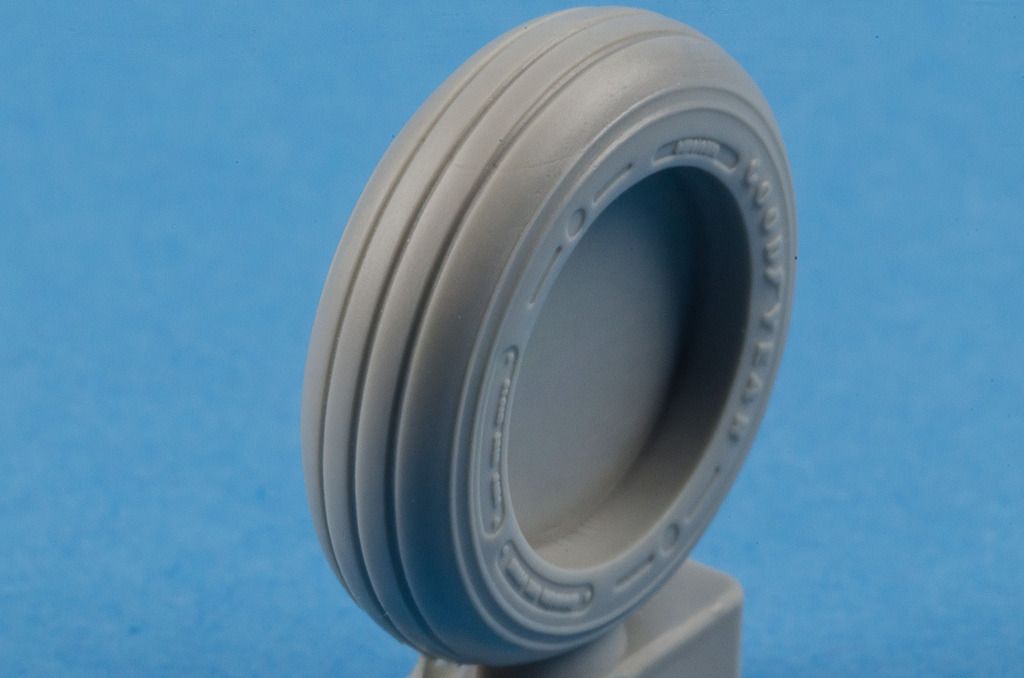
The MLG tire with all logos and moulded-in tire information:

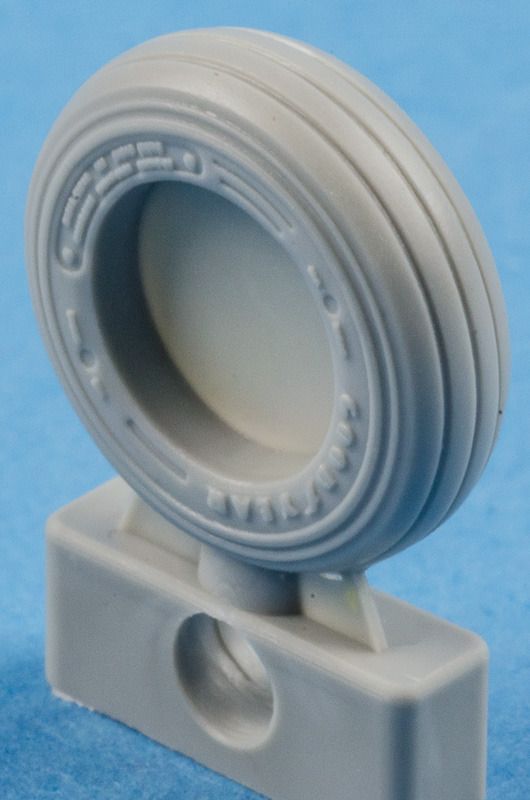
For the nose wheel you have the choice between a "spoked" version and a closed version. The kit nose wheel is incorrect in that it has spokes on one side and is smooth on the other.
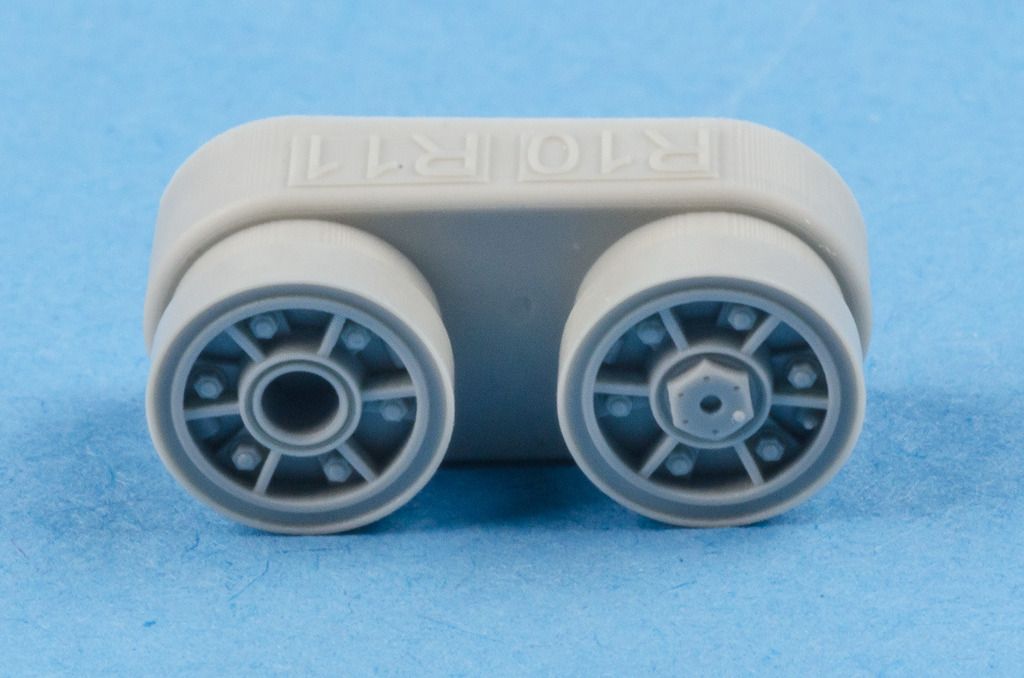
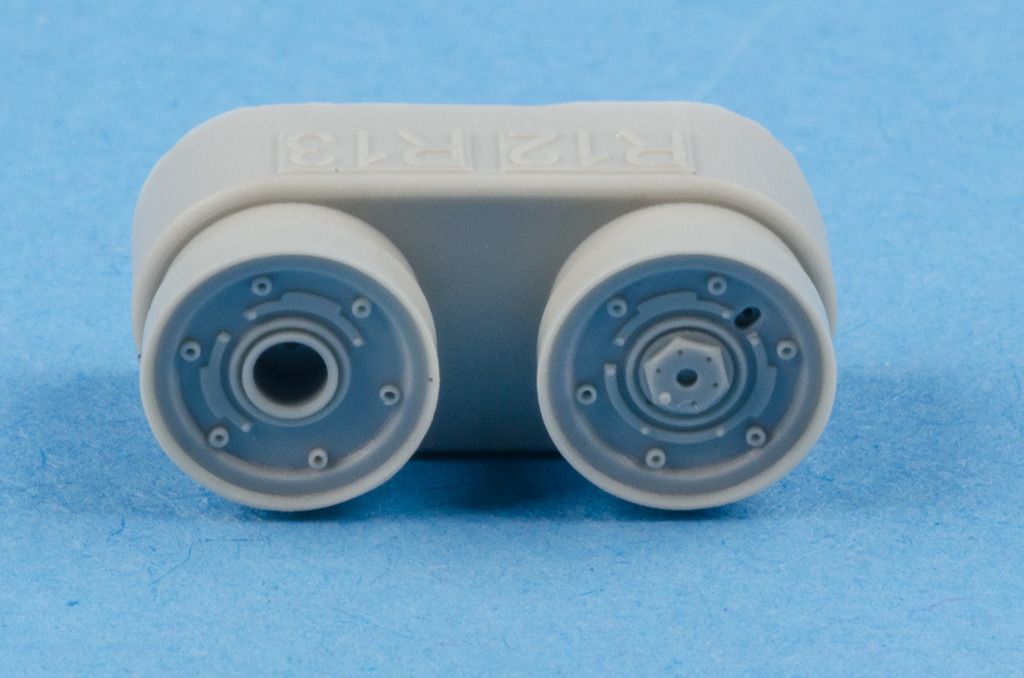
And the nosewheel tire:
There is one thing to keep in mind with this type of wheel; because it was wider than preceding wheel, the larger of the main landing gear doors were finished with a nice bulge to create room for the wheels. However, the Canadian CF-104's and the Japanese F-104J's were fitted with the same pattern hubs, only these were as slim as the earlier designs. Consequently, the CF-104 and the F-104J did not have the bulged main landing gear doors.
Of course, there are Always exceptions to the rules; as far as I have understood, the Danes did retrofit their CF-104's with the wider wheels. The Norwegians, who also bought surplus CF-104's from the CAF didn't and kept the narrow wheels and the flat doors!
https://www.youtube.com/watch?v=mhdAX8WHzBk
Those wishing to make the correct wheels for the CF-104 or F-104J might consider getting Brassin 632 045:
...and using the slimmer tires with the hubs from this set. I don't have 632 045 but presume that the MLG tires are indeed slimmer! Of course, you might have to sand down the backs of the hub-parts to make them fit the tires...
Very Highly Recommended!
Our thanks go to eduard for supplying the review sample.
-
1
-
-
Terrific job, Jeroen!
-
Brassin 632 047
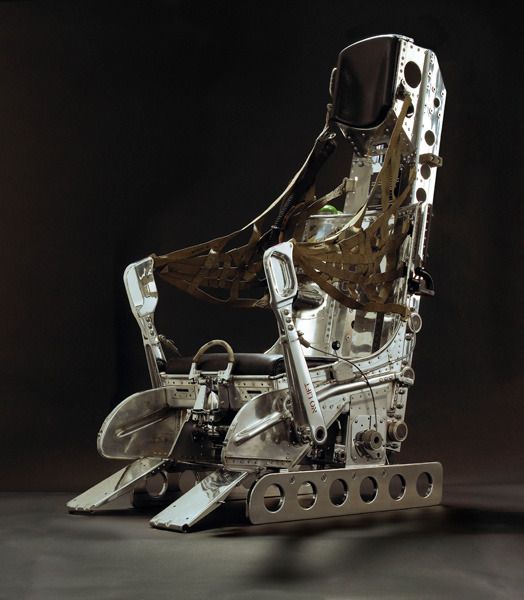
Lockheed / Stanley C-2 ejection seat
For Italeri's 1/32 F-104A/C and CF-104/F-104G Starfighter kits.
Available at quite a few online stores as well as Eduard itself.
http://www.eduard.com/store/Eduard/Brassin/Aircraft/1-32/F-104-C2-ejection-seat-1-32.html for €14,95.
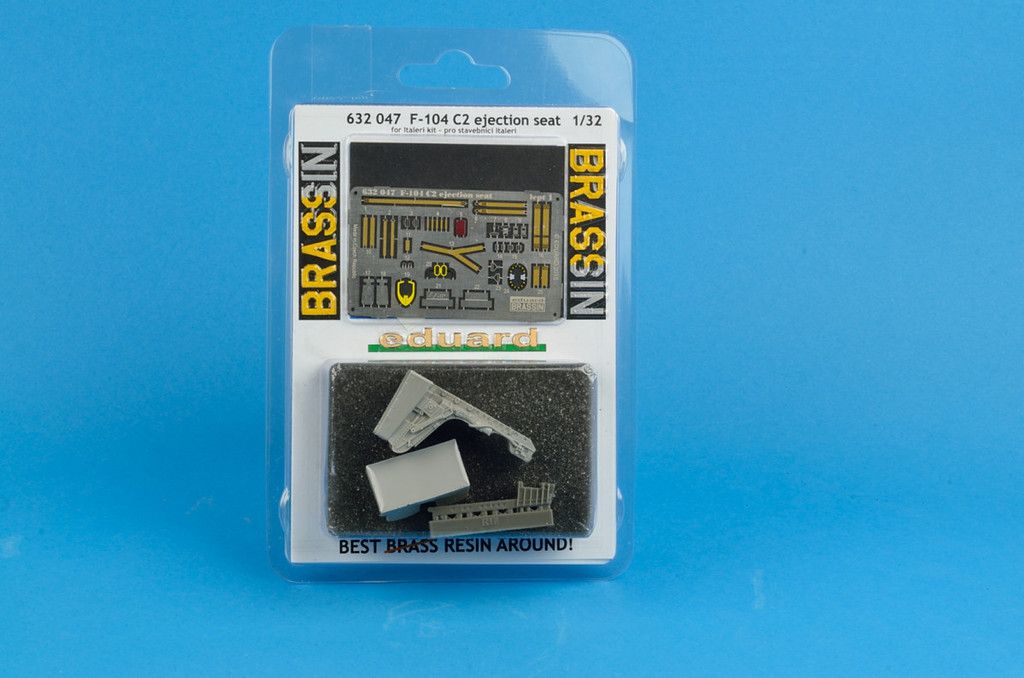
This Brassin set contains a very good looking Lockheed / Stanley C-2 ejection seat. It blows the kit seat out of the water, so if you would want to do only one very visible update on your One-Oh-Four, choose this one!
Even if it looks really good, you can see that Eduard does have some difficulties in identifying specific seat characteristics, even when present in this set!
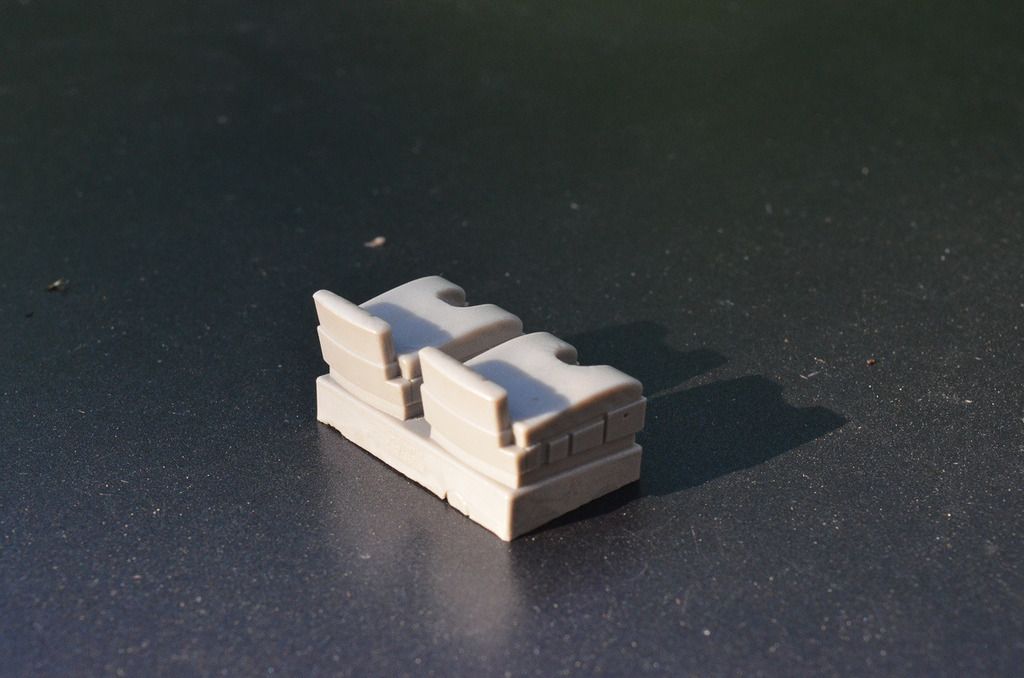
First some pictures around the basic seat part
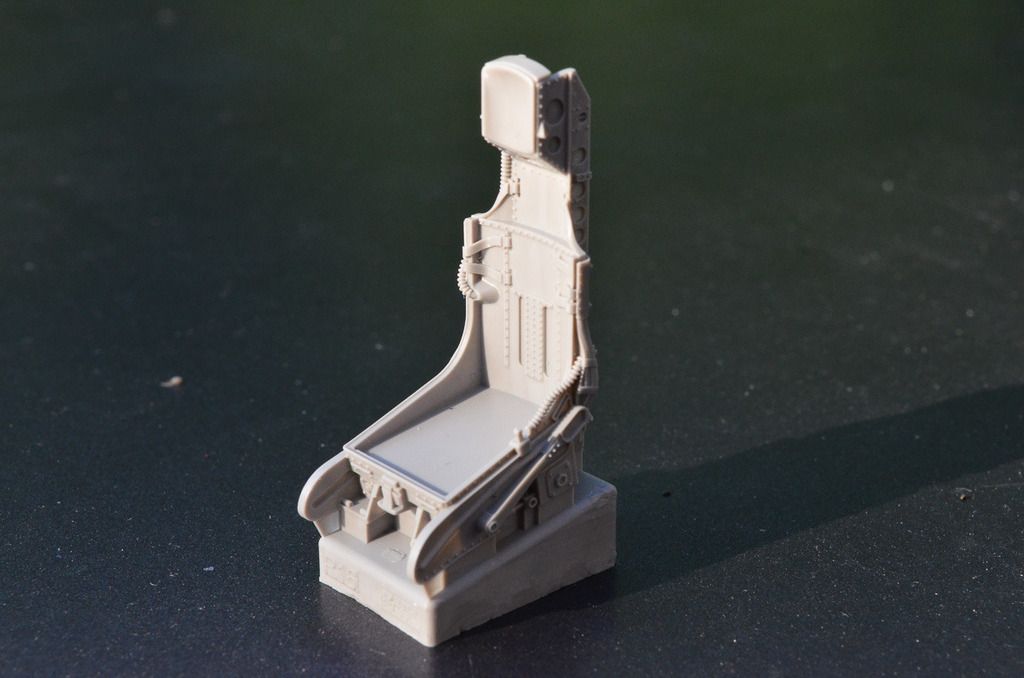
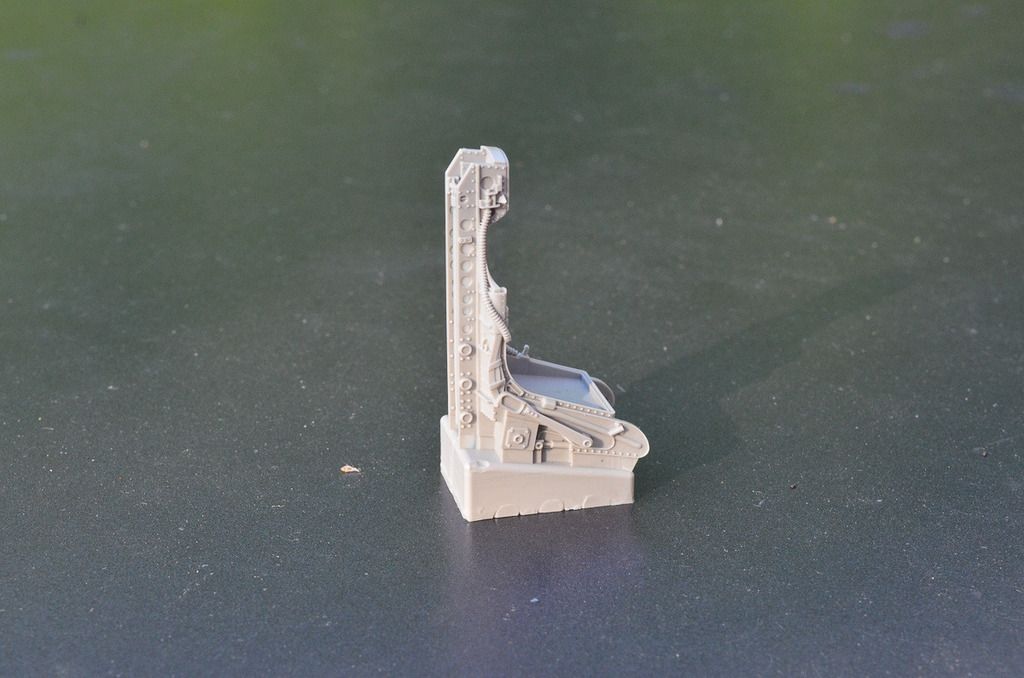
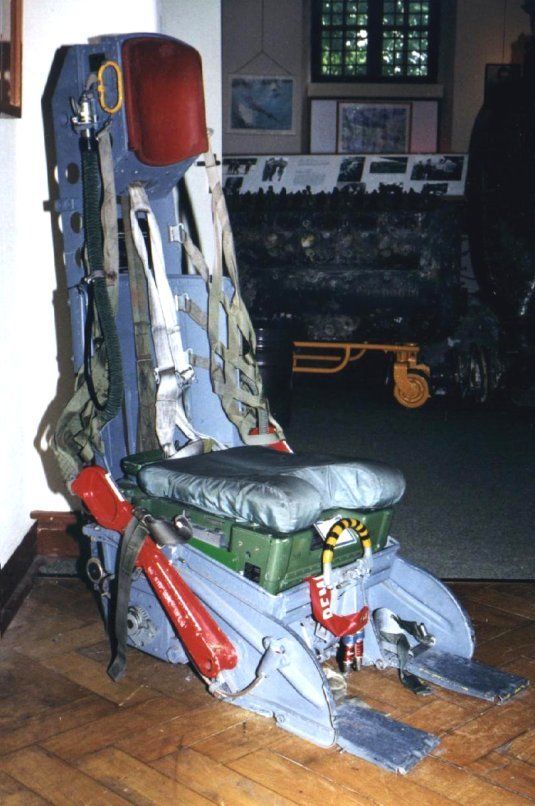
The seat conforms to the photos and drawings I know of the real deal. What is interesting are the two "handles" on the side of the seat bucket. In actual use they are no handles at all, they are exactly the wrong way around if they were to be used to initiate ejection as was common on earlier ejection seats. These handles (for lack of a better word) were attached to a piece of webbing that was stowed behind the seat back. If ejection was initiated by the pull-ring between the pilot's legs, the handles moved forward, taking the webbing with them, preventing that the pilot's arms would be blown backwards during ejection.
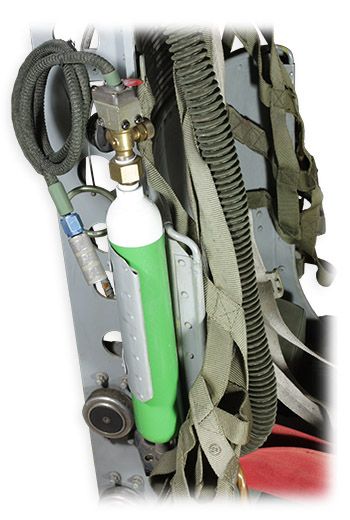
This C-2 that was refurbished as a hipster's chair by Avion-Art shows it rather well:
Avion-Art
This refurbished seat shows some kind of "oxygen bottle" clamped between the parts that in actual life stored the webbing. The model seat represents it faithfully, even if the built and painted example on the Eduard website doesn't show the webbing painted for the most part!
comptoir-aviation.com
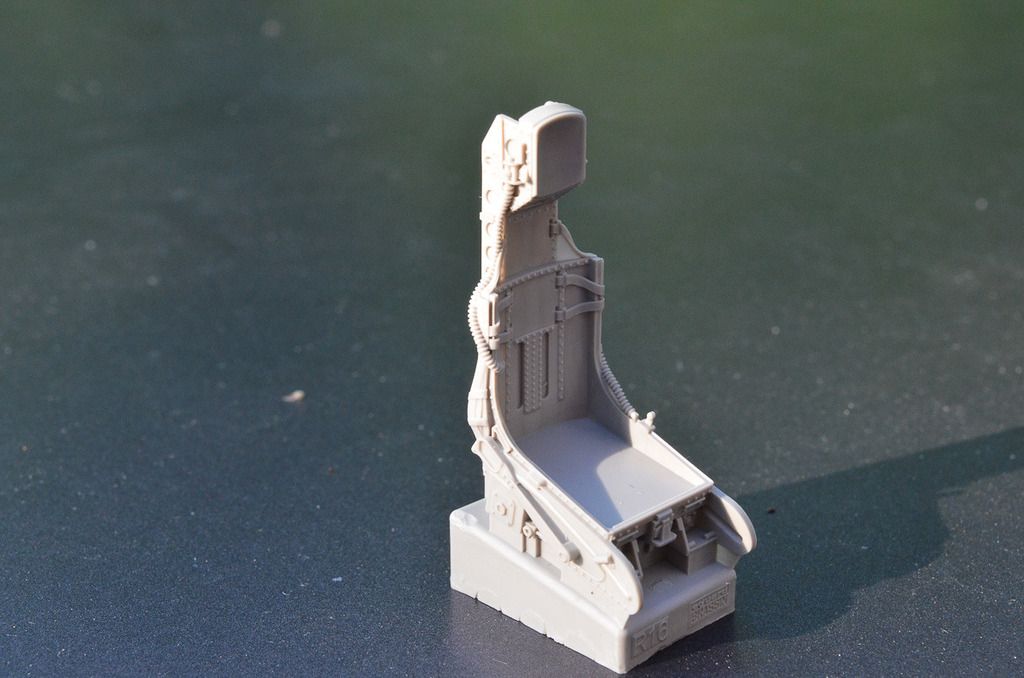
The set gives you two options for survival packs. One with a "bevelled" front, in any case correct for a Dutch or Belgian Starfighter and a "square" fronted survival pack. I've noticed that these were used by the Canadians on their CF-104's.
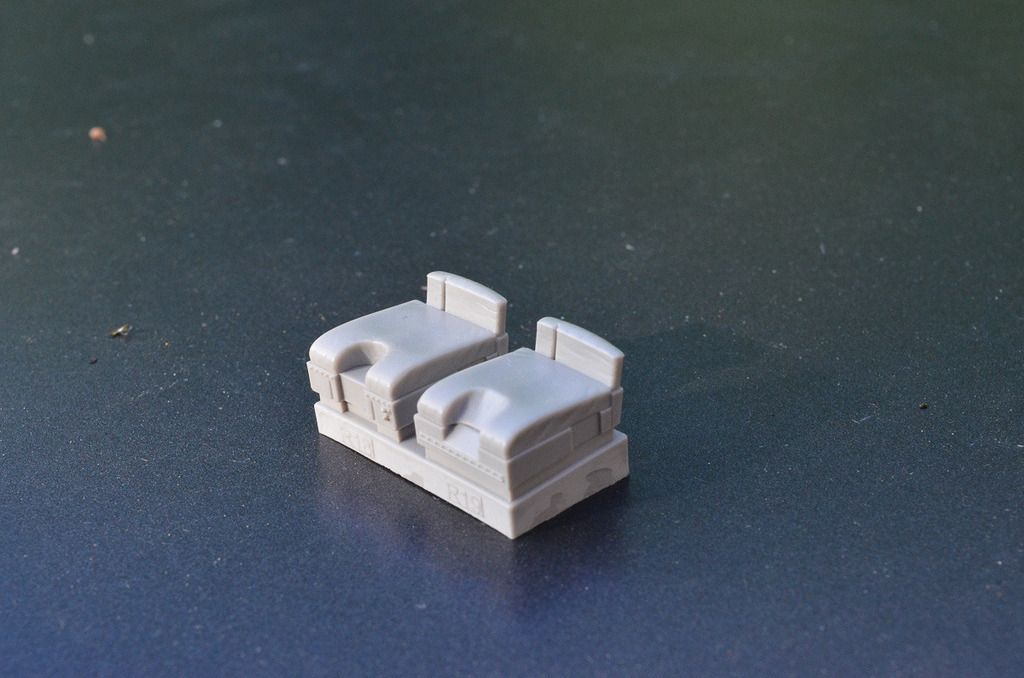
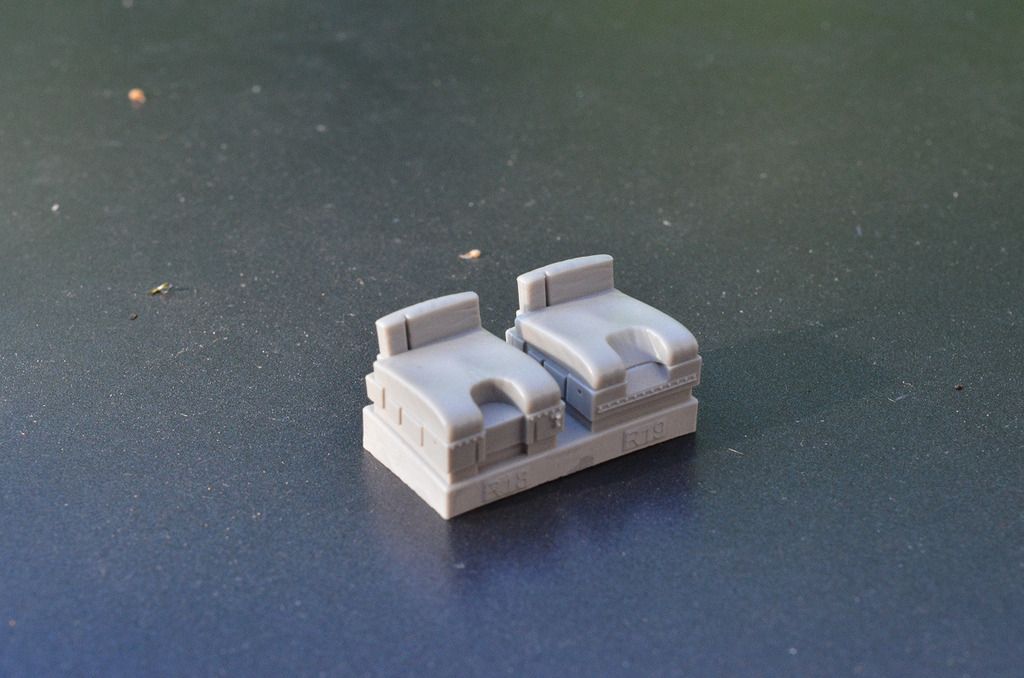
As you can see, there is a “notch” missing in the cushion that supports the back parachute of the pilot. That is the place where the oxygen hose and the green ball of the emergency oxygen emerge from the seat pan. Although a small oxygen bottle on the side of the C-2 as in the photo above looks cool, the emergency oxygen was located in the aft compartment of the seat pan survival pack.
On this photo you can see the seat cushion, the seat pan survival pack, the two initiators under the D-ring but also the spurs that normally the pilot would wear. The pilot would "hook up" his spurs to the seat and in case of an ejection his feet would be drawn back onto the foot plates so his legs wouldn't be torn off by the instrument panel...
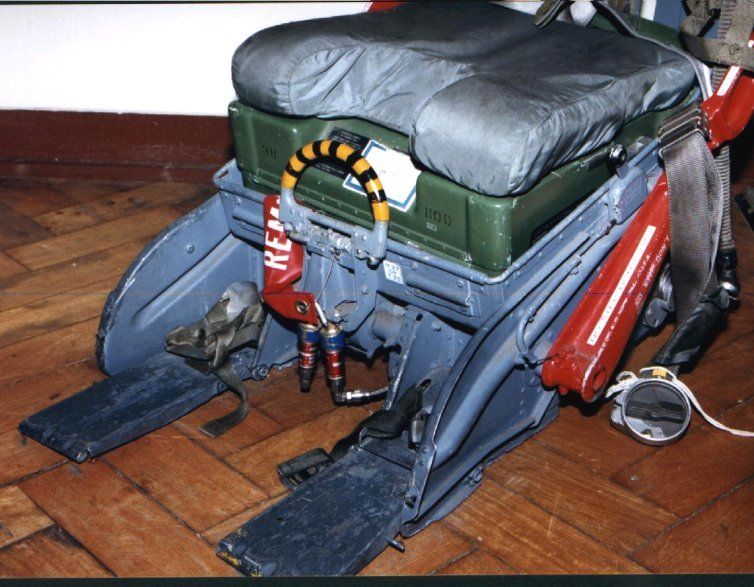
Mark Verbeek, ejectionsite.com
This photo from the Pakistani Air Force shows the spurs and the back parachute to good effect:
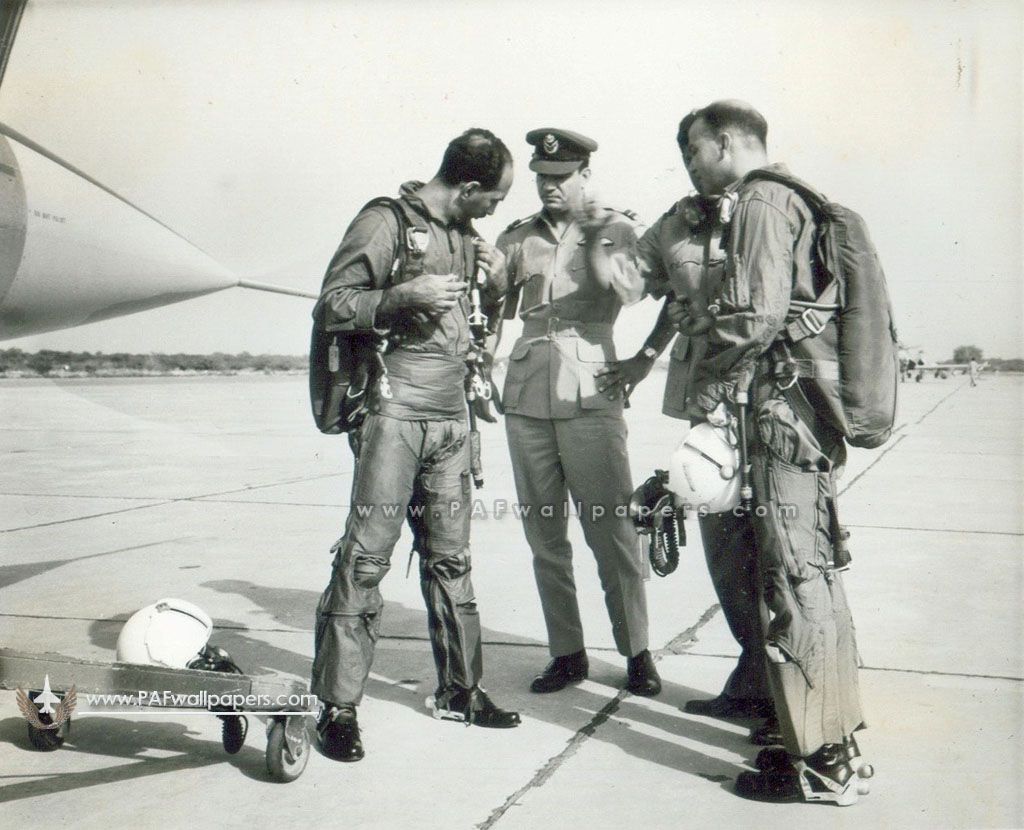
PAFwallpapers.com
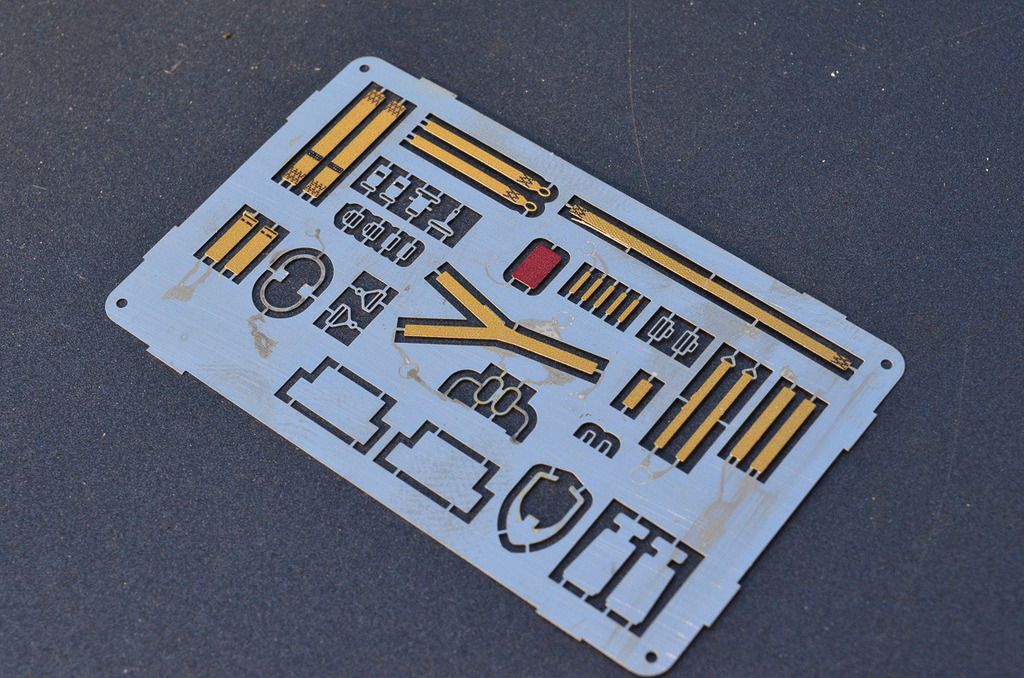
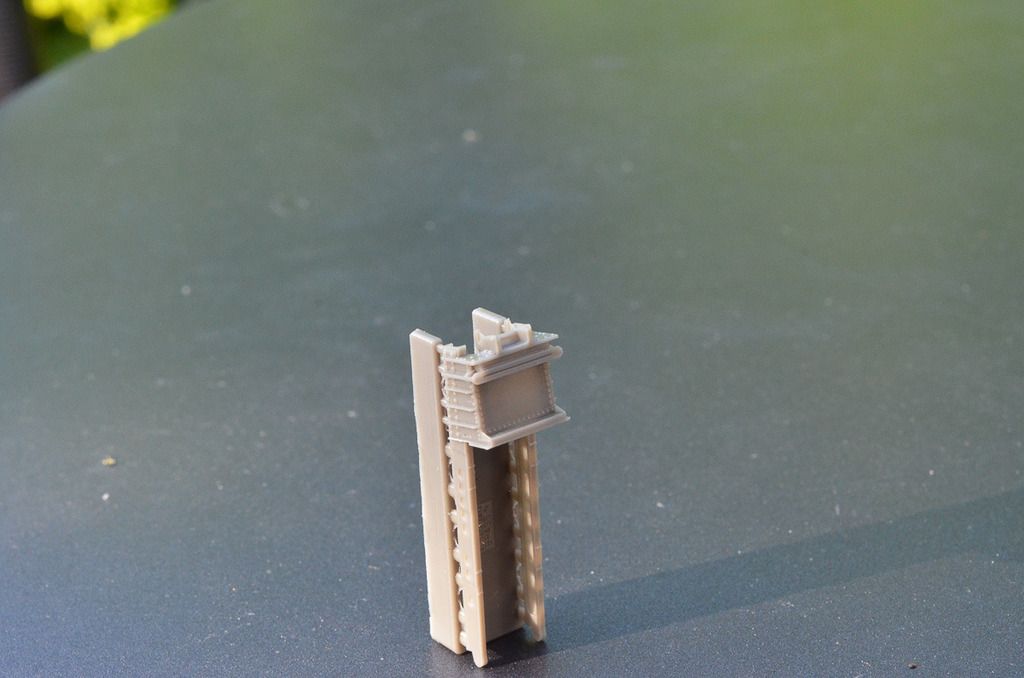
This is the photo-etch set that is included. Keep in mind that part 13; the Y-shaped belt is NOT part of the seat belts. It's a strap that runs from the back rest UNDER the survival pack. After ejection this strap is pulled in at the headrest and in doing so pops the pilot out of the seat. Before that, the seat belts have opened of course, otherwise it would be a rather painful exercise...
This strap is called the man-seat separator. Don't follow Eduard's instructions concerning this strap.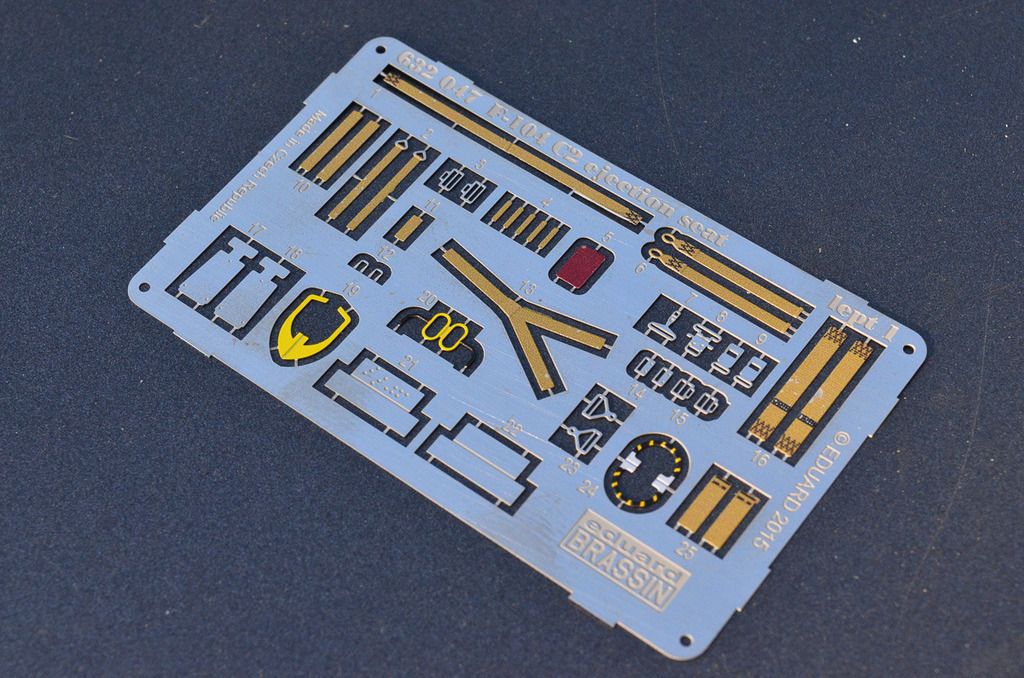
The backside is colored too:
The man-seat separator can be seen to good effect on this photo of a Dutch C-2 seat:
Mark Verbeek; ejectionsite.com
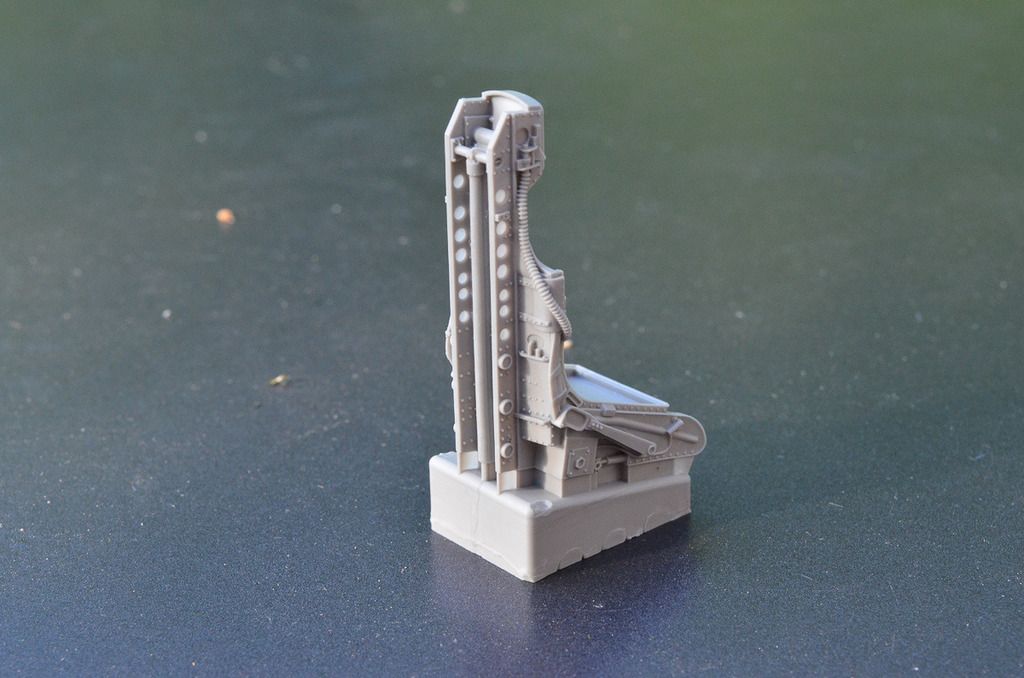
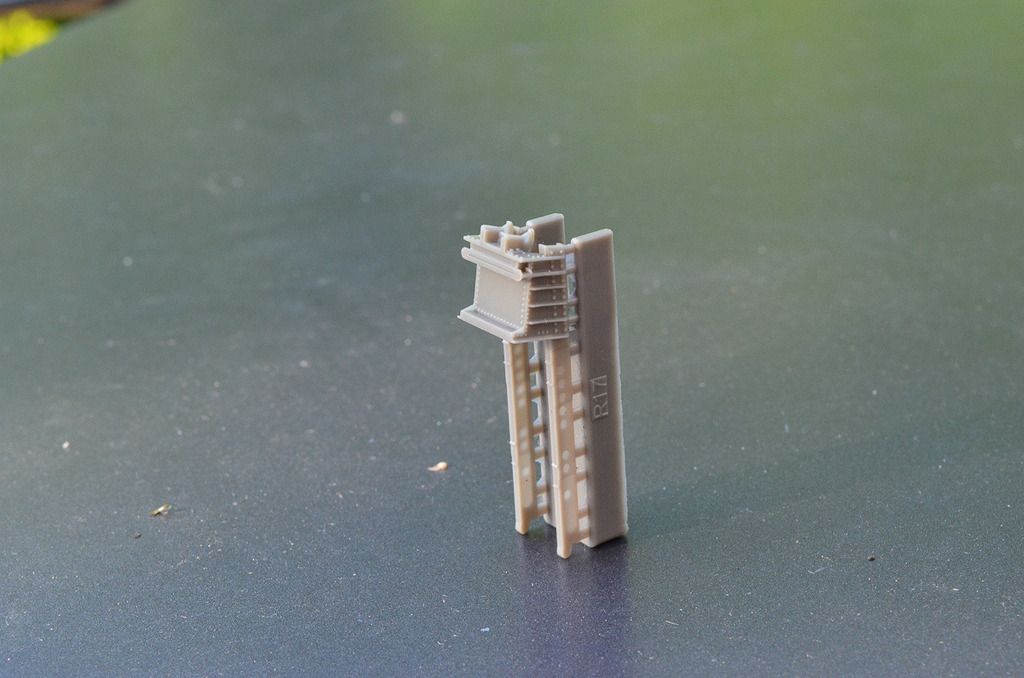
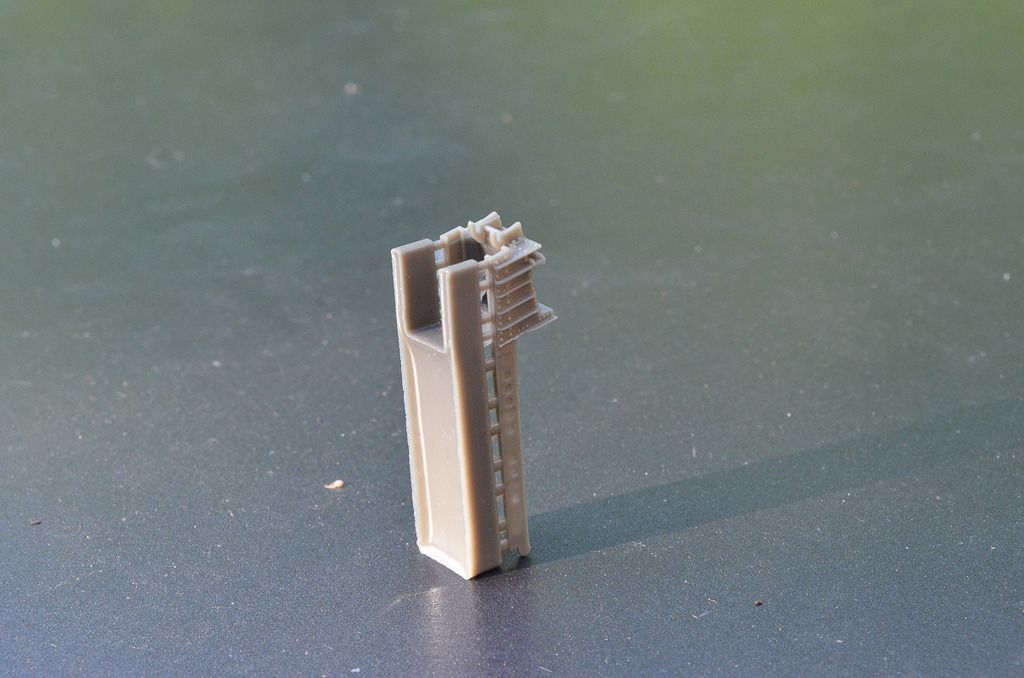
The package is topped off with a new part for the ejection rails that also improves greatly on the detail of the kit part. Be careful with removing the casting attachment as it sits on the front of the part. Also don't forget to drill the holes in the rails and the seat itself asthey are through and through on the real thing.
All in all a great addition to your Starfighter. Highly Recommended
Thanks to Eduard for providing the review sample.
NB: Keep in mind that very many F-104G's hadthis seat installed throughout their careers. Only the Danish, German and Italian F-104G's were (retro)fitted with the Martin-Baker MB-7Q seat. That also goes for the CF-104's that the danes acquired later on and of course the F-104S's from the factory. So by no means were it only "early" F-104's that were fitted with the C-2.
-
1
-
-
Foot? Foot? Oh you mean the bread rolls with cheese? Yeah, Dutchman..... On the penny...... Brought my own food.....
As for the aftermarket, Jeroen, I'll be using:
Fisher's long chord intakes:
www.hyperscale.com
The Eduard Interior Zoom set:

Jeroen Peters
http://forum.largescalemodeller.com/topic/3022-eduard-gloster-meteor-f4-interior-and-seat-belts/
Brassin wheels & mudflaps:

Benjamin Summerfield
http://forum.largescalemodeller.com/topic/3038-132-meteor-f4-wheels-for-hk-kit/
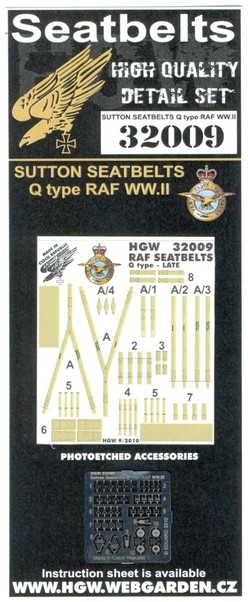
HGW Q-Type harness:
And I have to scrounge a Hawker Hurricane seat from somewhere. My PCM Hurricanes have made themselves scarce as they don't seem to want to be violated....
In any case, I progressed with a set of ailerons (with "working" trim-tabs) and a rudder..... Photos of this breaking news will follow shortly...
-
Nah, I did read a story about a "Lost Son", though... Was away for quite some time, came back and there was quite some rejoicing that the Mossie was finished in the meantime..... Or something like that....
-
Jeroen, I like it very much! Really good looking!
-
Great result!!

Eduard Lockheed/Stanley C1 ejection seat set for the Italeri F-104A
in Aircraft Reviews
Posted
Eduard Lockheed/Stanley C1 ejection seat set for the F-104A.
Product number 32 824.
Available from many online stores or directly from Eduard for €14,95
Eduard describes the set as being "F-104 C1 Seatbelts". Of course the belts are included, we may be happy that that's not all. The ejection seat in the kit is a somewhat flawed Lockheed/Stanley C2 ejection seat and although the family ties between the C1 and C2 are evident, they have easily seen differences. For instance the C1 was a downward firing ejection seat and had the rollers for the seat rails near the top, the C2 was upward firing and had them near the bottom of the seat... Because there were the Stanley A, B, C, C1 and C2 versions of this seat, you might be interested to read the history of the F-104 seats on The Ejectionsite.
So it's evident that the set needs some parts to backdate the C2 to C1, now would probably be a good time to check out the PE fret:
The first coloured sets from Eduard had their belts and the like coloured on only one side. Eduard realized this and those parts that are visible from both sides -and were coloured in the first place- did receive a coat of paint/ink on both sides. Although why the footrests and back rest were left in metal, I don't know...
In any case you can see that parts are offered for a new headrest assembly, foot troughs and triangle-shape ejection ring. I would advise not to use the webbing parts as included in the set and make it yourself from strips of paper or so as they were pretty neatly stowed on operational ejection seats.
Christopher Carey / ejectionsite.com
Christopher Carey / ejectionsite.com
Eduard's instructions show you what needs to be done to change the appearance of the C2 into a C1. For an early F-104A it's a must, this set will give you a good starting point.
Highly Recommended!
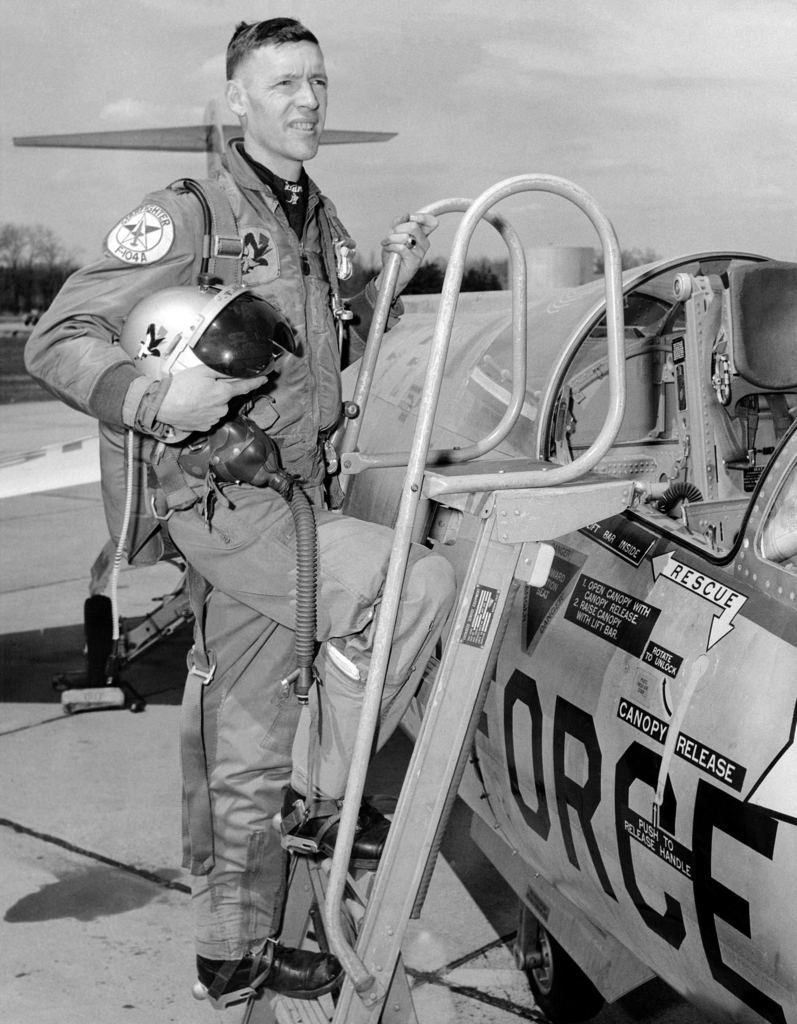
Keep in mind that the F-104 seats had the survival pack stowed in the seat pan (together with the emergency oxygen) and that the pilot wore his parachute on his back, no matter how many F-104 seats you see in museums with the parachute pack in the seat...
To illustrate it, our gallant pilot from 1958 climbs into his F-104A with downward firing ejection seat again...