The Great LSM Twins Group Build ends Aug 31, 2024
×


David Hansen
-
Posts
27 -
Joined
-
Last visited
Recent Profile Visitors
1,796 profile views

-

Tamiya F4U-1D Corsair: Update: 2/1019
David Hansen replied to Peterpools's topic in LSM 1/35 and Larger Work In Progress
Peter, i will have to give your Gloss Sea Blue a try. I think i've tried every available shade under the sun, and i have yet to find one i'm truly happy with. No two GSP subjects in my collection are exactly the same colour. Further complicating this, is the somewhat latent discovery that ANA Colours and their FS equivalents are not the same, and in some cases are off a long ways. ANA Gloss Sea Blue is a good case of this, as is the inconsistencies one runs into when trying to paint post-1957 Navy Jets Light Gull Gray (they were actually ANA Light Aircraft Gray) but that's another story. Neat choice of subject too; i always liked "Skipper's Orchid". I sometimes think about doing "Miss Flame" myself... -d- -
Yet another Tamiya Corsair Birdcage 1/32
David Hansen replied to spliffsecond's topic in LSM 1/35 and Larger Work In Progress
I think just going at it with a sanding stick until you go down to bare plastic, with no traces of black primer will do the job. As i like to say, you cannot inspect quality into an already-finished product. -d- -
Yet another Tamiya Corsair Birdcage 1/32
David Hansen replied to spliffsecond's topic in LSM 1/35 and Larger Work In Progress
Hi there Free, Hey, i don't mean to be a buzzkill, but it looks like you didn't quite remove all of the filler on the forward end of that seam you were re-working on the Belly. Looking at the oblique angle shots you took with black primer overlaid, it looked like the lying superglue (or whatever it was) that has the 2 parallel rows of rivets cutting across it has not been completely sanded down. You can actually see the edge of the filler in some places. Yeah i know its on the Belly, and yeah, i know you have to look closely. However, if i can see it, others can too. Having said that though, FWIW i thought the model looked pretty nice after you'd gone back and wet sanded it back down to bare plastic. I'd just mask along the panel lines that run along the length of the fuselage, sand the affected area, and then re- spray the black. david -
Hasegawa P-40E bringing back that mojo!
David Hansen replied to Wingco57's topic in LSM 1/35 and Larger Work In Progress
Now normally, i'm a Naval Aviation person, but there's something about a P-40E i like. I cannot get the image of John Bellushi in "1941" out of my head. I have considered doing a factory fresh, stateside example to cut my teeth on. The P-40 is sort of the BF-109 of Allied fighters, in the sense that there's a wide variety of versions and paint schemes...... Mee Likee! david -
Yet another Tamiya Corsair Birdcage 1/32
David Hansen replied to spliffsecond's topic in LSM 1/35 and Larger Work In Progress
Brilliant progress so far. I am much impressed. I remember when Loic was scratch building the masters for the Grey Matter Corsair accessory section. Your finished work should make him proud. Looking forward to seeing another Corsair finished! Mee Likee. Cheers, david -
Thanks for all the kind compliments. Next "Big" plane will be an RF-8A Crusader. I'm about halfway thru the new Tamiya F14A Tomcat now. -d-
-
Zoukei Mura DO 335A Pfeil
David Hansen replied to Uncarina's topic in LSM 1/32 and Larger Aircraft Ready for Inspection
Great looking, Beast of a model! Now, did HK Models also make a 32nd scale -335? Perhaps i'm confused... david -
The engine work looks really nice. How did you attain the result of getting the mud to stick in the tyre treads? What did you use to paint them? I really like that cruciform Firestone tread pattern. david
-
Very nice work, Danny. I know i said it before over on LSP but i wanted to go on record here, saying i liked it. You managed to do a good weathering job on an early Corsair, without going overboard. In particular, you weathered the propeller blades and hub in a realistic manner; quite different from the heavily-sandblasted propellers we see a lot. It also looks like you got a good fit between the cowling segments, without any of the excessive gaps we talked about. If he were still around today, i think Ed Oleander would have really liked it. david
-
As soon as i get pictures of me presenting the plane to Bob, i will post them. -d-
-
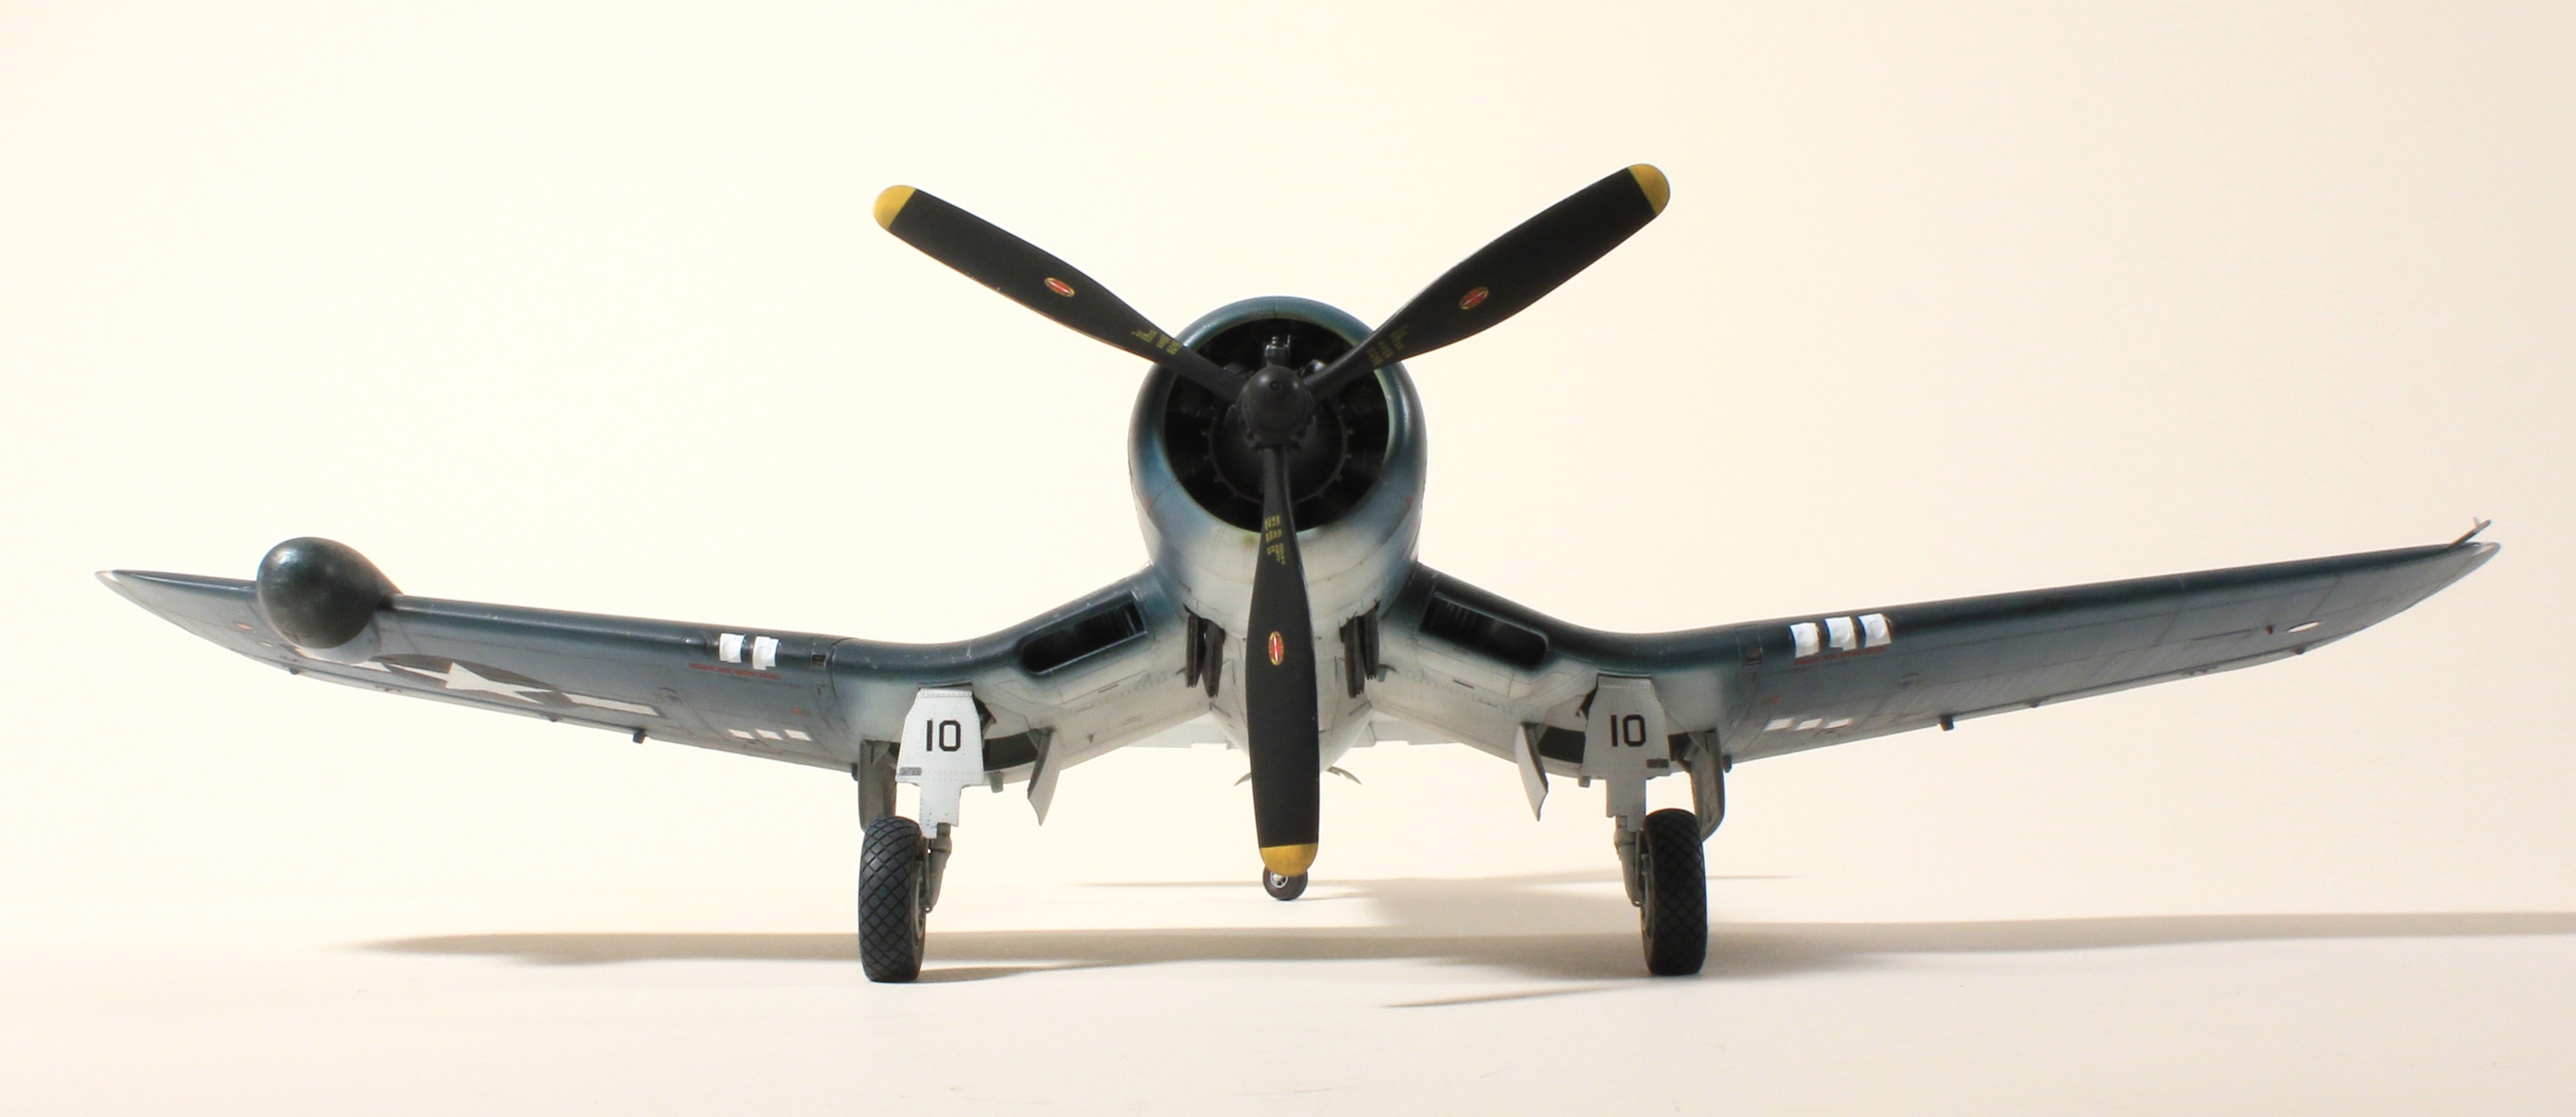
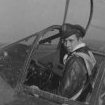
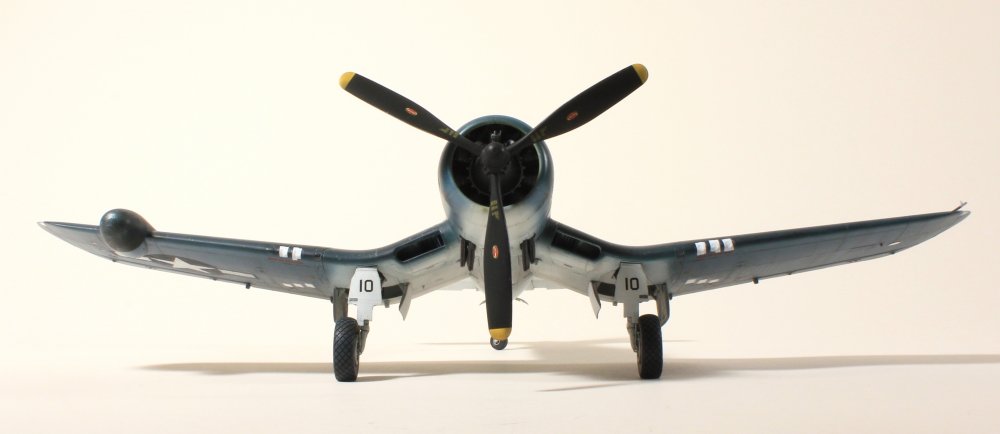
Hi Everyone, As the title implies, i managed to finish yet another 32nd scale aircraft model. Building on the learning curve gained from my earlier Goodyear FG-1, i present to you my F4U-2 Corsair, in the markings of VF (N)-101 aboard USS ENTERPRISE. This model uses a combination of conversion parts from Lone Star Models (Radome), AMS Resin(Flame Dampeners) and OWL (Radio Altimeter antennae). I also used the Barracuda Studios Corsair Cockpit Placard decal set and the Diamond Tread F4U/F6F wheels. As conversion efforts go, it was actually pretty simple, and one of the big benefits i had was the pilot who flew this aircraft is actually still alive! Bob Brunson flew this very plane and is alive and well in Estes Park, CO. Bob crashed in Bu Aer 02710, "Number 10" while coming aboard ENTERPRISE at night. Bob walked away with hardly a scratch, but his Corsair was deep sixed one night in May of 1944. This was my first big experiment in using Tamiya Acrylics; On my FG-1 i used Mr Color for the first time, but because of a lot of glowing reviews i heard about Tamiya (plus its availability), i decided to mix my own camouflage colours. Some of the blues were mixed to some Tamiya mixing Formulae from an old IPMS-Stockholm article, and some were suggested mixed via Martin Sanford. I mixed small batches of each major colour using the different formulas, and mixed and matched from the ones i liked. The single most controversial aspect of these planes is the paint scheme. There are only a handful of useful photos of these planes taken aboard INTREPID and ENTERPRISE, and what they depict is subject to some debate. Some people belive (and at least one book published) profiles of this aircraft with black flanks painted on the fuselage side. I was always a little skeptical about this; having spoken with Bob he was positive there was no black on the plane. Looking at "Better" pictures of the Marine F4U-2s assigned to VMF (N)-532, i've concluded the the Corsair in question had a heavily blended Non Spec Sea Blue fuselage, carried very far down the sides of the fuselage, and that the plane may have had semi gloss sea blue (Which is darker than Non Spec Sea Blue) applied to the fuselage sides, resulting in a combination flat finish/ semi gloss finish to the Fuselage. Given the degree of blending, in the picture you see below, its understandable that people would mistake the fuselage for black... The markings on these planes were very low-key. In fact, i refer to this model as, "A Very accurate depiction of a very dull paint scheme". There was originally a VF (N)-101 sticker applied under the windscreen, but when the remnants of -101 transferred from INTREPID to ENTERPRISE, orders came to remove the decals. Richard "Chick" Harmer's F4U-2 actually had nose art painted on the cowling called, "The Impatient Virgin" but no photos or artwork have been seen. The national insignias were painted on using MONTEX paint masks. For the most part they worked well, but the MONTEX instructions have the wing insignias slightly mislocated, and i didn't discover the error until it was too late. Due to the star and bar nature of the markings, i had to sort of apply the mask in steps; having applied flat white for the stars, i next located the stars in the proper positions, and then proceeded to build the remaining masks, element by element, around the stars. I did have problems with the blues of the insignia lifting off in very small flecks, that required a repair job way out of proportion to the problem caused. I used Mr Color Levelling thinner to thin the paint, and it worked well, but these itty bitty chips of paint were maddening and had no rhyme or reason. F4U-2s had a simplified antenna installation, consisting of a wire running from the leading edge of the right stabilizer, up to the rubber tensioner assembly and then down to the ceramic lead-in point behind the right hand side of the canopy. There was a simple whip antenna, and a Transponder/ IFF antenna on the belly. The 2 radio Altimeter antennas were mounted along the keel. These antennas are photo etched brass, made by OWL and while delicate, worked great. I cannot recommend them highly enough. In this shot, you can see the IFF antenna a little better, along with the flame dampening exhausts. I built a display base from 5/8" Plywood onto which i laminated a basswood carrier deck made by Nautilus models. It was painted with Tamiya acrylics and weathered with a wash of paynes gray and raw umber. First time i did this and for the most part i like it. The deck is a bit too blue- it should be a much lighter light gray colour- but not bad for a first effort. Not seen here, but i also had a brass nameplate made as well as a protective 1/8" thick acrylic display case. Close up of the antenna installation... The white light in the tail cone is a piece of .015 diameter Plastruct rod. As i write this, we are making plans to fly this model to Bob so I can deliver it in person. I am looking forward to it. If you ever get the opportunity to do something like this for a veteran, take my advice and do it. You wont regret it. david img163.tif
-
David Hansen changed their profile photo
-
I will gladly take the smell of chemical bananas over the smell of bug spray. david
-
I don't think naked pictures of Mr Self Leveling Thinner, or Mr Surfacer 1200 Black are all that sexy, so i wont post them here. Maybe later i will post some photo-etched radioaltimeter porn. david
-
1/32 P51 Mustang Double Trouble Two
David Hansen replied to Corsair Experten's topic in LSM 1/35 and Larger Work In Progress
The Corsair is even better. Nice build, BTW. david -
Thanks Paulo, I decided that, with one exception, i will try to build my 32nd scale subjects in "Factory New " condition. Why? Because i SUCK at weathering. Am looking forward to the HpH 32nd scale Helldiver..... -d-