


GazzaS
-
Posts
6,396 -
Joined
-
Last visited
Content Type
Profiles
Forums
Events
Gallery
Posts posted by GazzaS
-
-
On 11/24/2020 at 7:03 PM, DocRob said:
A pin wash to my eye doesn't have to be darker than the surrounding base colour. I tried lighter tones on different occasions and liked it a lot. the effect is obviously the opposite of a dark pin wash emphasizing shadows. In natural light panel borders may also produce a little highlight against the base colour, which could be replicated, by using a lighter grey tone for panel lining. Grey would keep the tonal balance, with some olive panel wash you might get interesting effects too. Just a thought...
Cheers Rob
I have seen a couple black model aircraft done with light colored lines. Every rivet and every line stood out. Not seeing your model, I can't comment on it.
Very recently somebody over at TOS completed an ME 110 in black with lighter colored details. For a while it looked great to me... But before I had quit looking a the selection of photos I began to feel that it just looked wrong. Again, every detail stood out from every distance and every angle. We all know that panel lines are little magicians who sometimes show up brilliantly, and at other times disappear. I don't think that I would be satisfied if I went that way.
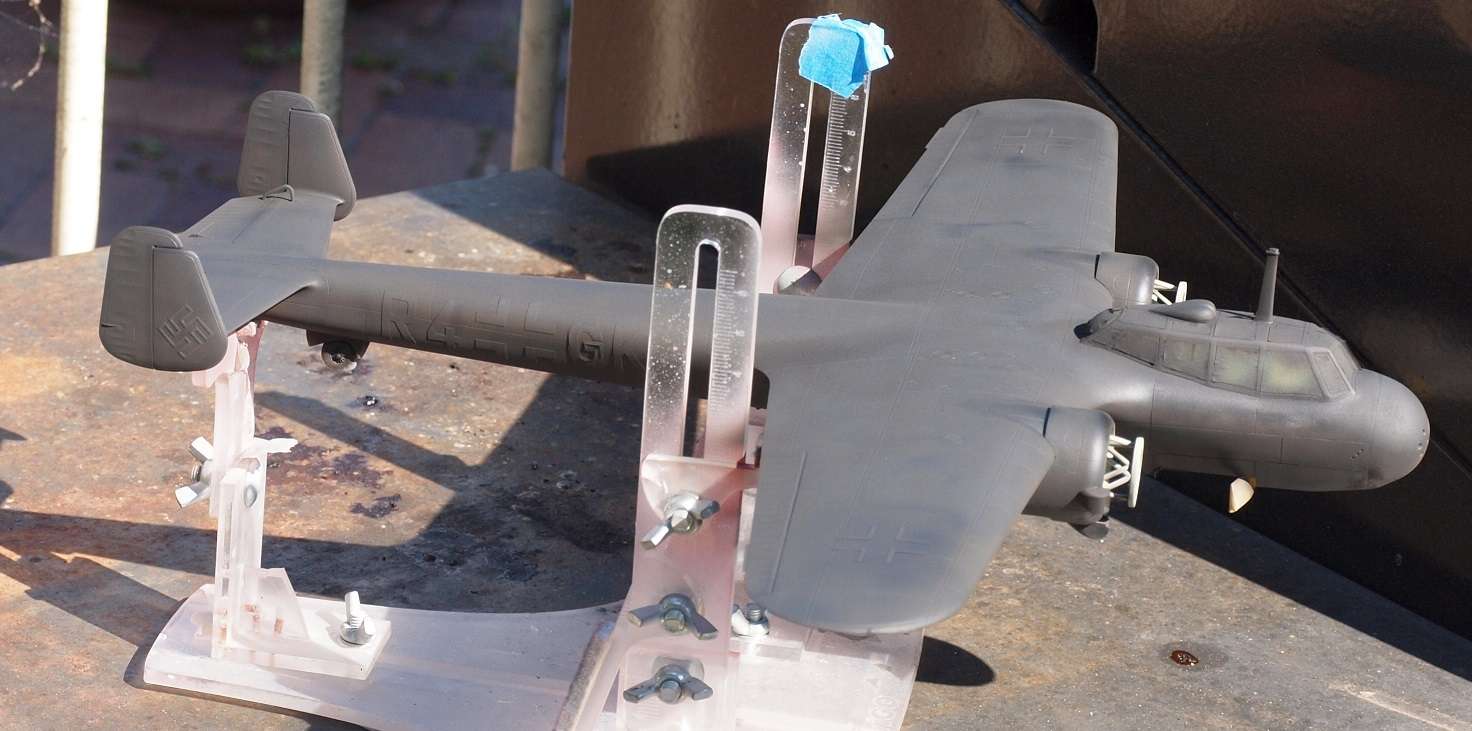
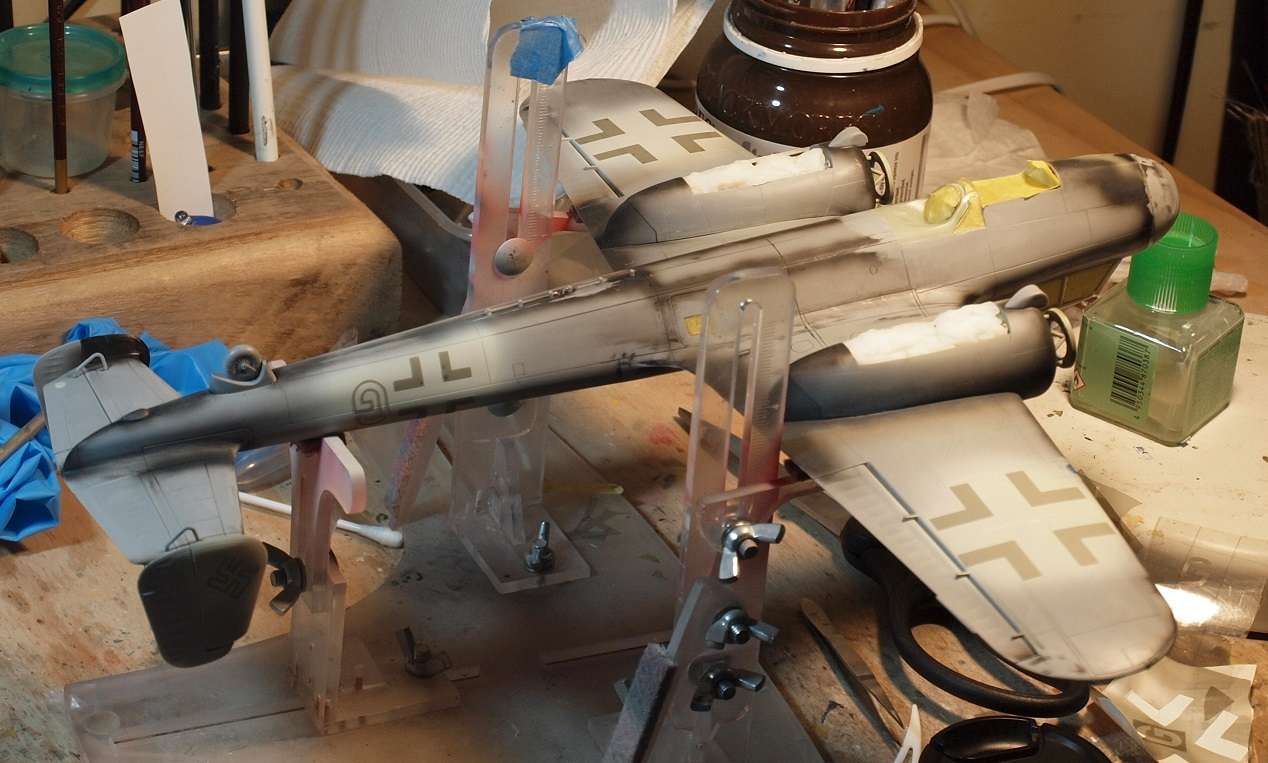
Today's update... some early morning pics after pulling the masks.


The white markings are 50% Tamiya white and 50% Tamiya JA Grey which also doubles as RLM 02 in many cases. I have three different mixes of RLM 02. The gray letters are MRP RLM 74.


Again, another photo with a lot of black in the background.

I really hate that the tailwheel isn't constructed so that it couldn't be added after painting. So, that's the next stop... and then a clear coat. Then sanding... then another clear coat. ...and hopefully a final lot of sanding.
Thank you for looking!
Gaz
-
 4
4
-
 2
2
-
-
A lot depends on where you are. If you're in the US, recommendations for England or Australia would not be as cost effective as a seller near you.
-
3
-
-
14 hours ago, harv said:
I think you nailed it. Bleach on inside shots....harv

Thank you, Harv!
-
3
-
1
-
-
17 hours ago, DocRob said:
The black to me is impossible to judge on the pics.
Thank you, Rob. That is kind of what I was hoping for. When you don't have true black around for comparison, anything close looks black. As long as you don't do something crazy like use white or blue to dilute the blackness. FYI I used Tamiya black X-1 diluted with Tamiya Red Brown XF-10 and Tamiya Green XF-5.
My painting bench top is just worn wood with paint drippings on it. While I was painting, it looked as if the model was just black. And when I set the model down on my BBQ with it's black sides, the difference shocked me.
I am honestly unsure of how I'll proceed from here. Originally I had planned to to the pin wash in pure black. But now, I think I will have to dilute it a bit because I don't want too much contrast.
Regarding the irregularities of the paint. I honestly have no idea what will happen with the clear coat. But there are effects I will try to use to make some detail pop.
Sadly, it's blowing a gale today. I don't dare do any painting, inside the house or out. But I can at least can do part of the first phase sanding.
Cheers
Gaz
-
4
-
1
-
-
Heh... just saying 'cool' was non-committal. I'm in.
-
3
-
-
Ok....finally... some color!
Or is it... a lack of light?

Now... believe it or not, there are seven shades of 'black' here.
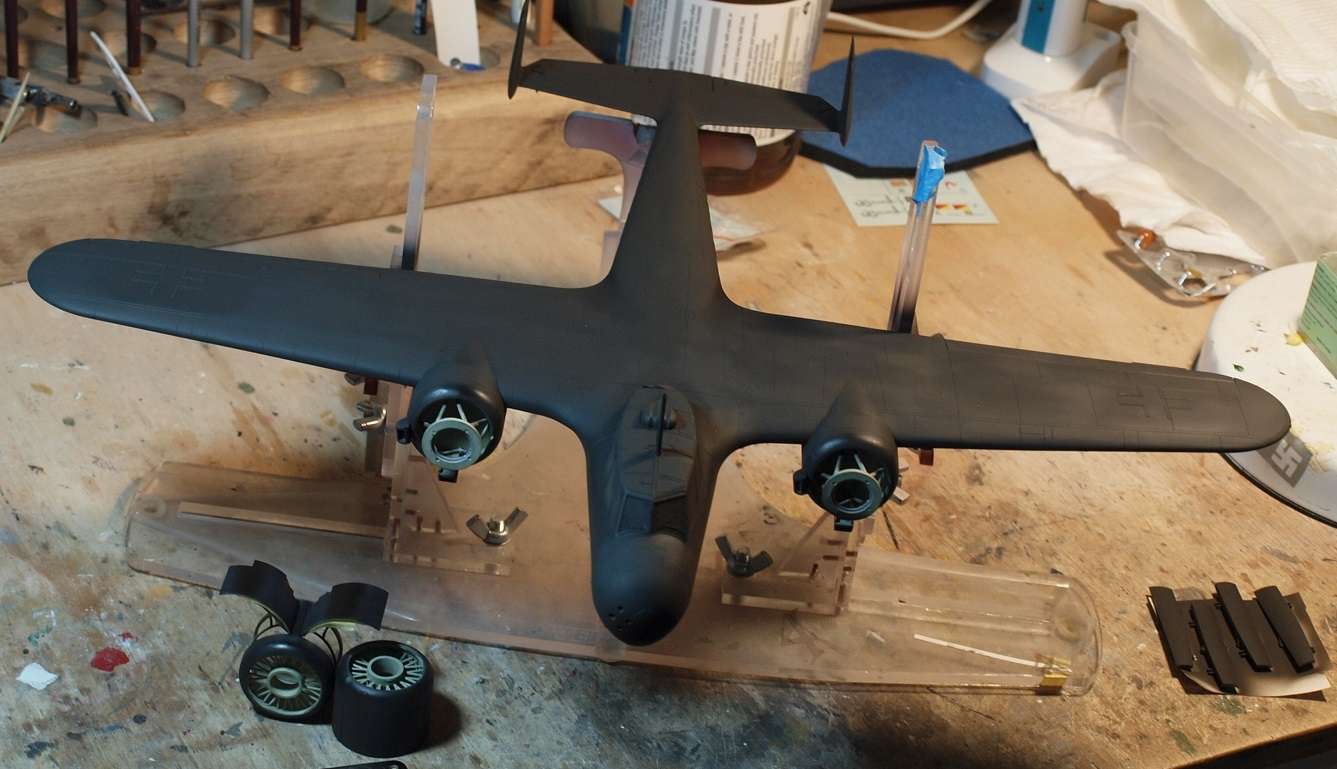
Looking at the nacelles, some of the shades are easy to see.
I cleaned my airbrush last night.... I wanted a clean nozzle for painting. Notice that you can still see the panel lines. Just tell me... does it look gray to you? If it looks gray... I am failing in my mission.
Notice the open panels? There are two bits of true Tamiya black there. Also around the curved leading edge of the cowl.
That little light spot.... I must have dropped a drip of thinner on it.
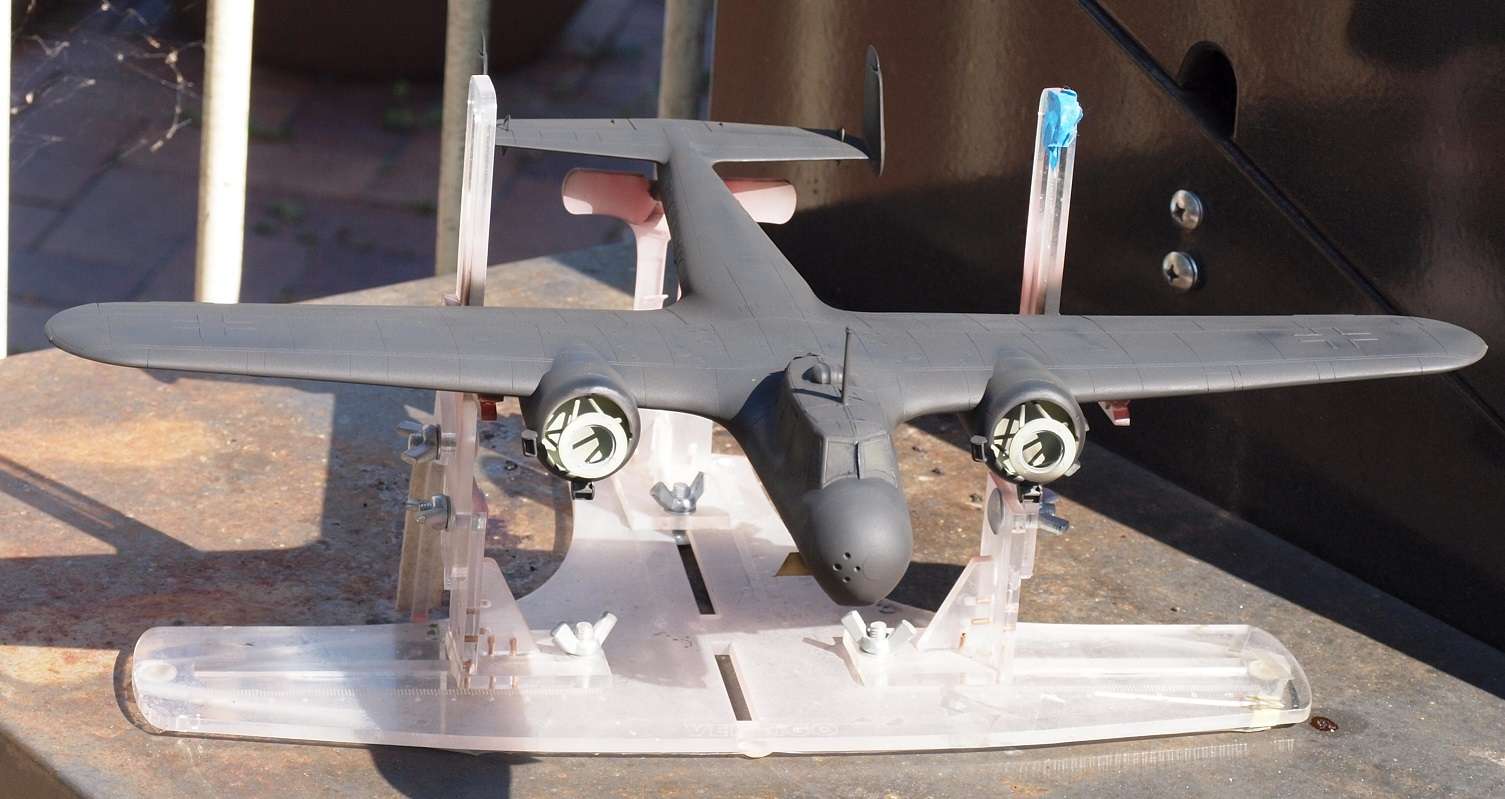
Now.... shade your eyes.... we're going outside to see what it looks like in sunlight.
 ,
,
Compared to the black side of the barbecue, the shade (even though it;s a bunch of shades) is highlighted.
Note to self: There can be no true black on the base.
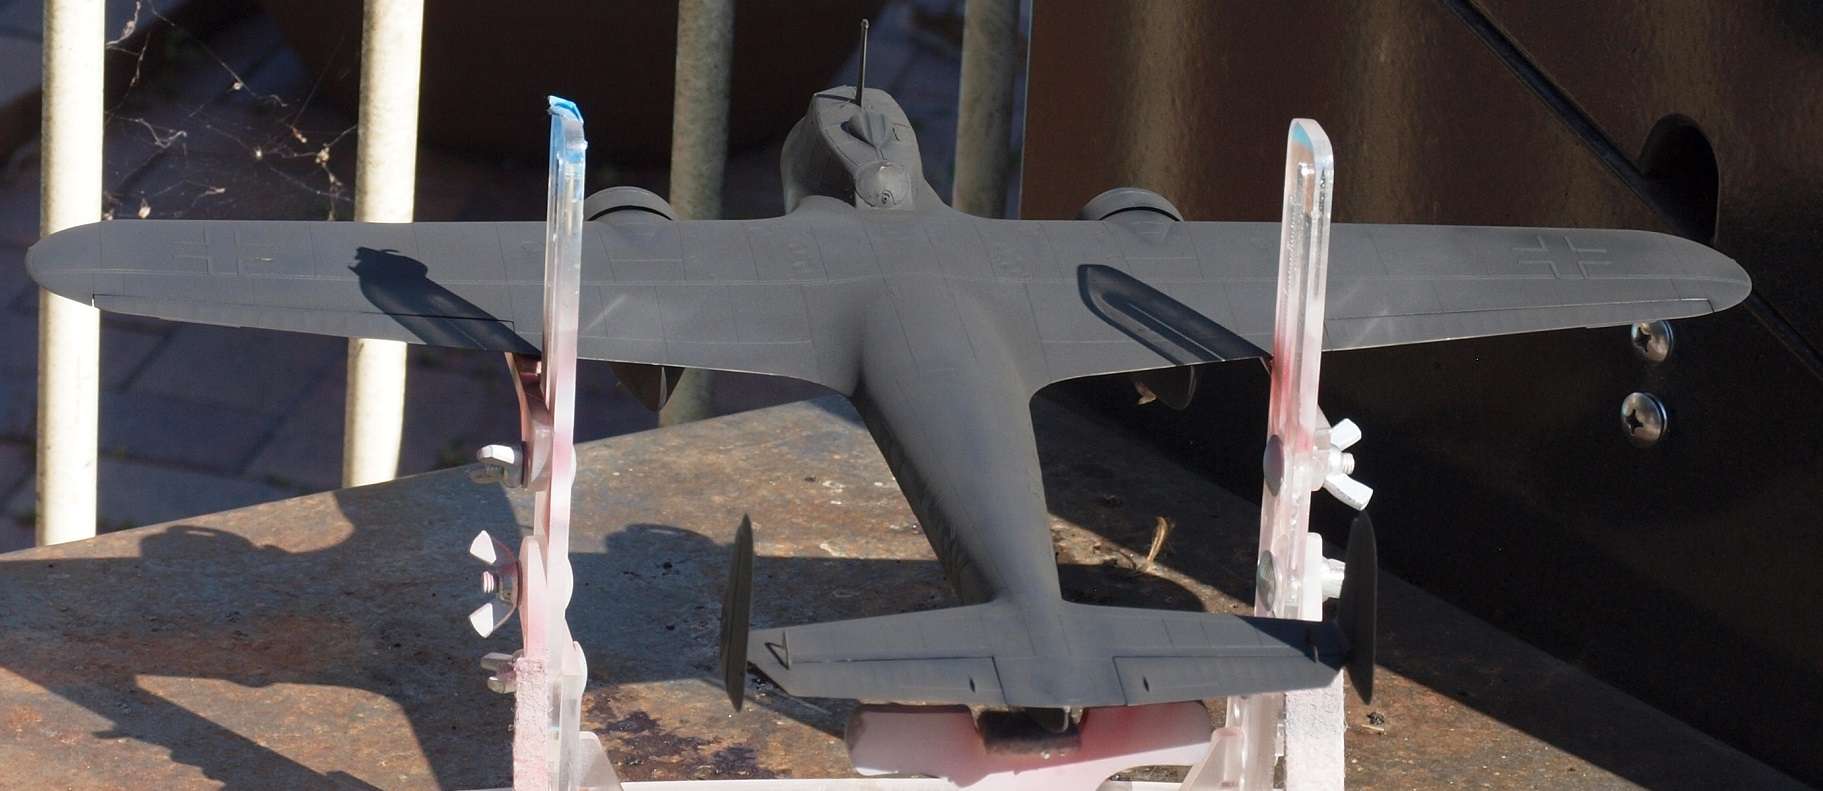
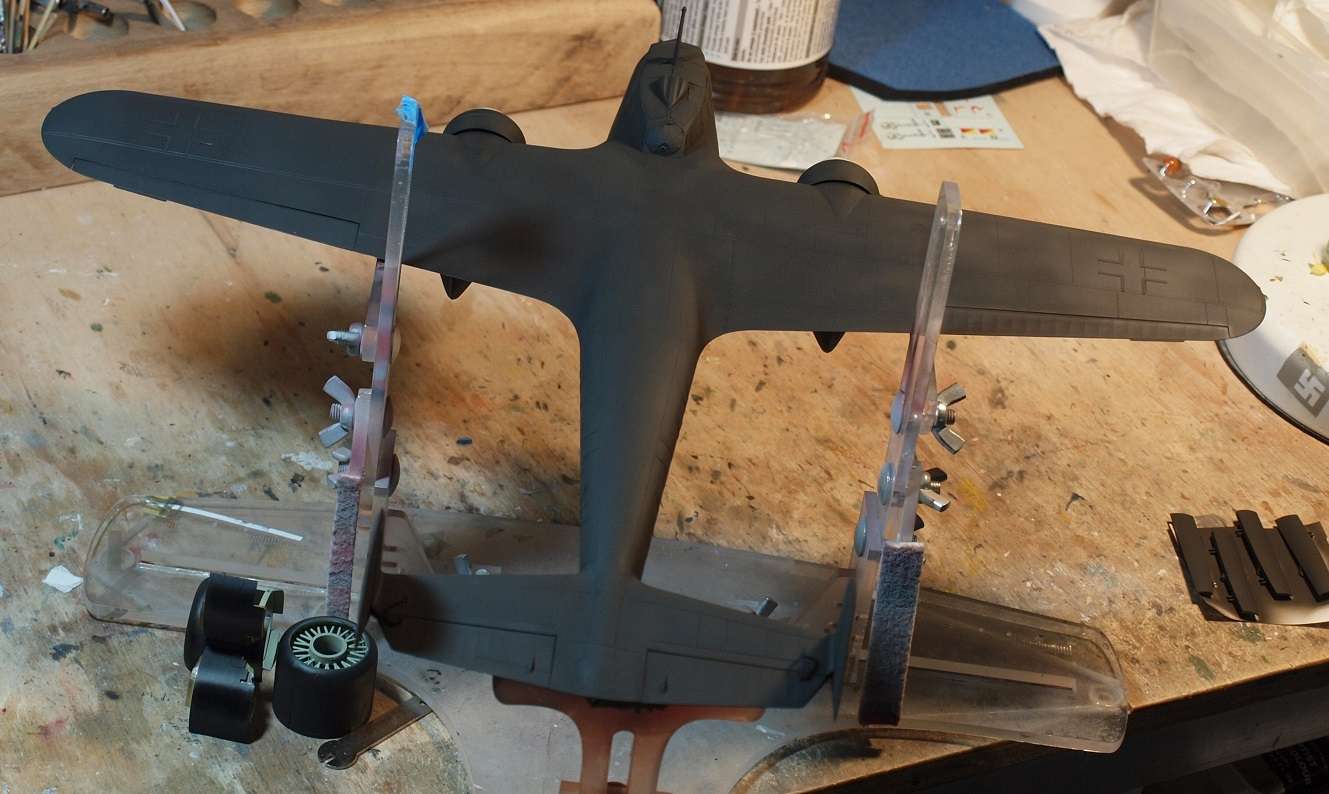
At the rear of the wing root, you can see two areas where my preshading shows through.
Now... There is a lot to do. Highlighting. Shadow making. Pin Wash. Spills. And the base.
I'd love to hear your thoughts!
Thanks for looking!
Gaz
-
7
-
-
1 hour ago, Bomber_County said:
Thanks Gaz, the eyes take a pounding though.........I’m quite pleased.....
I had some reading glasses custom made just for rigging. The best you can buy off the rack is 3.5X which is what I use for every day modelling. The custom set is 4.82X. That gives me a working distance of around 8 inches and works well-enough for passing back and forth through the tubes and threading eyelets.
Watchmakers use 5X glasses, but the working distance is so short that you wouldn't be able to get your head close enough without knocking your model over. Fortunately the guy who made my glasses was savvy enough to know and tell me about the working distance.
When I take off my custom glasses, it takes my eyes a while to get back to normal.
Gaz
-
3
-
-
5 minutes ago, HubertB said:
Yes, Gaz, of course. The Tiger Moth
 !
!
Hubert
I'm glad you love it so much...lol I liked it too... in The Blue Max. Not such a big fan of yellow wings, myself.
-
2
-
-
Correct me if I'm wrong... but didn't these kits all have shape issues up front?
-
3
-
-
52 minutes ago, SapperSix said:
The tow cable, muffler, extra running gear and many other details in this build make it a real eye catcher. Good eye, good job Gaz.
Thank you, Frank! Still some work to go... I haven't even touched the figures, yet.
-
2
-
-
Nice, tidy work, Phil!
-
2
-
-
-
1 hour ago, Bomber_County said:
Stunning Gaz, I’m just at the dust stage on my Grant, it’s finding these balance.......
Thank you Phil! I still have work to do on my dust coat.
-
2
-
-
15 hours ago, Clunkmeister said:
Tony we need to get you past the rubicon, Brother
No, No! Run away while you still can!

-
1
-
-
Got my first ever Artwox wooden deck this week. But still fighting this cold... don't think it worth a photo. Got some 1/48 MG17 barrels, too. Again... not very exciting.
-
5
-
-
2 hours ago, harv said:
Nice !!....harv
Thank you, my friend!
-
2
-
1
-
-
After spending most of the week sick, I found some time to devote to the Dornier.
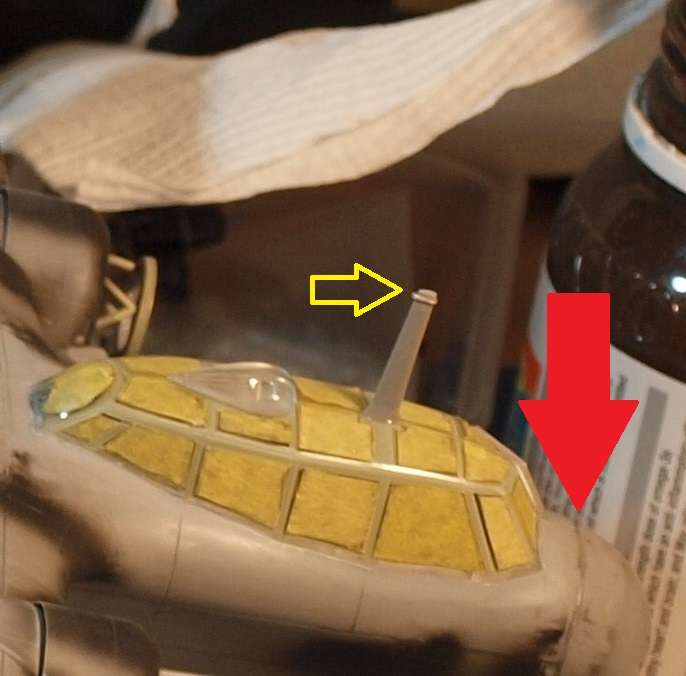
With a bit of aluminum flashing I fabricated the part that holds the aerial cable at the top of the mast(yellow arrow). And for a long time, I held off on scribing the line around the base of the nose cone. Masked the clear parts, too.
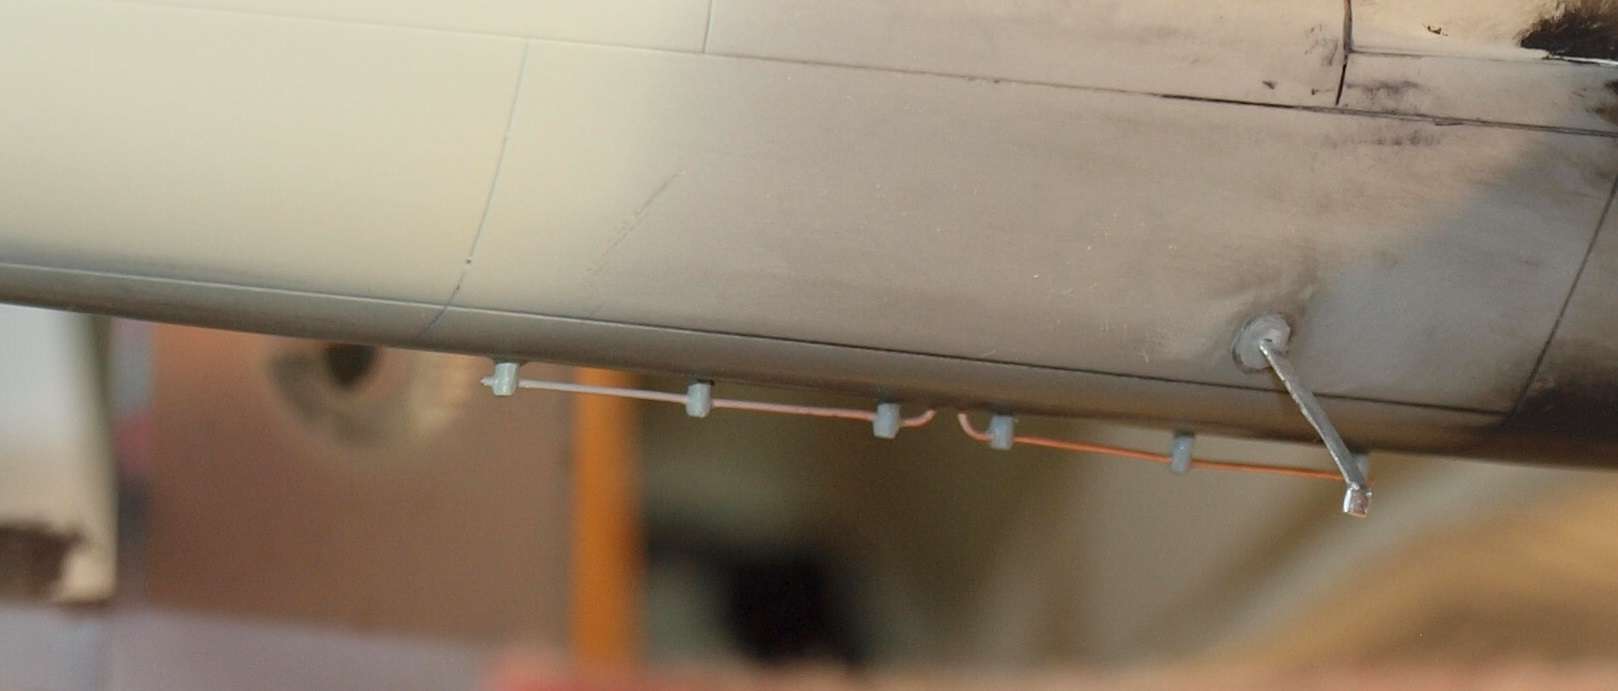
Again, with the aluminum flashing... I made the streamlined antenna at the right. I also used some copper wire to make the FuB1 blind flying aerial look a bit nicer than the kit part.
Got to lay down some paint today. Some very off, off white for the national markings. That means I devoted a couple hours making the simple set of masks.
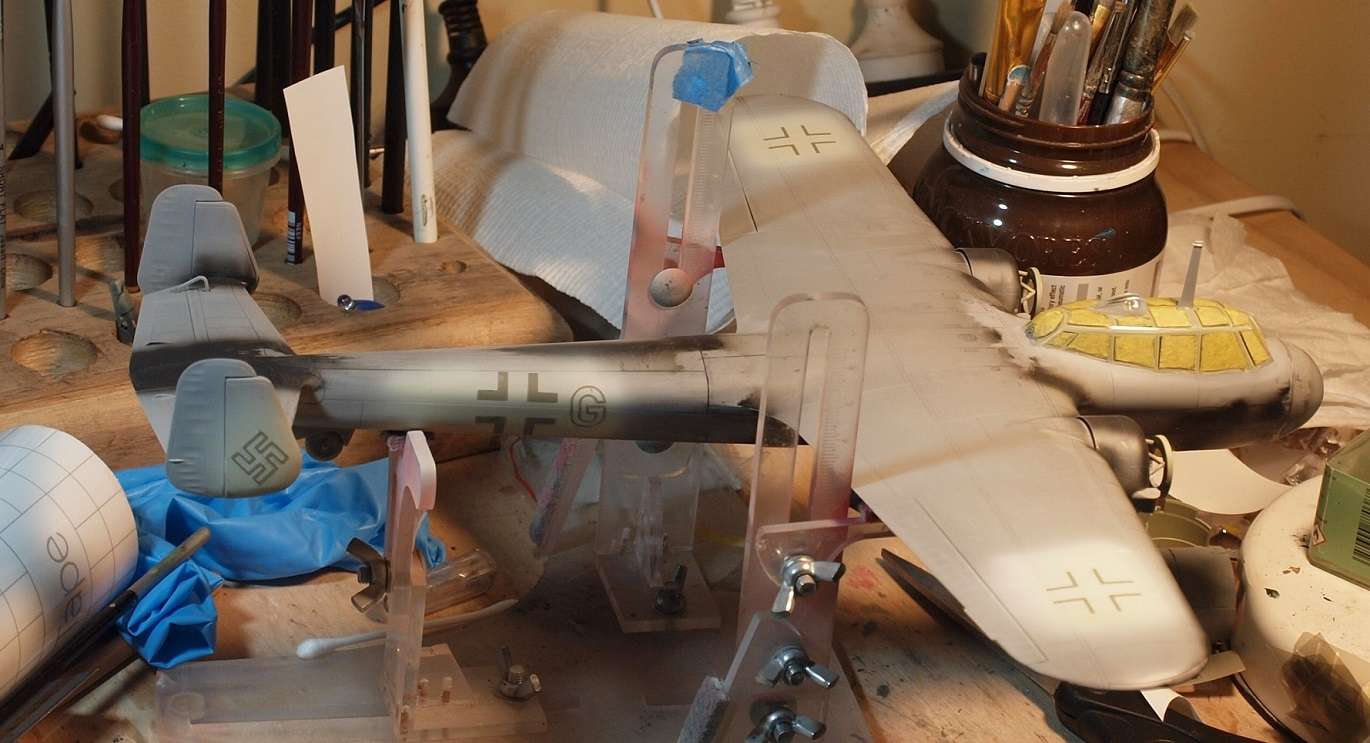
I have a pilot picked out, but no real pics of his machine. I'll talk about him later. Some machines had fuselage bands and some didn't. Likewise, the Englandblitz badge. Some machines were all black, and some weren't. But it's my new habit to avoid the in-box scheme. So, I've decided to go minimalist on the scheme so I can concentrate on the all-black aspect. Call it artistic license.
Thanks for looking!
Gaz
-
6
-
-
Outstanding, John!
-
4
-
-
Amazing detail.
-
2
-
-
-
I think I may have seen a Lada on a long ago watched episode of Top Gear... of course...I could be wrong.
-
6
-
-
Ewww....resin!

-
 2
2
-
-
I love binge-watching...
-
3
-
-
I just found this over at Farcebook:

Say what you will about Farcebook... Join the right groups, and you'll get a lot of free research photos.
-
3
-
A GOTHA
in LSM 1/35 and Larger Work In Progress
Posted
I think there are a lot of WNW that won;t get built by the 'first' buyer. There are some guys who are 'waiting for their skillset to improve' before they build them. If I was 35, I might thing that way... but being almost 20 years past 35... I gotta build em.