CANicoll
-
Posts
1,930 -
Joined
-
Last visited
1 Follower
Recent Profile Visitors
22,546 profile views


-
Beautiful! So well done!! Thanks for the pics.
-
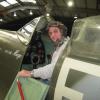
From a Facebook posting: Arlington National Cemetery is with U.S. Air Force. 2h · On March 30, 2026, more than 100 people gathered at Arlington National Cemetery to honor and remember aviation legend Col. (Ret.) Clarence E. “Bud” Anderson, the last surviving World War II triple ace and one of the most distinguished fighter pilots in American history. (Shooting down five enemy aircraft qualifies a pilot as an ace.) Anderson, who passed away at age 102, was laid to rest in Section 38, joining his beloved wife of nearly 70 years, Eleanor “Ellie” Cosby, who was buried in 2015. Anderson’s full military funeral honors with escort service commenced with a double flyover: first by four F-35 Lightnings, followed by four World War II-era P-15 Mustangs, two of which bore the name “Old Crow,” the name of Anderson’s fighter. A horse-drawn caisson carried Anderson’s urn to Section 38, where an Air Force firing team fired three volleys, a bugler sounded Taps and a bagpiper concluded the ceremony by playing “Amazing Grace.” U.S. Air Force Chaplain (Capt.) Andrew Lloyd, who oversaw the service, told the mourners, “In life, Bud Anderson honored the flag with his service to the nation; now, it is our honor to present our nation’s flag in honorable and faithful service.” After the Color Guard crisply folded the American flag over Anderson’s urn, Chief of Staff of the Air Force Gen. Kenneth S. Wilsbach presented it to Anderson’s son Jim, who then passed it to his sister Katherine “Kitty” Burlington, seated next to him. “We’re sharing it,” he later explained. Receiving the flag from Gen. Wilsbach humbled Jim. “I appreciate that he would take time out of his busy schedule to be here,” he said. Both siblings were deeply moved by the service, particularly the double flyover. While Jim had worked to ensure that the P-51s would be part of the ceremony, the addition of the F-35s came as a surprise. “That was really special,” he said. Anderson’s journey to becoming an aviation legend began in the 1920s, when he was growing up on a California farm and became fascinated by airplanes flying overhead. In 1941, at age 19, he earned his private pilot’s license. He joined the Army Air Corps Aviation Cadet Program in January 1942, shortly after the United States entered World War II, and was commissioned in the U.S. Army Air Forces (USAAF) later that year. During World War II, Anderson served two tours with the USAAF’s 363rd Fighter Squadron, flying P-51 Mustangs that escorted heavy bombers—helping to win Allied air supremacy over Europe. He flew 116 individual combat missions that resulted in 16 ¼ kills, earning him “triple ace” status. After World War II, Anderson remained in the Army and then the Air Force, after it was established as a separate service branch in 1947. As a fighter pilot, test pilot, and combat and operational commander, Anderson logged over 7,500 flight hours and flew more than 130 types of aircraft. His many decorations include five Distinguished Flying Crosses, two Legion of Merits, 16 Air Medals, and the French Legion of Honor and Croix de Guerre. Yet Anderson's legacy is not defined by numbers alone. After he retired from the Air Force in 1972, he became a public ambassador for the World War II generation and America’s achievements in aviation. Through his 1990 memoir and frequent speaking engagements, Anderson brought to life the experience of aerial combat and the significance of military service. Reflecting on his father’s influence, Jim—who attended the Air Force Academy, served in Vietnam and then became a commercial airline pilot—said, “When I was in the Air Force, I tried to keep it a secret who my father was because I wanted to make [my career] my own. But eventually people would find out.” And Anderson continued flying, until the age of 90. In 2022, when he was honored at the nation’s largest aviation convention, he took his last flight (as a passenger) in a P-51 Mustang. He was 100 years old. Beyond his remarkable career, Anderson was a devoted husband, father, grandfather and great-grandfather. Jim and Kitty each shared fond memories of their father. He taught them how to hunt, fish and play basketball and card games. Jim remembered his father fashioning a cockpit out of a large cardboard box, drawing dials on the dashboard and letting his young son wear his World War II-era helmet while “flying” in the makeshift cockpit. Kitty recalled Anderson playing with his grandchildren and great-grandchildren during his later years. She also noted that after her mother moved into a nursing home, he visited her every day and always brought something to cheer her up. “I really admired that he was so loyal to her,” she said. The funeral at Arlington National Cemetery offered a poignant farewell to a beloved family man and aviation icon. “‘Bud’ Anderson is a hero and legend in air combat; he wrote the playbook,” concluded Chief of Staff of the Air Force Gen. Ken Wilsbach, “He mastered his craft, flew with immense courage and leaves a legacy of service that will inspire generations.”


-
- 3
-

-
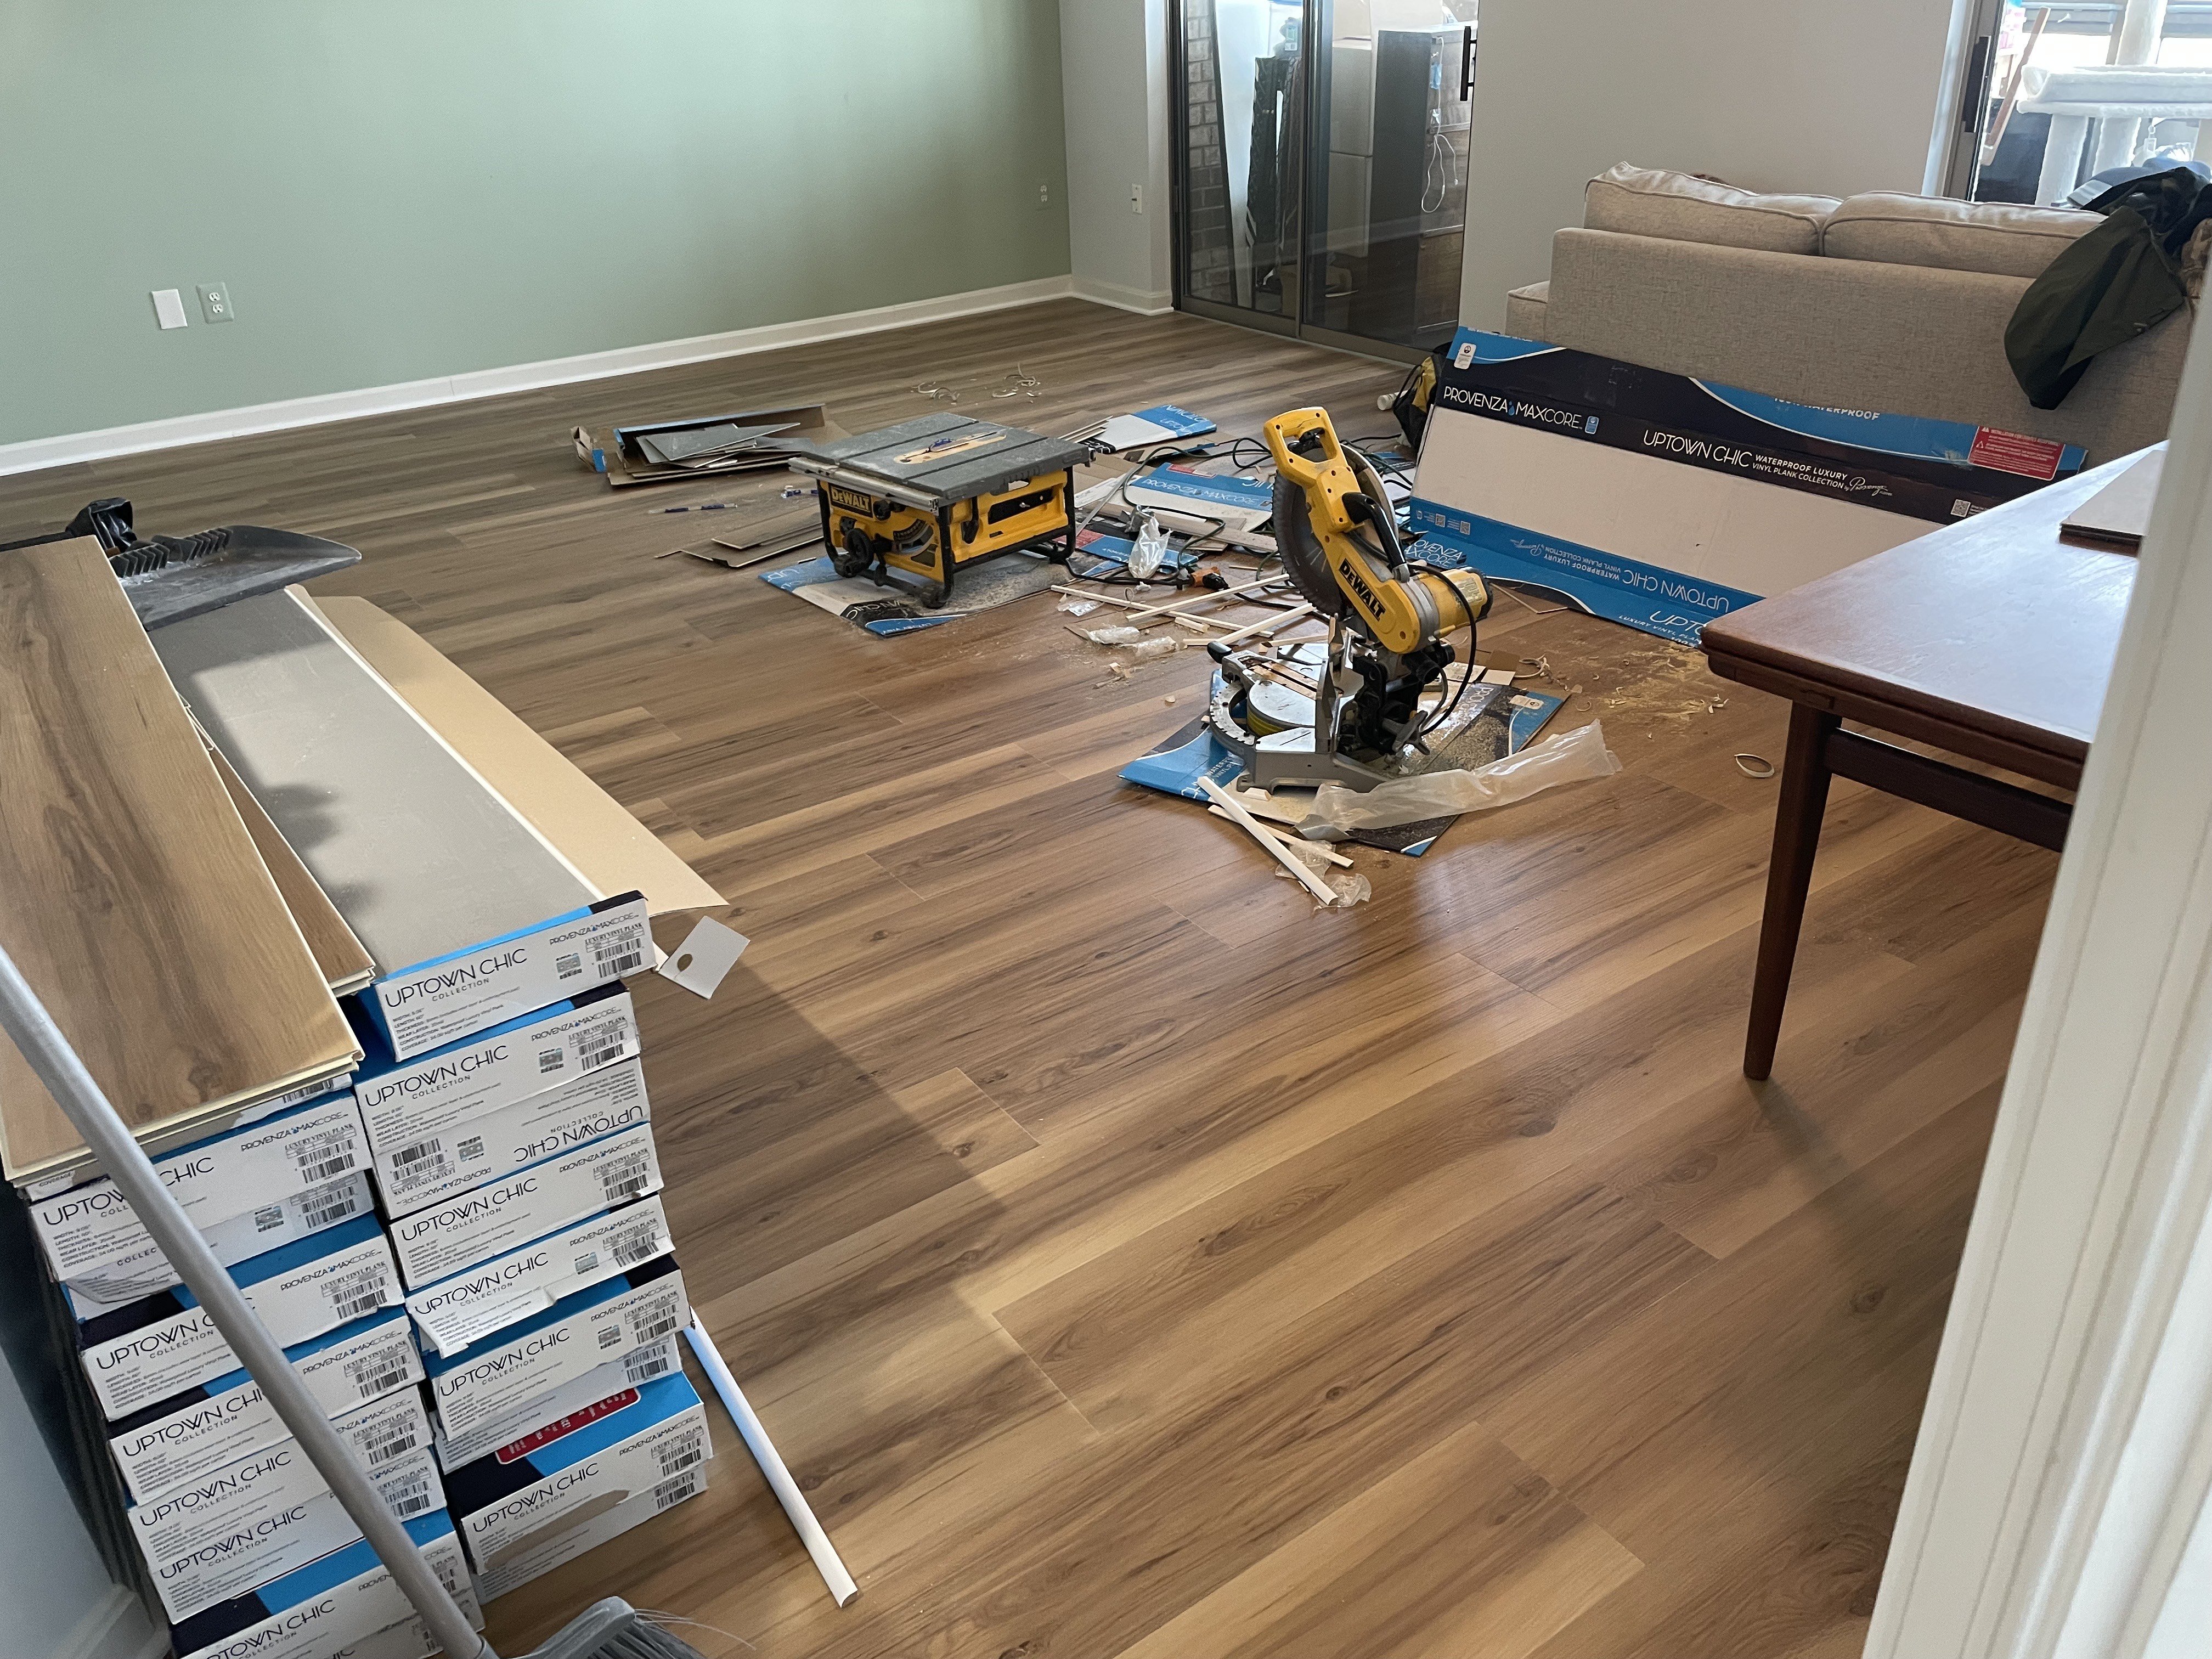
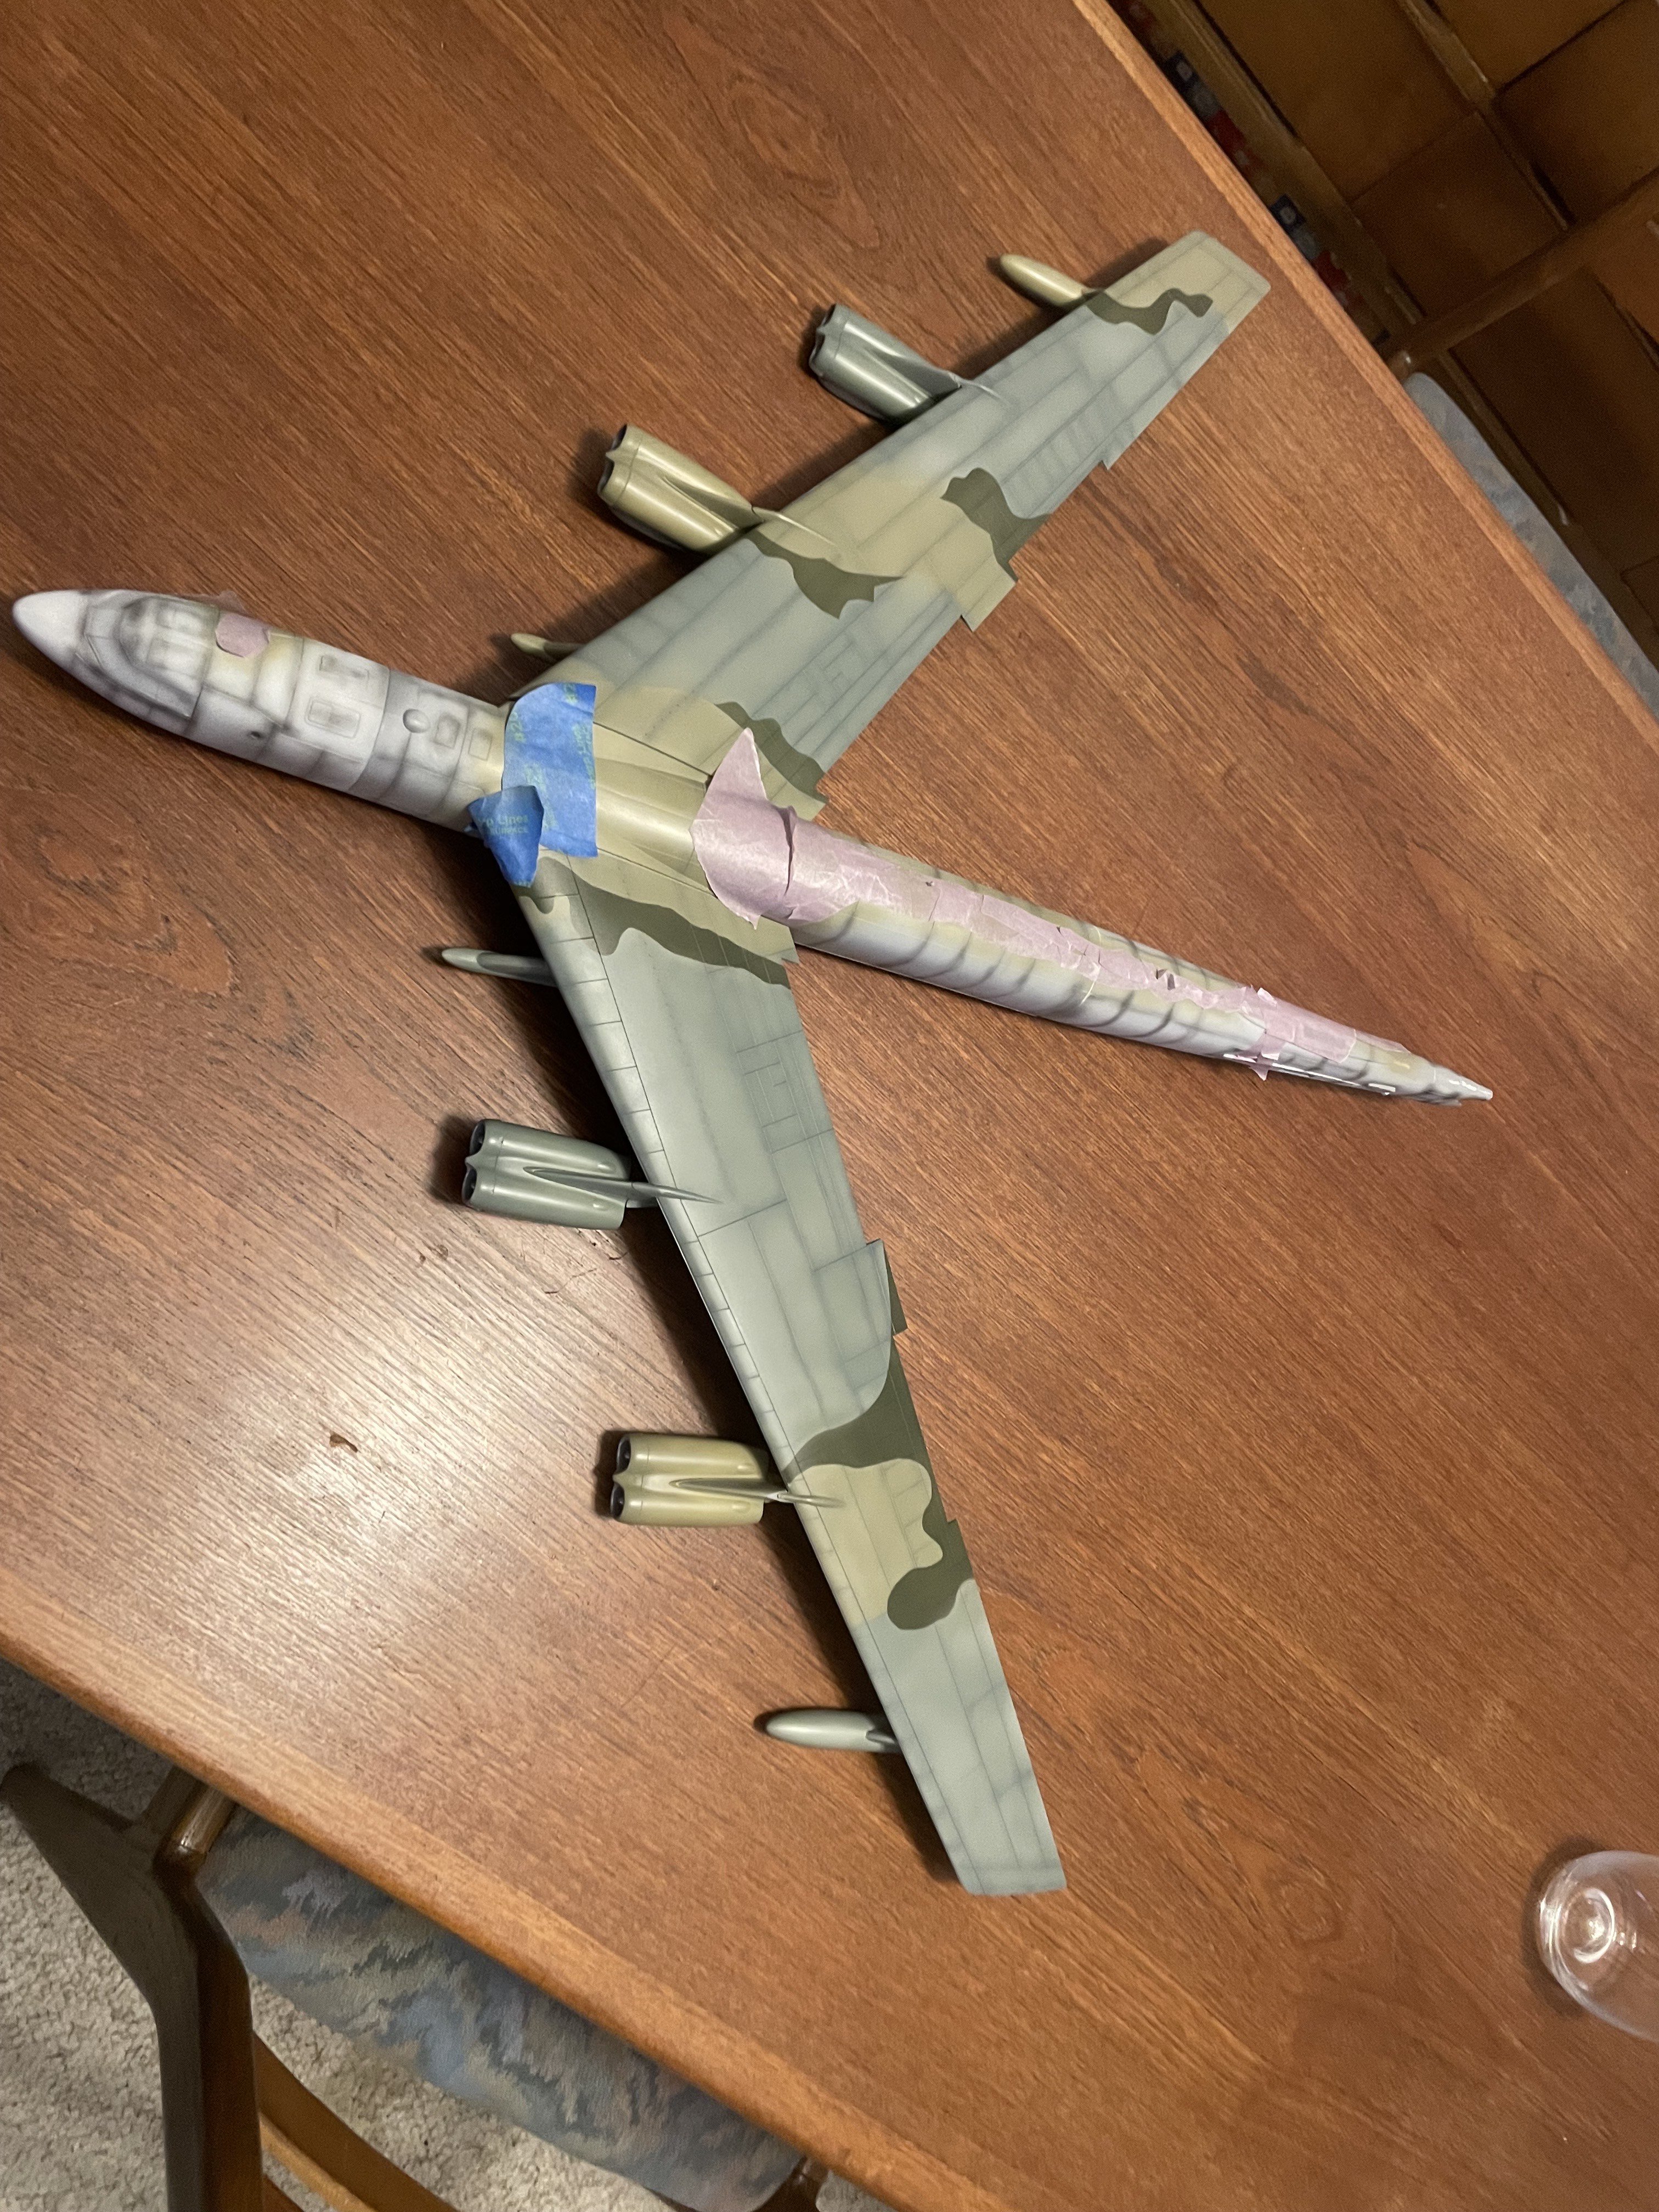
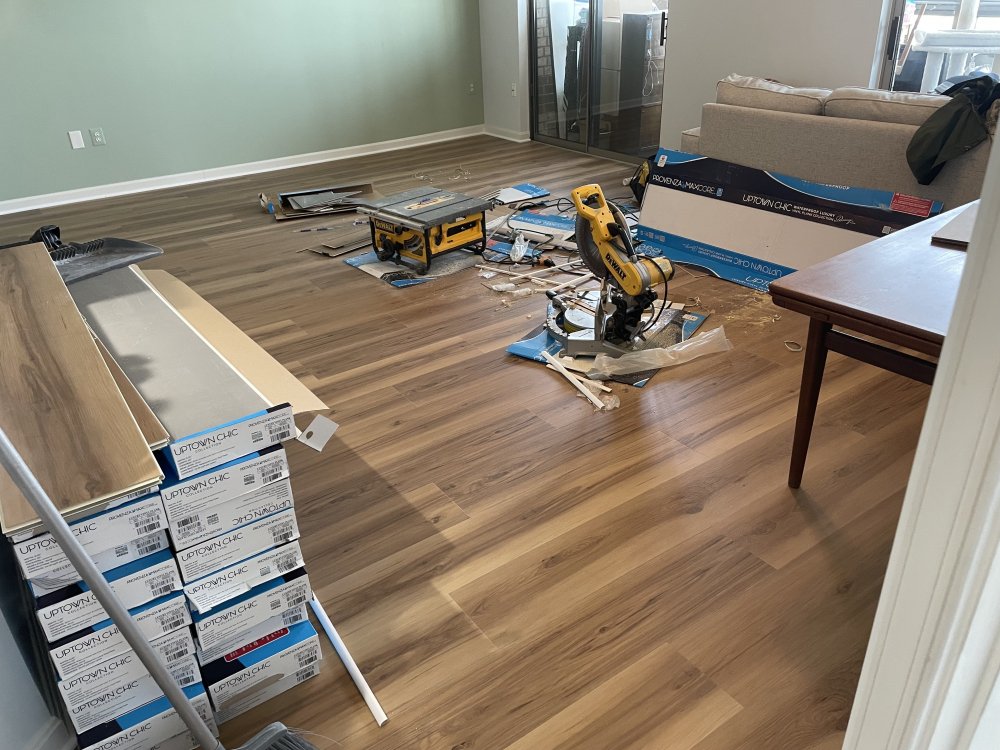
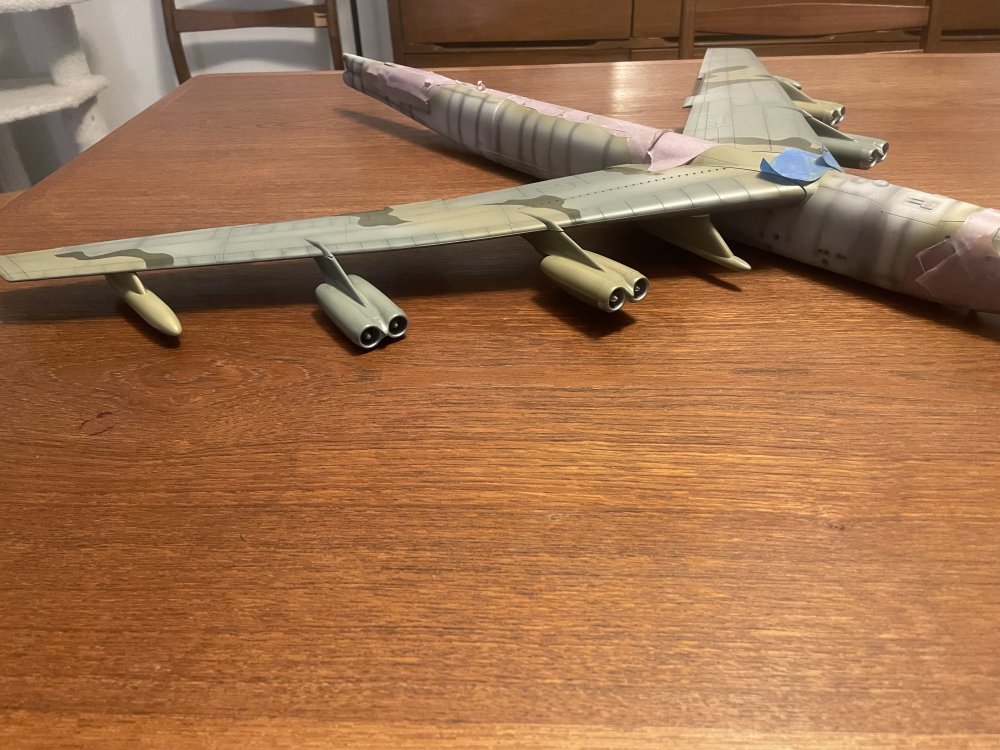
Very sorry to be gone so long. The flooring is in (Yay!) and got some new furniture, now its painting time. The project that never ends... And I tore two tendons in my wrist, on top of arthritis and tendonitis. However, did get the third camo color on the fuselage yesterday. FINALLY! But the painting starts tomorrow so another week or so of delay... Everything is dry-fitted at the moment.


-
Thanks Carl and Martin! I'm currently sitting in the only available chair, in a dark bedroom which is half done. Takes me back to my younger days when I didn't have any furniture! The previous carpet was over 20 years old (I moved in 6 1/2 years ago) so it was time to do something else. Now I have to figure out how to protect the floor from my painting! I think I'll be putting down one of those plastic carpet protectors that go under your desk. That should do the trick...
-
Strange aircraft!!!
-
Here we go... Same Floor, different light!

-
Ahoy Sailor!!! I used the flooring as an excuse to clean out the closets, and even (gasp) my model case. But now I have more room to display new models!!
-
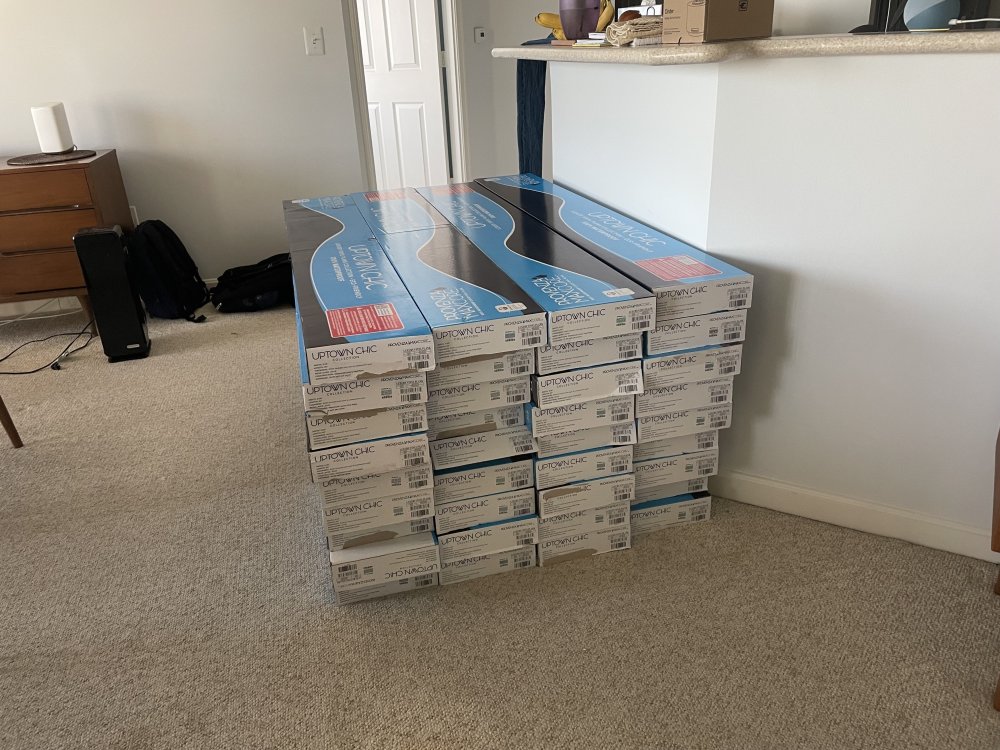
These arrived last Thursday for install this coming Wednesday and Thursday, with any luck! So I'm shut down for a couple of weeks on the B-52 which is a shame as I was just getting ready to put down the third camo colour, then finish with the underside and touch ups...
-
Thank you, Gentlemen!!! I'm kinda having fun with the camo and would like to get the dark green on the fuselage tonight, but am having flooring put down Wed/Thurs of next week and I need to keep clearing out my rooms. Esp the hobby room! I thought I'd take advantage of the snowy and Icelandic weather (see what I did there?? ) but cleaning house has taken precedence. But I can't wait to finish this big bird!
-
Carl, Thanks! Love the MRP paints just about fool proof. The flooring is supposed to be delivered Thursday, and installed next week. I have to clear out my Hobbyroom/Office however! We got about half what you did where I am, but not too far west they matched your snowfall. Supposedly we are getting another storm this week but I don't see it forecast. It was 16C this morning with no wind. Tonight we are supposed to see temps fall to -21C windchill... THAT has been brutal. The wind just cuts through you. Can't have any exposed skin for very long.
-

FS: Monogram B-17G #5600 with Lots of Goodies. US/VA
CANicoll replied to CANicoll's topic in Buy, sell, swap, seek
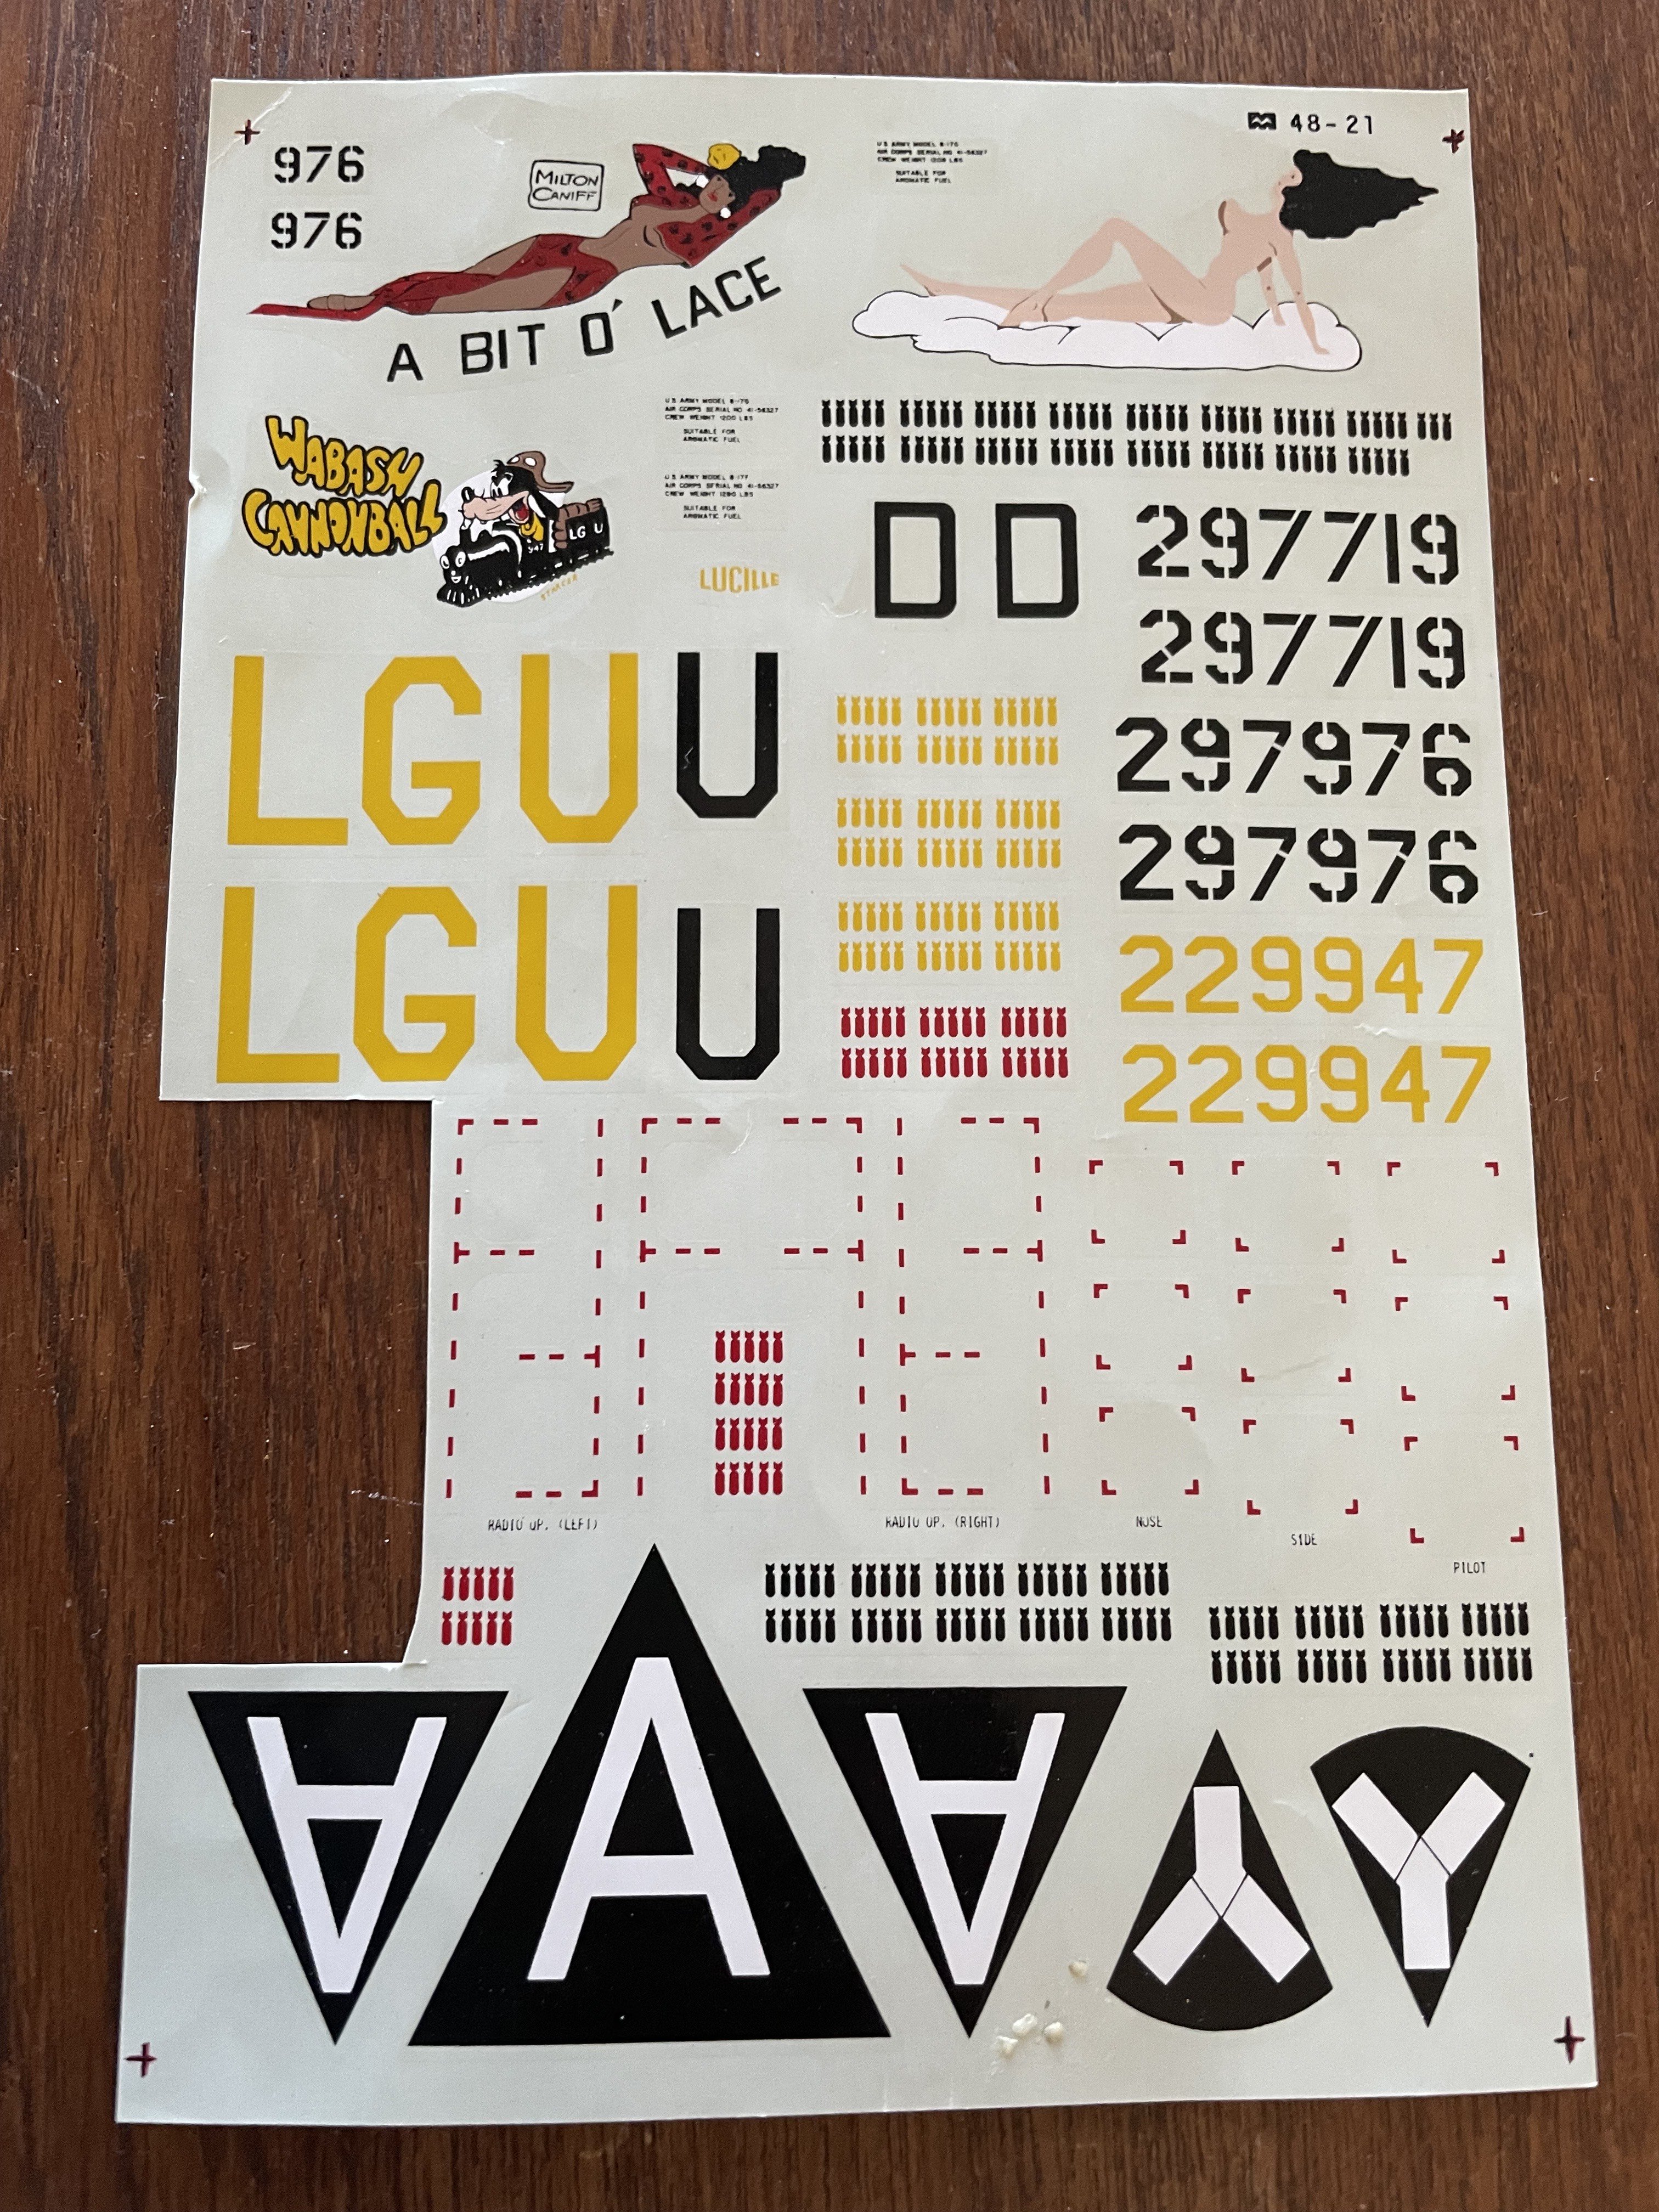
I found this set of decals and will throw them into the box. A Bit o Lace. is the main aircraft. Missing are the tail emblem K.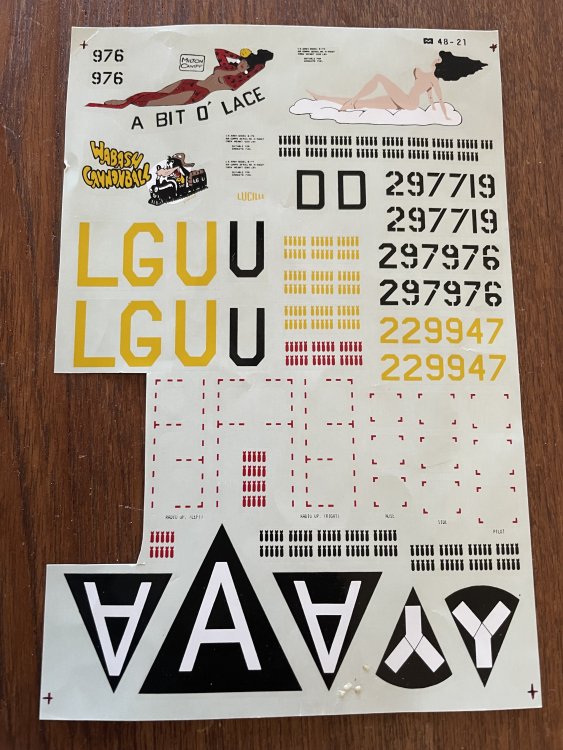
-
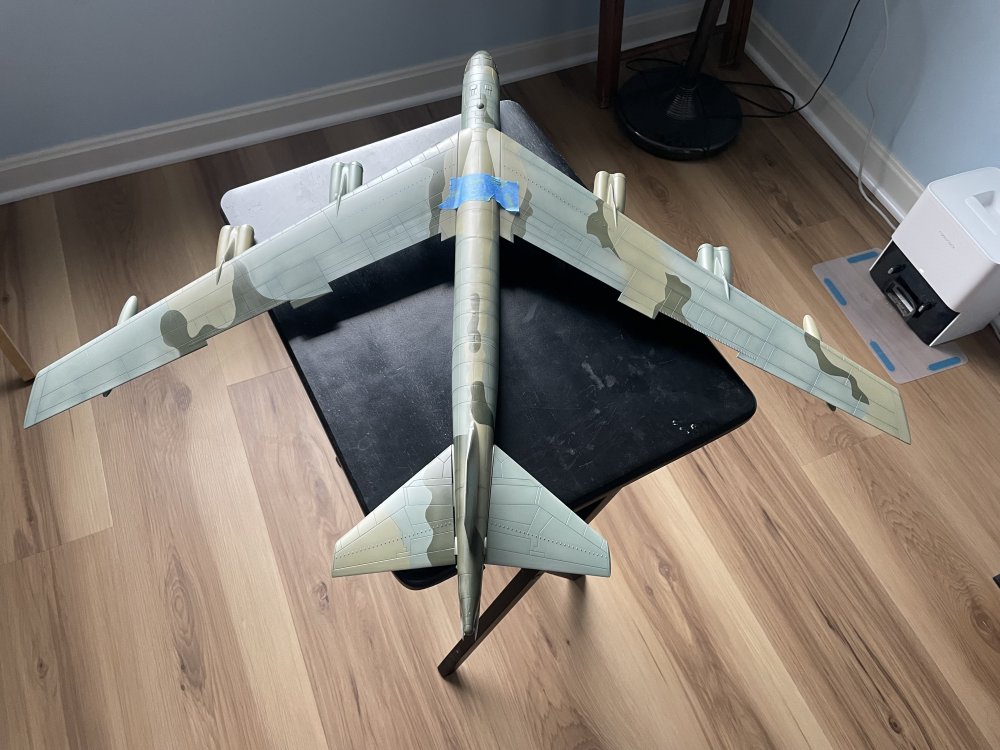
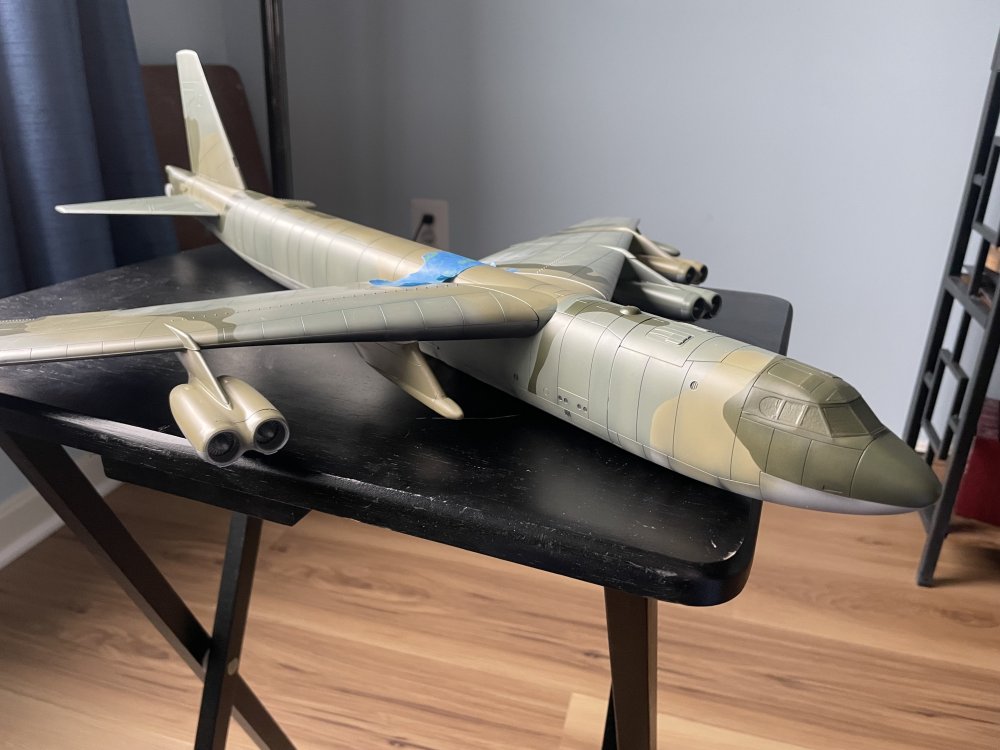
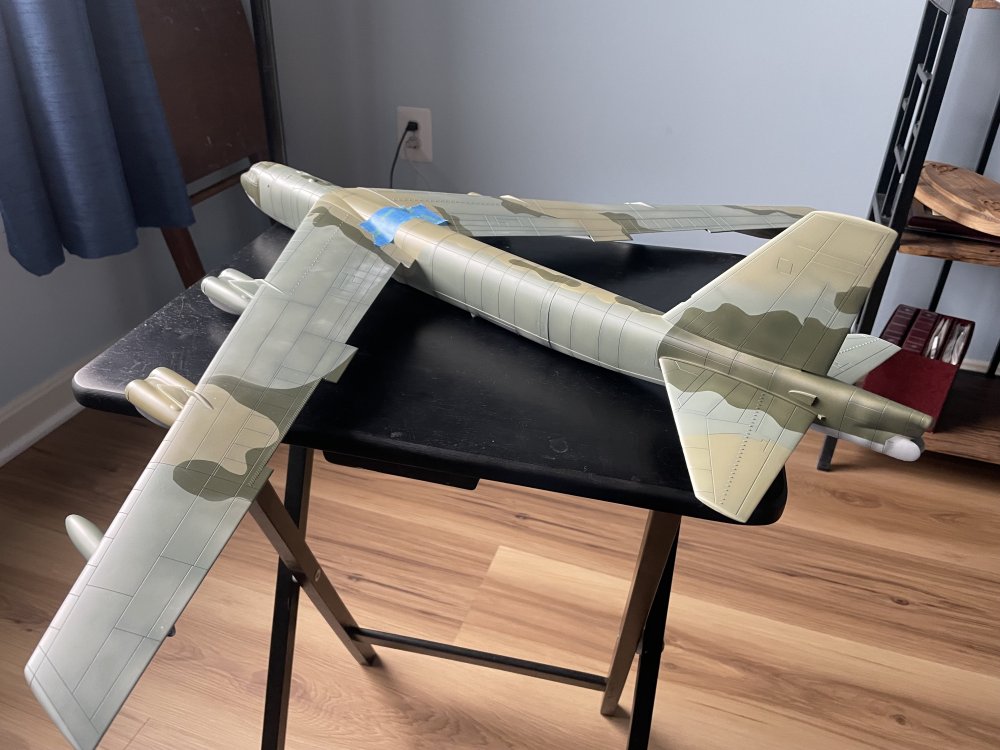
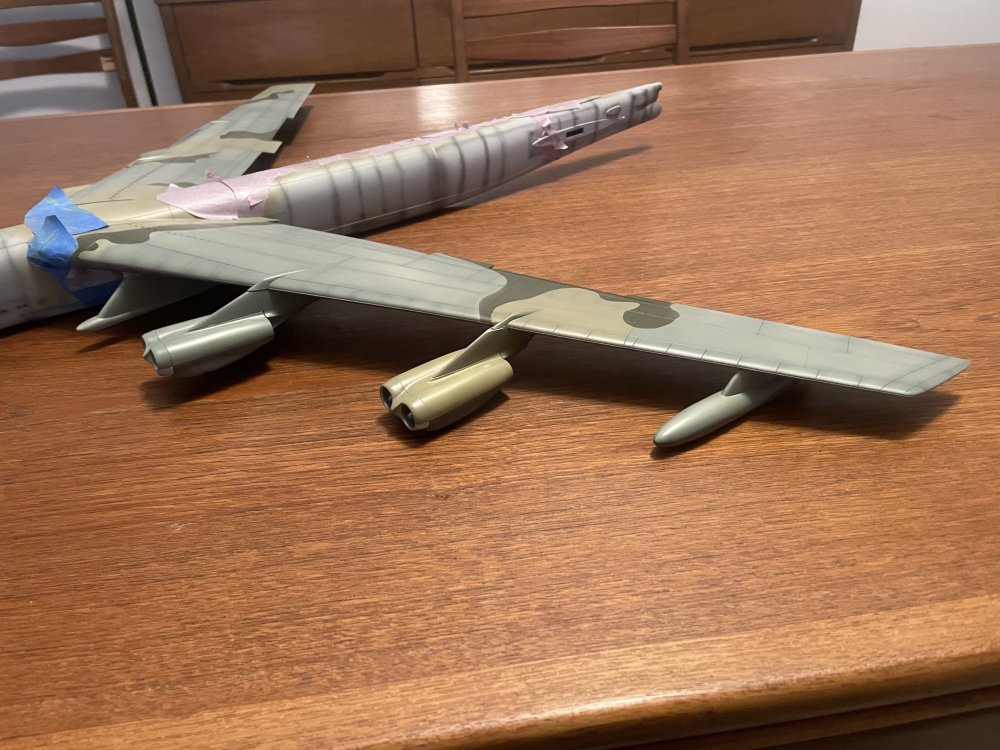
Making progress! Have completed the camo on the wings and have put down the first color on the fuselage. The tape is getting ready for the second color. Attached the engines which are an exercise in patience since there are no clear mounting points. And where the pylon meets the wing there is a gap, and the single pin on pylon top for the inside engines was about 2mm off of where it was on the engine pylon. Will take a bit of filler I think plus I did some paint damage gluing the pylons to the wing so will be doing some touch-up. And, yes, this thing is BIG....

-
Beautiful start on the kit! I love this airplane!
-
Thanks!! Very Interesting.
-
Very interesting! Thanks for sharing!