JeroenPeters
-
Posts
4,867 -
Joined
-
Last visited
Content Type
Profiles
Forums
Events
Gallery
Everything posted by JeroenPeters
-

1/32 Westland Whirlwind
JeroenPeters replied to JeroenPeters's topic in LSM 1/35 and Larger Work In Progress
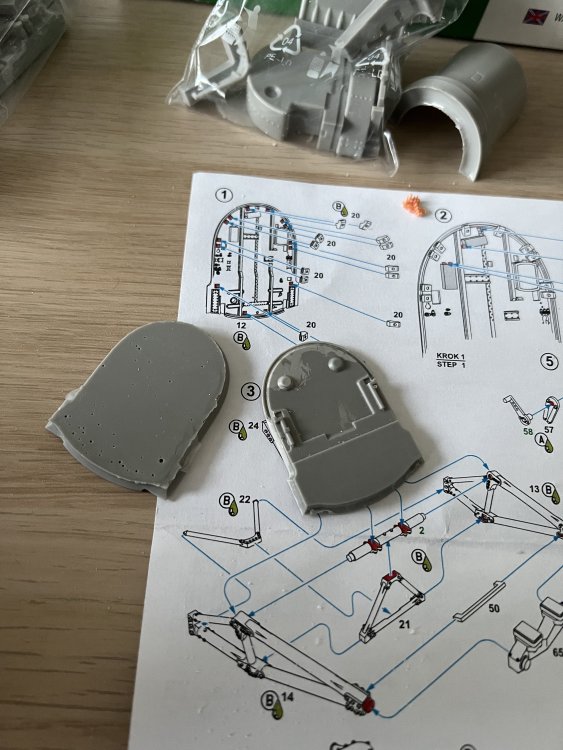
Fitted the firewalls. The new 3D prints are perfect.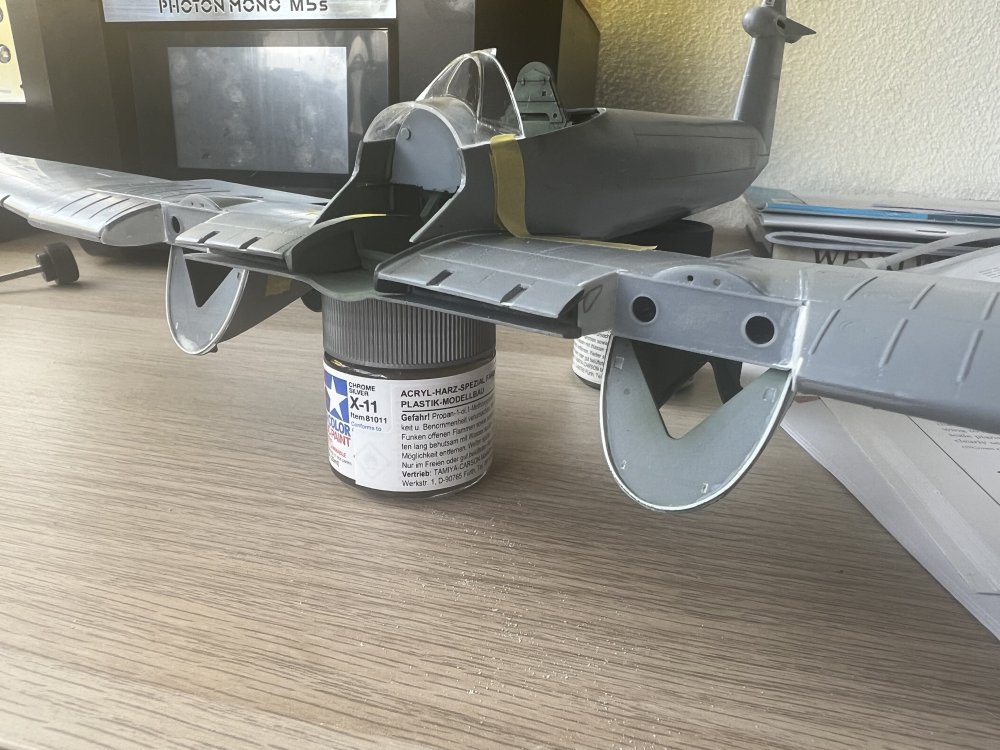

- 439 replies
-
- 12
-

-

-
1/32 Westland Whirlwind
JeroenPeters replied to JeroenPeters's topic in LSM 1/35 and Larger Work In Progress
Wasn’t happy with the firewalls. The shape is perfect, but they were just too pronounced and thick. Just printed some new ones. Curing in UV light now. IMG_7237.mov -
1/32 Westland Whirlwind
JeroenPeters replied to JeroenPeters's topic in LSM 1/35 and Larger Work In Progress
Fit looks fine. I’ll sand the spar thinner, but not too thin, since it will carry the weight of the engine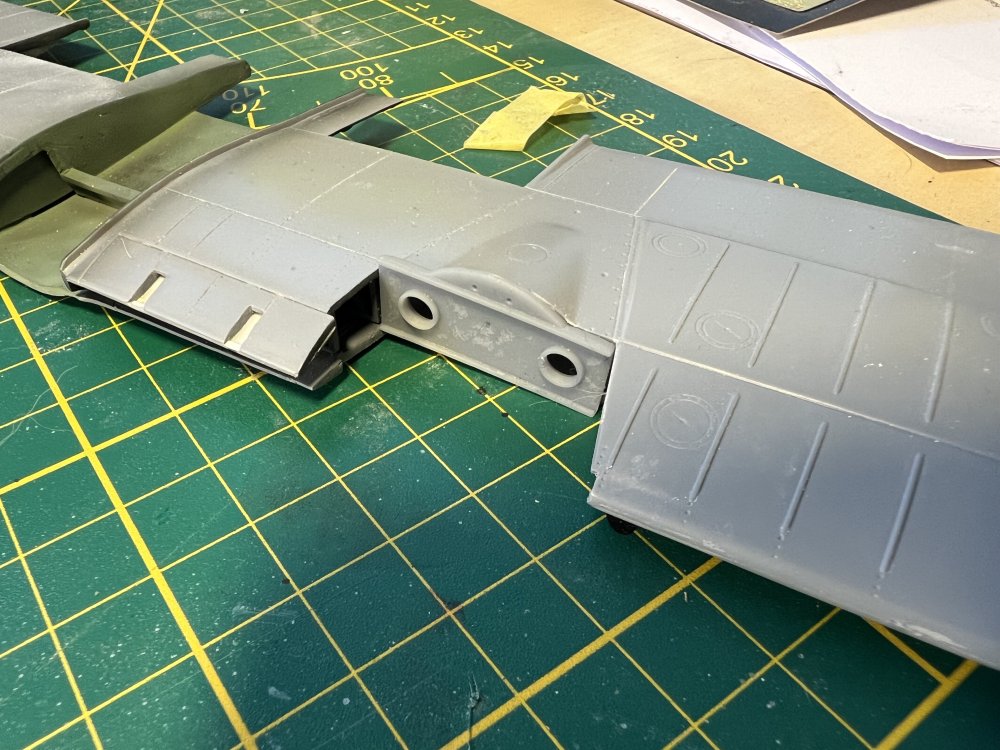


-
1/32 Westland Whirlwind
JeroenPeters replied to JeroenPeters's topic in LSM 1/35 and Larger Work In Progress
First test print
-
1/32 Westland Whirlwind
JeroenPeters replied to JeroenPeters's topic in LSM 1/35 and Larger Work In Progress
Working on the spar that holds the engine mounts. This will close up the front in this area.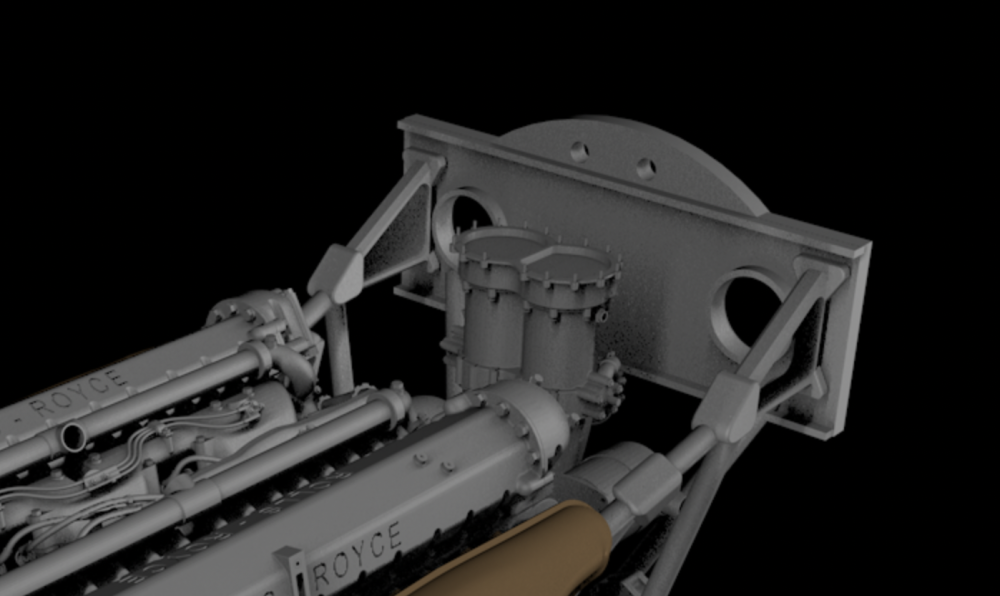

- 439 replies
-
- 10
-
-
1/32 Hawker Tempest
JeroenPeters replied to JeroenPeters's topic in LSM 1/35 and Larger Work In Progress
Started cleaning up the first parts. Very time consuming and delicate work. The firewall already has 16 parts attached to it. This will take some time!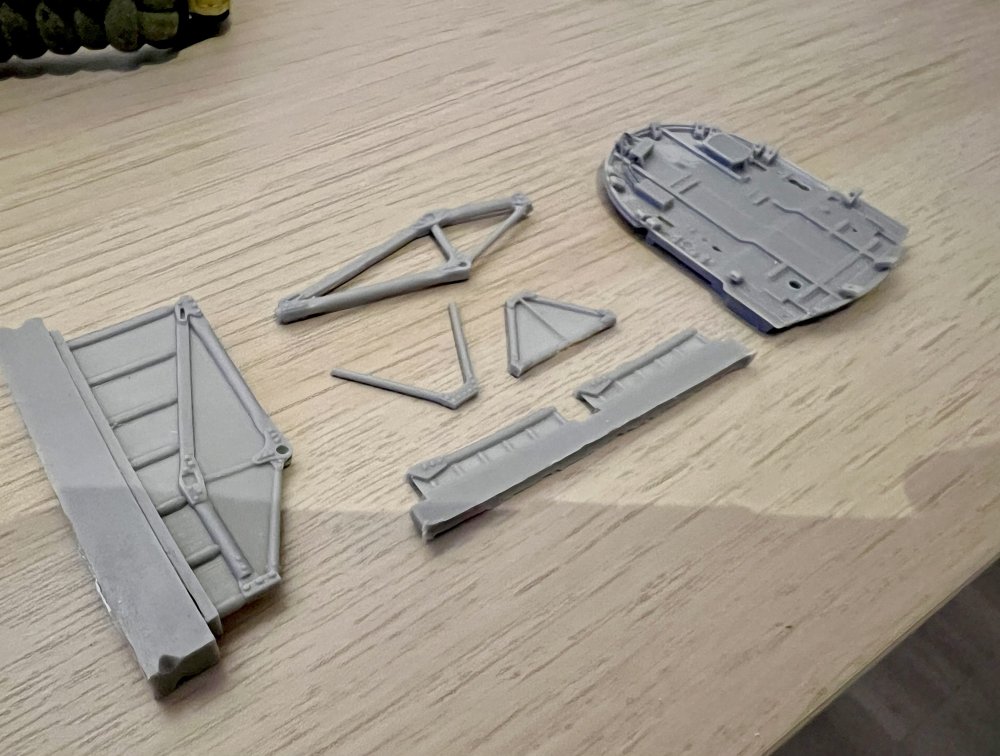
-
1/32 Hawker Tempest
JeroenPeters replied to JeroenPeters's topic in LSM 1/35 and Larger Work In Progress
First part is cleaned. Beware: if you’re planning on using the nose fuel tank set AND the engine set. Be sure to use the firewall from the nose fuel set and not the one provided in the engine set. The latter only has detail on the front.
-
1/32 Westland Whirlwind
JeroenPeters replied to JeroenPeters's topic in LSM 1/35 and Larger Work In Progress
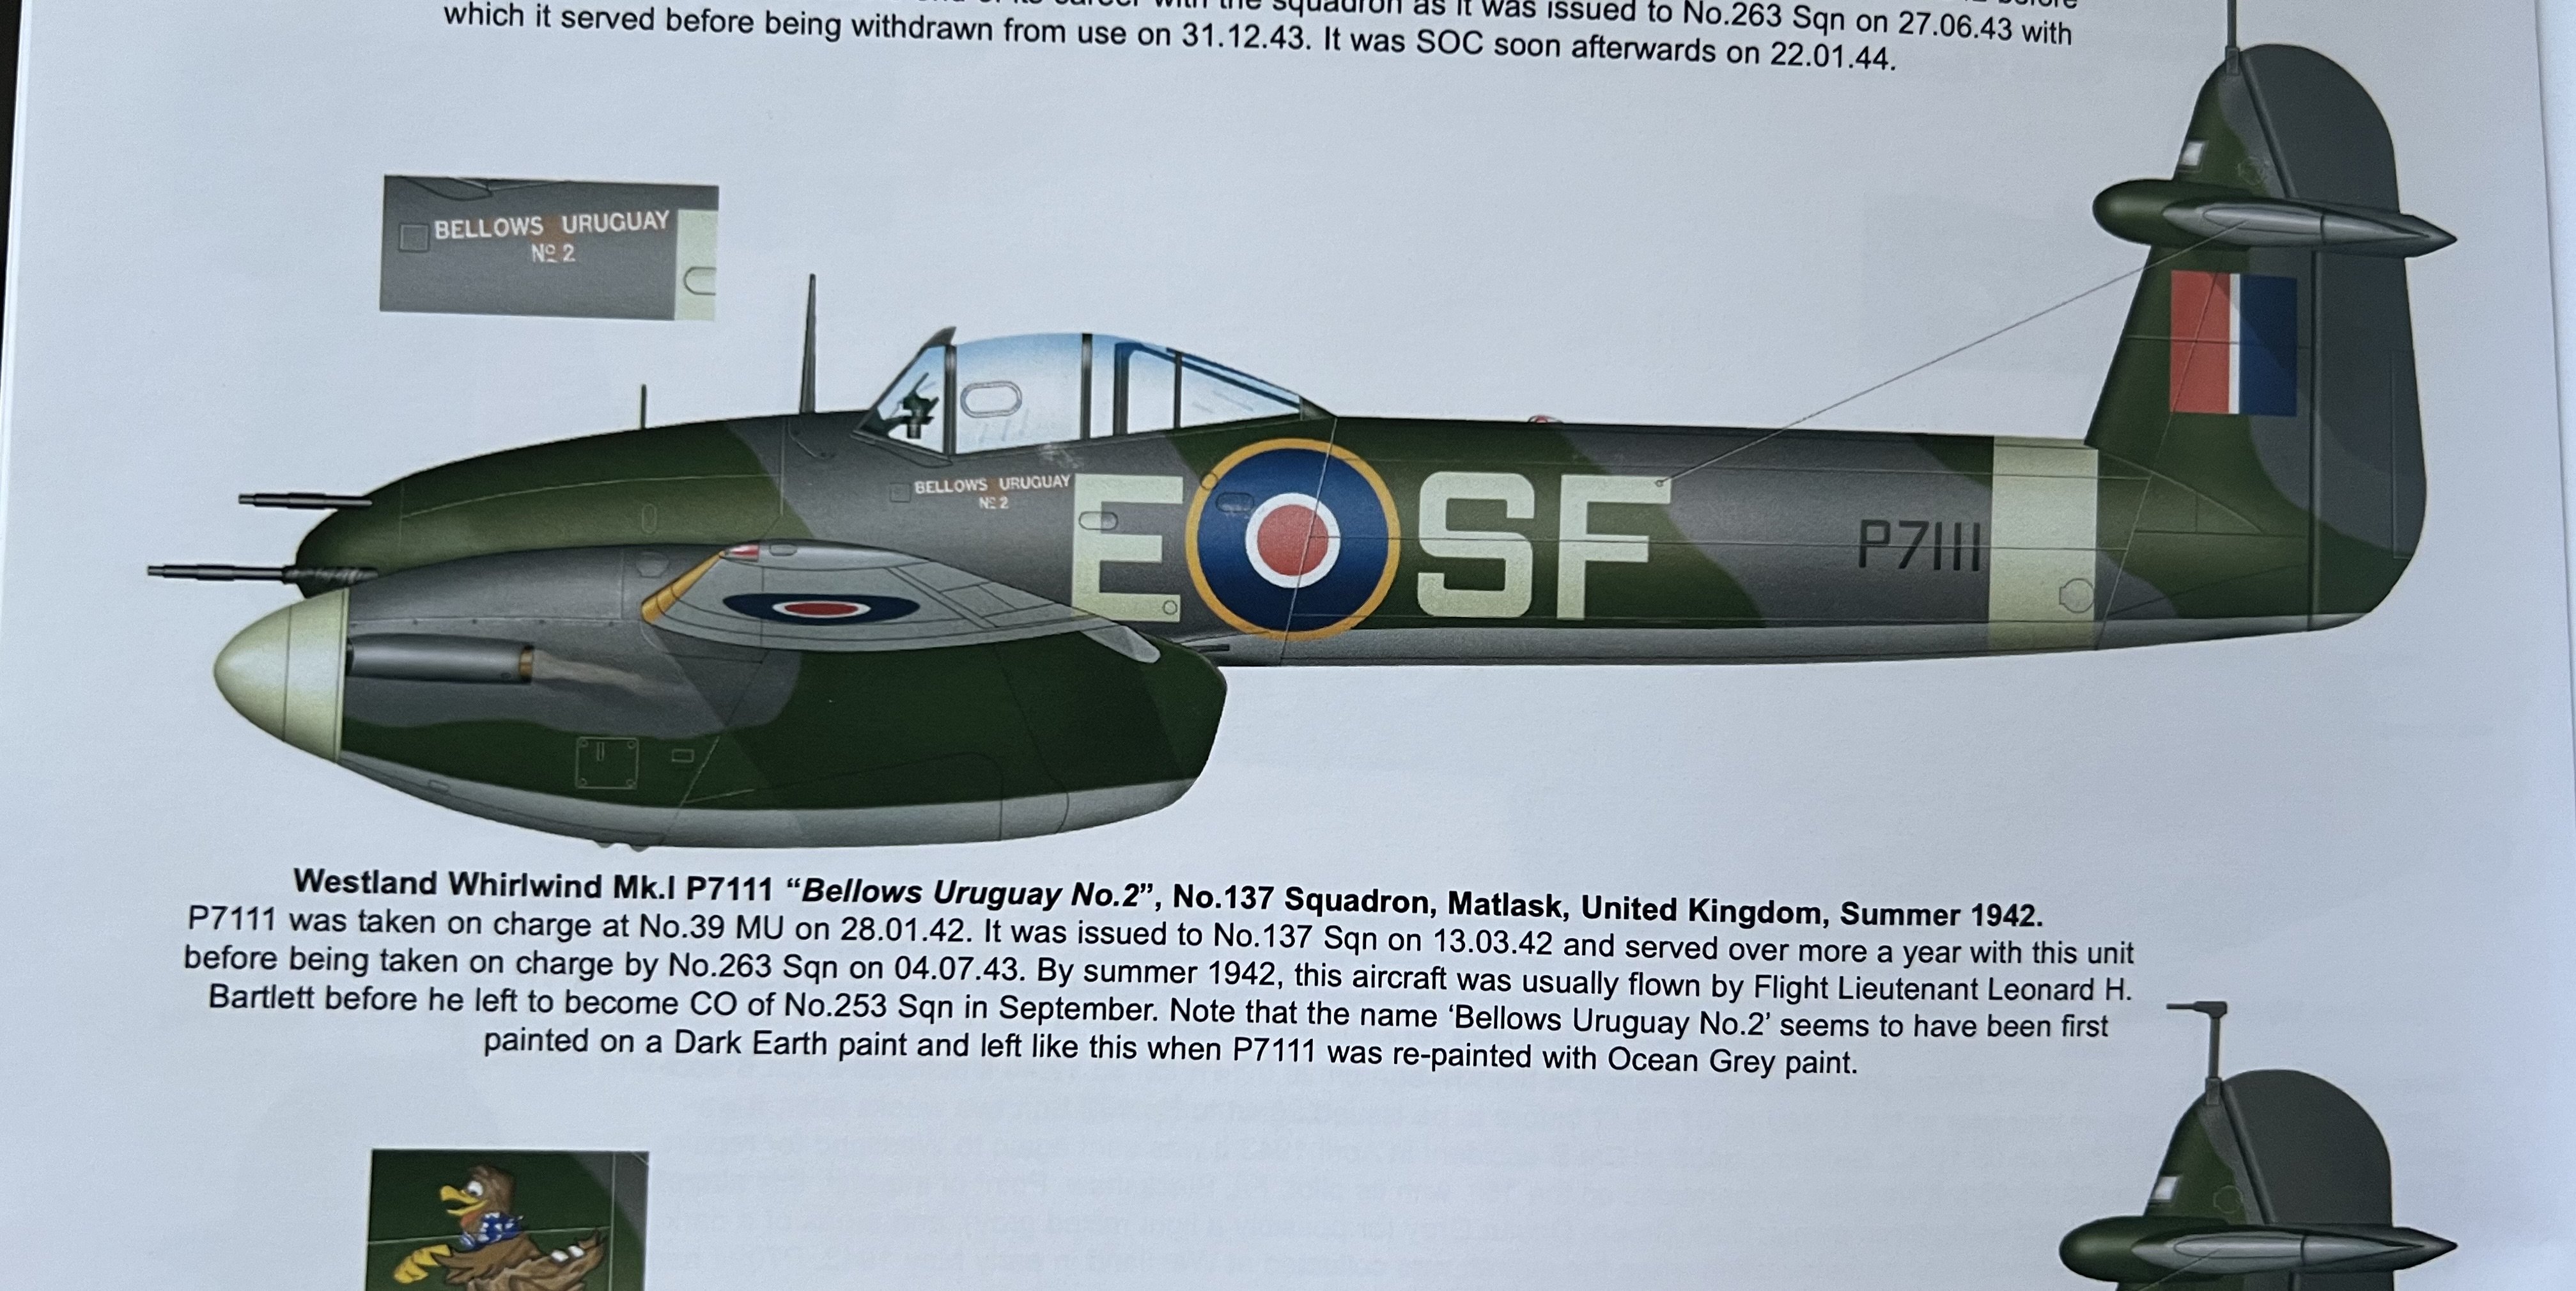
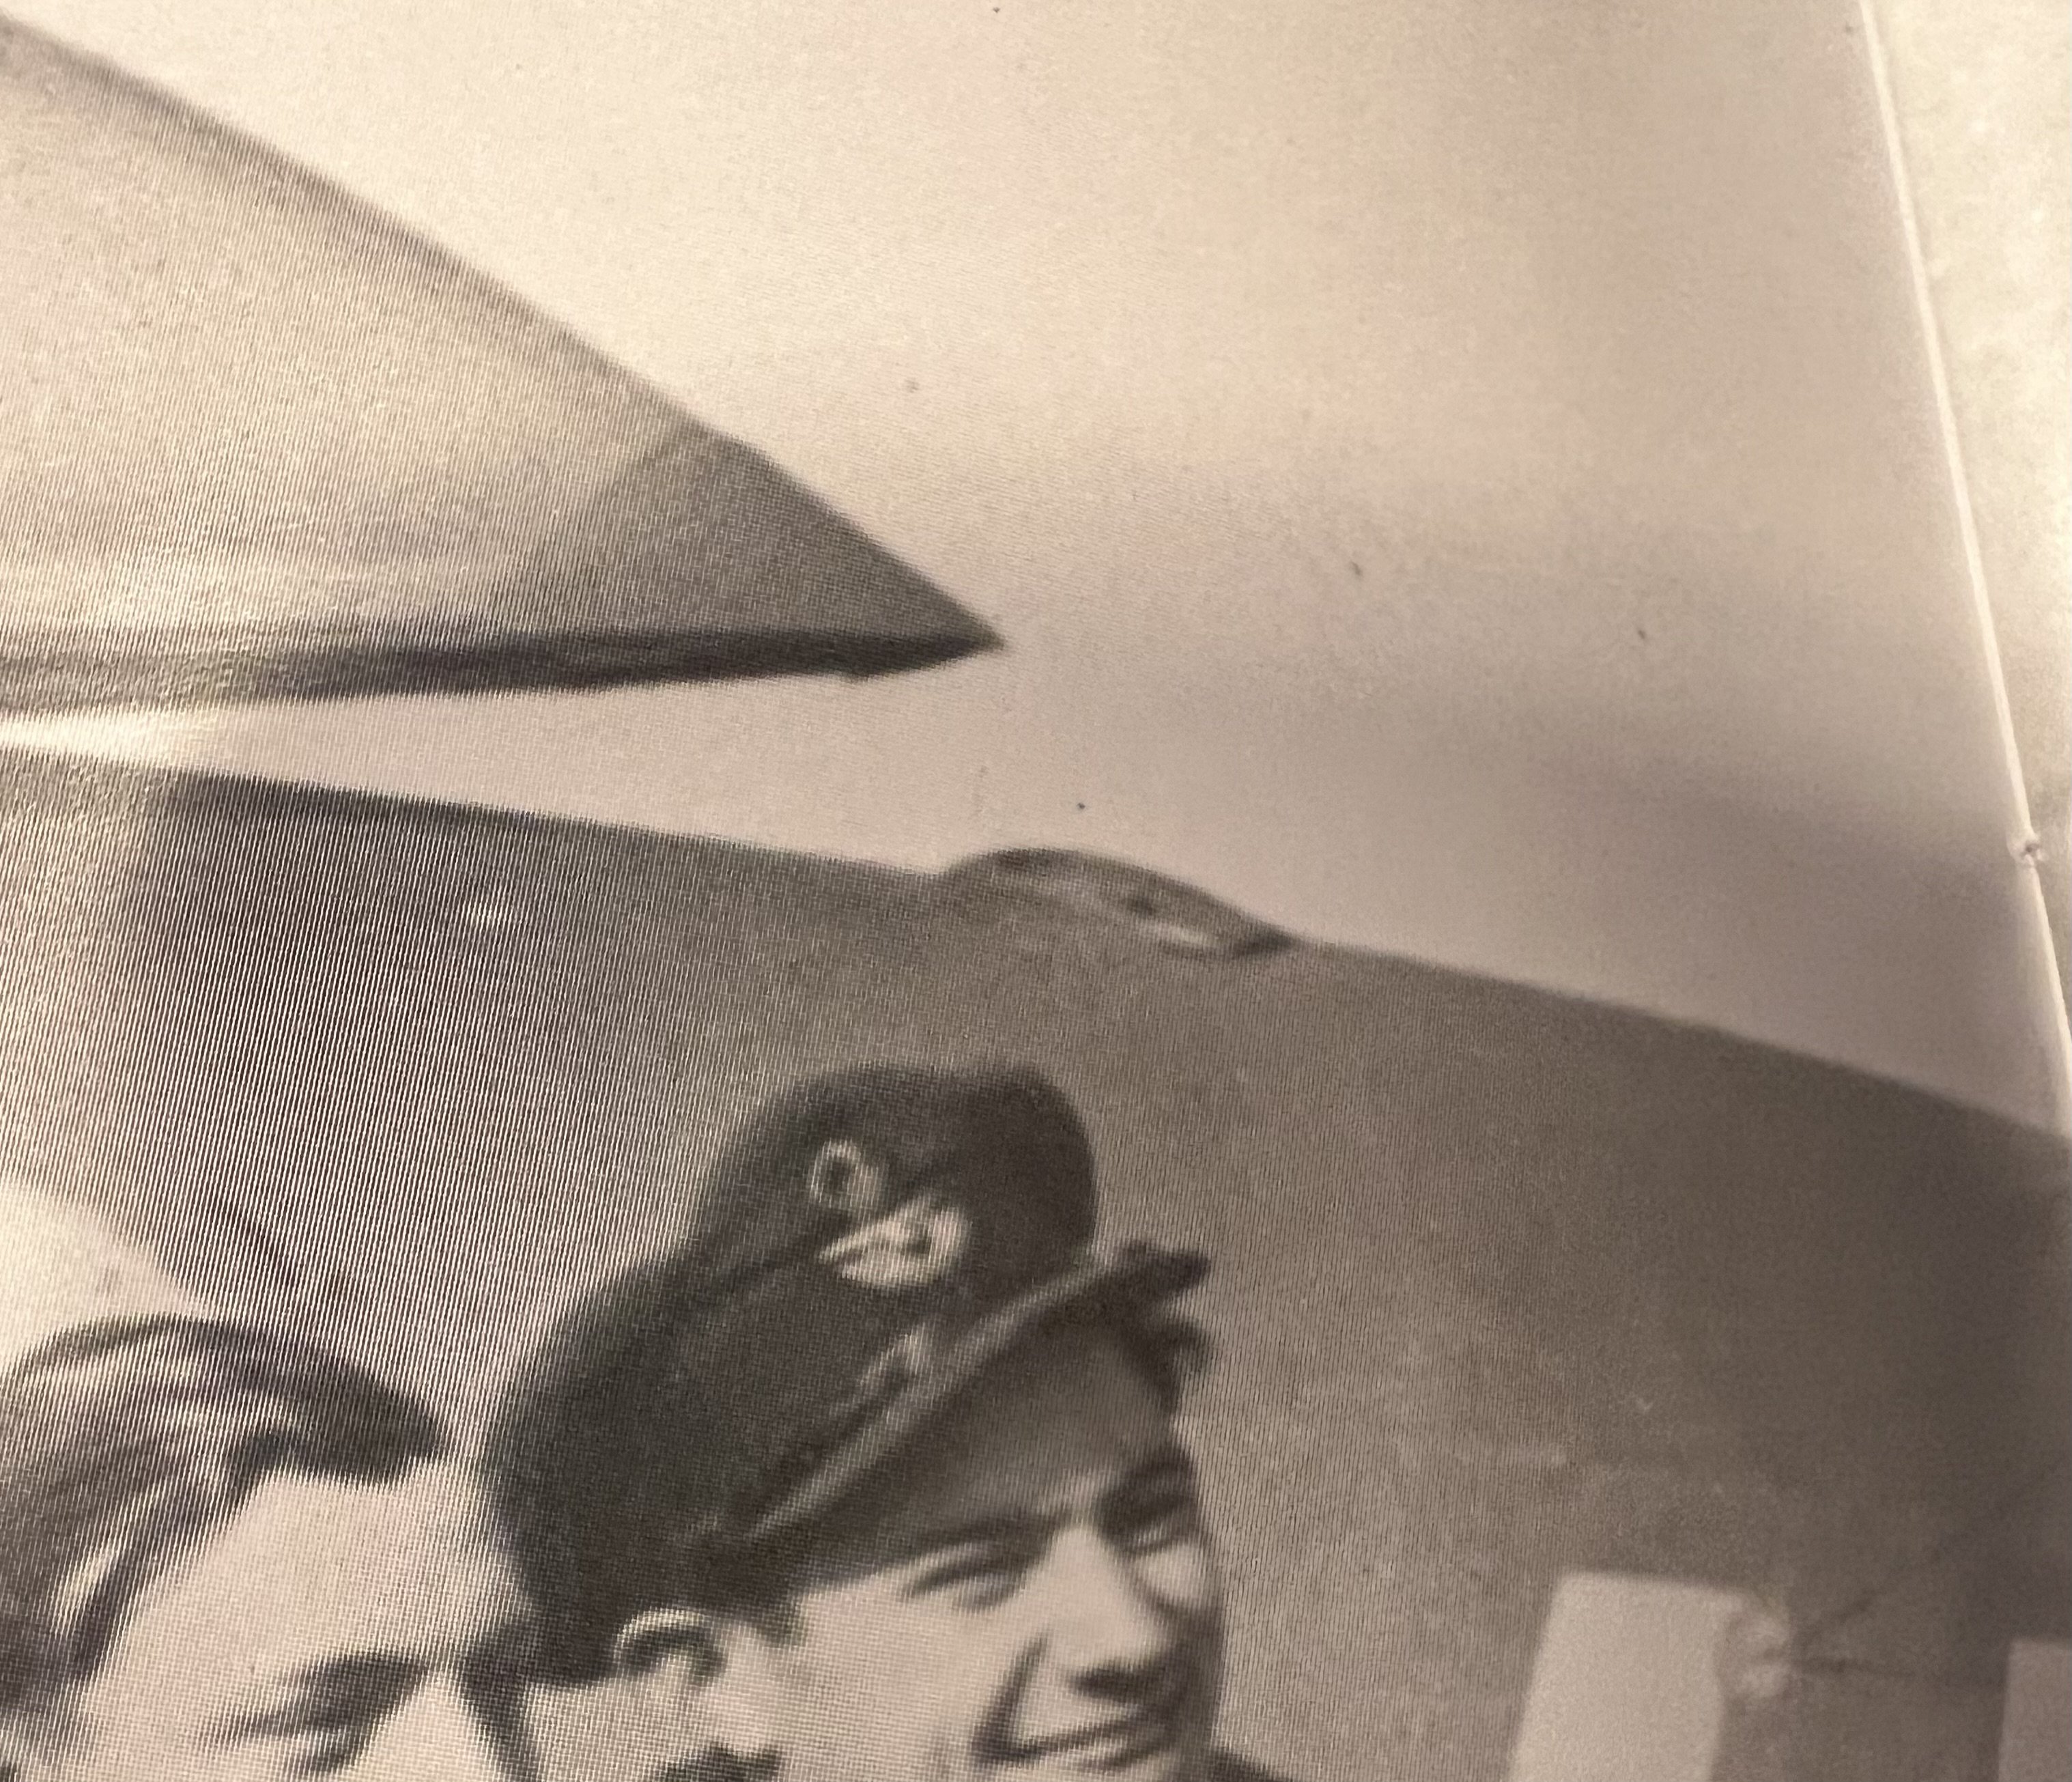
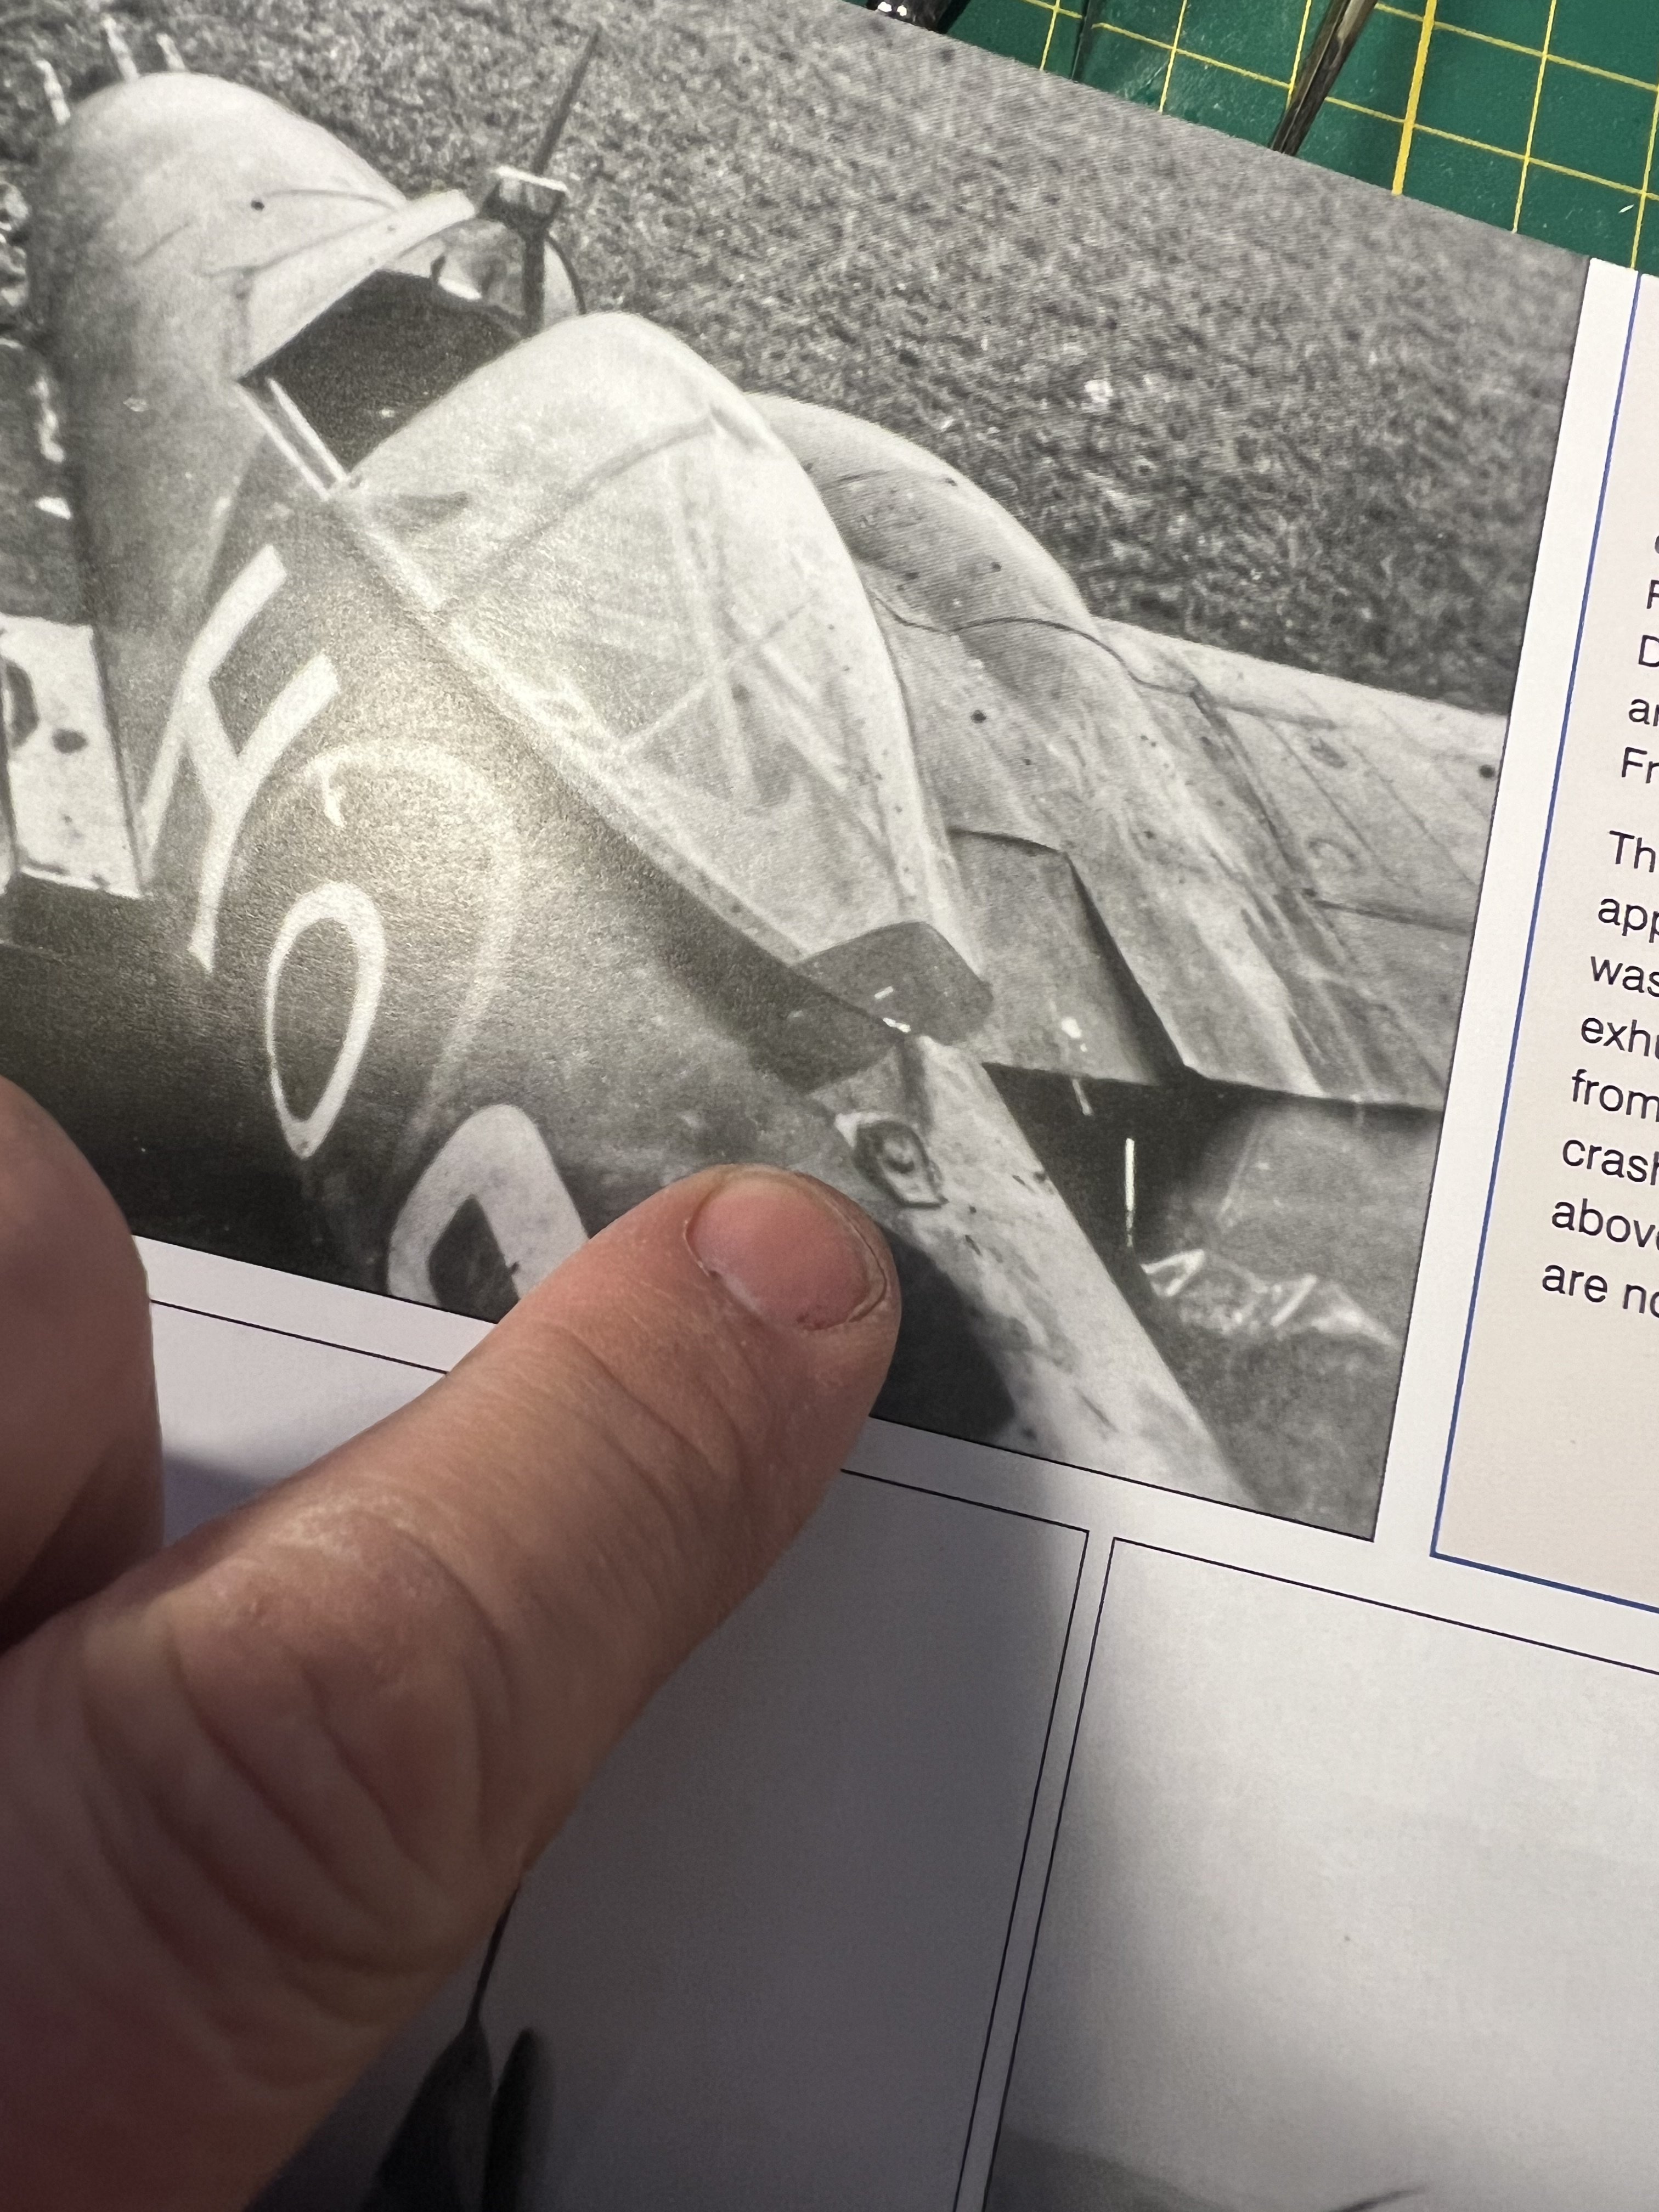
So i spent an afternoon searching the net for Leonard H Bartlett’s plane but couldn’t make sense of it. Serial number P7111, but i saw this plane was either 137th squadron’s SF-E or belonged to 263 squadron. Asked Gunnar and both are correct. Just found this profile in a book i have explaining it. So. This will be the plane I’m making. Bartlett’s plane, along with his signed photograph.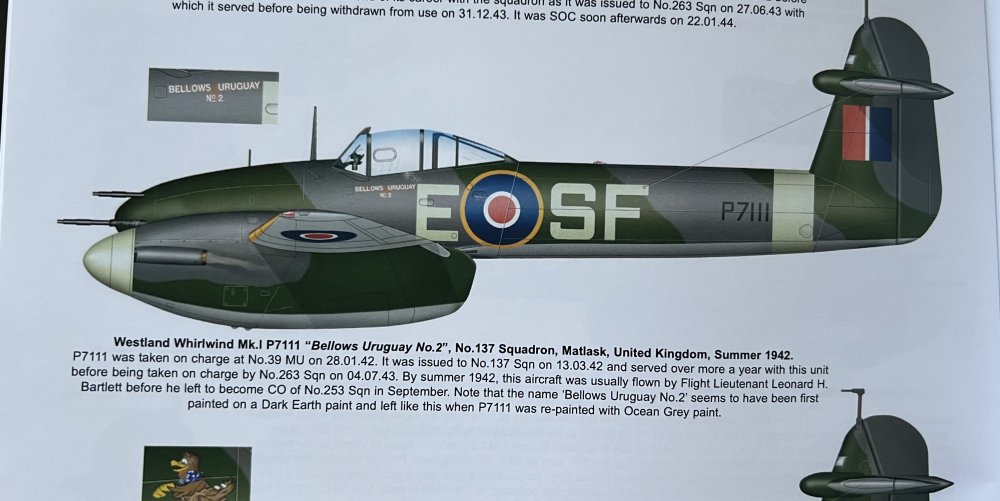
- 439 replies
-
- 10
-
-
1/32 Hawker Tempest
JeroenPeters replied to JeroenPeters's topic in LSM 1/35 and Larger Work In Progress
Got more goodies. almost ready to start!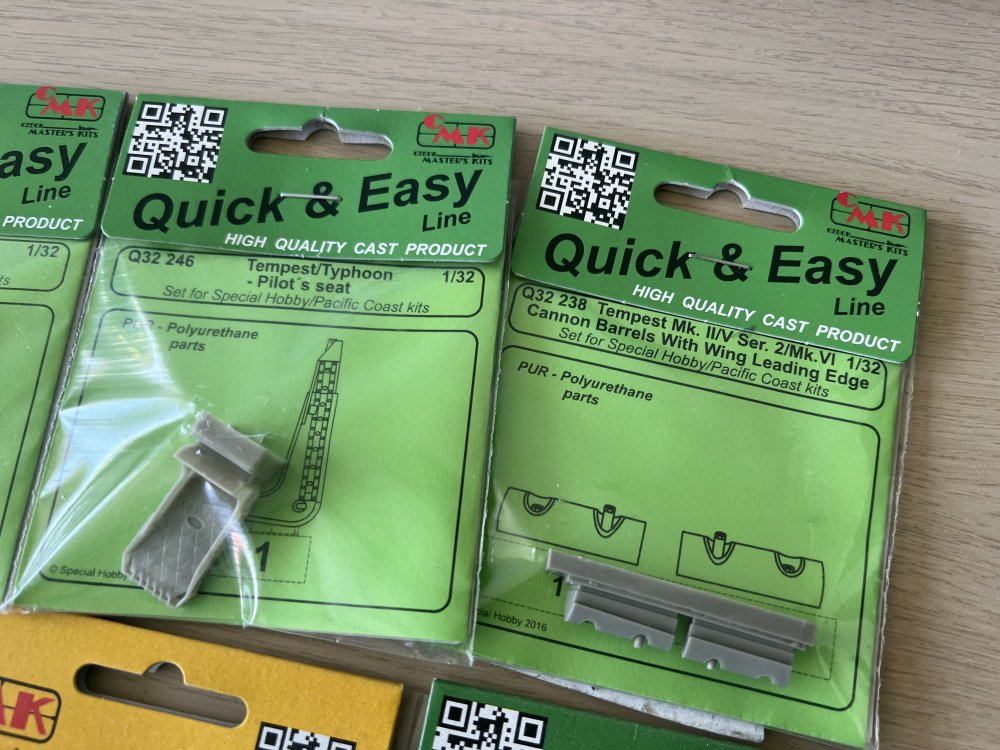
-
1/32 Westland Whirlwind
JeroenPeters replied to JeroenPeters's topic in LSM 1/35 and Larger Work In Progress
Thnx Gunnar, in the meantime i’ve moved on to the wingtip lights. Drilled a hole on the inside and filled it woth Alclad transparent red. Added a shim to make sure the light is not flush with the leading edge. This is because it was flush with the closed slat. Since i have my slats extruded, the light should protrude.
- 439 replies
-
- 10
-
-
1/32 Westland Whirlwind
JeroenPeters replied to JeroenPeters's topic in LSM 1/35 and Larger Work In Progress
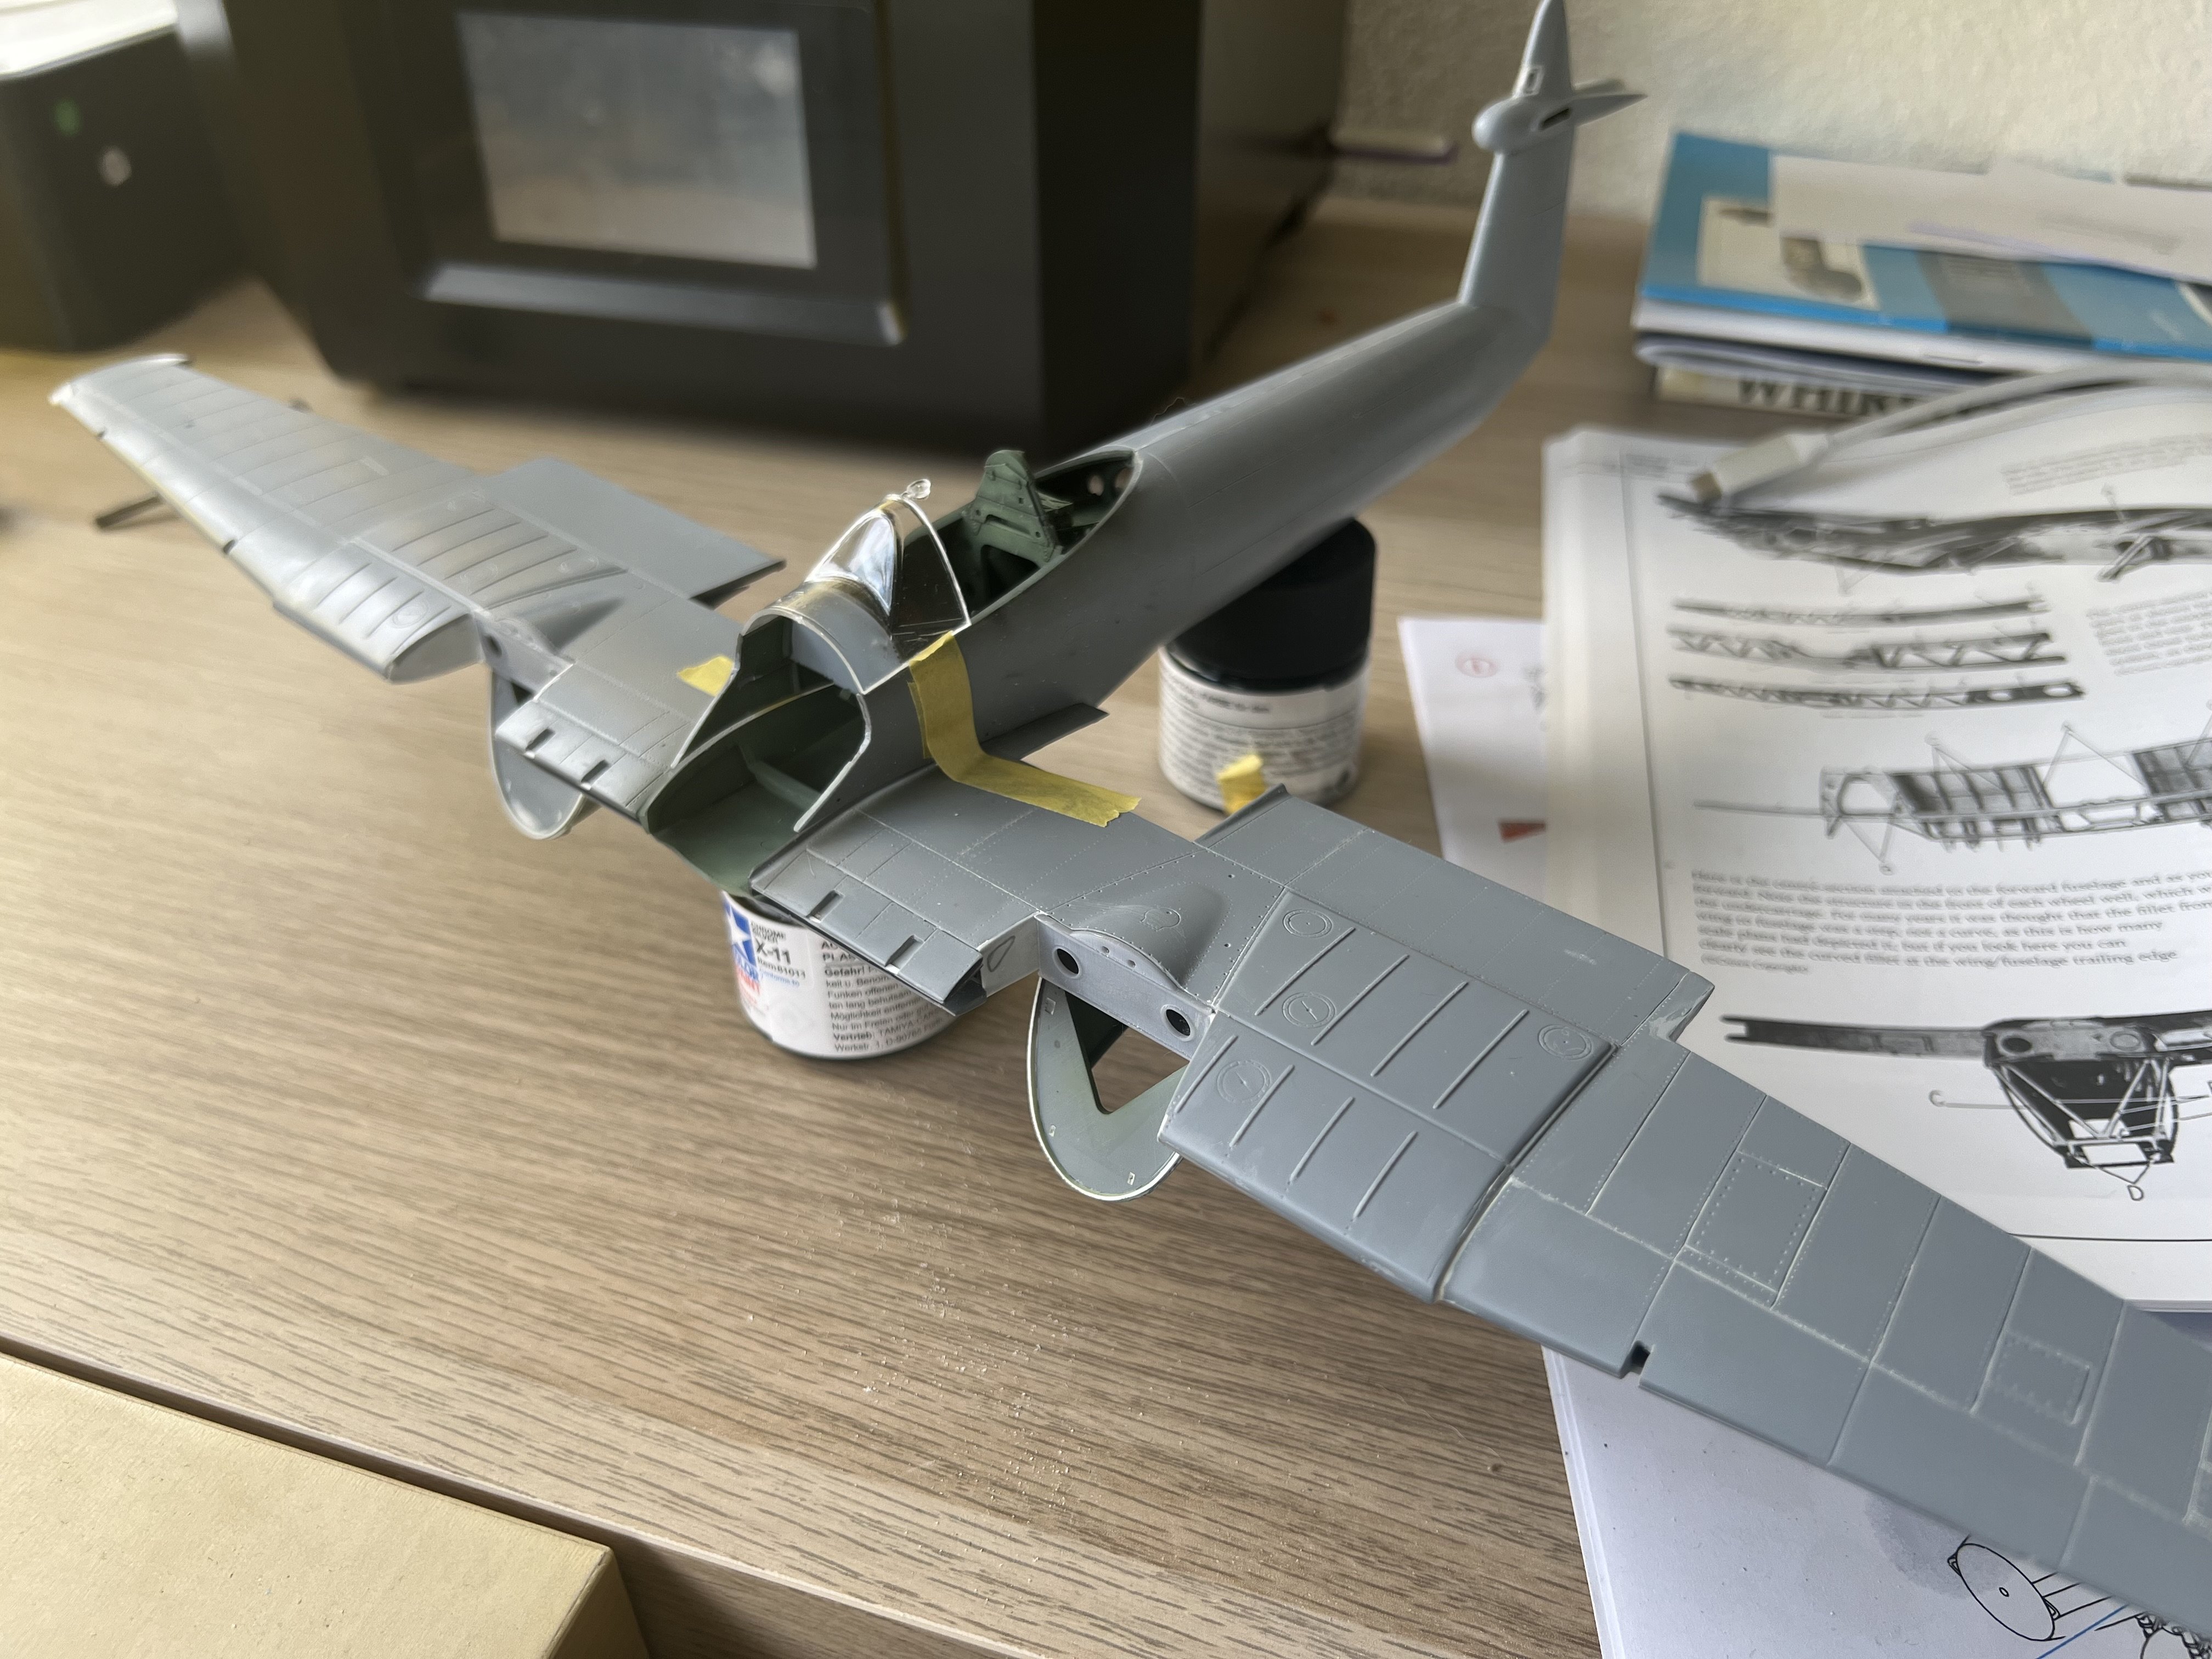
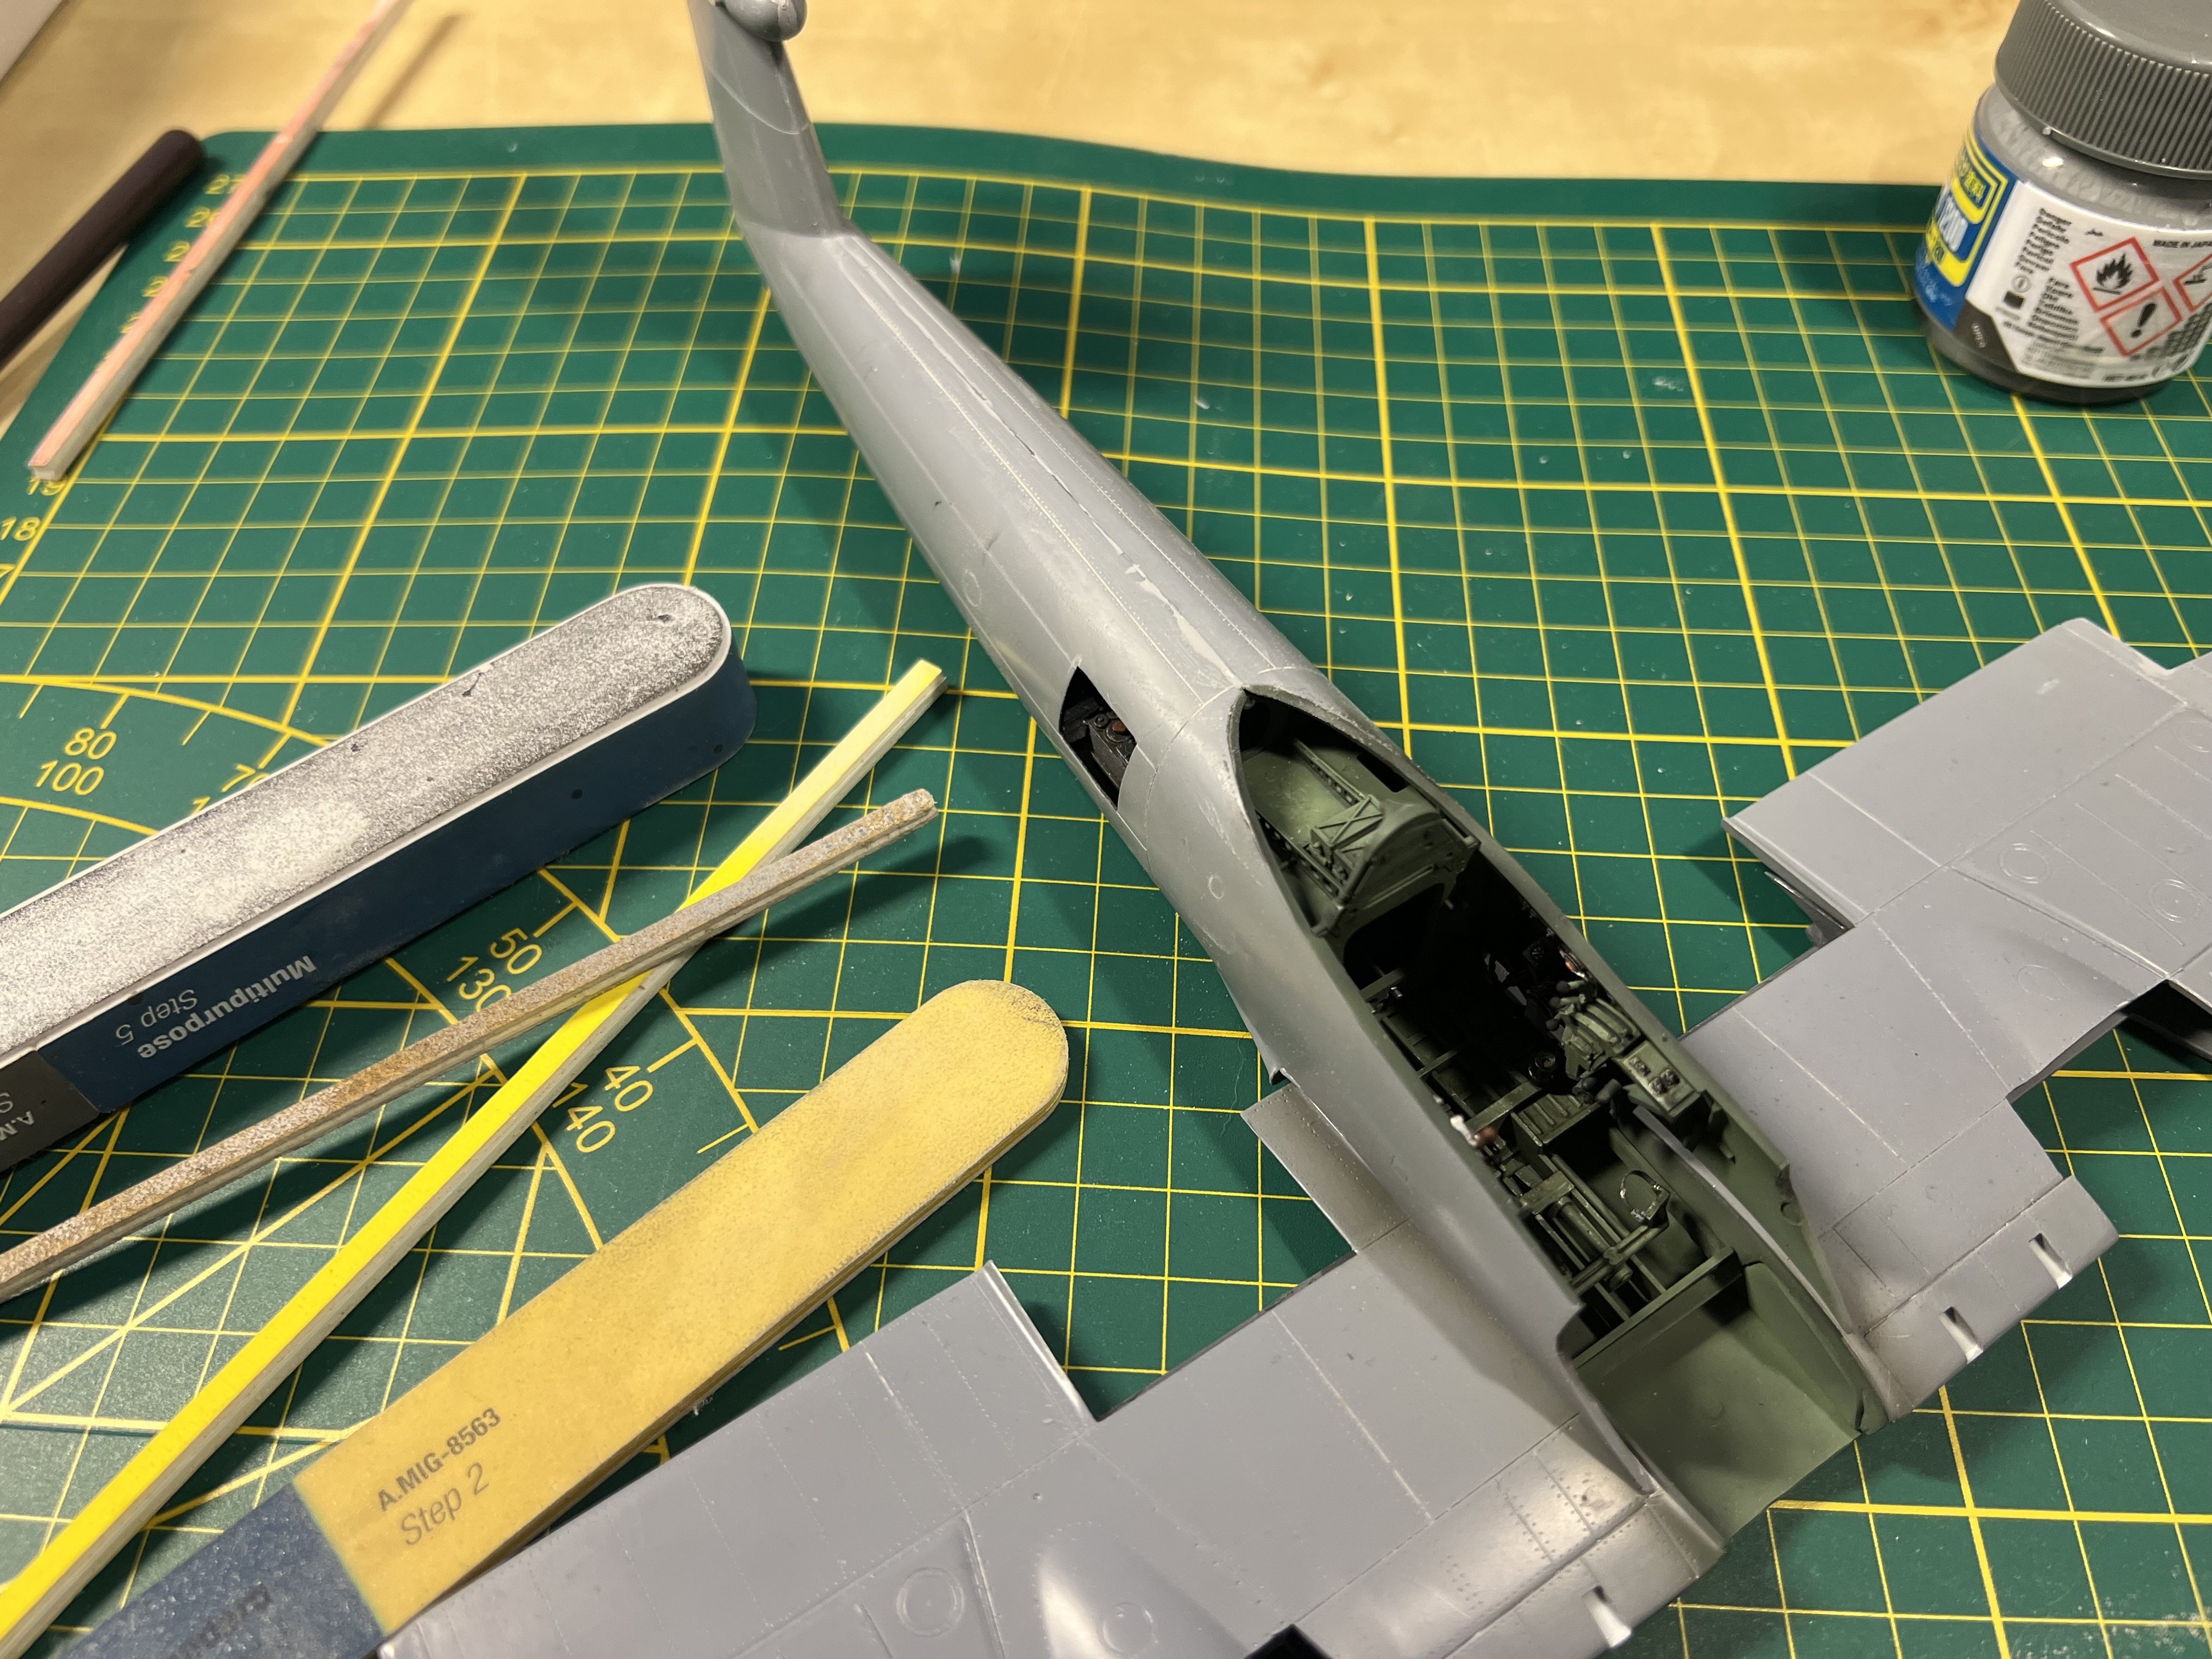
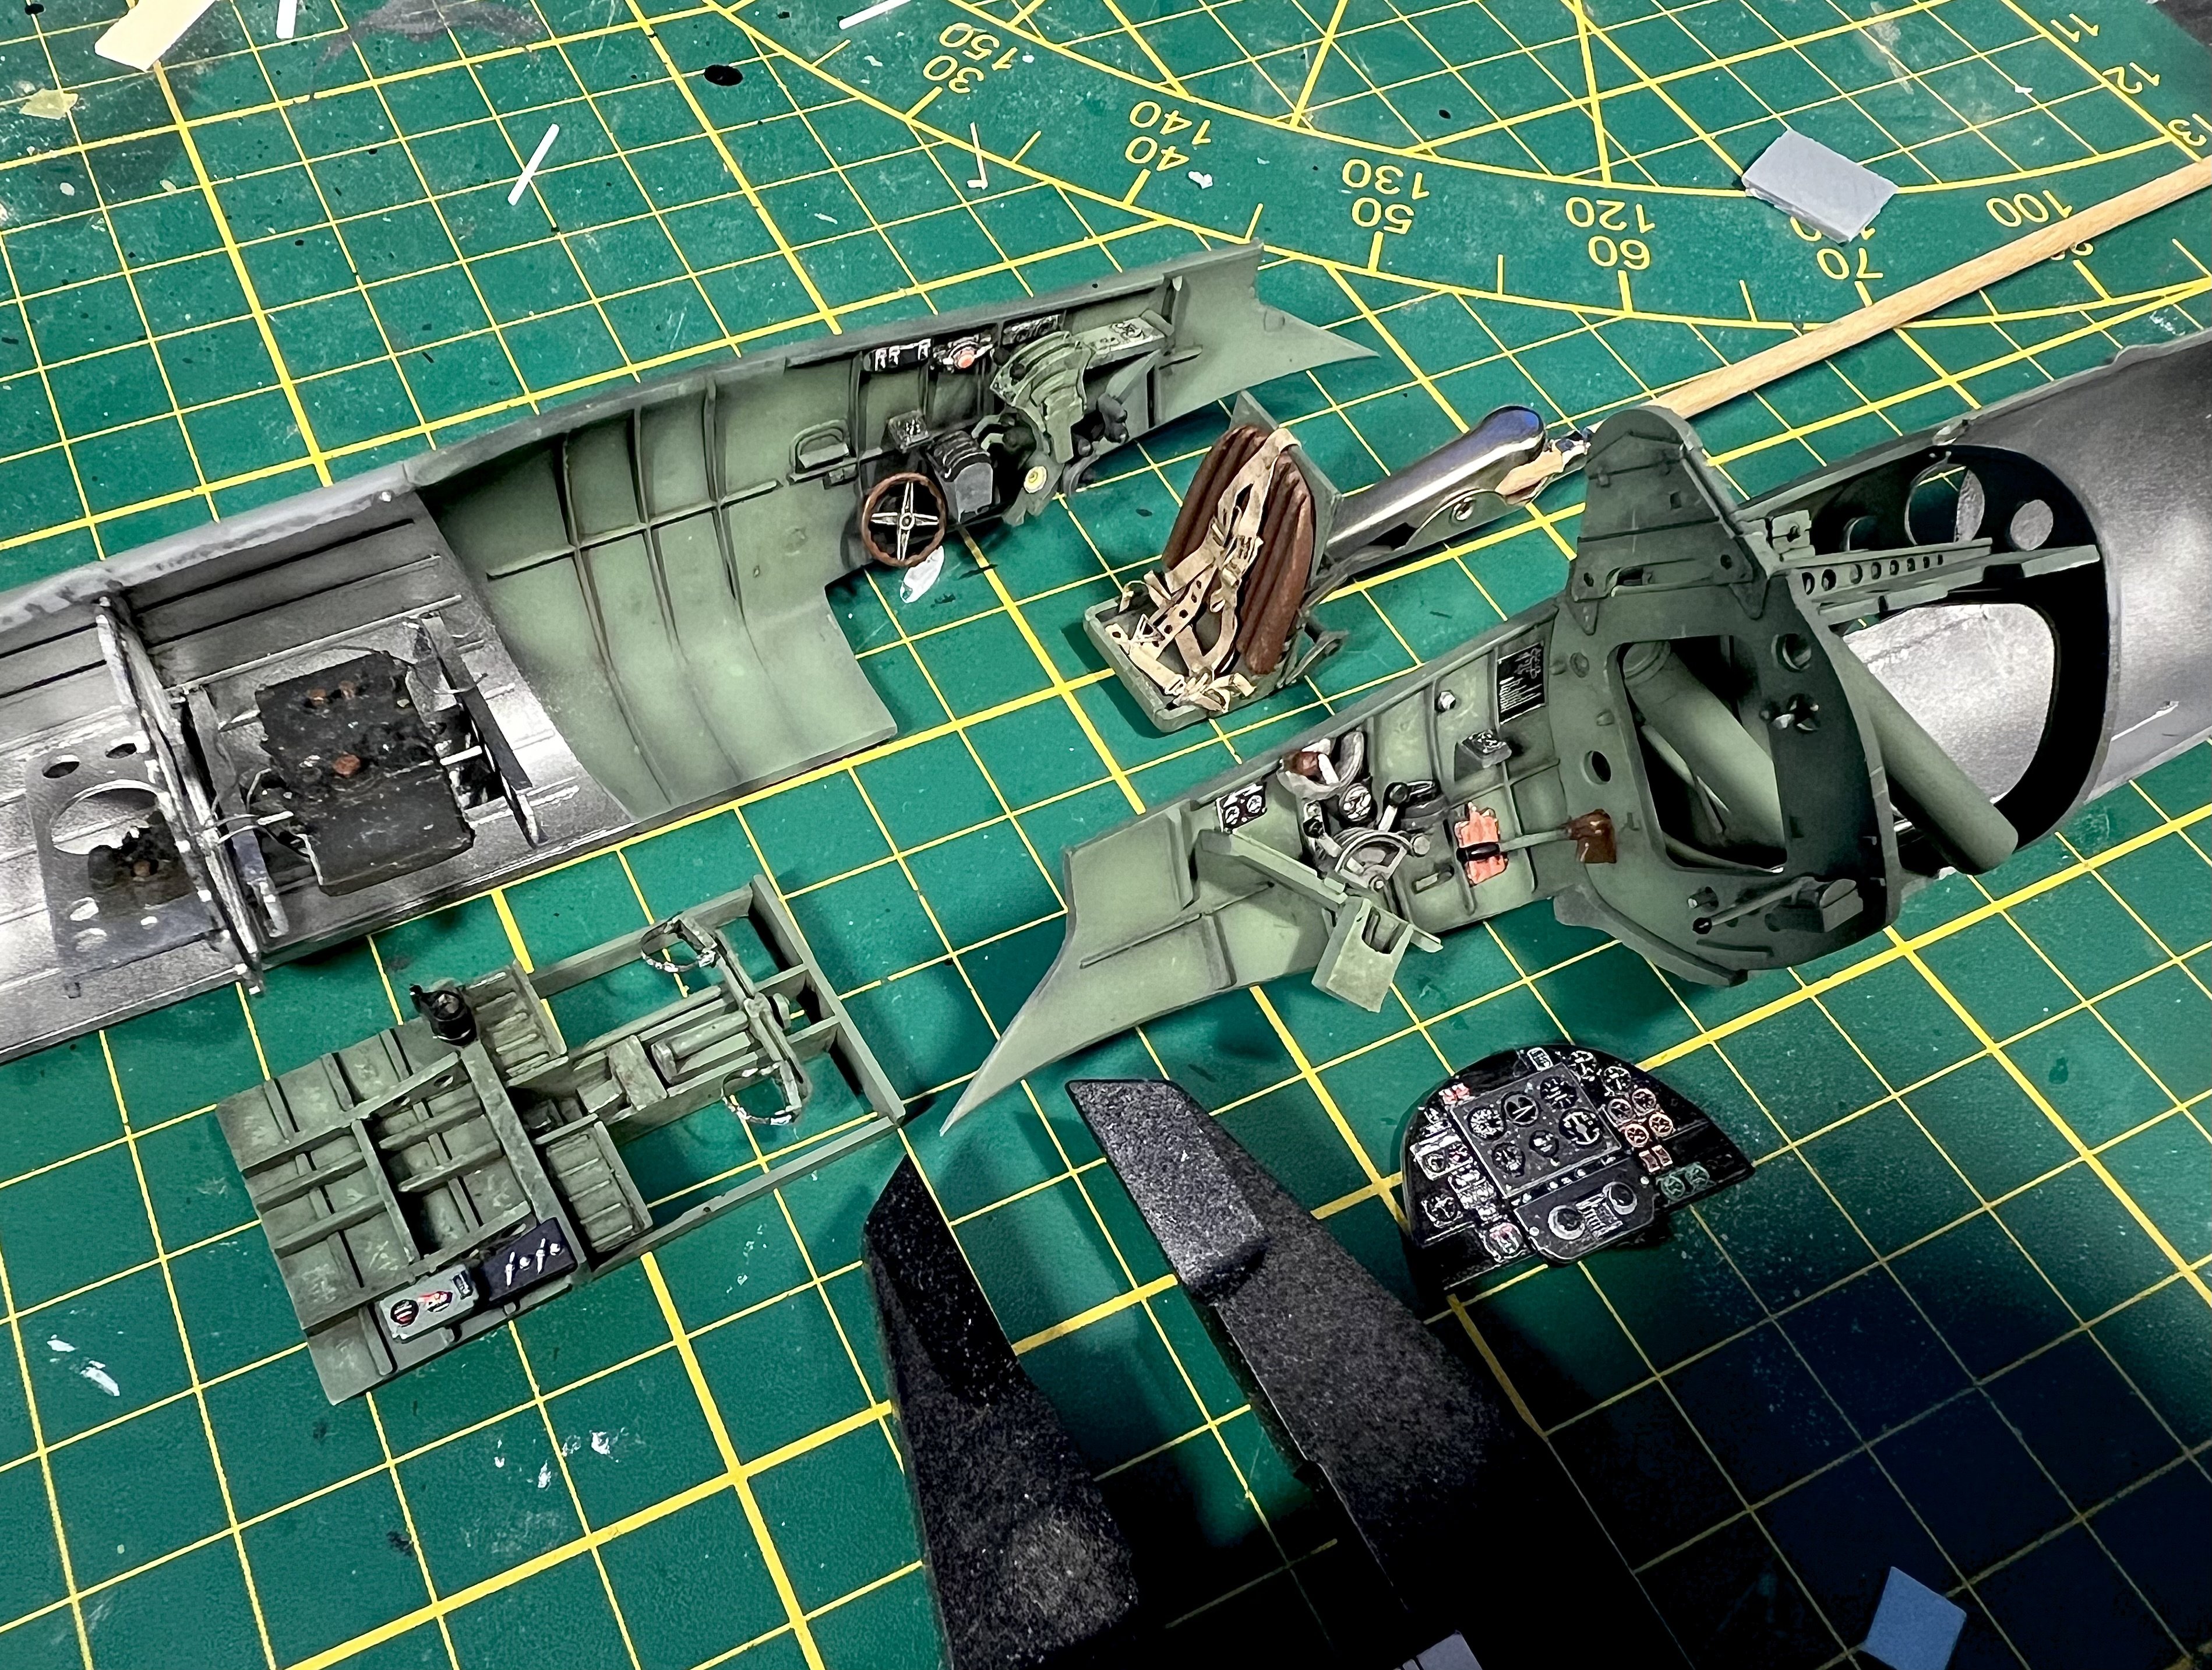
Getting there. The instrument panel is now in. The rear of the hispano guns appear to be too long at the back, making them stick against the instrument panel. Might have to shorten these, but they won’t be visible anyway. Also the firewall behind the guns appears to be a little too wide. We’ll see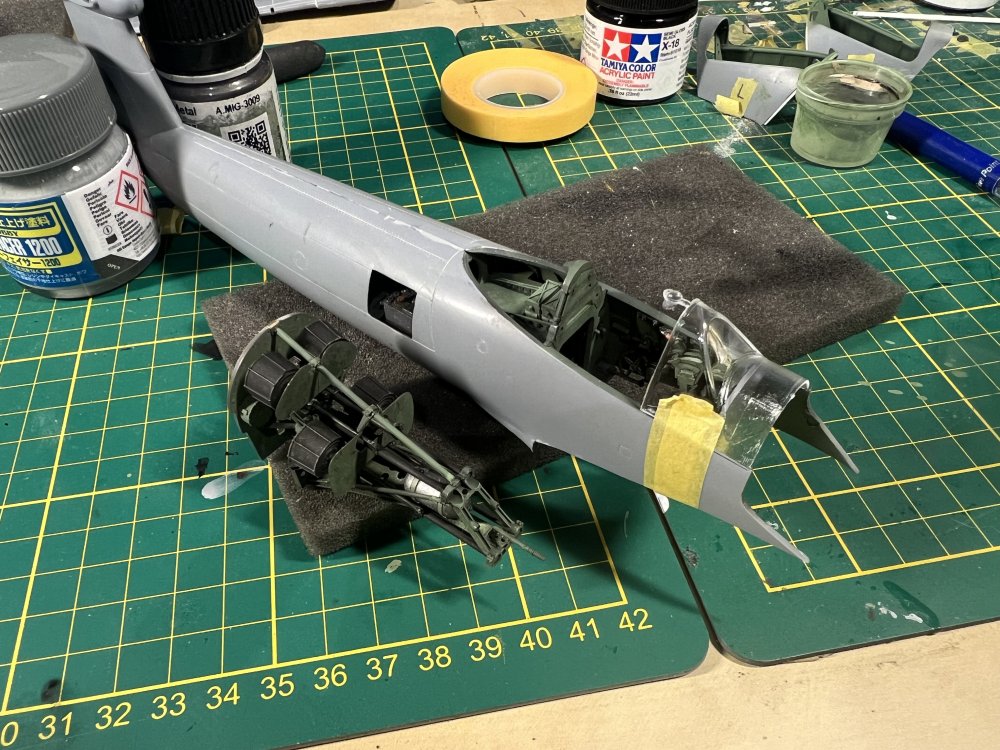
-
1/32 Westland Whirlwind
JeroenPeters replied to JeroenPeters's topic in LSM 1/35 and Larger Work In Progress
This nose section is intricate, delicate, tight fitting and precise. Just came from the cinema and sushi with one wine too many. Not a good idea to proceed.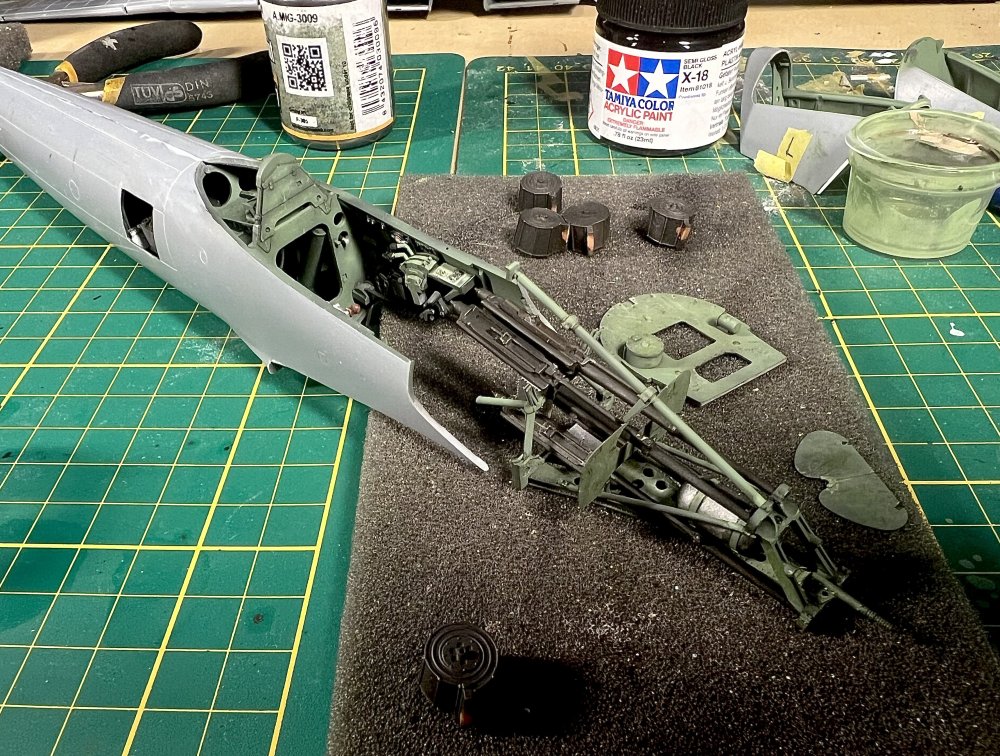
-
1/32 Westland Whirlwind
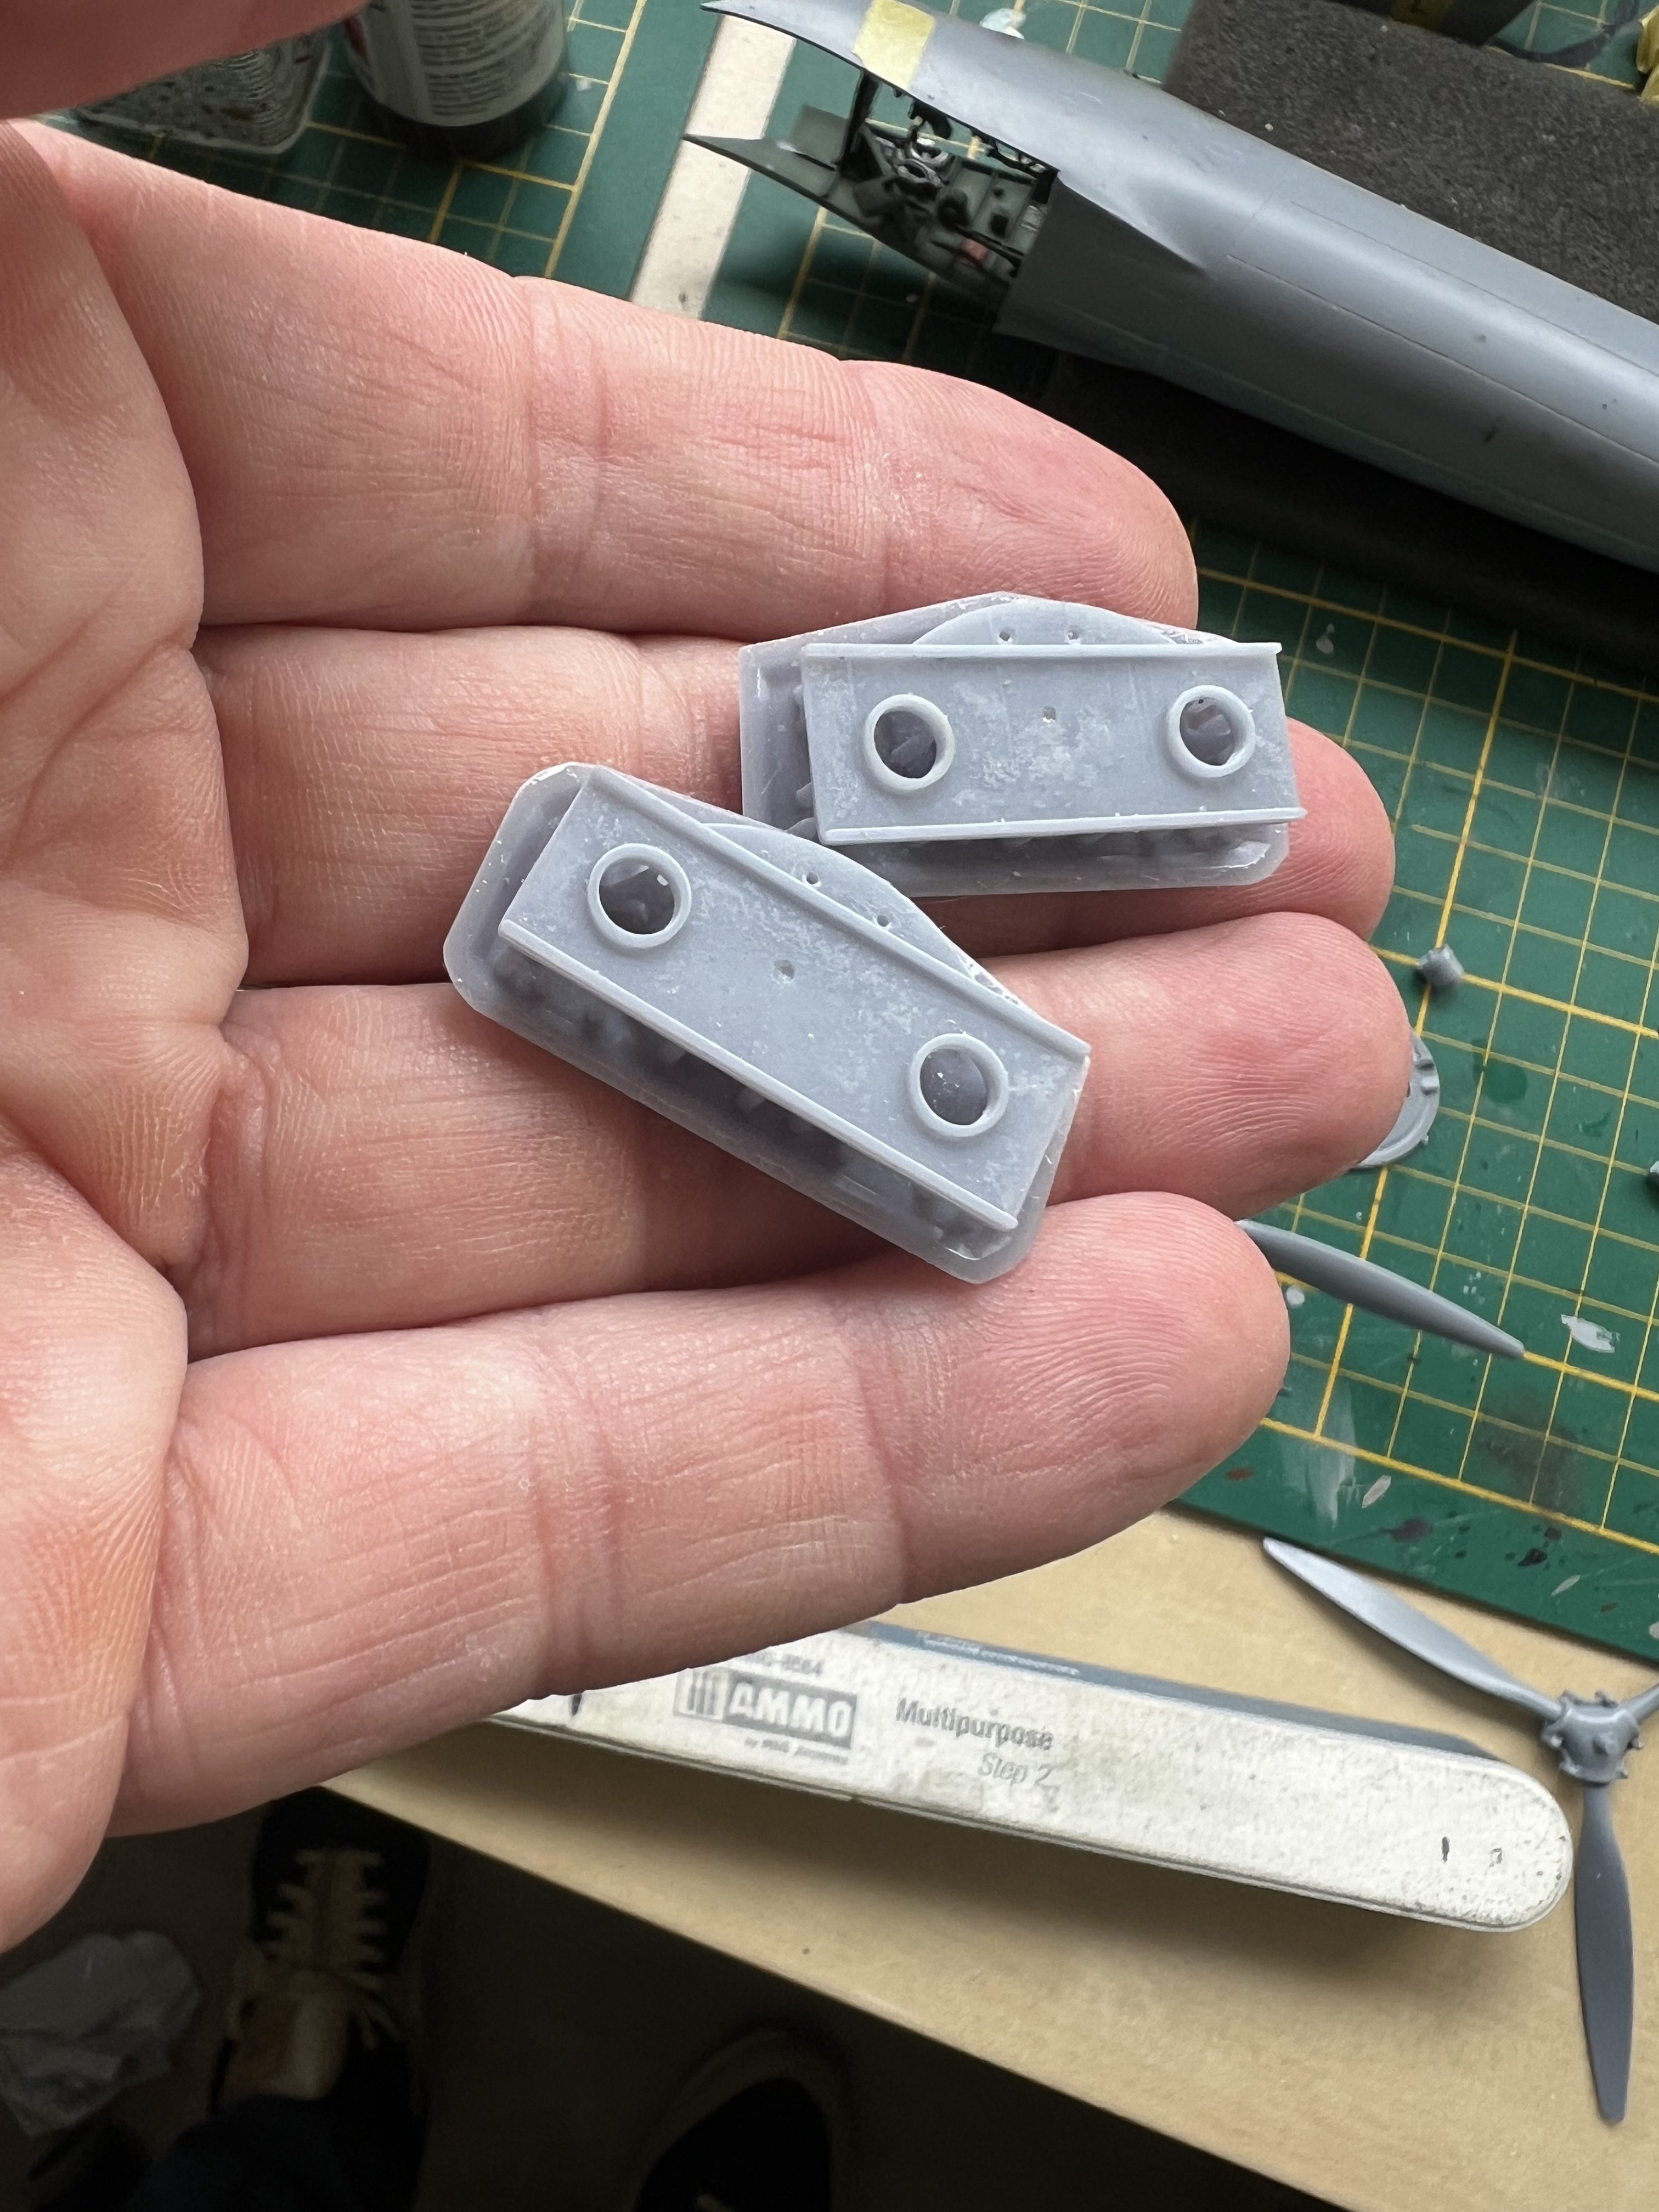
JeroenPeters replied to JeroenPeters's topic in LSM 1/35 and Larger Work In Progress
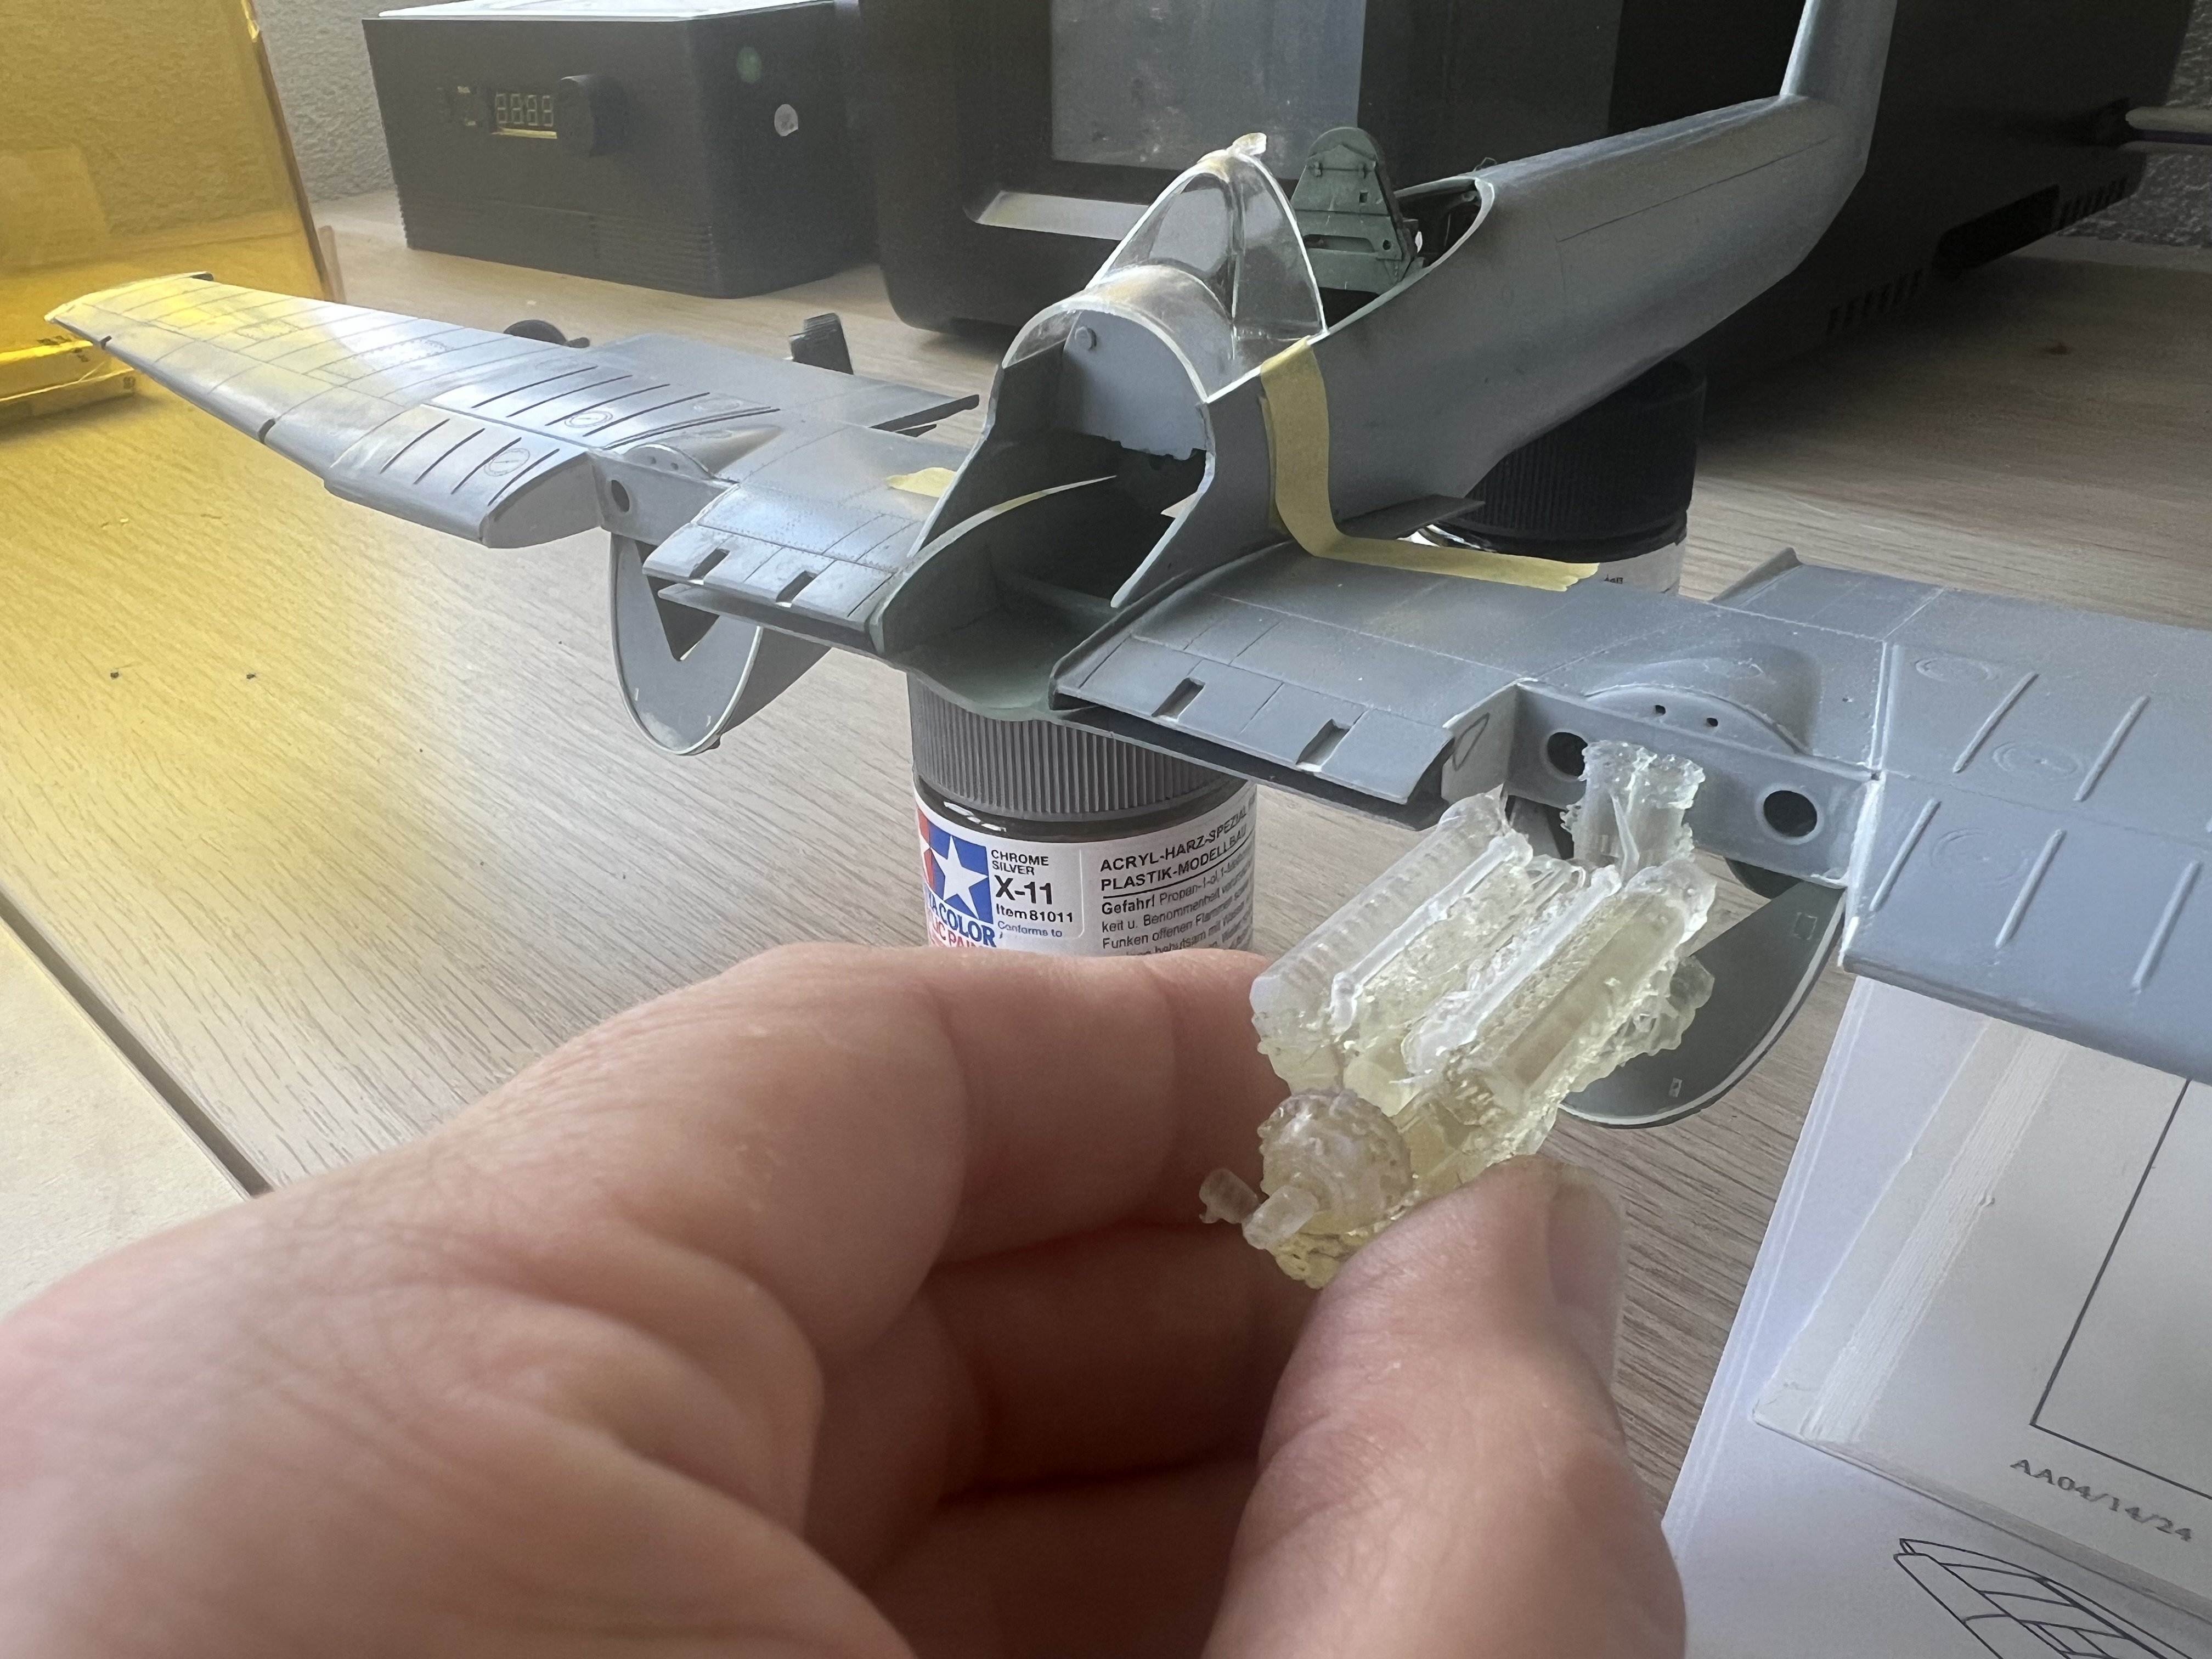
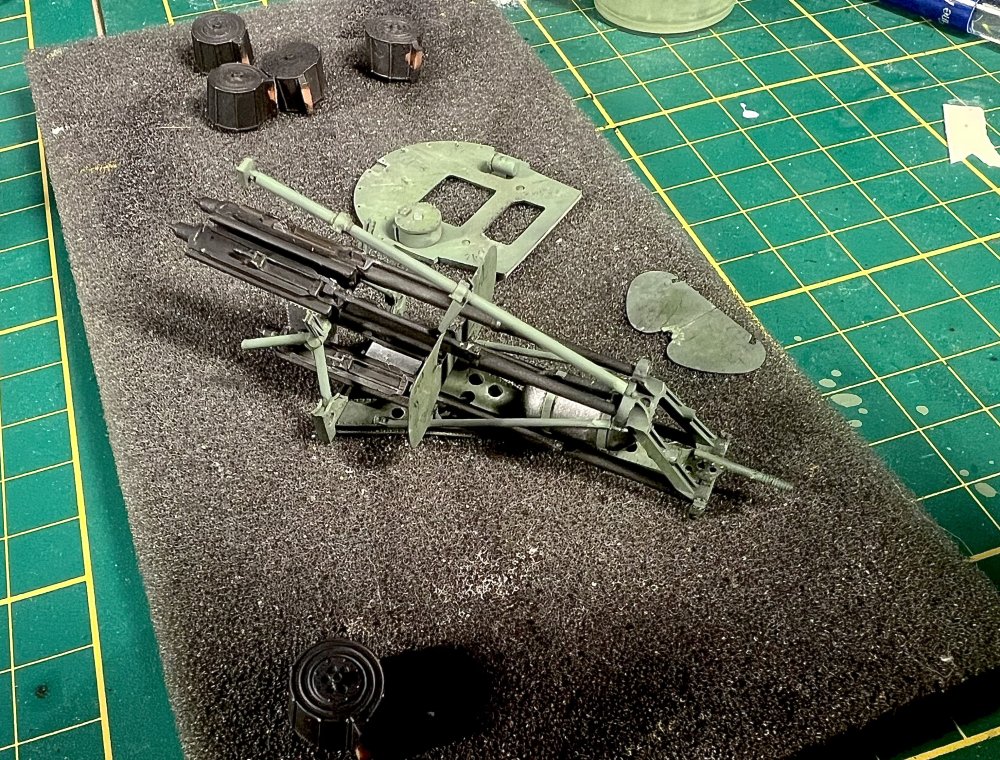
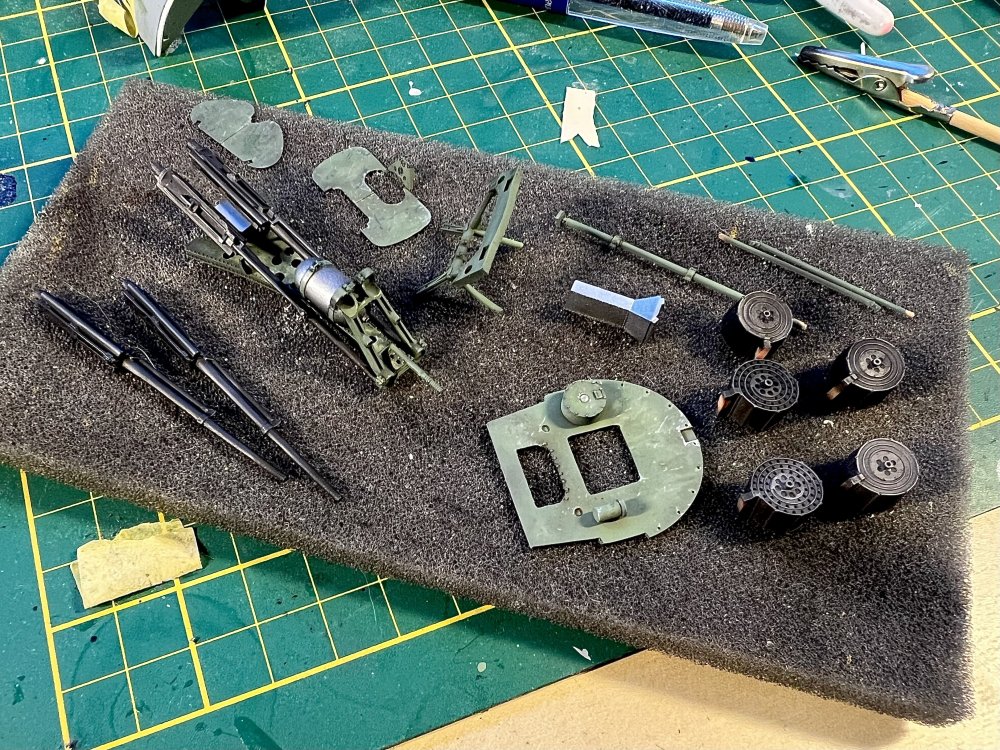
Needed a distraction so i started on guns.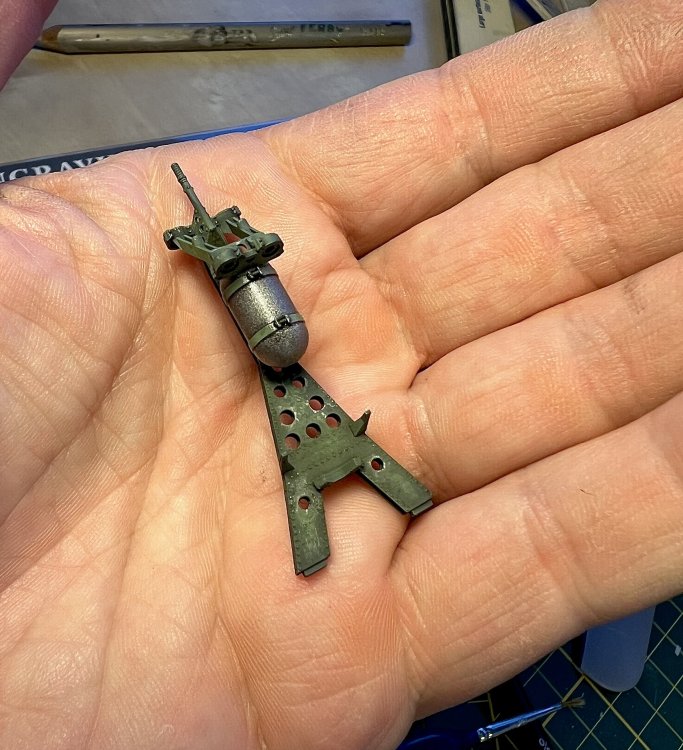
-
1/32 Westland Whirlwind
JeroenPeters replied to JeroenPeters's topic in LSM 1/35 and Larger Work In Progress
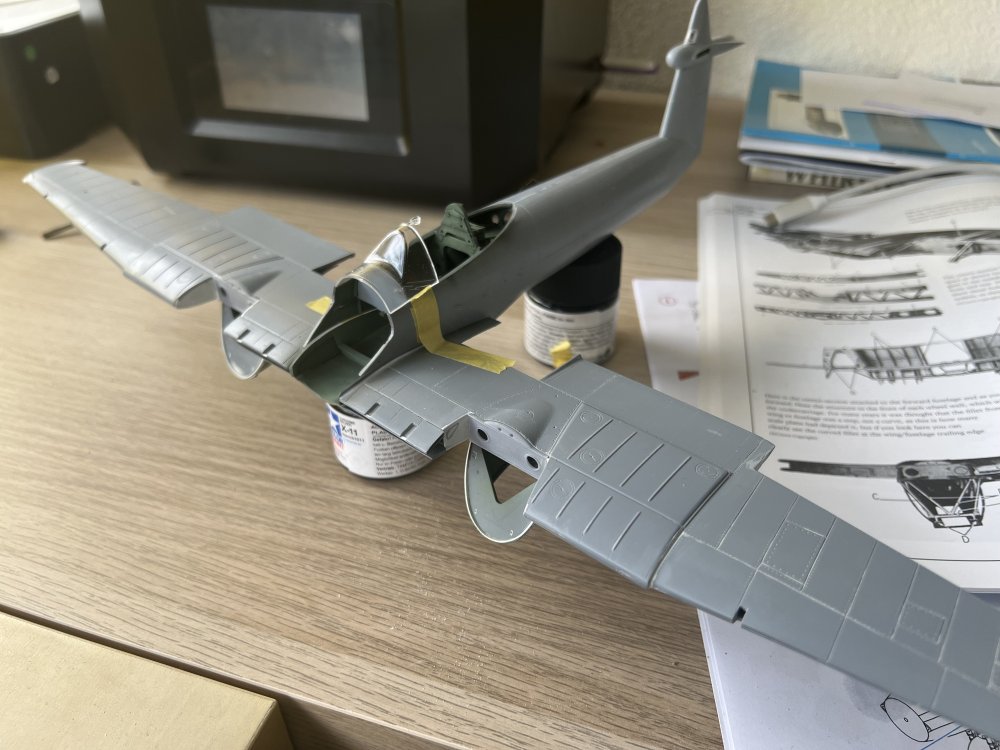
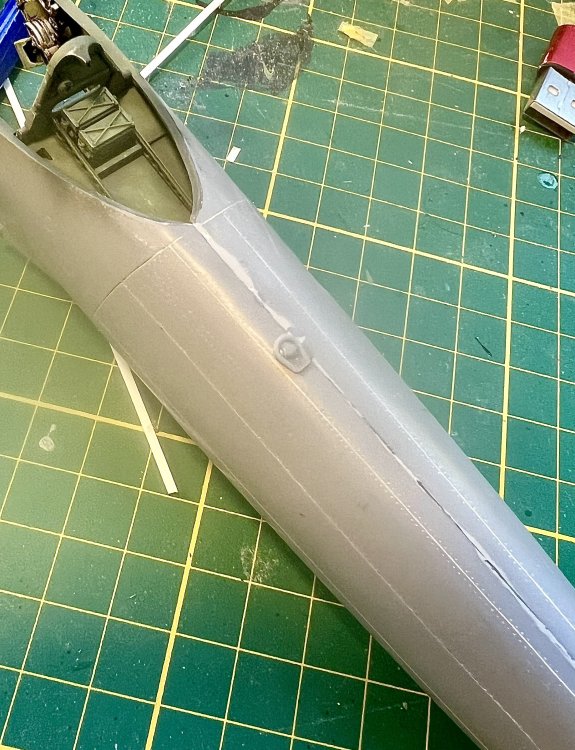
Done. The spine seam is as smooth as a baby’s bottom. Time to reapply some rivets and deepen a few panellines.
- 439 replies
-
- 10
-
-
1/32 Hawker Tempest
JeroenPeters replied to JeroenPeters's topic in LSM 1/35 and Larger Work In Progress
Just got this: WW2 RAF HAWKER TEMPEST A5 SELF ADHESIVE BOOKPLATE BOOKPLATE HAS BEEN SIGNED 9 HAWKER TEMPEST PILOTS RON POTTINGER 3 SQD KEN REEVE 247 SQD KEN KNEEN 41-26 SQDS DEREK TAPSON 197 SQD JOHN BYRNE 197 SQD JOHN THORBURN 80 SQD JACK HODGES 174 SQD DAVID INCE 193-257 SQDS FRANK WHEELER 174 SQD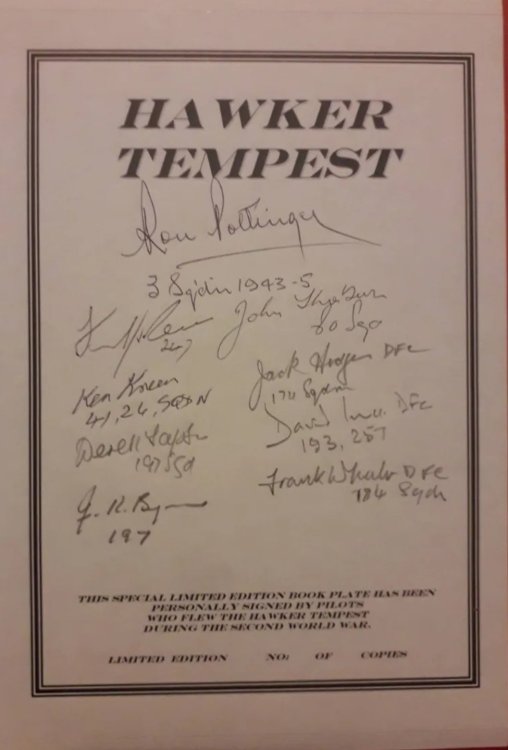
-
1/32 Hawker Tempest
JeroenPeters replied to JeroenPeters's topic in LSM 1/35 and Larger Work In Progress
At the moment still collecting books, reference and some more upgrades. Thnx! -
1/32 Westland Whirlwind
JeroenPeters replied to JeroenPeters's topic in LSM 1/35 and Larger Work In Progress
This will do.
-
1/32 Westland Whirlwind
JeroenPeters replied to JeroenPeters's topic in LSM 1/35 and Larger Work In Progress
First sketch of the antenna wire fairing
-
1/32 Westland Whirlwind
JeroenPeters replied to JeroenPeters's topic in LSM 1/35 and Larger Work In Progress
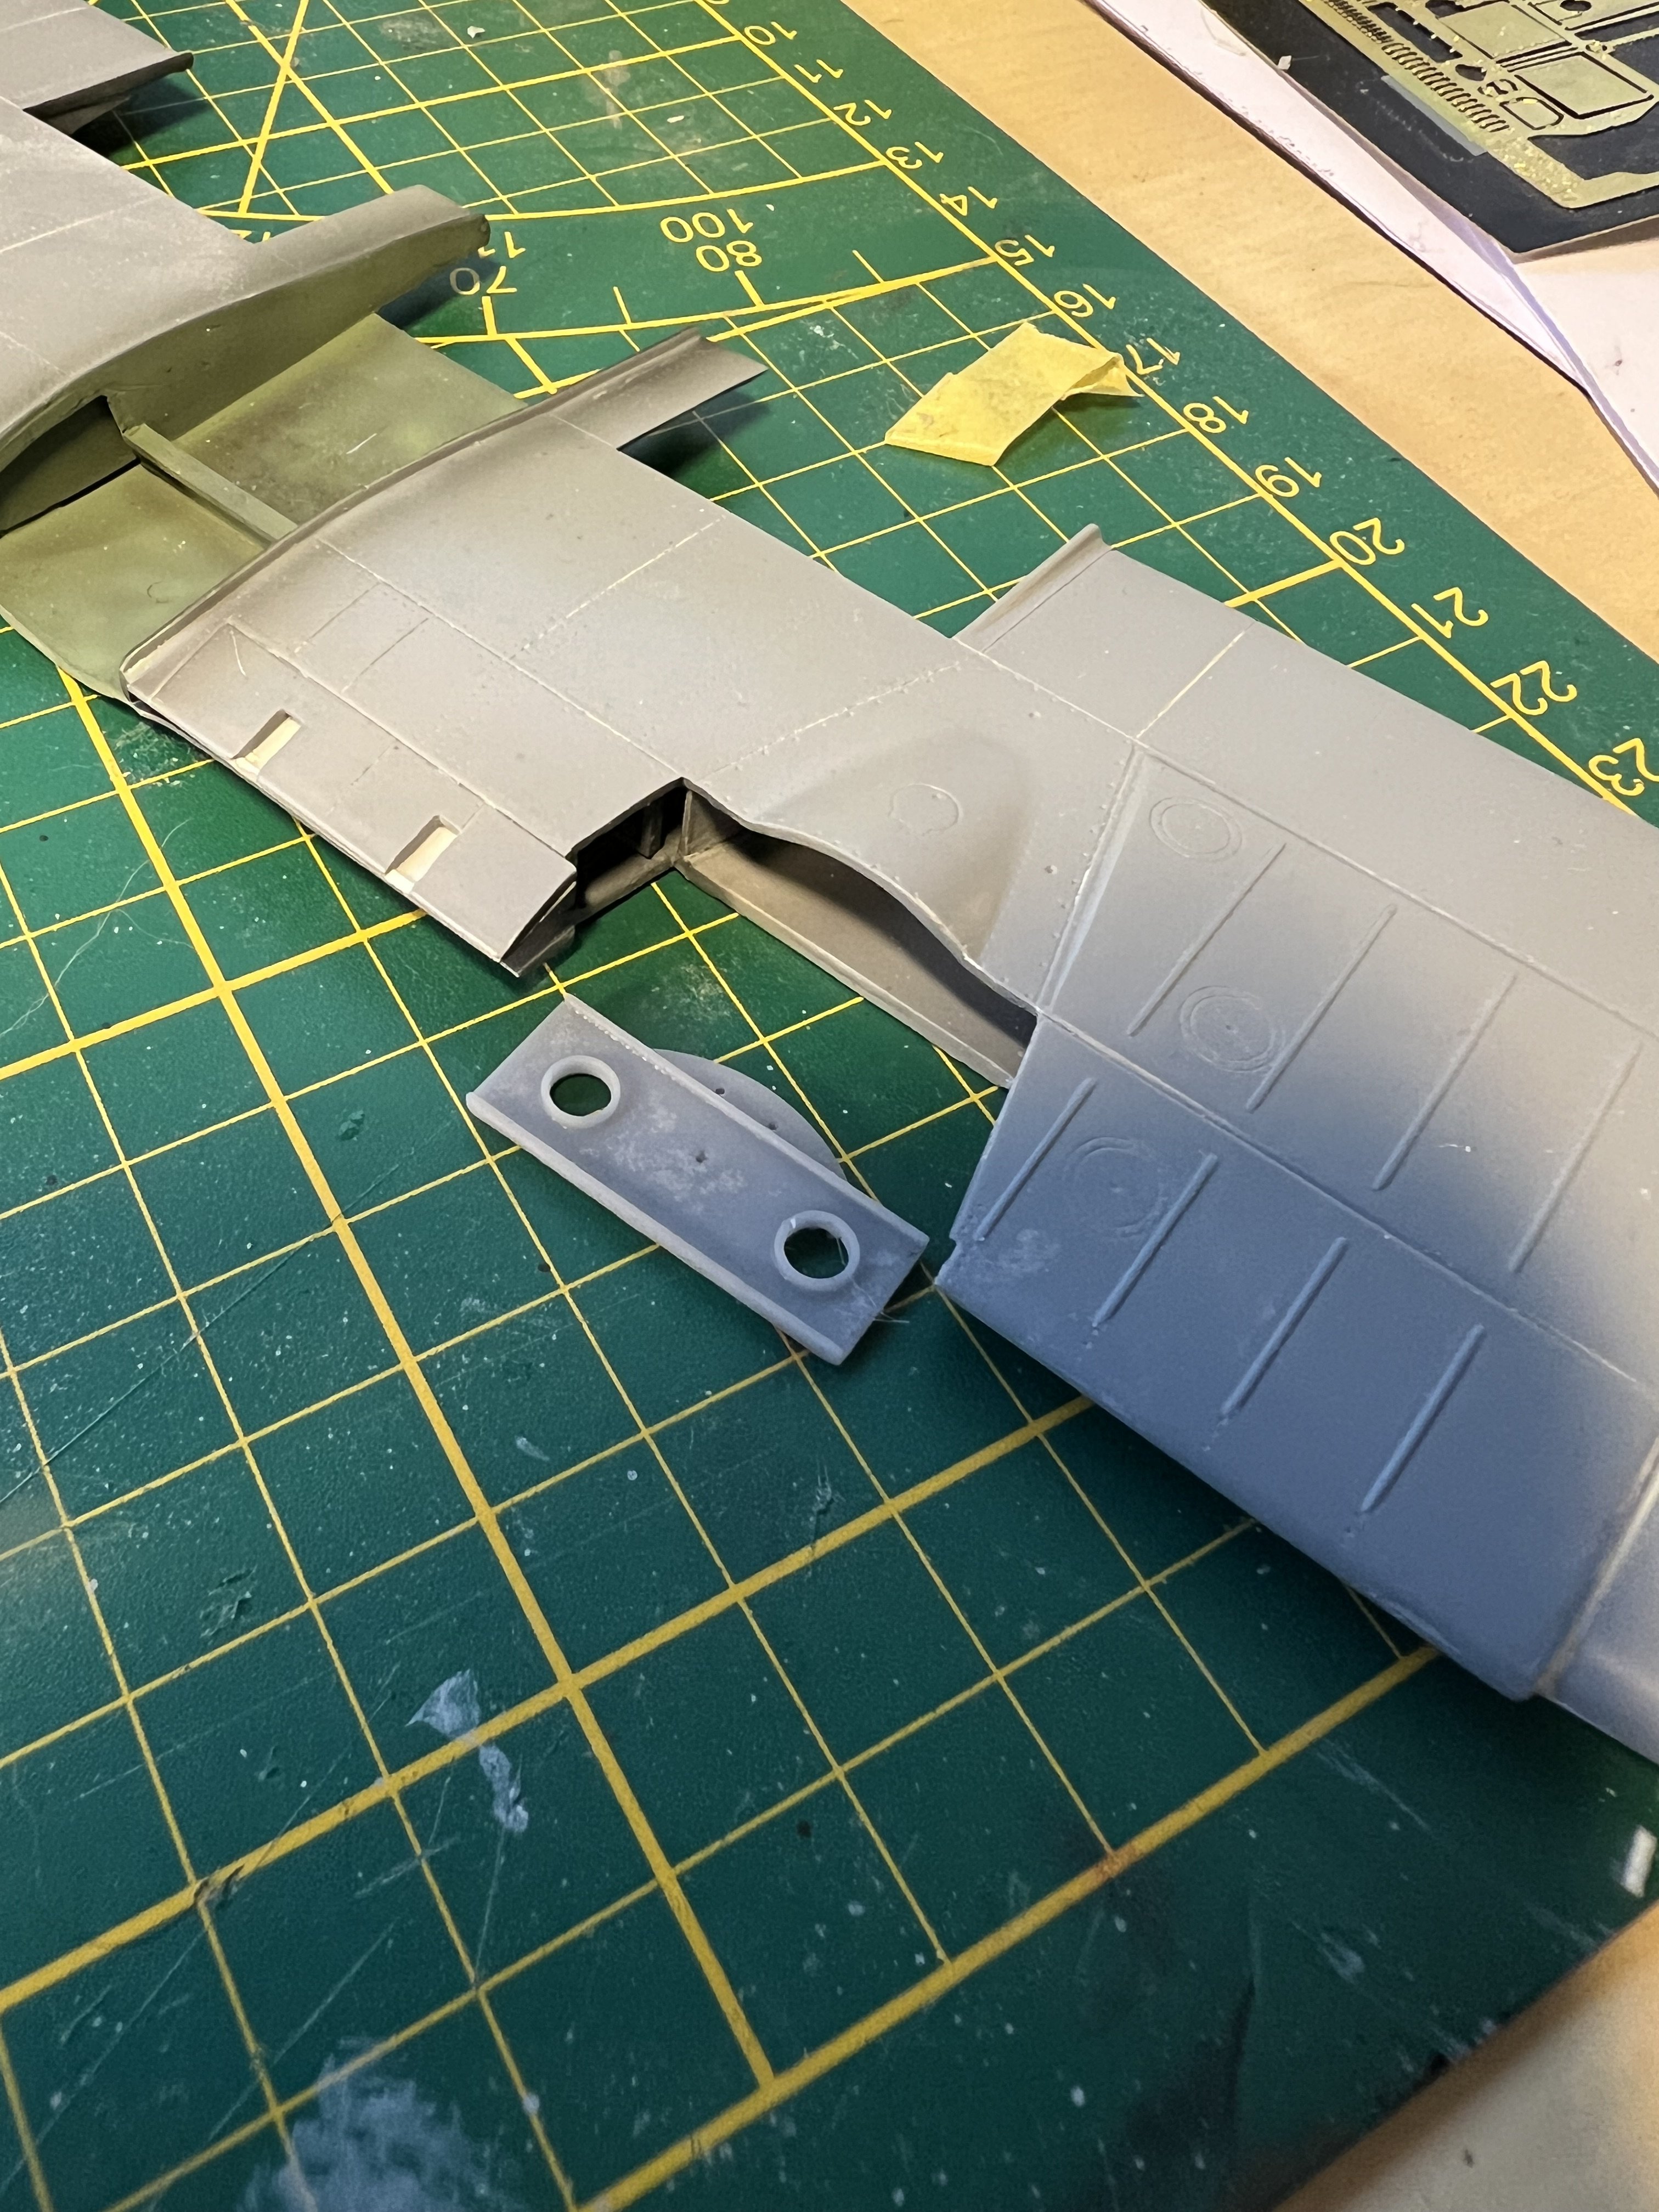
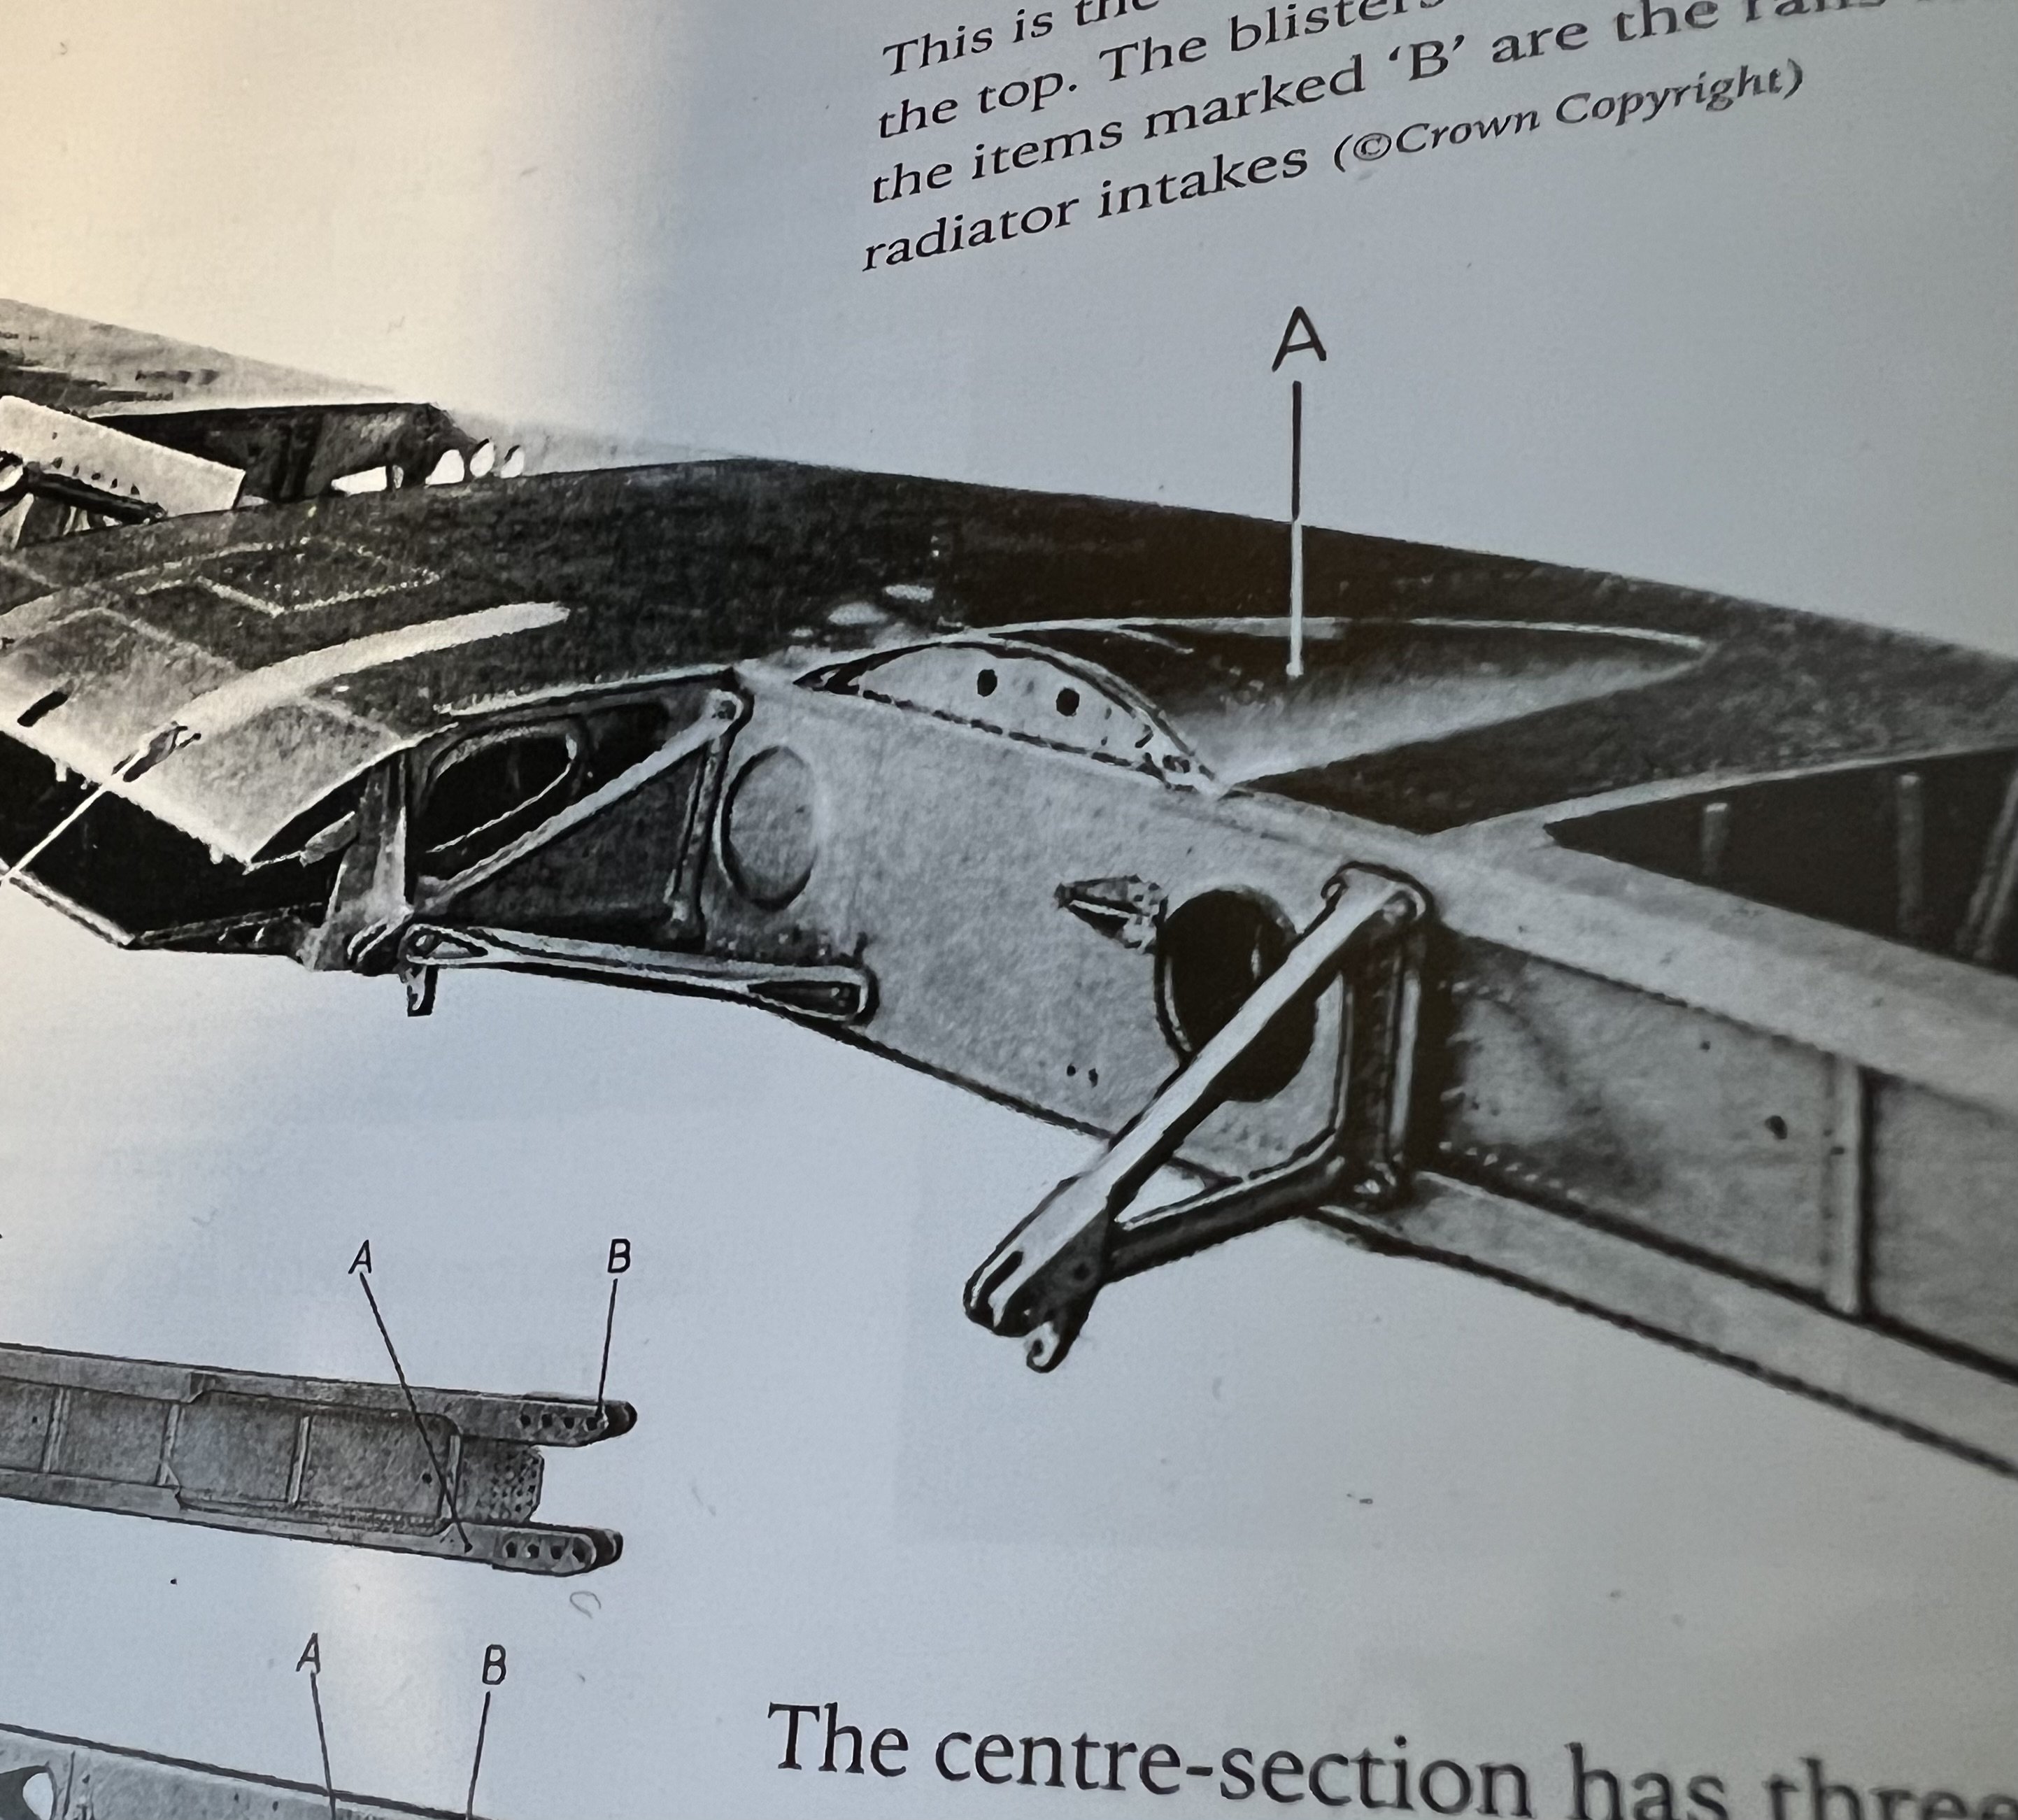
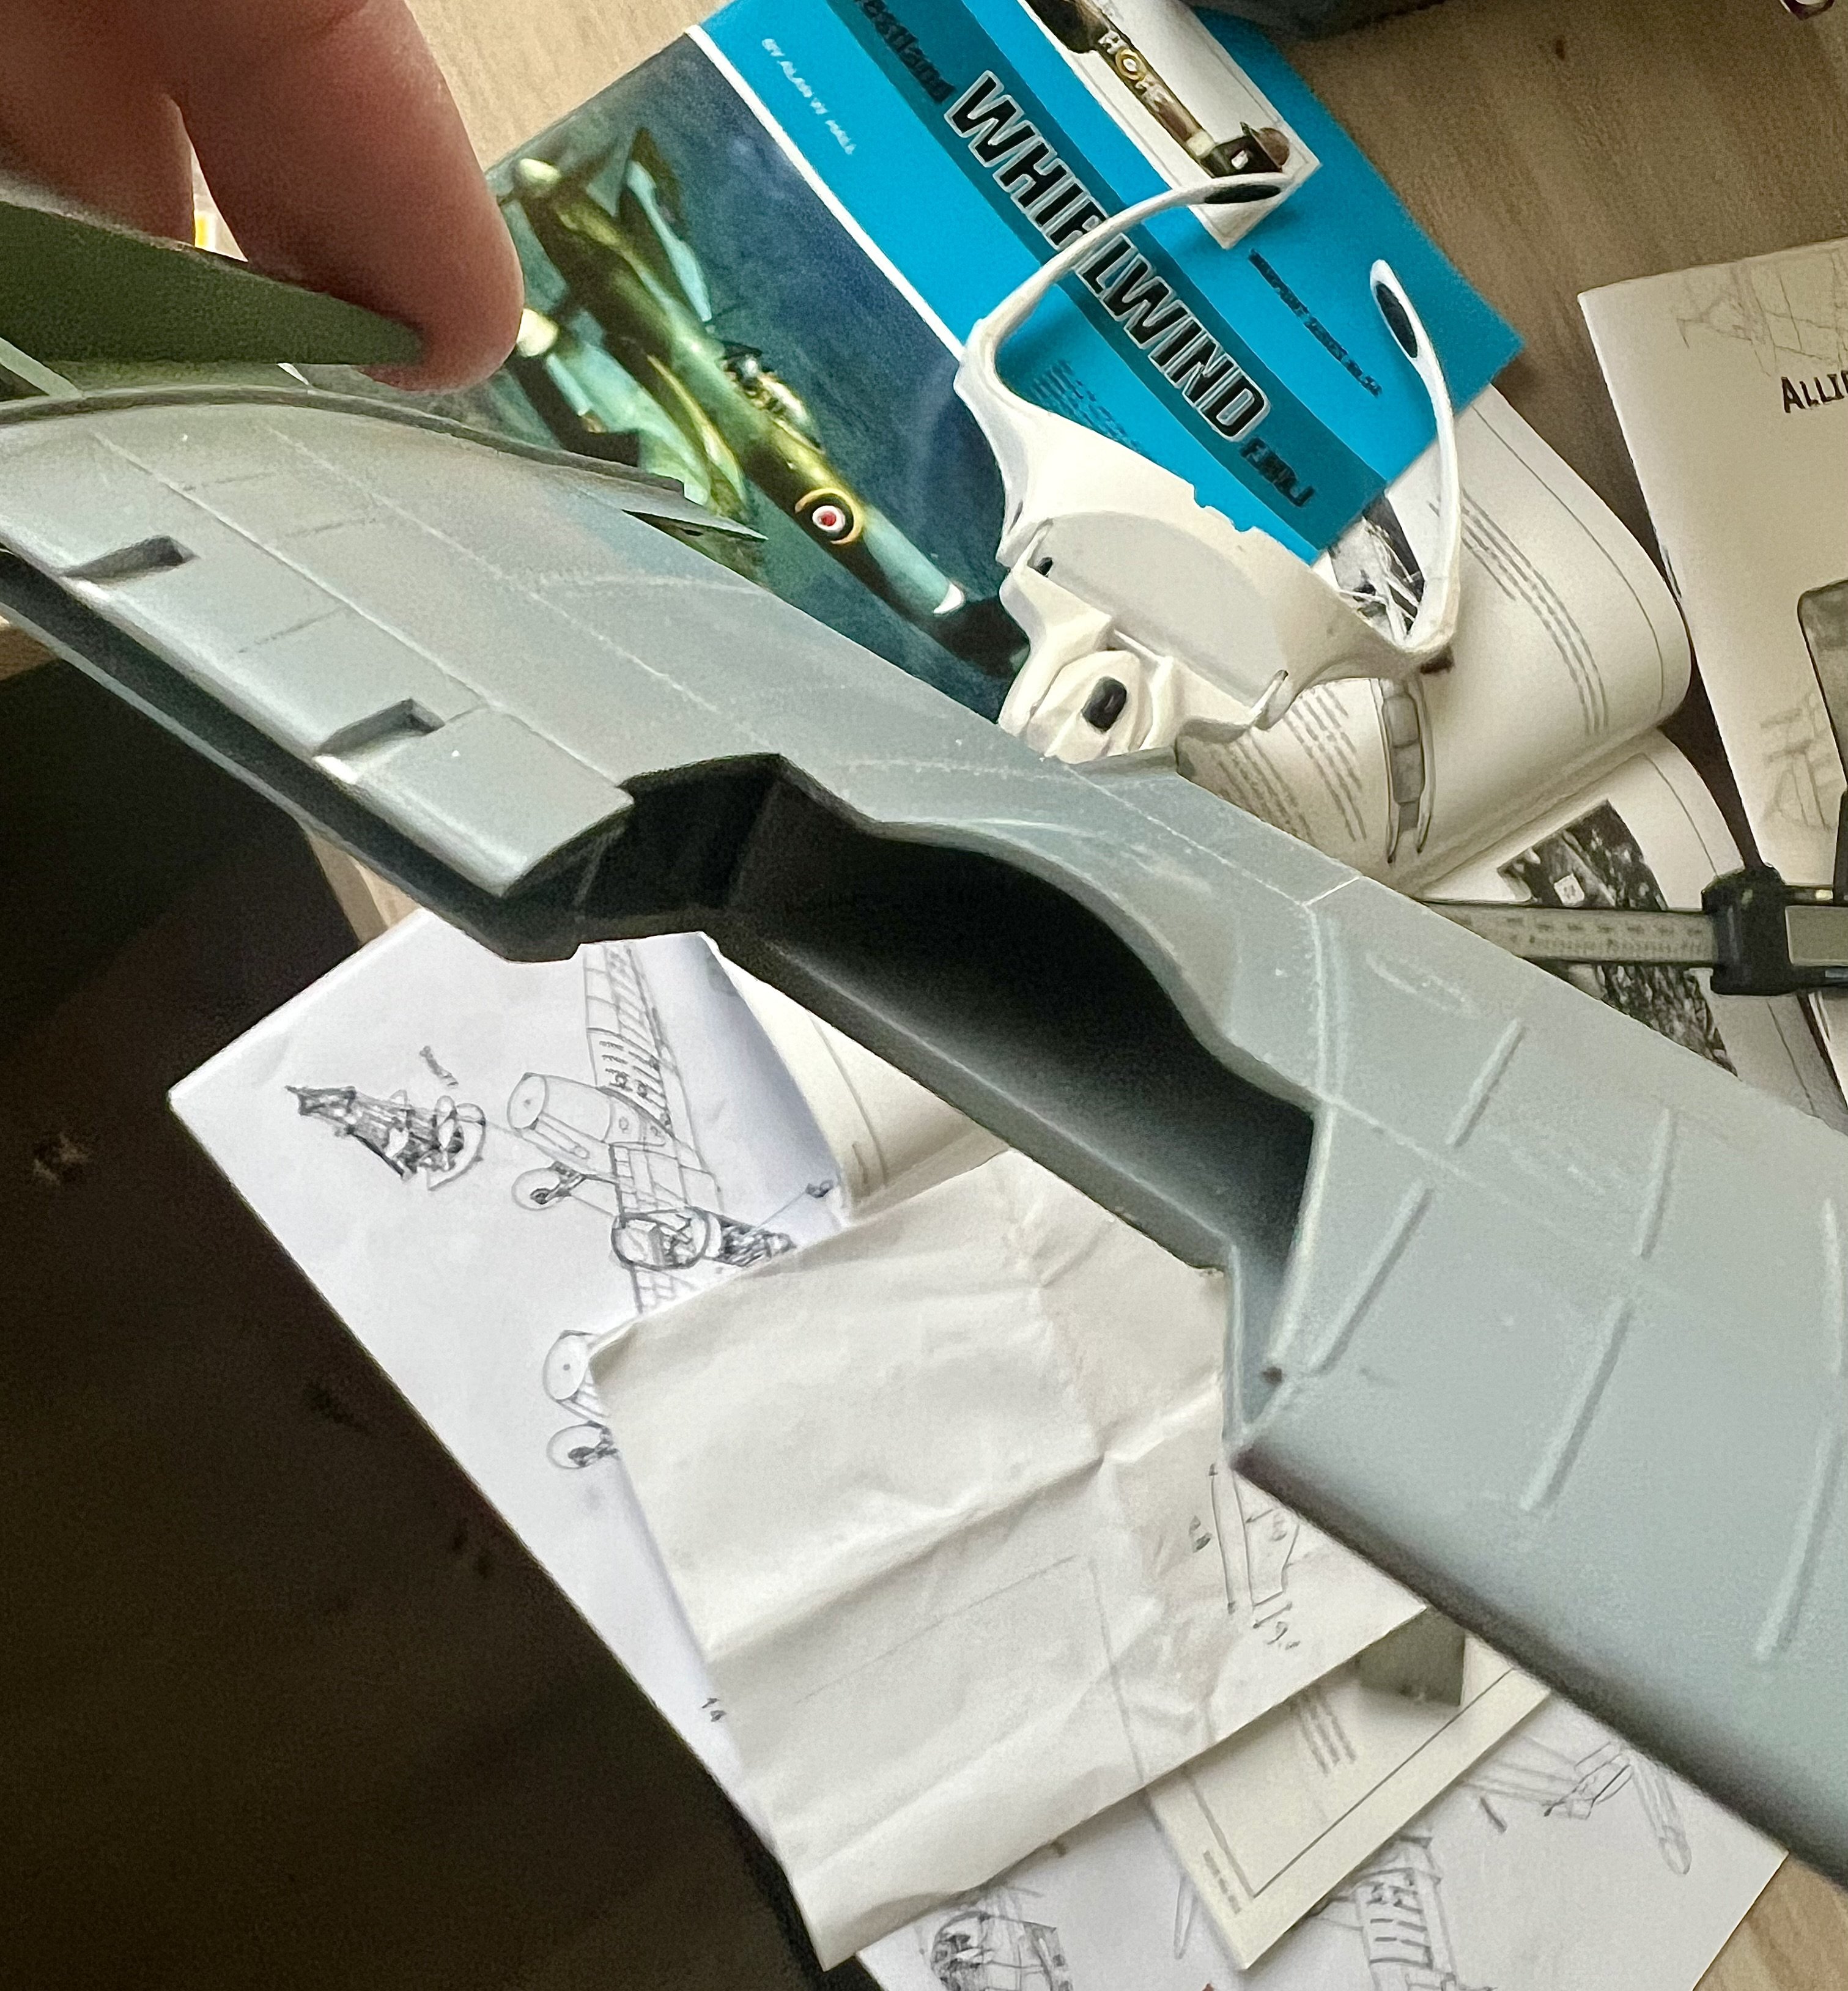
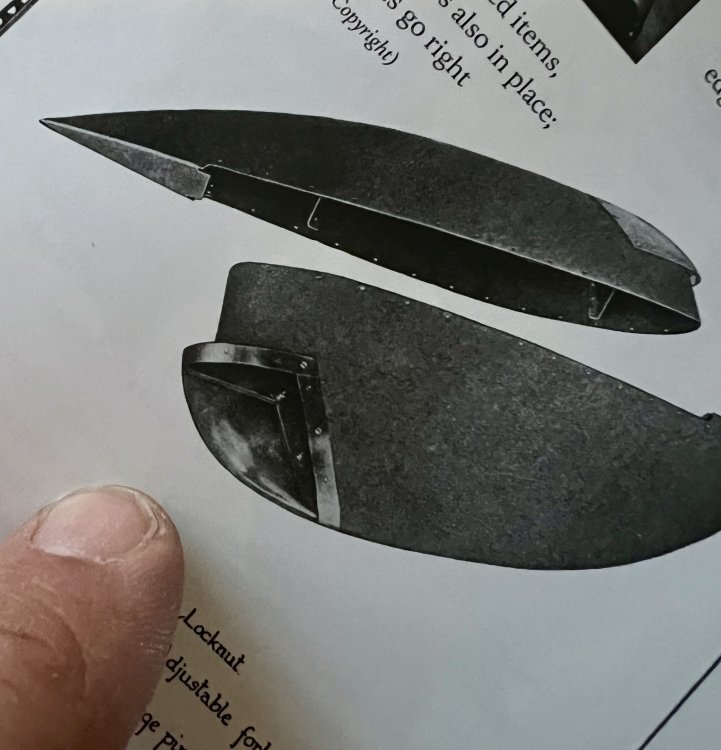
Question for Gunnar. The teardrop inlet for the radio wore that goes to the TR9D radio on the model is wrong so i deleted it. First of all it should be offset to the port side so it would fit between two stringers. And the shape is off. Looking at pics it has a flat rear and seems to have a flange. A lower inset. If that makes sense. Do you have a proper drawing or photo?


-
1/32 Westland Whirlwind
JeroenPeters replied to JeroenPeters's topic in LSM 1/35 and Larger Work In Progress
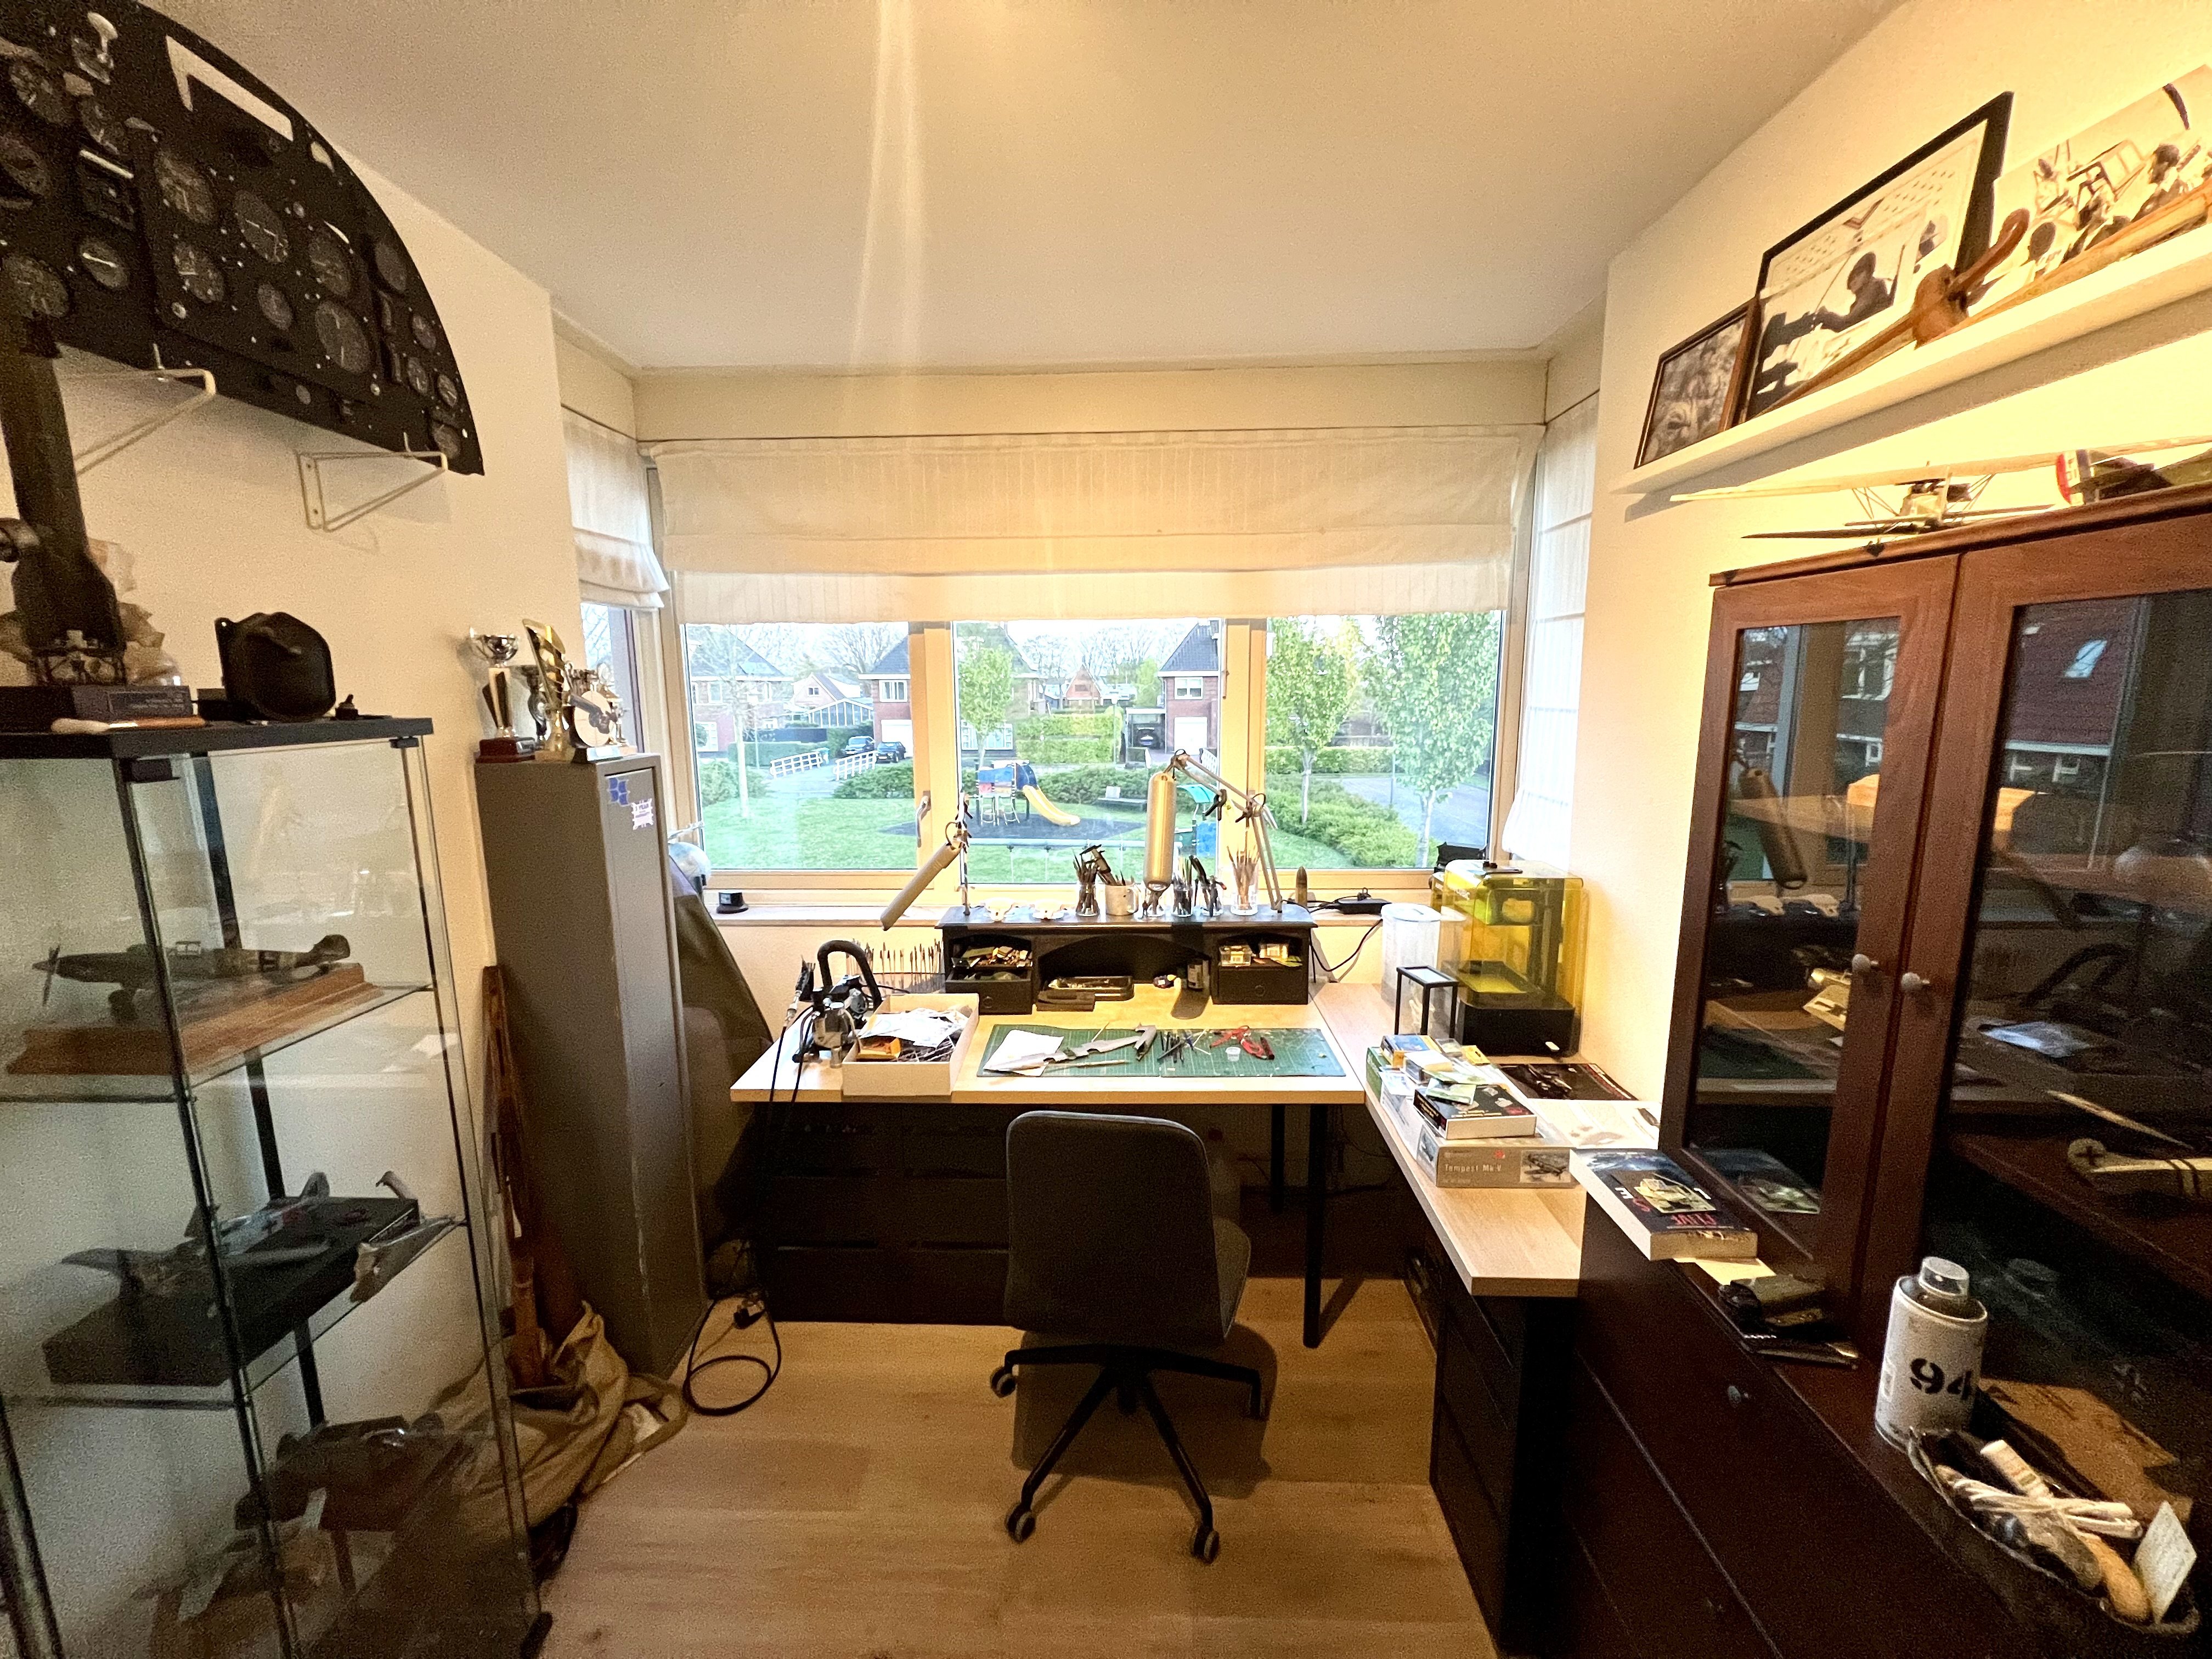
Building the whirlwind next to the tempest required more room. Cees Broere said: get a second desk. So i made a corner desk. If i had the room i’d get a third desk.
- 439 replies
-
- 10
-
-
-
1/32 Westland Whirlwind
JeroenPeters replied to JeroenPeters's topic in LSM 1/35 and Larger Work In Progress
Pit as good as done. One thing missing from the Quinta set is the oxy regulator on the right sidewall. I took that of the Kitsworld set.
- 439 replies
-
- 11
-
-
1/32 Westland Whirlwind
JeroenPeters replied to JeroenPeters's topic in LSM 1/35 and Larger Work In Progress
After some matt varnish. Perfect for some additional washes and scratches. Getting close to closing the fuselage.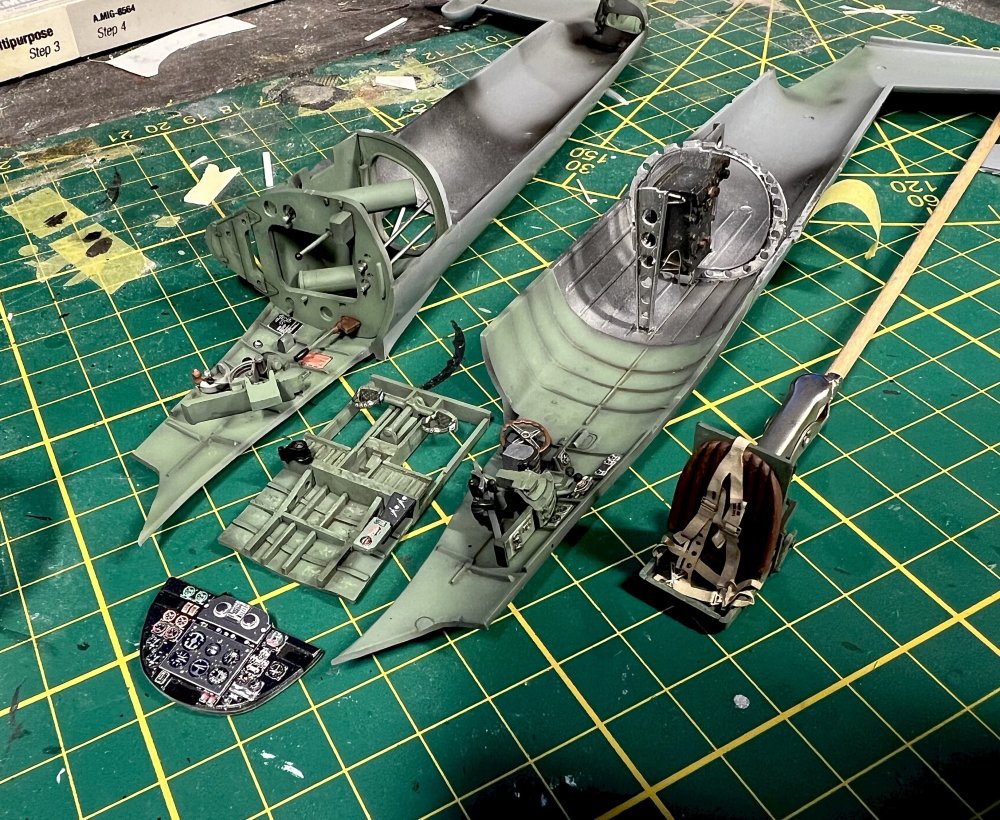
-
1/32 Westland Whirlwind
JeroenPeters replied to JeroenPeters's topic in LSM 1/35 and Larger Work In Progress
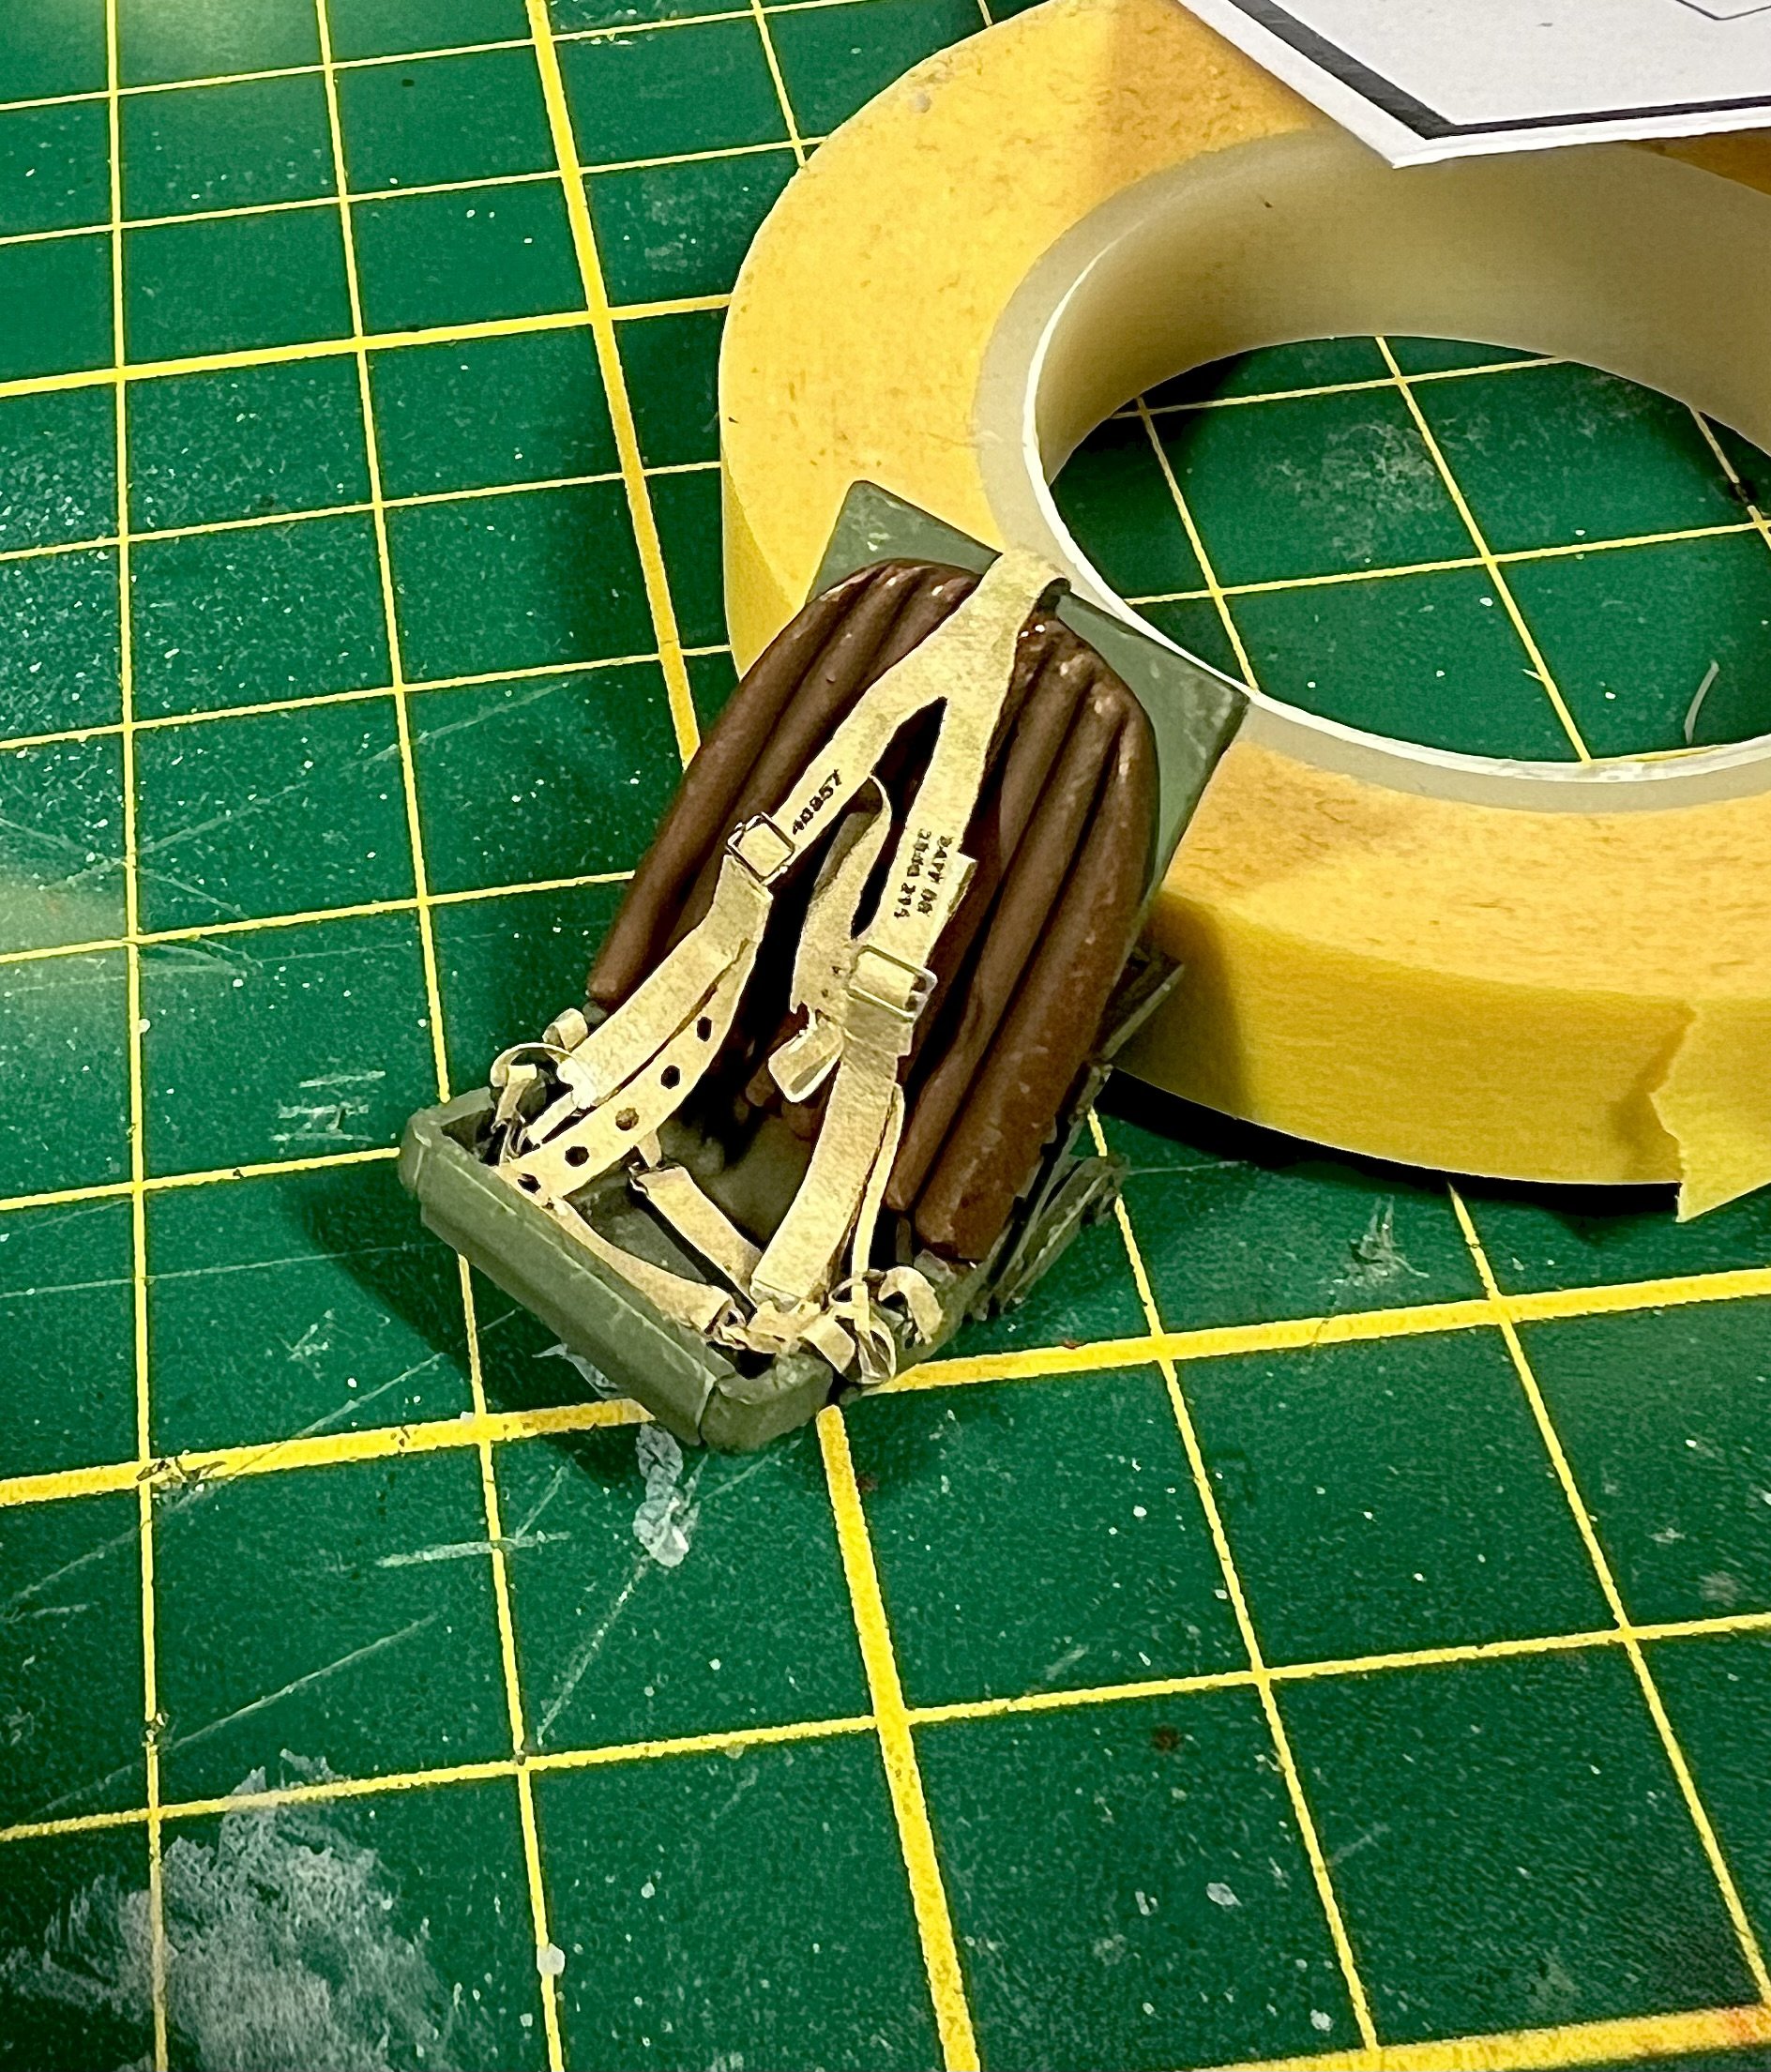
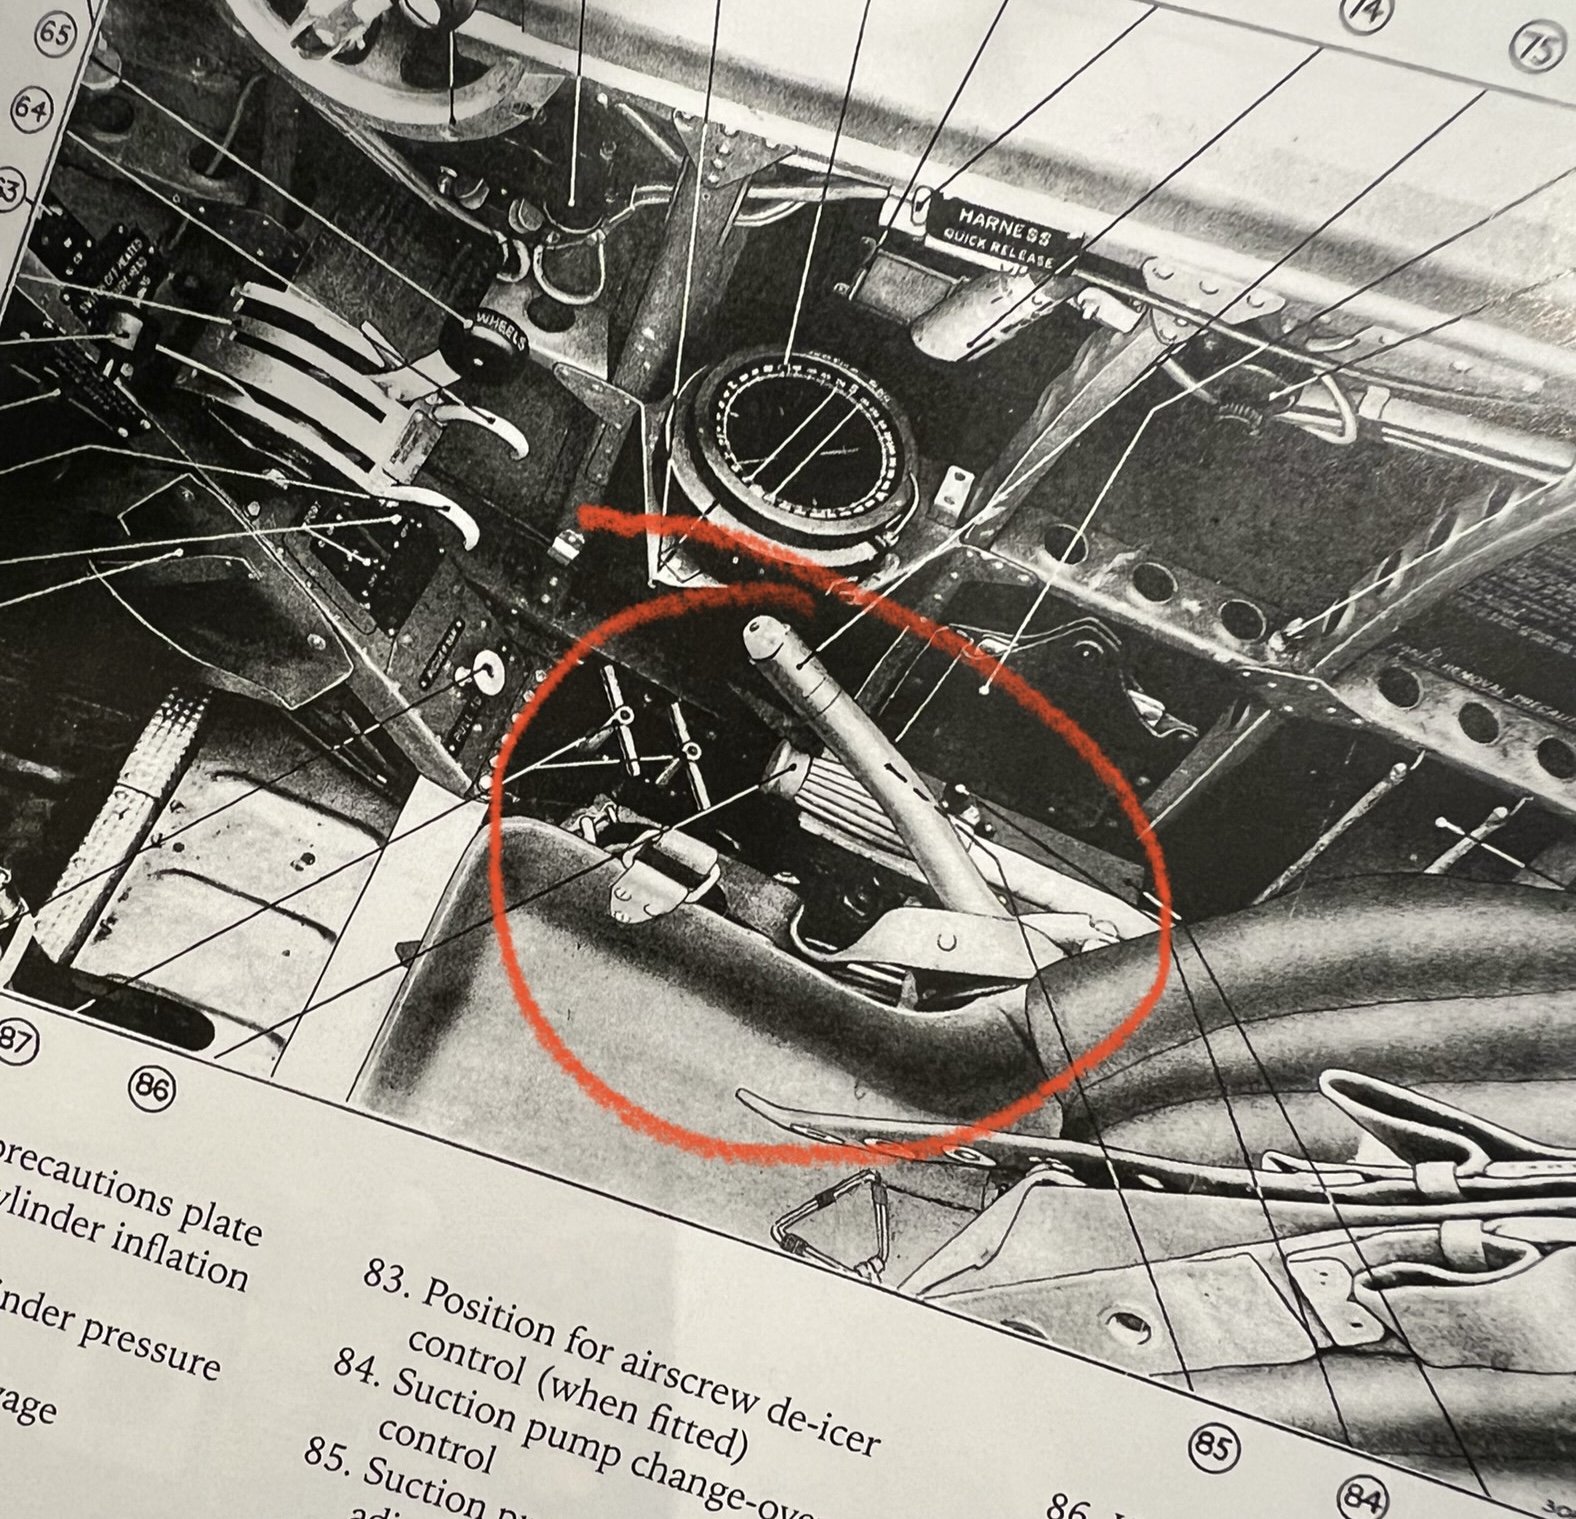
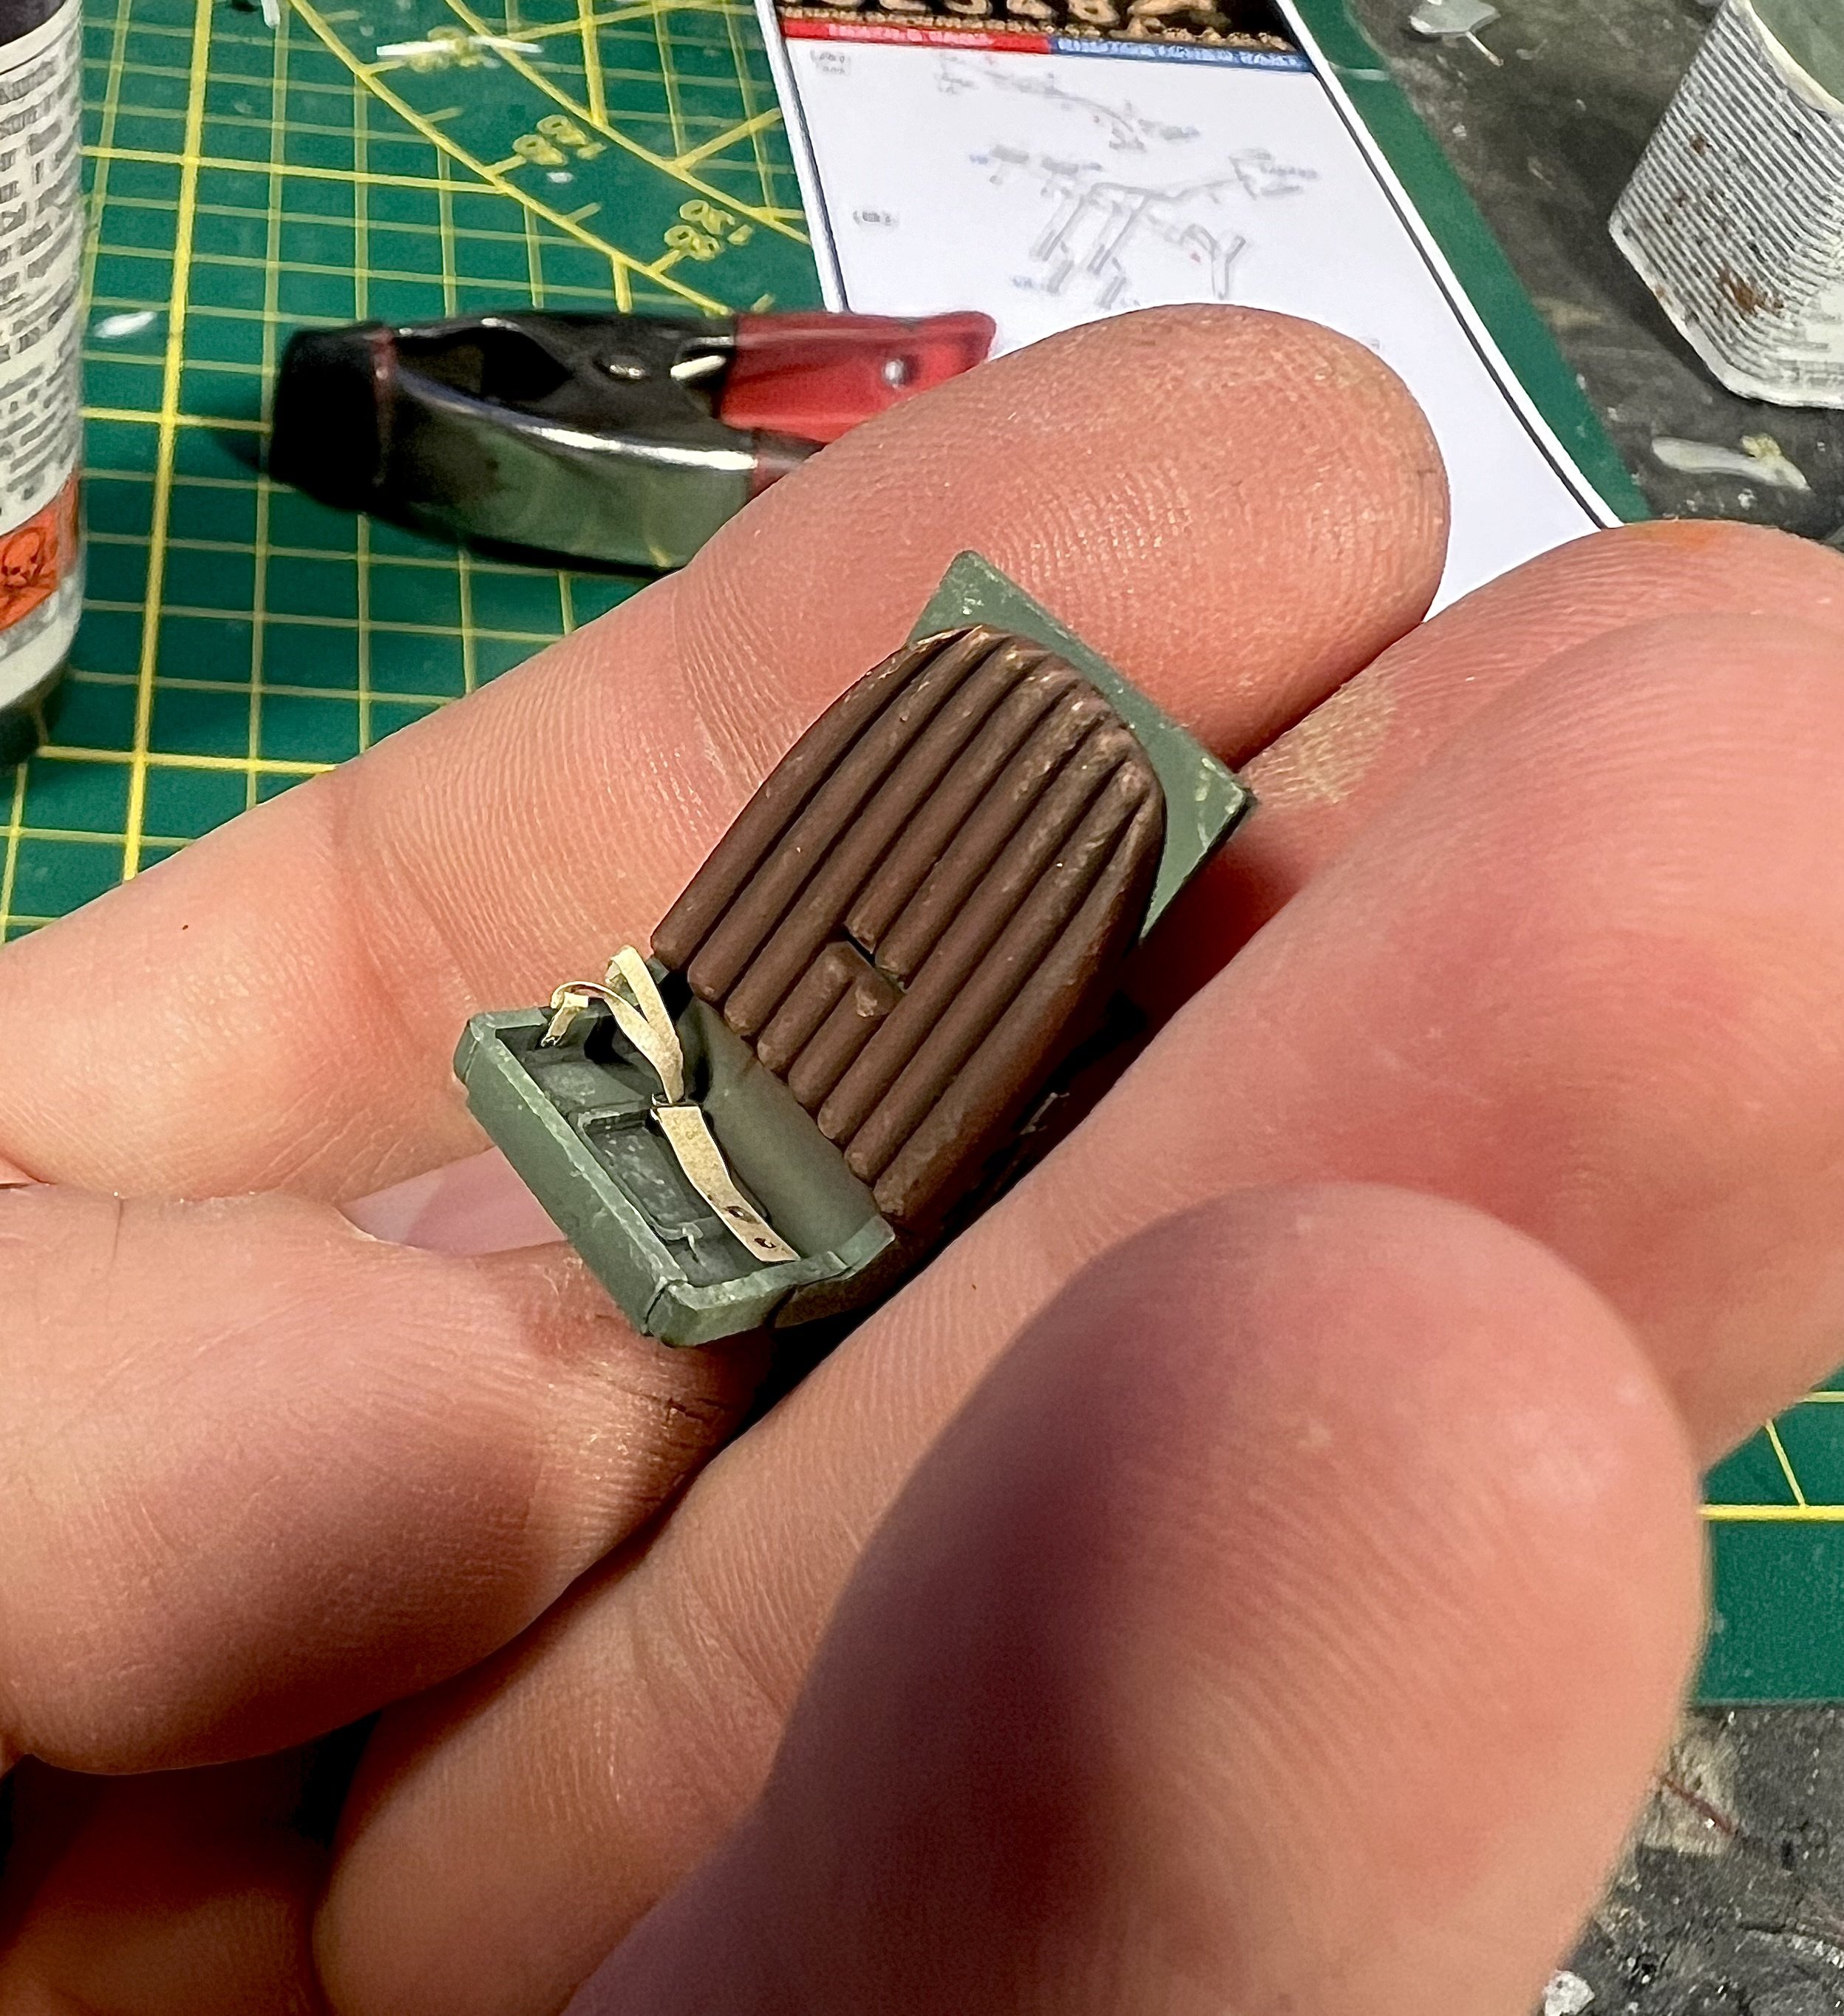
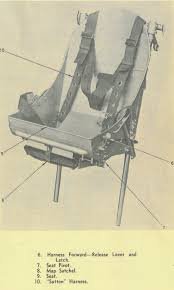
Busy with the HGW harnesses. This usually takes me three evenings. Almost done. Just need to drape and glue the straps into position. And then seal it all in with matt varnish, followed by a wash. The drawing shows an early Sutton harness and how it was attached. No Whirlwind but probably quite similar.
- 439 replies
-
- 10
-
-
1/32 Westland Whirlwind
JeroenPeters replied to JeroenPeters's topic in LSM 1/35 and Larger Work In Progress
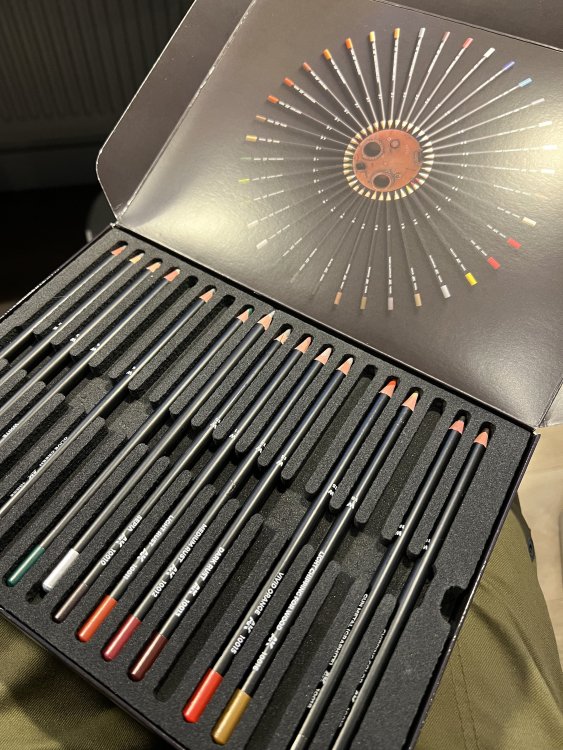
Working on the Seat going by reference material. You can see how the early sutton harness is attached to the seat. I love using the AK weathering pencils to get a worn look. The leather will get some more lighter areas along the edges.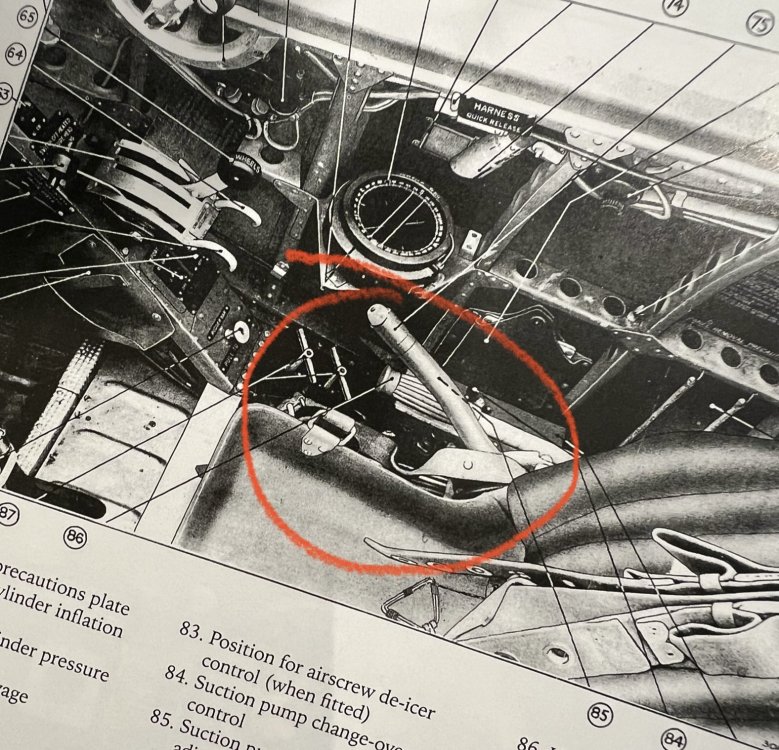

-
1/32 Westland Whirlwind
JeroenPeters replied to JeroenPeters's topic in LSM 1/35 and Larger Work In Progress
Slowly getting there. Next up: HGW seatbelts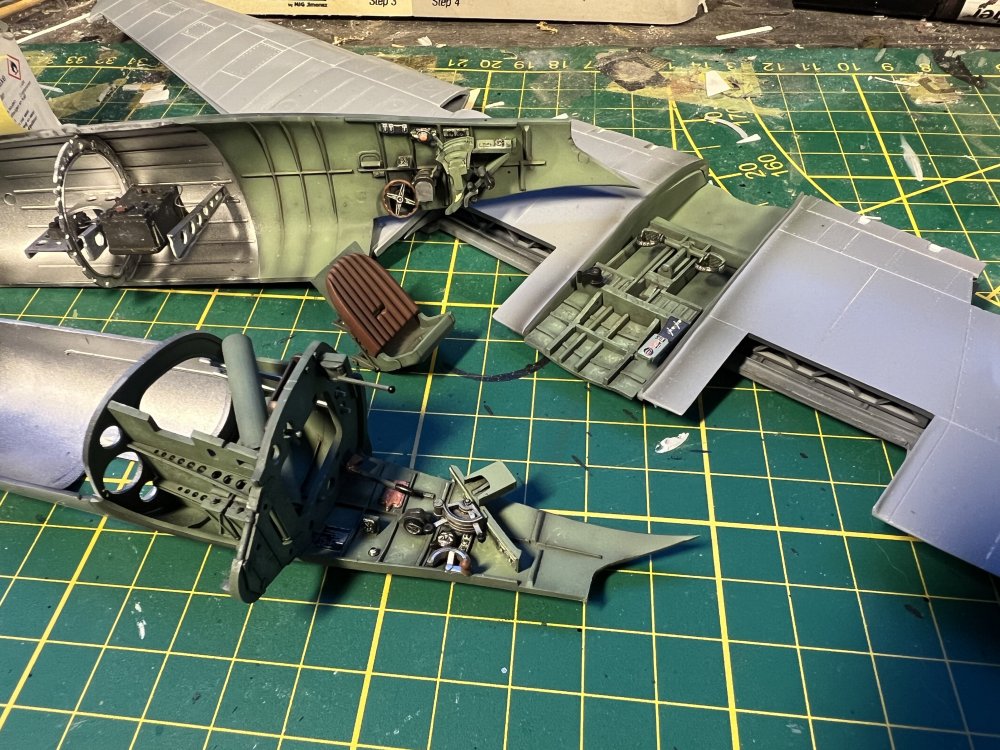
- 439 replies
-
- 11
-