JeroenPeters
-
Posts
4,867 -
Joined
-
Last visited
Content Type
Profiles
Forums
Events
Gallery
Everything posted by JeroenPeters
-
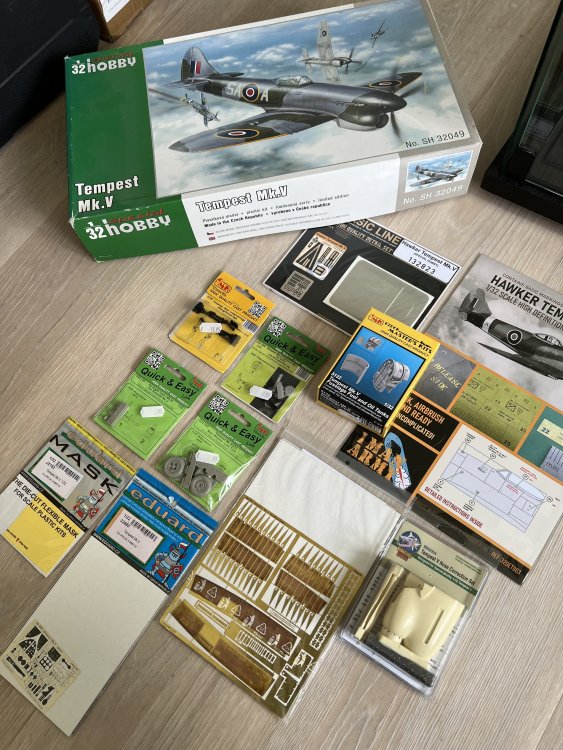
Now that I’m reading into RAF material, I might as well start this kit. Got it from Cees Broere years ago, so that obligates me to build it. Bought the expensive Napier Sabre engine yesterday (95€!) and got a shitload of sets today. Only need to get the gunbays and some other stuff.
- 100 replies
-
- 13
-

-

1/32 Westland Whirlwind
JeroenPeters replied to JeroenPeters's topic in LSM 1/35 and Larger Work In Progress
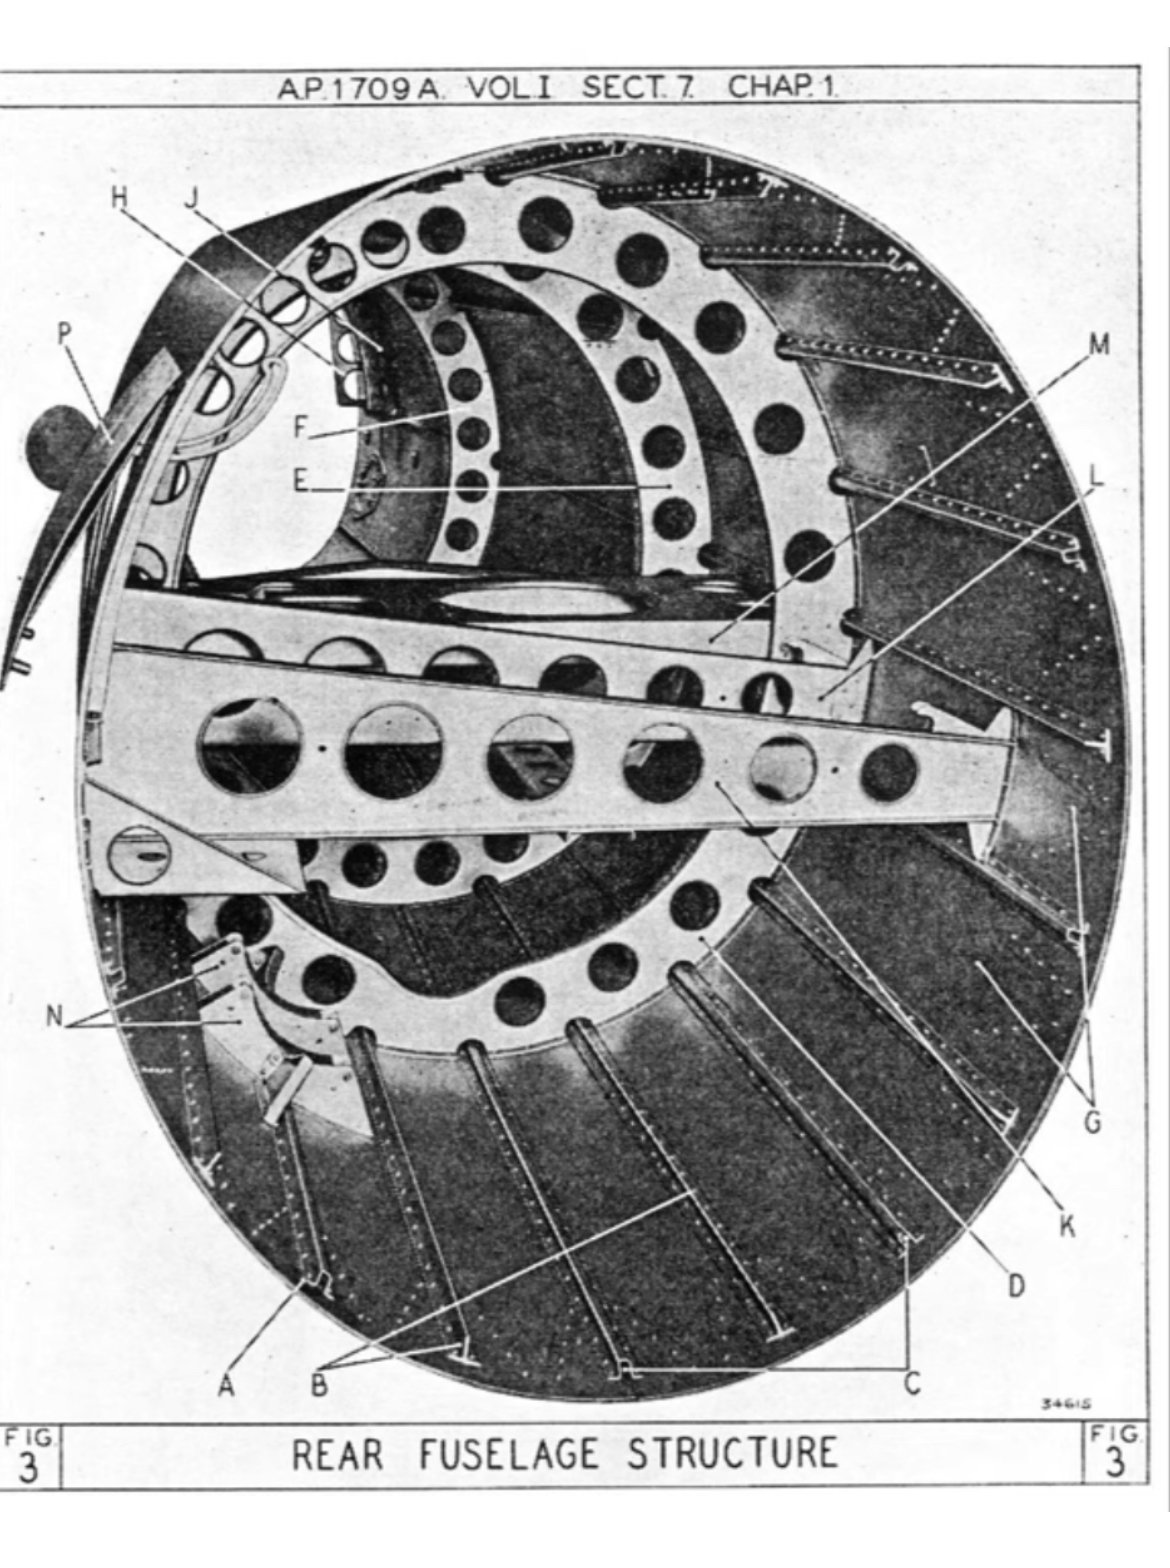
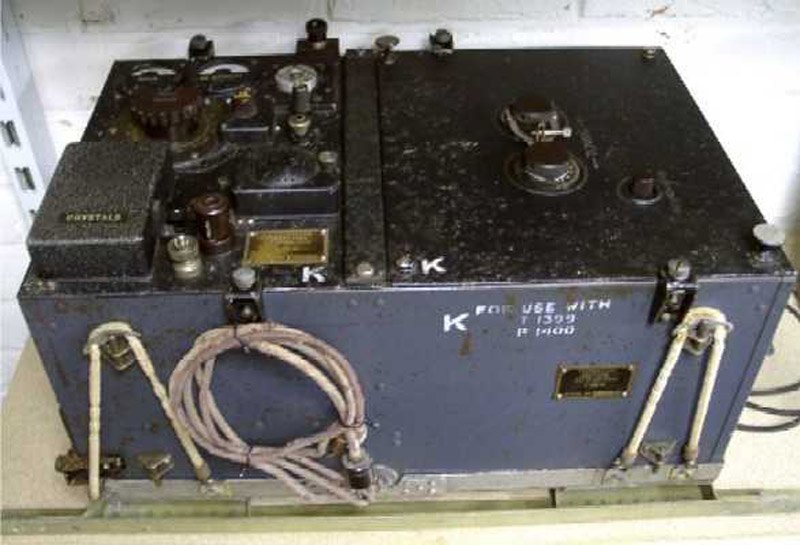
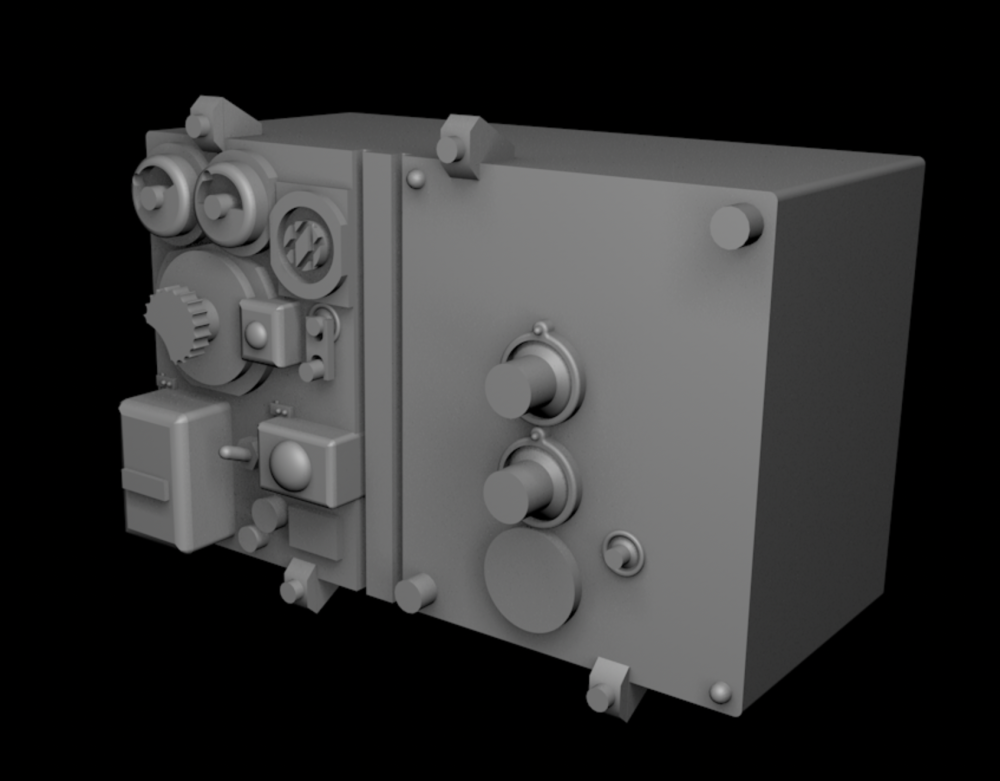
I did some digging and decided to add the radio. A TR9D and a TR300 IFF unit. Might be wrong, but seems legit. The way the radio was placed inside the fuselage looks similar to that of the Spitfire. On two sloping spars, on its back. Here's the Spitfire technical drawing: And here's the Whirlwind: Here's the radio (TR.9K (but similar to the TR.9D)) and the way it was mounted. I think: And here's my first rough 3D draft: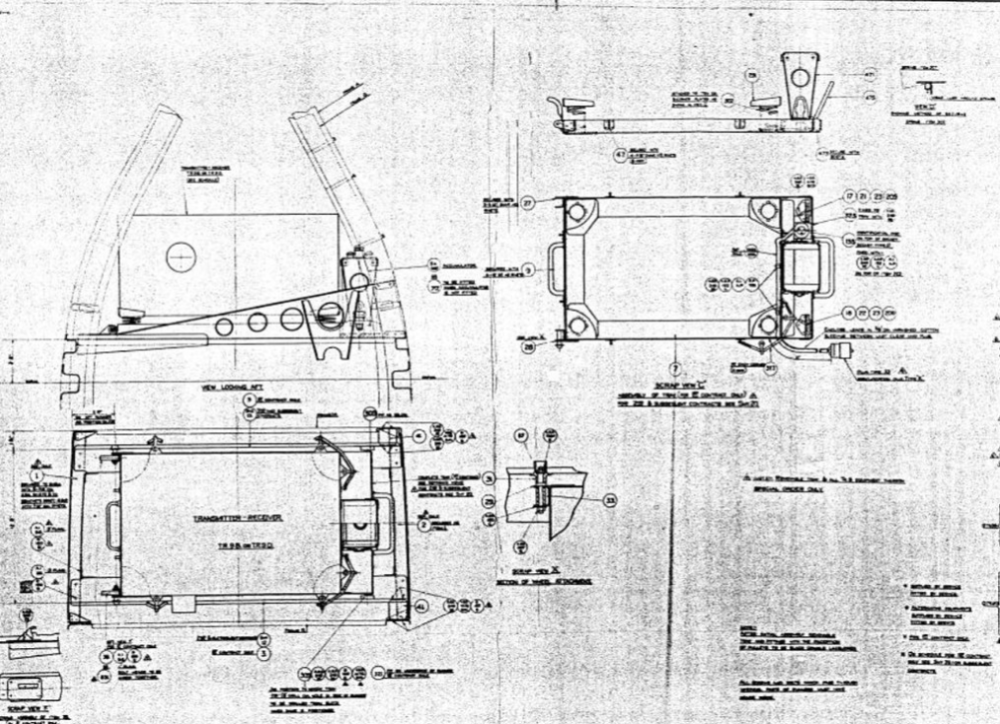

-
Lovely and welcome to the forum! Cheers, Jeroen
-
1/32 Westland Whirlwind
JeroenPeters replied to JeroenPeters's topic in LSM 1/35 and Larger Work In Progress
Just discovered a perfectly fine late style 3d printed stick in the hi-tech kit :)))) Might still print my own for shits and giggles though. More work on the cockpit. The 3D printed parts are crisp. Some printing layers are visible, but that can be fixed. Some warpage here and there, but fixed that with boiling water and a clamp.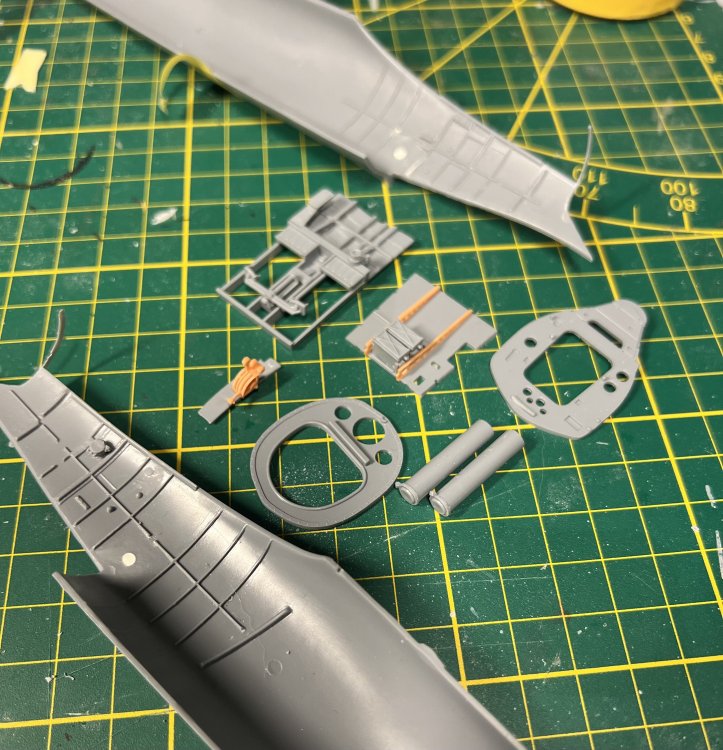
- 439 replies
-
- 10
-
-
1/32 Westland Whirlwind
JeroenPeters replied to JeroenPeters's topic in LSM 1/35 and Larger Work In Progress
Bit further..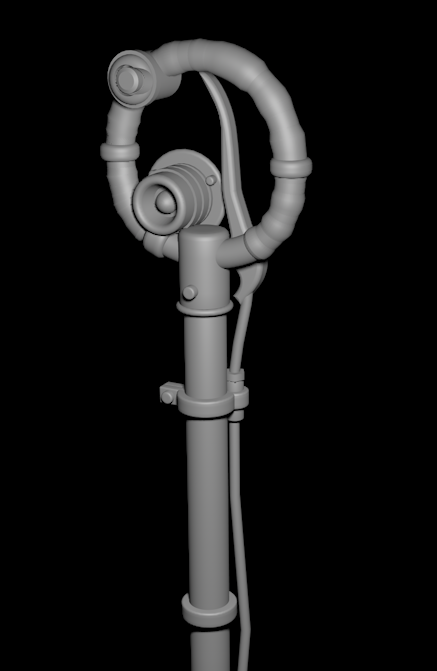
- 439 replies
-
- 10
-
-
1/32 Westland Whirlwind
JeroenPeters replied to JeroenPeters's topic in LSM 1/35 and Larger Work In Progress
Much appreciated! But i must credit Gunnar for most of the ground work. -
1/32 Westland Whirlwind
JeroenPeters replied to JeroenPeters's topic in LSM 1/35 and Larger Work In Progress
I need a little break from the wings. So I'm turning my attention to the control stick. Or spade grip. I'm going for the late style. I.e. any serial number from P.6984 and later. BUT! Not later than P.7054. Because after that the slats were fixated, and my model will have extended slats. First 3d steps...
-
1/32 Westland Whirlwind
JeroenPeters replied to JeroenPeters's topic in LSM 1/35 and Larger Work In Progress
So that does make sense then… I will let the camo run underneath, but weather it less, since it was less exposed. Thnx! -
1/32 Westland Whirlwind
JeroenPeters replied to JeroenPeters's topic in LSM 1/35 and Larger Work In Progress
Question for Gunnar: what colour would the leading edge be underneath the slats? I can’t imagine camo. Interior green? It was too early for yellow primer i guess? What do you think? -
1/32 Westland Whirlwind
JeroenPeters replied to JeroenPeters's topic in LSM 1/35 and Larger Work In Progress
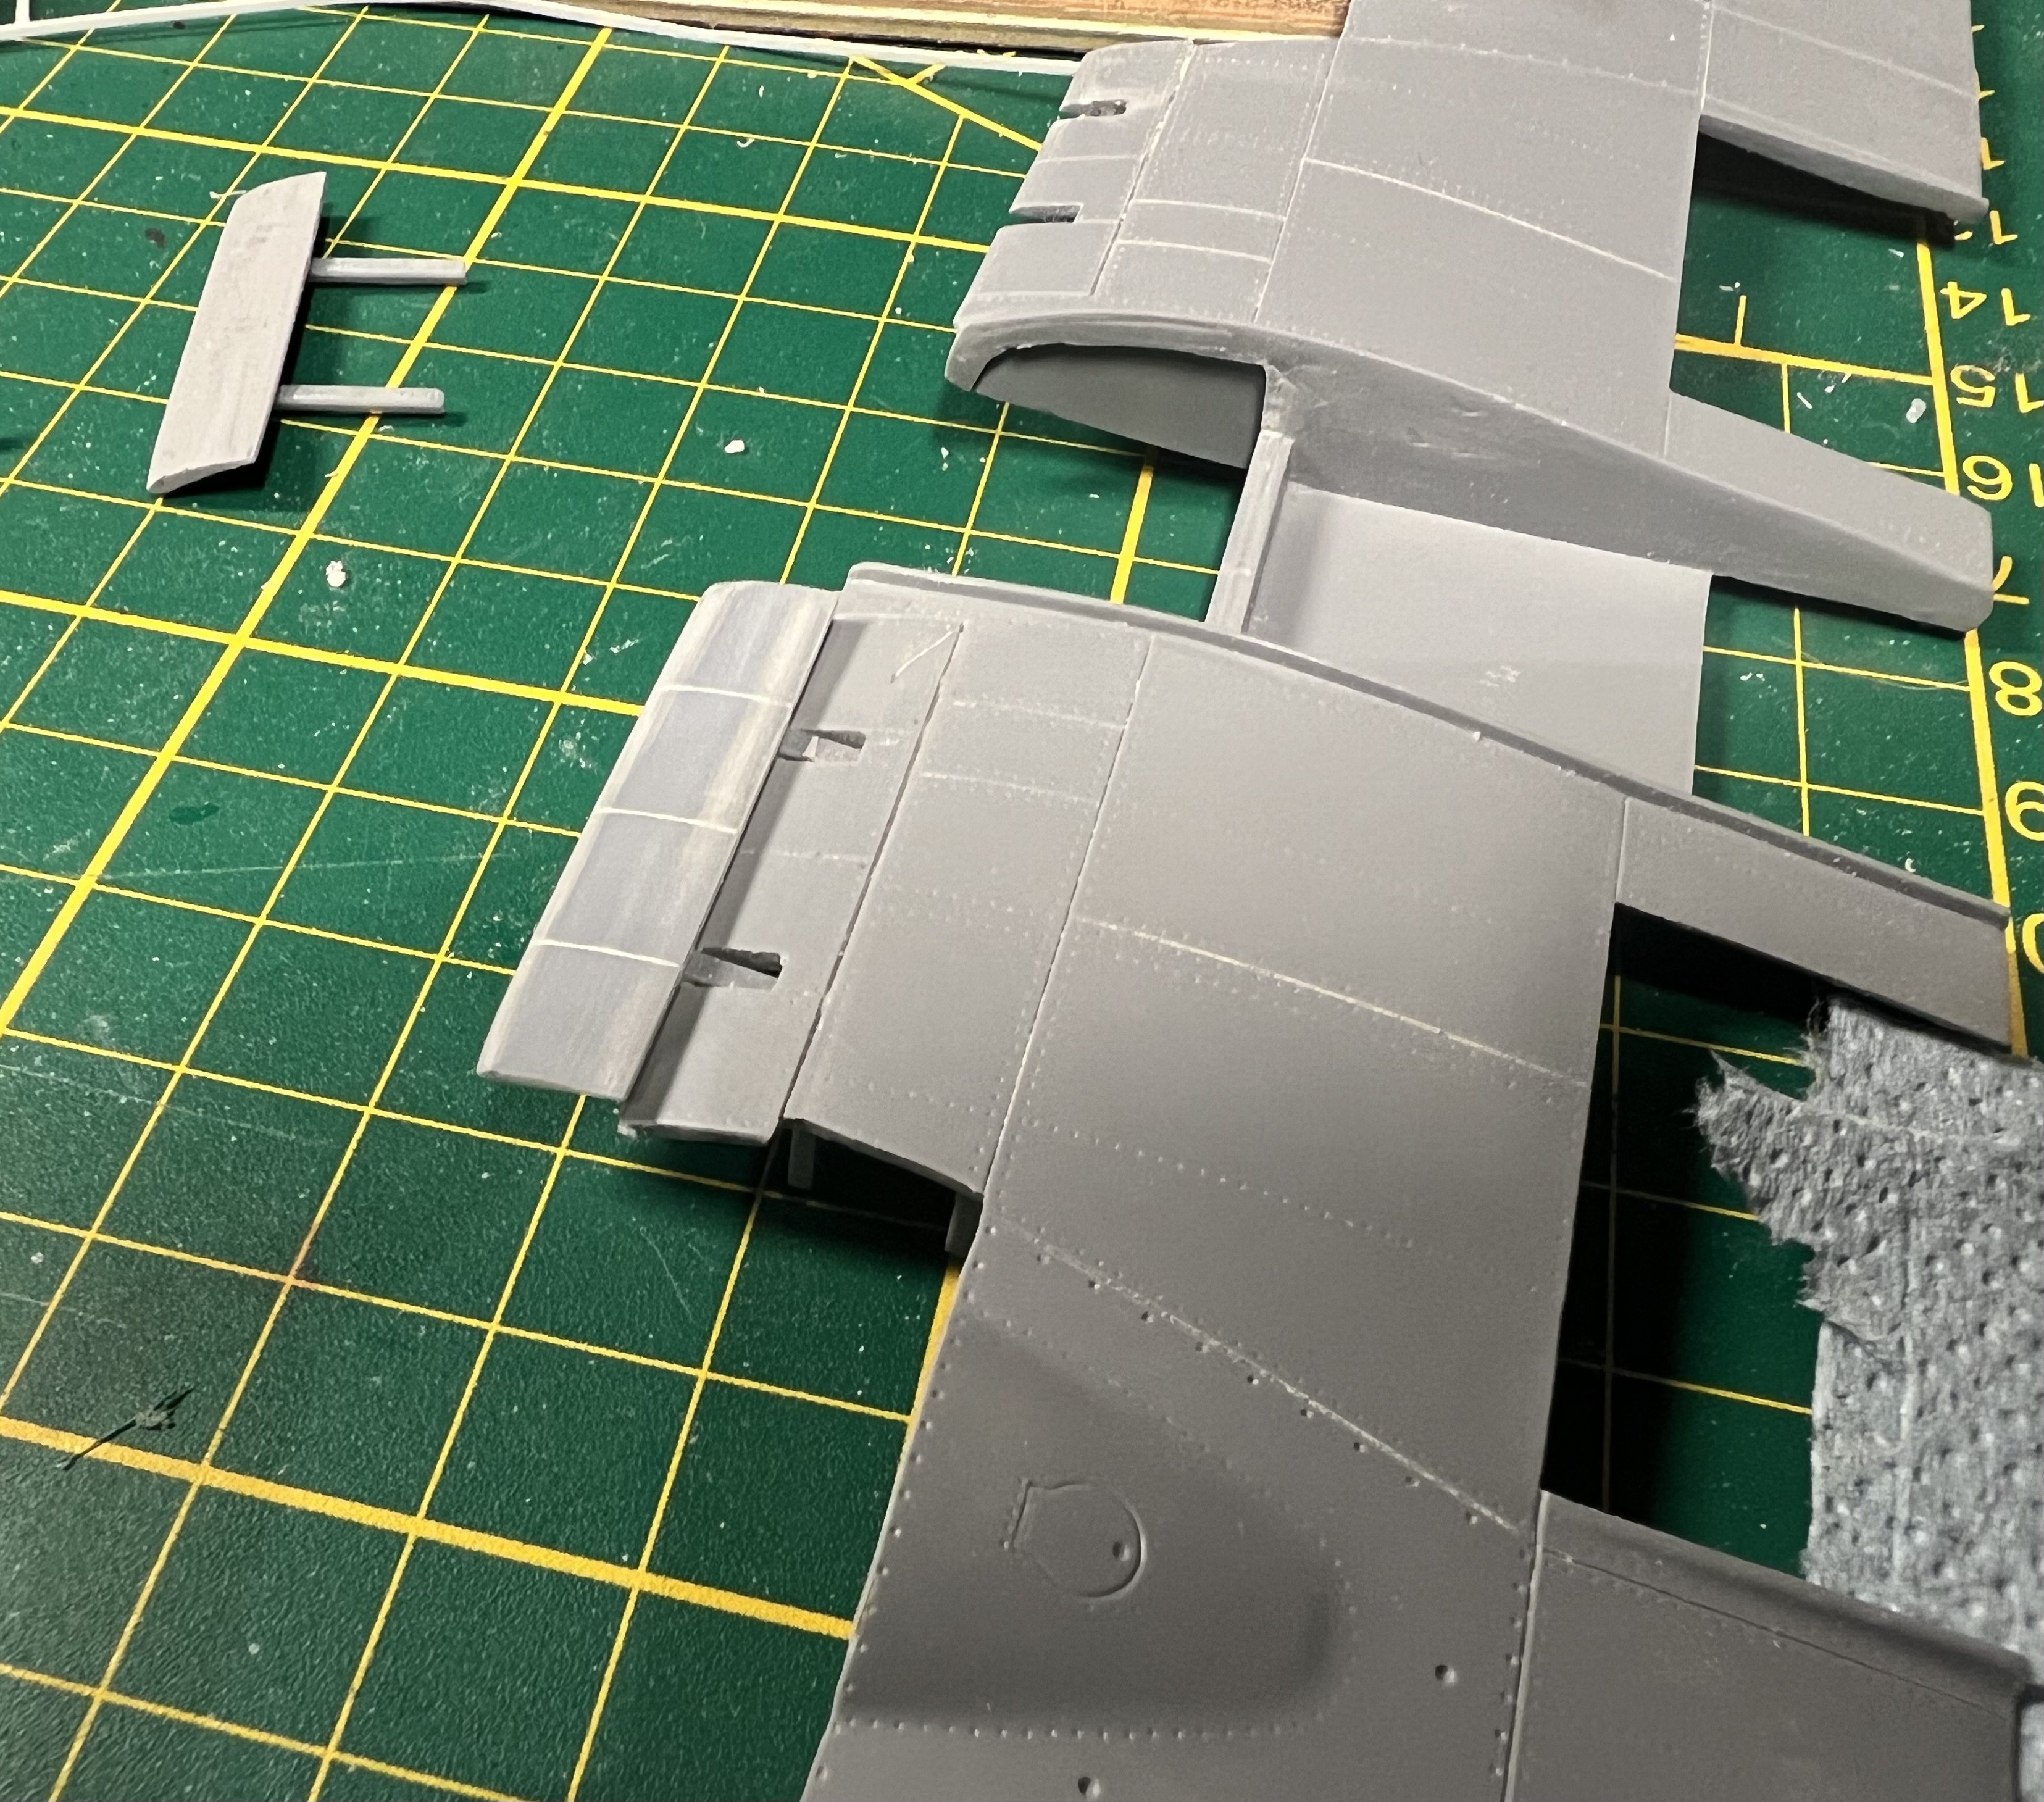
Dry fitting of the slats and aileron
-
1/32 Westland Whirlwind
JeroenPeters replied to JeroenPeters's topic in LSM 1/35 and Larger Work In Progress
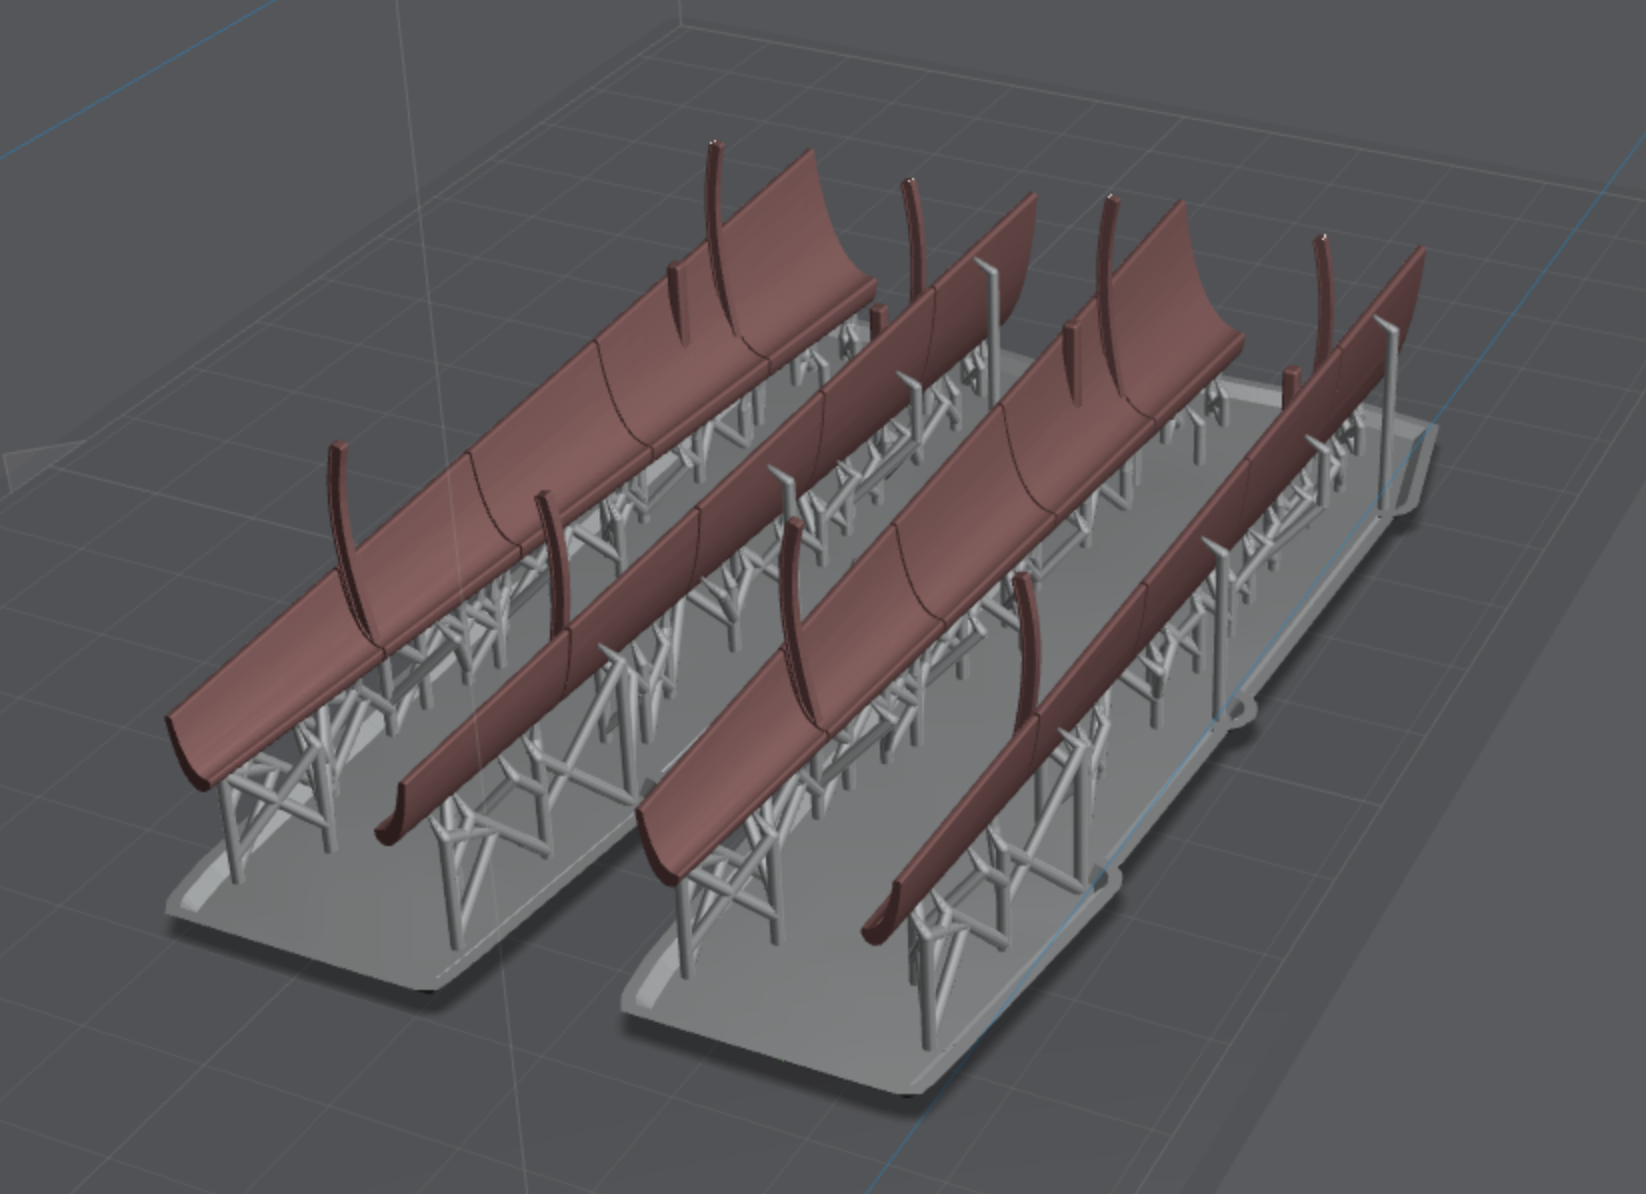
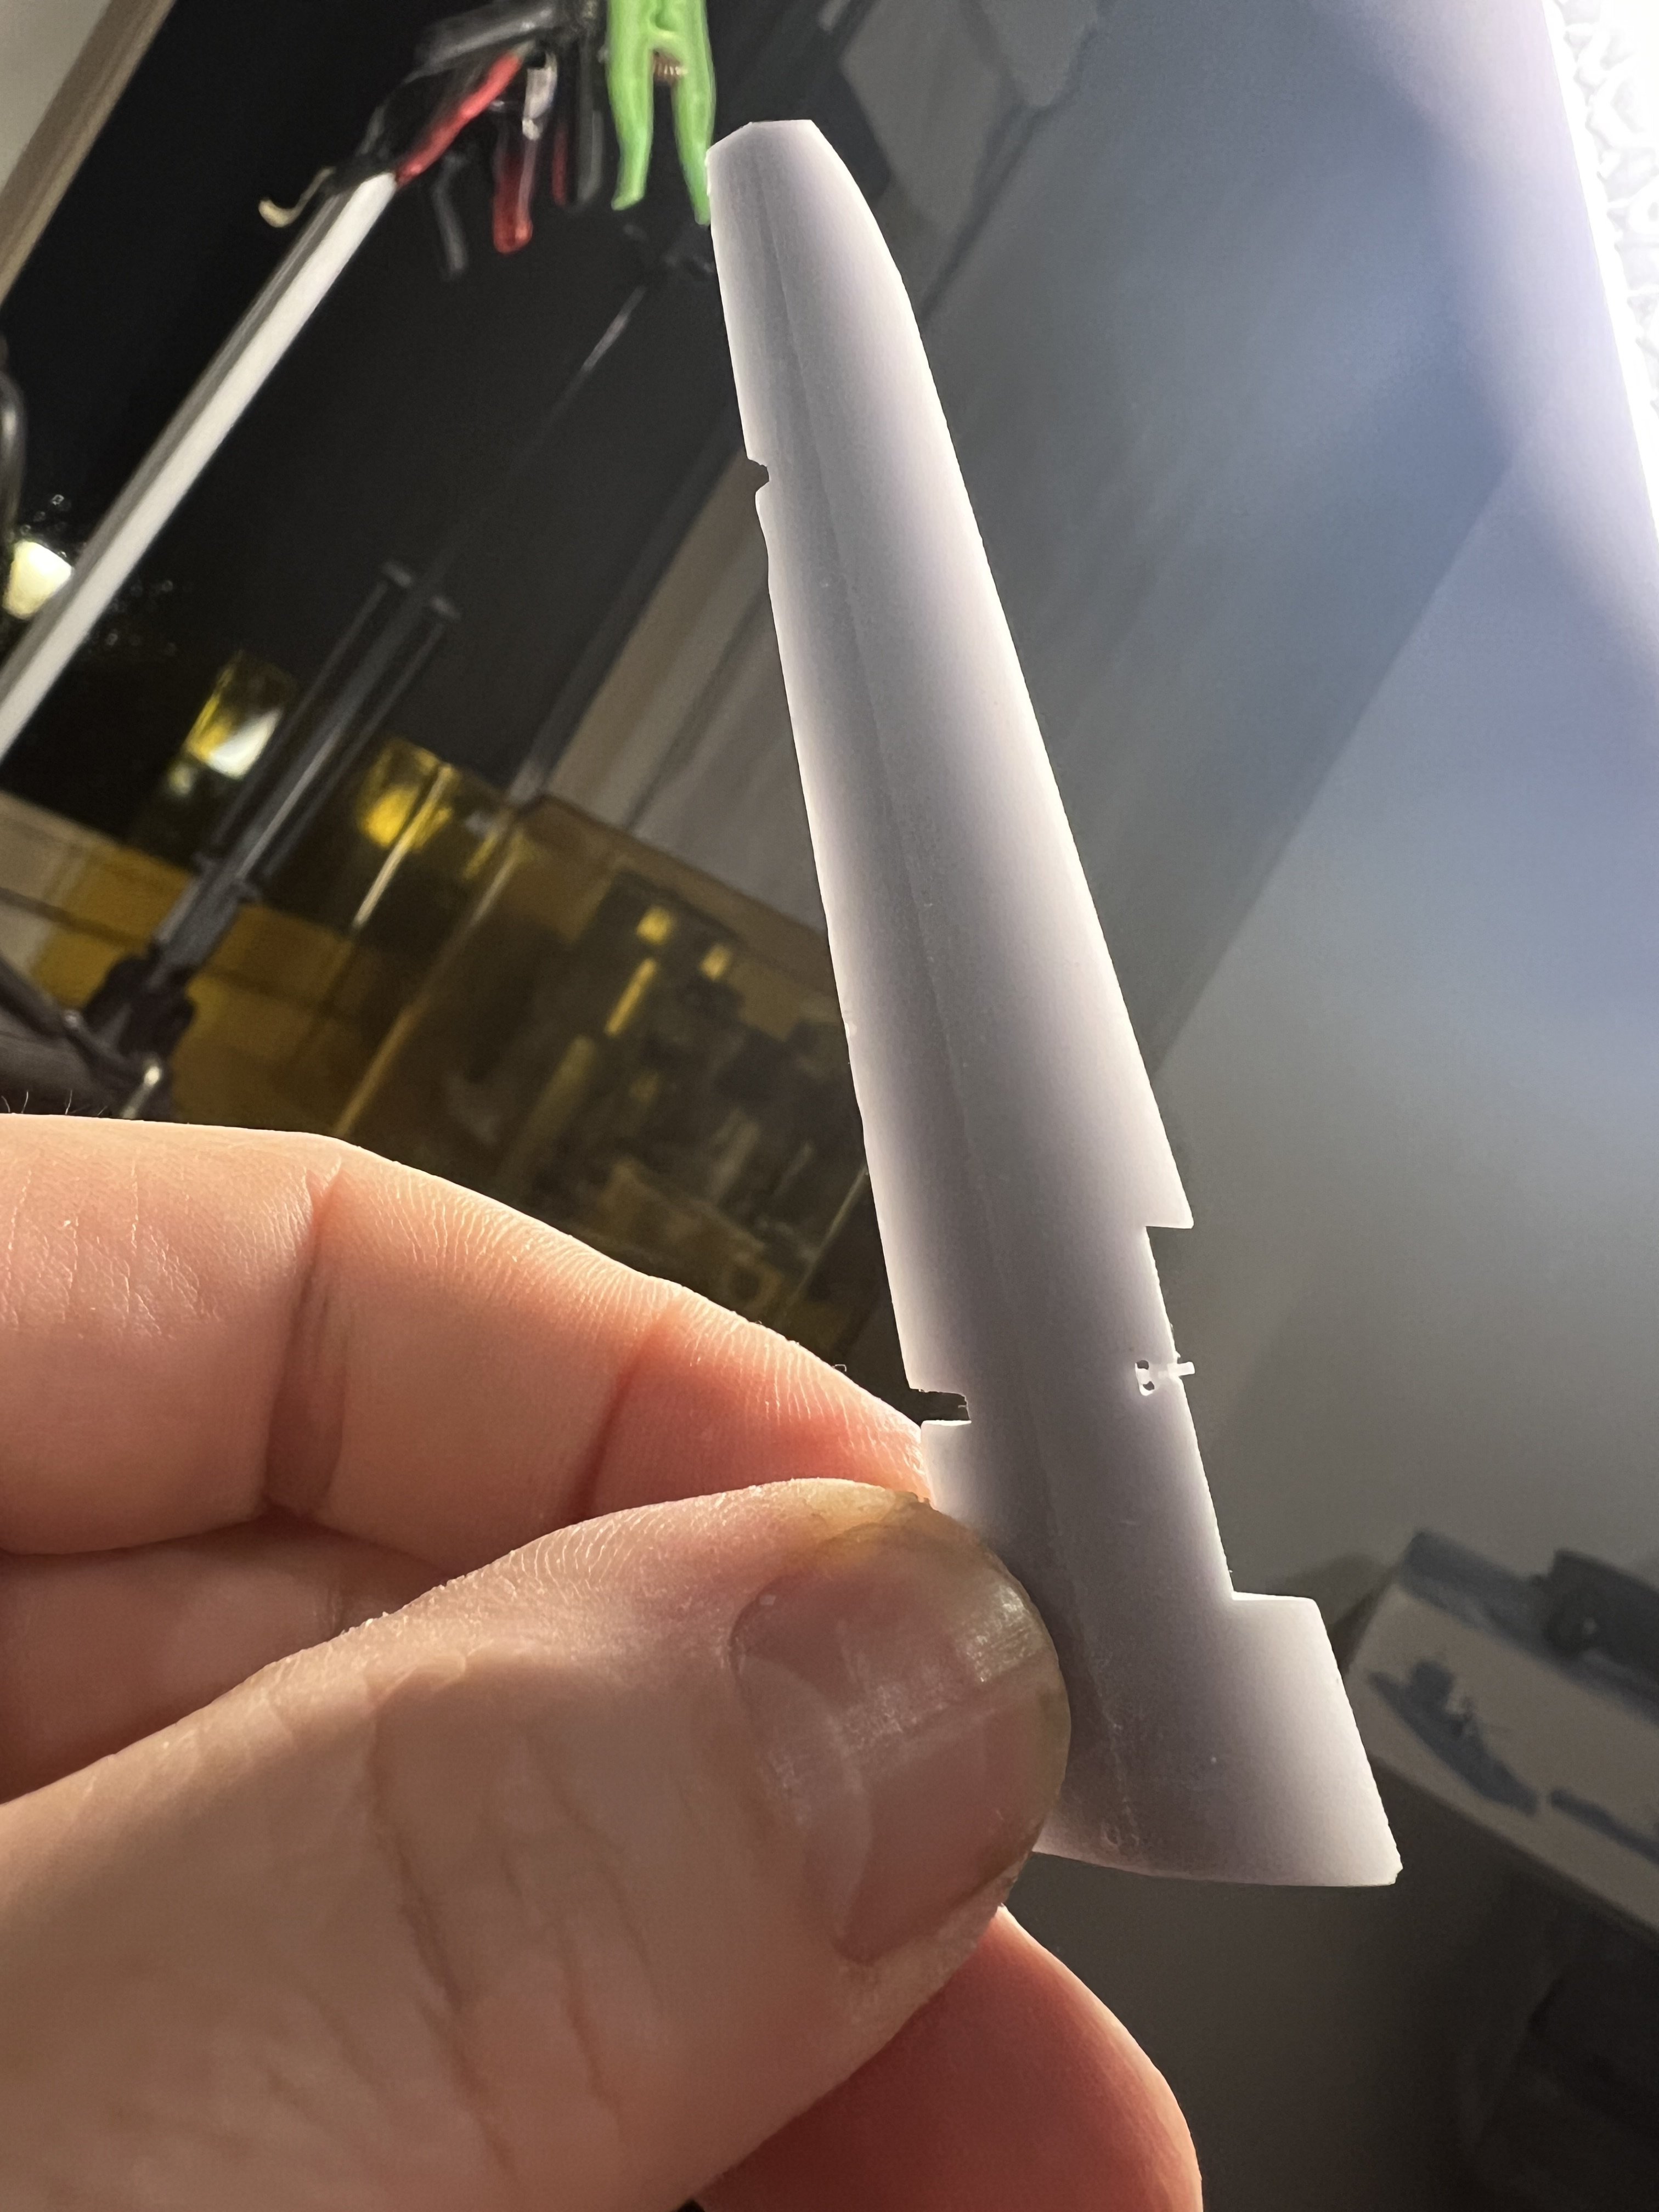
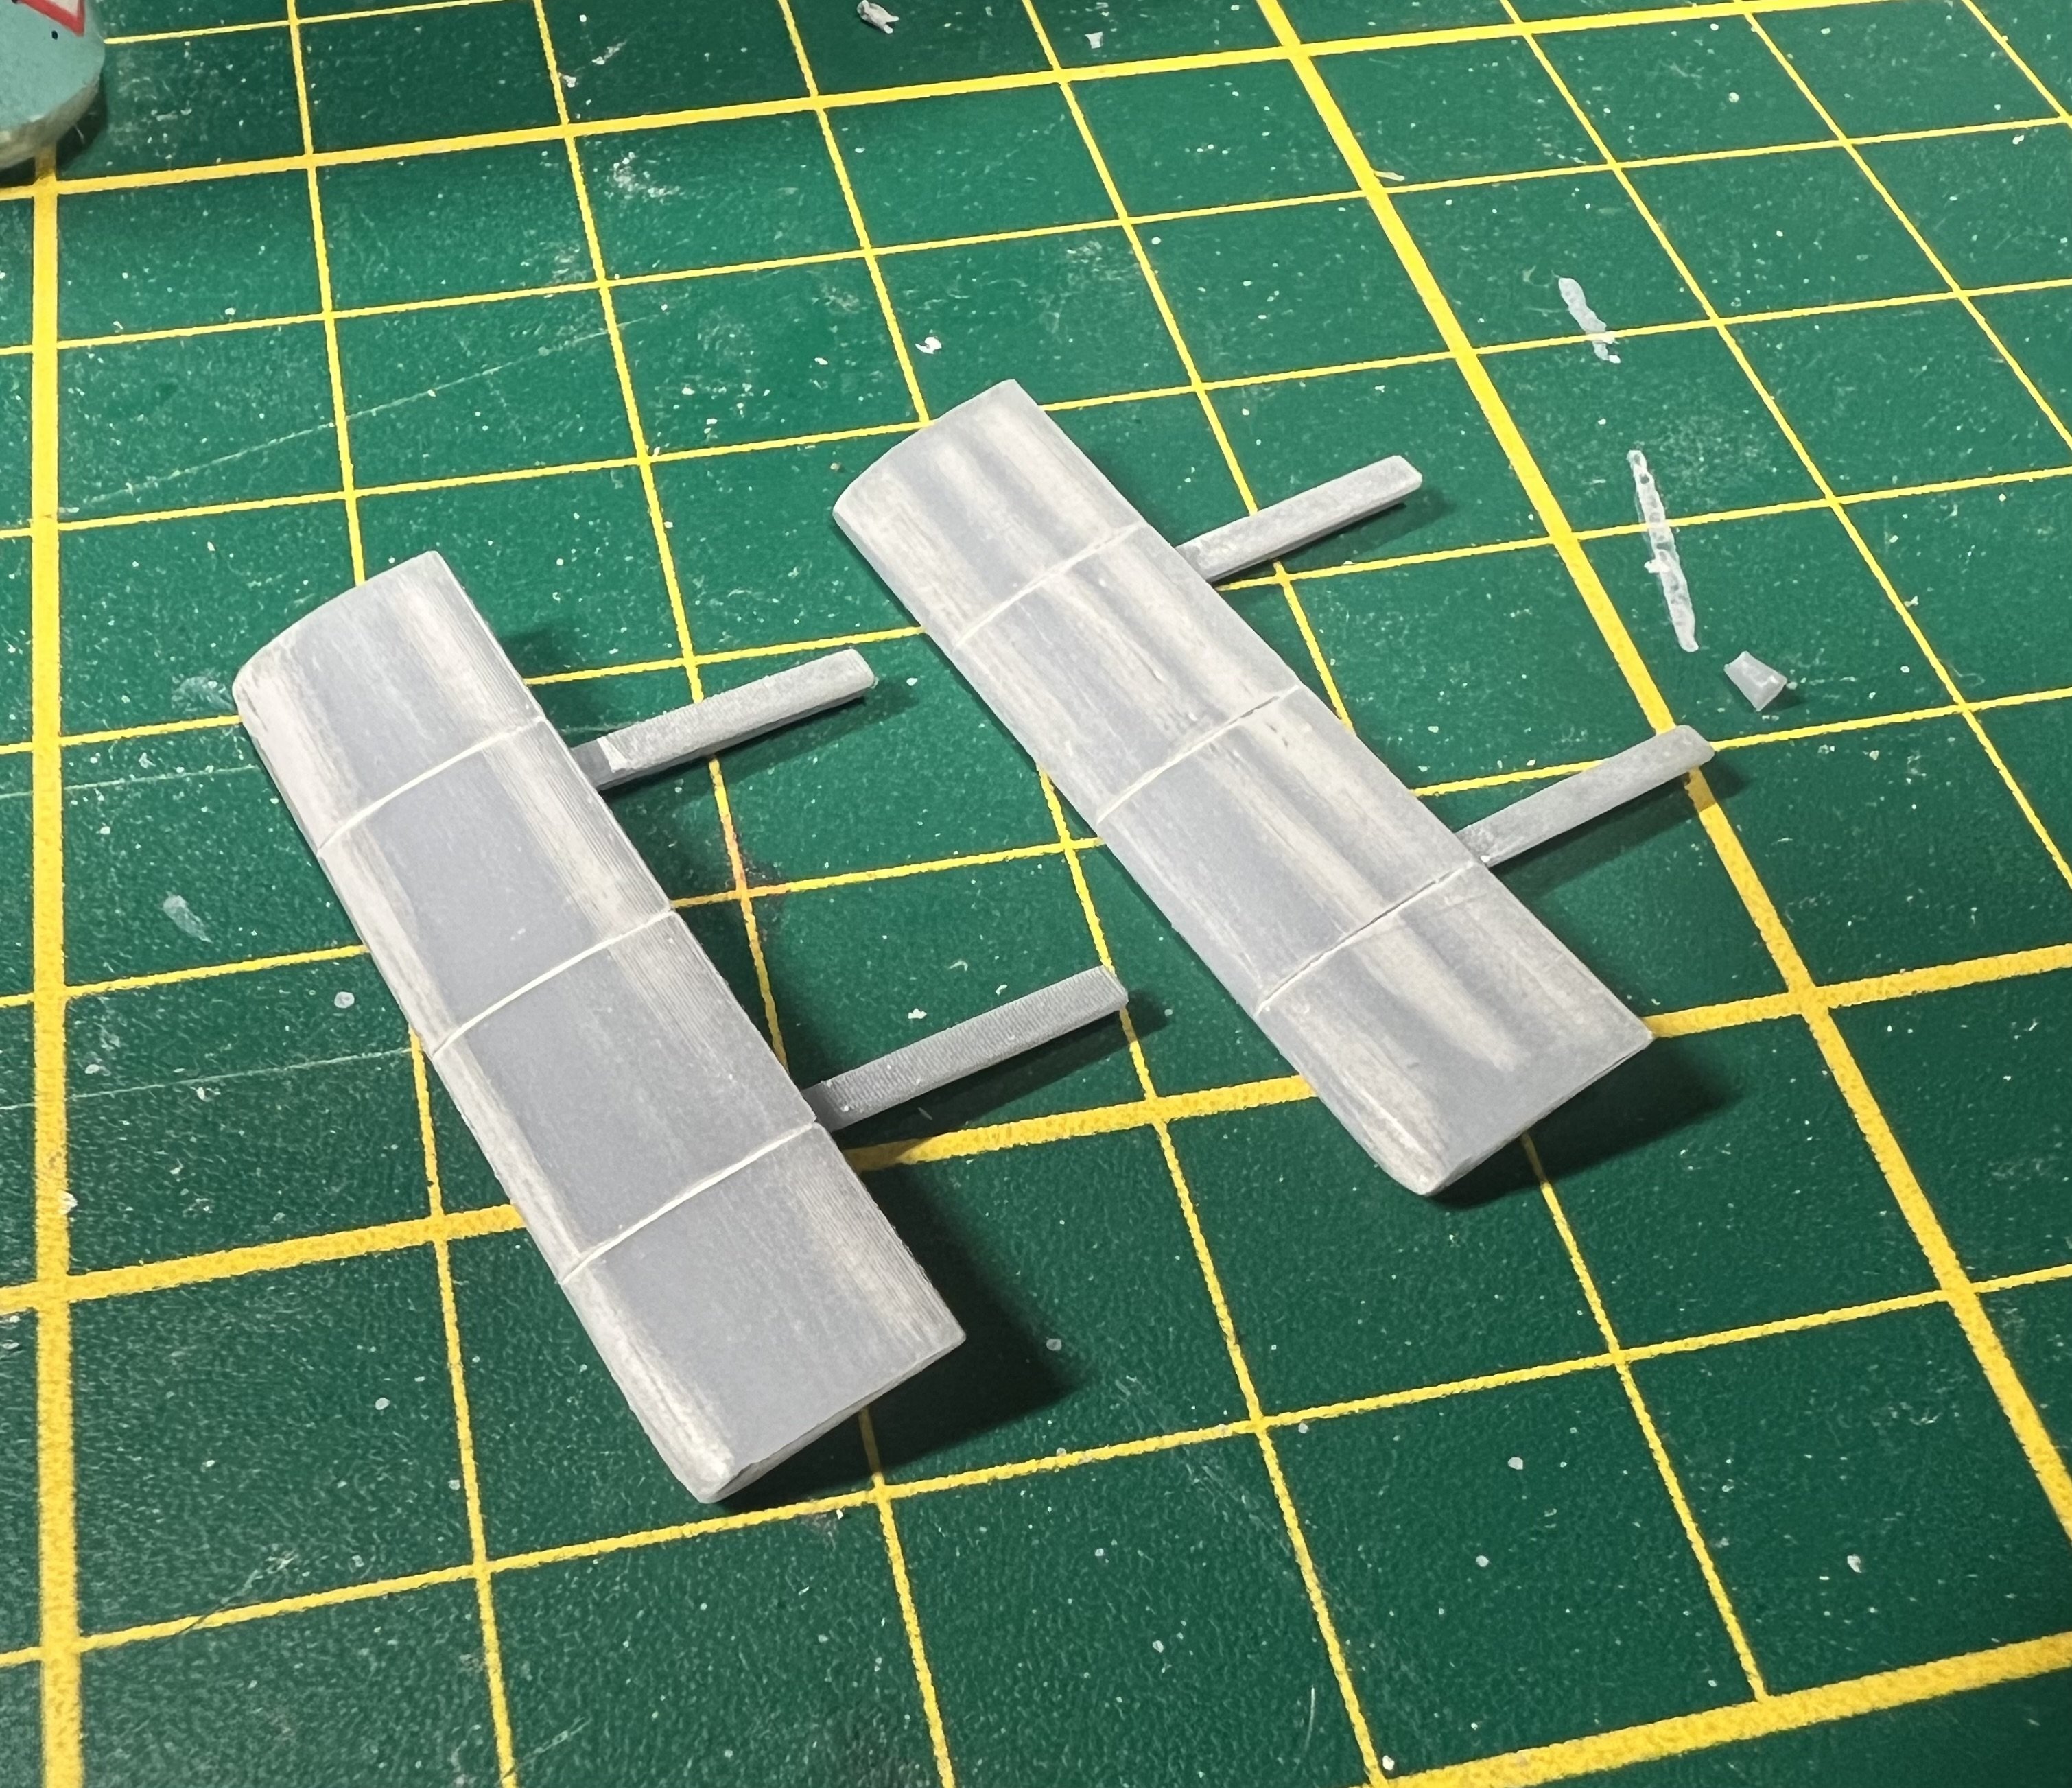
Just printed a few first tests. I prefer to print these vertically but that takes 10 hours. This angle takes only 3.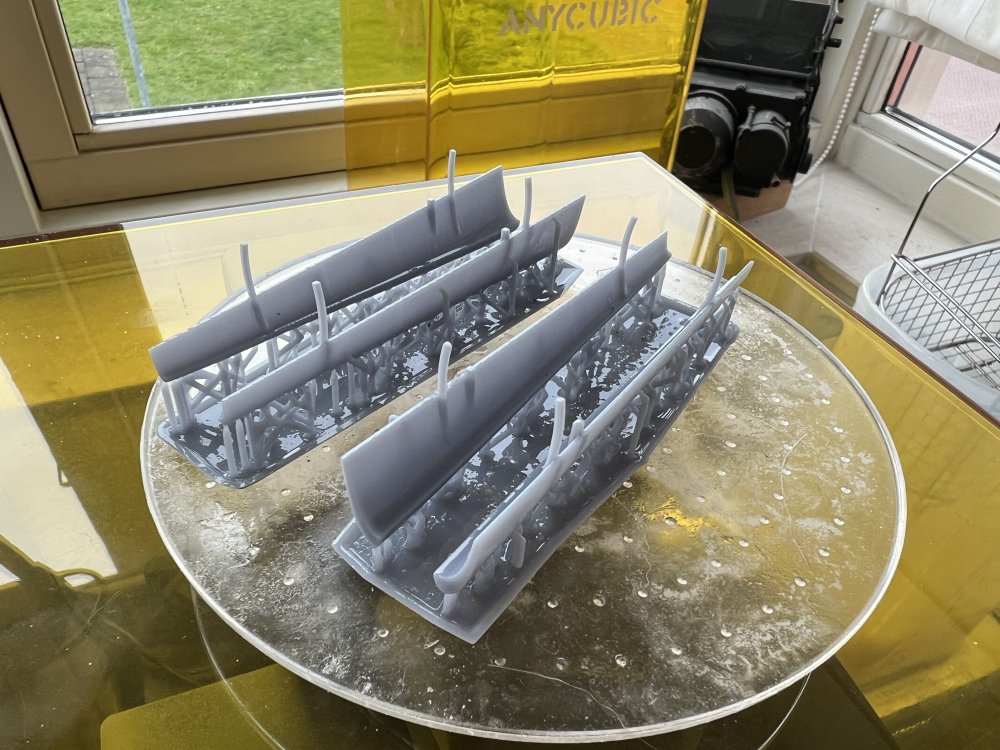
-
1/32 Westland Whirlwind
JeroenPeters replied to JeroenPeters's topic in LSM 1/35 and Larger Work In Progress
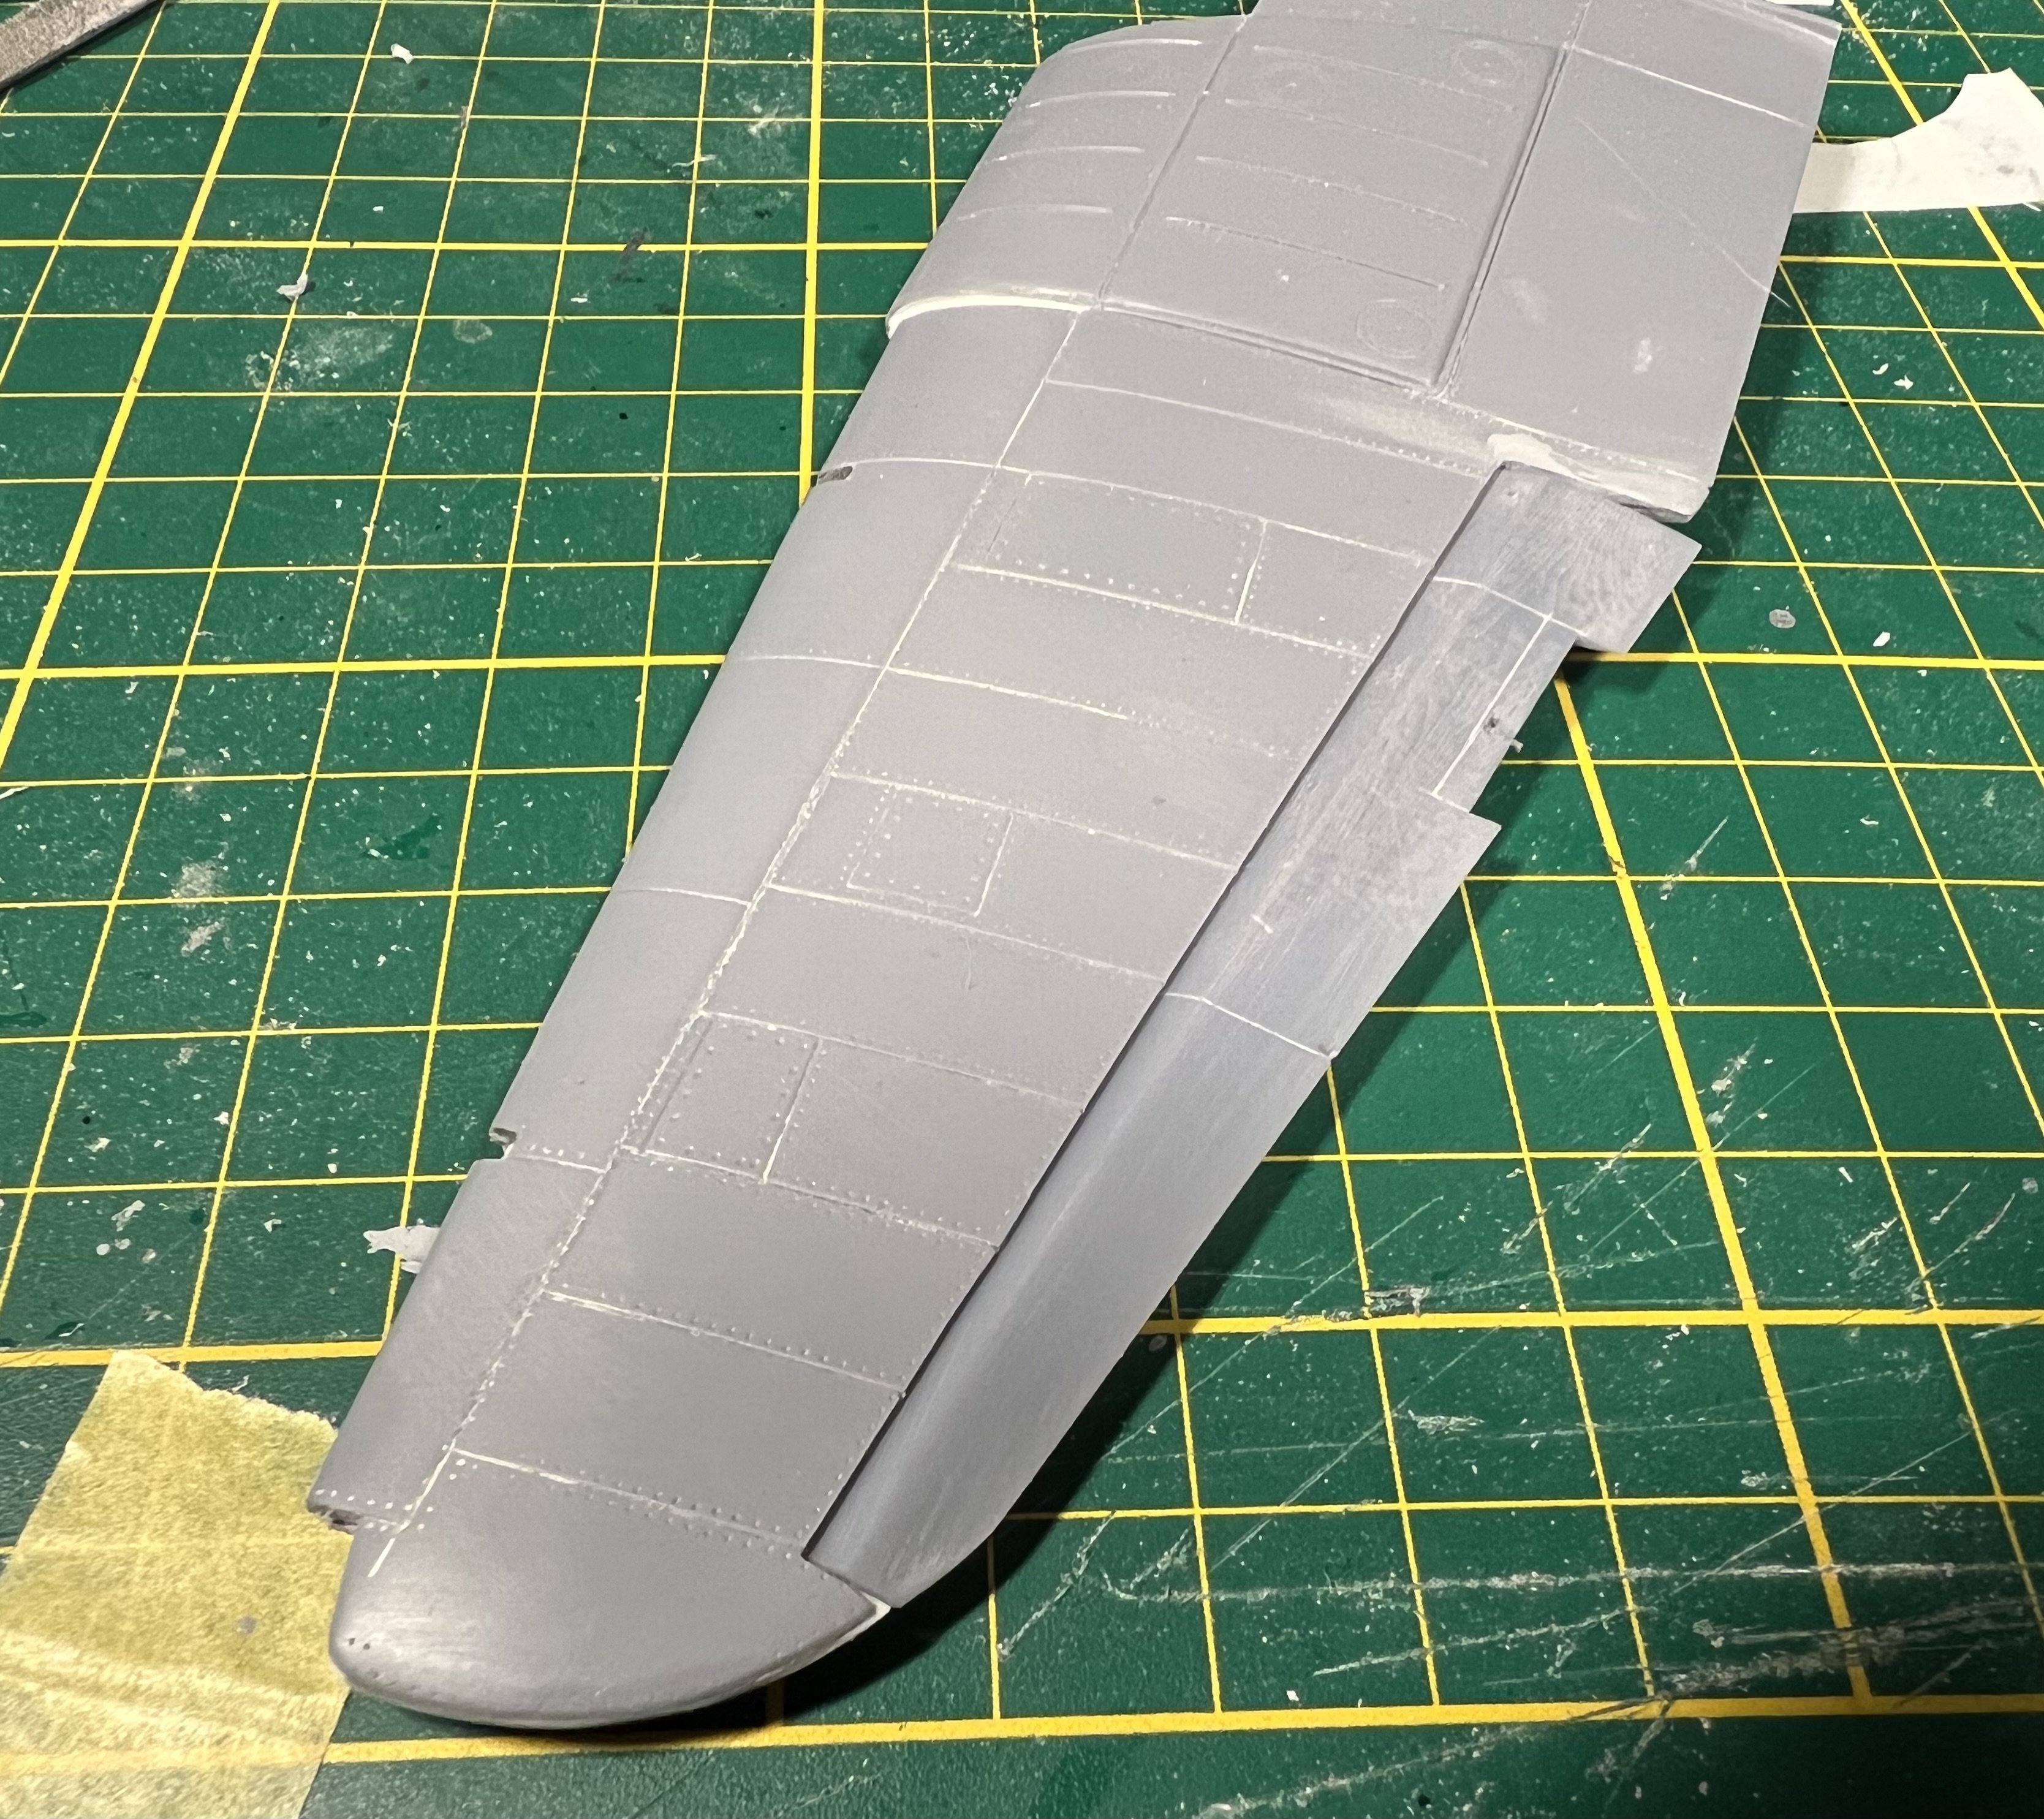
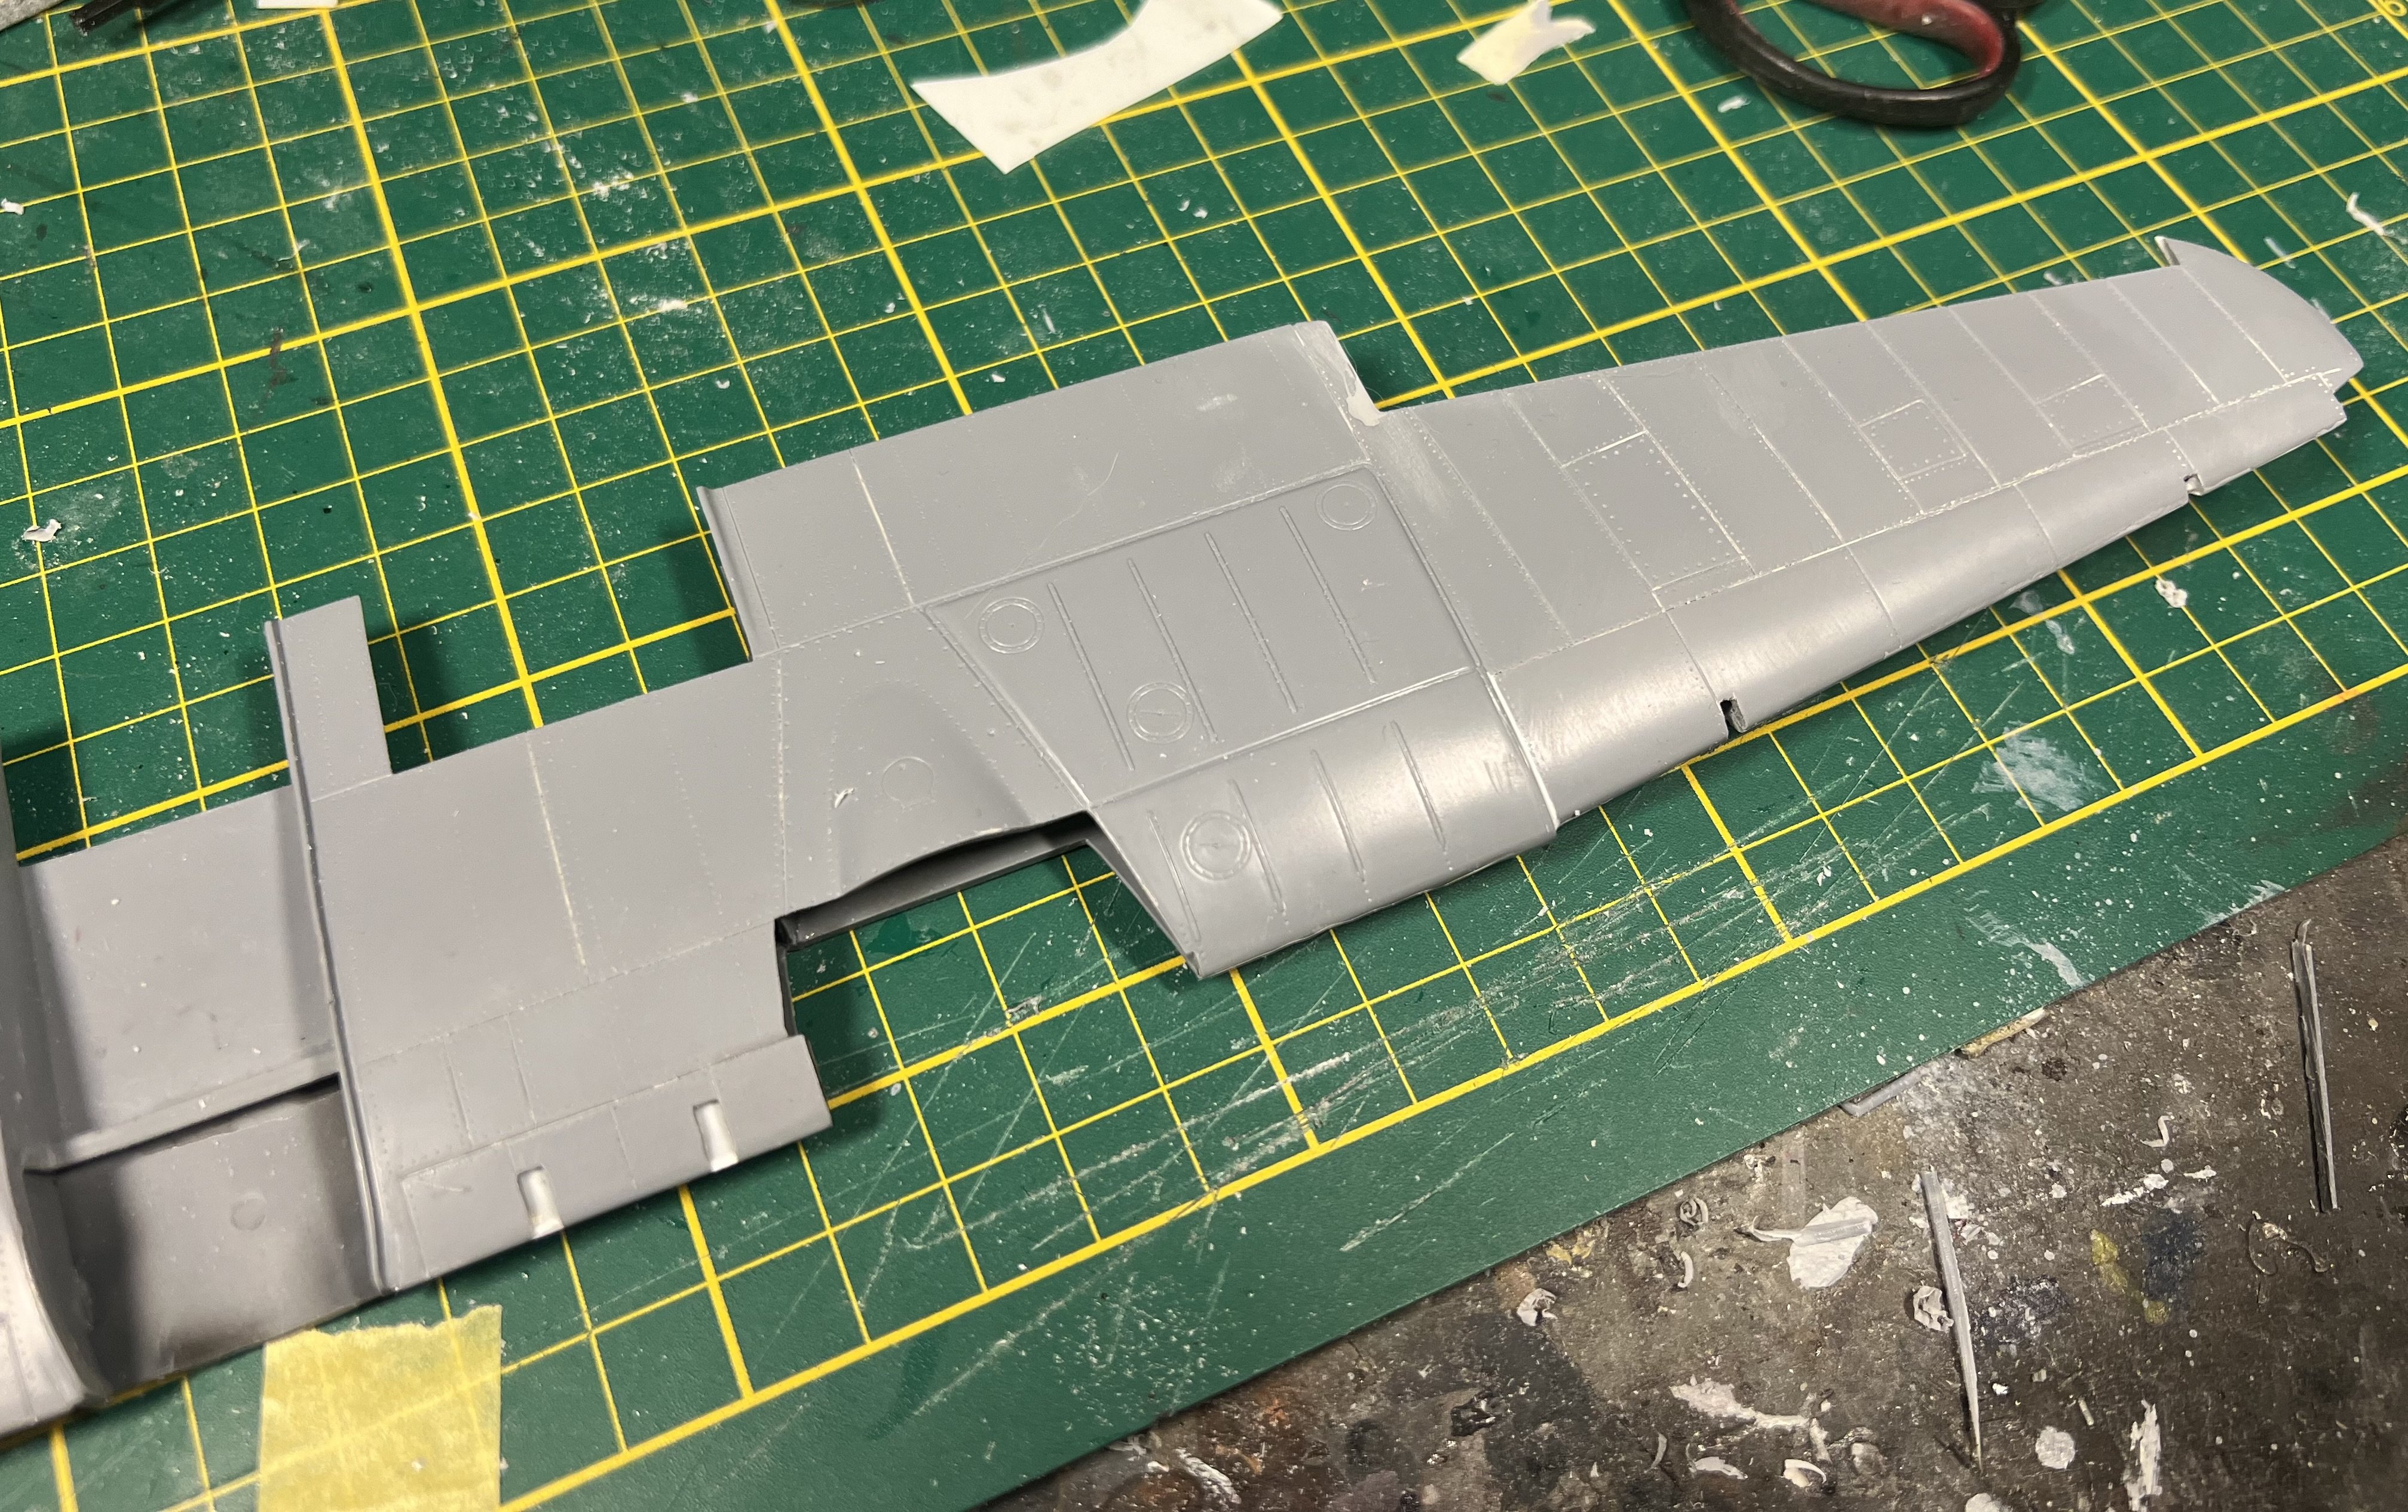
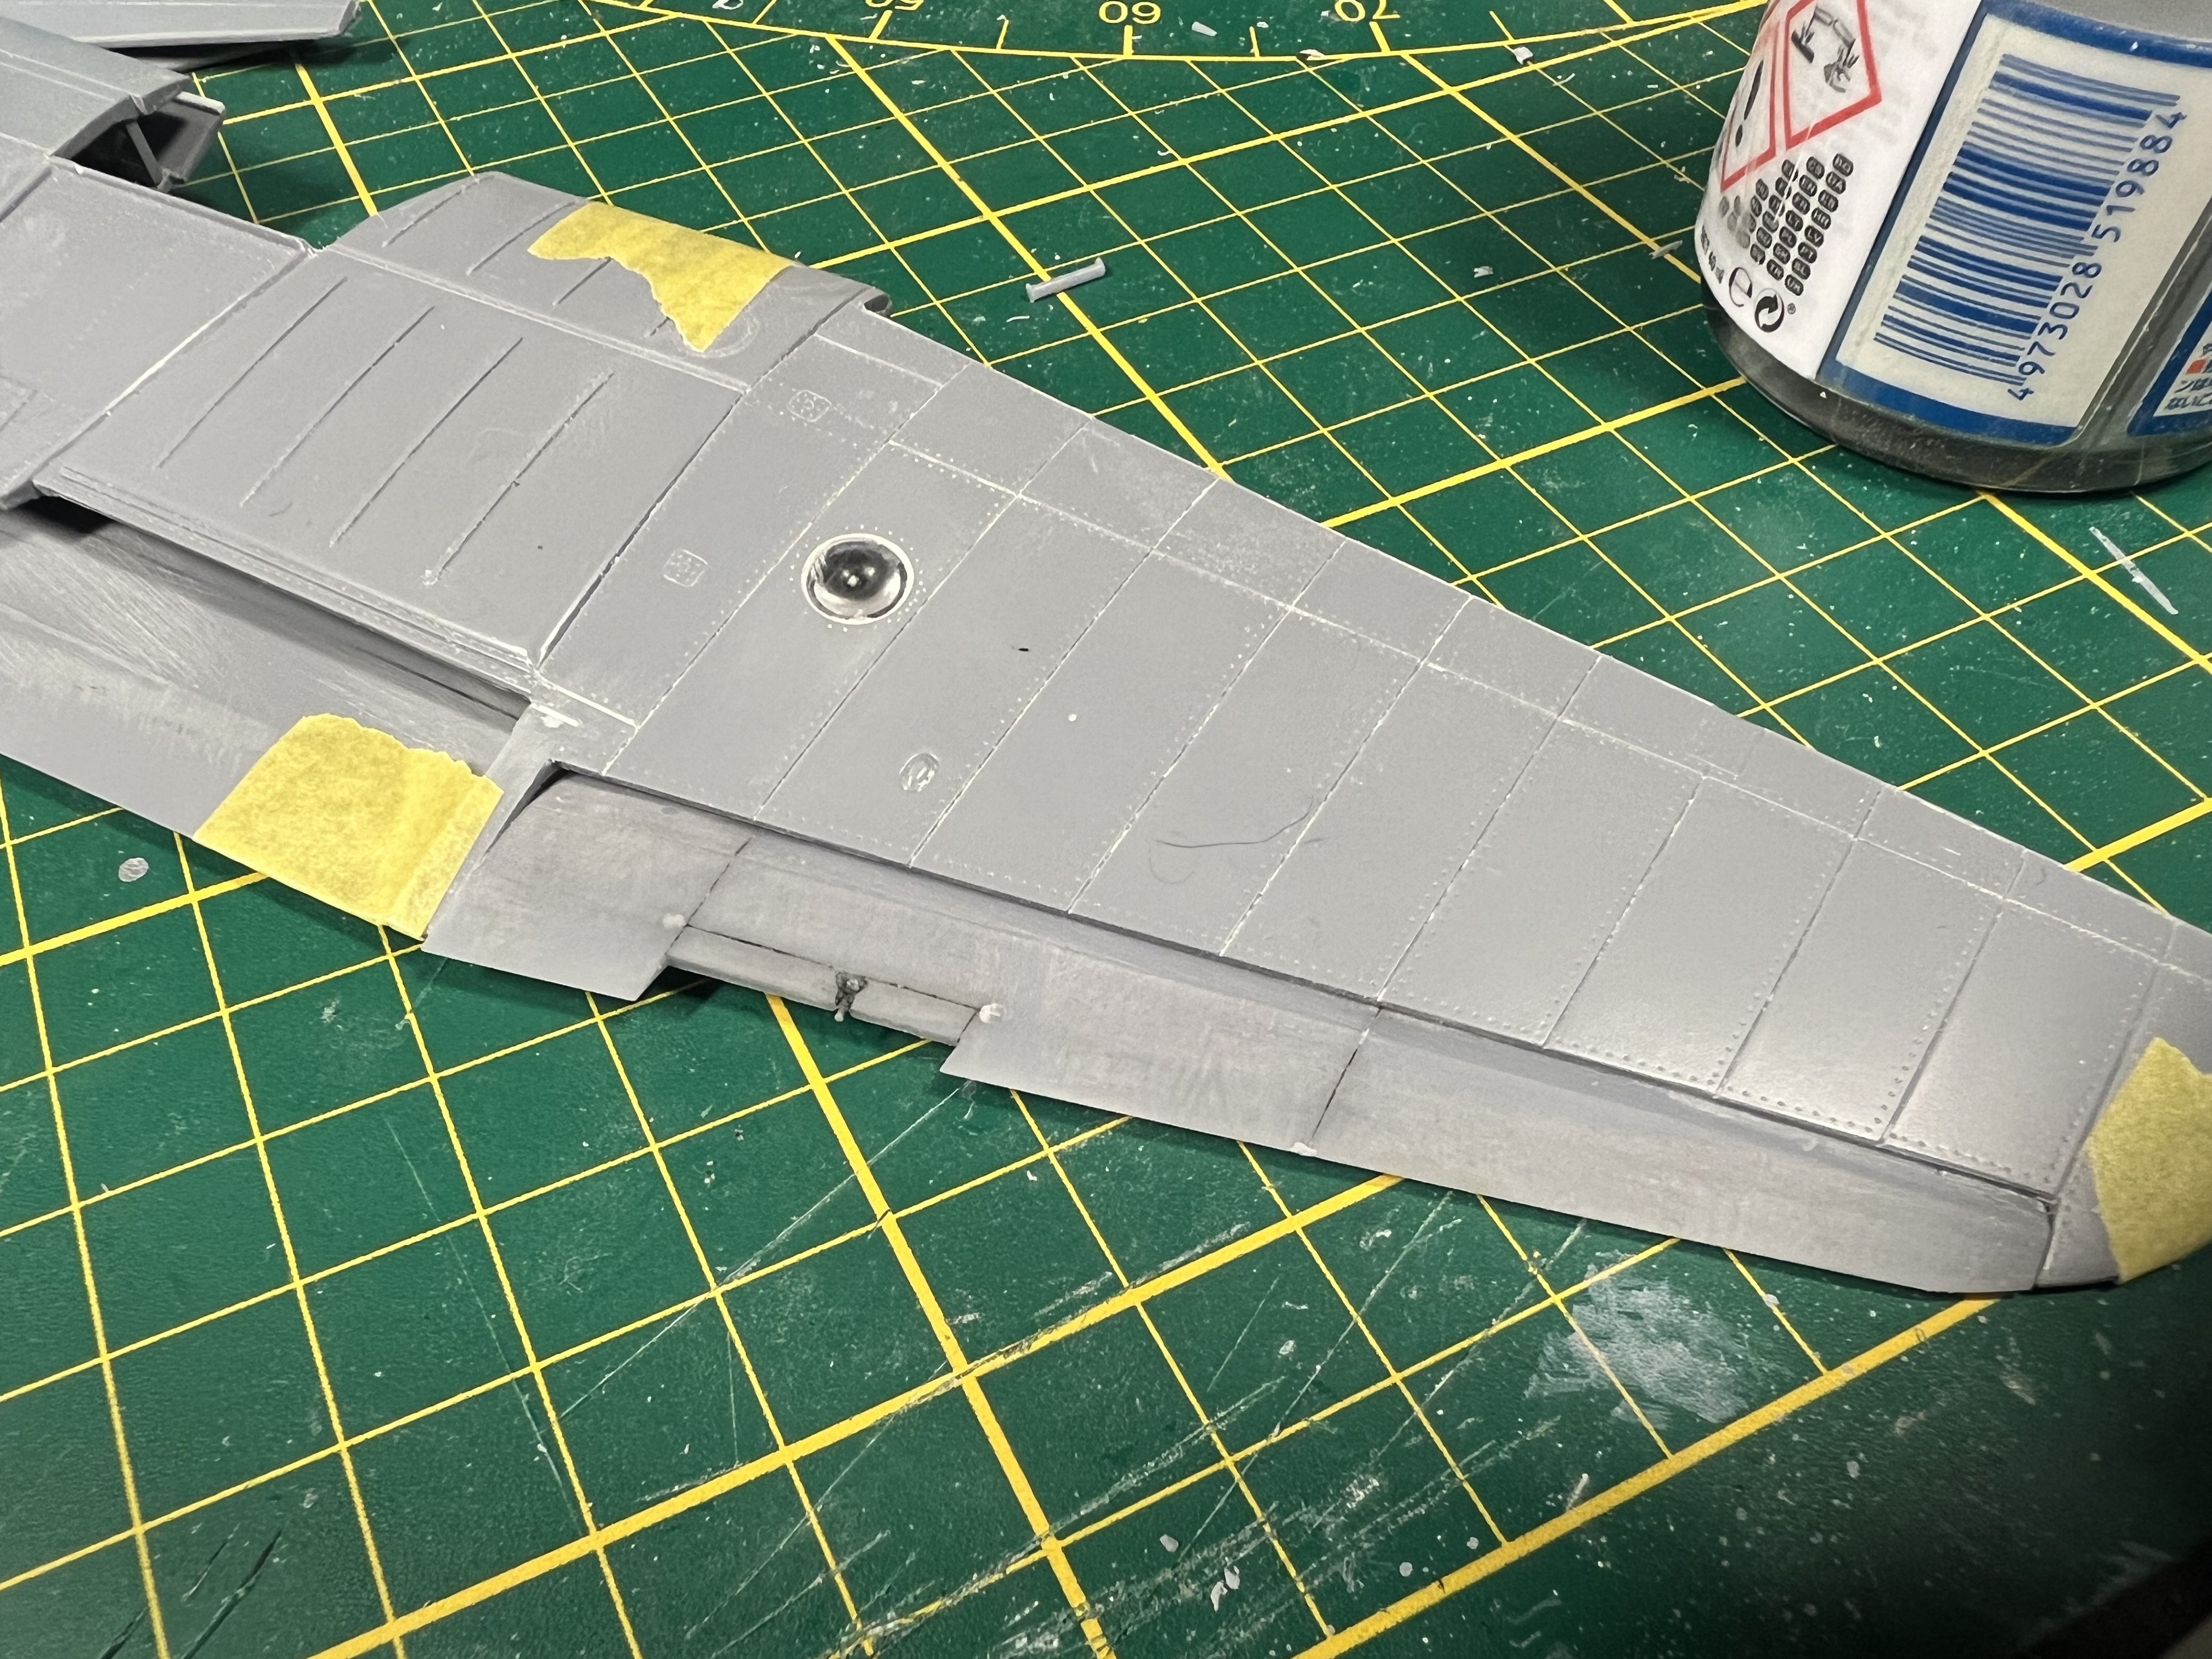
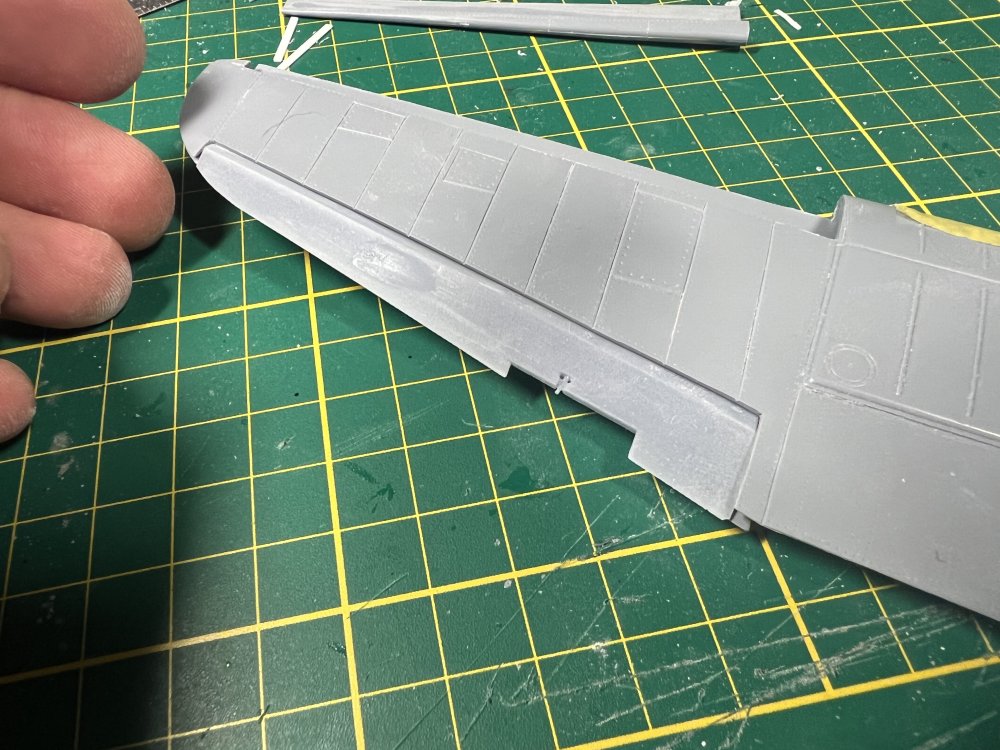
Leading edges under the outer slats are on again. I adjusted them a little so they now sit back a mm or so. Test printing the slats tomorrow.
-
1/32 Westland Whirlwind
JeroenPeters replied to JeroenPeters's topic in LSM 1/35 and Larger Work In Progress
Ready for print
-
1/32 Westland Whirlwind
JeroenPeters replied to JeroenPeters's topic in LSM 1/35 and Larger Work In Progress
First 3d work on the slat.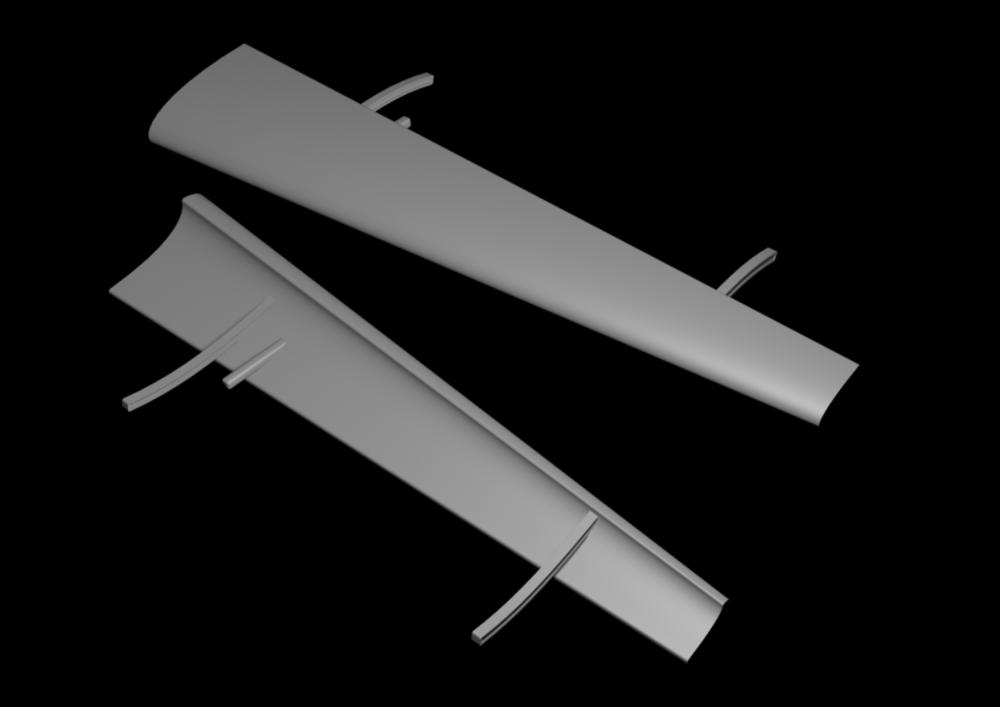
-
1/32 Westland Whirlwind
JeroenPeters replied to JeroenPeters's topic in LSM 1/35 and Larger Work In Progress
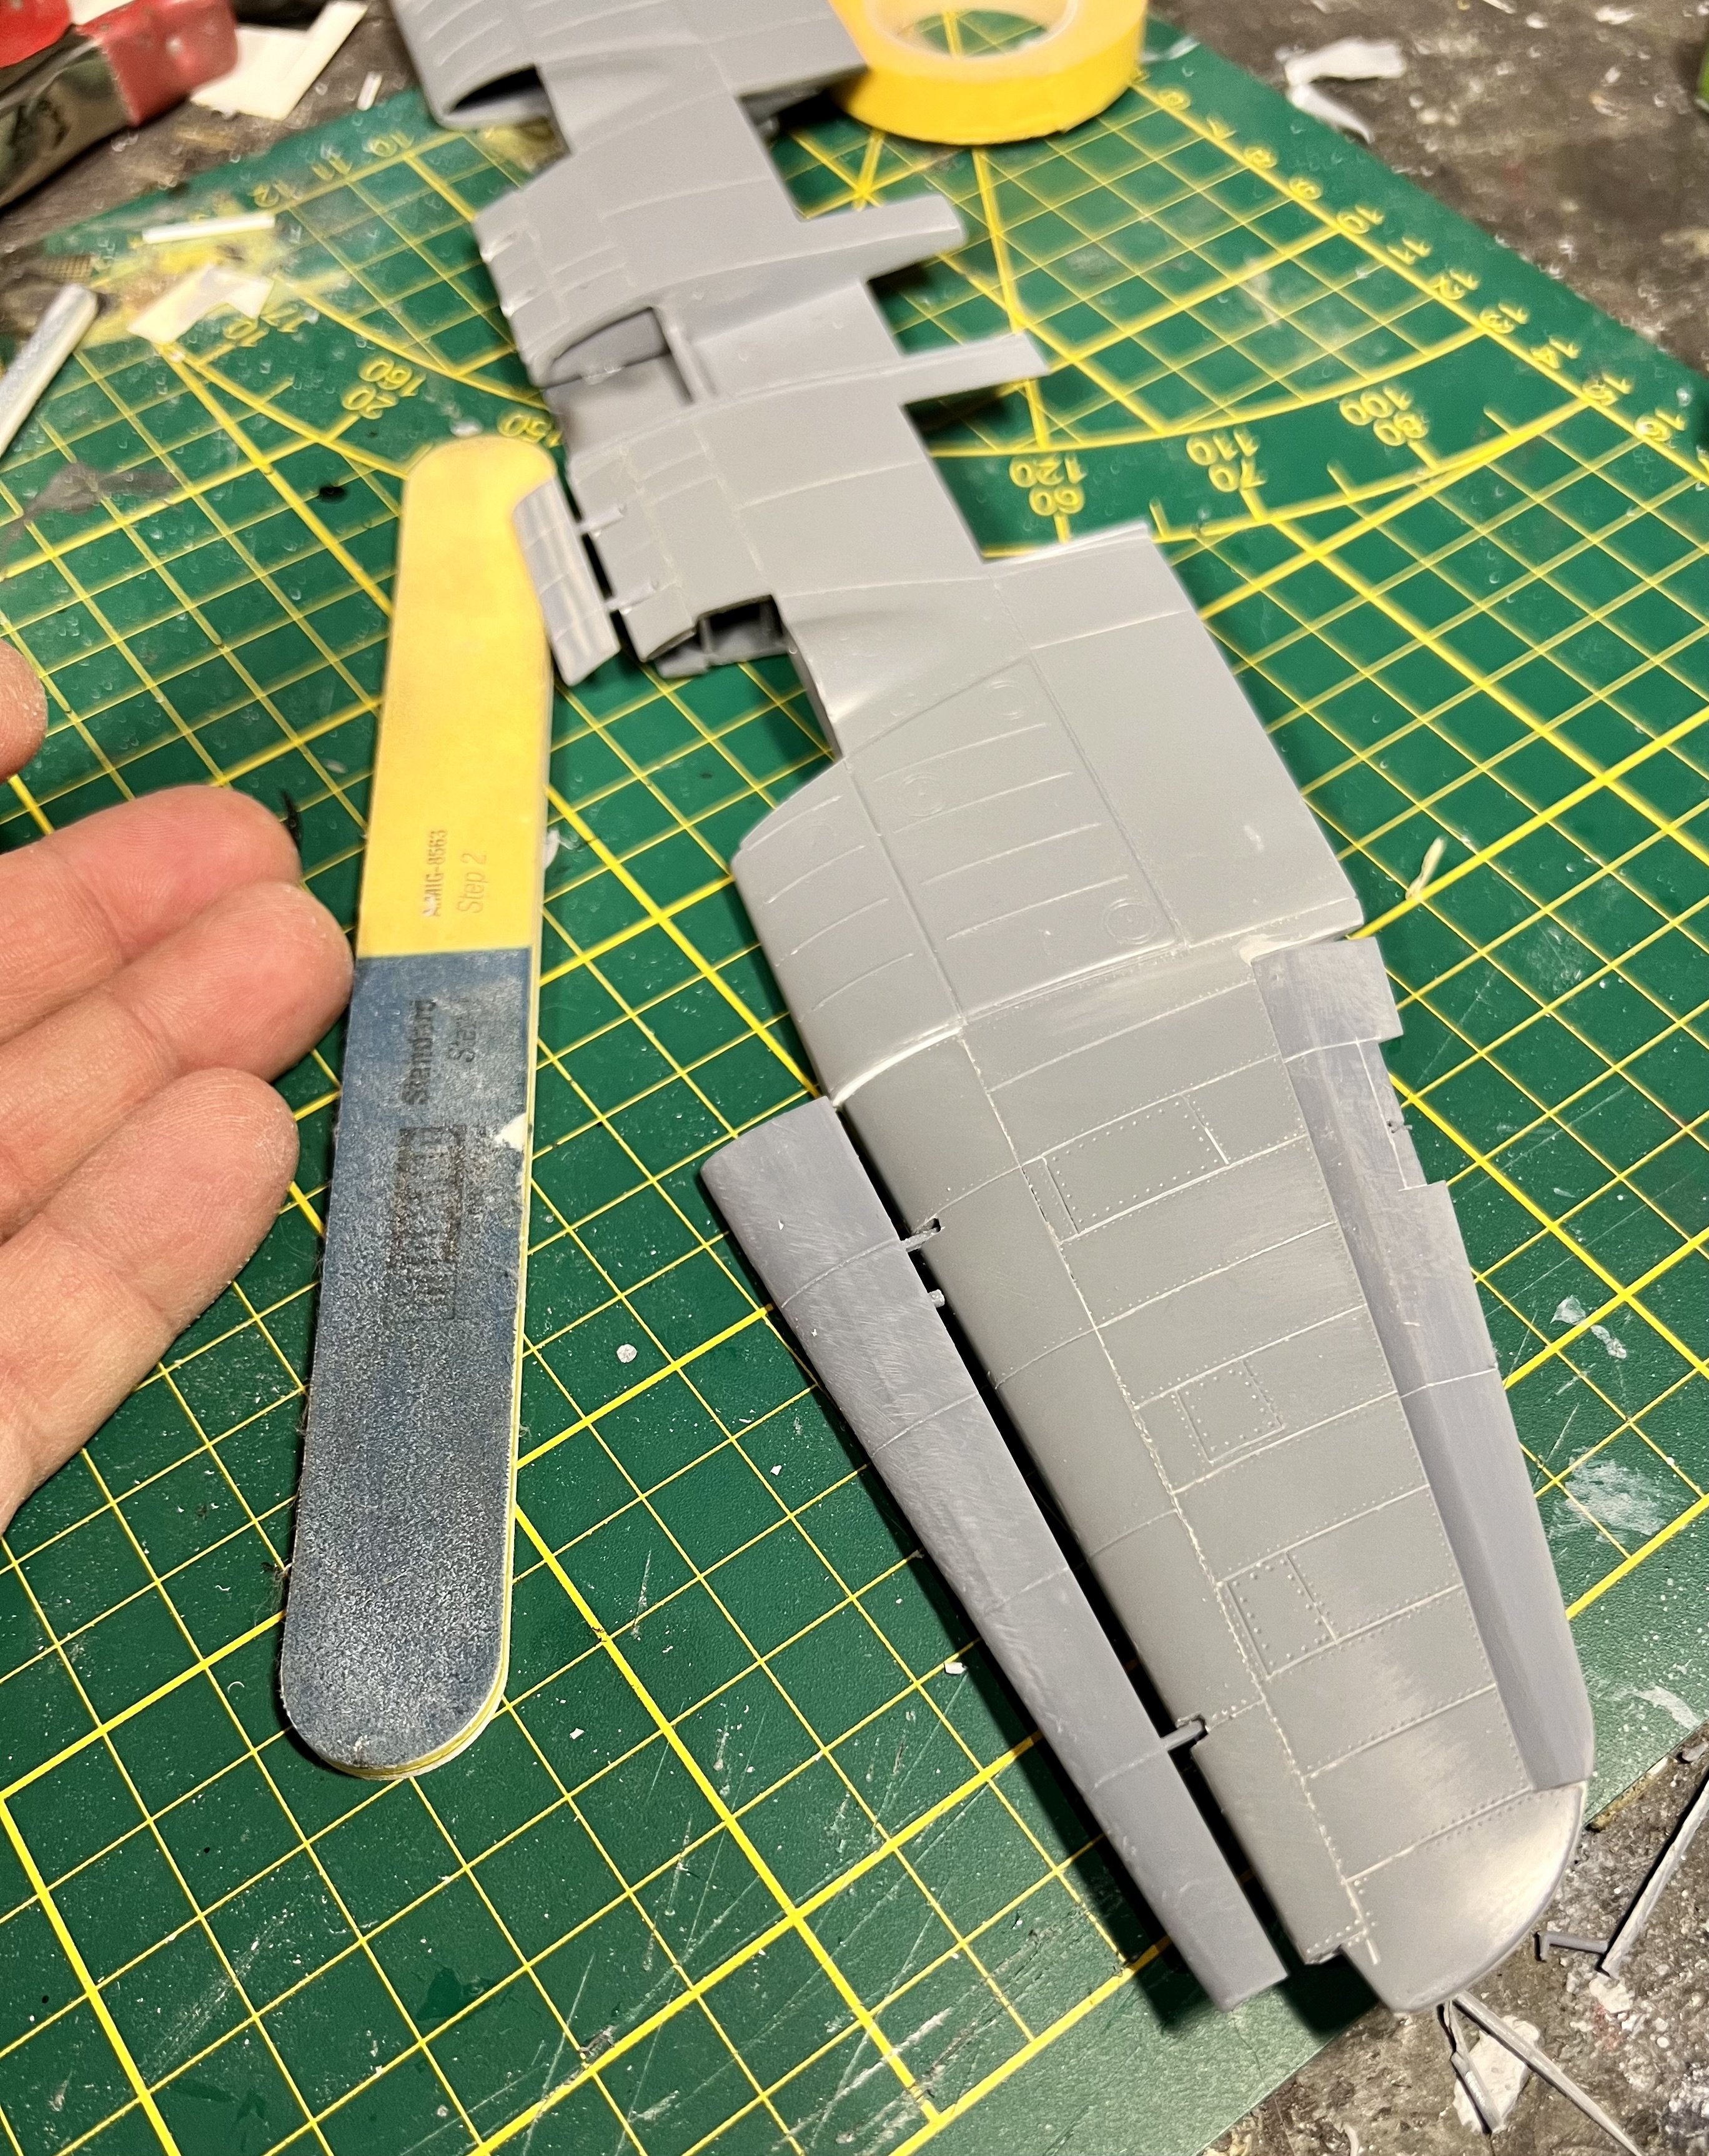
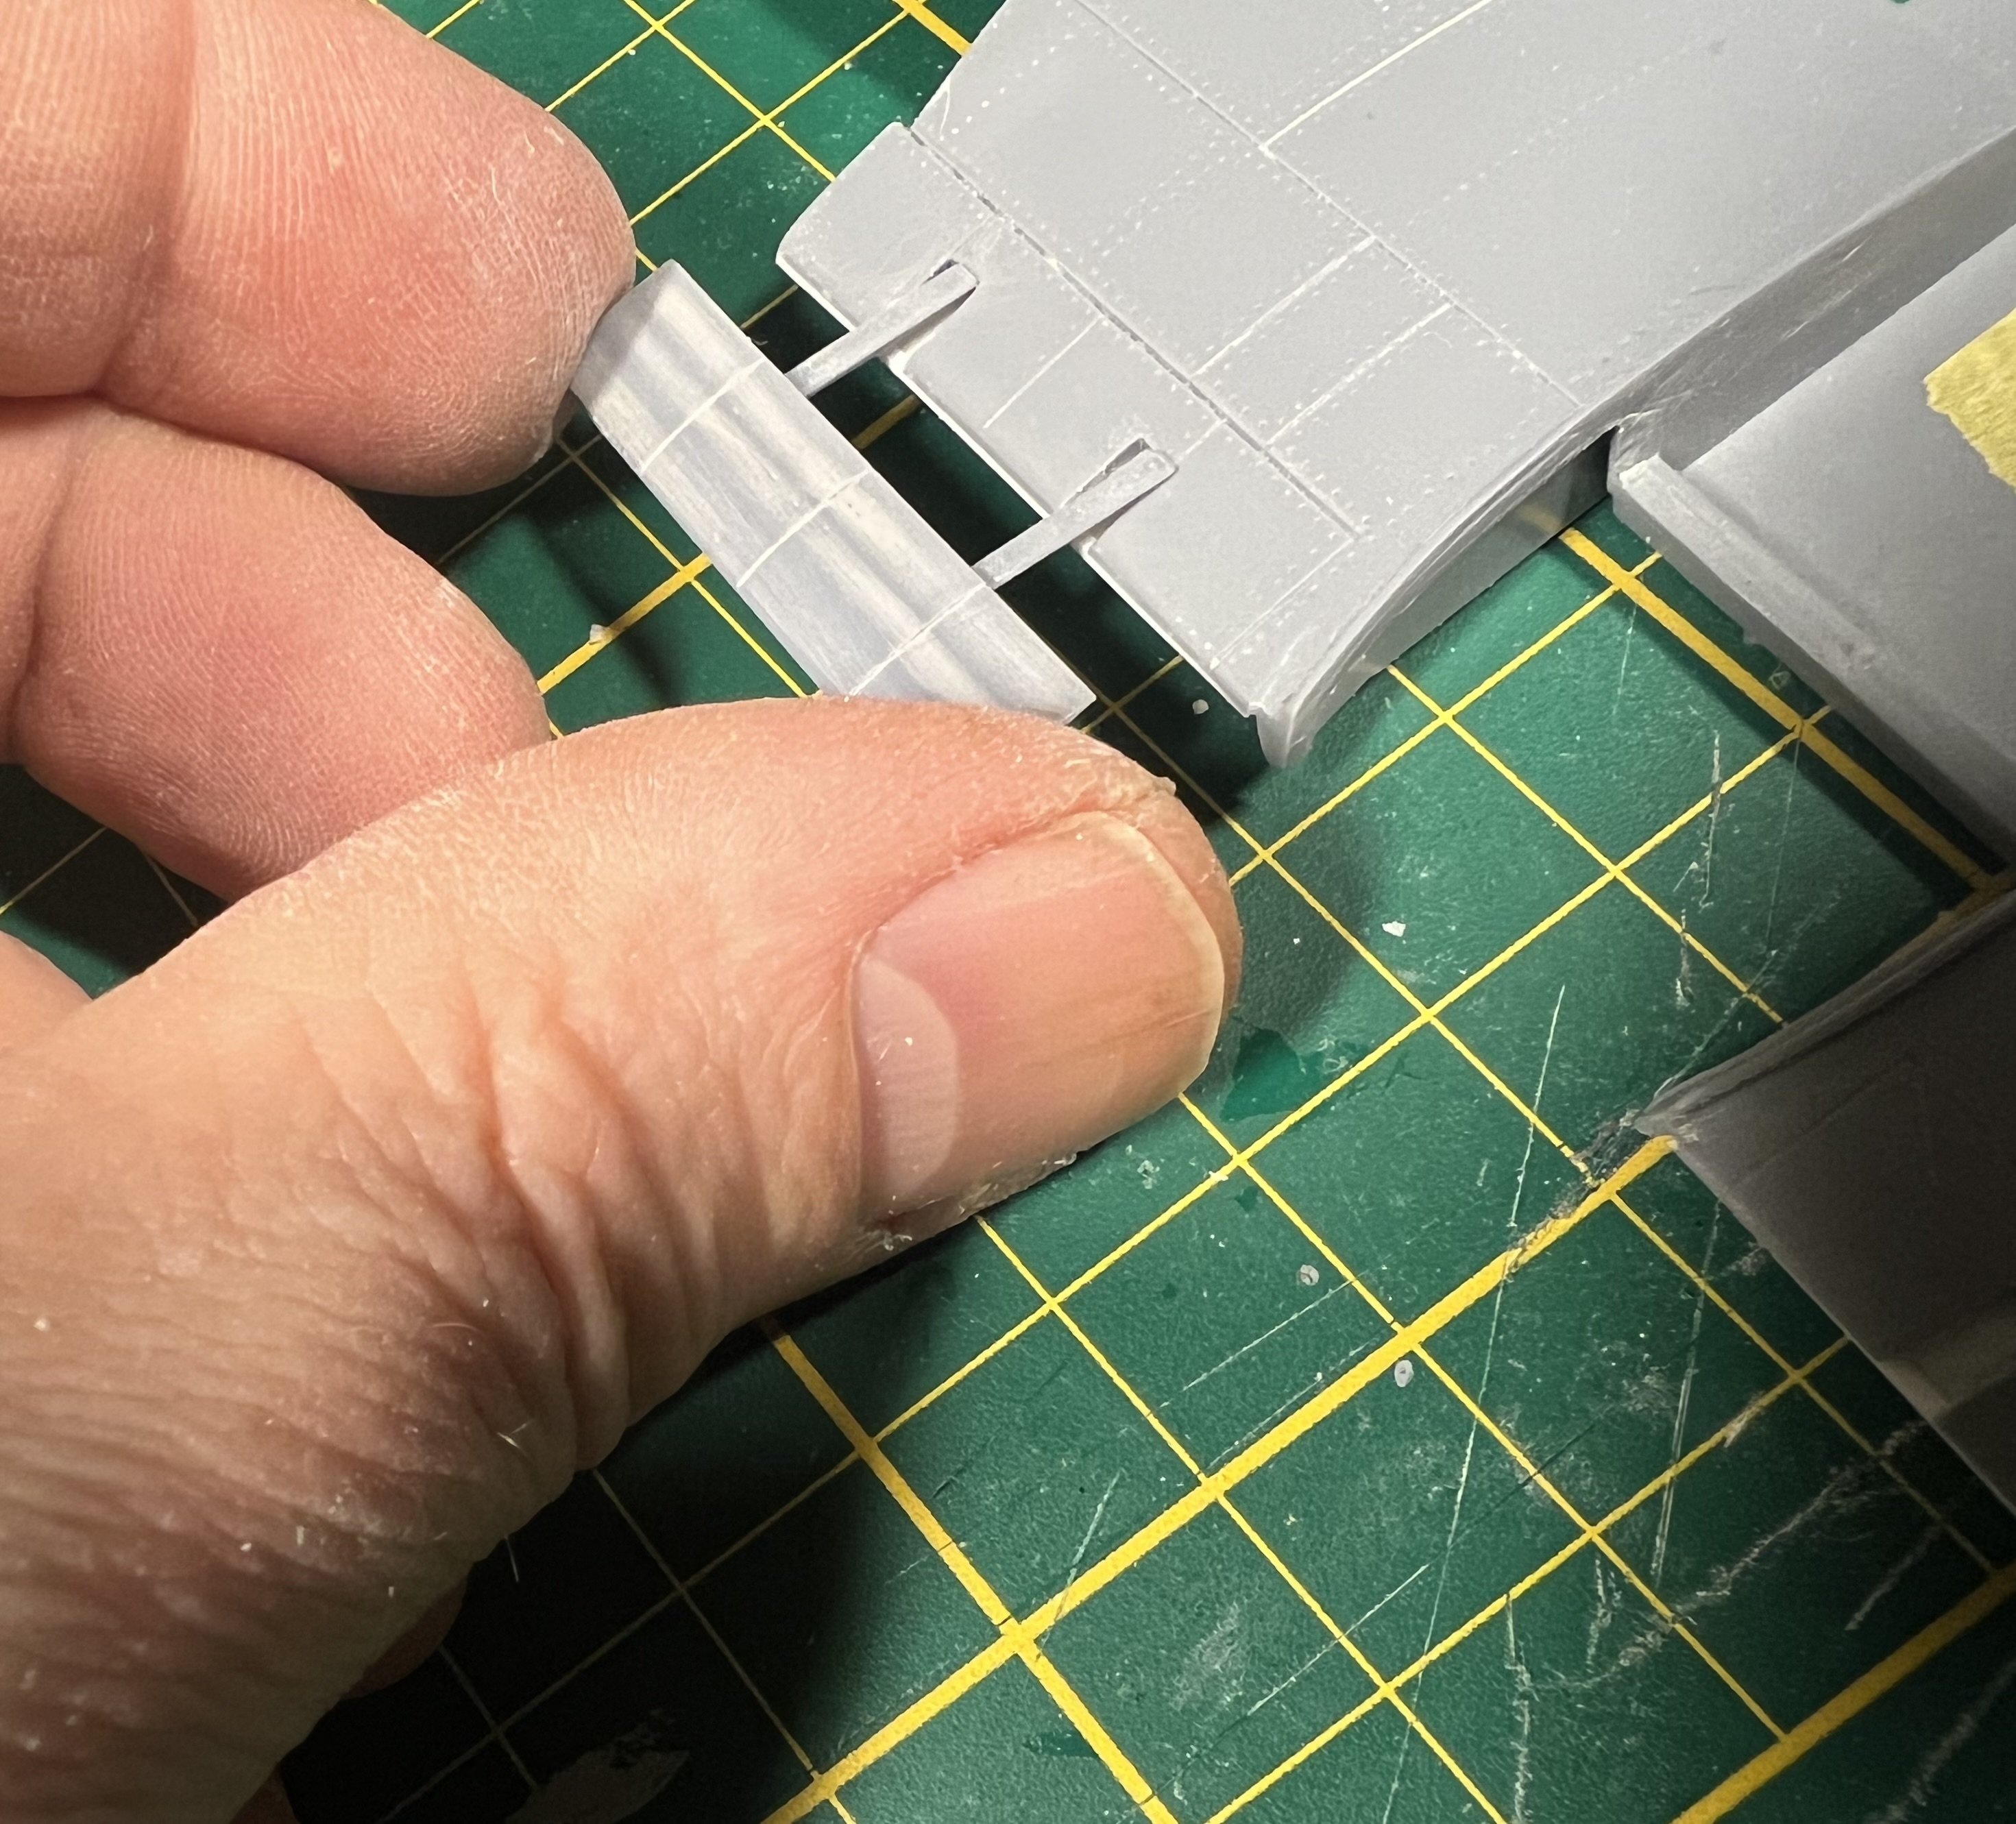
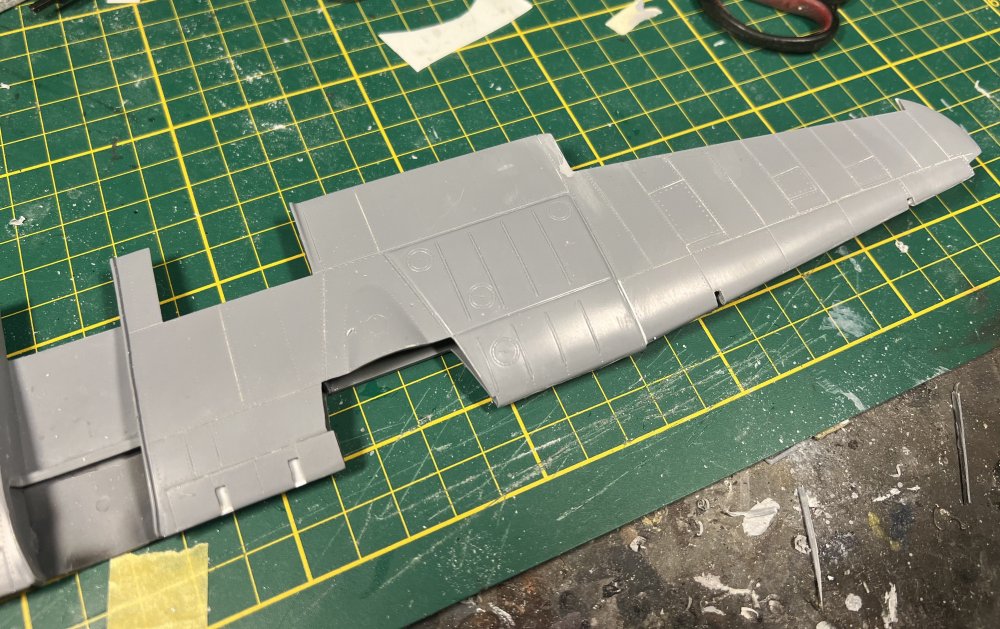
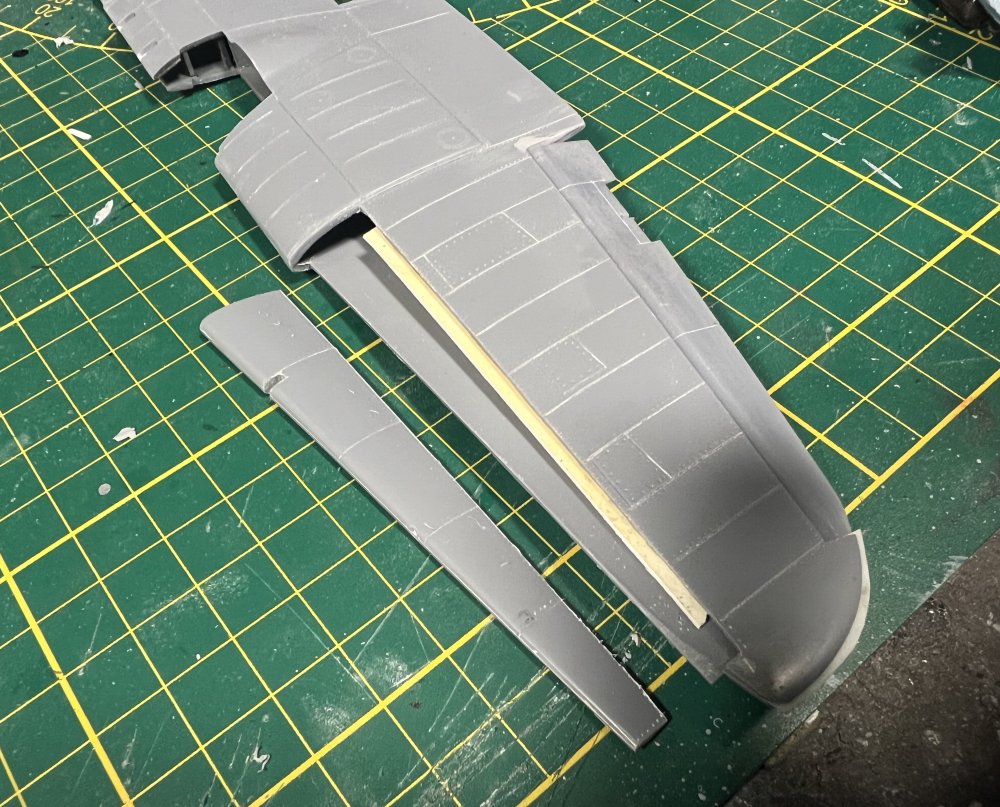
Soo.. working on making the area beneath the slats proper. It’s actually good that i cut out this part. It allows me so set it back a mm and change the angle downward a little to accommodate the slat. If that makes sense. Now working on a 3d model of the slats.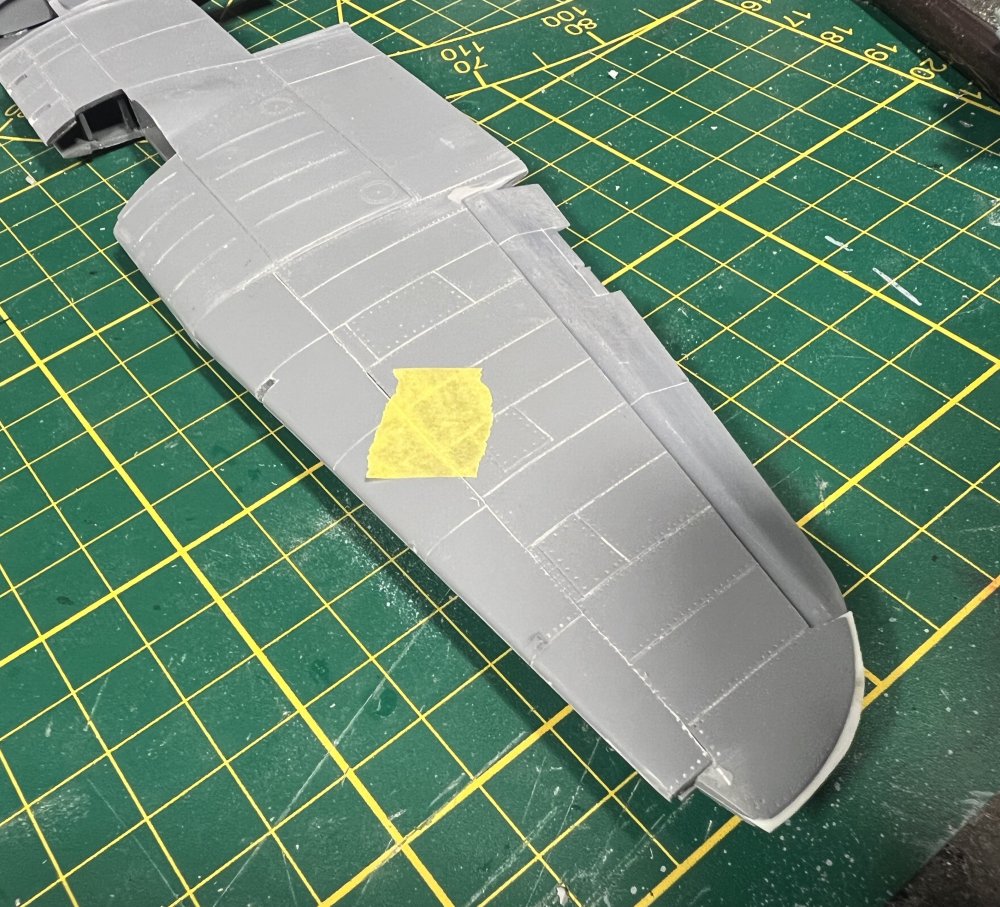
-
1/32 Westland Whirlwind
JeroenPeters replied to JeroenPeters's topic in LSM 1/35 and Larger Work In Progress
Got it! It would have been easier then to leave the leading edge on and craft / 3d print a new slat 😂 -
1/32 Westland Whirlwind
JeroenPeters replied to JeroenPeters's topic in LSM 1/35 and Larger Work In Progress
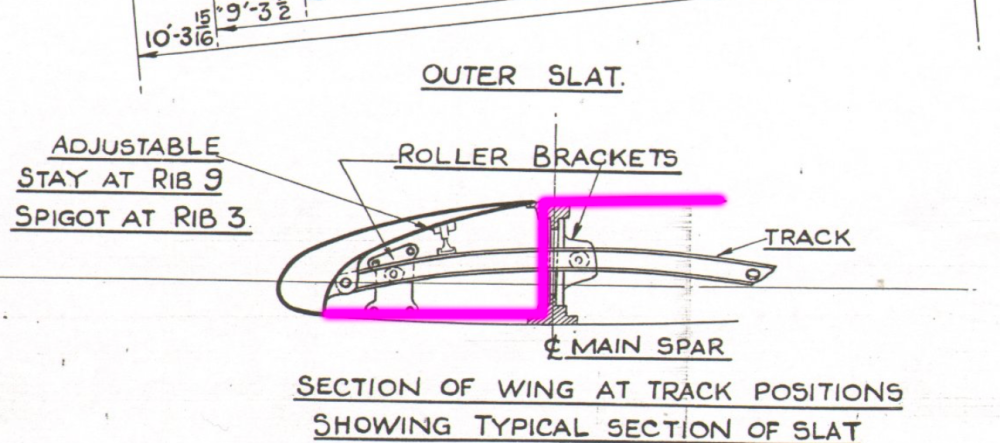
Question for Gunnar When the outer slat is out. Will we see the main spar? I.e.: Will we see the vertical spar? And would that spar be smooth? Closed?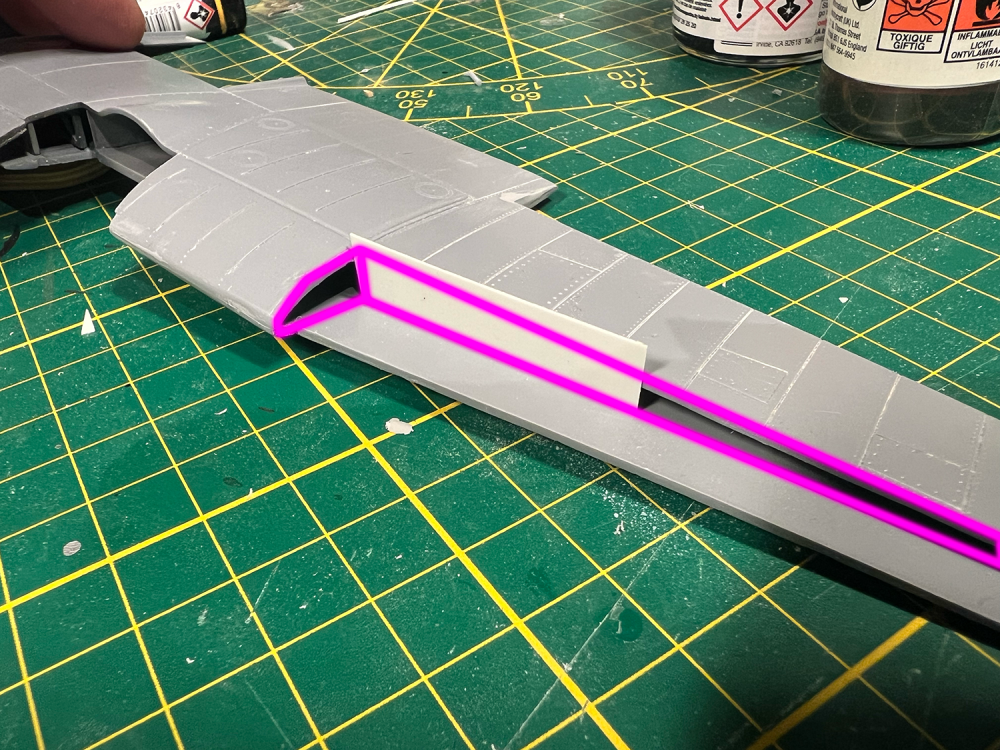
-
1/32 Westland Whirlwind
JeroenPeters replied to JeroenPeters's topic in LSM 1/35 and Larger Work In Progress
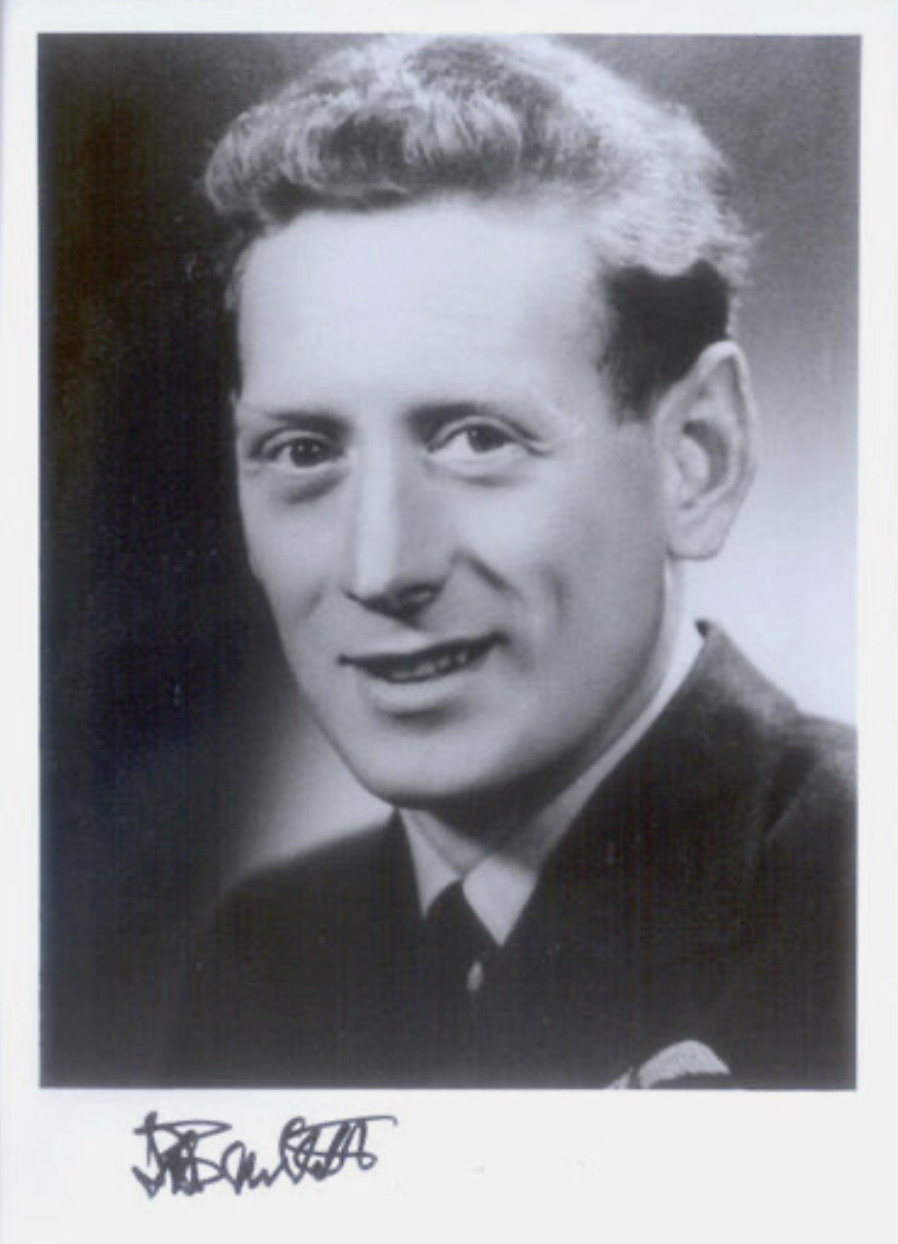
Today, after losing an Ebay battle over a sheet with four Whirlwind pilot signatures, I decided to look for more signatures. A few pilots lived many years after the war (Like Wing Commander J.E. McClure and Group Captain L.H. Bartlett). I managed to find a signed photo of the latter. He mainly flew Hurricanes, but also a Whirlwind (P7111) in which he damaged a Ju-88.
-
1/32 Westland Whirlwind
JeroenPeters replied to JeroenPeters's topic in LSM 1/35 and Larger Work In Progress
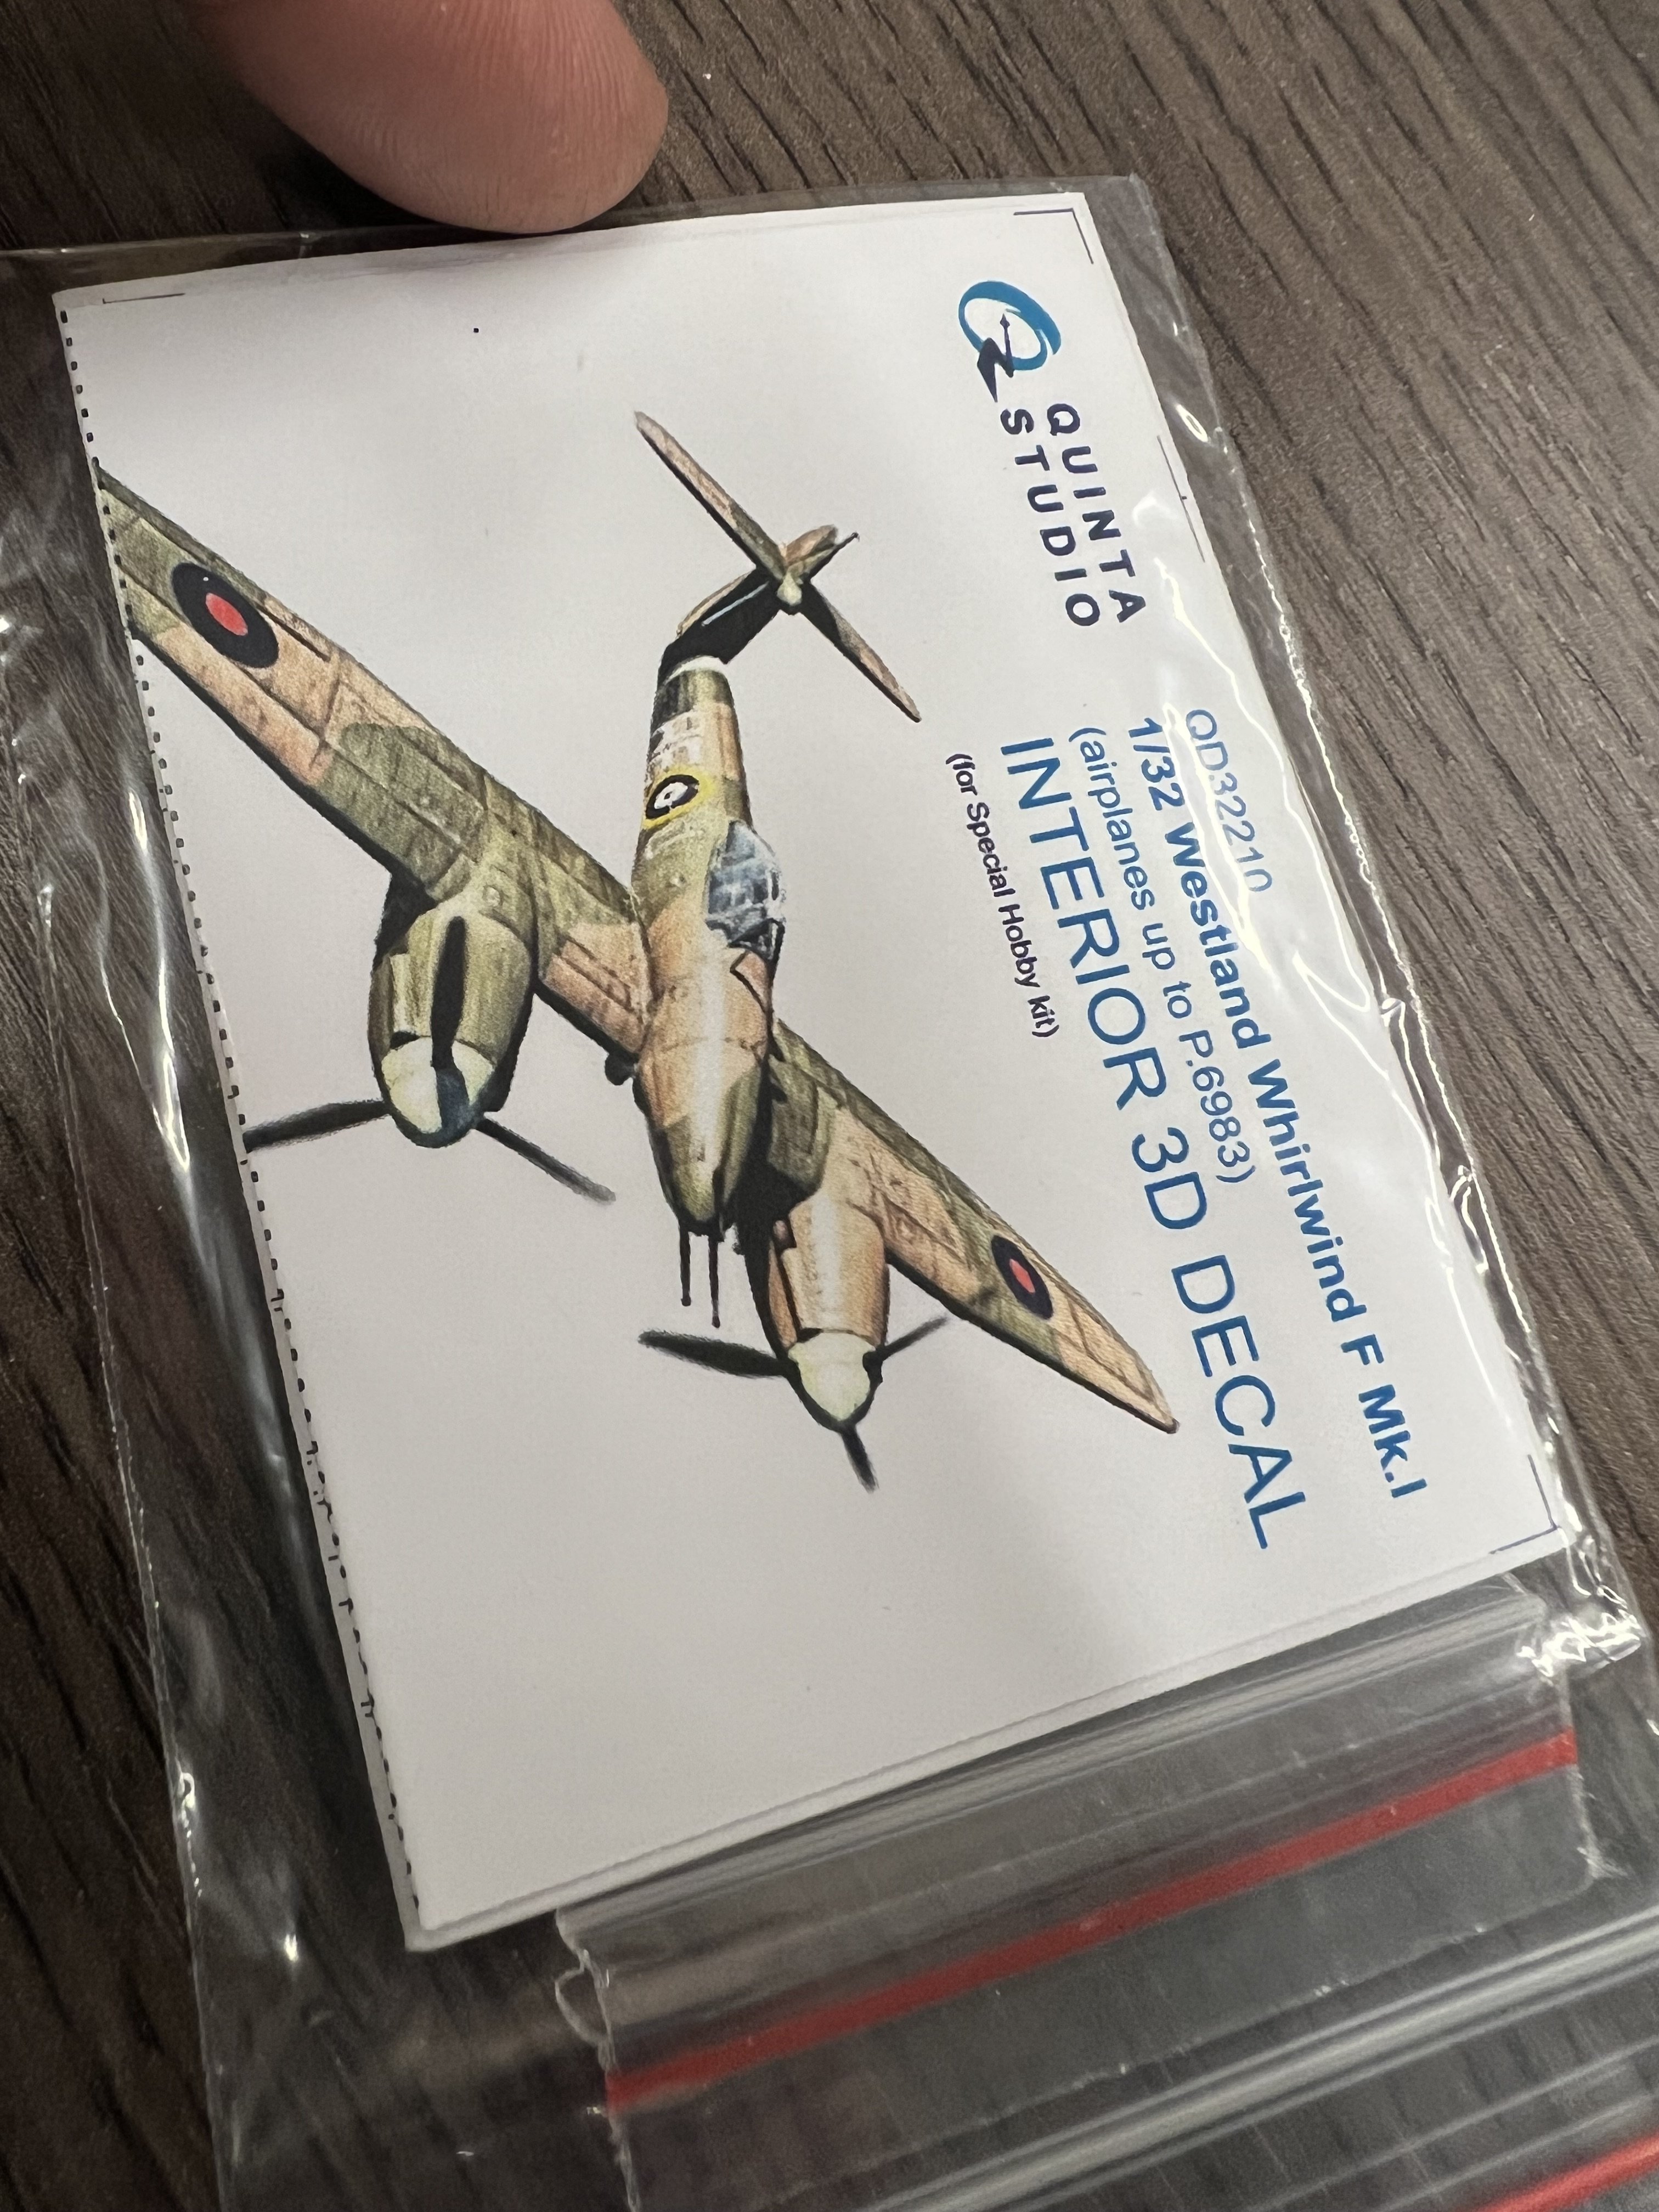
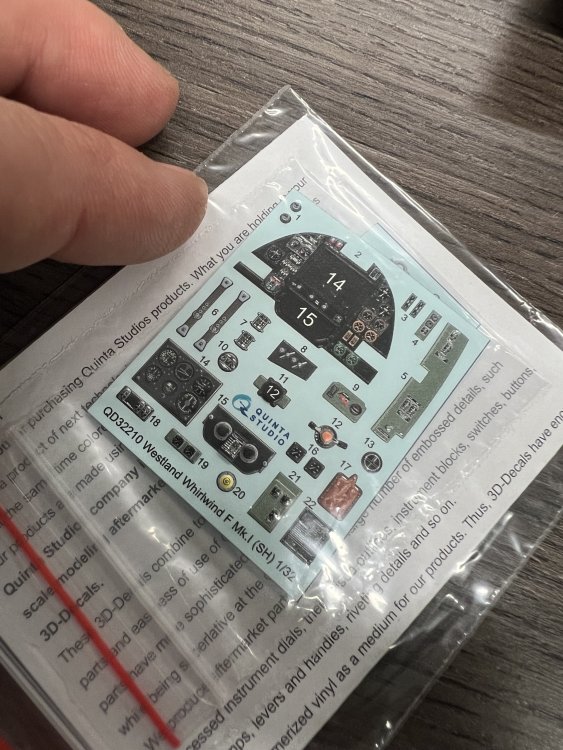
Quinta set arrived! 50€ shipping yo! Looks good though. Way better than Kitsworld.
-
1/32 Westland Whirlwind
JeroenPeters replied to JeroenPeters's topic in LSM 1/35 and Larger Work In Progress
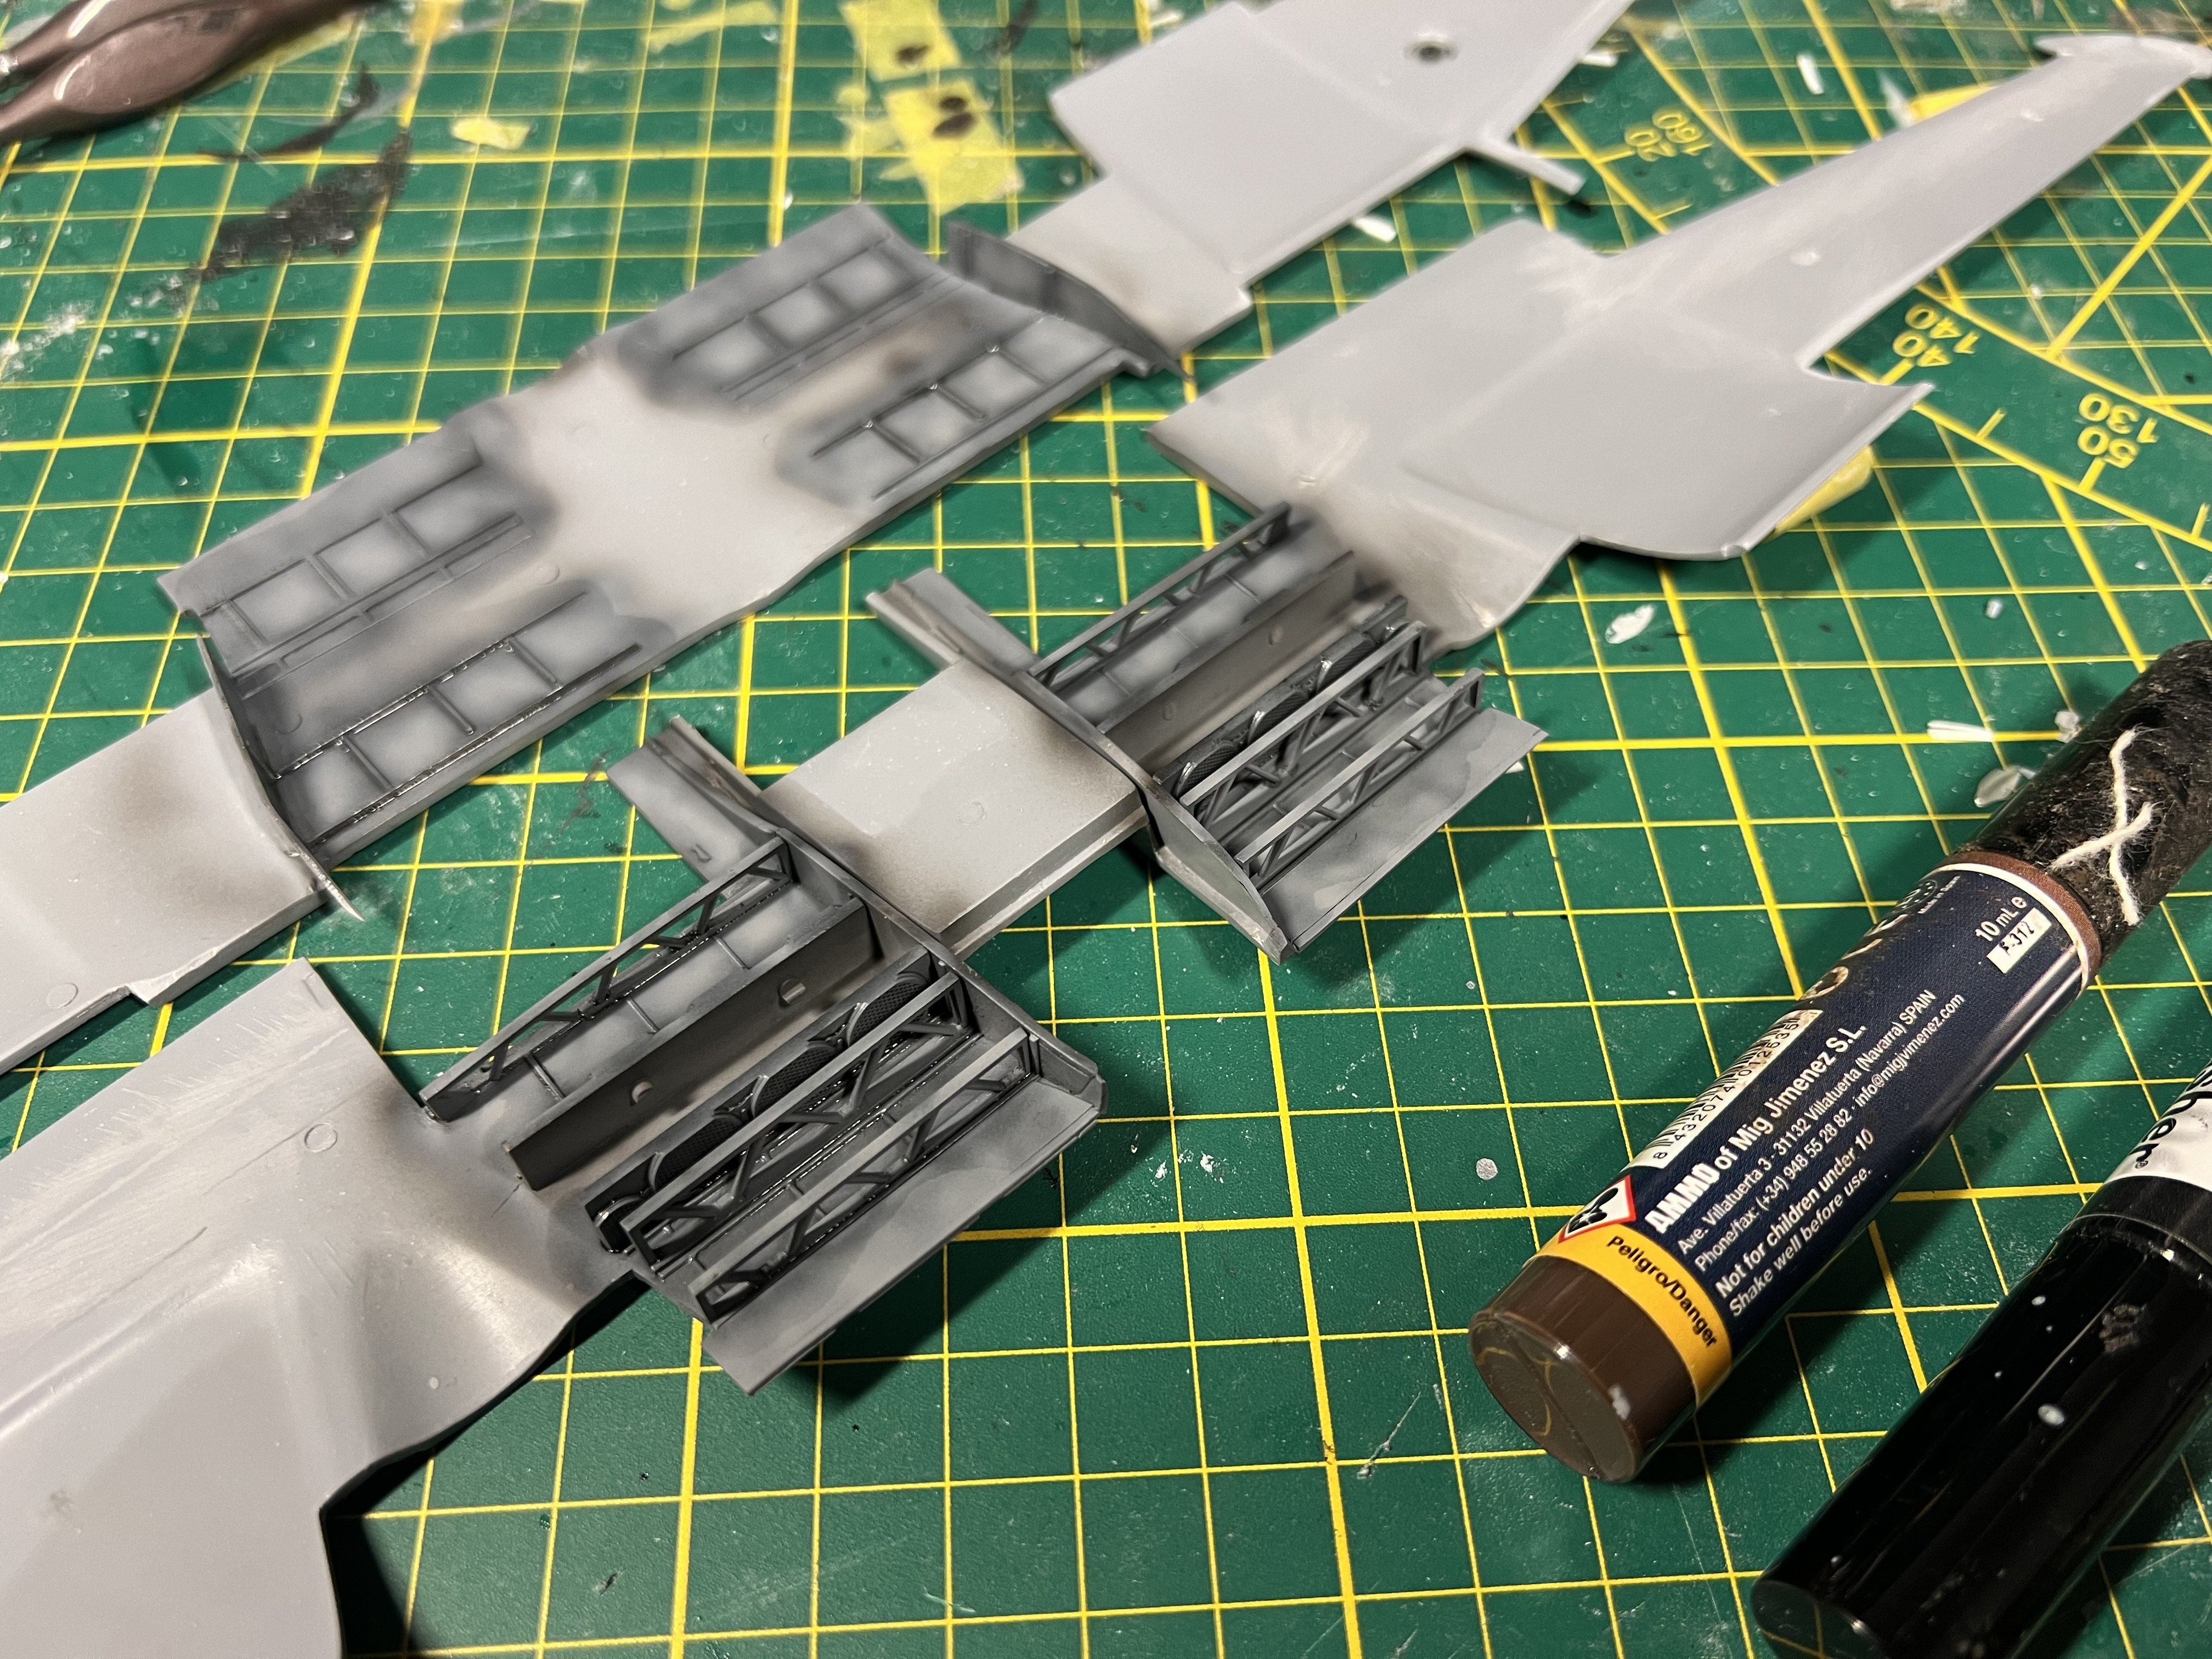
First paint is on. I sprayed a base of grey tones. Aluminum tones next.
- 439 replies
-
- 10
-
-
1/32 Westland Whirlwind
JeroenPeters replied to JeroenPeters's topic in LSM 1/35 and Larger Work In Progress
So i closed the inside of the oil cooler intake.

-
1/32 Westland Whirlwind
JeroenPeters replied to JeroenPeters's topic in LSM 1/35 and Larger Work In Progress
Really interesting. I see the inner slats are not completely straight and taper slightly. And now i see hoe the rails disappear inside the upper wing. I need to make some adjustments, but i know how i will make them. Thnx! -
1/32 Westland Whirlwind
JeroenPeters replied to JeroenPeters's topic in LSM 1/35 and Larger Work In Progress
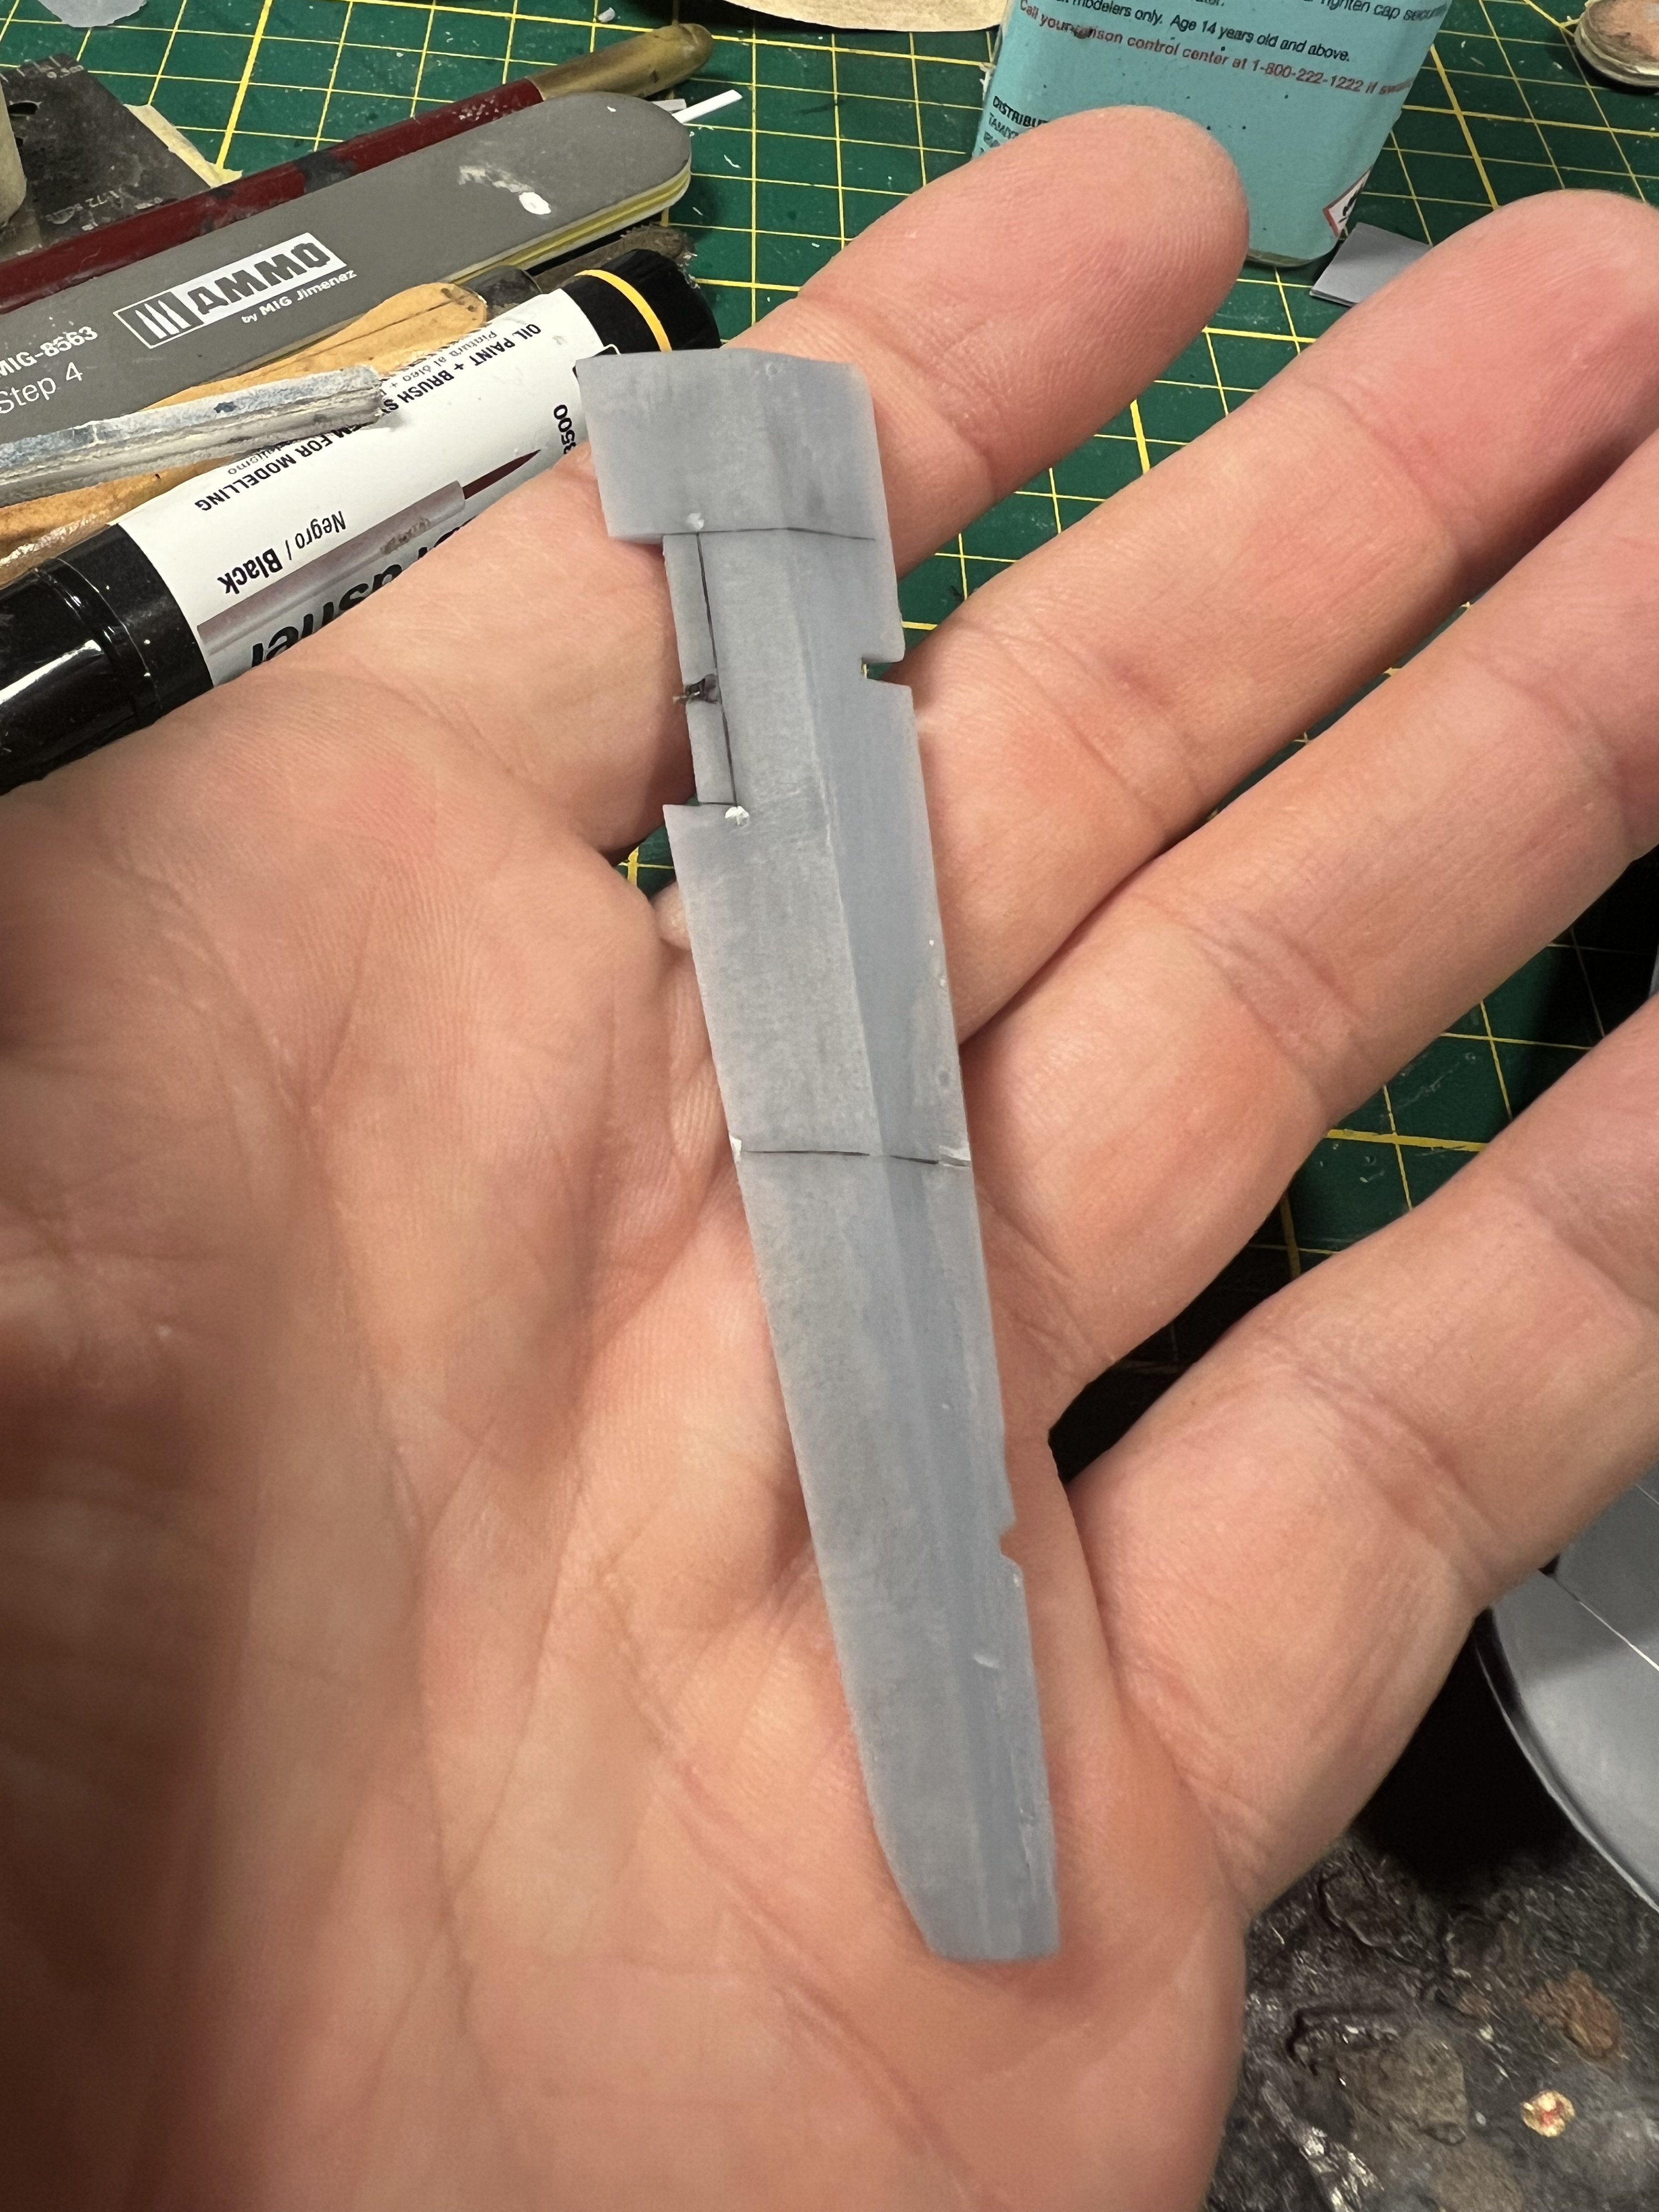
scribing in the resin. The resin is delicate. Let’s say i’m glad i printed a few sets.

-
1/32 Westland Whirlwind
JeroenPeters replied to JeroenPeters's topic in LSM 1/35 and Larger Work In Progress
The aileron looks ok. Only need to add panellines and rivets. Looking at the pics right now i see a very small chip missing in the corner. Will have to fix that.
-
1/32 Westland Whirlwind
JeroenPeters replied to JeroenPeters's topic in LSM 1/35 and Larger Work In Progress
Finally happy with the slats after printing in every angle and setting. The resin is perfectly scribable so i enhanced the panellines on them. Nextl: the ailerons