JeroenPeters
-
Posts
4,867 -
Joined
-
Last visited
Content Type
Profiles
Forums
Events
Gallery
Everything posted by JeroenPeters
-

1/32 Westland Whirlwind
JeroenPeters replied to JeroenPeters's topic in LSM 1/35 and Larger Work In Progress
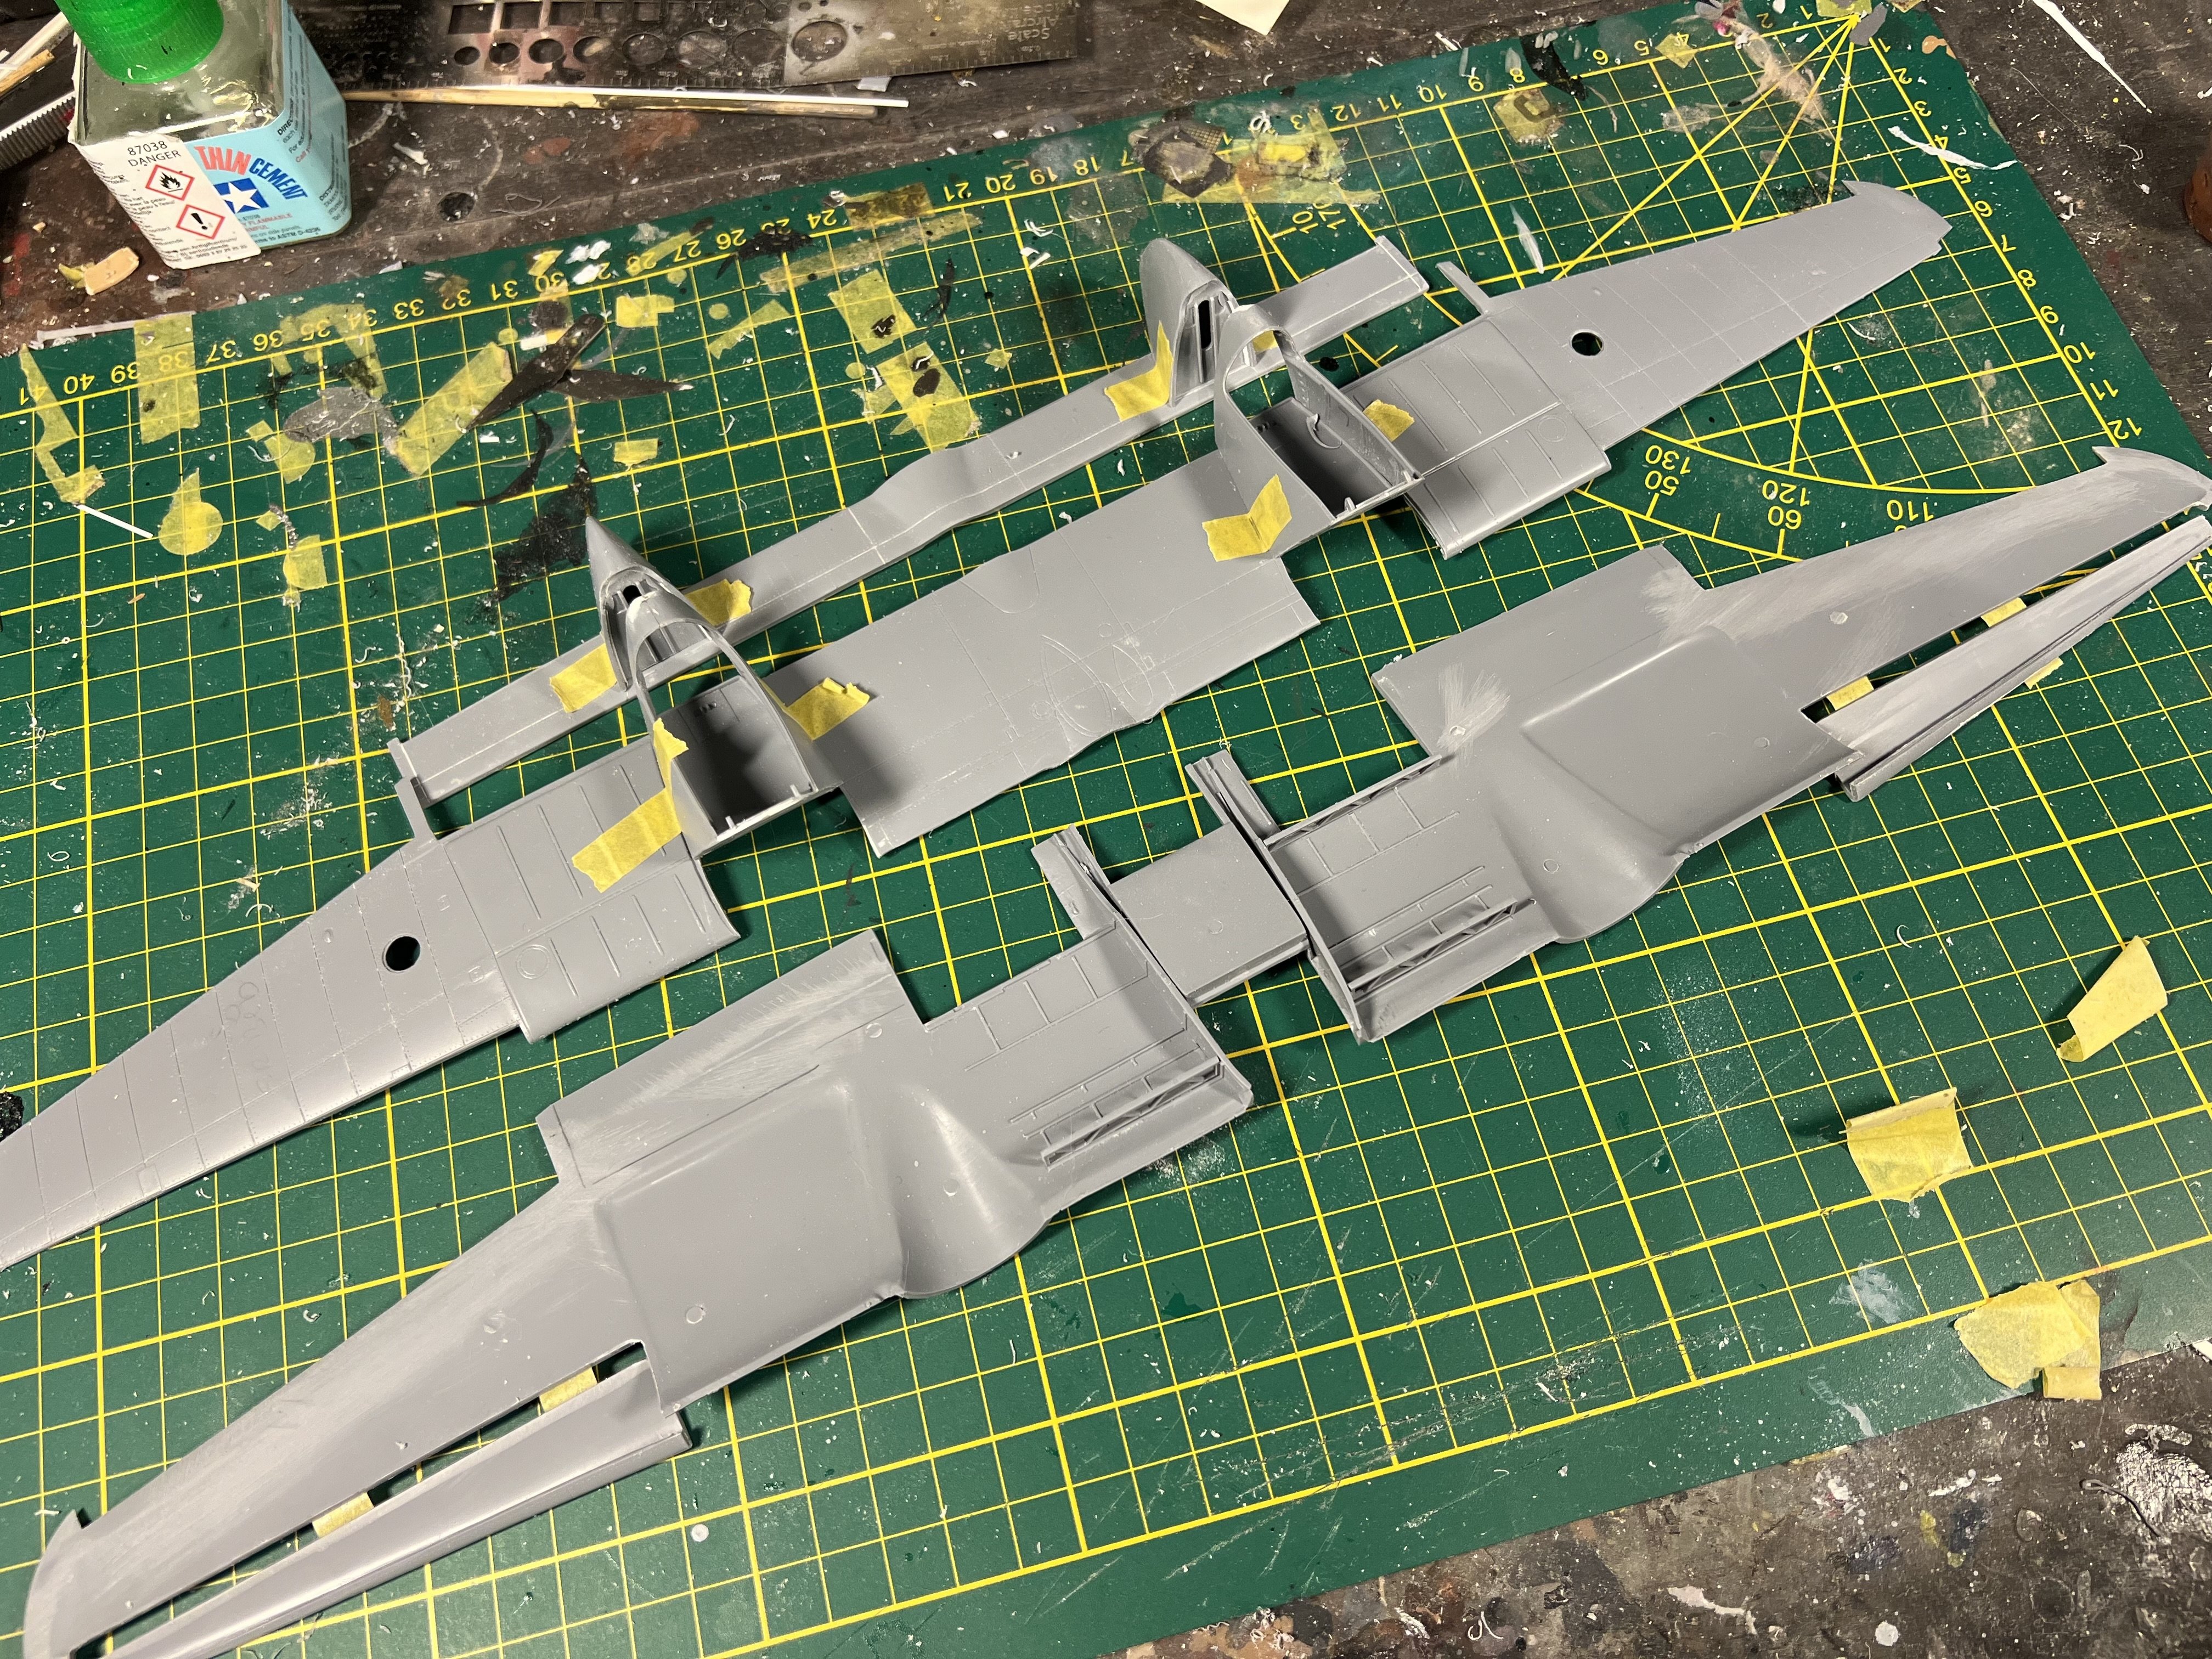
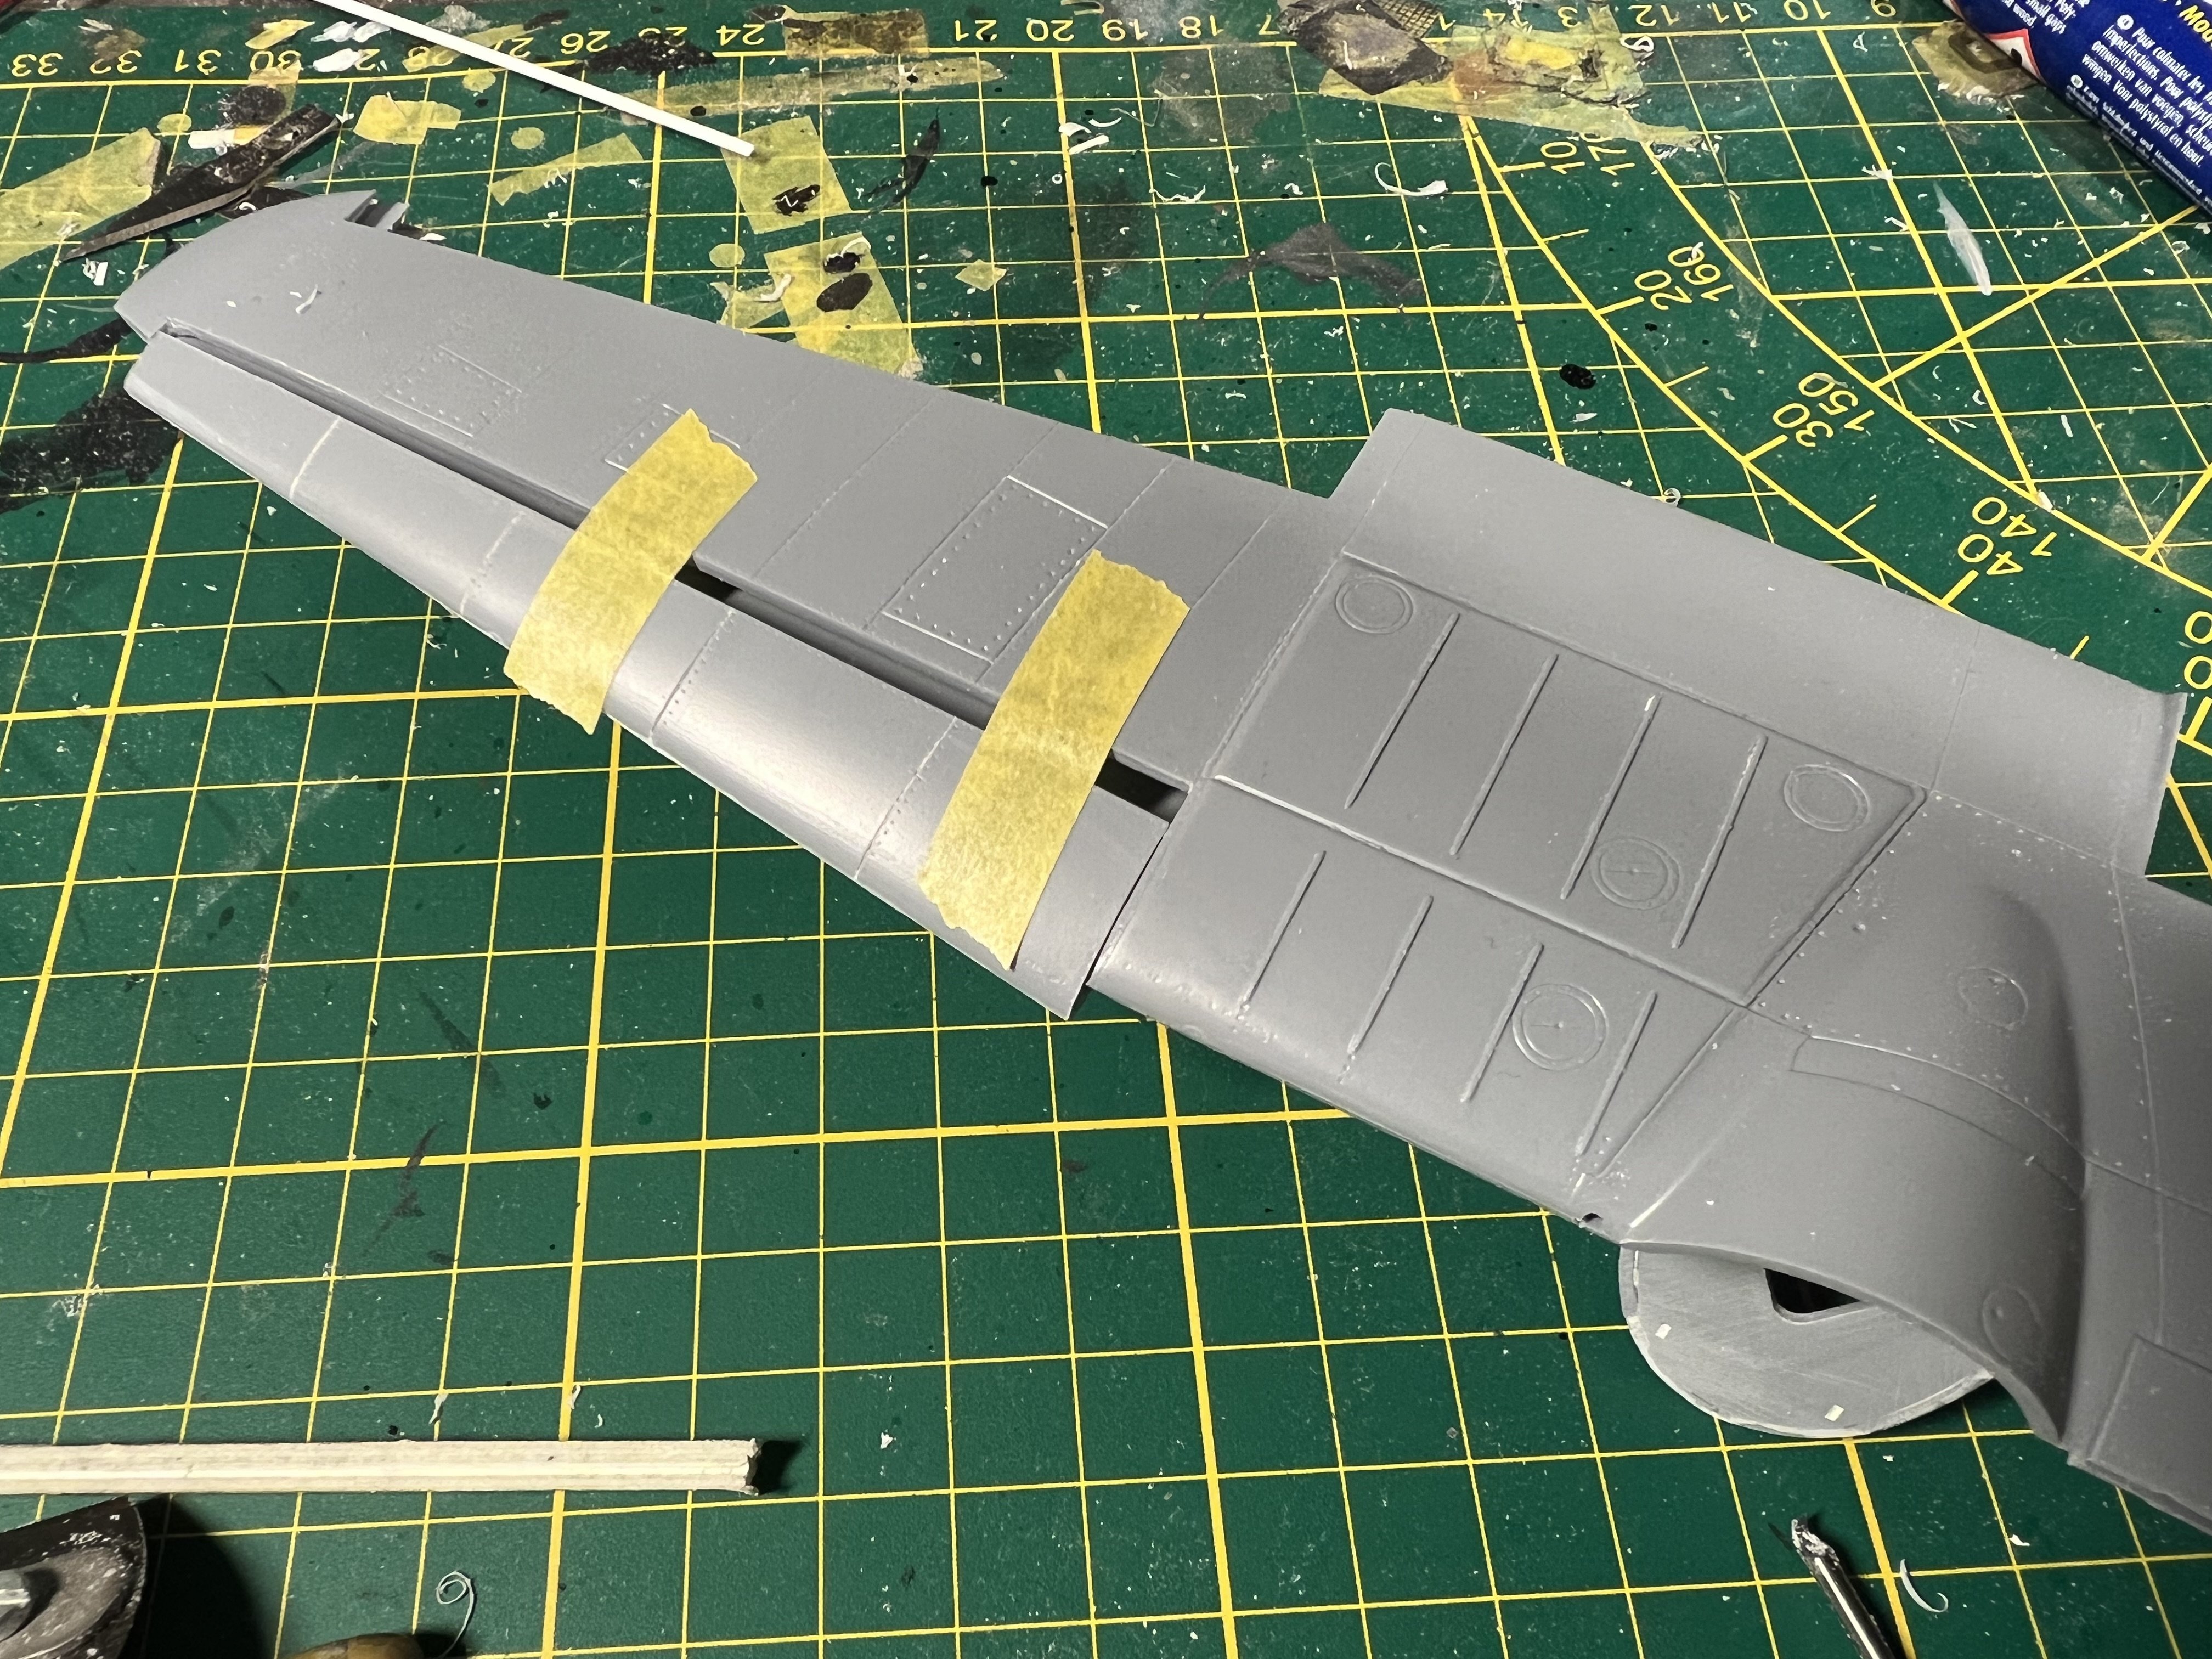
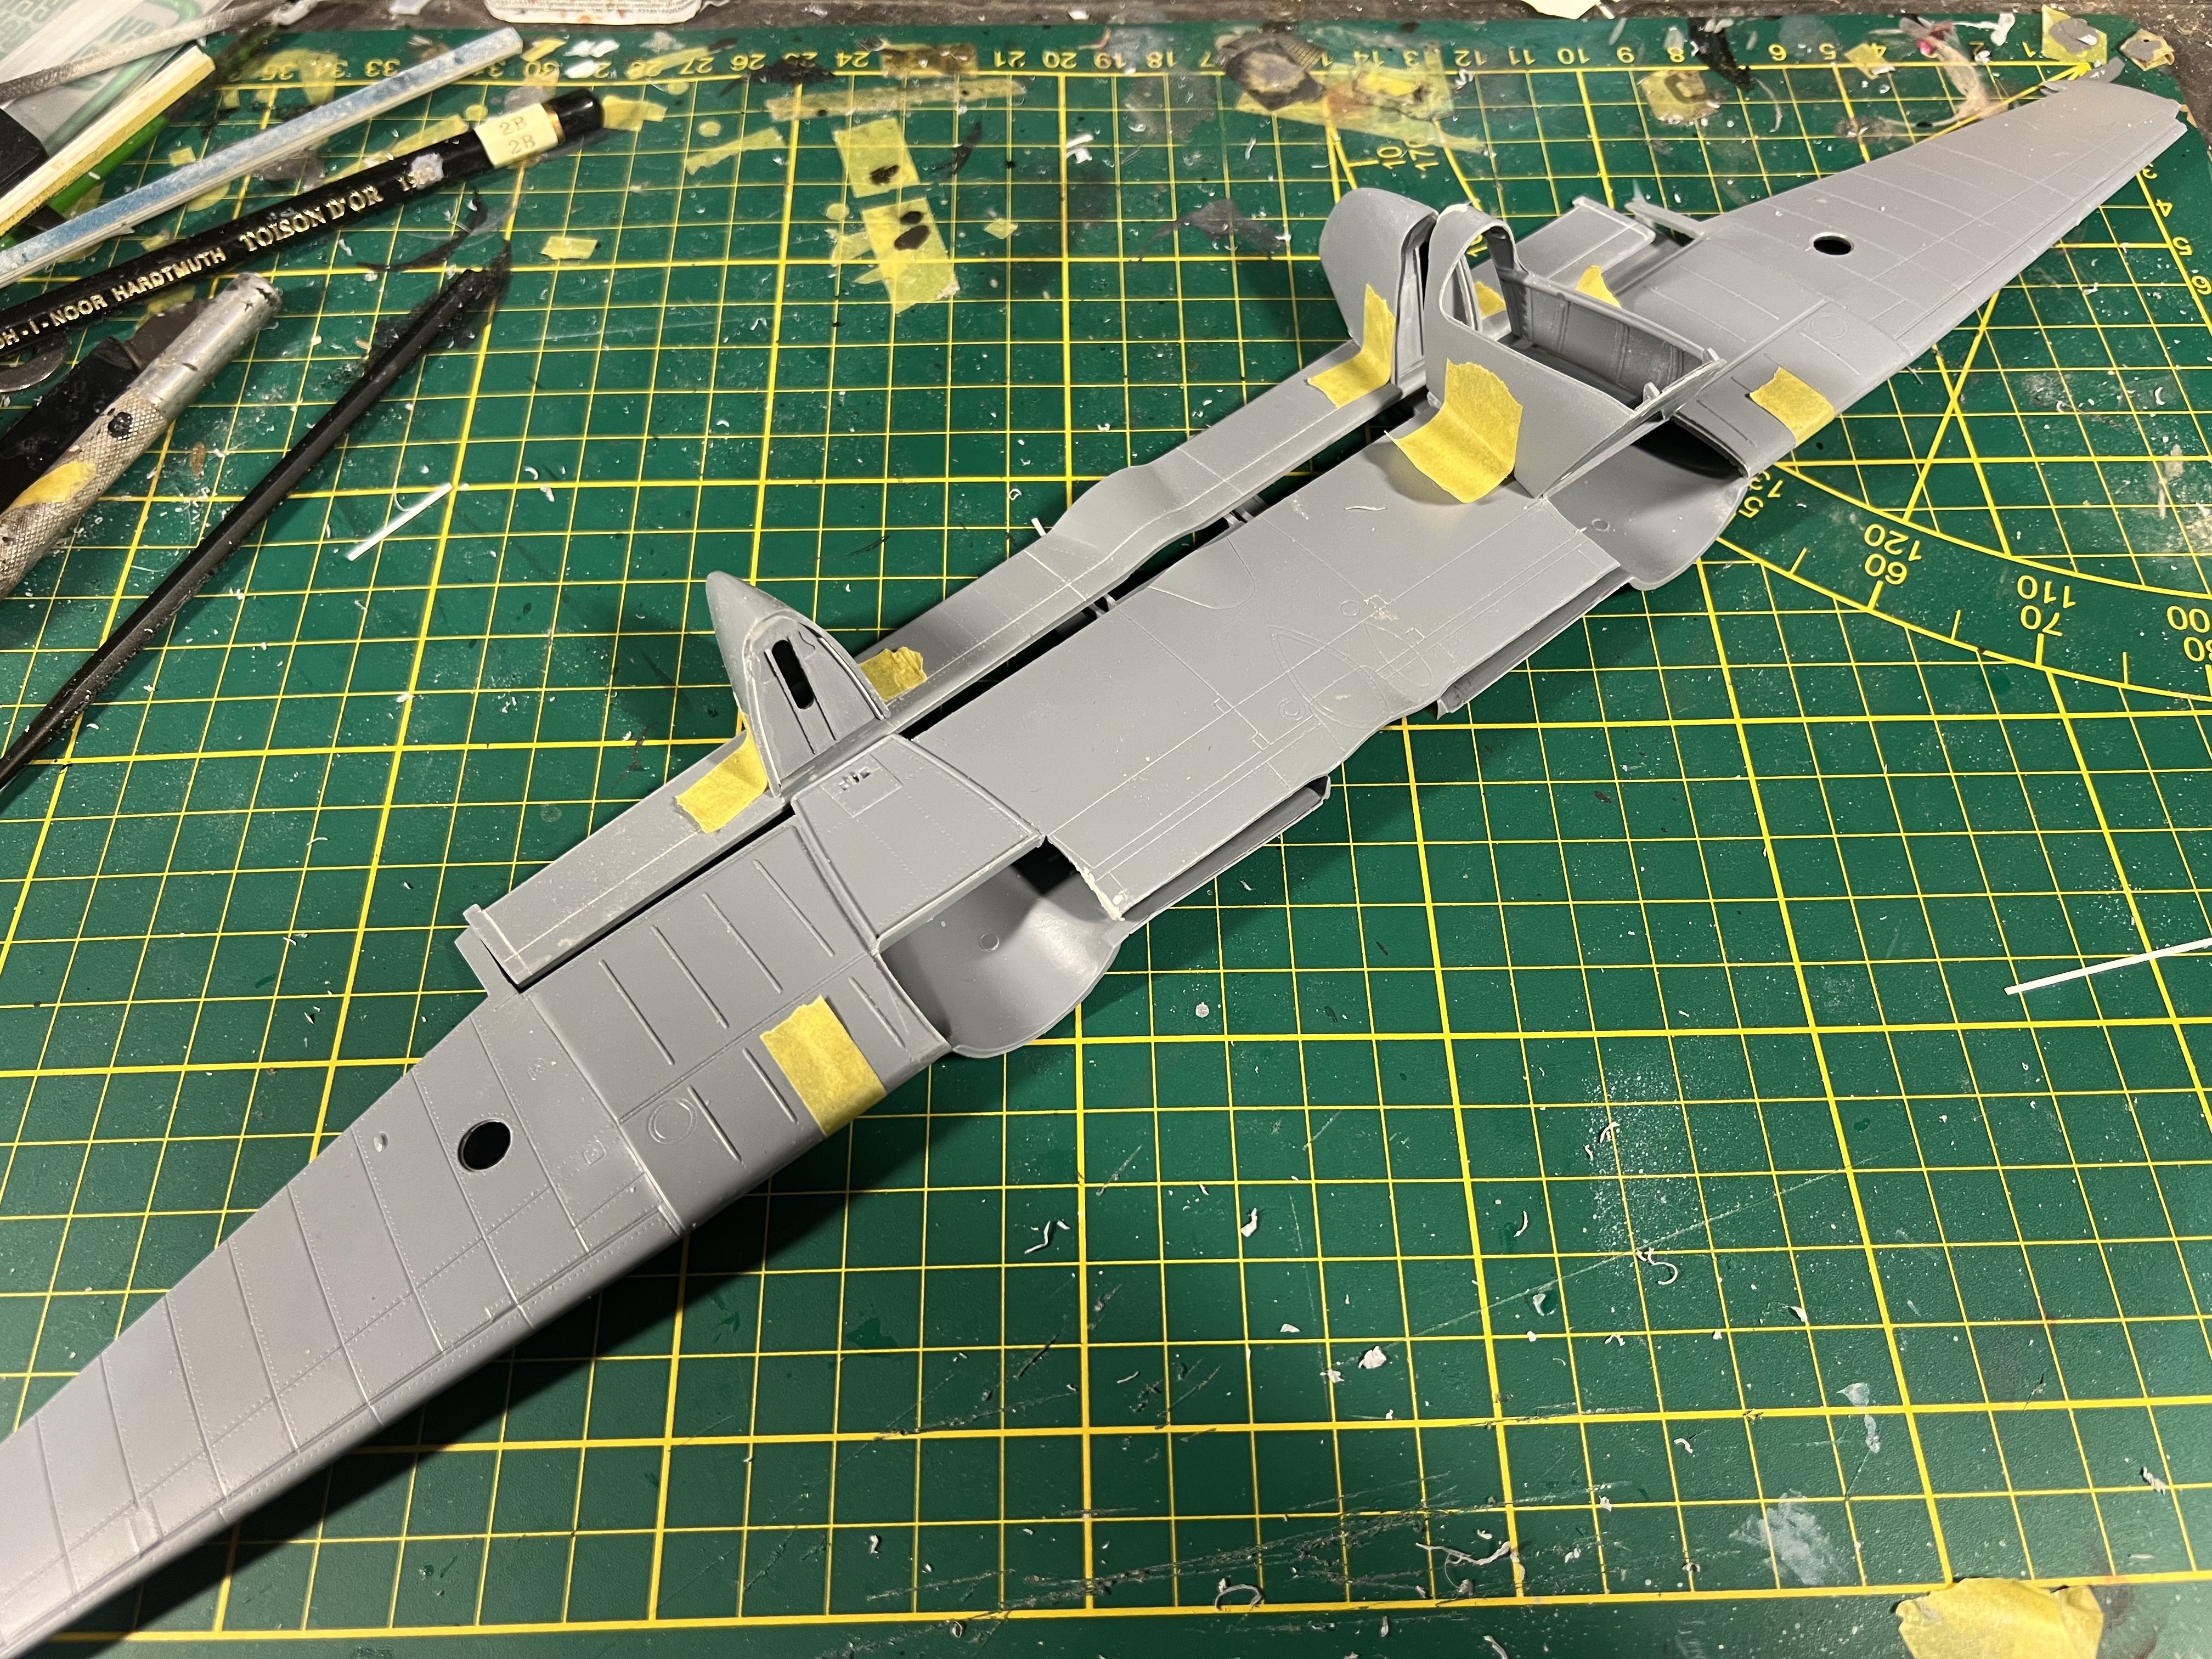
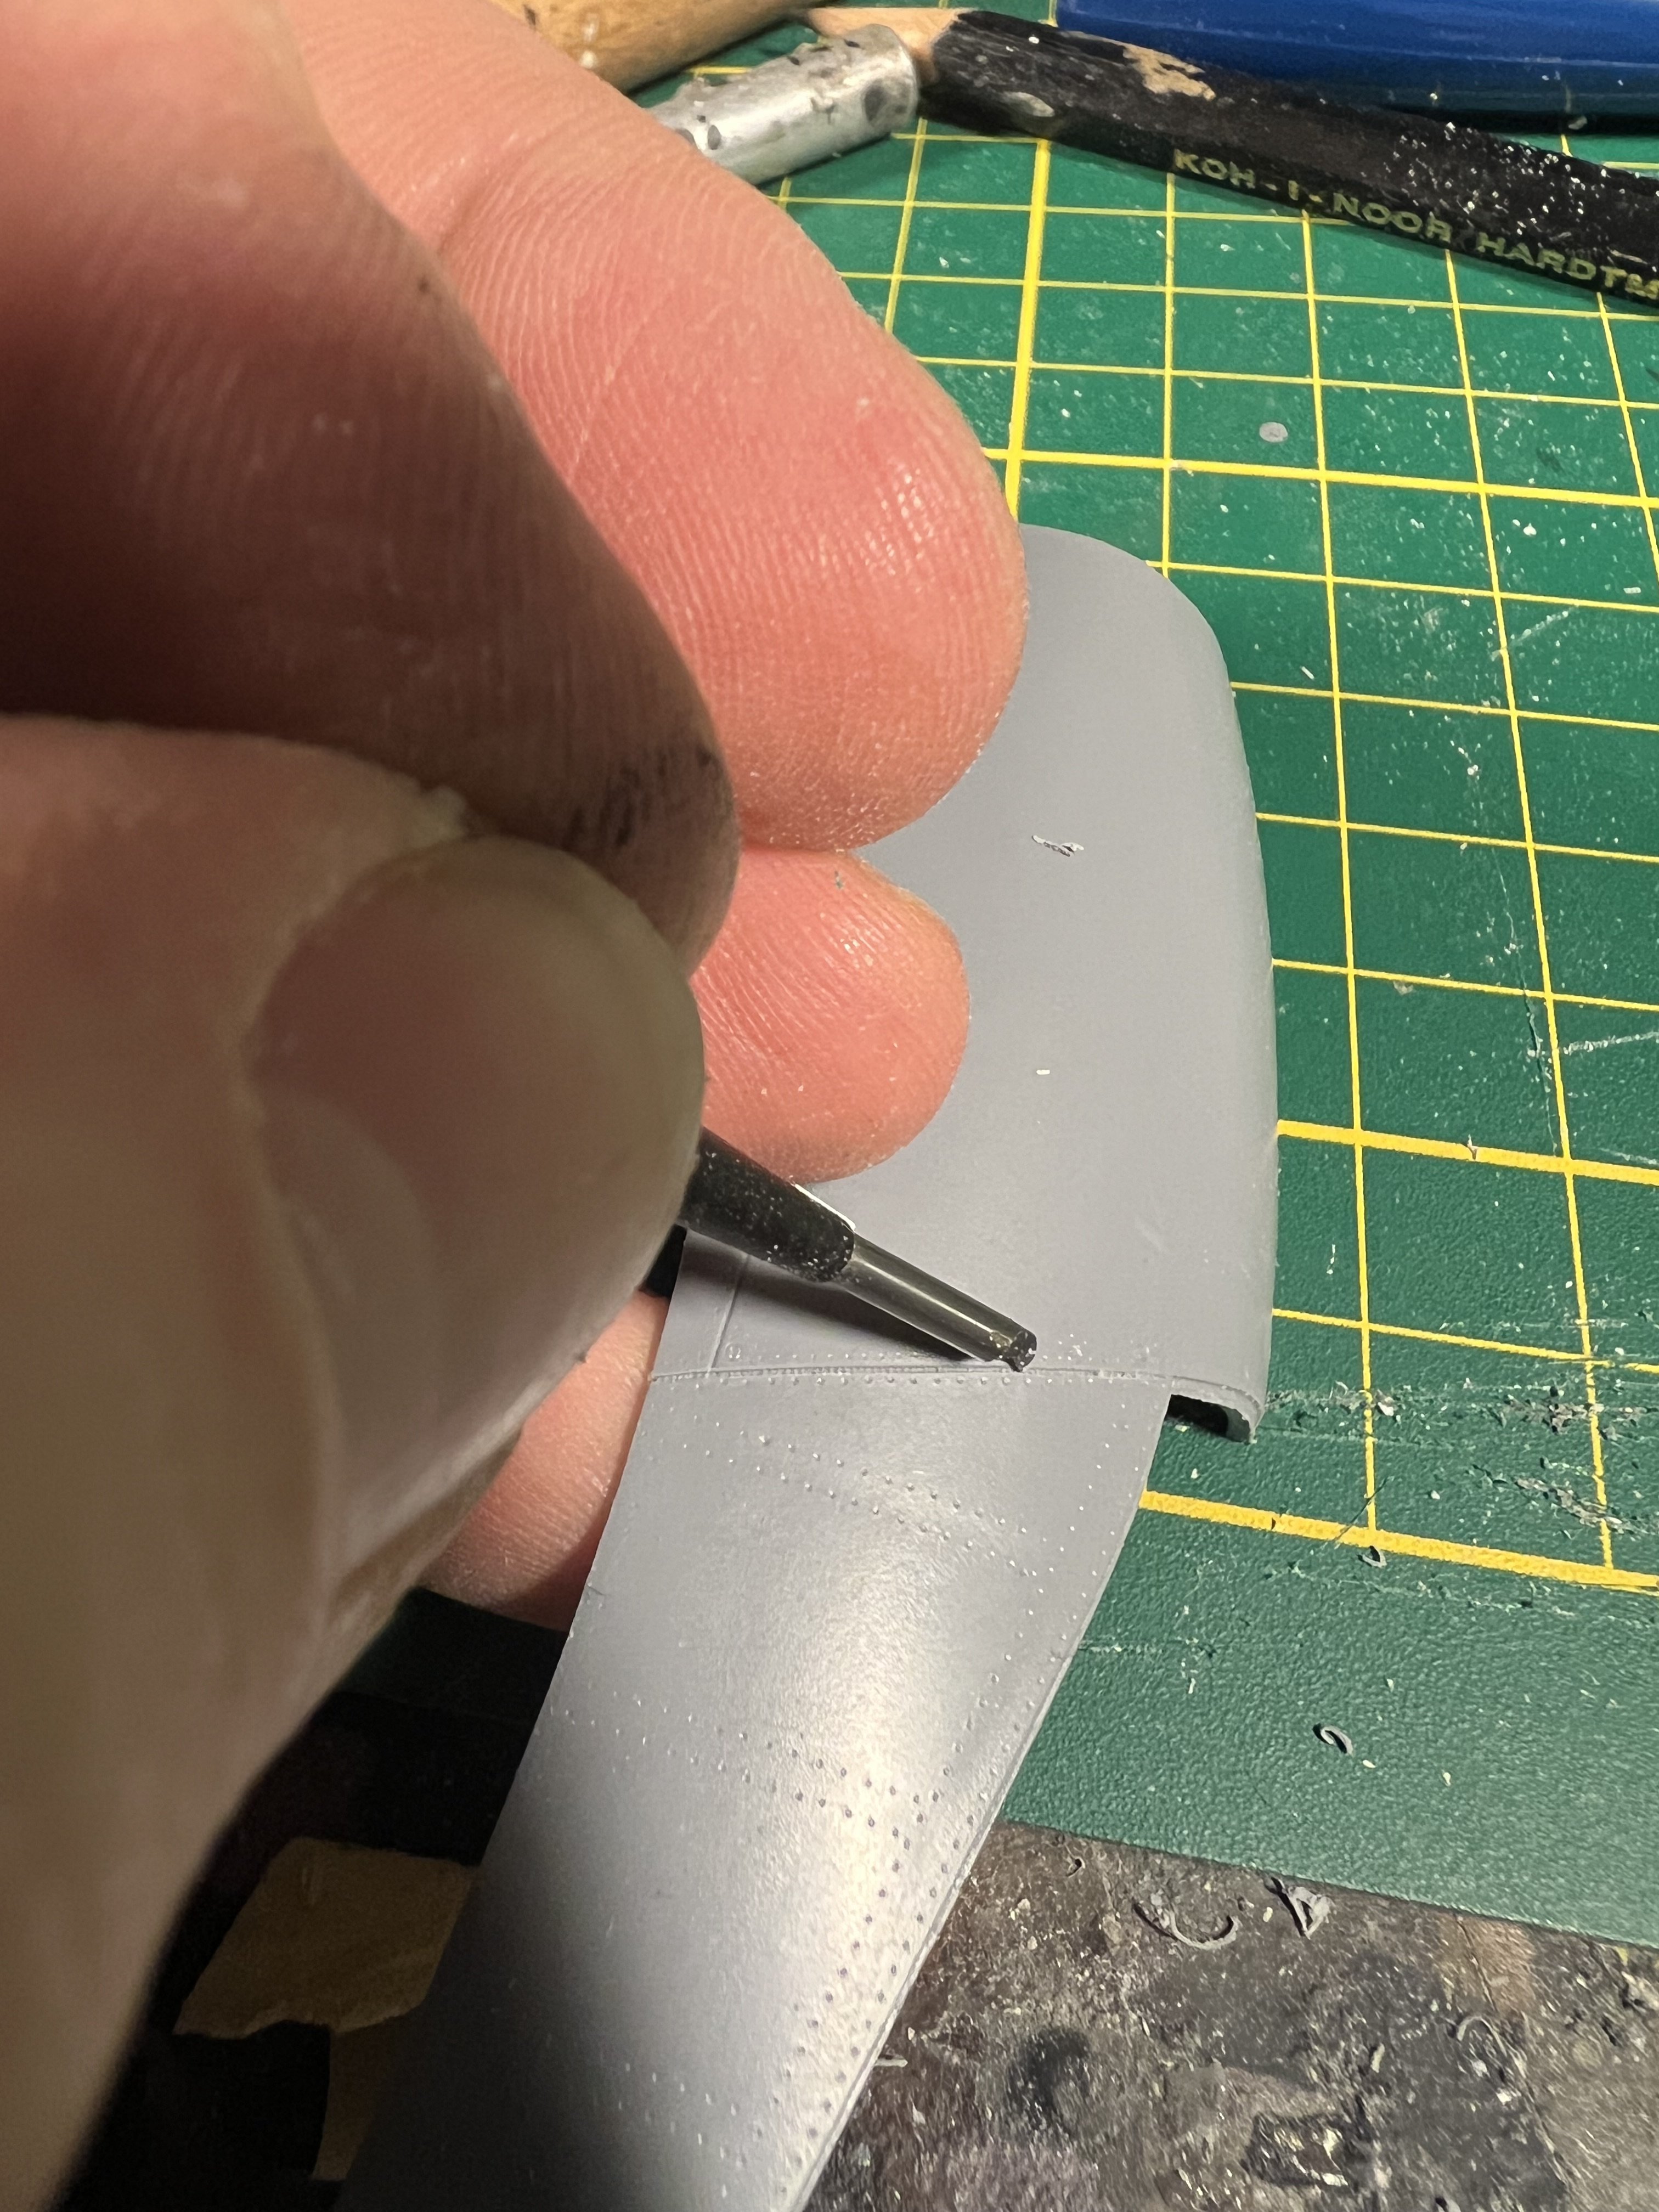
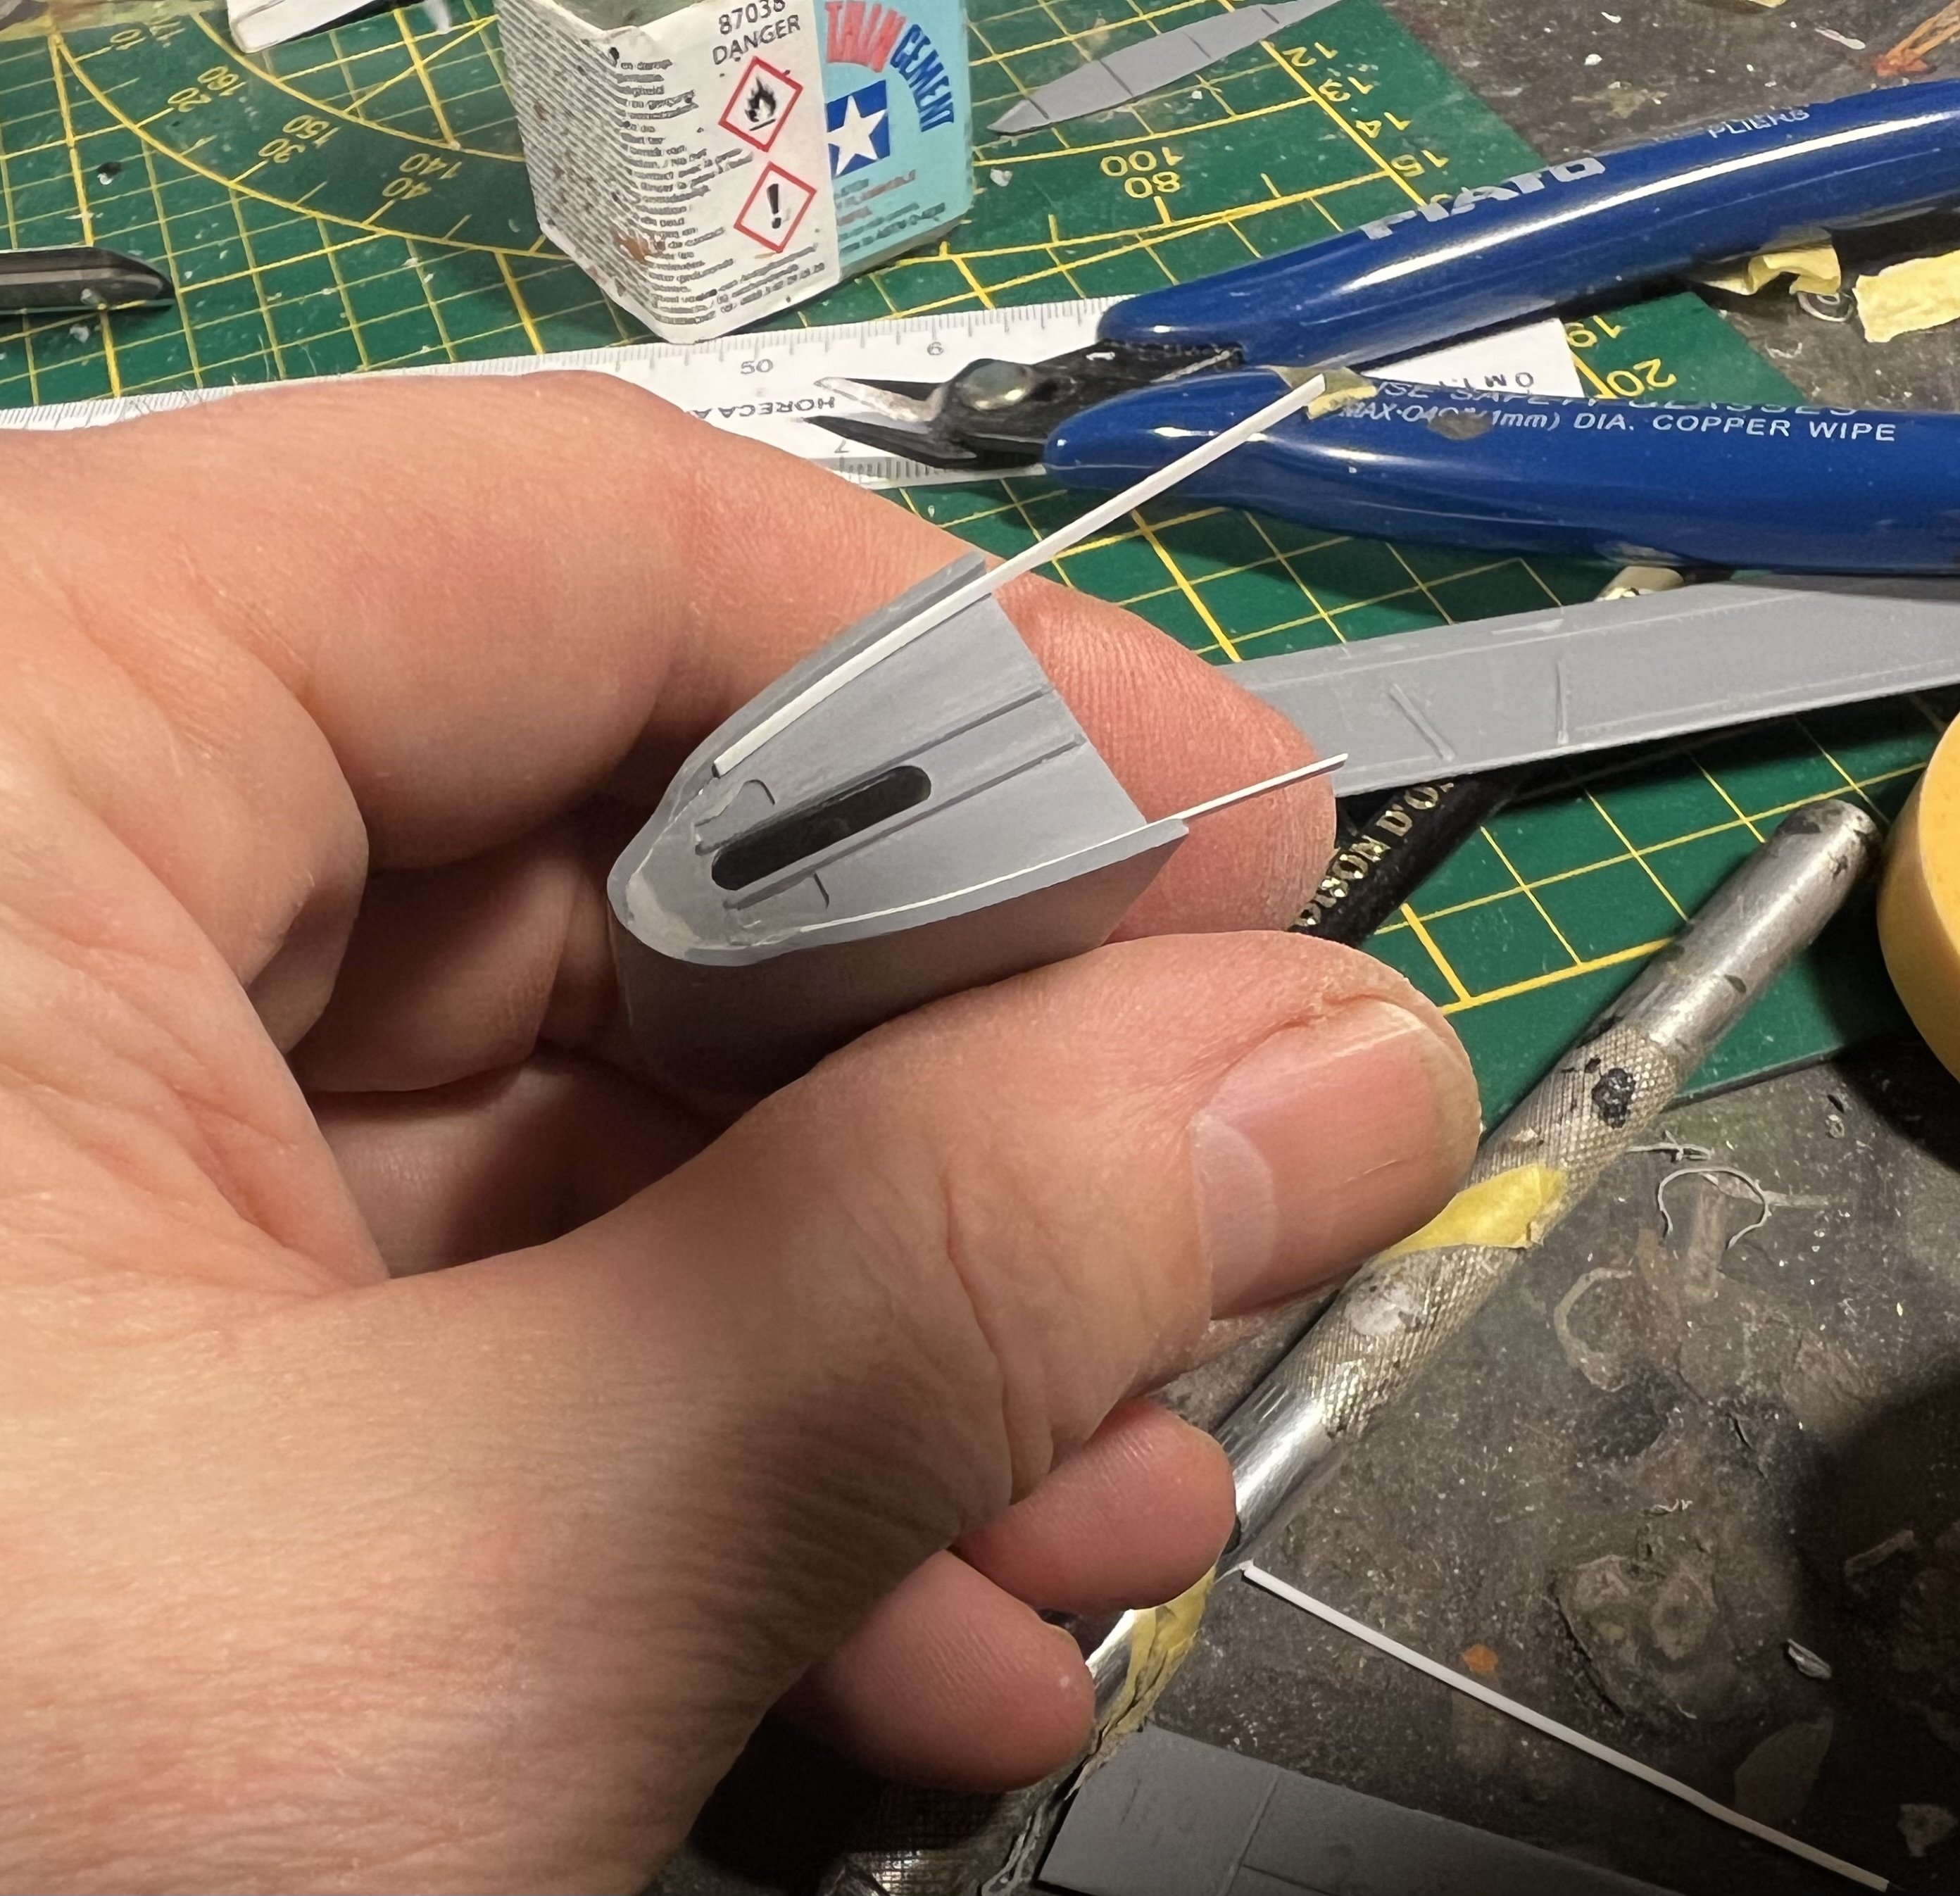
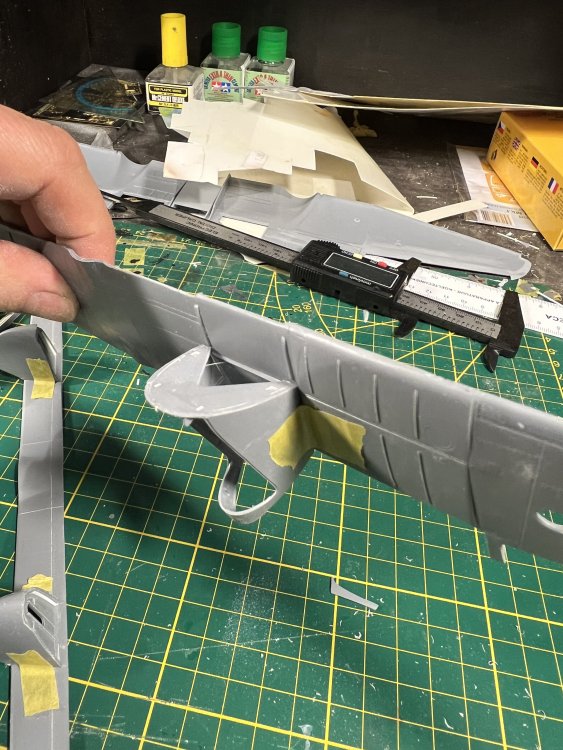
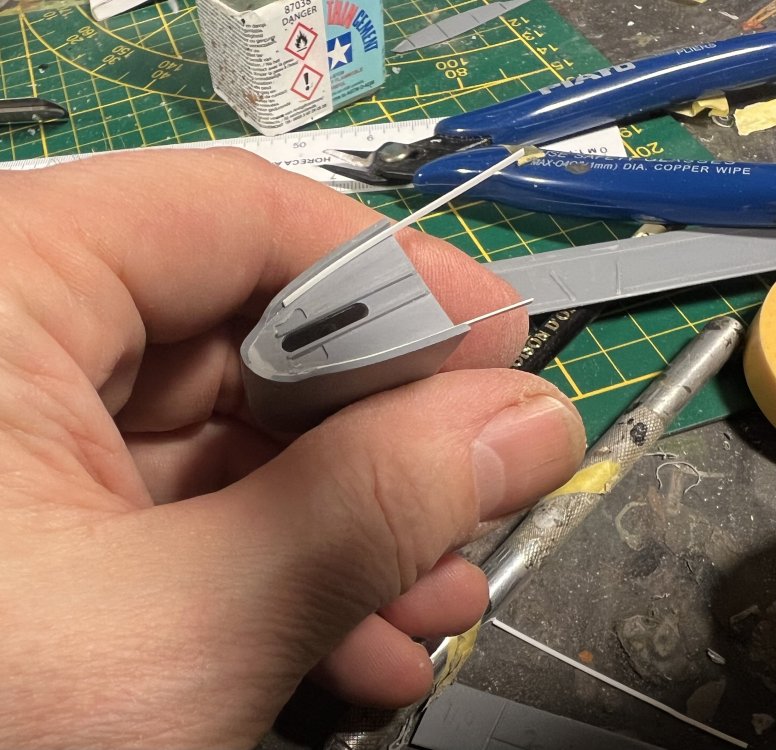
Thnx! Here we go. Cut out the slats parts on the upper and lower wing. slats will need additional thinning on the edge. This will make the wings more interesting to look at.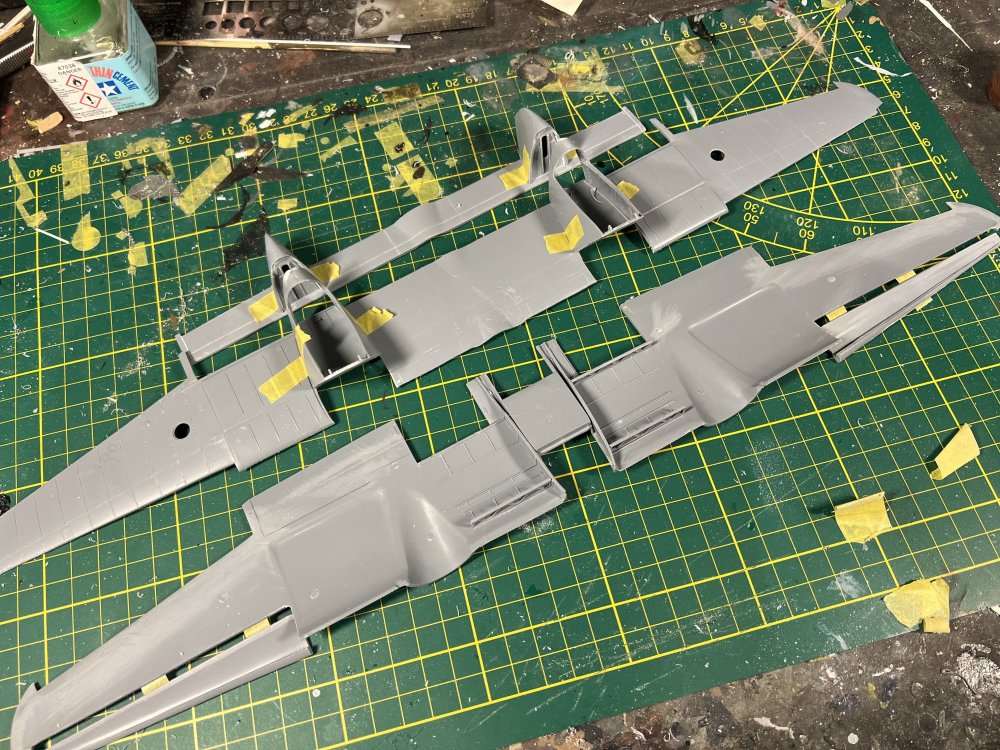

- 439 replies
-
- 11
-

-
1/32 Westland Whirlwind
JeroenPeters replied to JeroenPeters's topic in LSM 1/35 and Larger Work In Progress
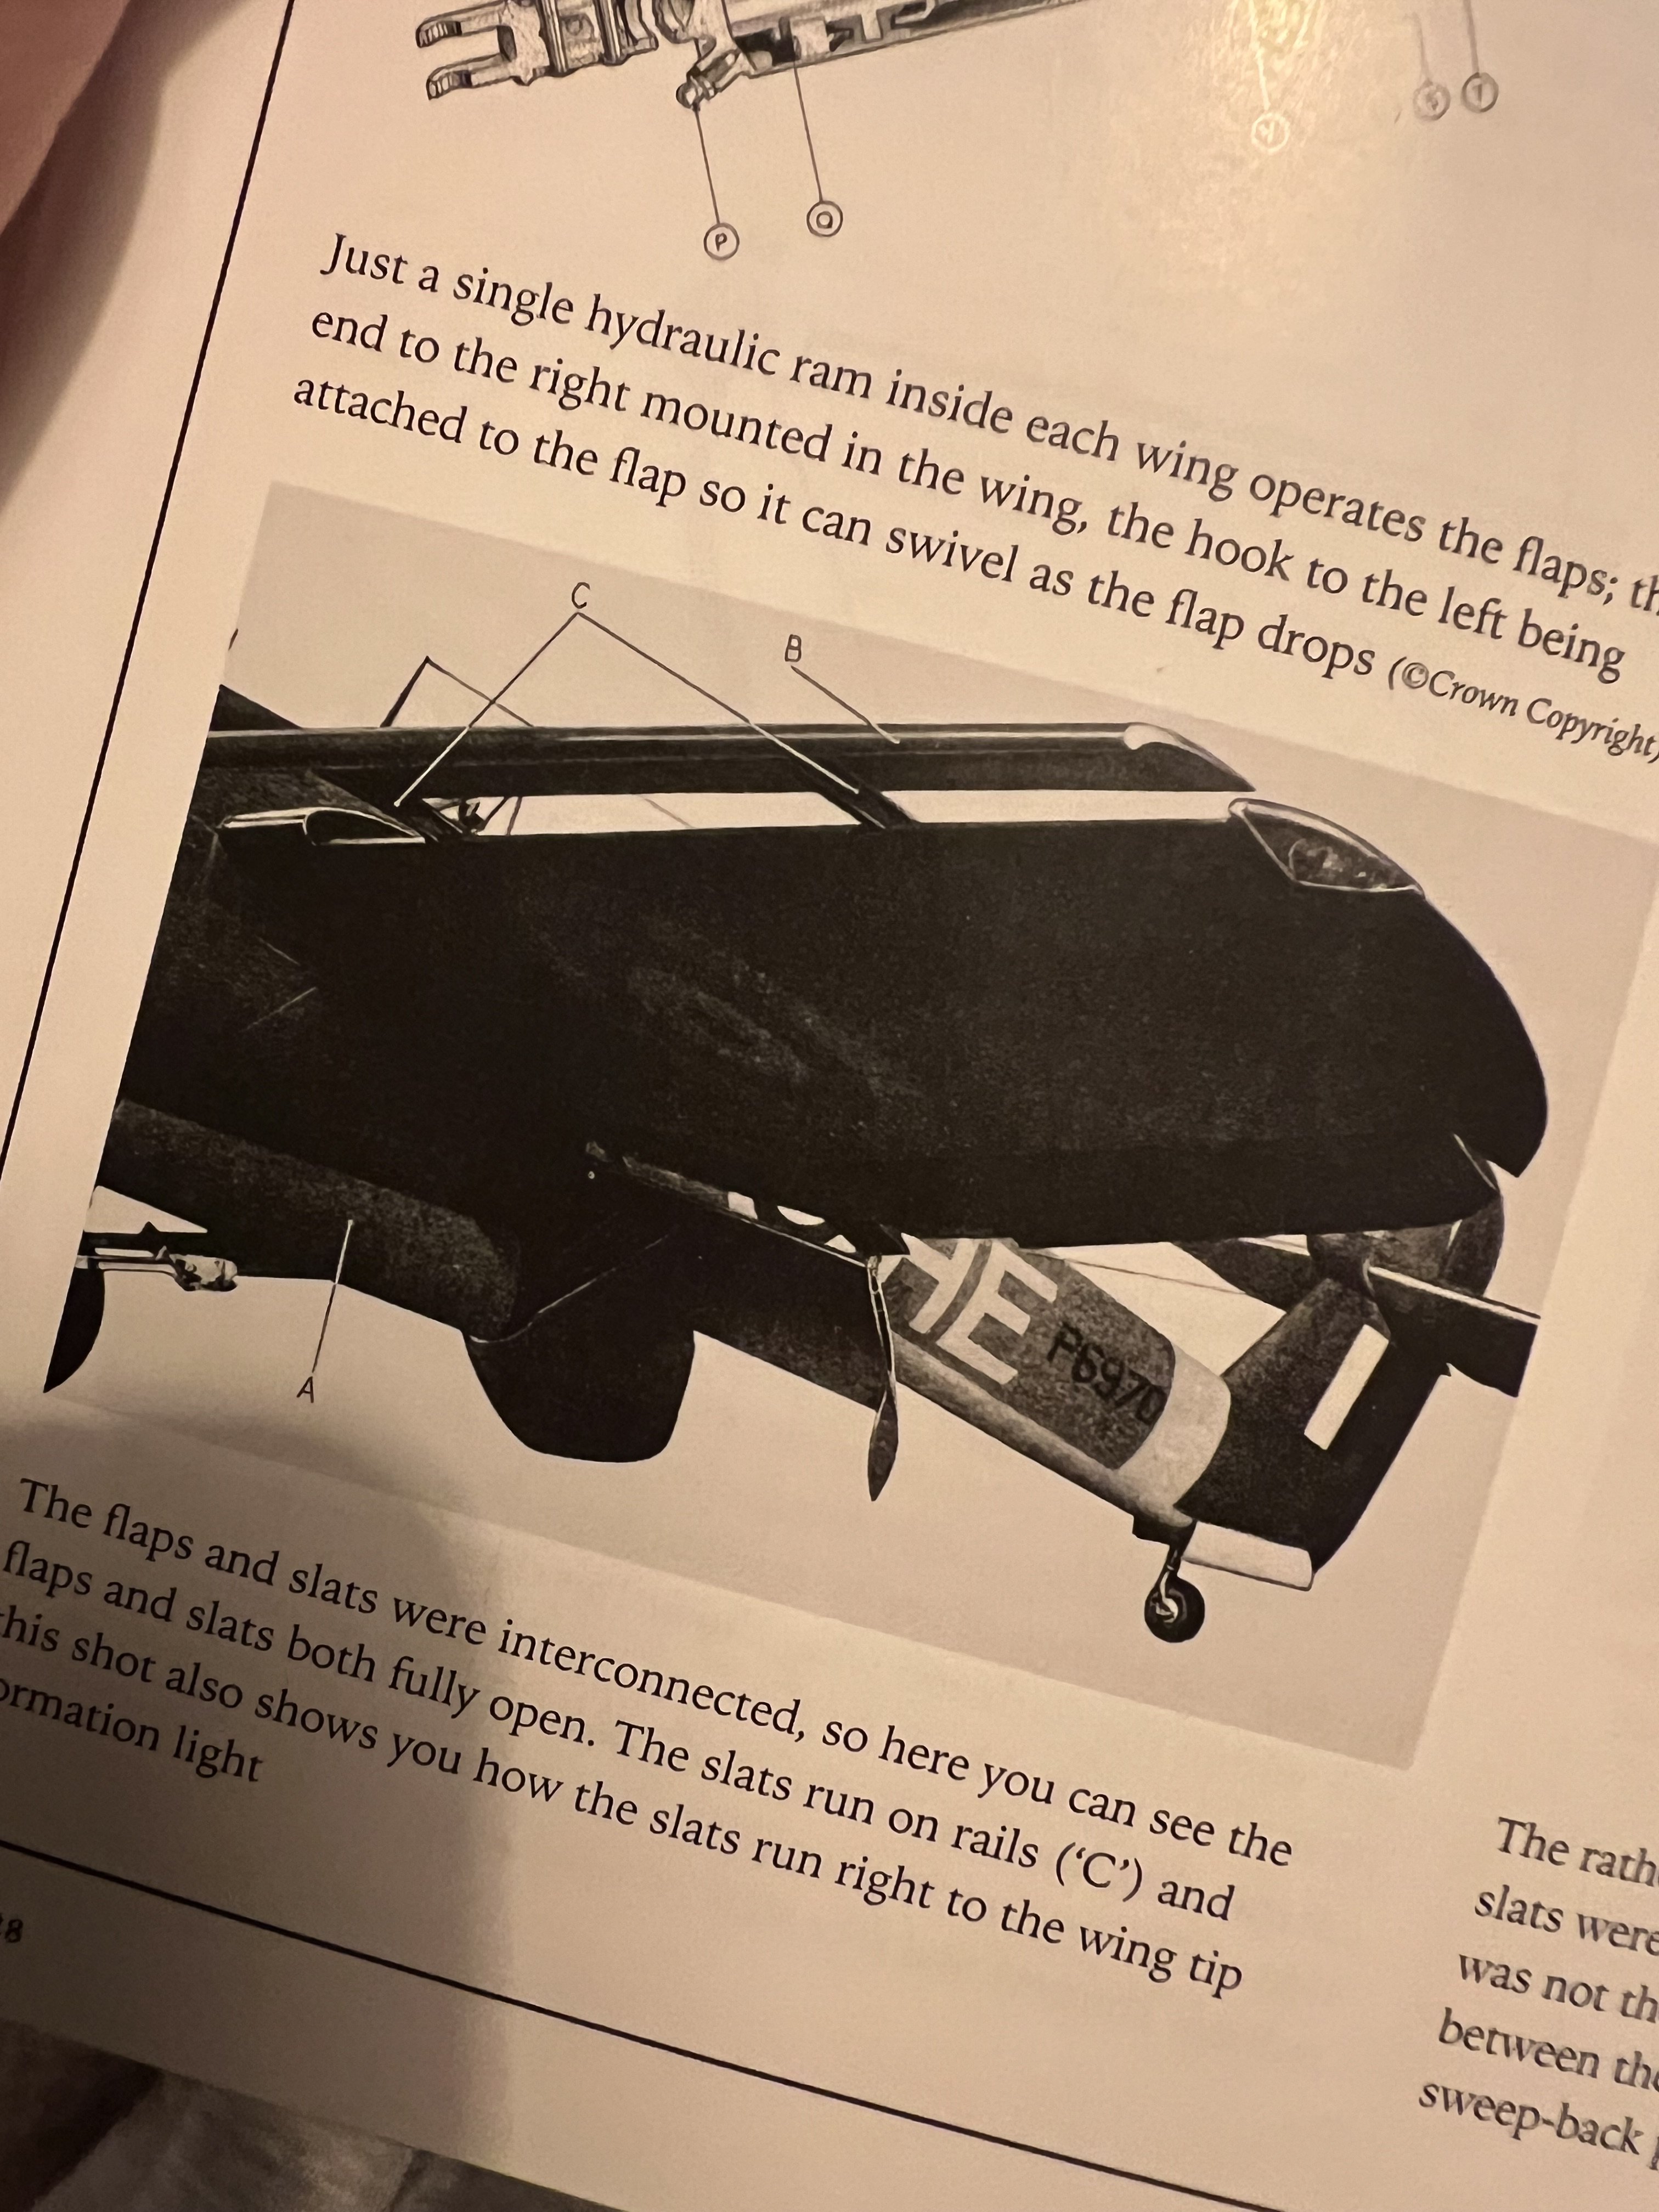
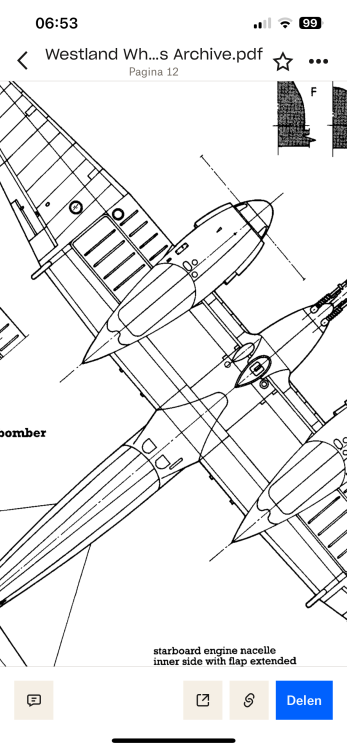
Hi Gunnar, I’m jumping all over the place and now i’m looking at the slats. In this photo you see the extended slats. It says they are interconnected with the flaps. First question: looking at reference photo’s i see a lot of planes on the ground with slightly dropped flaps but not extended slats. Shouldnt they both be out/down? second: the model shows no panel line on the upper wing where the slat should be. Also dont see it in drawings. How so? thnx in advance!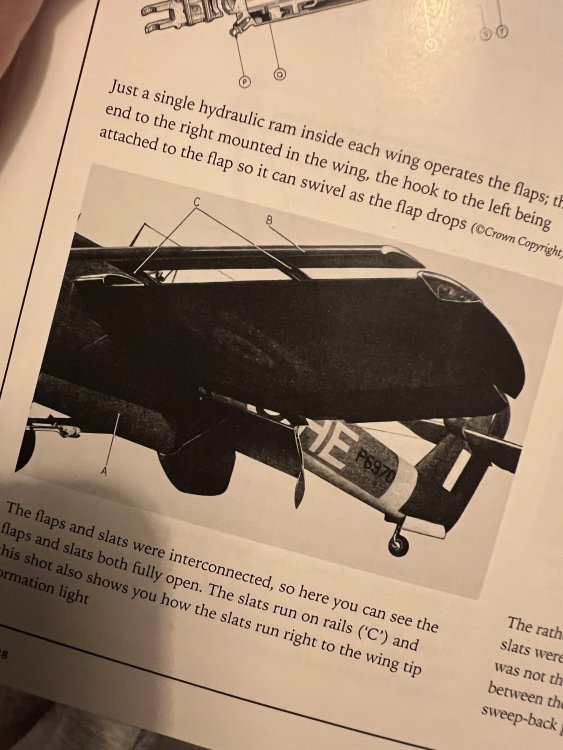

-
1/32 Westland Whirlwind
JeroenPeters replied to JeroenPeters's topic in LSM 1/35 and Larger Work In Progress
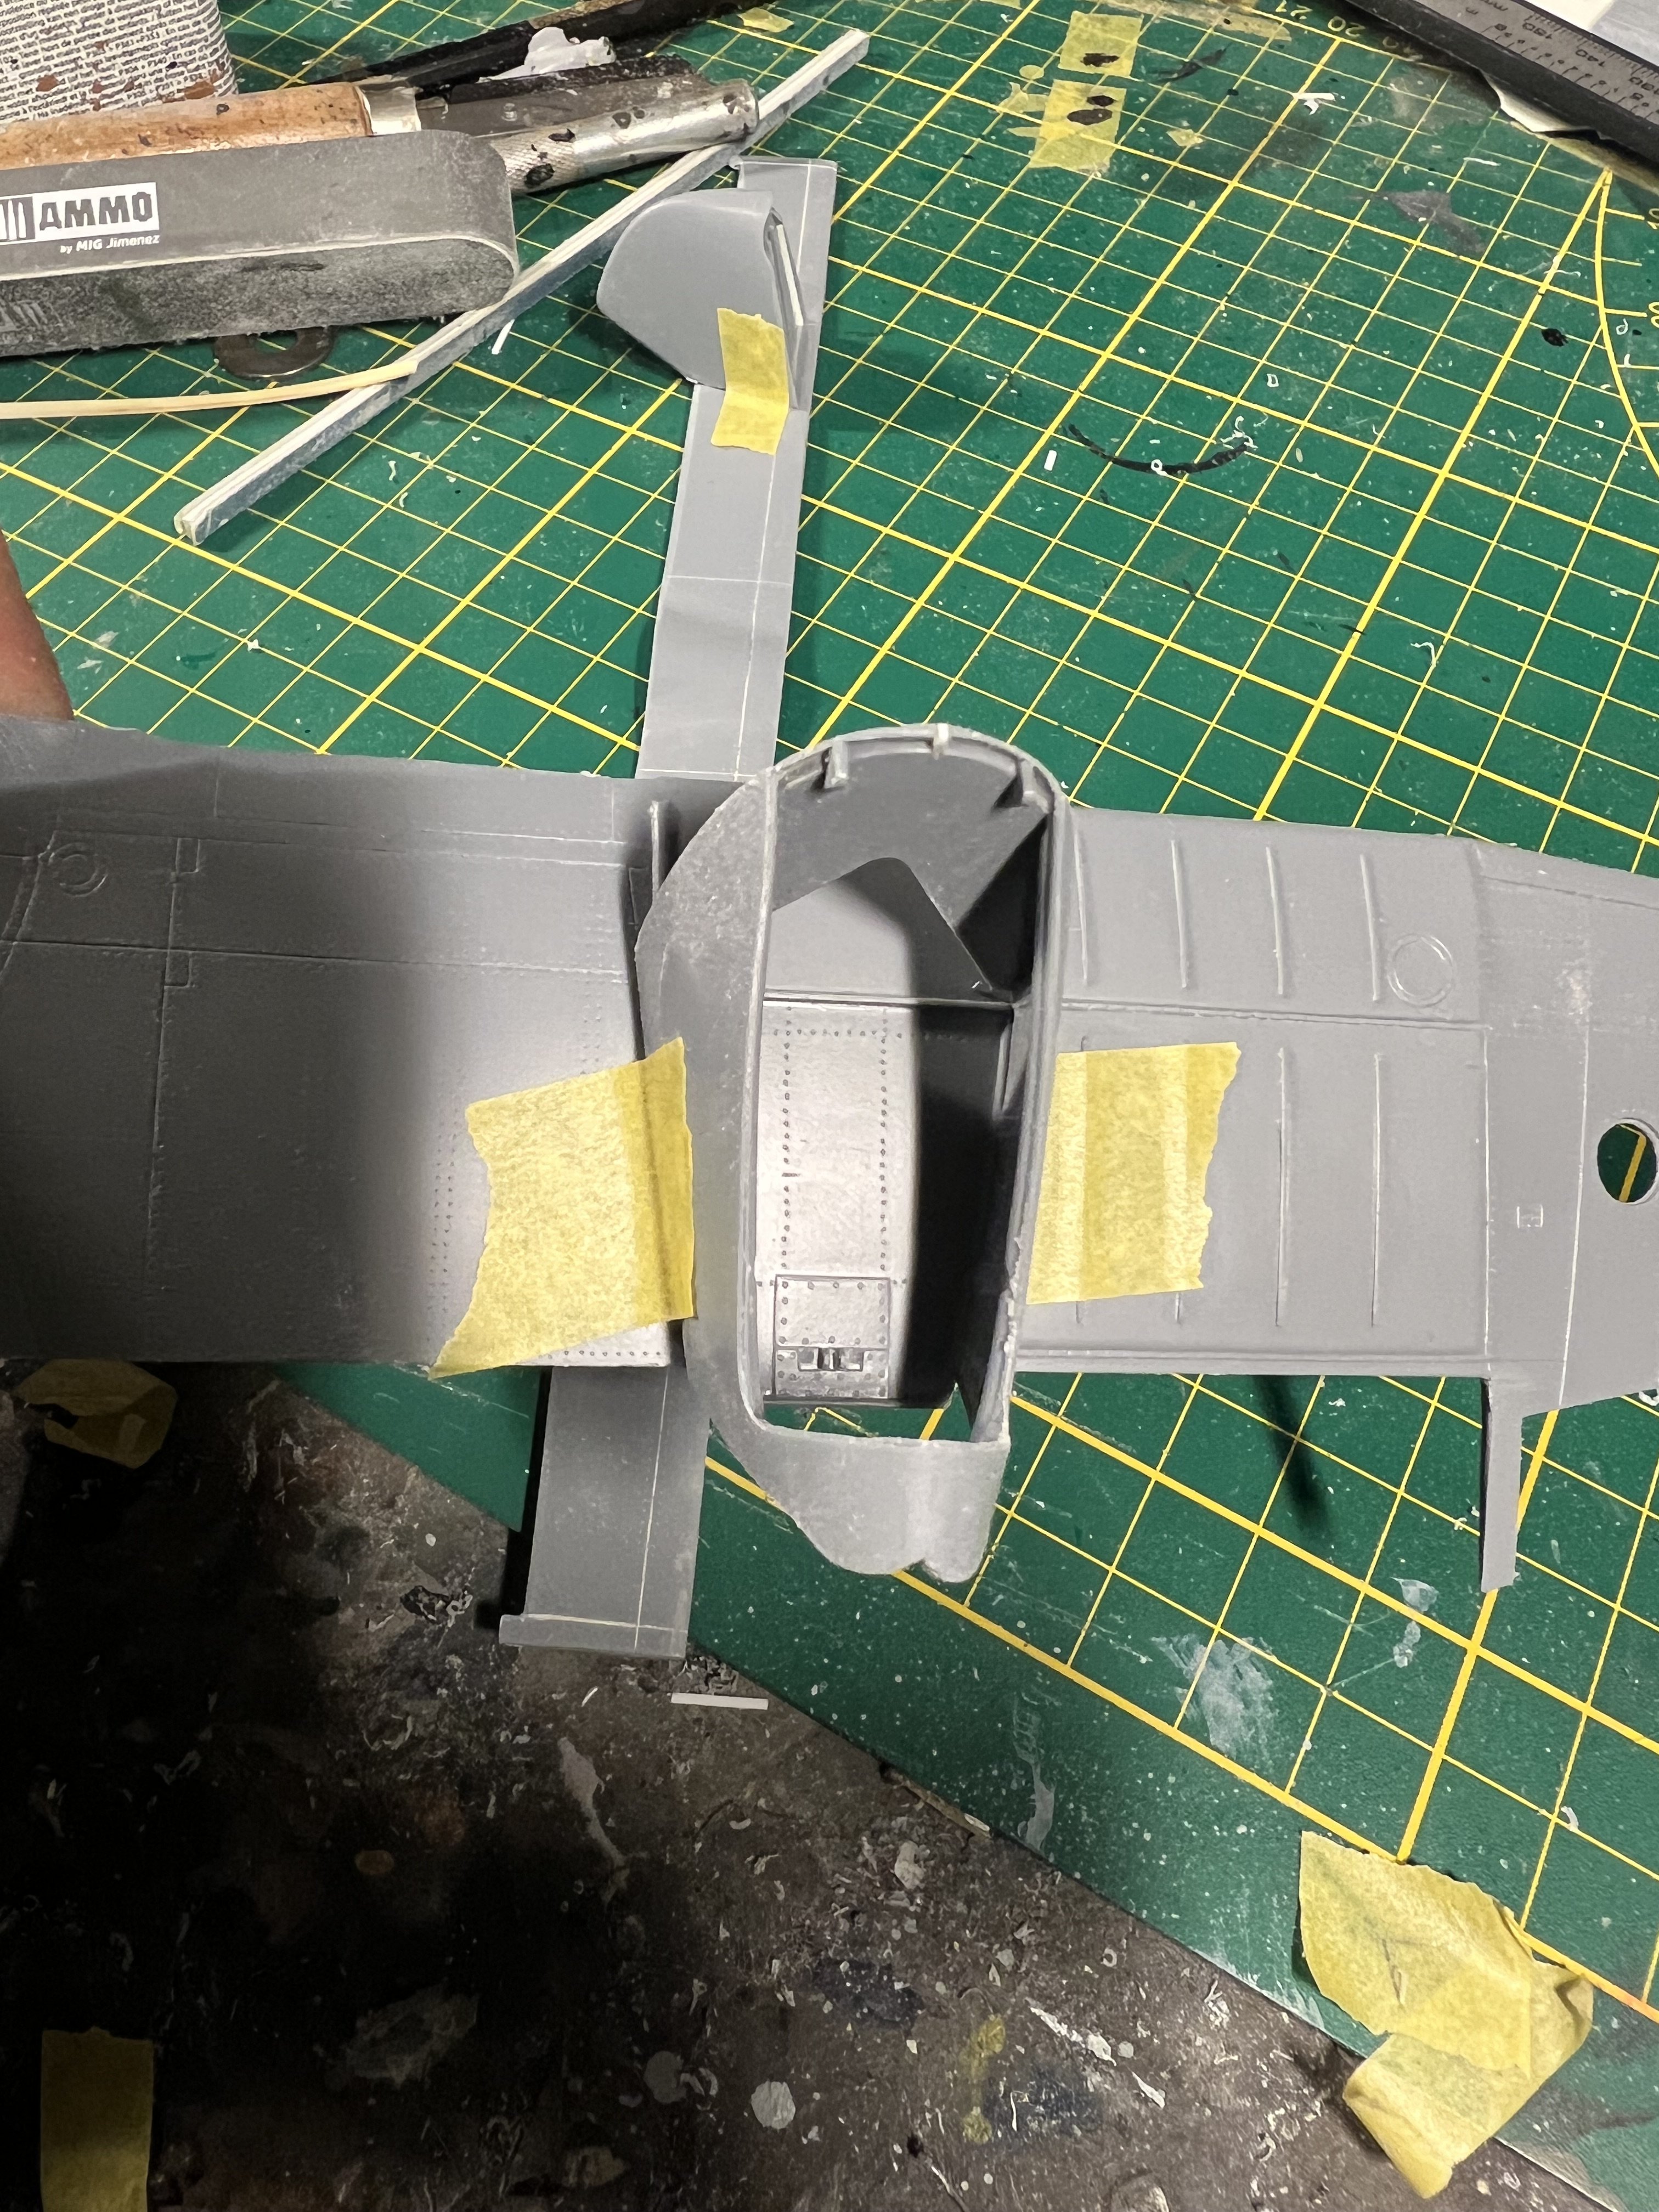
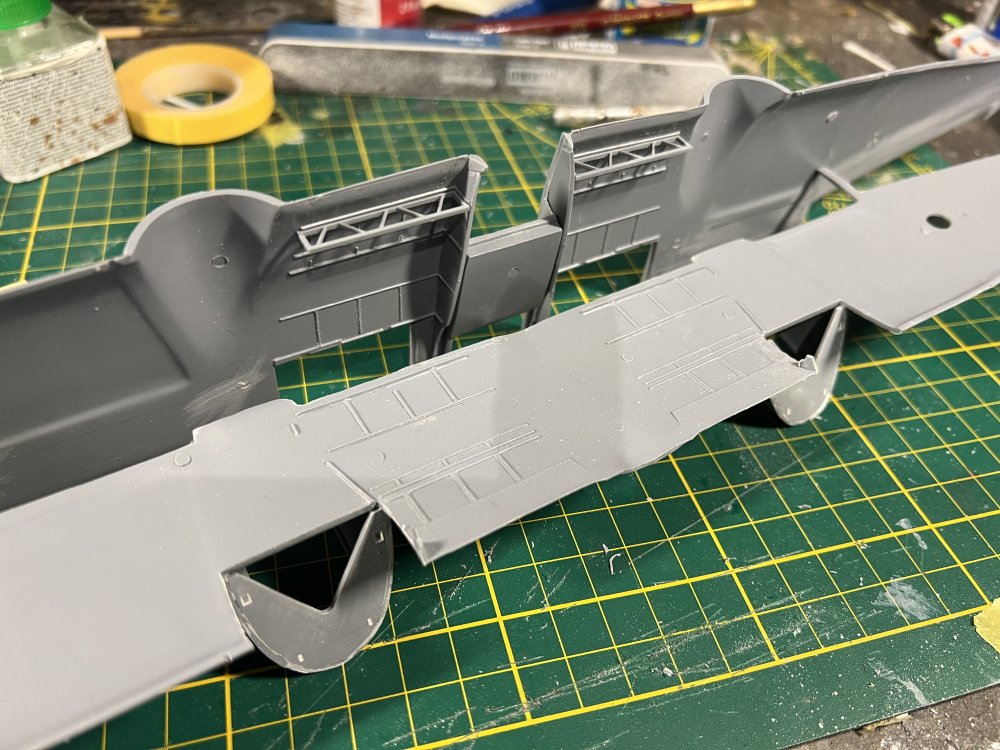
I think I've got it. Only need to modify the inner exhaust. And add some more detail. Also modify the inner triangular brace to the spar.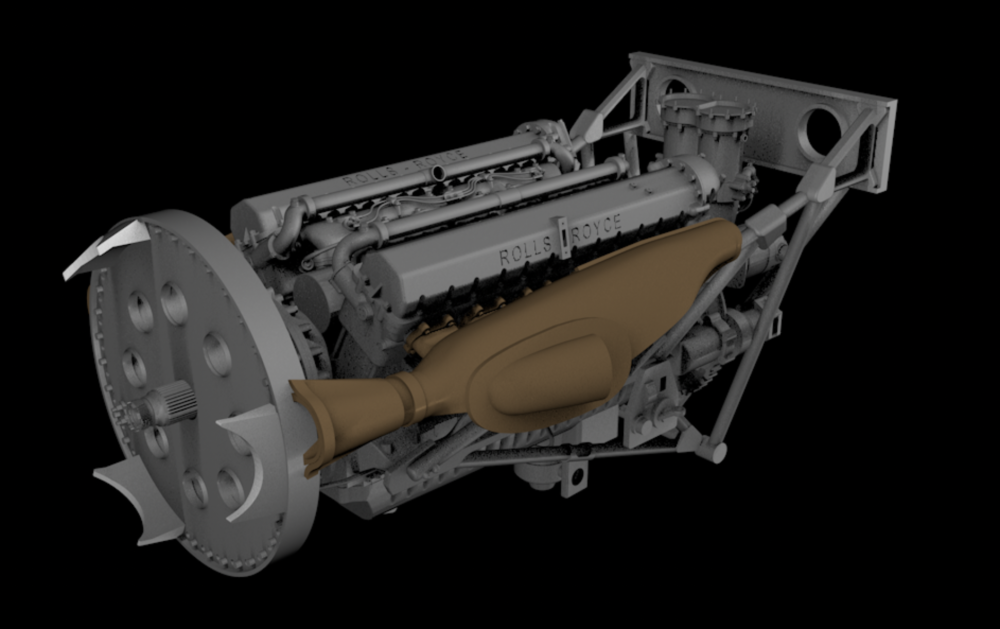
-
1/32 Westland Whirlwind
JeroenPeters replied to JeroenPeters's topic in LSM 1/35 and Larger Work In Progress
I have this drawing, but your remark about wall thickness makes sense! That might do the trick. Thnx! -
1/32 Westland Whirlwind
JeroenPeters replied to JeroenPeters's topic in LSM 1/35 and Larger Work In Progress
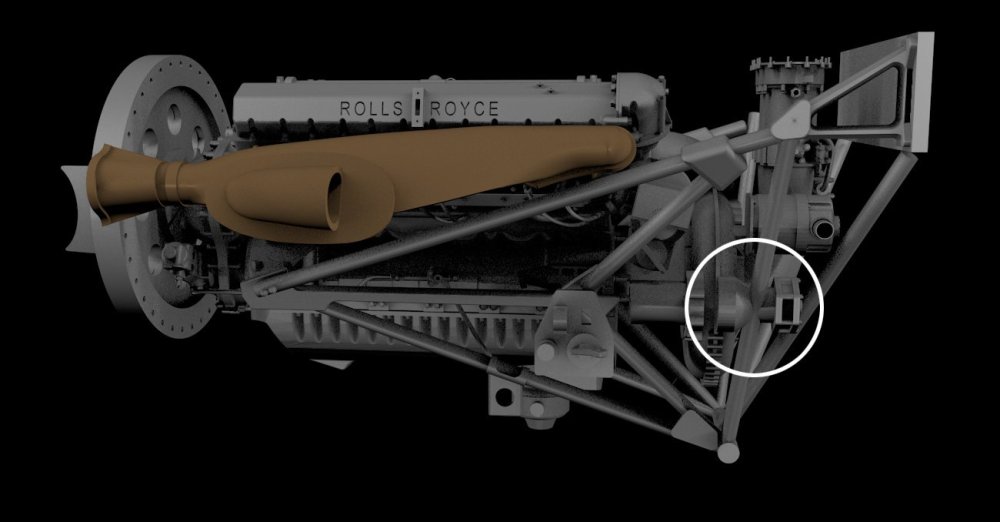
Hi Gunar, Question... For some reason I can seem to fit this engine support. It keeps colliding with this part of the engine. Am I missing something?
-
1/32 Westland Whirlwind
JeroenPeters replied to JeroenPeters's topic in LSM 1/35 and Larger Work In Progress
Thats very helpful! I was wondering about the rear nacelle… and i see more interesting details here and in the other photos. In the meantime i’m slowly getting the rough parts done and am measuring the parts i need to 3D print.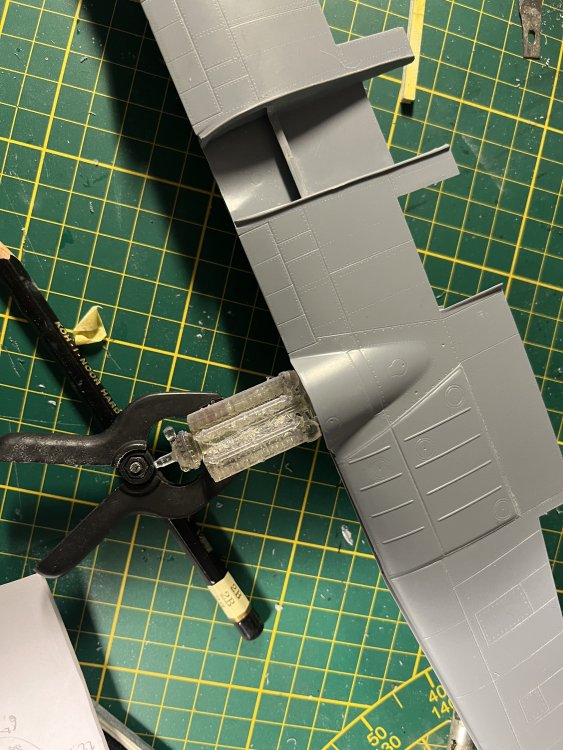
-
1/32 Westland Whirlwind
JeroenPeters replied to JeroenPeters's topic in LSM 1/35 and Larger Work In Progress
Starting to get somewhere… Now i can take proper measurements for the first 3d printed parts.
-
1/32 Westland Whirlwind
JeroenPeters replied to JeroenPeters's topic in LSM 1/35 and Larger Work In Progress
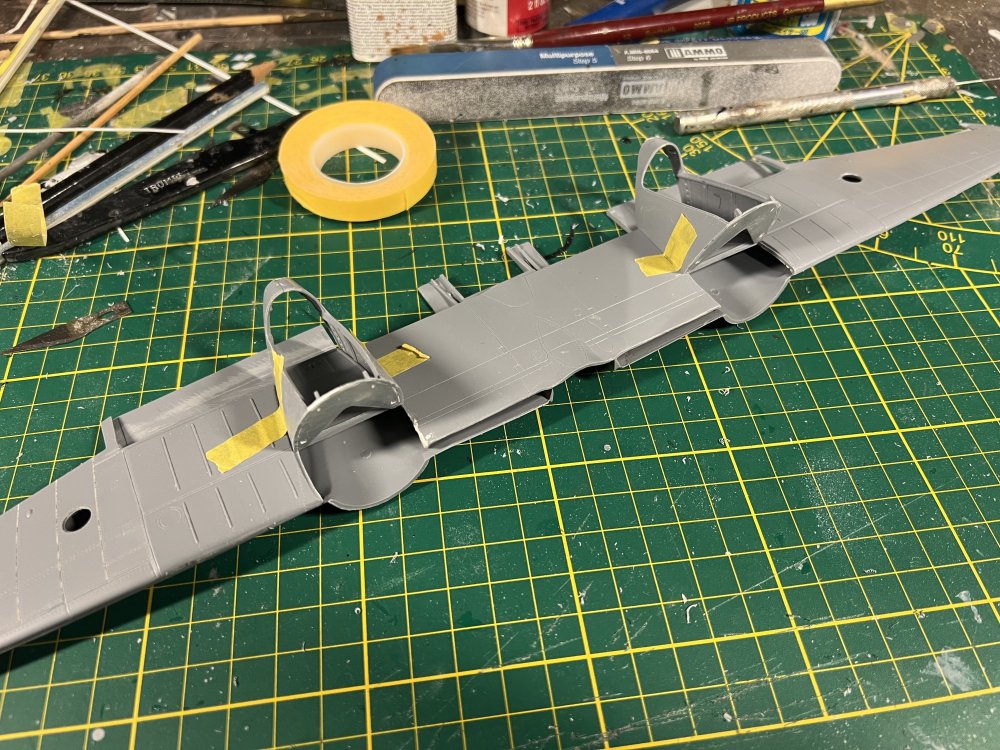
Cut out the area towards the spar to accomodate the engine.
-
1/32 Westland Whirlwind
JeroenPeters replied to JeroenPeters's topic in LSM 1/35 and Larger Work In Progress
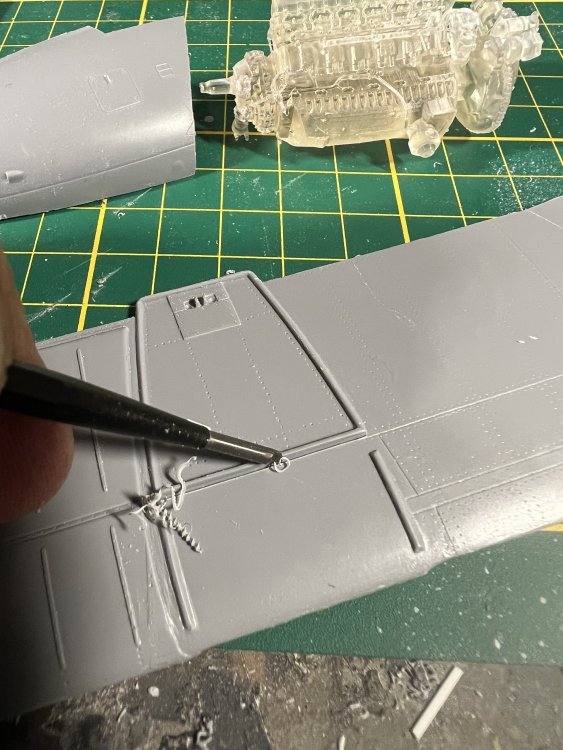
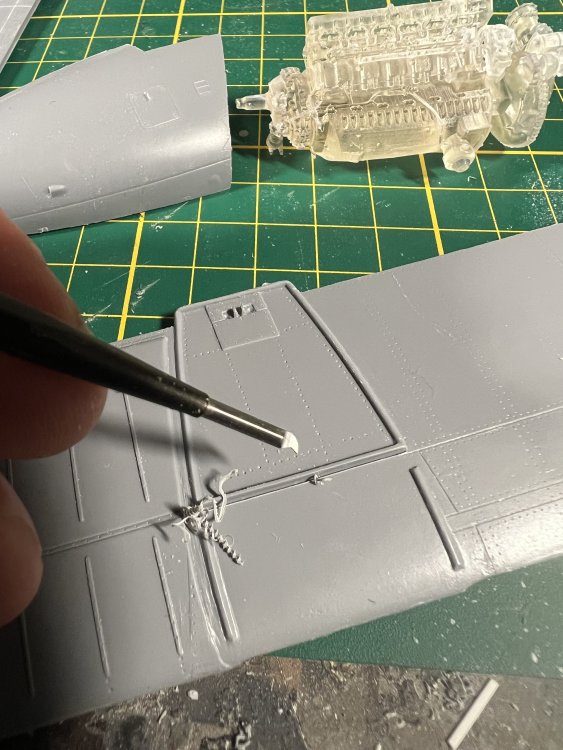
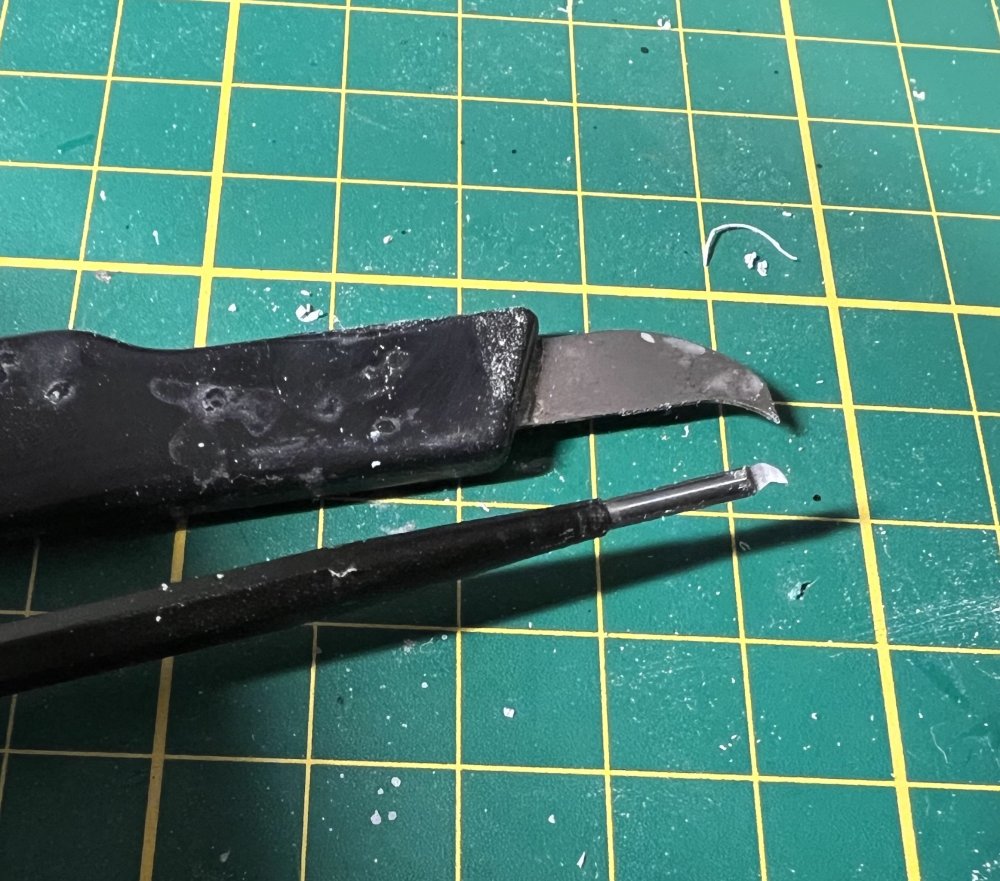
Hi Gunnar, basically a thick scriber from Trumpeter for the first few strokes and then with a verynfine tungsten steen scriber. Sometimes also a micro saw.
-
1/32 Westland Whirlwind
JeroenPeters replied to JeroenPeters's topic in LSM 1/35 and Larger Work In Progress
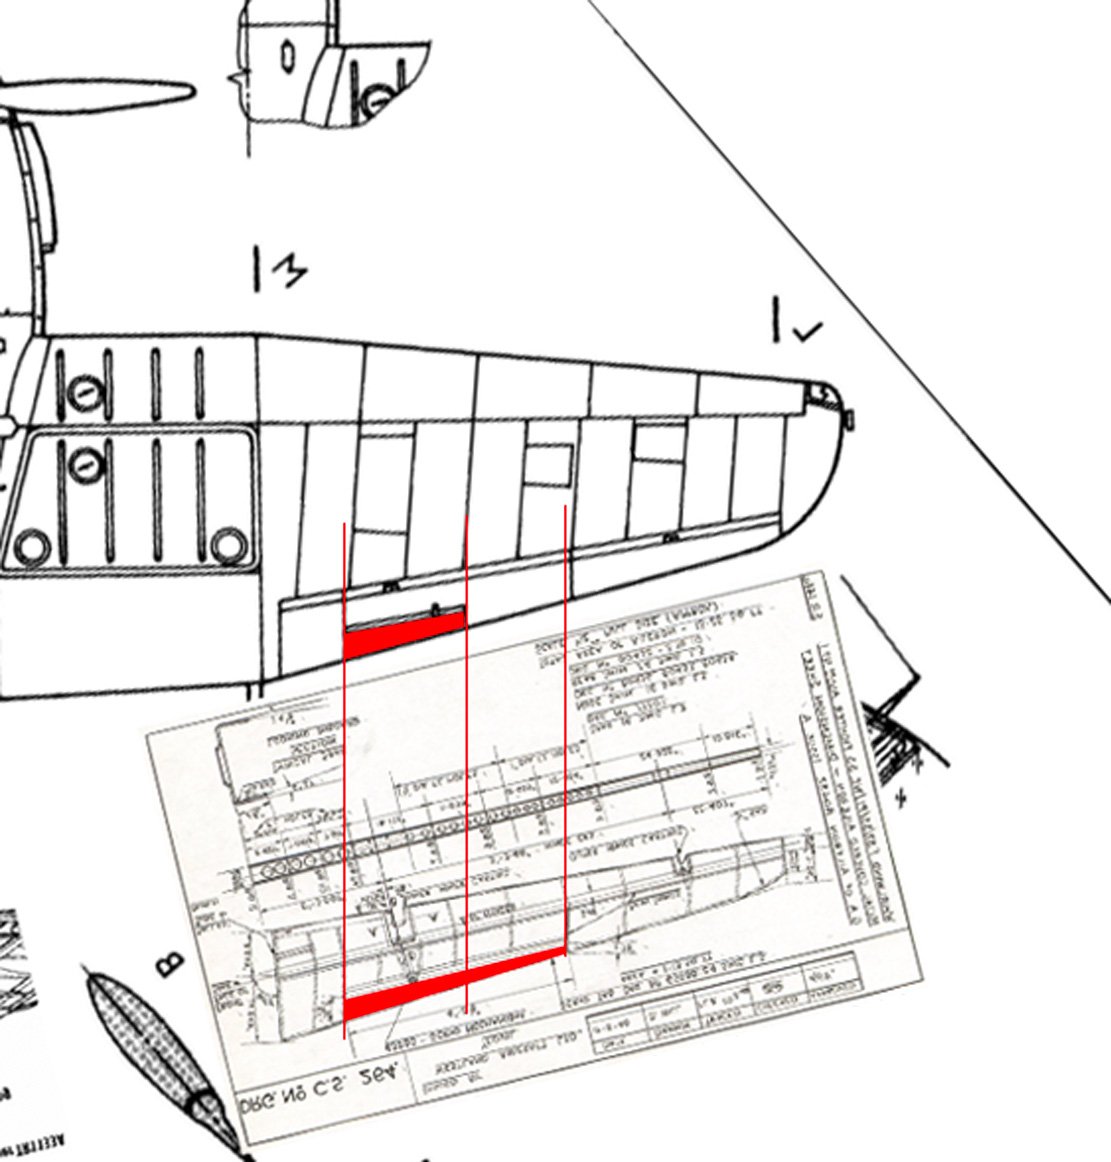
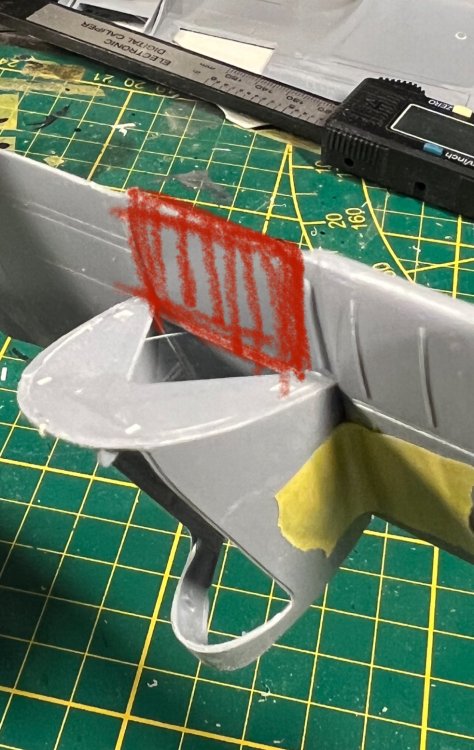
Got it. this whole red section needs to be removed until the front spar.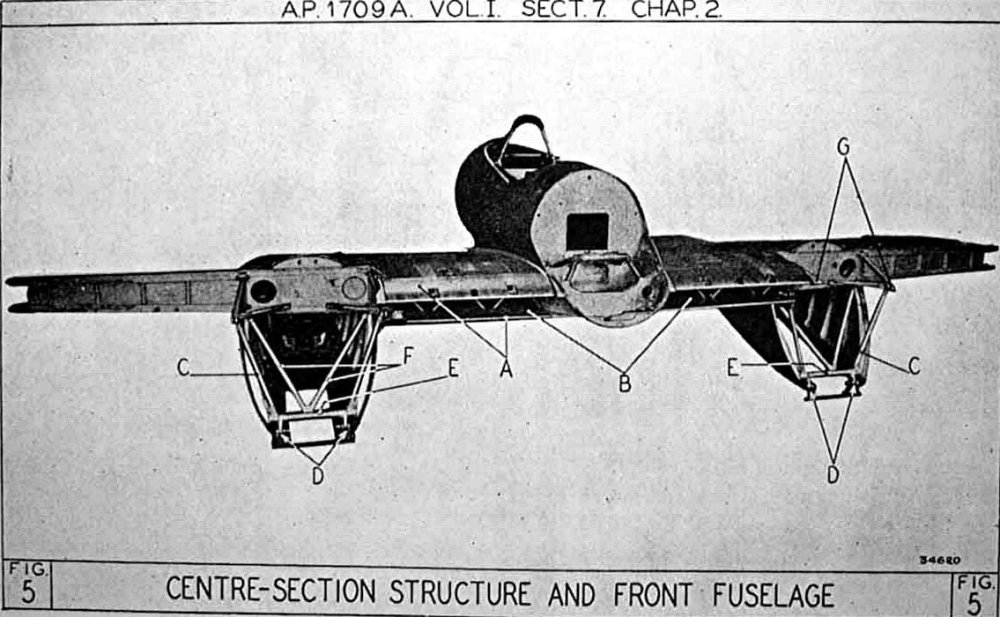
-
1/32 Westland Whirlwind
JeroenPeters replied to JeroenPeters's topic in LSM 1/35 and Larger Work In Progress
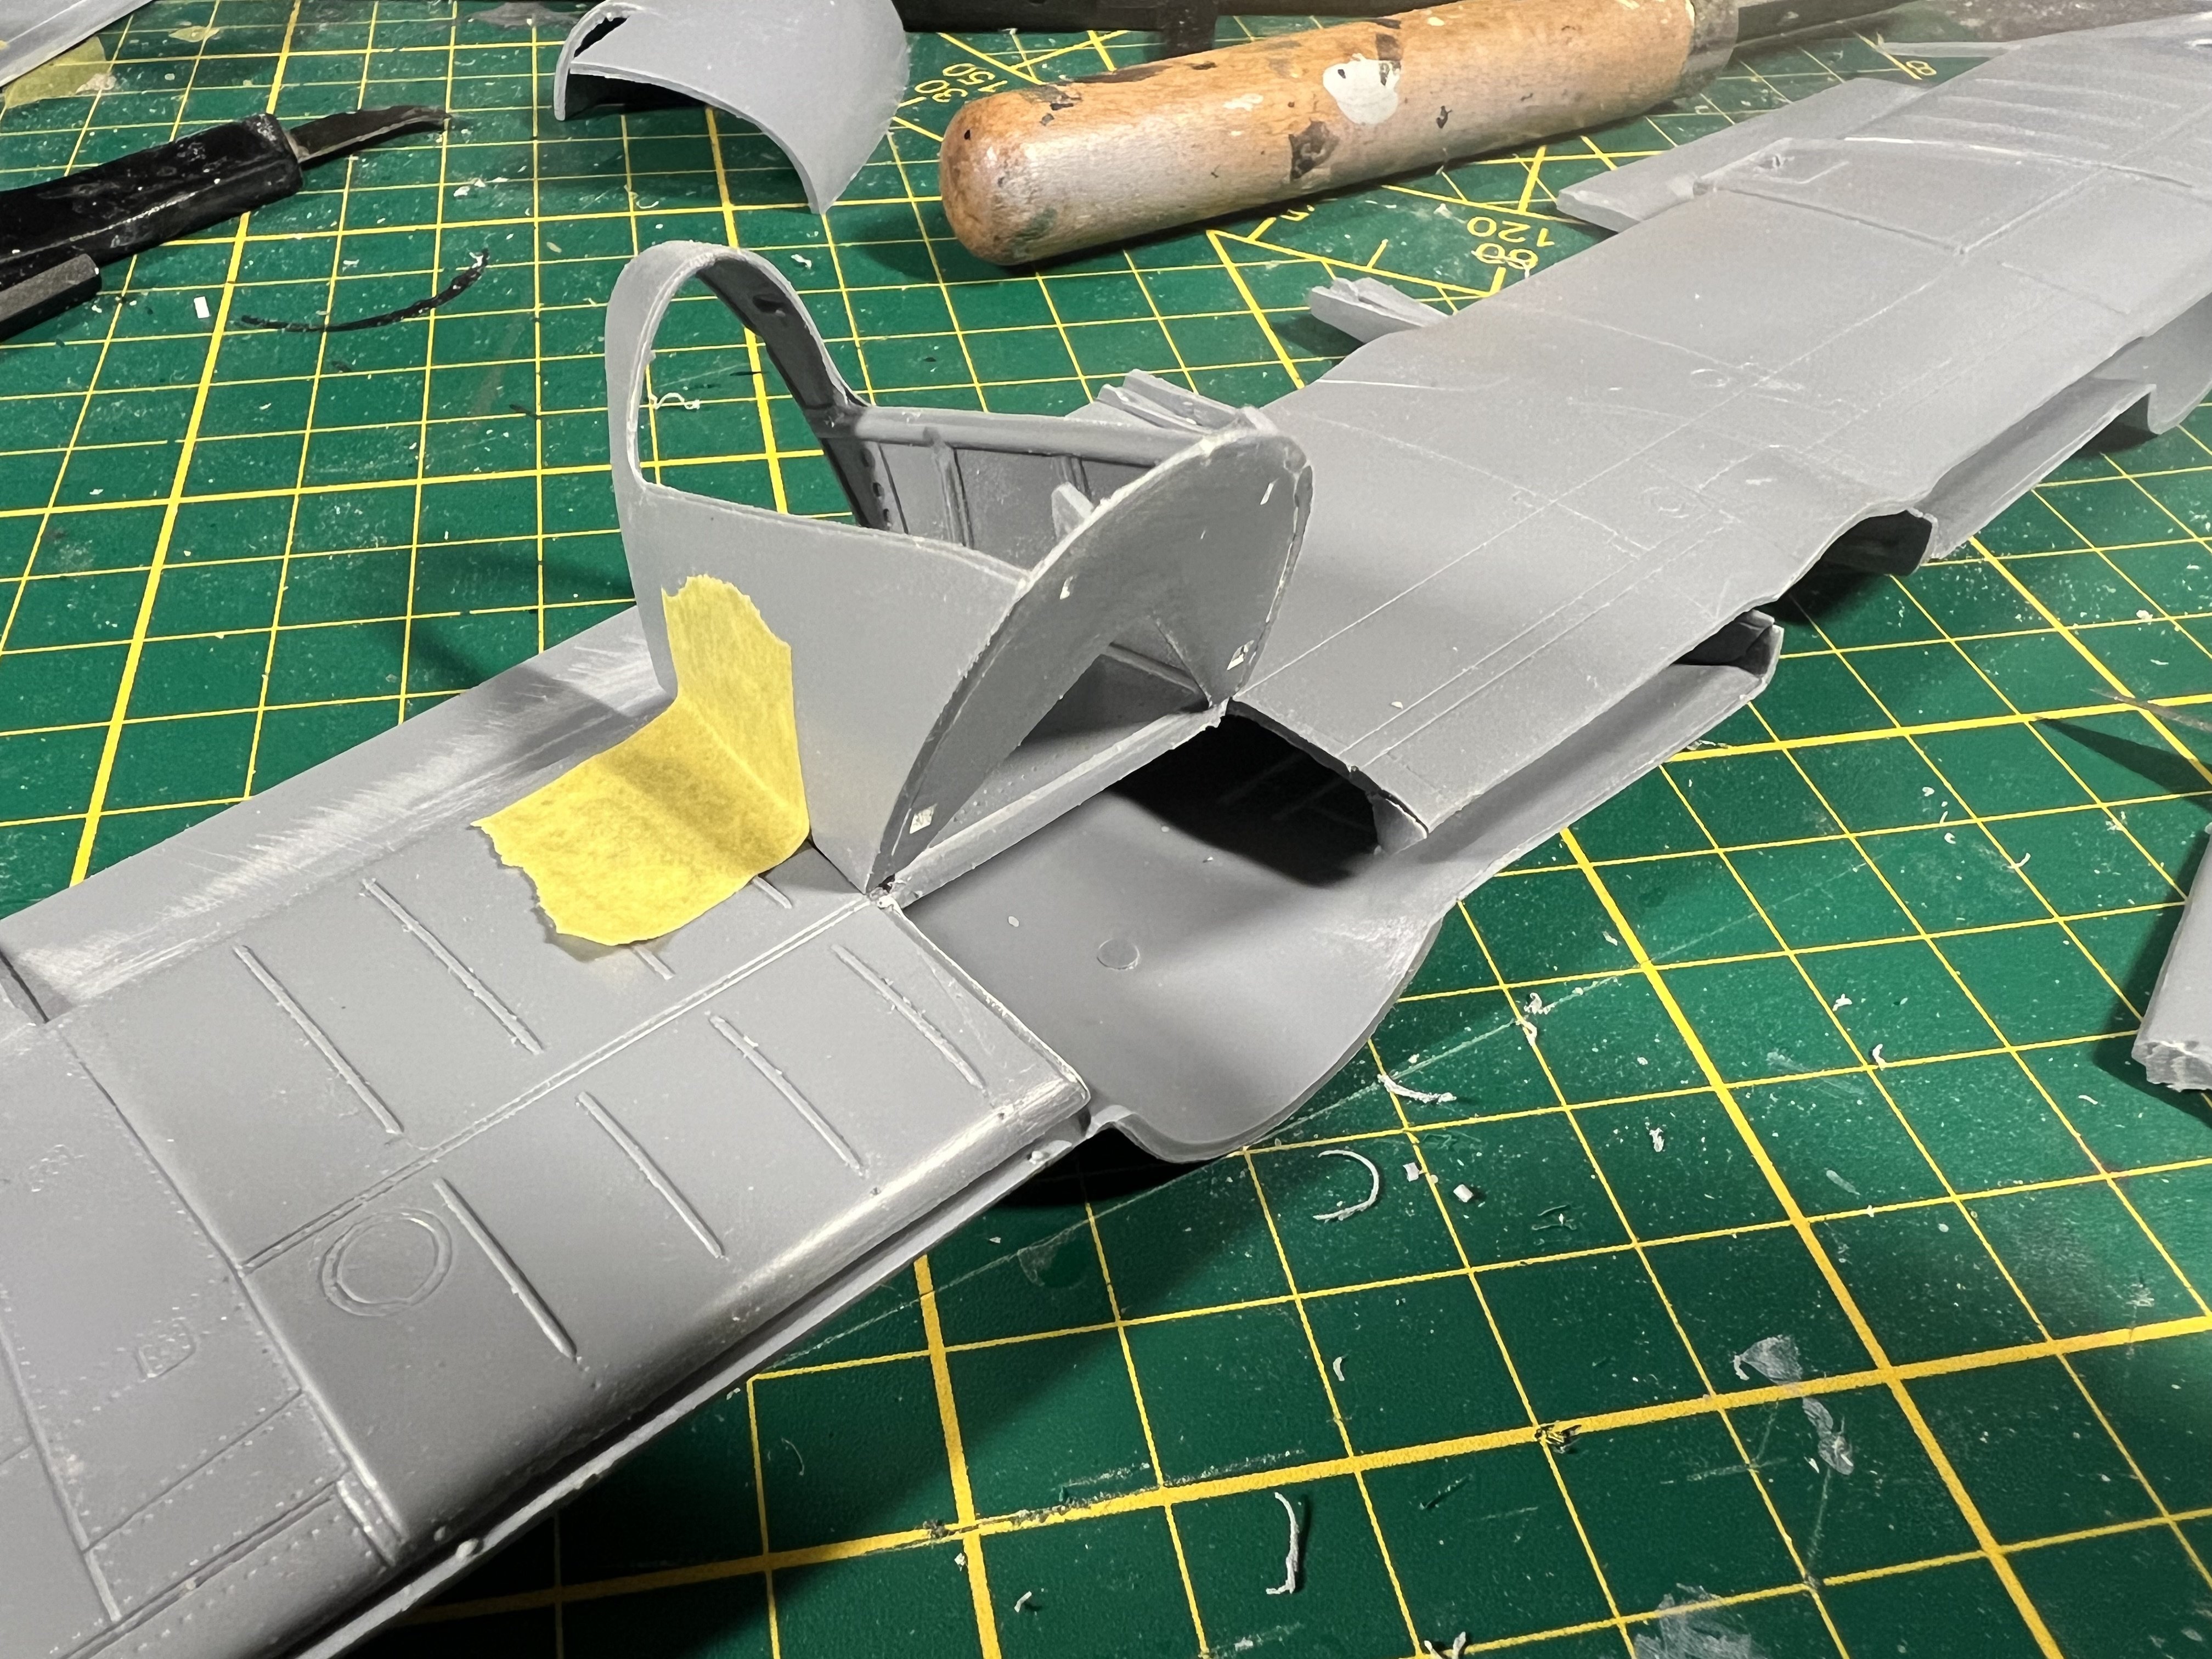
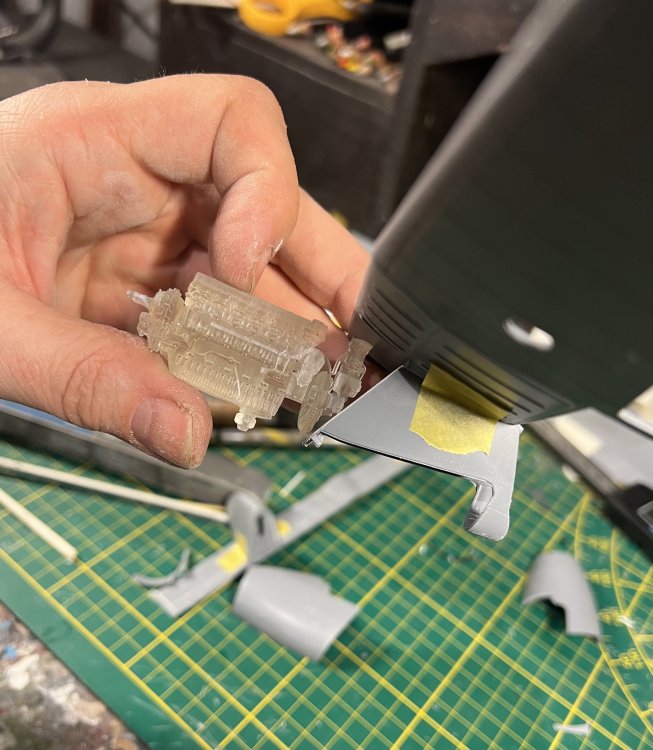
So. I put together one gondola and cut off the engine plating. I sanded the firewall flush, since all the detail will be 3d printed and this gives me a solid base. I printed one engine to play with during construction. Need to re-measure the engine since as is, it won’t fit. The rear should slightly protrude the firewall.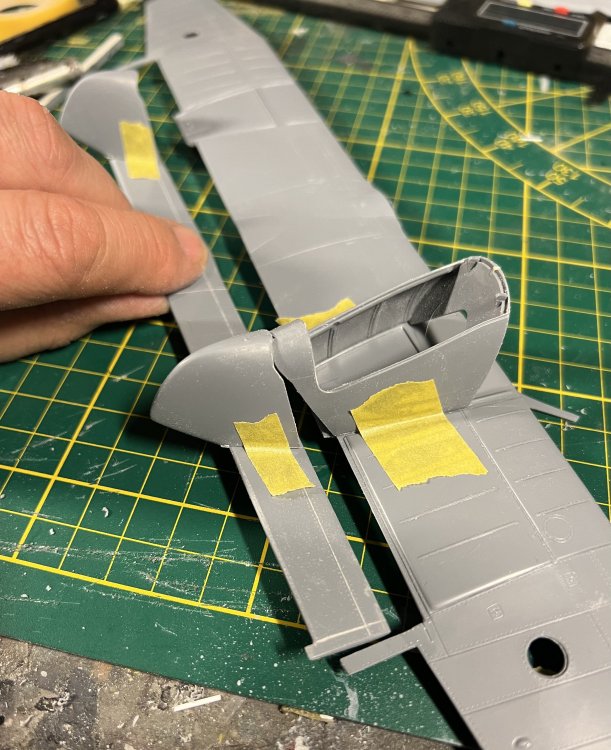

-
Sure! i use mr Hobby colour and tamiya paints. Westhering is done with AK panel line wash and AK weathering pencils. Followed by a mr Hobby matt coat.
-
1/32 Westland Whirlwind
JeroenPeters replied to JeroenPeters's topic in LSM 1/35 and Larger Work In Progress
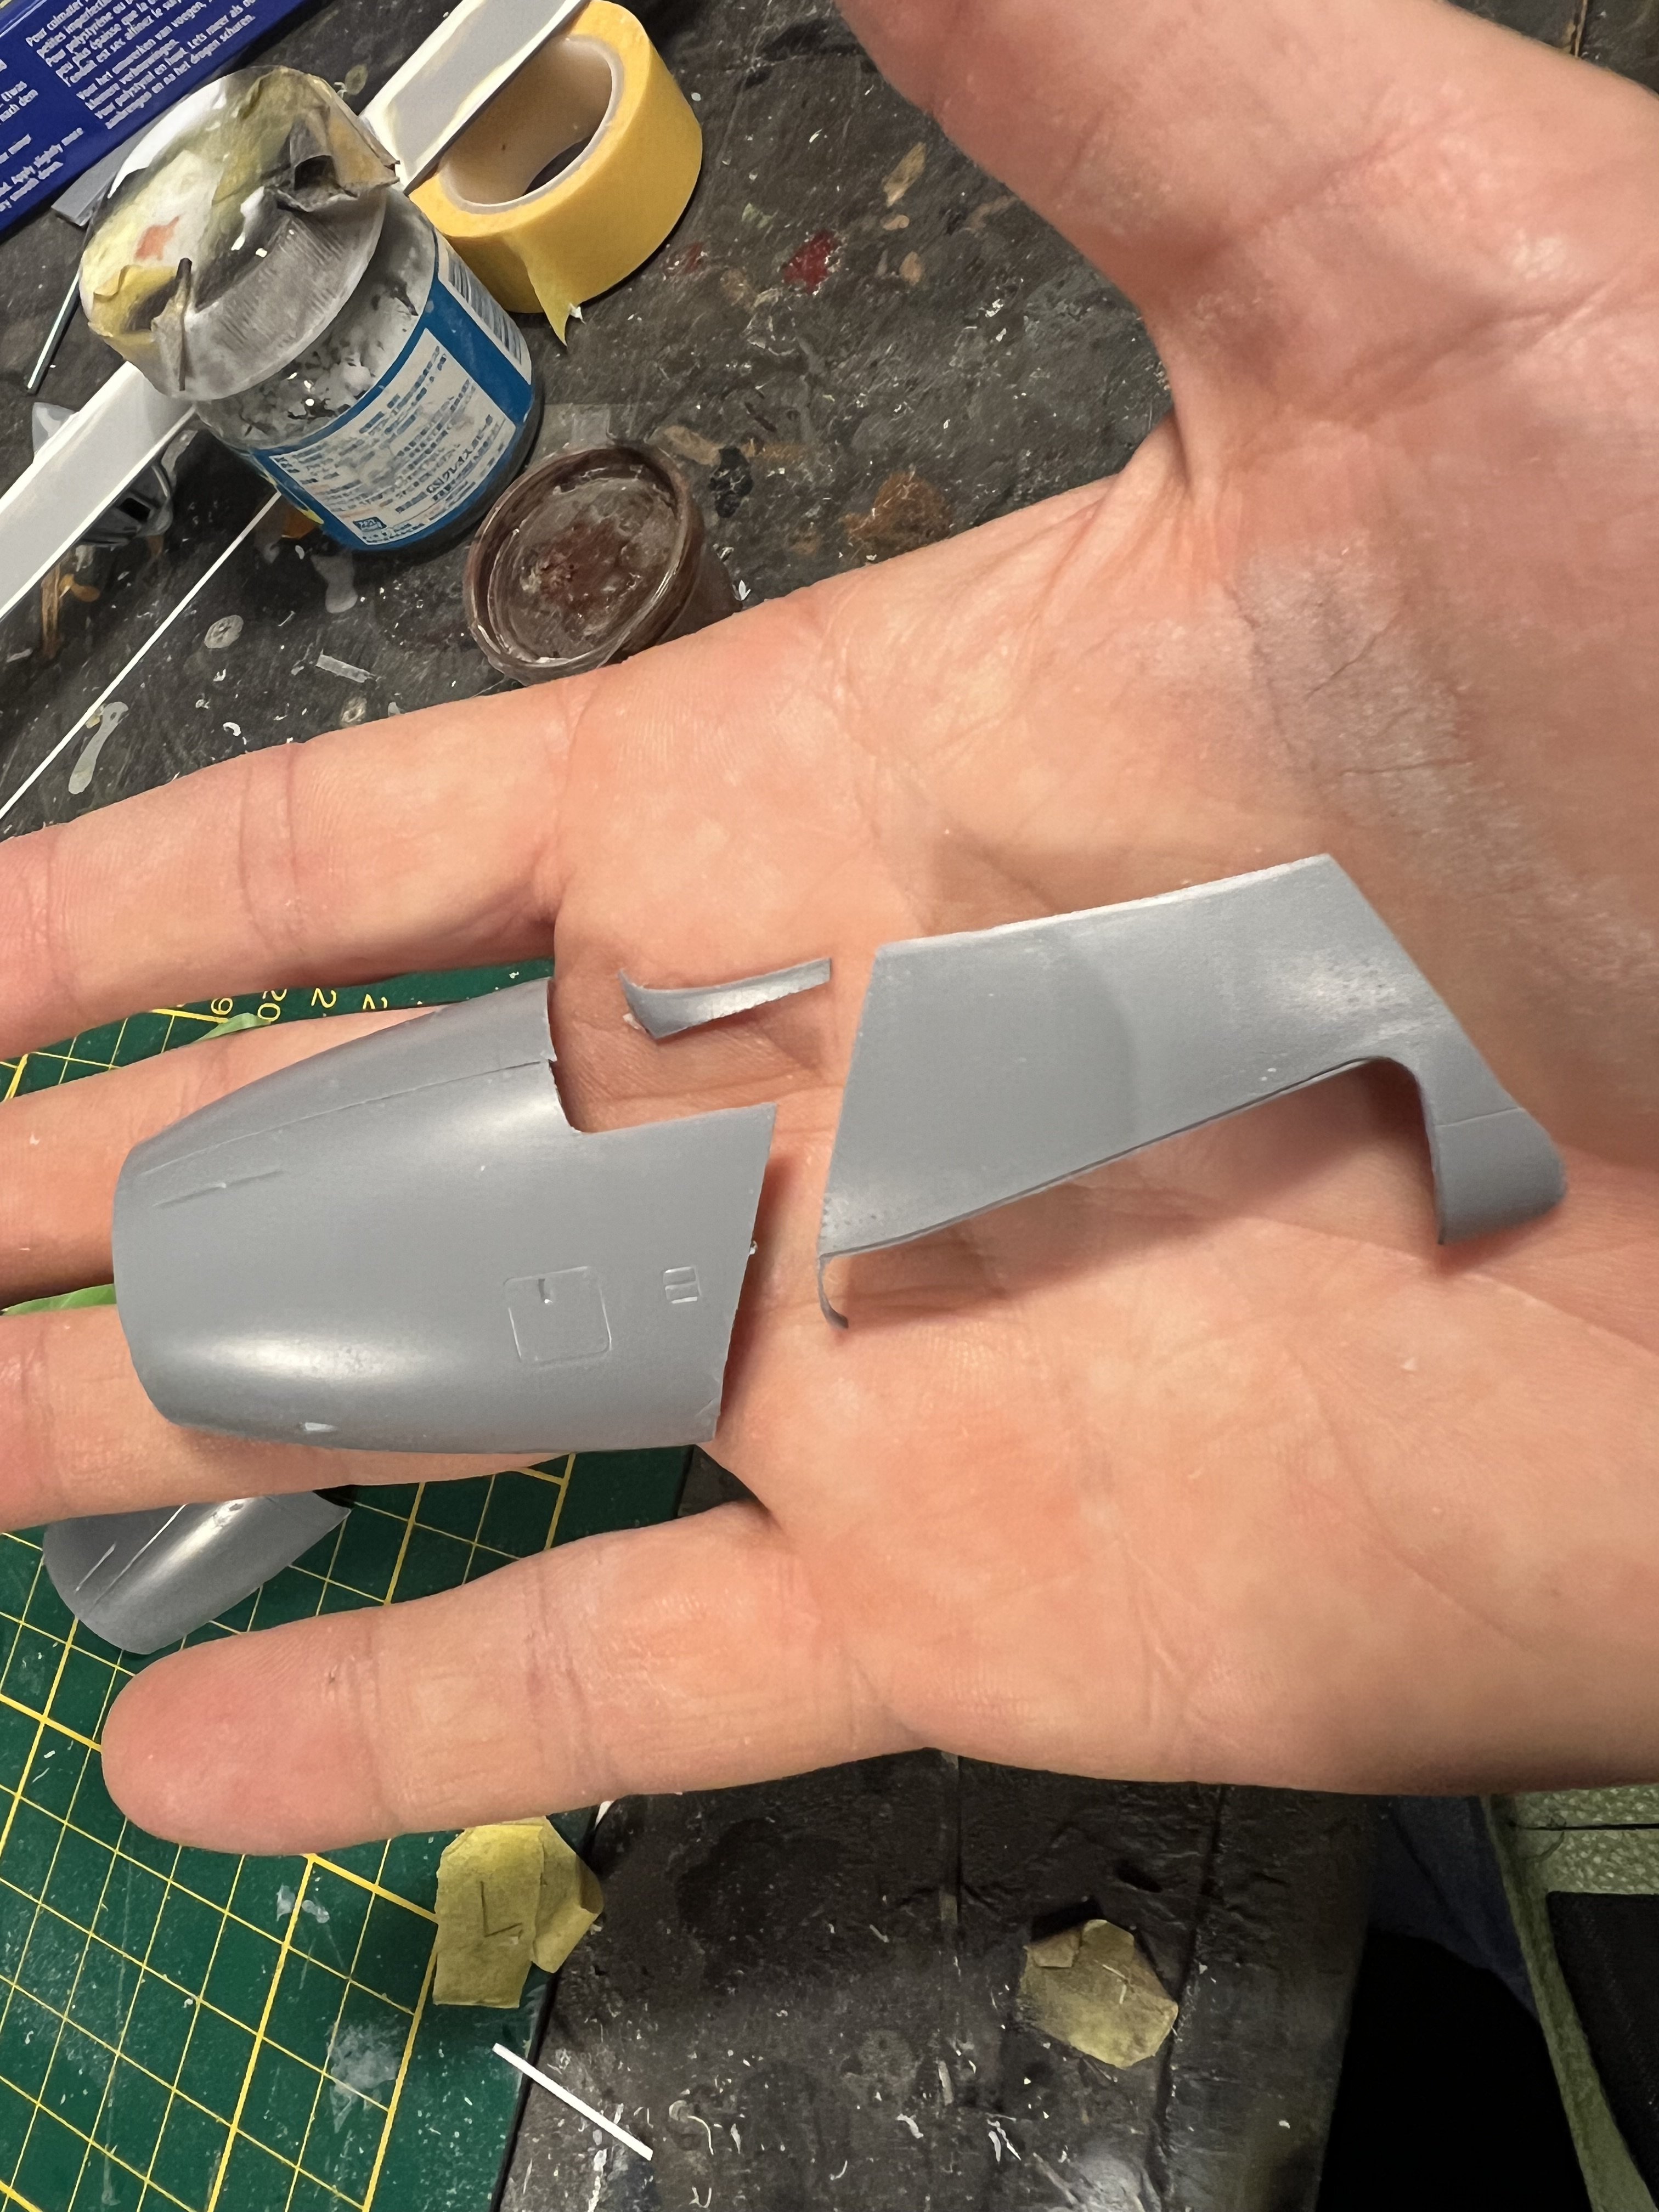
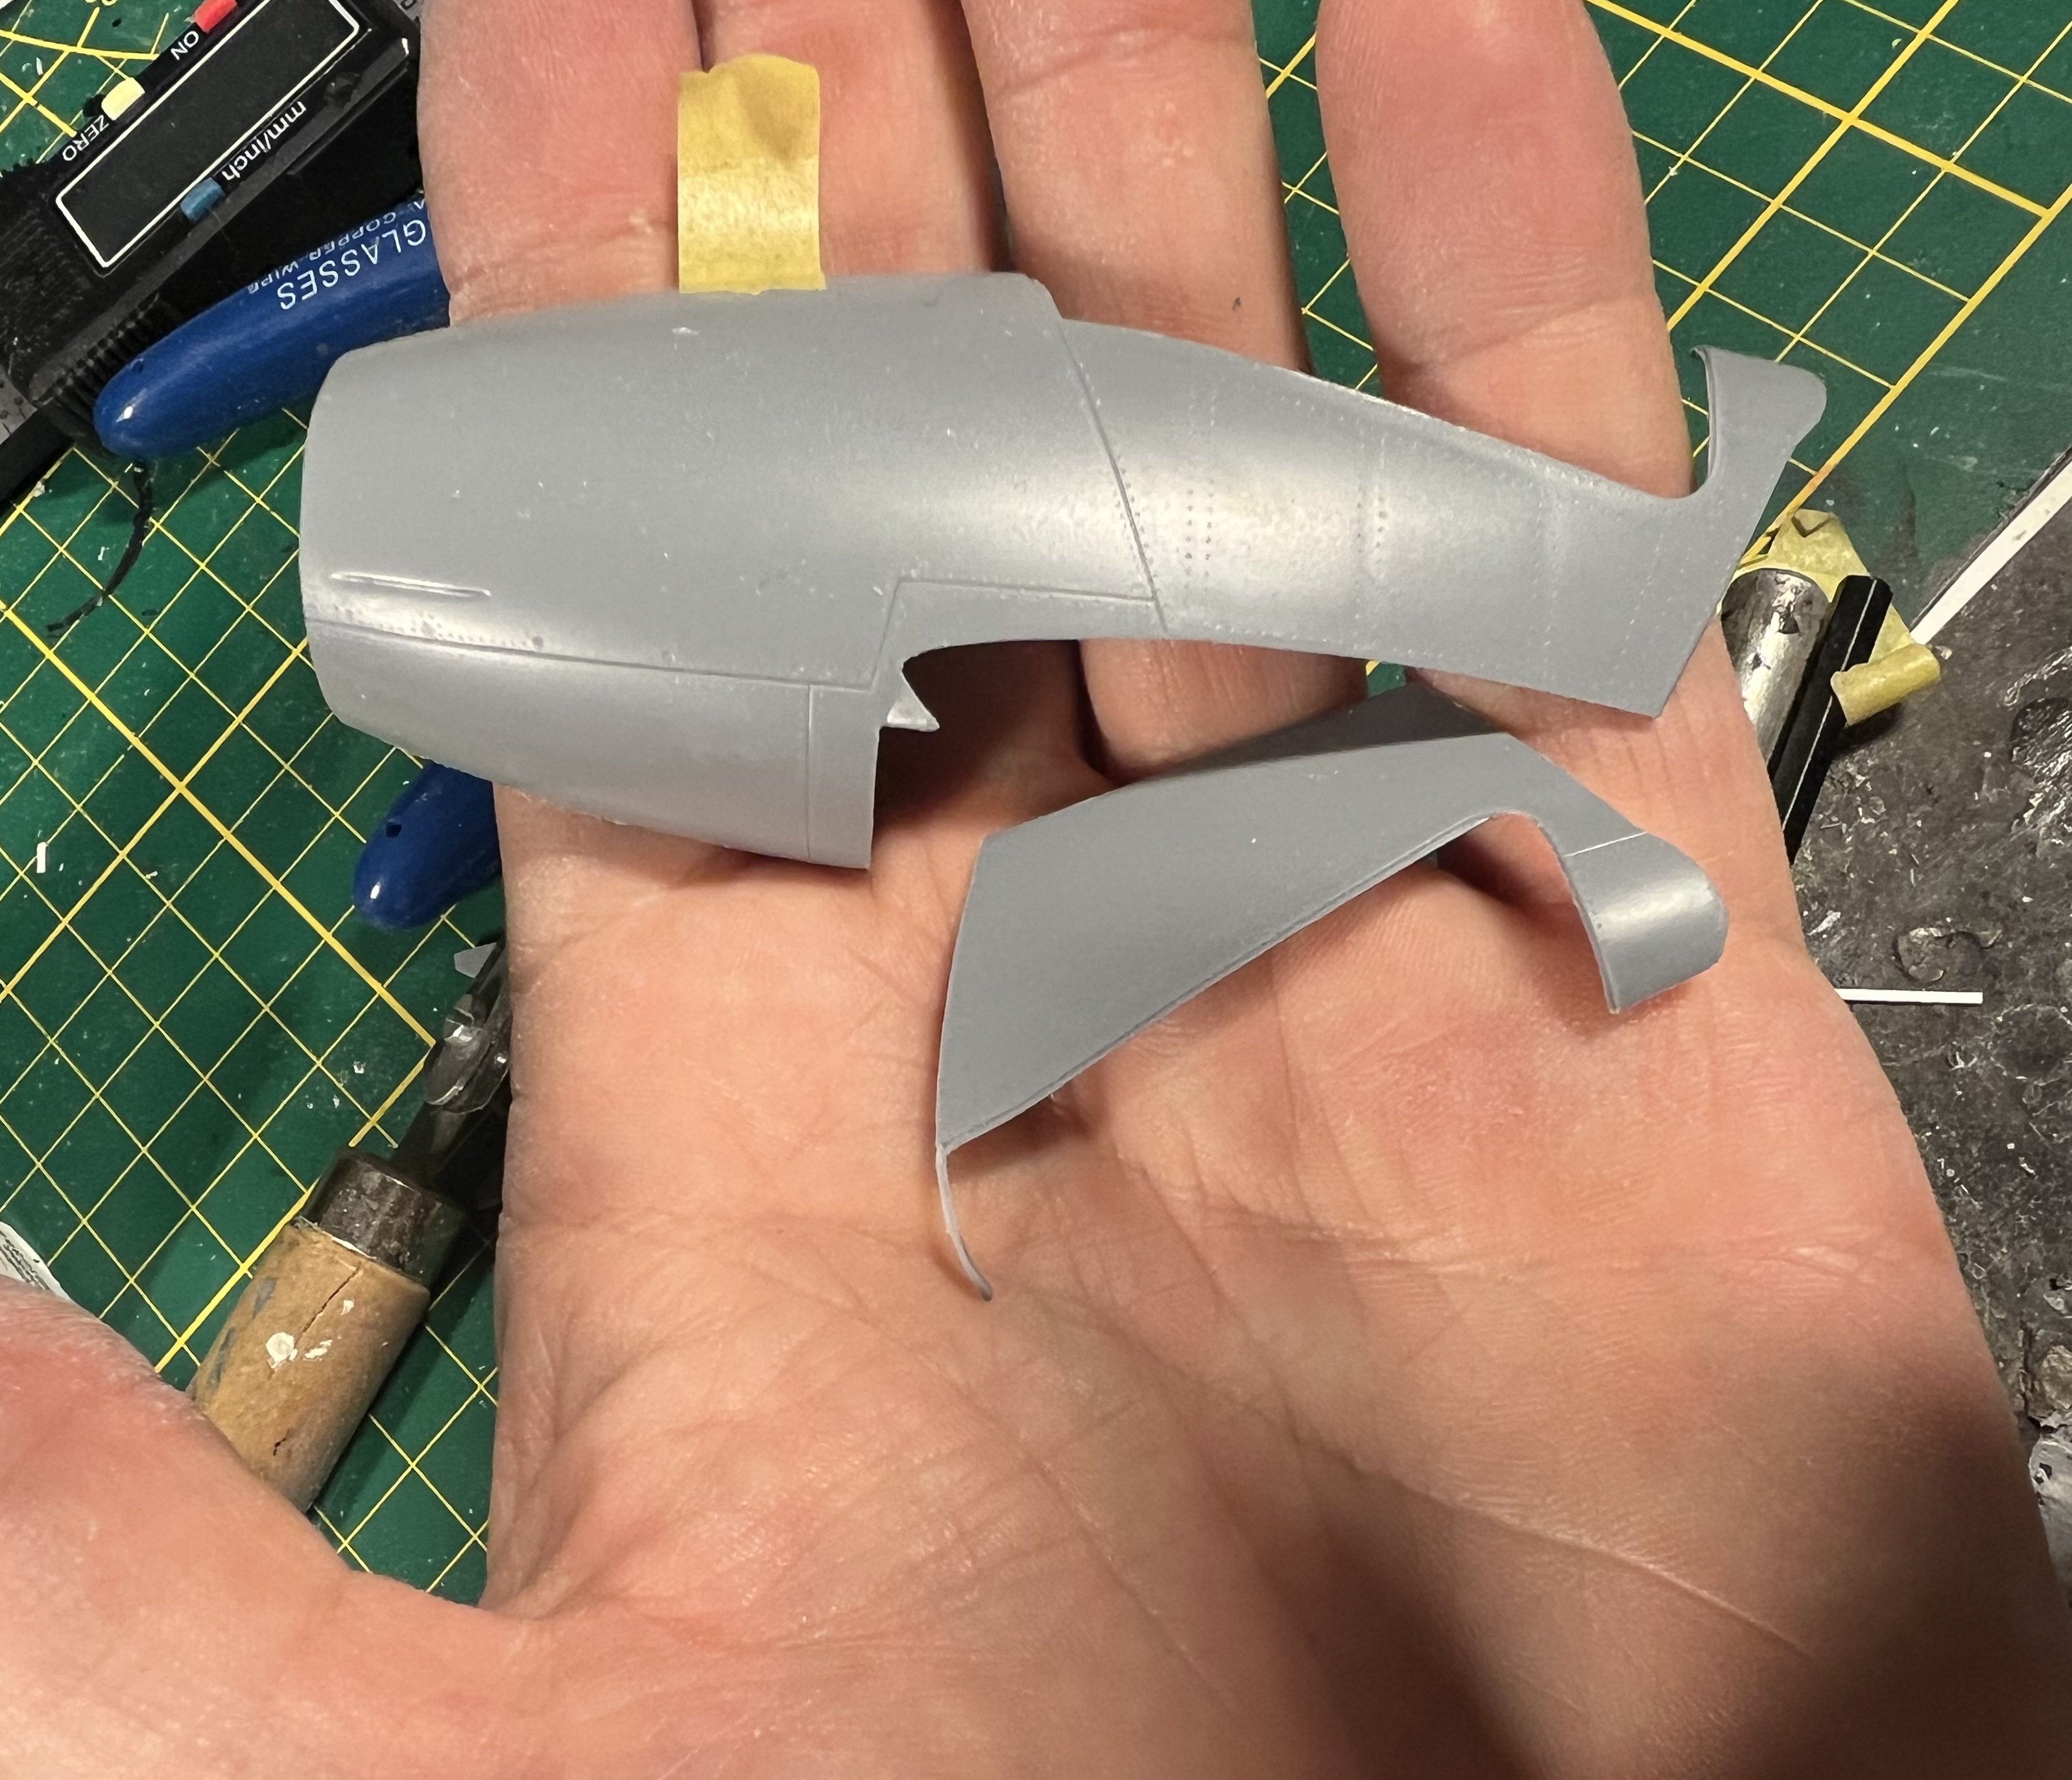
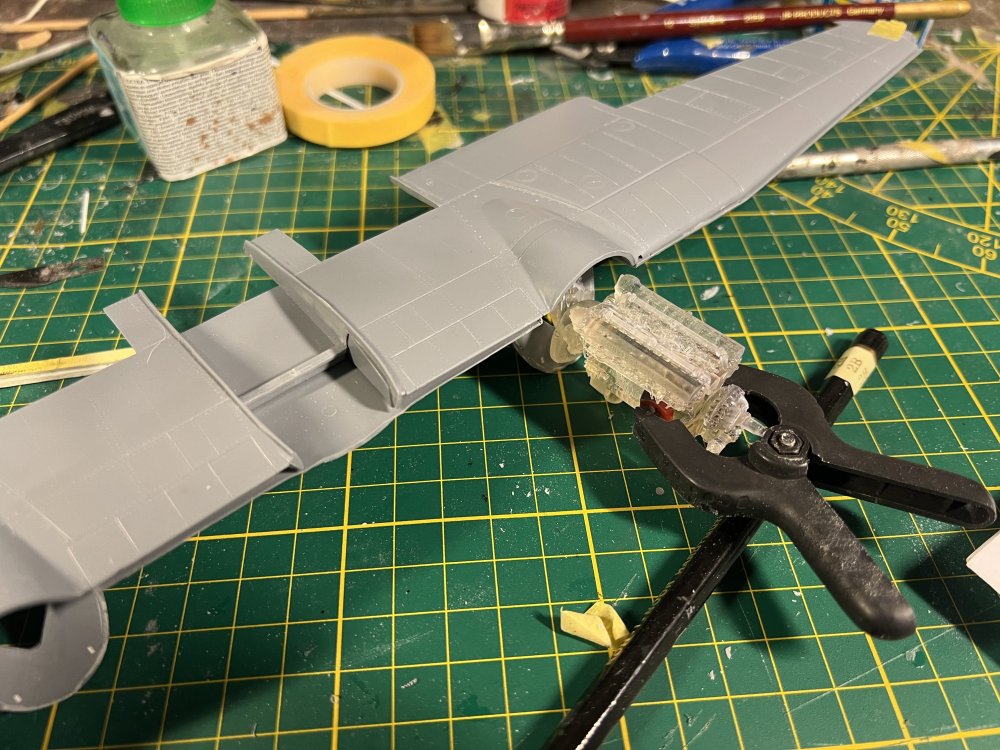
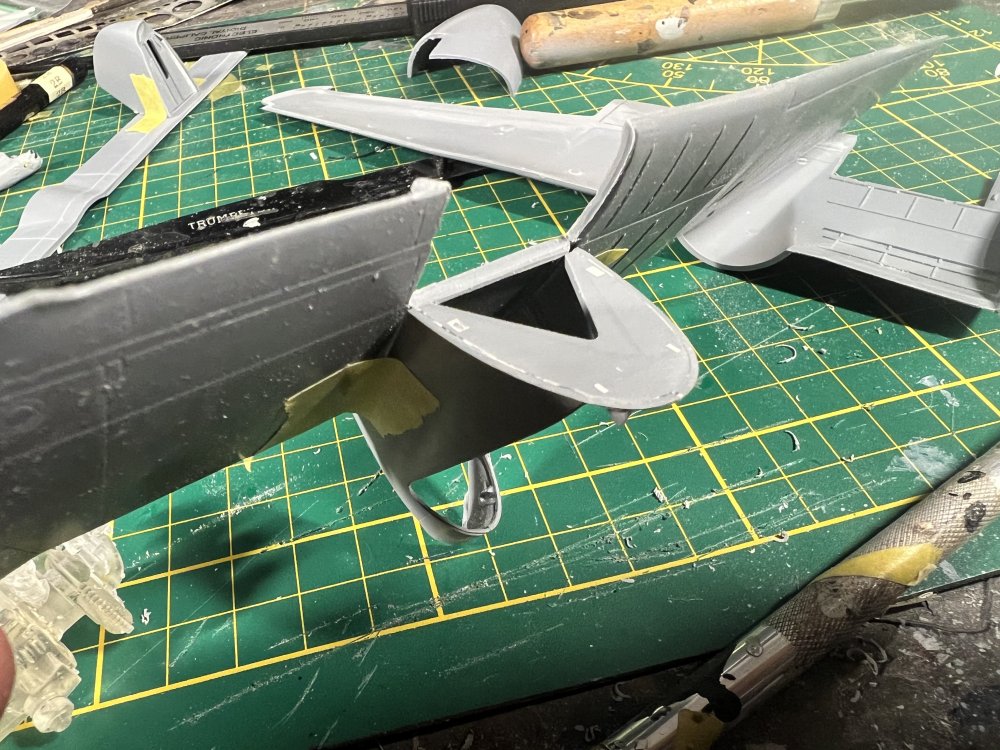
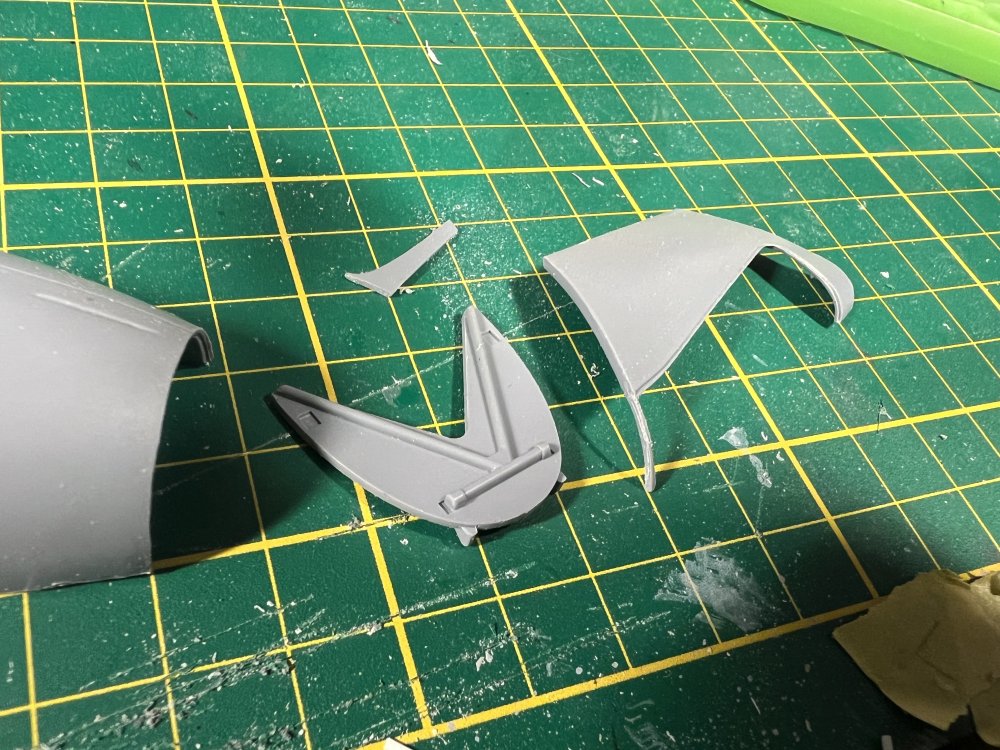
Cutting up the gondola’s. Doing this in parts that all need to be thinned out and put back together afterwards. I’m aiming to making a solid base to attach the engine to.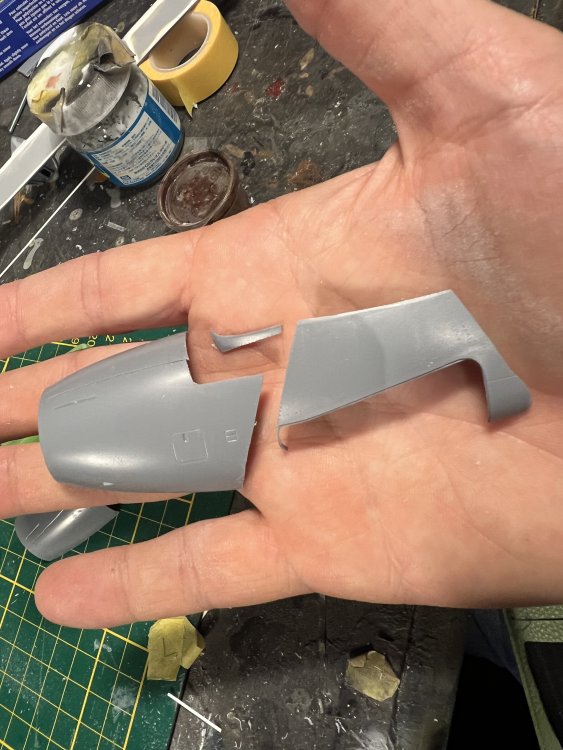

-
1/32 Westland Whirlwind
JeroenPeters replied to JeroenPeters's topic in LSM 1/35 and Larger Work In Progress
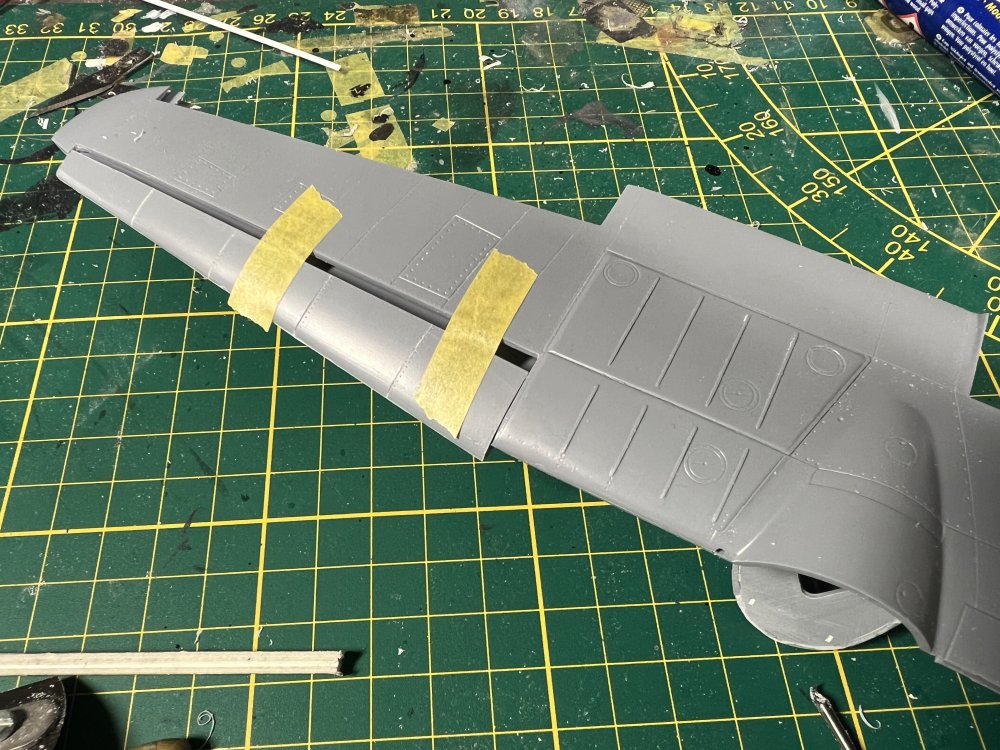
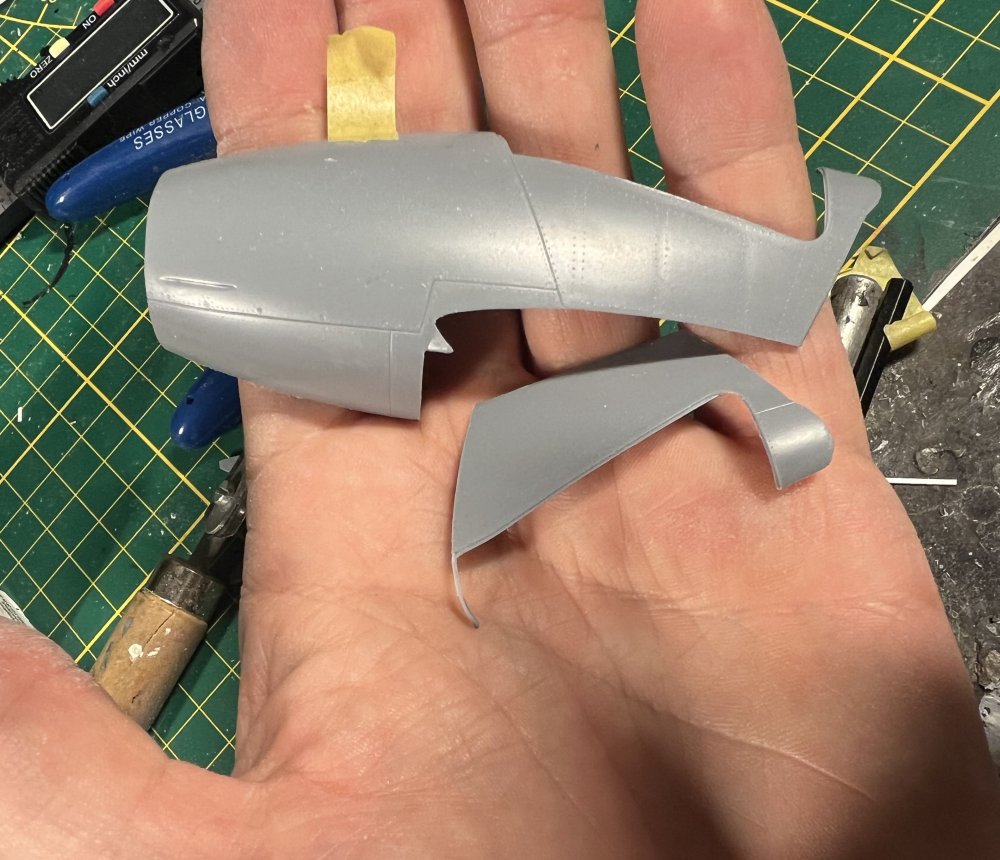
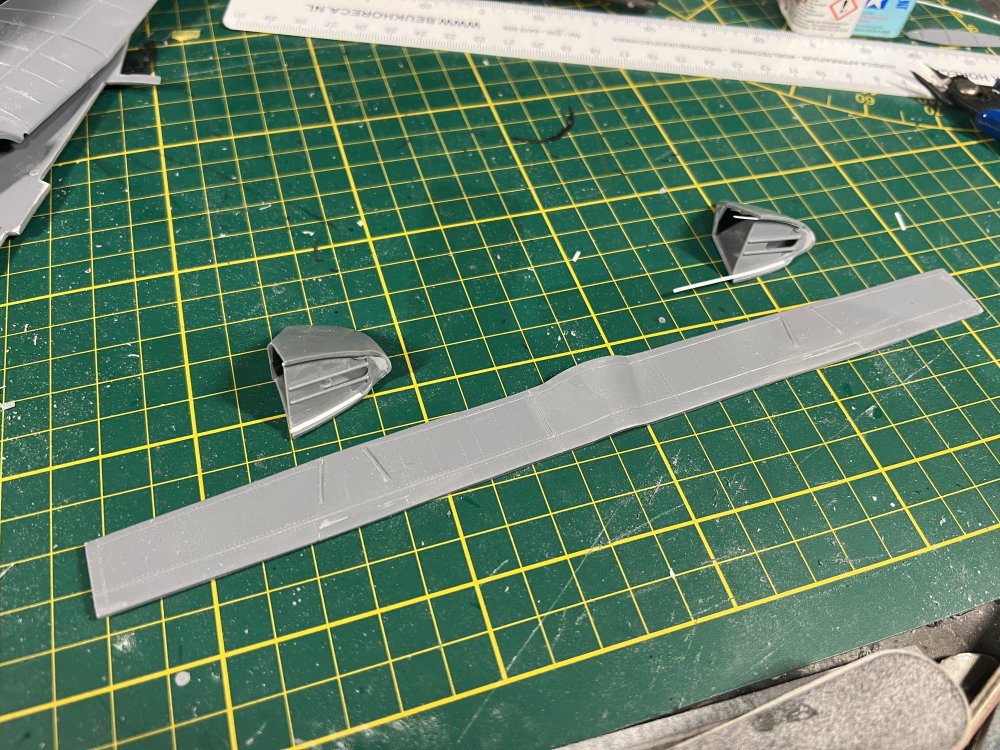
Ok! so i cut the length edge of the flap and will attach this to the top side of the wing. Resanded the new edge. And making a new smooth transition between the gondola’s and the flap.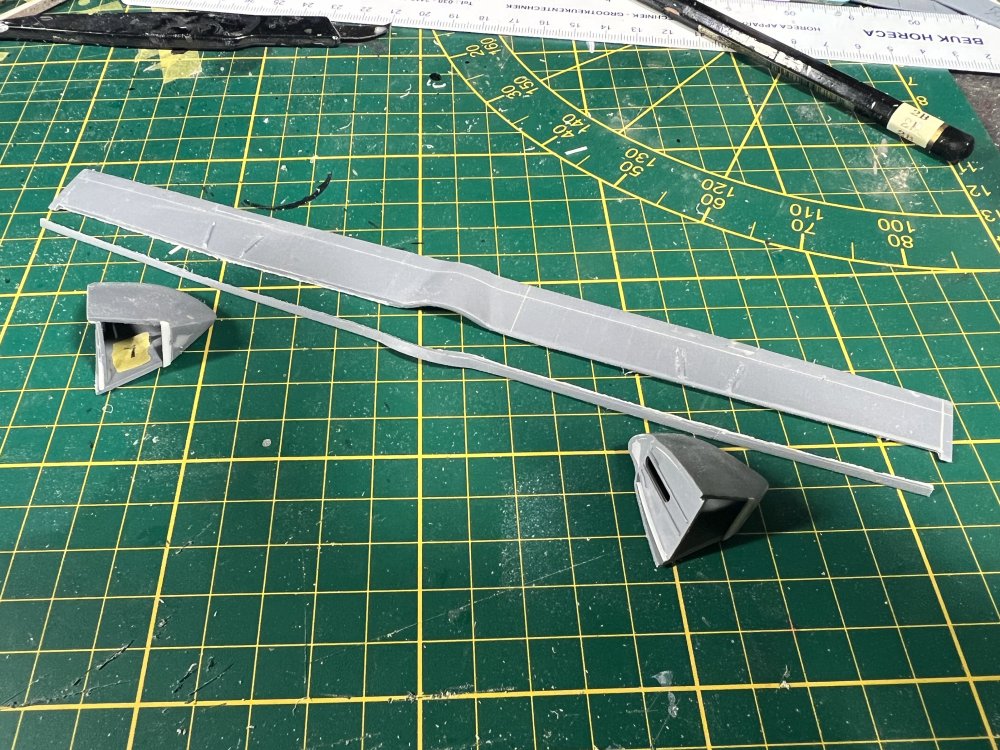

-
1/32 Westland Whirlwind
JeroenPeters replied to JeroenPeters's topic in LSM 1/35 and Larger Work In Progress
I reckon i should look at this? That means the full length of the flap needs that strip removed… Geez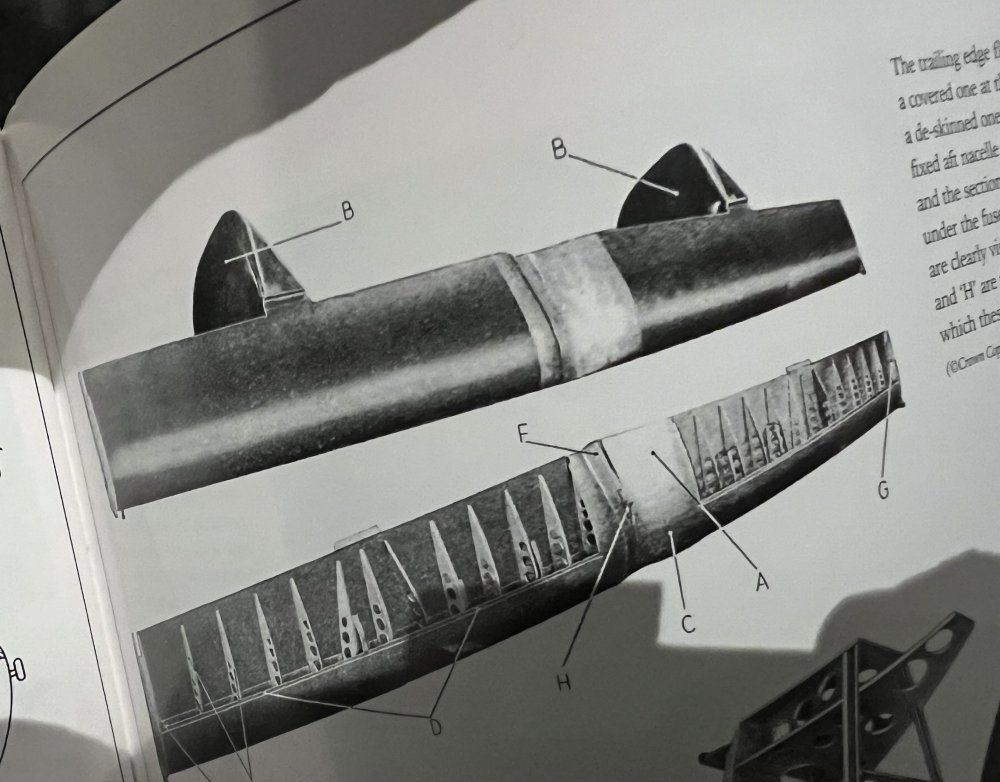
-
1/32 Westland Whirlwind
JeroenPeters replied to JeroenPeters's topic in LSM 1/35 and Larger Work In Progress
Sorry if i keep asking, but does that mean that these two parts indicated in red need to go? So only outboard the nacelles and not at the radiators?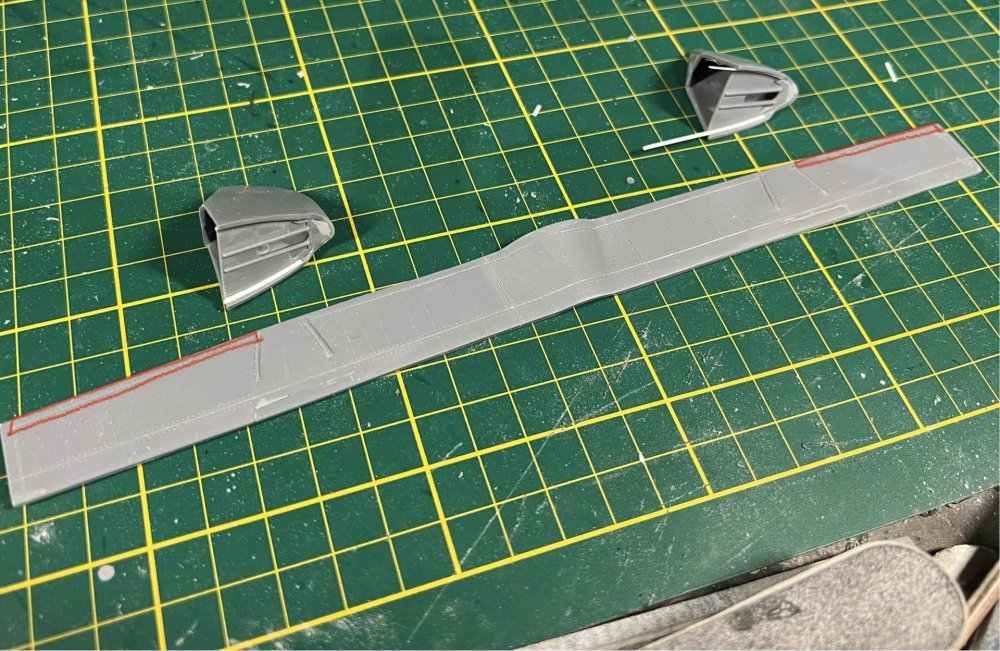
-
1/32 Westland Whirlwind
JeroenPeters replied to JeroenPeters's topic in LSM 1/35 and Larger Work In Progress
Does that mean that this panel line actually is not a panel line but a seperation? in that case i should maybe fill this panel line? And add a strip to the bottom of the top wing?
-
1/32 Westland Whirlwind
JeroenPeters replied to JeroenPeters's topic in LSM 1/35 and Larger Work In Progress
Ah yes. Cees already warned me about this. I corrected it and am now adding final details. Thnx! -
1/32 Westland Whirlwind
JeroenPeters replied to JeroenPeters's topic in LSM 1/35 and Larger Work In Progress
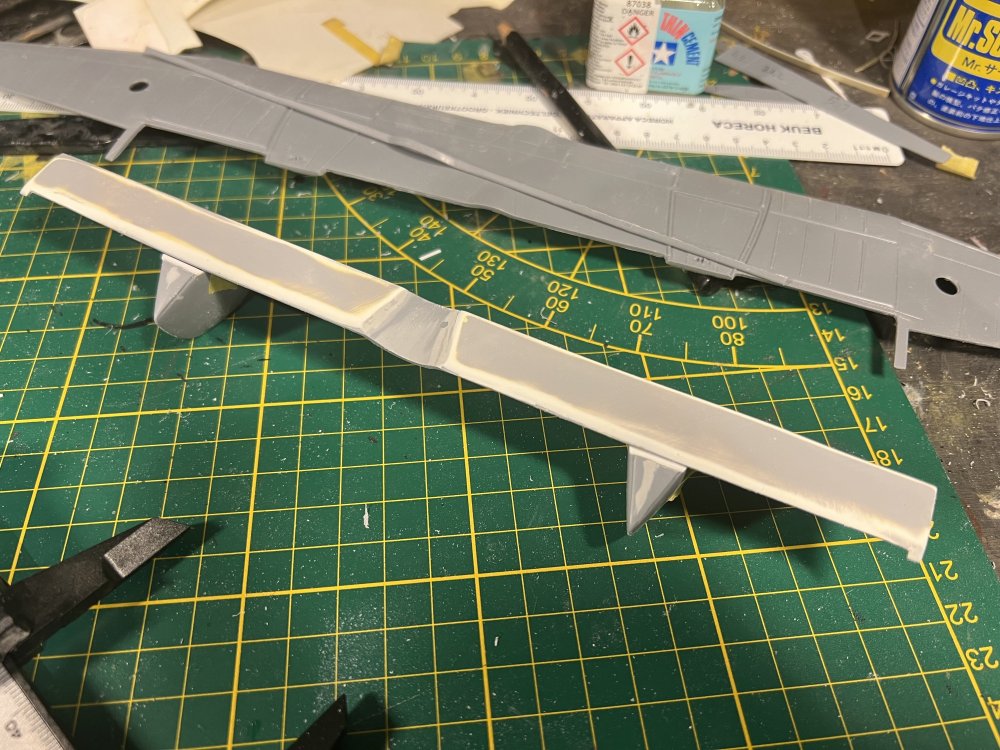
Still lots of sanding and shaping on the flap. And adding detail to the rear nacelles that are attached to the flap. in almost every photo you see some dropping of the flap due to hydraulics sinking. Visible in this photo is the flap indicator stick.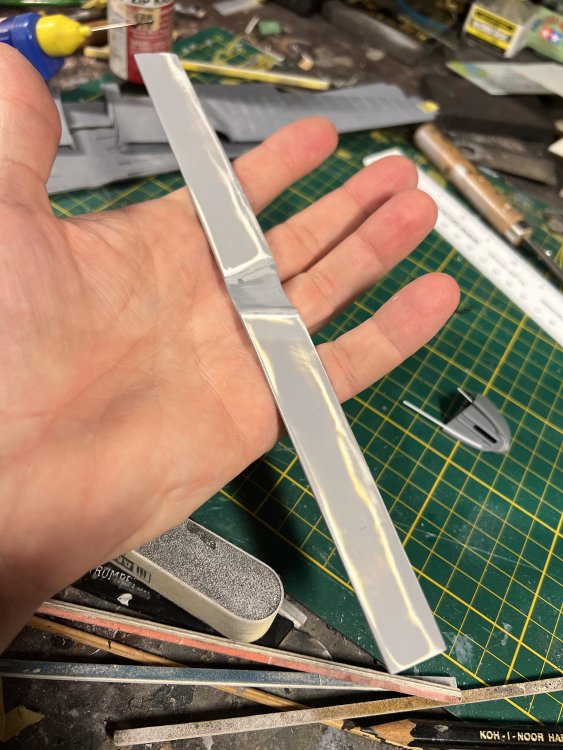

-
1/32 Westland Whirlwind
JeroenPeters replied to JeroenPeters's topic in LSM 1/35 and Larger Work In Progress
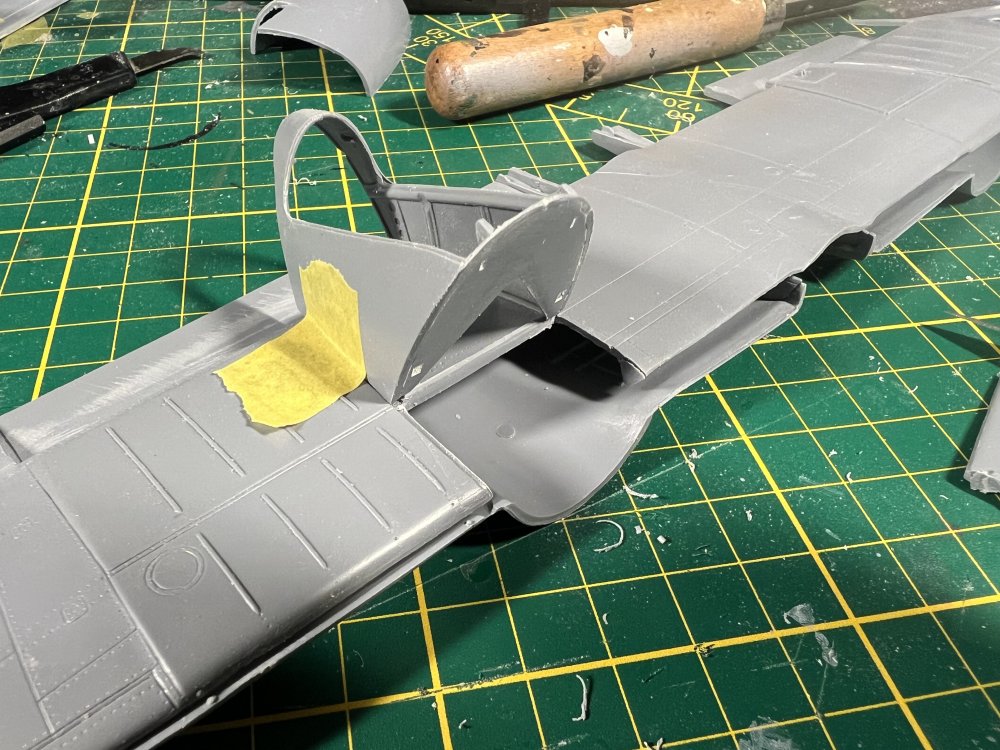
More goodies today. The Wingleader book is actually quite helpful in determining what is what on this plane. And decided to replace the thick canopy for a vacform that one. We’ll see how that goes.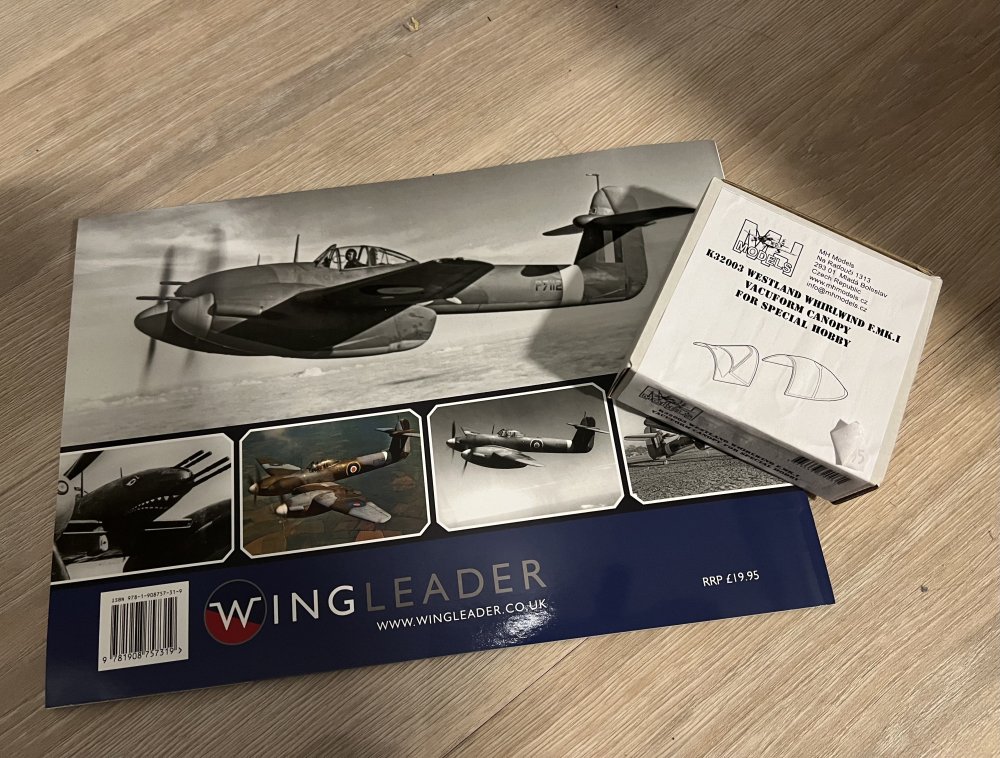
-
1/32 Westland Whirlwind
JeroenPeters replied to JeroenPeters's topic in LSM 1/35 and Larger Work In Progress
Hi Gunnar, Do you know why the trim tab on the aileron is almost twice as wide on the technical drawing than on scale plans and photo's?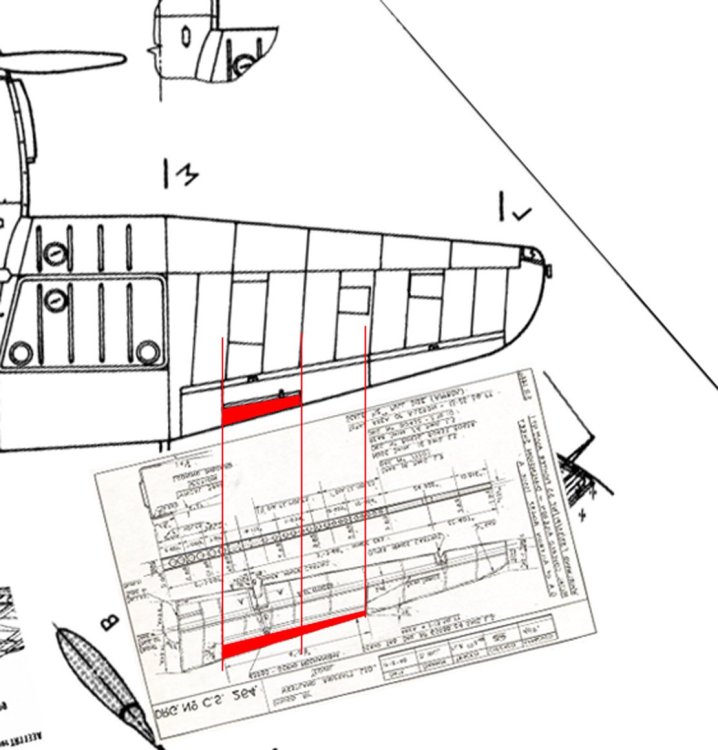
-
1/32 Westland Whirlwind
JeroenPeters replied to JeroenPeters's topic in LSM 1/35 and Larger Work In Progress
Thnx! I haven’t studied the cockpit yet, but that sounds like a quick fix. I reckon more corrections need to be made in this area. -
1/32 Westland Whirlwind
JeroenPeters replied to JeroenPeters's topic in LSM 1/35 and Larger Work In Progress
Yes Kevin! The kit does not offer the option to drop them, so i cut them and now am working on the details. Gunnar’s help is most welcome here (and everywhere else for that matter!) -
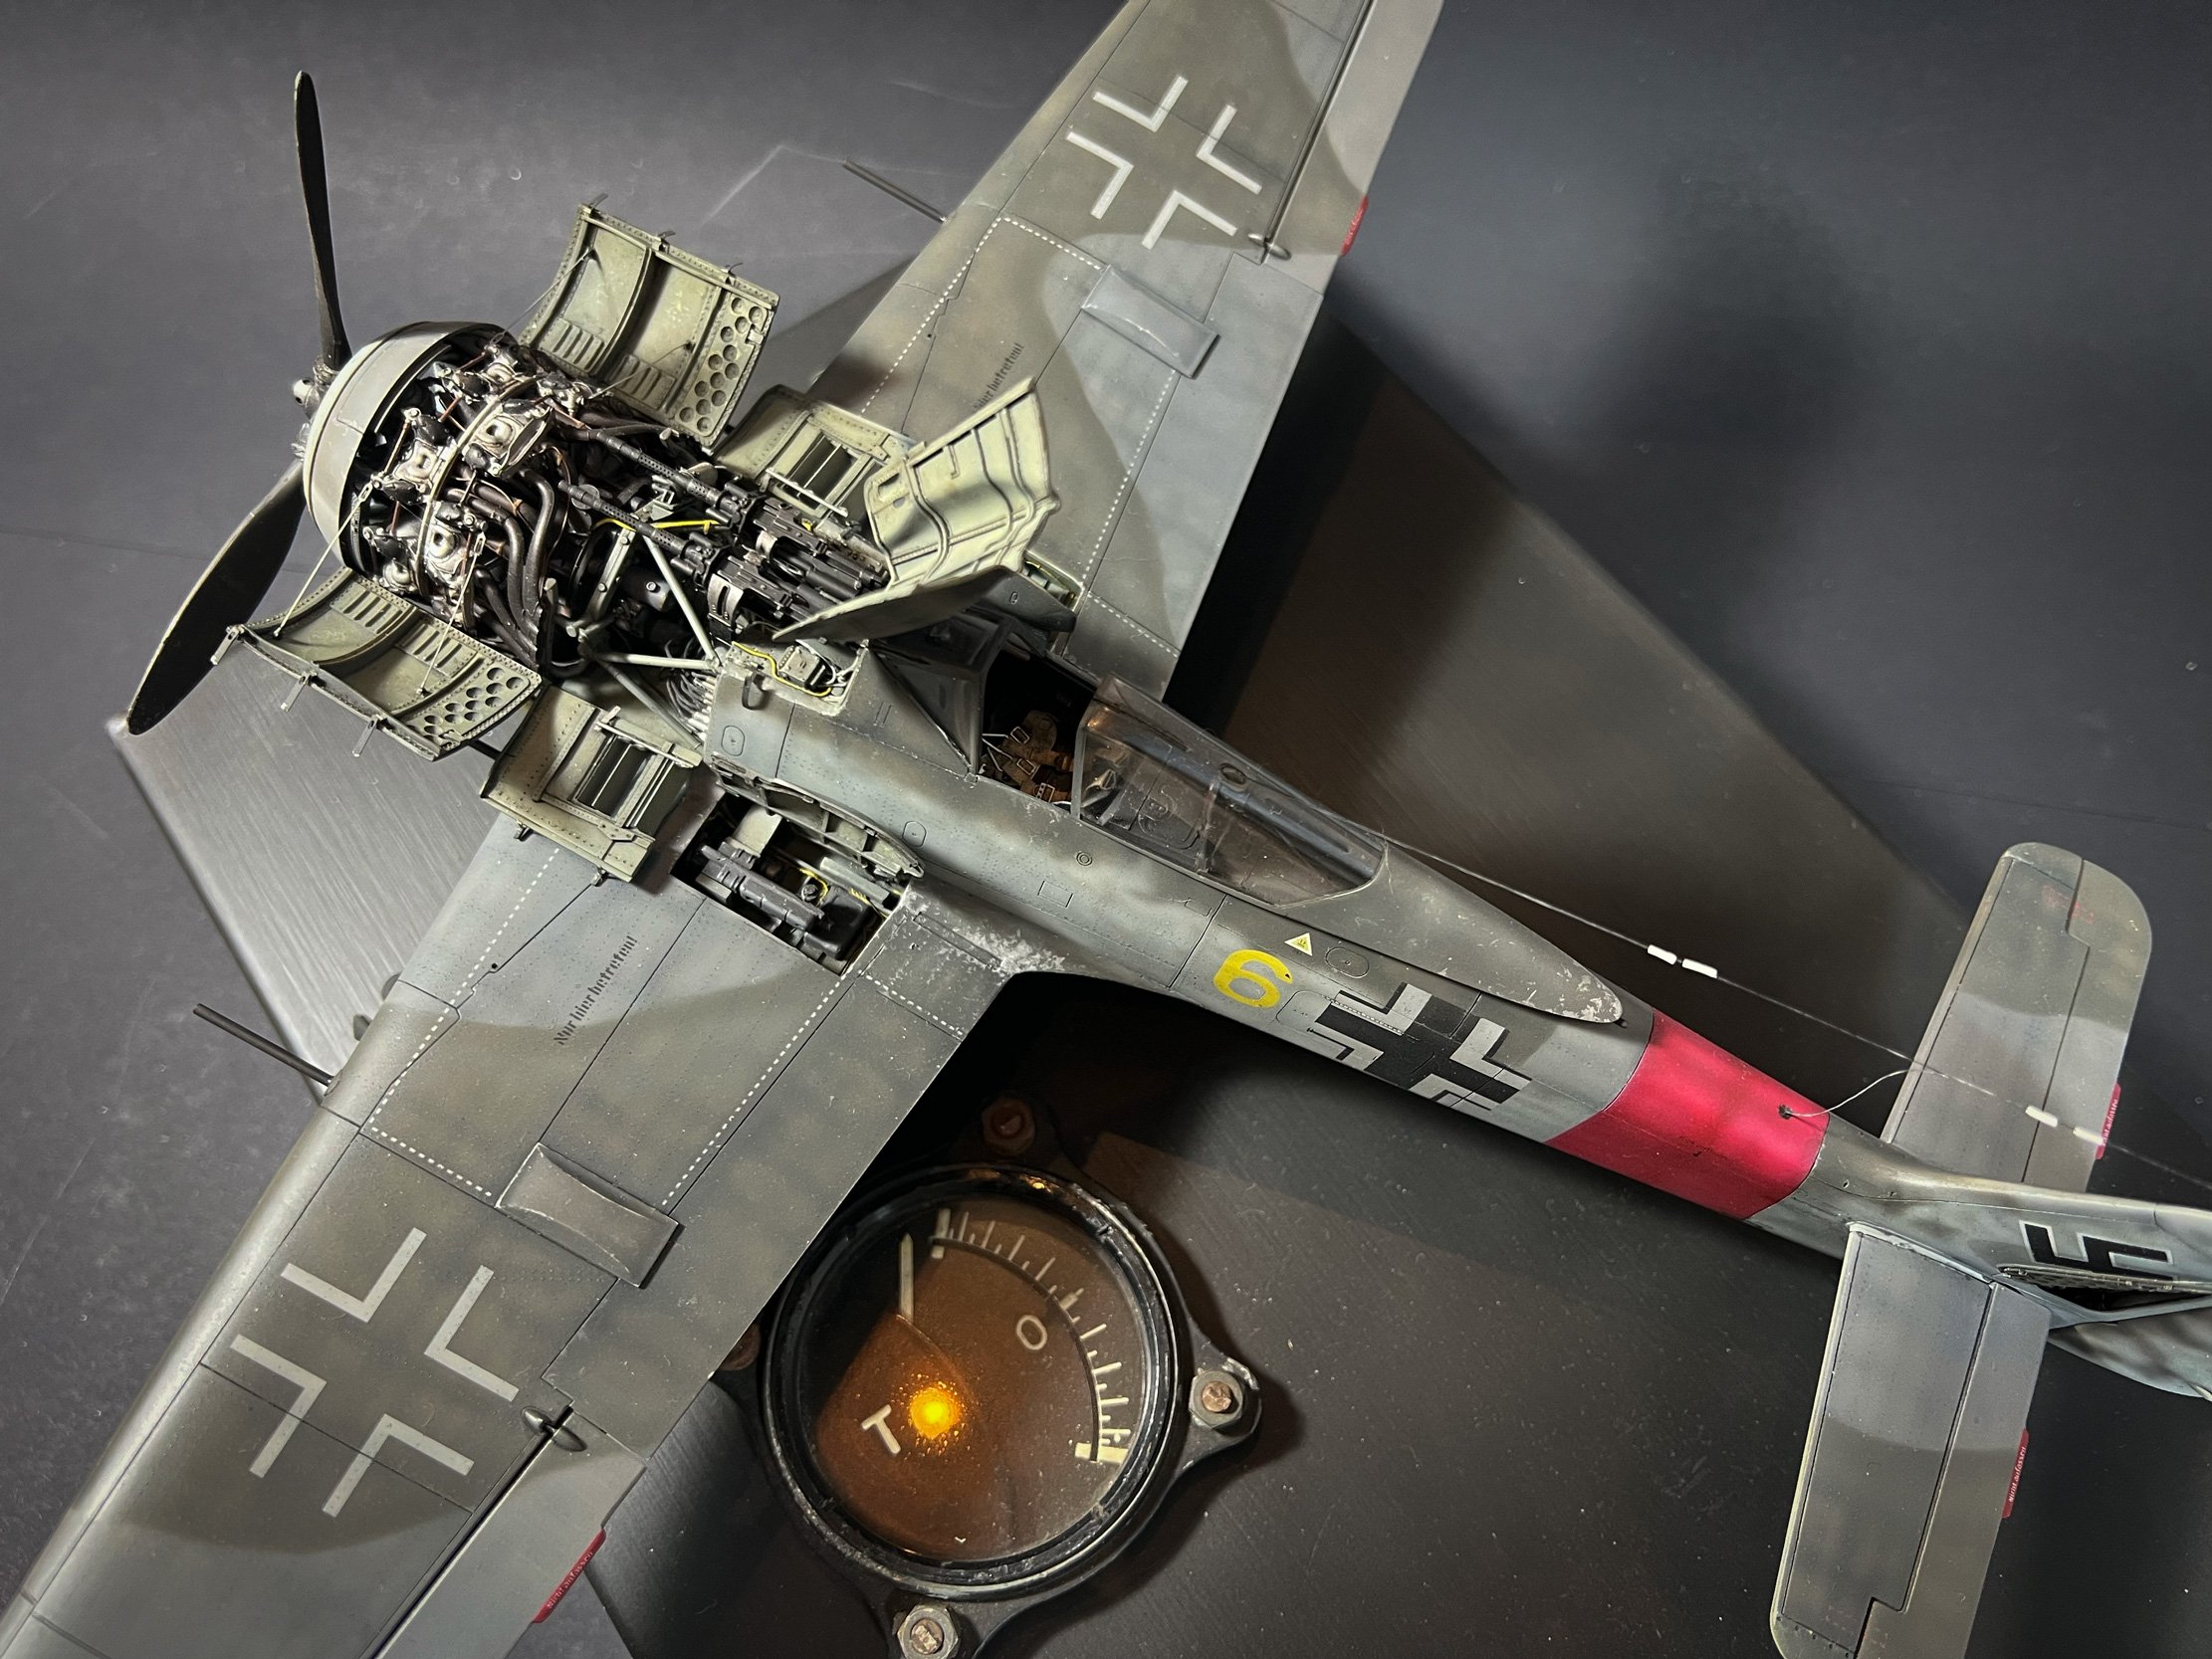
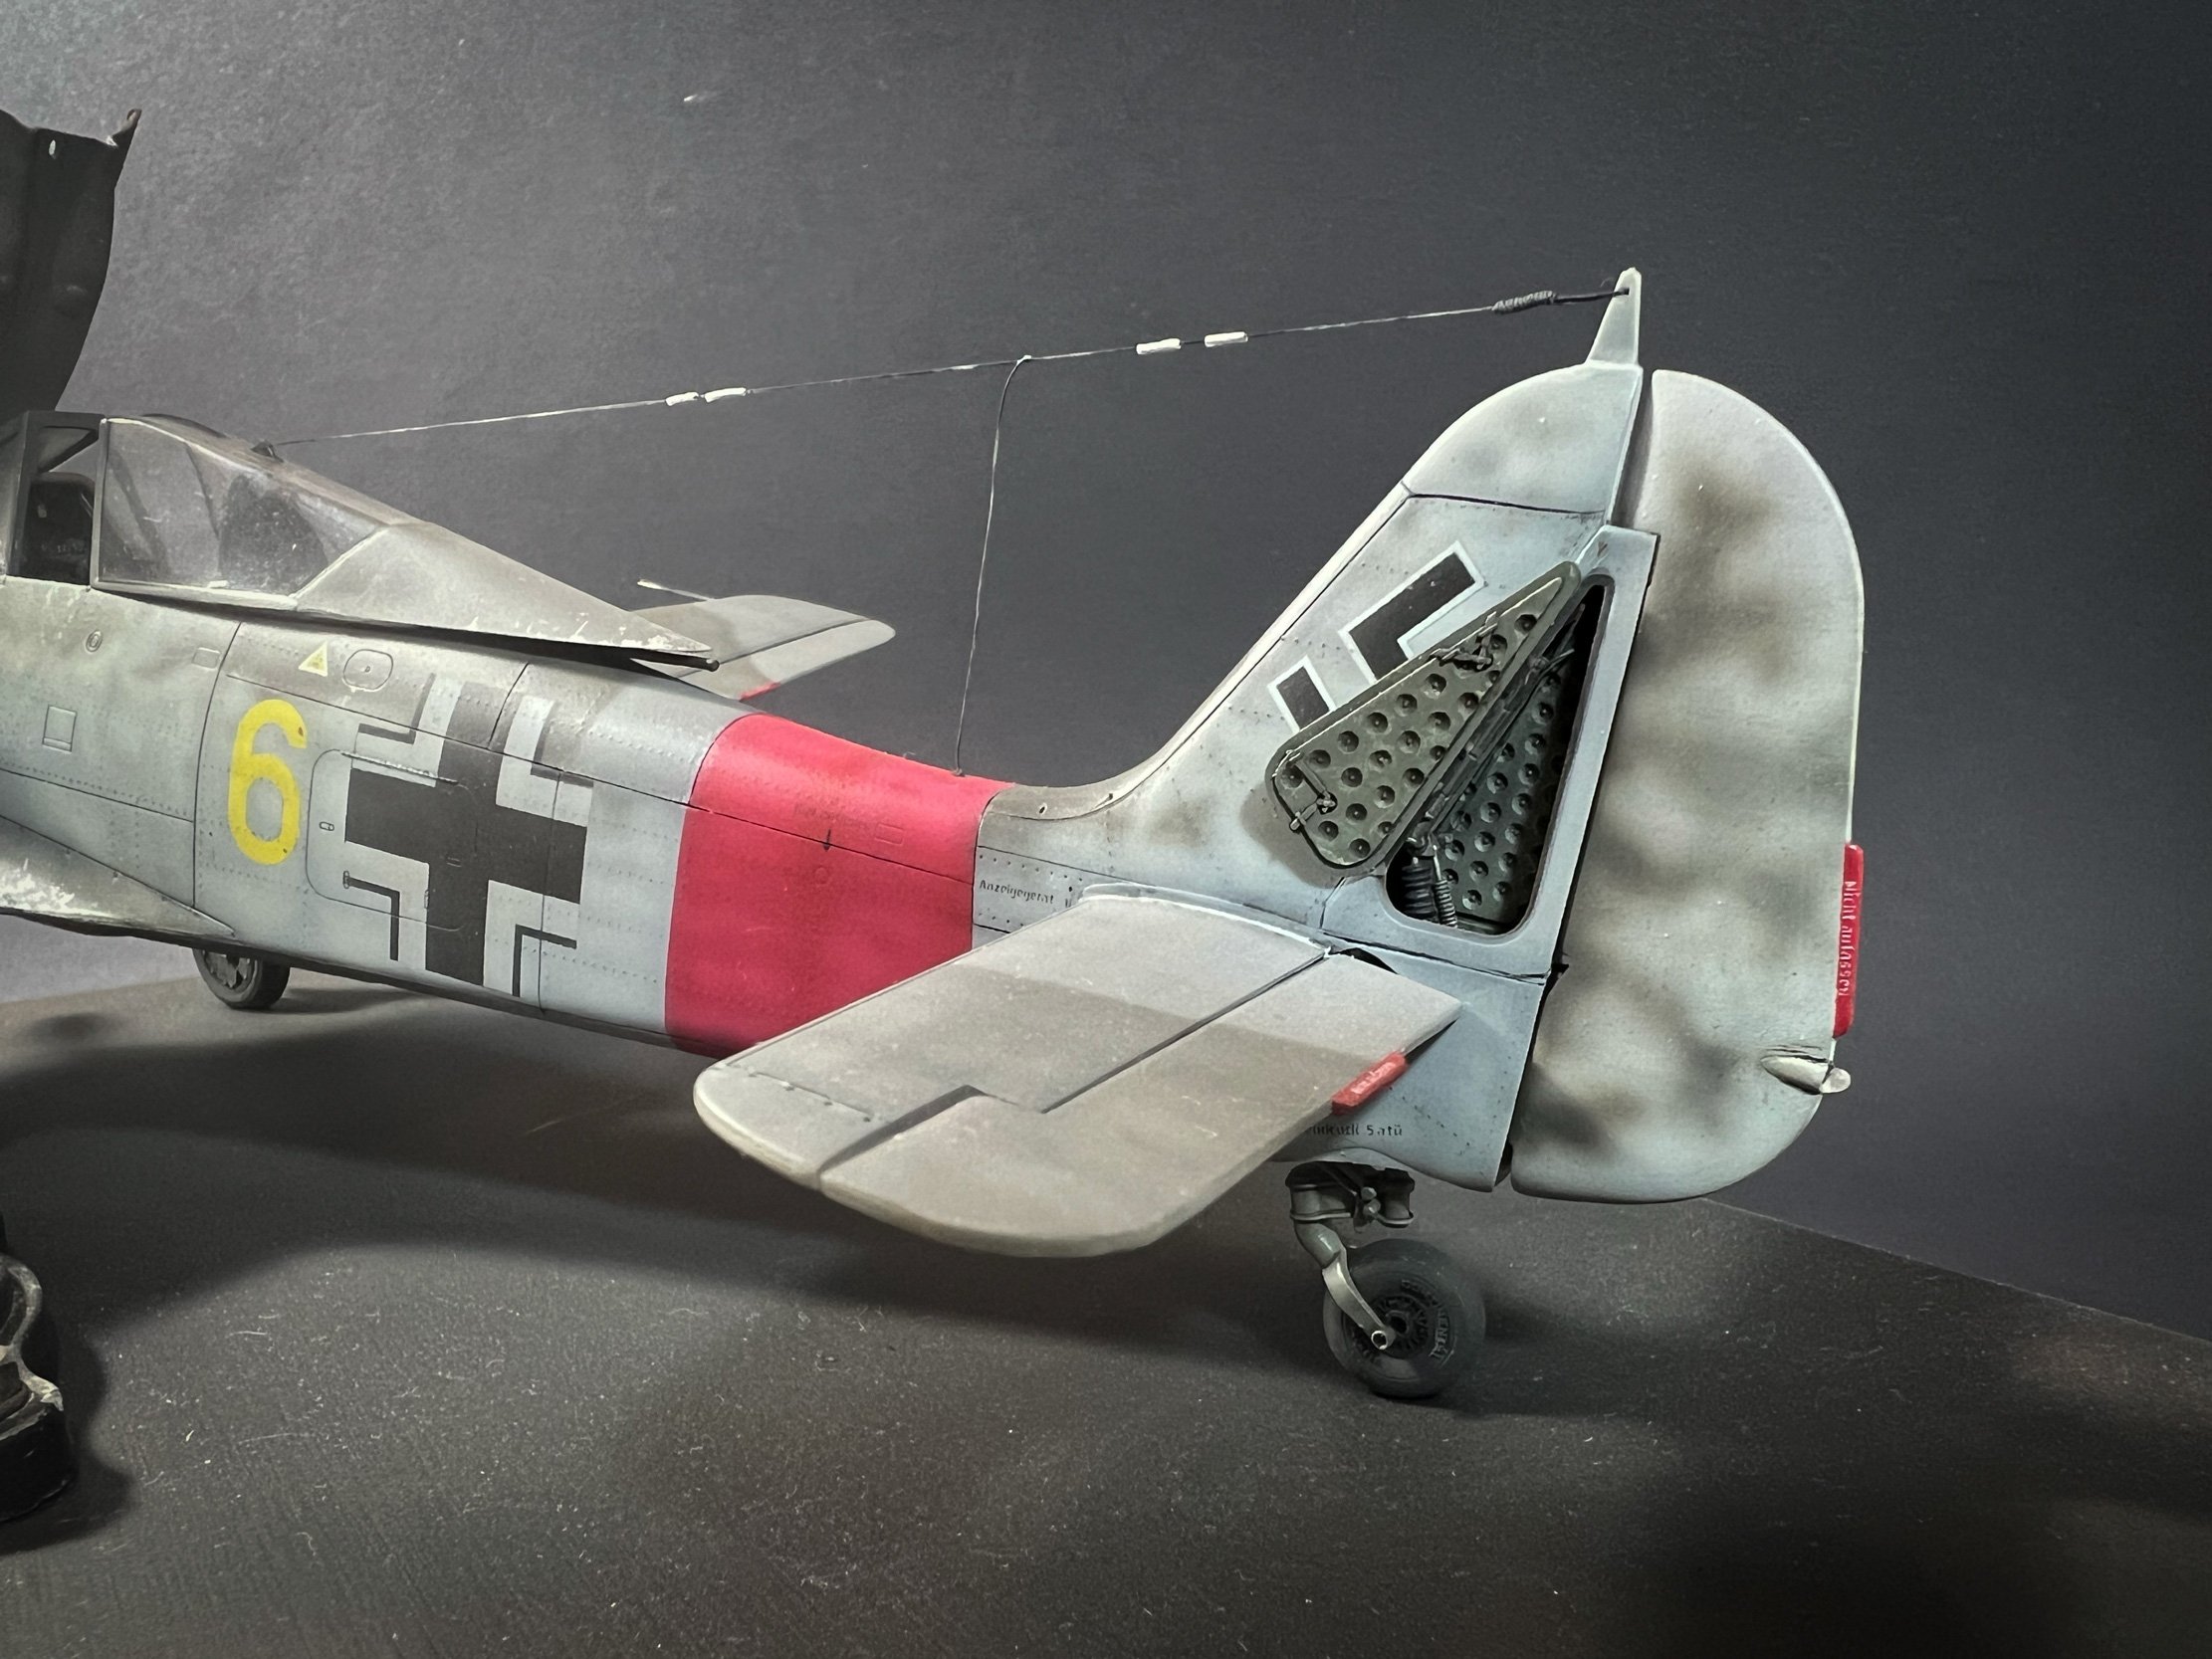
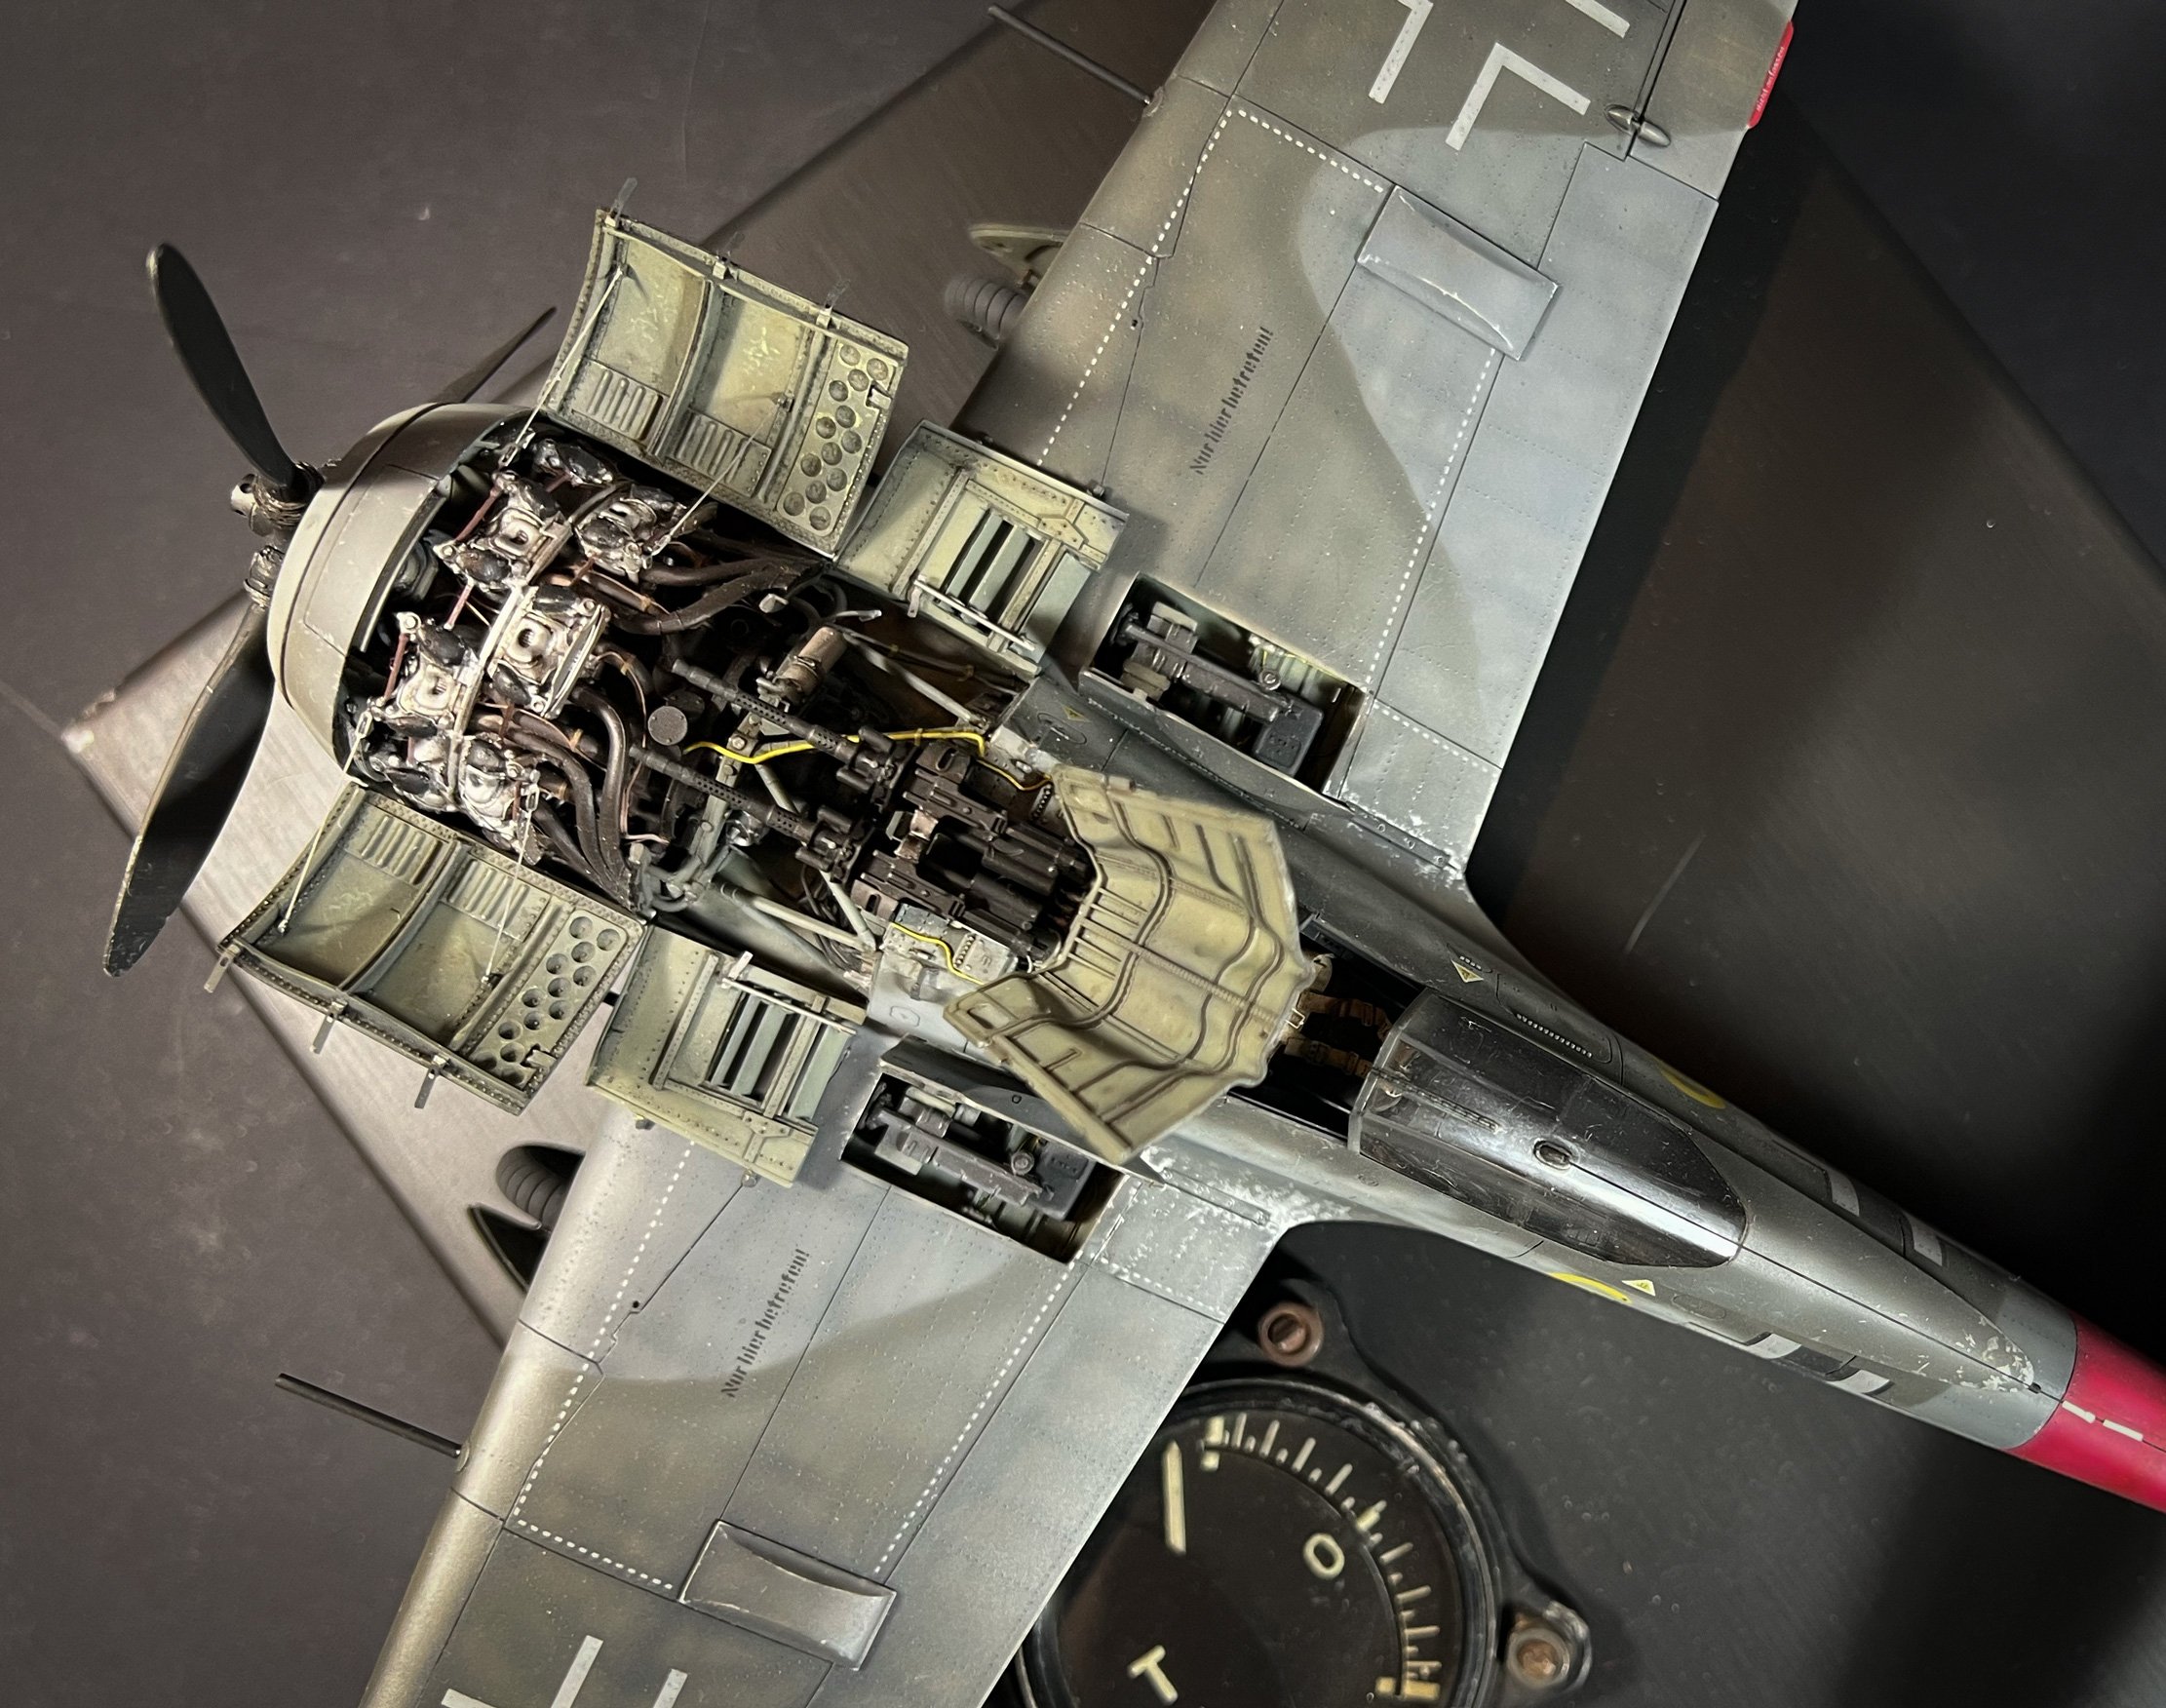
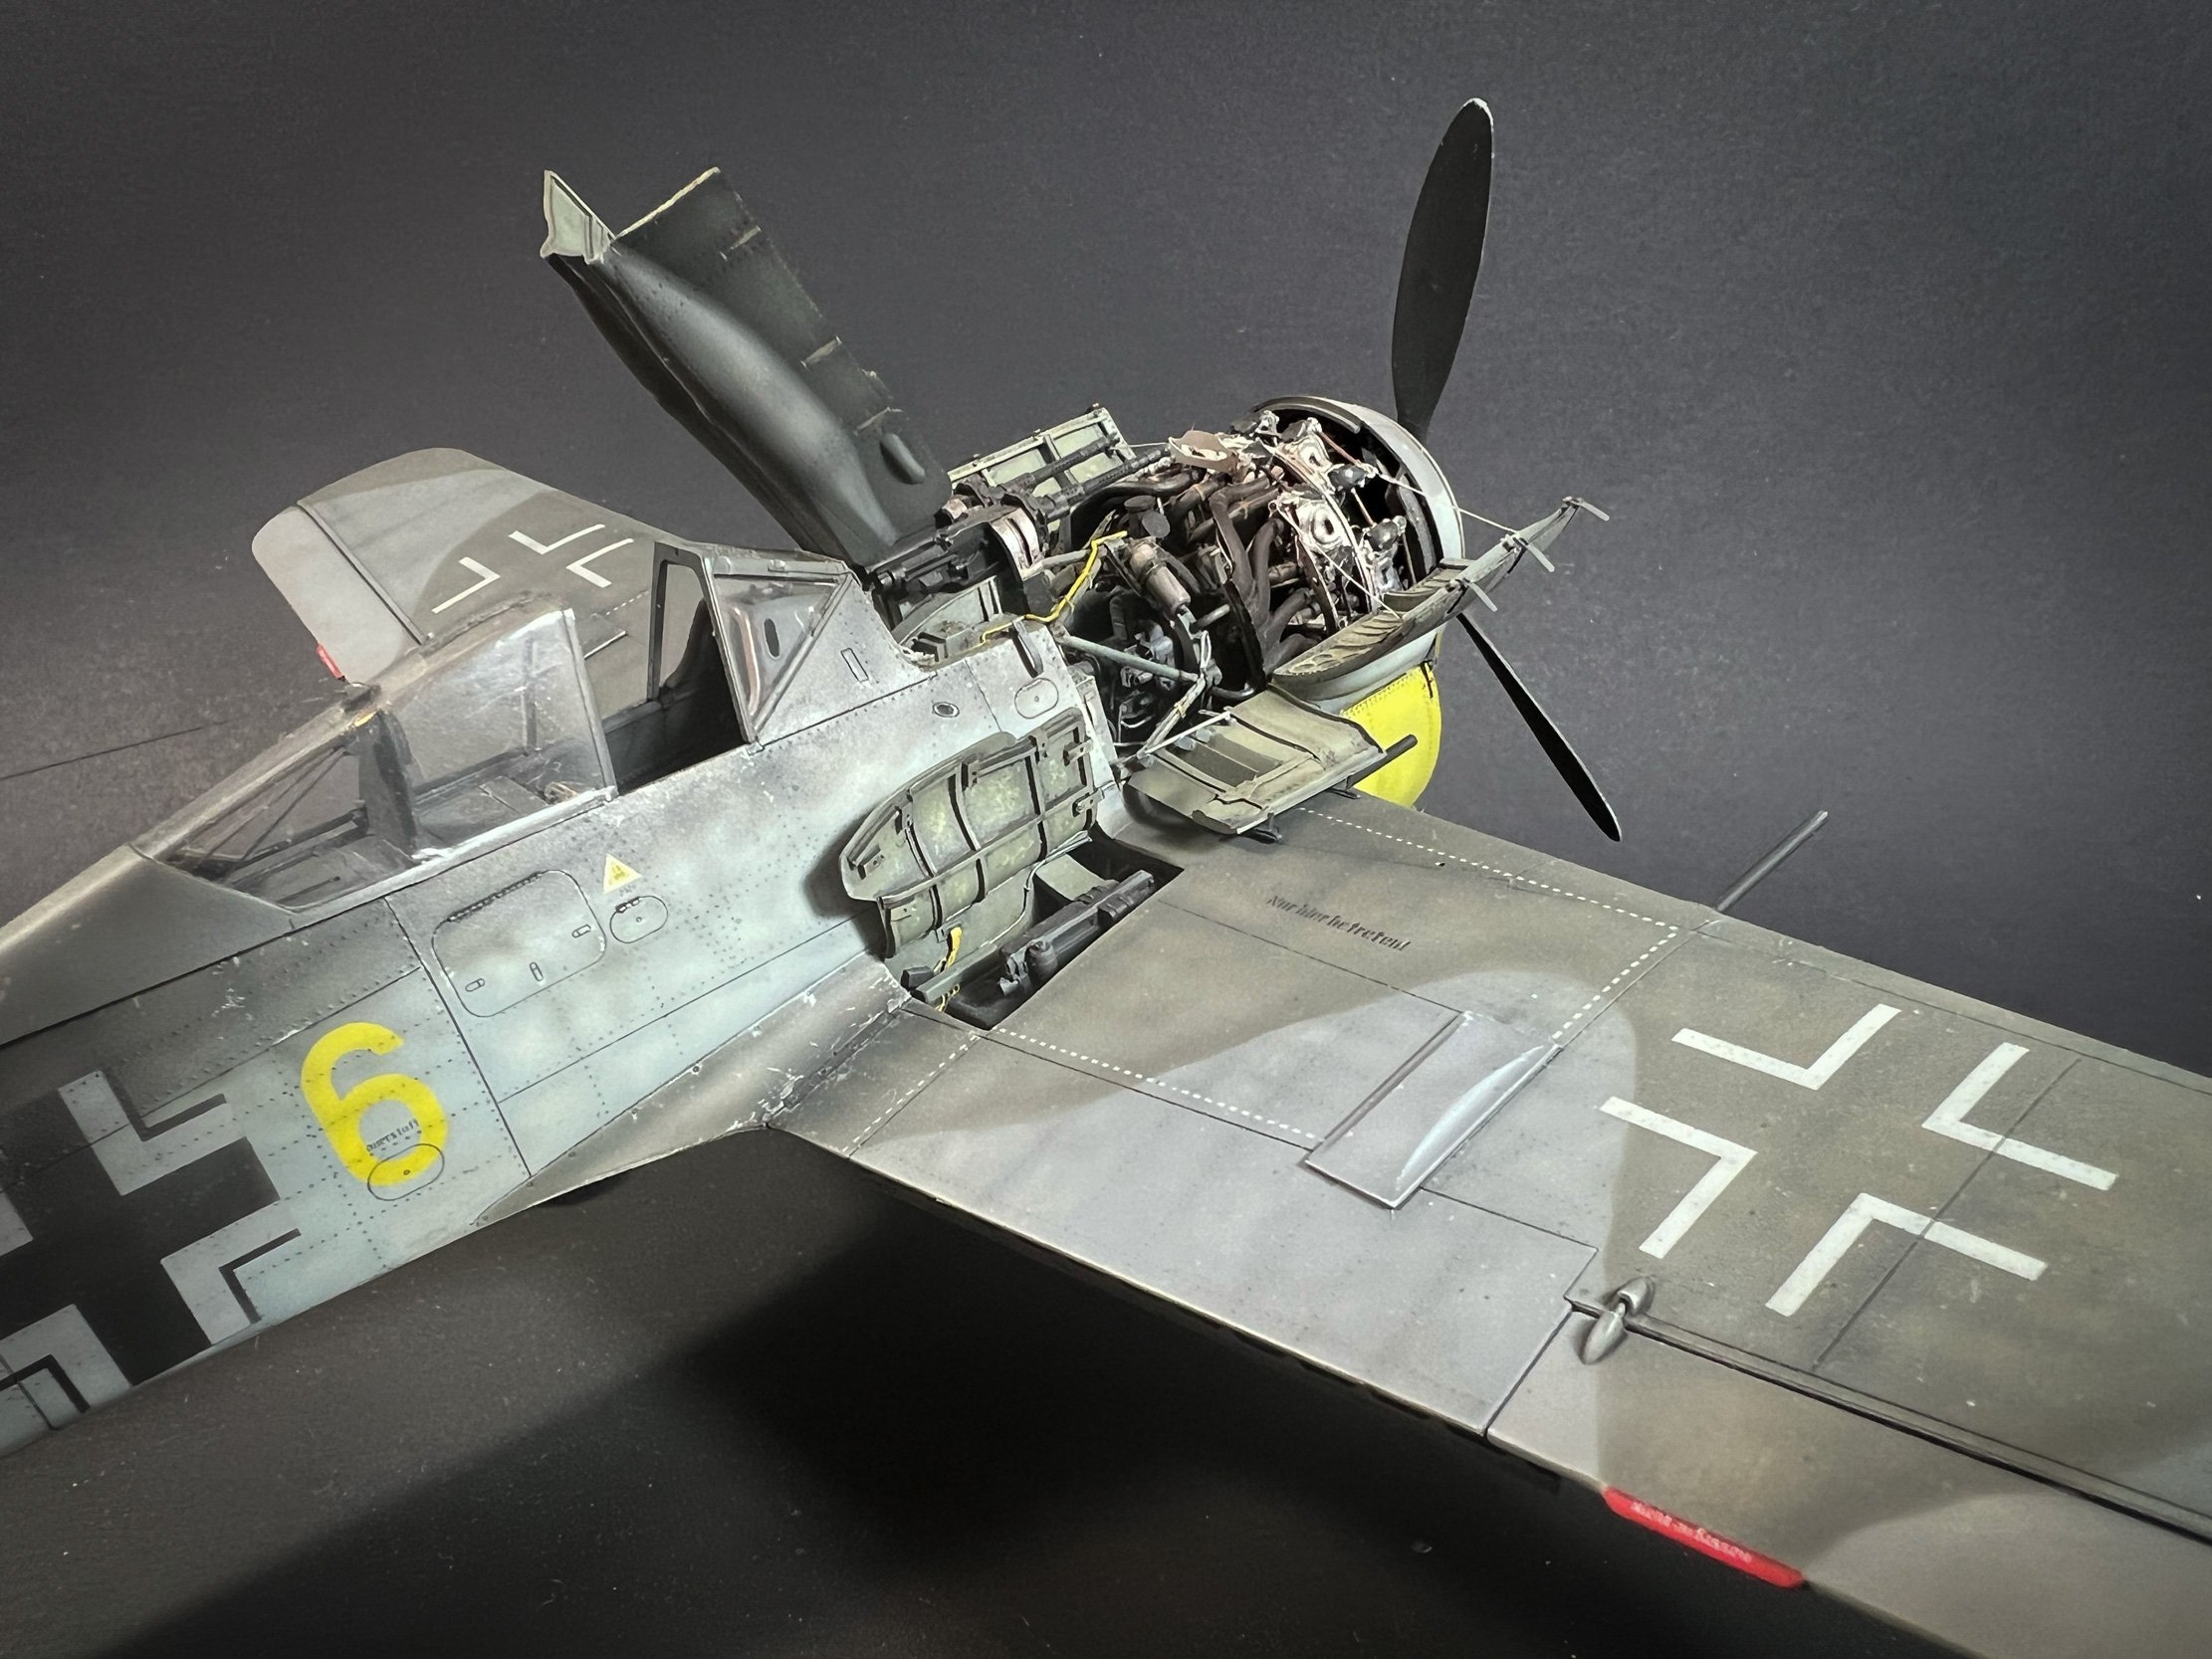
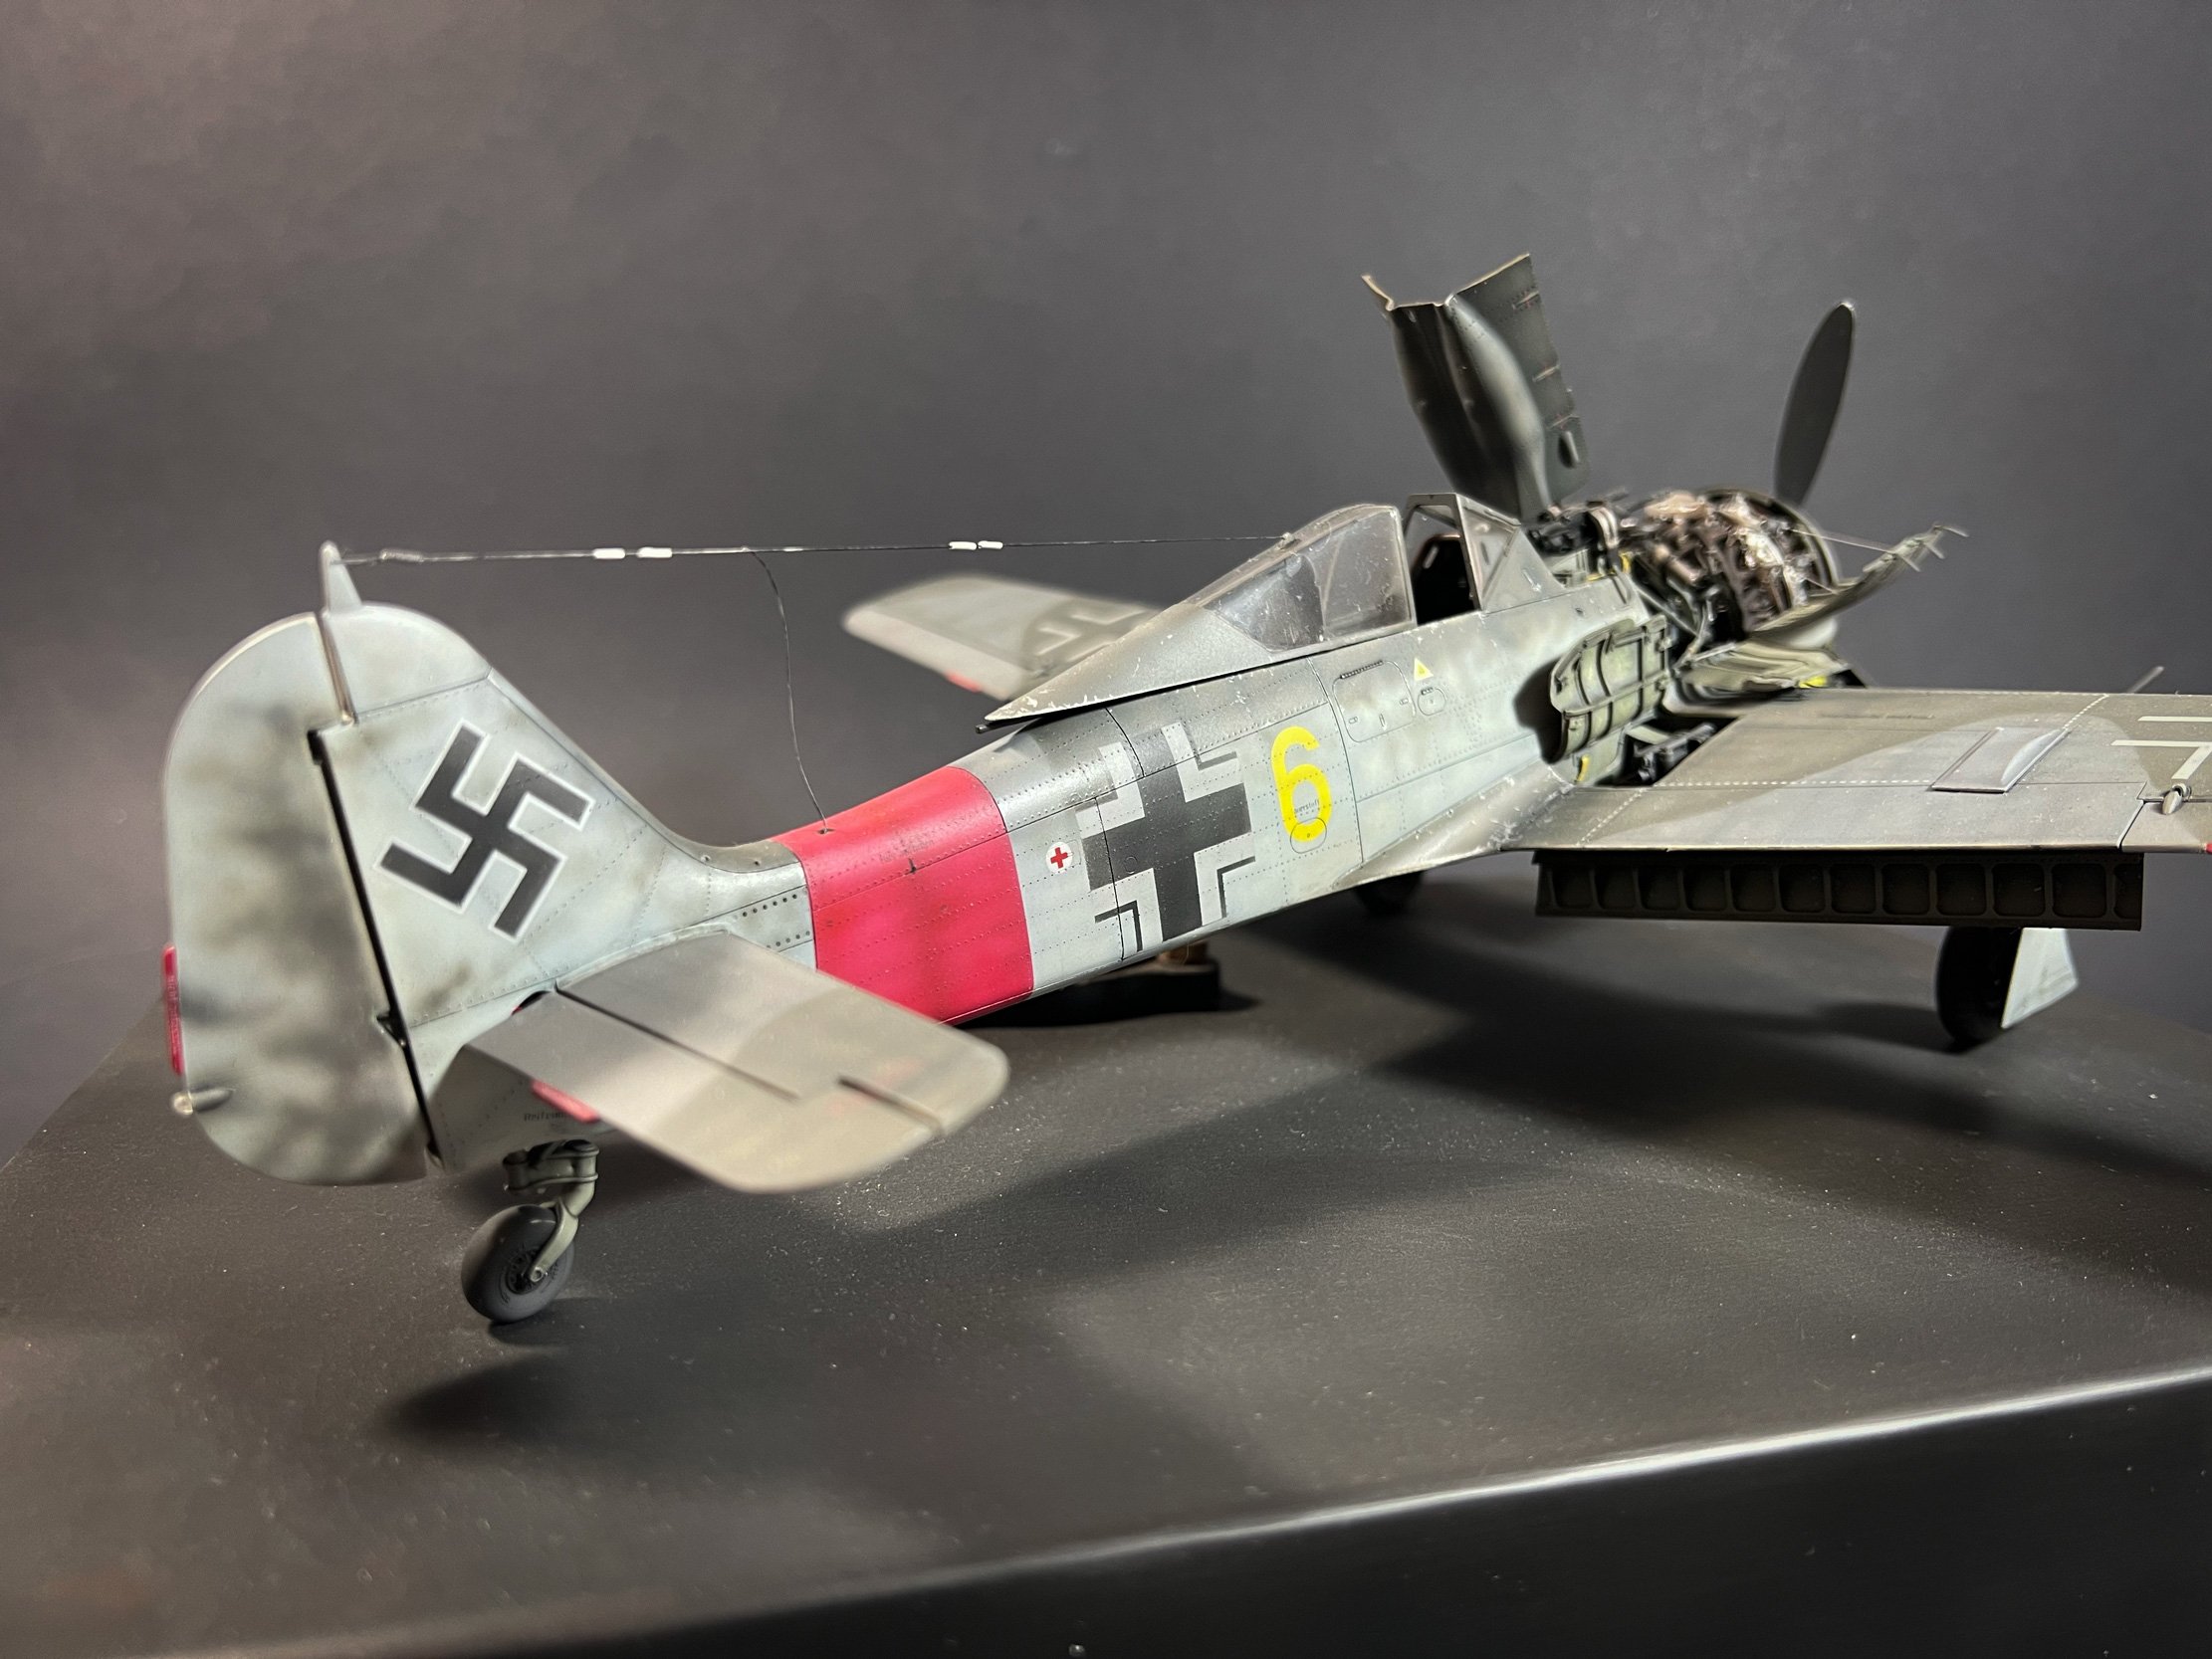
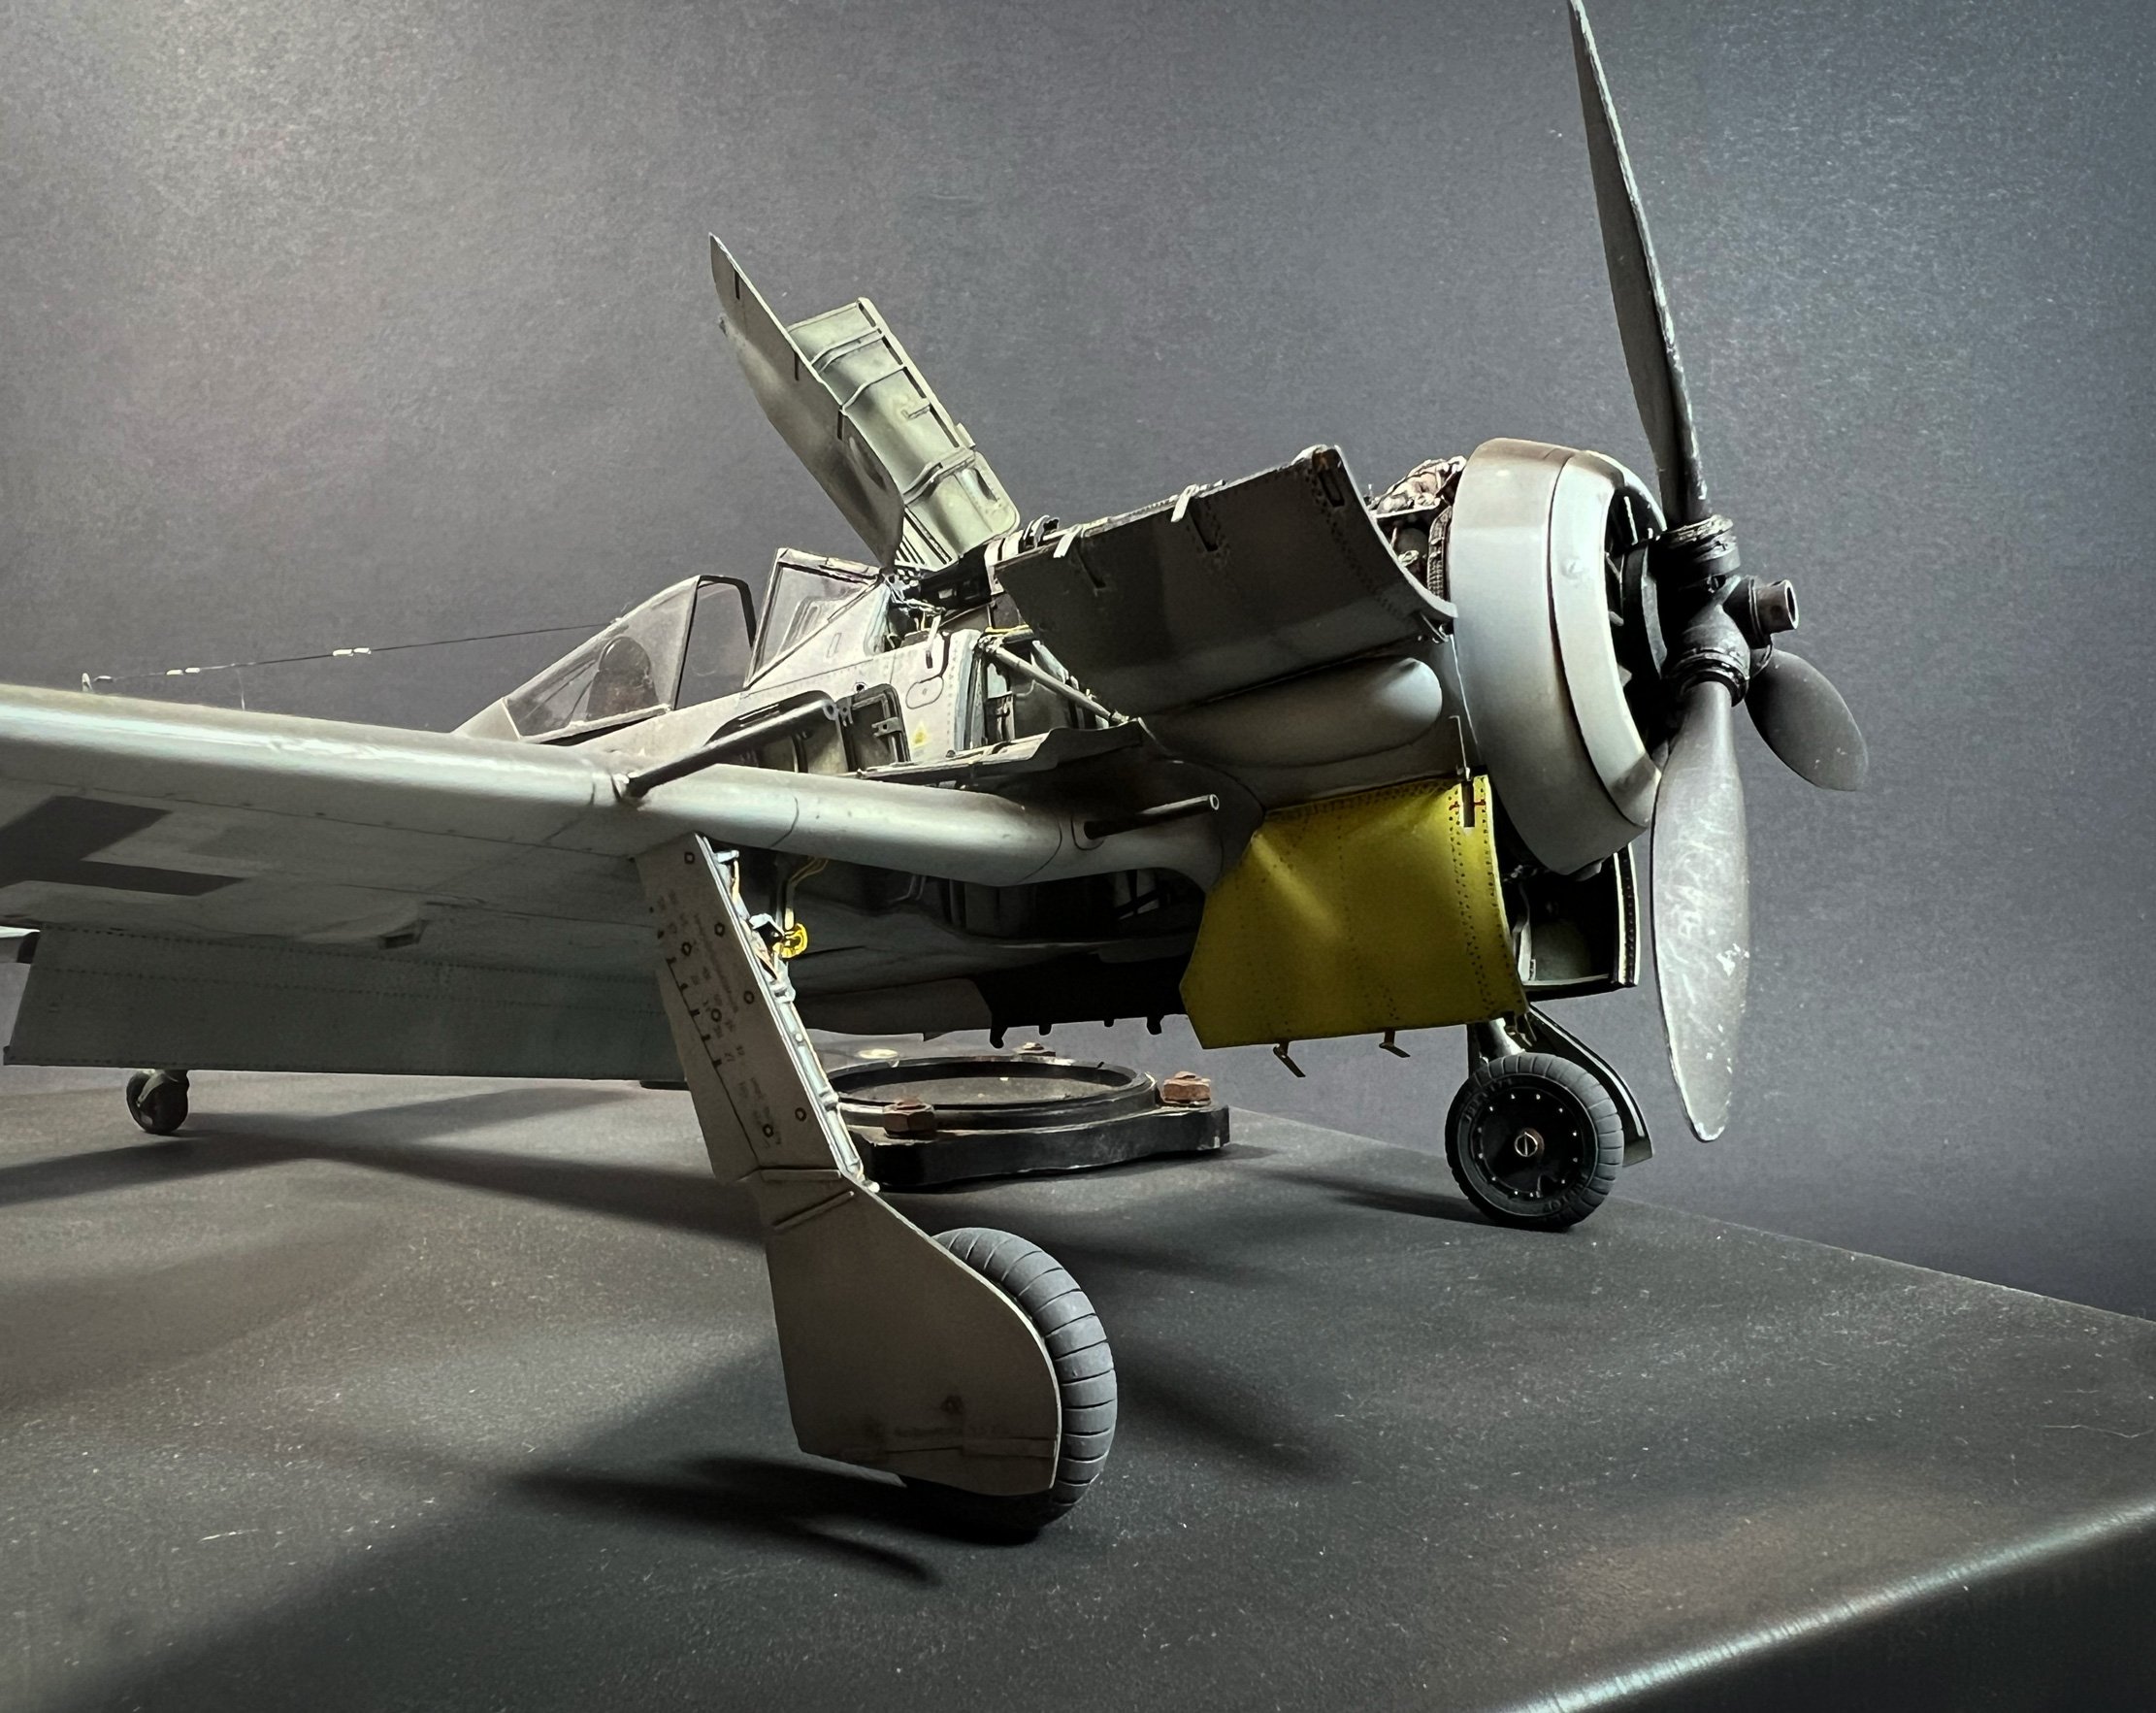
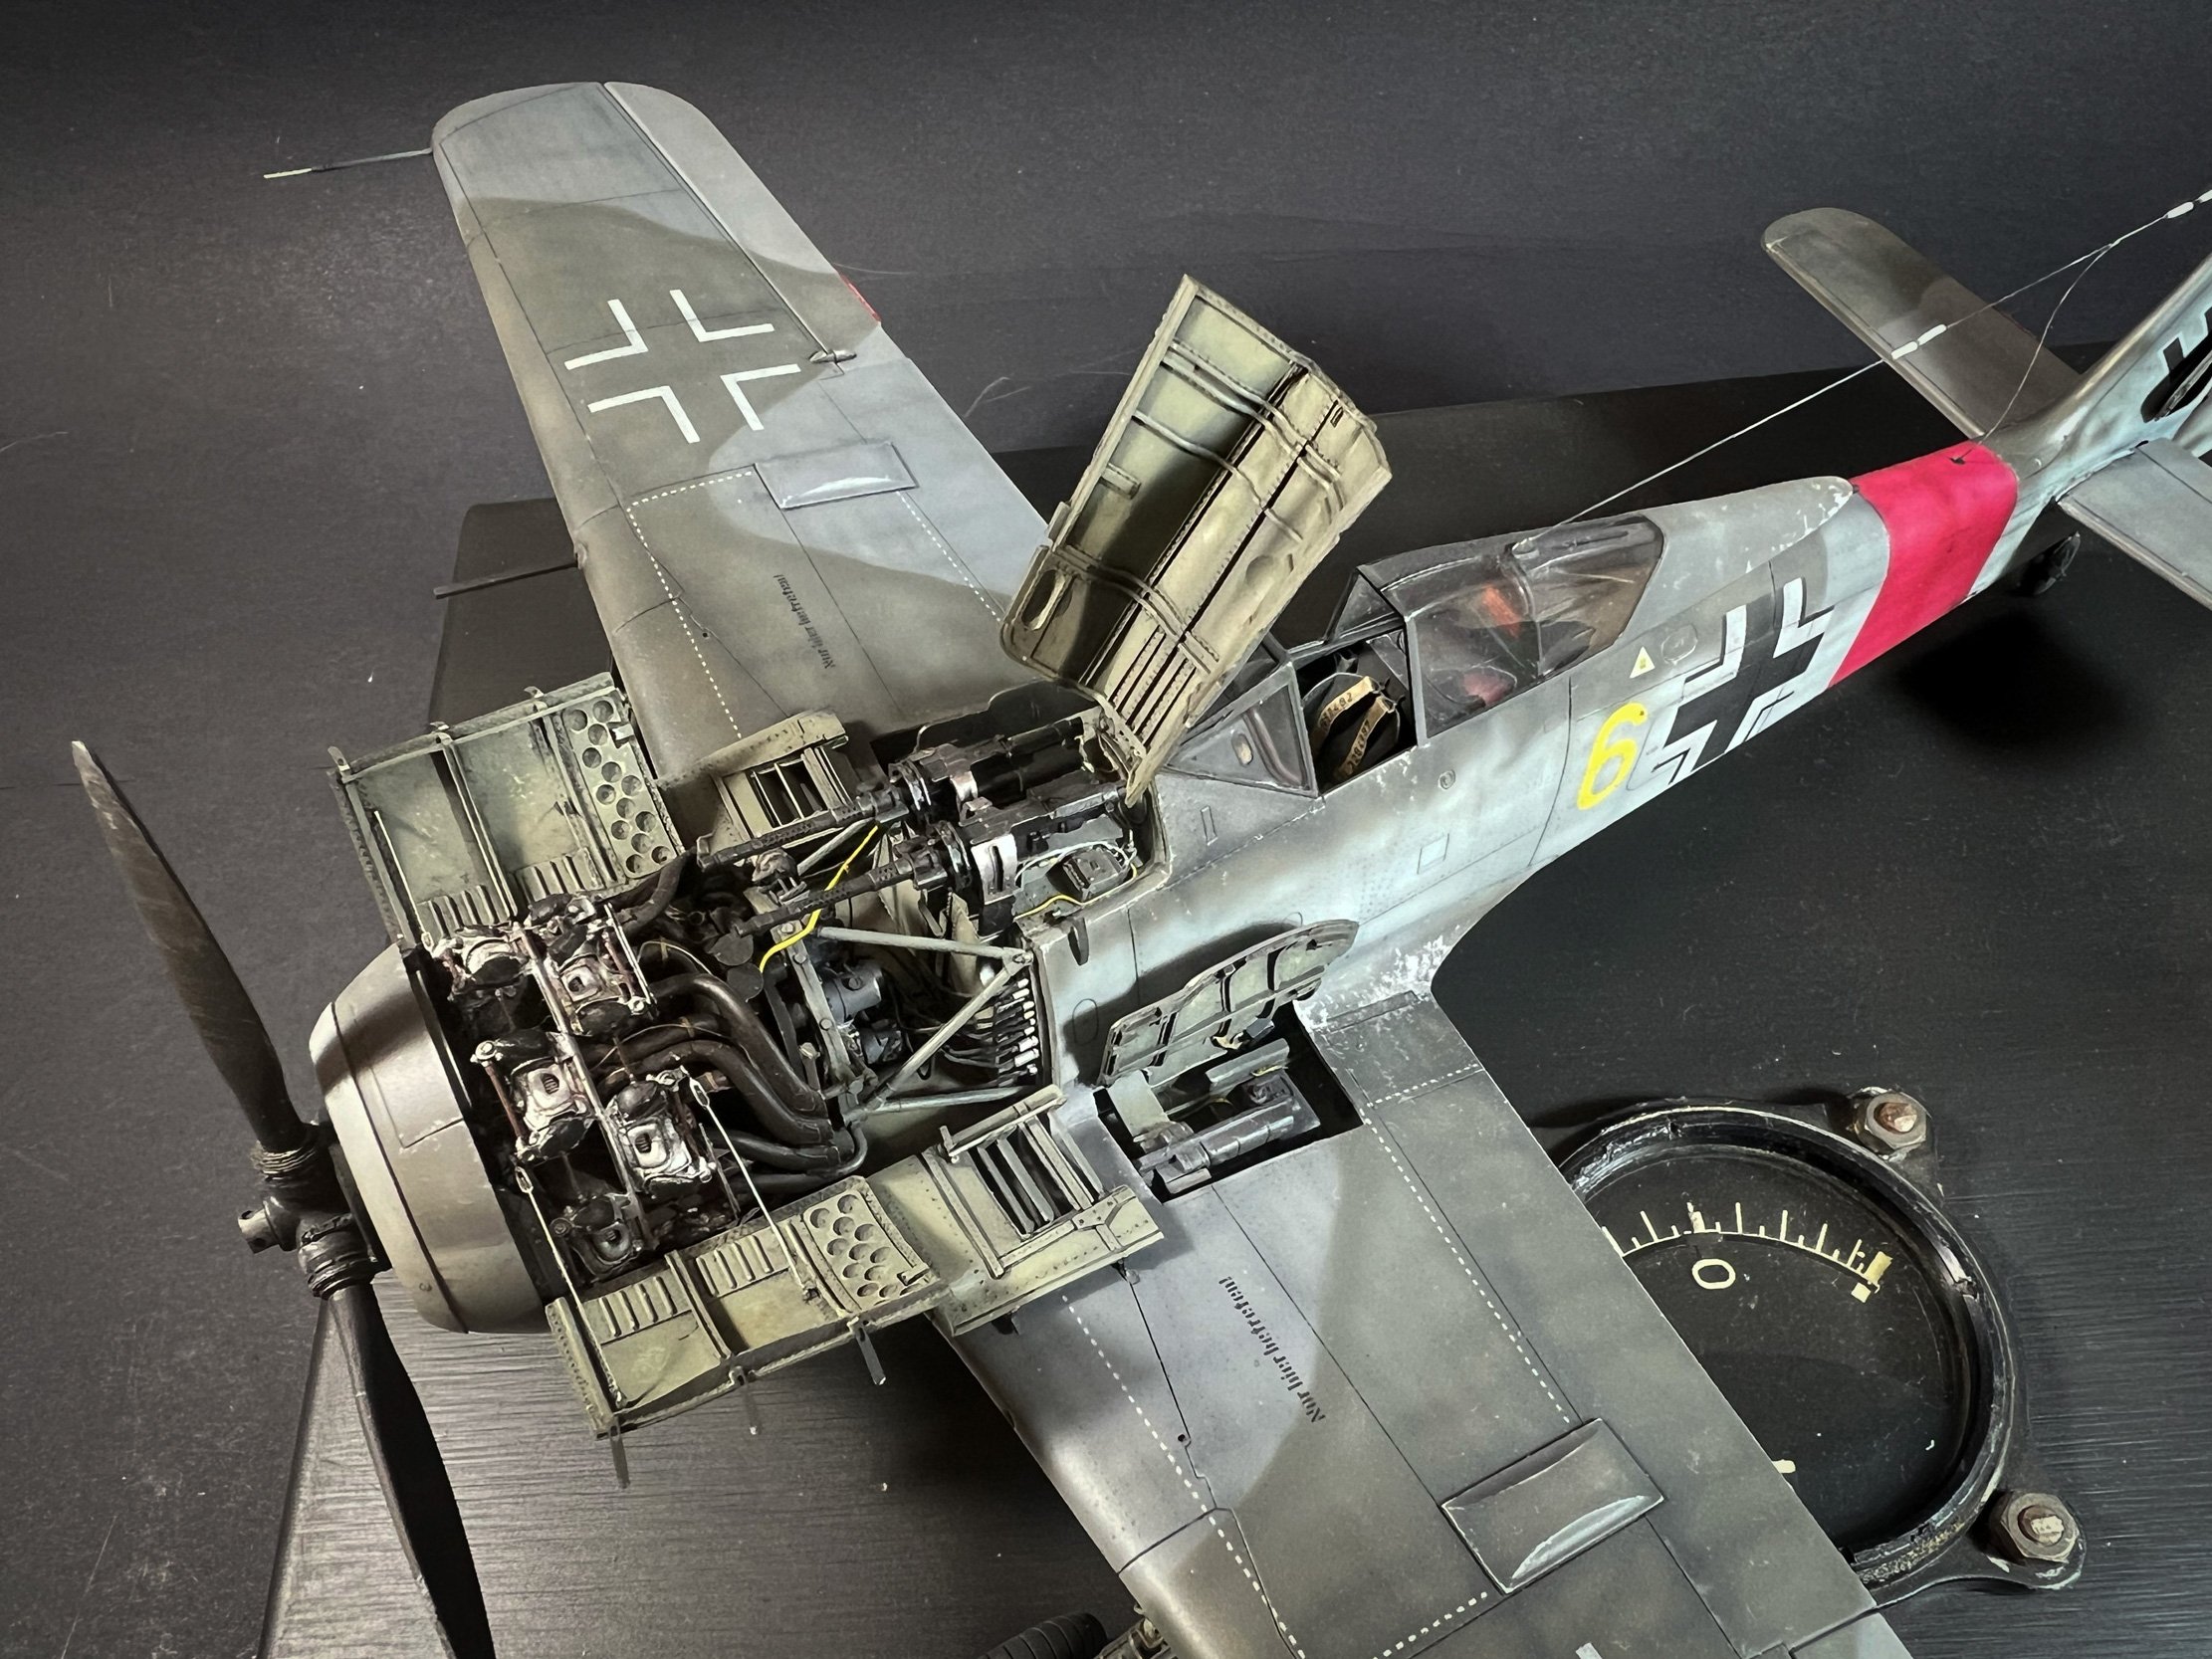
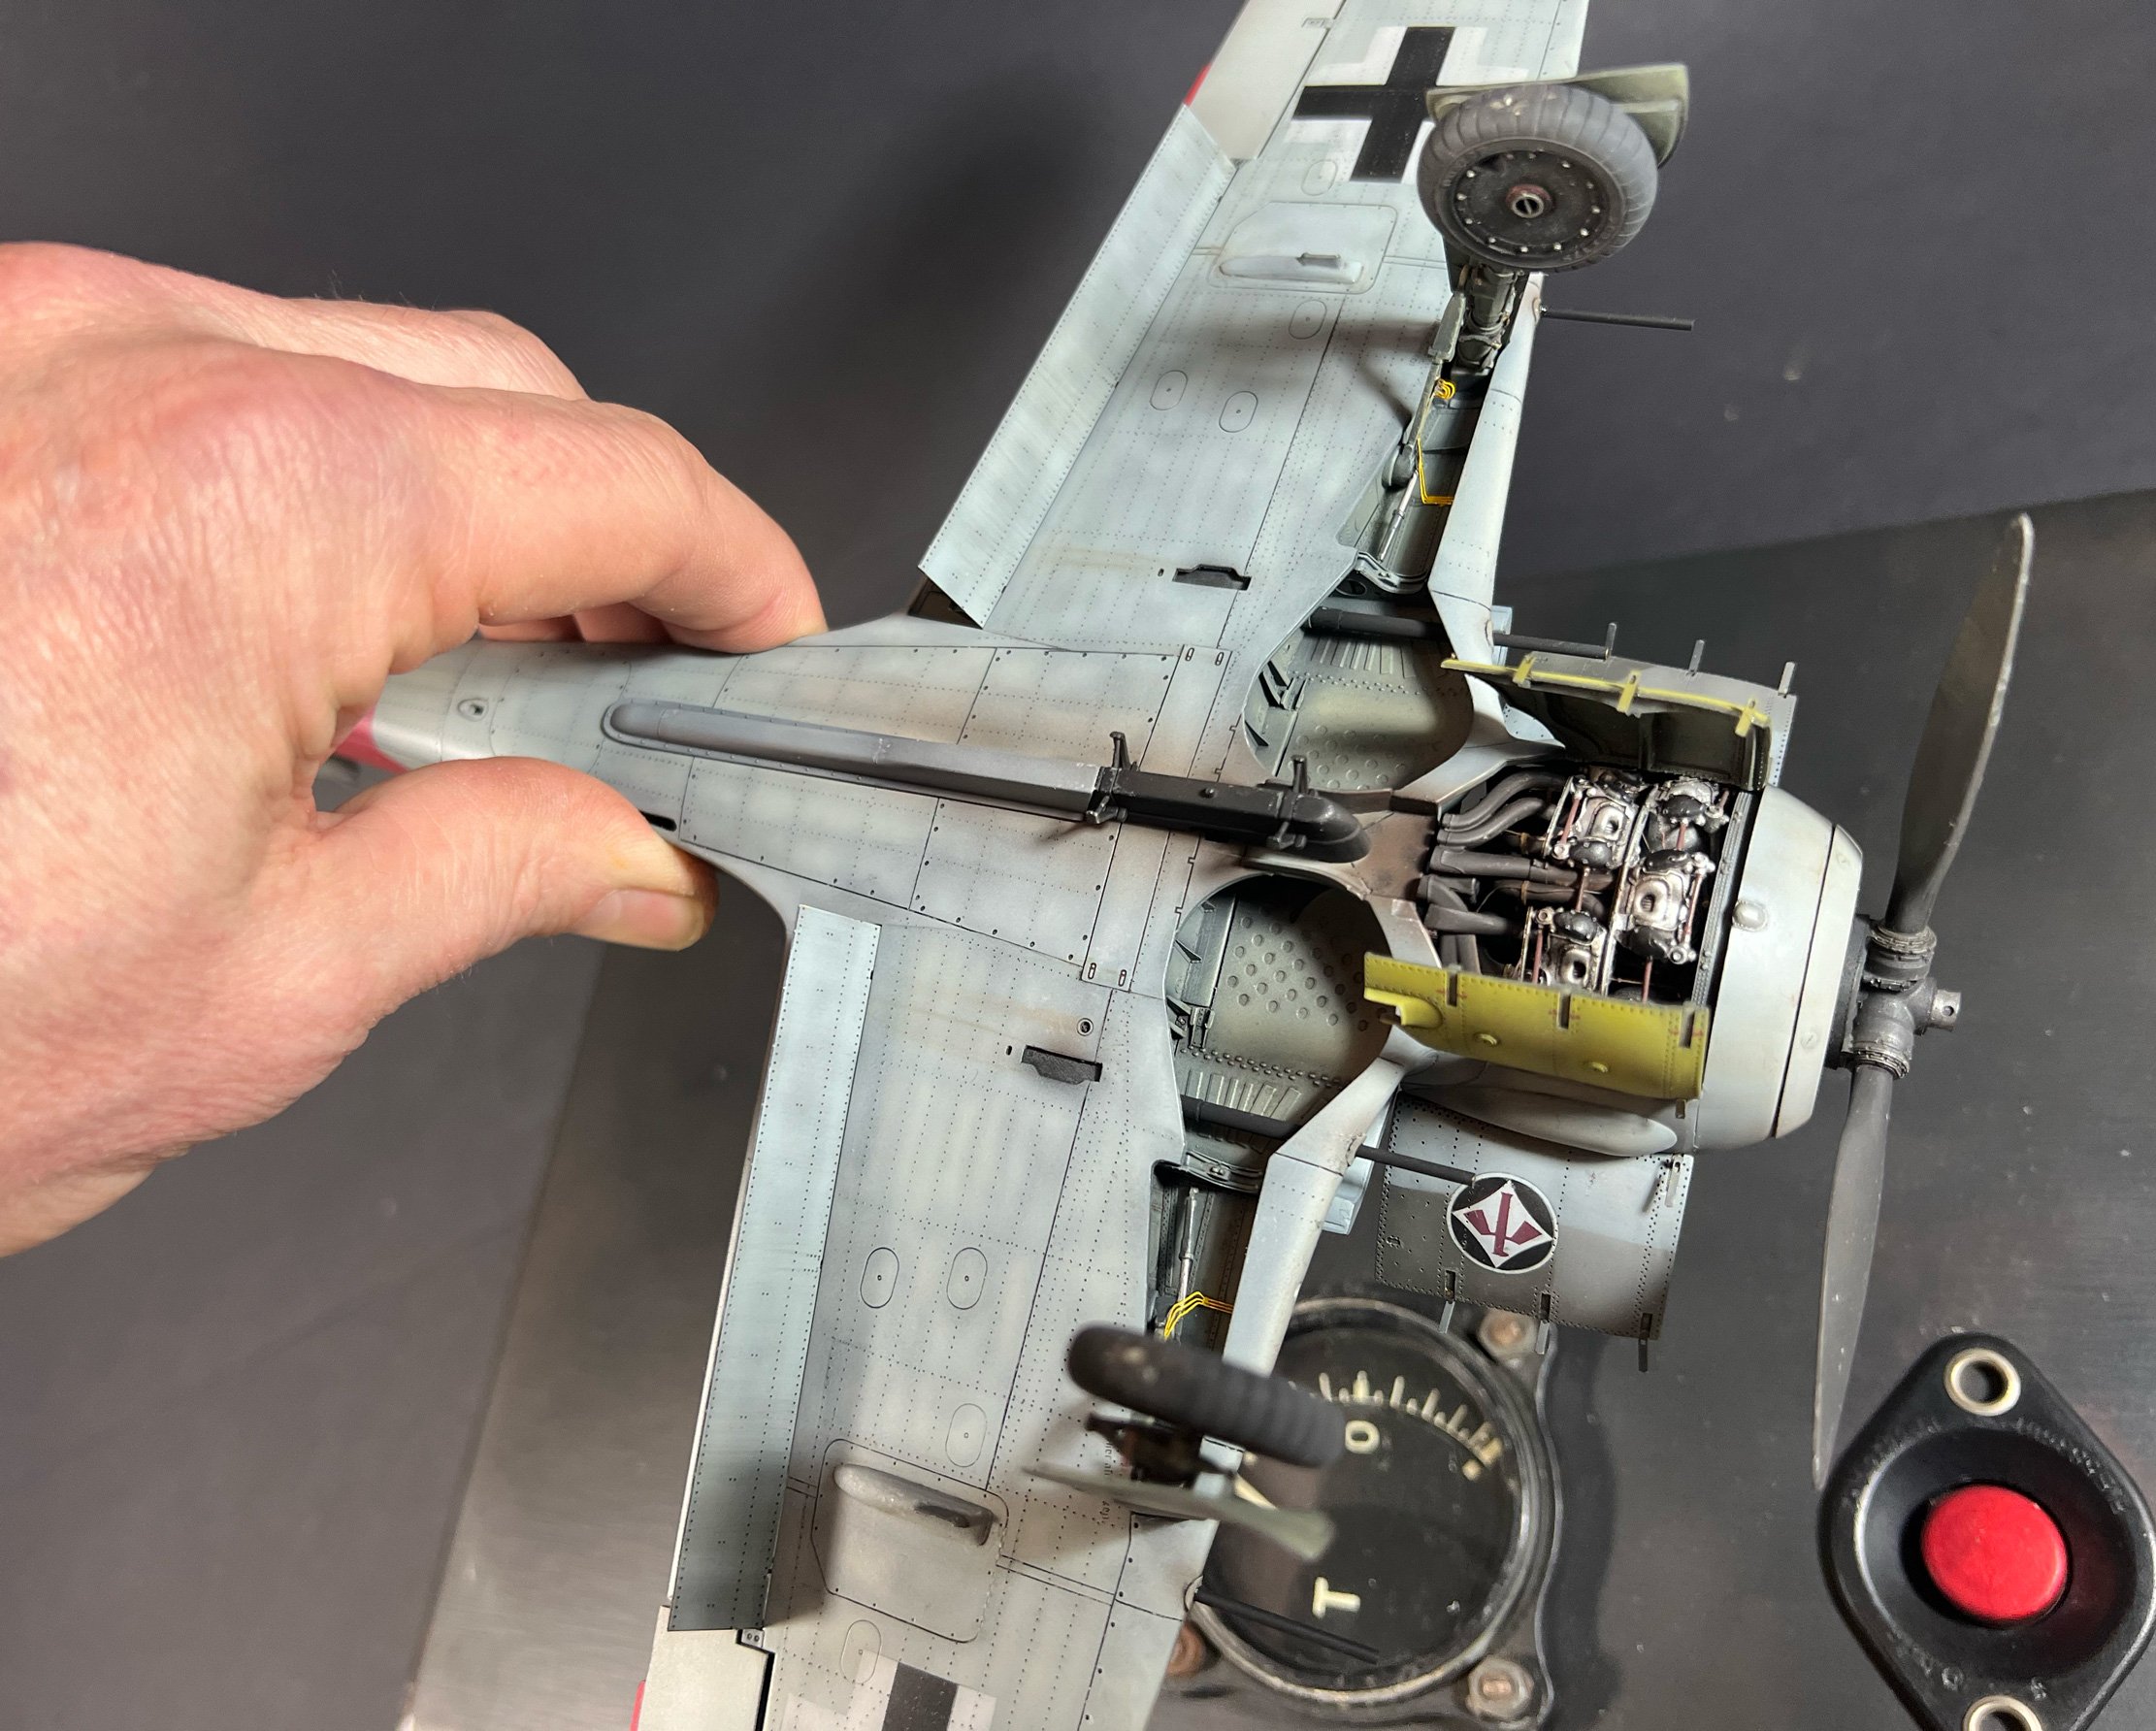
Those are scratch built
-
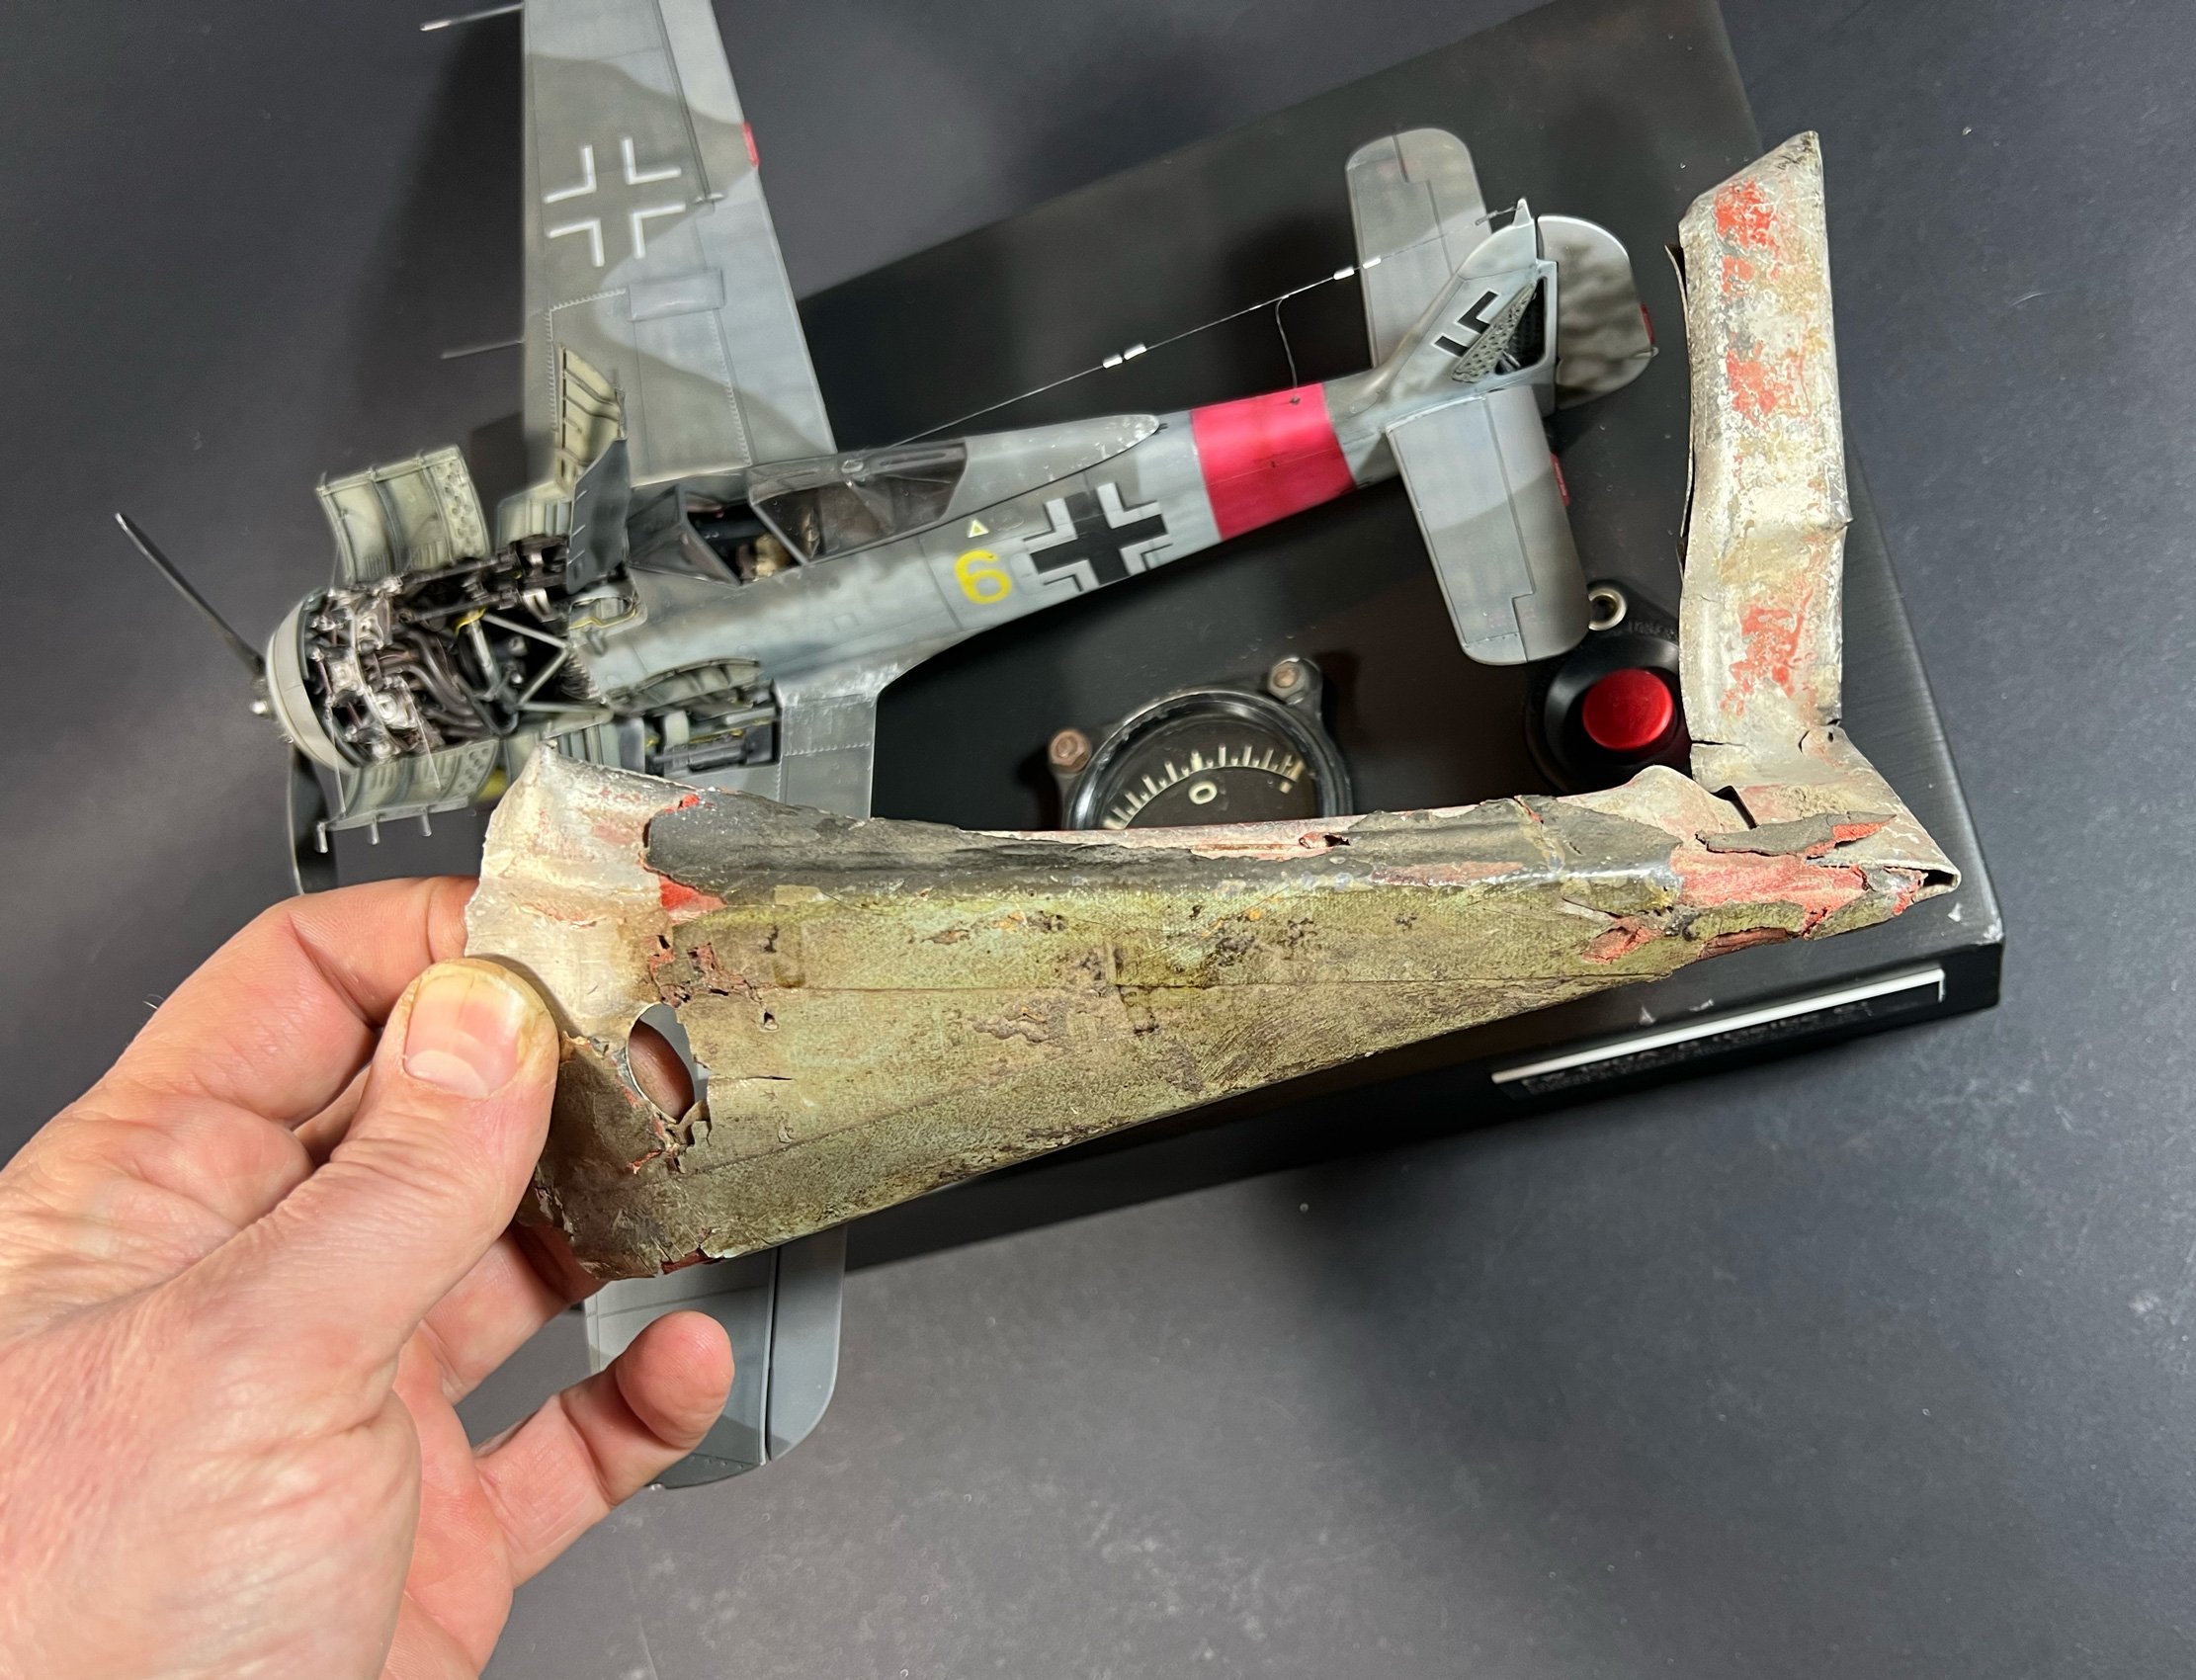
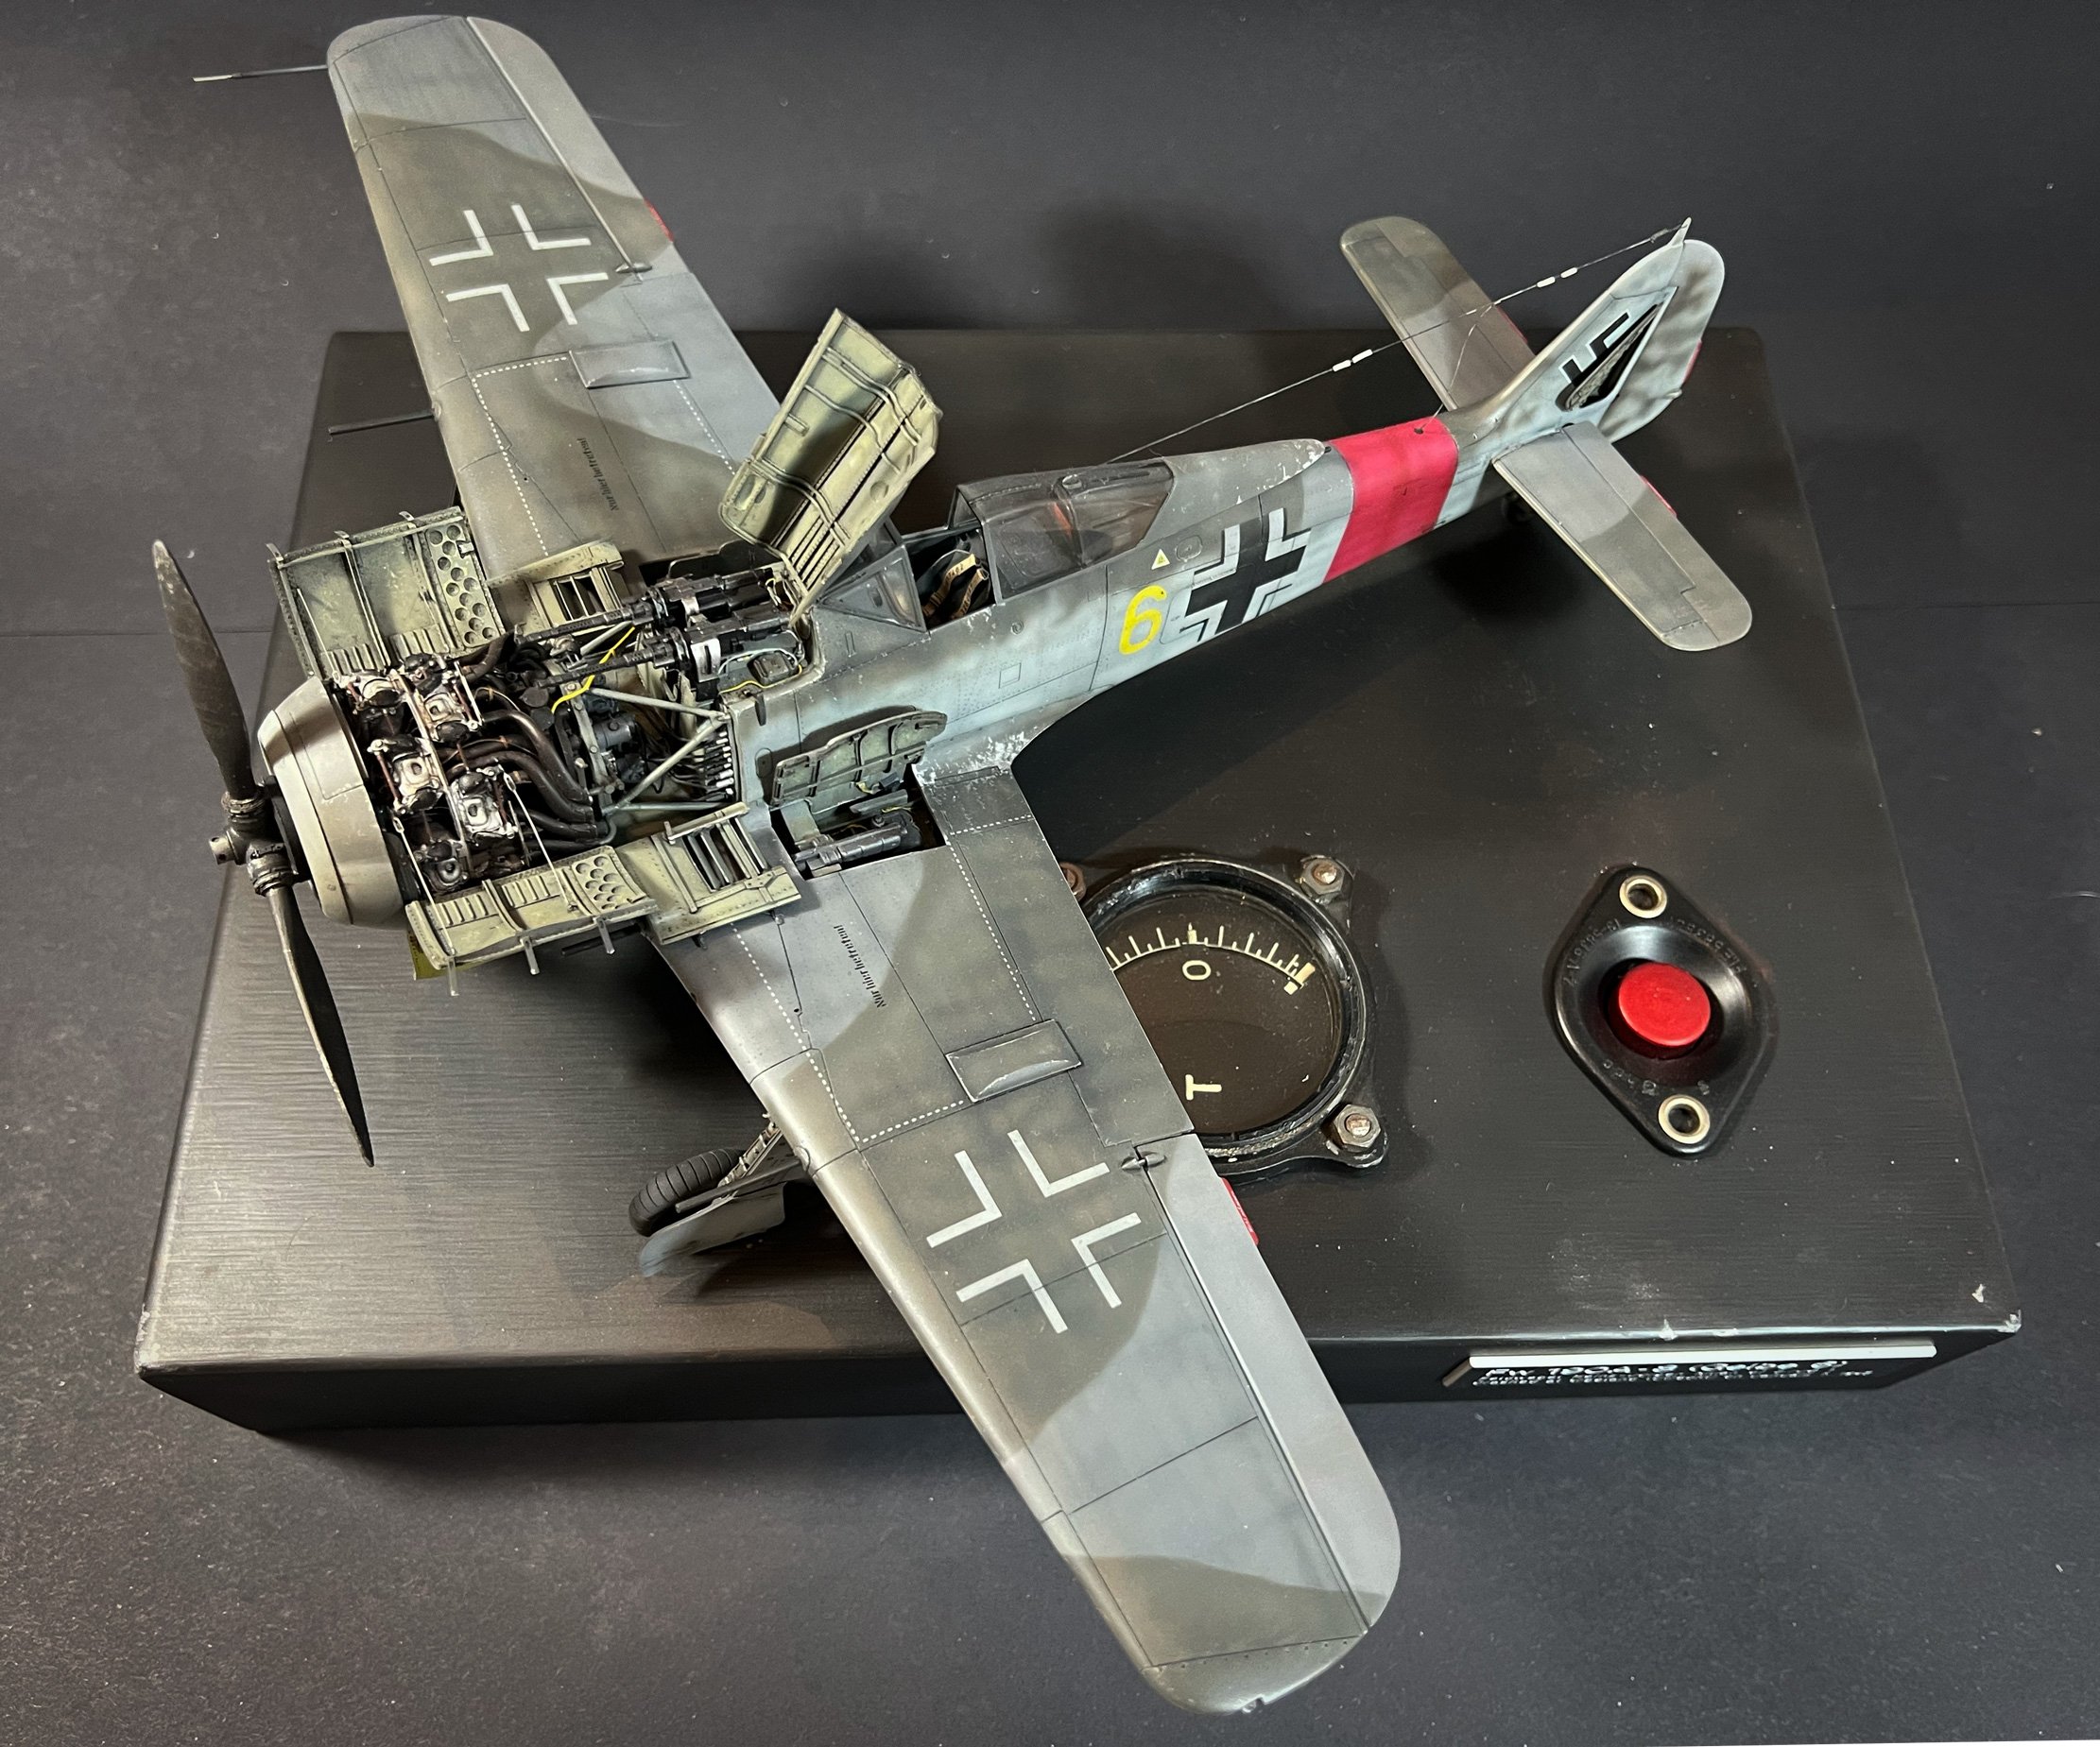
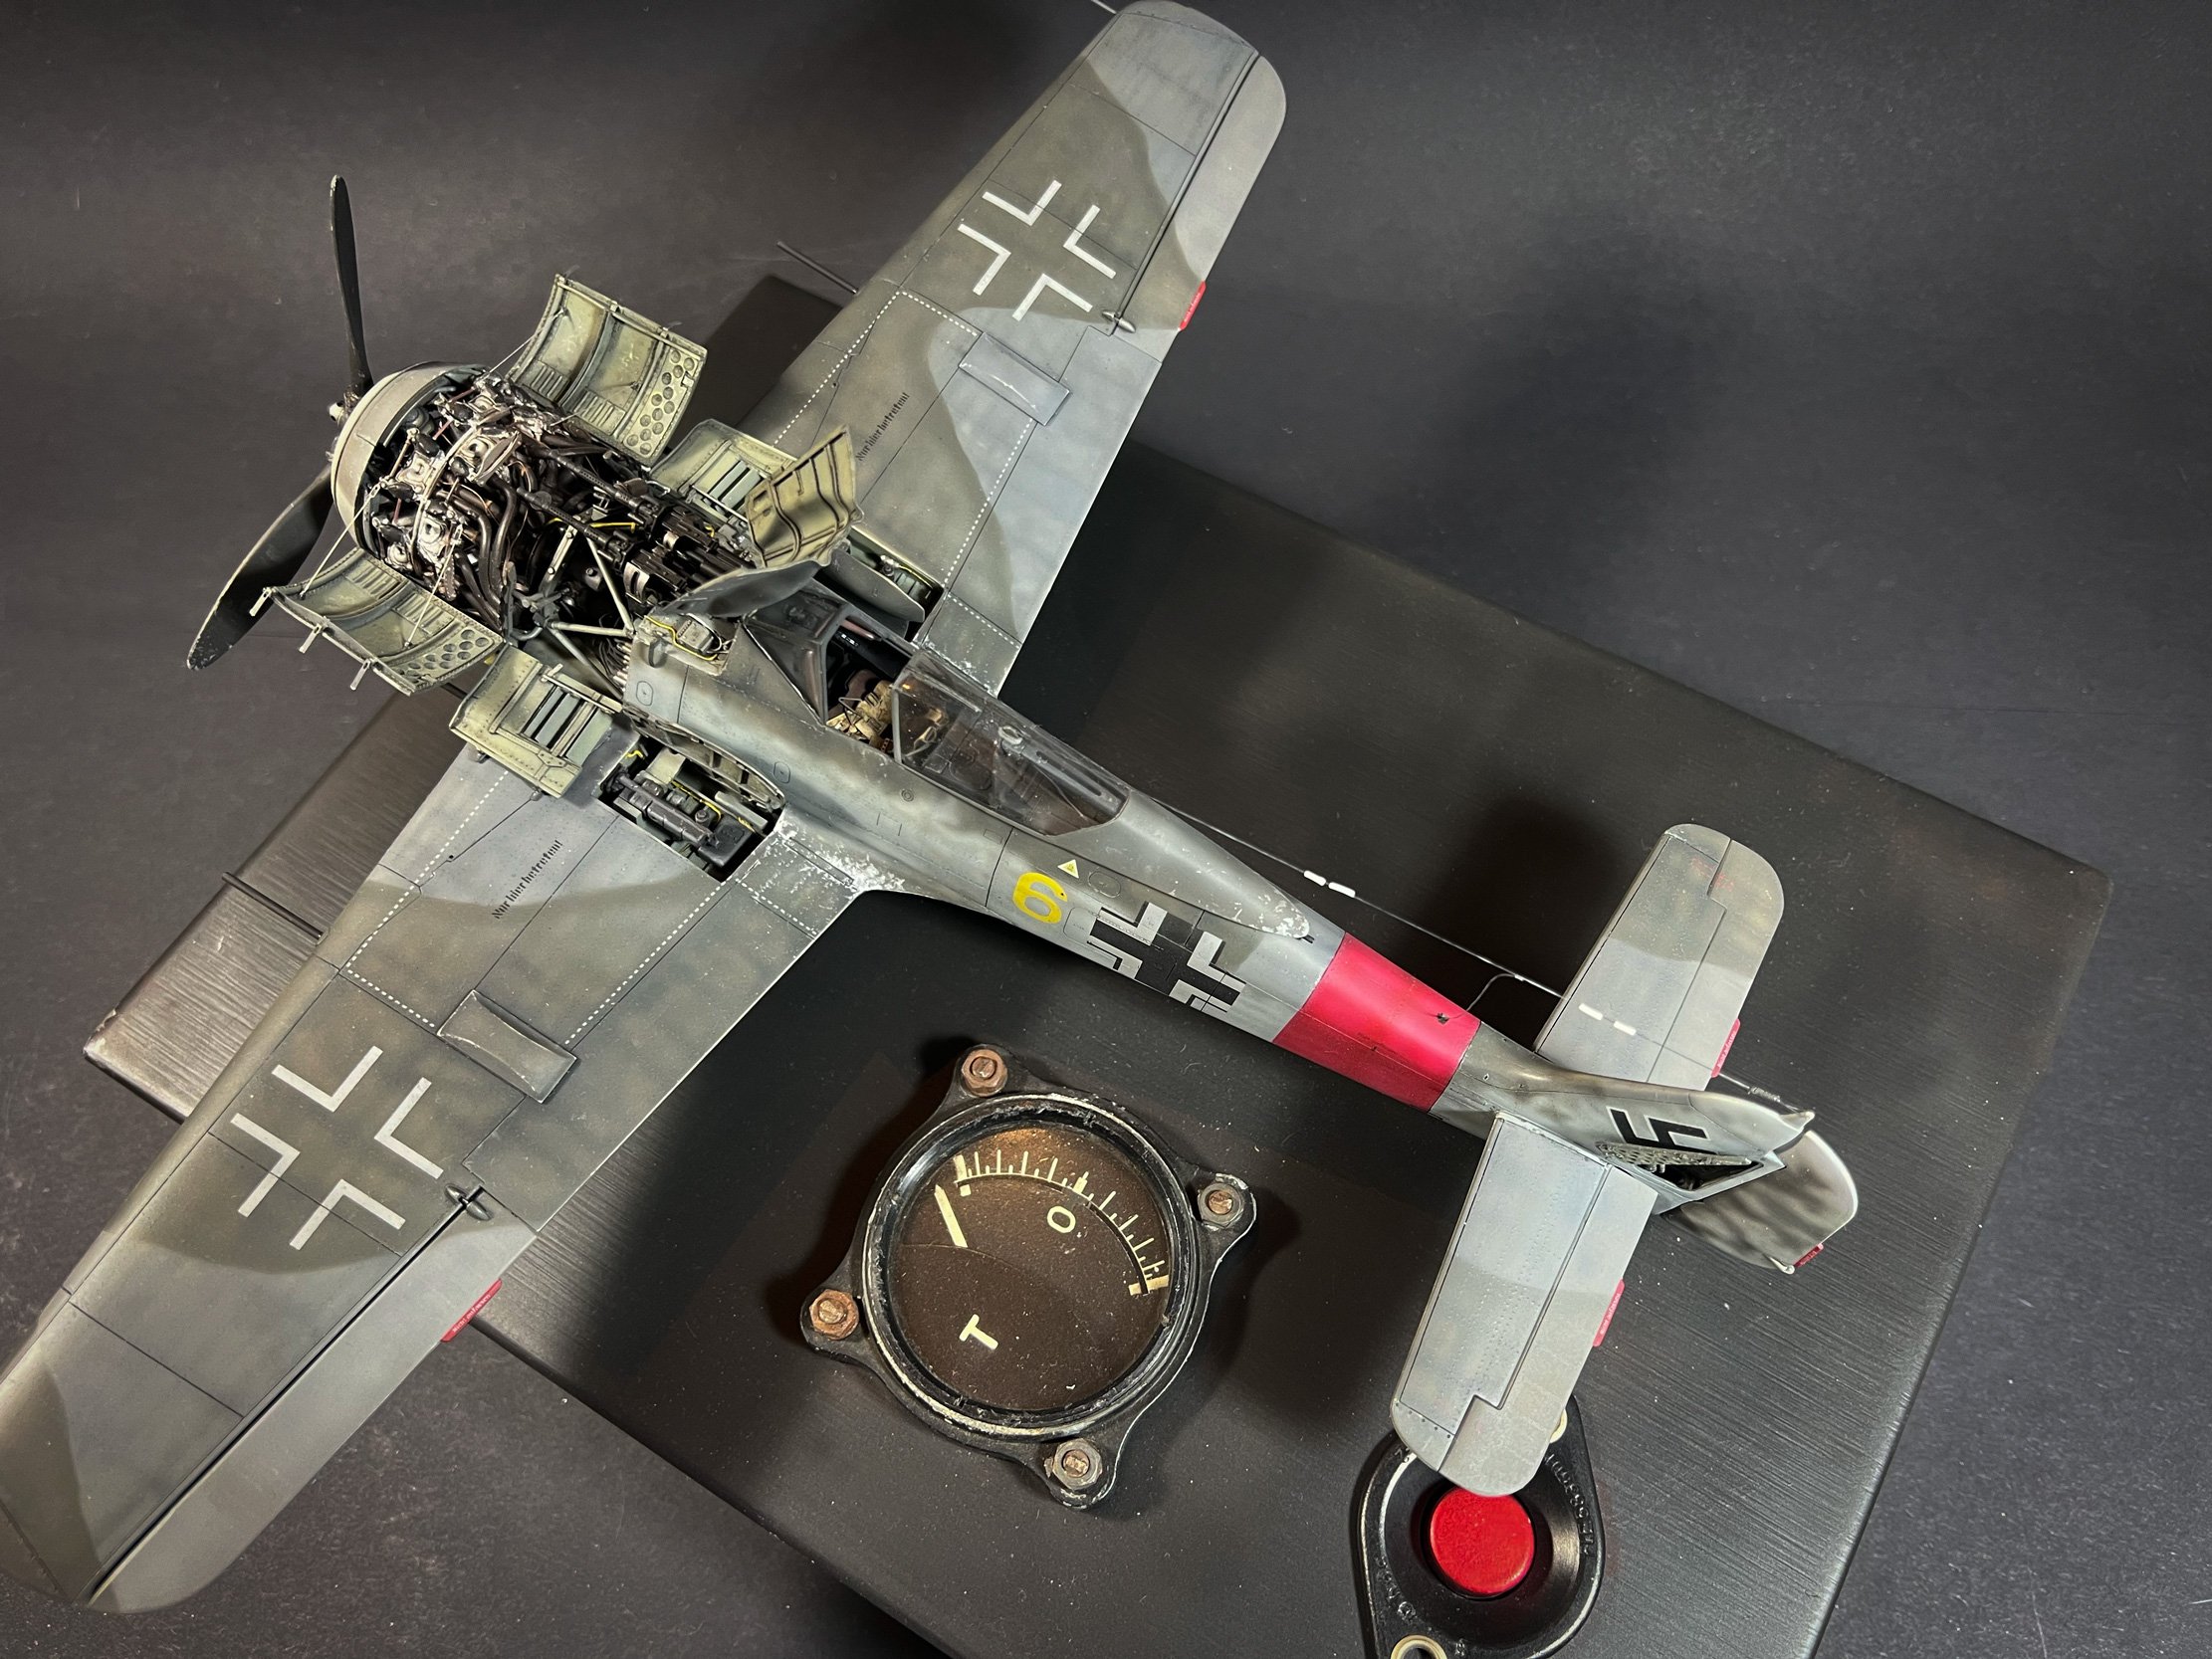
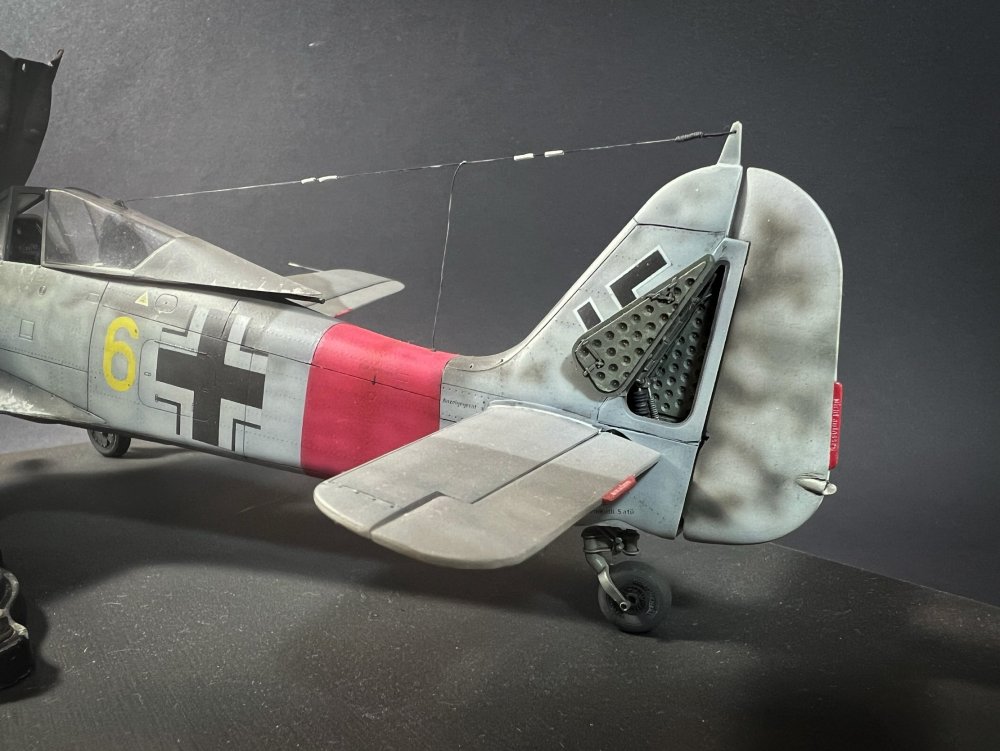
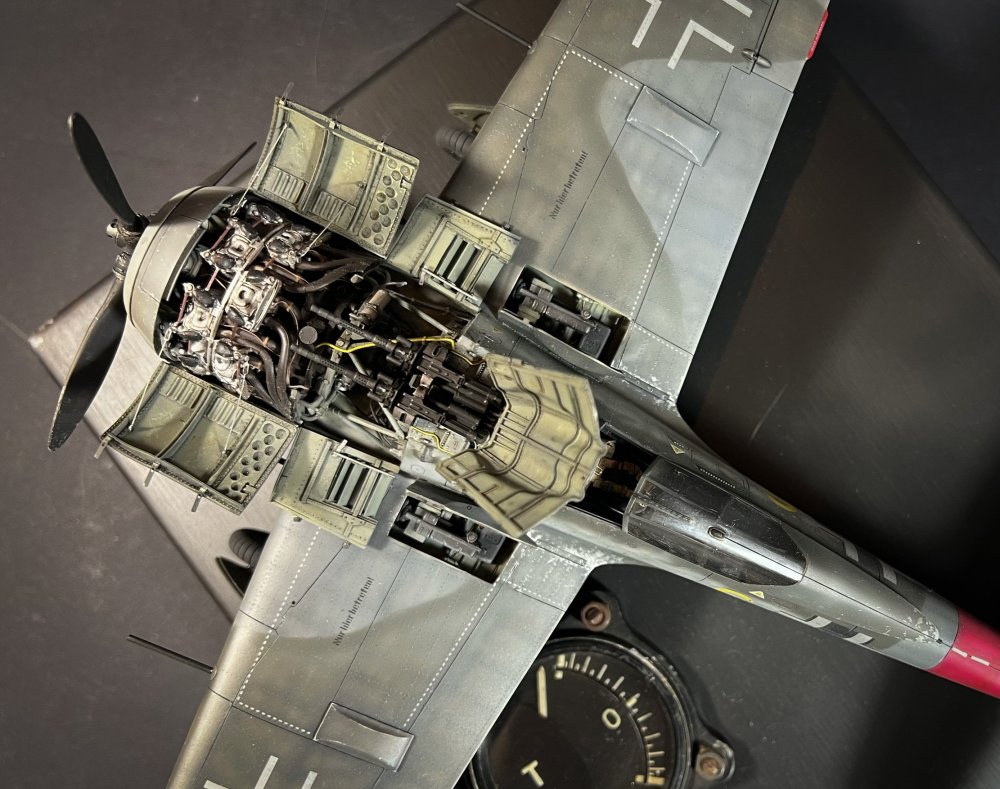
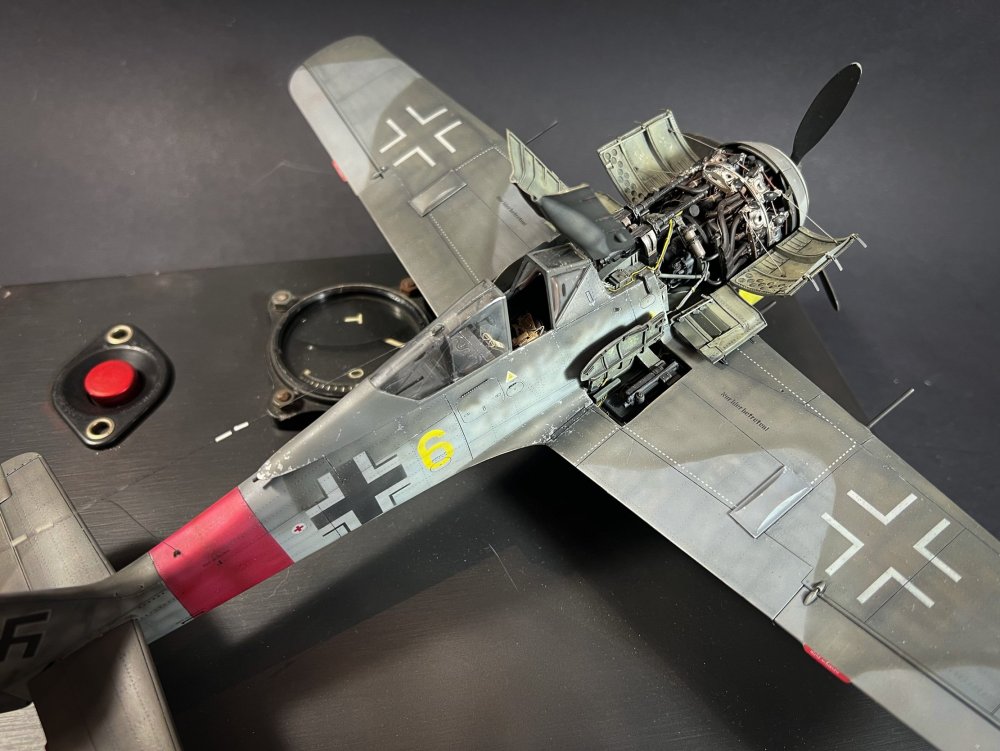
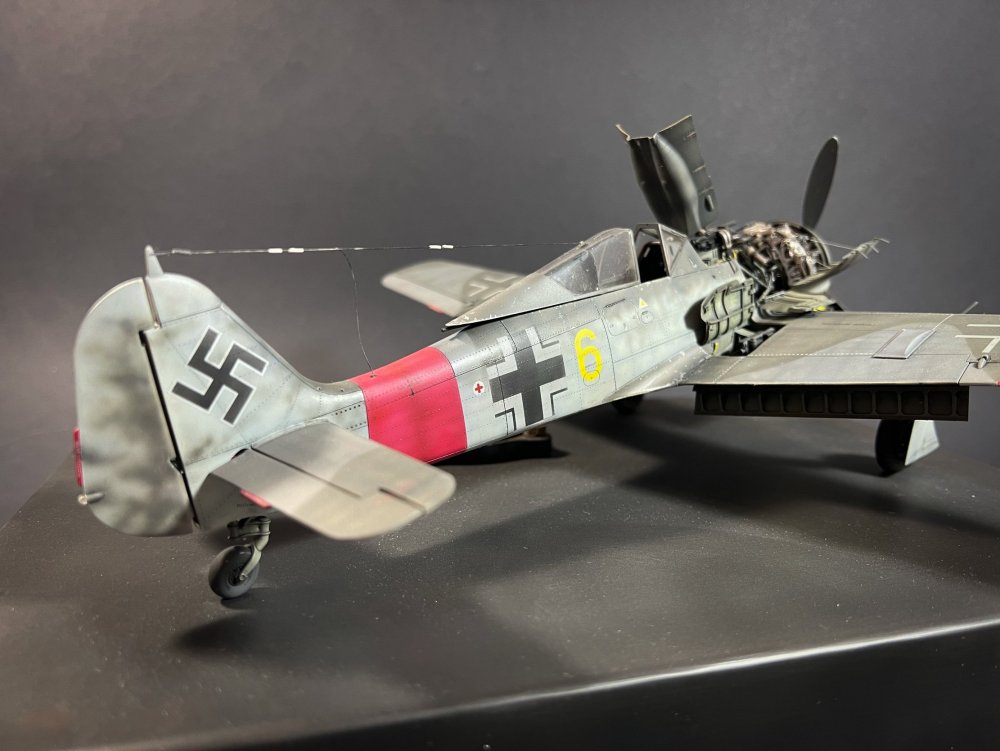
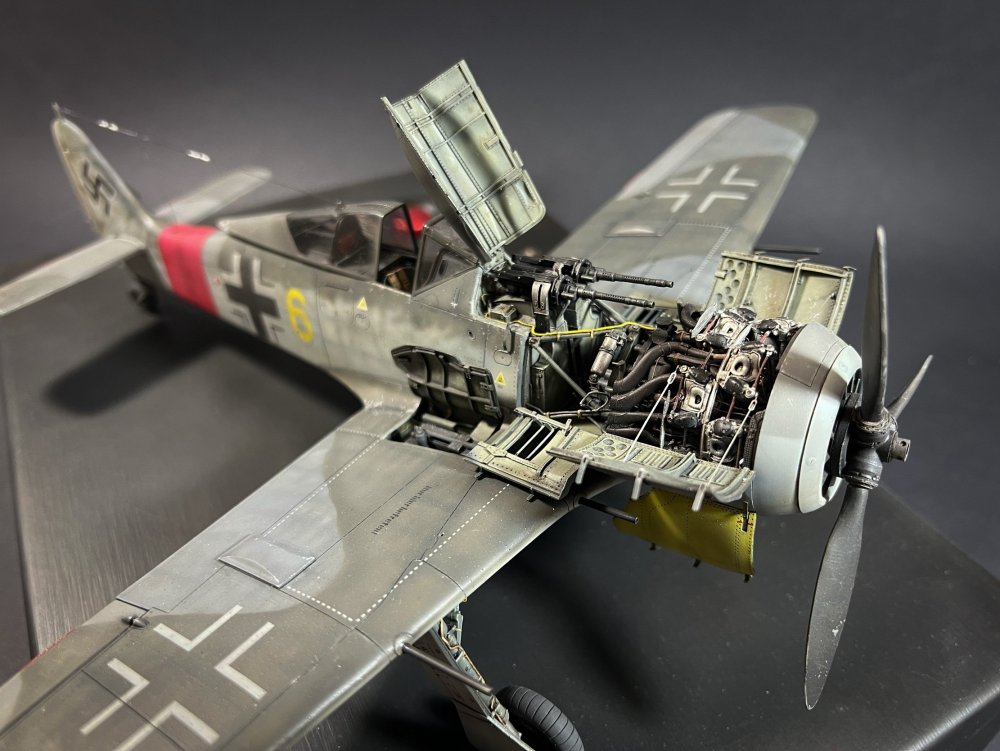
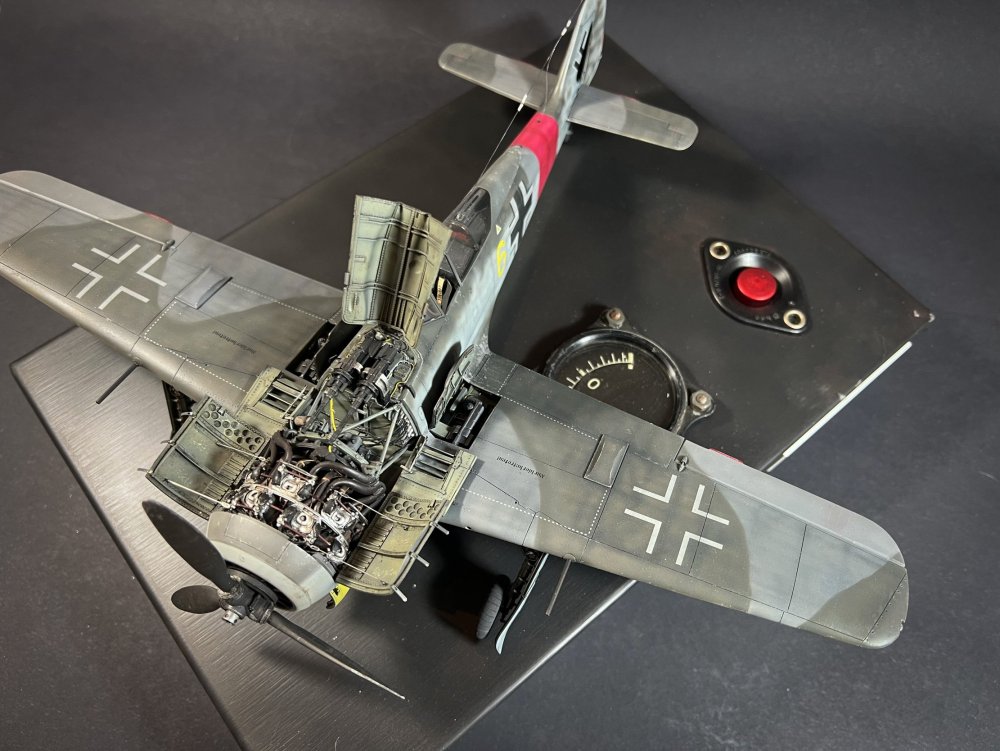
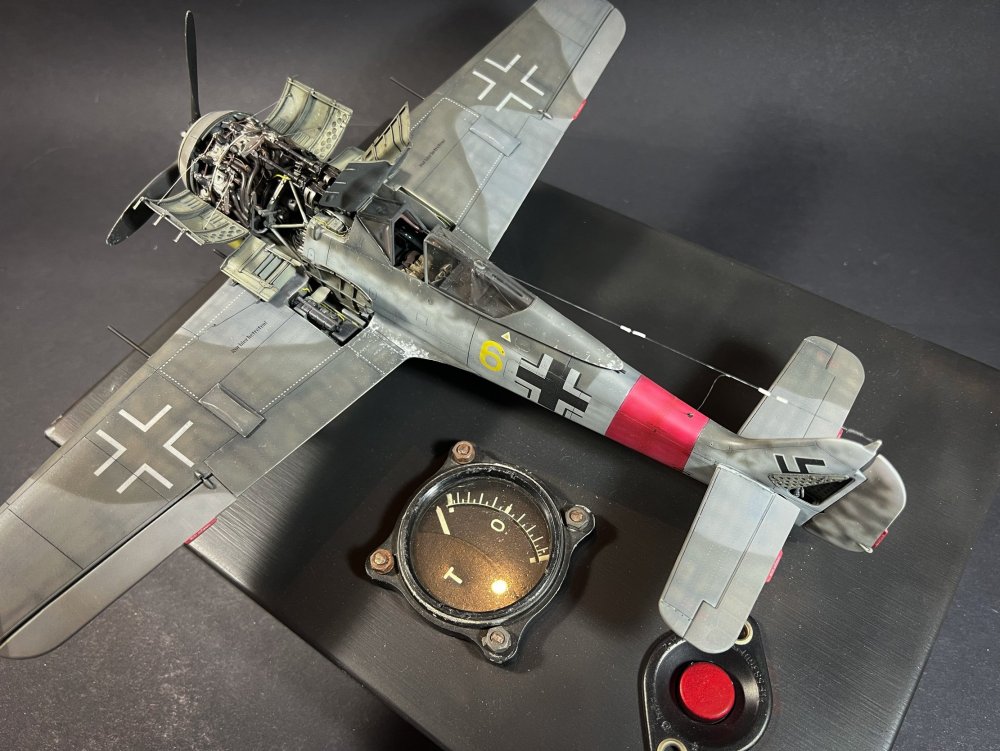
This Revell model took me the better part of a year to finish. All masks, no decals (1Manarmy.be). 3D printed ejection chutes and all the aftermarket you can think of. Master, Eduard, HGW, etc.. The crash relic is from the this particular plane itself, gifted by Cees Broere. It's the edge of the aileron. The plane was hit by friendly ground fire during operation Bodenplatte. The pilot bailed out. Chute did not open and he fell hard on the frozen water. The trim gauge and button are both from a Fw190 left cockpit console. The base was shaped from aluminium.


- 11 replies
-
- 15
-