
Fran
-
Posts
2,286 -
Joined
-
Last visited
About Fran

- Currently Viewing Forums Index
- Birthday 05/24/1979


-
 Wow!! Im loving this!! Awesome work!!
 -
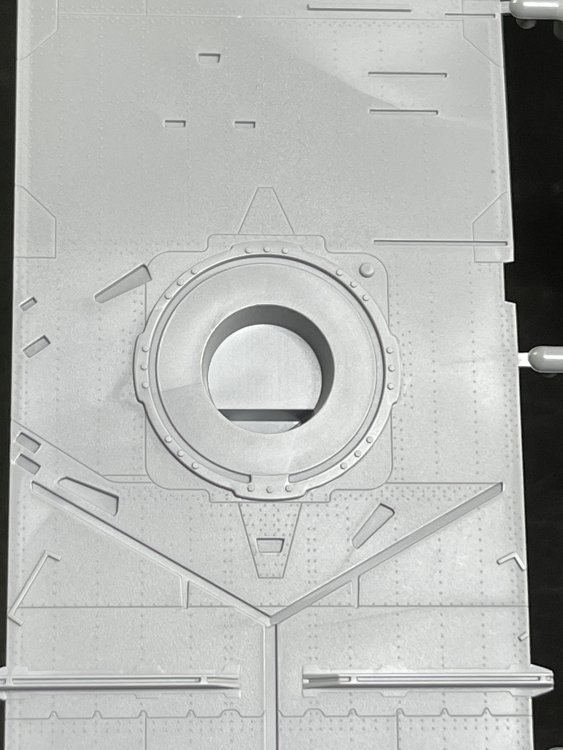
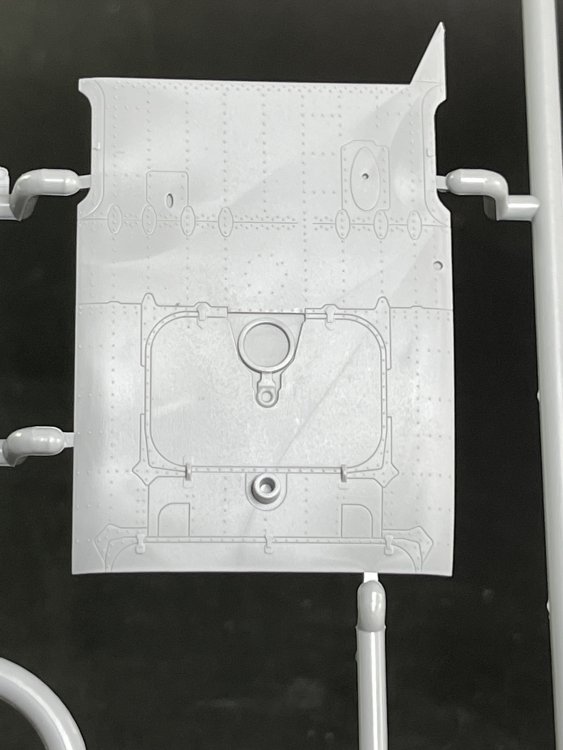
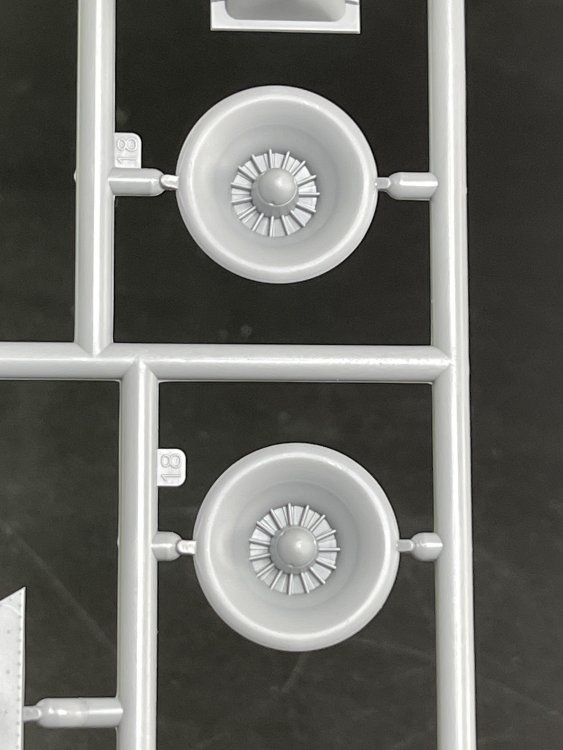
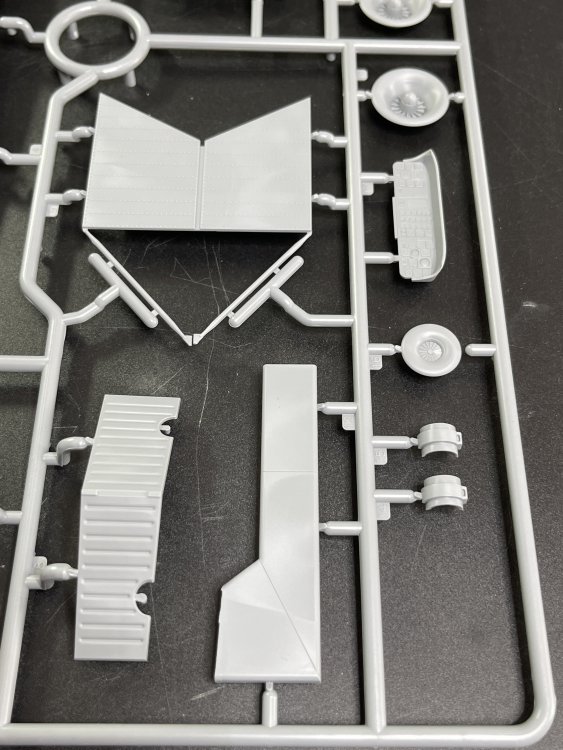
A 1:32 Defiant for 2028! Project Defiant! "The Boulton Paul Defiant was an innovative solution to the problem of defending the UK from German attack, as anticipated by the Air Ministry in the mid-1930s. The powerful Merlin engine would allow the Defiant to catch any Luftwaffe bomber and attack it from a safe angle, using the destructive power of a quartet of Browning machine guns to shoot down the enemy. As we know, Hitler did not read this script, and after the invasion of France Luftwaffe fighters could reach UK airspace. Suddenly the Defiant was vulnerable in a way that was unexpected. The reputation of the Defiant suffered after a couple of high profile disastrous engagements, but recently there has been a re-evaluation of its performance and a new-found respect for brave men who fought in it. This model will be an indispensable addition to any collection of 1/32 Battle of Britain aircraft. Kotare Models kitset K32510 will be in 1/32 scale, designed with our usual attention to accuracy, surface detail and ease of assembly. Introducing Nick Moore! We are very pleased to announce that experienced kit designer Nick Moore is coming on board, to join the Wellington crew of Kotare staff. Nick was formerly with Wingnut Wings, and his work included the DH.9A, Salmson 2A.2, Pfalz D.XII, Gotha UWD, Gotha G.1, and DH.9. Nick has been working in the engineering industry for over 5 years, but is very keen to get back into aircraft design, and has been reading up on the Defiant and can’t wait to get started. Exclusive Limited Numbered Edition kitset; what does this mean?? We will be producing only 5000 copies of this kitset, each one hand numbered by Kotare Models owner Mark Robson. It will be available ONLY direct from Kotare Models via our website and at major hobby shows that we attend. This exact boxing will never be produced again. The part set will not be used again for at least 5 years after issue. By ordering now, you will become a member of Project Defiant, with exclusive access to a dedicated private Facebook page, online forum and email group. There will be in-person meetings at major model shows in the UK, Australia, USA and NZ attended by Kotare staff to get to know people and exchange ideas. There will be regular updates on the design progress and a chance to interact personally with Nick and the team. Members of Project Defiant will be invited to have a say in major design principles, contribute knowledge about the aircraft and collaborate on colour scheme choices. All pre-orders will come with a free set of 3D printed highly detailed resin exhausts and a print of the beautiful Darryl Legg box art. Be in the draw to build a second test shot! From the first 500 people who make an order, we will randomly draw 20 names. Those modellers will be offered the chance to build and critique a second test shot of the kitset, to augment the process we at Kotare do. Delivery Date We are confident we will be shipping pre-order kitsets by March 2028 Cost Due to the increased complexity involved in the turret of the Defiant (when compared to our other single-engined fighter kitsets), the retail price is US$125 plus shipping and applicable taxes and/or tariffs in your country. Thanks in advance! K32510 Kotare 1/32 Defiant Mk.I – EXCLUSIVE LIMITED NUMBERED EDITION - US$125 By ordering early, you become part of a community AND help us to make faster progress than we otherwise could. The design of kits and the creation of the mould is a slow process and the more designers we have on board the quicker we can broaden our ranges and perhaps get to YOUR favourite subject that you have been waiting to see in plastic. As always with Kotare pre-orders, refunds are available at any time up until the date of shipping of your purchase. Cheers, and happy modelling! Mark, Nick and the rest of the Kotare team"

-
- 4
-

-
1:32nd scale Jeannin Stahltaube
Fran replied to sandbagger's topic in LSM 1/35 and Larger Work In Progress
Fantastic paint job!! -
ahhh. Love those old resin model kits! Yes, I think (almost sure) that Reheat Models were resin model kits.!
-
I just LOVE the Triebflugel. Great work!! Well, if it is Miniart then is in 1:35 scale and plastic. In 1:48, if is a old model, its probably resin, yes, because Amuzing Hobby already have one in 1:48 in plastic also.
-
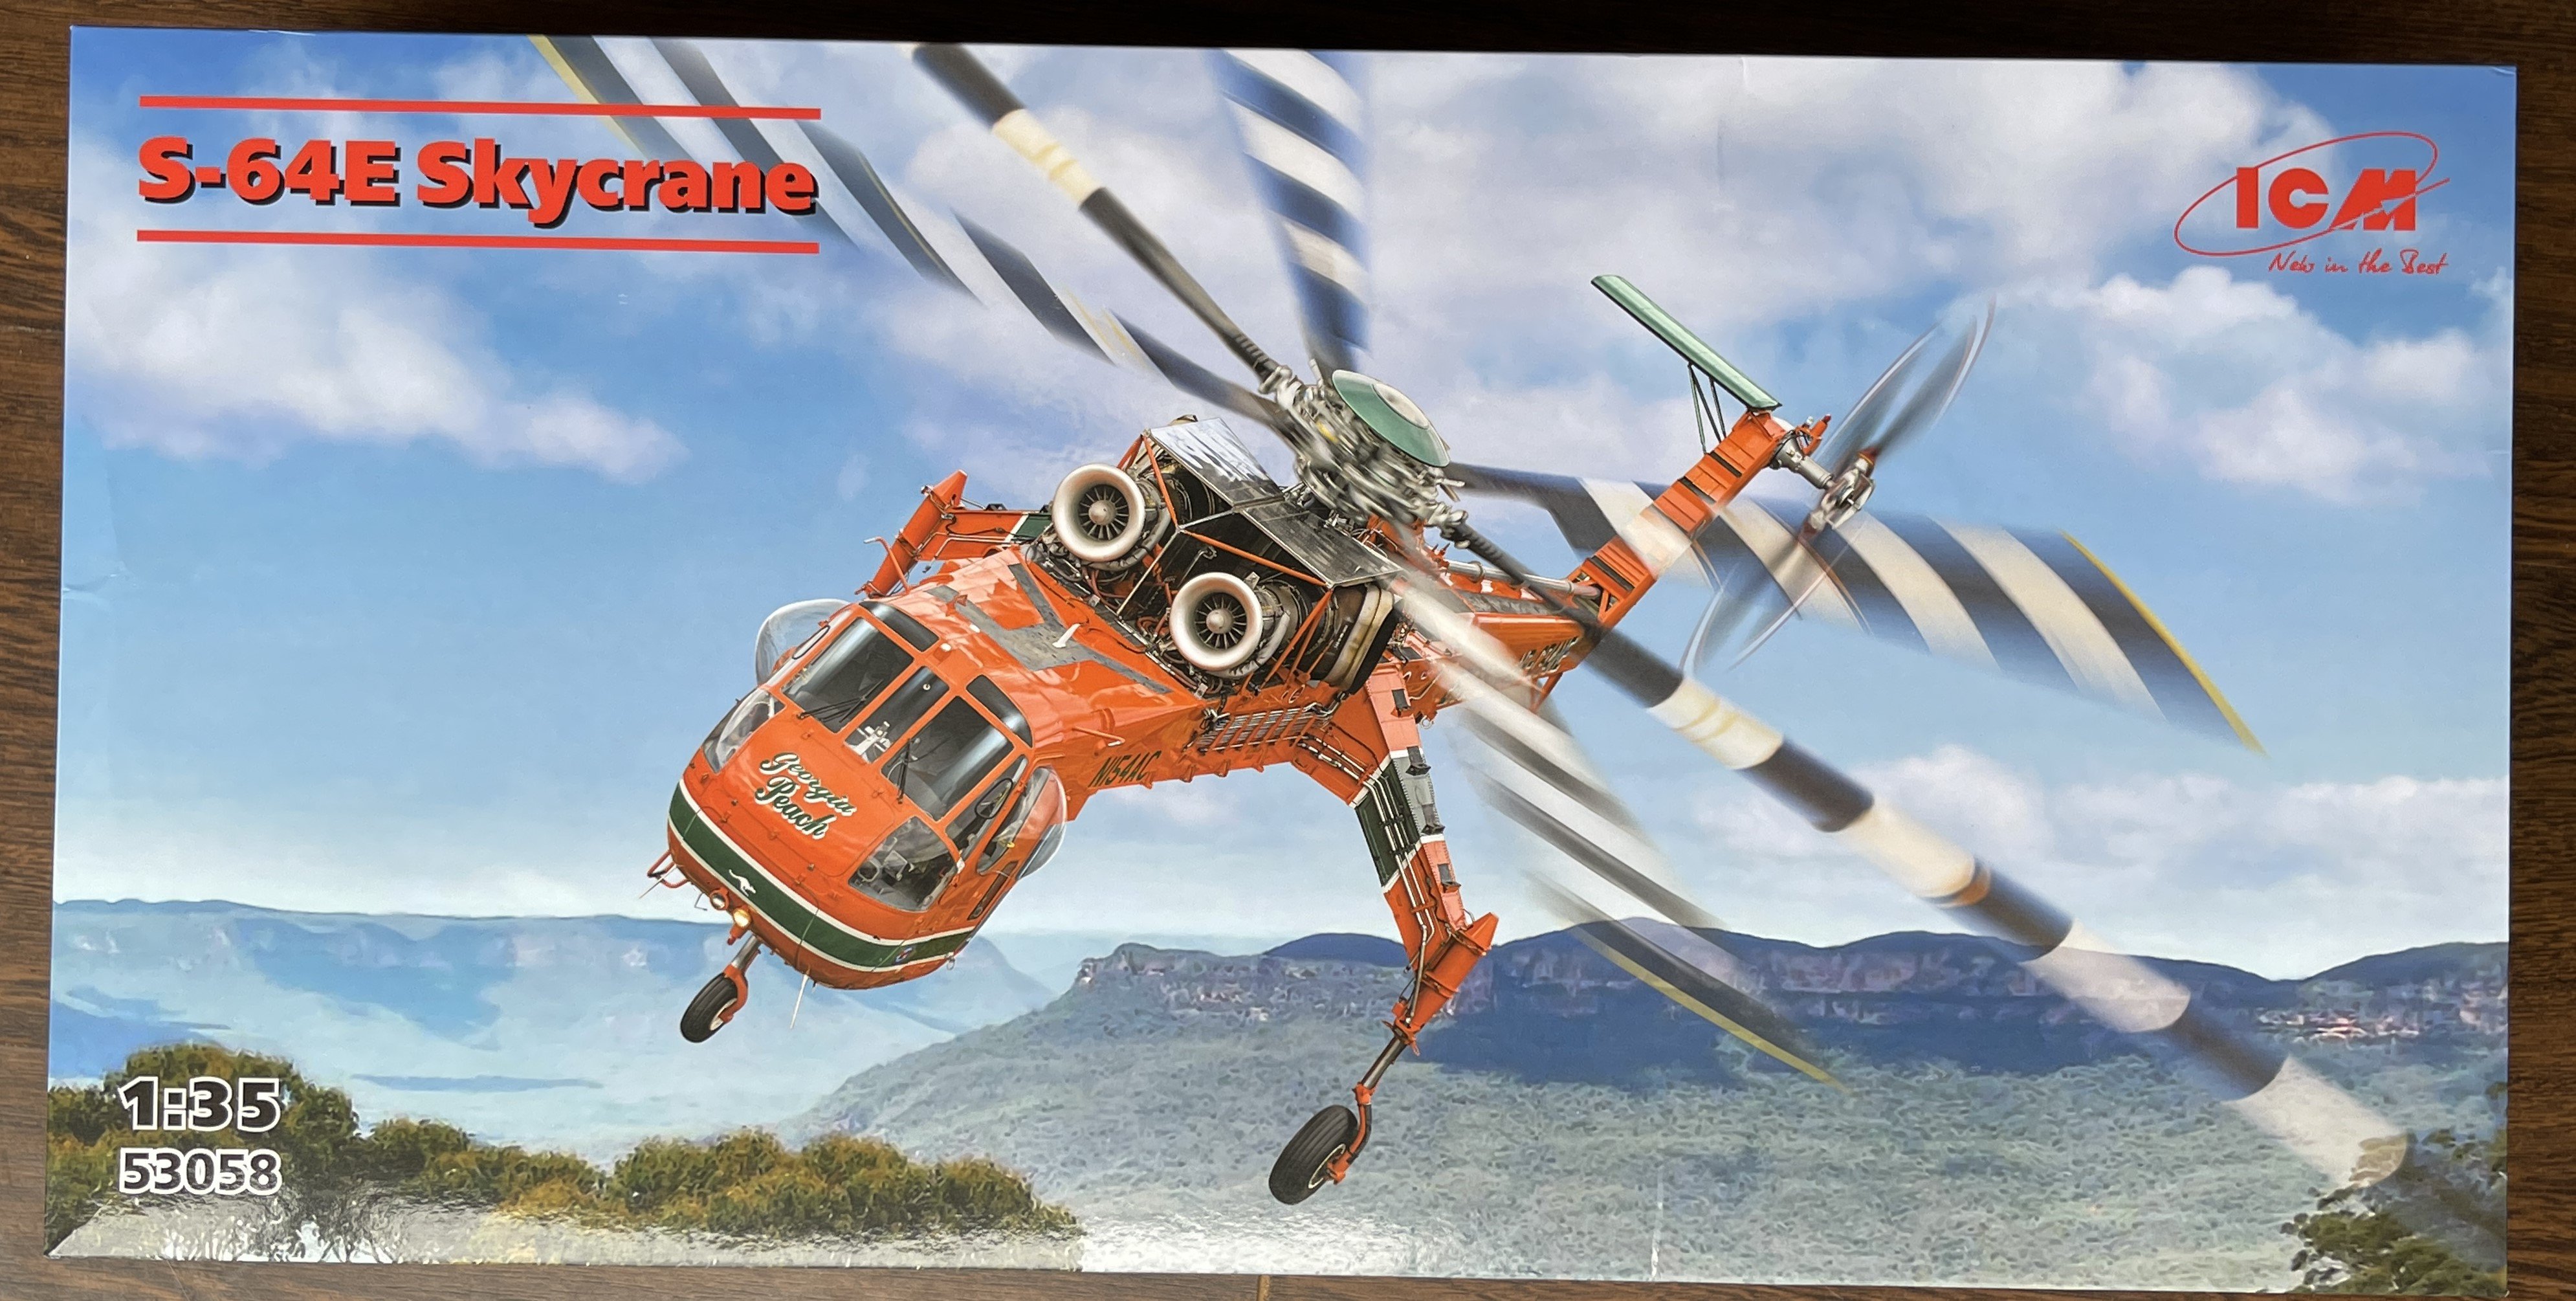
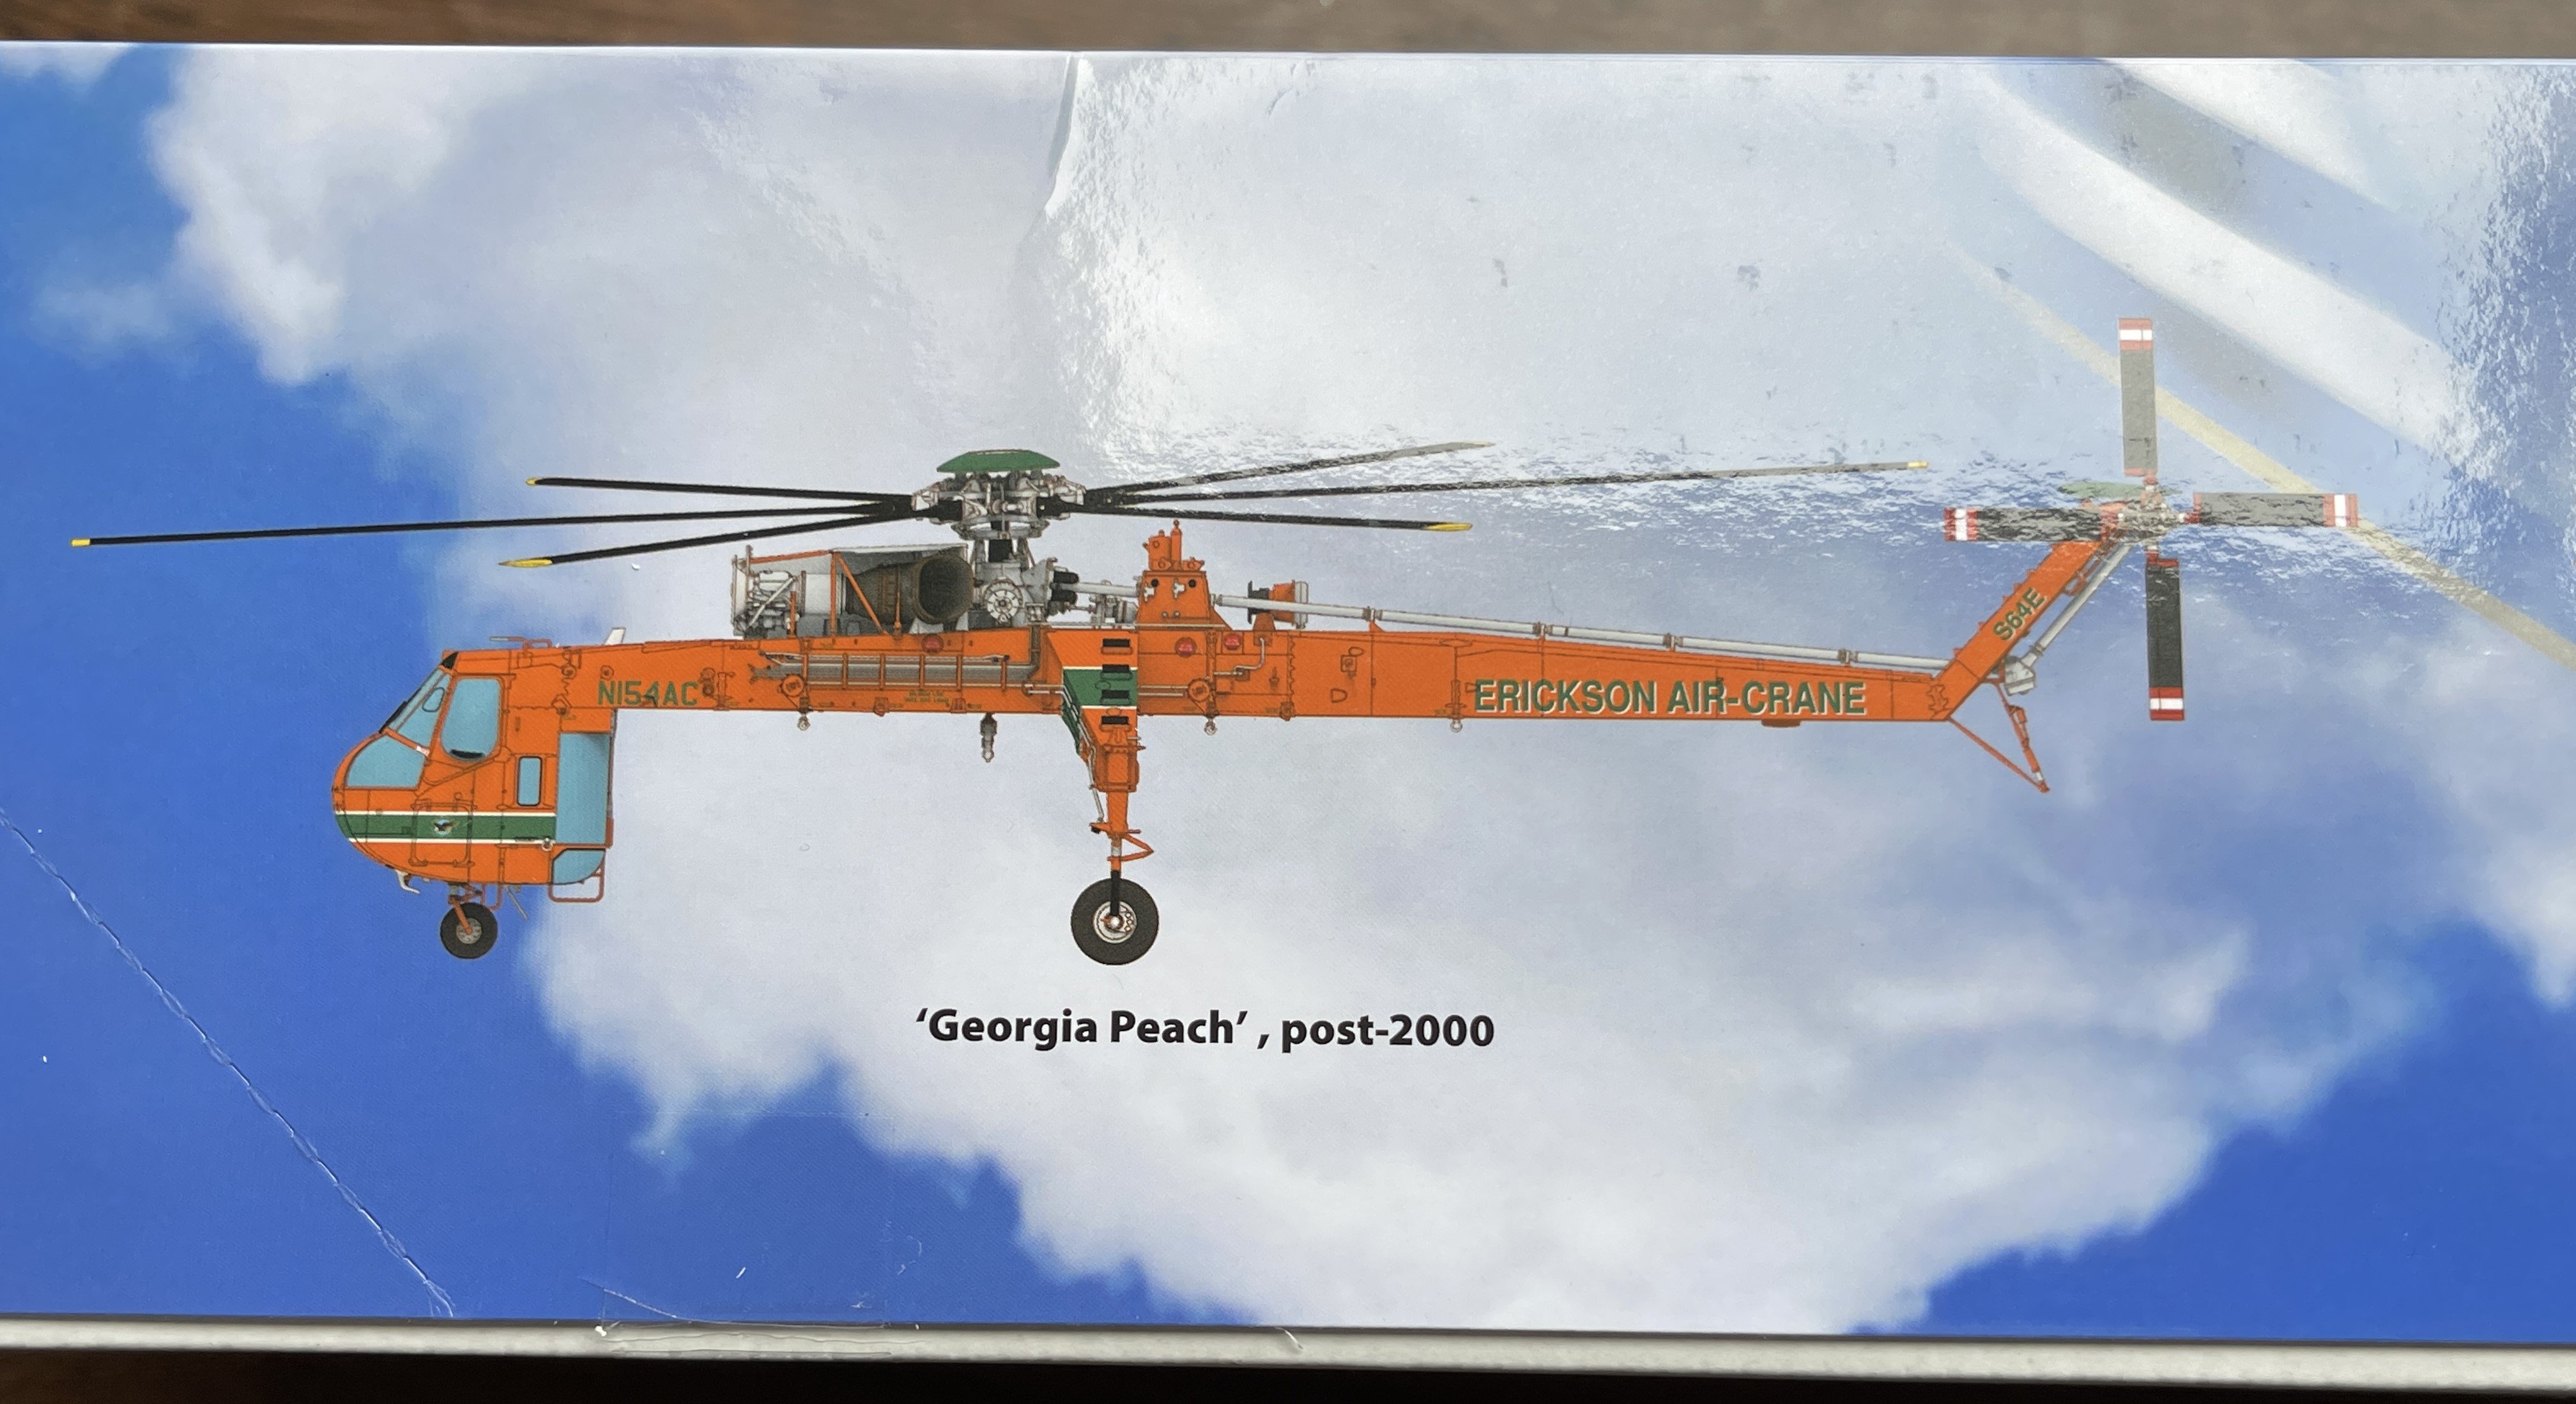
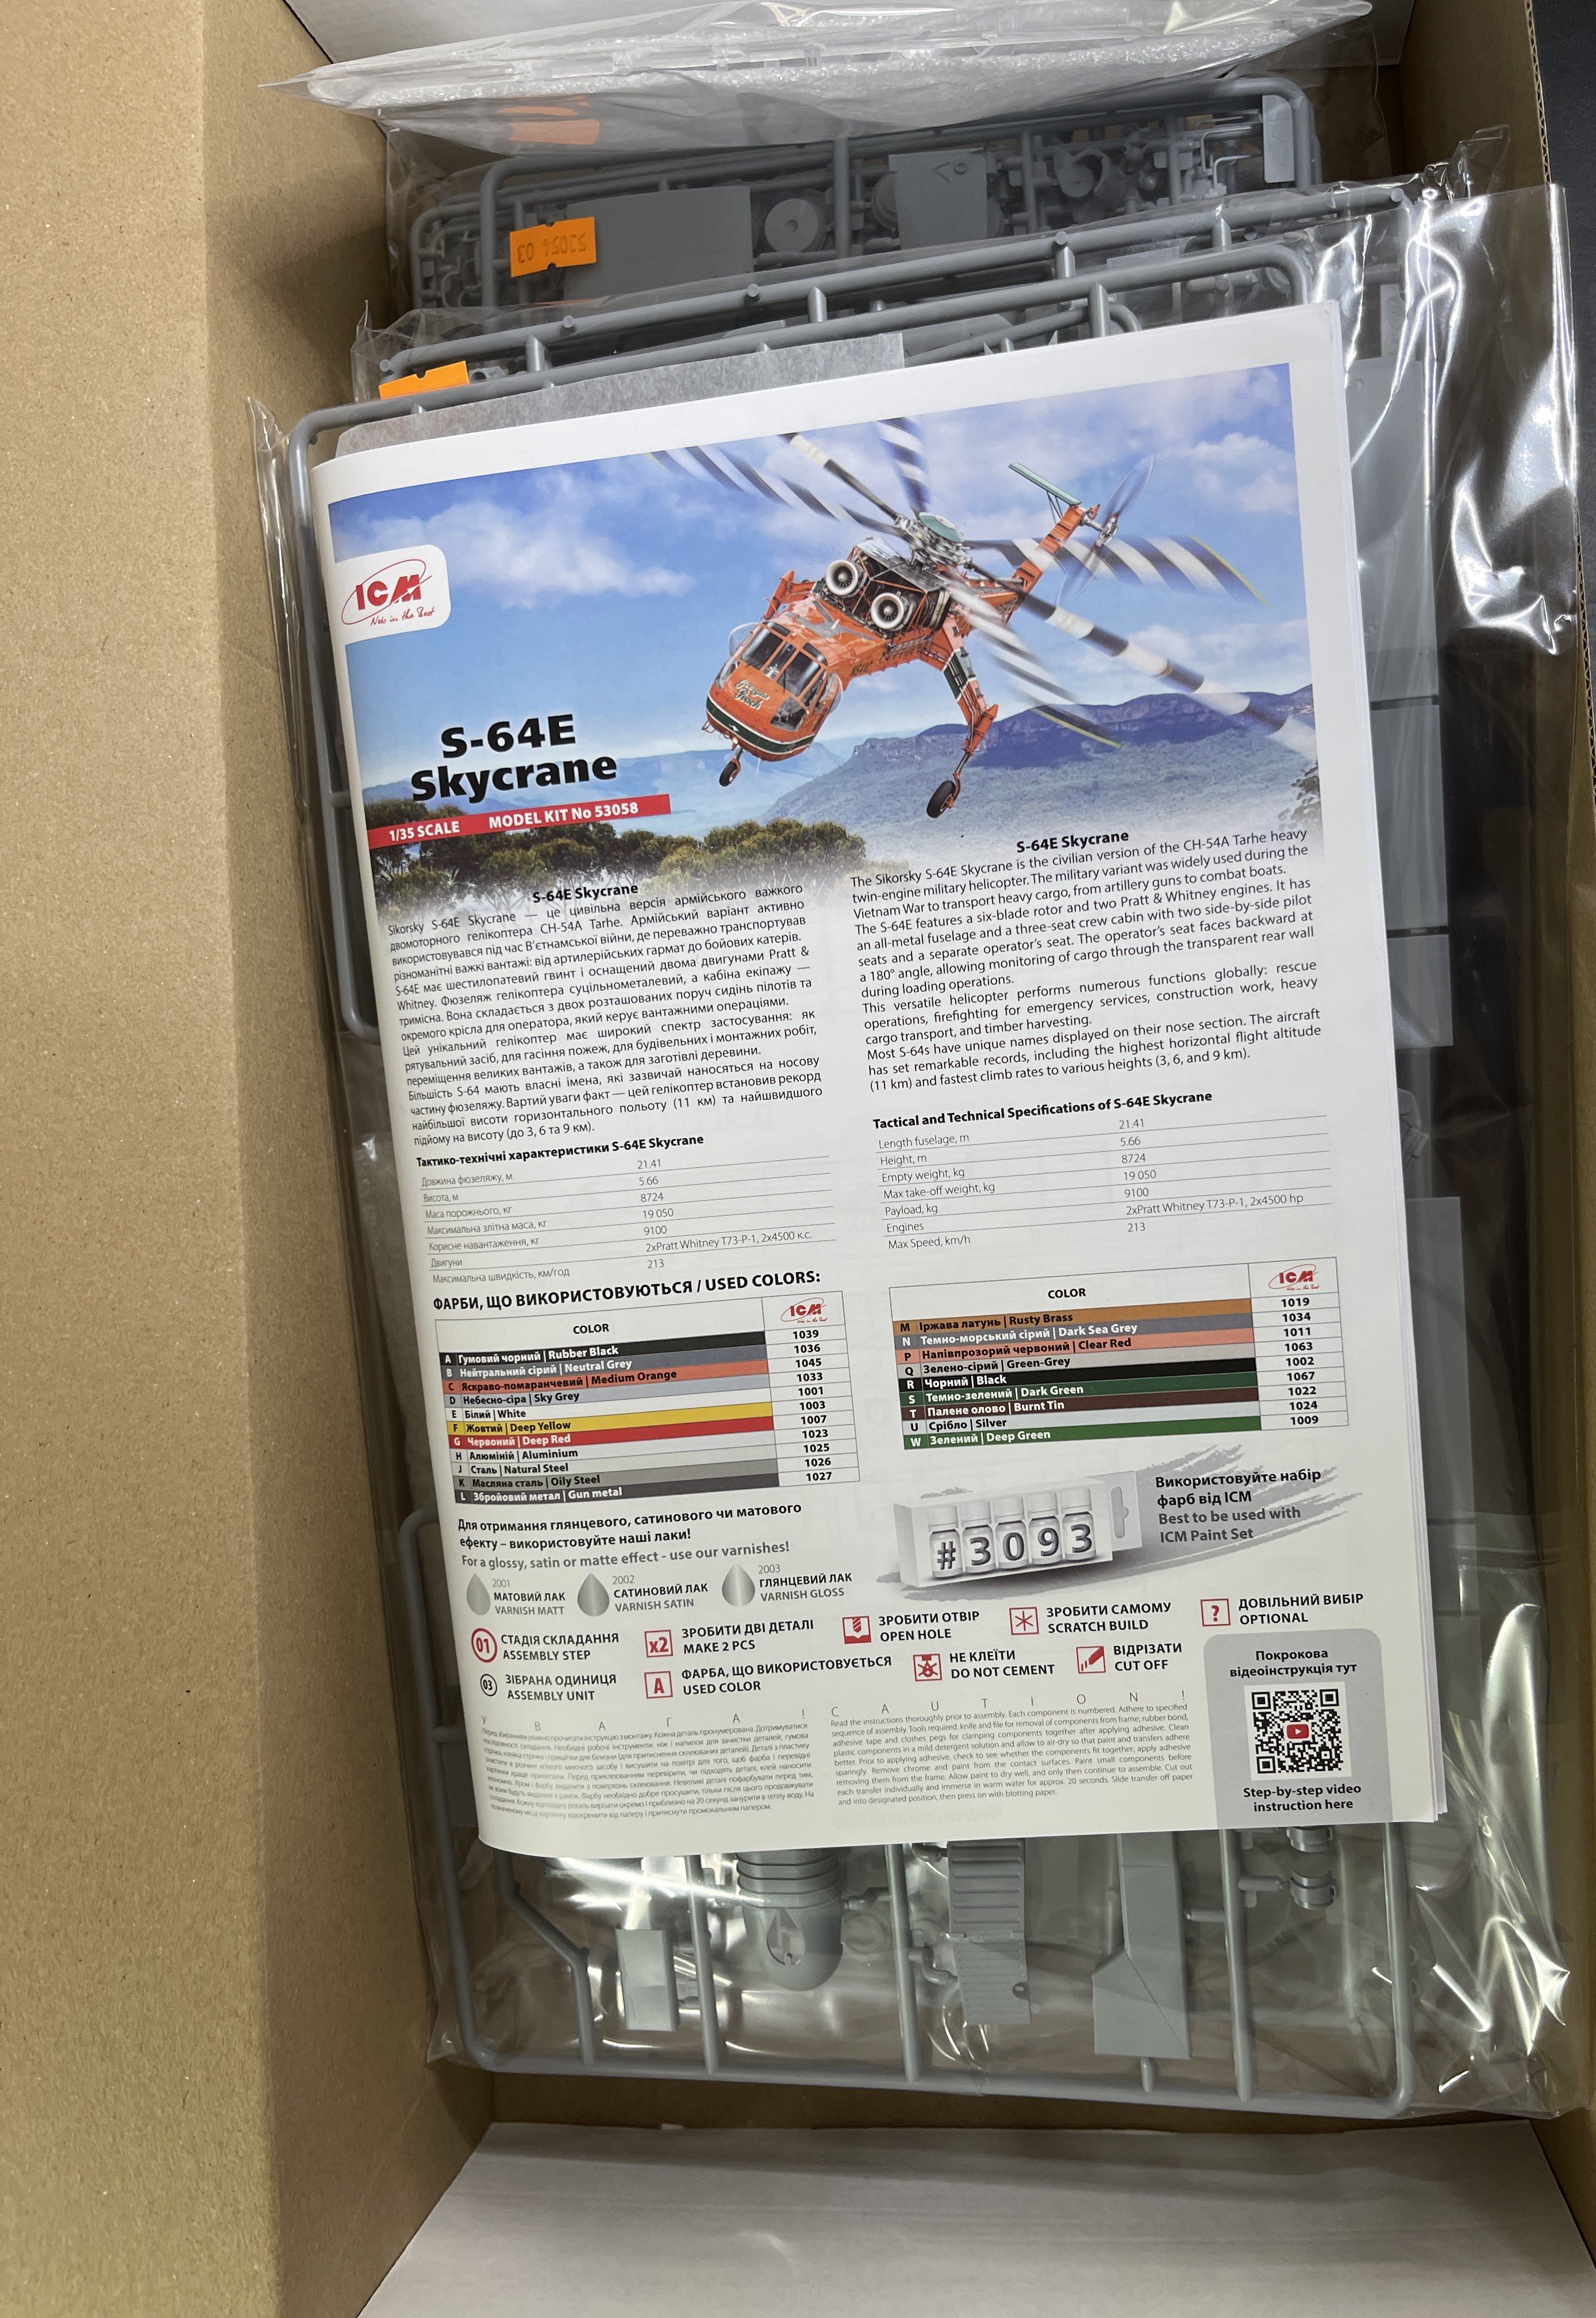
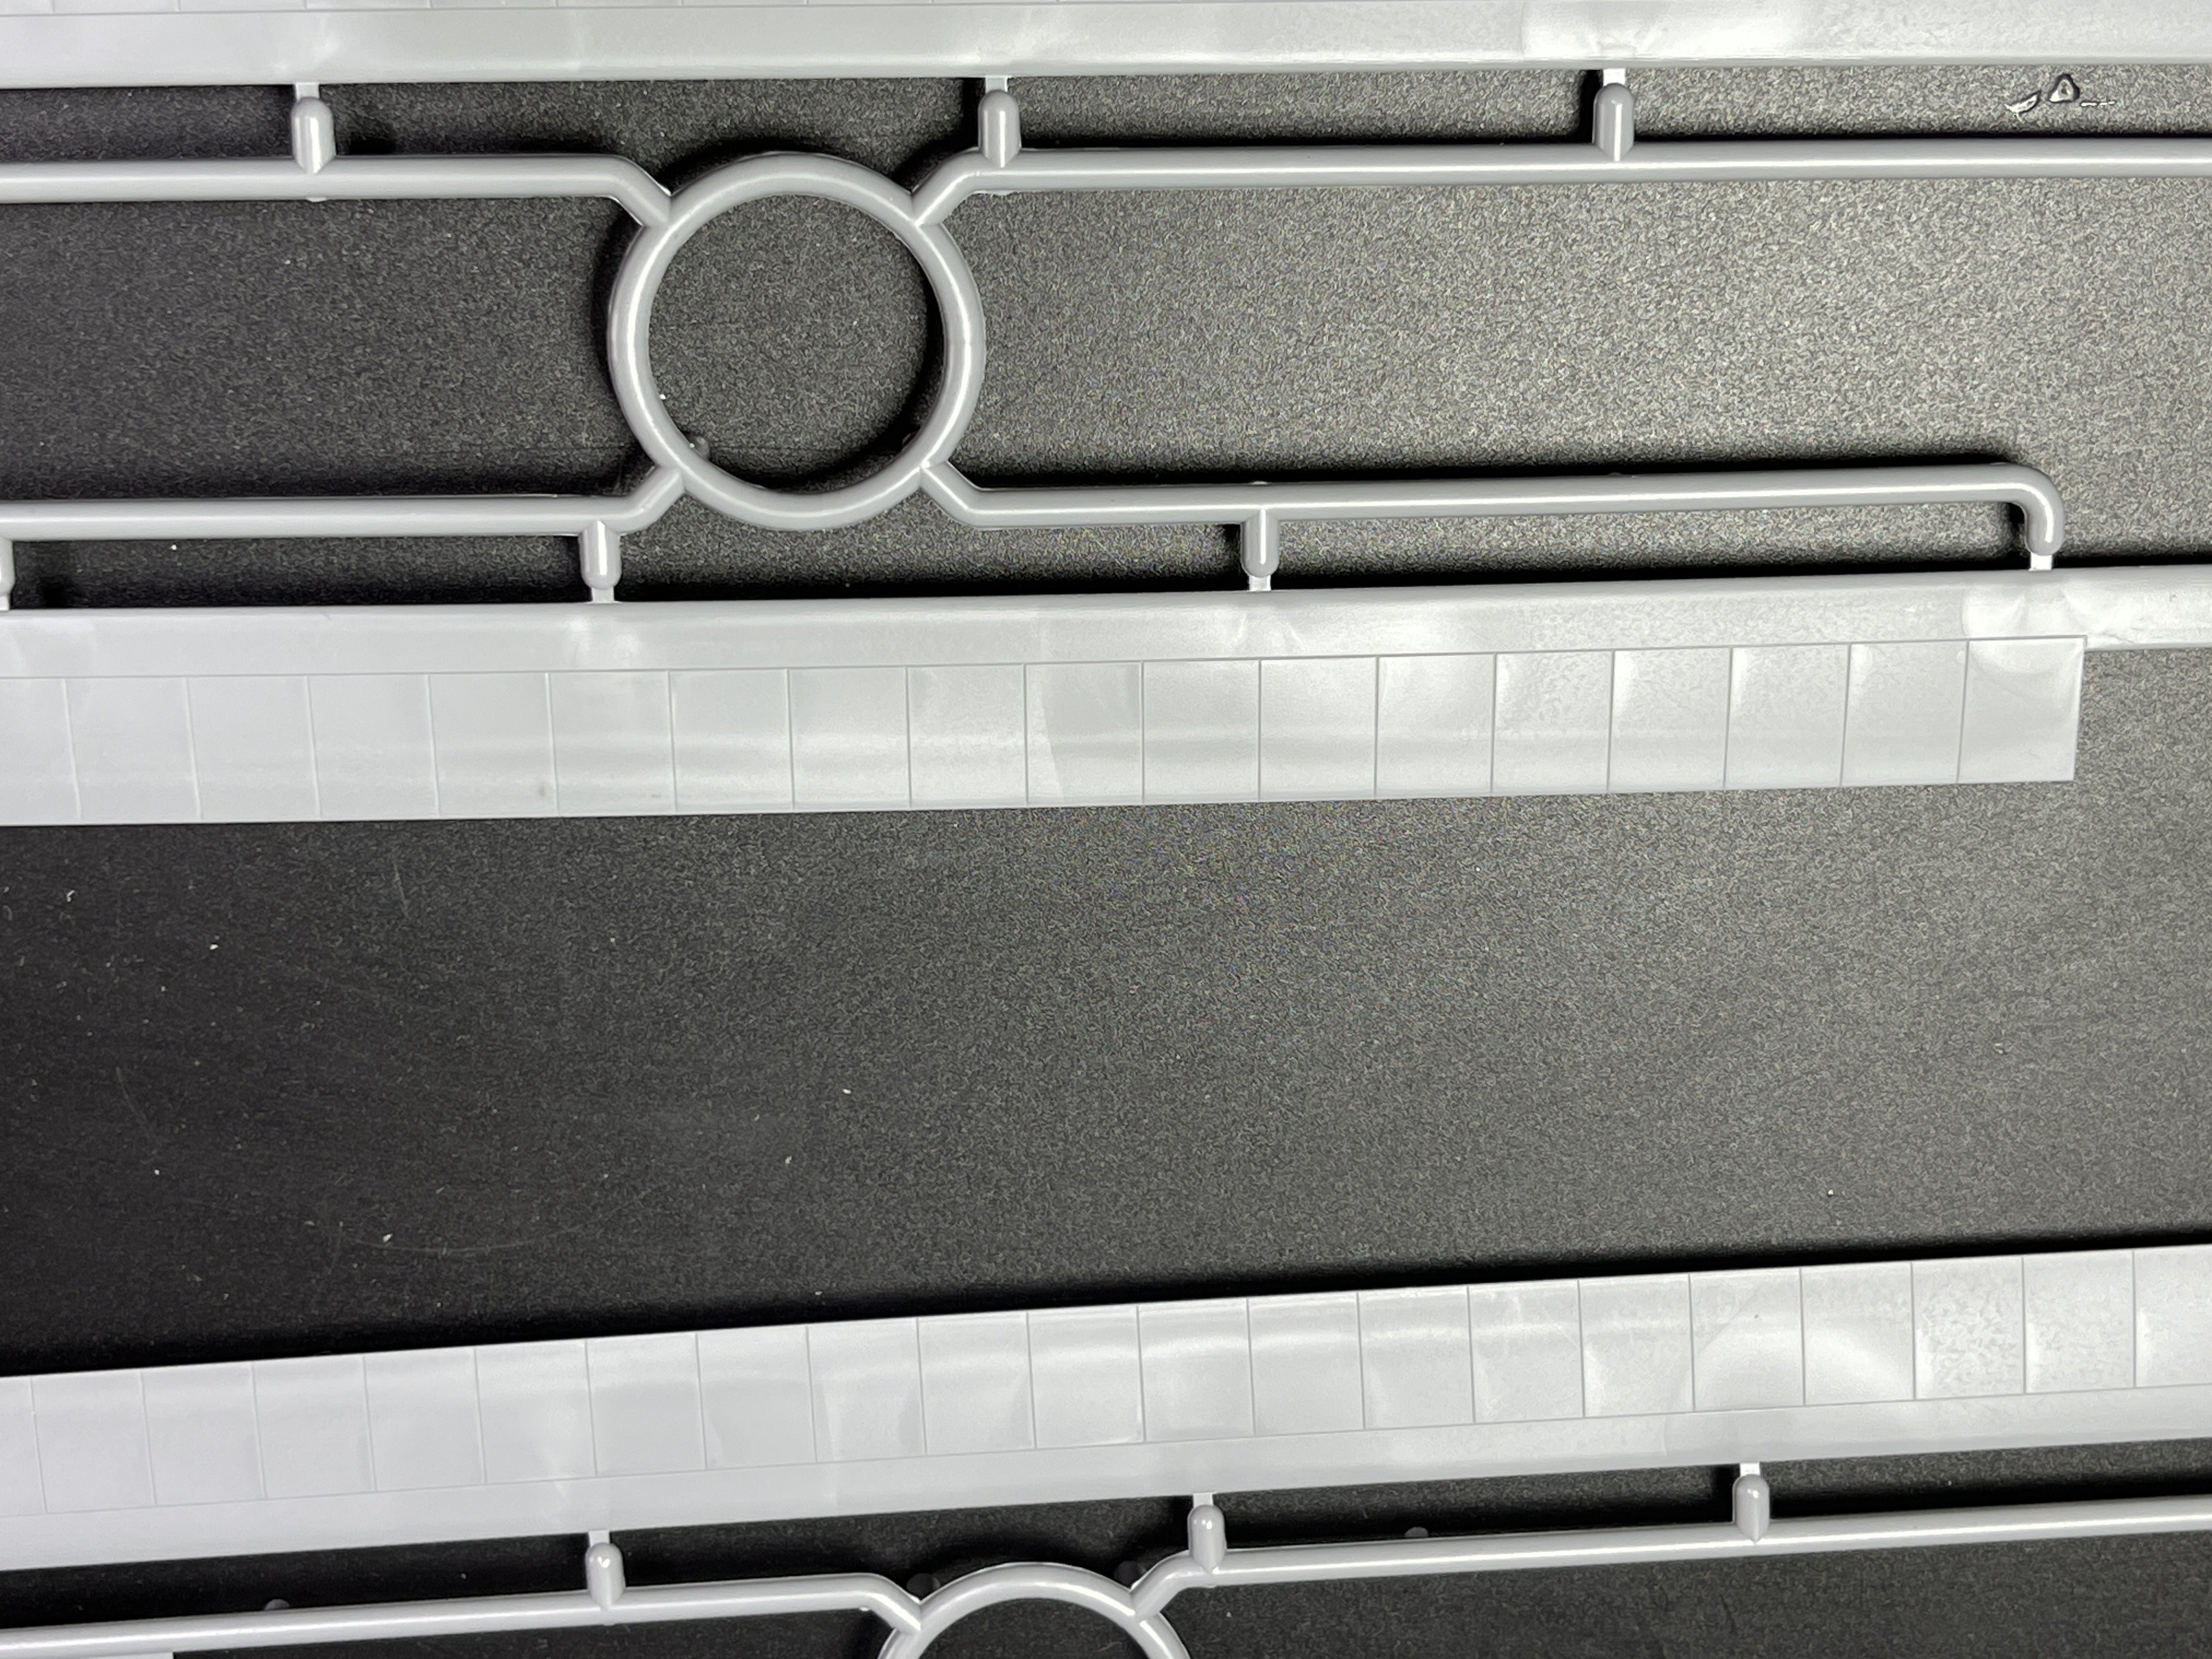
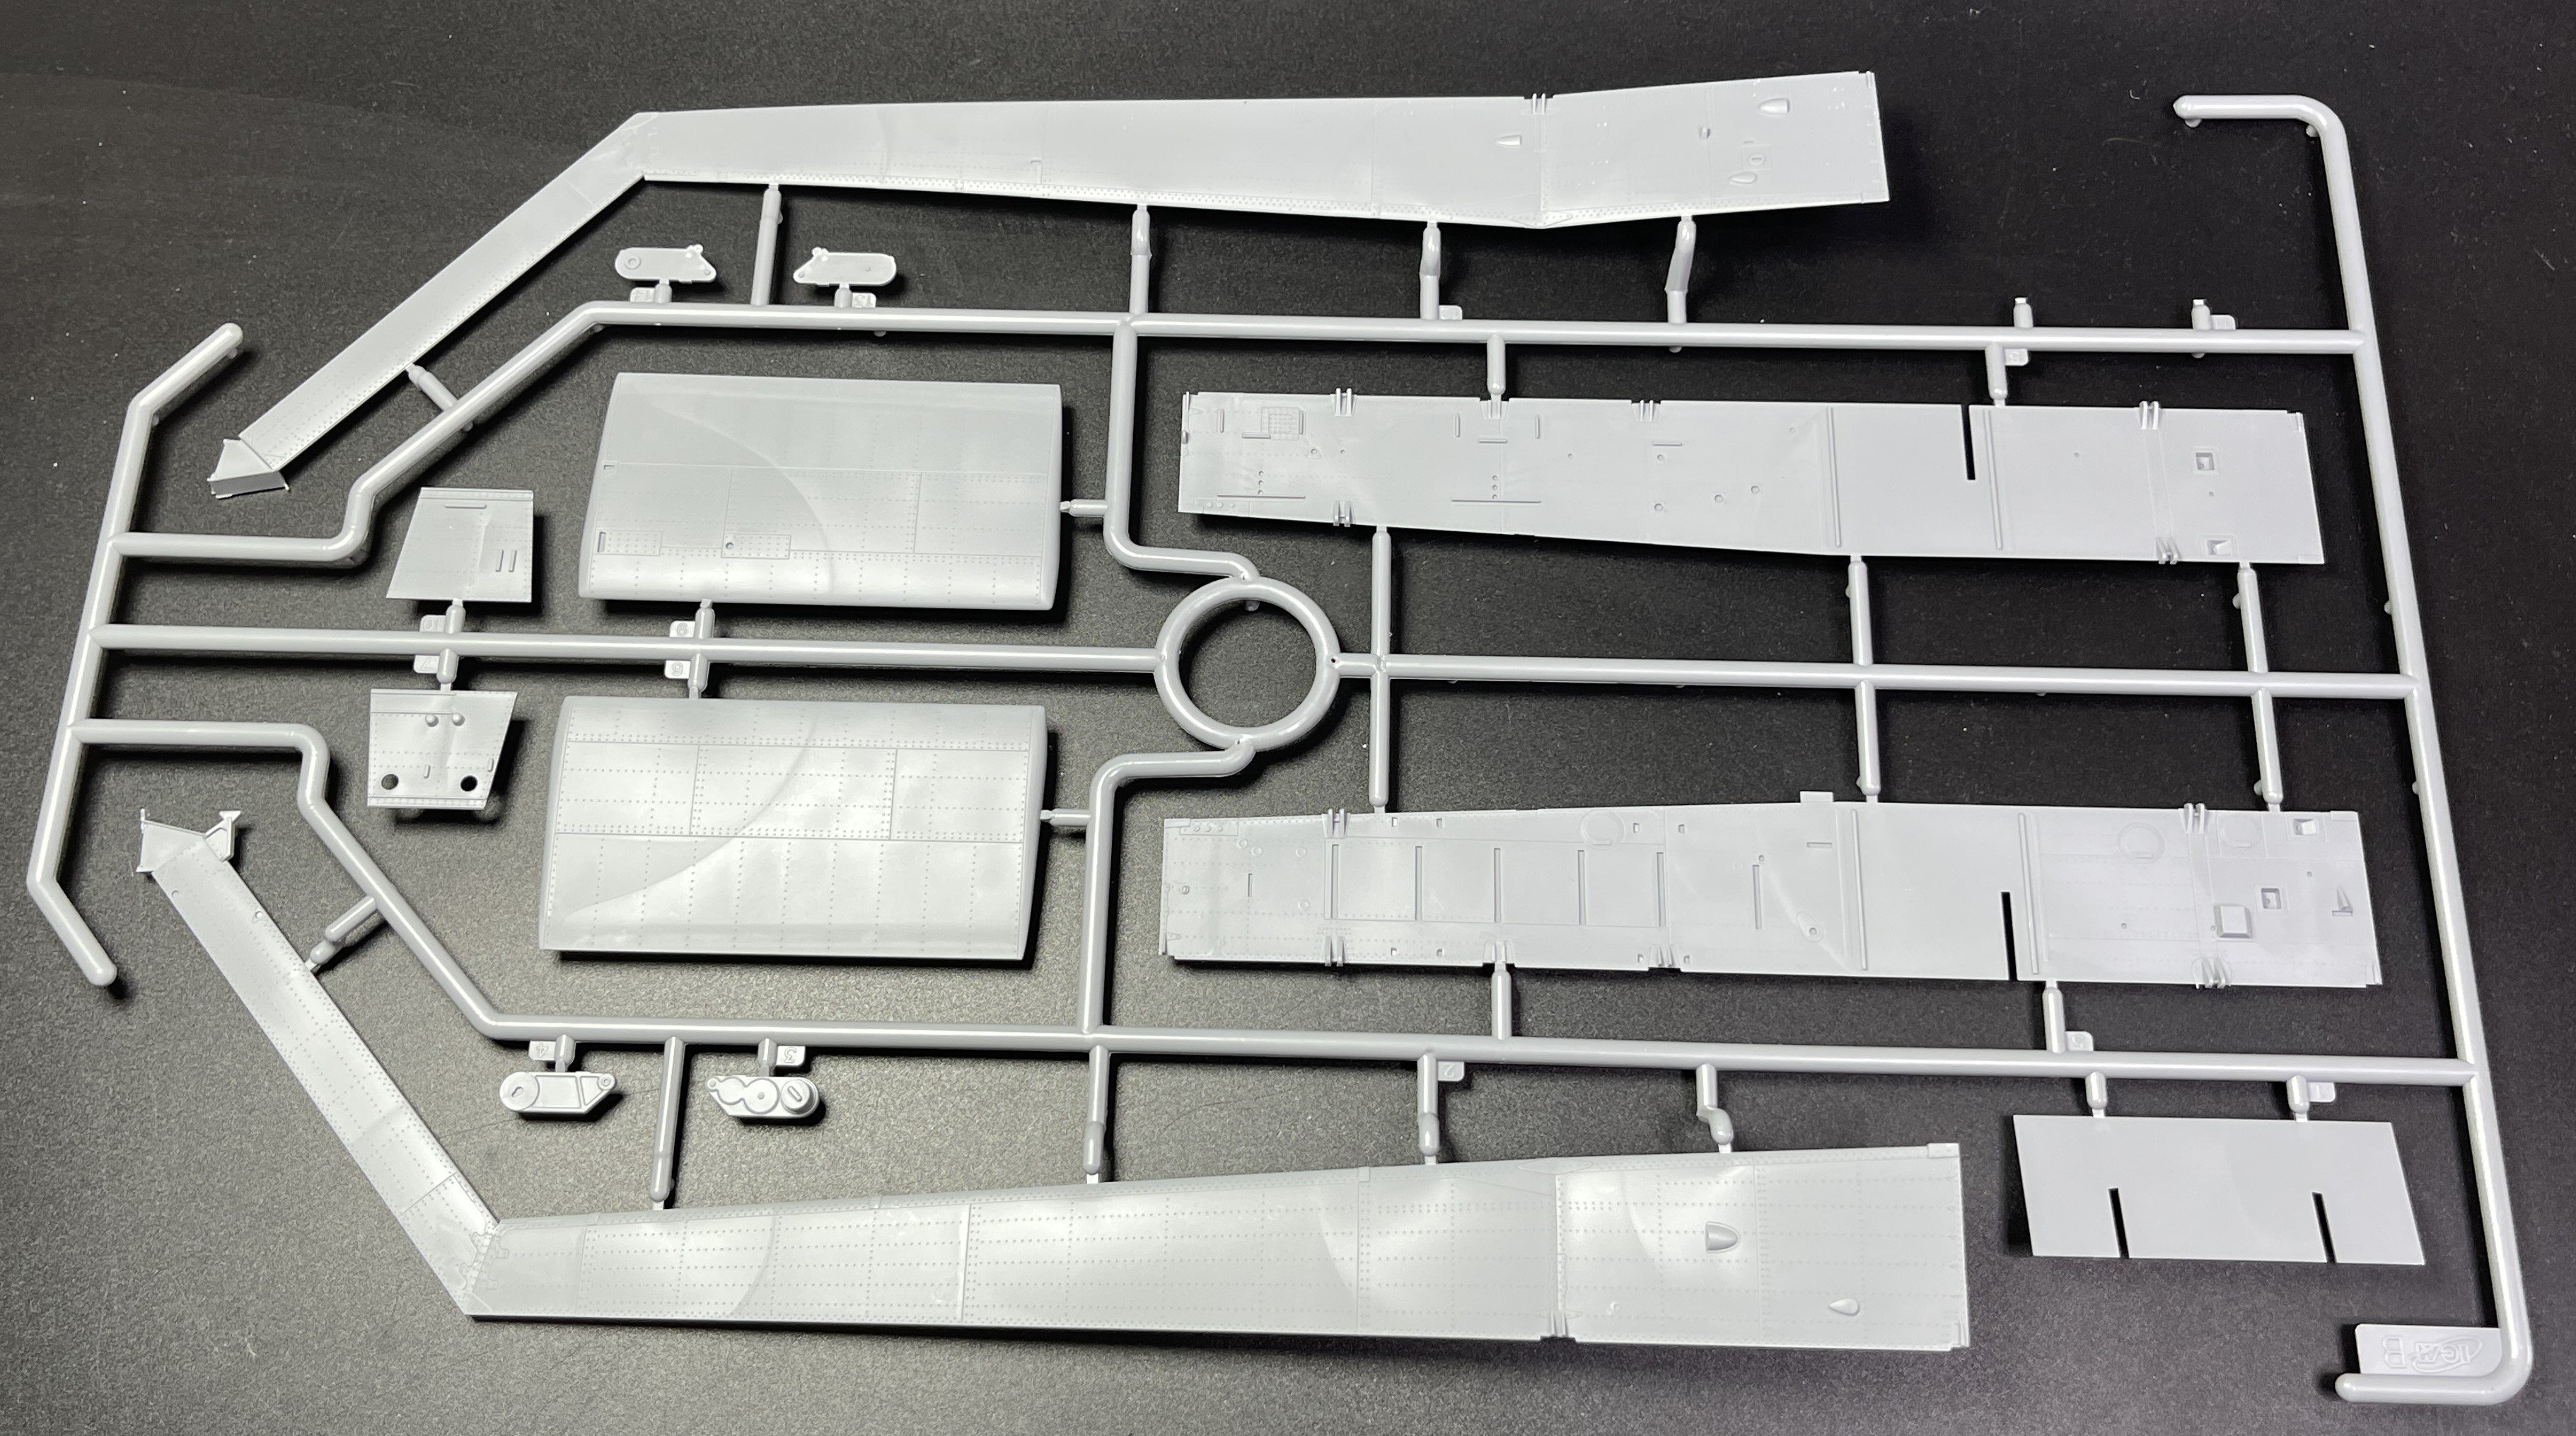
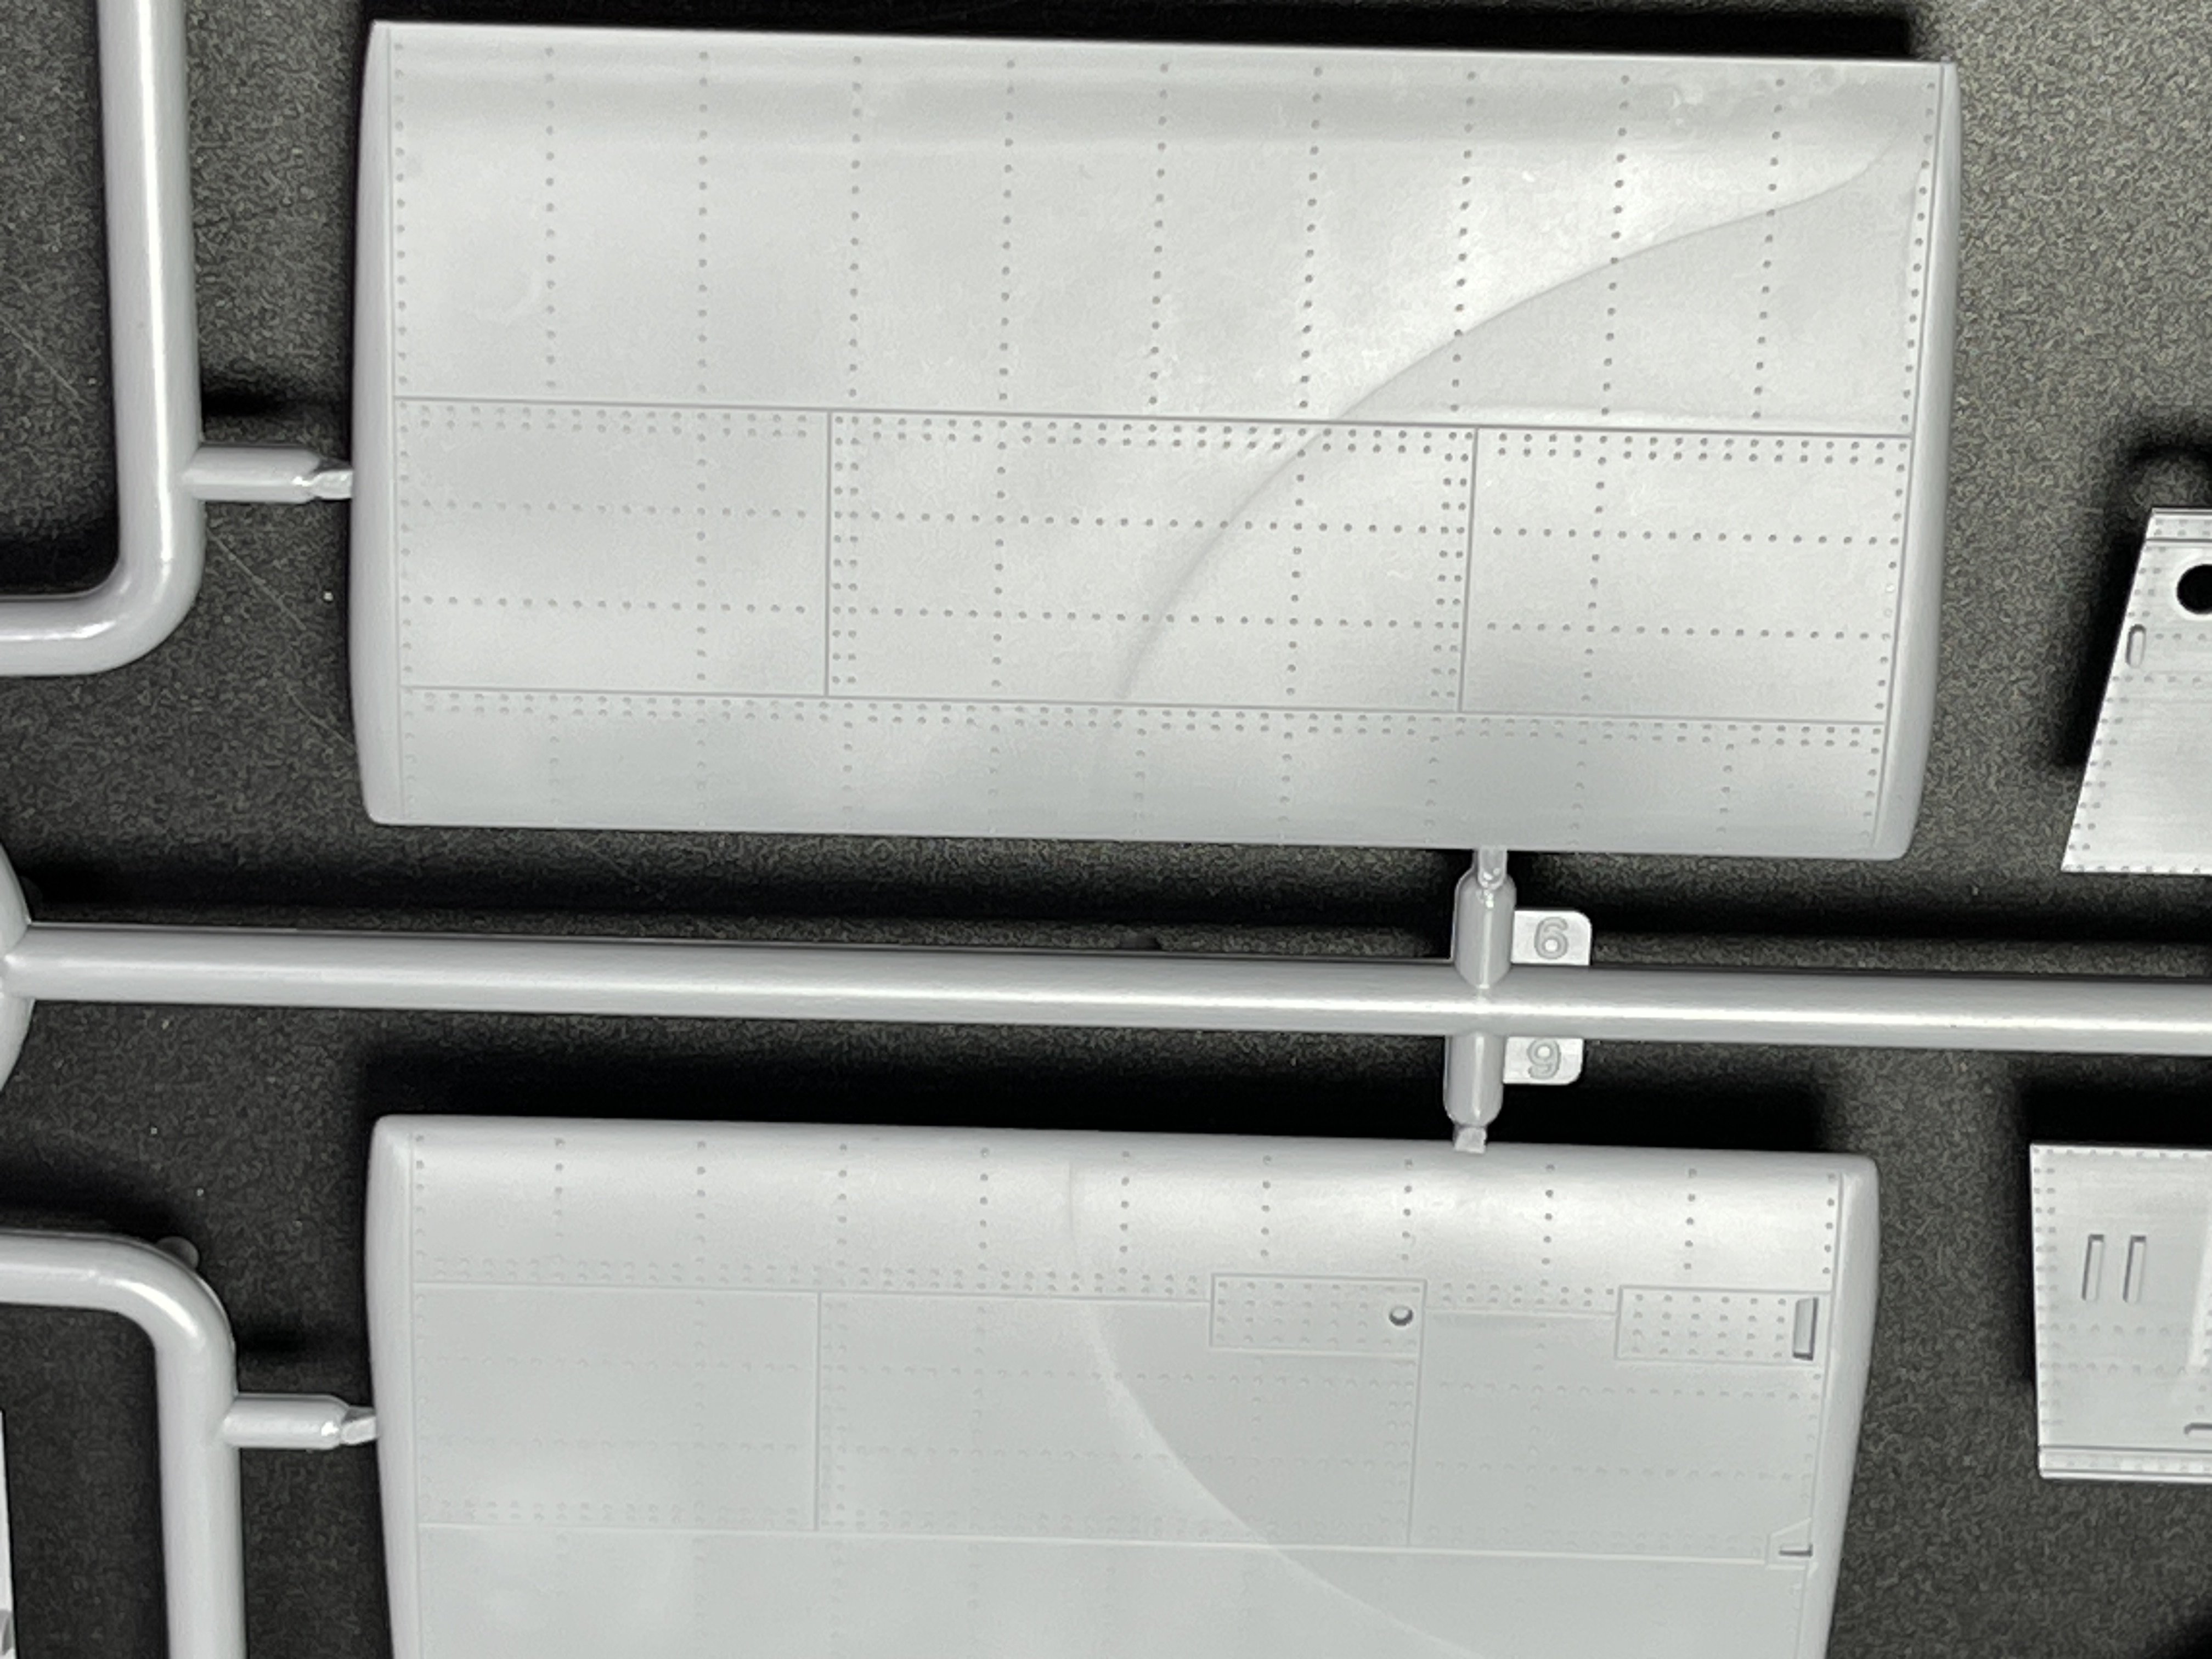
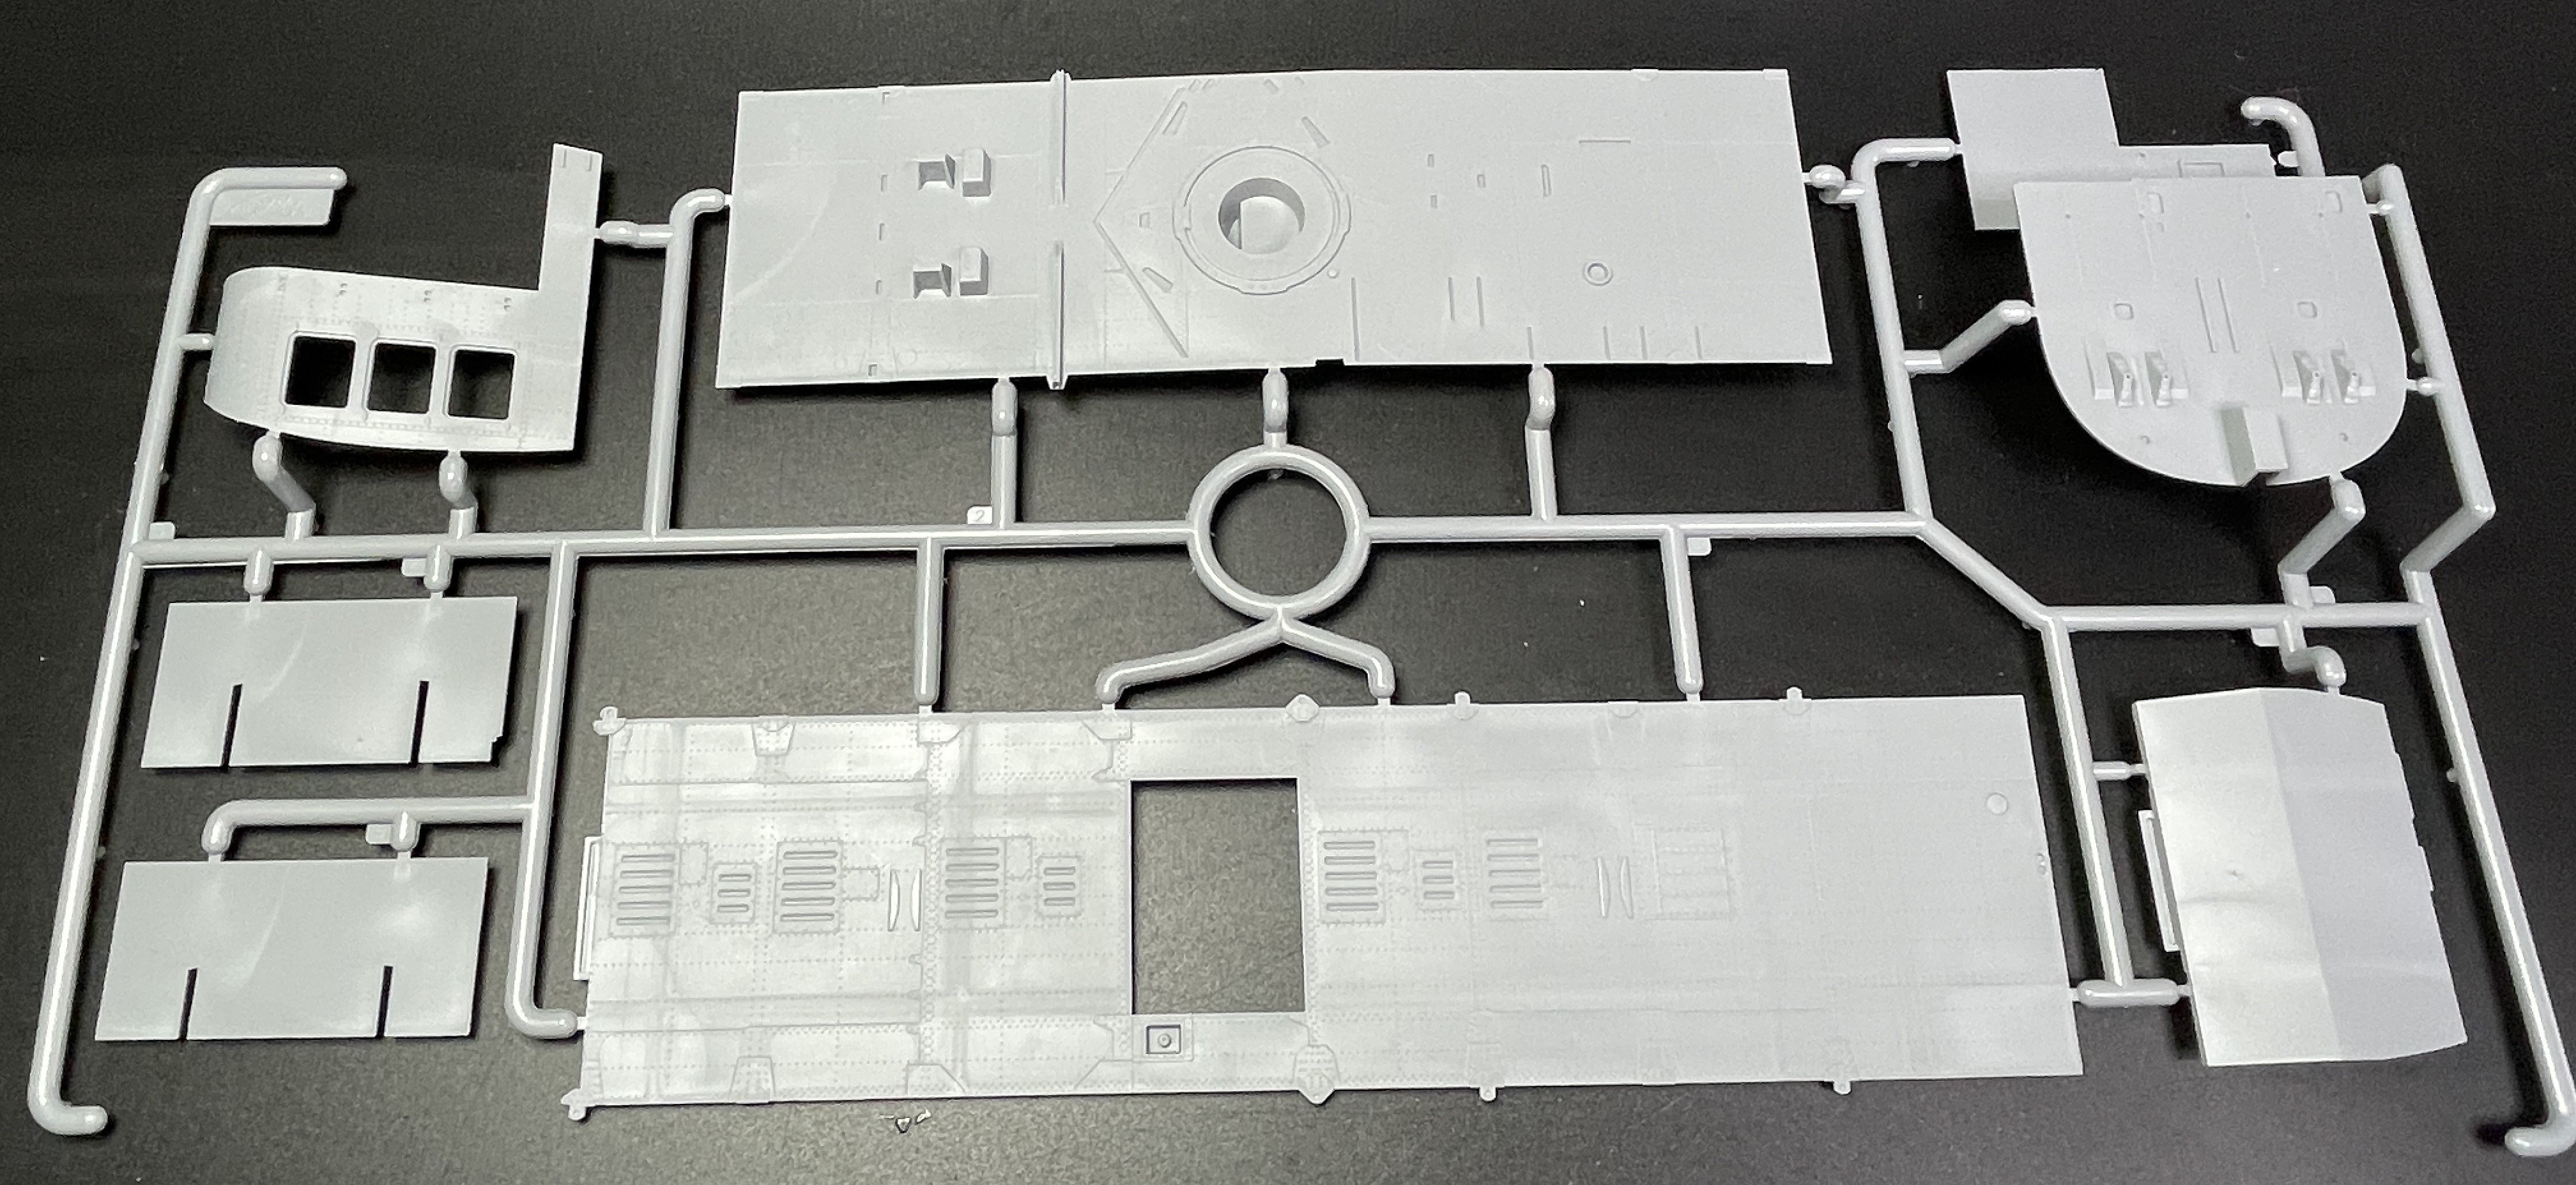
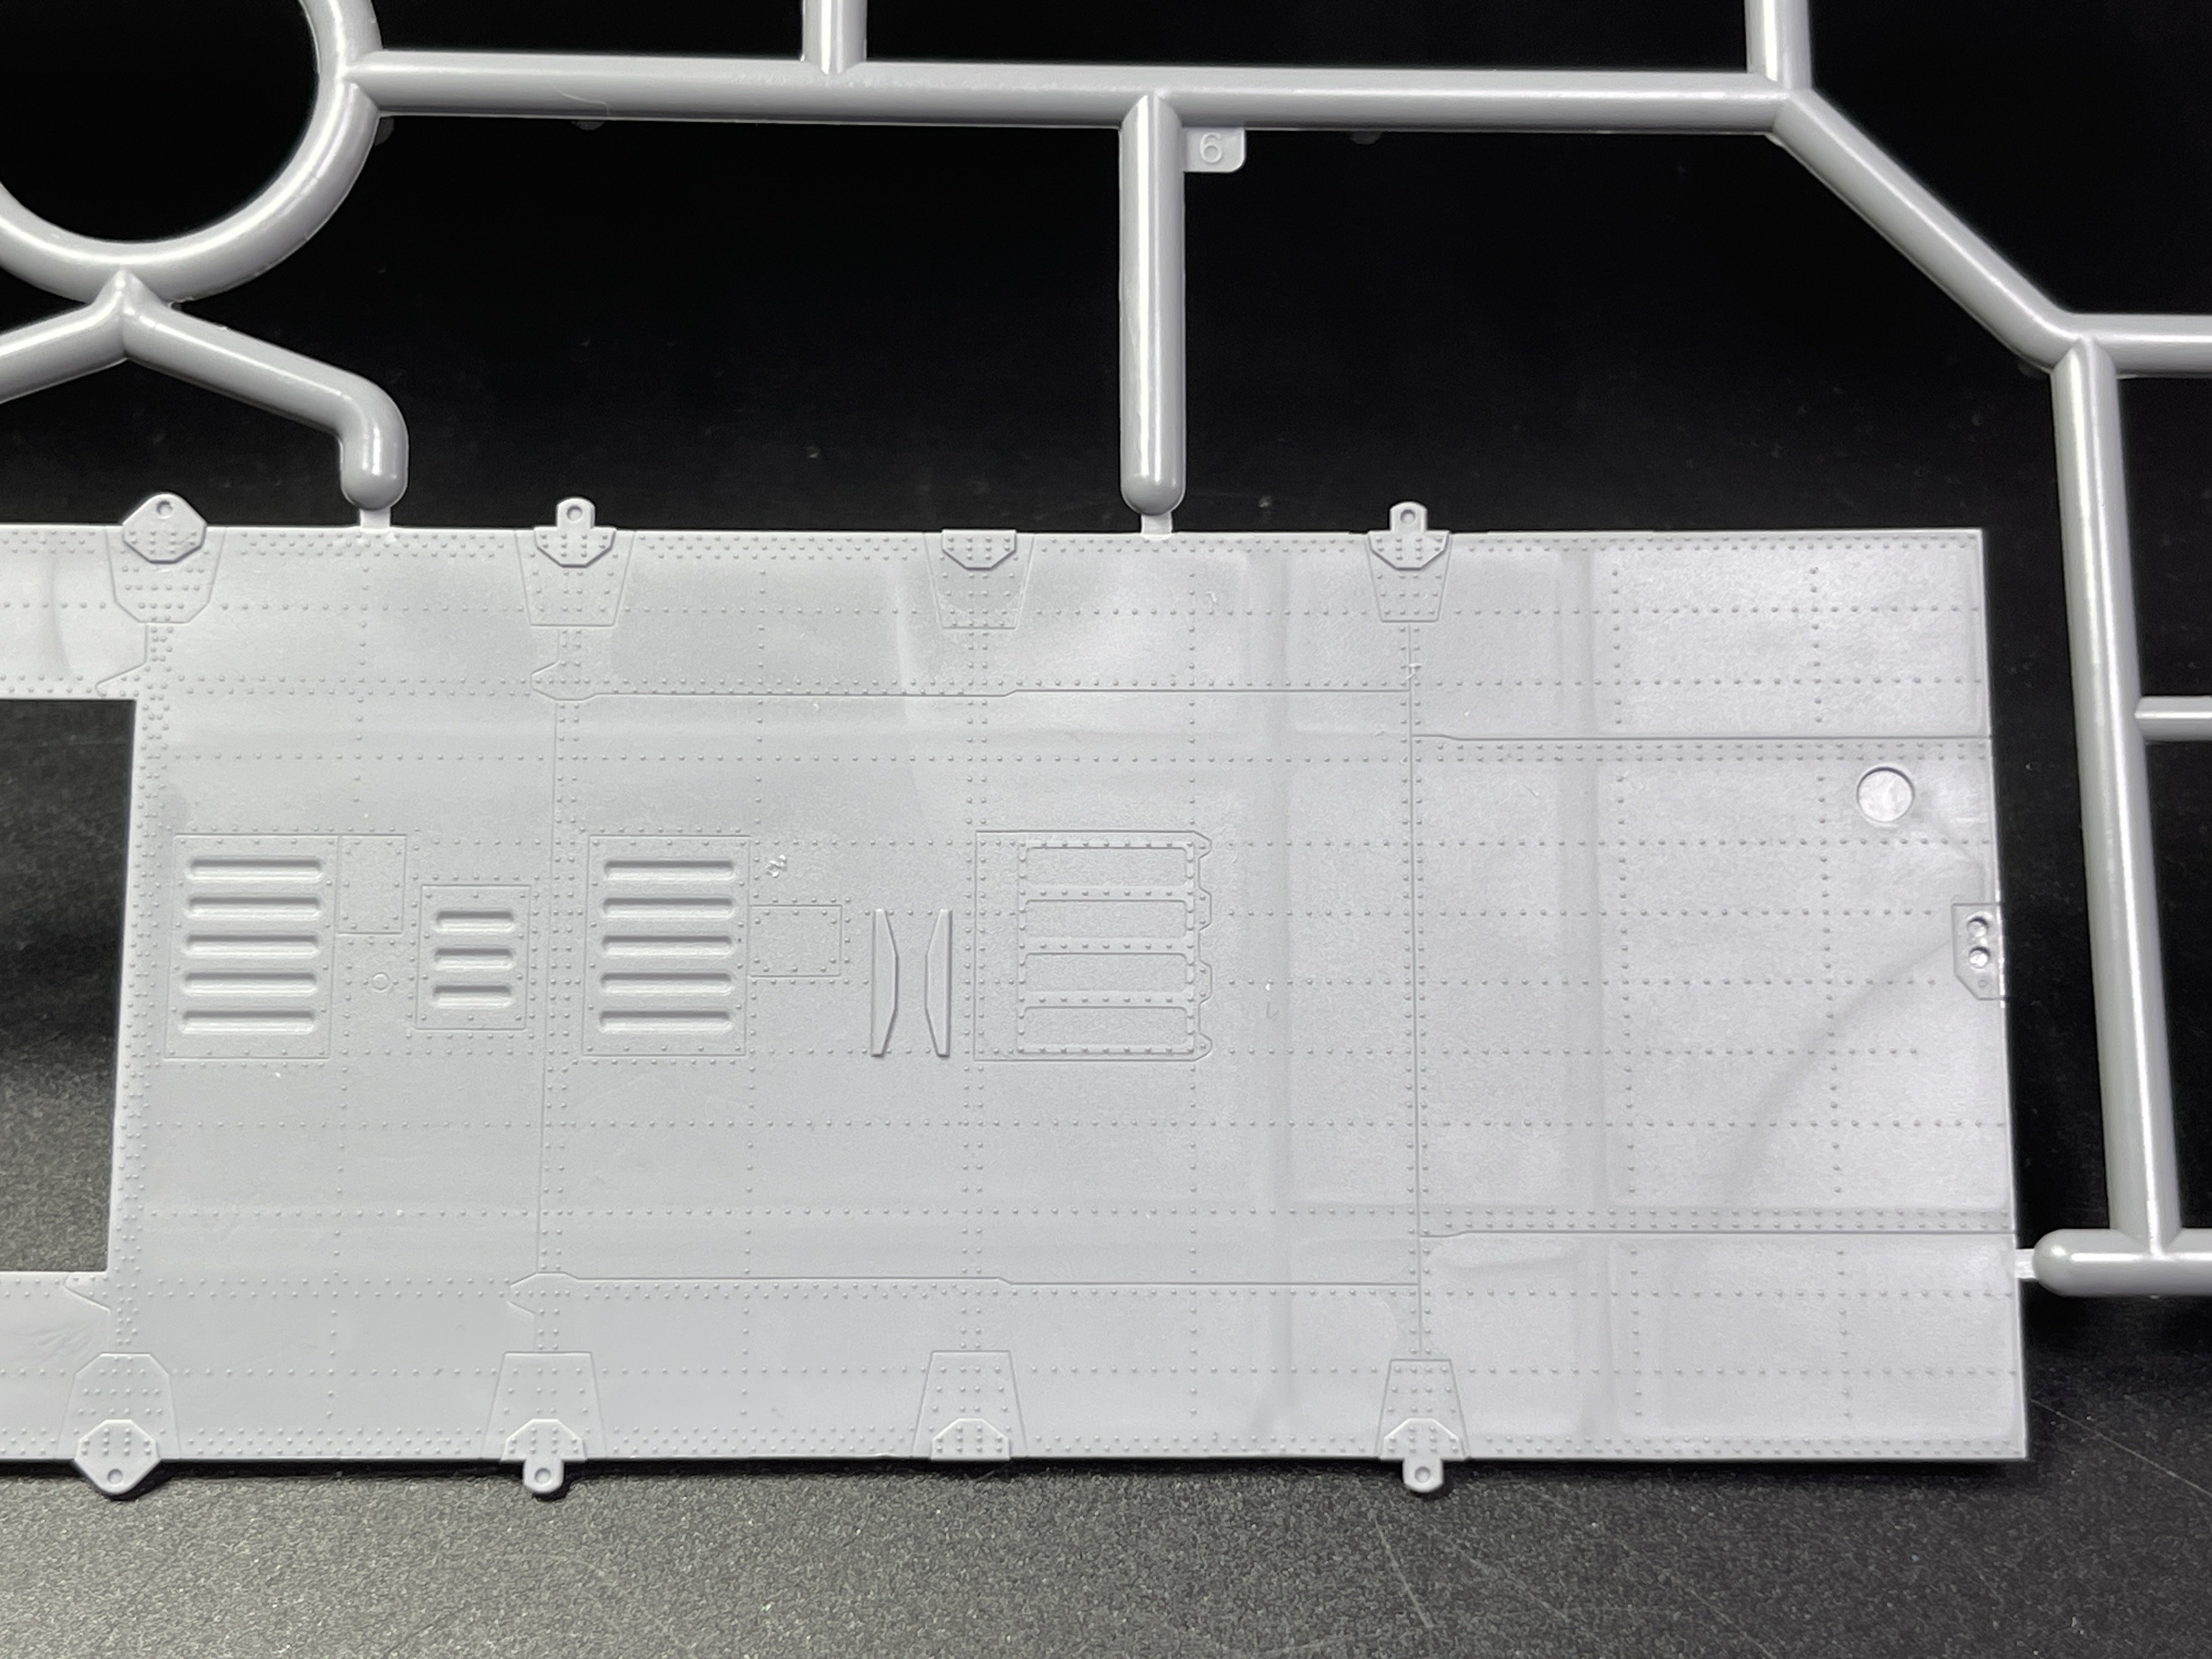
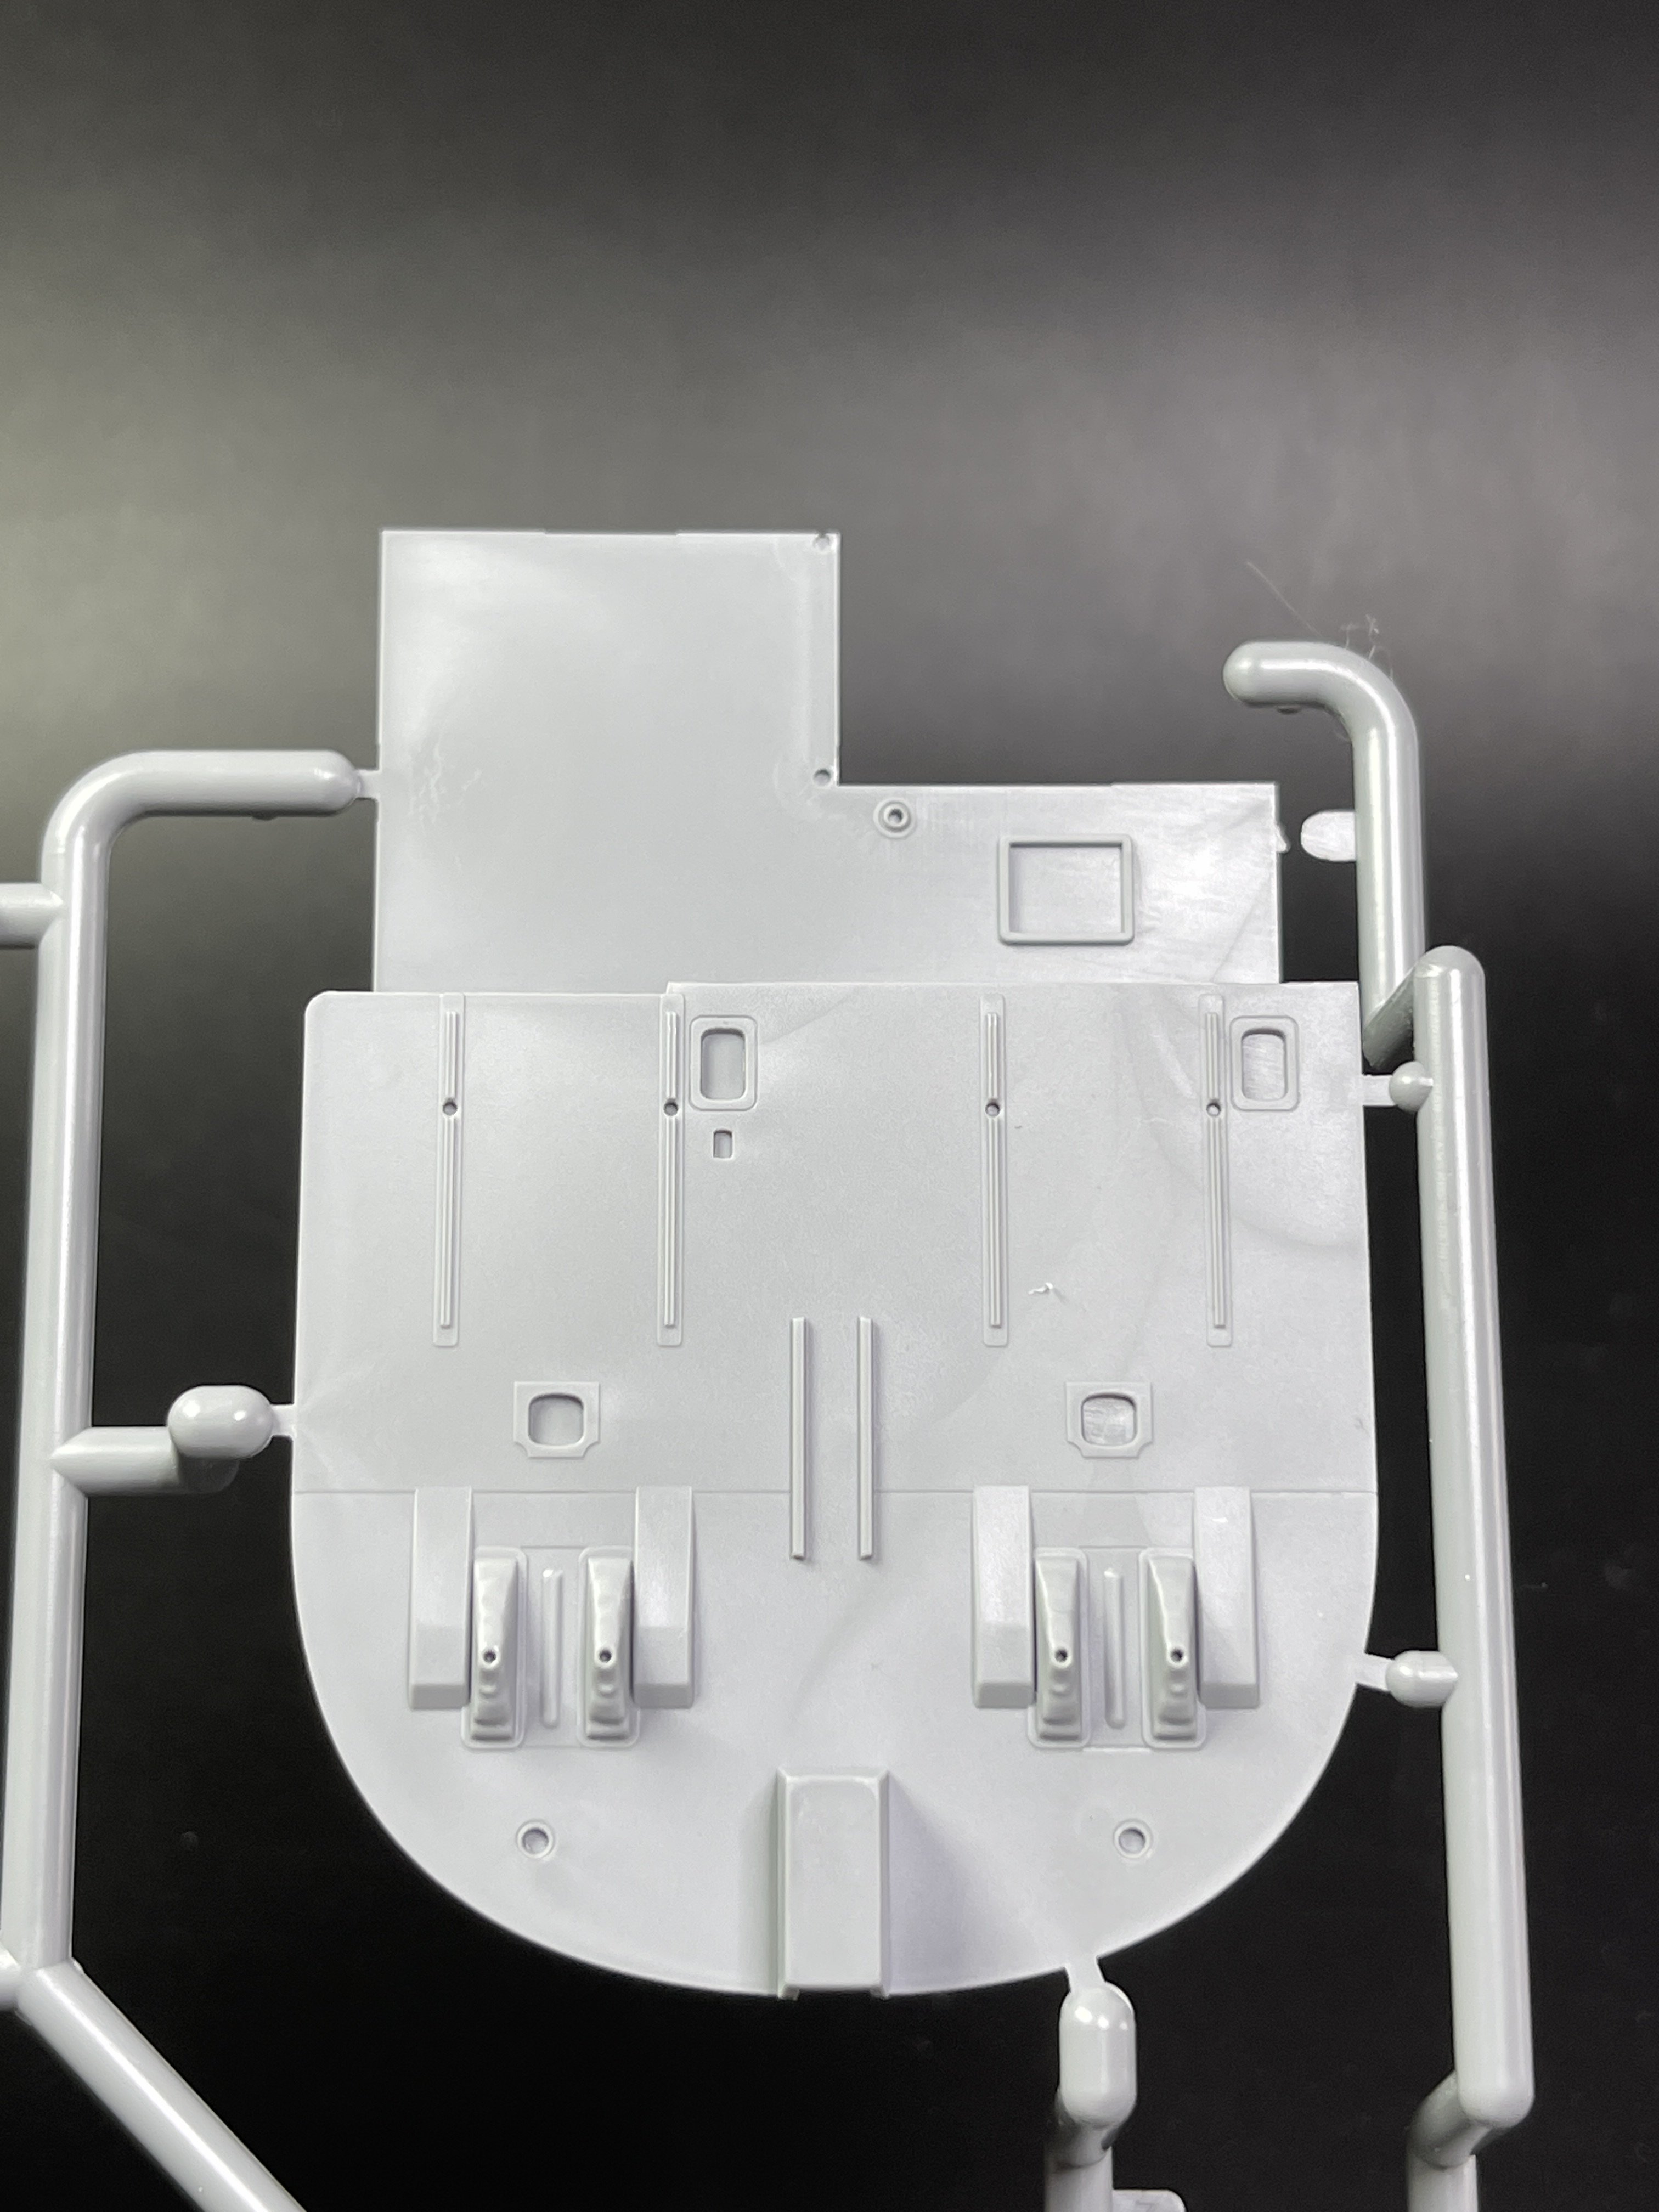
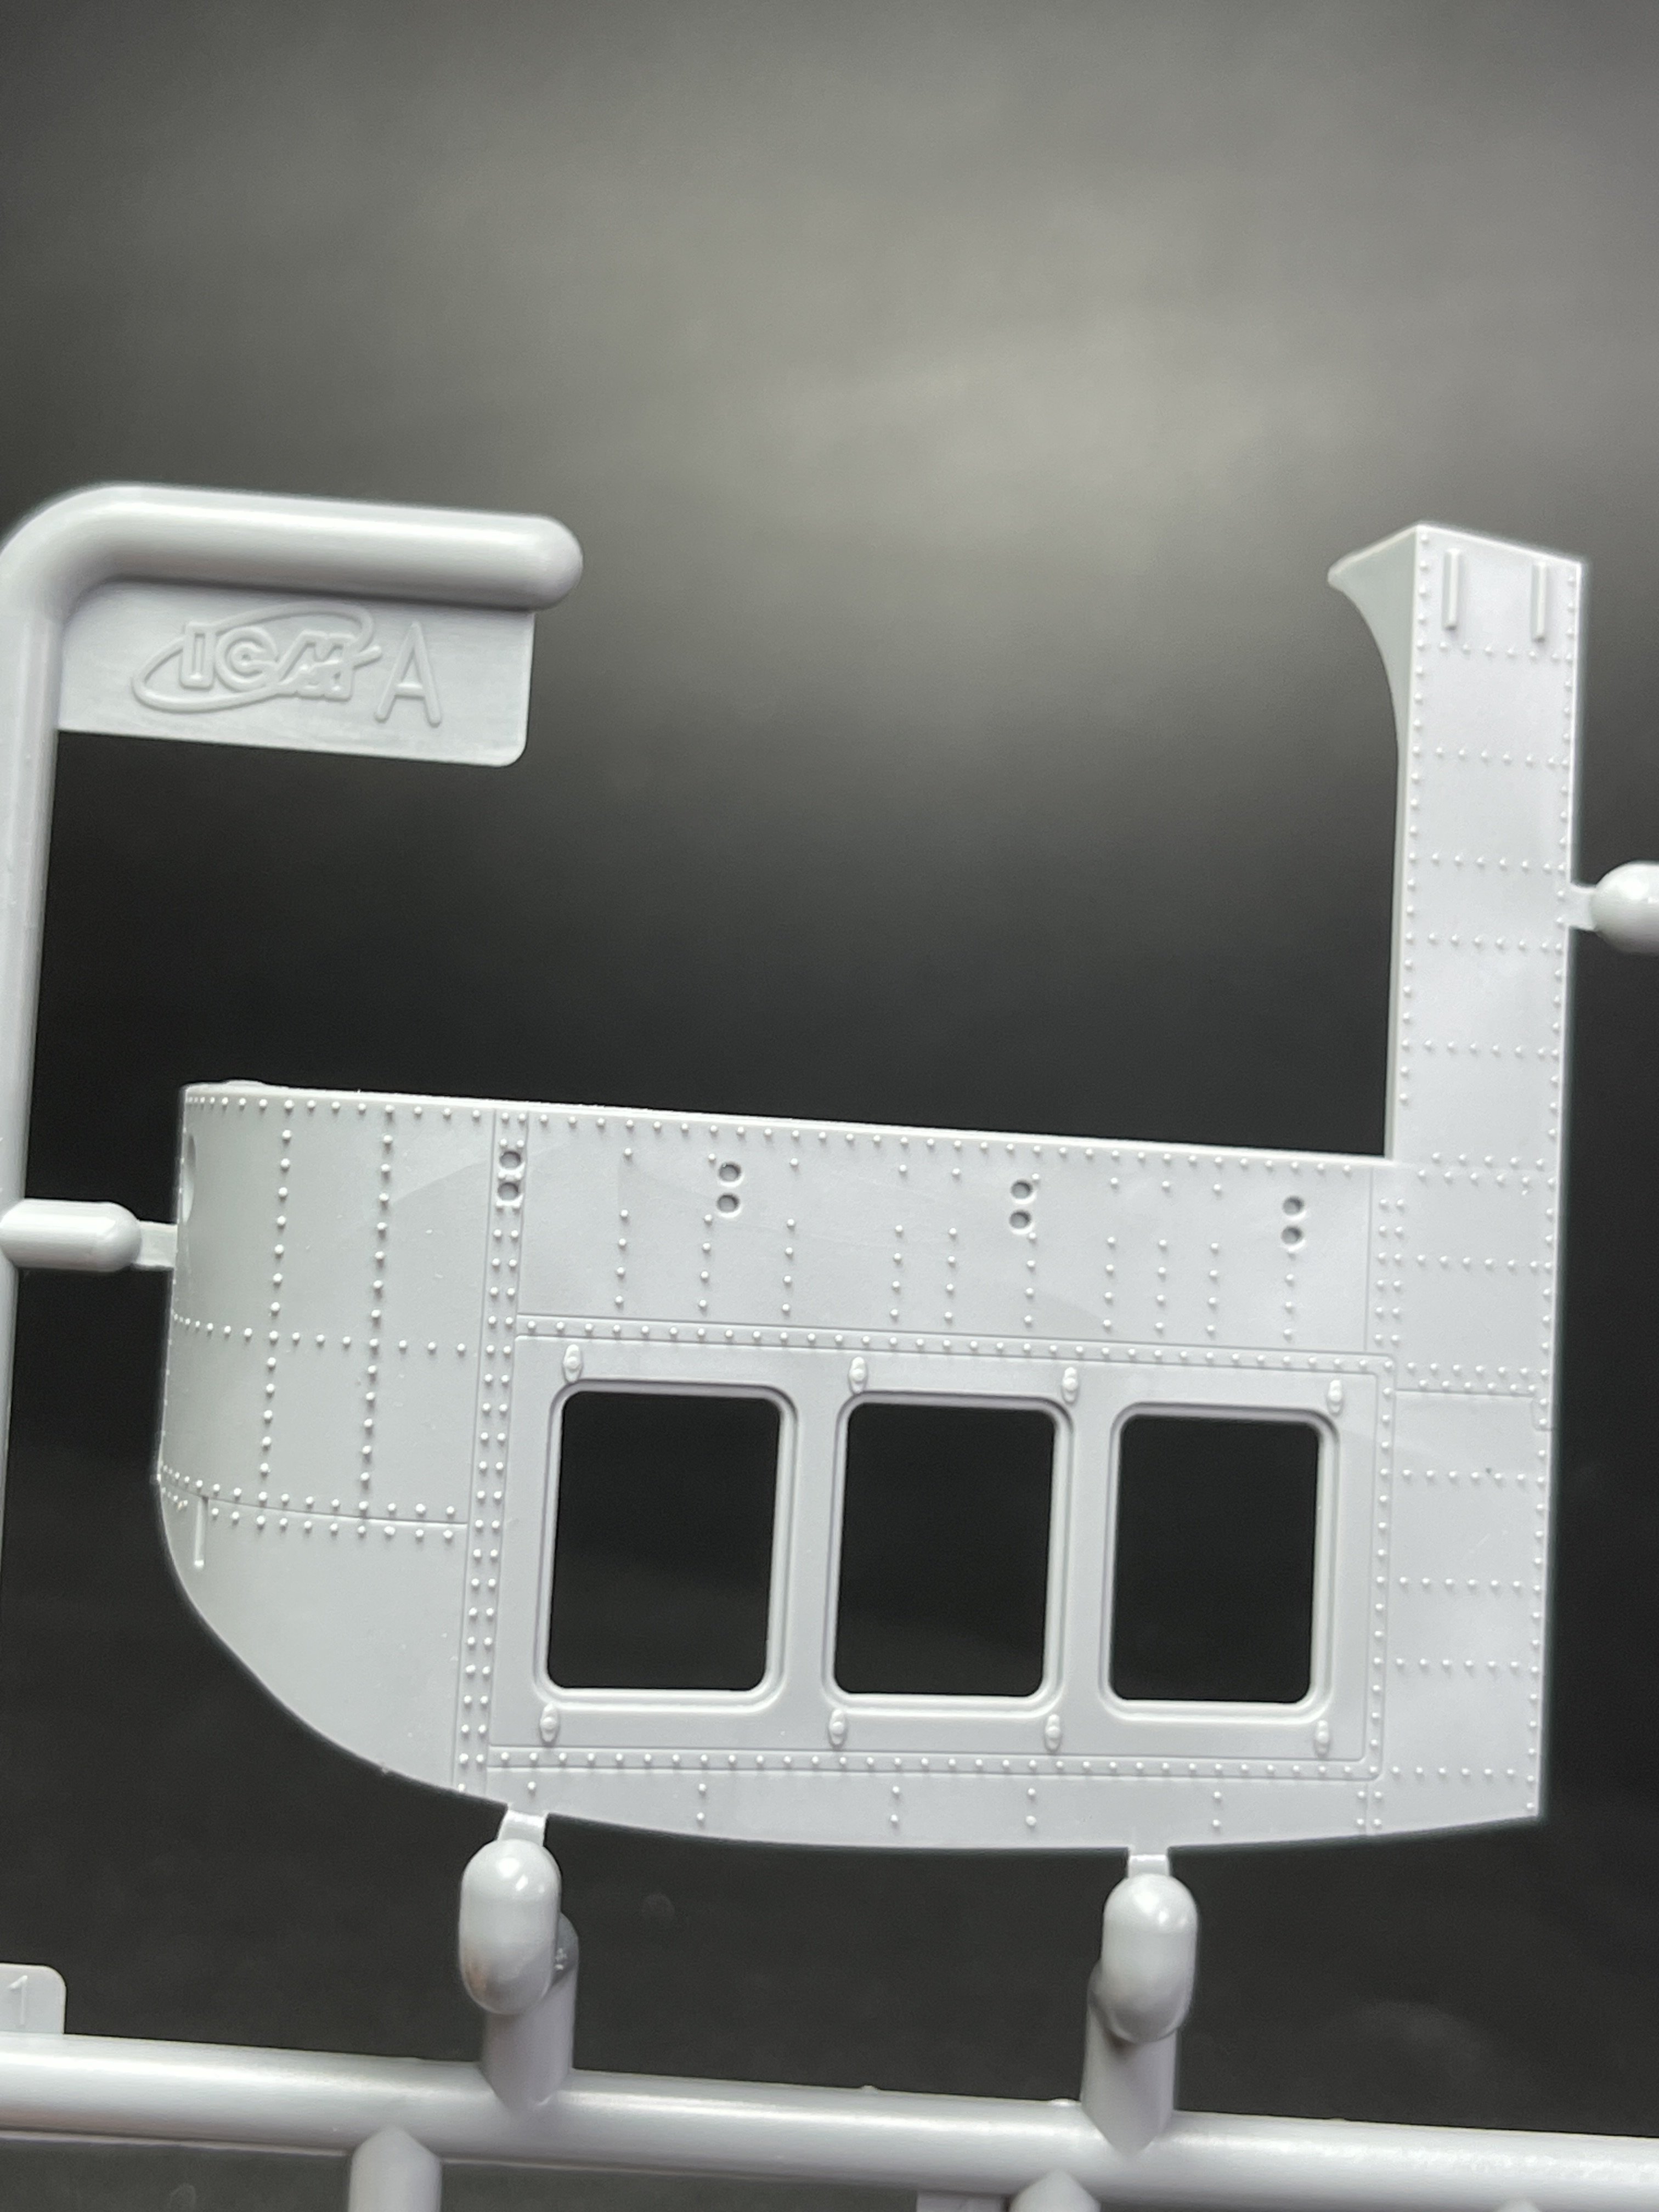
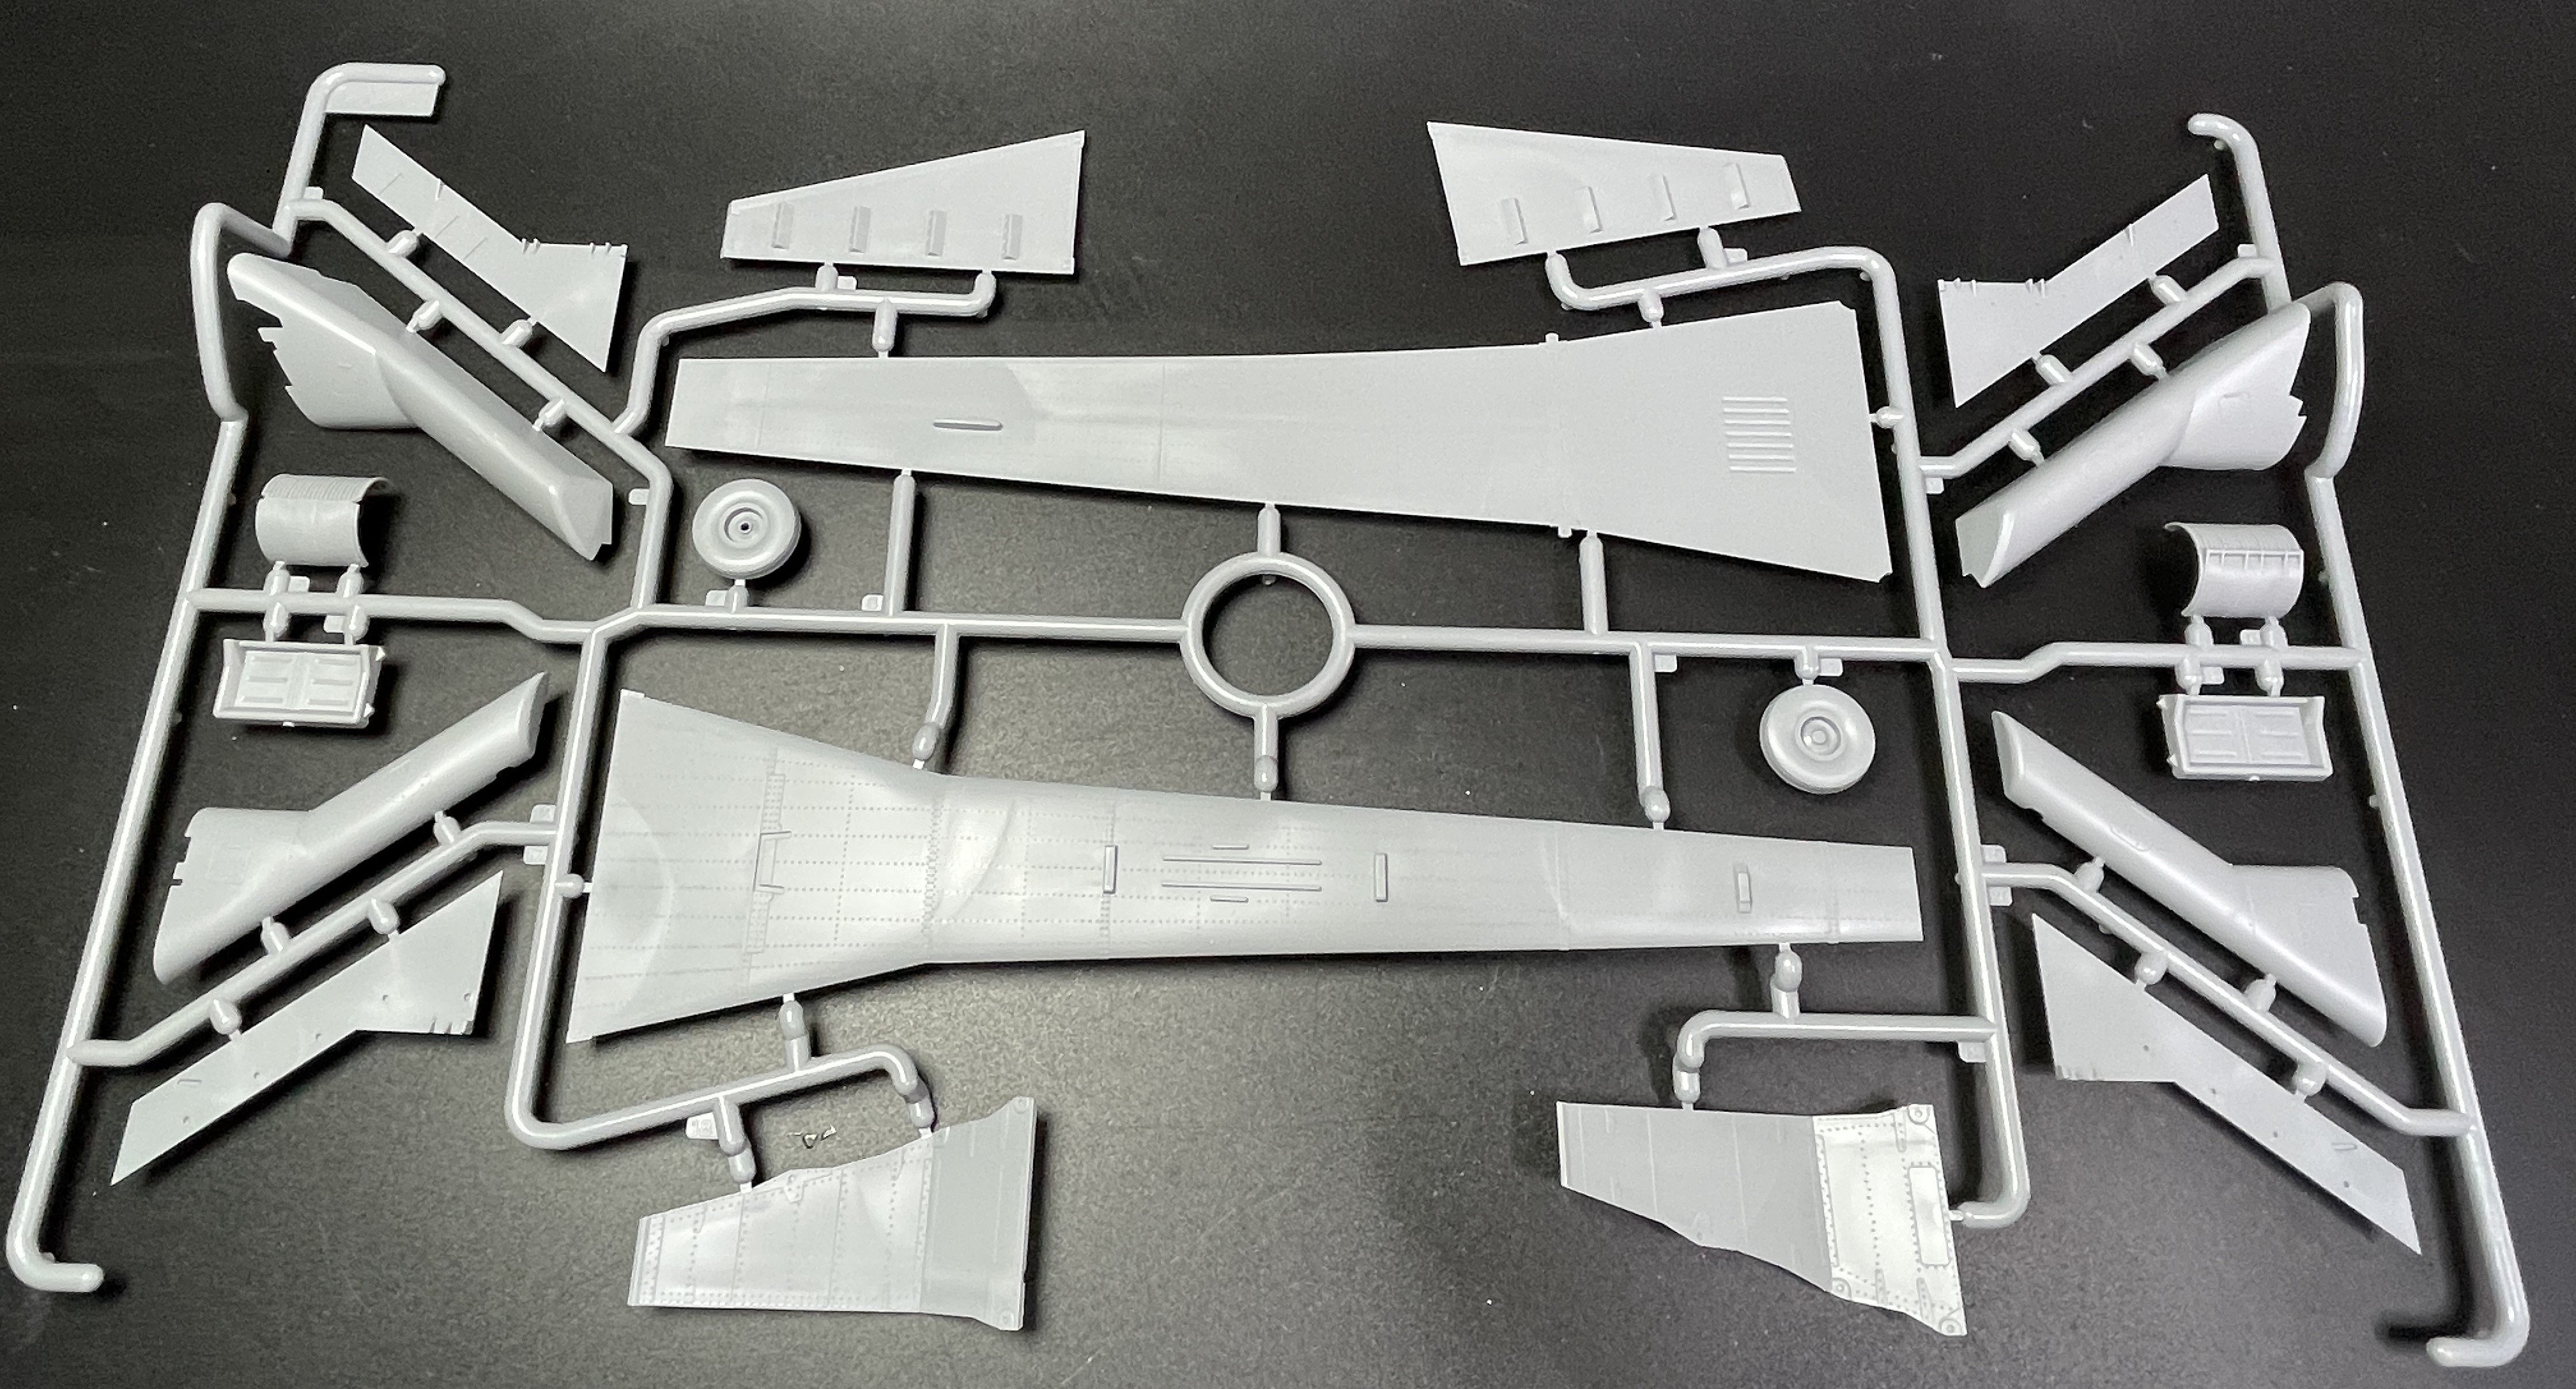
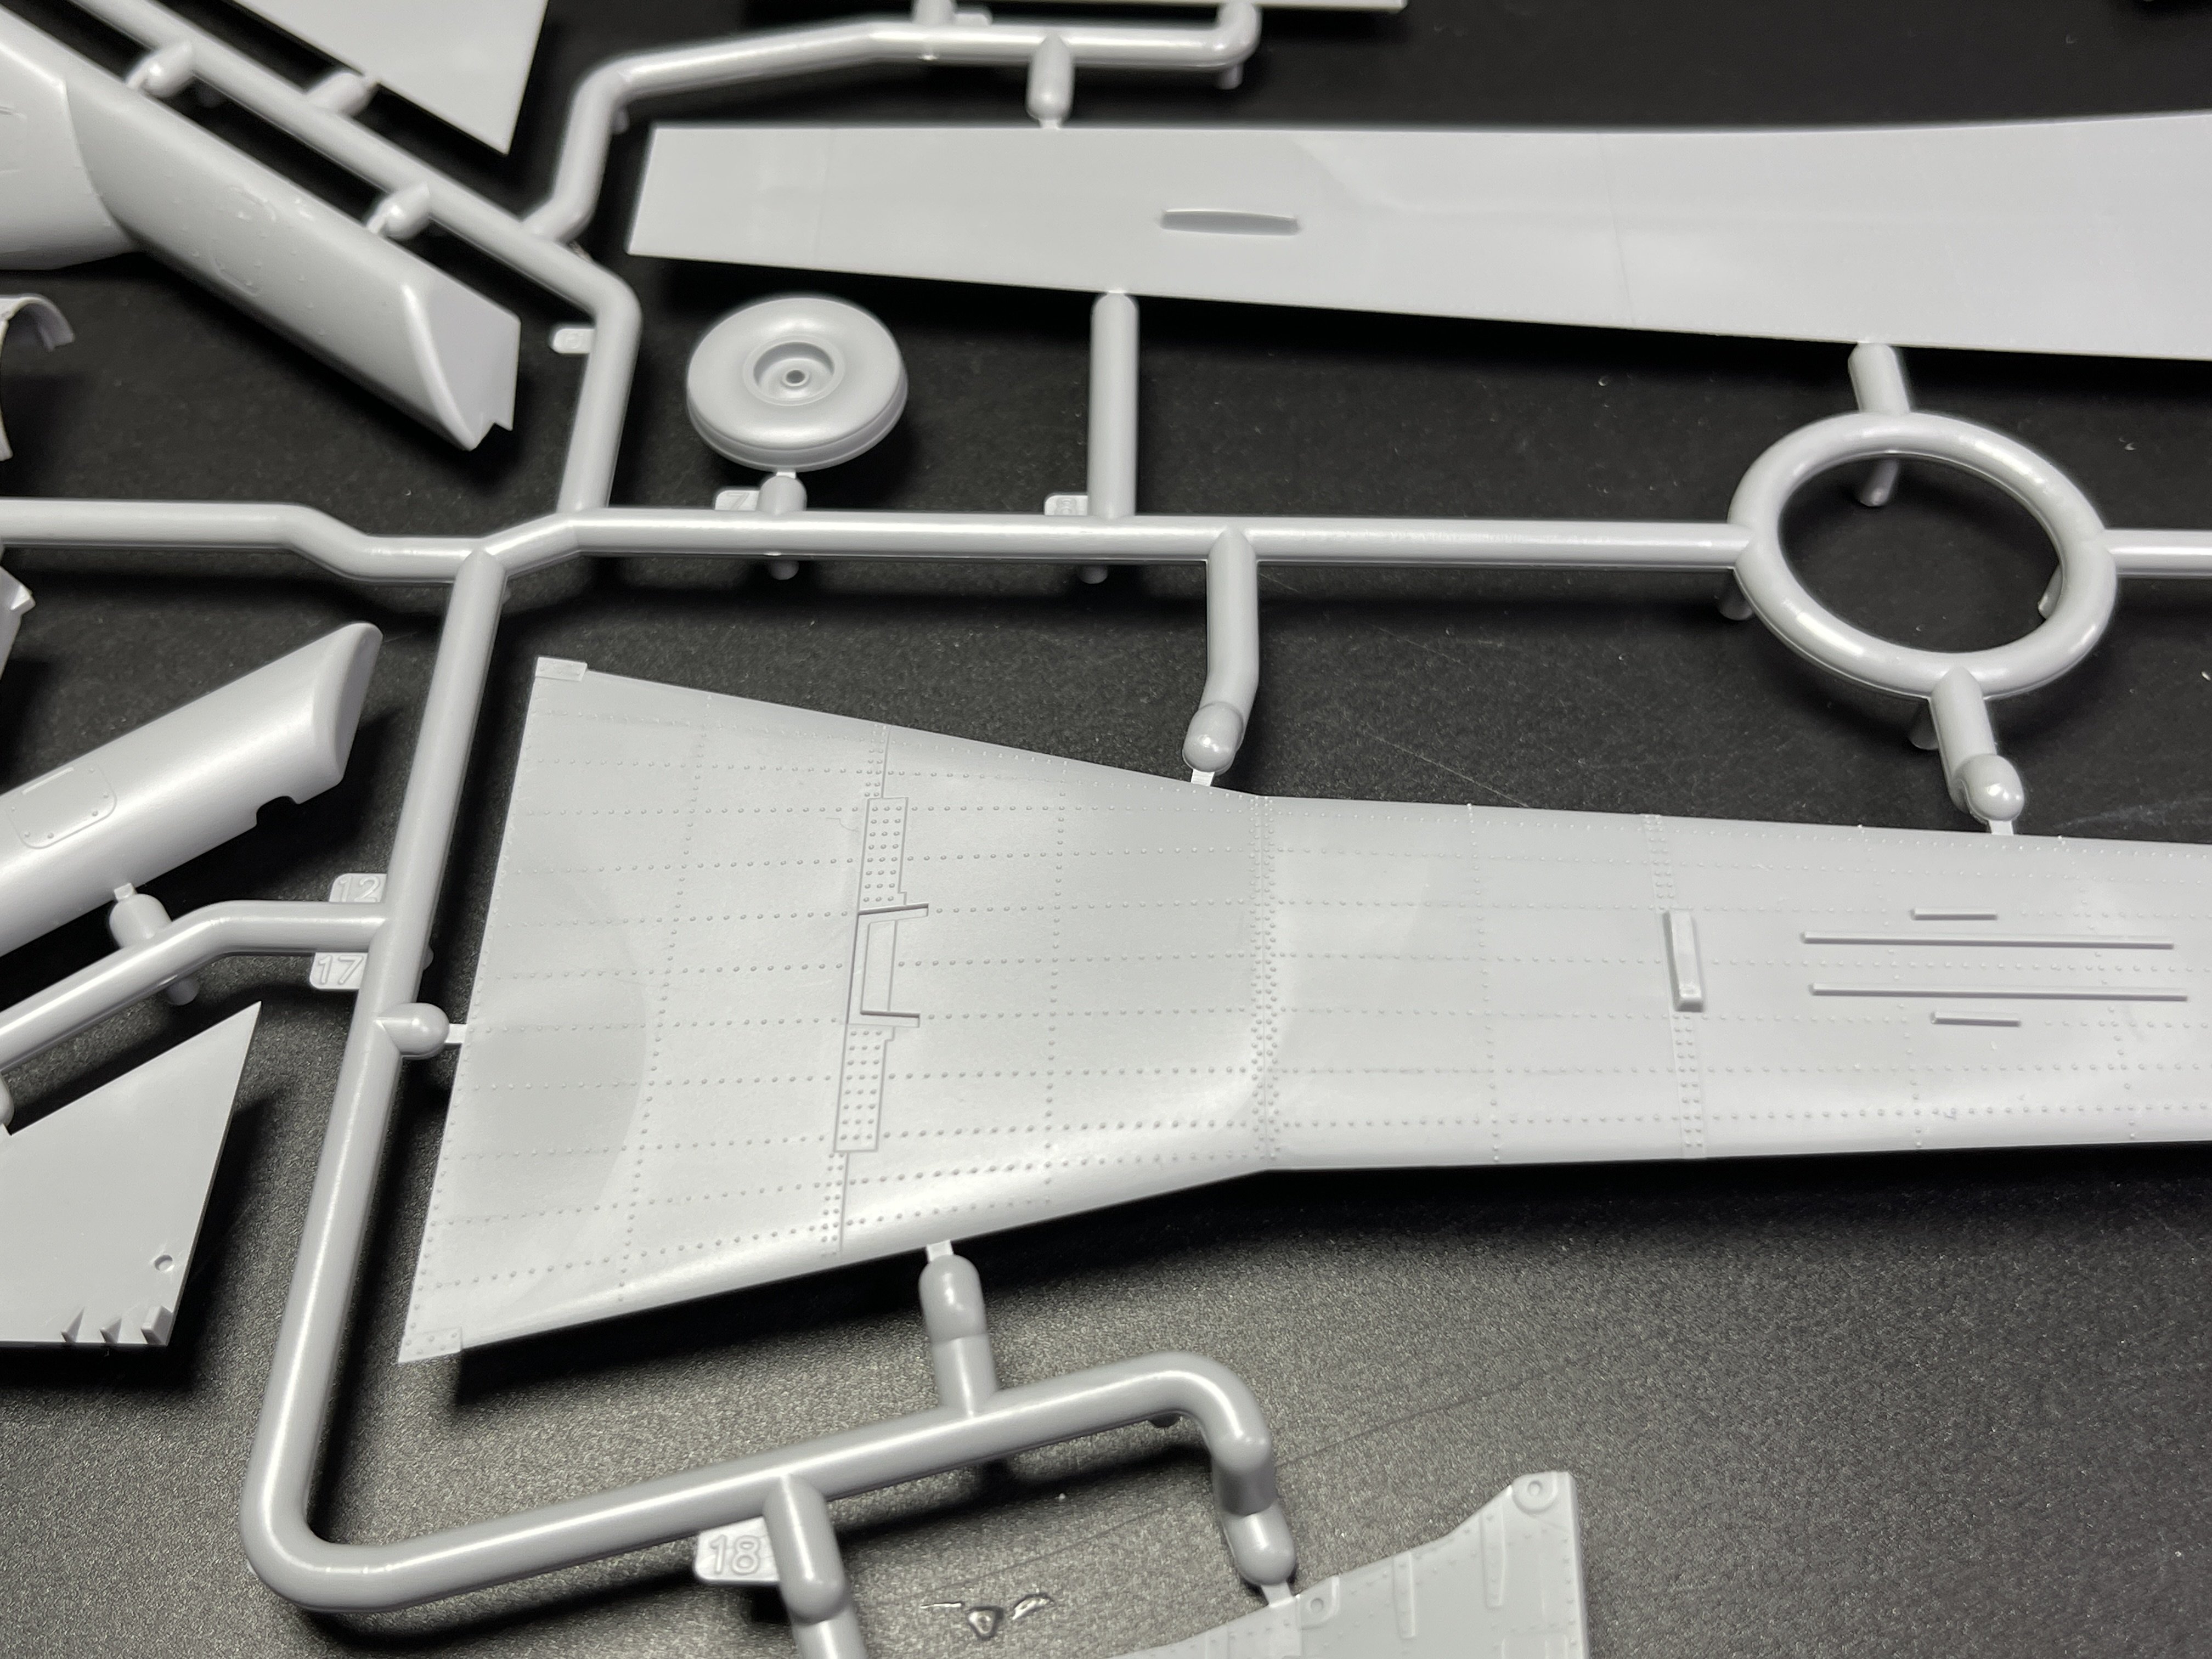
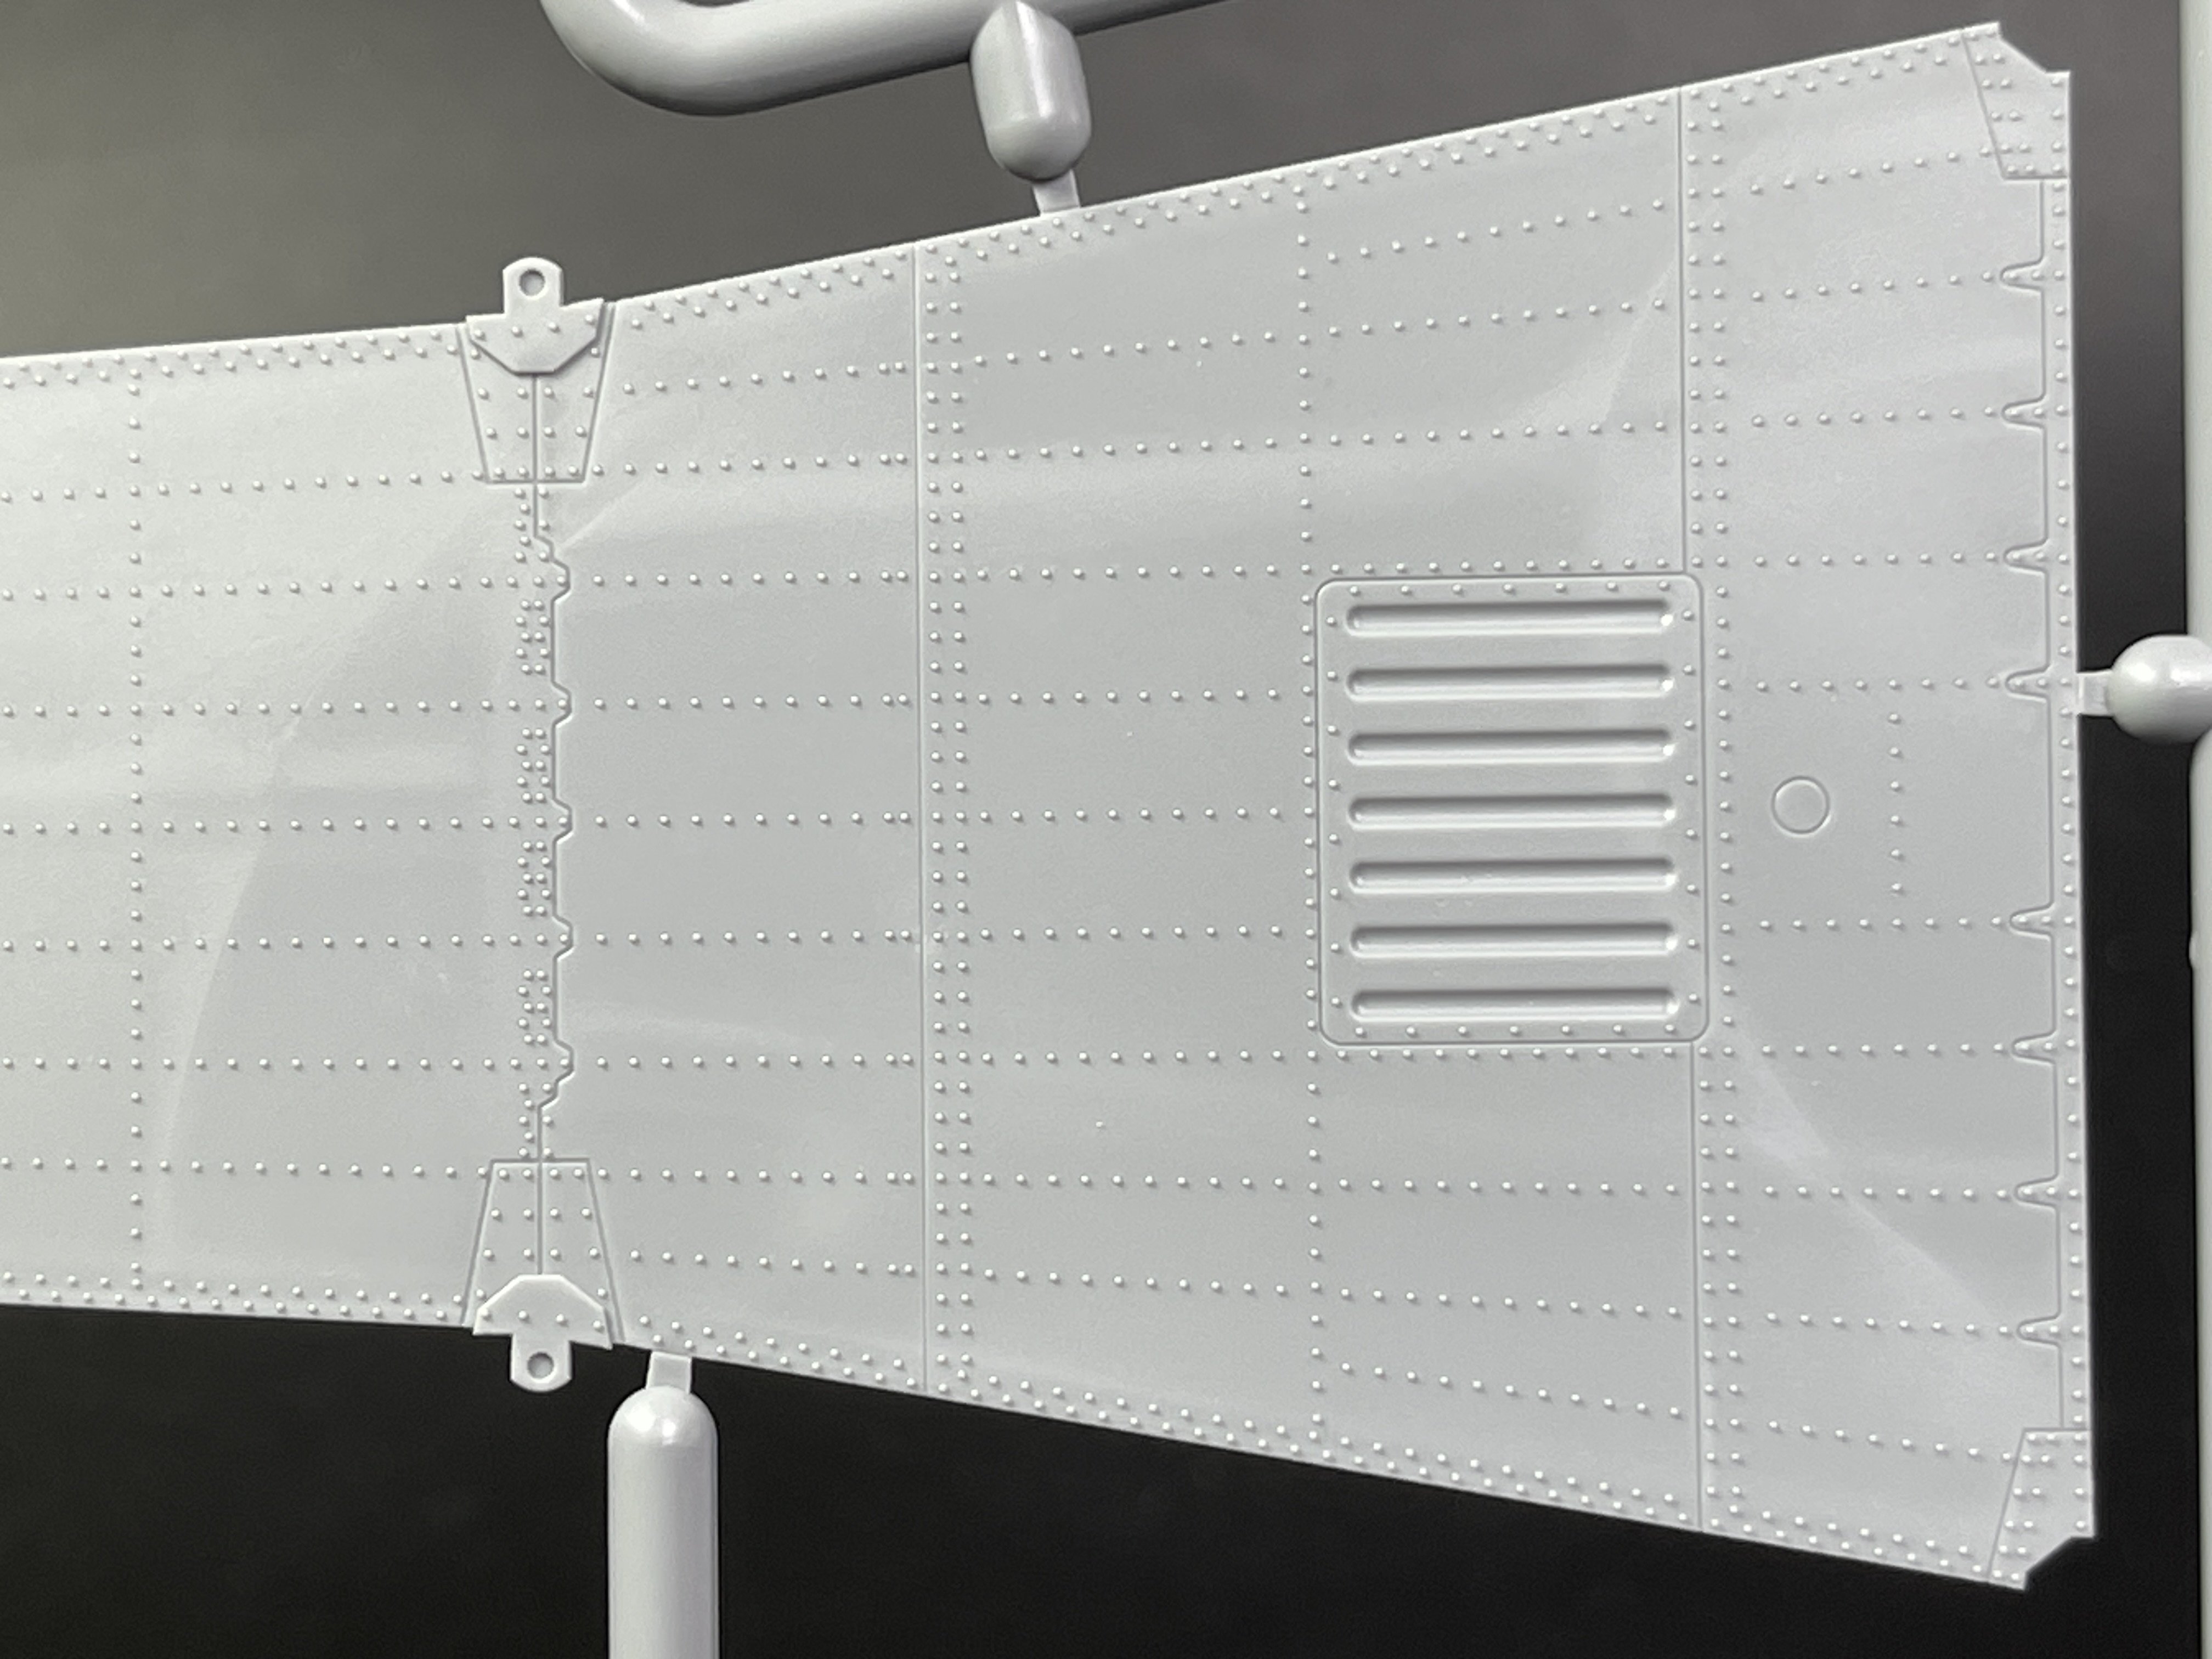
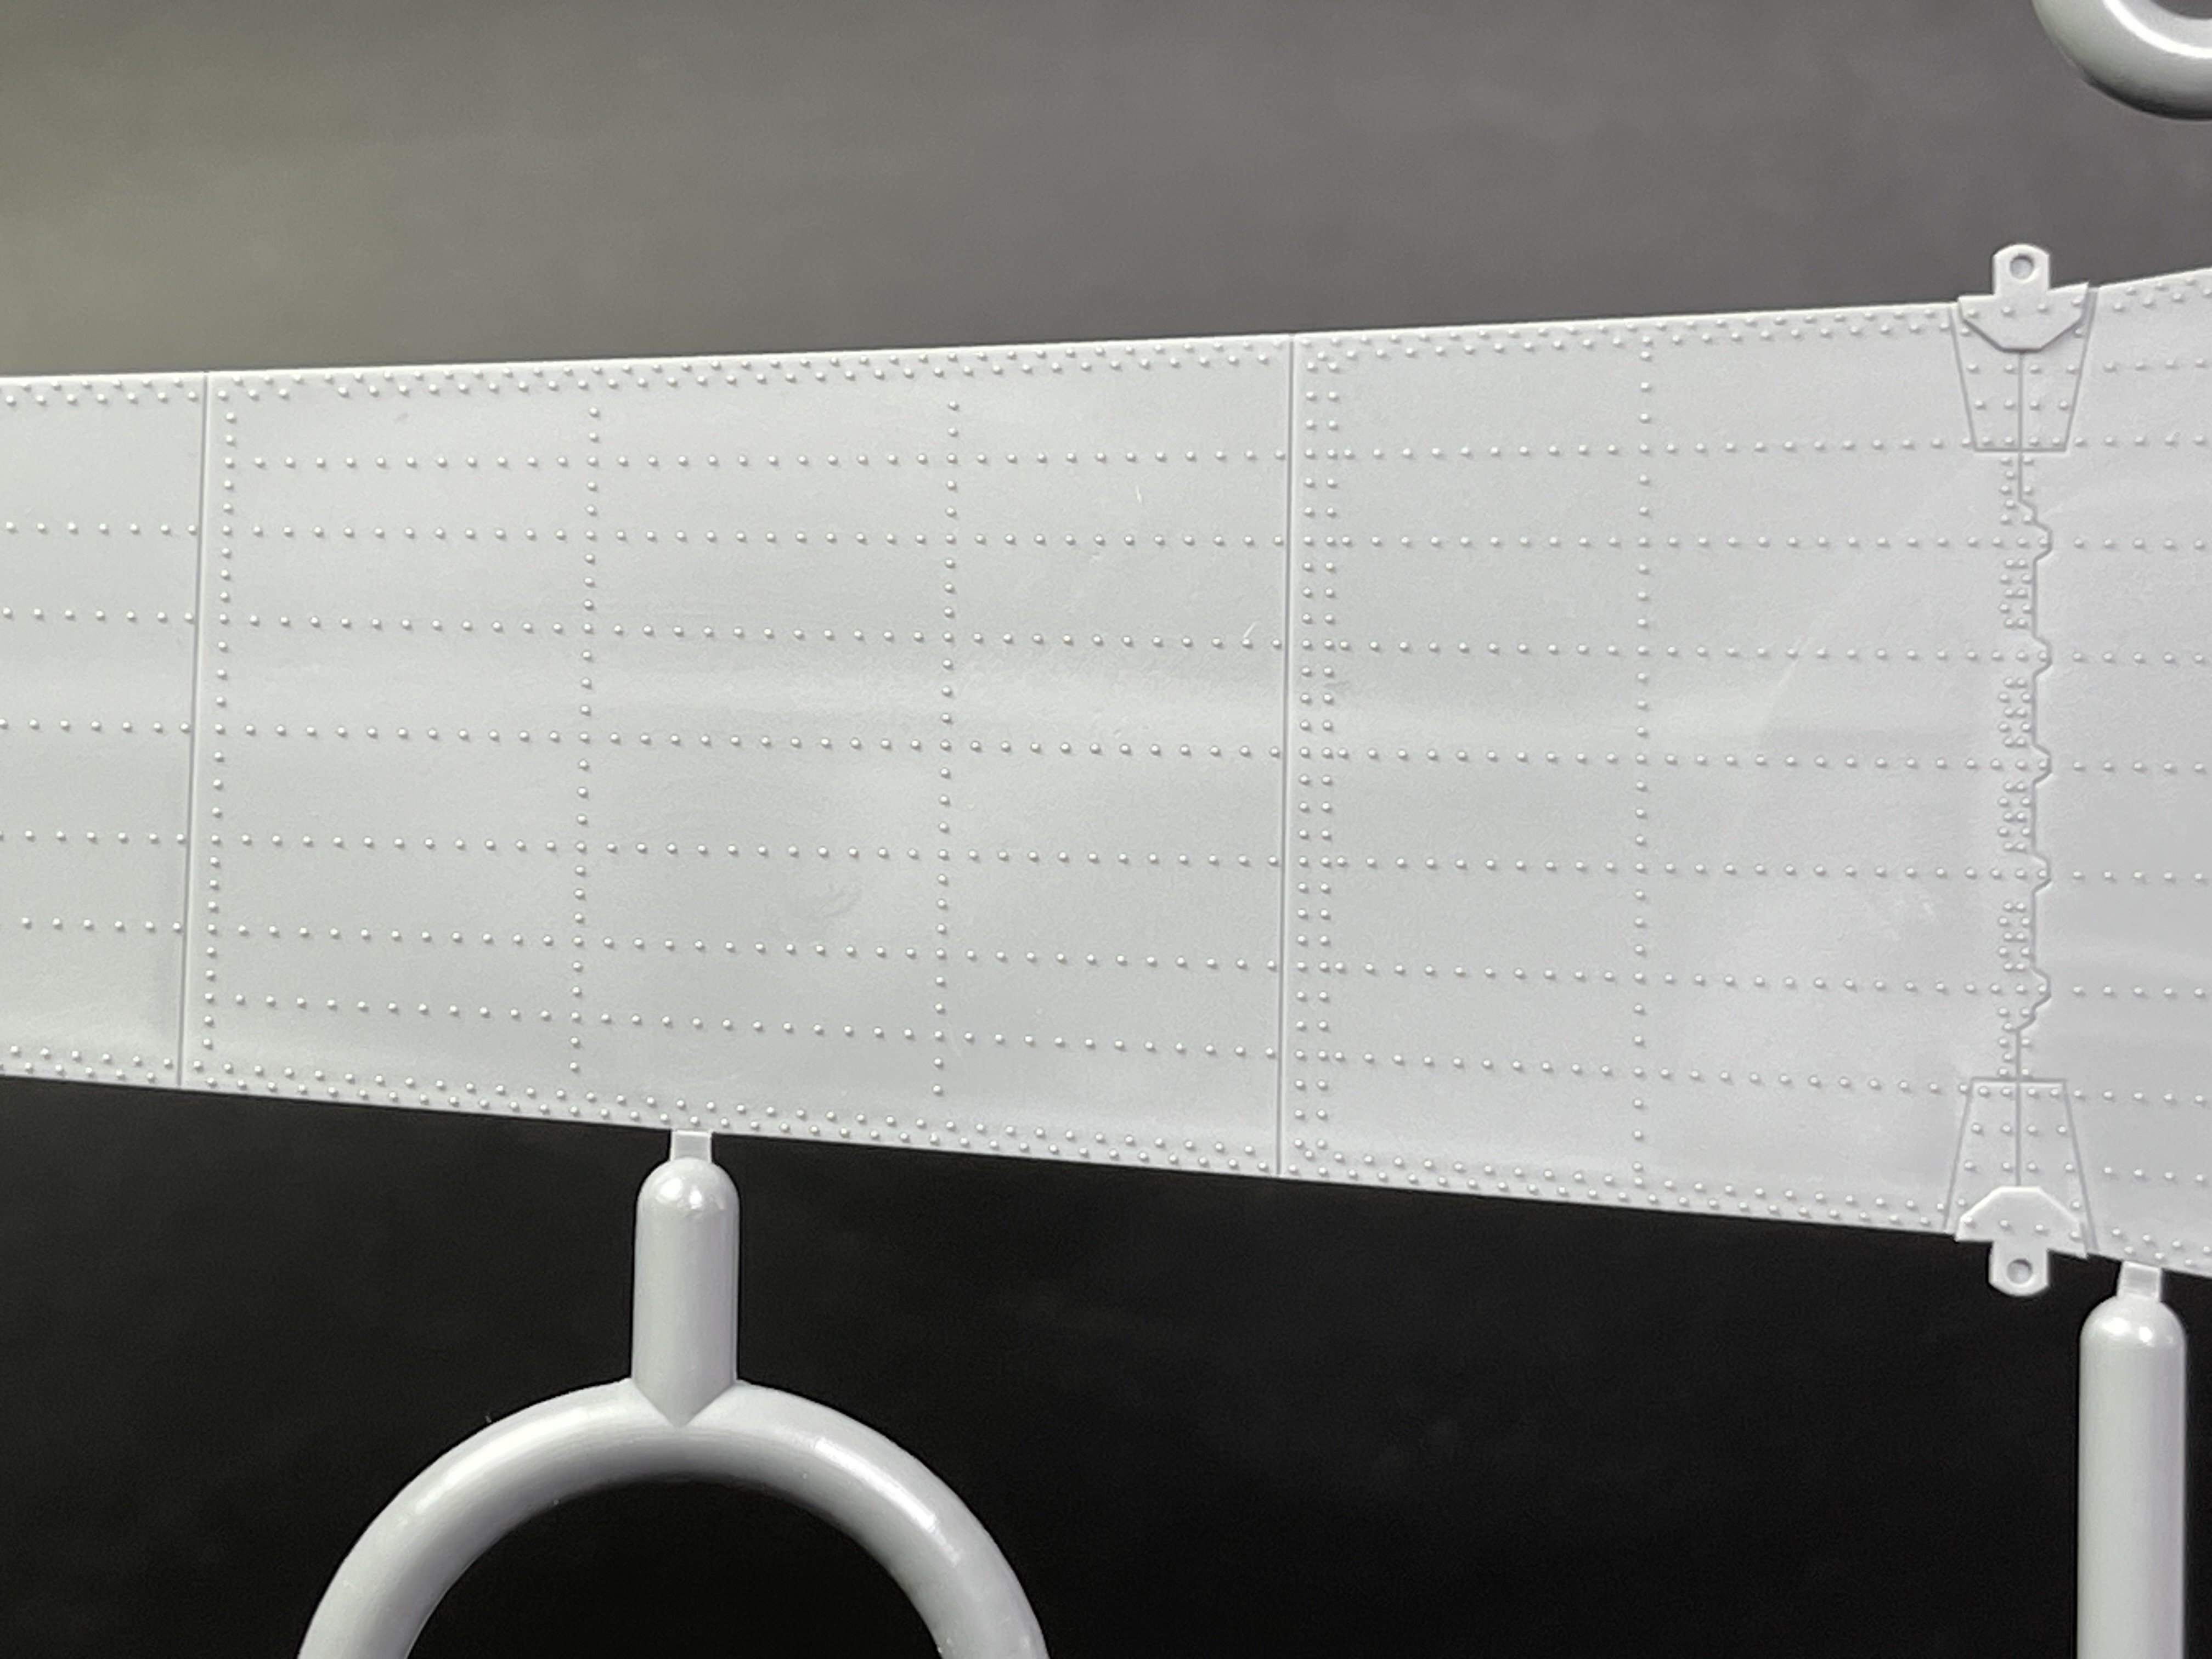
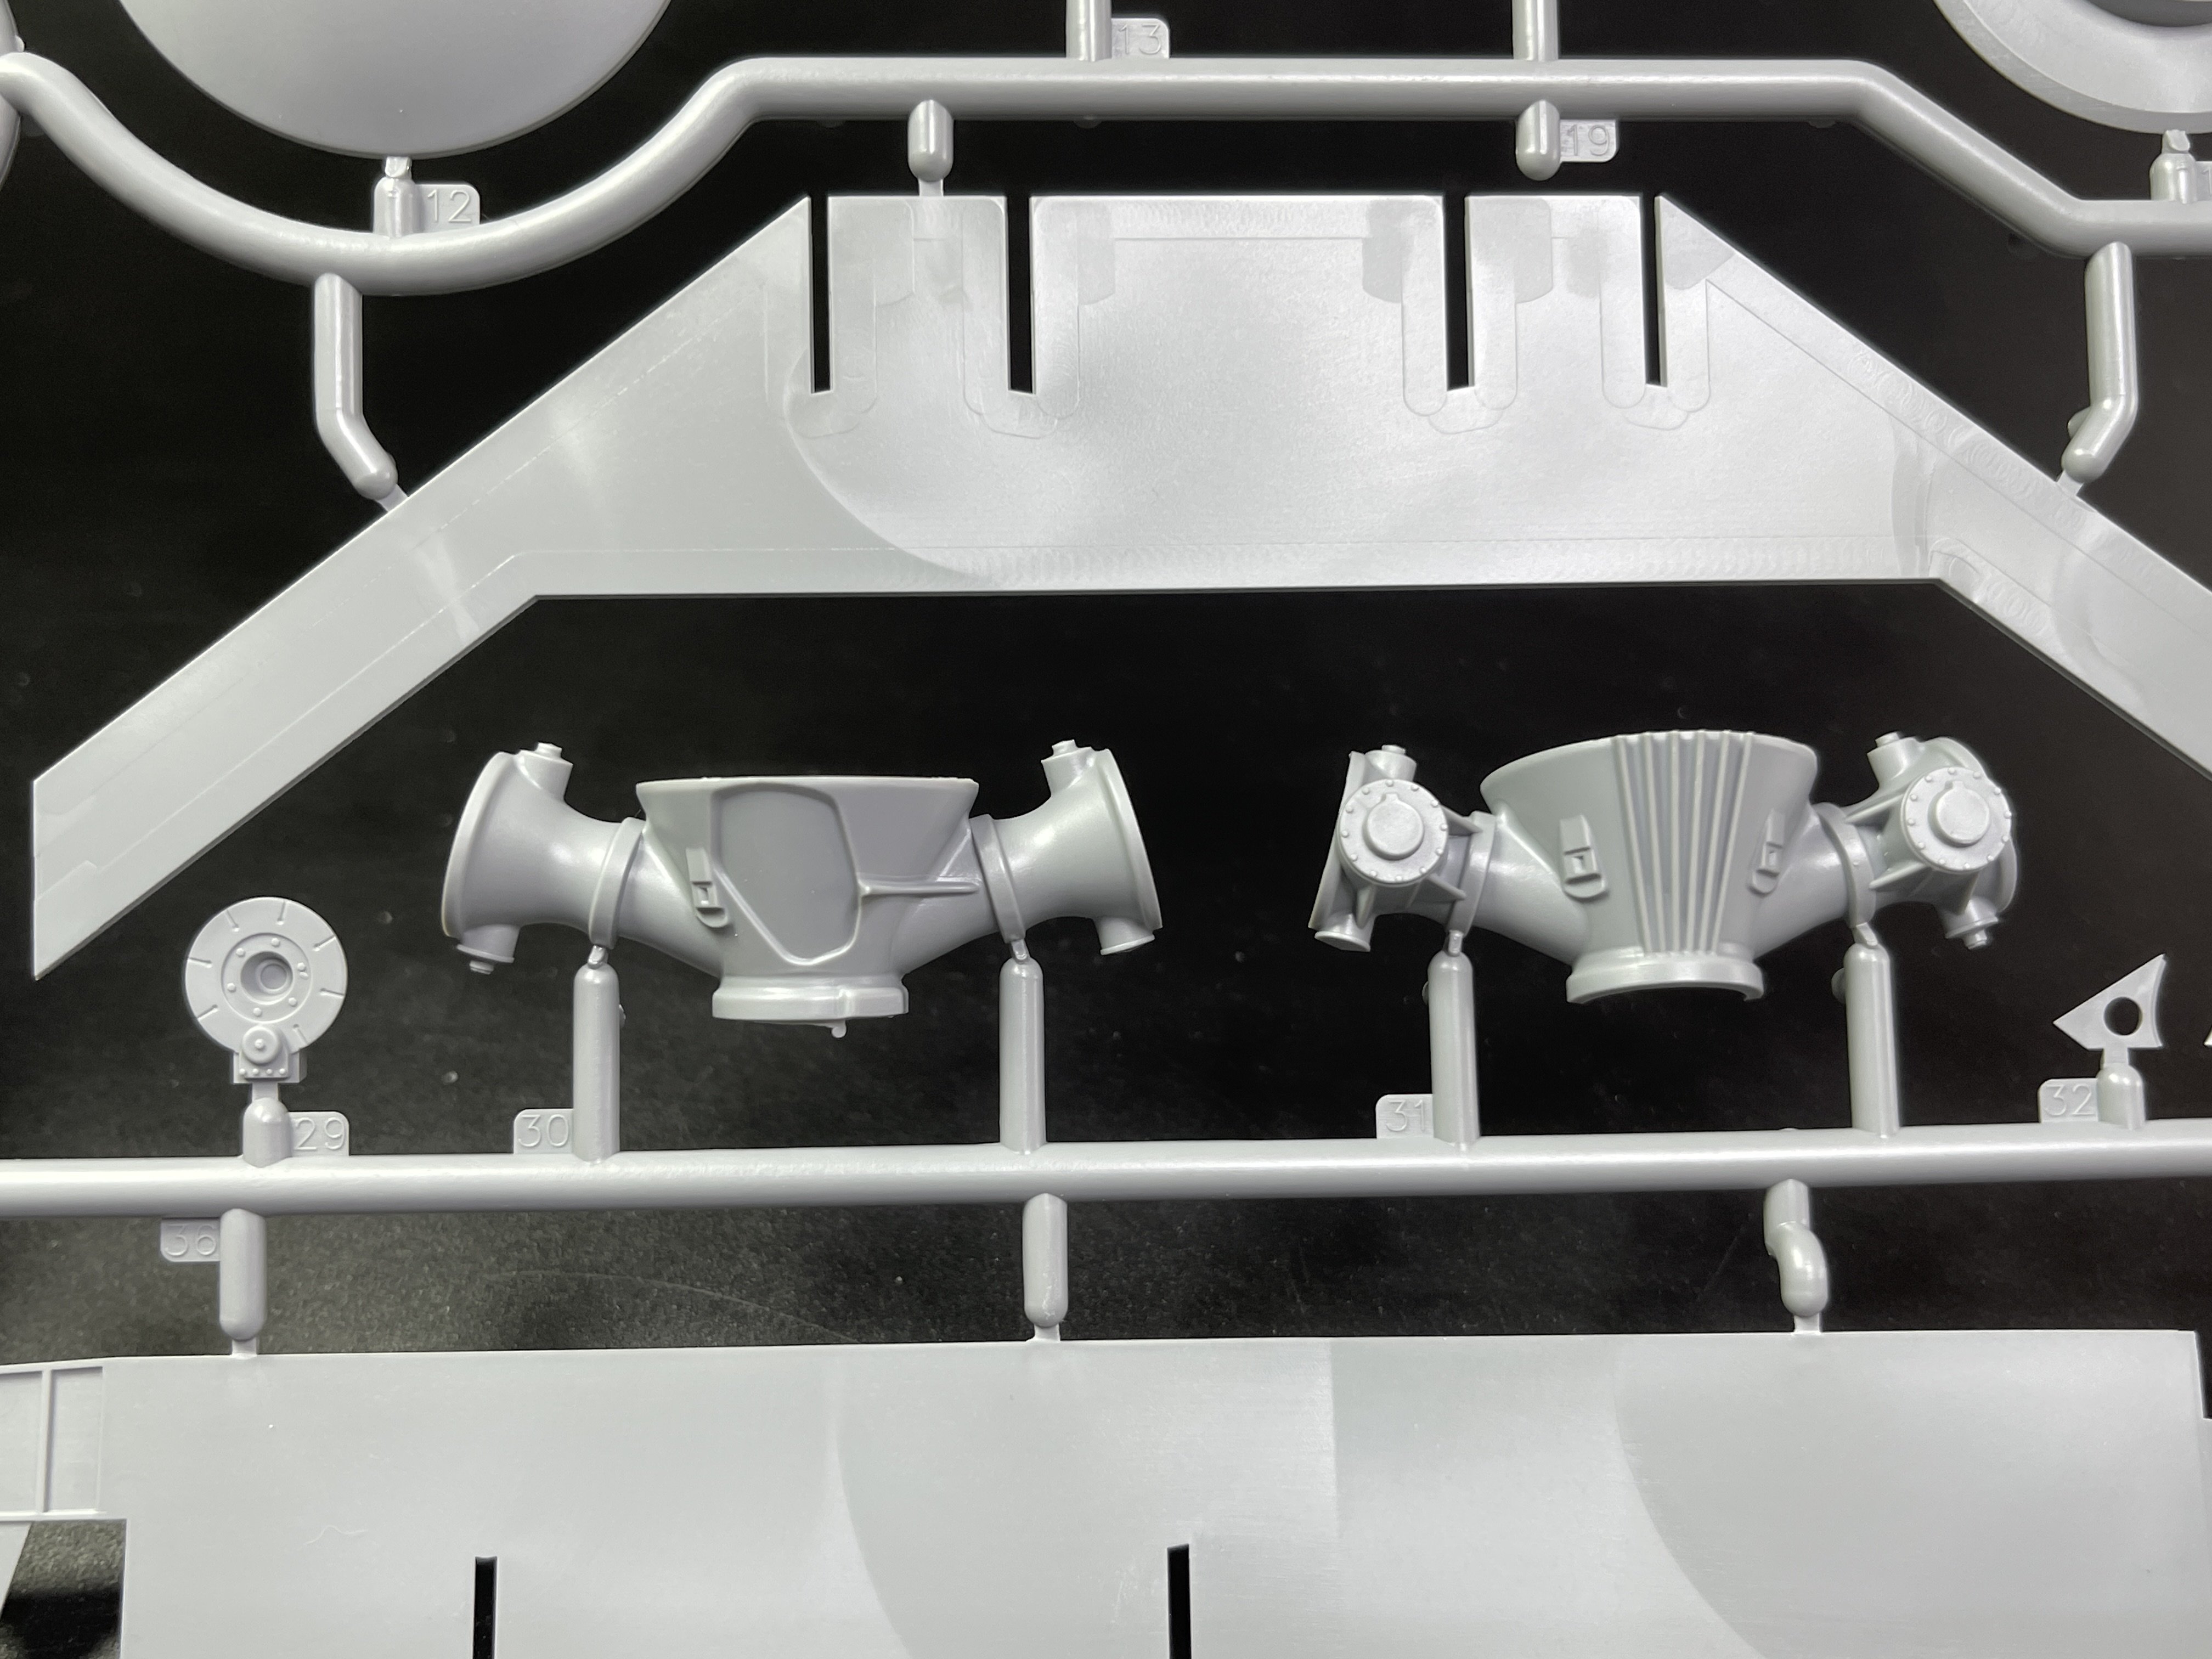
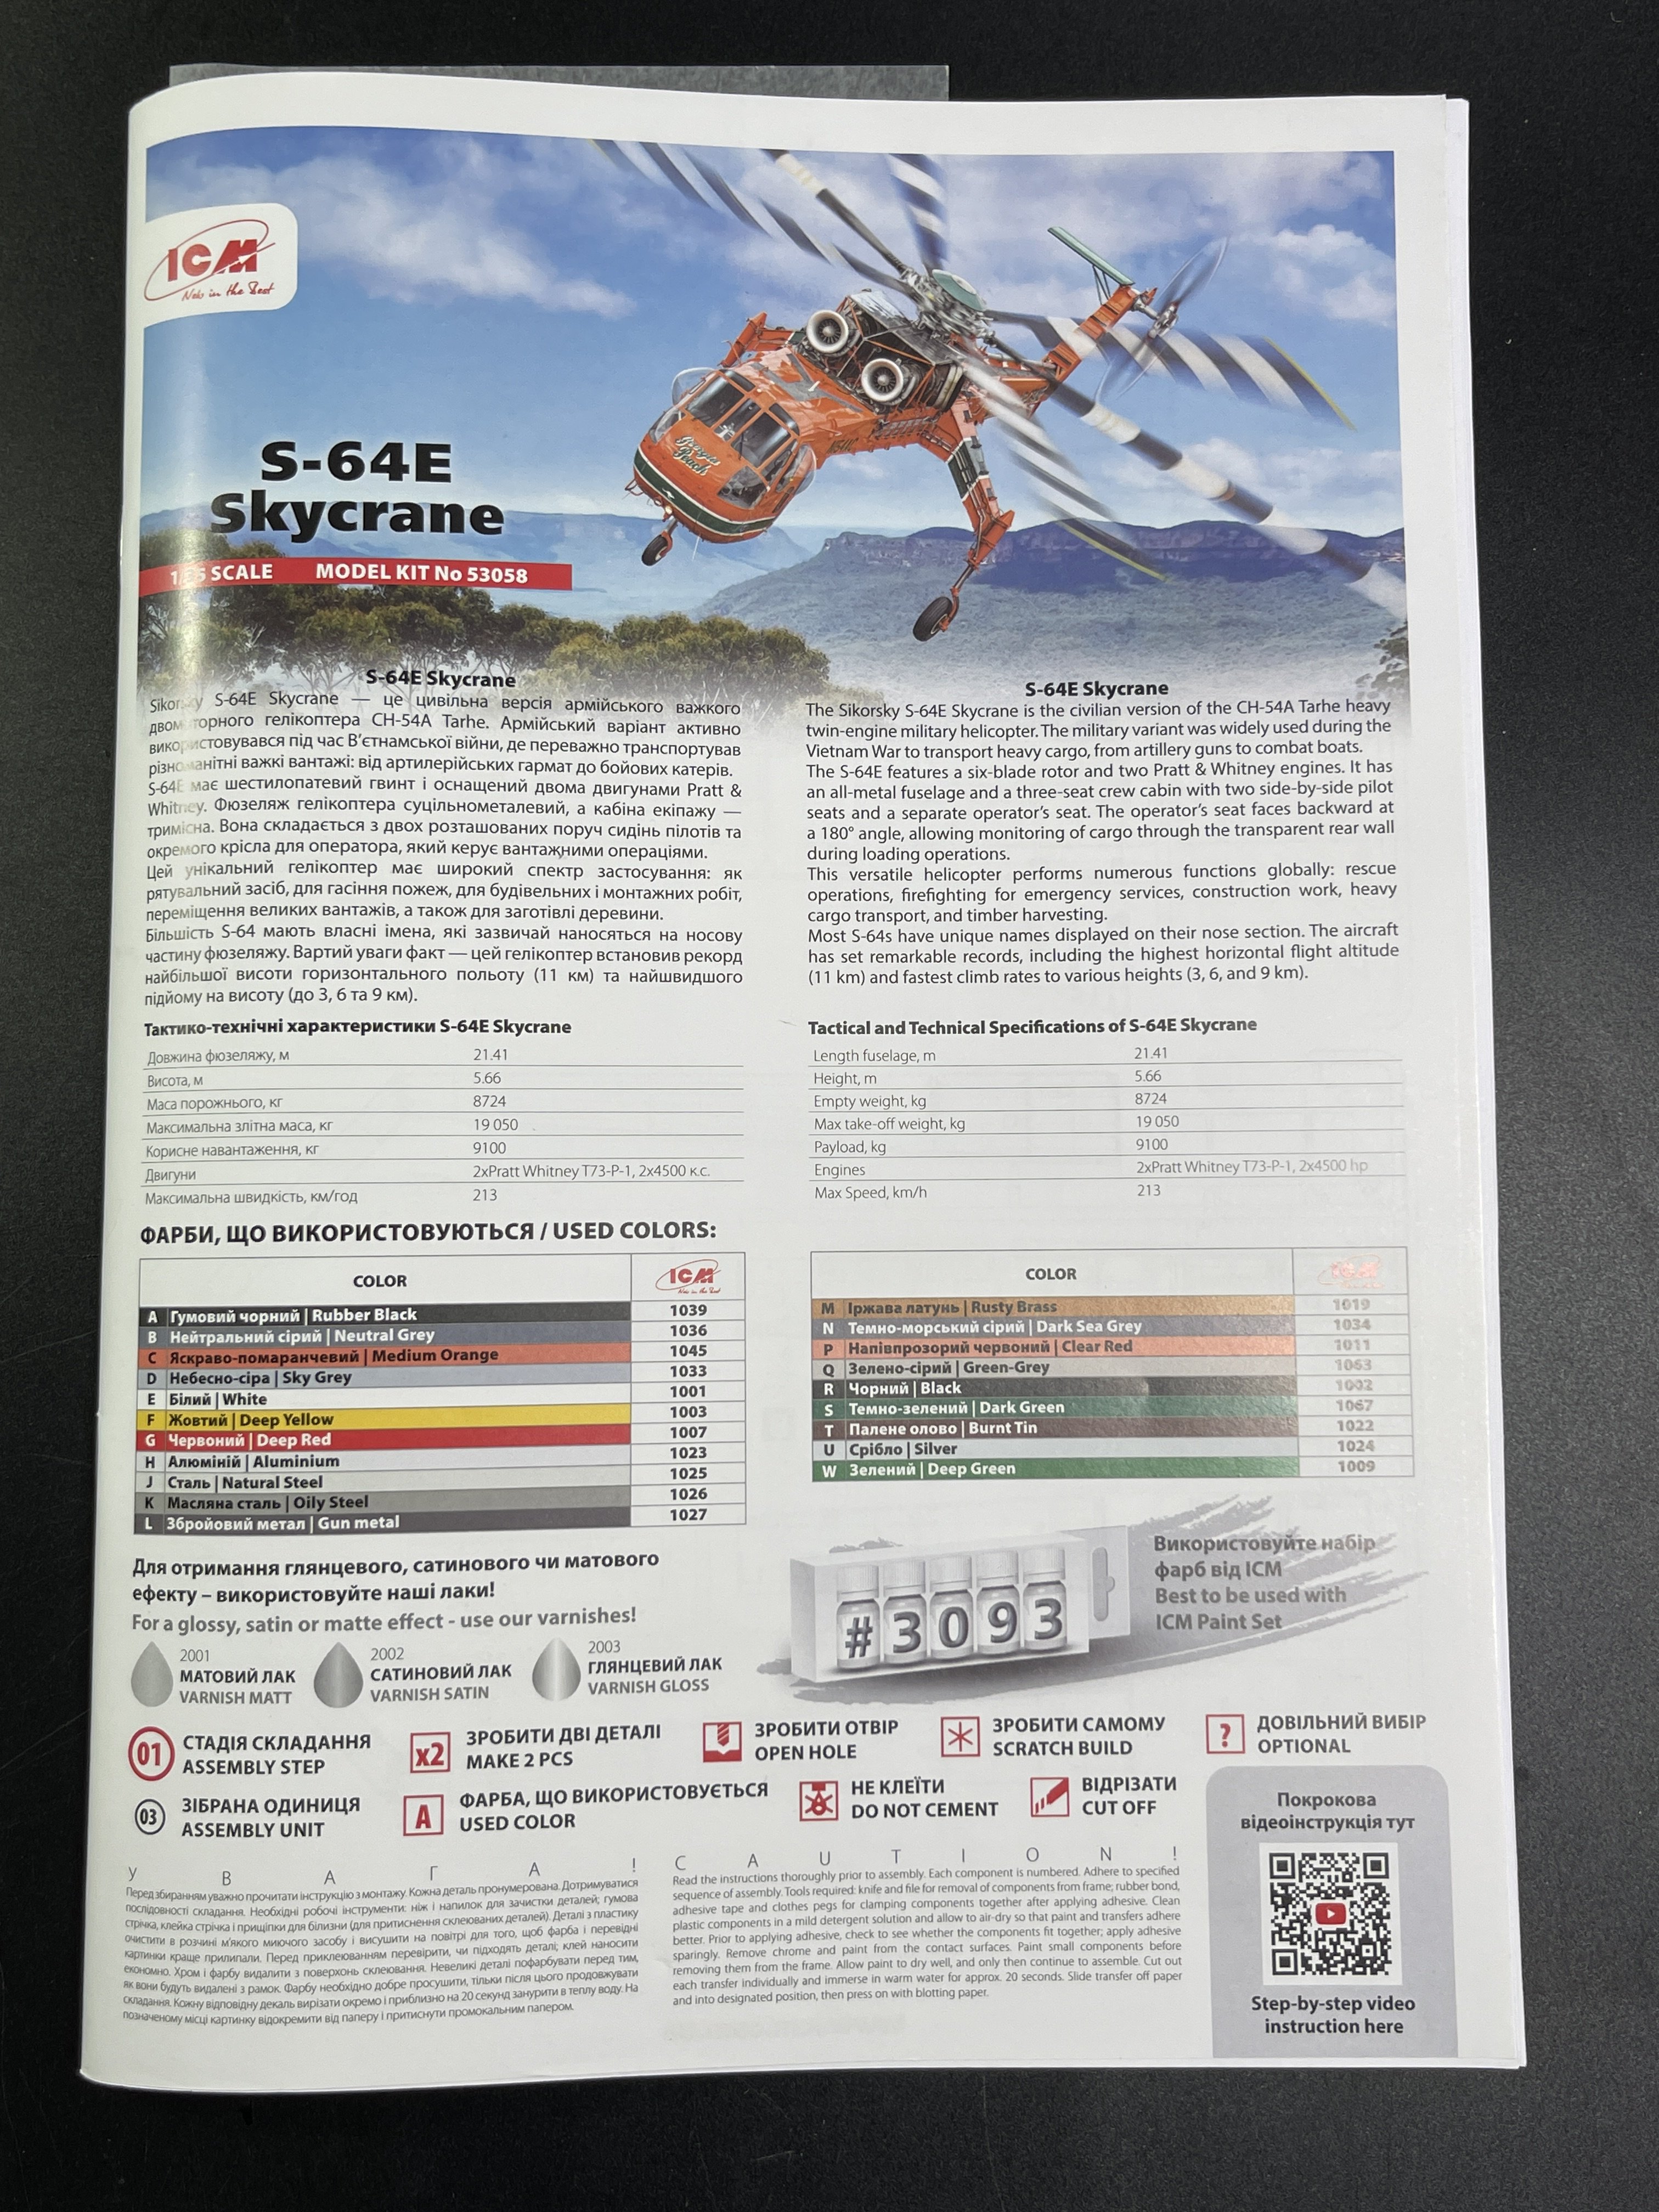
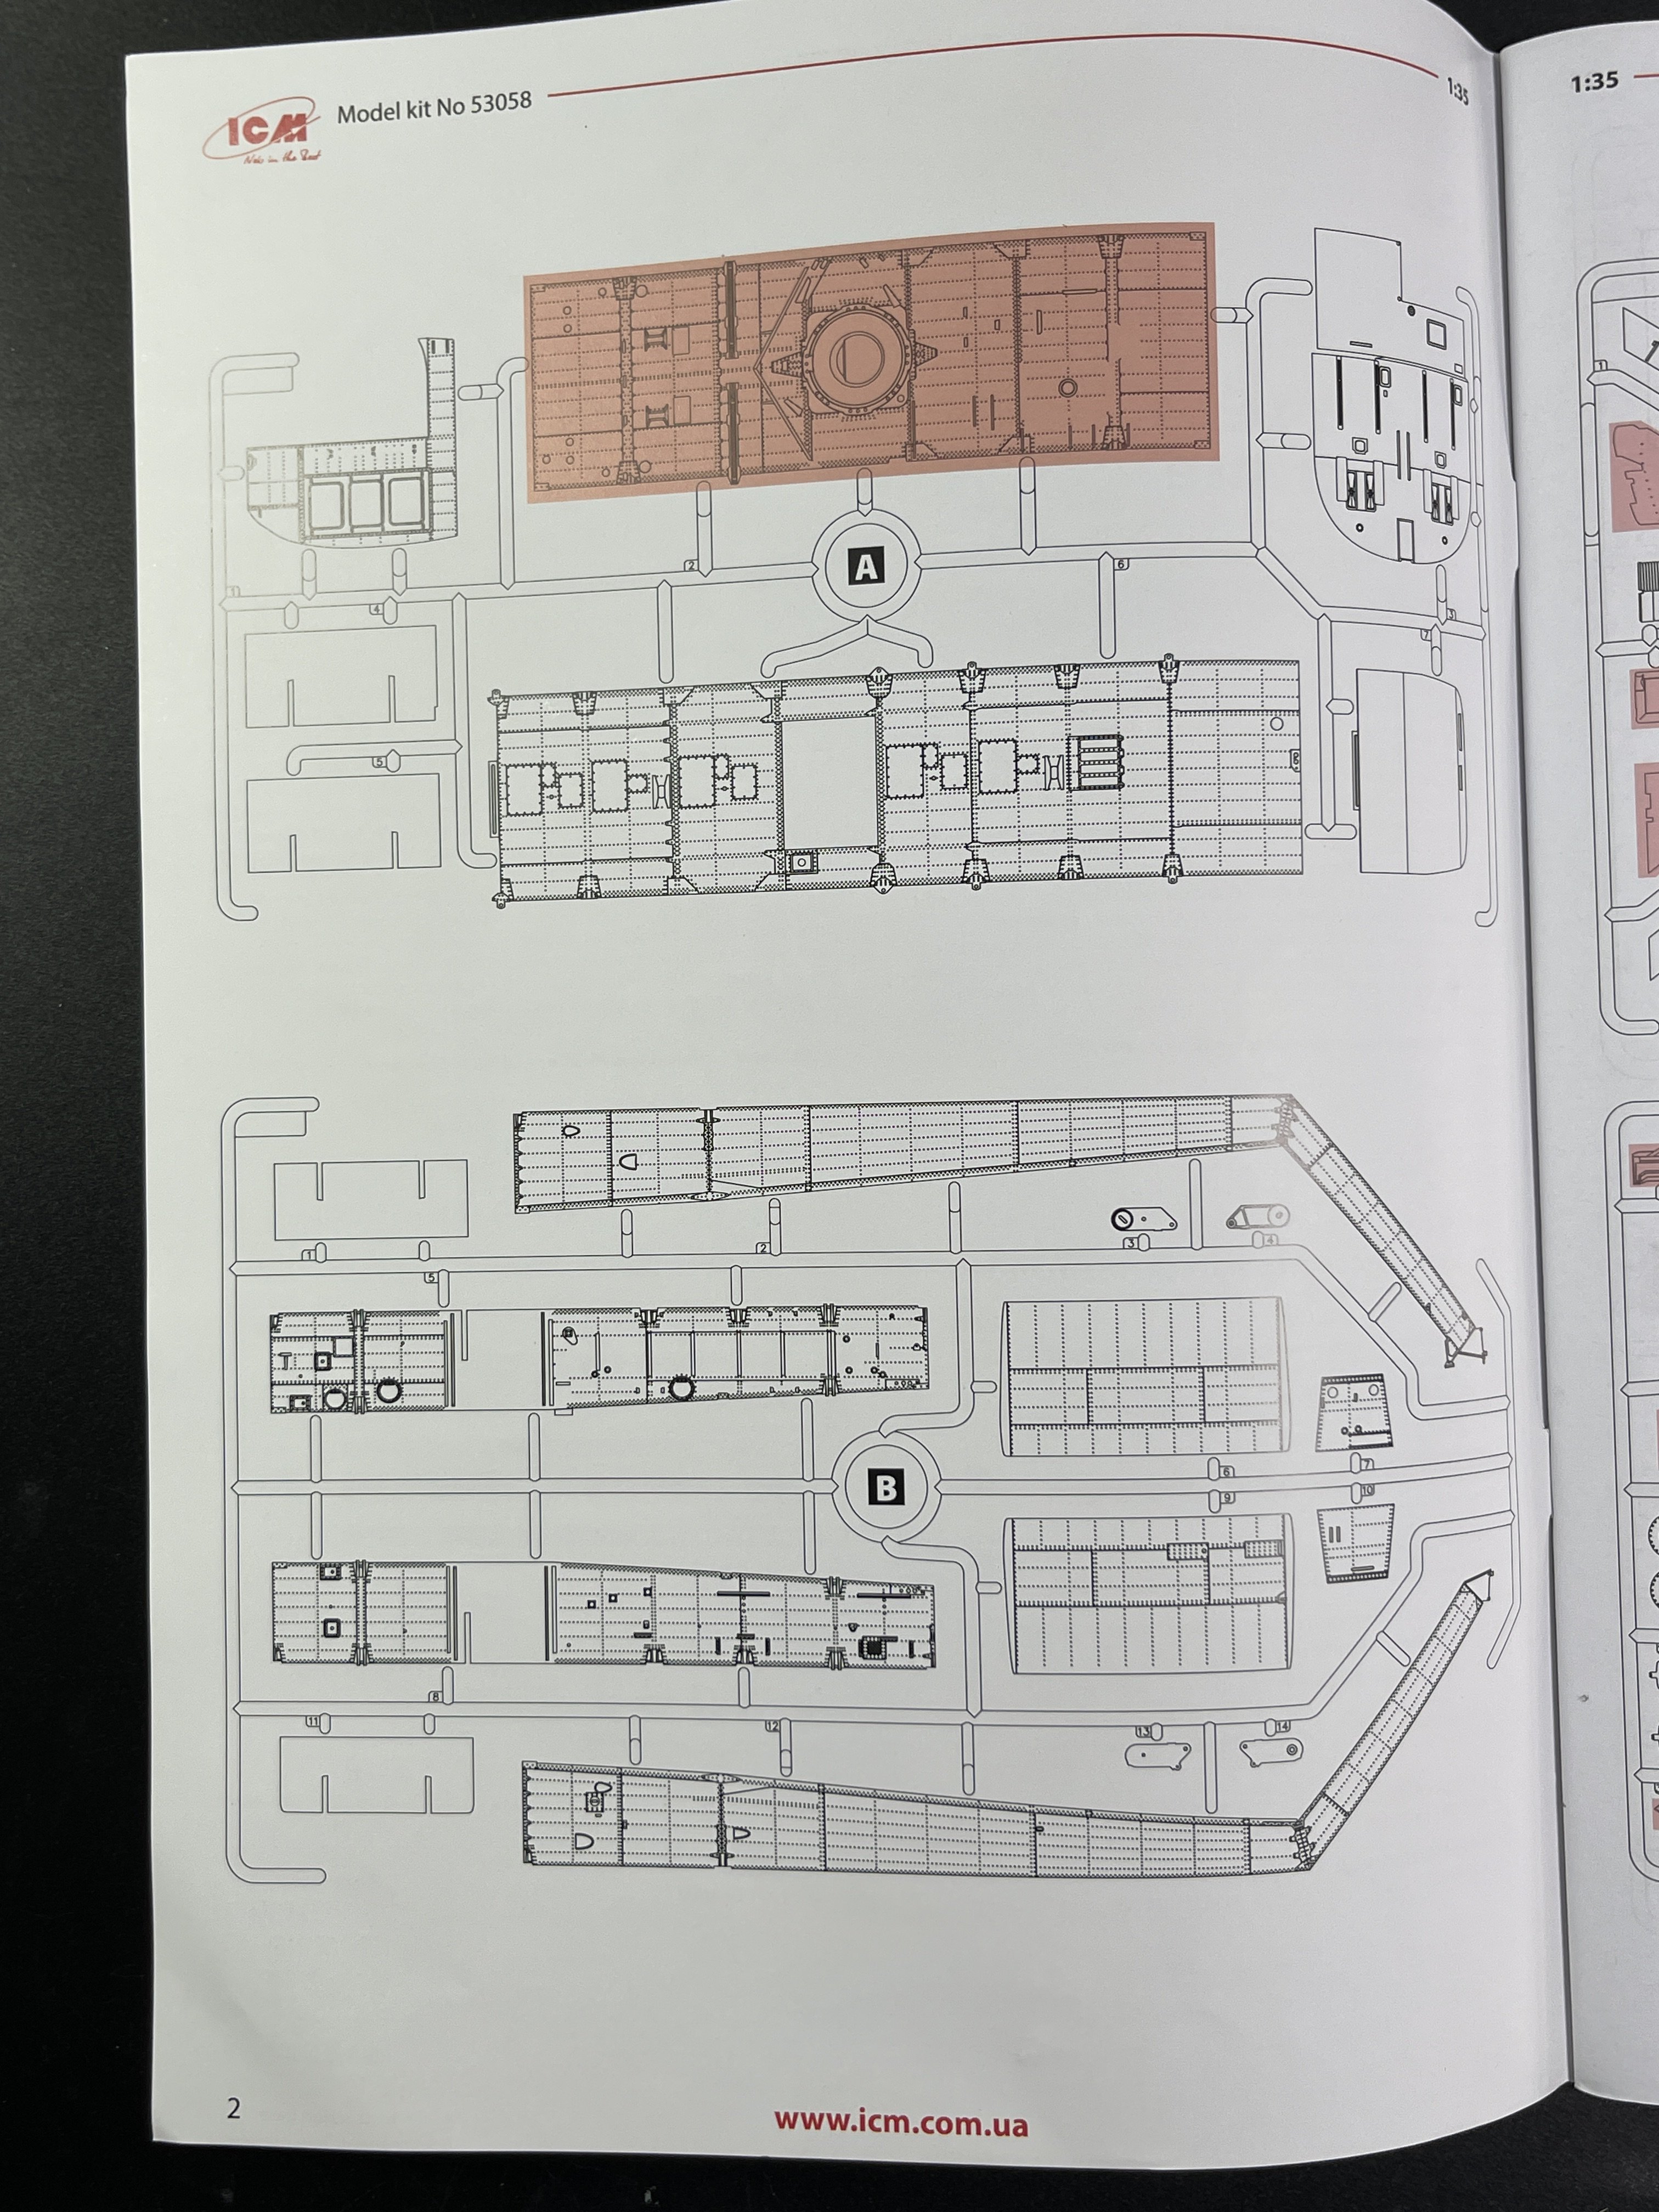
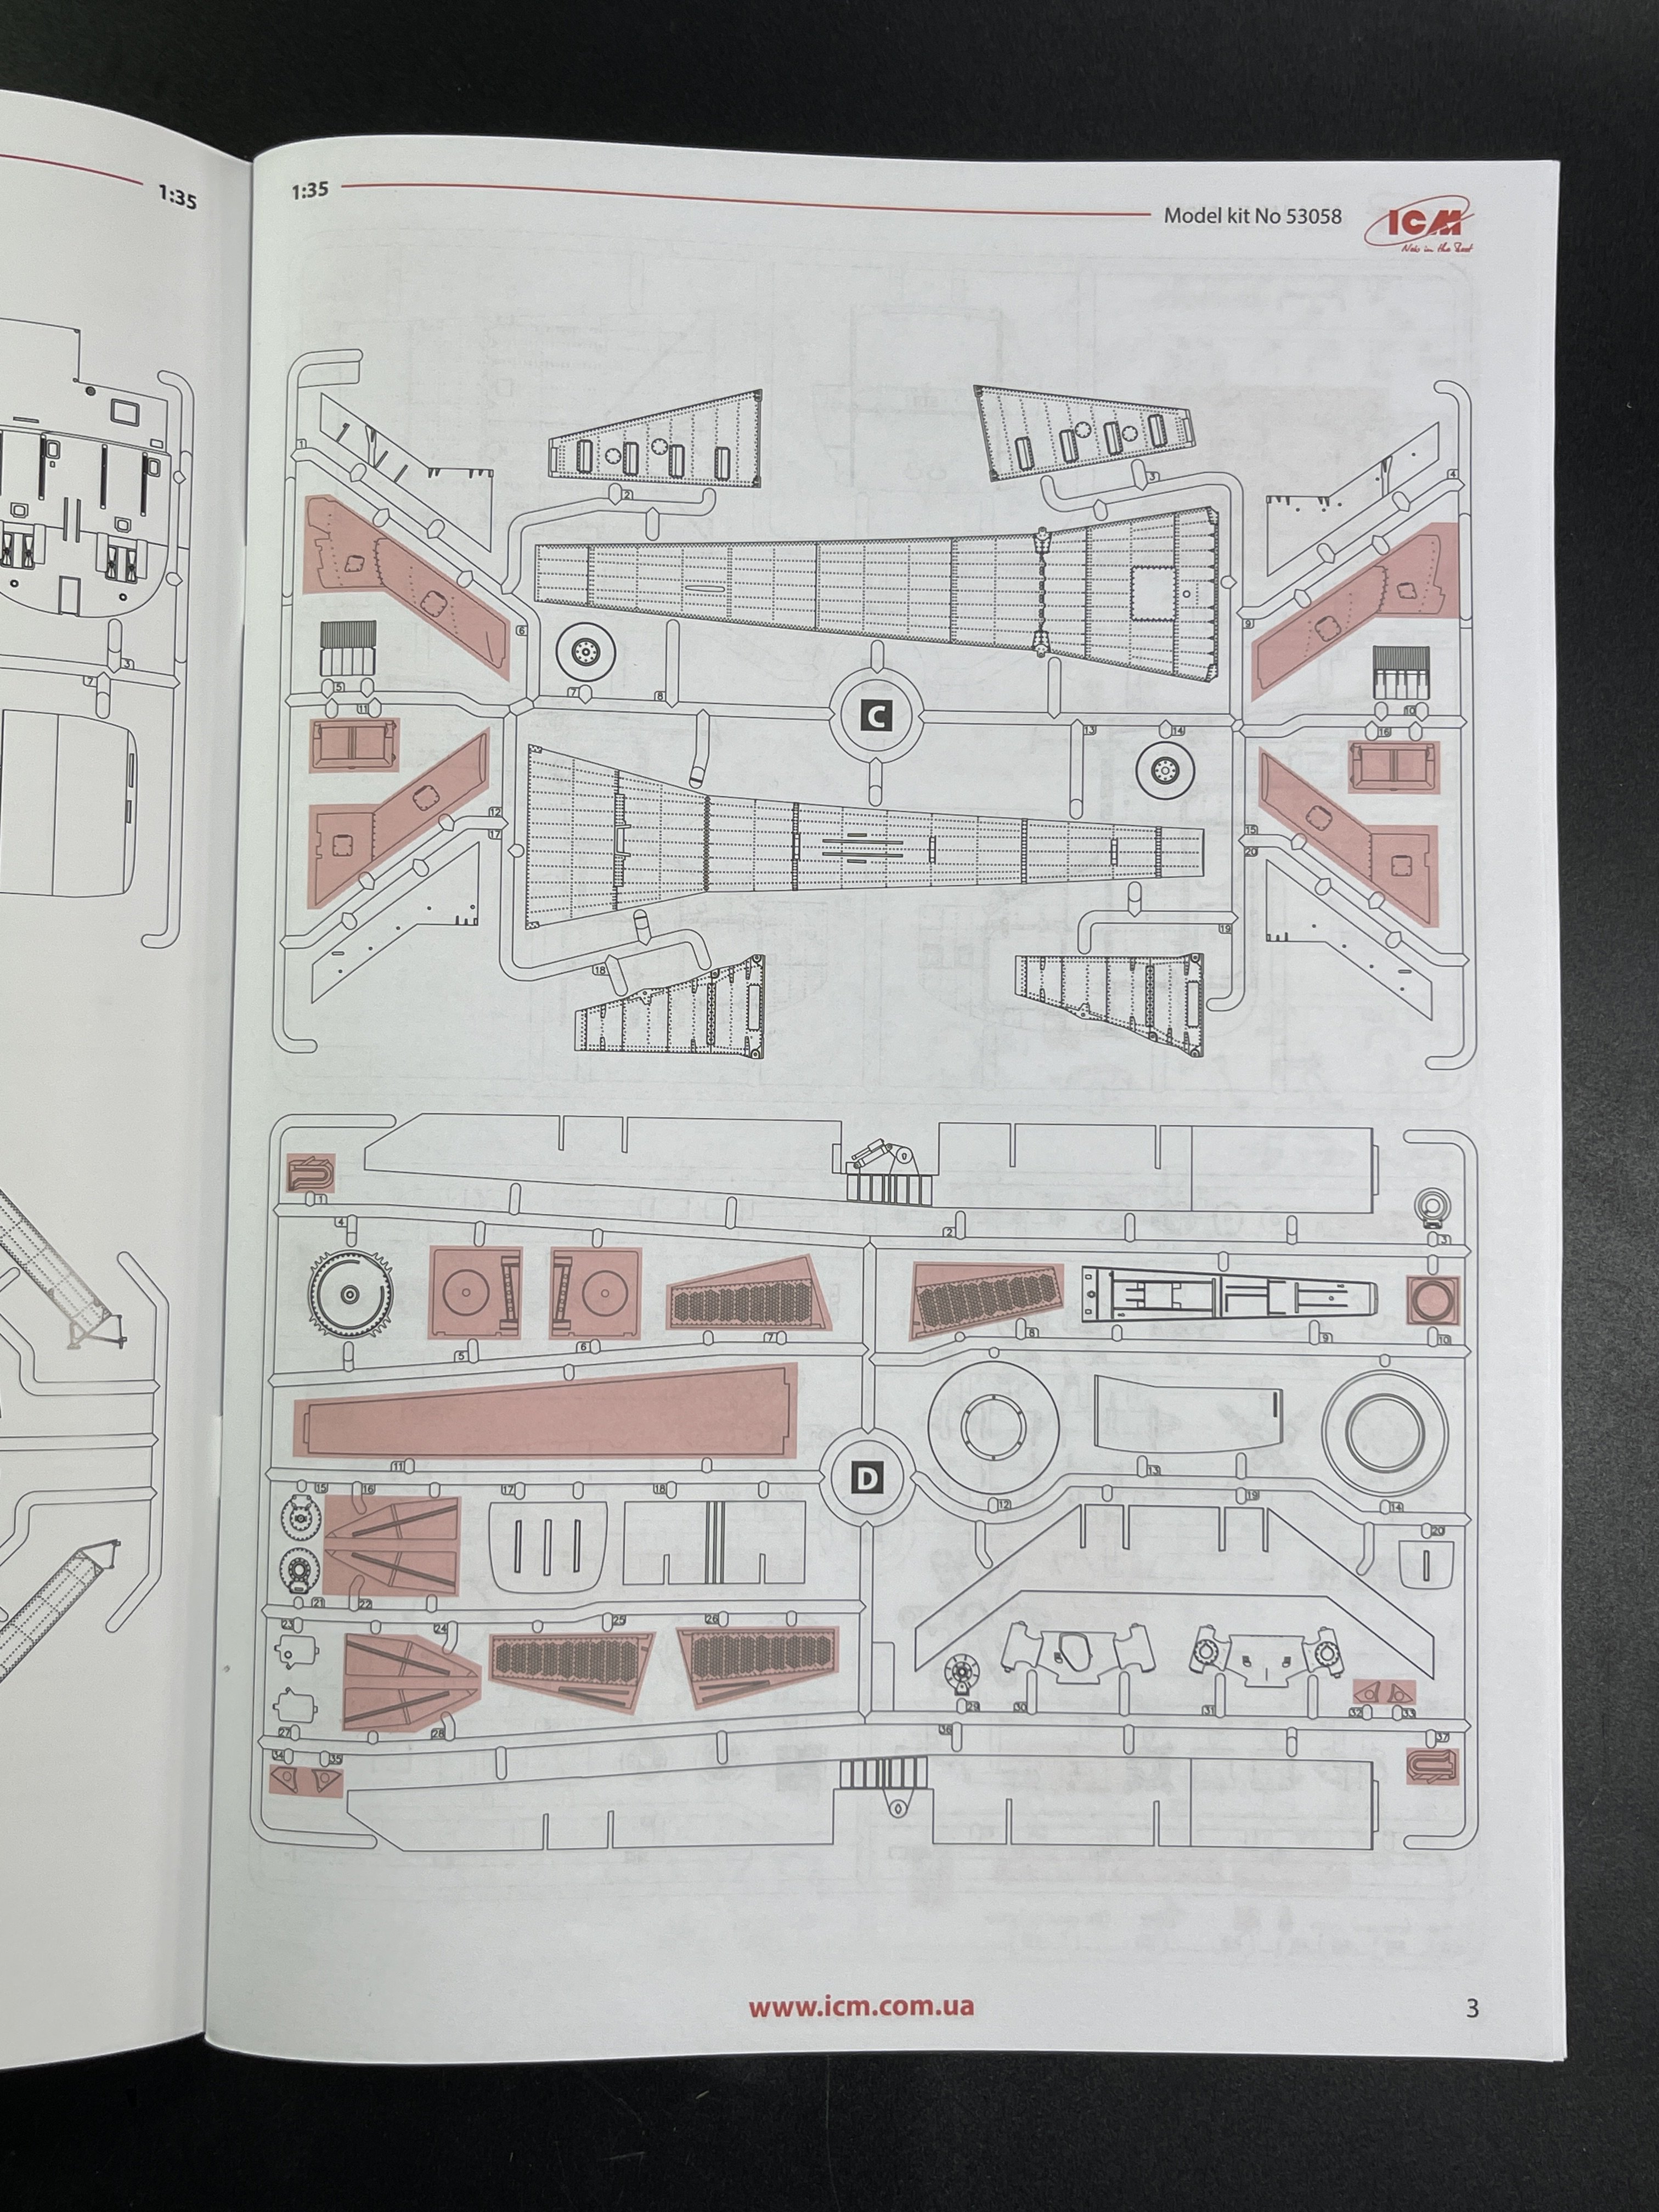
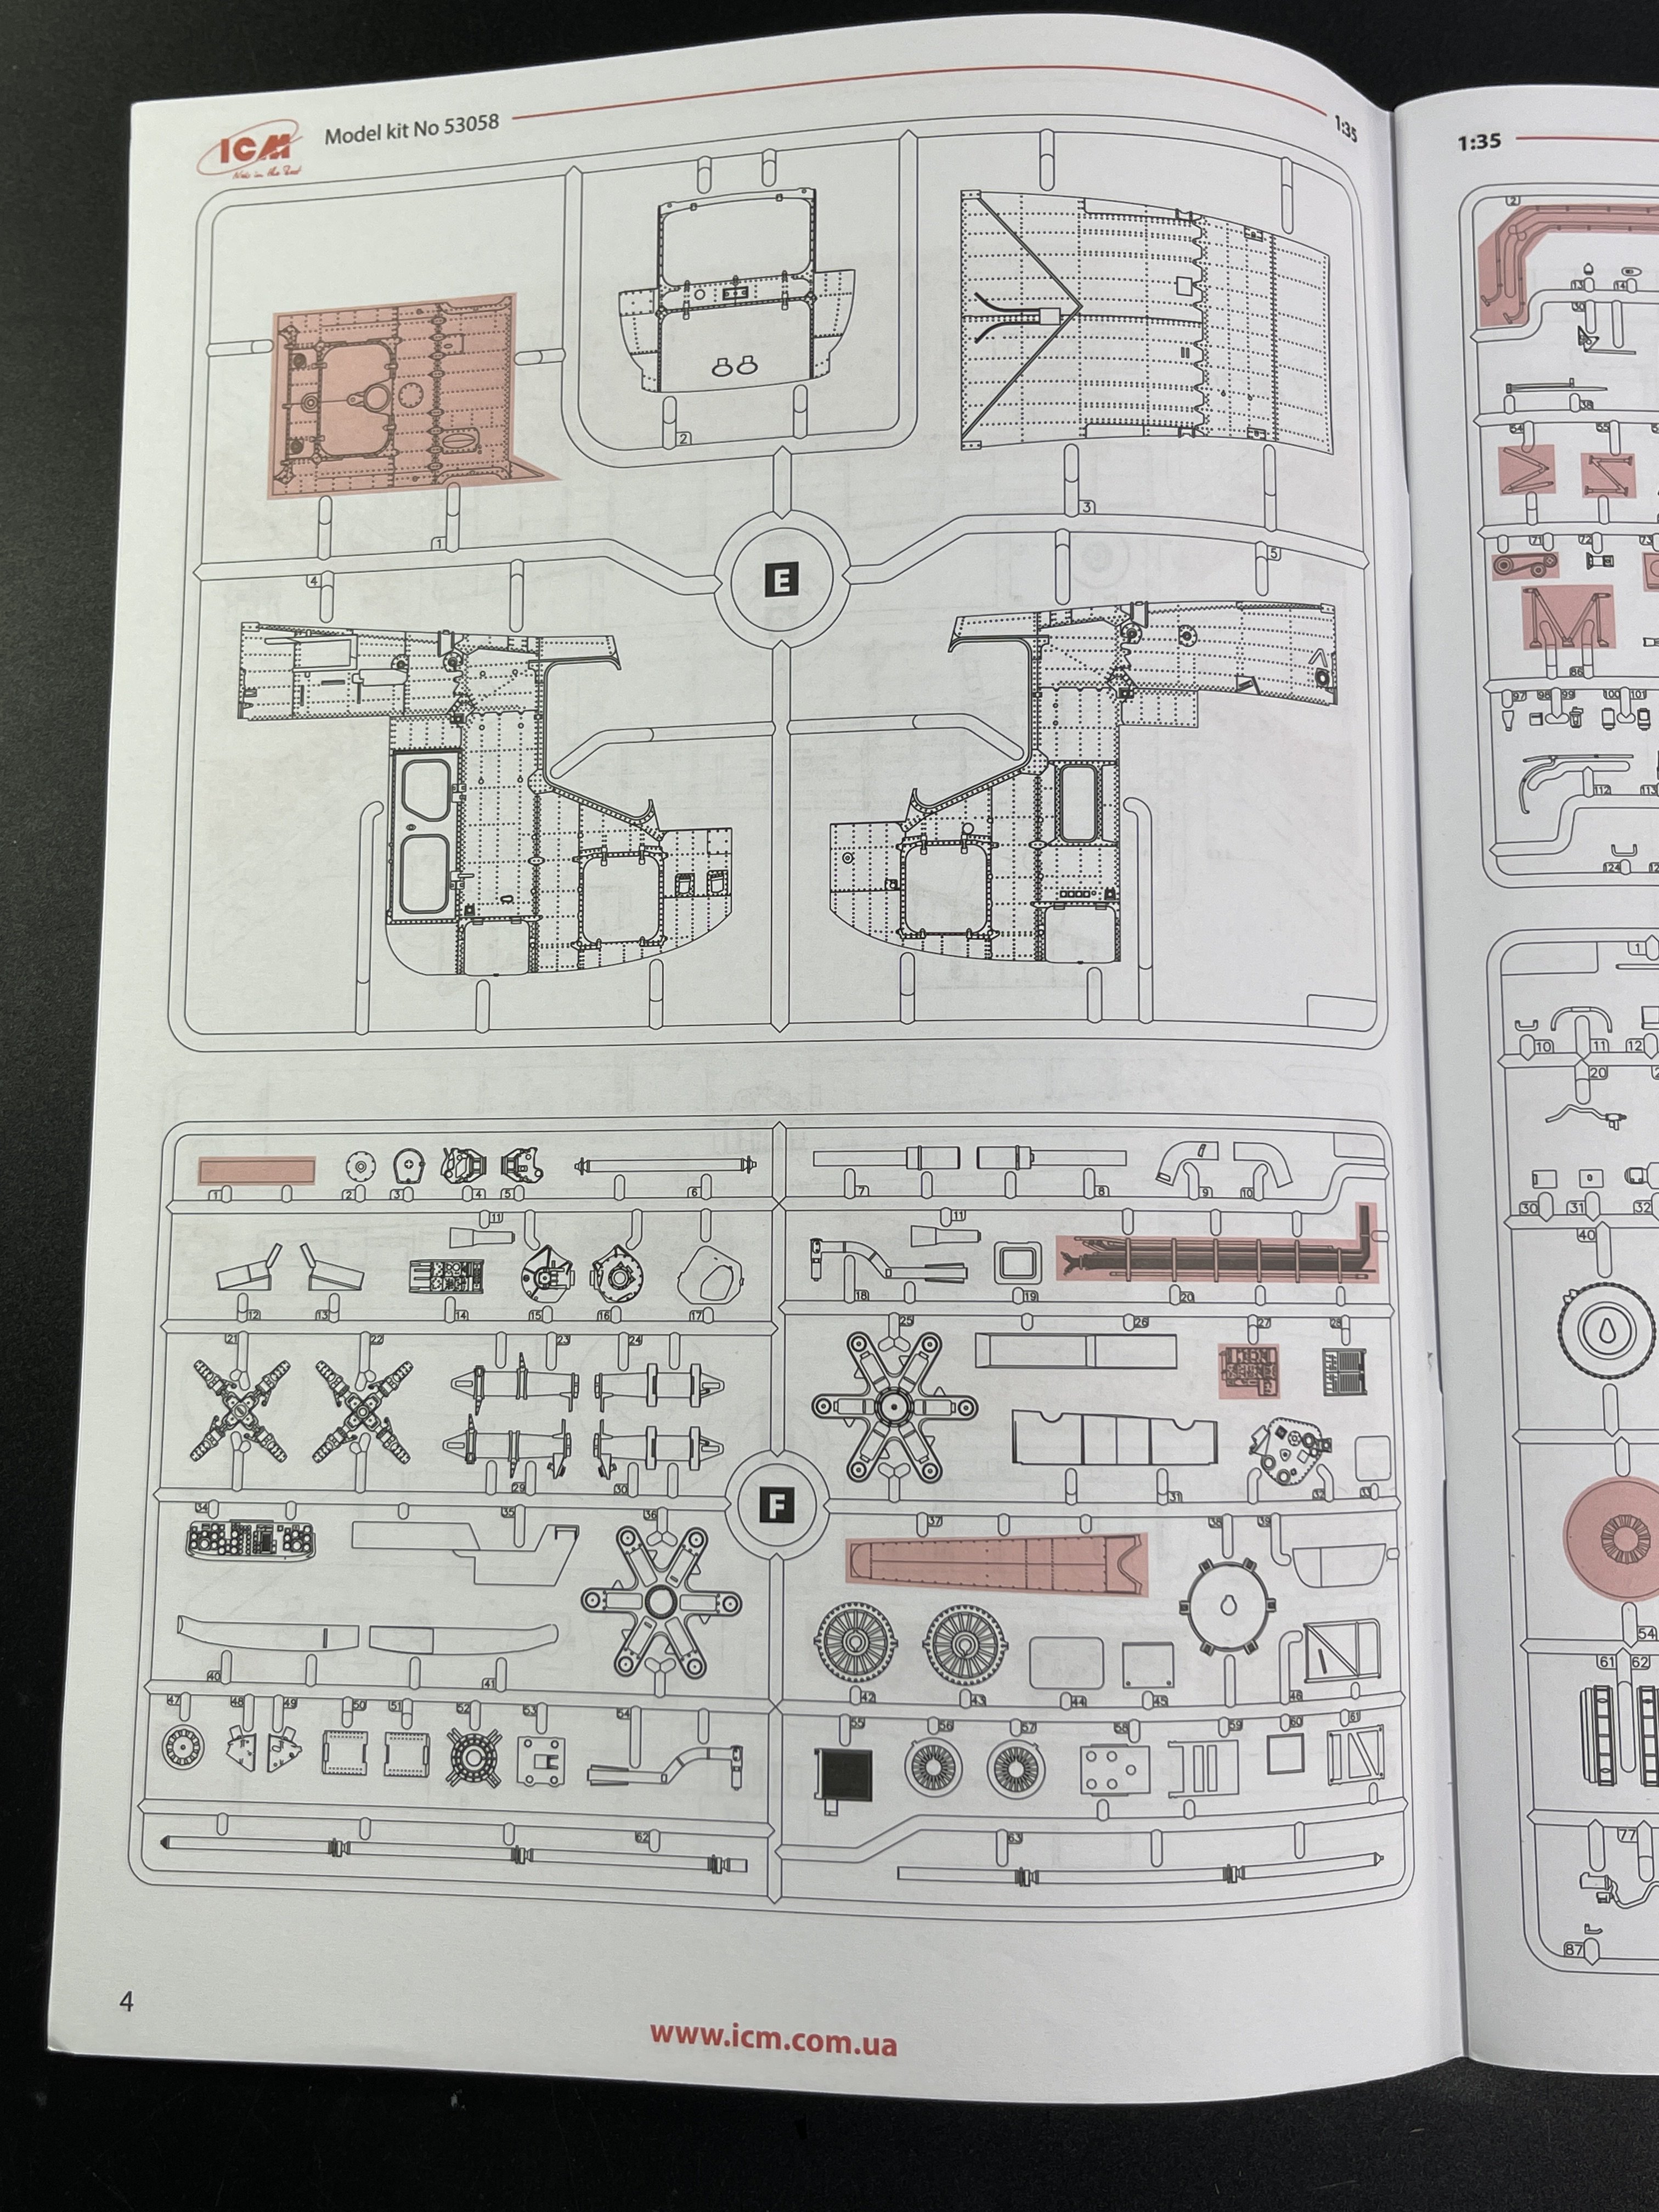
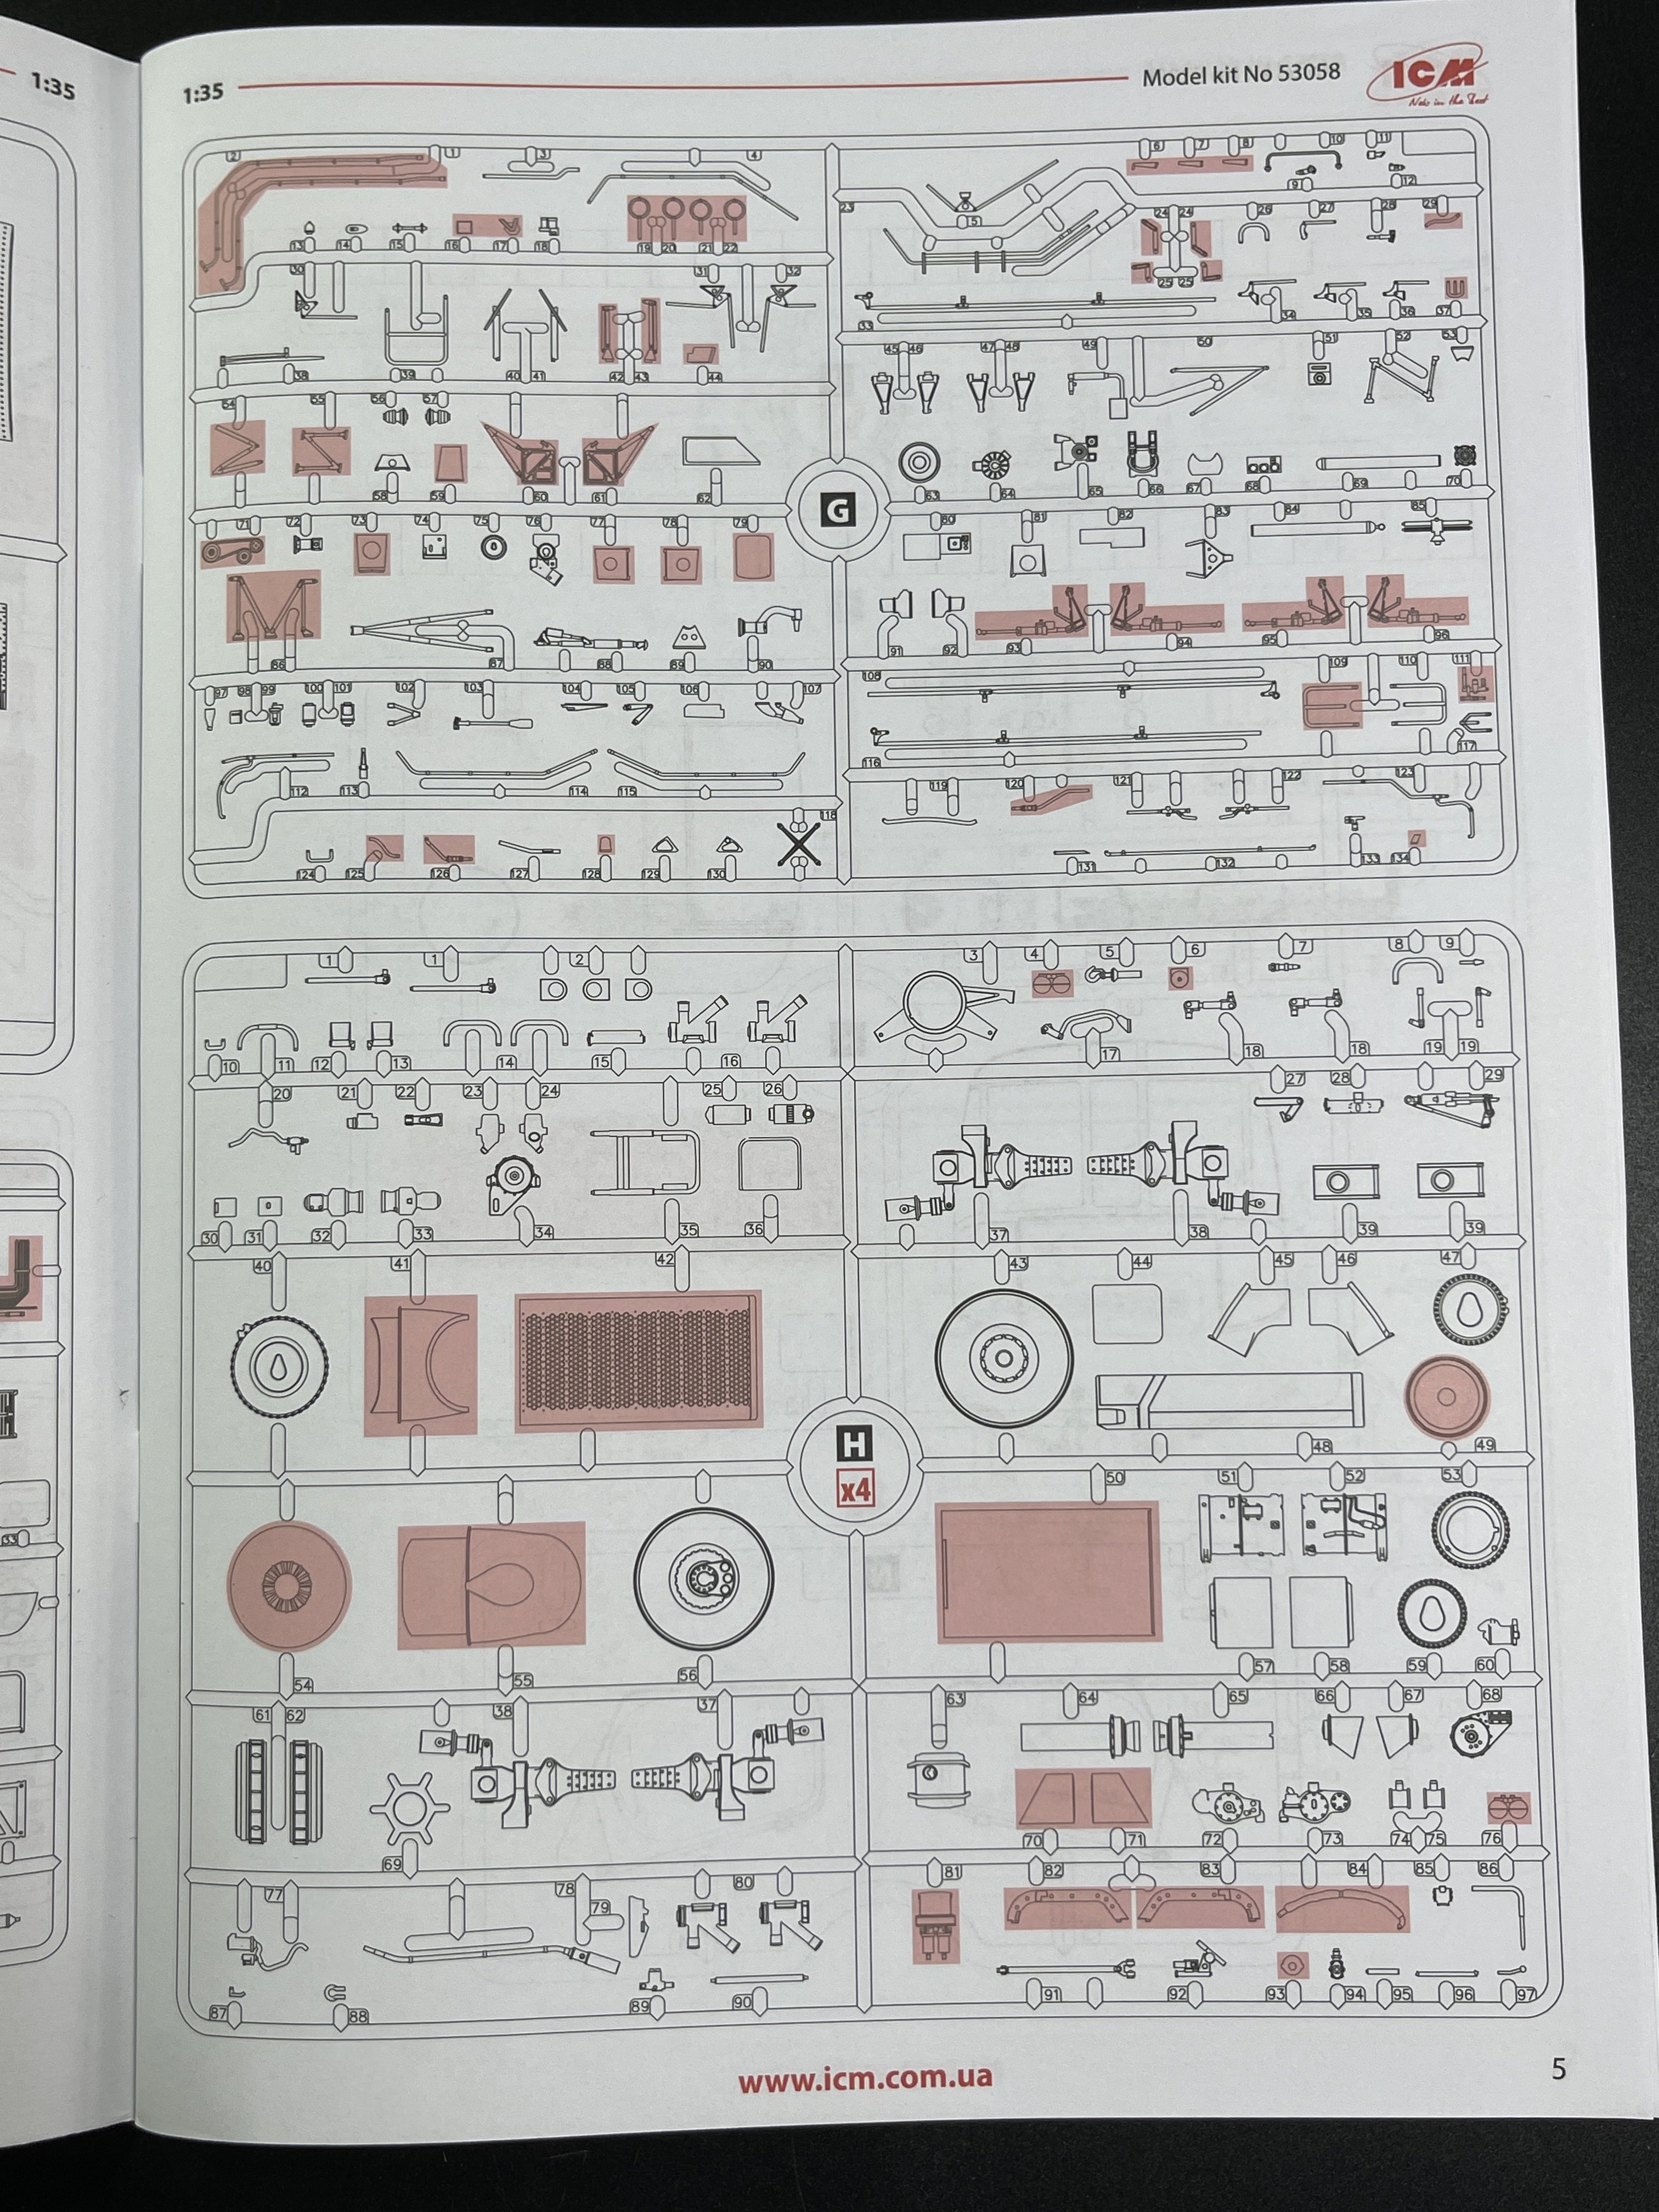
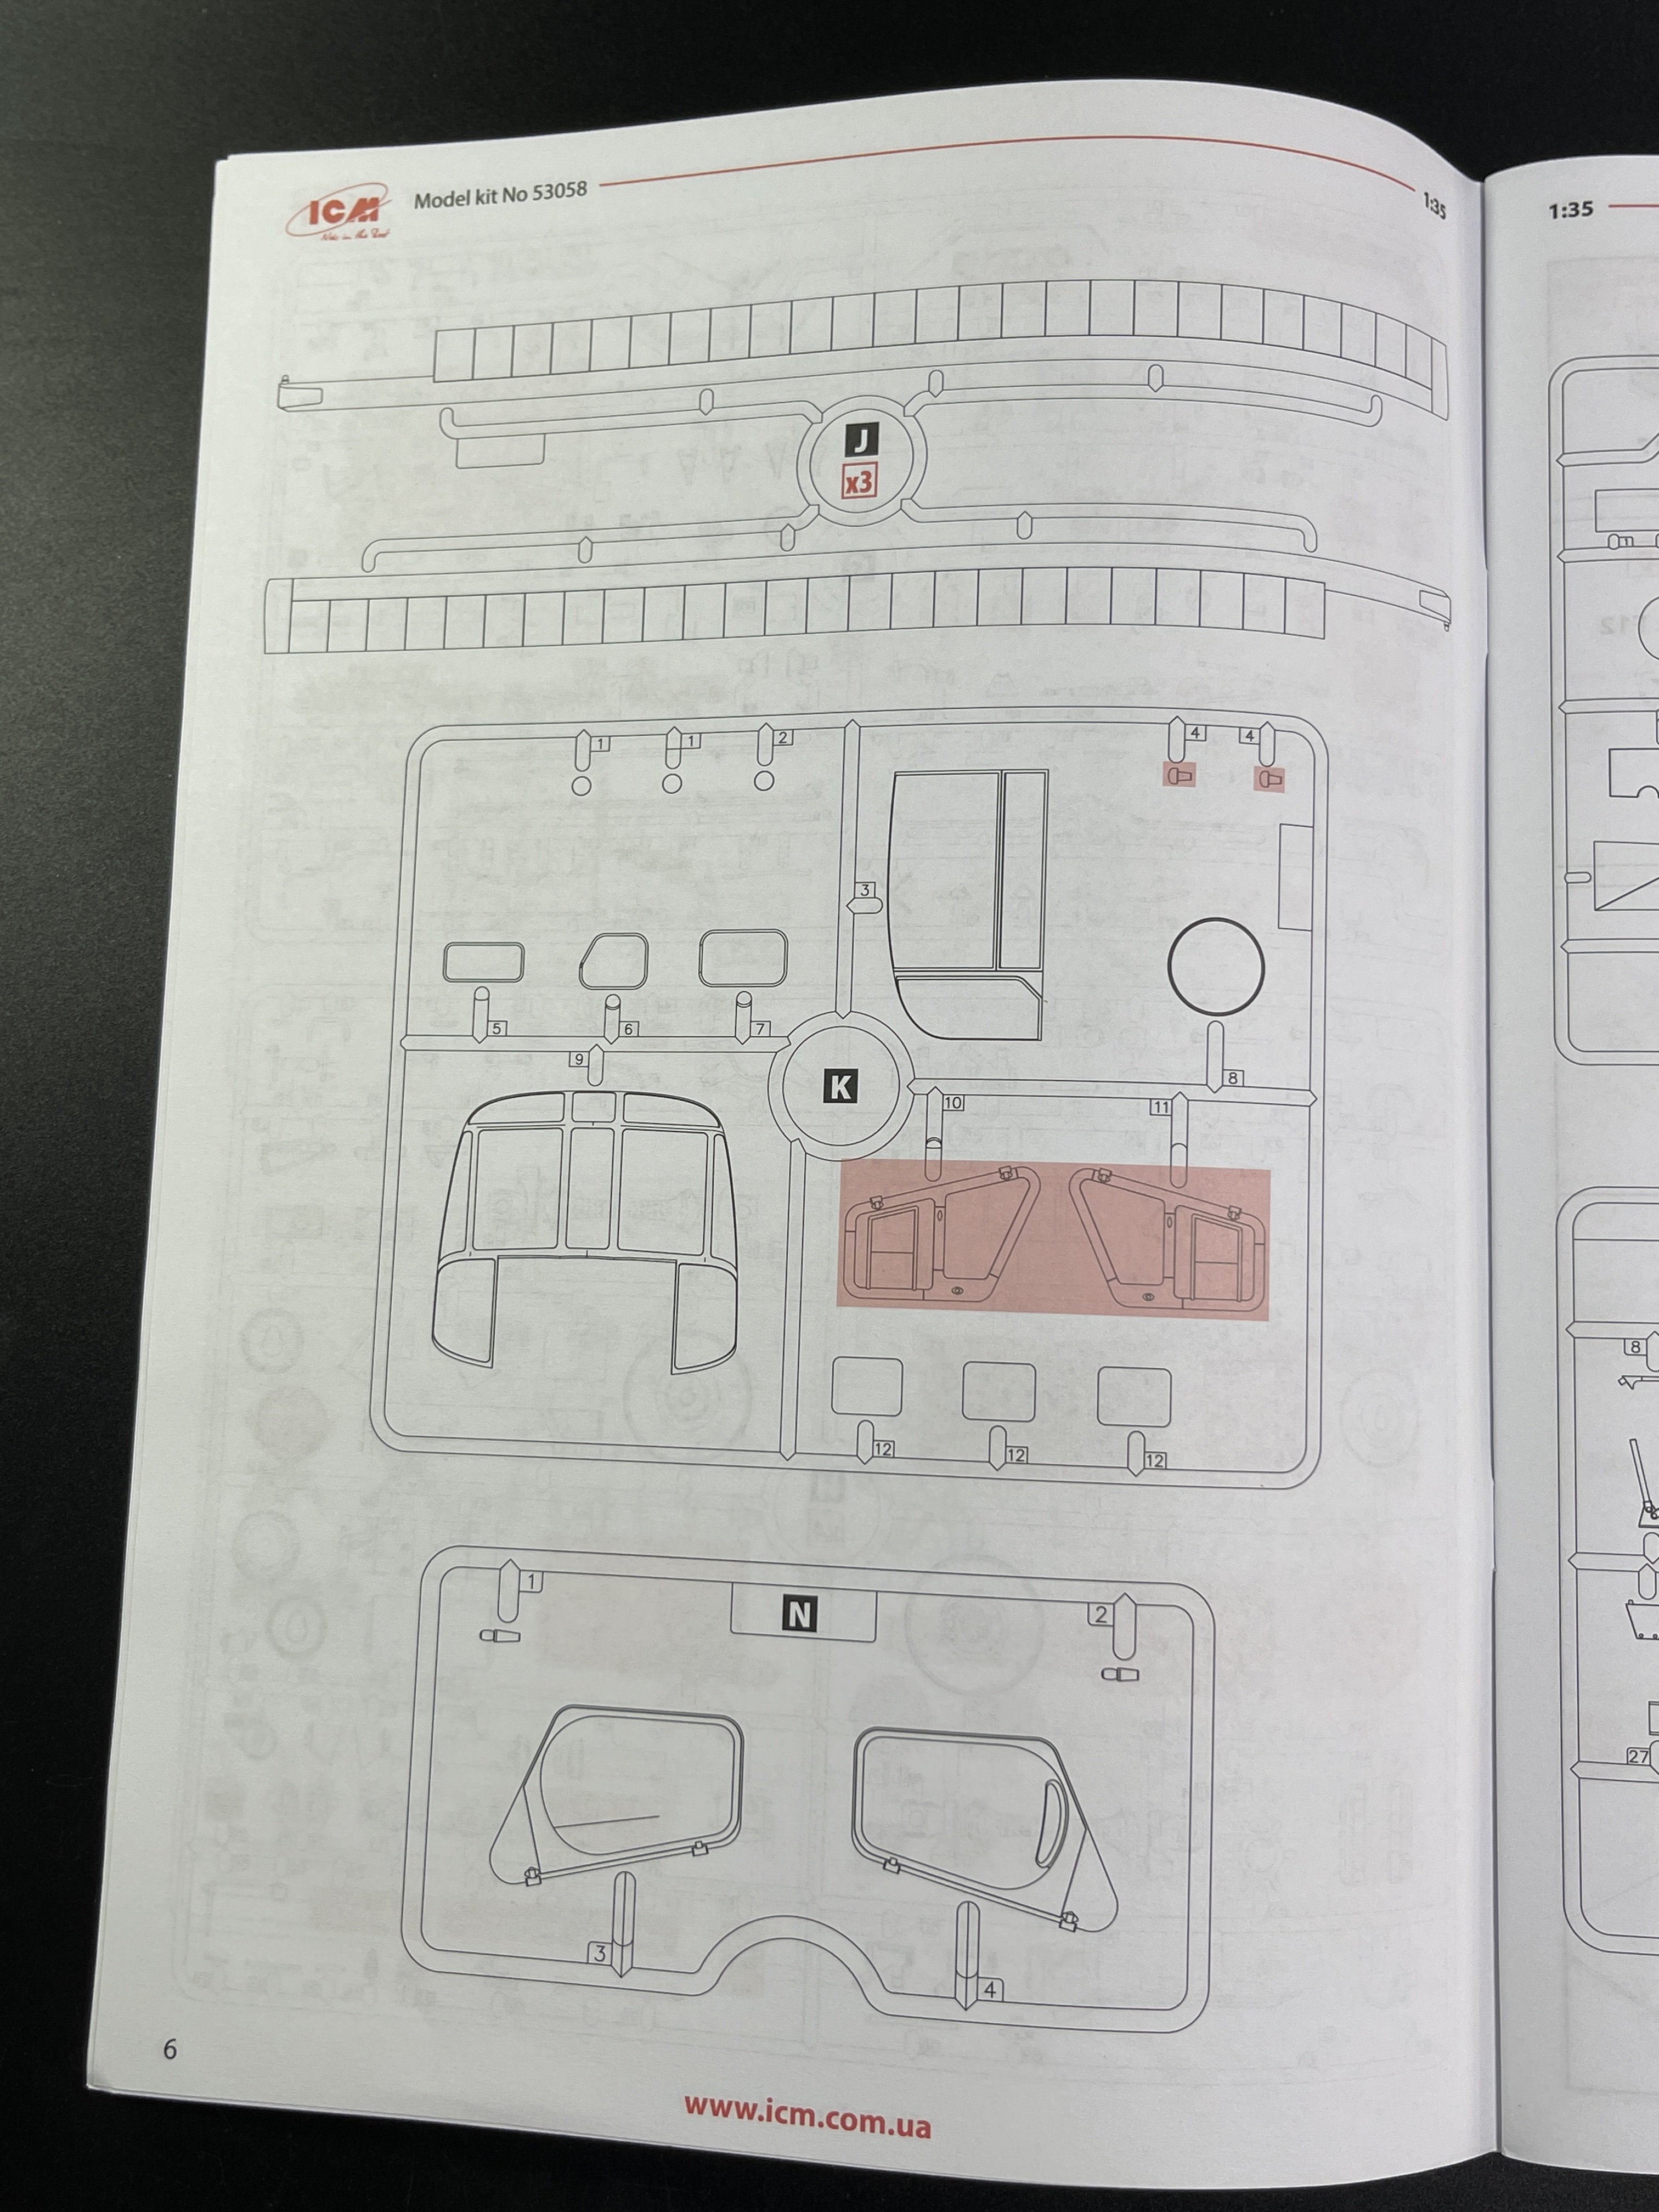
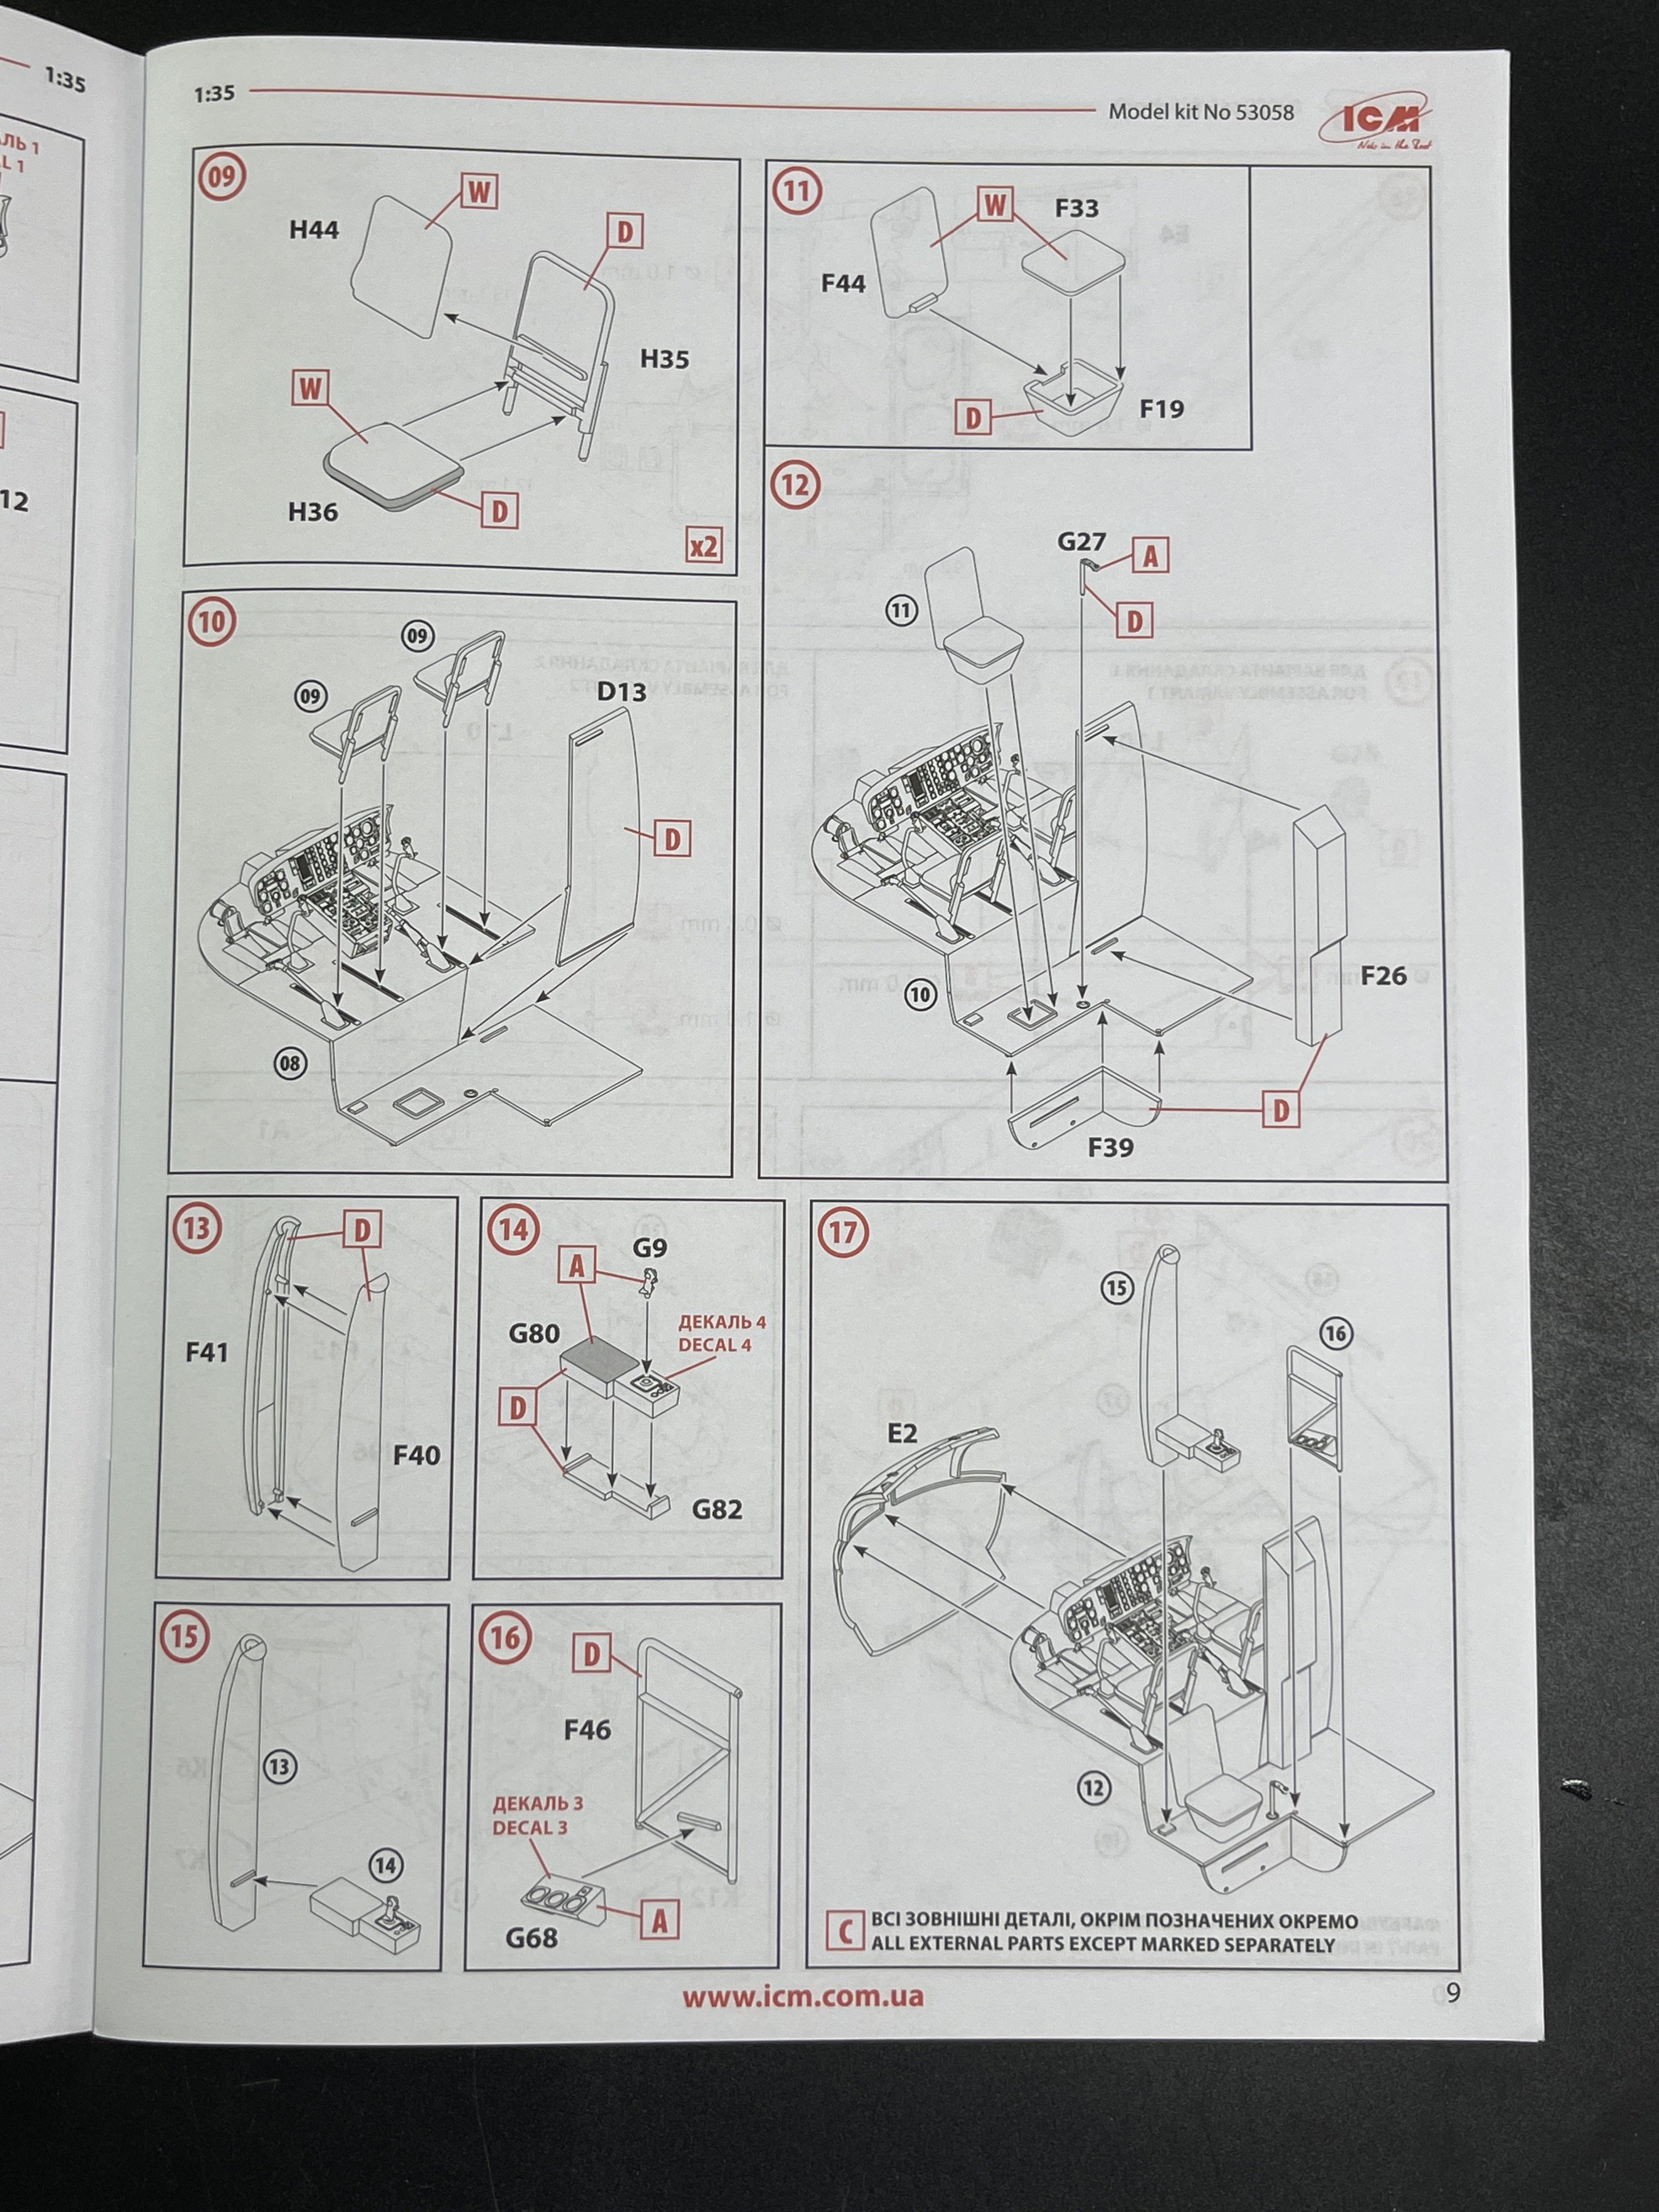
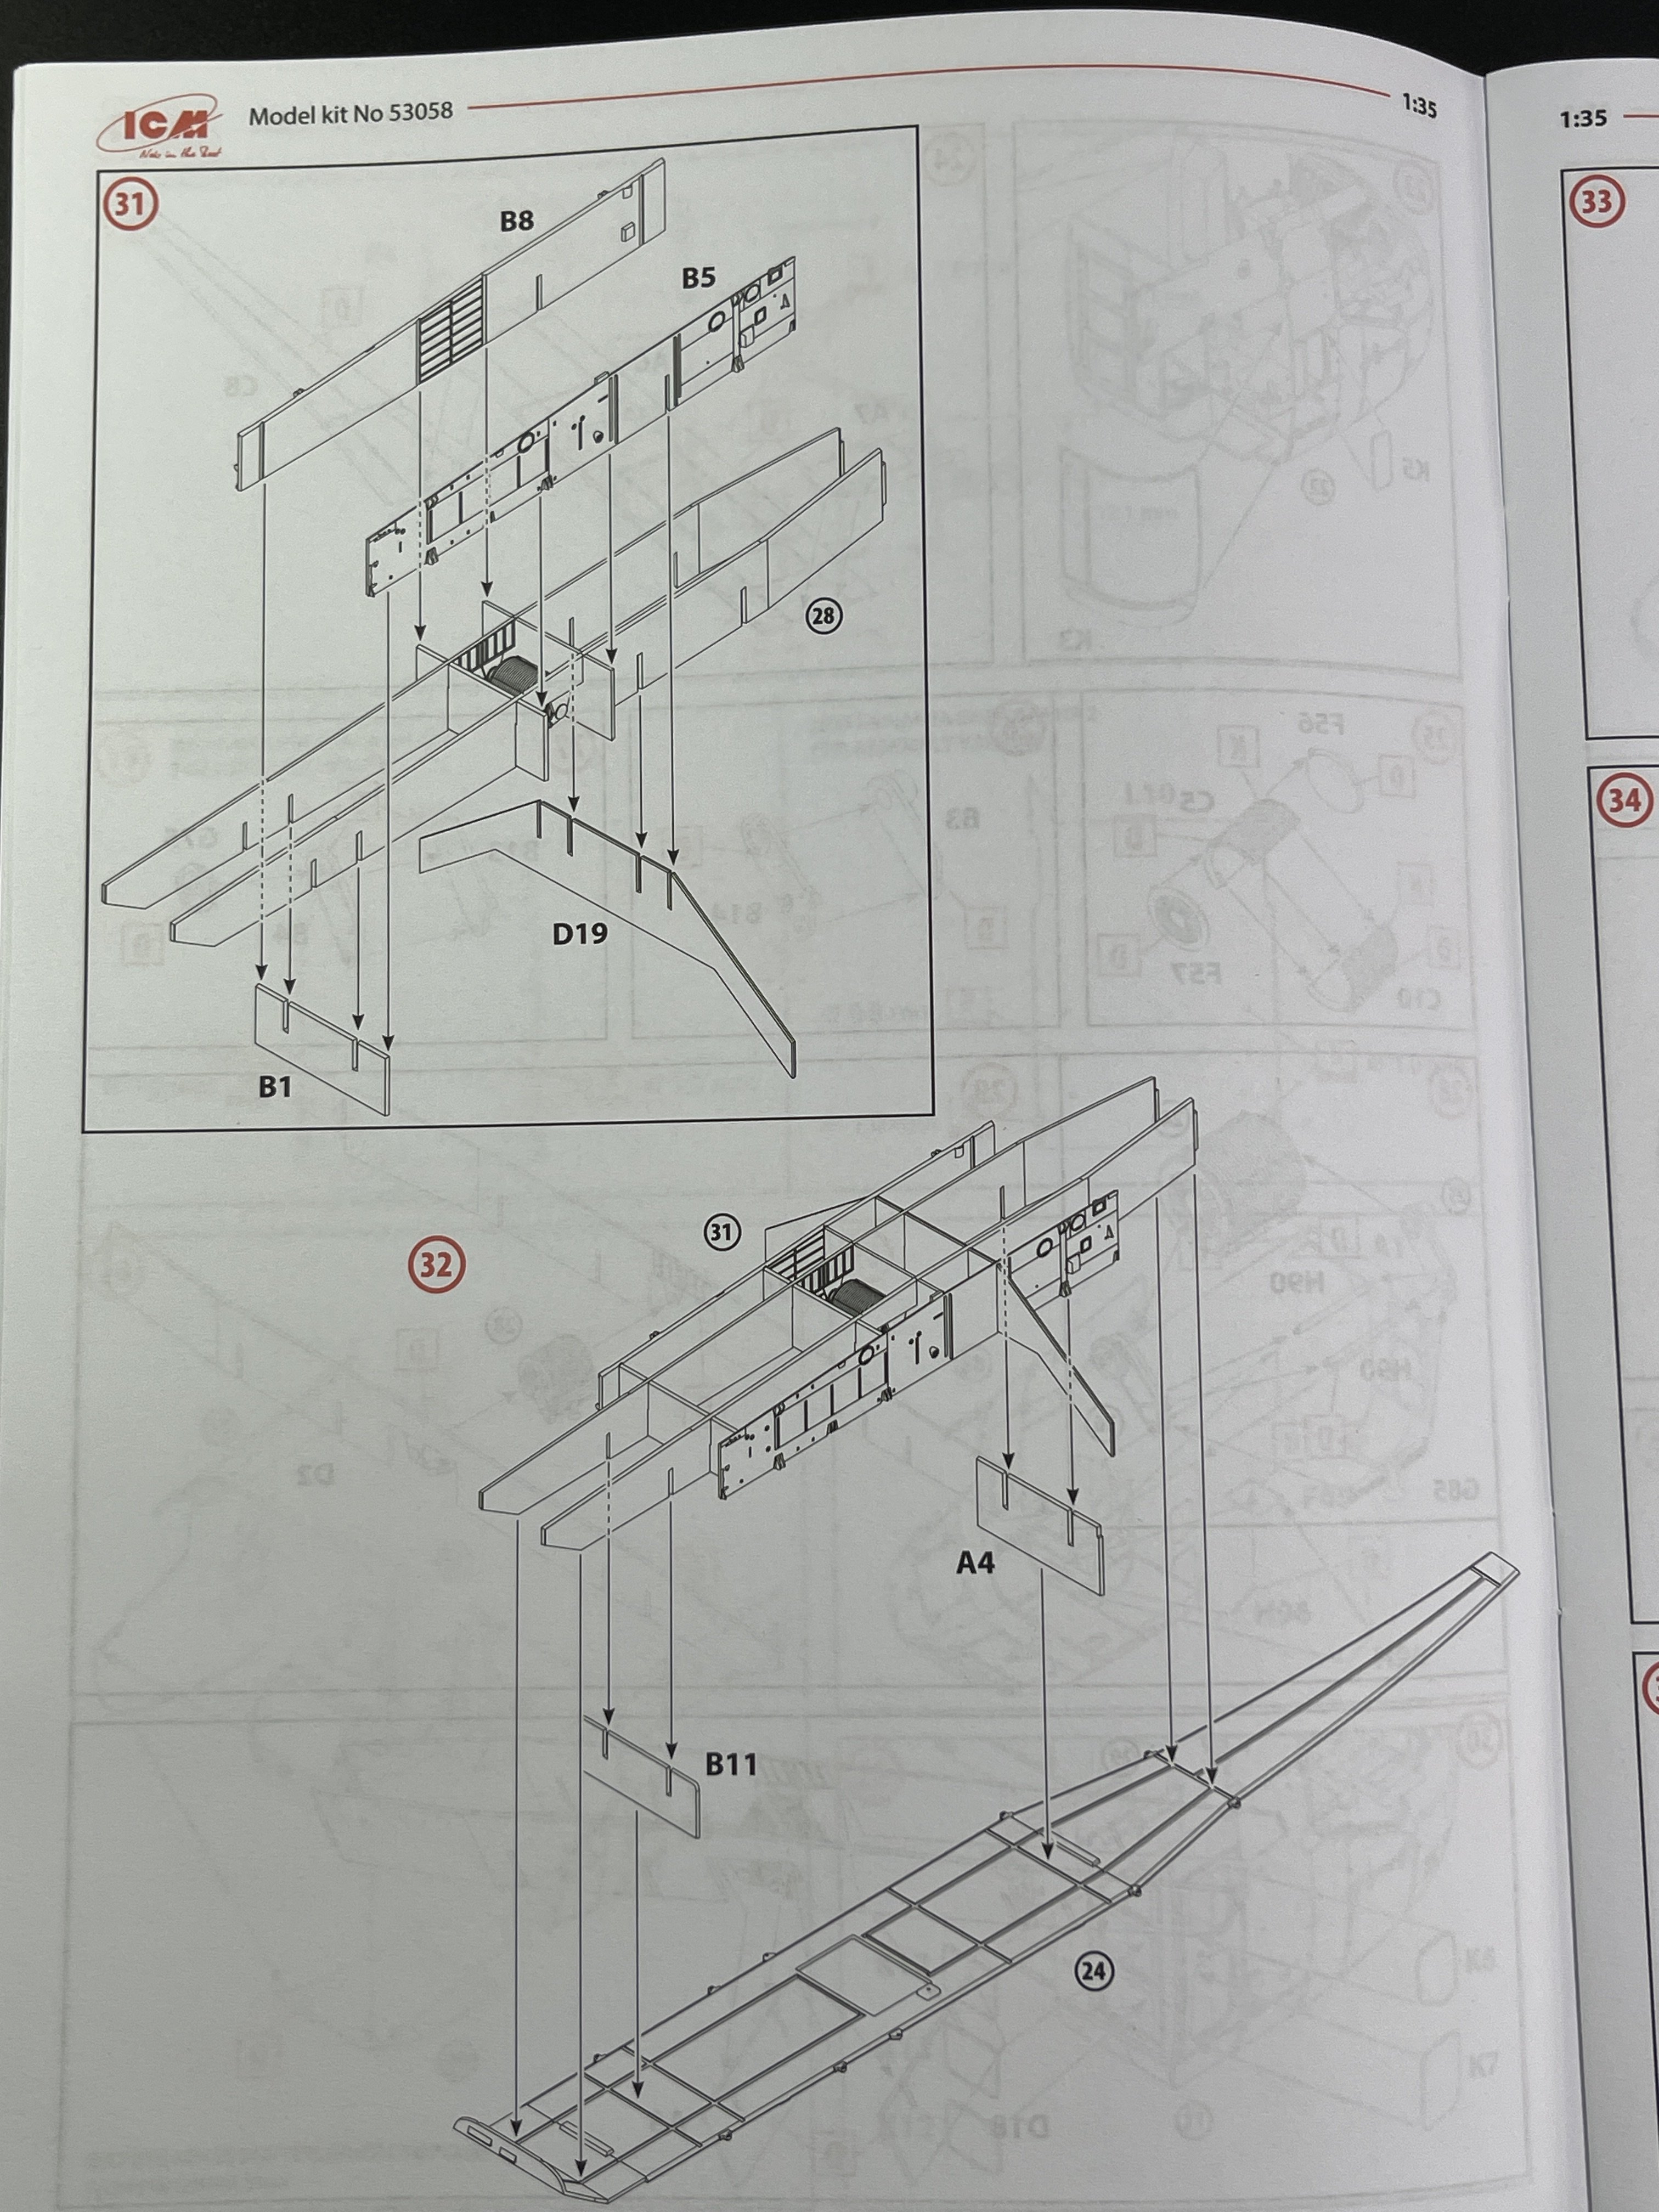
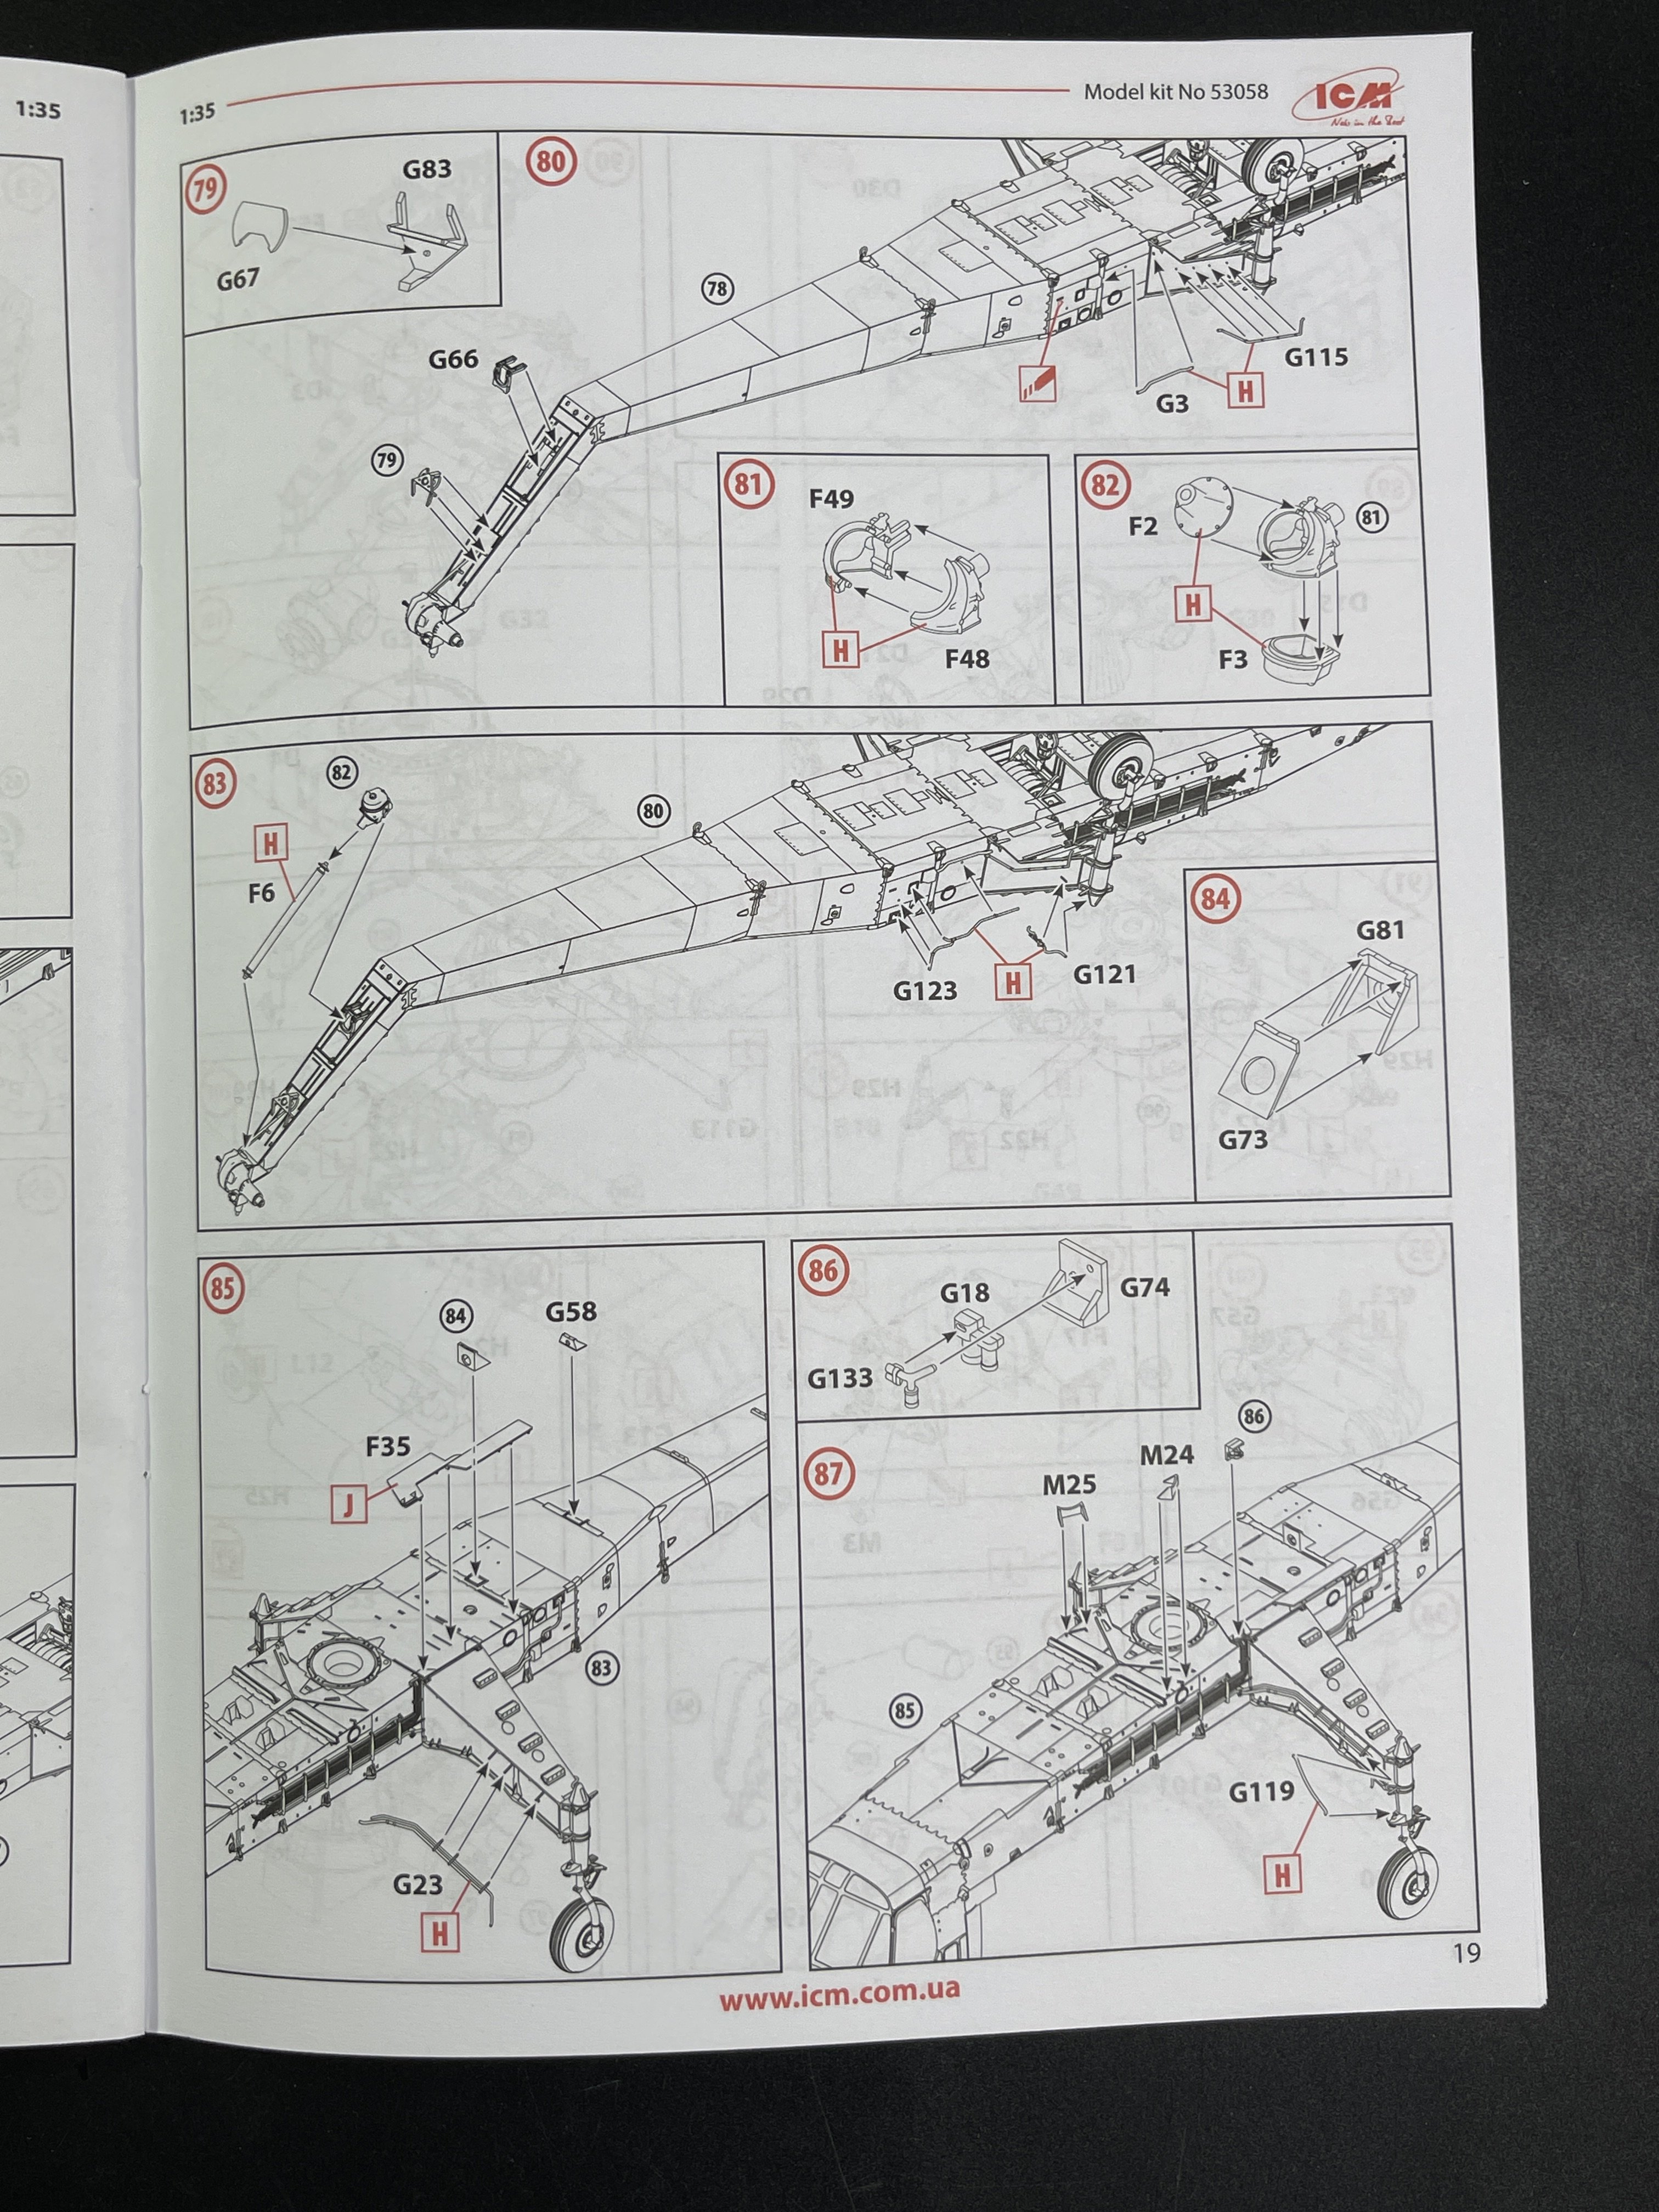
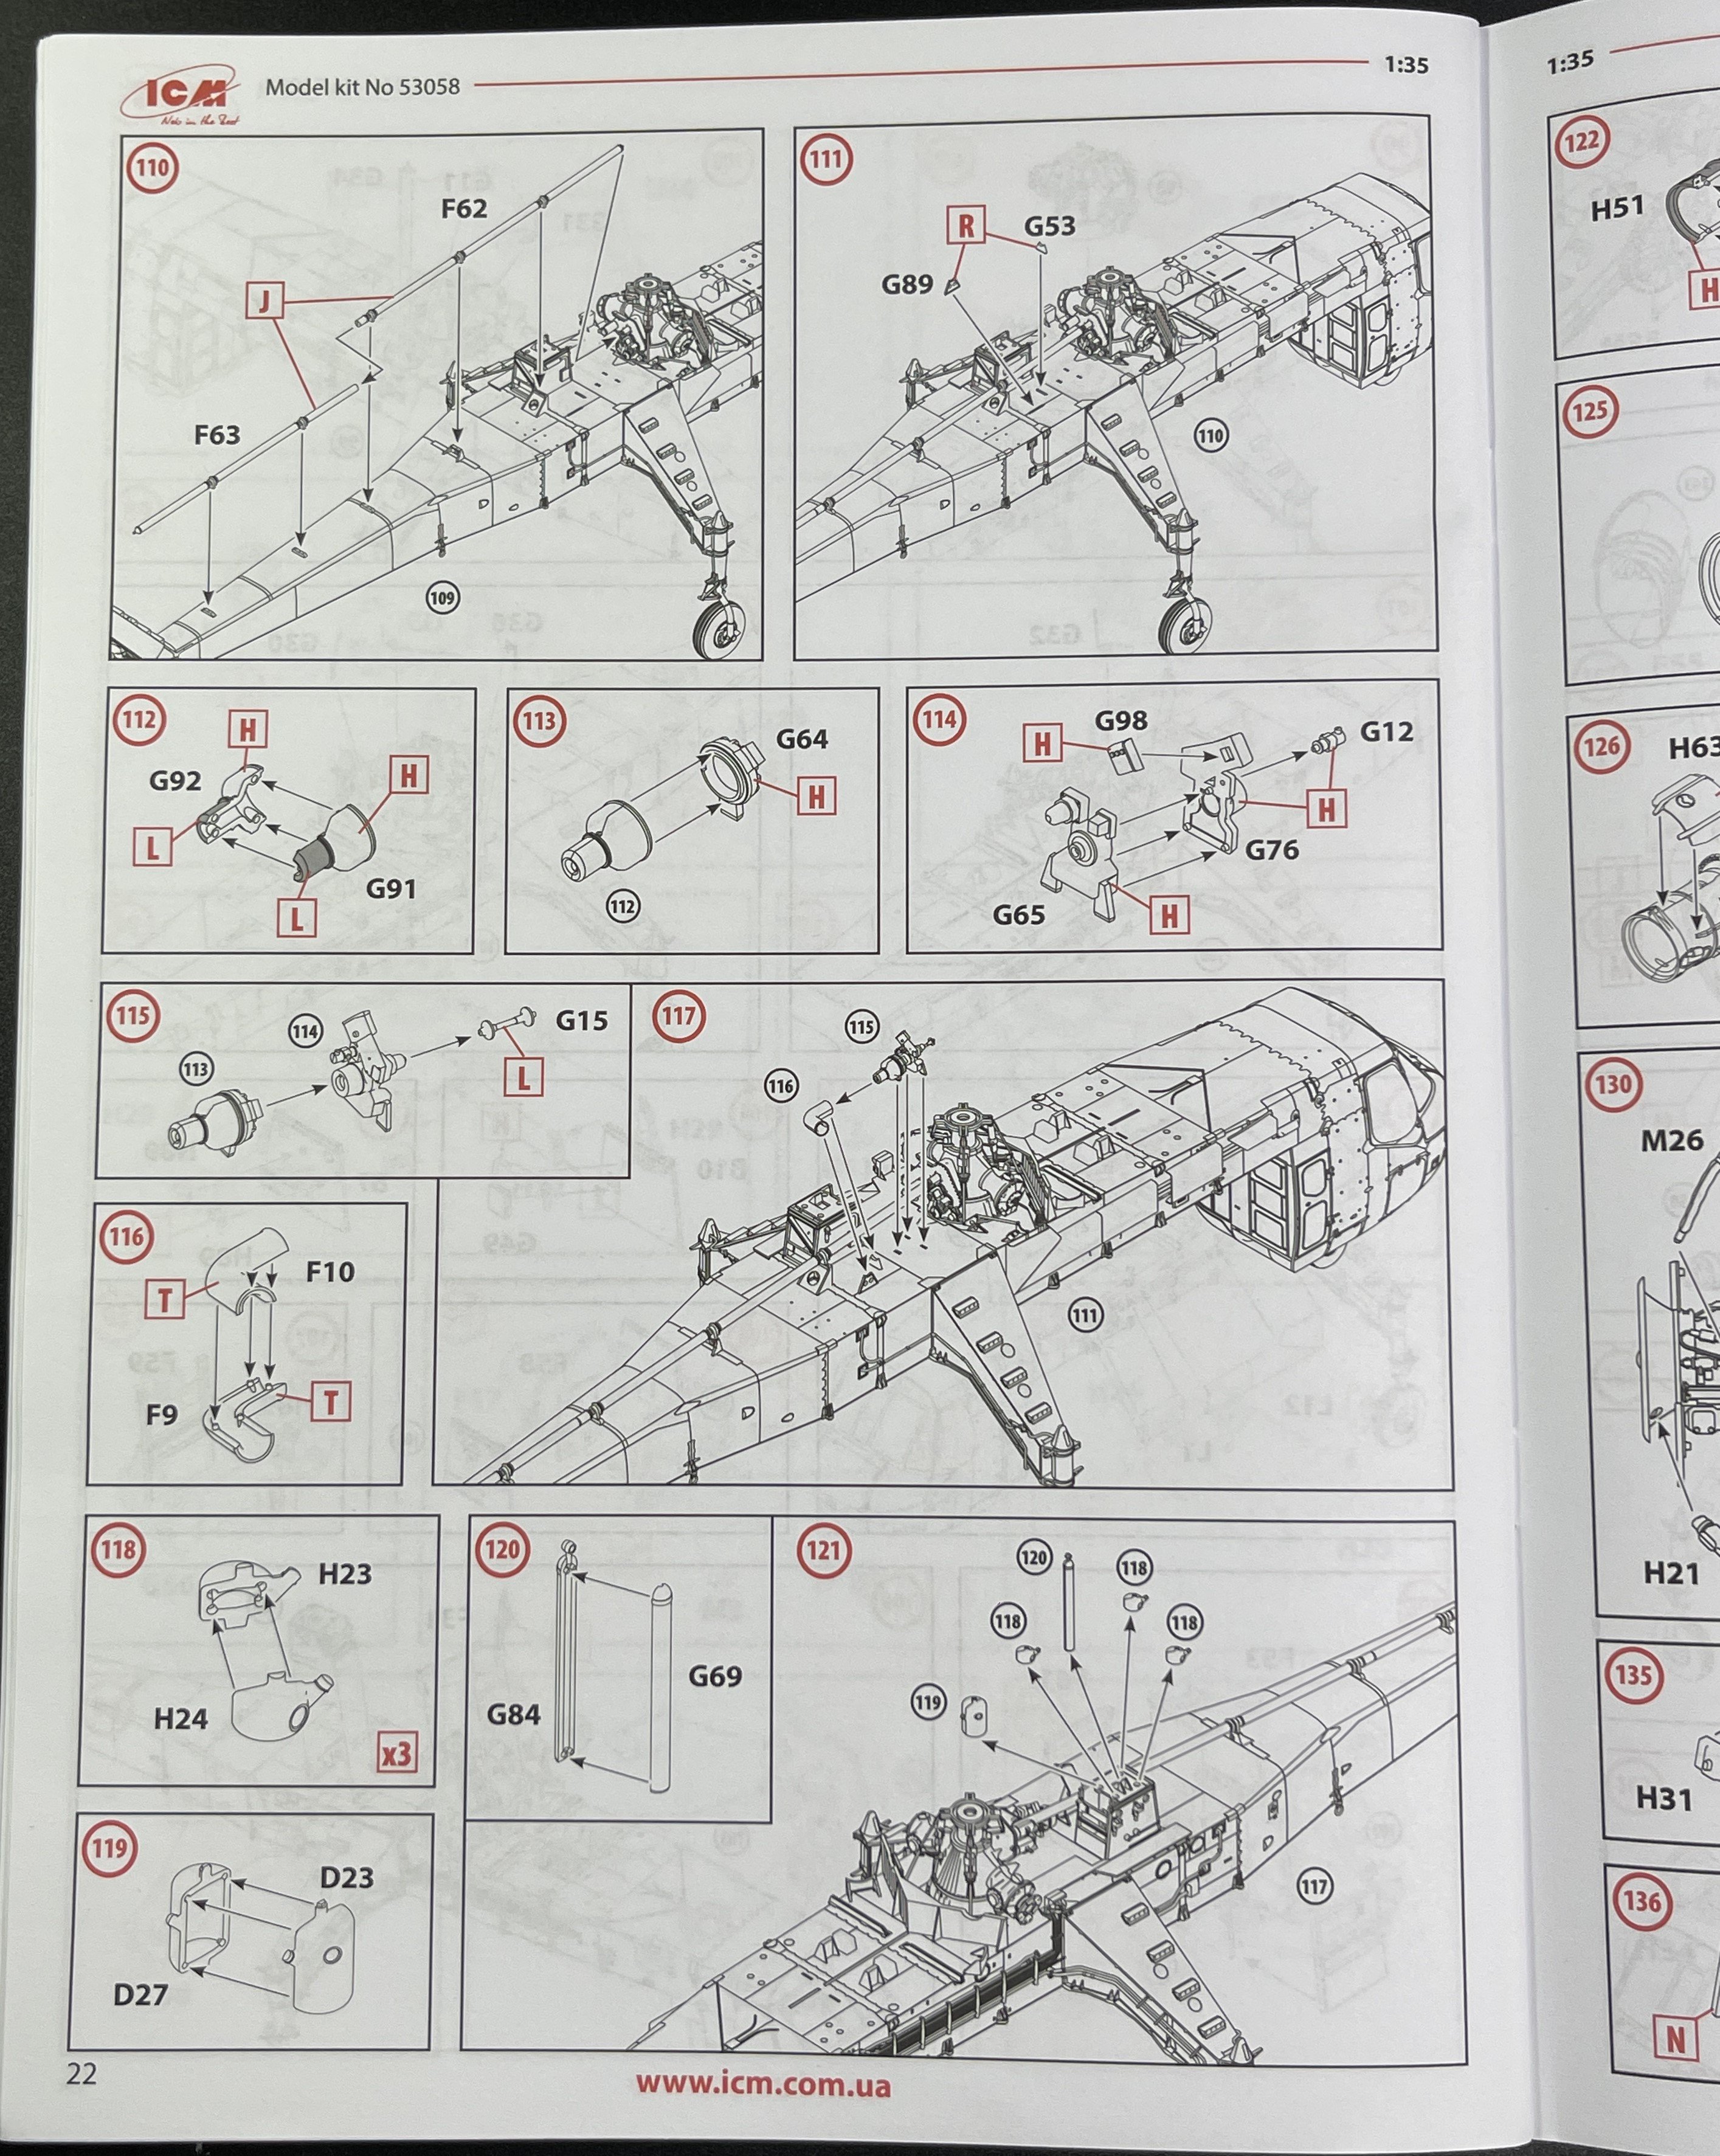
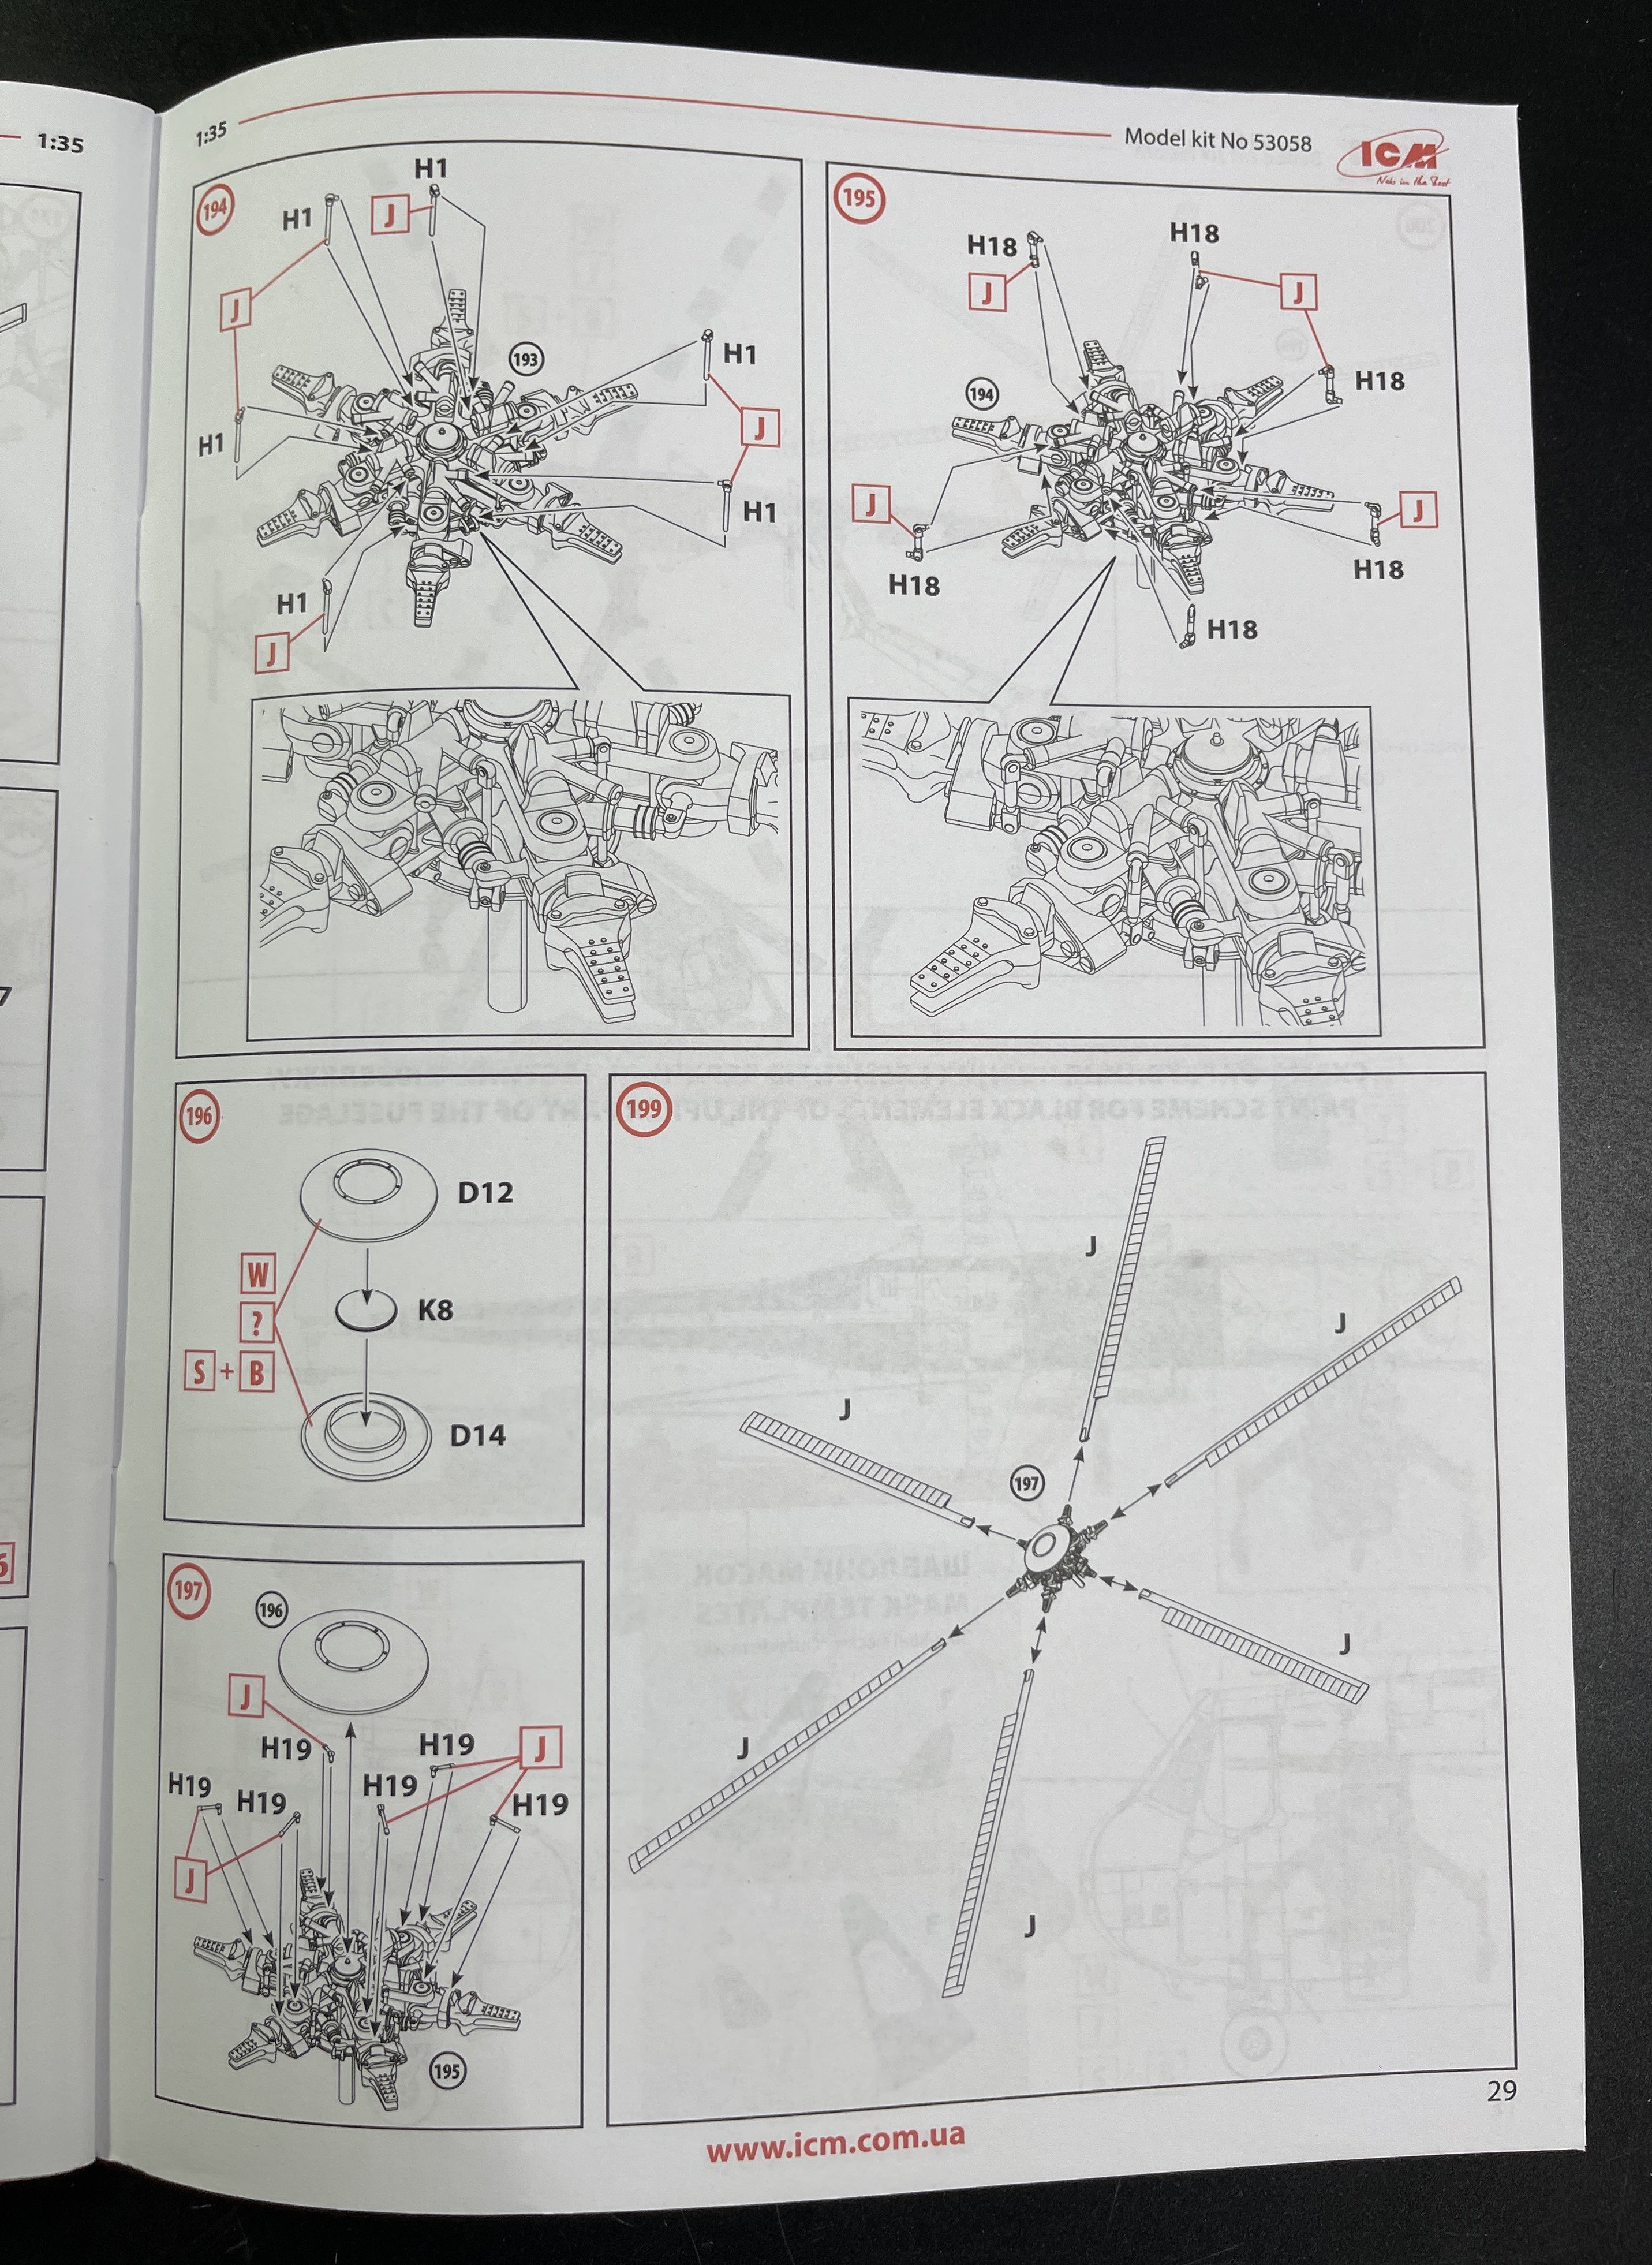
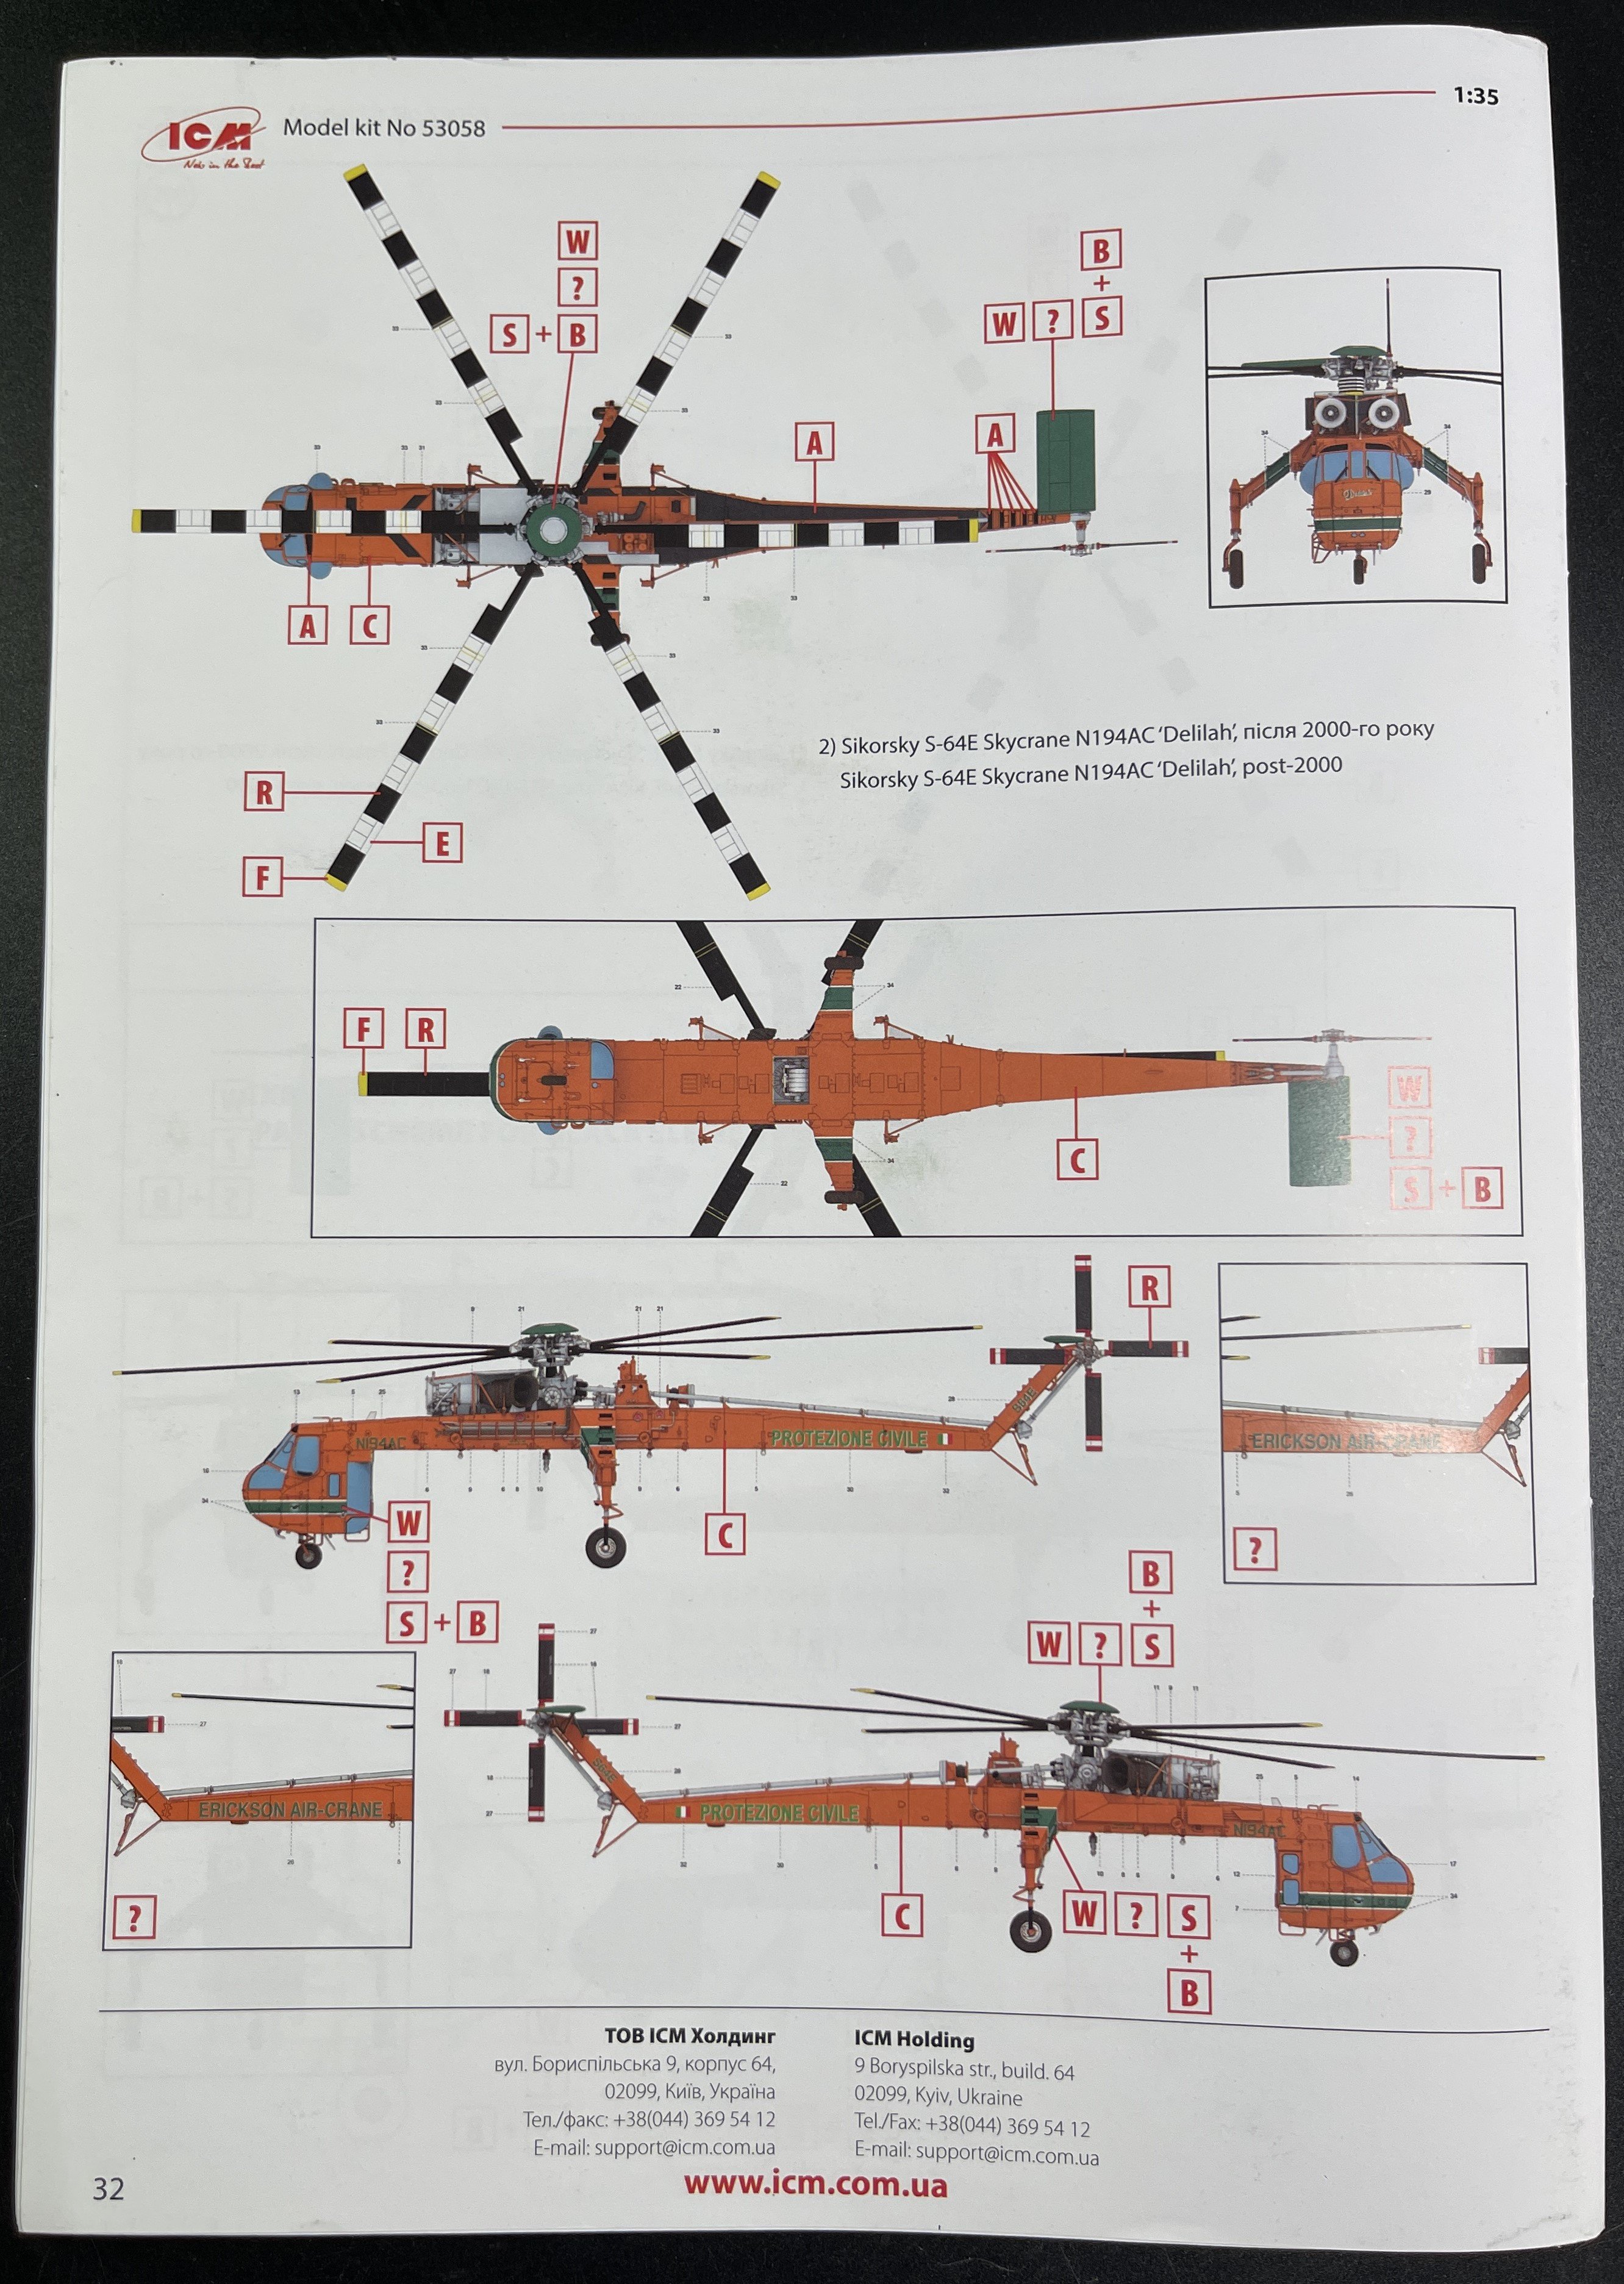
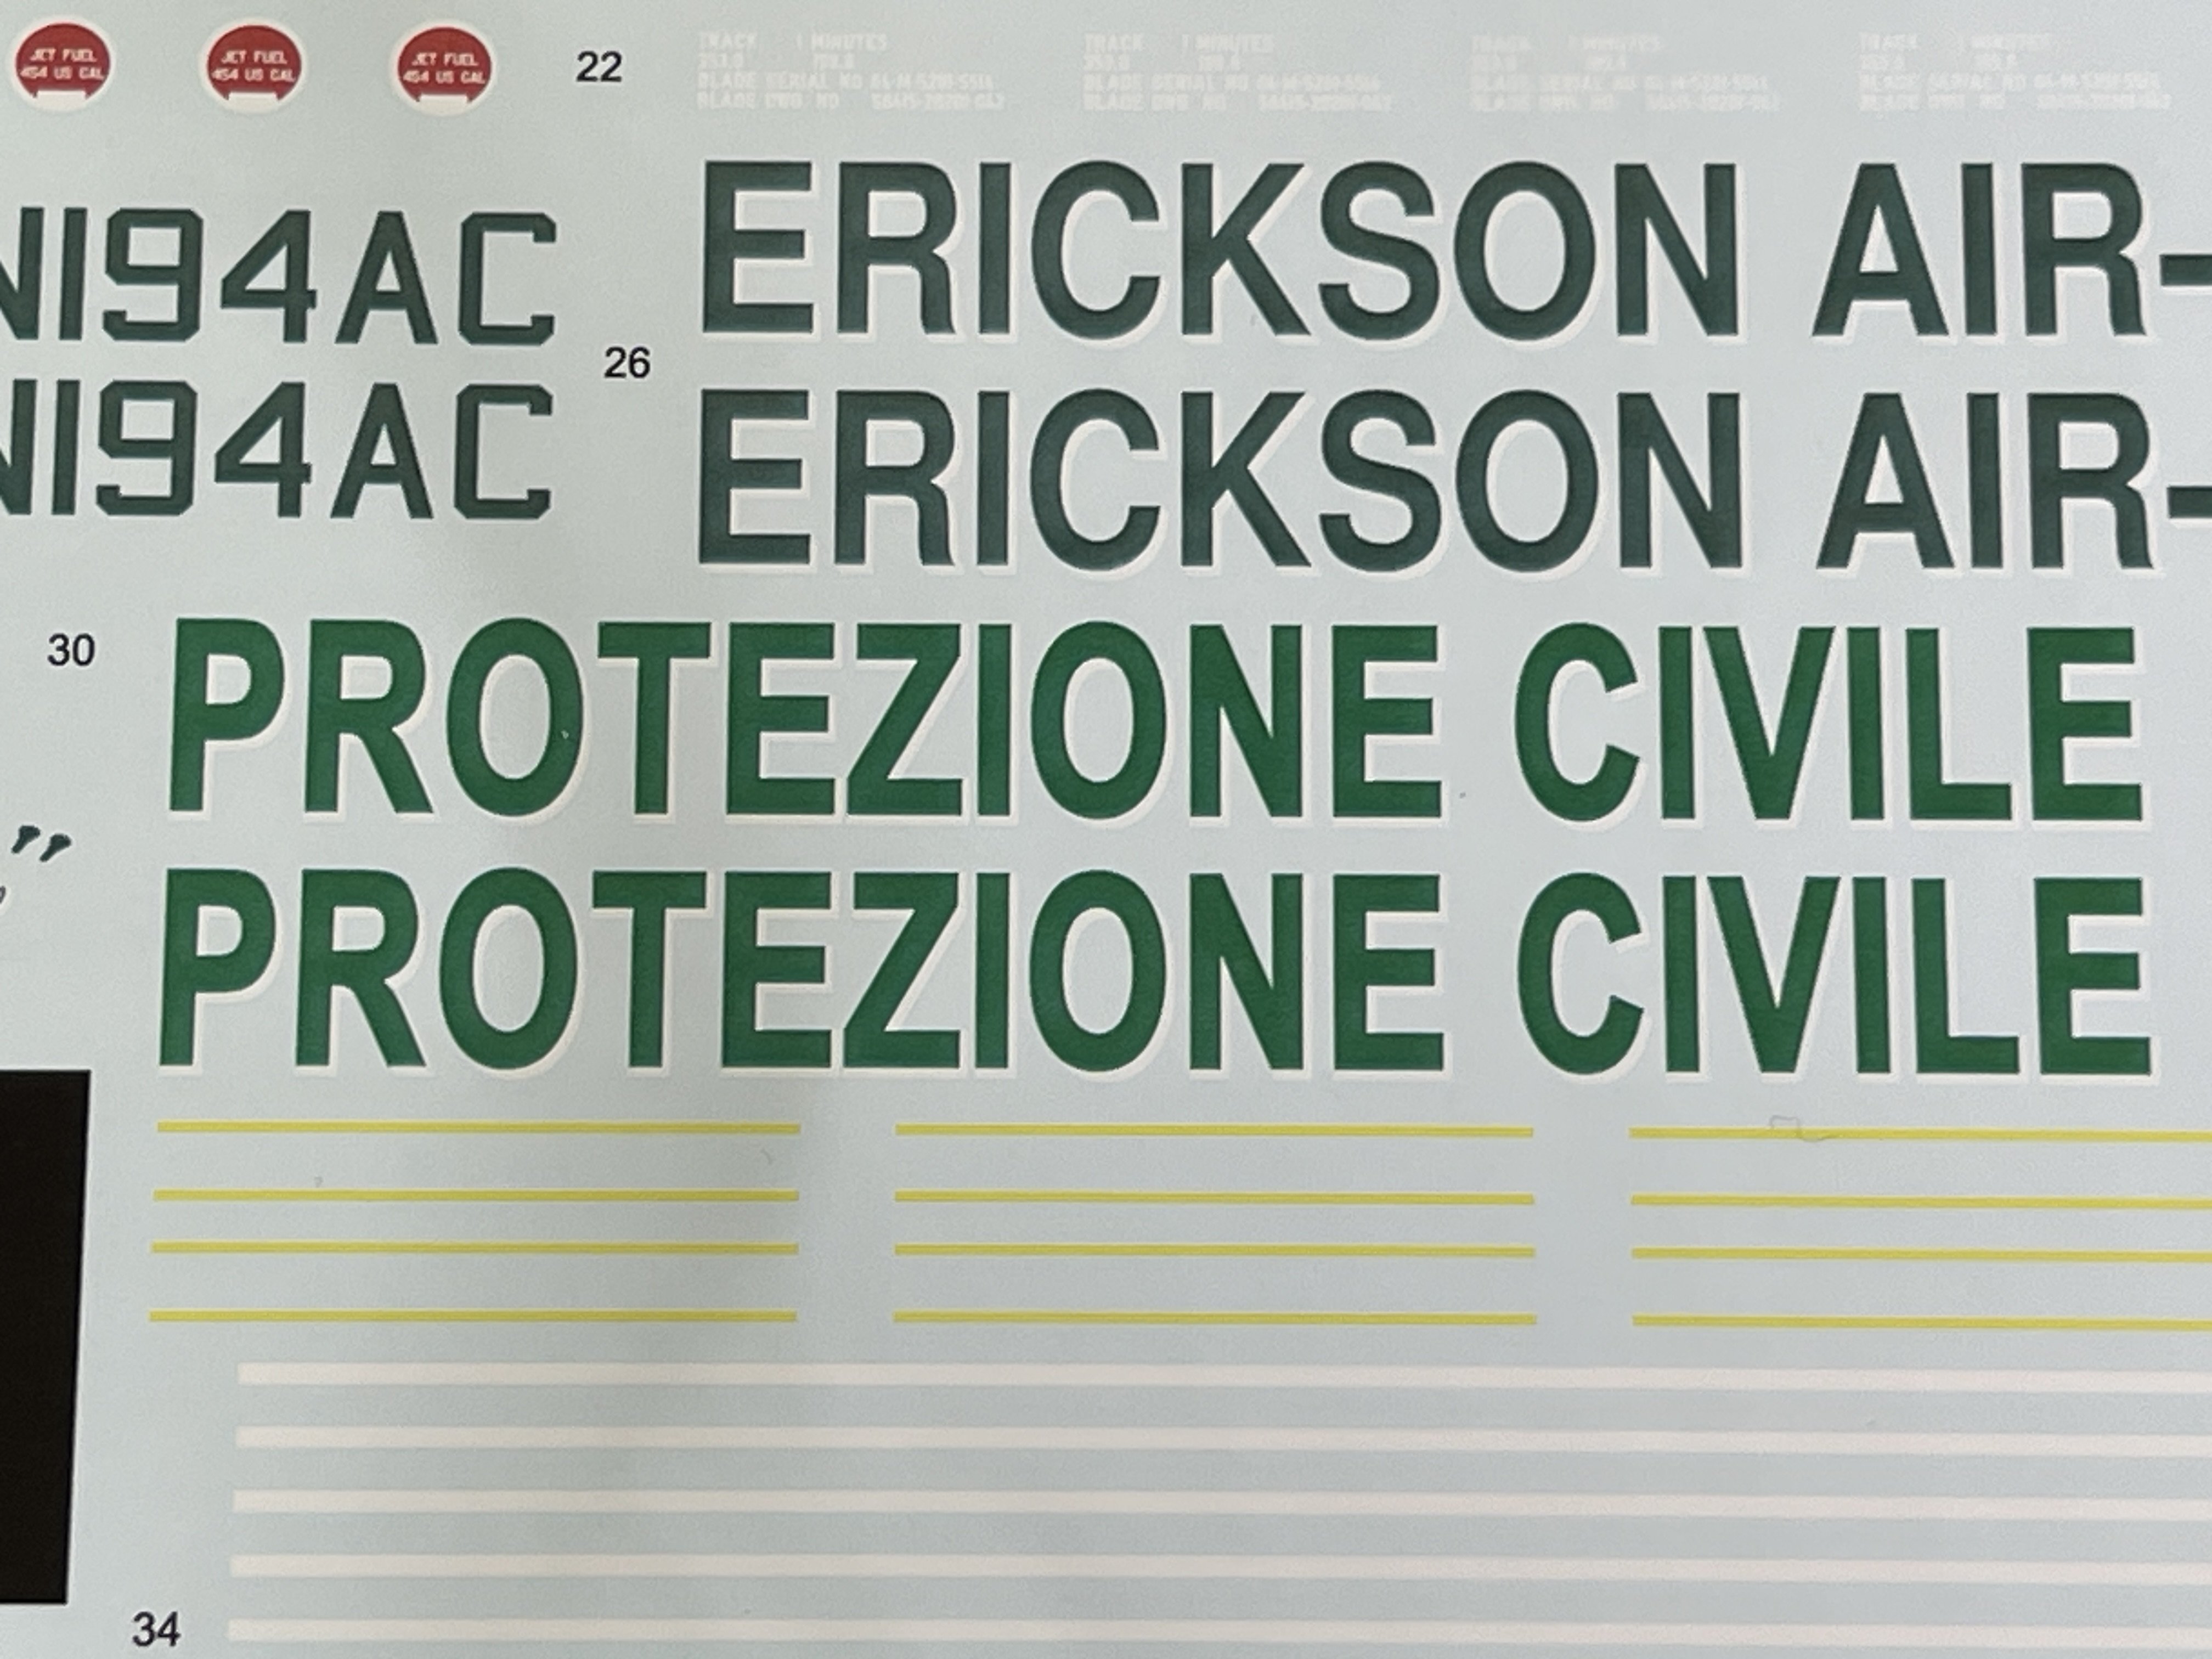
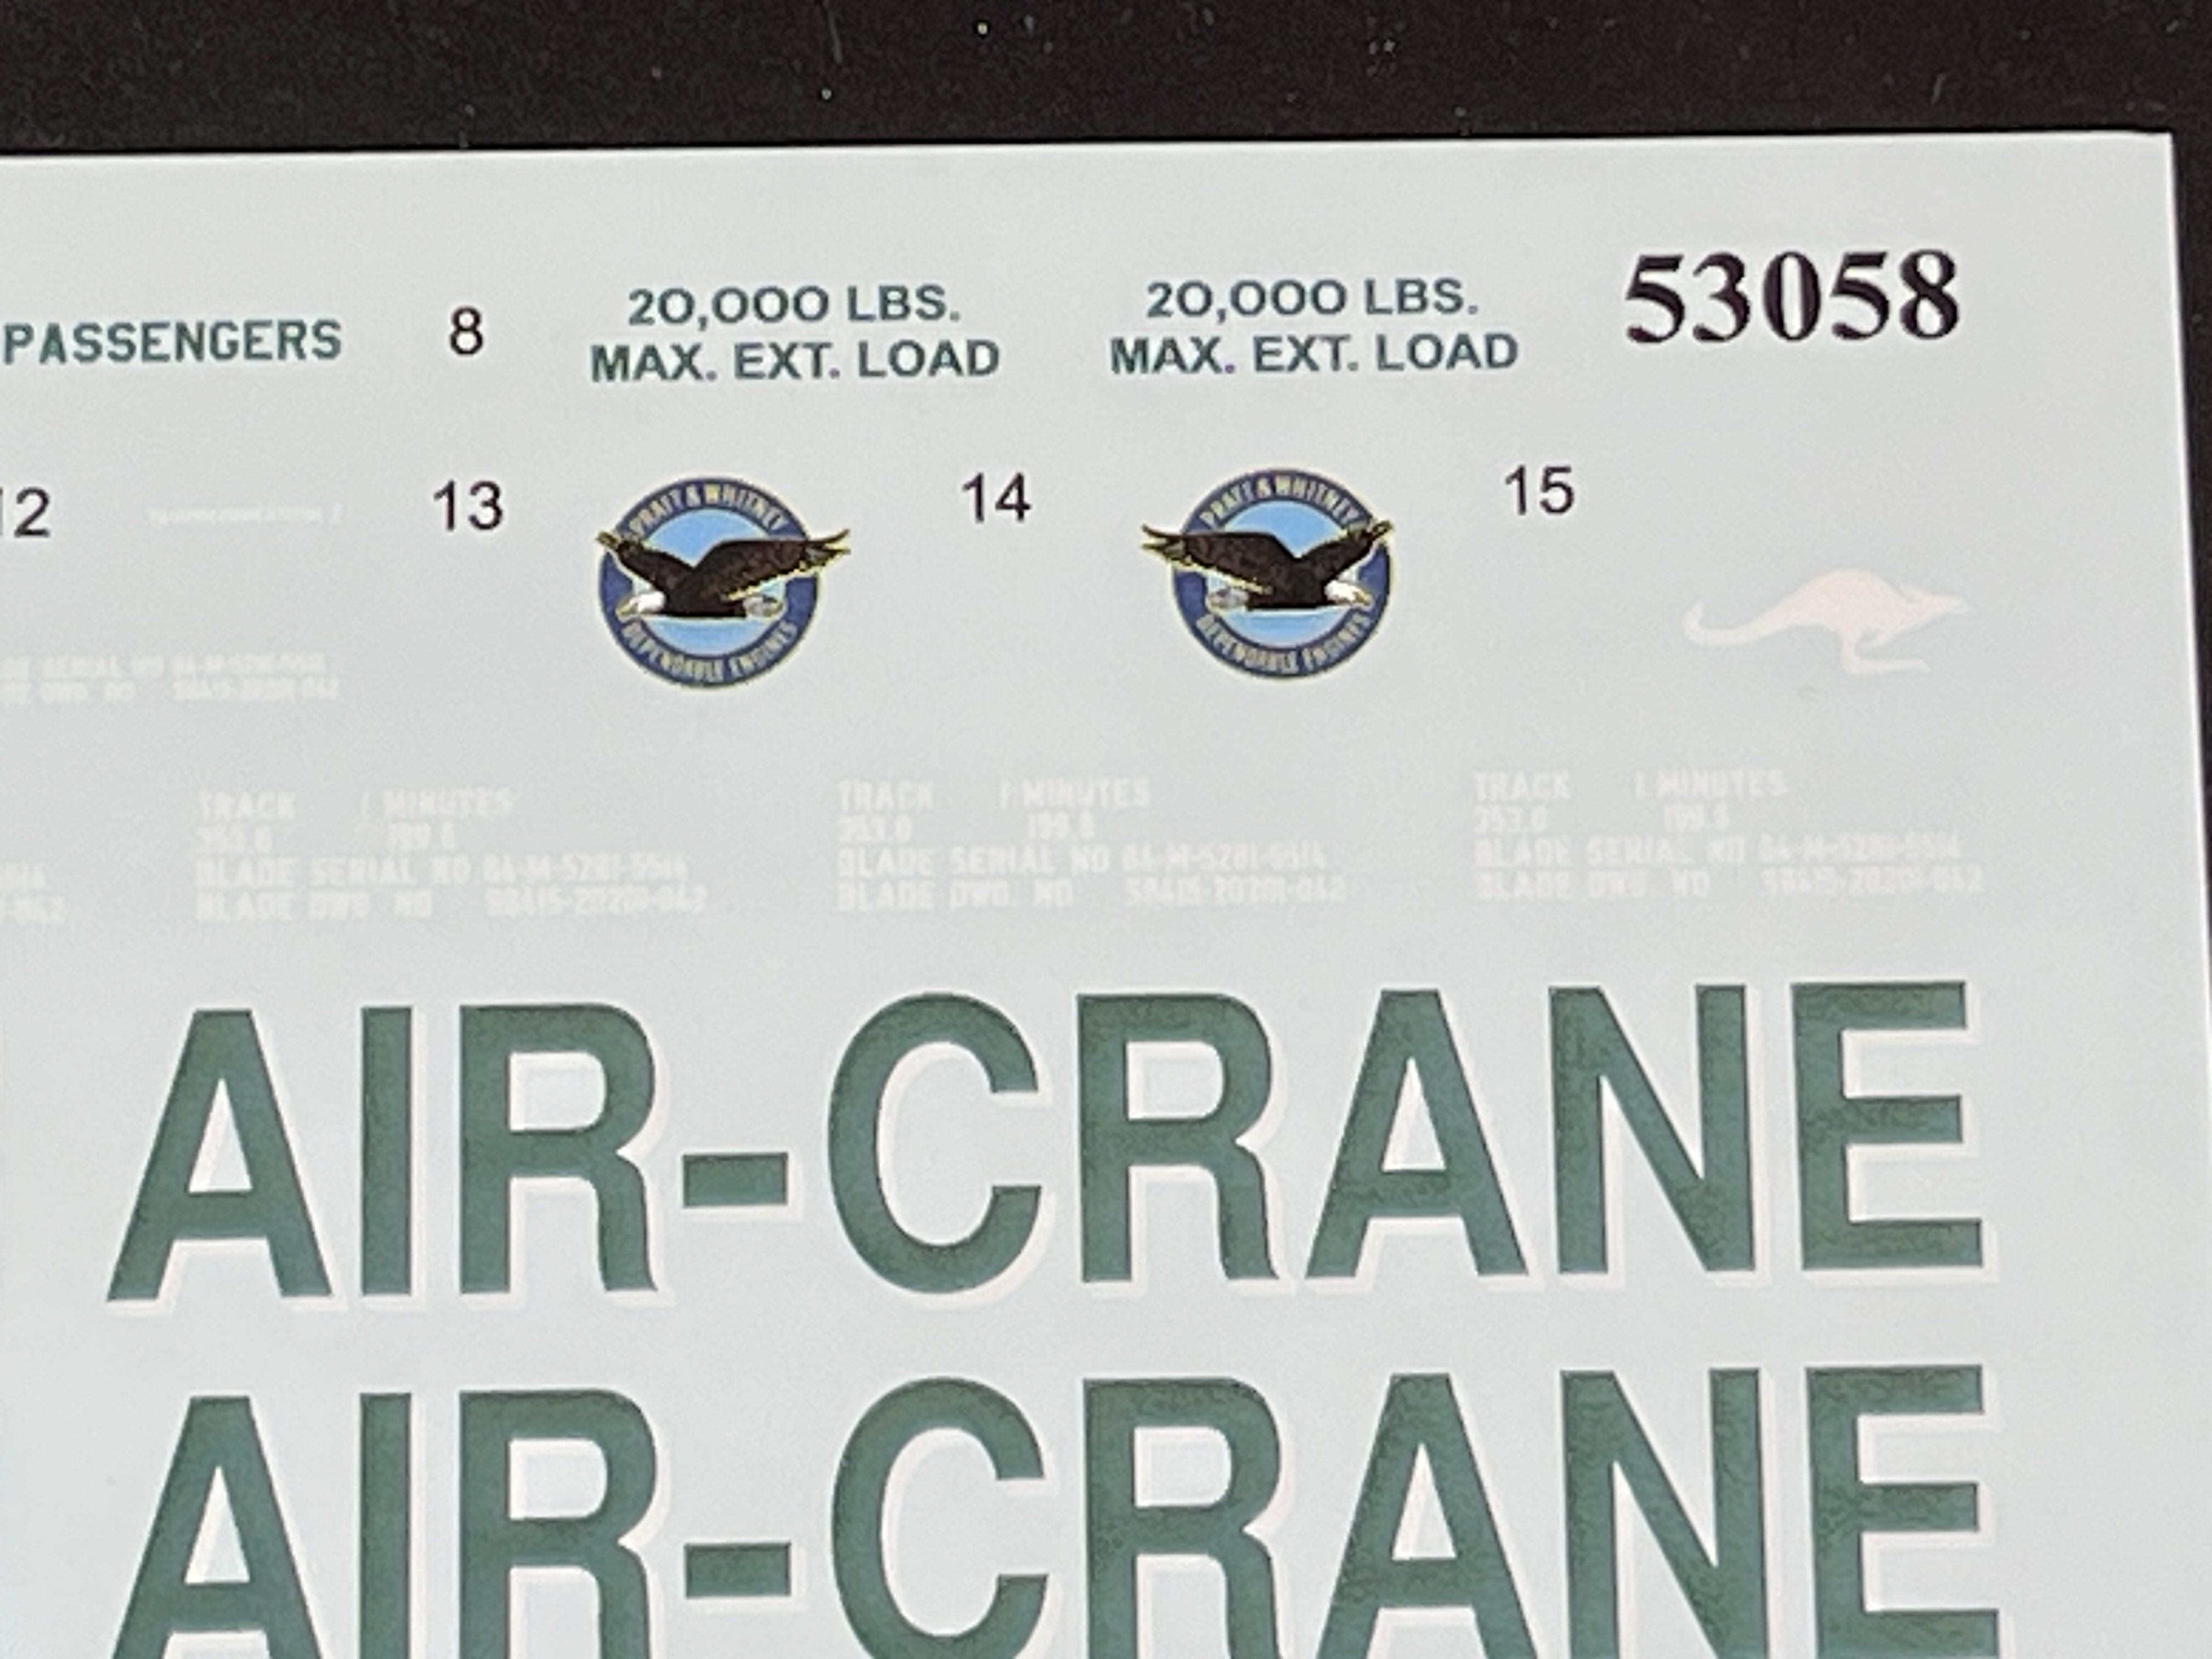
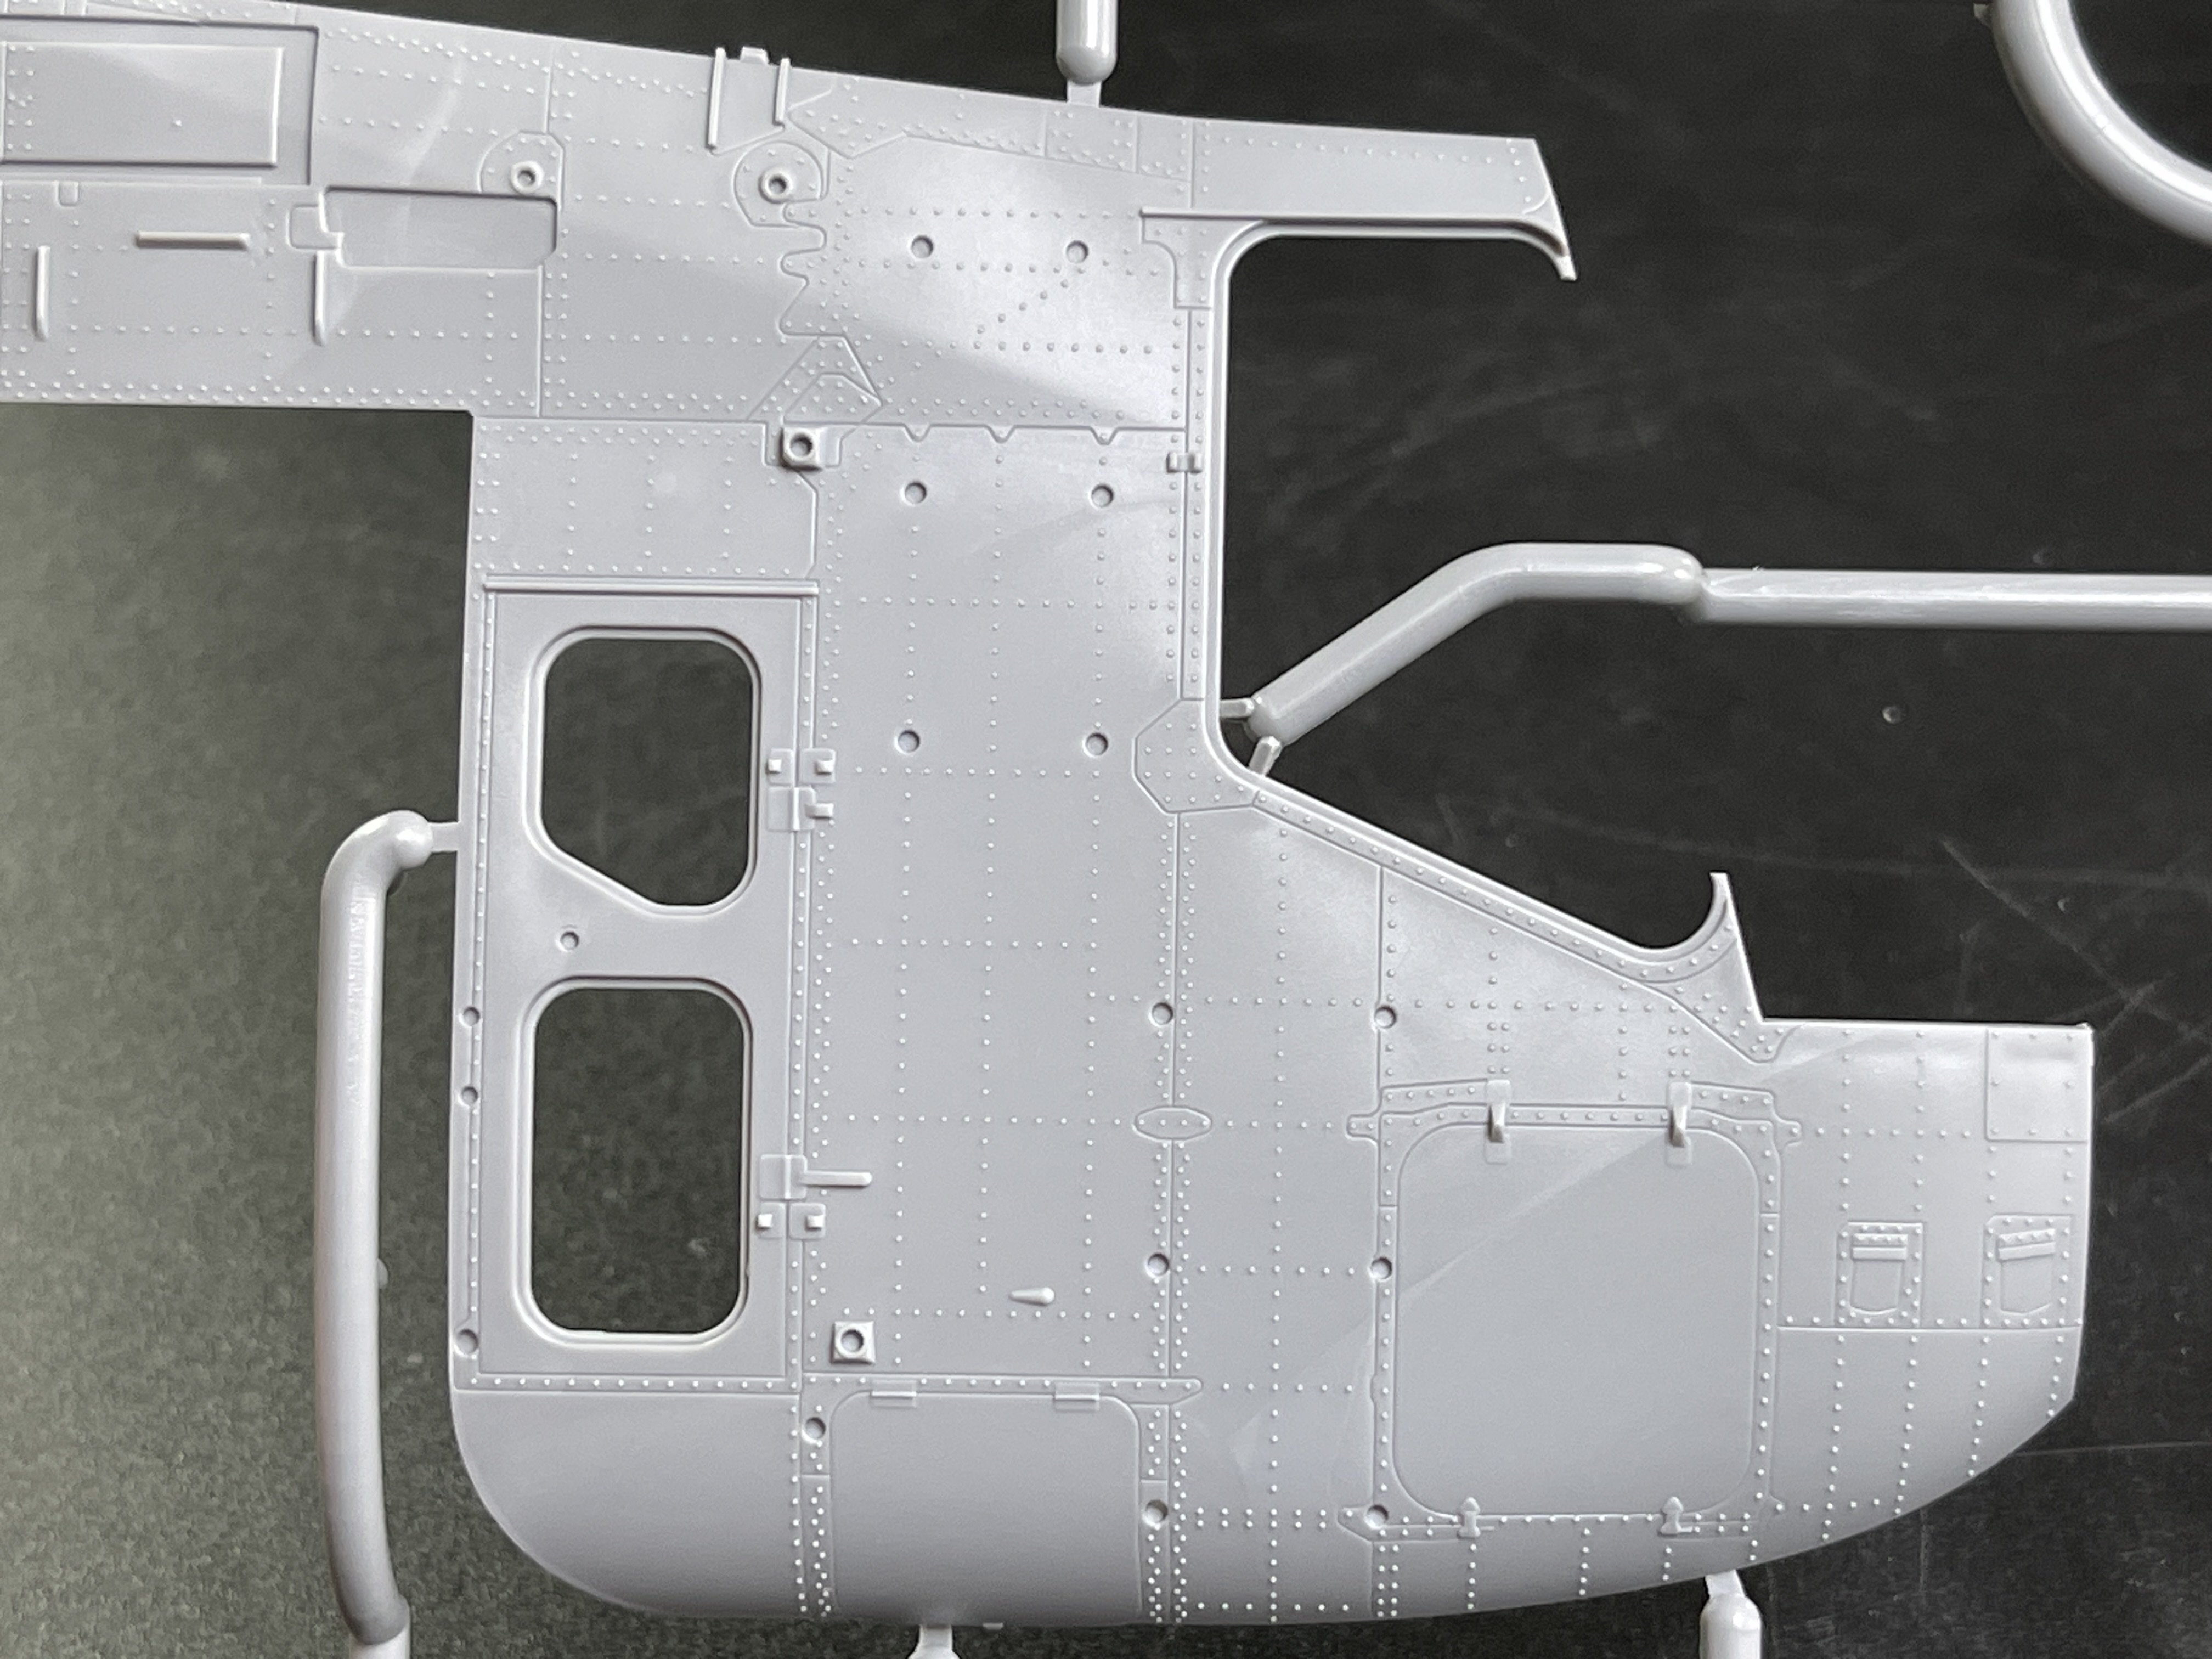
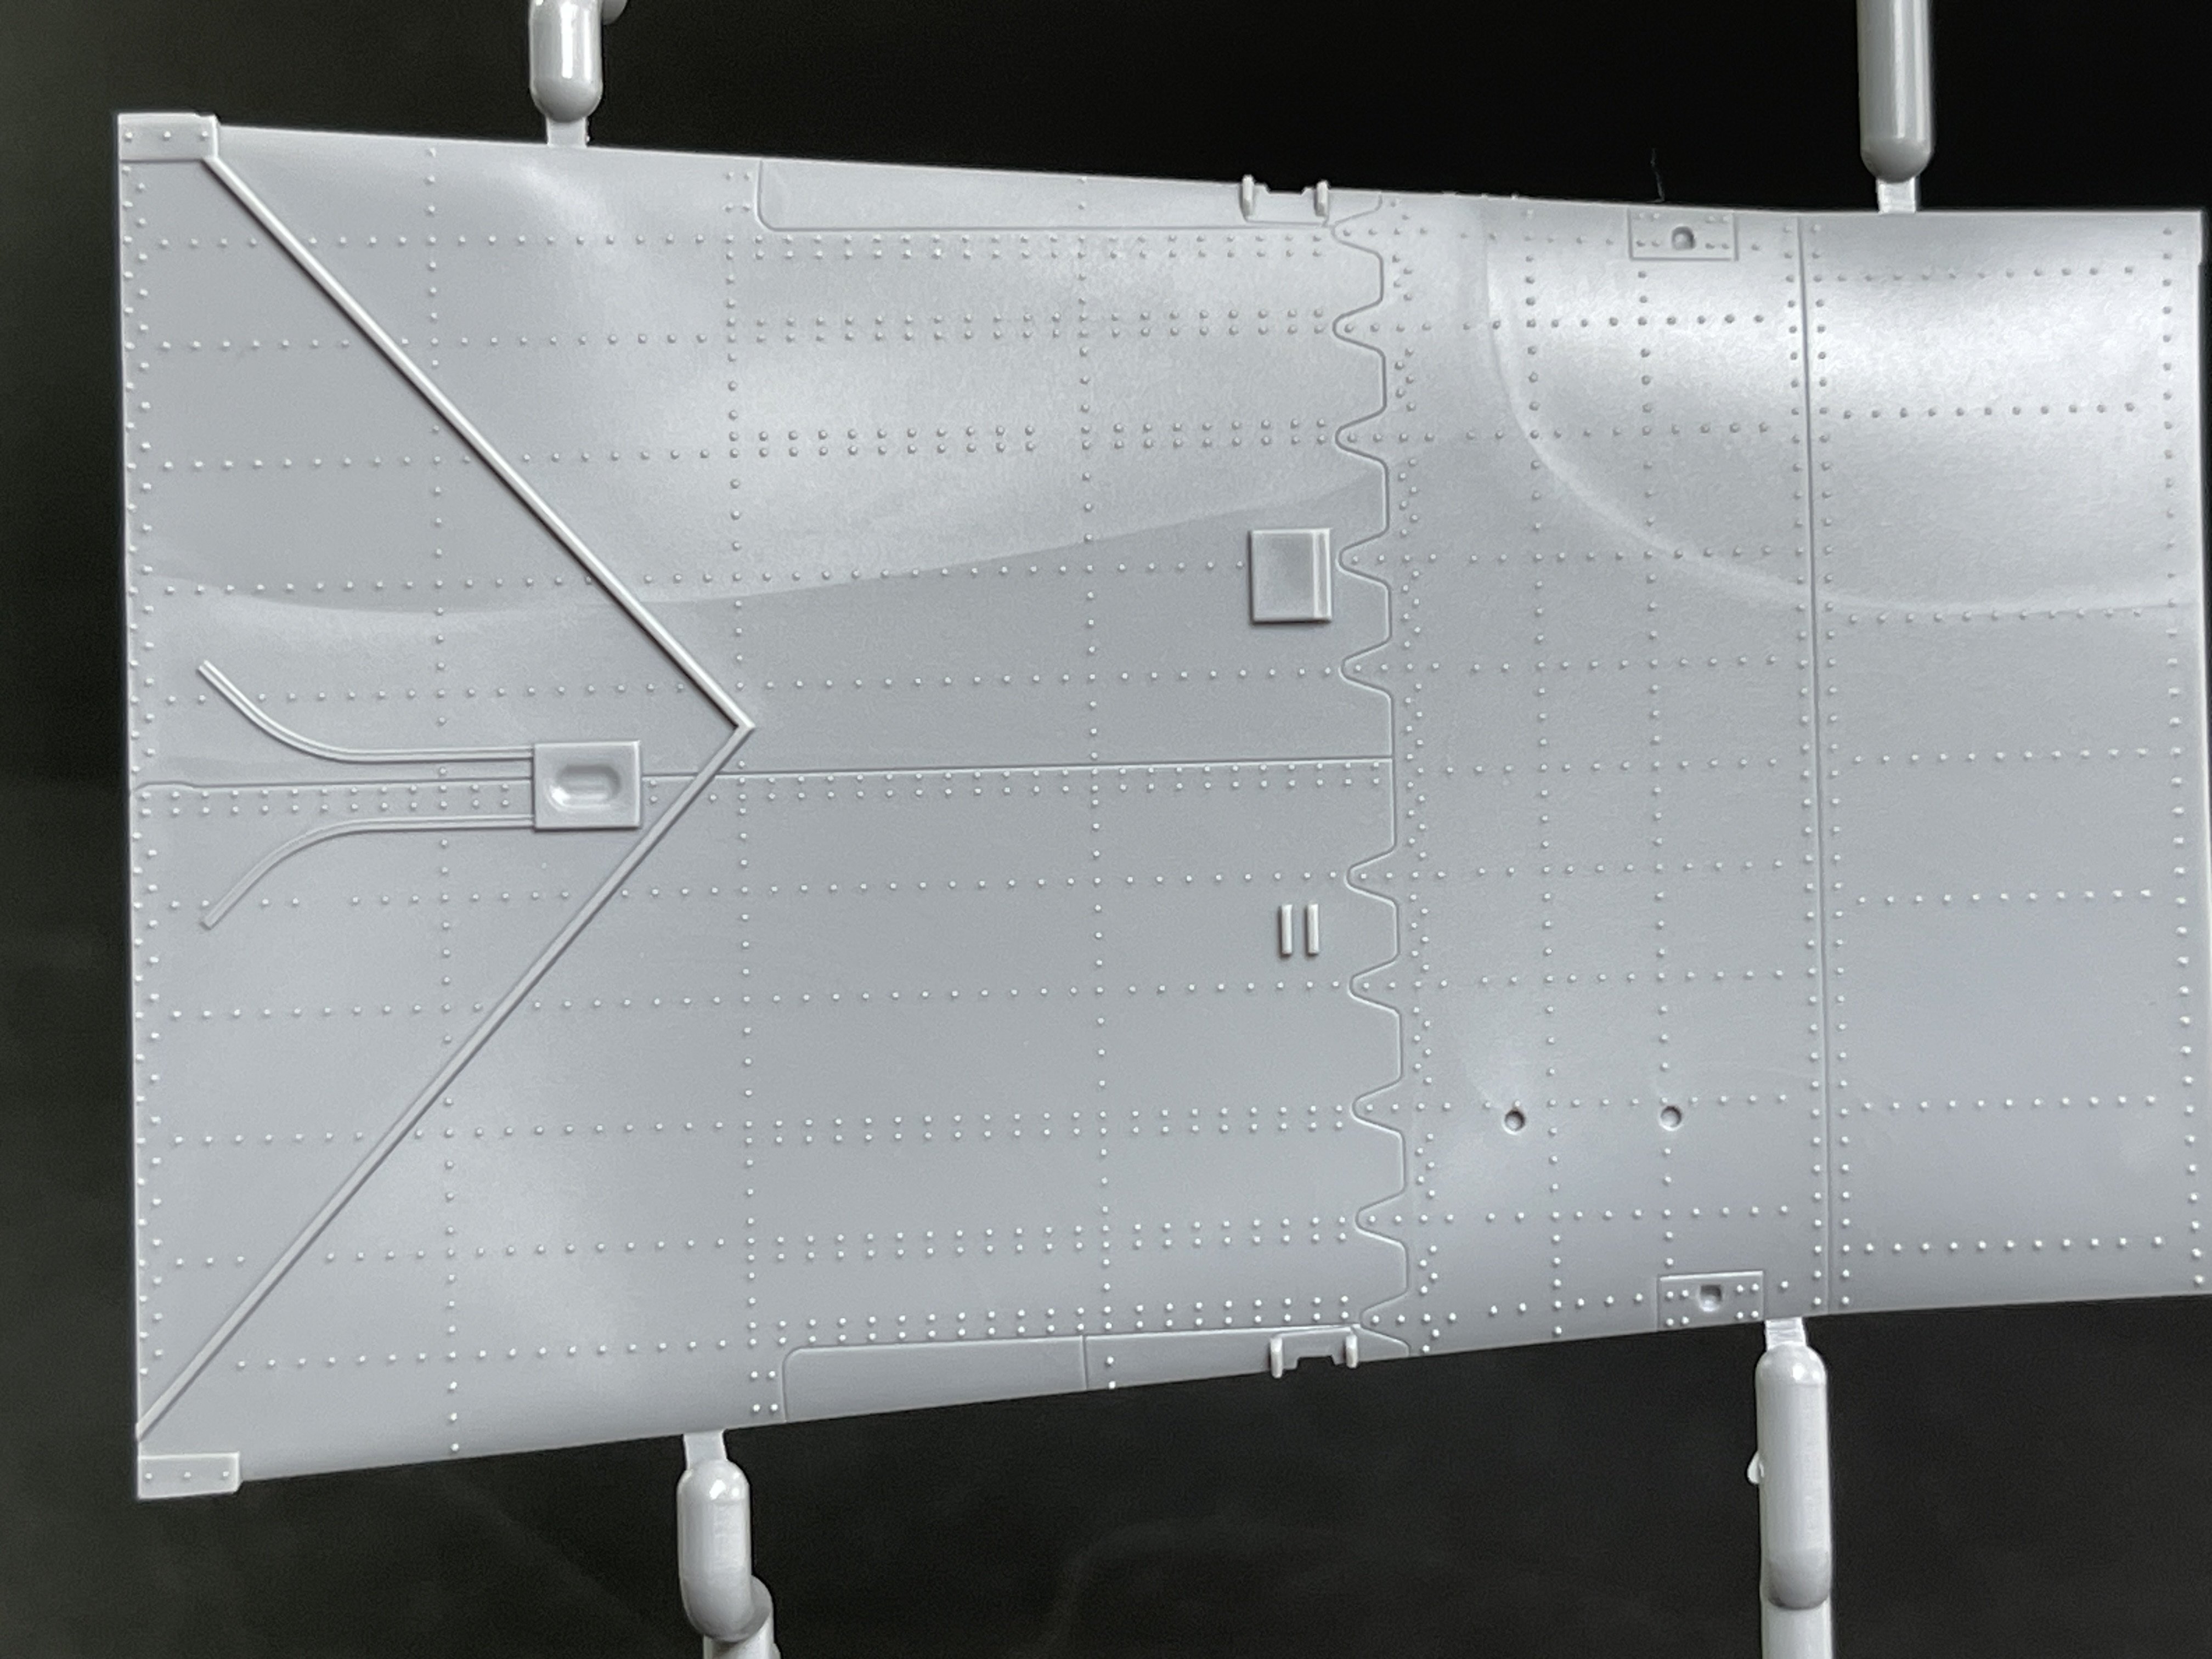
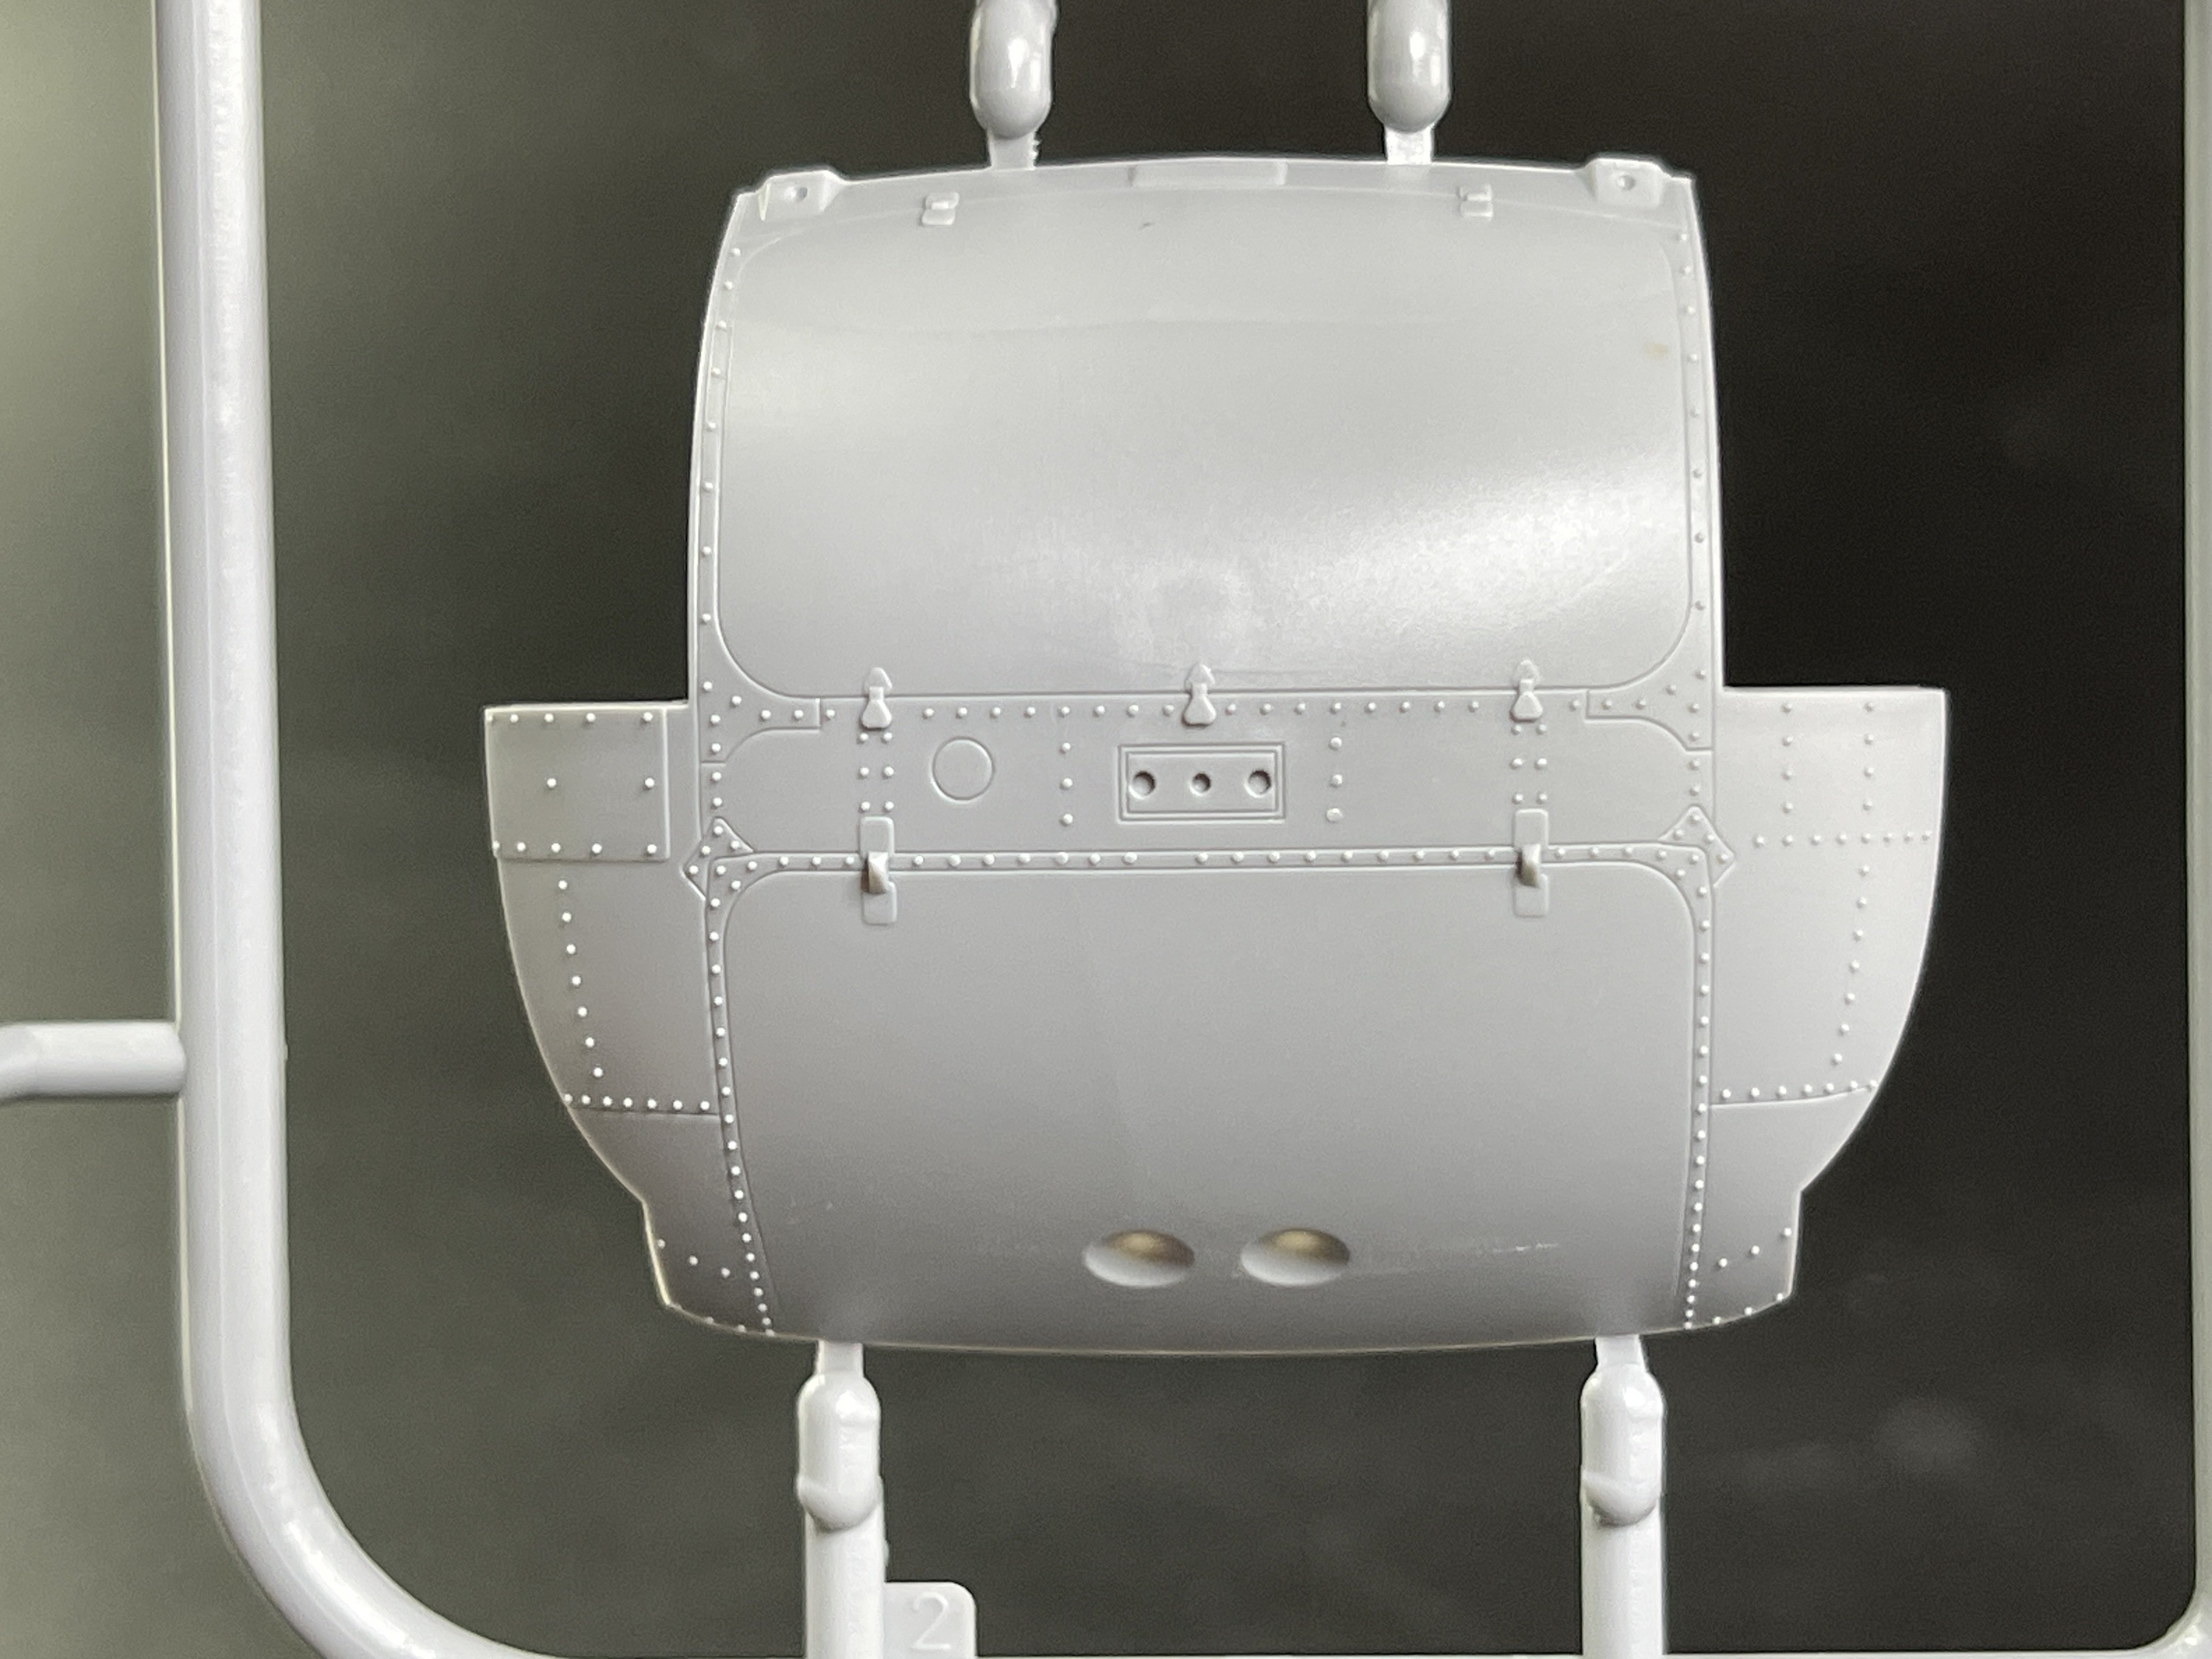
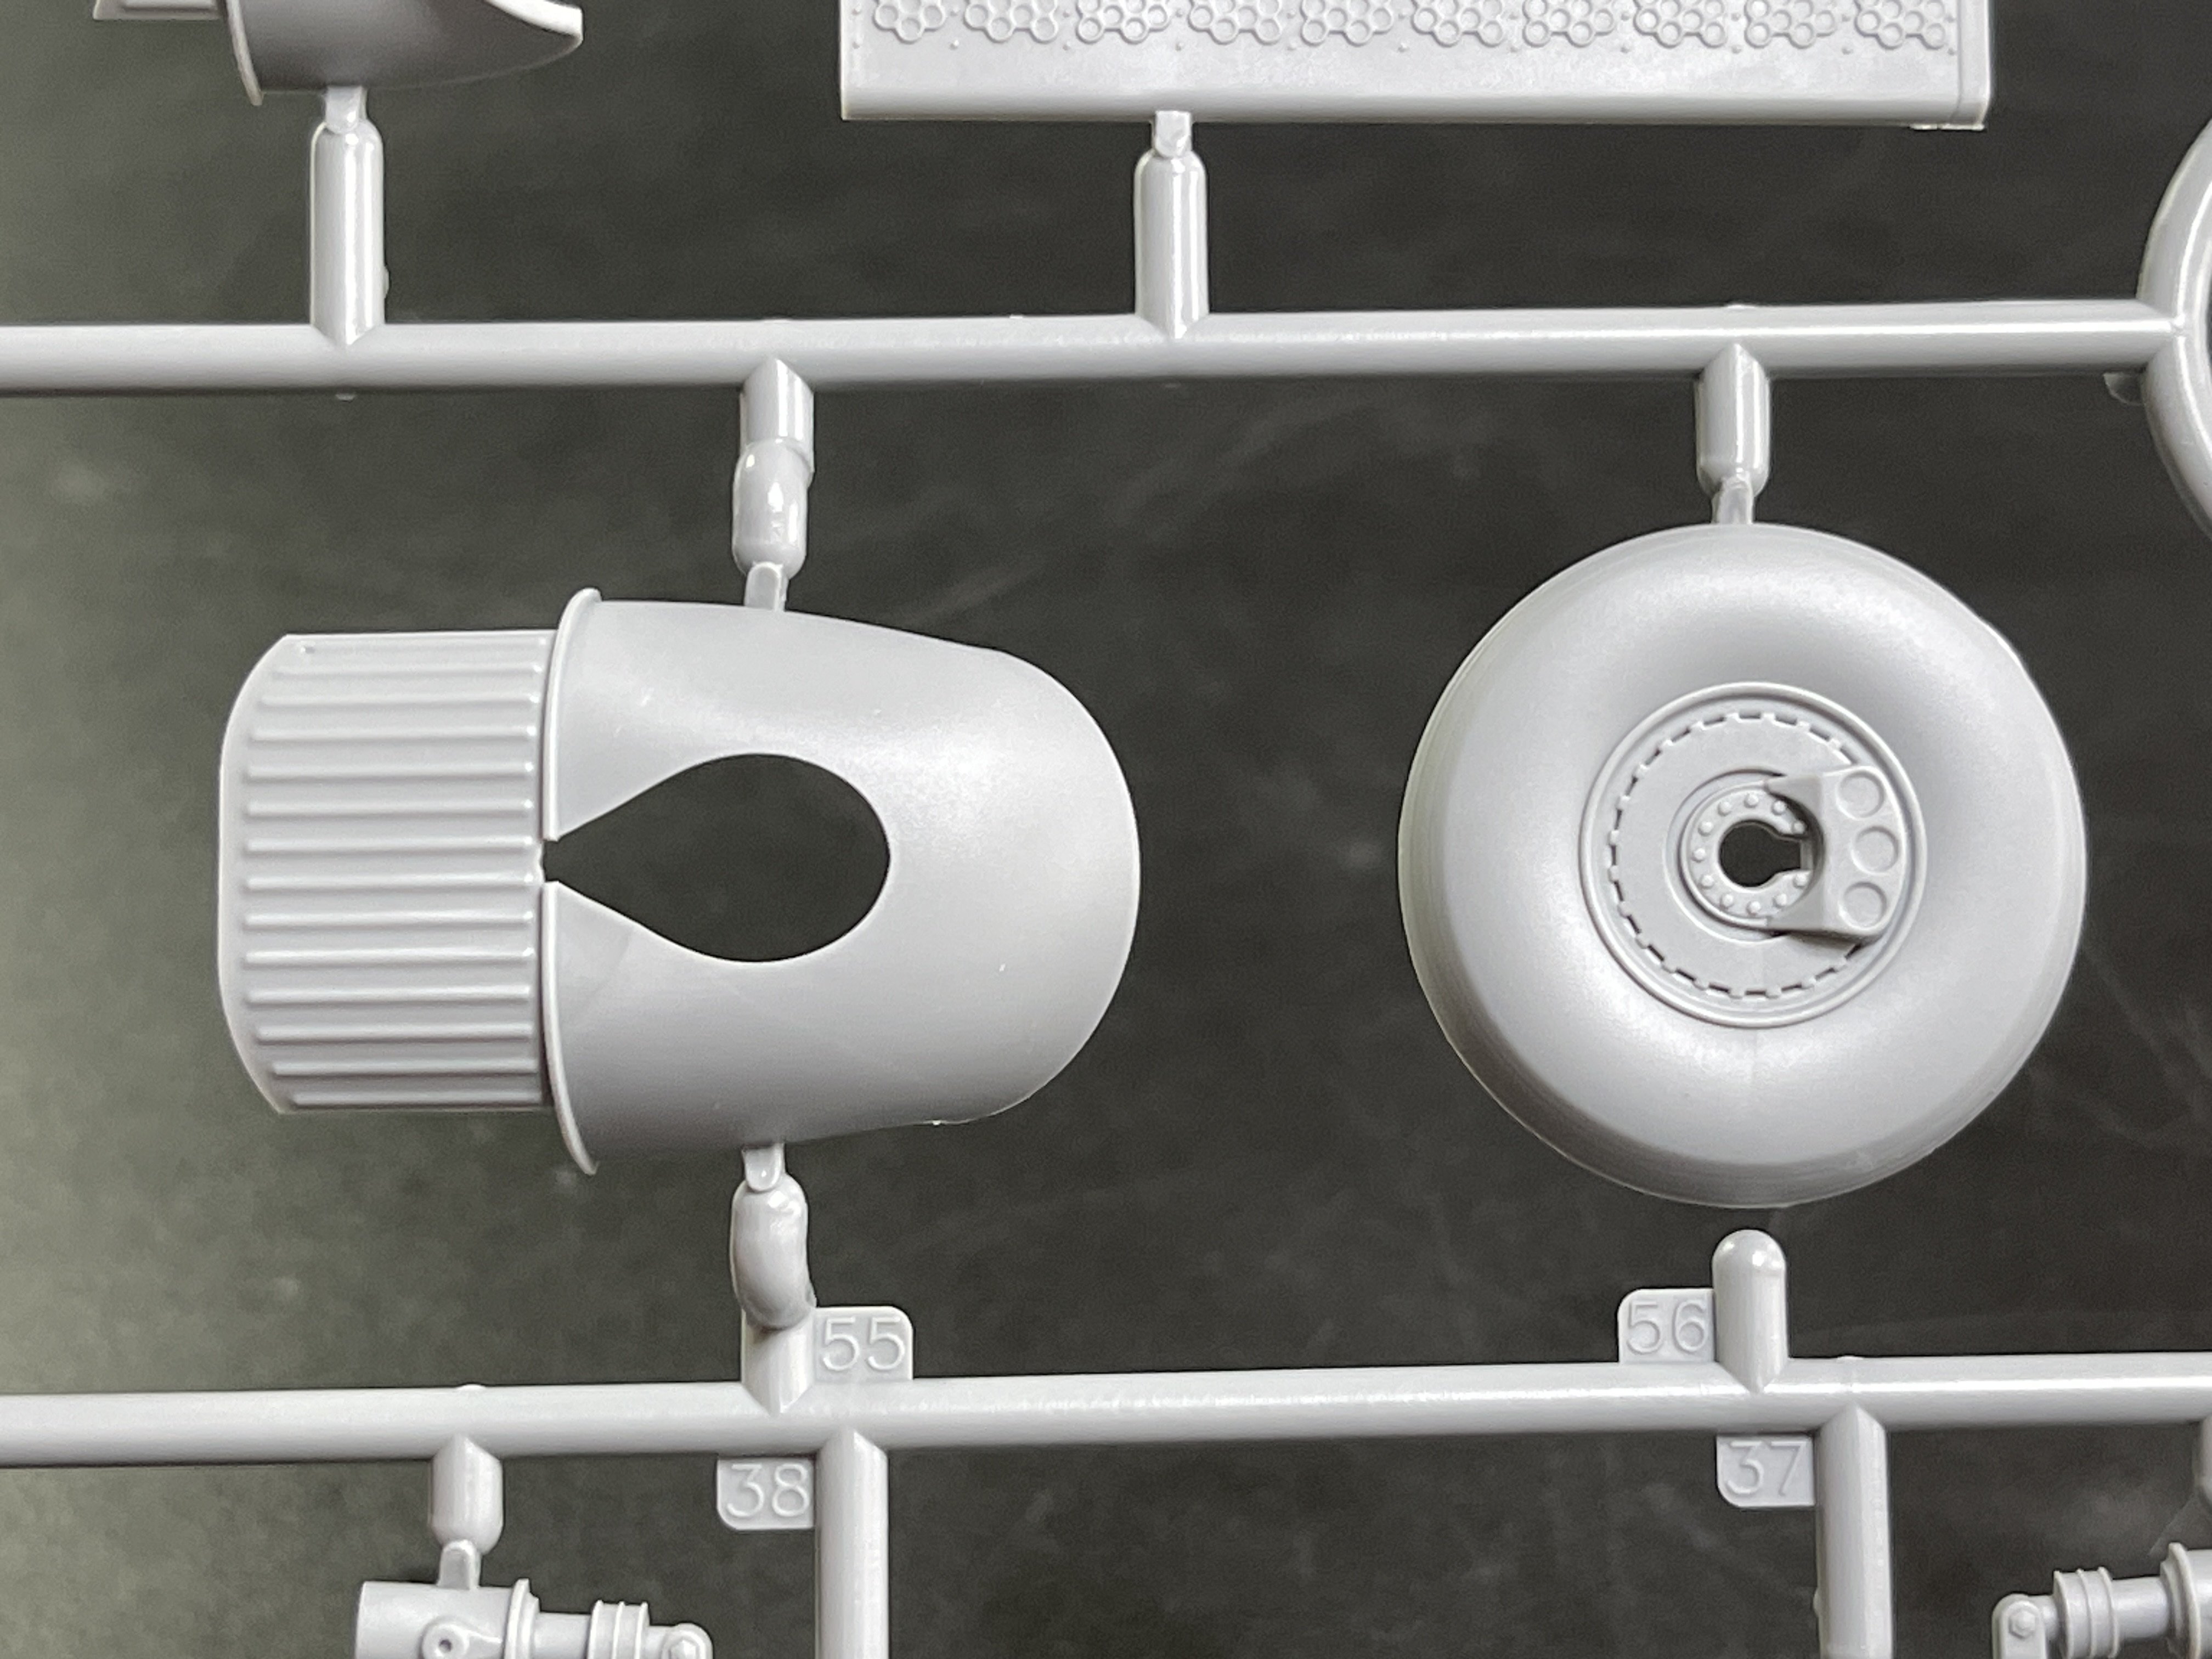
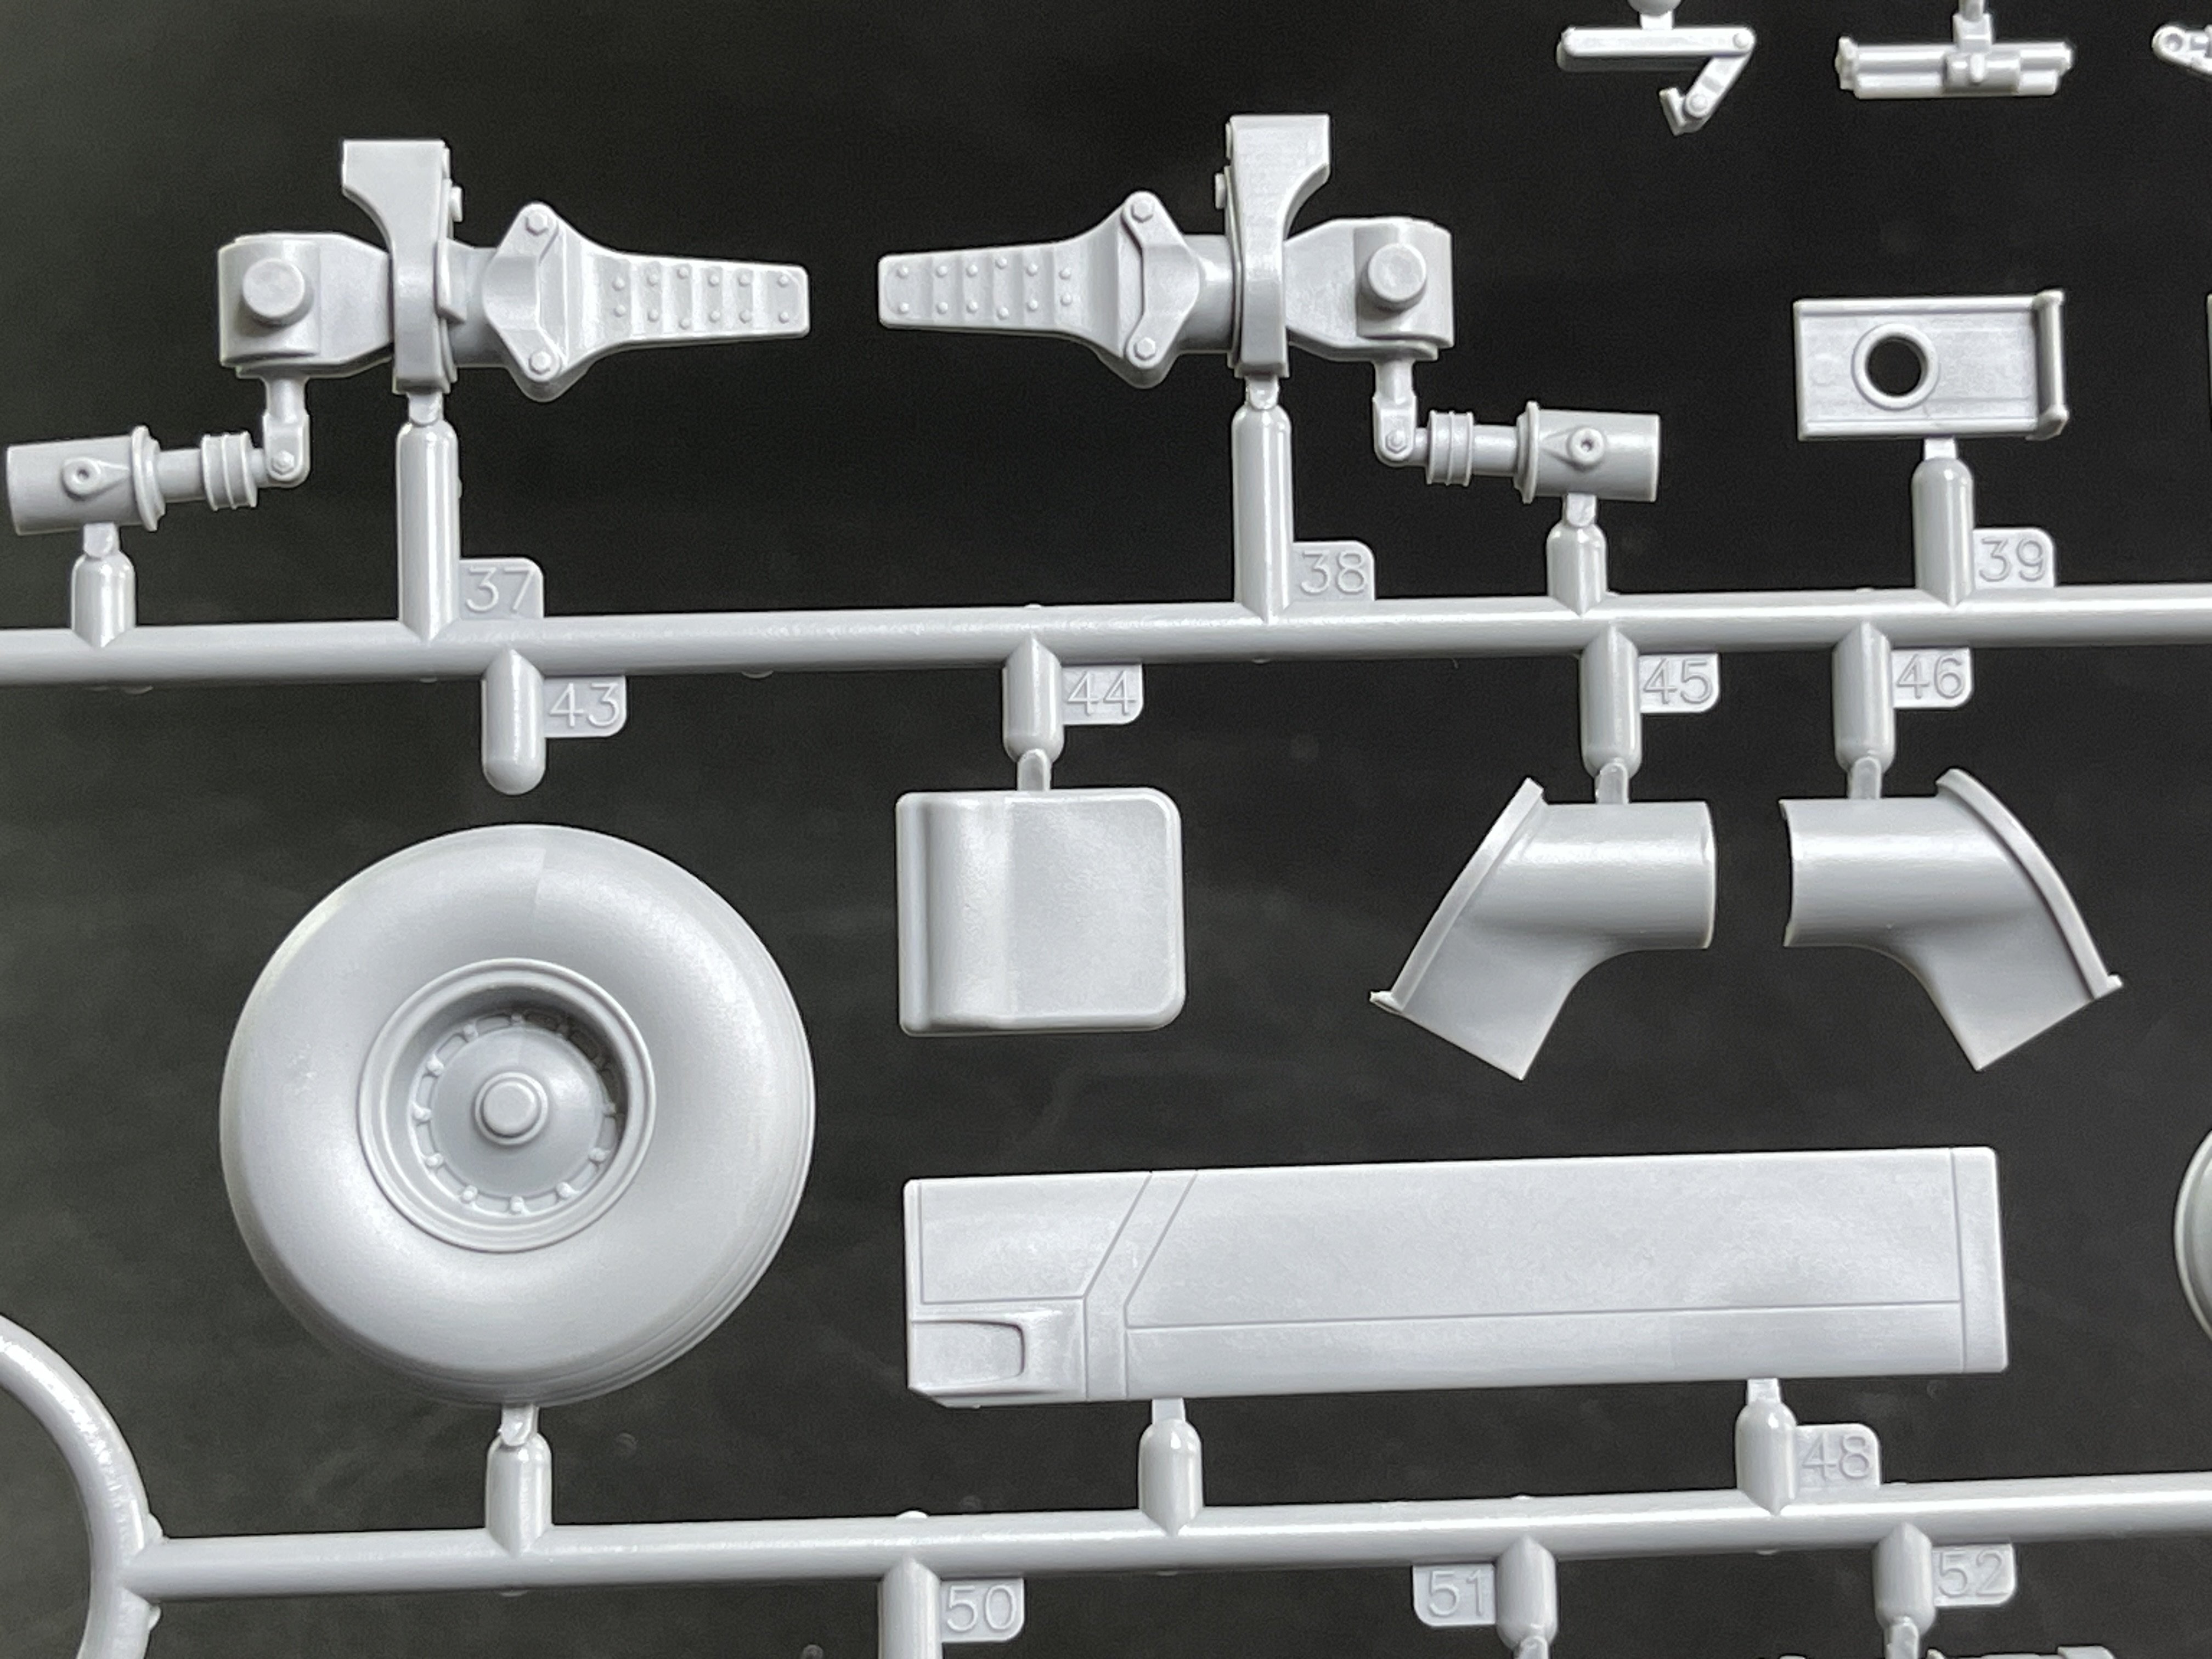
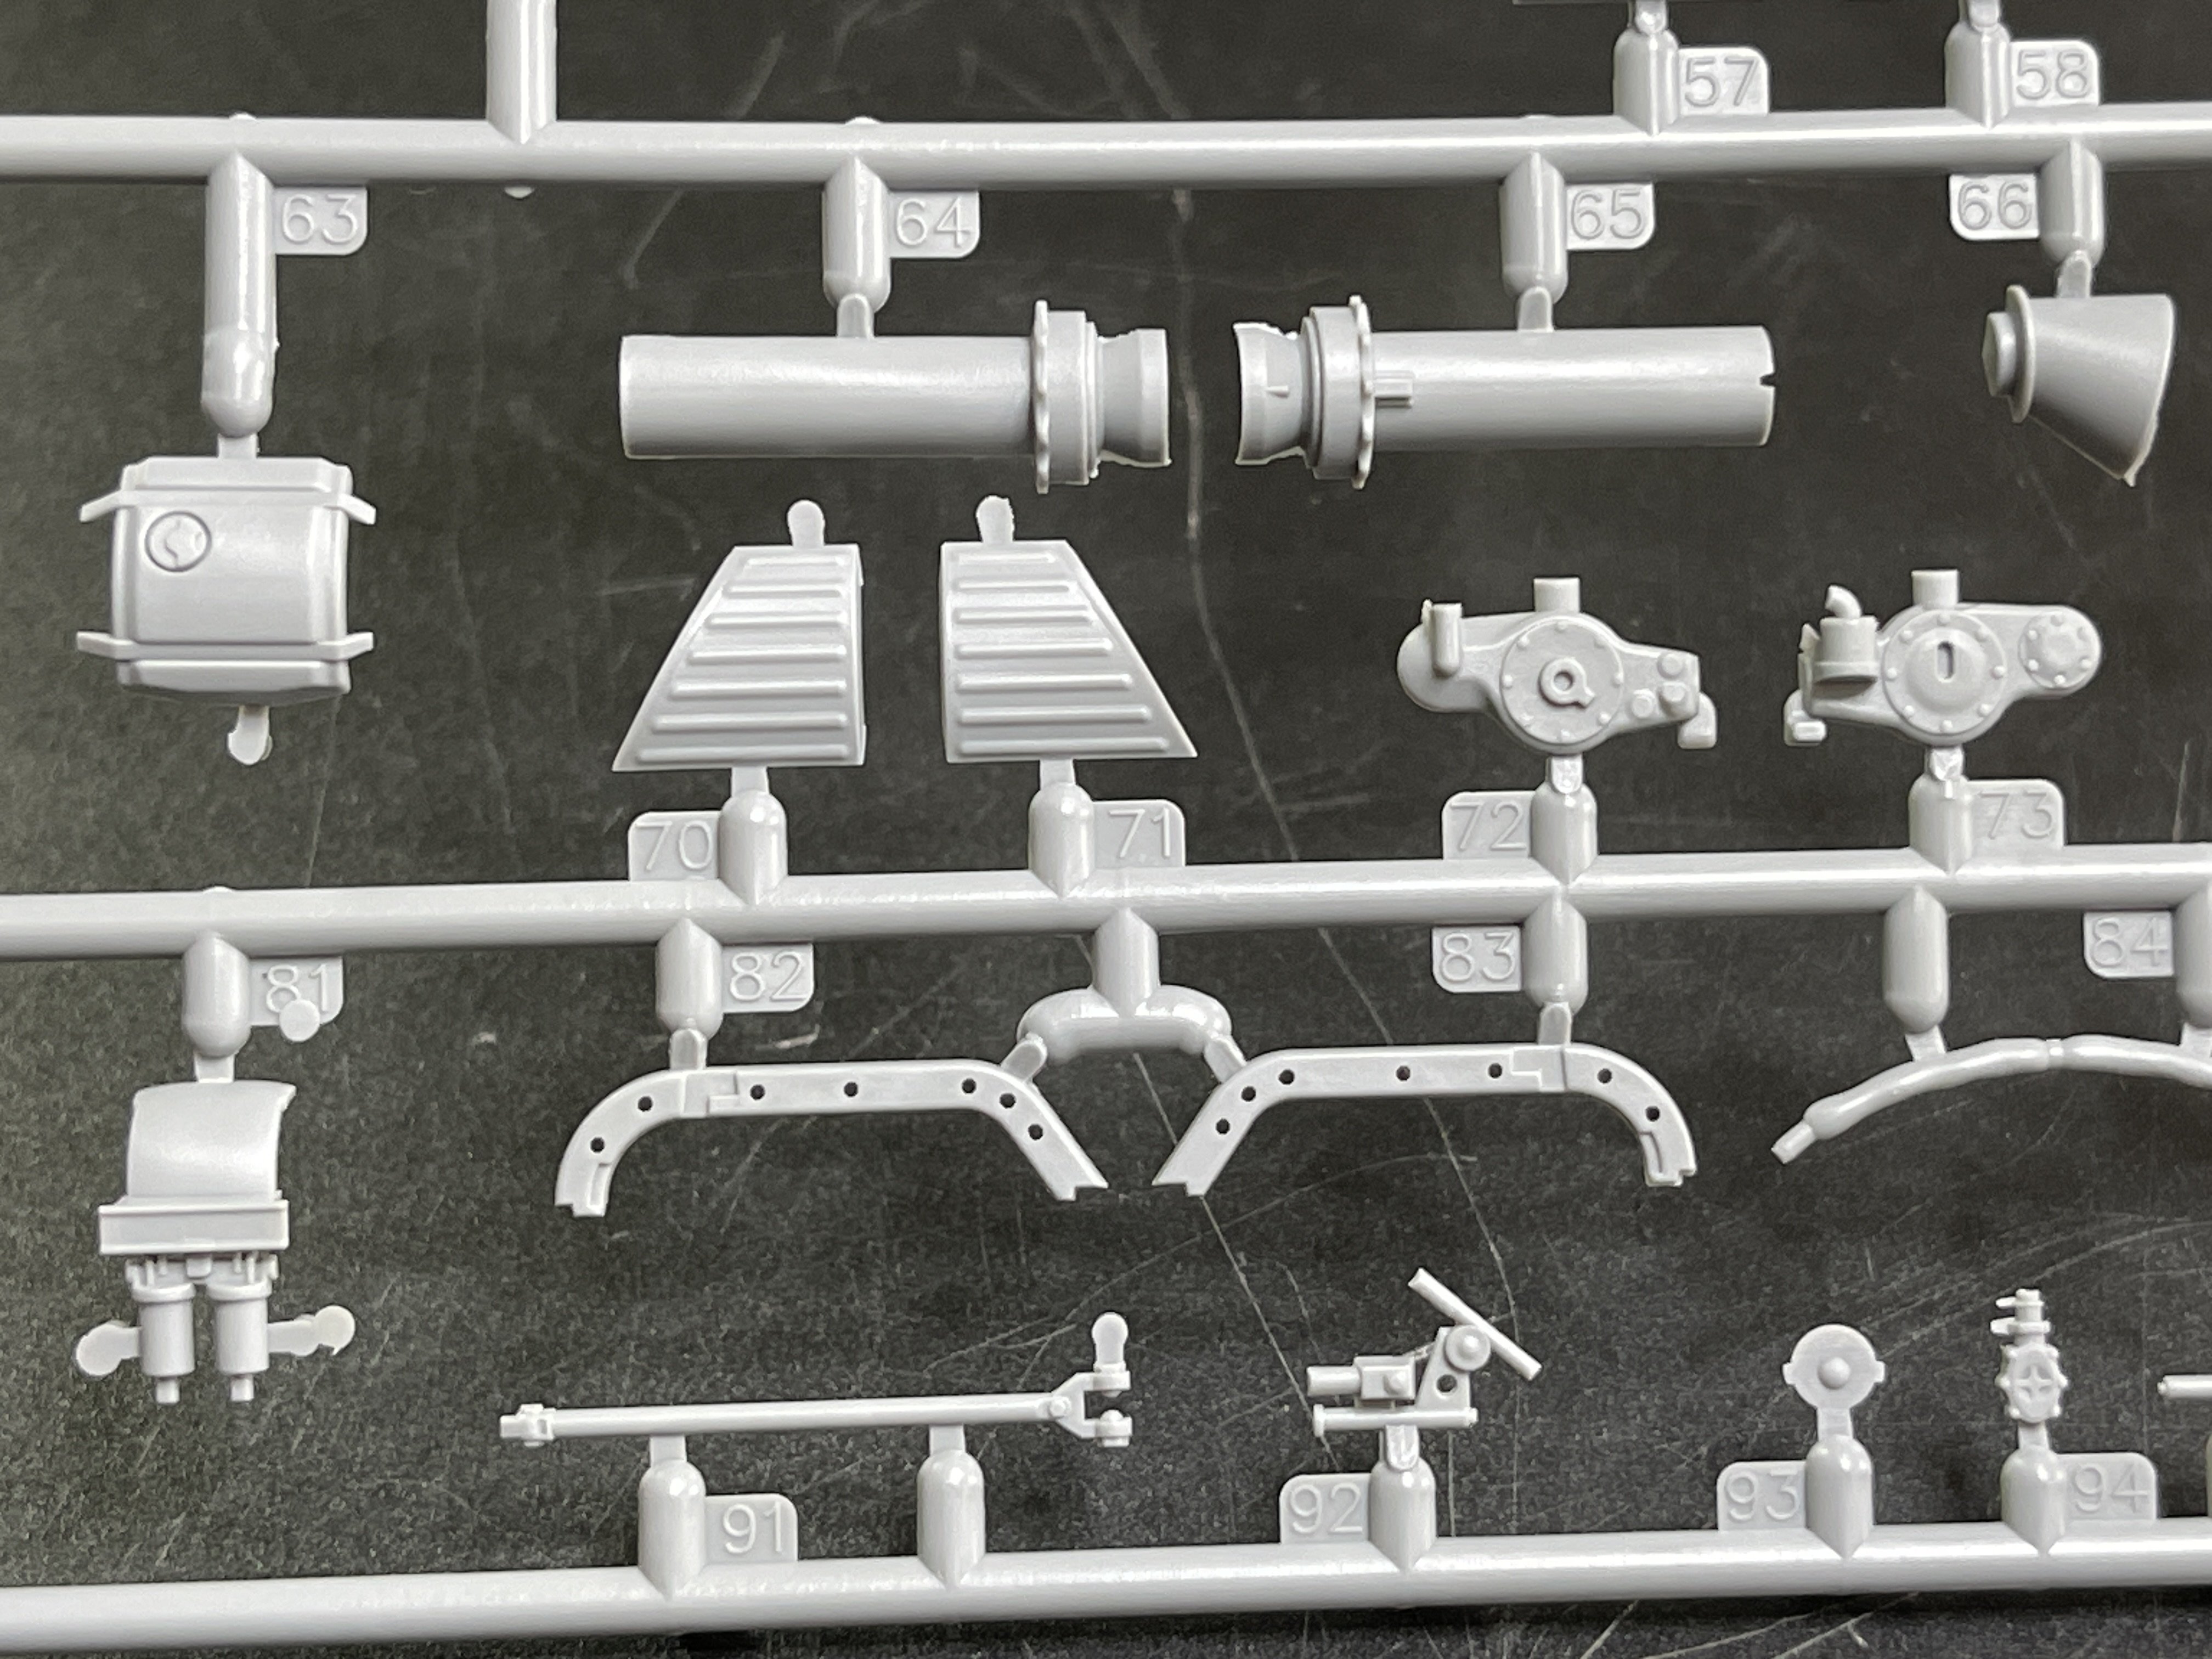
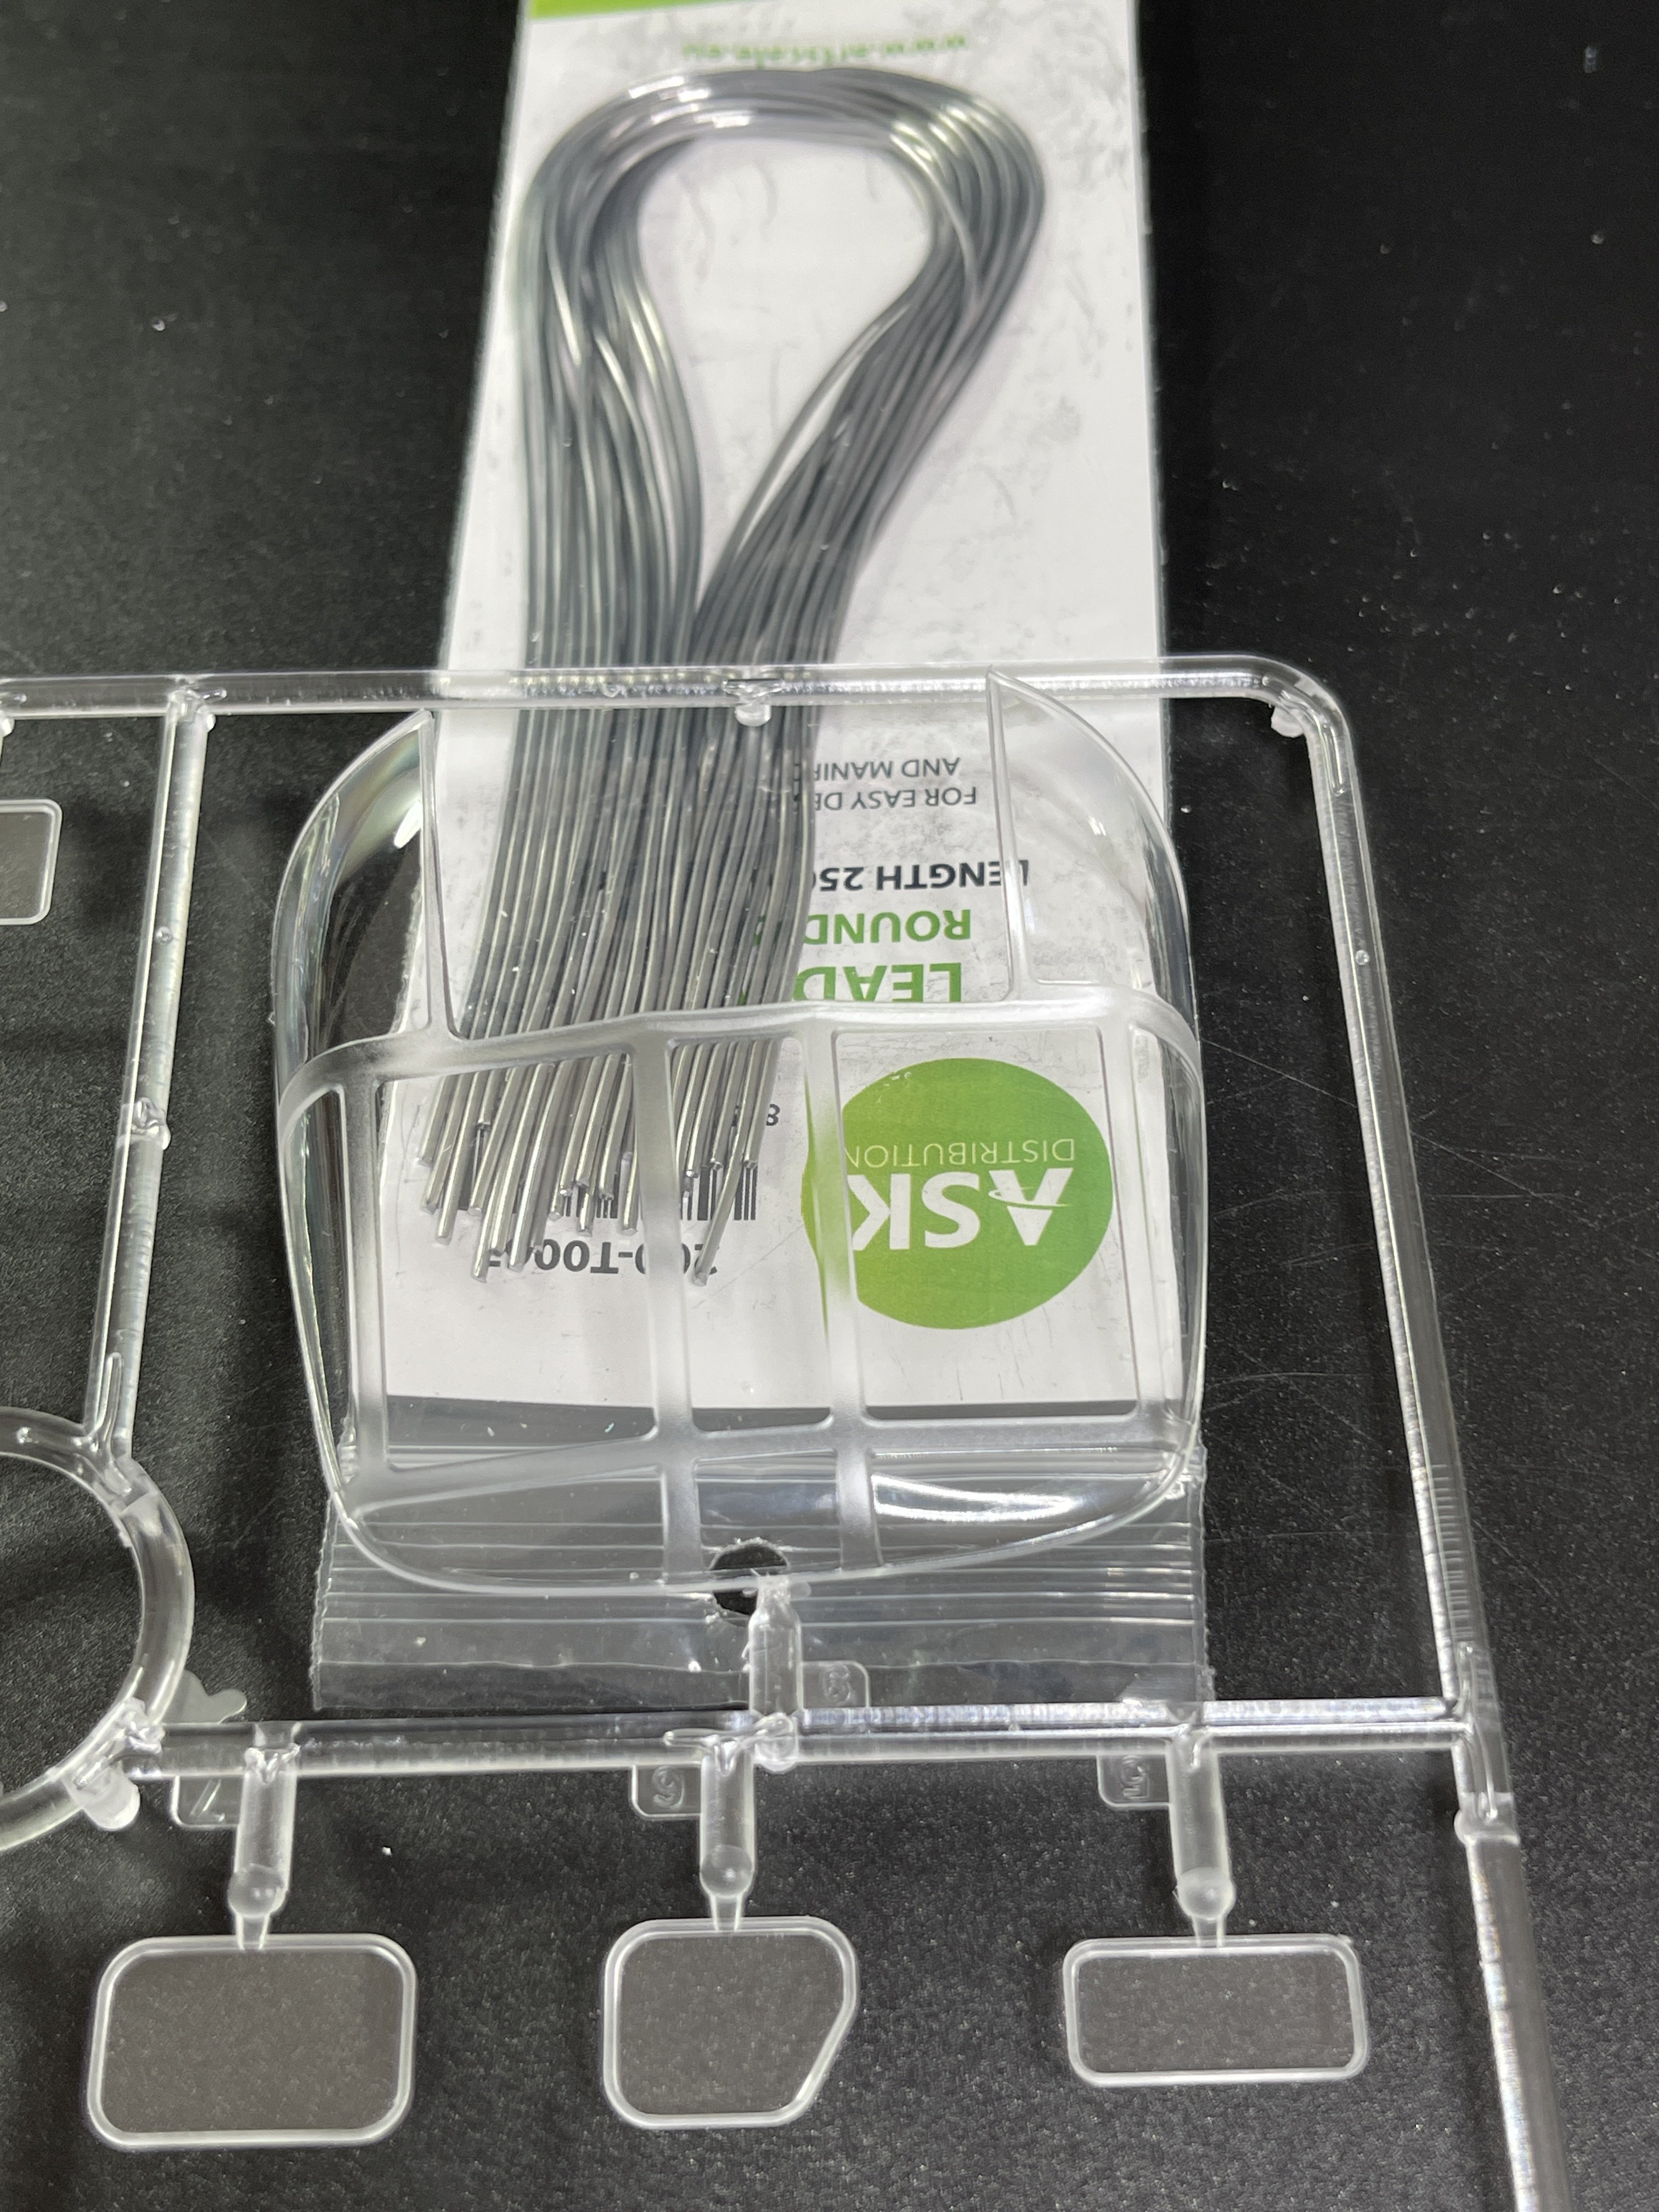
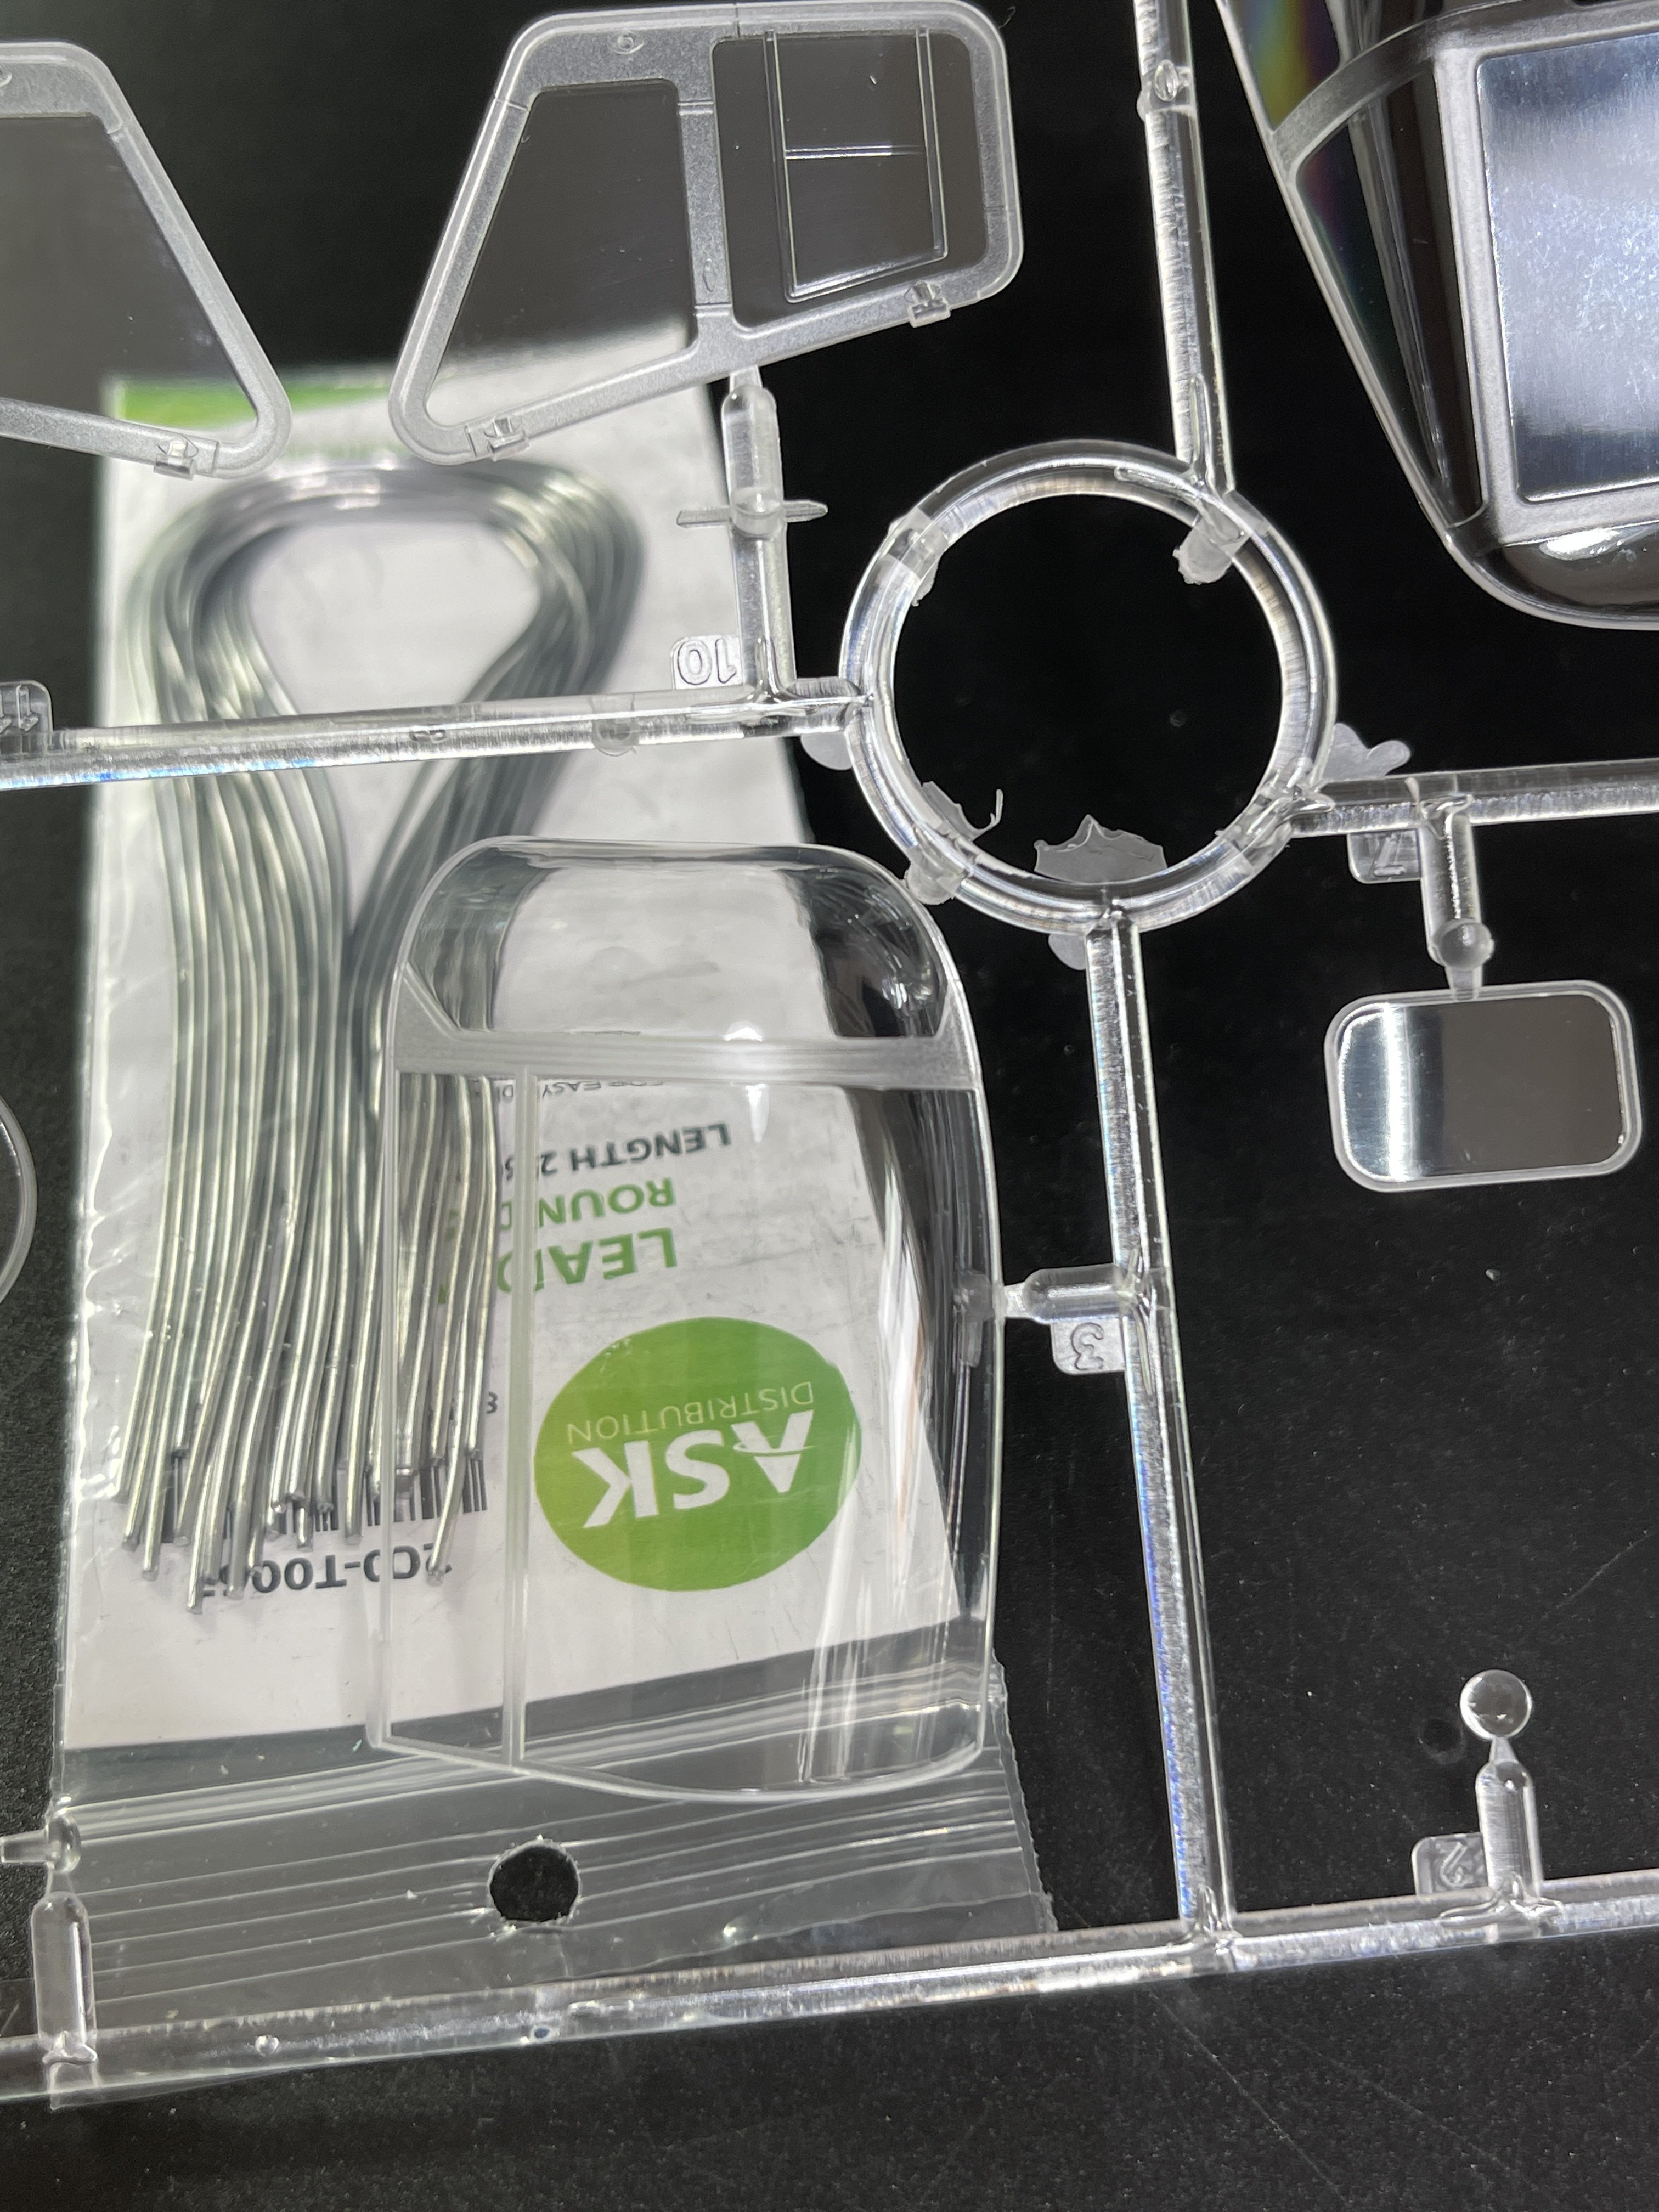
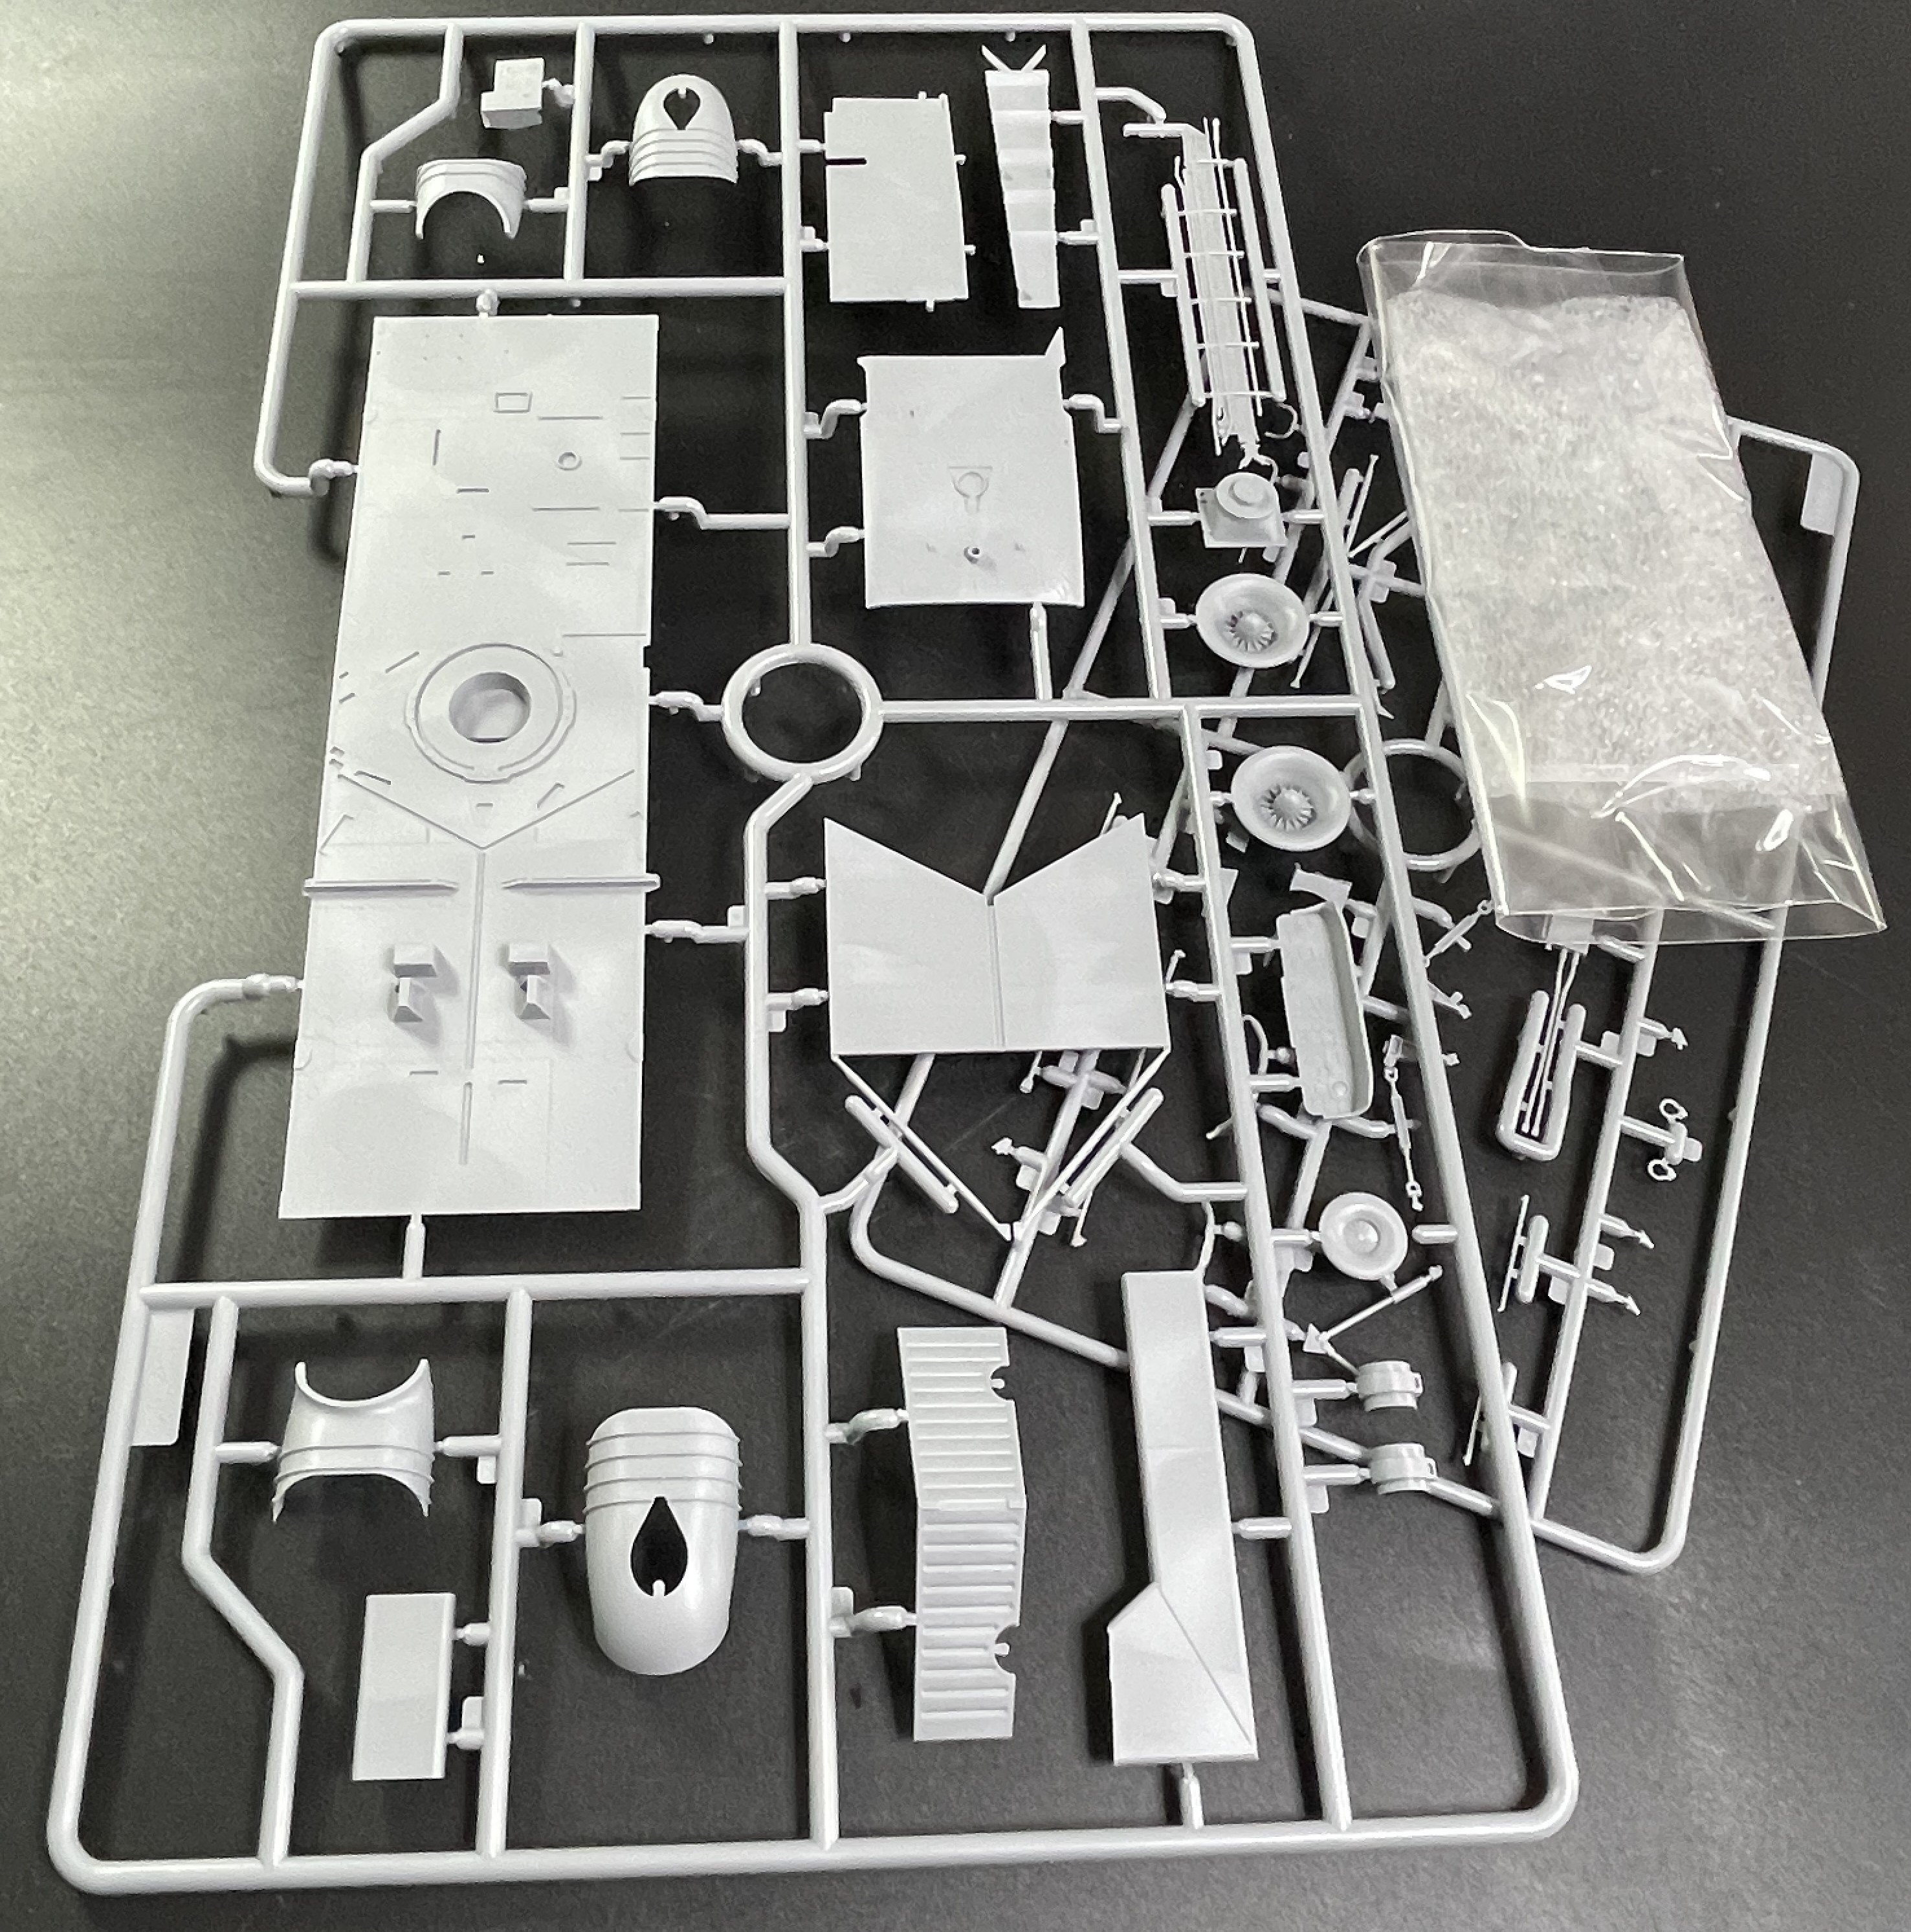
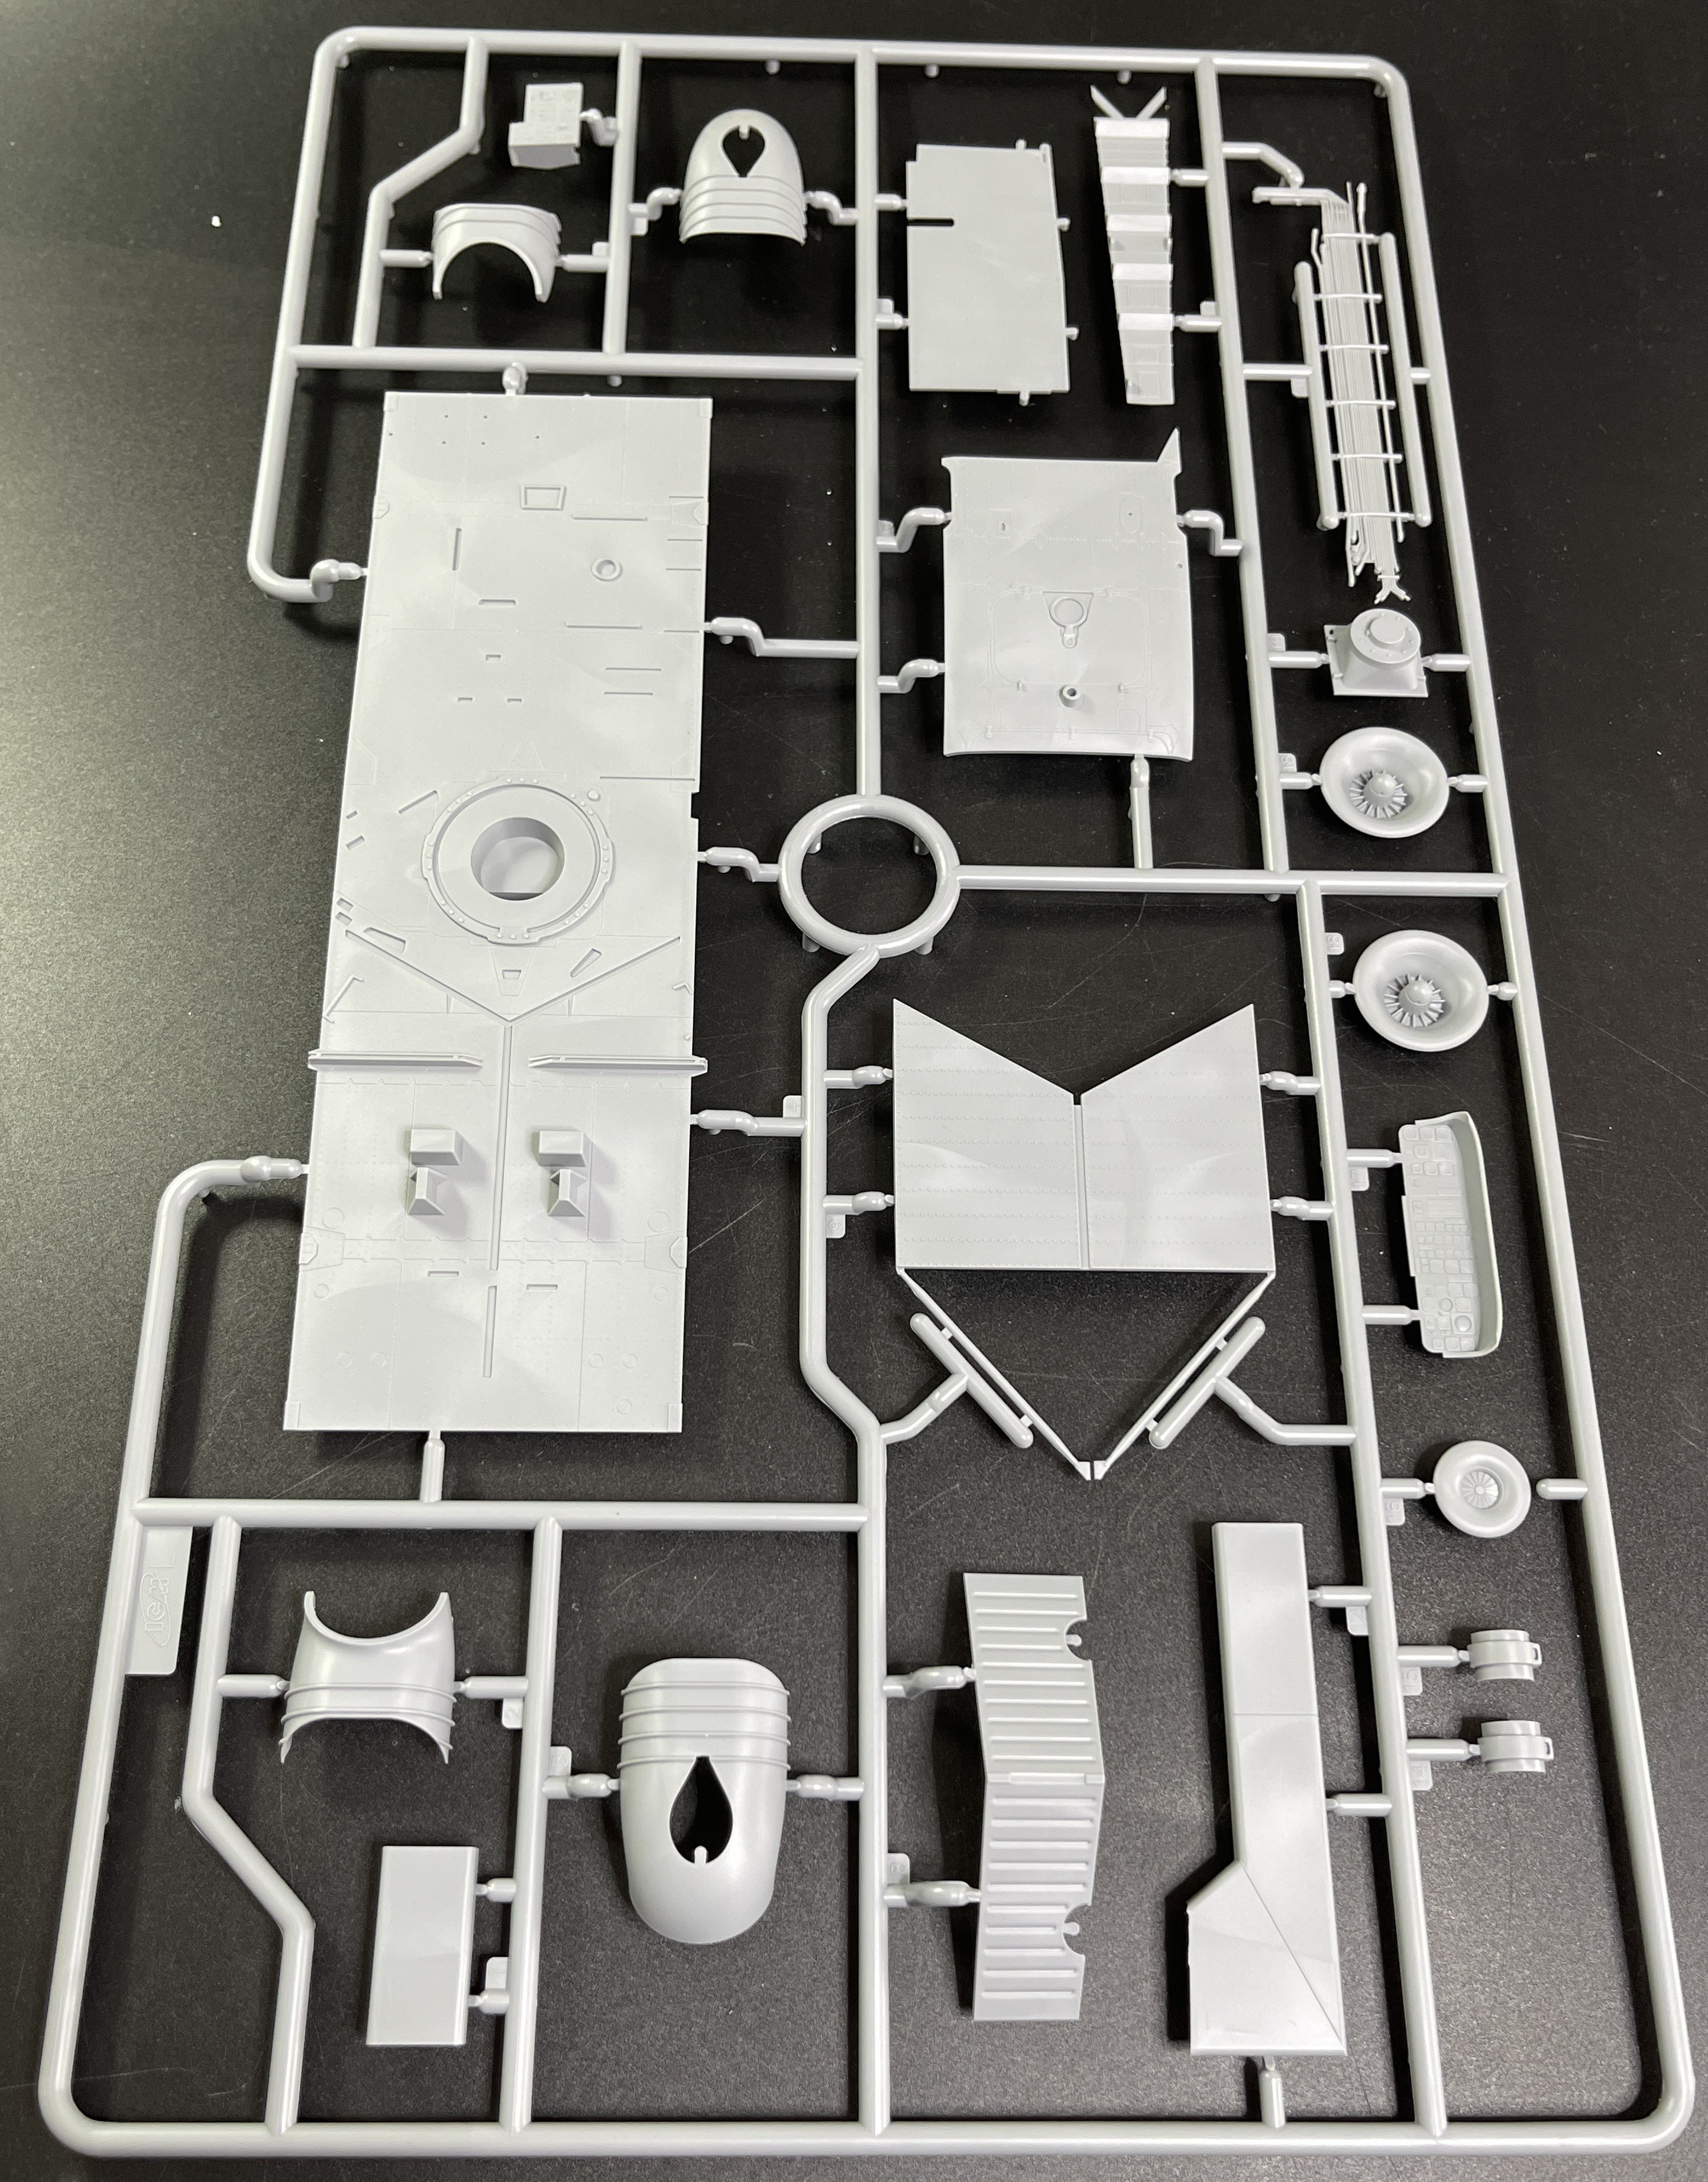
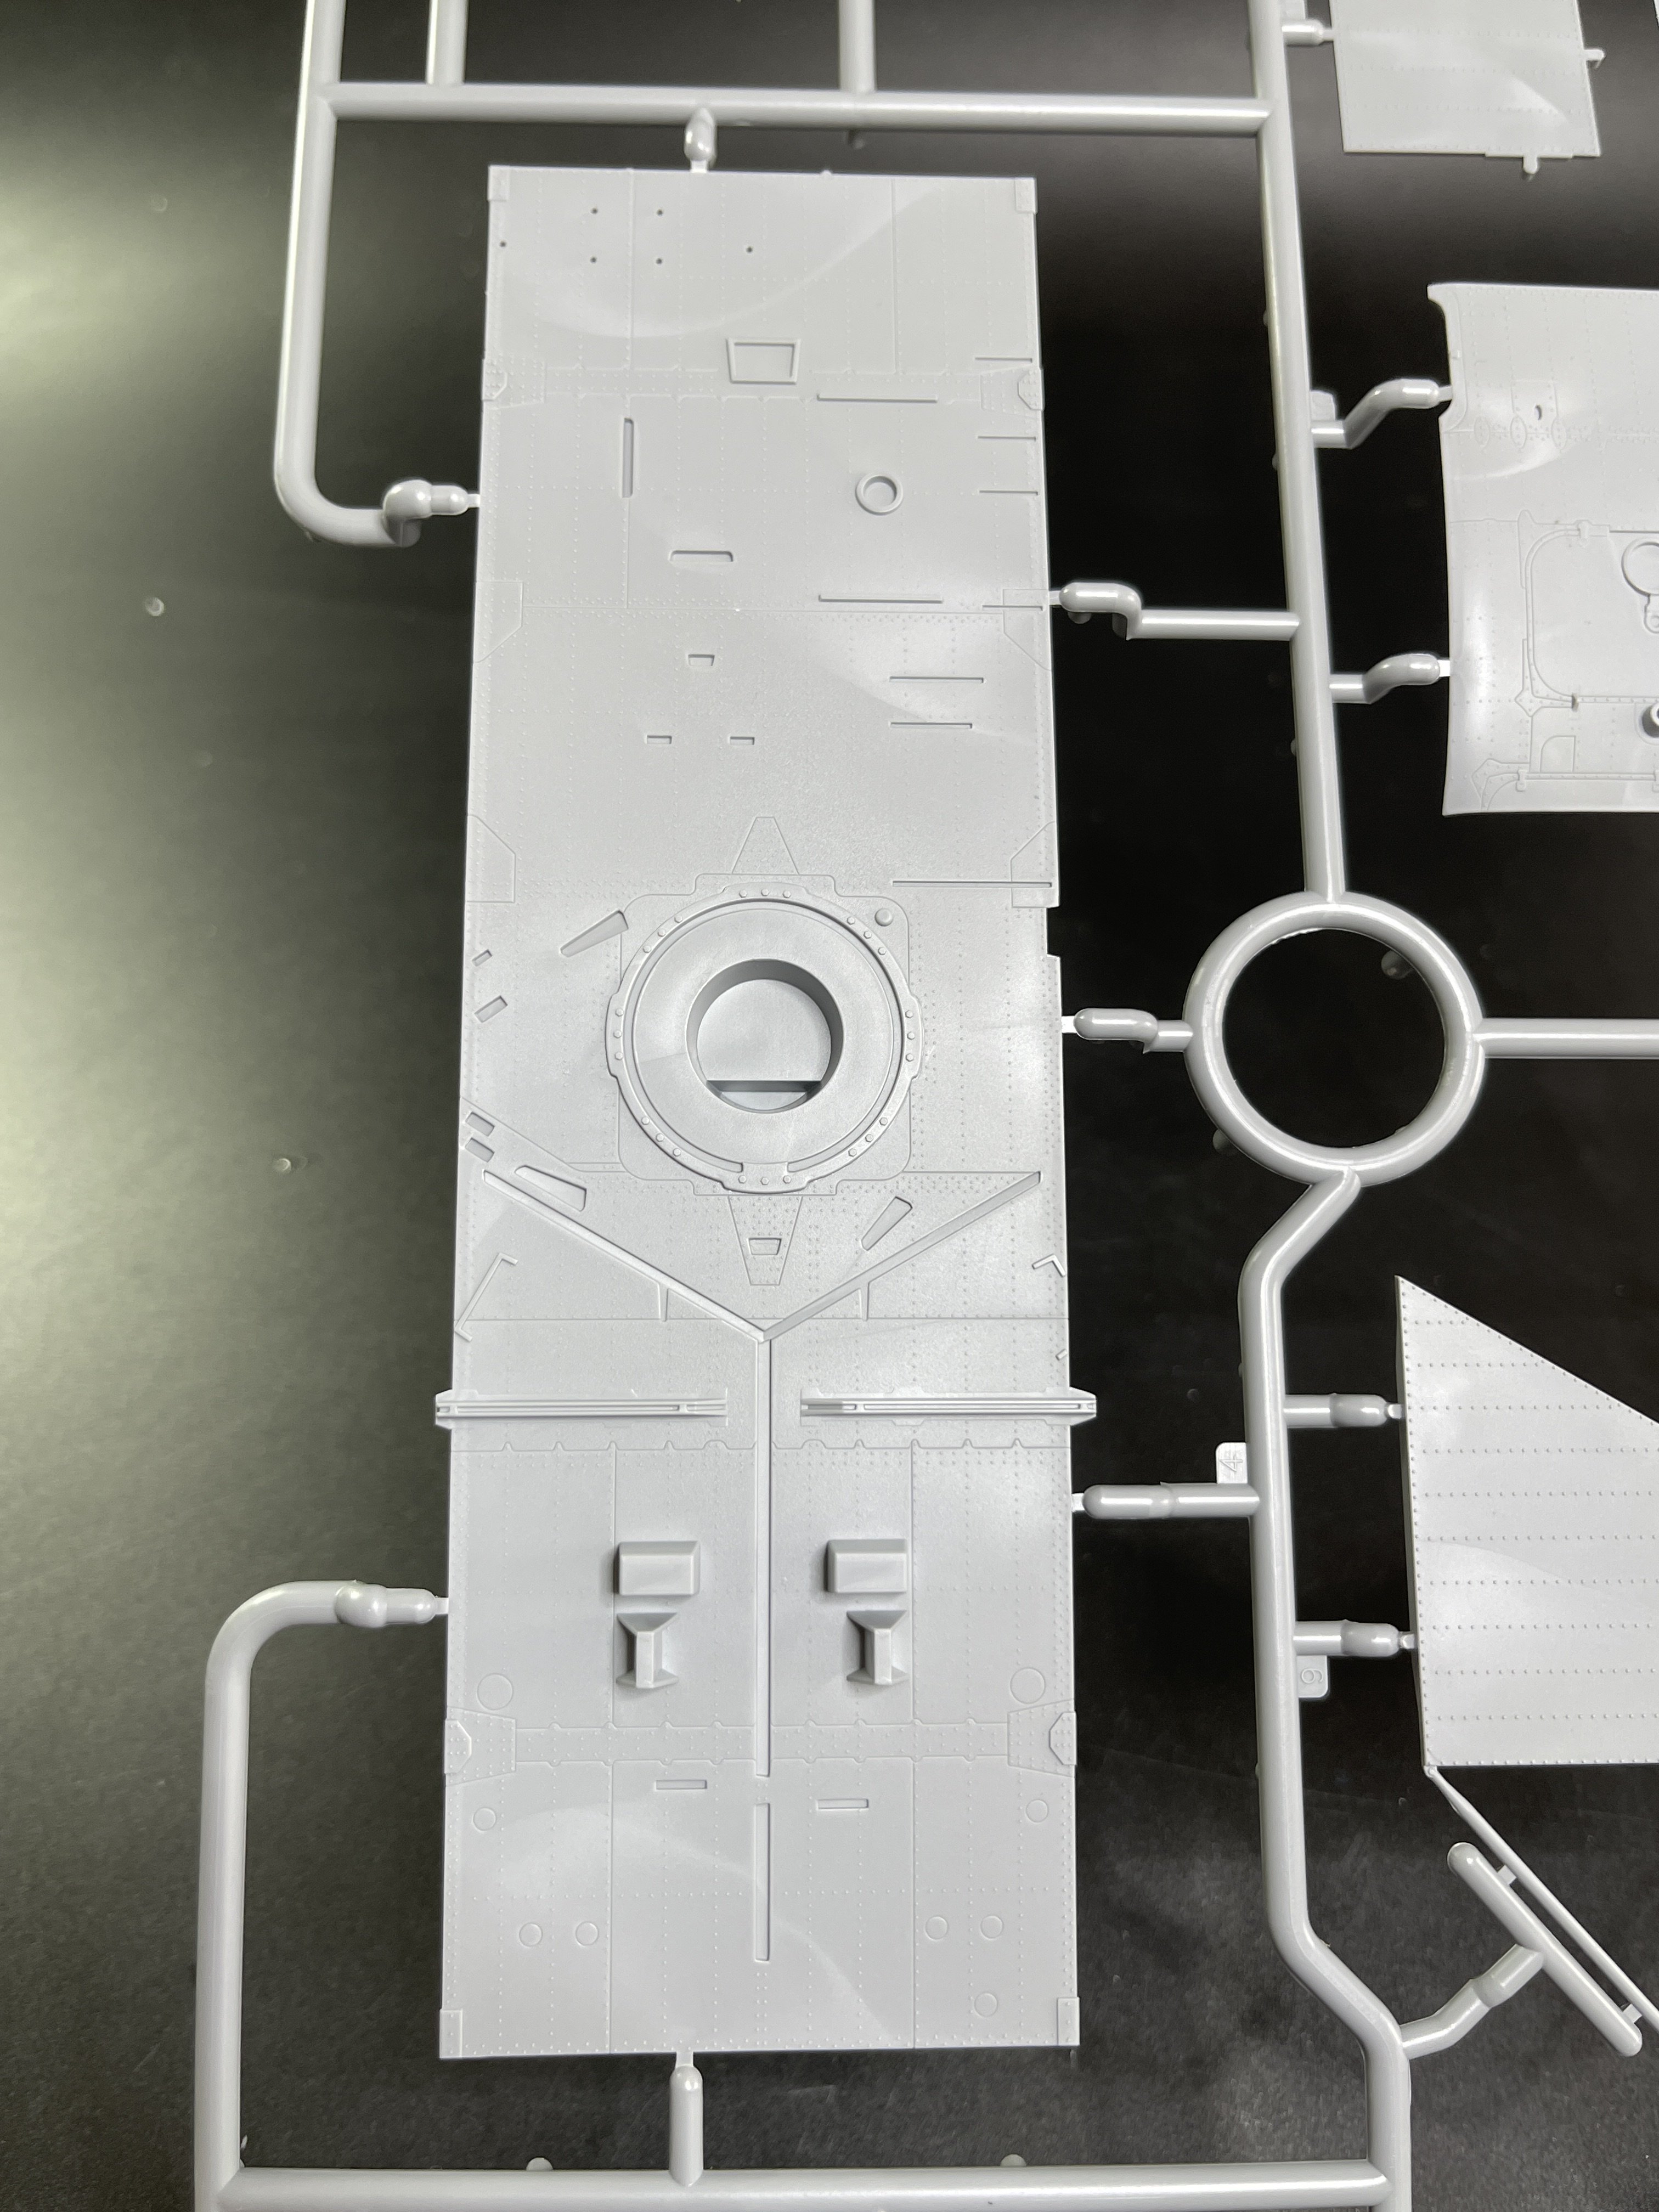
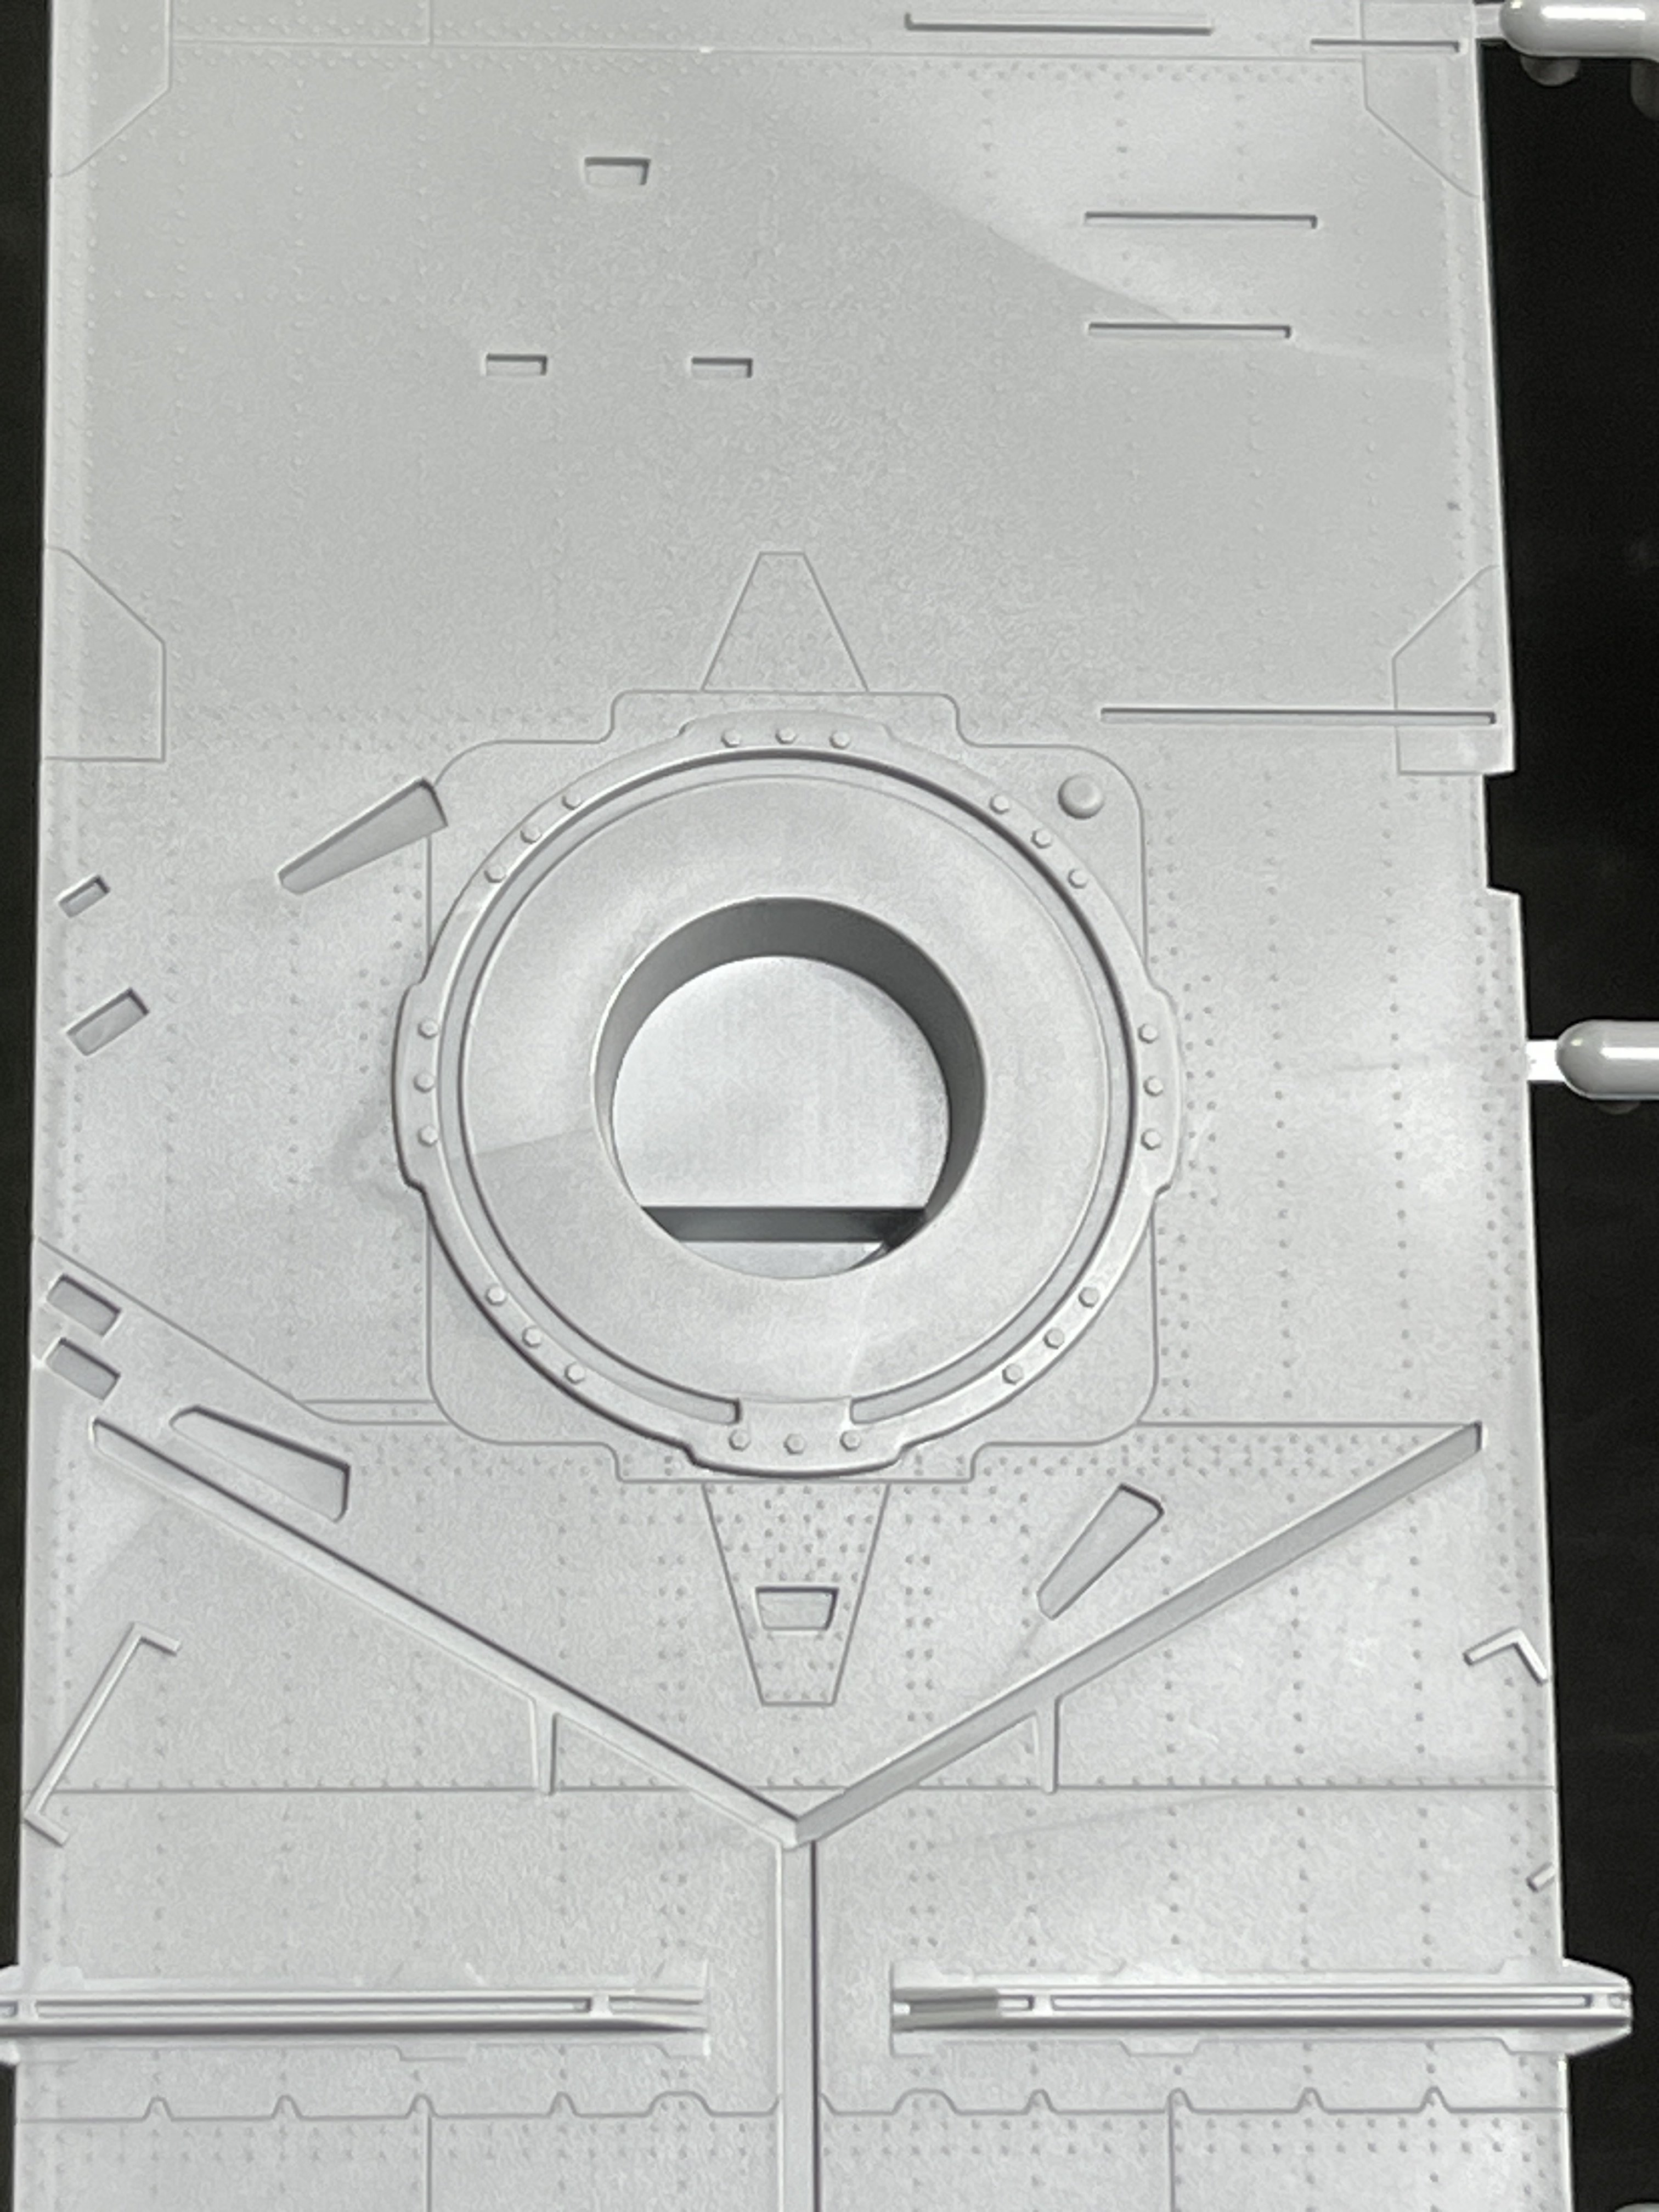
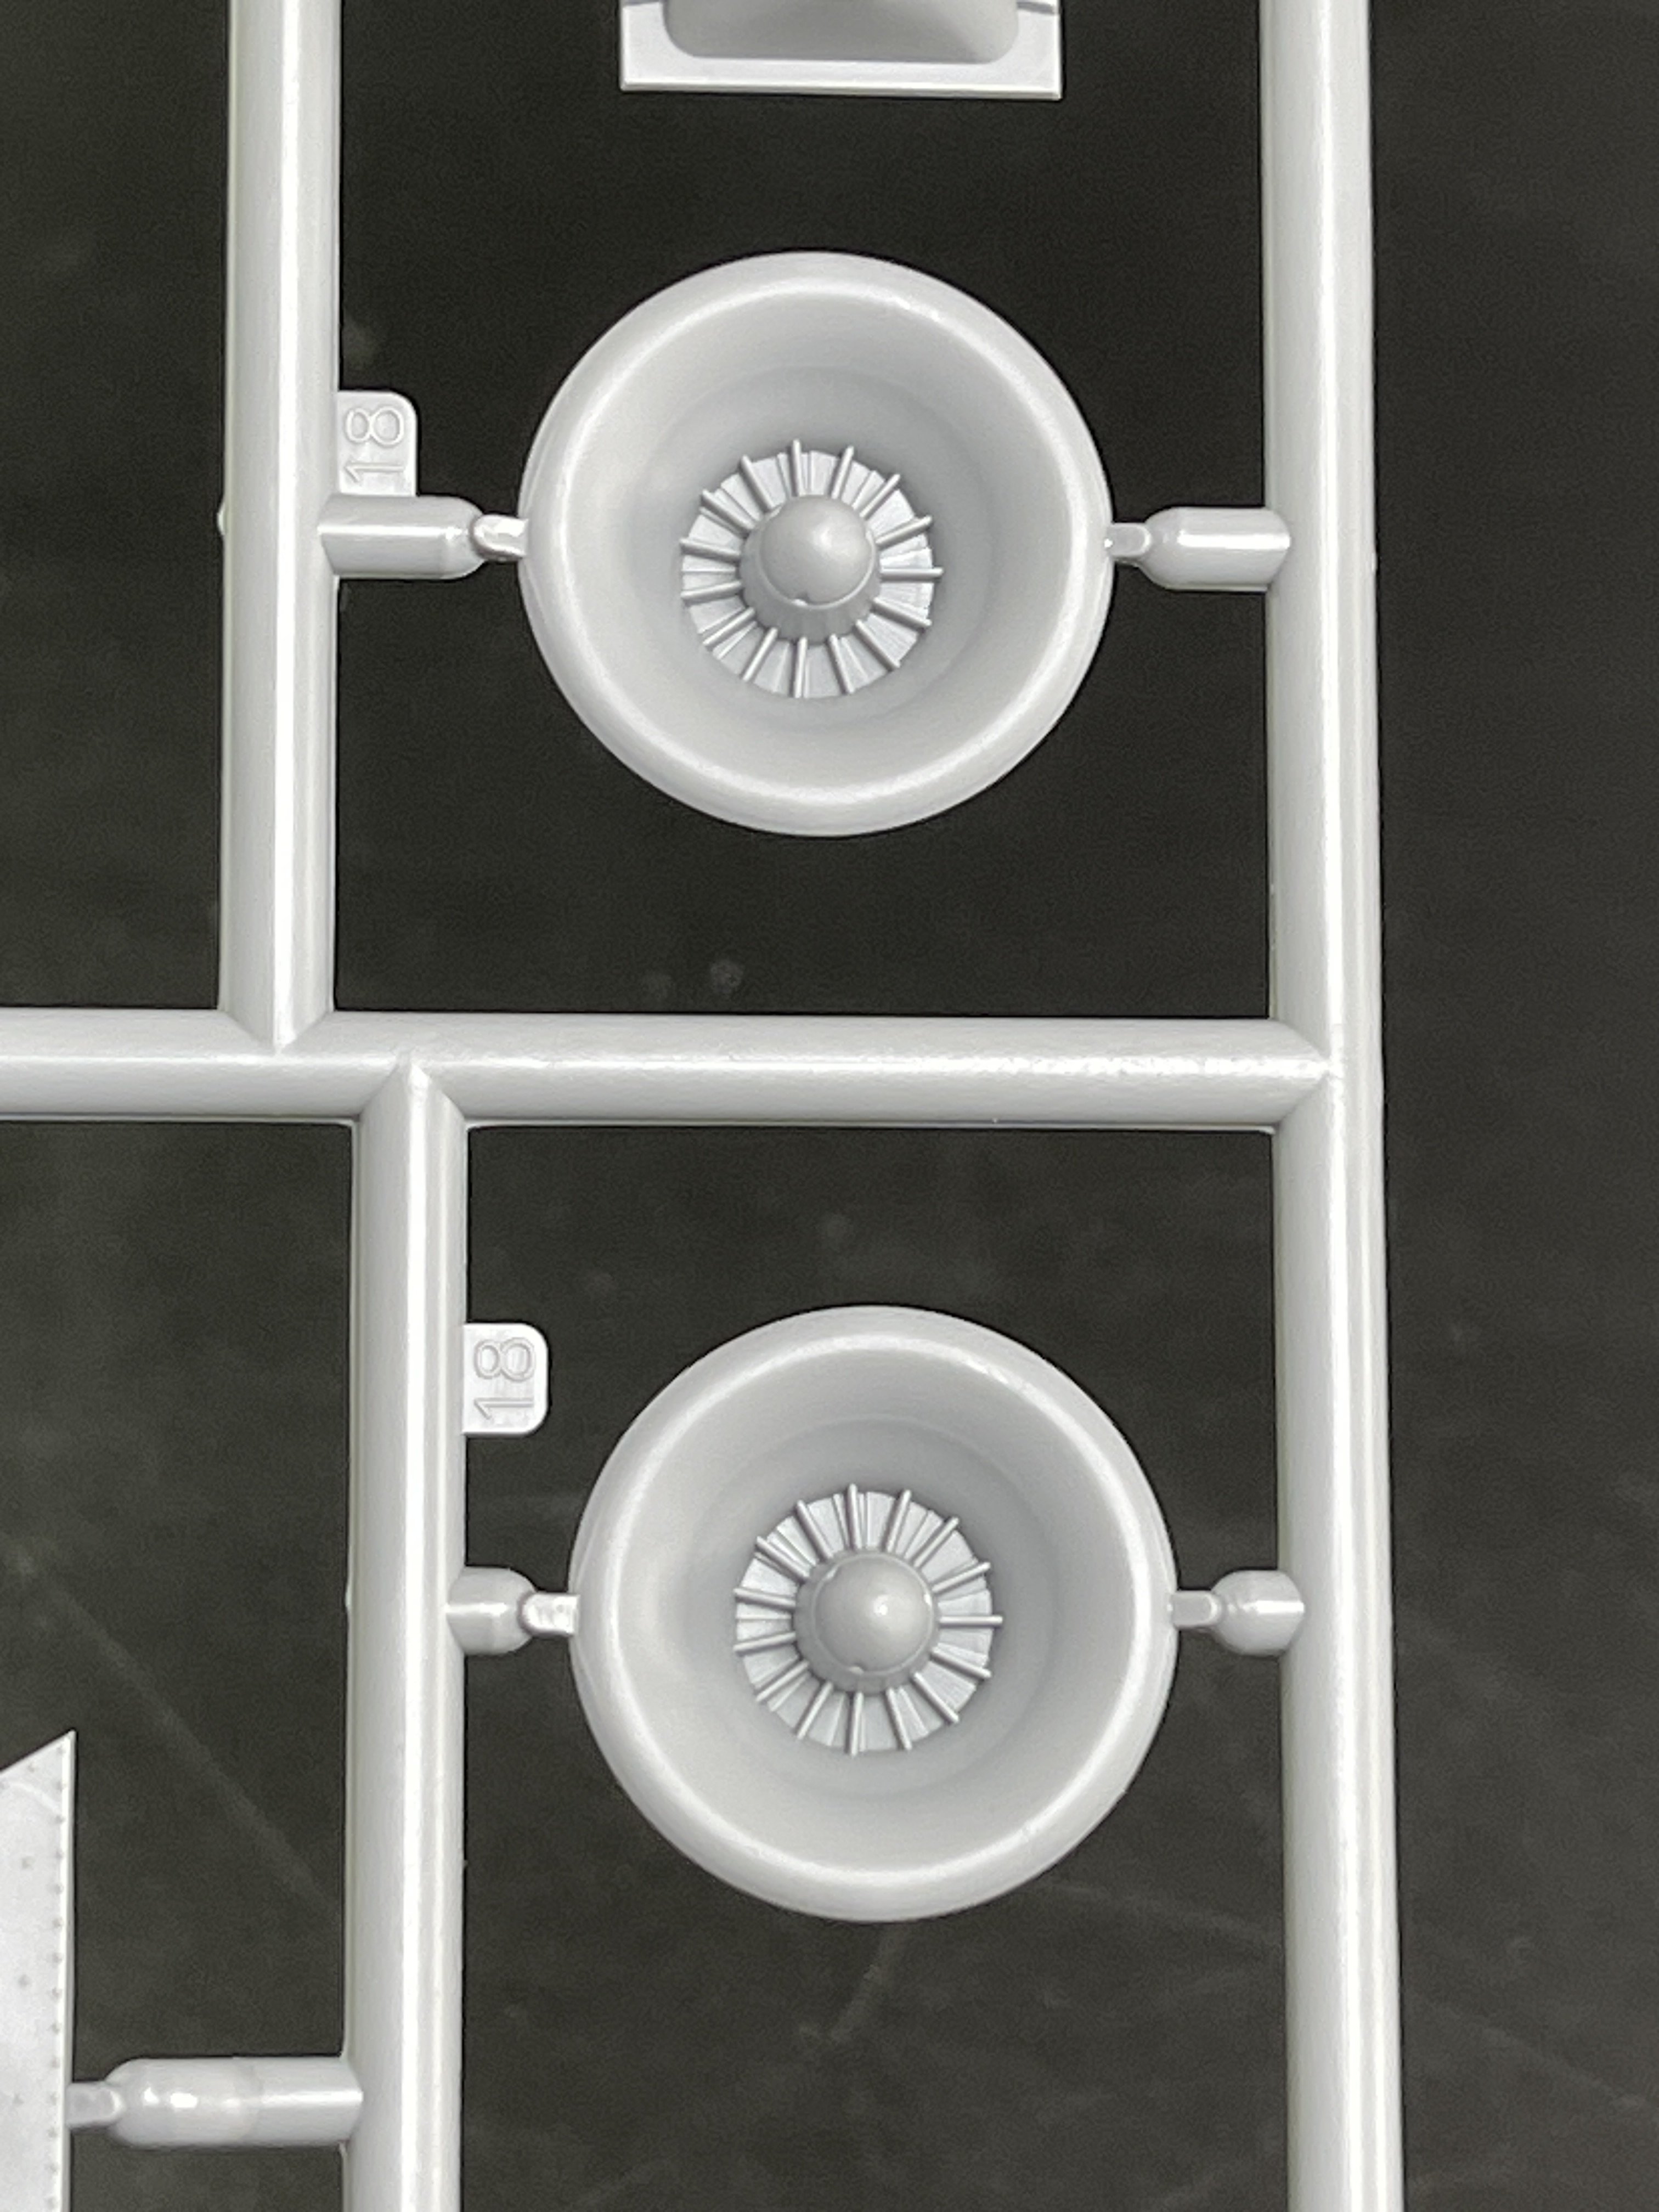
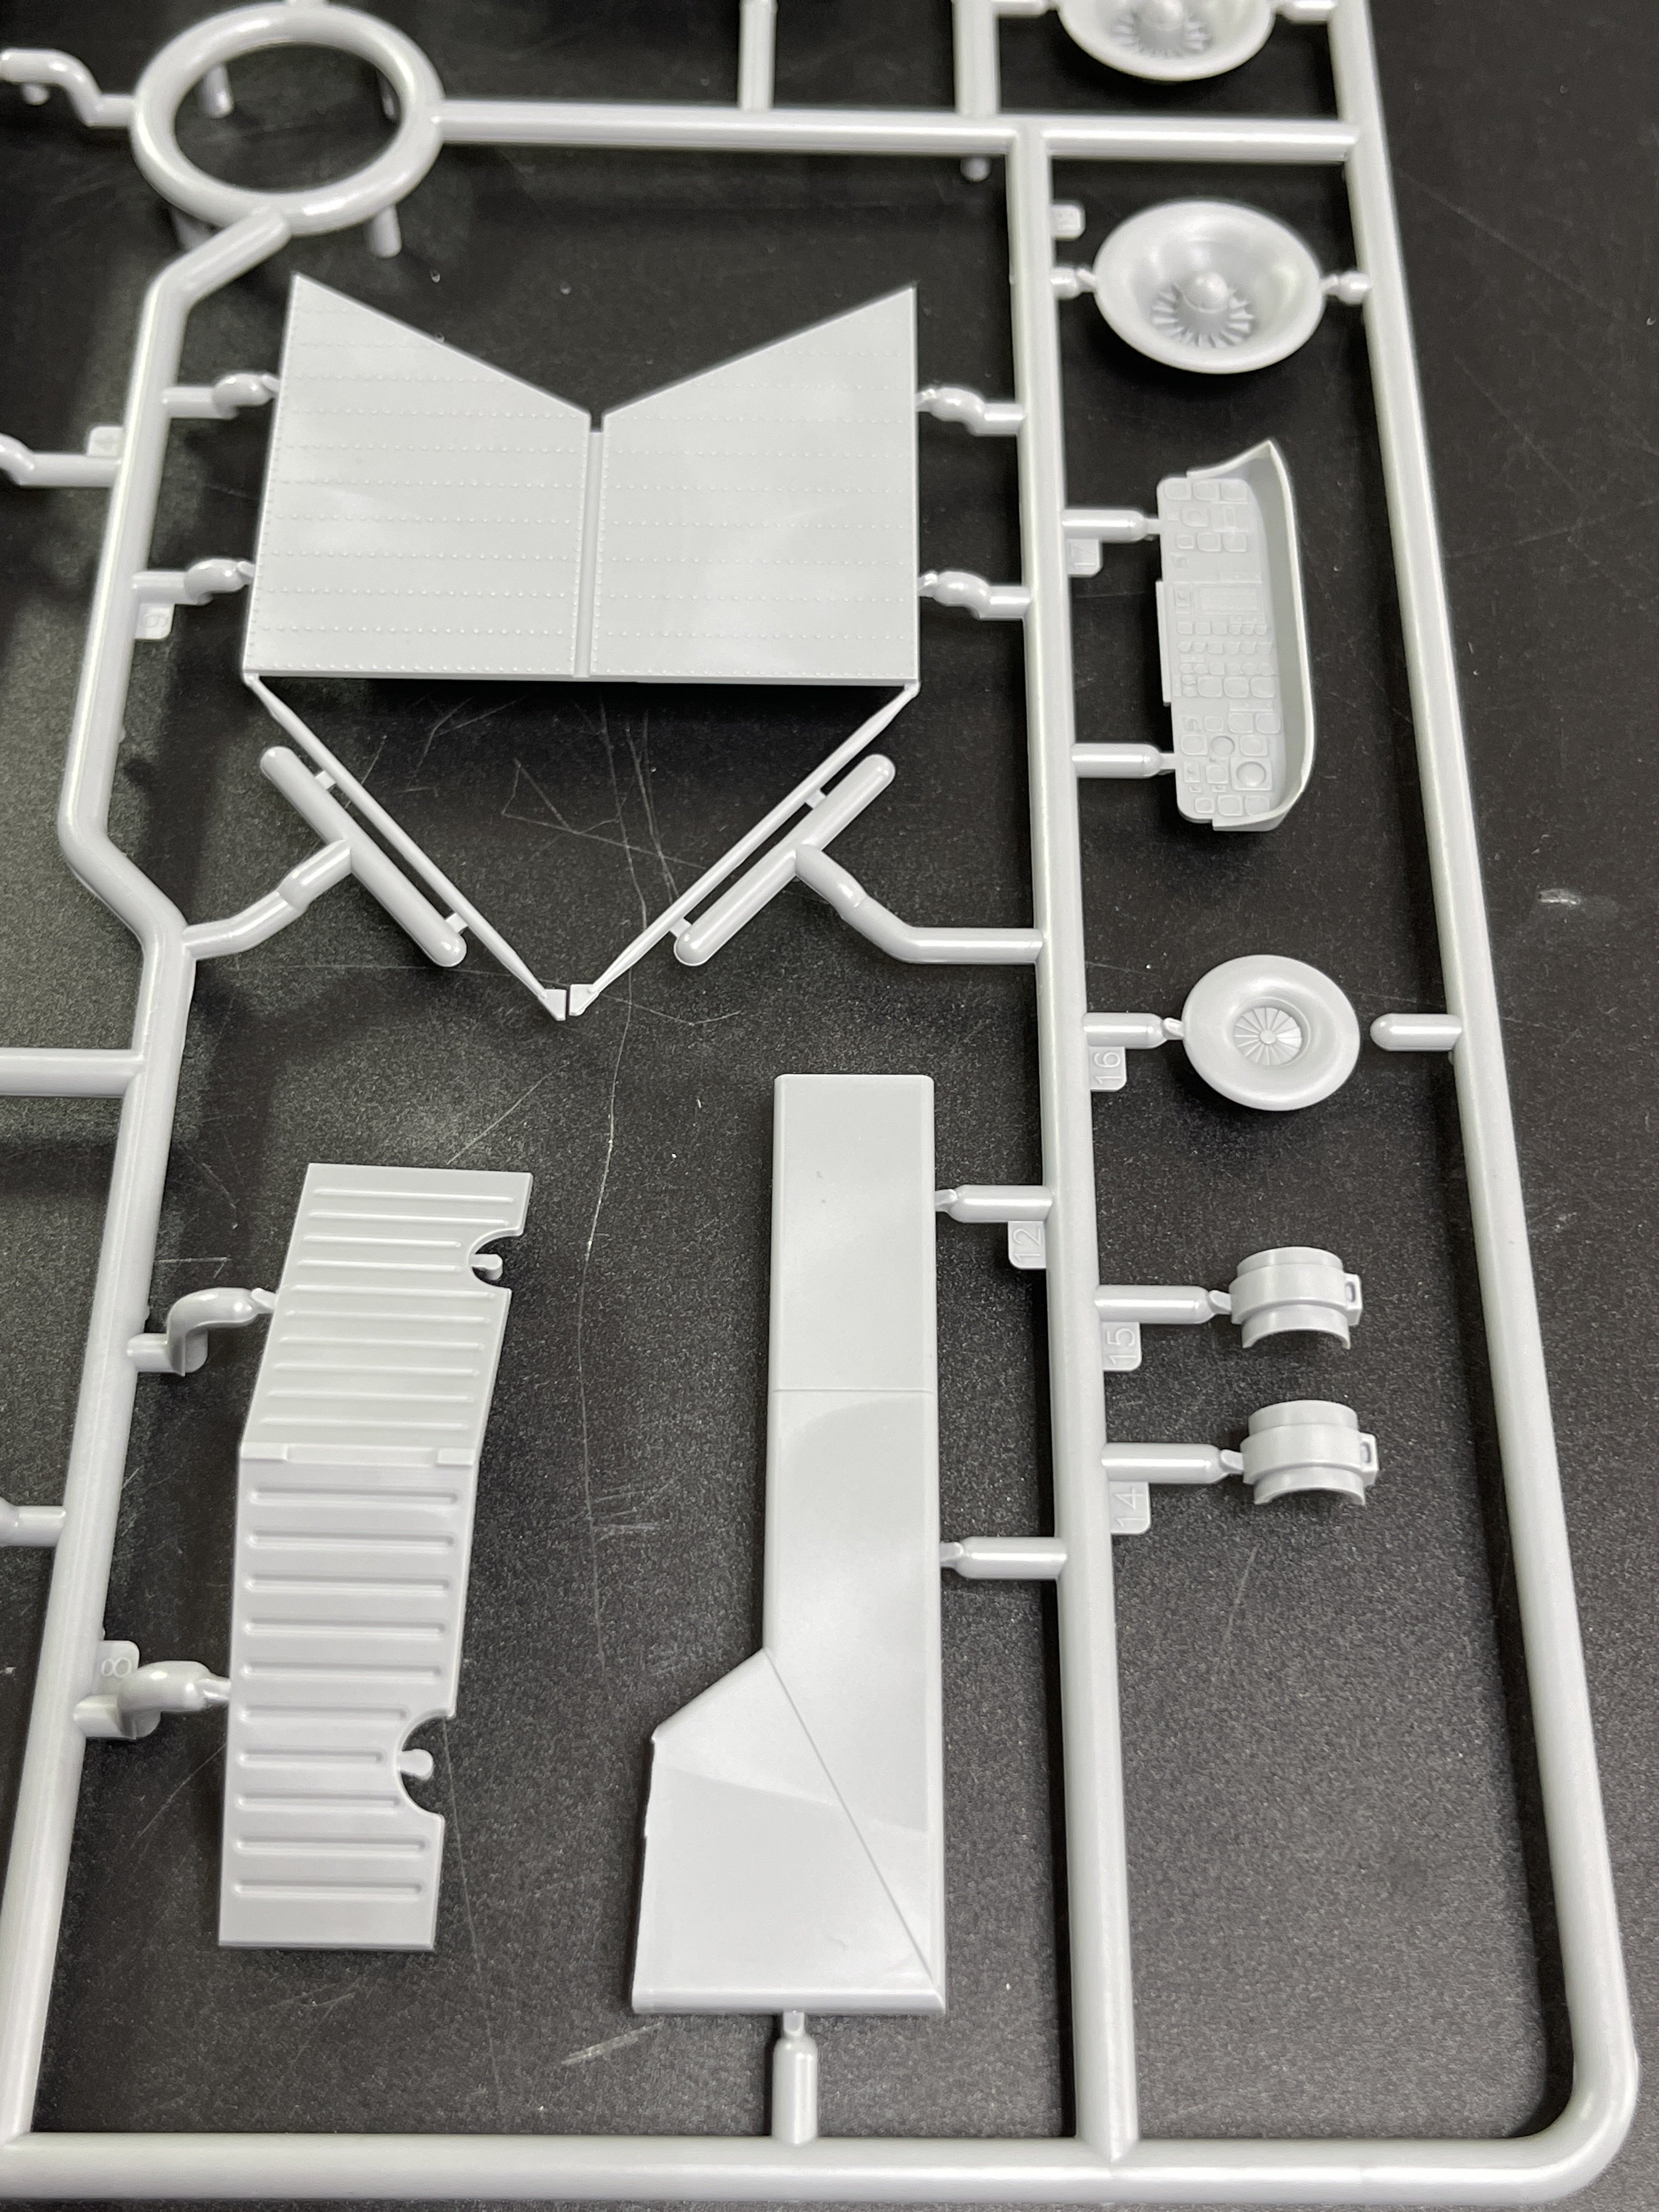
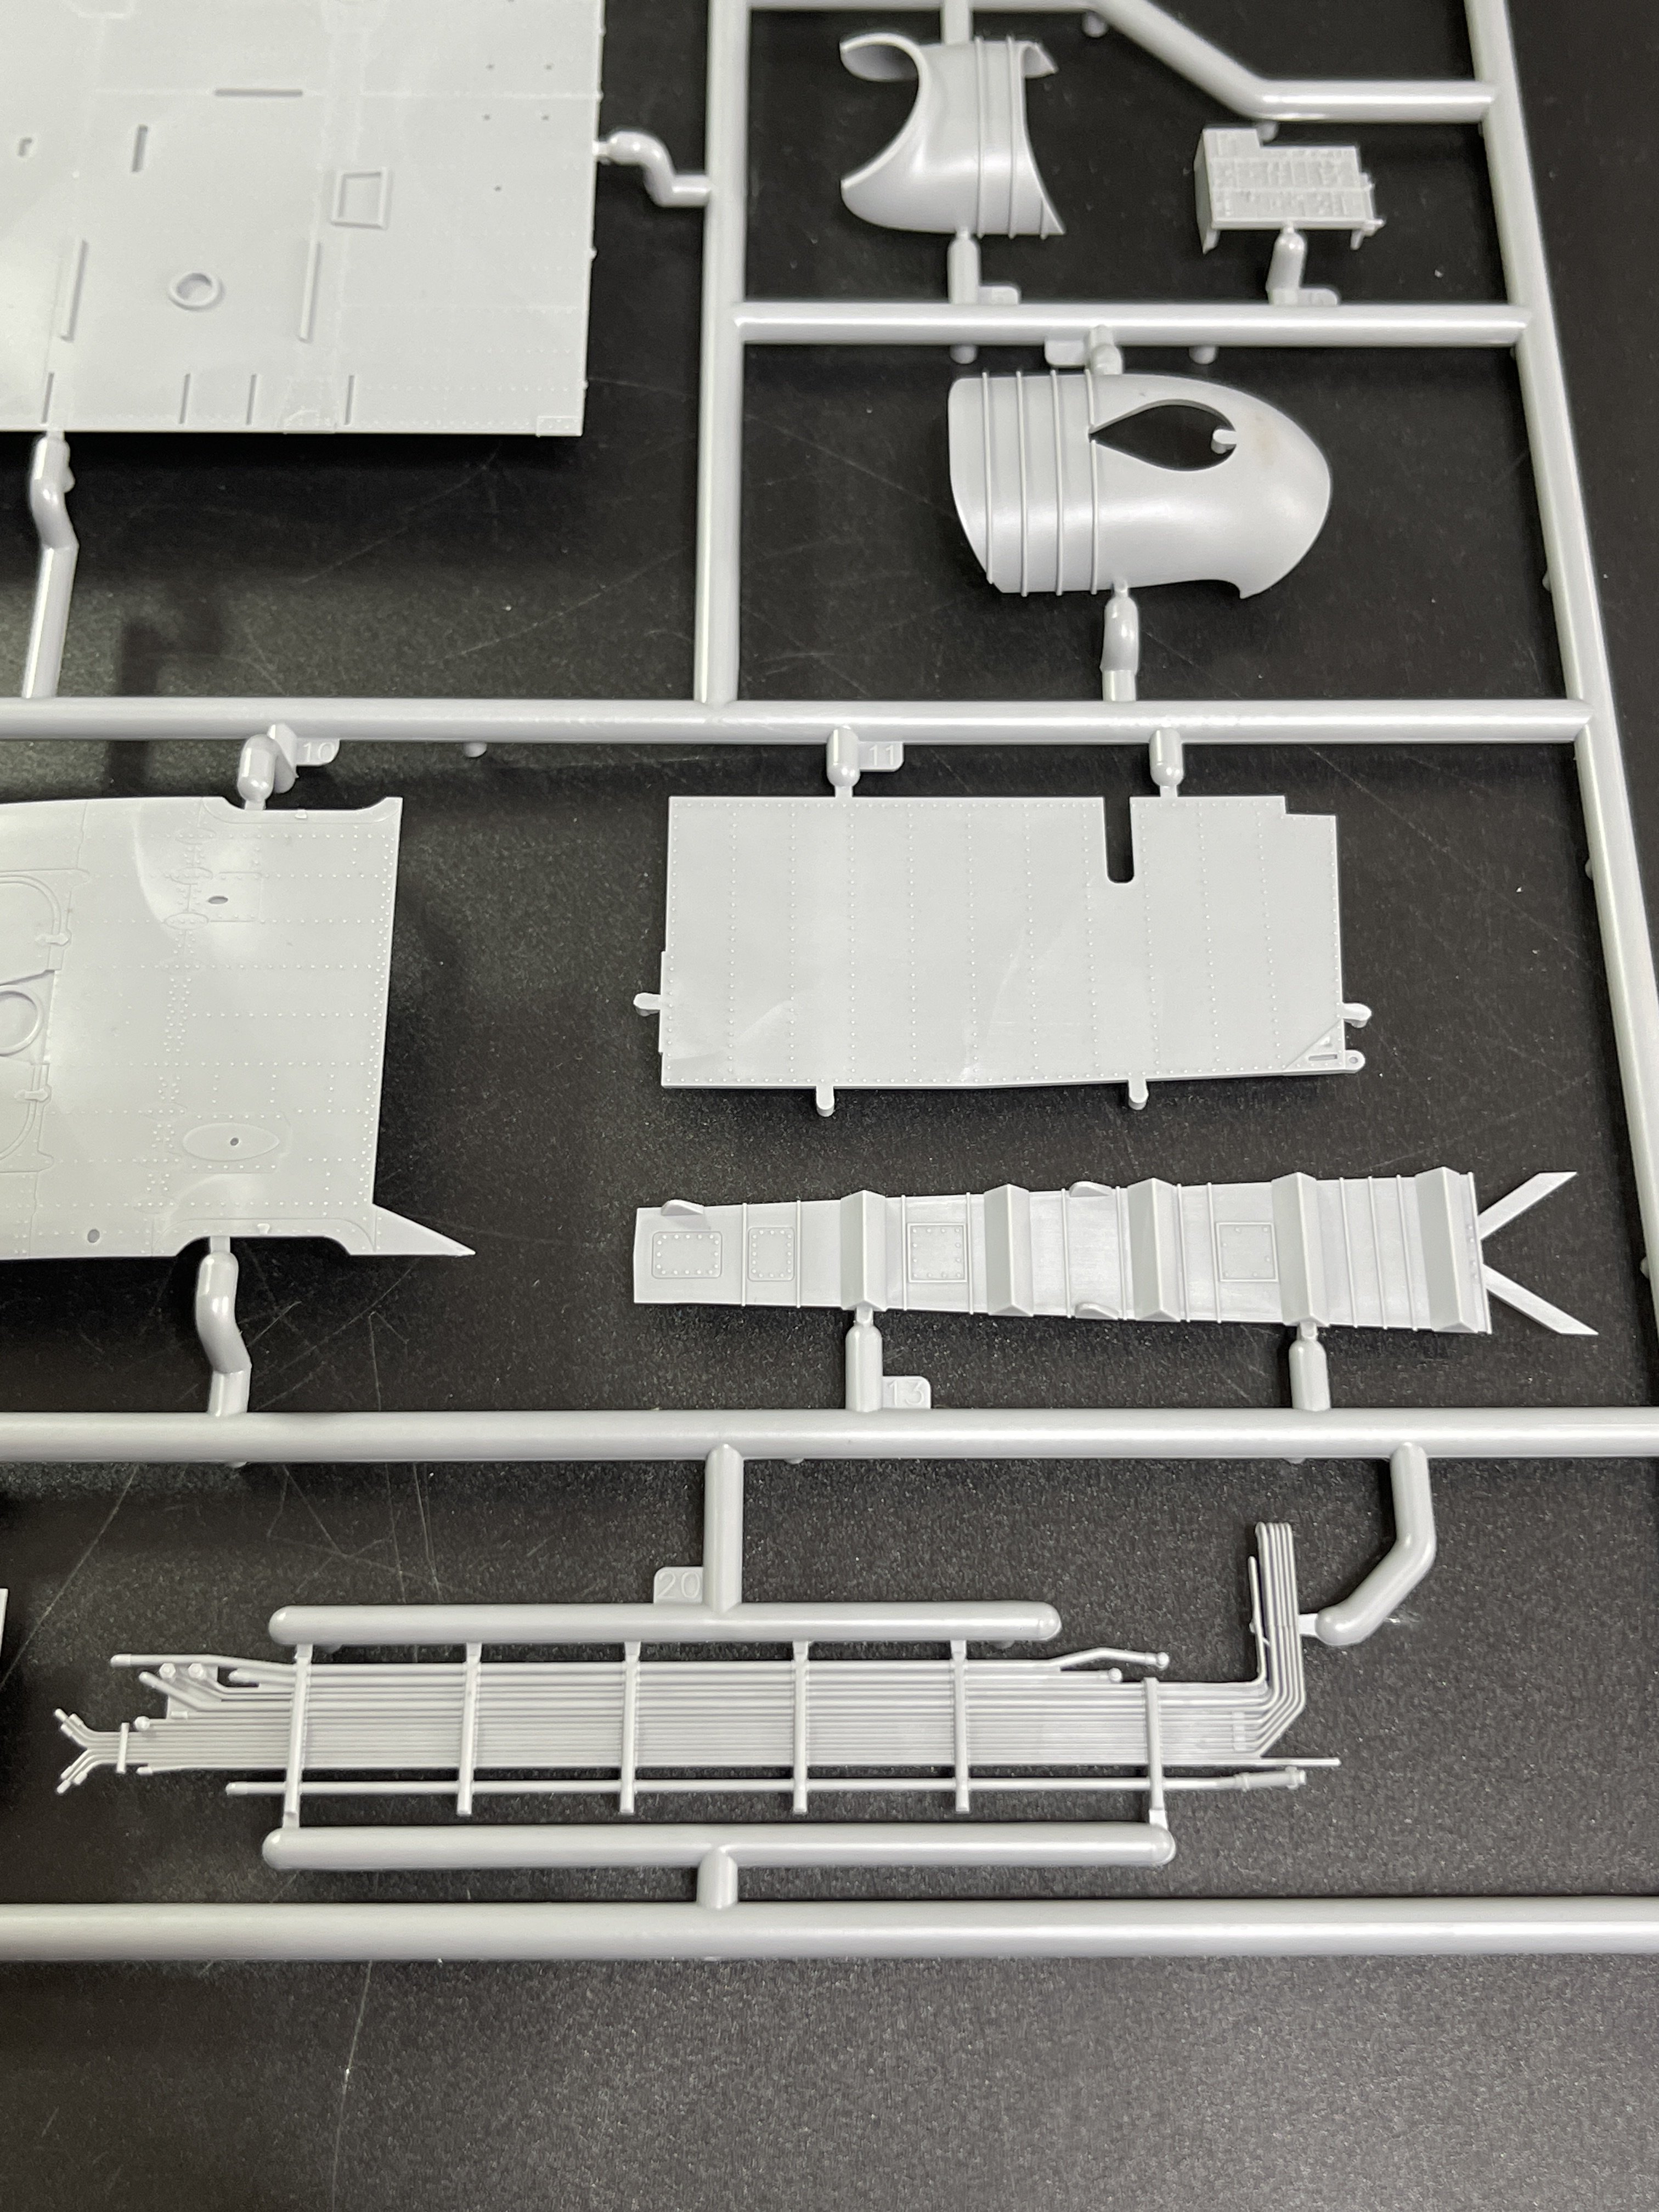
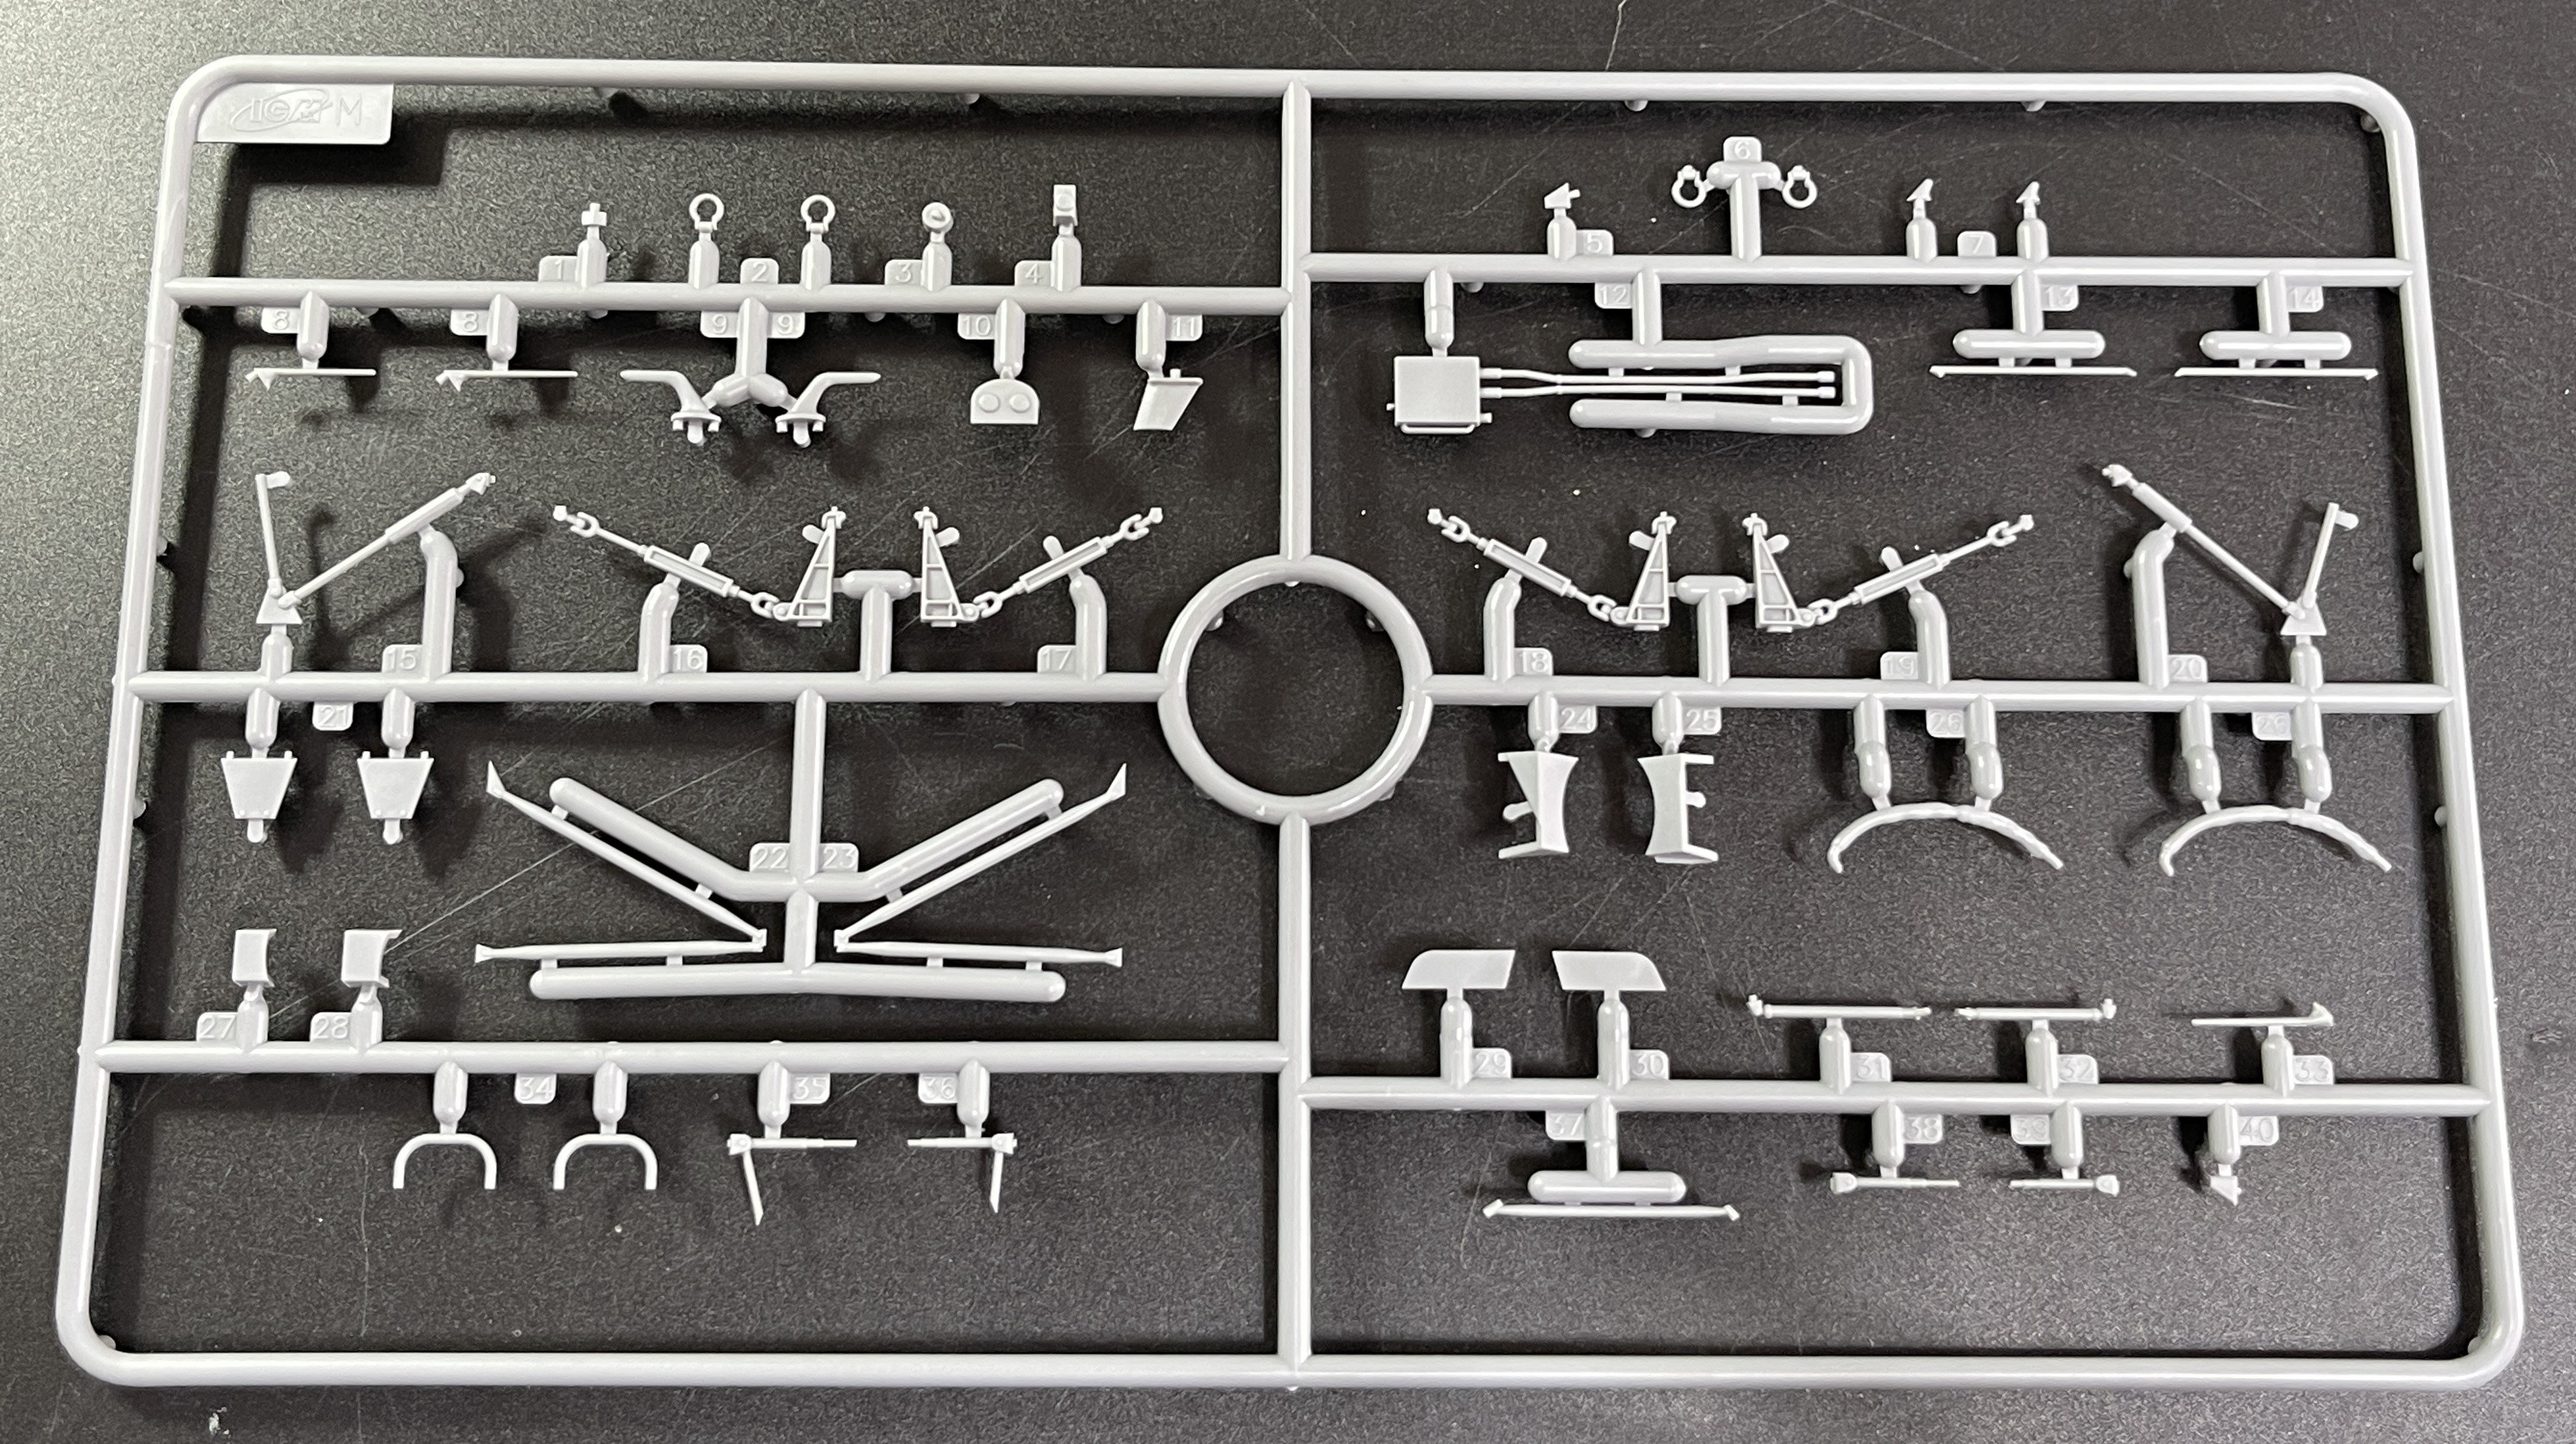
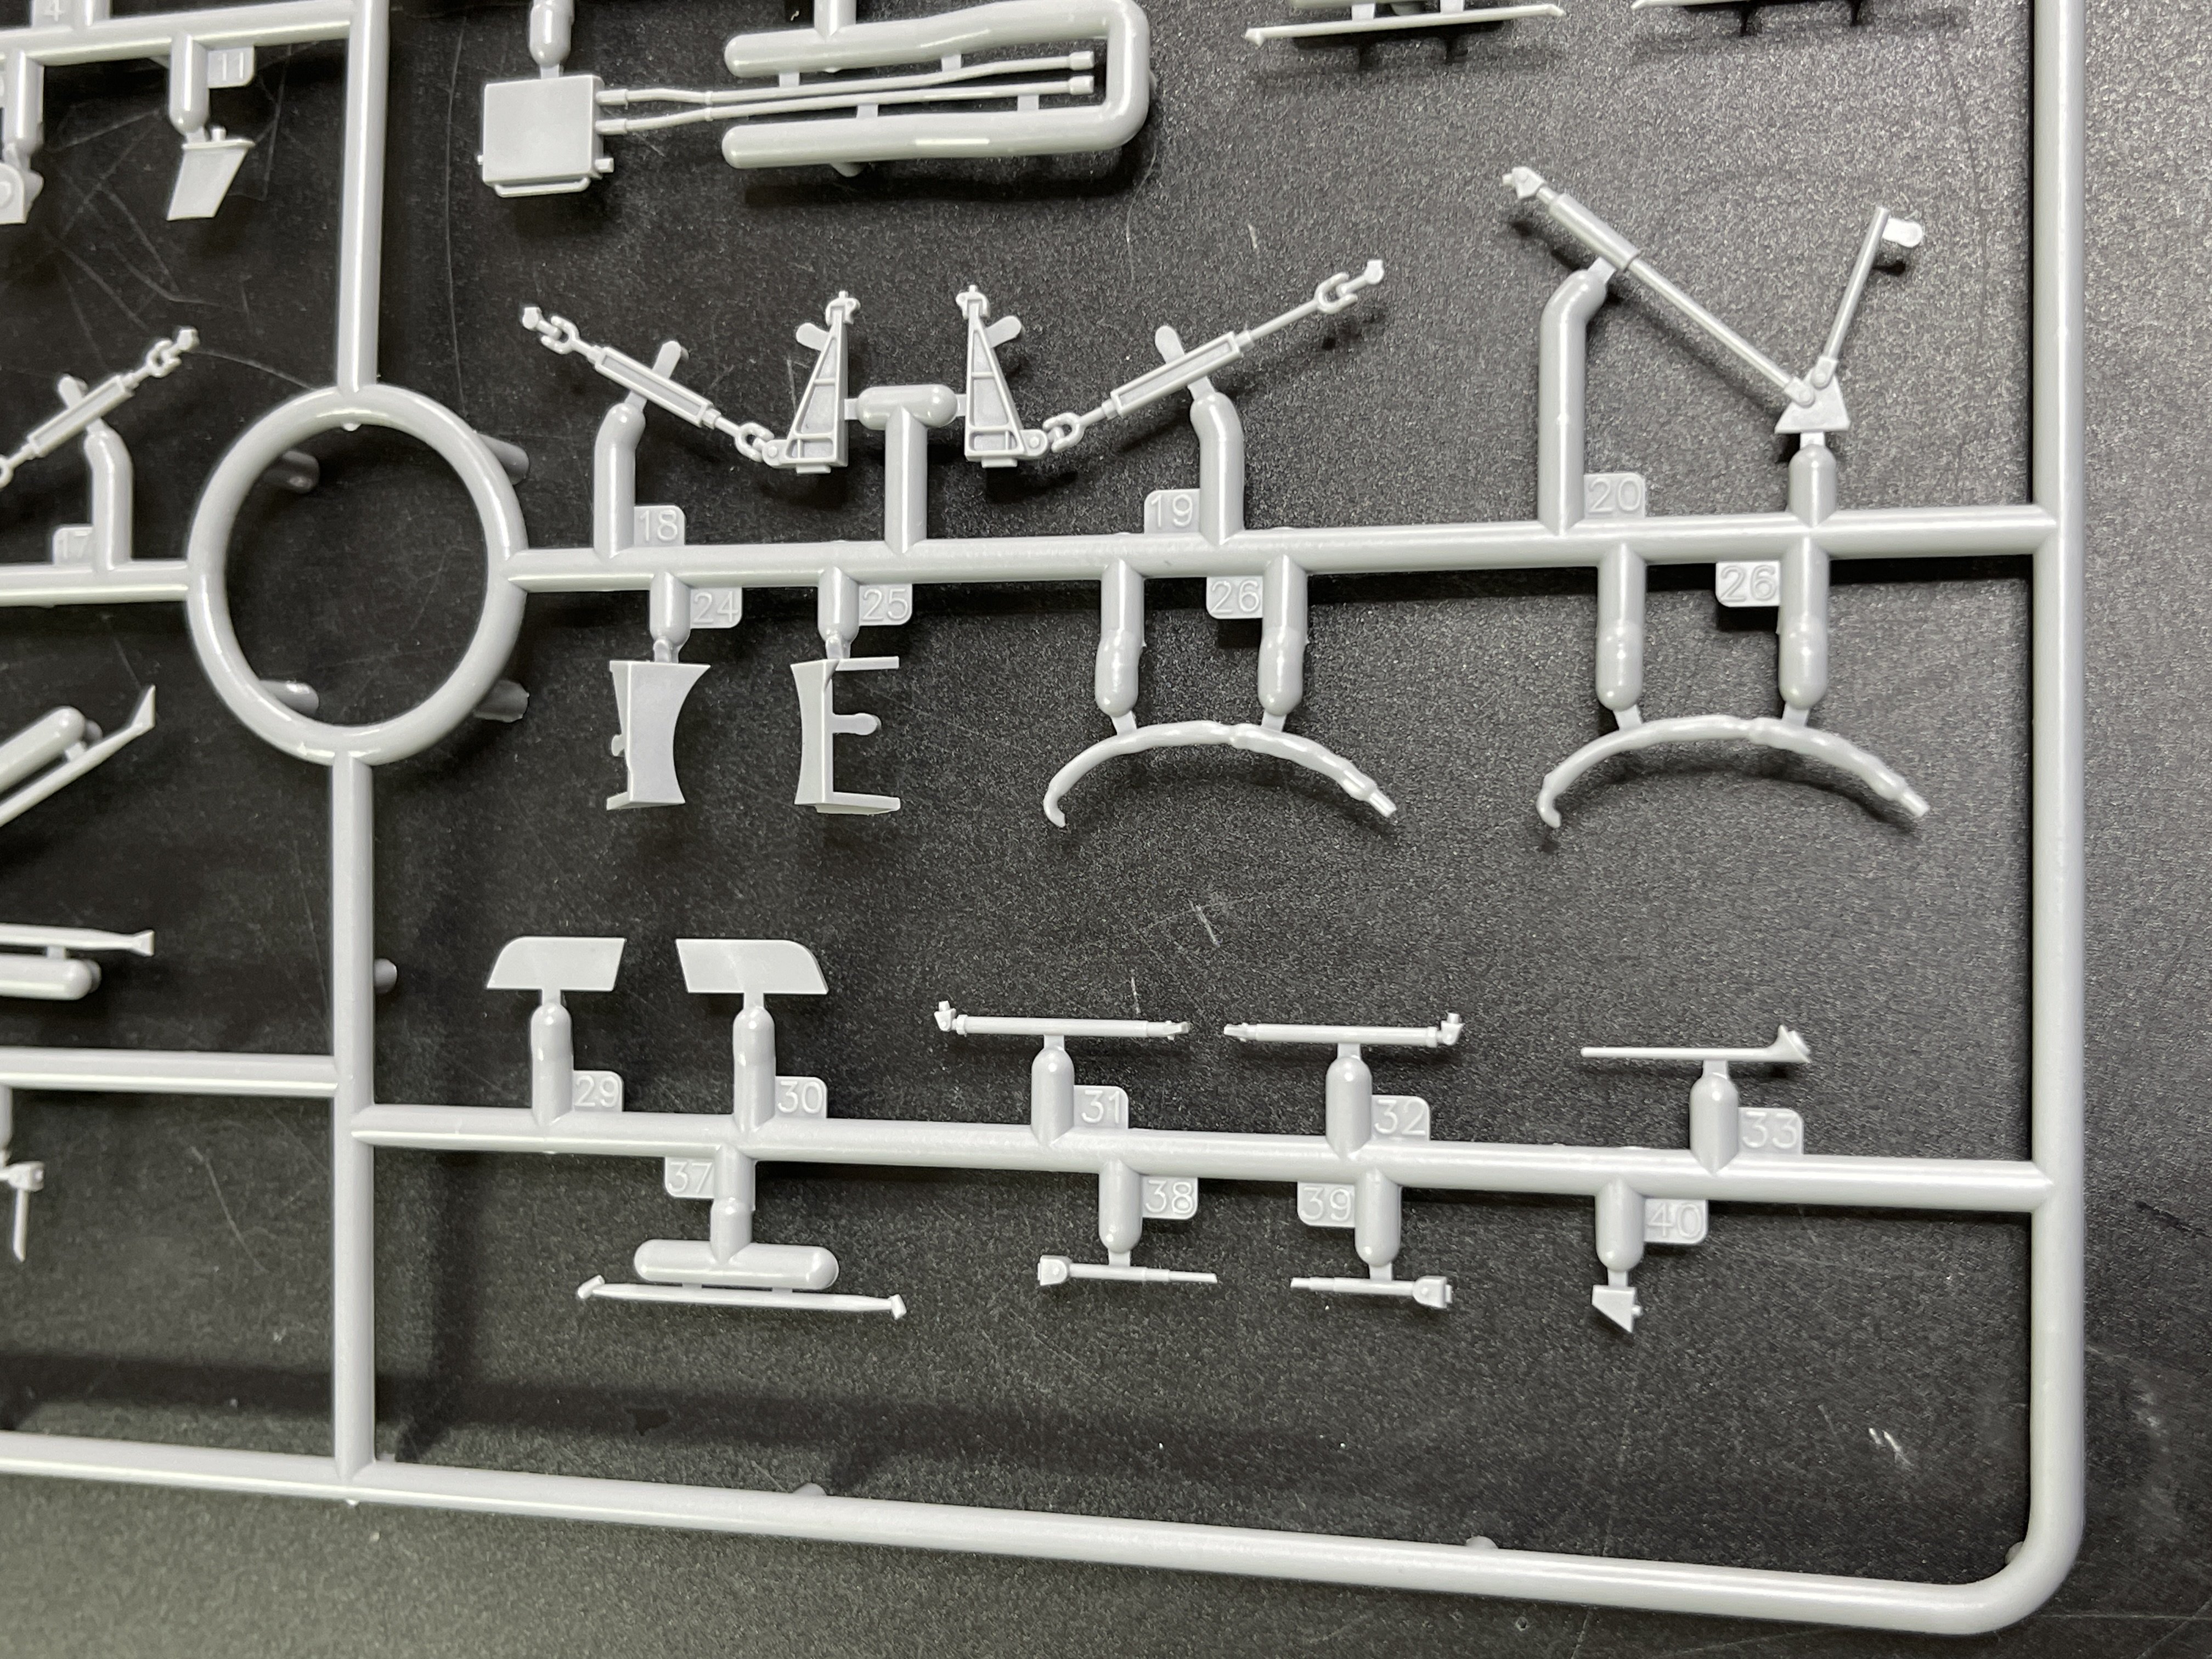
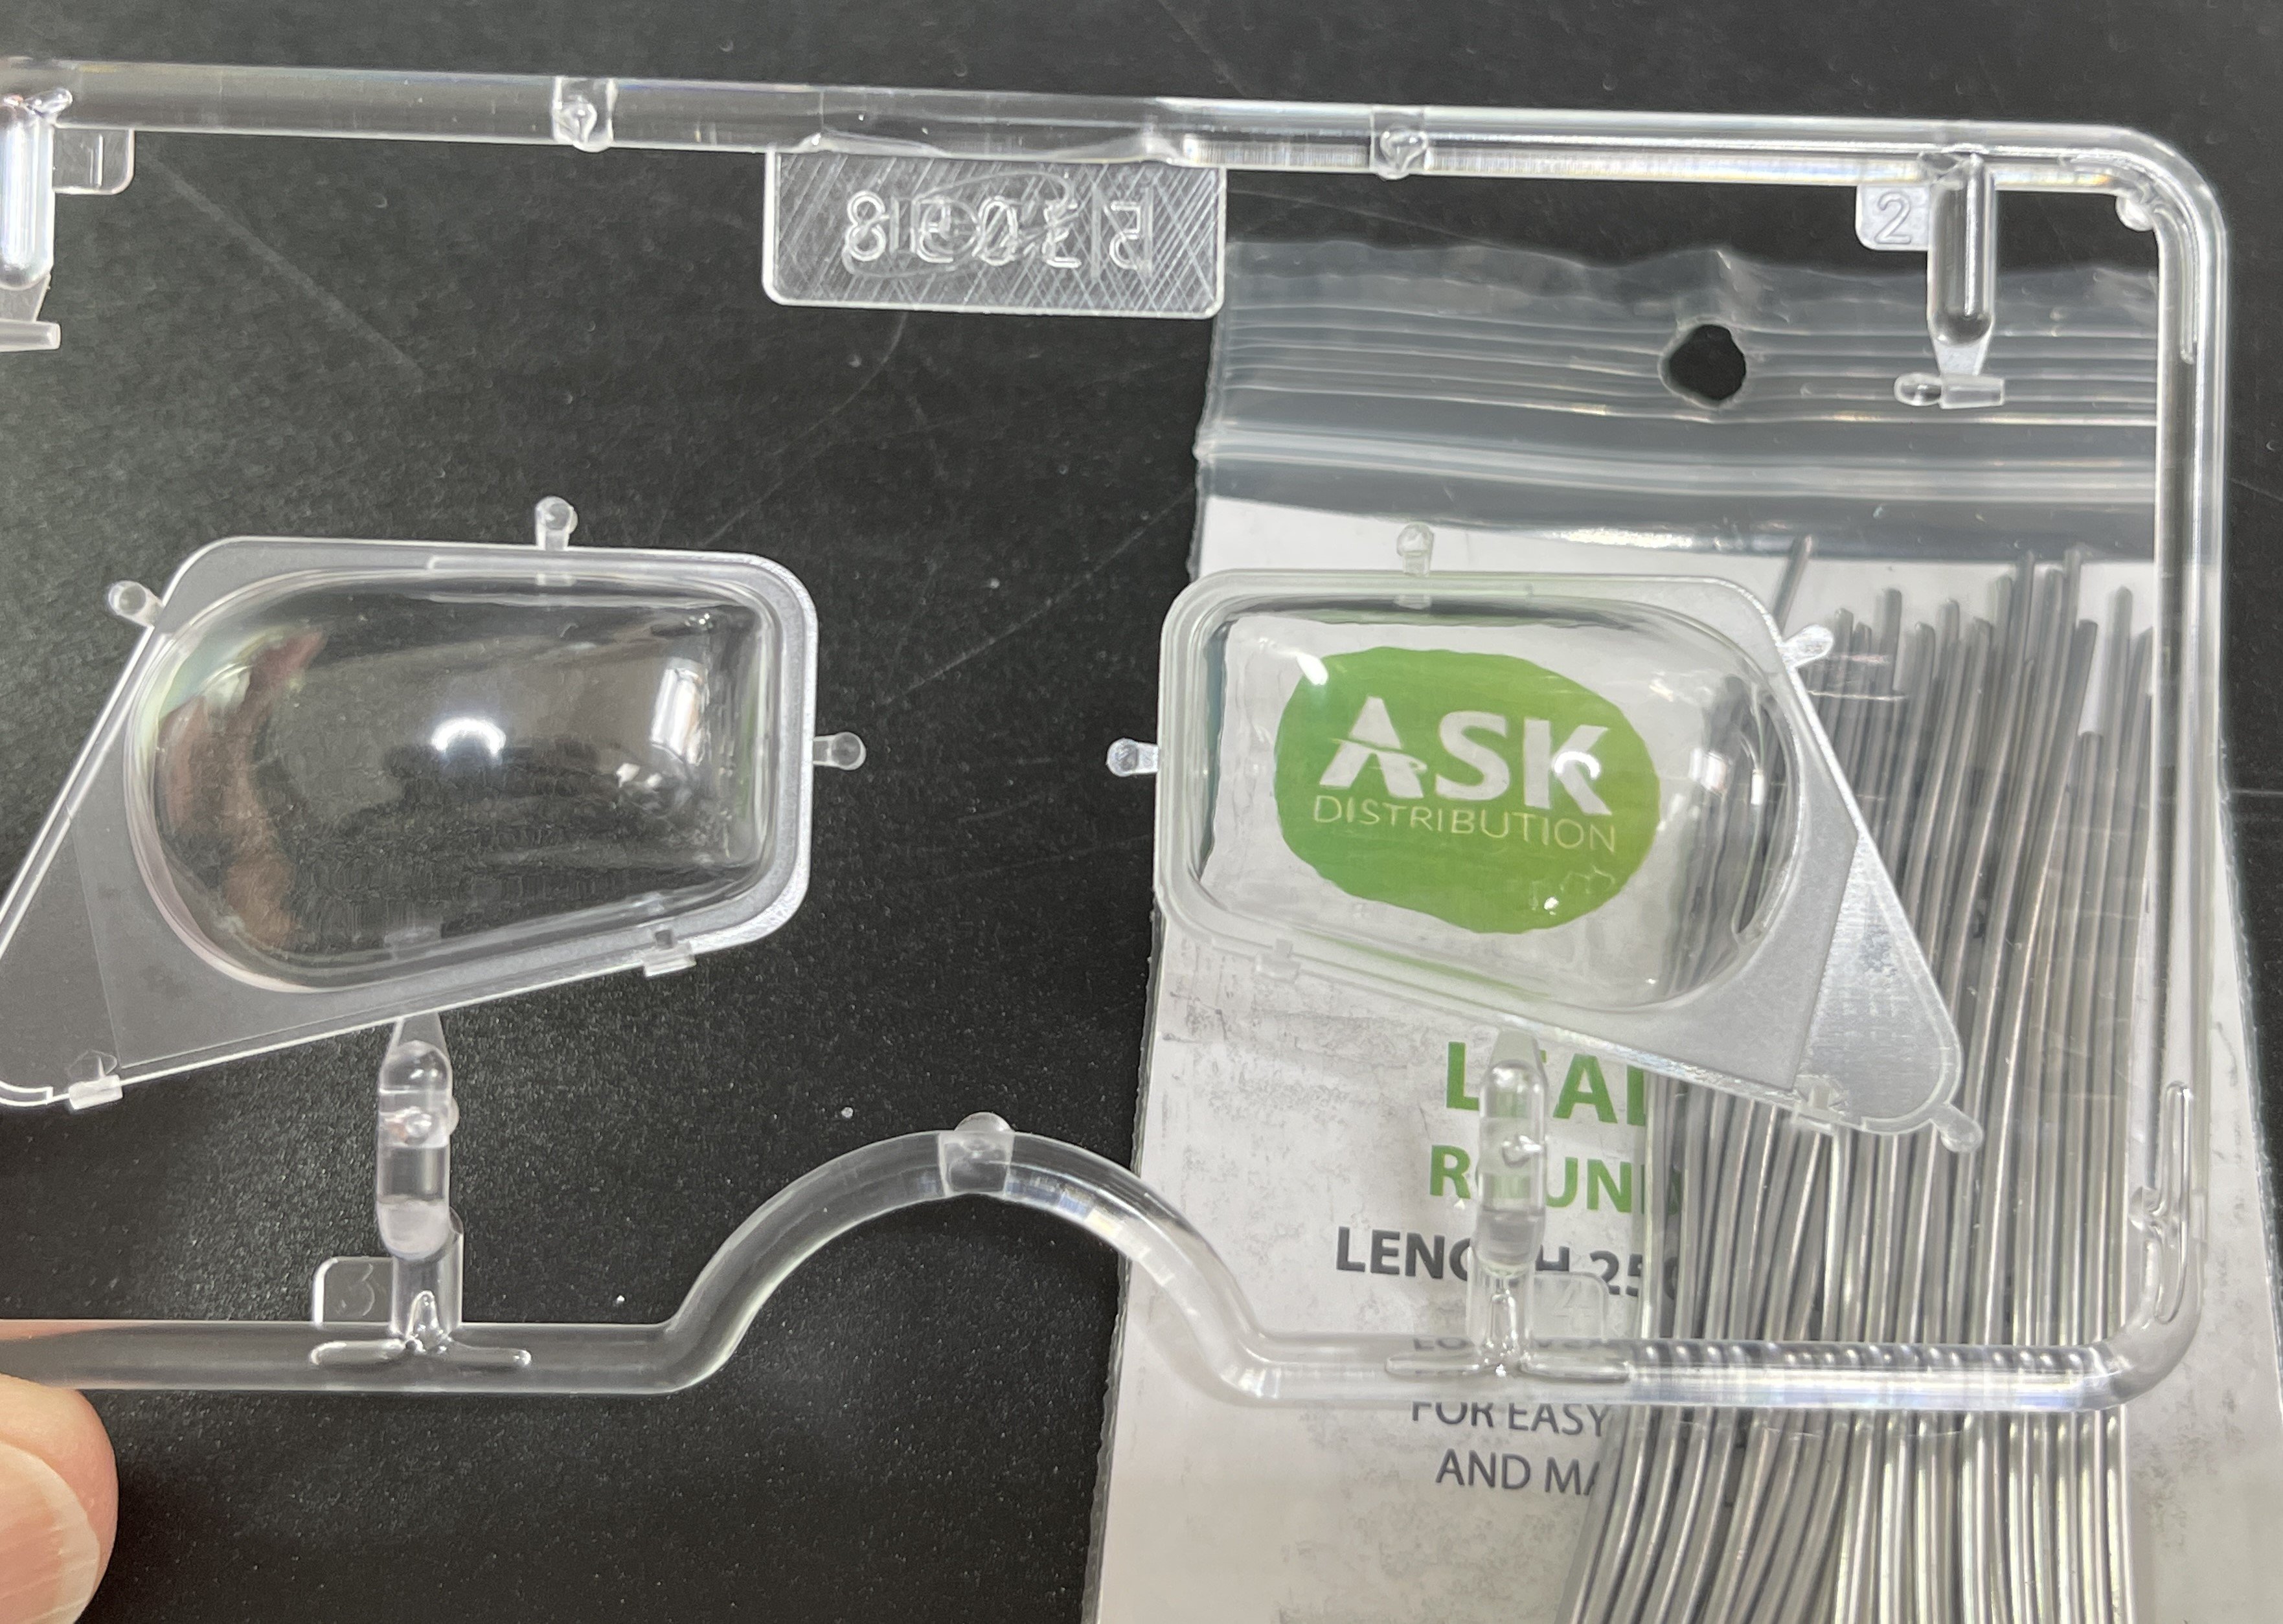
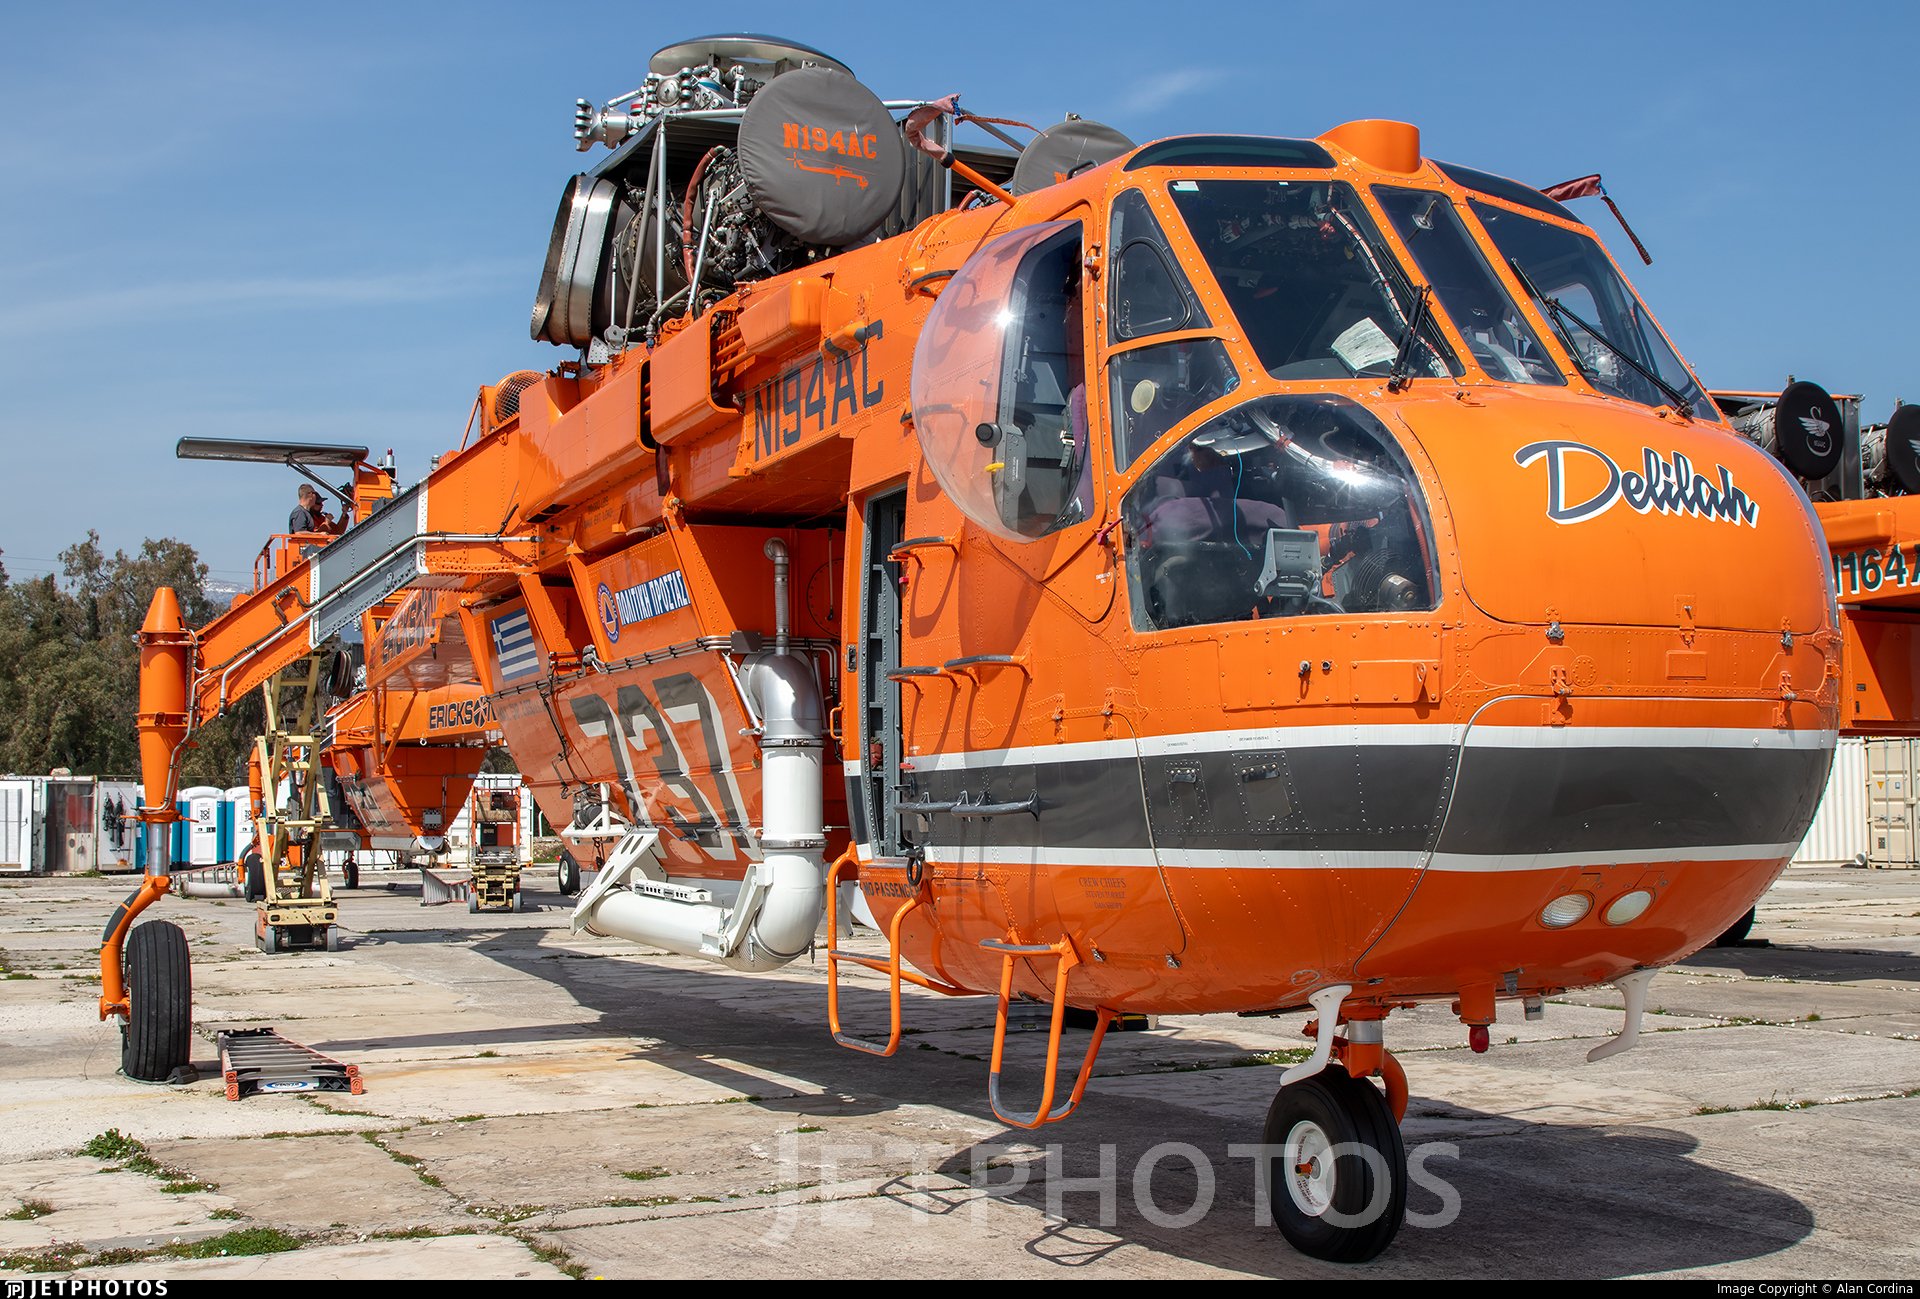
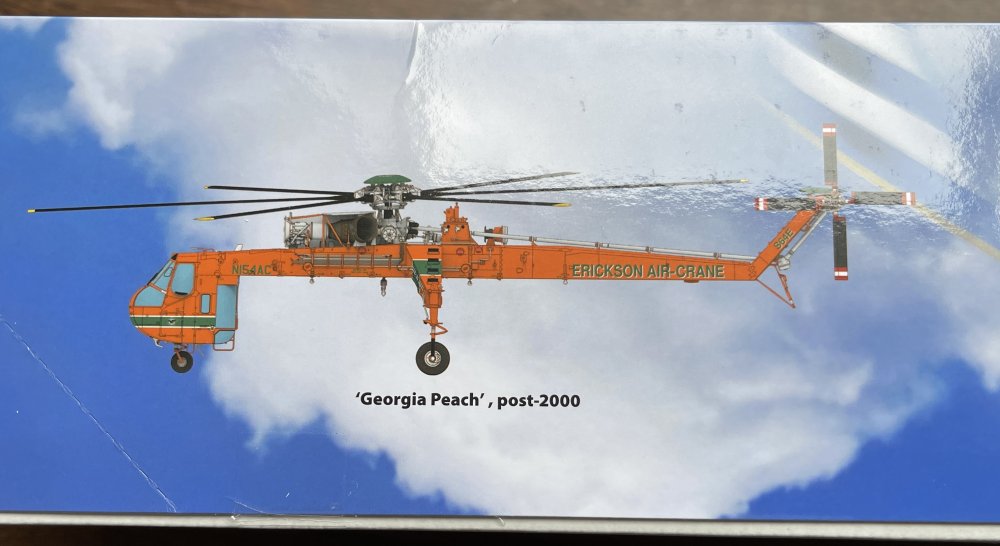
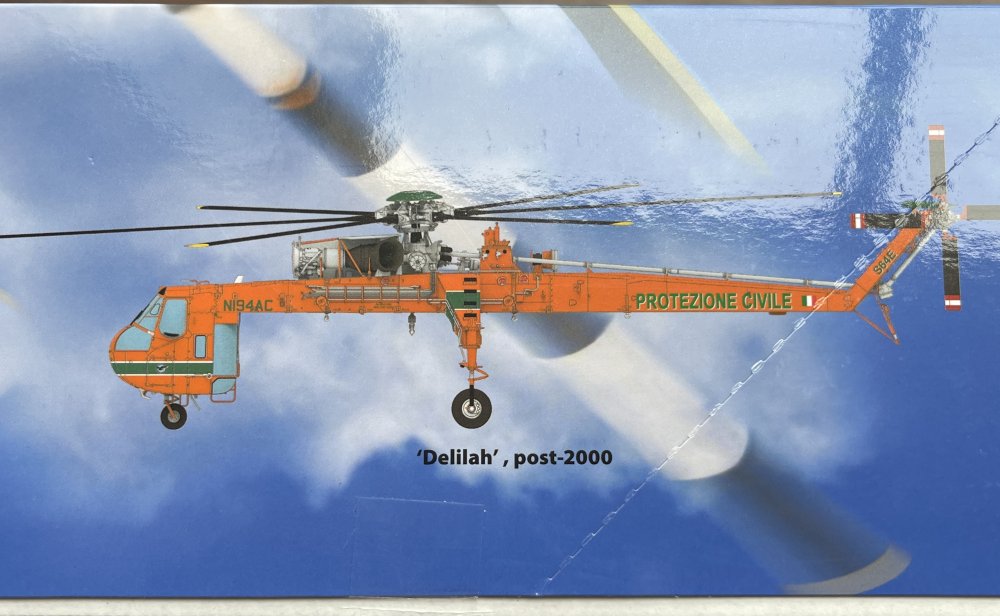
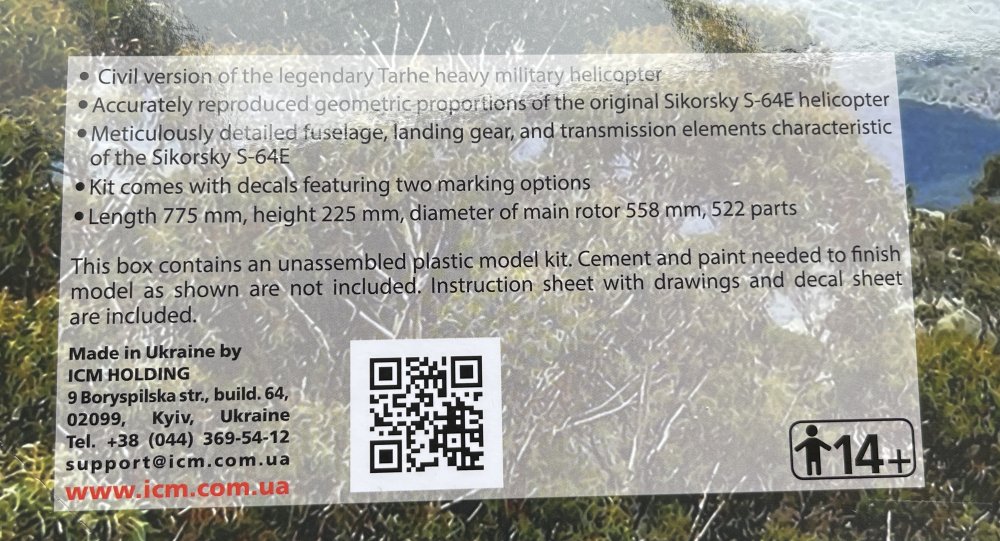
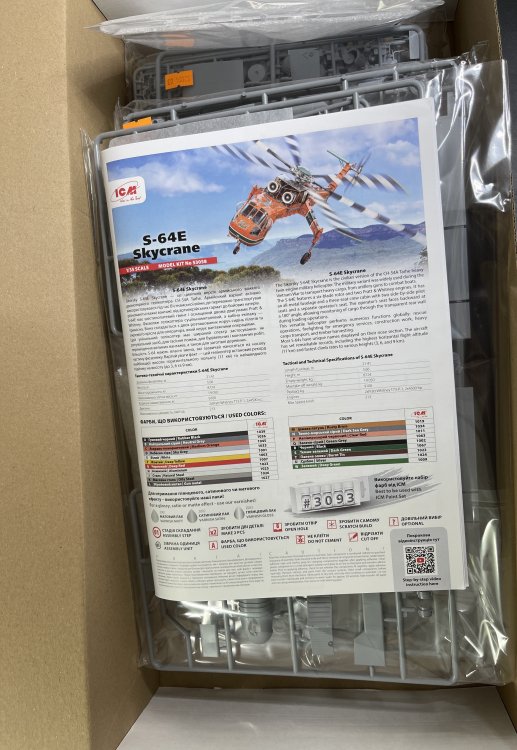
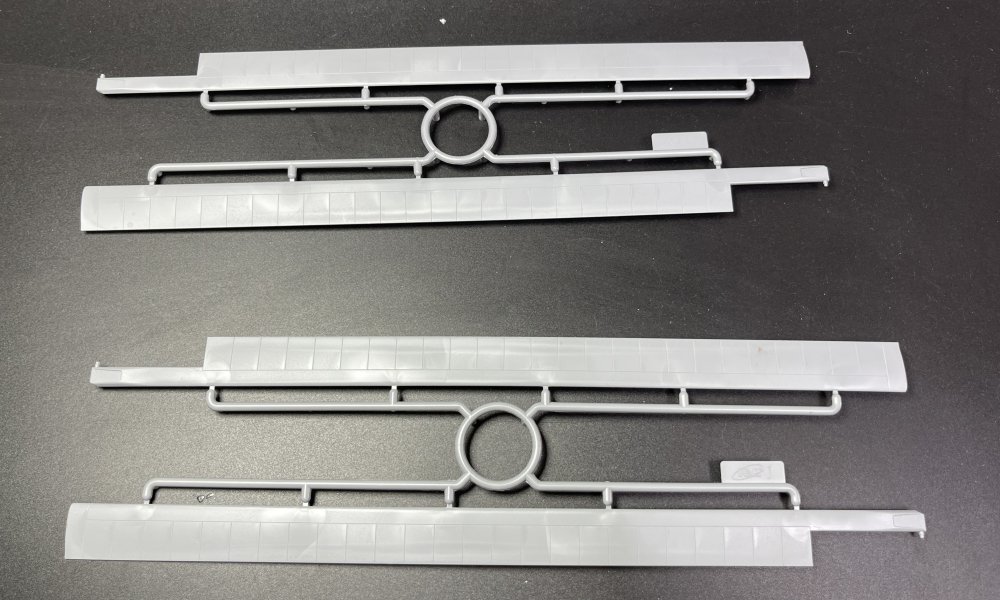
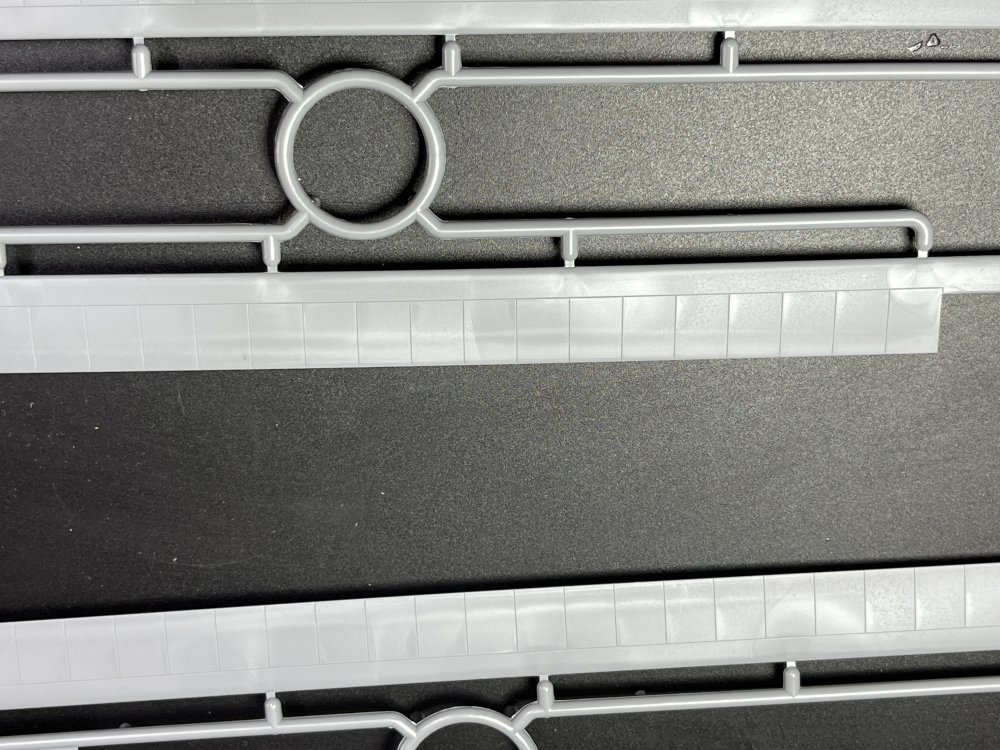
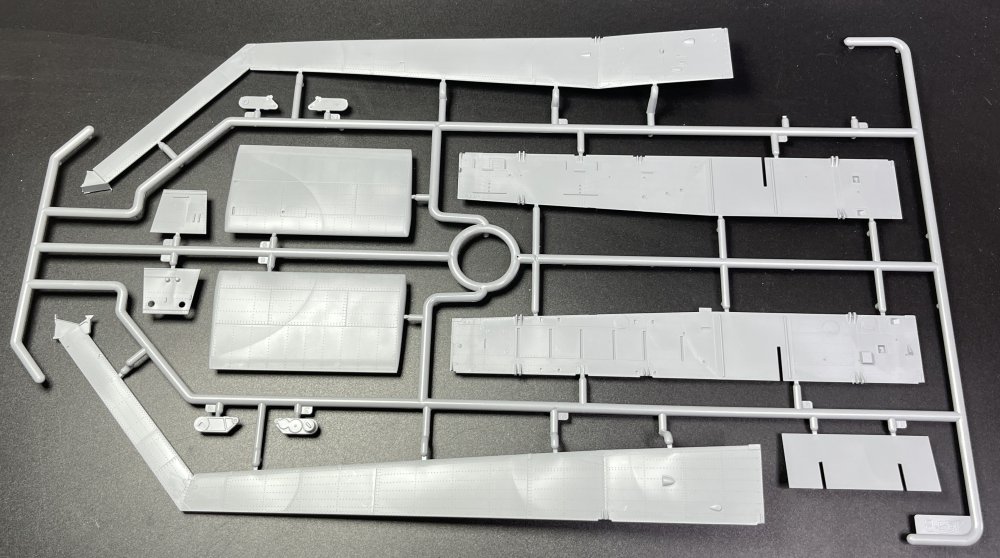
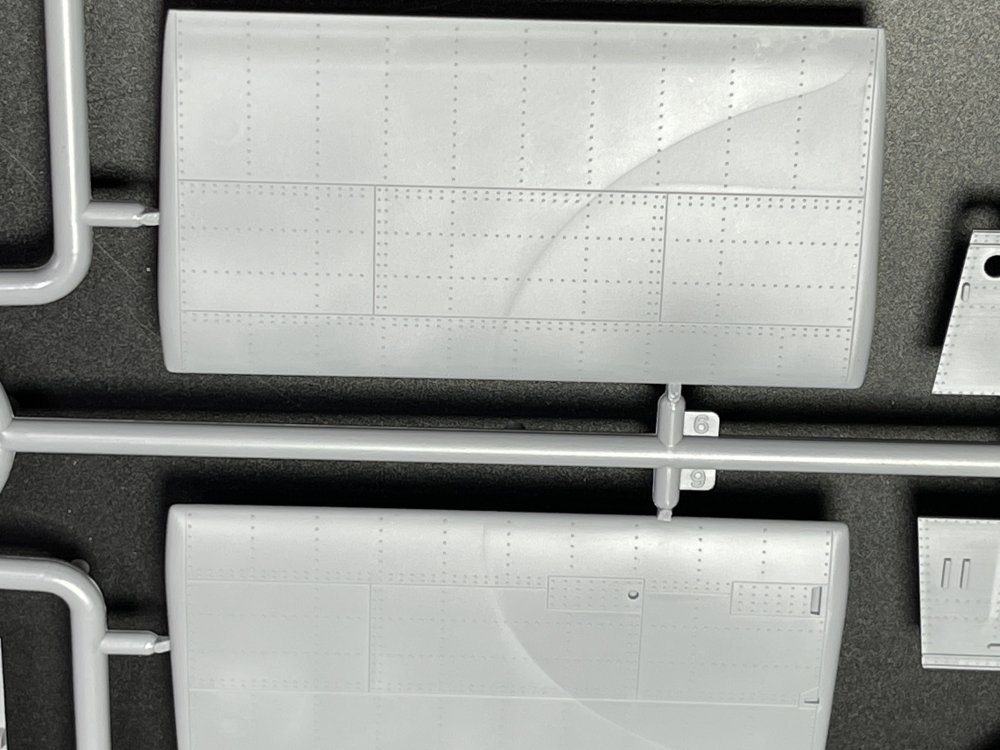
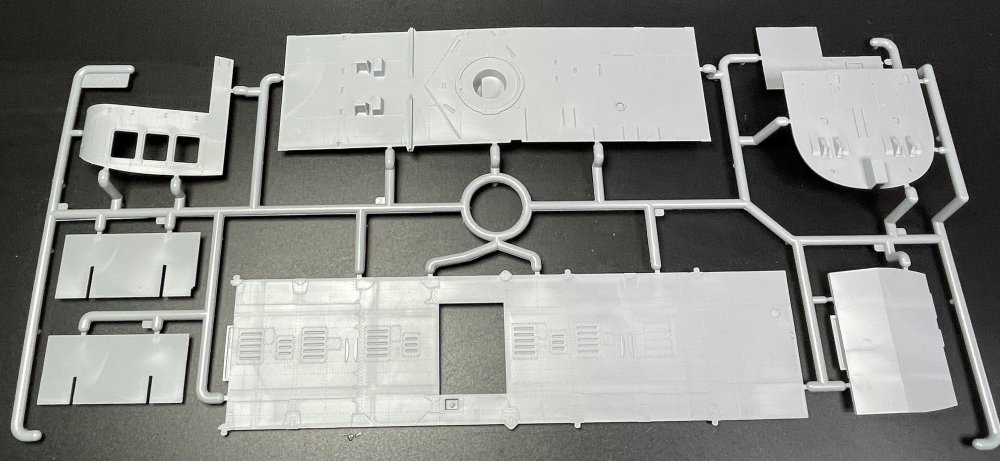
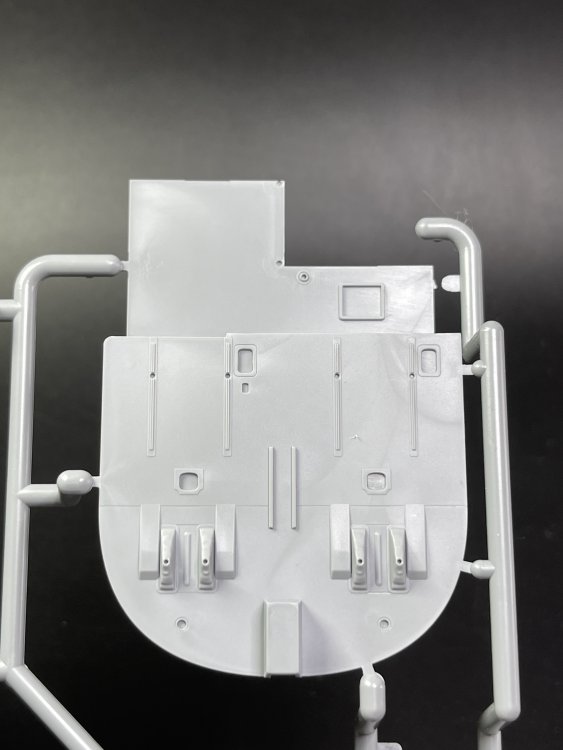
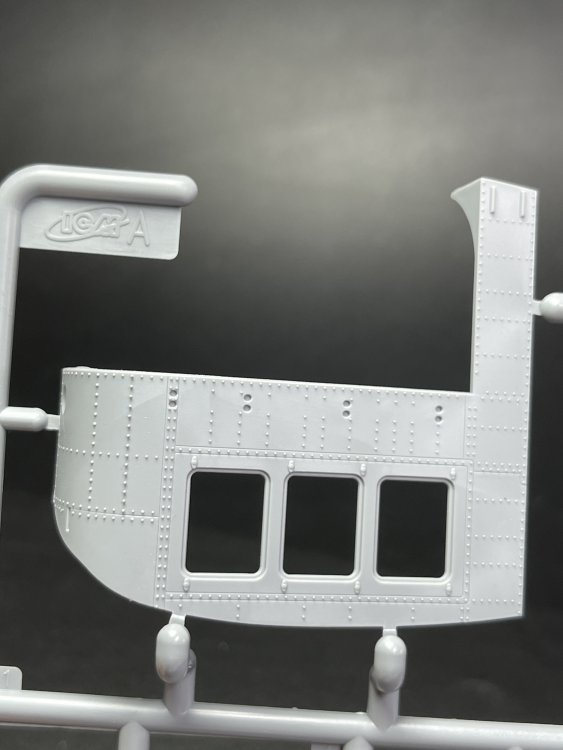
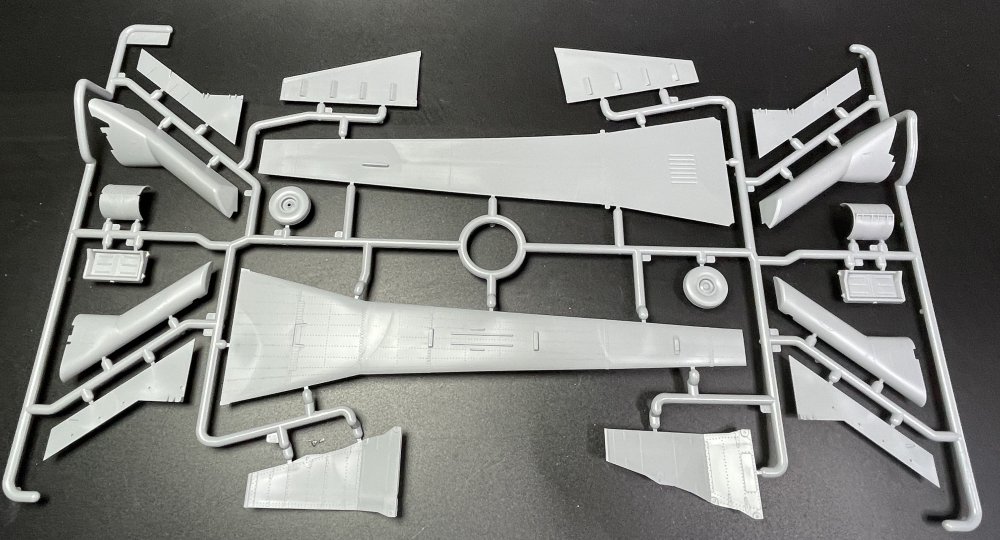
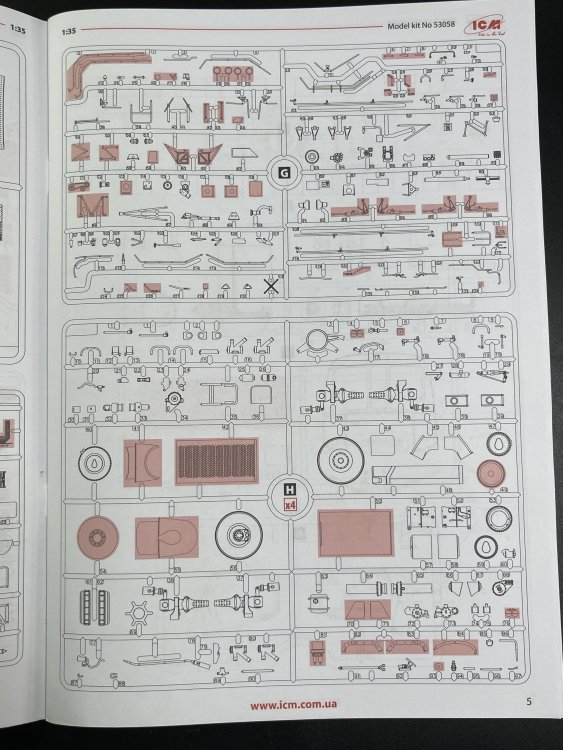
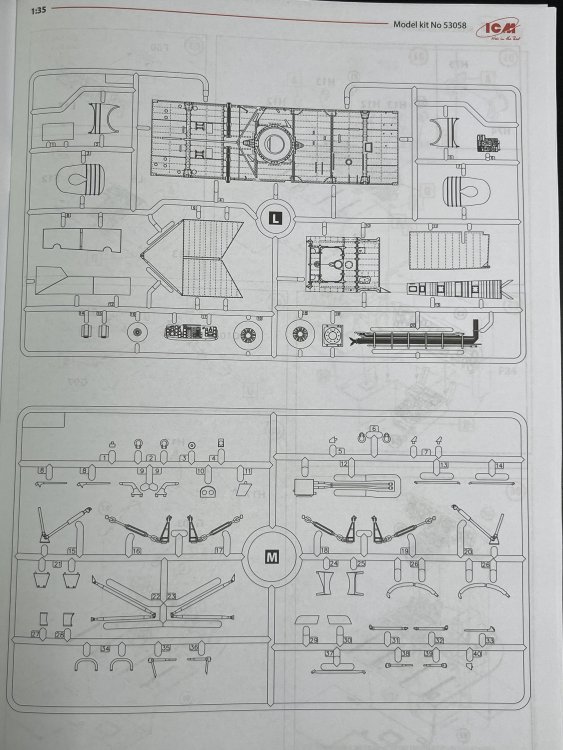
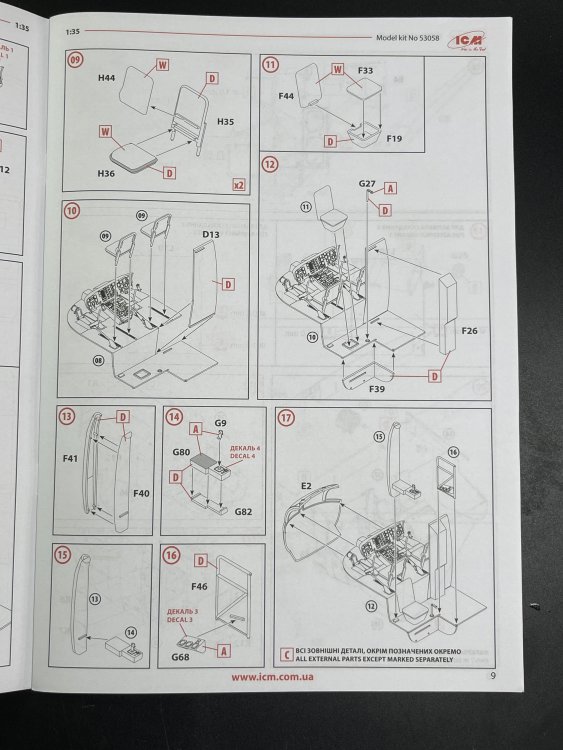
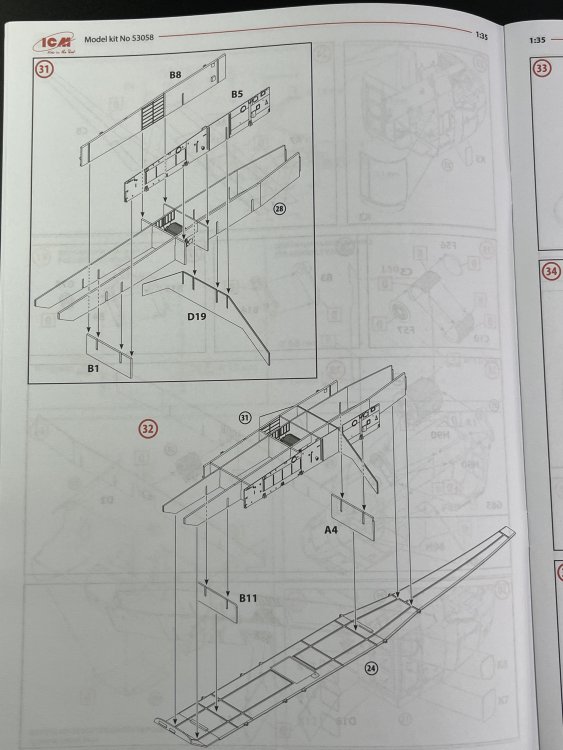
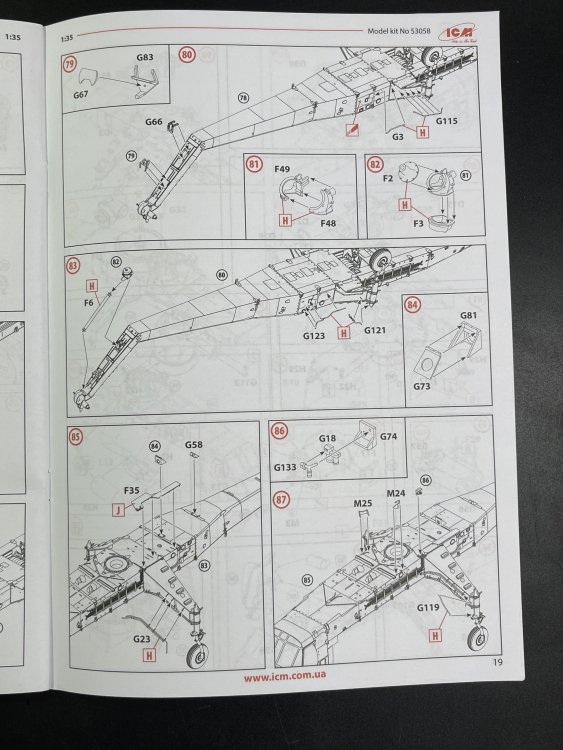
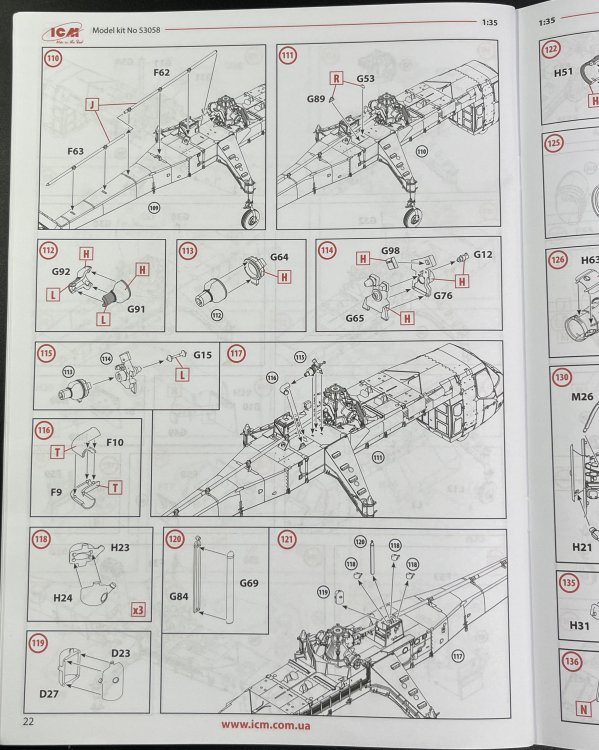
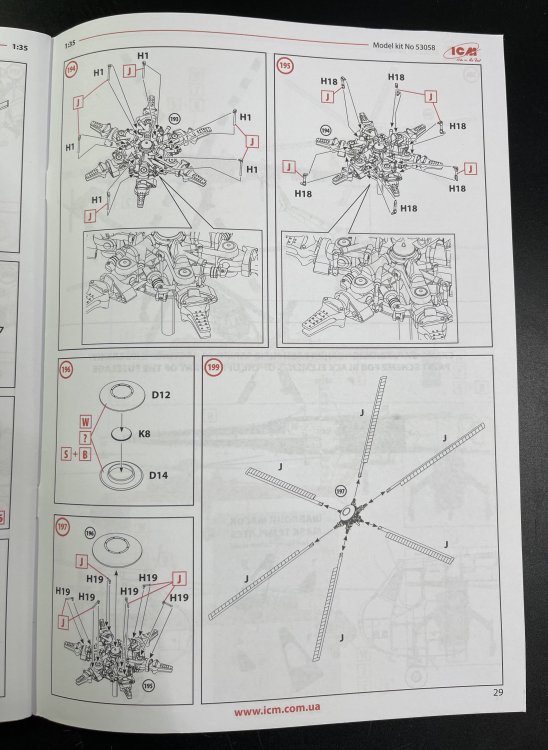
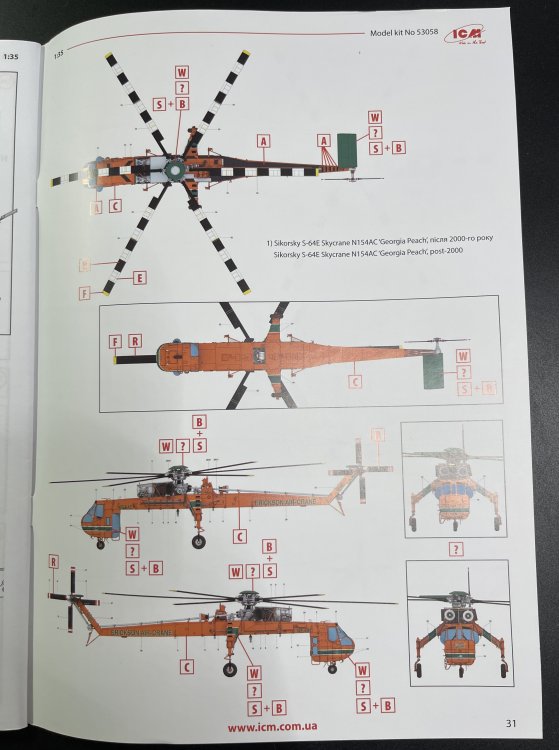
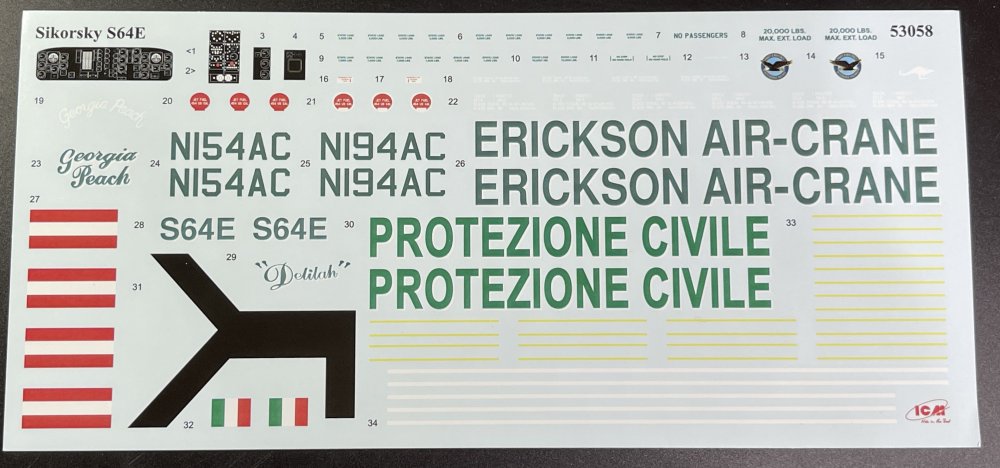
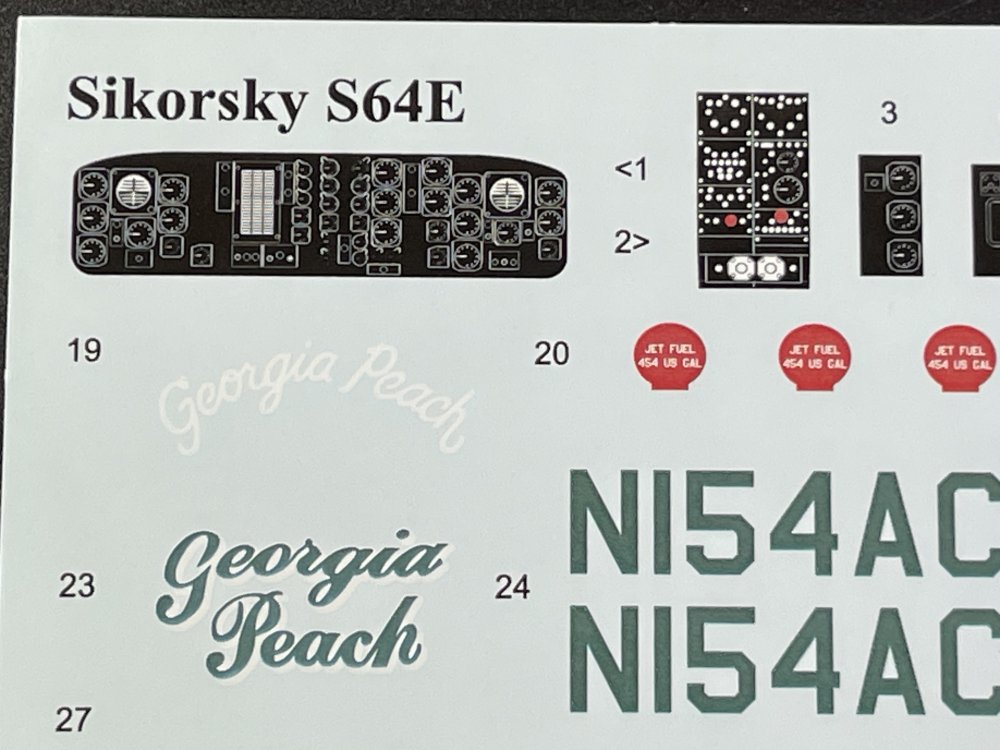
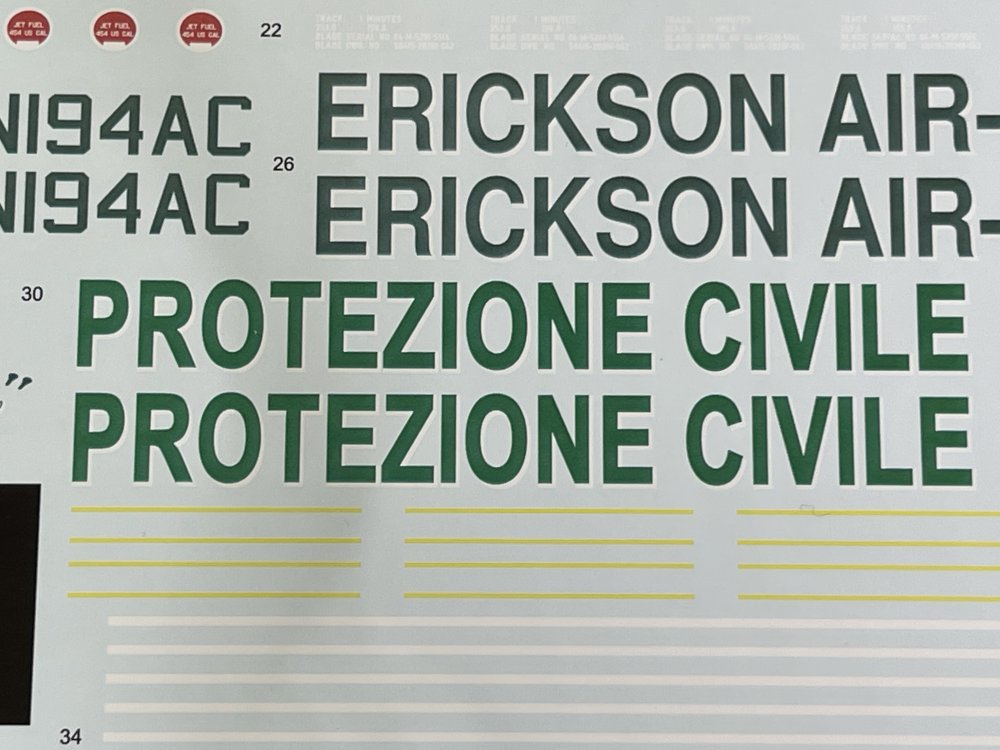
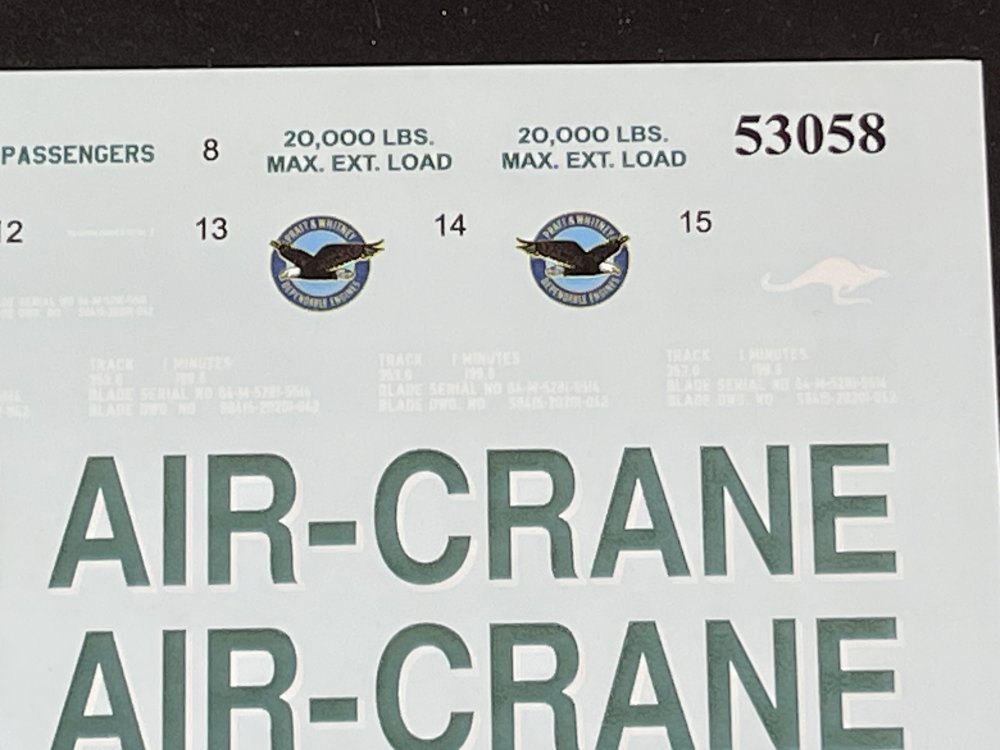
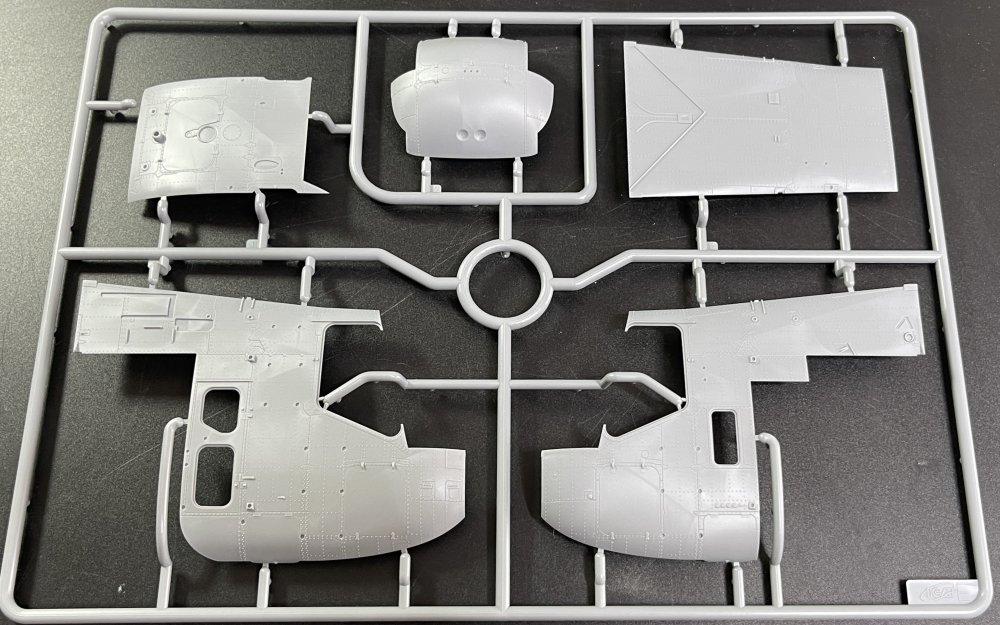
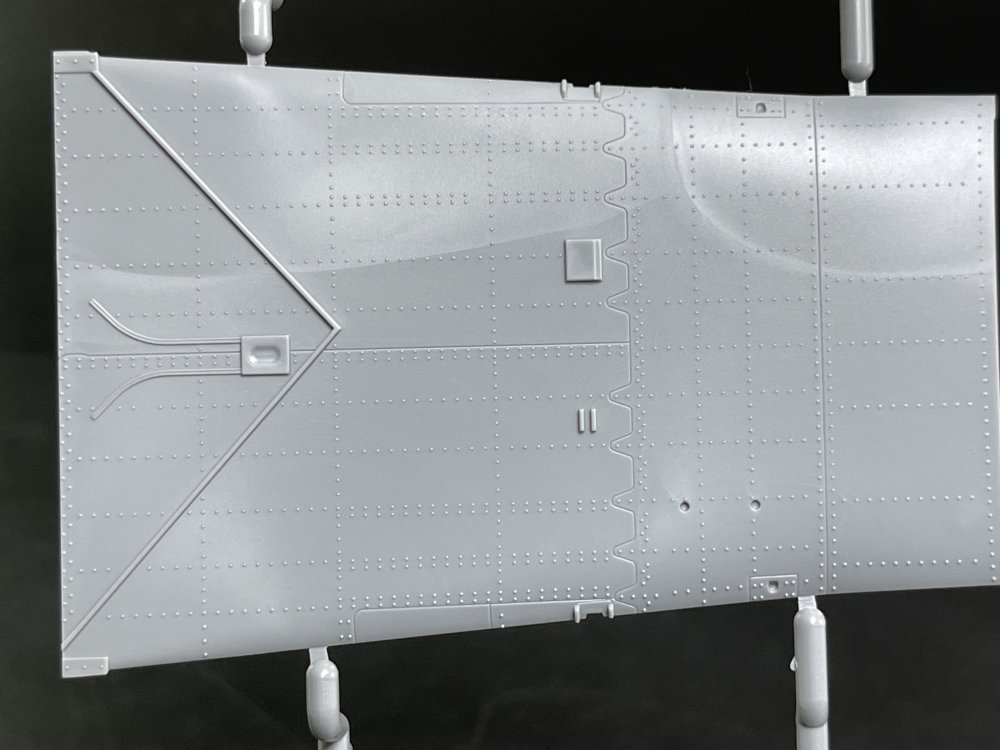
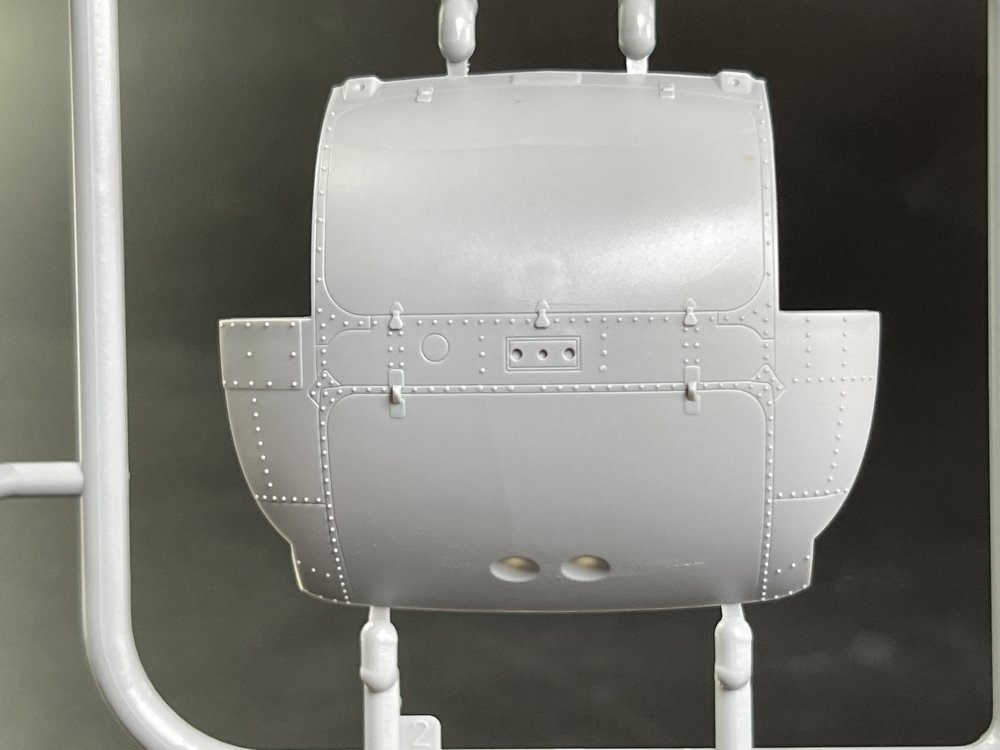
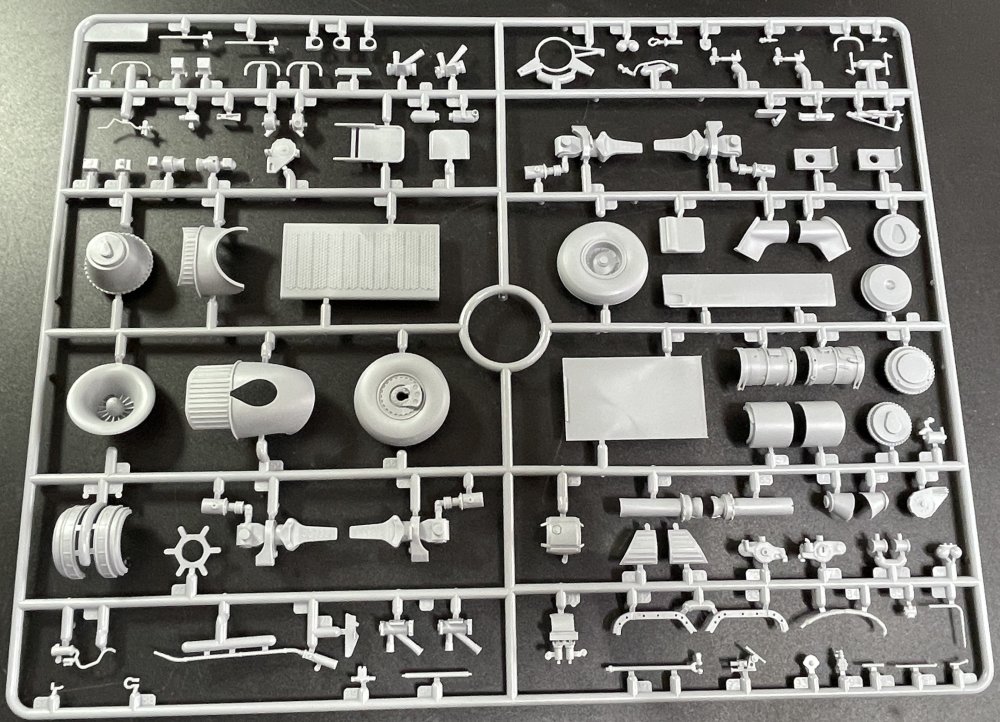
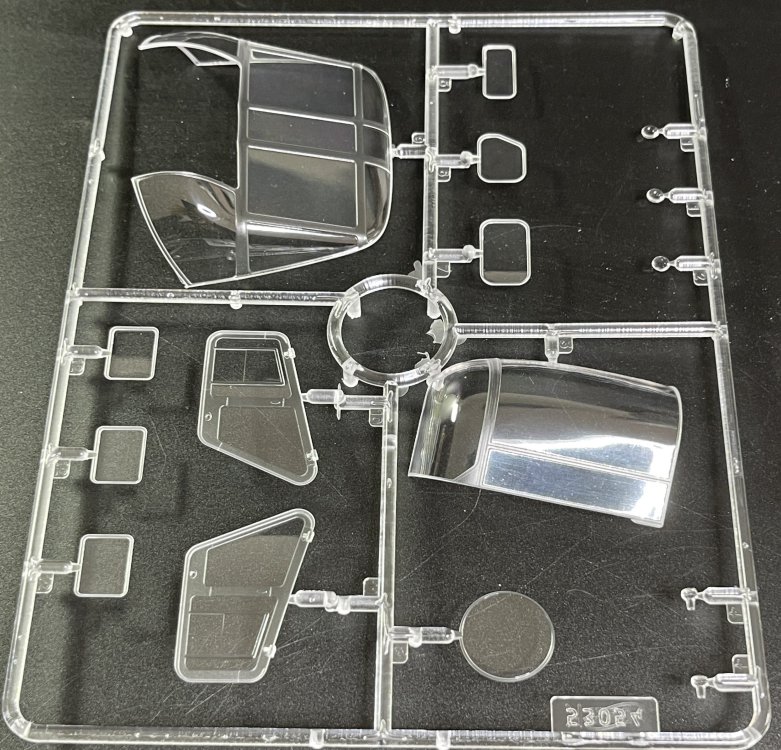
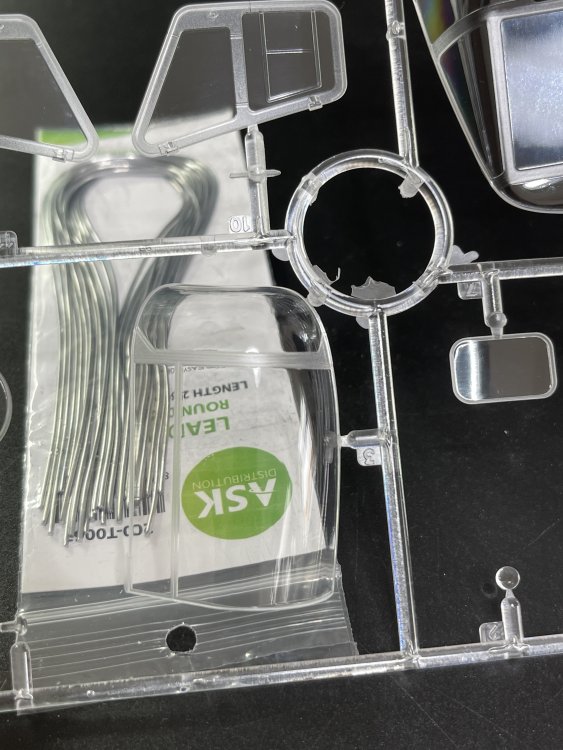
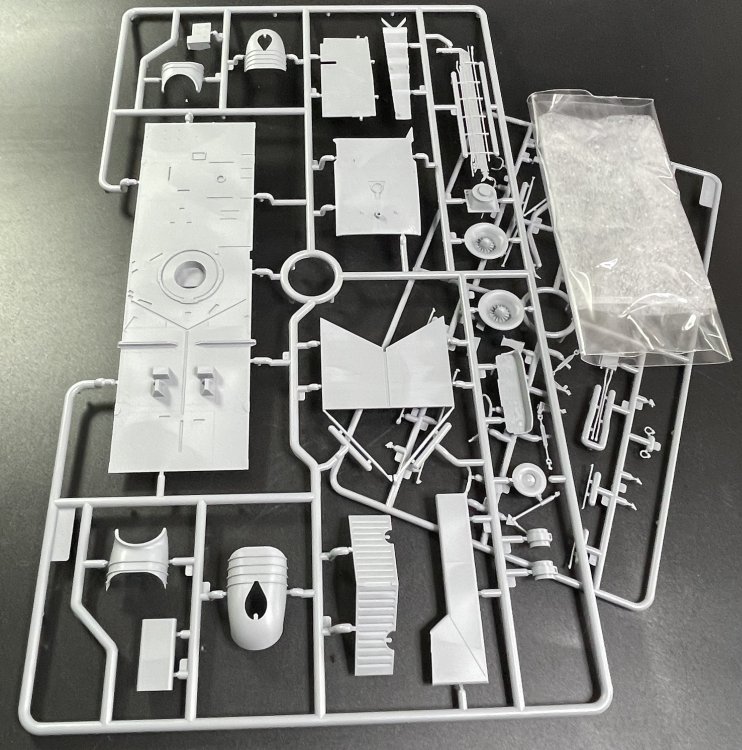
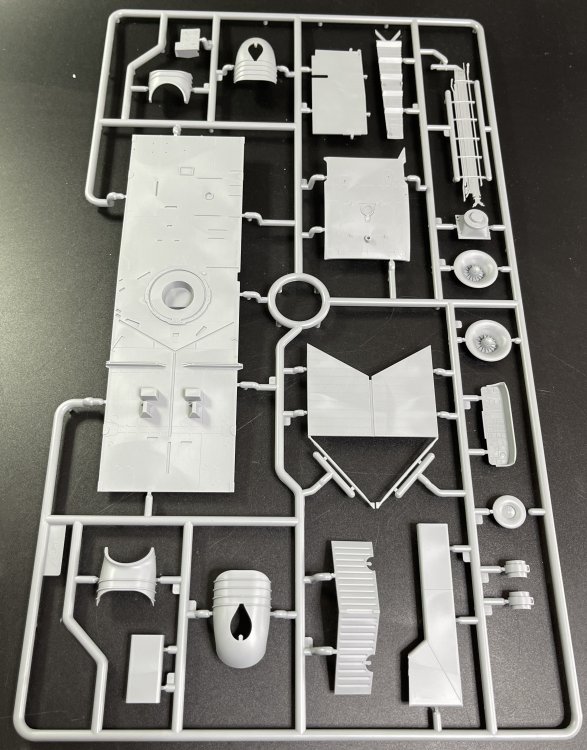
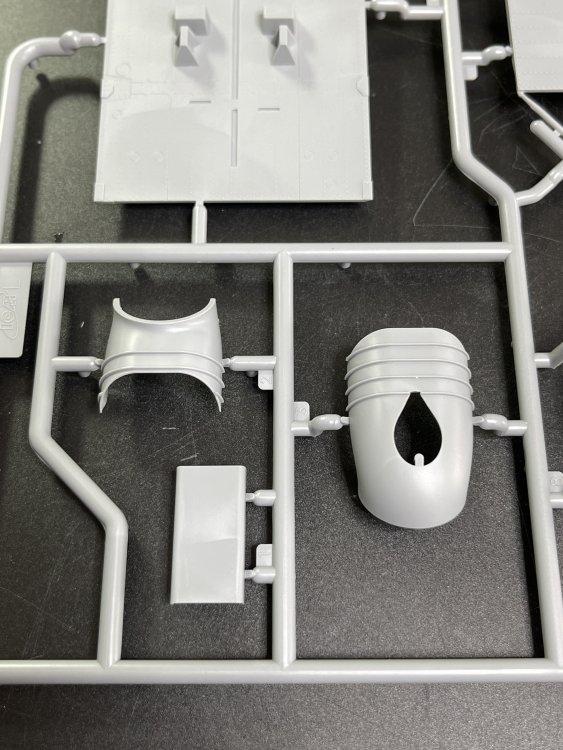
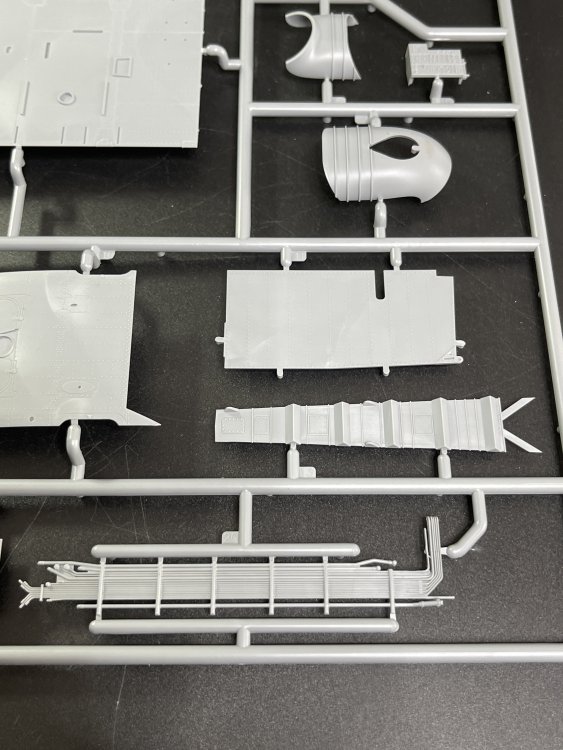
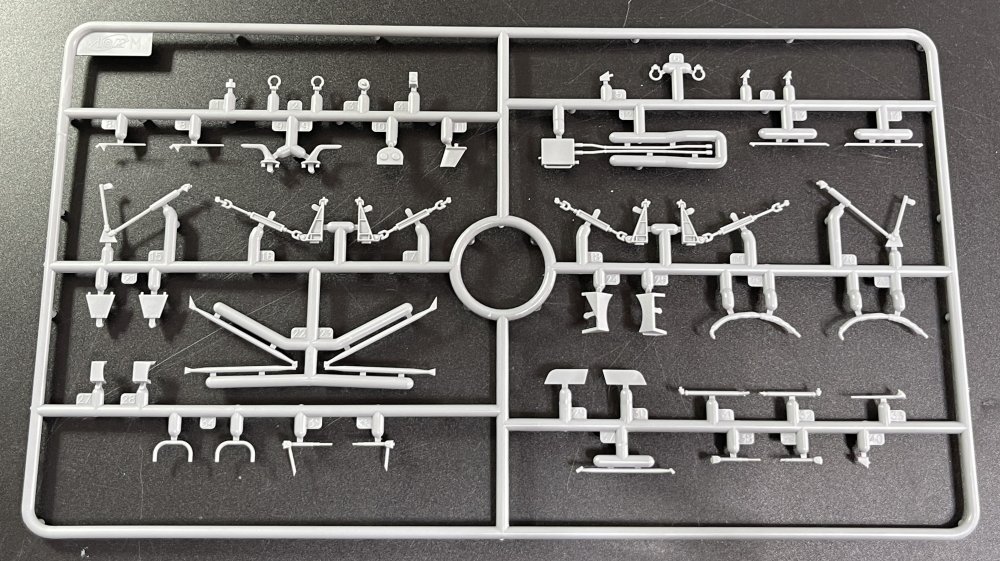
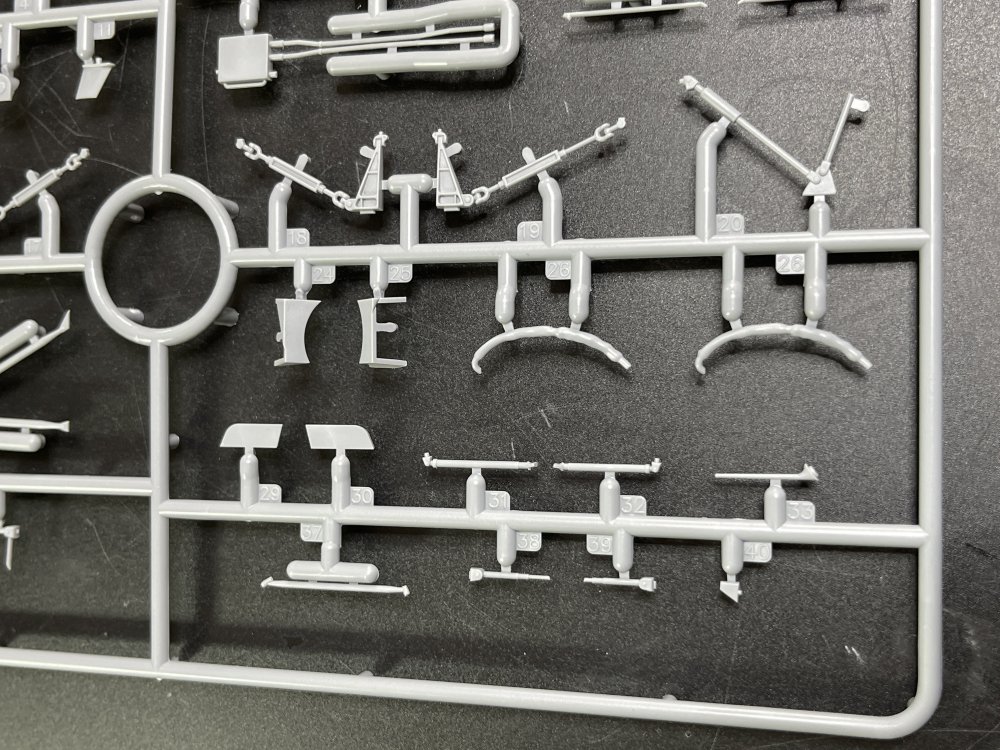
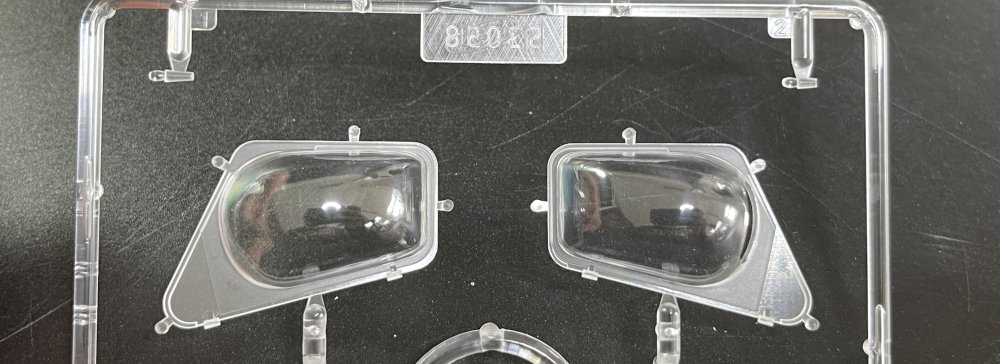
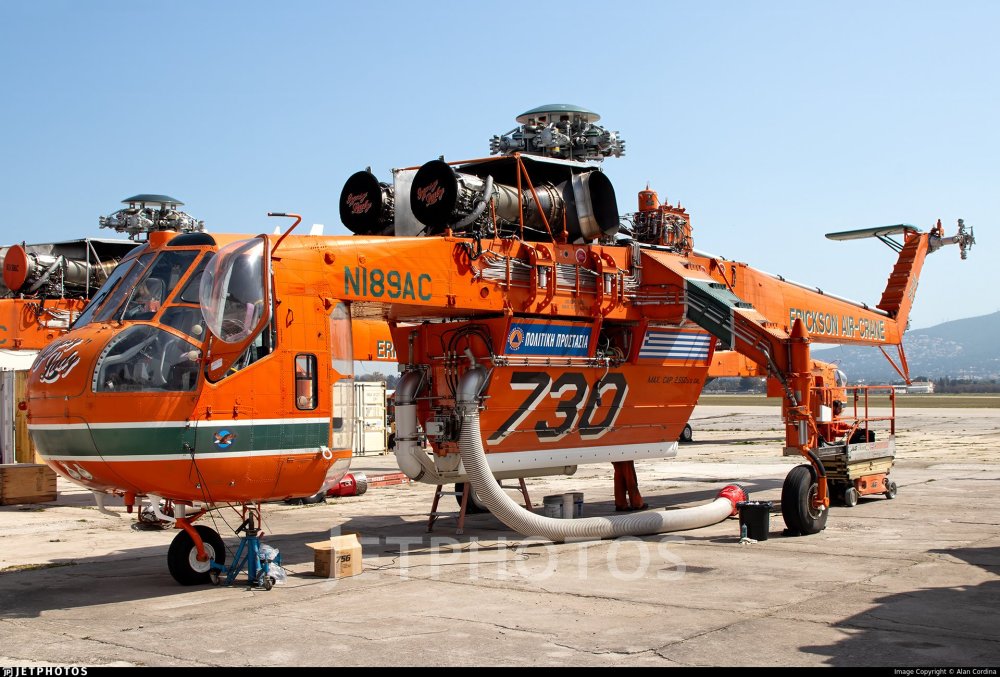
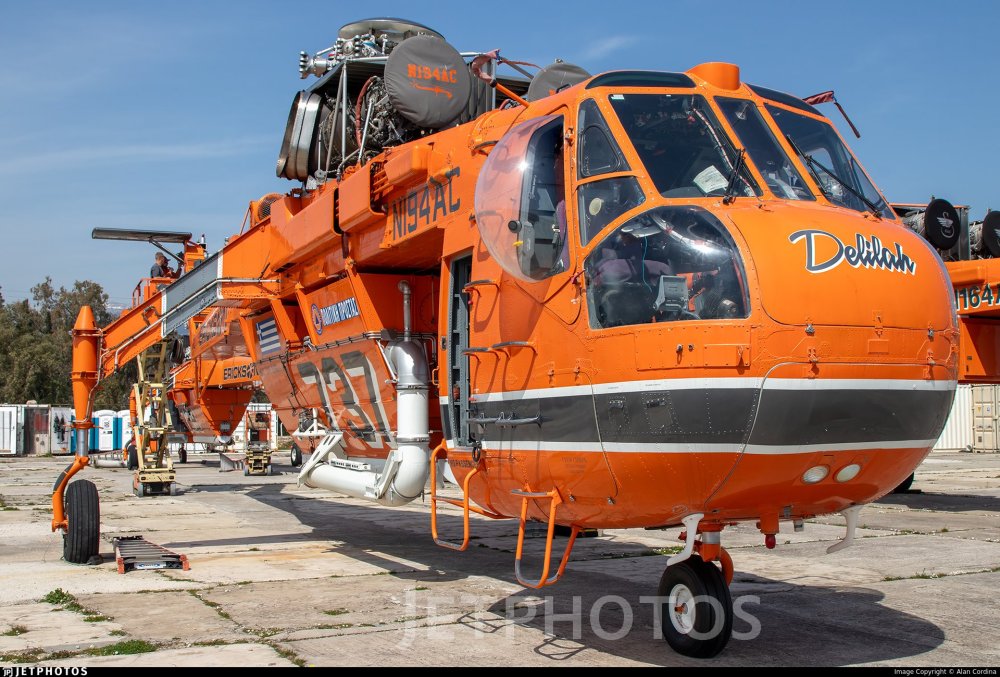
1:35 S-64E Skycrane Cat n.º 53058 Price tag: €139,50 Available here ICM done it again. A huge Sky Crane hit the shelves once again but this time is the Civilian Version I already had the privilege to review the Military version, the CH-54, so I will check this review in terms to see the new parts to make the civilian version. There is a lot of video of the S-64 in flight - https://www.youtube.com/watch?v=cXTrWevjjro This particular version almost the one on this box (this one on the video is “Elvis”. https://www.youtube.com/watch?v=e36yFXl35Mo And in this page, a lot of pictures of several S-64E. The sky is the limit! https://www.jetphotos.com/aircraft/Sikorsky S-64E Skycrane Here are some pictures of the real thing... ICM where is the water tank? Please do it! As for the military version, the box is the same size (very big one) and with full of plastic. The plastic is typical from ICM, in grey colour, with very good surface details as are all ICM models kits. In my model I have some moulding lines that are easy removed and perfectly normal in a standard model kit. Don't have any flash. The moulding quality is quite good in all dimensions, large parts and very small parts. The surface detail is quite good, actually, is best one I have ever seen in an ICM model kit so far. Next review it will be the Hampden so let’s see if it surpasses the Sikorsky. We already have a pleasure to review the previous release of the CH-54 so the main thing is to find whats is in this box that is different from the Military version besides, the obvious decals. Comparing with the military version, this civilian version has more three sprues, the N, the L and the M. All others are the same but there`s a lot of parts not to use. You will get, by the end, a lot of spare parts. Starting with the clear parts, this version brings in the N Sprue the side windows with the bubble side (sorry if that is not the correct word for it) so the pilot and co-pilot can have a much clear view to the ground. The new clear sprue: The L sprue, gives the modeler, new front reactors, new instruments panels, new side instruments, and mainly a all-new upper main body. Finally, the M sprue brings some extra parts as turnbuckles, struts, hinges and others small details. As for seatbelts, ICM don’t give them moulded on the seat (thanks!!!) but also don’t give any PE (as they don’t have outsourcing – it`s a all in product) so you will have to source out somewhere, either aftermarket either scratchbuild. As overall, the plastic quality is impressive, with nice molding, sharp details, and no major flash. External features like rivets, panel lines, and structural elements are well-reproduced, enhancing visibility under paint. The engine bays are nearly fully exposed, inviting weathering and aftermarket enhancements like wiring or resin details and there`s a lot of AM for the Sikorsky. The decal sheet is a quite large one, very well printed, with good color and pigment saturation. The sidedown is only two schemes : Erickson Air-Crane N154AC "Georgia Peach" Protezione Civile N194AC "Delilah" Some of the decals are quite big so be careful in handling and placement. The instructions booklet The instruction book is a A4 size with 32 pages with the first and last page in glossy paper. The instructions are easy to follow, with very good drawings with good parts identification and indication where to fit. The colour indication. Not my first time telling this but one of ICM CEO said, in one podcast (Models from Ukraine) that ICM wants to be an “all in company” so all the ICM production is a vertical one, they made the CAD, the steel molds, the decals and now they are making also paints. It`s, in fact an all new approach in the modelling world but ICM is getting there because I already saw, finally, in one of my usual model shop (Art Scale Kits) ICM paints on sale. So the colour being only ICM references starts to be a non-issue to the novice modeler (attention, this particular modeler is not for the novice one) that simply can get some ICM paints quite easily in a foreseeing future. As usual, in all ICM kits now, there`s masking tape template. Conclusion: Again, ICM clearly wants to give to all modellers, a quite good direct products straight from the box, and they actually did it very well and leaving room for the aftermarket players and to modellers that want a little more detail. Surface panels line detail is very pleasing and the intakes, engines and transmission provide a lot of detail straight from the box. Just one low.... Please ICM gives us a the water tank and all the gear associated!! You can make a impressive and quite detail replica straight from the box and that`s something and I totally understand that ICM wanted to get there, as after all it`s not a cheap kit and it couldn’t be cheap! Is enormous and FANTASTIC and Its CIVILIAN! So it’s a perfect to all even to Military Modeller.. VERY HIGHLY RECOMMEND


-
1:32nd scale Jeannin Stahltaube
Fran replied to sandbagger's topic in LSM 1/35 and Larger Work In Progress
Fantastic work!! and fast!! -
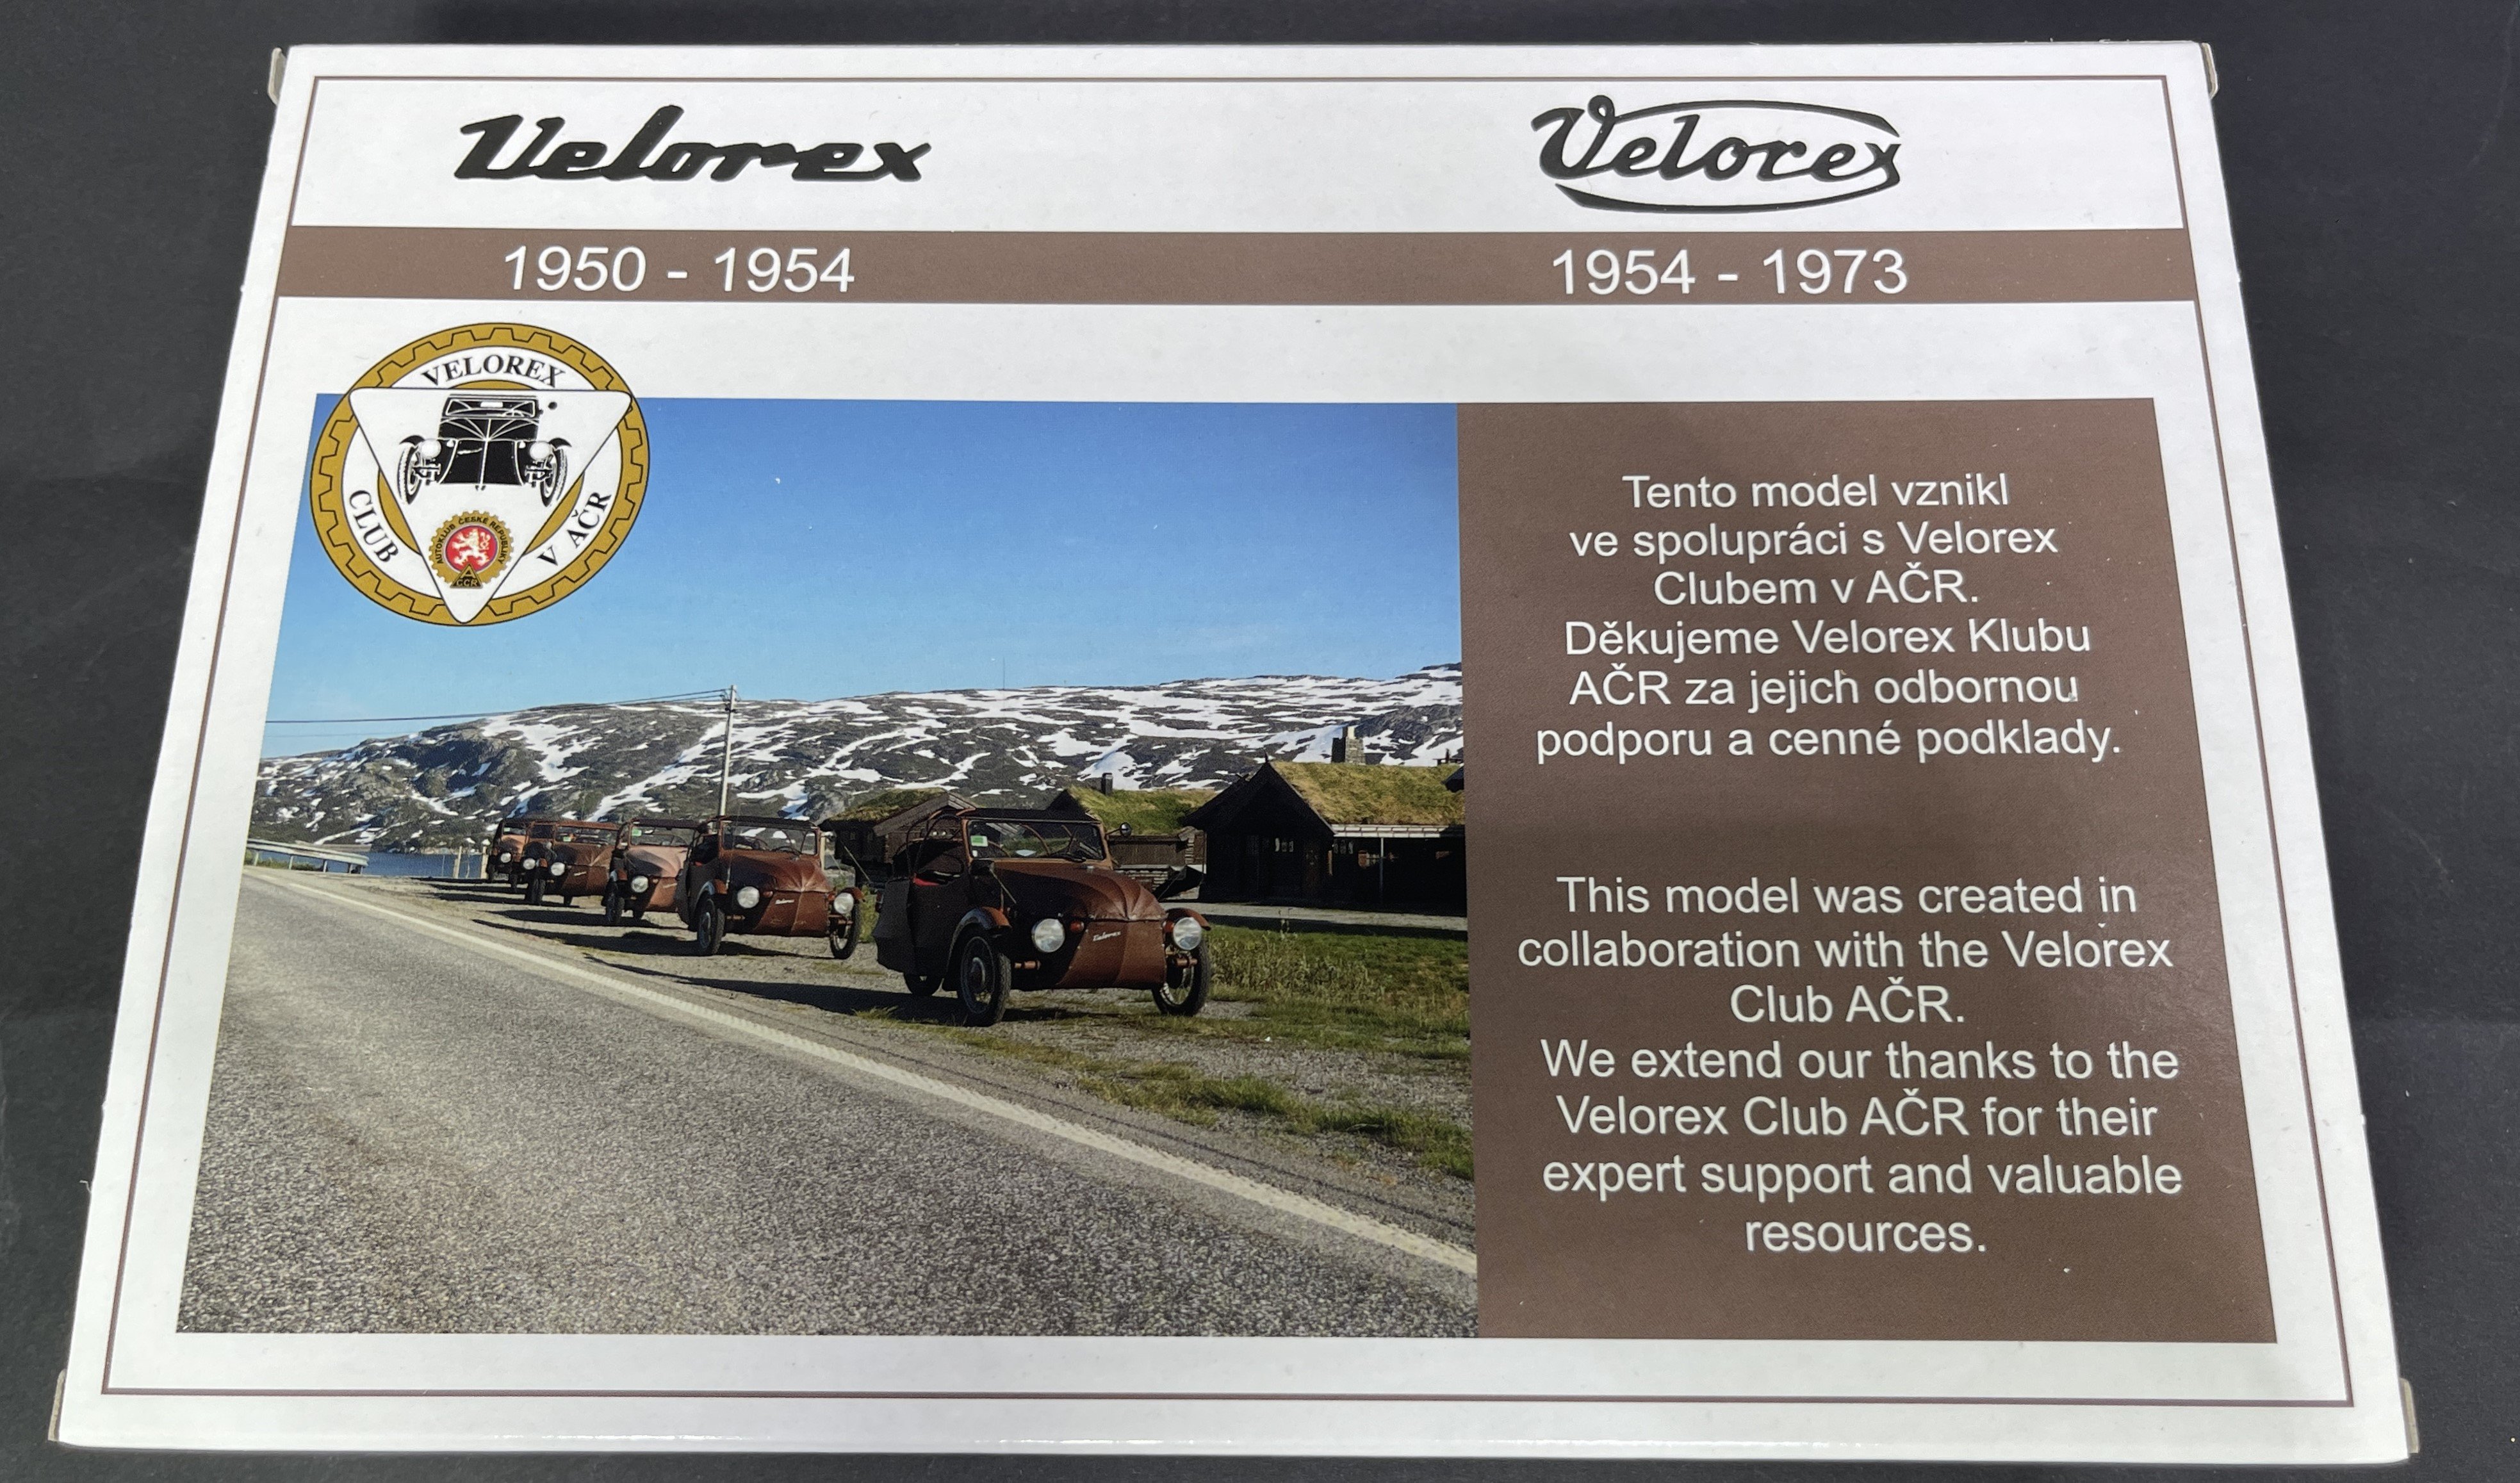
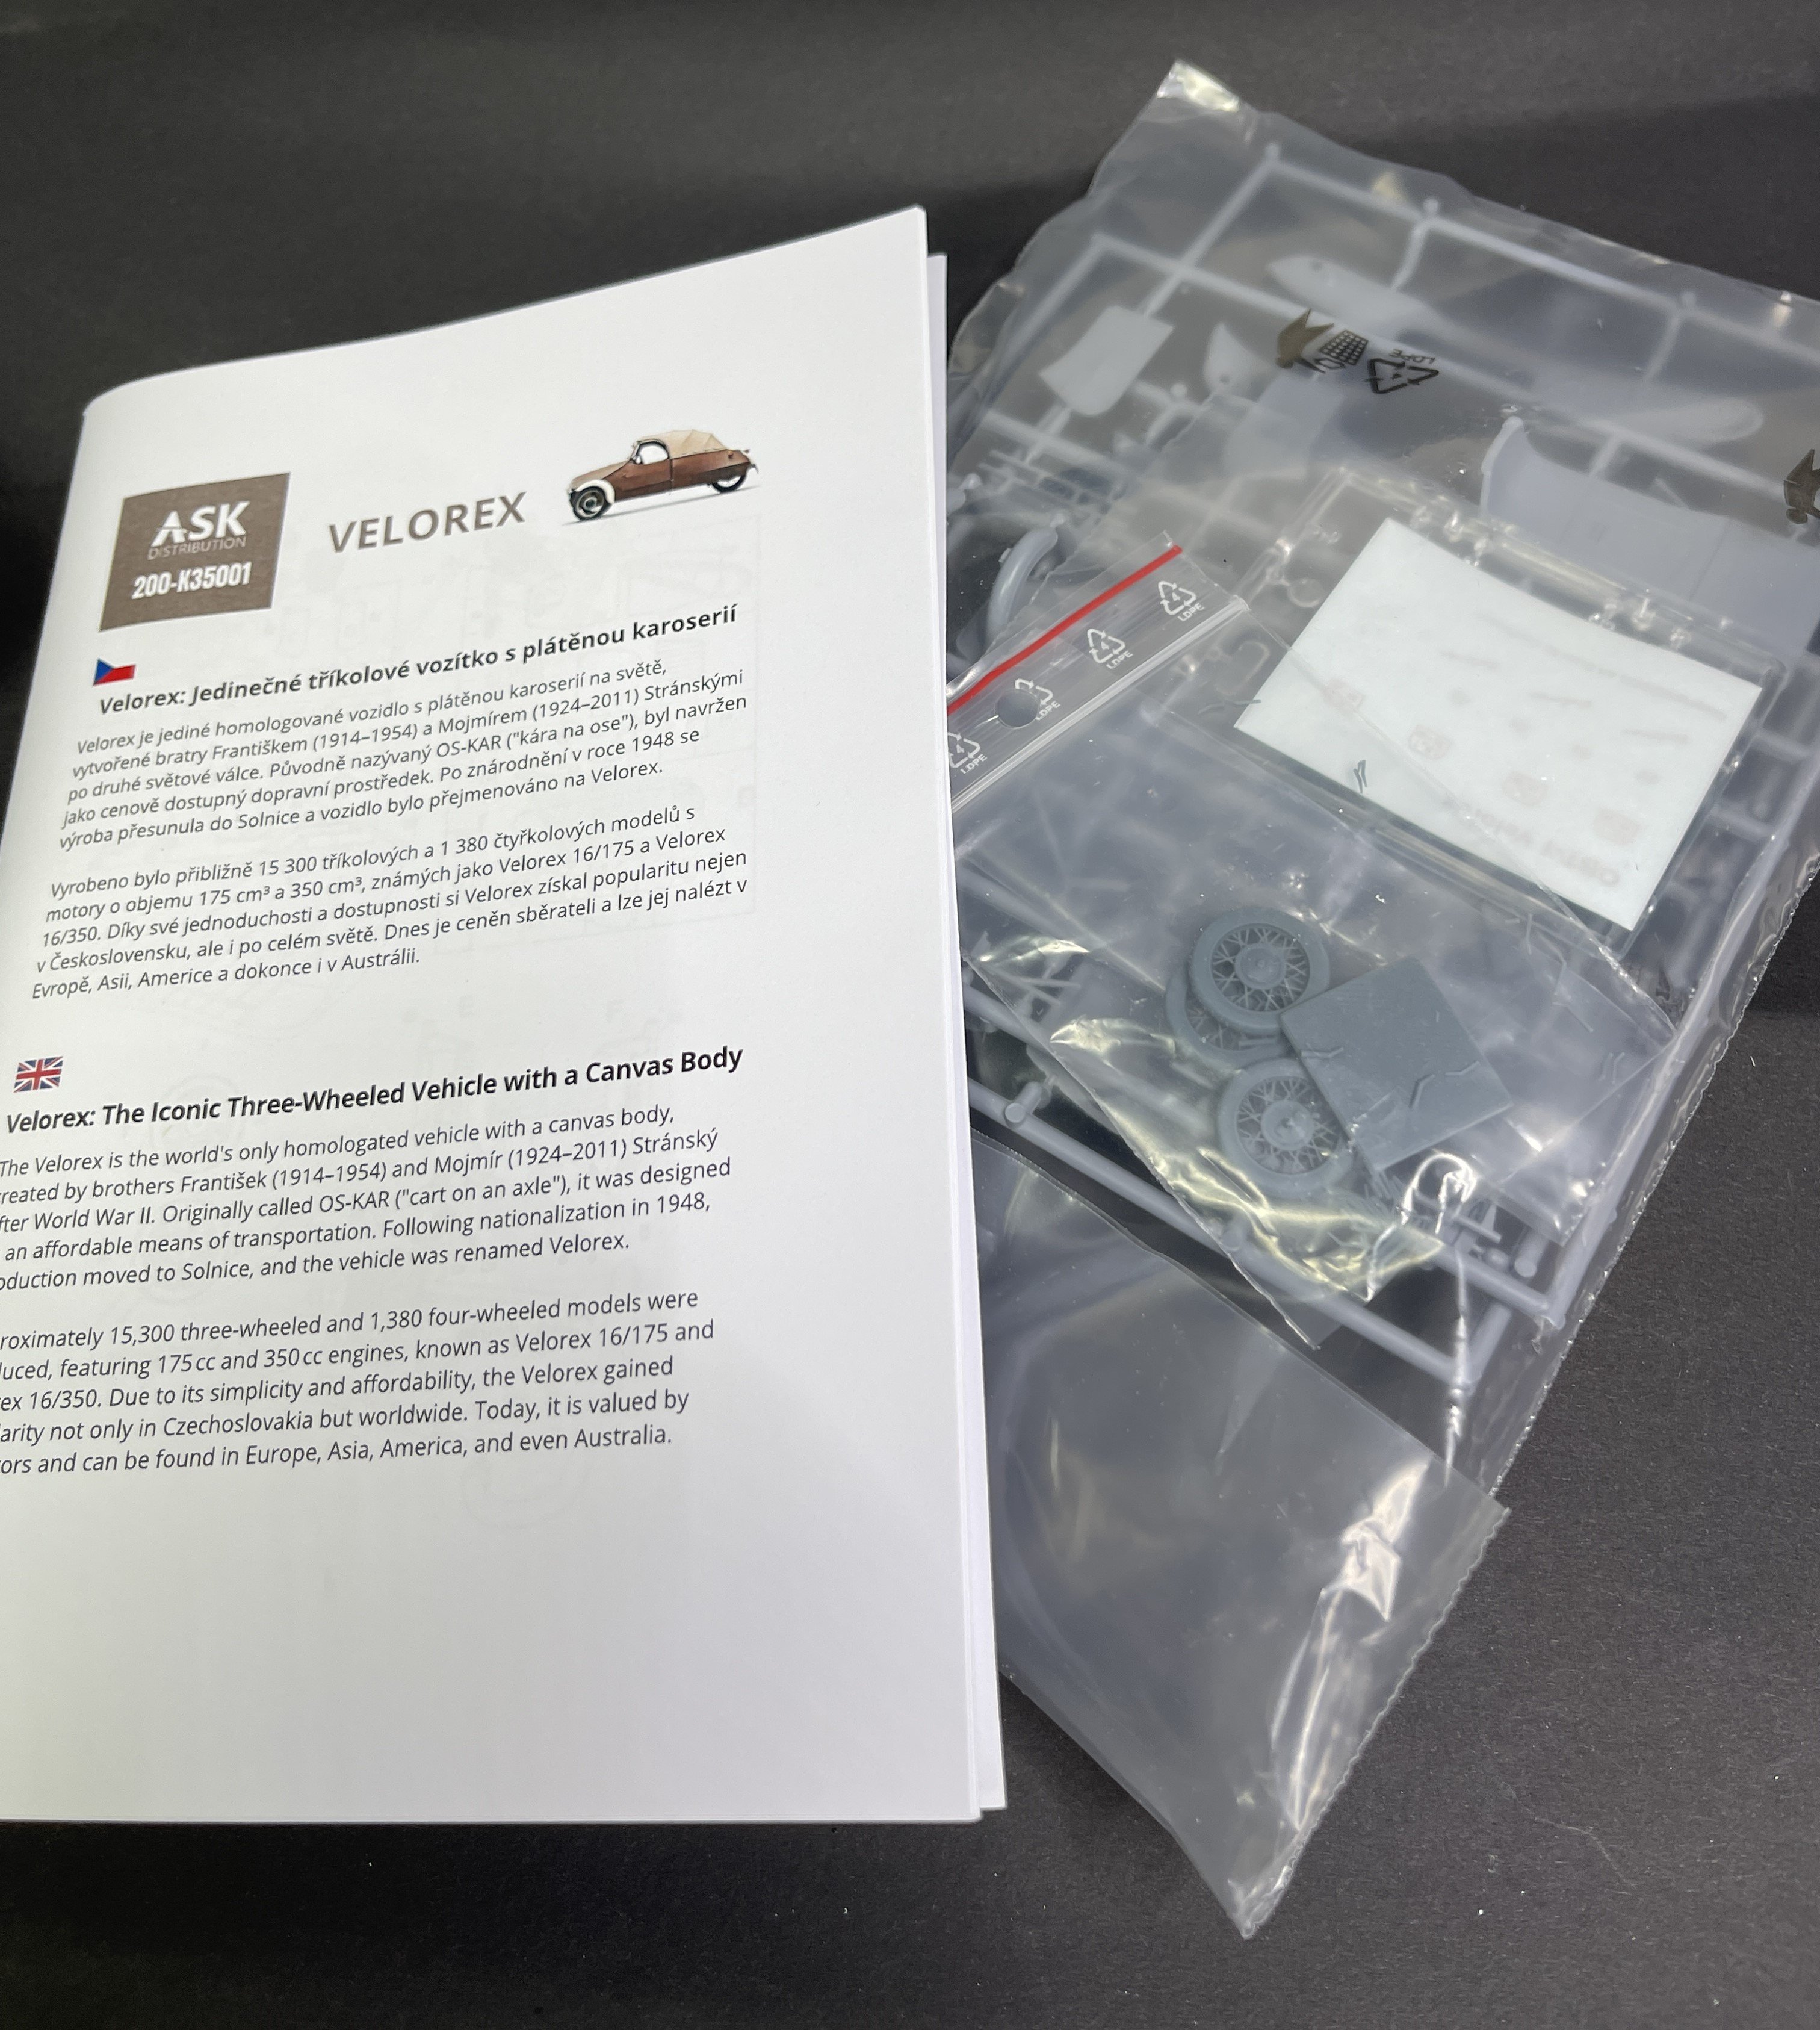
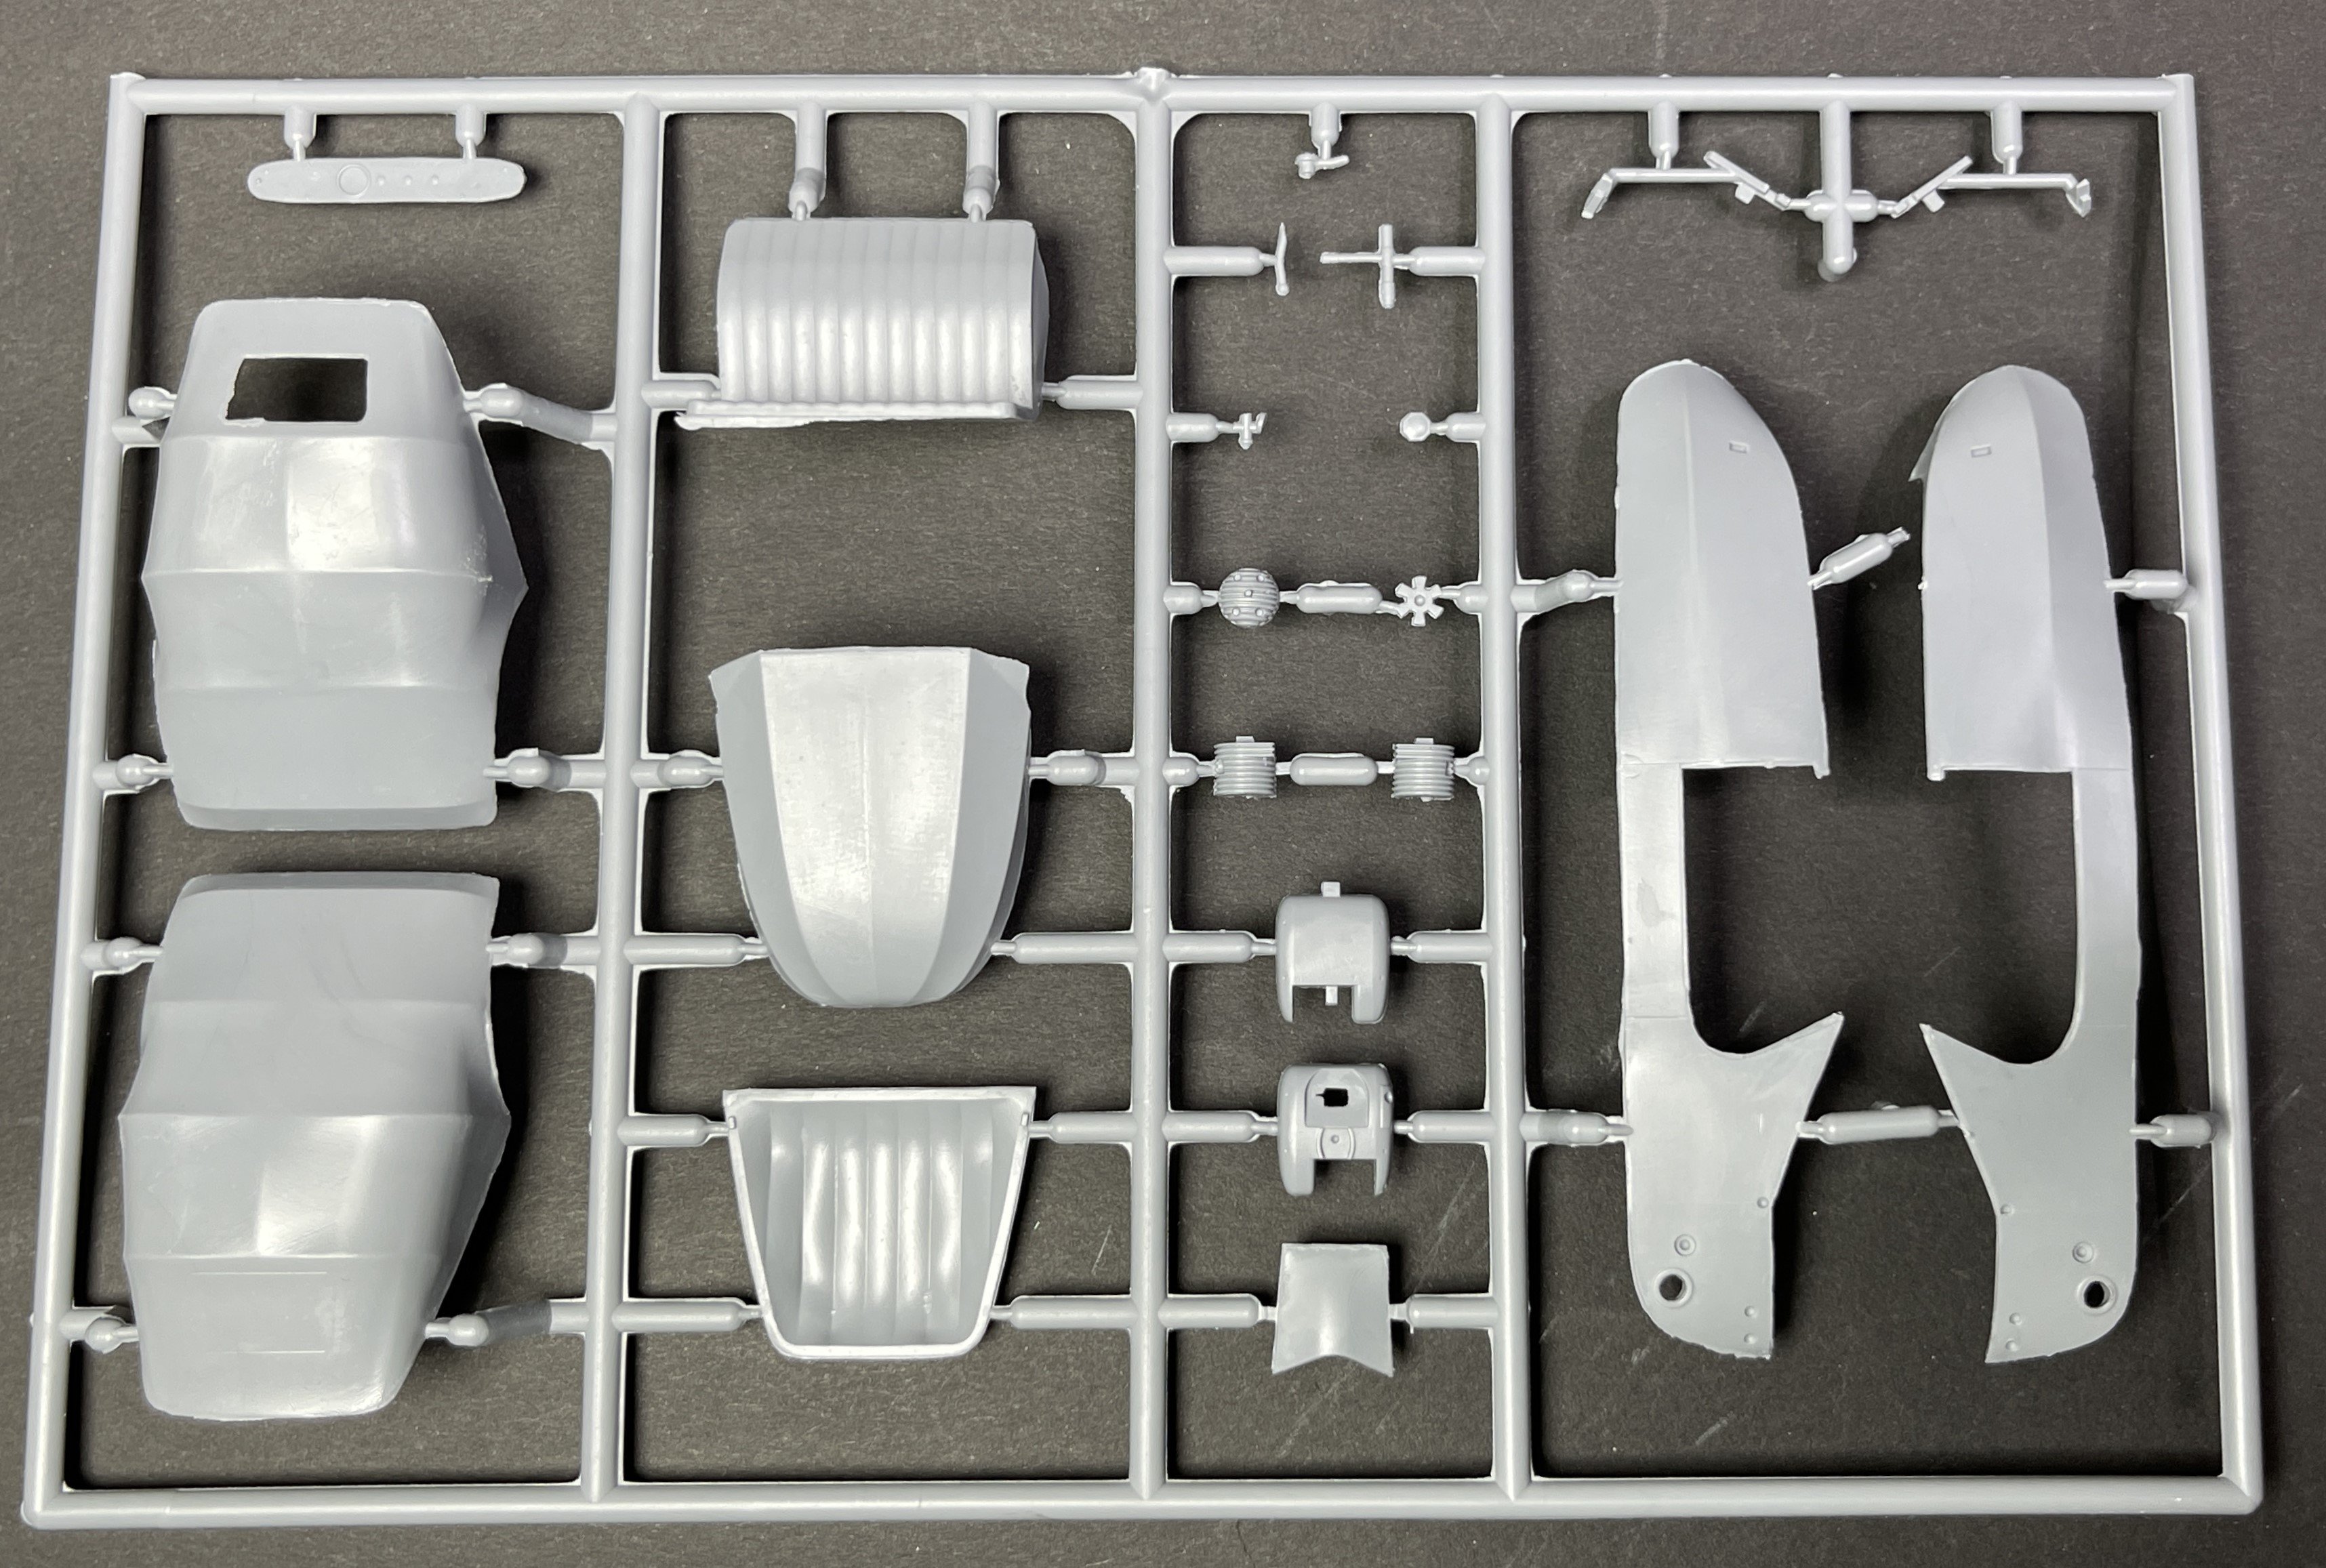
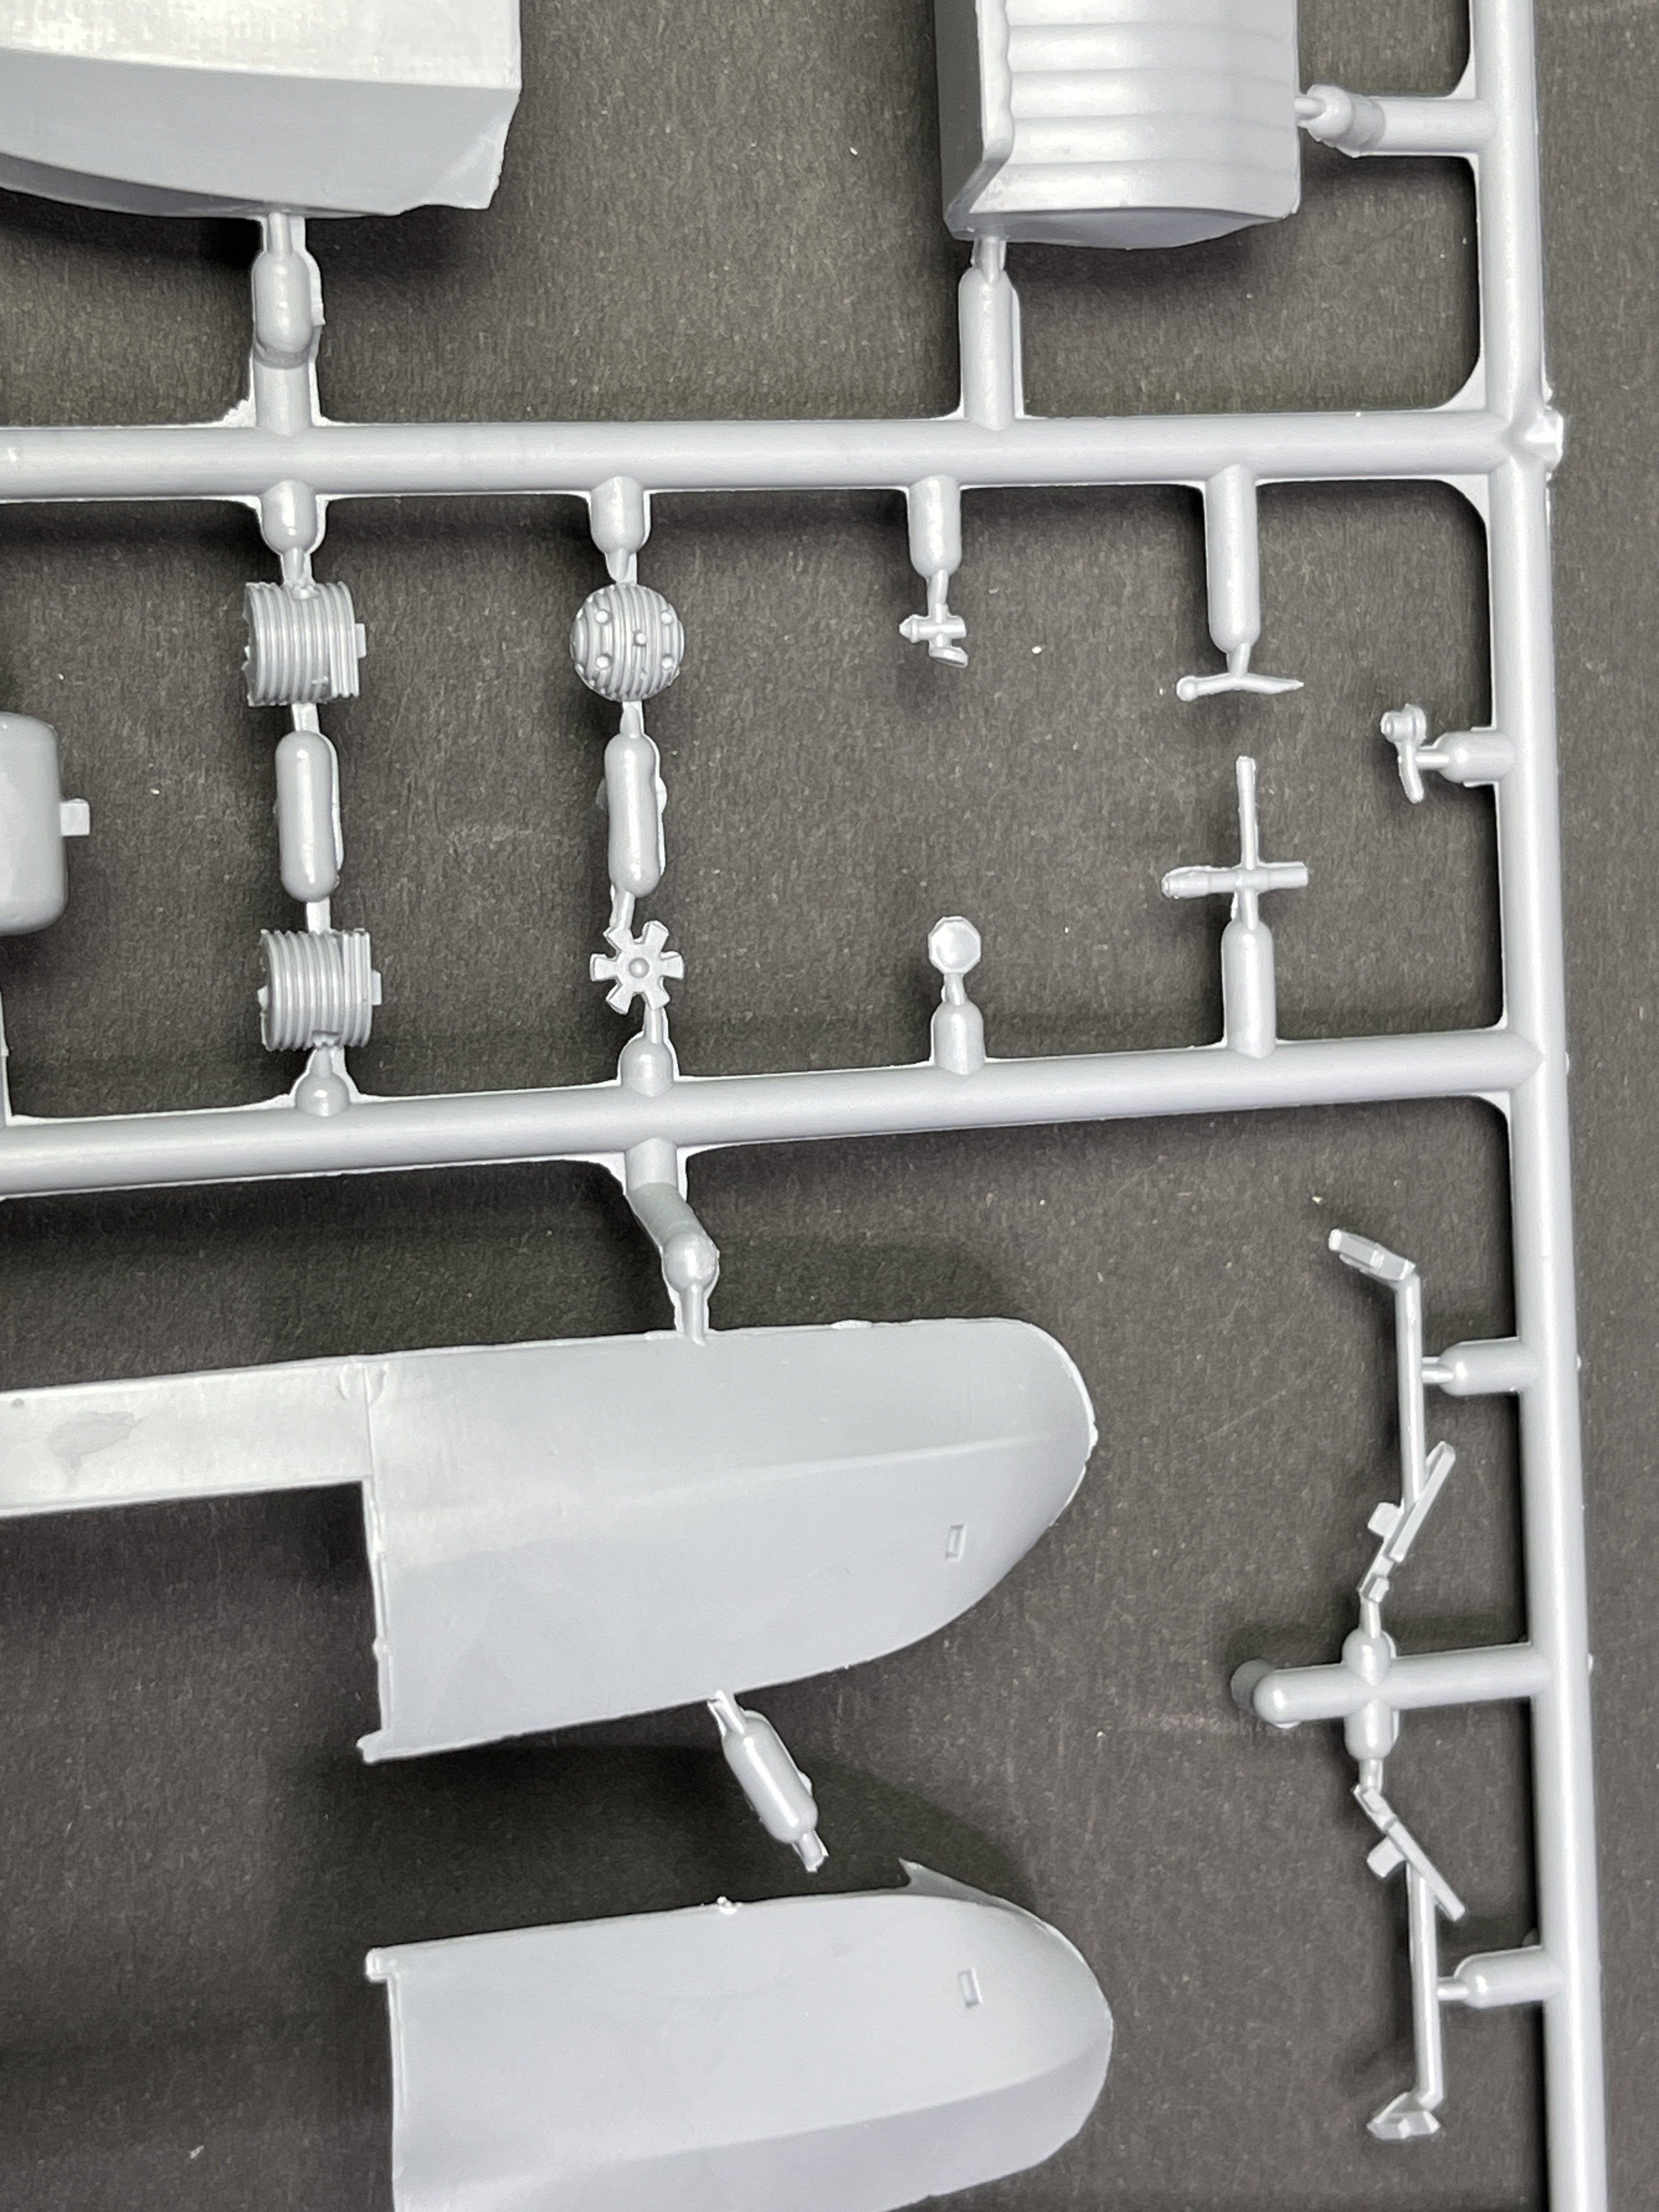
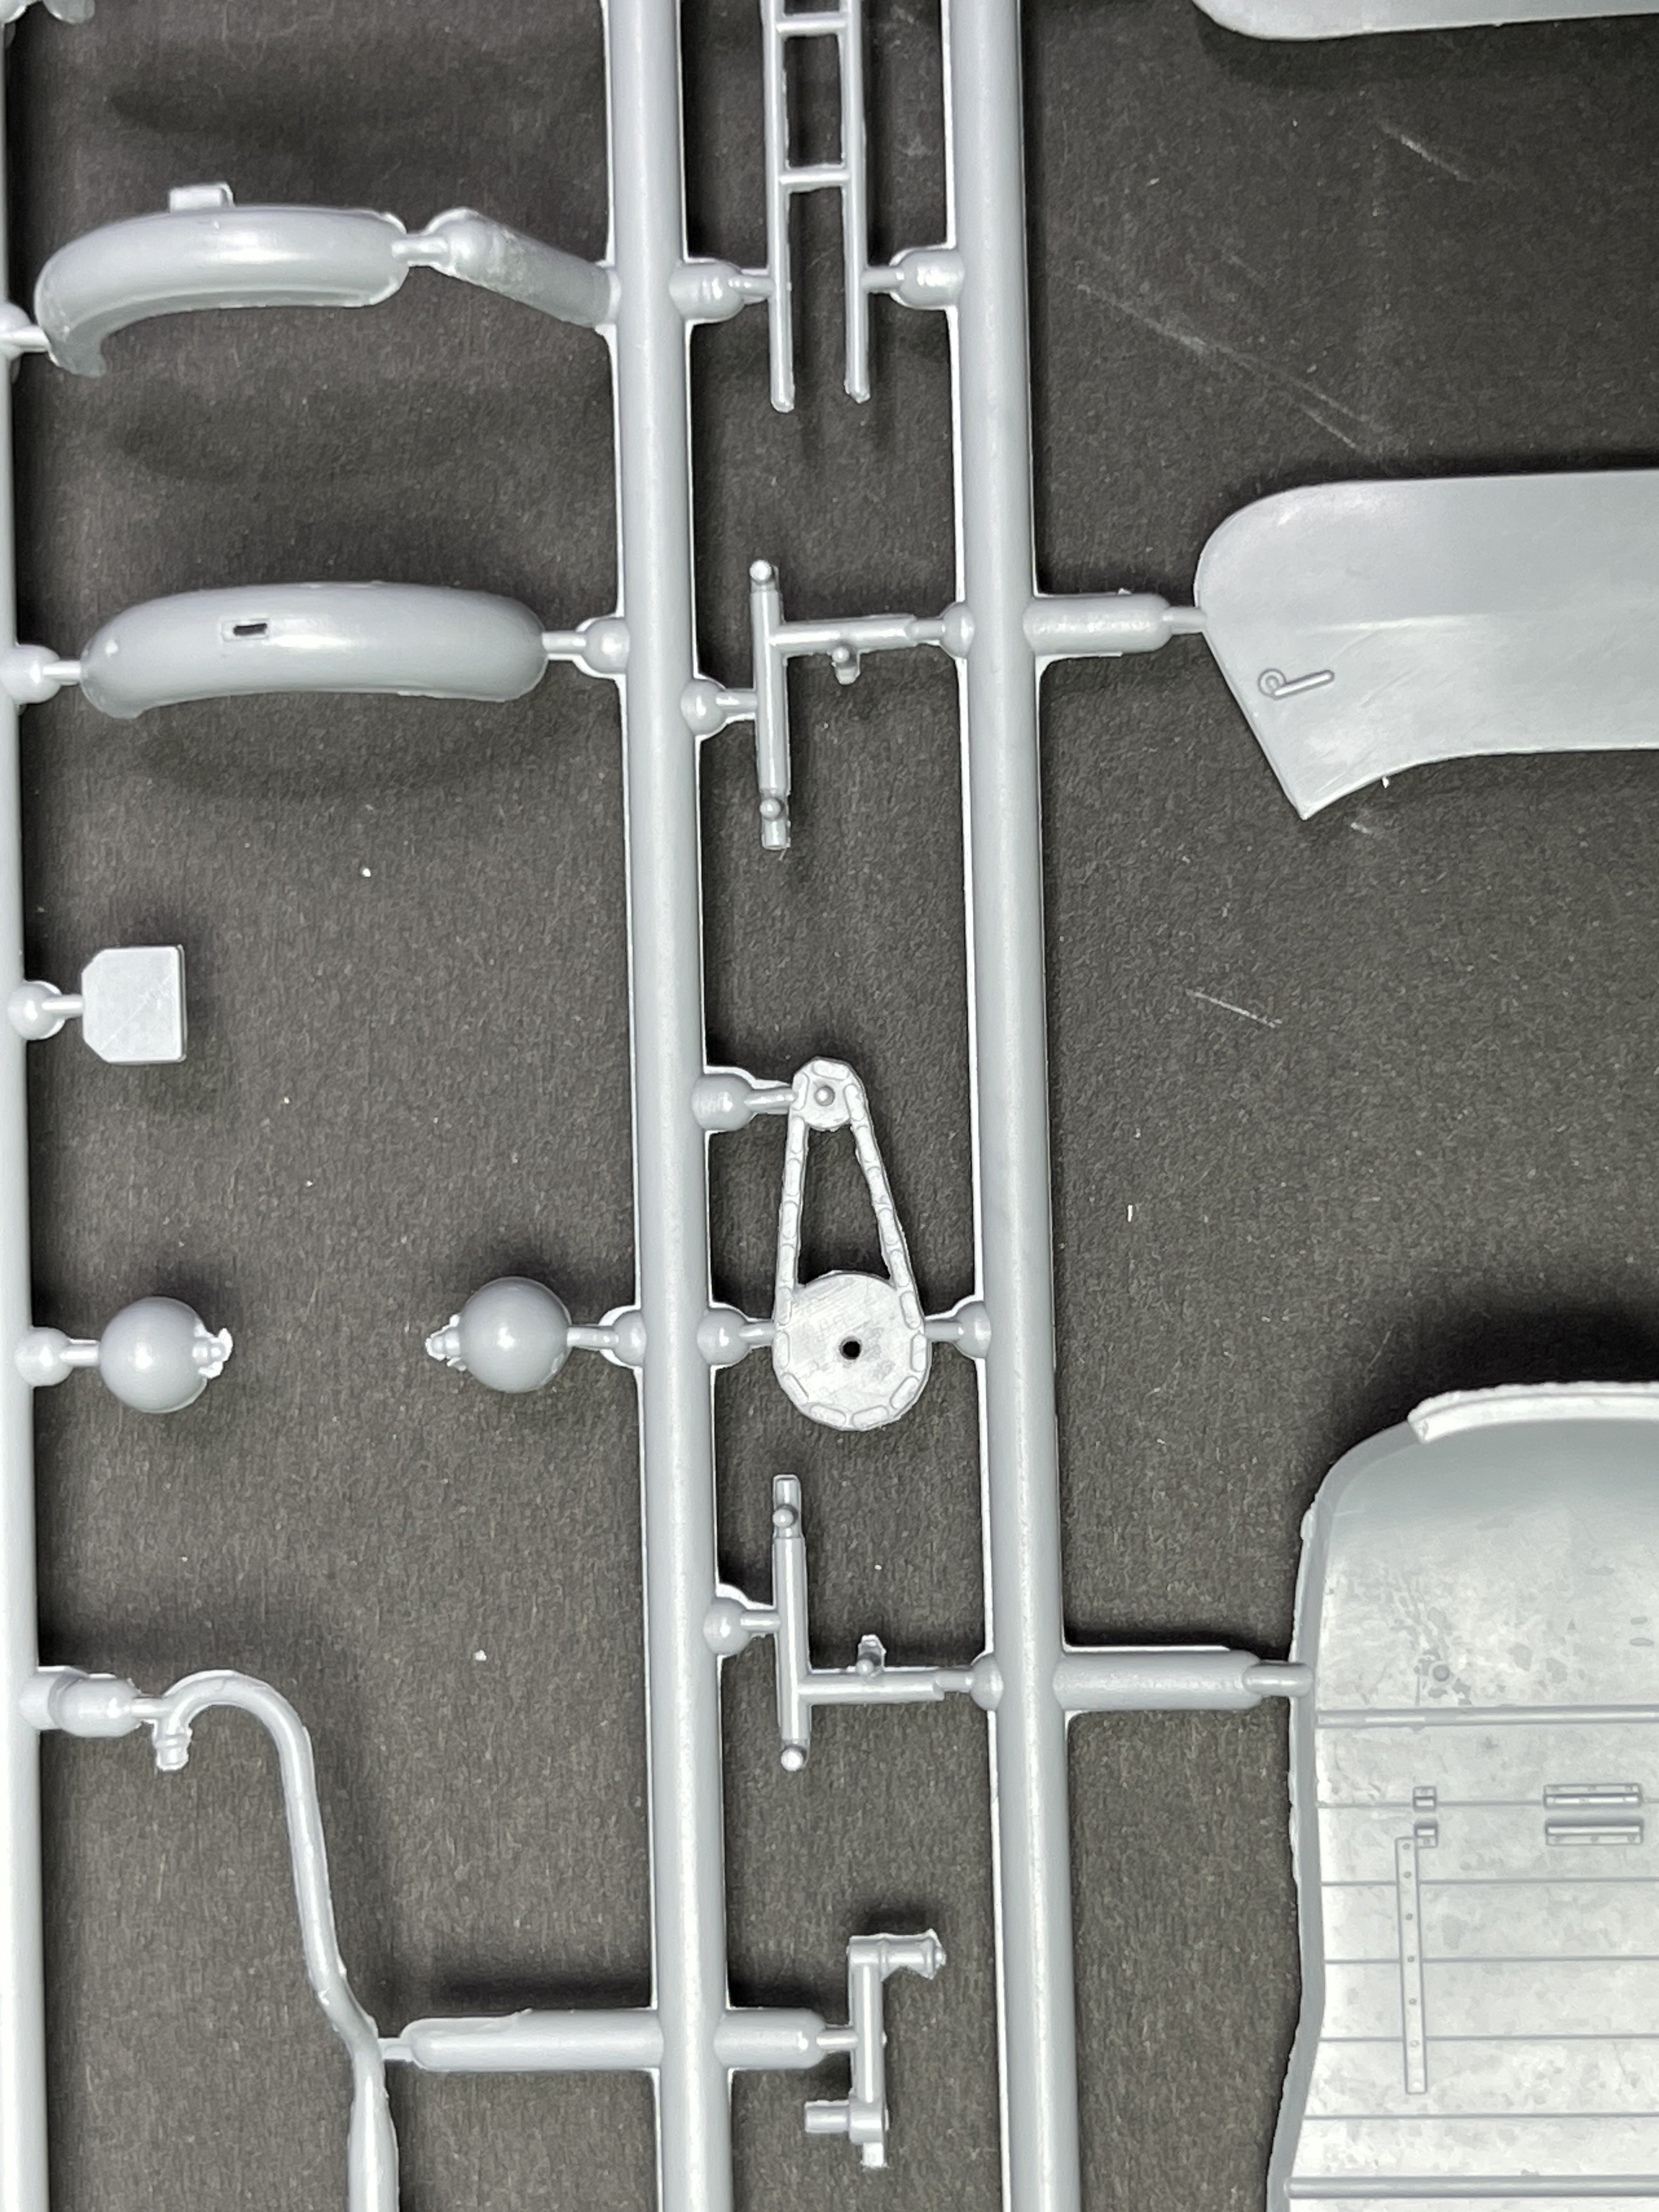
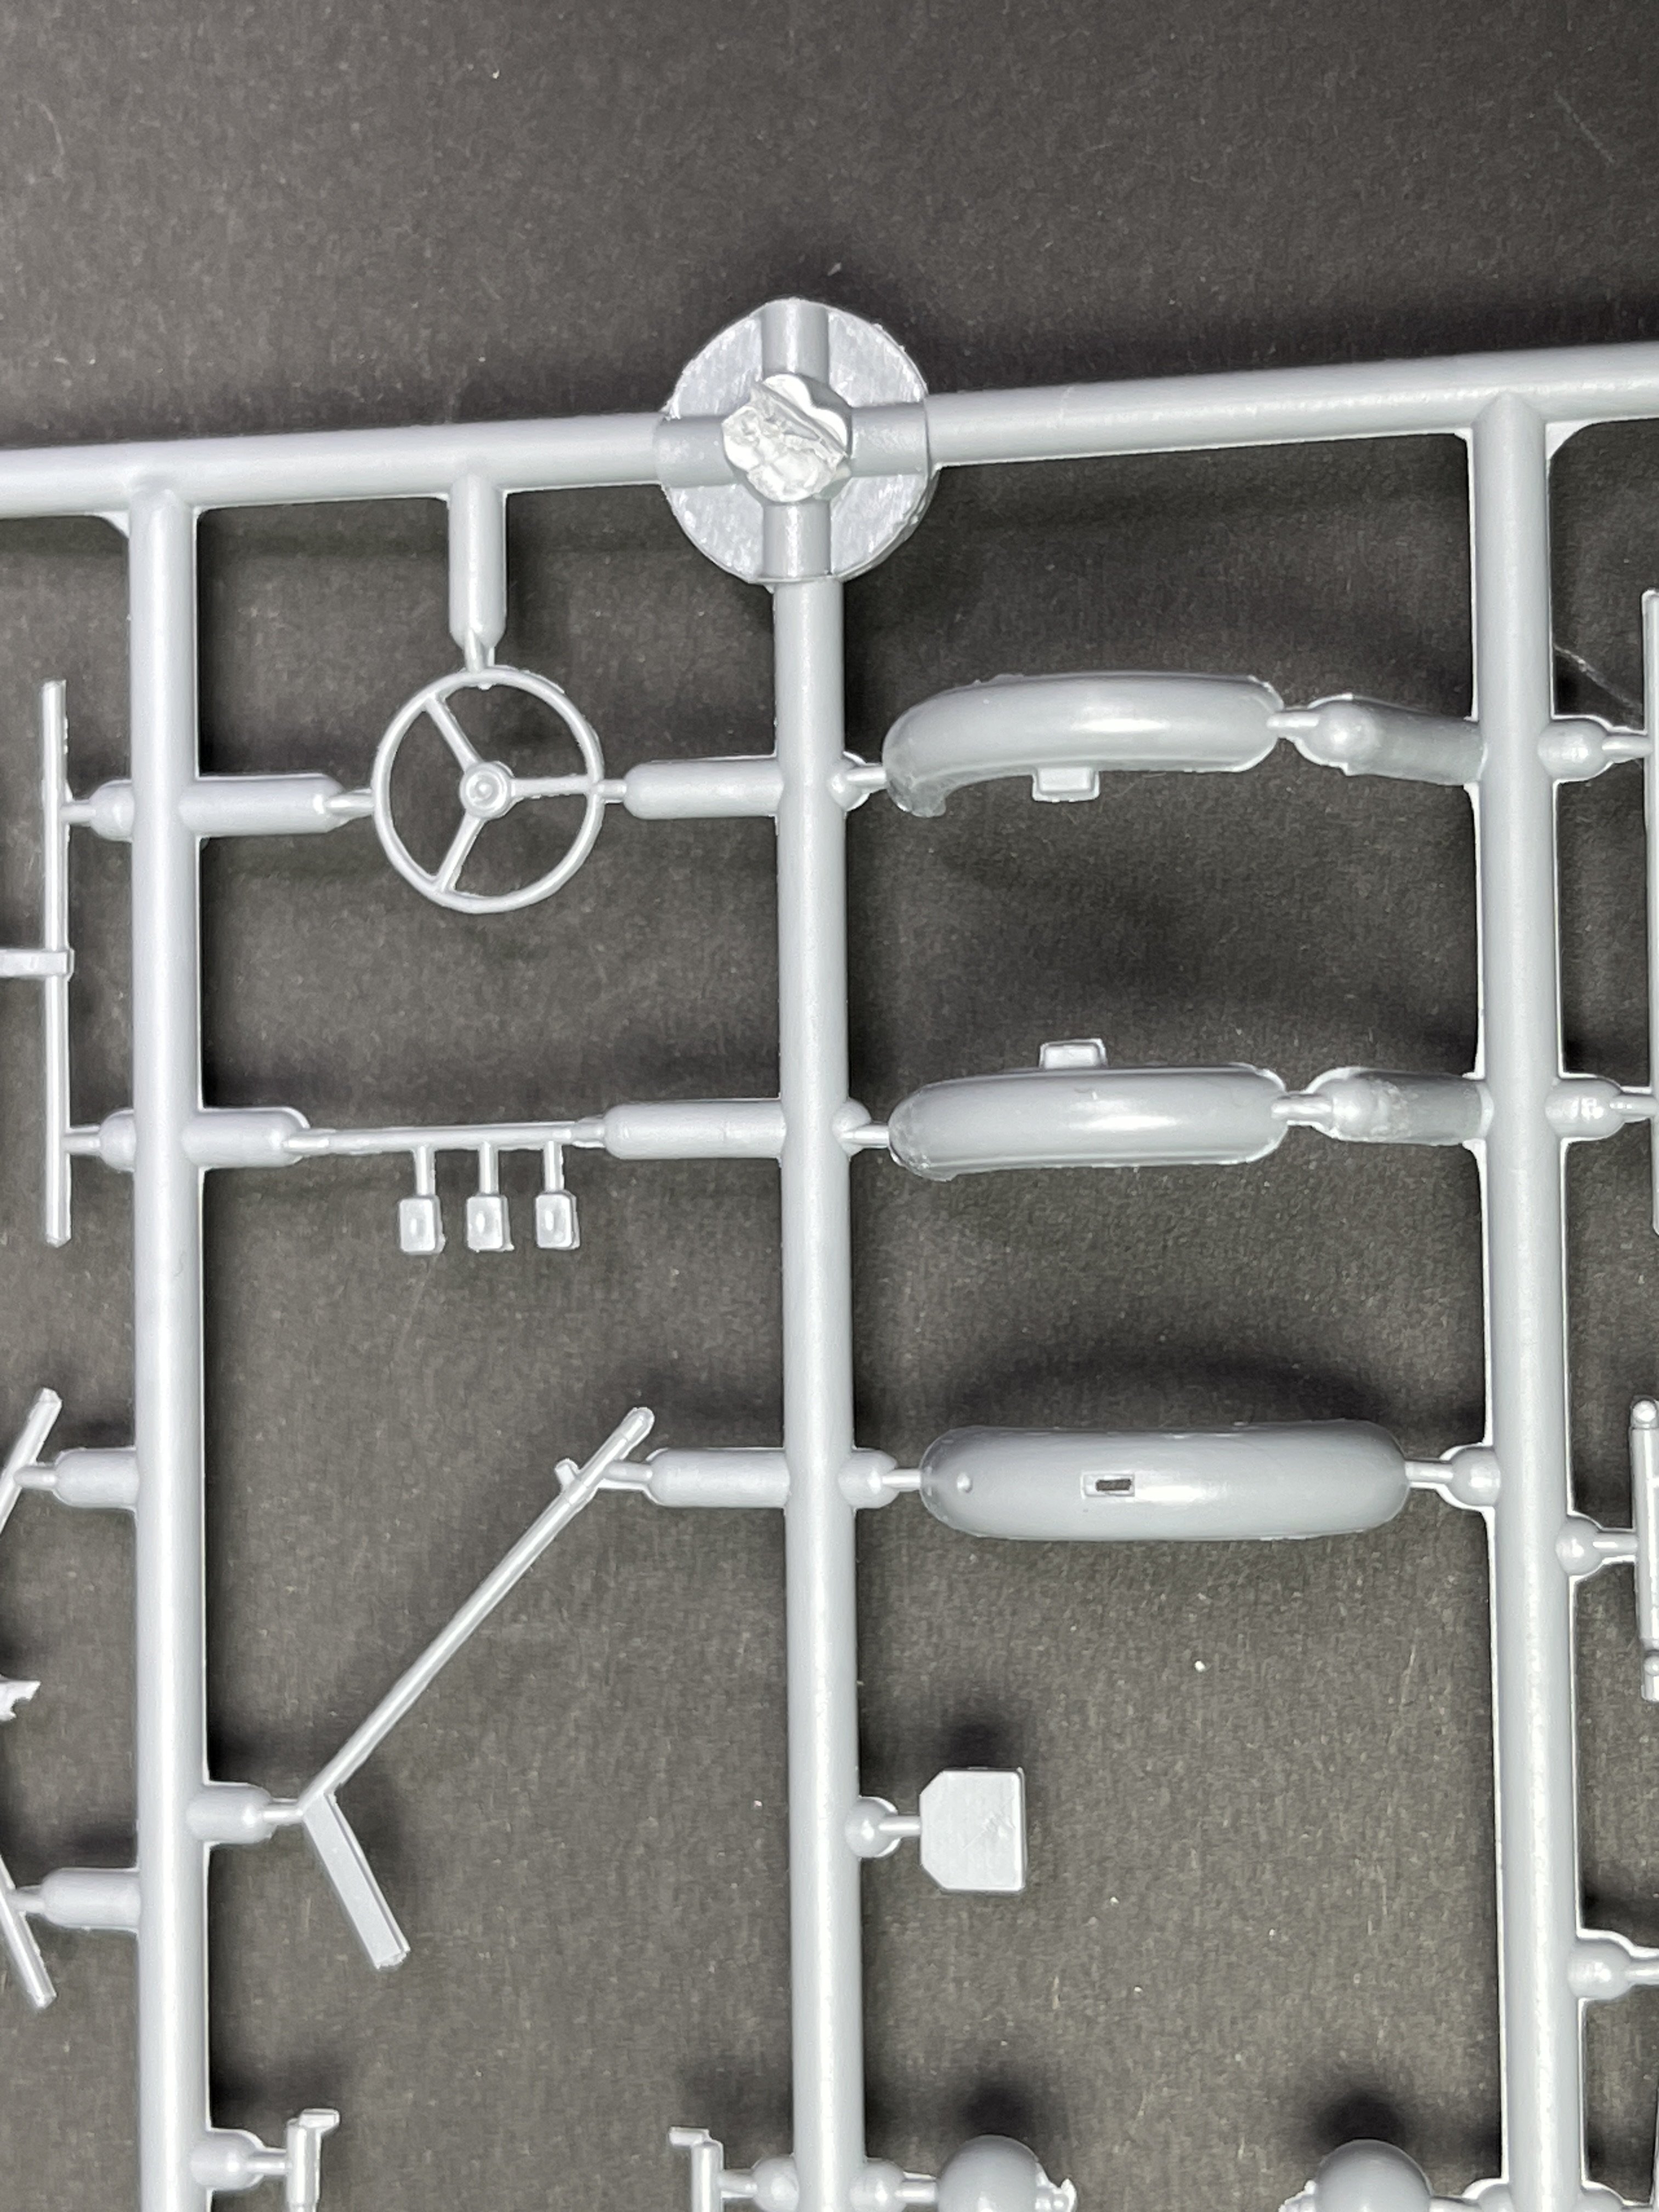
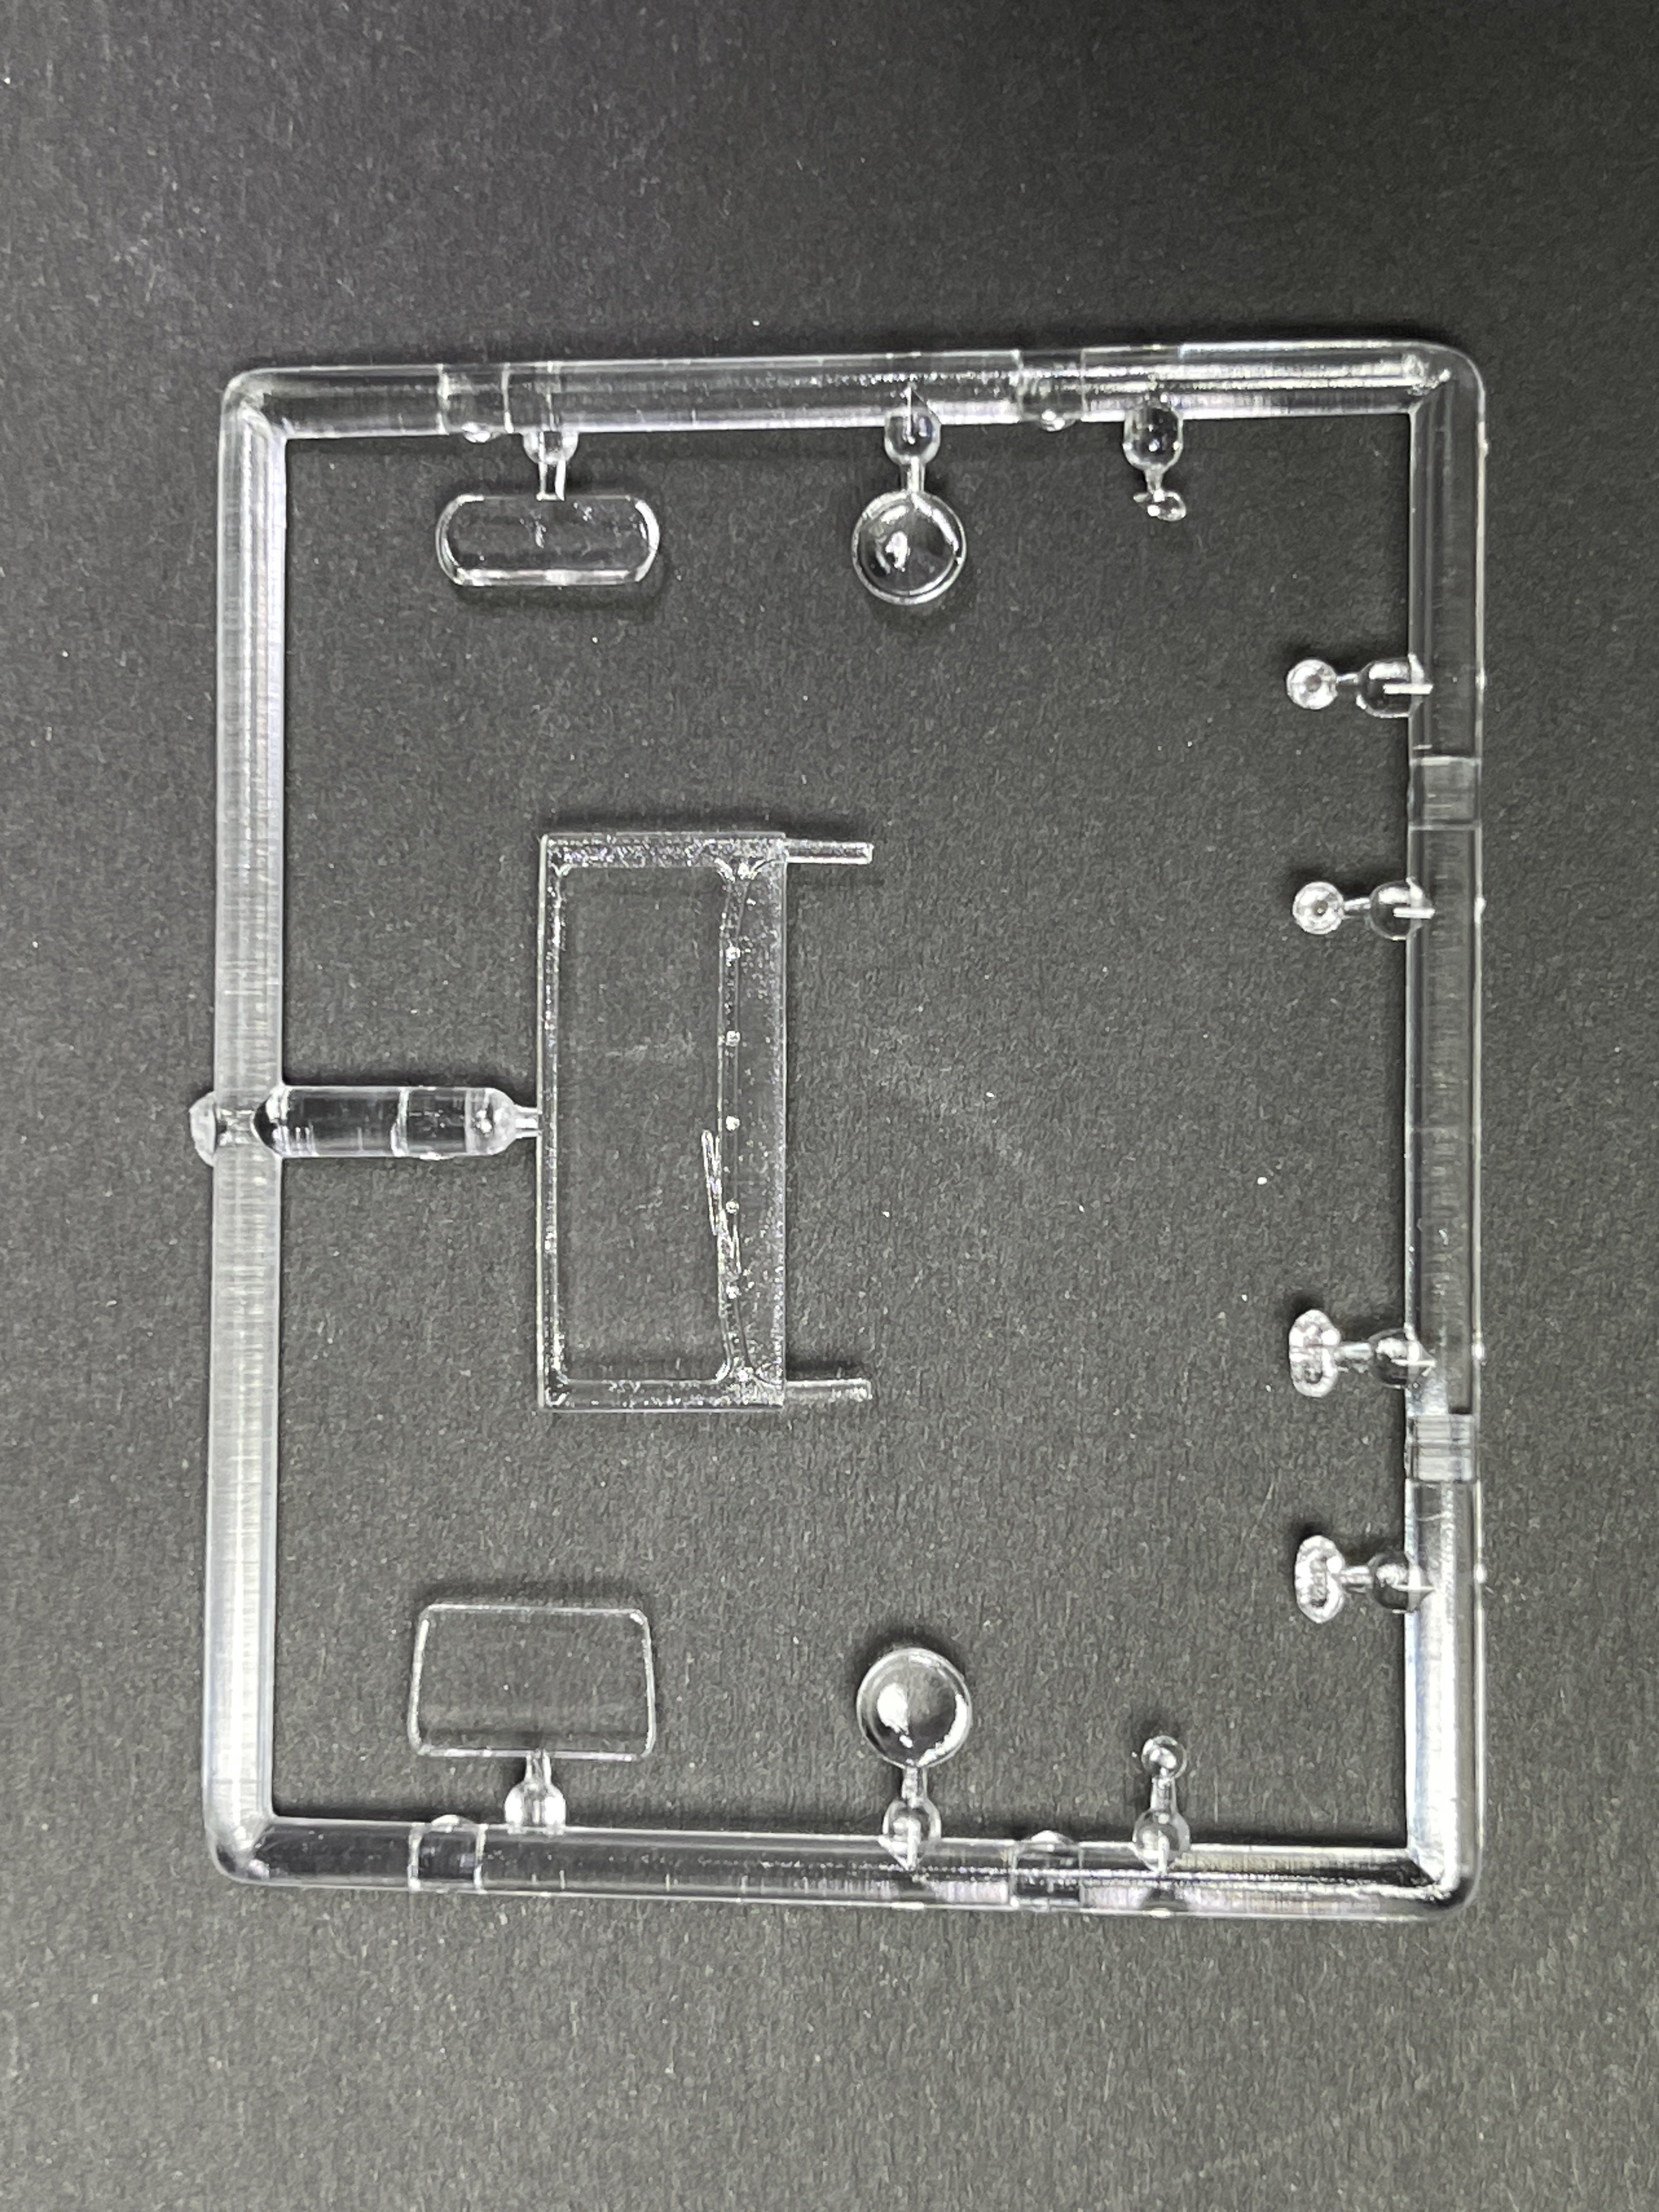
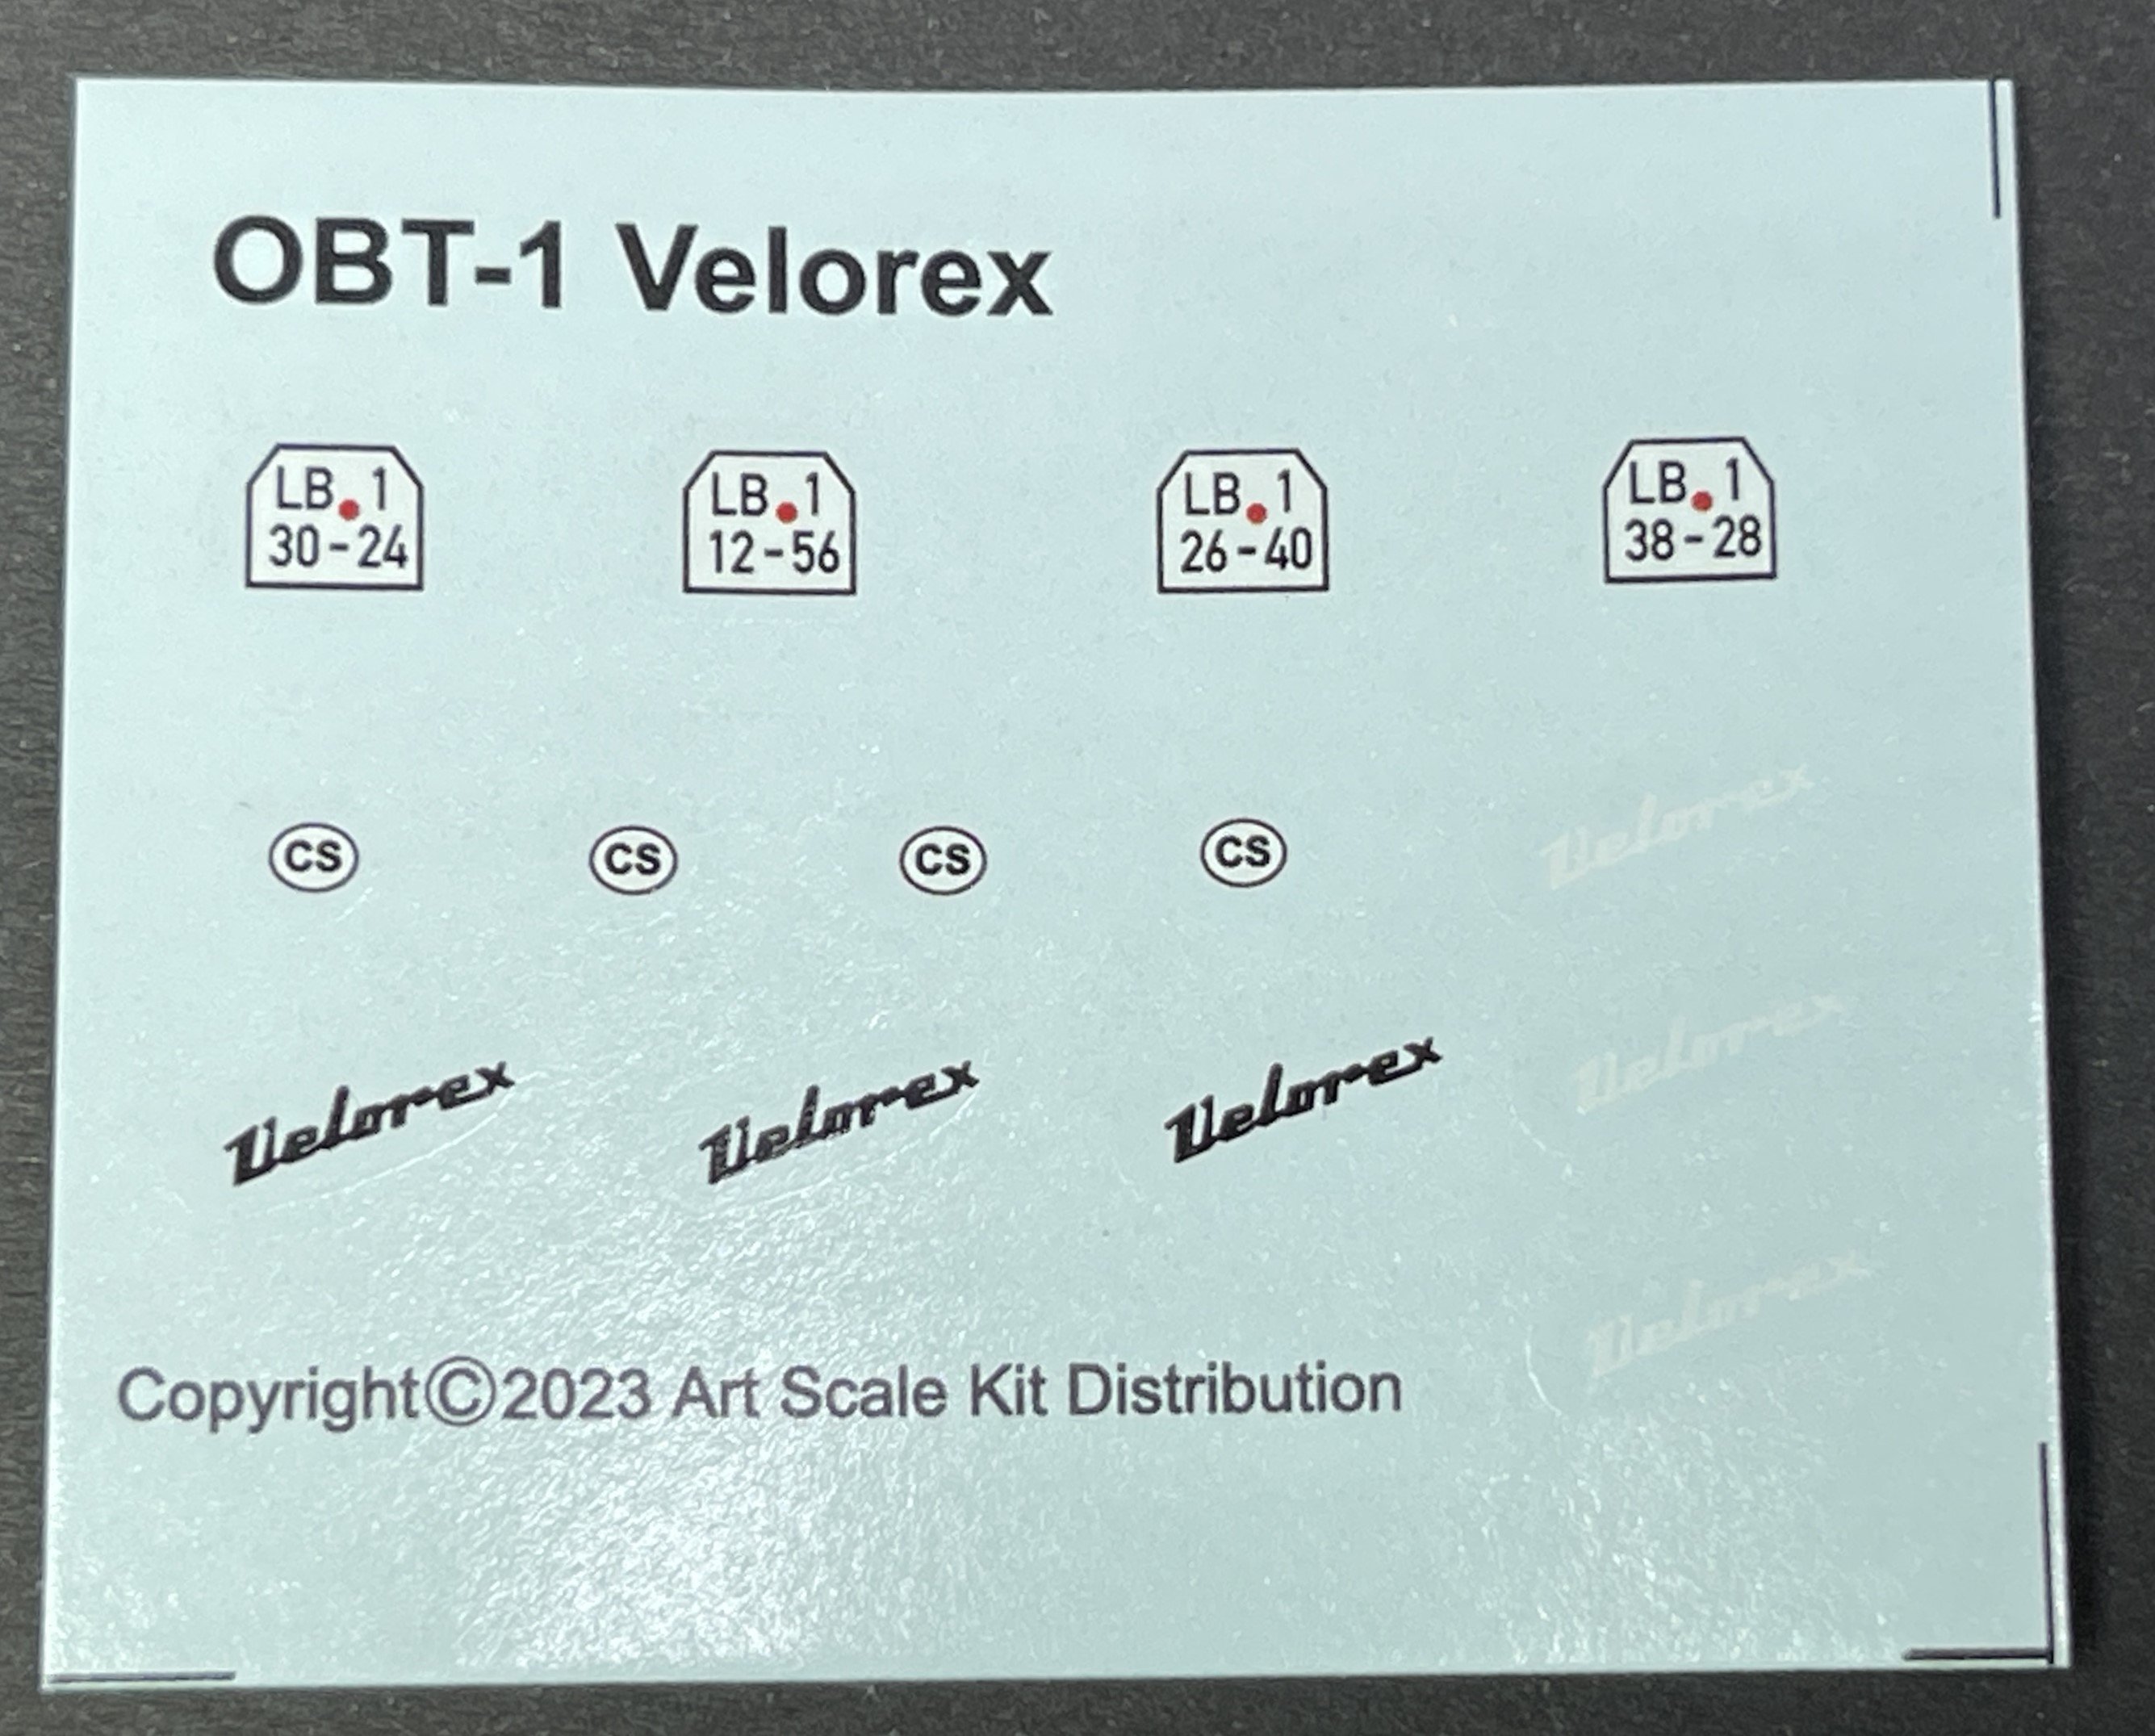
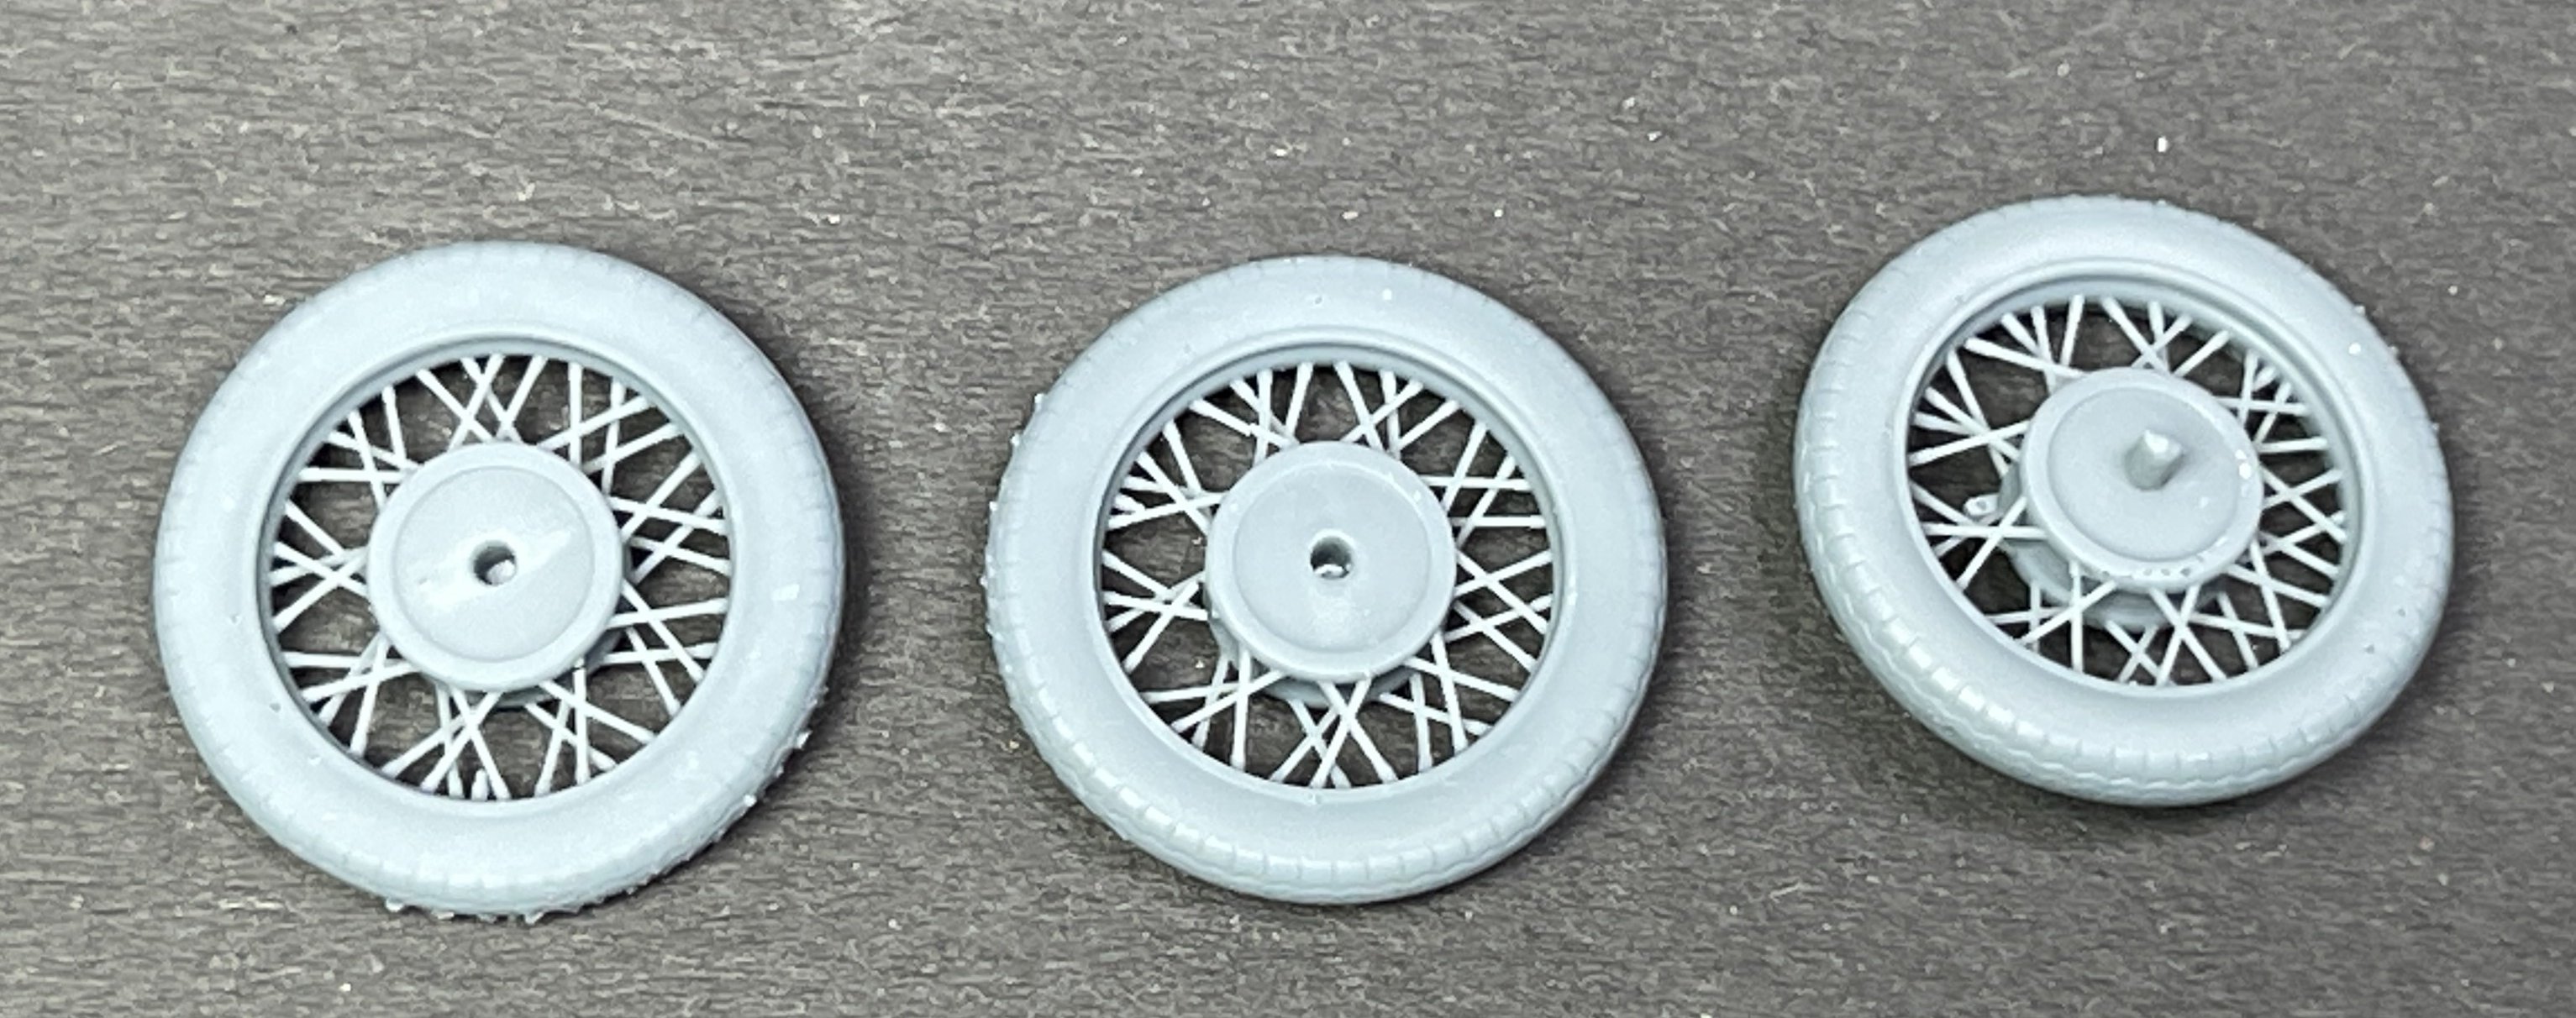
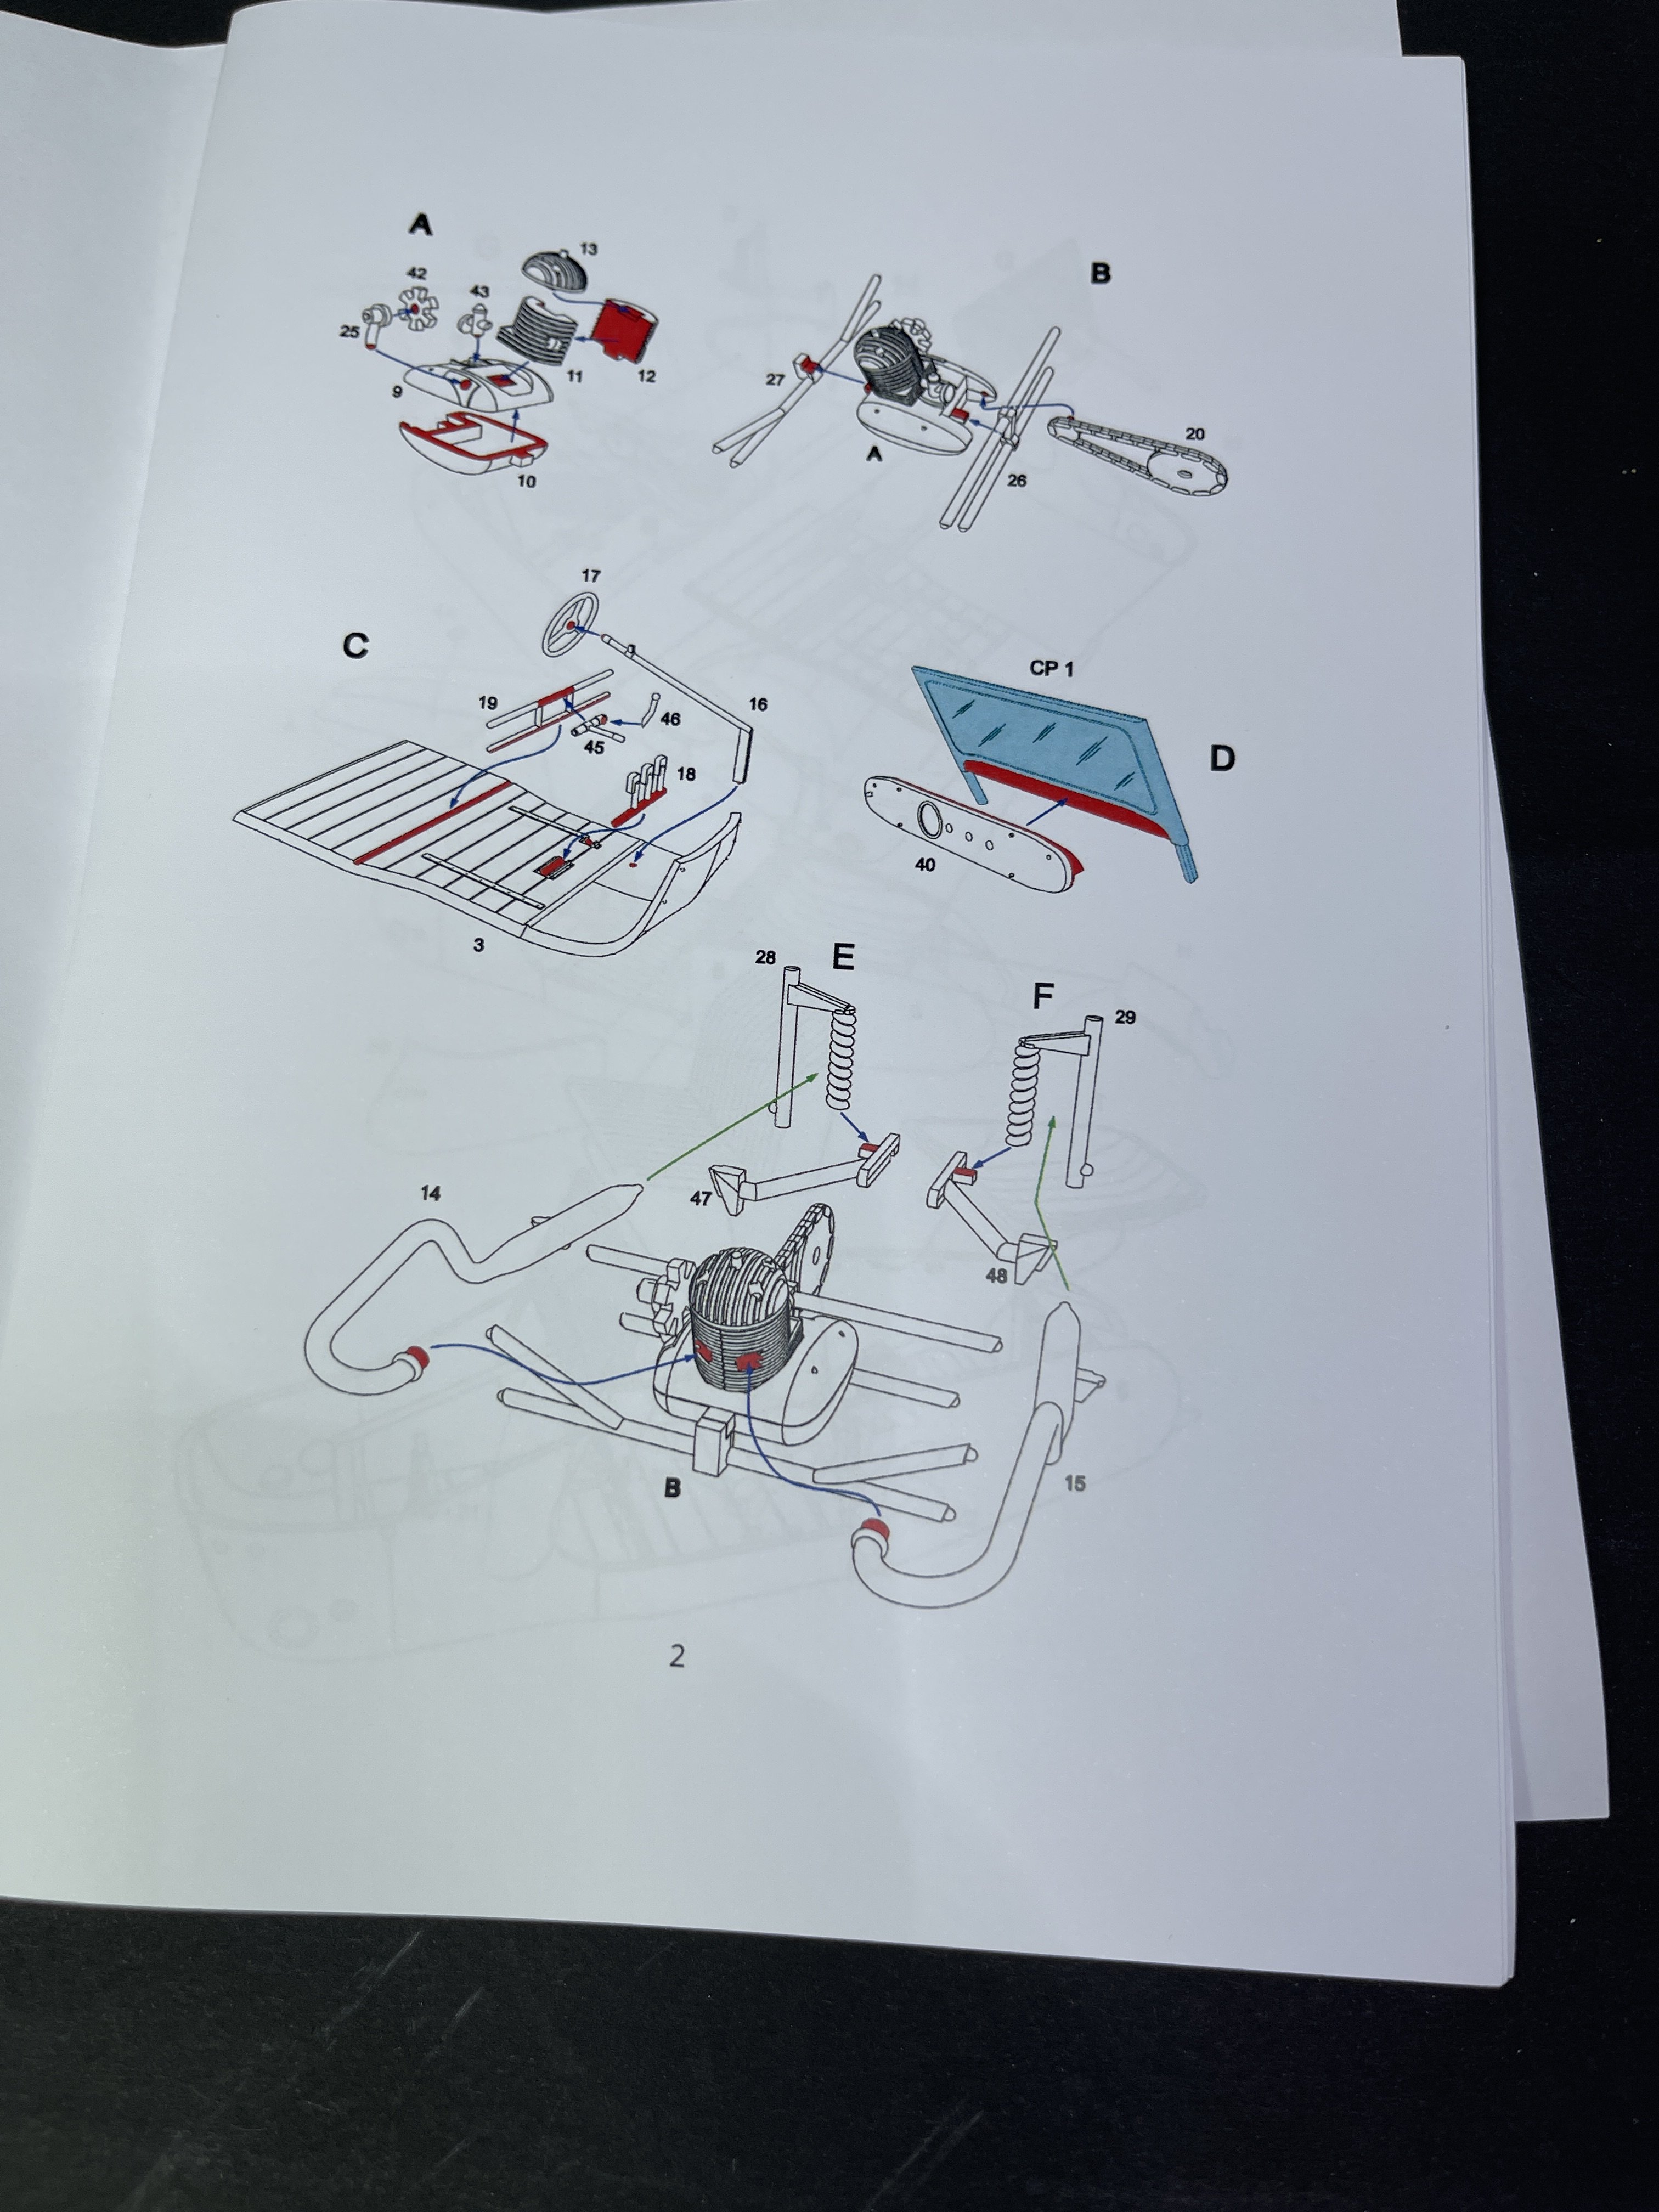
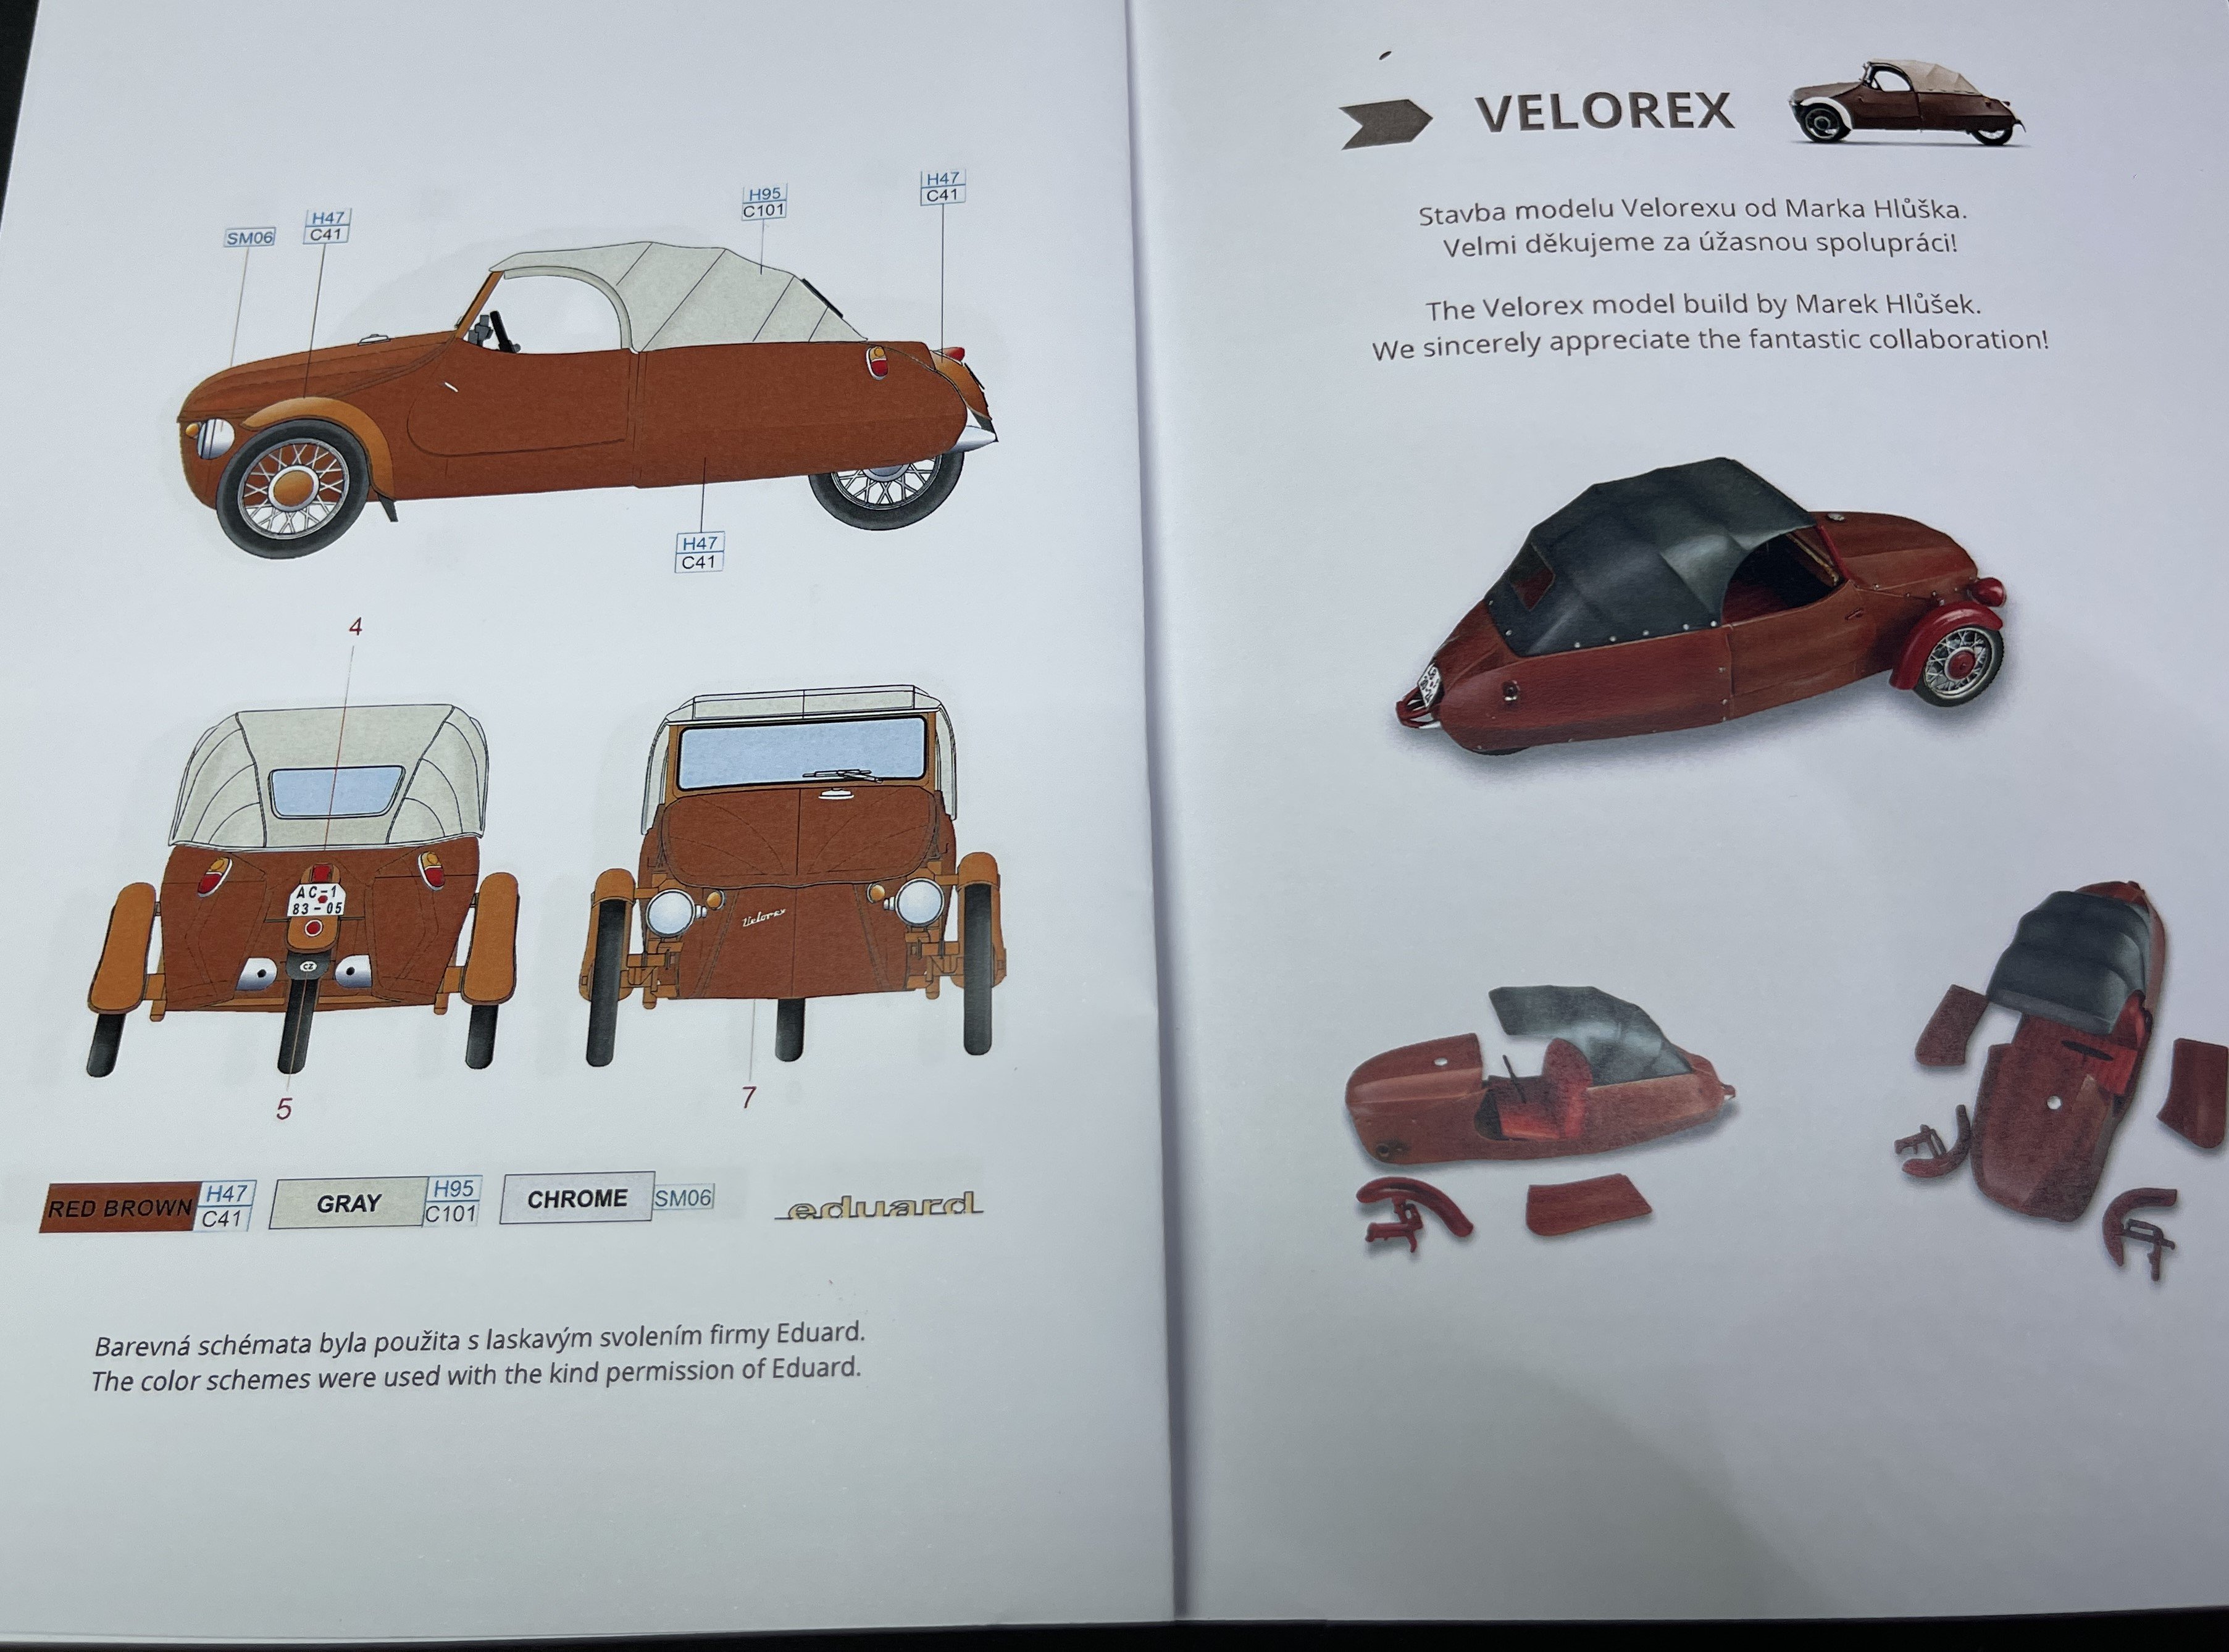
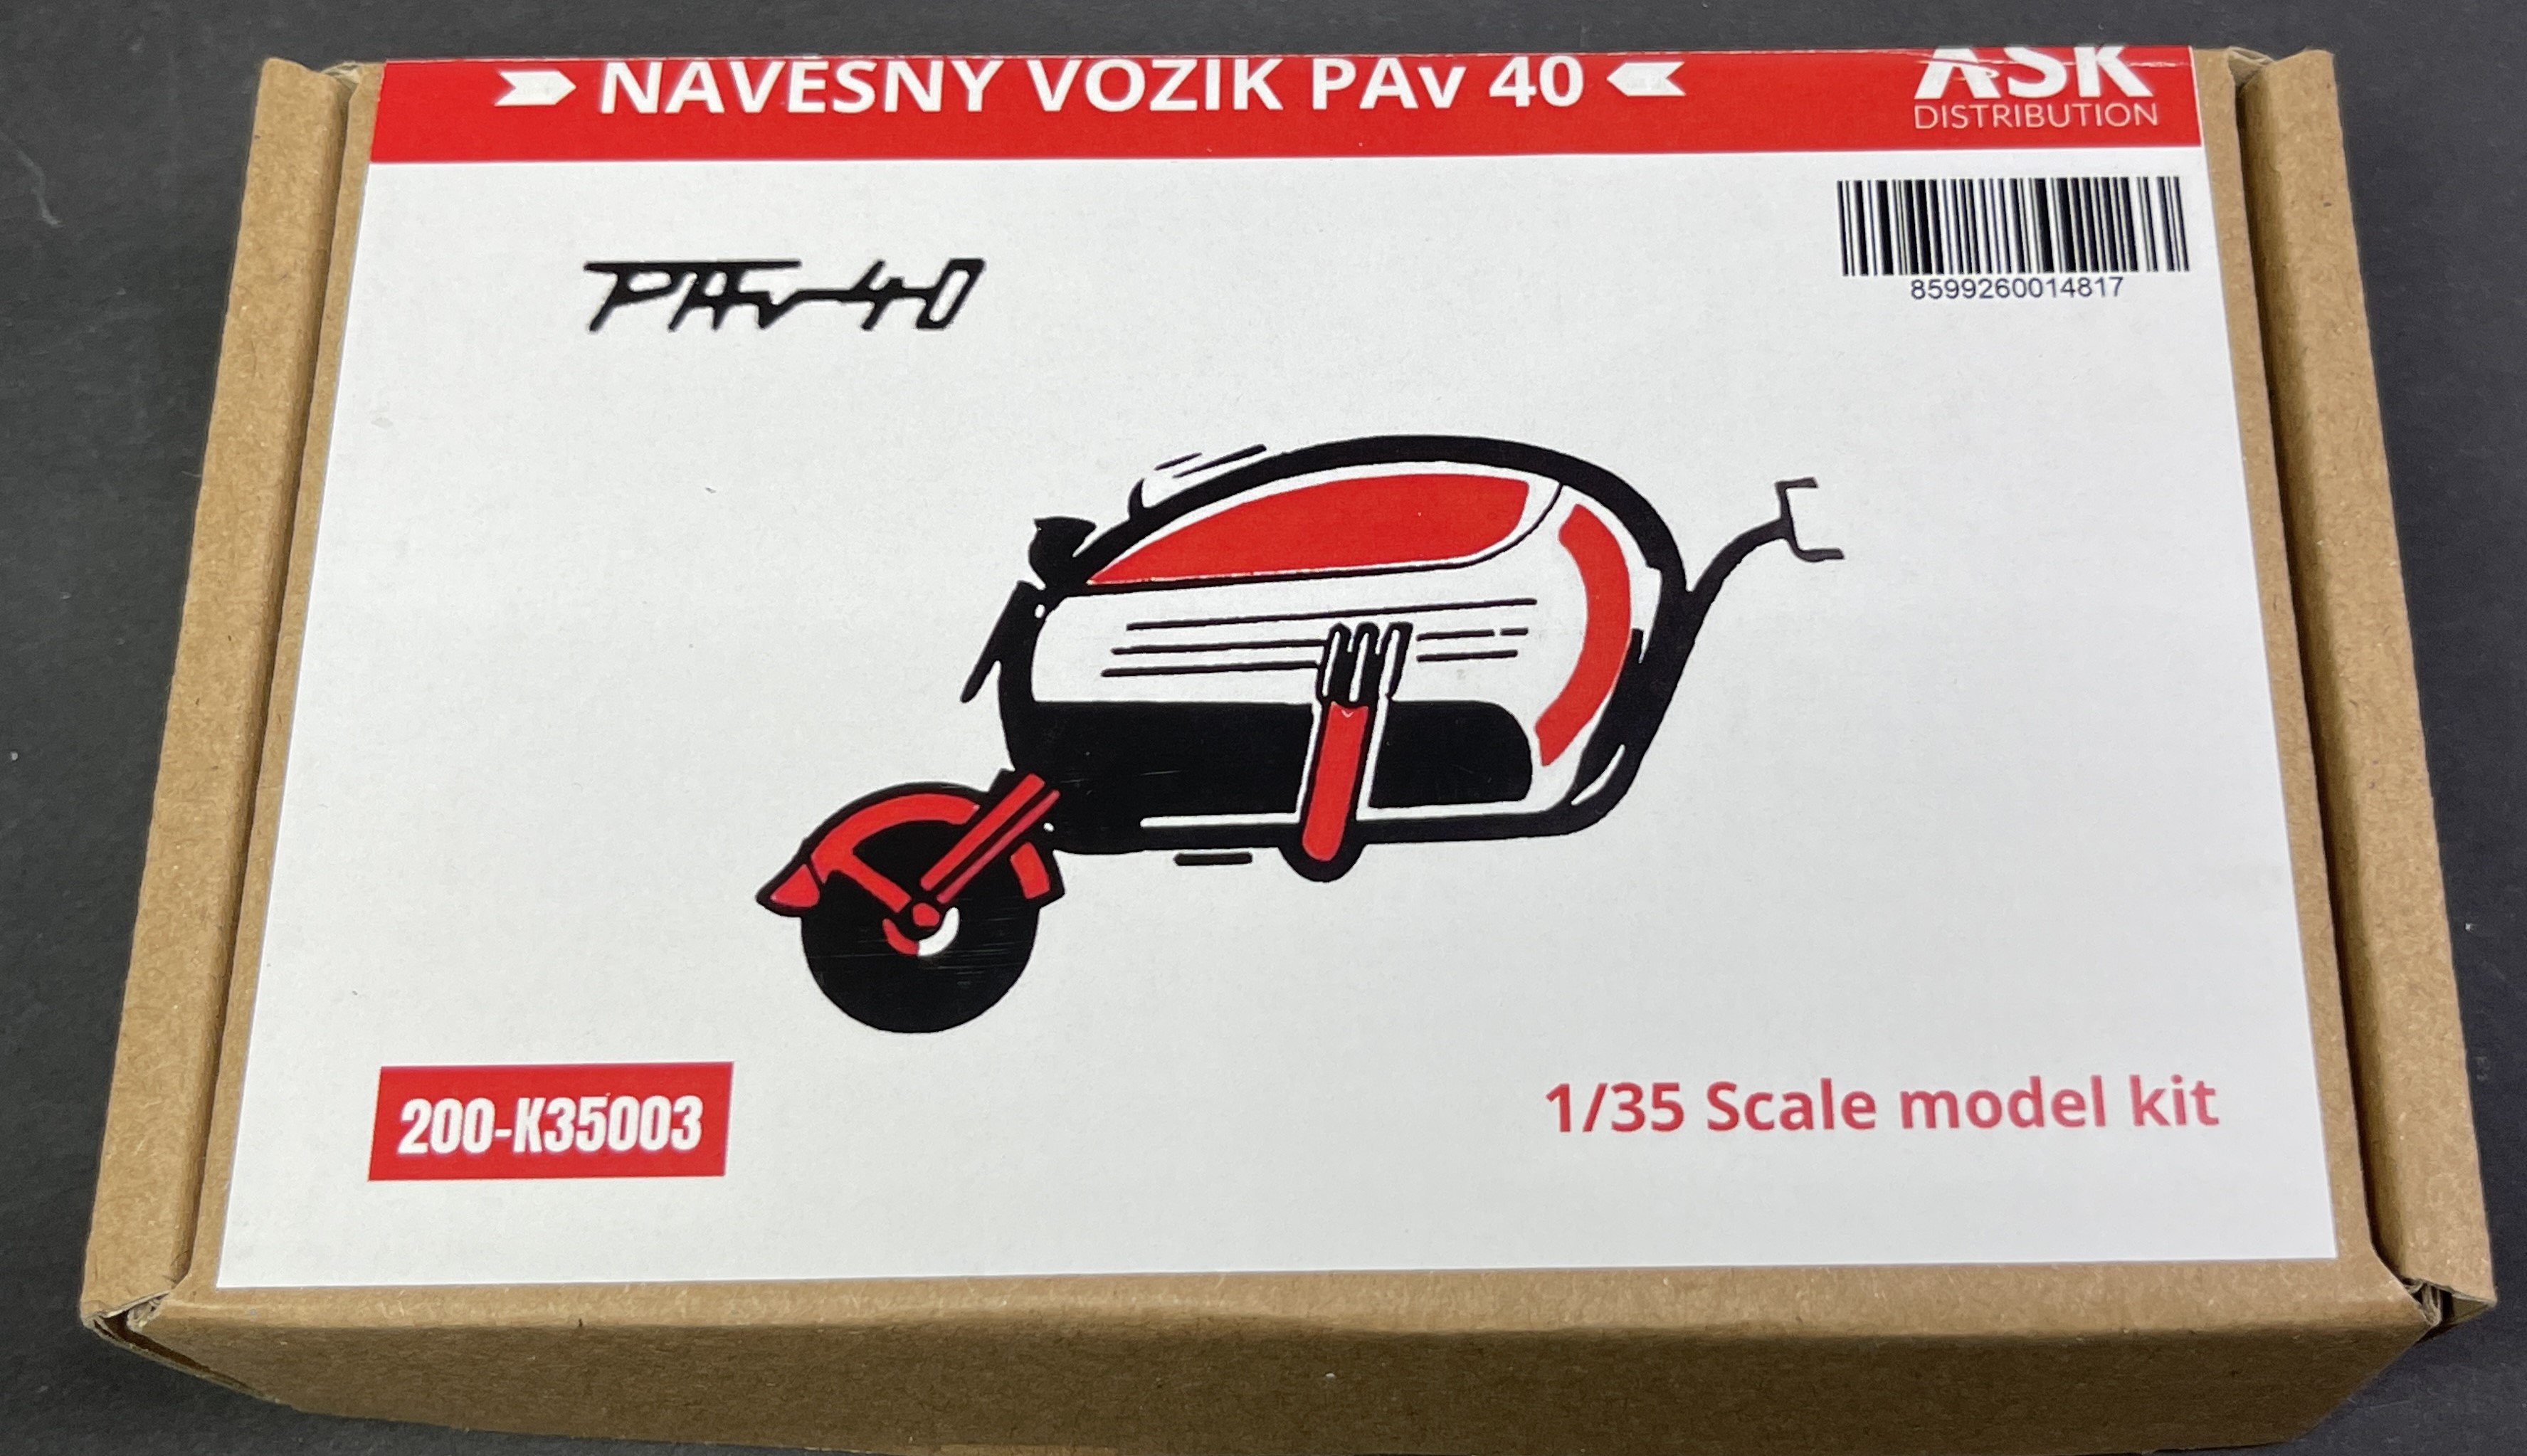
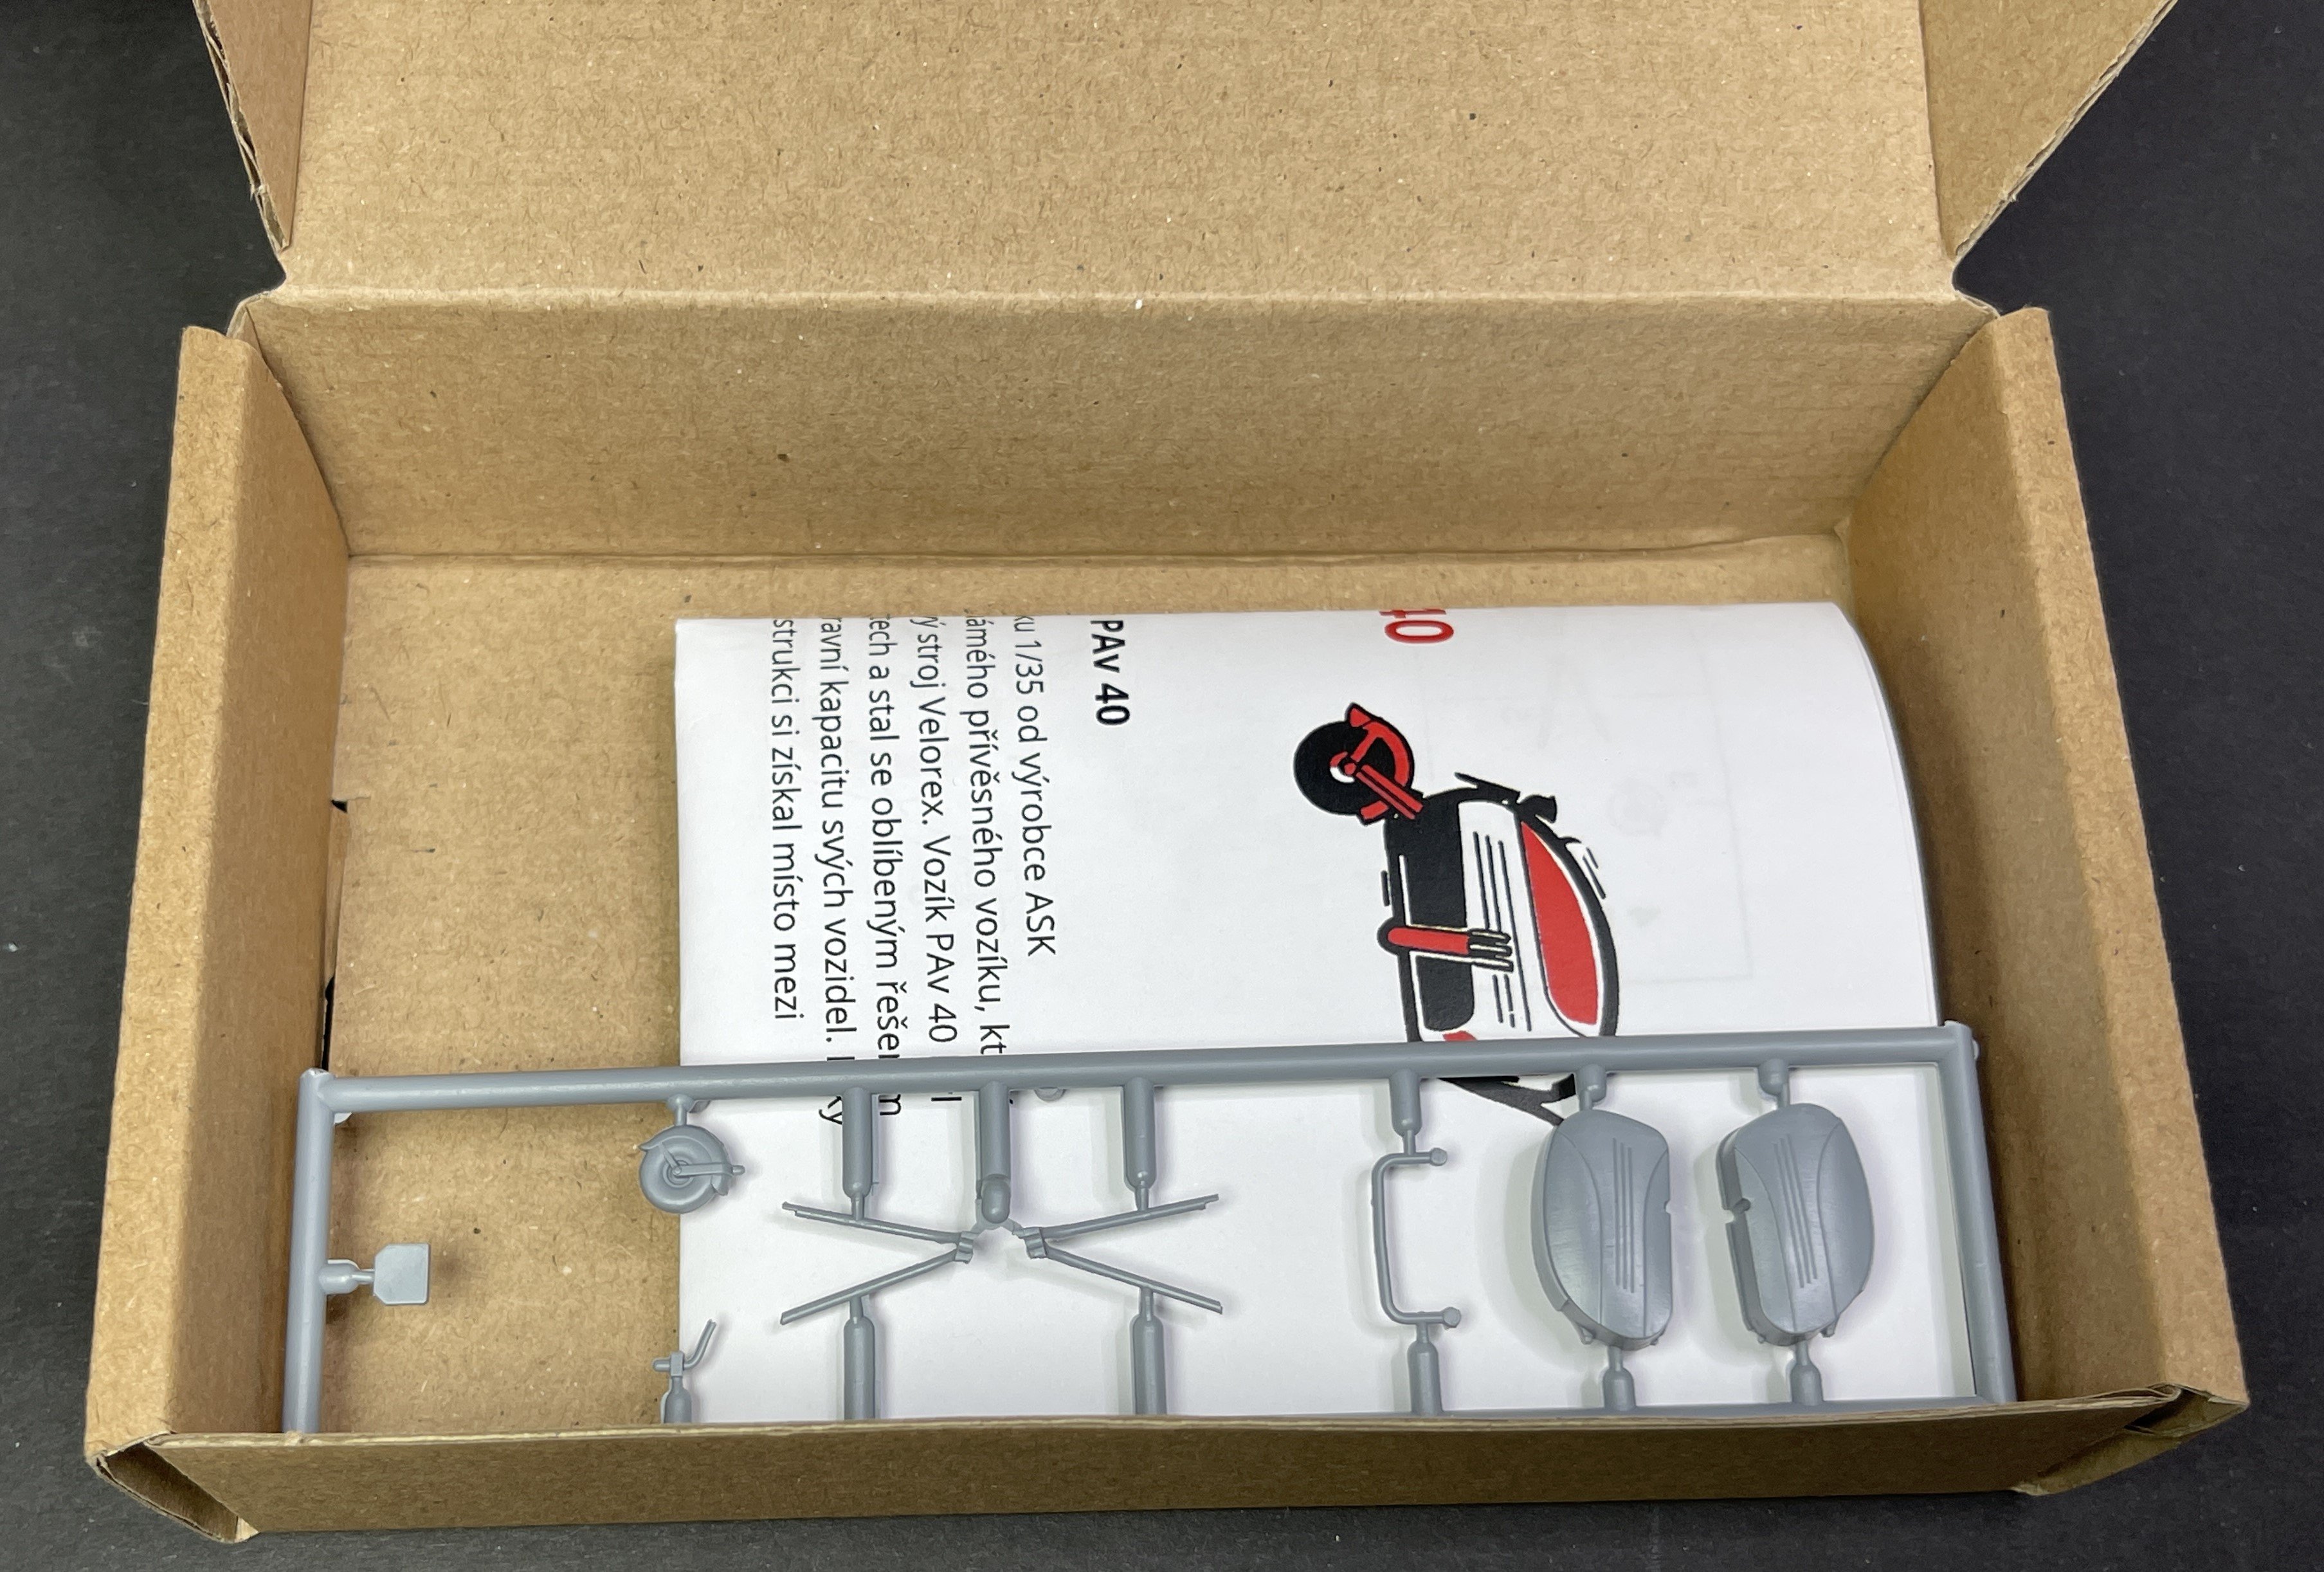
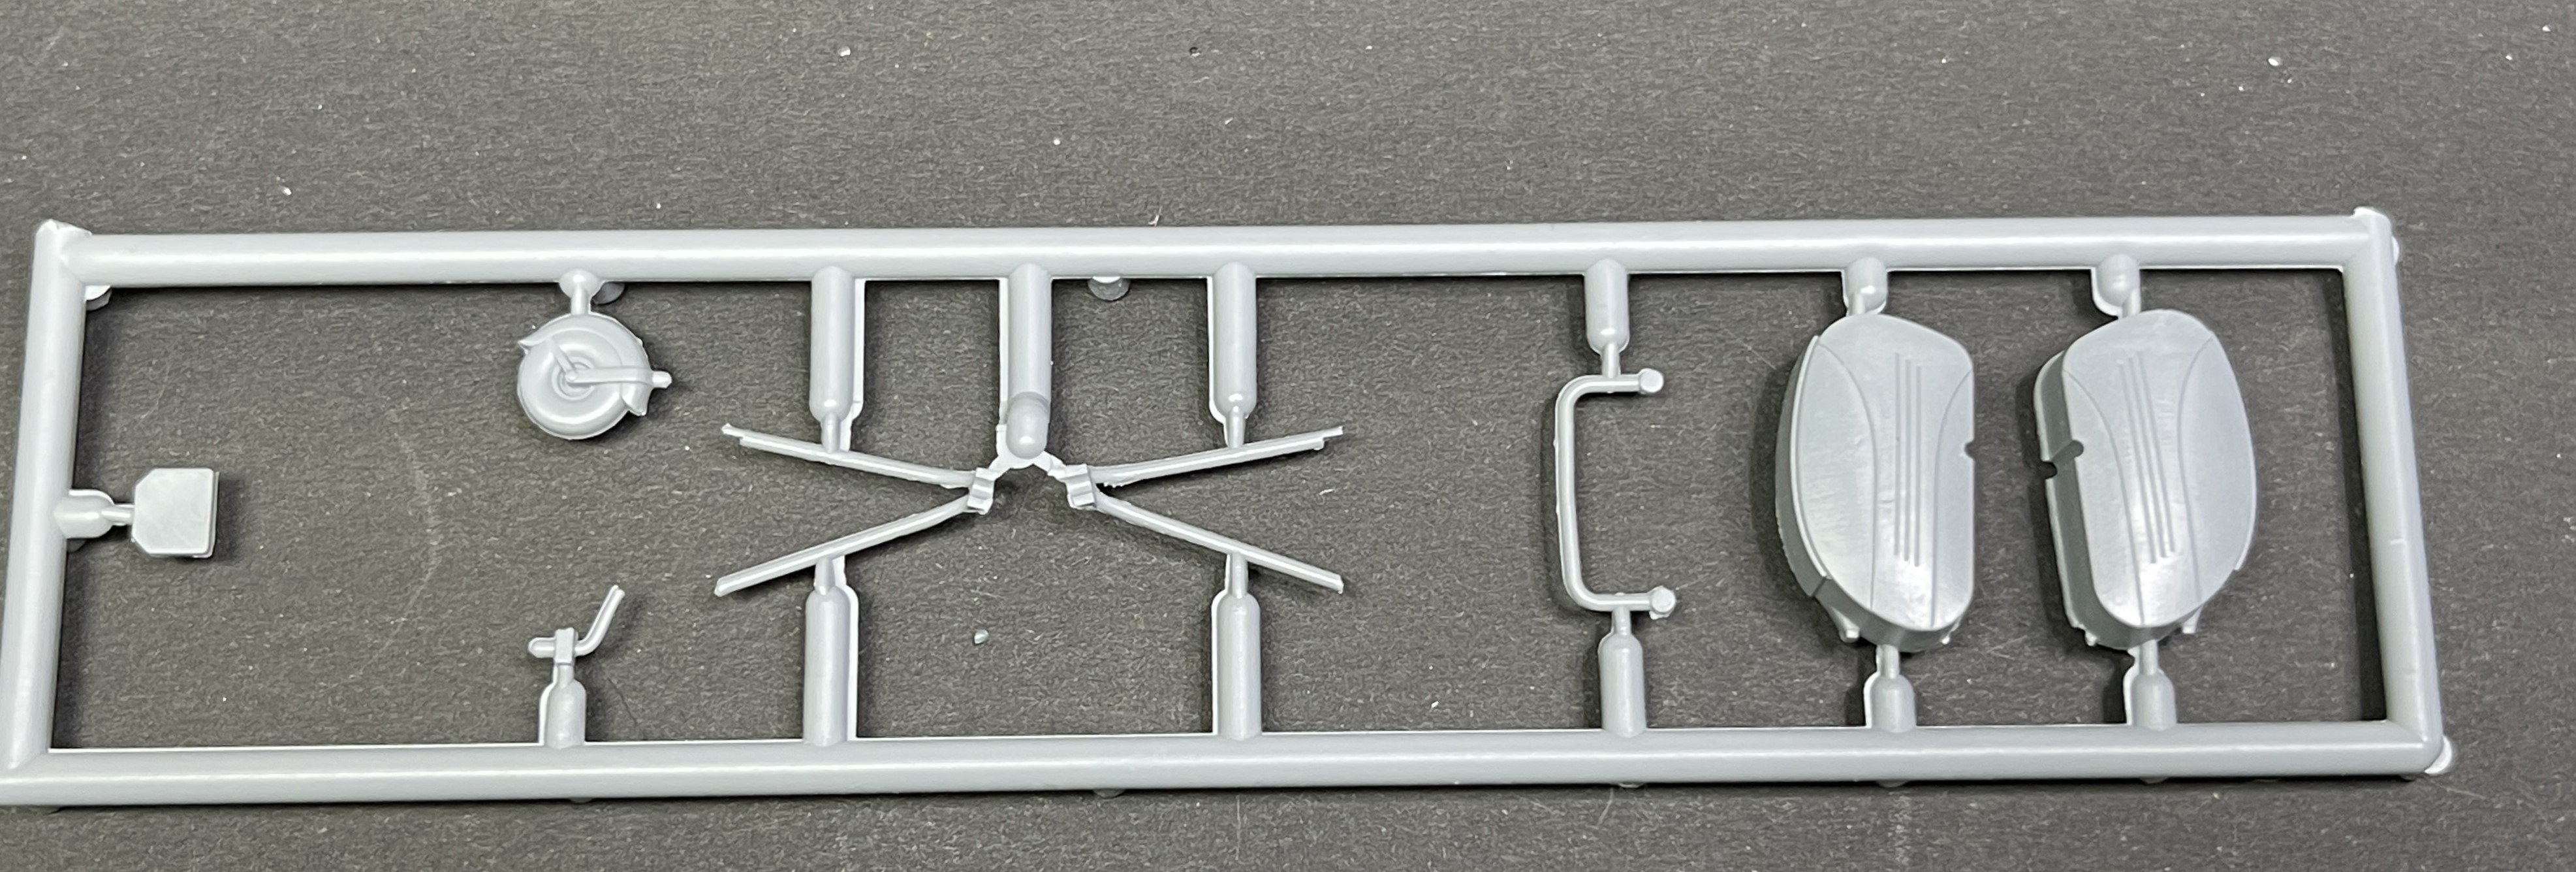
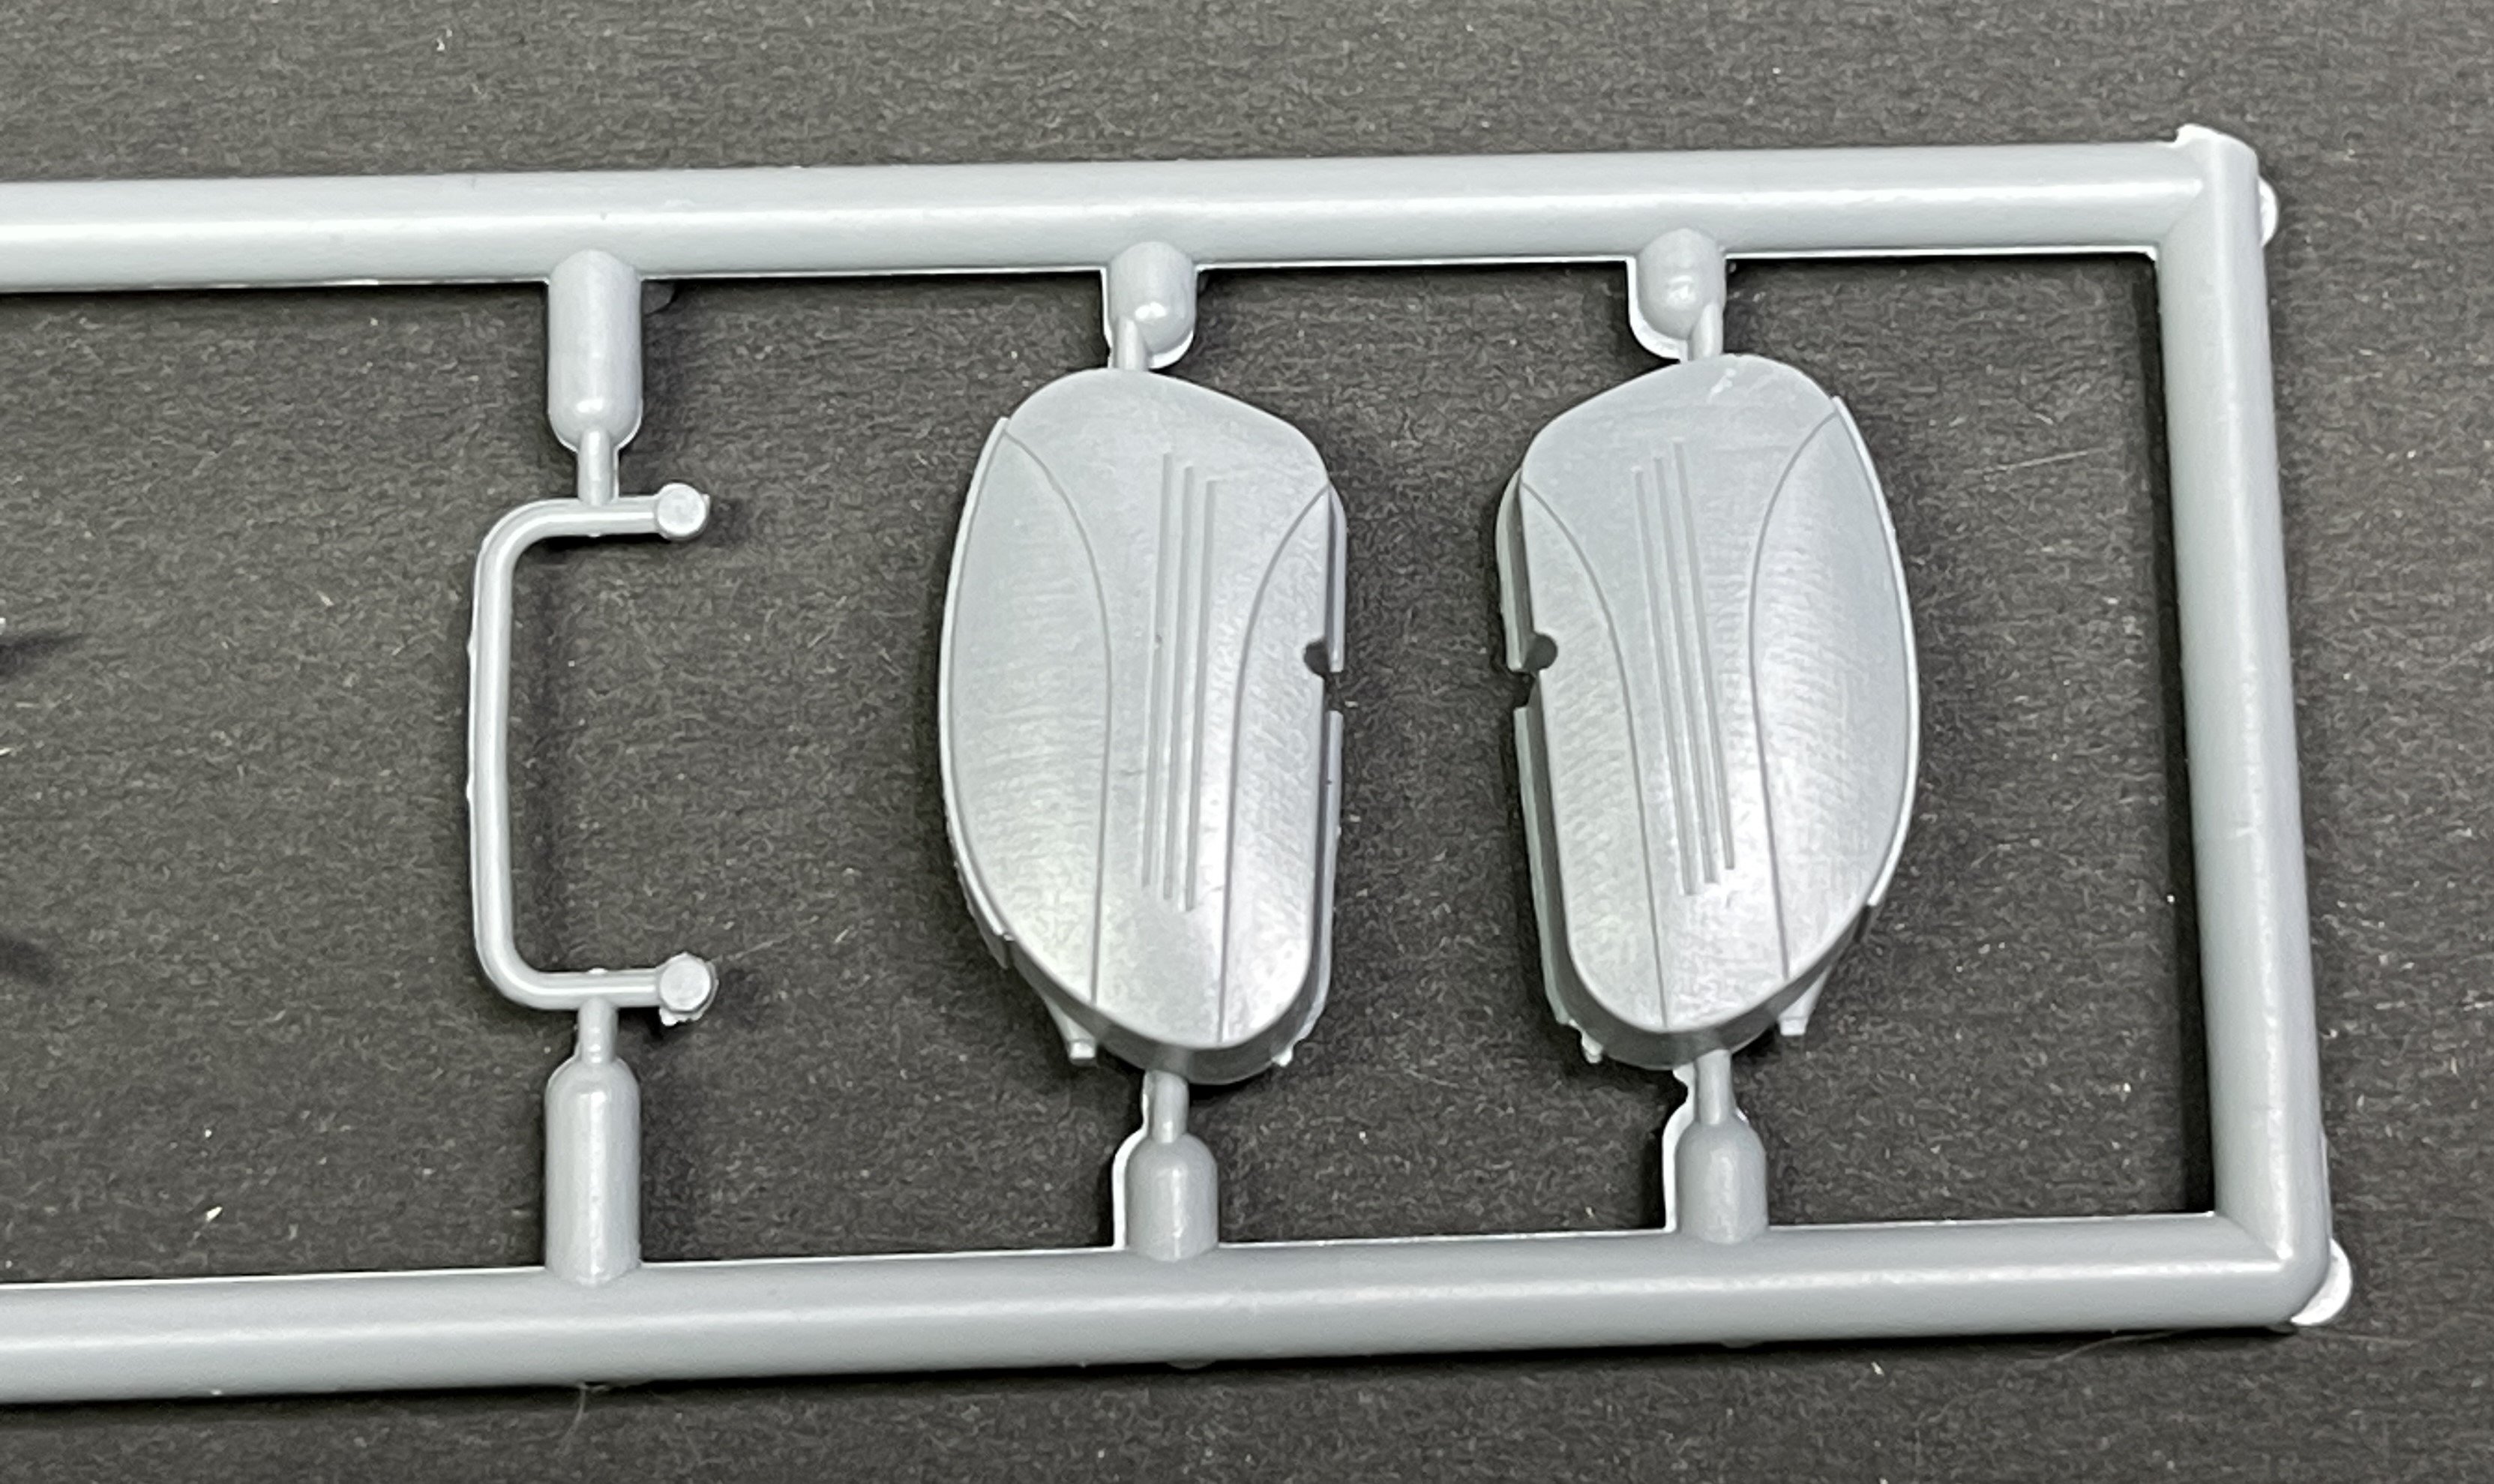
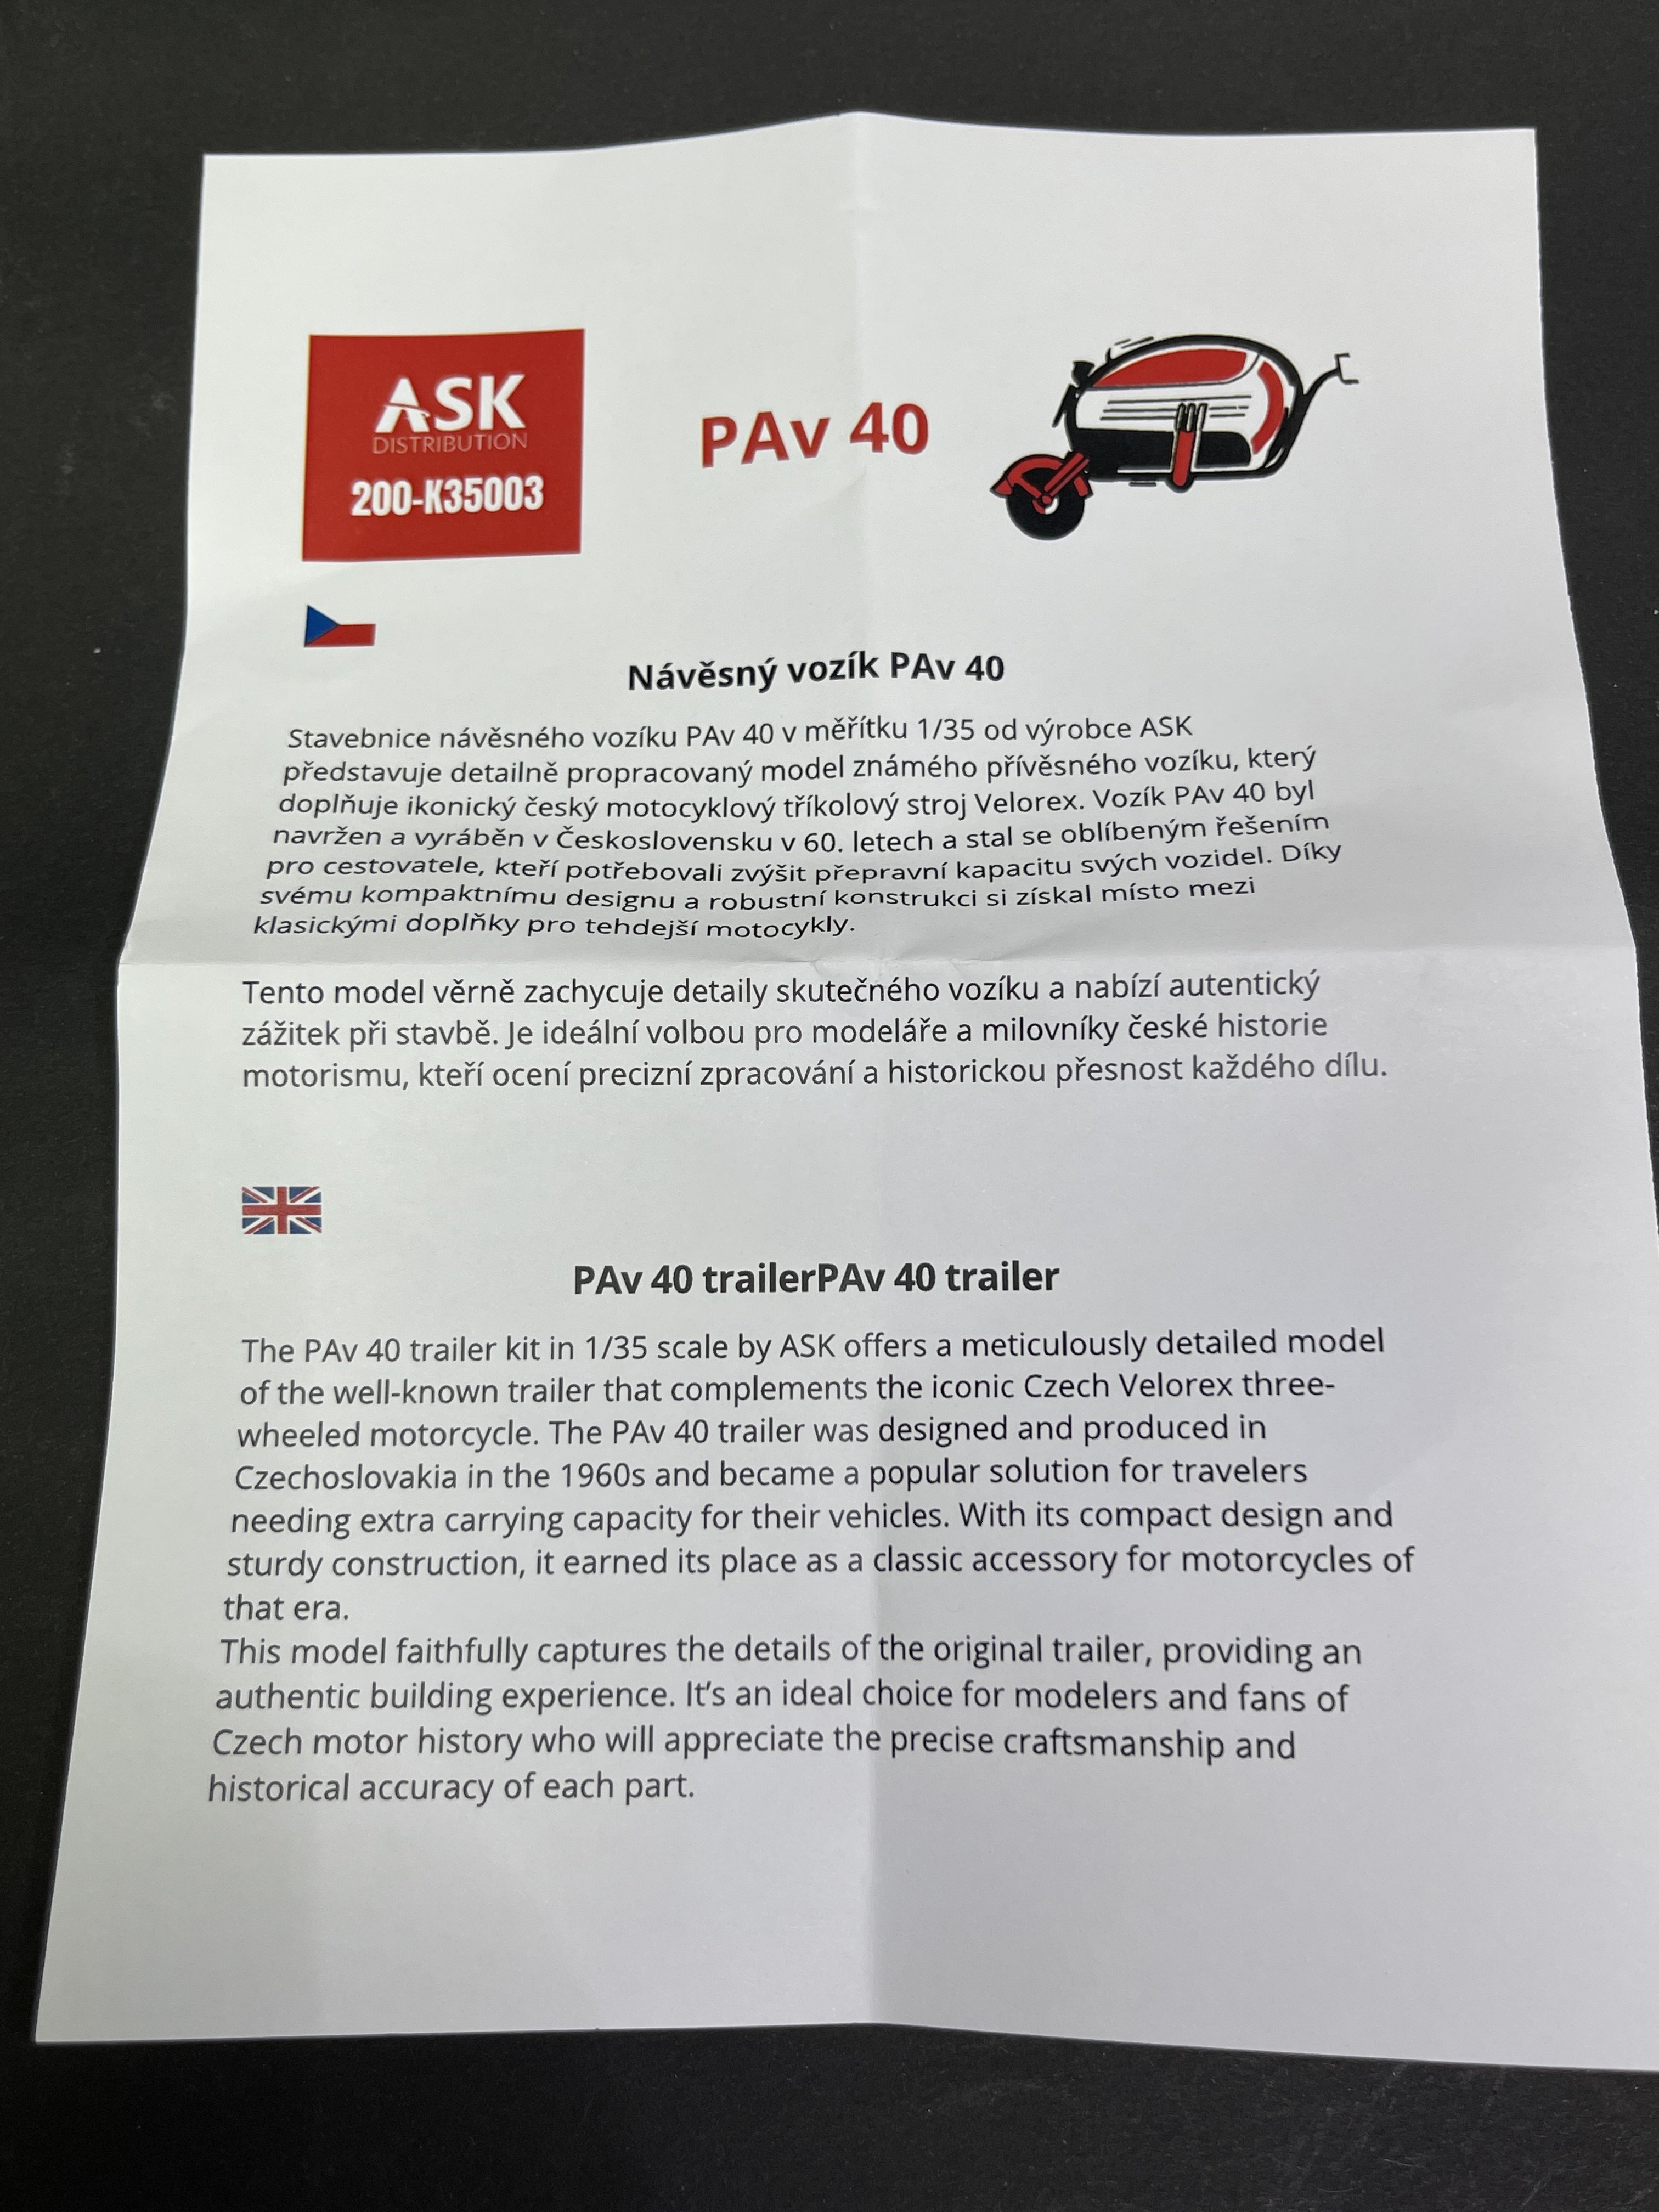
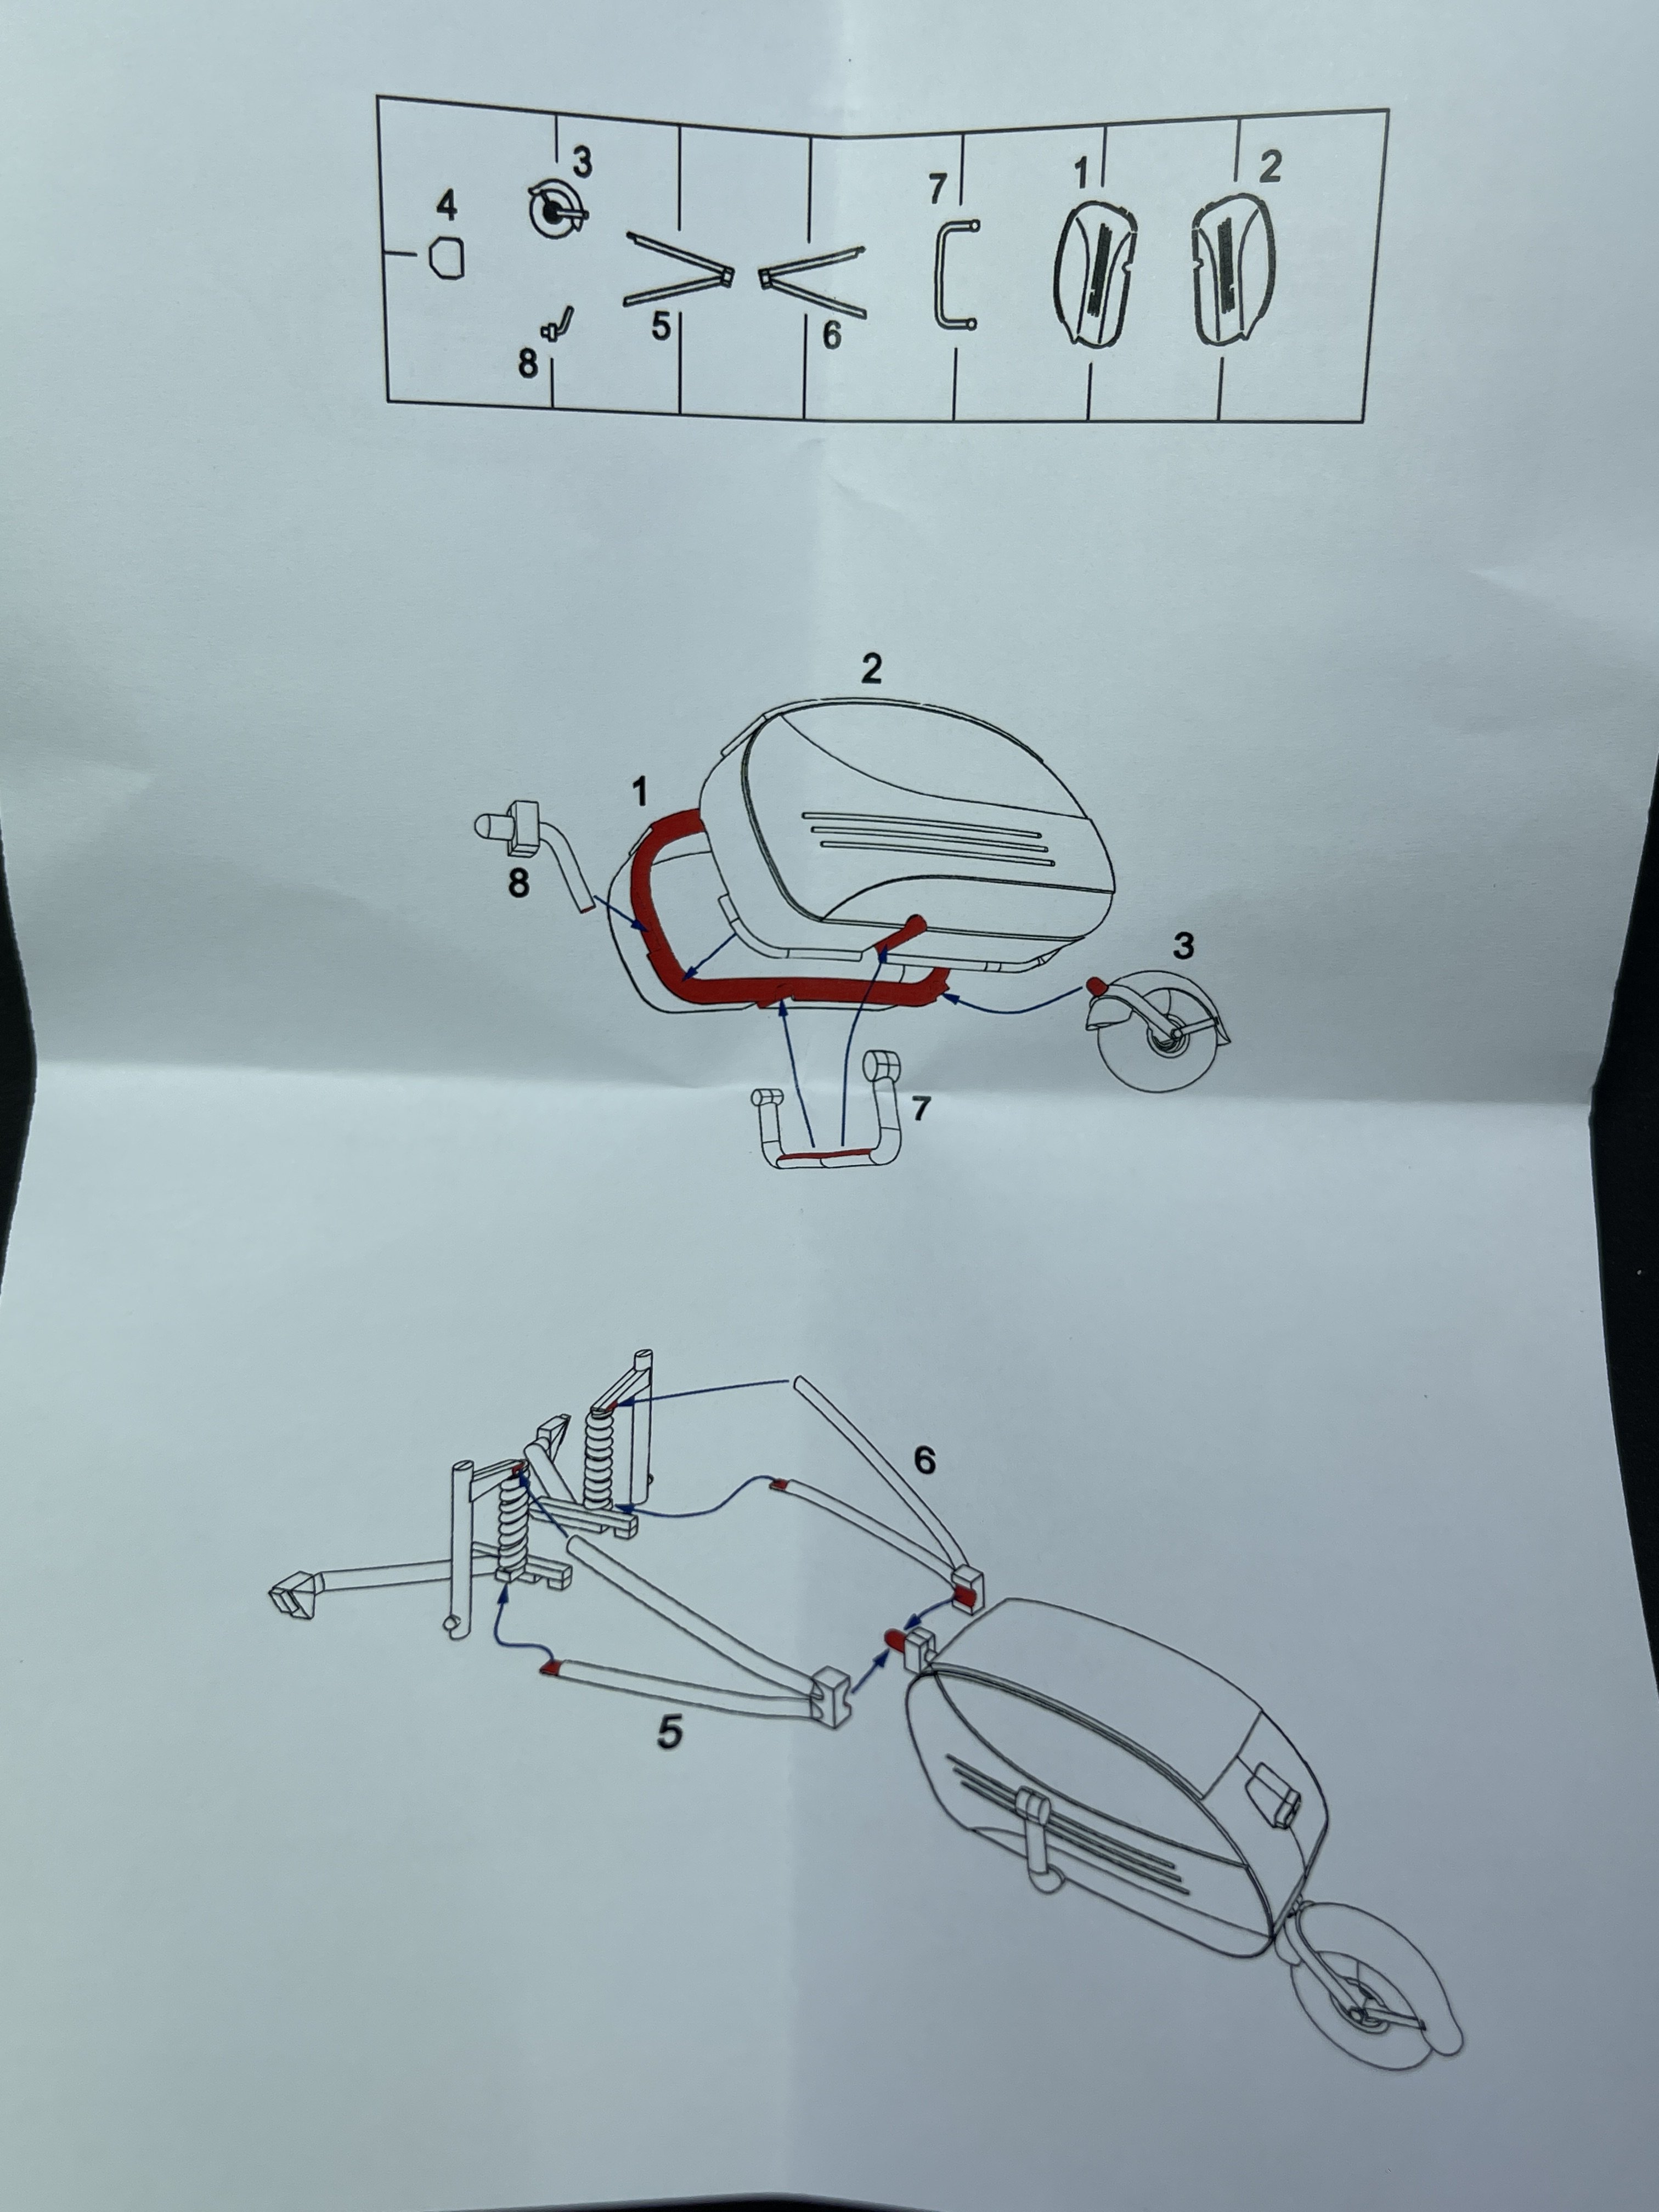
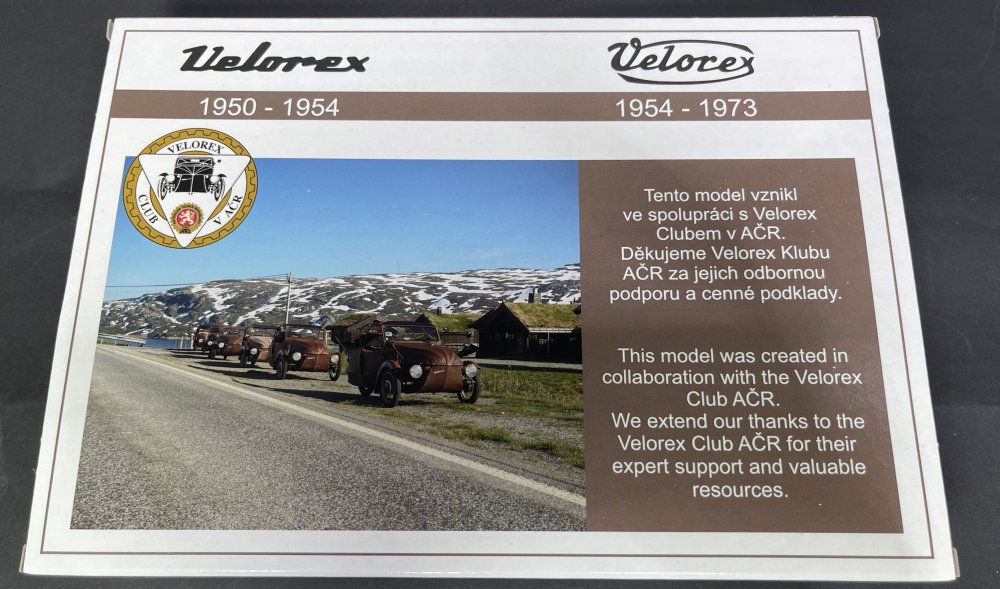
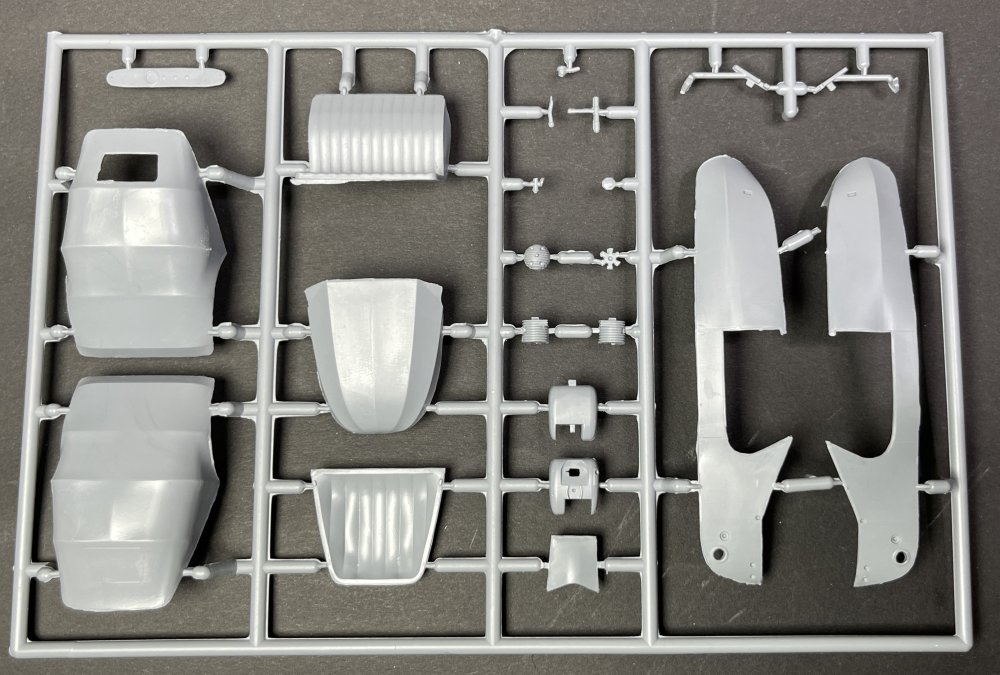
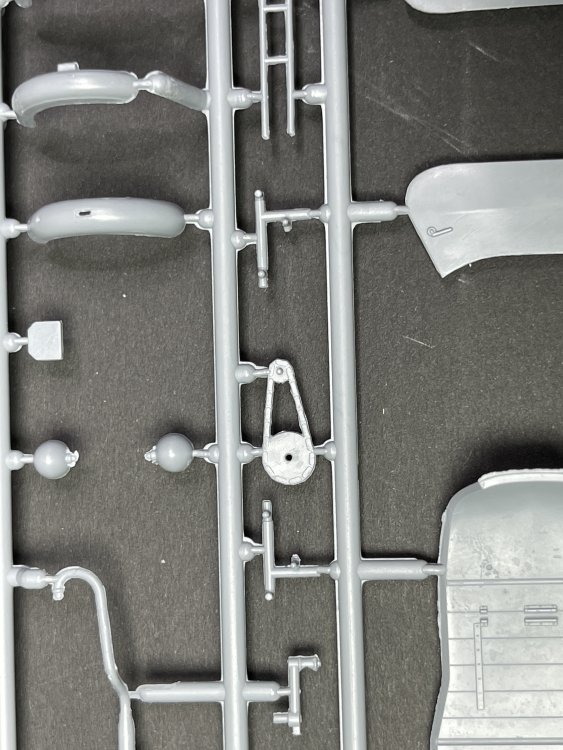
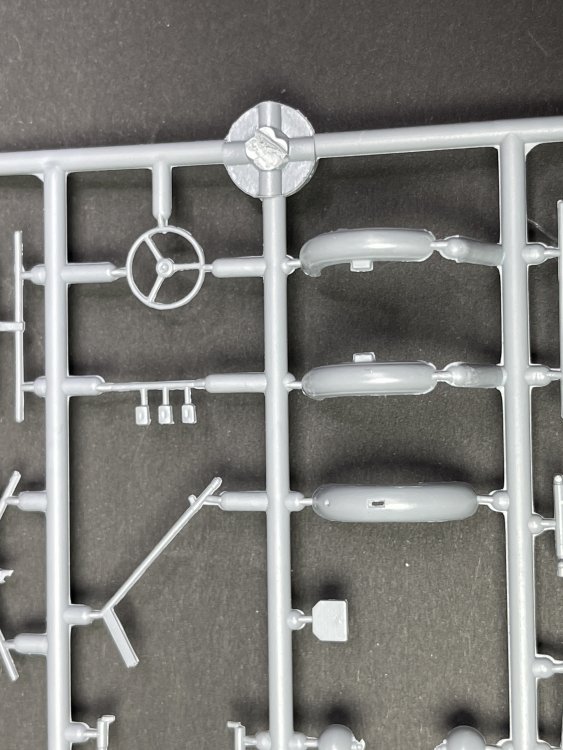
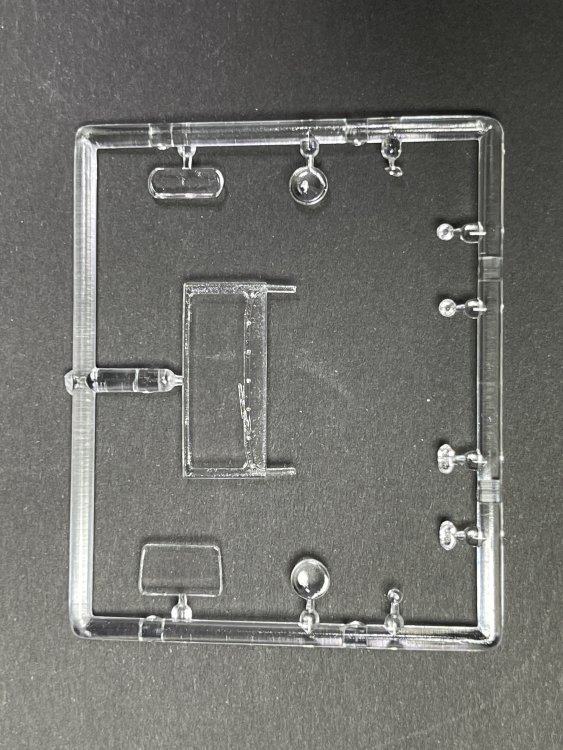
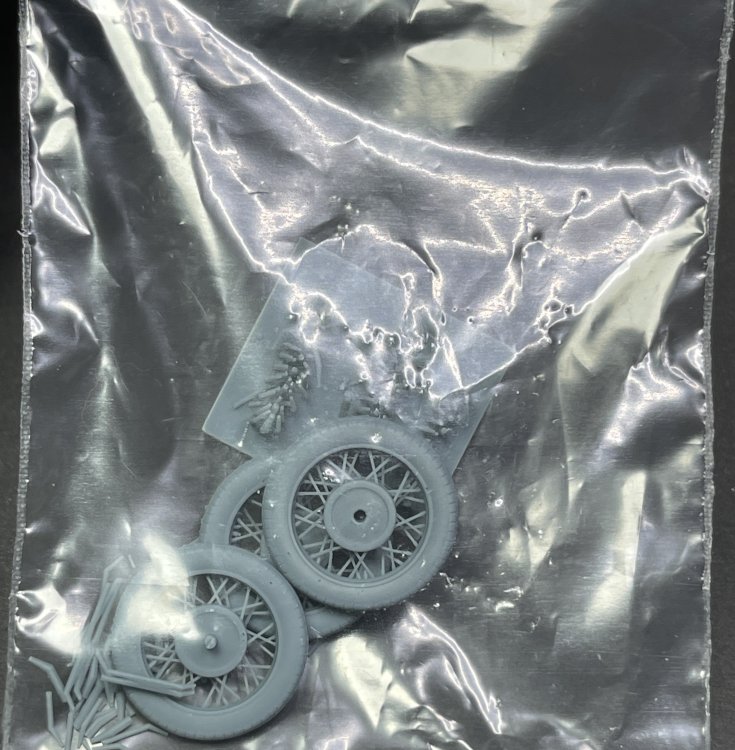
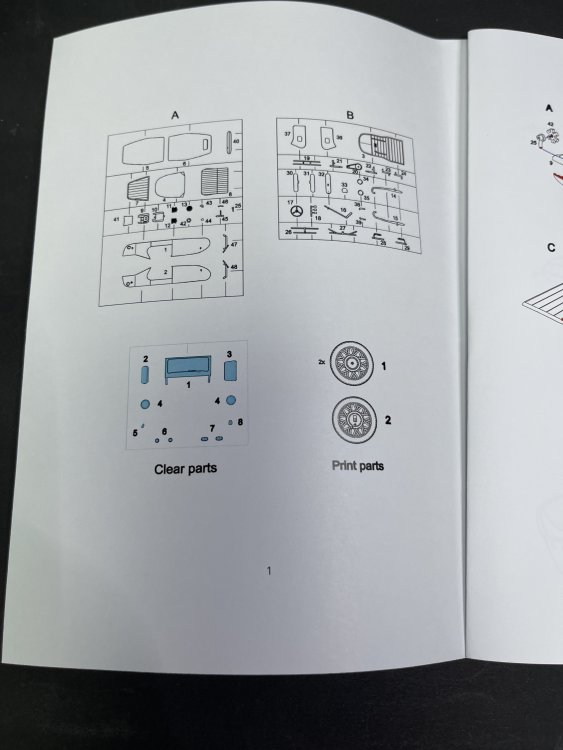
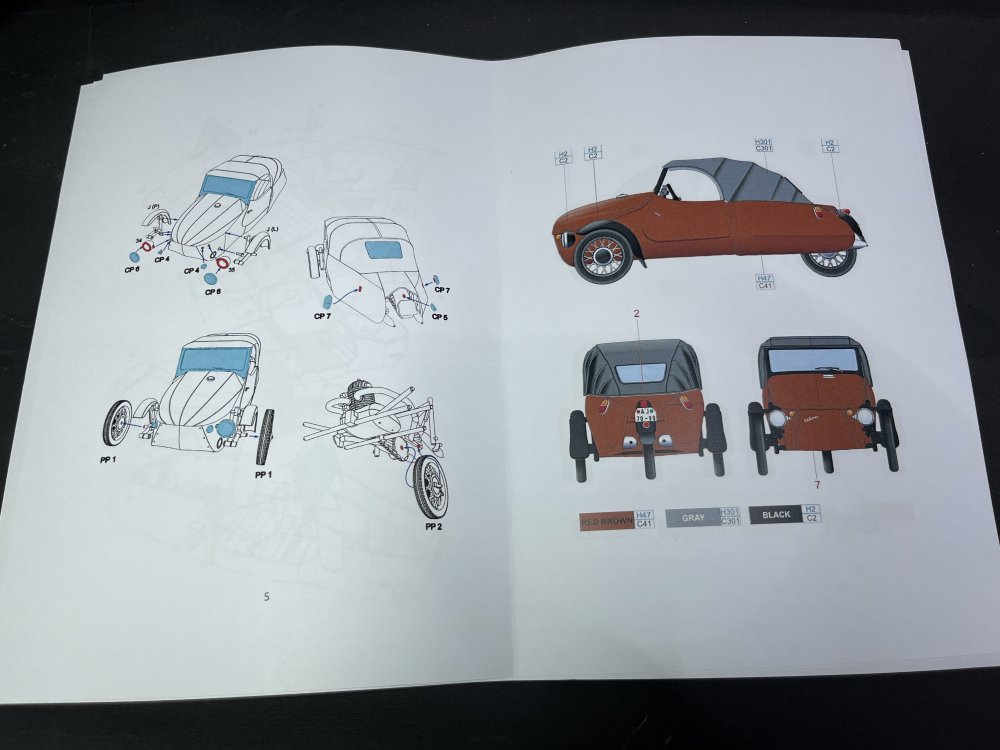
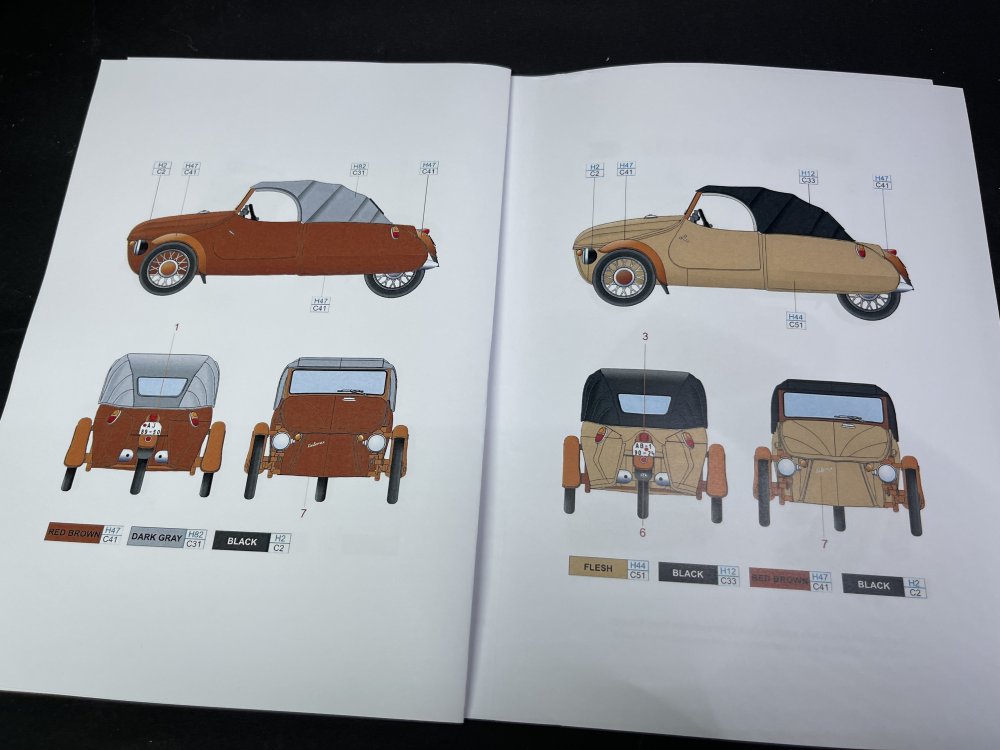
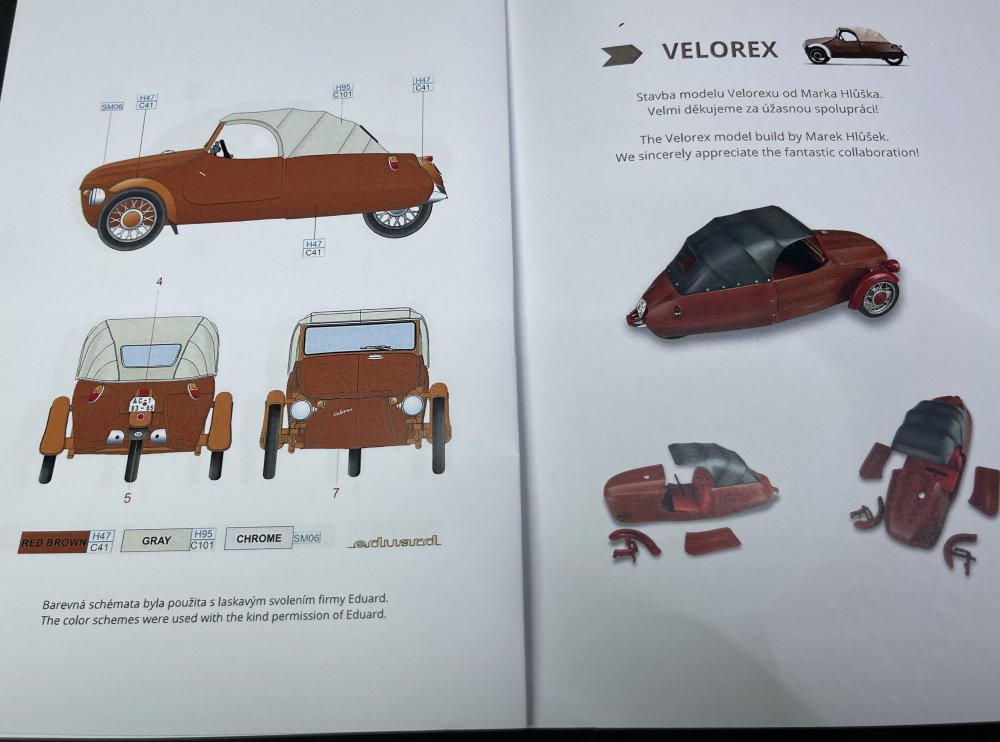
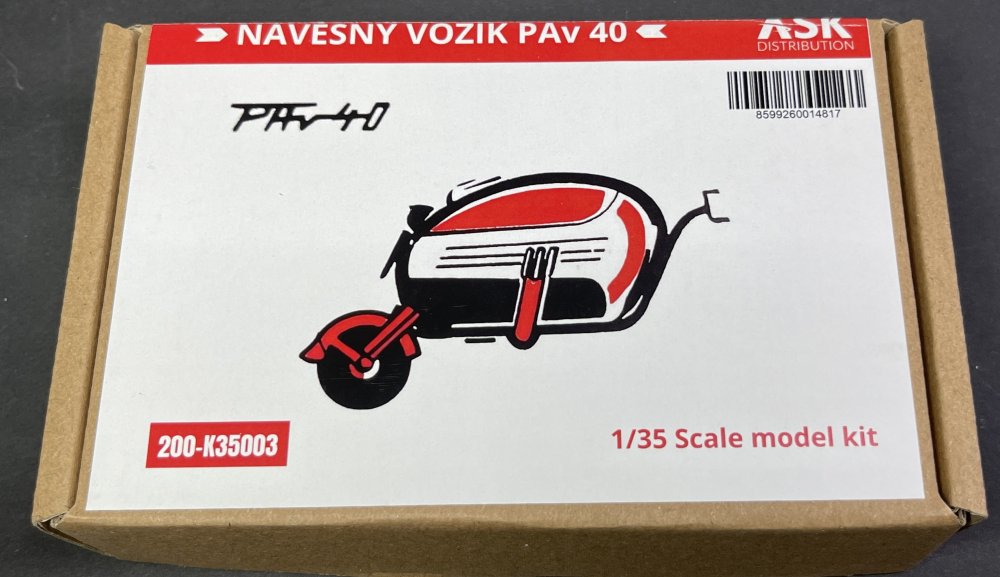
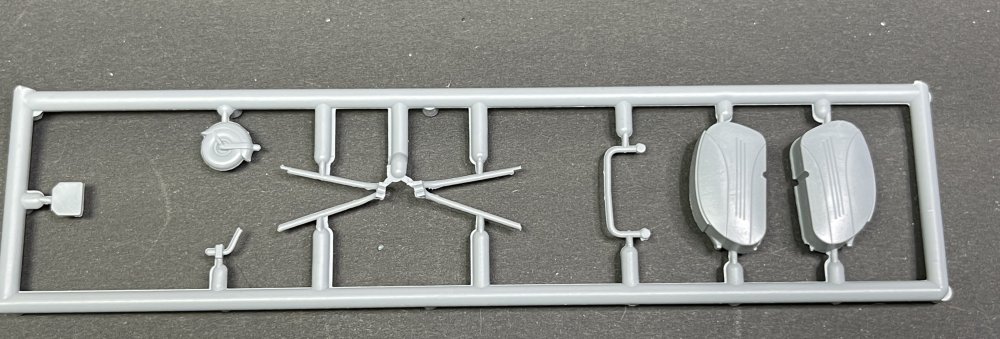
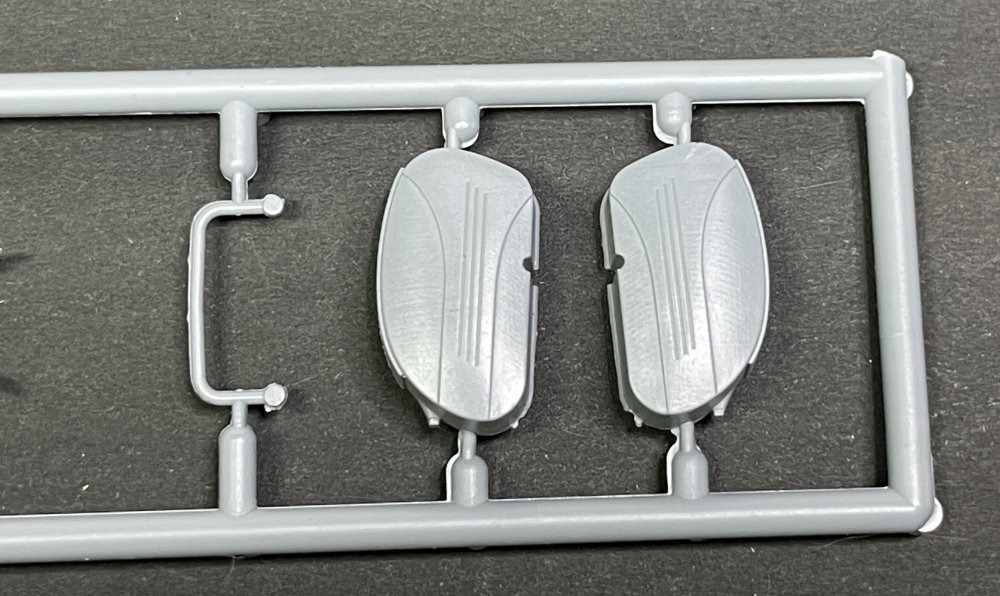
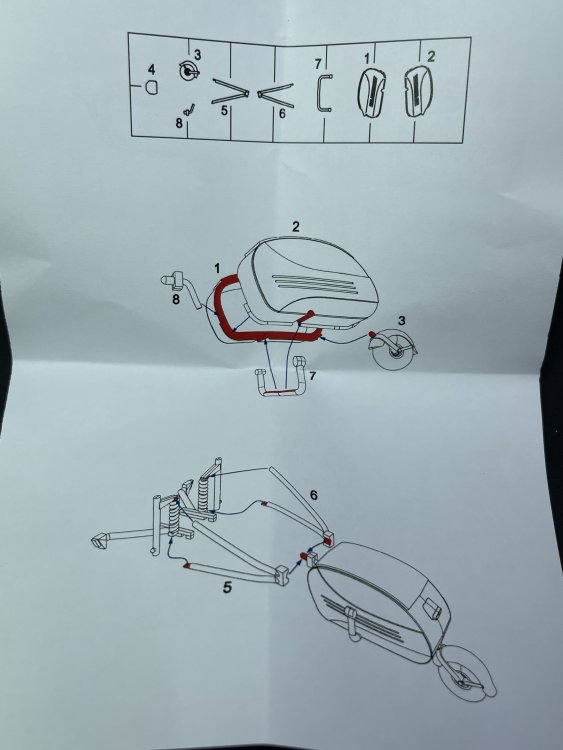
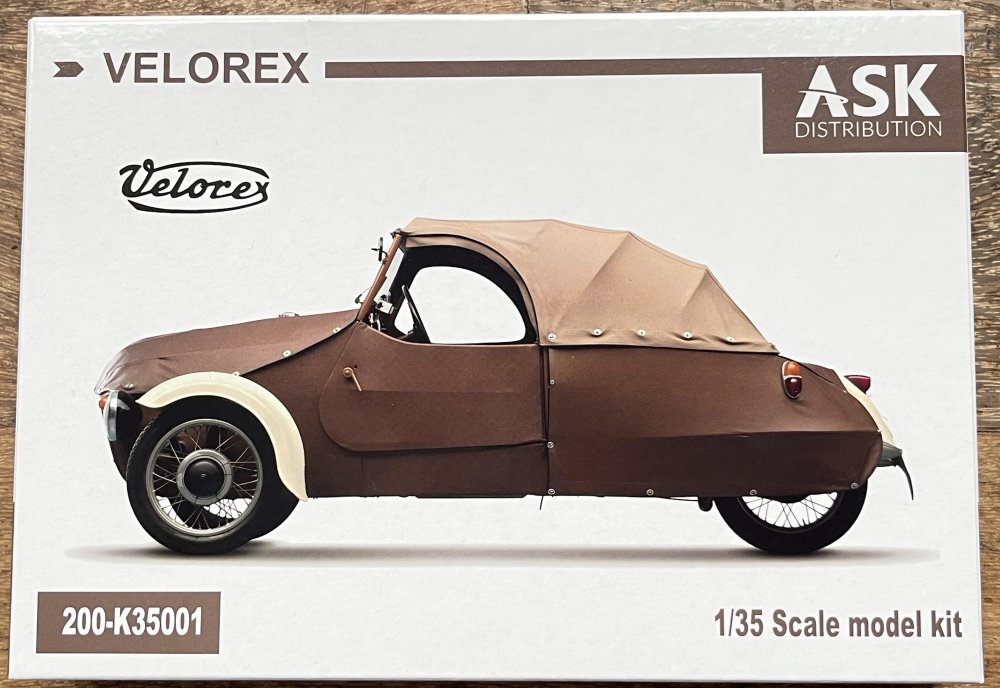
1:35 Art Scale Kit Velorex And Trailer PAv 40 Velorex – catalogue n.º 200-K35001 Available here – 24,50€ PAv40 – catalogue n.º 200-K35003 Available here – 3,30€ And Velorex 3D Print Wheels – available here - €5,30 Art Scale Kit (also known as ASK) is a model hobby shop and has growing in the modelling world with their decals, 3D Productions and tools. They have release their first injection mold 1:35 model. The Velorex and its little Pav40 trailer. The Art Scale Kit (ASK) 1:35 Velorex (kit number K35001). The first time I saw it, I thought: what? Velorex? I confess I never heard about it. “Based in Parnik, Czechoslovakia, the Stransky brothers (Frantisek and Mojmir) opened a bicycle repair shop in 1936. Inspired by the simplicity of Morgan's three-wheelers, the brothers decided in 1943 to build their own three-wheeled economy car, aimed at disabled veterans. That year their first prototype was constructed, using a tubular steel chassis and sheet metal for the bodywork. By the time the first batch of a dozen production cars was made in 1945, the duralumin bodywork had been swapped for a leathercloth-type material called Igelit, but the original tubular chassis was retained. Those Igelit panels were held on by press studs which made them easy to replace if they got damaged. The two brothers experimented with engines, with those first Oskars (as the car was now called) receiving a mix of 150cc, 250cc and 300cc two-stroke air-cooled engines. As an exercise in cheap motoring the Oskar was a triumph, as it cost about a quarter of the cost of a more typical car. The vehicle was about as faithful as one could get to the true spirit of the classic cyclecar. Components such as the engine, wheels, wings, and even the teardrop-shaped fuel tank were pure motorcycle. In 1950 the Stranskys' design was taken over by a government co-operative called Velo, and their workshop was transferred to Hradec-Kralove, later renamed Velorex. A year later half a dozen workers and the machinery to build the Oskar 54 (as it was now called) were once again relocated, this time to Solnice, for production to be ramped up. While just 120 Oskars were built in the whole of 1951, and 180 the following year, by 1954 production was running at the rate of 40 cars each month. This wasn't a good year for the Stransky brothers though, because in January Frantisek was killed while testing an Oskar prototype, then later that year Mojmir was sacked from the company for refusing to join the Communist Party of Czechoslovakia. In 1956 the company that made the Oskar was renamed the Velorex Oskar before later reverting to simply 'Velorex', and despite the car's advancing years it was in demand more than ever. Half of the cars made were going to disabled Czechs while the rest were being distributed throughout other Eastern Bloc countries such as Hungary, Poland, East Germany and Bulgaria. By 1959 120 Oskars were leaving the factory each month and in 1961 the investment continued with a new factory opening up to share the workload. Until 1963 the Oskar had been fitted with a choice of 172cc or 249cc single-cylinder engines, but from this point on the bigger engine was swapped for a 350cc Jawa unit, while the interior was also spruced up a little – not that the Oskar was ever what you would call luxurious. Oskar production continued right up to 1971 when an all-new four-wheel model took over, with the very catchy name of 453. But it was a disaster and production stopped after just two years, as the 453 couldn't compete with the Trabant which was much more usable and just as affordable – even if the waiting list to get one ran into several years. The joys of living in a communist regim” https://www.below-the-radar.com/velorex-oskar/ Also check the link for some great picture for color indication. This injection-molded plastic kit, developed with input from Velorex club ACR as it results on the back of box with the Velorex club bagde and a note of thanks. The box art is a profile drawing of the Velorex. This injection mold kit is the first offer in any scale, I think, of the Velorex and Pav40 trailer. This quirky vehicle model kit is quite appealing to auto modelers, diorama builders, or simply to the modeler that wants something quite different. The completed model measures approximately 80mm in length, making it compact yet detailed for 1:35 displays. So, inside the box, you got three plastic sprues, two plastic gray and one clear plastic, separately bagged for protection. You also get a set of 3D Resin printed wheels and a small decal sheet. I was quite surprised with the amount of detail of this little model kit, despite it`s 1:35 scale. The grey plastic is very well molded with some quite good details, with a little flash, easy to deal with. The clear parts are quite clear and perfect visible. The 3D wheels are very good as all 3D Printed parts from Art Scale. In grey plastic you get the engine (Jawa engine - no idea if is the 175cc or the 350cc) with two cylinder, exhaust, the tubular frame, canvas body, two roof options, separate doors, fenders and for the inside detail, seats, wheels, pedals and of course, the steering. The small decals sheets give the modeler the Velorex logo in black and in white and plates. The instructions are quite good with a small Velorex History. It has no color indication for the interior or other parts. However, gives you four profiles and the color used giving Mr Color indication color (a bit odd choice, at least for me). Complementing it is the separate 1:35 Návěsný Vozík PAv 40 trailer (kit number K35003). It’s a complete separate kit so you can buy the Velorex or the Pav 40. The trailer is a simple add-on designed specifically for the Velorex, replicating the real-world single-axle trailer used for extra cargo. Its comes in a very small sturdy box and inside a single grey plastic sprue with 8 parts with fine surface details, basically the same quality as the Velorex. The two parts of the “bag”, the only wheels, the tubular support and 3 small details. The instructions are in a single sheet with no decals. *** Conclusion: Wow!! I really liked this little gem that it will stand out as a single piece or in a diorama! And with the trailer Pav40even more, so indulge yourself and get one of each. If you want detail even further this little gem, so go ahead and get the Eduard details set for it as it looks like worth it. My thanks to Art Scale for making this model possible and it is on the model buils for 2026. Francisco Guedes .


-
FS: Monogram B-17G #5600 with Lots of Goodies. US/VA
Fran replied to CANicoll's topic in Buy, sell, swap, seek
Thanks Chris. I bet betwween shipping and customs, I would pay around 100$ (around 80€ probably) on top of that. -
FS: Monogram B-17G #5600 with Lots of Goodies. US/VA
Fran replied to CANicoll's topic in Buy, sell, swap, seek
great deal... Only if I was on that side of the pond! -
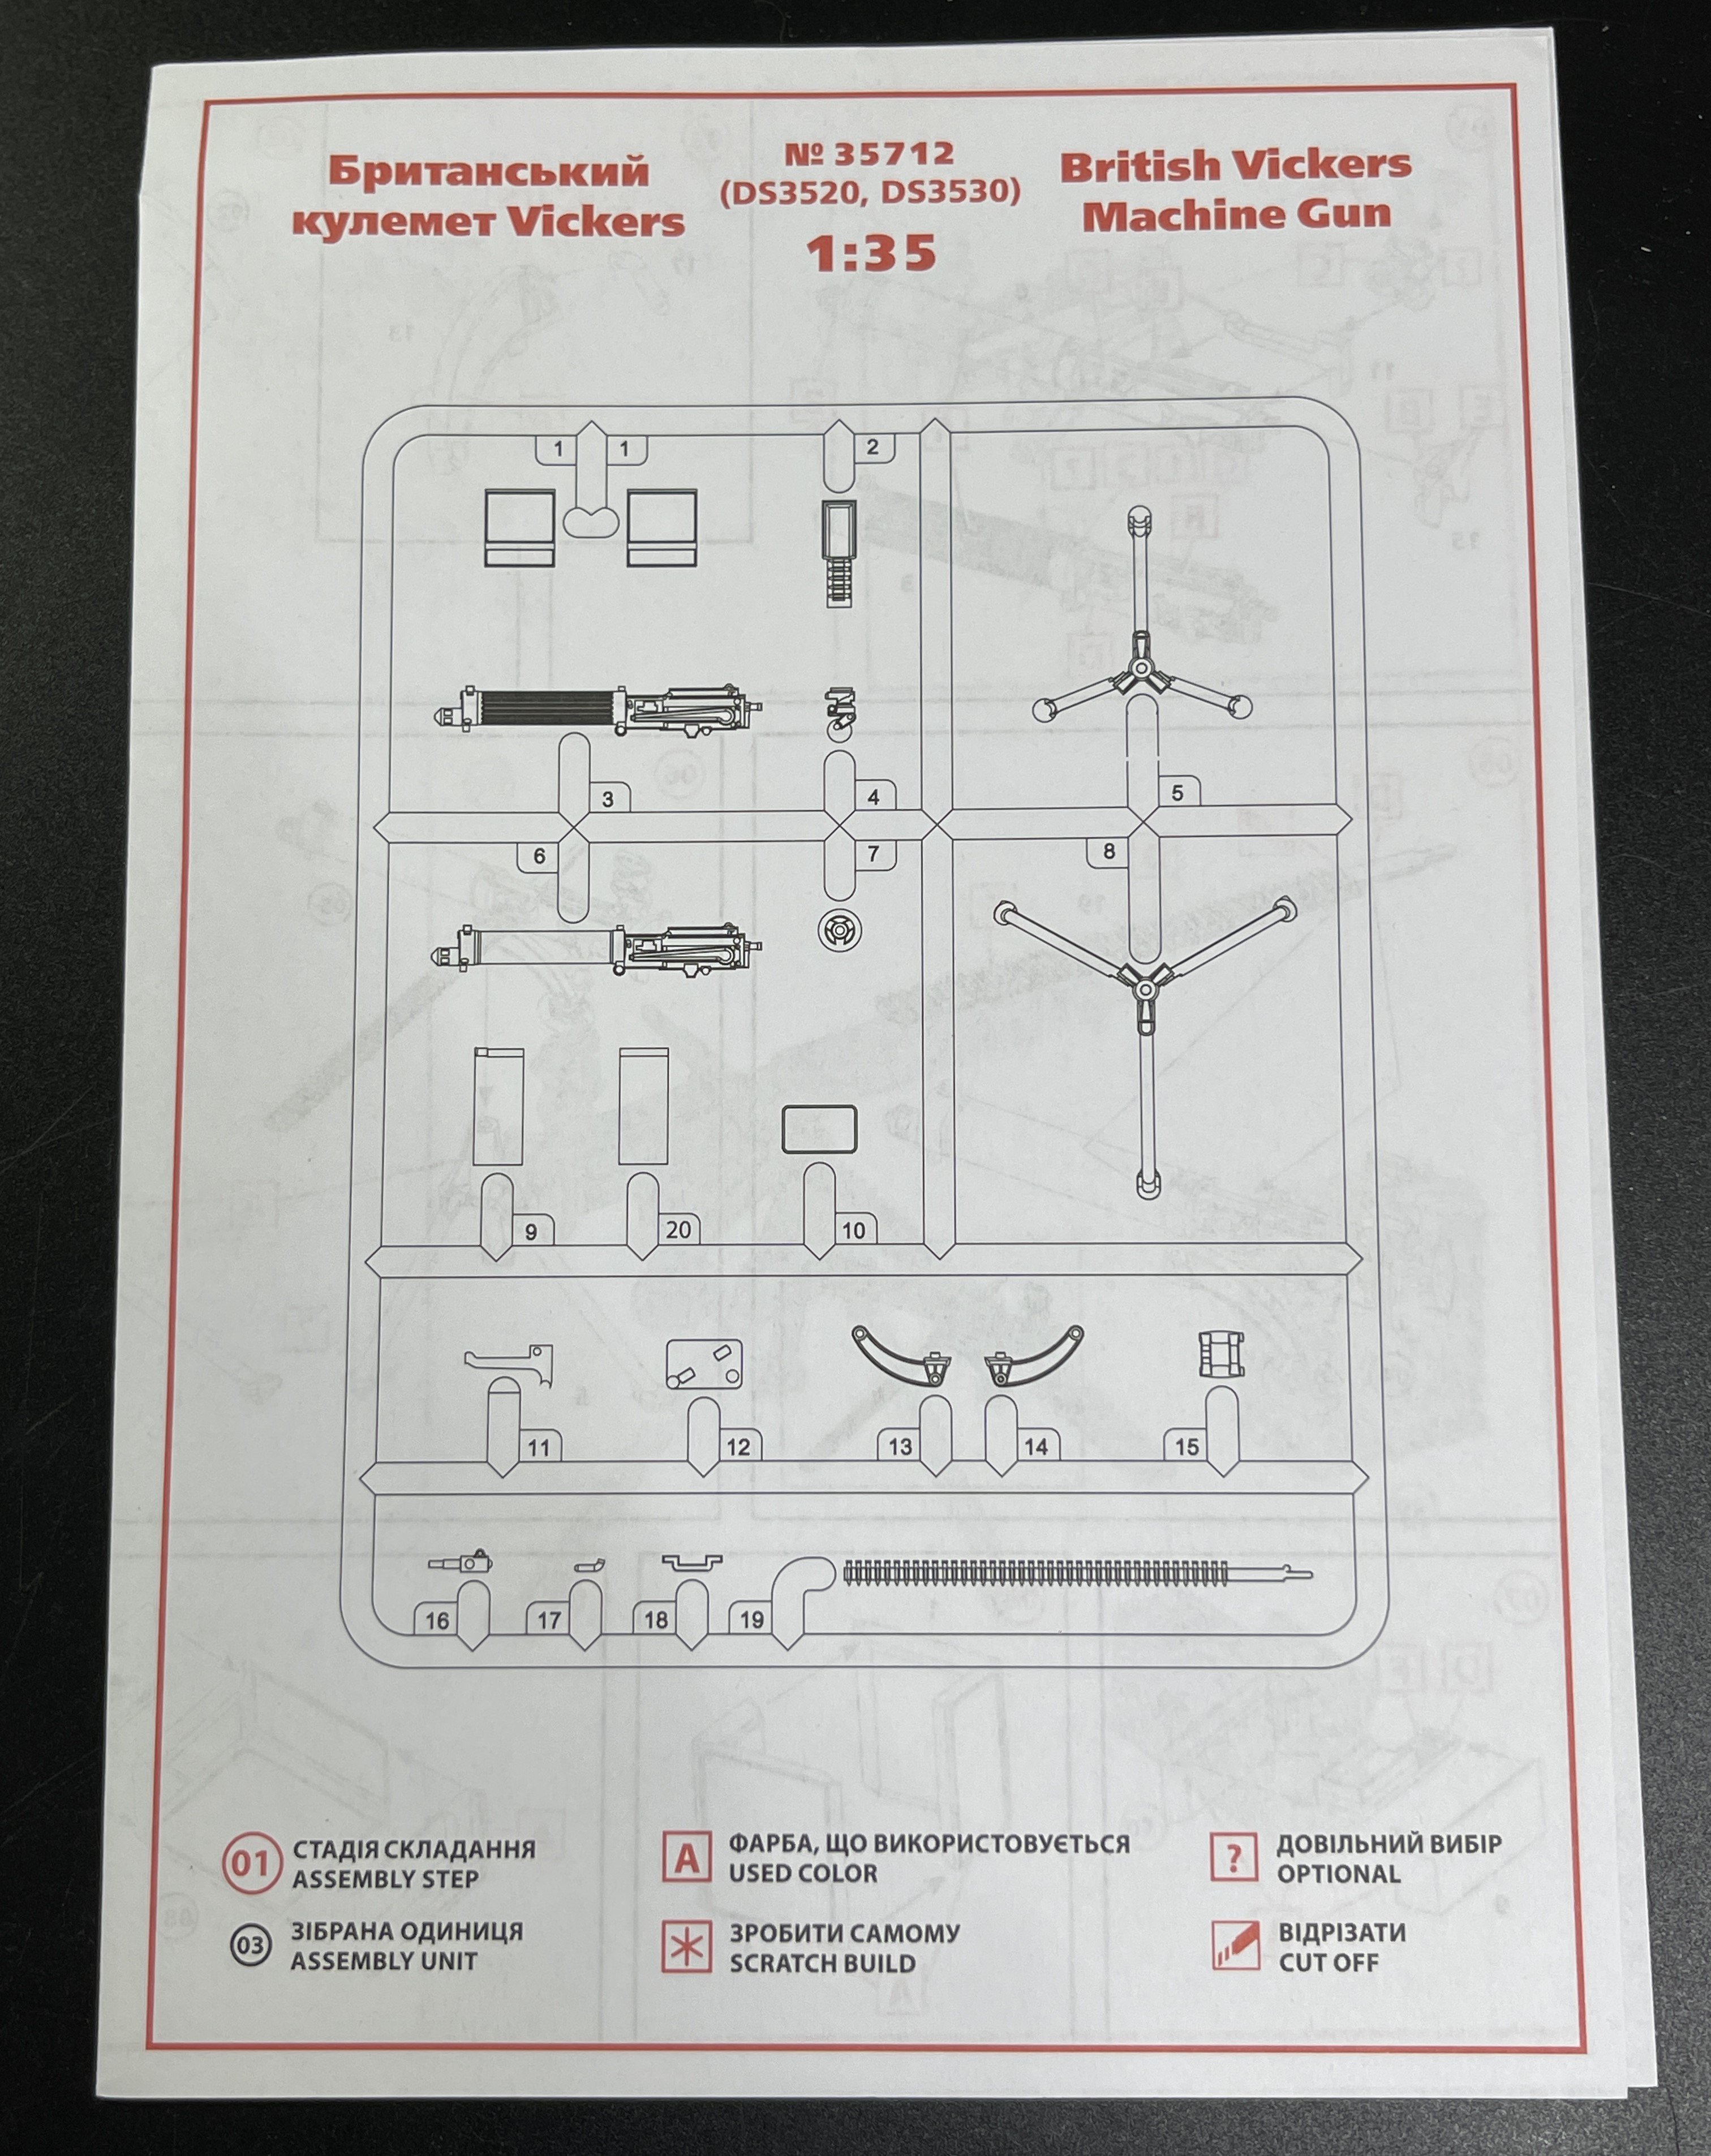
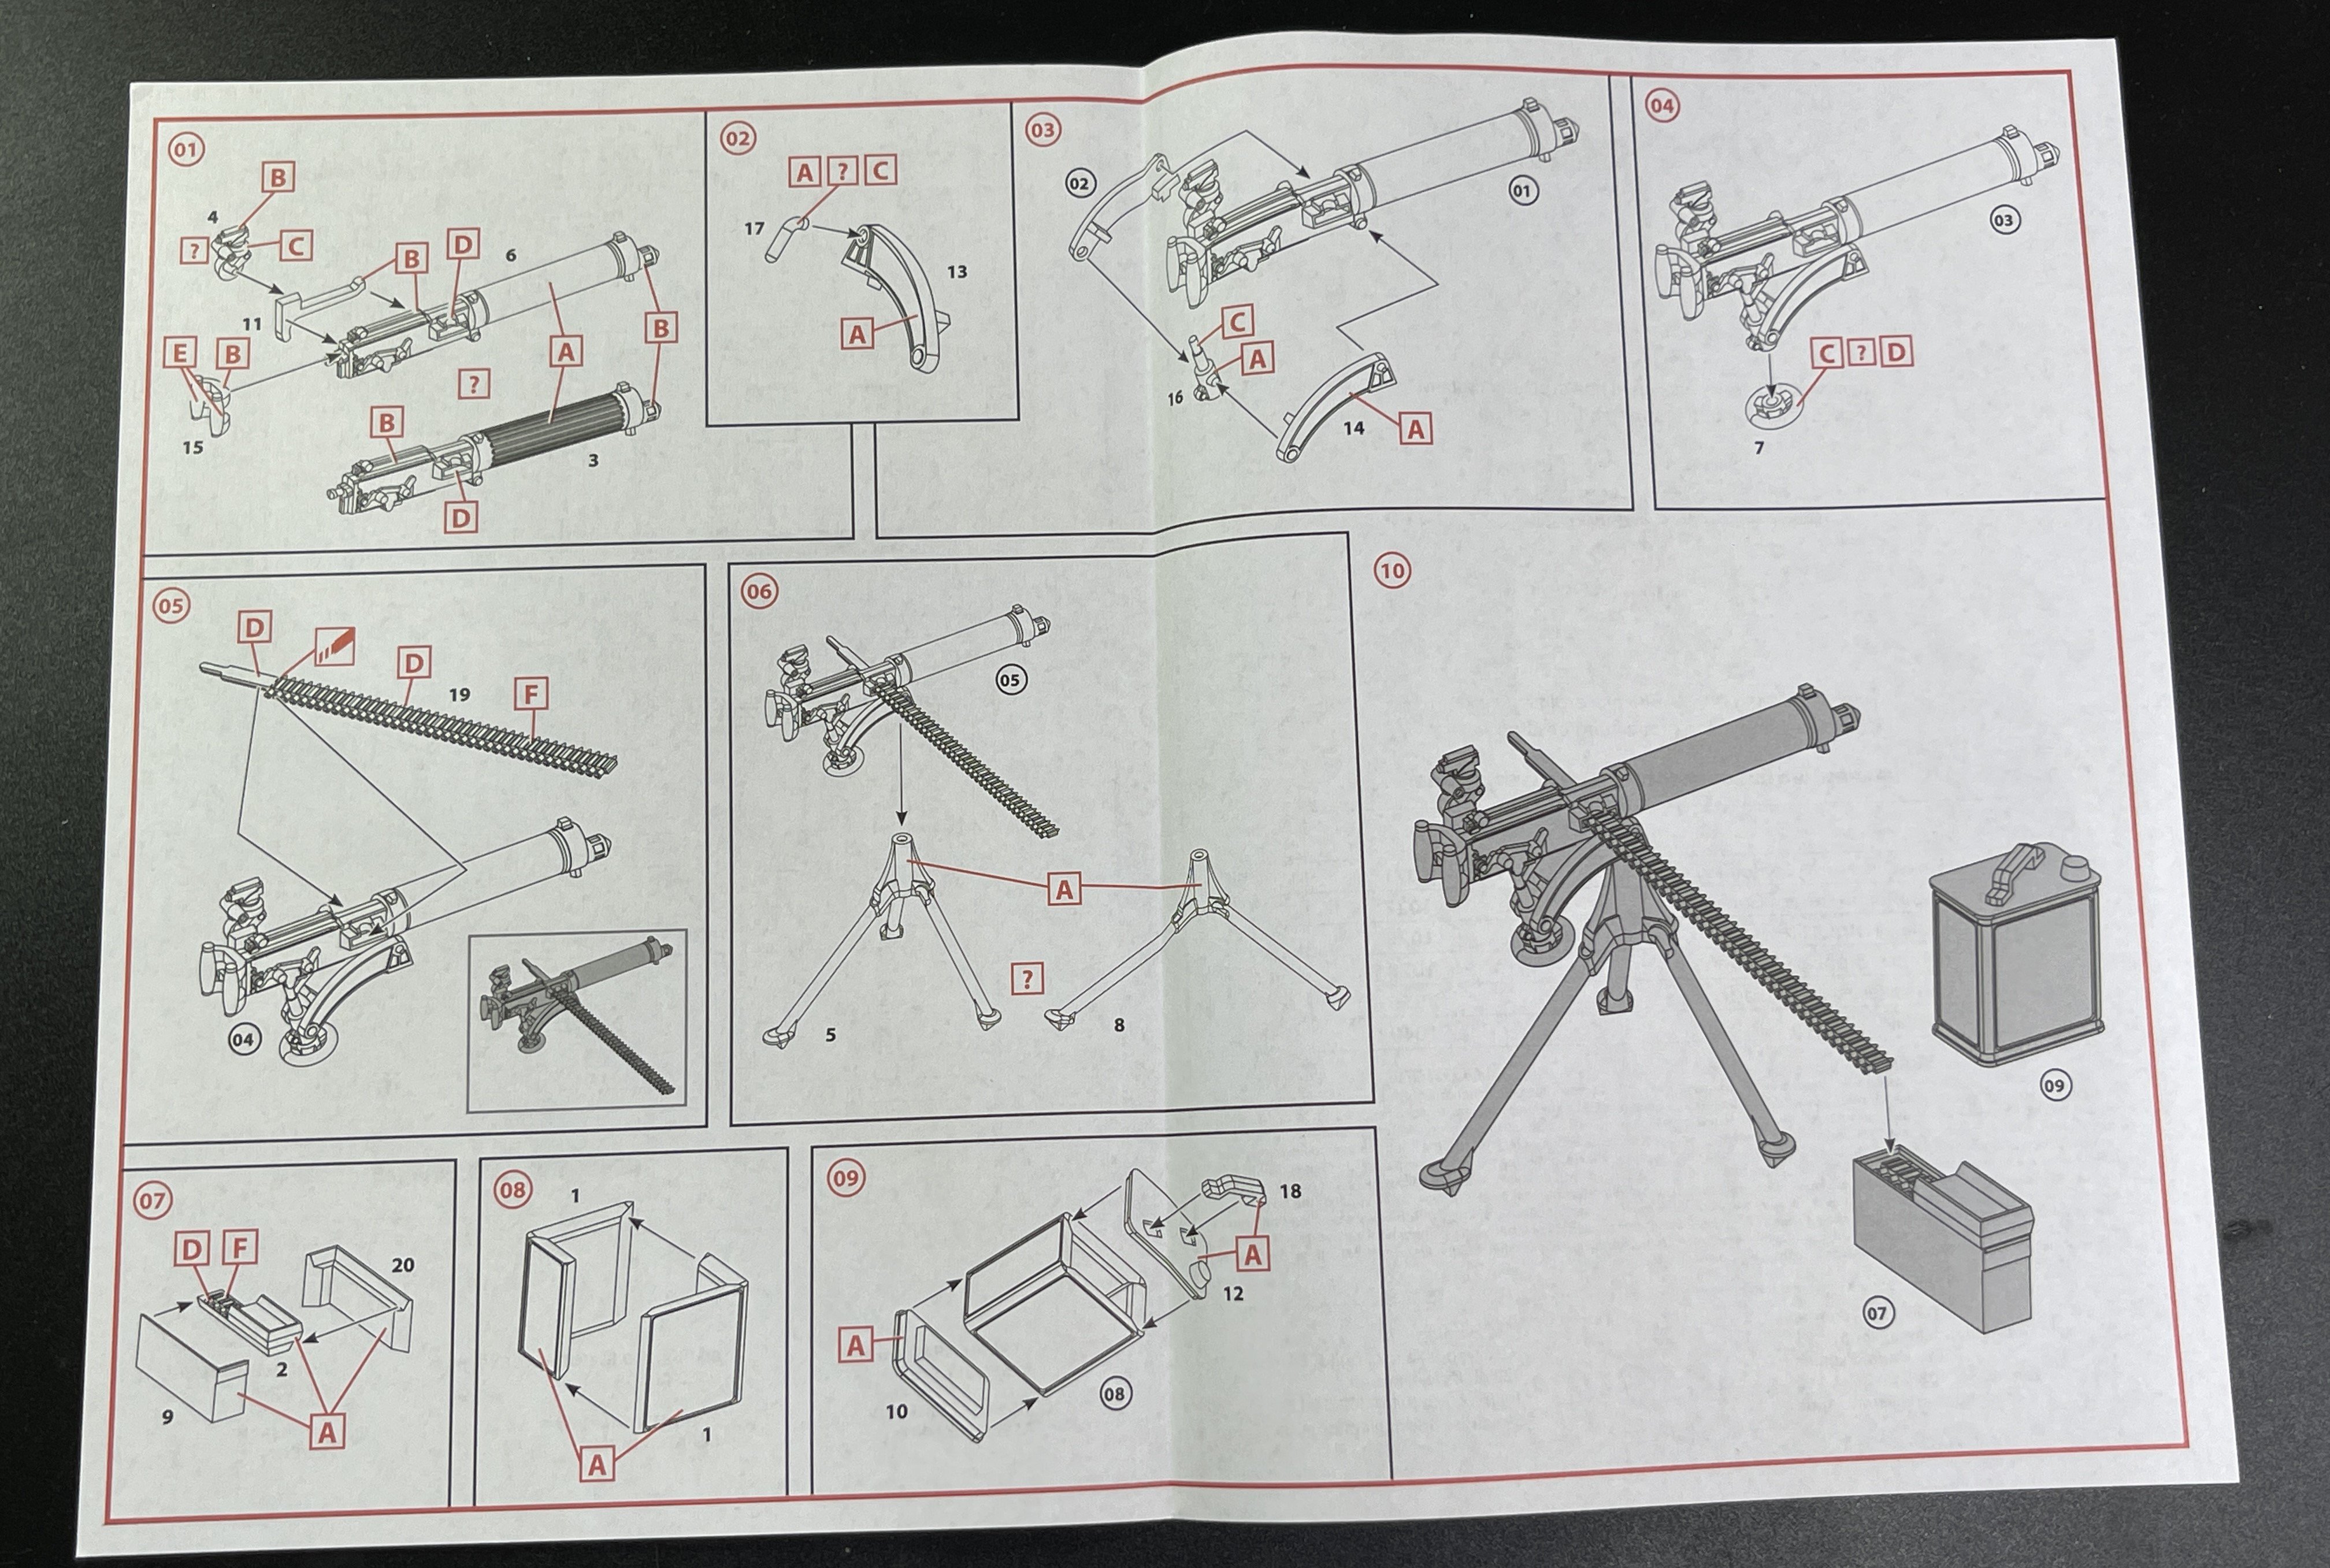
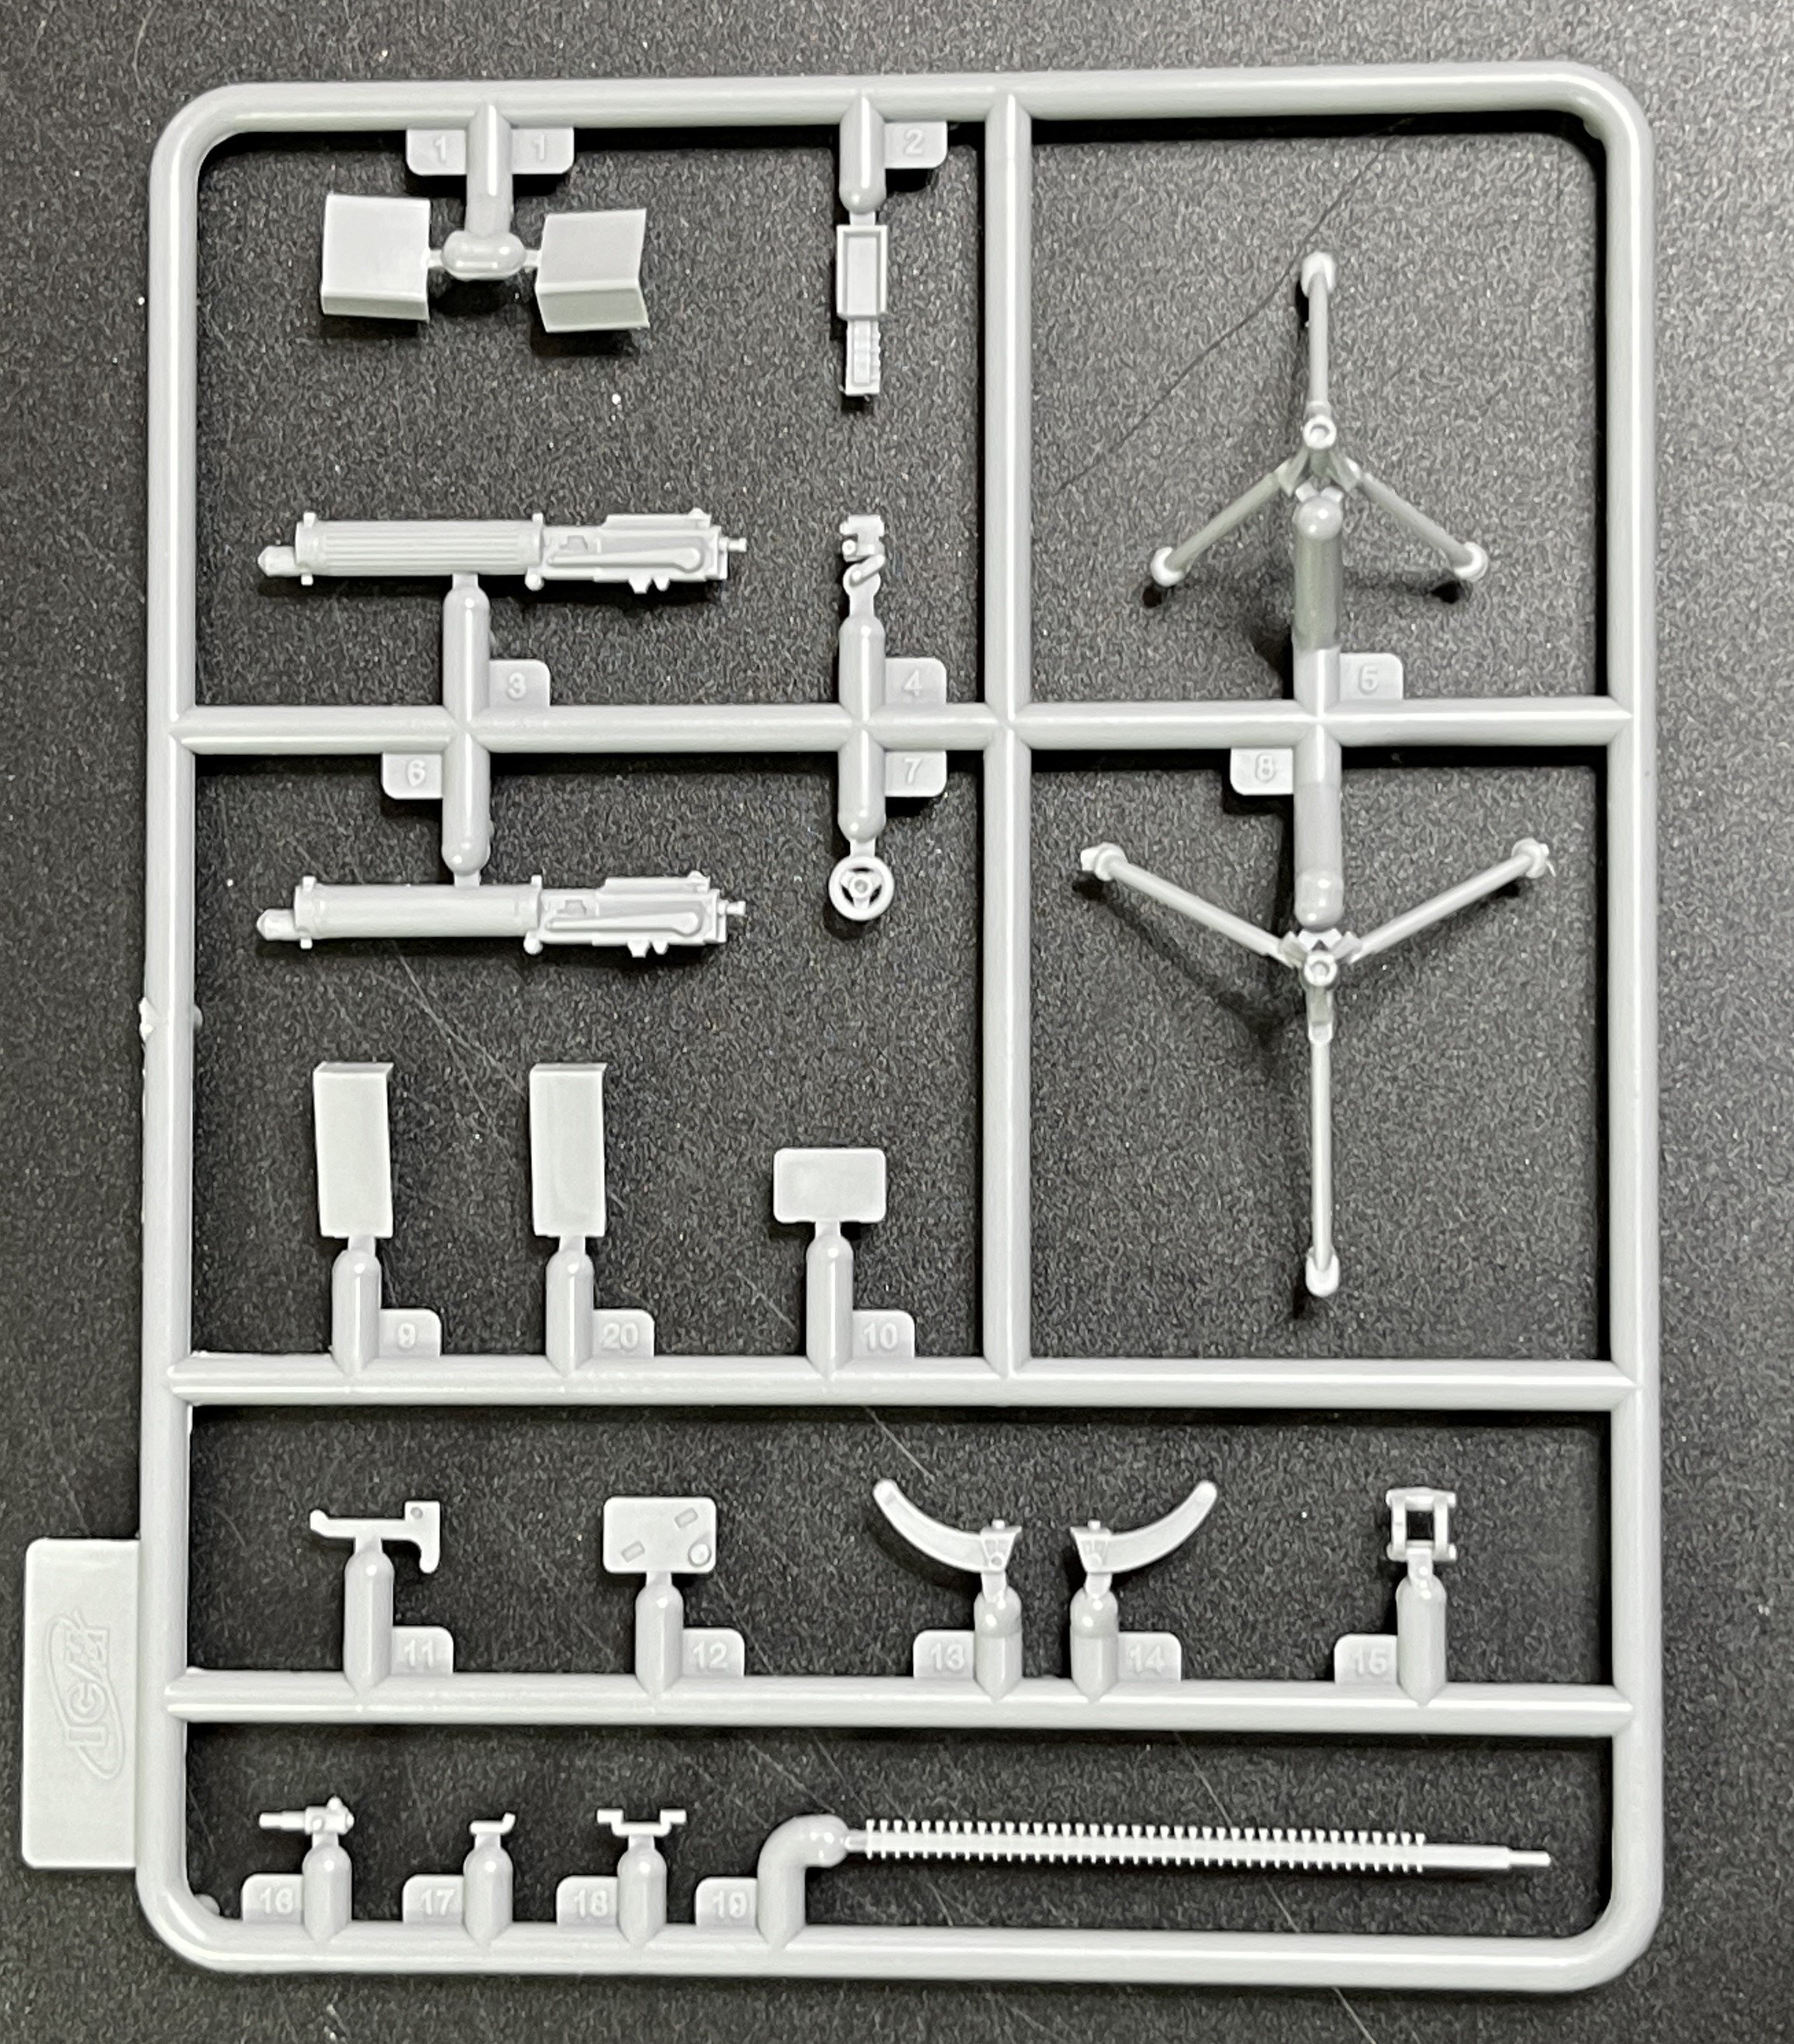
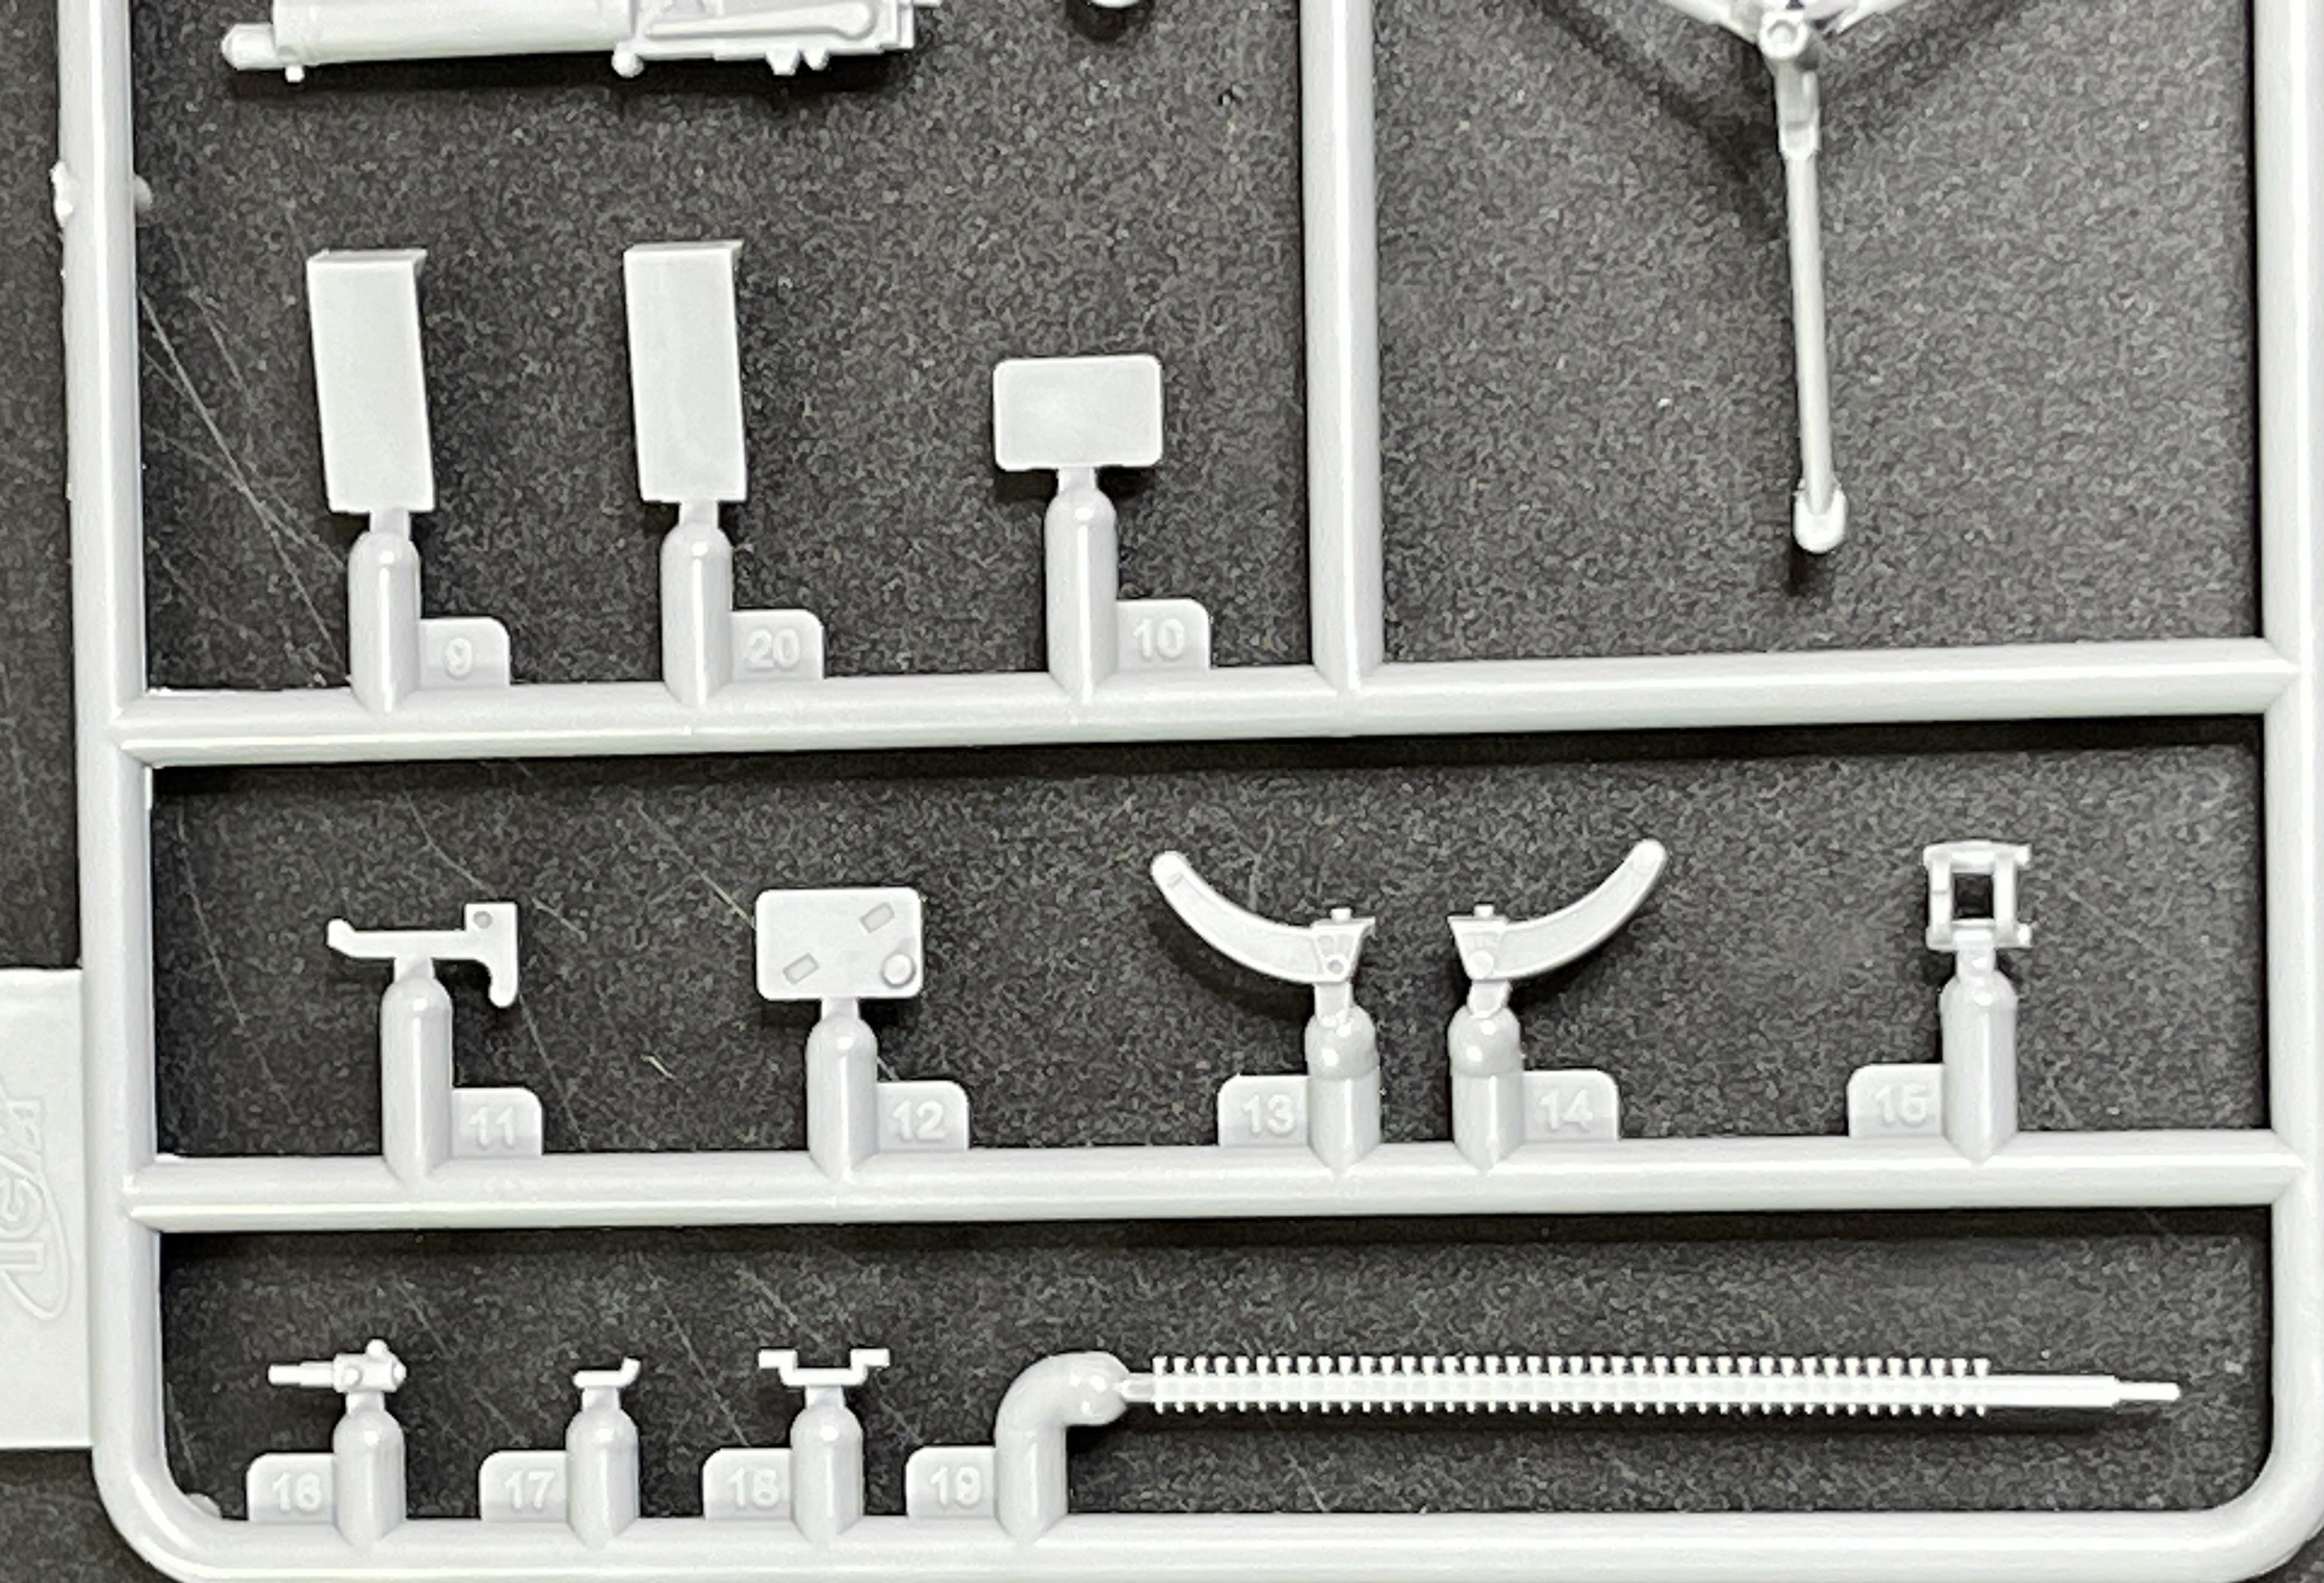
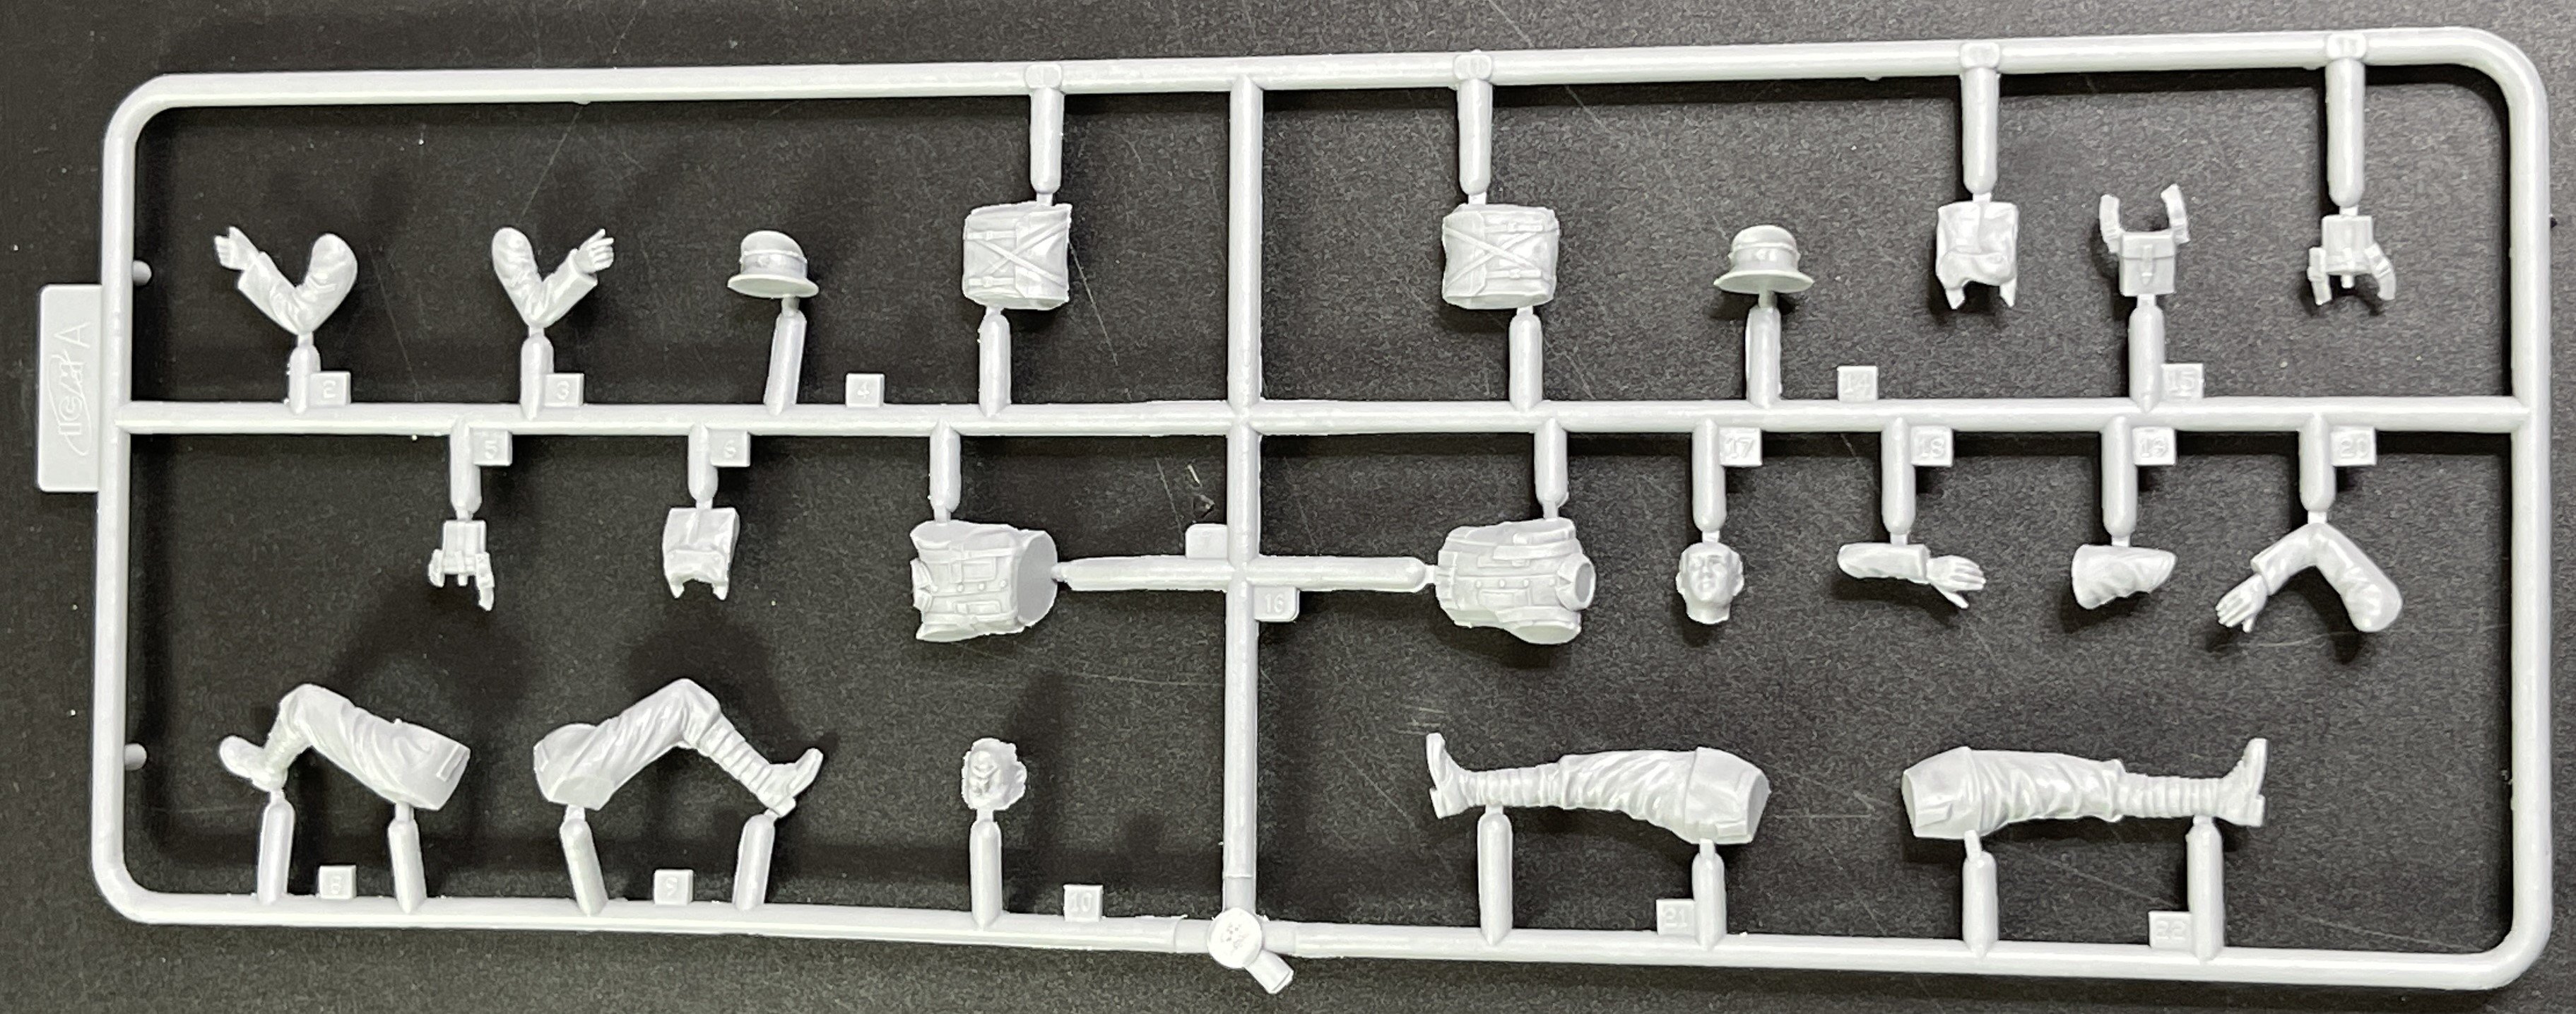
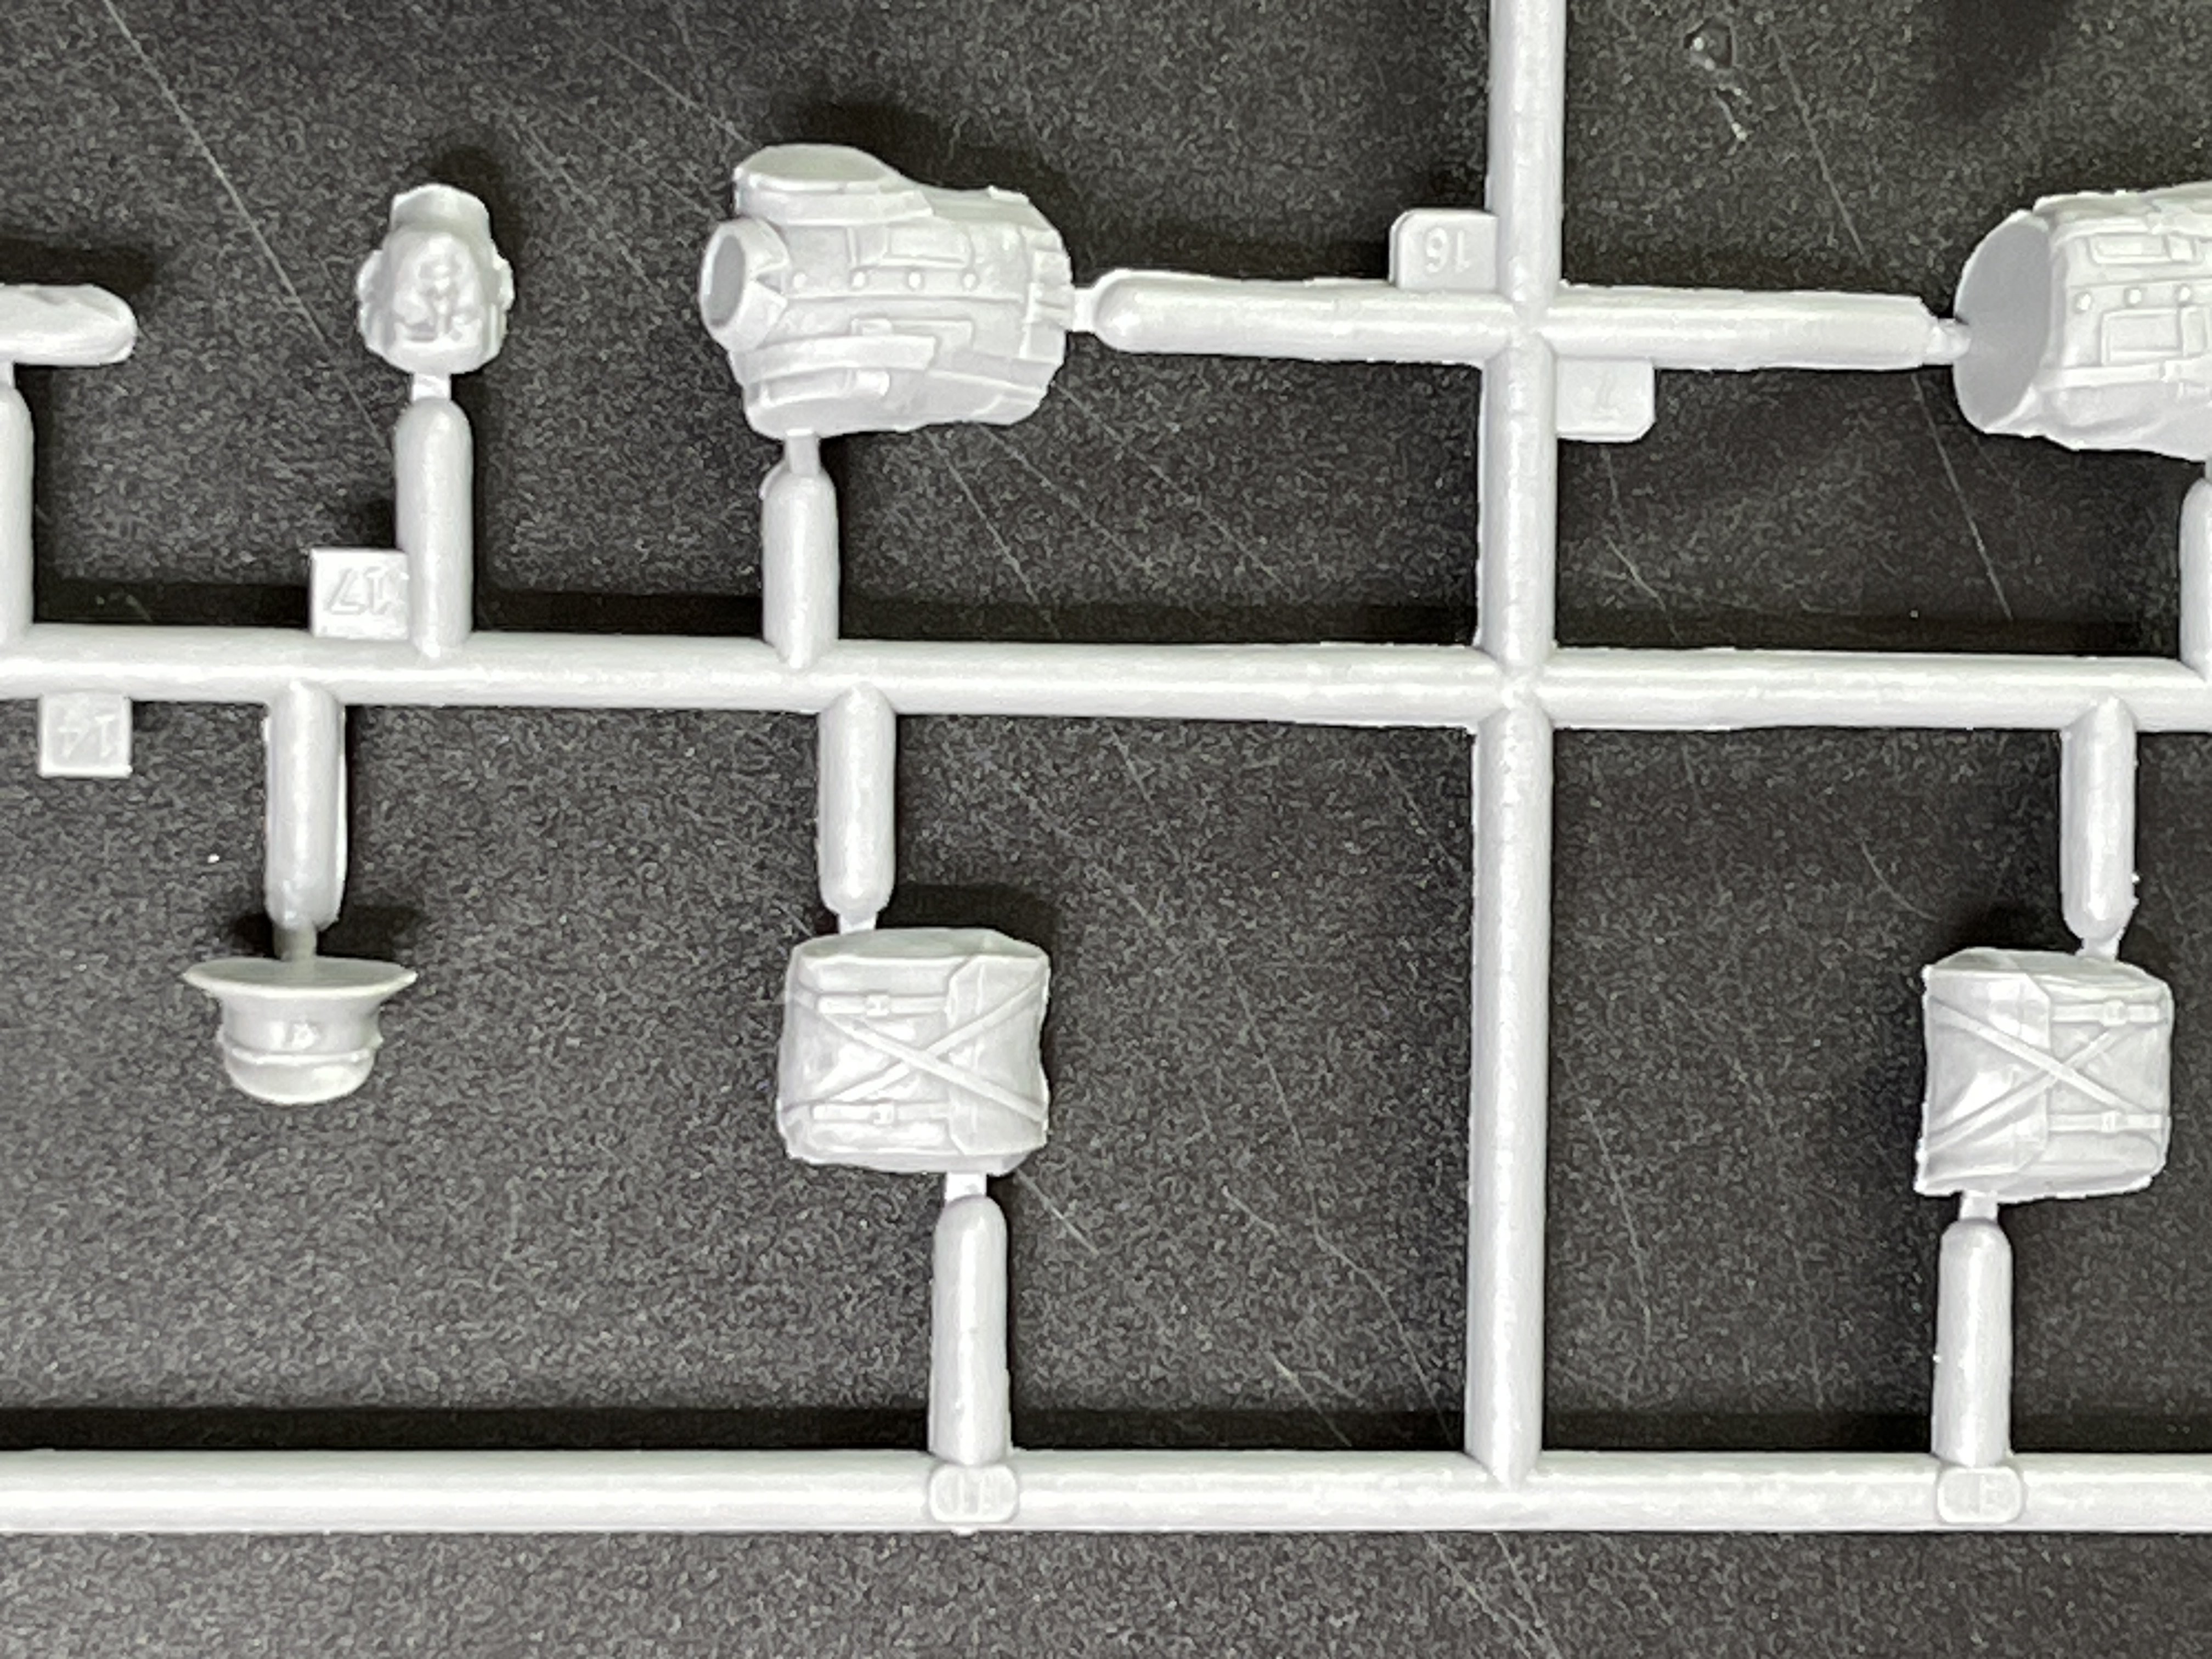
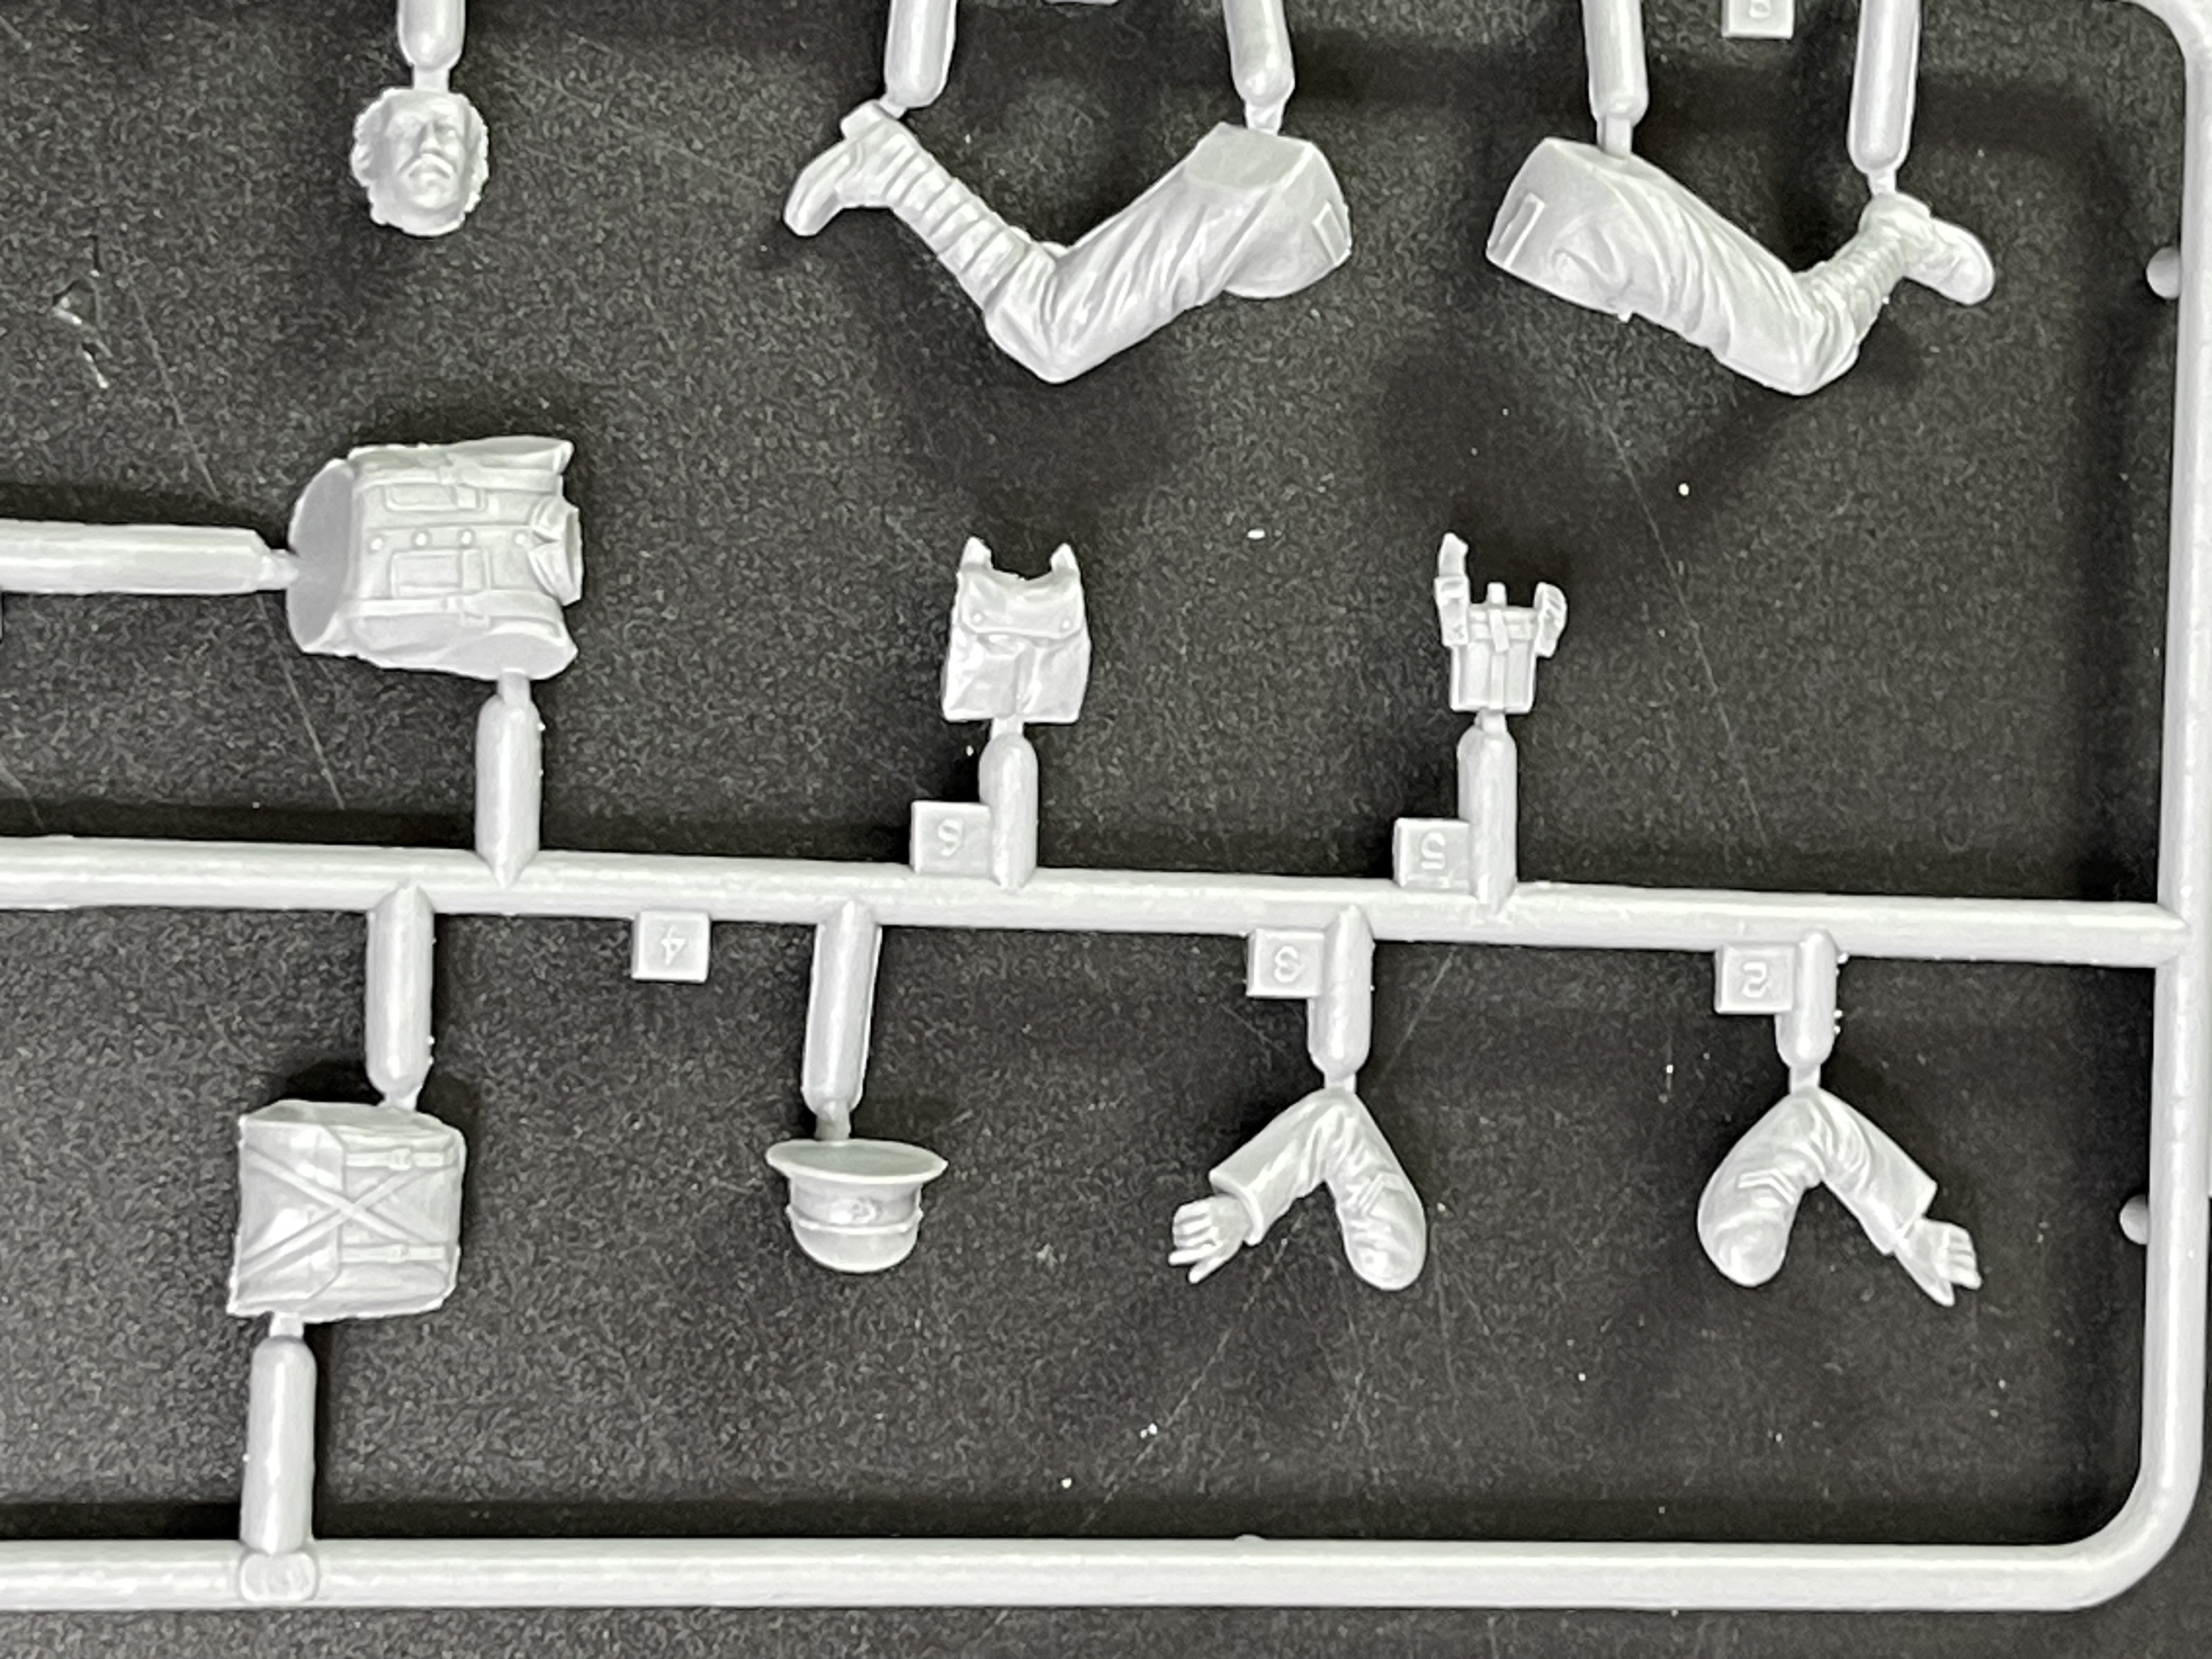
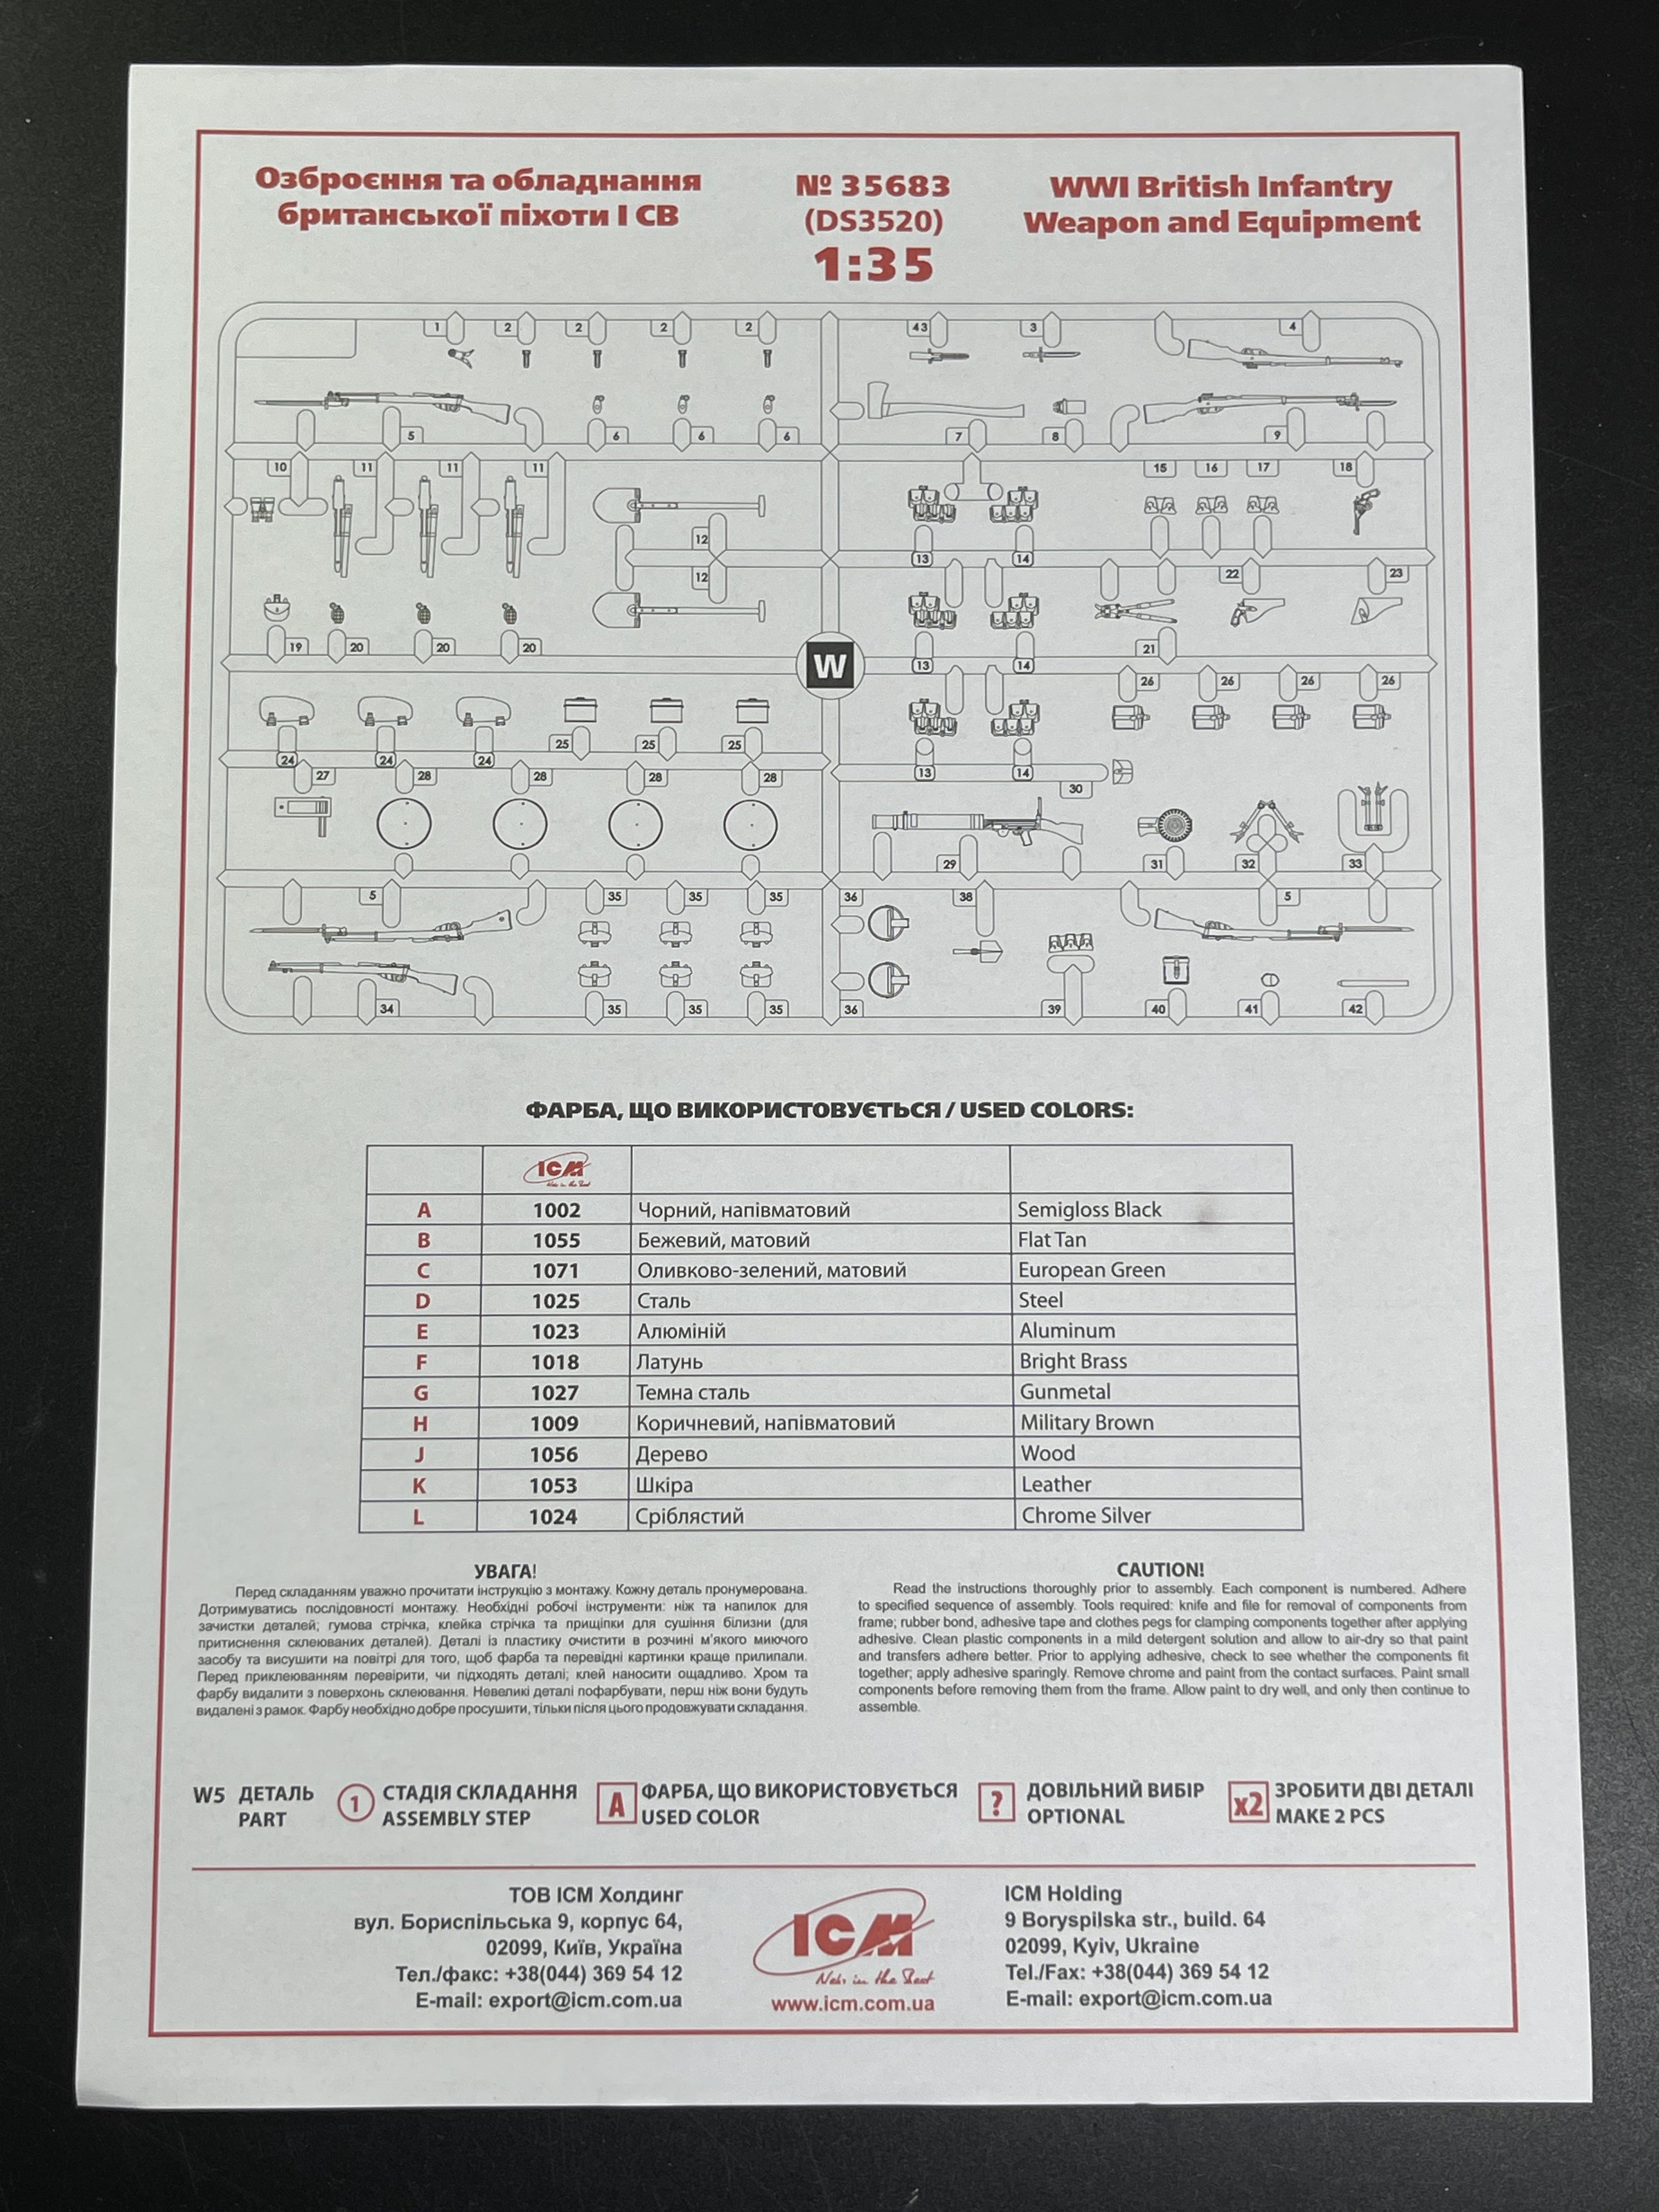
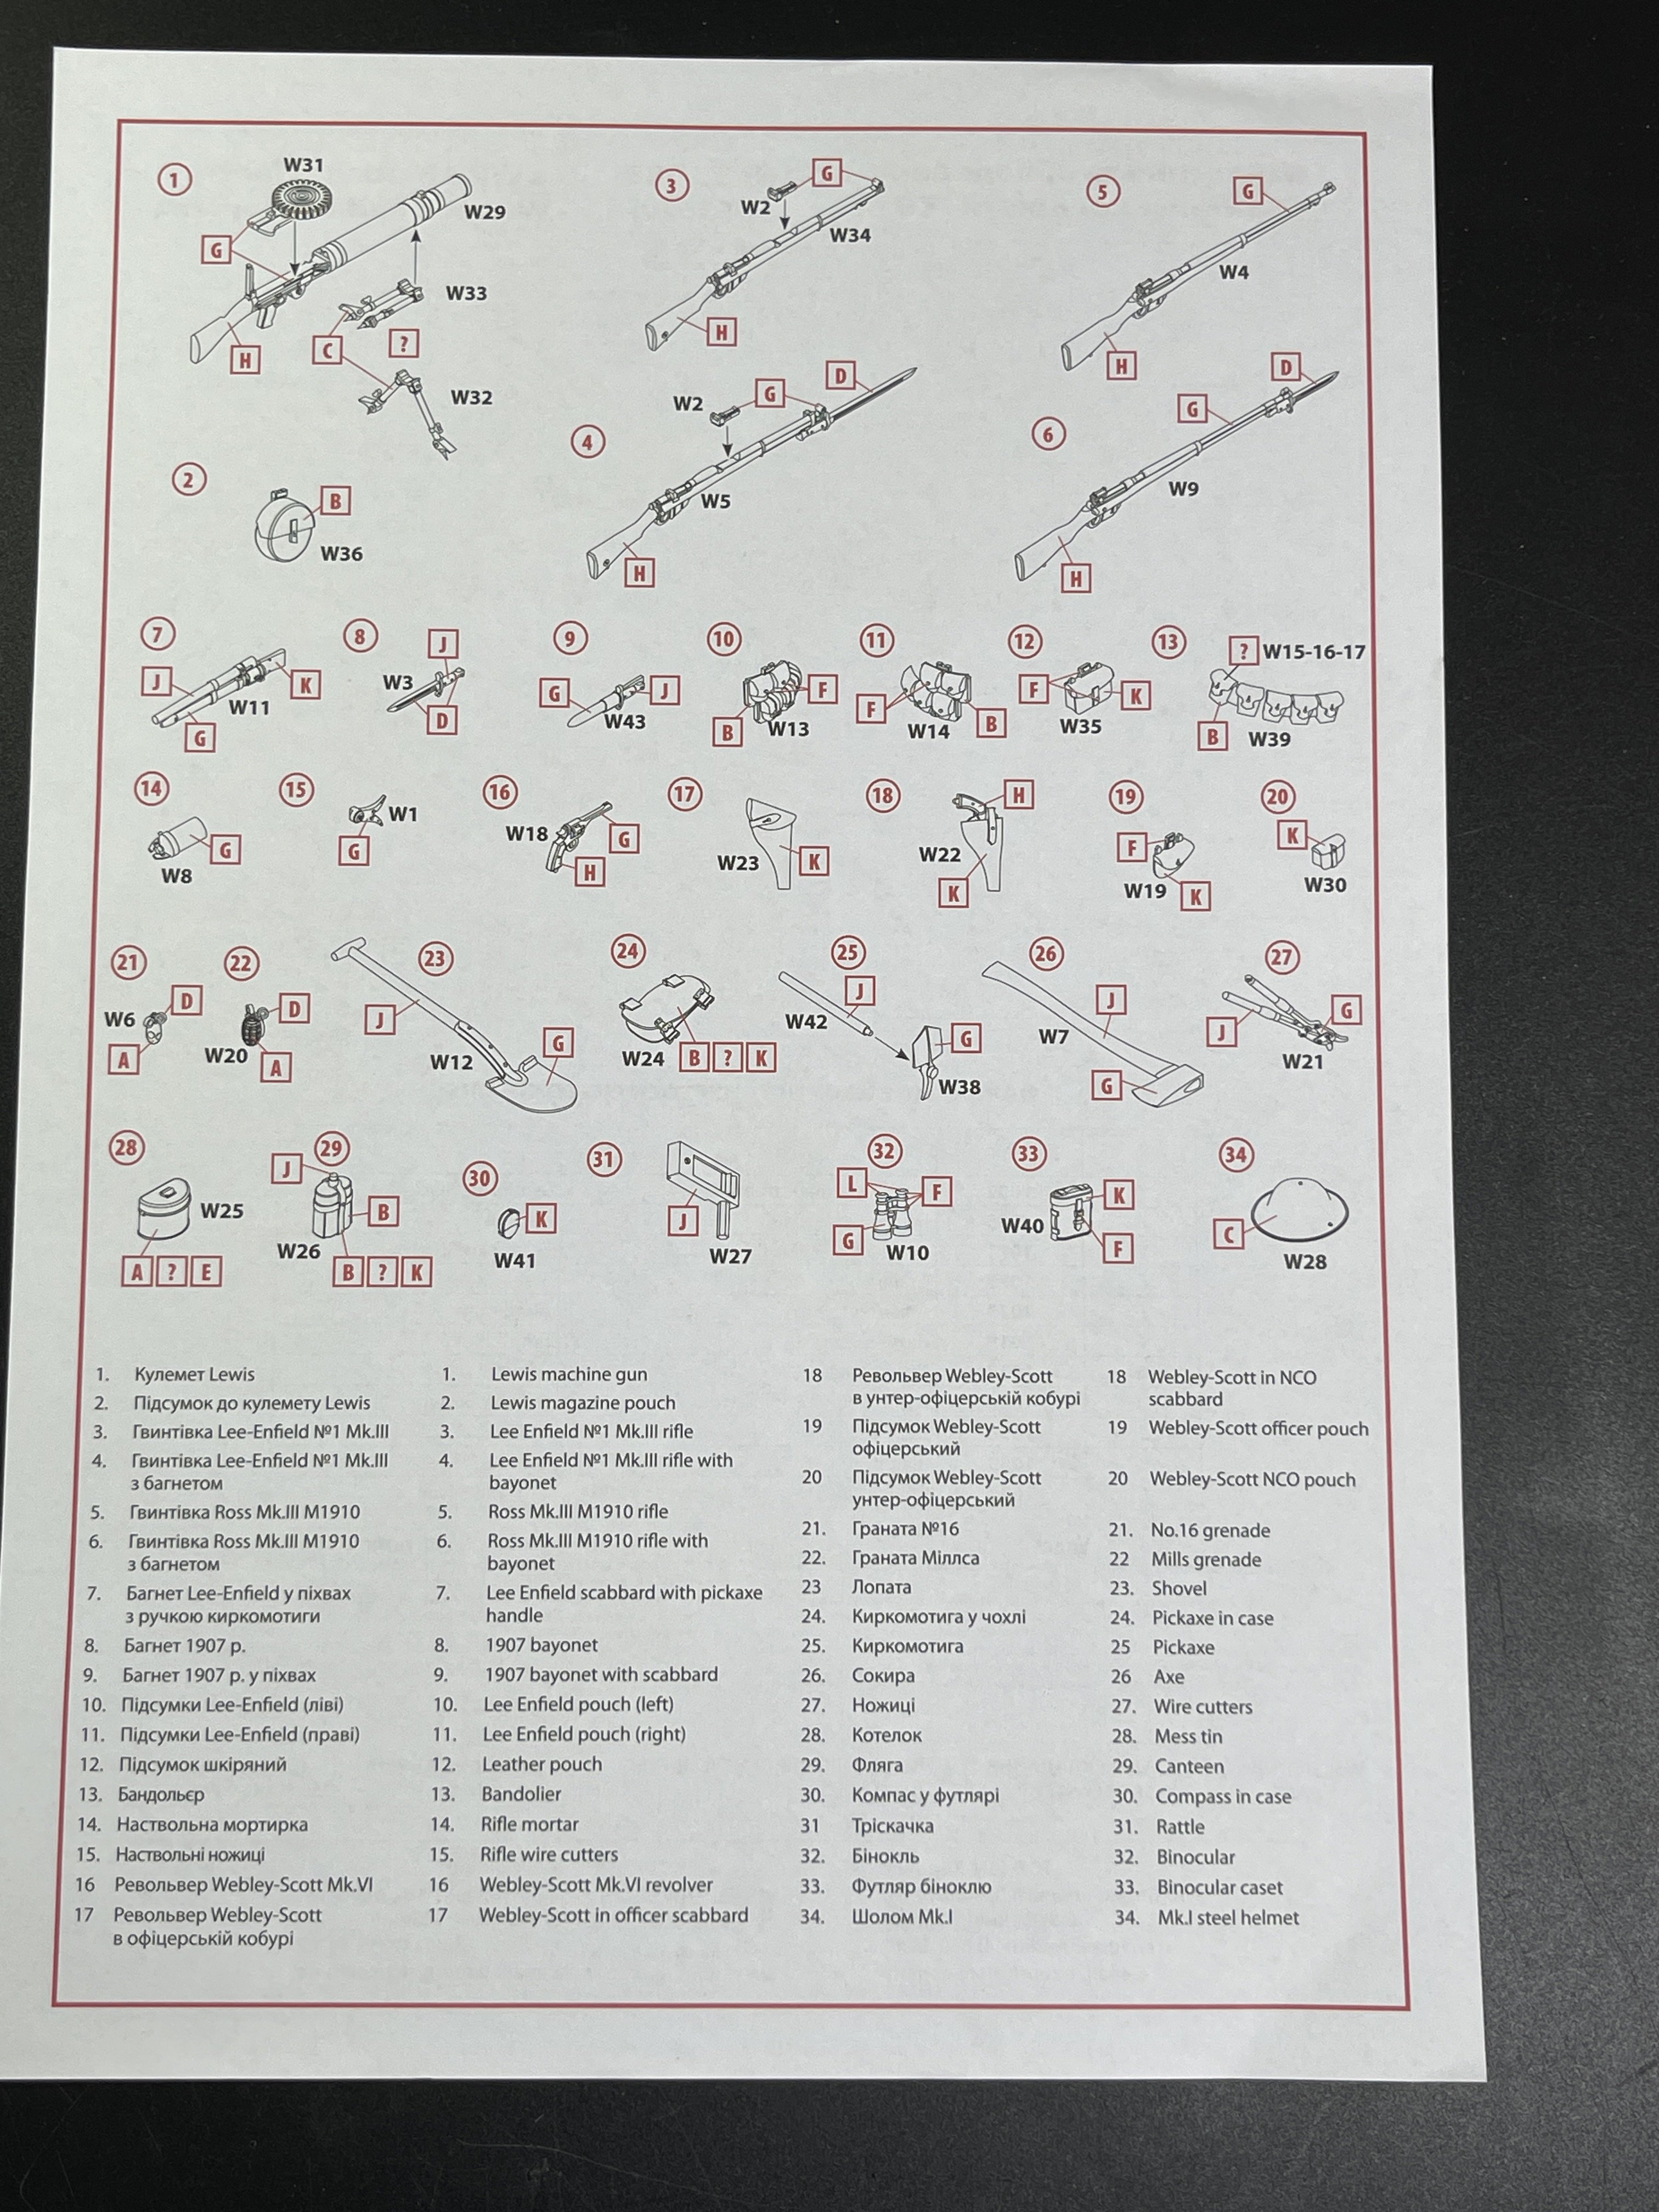
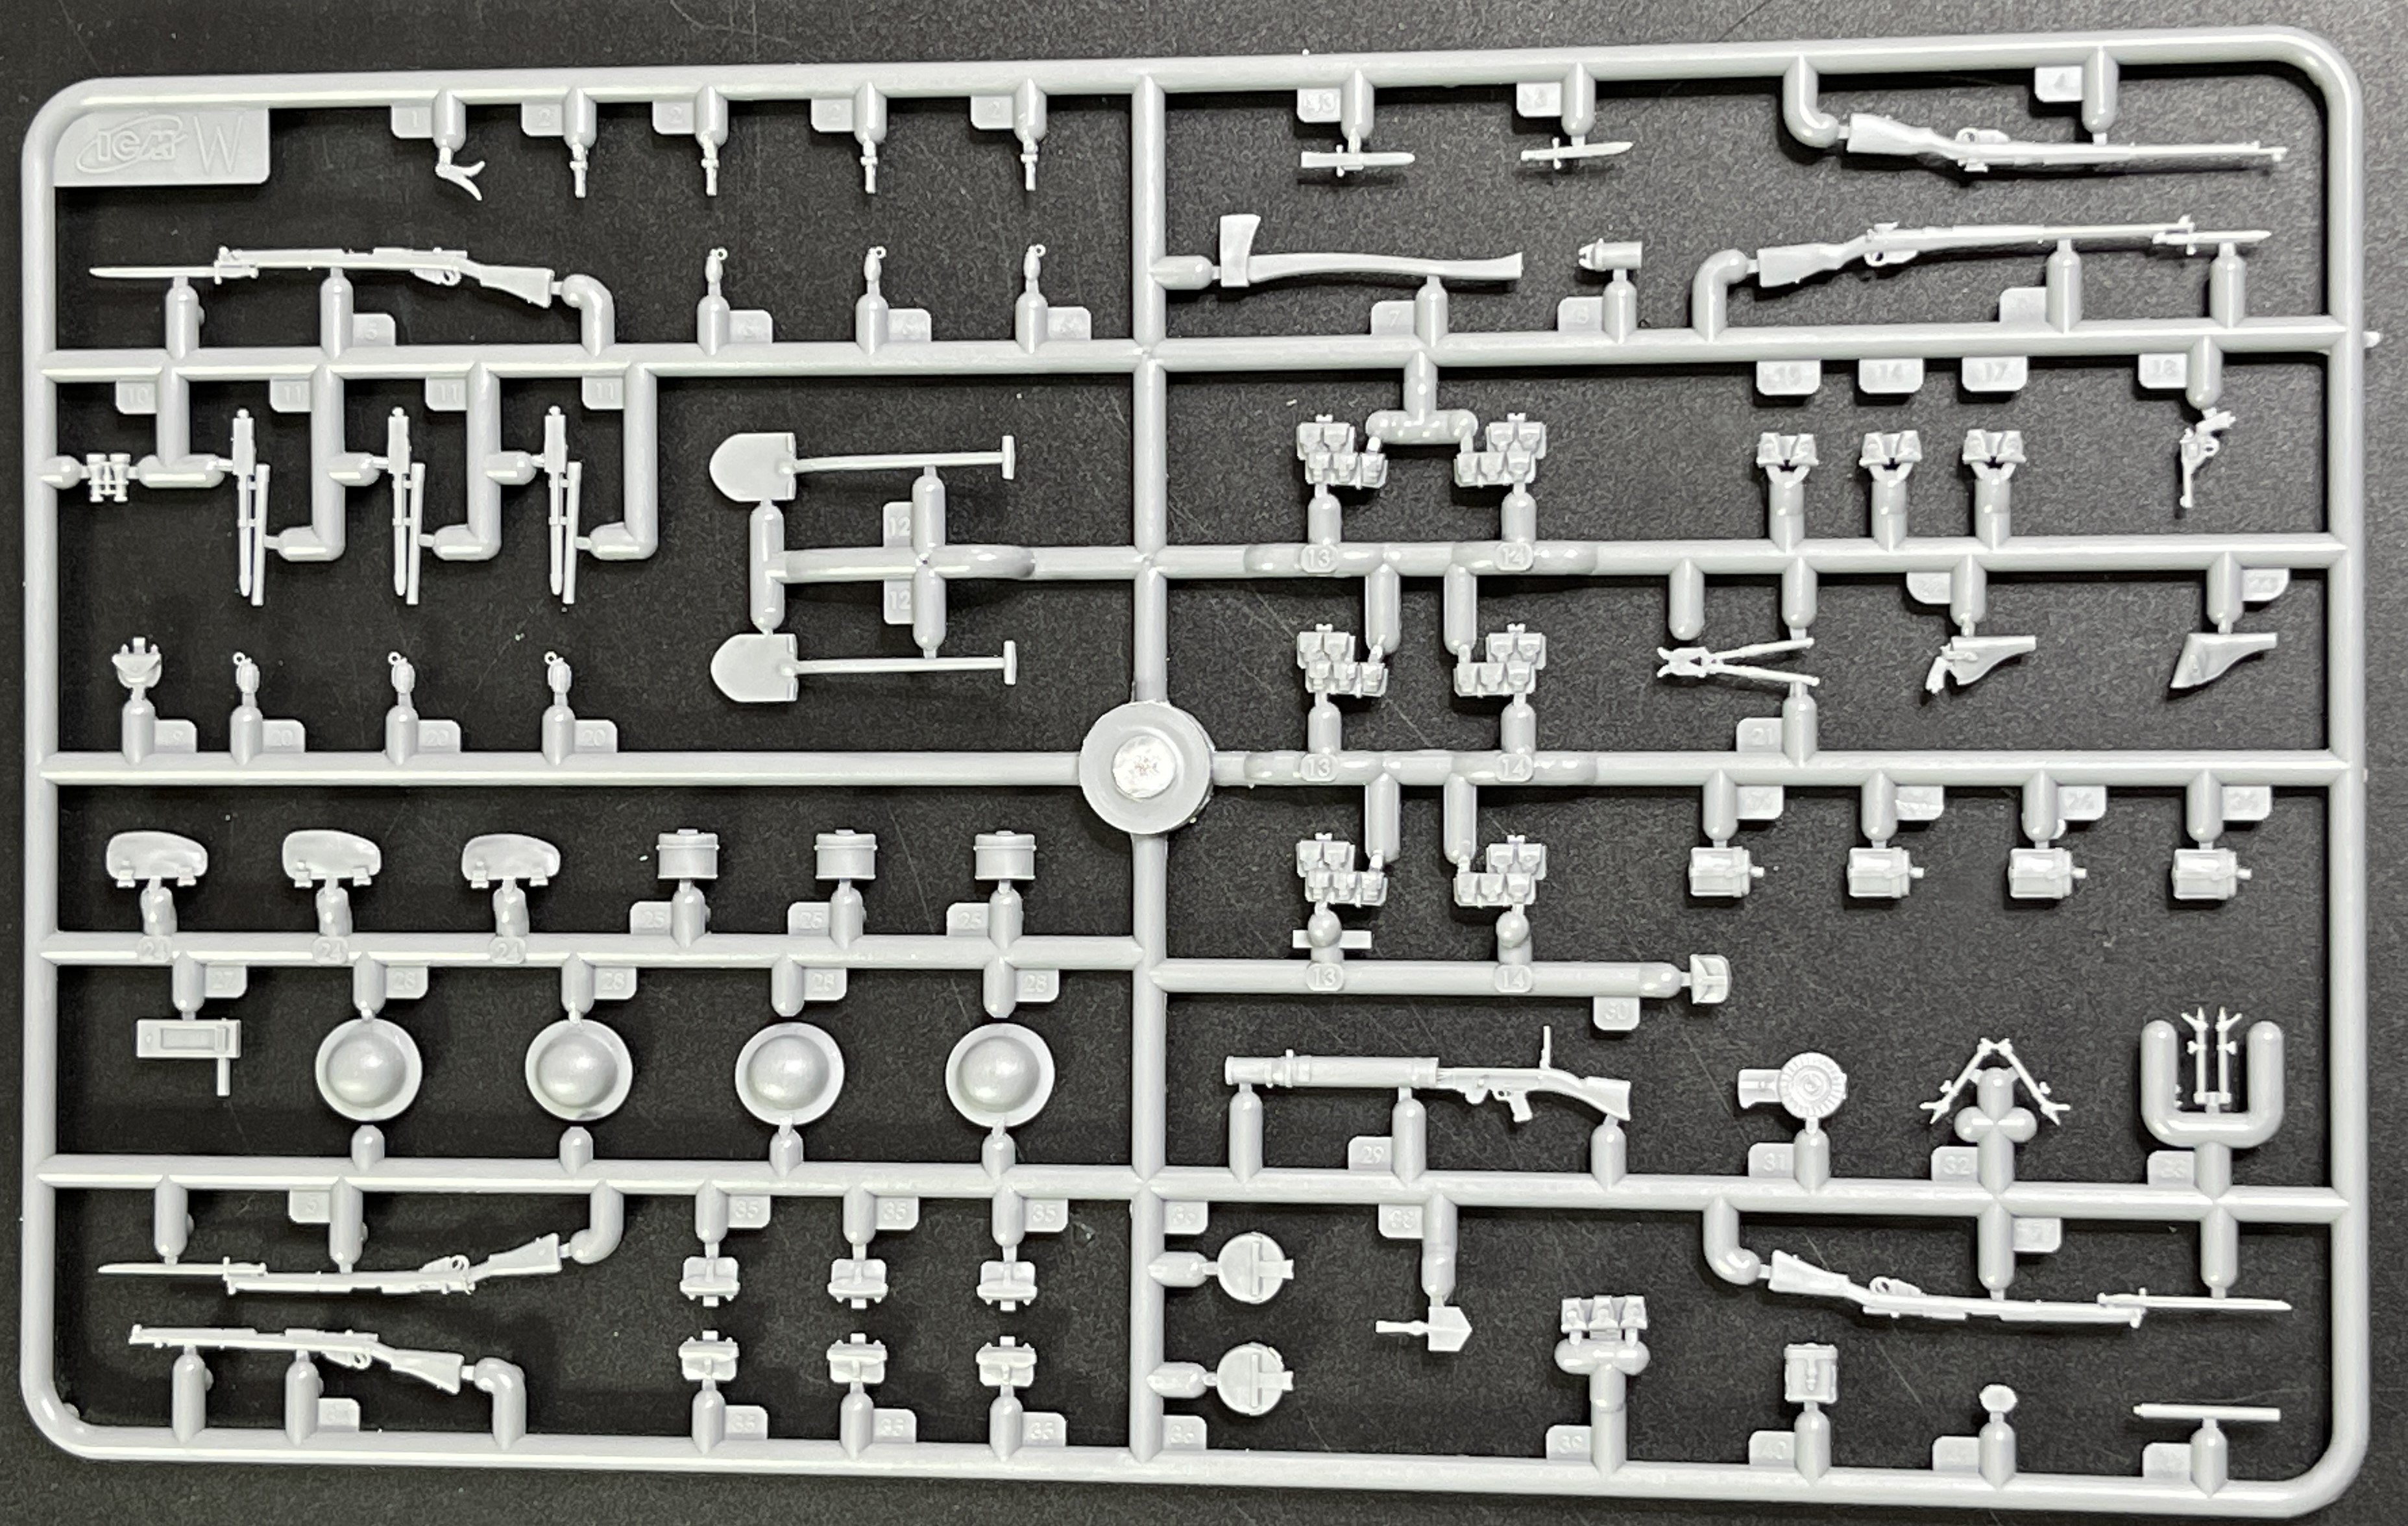
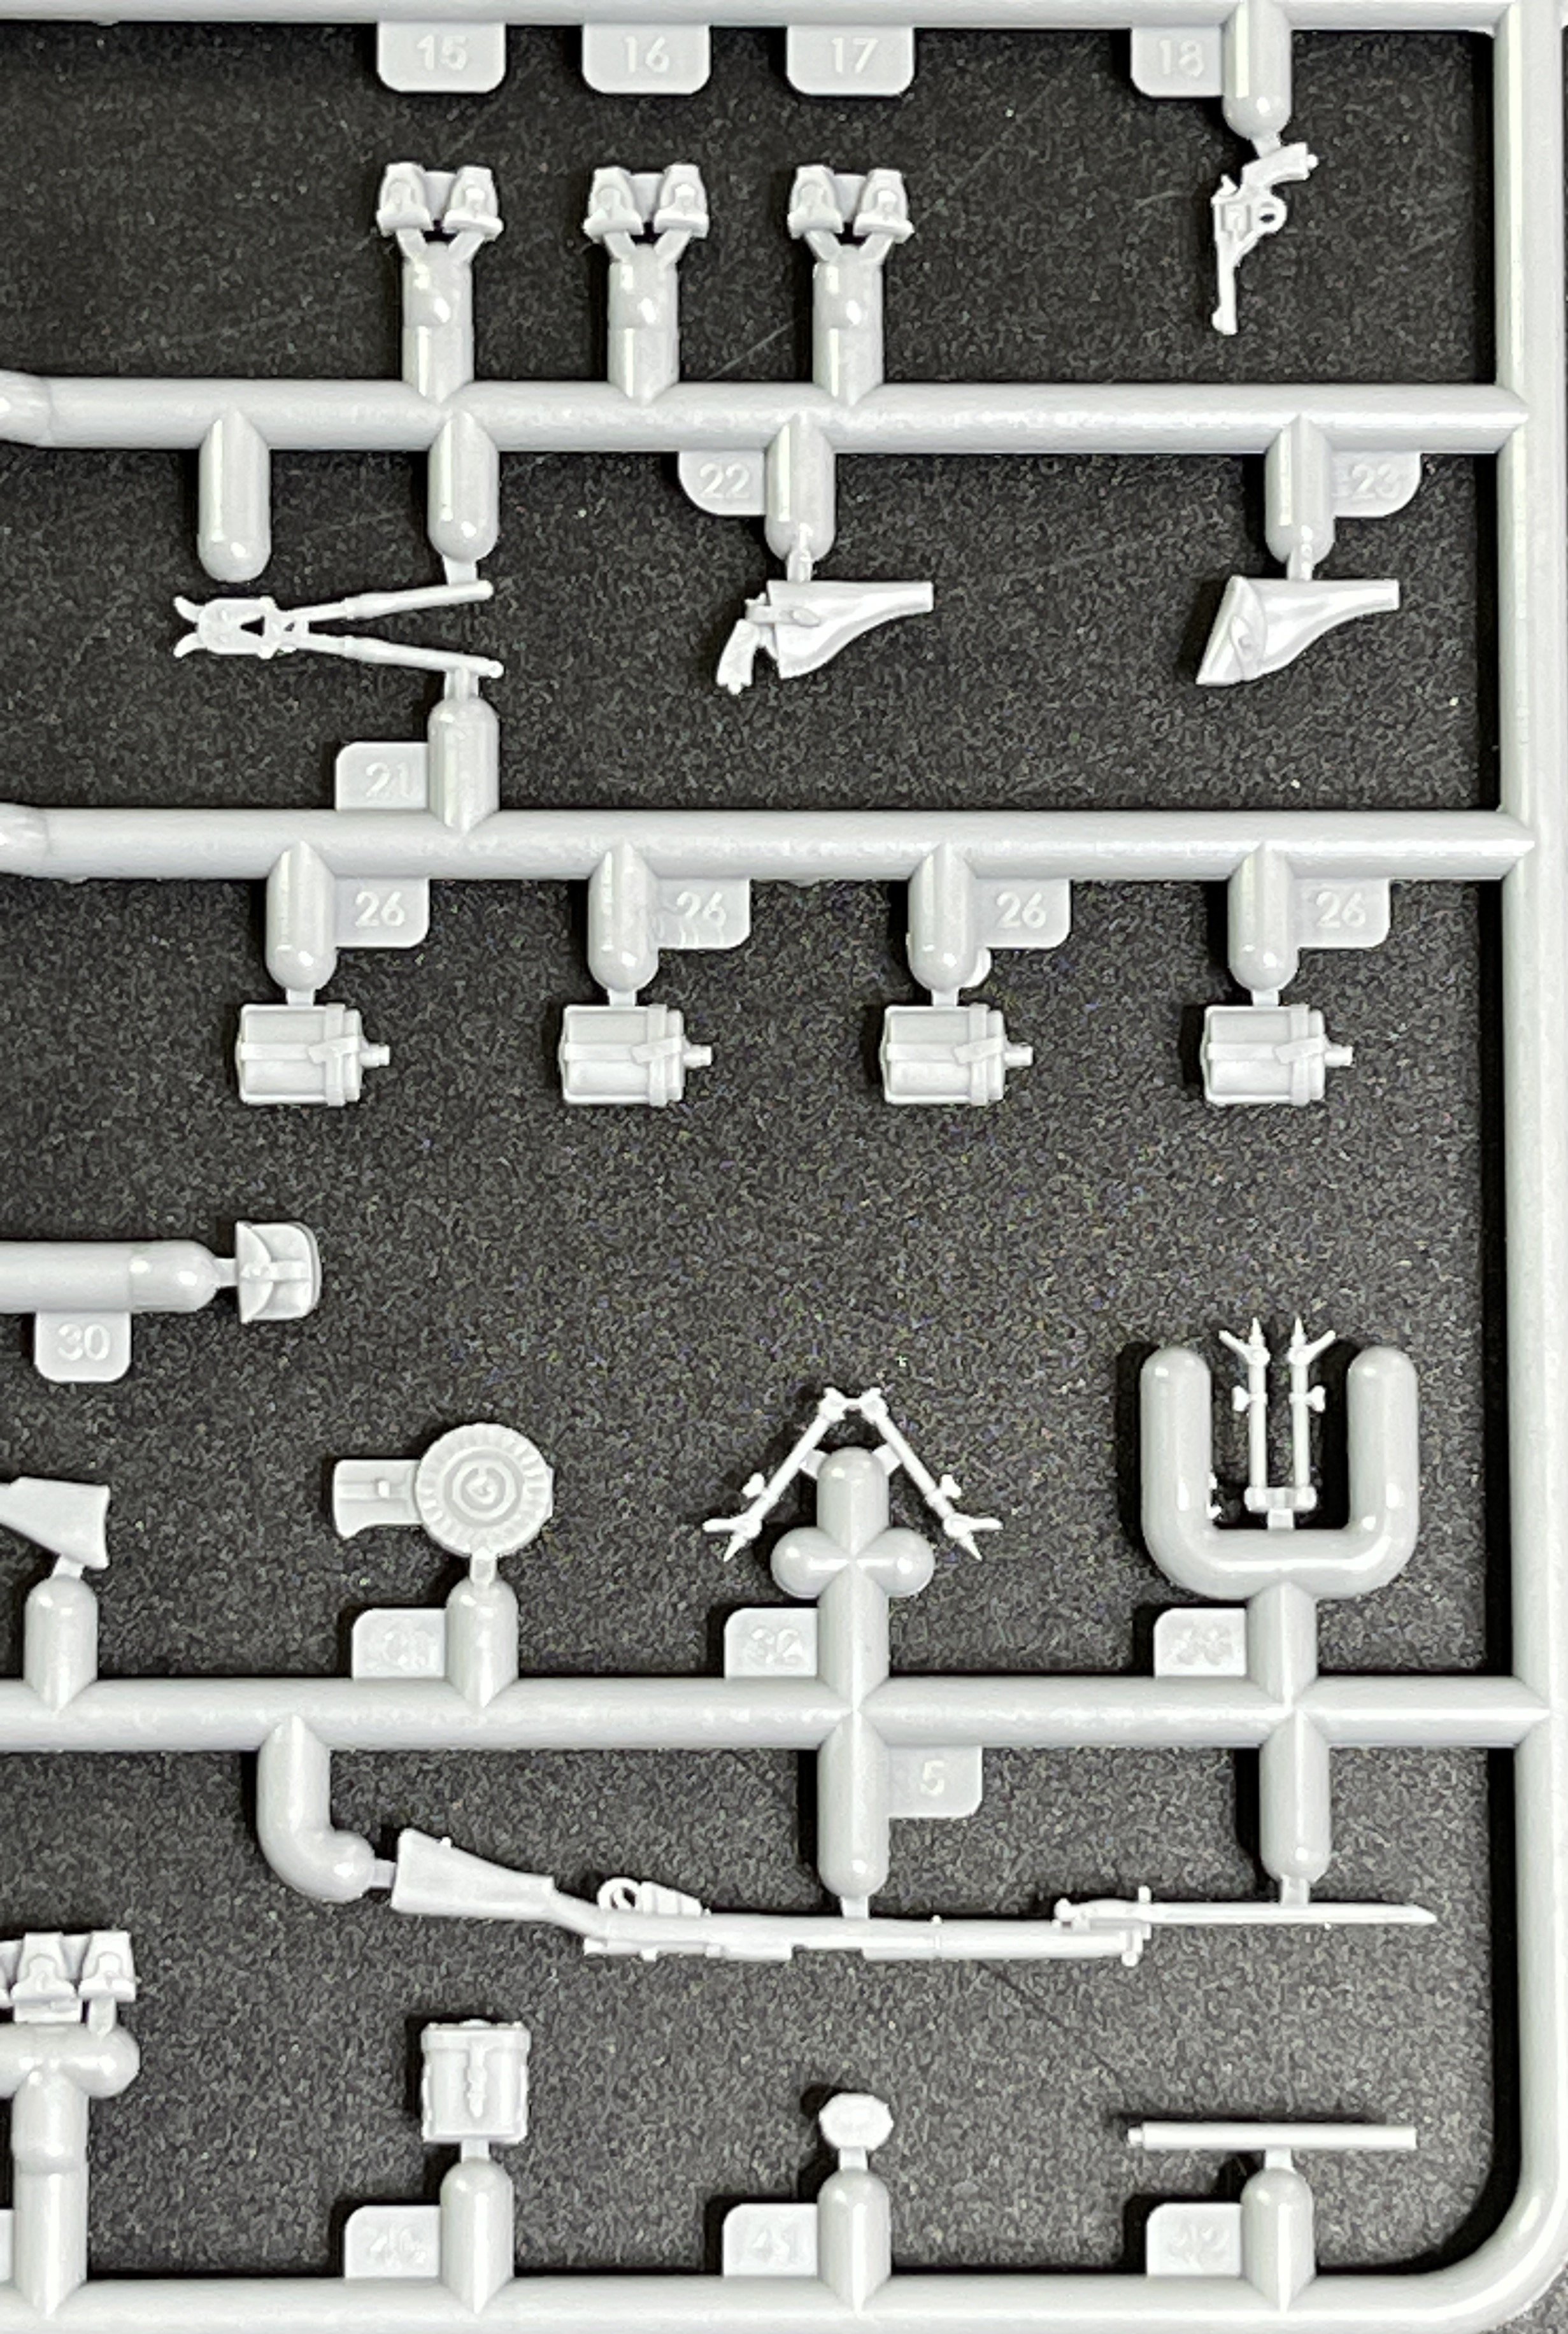
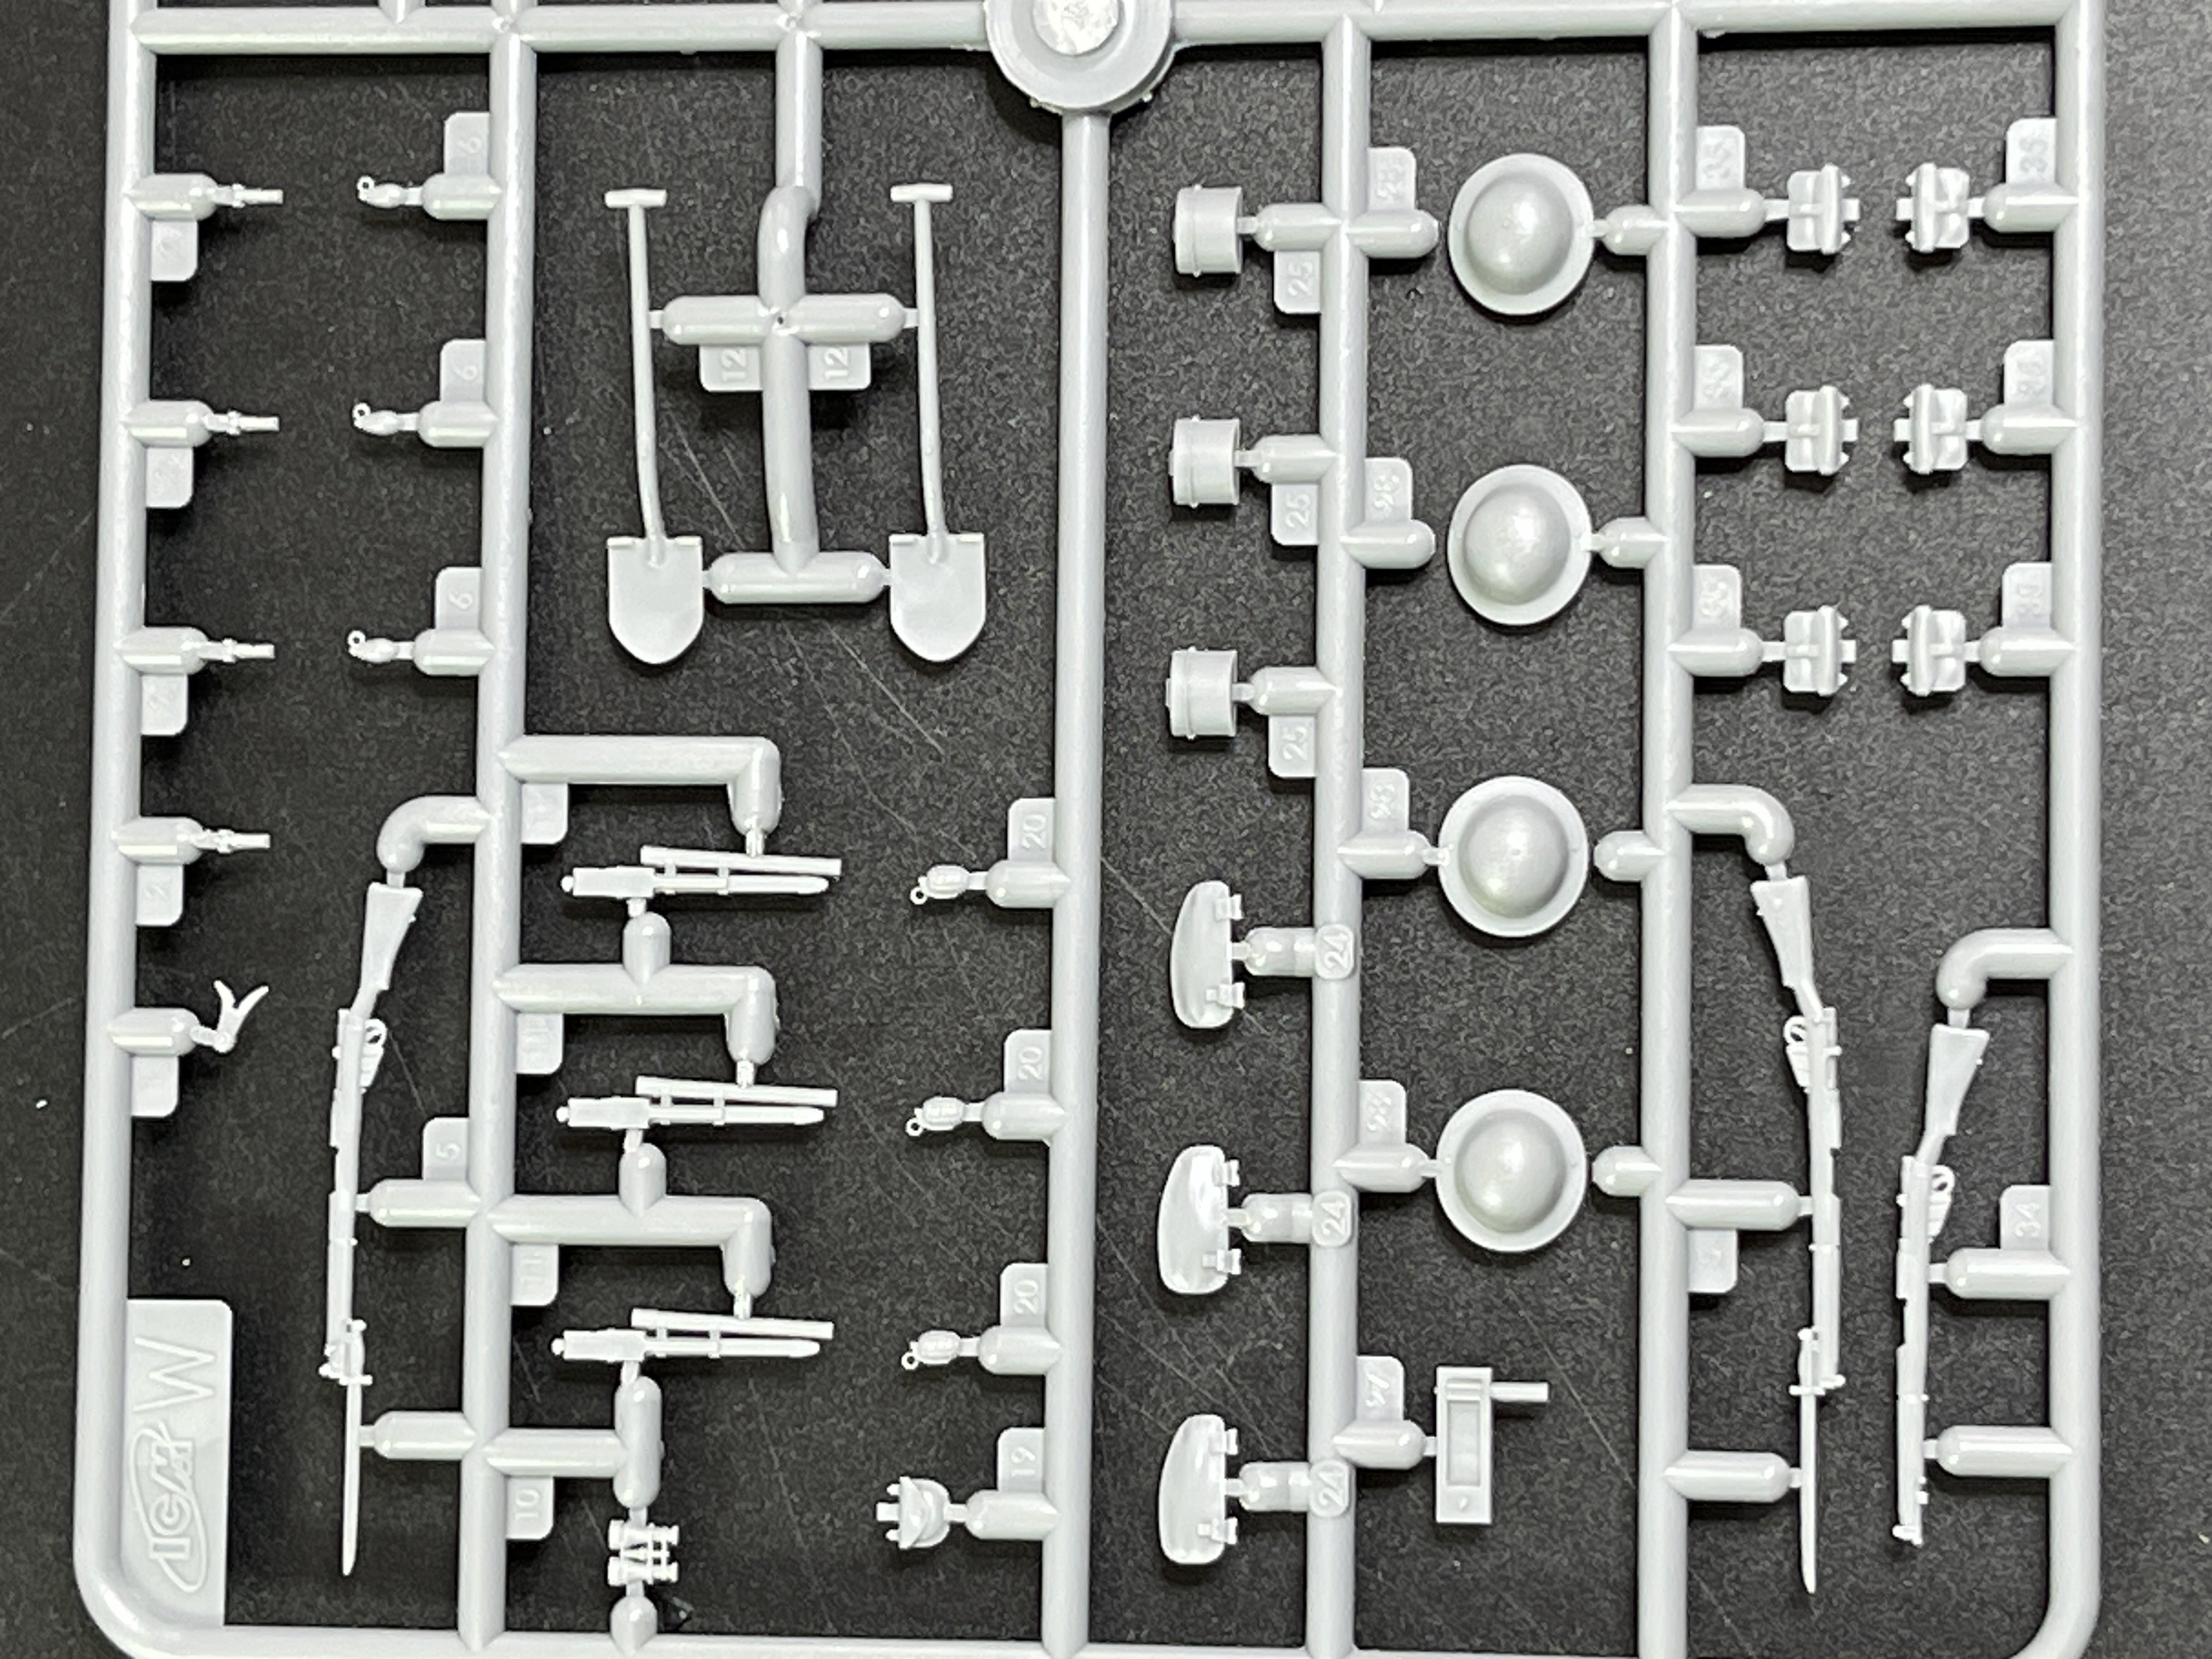
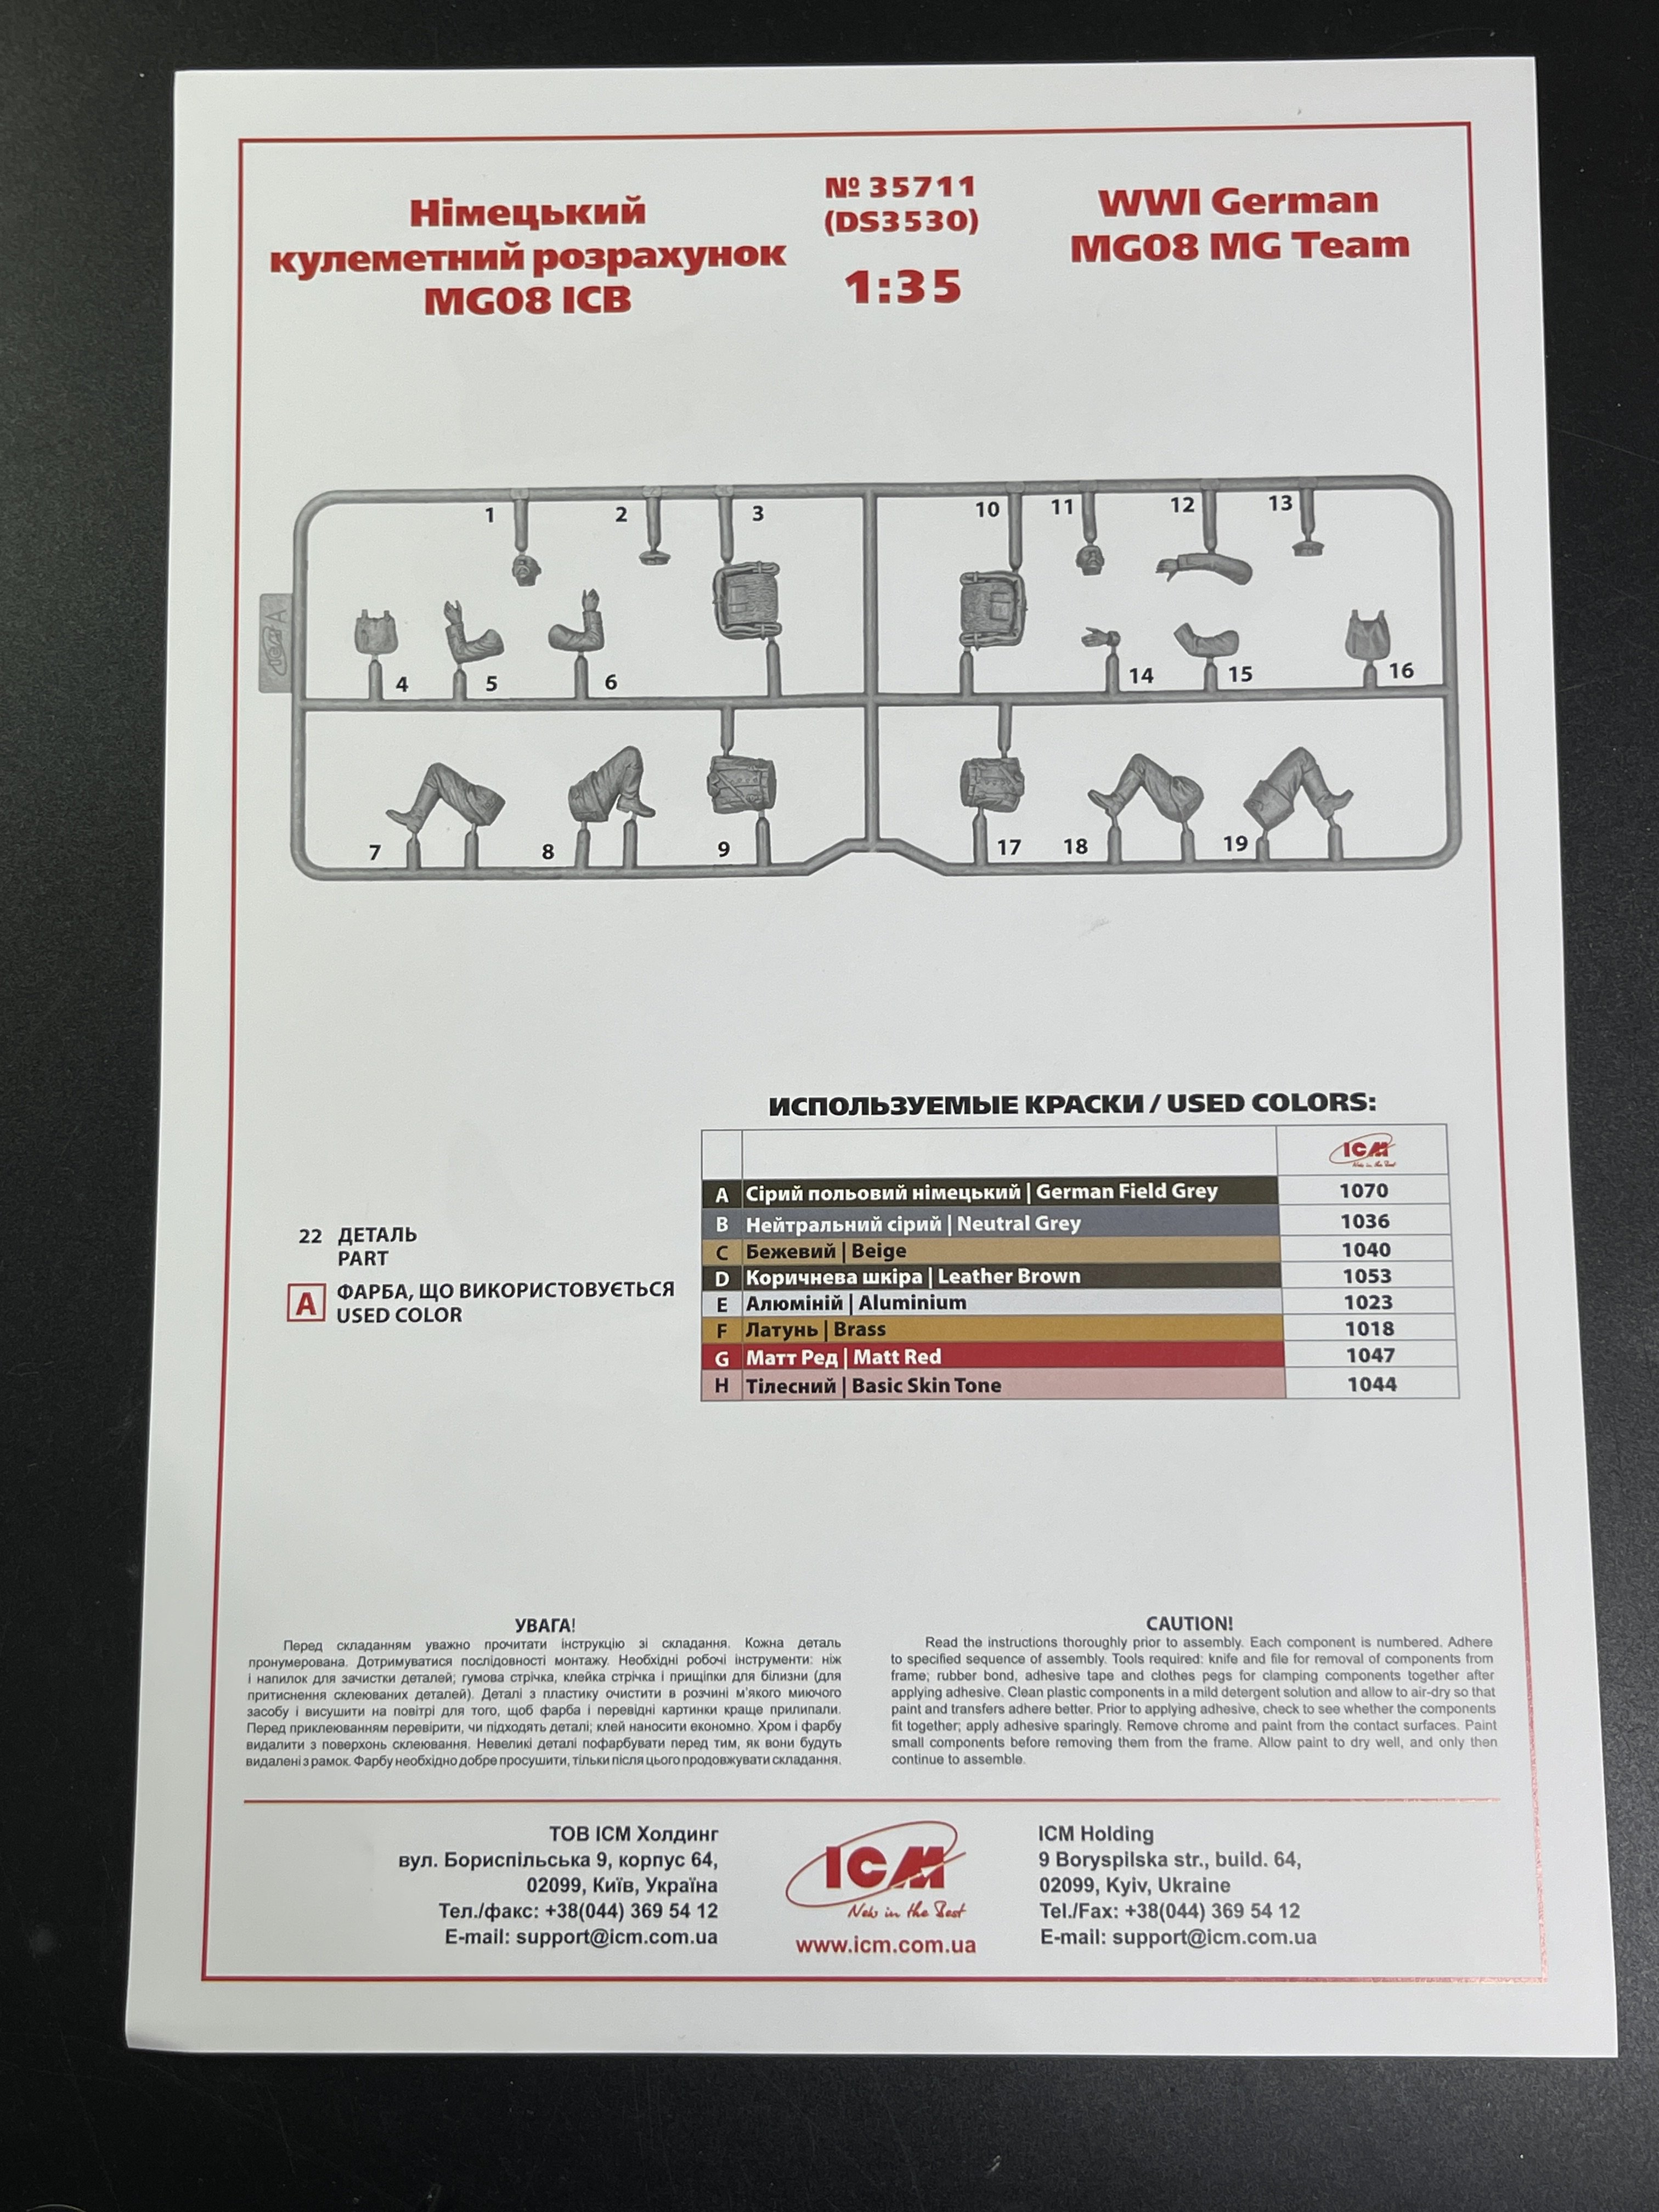
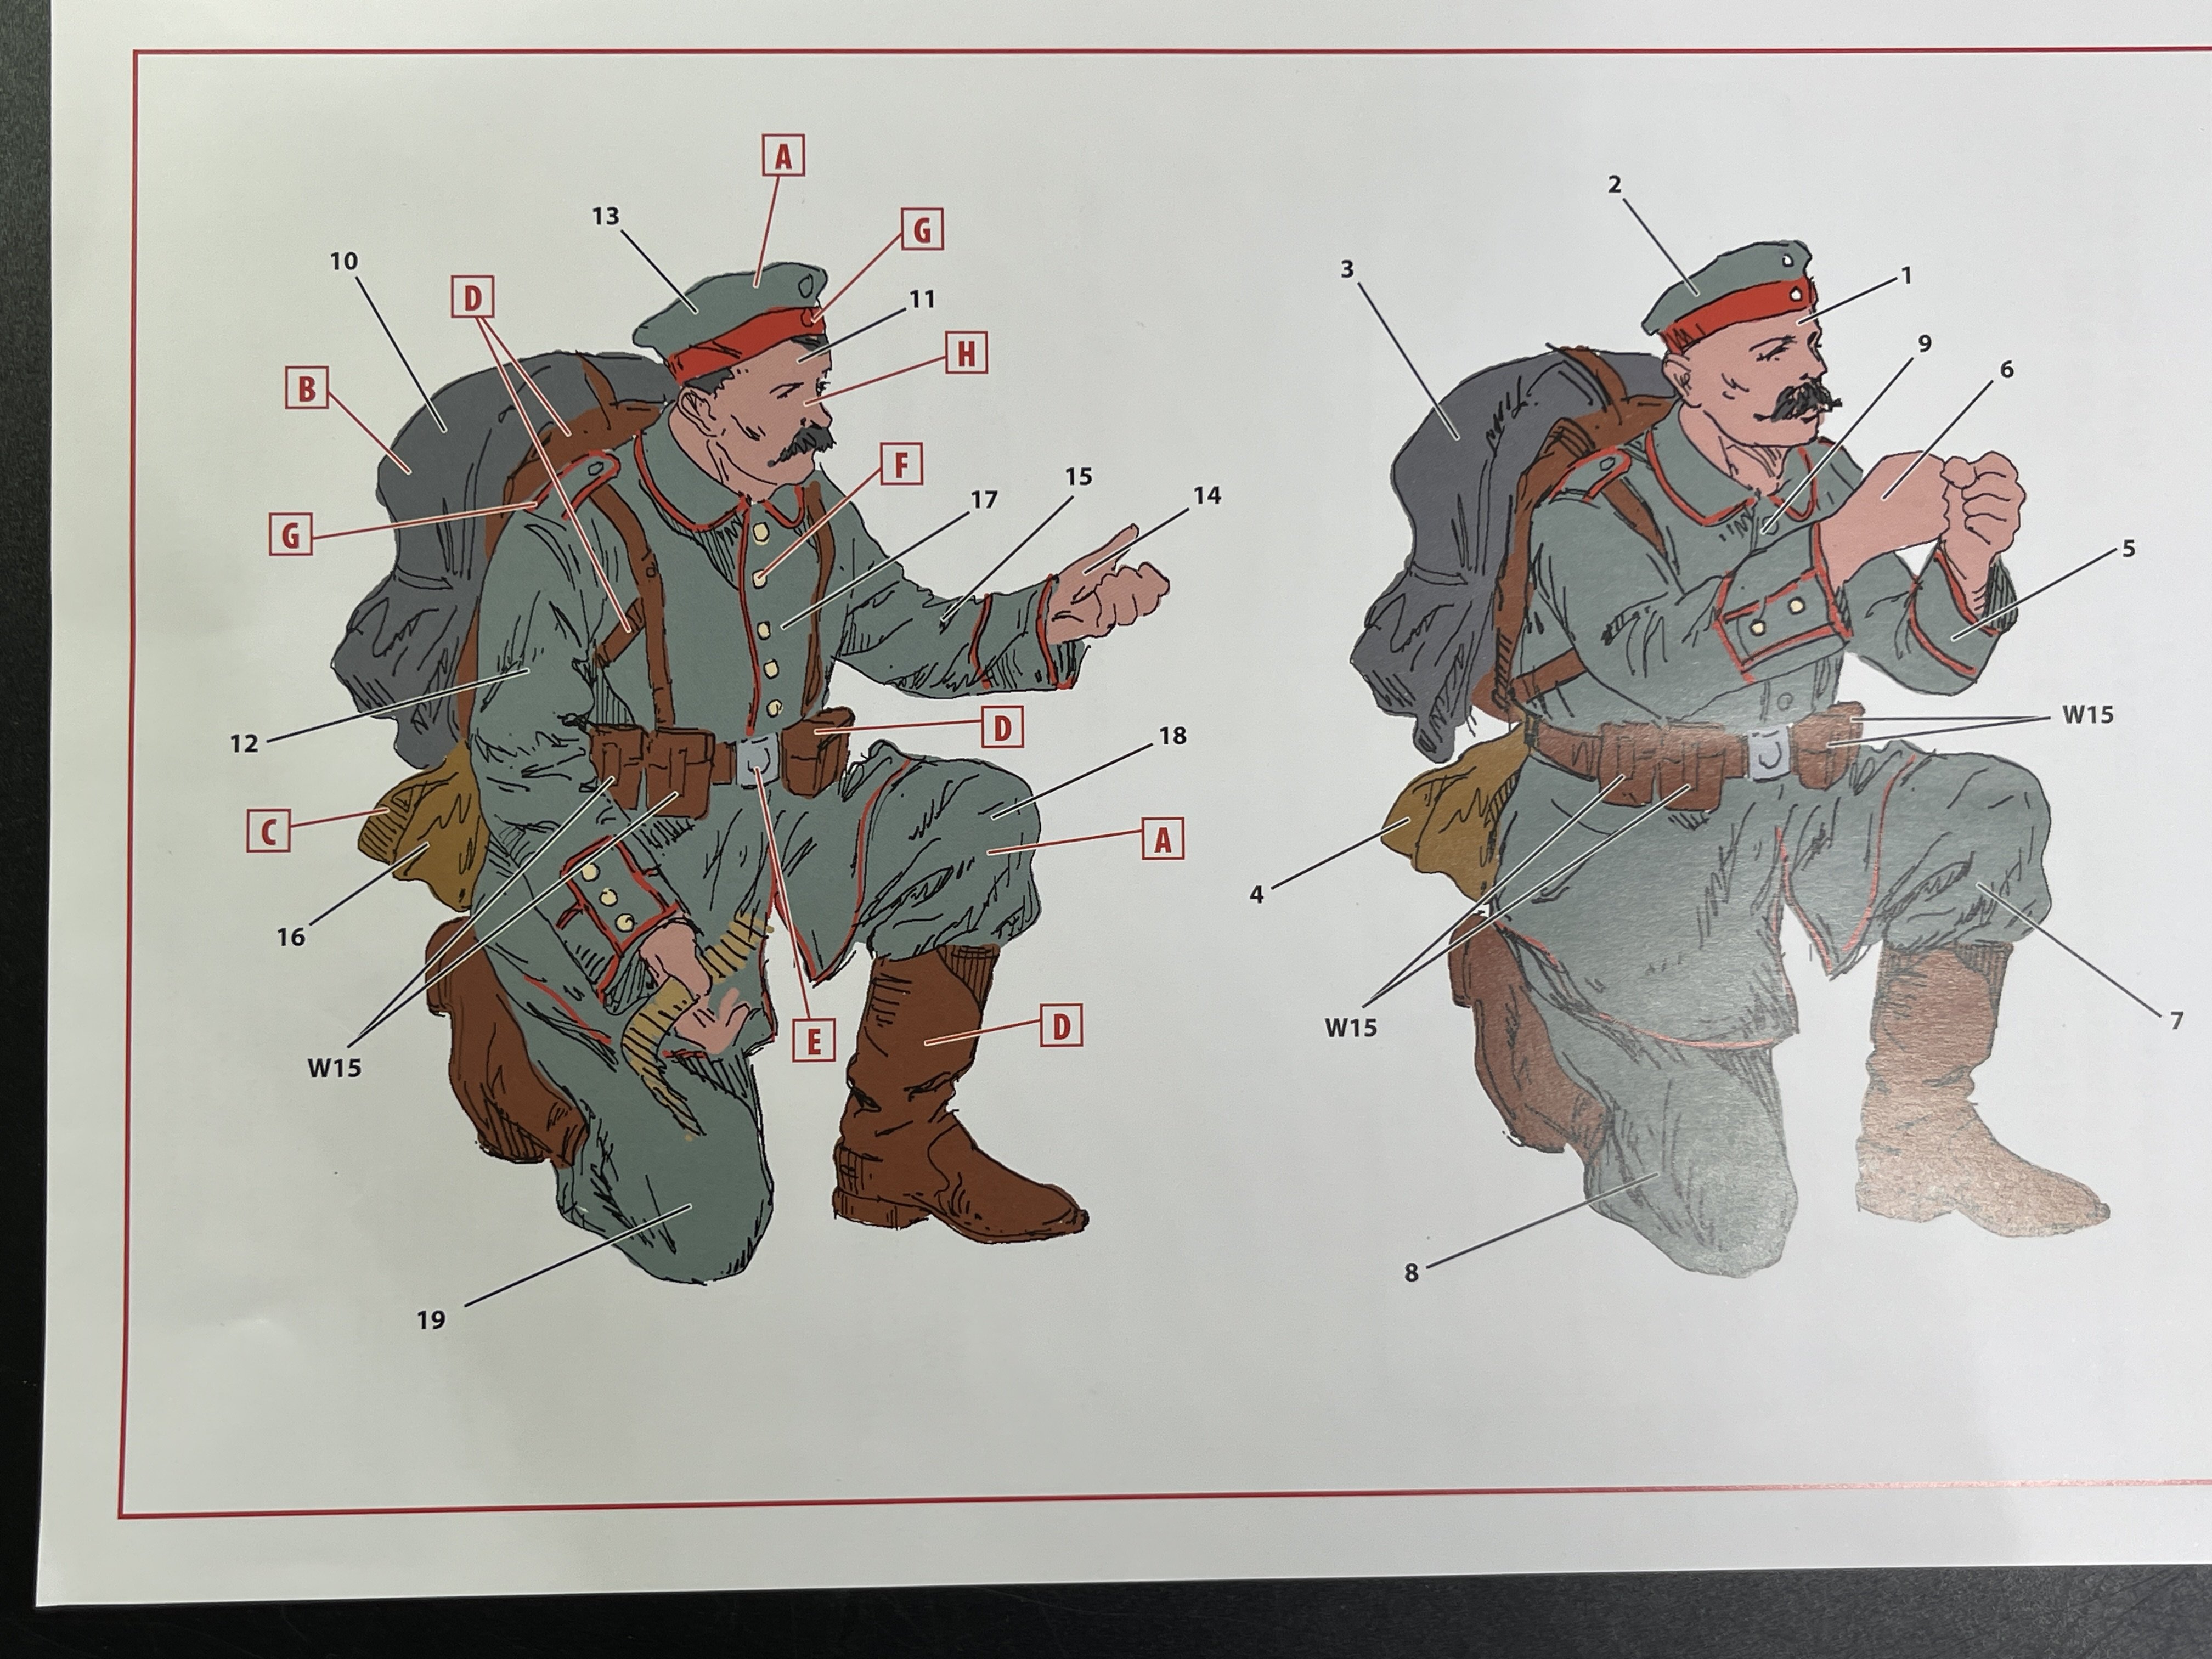
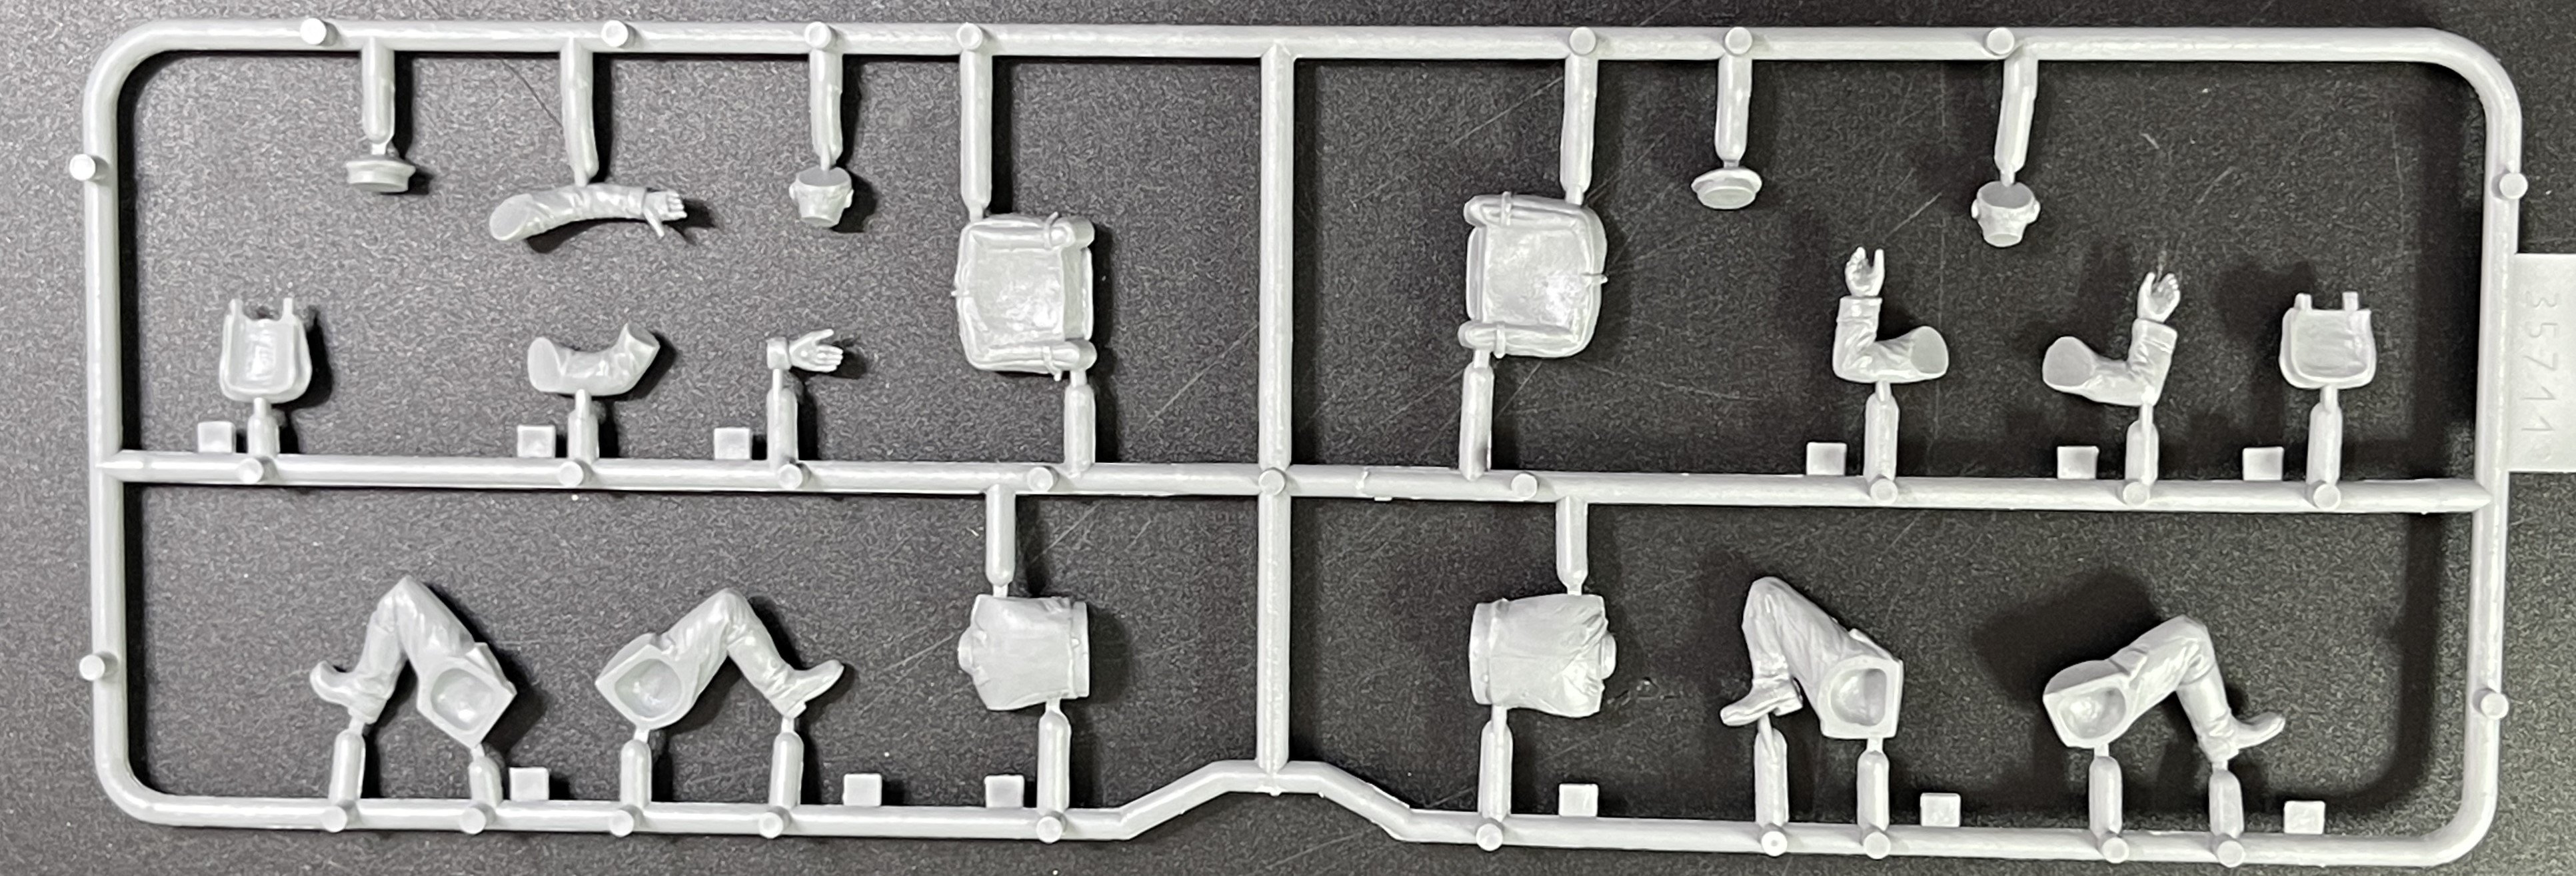
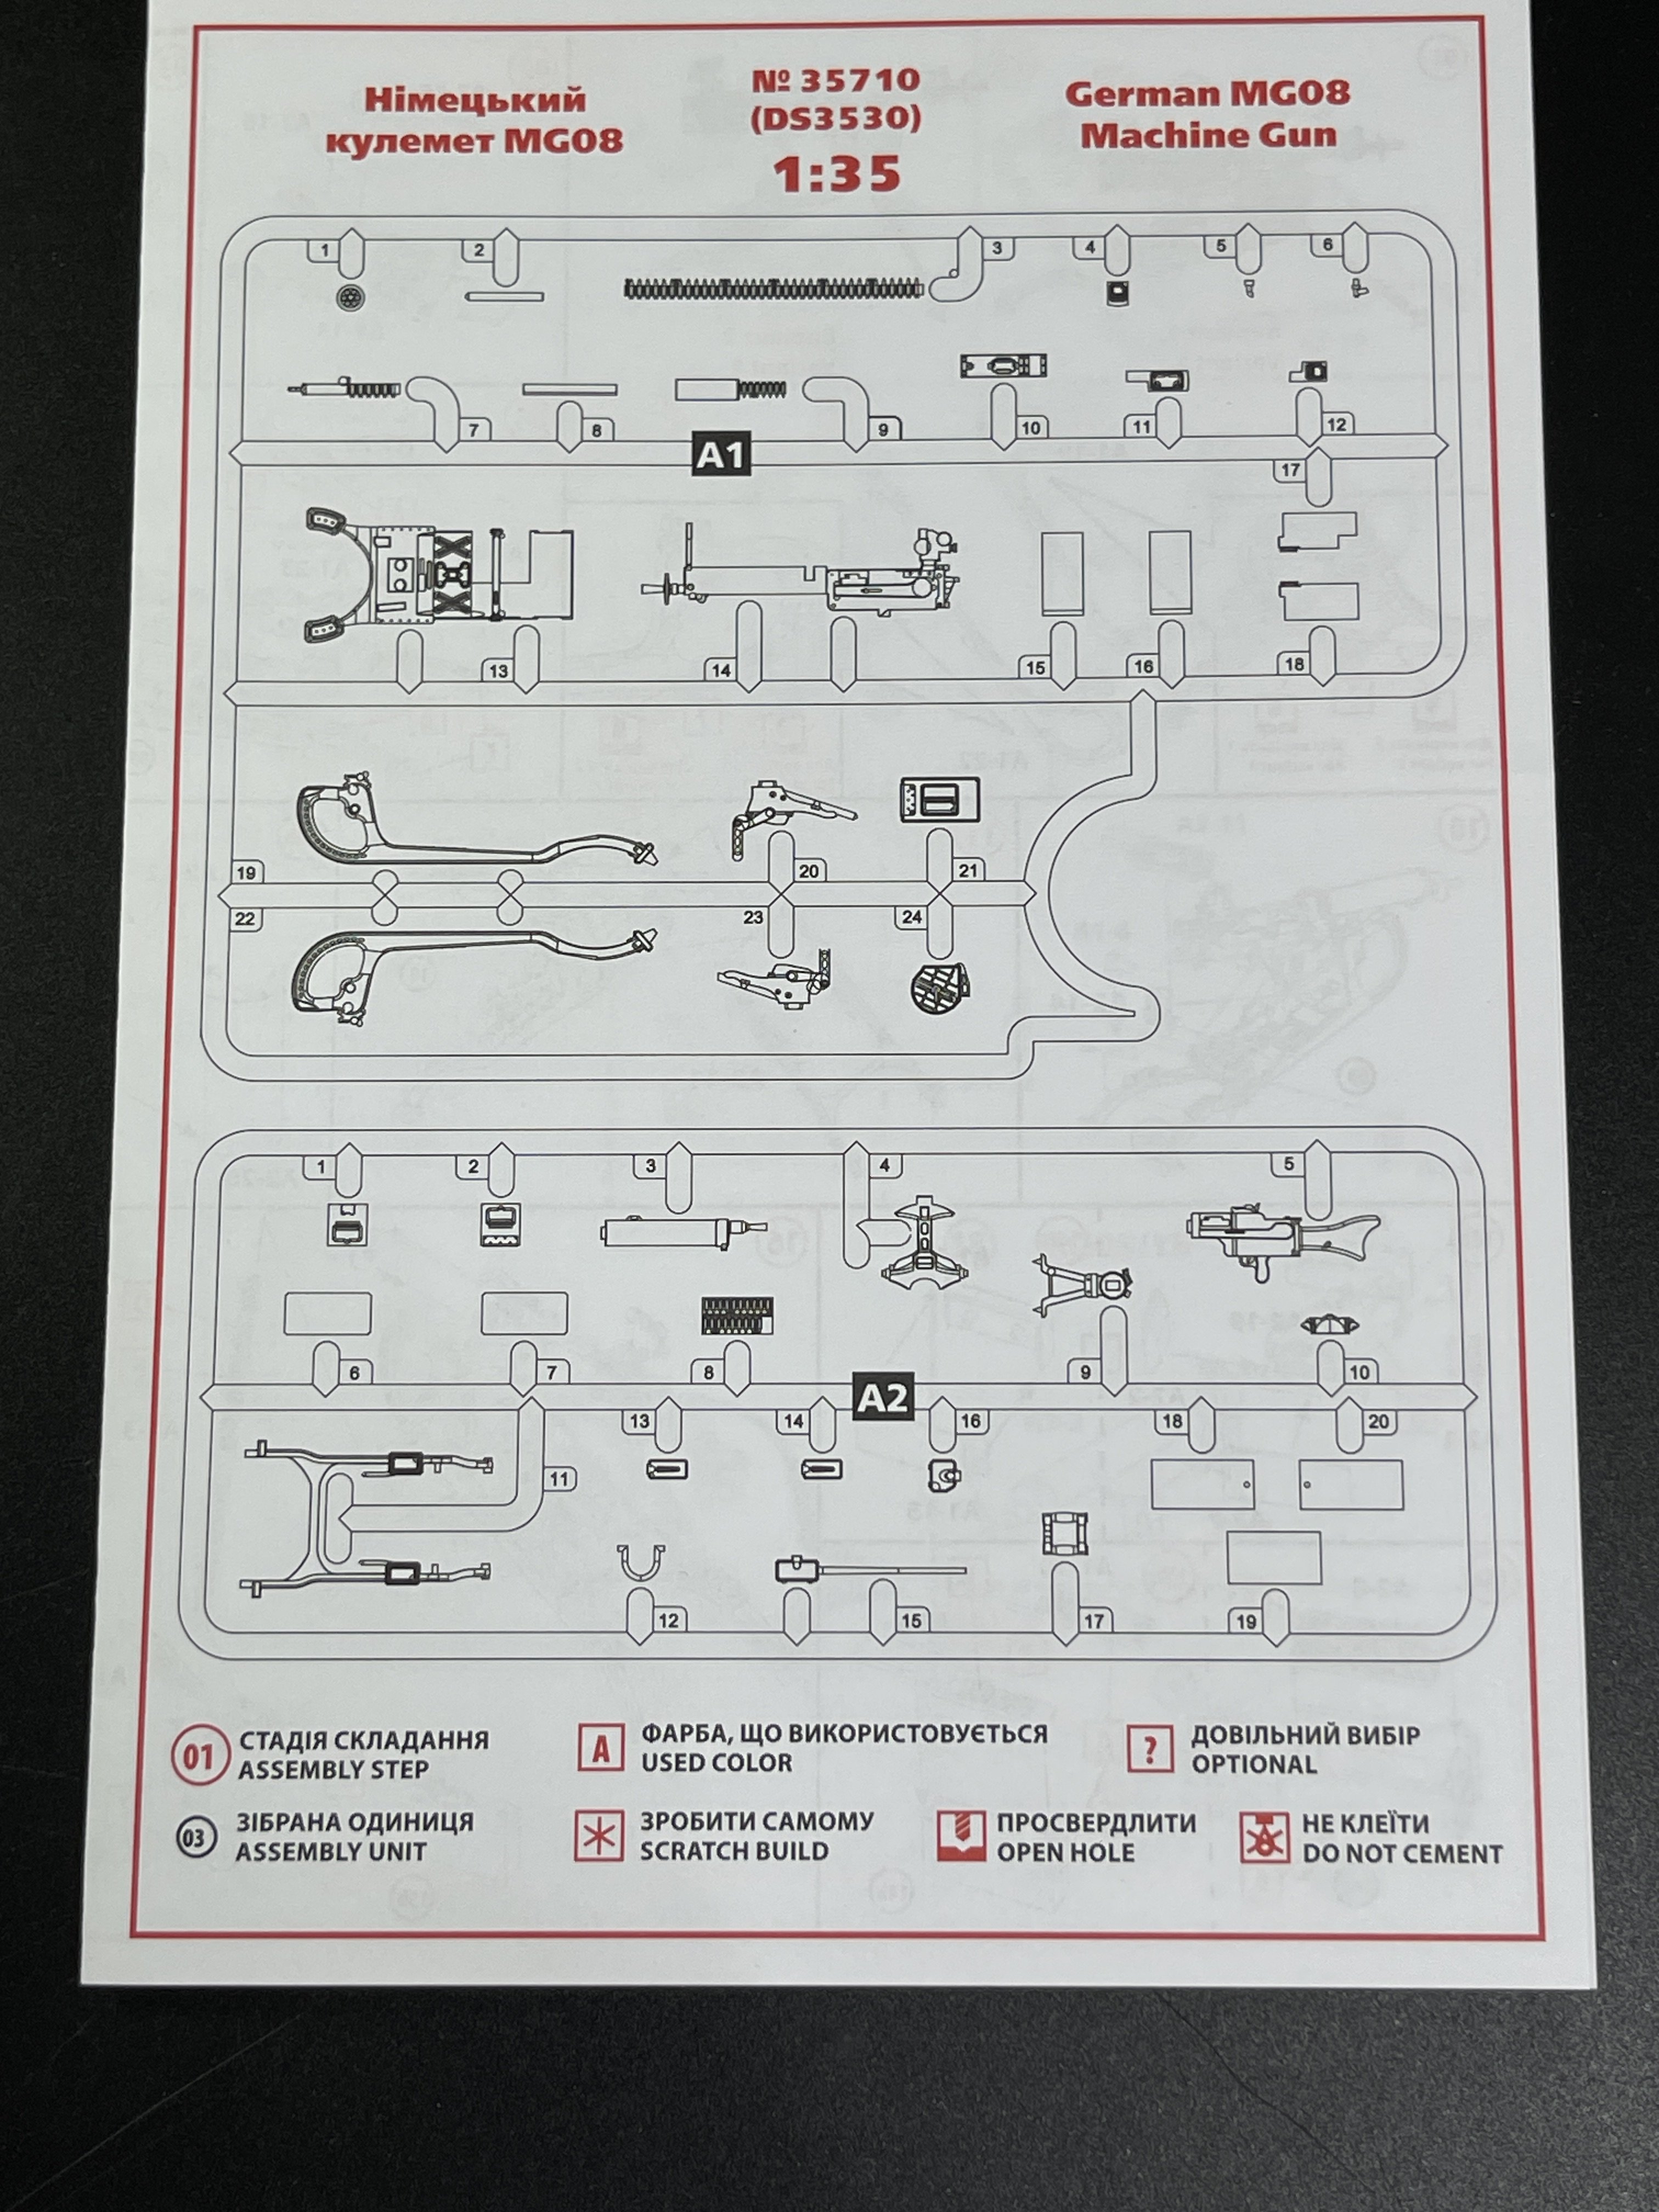
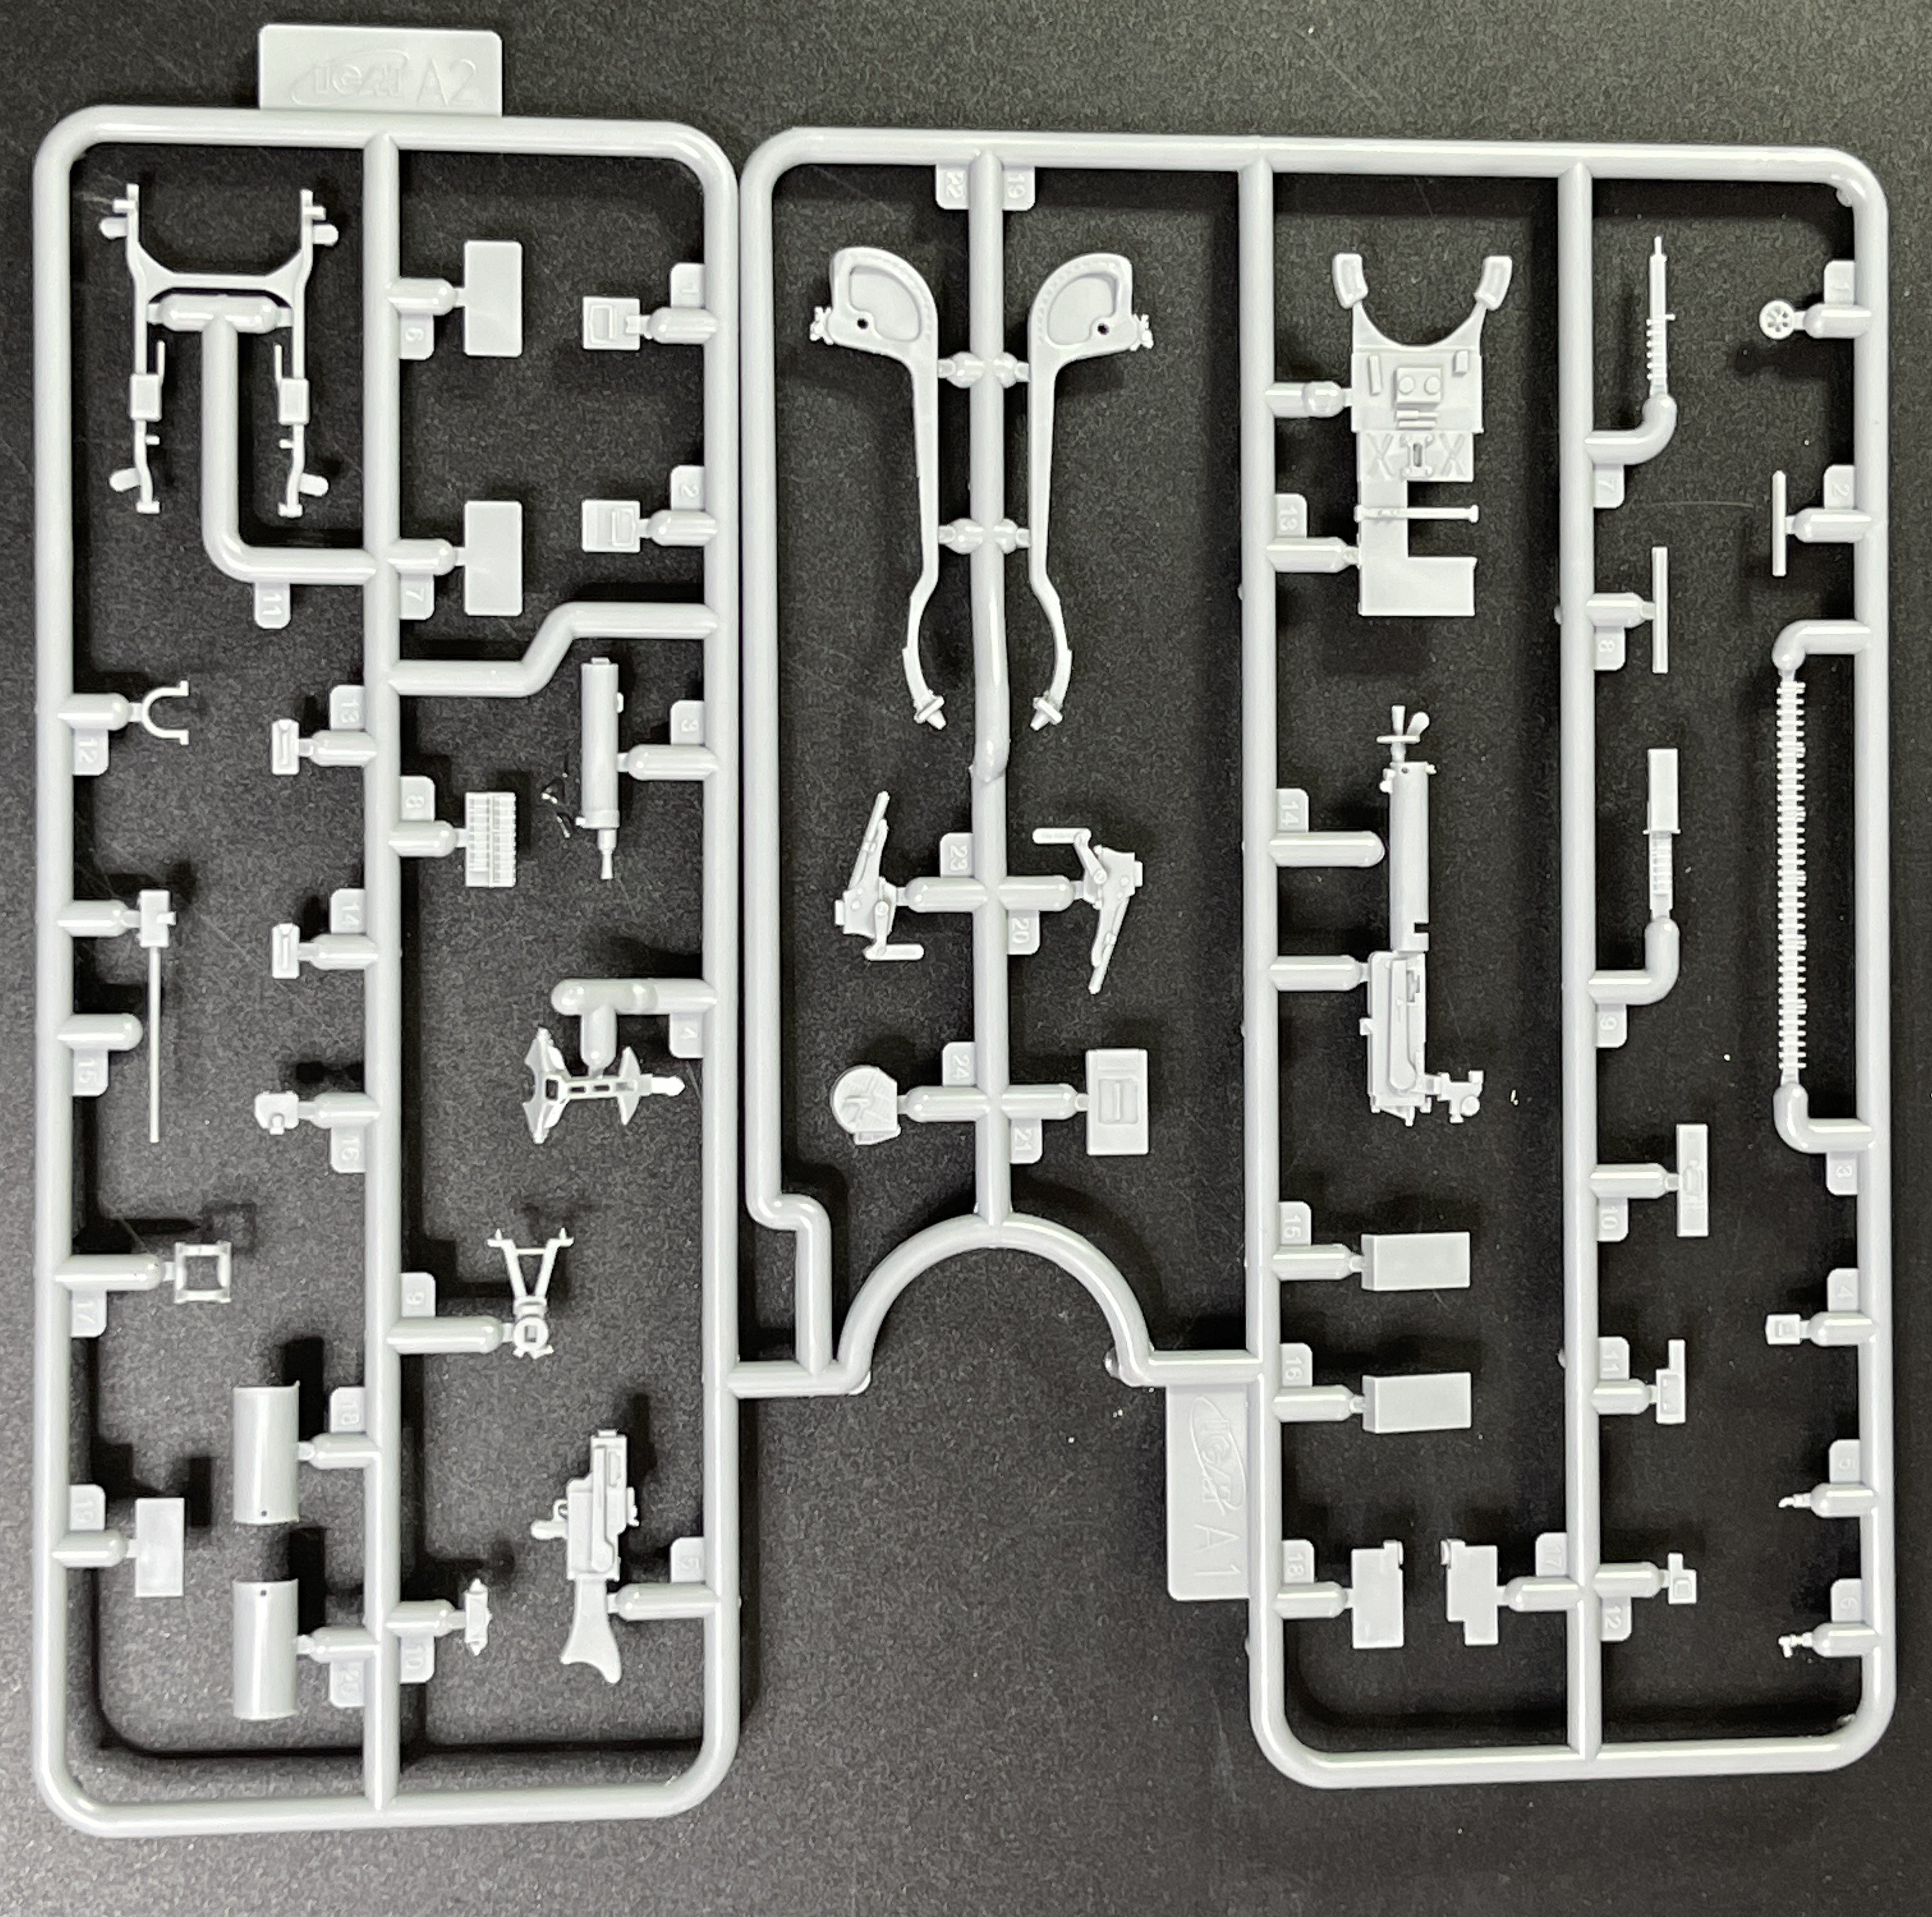
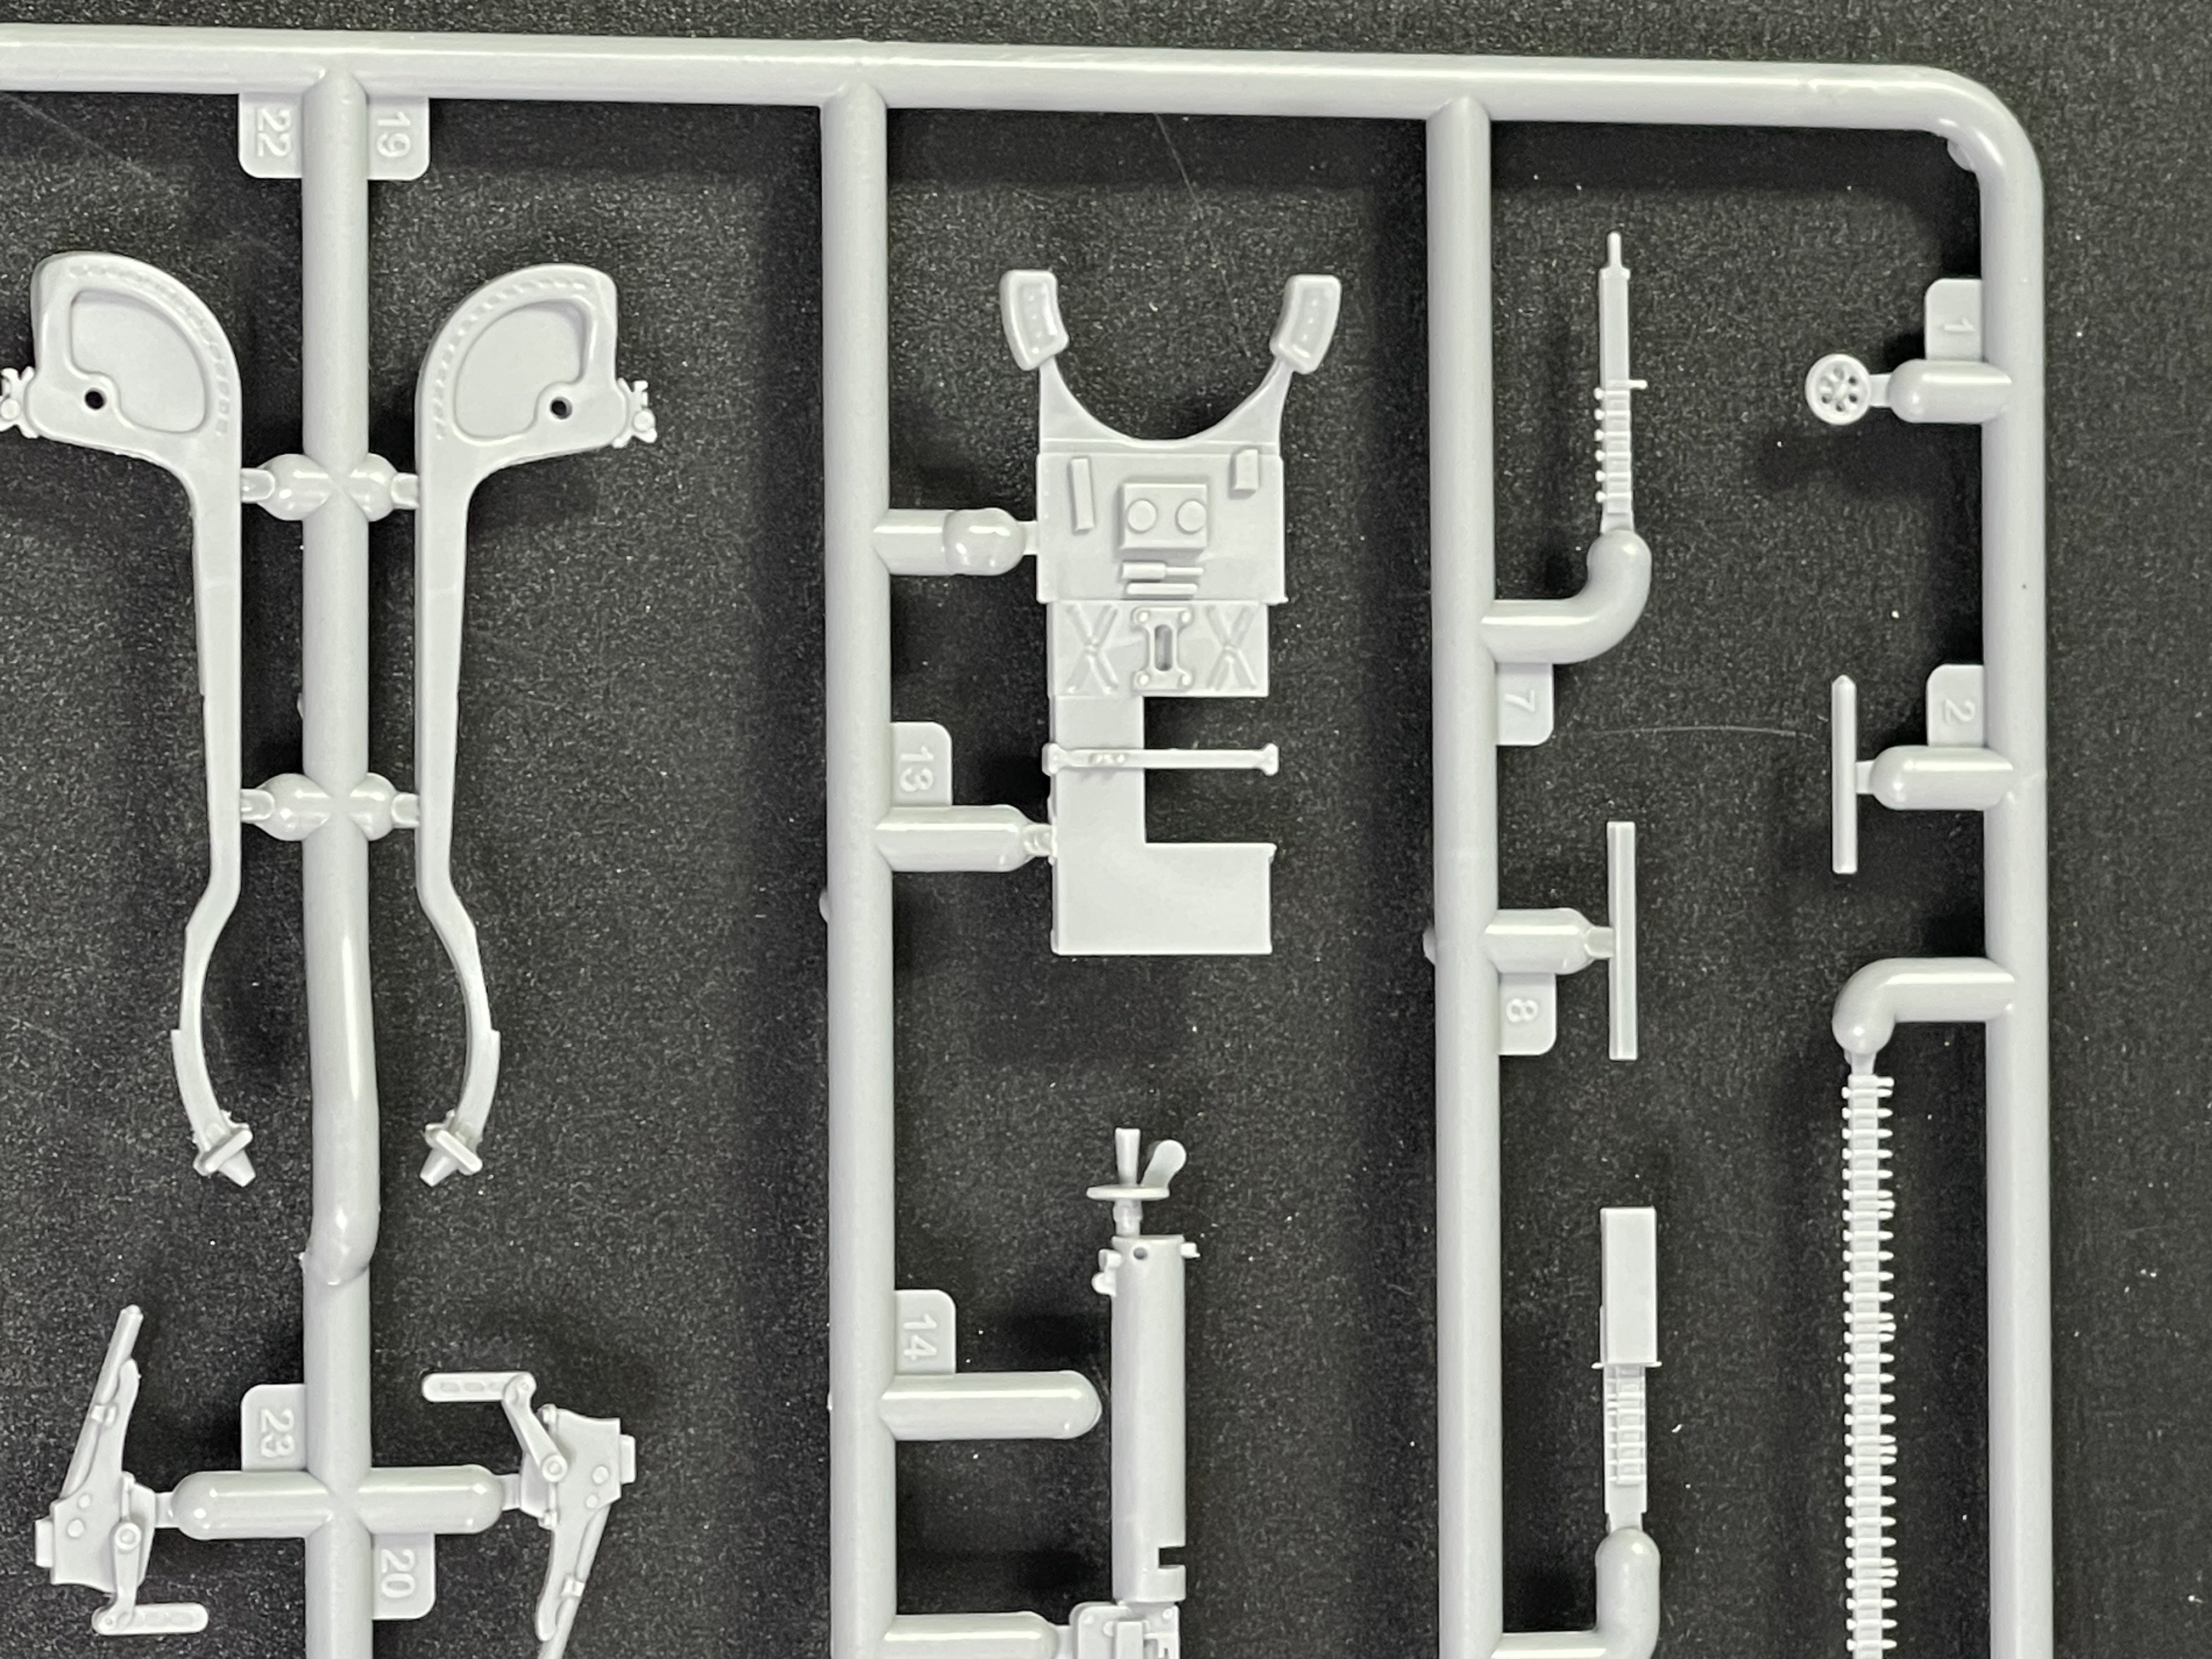
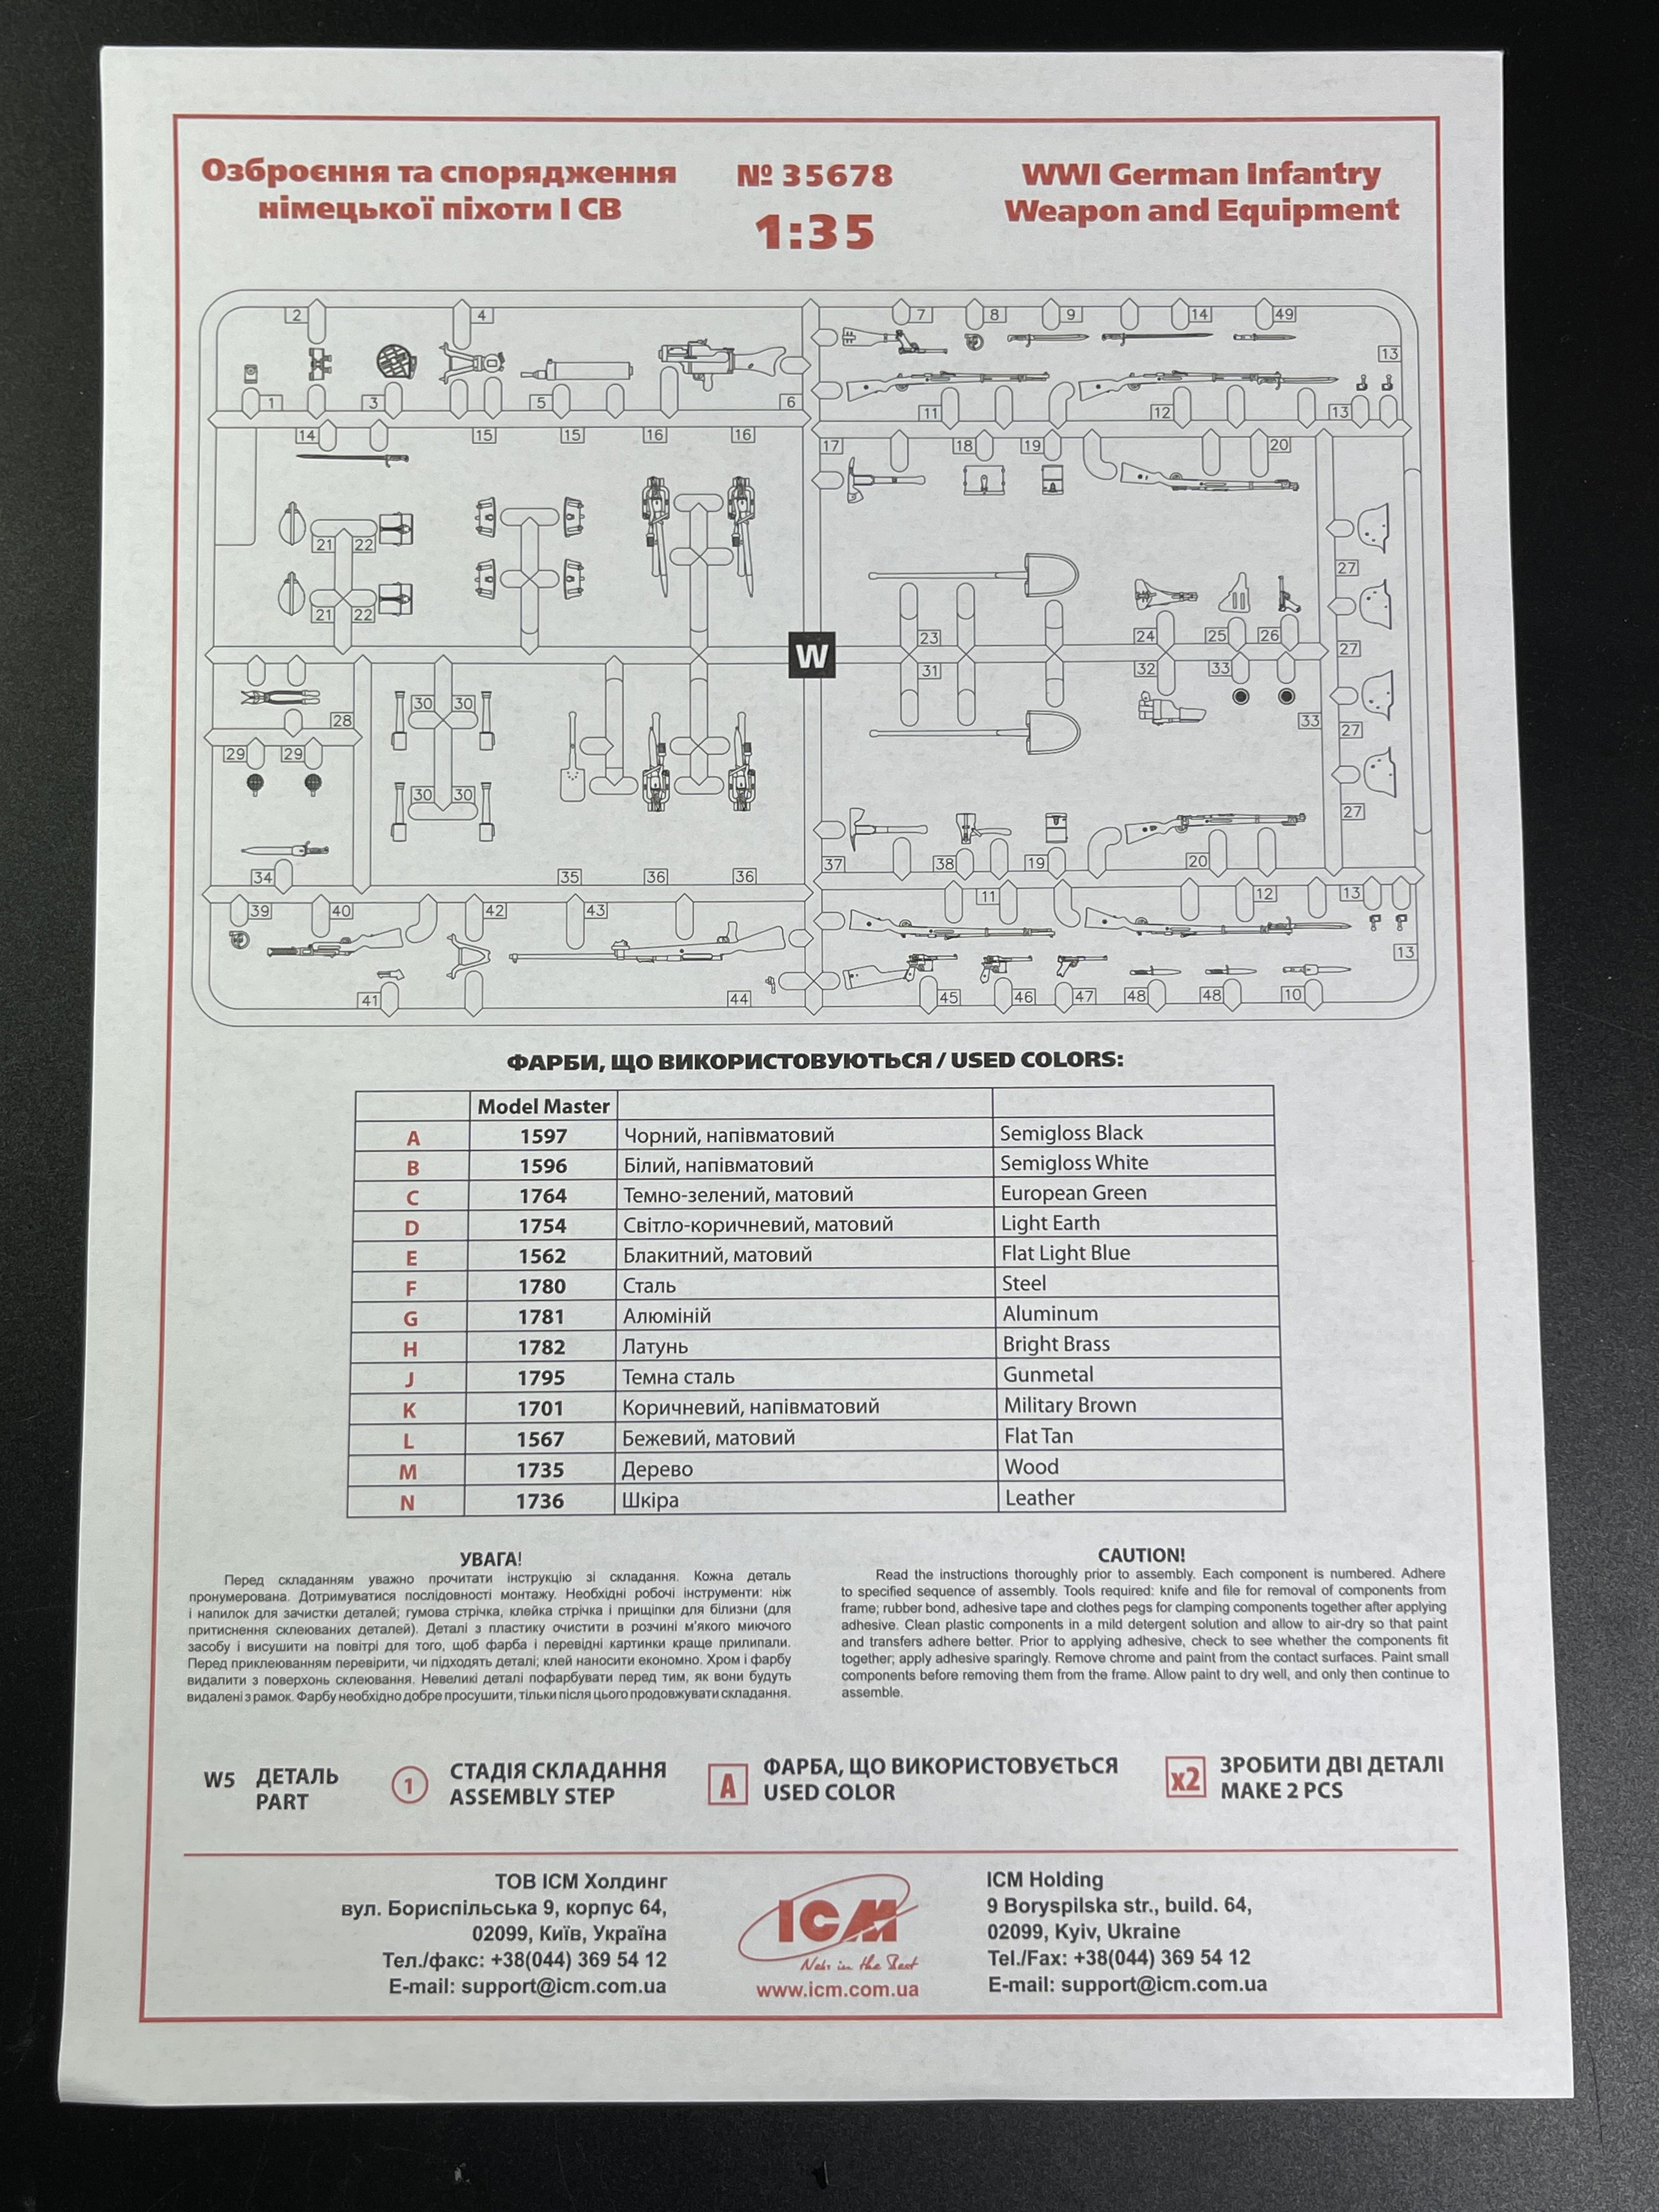
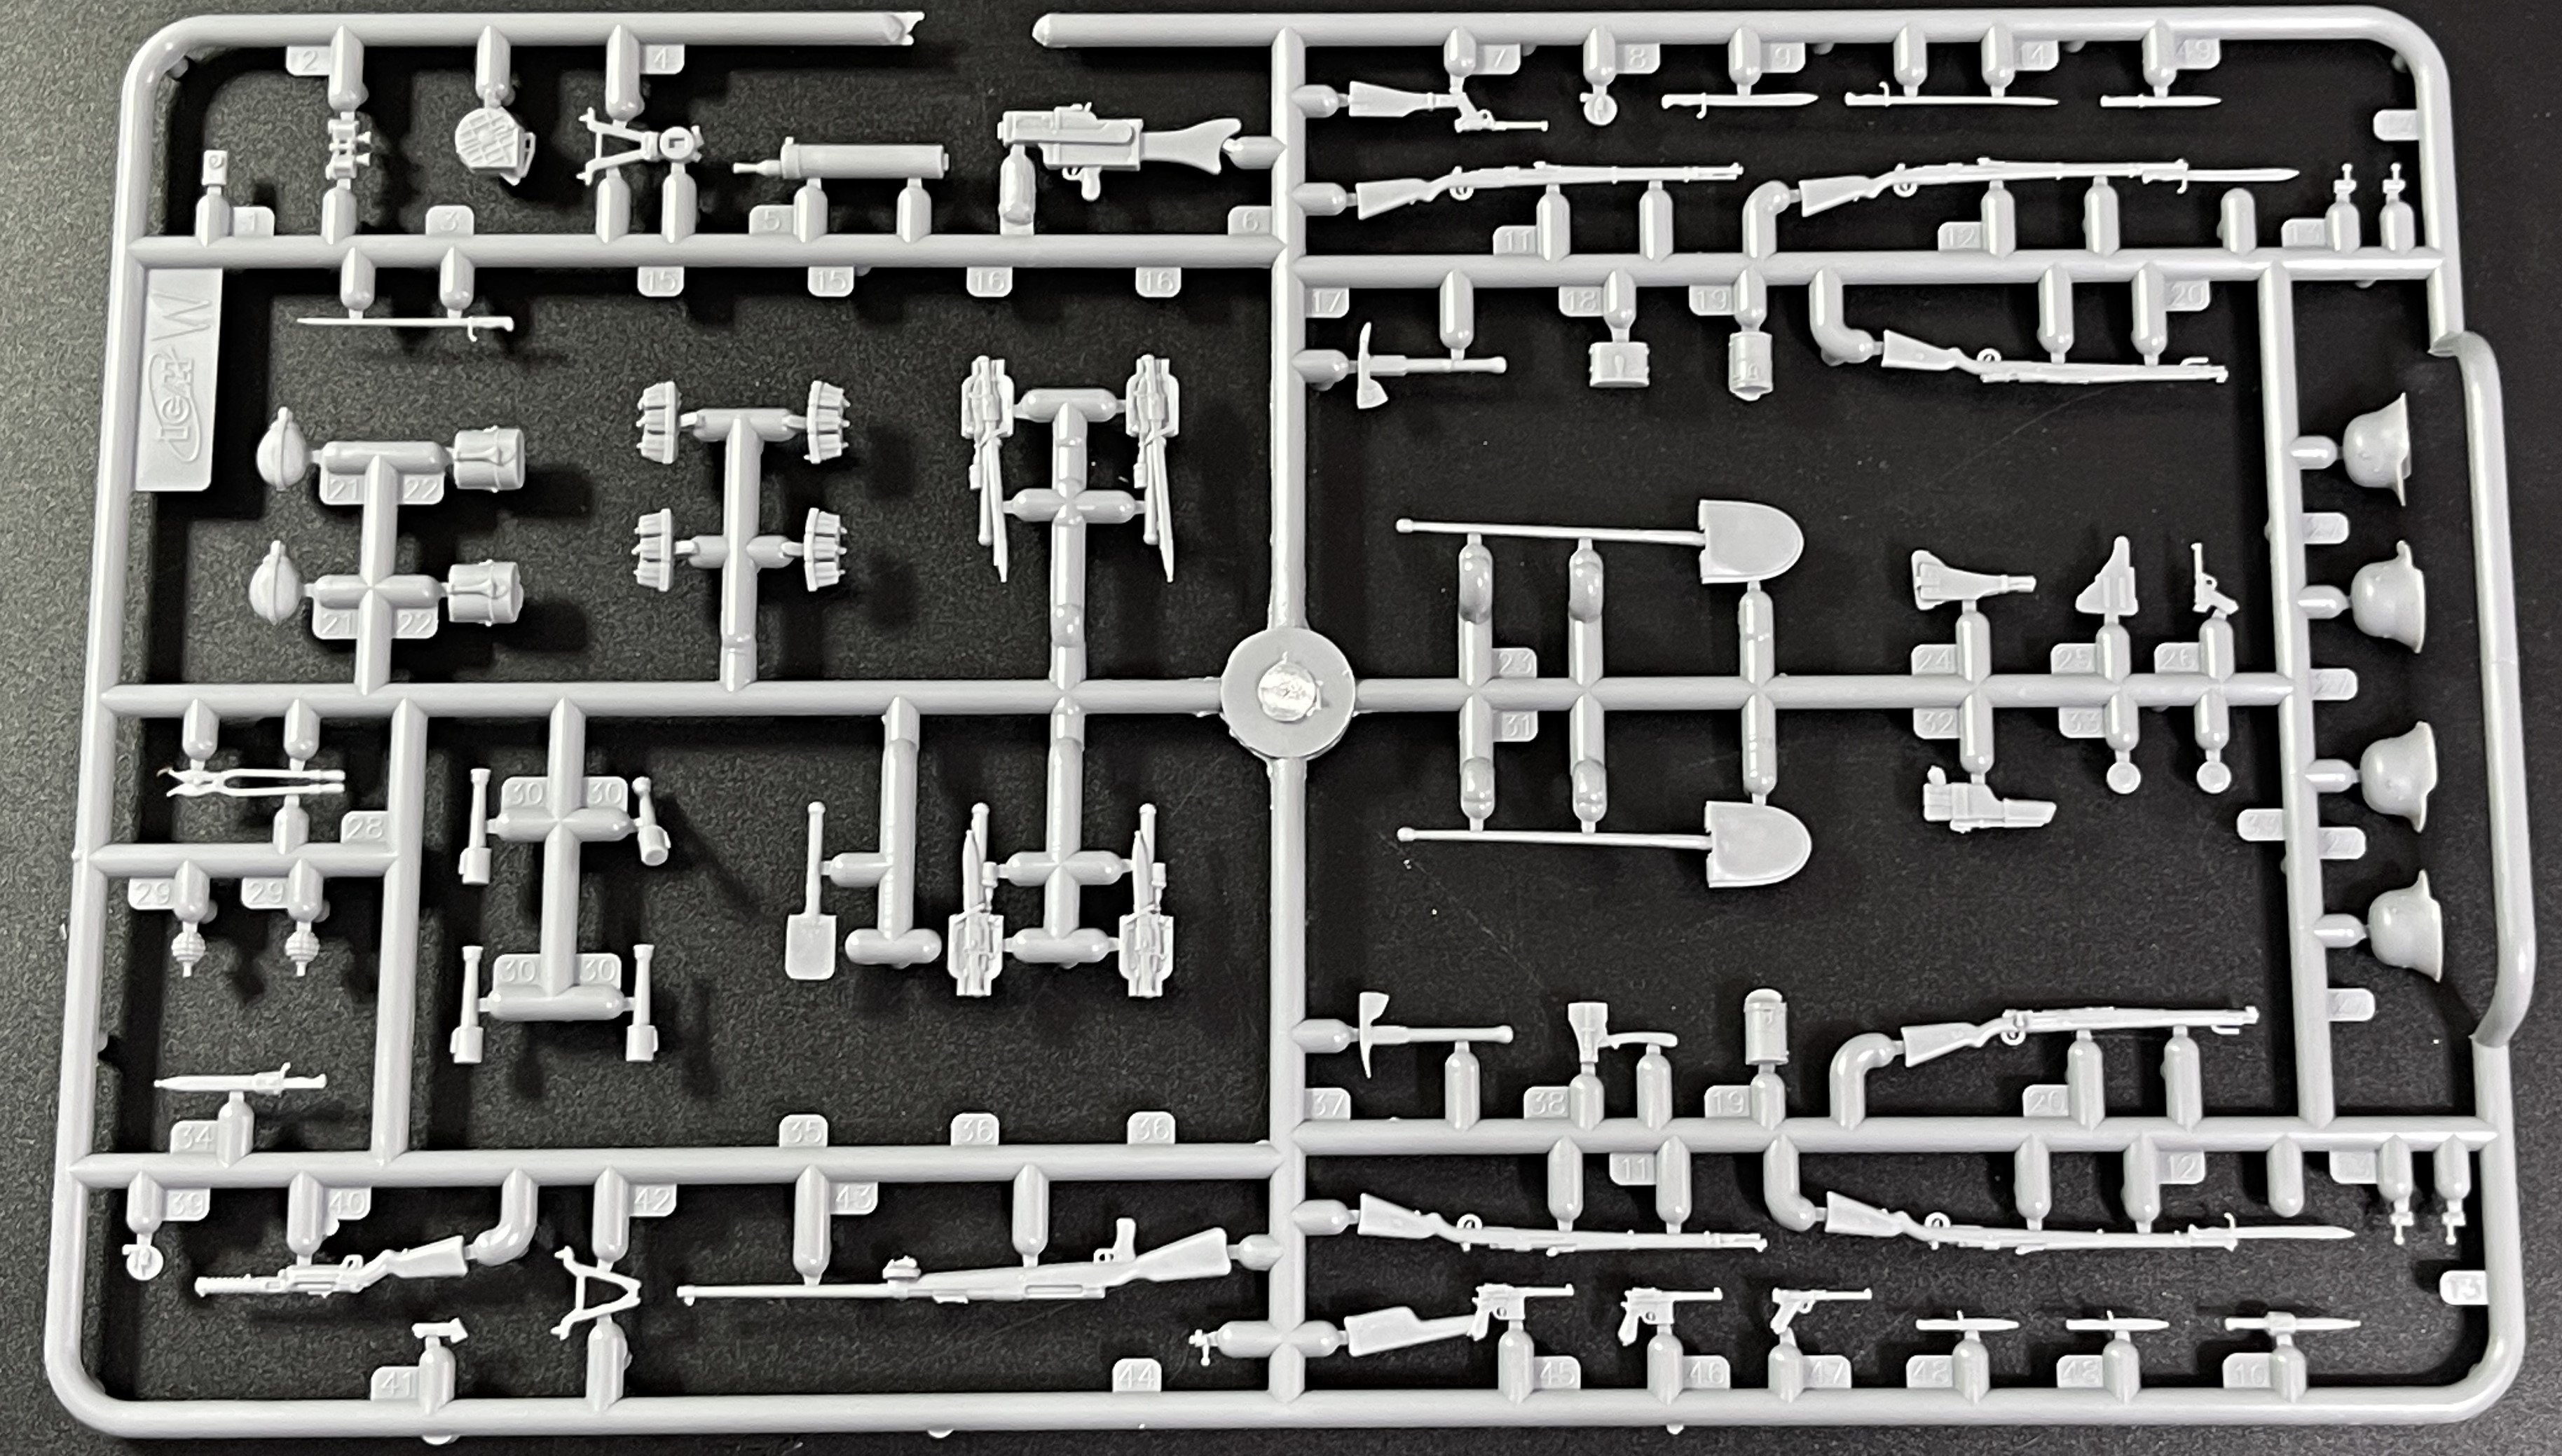
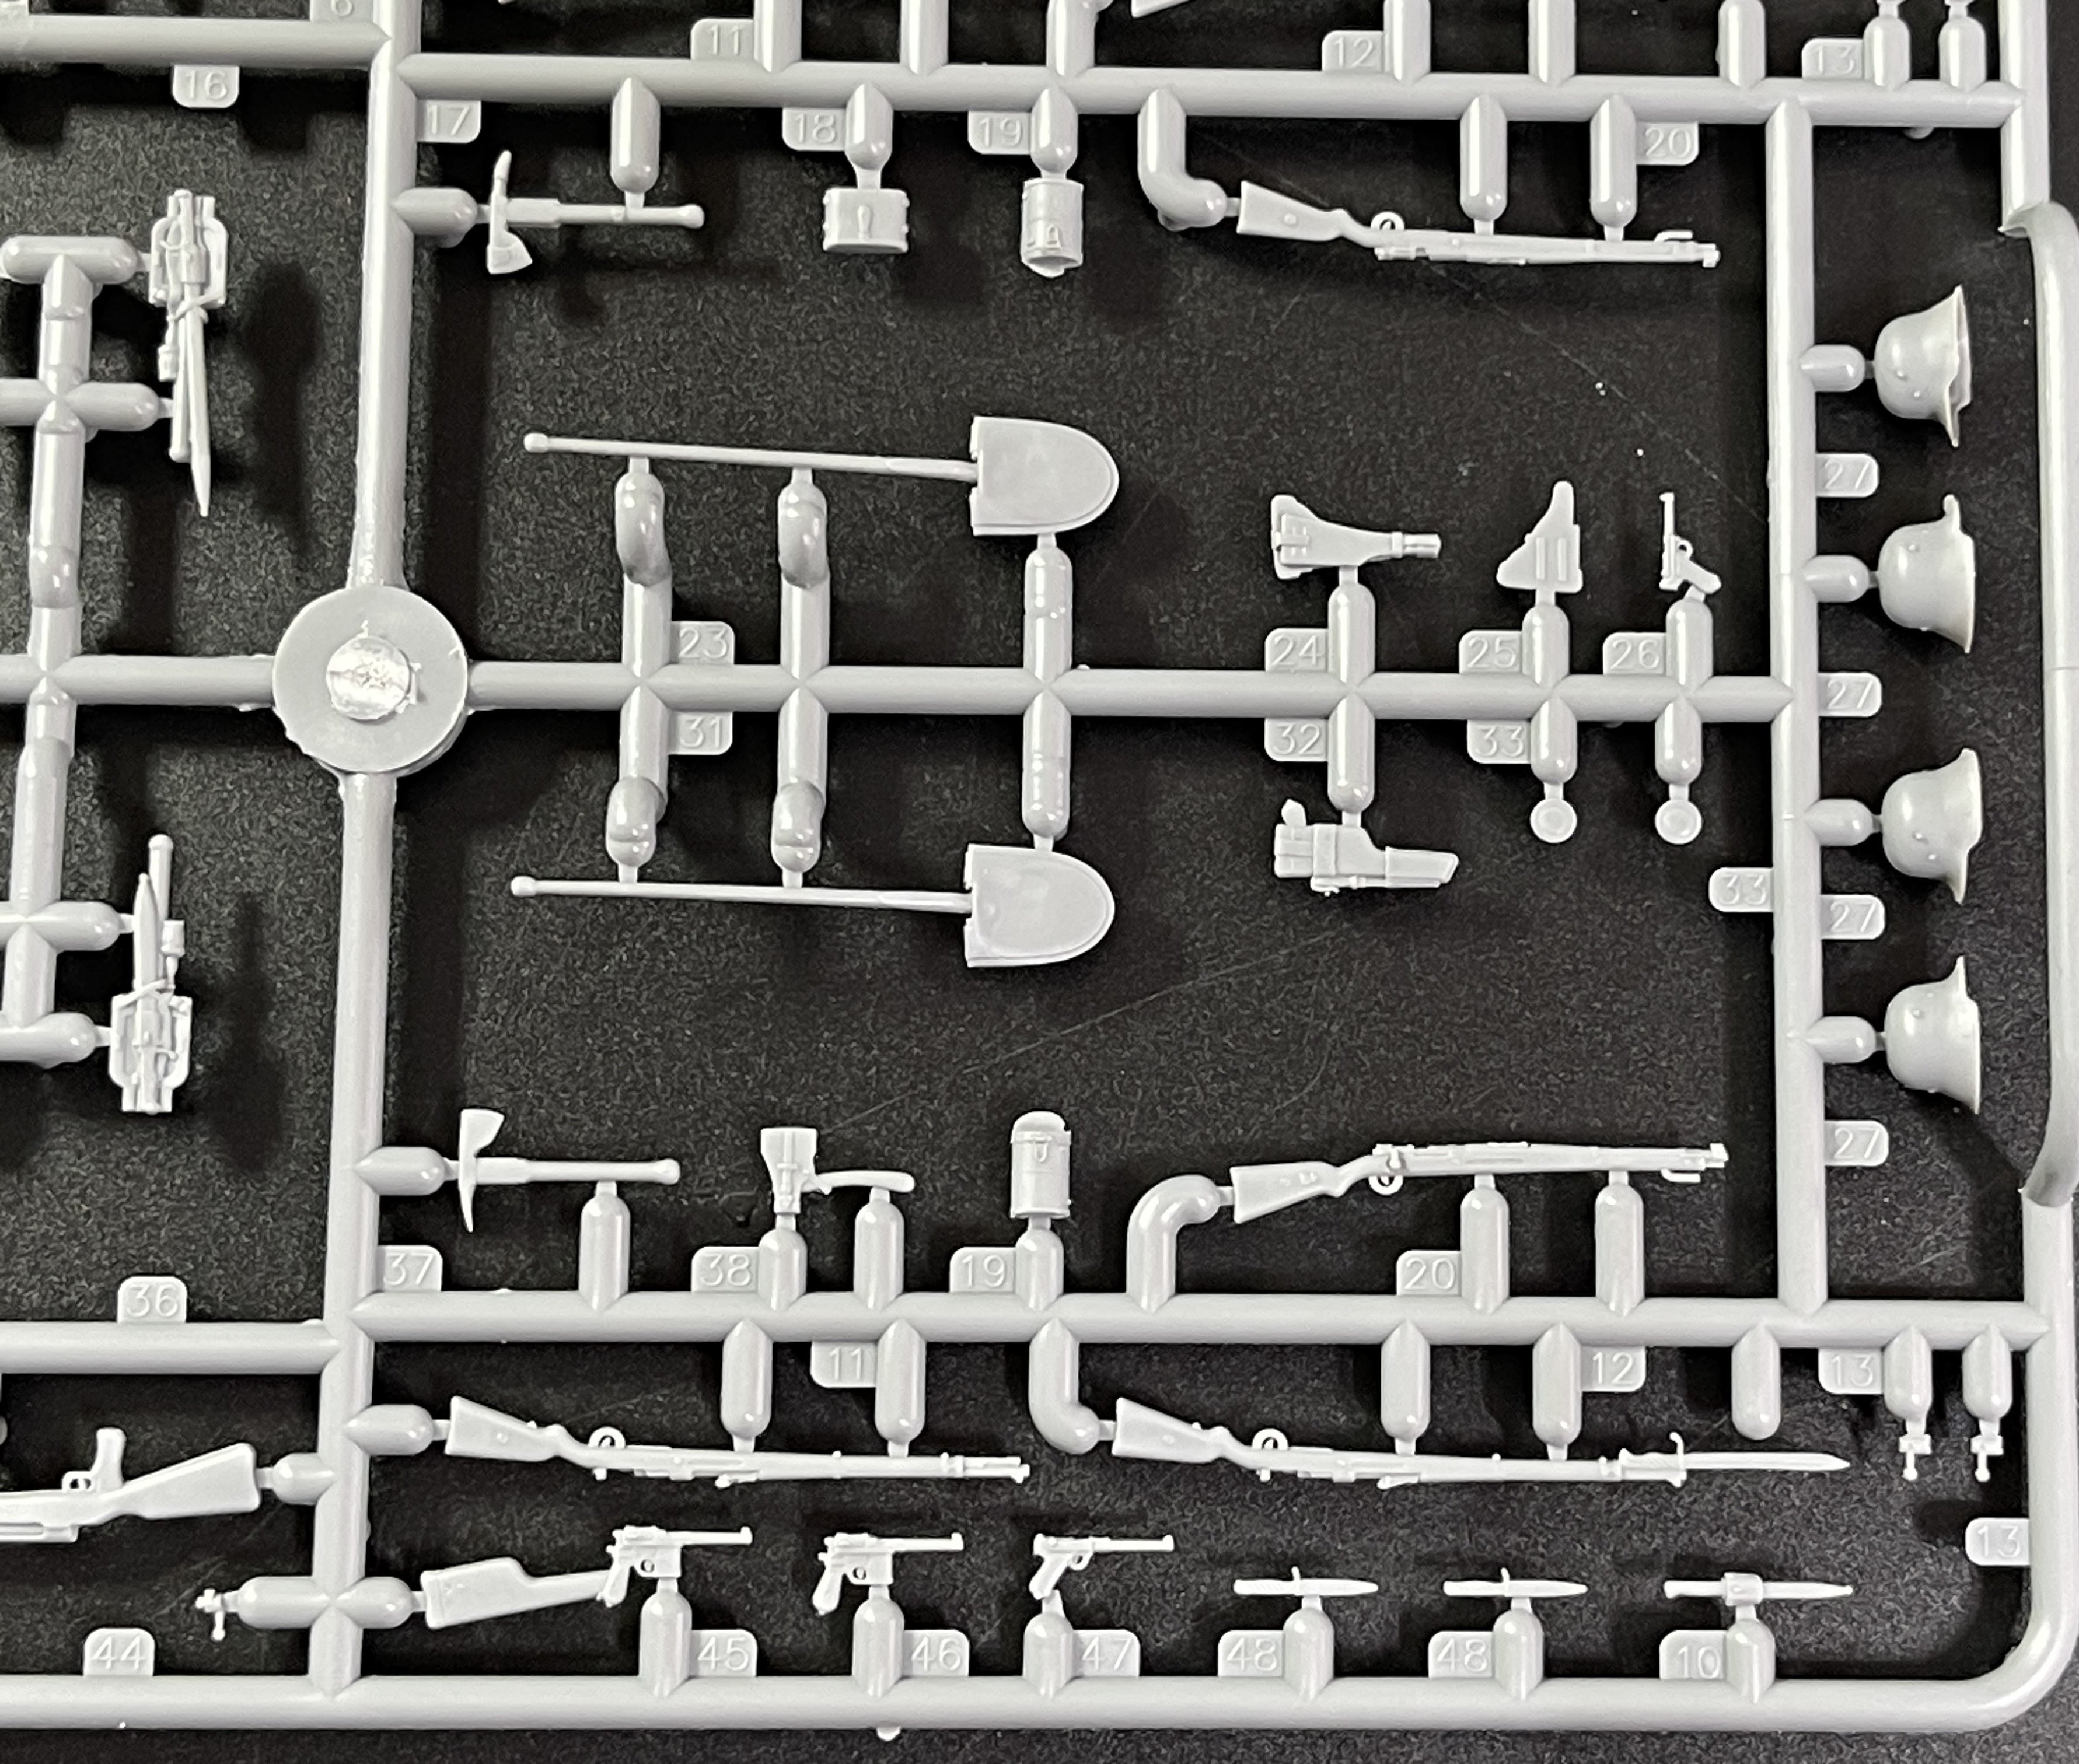
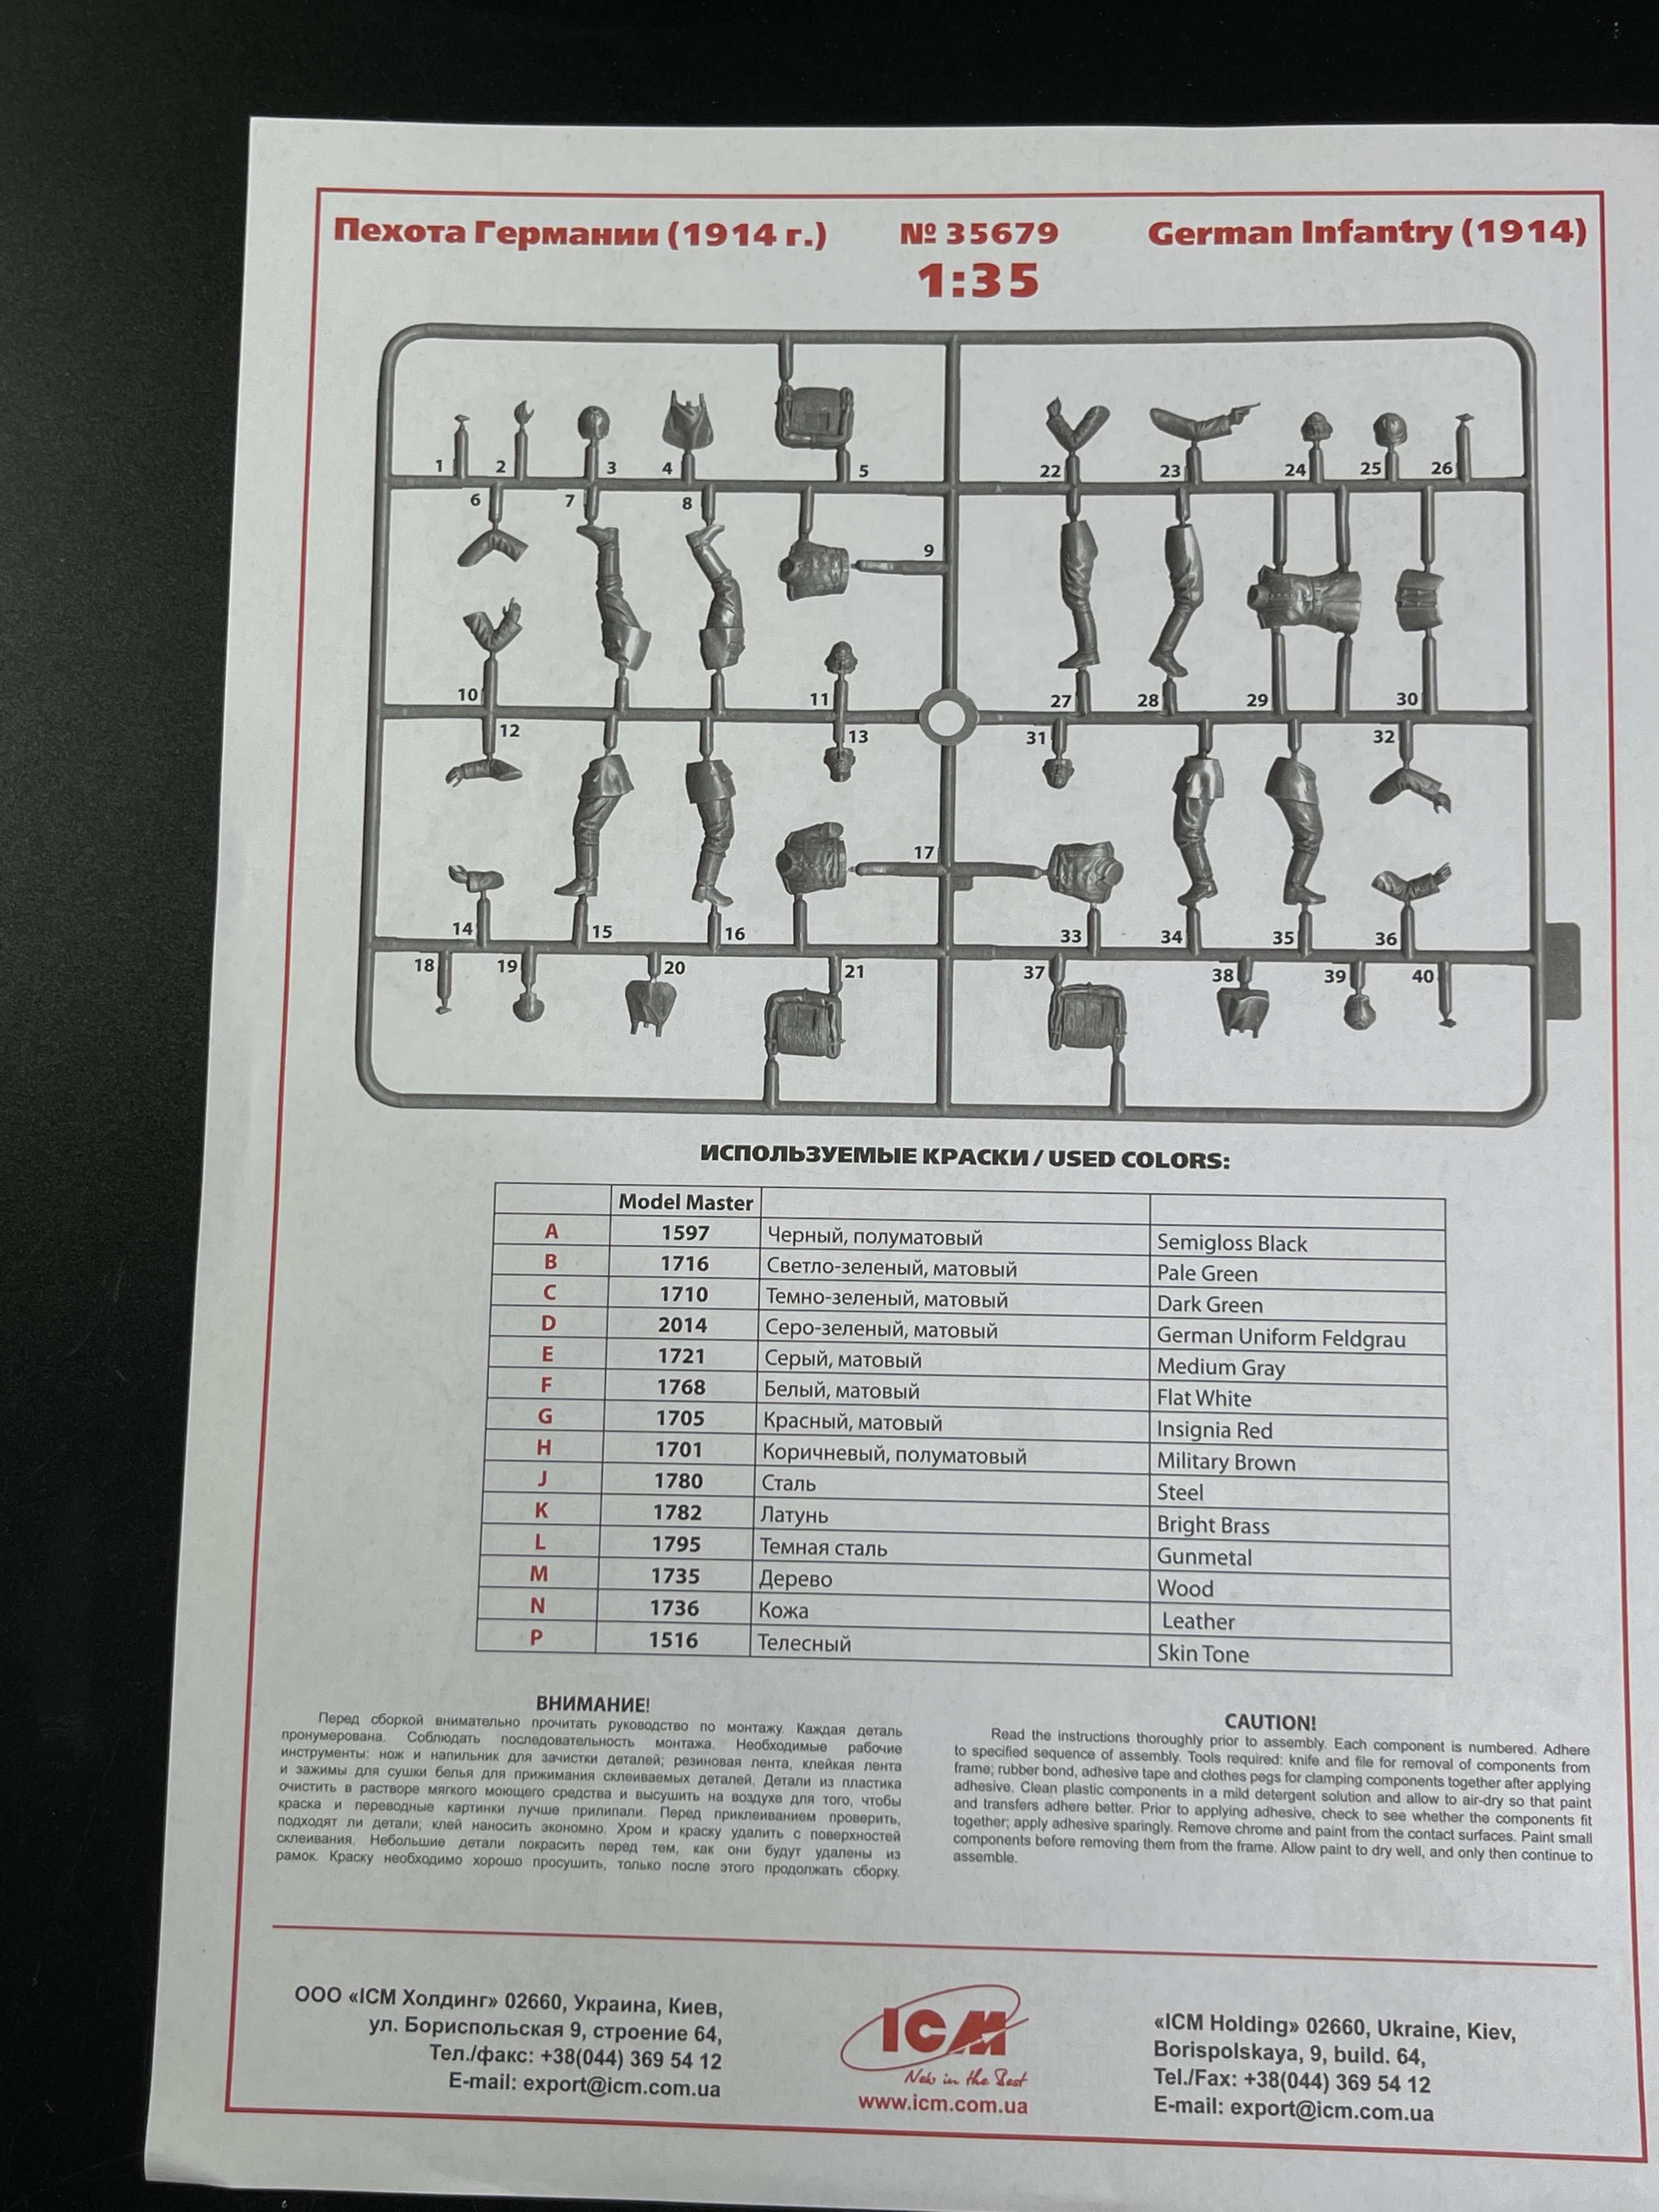
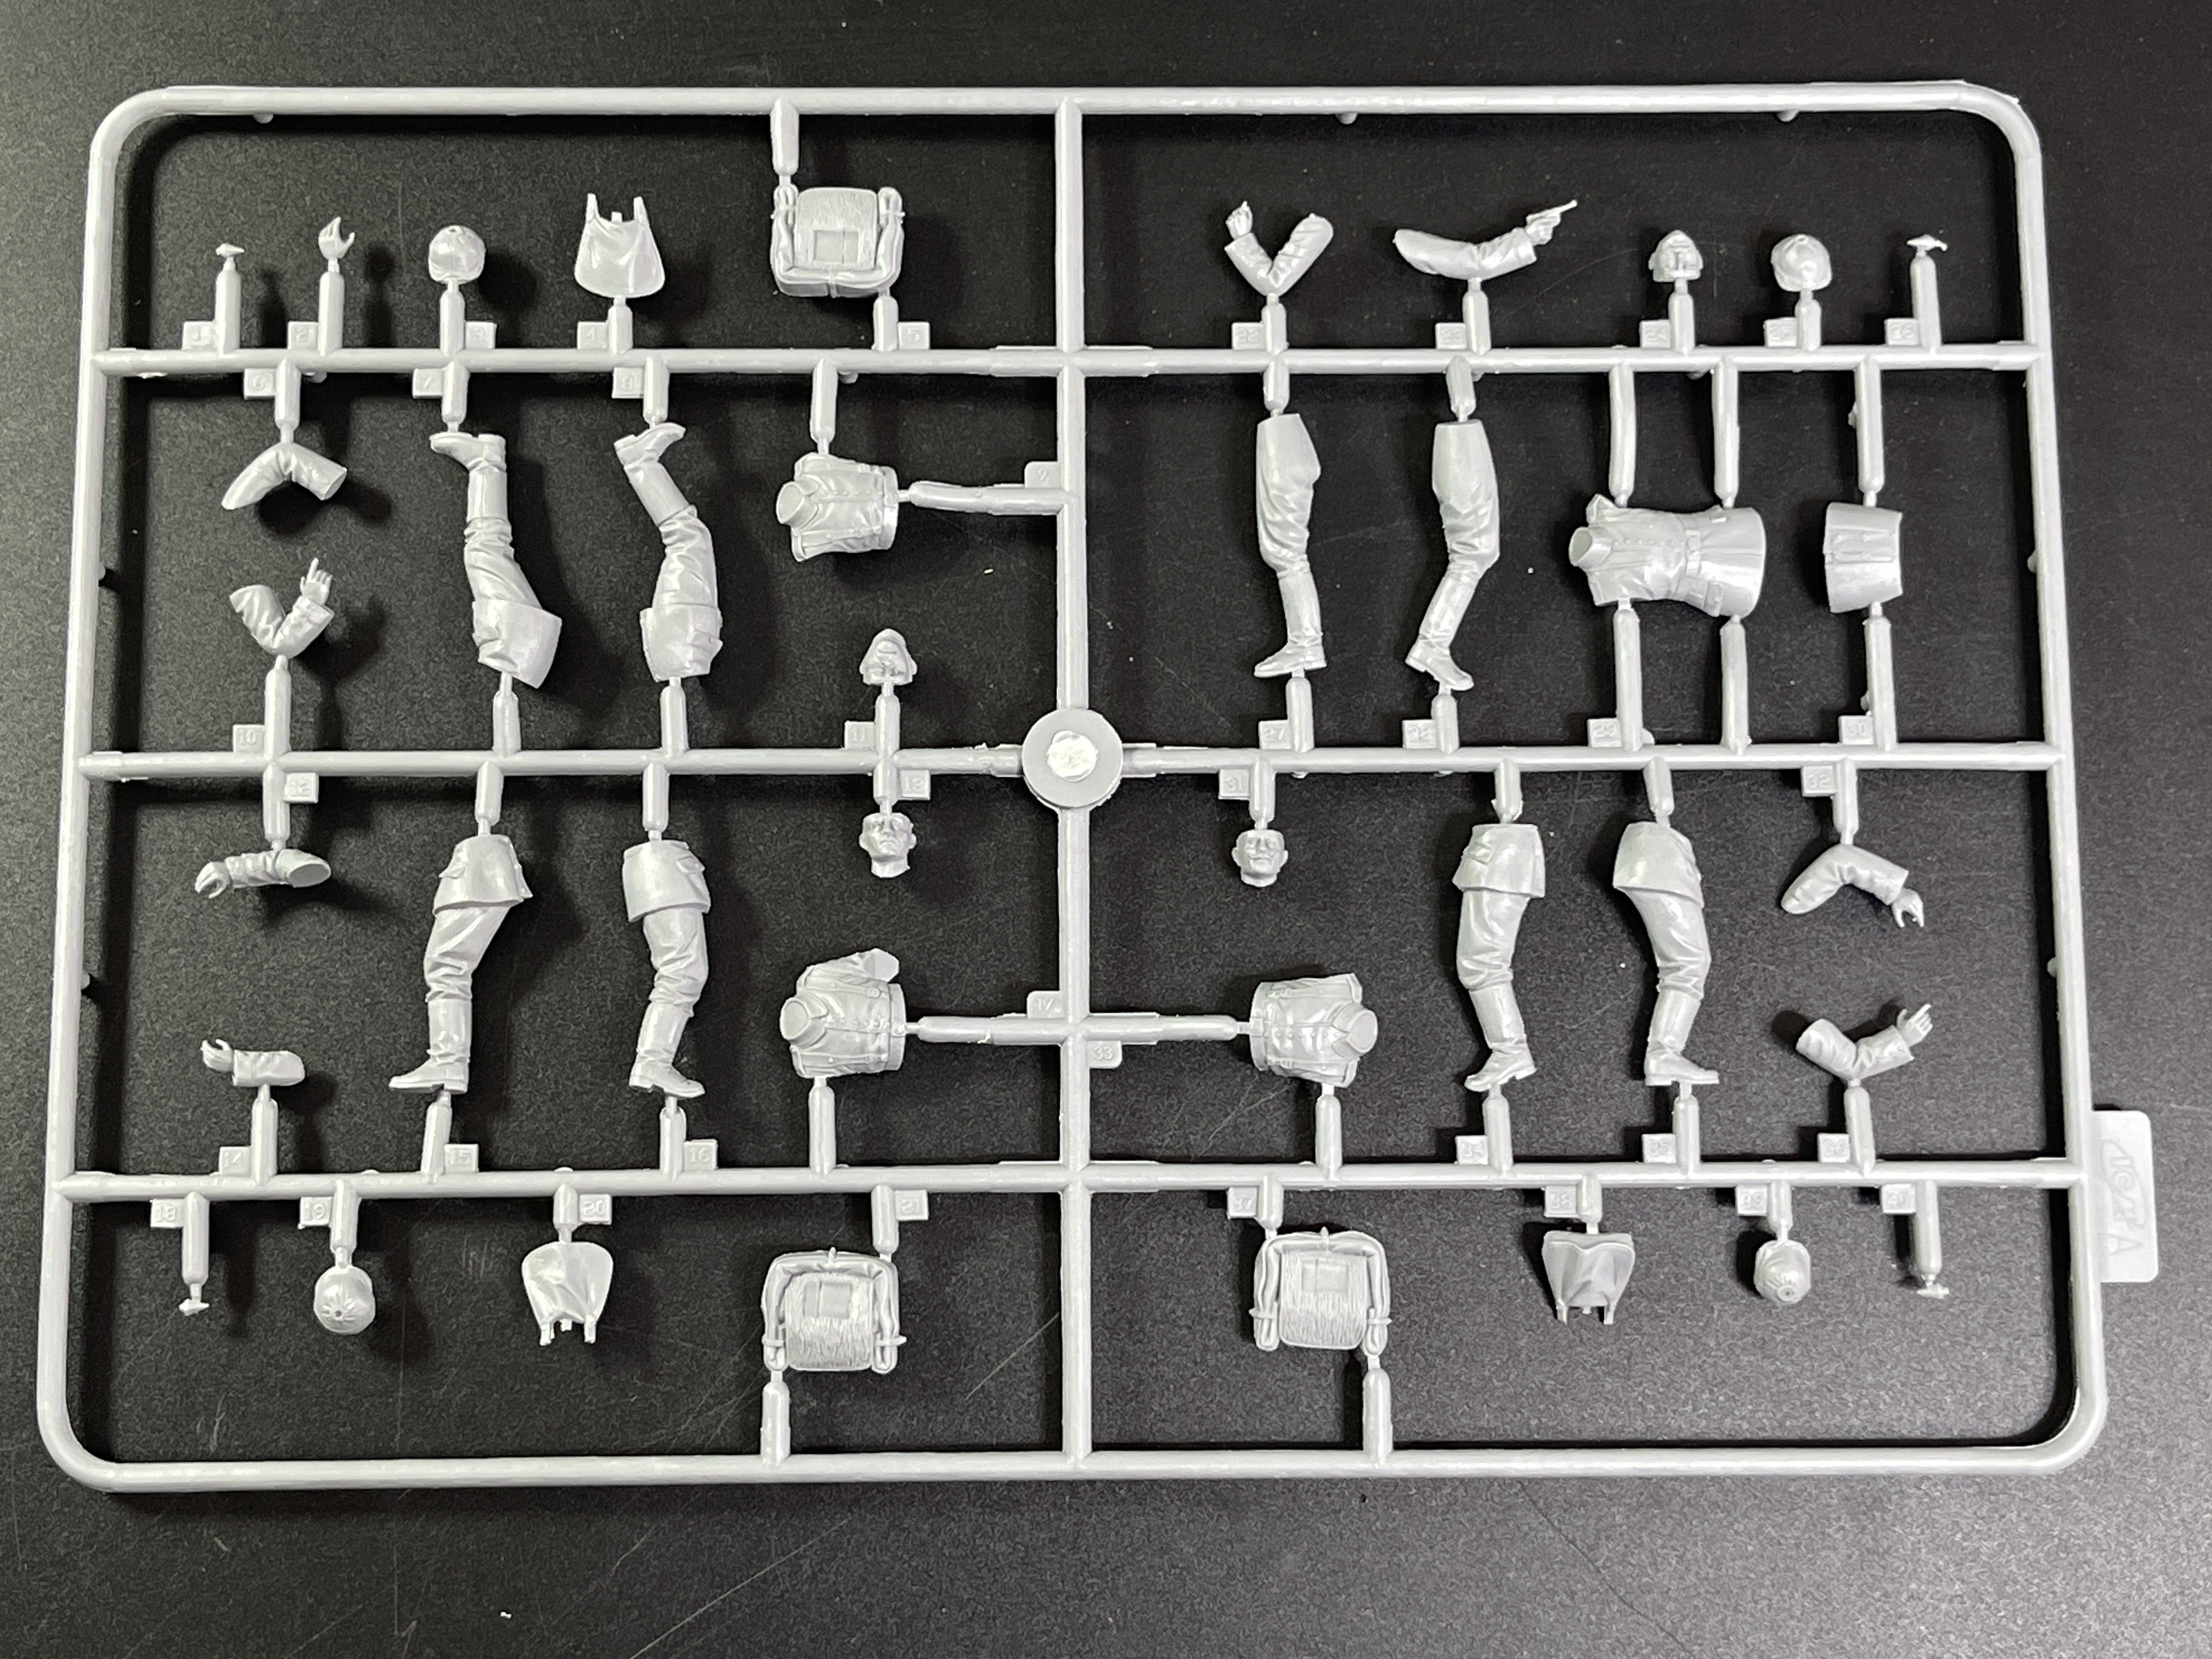
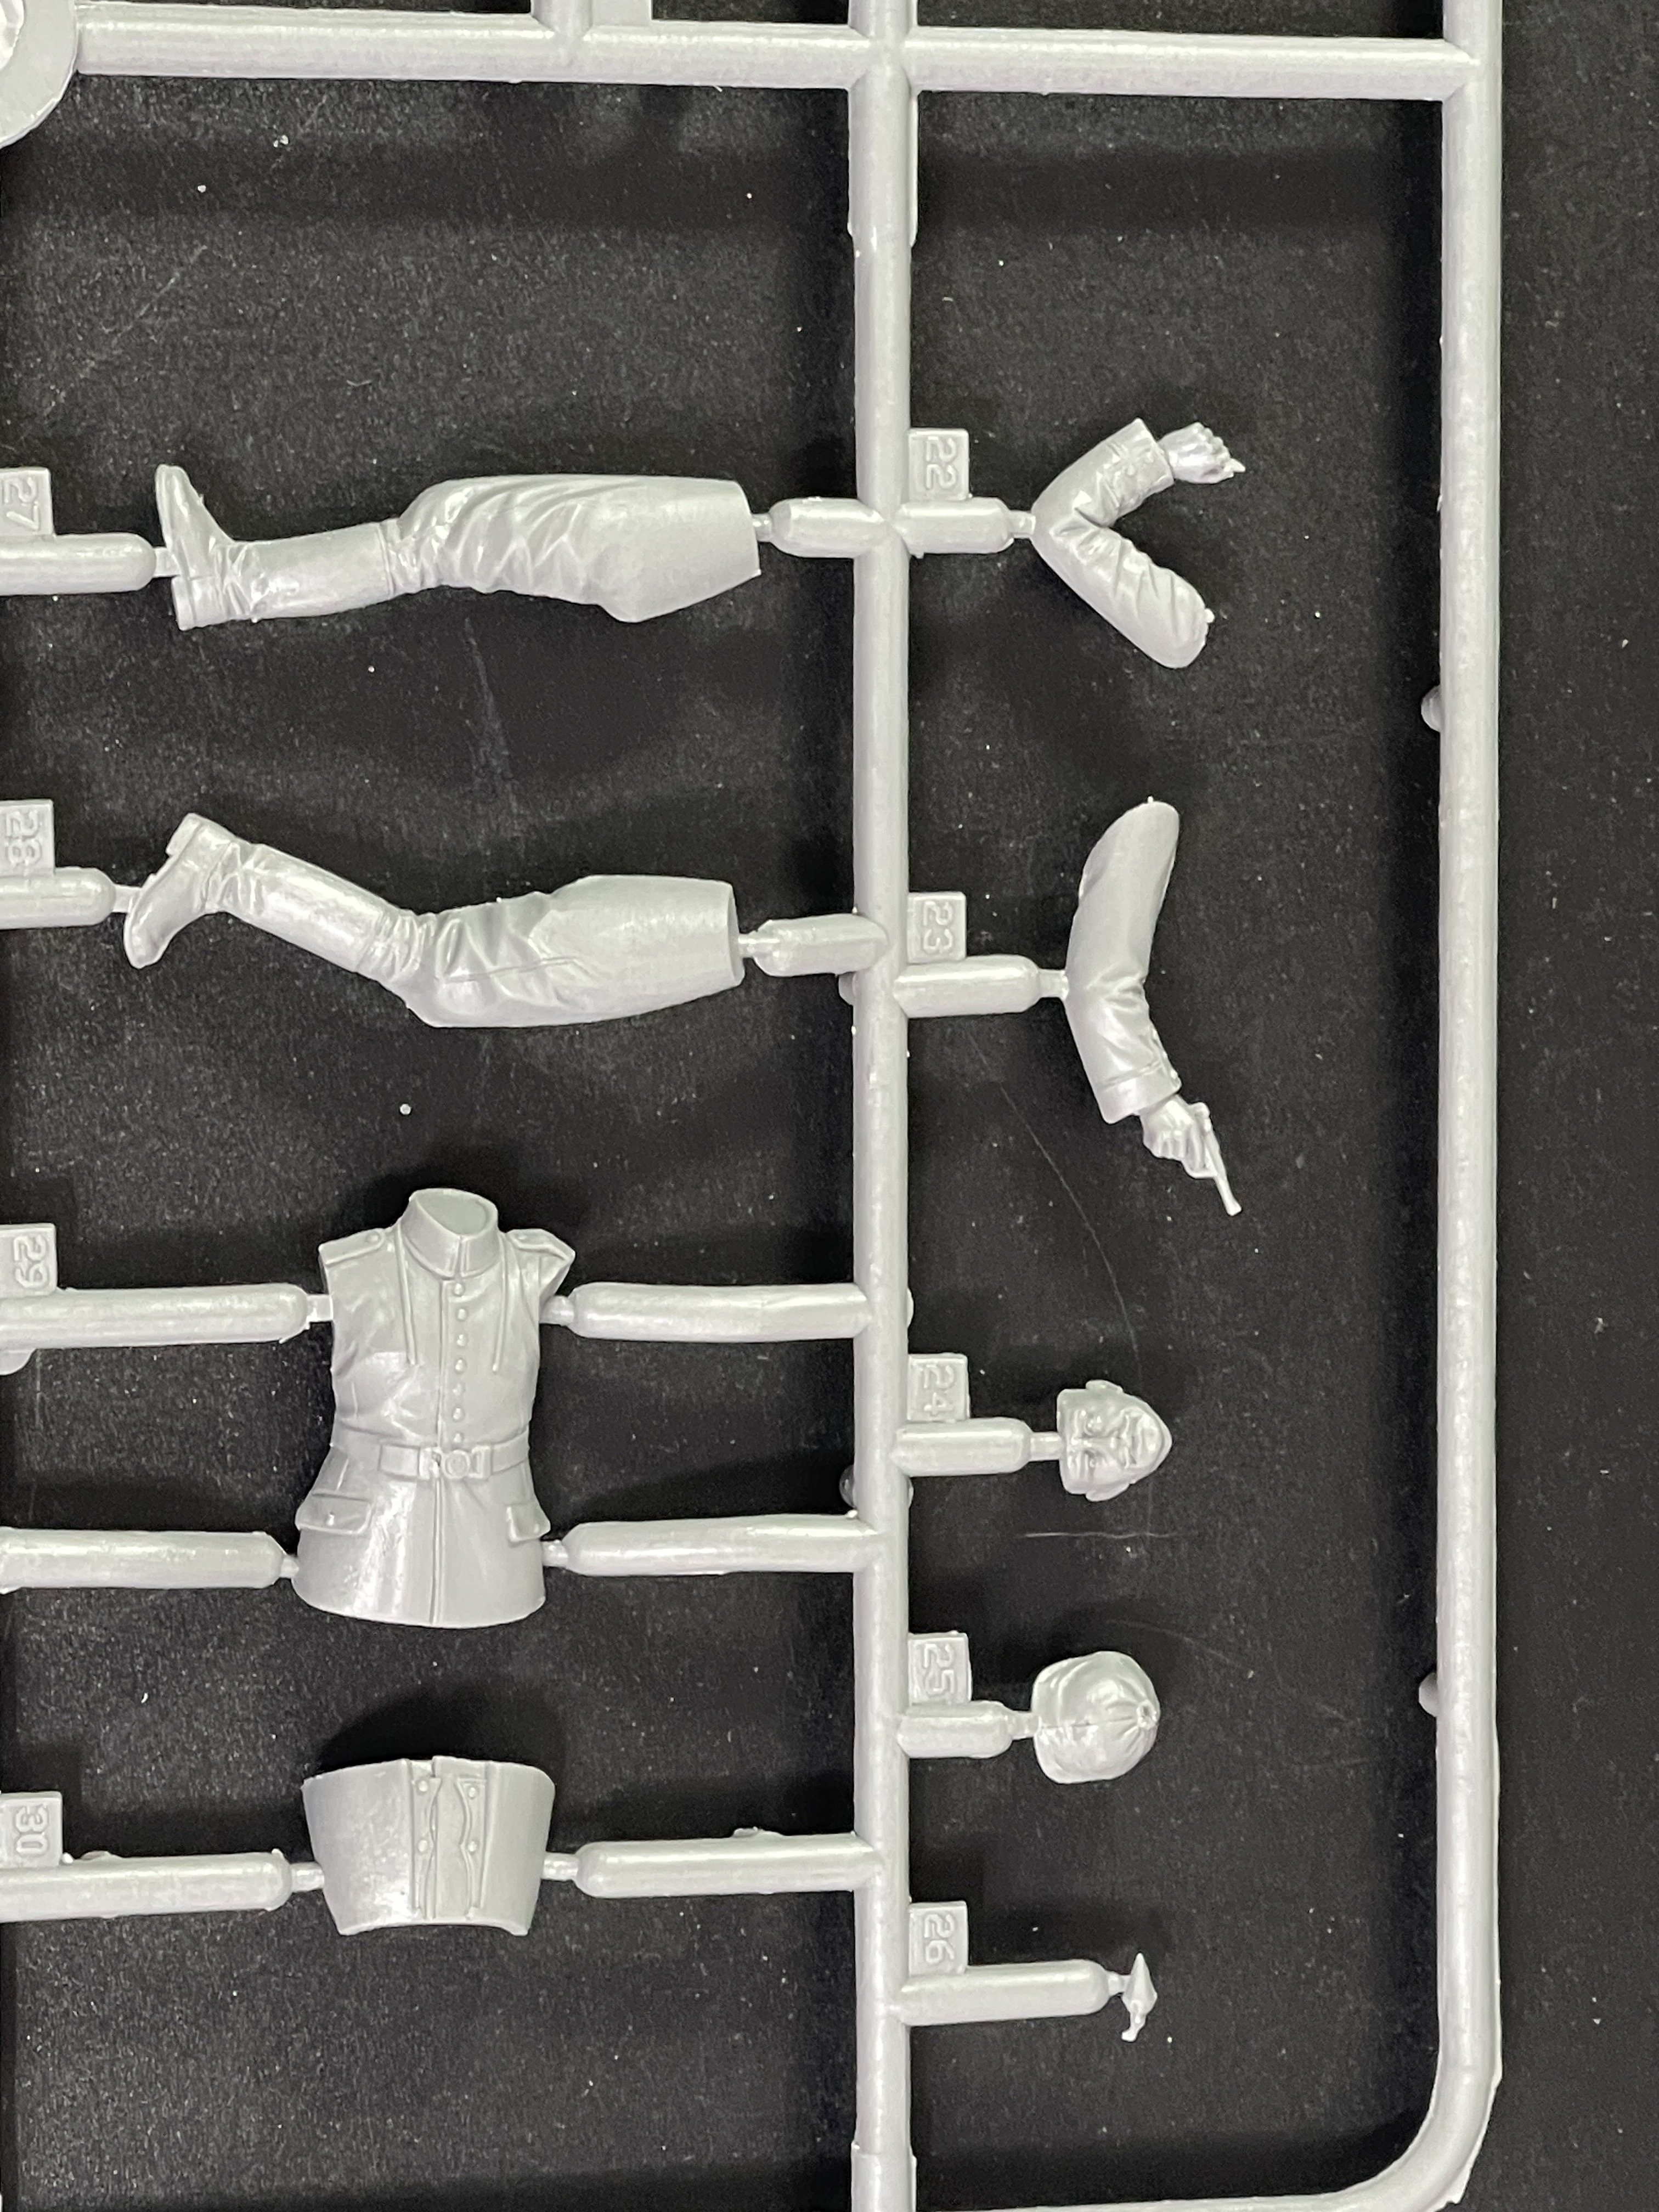
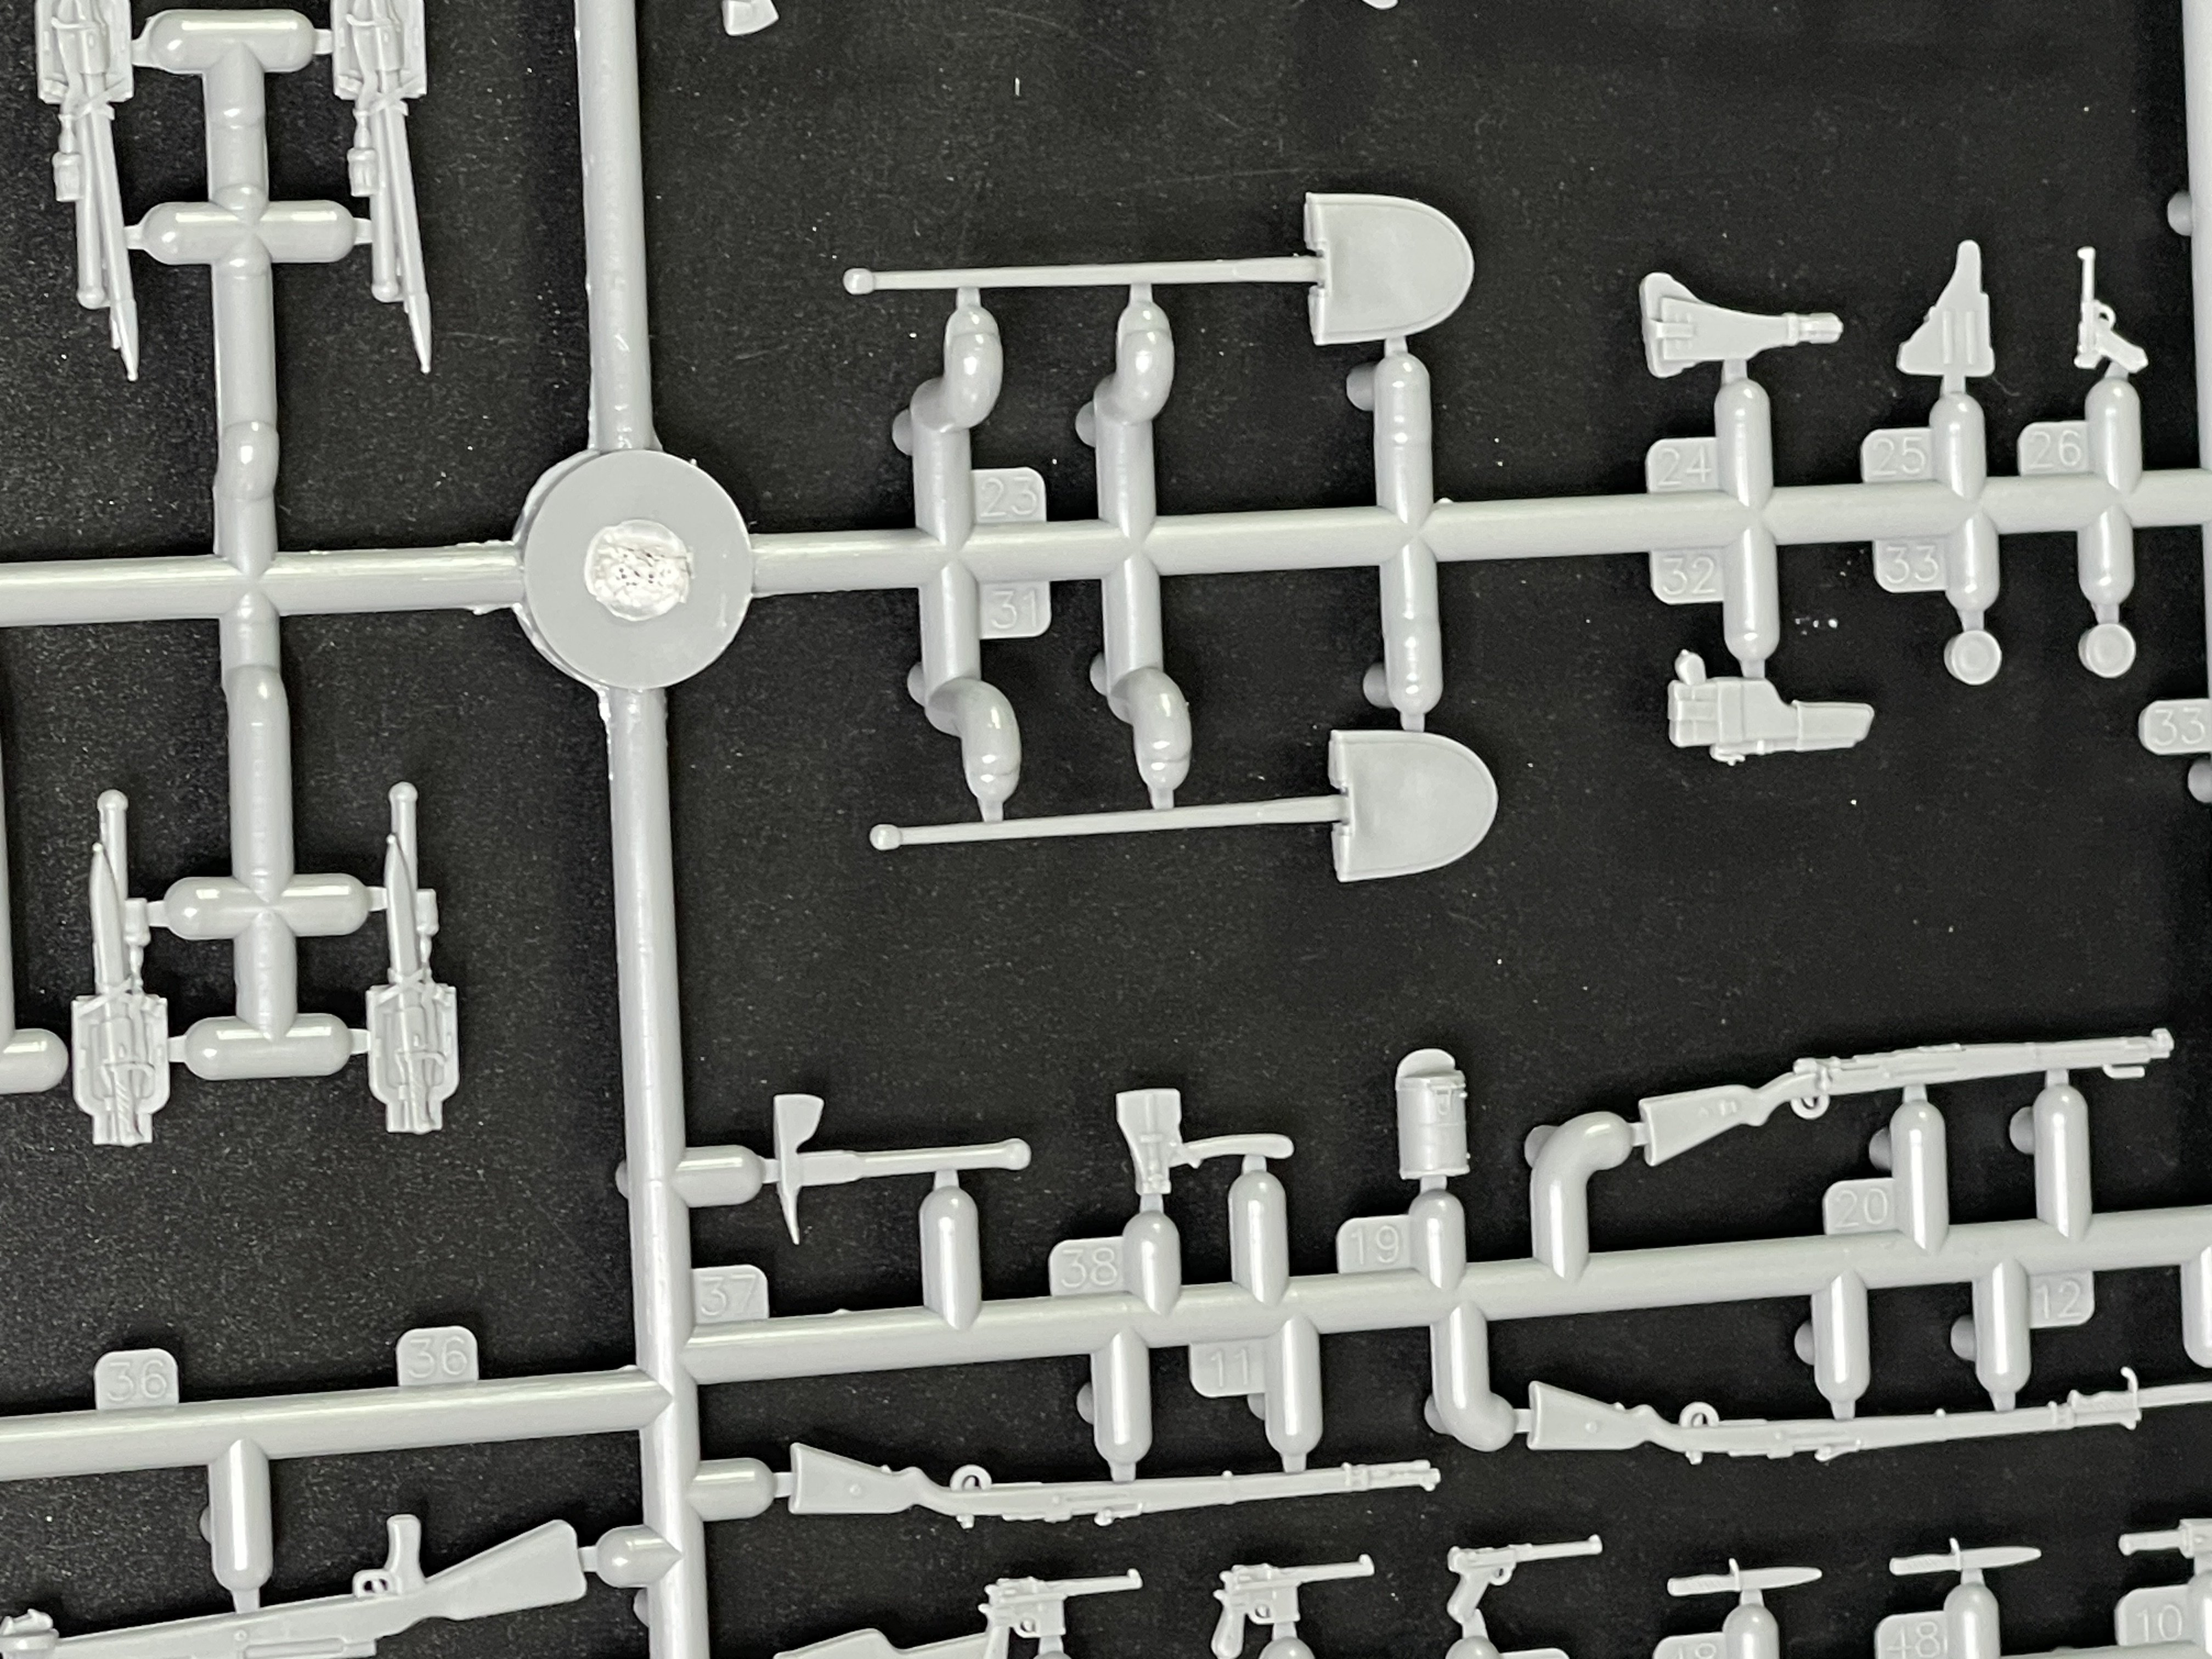
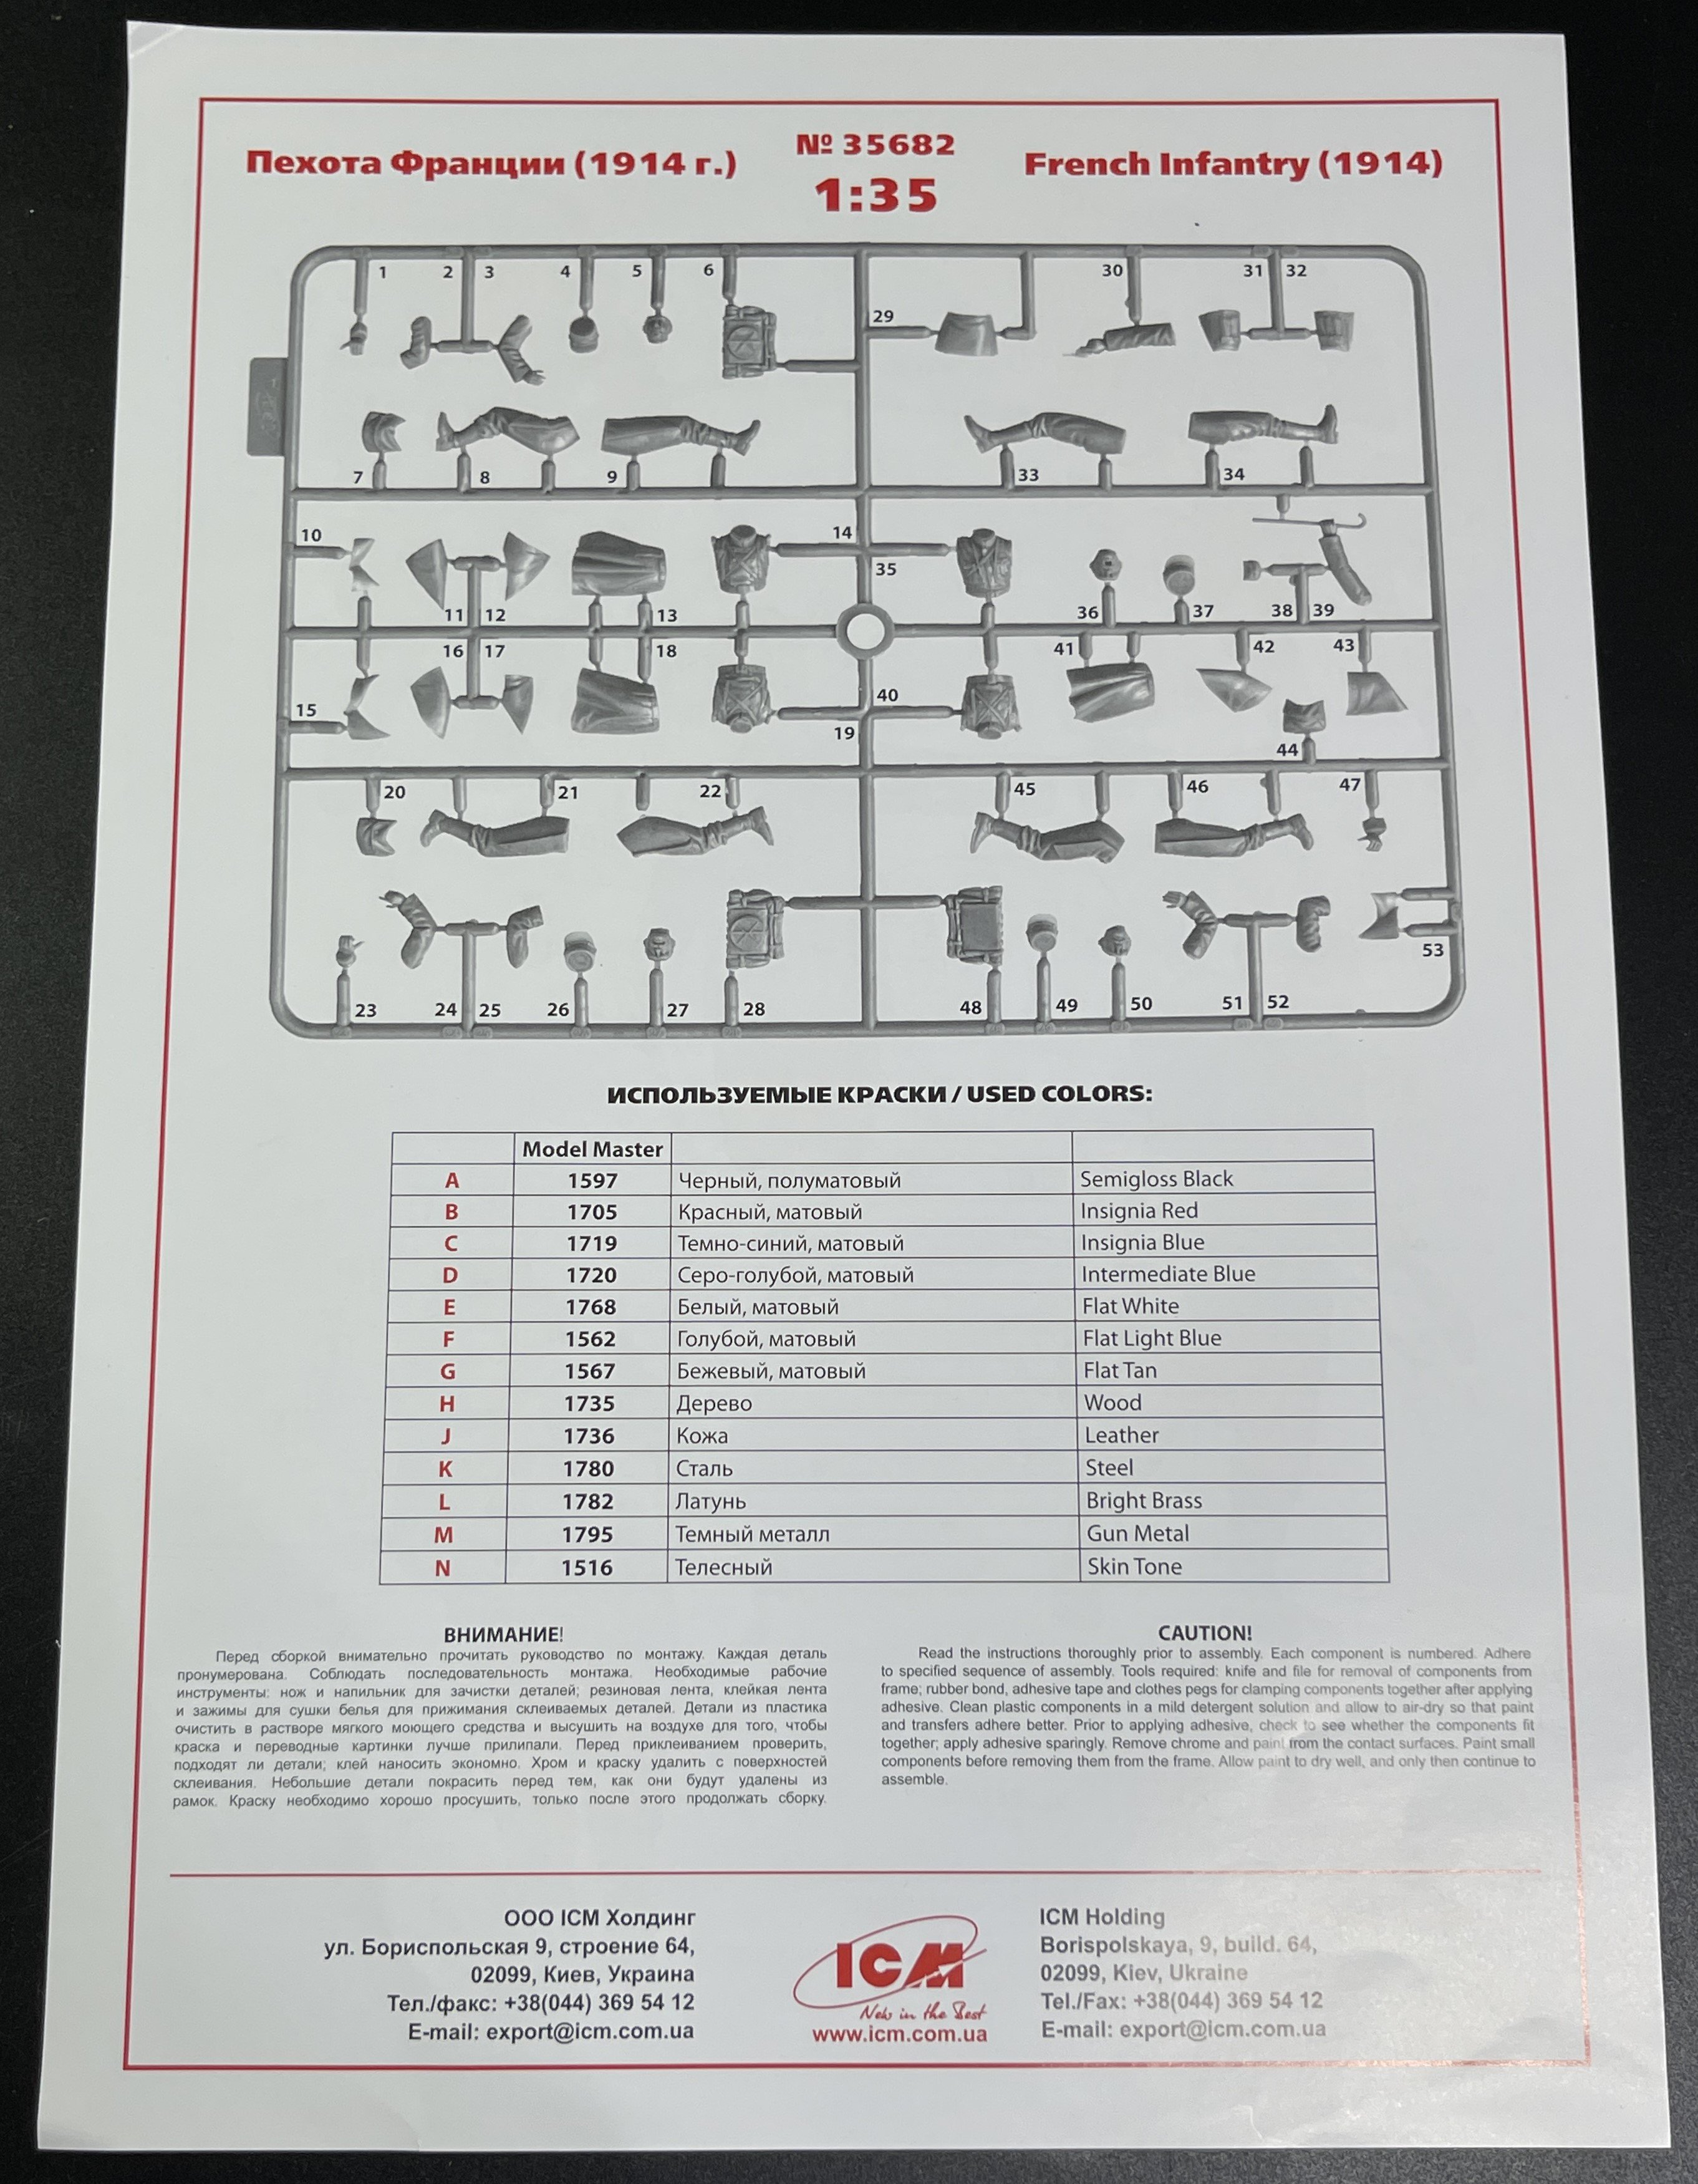
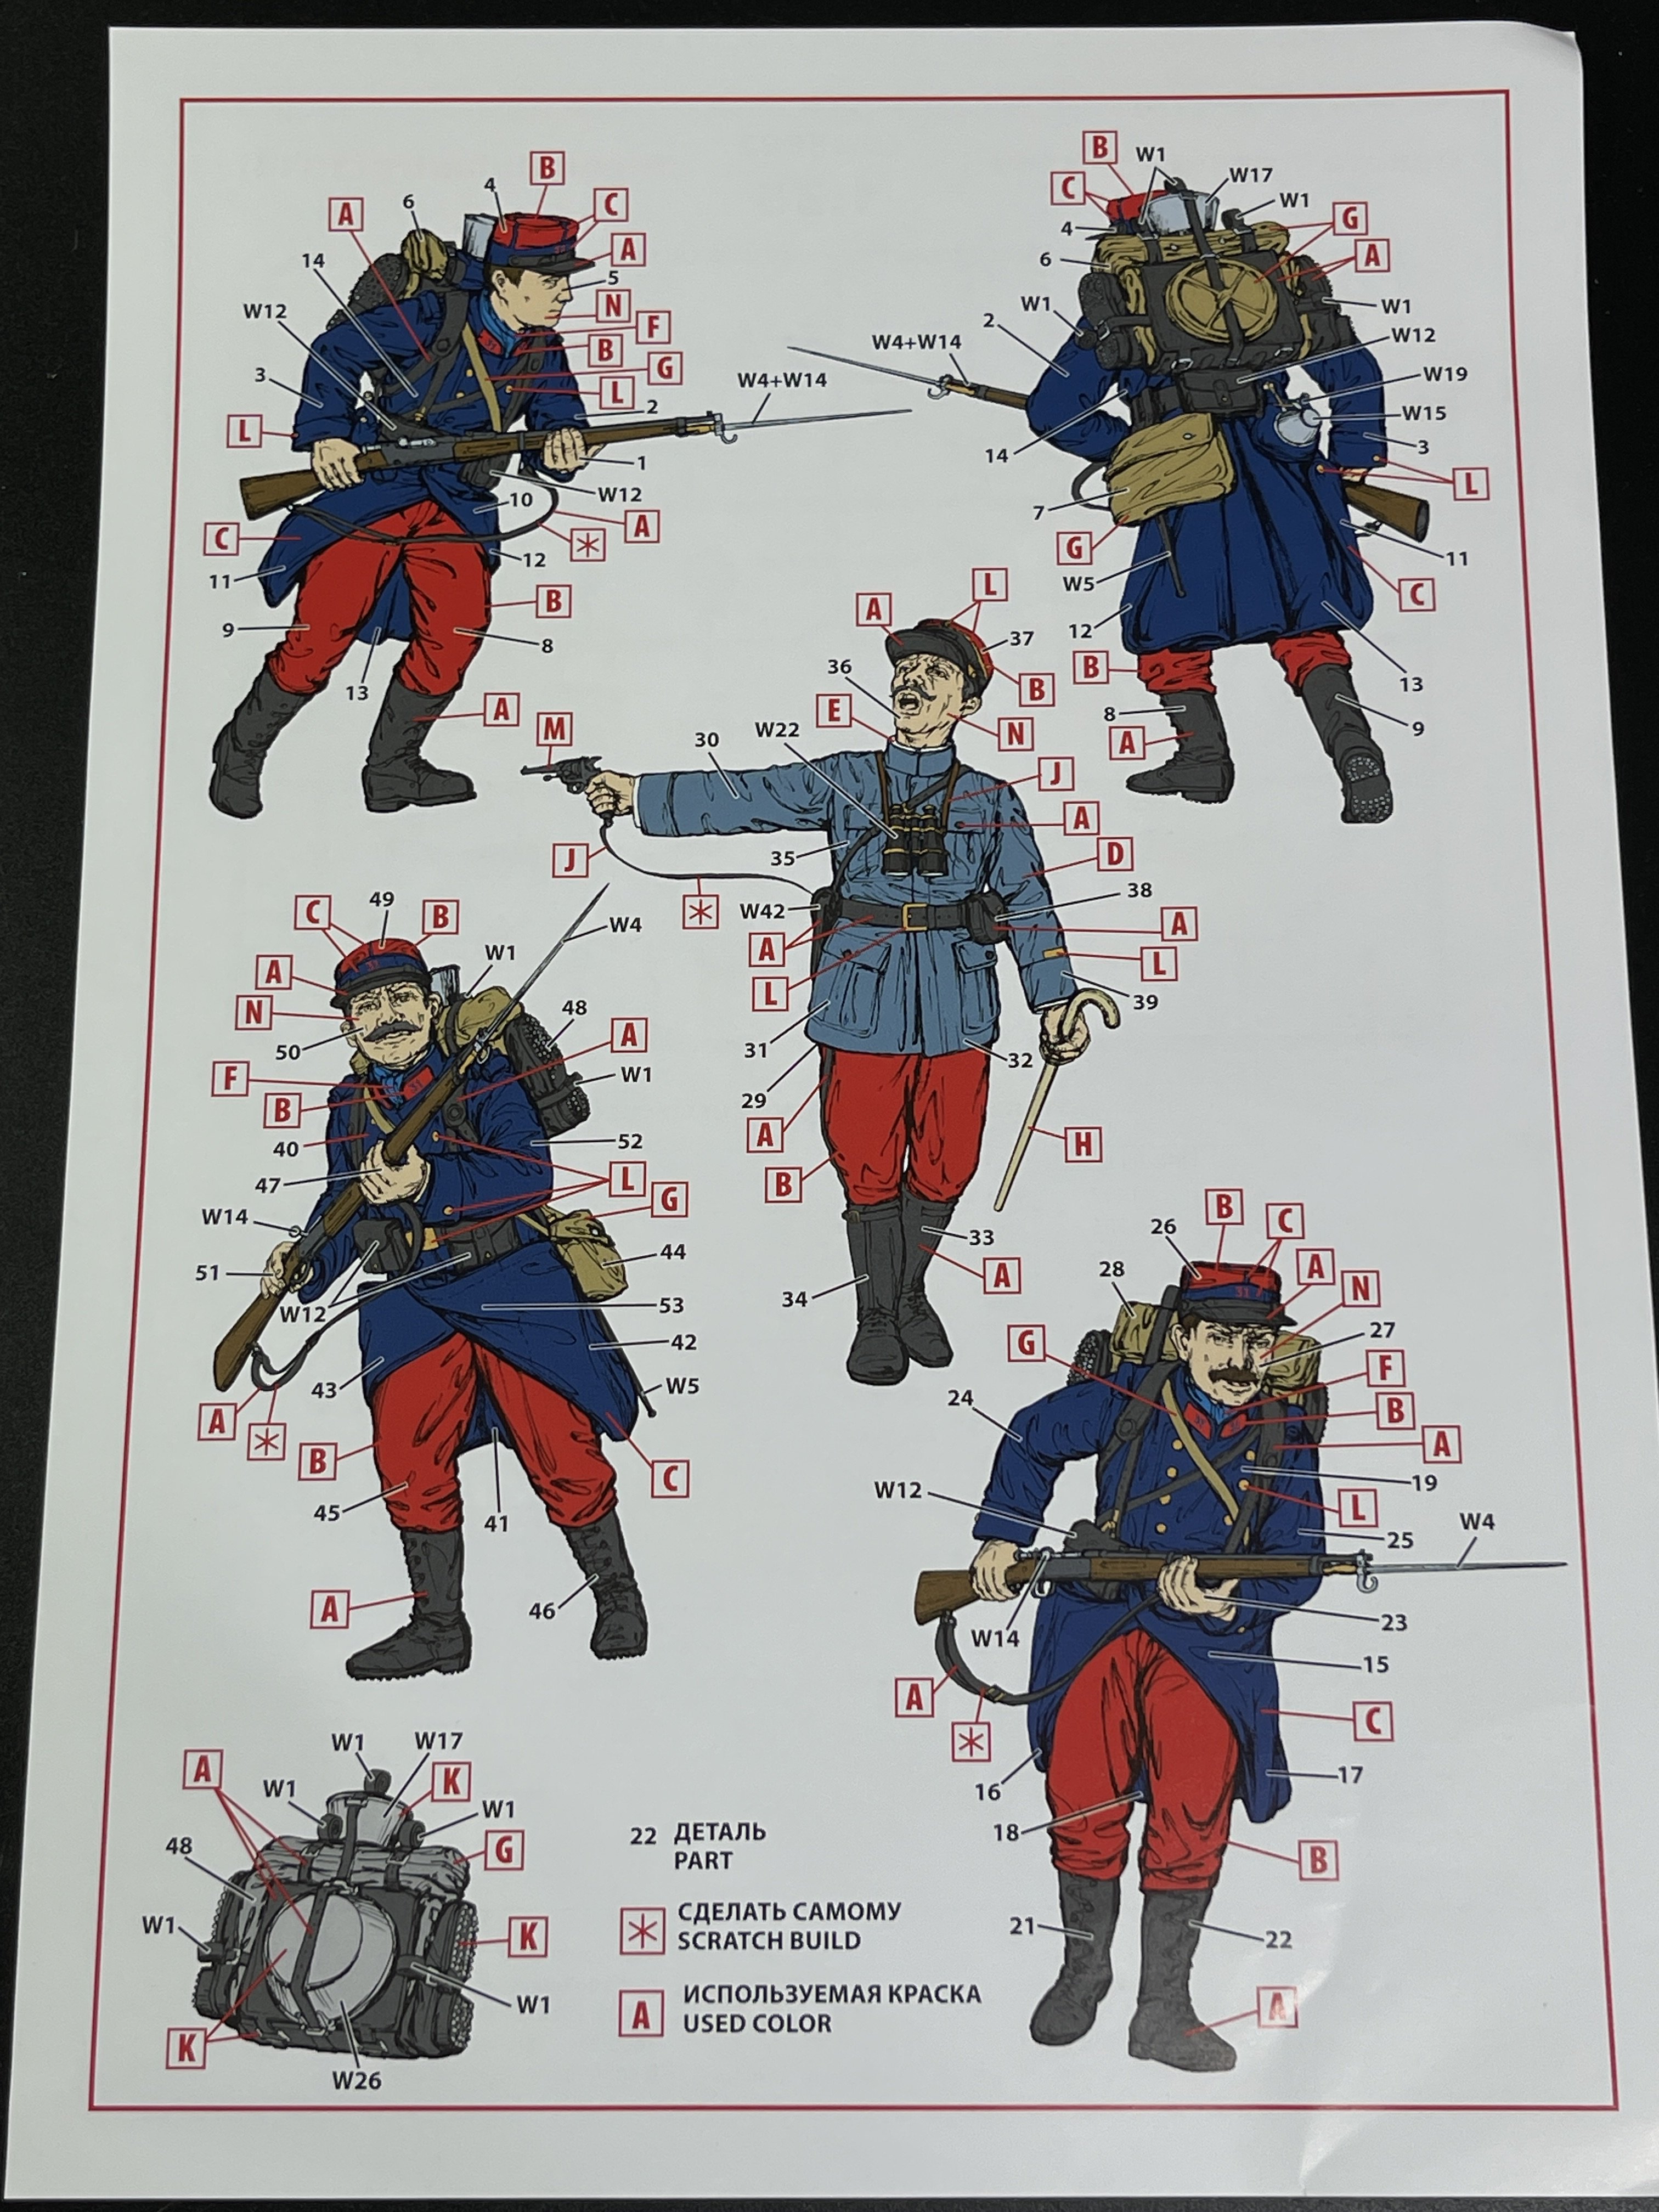
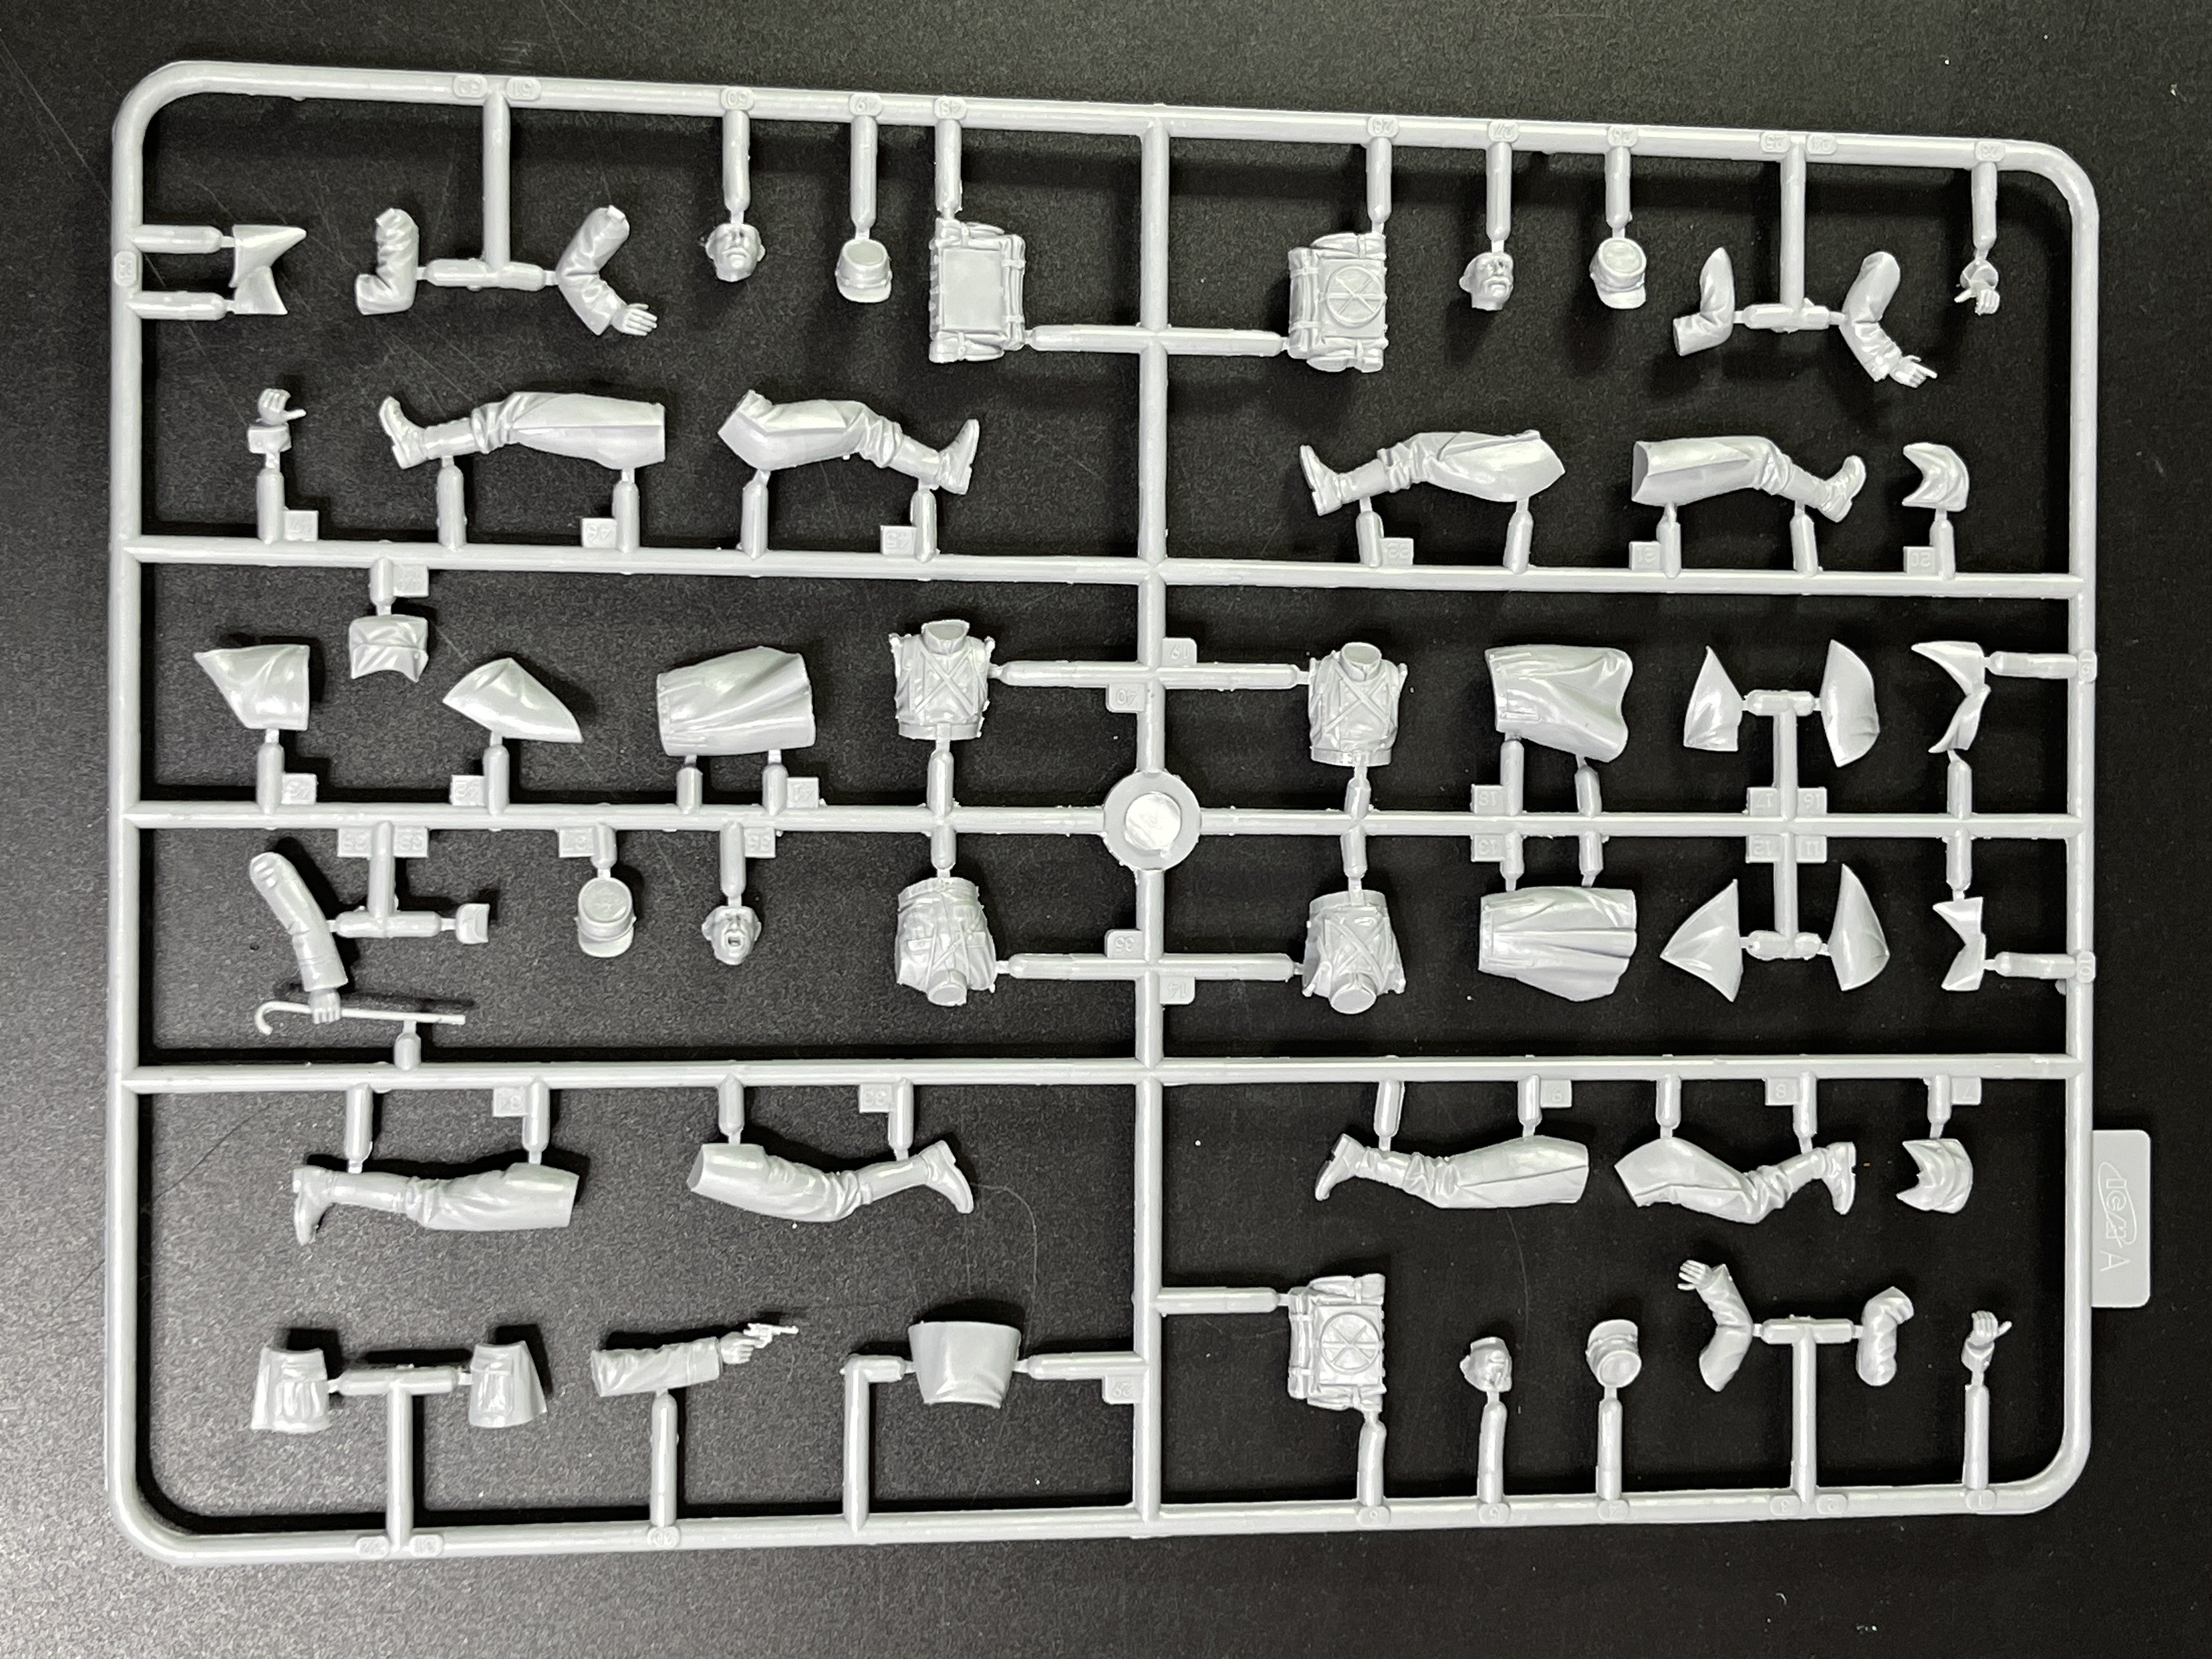
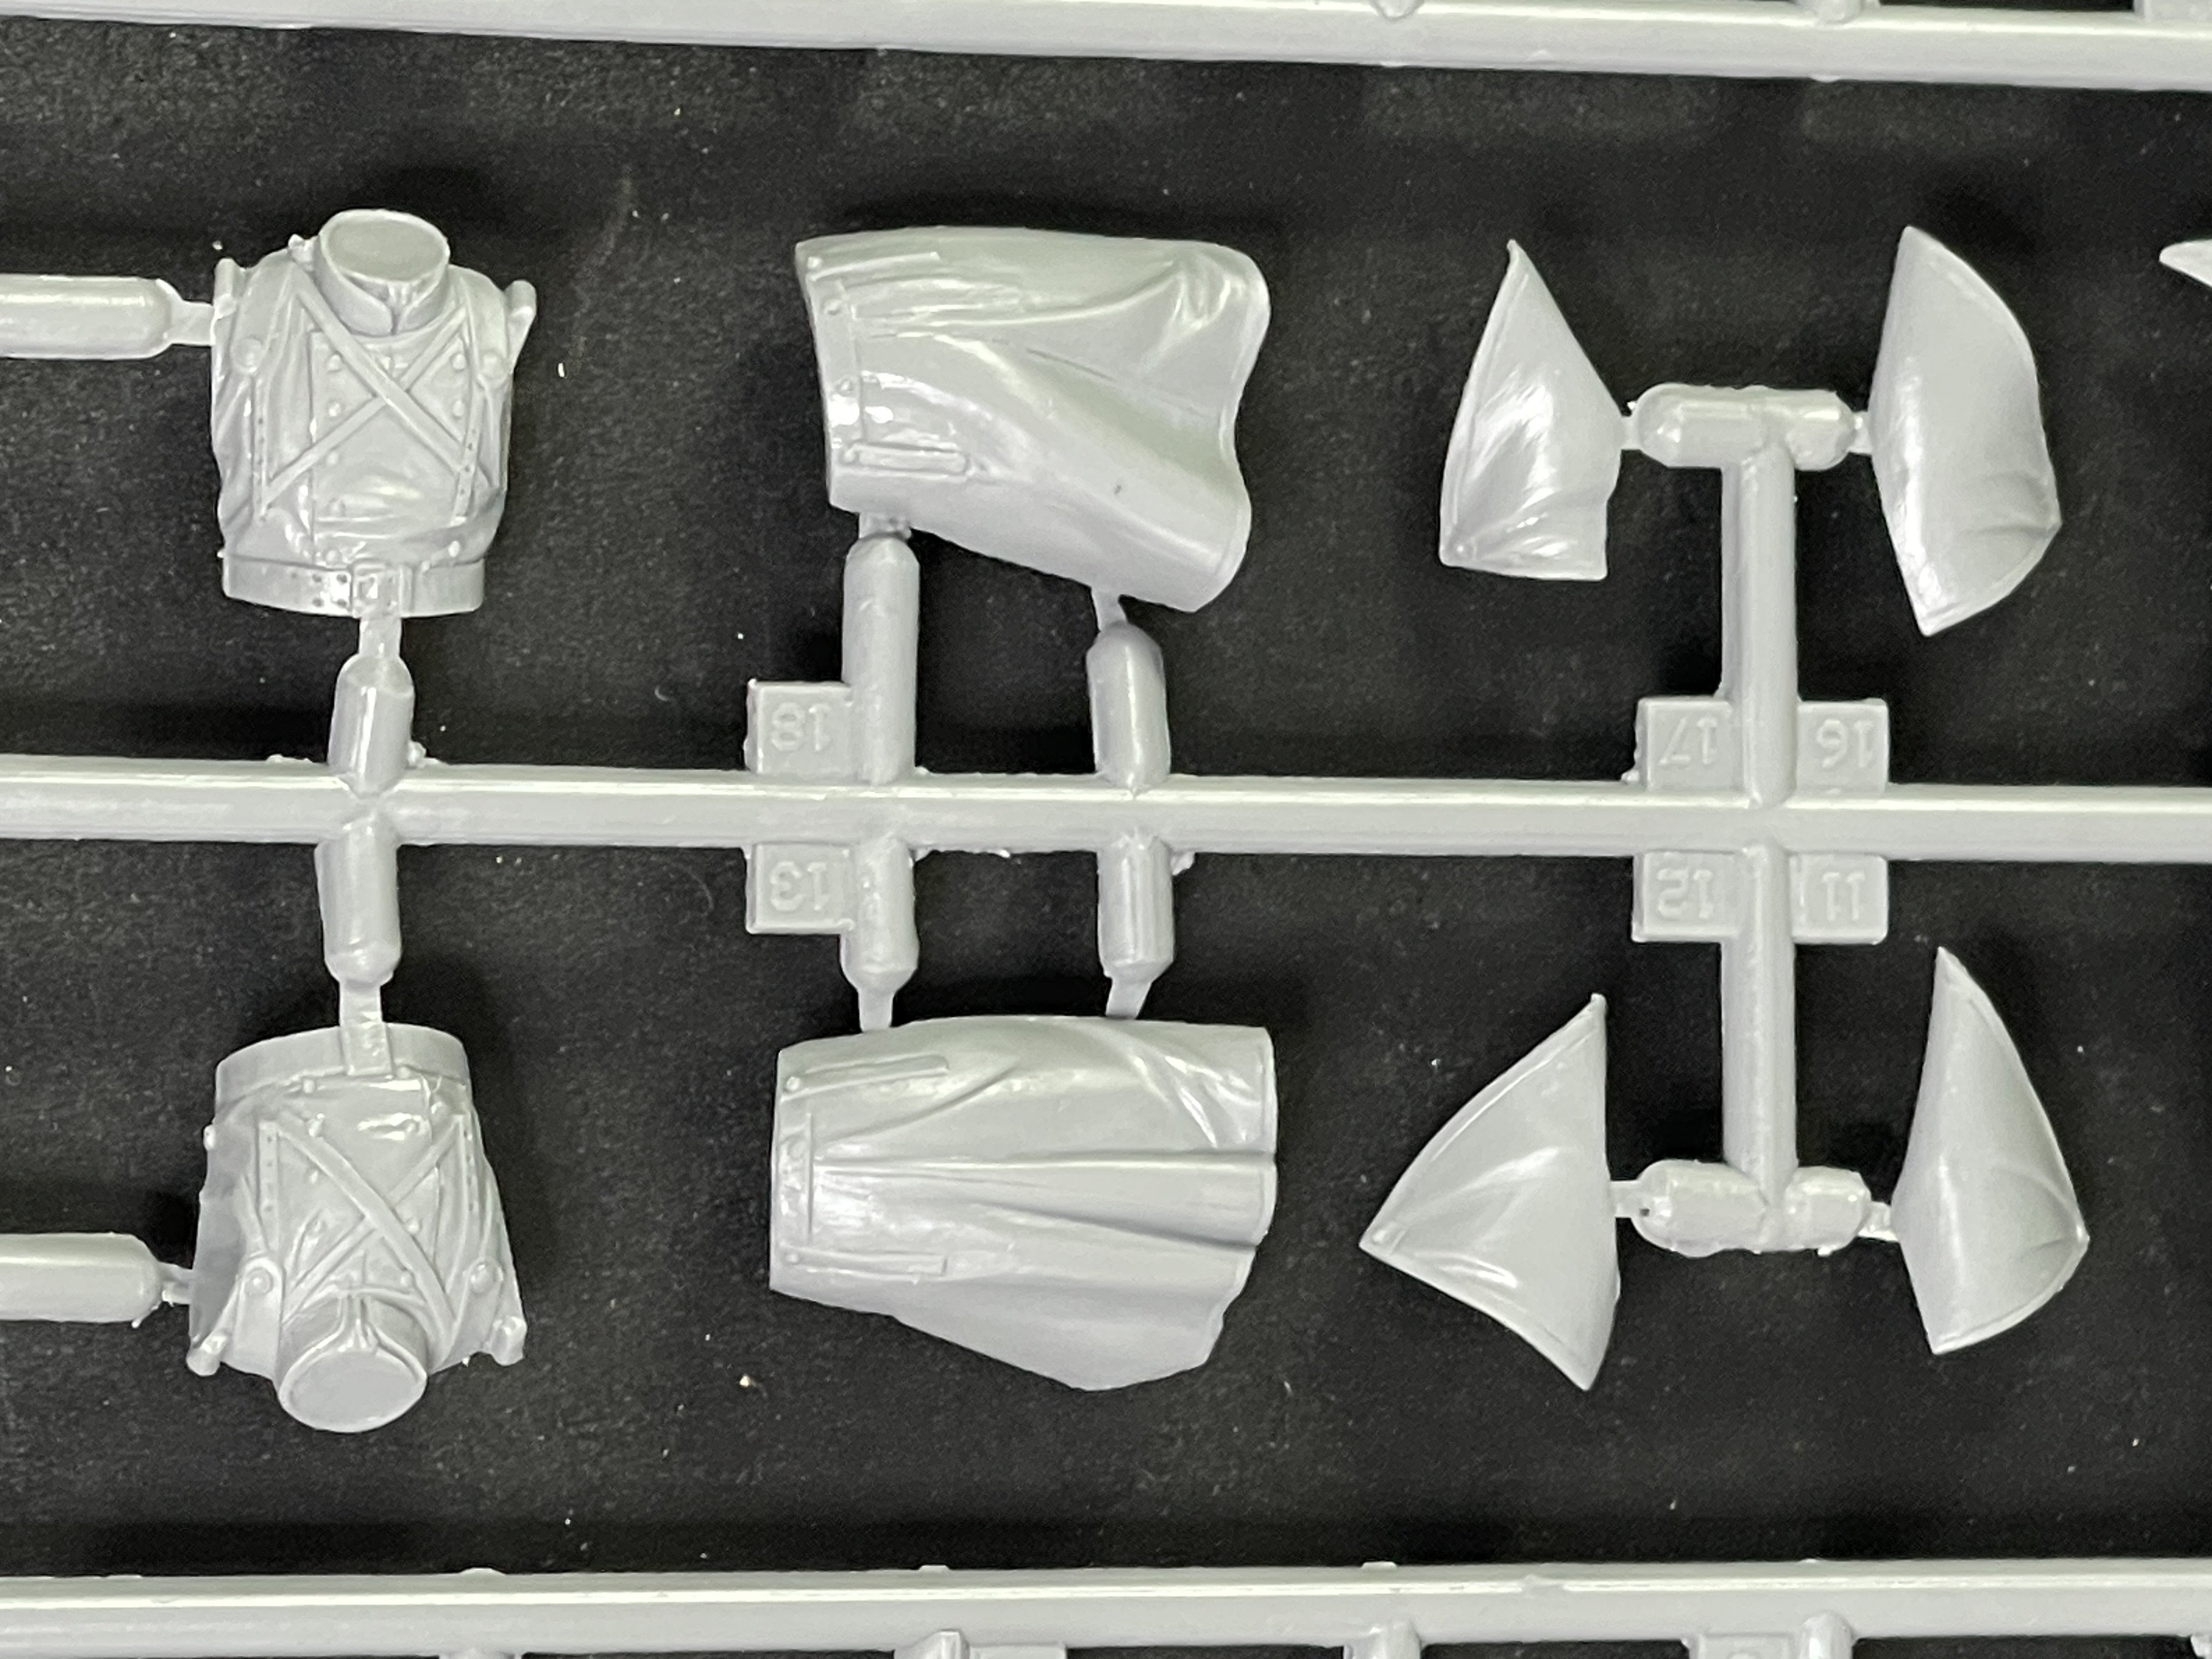
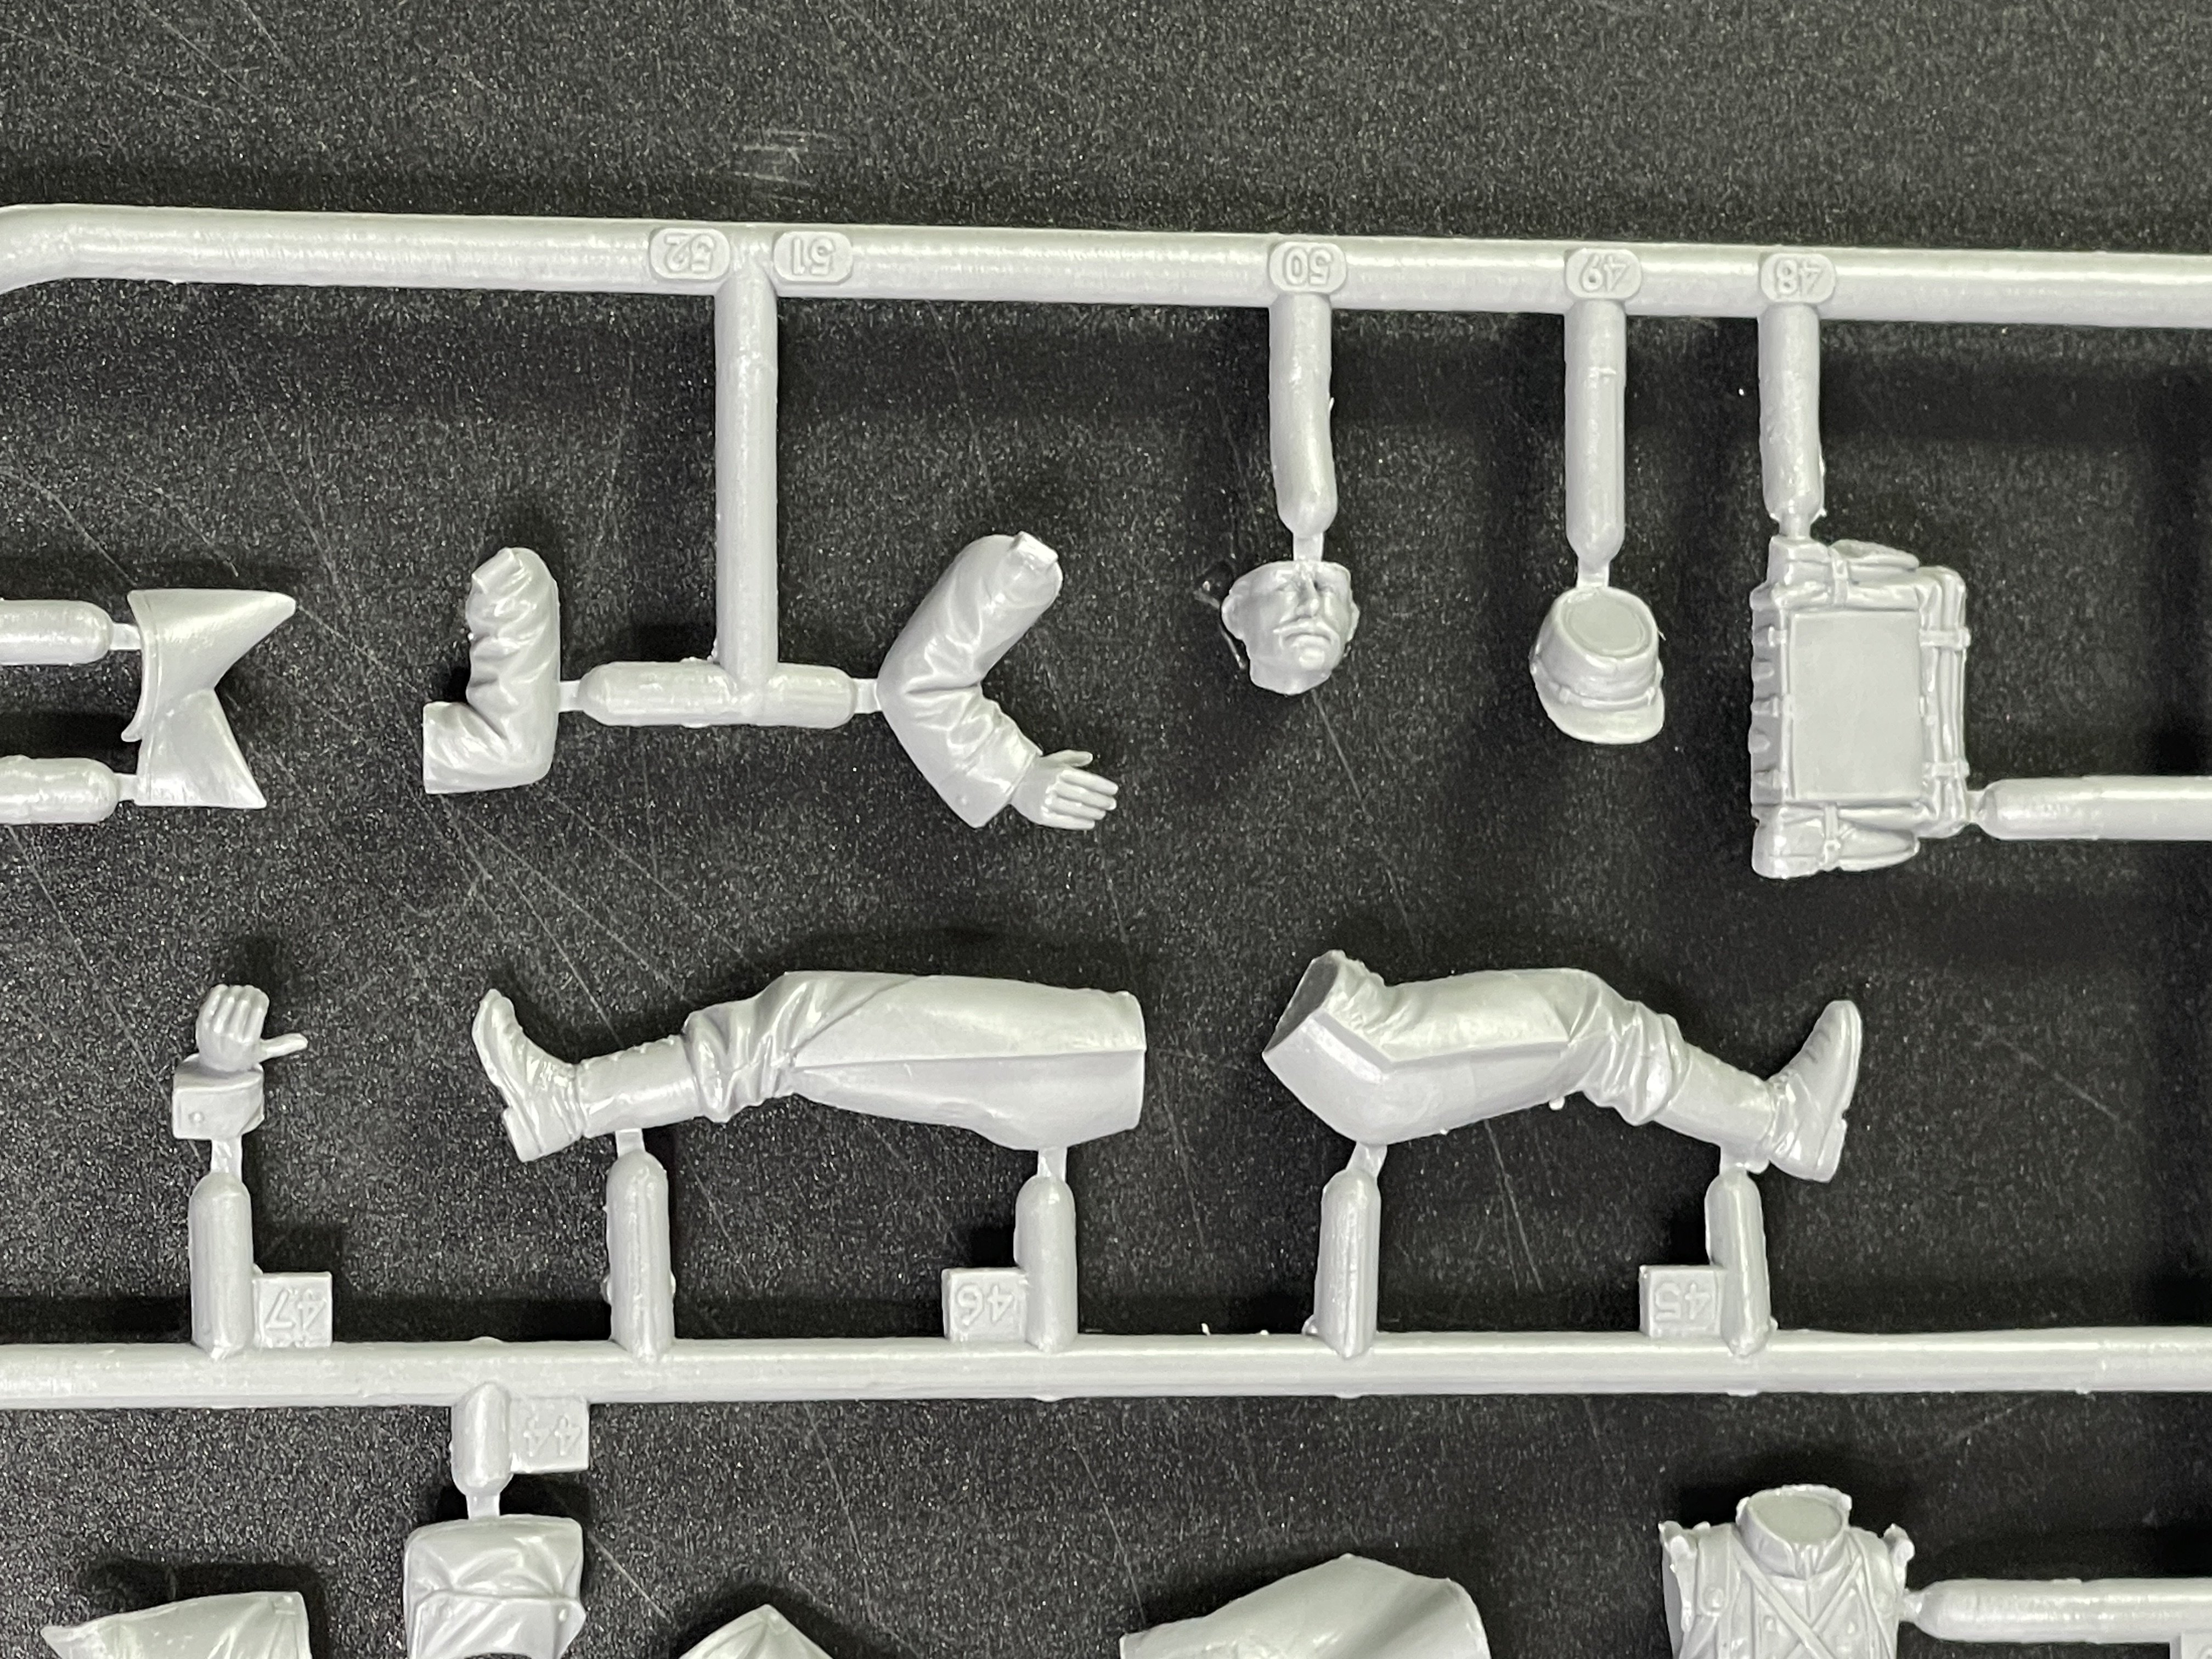
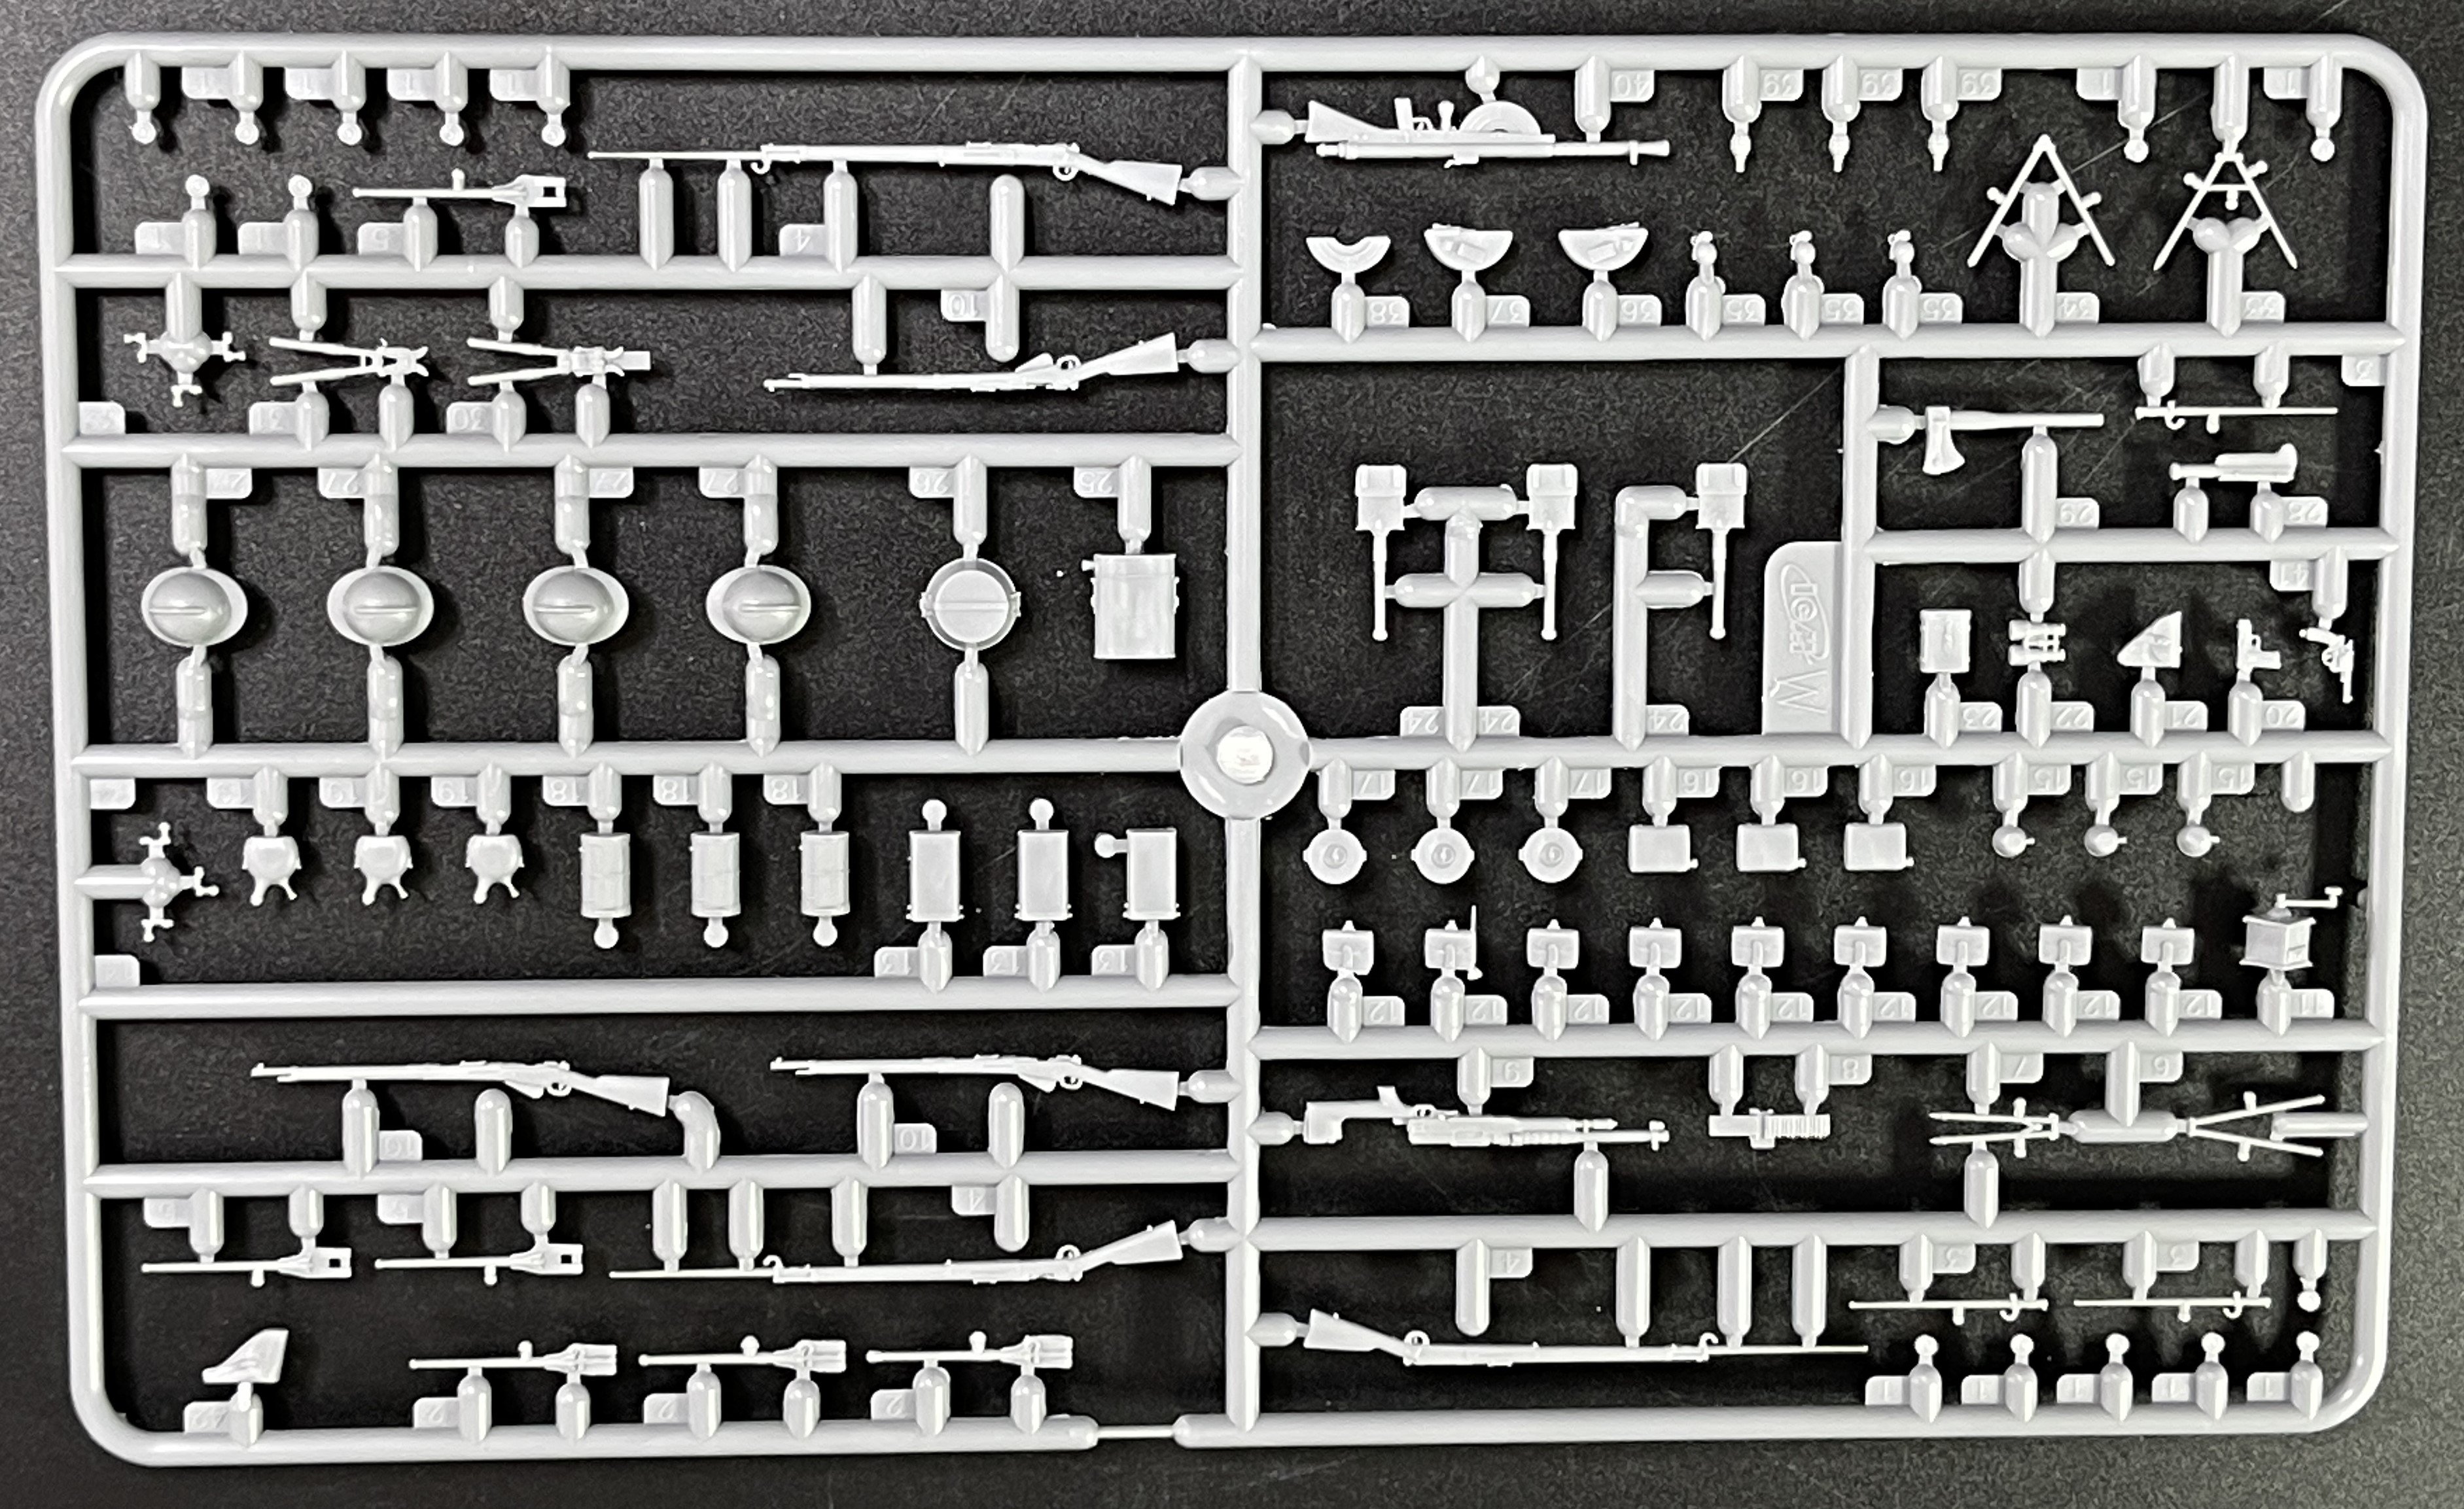
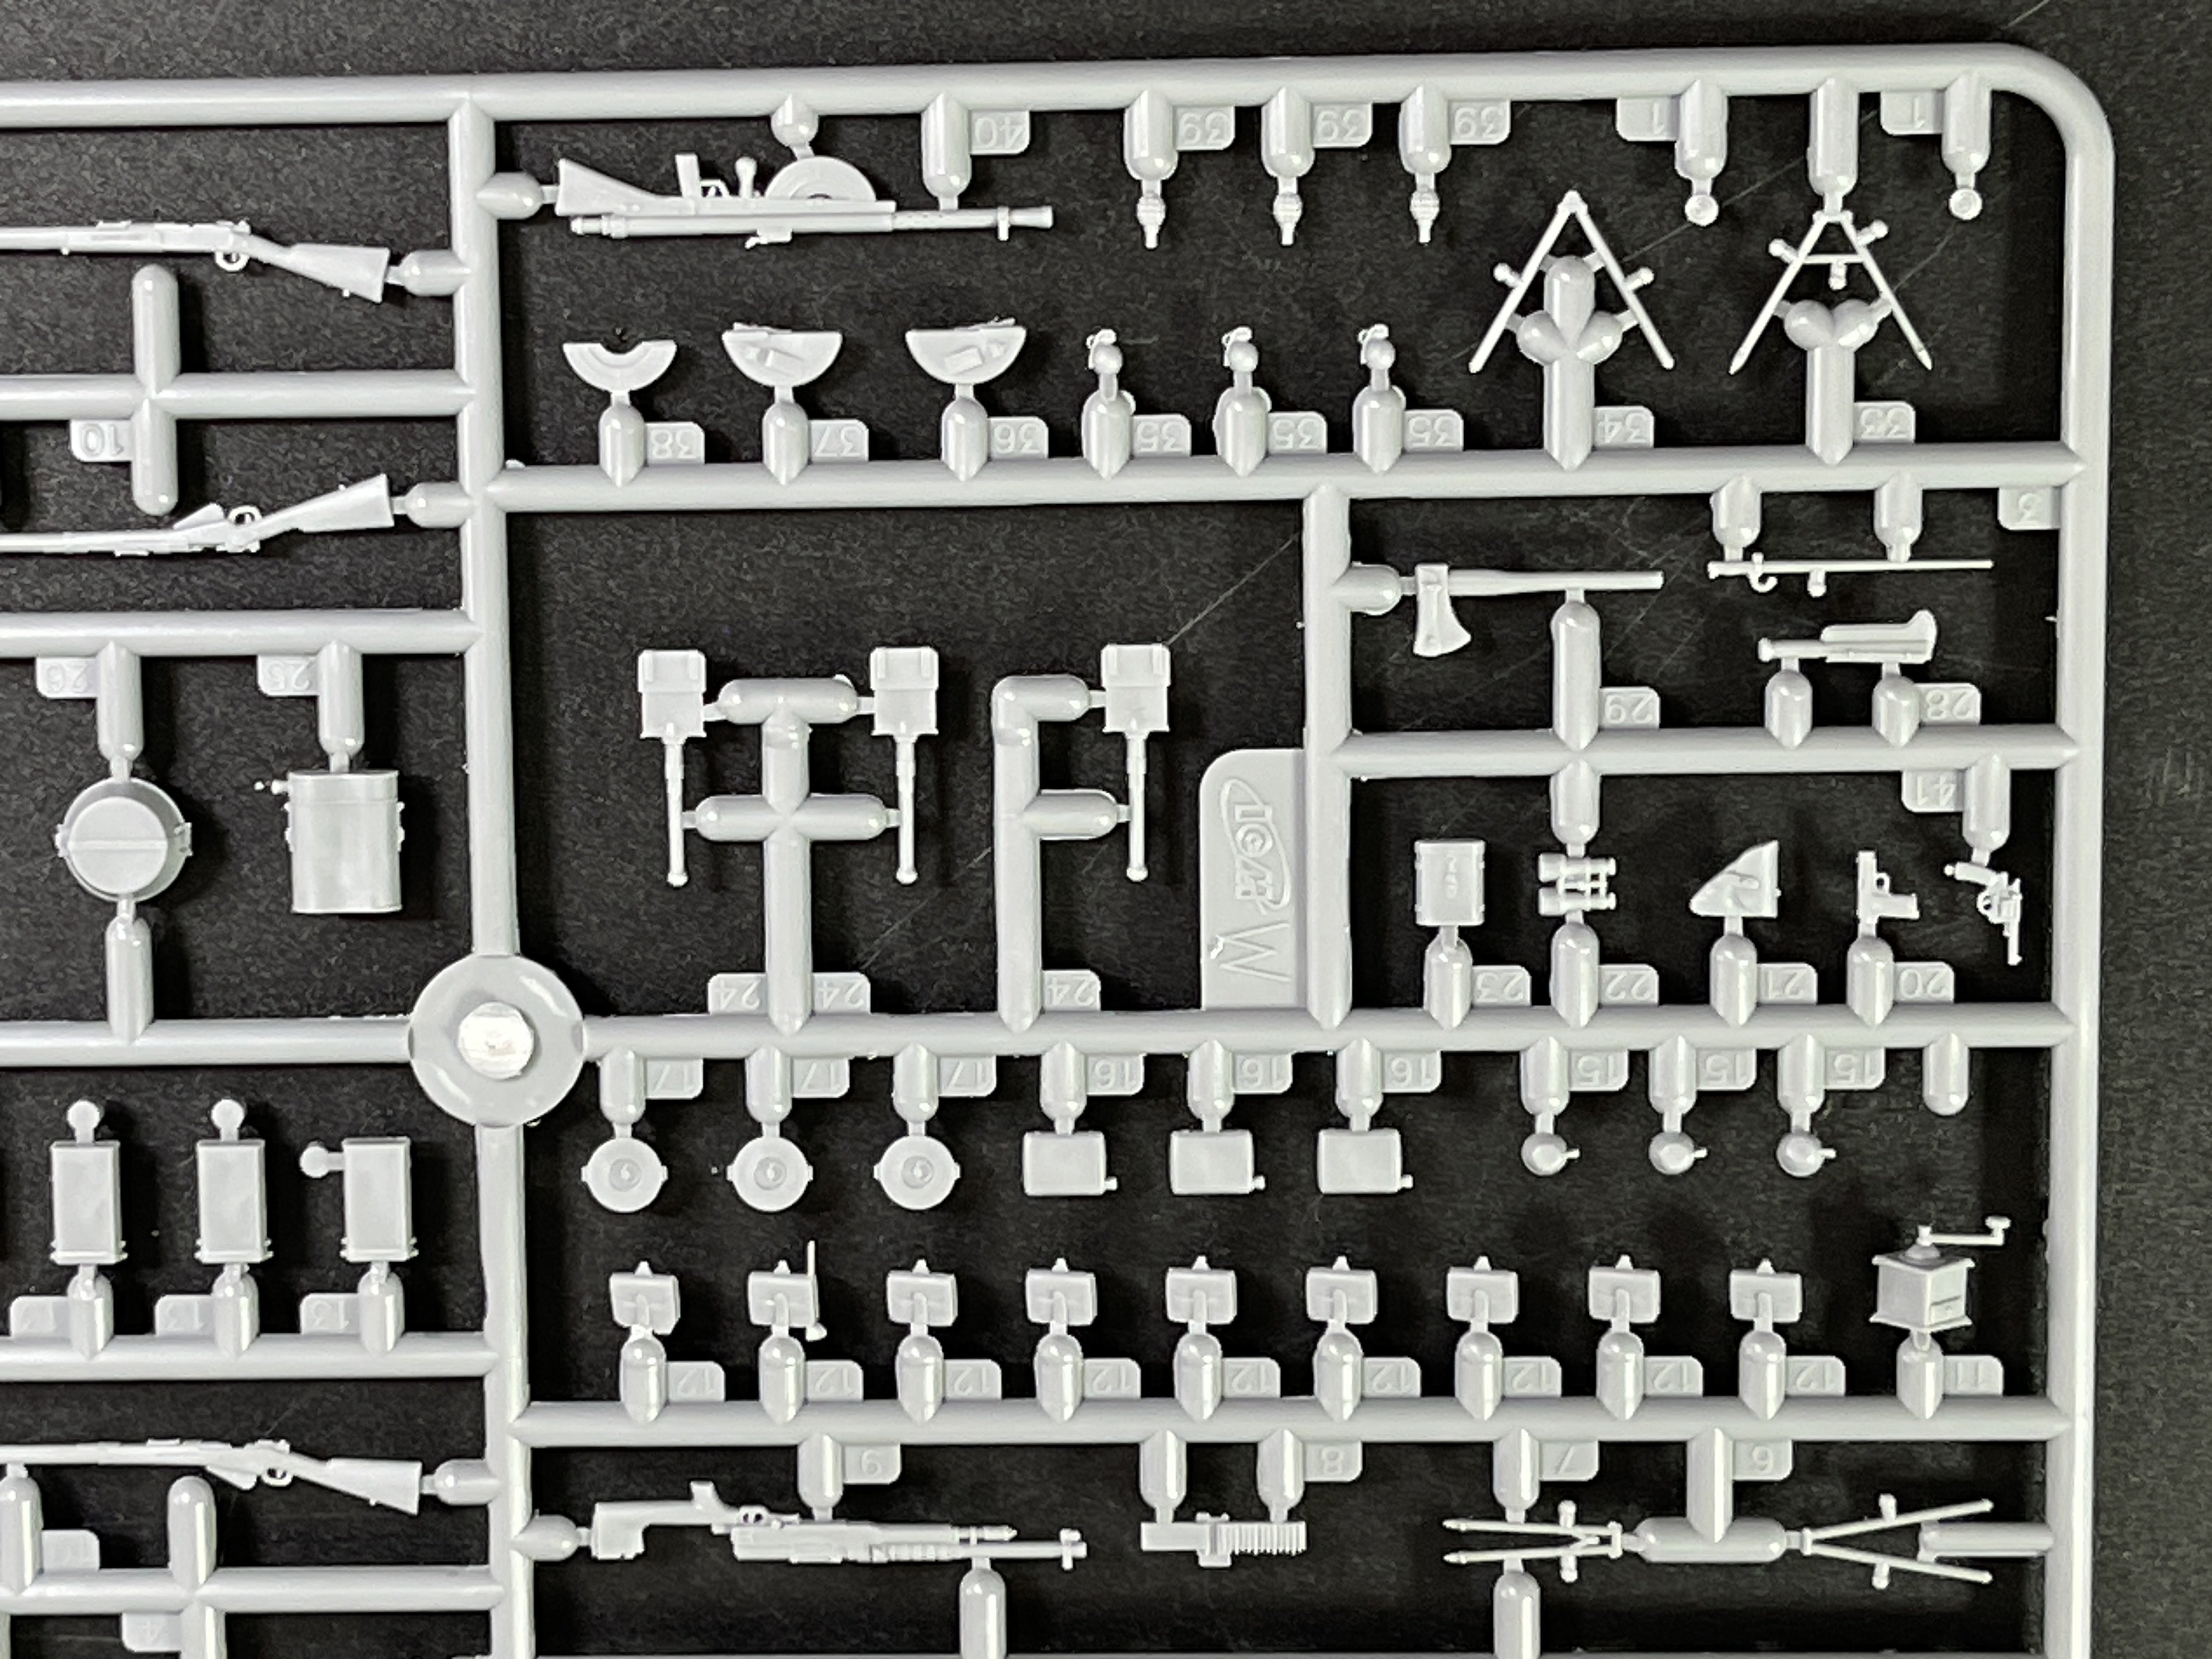
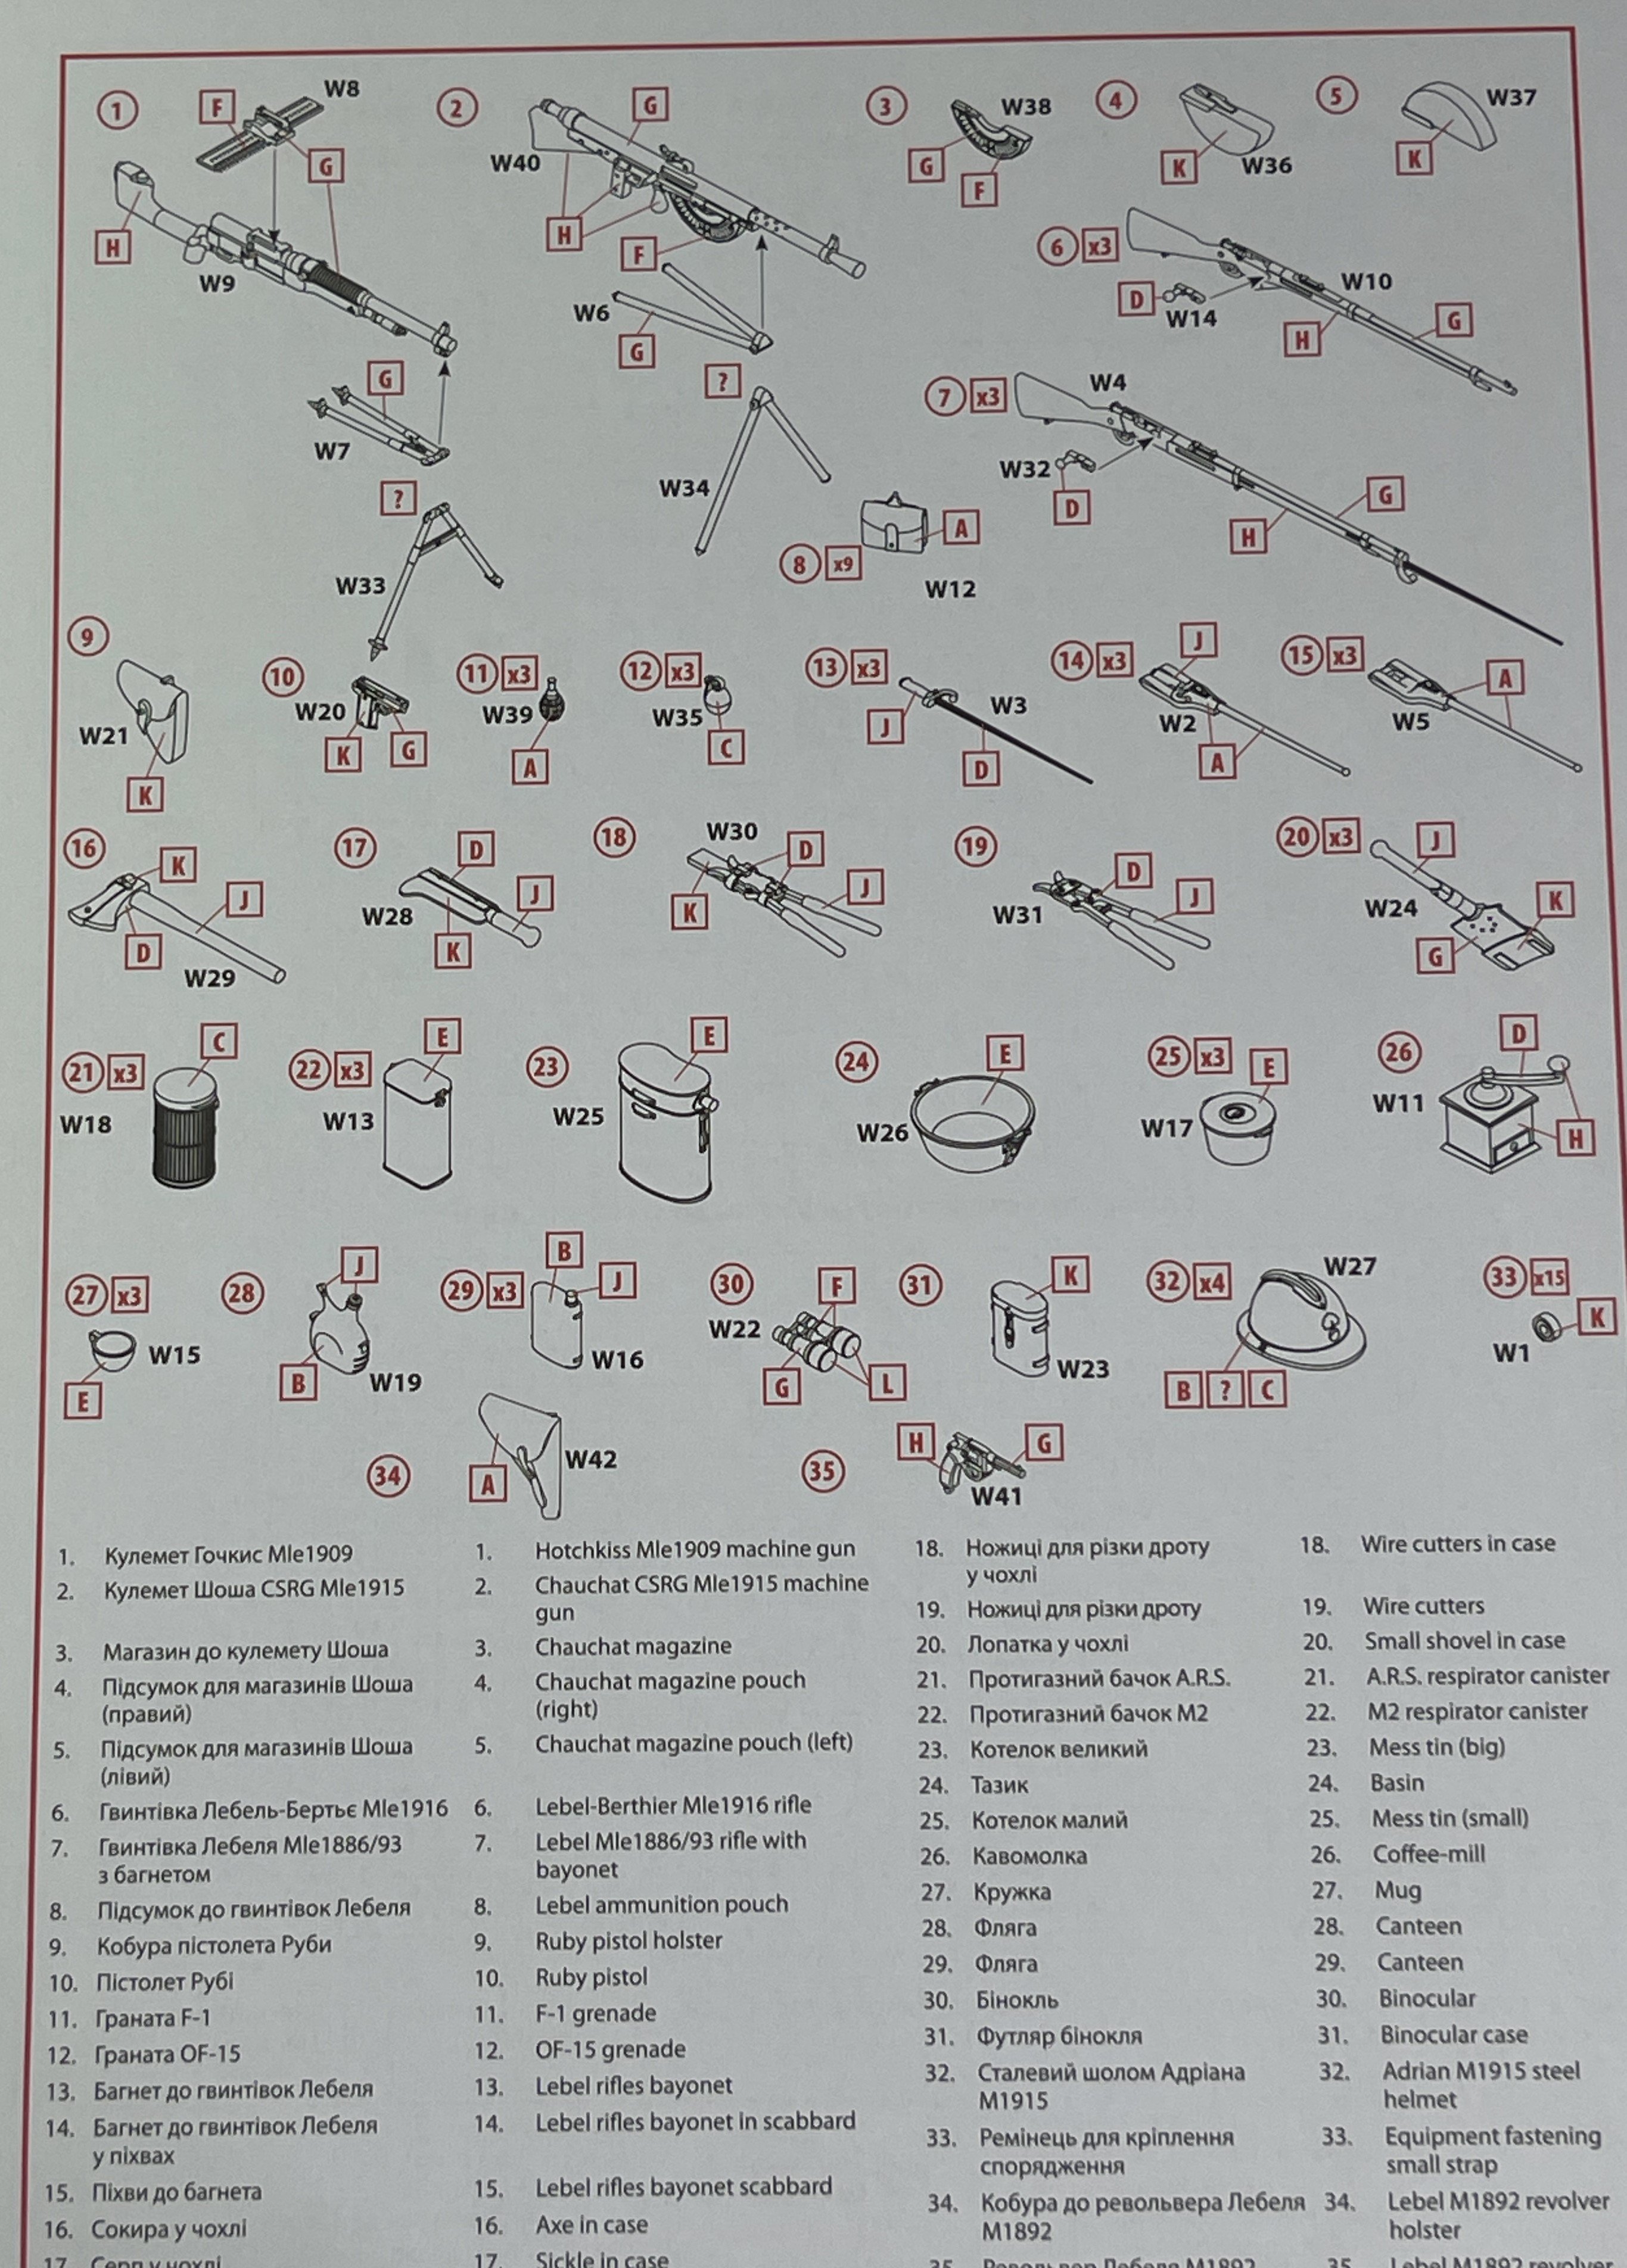
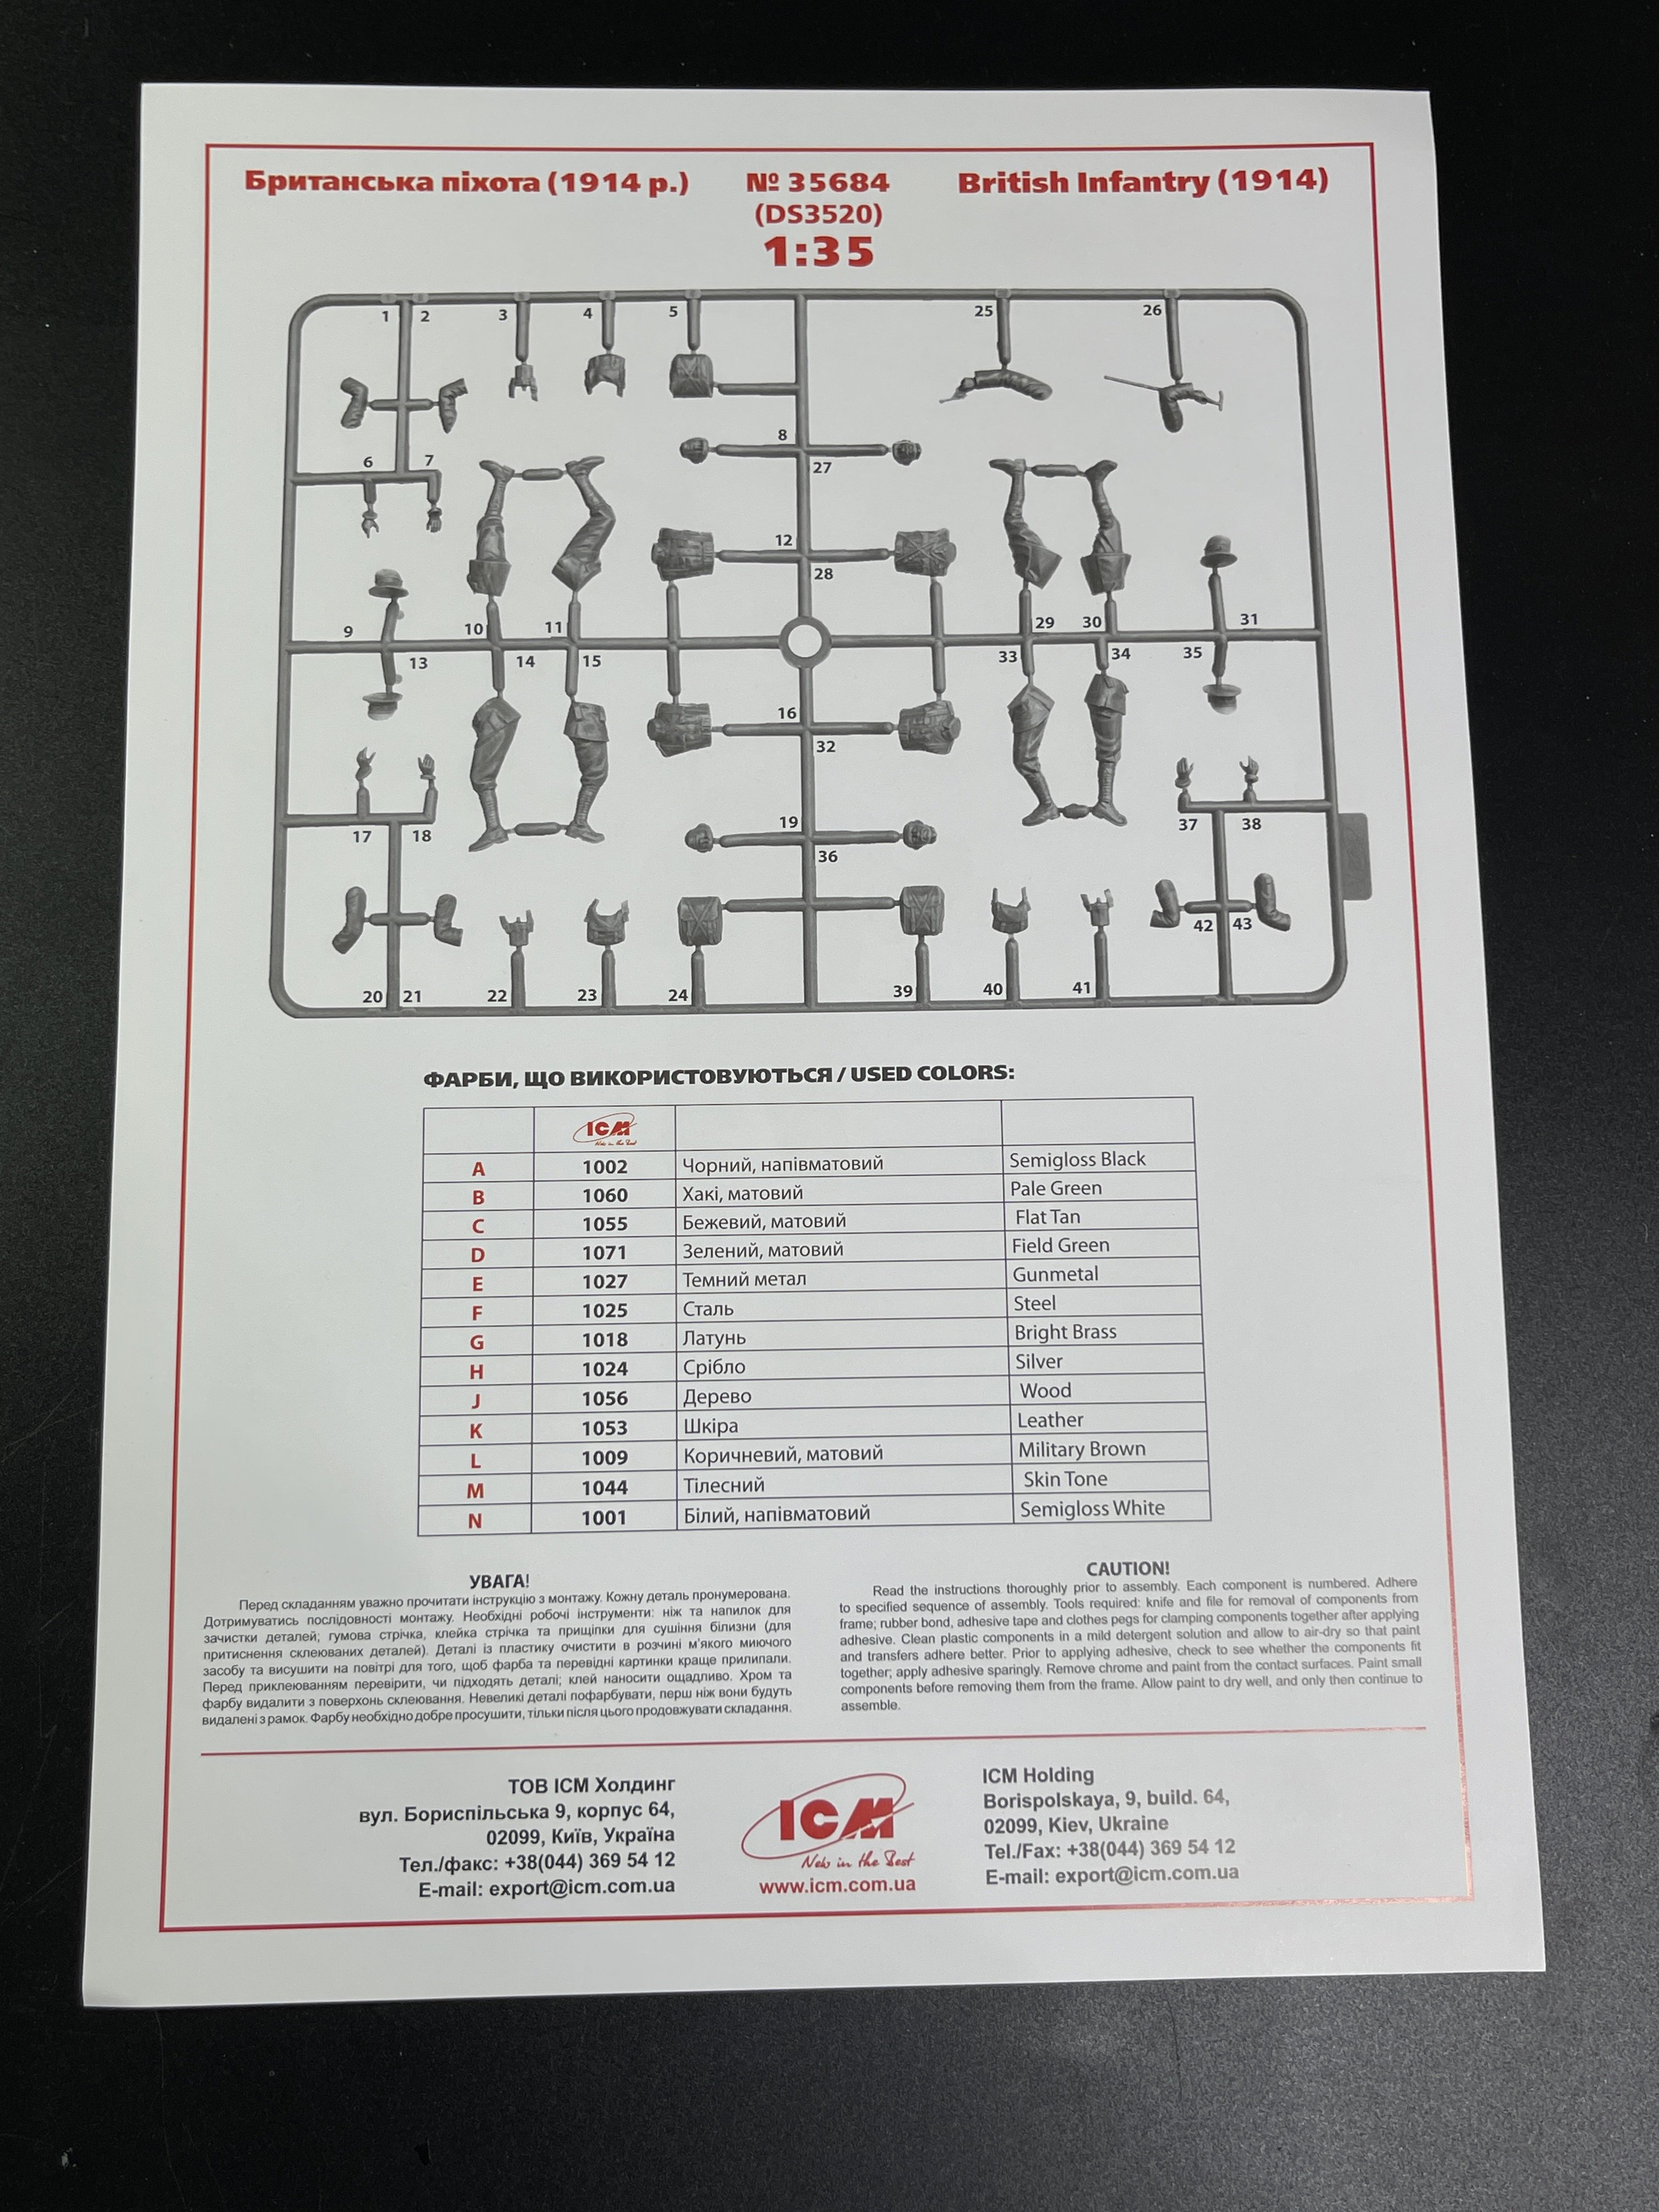
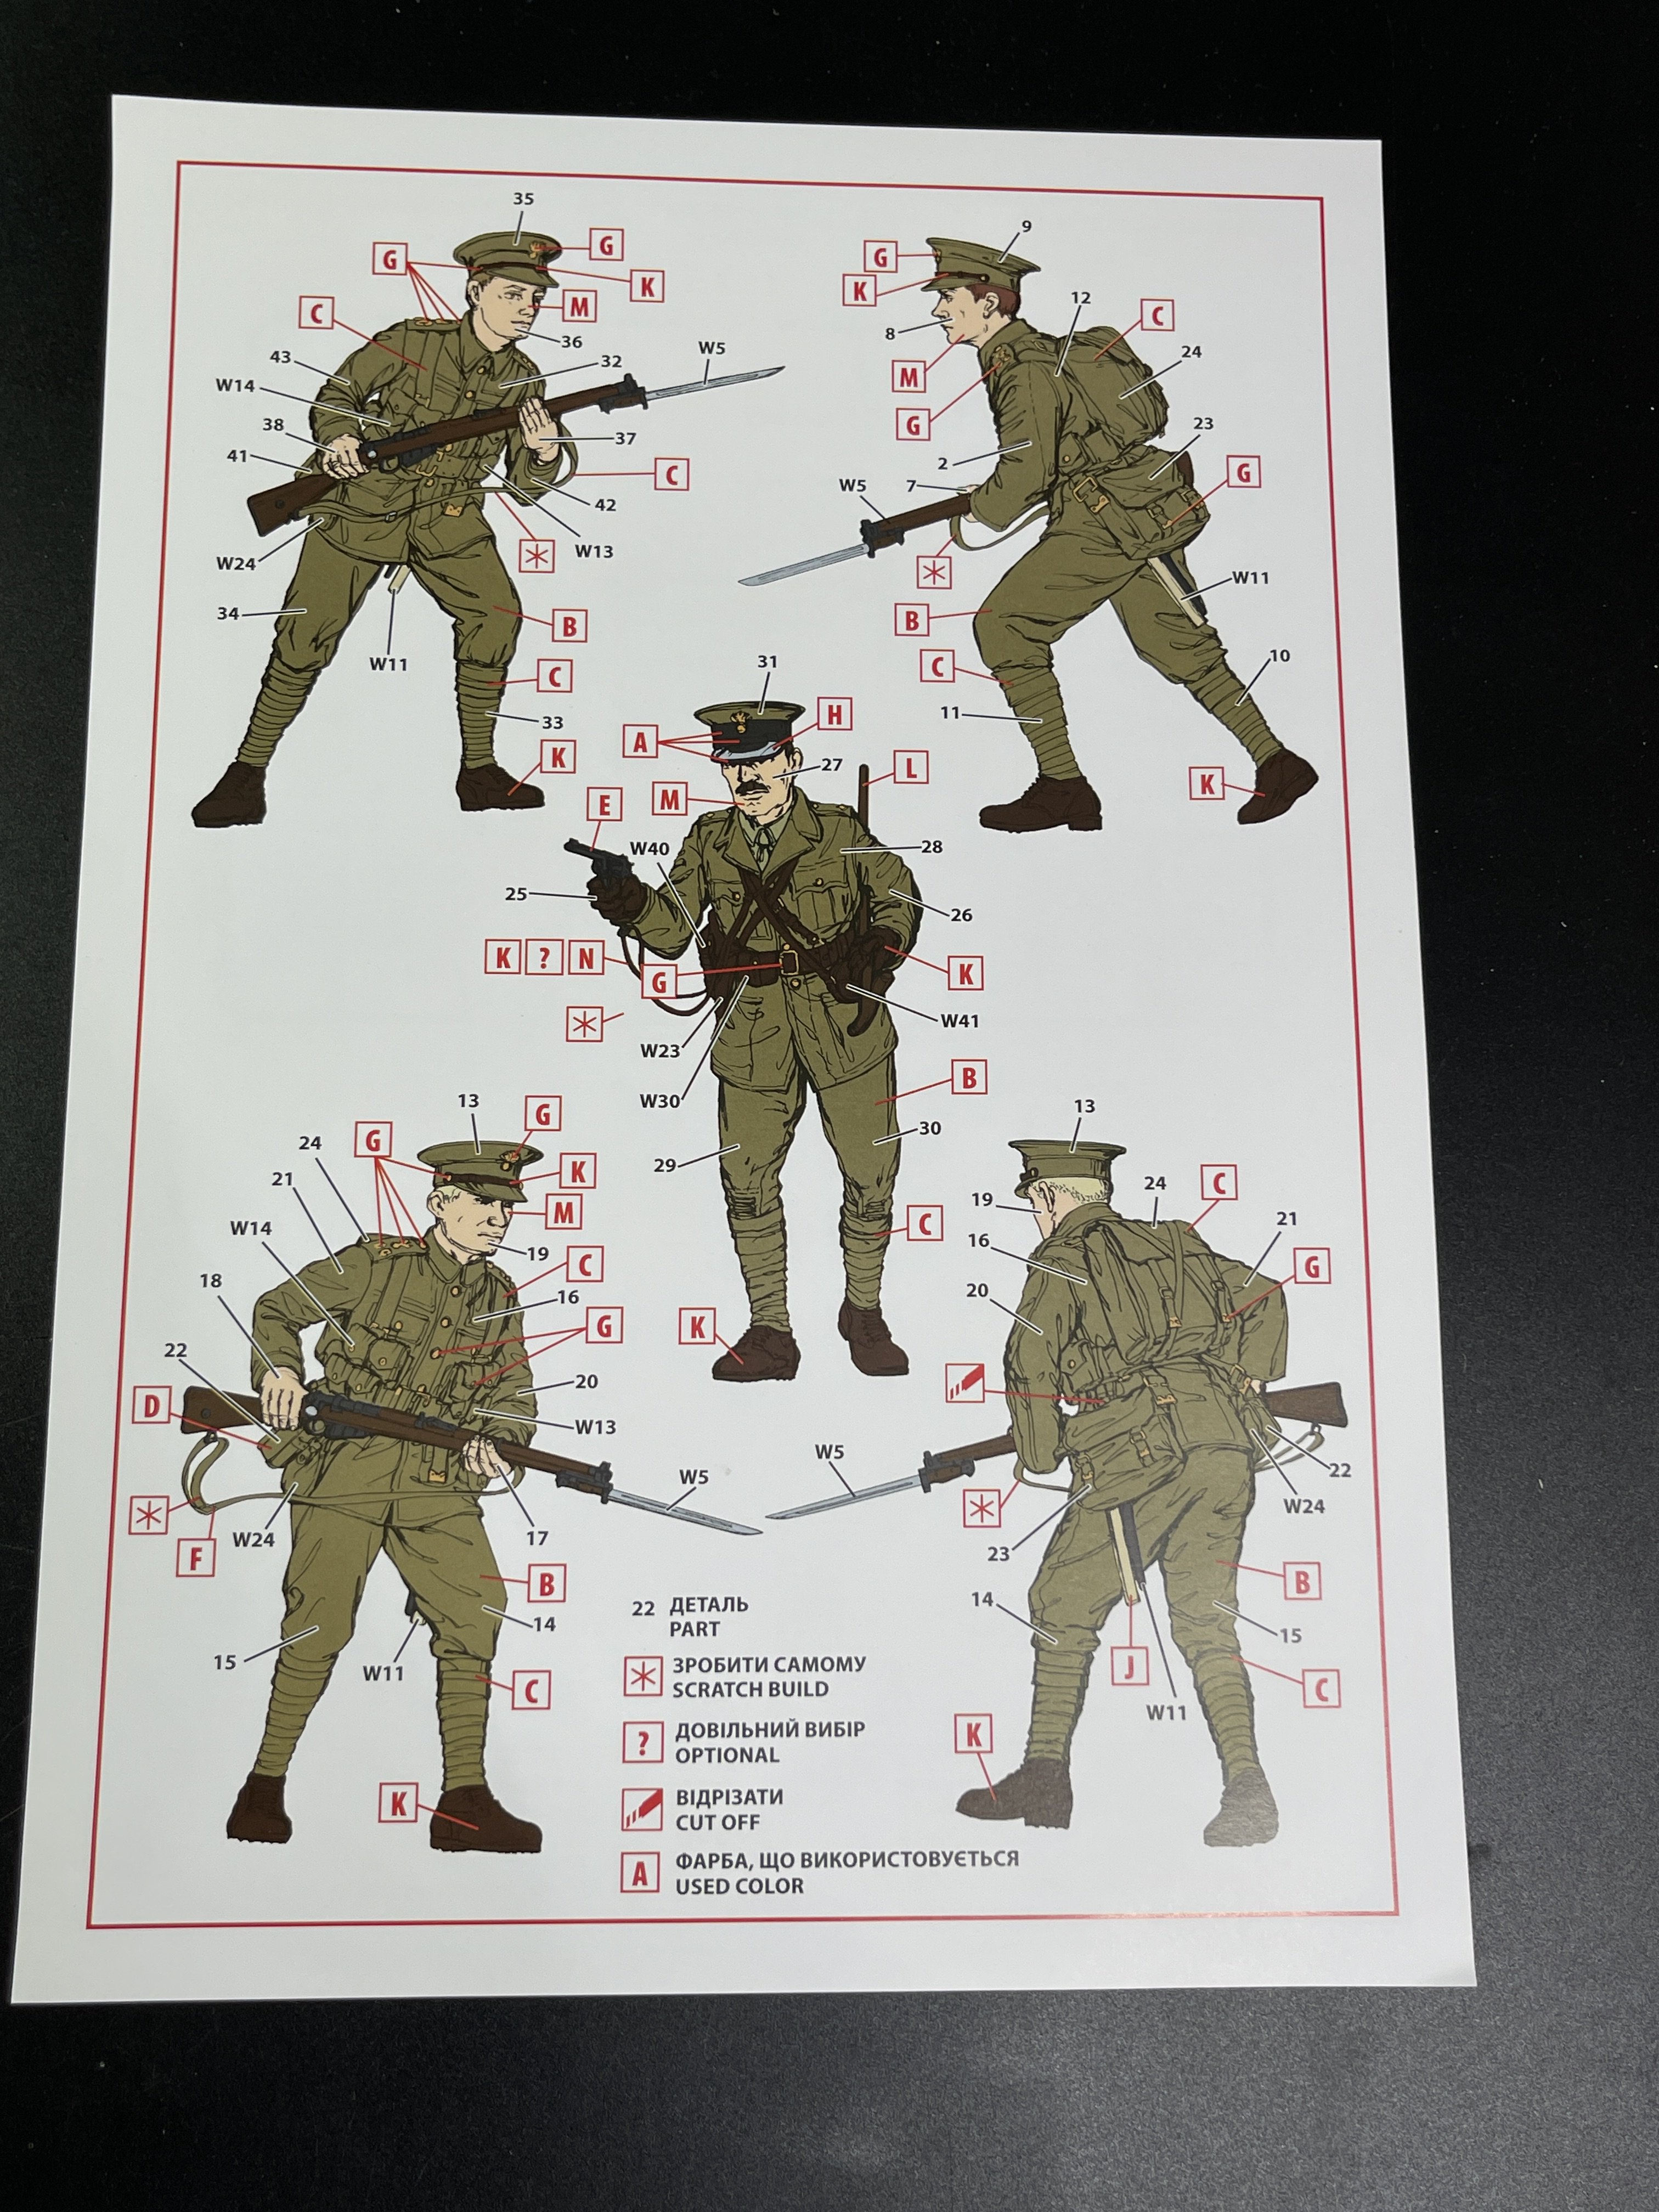
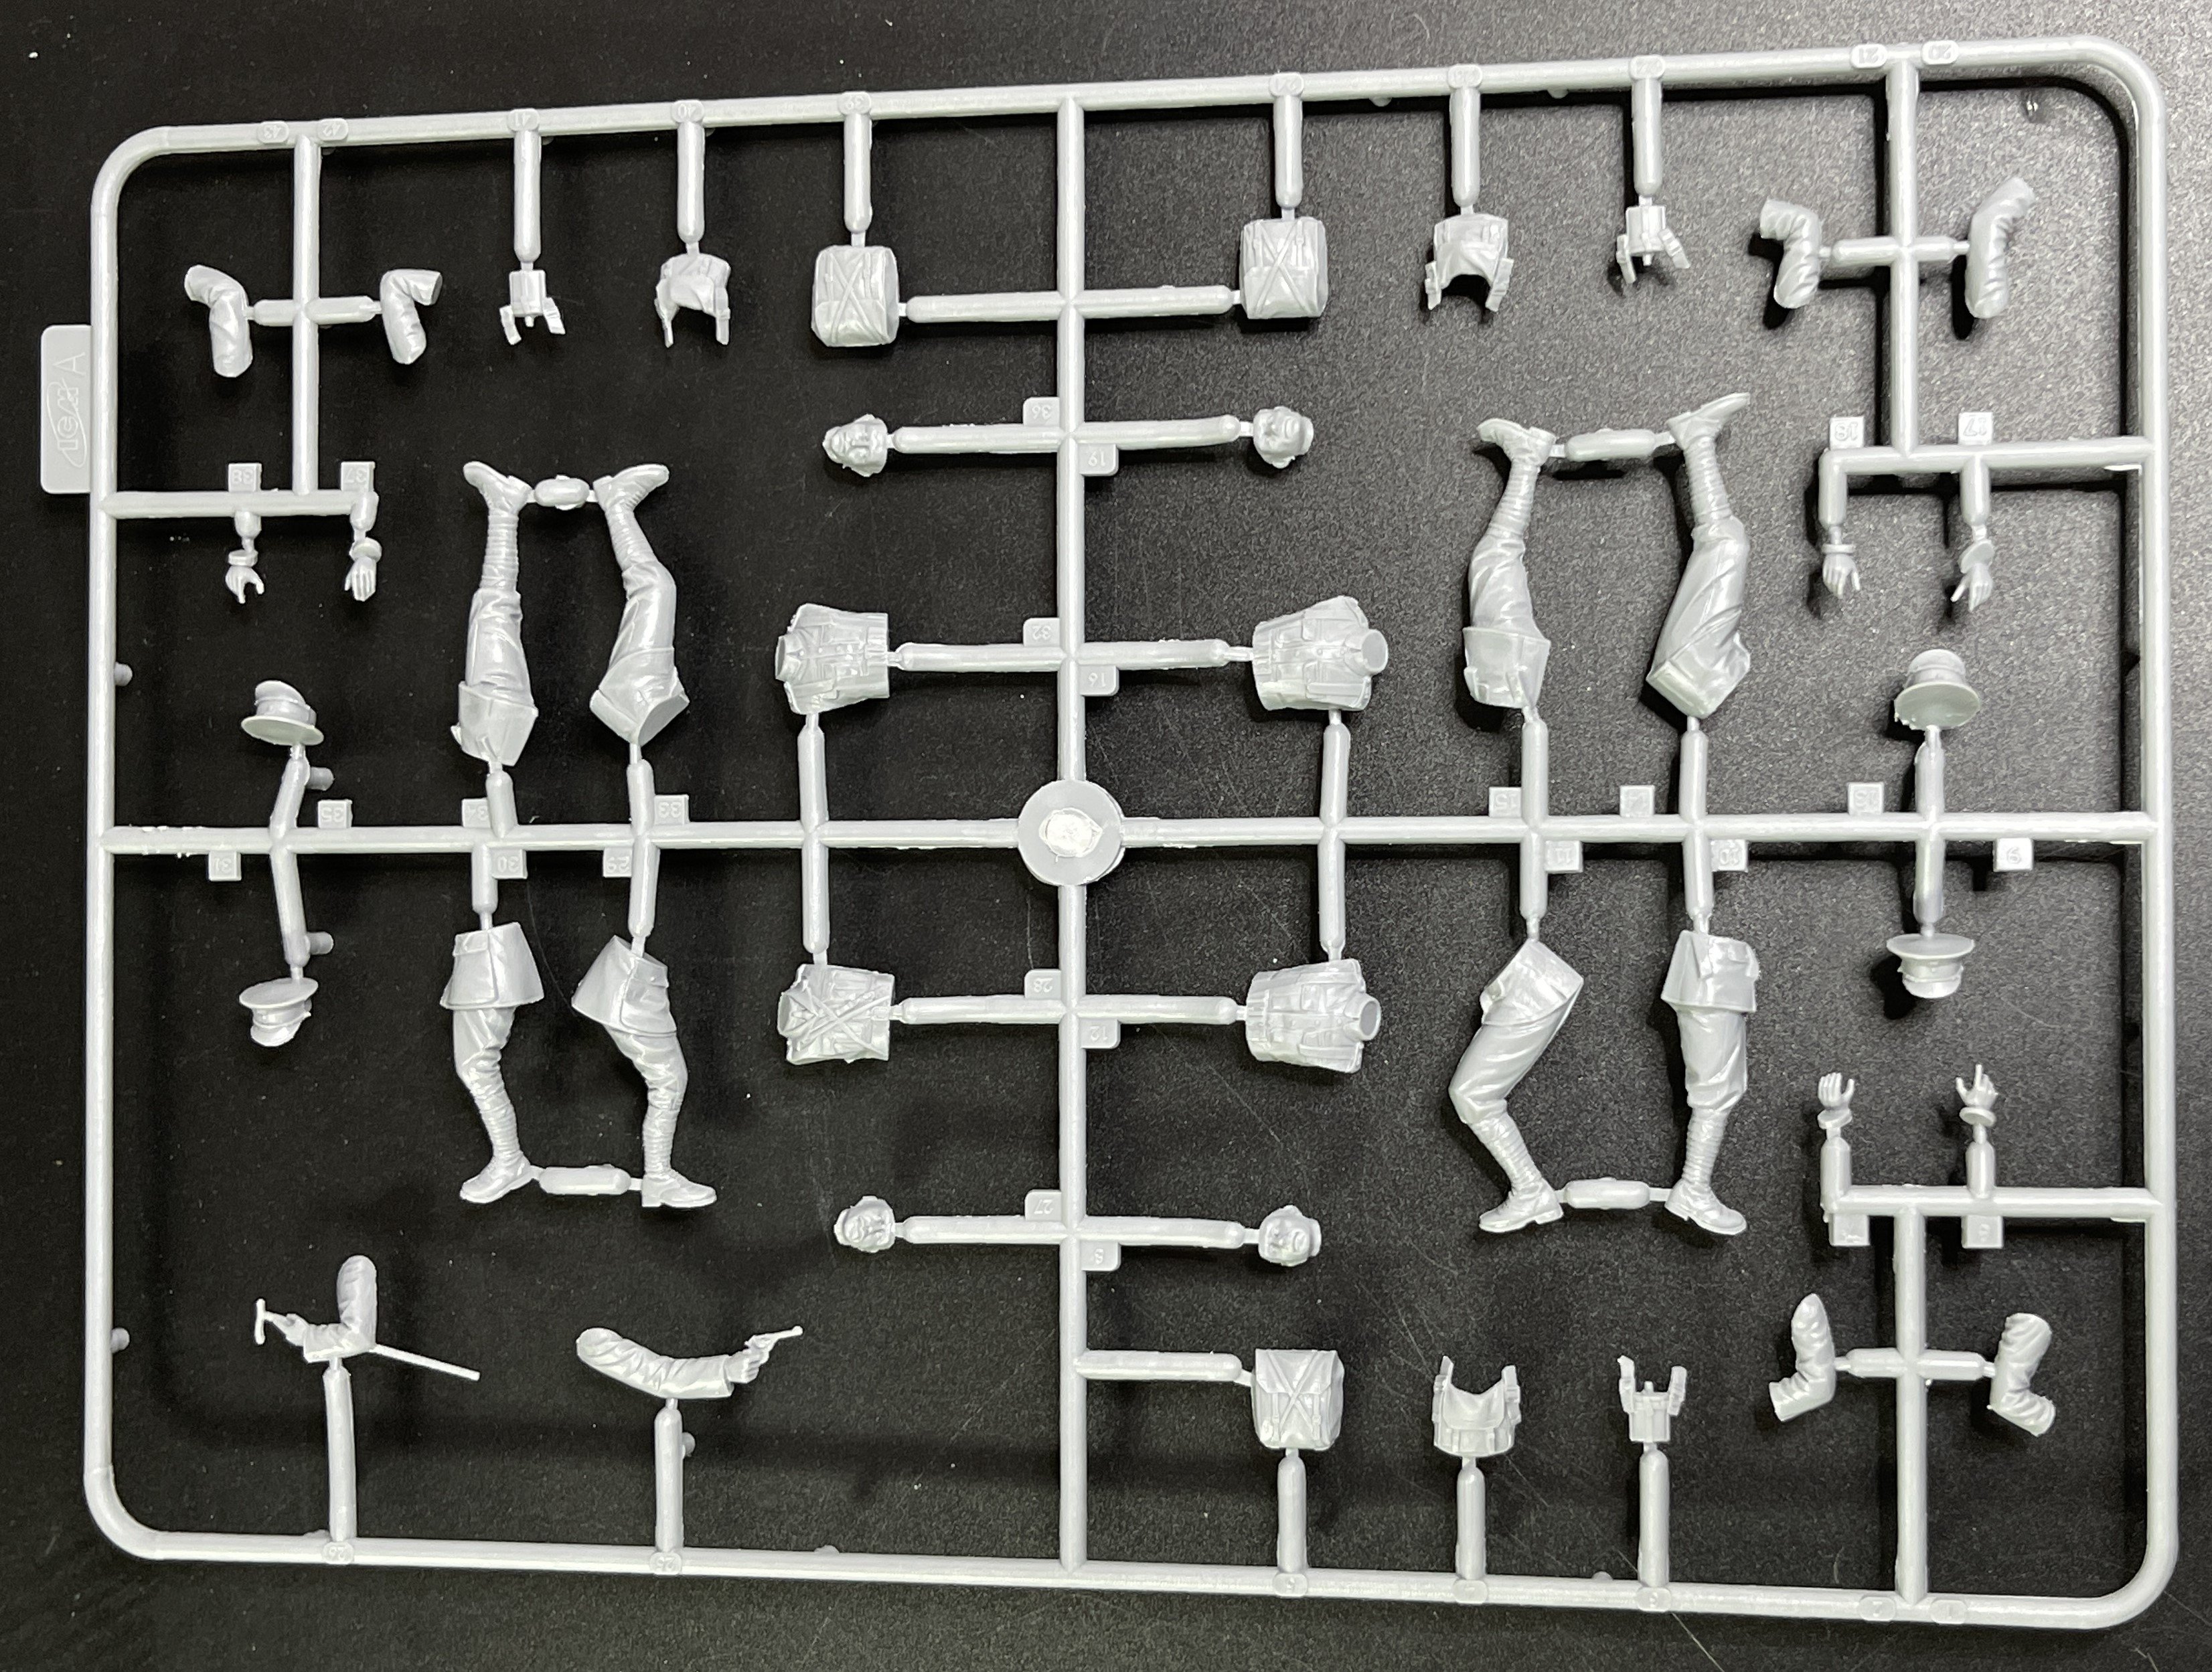
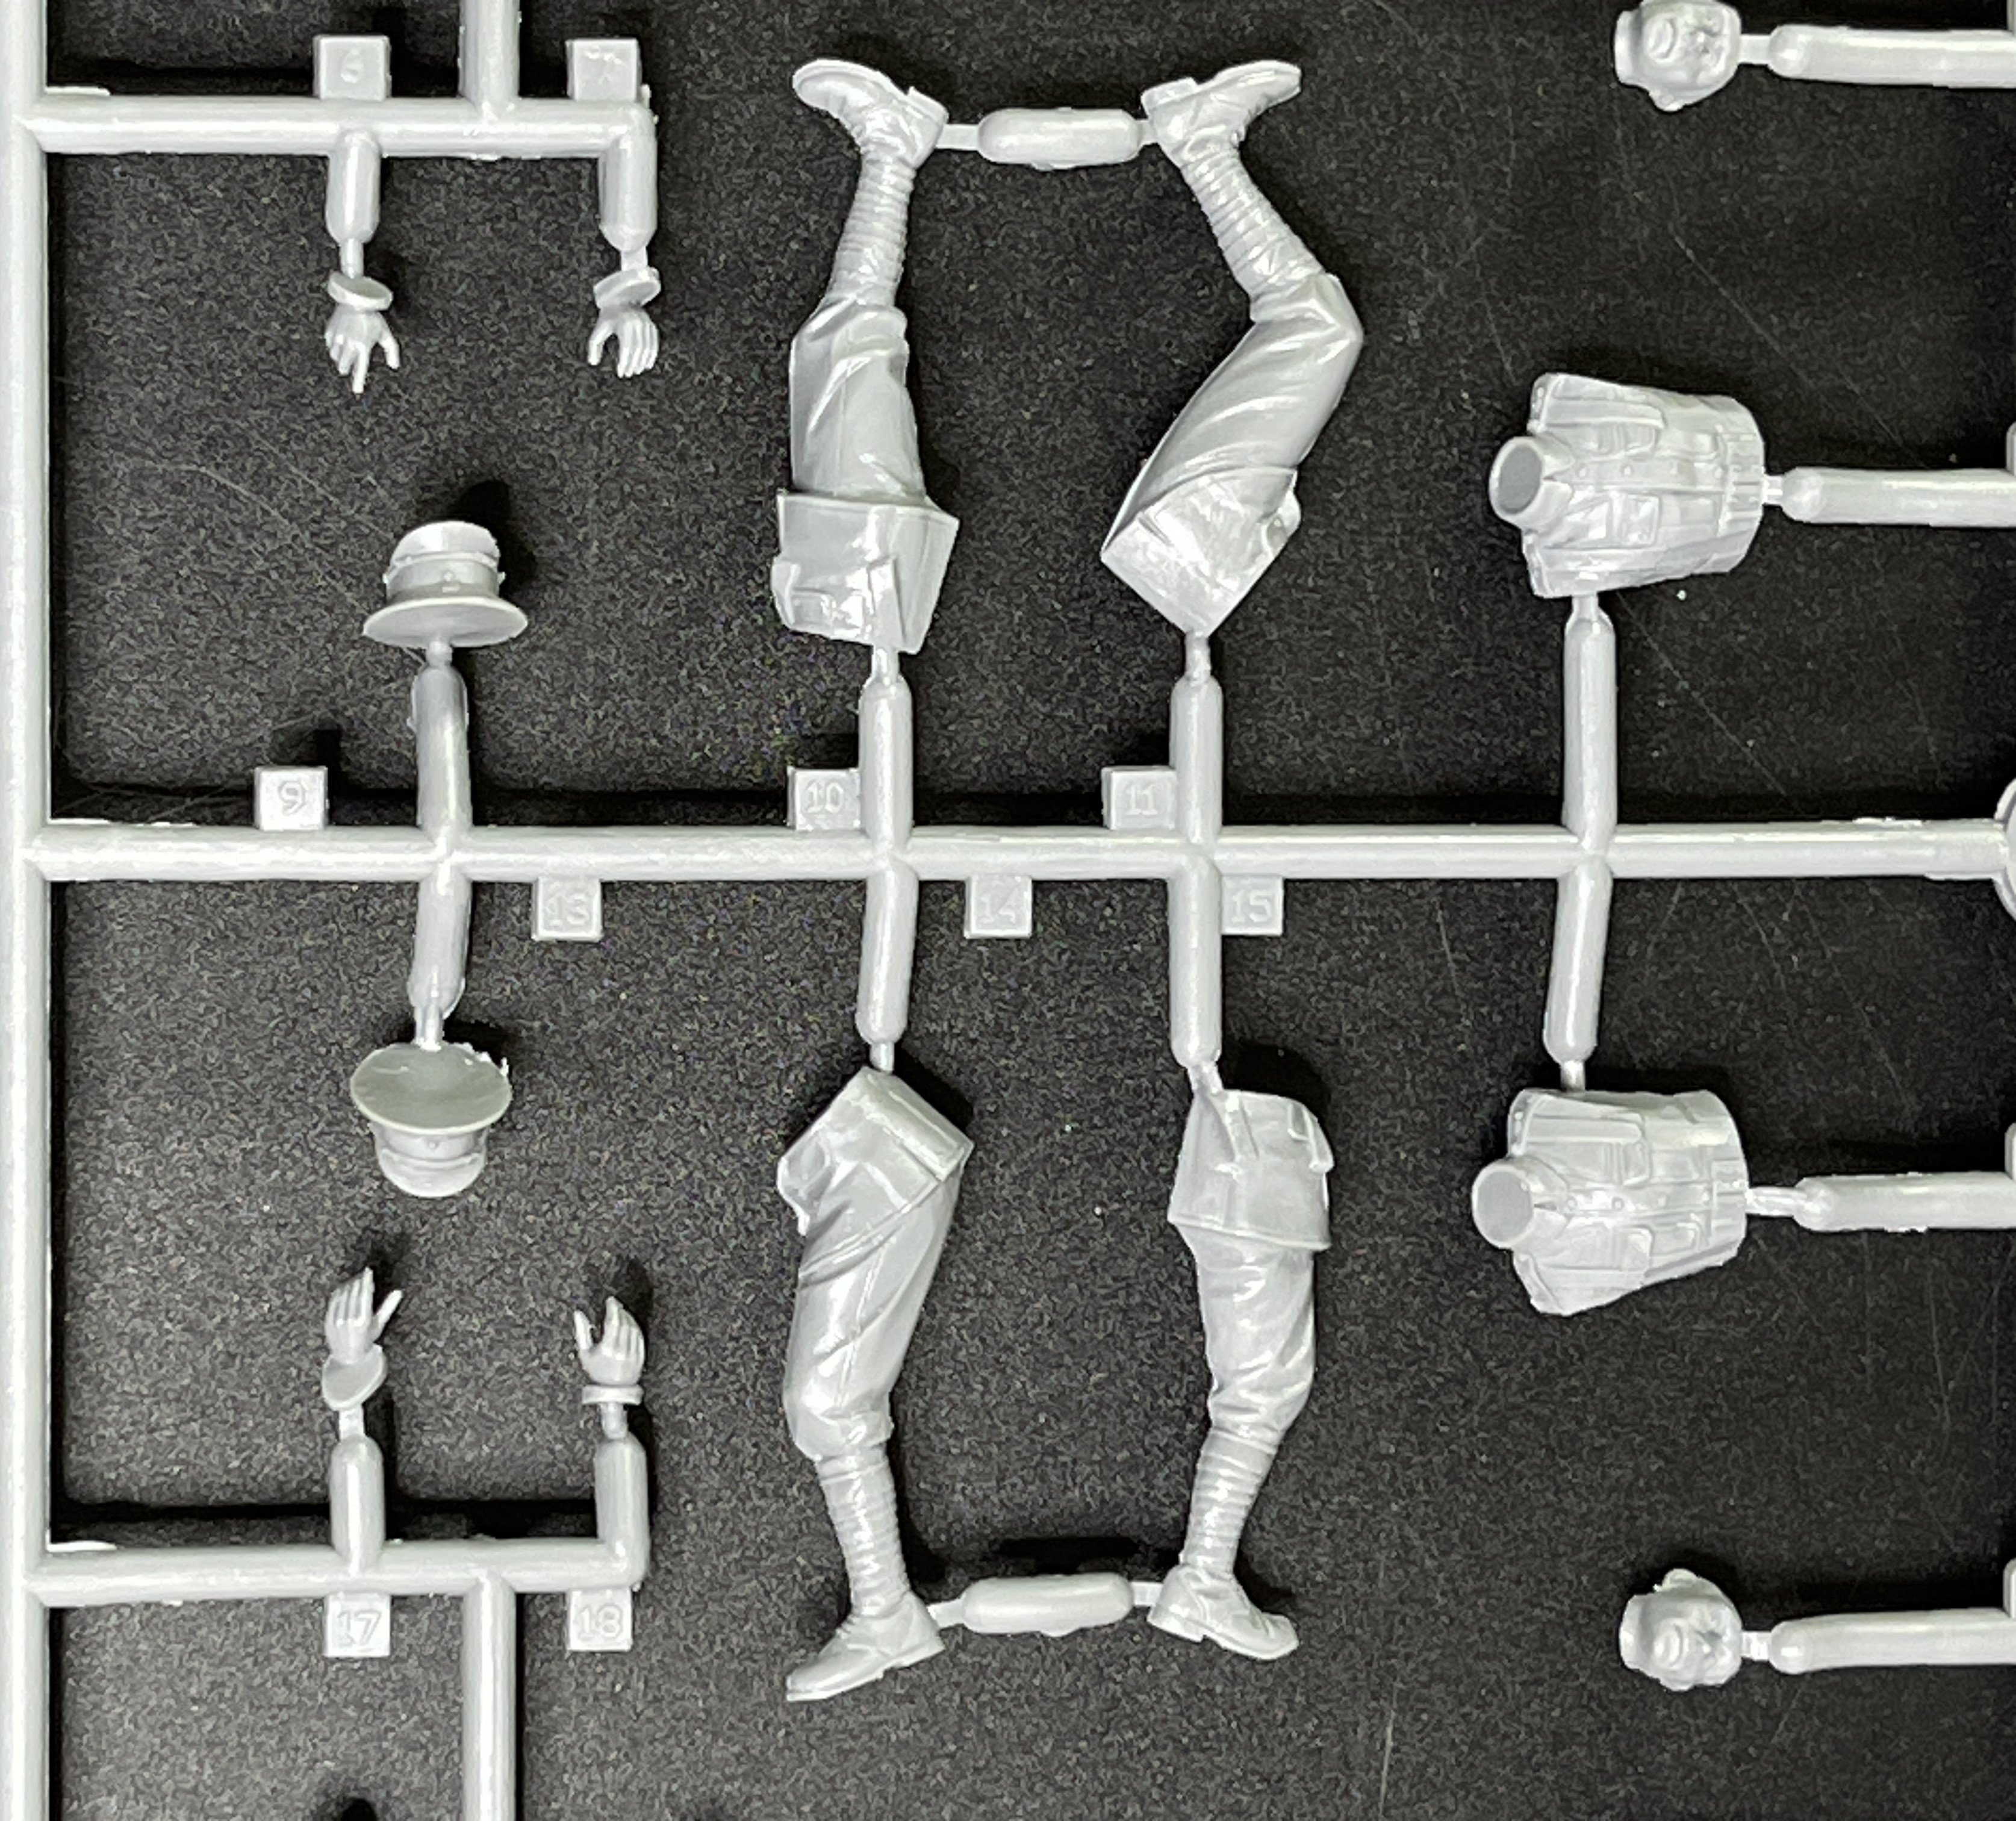
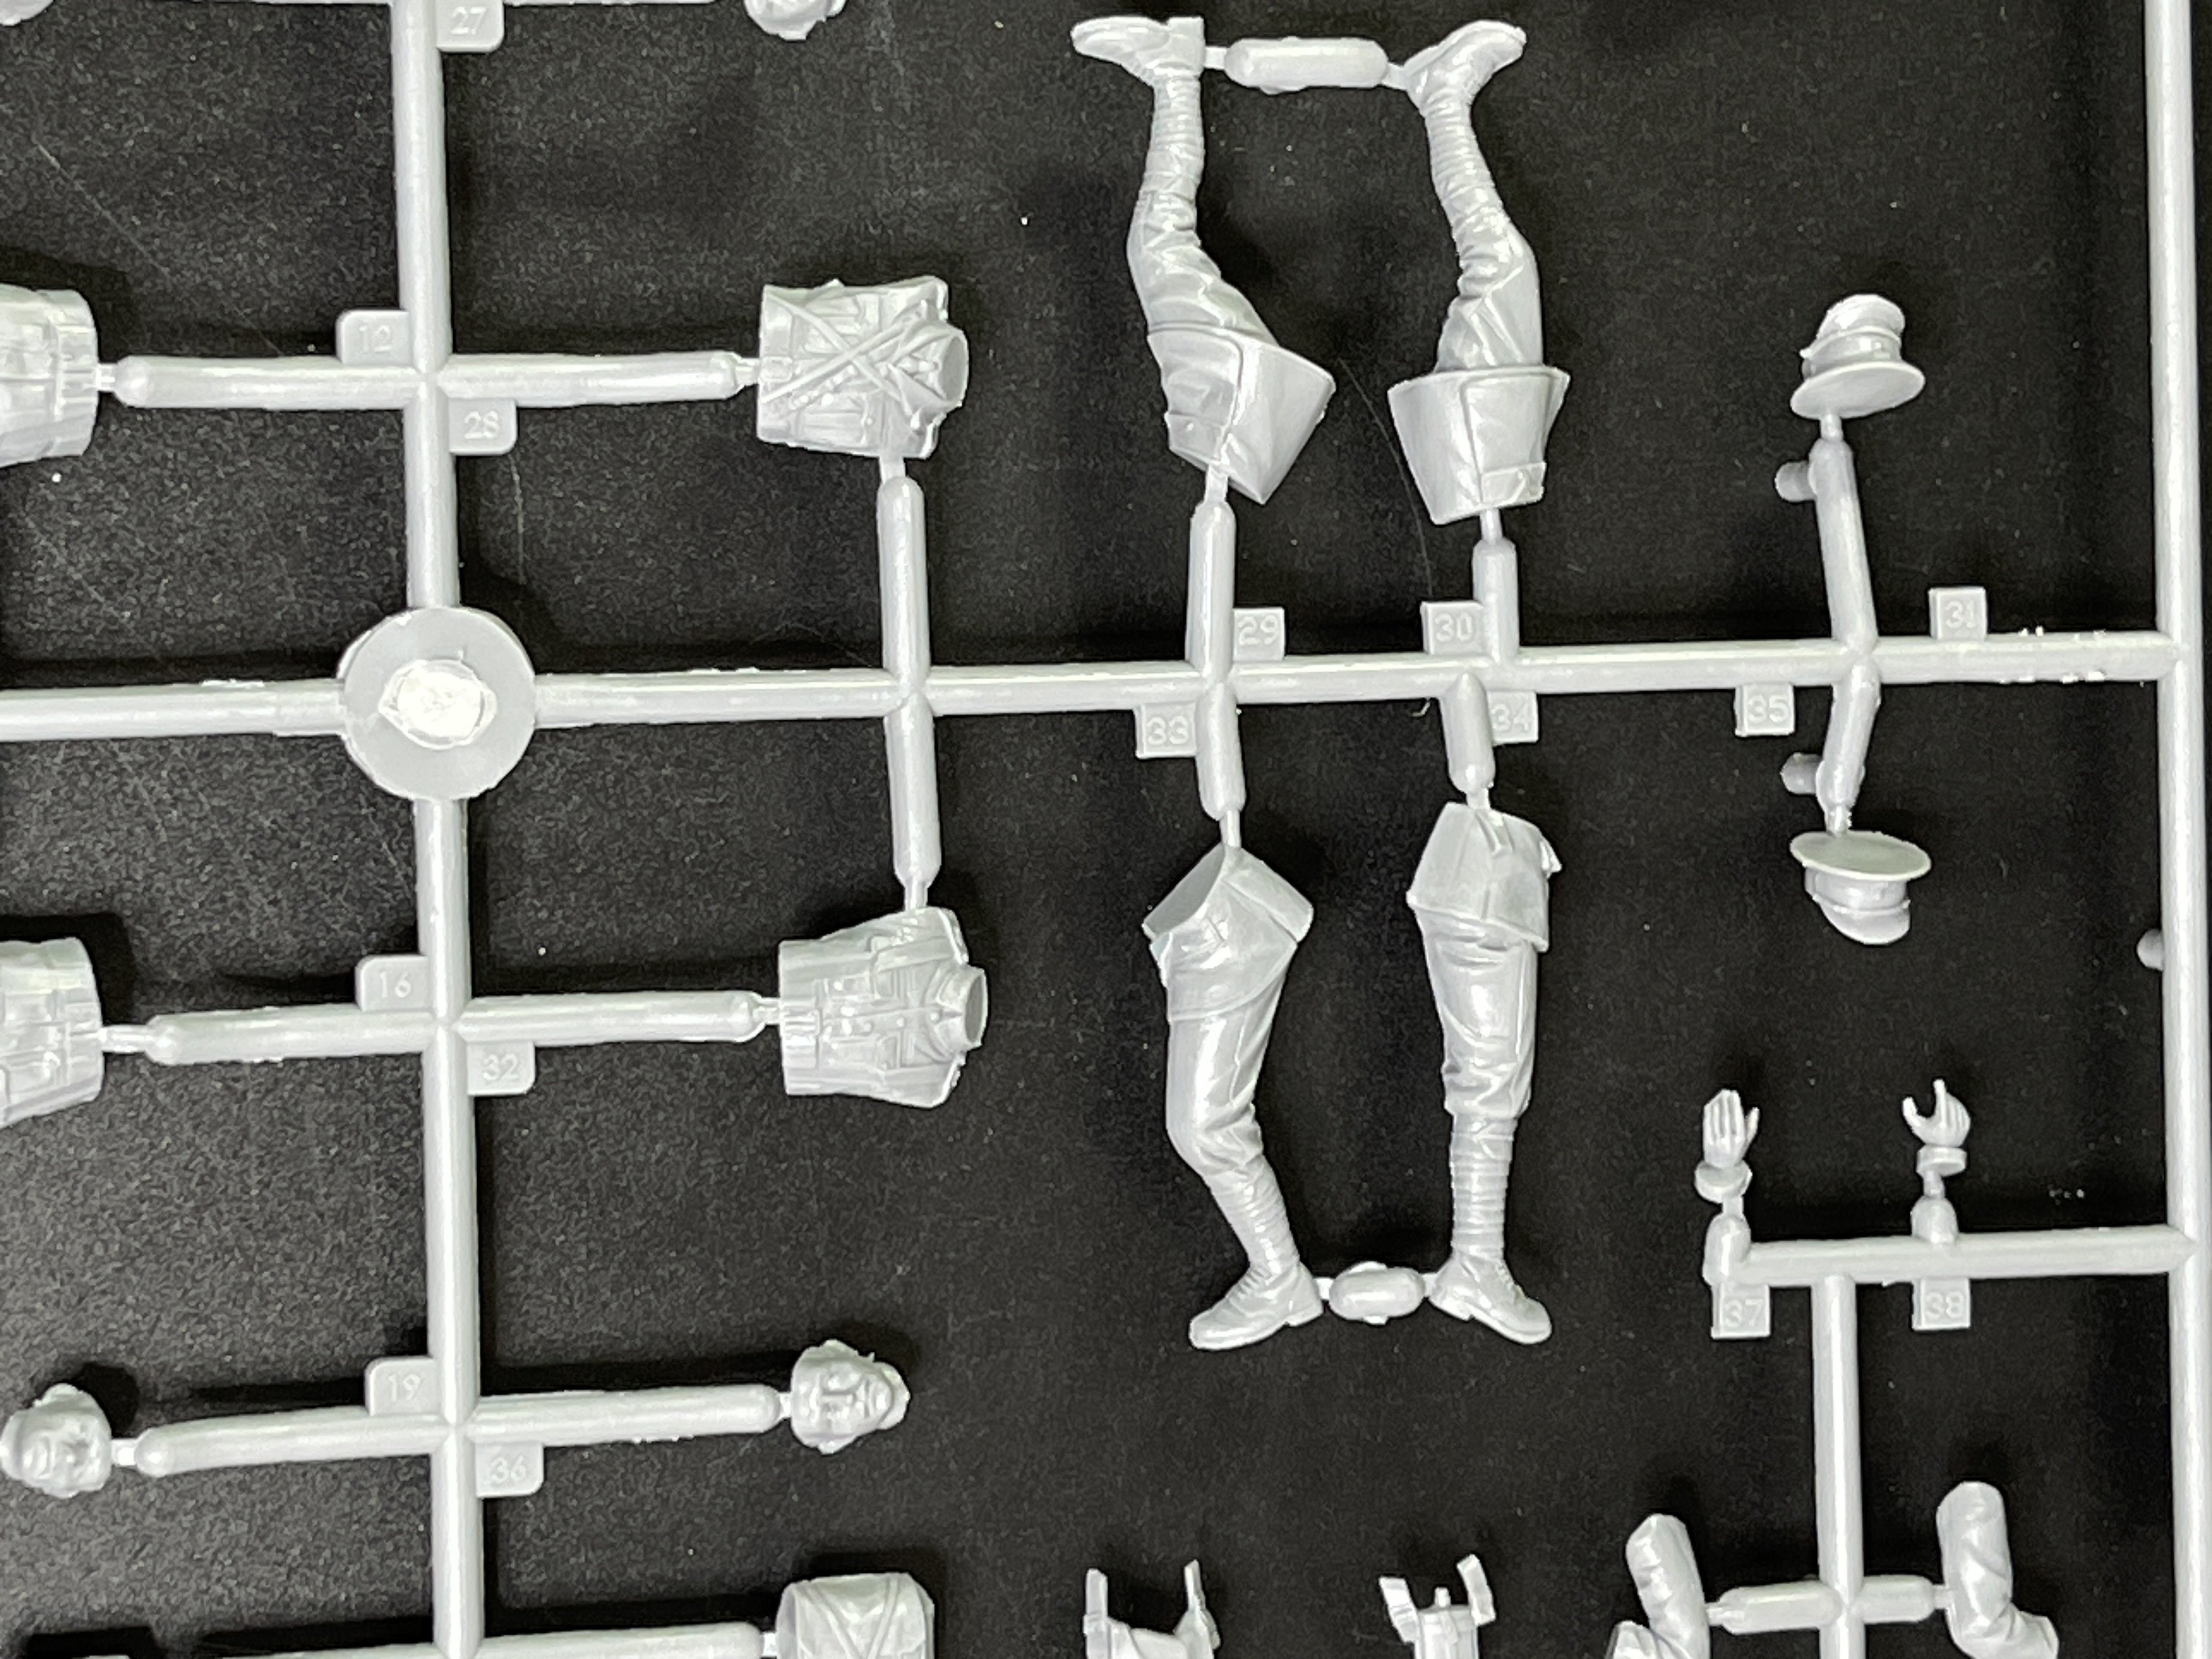
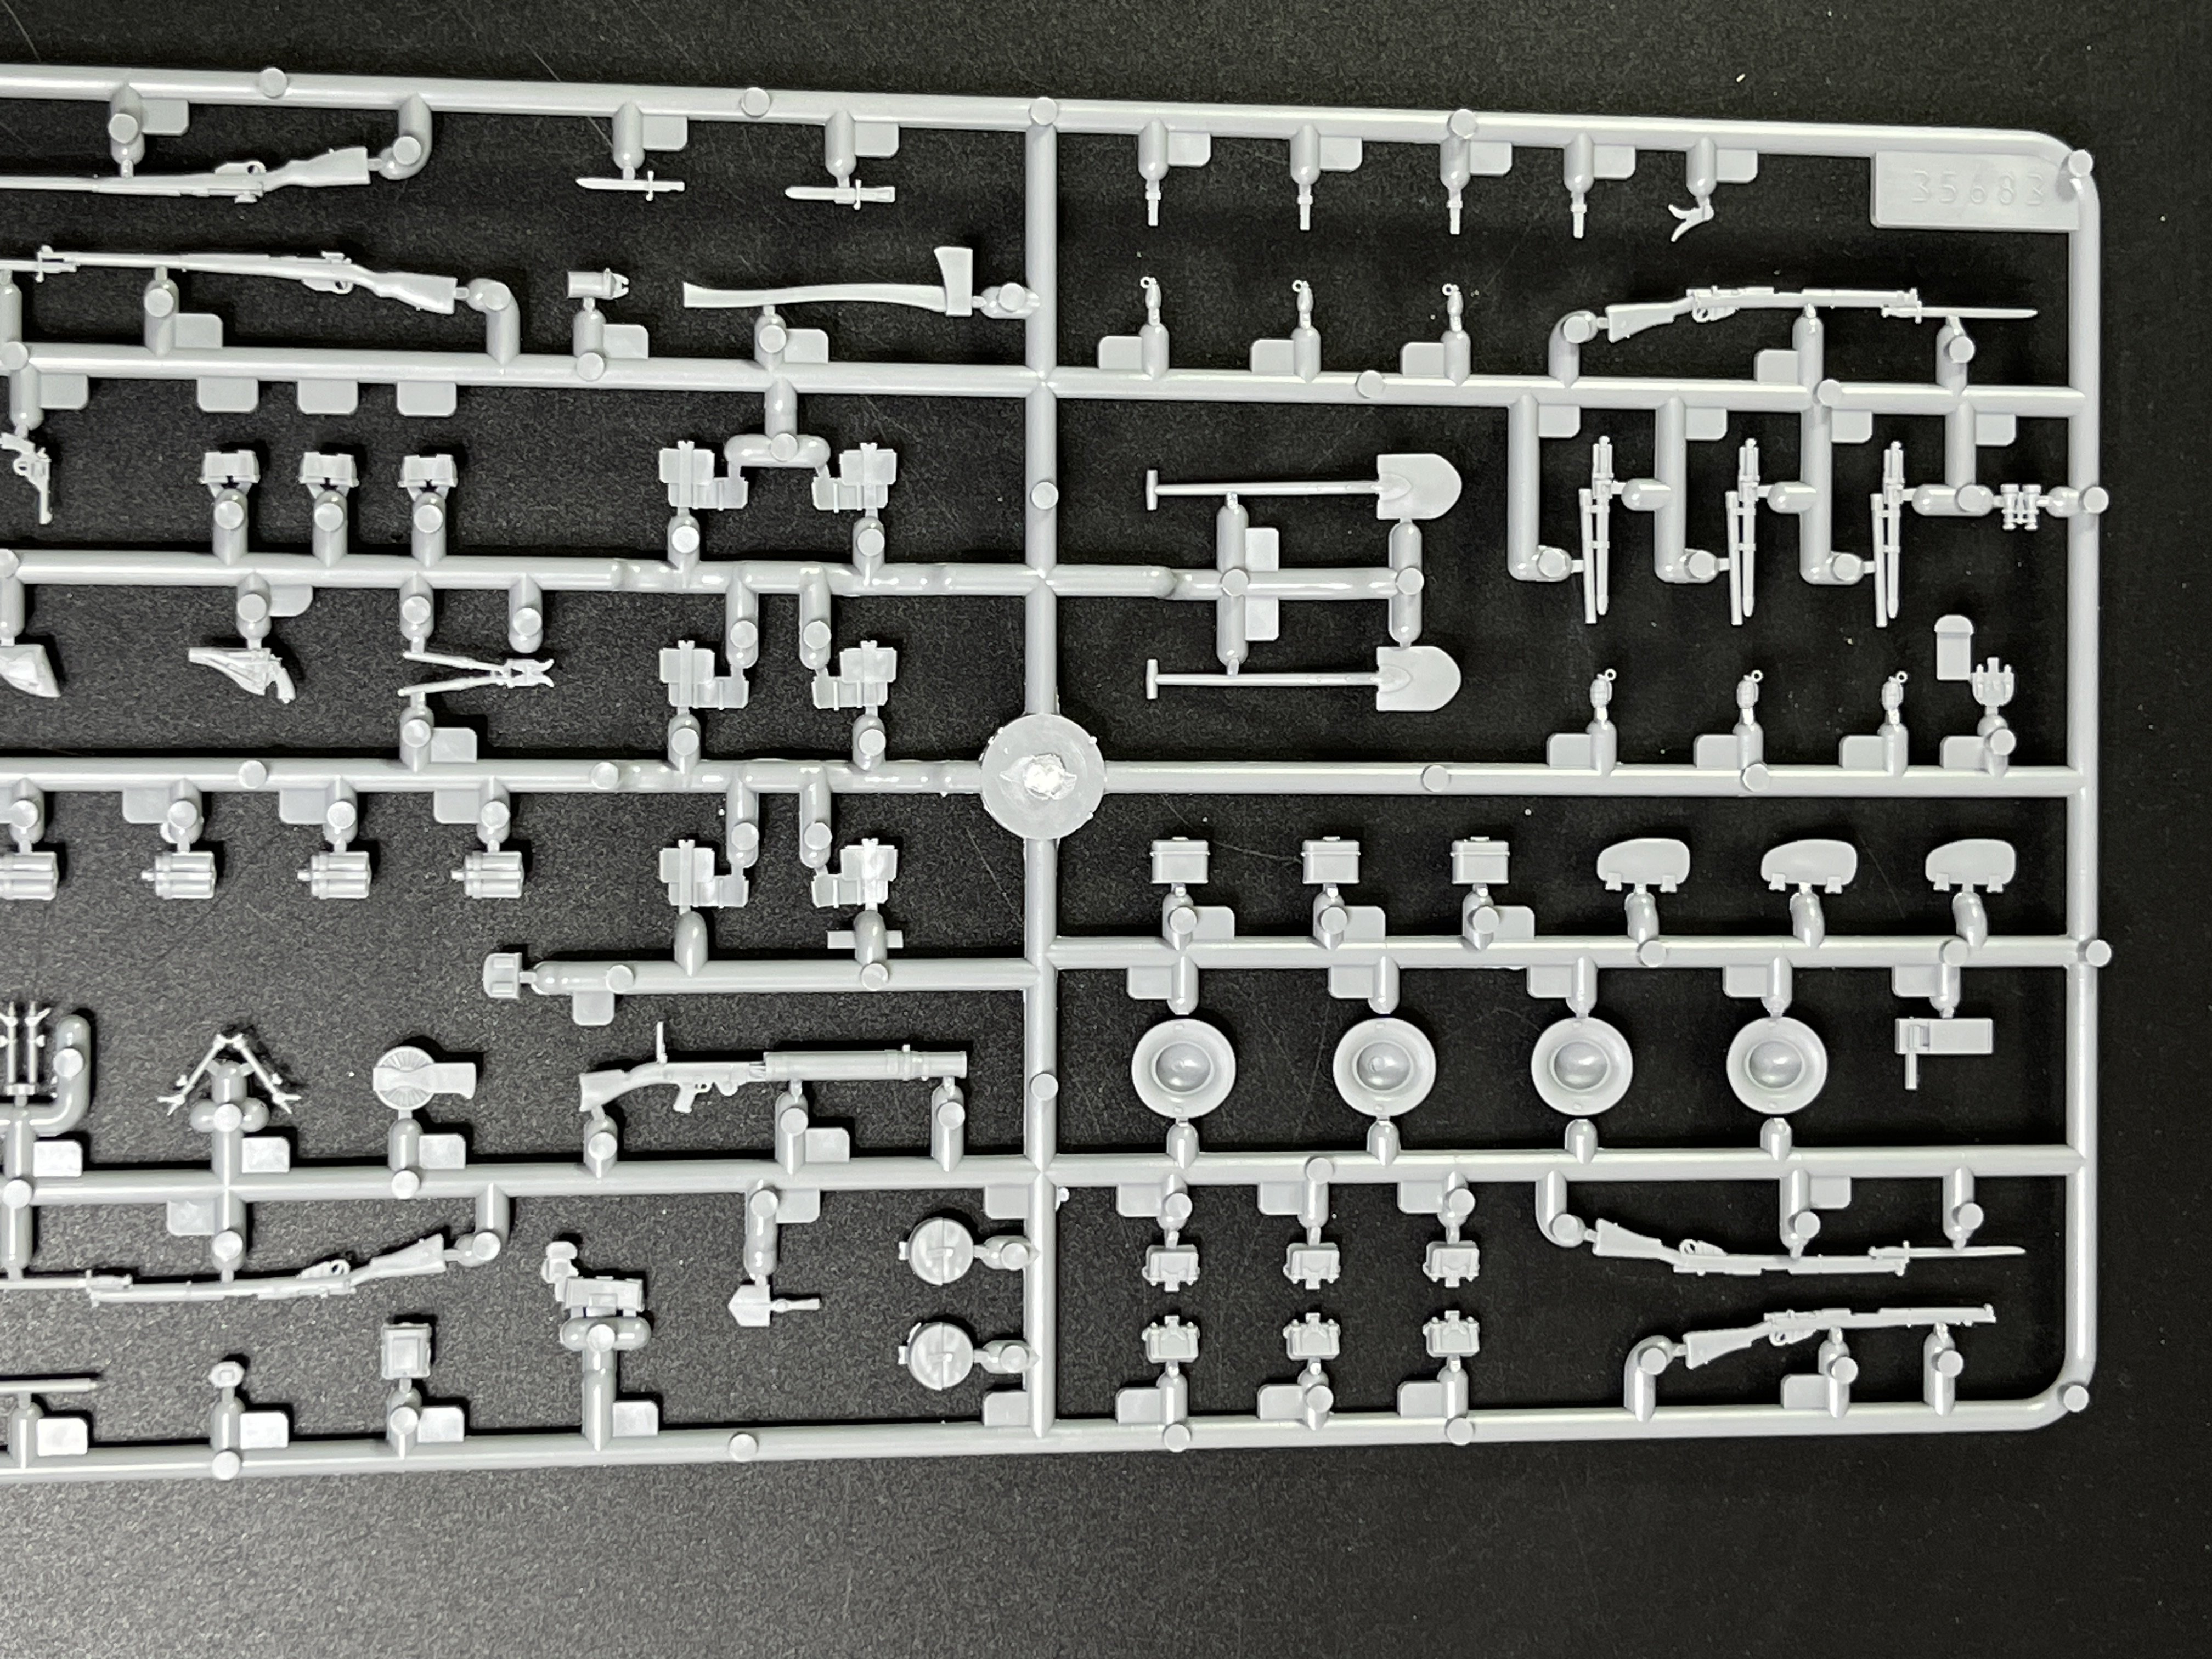
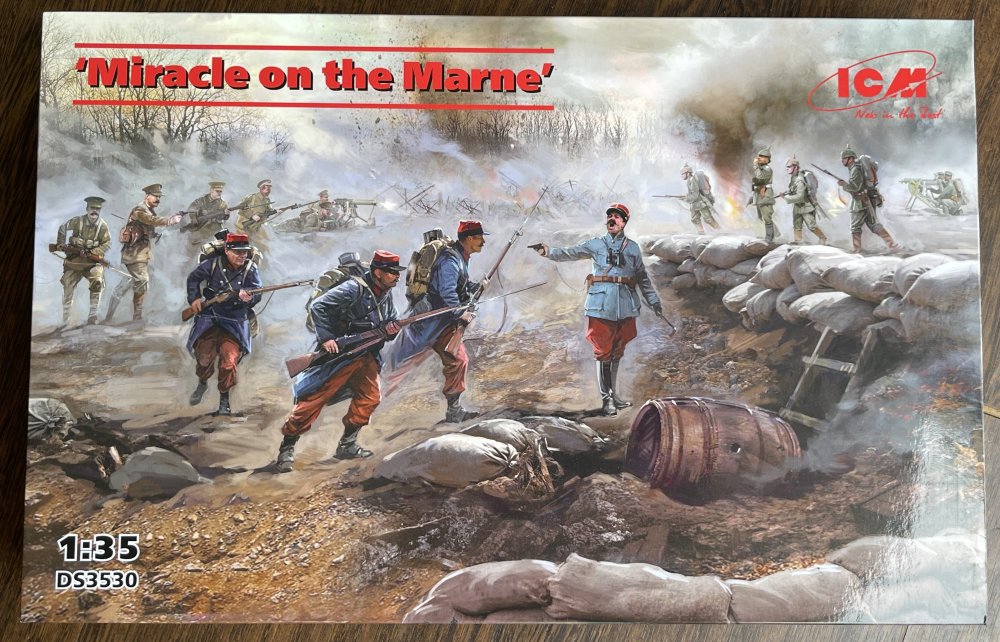
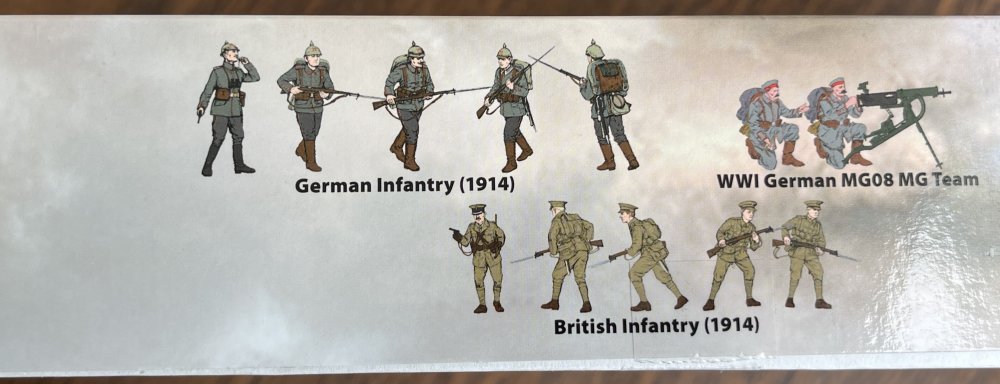
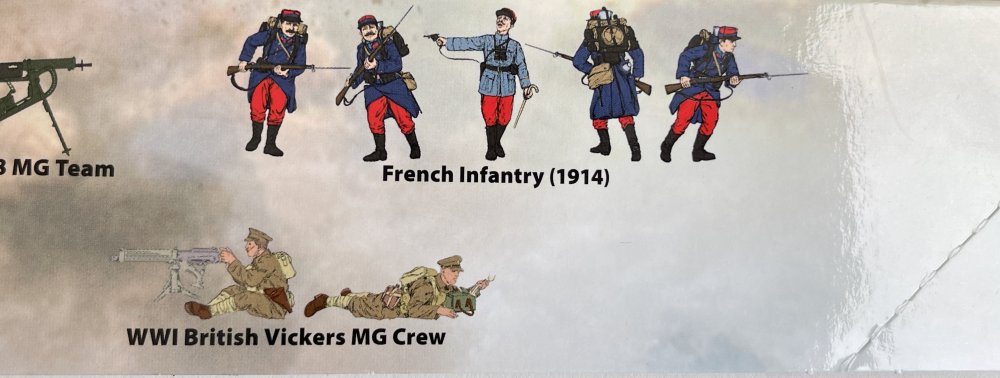
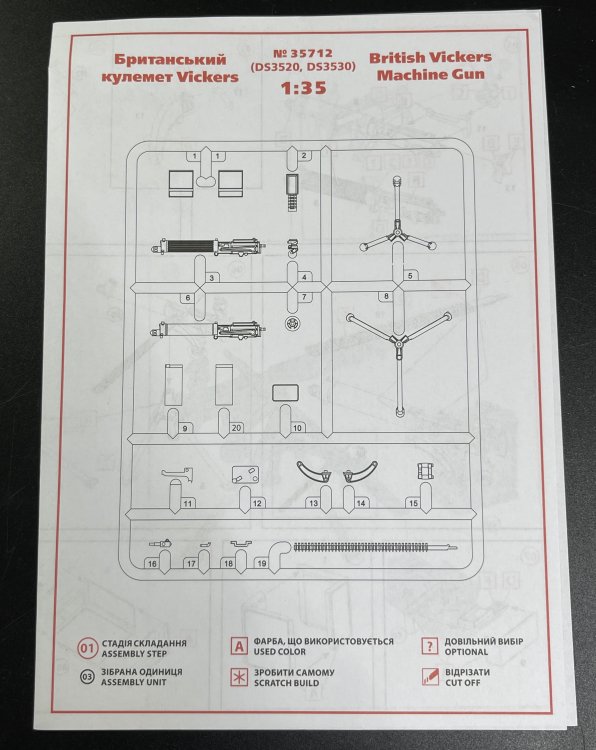
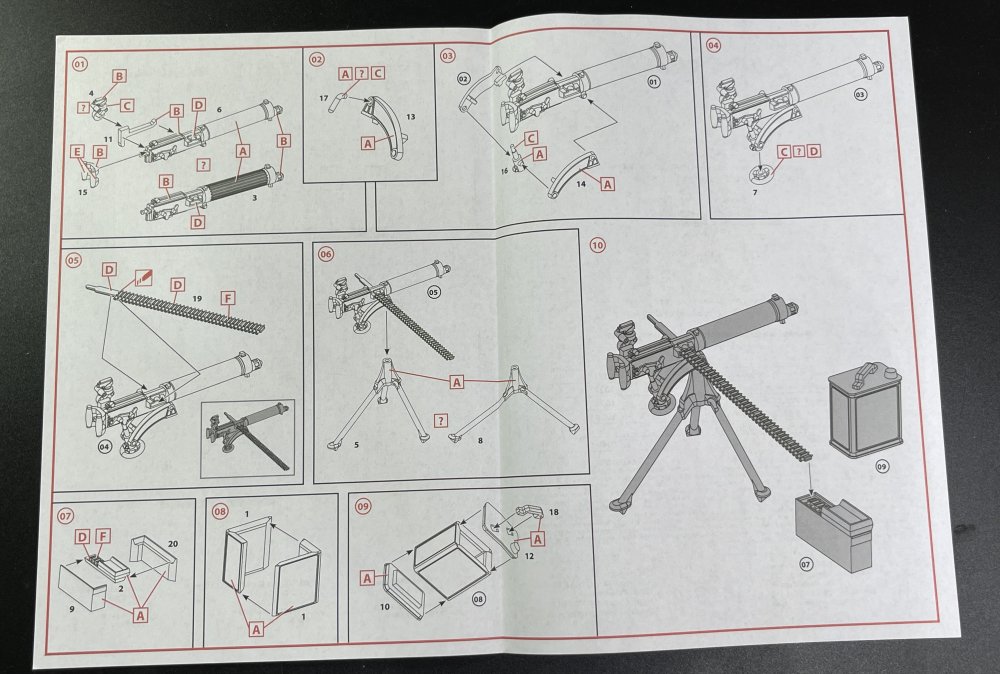
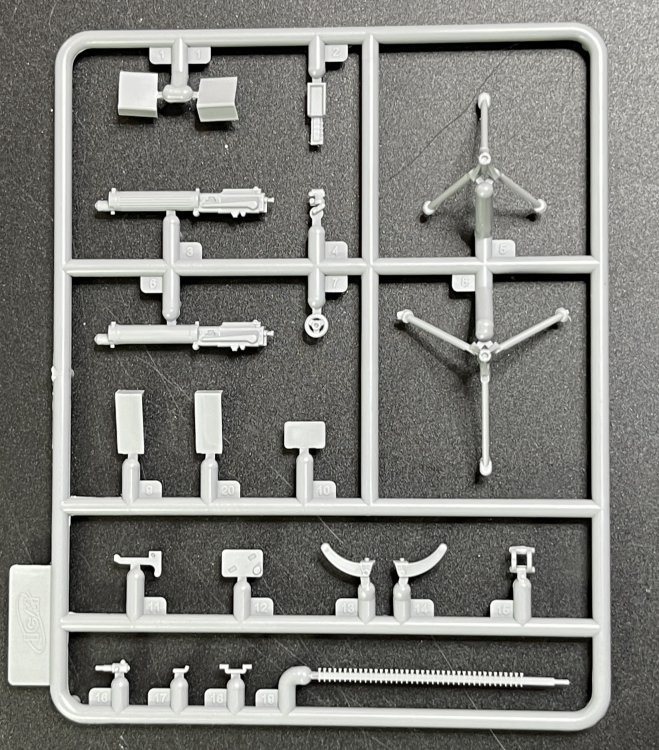
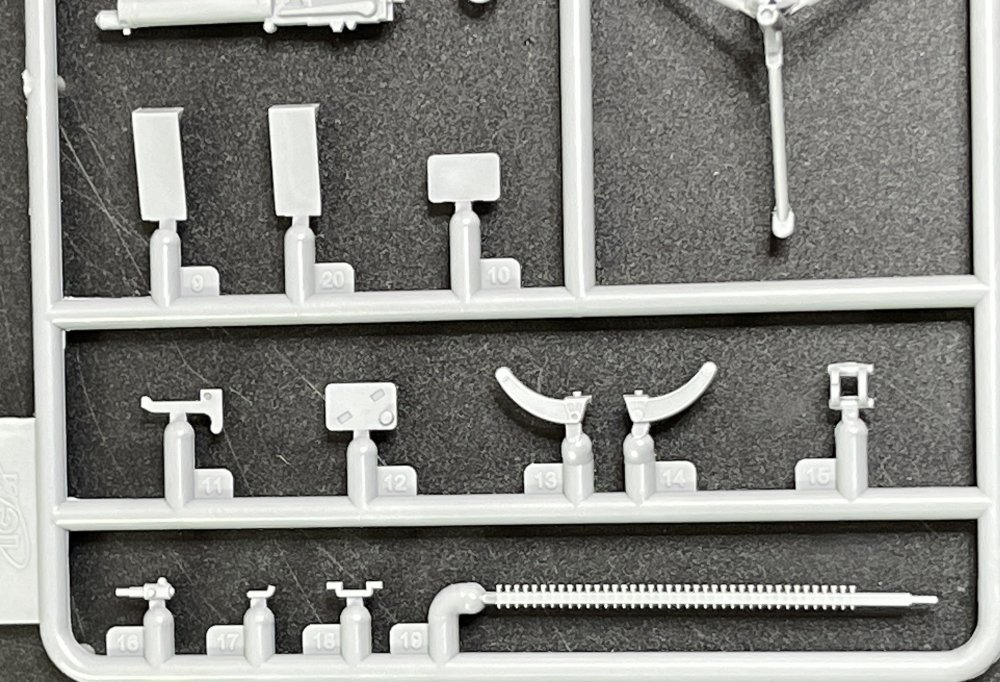
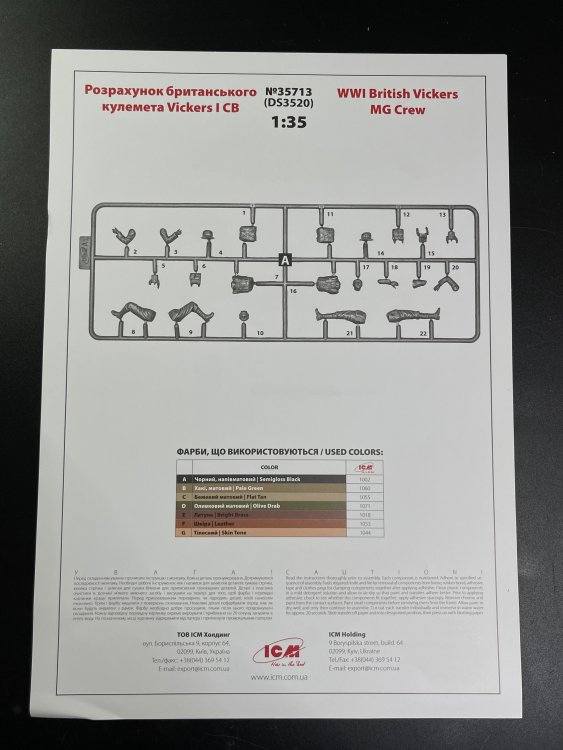
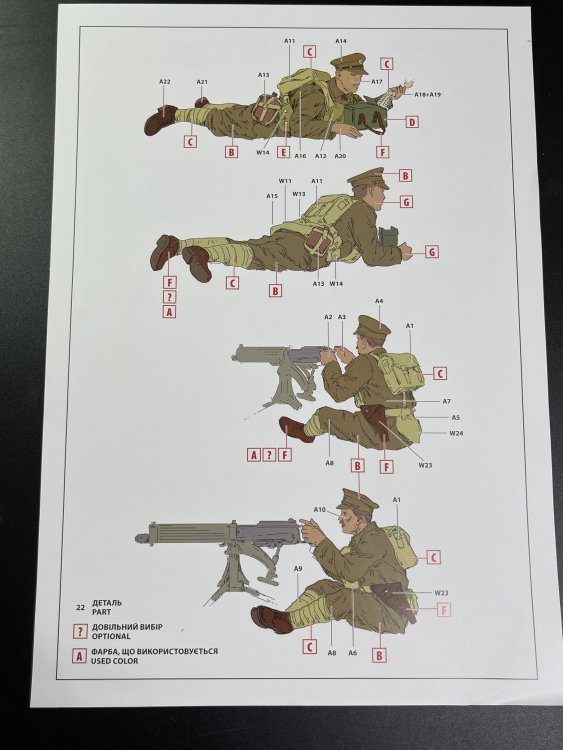
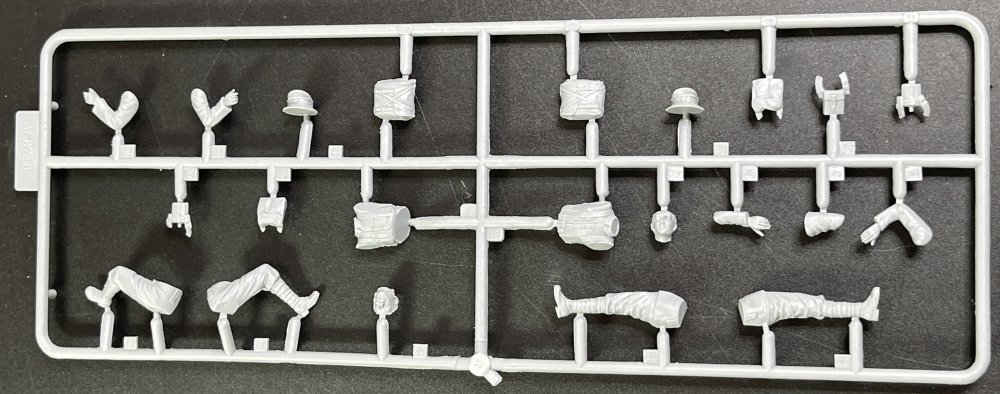
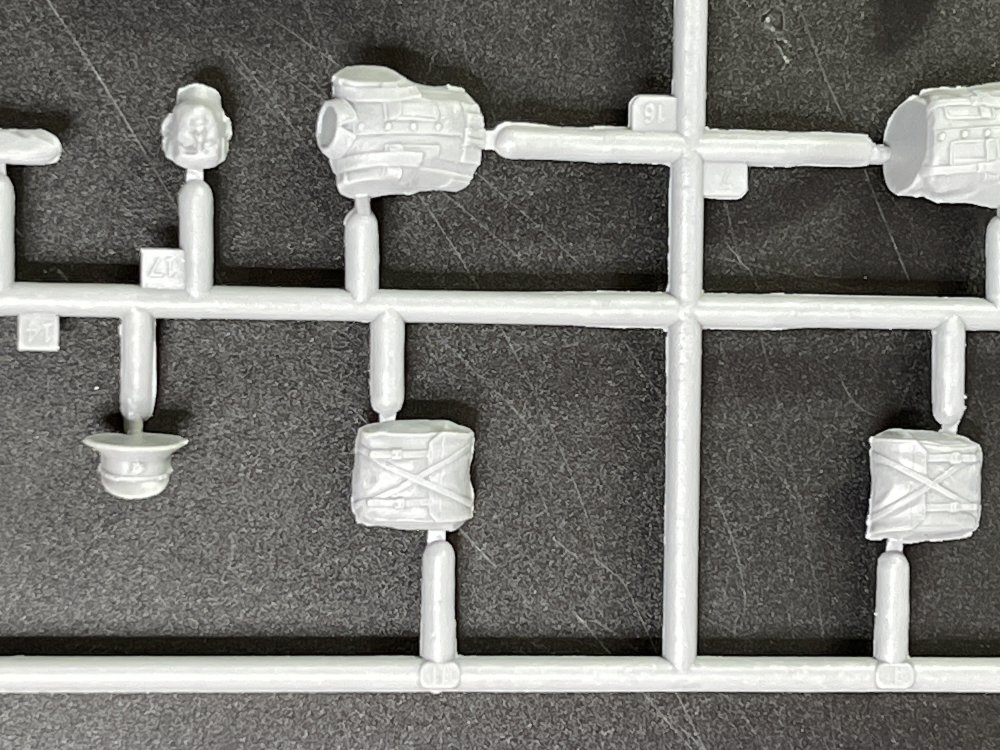
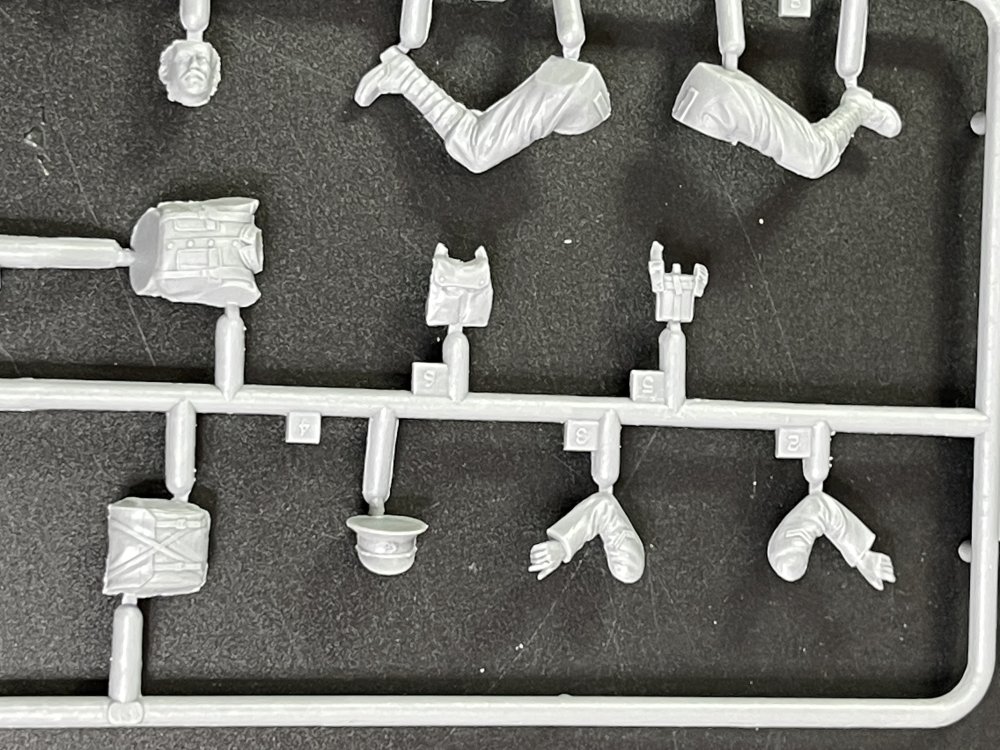
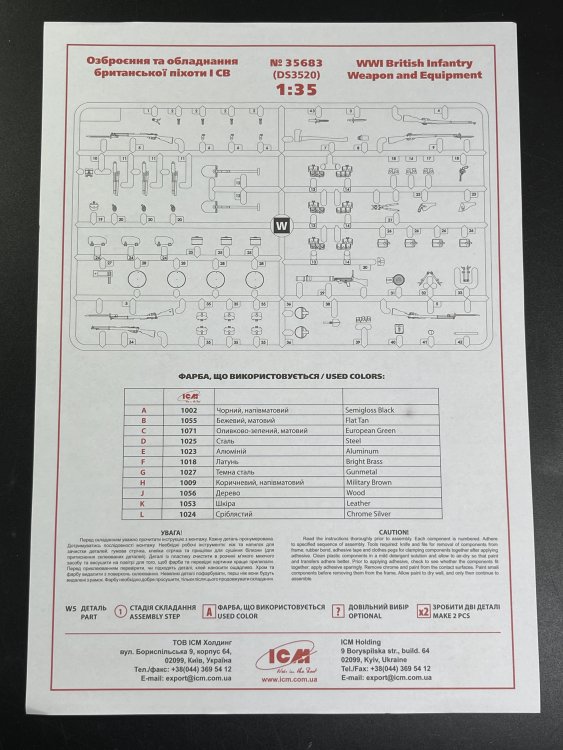
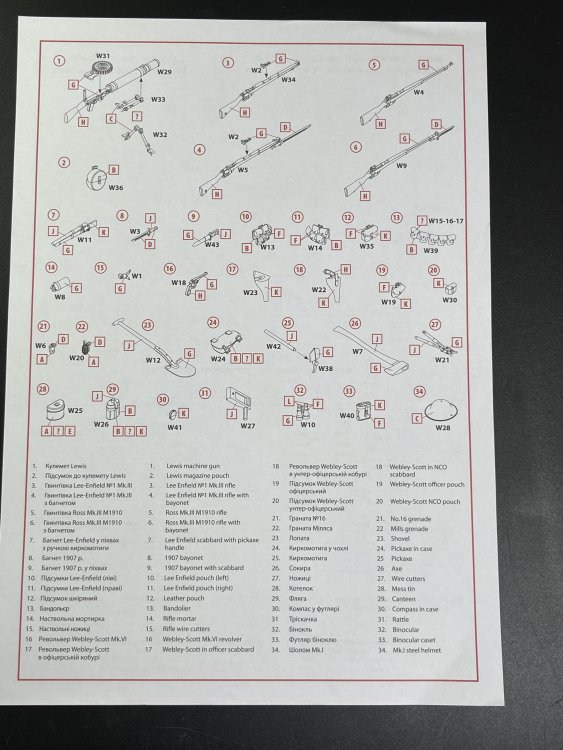
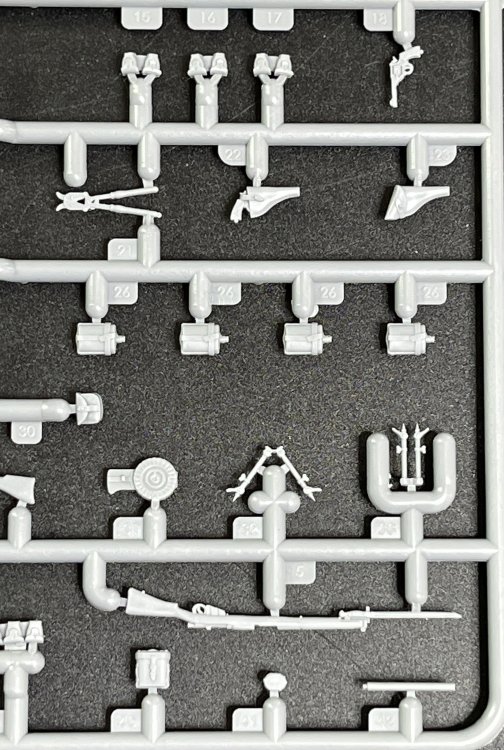
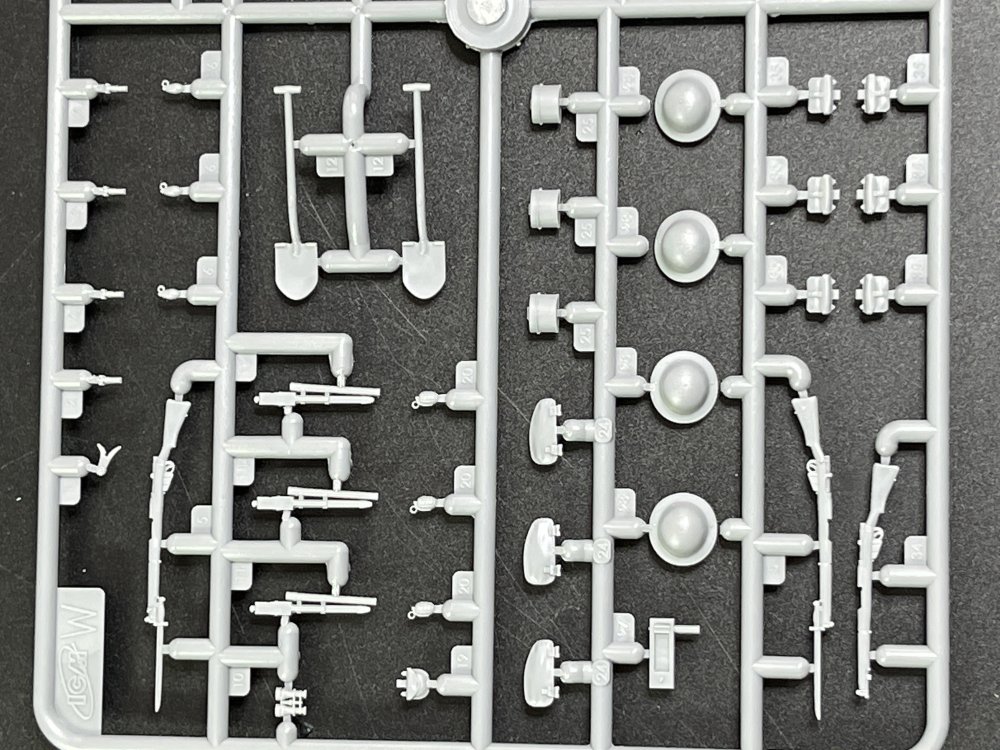
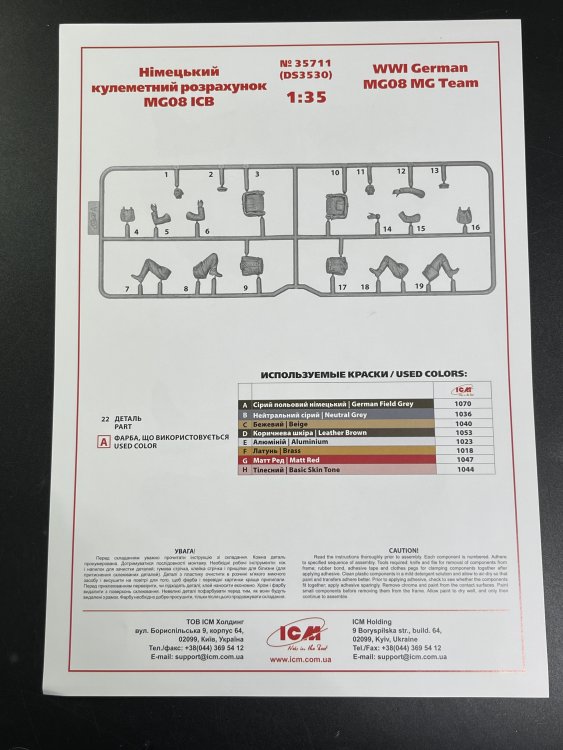
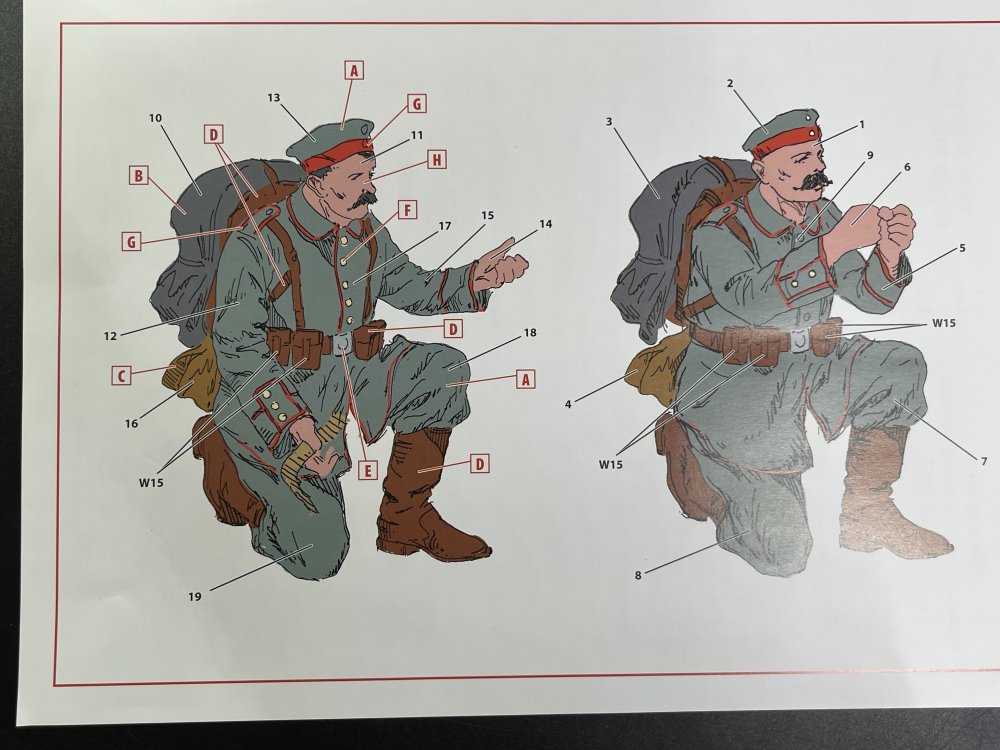
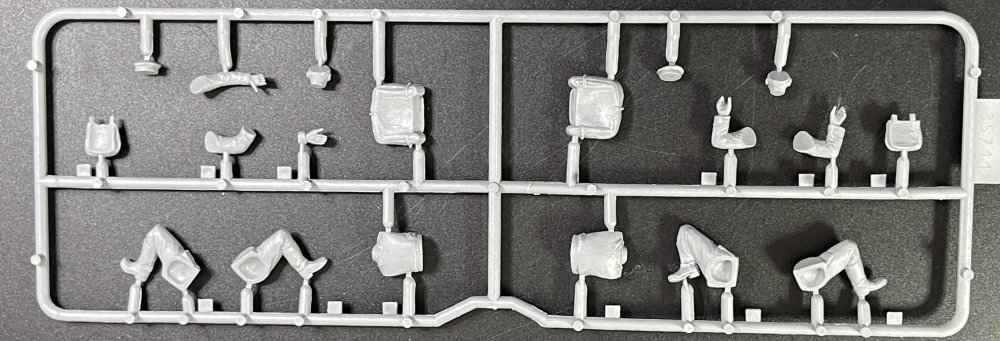
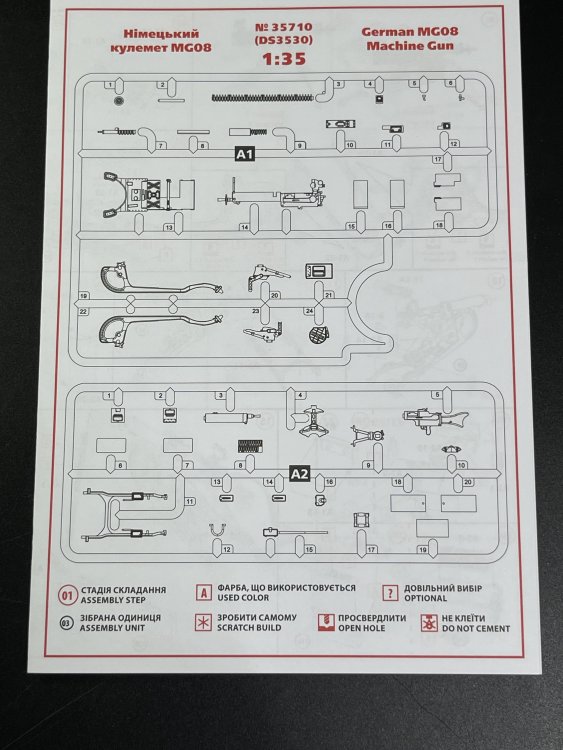
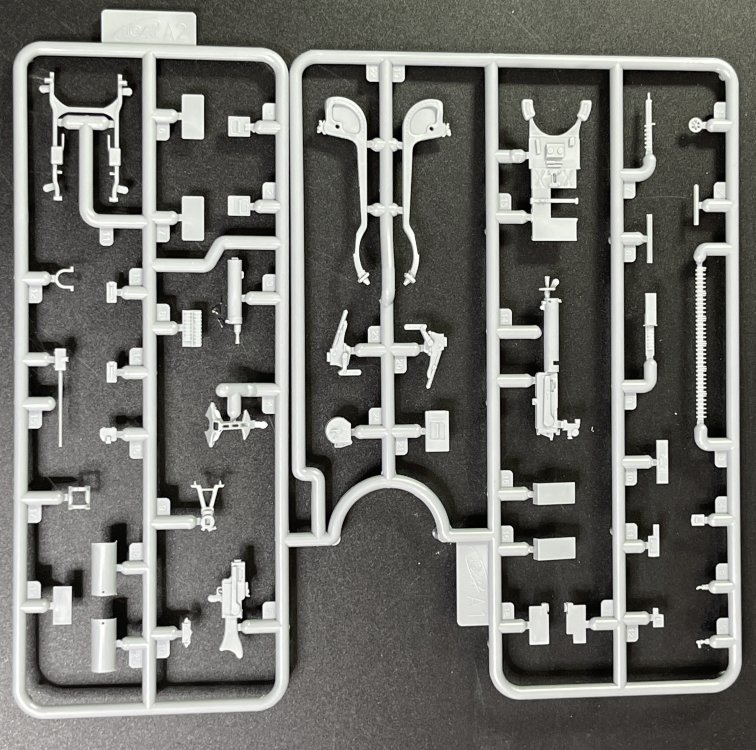
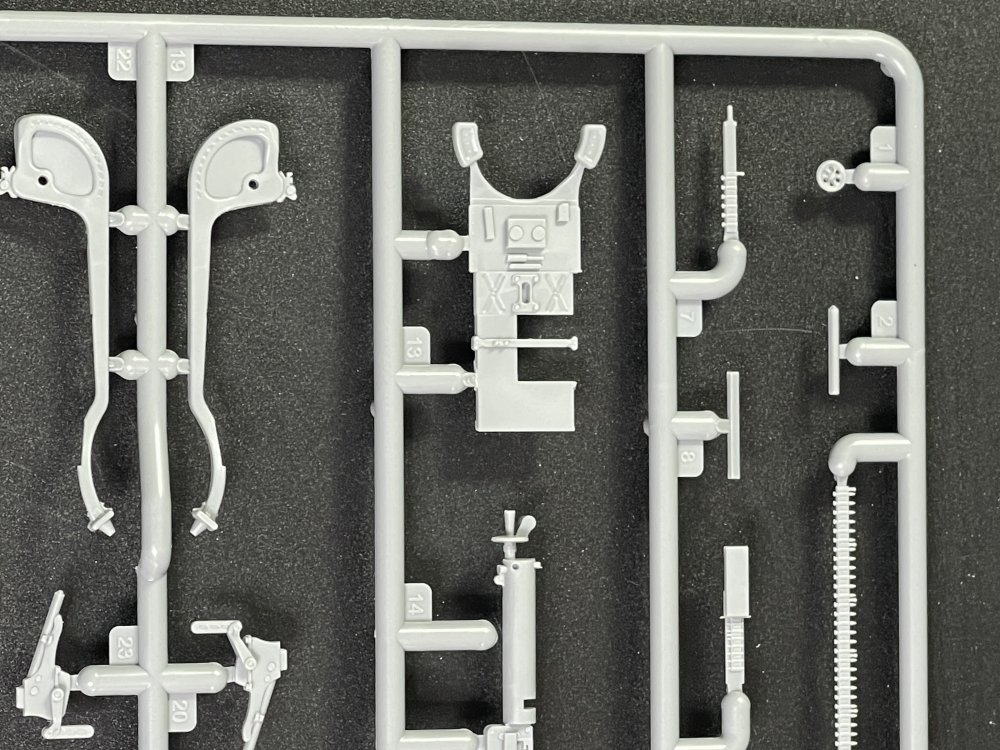
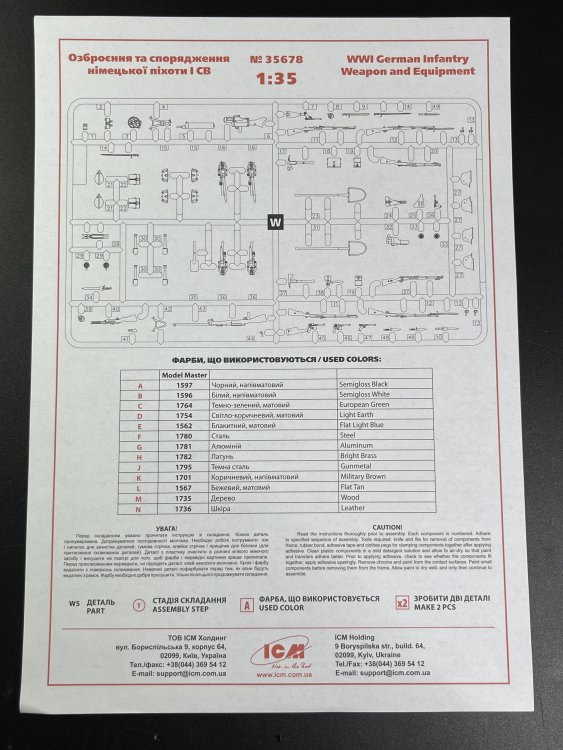
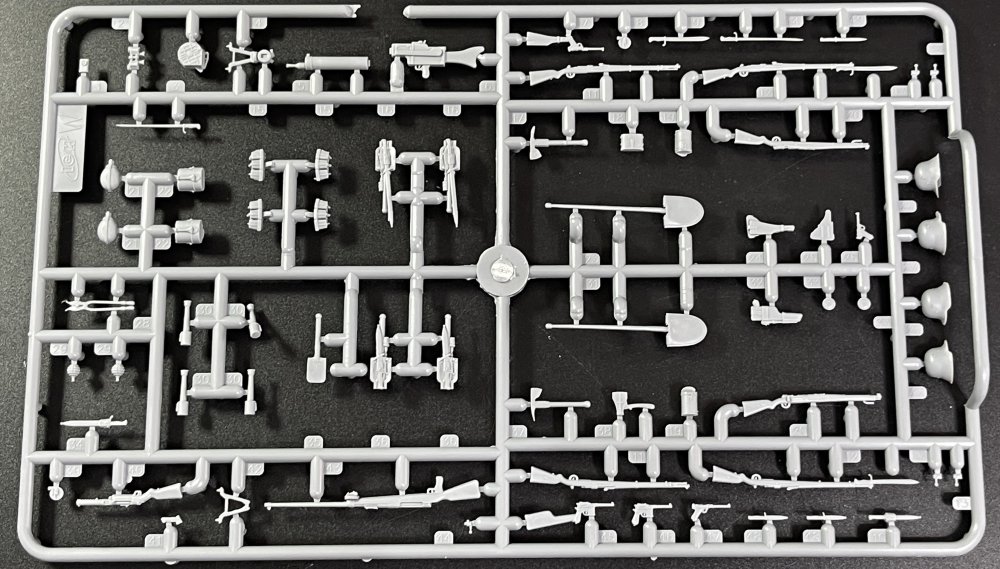
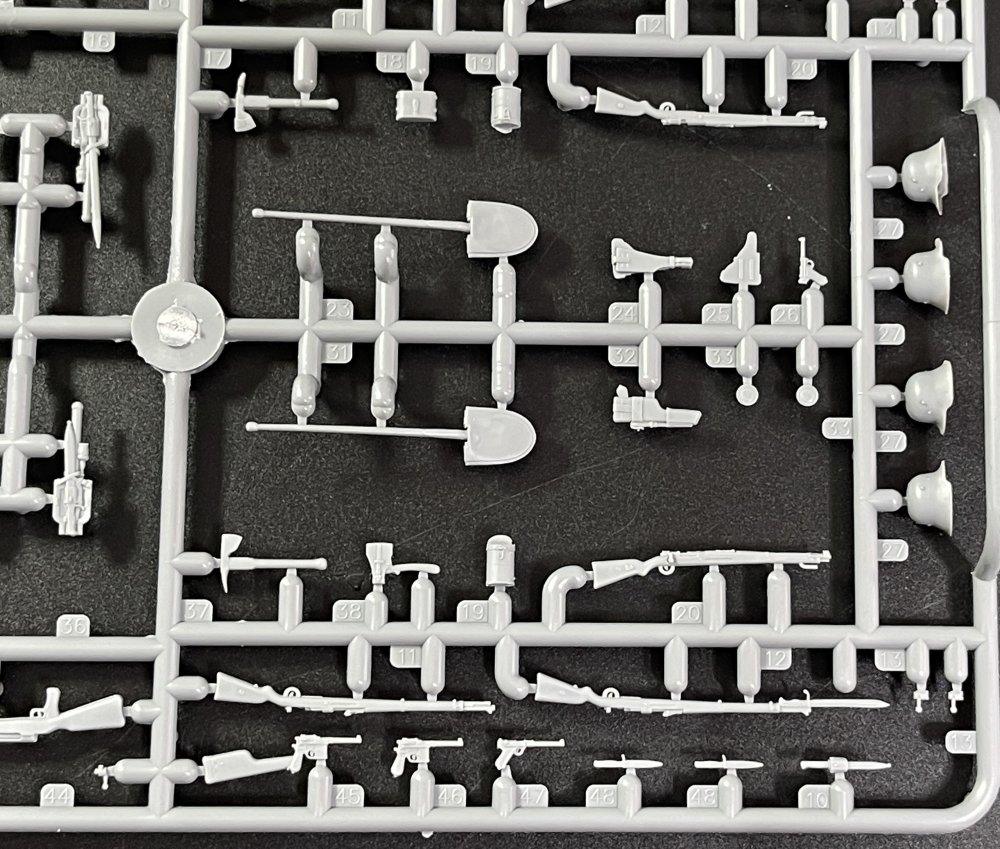
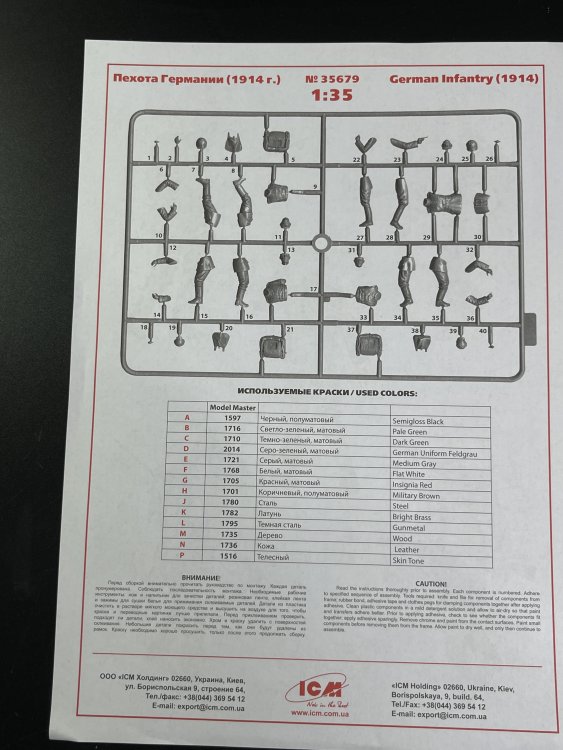
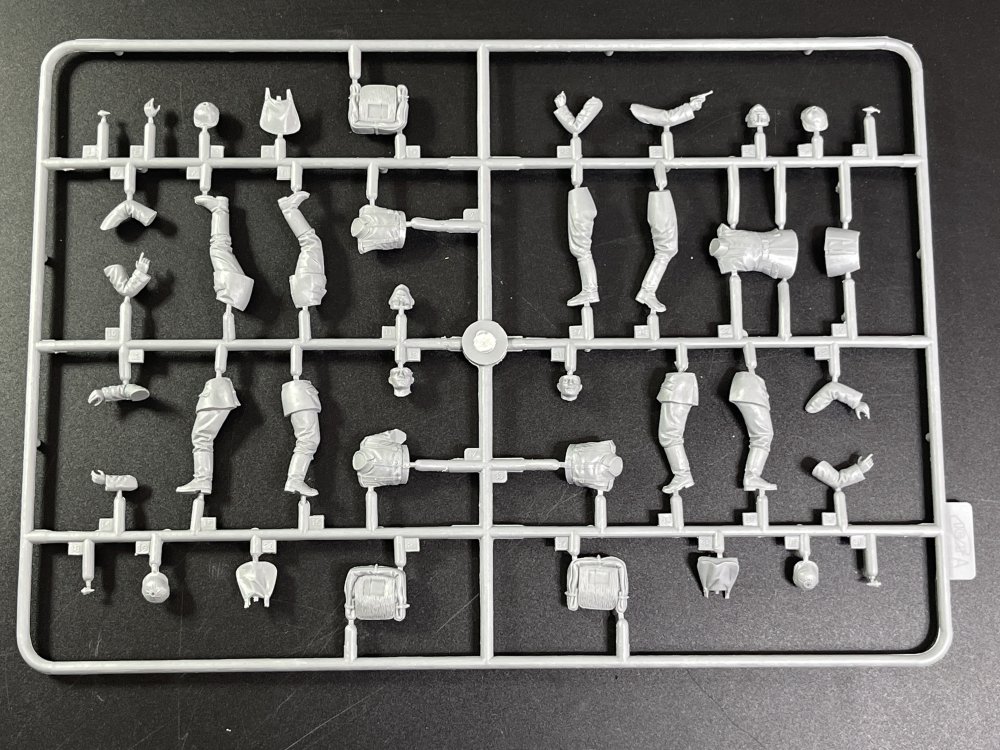
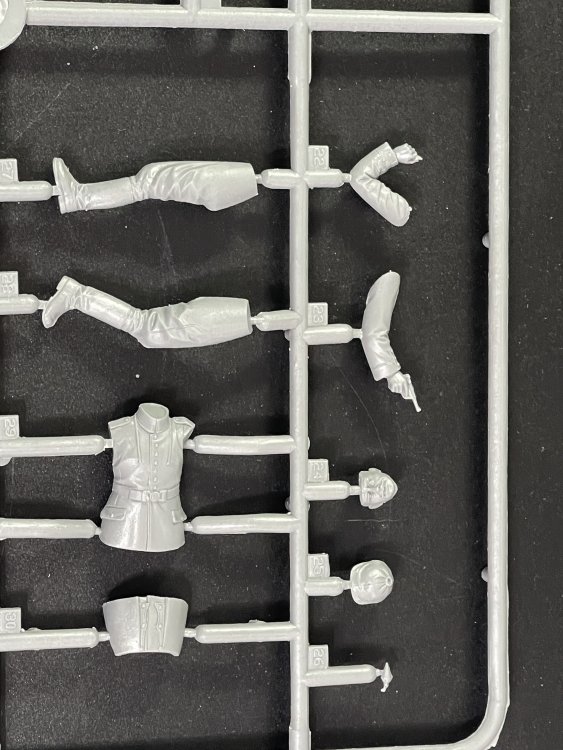
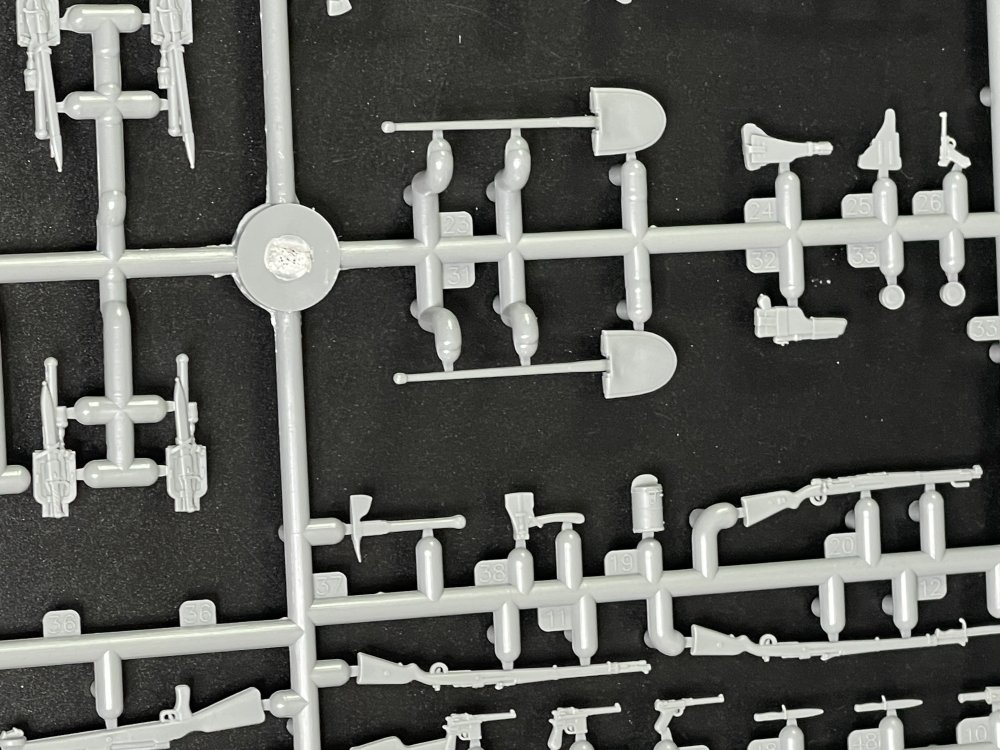
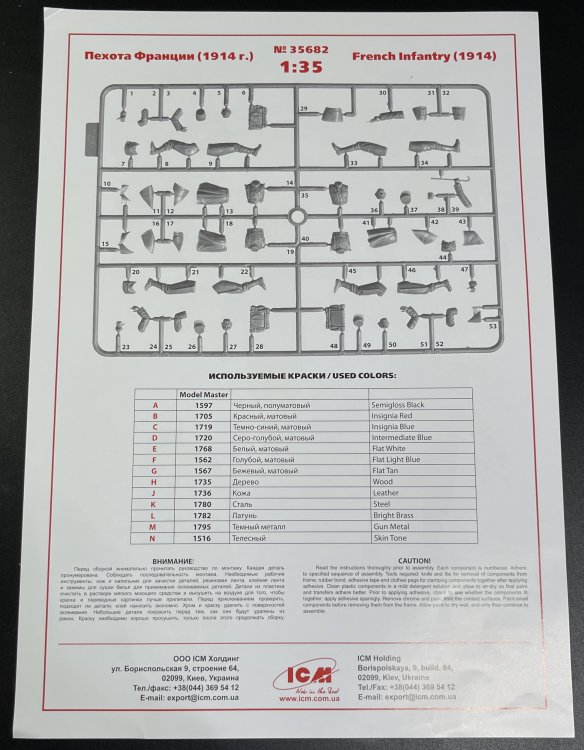
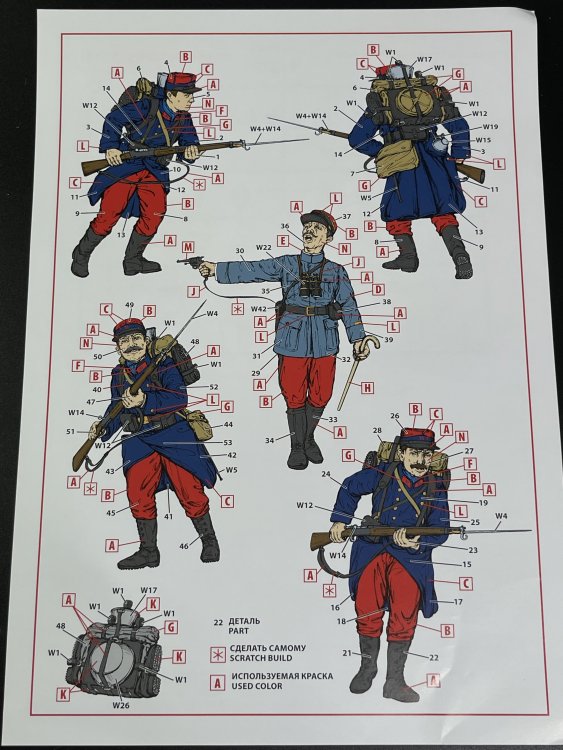
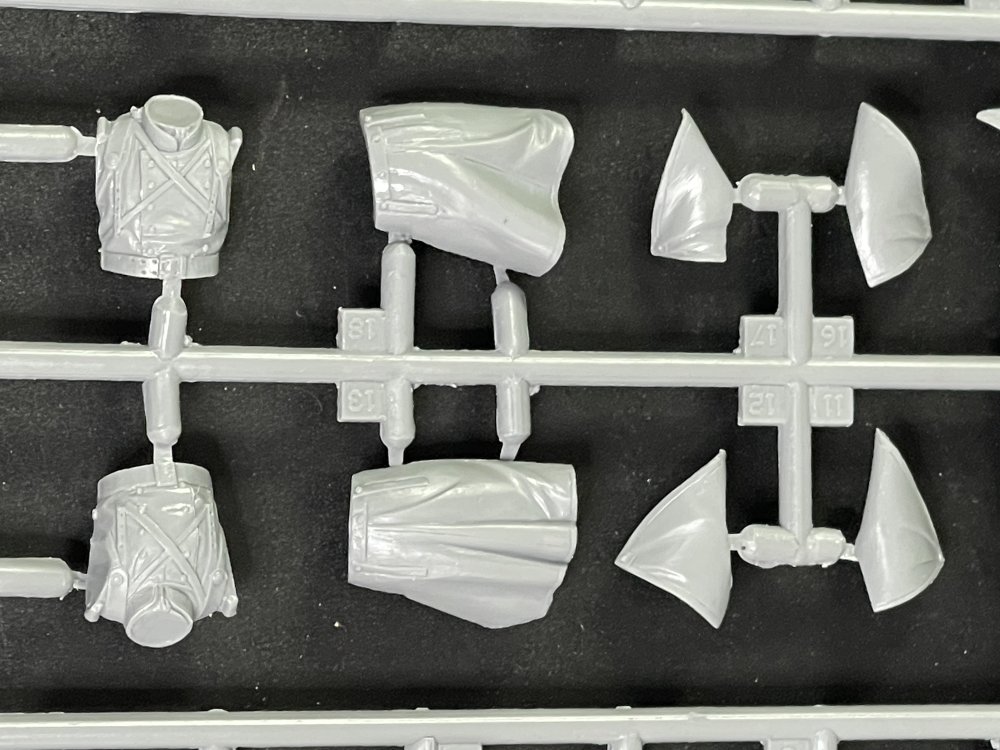
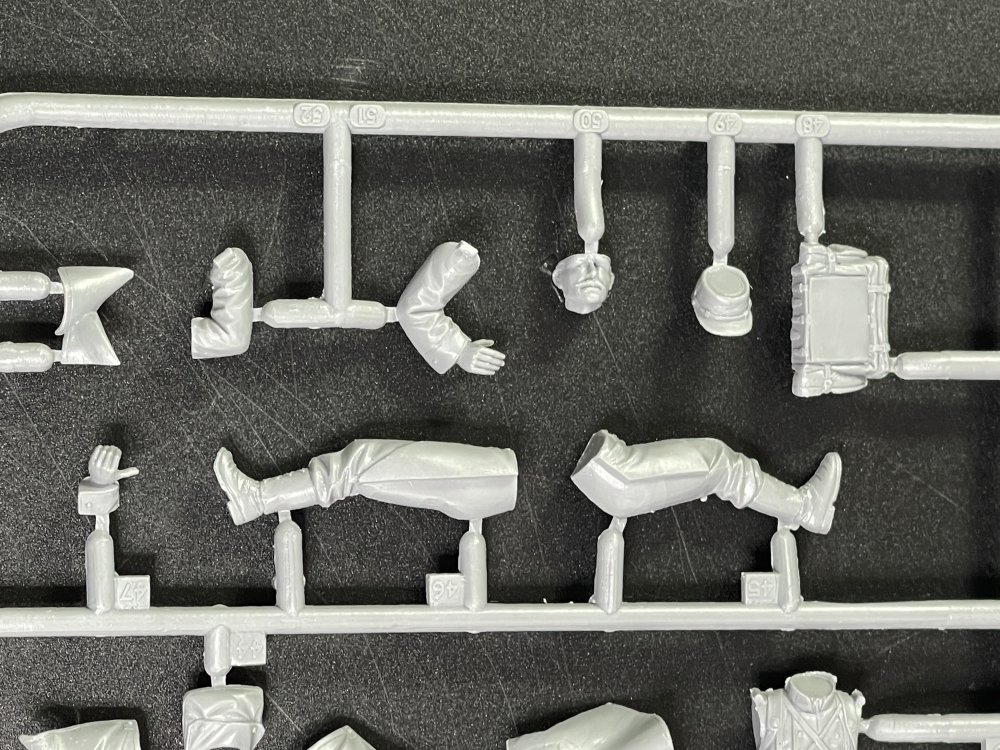
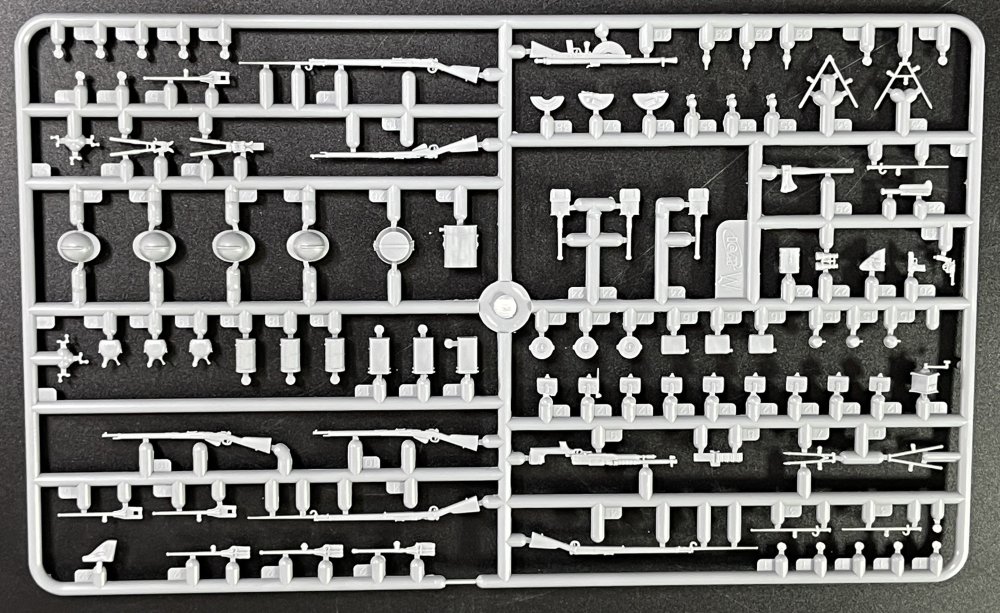
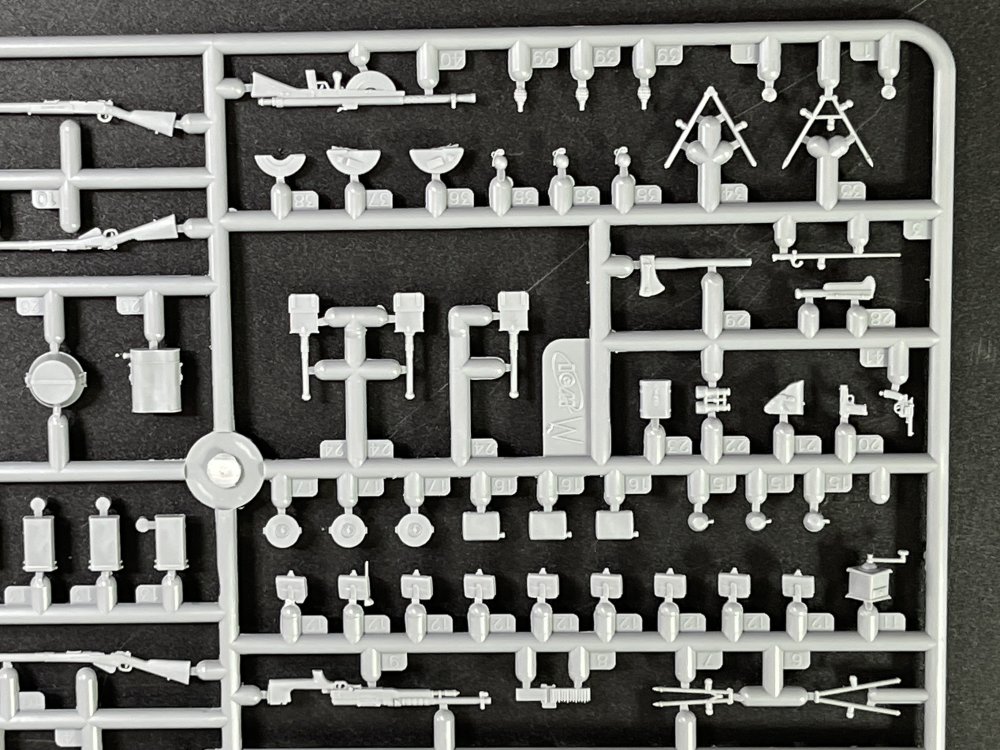
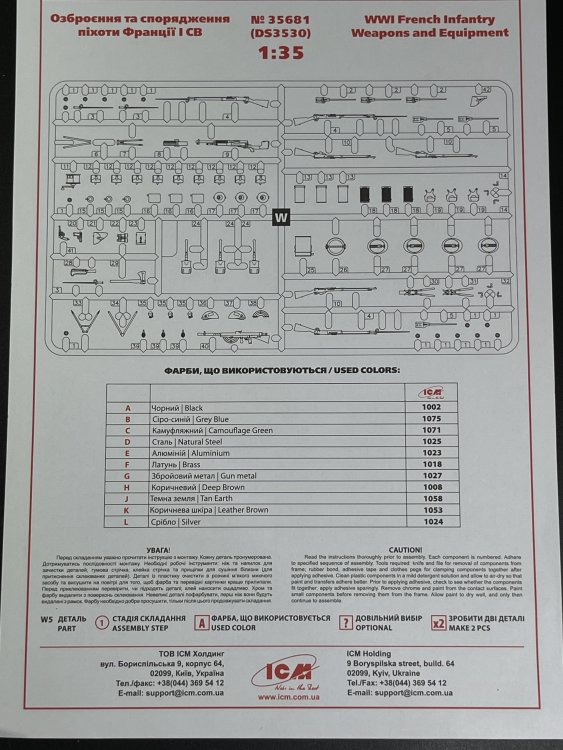
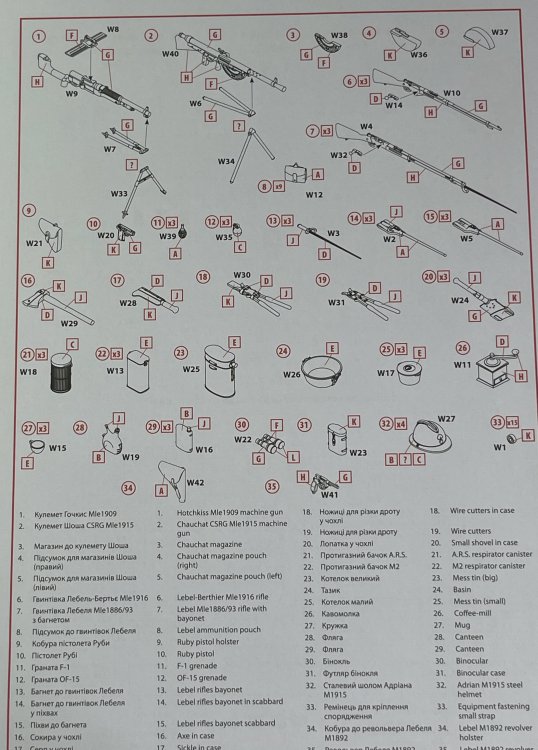
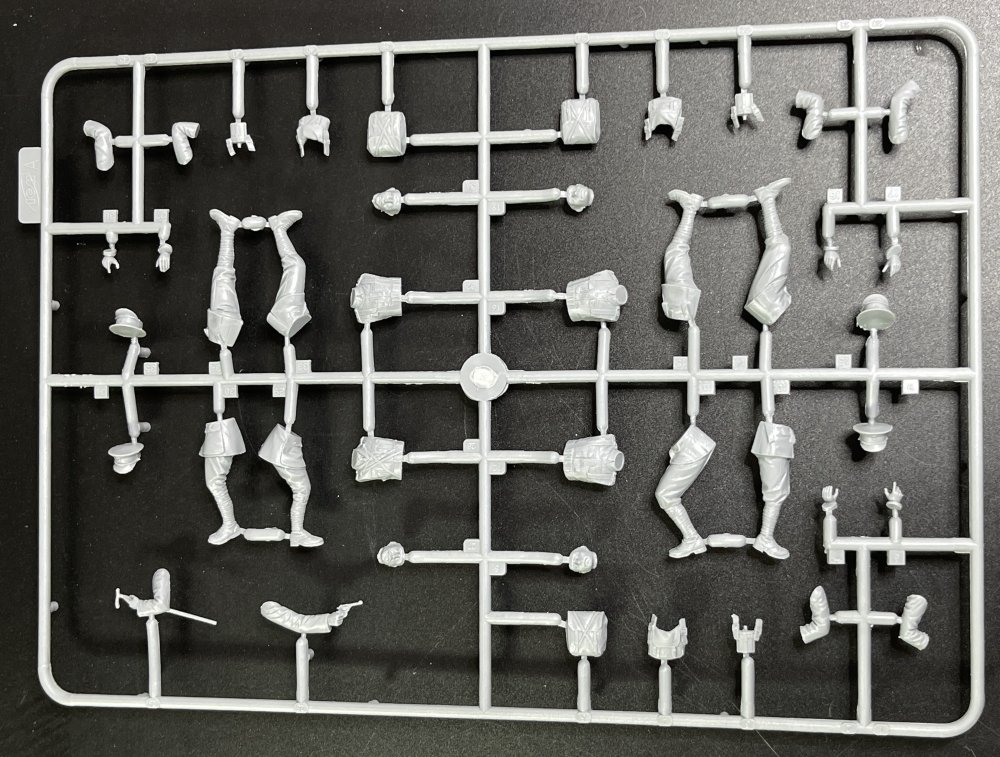
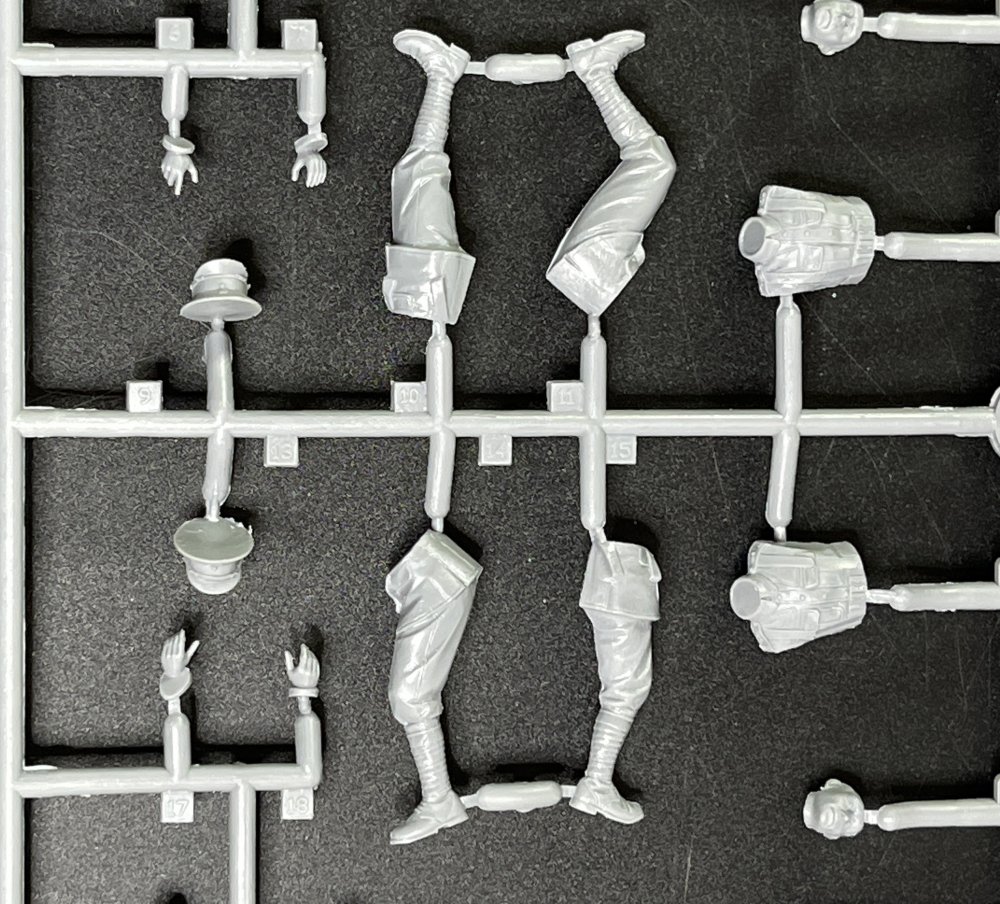
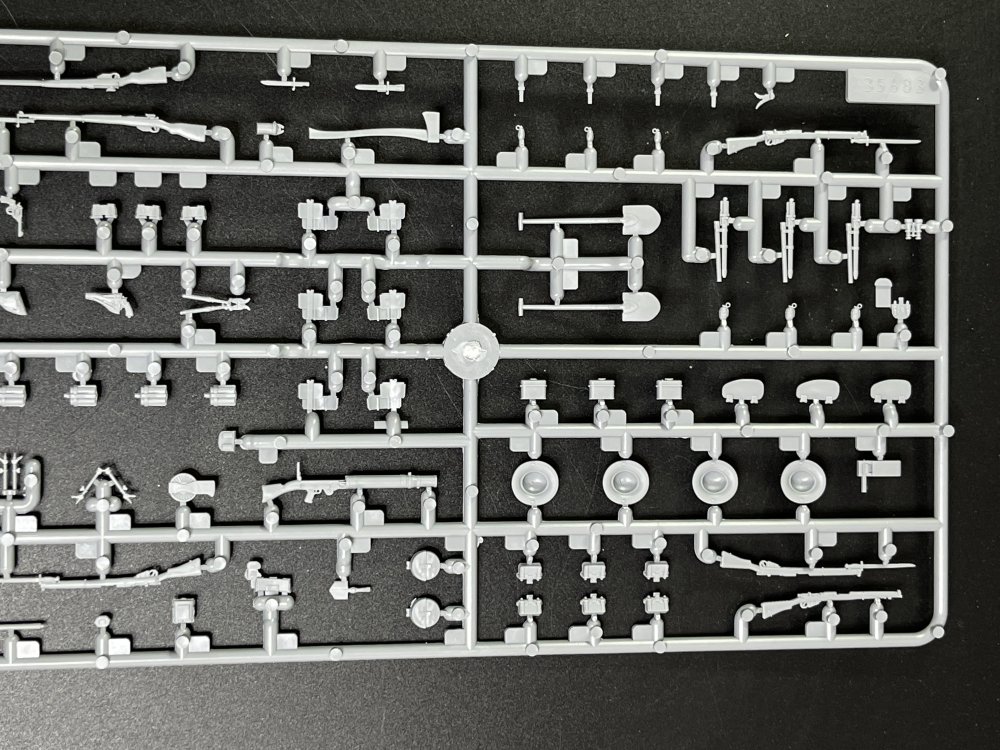
1:35 “Miracle on the Marne” ICM Catalogue number DS3520 Price: around 45€ “The ICM "Miracle on the Marne" is a 1:35 scale diorama set released in 2025 (kit reference DS3530), focusing on the iconic events of the First Battle of the Marne. And what was the Miracle all about? The miracle of Paris not falling to German hands in WWI “Of the continental European powers who went to war in 1914, France probably carried the smallest share of the blame for its outbreak. In the rapidly escalating crisis of that summer, the republic played a largely defensive role. Yet its stake in the ensuing conflict was at least as great as that of any other participant. For France, this was a struggle to liberate its own territory and to recover Alsace-Lorraine, the provinces lost to the hated German occupiers a generation before in the Franco-Prussian War. With approximately 2 million men, the French army dwarfed the British Expeditionary Force (BEF) that was rapidly dispatched to offer support. The British troops were well-trained and equipped – their Lee-Enfield rifles were superior to the standard French issue 1886 Lebel model. British khaki uniforms were also better adapted to modern warfare than the bright blue and red outfits that made the French so conspicuous in battle. But the BEF fielded barely 100,000 men in August 1914. Against the Franco-British coalition were pitched some 1.7 millionGerman troops. The invaders possessed advantages in terms of equipment. German units were issued with effective Mauser Gewehr 98 rifles and had the edge over their opponents when it came to machine-guns, light mortars, and field artillery. Their 105mm and 150mm howitzers would prove deadly killing machines. The decisive encounter – remembered in France as the ‘miracle on the Marne’ – took place along an extended front running eastward from Paris along the River Marne. Here the German war plan stalled, ending its commanders’ hopes of a swift resolution to the war. Yet it also fell short of a conclusive allied victory, and led to the prolonged blood-letting that scarred the Western Front over the next four years. How are we to explain what happened on the Marne? Contrasting commanders The opposing sides’ commanders could scarcely have been less alike. Joseph Joffre, chief of the French general staff since 1911, cut an avuncular figure with his stout physique, white hair, and moustache. Known as ‘Papa Joffre’, the 62-year-old exuded stolidity and reassurance rather than dash and dynamism. His insistence on a regular routine of eating and sleeping reinforced his imperturbable image. Yet appearances were deceptive. Joffre was a master of detail, who always weighed alternatives up carefully, but who knew his own mind. During the war, he monitored his subordinates closely, bombarding them with missives and driving great distances, often at considerable personal risk, to visit them at the front. Here was a key difference with his principal antagonist, Helmuth von Moltke the Younger, chief of the German general staff since 1906. As the invasion got under way, Moltke based himself in Koblenz and then in Luxembourg, 150 miles away from the action in France, and allowed his junior commanders too much latitude. Joffre was capable of great ruthlessness too, sacking commanders whom he judged to be lacking in loyalty or competence, or both, in the wake of the German invasion. As he stated in his memoirs, ‘you can wage war only with men who have faith in their success, who by their mastery of themselves know how to impose their will on their subordinates and dominate events’. Joseph Joffre, chief of the French general staff (above), and Helmuth von Moltke the Younger, chief of the German general staff (below). The two commanders could scarcely have been less alike. By contrast, Moltke exhibited a fatal lack of self-confidence. He owed his promotion to a personal connection with Kaiser Wilhelm II and was unable to live up to the legend of his famous uncle and namesake, the Elder Moltke, victor of the German wars of unification in 1864-1871. Under pressure, he would soon suffer a career-ending nervous breakdown. Sir John French, commander of the BEF, divided professional opinion both in his lifetime and after. Undoubtedly brave and popular with his men, he was also emotional, inattentive to detail, and without clear and consistent strategic vision. A cavalry commander of genius, he lacked many of the key qualities required of a senior leader at a time of grave crisis. His touchiness, combined with perhaps excessive caution, made him a difficult partner for Joffre. In addition, the BEF remained organisationally independent, with instructions to cooperate with the French but to consult London before embarking on offensive action. Reality bites How did the belligerent parties converge on the Marne? Germany followed the broad outlines of the Schlieffen Plan as soon as war broke out, but with critical modifications. Schlieffen’s blueprint may well have been incapable of delivering victory right from its conception, as it expected German forces to maintain momentum on dangerously extended supply lines. Late changes made failure a near-certainty. The advance through France was weakened by the transfer of some troops eastwards to meet the Russians, who were mobilising more rapidly than anticipated. The German right wing, which was meant to sweep along the Channel coast to encircle Paris, was also denuded of troops to deal with unexpectedly strong Belgian resistance. In the first month of the war, the German army lost 265,000 men killed, wounded, and missing. The survivors were approaching exhaustion after their rapid advance through the summer heat. These setbacks gave time for the BEF to deploy. If German plans did not work out as anticipated, neither did the preparations of the Entente. French military thinking was based on Plan XVII, devised by Joffre. It embodied the concept of the offensive, to which most French generals subscribed in 1914. They were convinced that, notwithstanding improvements in artillery and other weapons of defence, the key to victory was the bravery, commitment, and élan of troops in a frontal assault. By taking the initiative in the west, the French hoped as well to aid their Russian allies, whose superior numbers were expected to prove decisive once brought to bear on eastern Prussia. Plan XVII anticipated a German attack through both Belgium and Alsace-Lorraine, but assumed that the invaders could not succeed in both theatres. A determined French counter-attack into Lorraine would cause the Germans to take troops from their forces further north, critically weakening their offensive. There followed a series of French assaults along the country’s eastern border, known as the ‘Battle of the Frontiers’. The French government refused to allow a pre-emptive movement into Belgium, probably because it would antagonise Britain. It also mistakenly believed that the great Belgian fortresses of Liège and Namur would be proof against a German advance west of the Meuse. In the battles of August 1914, first against well-prepared German positions in Lorraine and then in the wooded, hilly terrain of the Ardennes, French forces were exposed to devastating German fire, taking some 260,000 casualties. Retrieving the situation Meanwhile, the BEF was retreating from the Belgian frontier after a clash with General von Kluck’s First Army at Mons. En route, at great cost, British forces conducted a holding action at Le Cateau in late August. Shortly afterwards, the French Fifth Army, also heading southwards, checked the onward march of General von Bülow’s Second Army at Guise. Responding to changing events, Joffre abandoned the failed Plan XVII, and from 24 August moved troops westwards from Lorraine. A well-developed rail network enabled the French to make the most of their numerical advantage. Joffre formed a new army, the Sixth, under General Michel-Joseph Maunoury, whose task was to cover the capital city and outflank the German right wing. Older accounts suggested that the initiative came from the military governor of Paris, General Joseph Simon Gallieni, but it seems that he and Joffre reached the same conclusion independently of each other. The invaders now made a fatal miscalculation. On 30 August, Kluck decided not to move west of Paris, but to cut eastwards to support Bülow and cut off the main body of the French armies from the capital. But as they wheeled east of Paris, the Germans exposed their right flank to attack. Sir John French had decided to rest his troops, but Joffre – backed up by the findings of aerial reconnaissance – realised that this was the moment for the counter-stroke. The BEF commander found himself overruled on 1 September, following a direct appeal from the French leadership to Britain’s War Secretary, the legendary Lord Kitchener. To his chagrin, French was obliged to cooperate with Joffre’s new strategy. It was no doubt through gritted teeth that Joffre cabled Kitchener to offer thanks for Sir John’s ‘constant’, ‘precious’, and ‘energetic’ support of the allied effort. As a precaution, the French commander recommended that the government leave Paris for Bordeaux, as its embattled predecessor had done in the Franco-Prussian War. Rendezvous on the Marne When battle was joined on 6 September, 56 allied infantry divisions and nine-and-a-half cavalry divisions confronted 44 German infantry and seven cavalry divisions. What followed was a series of engagements along a front 100 miles long, with both sides taking the offensive at different times. Initially, the battle went largely in the Germans’ favour. In the centre, in the St Gond marshes, the German Second Army pushed back France’s Ninth Army, led by Ferdinand Foch, towards the Seine. In the west, too, the Germans repelled French assaults. The sheer determination of the French infantry, however, proved critical. They were supported by the withering fire of their 75mm guns – known by the Germans as ‘black butchers’ – whose flat trajectory made them ideal for the task. In the process, they expended most of their ammunition, but the Germans also struggled to supply their field artillery. One of the best-known stories of the battle is that of the Paris taxicabs, commandeered by the Paris police on General Gallieni’s instructions, to ferry reinforcements to the front. In fact, many of the French infantry travelled by lorry during the night of 7-8 September, rather than by taxi. Lots of the vehicles missed their way in the dark and suffered from accidents and flat tyres. Returning for a second load of passengers, the first wave often encountered slower oncoming taxis, which were still making their first journey and now clogged the roads. The turning point came on 9 September, when the allied leadership saw a chance to exploit a 30-mile gap that had opened up between Germany’s First and Second Armies as the former moved eastwards. Into this opening the BEF and the French Fifth Army, headed by a dynamic new commander, General Louis Franchet d’Espèrey, now moved, with decisive results. Shortly afterwards, the Germans withdrew rather than risk the encirclement and destruction of their forces. Could the Germans have won? Some historians have criticised them for prematurely breaking off the action. Communication between the First and Second Armies was poor and the mood at Moltke’s distant headquarters was pessimistic. He dispatched an emissary, Lieutenant Colonel Richard Hentsch, with discretionary powers to order a retreat if the situation on the ground required it. By the time Hentsch arrived, aerial reconnaissance reports of the BEF crossing the Marne had made Bülow’s mind up for him. He and Hentsch had a similarly negative temperament. With Second Army starting to retreat, Kluck was obliged to follow suit. The Battle of the Marne was over, leaving the French and Germans with roughly a quarter of a million casualties each, and the British with losses of approximately 12,700. Missed opportunity? It is far from certain whether the Germans could have precipitated a French collapse if they had stood firm. The most likely outcome would have been a stalemate, closer to Paris and thus more dangerous for the French. It seems clear that a failure of nerve was the main reason for the German withdrawal. The First World War veteran and military historian Basil Liddell Hart described the Marne as a ‘psychological rather than a physical victory… the issue of battles is usually decided in the minds of the opposing commanders, not in the bodies of their men.’ The war of movement would almost certainly have ended at some point, even without the Marne. Trenches had started to appear in the eastern sector by the beginning of September. But the outcome of the battle determined the timing and nature of the ensuing stalemate. The Germans withdrew to the north bank of the River Aisne, where on steeply rising ground they entrenched – a form of warfare for which they were more prepared than their opponents. Although apparently at breaking point just a few days before, they now rallied to take up an advantageous position. Critics of the allied performance on the Marne have argued that they should have pushed forward more decisively through the gap between the German armies. But the French and British soldiers, no less than their opponents, were exhausted. This is not surprising. On the 13 days of the retreat from Mons, the BEF’s infantry had snatched an average of four hours’ rest in every 24 hours. Nonetheless the Marne was a strategically decisive battle. Germany’s failure to win a quick victory meant that it was now committed to a protracted war. In the long run, the imbalance of resources between Germany and its opponents would doom it to defeat. More than any other individual, Joffre deserves credit for the outcome. He had found himself in a position of supreme responsibility in his country’s greatest crisis since 1870. Public opinion was febrile, and another reverse could easily have caused a collapse of morale akin to that of June 1940. For all the heroism and skill displayed in the BEF’s retreat, it was numerically small and no one could tell, at the start of the battle, what contribution it would make. It was Joffre who took the key decisions on which the fate of Paris, and of France itself – and thus of the allied cause in the west – depended. As he put it, with his characteristic grim humour, ‘I don’t know who won the Battle of the Marne, but if it had been lost, I know who would have lost it.’ History on - https://the-past.com/feature/miracle-on-the-marne/ This kit is a multi-subject diorama package with several older releases from ICM that combines World War I figure ranges from ICM catalogue. Opening the box, you get a set of German infantry figures, a German machine gun 08 team of figures operating the machine gun, French infantry and British Infantry and a Vickers machine gun crew figures also operating the machine gun. It’s a lot of figures and accessories, all from 1914-era range, so all are early-war uniforms. Besides the figures sets, there`s also WWI British infantry weapon and equipament set with a lot of equipament like Byonet, grenade , shovel, lewis machine gun, rattle etc. Also, there is another set of WWI German Infantry Weapon and Equipament full with with German equipment, like MG08, Mauser carb, kugelhandgranate grenade, Luger pistol, etc And if that was enough, also a full set of WWI French Infantry weapons and equipment, with Hotchkiss Ml1 1909 machine gun, Lebel Berhier, OF-15 grenade, chauchat magazine etc. If thus figures weren’t enough there also these 3 sets that will make you have a lots of equipment for this diorama and probably for a few others that you may want to use these. Finally, an extra set of the Bristish Vicekrs Machine gun , with a full and single sprue for it. All figures set have instructions with the parts and colors. As for the equipment a single sheet with small instructions and the label nam,e of all the equipment available on the sets. As for the figures, as I once said, thes ICMfiguress are one of the in injection plastic. So besides the very good and sharp detail (as the molding is very good with minimal flash), they have excellent anatomy, natural poses, fine uniform details (buttons, straps, kepis), and very good facial expressions (AS the faces are quite good, you can have some other expressions and higher face quality with some aftermarket face like Hornet heads). Infortunaly, and I`m sorry but my pictures don’t make these figures the justice they deserved. All the sets can be combined between so you can make or replicate some part of the battle, but the ground and scenario is all up to you. This set only gives the modeler the figures and equipment. Conclusion This is a fantastis set with tons of figures and equipment that allows you to replicate the Miracle of Marne or a single part of it and having leftover for a lot of others WWI project that you might have. It’s a set very useful and much cheaper then buying every single set separately and essential for anyone interested in World War I modeling. And you can also use this set with the ICM's Renault Taxi de la Marne (kit 35660), as it is a perfect match to a fantastic history of an historical battle. VERY Highly recommend this to intermediate/expert modeler My thanks to ICM for making this fantastic set.


-
Love it!!! Great work and thanks for sharing all this WIP.
-
Now that`s all in for that B-17!! All AM looks to be there!! Go for it!
-
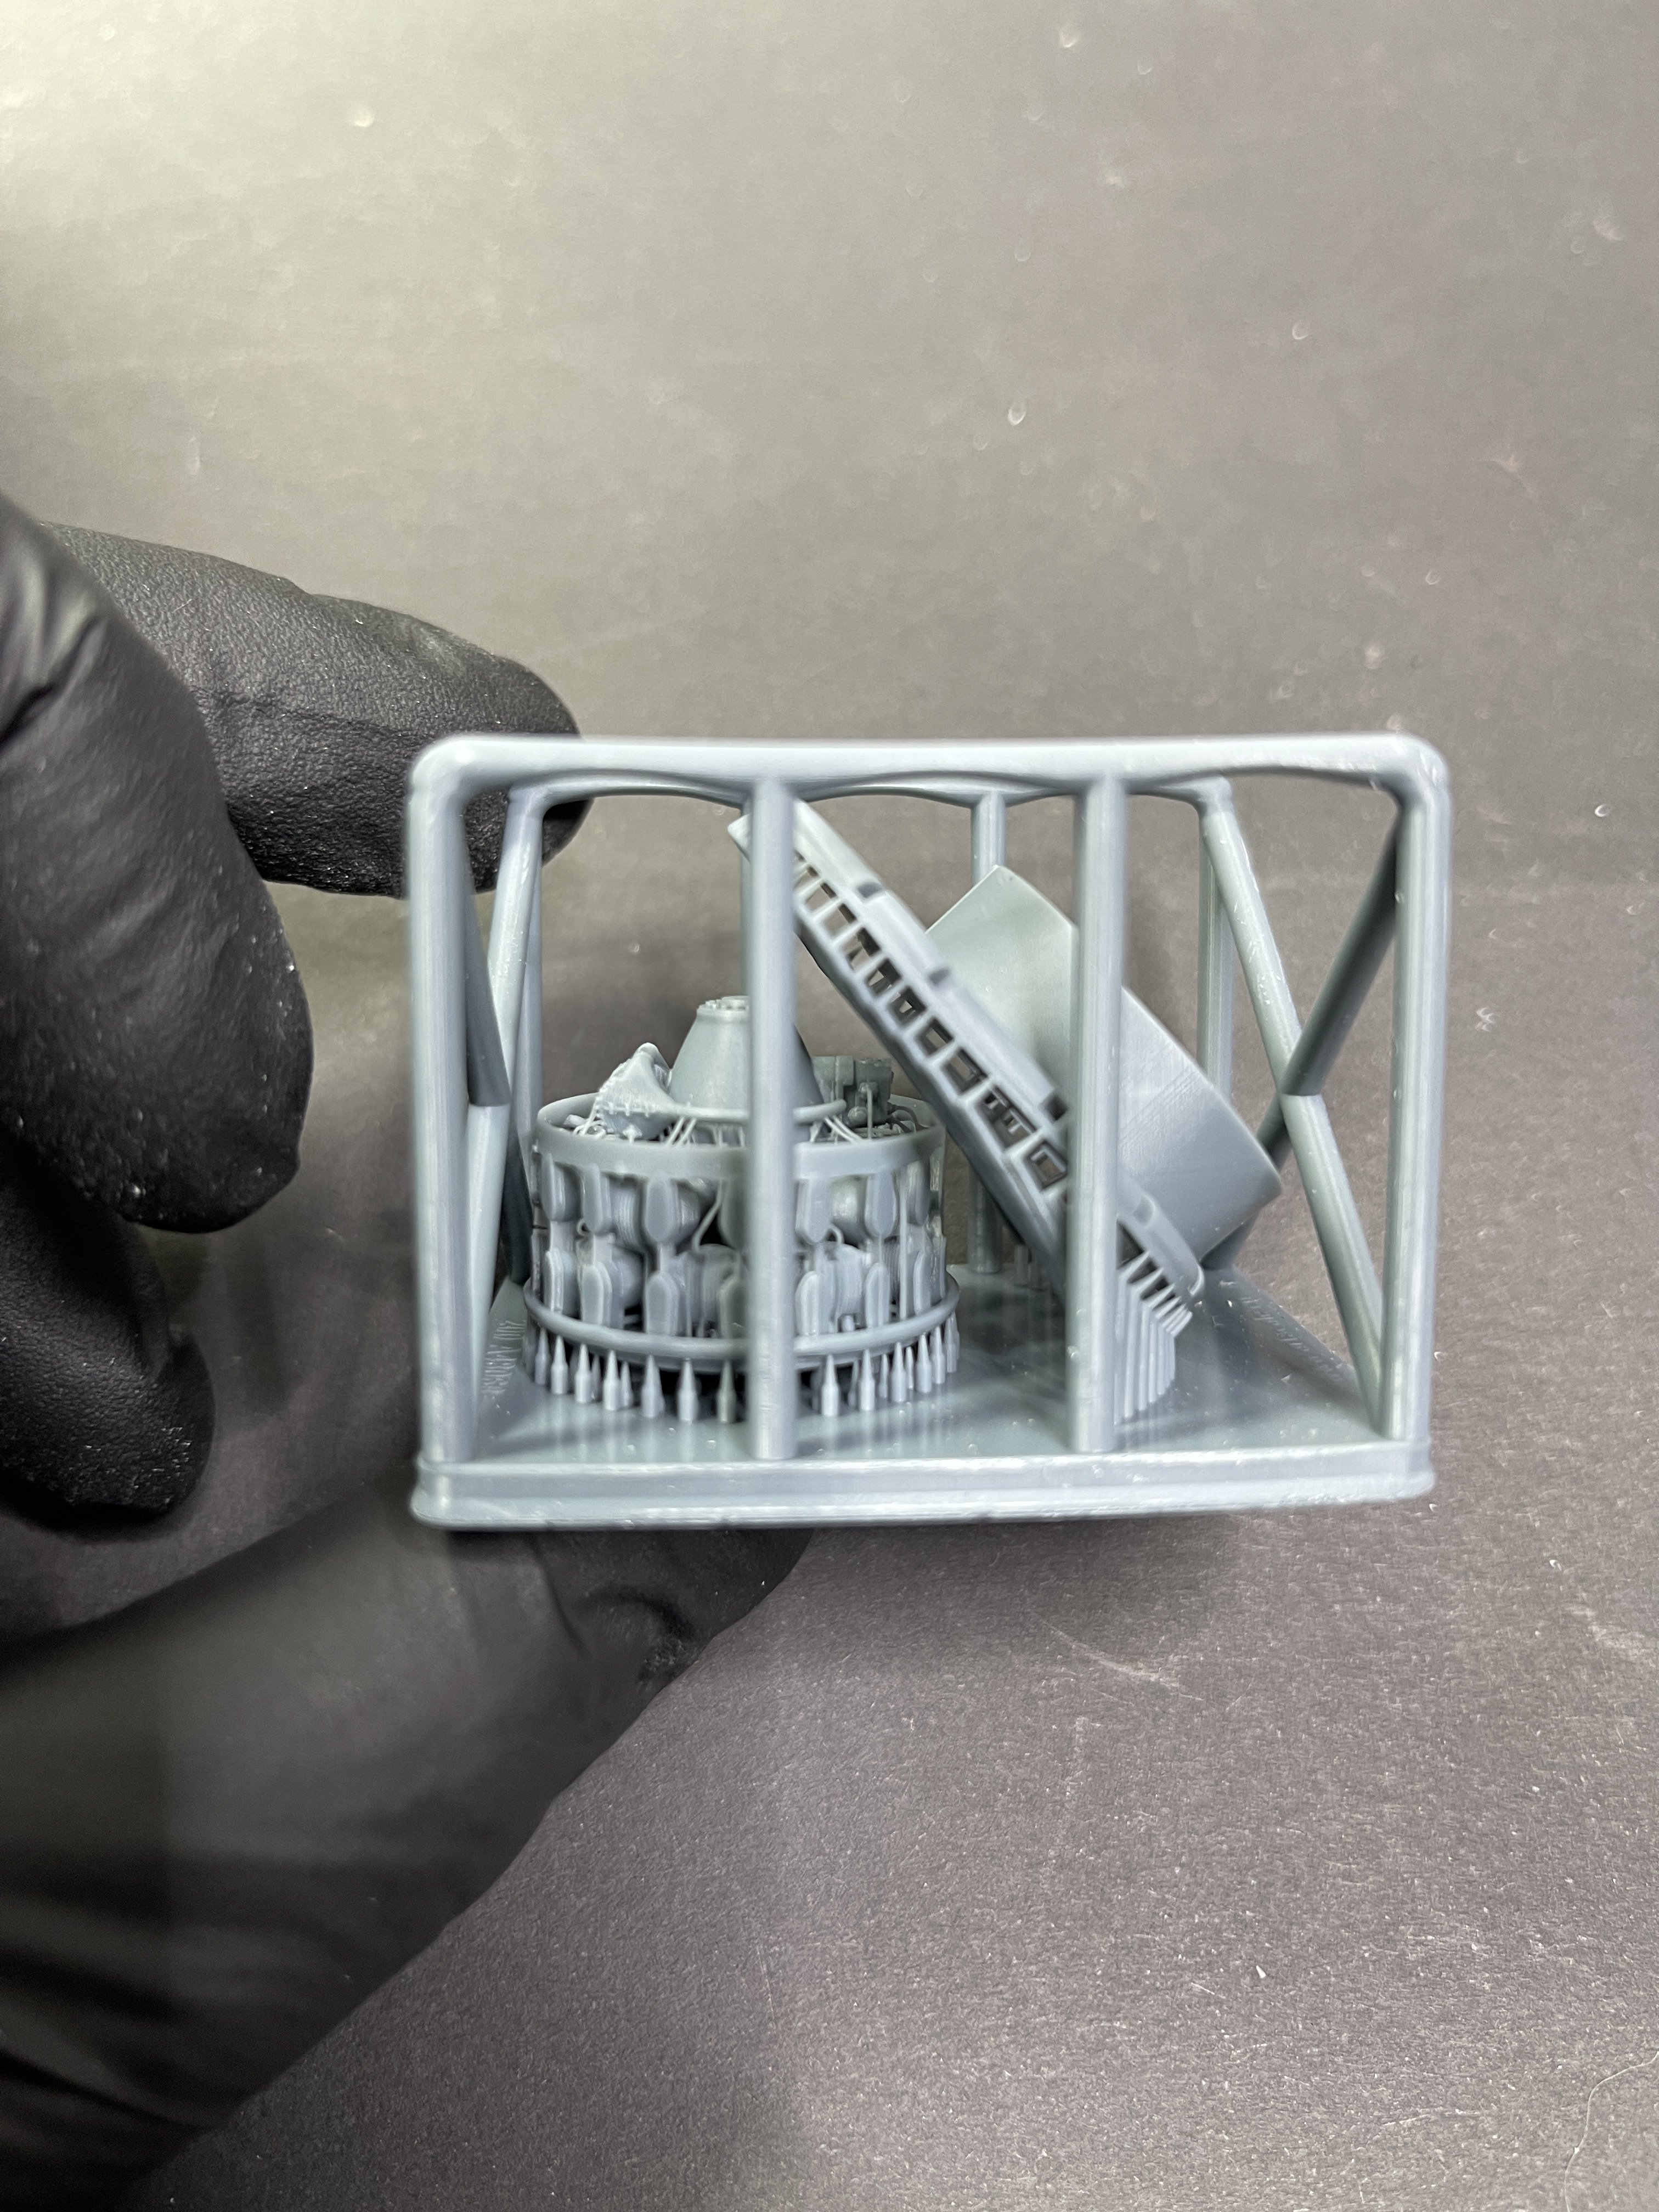
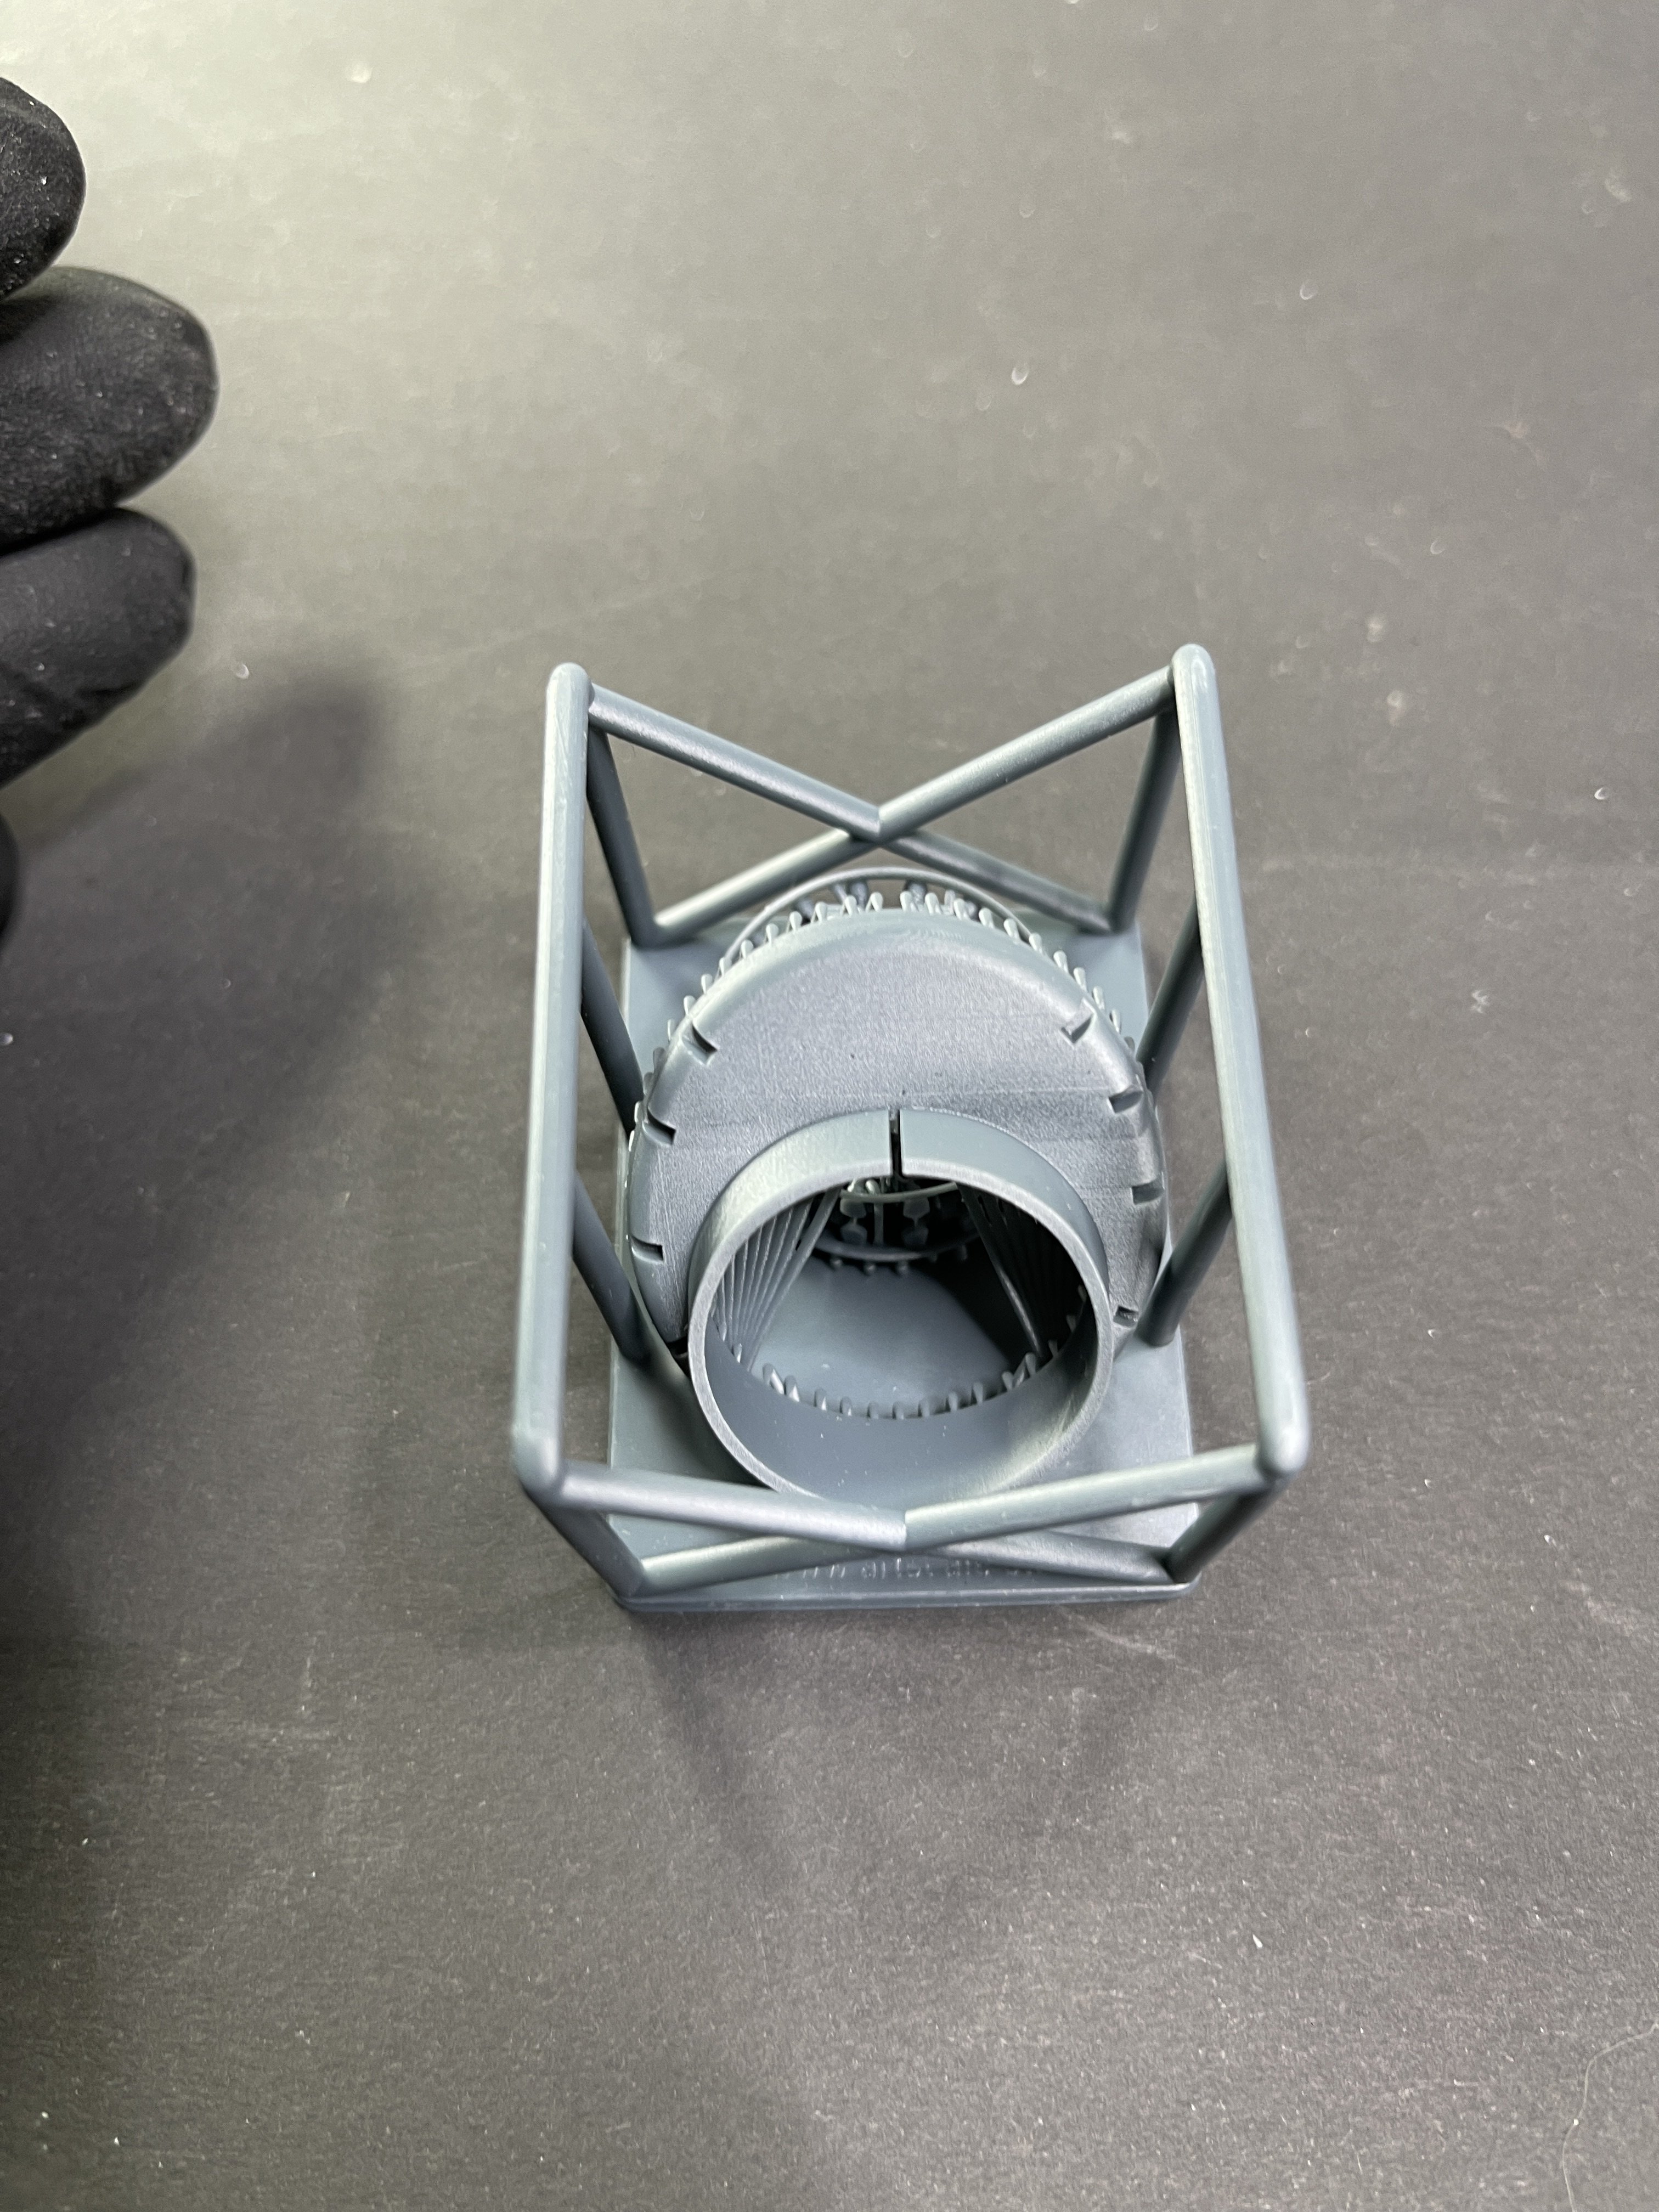
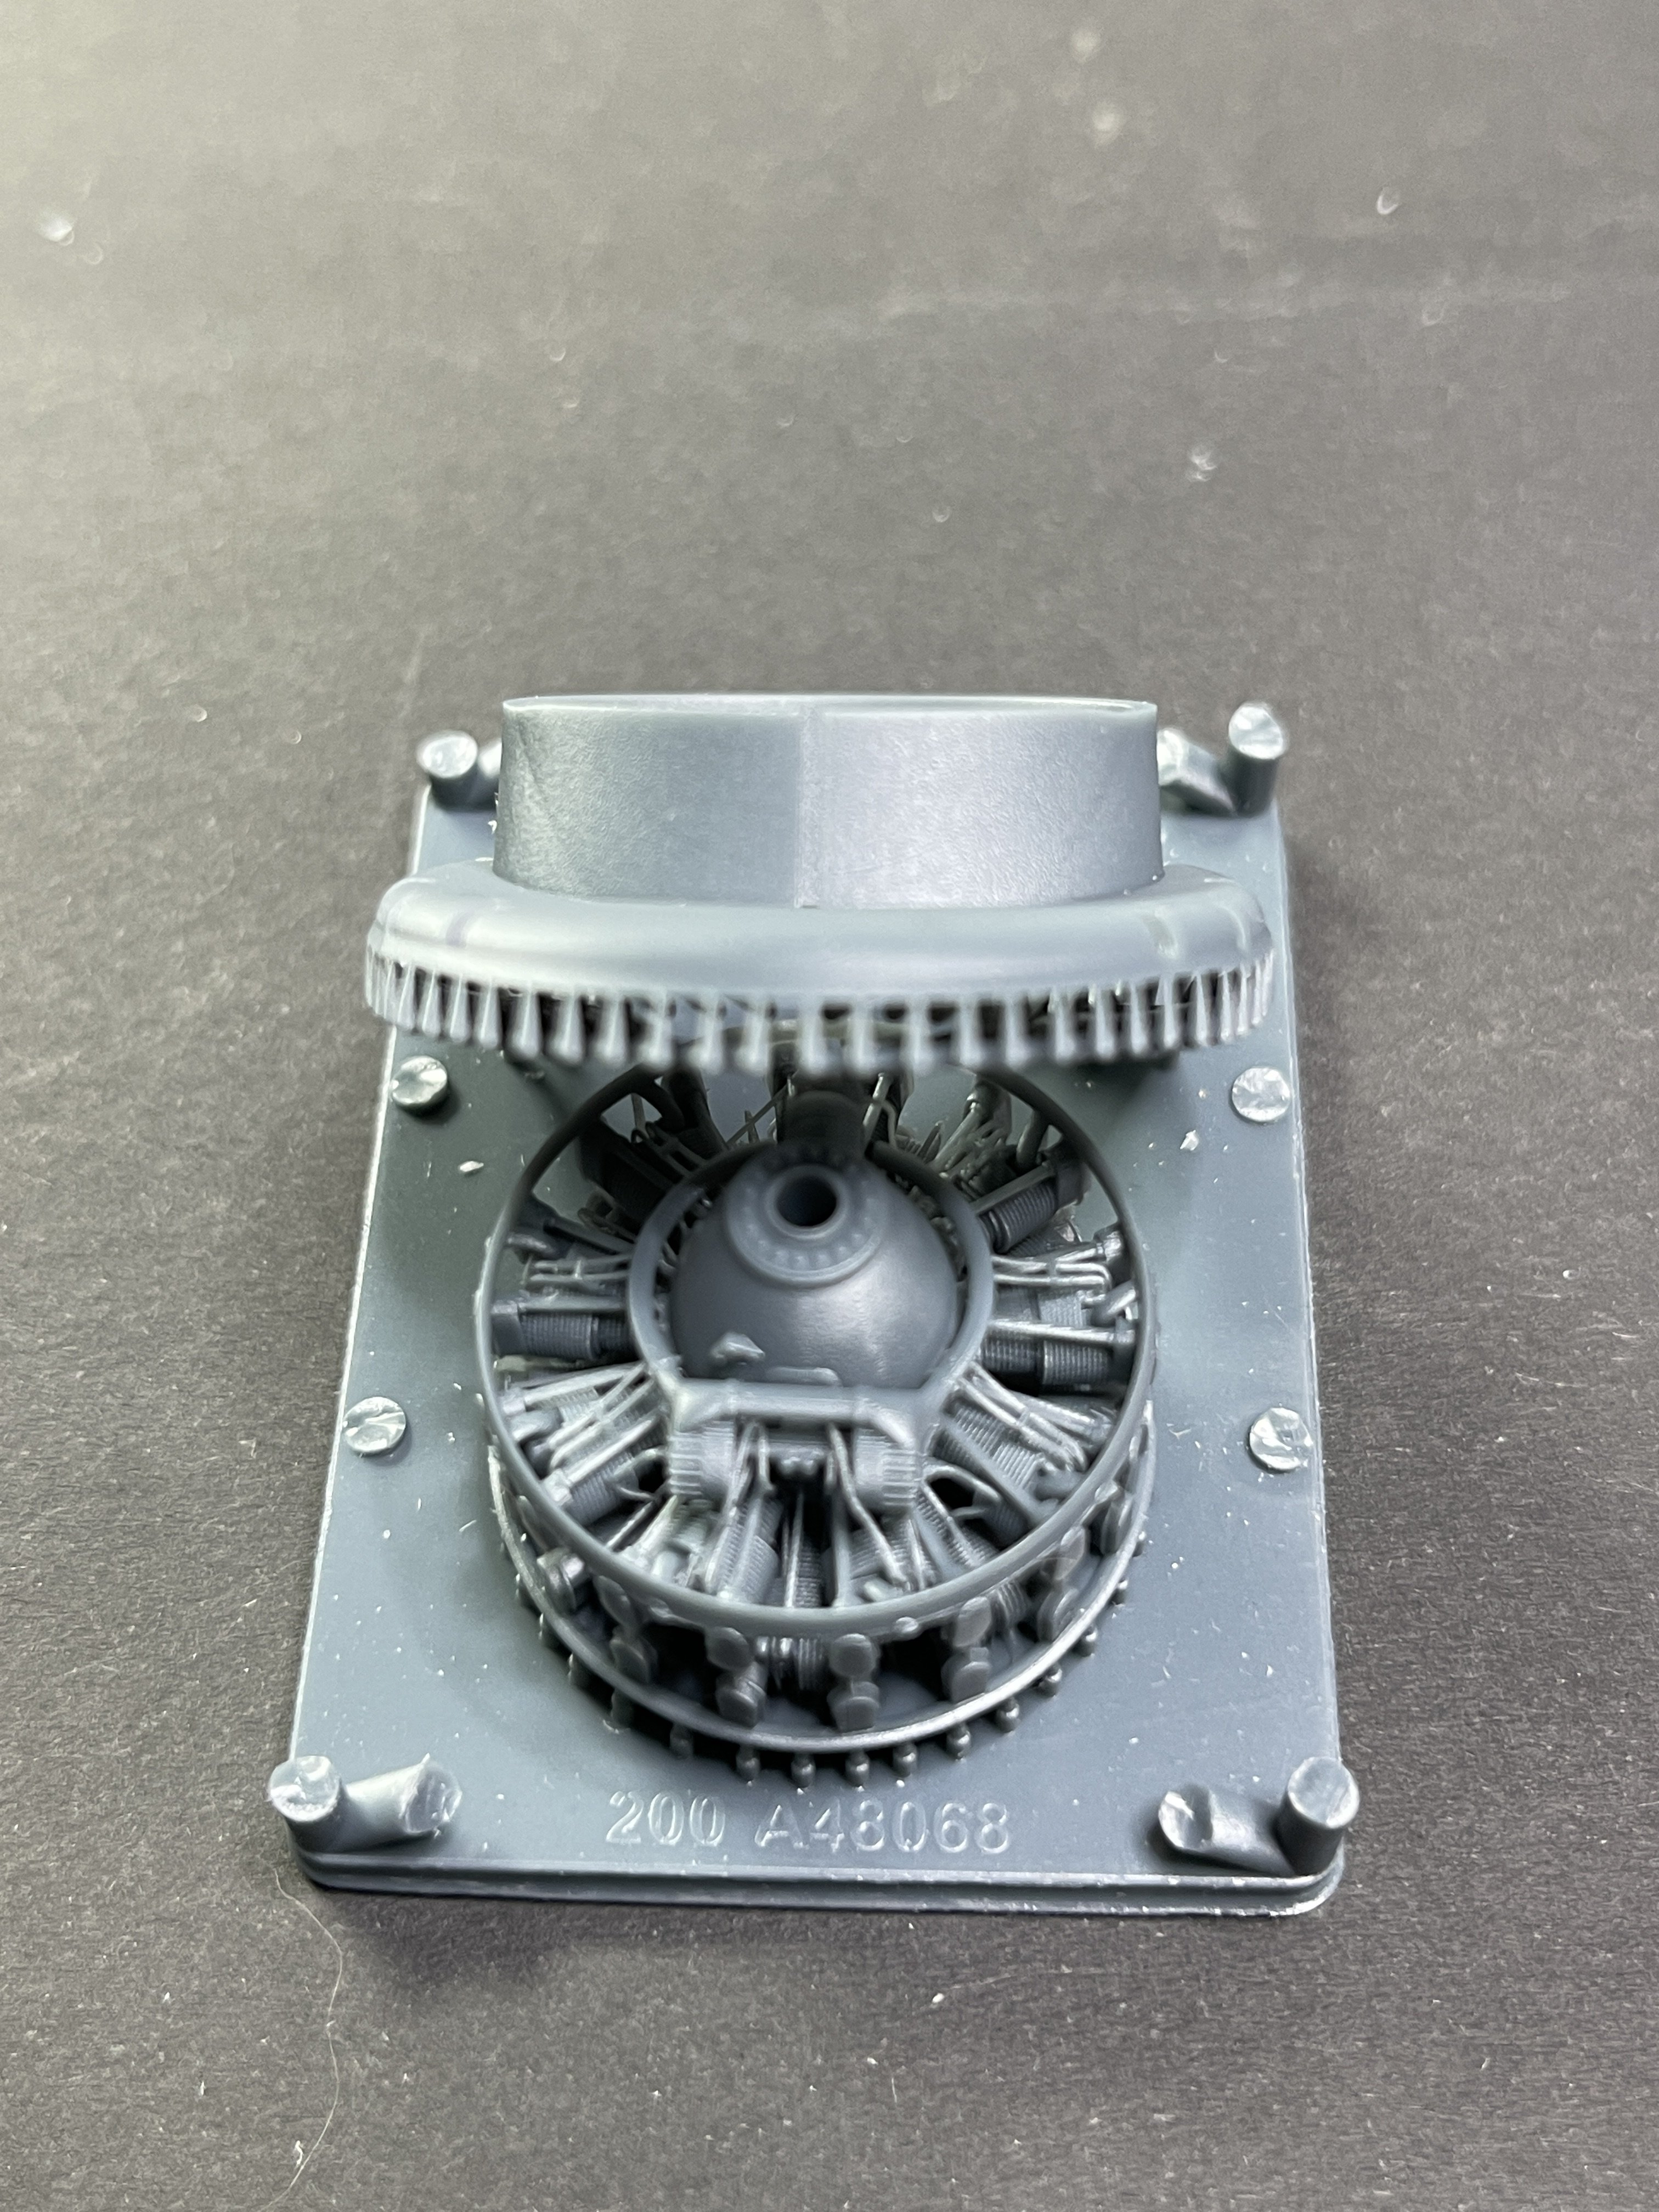
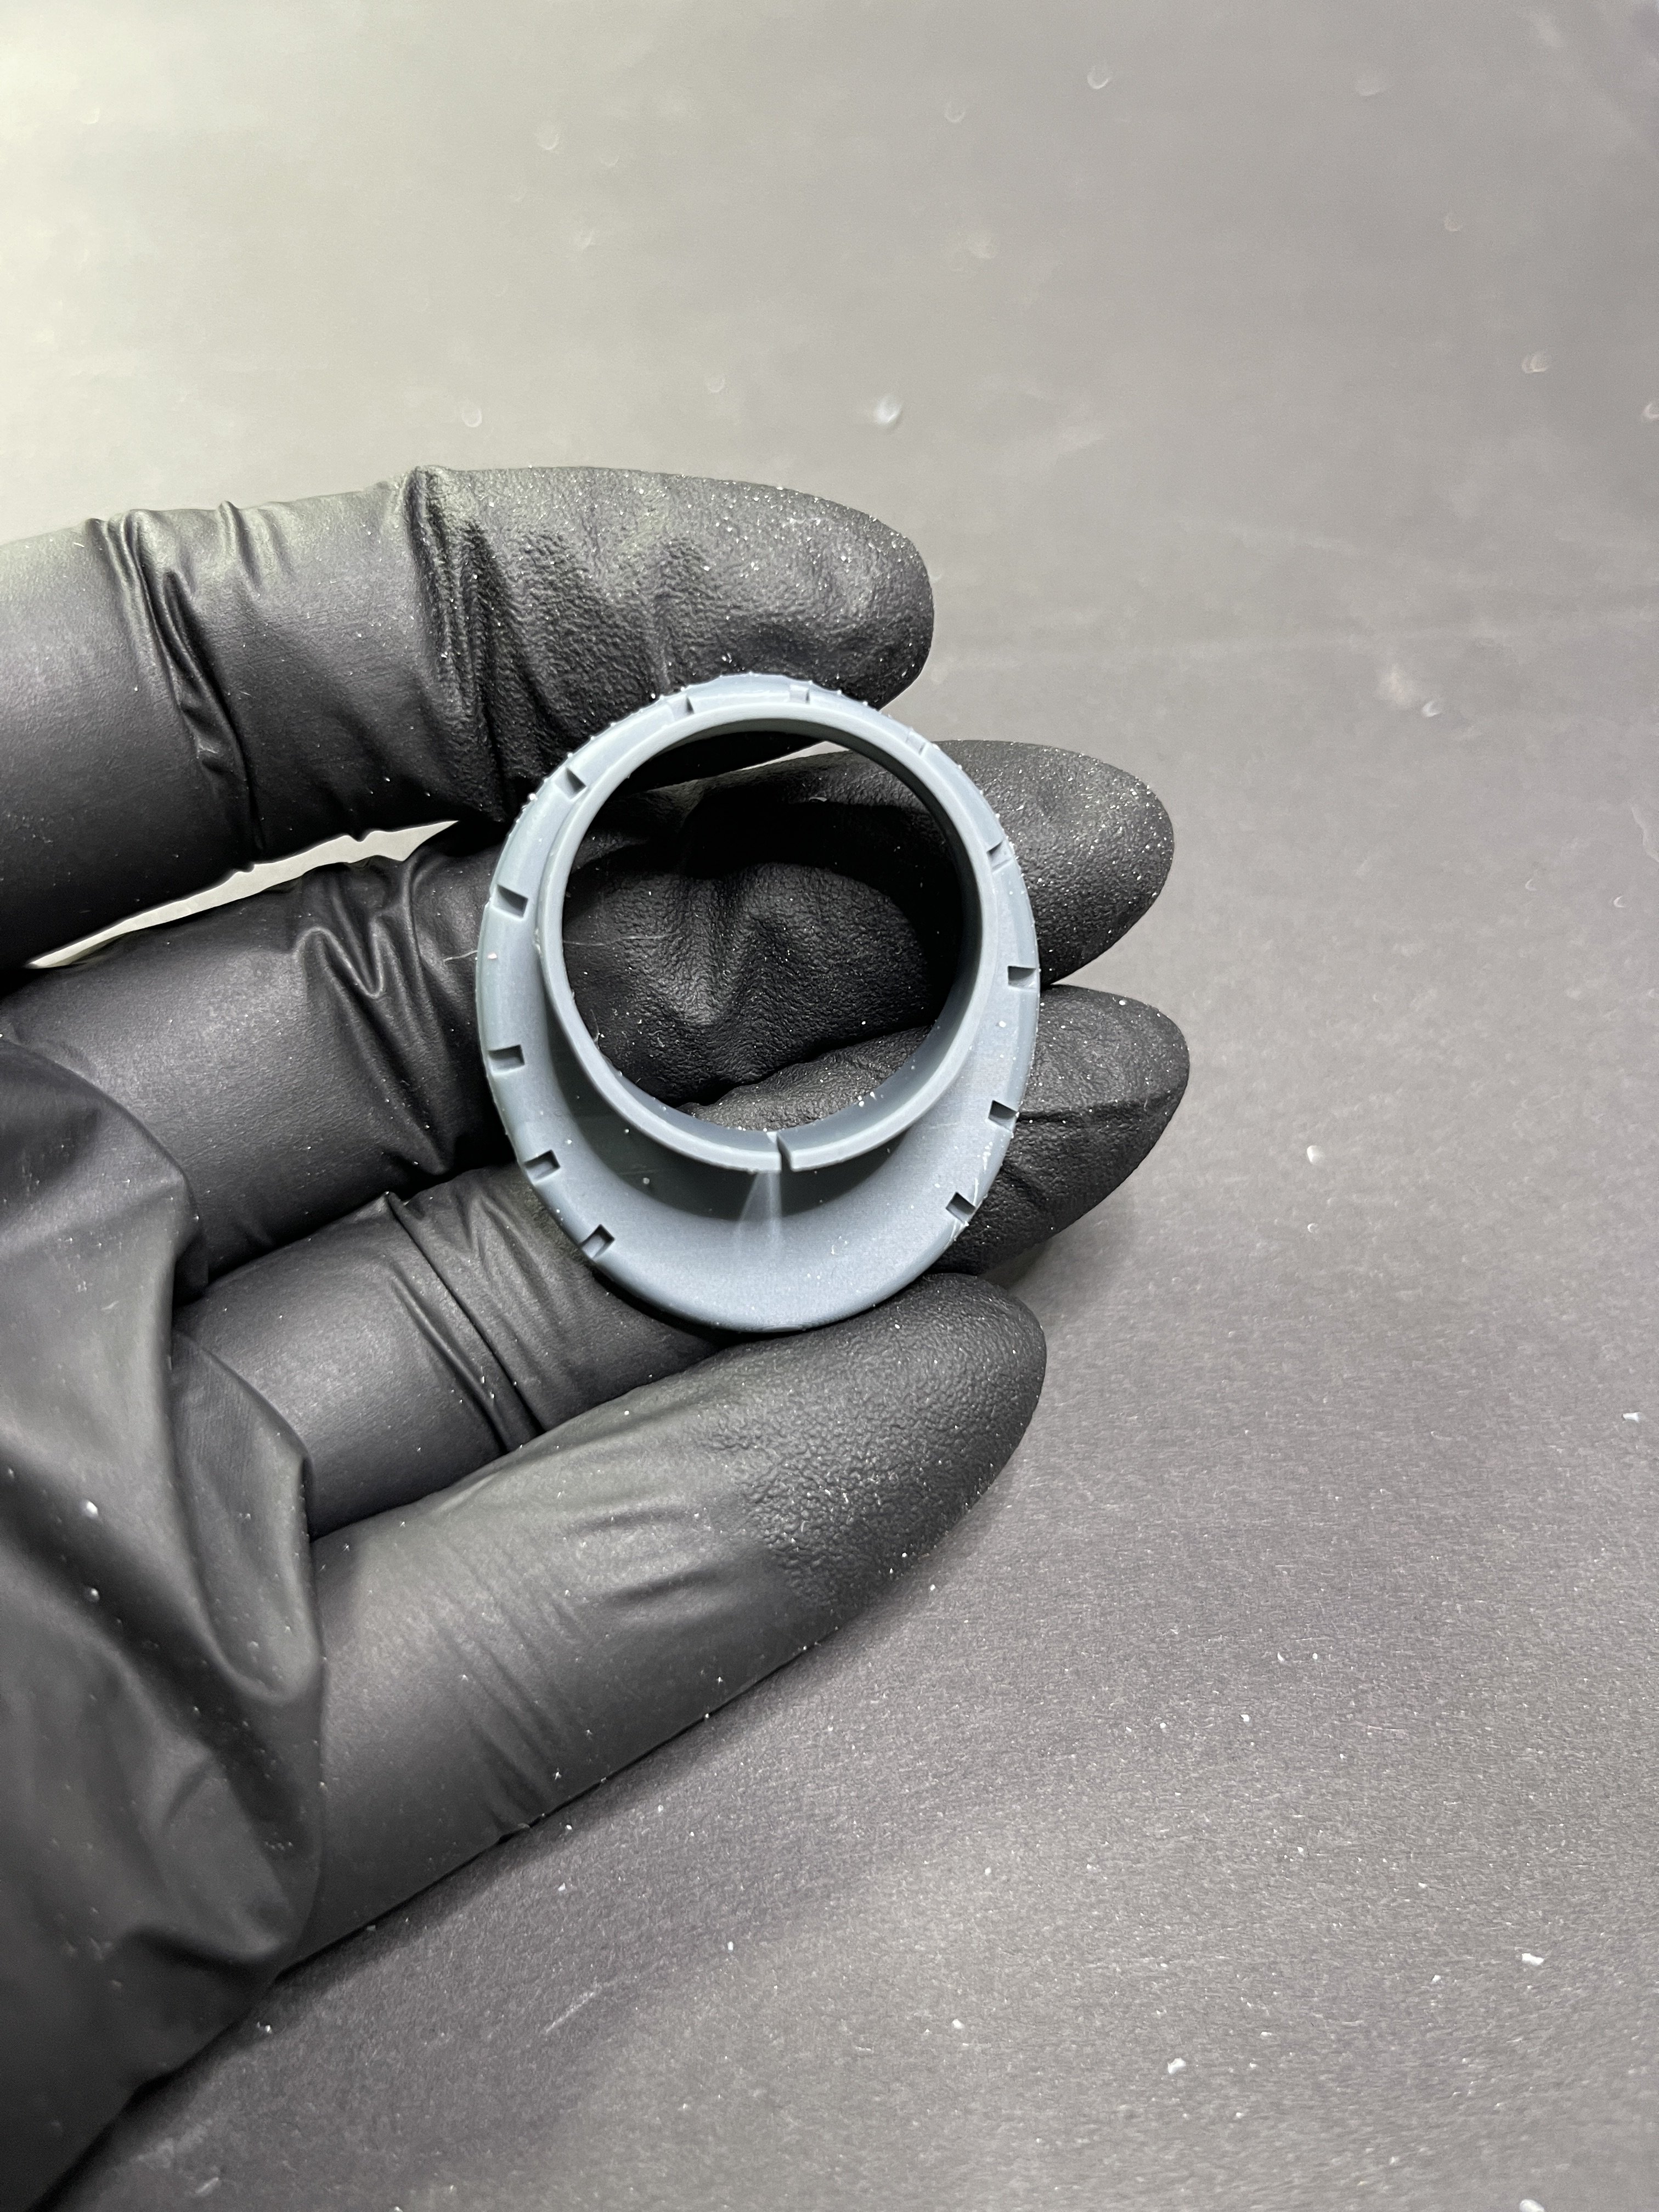
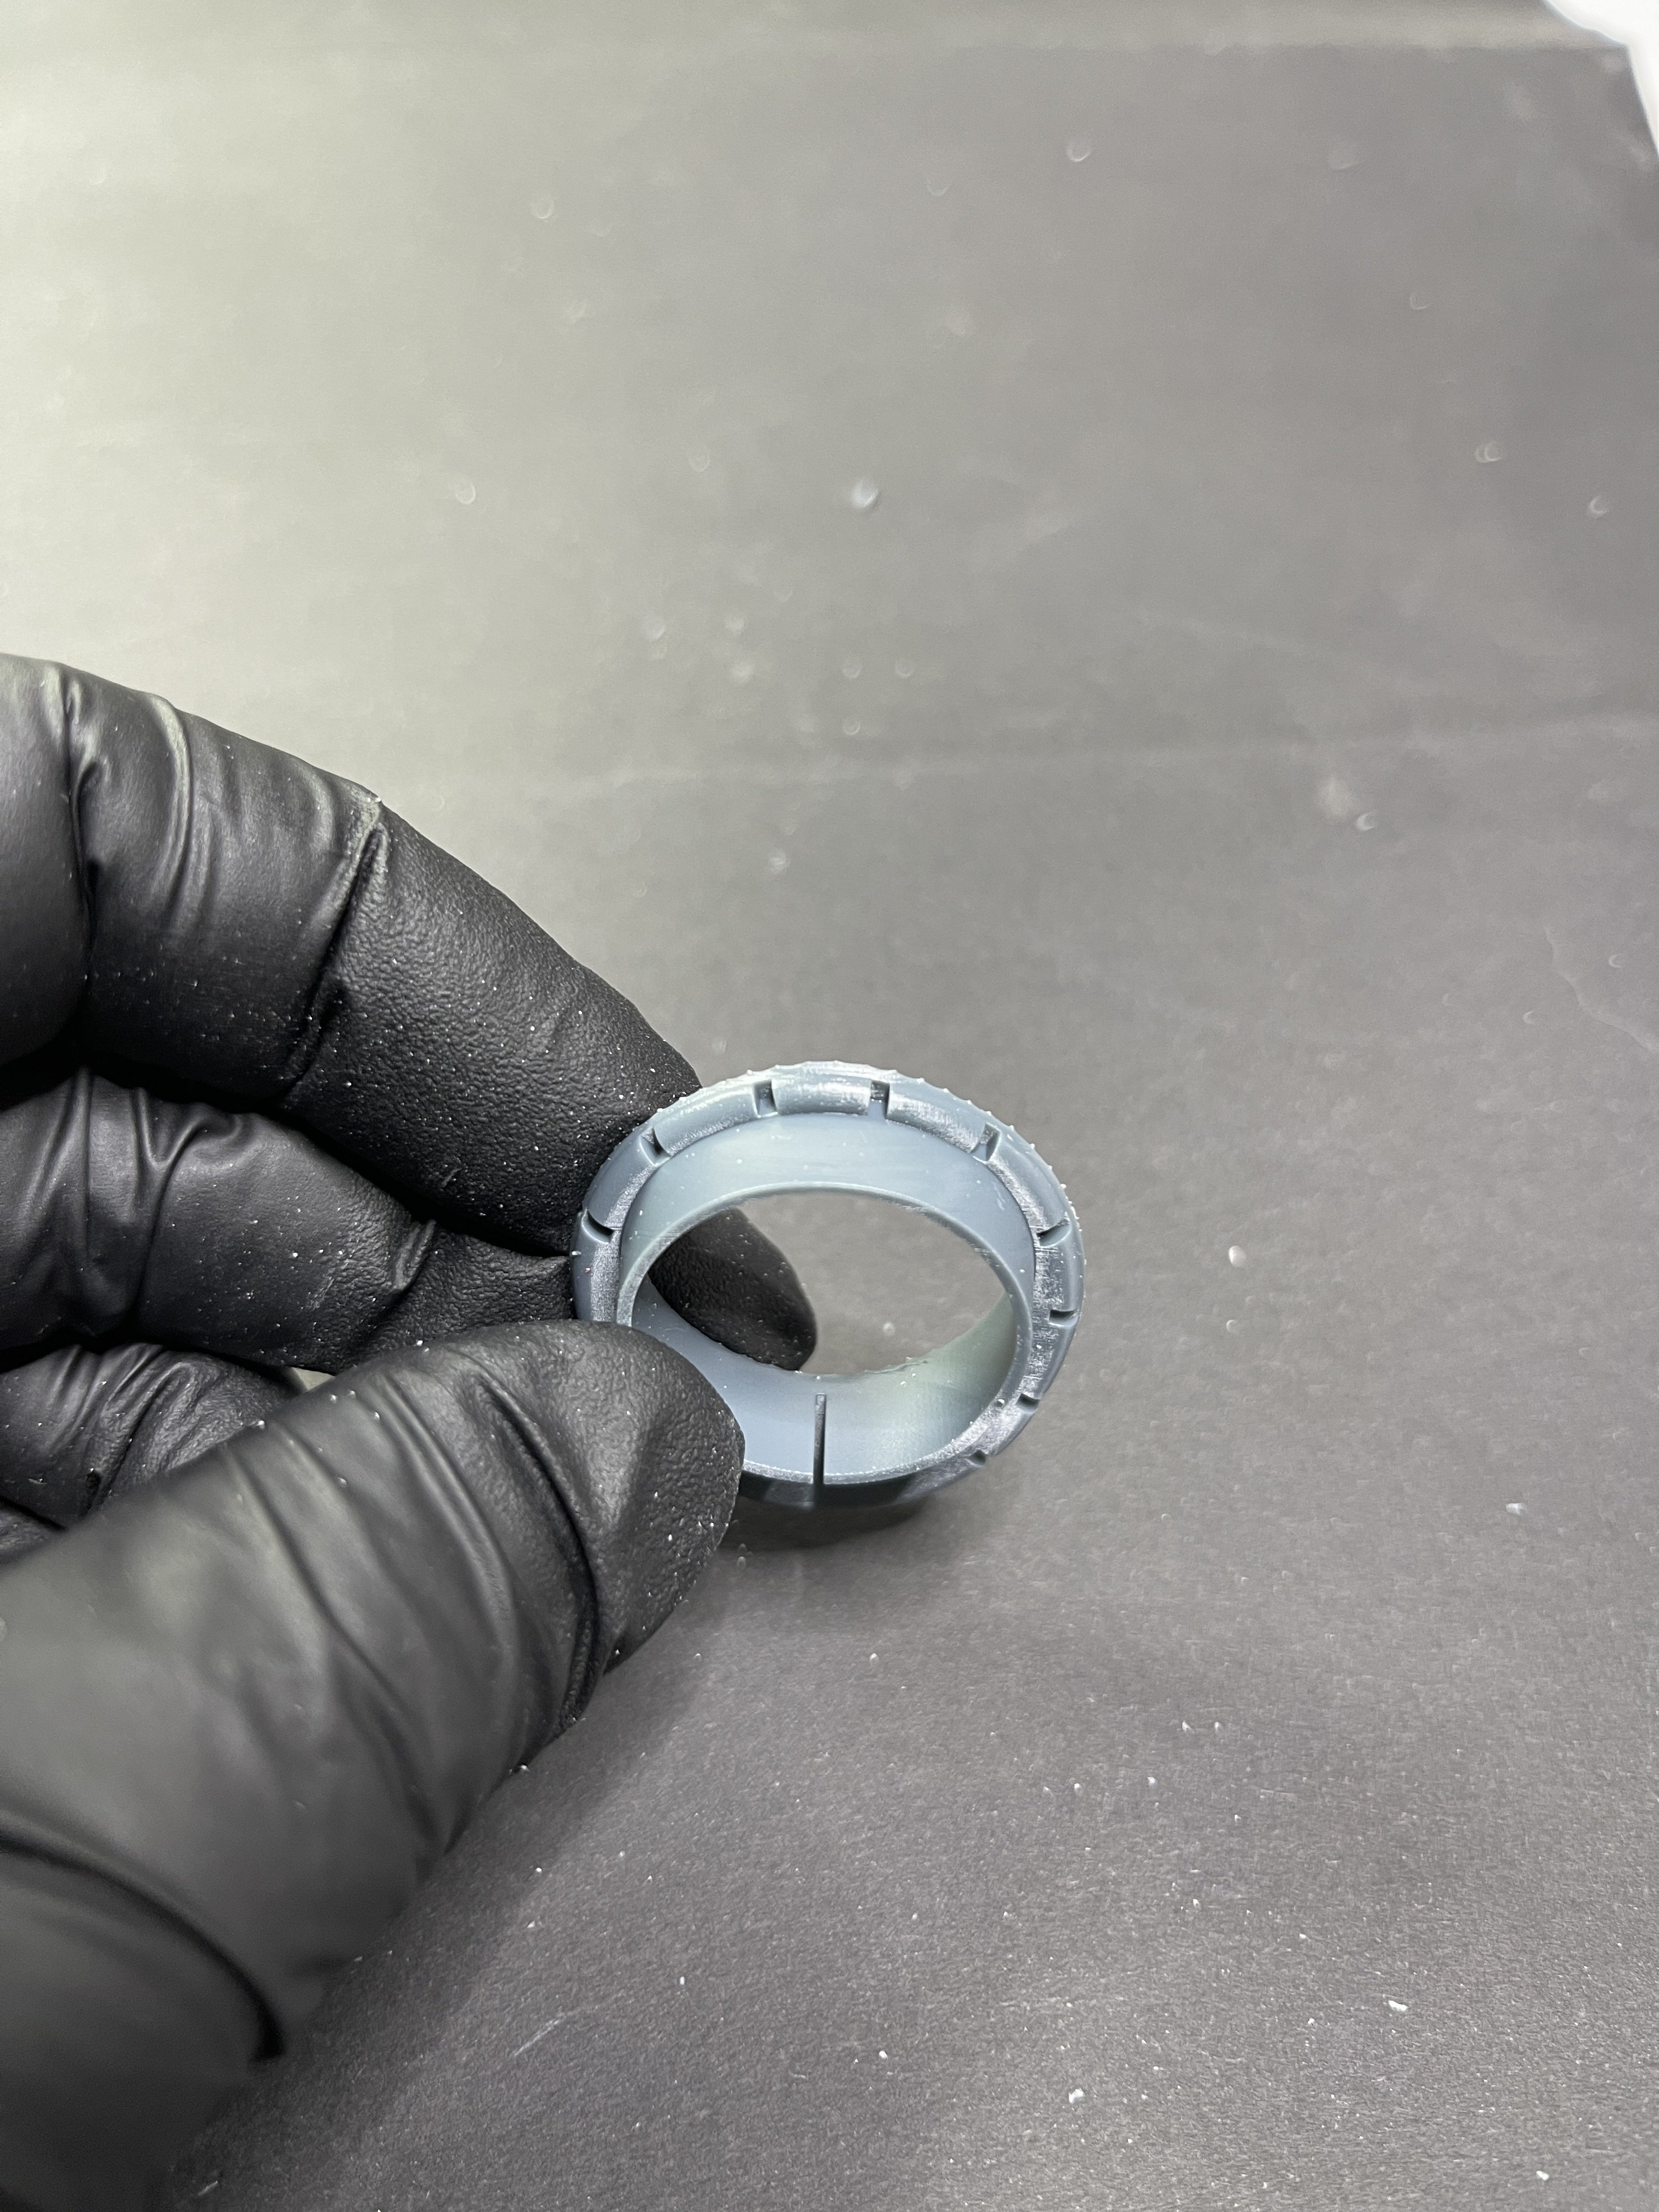
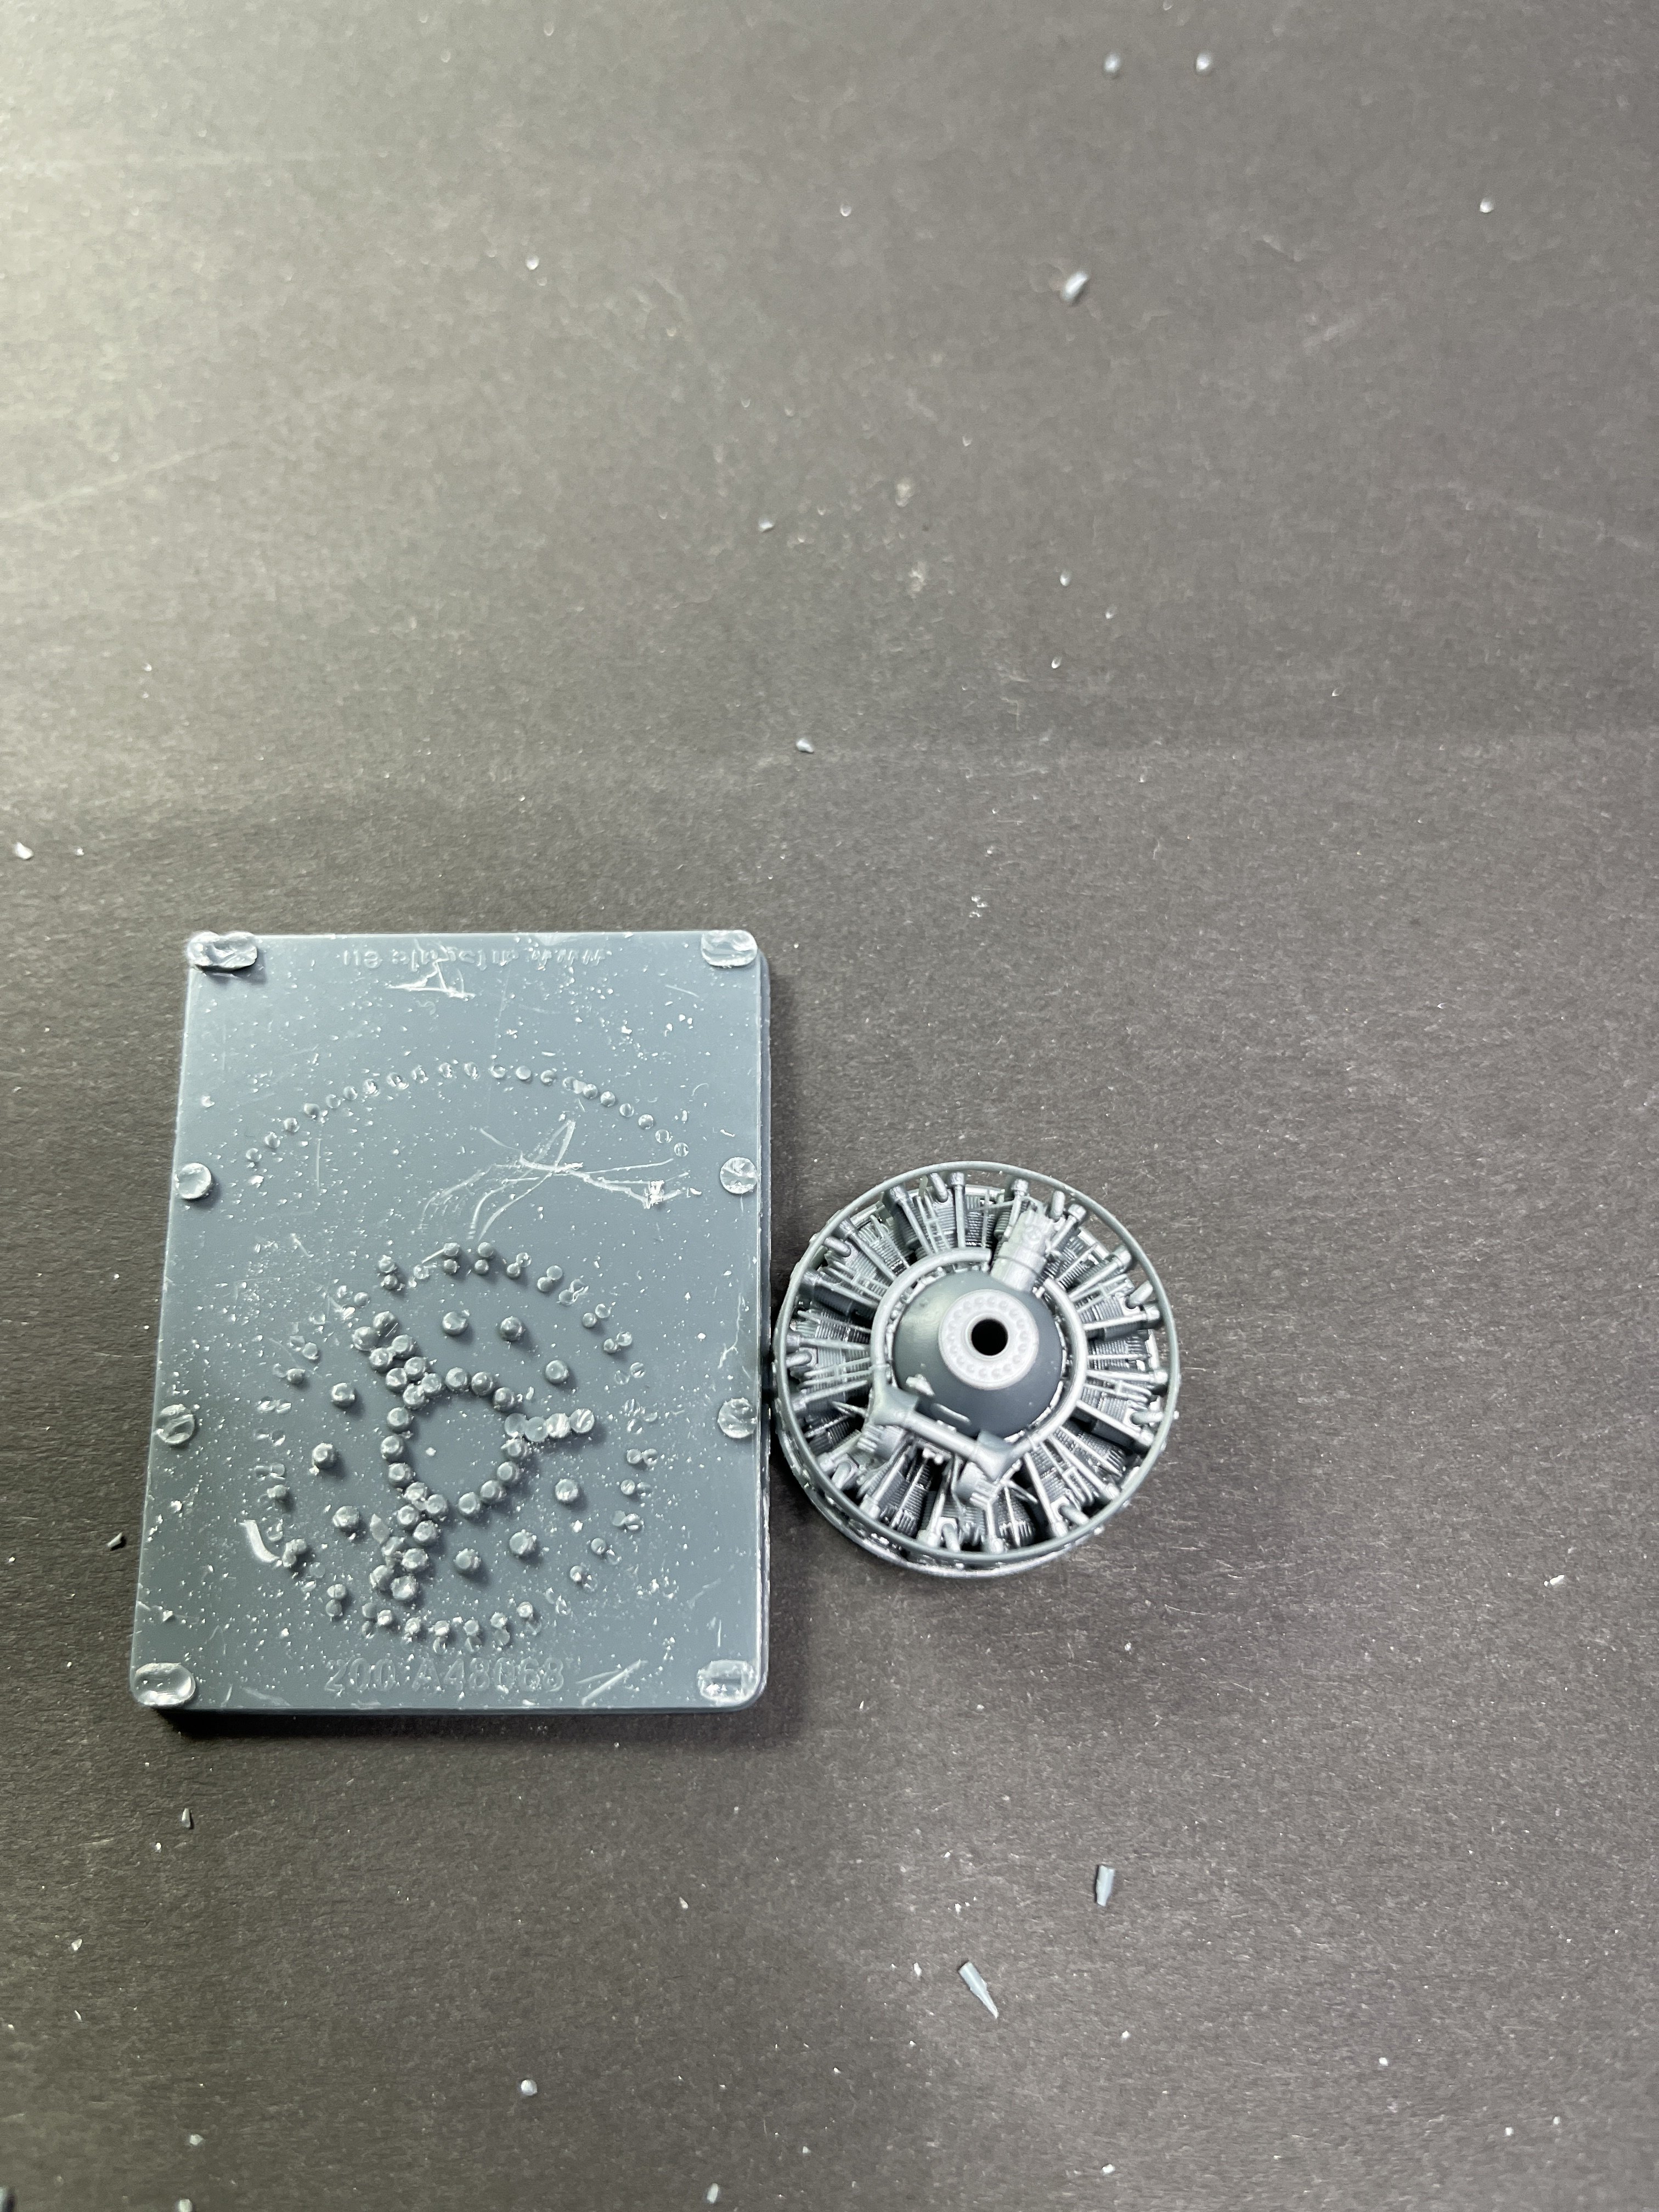
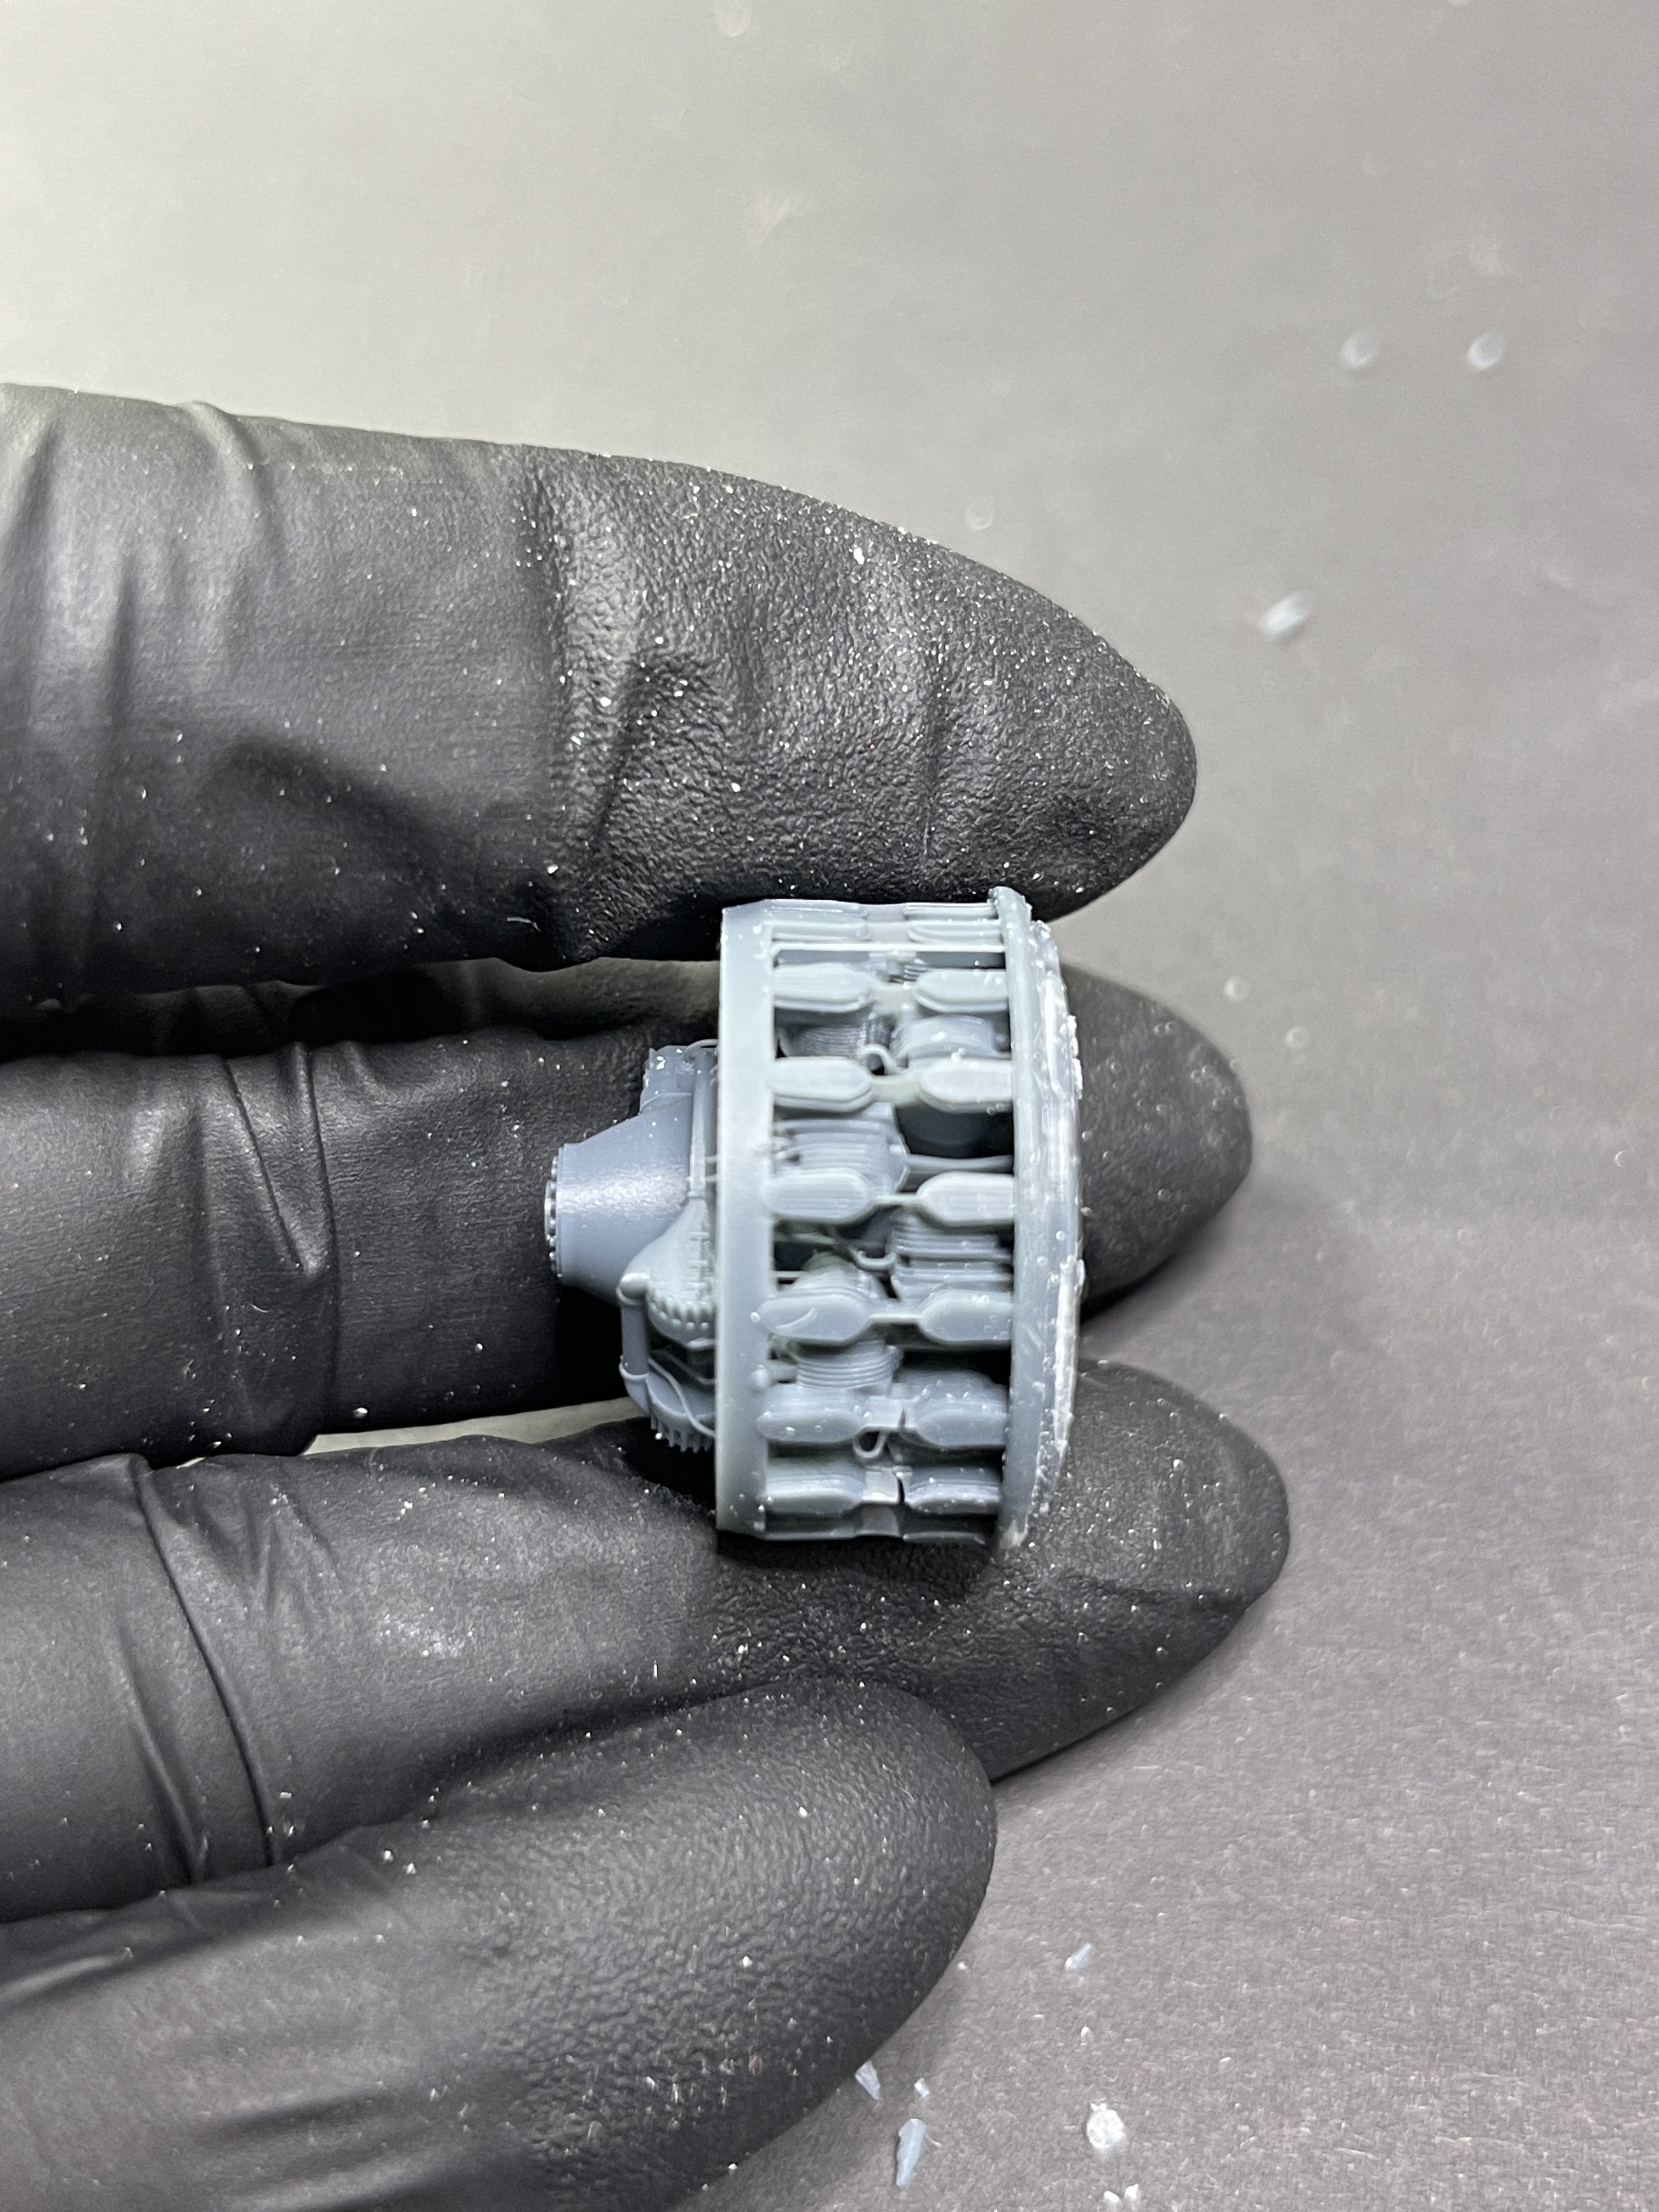
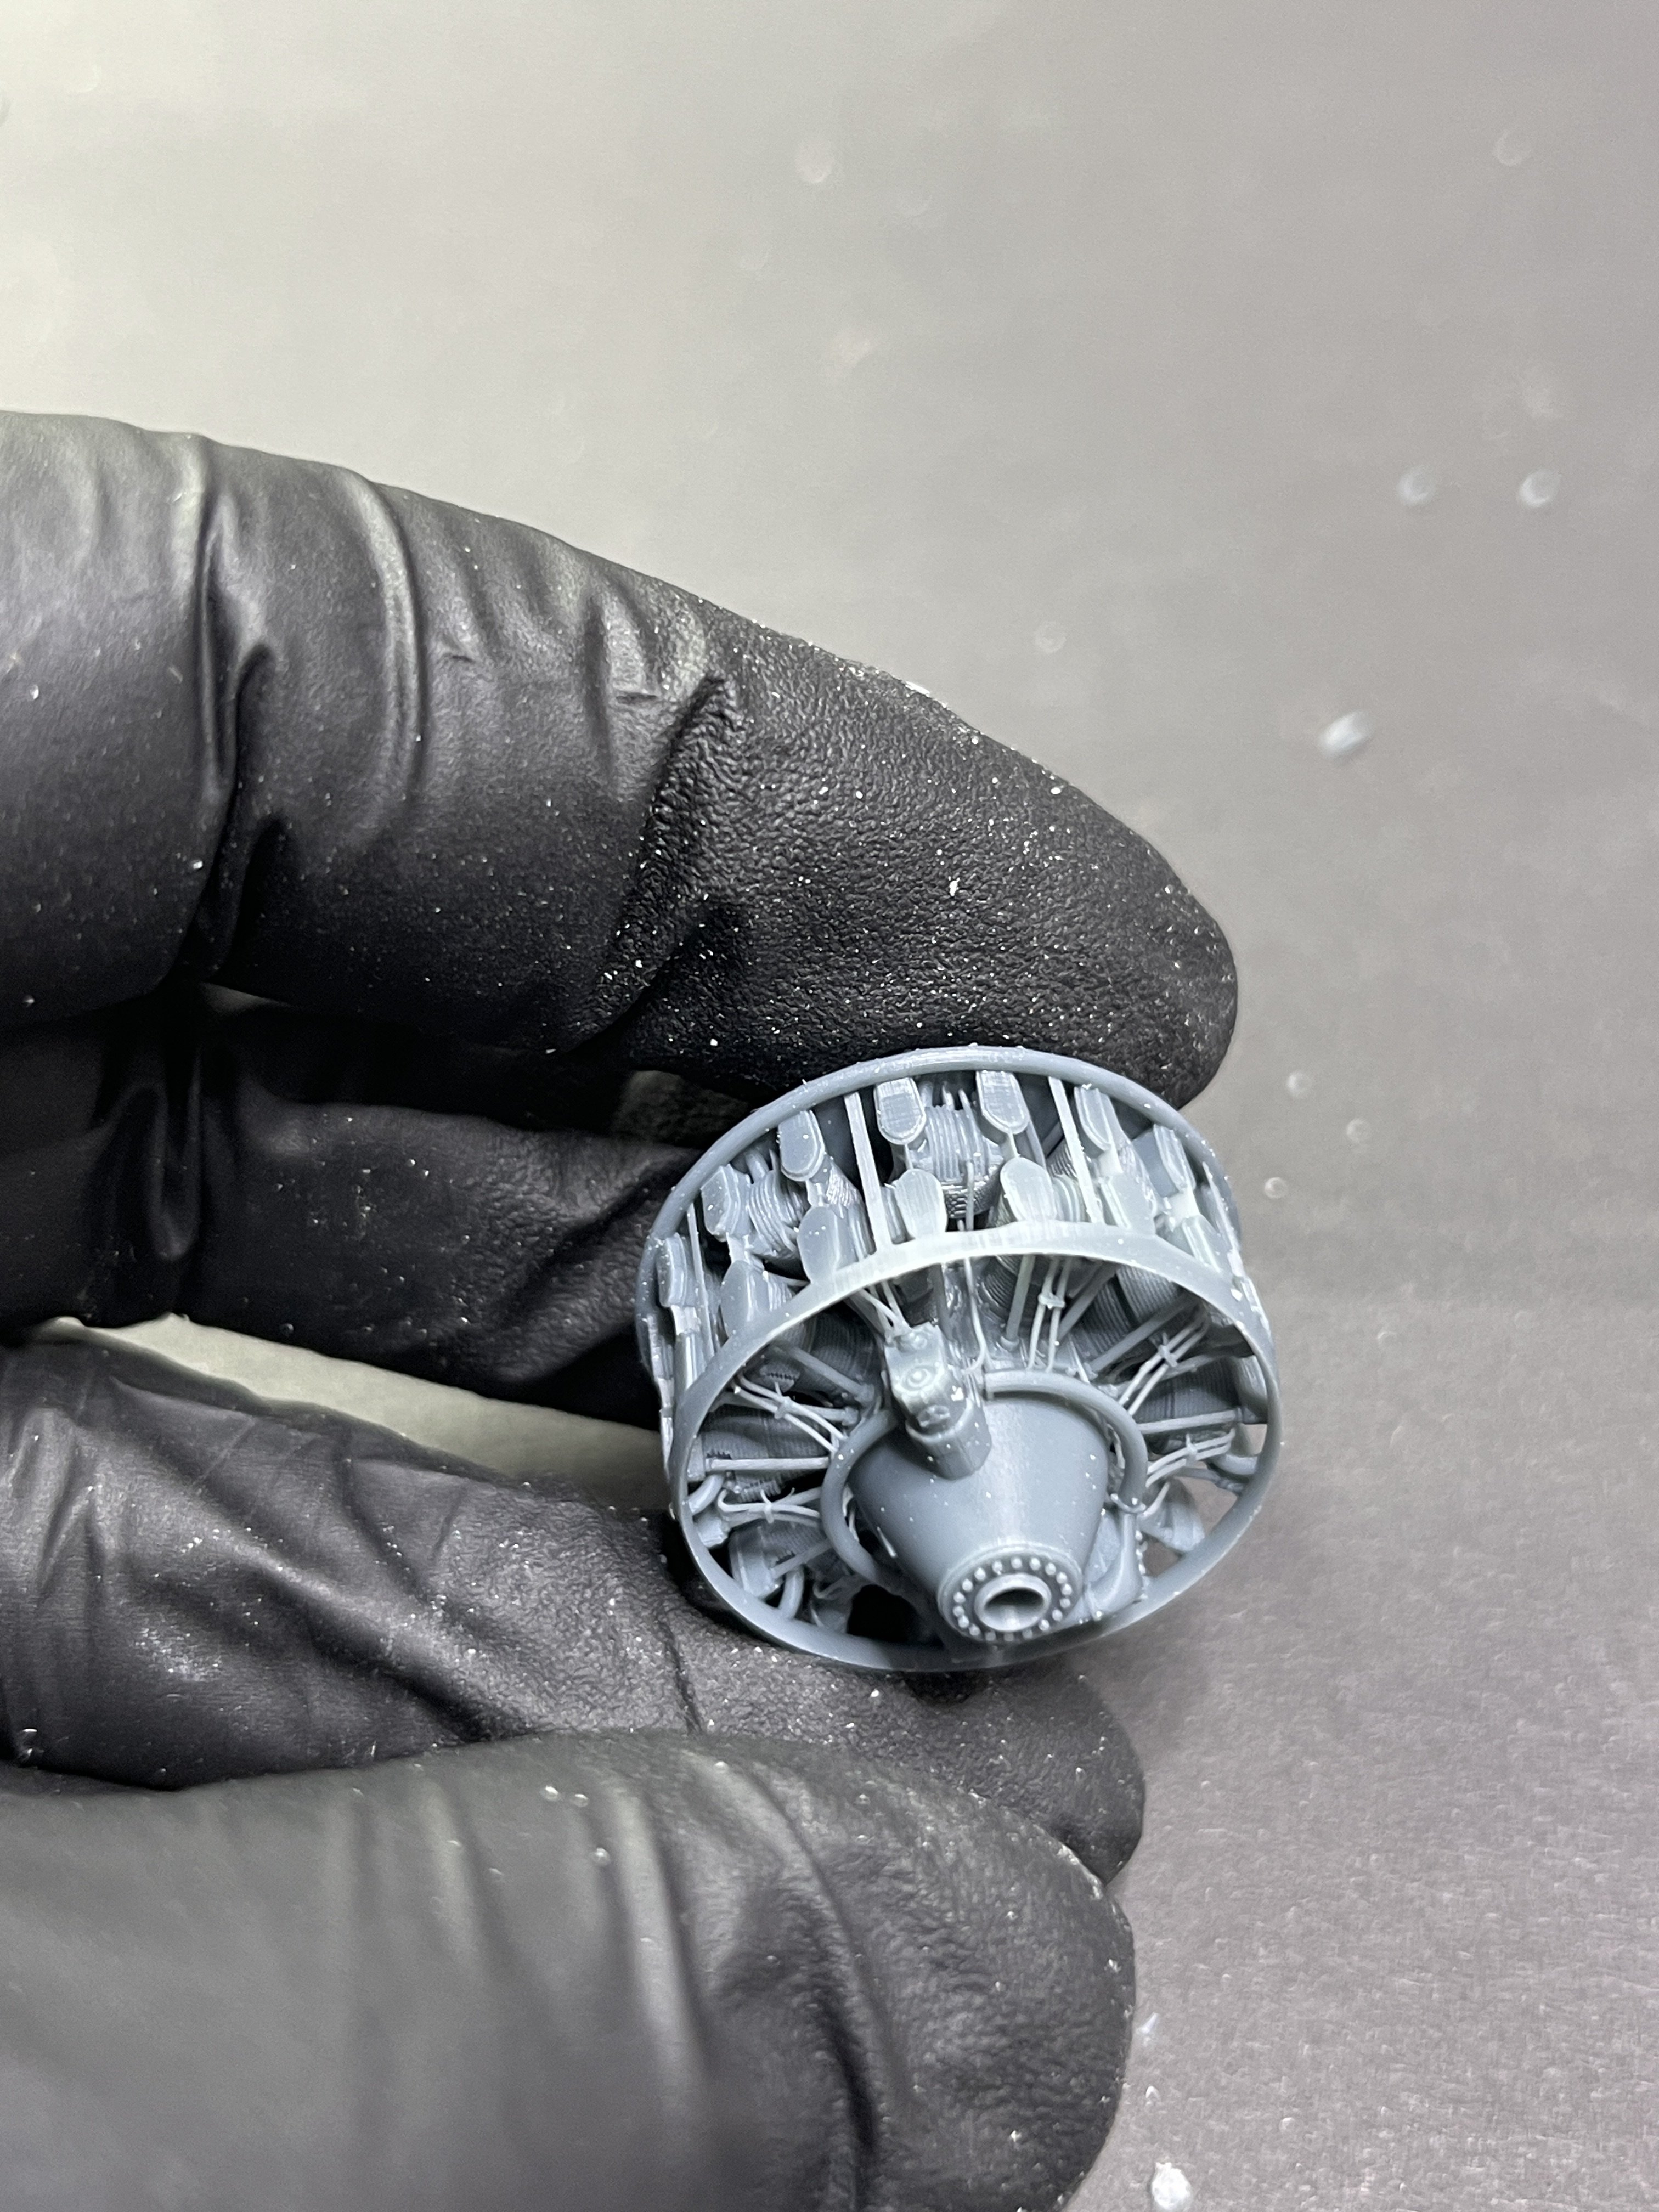
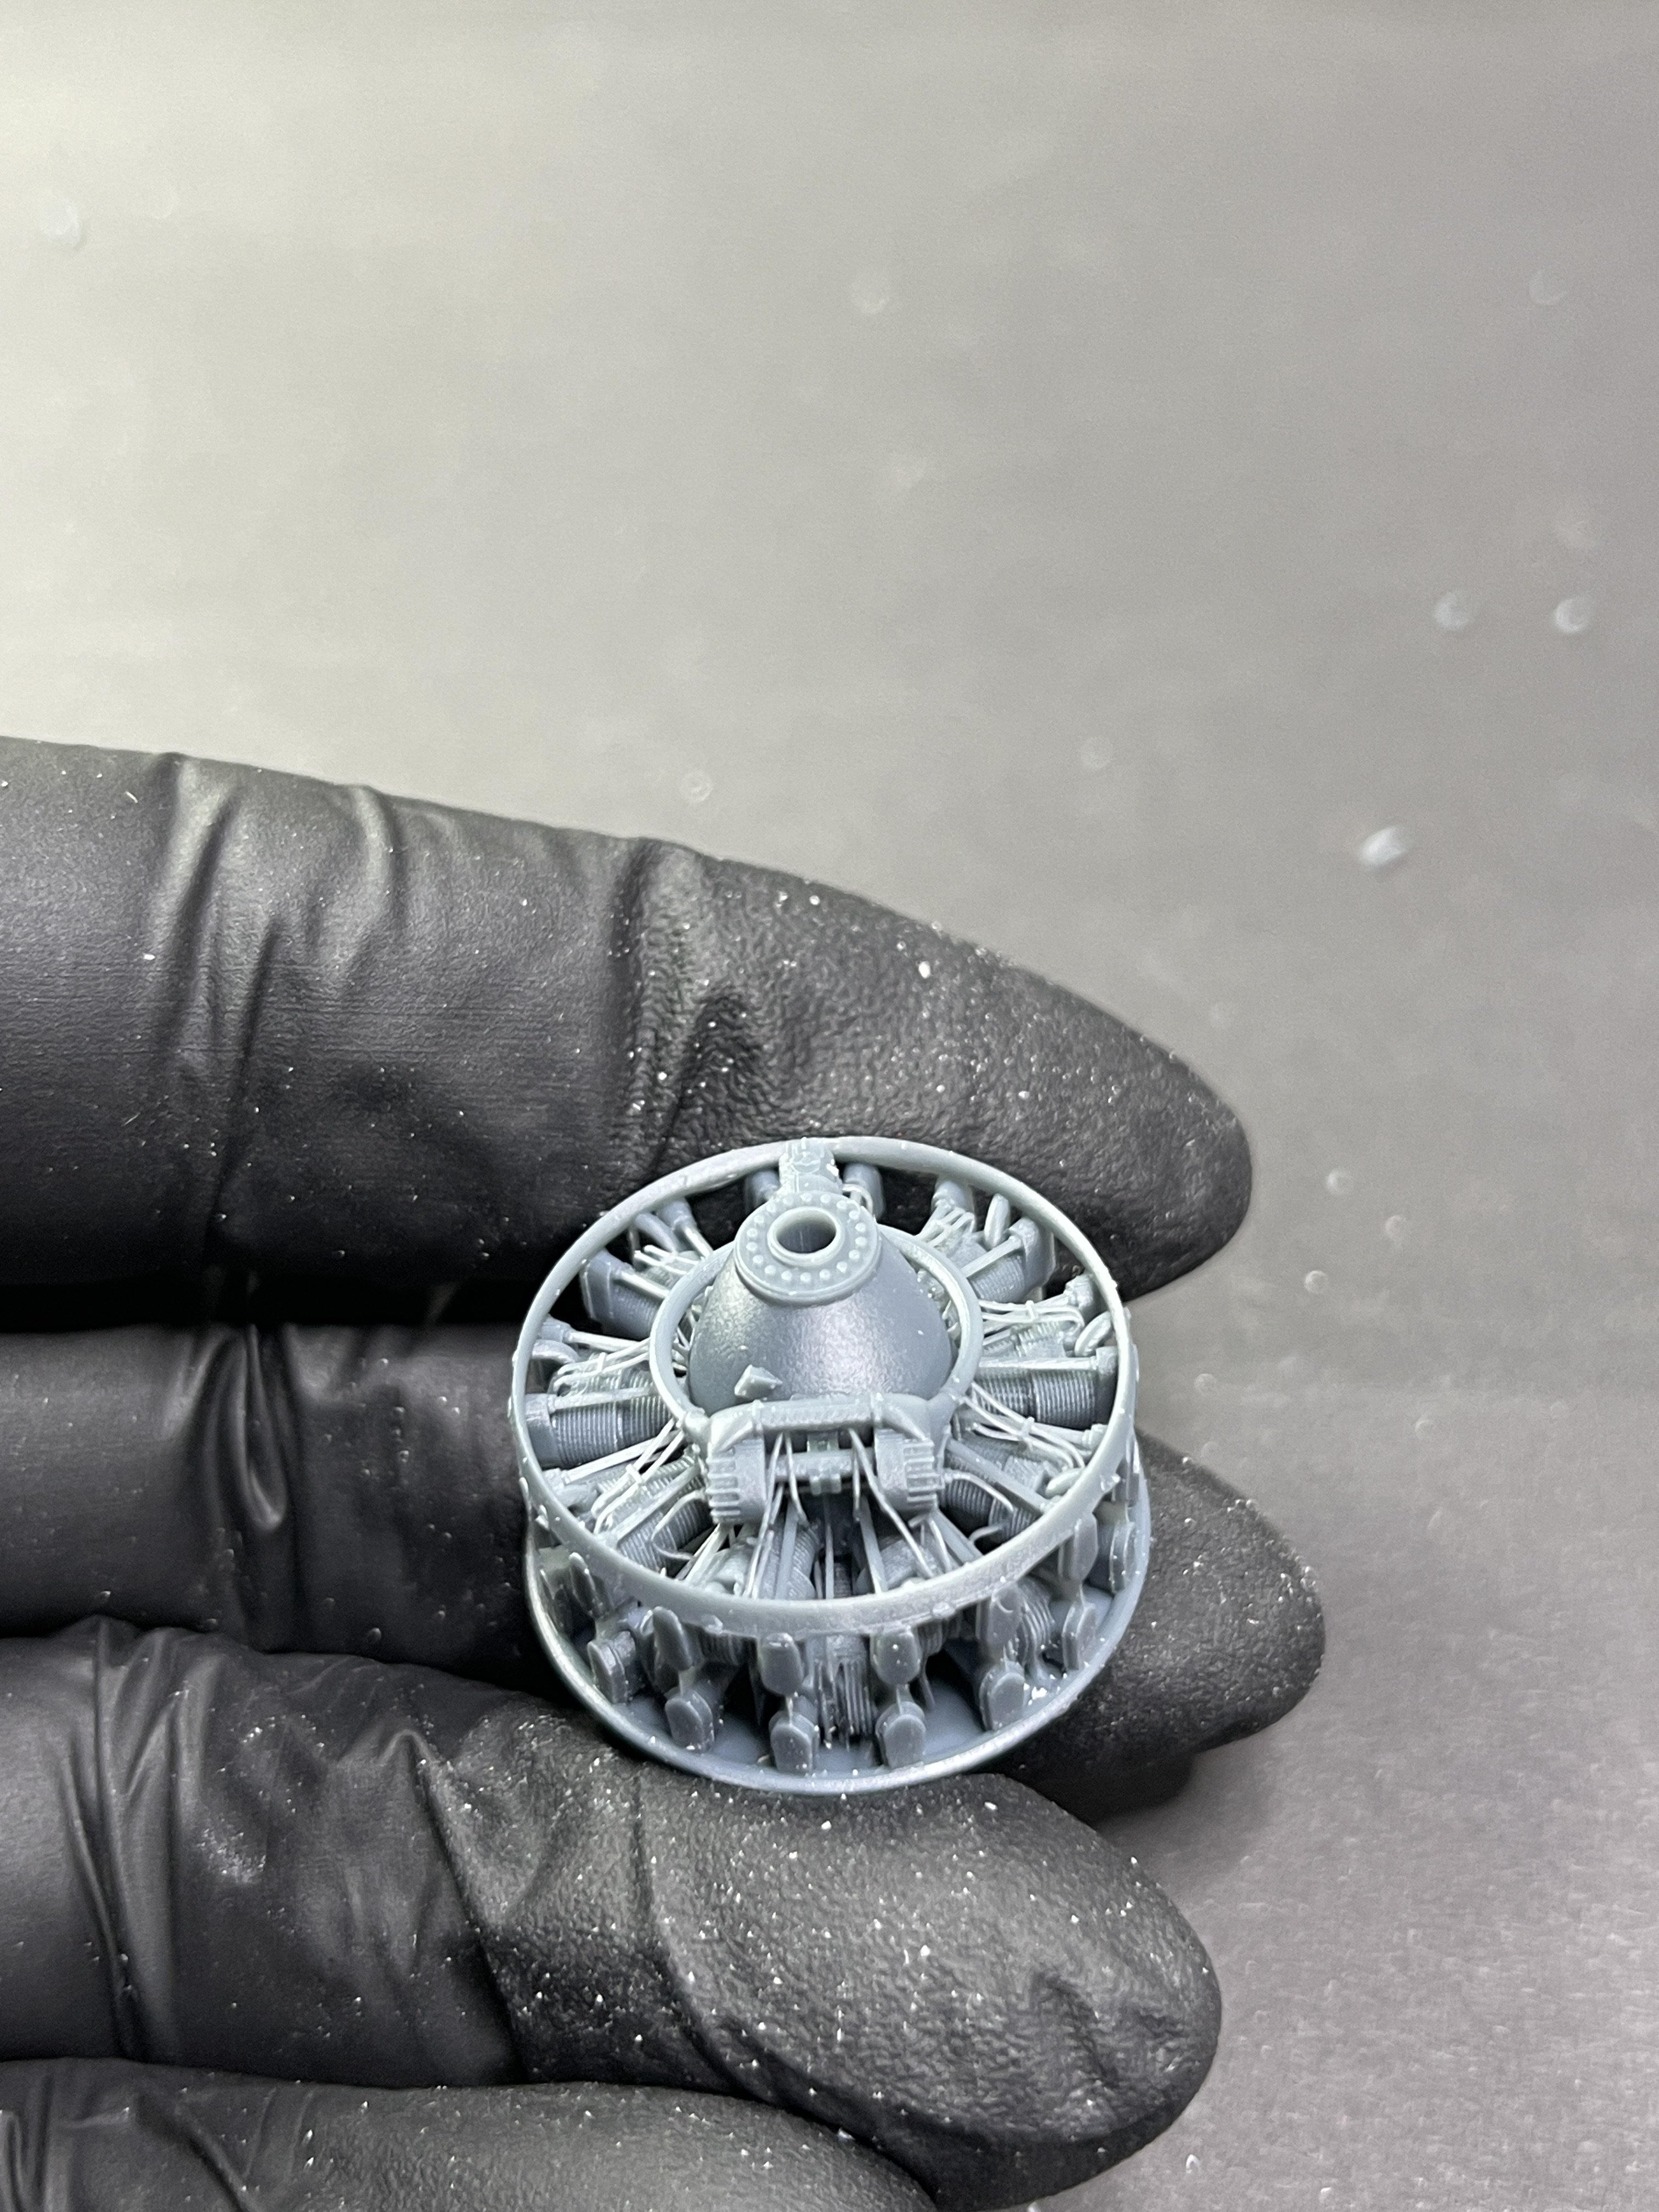
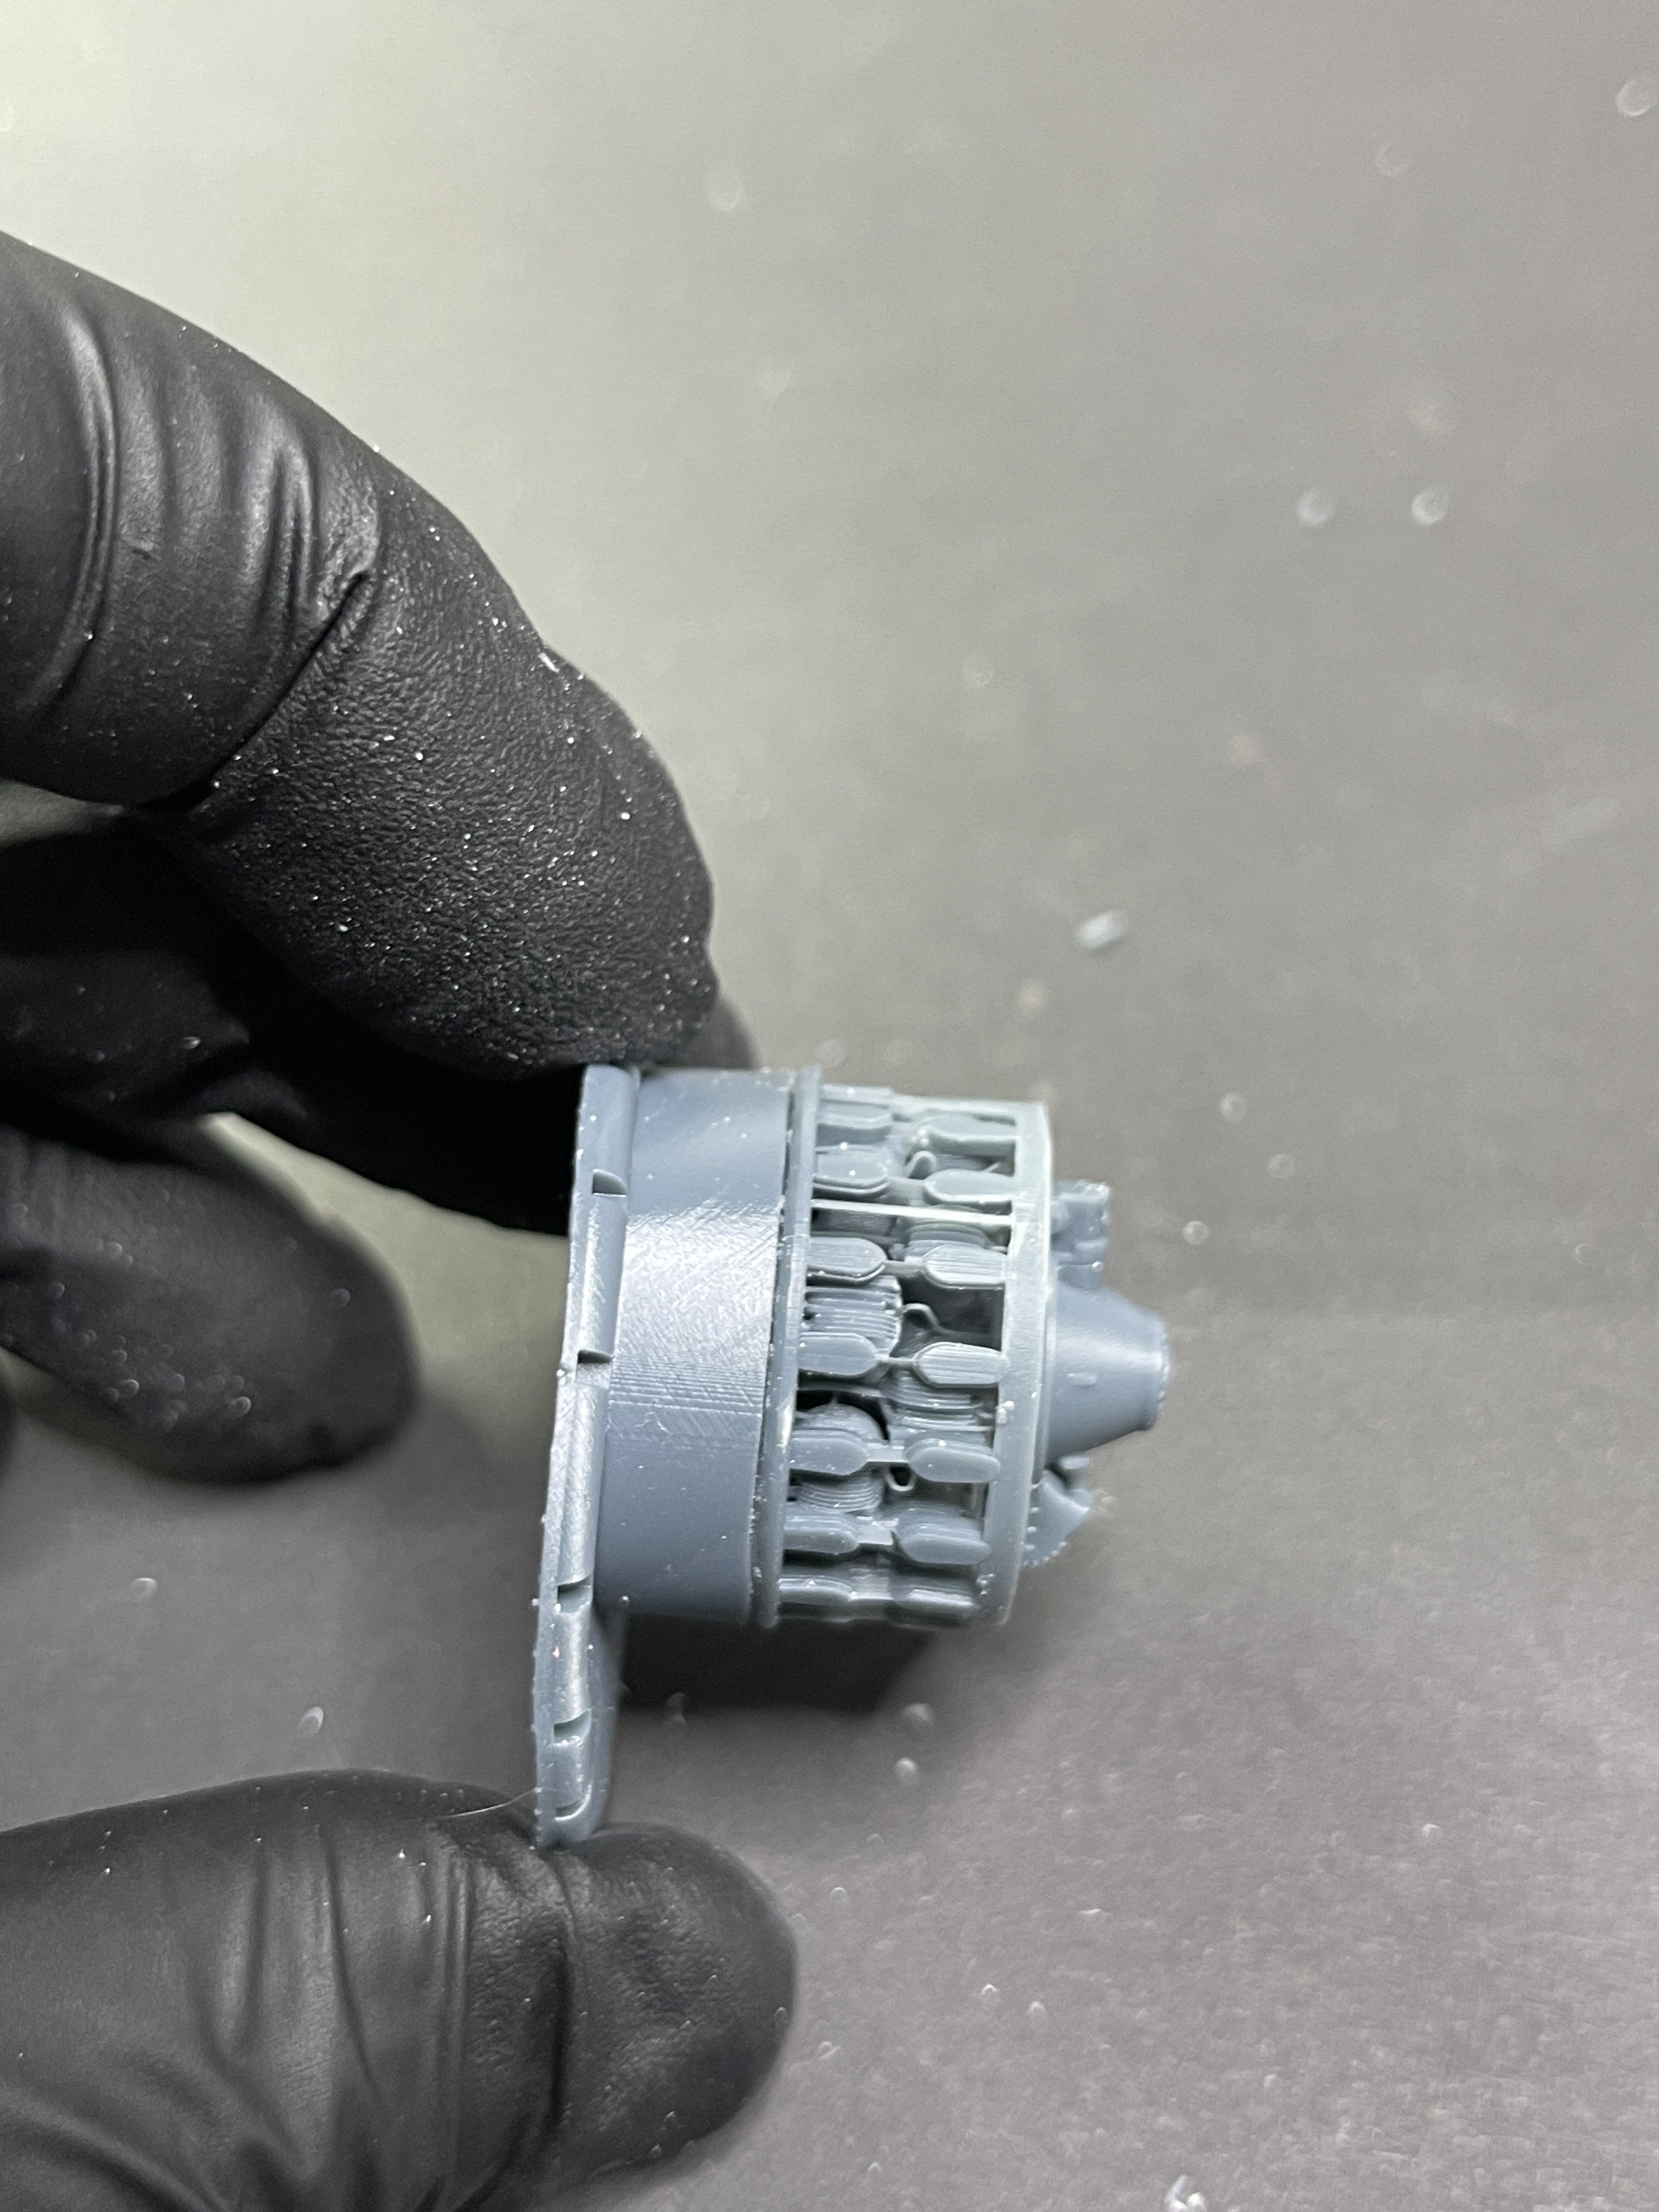
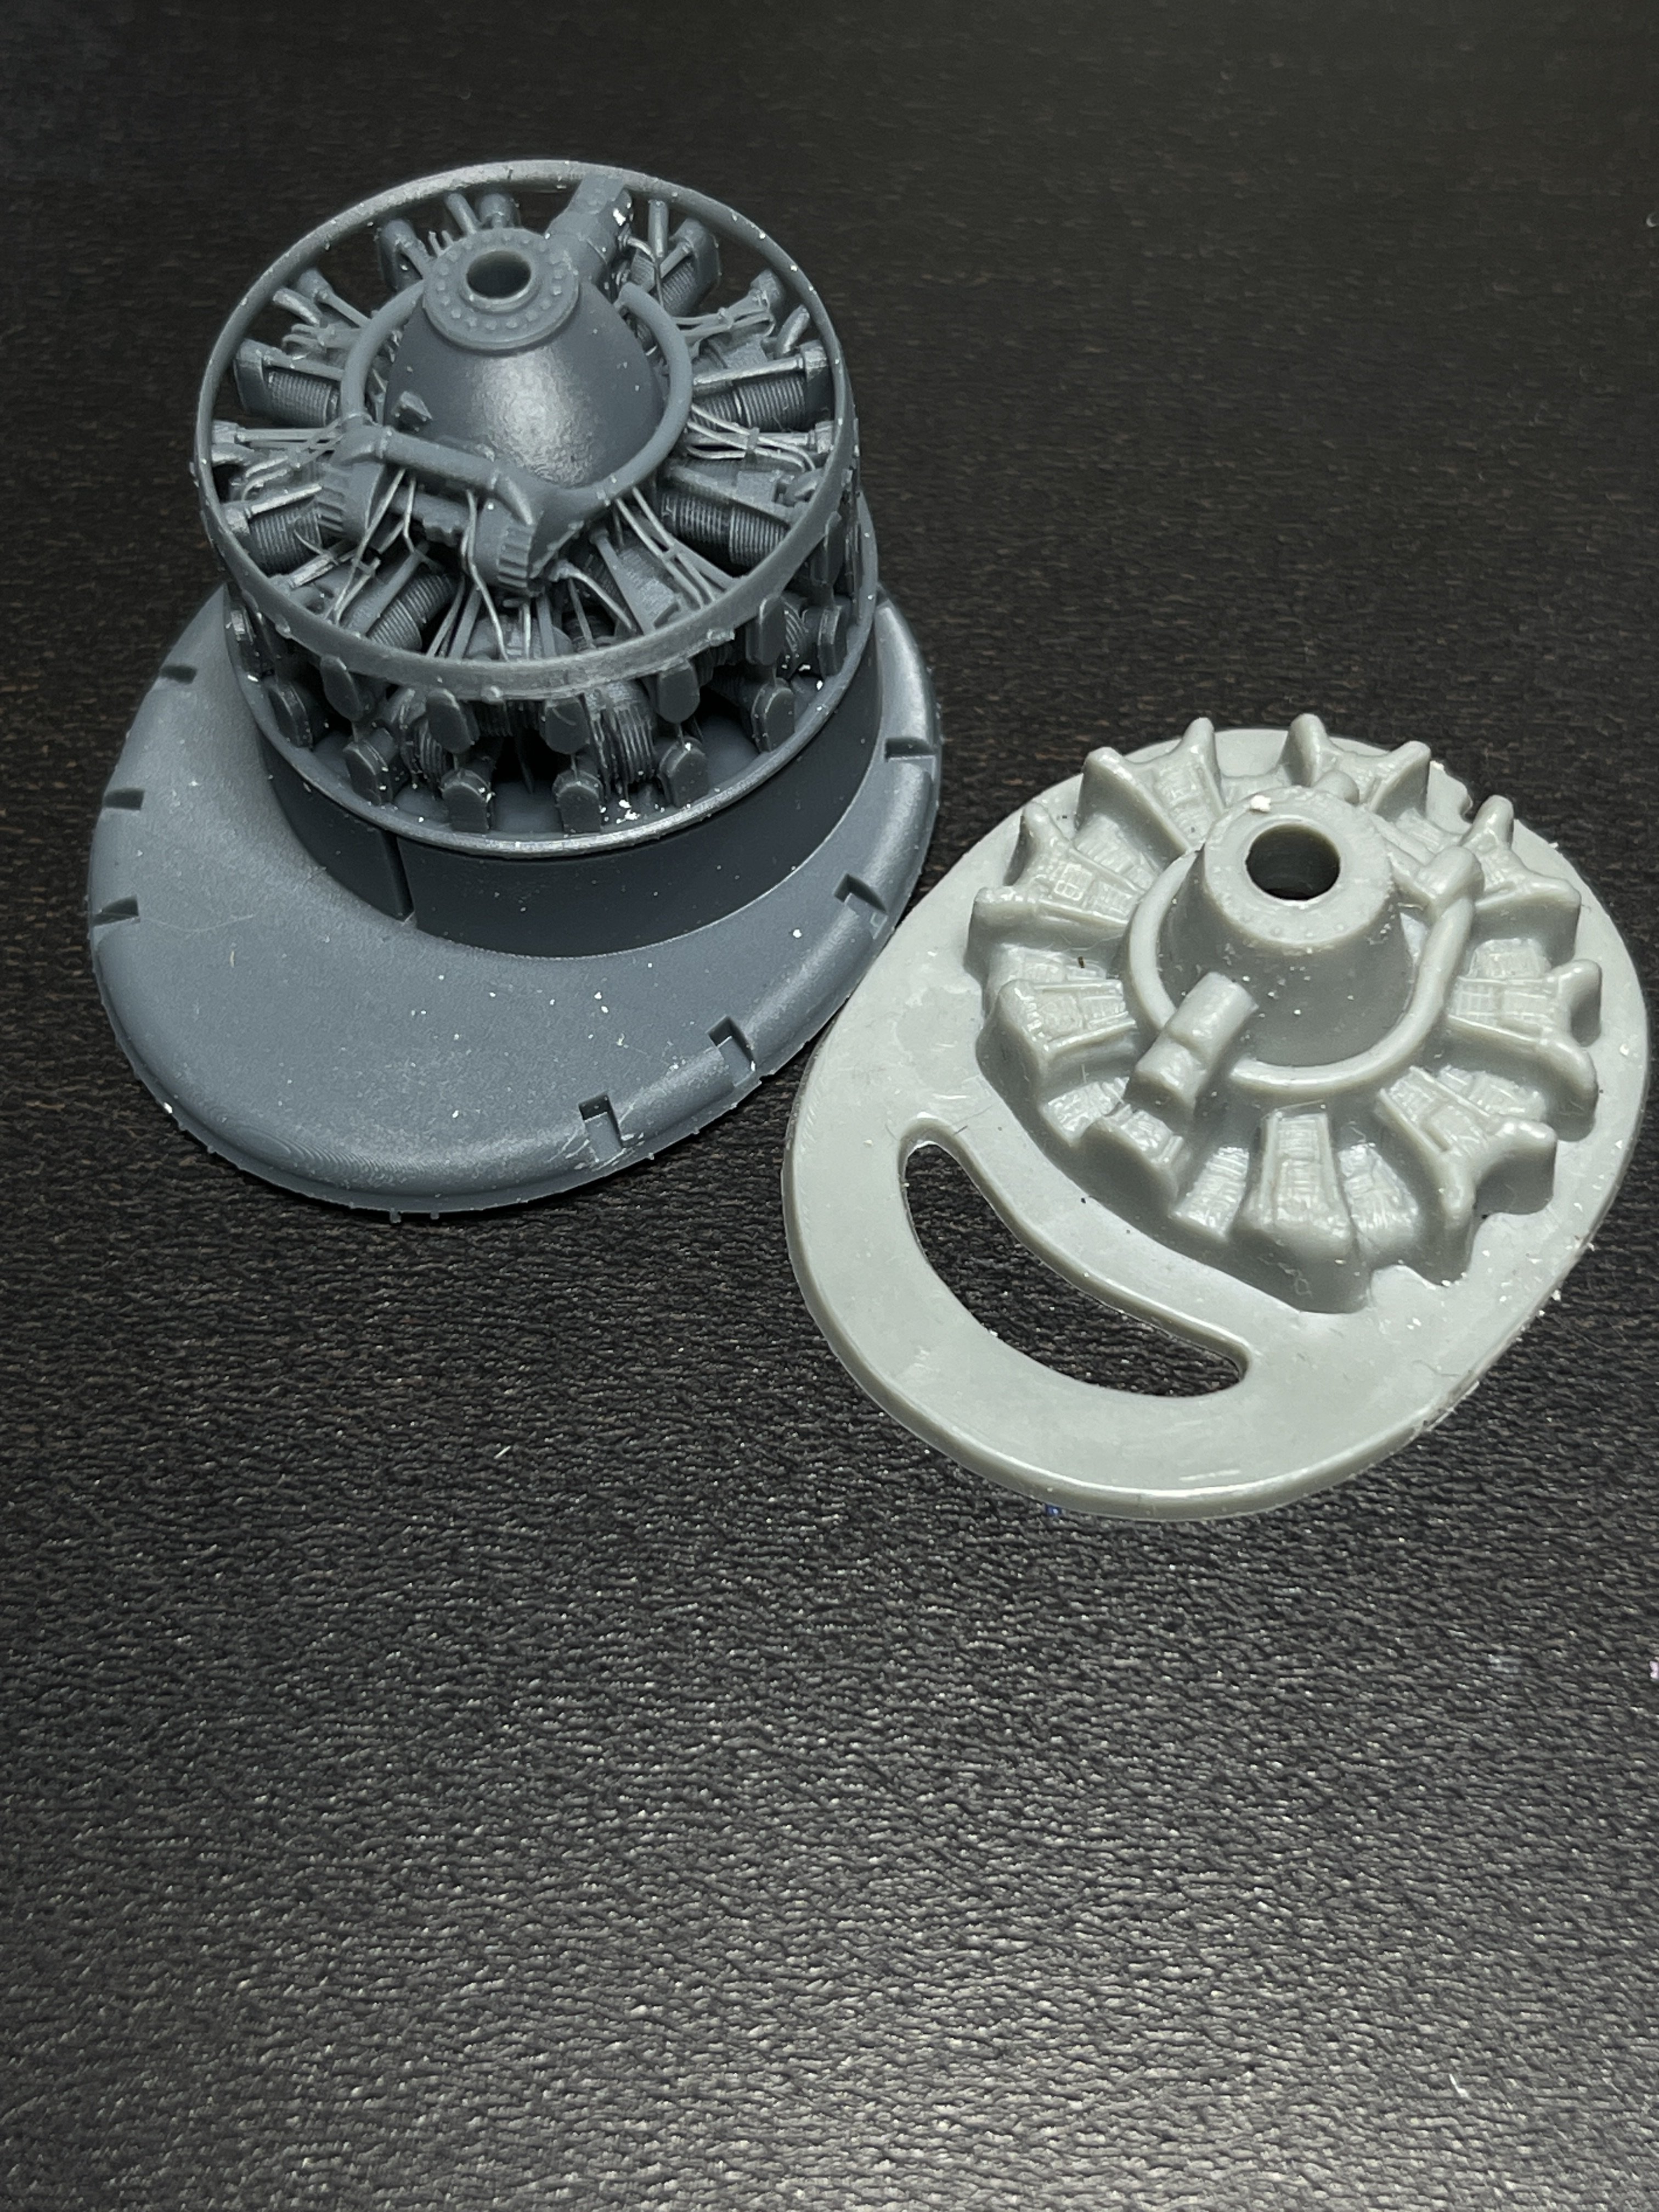
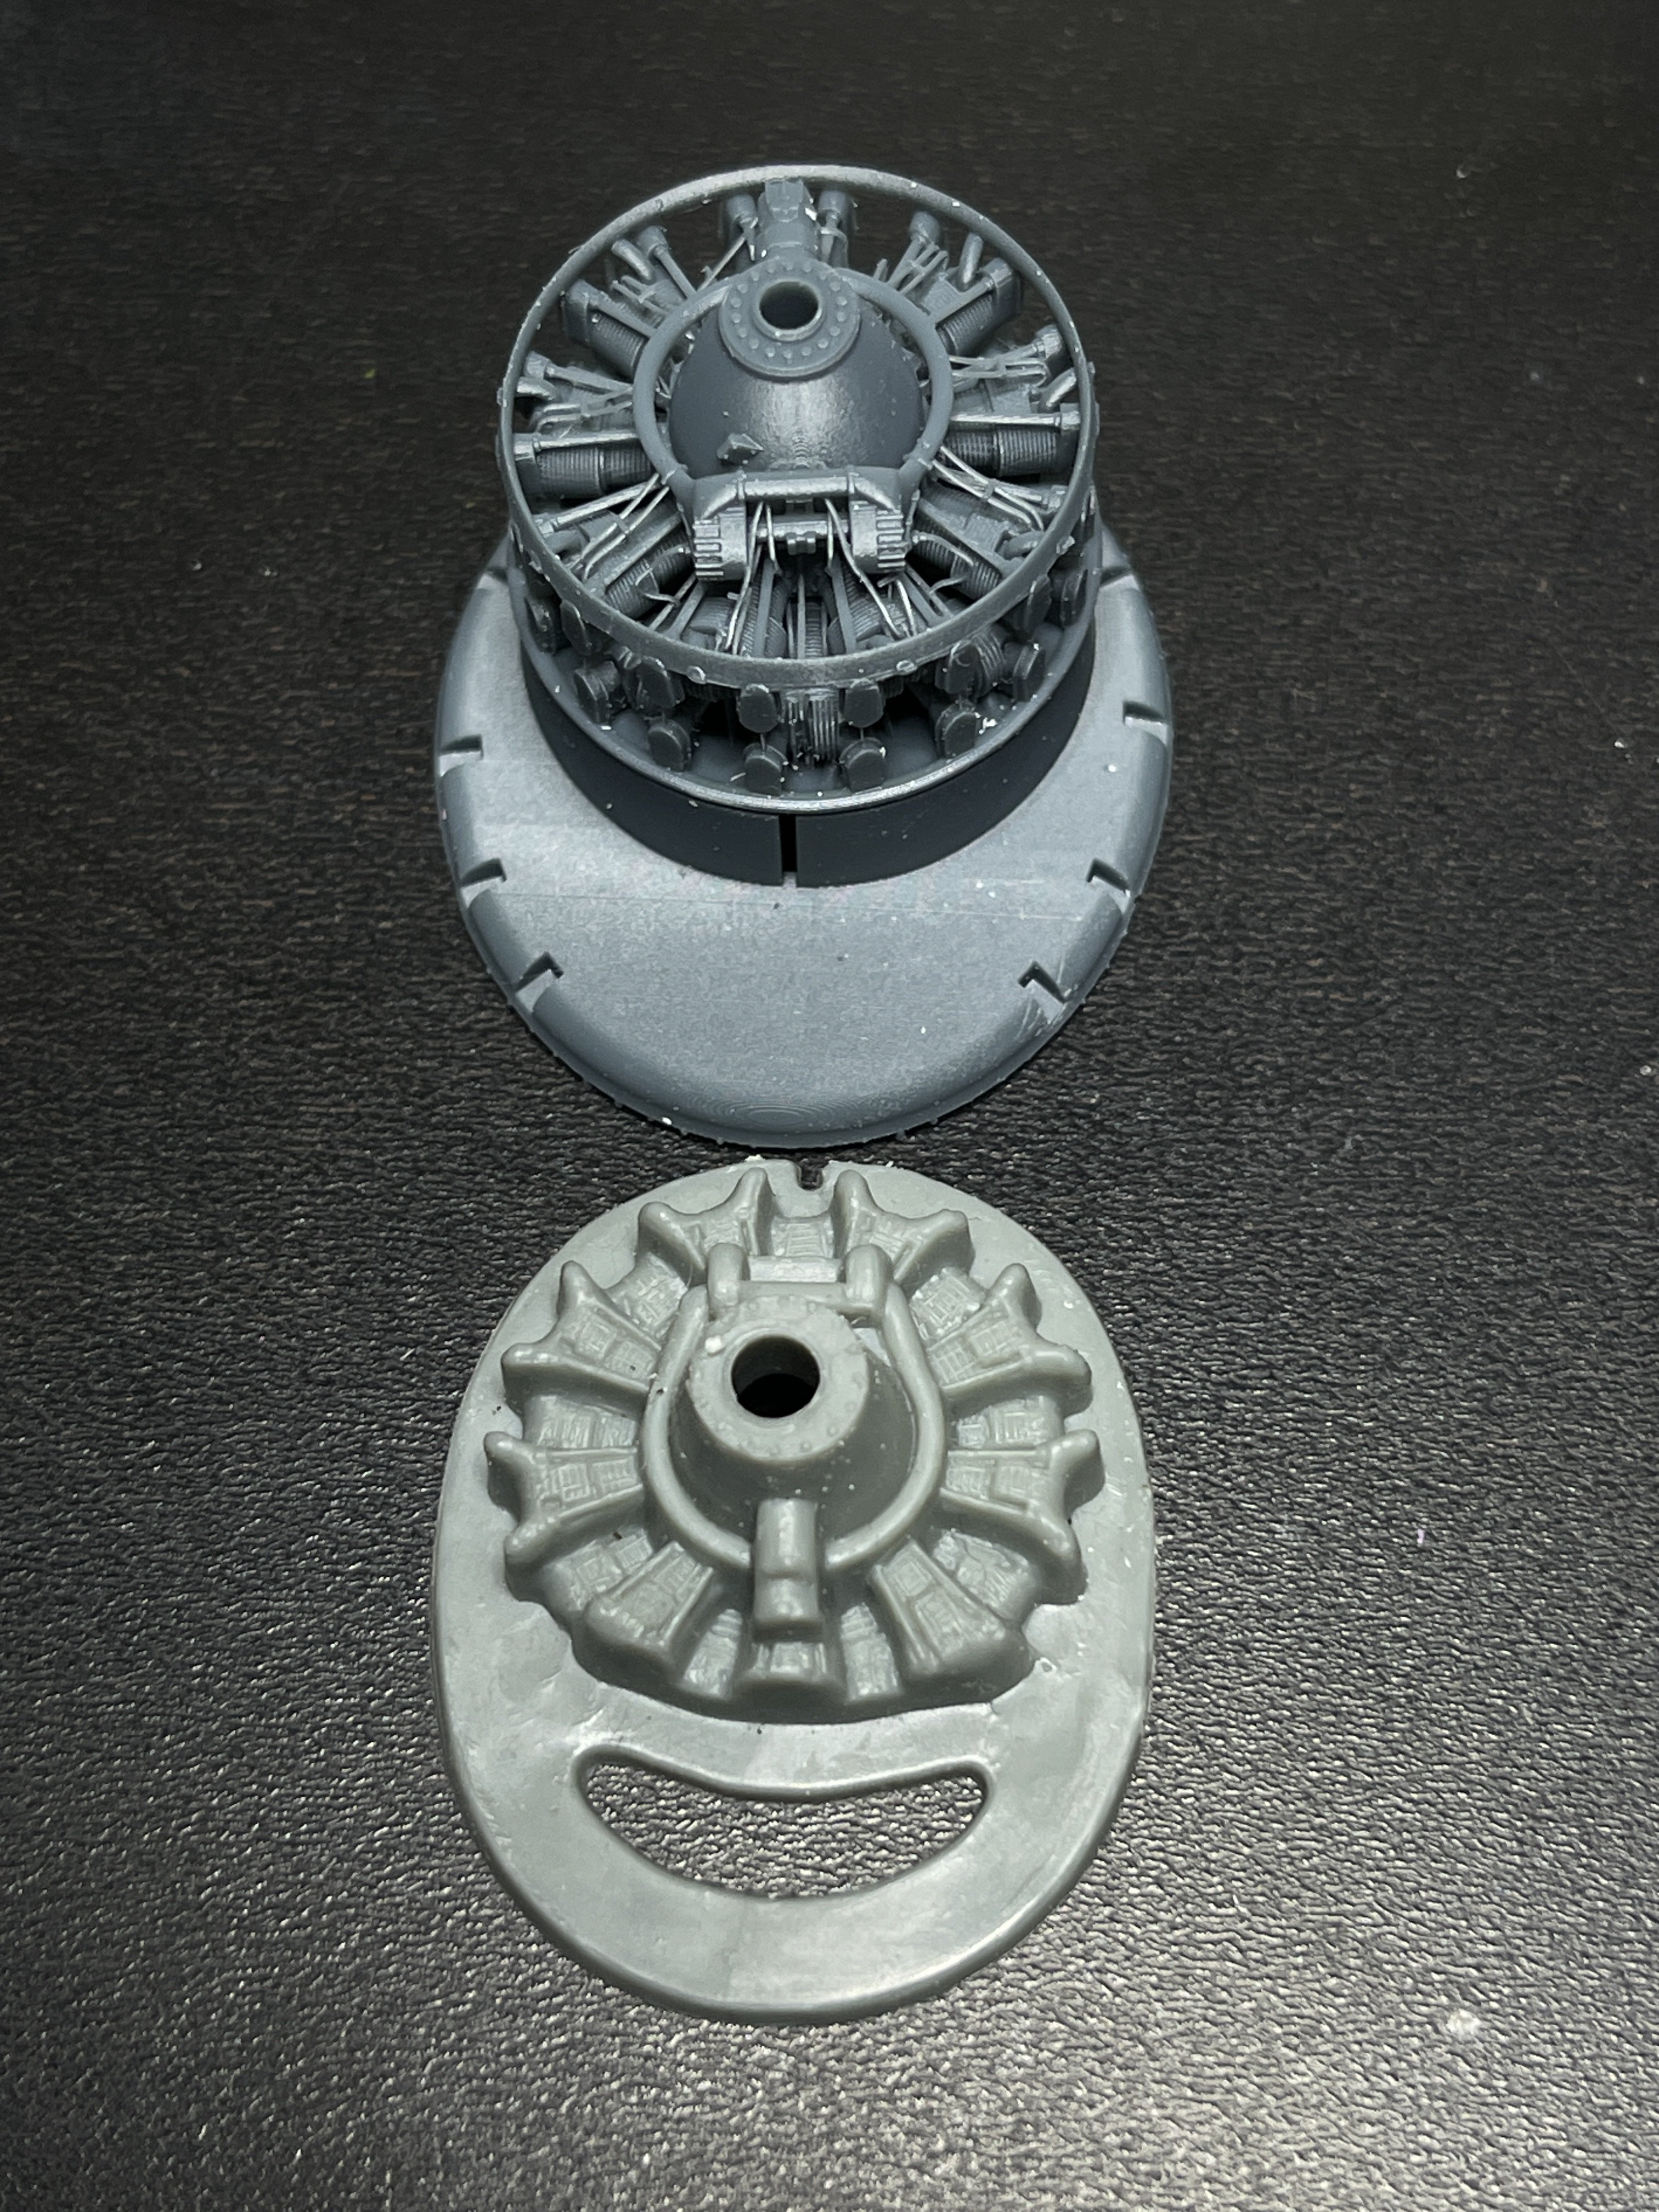
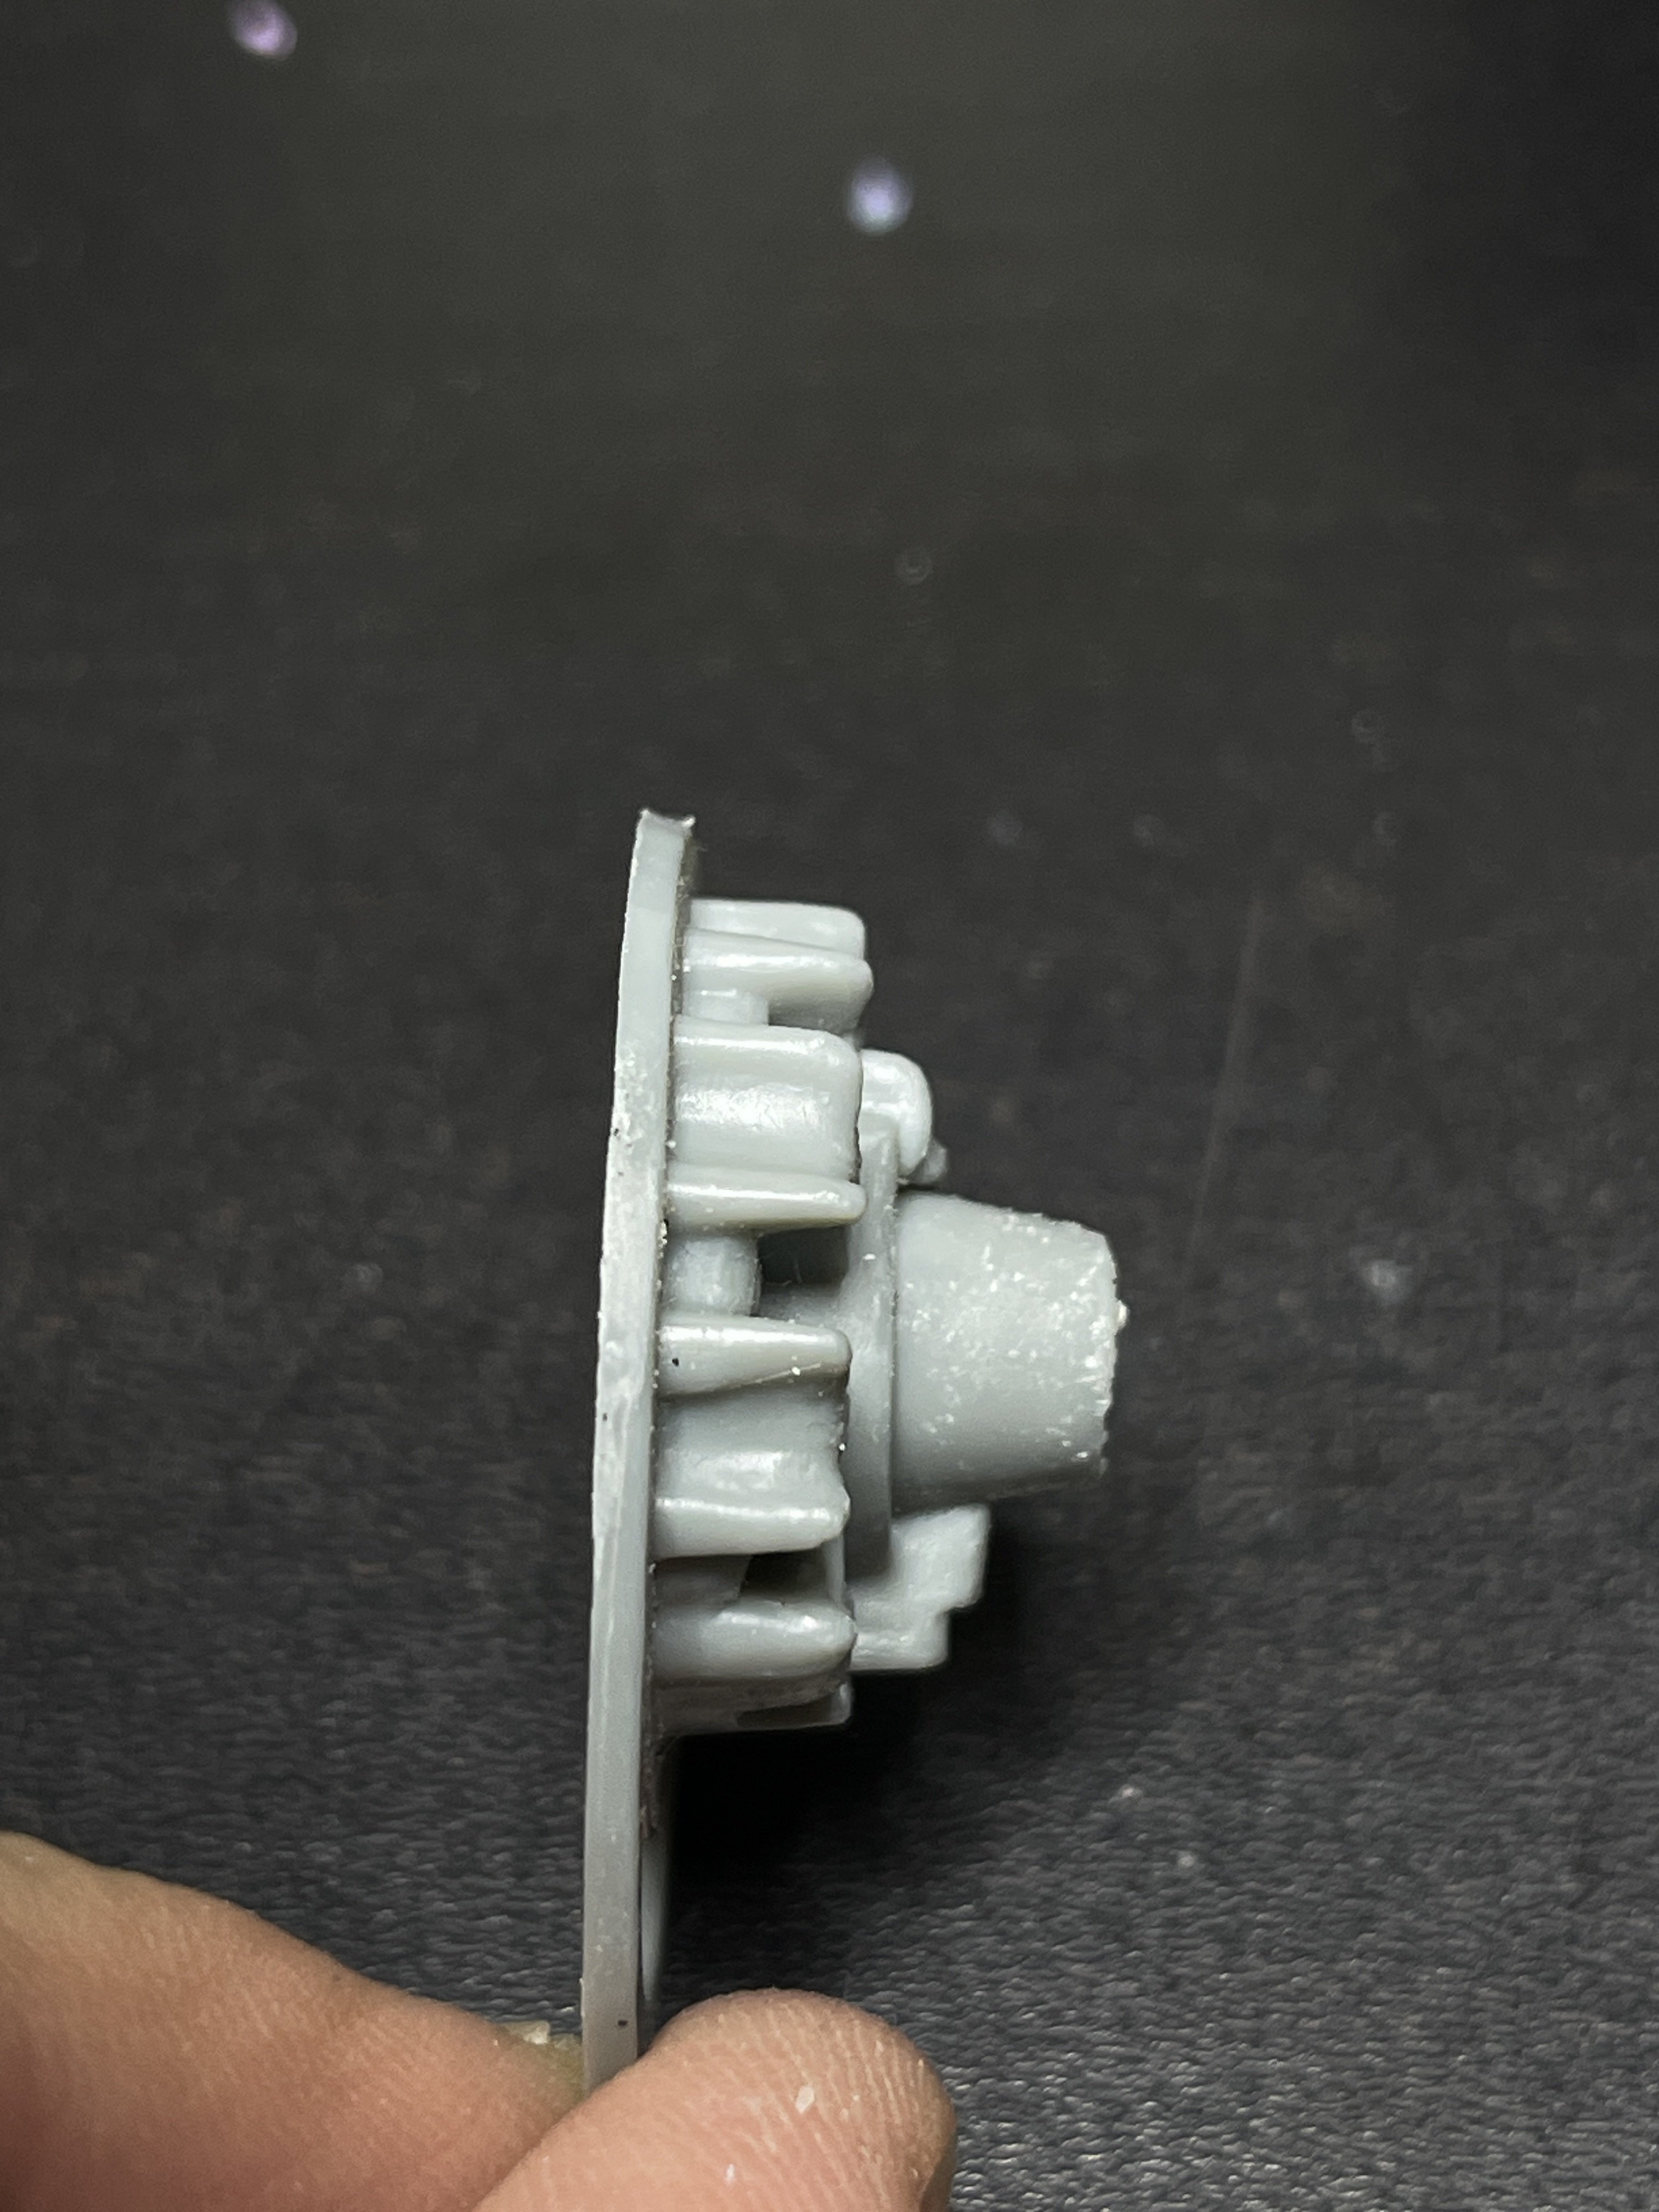
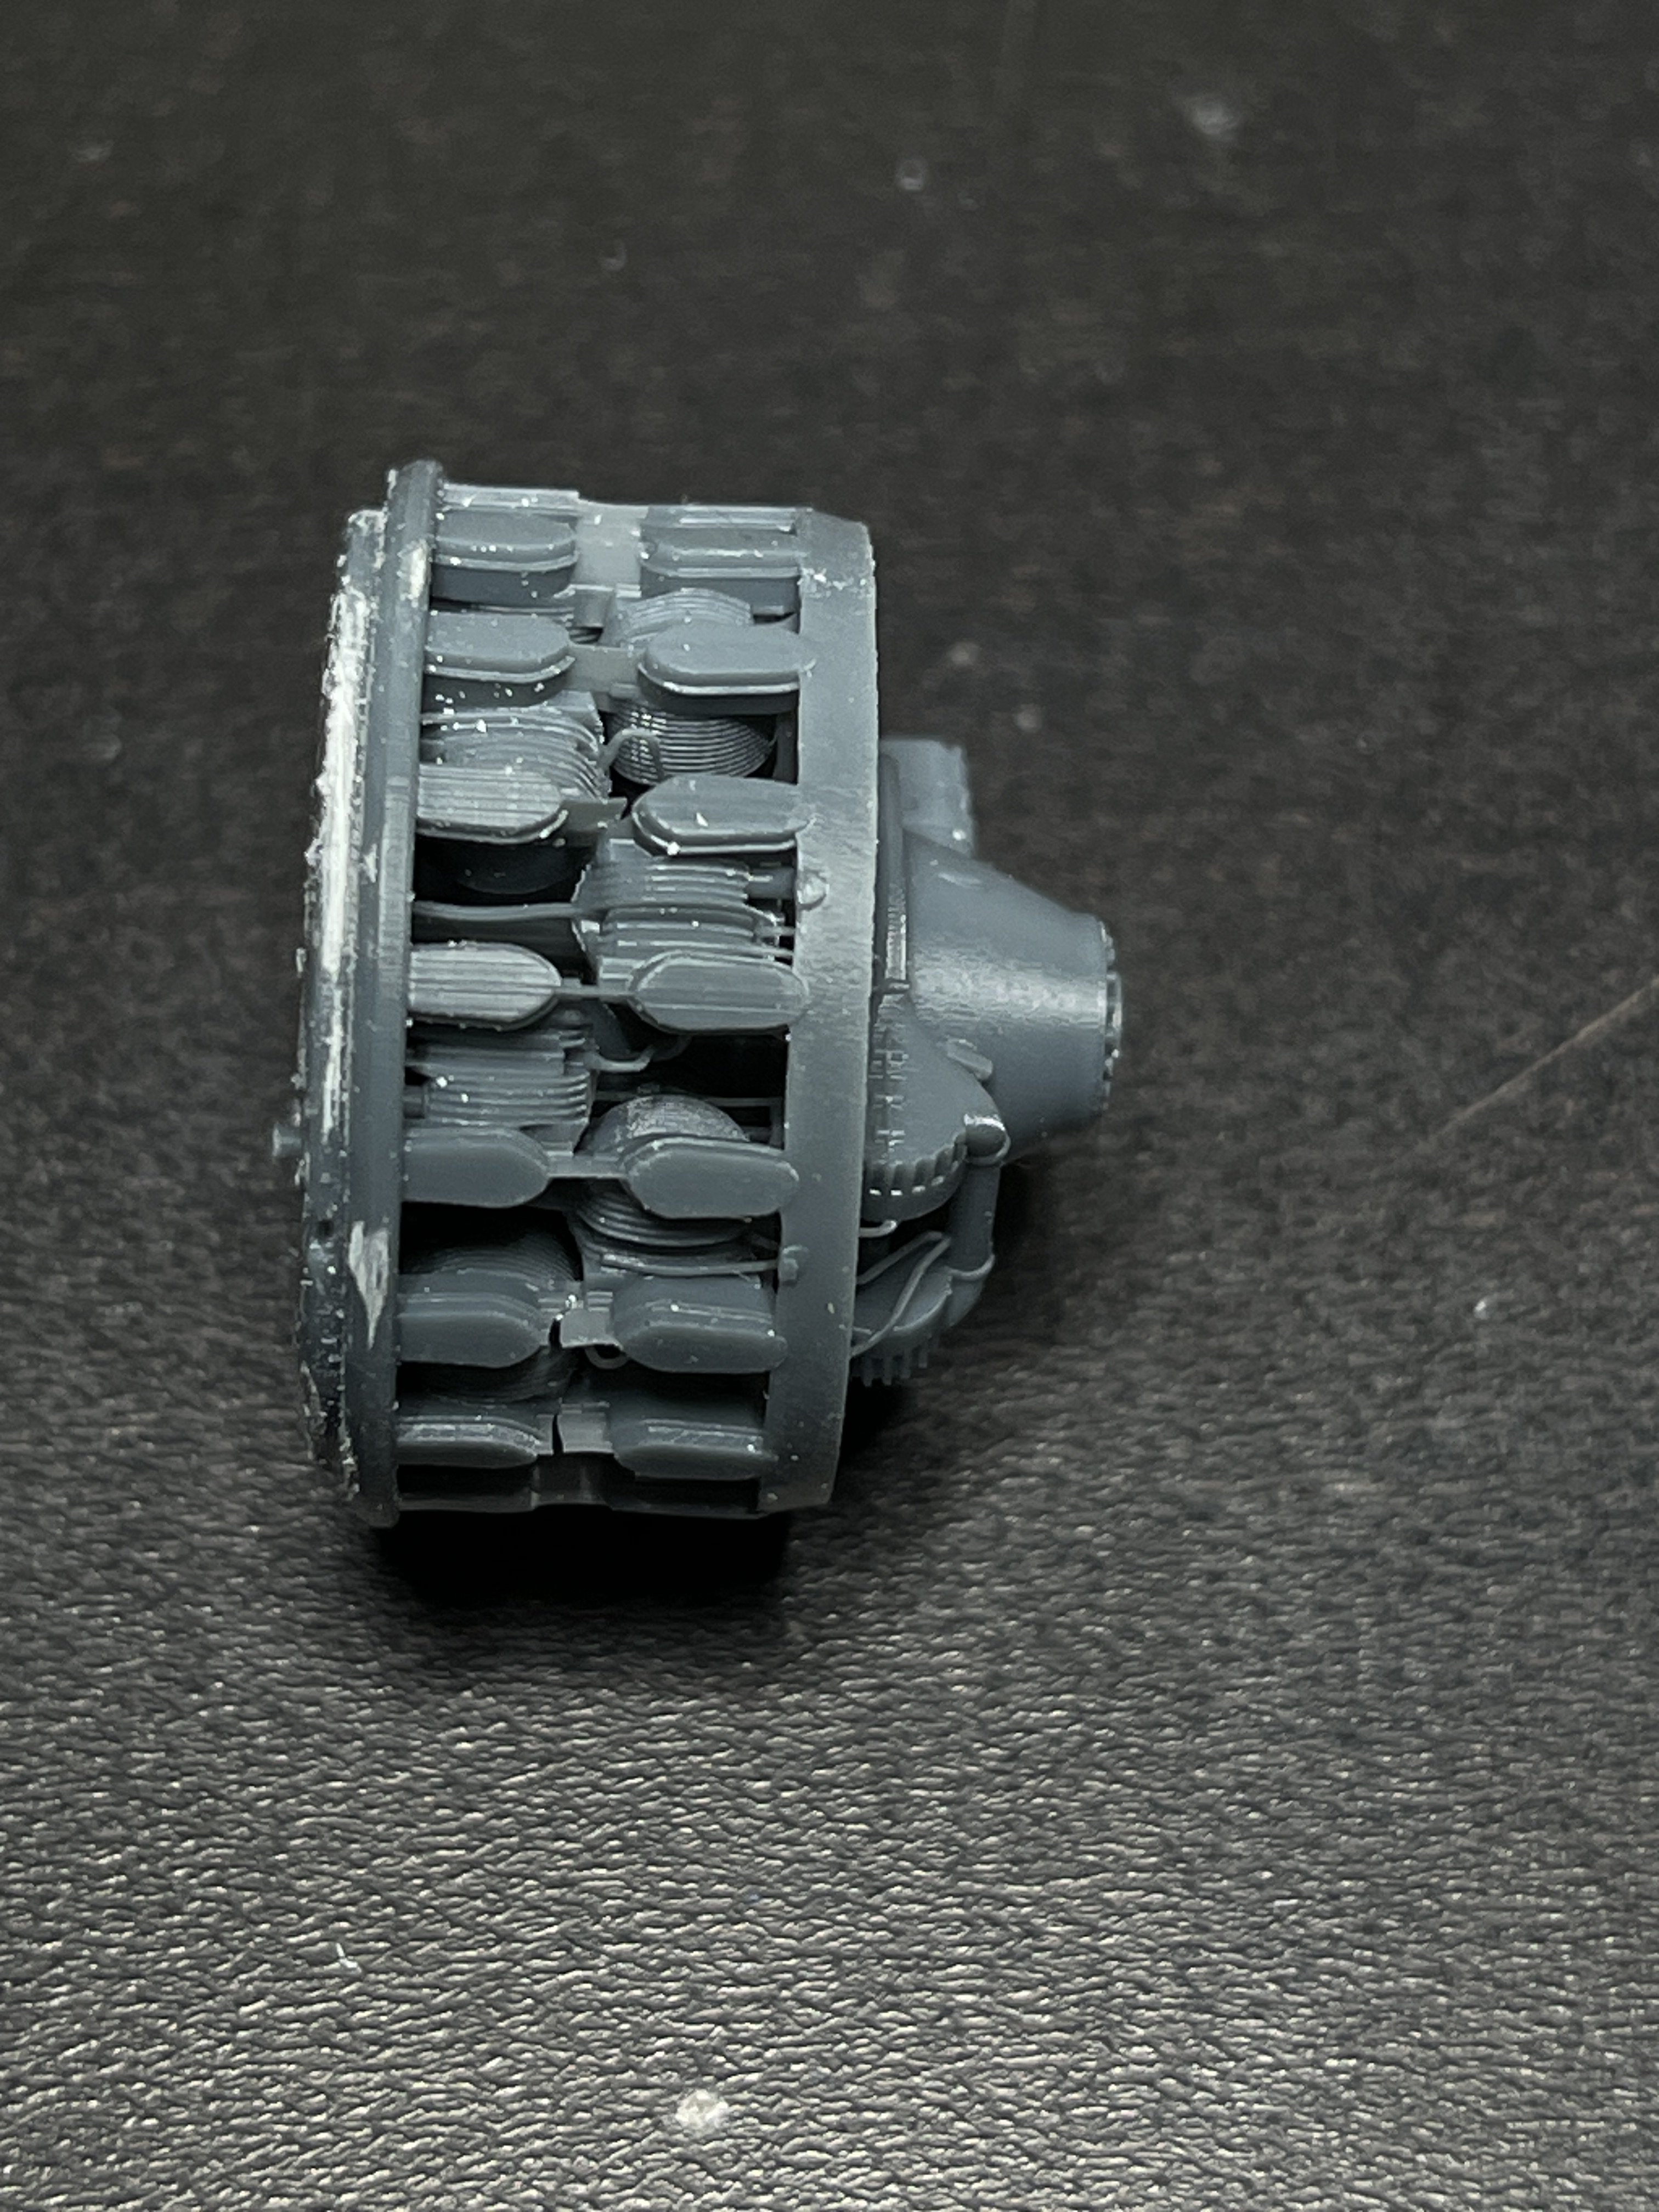
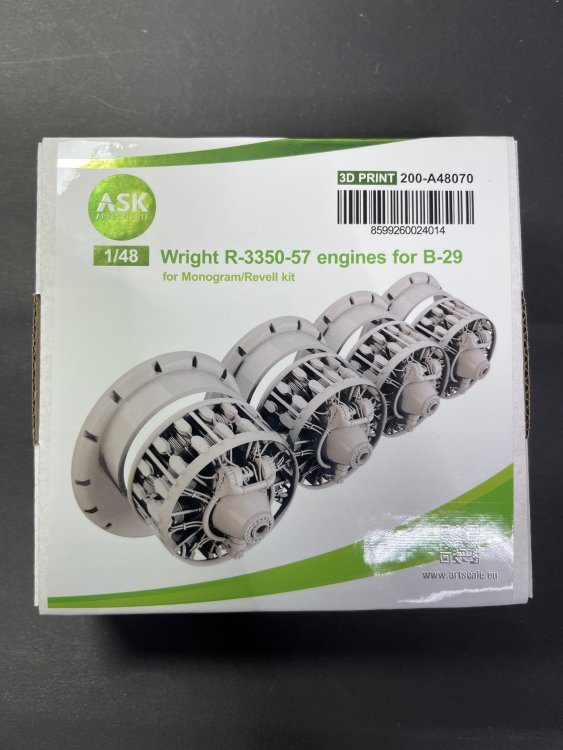
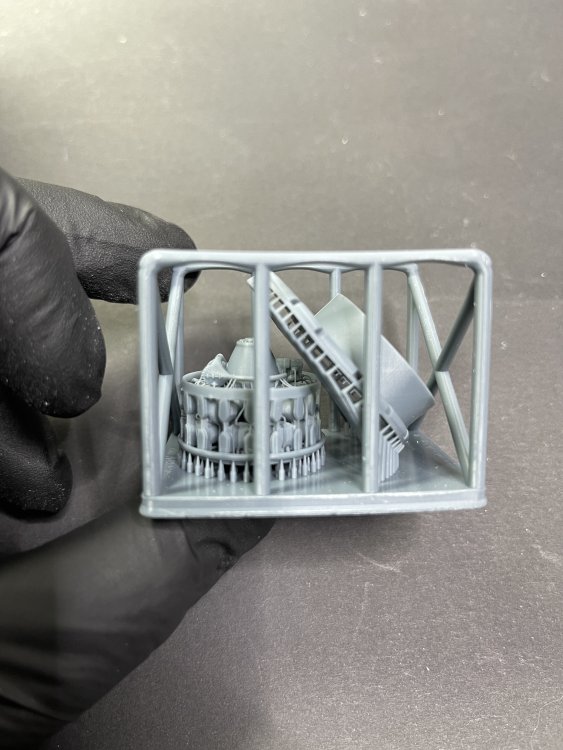
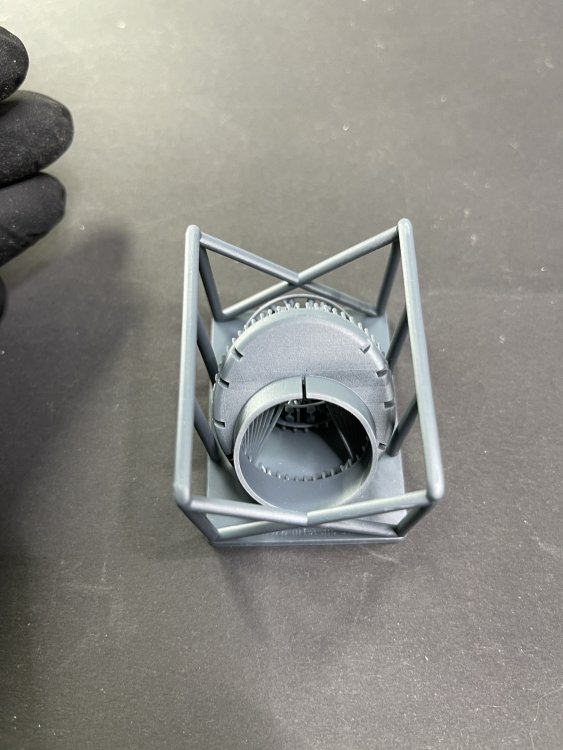
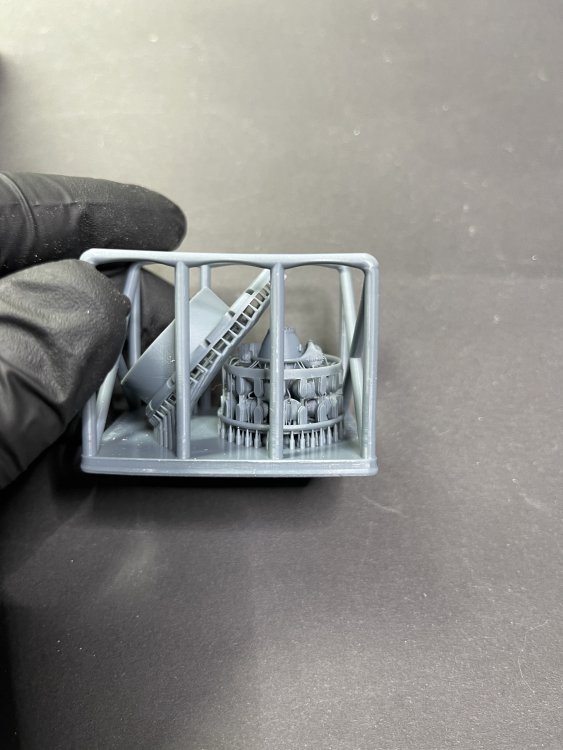
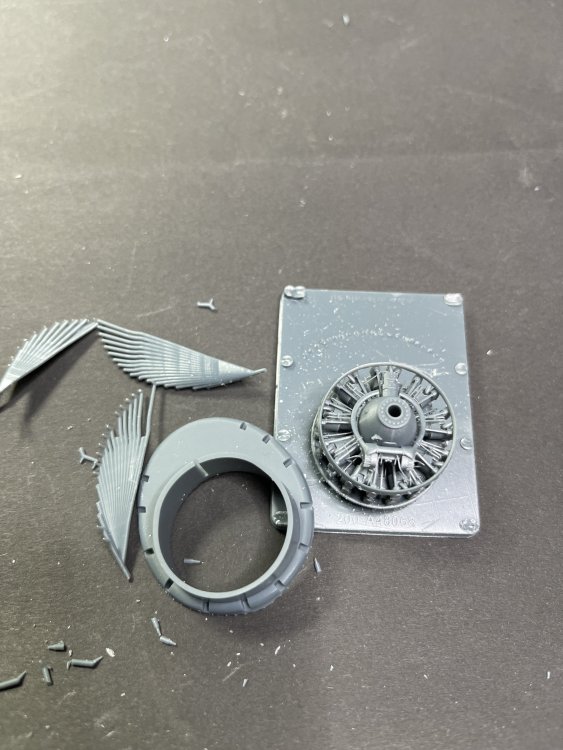
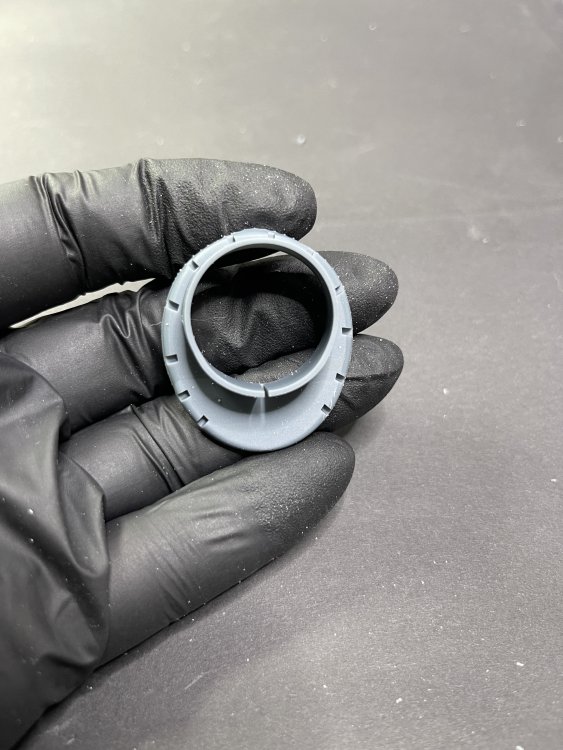
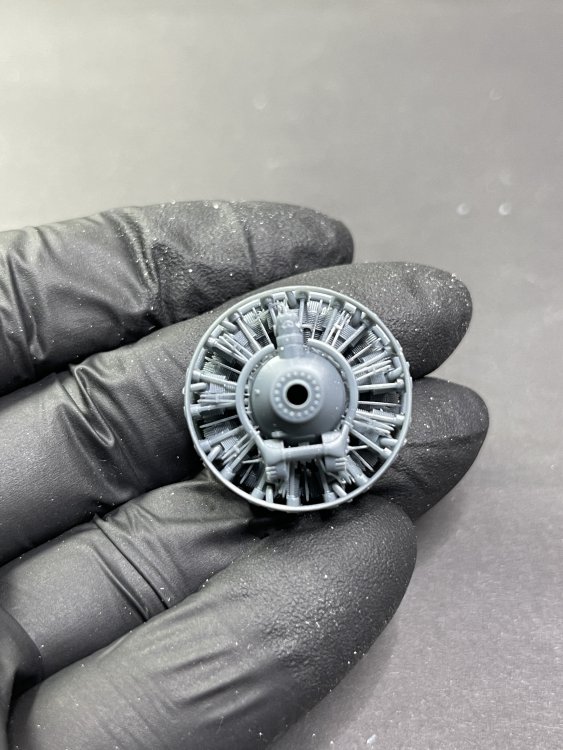
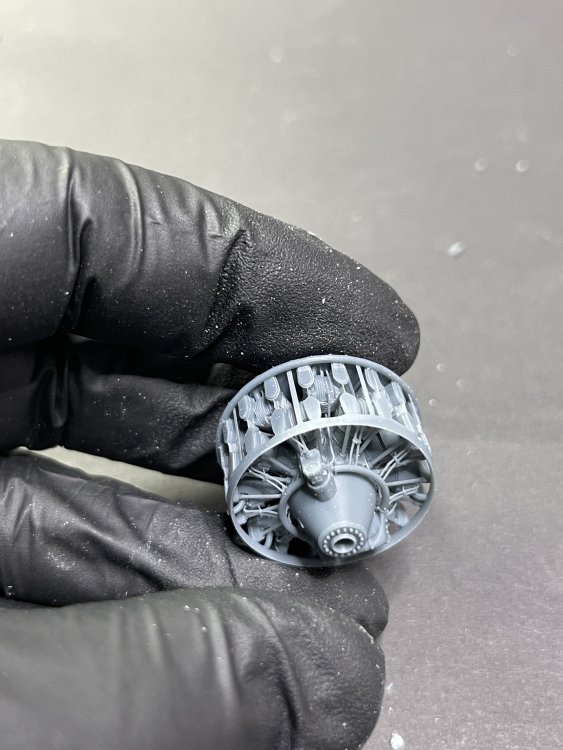
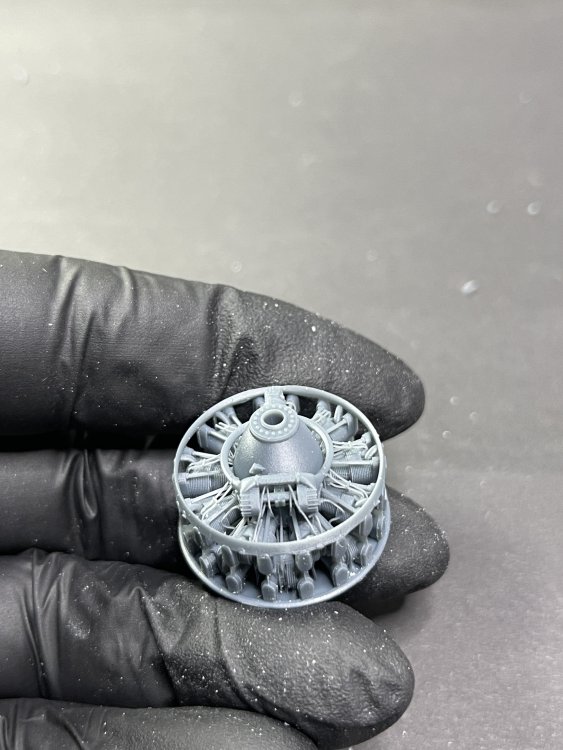
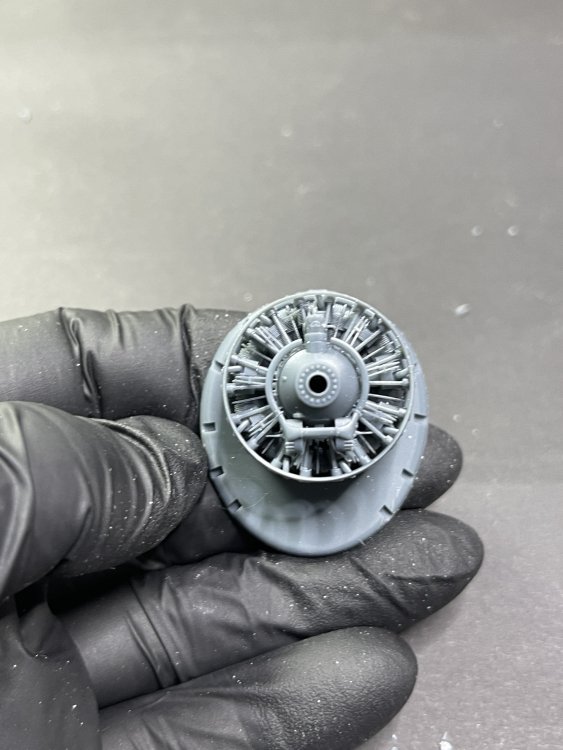
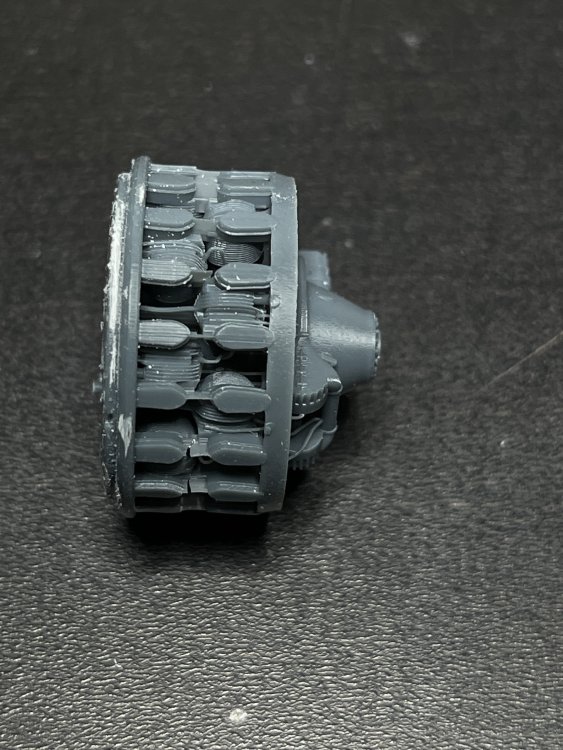
ART SCALE KIT 1:48 B-29 Engines Set Cataloque number 200-A48070 Available at ASK store, here Price tag: 61€ ASK is already a a strong name in the modelling world and their resin 3D are very very good. But now they release a big detail set. And it’s a very welcome one. A full set (four open engines) for the B-29. All are 3D resin Print, very well printed with no printing lines at all, resulting in beautiful surface detail and intricate details. You get the engine itself and the back part so it’s a to notch for the Monogram/Revell offer as you can see both side by side. The only difficult thing that is the paint job of the engine… will not be easy but for sure you will get a much better result than the Revell/Monogram one. CONCLUSION: What a set!! It’s a must have to all modeller that want to tackle the 1:48 B-29. ArtScale also have the one set with one engine if you don’t want all four of them. This set brings you’re the B-29 to an all-new level. Very VERY Highly recommended Fran Our thanks to ASK – Art Scale Kit for the review samples. You can get this set and all mask set at Art Scale Kit webshop


-
1:35 GARDEN WALL PlusModel Price tag: 24,6€ - click here to order Plusmodel are one of most prolific manufacture for dioramas stuff in 1:35 and of course one of the best! Today we are opening a new little set that is suitable of any diorama and small base, the Garden Wall (catalog number 626). As usual, a a sturdy cardboard box with the actual model made as the box art. Carcking the box, inside you'll find a mix of materials: plaster casts for the main wall sections, resin parts for finer details like pillars or caps, and 3D-printed for the gates. The plaster for the wall sections provides a realistic stone or brick texture. The resin in pale beige color is for the upper stones and the top edge of the wall. The 3D parts are very very delicate but very well printed. You need tobe extra carefull in removing form the tree not to damage the gates. The total wall shoulb be around a length of 25 cm when assembled end-to-end. No instructions are given and basically you don’t need one. Also no decals. Conclusion Another fantastic release from Plusmodel and it`s really perfect for a upcoming project that I have. It’s a great addition for their diorama catalogue and its perfect for almost every scenery evolving rural or village scenes. Love it Plusmodel! As usual, Highly recommend My thanks to Plusmodel for making the fantastic set.