

Mikester
-
Posts
2,654 -
Joined
-
Last visited
Content Type
Profiles
Forums
Events
Gallery
Everything posted by Mikester
-
Heinkel He 111Ps of KG 27 (Kagero Red Series Decals)
Mikester replied to Mikester's topic in Tools, Books & Misc.
It's about damn time he gets away from those stringbags and models a proper subject! -
Brilliant work!
-
1:32 Hasegawa Bf109 G-14 Farnborough
Mikester replied to rieser's topic in LSM 1/35 and Larger Work In Progress
Nice! -
Heinkel He 111Ps of KG 27 (Kagero Red Series Decals)
Mikester replied to Mikester's topic in Tools, Books & Misc.
Looking forward to that, Jim. That HPH set is off the hook! -
Heinkel He 111Ps of KG 27 (Kagero Red Series Decals)
Mikester posted a topic in Tools, Books & Misc.
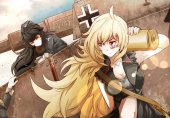
Heinkel He 111 Ps of KG 27 (Red Series Decals) Code: KD2-1/32(32002) Manufacturer: KAGERO Price: €13.53 For large scale aircraft modelers, early war Luftwaffe subjects were a topic that was long overlooked. The old Hasegawa 109E, the Revell Ju 87 and Bf 110 (and a few other dinosaurs from the '60's) being about the only exceptions. Curb your enthusiasm, right? Over the last several years we've seen this problem rectified big time. New Emils, 110s, Stukas, even large scale Ju 88s and He 111s! Enough to keep you busy for a good long time. If you've got Revell's excellent 1/32 He 111P in your stash (if you don't please take a look at our own Nick Mayhew's excellent review of the He 111H-6, the H-6 is a bit different but a good portion of the review is applicable to the P as well http://www.scaleplasticandrail.com/kaboom/index.php/all-things-aviation/132-135-scale/132-kit-reviews/1867-1-32-heinkel-he111-h-6-from-revell) and are looking for something other than a Battle of Britain aircraft this sheet is right up your alley. Kampfgeschwader 27 (KG 27) was formed in May of 1939 and was active in the Polish campaign, the Battle of France and the Battle of Britain. The aircraft featured on the decal sheet all from the 1939-40 era, they include: - He 111 P-2, W.Nr. 1417; coded ‘1G+FN’ of 5./KG 27, Seerappen, East Prussia, September 1939; - He 111 P-2; coded ‘1G+BB’ of Stab I./KG 27, flown by Oblt. Paul Hollinde, Gablingen, late autumn-winter 1939/1940; - He 111 P-2; coded ‘1G+DL’ of 3./KG 27, crew: Uffz. Otto Wehmeier (pilot), Uffz. Arthur Voigt (observer), Uffz. Otto Miklitz (flight engineer), Uffz. Manfred Kisker (radio operator); Münster-Handorf, 10 May 1940. Included in the package is a 12 page full color booklet and two sheets of decals. The booklet contains beautifully rendered three view color profiles (as well as lower wing scrap view) of the three aircraft featured on the decal sheet. The profiles also serve as a decal placment guide. Two photos of "1G+DL" in a somewhat less than airworthy state included as well as short narrative on each of the three featured aircraft. The decals are bit of a (welcome) departure from the "Topcolors" series as they contain a full sets of national markings as well, although the Hackenkreuz are split into two parts as is customary to comply with laws in countries where it's illegal to display. The scans do not do the quality of the artwork on this sheet justice, it is simply superb, the best I have ever seen, period. Kagero and Cartograf have outdone themselves, enough said! Note that these are available in 1/72 as well for Hasegawa's excellent He 111P. So what do we think? Buy these! Do not pass GO, do not collect $200! Very highly recommended! Thanks to Kagero for the review sample. Available directly from Kagero here: http://www.shop.kagero.pl/en/1-32-heinkel-he-111-ps-of-kg-27.html -
Tamiya Spitfire Mk.IXc
Mikester replied to lawman56's topic in LSM 1/32 and Larger Aircraft Ready for Inspection
Great work! -
Outstanding!
-
1/32 Revell Heinkel 219 wip
Mikester replied to BevanBrooks's topic in LSM 1/35 and Larger Work In Progress
Wow, really impressive work! -
Airbrushing Clinic, advice for my first efforts.....
Mikester replied to Matt_'s topic in Hints & Tips
As Matt (Doogs) mentioned it's all about paint/thinner ratio and pressure. A lot of people insist that you have to low pressure but I prefer higher pressure with the paint flow dialed back. I dial my needle down to the point where I'm barely getting any paint flow and slowly build up the mottle, this will help avoid the the puddling. I use Mr. Color laquer with their thinner at about 50/50 ratio, i don't like to go much thinner because it splatters on me if I go much more than that. I like to work very close to the surface as well, to me this is crucial. My Grex airbrush has a special cap for up close work that minimizes blow back by venting the sides of the cap. I also use .2 mm needle which helps. -
Stage 2: Matt M: Pros: Overall fuselage fit is excellent, with the exception of a locator pin just aft of the chin radiator that causes a slight misalignment. Easily removed. The stub tail and optional upper tail parts are a great approach to the early and late-style tail/rudder options. Far easier to clean up than Hasegawa's tail-plug approach. The clear part provided for the aerial lead insulator. Yes, you'll have to drill it out to install the aerial, but this is fairly easy once you've glued the part in place. I can't think of any other 109 kit that gets this small detail right. Cons: The cowl. Everyone else seems to have skated through this, but I ran into seam problems galore, likely due to my solvent problems (see build notes below). The thing that gets me is that we've already been shown how to do this right. Trumpeter's G-6 and Zvezda's 1/48 F-2 and F-4 use the aircraft's actual hinged engine access panels to inform the engineering. Revell's arrangement feels like a step backward. The exhausts. Unless you want to hack massive holes in the nose, the kit's design forces you to install the exhaust stacks before you join the fuselage halves. As one who generally prefers painting the exhausts separately and then installing them after painting the aircraft, this is frustrating. The rudder. Revell would have you sandwich the rudder over two t-style mounts coming off the tail. Nope! I lopped off the verticals of those t-mounts so I can install the rudder after the fact. Aftermarket: Quickboost resin MG 131 machine guns replaced the oversized and poorly detailed kit barrels. Replacement was drop-in. Build Notes: Tenax 7R has been my solvent glue of choice ever since I came back to the hobby 3+ years ago. It's worked like a charm across probably thirty models now. So it was a bit of a surprise when it floundered here. It did a fine job of melting the Revell plastic, but that plastic took forever to cure back. I think this might be responsible for some of my cowl fit issues. I switched to straight MEK for the rest of the build and had no problems. The instructions call out Part #69 for the tailwheel fairing. The opening on this part is too small to fit the oleo scissor, so you'll probably want to use #70 instead. Overall Stage 2 Rating: 7 - Again, the Revell gets a lot of things right, and a few things just seem head-smackingly stupid. Matt L: Pros: Fuselage fit is pretty good, as others have noted part I34 didn't fit too well at the rear; Tail upper was a good fit; Cons: The notorious beule, under sized, though maybe a more accurate shape than Hasegawa. For this build I went with the Hasegawa parts. I felt the locating mounts for the upper part of the tail wheel strut were a little vague, worked fine in the end but could have had a more positive fit. Exhausts as everyone says could have been engineered for external fitting. Quite a lot of seam work to do if wanting to leave canopy open and get a good smooth cockpit sill.. Construction notes: I had less trouble than Matt with the nose panels, but did have a little bit of alignment issue between side panels and top (I think this was my fault for trying a different approach I won't bore you with). Anyway, a little filler and some sanding and it's almost sorted. Hasegawa beule, not a perfect fit, especially at the front, but very do-able, hopefully someone will come out with a solution to this before my next.. The supercharger intake went on OK. I added the thicker rim missing from the kit with a ring of lead wire blended in with superglue. I still need to add the weld seam. You can just make out the hole I've cut in the nose to get the exhausts in later (hopefully some nice aftermarket ones with hollowed out ends - please...) The most tiresome and tricky element of this stage for me has been tidying up the cockpit insert around the cockpit sill. On the real aircraft this 'shelf' is quite a feature and the way Revell engineered the cockpit insert leaves a sizeable seam running right around it. Puttying and sanding around the previously detailed cockpit was not fun! I also lost the rear luggage compartment door when sanding away the seam around the rear bulkhead (now replaced). Aftermarket/scratch: No aftermarket as such. Hasegawa beule, Added lead wire to supercharger intake to form lip, Aluminium sheet to recreate lost luggage cpt cover.. Overall stage 2 rating 8 - Most of this Revell gets right (a couple of errors in instructions have been picked up by Matt above). It does have foibles, but I enjoy the build in itself and think the next will be easier. It also felt good assembling a dimensionally accurate fuselage... Matt M: So I wonder if the inevitable Eduard PE set will include a PE applique for the cockpit "shelf"? Seems like quite possibly the most obviously needed PE enhancement. Also a note about the rear bulkhead (assuming you're talking the slanted part) - I've found the seam/slight protrusion does an excellent job locating the rear glass, and is in turn completely covered up by it. So I think it might have been intentional. Maybe. Matt L: Yep, a part covering the whole sill and the sloping bulkhead would be good. I shall try my own version of that solution on the next... I don't know if Revell intended that lip...? It certainly does help locate the three part canopy's rear, but on the Erla Haube it shows up when there should be a flat surface all the way to the edge: In fact the rear of the canopy slightly overlaps that bulkhead - that's what gives the distinctive worn area along the edges. That's why I put a lot of effort into getting it nice and smooth... Just noticed in this image that the panel has a totally different hinge - little butt hinges at either end, rather than the piano hinge on the Revell kit (not saying Revell one is wrong, this is just a variation). Dave: Pro's Like the wing spar that locates the cockpit into place in the Fuse. Found the cowl pieces went together well and I didn't have any hassles of filling the seam many times on same area on the Hasegawa kits. Love the tail stub to cover the diffenent Tail options Overall fit of the Fuselage is pretty good. Con's Small about of Flash on some of the parts Pins misalign lower fuselage just aft of the chin scoop. Having to fit the exhausts so early Don't the like the MG's provide in the kit, they look out of scale compared to other manufacturers. Replaced with Aber barrels. Cowl bulges just don't look right... No weld seam on the supercharger intake. Stage 2 rating... 7 out of 10 Rick: Pros: Fuselage fit good, no alignment issues. Nice to have choice of filler caps. Love the wheel well construction, really nice detail. Kinda tricky to align, I used inner wing panels as a jig. Wing spars work well especially during wheel well assembly. Cons: Exhaust assembly early and could be a pain to paint around. I removed much of nose area to allow insertion of Quick Boost exhaust deep into final build. Cowling panels are annoying to build. Where is the DB-605? After much test fitting I decided to eliminate braces for top cover to ensure tight alignment and fit. MG's too bulky, replaced with QB 131 MG's. One beule locator hole on each cowling panel not opened. No instruction call out to open holes on cowling panel. I removed beule locator pins to allow better flush fit to cowling panel. Tail wheel part incorrectly called out, #69 does not allow oleo fit use #70 (thank you Matt M). Rear cockpit bulkhead fit for Erla Hood. Using the Erla Hood in open position you must make the bulkhead flush to fuselage. A little surgery required not really a big deal with exception this could have been easier if done during earlier stages of cockpit assembly. Instruction call outs. Continue to be the only truly awful feature on this kit. Aftermarket Used: Quick Boost exhaust along with some minor surgery on cowling side panels for good fit. Quick Boost 131 MG's. Plastic card used to scratch build rear cockpit bulkhead. The really bad "Instruction Call Outs" are driving me crazy. Still enjoying this build and the problem solving opportunities. Stage 2 RATING OF: 7 Instruction format is a 2. With a little work QB exhausts will fit. Carefully remove the kit exhaust mount. Sanding complete, now on to the cowling panel. Carefully scrape/shave (like scraping a seam) the top and bottom openings to make room for the QB Exhaust. Not much is needed, just a little smoothing. Nose cut out and will add exhaust after paint. Cowling side panels added before fuselage fit. After fuselage buttoned up balance of cowling mount braces are removed. Test fit showed these braces helped with challenging fit. Top panel added and beules installed. Rear bulkhead of the Erla Hood is flush with fuselage. I want canopy displayed open and a little surgery is needed. Extra windscreen taped on and pit opening masked to protect during surgery. Carefully cut at base of rear bulkhead and remove bulkhead. Then... using .05mm stryne card I traced shape of bulkhead. After sanding fuselage where new bulkhead would nest to accomodate the thickness of the stryne card I glued the new bulkhead in place. After glue cure I trimmed and sanded flush to fuselage. Battery cover and canopy opening rods will be added Cockpit sidewall and rear bulkhead seams filled with putty. Care not to damage pit is critical. Wings and tail are next then sand and scribe. Mike: Pros: - Overall fit was very good, the spars for the wing root ensure just about a perfect joint - Wheel well design is excellent with great details Cons: - Multi-variant design/engineering causes some additional work - Anemic Beule - I think I'm alone in not liking the tail design I would have much preferred a fuselage plug ala Hasegawa rather than gluing the upper portion of the tail on As you can see I've already departed from OOB by adding some Beule from a Hasegawa kit. The fit was pretty good with some filler being required on the forward edge. I've opened up the front of the fuselage with a Dremel to install after-market exhausts after painting is complete. I've also decided the the kit MG 131's must go so I've used some Quickboost replacements. After reading about Matt's fit issues I elected to glue the cowl panels to the fuselage halves before I joined the fuselage together. This seemed to work pretty well but induced another problem, but that's a story for another update. The cowl panels extending all the way back to the cockpit area create a panel line which was not present on the real thing. The incorrect position of the cockpit fresh air vents needs to be addressed as well. The interior wings panels mated up perfectly with the fuselage. I'm a big fan of the wheels well arrangement. Overall things went as expected, as I noted earlier the tail and the cowl panels require some filling and sanding that I think could have been avoided with a dfferent design, but you win some, you lose some.
-
Joe, see if you can find a copy of USAF T.O. 1-1-4 "EXTERIOR FINISHES, INSIGNIA AND MARKINGS,APPLICABLE TO USAF AIRCRAFT" from the approximate time frame you're looking for, that should have the specific pattern and paint colors. I found a copy on-line but unfortunately it was published prior to the B-1 deployment.
-
His user name at LSP is JRutman, should be able to PM him there.
-
I think Jerry R. discontinued a lot of his upgrade sets for older kits, he works with Grey Matter now and they've re-released some of his better projects but the old stuff is pretty much gone. You can try emailing him though, he may have some odds and ends left. No one's produced anything new for this in a long time.
-
I'm going to another Trumpy 109 too, I finally found some decals for an Italian G-6 that I've wanted to do for a while. The fit on the Trumpeter kit is outstanding, as good or better than Hasegawa. It does need some tweaks here and there but overall it's a pretty good kit.
-
Steve, The more time I spend with the Revell kit the more I like Hasegawa. The Revell kit has a lot of strong points but I think Hasegawa really is an easier build, which goes a long way in my book. Perhaps I need some more Revell kits under my belt (I've got a lot of experience with Hasegawa) to sort out it's idiosynchrosies but I'm spending more time sanding and filling than I really like with the Revell kit.
-
Rog, It should fit the "E" as well, although in both cases you'll have to install a little shim on the upper portion of the tail to get the rudder to fit correctly.
-
Nice one, Nick!
-
Amazing!
-
I'm not throwing away my Hasegawa kits by any means! Being a Yank living in Japan (with a military address) I get the best of both worlds, Japanese retail prices and duty free mail order from the USA. I pay about $35 US for a Hasegawa 109 here, or I can mail order the Revell for $25 from the US. I'm waiting for the dust to settle on the price of the add-ons for the Revell to see what the finall tally will be after the Beule and a few other upgrades that it needs are out. I suspect after all is said and done both kits will wind up costing me about the same.
-
I'm holding out for the 1/6 scale version.
-
You can still find the 21st CT Macchi C.202 and C.205 occasionally on ebay at decent prices.
-
Simply outstanding work, Paul! The overall RLM 02 really looks good on the aircraft, love it!
-
Once the initial rush dies down you'll be able to pick these up for under $20 on sale. Revell really is a great value.
-
Get two!