Wingco57
-
Posts
3,925 -
Joined
-
Last visited
Content Type
Profiles
Forums
Events
Gallery
Everything posted by Wingco57
-

RR Spey powered RAF Phantom conversion
Wingco57 replied to Wingco57's topic in LSM 1/35 and Larger Work In Progress
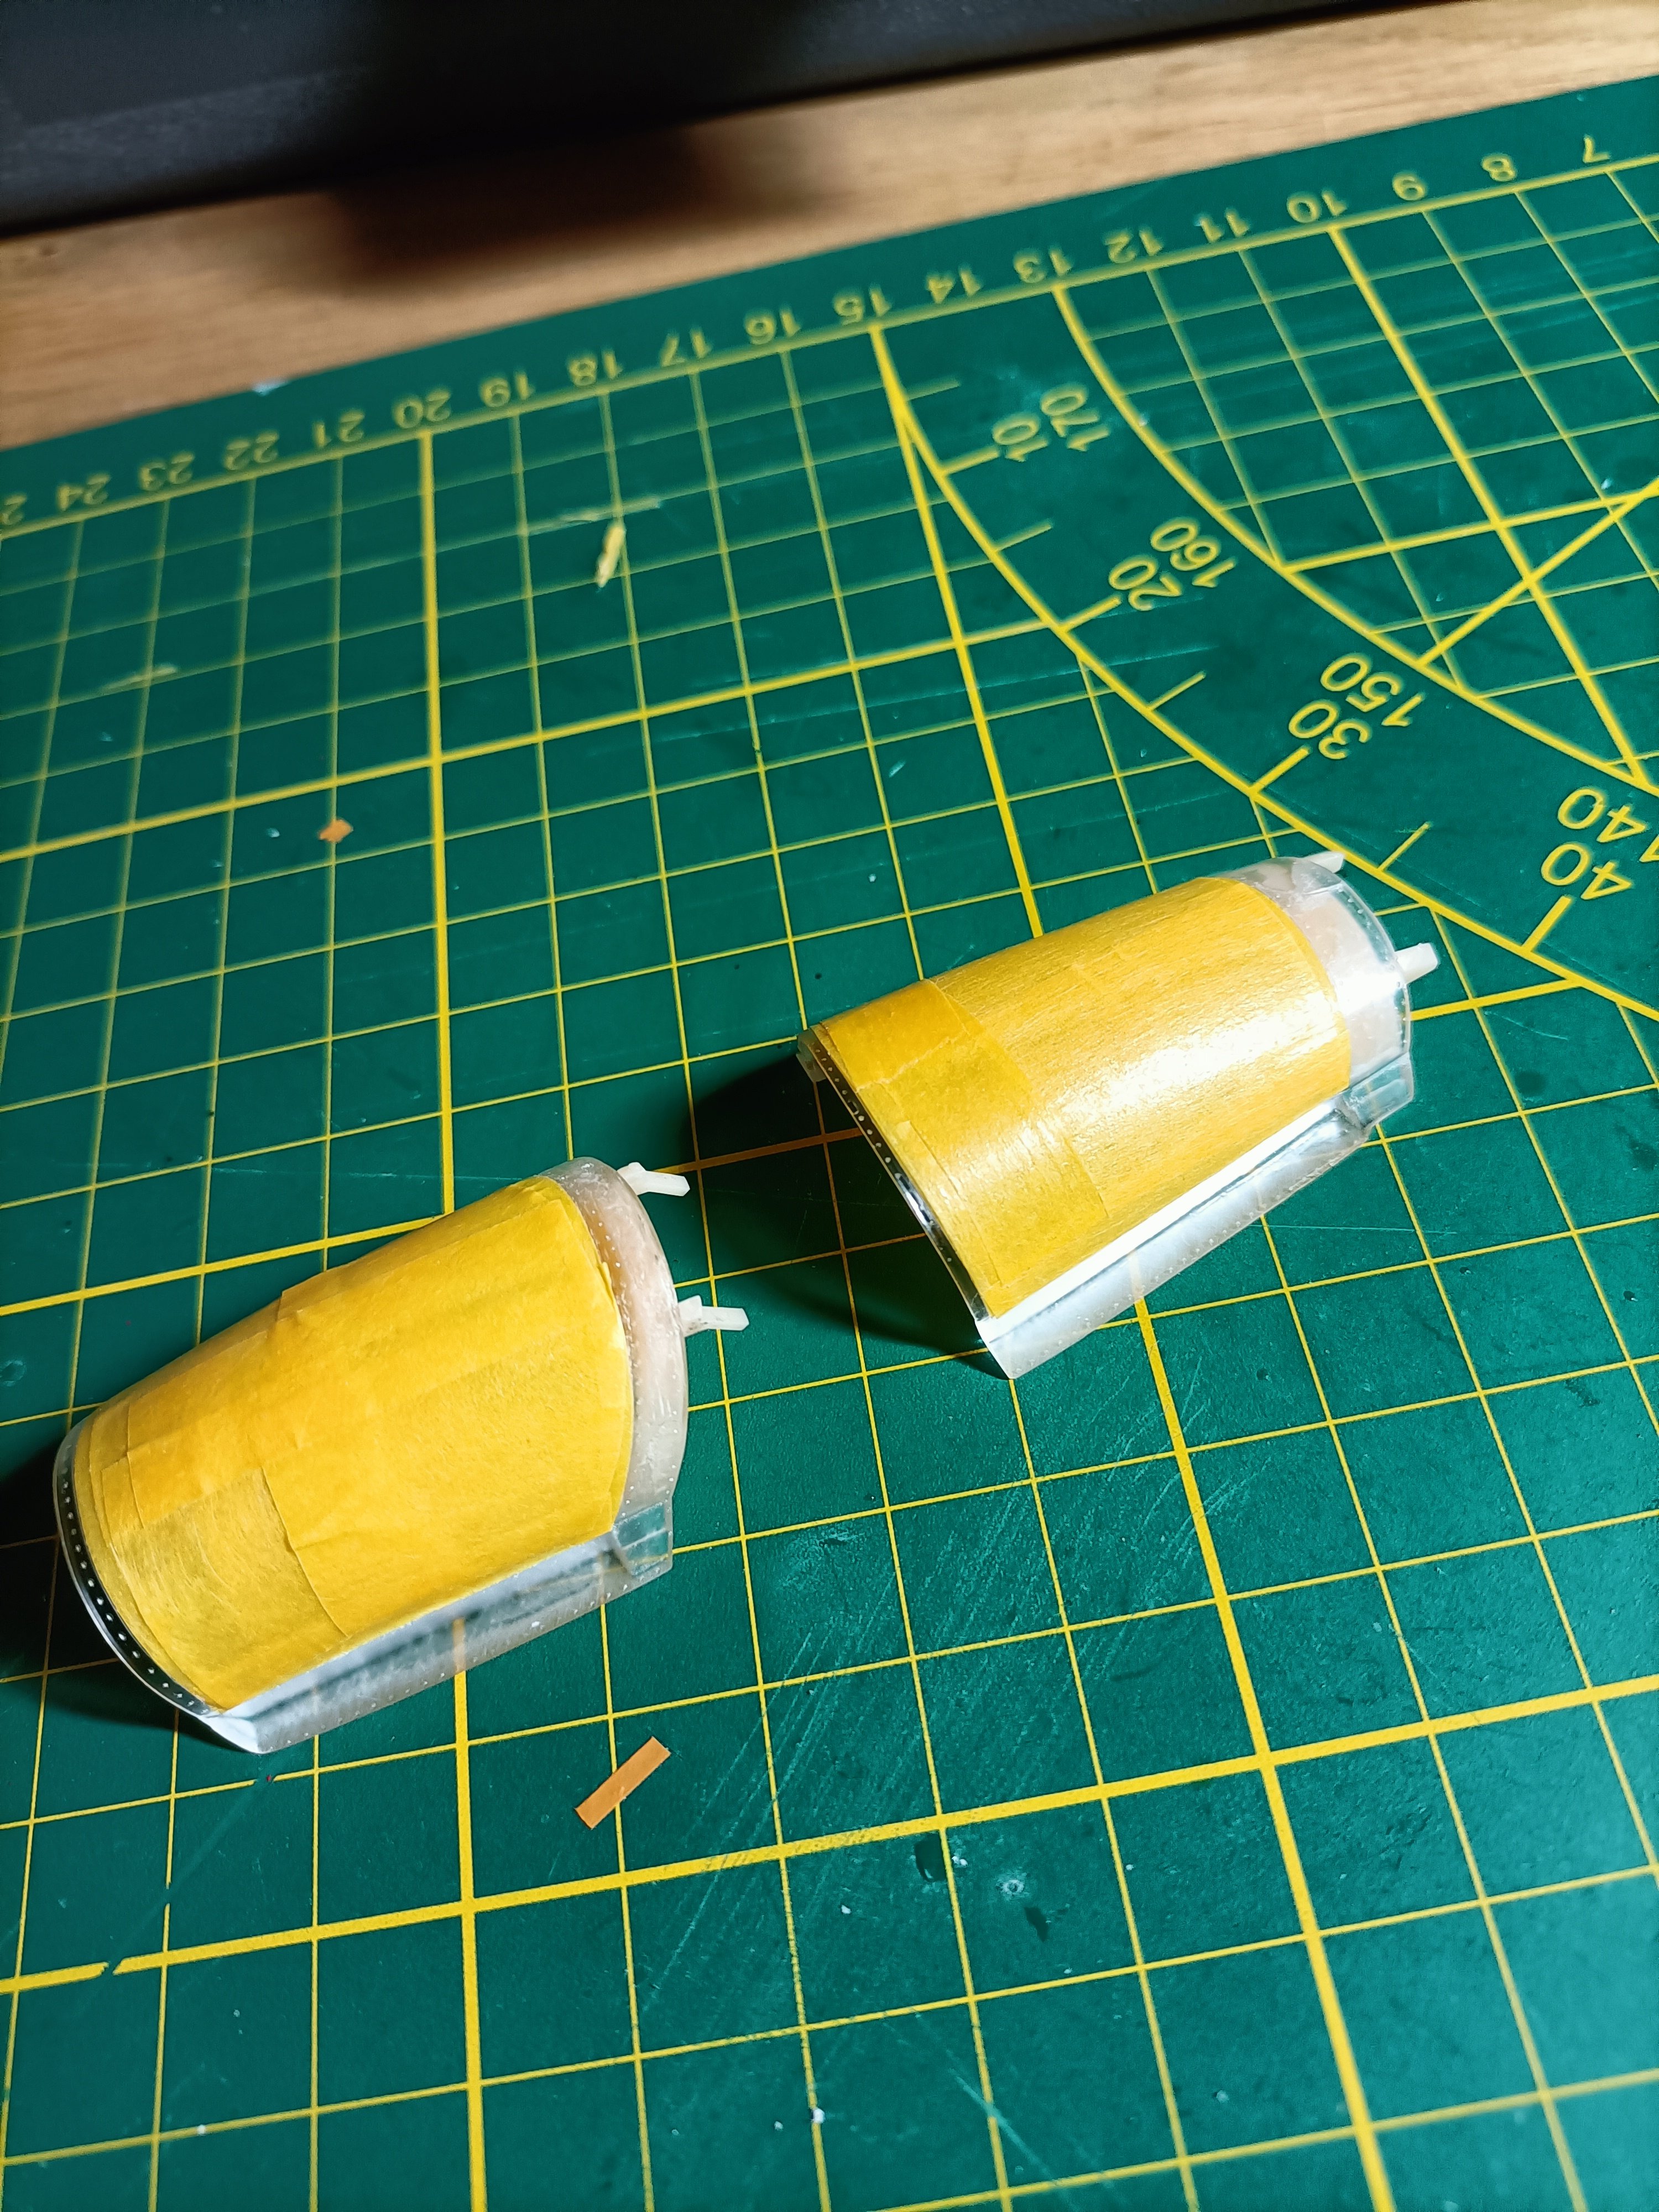
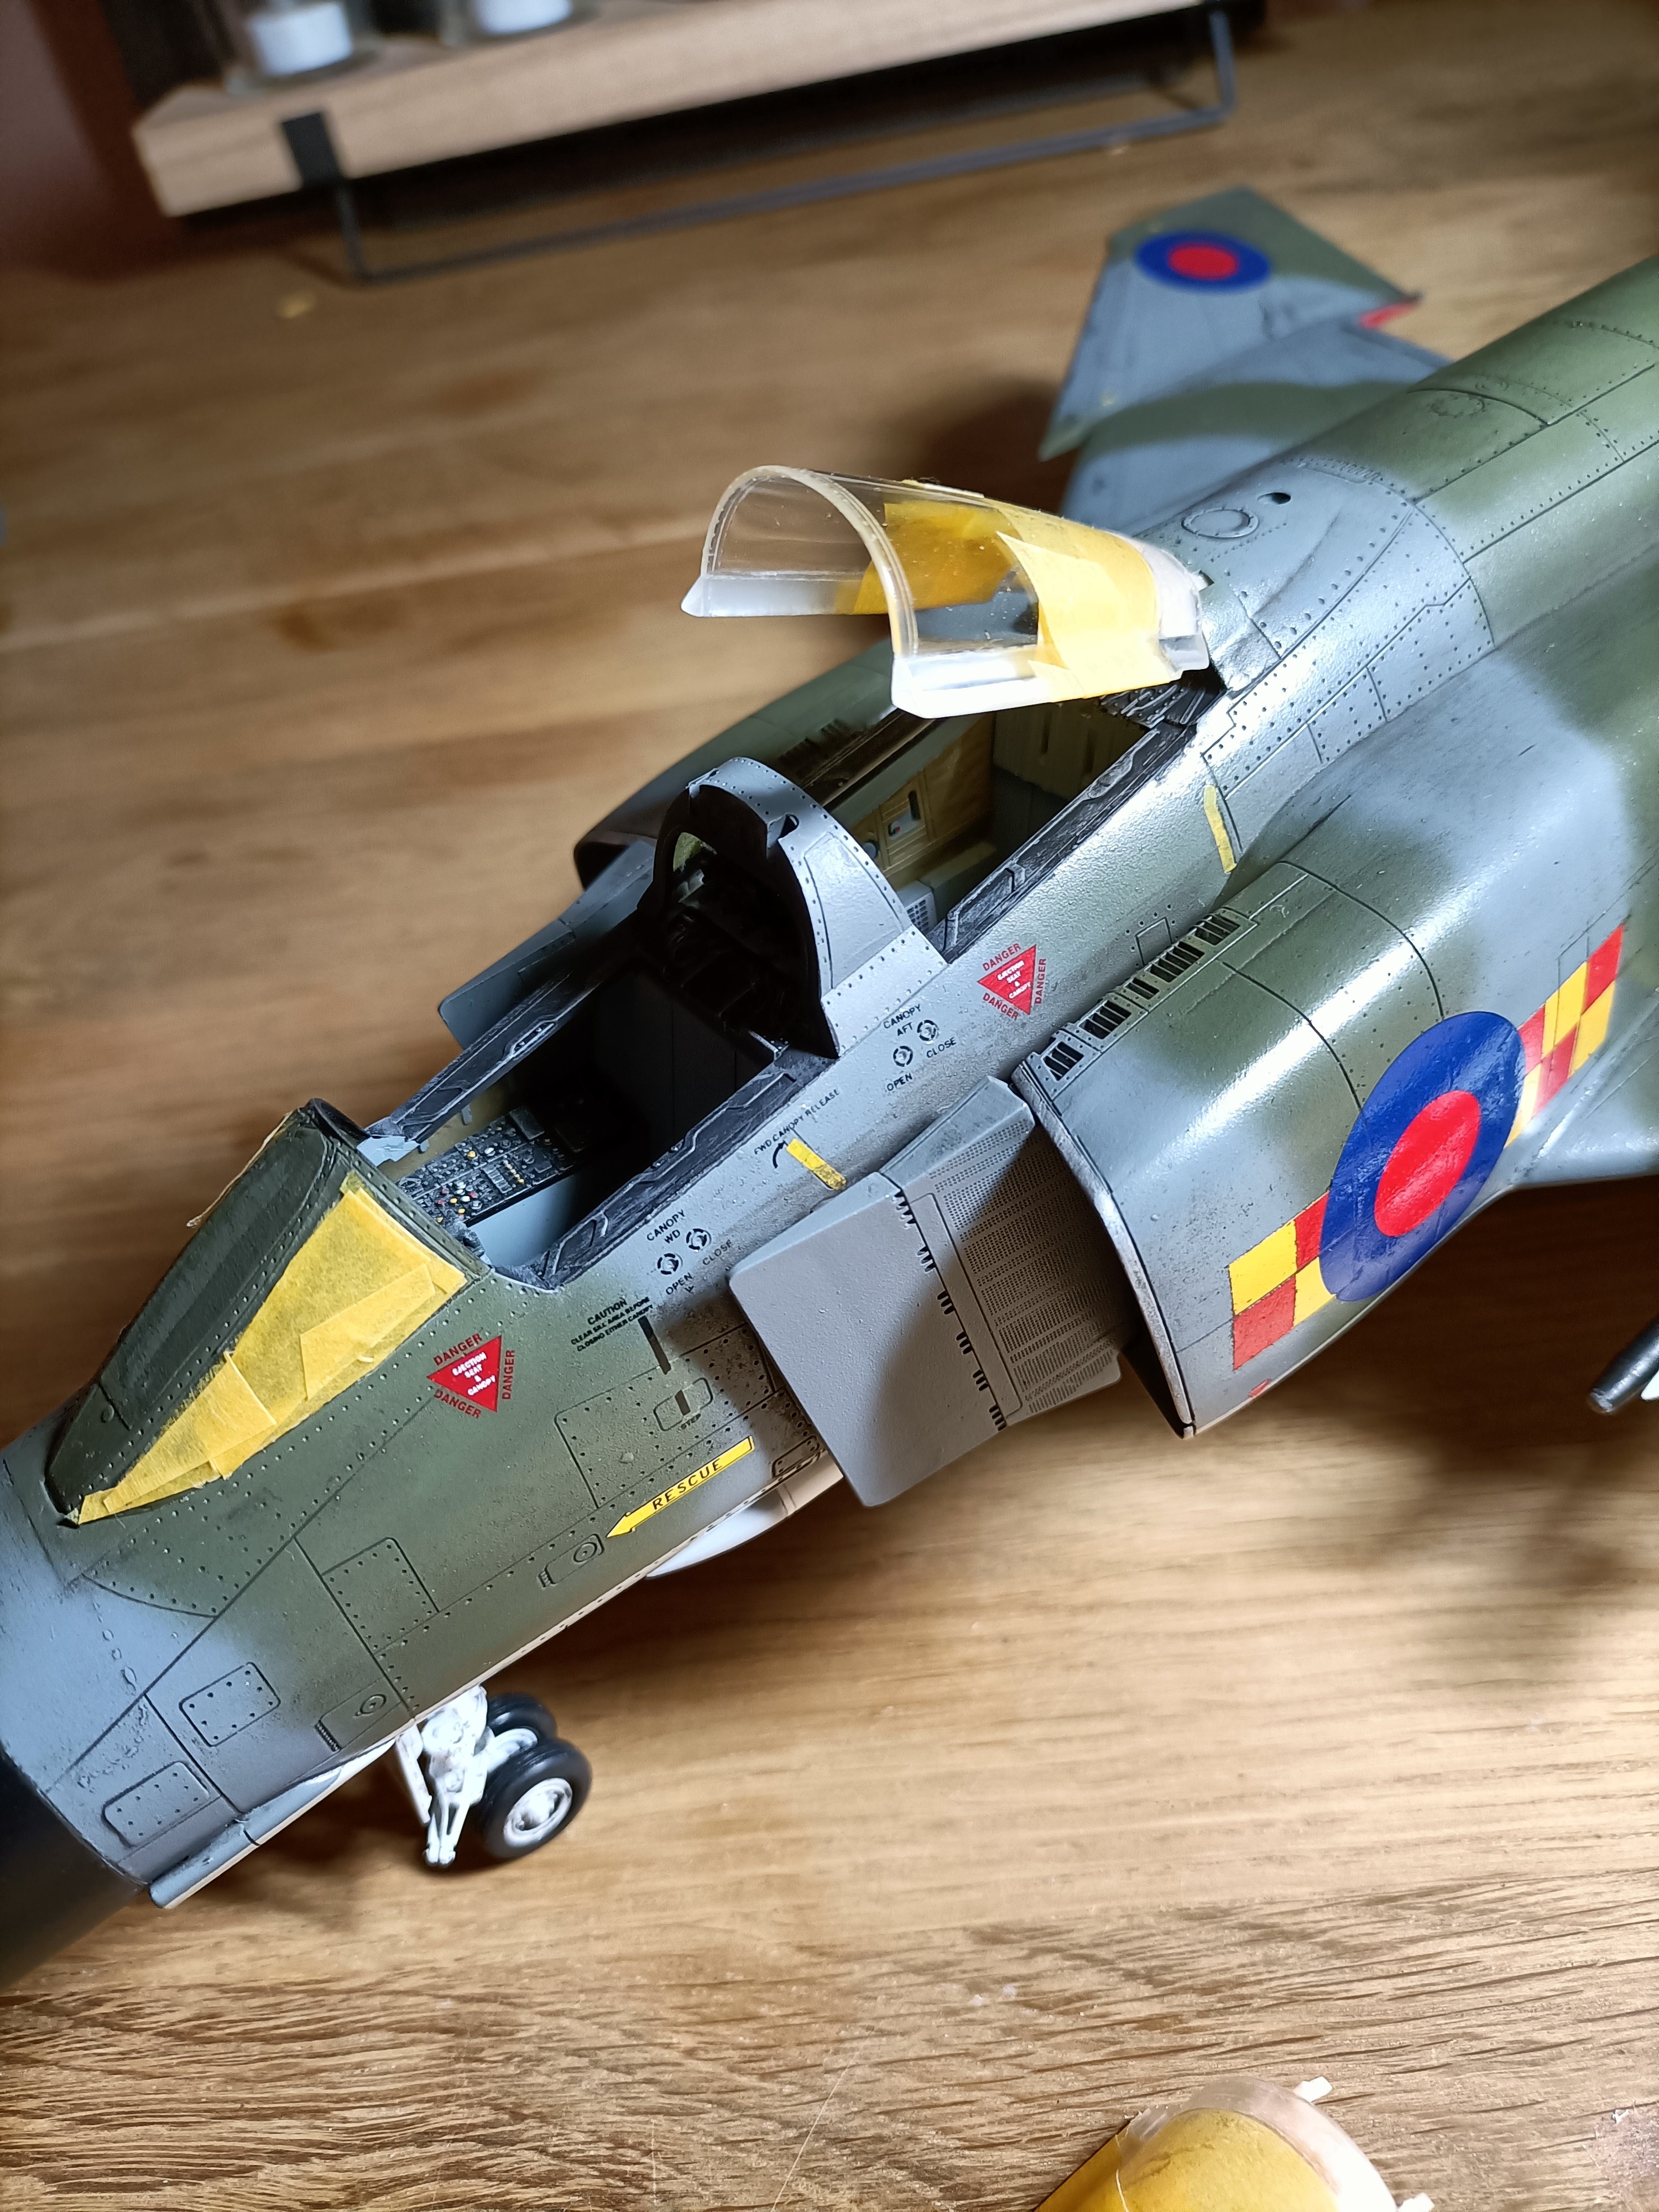
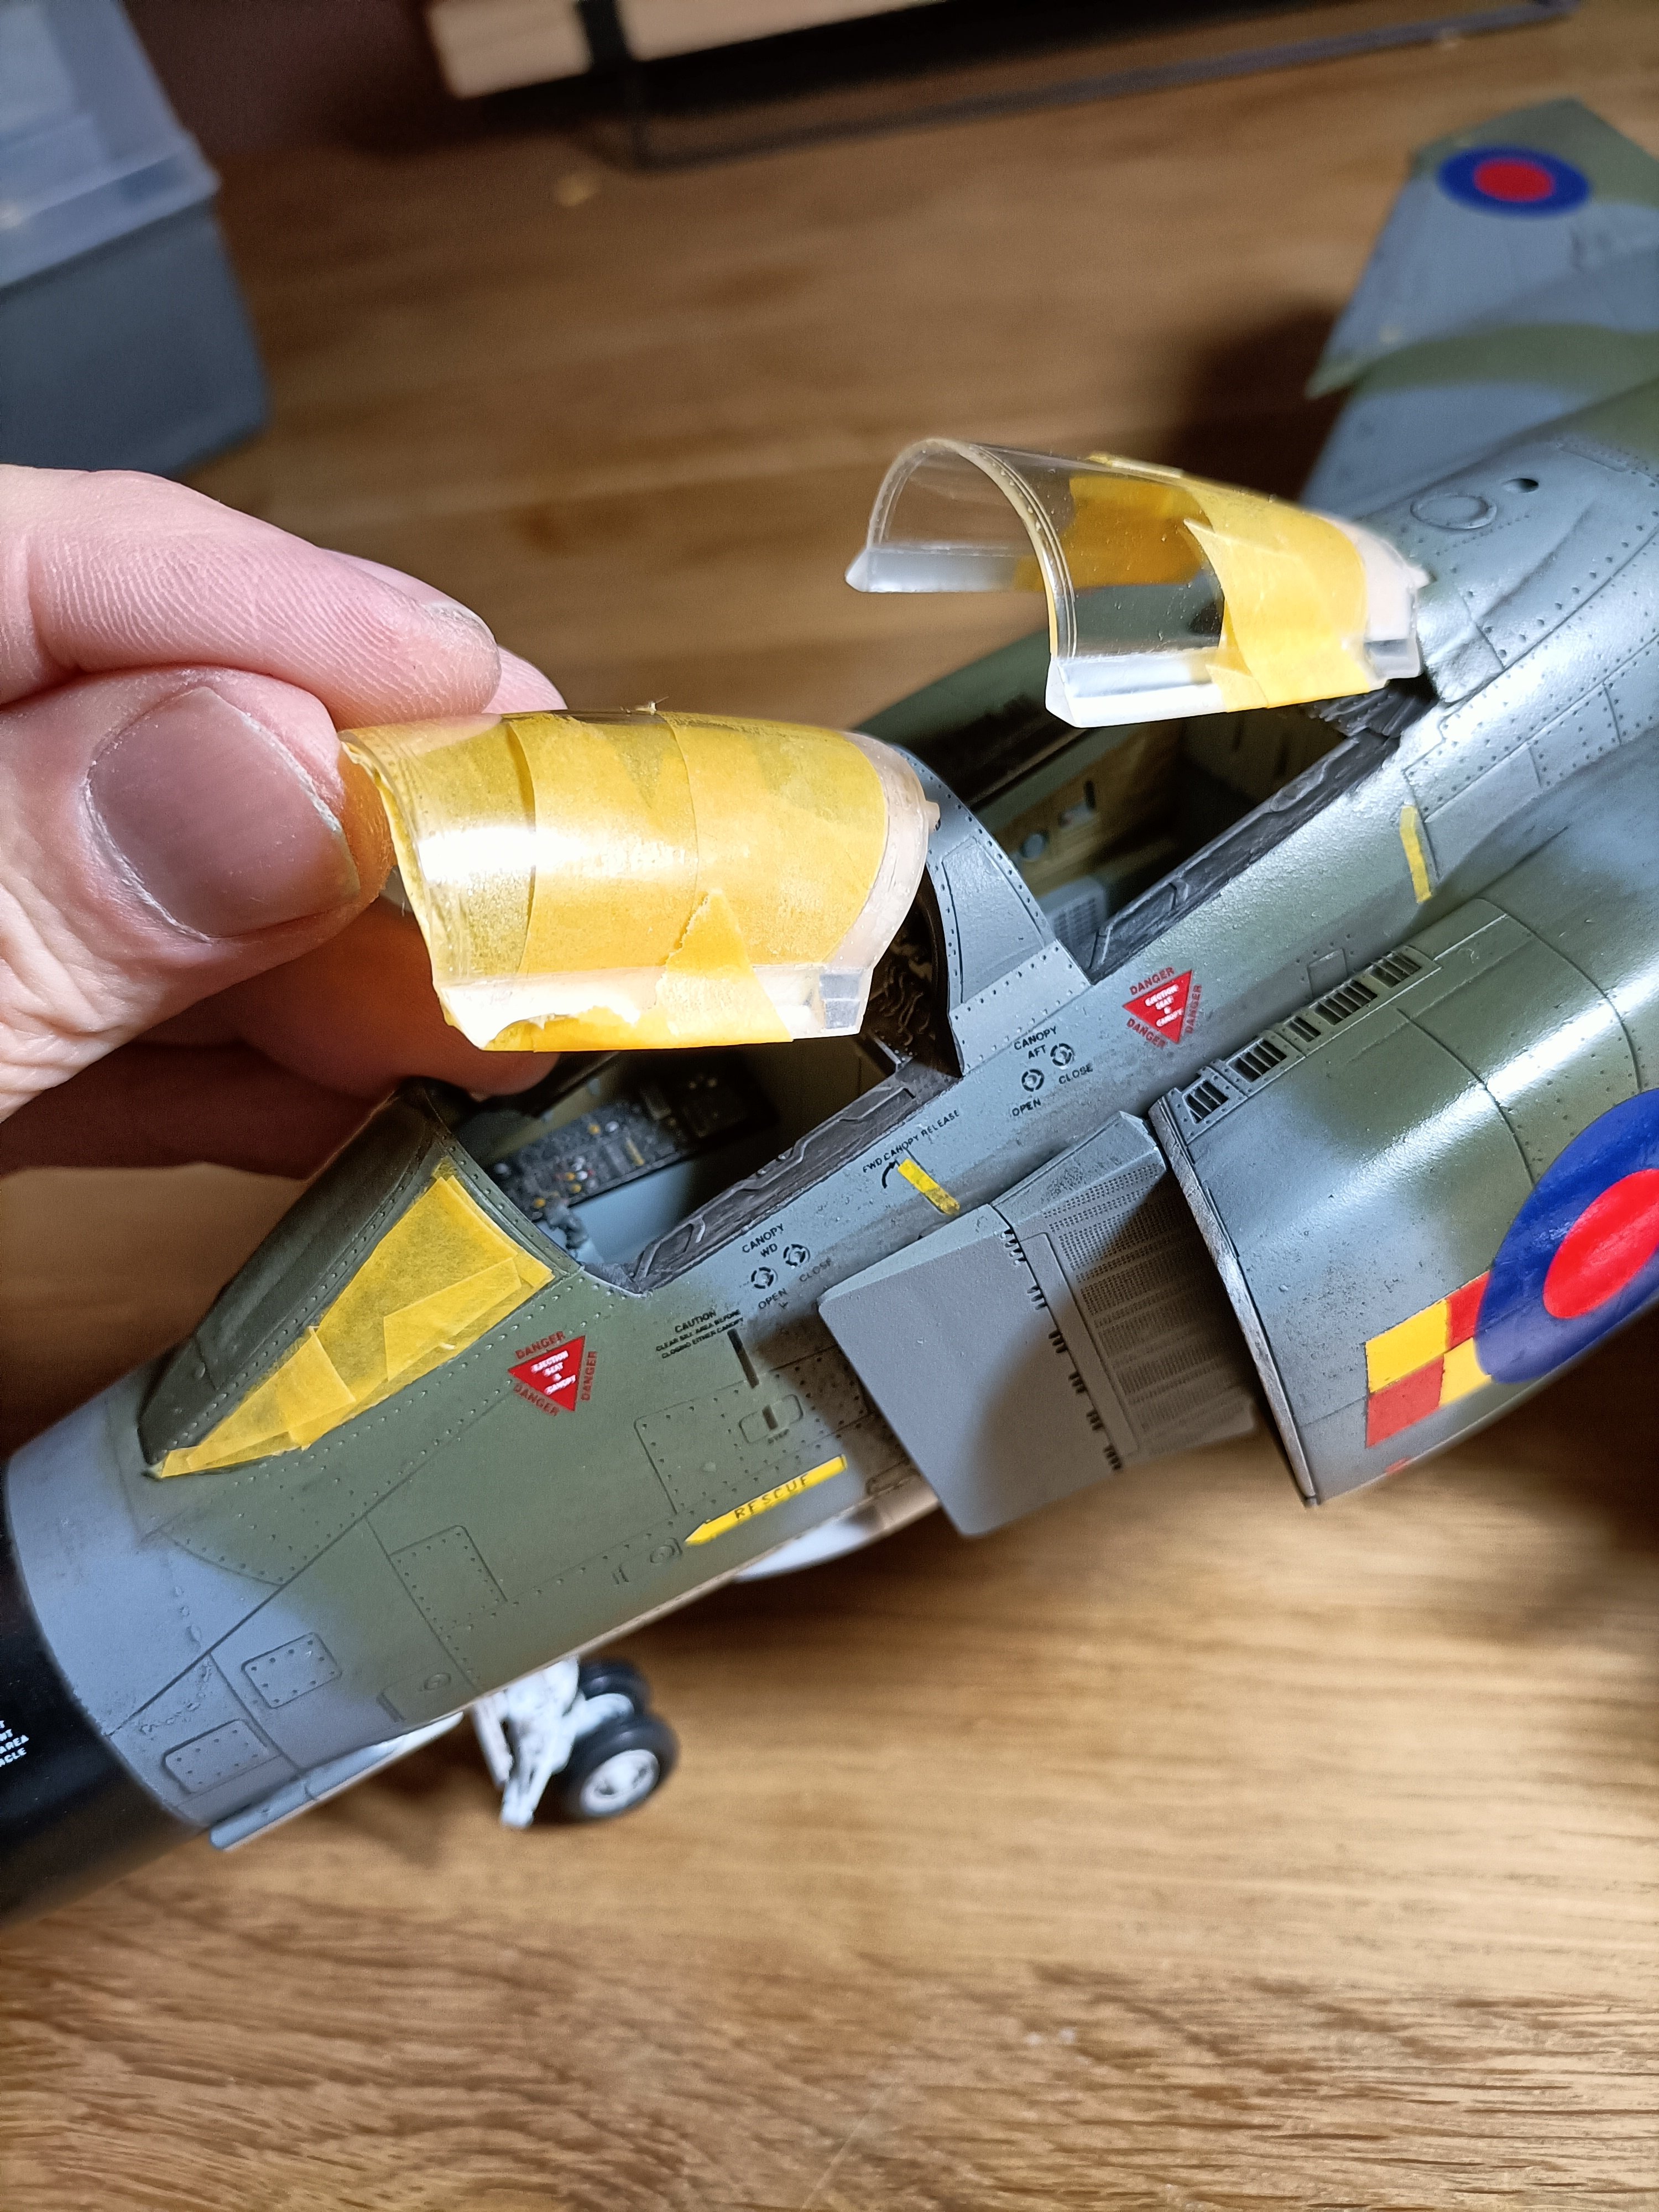
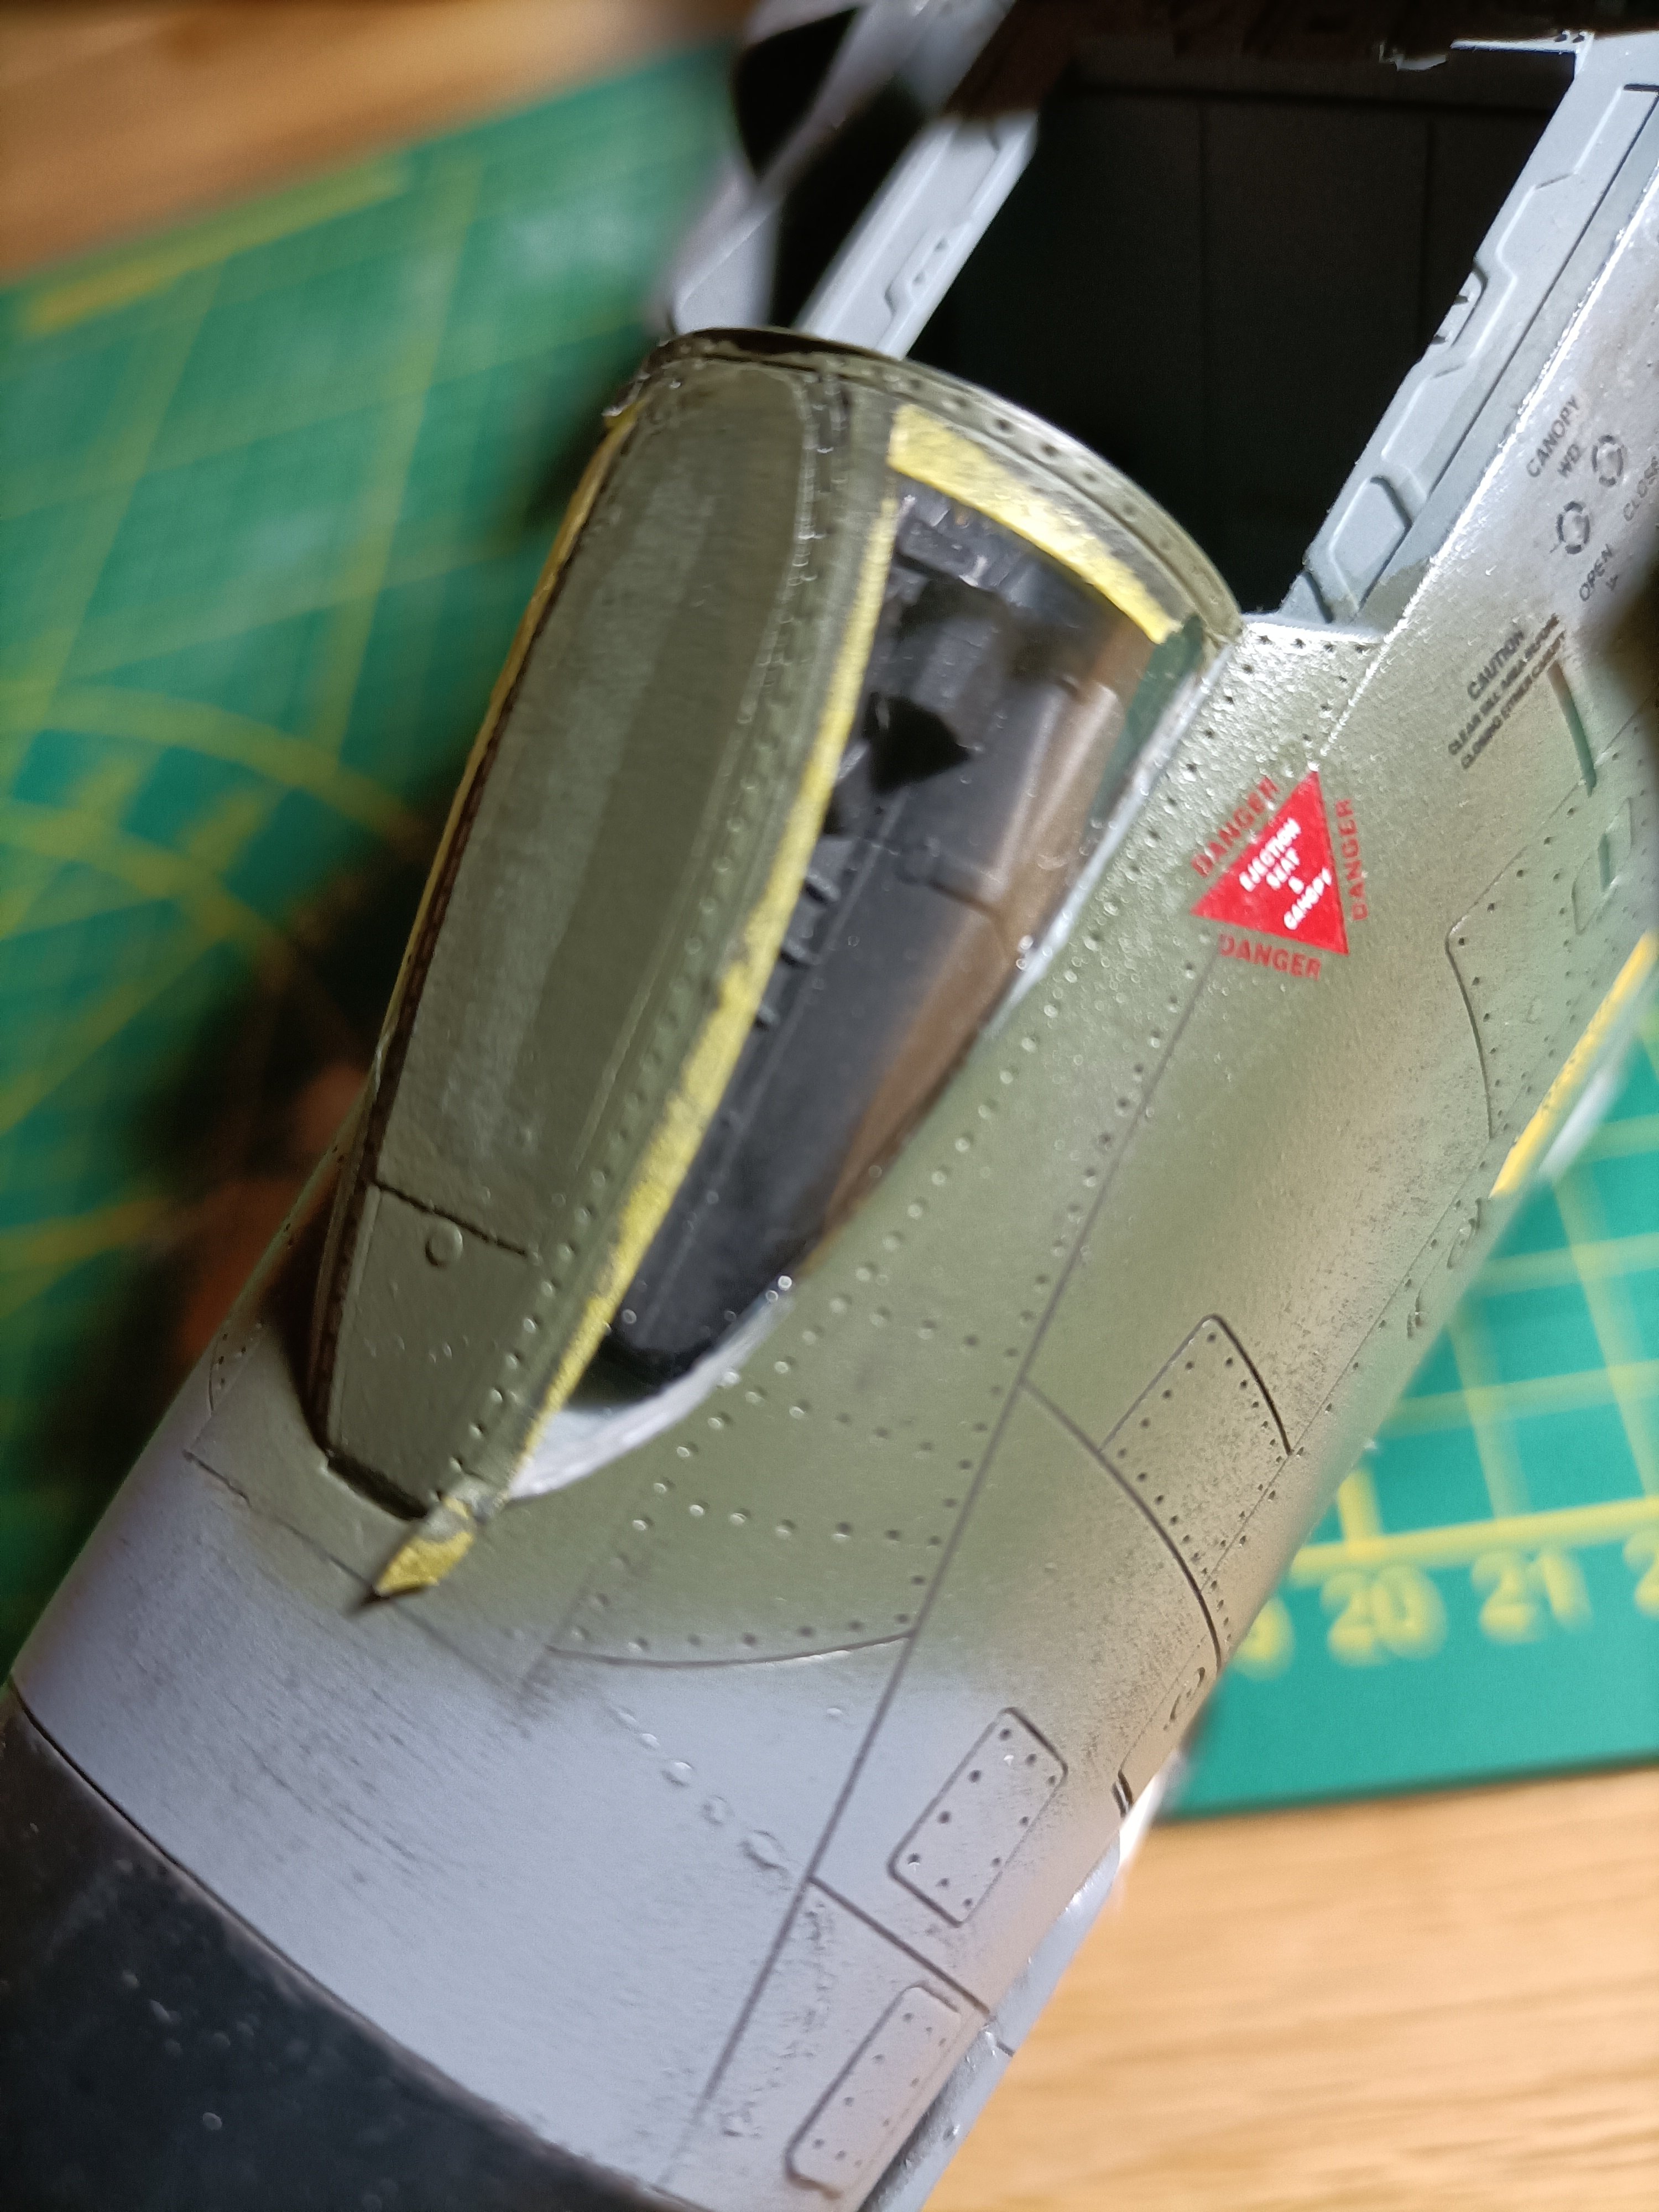
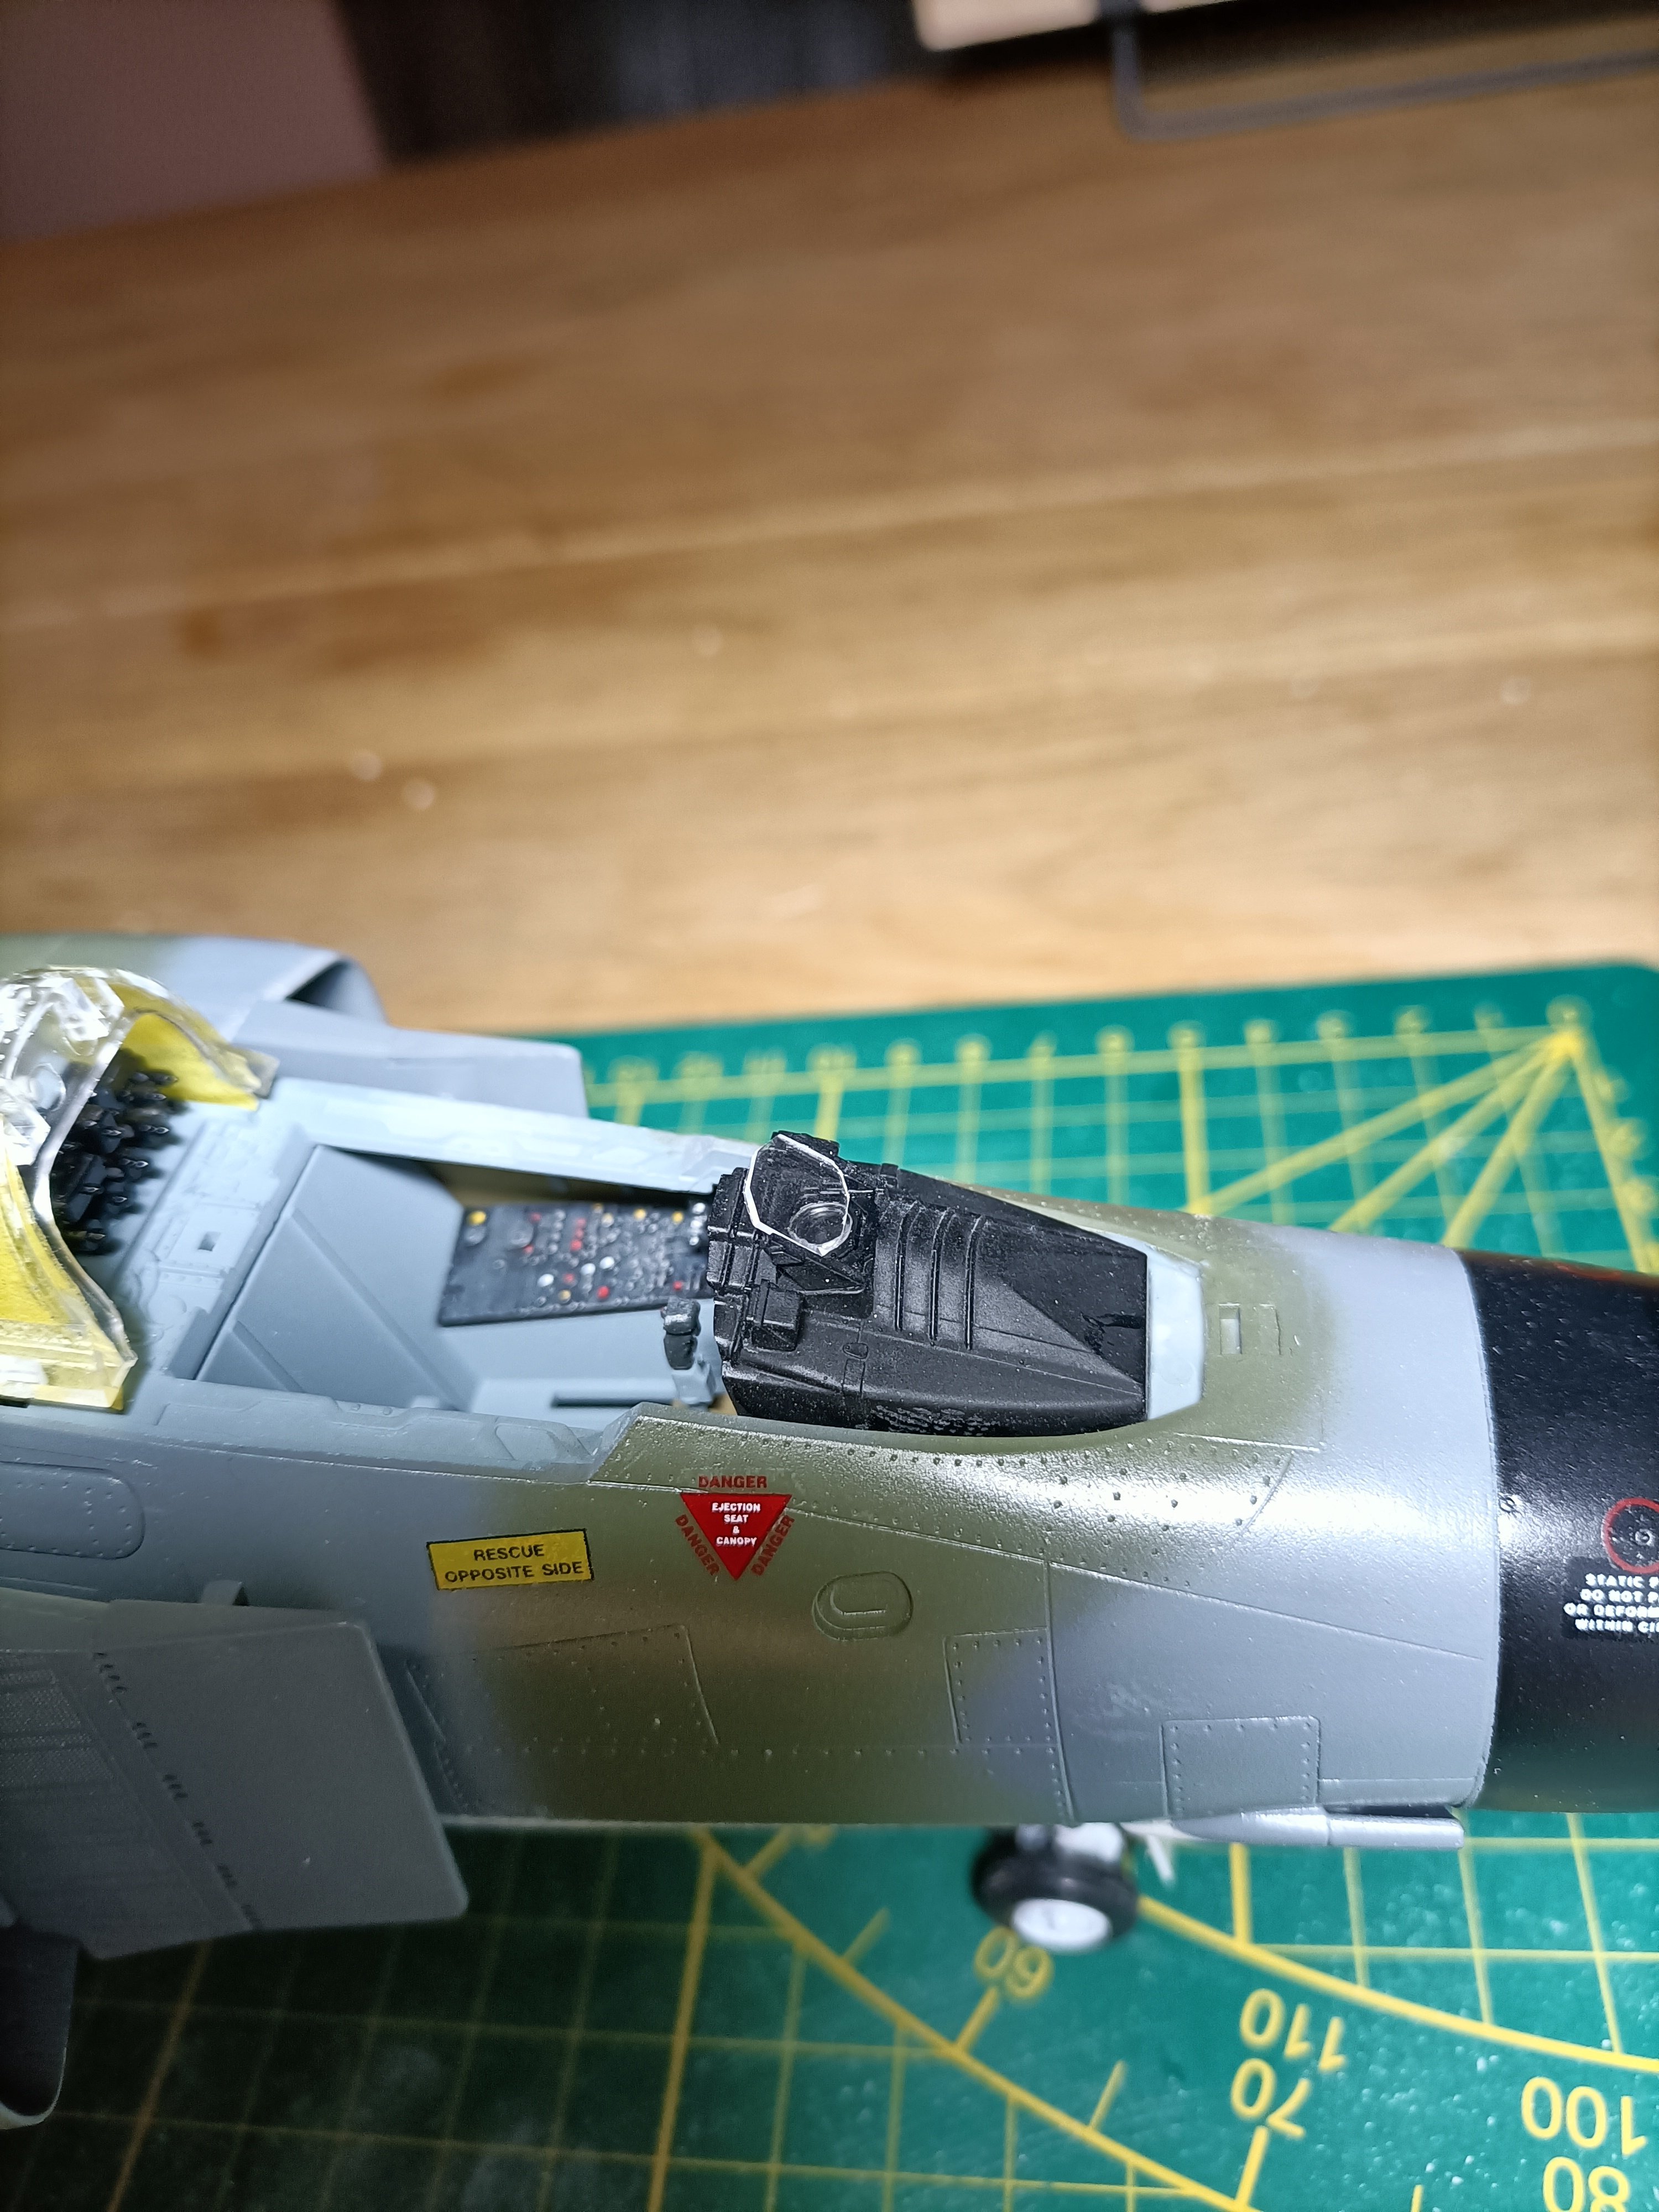
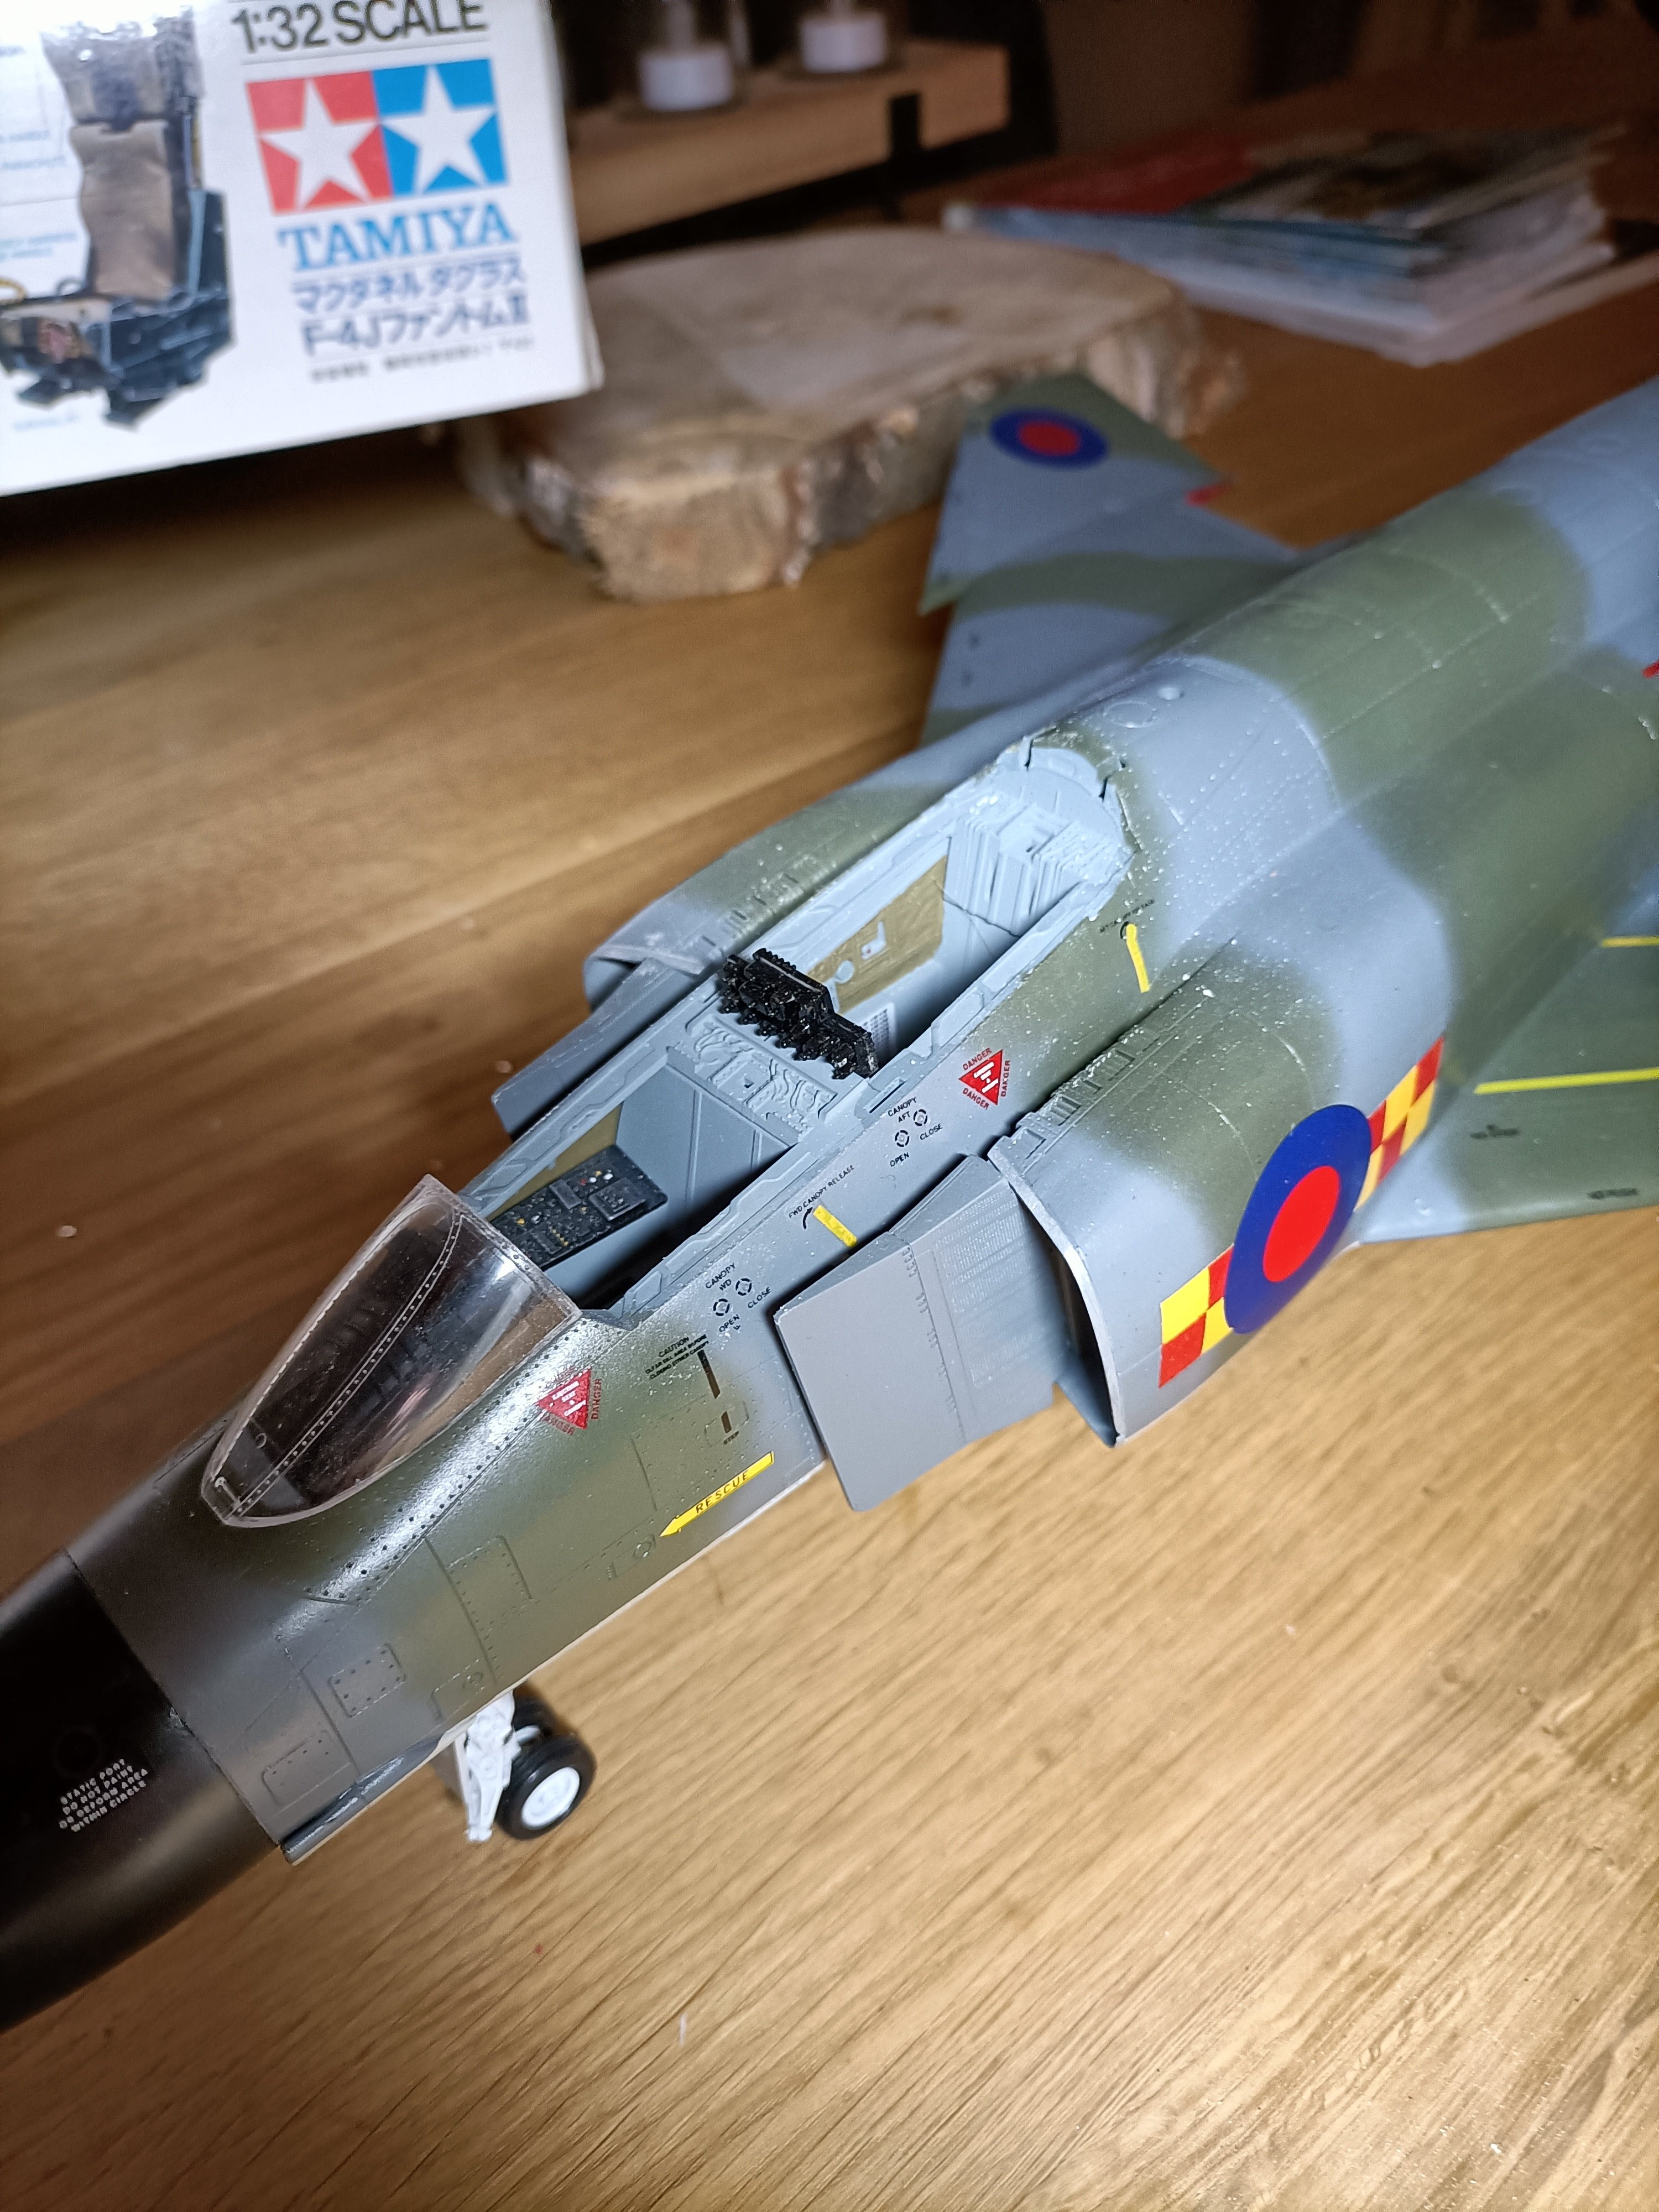
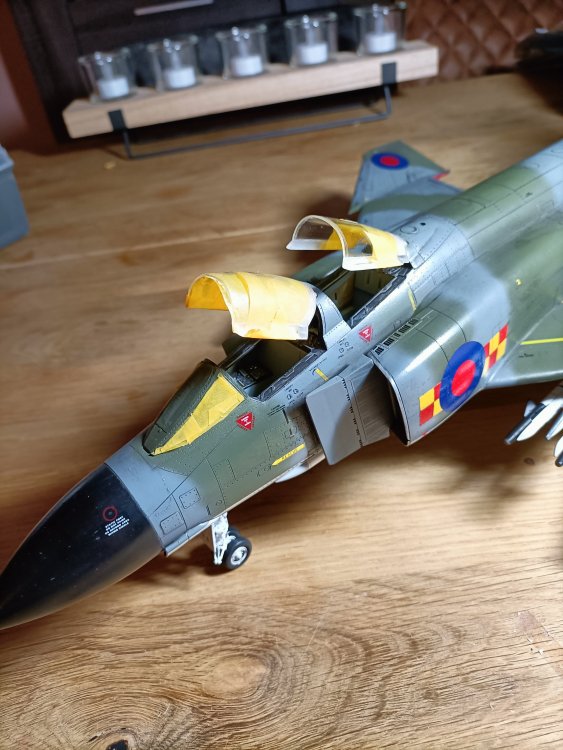
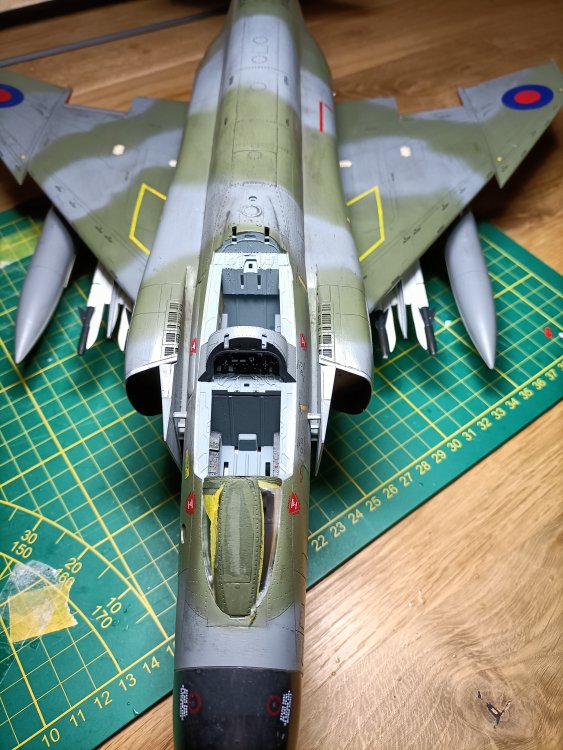
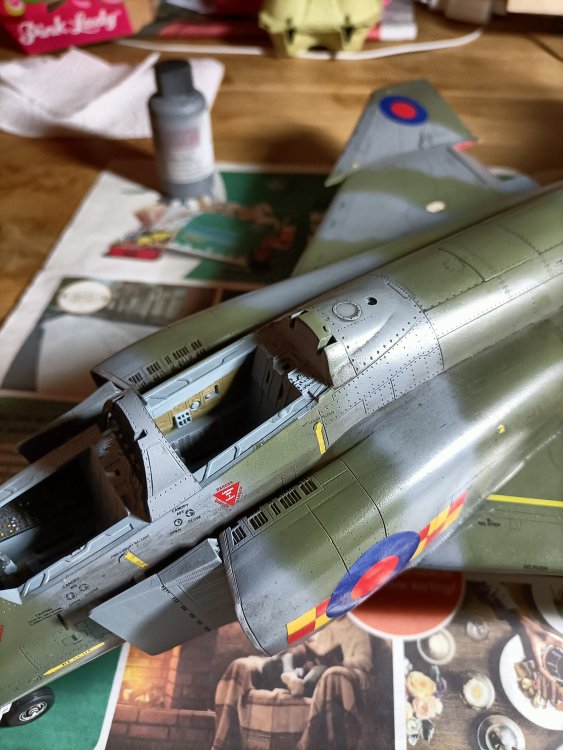
Canopies masked inside and out.
- 414 replies
-
- 4
-

-

-
- conversion
- phantom
- (and 1 more)
-
RR Spey powered RAF Phantom conversion
Wingco57 replied to Wingco57's topic in LSM 1/35 and Larger Work In Progress
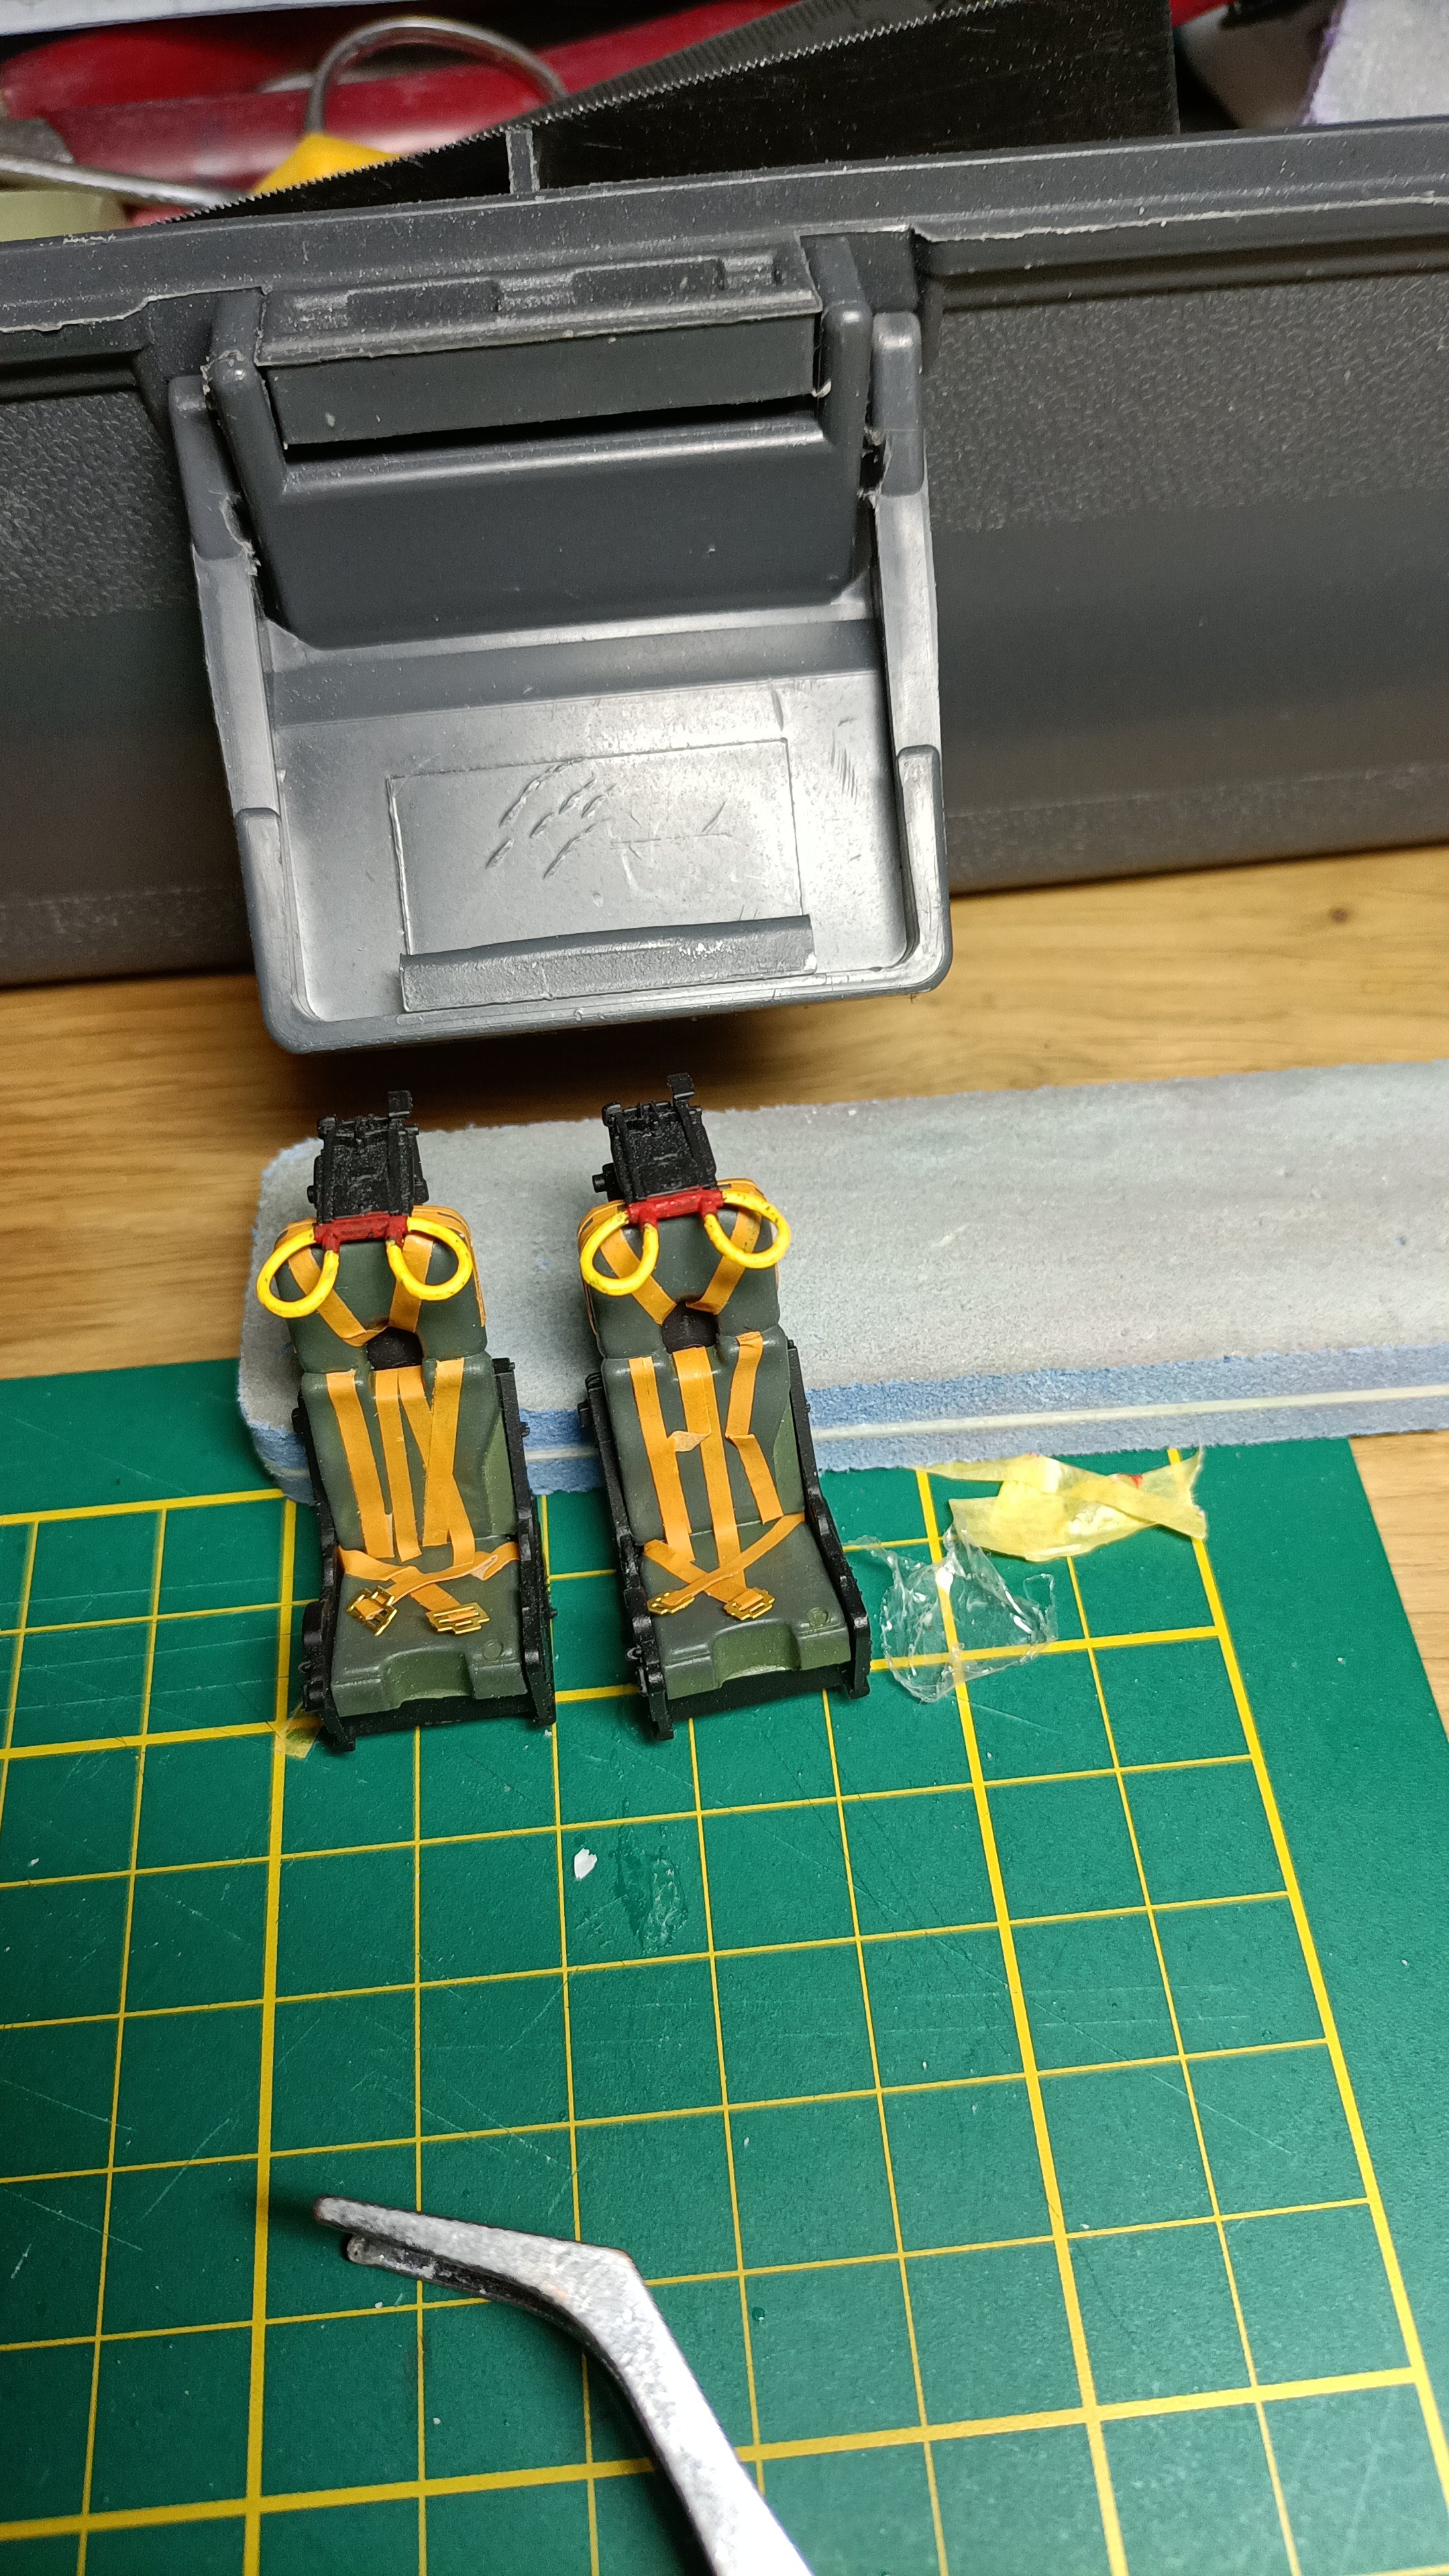
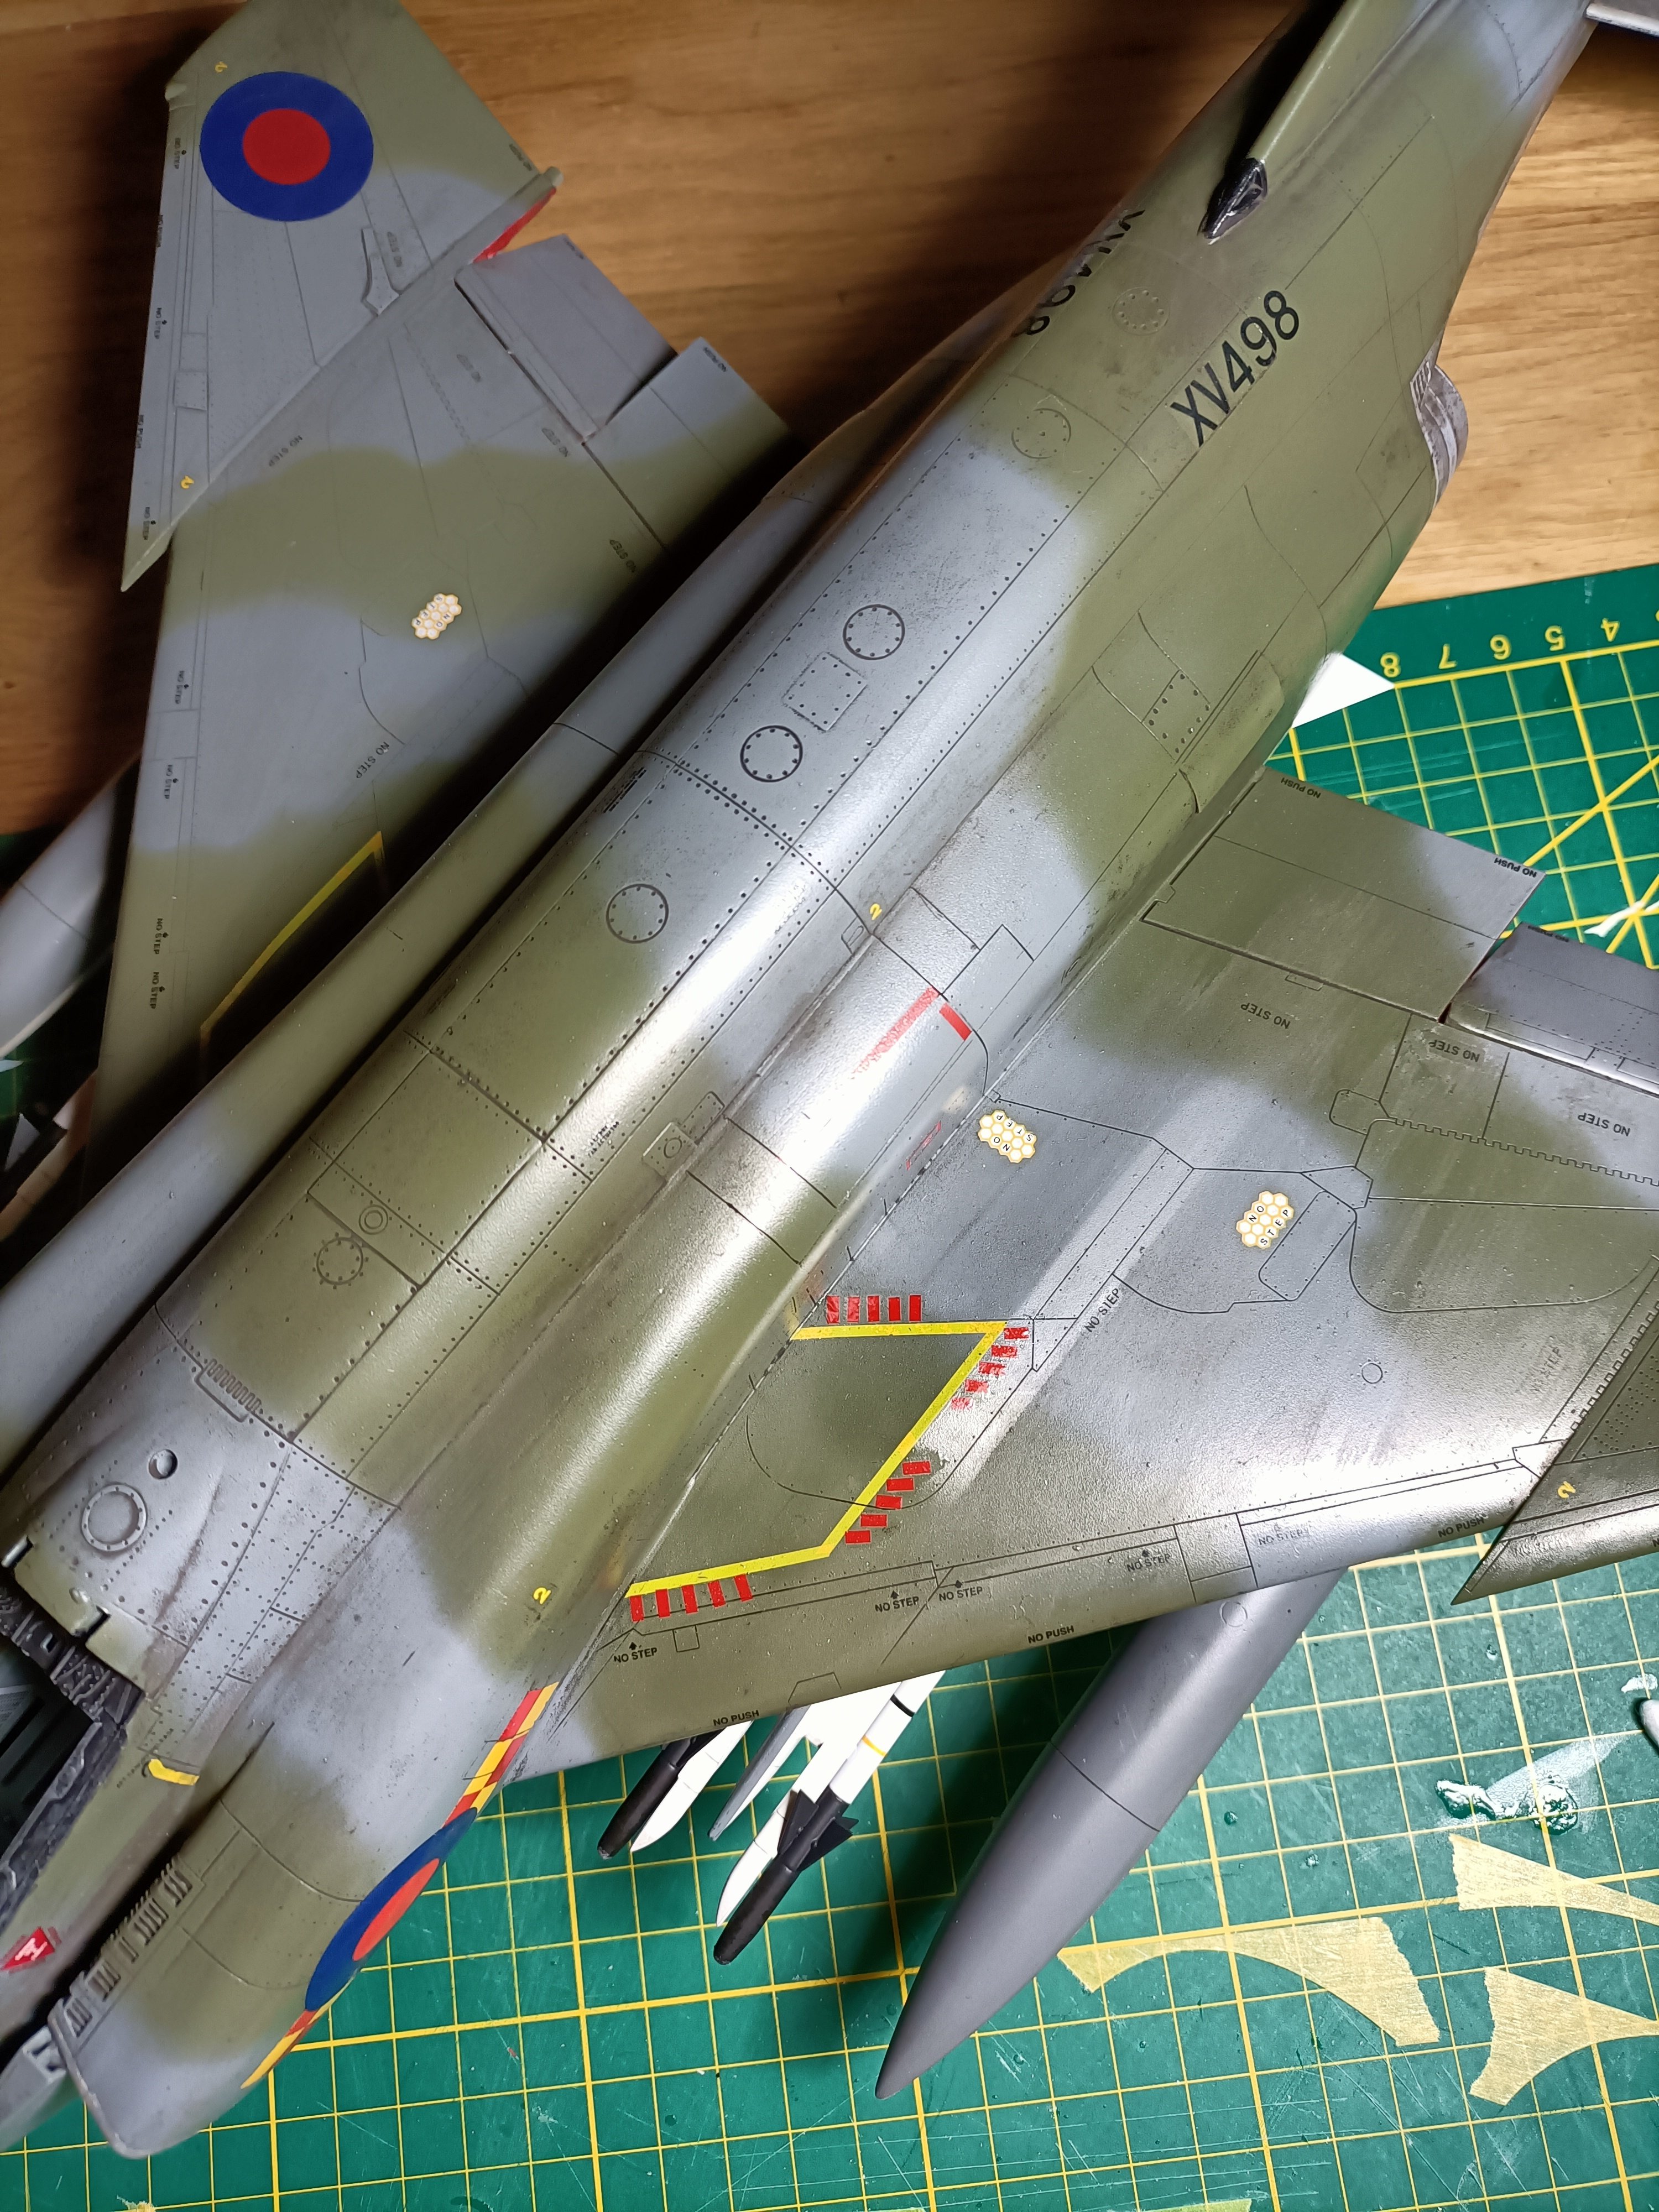
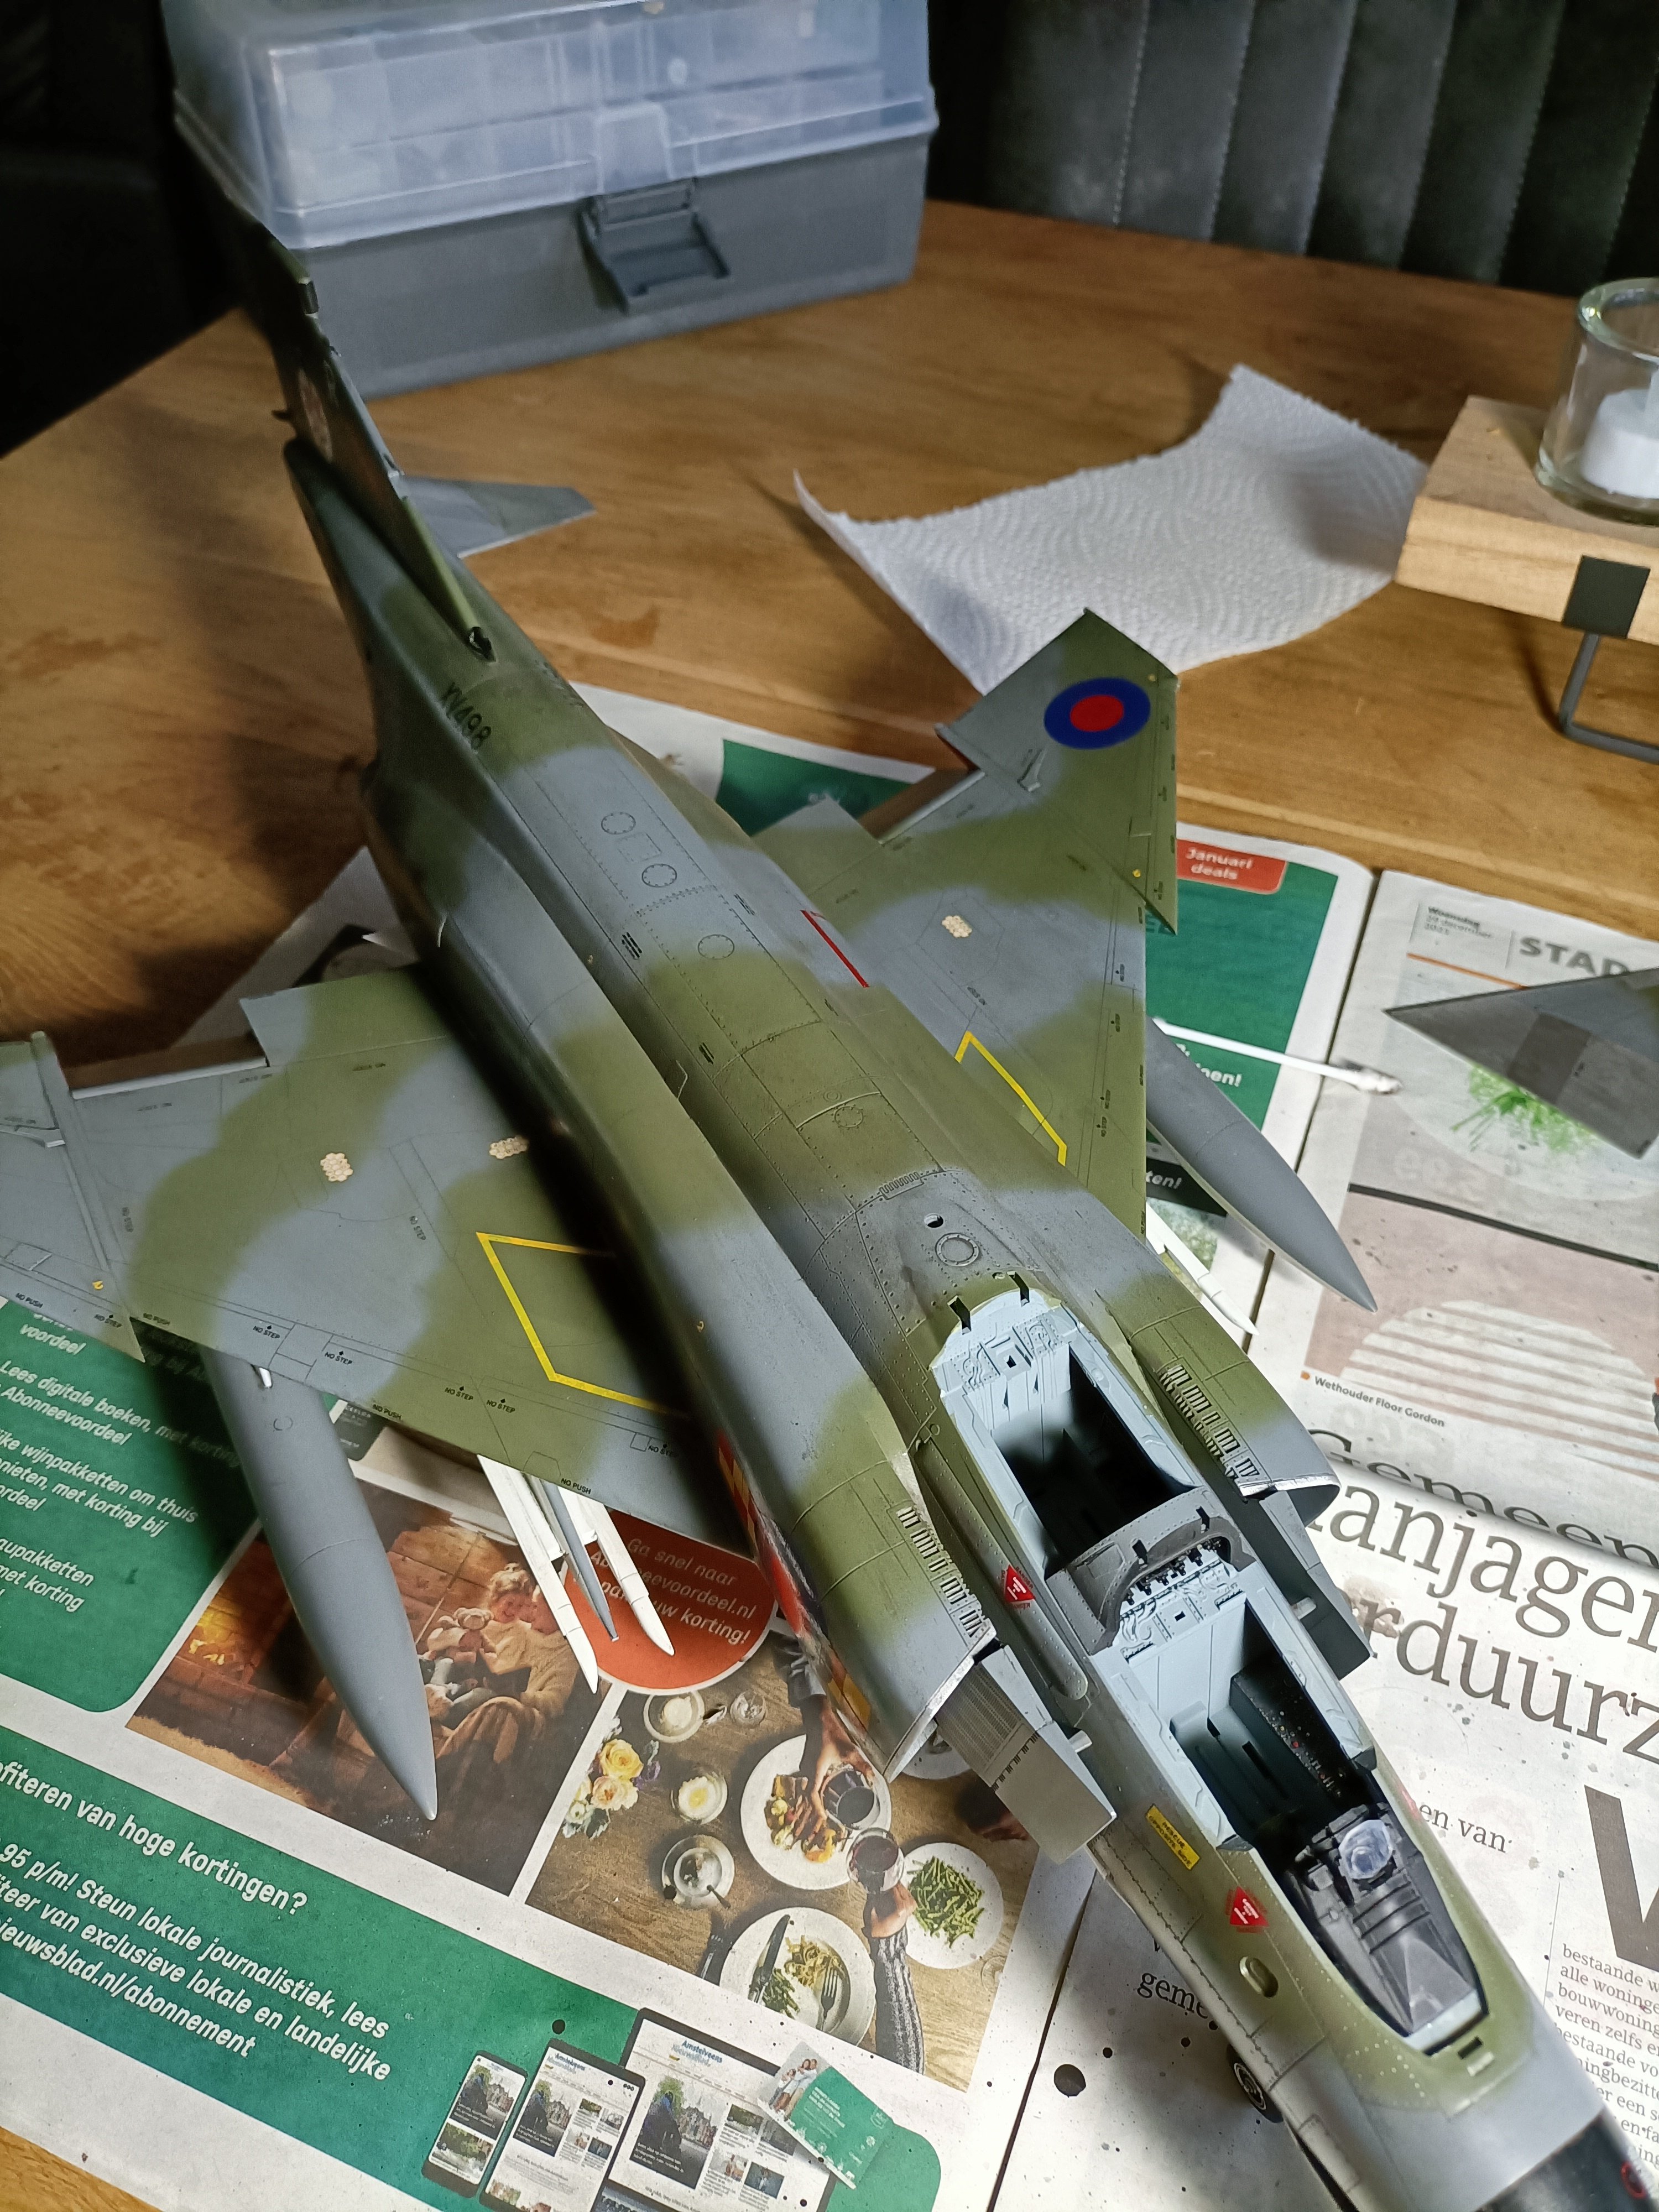
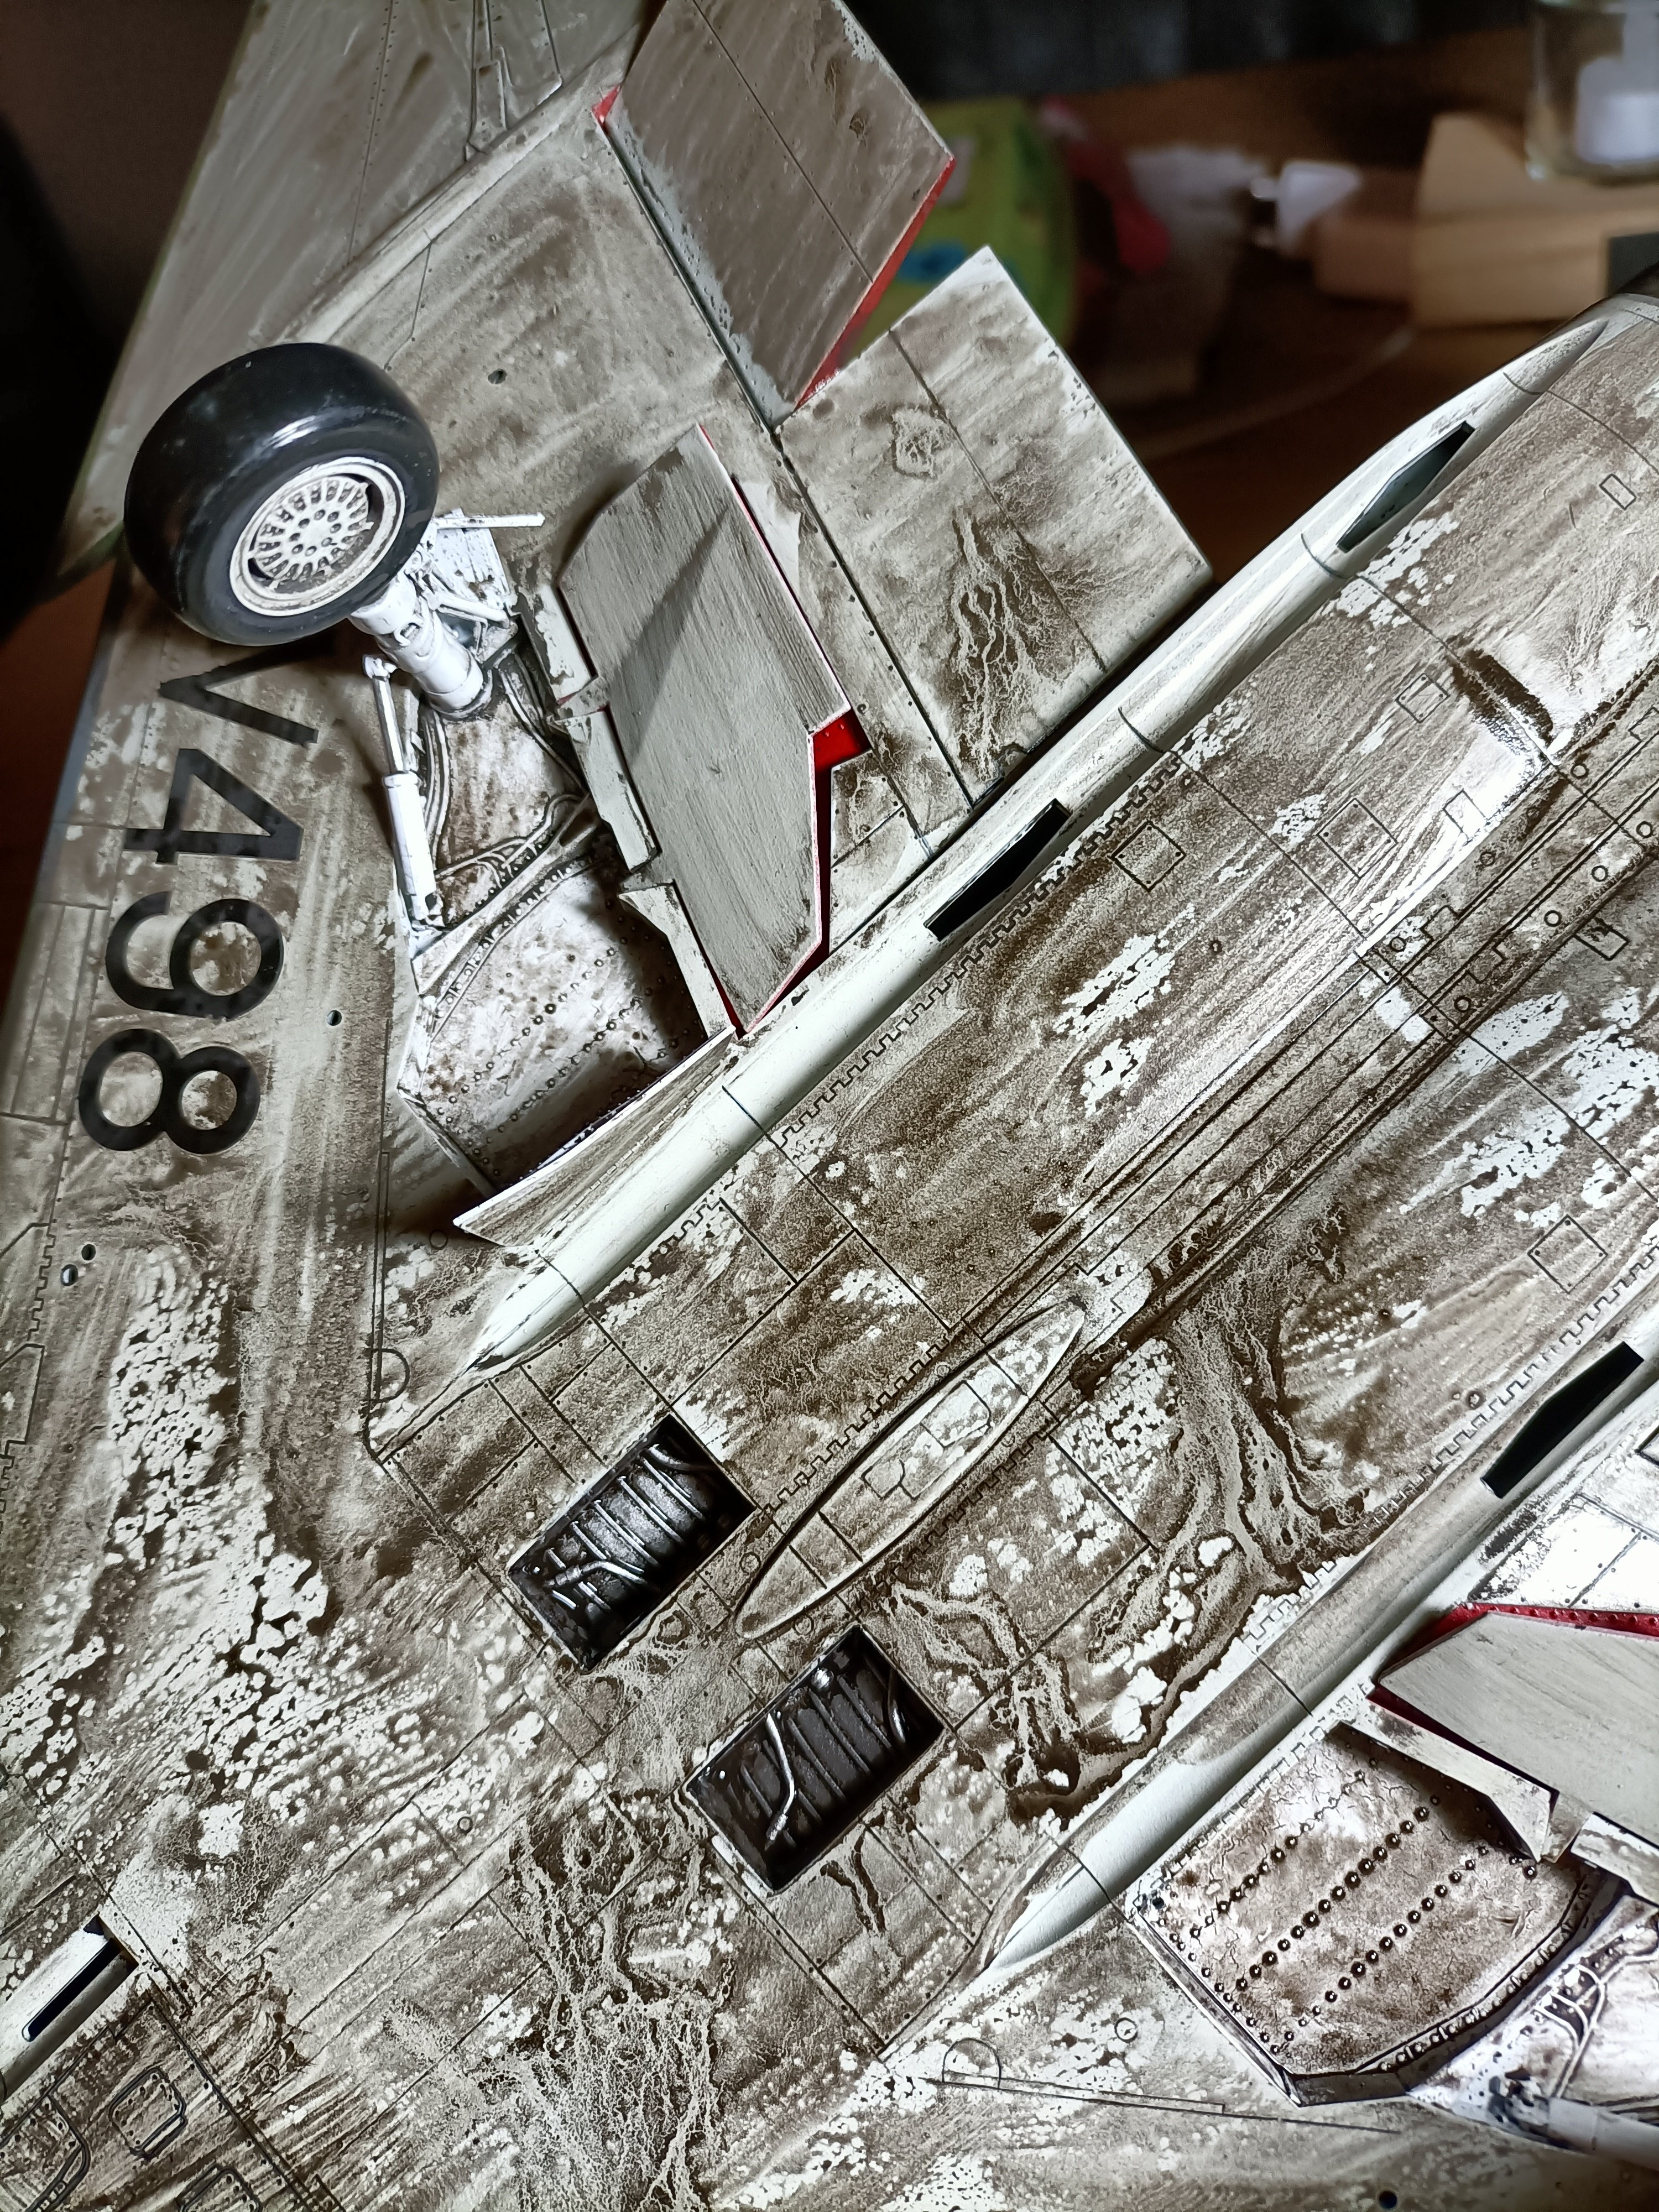
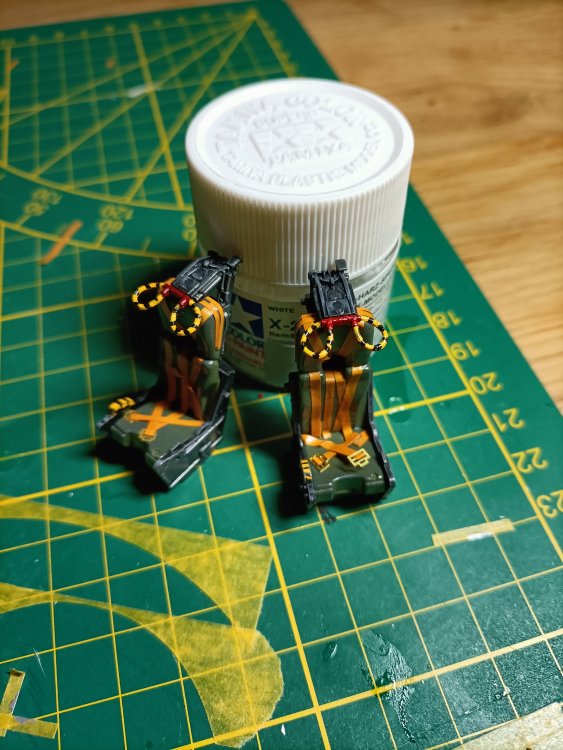
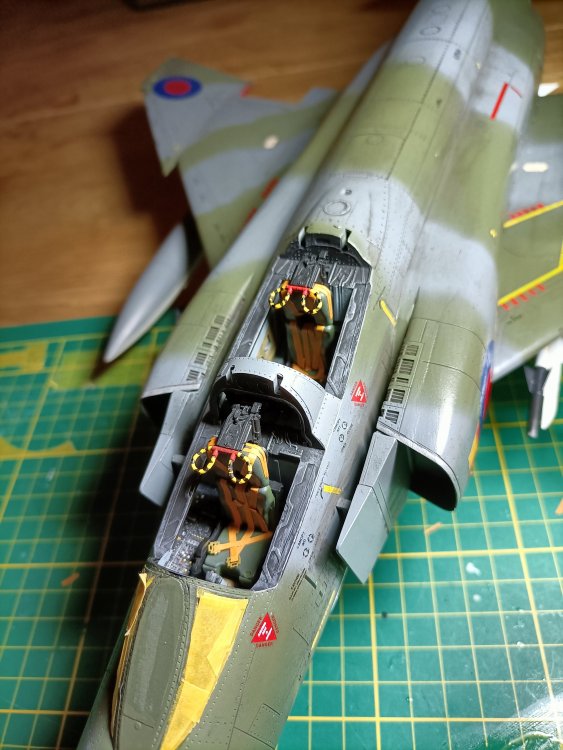
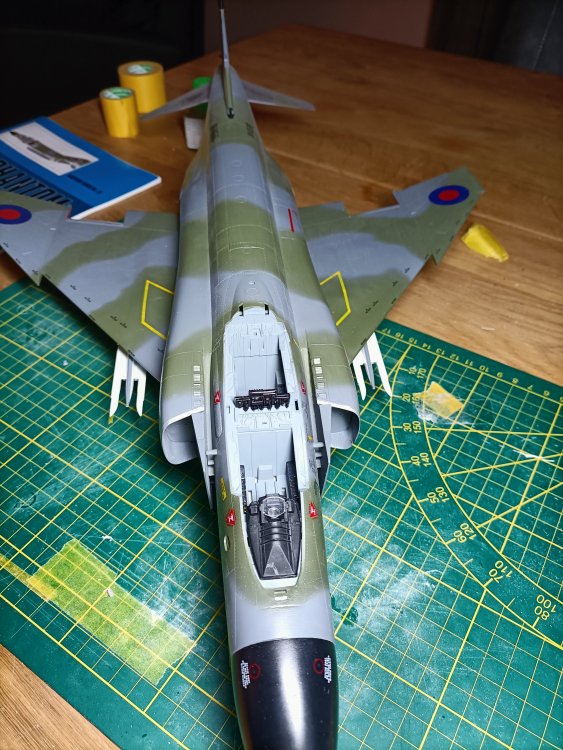
Getting nearer to the finishline . I dirtied up the upperwing surfaces a bit to get a "used" look (in the pics it looks more serious than in real life). The ejection seats are done now and dryfitted in the cockpit. Jobs still to do are to apply the matt varnish, fit some small transparencies and last but not least, detail and paint the two canopies. Notice I keep the most difficult part till last.
- 414 replies
-
- 5
-
-
-
- conversion
- phantom
- (and 1 more)
-
Bardahl Lightning was done last January 2022
Wingco57 replied to JohnB's topic in LSM 1/35 and Larger Work In Progress
You are a machine John, but I really like your subjects. -
RR Spey powered RAF Phantom conversion
Wingco57 replied to Wingco57's topic in LSM 1/35 and Larger Work In Progress
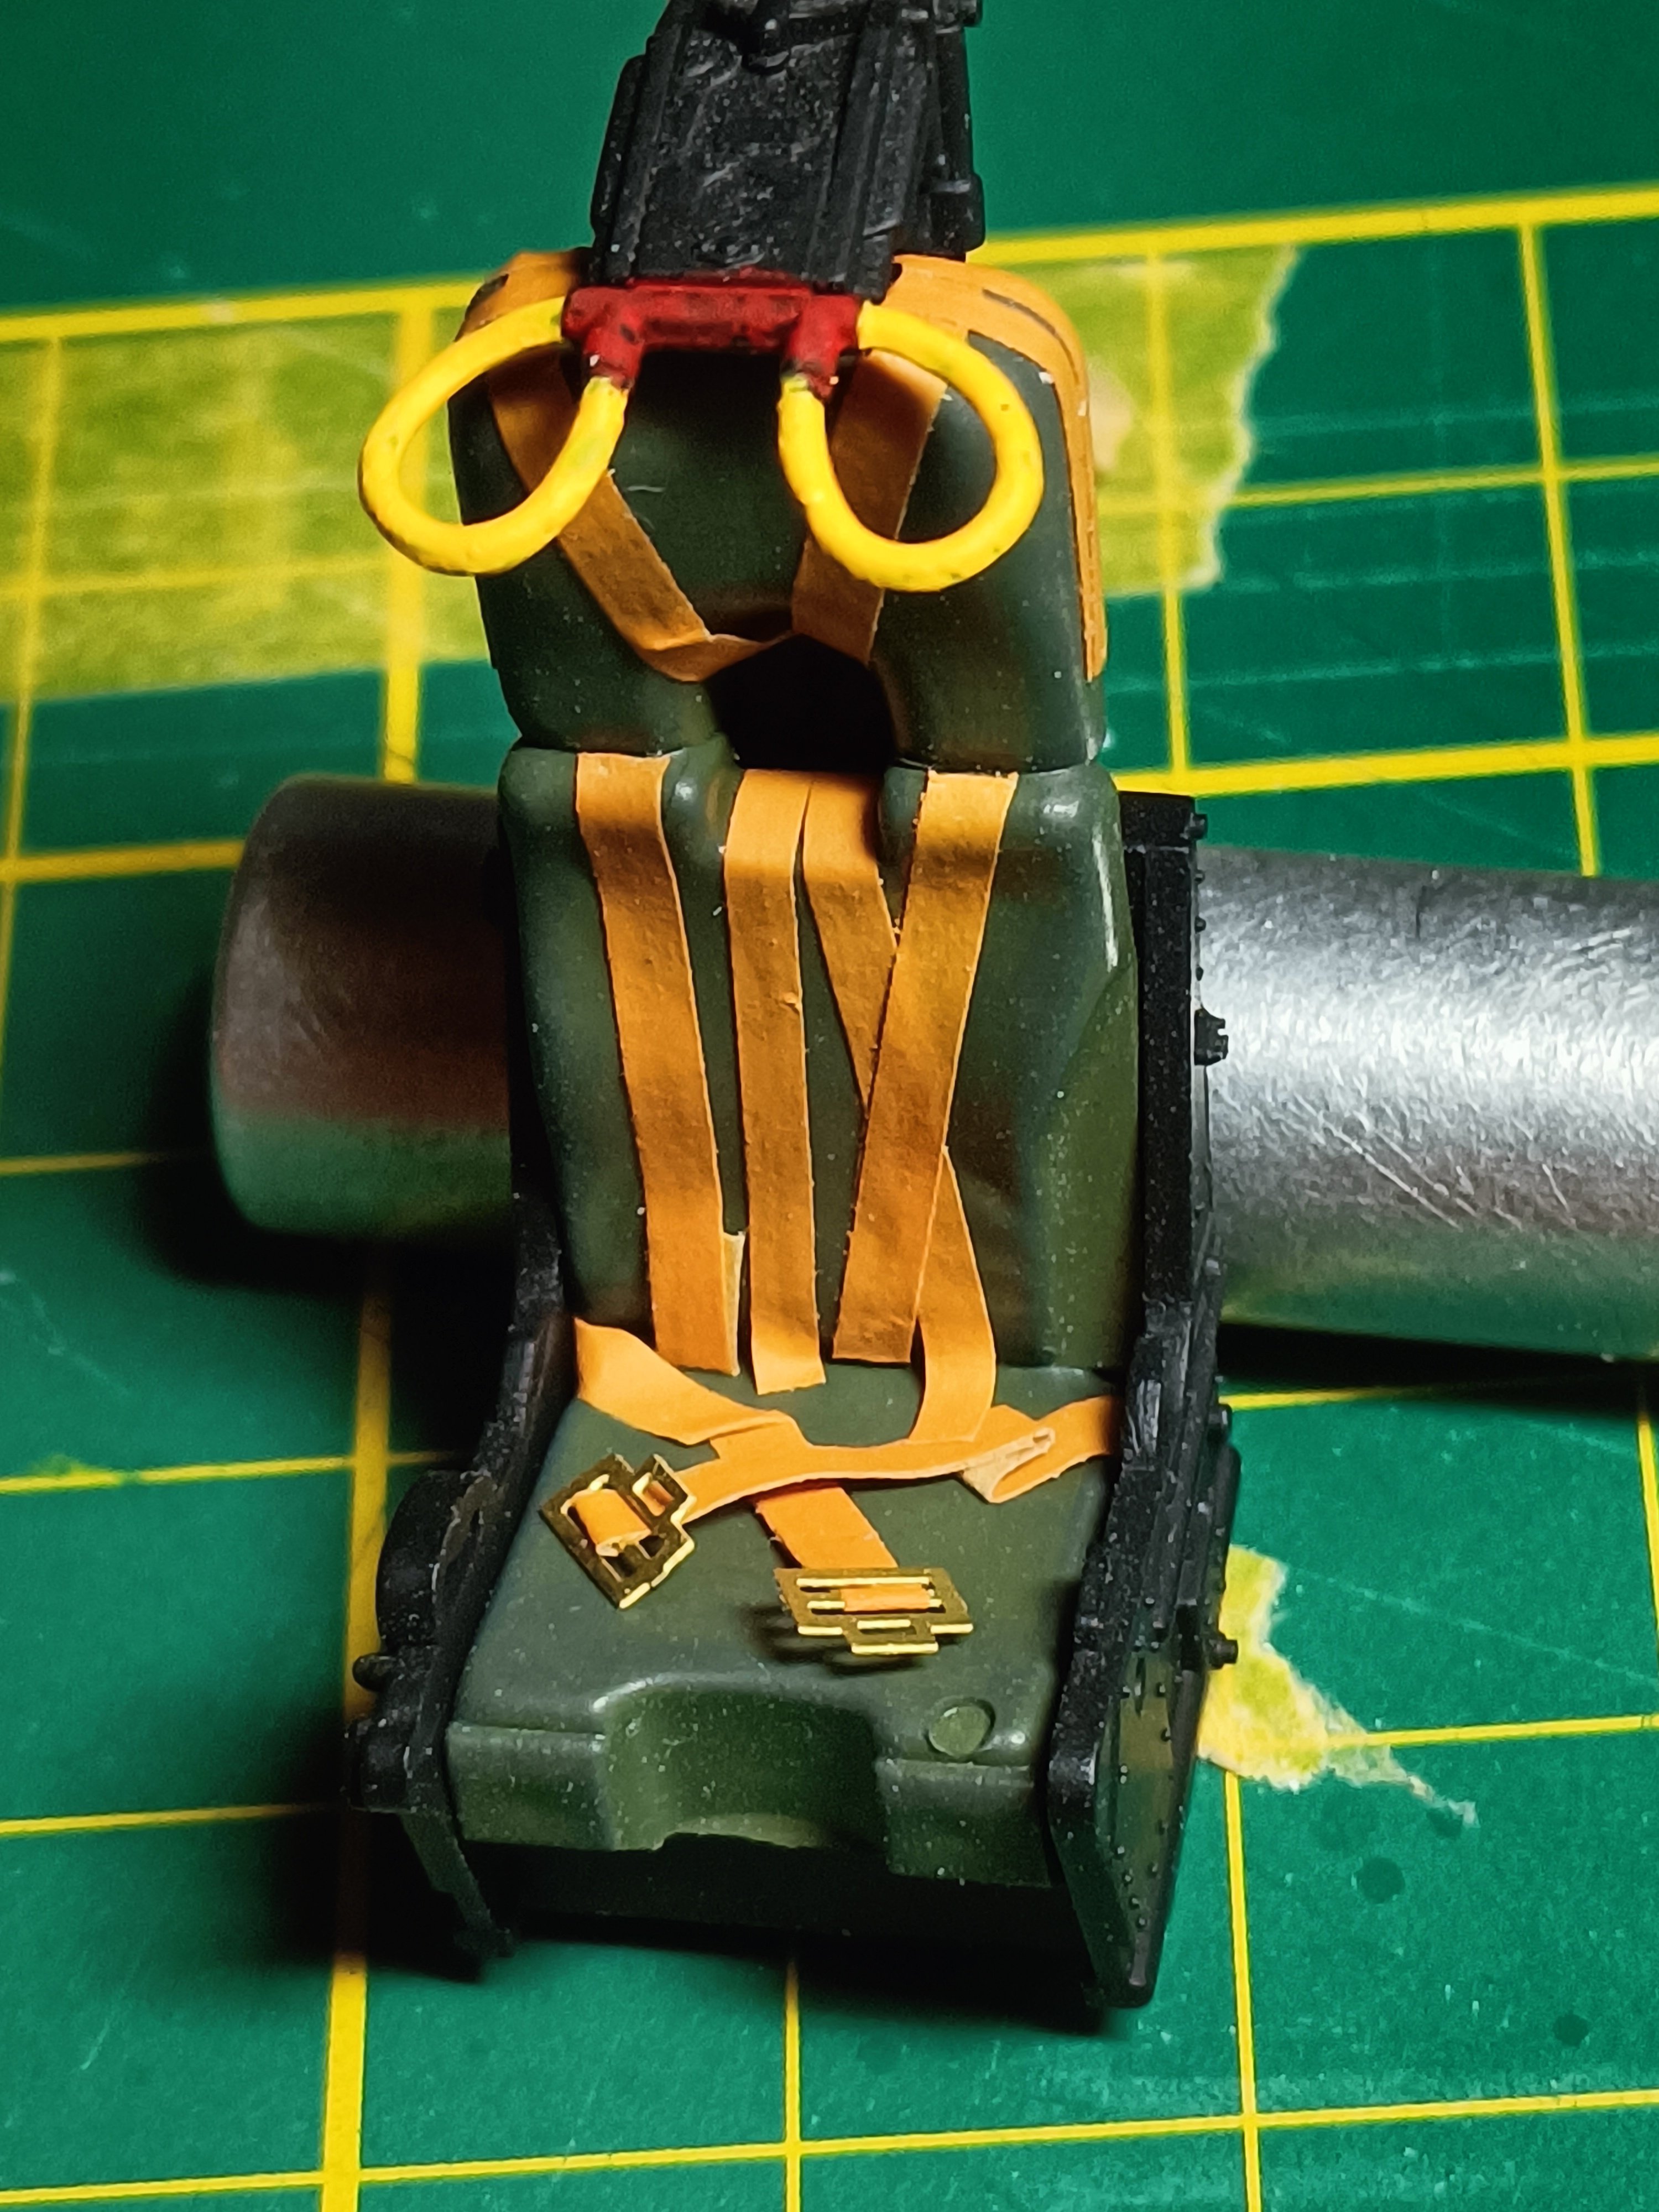
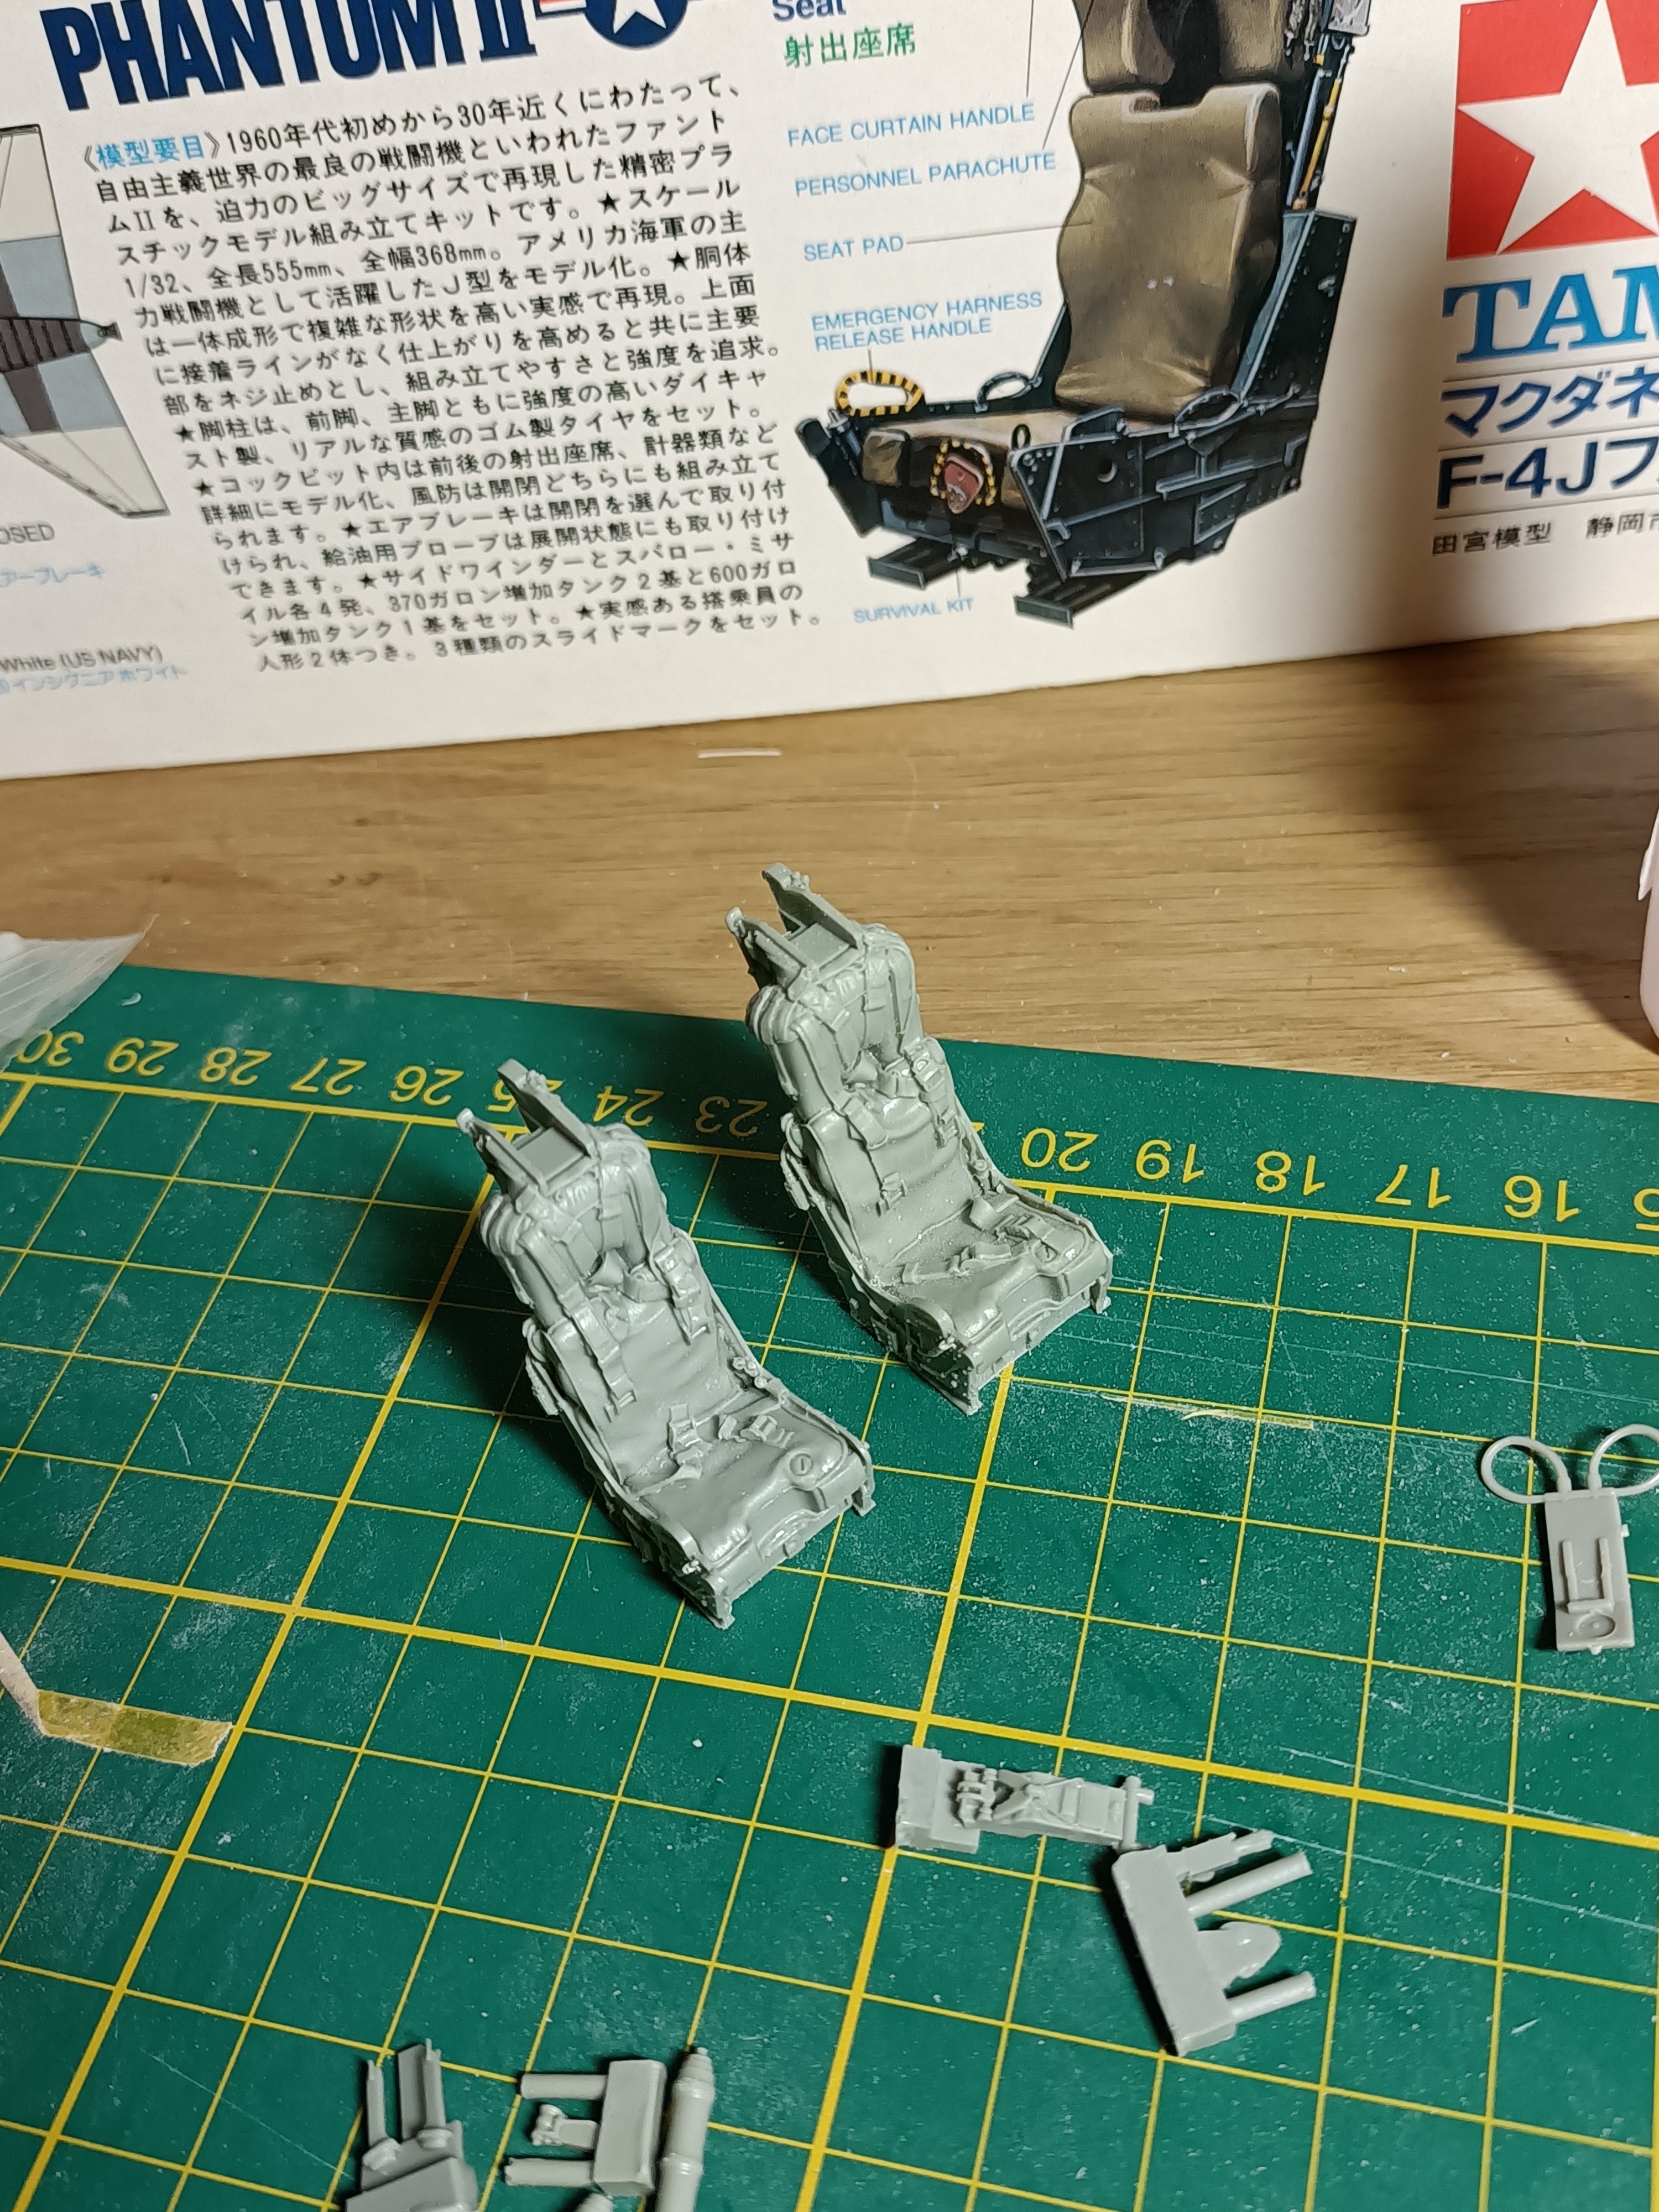
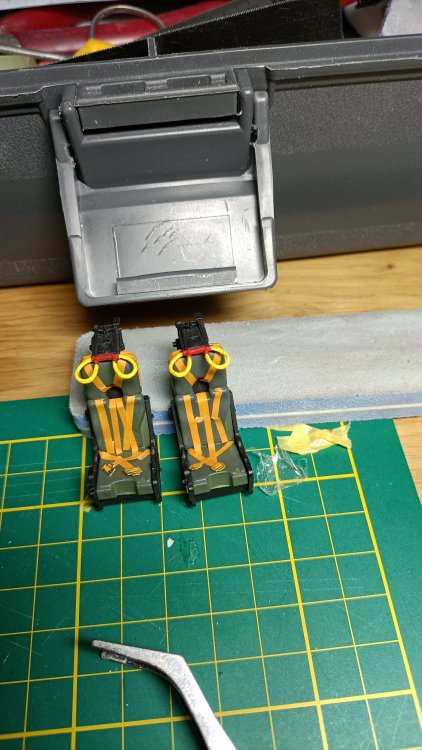
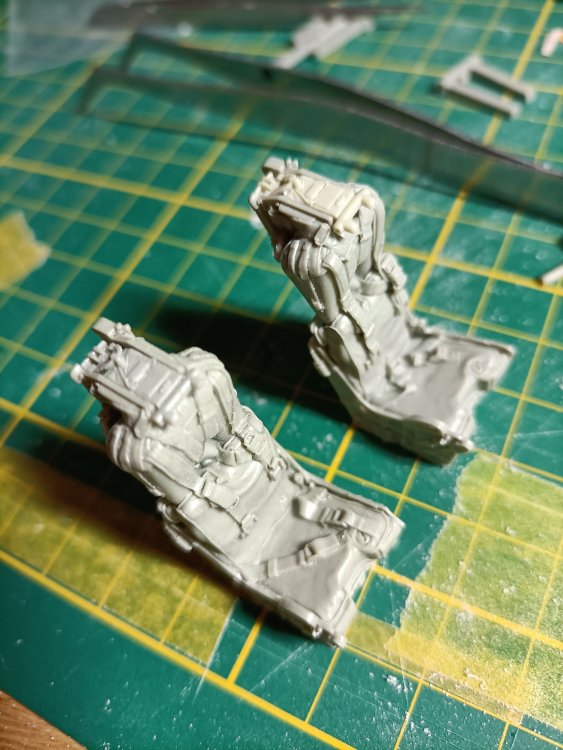
Looong time ago that I painted ejection seats. Not quite pleased with the yellow/black handles. Hmm. But a check how the half finished seats look in place. Hmm a bit better.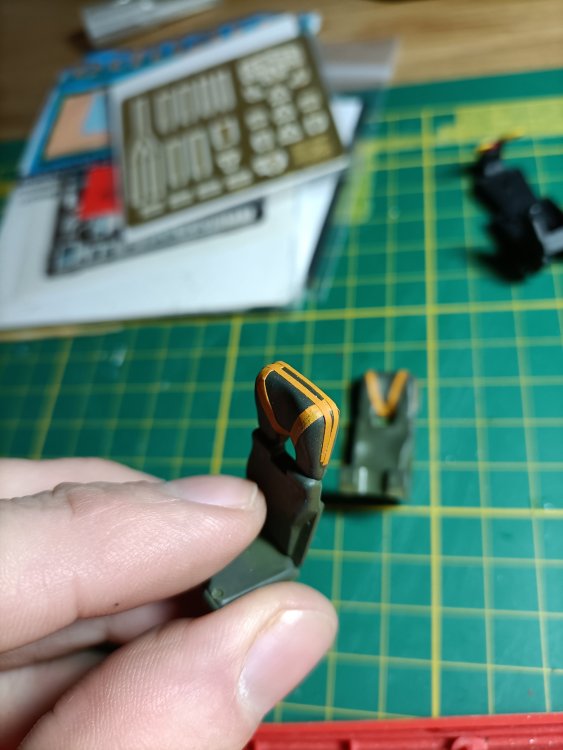


- 414 replies
-
- 4
-
-
- conversion
- phantom
- (and 1 more)
-
RR Spey powered RAF Phantom conversion
Wingco57 replied to Wingco57's topic in LSM 1/35 and Larger Work In Progress
The devil is in the details.....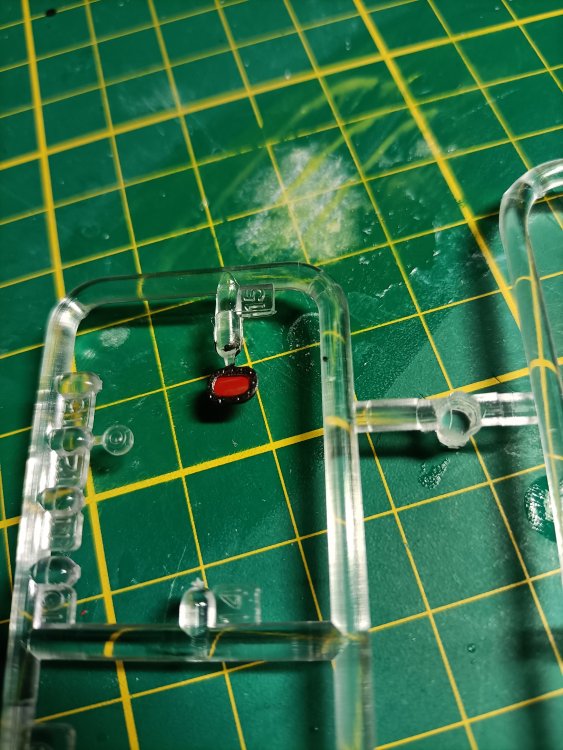
- 414 replies
-
- 5
-
-
-
- conversion
- phantom
- (and 1 more)
-
RR Spey powered RAF Phantom conversion
Wingco57 replied to Wingco57's topic in LSM 1/35 and Larger Work In Progress
No health and safety back then I suppose.😉 The starboard side is done too.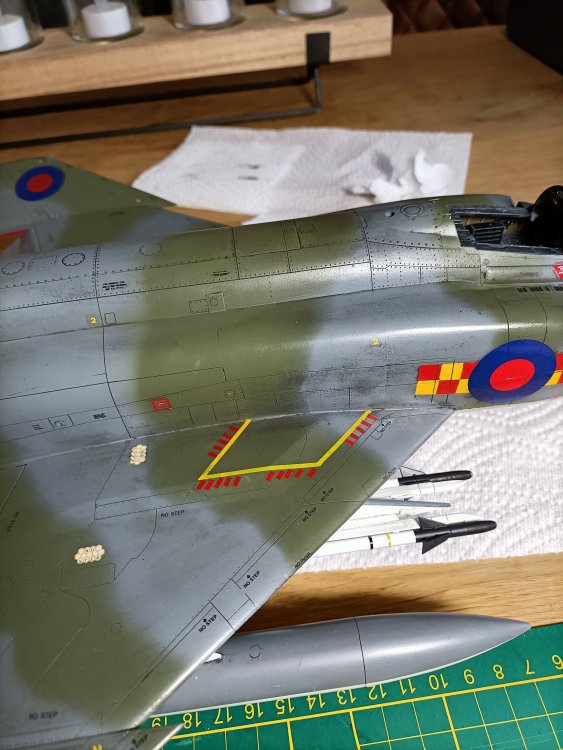
- 414 replies
-
- 7
-
-
-
- conversion
- phantom
- (and 1 more)
-
RR Spey powered RAF Phantom conversion
Wingco57 replied to Wingco57's topic in LSM 1/35 and Larger Work In Progress
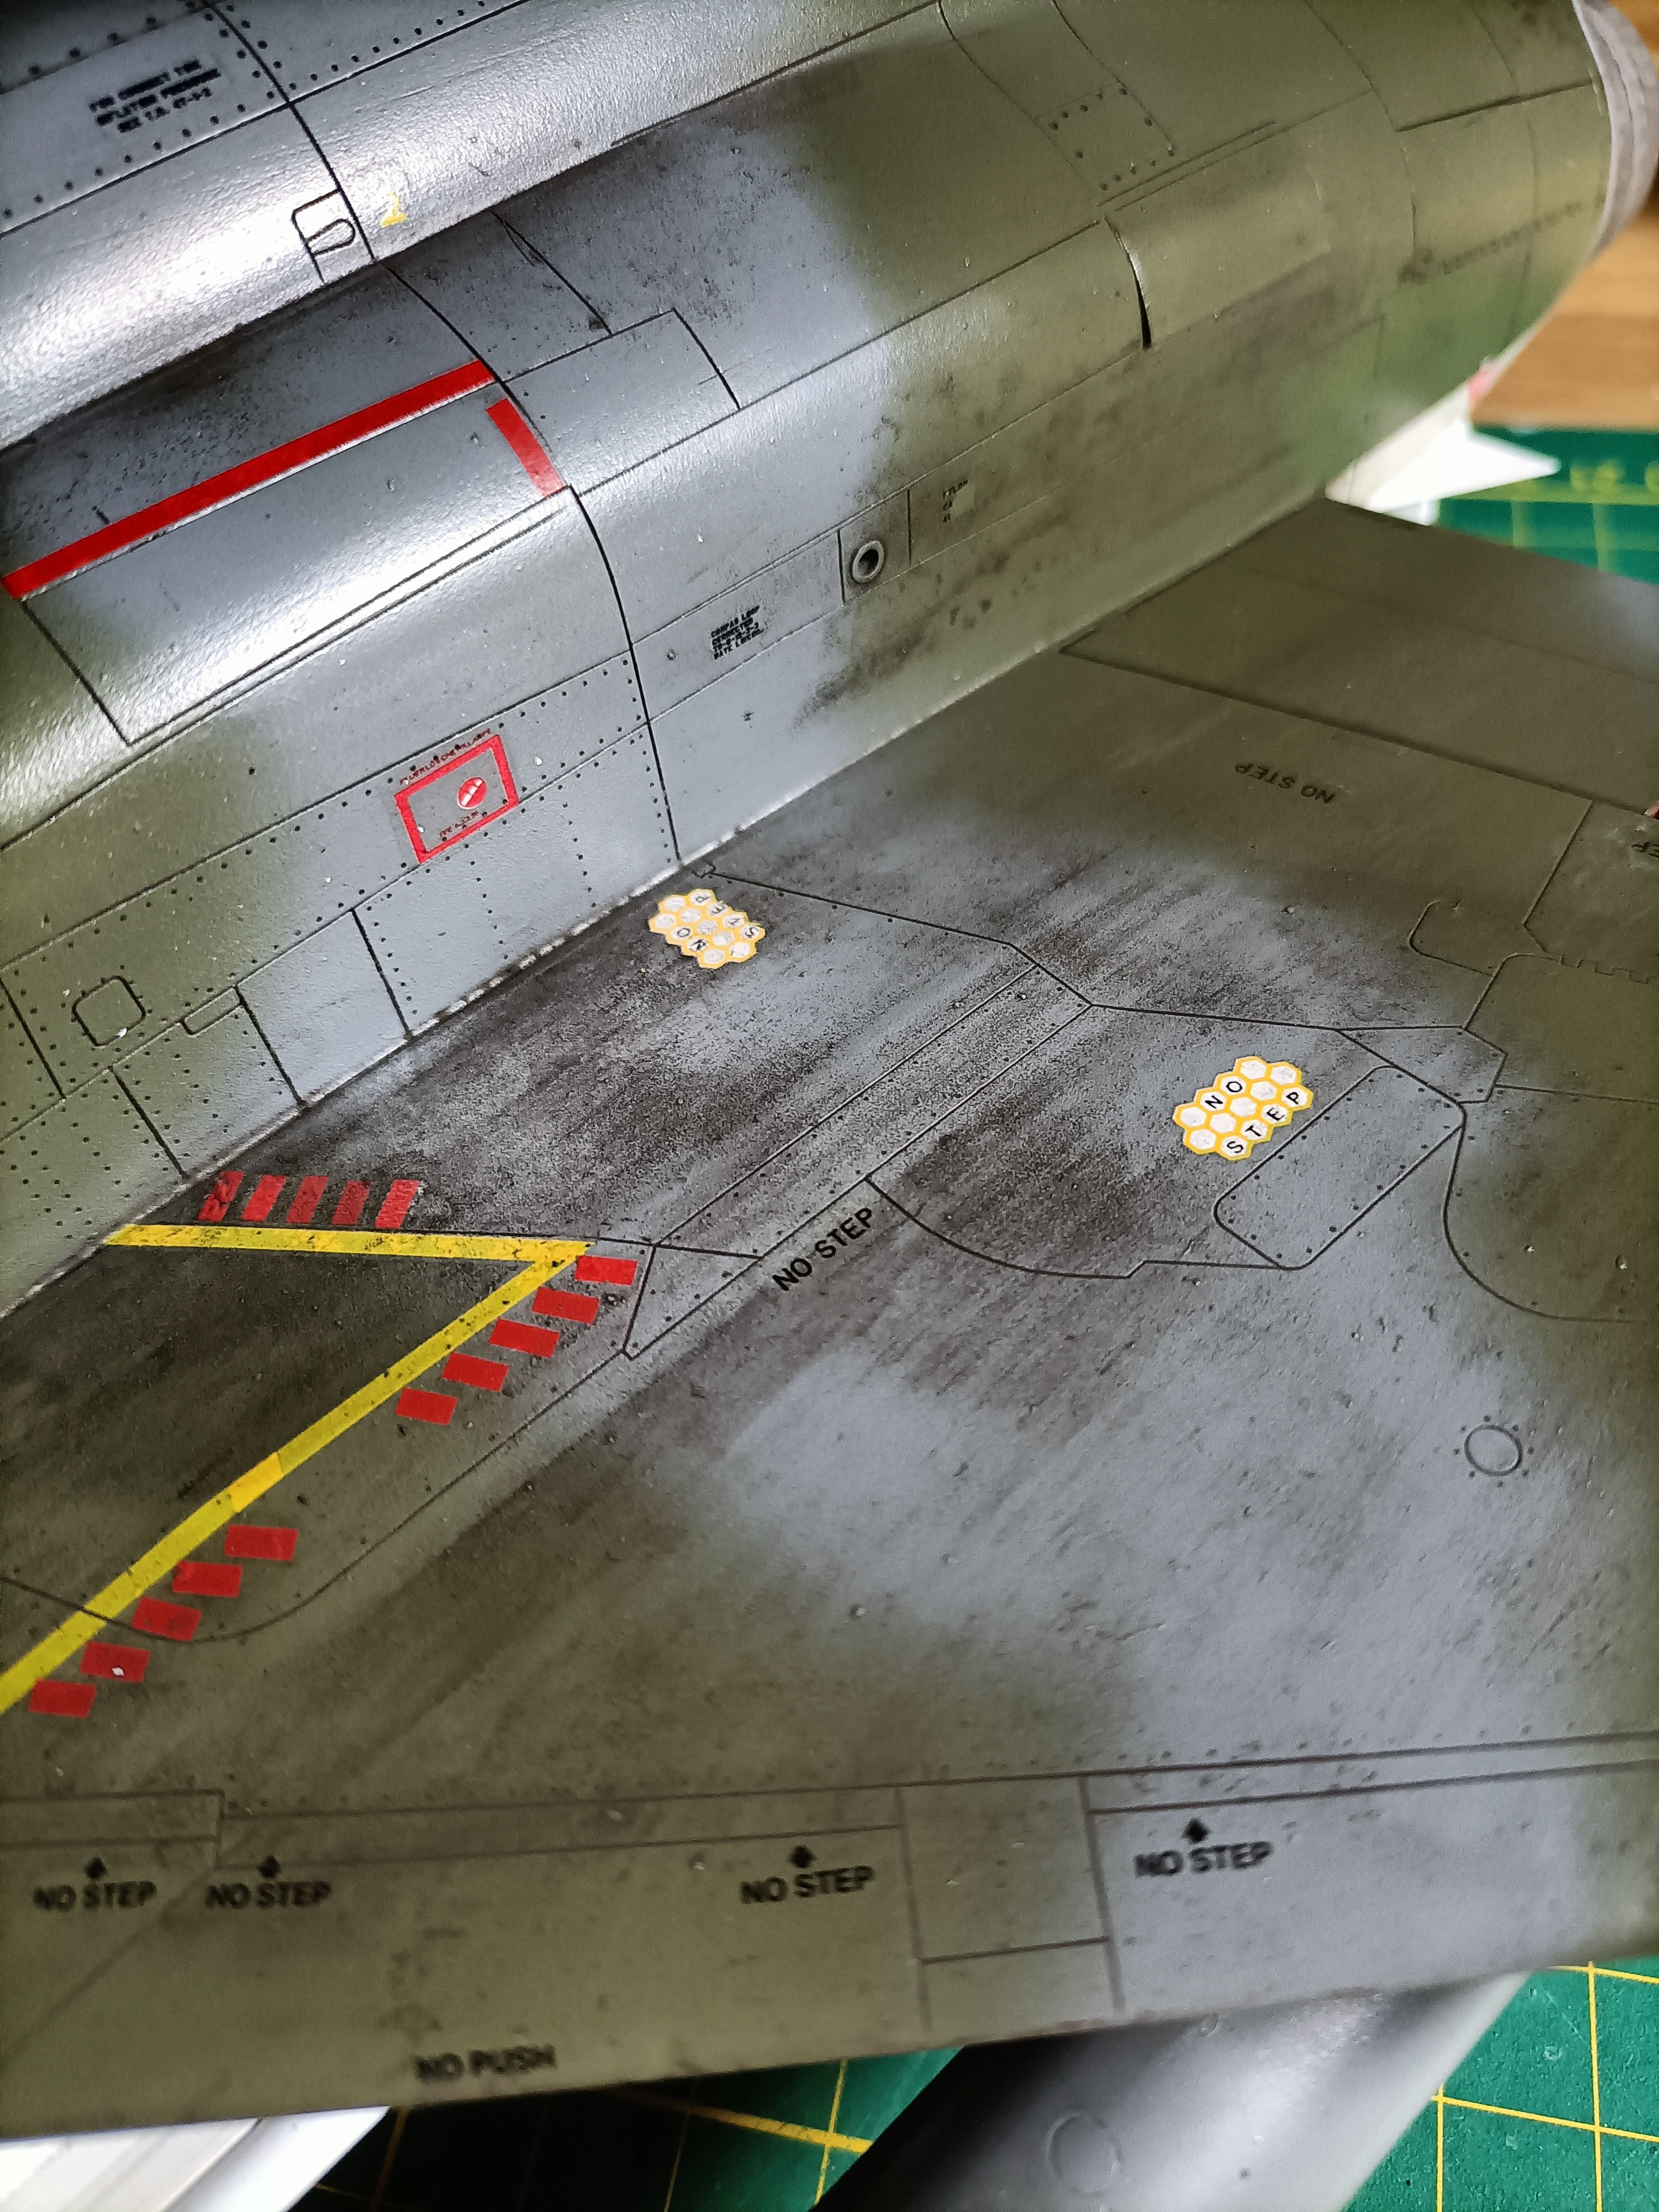
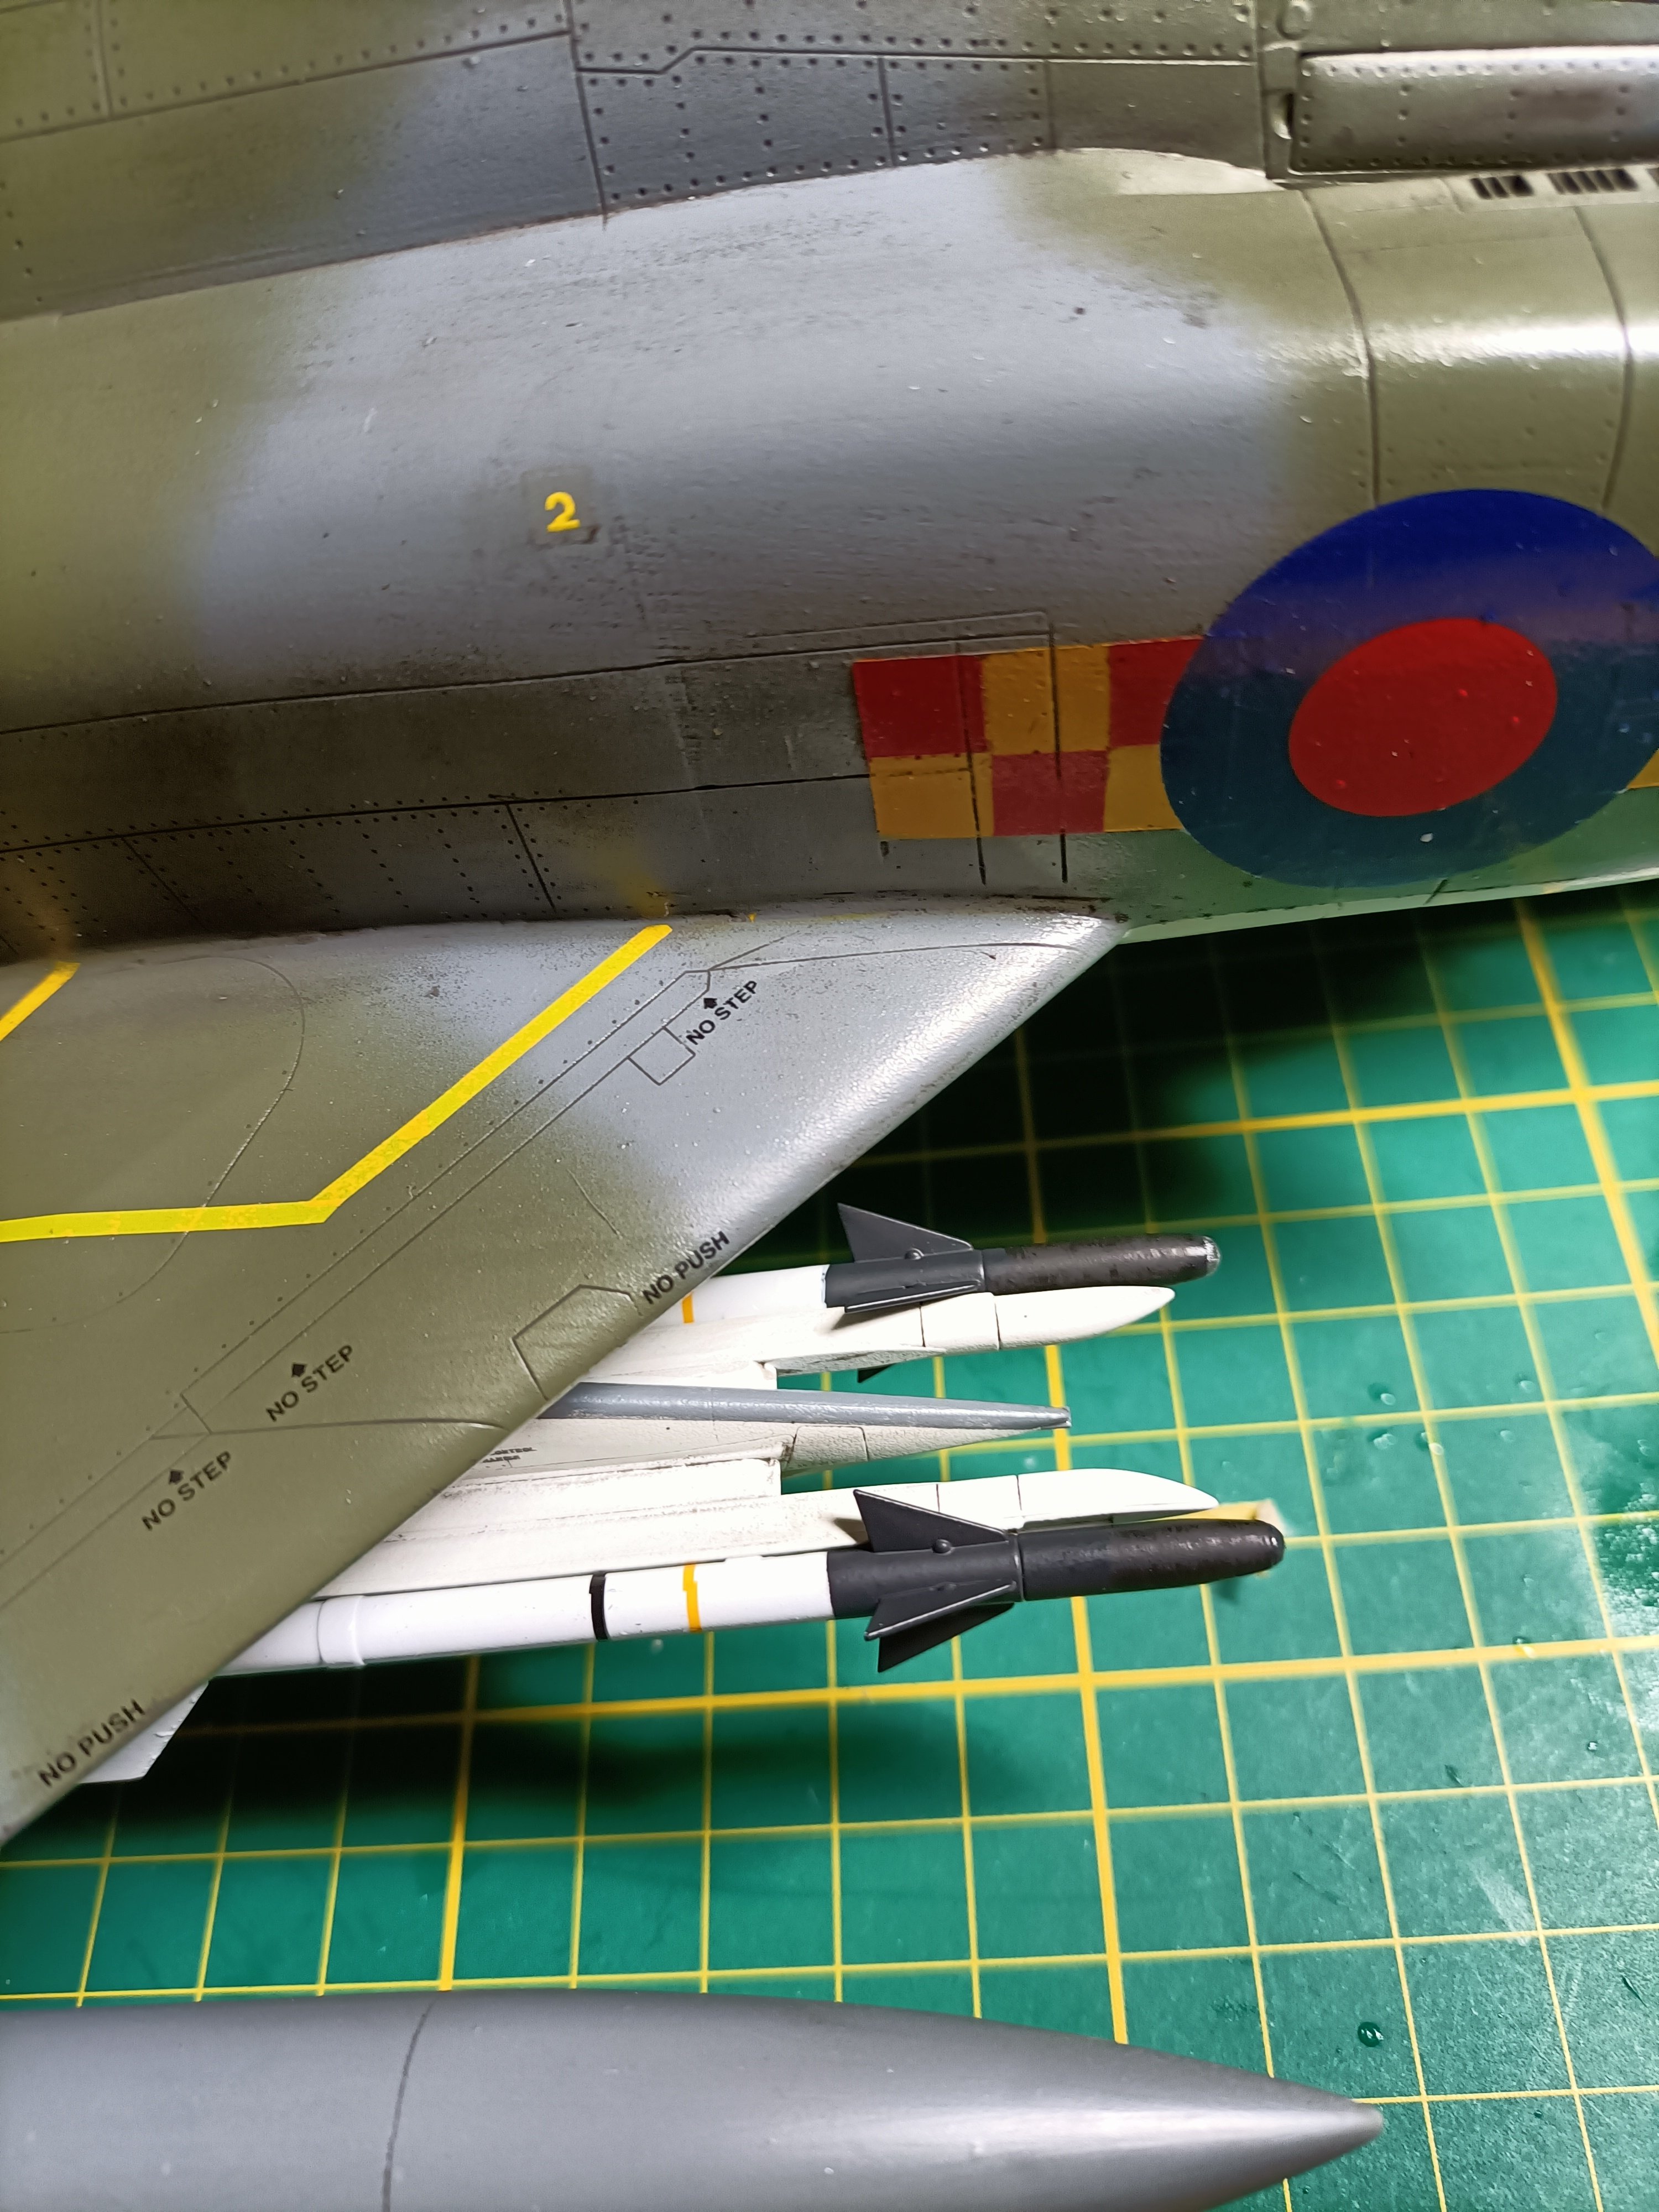
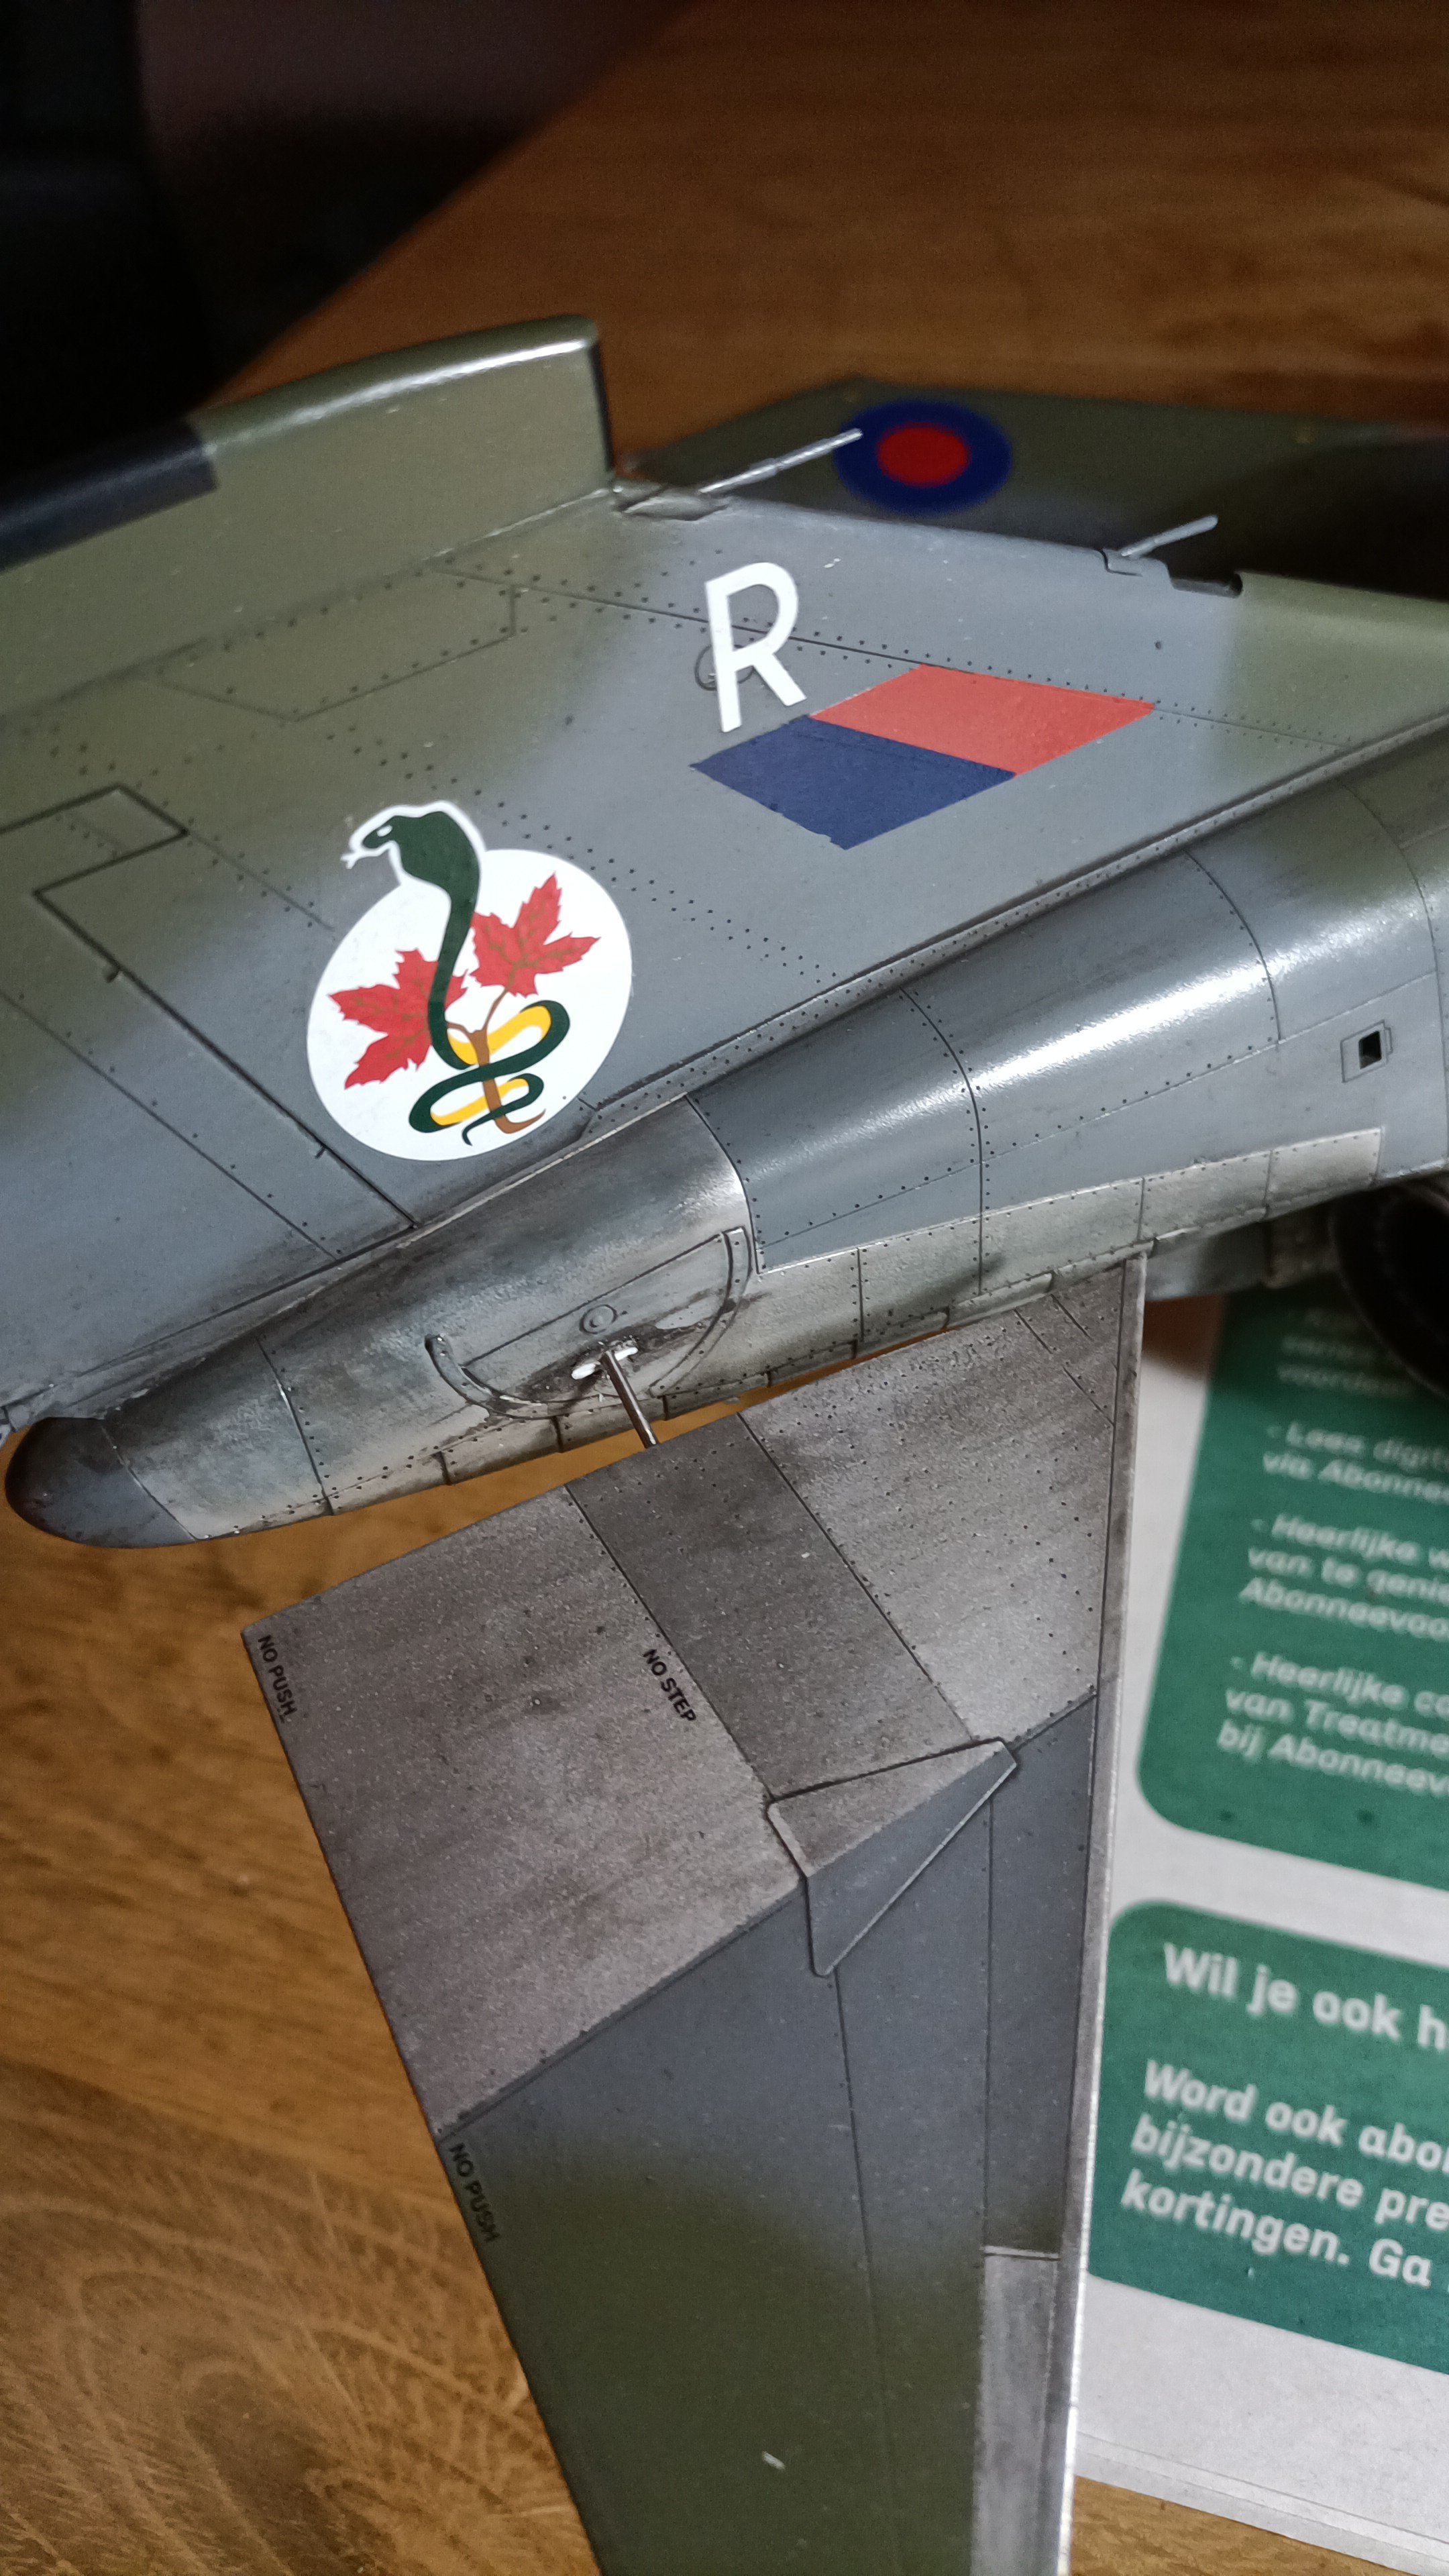
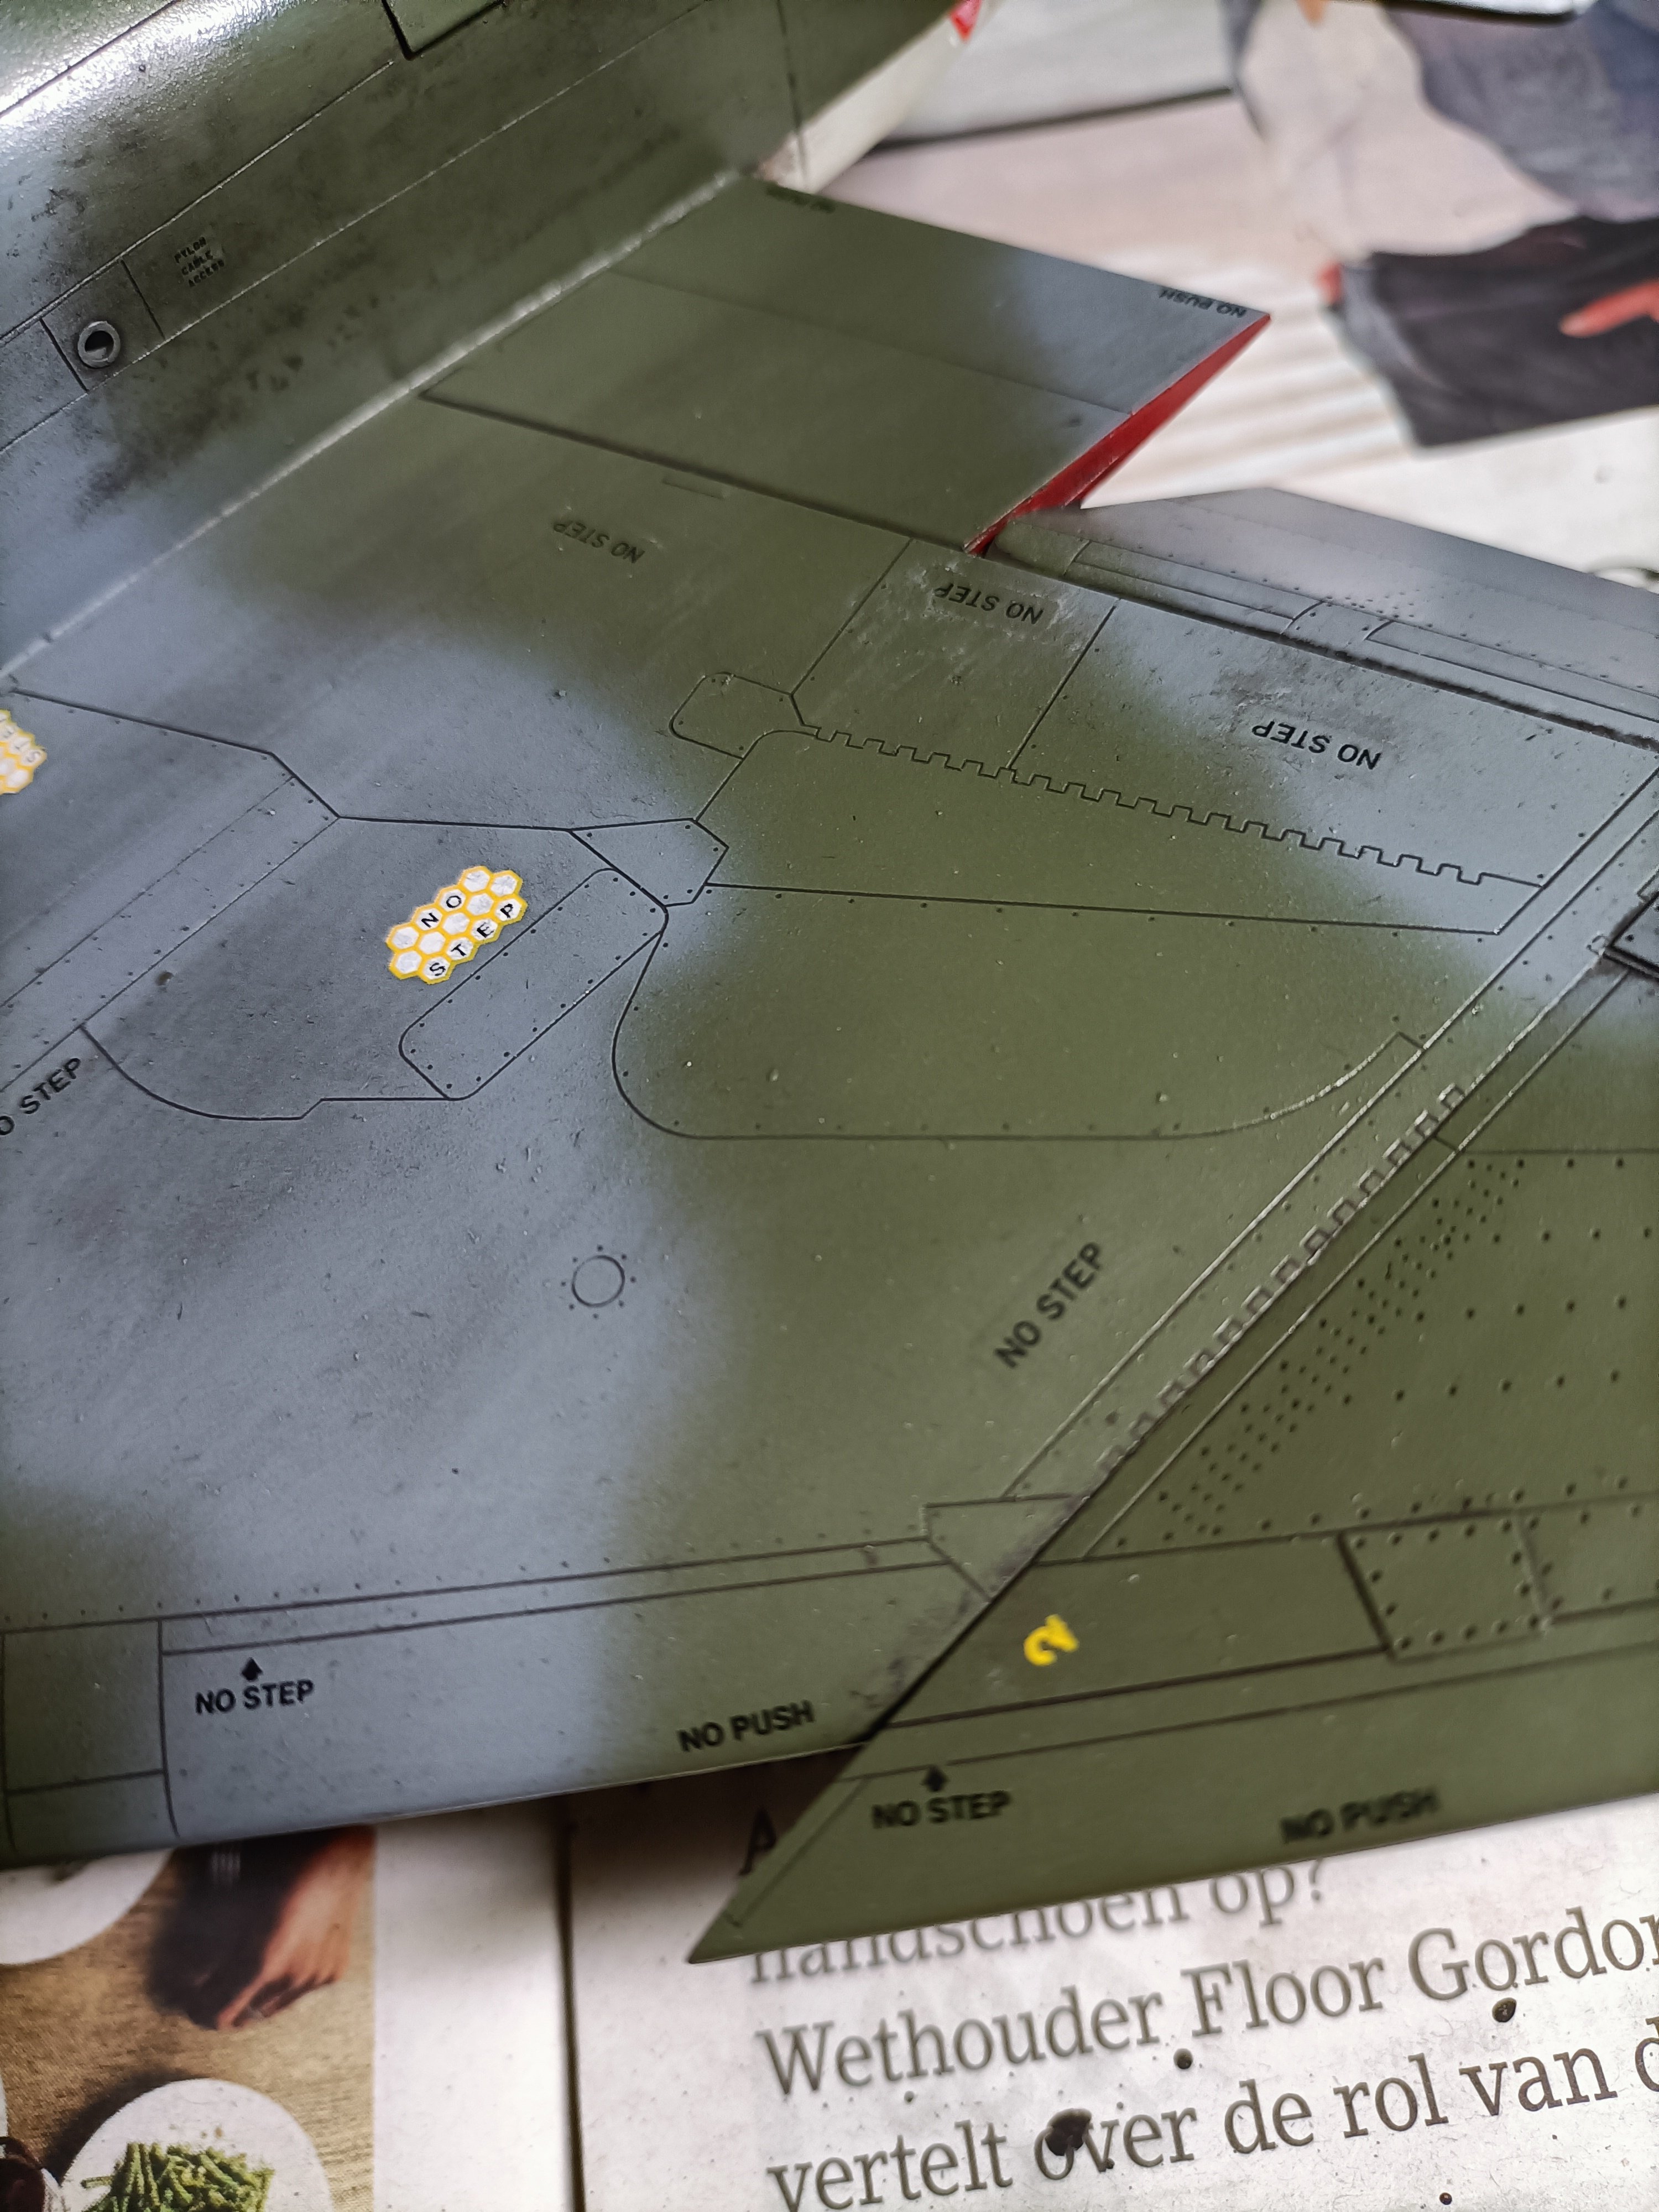
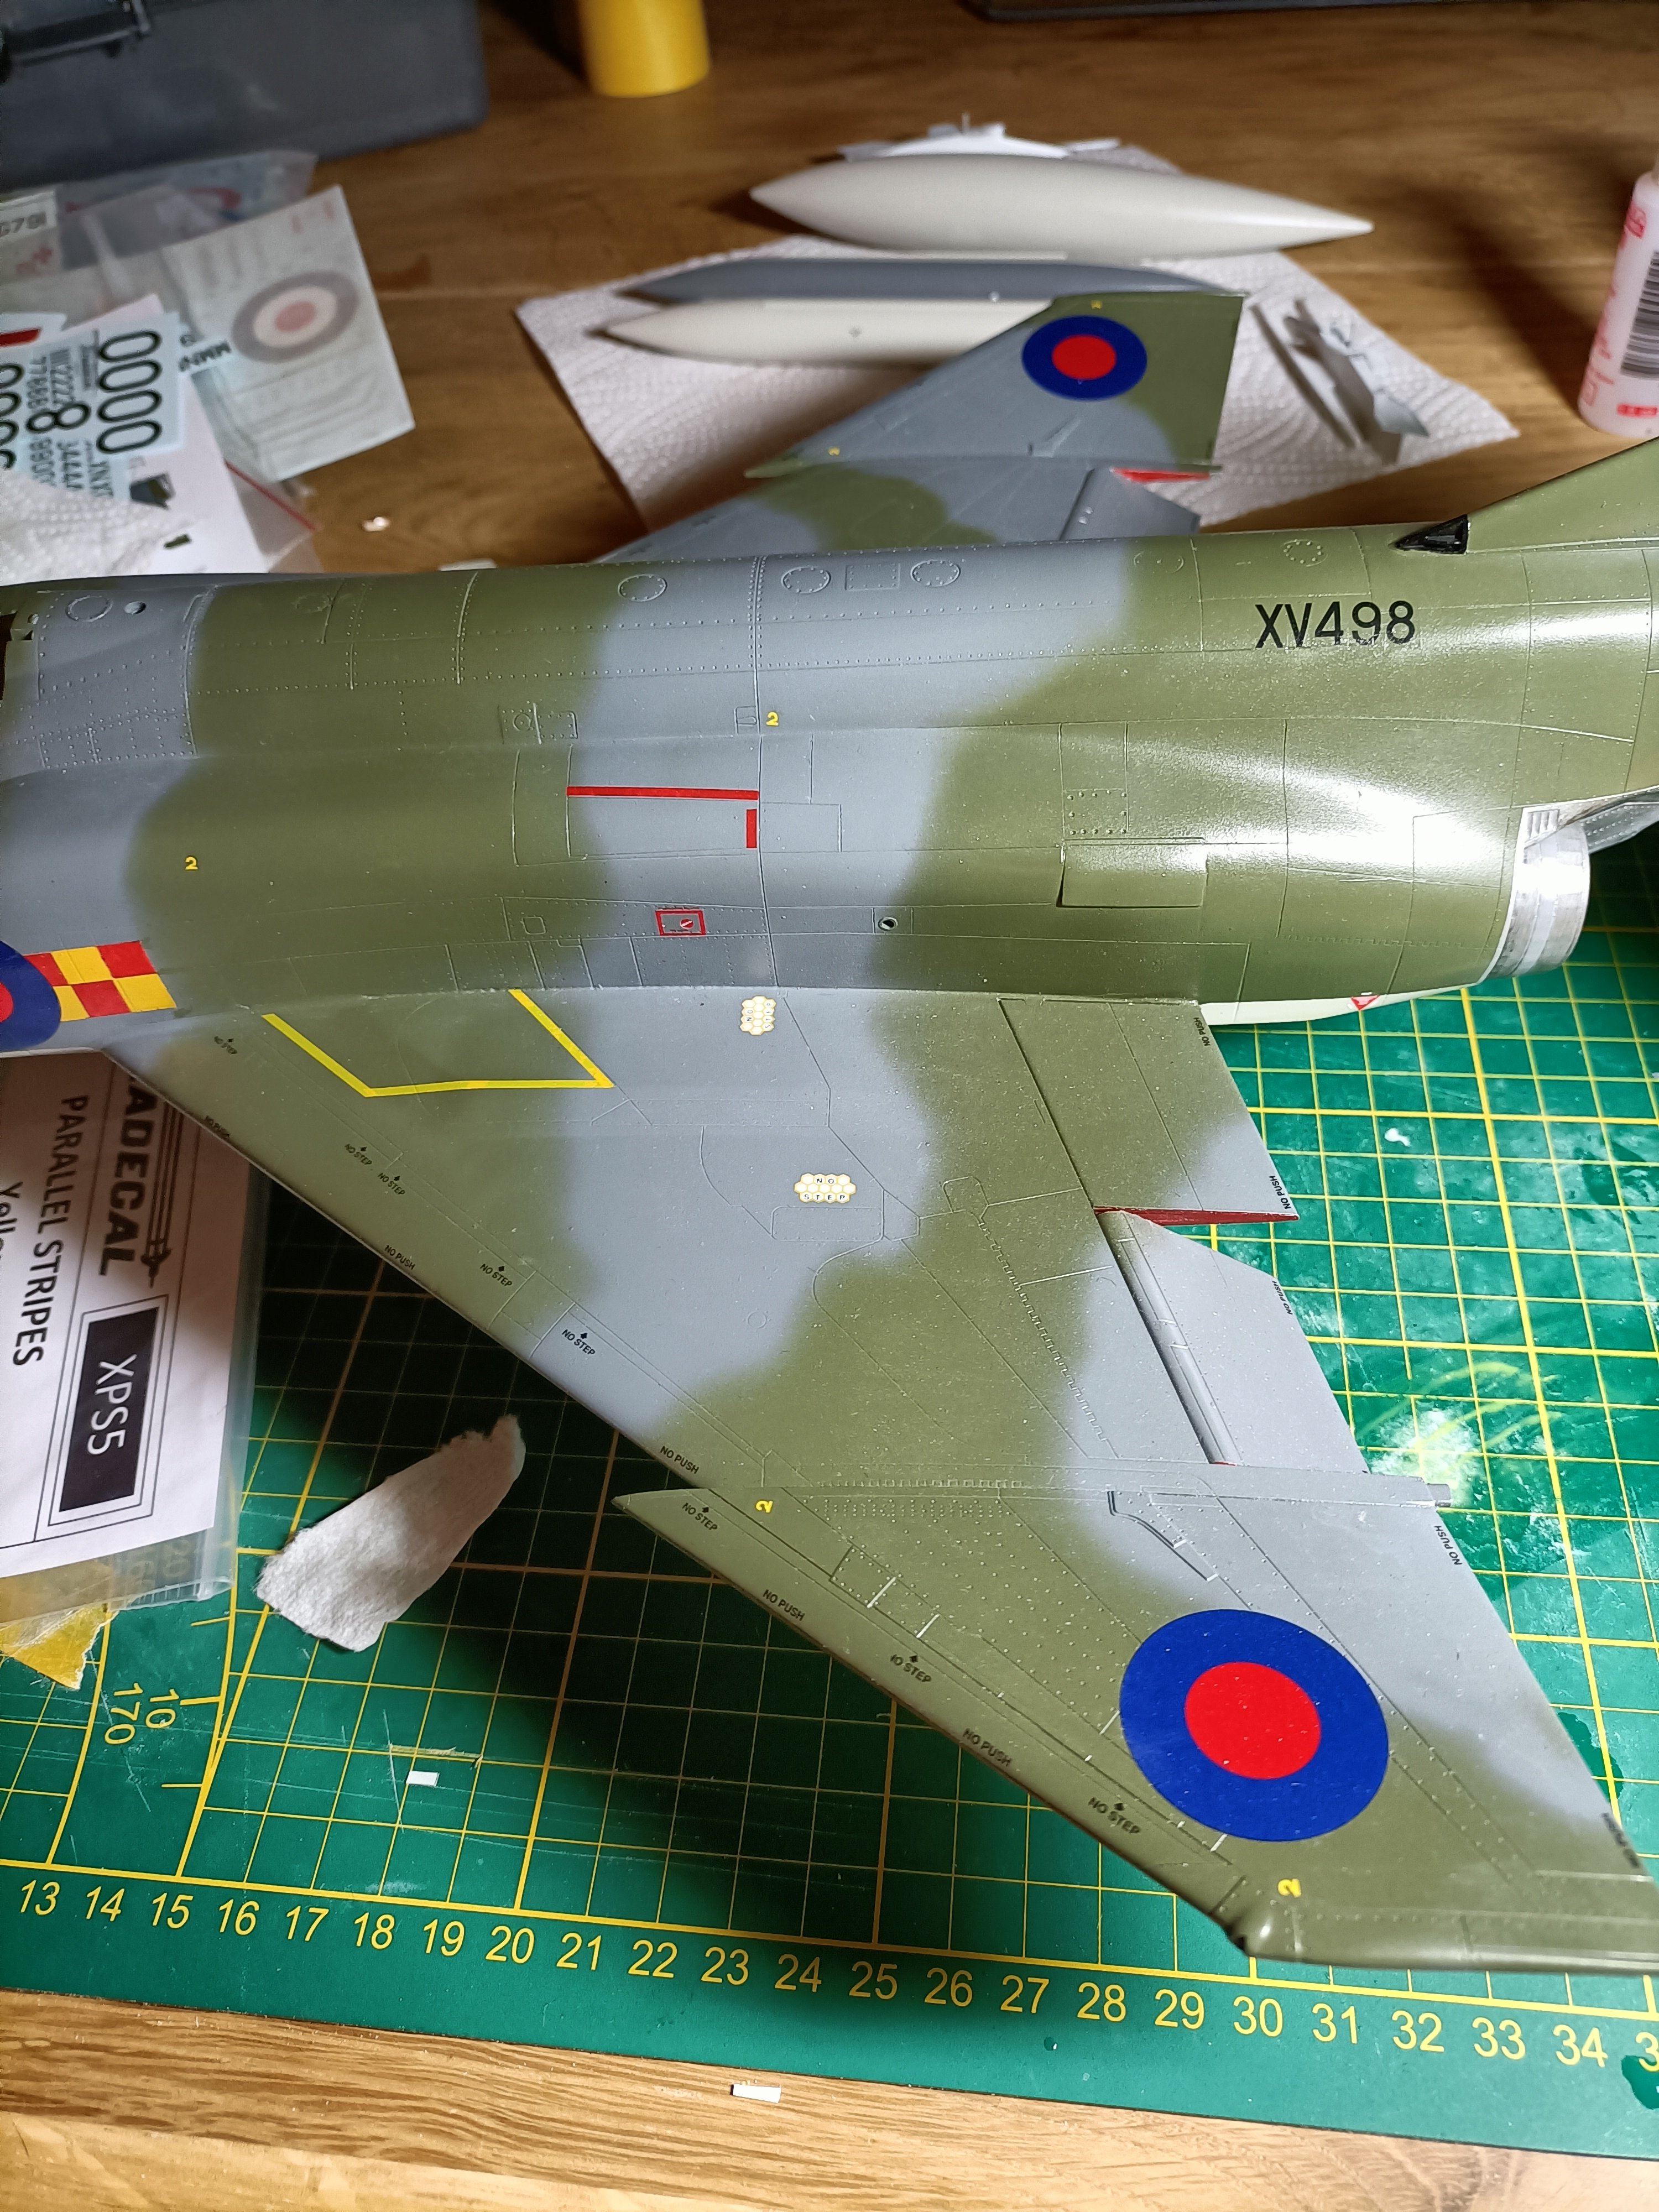
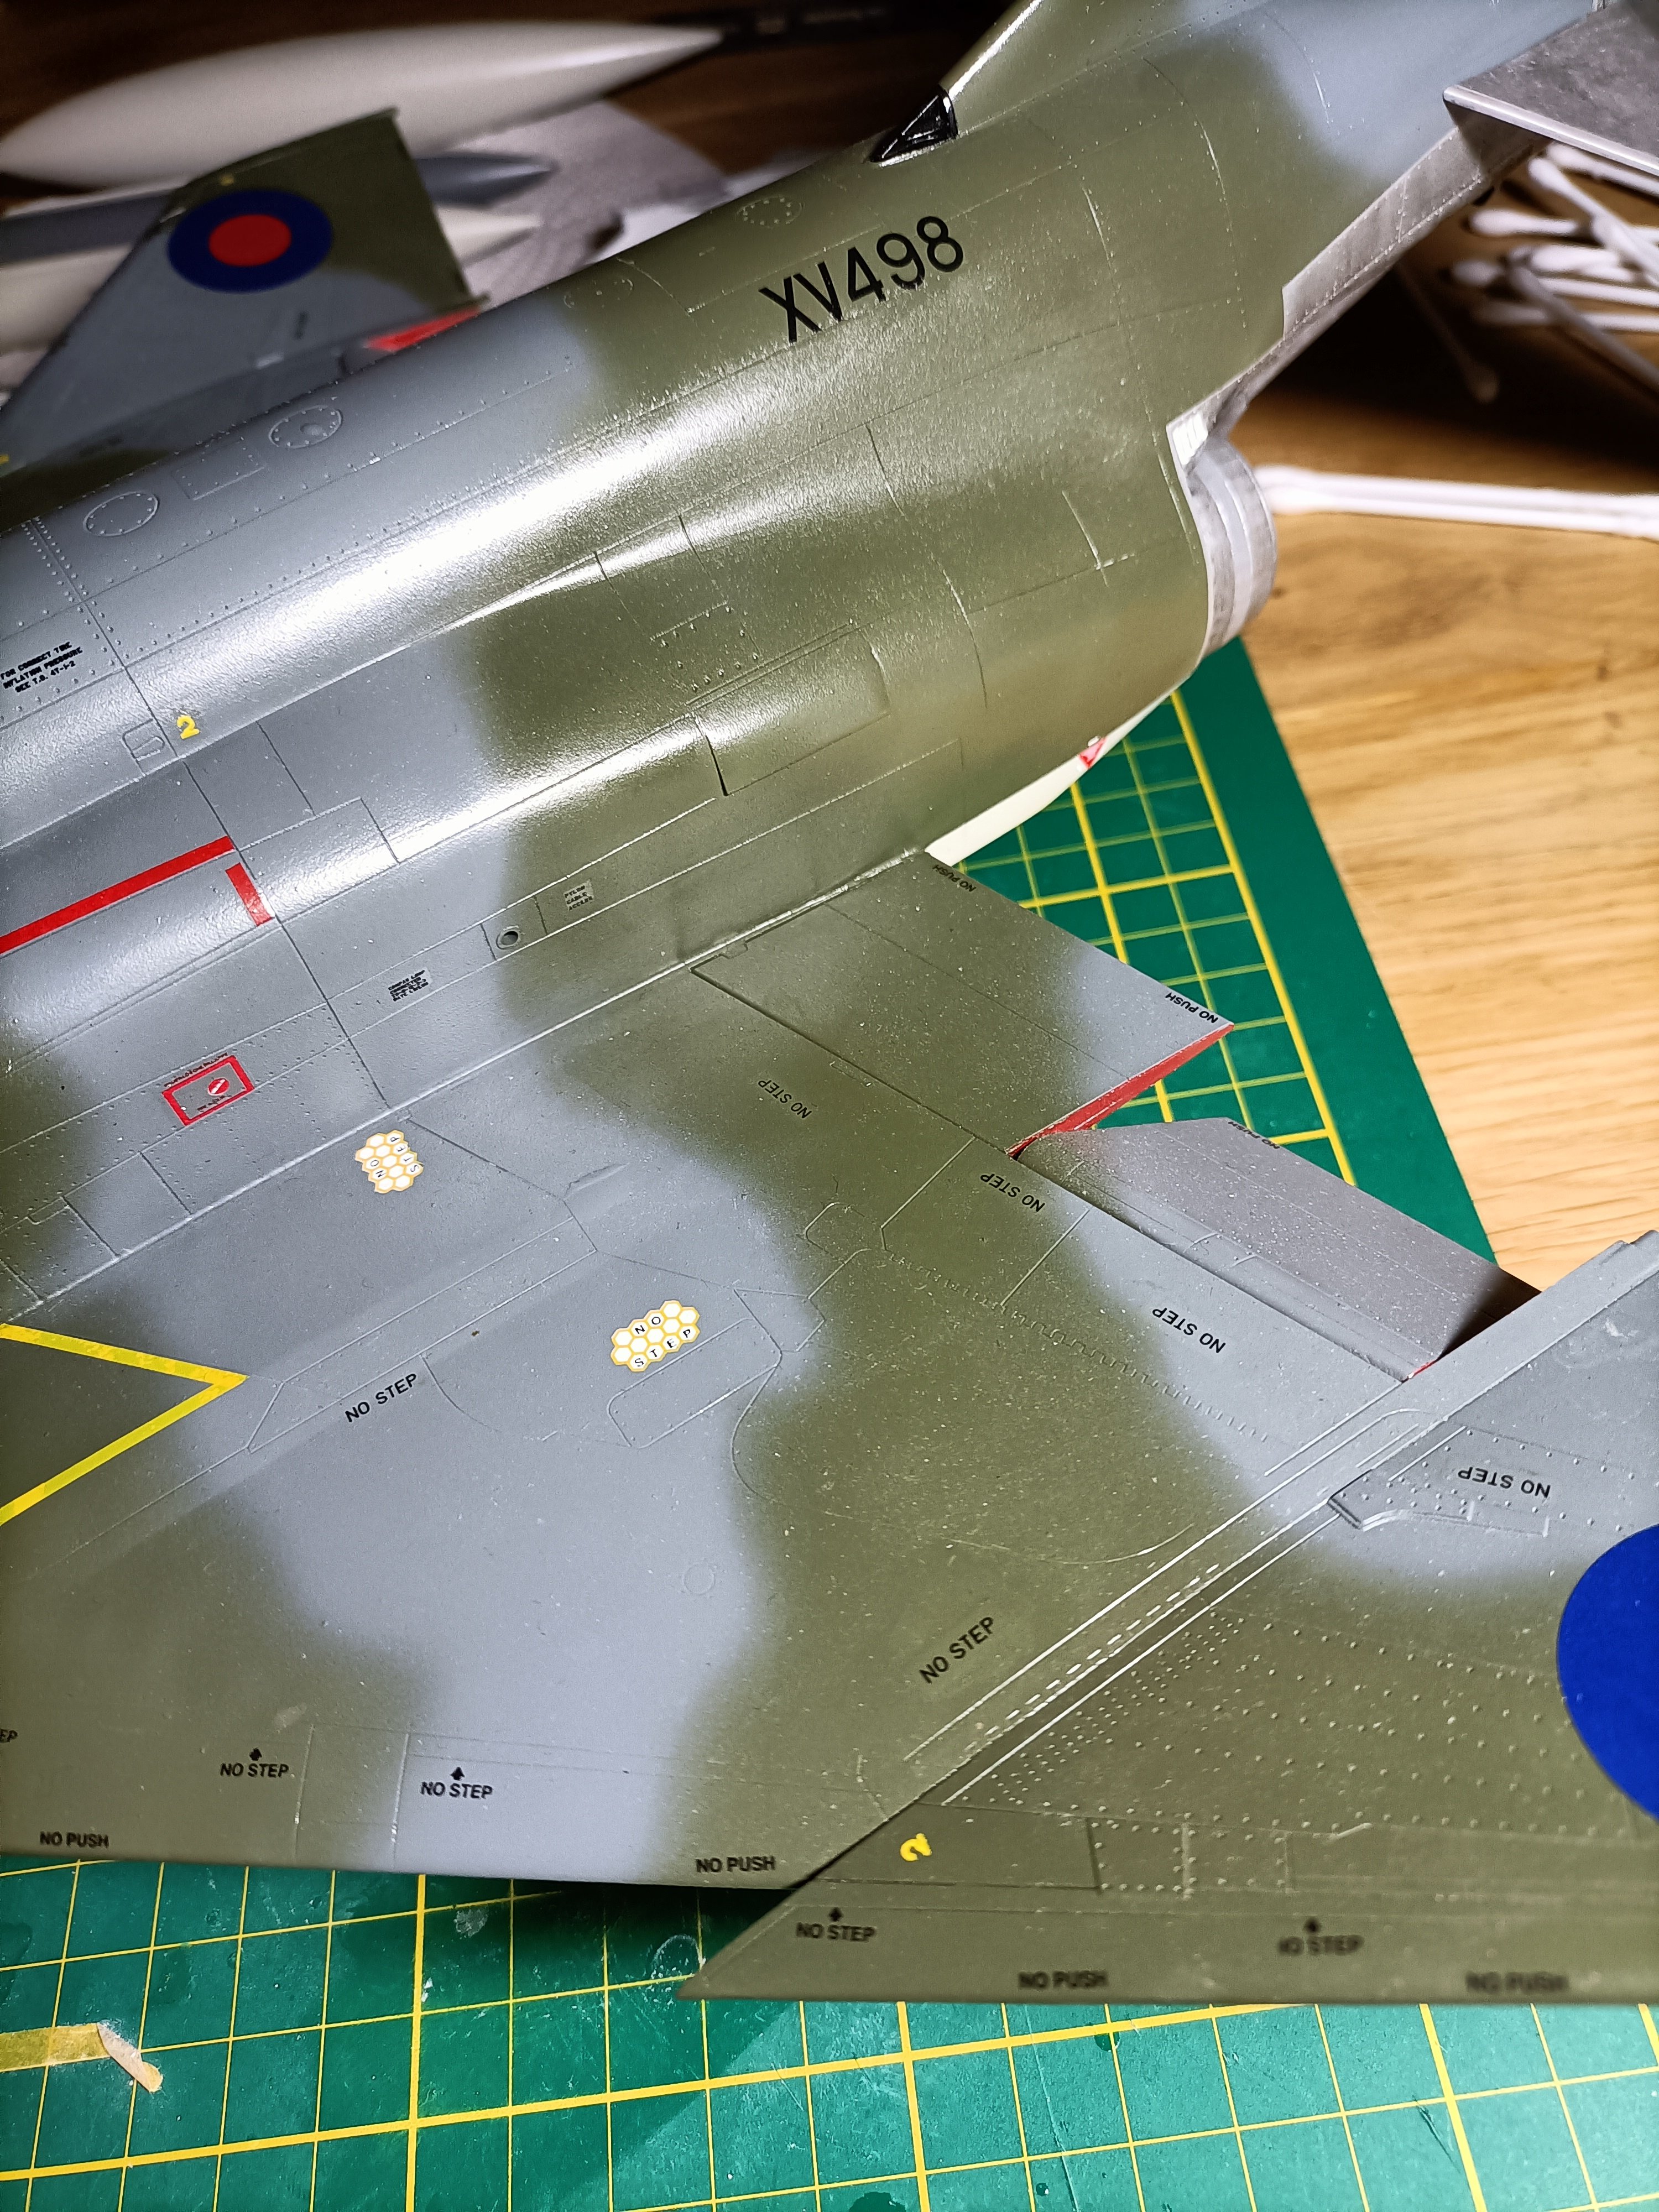
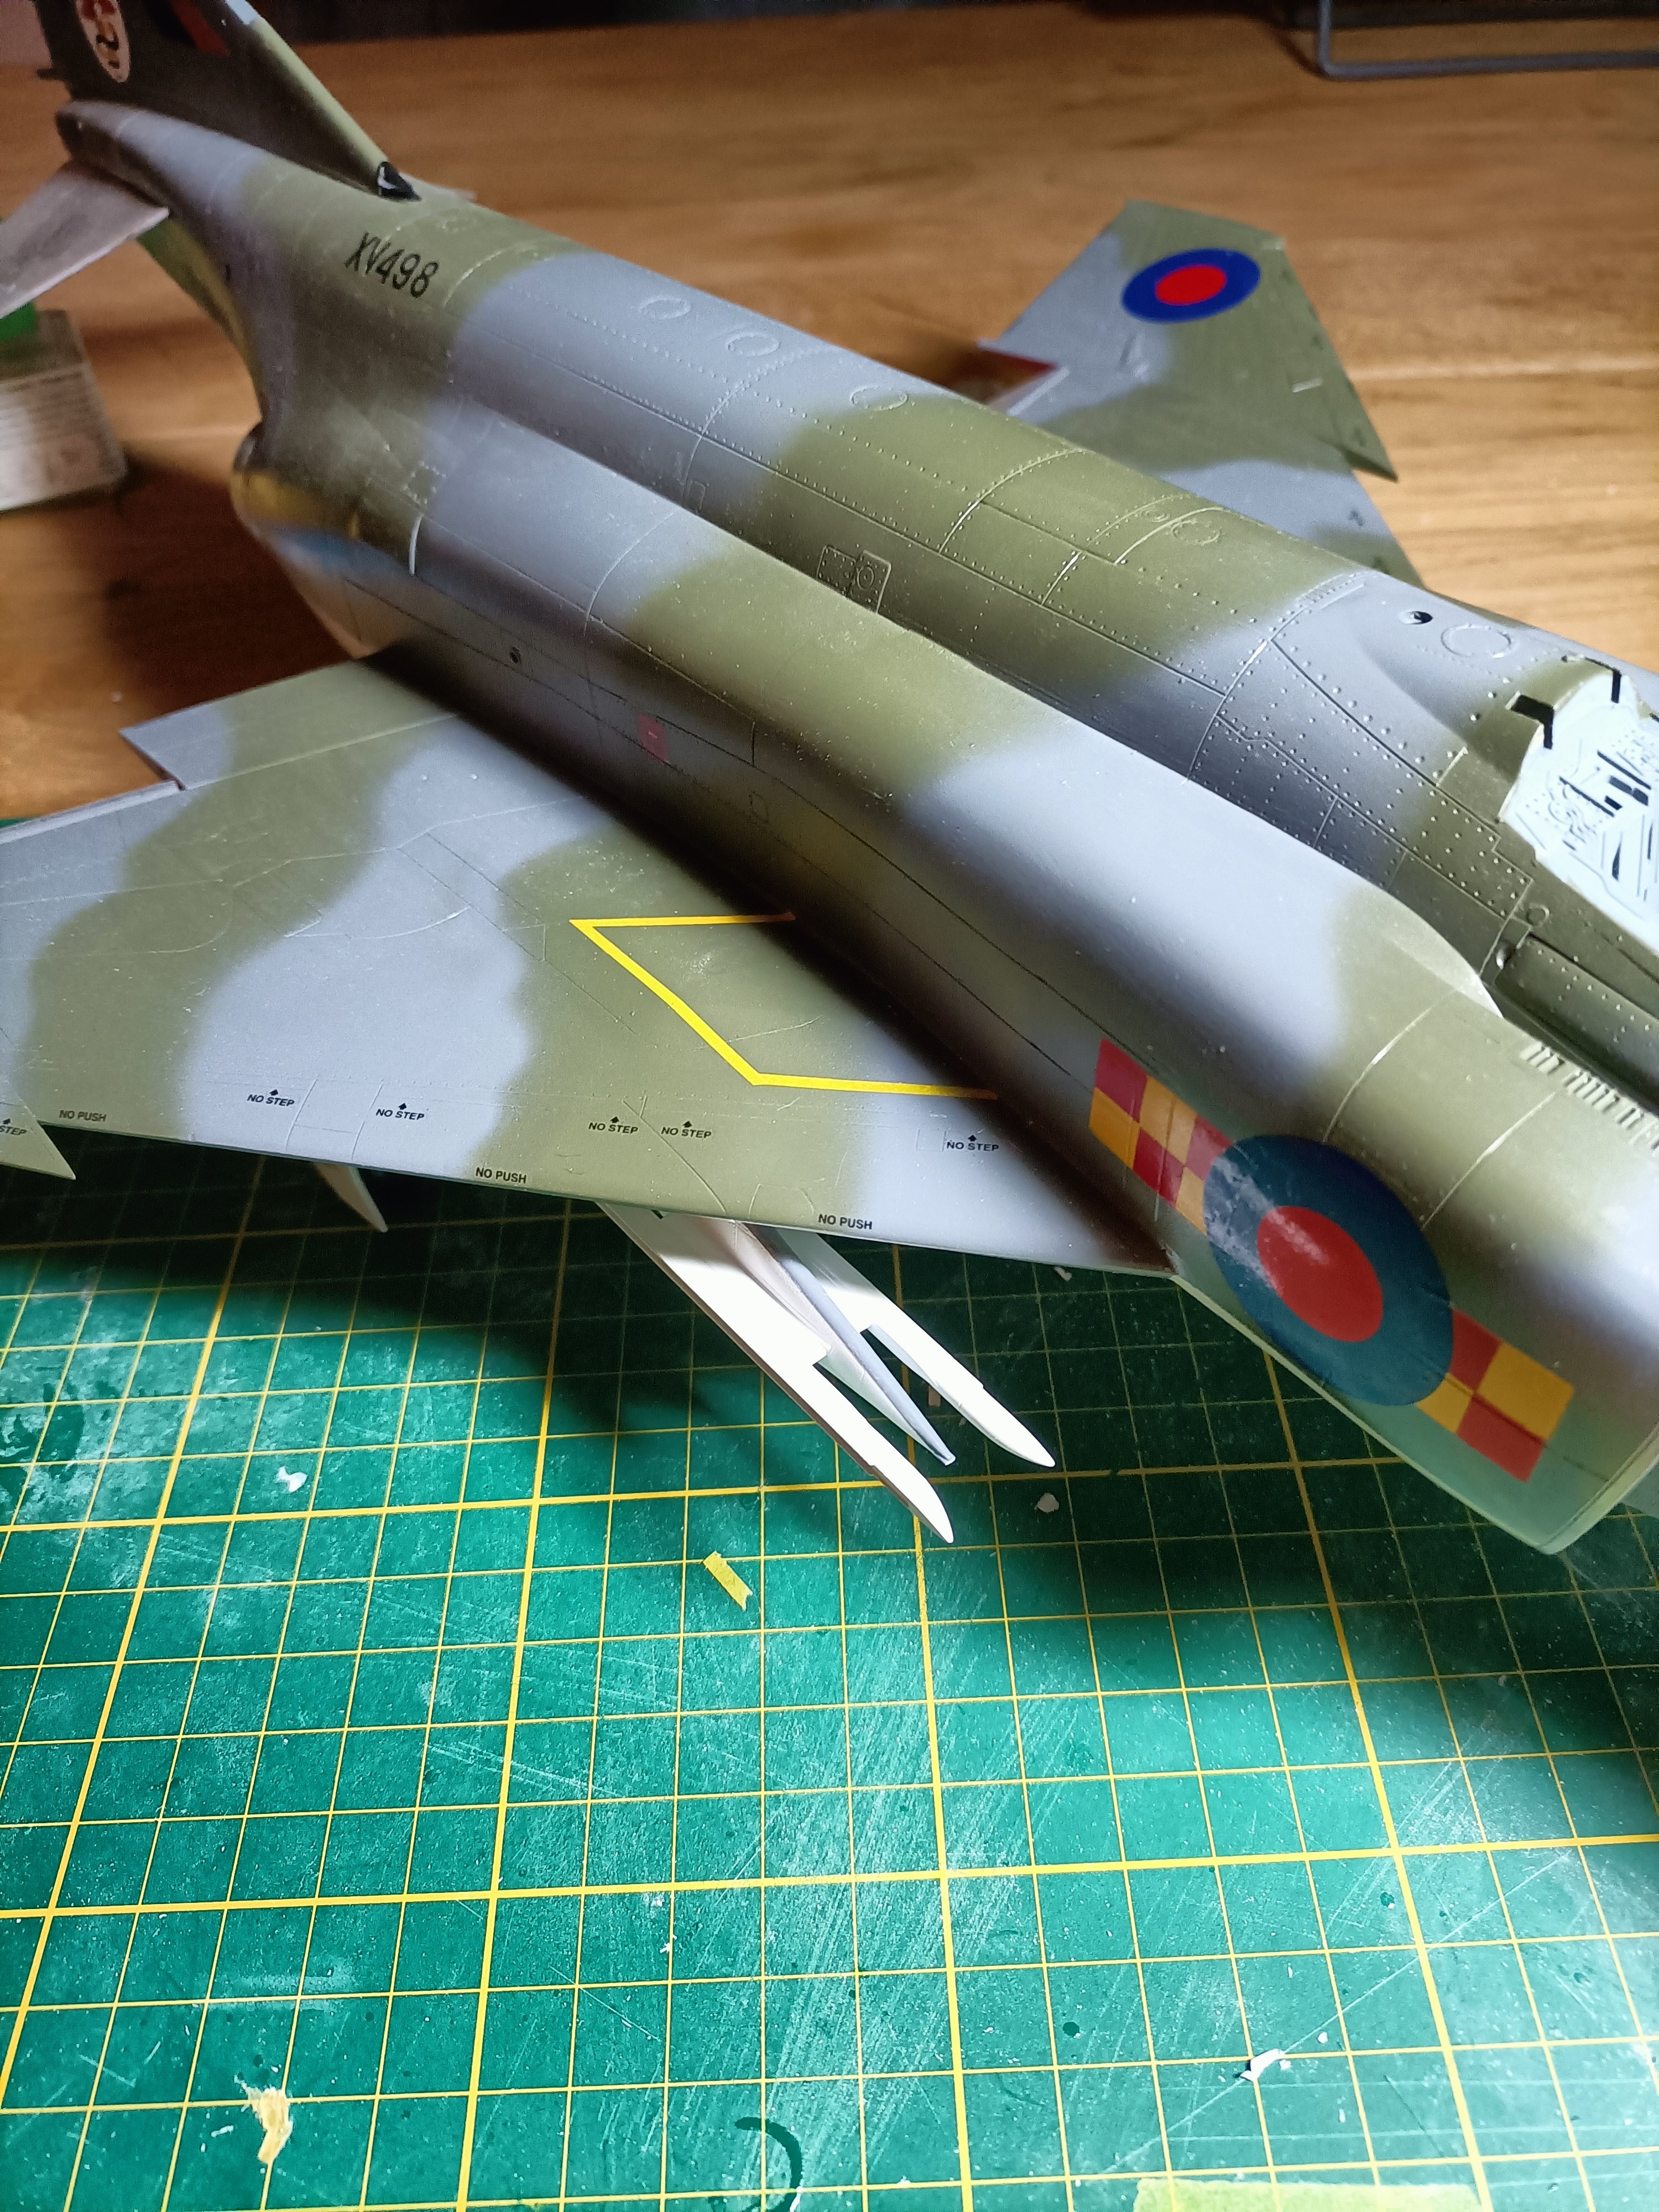
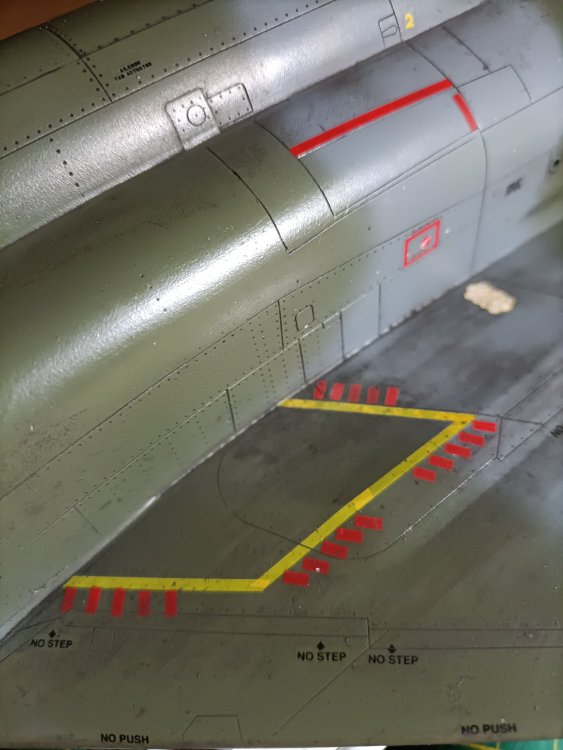
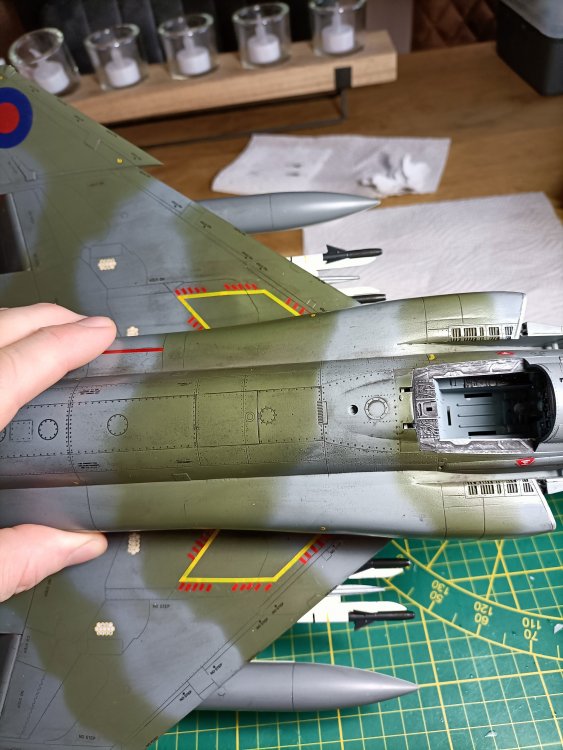
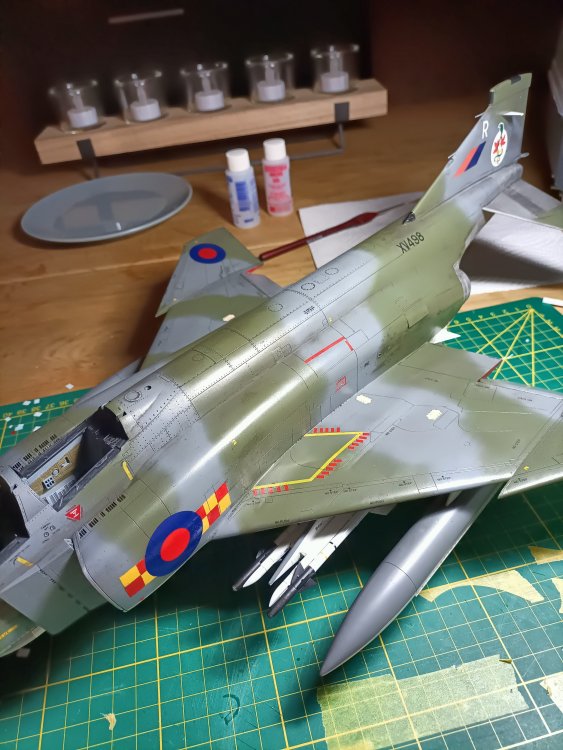
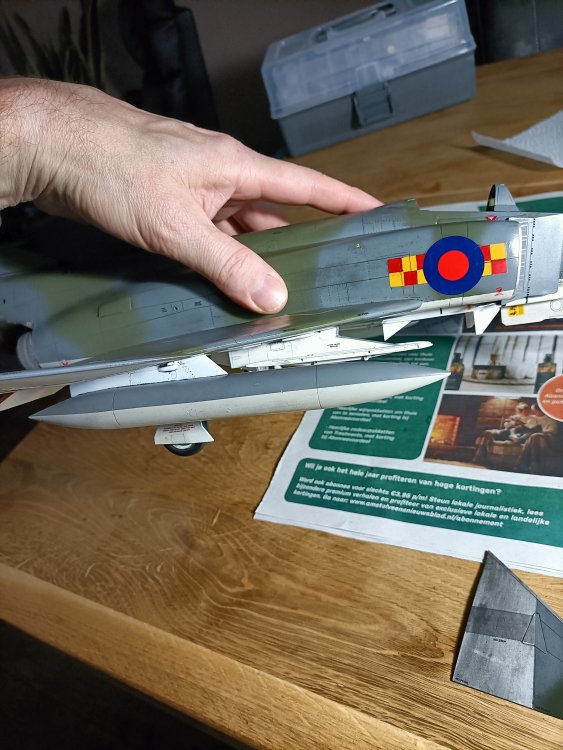
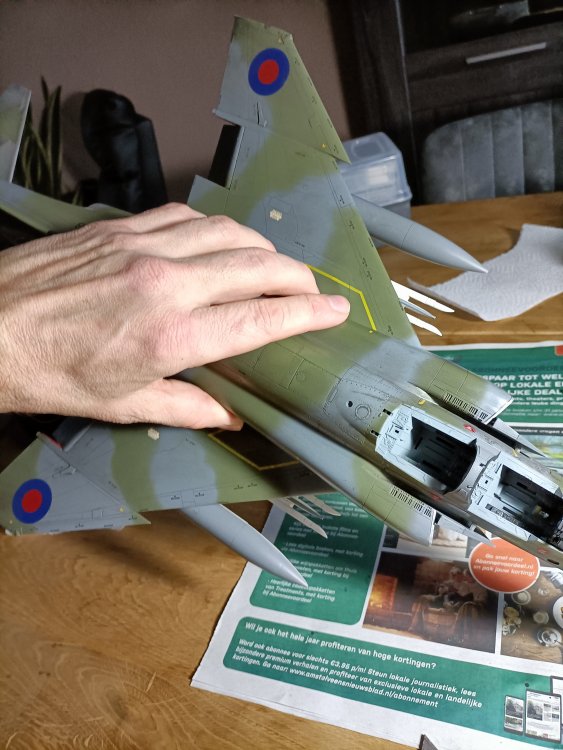
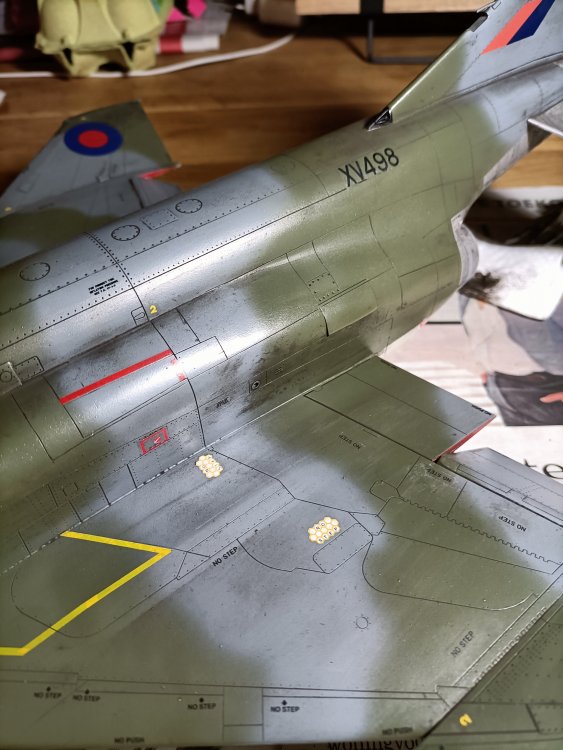
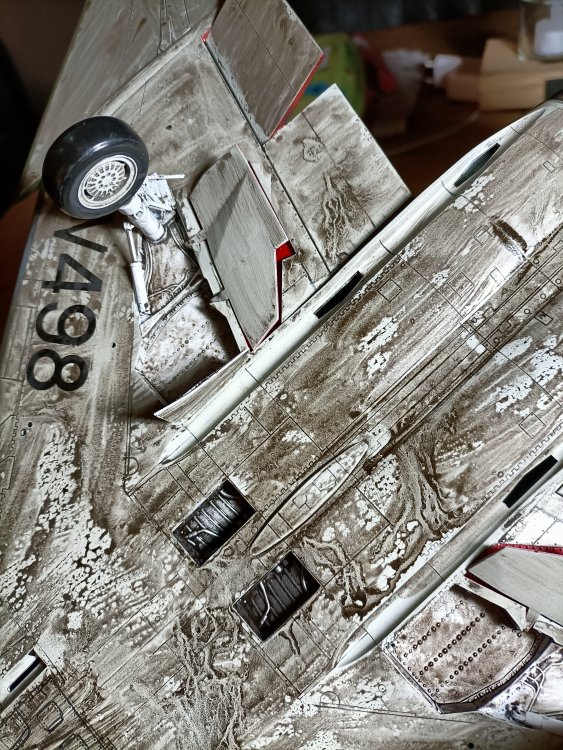
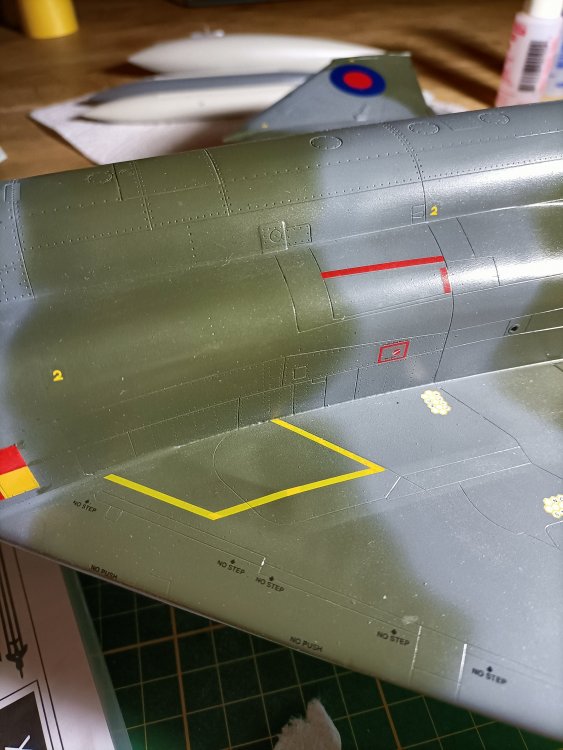
Strange that when you dread a certain job in scale modelling, it is actually quite simple. For instance the FGR-2 wing walkways of which there is no aftermarket available. It only takes 20 teeny tiny strips of red decal,...each side. Starboard one will be done tomorrow. The central fueltank got it's Flory wash.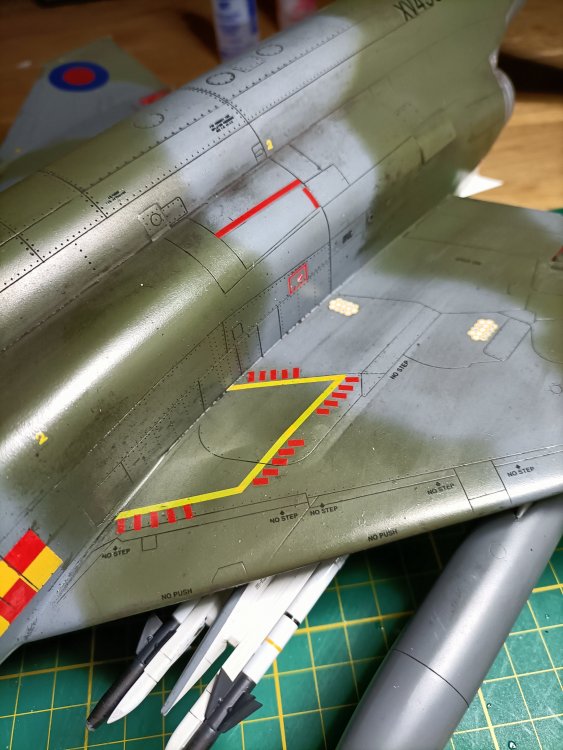

- 414 replies
-
- 6
-
-
-
- conversion
- phantom
- (and 1 more)
-
RR Spey powered RAF Phantom conversion
Wingco57 replied to Wingco57's topic in LSM 1/35 and Larger Work In Progress
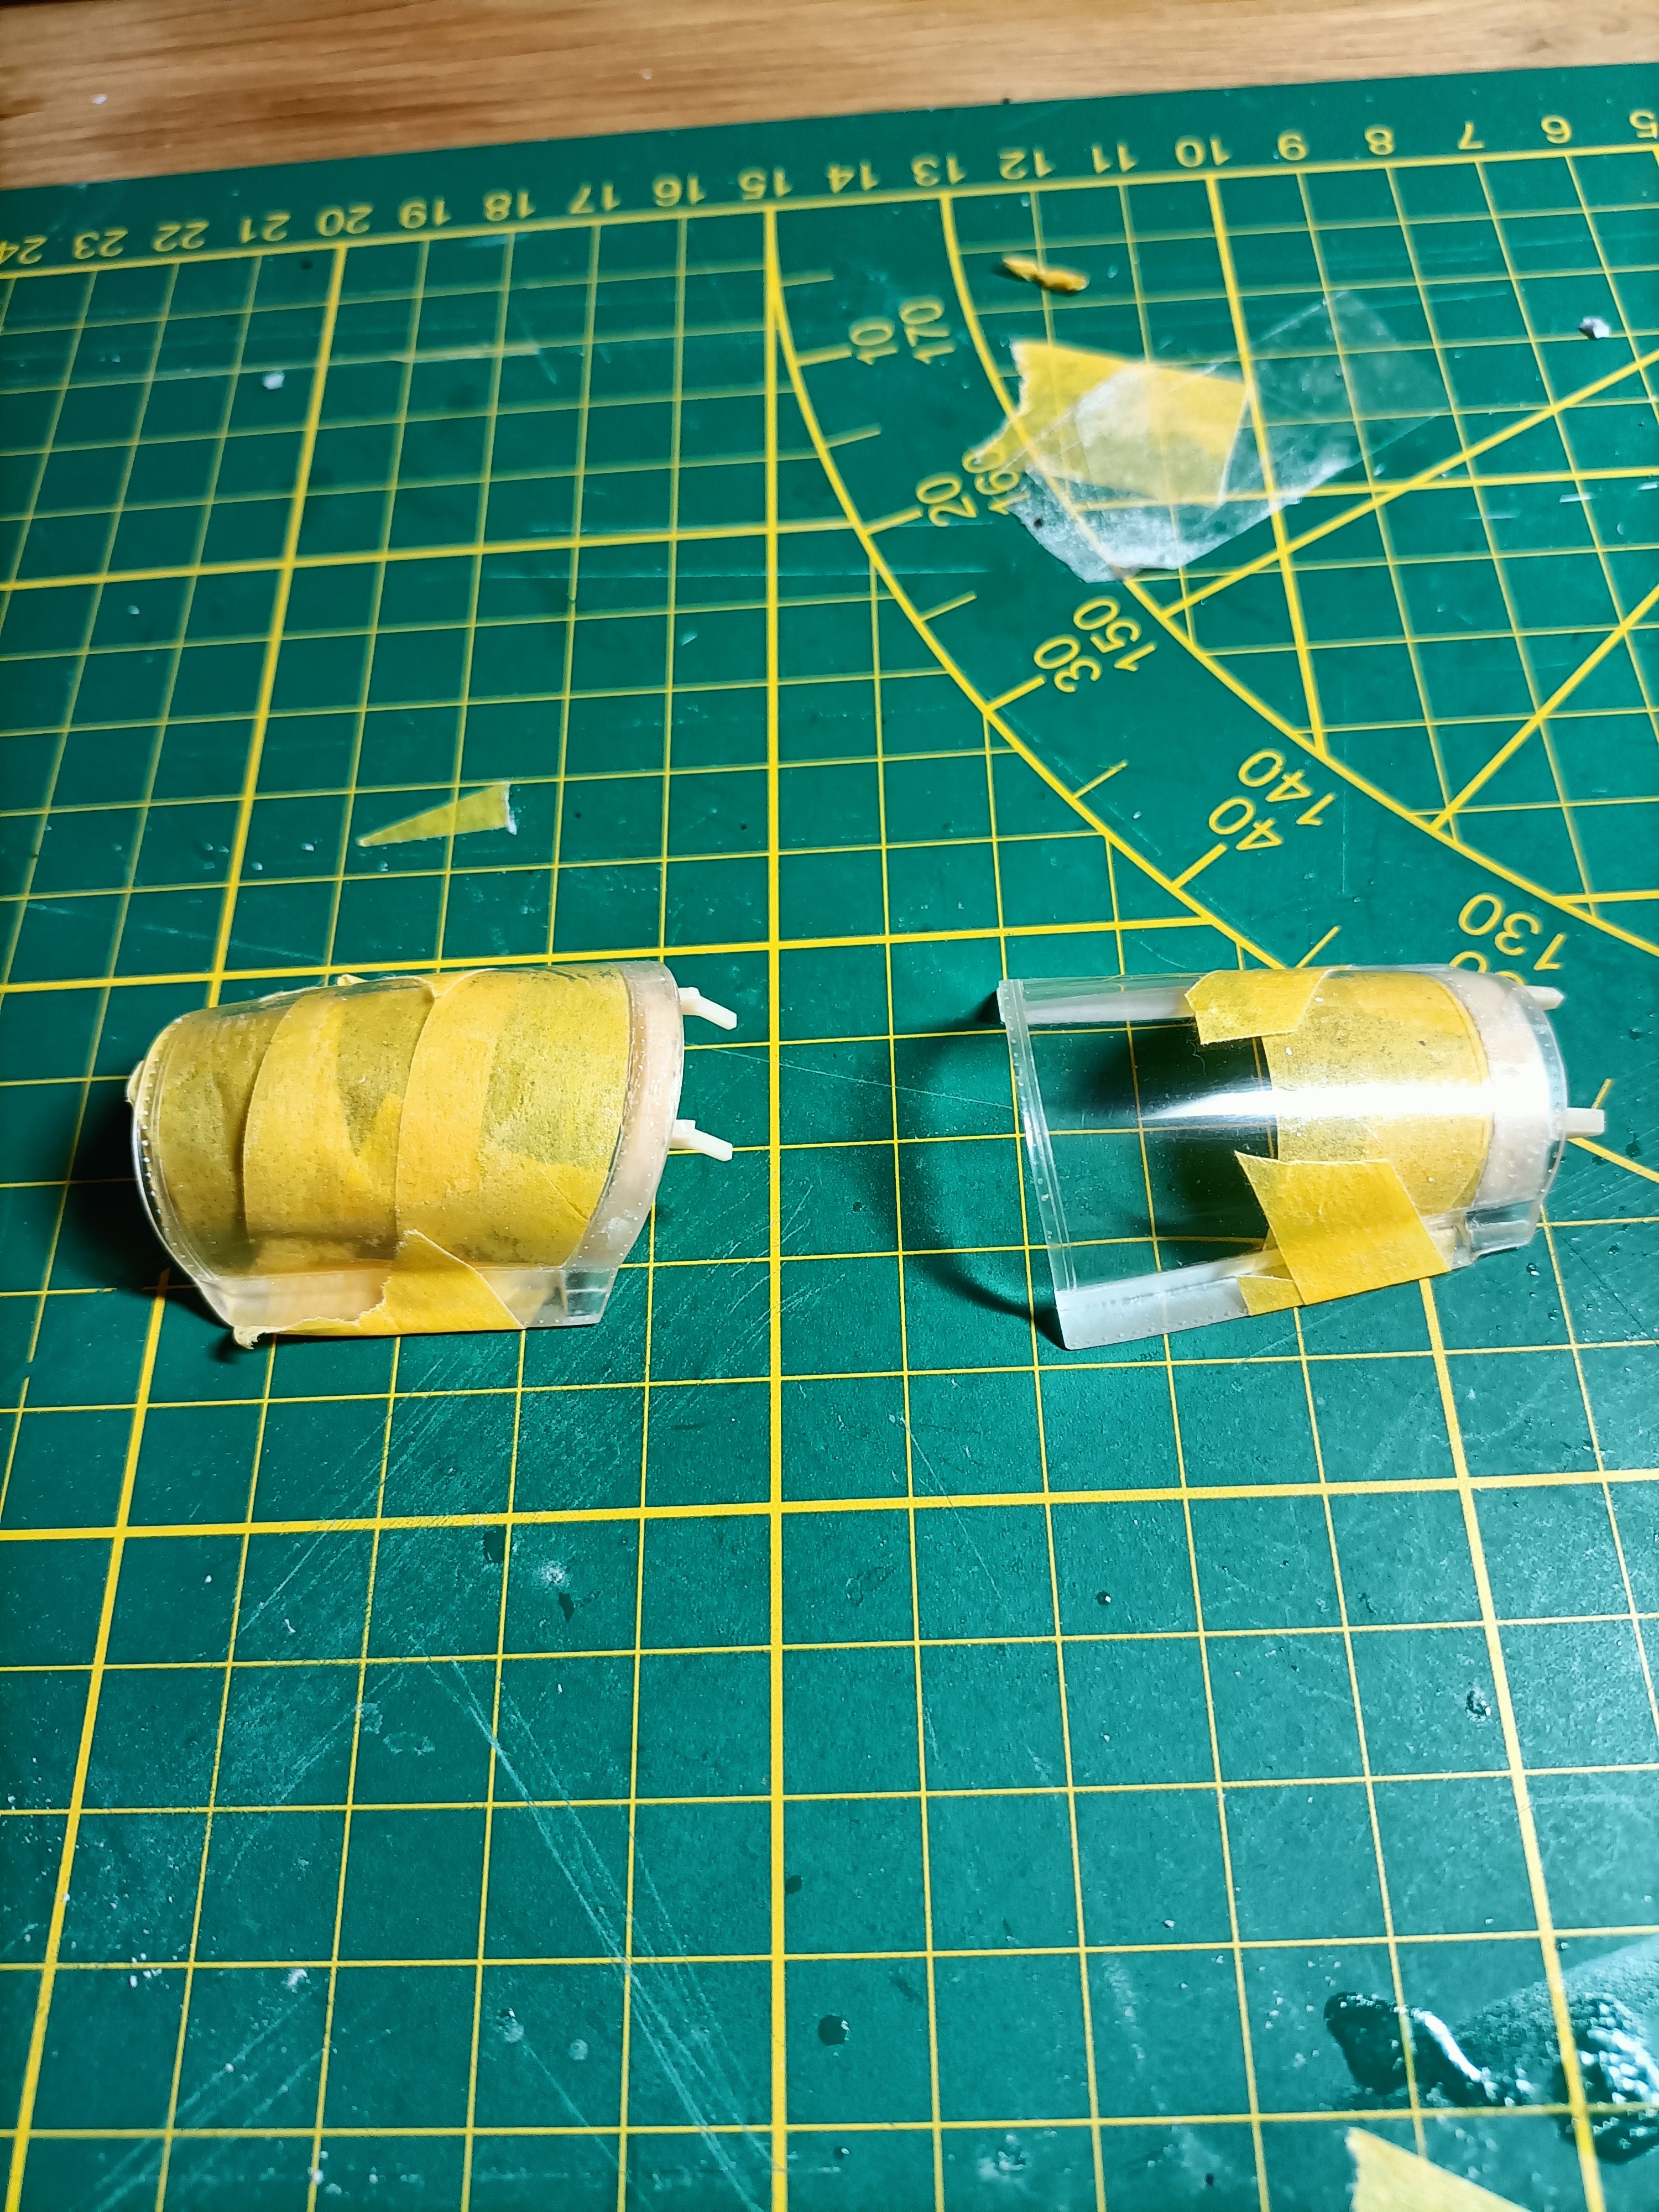
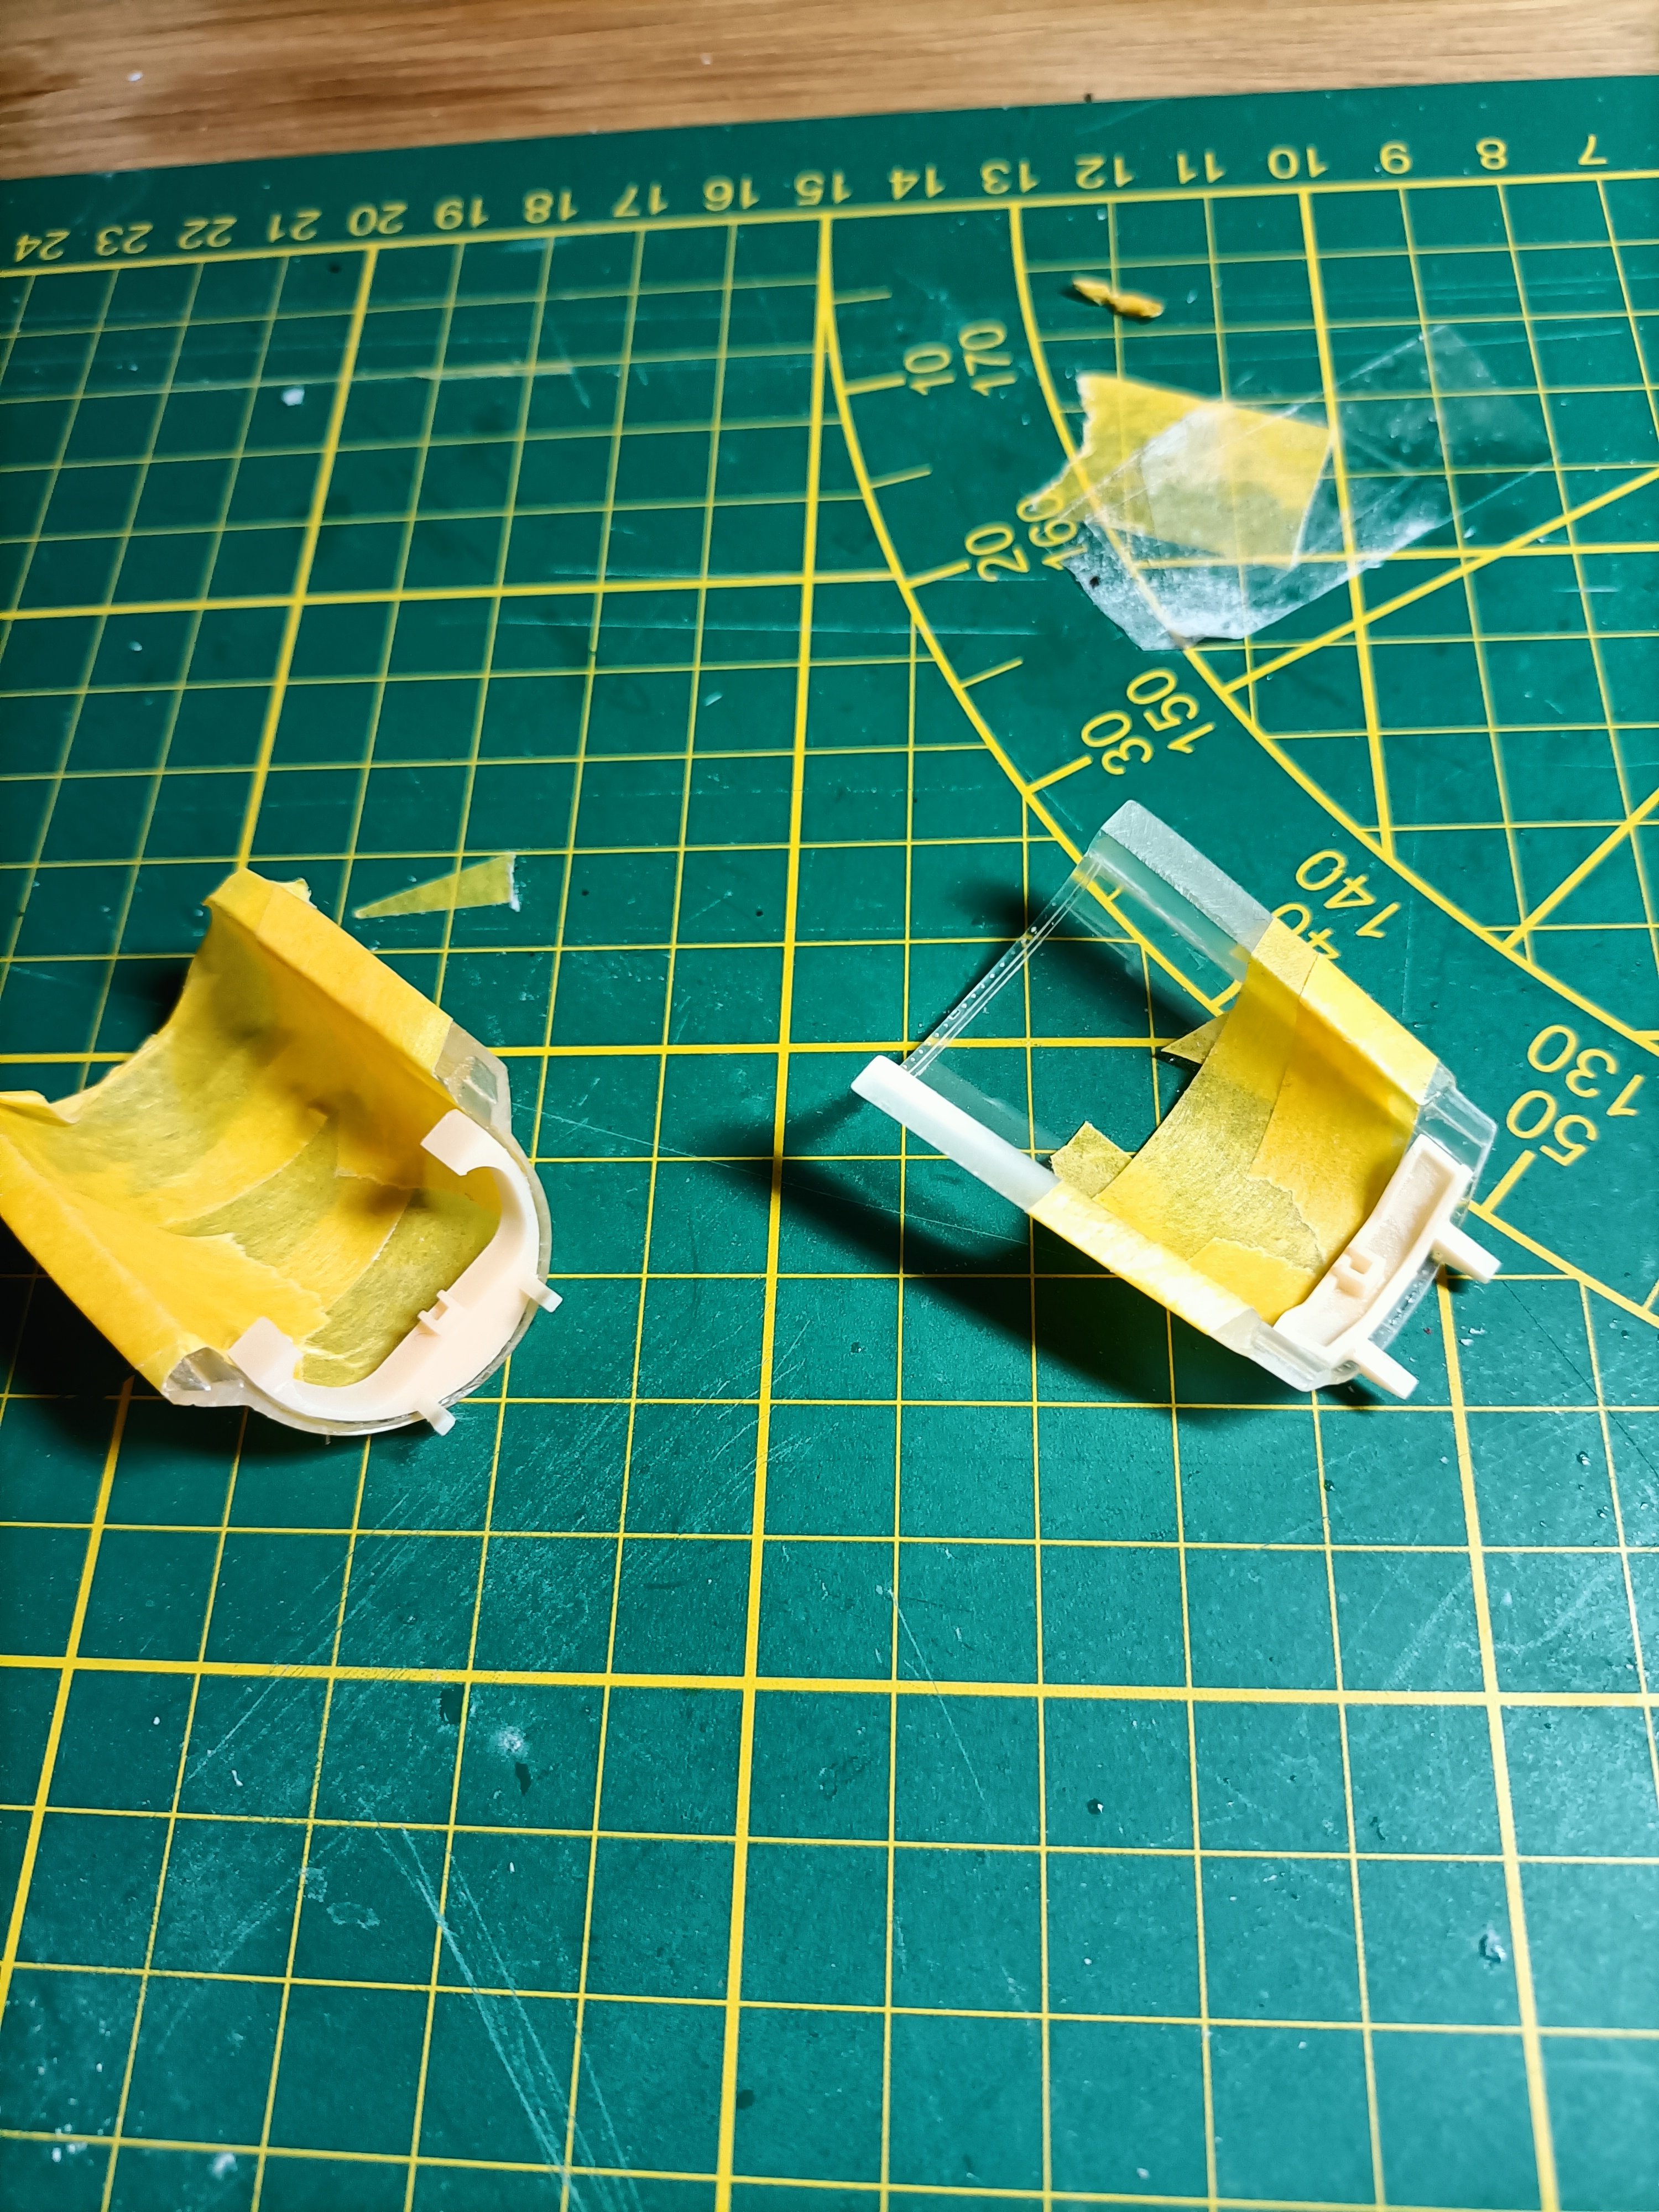
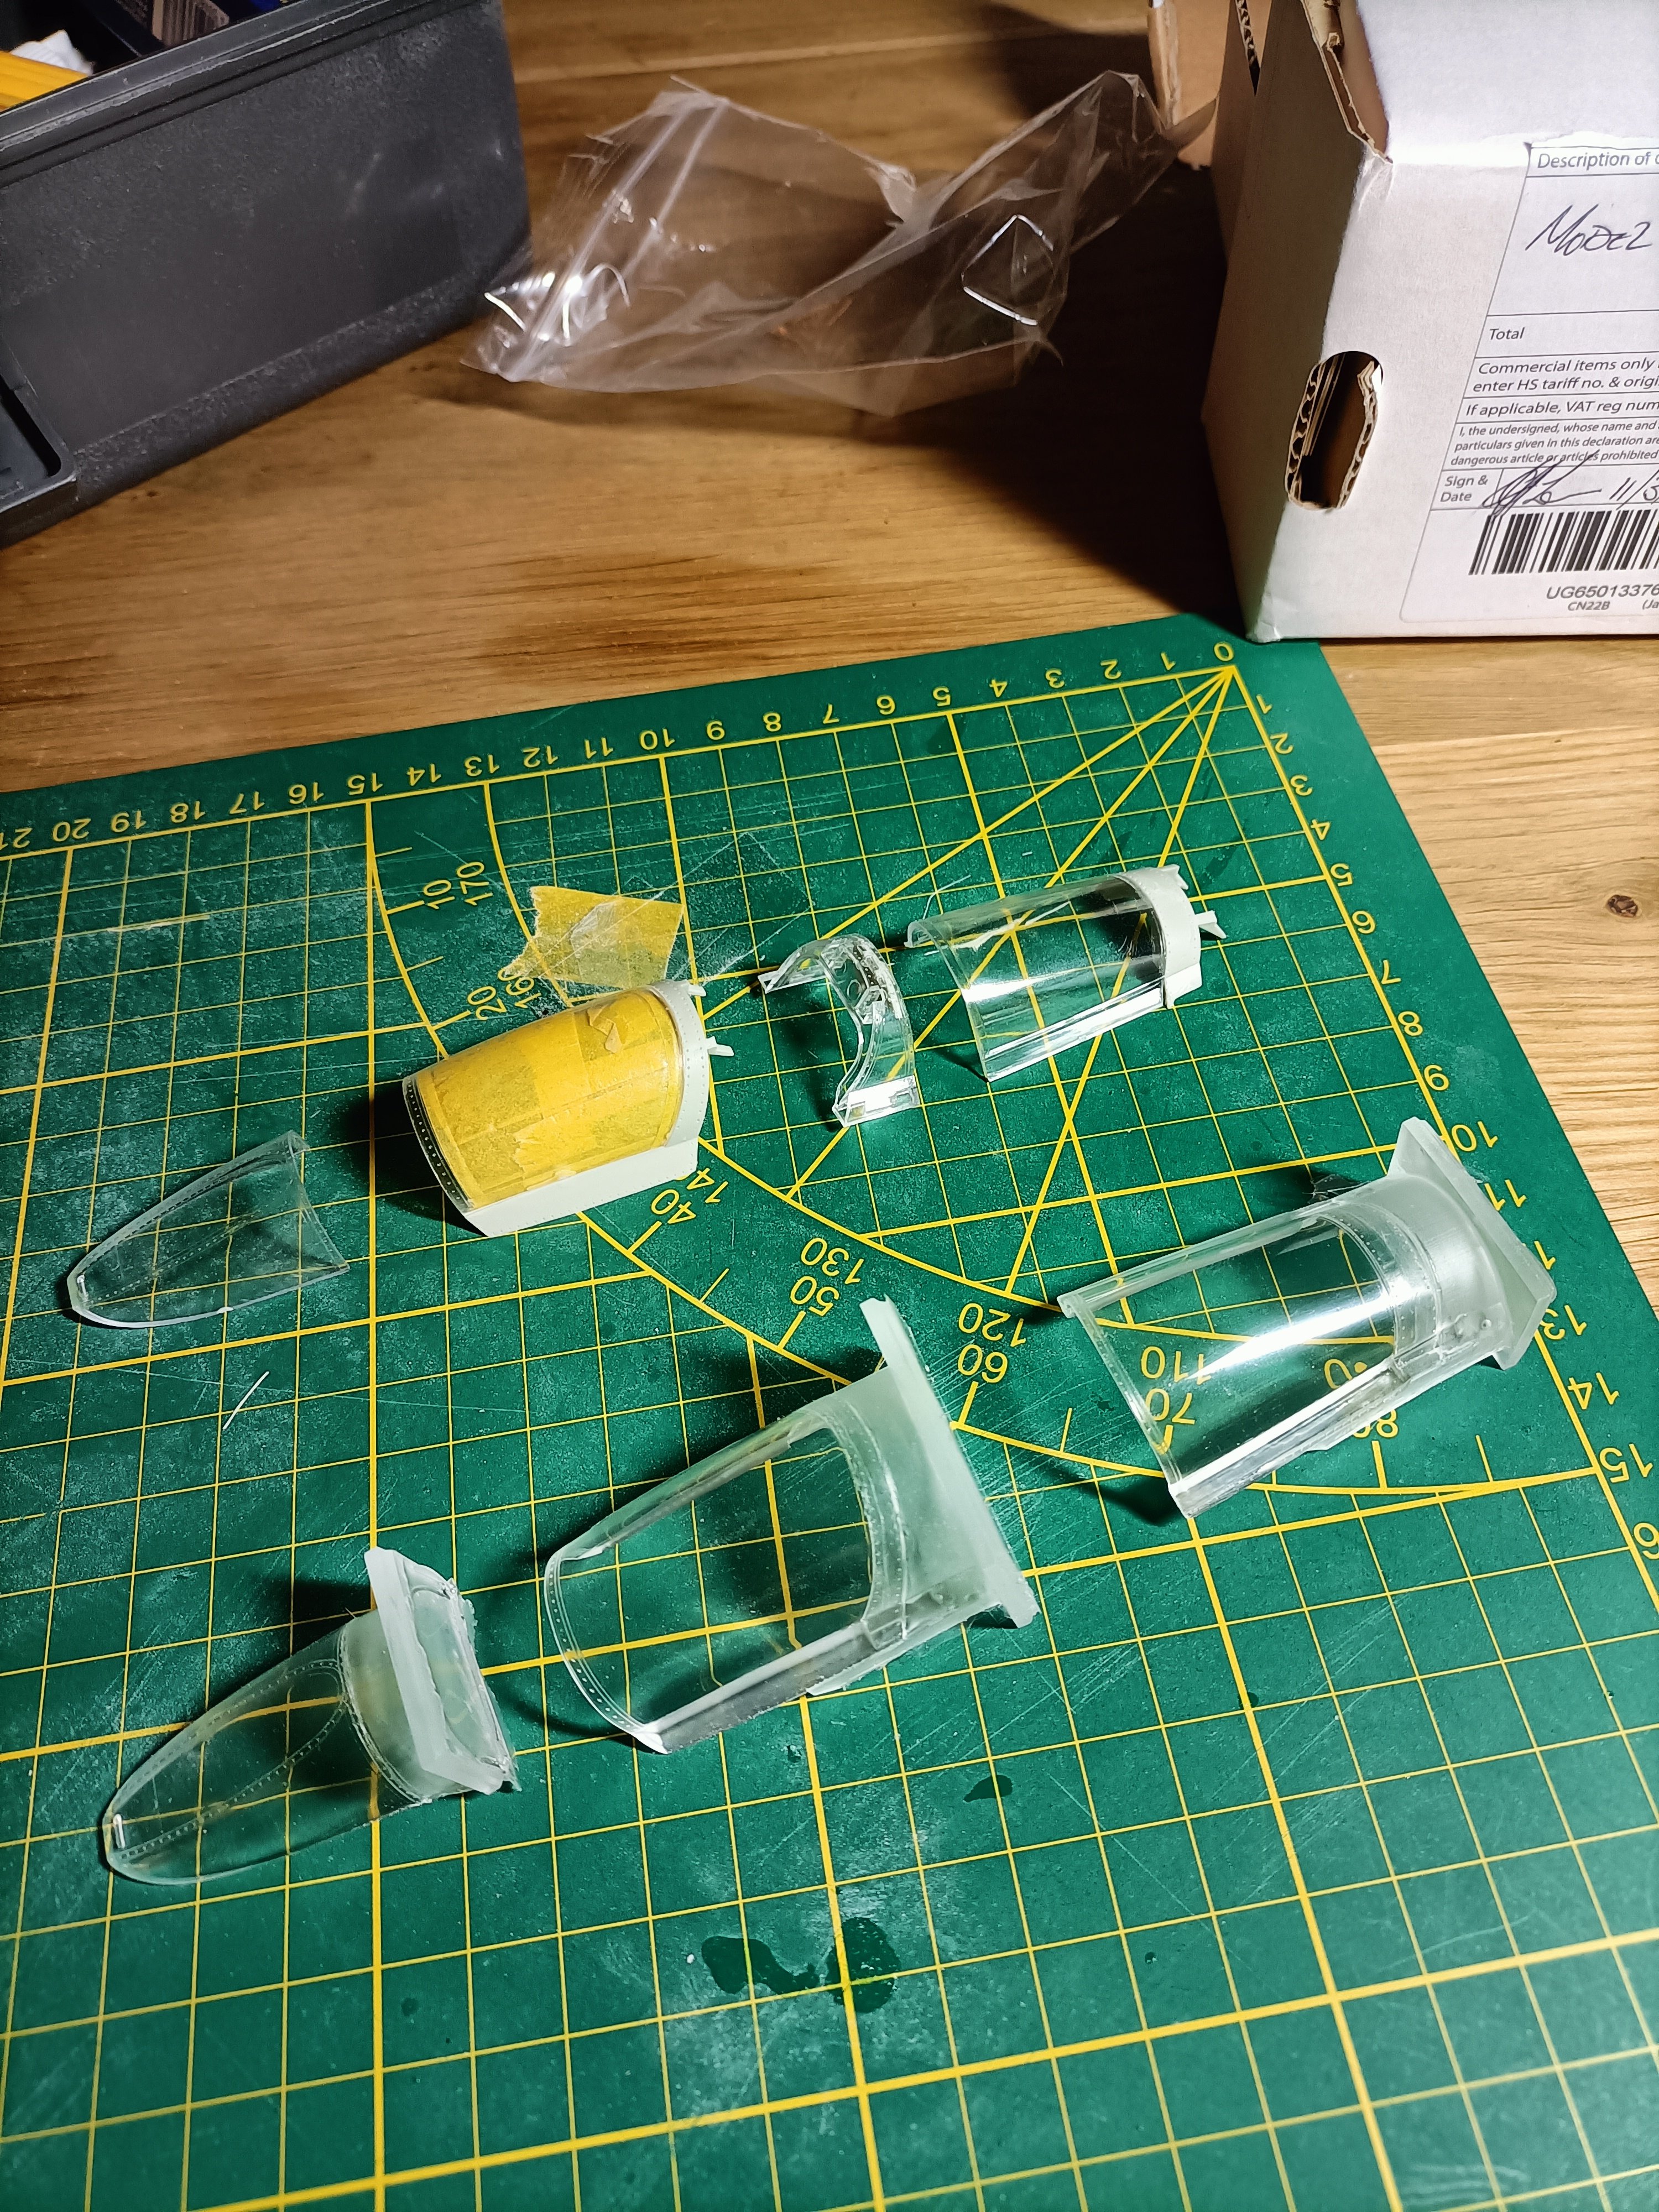
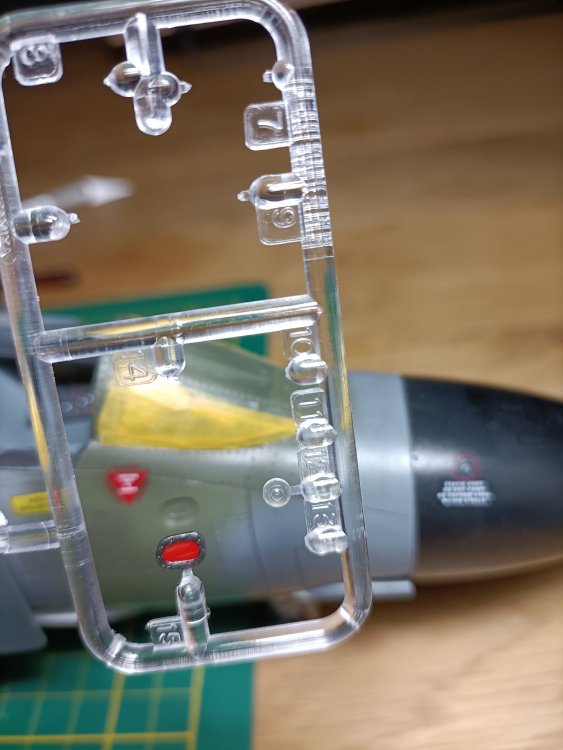
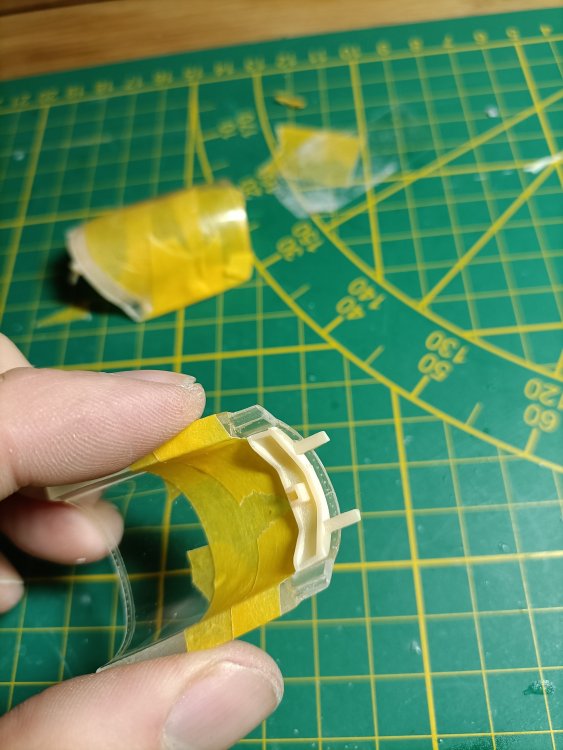
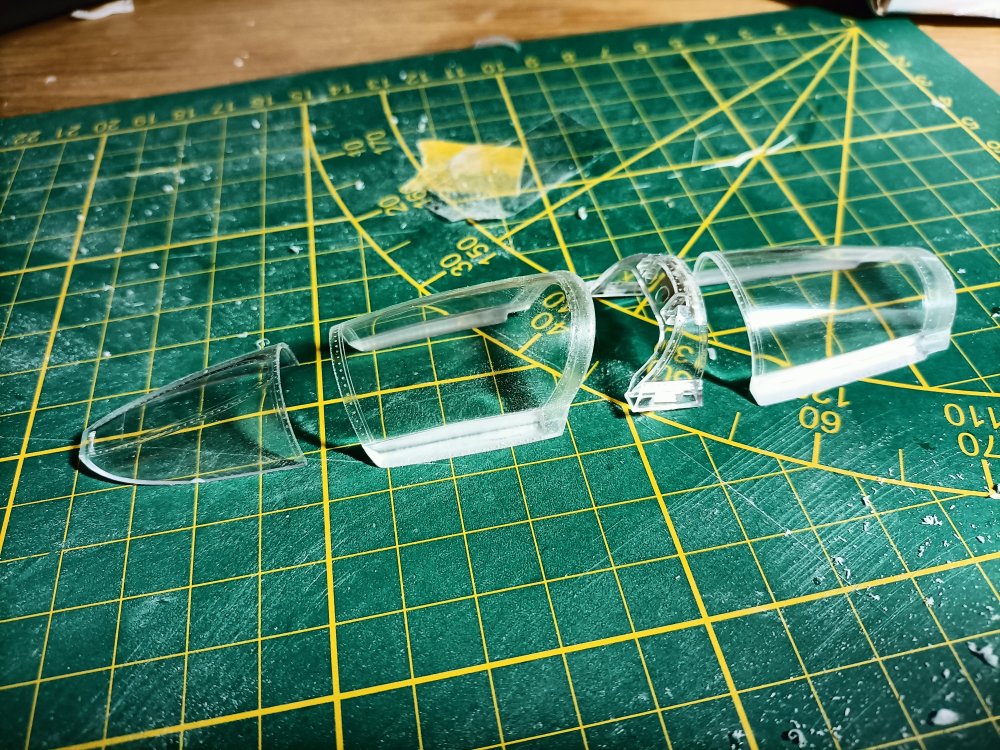
Getting the Aerocraft canopies ready by fitting the 3d printed bridge pieces on the inside.. Very fiddly but necessary for strength. Dryfitted they look good.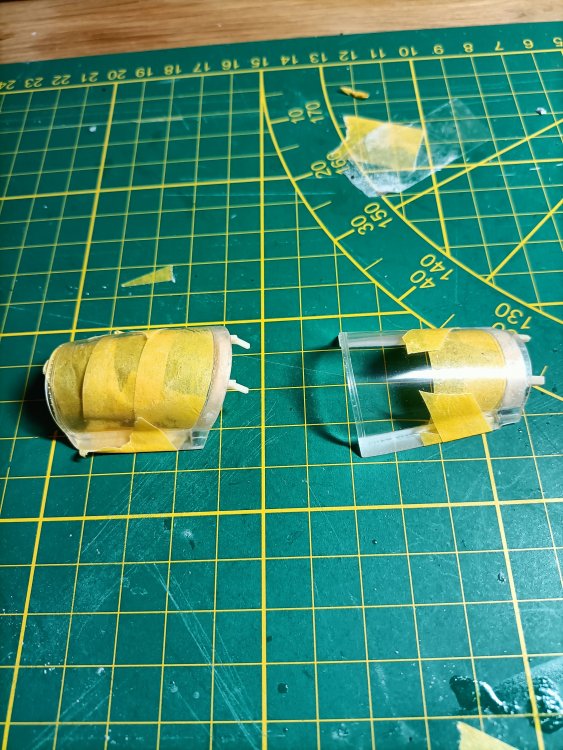


- 414 replies
-
- 8
-
-
-
- conversion
- phantom
- (and 1 more)
-
RR Spey powered RAF Phantom conversion
Wingco57 replied to Wingco57's topic in LSM 1/35 and Larger Work In Progress
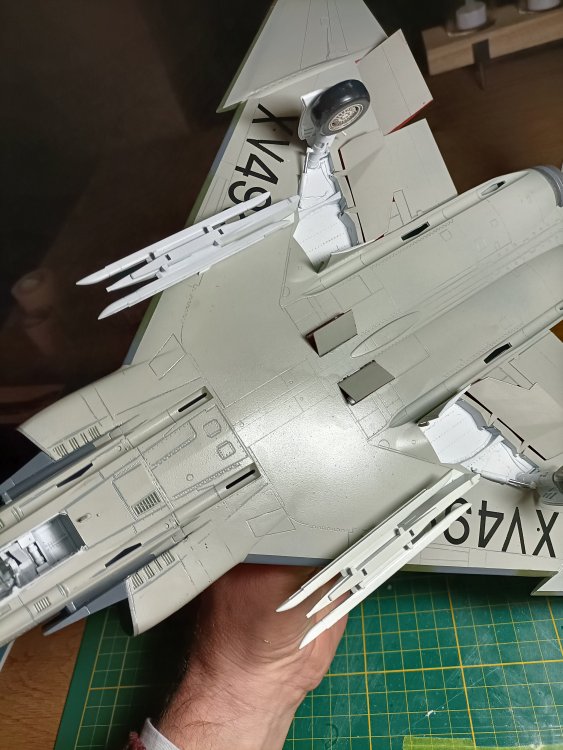
Hi Martin, you are correct of course, but I used parts from both kits as I felt like. The Revell slits are a bit longer I think, but that kit had later missiles. Due to the join at the front between the Tamiya and Revell parts, the Tamiya Sparrow fins would foul the Splitter plates and I had to shorten the missile bodies. A real mix up of two kits. A genuine Frankentoom. But don’t tell anybody.🤥 Cheers Cees- 414 replies
-
- 6
-
-

-
-
- conversion
- phantom
- (and 1 more)
-
RR Spey powered RAF Phantom conversion
Wingco57 replied to Wingco57's topic in LSM 1/35 and Larger Work In Progress
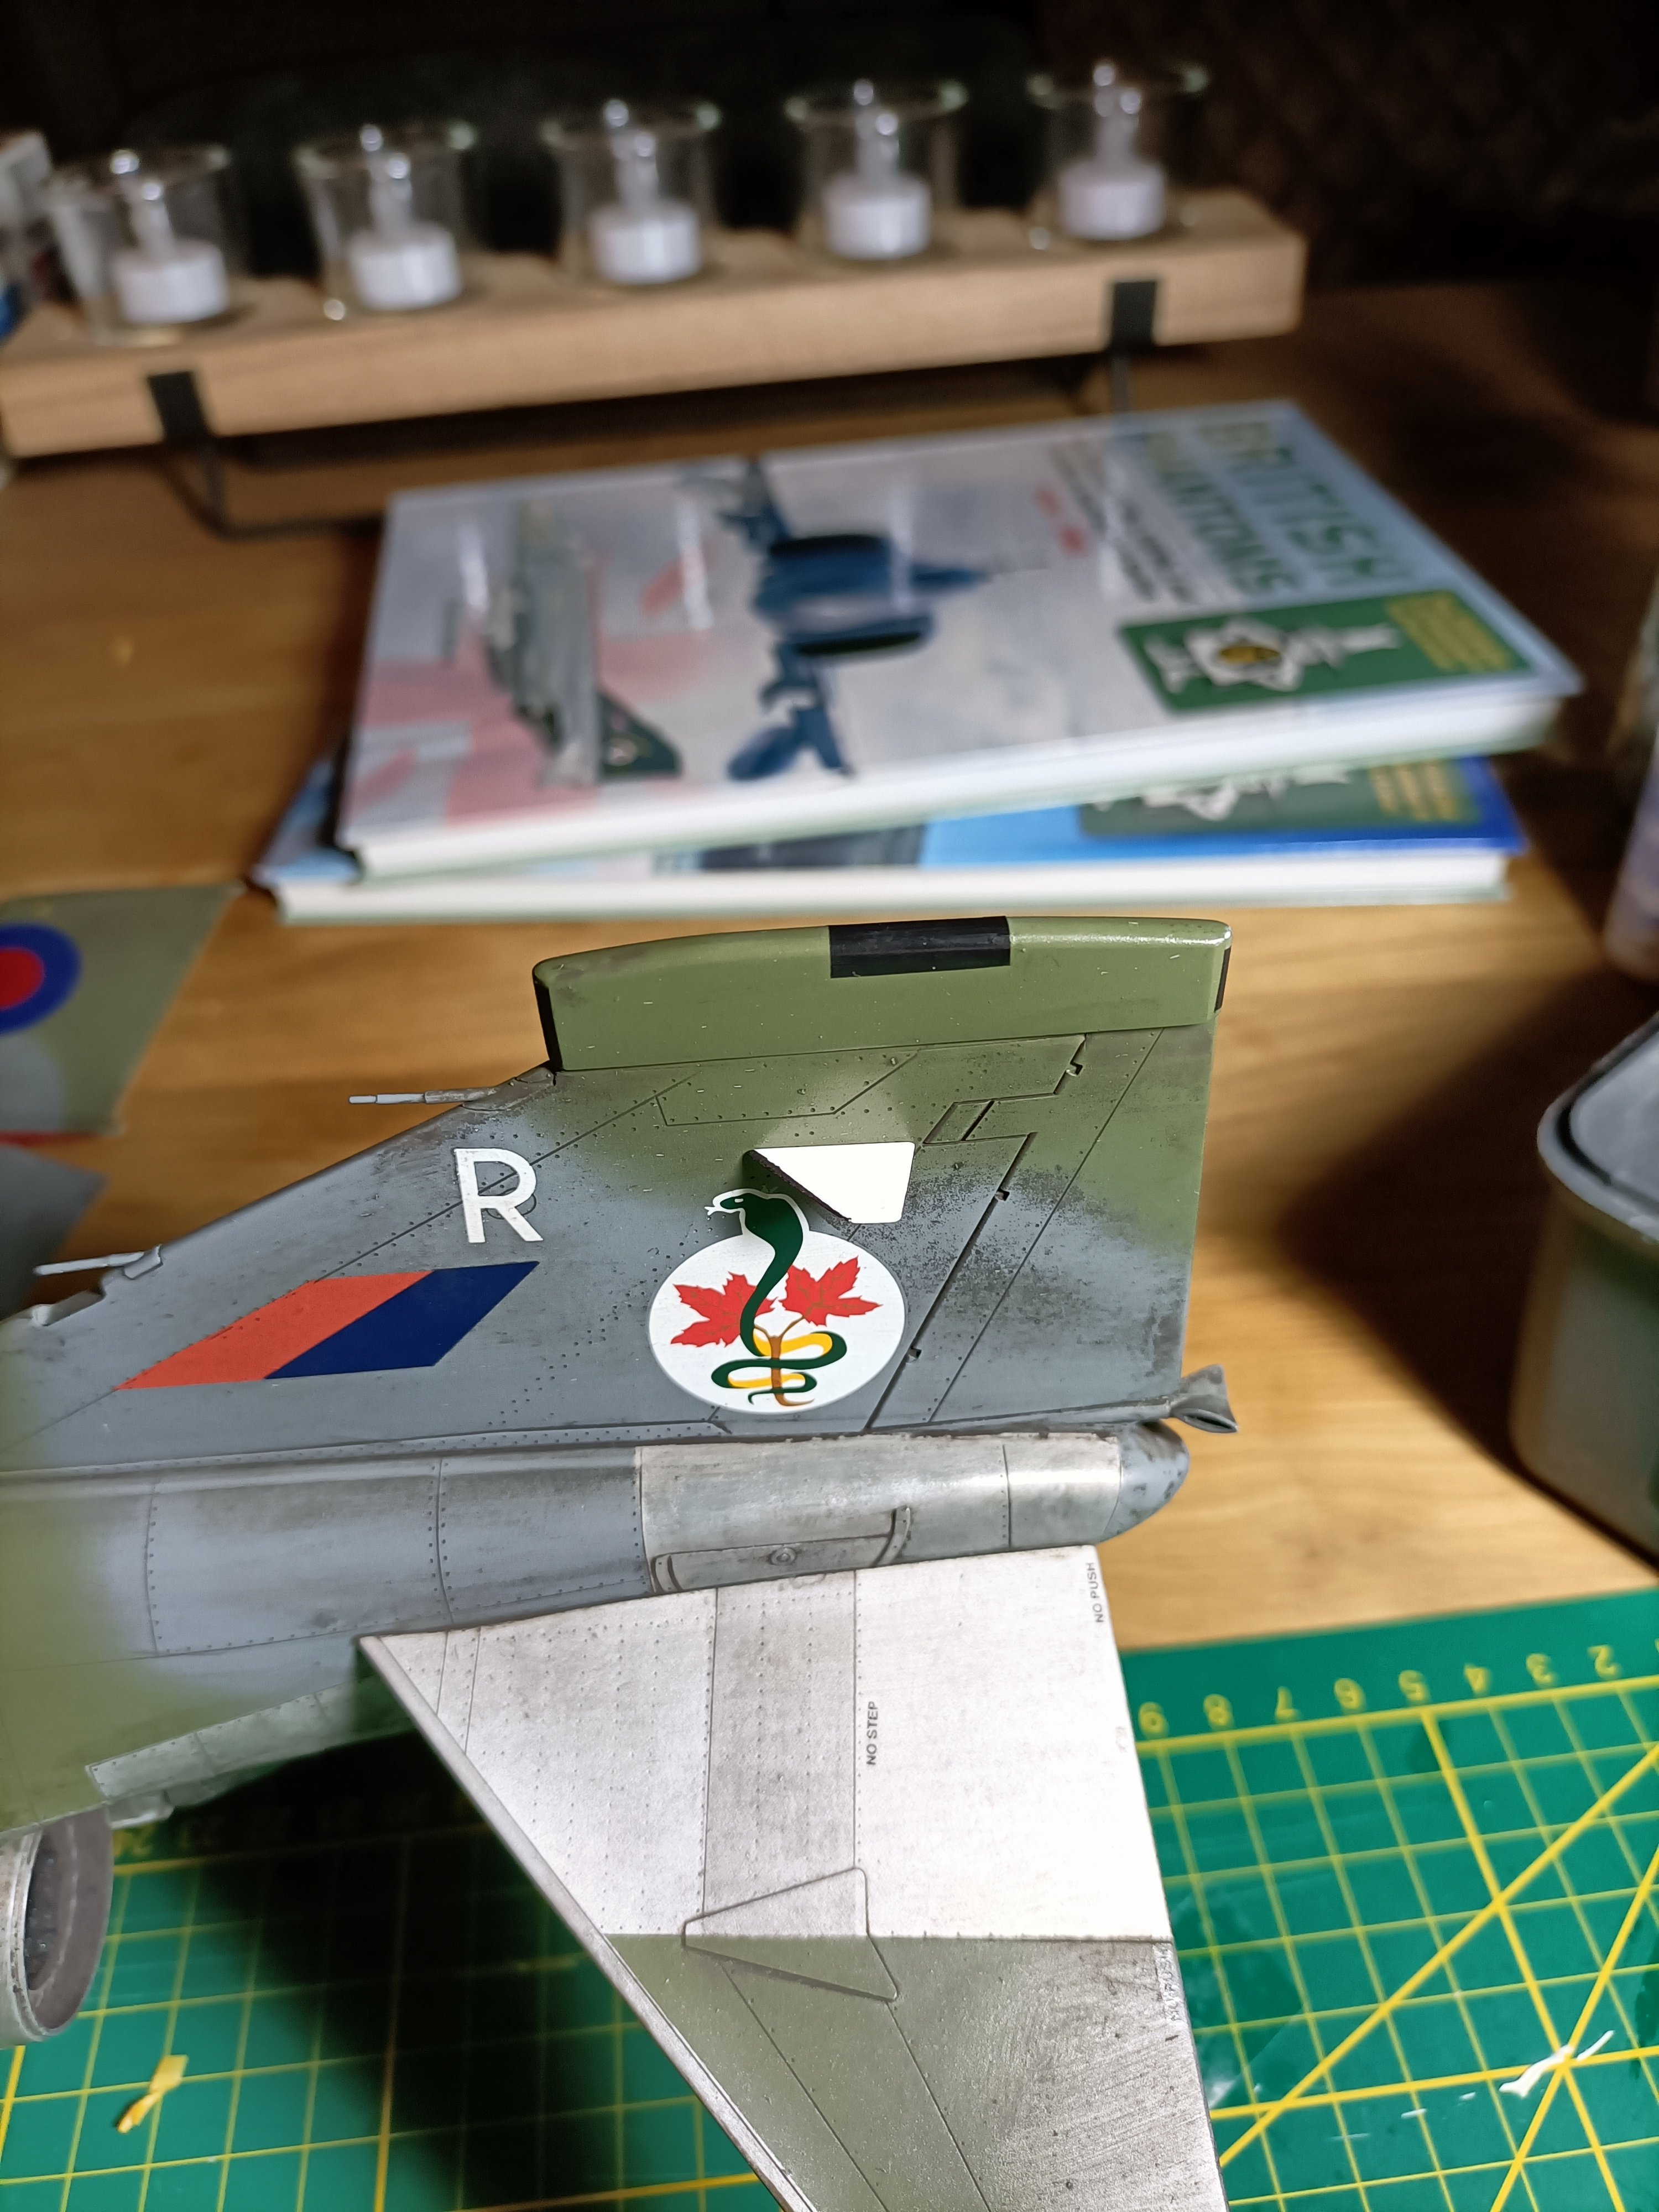
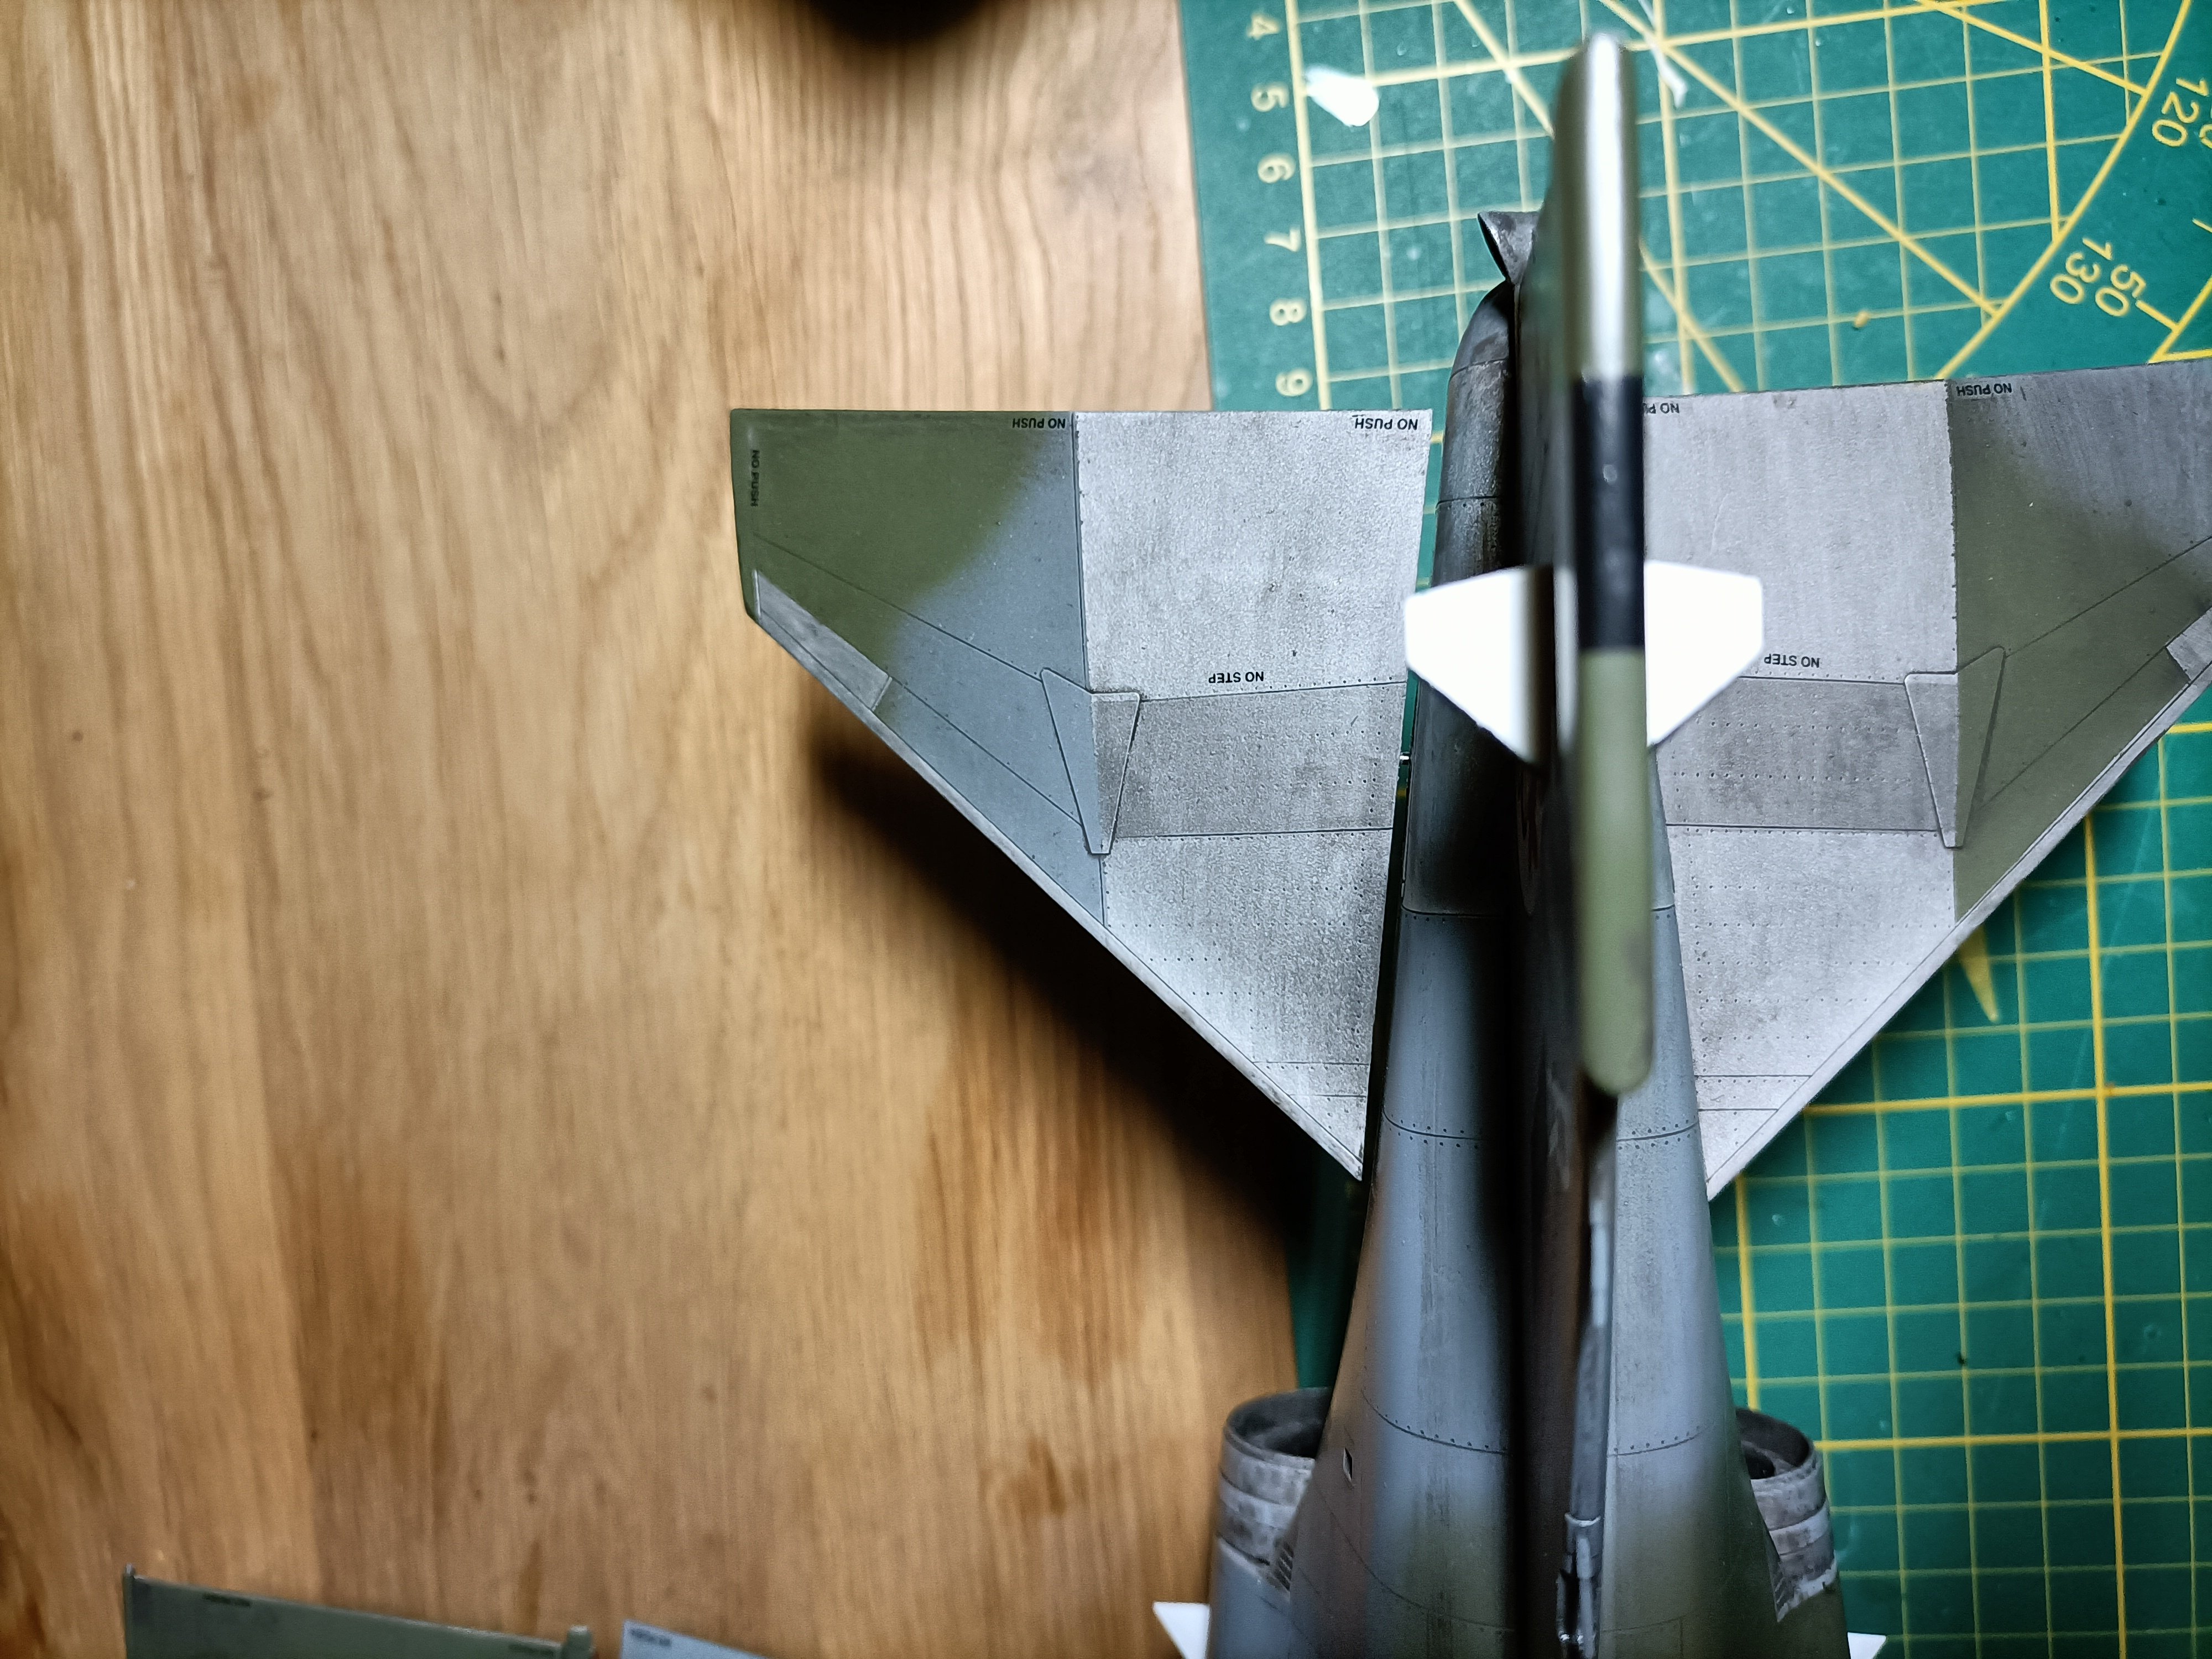
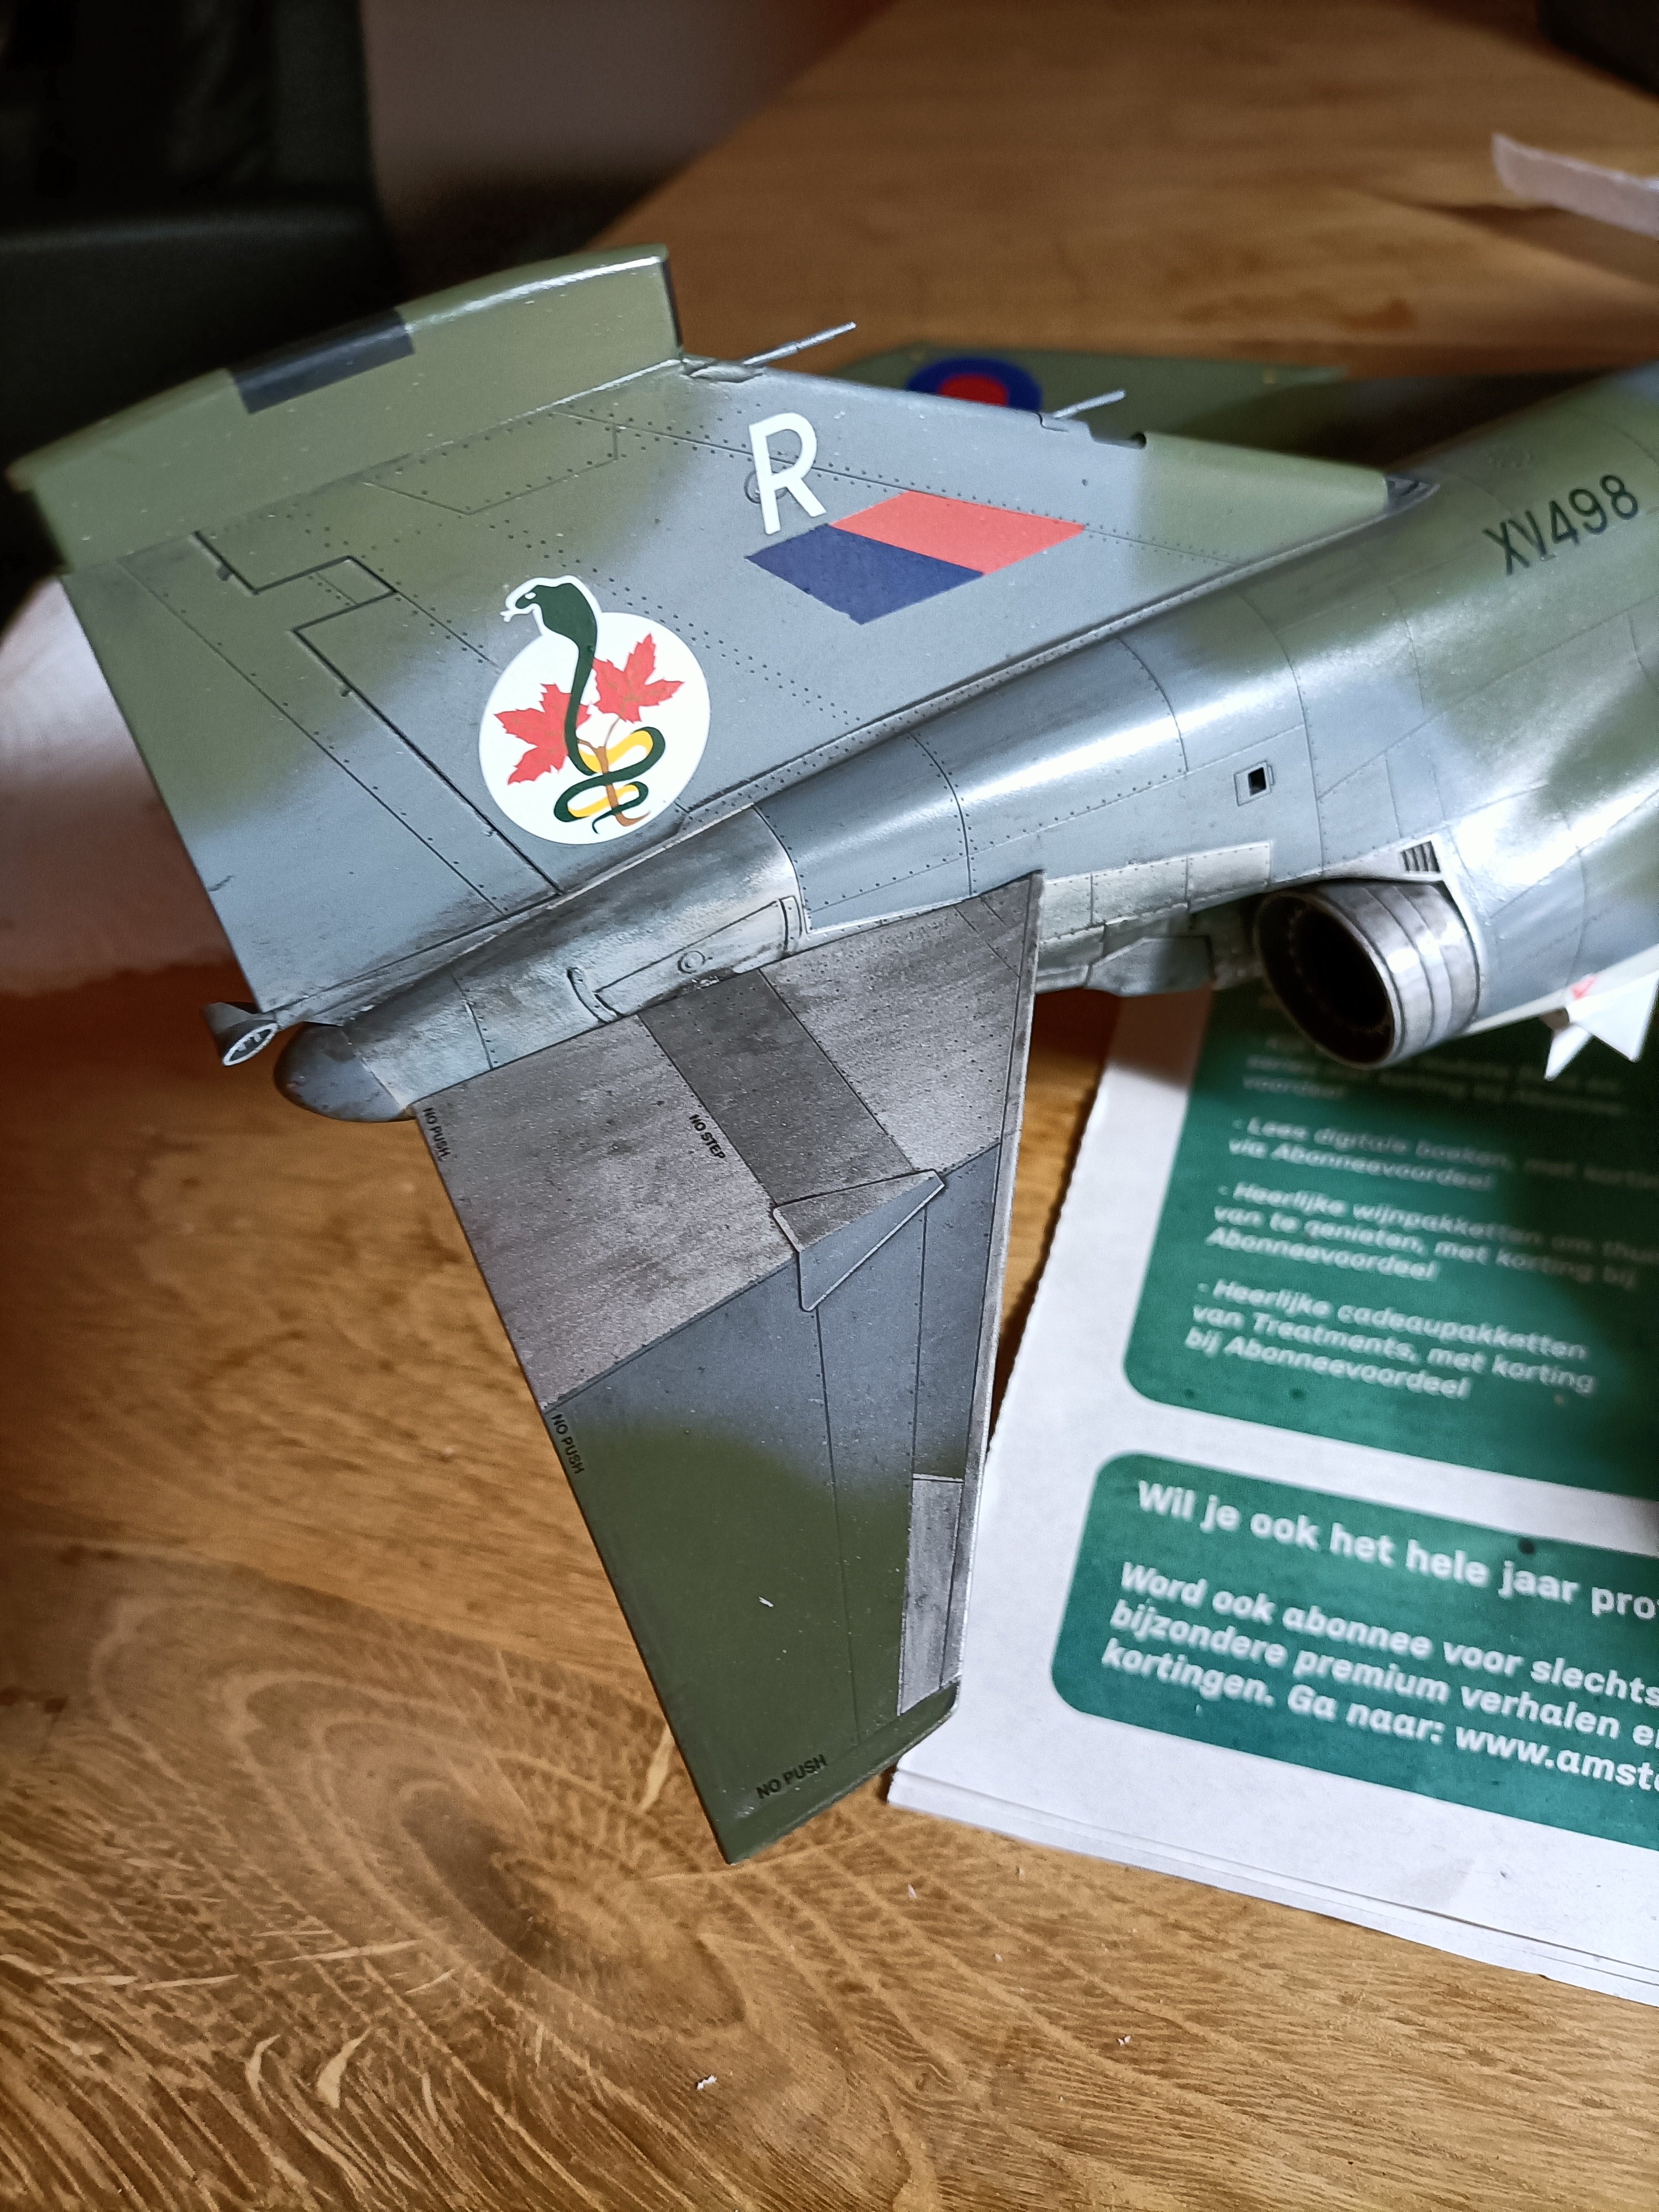
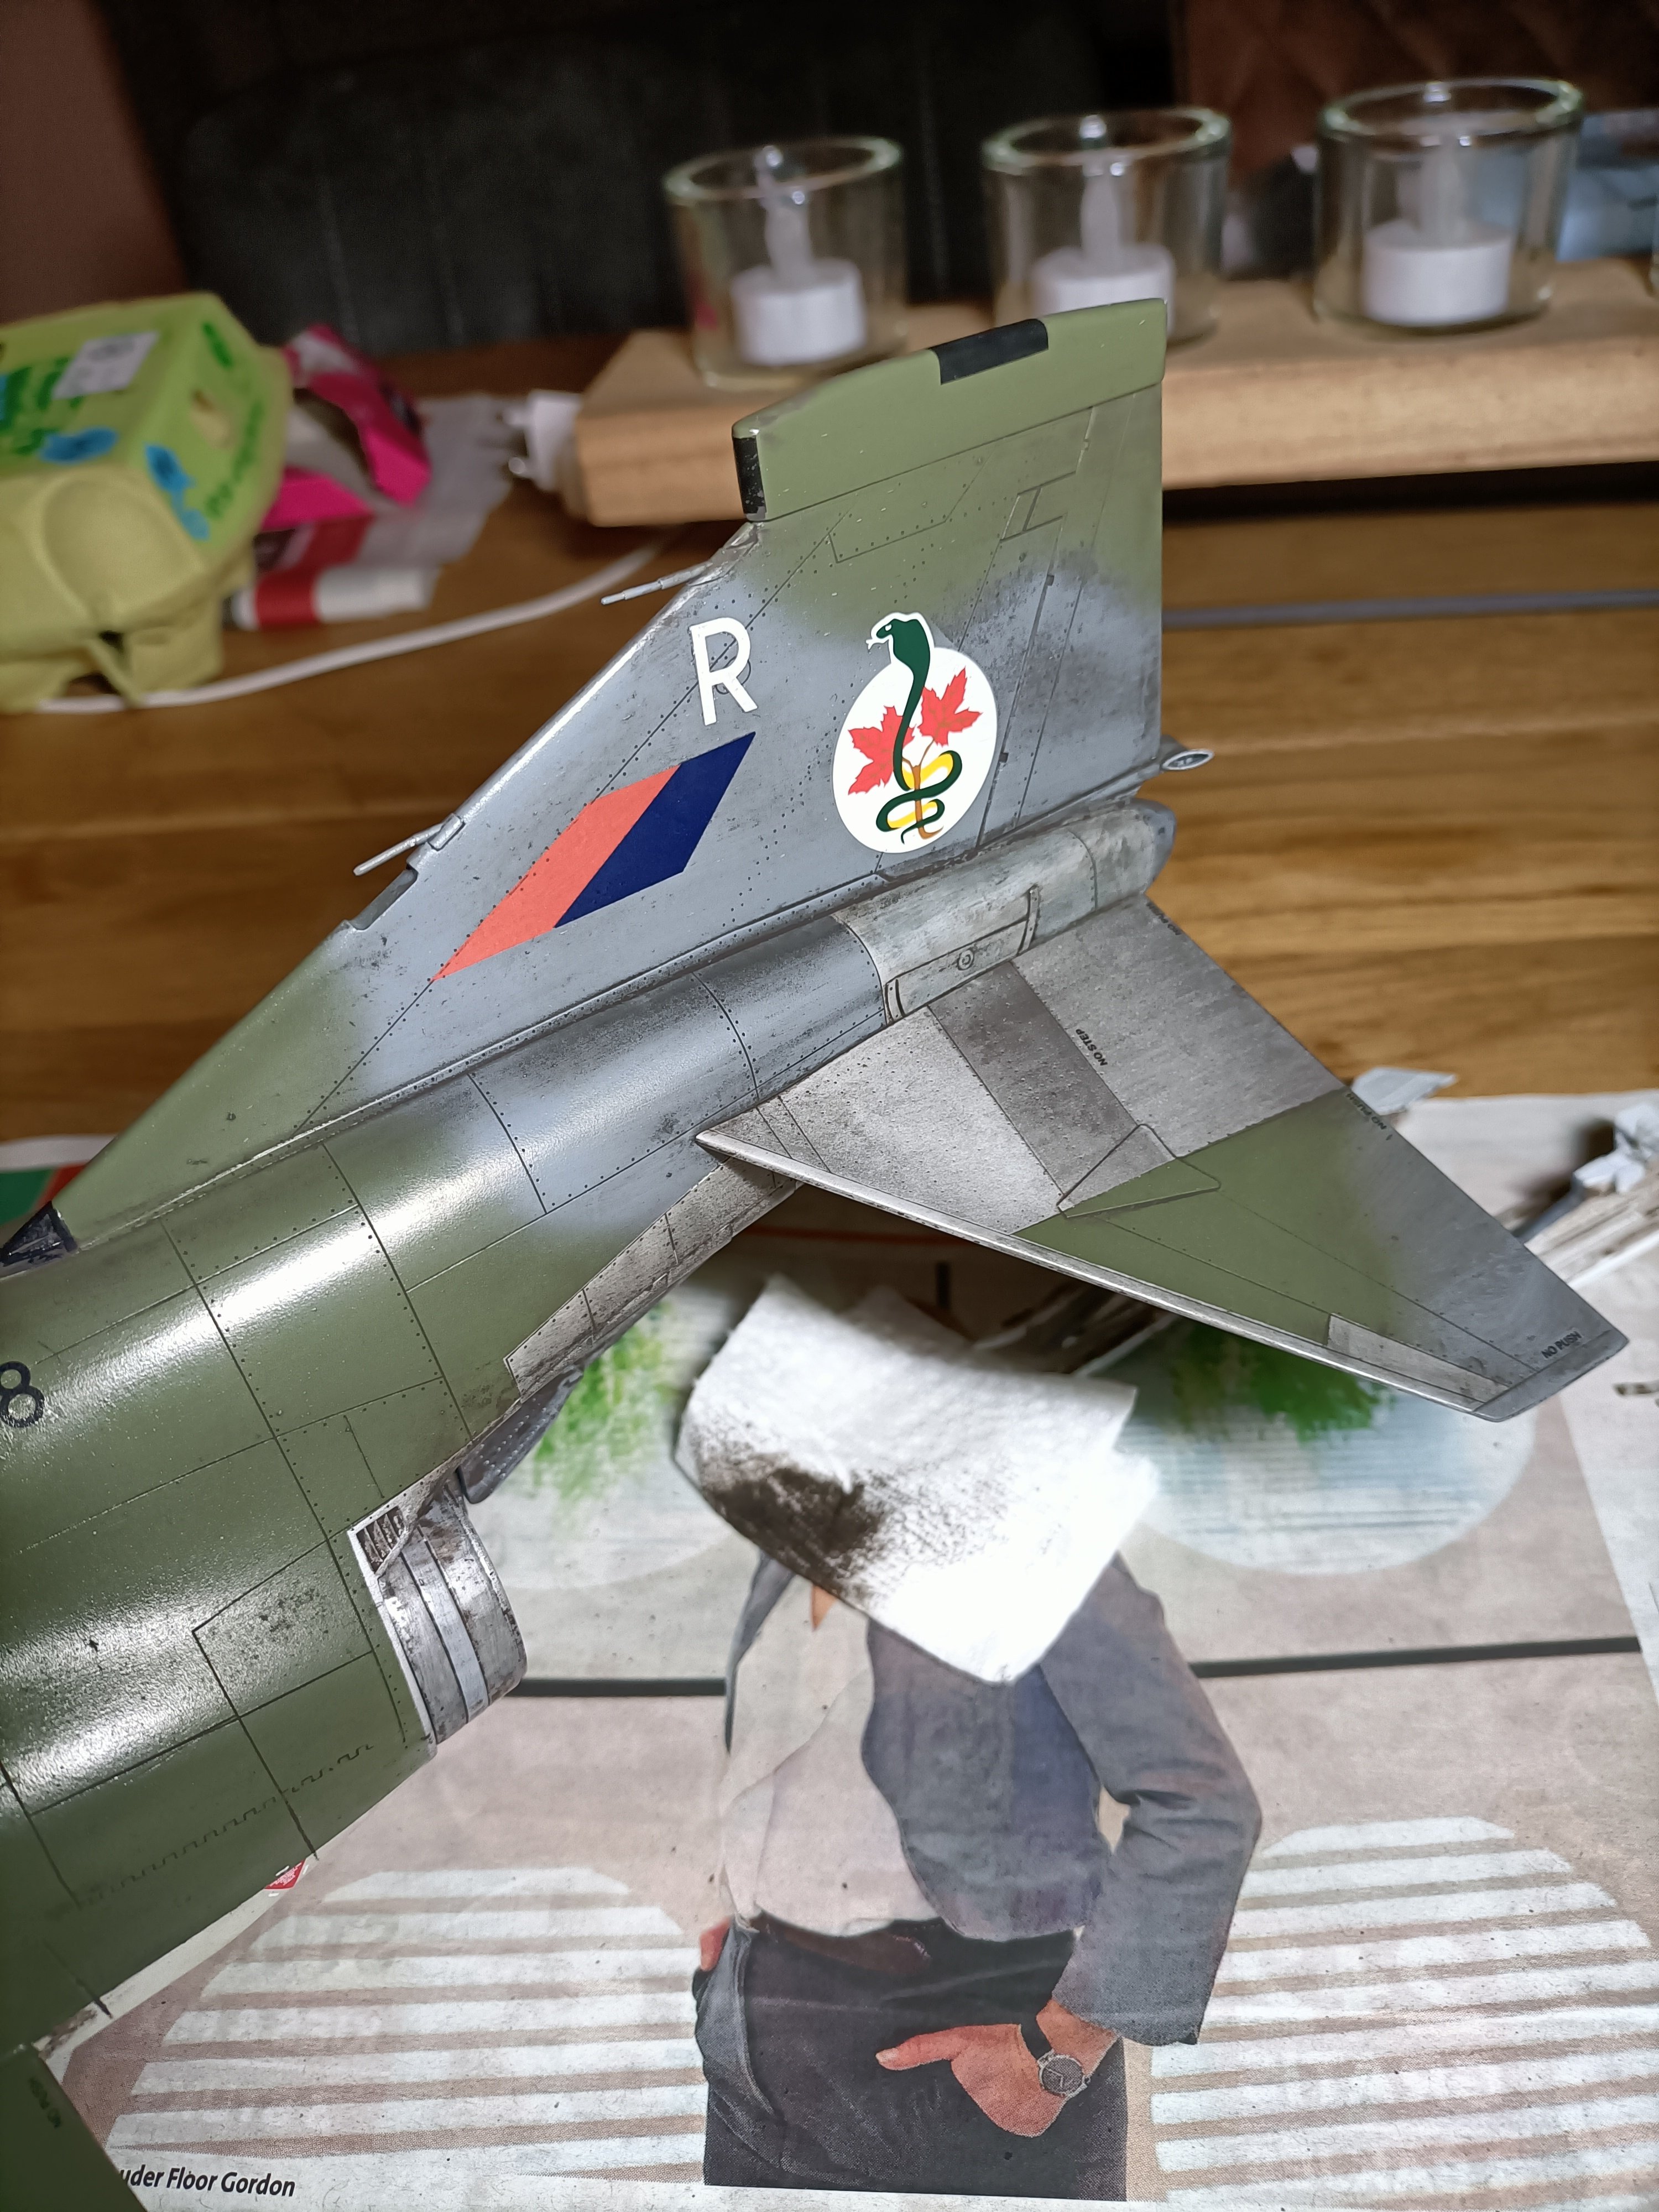
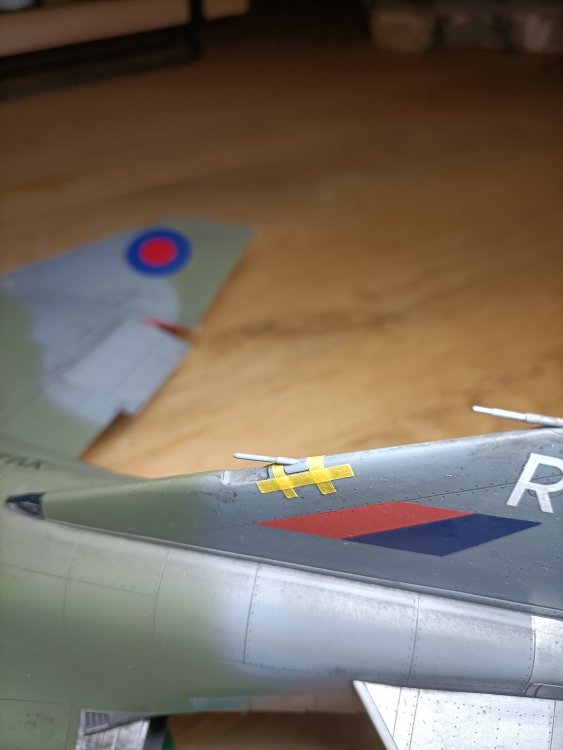
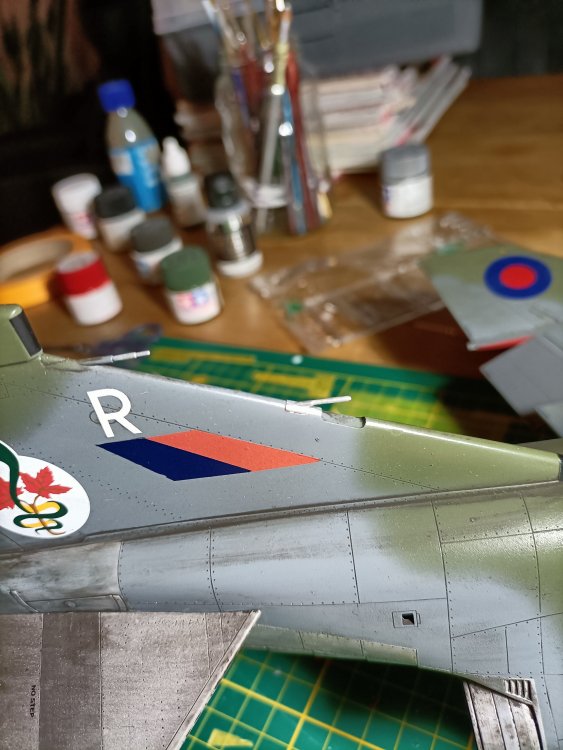
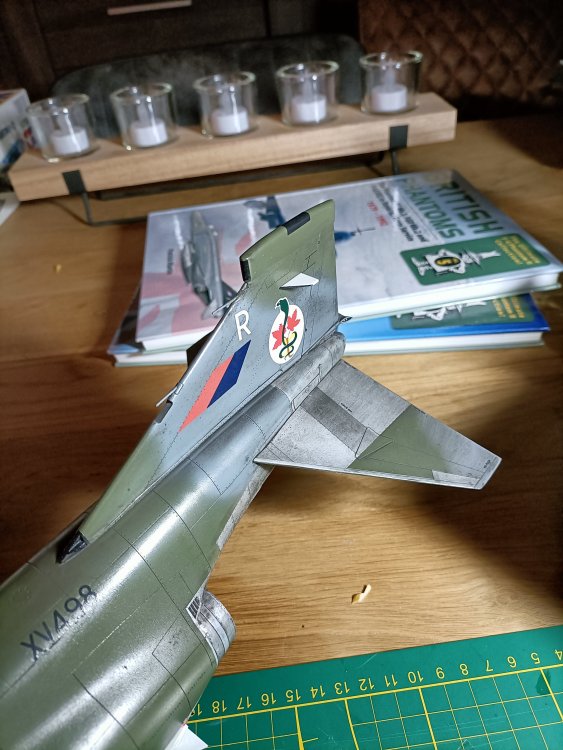
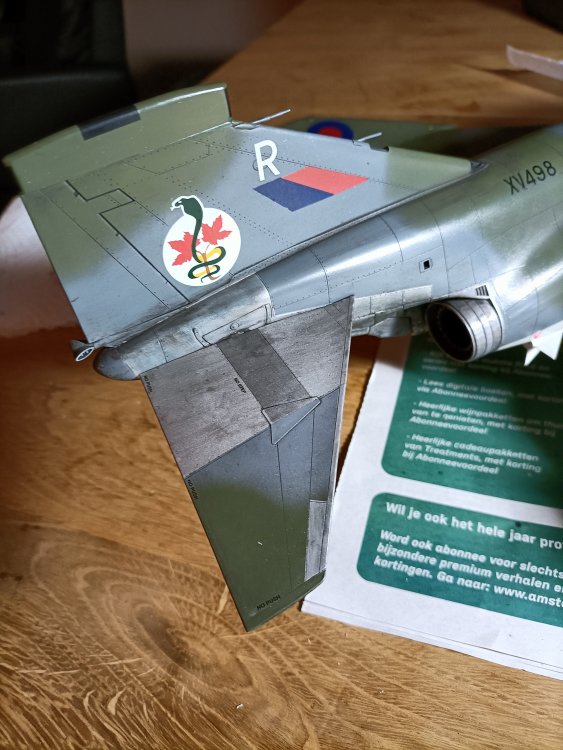
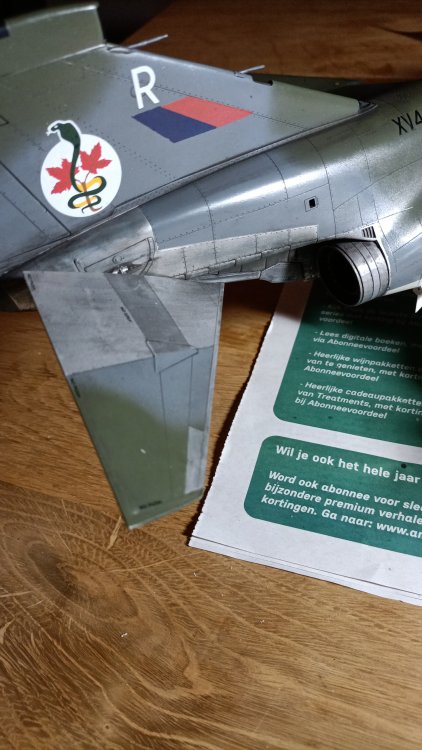
Actually an FGR-2😉 Fitted the antennae on both sides of the fin. The to-do list is getting shorter by the day.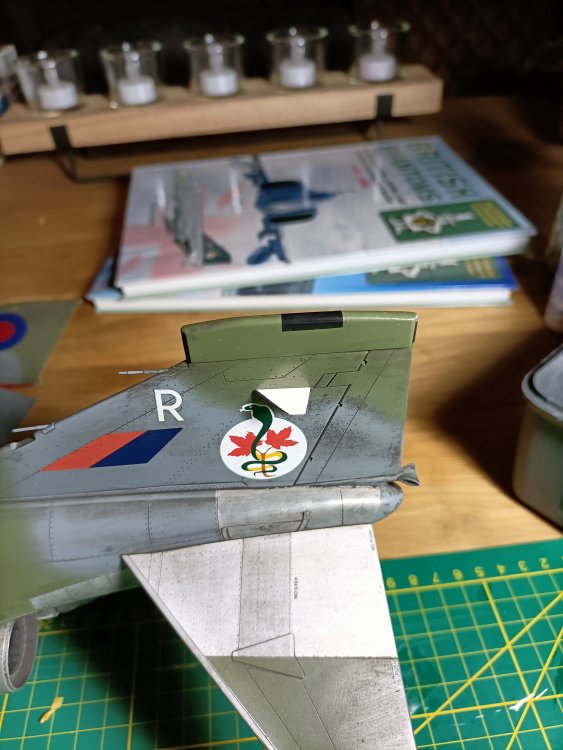

- 414 replies
-
- 7
-
-
- conversion
- phantom
- (and 1 more)
-
RR Spey powered RAF Phantom conversion
Wingco57 replied to Wingco57's topic in LSM 1/35 and Larger Work In Progress
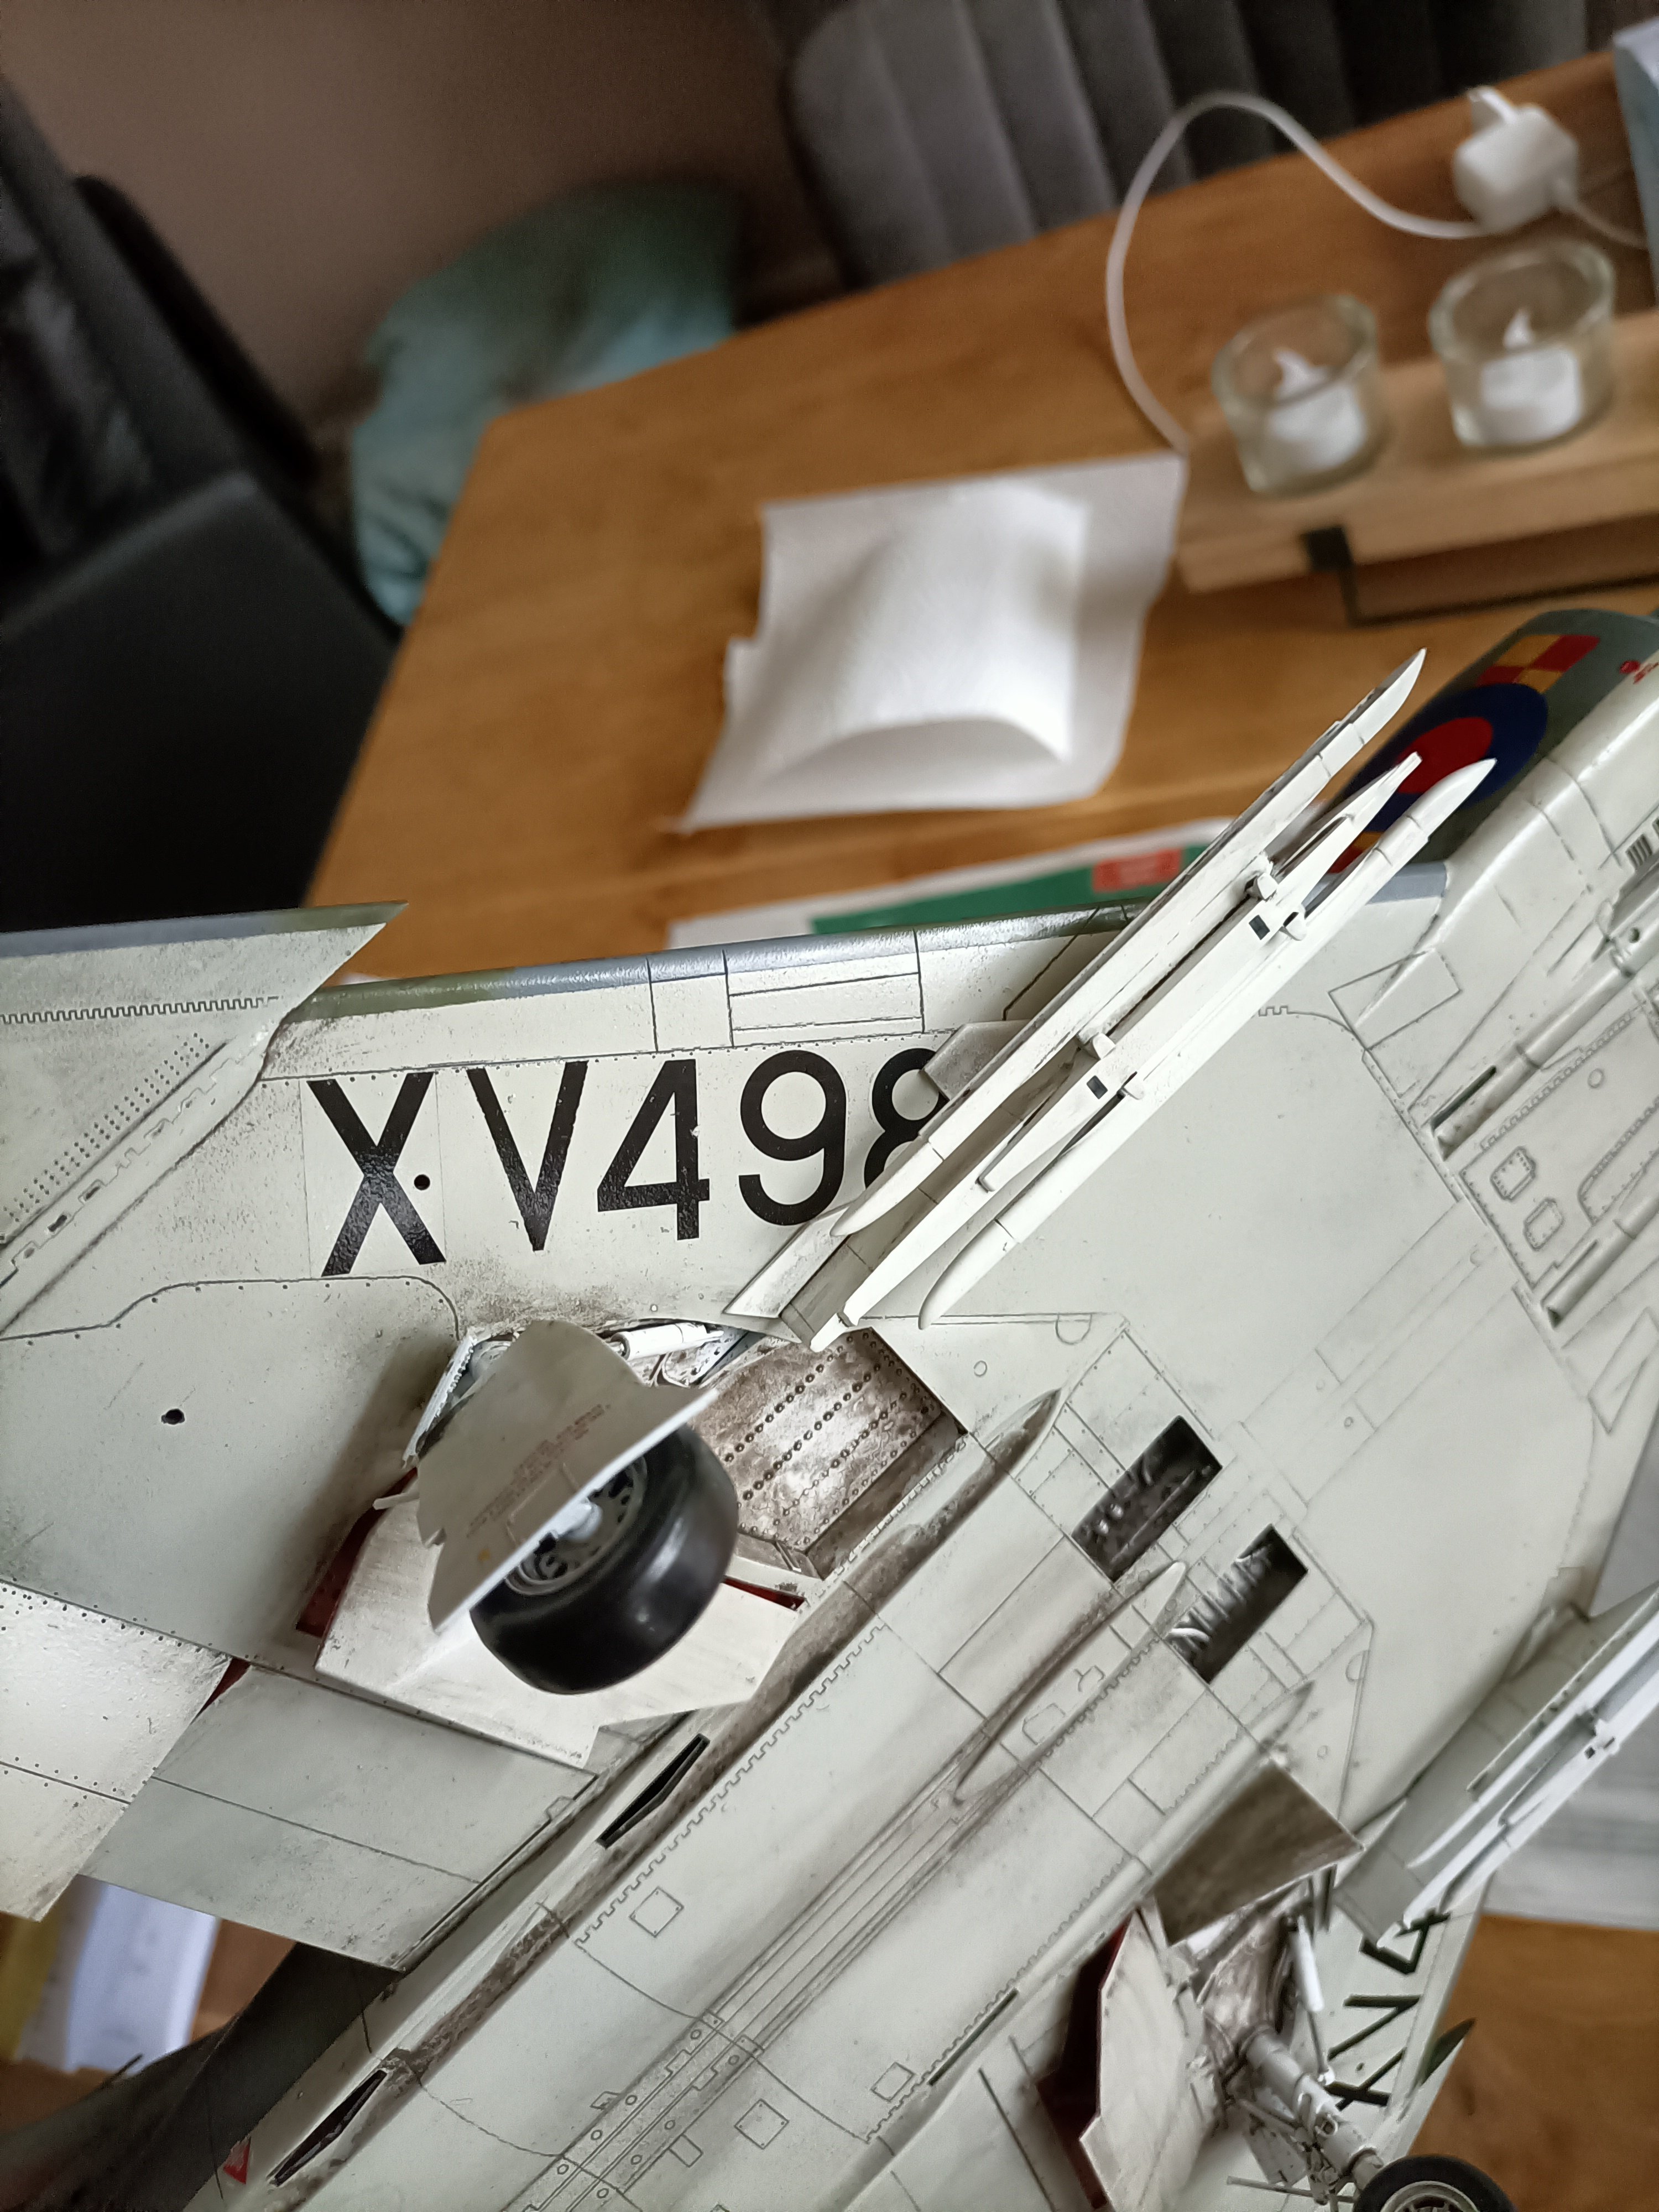
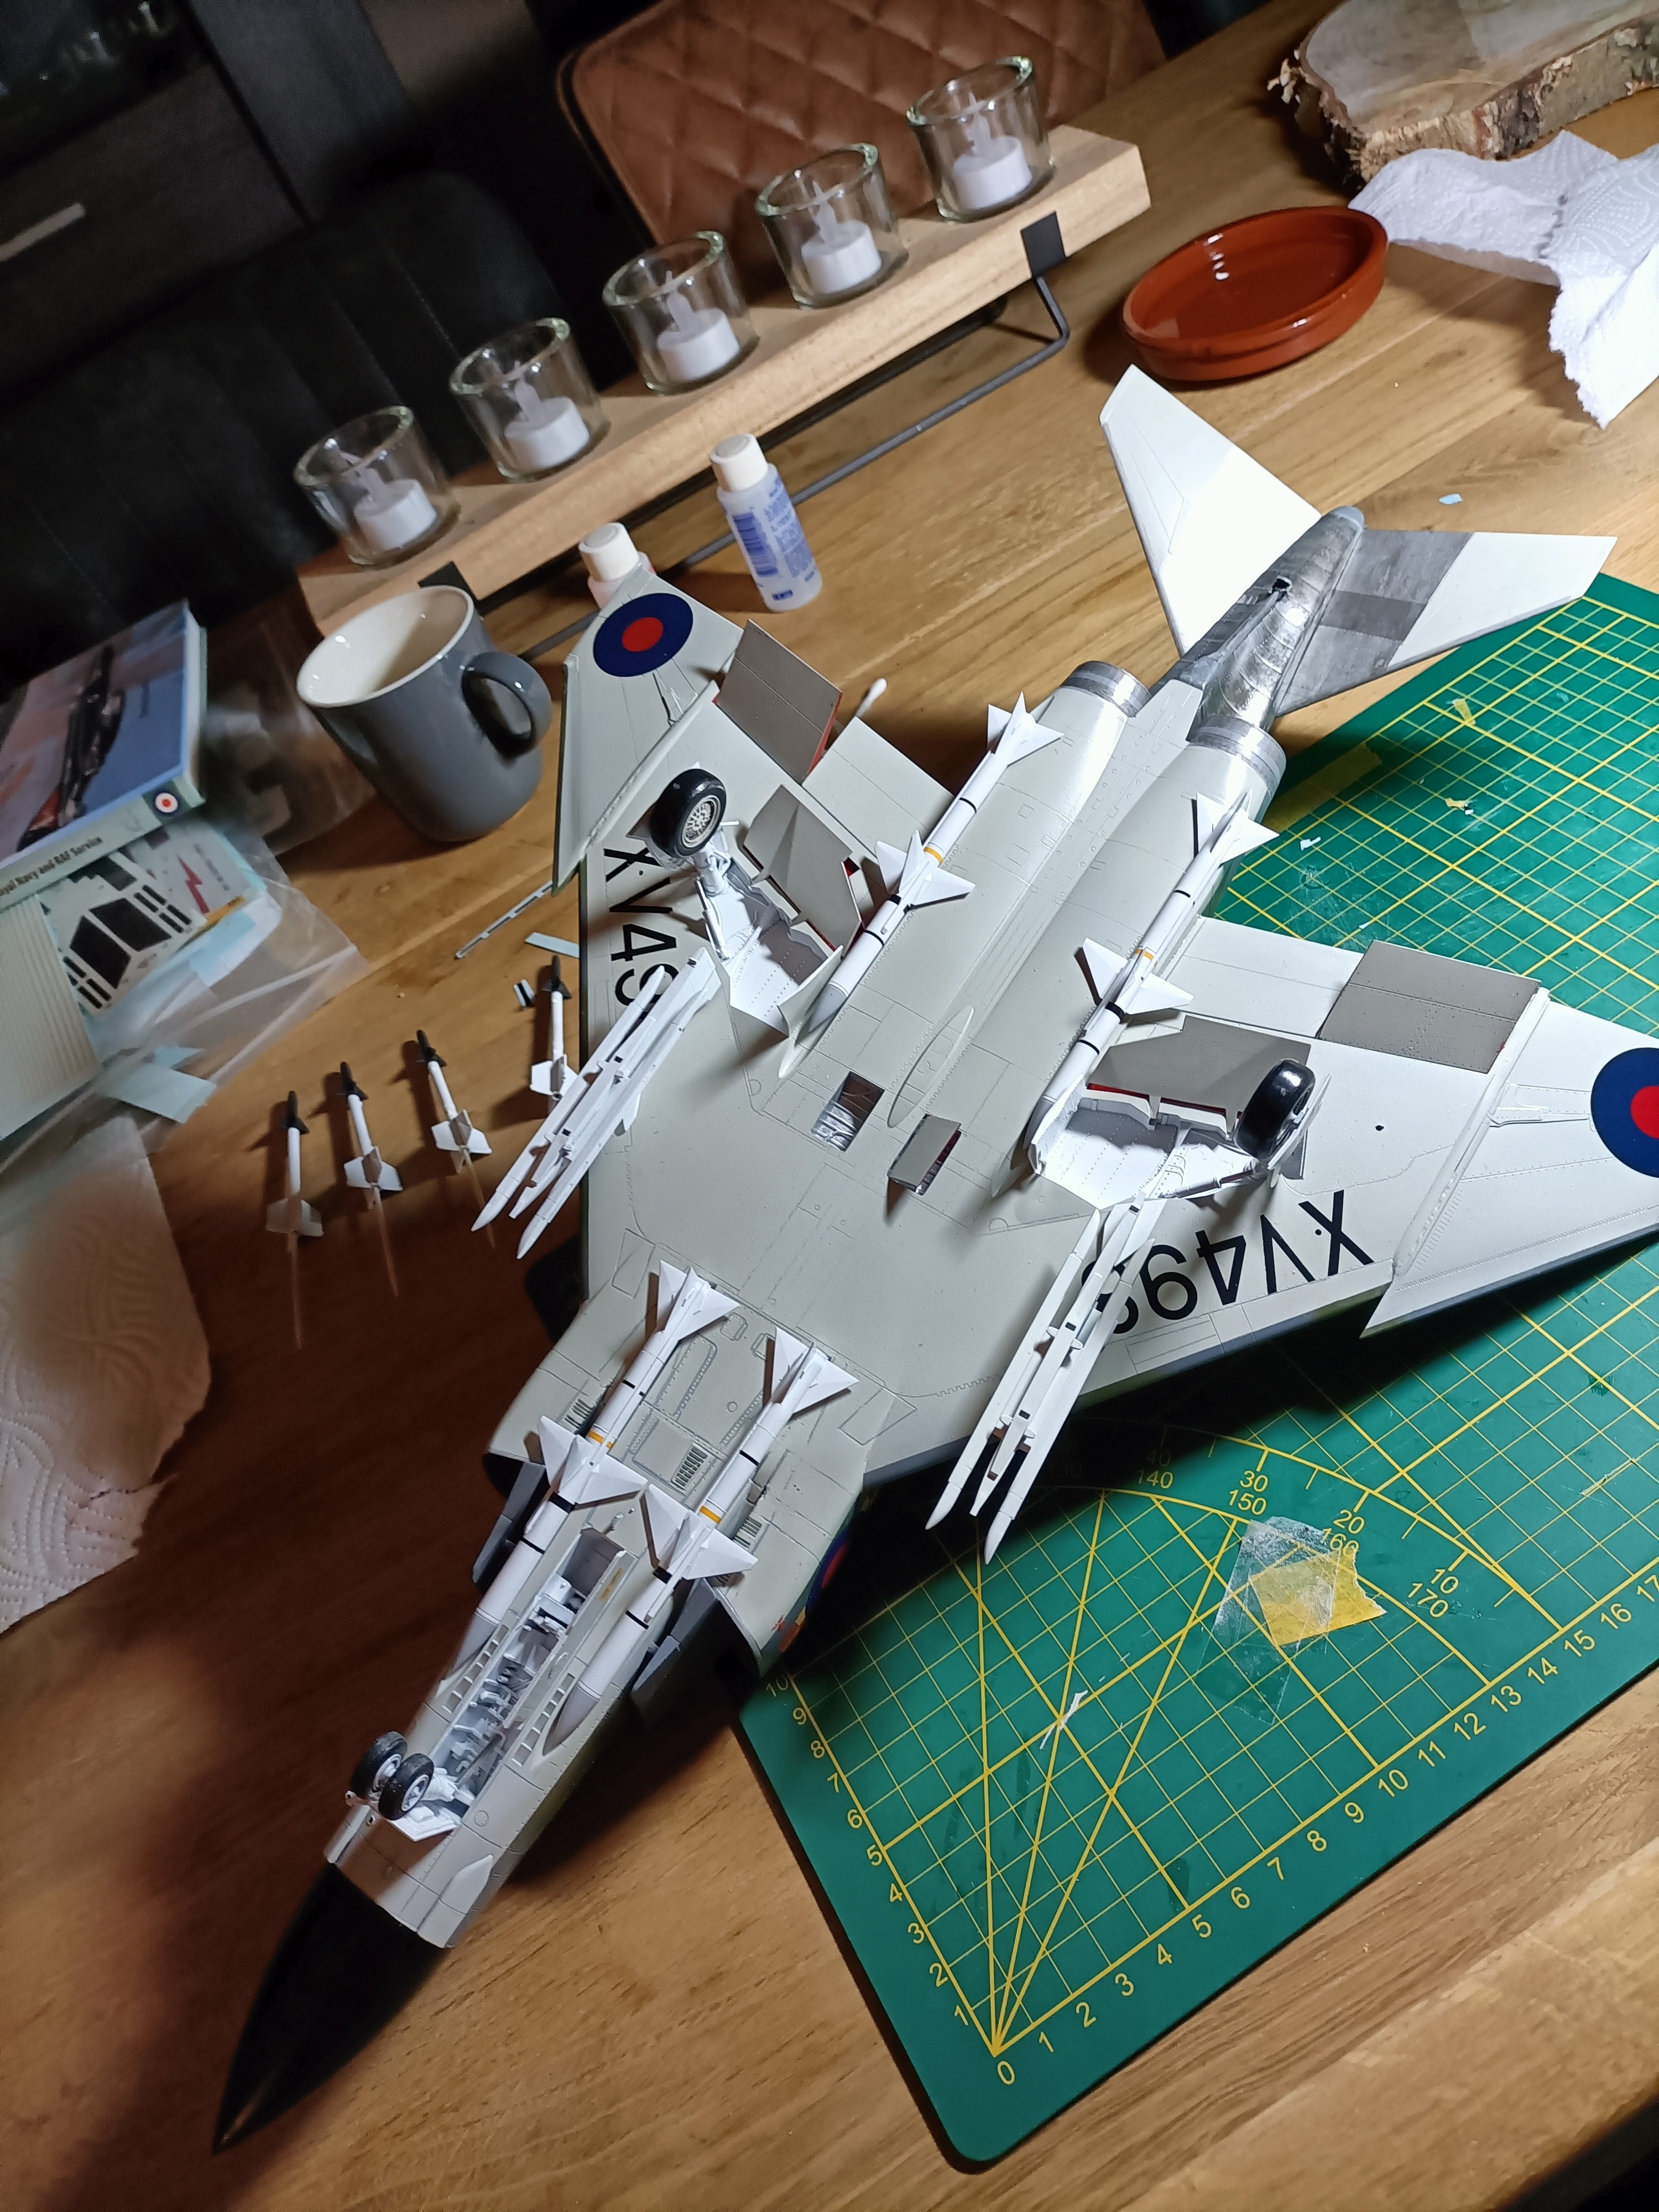
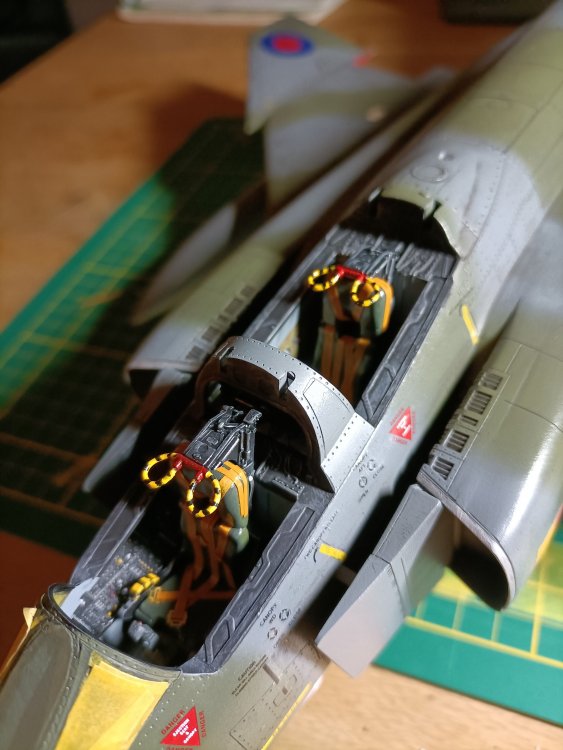
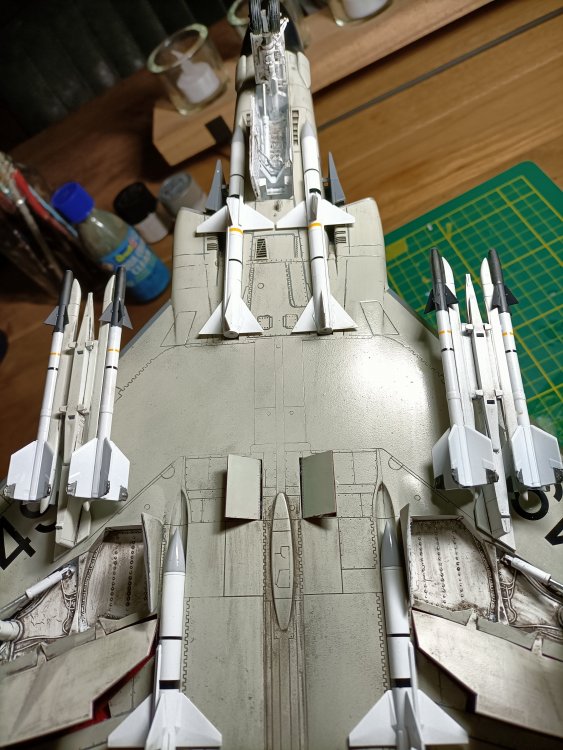
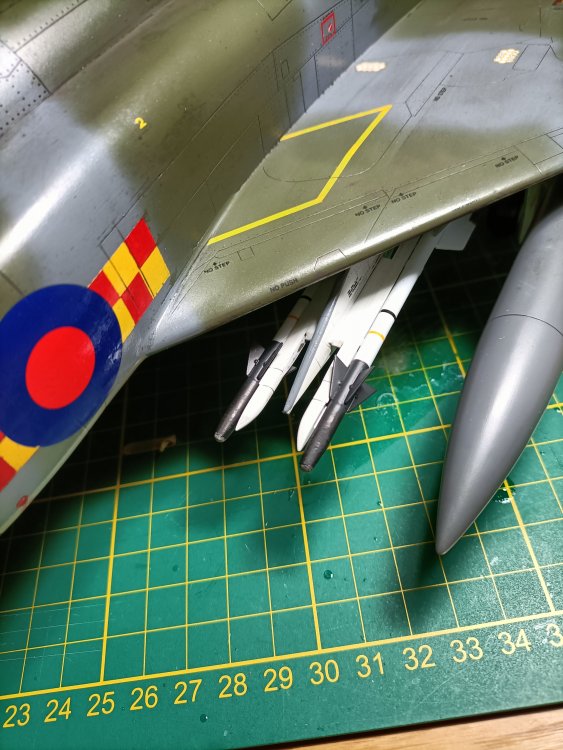
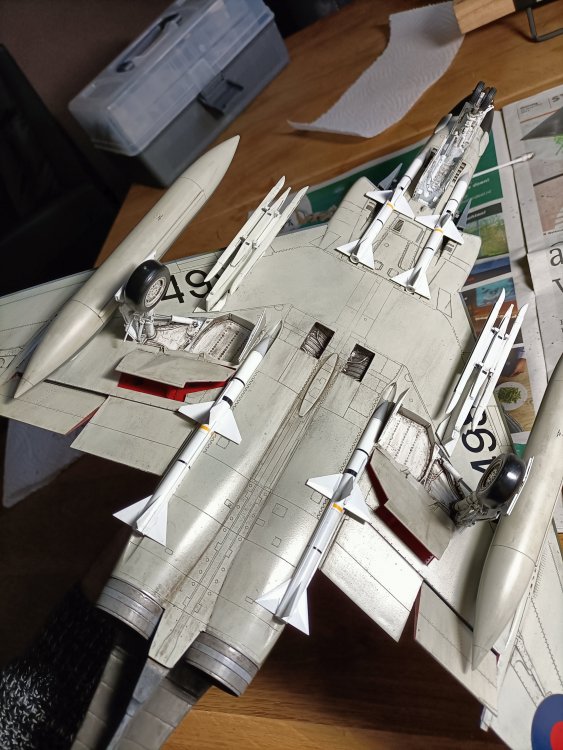
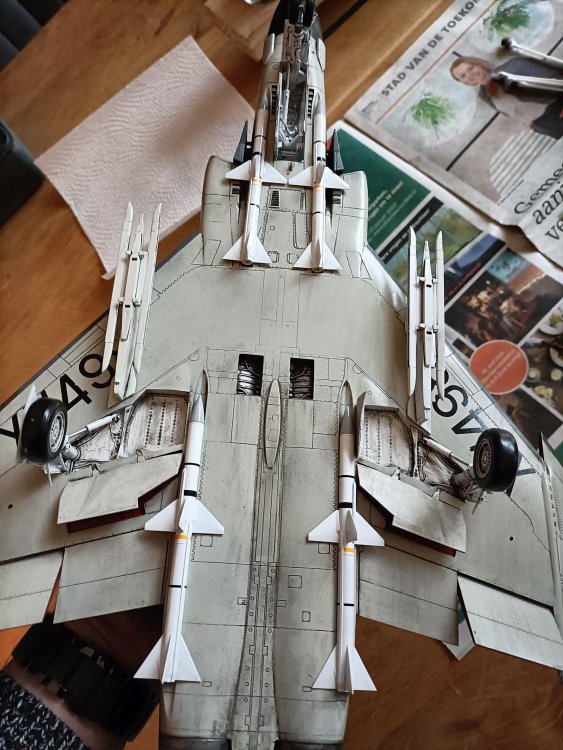
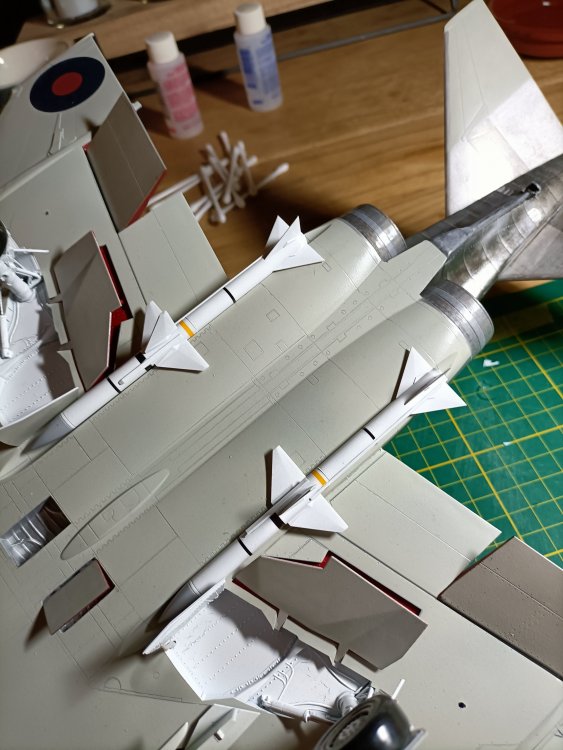
The Aerocraft clear resin windscreen is a drop-fit. The white is Kristal Kleer glue that dries up ... clear. According to the instructions that is. Also the Sidewinders were finally fitted. Slowly but surely getting there. But the cockpit still needs a lot of detailpainting.


- 414 replies
-
- 7
-
-
- conversion
- phantom
- (and 1 more)
-
RR Spey powered RAF Phantom conversion
Wingco57 replied to Wingco57's topic in LSM 1/35 and Larger Work In Progress
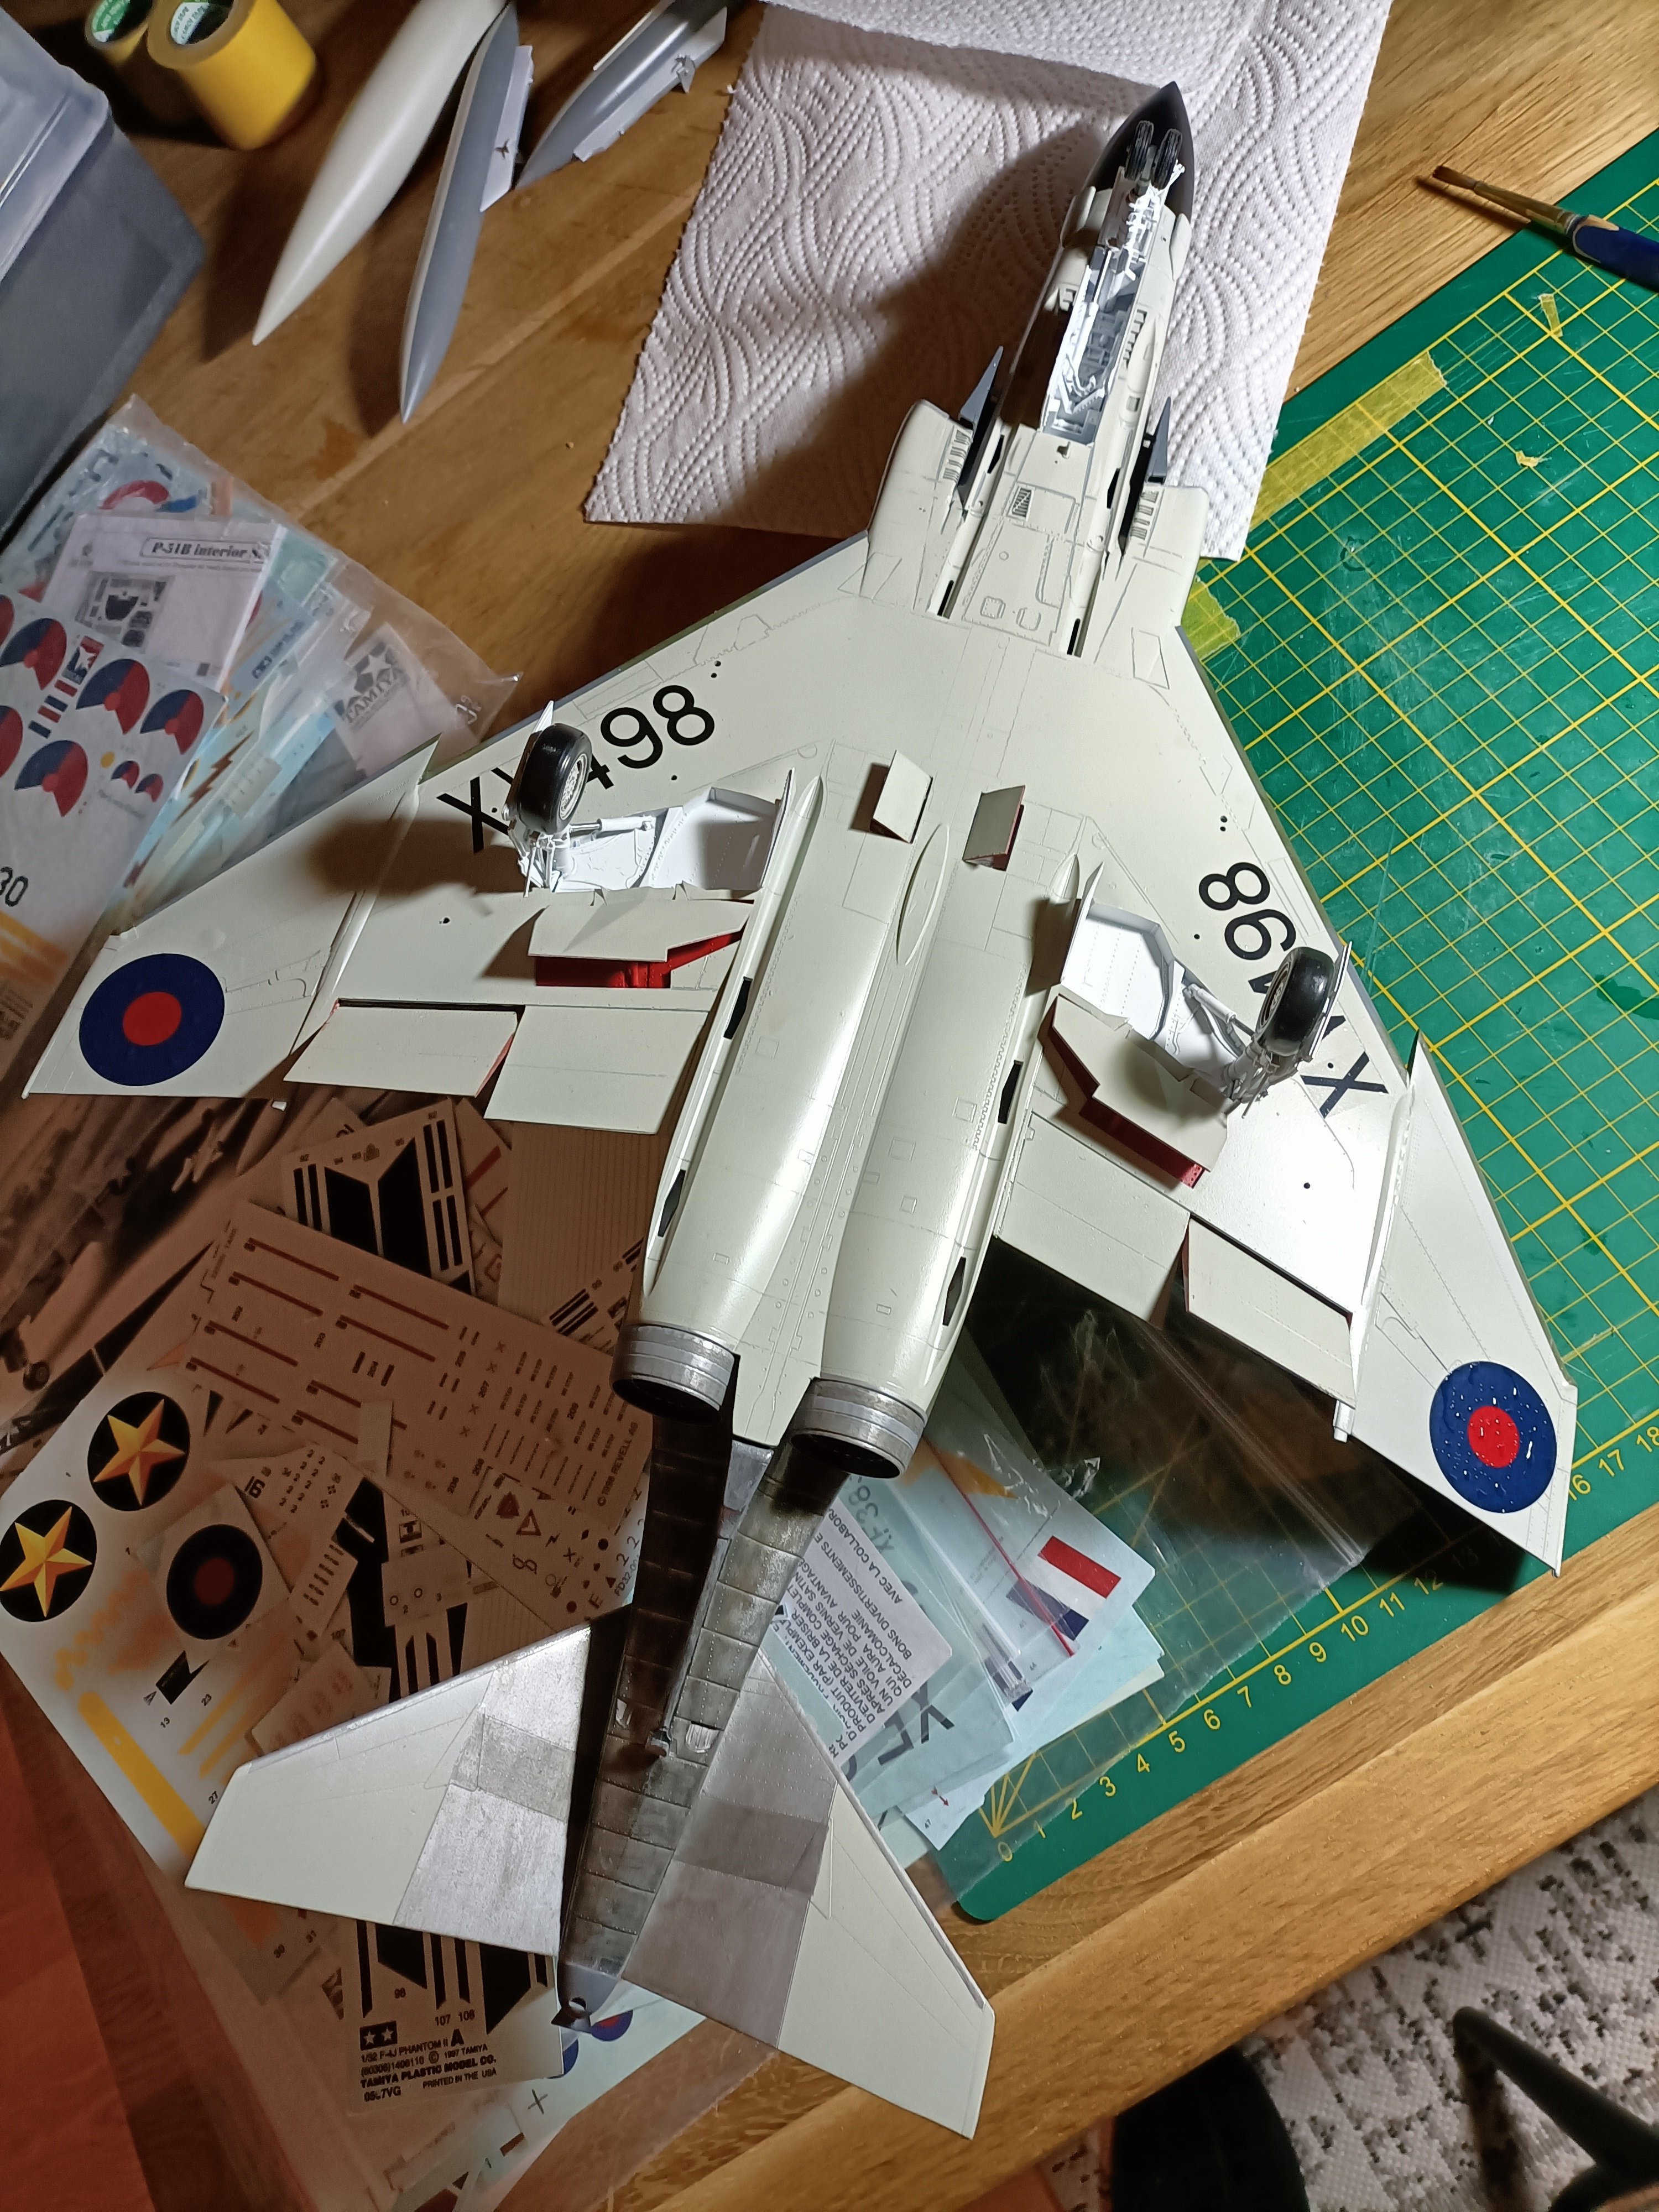
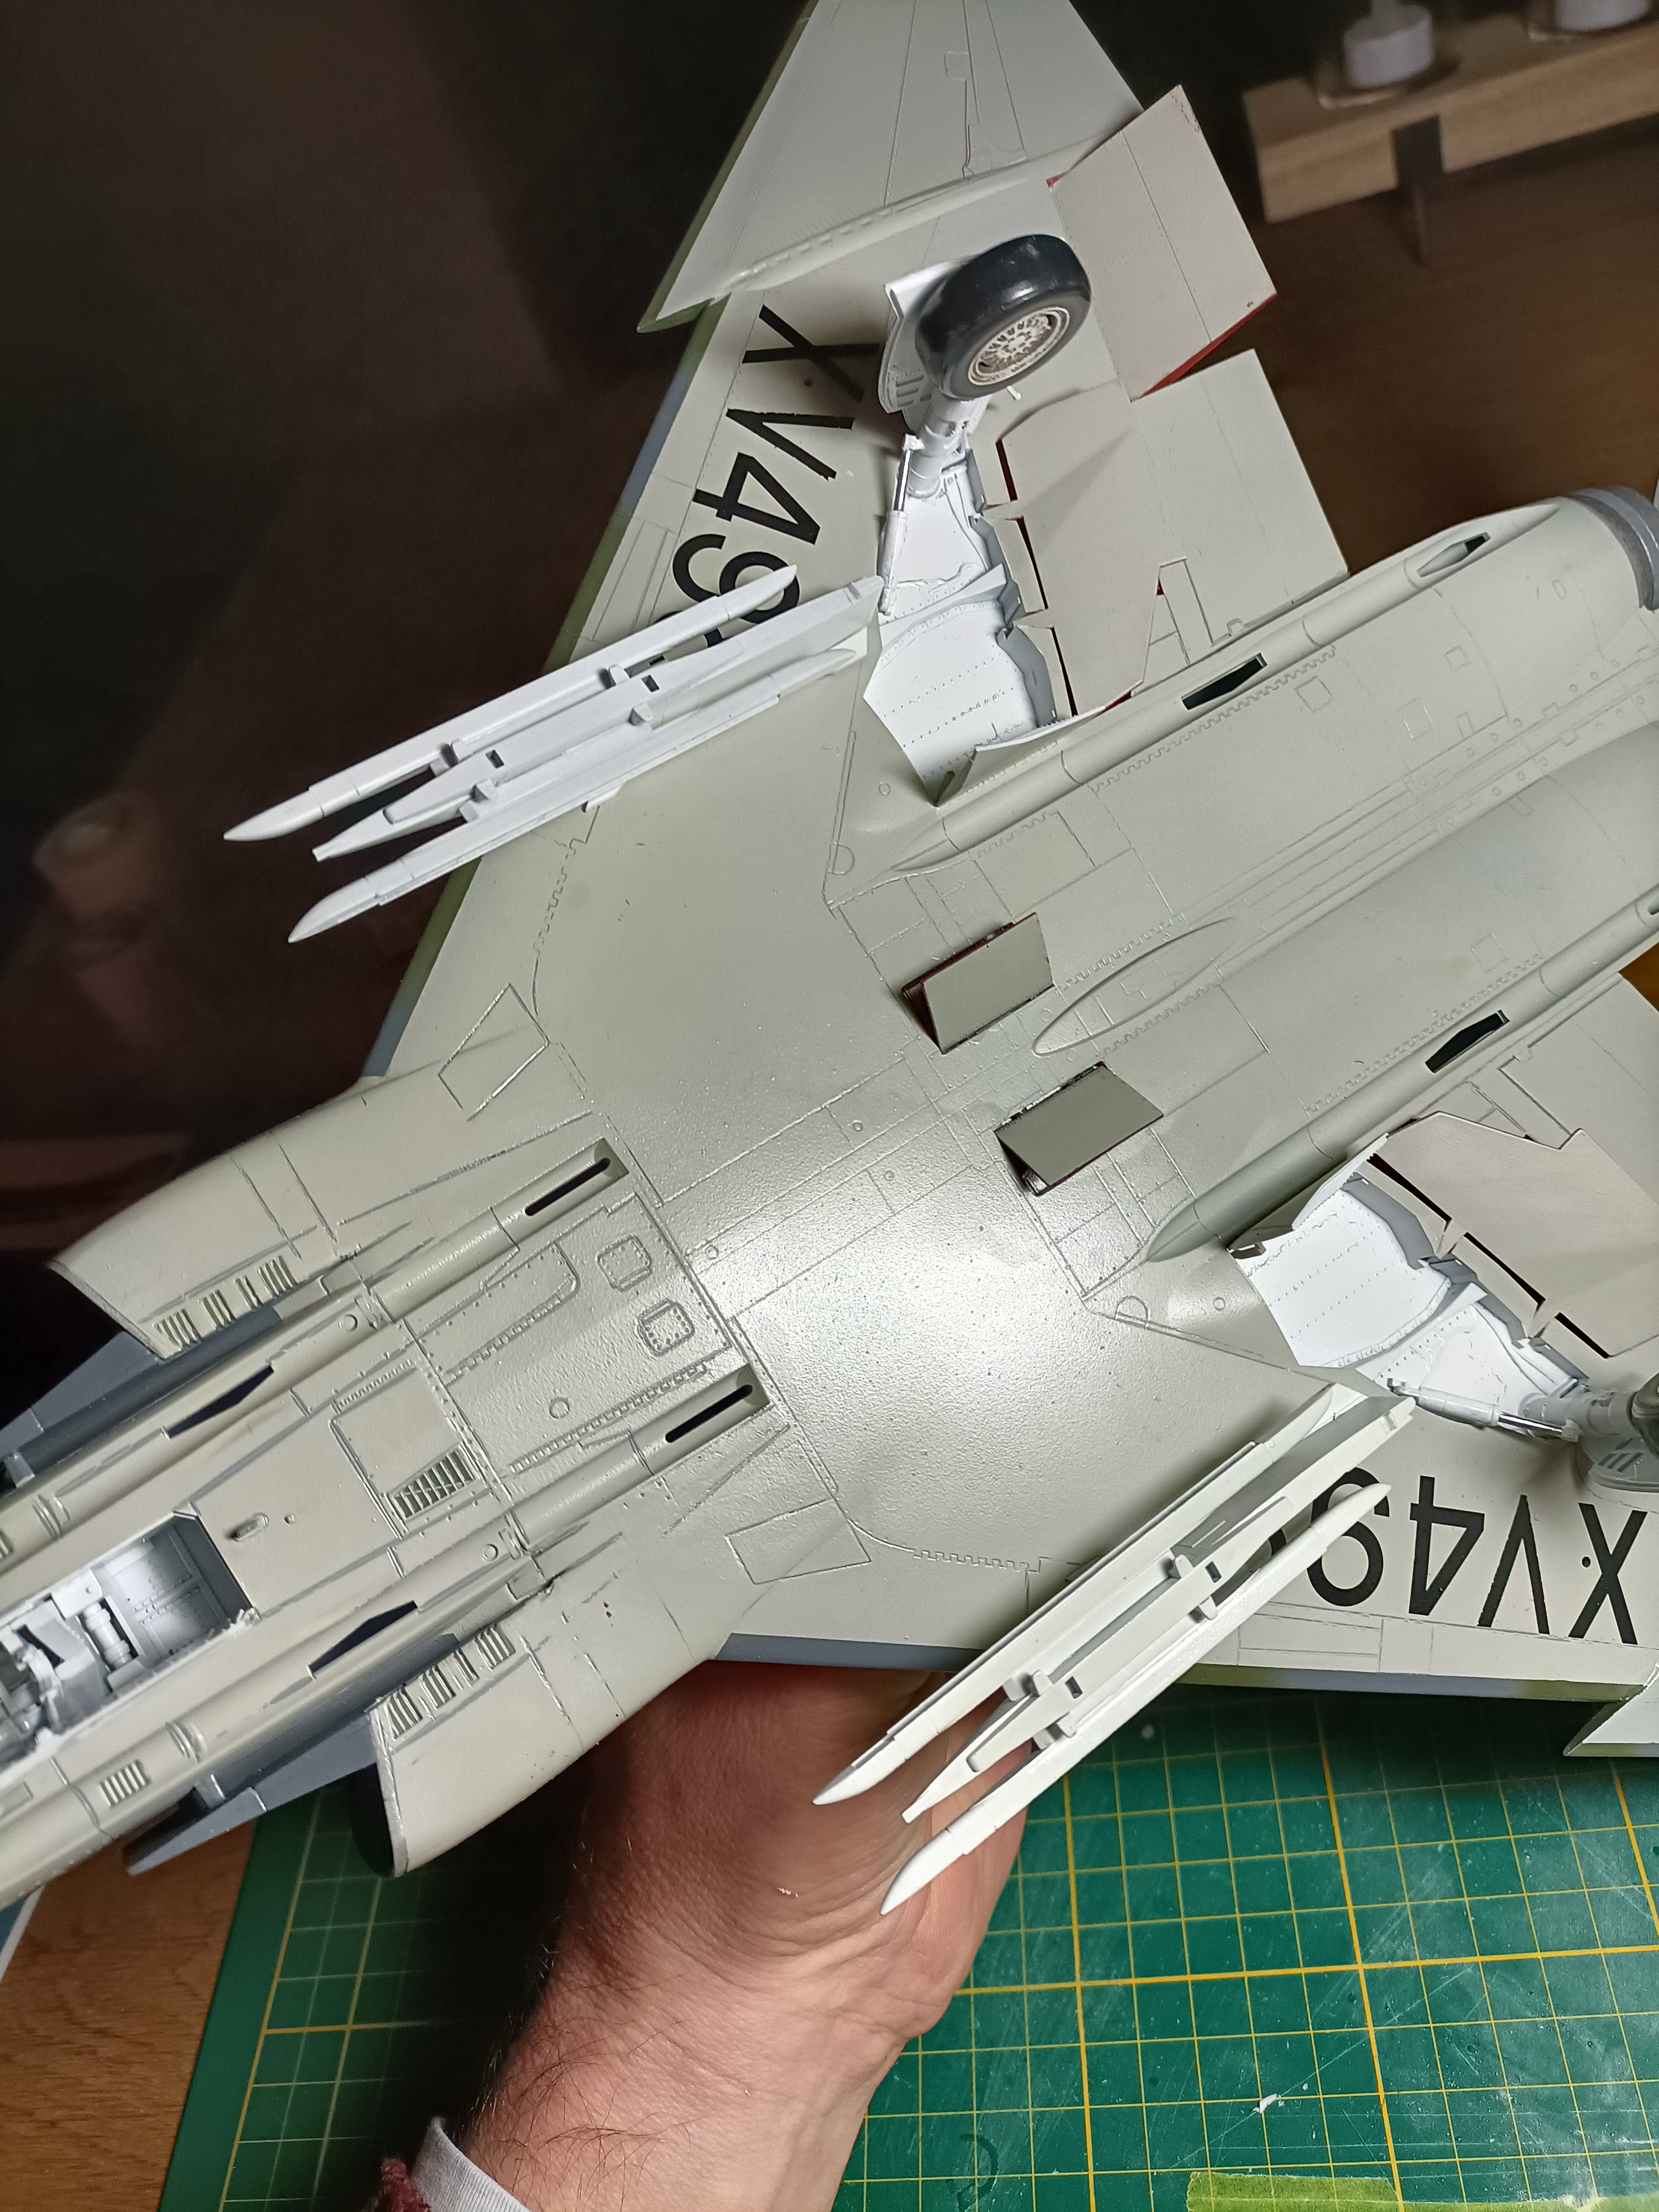
Some more progress. The underwing fueltanks have been finished and fitted. The ventral doors refitted and anything that had come adrift due to the repeated handling of the model. This also caused the starboard stabilizer to break off. But a metal rod soon fixed that.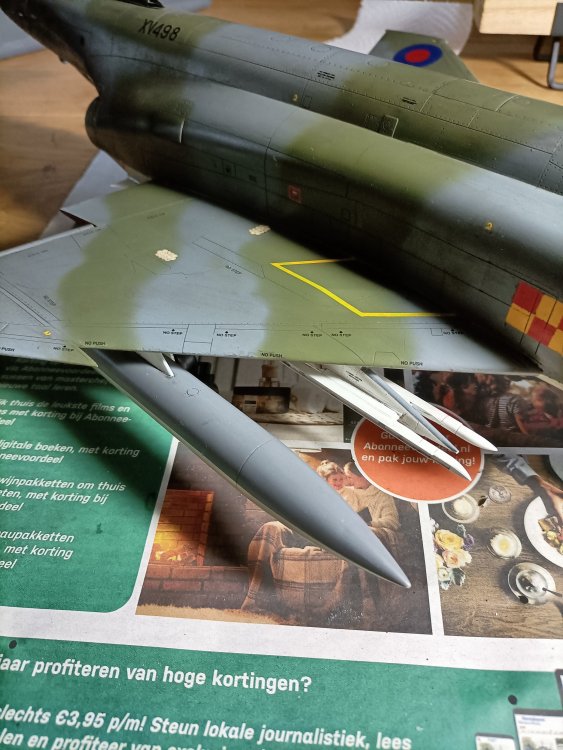


- 414 replies
-
- 6
-
-
-
- conversion
- phantom
- (and 1 more)
-
Fw190A-8 3/JG1 crash Vreeland
Wingco57 replied to JeroenPeters's topic in LSM 1/35 and Larger Work In Progress
AEG or Miele? -
RR Spey powered RAF Phantom conversion
Wingco57 replied to Wingco57's topic in LSM 1/35 and Larger Work In Progress
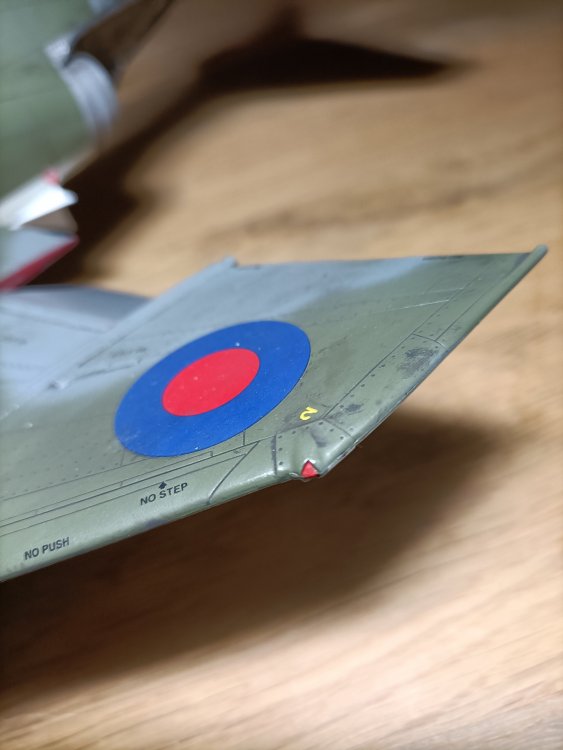
Question, does anyone have information on the red diagonal stripes radiating from the yellow walkway? Can’t seem to find useful references.- 414 replies
-
- 2
-
-
- conversion
- phantom
- (and 1 more)
-
RR Spey powered RAF Phantom conversion
Wingco57 replied to Wingco57's topic in LSM 1/35 and Larger Work In Progress
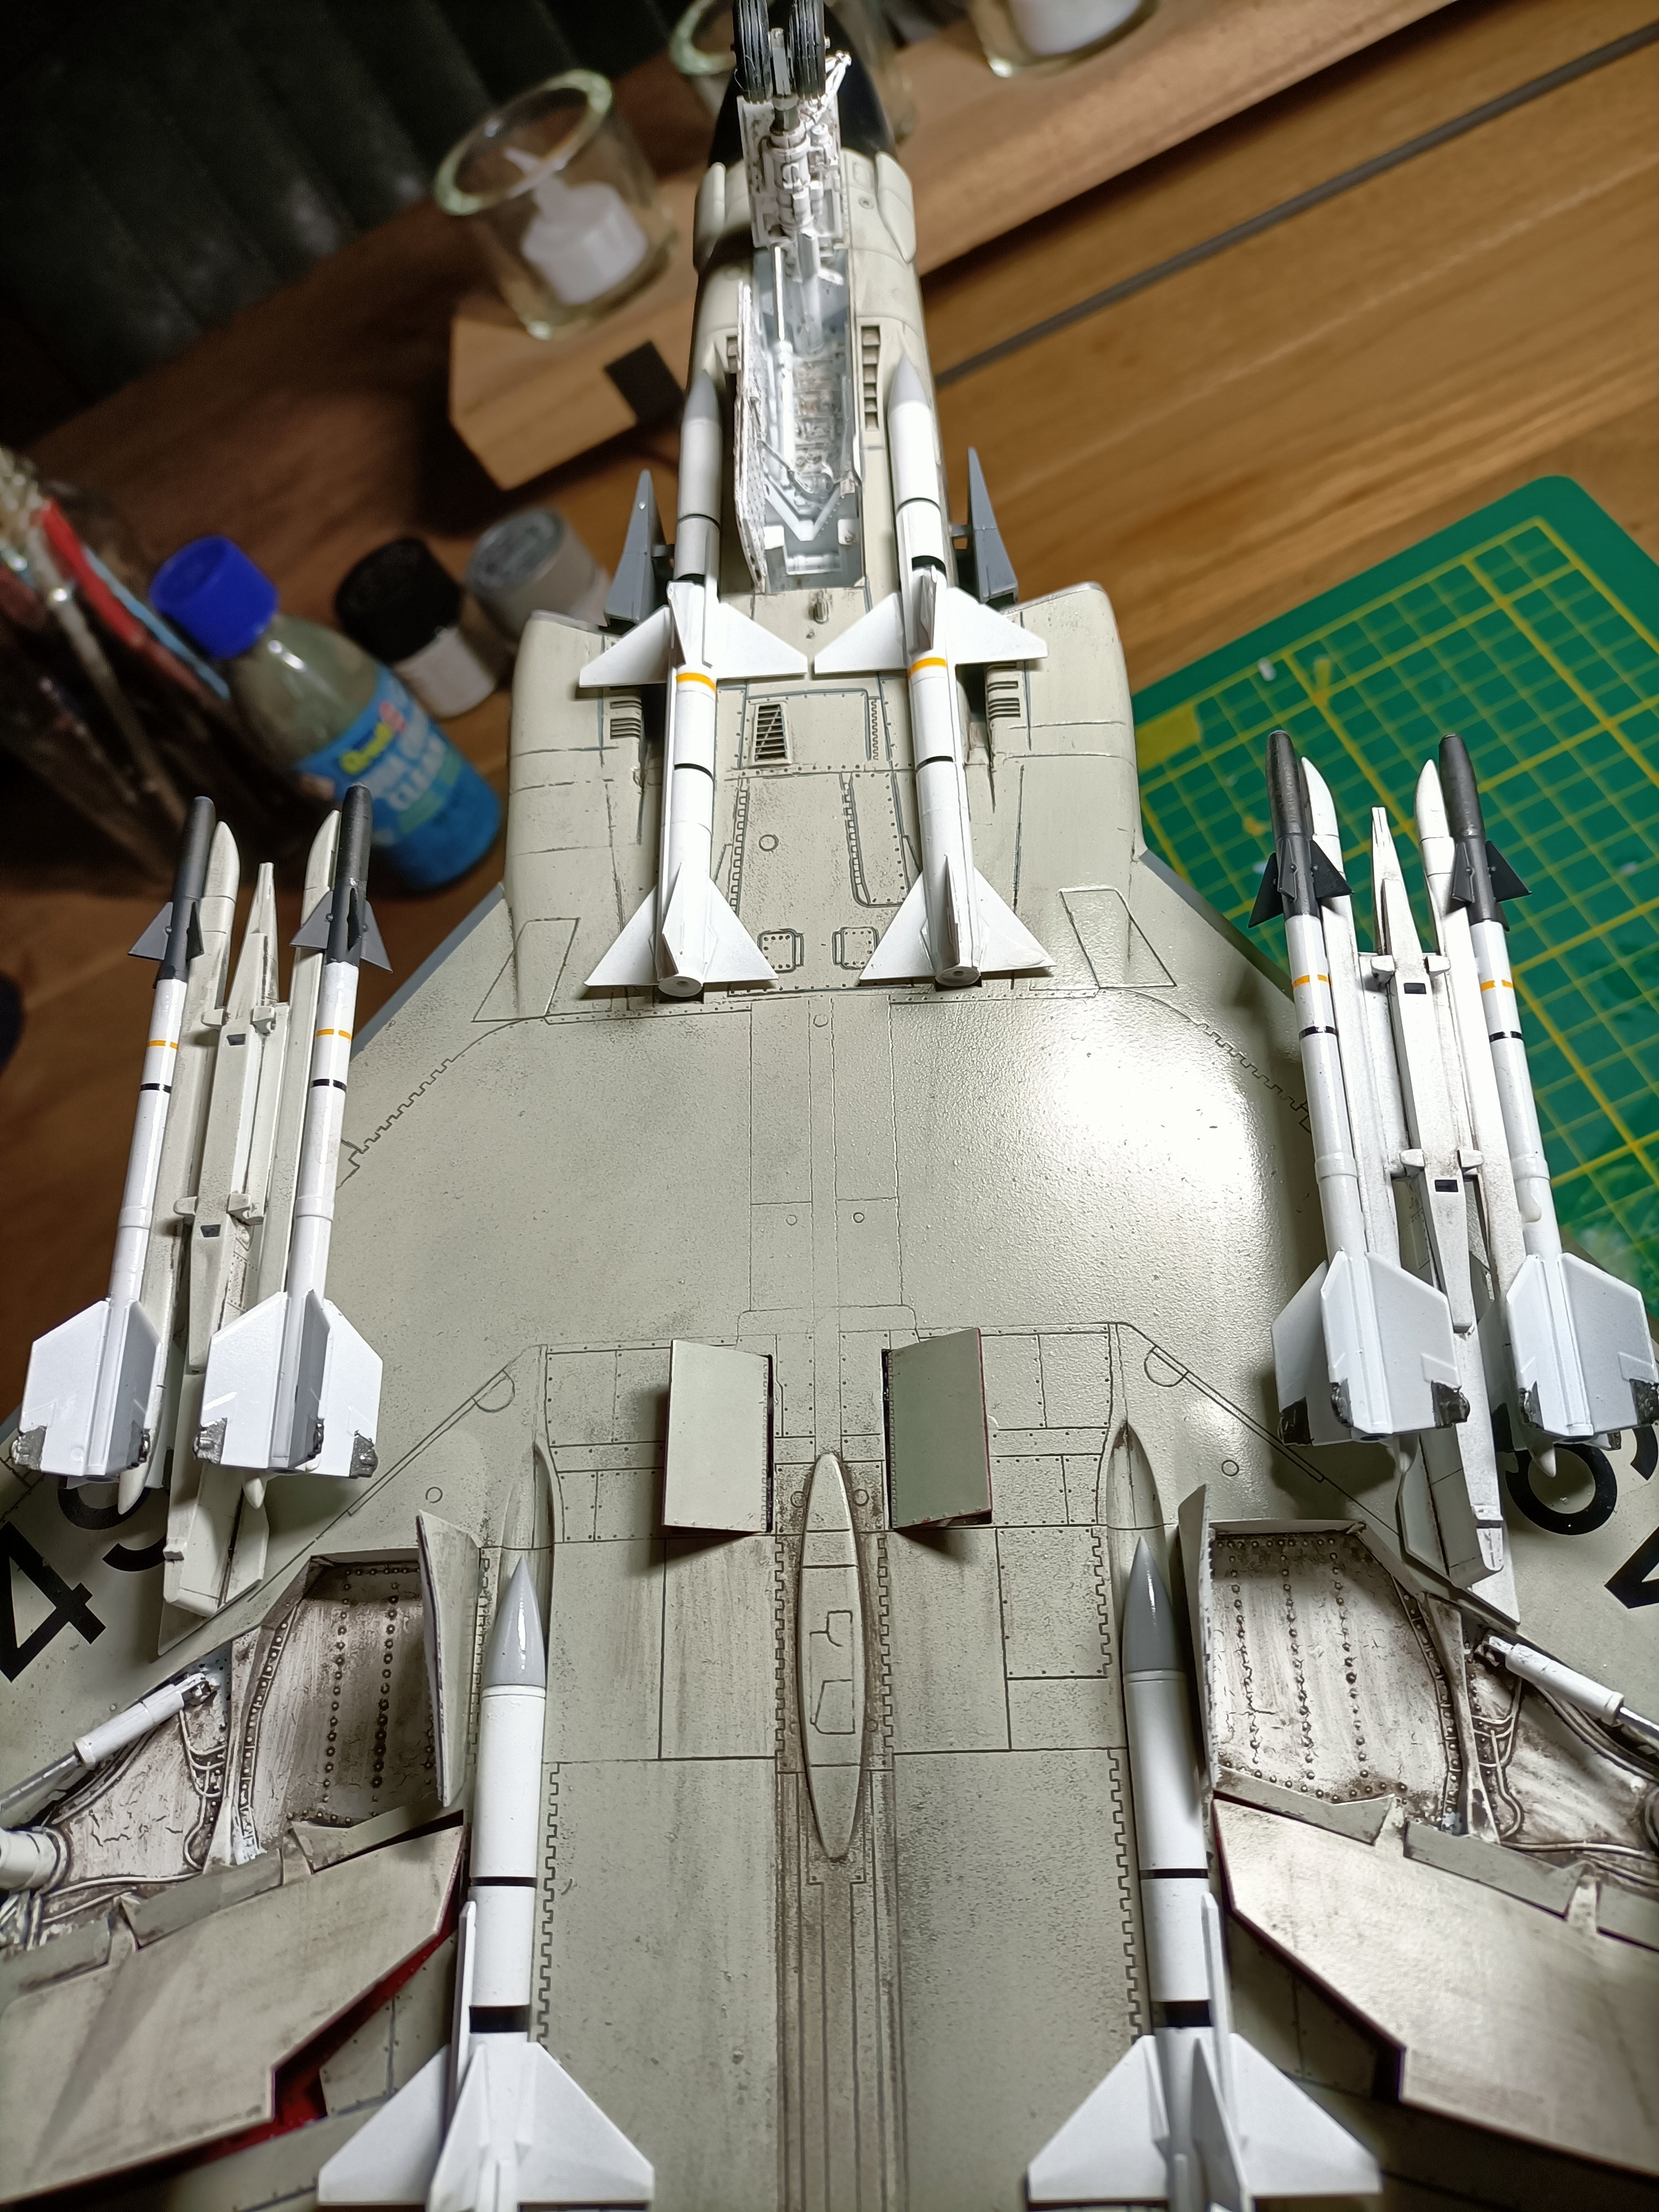
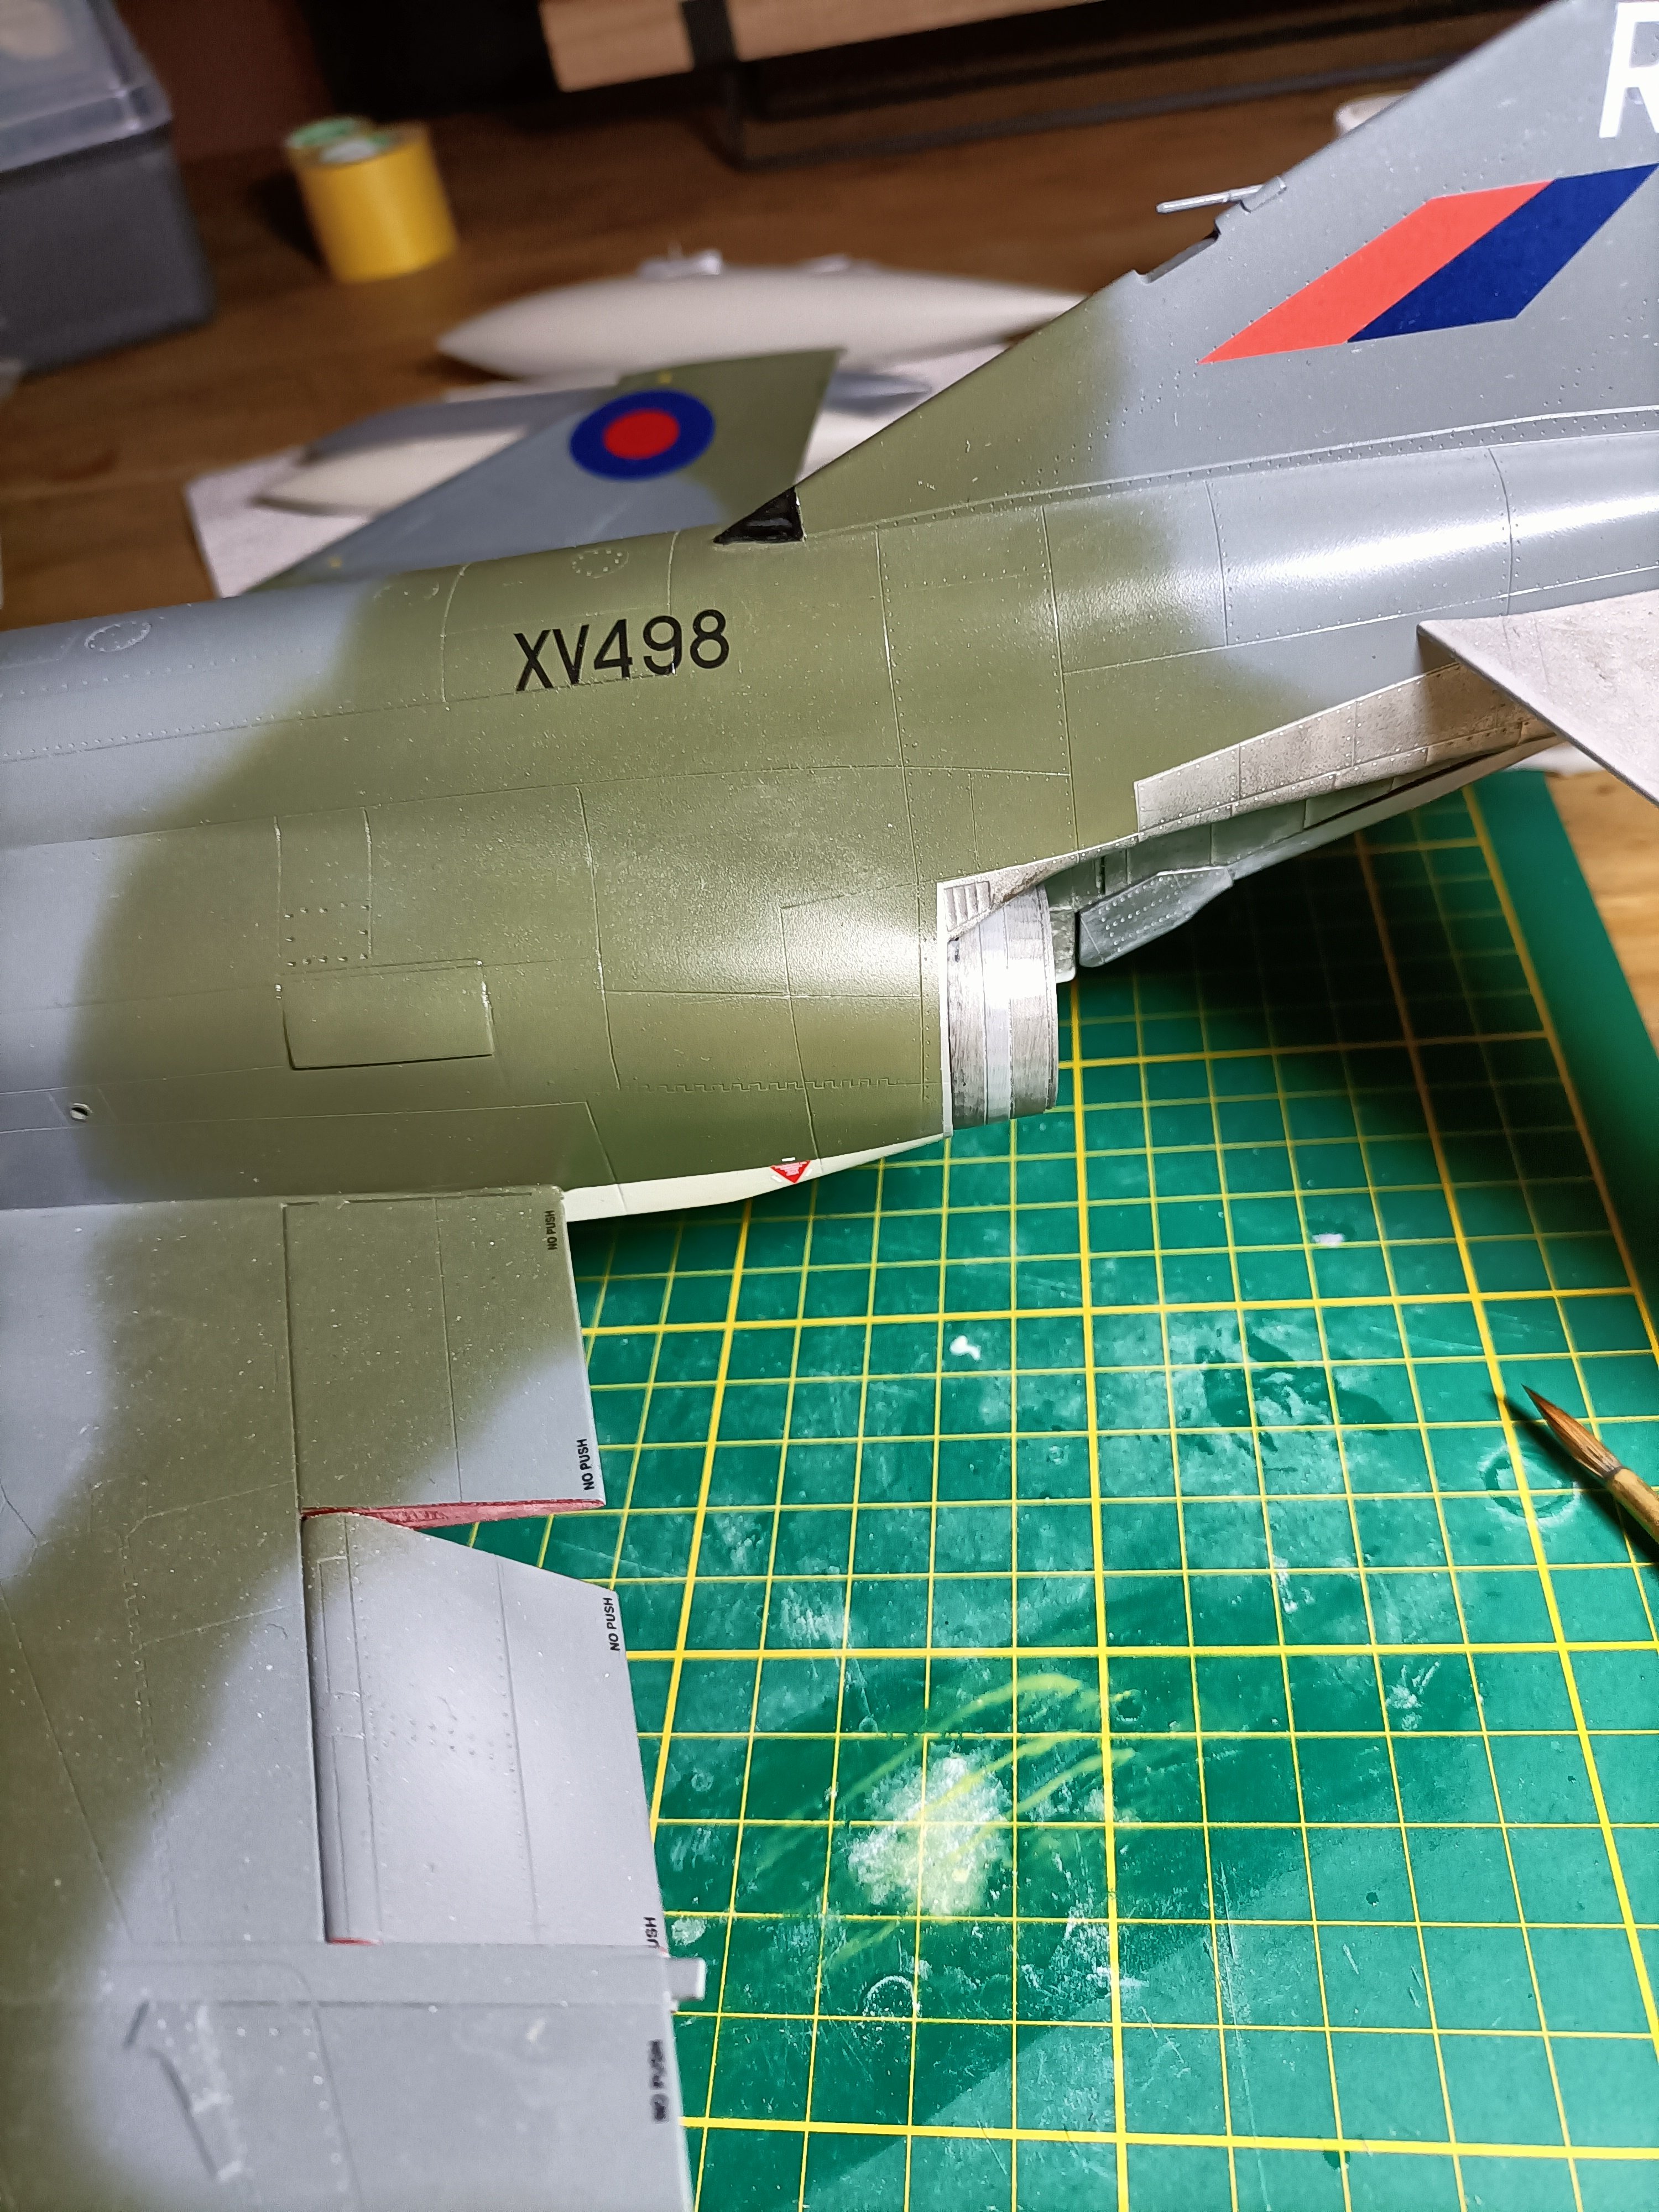
Some more progress. The rear shows sign of reheat soot. The sidewinder pylons and Sparrows have been fitted now. The outer fueltanks have been sludged over prior to cleaning up and fitting. a very enjoyable stage of this long enduring build.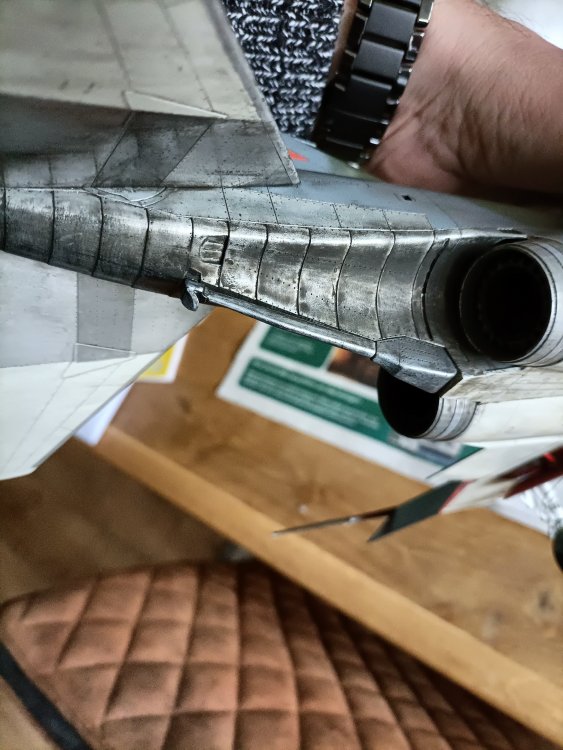


- 414 replies
-
- 7
-
-
-
- conversion
- phantom
- (and 1 more)
-
RR Spey powered RAF Phantom conversion
Wingco57 replied to Wingco57's topic in LSM 1/35 and Larger Work In Progress
Thanks Peter, Next, a wash. I am always amazed how such a simple technique can transform a model.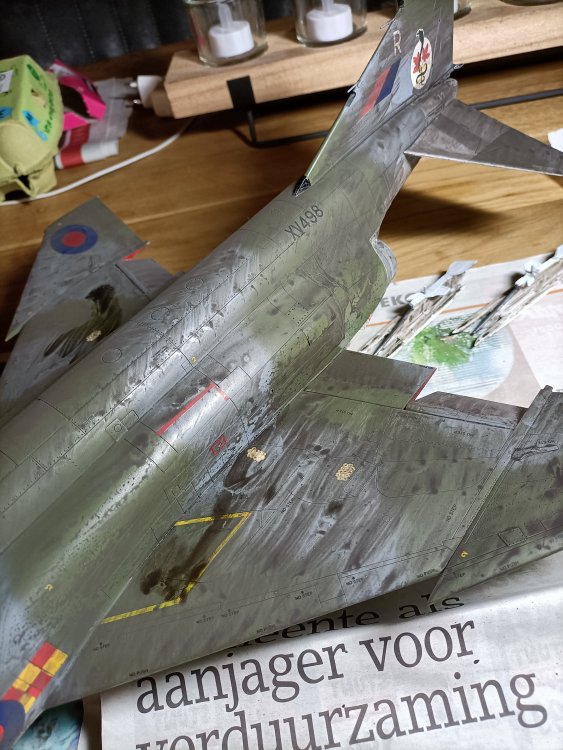


- 414 replies
-
- 6
-
-
- conversion
- phantom
- (and 1 more)
-
RR Spey powered RAF Phantom conversion
Wingco57 replied to Wingco57's topic in LSM 1/35 and Larger Work In Progress
And the sidewinders.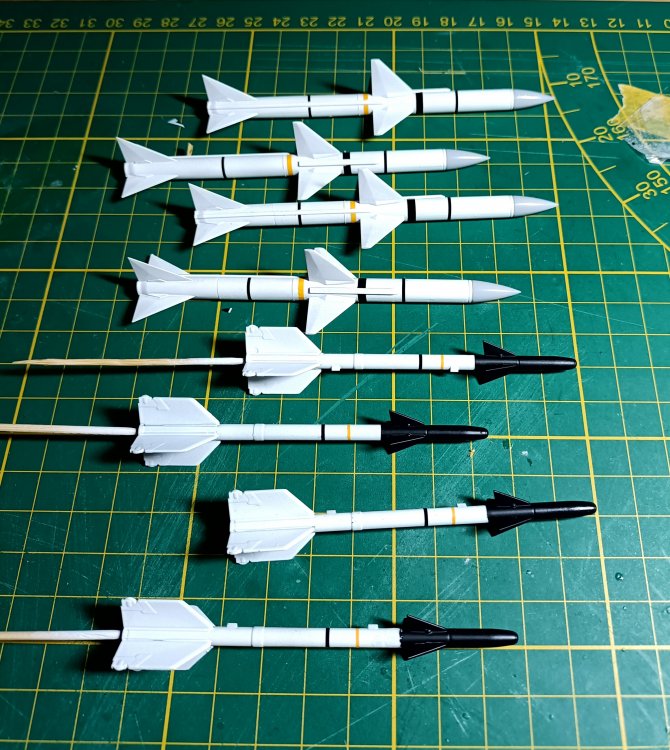
- 414 replies
-
- 6
-
-
- conversion
- phantom
- (and 1 more)
-
RR Spey powered RAF Phantom conversion
Wingco57 replied to Wingco57's topic in LSM 1/35 and Larger Work In Progress
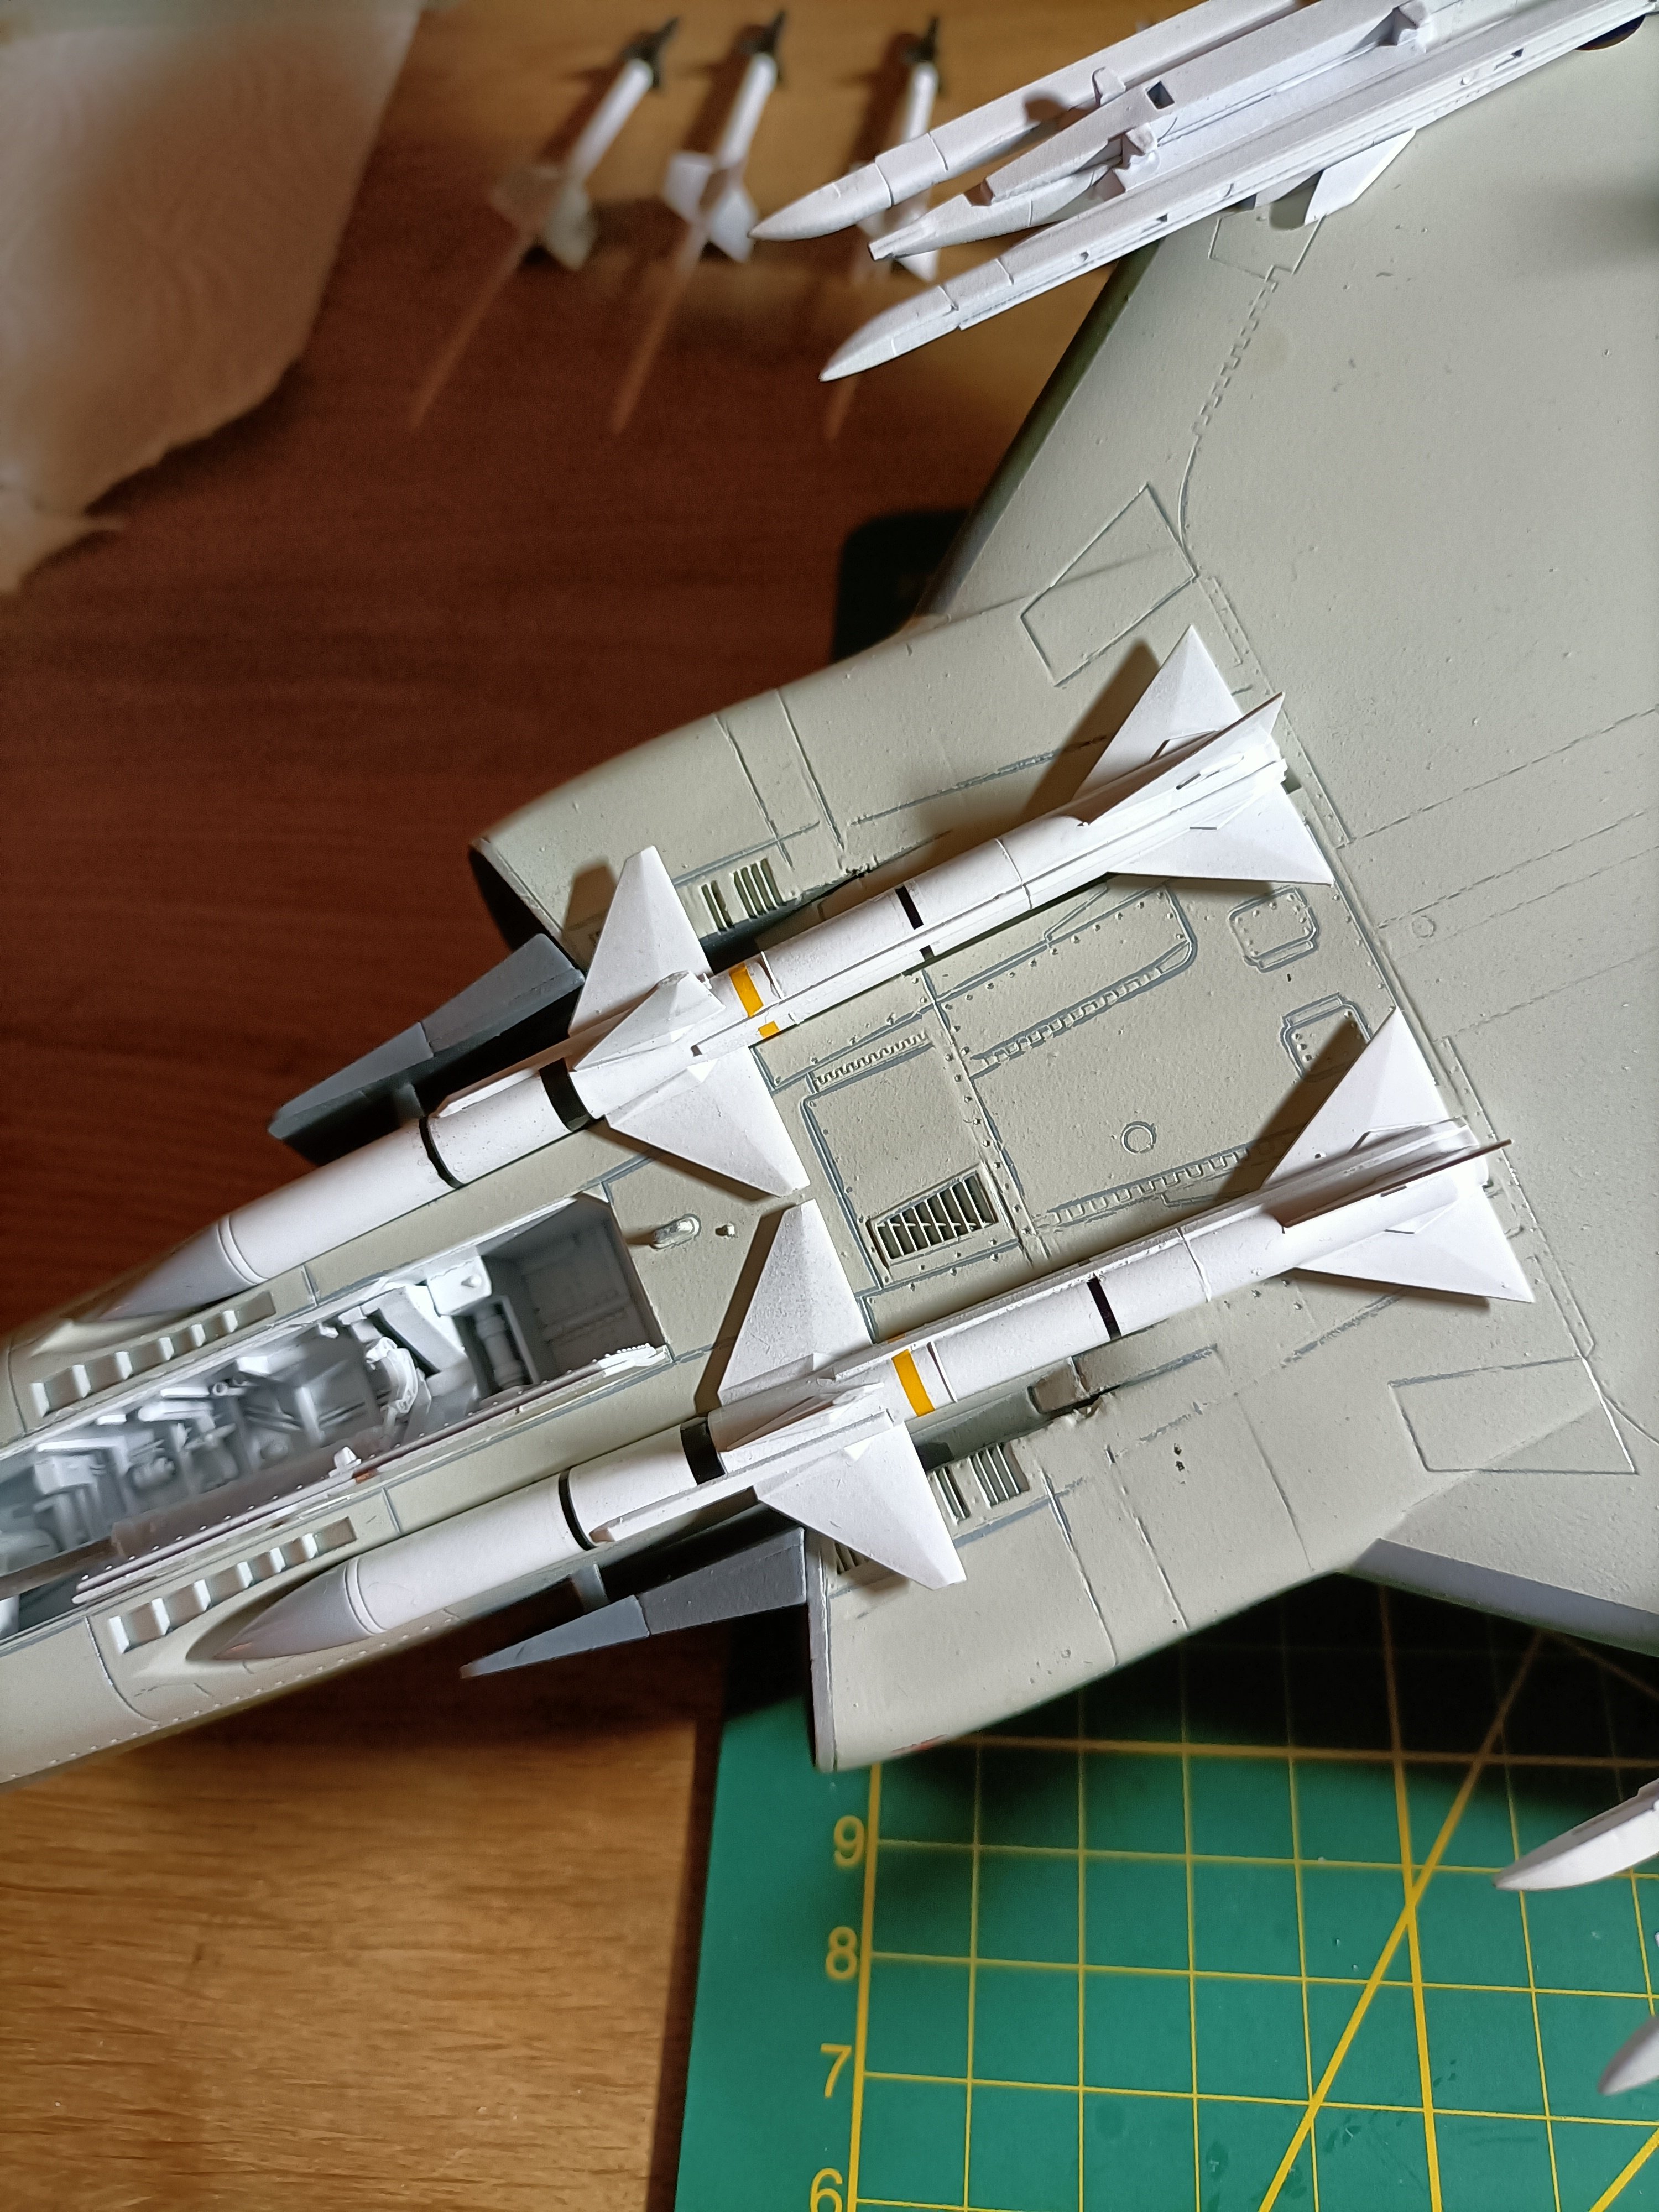
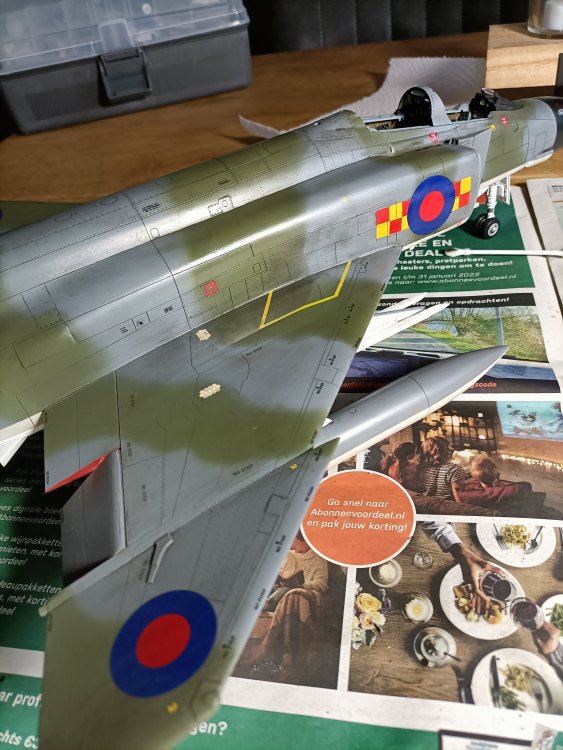
middle canopy section fitted, windscreen just dryfitted. And adding more decals. This time the Sparrows take their turn. These are little Models by themselves with all the black and yellow striping. I decided not to mask them off but use strips of decal instead. Sidewinders next.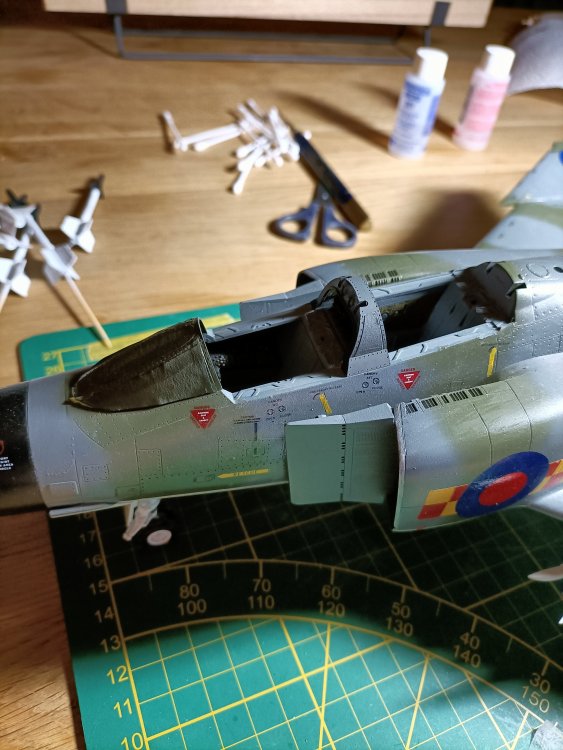


- 414 replies
-
- 6
-
-
- conversion
- phantom
- (and 1 more)
-
RR Spey powered RAF Phantom conversion
Wingco57 replied to Wingco57's topic in LSM 1/35 and Larger Work In Progress
Finishing off the decals.


- 414 replies
-
- 6
-
-
- conversion
- phantom
- (and 1 more)
-
RR Spey powered RAF Phantom conversion
Wingco57 replied to Wingco57's topic in LSM 1/35 and Larger Work In Progress
The sidewinder pylons have been temporarily fitted with some plastic rod. The HUD display is also done. Front and middle transparencies have been masked and the ejection seats and Vulcan cannon prepared for airbrushing.

- 414 replies
-
- 7
-
-
-
- conversion
- phantom
- (and 1 more)
-
P-51 racer Bardahl Special
Wingco57 replied to JohnB's topic in LSM 1/35 and Larger Work In Progress
Not the first time Tamiya and Revell match very well. I always thought Red Baron had a Griffon up front. -
RR Spey powered RAF Phantom conversion
Wingco57 replied to Wingco57's topic in LSM 1/35 and Larger Work In Progress
Preparing the aftermarket resin ejection seats. Much better than the kit ones.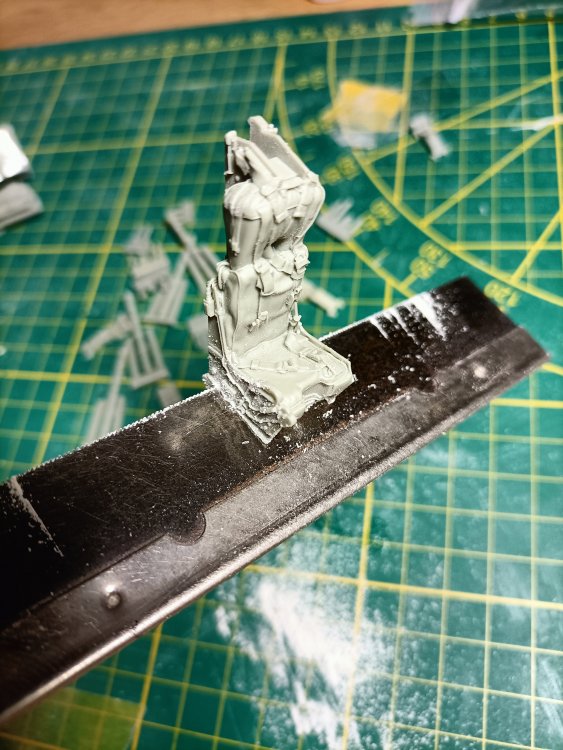

- 414 replies
-
- 7
-
-
-
- conversion
- phantom
- (and 1 more)
-
RR Spey powered RAF Phantom conversion
Wingco57 replied to Wingco57's topic in LSM 1/35 and Larger Work In Progress
Me too. Small progress, the ILS blade antennae that were located on both sides of the fin.

- 414 replies
-
- 6
-
-
-
- conversion
- phantom
- (and 1 more)
-
Fw190A-8 3/JG1 crash Vreeland
Wingco57 replied to JeroenPeters's topic in LSM 1/35 and Larger Work In Progress
I like your patience. -
RR Spey powered RAF Phantom conversion
Wingco57 replied to Wingco57's topic in LSM 1/35 and Larger Work In Progress
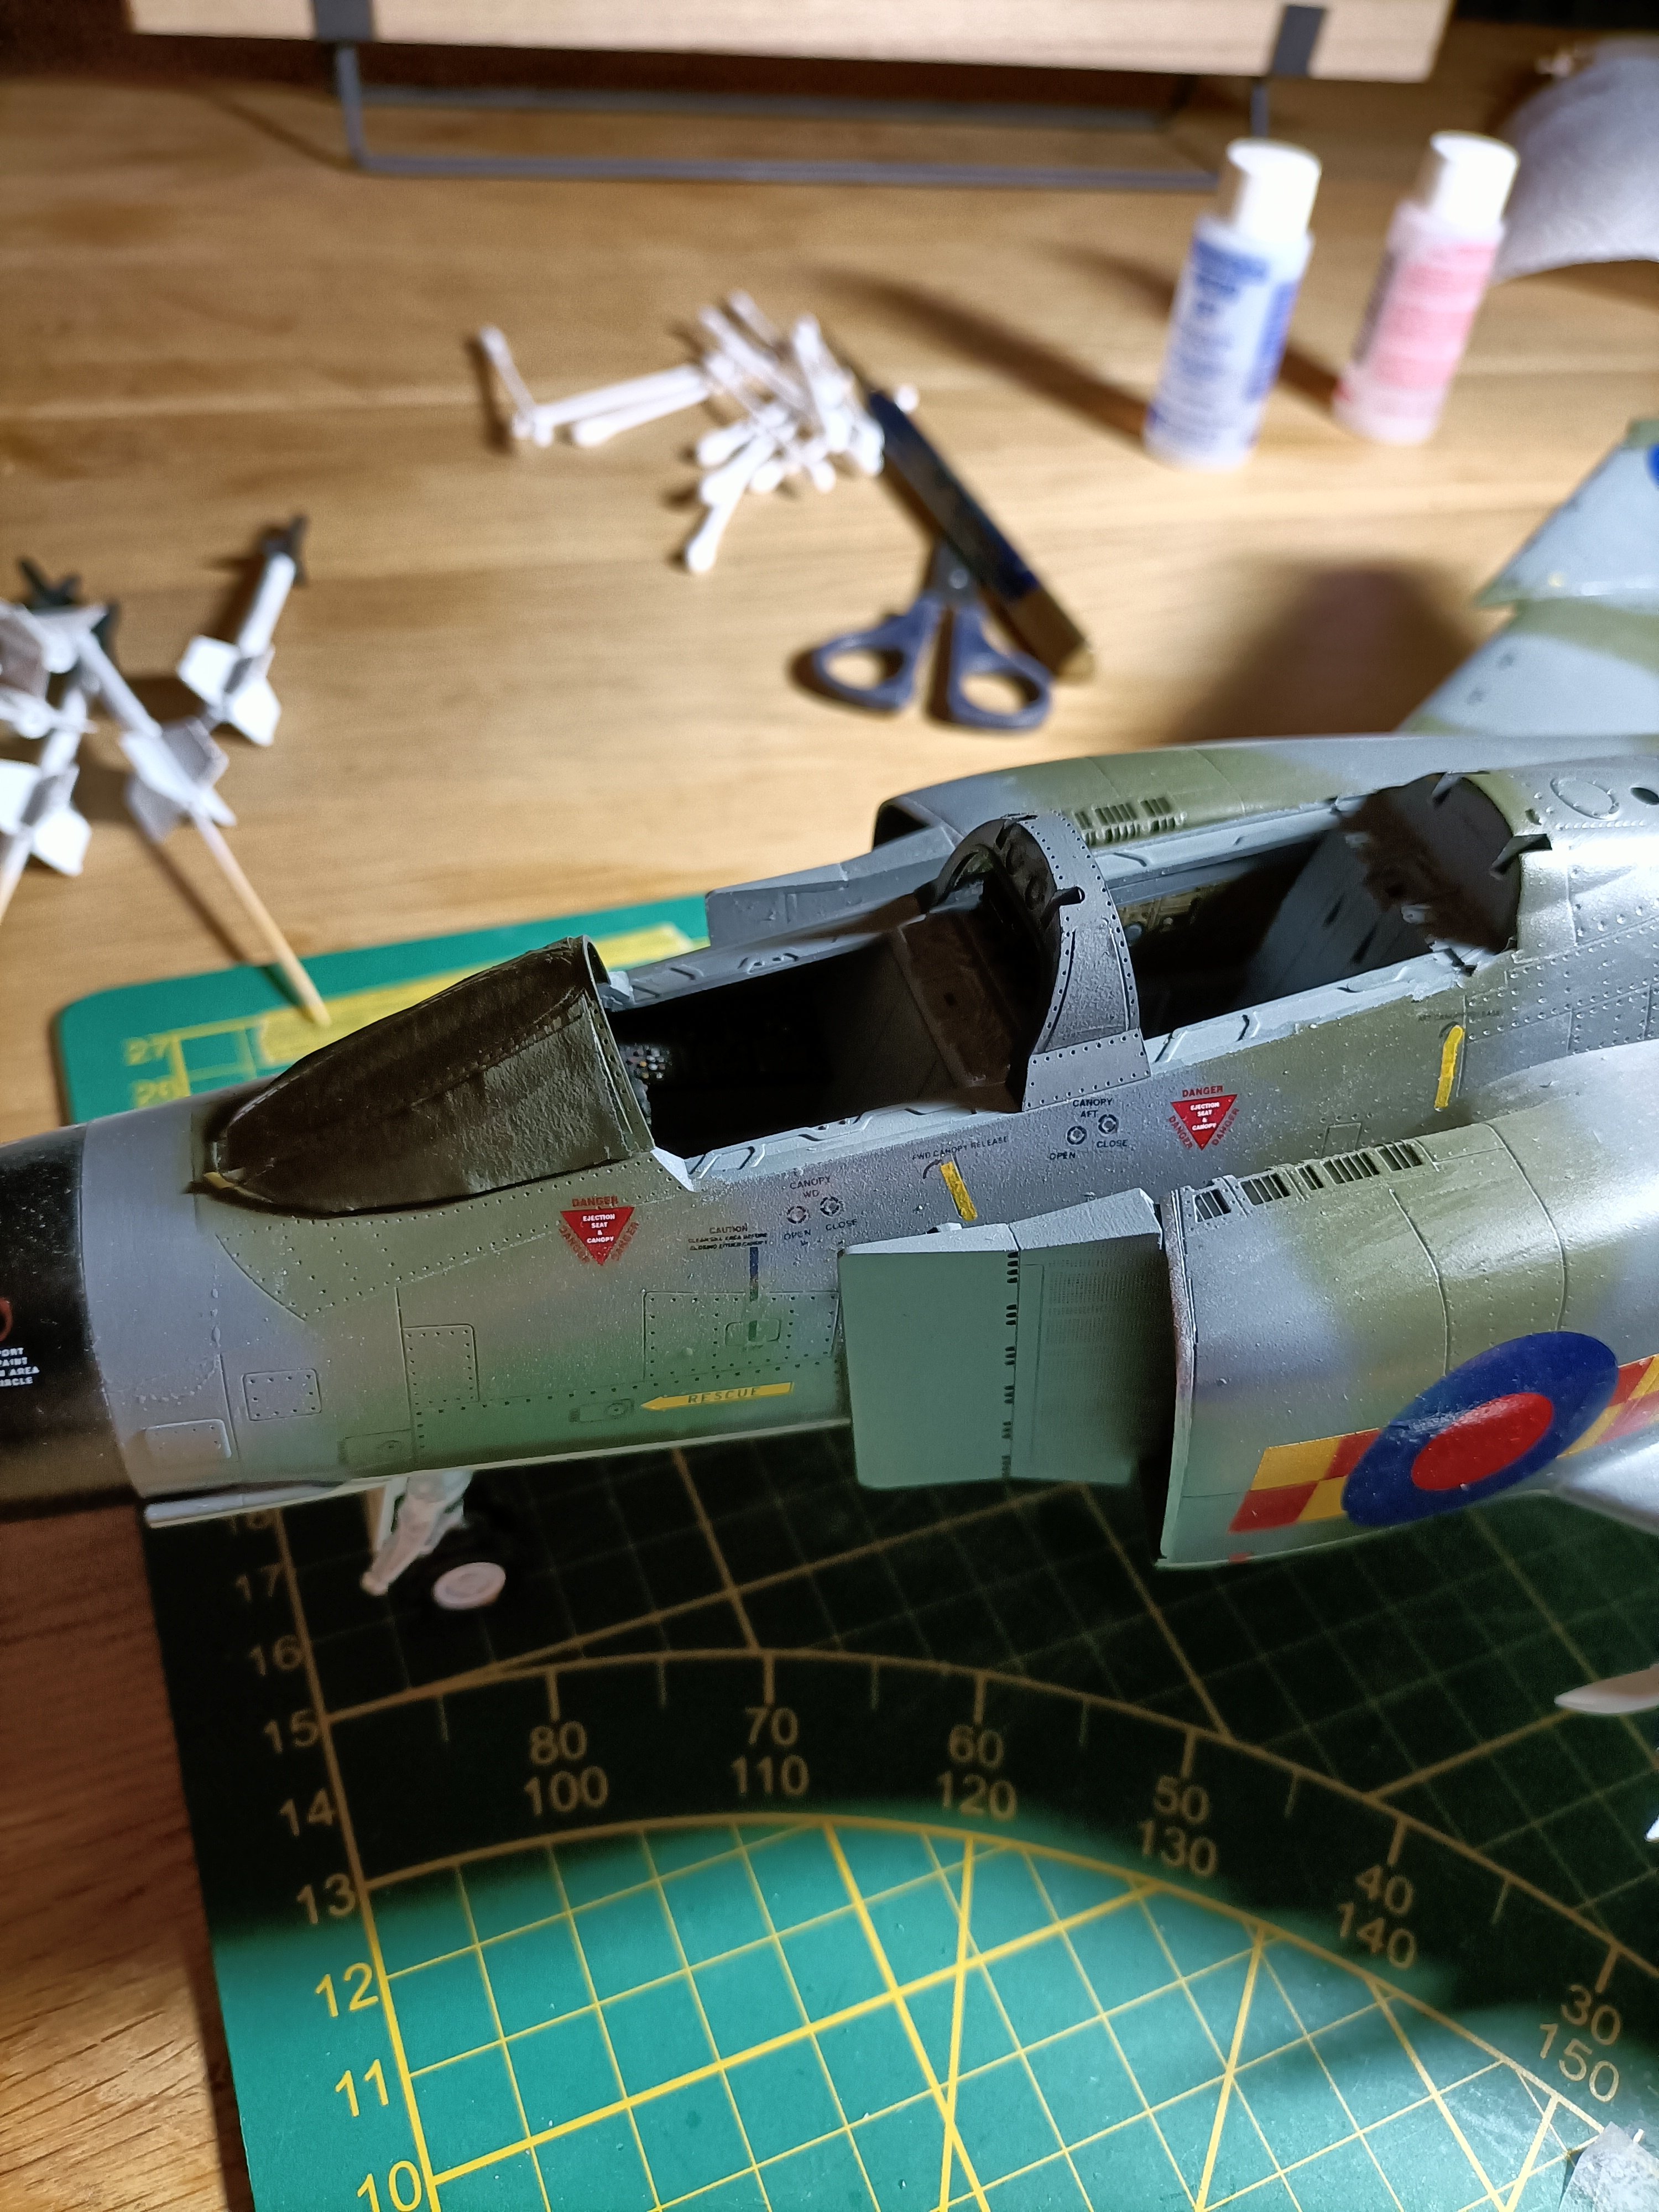
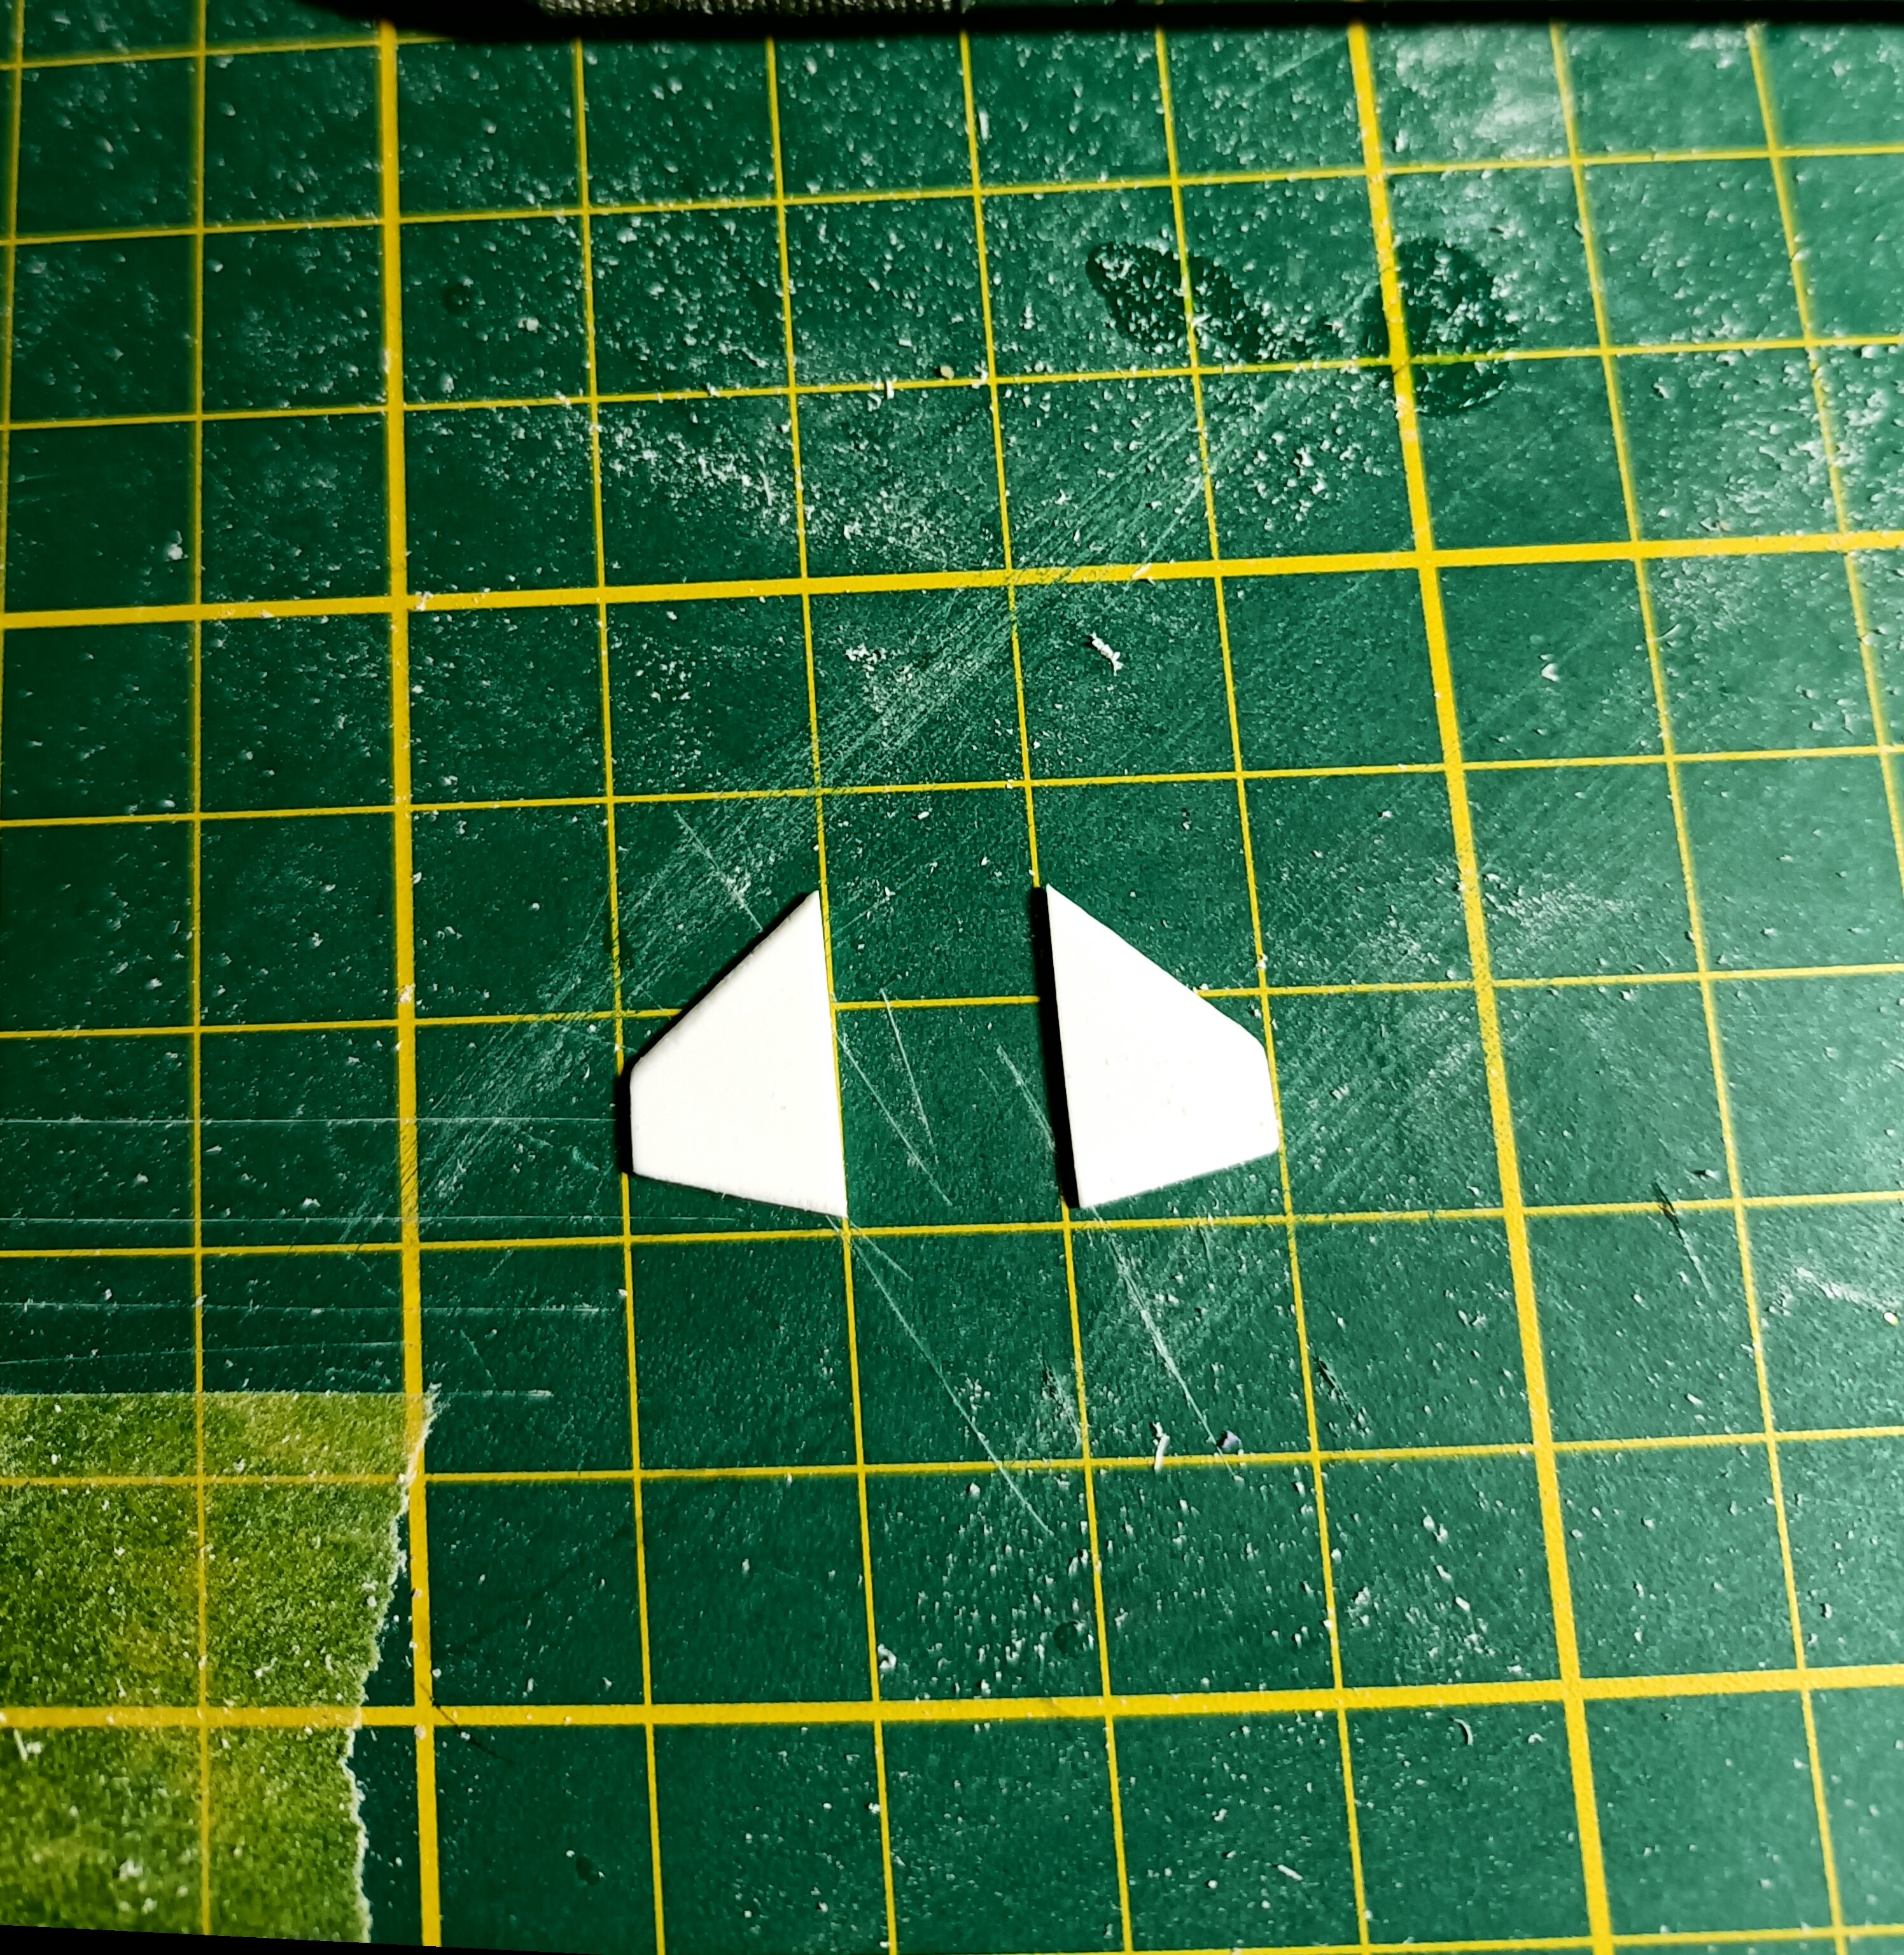
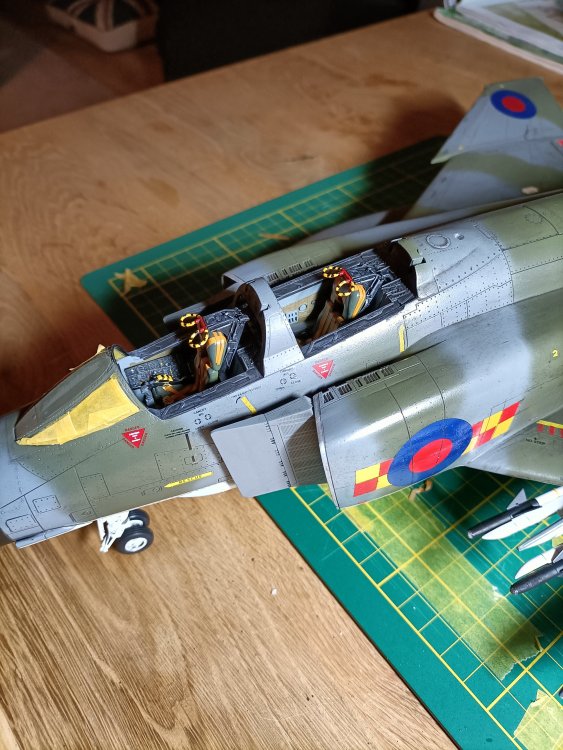
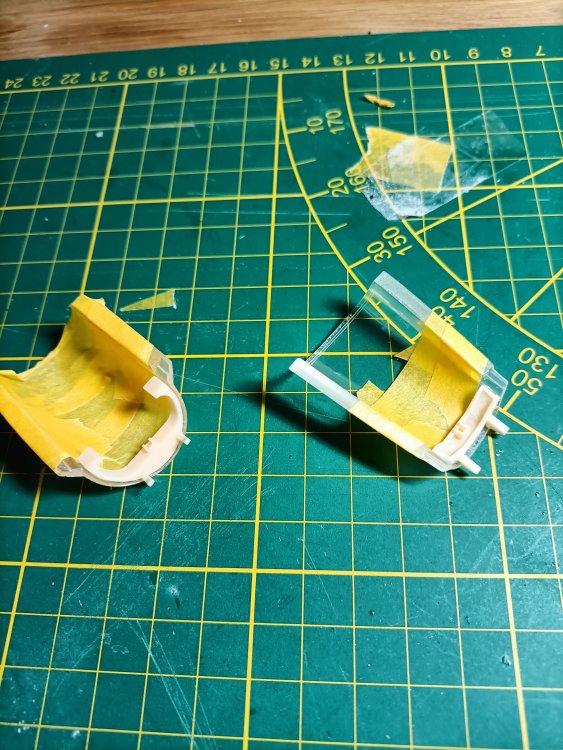
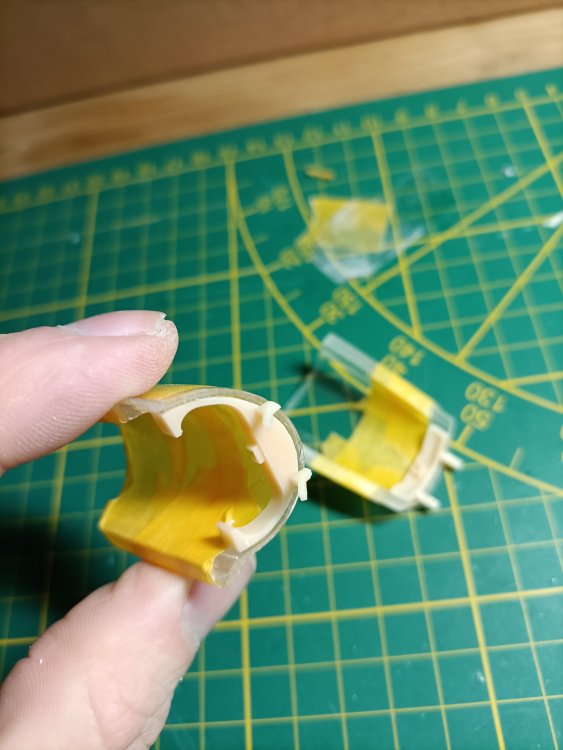
Been a while, time flies like bananas. As my only new years resolution I will finish the Toom. I started with cutting out the wonderful aftermarket clear resin canopies. After some nervecwracking work they came out fine. The model will have open canopies.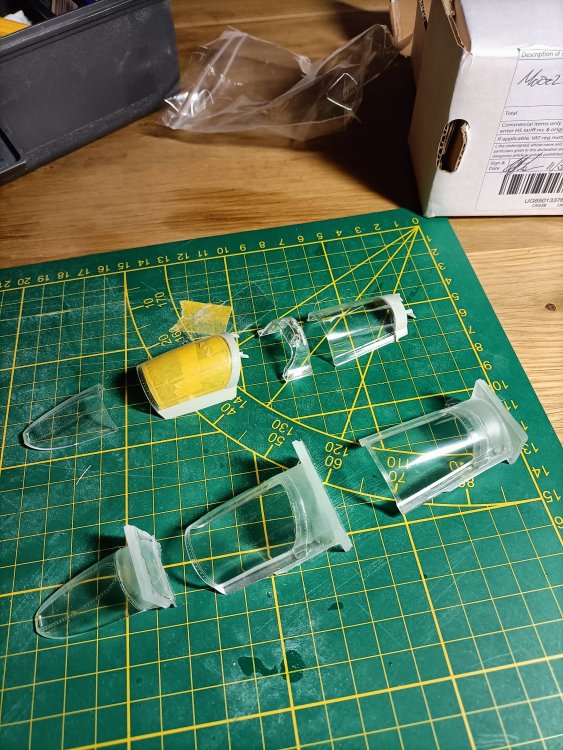

- 414 replies
-
- 8
-
-
-
- conversion
- phantom
- (and 1 more)