Trigger
-
Posts
211 -
Joined
-
Last visited
Content Type
Profiles
Forums
Events
Gallery
Everything posted by Trigger
-
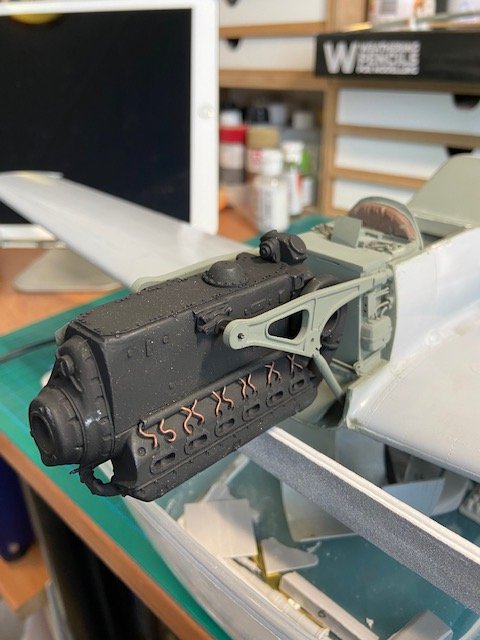
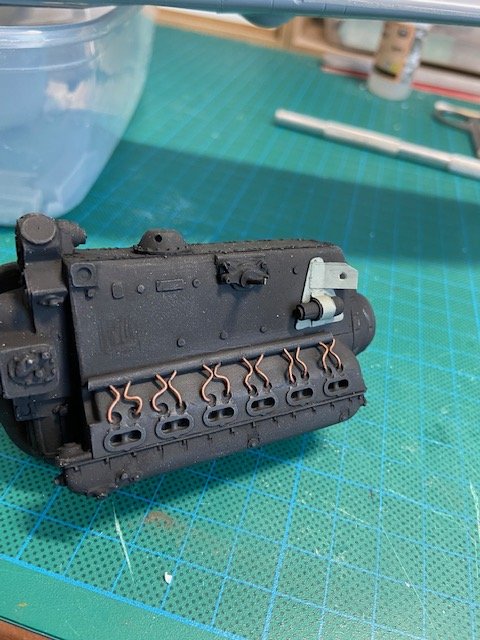
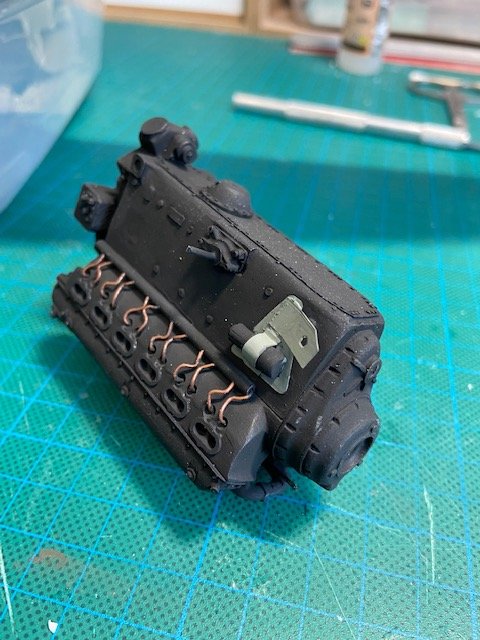
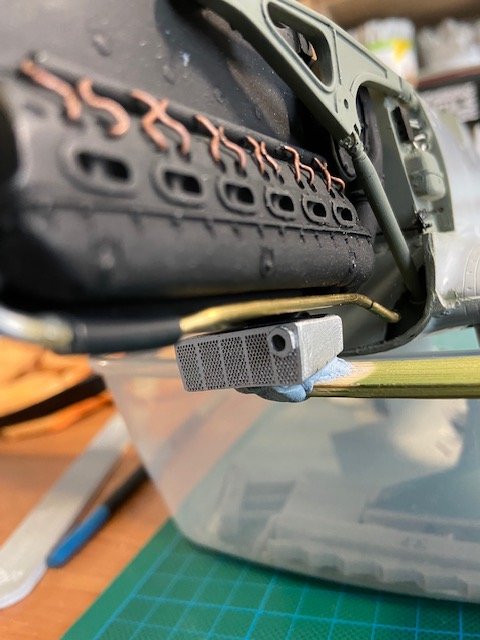
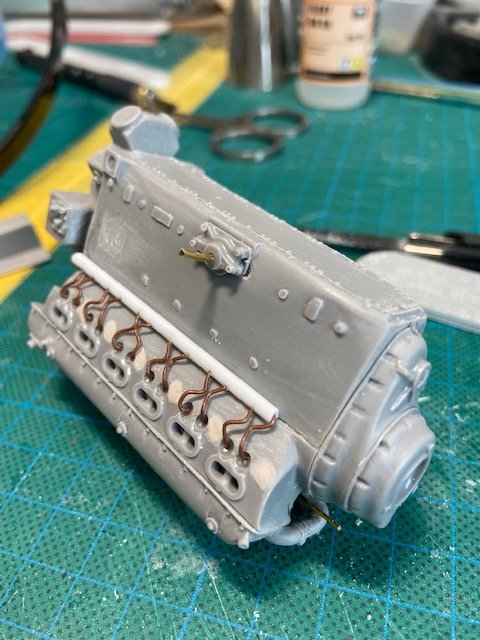
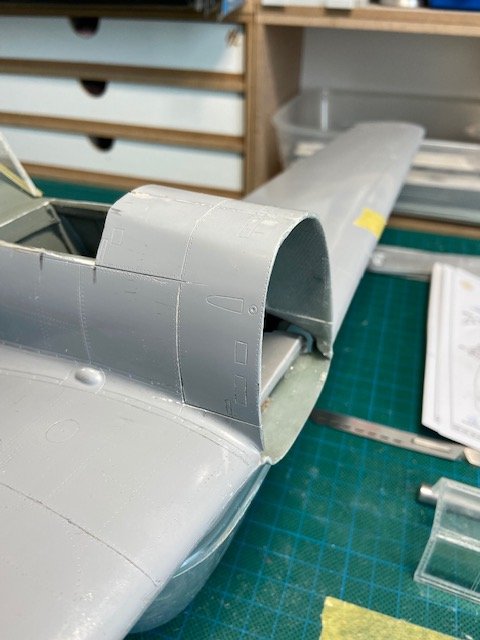
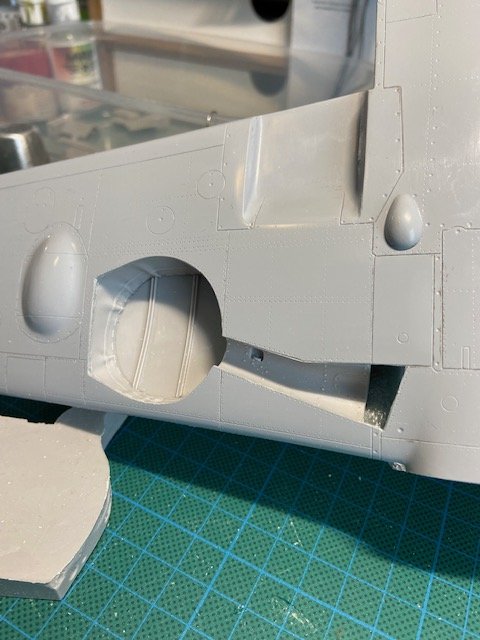
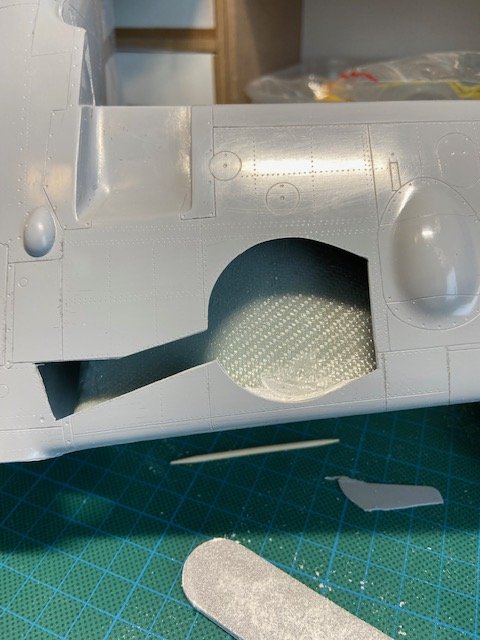
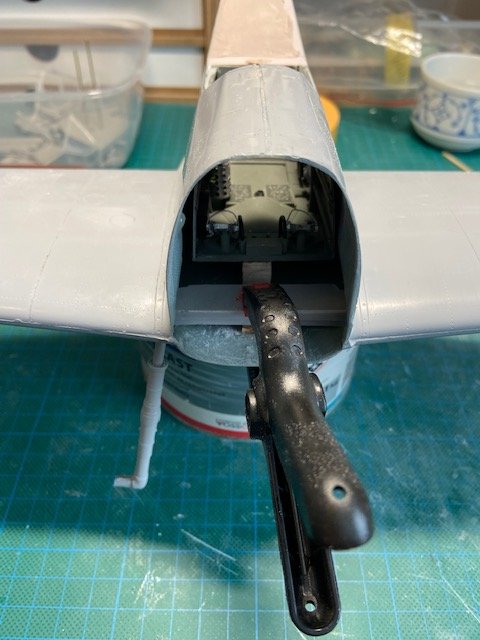
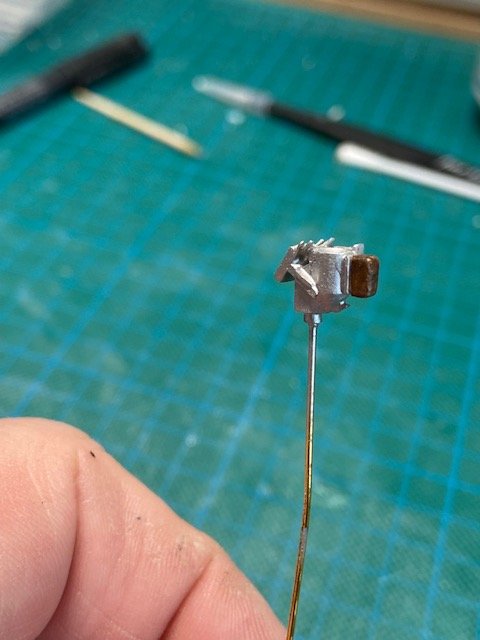
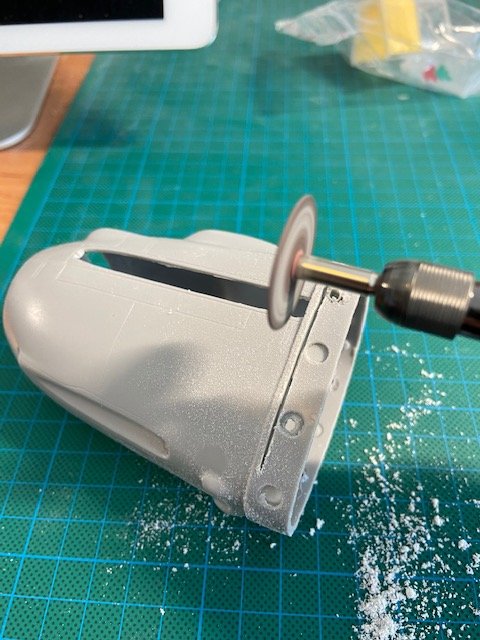
Hello Guys, Here's another update on the 109, started with the engine mounts and the lower struts, placed copper bushings in the firewall so the lower struts would fit nicely and solid, (used epoxy), then I had to line up the engine so it was horizontal with the gun deck and would still fit inside the cowling. Had to cut up the nose into a lower and upper section, because I want to show the engine, the lower cowling needs another cut, so you can see the oil cooler. Build the oil cooler from scratch, the front and rear radiator mesh were the only things I could re-use. First I have to dry fit the coolant lines from the cooler in the front to the firewall, beneath the cooling lines the oil cooler is situated hanging from a bracket attached to the cooling pipes. (on the later G models they mounted the oil cooler in the lower cowling, on the right side was a hinge so you could let the lower cowling swing to one side complete with the oil cooler) On the E models this is not the case, the entire lower cowling has to be removed to get access to the oil cooler. So her are some pics, The engine bearers the right one still had to be lined out to be even with the left side, did some work on the engine and painted it black and put some scratch build details on. The engine is now hanging on the engine bearers like the real plane this is what holds everything together the coolant reservoir, painted and some cooling lines added Scratch build a bracket that is only present on the E models This is the idea how the oil cooler should be place, I must make a bracket that goes from left to right and supports the cooler, the whole thing will be hanging on the cooling lines, the cooling lines are attached to the rocker cover as you can see on the picture below. The upper and lower cowling cut in half, the lower cowling must still be cut up a bit further. after cutting I will smoothen the surface, there is a lot of polyester and resin to be removed It's all very time consuming because you basically have to scratch build a lot of items , like the oil cooler and some bits and pieces on the engine, also scratch build the throttle controls and mounted them to the fire wall, with a rod going through the side wall on the left so that's it for now, it doesn't seem much but you really need to think twice before you cut something up, cause there's no way back. and a lot of research and looking at pictures where everything is fitted. So, Until the next update, Cheers, Frank

-
Israeli Mirage III C with Atar9C
Trigger replied to Kaireckstadt's topic in LSM 1/35 and Larger Work In Progress
Looks absolutely how it should be!, very convincing exhaust, keep up the great work, the fun part is almost there!, cheers, Frank -
Hi Kai, the tube for the ignition harness is indeed evergreen tube (hollow), the tube from the kit wasn't suitable because of the other spark plug arrangement on the DB601, I am now , (once the firewall is all done) , trying to get the diagonal motor supports in place so I can line up the engine with the cowling, and the engine is able to carry it's own weight, I might just have to replace the original struts by copper tubing because of the weight, anyway lots to do, the Mirage is now very close to painting, it must be motivating to know that you are almost there, the hydraulics of the undercarriage look spot on! Cheers, Frank
-
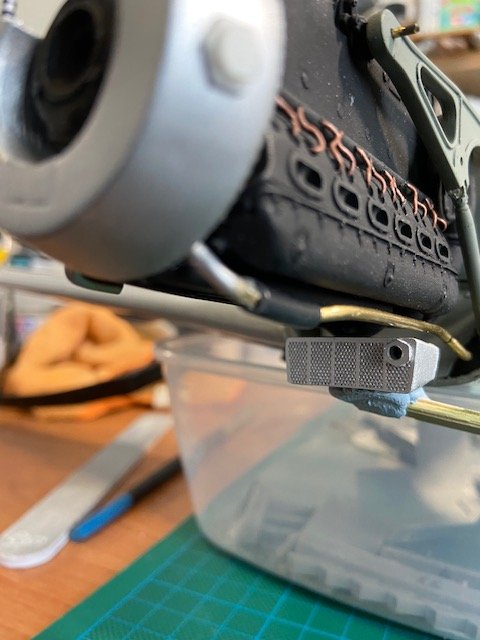
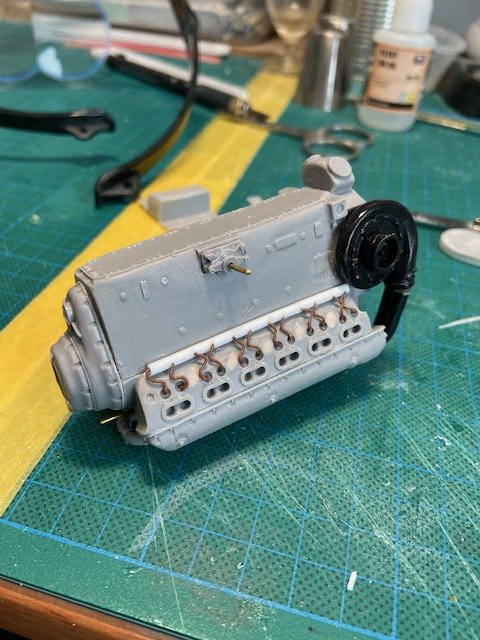
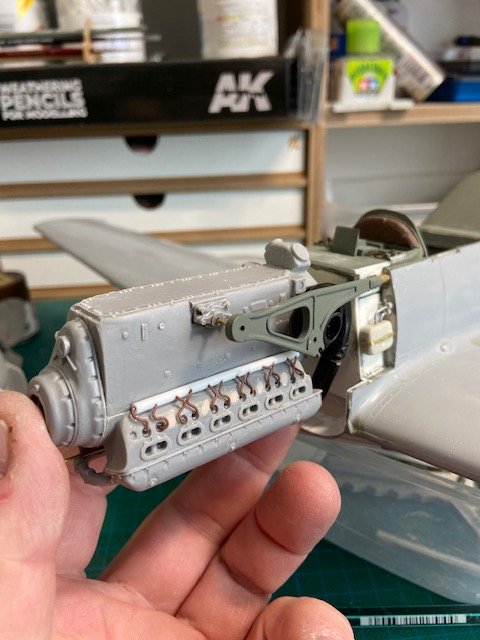
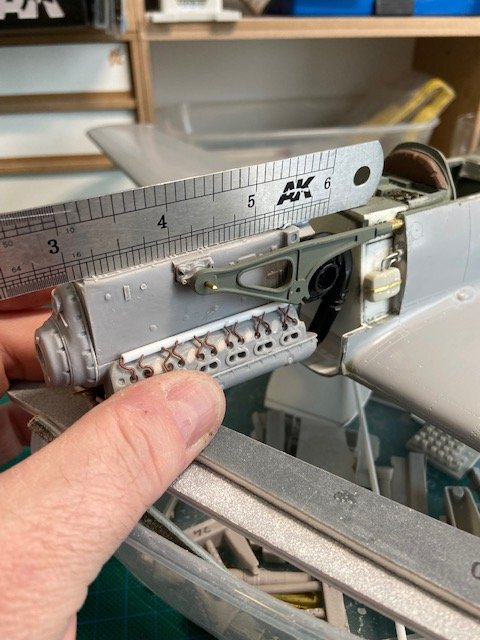
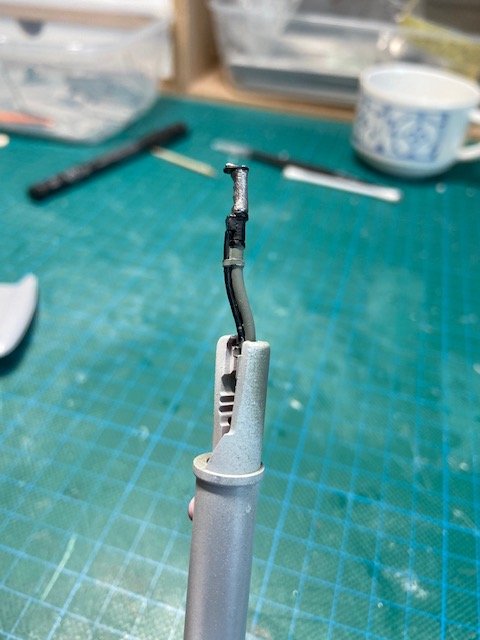
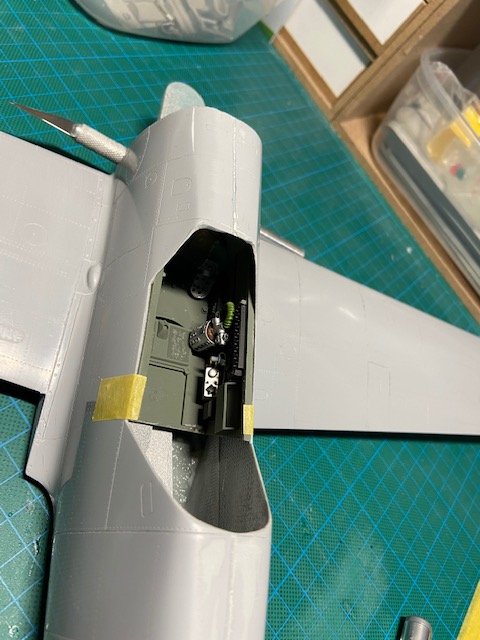
Hello Guys, here's another update on the ME109, I first assembled the engine as far as I could to test fit it in the fuselage. Had to fill in the holes of the spark plug housing, on the DB605 there is only one hole per 2 spark plugs, but on the DB601 each spark plug has it's own hole, so I filled in the holes and drilled new ones, And made a tube for the ignition wires and placed the ignition wires Then I fitted the fuel pump and fuel lines Fitted the upper supports for the engine bearers , and test fitted it to the fire wall With a ruler on top, fits nicely HPH made those bearers with a metal pin inside, so fitted a copper tube to the fire wall so the engine bearer could slide in to place easily Started to scratch build the lower part of the fire wall and sprayed it in RLMO2, so that is it for now, more to come, Cheers, Frank


-
Hai Kai, yes that will be interesting, the lower firewall bends inwards with a rounding so it will be a challenge, but I need to get it done otherwise the engine won't fit, so say tuned...... Frank
-
You are right, it's Tamiya XF22, i only thinned it by approximately 60%, sprays nicely then and less, tip drying. It does seem bit on the dark side, but whatever foto's you study, the only reference material are all restored aircraft, so for me this works well , thanks for the response Gazza, Frank
-
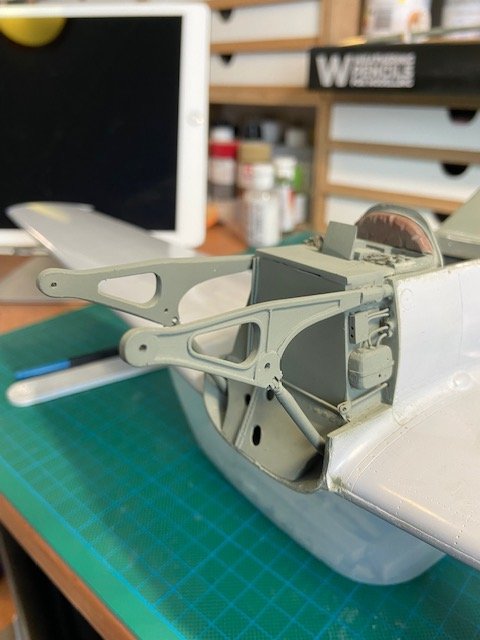
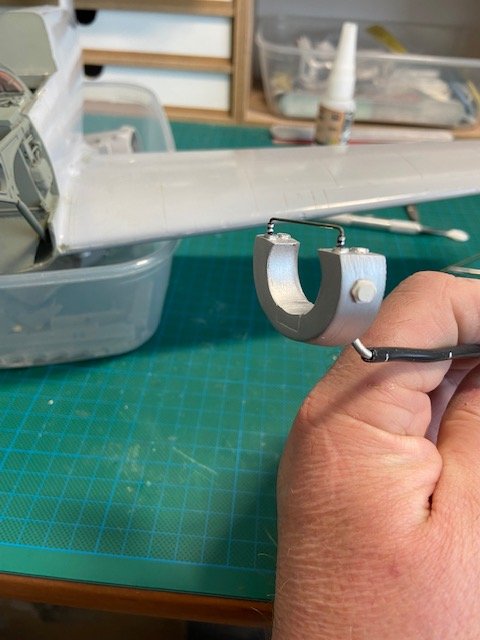
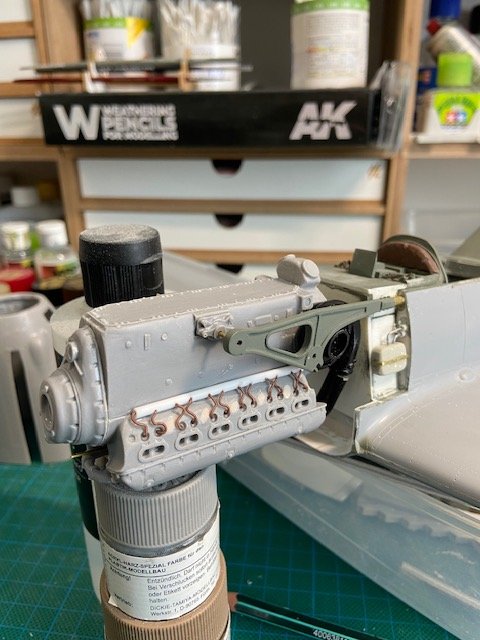
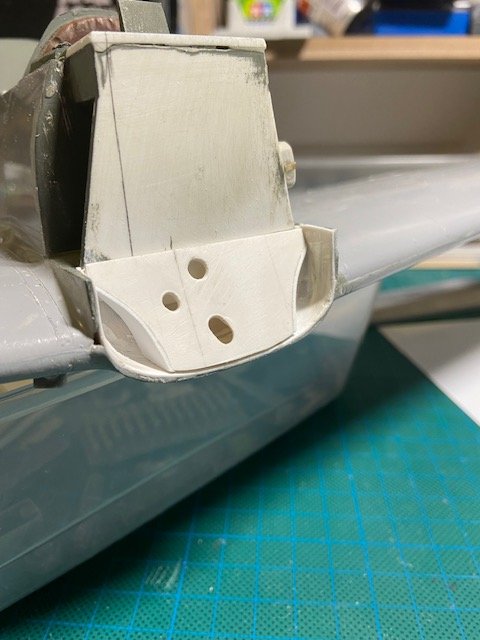
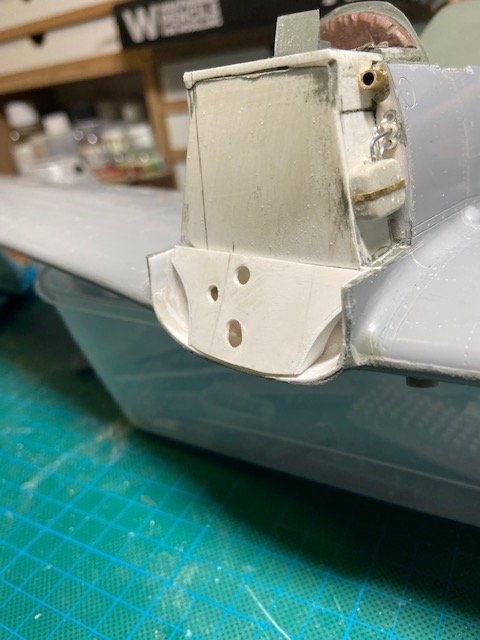
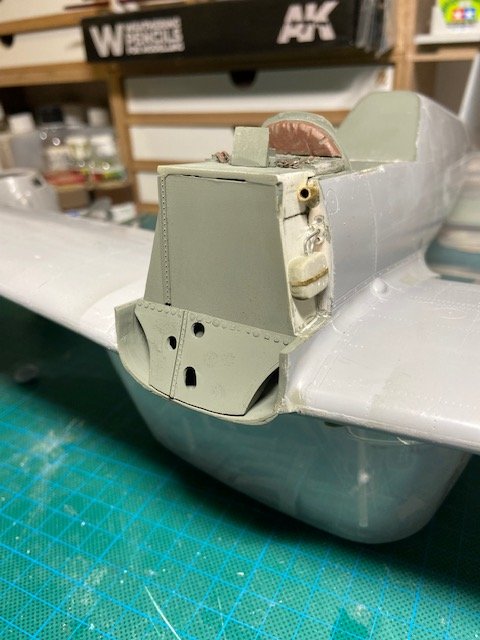
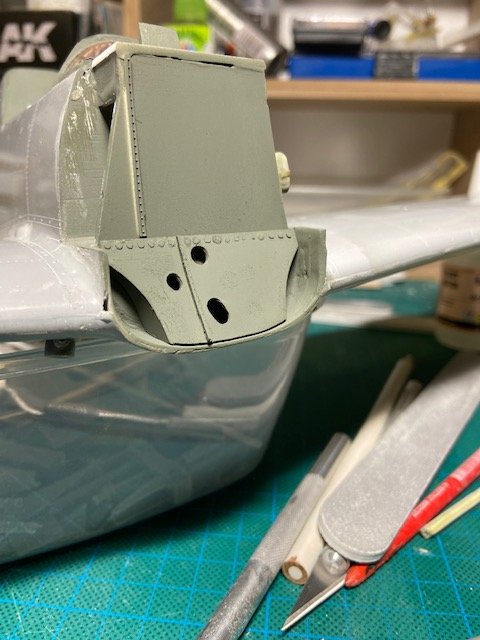
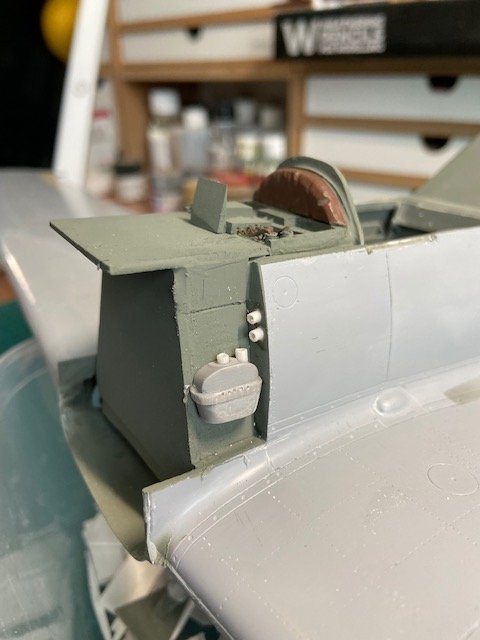
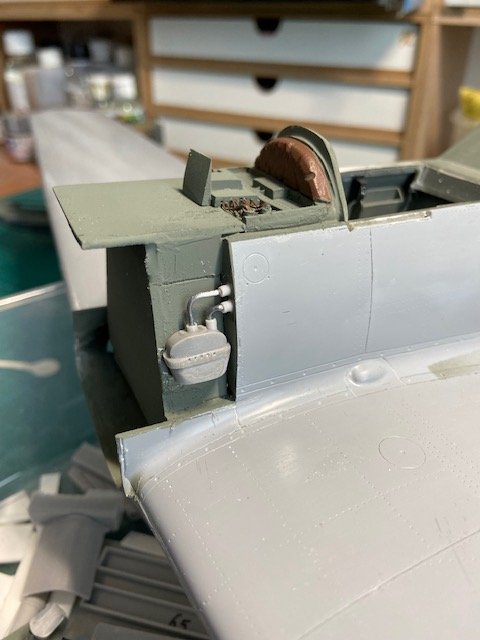
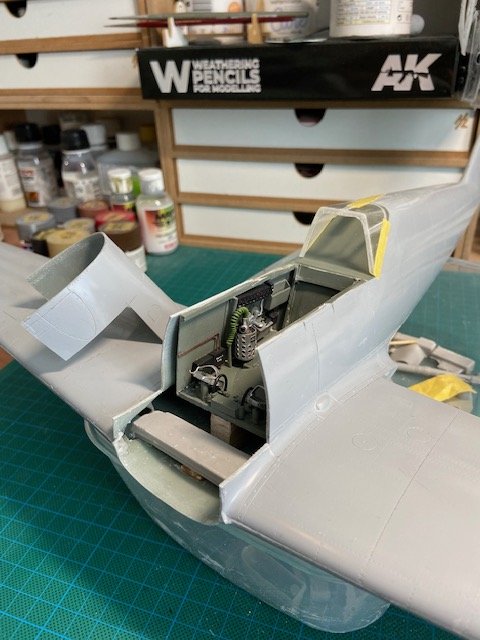
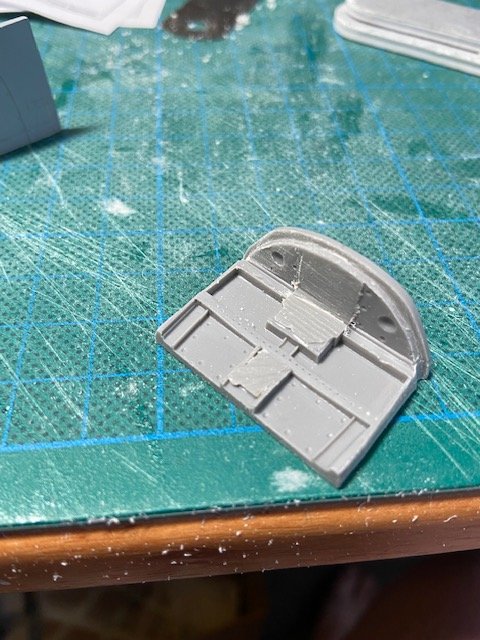
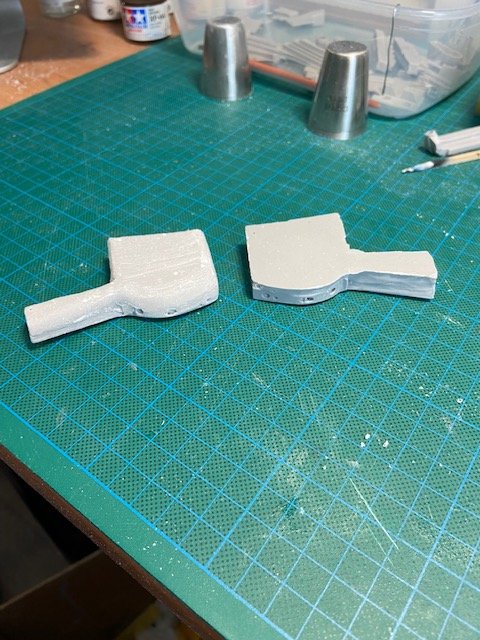
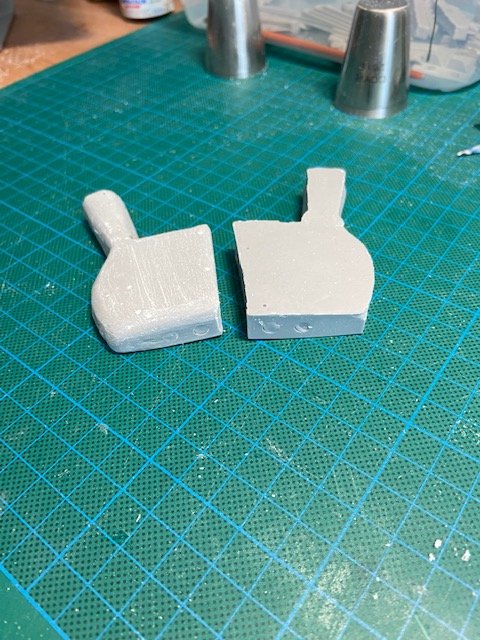
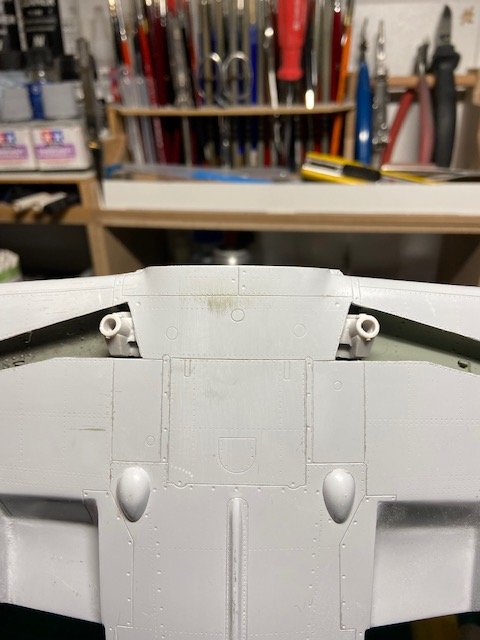
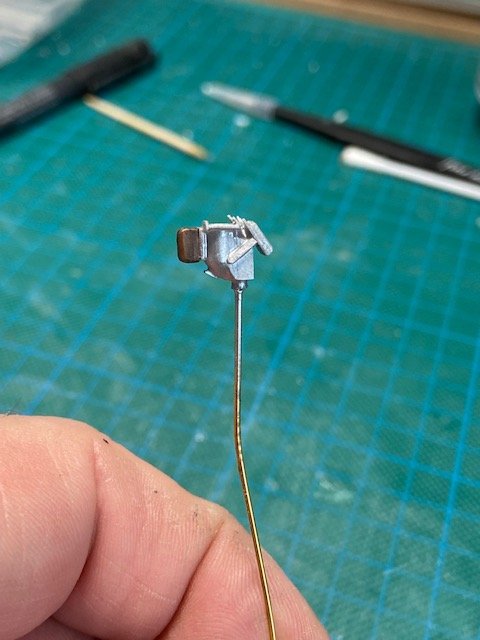
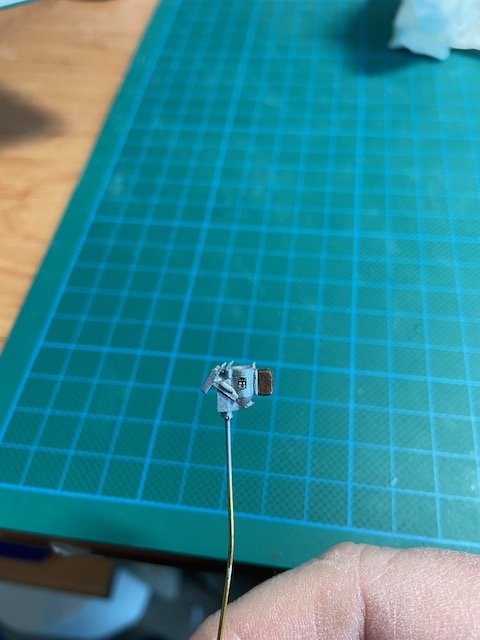
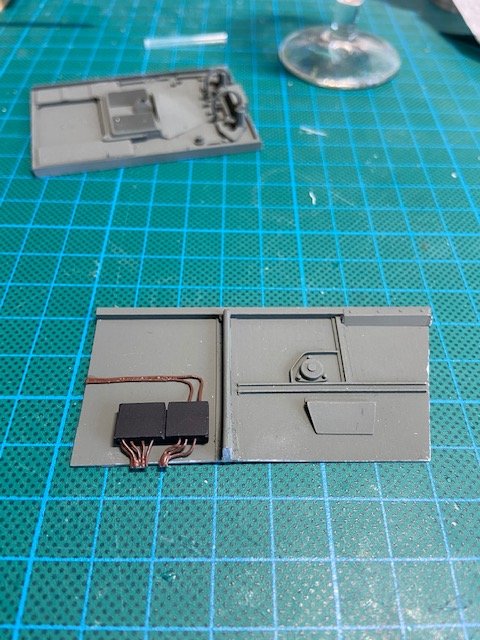
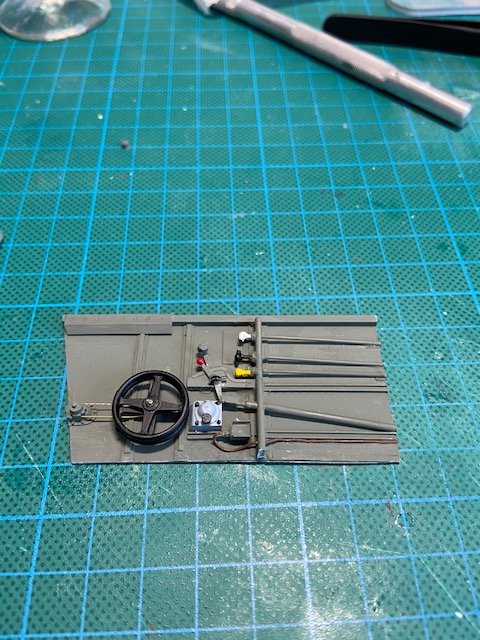
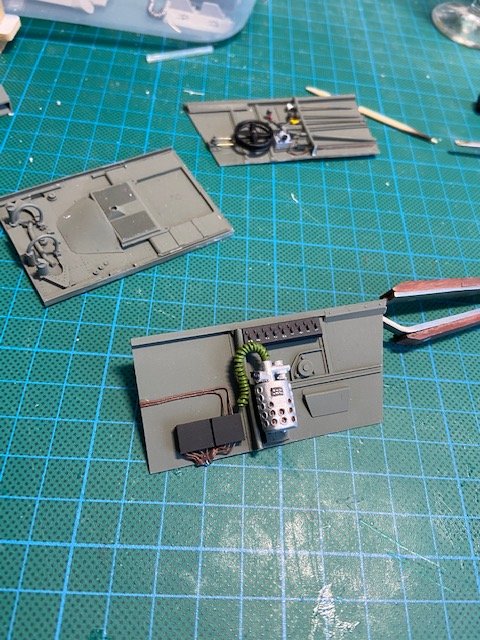
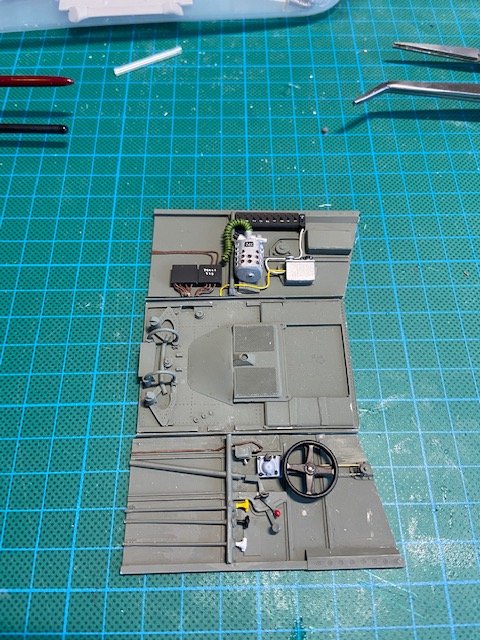
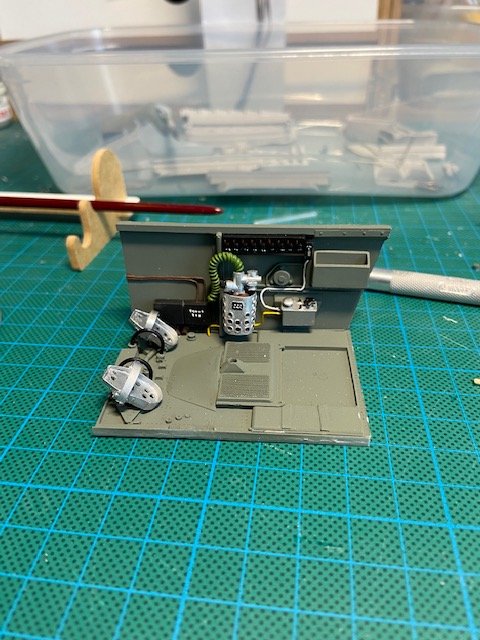
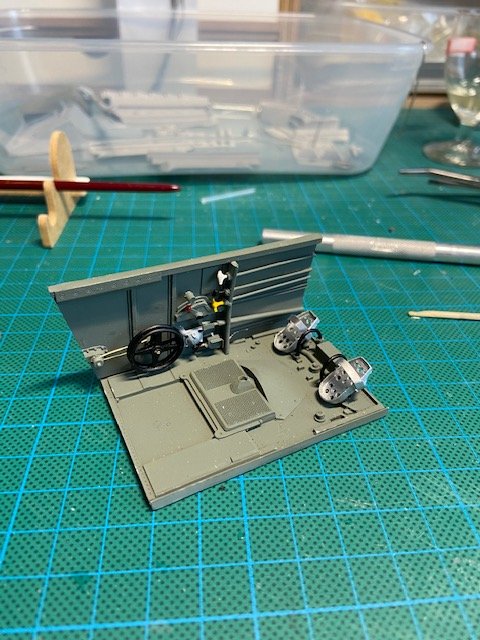
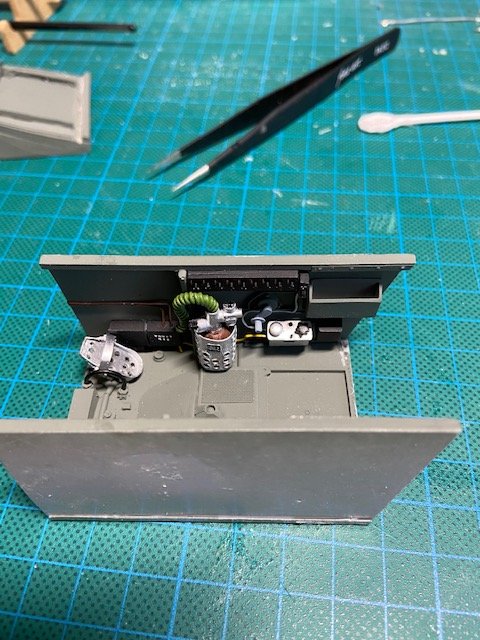
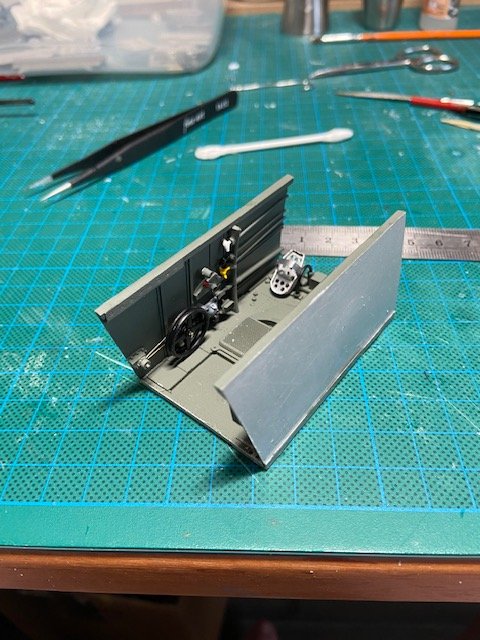
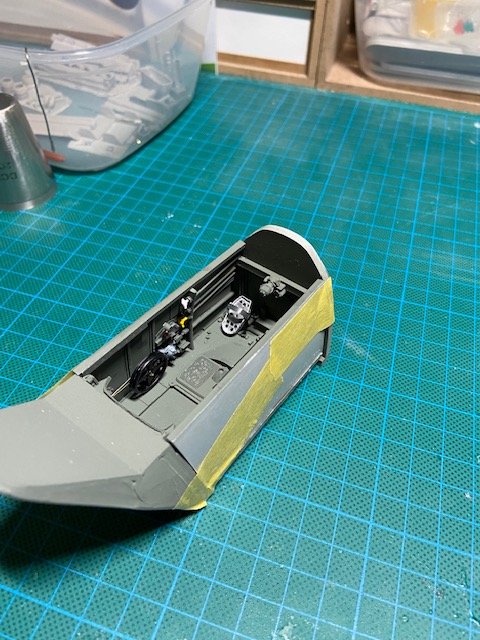
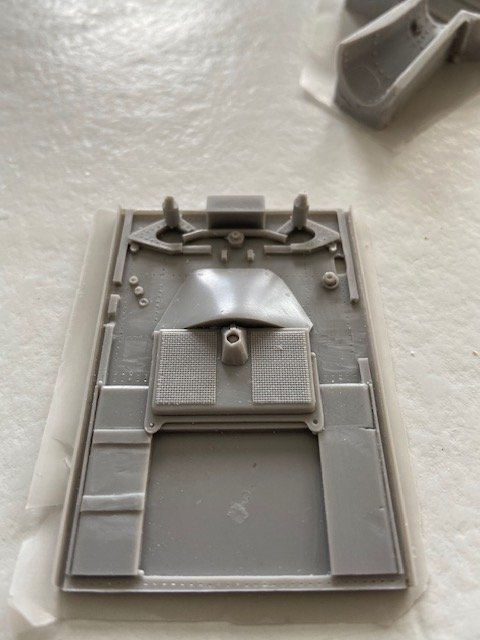
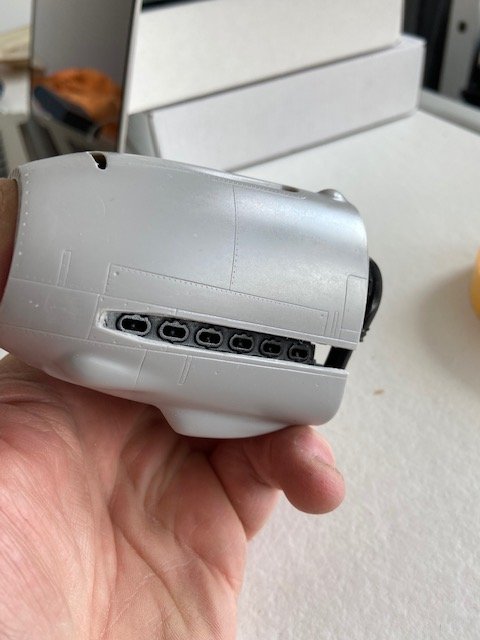
Hello guys, time for a small update, Started on the gun deck, removed all unnecessary objects that do not belong on an e model. Put the leather "bag" in place that houses the wiring for the instruments. lengthened the gun deck so it can house the ammunition boxes, scratch build the housing, Also installed some wiring for the interrupter gear an a few Electra boxes masked everything and sprayed it in RLM02 painted the wires and the leather bag in front of the cockpit Did some plumbing, a tank fitted and the the hoses to the tank Well, that is it for now, next step is to scratch build the lower firewall so I can get the engine mounts in place, Cheers, Frank

-
Israeli Mirage III C with Atar9C
Trigger replied to Kaireckstadt's topic in LSM 1/35 and Larger Work In Progress
Wow Kai, like Gazza said, your cockpit looks fantastic now, and the undercarriage really comes to life now!, Looking forward to the next stage, Cheers, Frank -
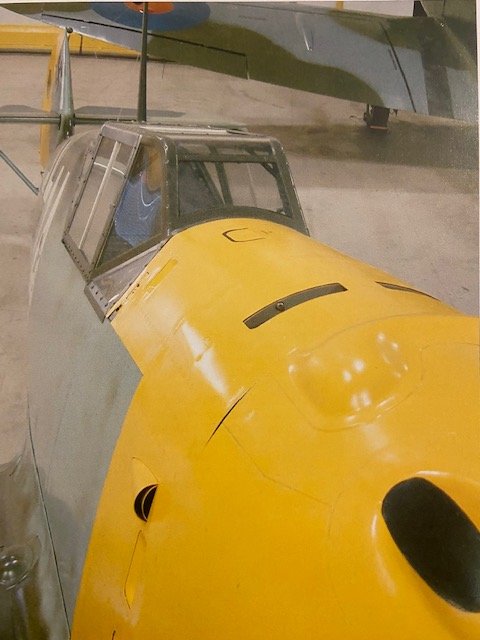
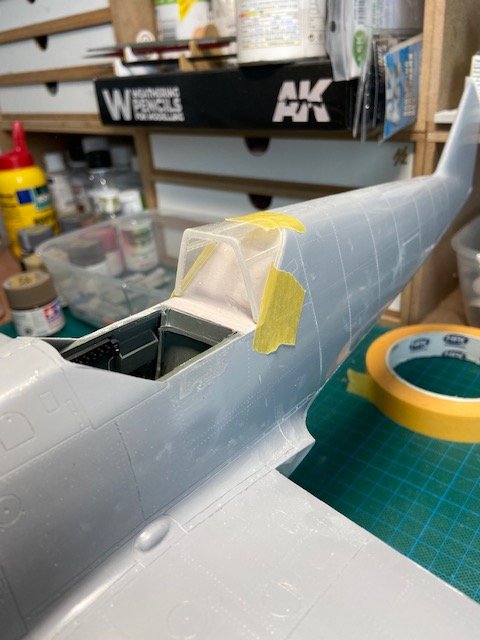
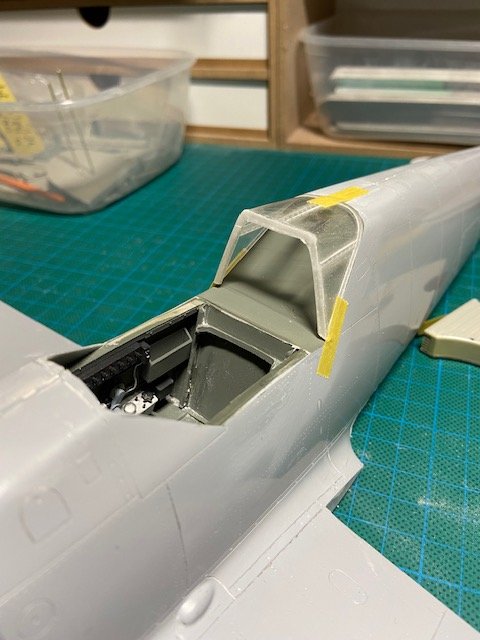
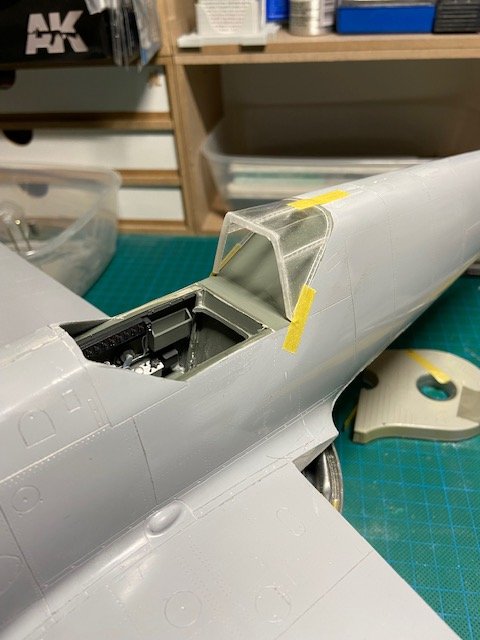
Hi Hubert, you are absolutely right , at that point I didn't have a frame on the front of the windshield, so it is "dangling" in mid air in that picture, a few pictures further I put in the front gun deck, so now the front windshield can lean on the frame. Now it aligns much better, but still not perfect, the front of the windshield has two three-quarter windows that need to be put in place in the right angle, that will also help to get the windshield in the right position. the last picture from my reference book shows this pretty good. Thanks for the input by the way, two pair of eyes always see more than one pair, Cheers, Frank
-
Hi Kai, Well I guess you are the expert in sanding and fitting! Great work on your landing gear by the way, the end is in sight, Frank
-
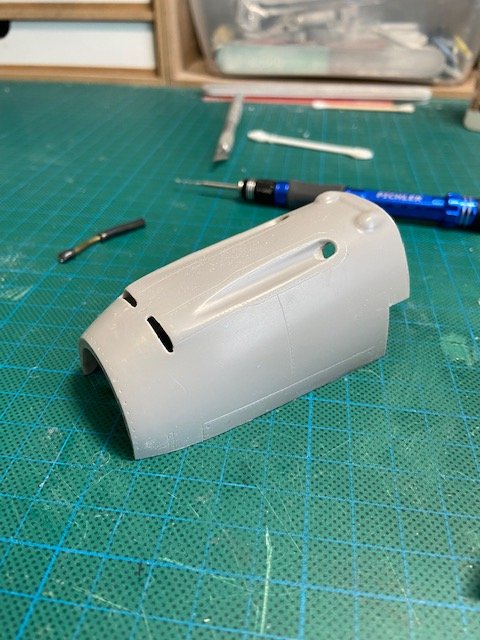
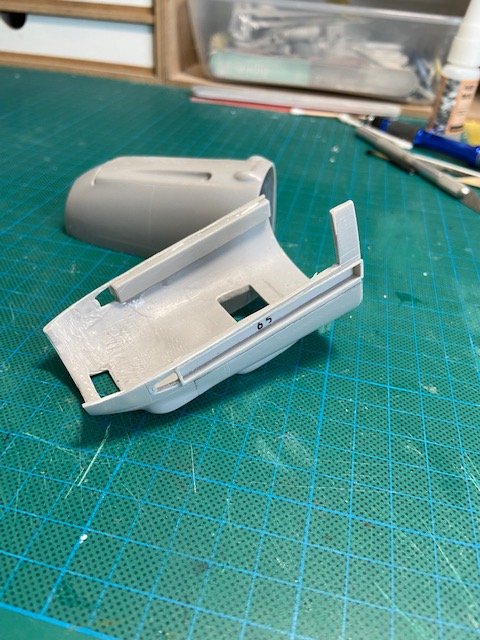
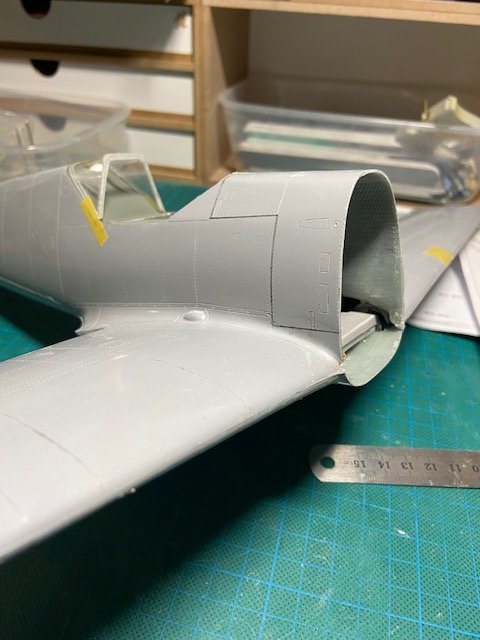
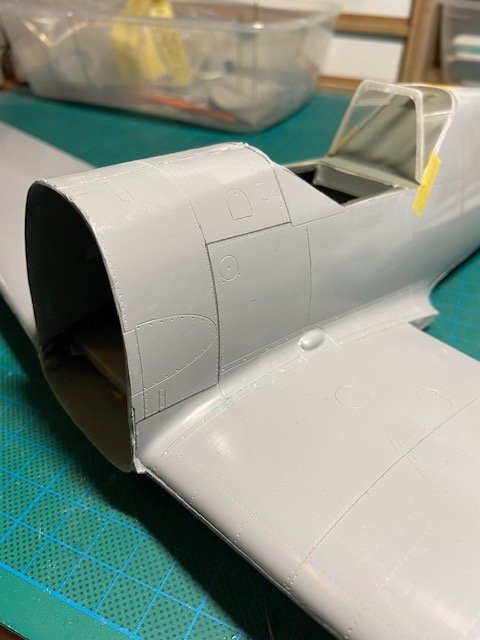
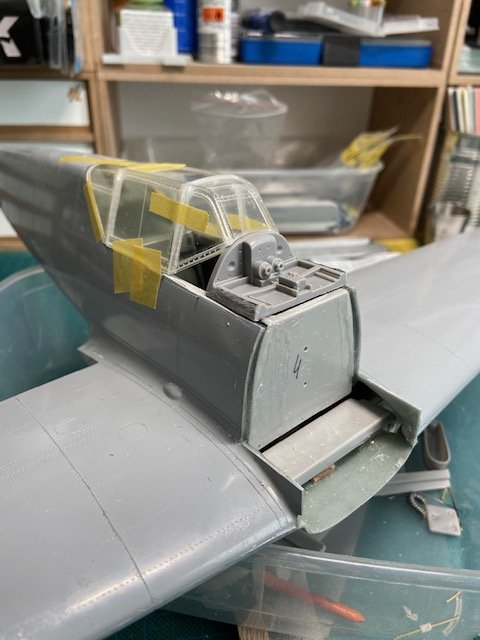
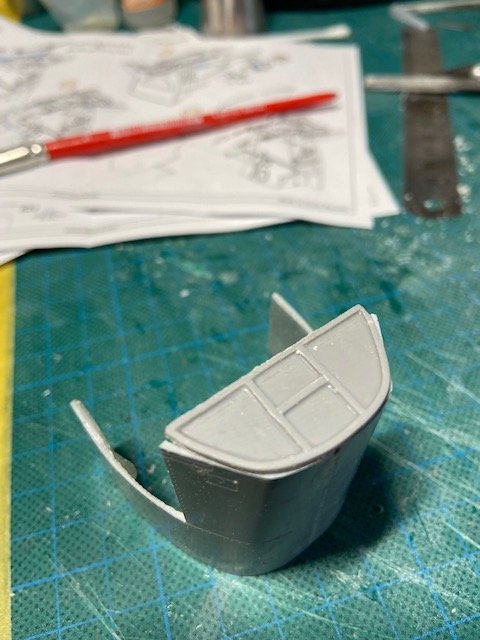
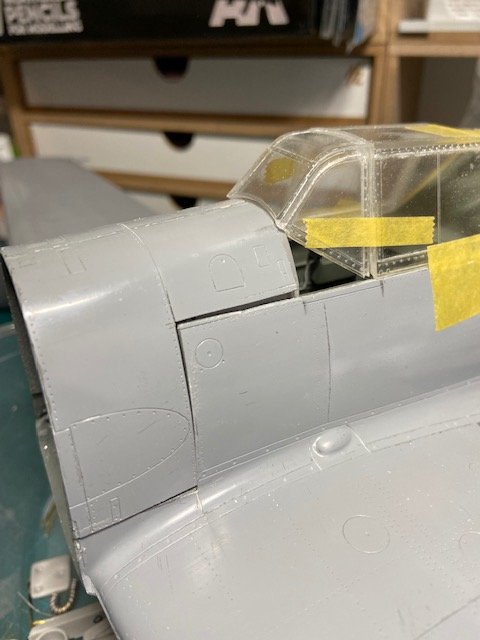
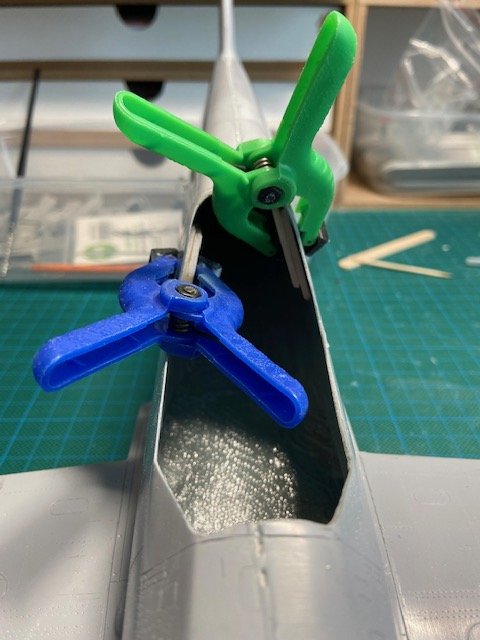
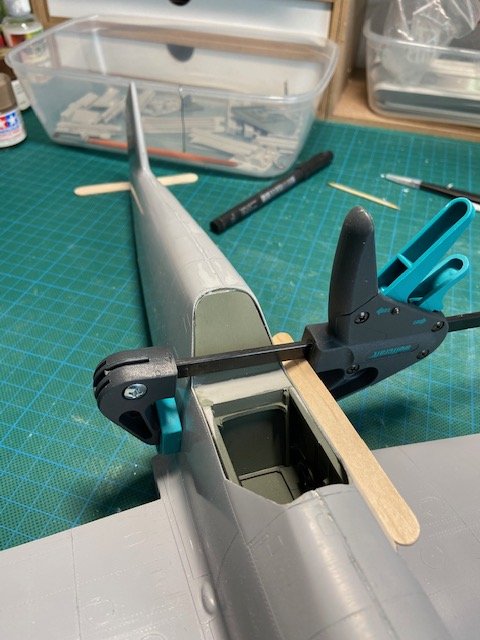
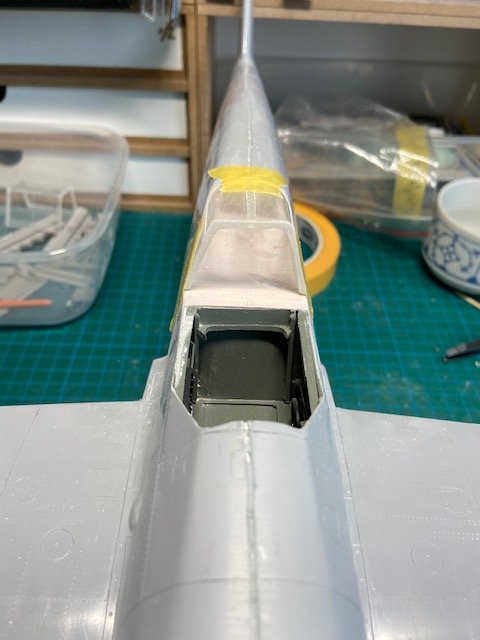
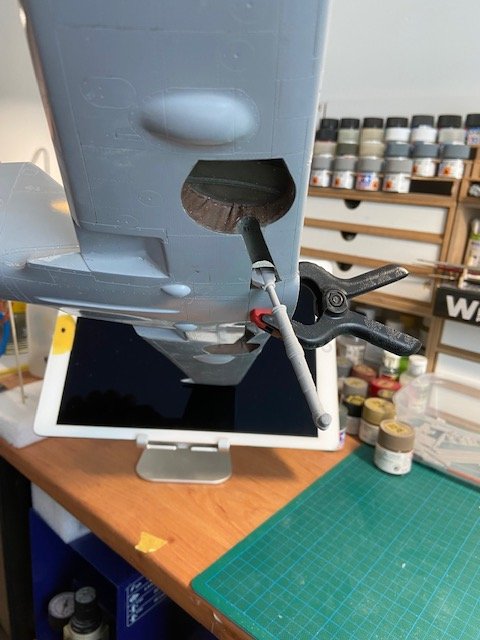
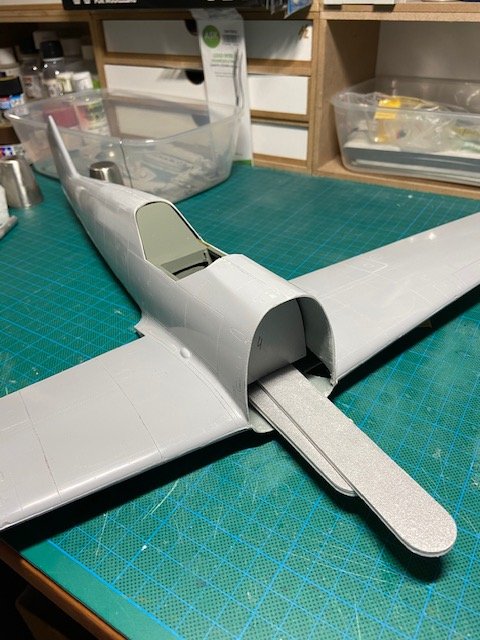
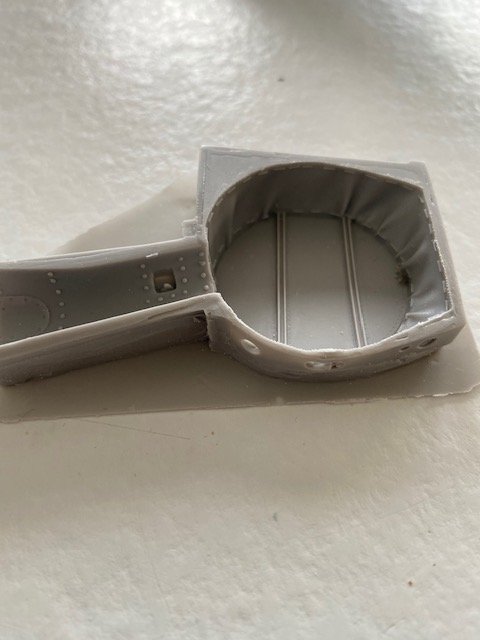
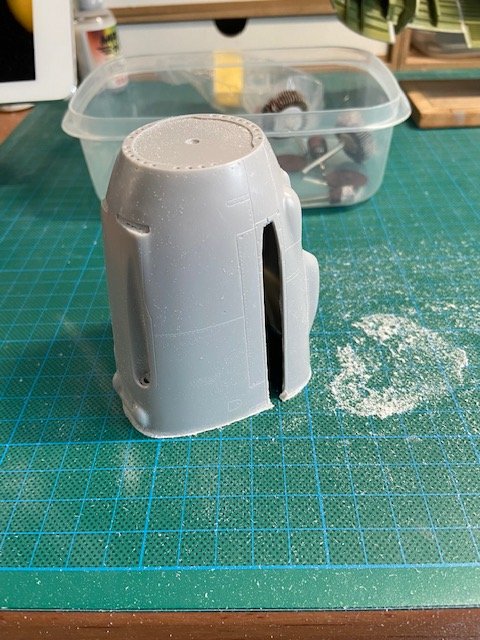
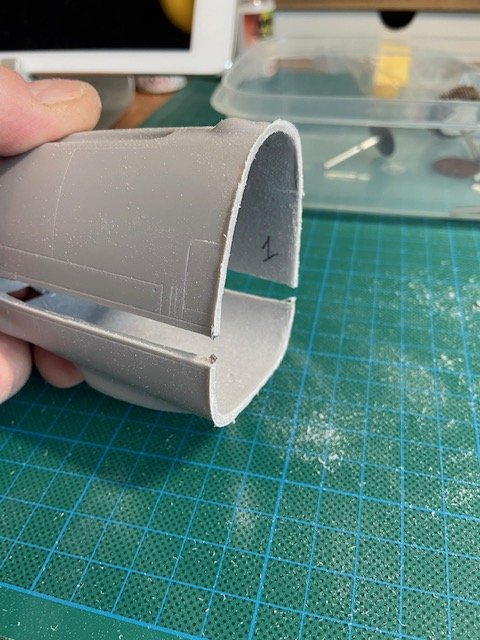
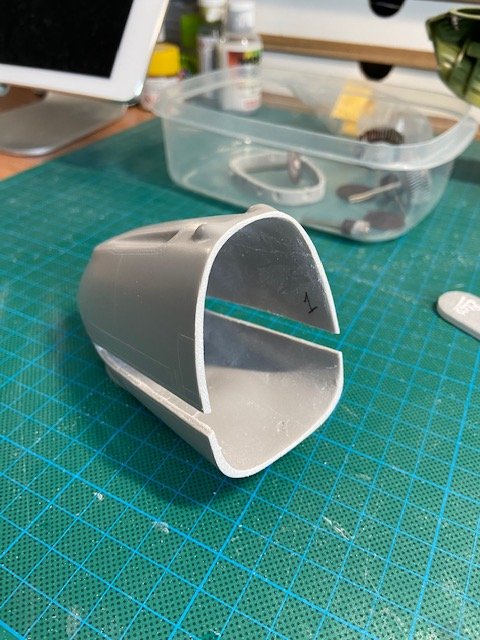
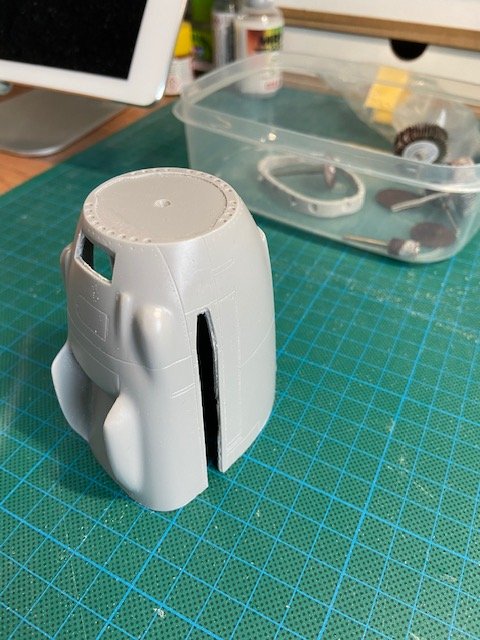
Hello Guy's, here's another update on the Me109, Finally made the first cut in the fuselage...............first drew the cutting lines with a pencil..... Used my thinnest razor saw in order to get as little as possible material loss, so now i have one gaping hole...... next step is to fit the firewall Cut the top of the firewall off so I could get the platform in with the MG'S....used epoxy to get a good bond with the sidewalls, otherwise the dihedral of the wings could be off, when the epoxy dried everything was as solid as before the cut. Test fit of the gun deck, (this is the gun deck of a Gustav, I will use this one and scratch build the the proper gun deck for an Emil) Now I have to make the gun deck fit with the front windshield. Test fitted it under the cowling, Cut of some parts that are not present on an E model, the back wall was cut so the cowling can line up withe the front windshield Test fit, still a big gap, back to sanding and cutting............. Almost there, still a gap of 0,5 mm, a bit of sanding and it will fit with a minimal seam, witch the real aircraft had also well that is it for now, doesn't seem much, but you have to think twice and cut once, so I am fitting and sanding a lot in order to get everything to fit, and then I can move on to scratch building the mounting brackets for the MG'S, cheers, Frank


-
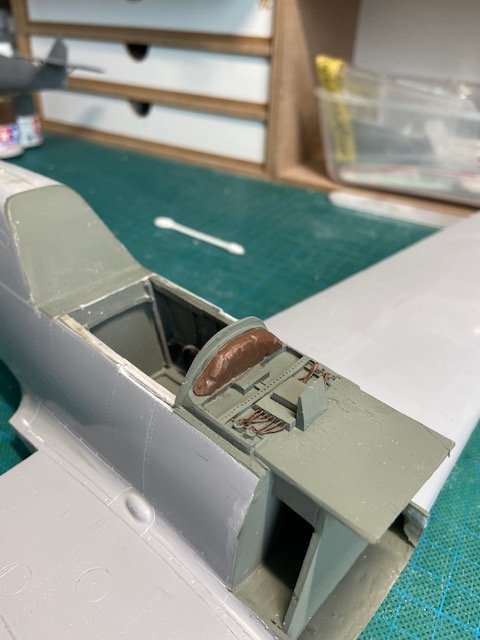
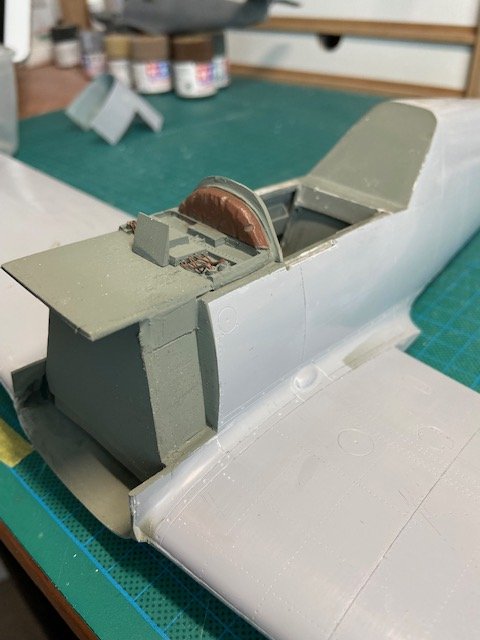
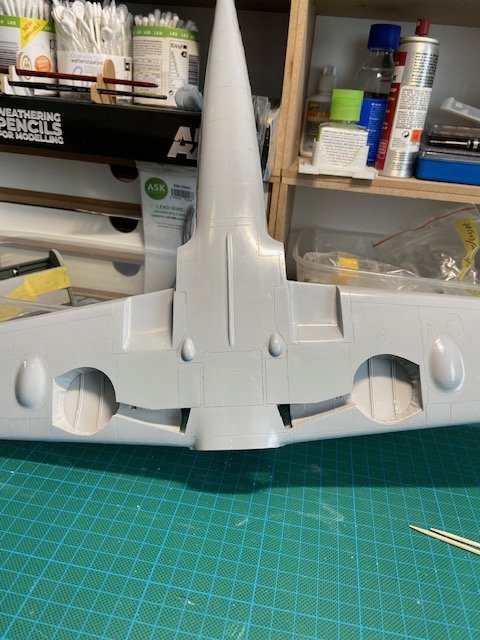
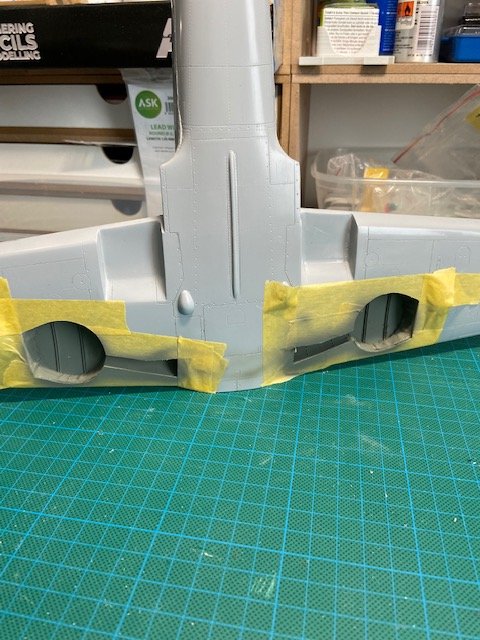
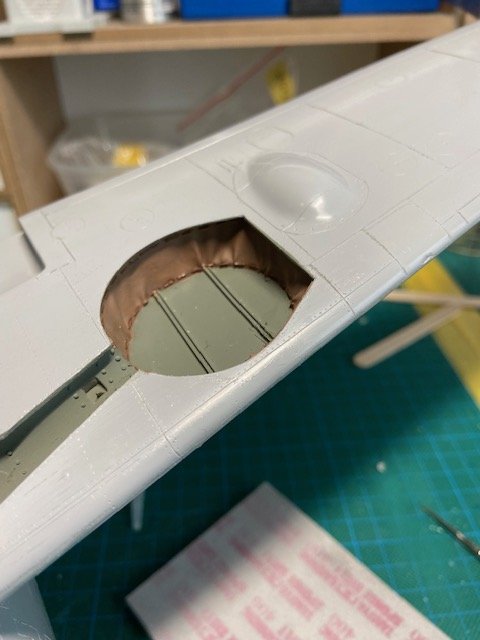
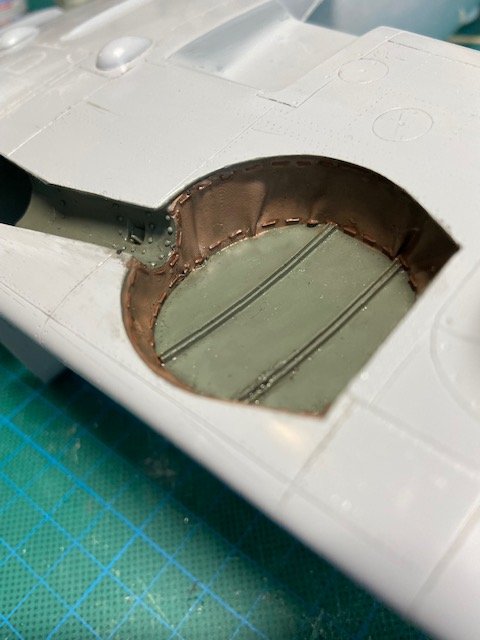
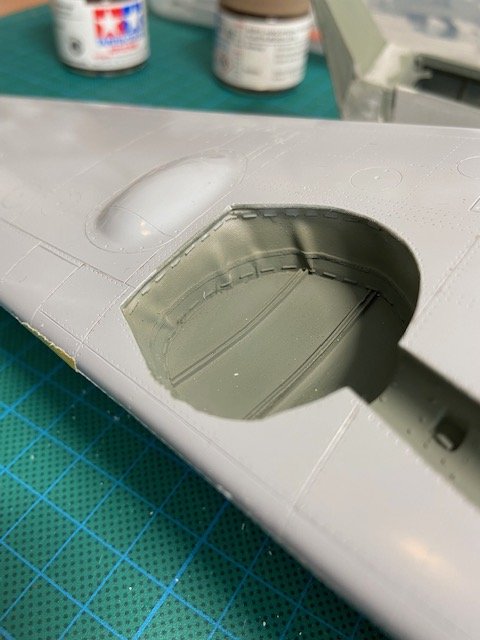
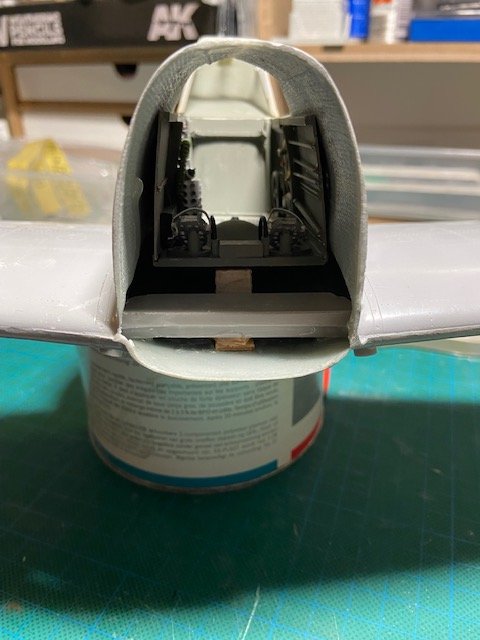
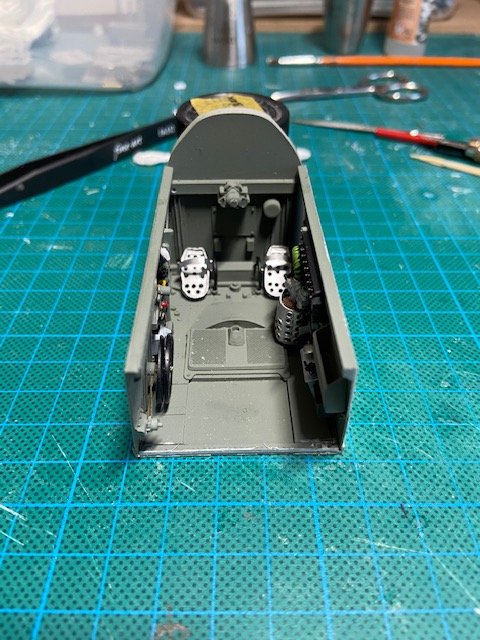
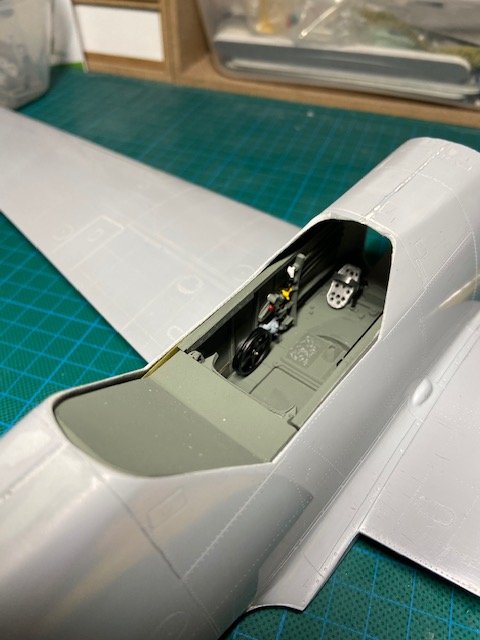
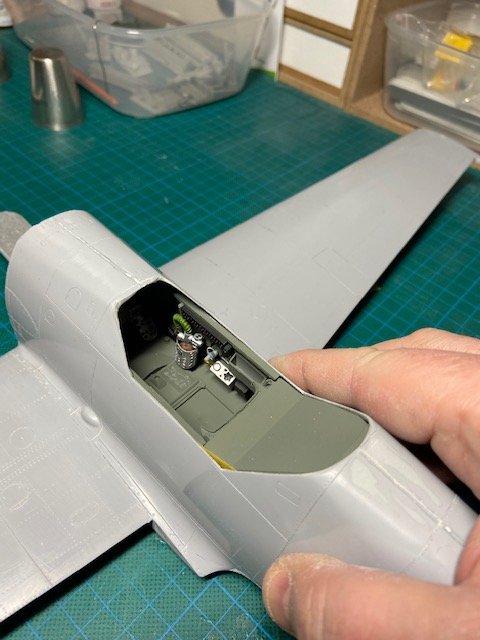
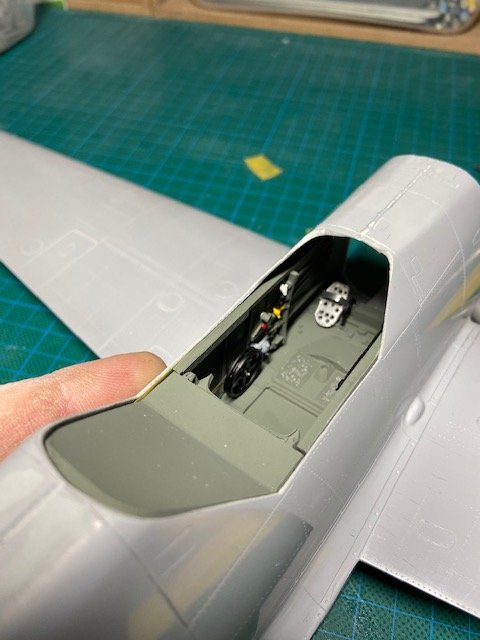
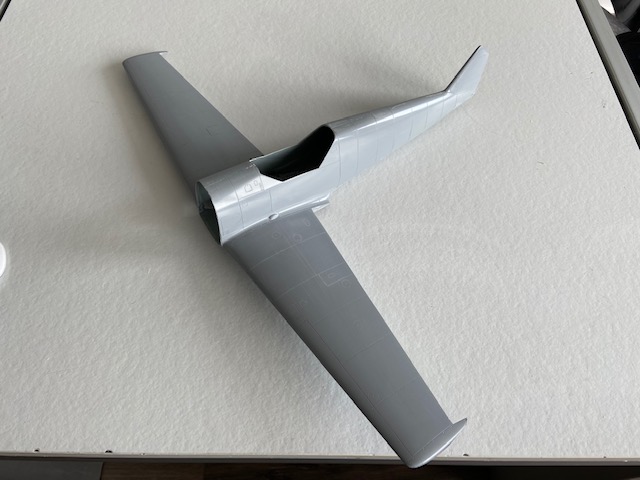
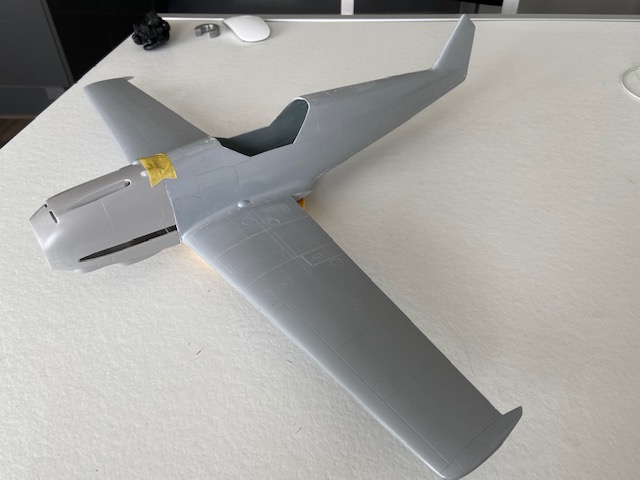
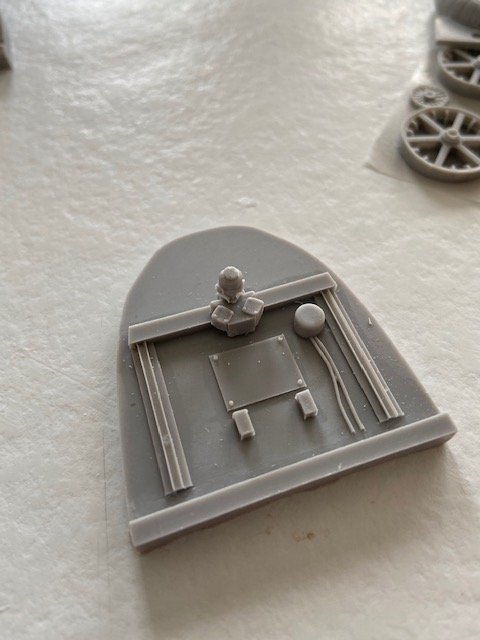
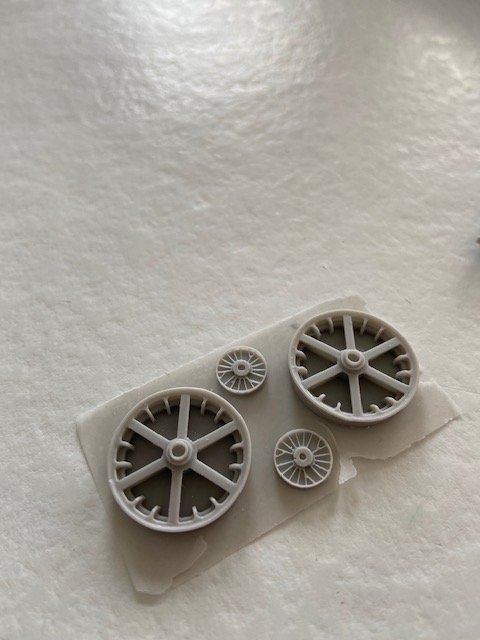
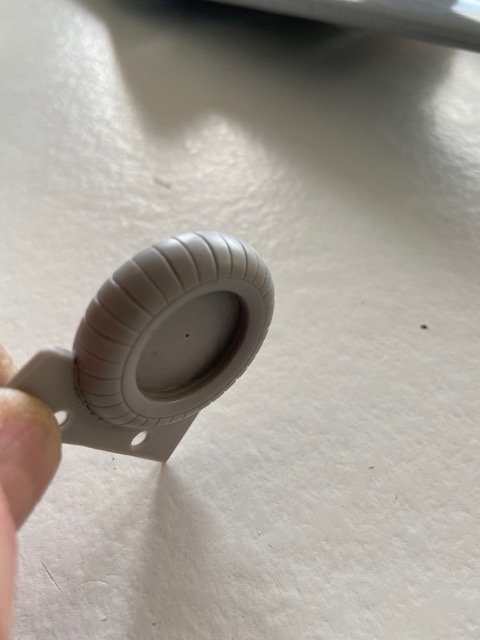
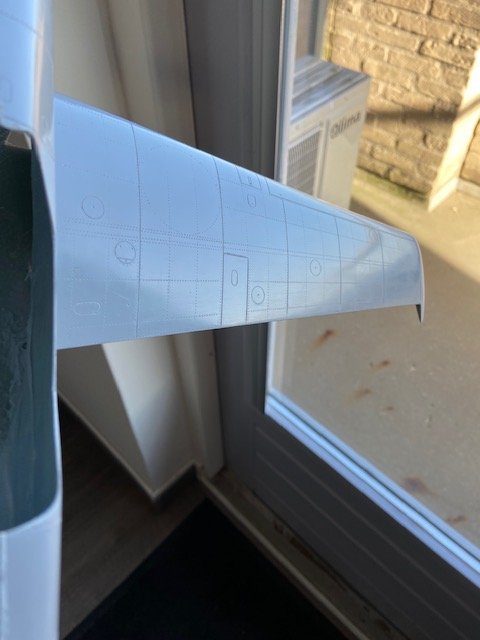
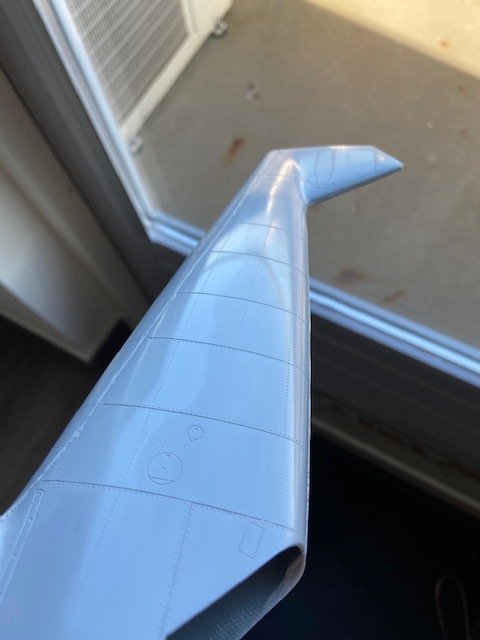
Hello Guys, Here's another update on the 109, first i had to make the wheel wells fit to the wings, they needed a lot of sanding and test fitting, but in the end they fitted, see for yourself, the left one is after sanding, the right one is the casting block with wheel well, After some struggling it was sanded to fit, Both wheel wells in place, quit difficult to get them in place, you need to slide them in from the nose, and then work them around the "corner" to get them in the wing, but I got there in the end, glued with epoxy, they are going nowhere anymore. Painted in RLM02, Painted the inside cover complete with the stitching, used a somewhat darker color for the stitching, and applied a wash in the wheel well Then I could fit the cockpit in position, I first glued a few "stops " in place left and right in the fuselage so the cockpit couldn't move to far backwards, Glued together, the sidewalls were glues later on, they line up with the fuselage nicely now, Test fitted the rear part of the canopy, and smoothed the backside with epoxy filler and sanded to fit, And after painting, Also put in the landing gear, wasn't easy to get the right angle Once the epoxy dried the angle was perfect Finally put my attention to some cockpit details like the revi gunsight and the control stick , And with a decal on the body of the gunsight, the brackets need to be painted in black yet, and I have to place the reflectors, but getting there, And the control stick.... That's it for now, the moment is getting near to cut the fuselage to accommodate the engine ......... Cheers, Frank

-
Israeli Mirage III C with Atar9C
Trigger replied to Kaireckstadt's topic in LSM 1/35 and Larger Work In Progress
Hi Kai, Looking better every day, love the dampening rings on he guns, these kind of details will make the model stand out for sure, good choice on the pitot tube, they really make nice parts at Master's Looking forward to the next build stage, Frank -
As is your FW190, great paint job! Cheers, Frank
-
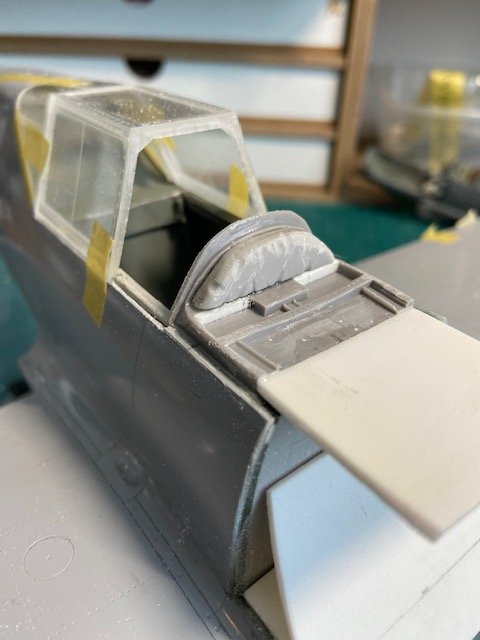
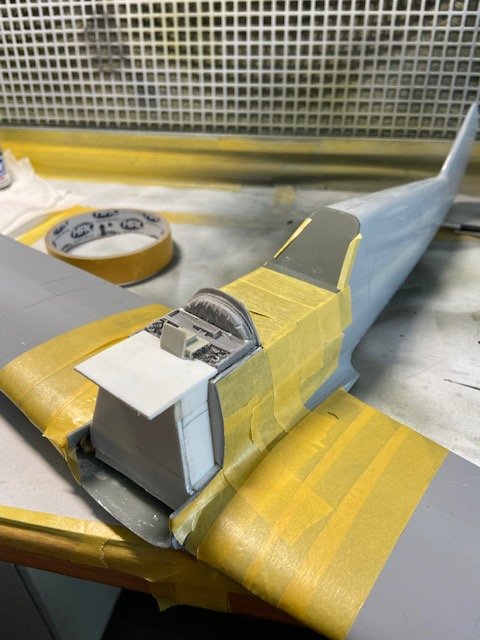
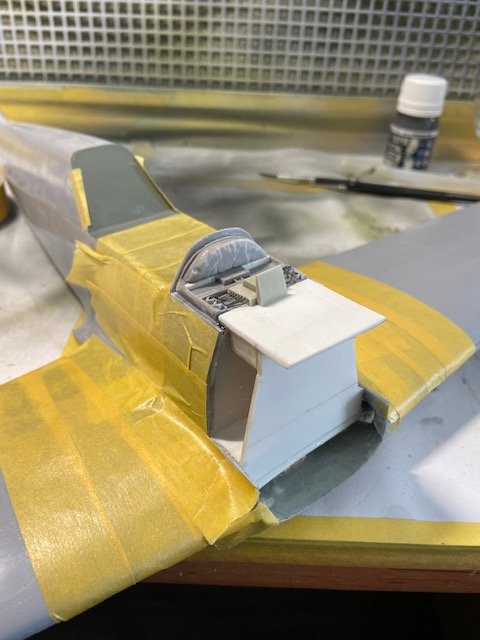
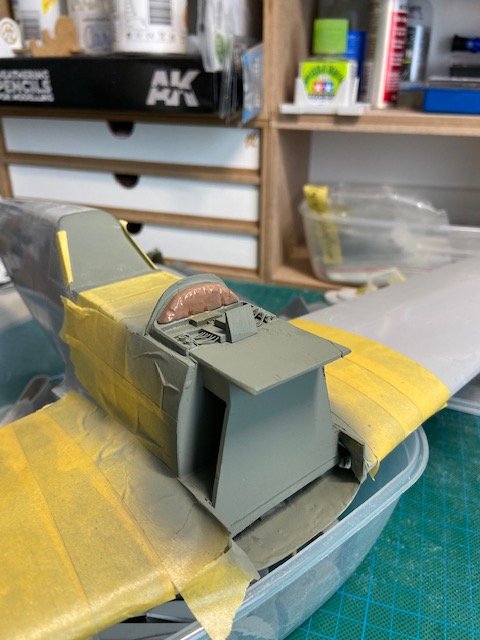
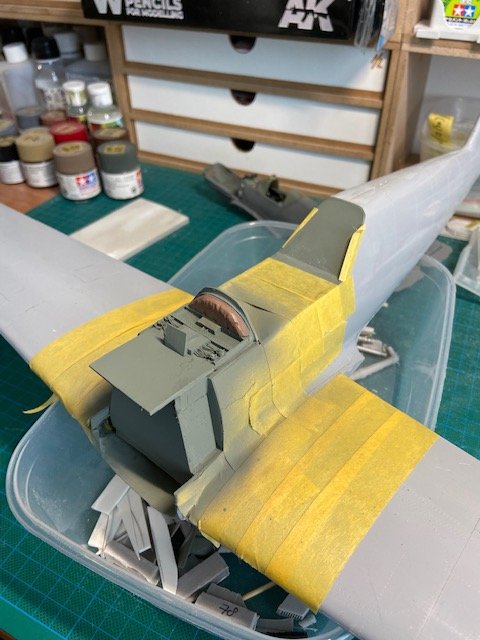
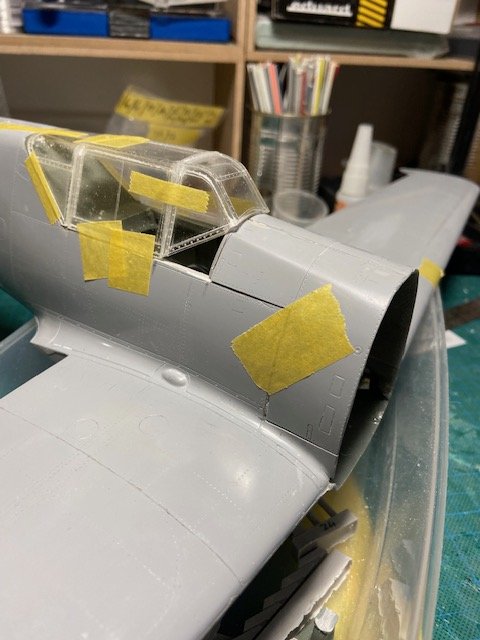
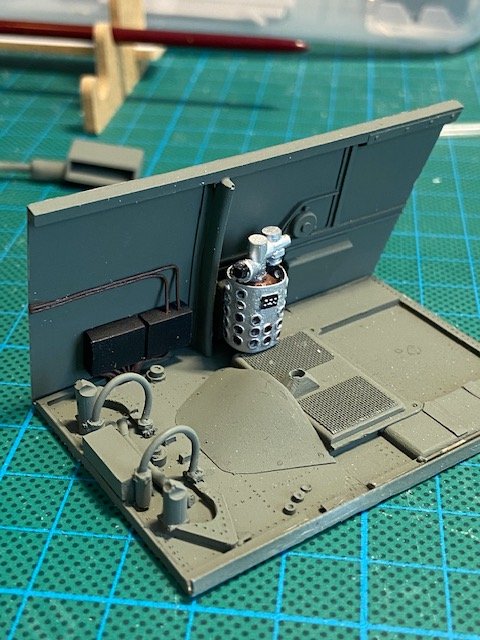
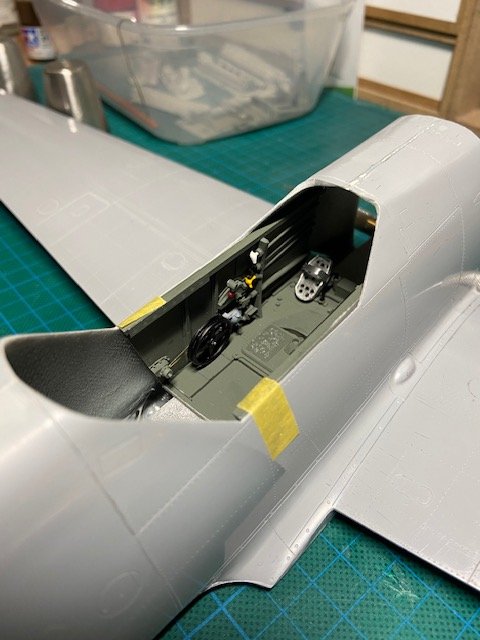
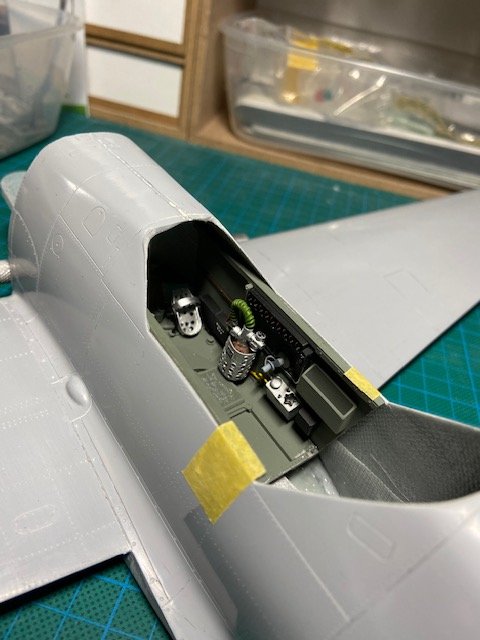
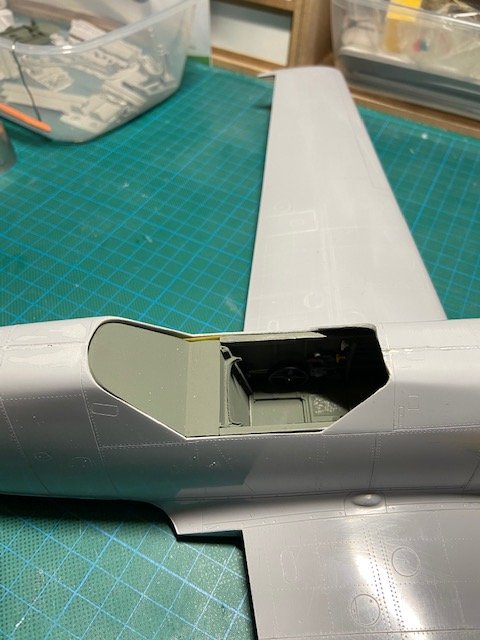
So, it is time for an update, I decided to first do the cockpit, because when that is in place I can focus on cutting the nose section. The cockpit must be in place first so I have a reference where the front firewall exactly is situated in order to make a precise cut. So here are some pics, first the build up of the side panels some scratch build wires from lead wire Also sprayed some different tones of RLM02, so the panels look a bit weathered, scratch build air hose Both panels done and wired Pilot seat painted flat aluminum , sprayed some chipping fluid on it to weather the seat once it's painted in RLM02, Connected the sidewalls to the floor Test fitting the cockpit tub into the fuselage everything is held together with tape, the sidewalls line up nicely with the fuselage taped the rear bulkhead in place, that will need some filling and sanding before it fits It will be ok, when I squeeze the fuselage just a tiny bit it all lines up nicely And with the front firewall in place Cockpit all taped up all the seams will be gone once i glue them in place, So that is it for now, will now get the rear bulkhead in place and sand it to fit so I can glue the cockpit in place, Until the next time, Cheers, Frank
-
Israeli Mirage III C with Atar9C
Trigger replied to Kaireckstadt's topic in LSM 1/35 and Larger Work In Progress
In spite of all the setbacks, I still love the mirage, what a beautiful fighter, I can understand why you wanted to build a Swiss version with the canards. (But I guess that project will stay grounded after you finish with the IIIC). Keep at it, the end is in sight, Cheers, Frank -
Israeli Mirage III C with Atar9C
Trigger replied to Kaireckstadt's topic in LSM 1/35 and Larger Work In Progress
Hello Kai, almost ready for takeoff...... Great progress, Frank -
Hello Rob, That's indeed why i began with the nose section first, you never know how good the scale of the engine is in comparison with the rest of the model until you actually test fit the two. I must say i am happy with the fit. With the cooler in place in front of the engine I could see how the fit of the exhausts were going to be, and they line up exactly spot on. The turbocharger also lines up good with the left side of the cowling, so far so good. The next big thing is to scratch build a fire wall and make the connection with the engine bearers. Well step by step I will get there, thanks for the response, Frank
-
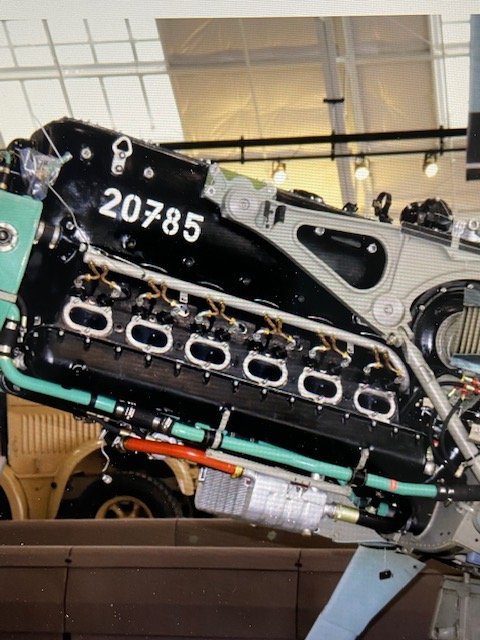
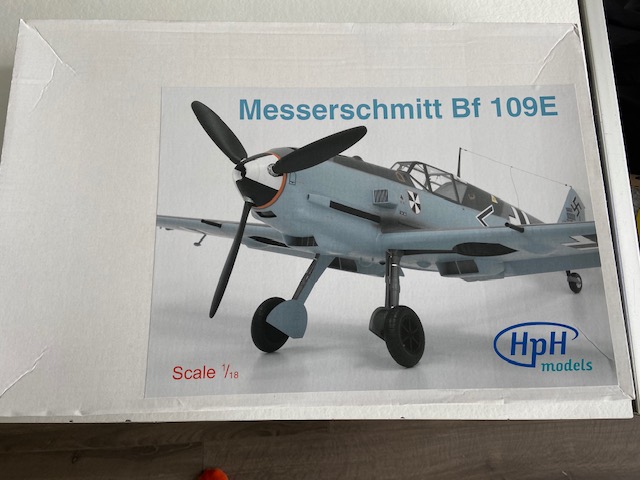
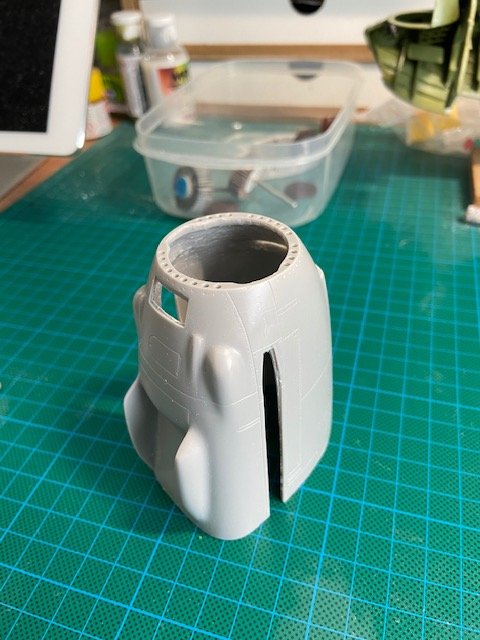
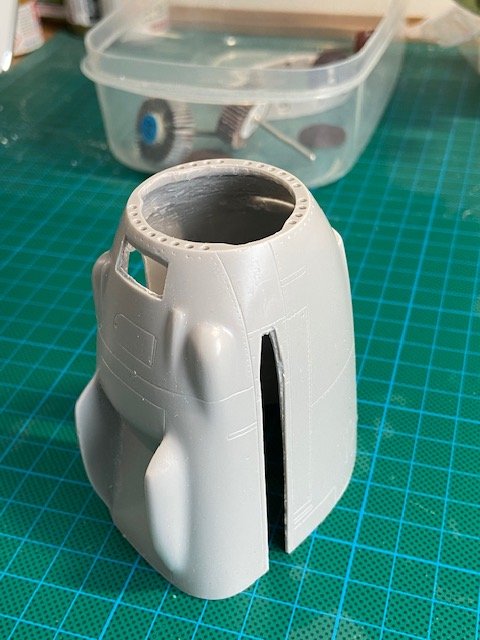
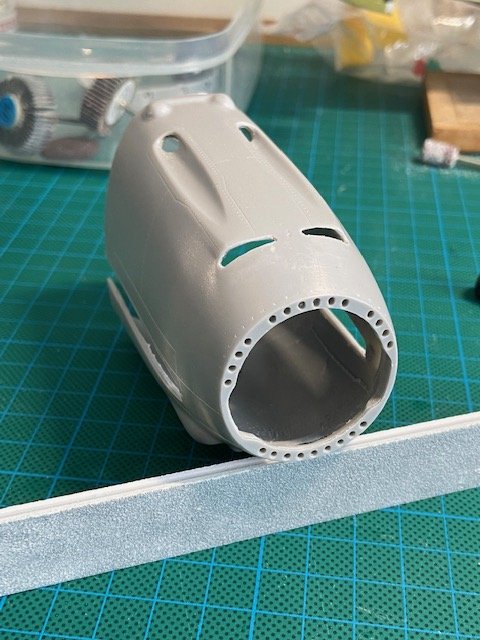
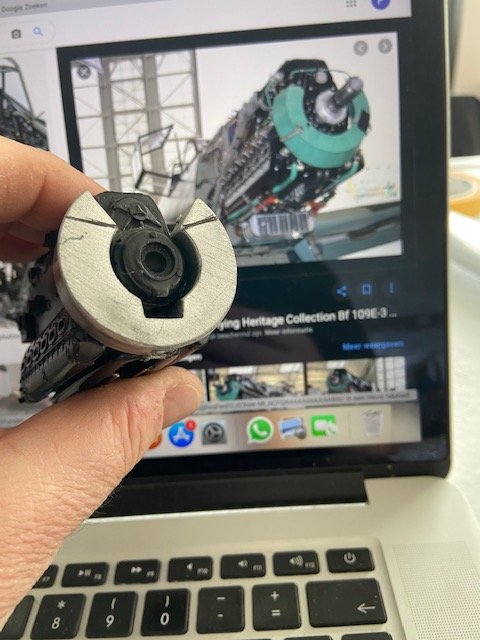
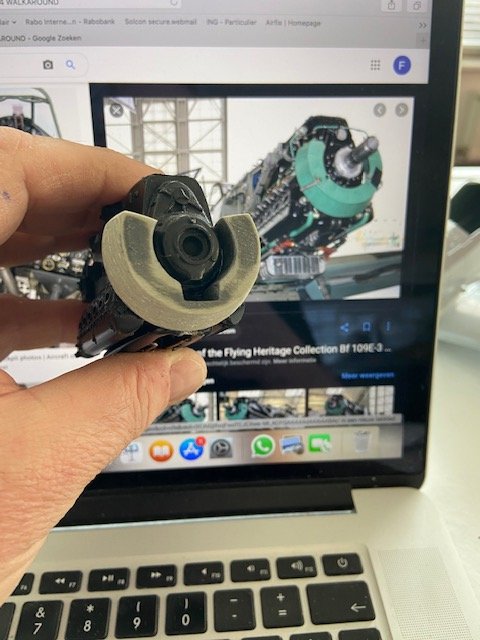
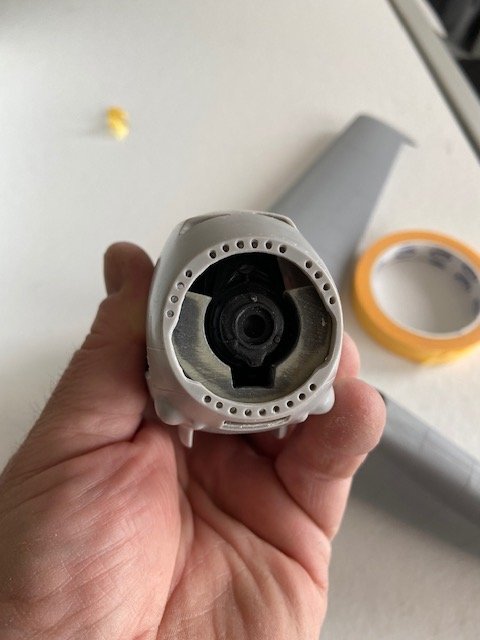
Hello guys, As if I didn't have enough to do already , (with the Catalina underway and the DB605 engine), I Really couldn't resist to build an all time favorite of mine, and in a very large 1/18 scale too. The famous ME 109. It wil be a slow build because I intend to place a DB601 engine in the model, which it is now lacking. Now there is no other engine available in this size other than the DB605, so I ordered a 605, and I will try to convert it into a DB601 which was used in the E4. I will have to cut open the model to get the engine in place, this will be a bit nerve wrecking , as the aircraft is moulded with a complete fuselage and a loose nose cone made in one piece. So in order to get an engine that is visible I have to cut open the nose cone, but also the front of the fuselage. The engine will be completely visible, engine covers taken of, the bottom cowling with the oil cooler visible, (will have to scratch build that one). But enough said, here's the model I will not be doing this version , got some books from the shelve, and I am currently trying to decide what kind of version I will build, I am more leaning towards something like this, visually more interesting with the mottling .... As you can see, it's huge, the detailing is really impressive, look at some loose parts, Very impressive wheels,... Look at the detail of the inner lining of the wheel well, even unpainted it looks like the real deal Cockpit floor also great detail So I started with the model (head on) literally . Got the nose cone out, its a one piece moulding. Where the propellor meets the fuselage is a 1 cm thick piece of resin on the inside that has to come out, so started there, and removed the pour stub from the nose, Still some cleanup to do Then it was time to open up the nose in order to get the engine in withe the cooler, Opened the holes with a drill, there was a huge "blob" of resin directly behind the cowling, so had to sand a lot of it to get a Smoot finish, have to get to almost scale thickness in order for the cooler to fit directly behind the cowling. Butchered the cooler from the DB605, the cooler from the 605 is bigger so I had to cut a piece of, and had to grind the cooler all around because it is tapered and wouldn't fit in the fuselage, here are some pic's, Original db605 coolant tank.... And cut and tapered, (have to fill in the gap on the bottom inside ) , next on the list, this was only for testfitting, But it fits like a glove, the crankshaft also lines up exactly in the middle, Exhausts also line up nicely, That is it for now, more to follow, will be cutting up the nose next .....................can make no mistake there, because I need every part of that nose. Getting pretty nervous to do that, but that's for another time, Cheers, Frank


-
Israeli Mirage III C with Atar9C
Trigger replied to Kaireckstadt's topic in LSM 1/35 and Larger Work In Progress
Looking so much better now, you did a great job on filling all those gaps Kai. I also wondered how Italeri got the idea to make those intakes in such a way that there was a seam running from top to bottom straight through a hatch? Just half a cm or so more to the front and the seam line would have been between to panel lines and much easier to remove.(I opened the box on my Mirage IIIE, just hoping that the fuselage would be different, but no, they used the same place for the intakes to join with the fuselage as on the IIIC, so I closed the box and moved it to the bottom of my stash). But you are getting there, the fuselage is getting smoother every day, looking forward to the painting stage, Hang in there, Frank -
DB605 Engine 1/18 scale HPH
Trigger replied to Trigger's topic in LSM 1/35 and Larger Work In Progress
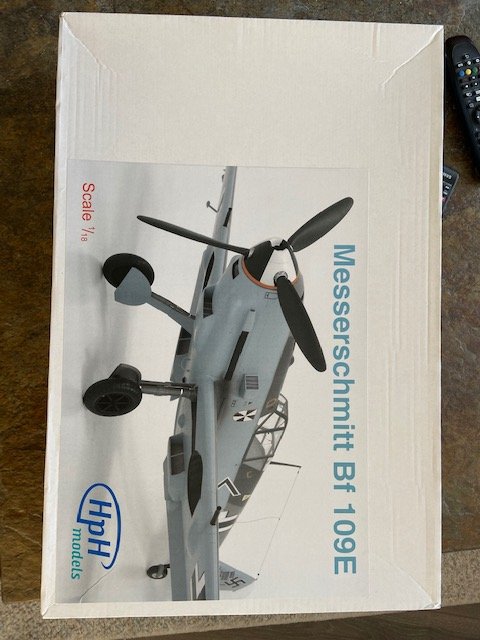
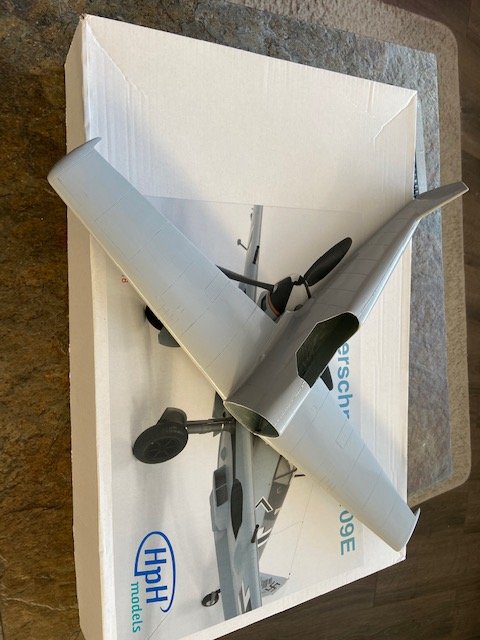
Hi Rob, You kinda got me thinking, perhaps al together not such a bad idea. At hph they do have a 1/18 scale ME109 E4, it's a fantastic kit, but it is lacking an engine now the E4 had a DB601 engine, on the outside very similar as the 605, but there are some differences in the cooling system/ MG's etc. So why not open the kit up and install an engine in the front, that would really make it stand out. After some thinking I decided to take the plunge and ordered the kit with an extra DB605 engine that I have to modify to a DB601. So after I have got the Catalina out of the way and the DB605, that is going to be the next project. I already got the kit....... .........here's a preview......... Very nice rivet detail........................ And a huge box, .............can't wait to get started on this one............ Cheers, Frank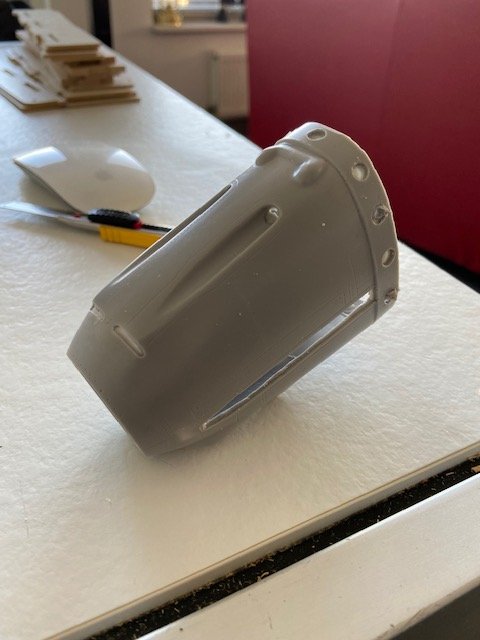

-
Israeli Mirage III C with Atar9C
Trigger replied to Kaireckstadt's topic in LSM 1/35 and Larger Work In Progress
When the going gets tough, the tough get going! -
DB605 Engine 1/18 scale HPH
Trigger replied to Trigger's topic in LSM 1/35 and Larger Work In Progress
Hello, Kai The Catalina is coming along fine, i'am about ready to put the front office in place, and I prepped the other bulkheads to be fitted, I guess I'll have an update on Saturday, Your mirage still pulls tricks on you I see, what a bummer that landing gear...... Frank -
Israeli Mirage III C with Atar9C
Trigger replied to Kaireckstadt's topic in LSM 1/35 and Larger Work In Progress
Oh my god, ........this is beyond words, even LEGO assembles better than this, I definitely banned my Mirage to the attic............ Good luck with the undercarriage, you'll need it, Frank -
DB605 Engine 1/18 scale HPH
Trigger replied to Trigger's topic in LSM 1/35 and Larger Work In Progress
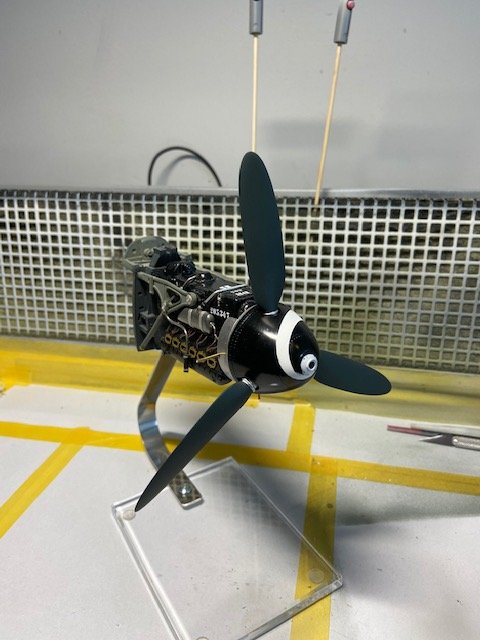
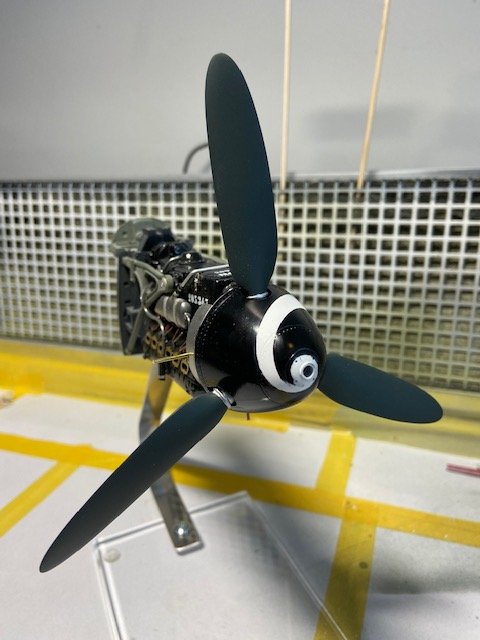
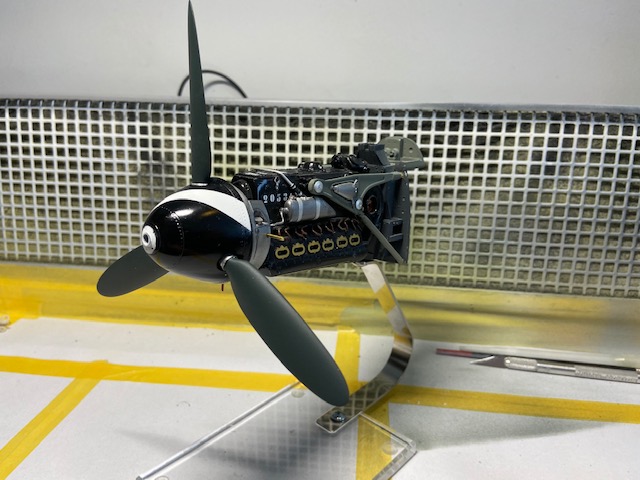
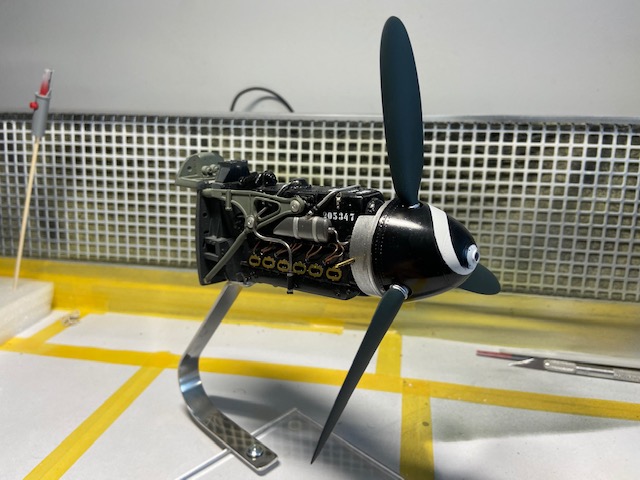
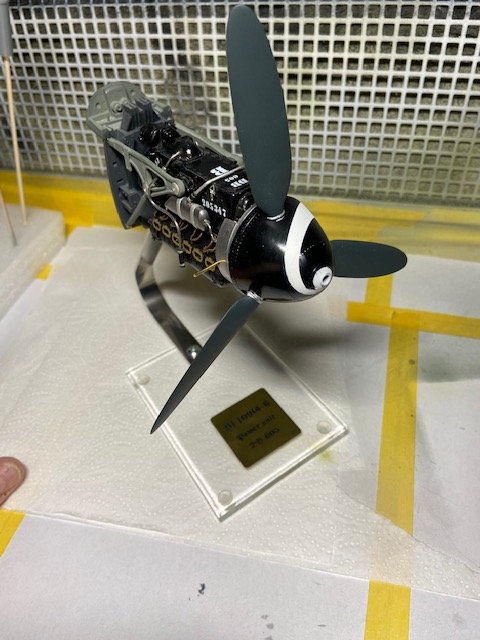
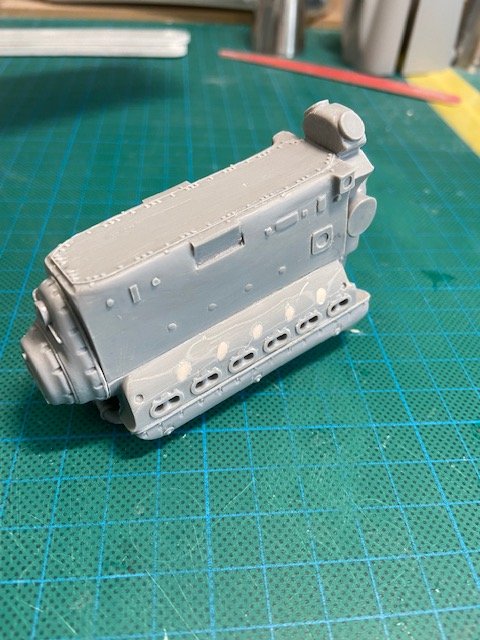
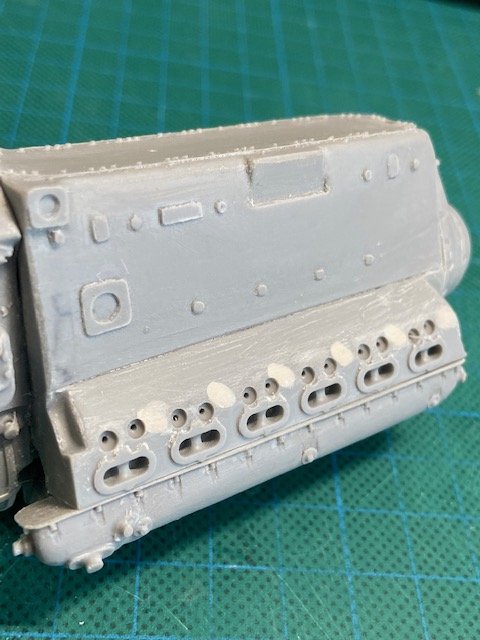
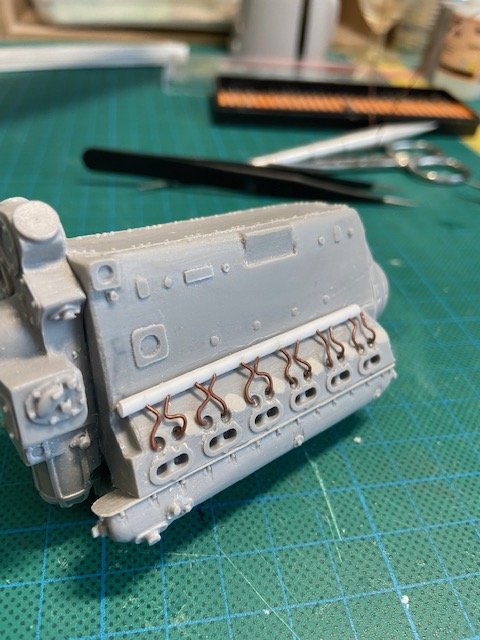
Hi Guys, Small update on the DB605, placed the prop just to see how it looks, still got lots of plumbing and wiring to do............ Didn't have much bench time this week so that is it for now, more to follow Frank