
Kaireckstadt
-
Posts
1,705 -
Joined
-
Last visited
1 Follower

Recent Profile Visitors


-

Special Hobby Whirlwind
Kaireckstadt replied to Peterpools's topic in LSM 1/35 and Larger Work In Progress
Smooth paintwork Peter! Coming along very nice! -
Nice work on the cockpit and engine Gary. I would have replaced the wires you marked with a brace by copper or lead wire. Regarding the wing it’s really a shame that all disappears under the skin. Typical of ZM-kits.
-
Special Hobby Whirlwind
Kaireckstadt replied to Peterpools's topic in LSM 1/35 and Larger Work In Progress
Great surgery on the nose Peter. -
Great progress and the landing gear is awesome 🤩! Amazing work Mark!
-
Great subject Gary and I will follow your build of yellow 10 😉 closely.
-
Duchess of Kingston - Beauty of the Seas - Wooden Sailing Ship 1/64
Kaireckstadt replied to DocRob's topic in Non LSM 'WIP
Just came across your build here today Rob. You really build a broad range of models: planes, cars, figures, ships…! The ship and figures are looking awesome. Great build! I never thought of building a ship. Should think it over. I just build a Mayflower from Revell when I was a young boy. -
Just saw this here today Gary. Great job on the MiG and the dio! The foiling is simply perfect 🤩! And the weathering of the vehicle is spot-on!
-
617 Sqn Tornado Dambuster 70th
Kaireckstadt replied to Kaireckstadt's topic in LSM 1/35 and Larger Work In Progress
Thank you all for your feedback. I’m happy that this challenge is behind me now. Now onto one of my favorites: the paintjob. -
CF-104D Triple Sick
Kaireckstadt replied to BlrwestSiR's topic in LSM 1/35 and Larger Work In Progress
The pit and the main LGB are looking great. The 104 is one of my favorites and I love the sleek look of the fuselage. First big step is completed Carl. -
Special Hobby Whirlwind
Kaireckstadt replied to Peterpools's topic in LSM 1/35 and Larger Work In Progress
Great looking bird so far with a beautiful shape. Good to see that you mastered all challenges up to now. -
617 Sqn Tornado Dambuster 70th
Kaireckstadt replied to Kaireckstadt's topic in LSM 1/35 and Larger Work In Progress
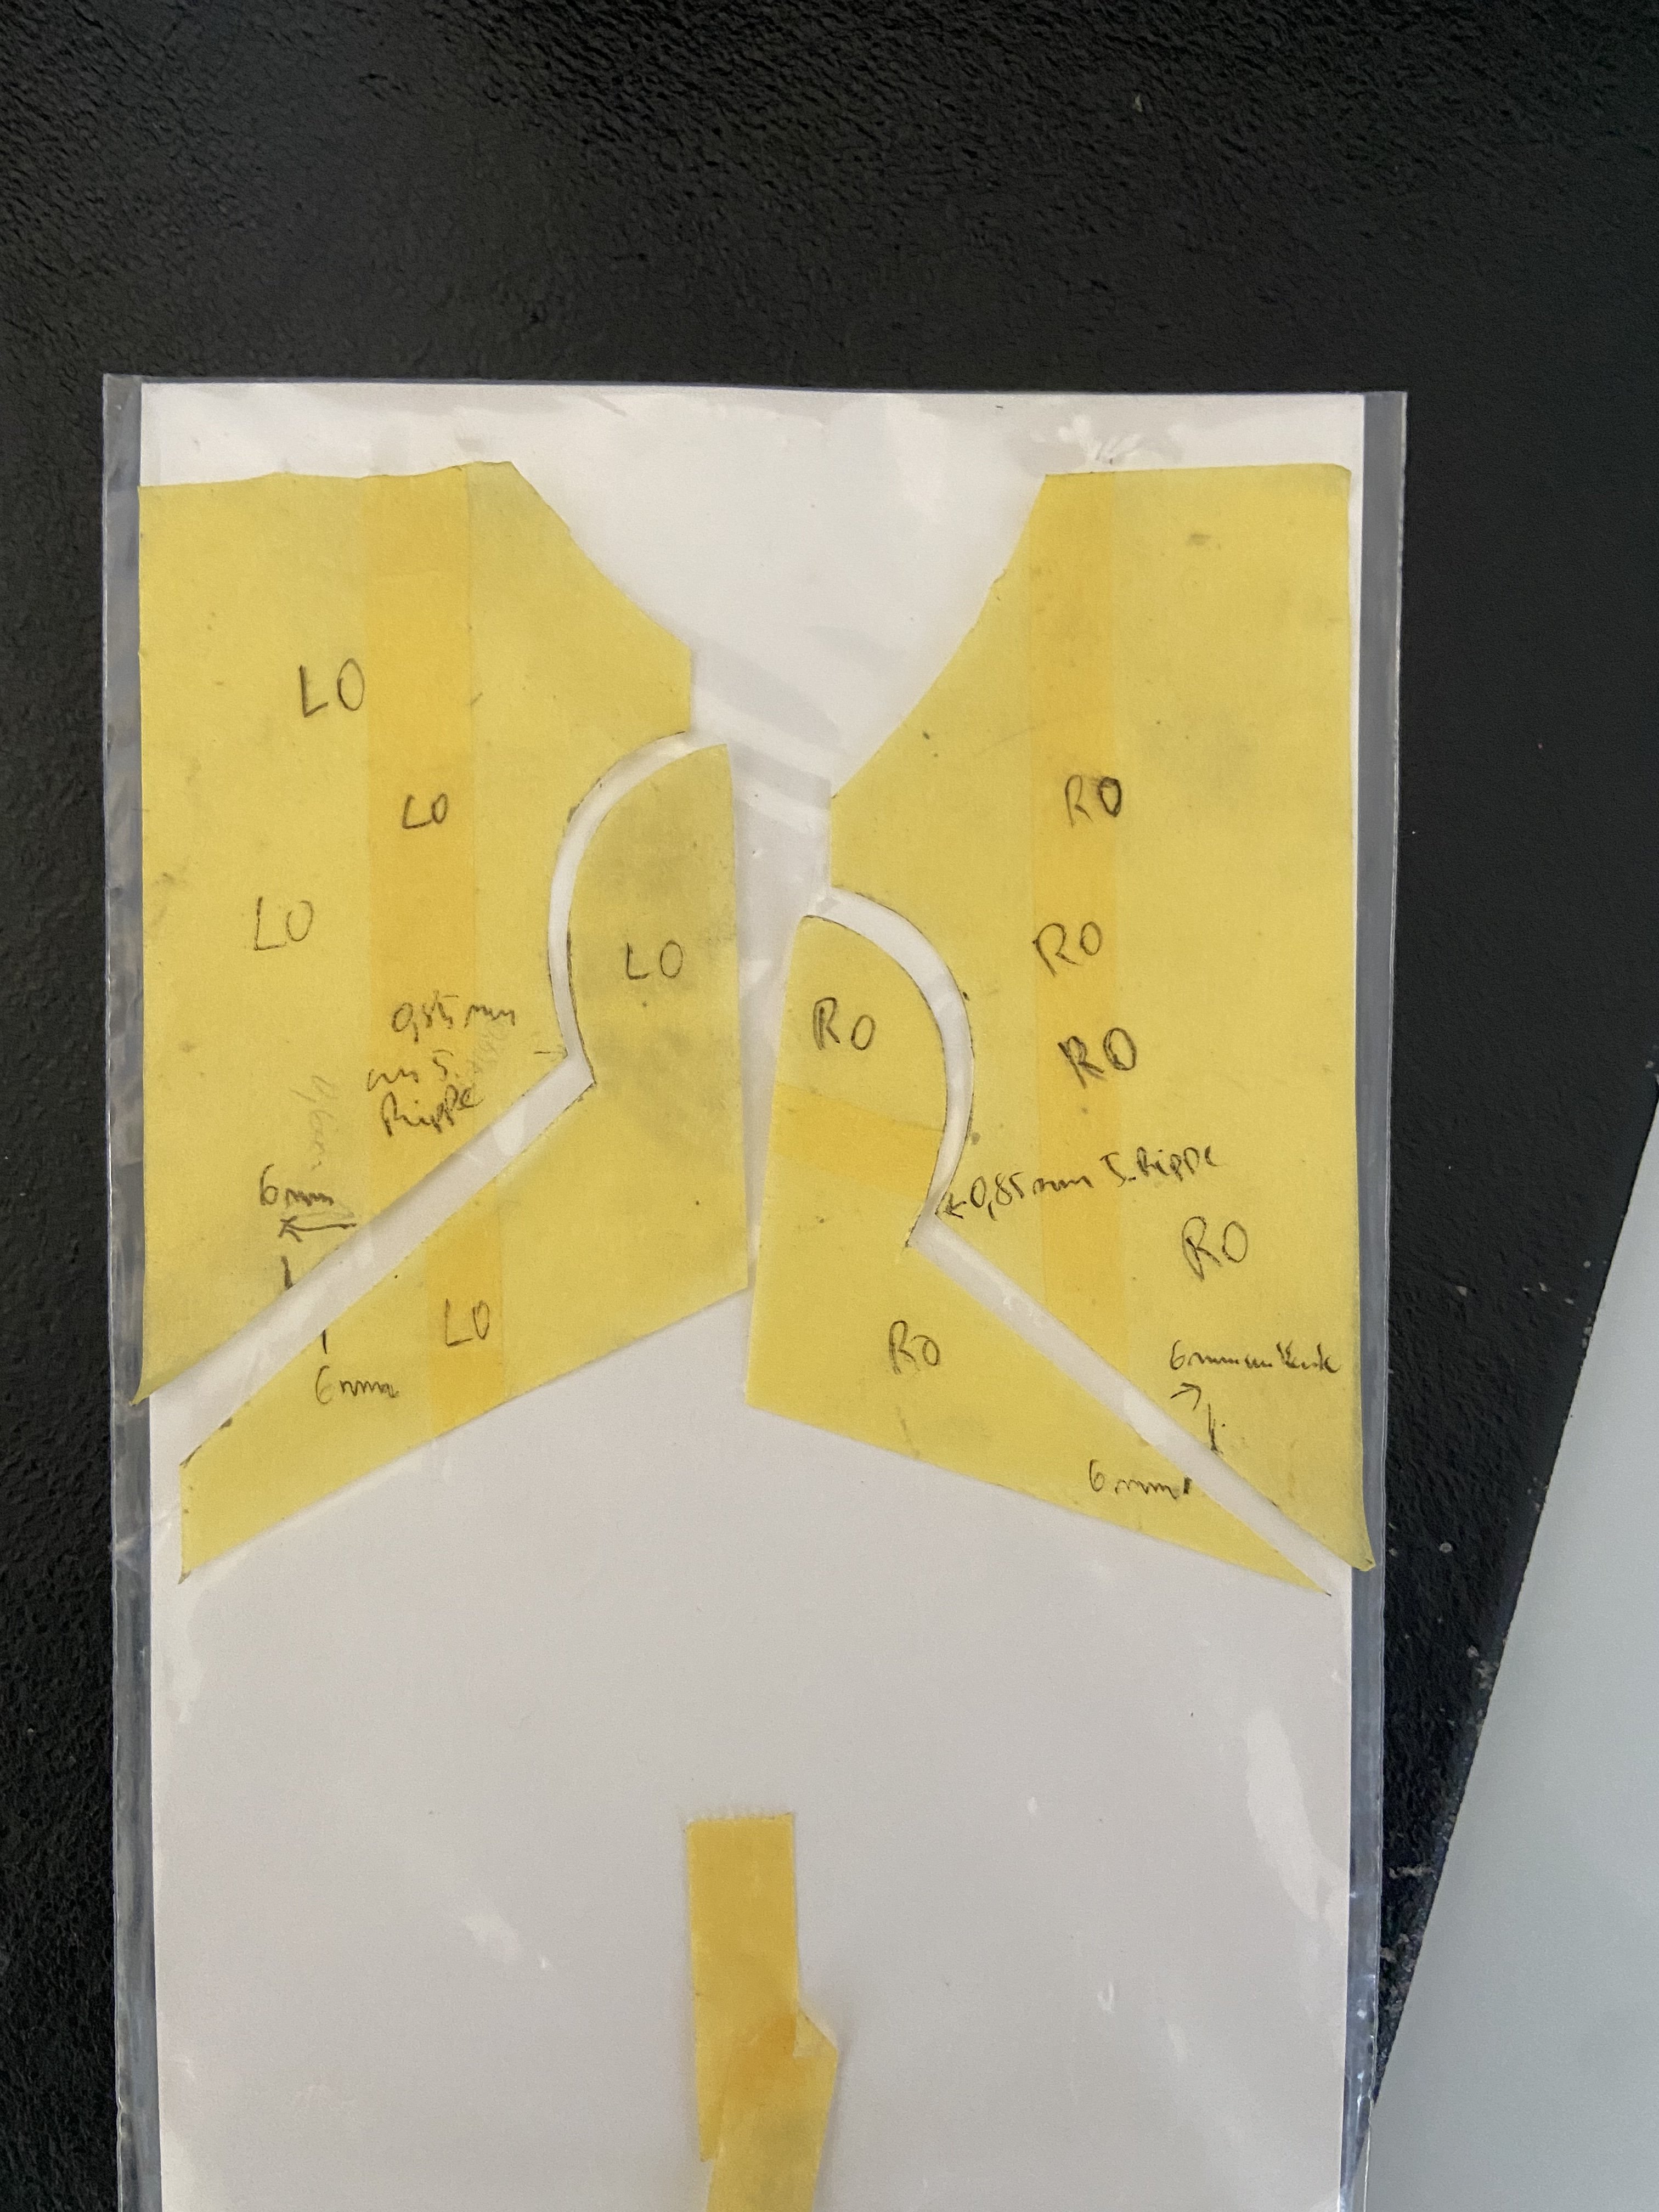
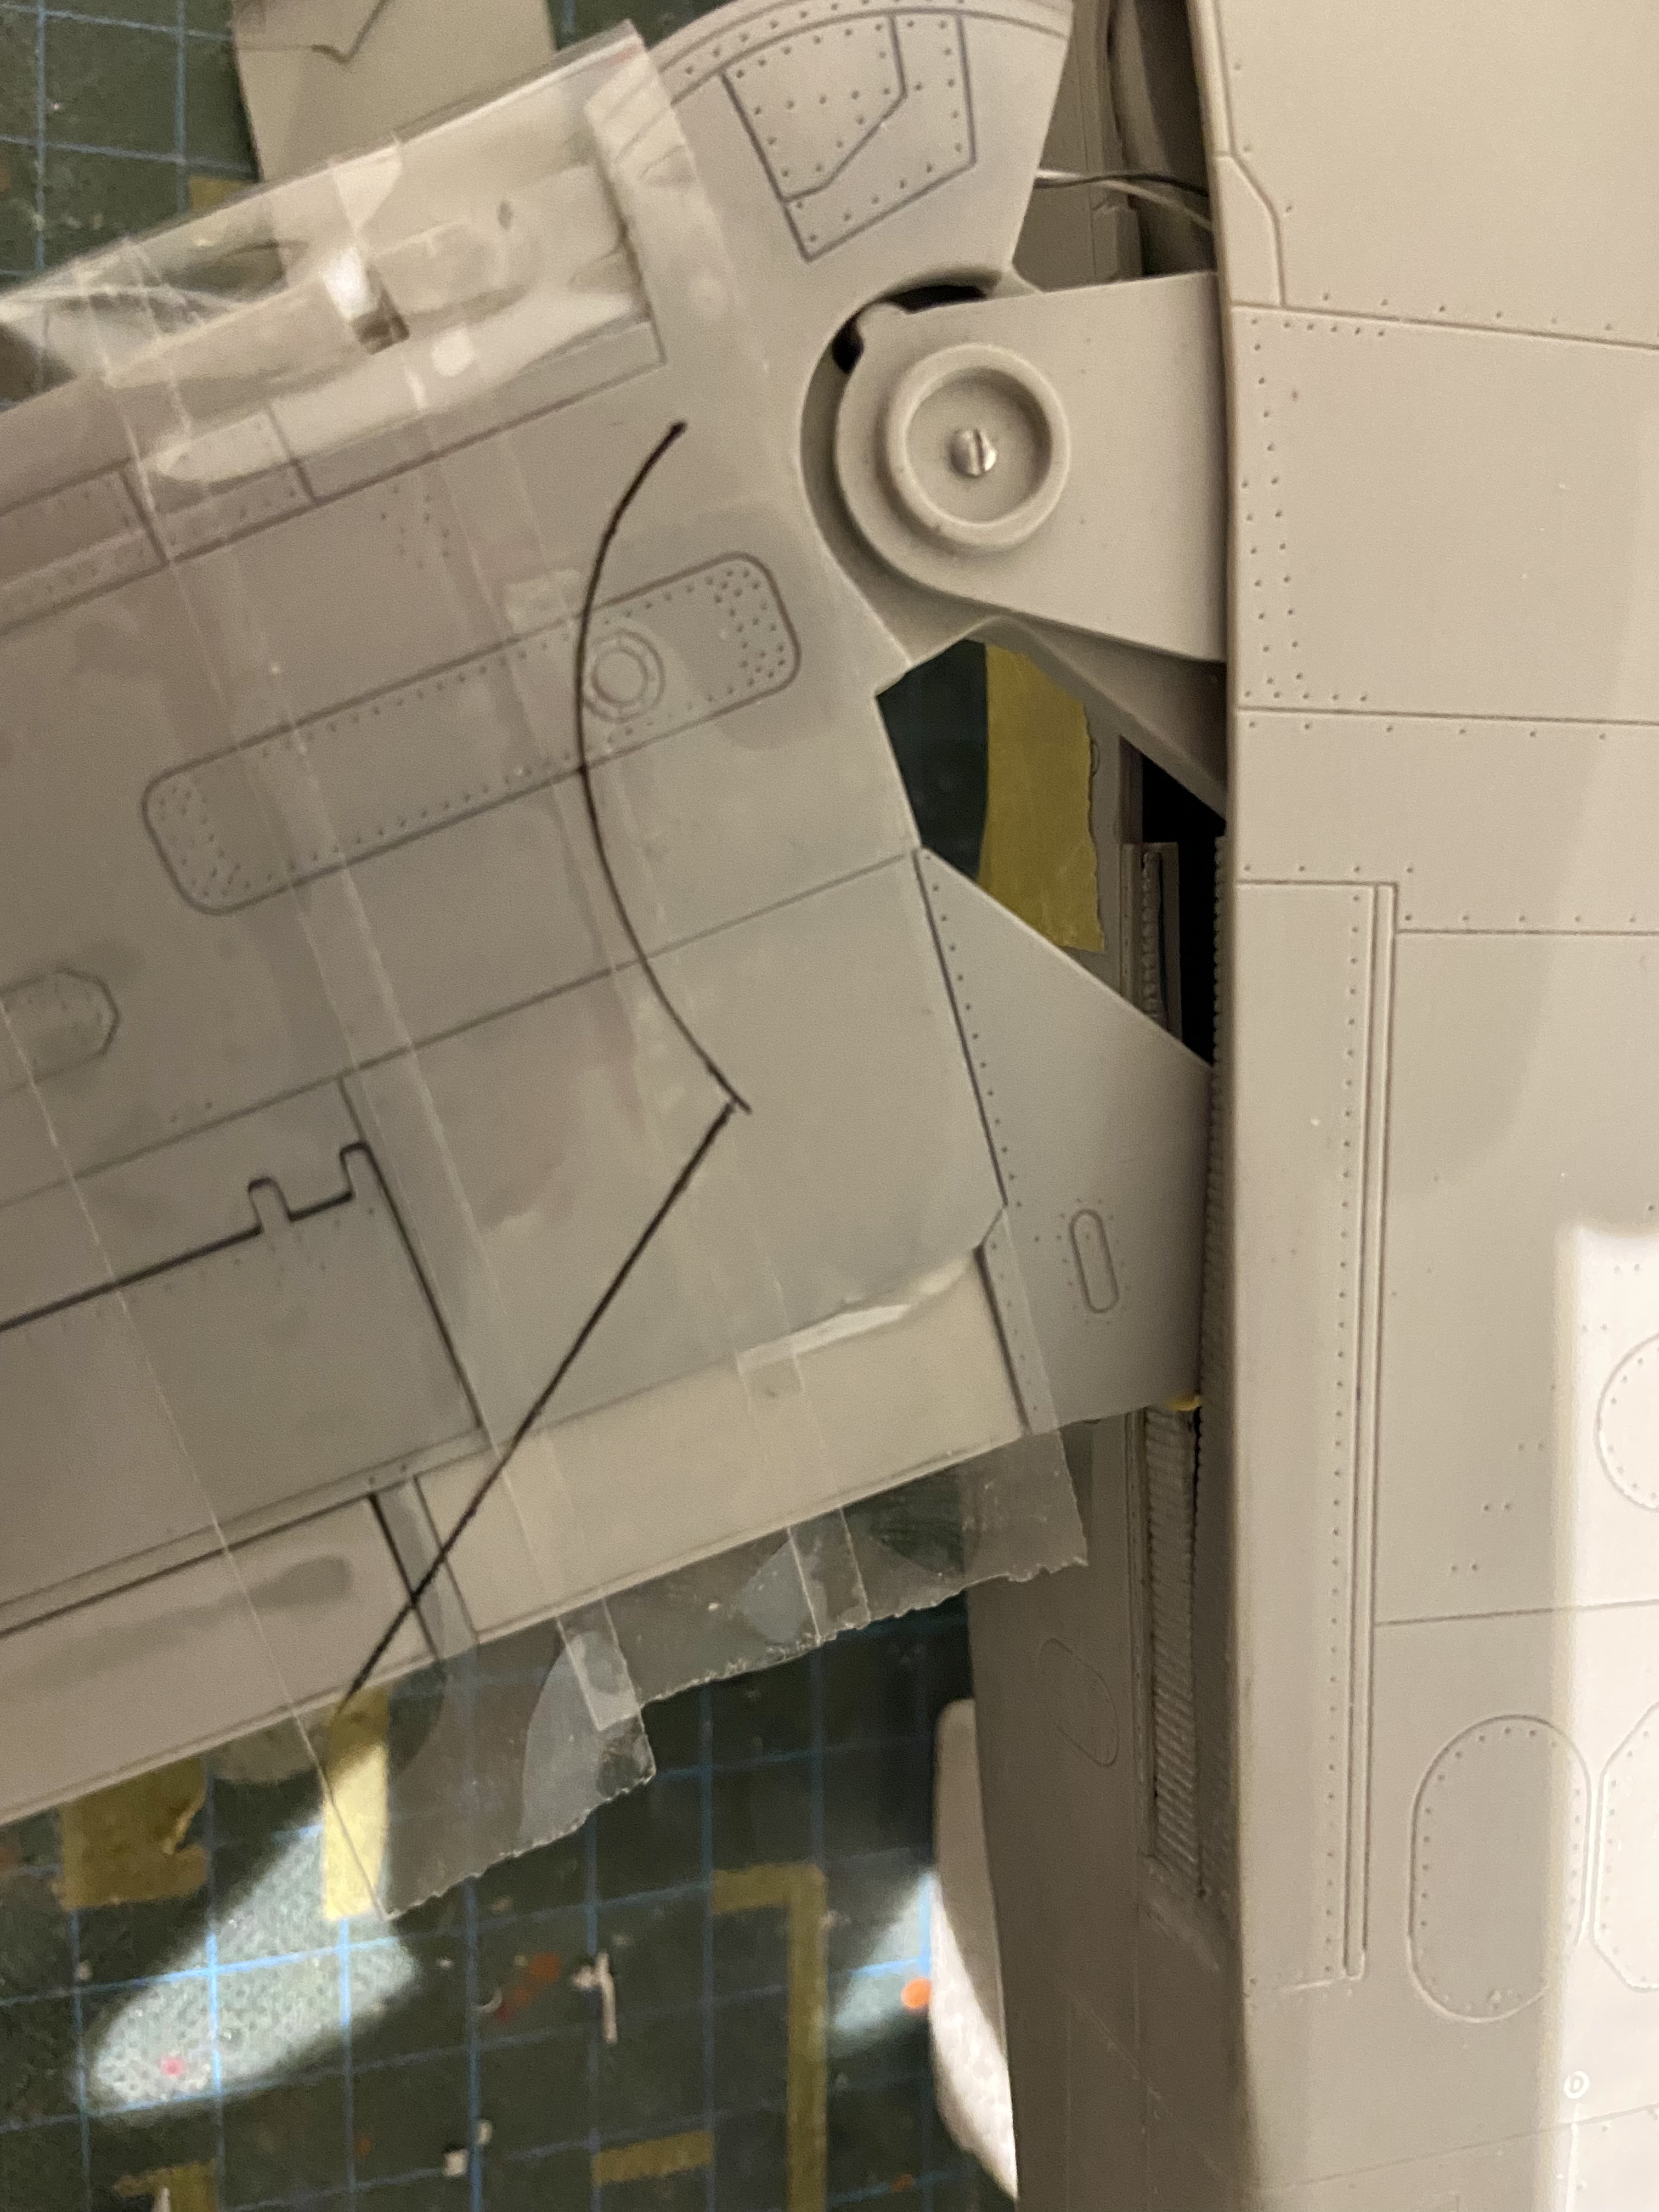
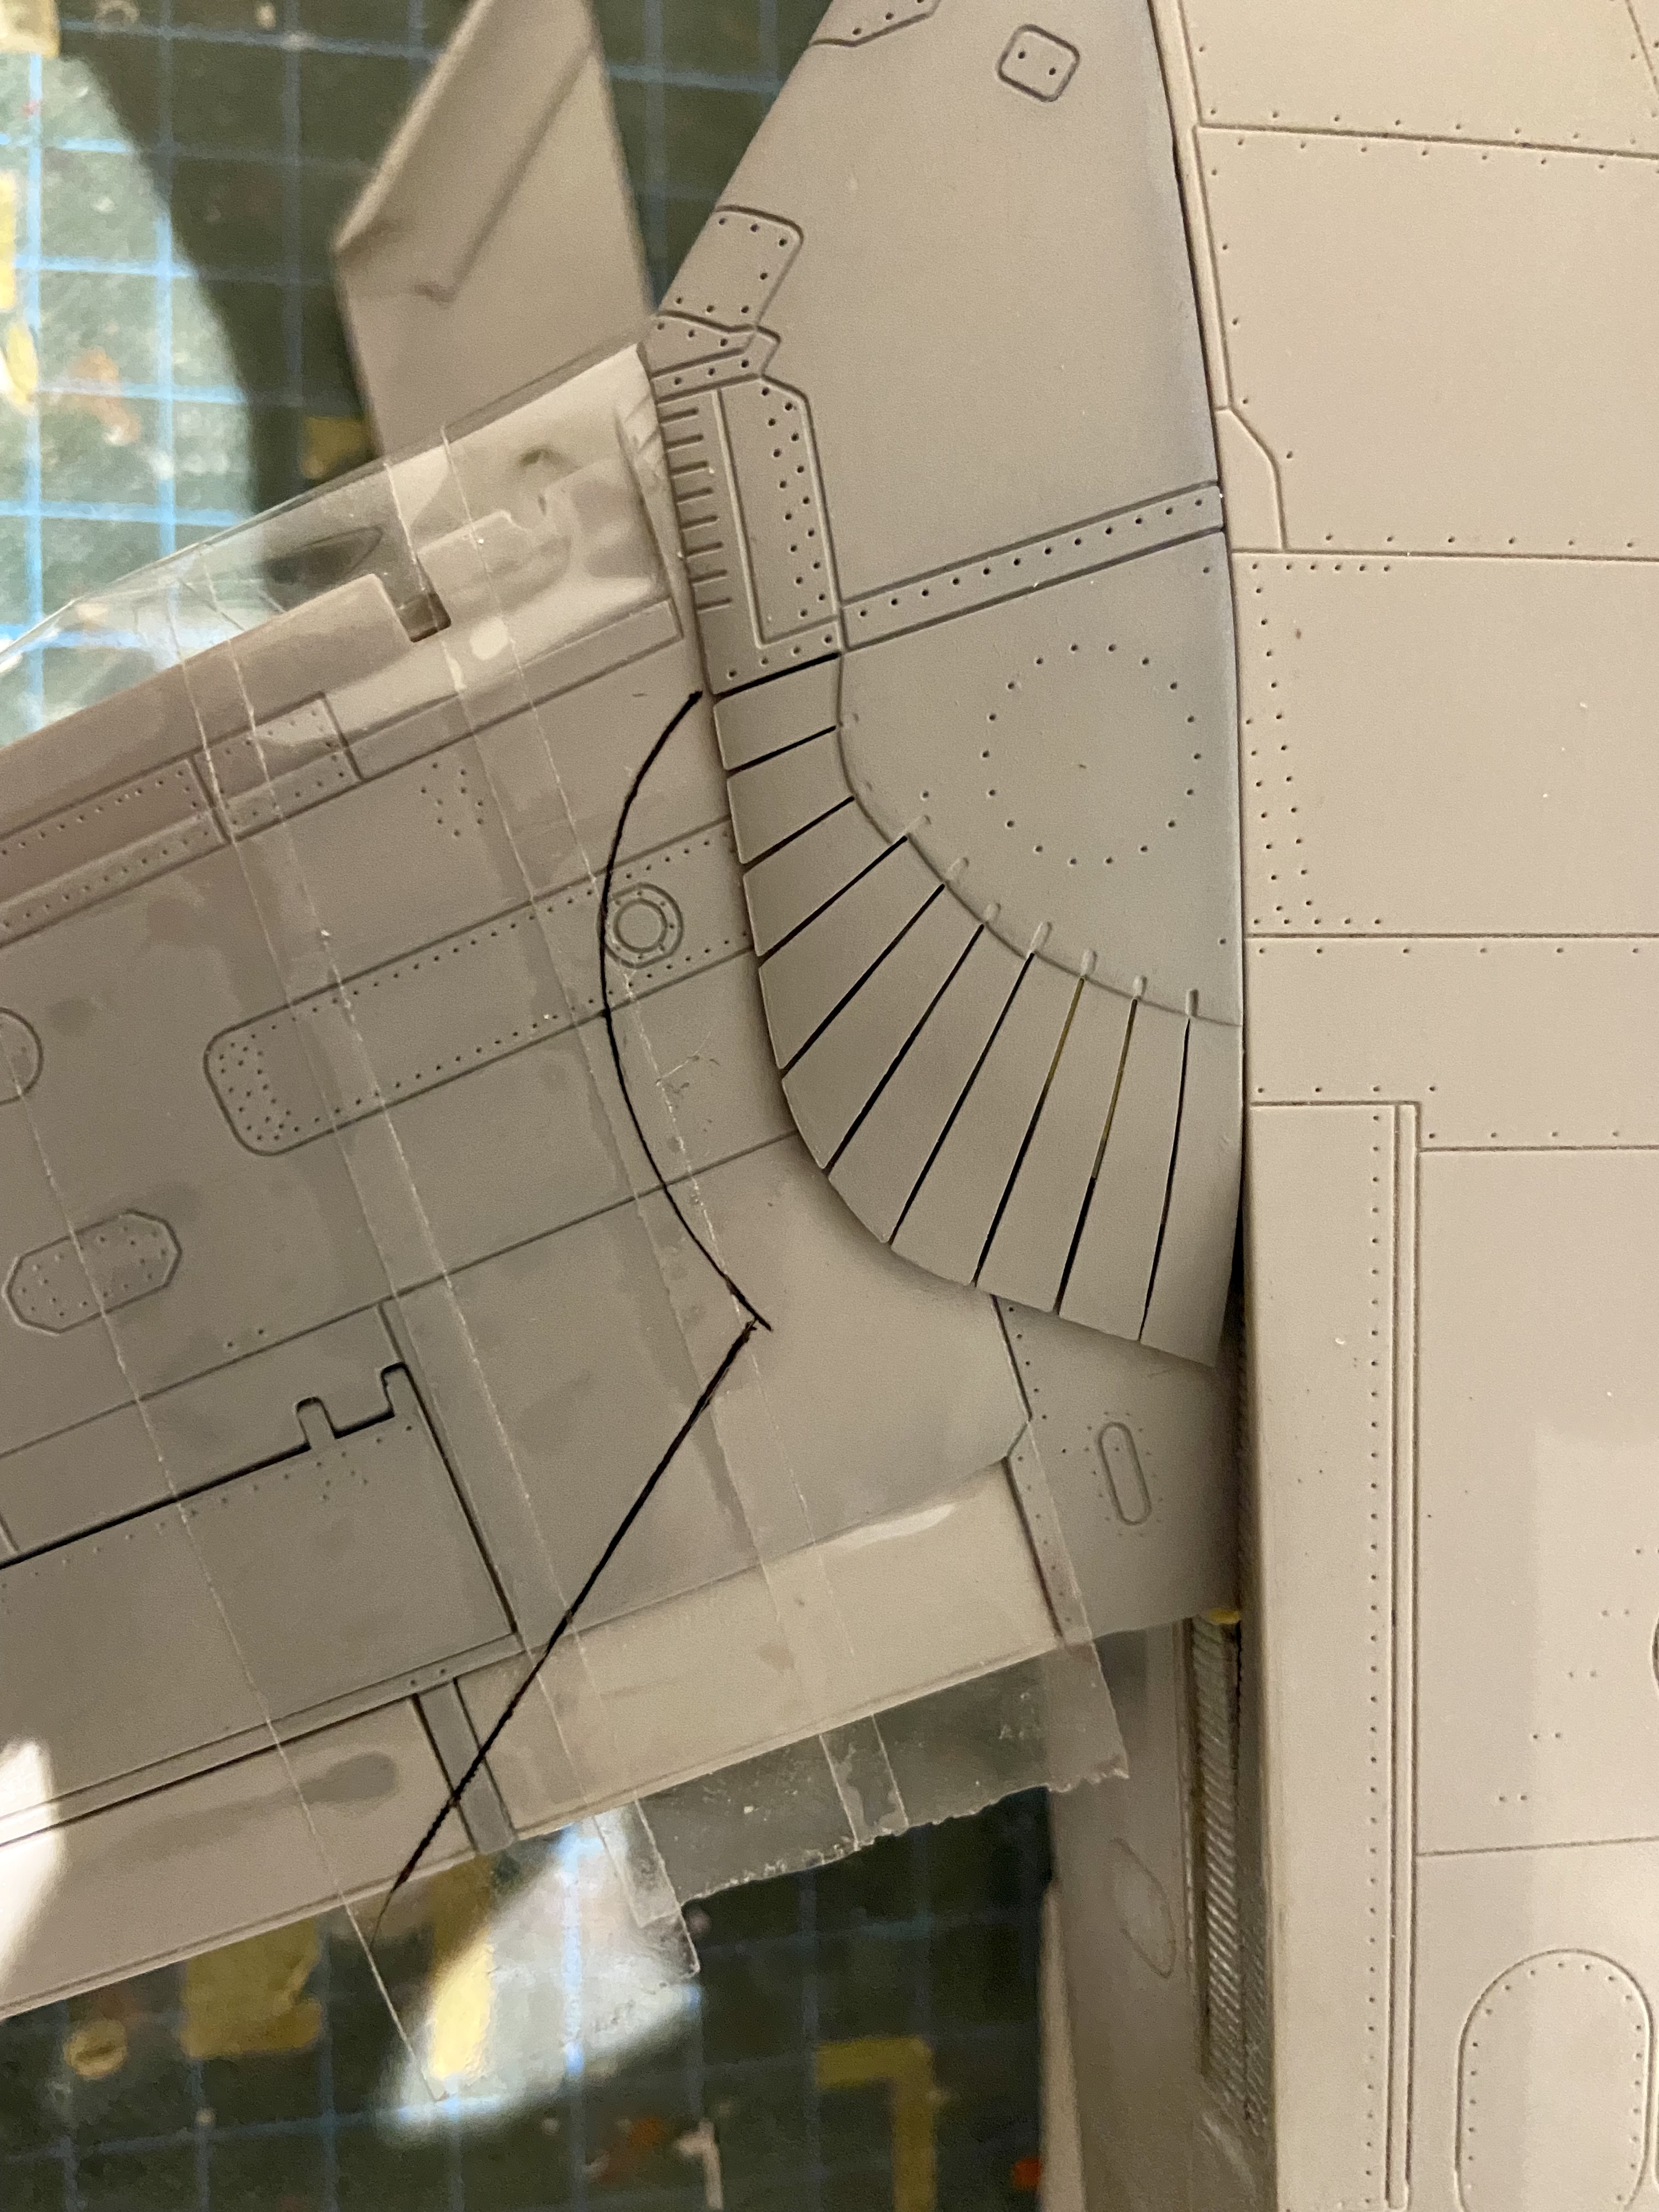
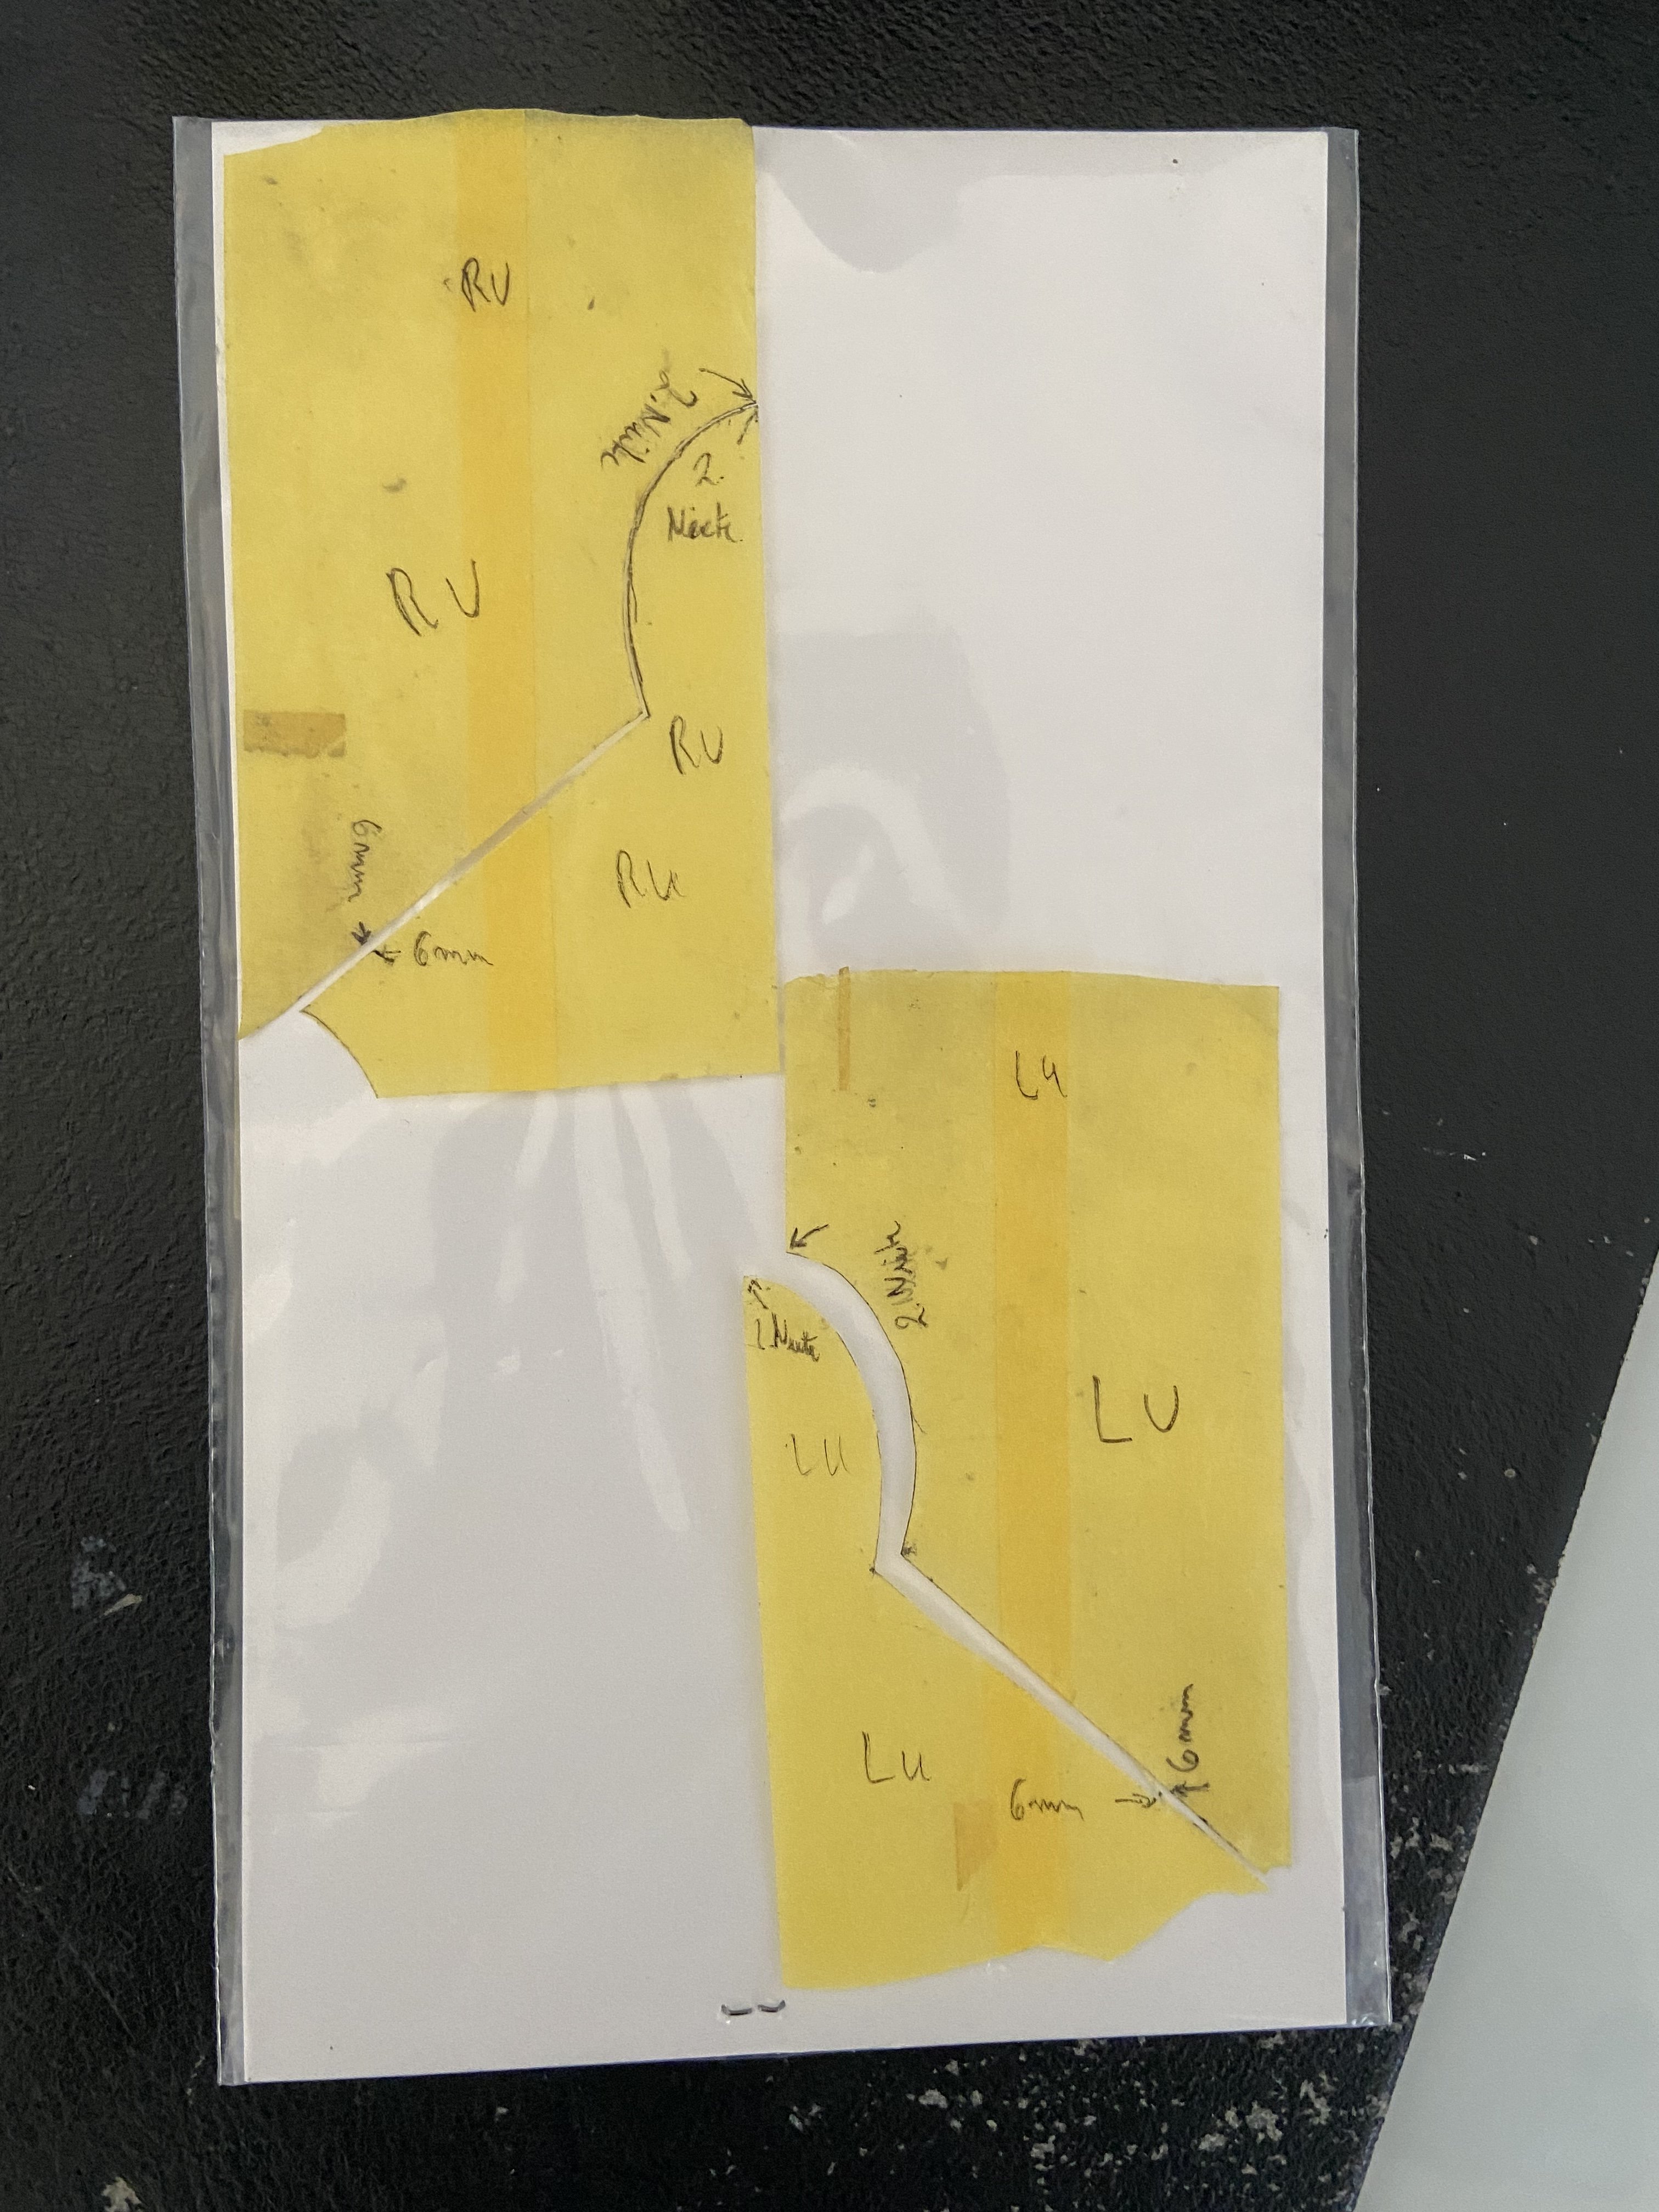
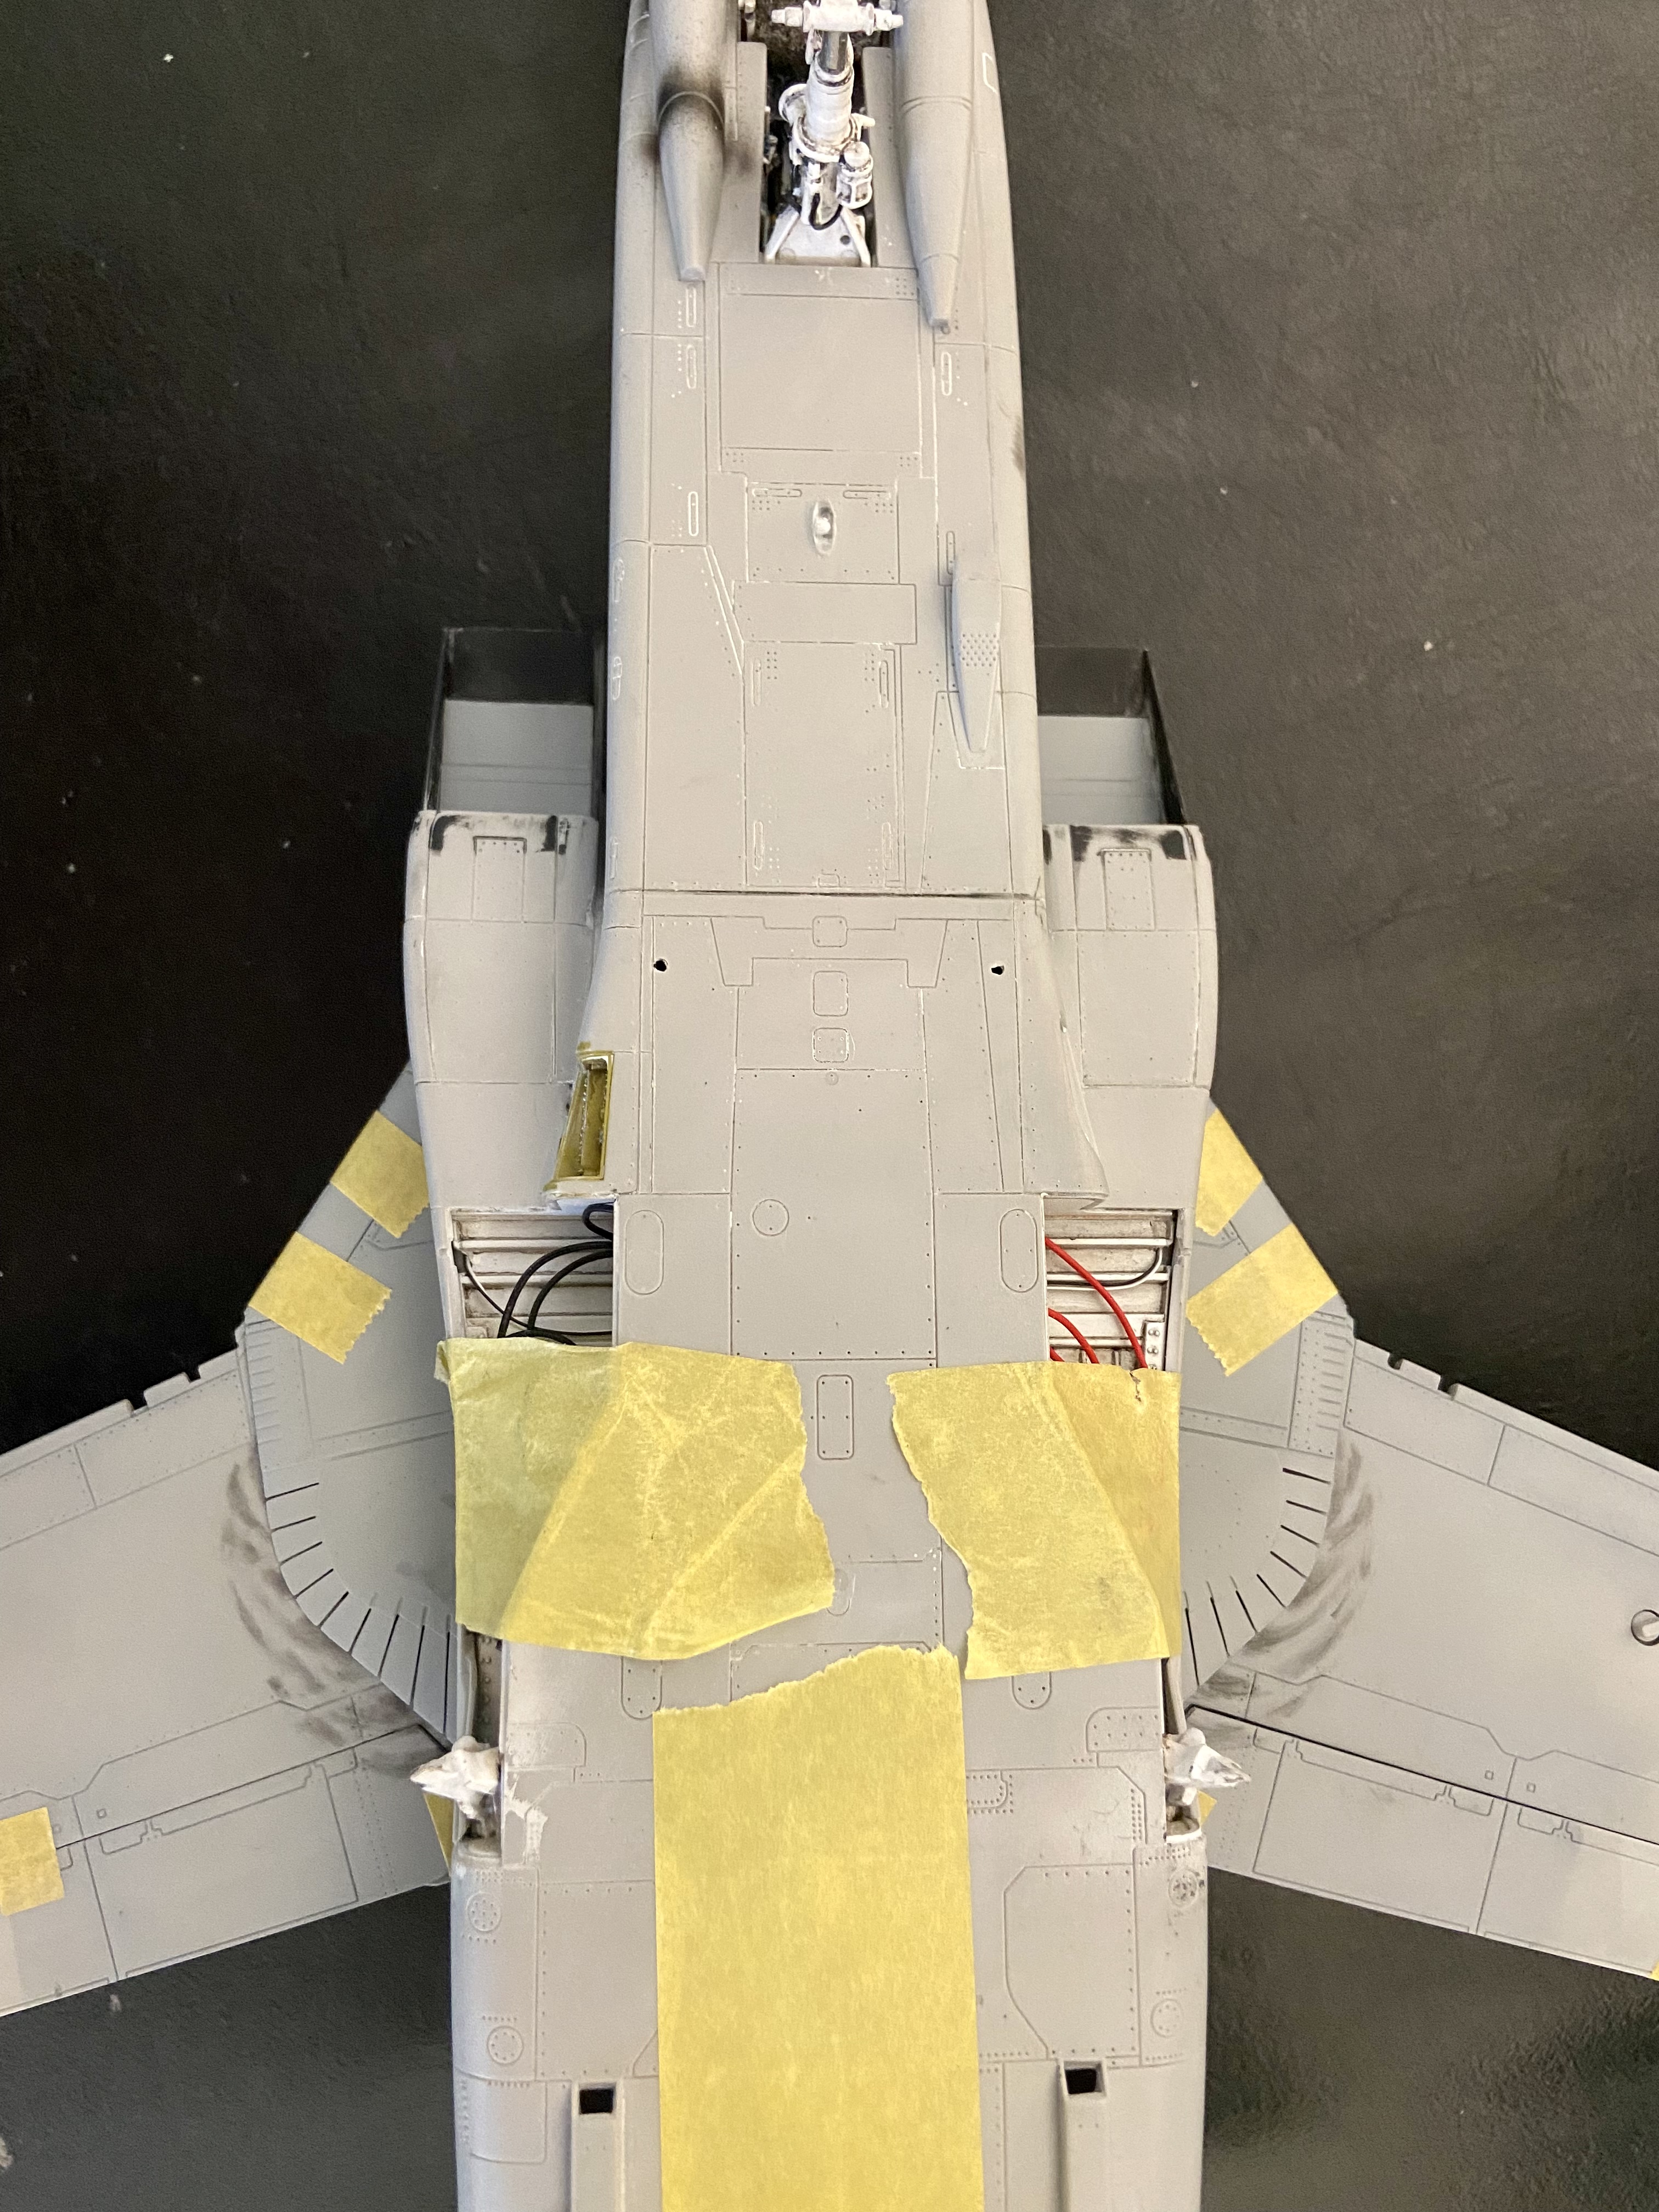
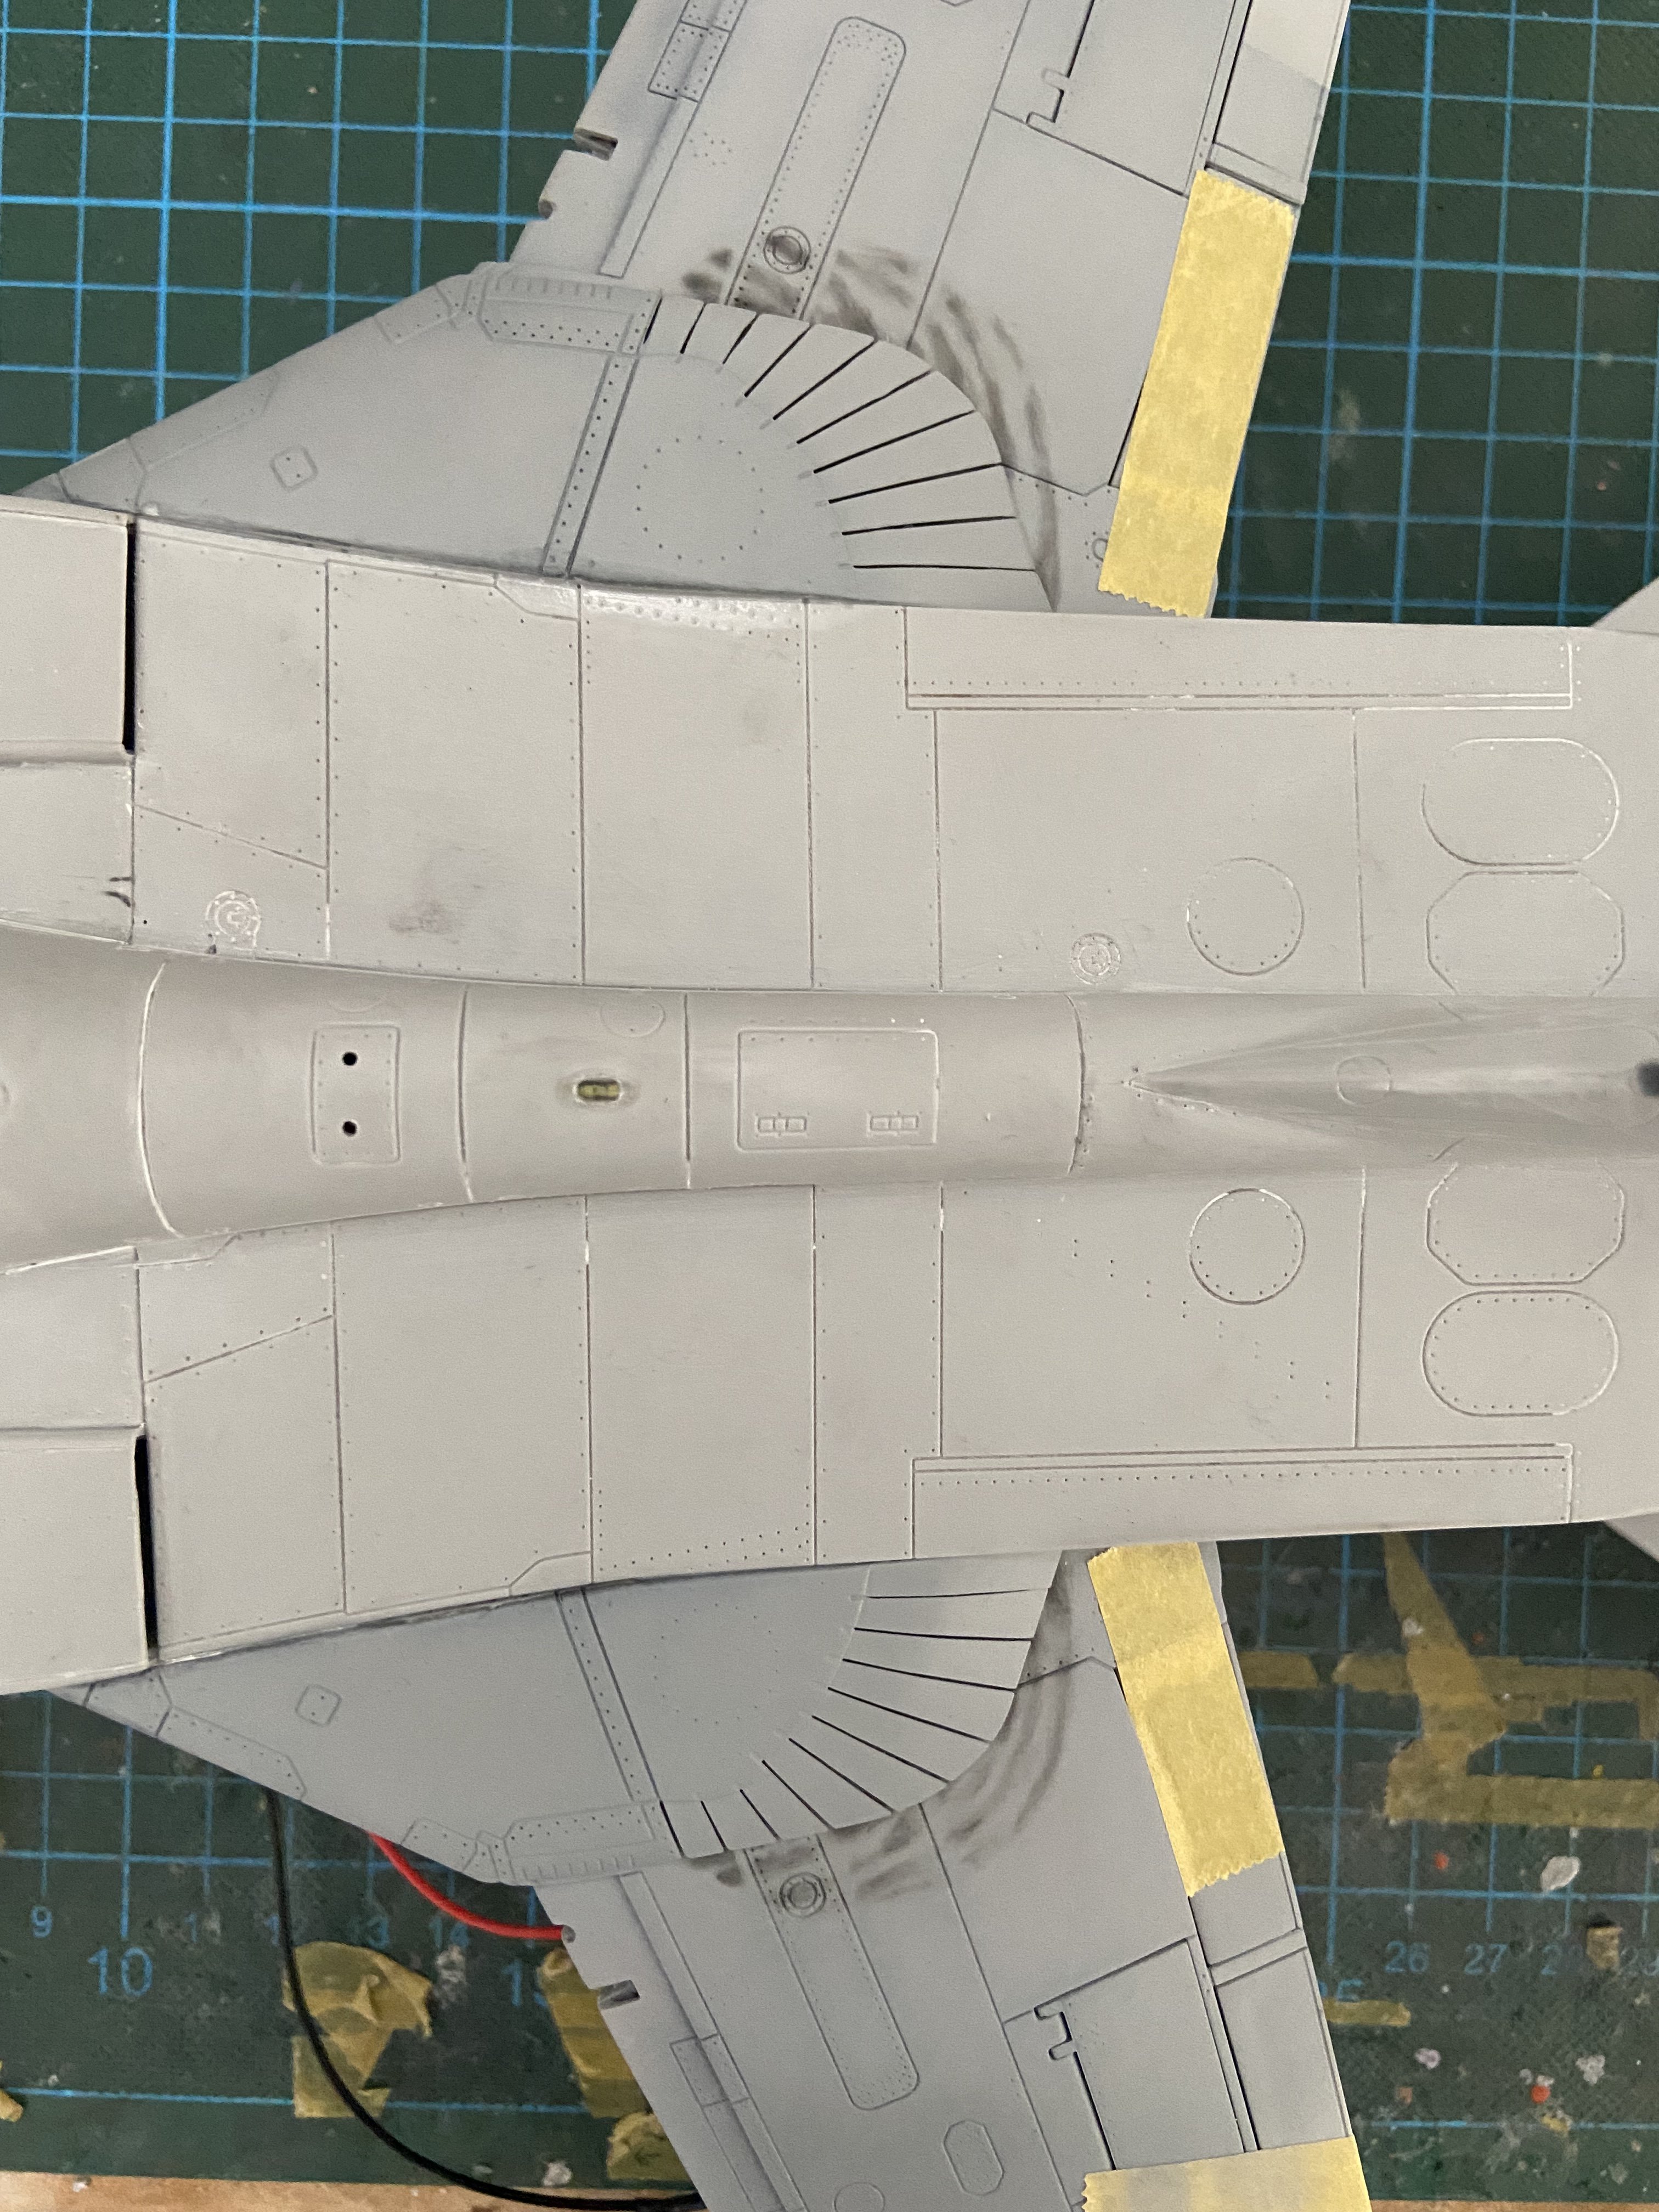
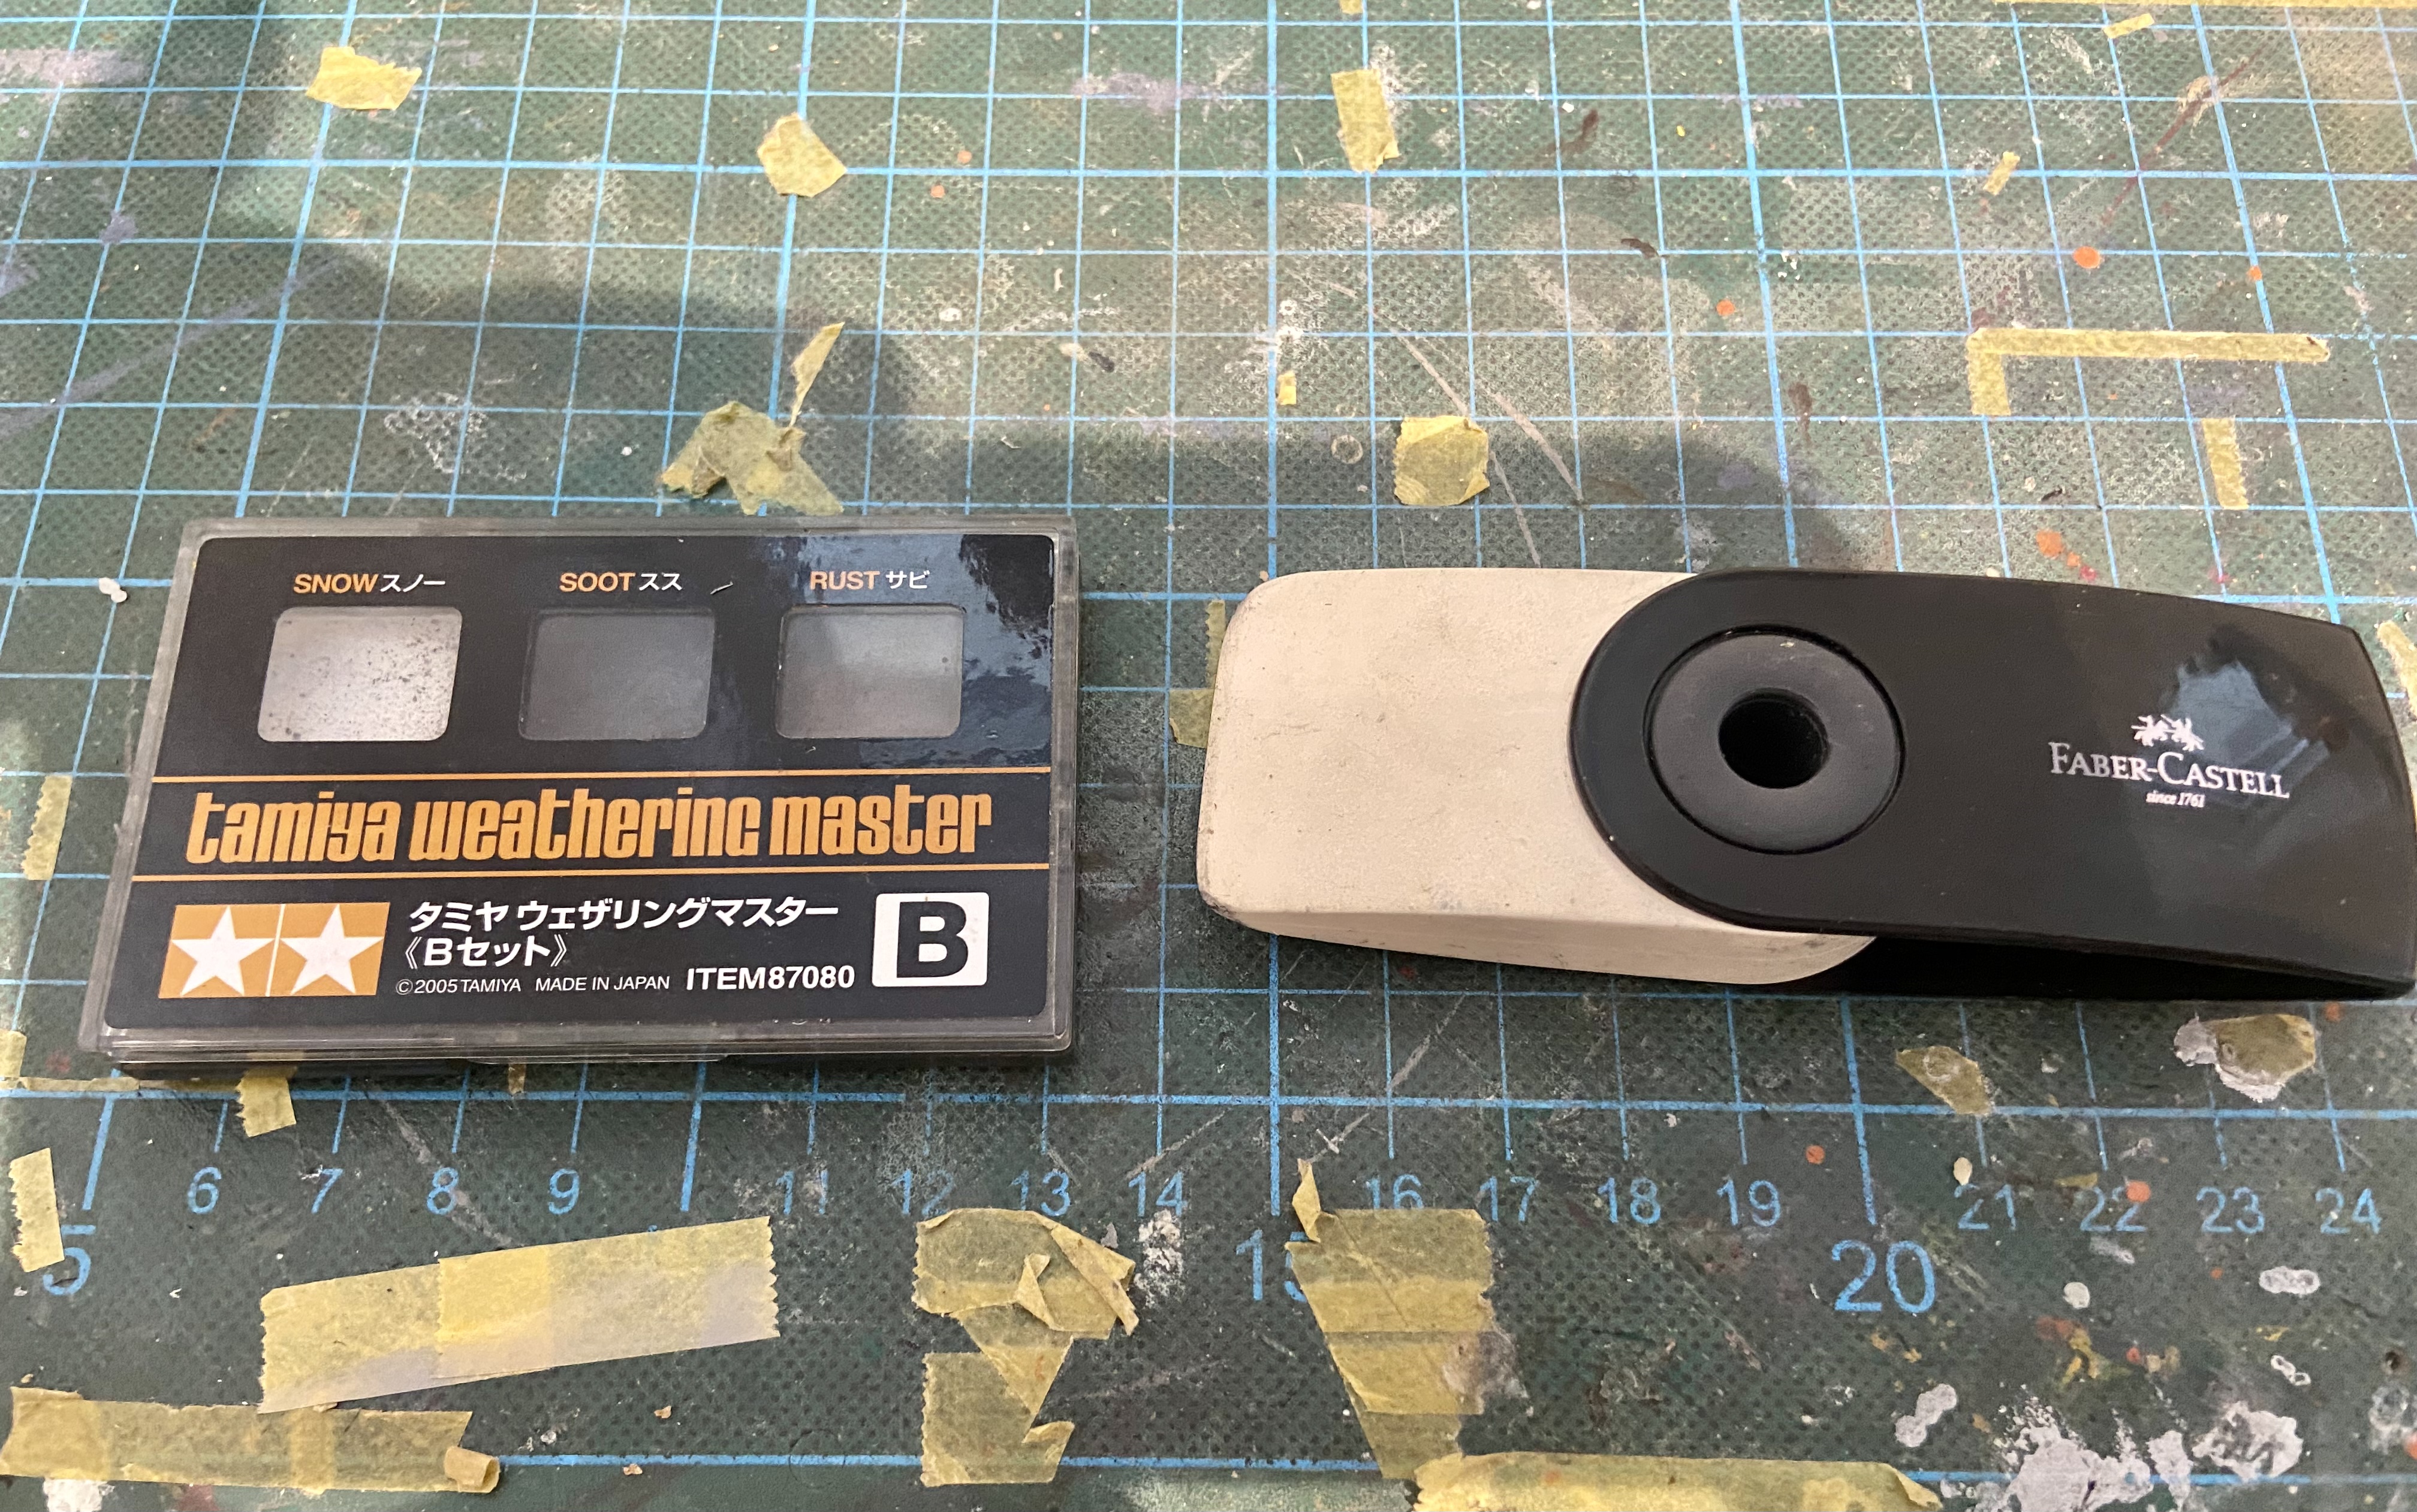
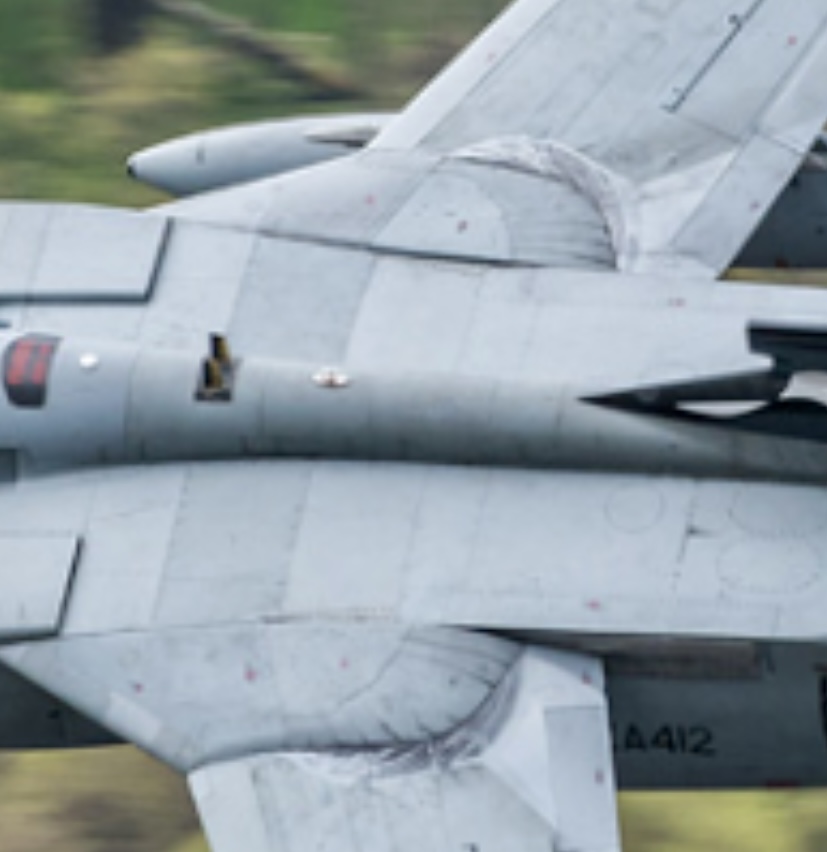
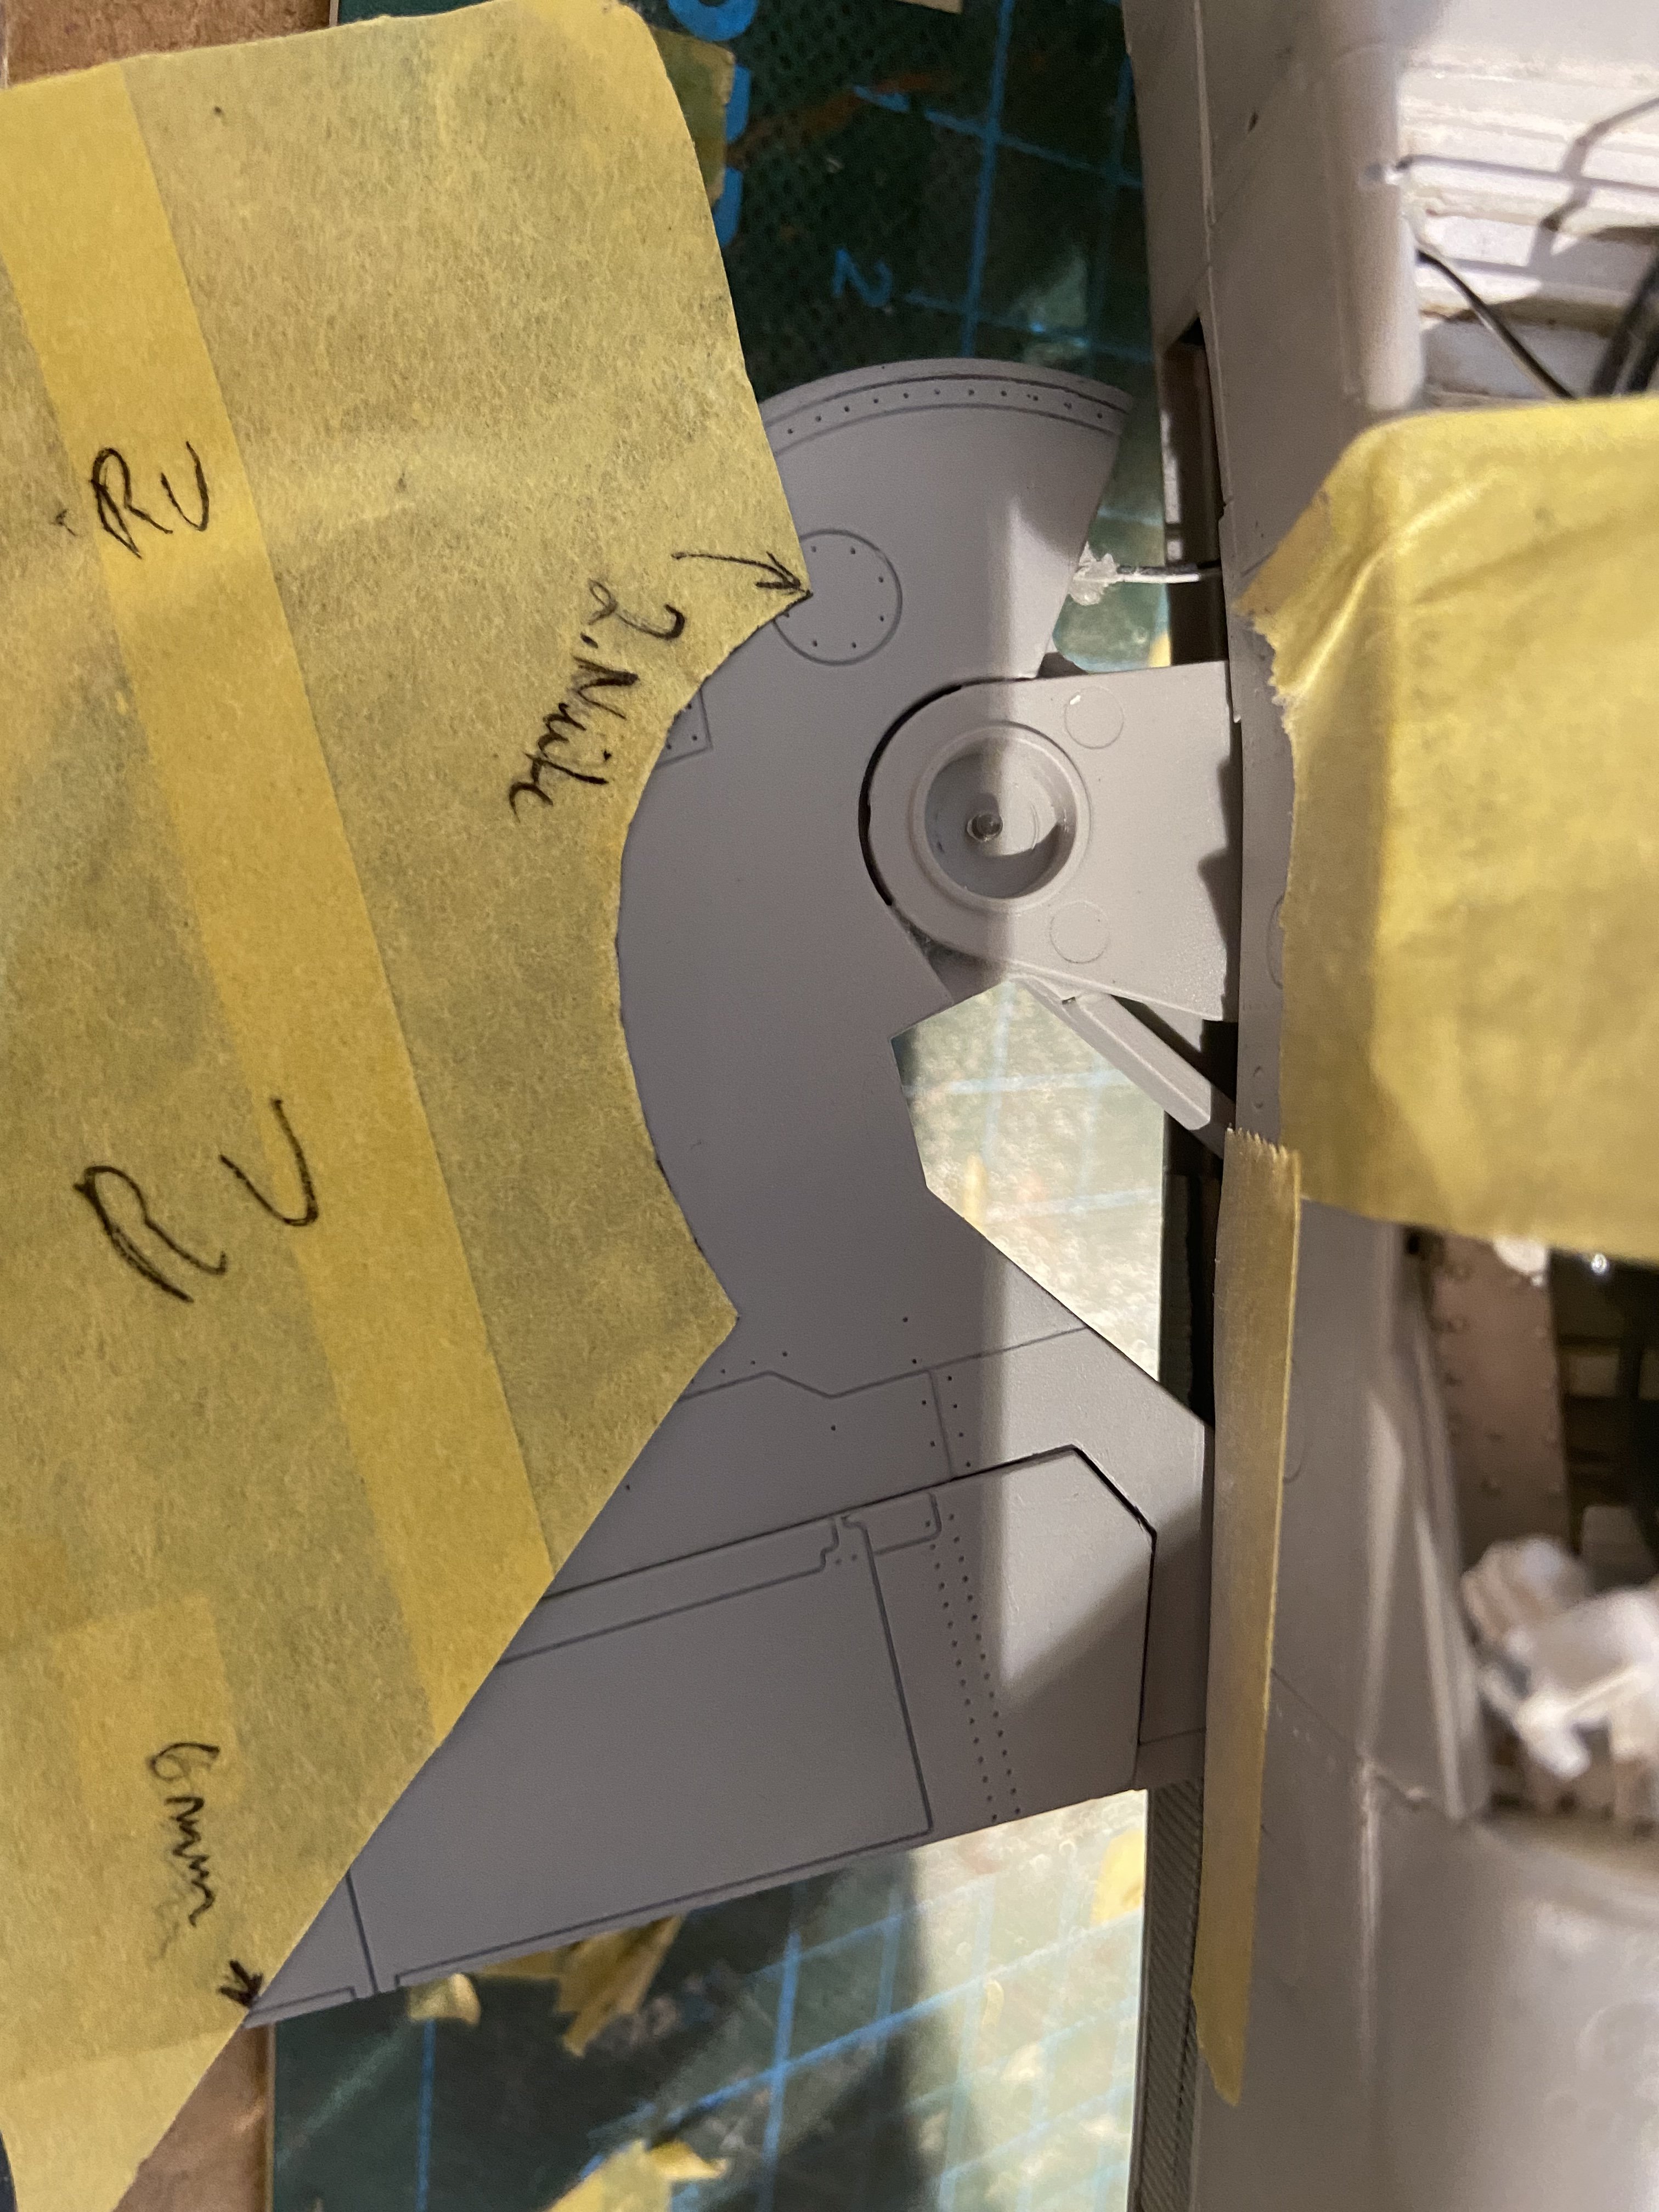
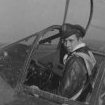
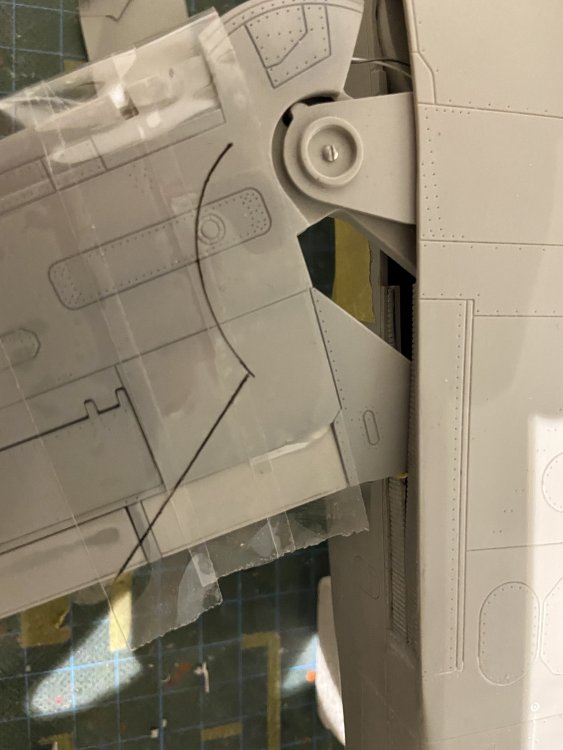
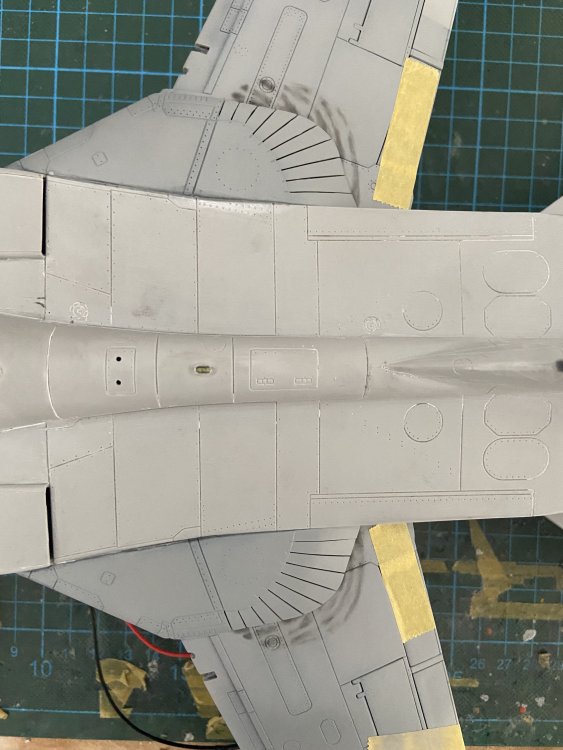
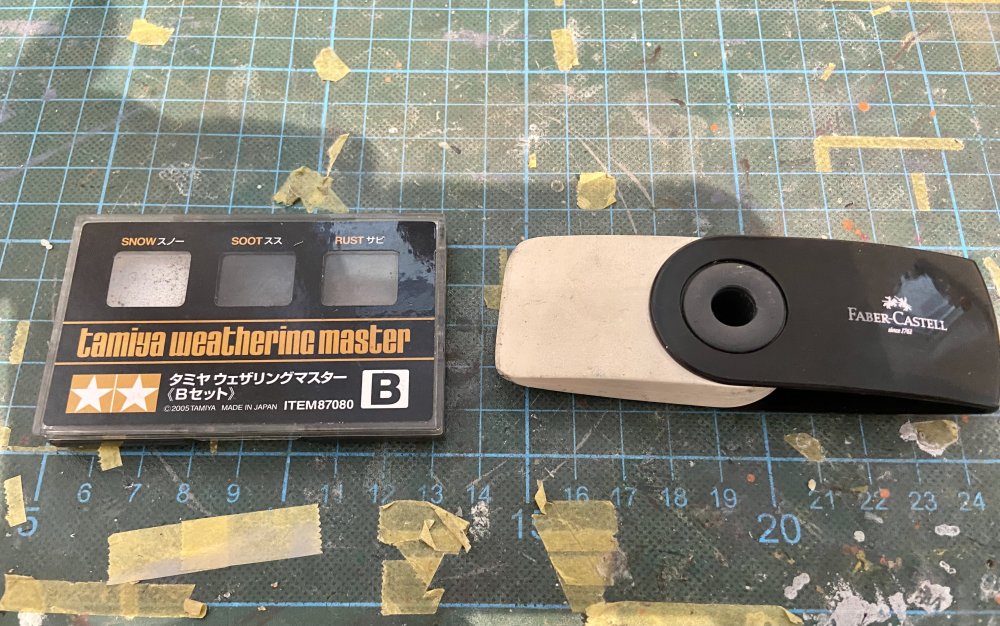
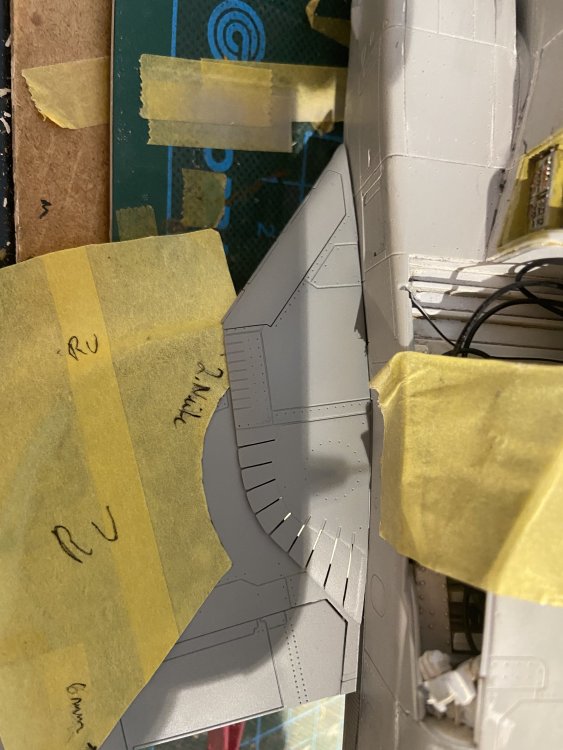
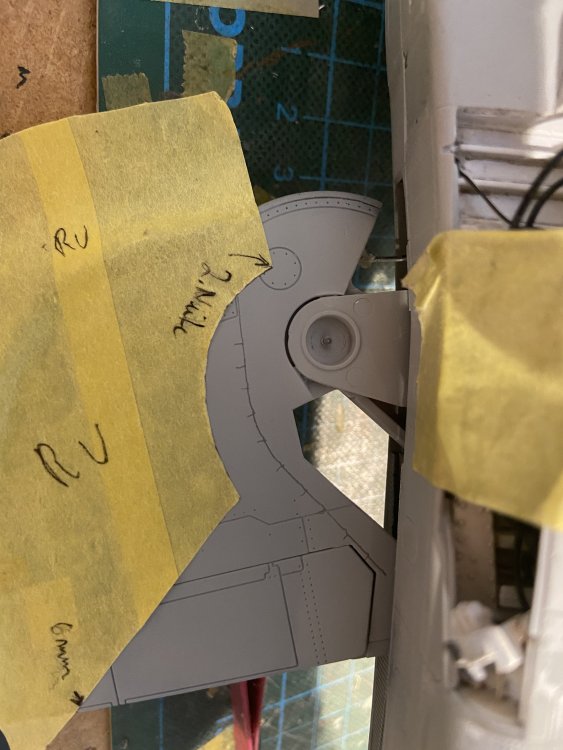
The area of the wing-sweep-mechanism had to be painted and weathered in advance since it’s not possible to reach all areas of it when the covers are attached. For this job I prepared some homemade masks for the sweep-area. I used fotos as reference. Then I started replicating the grinding marks in the wing pivot area by using the masks and a photo of this area of the aircraft I build. I used „soot“ of the Tamiya weatherine set applied with a reworked brush and an eraser. Repeated this on the undersides of the wing and then glued the covers in place. Making of the masks: Preparation for application of grinding marks: Guiding-lines applied with a pencil: That’s how they look like on the original plane: Things used for application: Applied before erasing: Finished result on the lower wings: And on the upper wings: Next step will be the priming of the rest of the plane.


-
Awesome looking Viggen, Mark! Can‘t wait to see her cross the finish-line!
-
Copy Peter, Harv! All the best for you and I wish you a fast recovery and return to the modeling bench!
-
Special Hobby Whirlwind
Kaireckstadt replied to Peterpools's topic in LSM 1/35 and Larger Work In Progress
Great build so far Peter and I’m sure you will manage to overcome all obstacles on the way to your next beauty. -
Tamiya Spitfire MK XVIe
Kaireckstadt replied to Peterpools's topic in LSM 1/35 and Larger Work In Progress
Copy Mark: she’s a stunning beauty and I love the weathering approach you chose.