Trigger
-
Posts
211 -
Joined
-
Last visited
Content Type
Profiles
Forums
Events
Gallery
Everything posted by Trigger
-
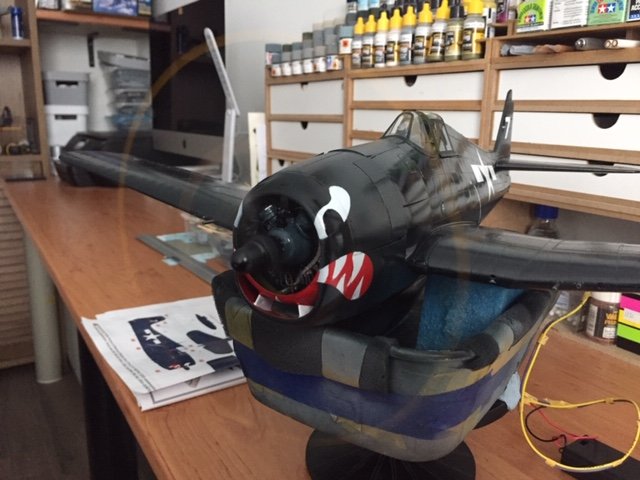
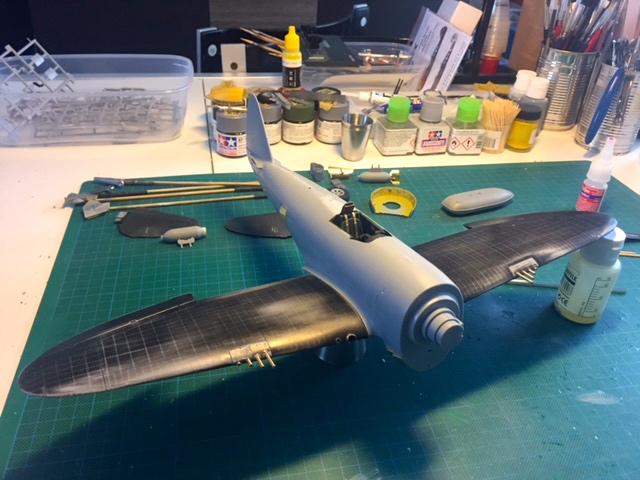
Just for the fun of it, I did install a prop motor in the Hellcat, it's going to be an "in flight" model, so I thought it was a nice feature........... I am now thinking how to get the wiring of the engine as invisible as possible through the display stand, need to get the balance right because it's a heavy cat, I might have to cancel the bellytank, because otherwise the model has the tendency to tip over to the front,..............to be continued, Frank
-
Thanks for the compliment, I've learned the most from the failures I've made, sometimes what I want or what I have in mind works and sometimes those projects are shelved when it just won't work, it's better to stop then and try again at a later stage, Cheers, Frank
-
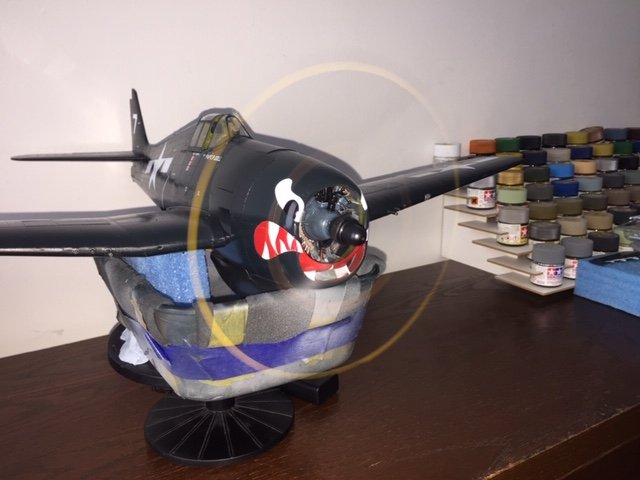
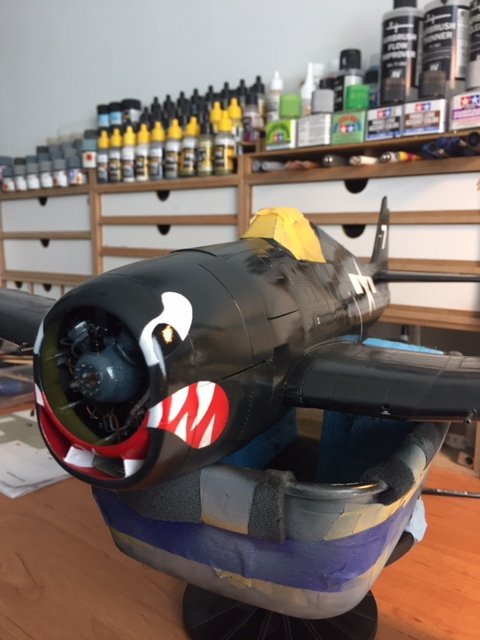
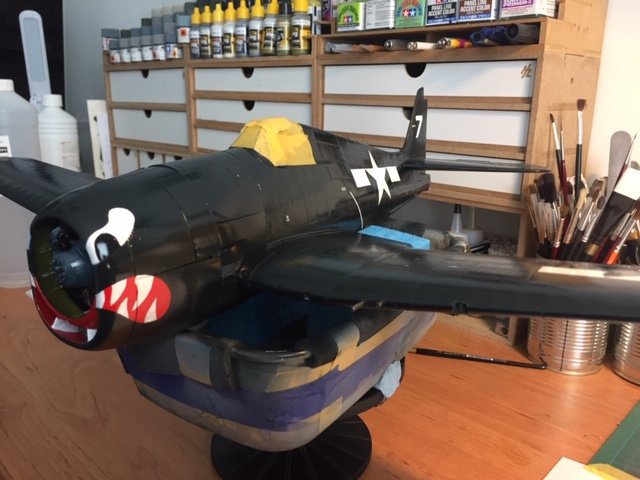
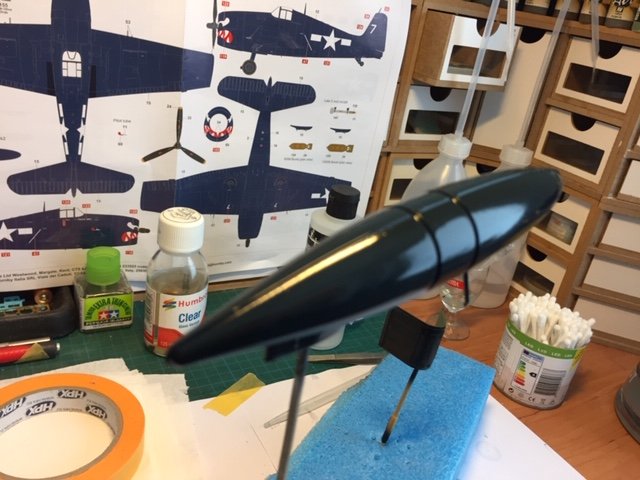
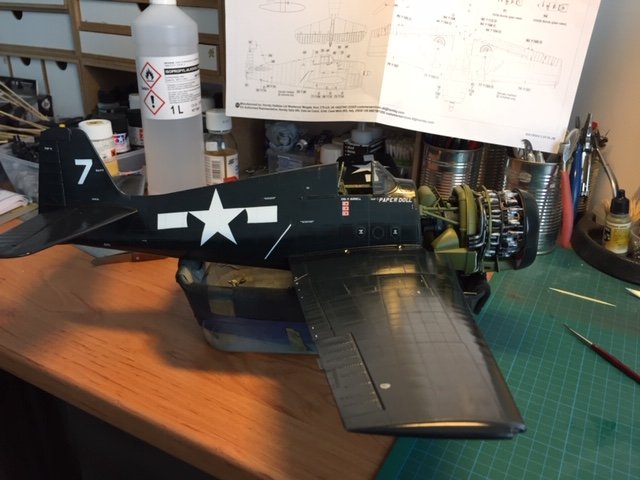
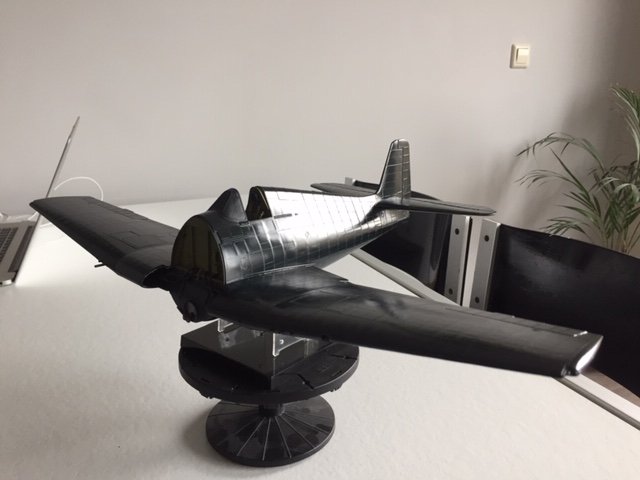
And now both sides are done and glosscoated........... Cheers, Frank
-
Hey Ron, I have build the typhoon myself, and as far is I know there weren't any mk1b typhoons with uncovered cannons, this was only featured on the car door version, later production models of the car door version had covered cannons. You can use the cannons for the Mossie, I think it's a real upgrade for the model since you can build the plane with the bomb bay open and then they are nice and visible. They will fit under the bottom plate, but then you can only see the very tip of the cannon, and I know that looks very good on the master set, a real upgrade of the plastic ones. So I would use them for the Mossie if I were you, Frank
- 1 reply
-
- 1
-

-
Looking great John, soon the only thing she will need is a pin up girl,........................ cheers, Frank
-
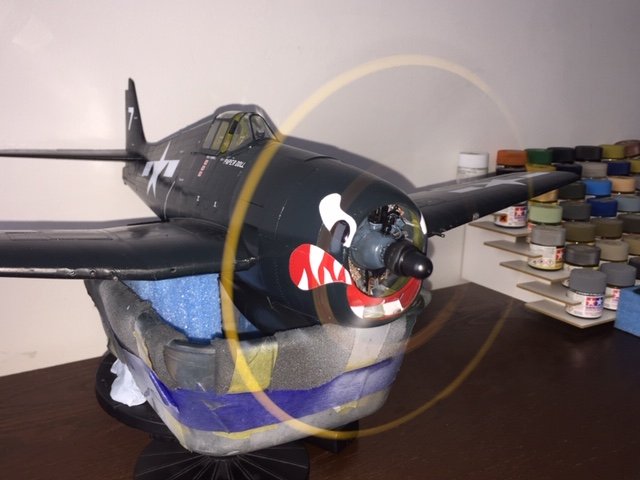
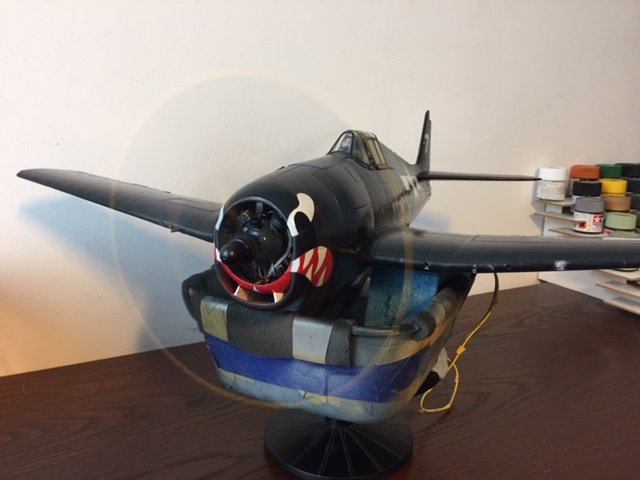
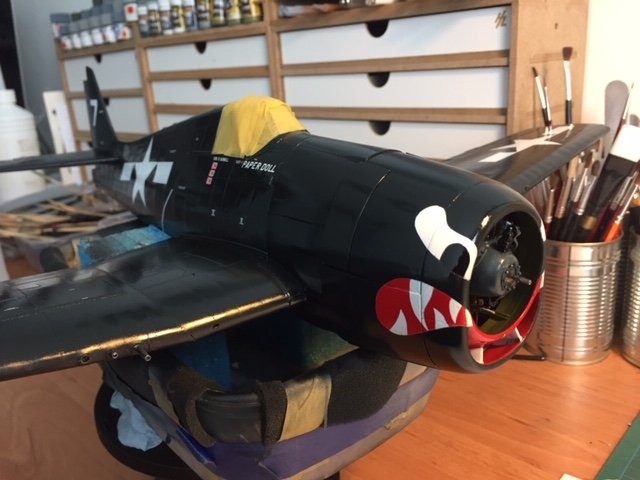
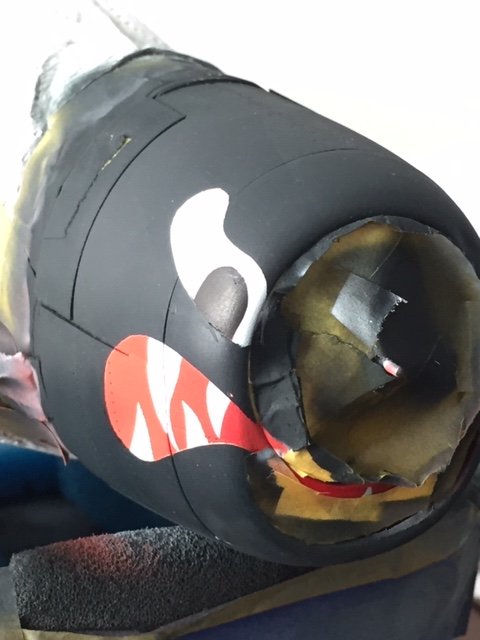
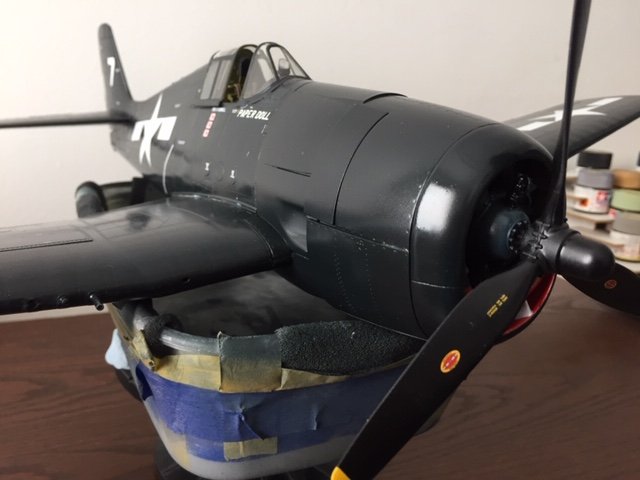
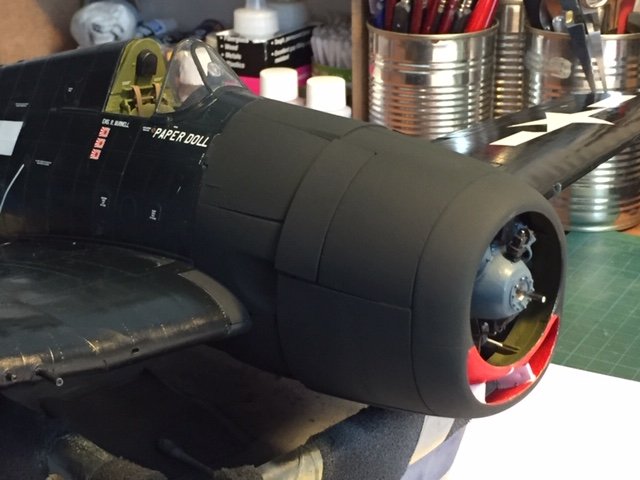
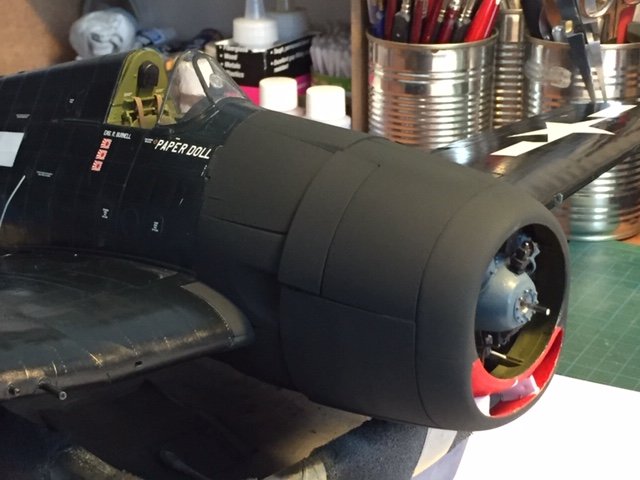
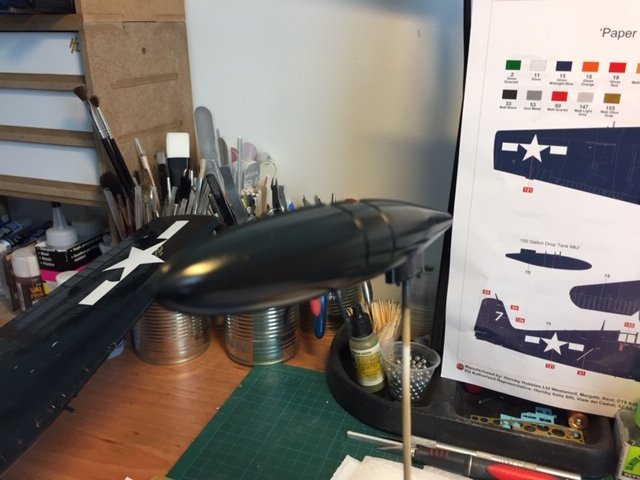
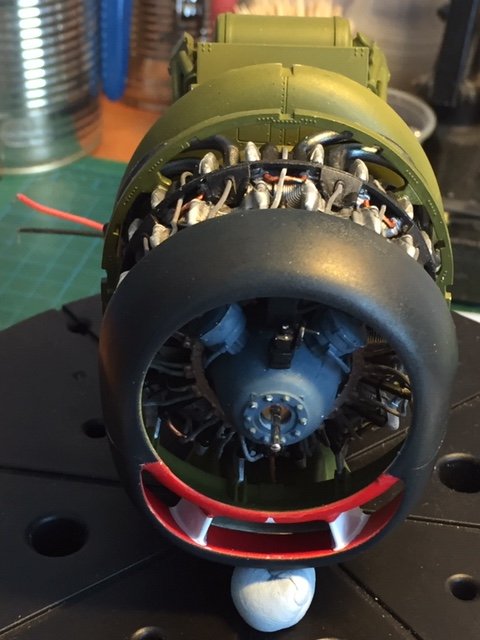
Just finished spraying the sharkmouth on the starboard side of the Hellcat, when that's dry I'll finish it with a clear gloss coat, so then it will stand out better I have to do some touch up work, but then they will look fantastic under a gloss clear coat...

-
I hate decals too, and you are right, I should slow down. I always use masks, and because I was placing decals anyway I thought I'd have a go with the shark mouth, needless to say, NEVER AGAIN......, they are just to big and the curves of the cowling are too great to get them right, and I didn't like the end result so i started masking again as I should have done in the first place, thanks for the comment, Frank
-
That's okay Sheldon.....
-
How to do the P &W R-2800-10W in the Airfix kit part 2
Trigger replied to CrankyCrafstman's topic in Modelling Discussion
Hello Ron, I've made the same mistake, but if you really look carefully at the drawing from Airfix then they are pictured with the bow down, only when you put them on the engine it doesn't "feel" right, so i mounted them also bow up, and then indeed it's a pain in the **ss to get part J2 to slide over them, I was to late to correct it, and my build is an in flight model so it really doesn't matter for me. Following your build, it will be a beauty when finished, Frank -
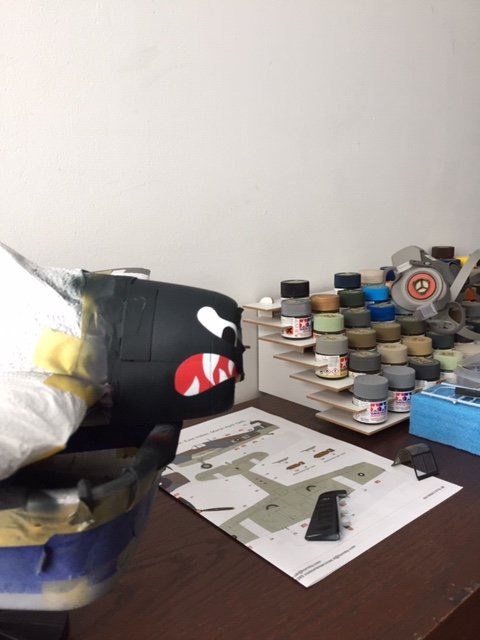
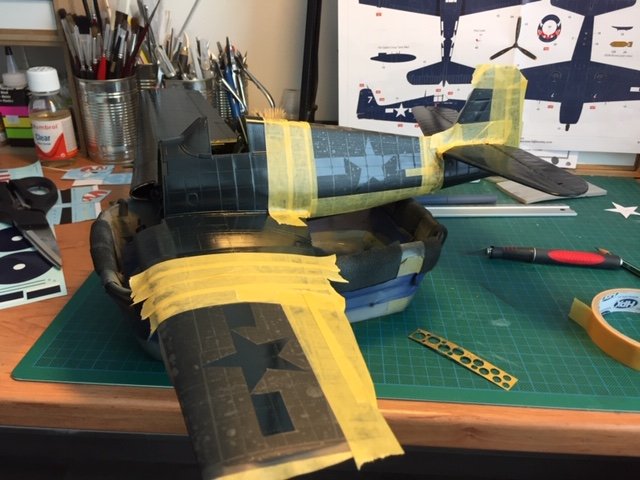
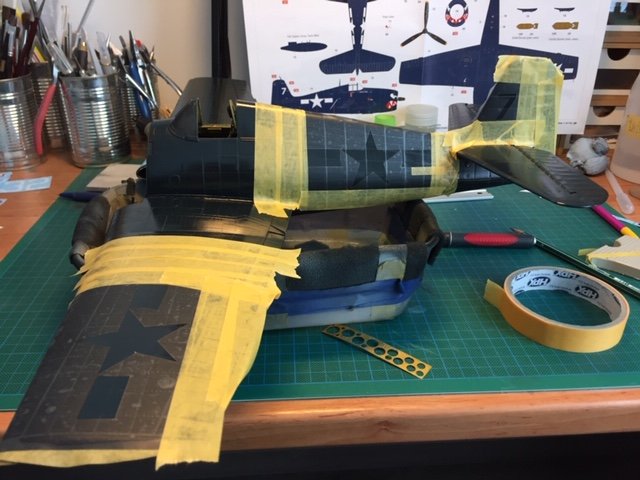
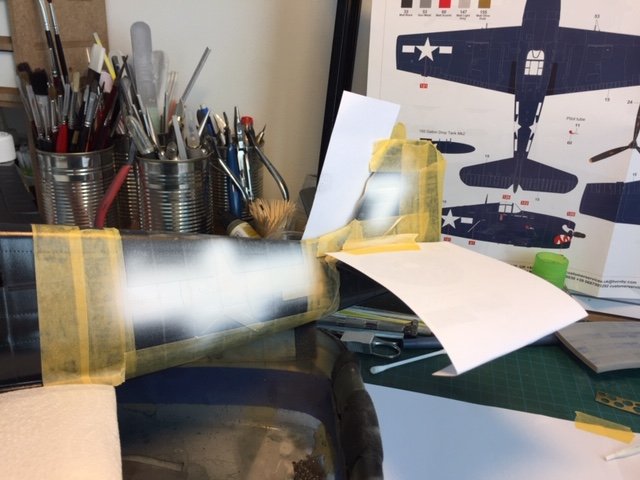
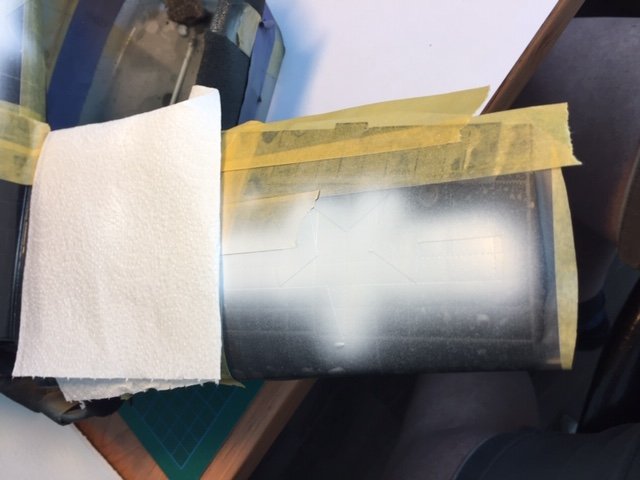
After a gloss coat on the engine cowlings I decided to start with the decals with the shark mouth , the idea was to get them on and then give them a clear coat to seal them in. I just couldn't get the decals to form along the panel lines, and the engine cowling witch has a pretty round curve, the damned things just wrinkled, and I couldn't get them right no matter how much micro sol and set I used. second little disaster was that because of the use of microset I got all kinds of stains in the paint (grrrr). My own stupid mistake, (trying too fast on paint that hasn't fully hardened yet). Before placing the decals I allready had made some masks using the decals as a template, so now I will be spraying them on. All in all much more work, but it will certainly come out a lot nicer, (no wrinkles or panel lines shining through the decal), so here are some pics with minor progress, And here the decals after removal, they just wouldn't follow the curves of the paneling properly....., so made some masks.... When that's dry I can fill in the red color, we'll see how that goes..........
-
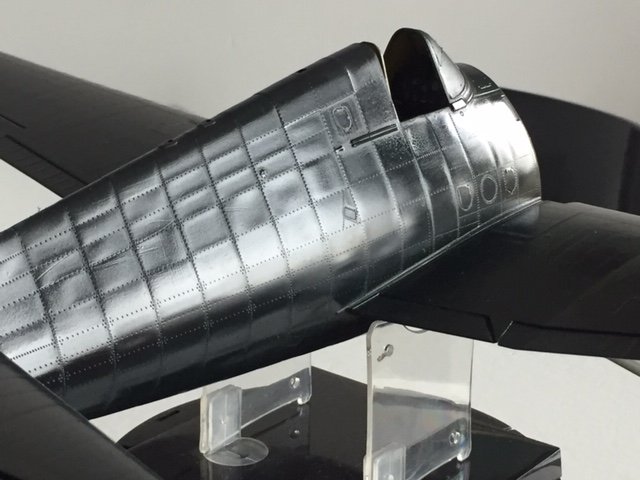
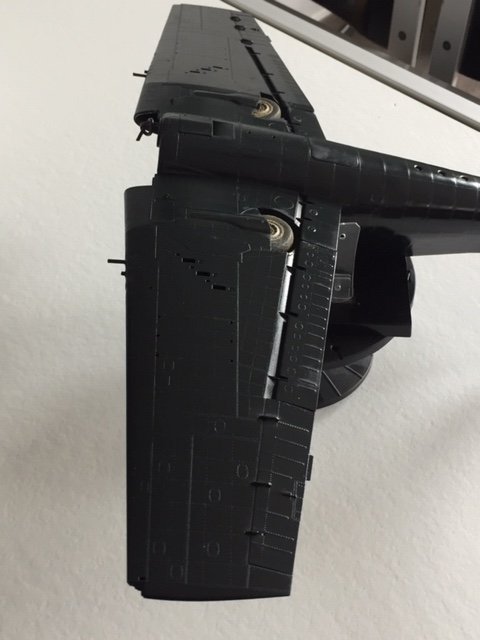
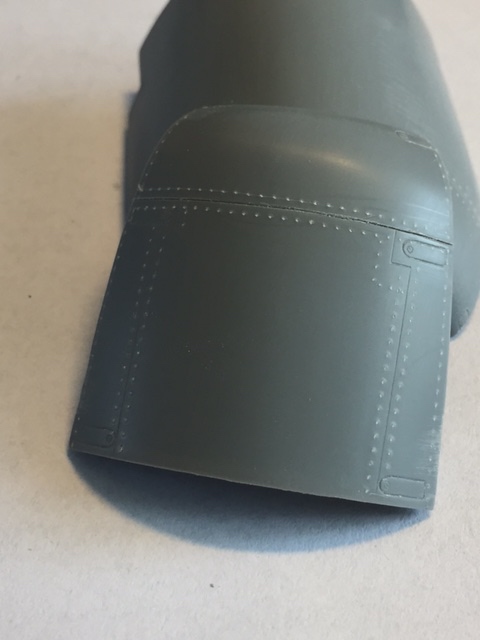
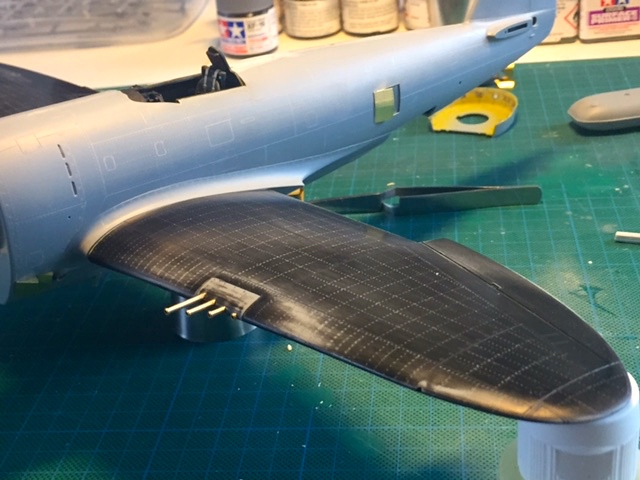
Here are some pics of the progress of the engine panelling, I started out with Tamiya Matt sea blue, and when that was dry I gave it a gloss coat, and then the color really comes to life, see for yourself, And some loose parts, bellytank and cockpit

-
Hello Phil, Yes I' am going to do that, exhaust stains, sunfading etcetera, it will be a challenge not to make that to heavy, I like the looks of the glossy sea blue I must say, and I don't want to ruin that to much by excessive weathering. Frank
-
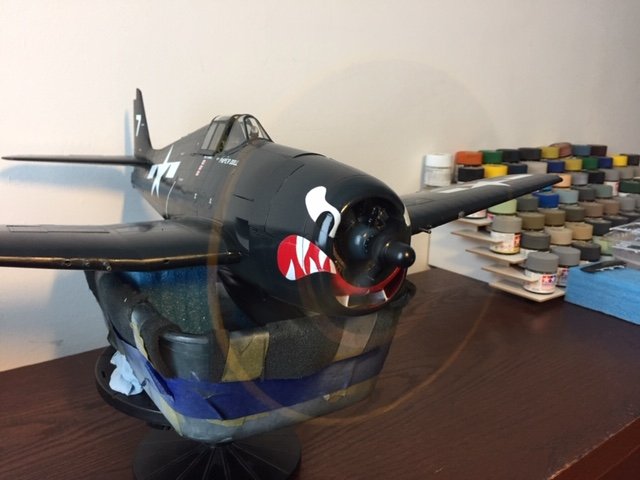
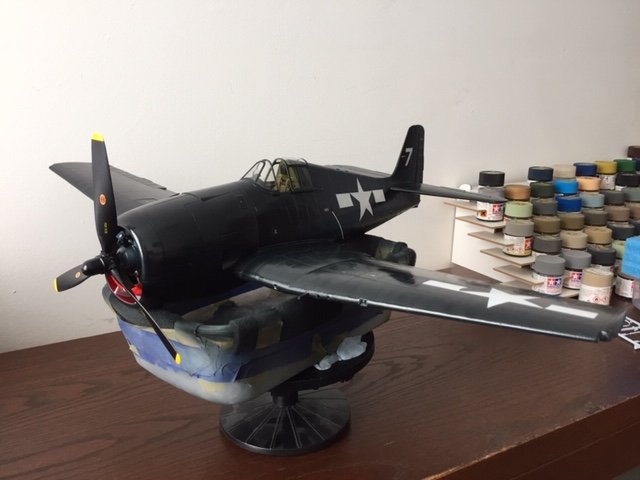
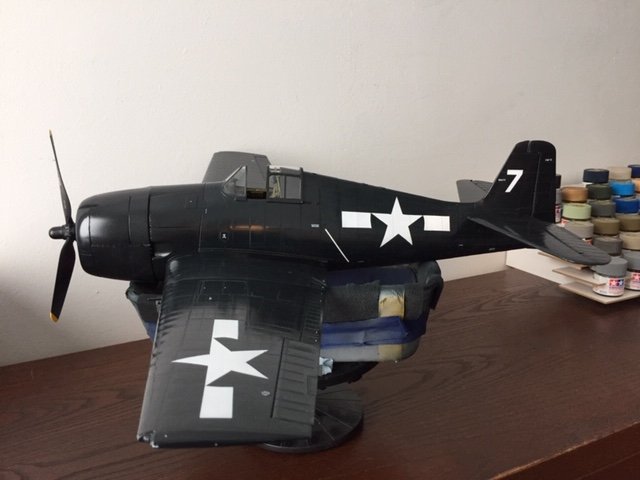
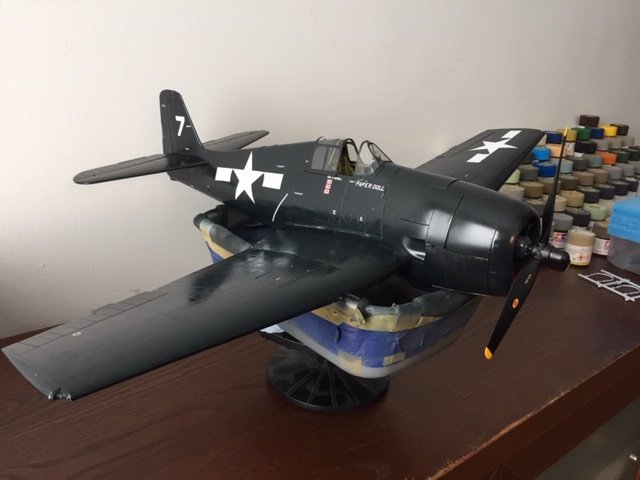
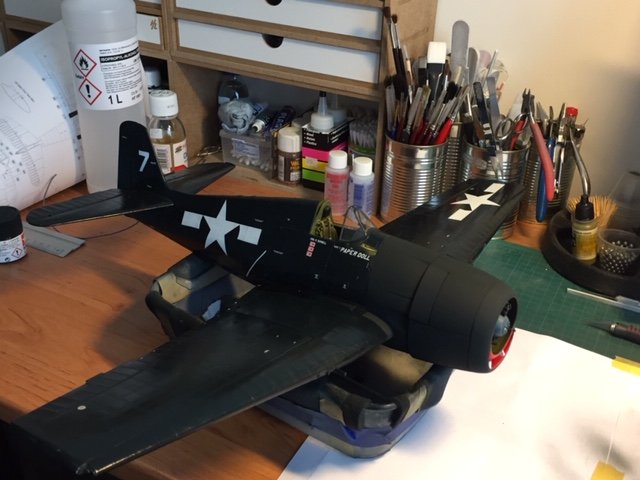
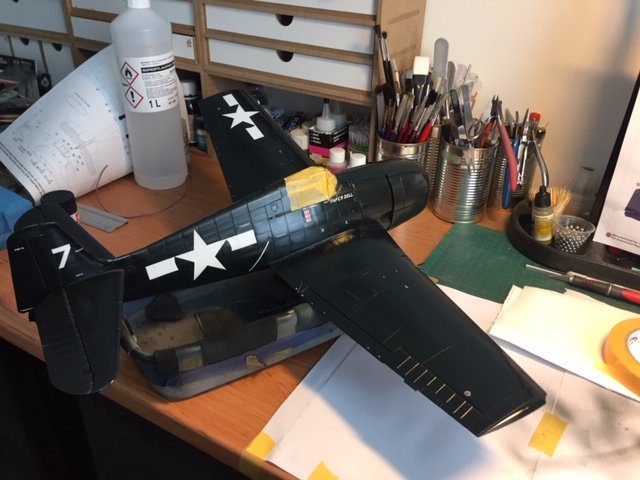
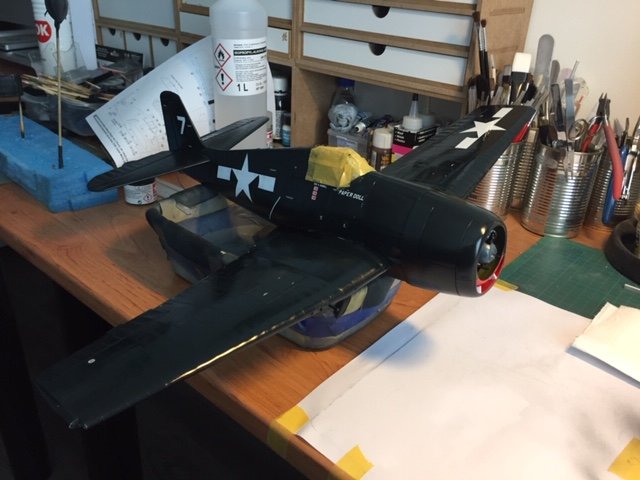
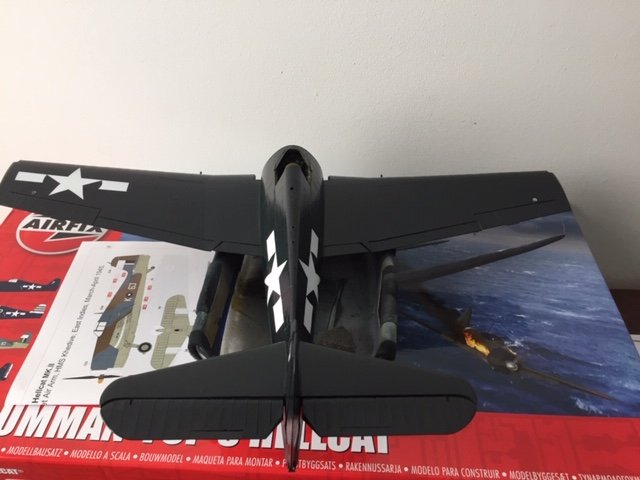
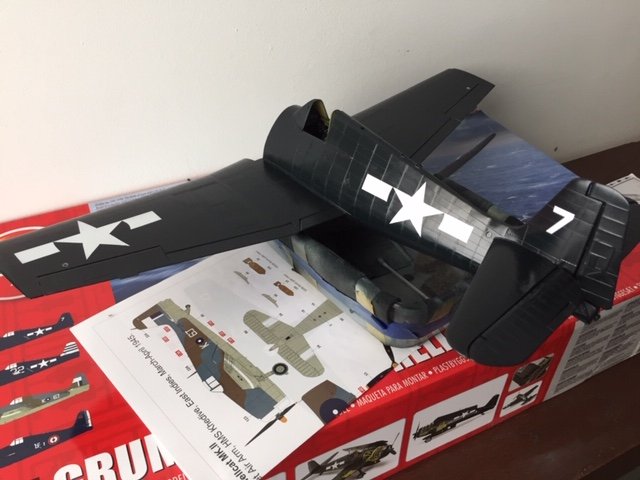
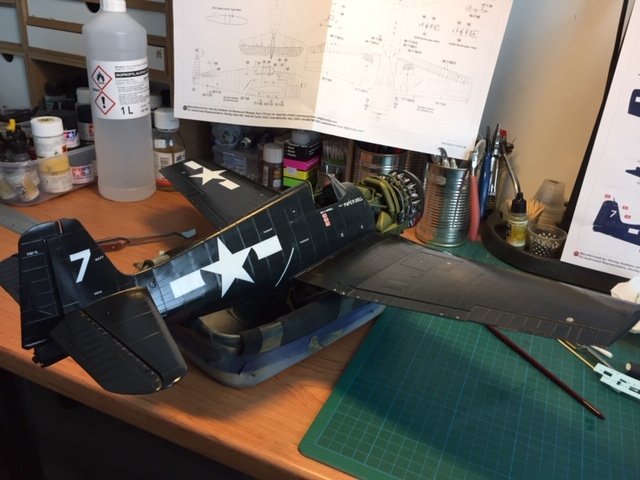
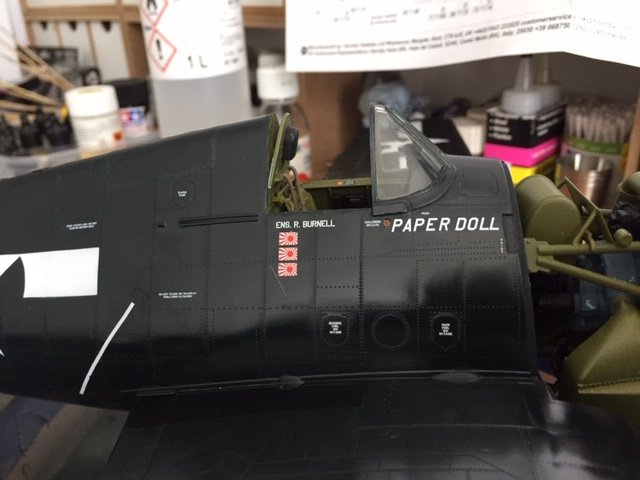
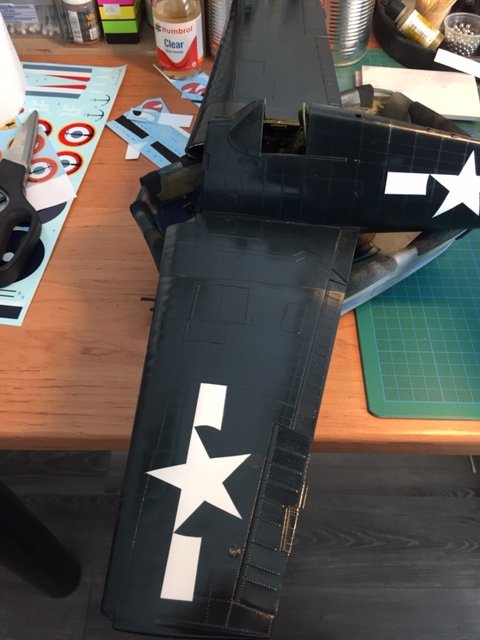
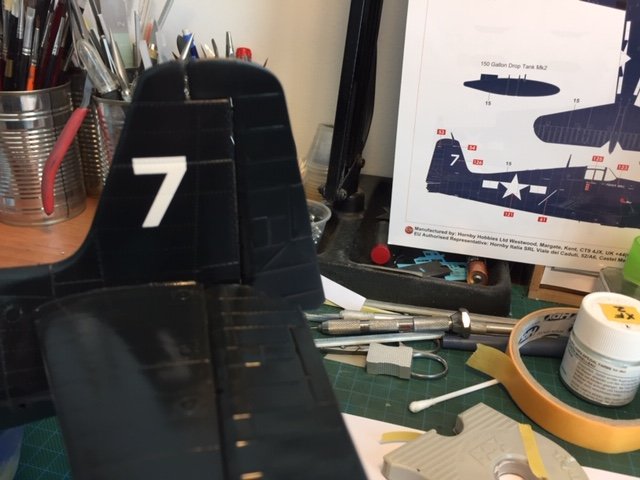
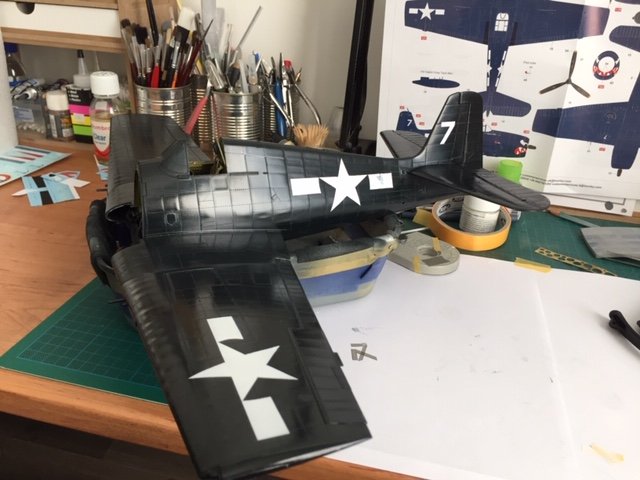
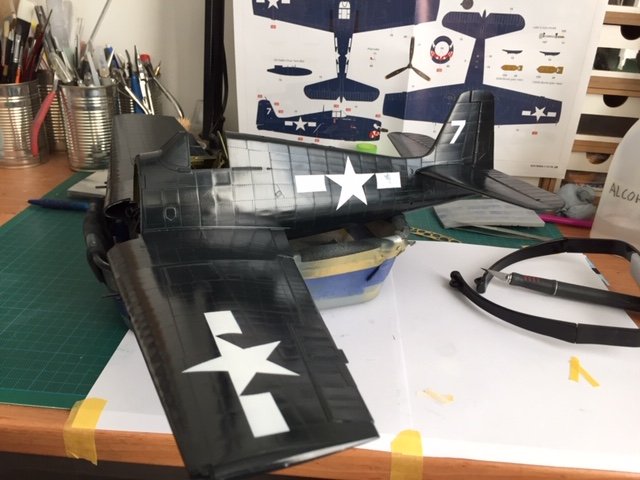
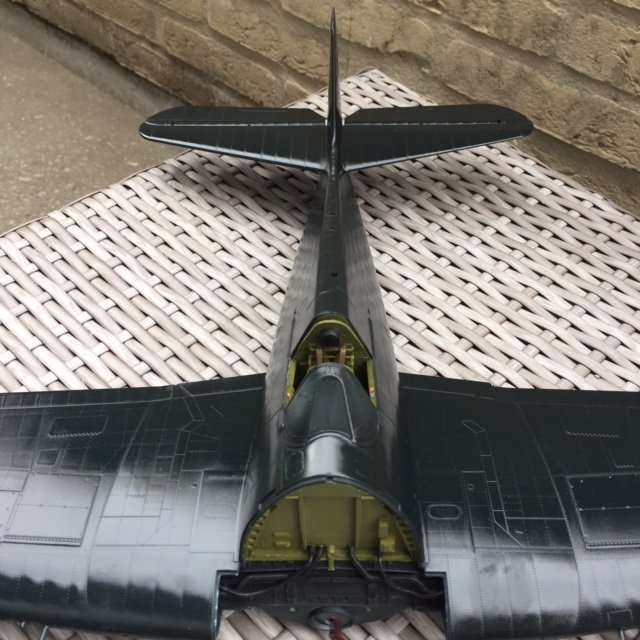
Well, I have corrected the insignia on the left side of the plane, resprayed it, and now it came out fine, have sprayed the other insignia as well on the sides and the top half of the Hellcat, need to to do the bottom of the aircraft. I couldn't resist tot start with the decals, cost me Half a day to get them on only on the top and sides of the aircraft, need to do the bottom half still. Sprayed the engine covers in Gloss Sea Blue, those are drying now, so I act start fitting them tomorrow and put on the decals. So here's where i'am at...... Decals on........... Painted the engine covers and the centerline fuel tank................ So this is all for today, see you all next time, and thanks for all the thumbs up, keeps the motivation going, Frank
-
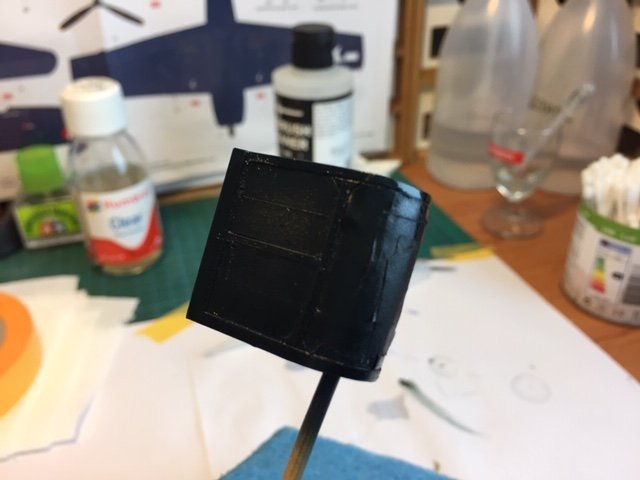
Well, got some work done, made masks myself with the decal sheet as a template, and then got some paint on, the bar next to the American star on the starboard side didn't go very well, the paint just wouldn't stick, probably made a mistake or didn't degrease it good enough before painting, well I will let it dry for the moment and correct it tomorrow. Here are some pics, and the f**ck up with the mask........, will be correcting this tomorrow,

-
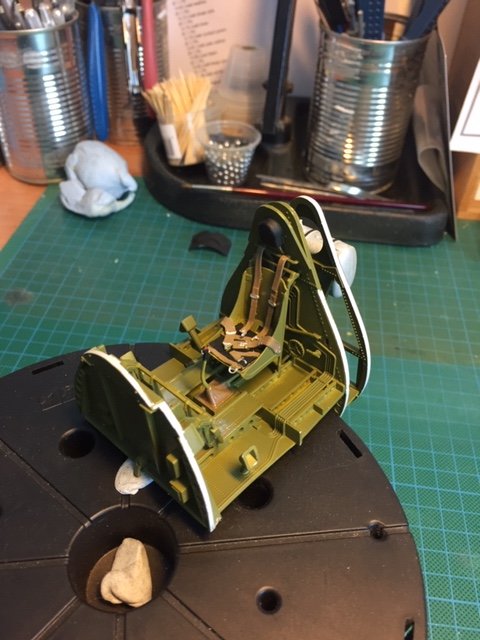
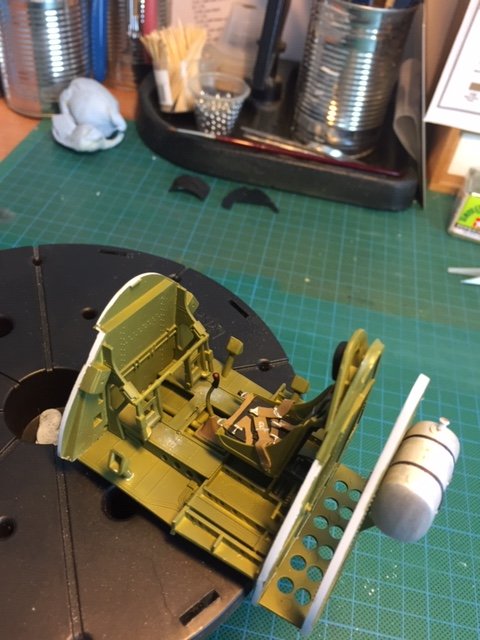
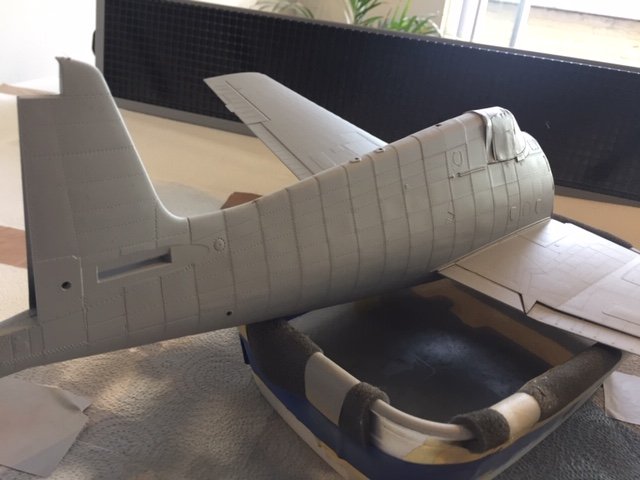
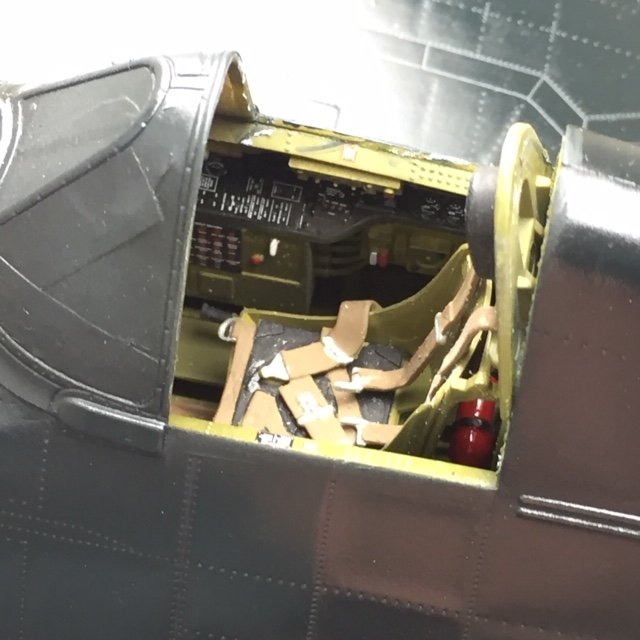
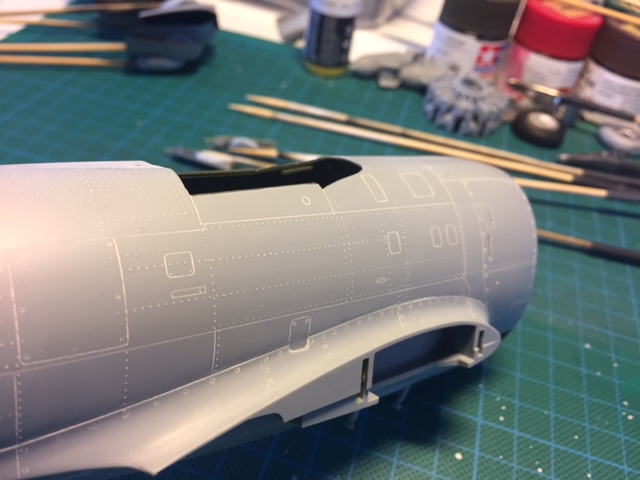
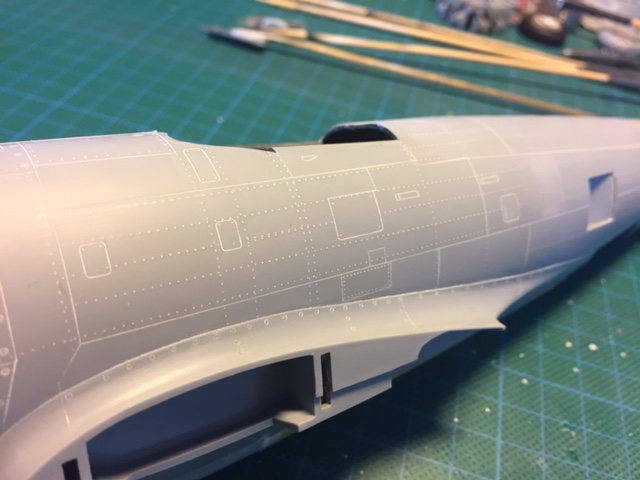
Assembled the wings and the fuselage and cockpit. Gave the fuselage and wings a coat of Tamiya grey primer because I think that the surface texture of the model is a bit "rough" , I am afraid that when I put the color on if left untreated, the surface texture wouldn't be smooth enough. Carefully sanded the primer as not to ruin the detailing of the fuselage and wings. Used 6000 grid sanding paper and after that a rub down with a fine micro mesh cloth, the model now feels much smoother. Masked everything for painting. Wings assembled.... Ready for primer...... And then the color,.............. I first tried mr color 71 gloss, but I couldn't get the result I wanted, so I switched to Tamiya XF17 Matt finish and gave it a gloss clear coat. That came out better. Needles to say is that everything you have done wrong now pops up, I've got a few scratch marks from sanding that I didn't see on the starboard fuselage that are now staring right in my face, aargh. I hope that when I spray the markings on some of them will be less visible, also need to tone down the gloss coat here and there when I start weathering the plane. Couldn't resist test fitting the engine...............what a beast! that's all for now, Frank


-
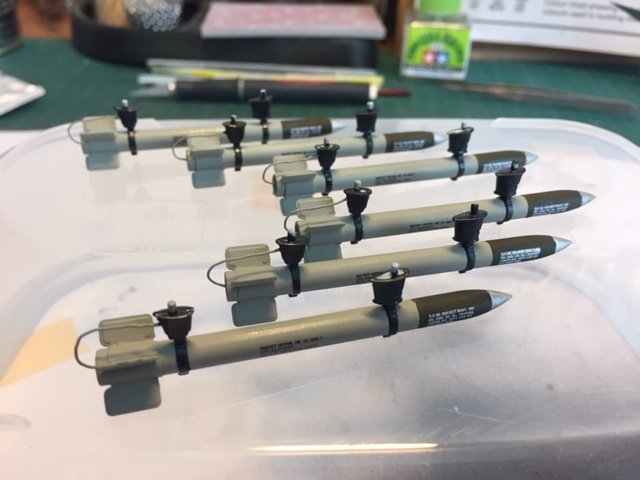
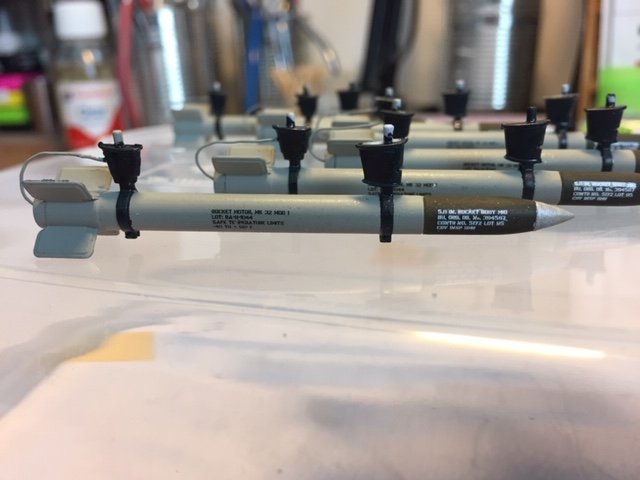
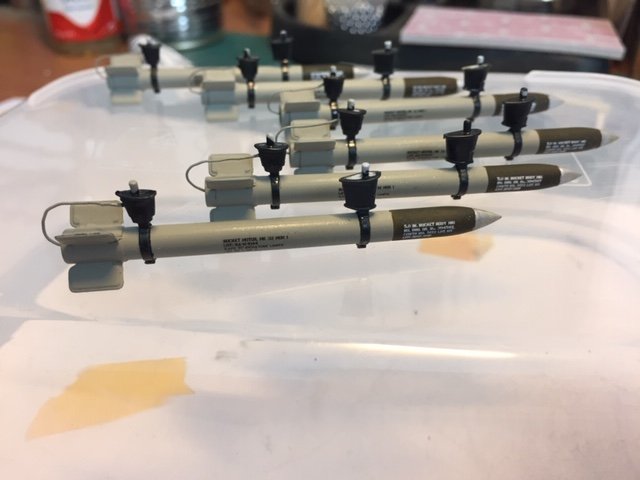
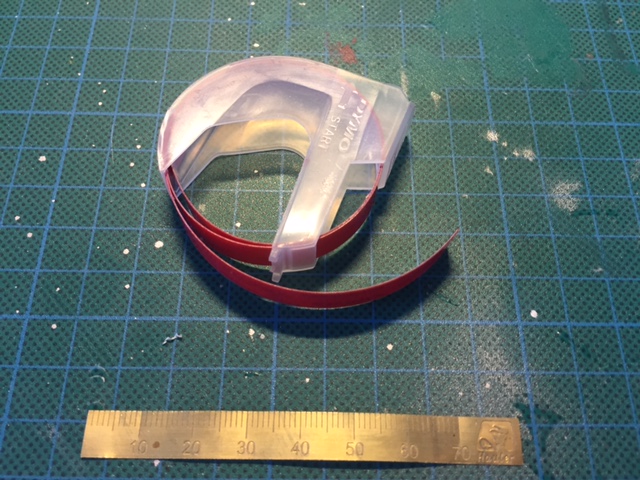
Have been busy with a "sub" build, the HVAR rockets Only added ignition wires as en extra, tomorrow the fuselage and cockpit
-
Thanks for the comment Ron, my guideline was the Airfix manual that says otherwise, but they got the color of the crankcase wrong too, so I was just in time to correct that, it's now no longer possible to correct this one. Saw your build of the P&W engine, that's looking great, love the braided hoses, looks like the real thing! Will be watching your progress, Greetz, Frank
-
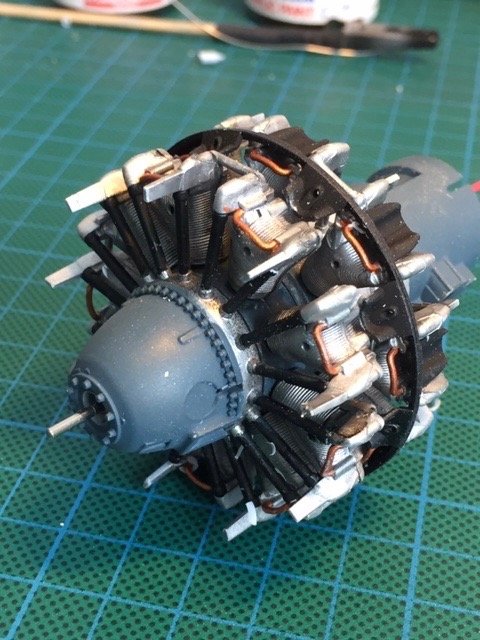
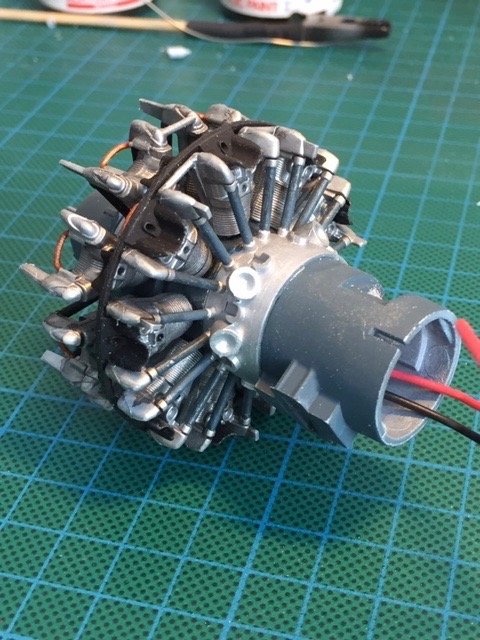
Hello rob, thanks for the comment, you have to make the ignition wires yourself from 0,7mm lead wire or copper wire, Frank
-
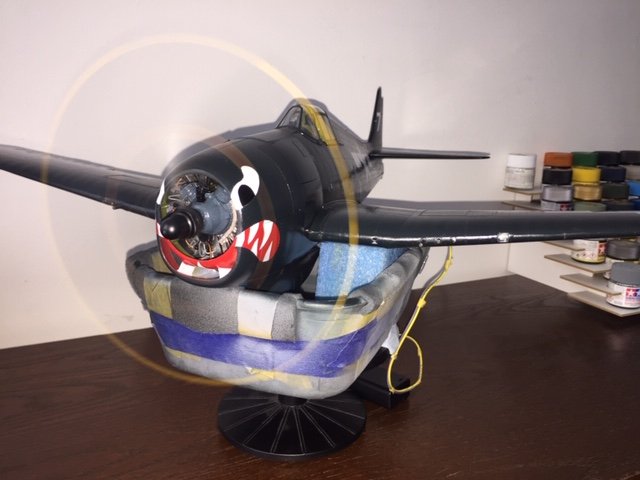
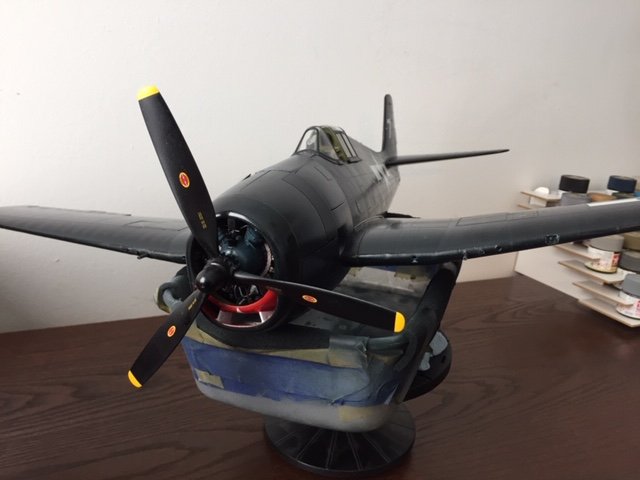
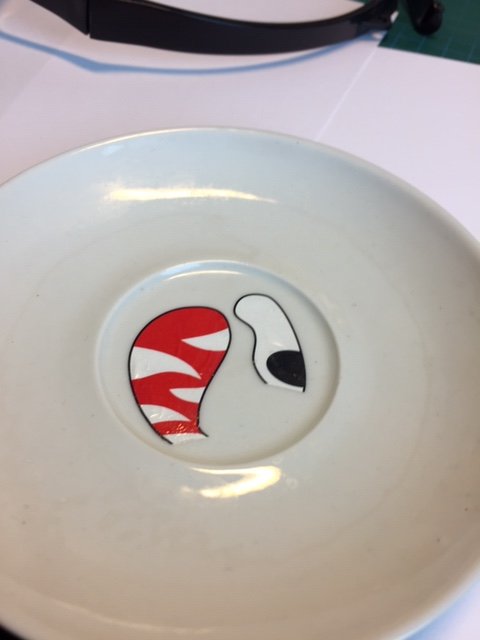
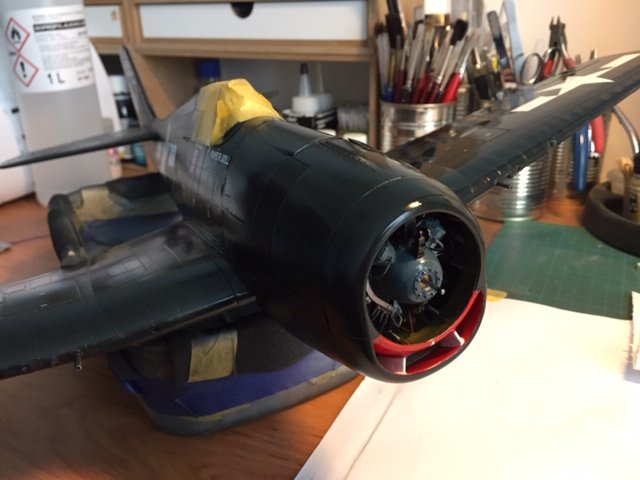
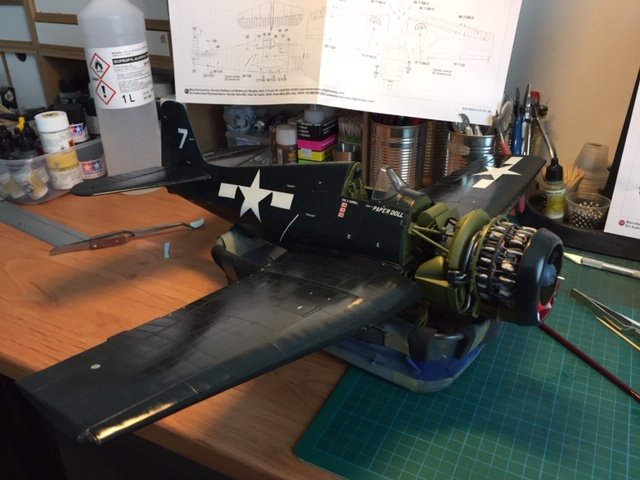
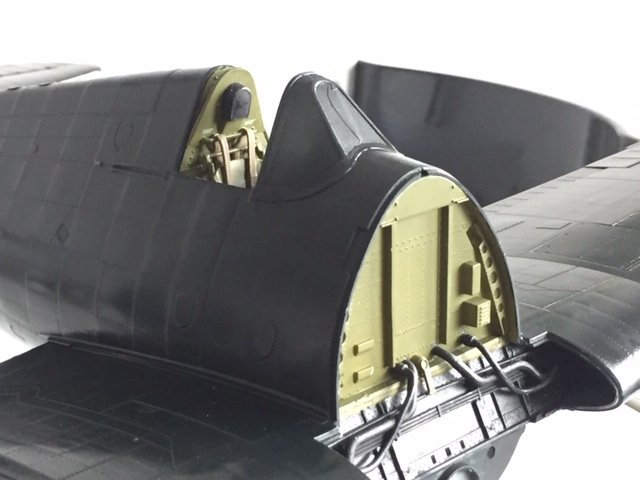
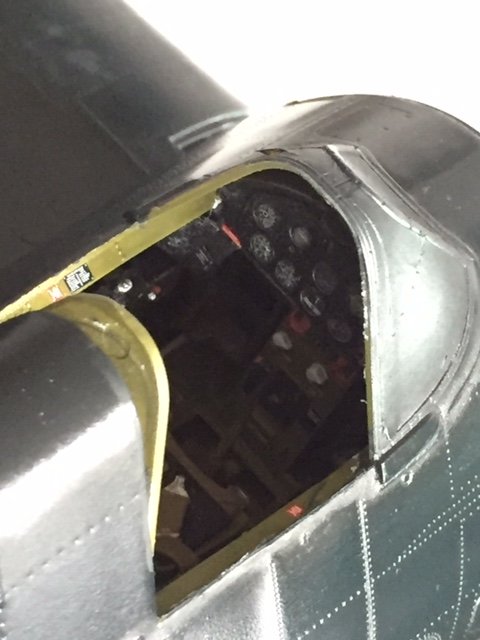
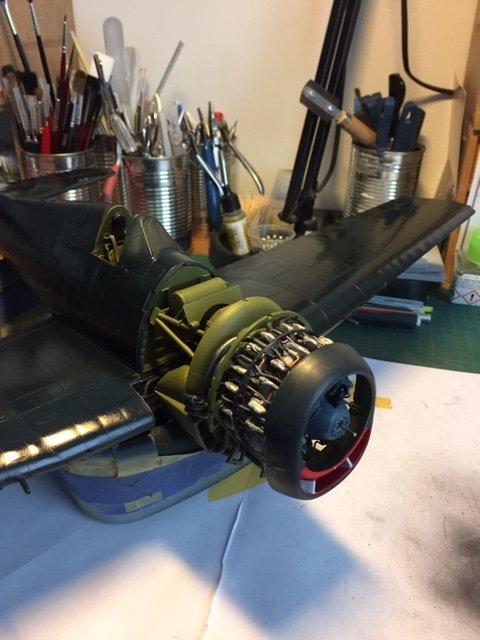
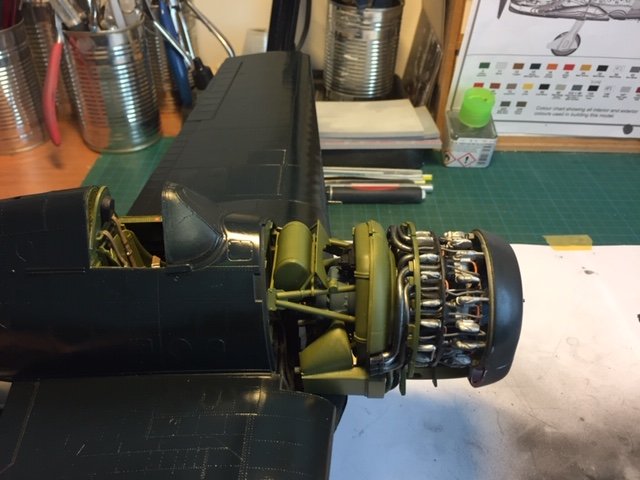
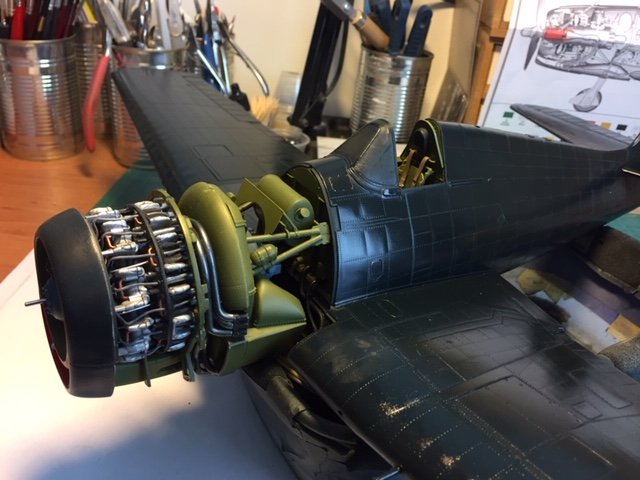
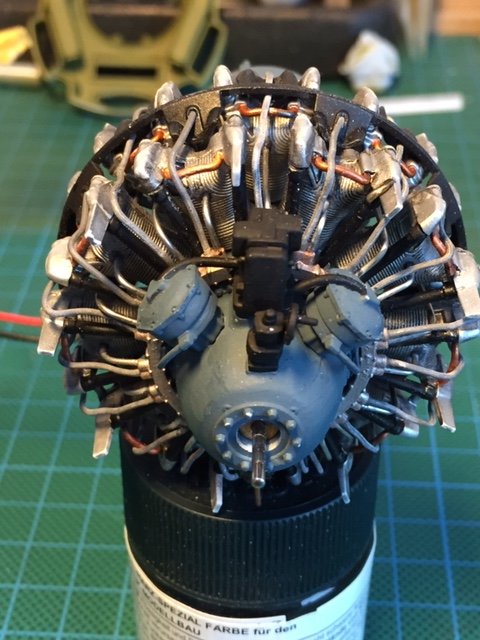
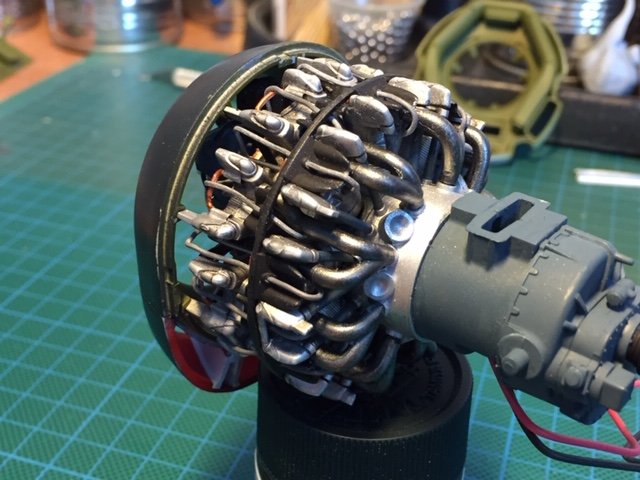
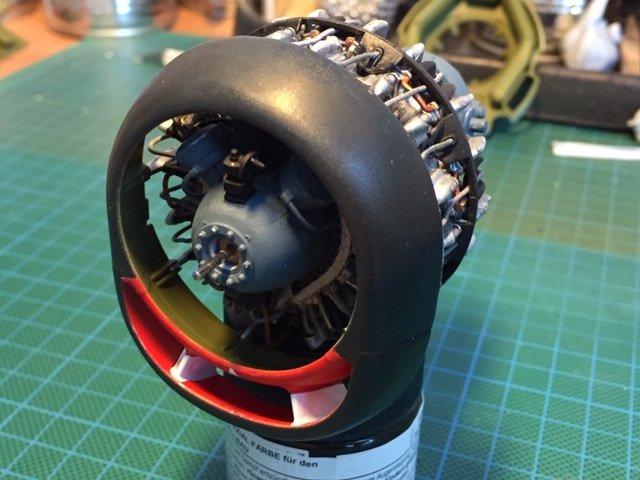
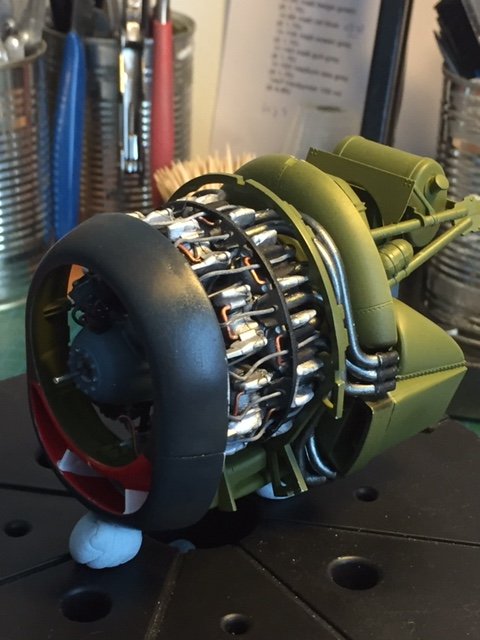
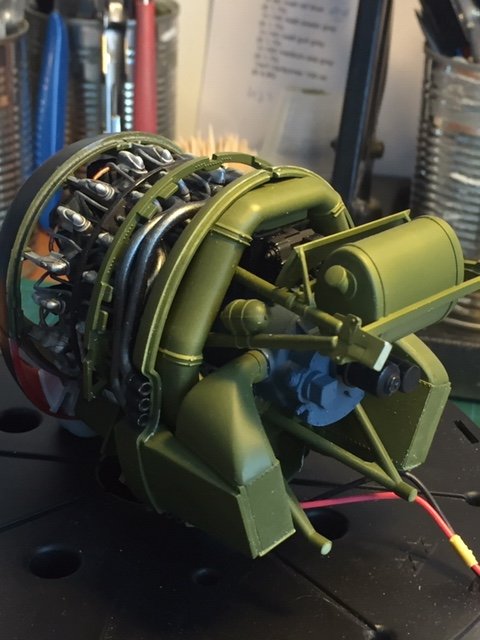
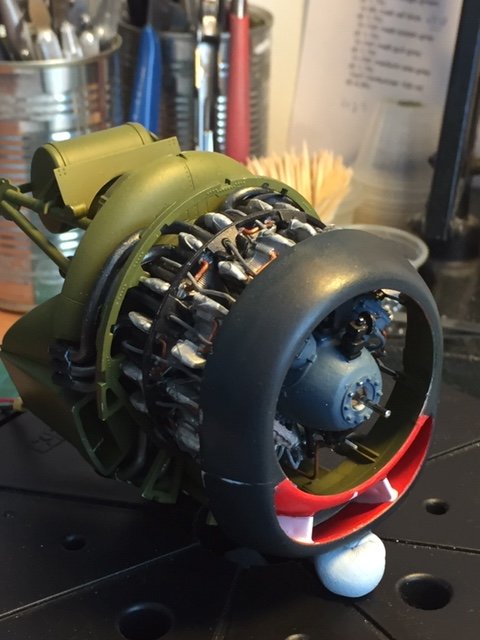
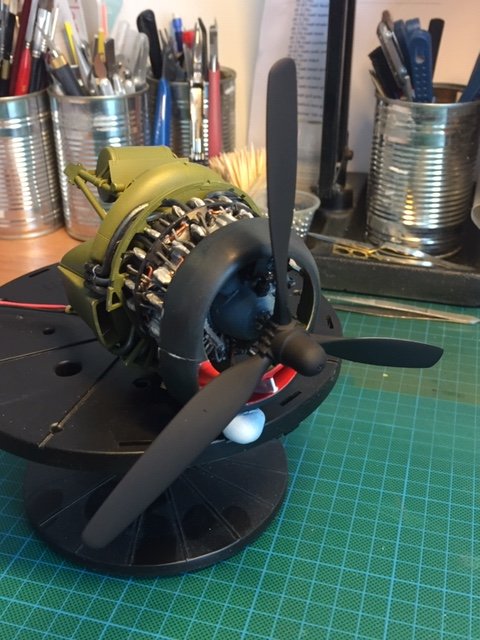
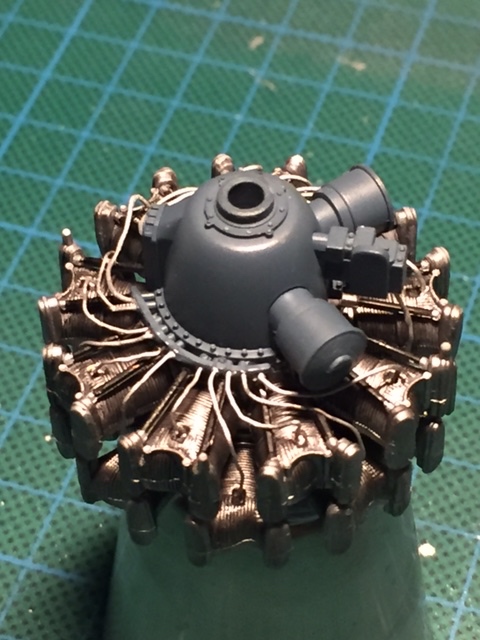
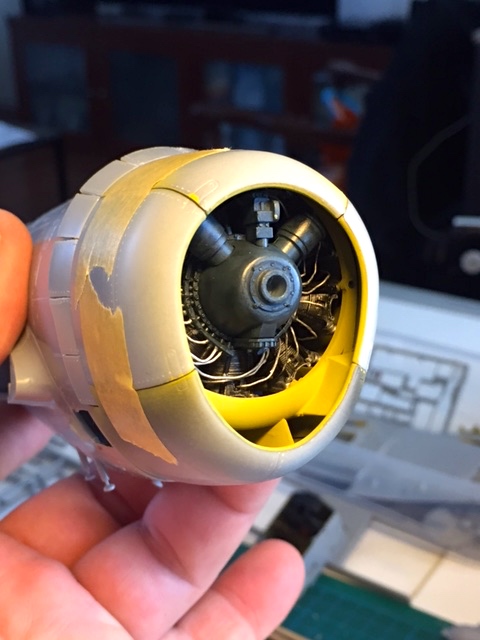
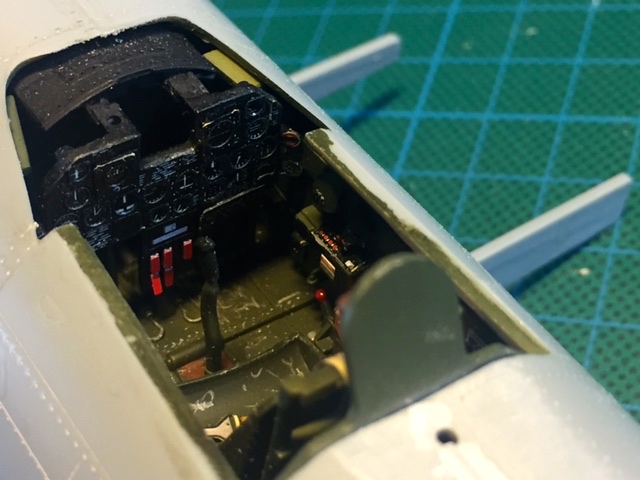
Good evening, I have started with my version of the Airfix Hellcat, i see there is a very detailed build underway on the forum about the P&W engine, amazing detailing! I have already built up the engine, and I ran in to the same problems as Nigel described on his you tube channel. It has been an endless sanding and fitting struggle to make everything fit as it should. I have used the colors on the engine as advised in the manual, except the engine color, this should be a blue grey color, so I used that color, I hope I have got the color right. The fit of the parts wasn't without it's problems. It is so busy with parts on the rear of the engine, that is was a challenge to get the exhaust pipes in to the right position, but with some effort I managed to get them in. After endless fitting and sanding I painted the parts before I installed them, gave the cilinder heads a wash so the detail of the cilinder heads was better visible. I have pretty much assembled everything out of the box. I want to build the Hellcat as an in flight model, so it will be with wheels up, and I decided to install the electric engine so the propeller can spin. Here are some pictures of the engine build up, I installed the front cowling to get an idea how it all wold look, I am going for the "Paper doll" version, so I painted the inside of the cowling red and white as a shark mouth, And with the entire exhaust build up and rear end of the engine, still need to do some touch up work here and there, And with the prop test fitted, So far for my build, now working on the cockpit and fuselage, Greetz, Frank

- 63 replies
-
- 10
-
-
P-47 Thunderbolt " Dottie Mae"
Trigger replied to Trigger's topic in LSM 1/35 and Larger Work In Progress
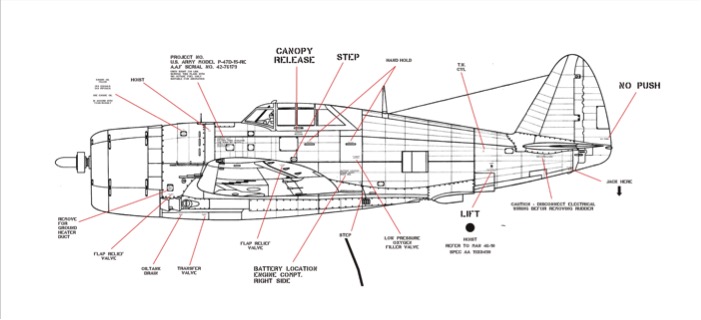
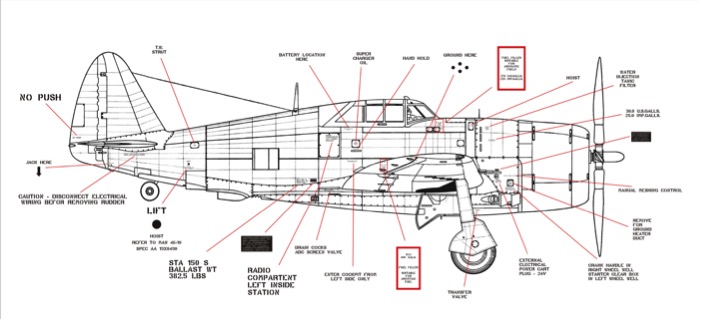
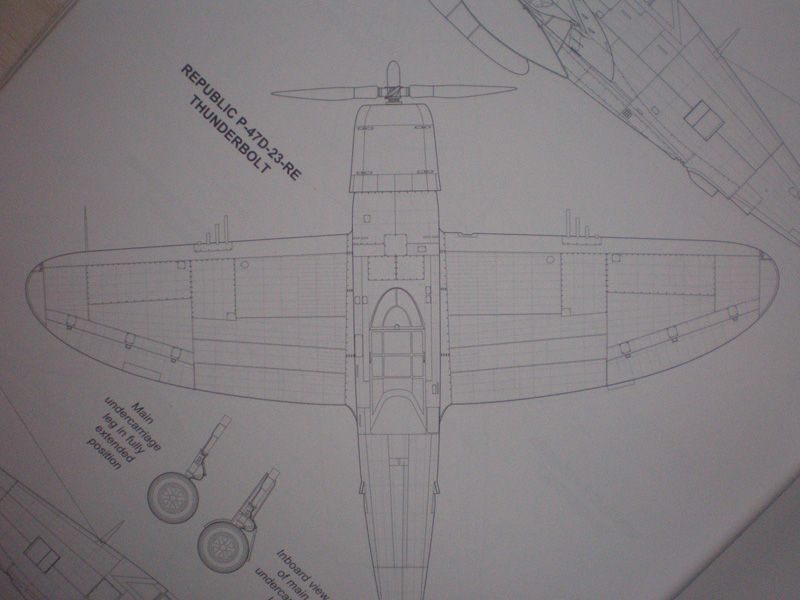
Hello Oz, Thanks for the response, i just searched the internet and found a couple of useful line plans that i have used on my P-47, see pictures below, (they are from a razorback p-47, but a lot of lines are the same), further i looked at a lot of pictures of various aircraft in walkarounds, and there you can find a lot of details, I hope this will be useful for you, Cheers, Frank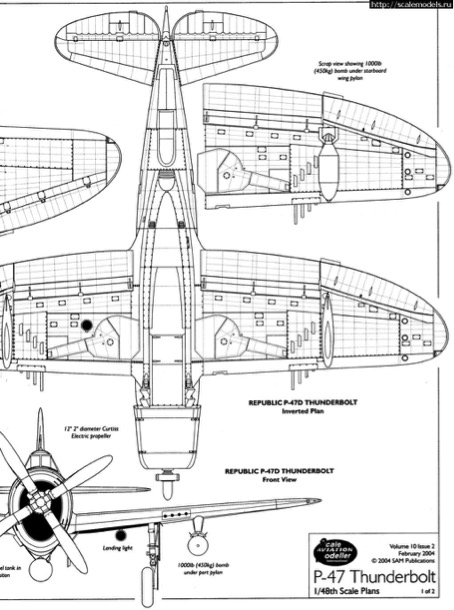

-
P-47 Thunderbolt " Dottie Mae"
Trigger replied to Trigger's topic in LSM 1/35 and Larger Work In Progress
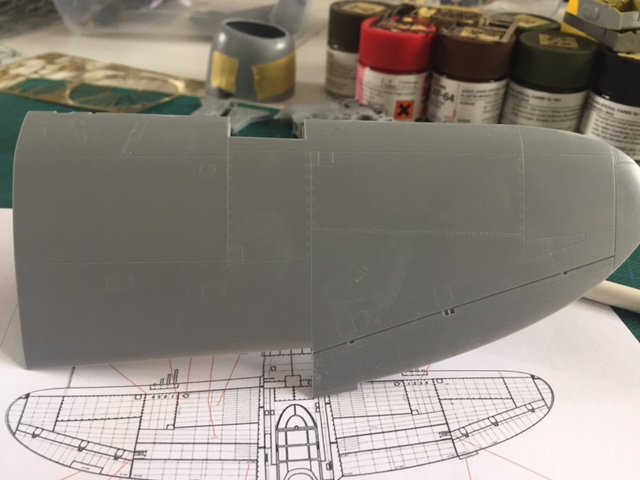
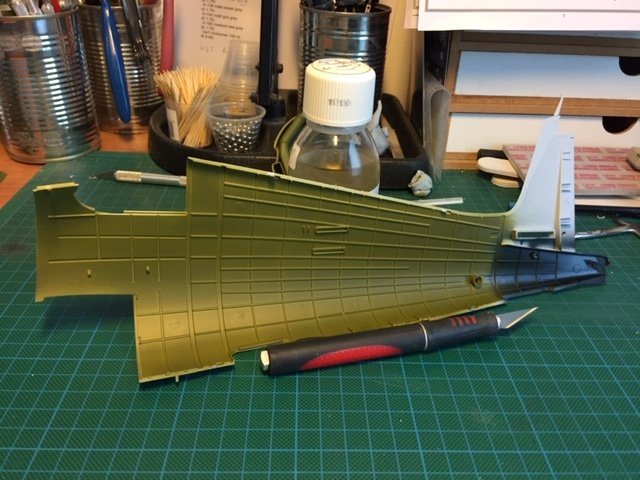
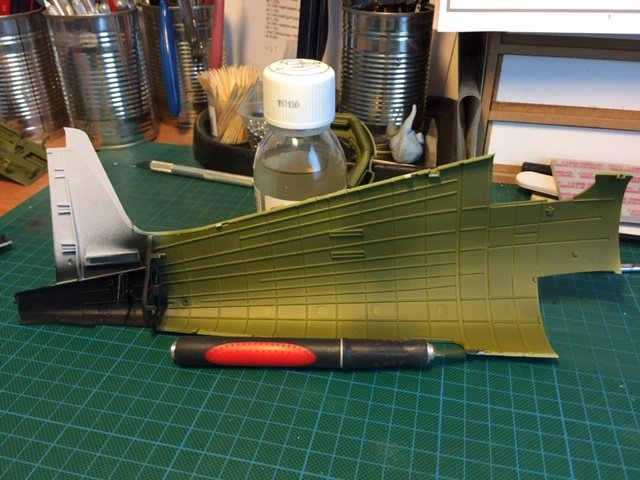
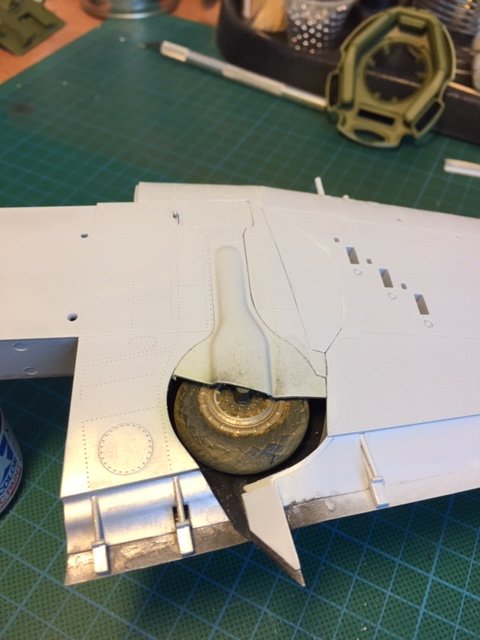
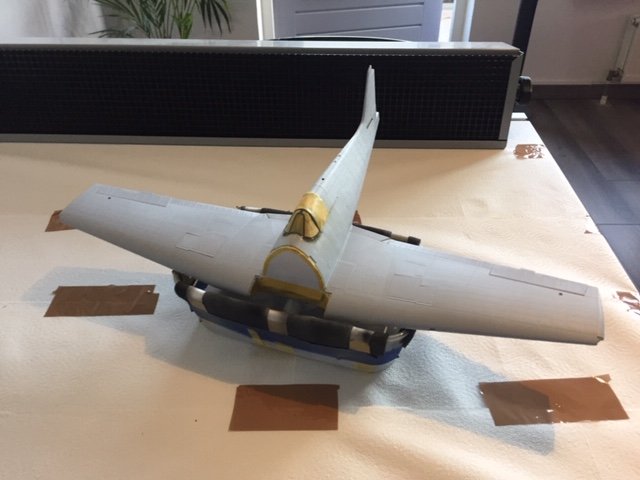
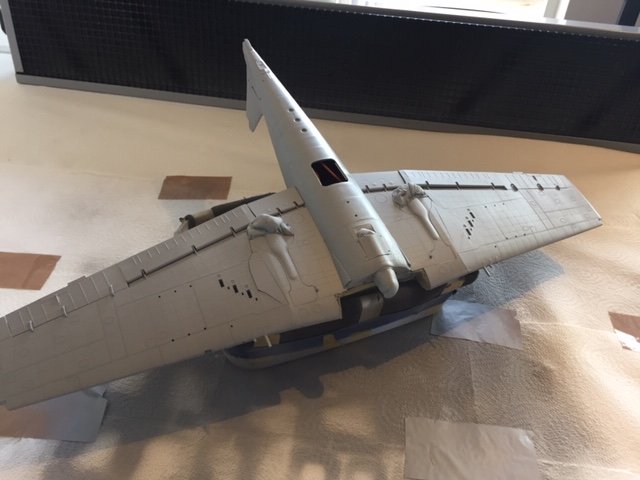
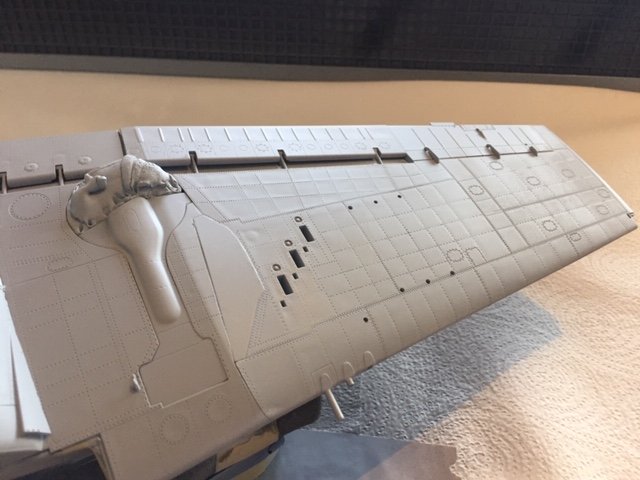
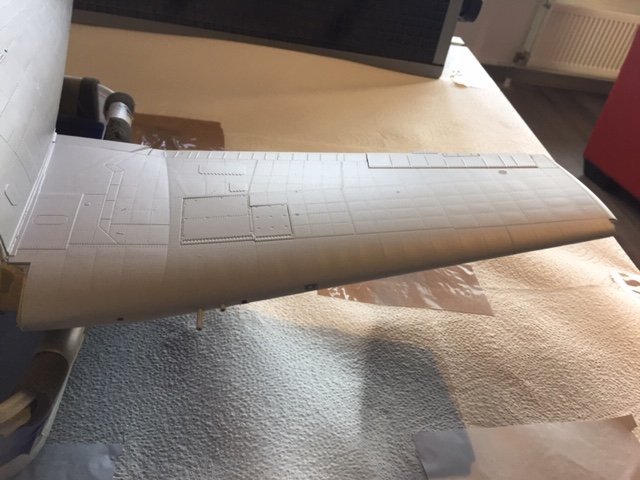
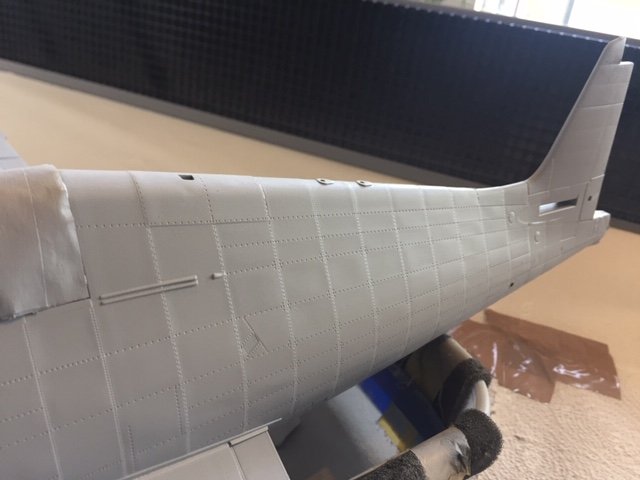
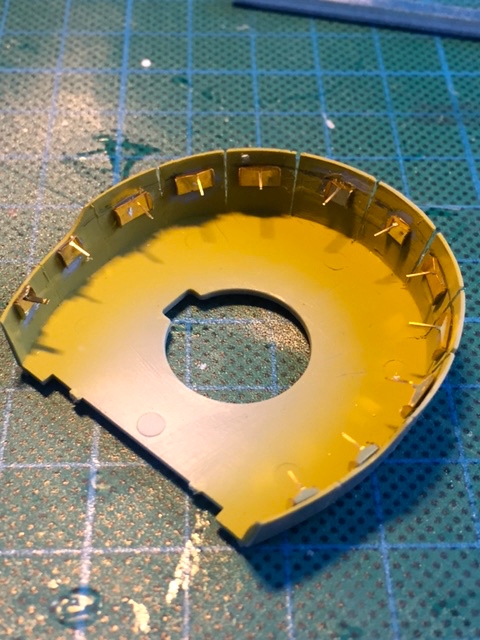
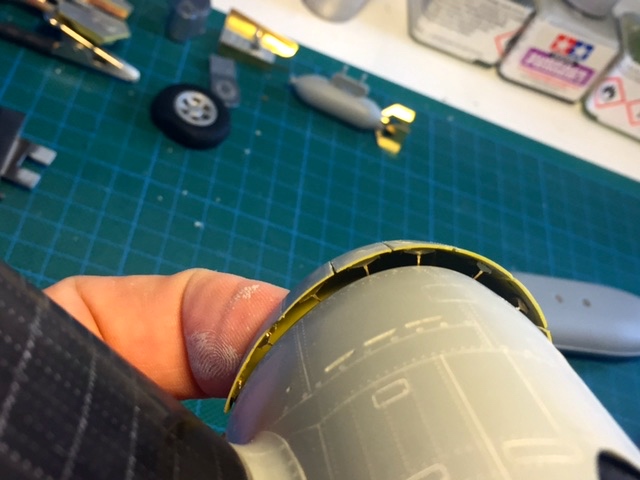
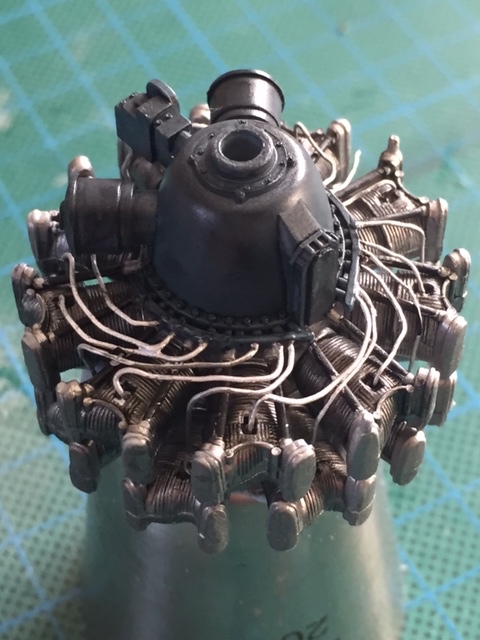
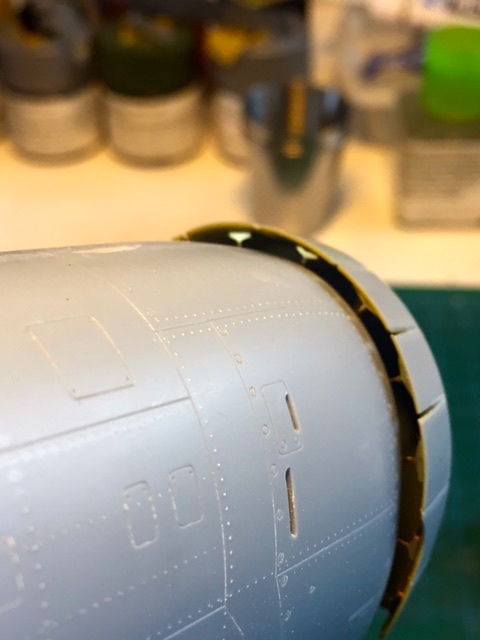
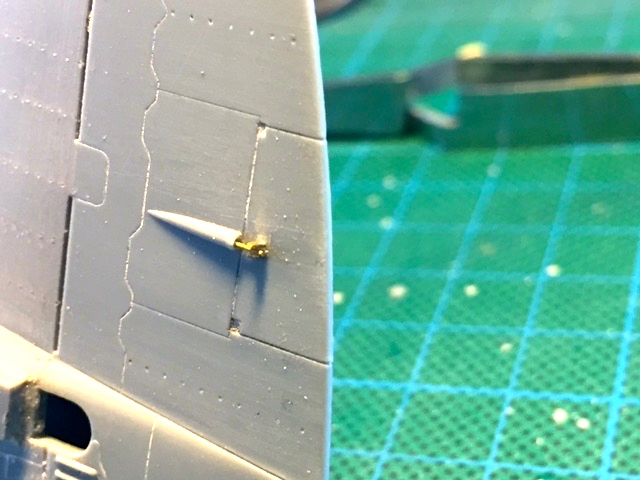
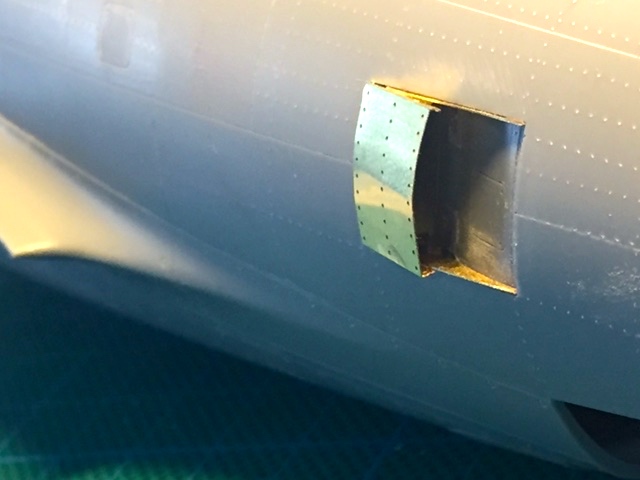
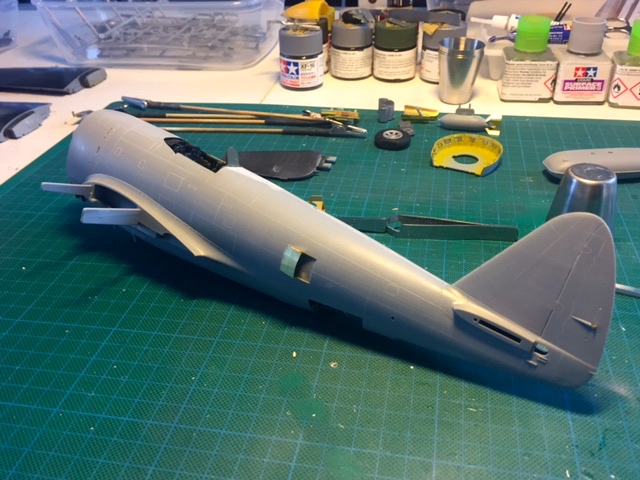
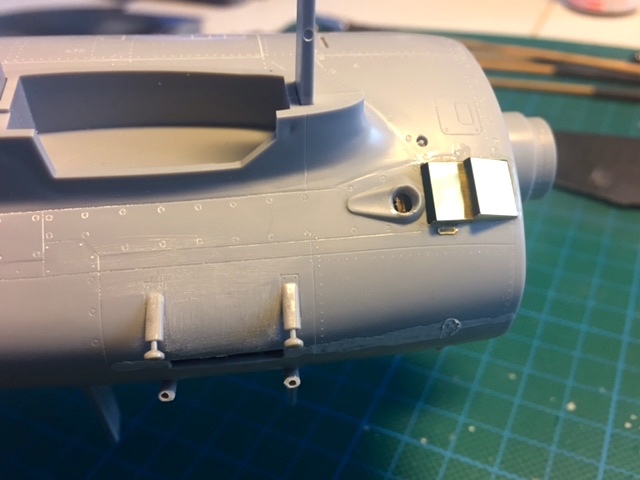
Hello There, Here is an update on the P-47, i have been busy with the fuselage and the engine and cowling, added some spark wires to the engine, and some pe parts tot the engine cowling, here are some pics, added riveting to the cowling parts added lead spark wires, and a wash to dirty things up a bit and get more detail Test fit inside the cowling Bought an extra pe update set for the P-47 from eduard containing parts so i could position the cooling flaps in an opened position, and you can see the result when fitted on the fuselage, just enough visible to make it interesting. Decided to use a mix of eduard pe and of the kit itself for the trim tab actuators, drilled a hole in the the covering where the rod comes out, used brass rod and a pe part on the tab itself to finish the job. Replaced a lot of plastic for pe parts as you can see Shot of the cockpit when the fuselage was all buttoned up. Test fitted the wings on the fuselage, looking good, i haven given the wings a coat of black primer so i could see how the riveting looked like, not 100% straight, but it will have to do, So thats's it for today, until the next update, Frank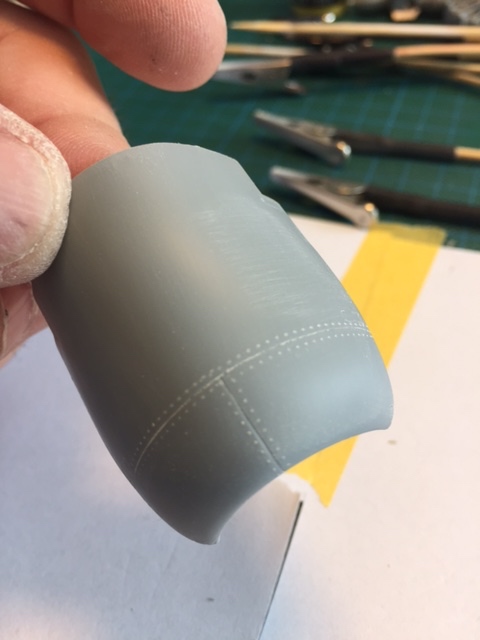
-
P-47 Thunderbolt " Dottie Mae"
Trigger replied to Trigger's topic in LSM 1/35 and Larger Work In Progress
Thanx Jeroen -
P-47 Thunderbolt " Dottie Mae"
Trigger replied to Trigger's topic in LSM 1/35 and Larger Work In Progress
Hello Cees, I am not able to do this freehand, because i would be all over the place with my riveter, i use a combination of the good old "dymo tape" and a foto etch ruler that is so thin that you can bend it in all sorts angles, and i use rb riveter tools, here are some pics and a few pics of the progress on the fuselage, Greetz , Frank
-
P-47 Thunderbolt " Dottie Mae"
Trigger replied to Trigger's topic in LSM 1/35 and Larger Work In Progress
thanks, i don't see this kit as a collectors item, for me it's just a nice plane to build Frank -
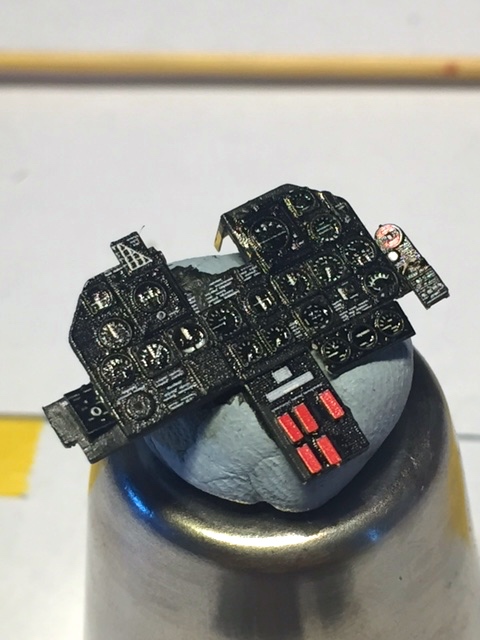
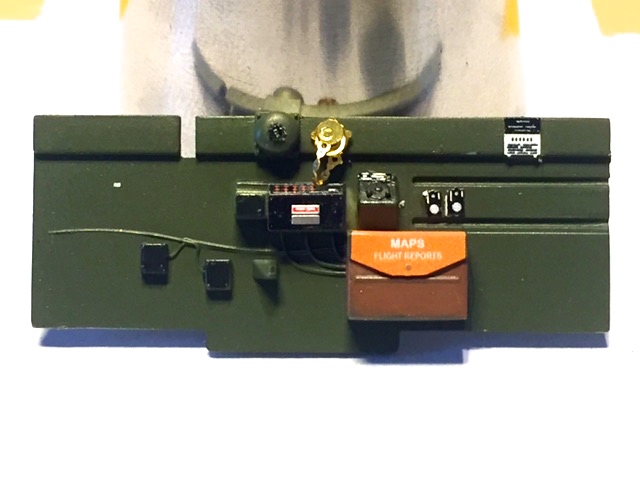
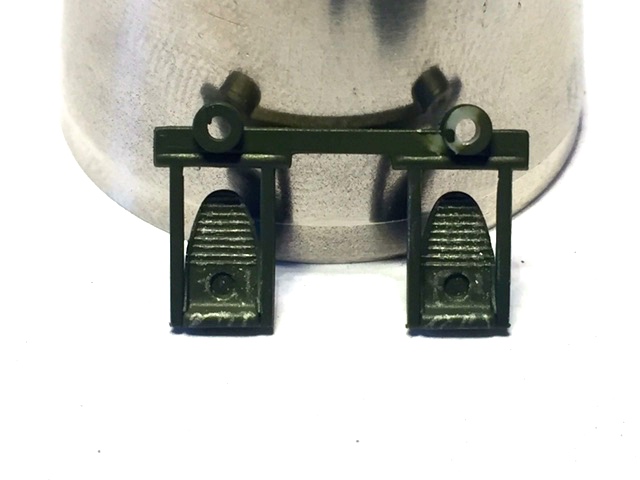
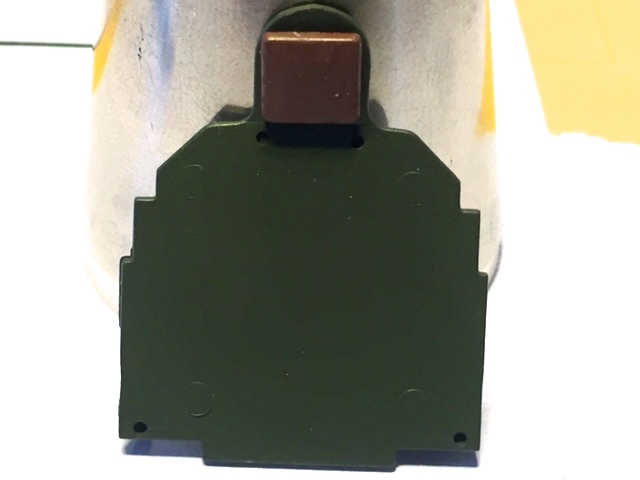
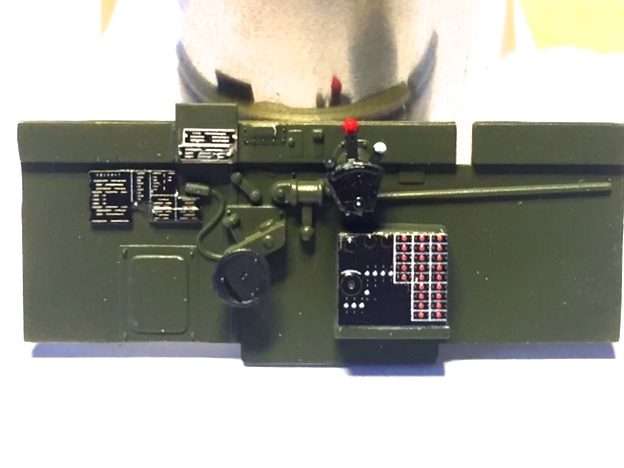
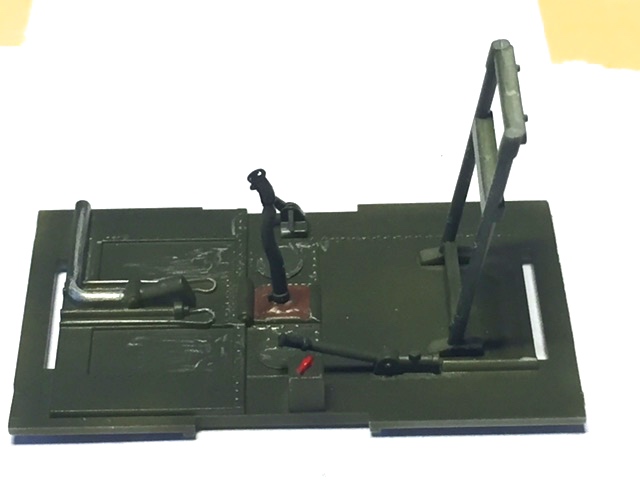
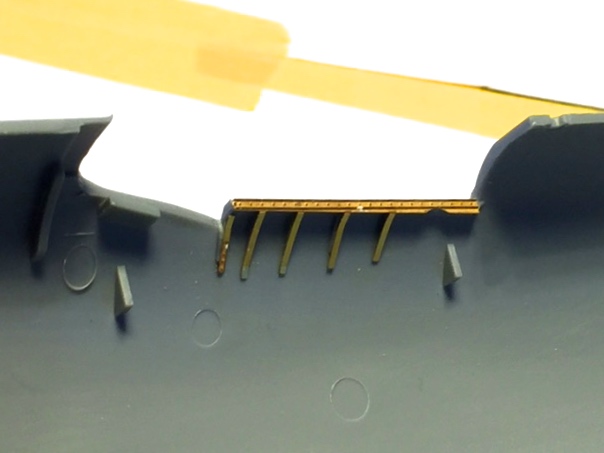
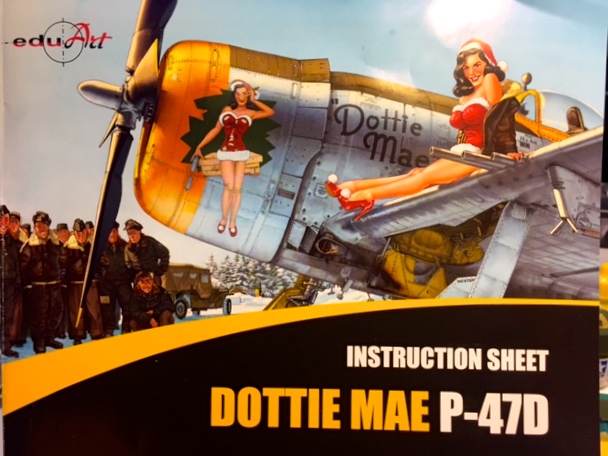
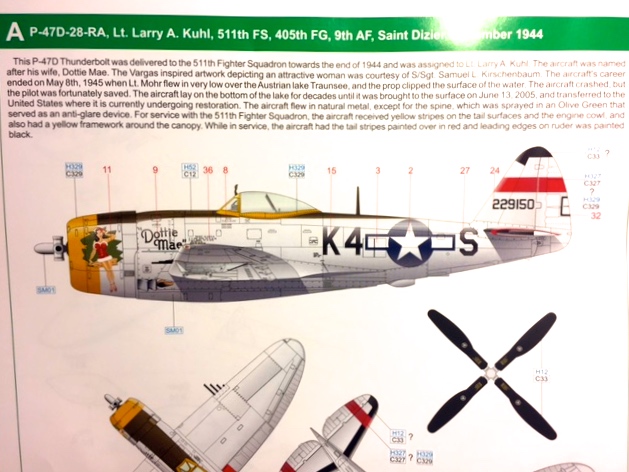
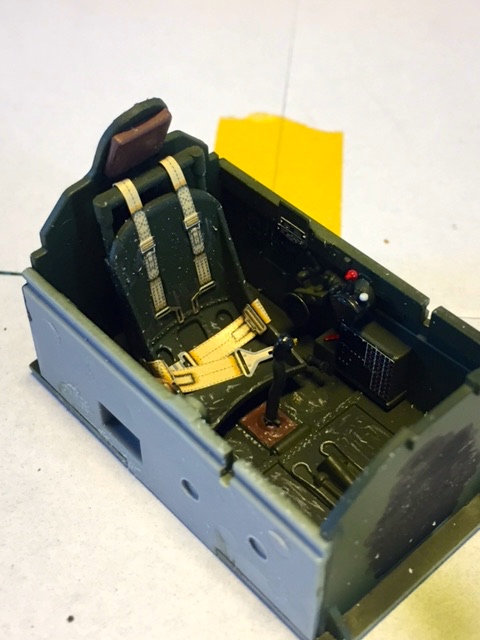
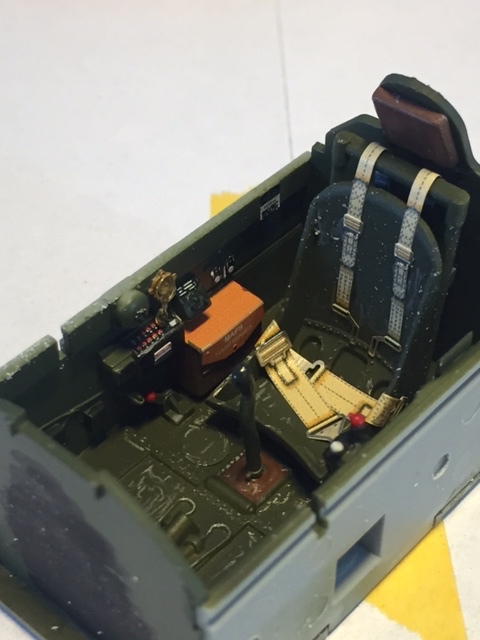
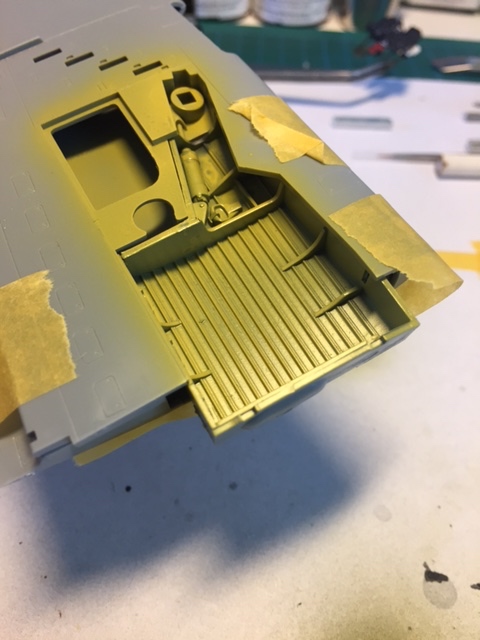
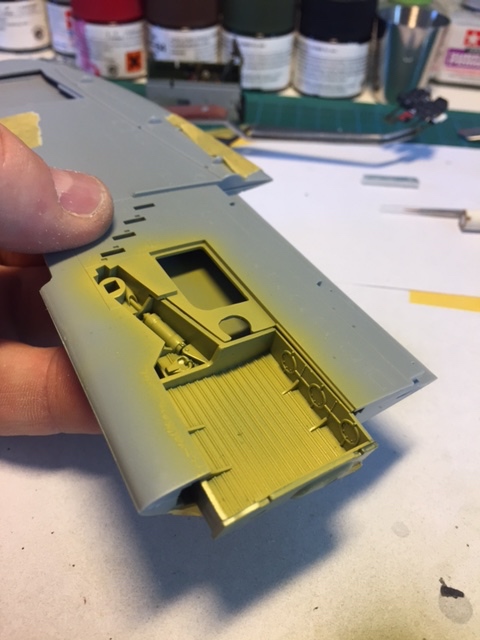
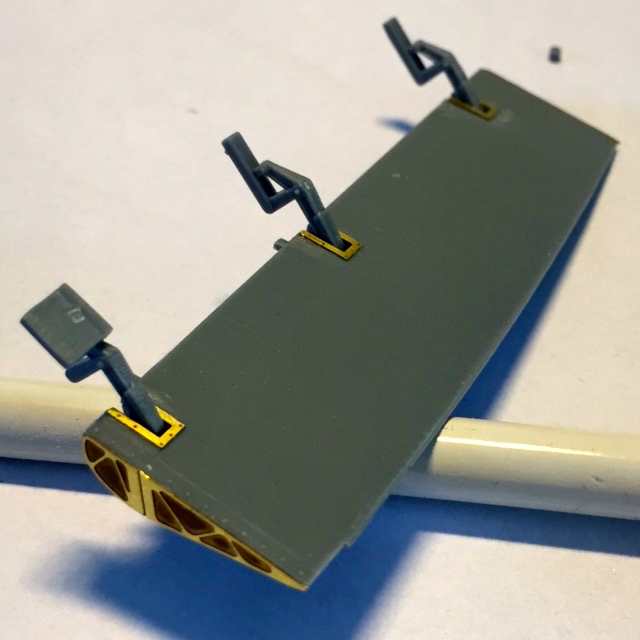
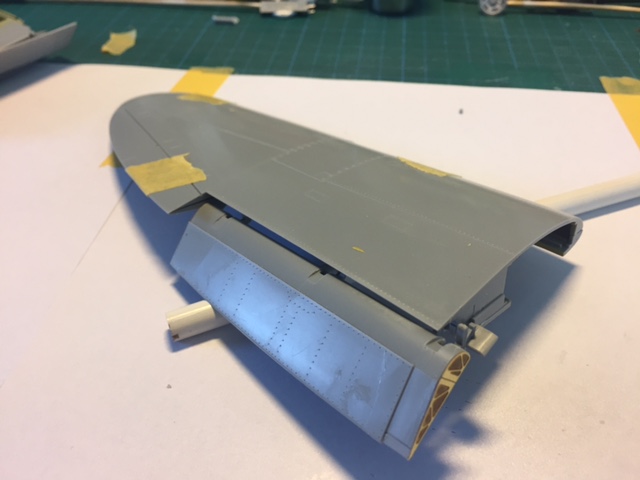
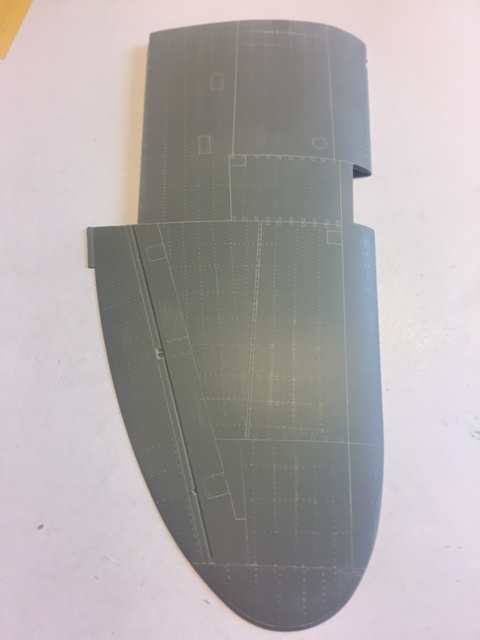
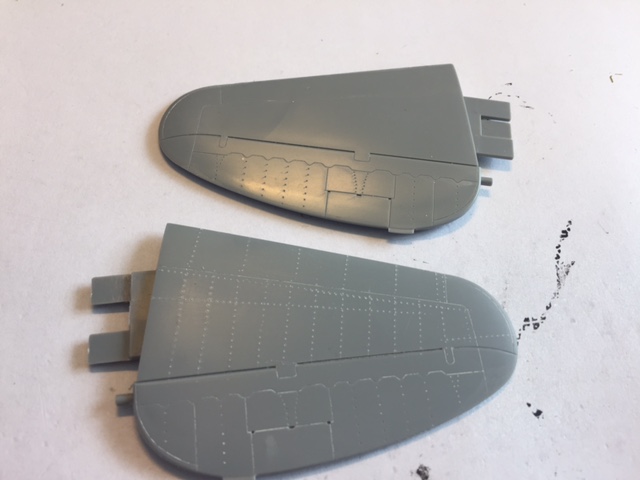
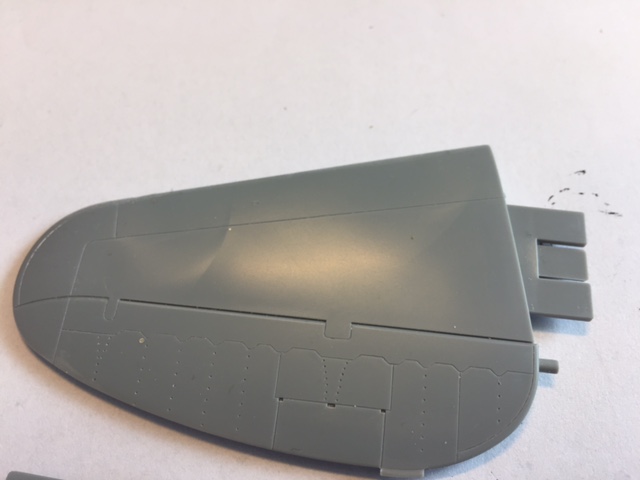
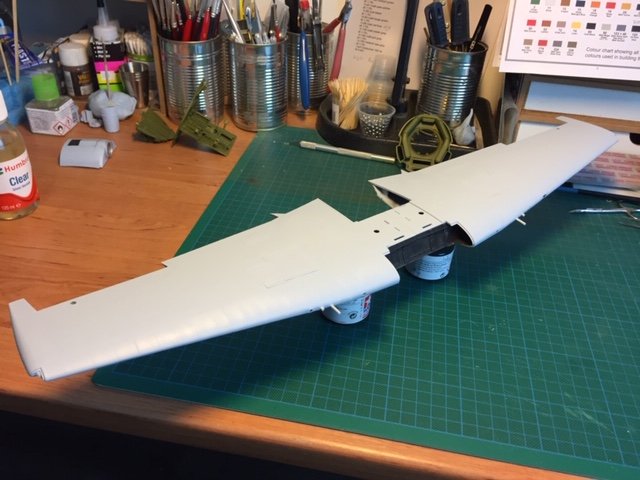
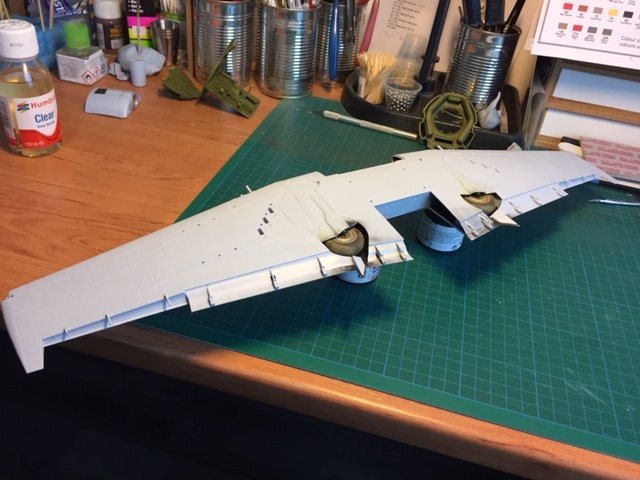
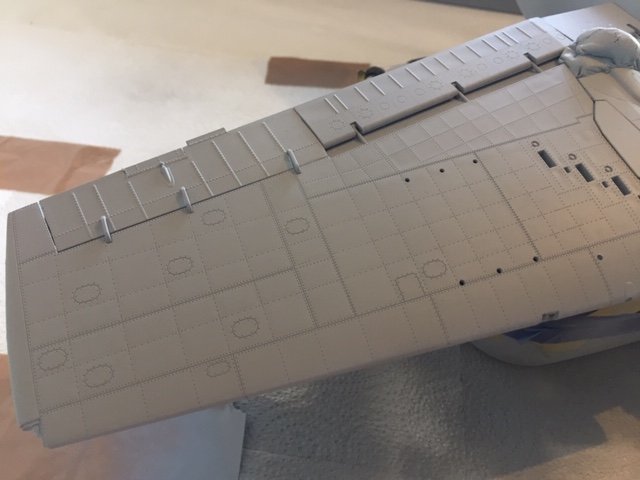
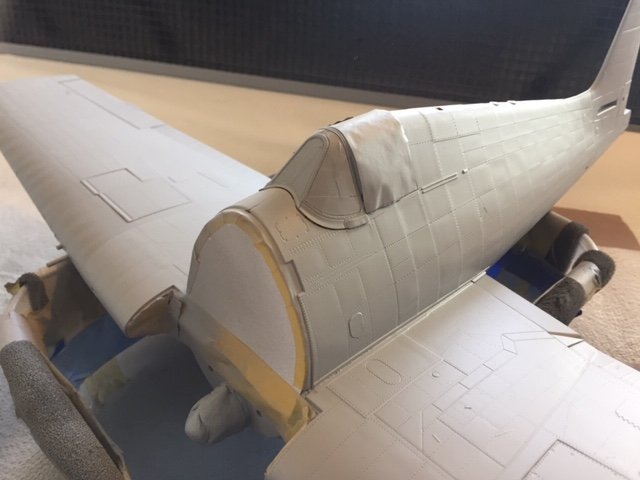
Hello there, There has been a lot to do lately about the P-47 " Dottie Mae" , this aircraft crashed in an Austrian lake in the last day of WWII, the pilot could barely get out alive while his plane sank to the bottom of the lake. The aircraft was salvaged from this lake a couple of years ago, and has been restored to flying condition. There are numerous films on you tube about this salvage operation, and about her restoration. The boys at Eduards must have been interested, so they made a limited production run of this aircraft in 1/32 scale with some beautiful artwork and some extra's in the kit. The subject raised my interest to, so i searched the internet for this kit, and found one for a reasonable €80 euro's, shipping costs included. (price at Eduards today €124,- without shipping). I won't do a review of the parts and the kit itself, since there are a number of reviews on the various web sites of this kit, So, on with the build, I started the build with the cockpit, added a lot of pe parts that come with the kit, The instrument panel, Cockpit complete, (still need to dirty up the cockpit a bit with various washes), Started on the wheelbay's, sprayed them in zinc chromate tamiya xf4, Done some work on the flaps, added some pe parts that come with the kit, Looking at the wings, i got the (stupid ) idea to add more detail as in rivet lines that are missing. The kit is basically a Hasegawa kit, and is missing these kind of details, and since the aircraft has a bare metal look i thought i was a good idea to add them to the kit. But what a tedious job!, almost regretted that i ever started it, anyway, here are some pics, before and after riveting, I am now working on the fuselage to add riveting lines, so more picture to follow, Greetz, Frank