

Trigger
-
Posts
211 -
Joined
-
Last visited
Content Type
Profiles
Forums
Events
Gallery
Everything posted by Trigger
-
Israeli Mirage III C with Atar9C
Trigger replied to Kaireckstadt's topic in LSM 1/35 and Larger Work In Progress
Yup, I know what you mean, ........................(made the same mistake)........... bottom of my list too......... Frank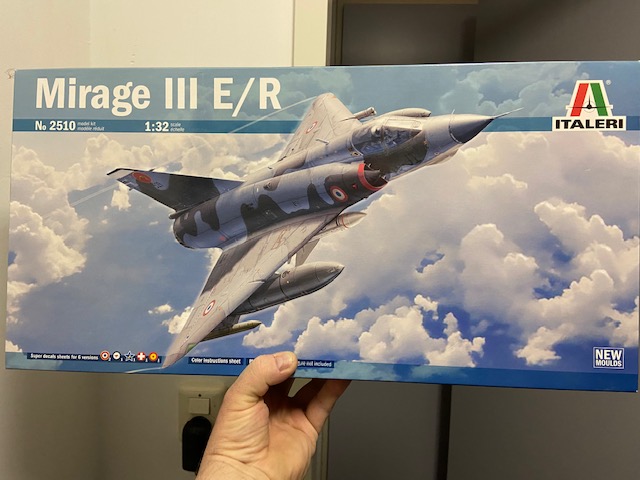
-
Israeli Mirage III C with Atar9C
Trigger replied to Kaireckstadt's topic in LSM 1/35 and Larger Work In Progress
Hello Kai, Great progress, but what a hell of a job, I can remember from my mirage that the fit of the nosecone was also a terrible fit, maybe that's why I abandoned it, I don't know anymore. Great to see another build underway by Alberto. Keep on sanding and scribing, the end is in sight! And then the painting stage....... can't wait to see it, Hang in there, Frank -
Wow, yet another Mirage!, Nice progress with the cockpit, looks real good, Will follow Your build with interest, cheers Frank
-
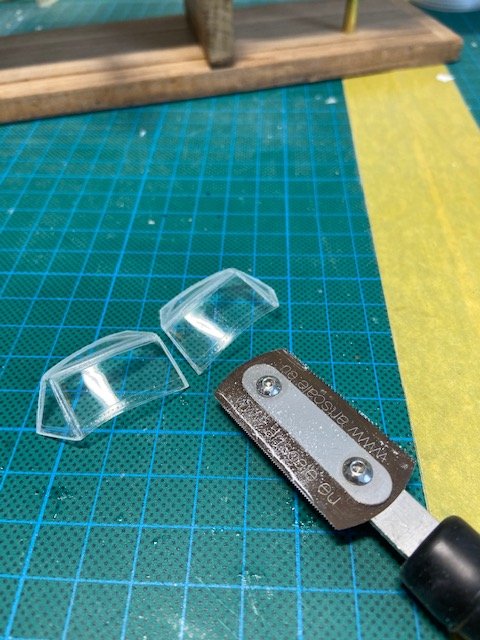
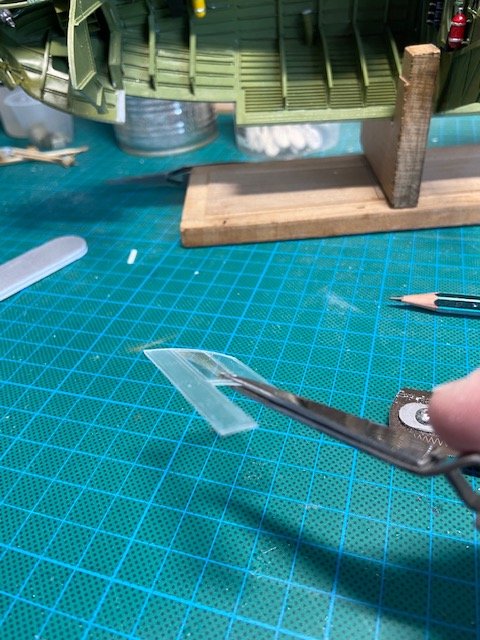
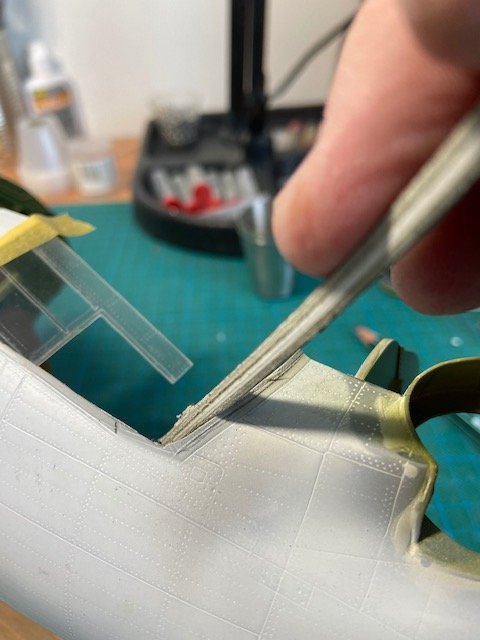
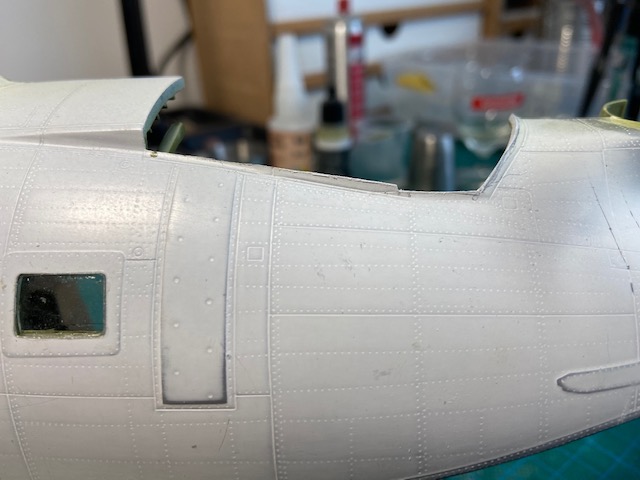
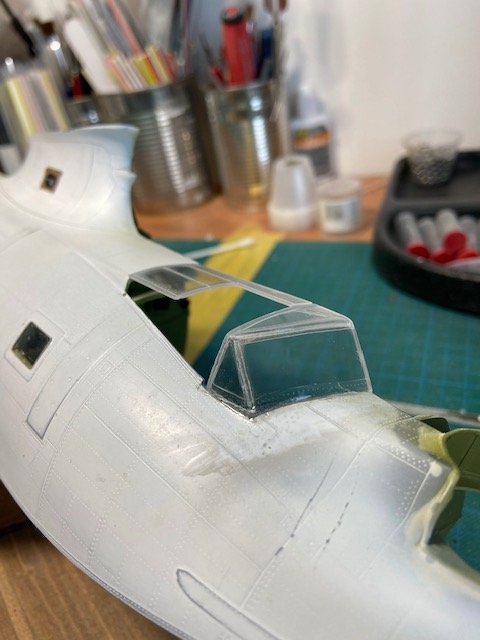
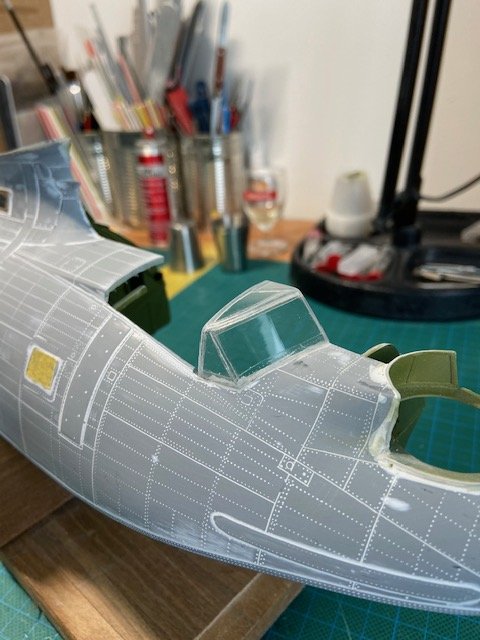
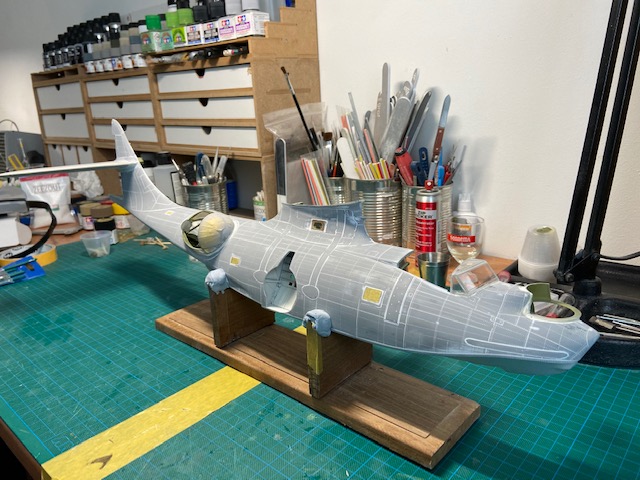
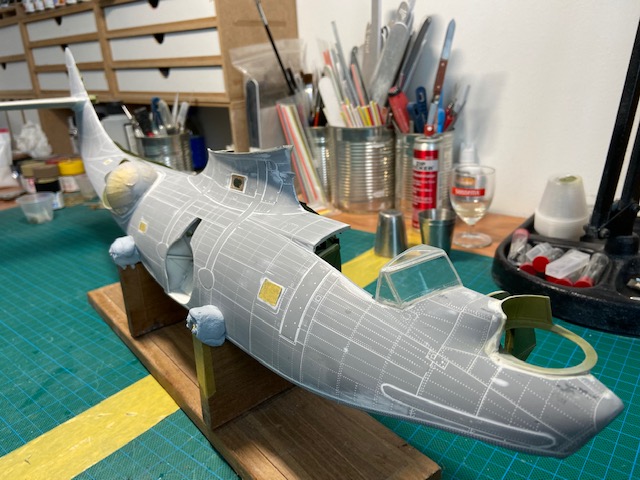
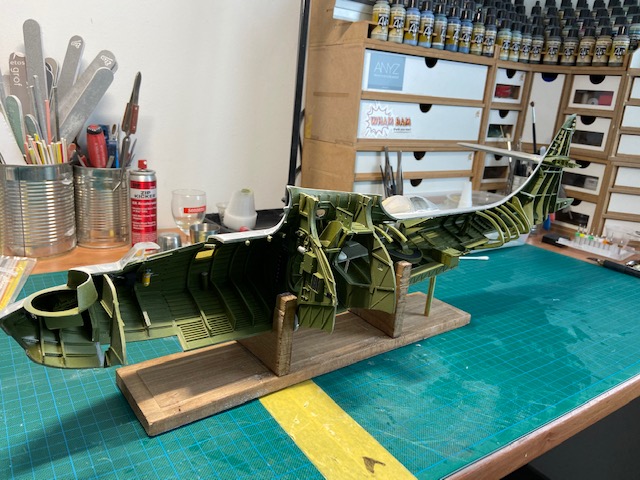
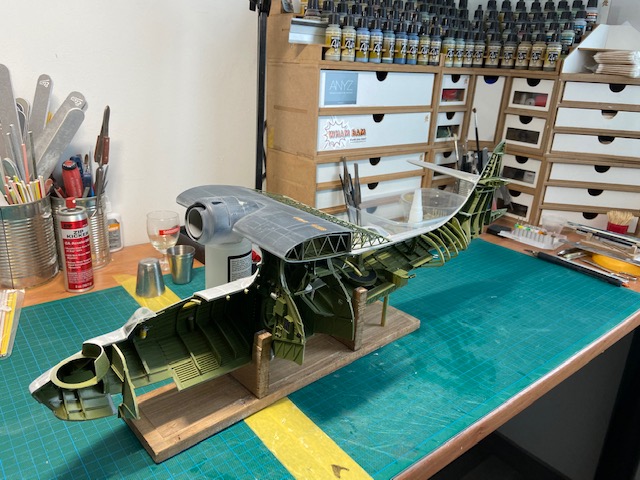
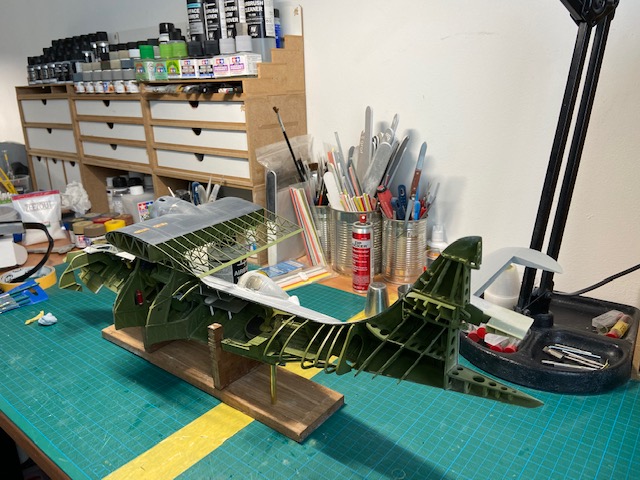
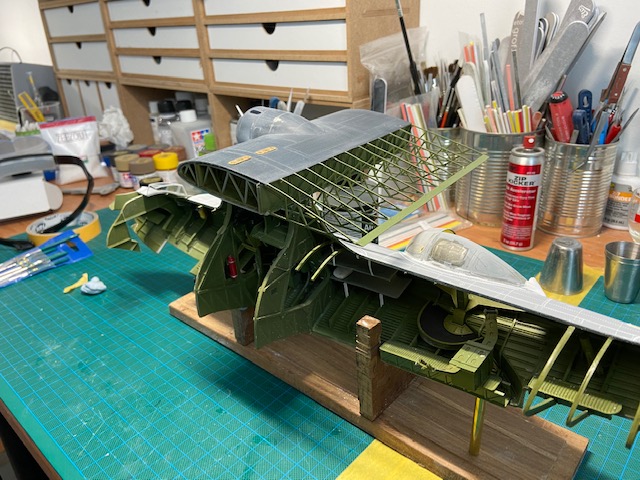
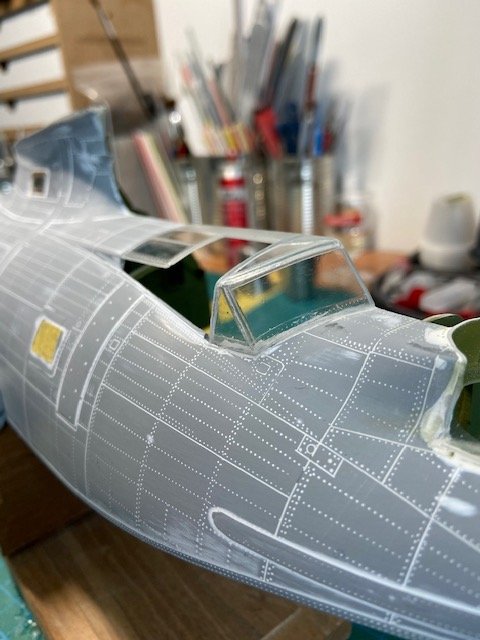
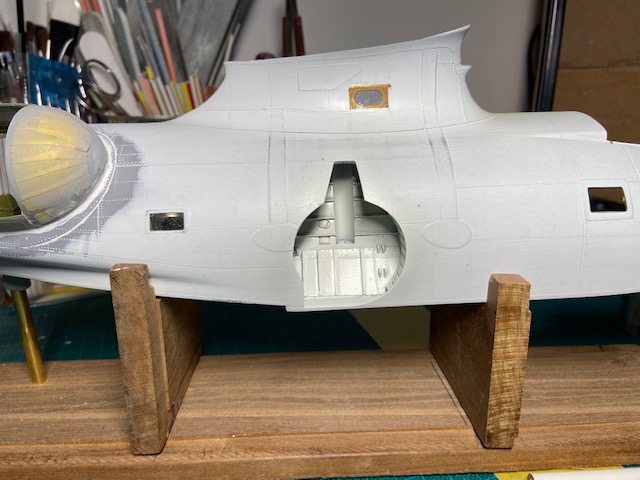
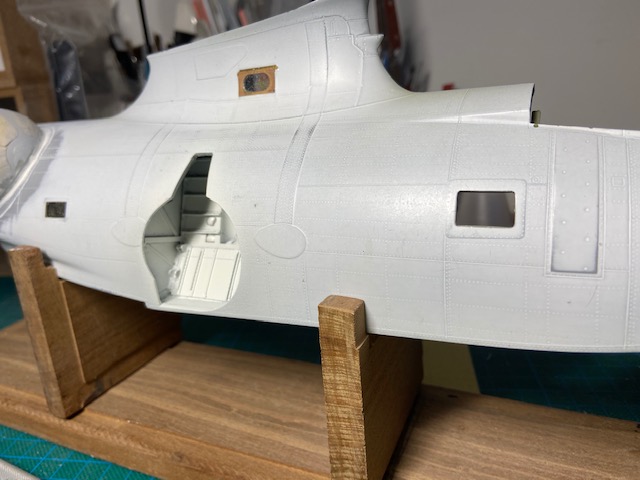
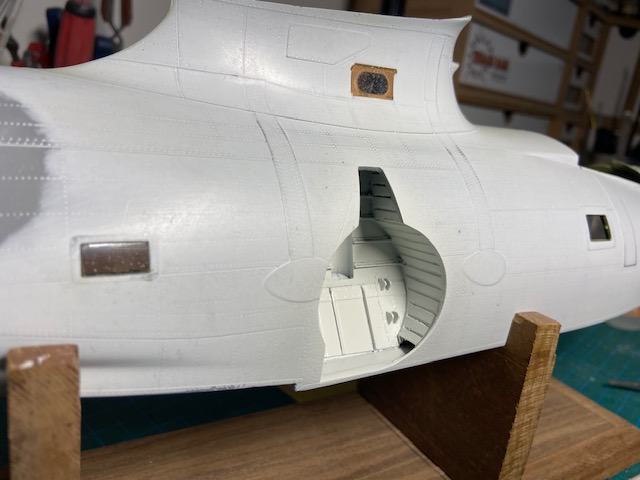
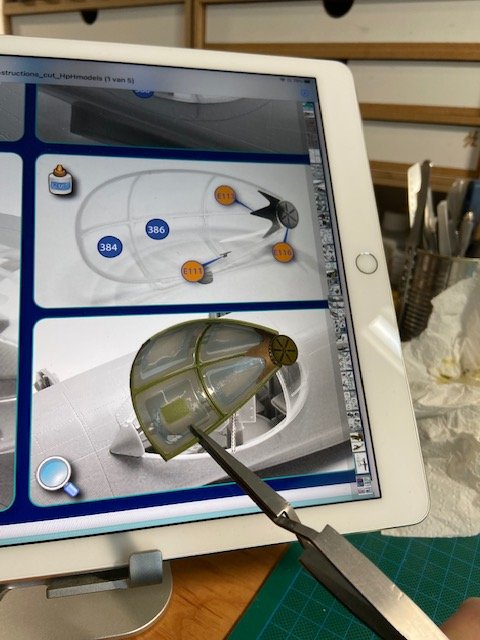
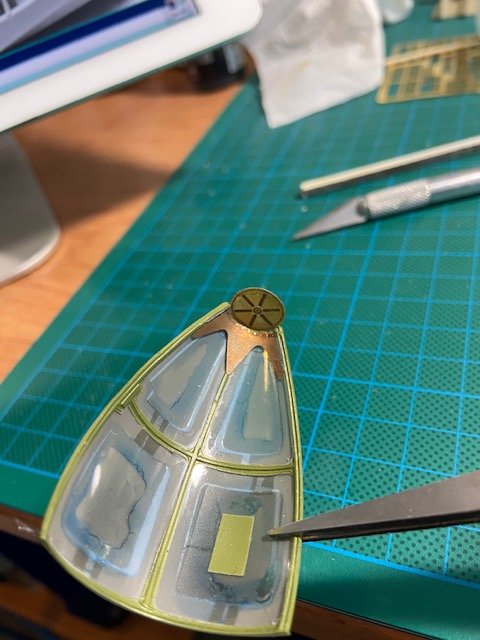
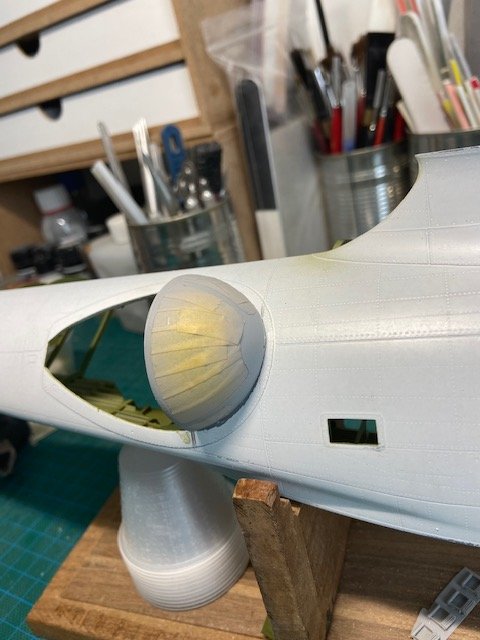
Hello Guy's, Here's an update on the Catalina, placed a bulkhead and glued it with epoxy for the necessary strength, see or yourself... prepared the fuselage for epoxy and glued in, next step was the cockpit area, fitted the windshield after numerous fitting and sanding, first had to cut the windshield in half, Went pretty good, then the roof of the cockpit , I placed the part on a "sausage " of blue tack, in order not to break the part while I was cutting, lined it all out with a piece of dymo tape, and voila..... a nice clean cut, and straight Put the cooking plates between the two bulkheads Then a lot of sanding and fitting for the windshield..... This was by no means an easy task, this was still a test fit, had to do al lot more sanding.... Also sanded the complete fuselage, all the detail suddenly popped up, didn't ruin to much detail with the windshield, can easily be rescribed, glued the windshield with epoxy glue. some overall shots after sanding Couldn't resist to put the wing on it, (just test fitted ), to get an idea of the complete model, that's it for now, until the next update...... cheers, Frank

-
DB605 Engine 1/18 scale HPH
Trigger replied to Trigger's topic in LSM 1/35 and Larger Work In Progress
Hi Rob, Thanks for the response, an opened up 109 is a great idea, (they do make a scale 1/18 version of a BF1O9E at hph, without an engine), so who knows, I might just do that, the only setback is the price costs "just" €475,- euro's , but I like the idea, and I think no one has done it before in this scale. Cheers, Frank -
Israeli Mirage III C with Atar9C
Trigger replied to Kaireckstadt's topic in LSM 1/35 and Larger Work In Progress
Hello Kai, Pffffffff, there seems to be no end to the fit issues with this kit. But when you are done with the rescribing, sanding, etc, (and endless flows of beer), you will have a stunning looking Mirage in the end. The reward will come when you get to the painting stage, keep up the good work, Frank -
DB605 Engine 1/18 scale HPH
Trigger replied to Trigger's topic in LSM 1/35 and Larger Work In Progress
Hello Peter, Wow, the ZM kit is a real challenge, I have been wanting to buy a HE219 for some time now, I am not sure to buy the Revell kit or the ZM kit, the ZM kit is without a doubt much more detailed. I think you are right about the color of the engines, the only reason the Germans didn't paint them black is because the HE219 came out late in the war, and they where running low on supplies, so they made use of what they could get their hands on. The HE219 was by the way the first aircraft with an ejector seat, so the design was very cutting edge for that period. Looking forward to your build thread, the UHU is one of my favorite German aircraft. I hope your hands do improve, no better way to do that while modeling. It must be a nightmare to lose control over your hands, I certainly would be frustrated when you have to do things with your hands that normally would be "simple" , and now takes hours to get right. Keep going, (although it might be a struggle), it's so rewarding to see a model grow in to a complete aircraft, Cheers, Frank -
DB605 Engine 1/18 scale HPH
Trigger replied to Trigger's topic in LSM 1/35 and Larger Work In Progress
Hello Kai, I agree on the prop blades, looking way better now, and I think color wise also more accurate, this kit is stil for sale direct from hph. (www.hphmodels.cz), for €60,- euro's. I think the price is good, you get a lot of extra's, a pe fret, decals and some wiring. You don't have to get anything extra to build this kit, it's very complete, and builds in to a fantastic (iconic) engine.( They also have the Packard Rolls Royce Merlin as mounted in the Mustang, I have ordered that one too, looks great when mounted on a stand, and I also love the Merlin, talking about iconic engines.) Thanks for the response, The Mirage already looks better with the IDF colors on the intakes, painting is always the reward for the preparations you have done, and keeps you motivated to keep going, following with interest, Frank -
DB605 Engine 1/18 scale HPH
Trigger replied to Trigger's topic in LSM 1/35 and Larger Work In Progress
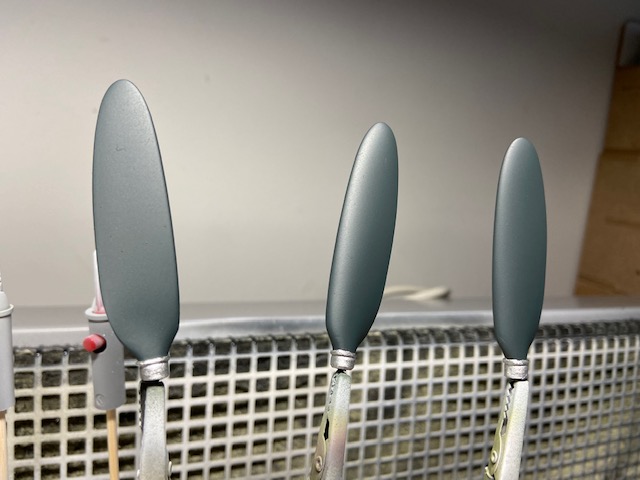
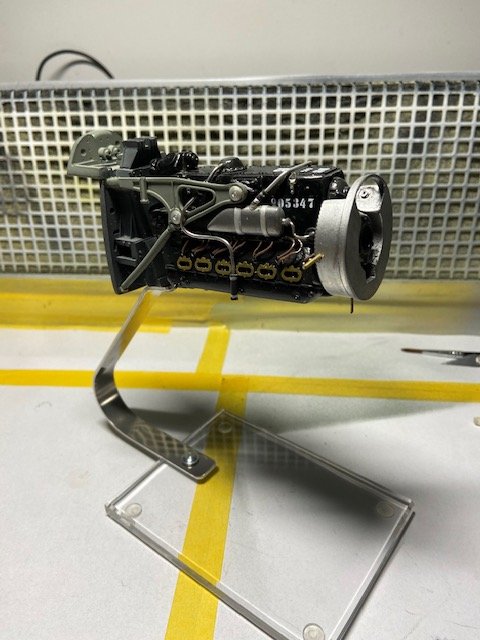
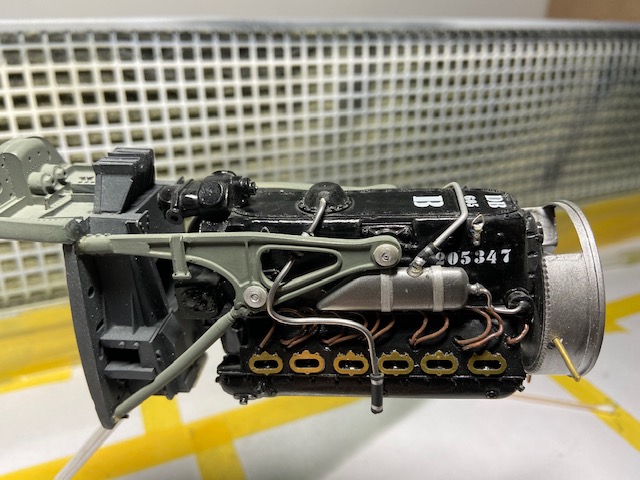
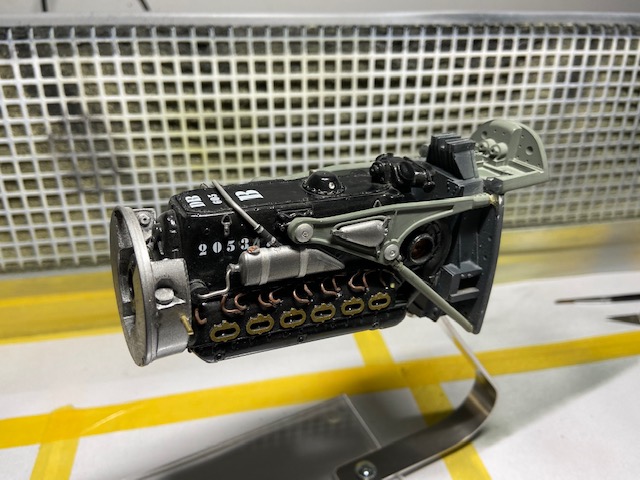
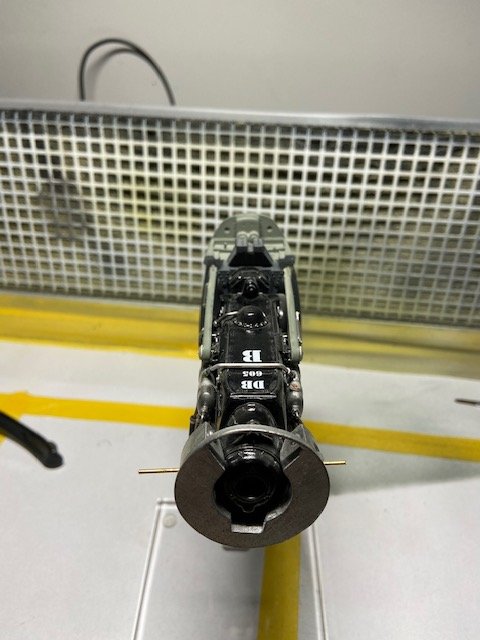
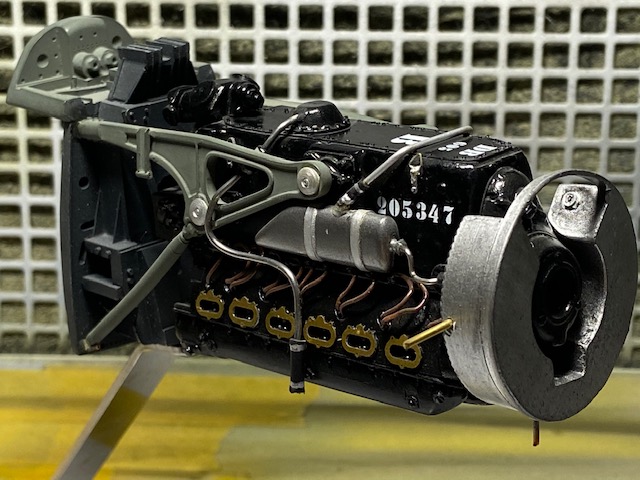
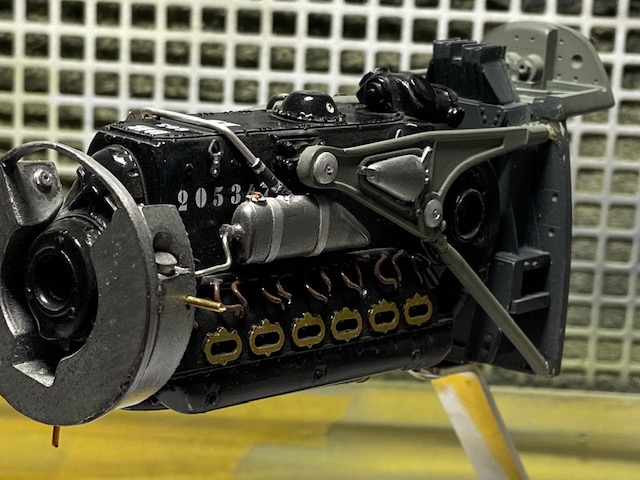
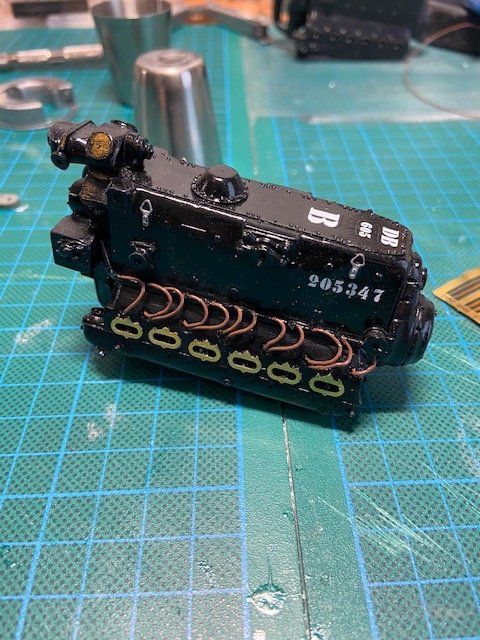
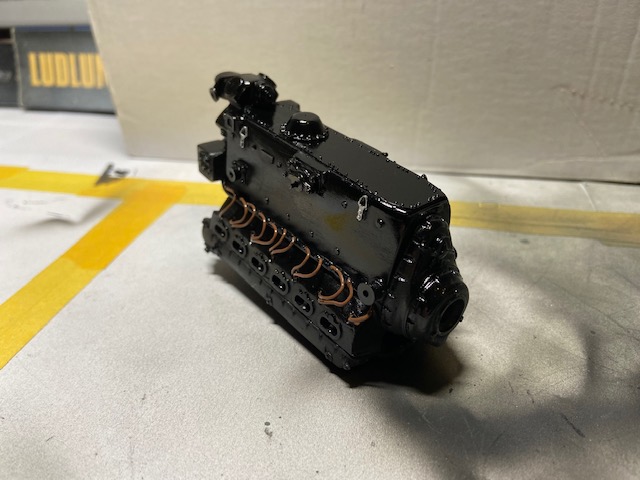
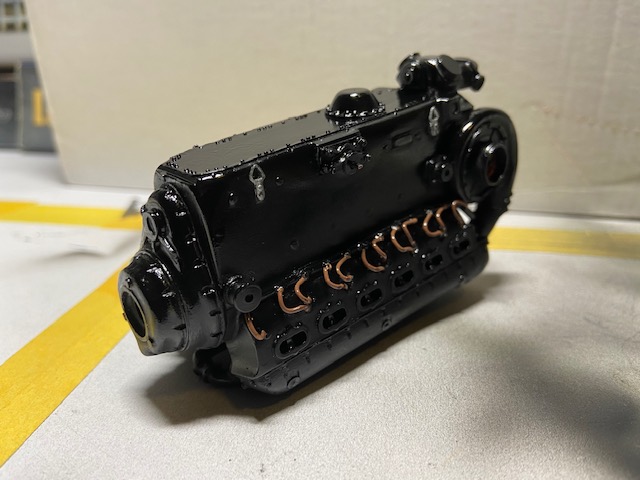
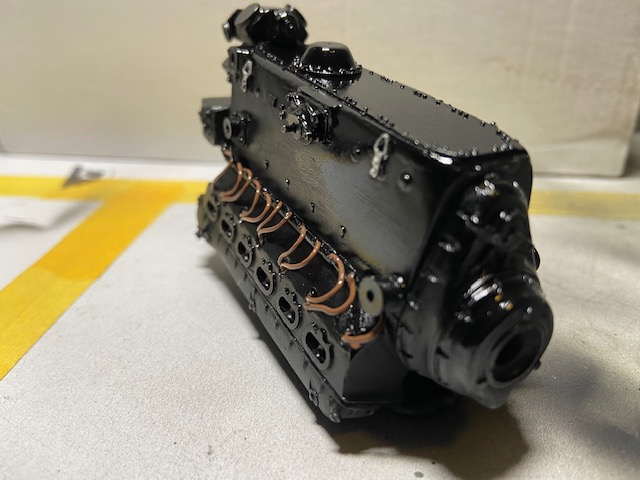
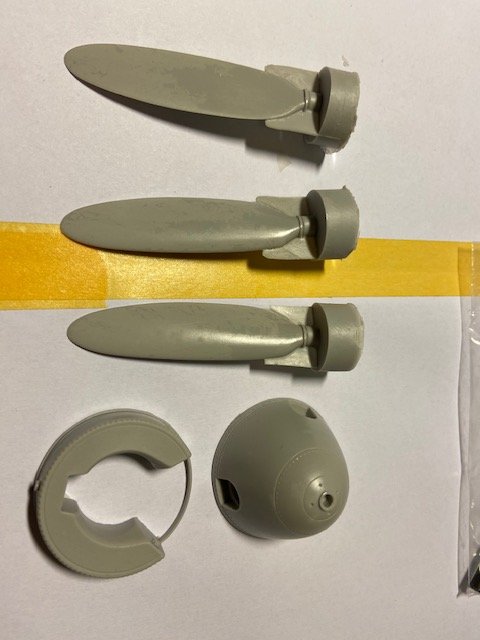
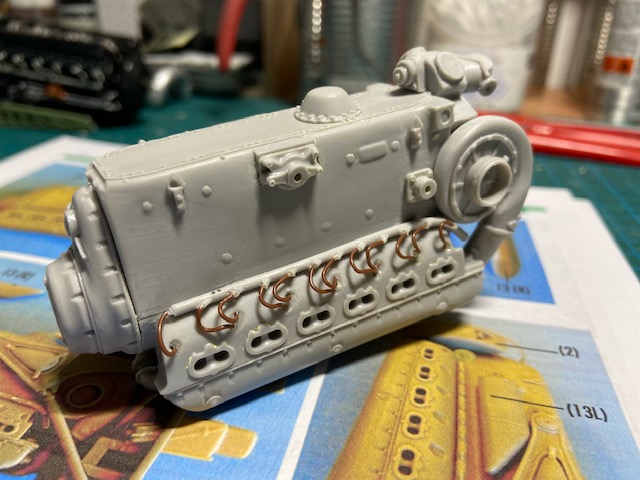
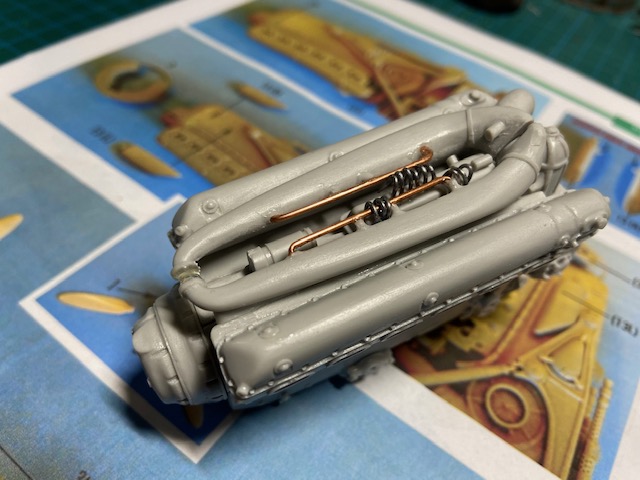
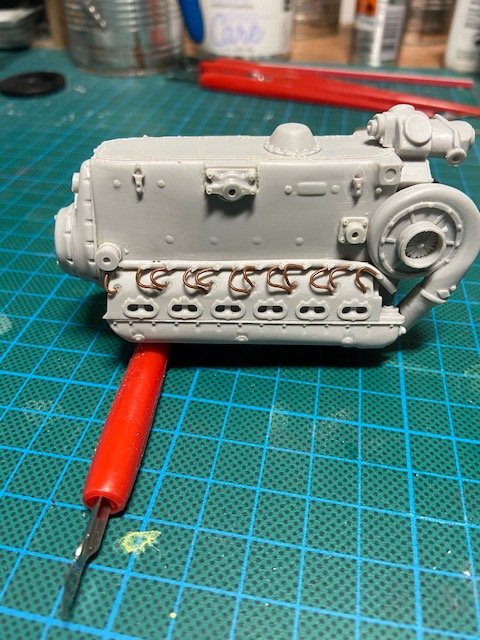
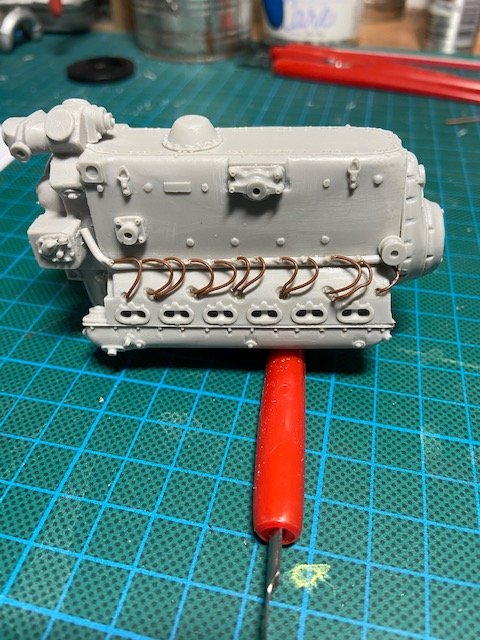
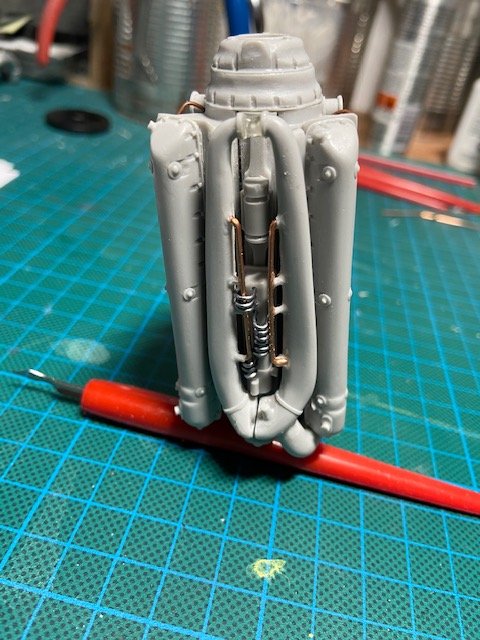
Hello Guy's Time for another update on the DB605, really put some effort in to it, got a lot of things done, first I repainted the propellor blades in rlm70, black/green looks better in my opinion, although the HPH color callout says it should be black. I have built a few 109' s, and the propellers where RLM70, so here they are Then I went for the construction of the motorframe/ engine supports. Took a lot of testfitting/ sanding to get the engine properly aligned Had to adjust the firewall a bit to get the side supports in to place, the lower struts were a nightmare to get right, broke both of them Drilled tiny holes in the length of the lower engine bearers and inserted 0.2 mm metal rod to get the necessary strength to hold the engine, (it's one big lump of massive resin) so it weighs a lot. Also put metal pins in to the side of the engine block to support the main bearers, only ca glue didn't do the trick, the engine is just to heavy. (like the real thing I can imagine). But finally got there, once the engine was in place I started constructing some coolant pipes from lead wire, and put some tanks on the side of the engine. I am no trying to get the front coolant tank in the right position so I can align it withe the propellor. It is not going as I want, but I will get there in the end, (you can see three copper metal rods sticking out of the tank, used the same rods to get the engine in place and attach the supports to the engine), Got a lot done I think, until the next update...... It's really coming together now, it's a nice kit to build, but not without it's challenges, it is really beginning to look like an operational DB 605 , what do you guy's think?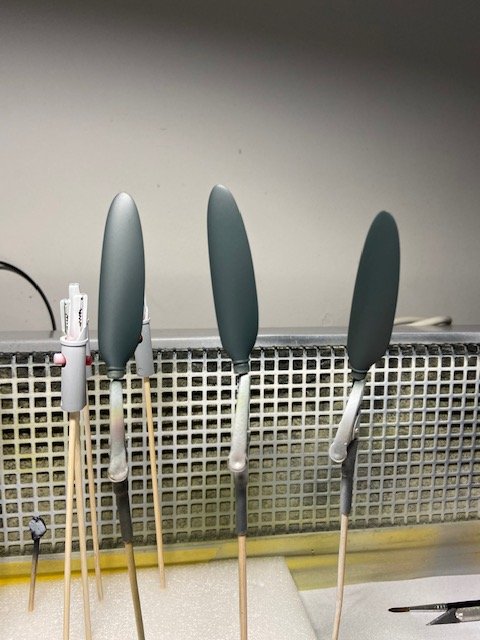
- 25 replies
-
- 10
-

-

-
DB605 Engine 1/18 scale HPH
Trigger replied to Trigger's topic in LSM 1/35 and Larger Work In Progress
Ha, Ha, ha, well at least you still have your humor, in the end that is going to save you, (I think you are also right about the color of the blades, I didn't seem right to me too in black, so I think I'll repaint them in rlm70 as you suggested). Thanks for the response, Frank -
Israeli Mirage III C with Atar9C
Trigger replied to Kaireckstadt's topic in LSM 1/35 and Larger Work In Progress
Hai Kai, I immediately looked at my mirage, I can not remember having those fit issues, but is has been a while for me since I started it, it might as well have been the reason why I shelved this project, but you persevered and you've nailed it, don't be discouraged, in the end when you can begin putting paint on it will all be forgotten....... I do remember that those intakes are a real nightmare to get right, I think you made the right decision to cut them up, one way ore the other you have to make it work for you, but it can be discouraging to a point that you give up (like I did), but don't do that please, you'll get there in the end....... Frank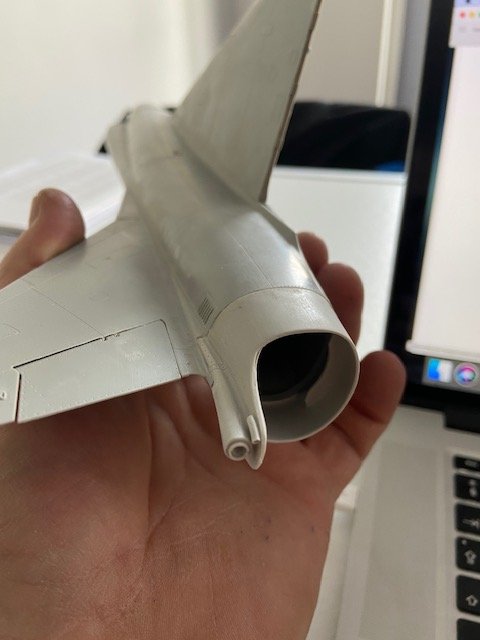

-
DB605 Engine 1/18 scale HPH
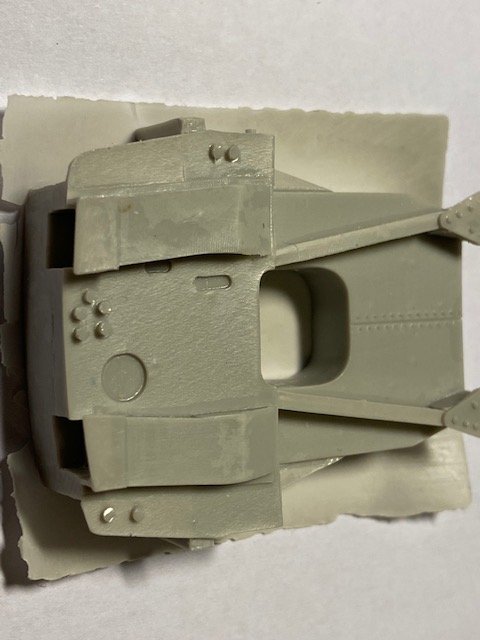
Trigger replied to Trigger's topic in LSM 1/35 and Larger Work In Progress
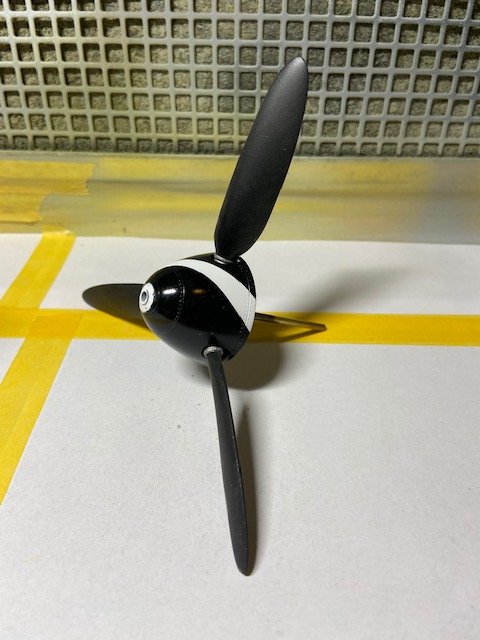
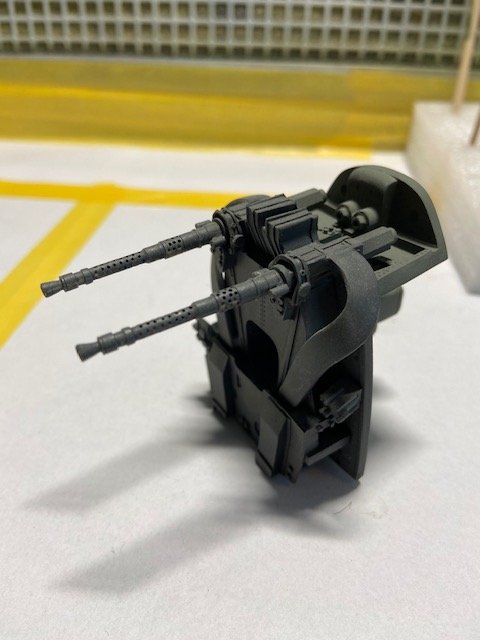
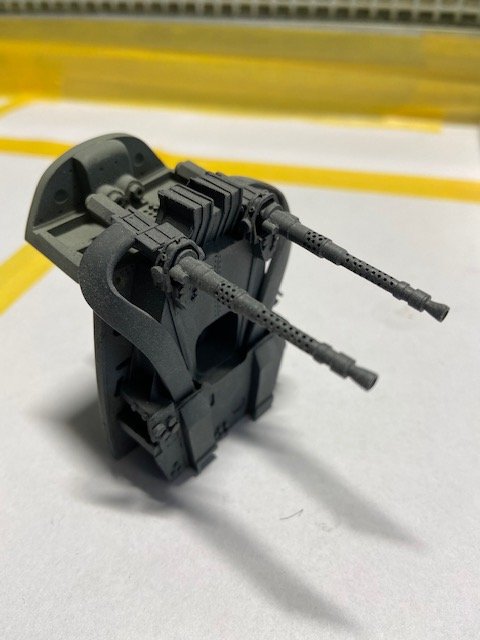
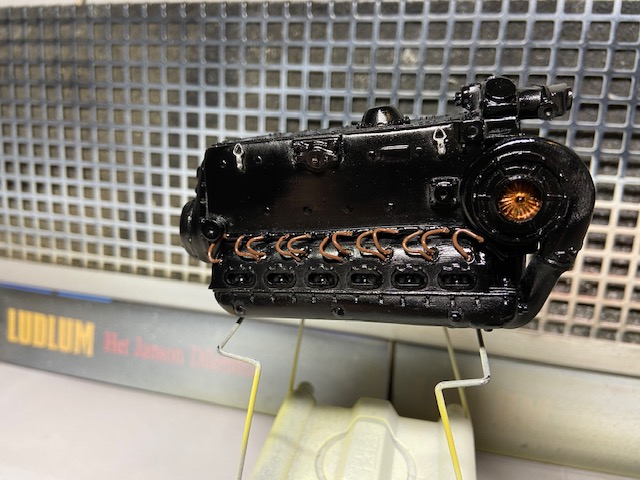
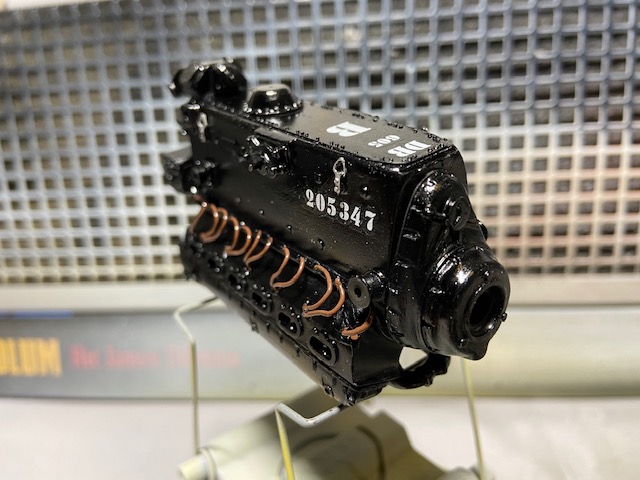
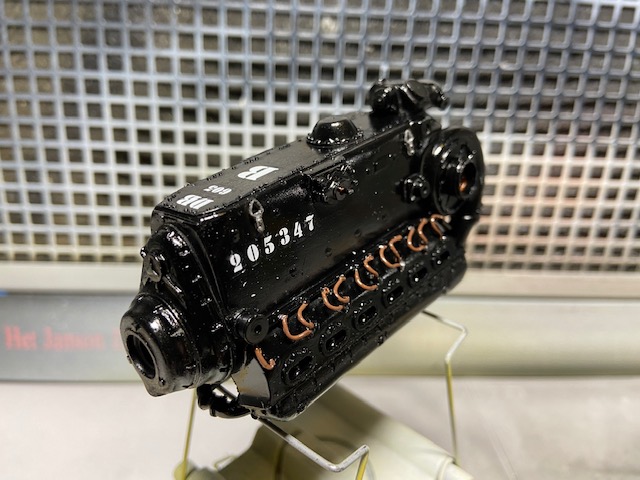
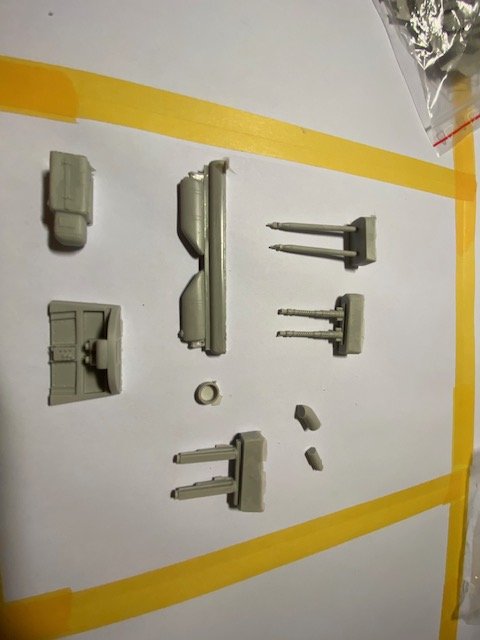
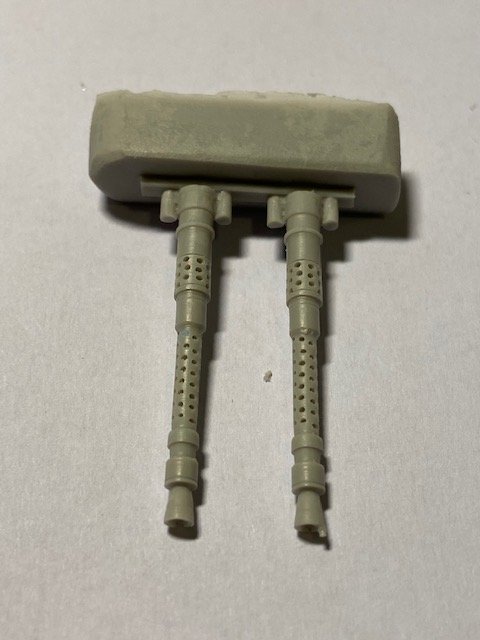
Hello Guys, Here's an update on the DB605, done with the prop, put some metal rods in the propellor blades for strength/support, the propellor hub is a one piece solid cast and is pretty heavy, painted the hub black and the spiral in white, looks good in my opinion. the color callout from HPH states that the blades are black, so I painted them in that color (dark green would also have been an option), but look for yourself.. still need to align the blades in the right angle, just test fitting, also build the firewall with the MG mounts and munition feed belts I must paint the MG's in gun metal, they are only test fitted foR NOW, And then of course the eingineblock, painted it black, put the decals on..... And withe the exhaust gaskets in place..... Awesome engine, and a pleasure to build, beware though you must test fit everything before you glue anything, and think two steps ahead, but I think i'am getting there, Until the next update......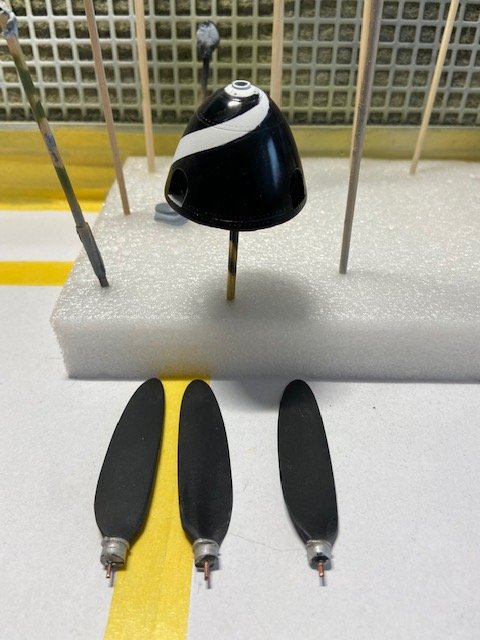
-
Thanks, i’ll do my best to make a decent looking model, Frank
-
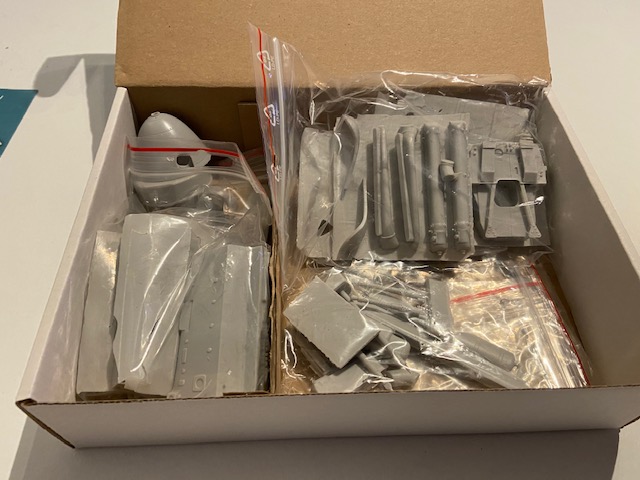
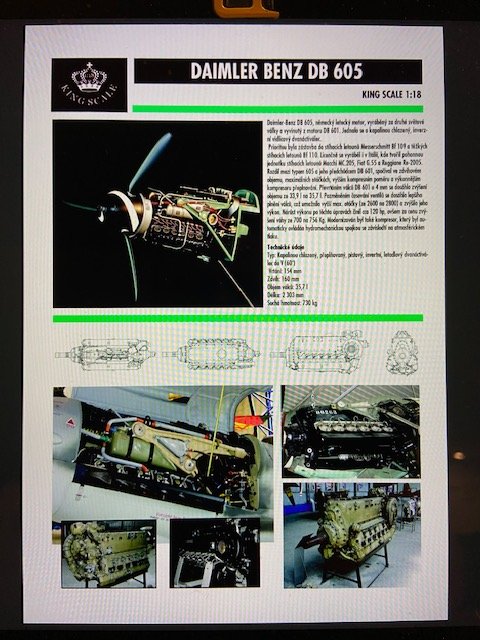
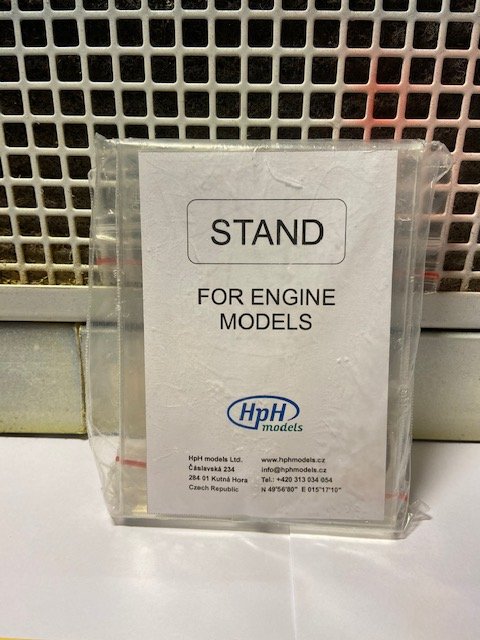
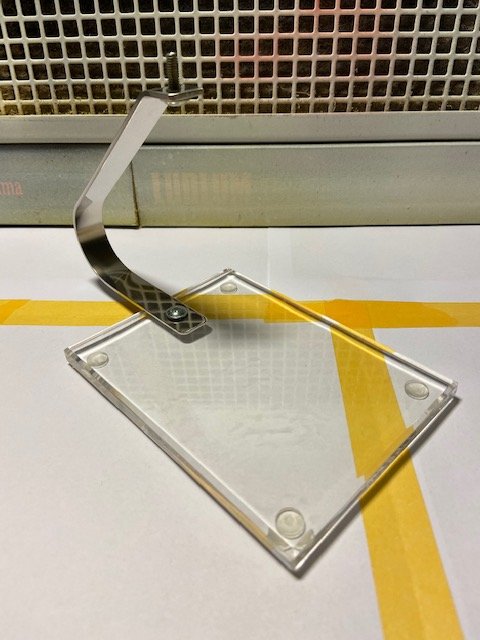
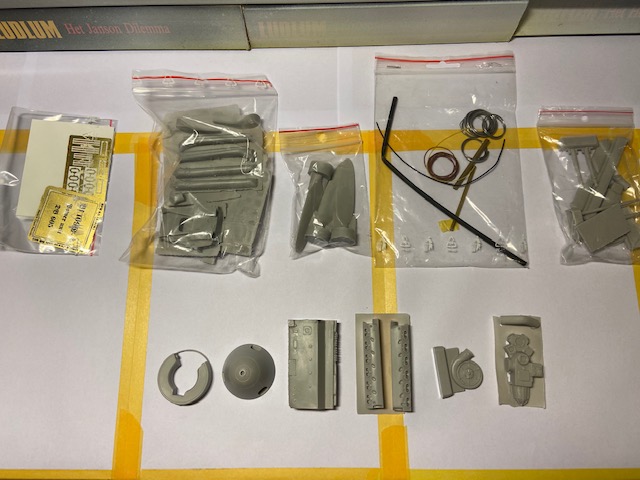
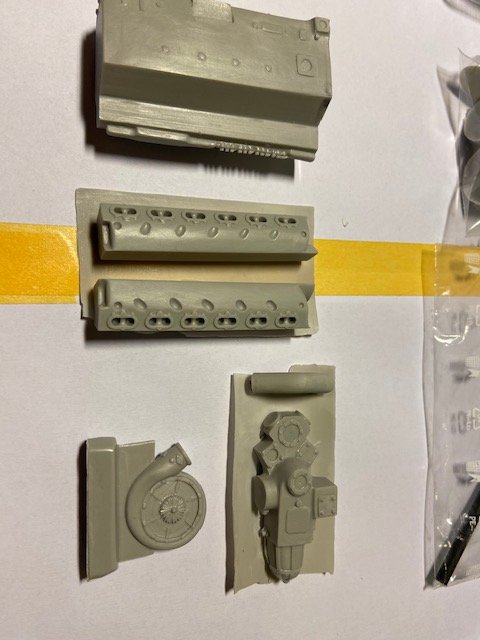
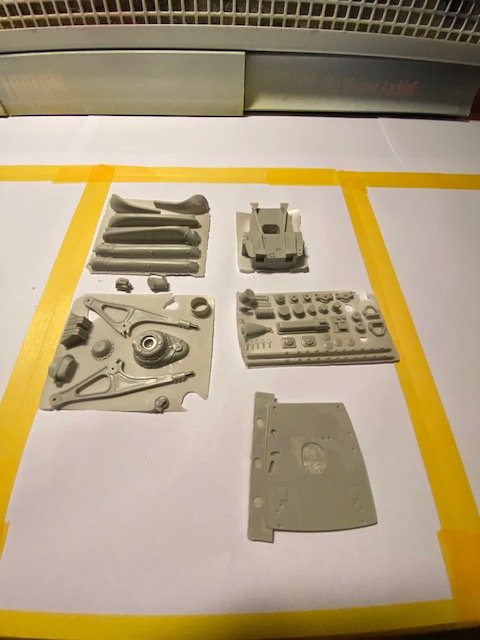
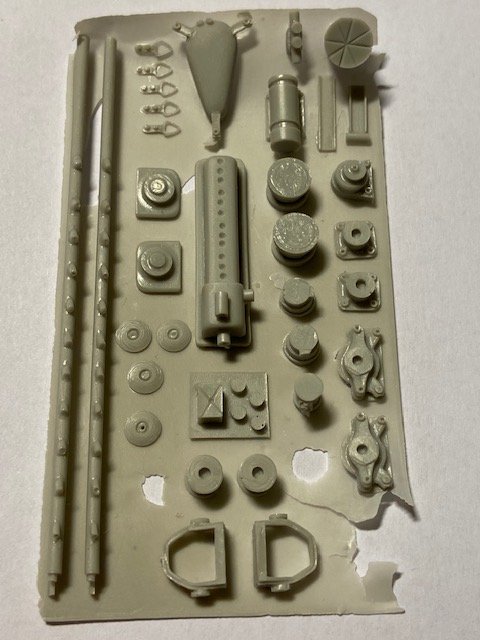
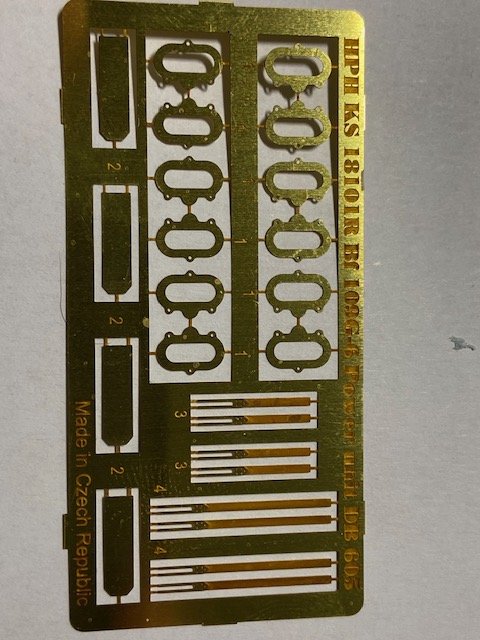
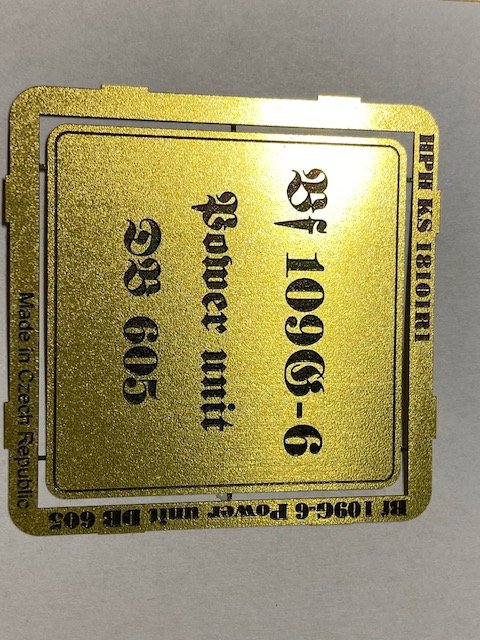
Hi guys, I am going for the construction of the famous DB605 engine that powered most of the Me 109's. It's a kit that had my attention for a while now, it's released a number of years ago bij HPH , they also do the Packard Merlin engine in 1/18 scale, ( that will probably be my next build) But here's the kit, The box is full of resin parts, the detailing of the parts is excellent, and in 1/18th scale they are HUGE , I hope I can do this famous engine justice, when done it should look like this, In the box is also a cd with building instructions and a parts breakdown, I also ordered the stand, (doesn't come with the kit) , it's worth it's money, and I want to display it as good as possible there is also a nice pe fret with the exhaust gaskets and a plate that is to be glued on the stand with the engine number, Enough said , so on with the build................. Fiets I cleaned up al the parts from the resin sheets and started with the main construction of the engine block , Glued the cilinder heads to the engine block, and added the ignition wires with the tube that holds them , also mounted the supercharger (The DB 605 is an inverted V12 ) After that I added the fuel injection pump on the bottom of the engine and added the injection lines to the pump, The injection system was a great advantage of this engine over the merlin engine that had a carburetor , the 109 could fly inverted and the engine would still be running thanks to the fuel injection system, while in the early spitfire's the engine would shut down when pulling negative G's, the carburetor didn't get any fuel under those circumstances and the engine would shut down. They English solved this problem later on, but at first the Germans made grateful use of this flaw, Fuel pump and fuel lines in place , made of lead wire That is it for now, will try to update regularly , (als got the HPH Catalina going on), so stay tuned, Frank


-
Israeli Mirage III C with Atar9C
Trigger replied to Kaireckstadt's topic in LSM 1/35 and Larger Work In Progress
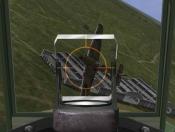
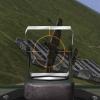
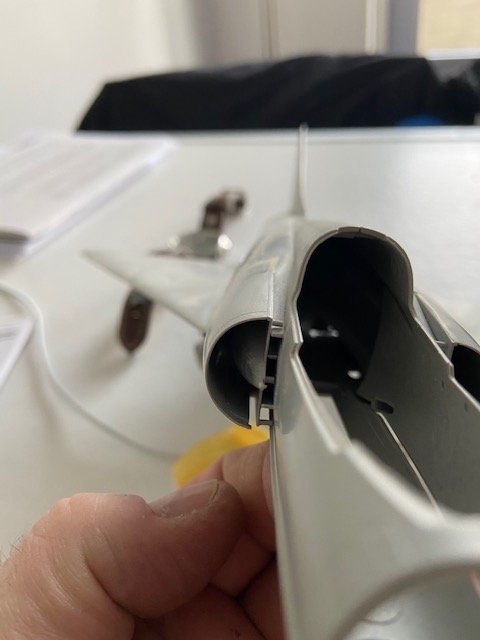
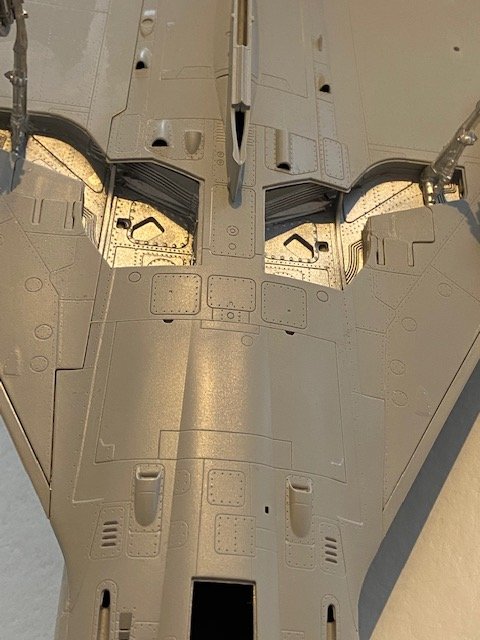
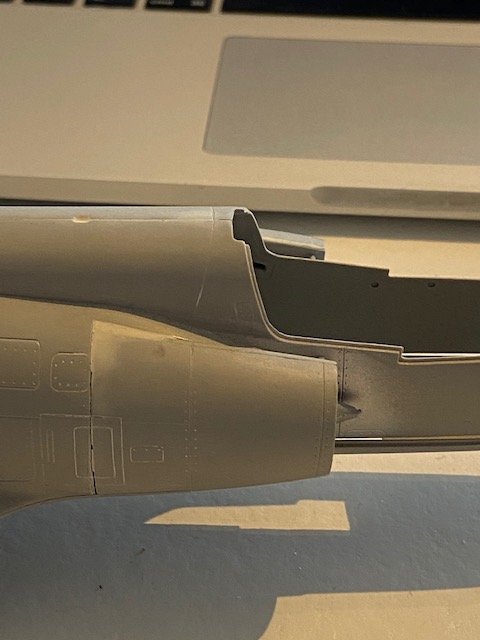
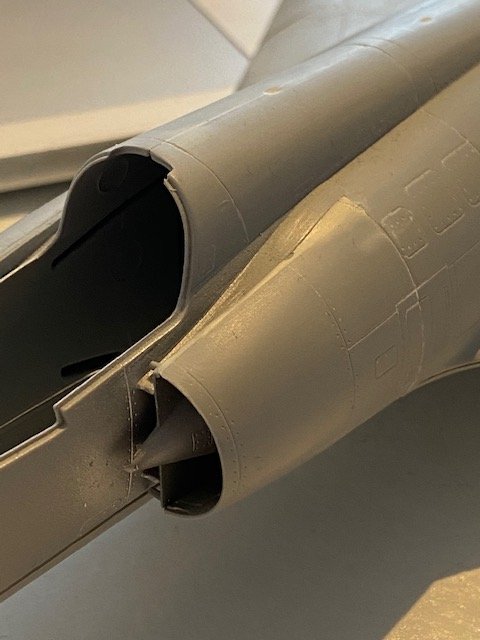
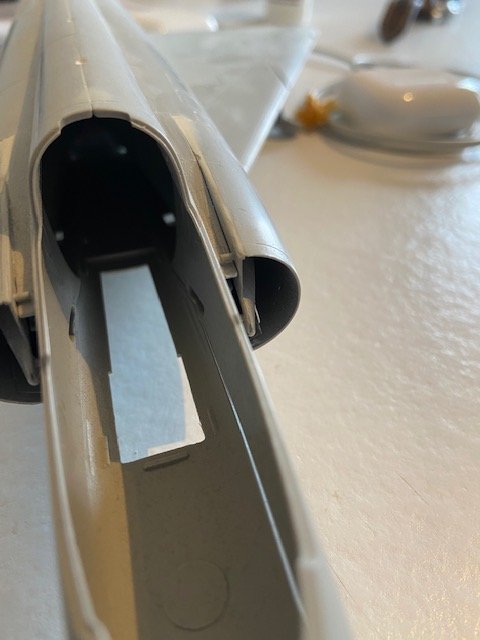
Hello kai, Great progress, I pulled out my mirage to compare if it has the same issues as yours, I remember that I also had issues with the fit of the intakes (see pictures), what is also pretty annoying is that there is a seam that runs through the Panel from top to bottom, a lot of filling to get that right, why could those guys at Italeri not come with a better idea or design for that? , but never the less it still is the only kit available in 1/32 scale that comes close to a mirage. you just have to put in a lot of effort to get there, and looking at your cockpit I know you will do the mirage justice , keep working like this and you will end up with a great Mirage,
-
Hai Kai, well, museum piece is not my goal, I just try to make it as decent as possible, if it were a complete aircraft I would certainly weather it, I am going for a "factory fresh" look with minimal weathering.
-
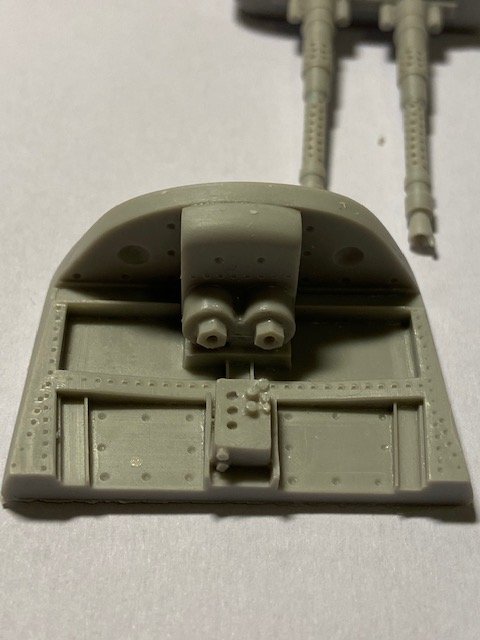
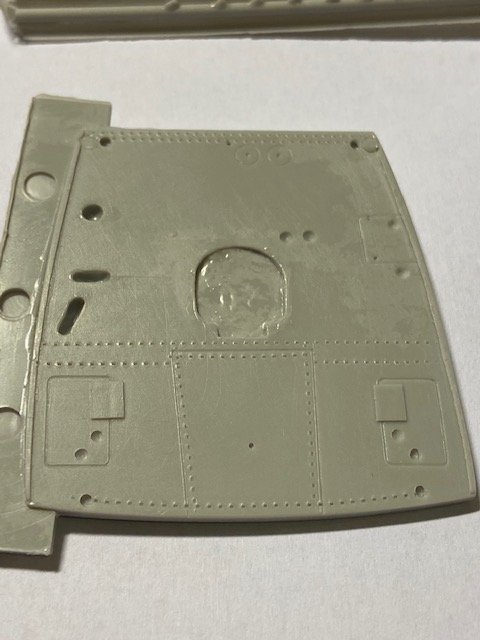
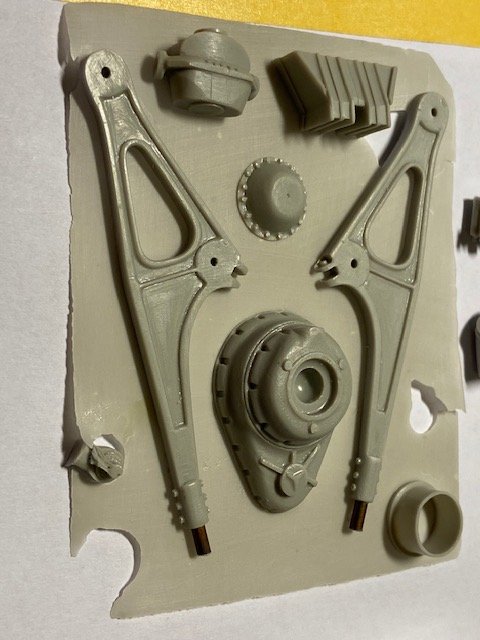
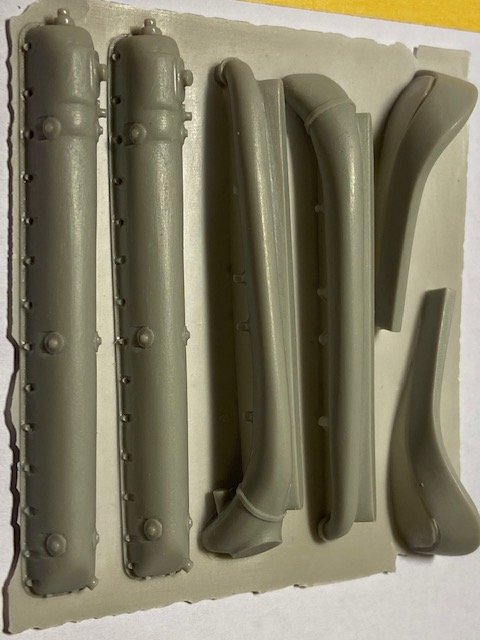
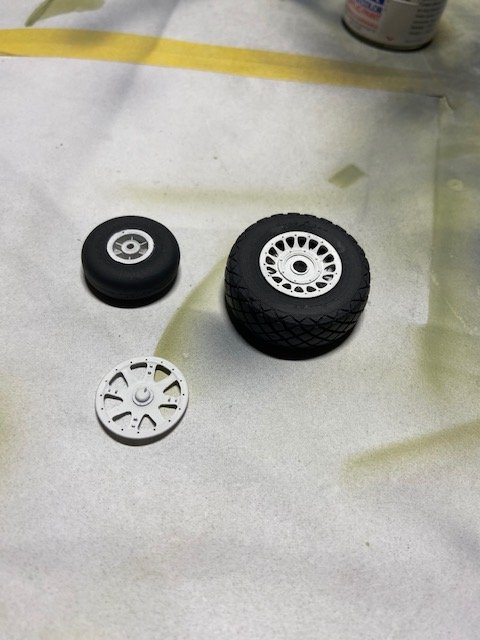
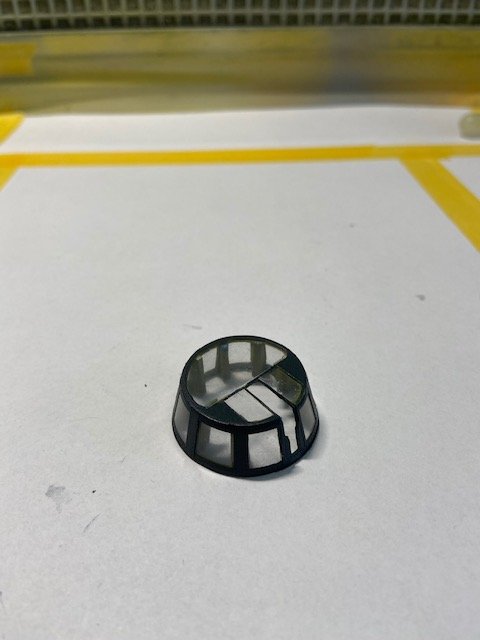
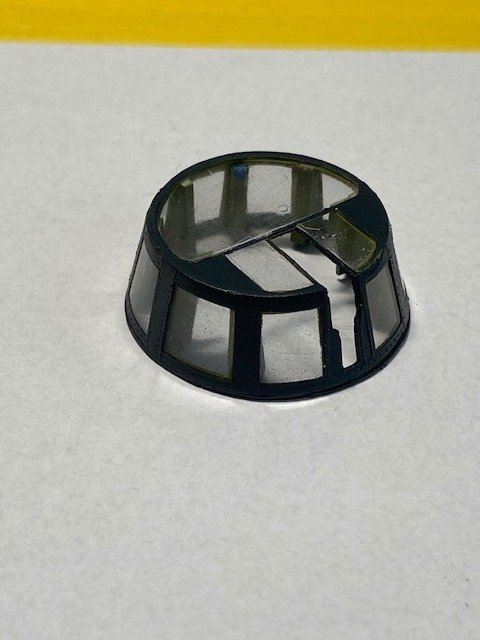
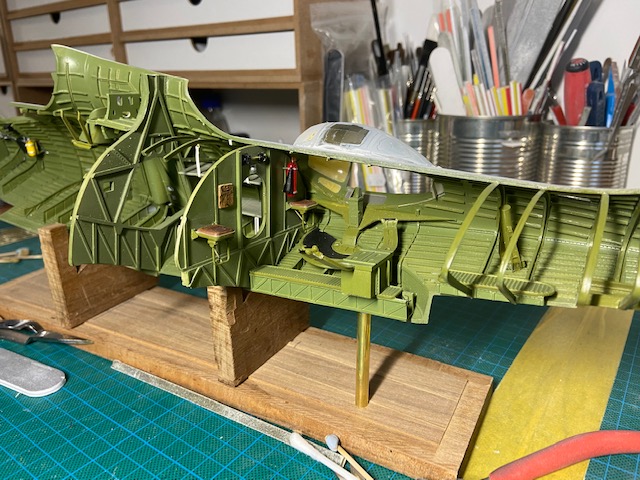
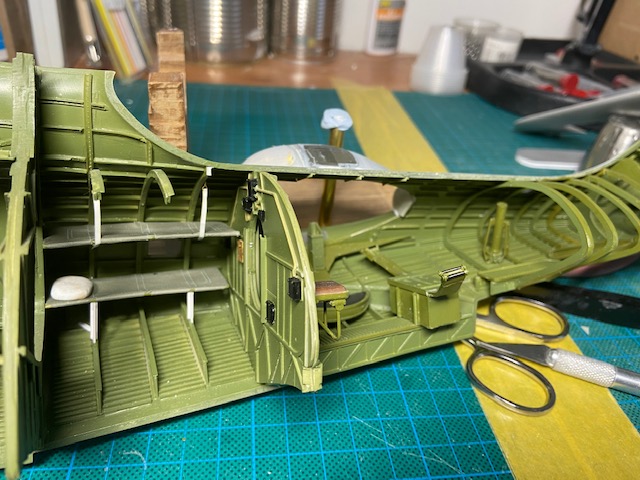
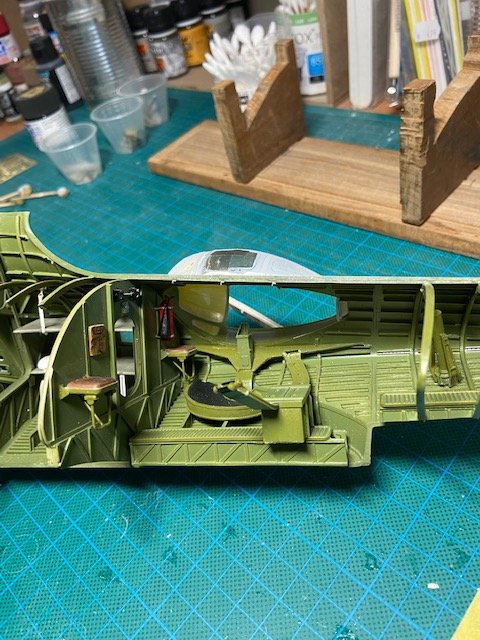
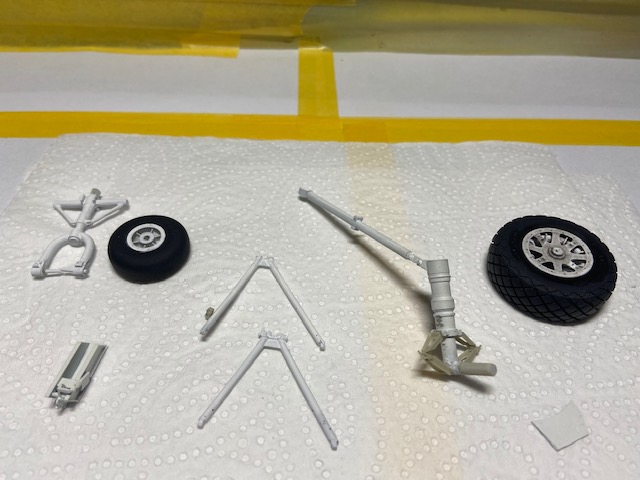
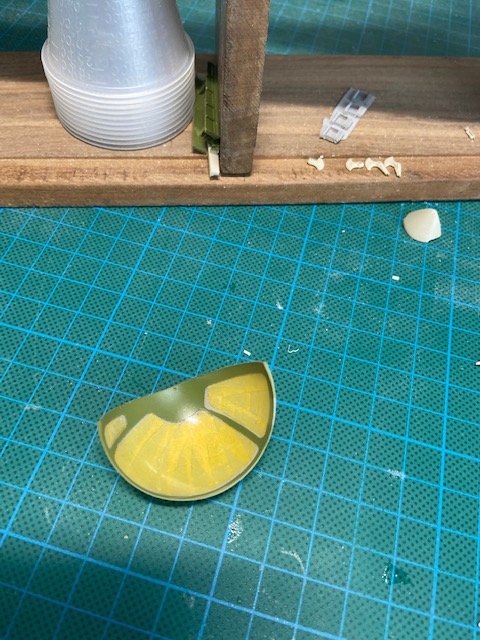
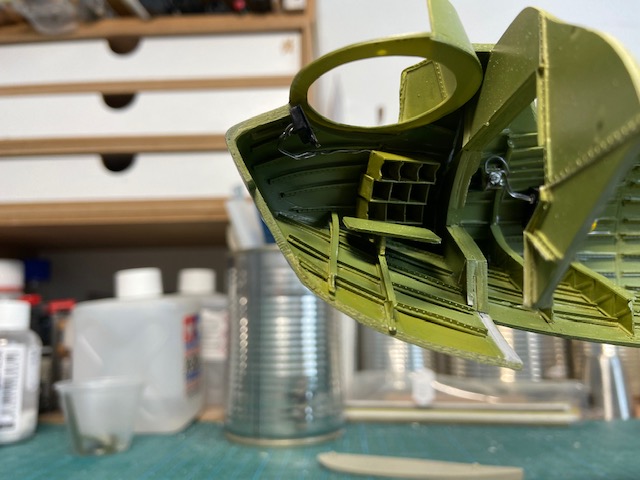
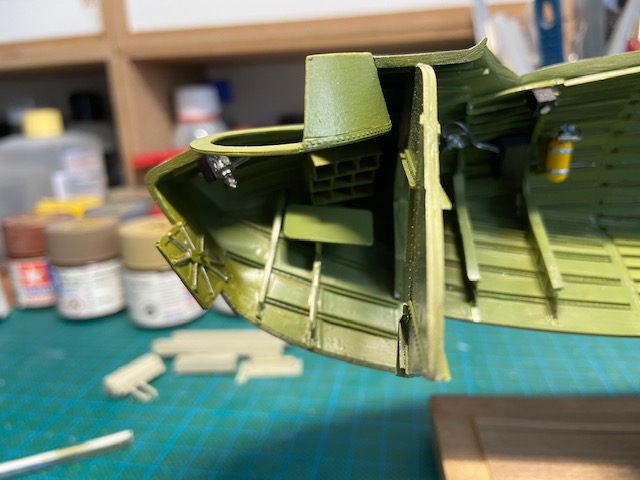
Hello Guys, Time for a small update, have been working on all kinds of bits and pieces, see for yourself, put the instruments in for the engine operator Put in the window from where the engine operator could see both engines, lots of sanding and fitting etc. Painted the wheel housing and the wheels Added hydraulic lines to the actuator cilinder that lowers the wheel, and also up again The Radio operator has his equipment now including head phones and morse key, added a wire on that one Some more radio equipment Added the pivot/hinge on the blister, nice piece of pe been busy with the bunks, the top one hangs from the overhead frames with belts added a Cushion, made of milliput Still needs some paint work on the legs of the bottom bunk The front turret painted, Well, that is it for now, still have tons of work to do, but I'am reaching the bottom of the parts box, Until the next update,


- 77 replies
-
- 12
-
-
-
Israeli Mirage III C with Atar9C
Trigger replied to Kaireckstadt's topic in LSM 1/35 and Larger Work In Progress
Hi Kai, I have the very same book, used it also as a reference for my build, my conversion set was also from Isra cast, at some point I will continue with this build, I think Italeri gave us a pretty good platform to build a Mirage all though the kit has it flaws, but it's the best kit available in this scale so far. I will certainly continue with it, and in the meantime I will be watching your build, Frank -
Israeli Mirage III C with Atar9C
Trigger replied to Kaireckstadt's topic in LSM 1/35 and Larger Work In Progress
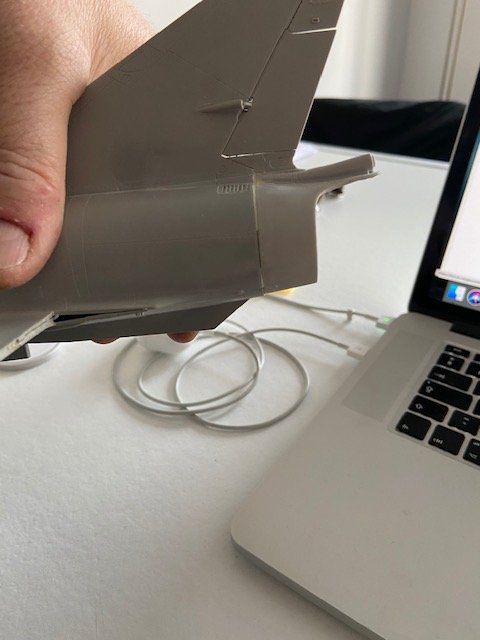
Nice clean work, i'am looking forward when you can put the camouflage colors on, absolutely love the Mirage, the IAF really made the aircraft work for them, as an interceptor it was a good opponent for the mig21 and the Hawker hunter in the Egyptian and Jordanian airforce. (I could not help myself and got my Mirage from the shelf of doom and dusted it of, I must really complete this bird, your build is giving me the enthusiasm to continue with it, but first the Catalina must be done) A picture from my Mirage, I was also going to build an Israeli bird, Cheers, Frank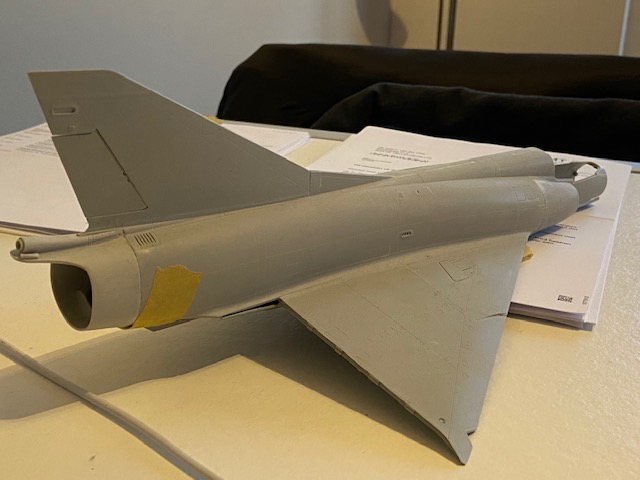
-
Thanks Harv, I'll keep on trying
-
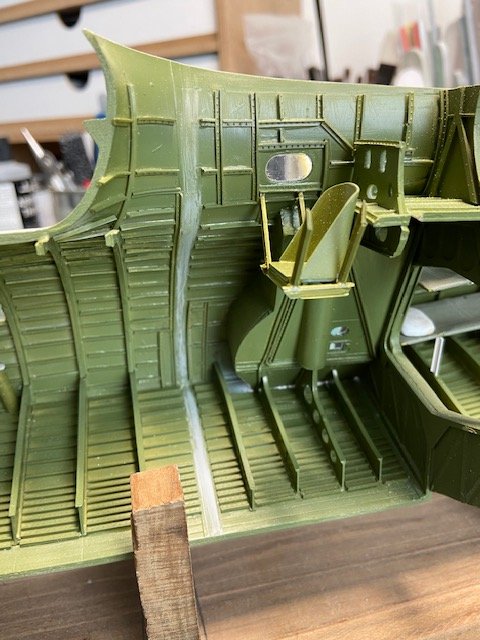
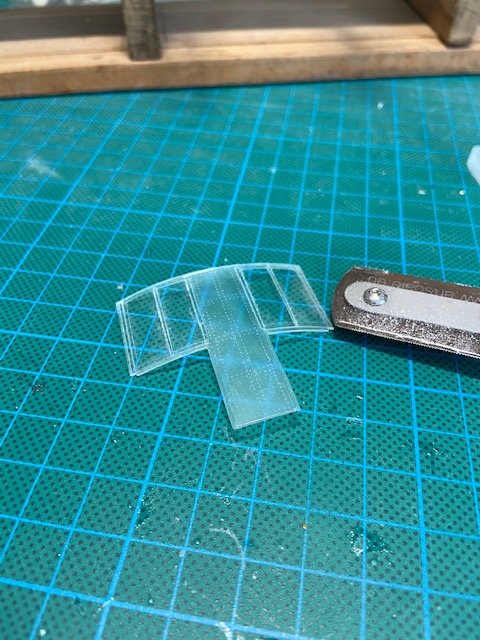
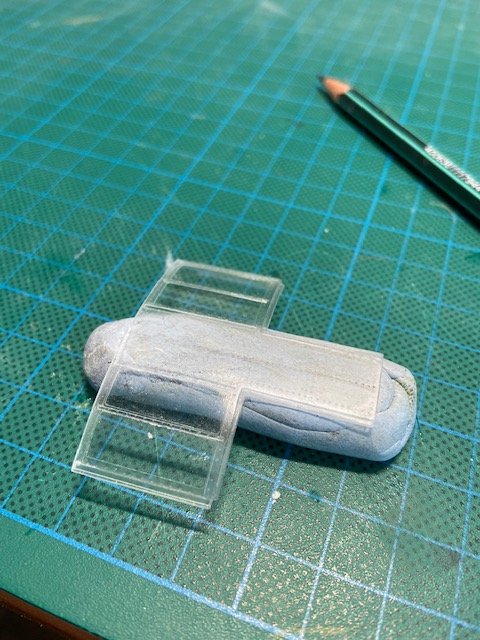
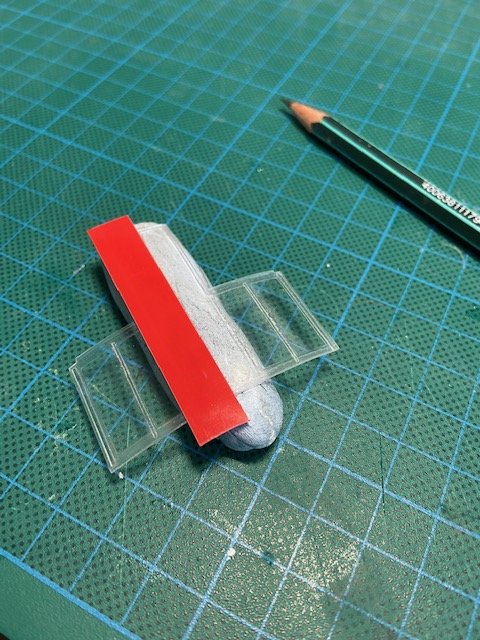
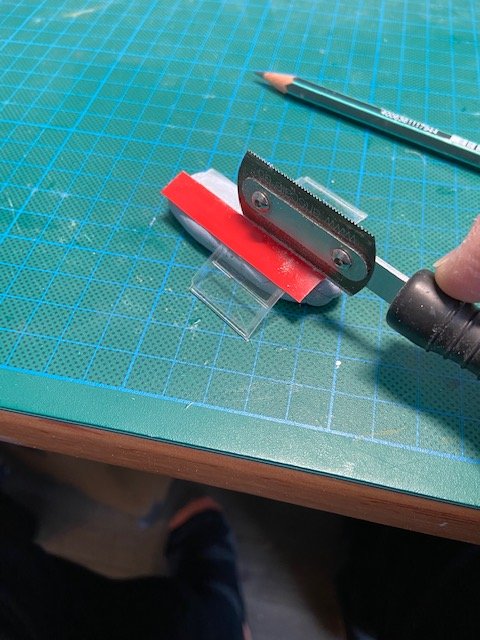
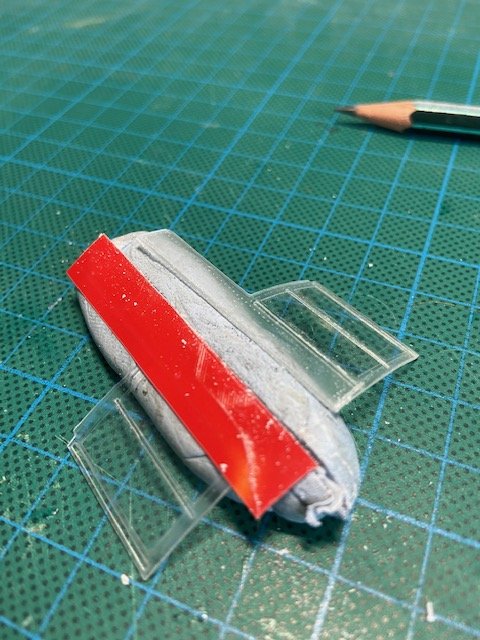
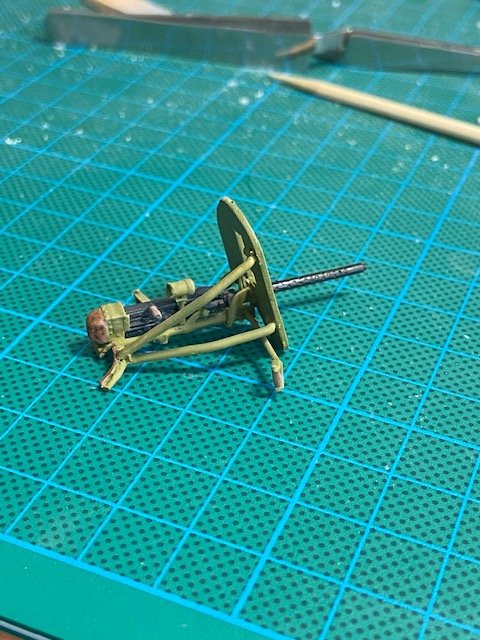
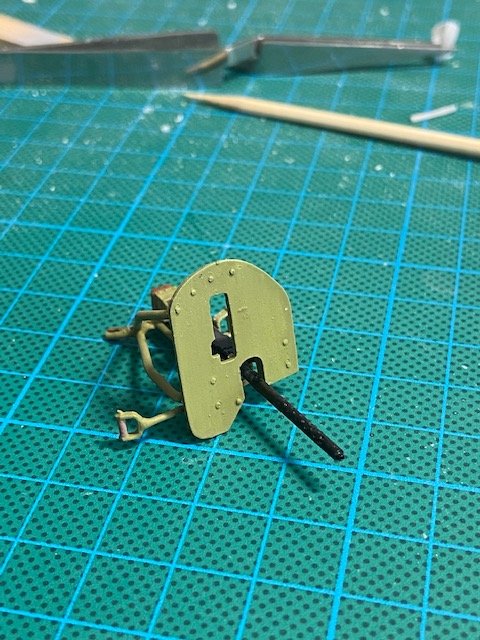
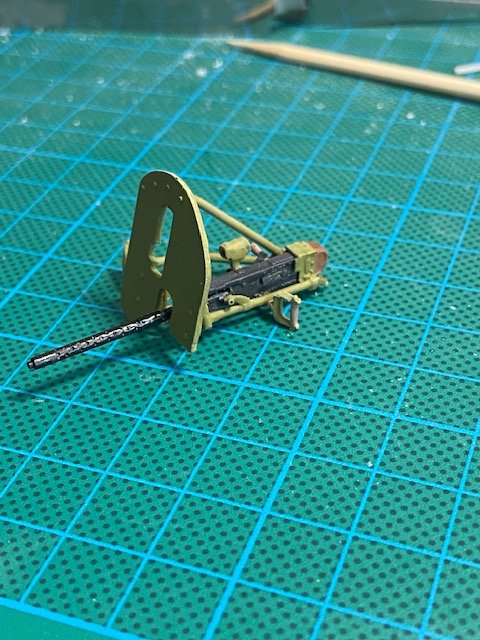
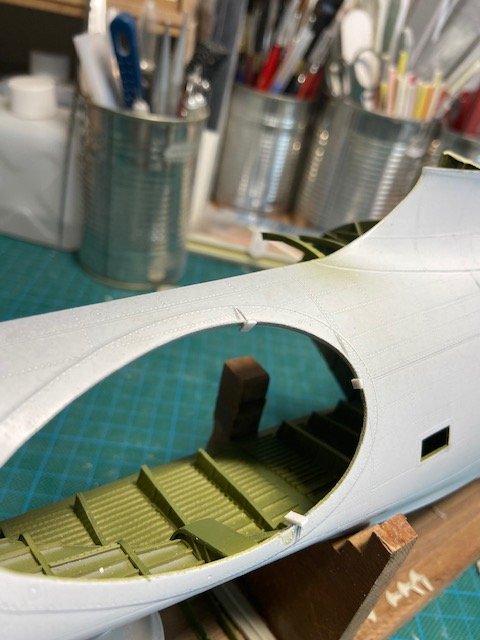
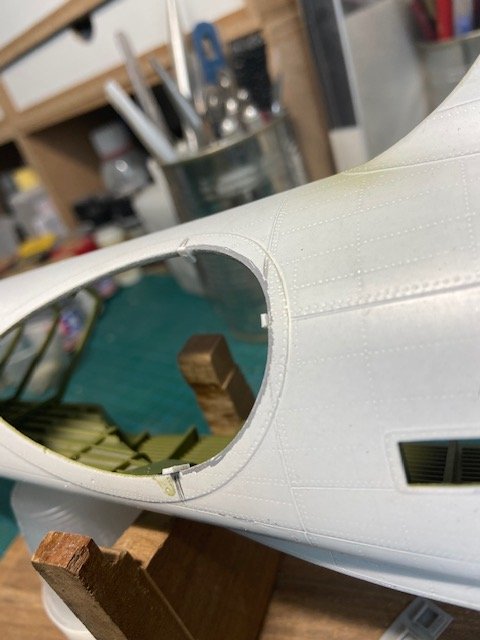
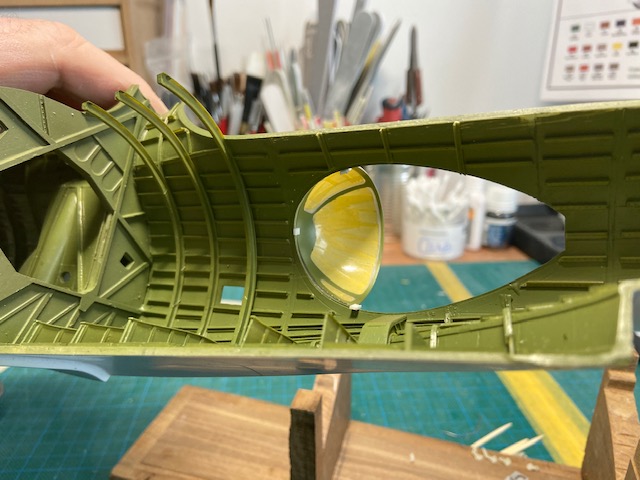
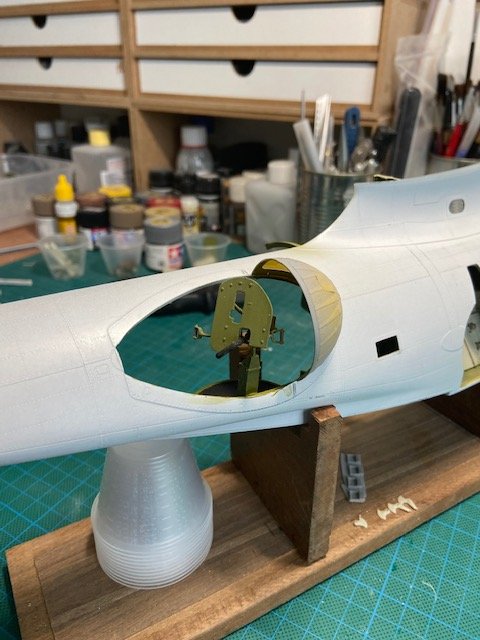
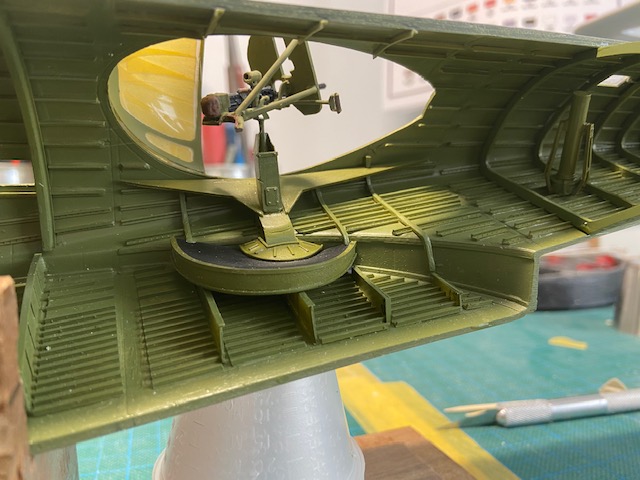
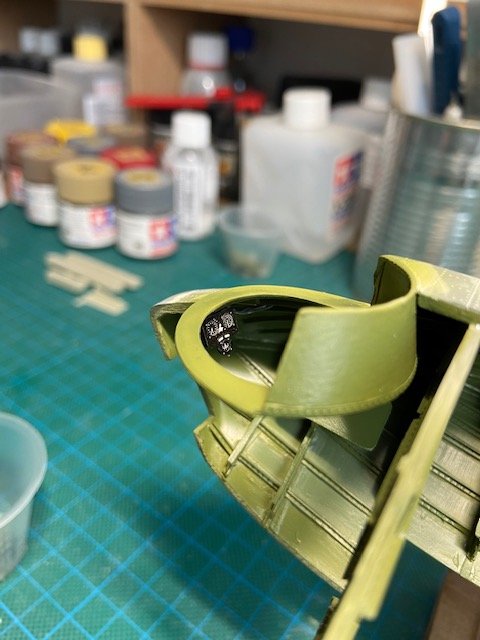
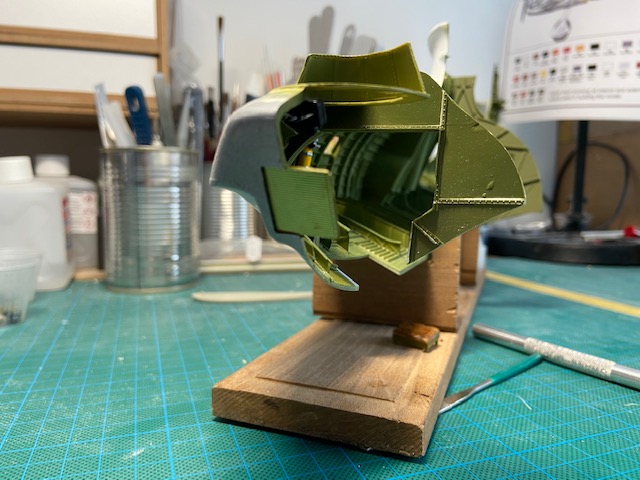
Hello Guys, Time for a small update on the Catalina, I have been working on all kinds of bits and pieces, decide to install the blister and the machine-gun, see for yourself , Ver time consuming to get all the parts together, cleaned an primed and painted, next step was to get the front of the blister against the fuselage. I decided to glue three little plasticard strips against the fuselage so I could get some kind of way to fixate the blister while I was glueing it, (used epoxy for this). So there I was sitting with my hand holding the blister in place while the epoxy dried for 5 minutes., but it worked.. Primed the inside of the blister and painted it in interior green, afterwards it would be impossible,.... Machine gun test fitted.... That's it for now, still in the process of preparing all the parts to be installed inside the fuselage, so that's not going very fast, but with every part mounted it gets better, and the Cat is beginning to be a very tricky thing to move about, constantly afraid of knocking something off... Frank

- 77 replies
-
- 12
-
-
Thanks, Your Mirage is also coming along nicely, (there are some interesting films on you tube with dog fights of the Israeli airforce with the Jordanian airforce, who flew with the hawker hunter at that time, although computer generated they give a good view of the capabilities of the Mirage, ( and their pilots), very interesting to see) I love the Mirage III, one of my favorite aircraft, will be watching your build, Frank
-
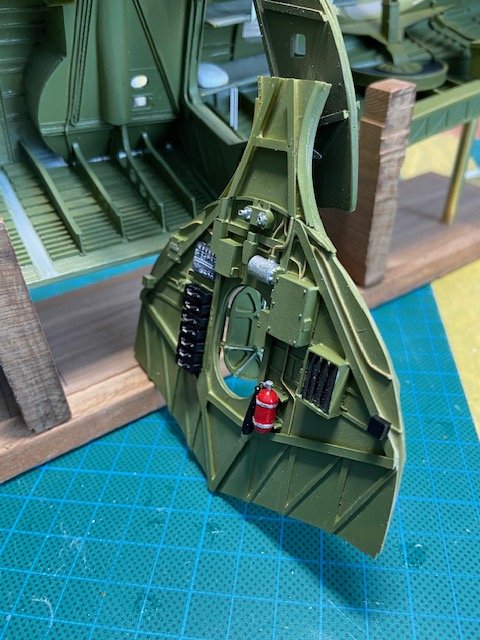
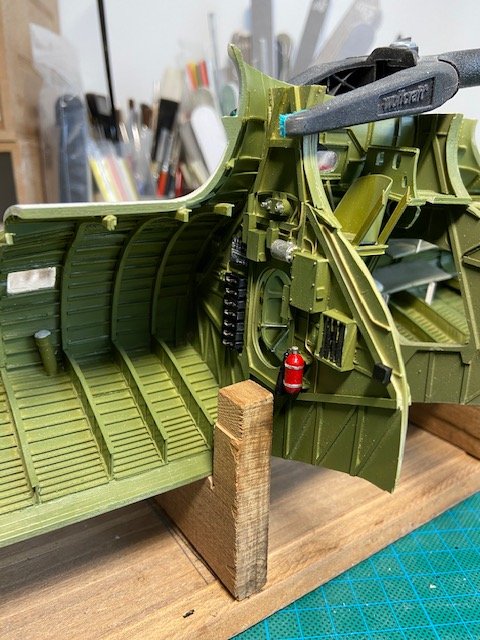
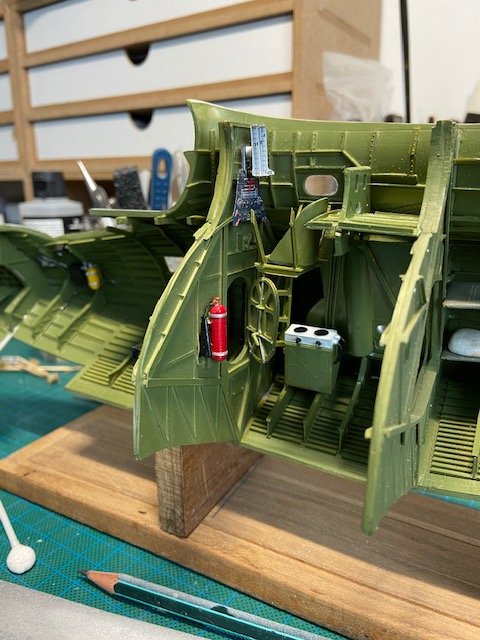
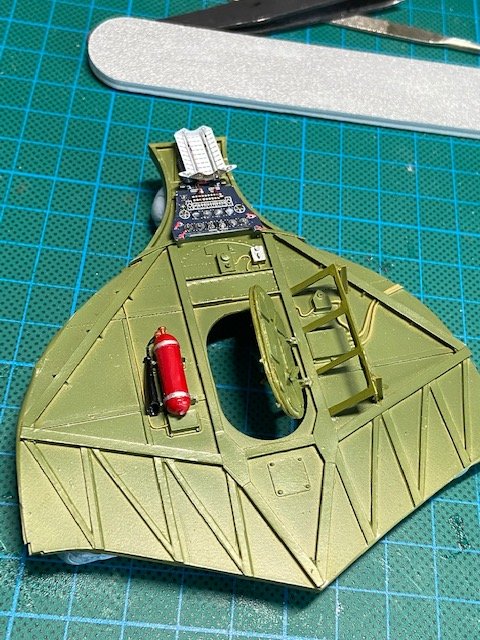
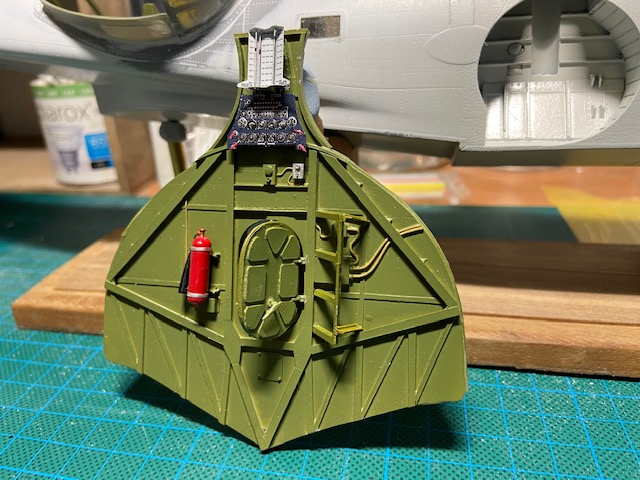
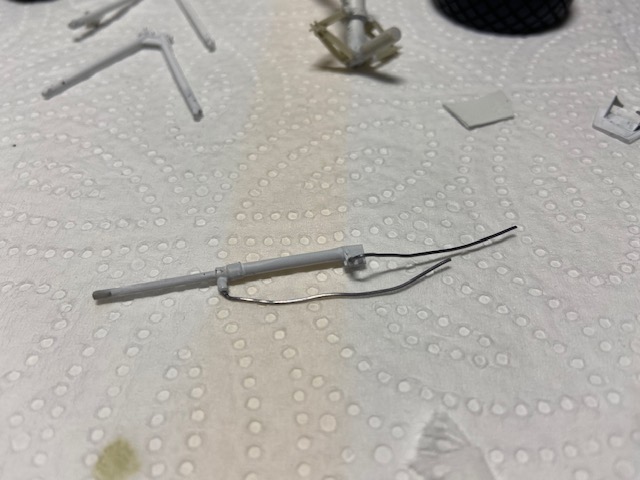
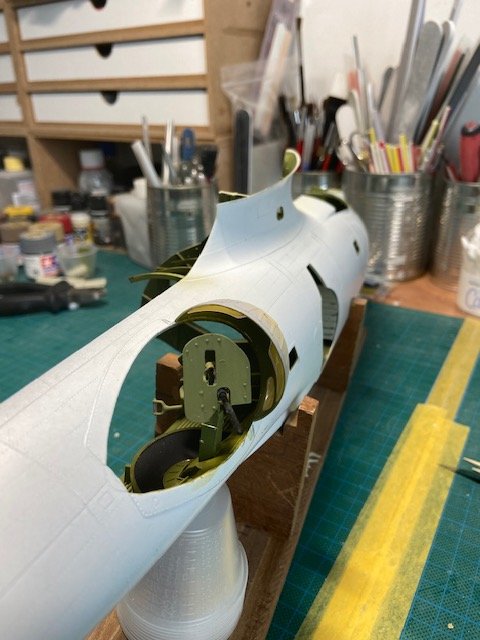
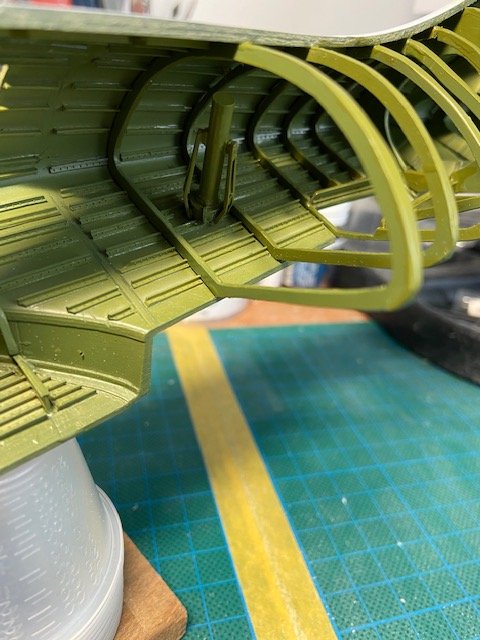
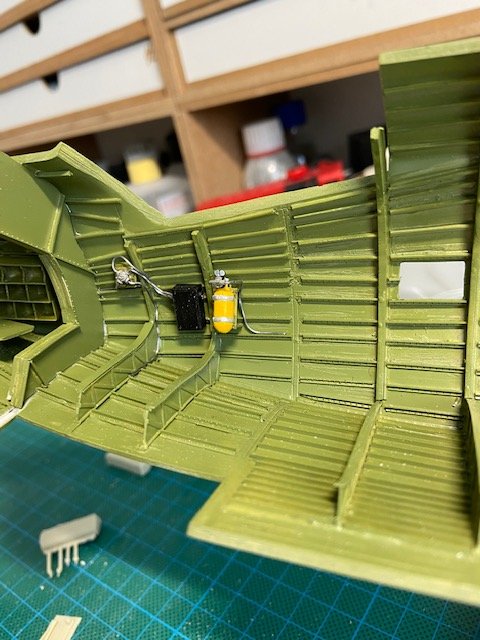
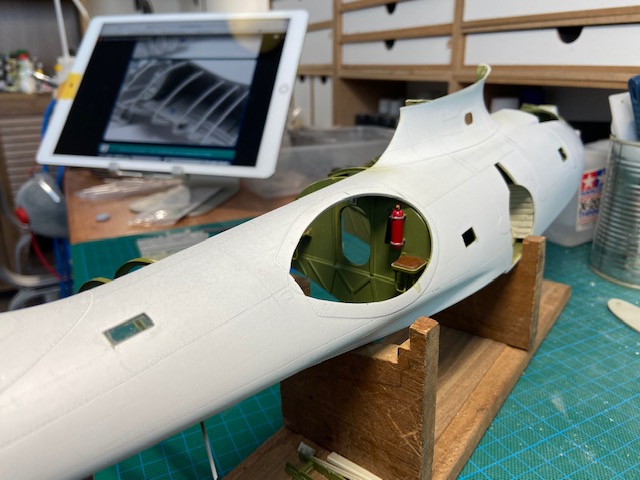
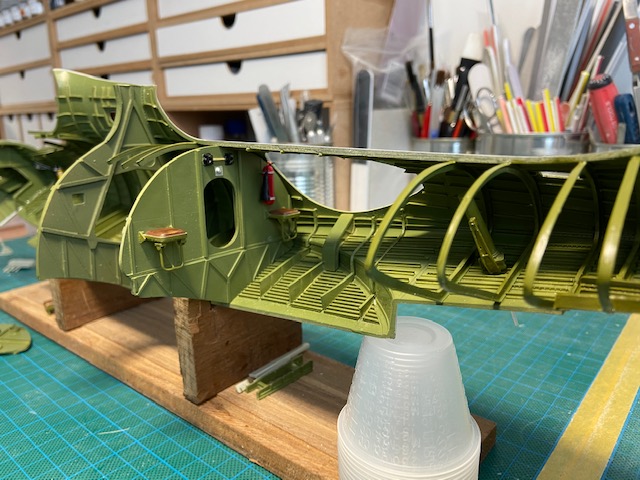
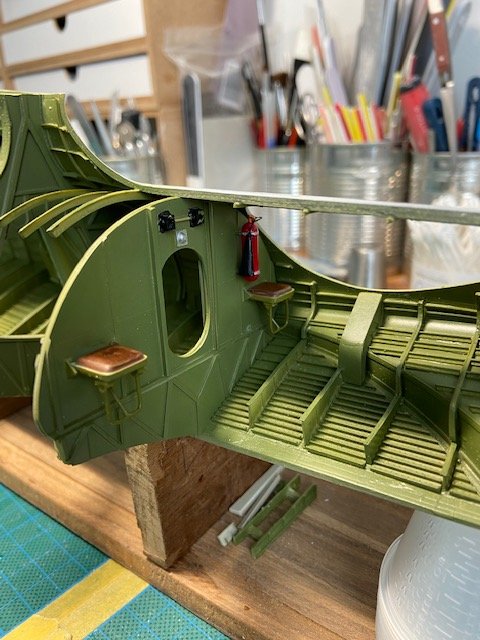
Hi Guys, Making small babysteps ahead, all those details are very time consuming, put in the ribs in the rear of the plane with the hatch opening for the machine-gun, one of the ribs doesn't line up very well, (to far inward), will take care of that later, also placed the ejector tube, Placed an oxygen bottle with some airlines made of lead wire in the cockpit area, placed an instrument panel with wiring in the nose section, and placed some other closets and a little table nose hatch fitted, worked on detailing some bulkheads , placed two folding seats and a fire extinguisher well, that's about it for now, working myself through all the bits and pieces, (and there are a lot), so doesn't look like much but slowly I'll get there, More to follow, Frank


-
Hello Fran, i know you did The review, was very good, ever since then i wanted to buy The kit, but the price witheld me, untill now, i Will try to do the kit Justice, thanks for the comment, Regards, Frank
-
Thanks Peter, Any news on your Sufa?
