Clunkmeister
-
Posts
7,193 -
Joined
-
Last visited
Content Type
Profiles
Forums
Events
Gallery
Everything posted by Clunkmeister
-
They have their style over there and we have ours. My thoughts are with the great people who have run that outfit for years, and through their devotion, have given us the best model kits this world has ever seen. All those releases, and there’s not a dog in any of them.
-
Tim, c’mon out this way and I’ll hook you up with some 180 proof. Then, if you can handle it there grasshopper, we’ll dial it up to 195 80 proof? Like making love in a canoe...... F**king close to water!
-

IBG models PZL P.11c. Finished
Clunkmeister replied to Clunkmeister's topic in LSM 1/35 and Larger Work In Progress
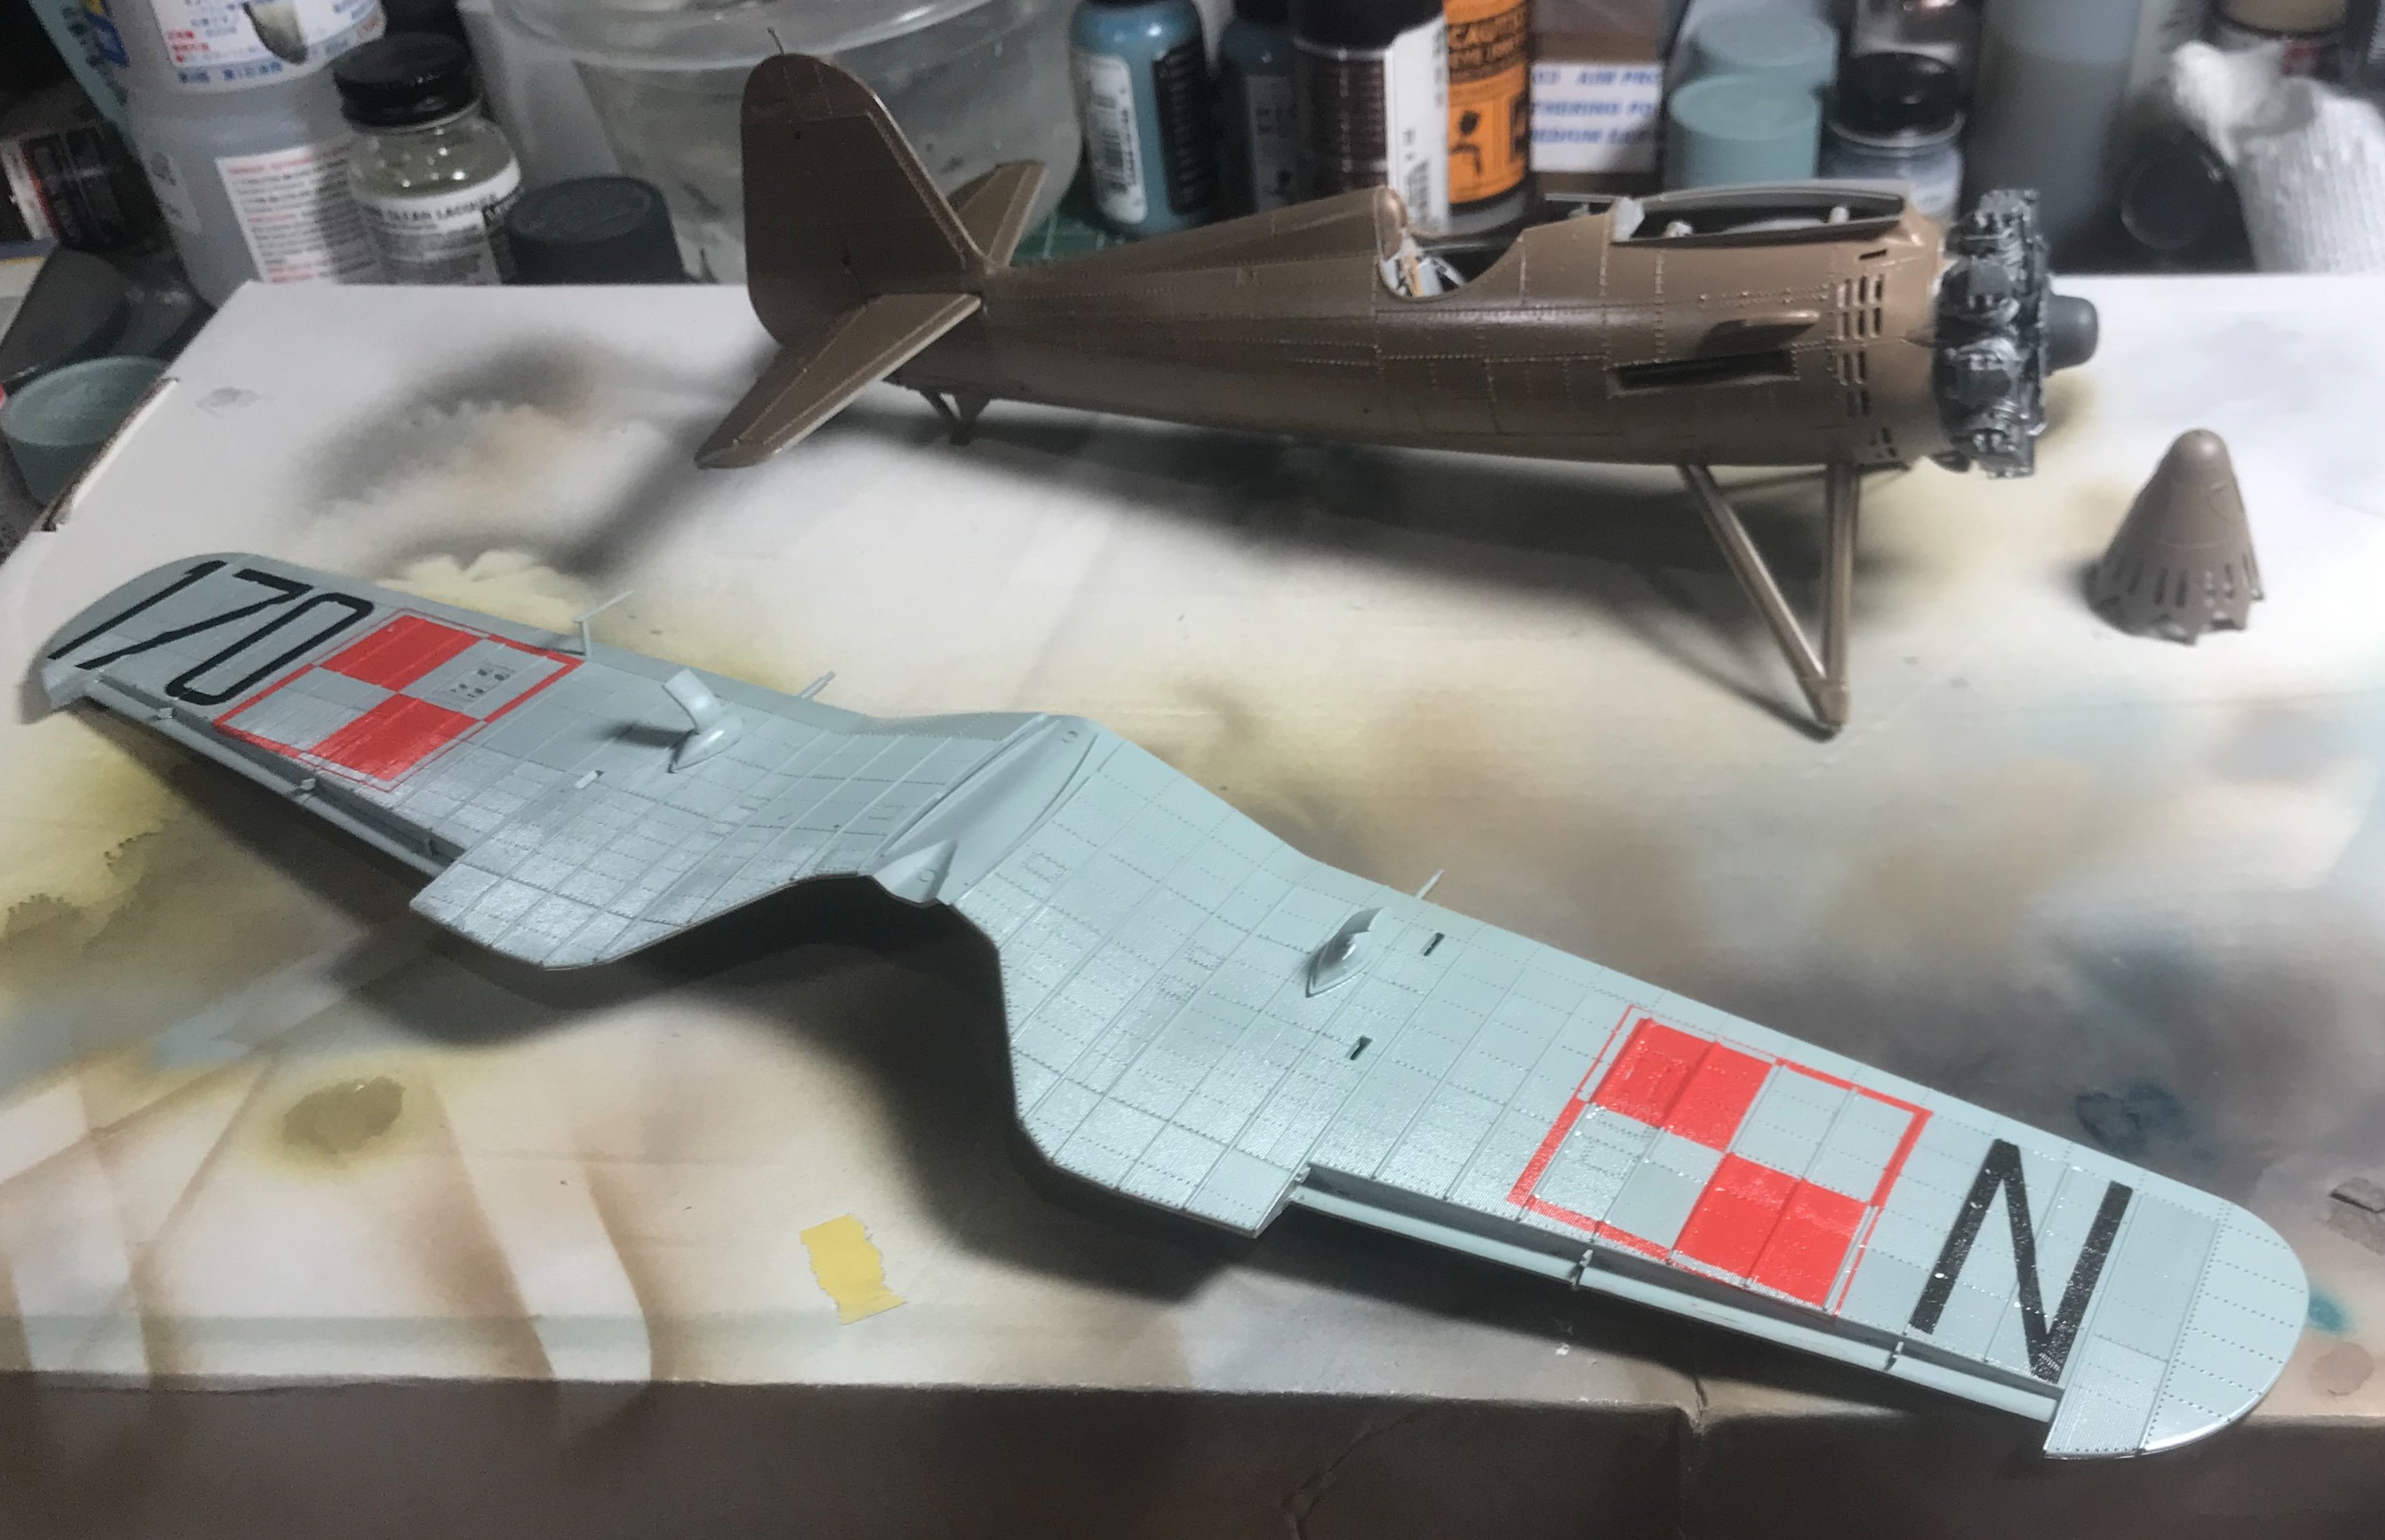
Alright, time for an update, folks. I’ve made a few little mistaakes here and there, but all were minor and just simple builder errors. Nothing remarkable, just all fixable things like forgetting to drill the holes for the spent brass ejectors. The ejector chutes are solid. They need to be hollow, so for my next build I’ll either hollow the ends or buy AM somewhere. A word. I looked on eBay and there are multiple AM pieces being issued for the P.11, so I expect this is going to be one VERY popular kit around the world. This kit really doesn’t need much AM. Resin engines, nosecones, wheels etc are all available, but the kit parts are truly superb OOB. Techmod supplies the kit decals, (makes sense), and as is usually the case with Techmod, the decals are superb. Very, very thin, and they stick like glue. They are impossible to “float” into position, so make sure you get them in place quickly. A bit of dish soap in the water helps the decals ease into position a bit easier. I decided to decal the bottom of the wing before mounting the wing, so tomorrow, on goes the wing. The bottom insignia were quite difficult to locate correctly, but eventually, they found their spots. Just keep them well lubricated. Then hit them hard with MicroSol to snuggle them down. They’re still drying here, I’m on my third coat of MicroSol, and then a clear coat followed by some weathering. Decal performance has been absolutely stunning.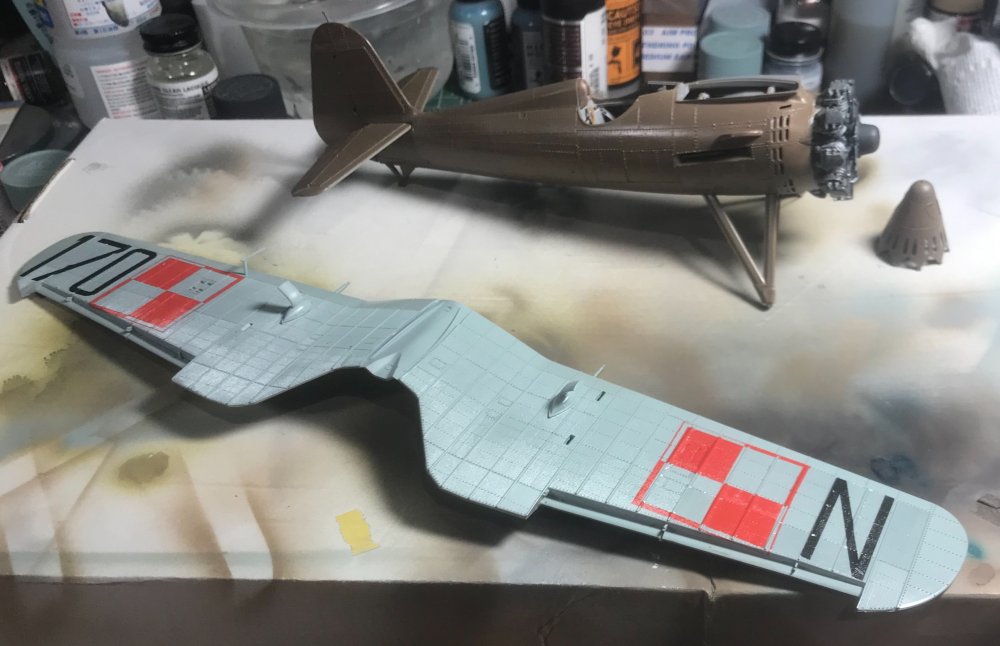
-
Good grief, alcohol abuse! That Scotch is about to spill! But have no fear, anyone who knows me understands that my taste in alcoholic beverages runs much, much more refined than that swill.
-
What is on your bench right now ? Share a picture :)
Clunkmeister replied to Martinnfb's topic in Modelling Discussion
It looks like a diagram of football play just to get to Carl’s bench.. hahahahaha. -
IBG models PZL P.11c. Finished
Clunkmeister replied to Clunkmeister's topic in LSM 1/35 and Larger Work In Progress
Excuse me, but I’ve turned brown. Too long in the sun. I really, really like the classic look of an uncowled racial....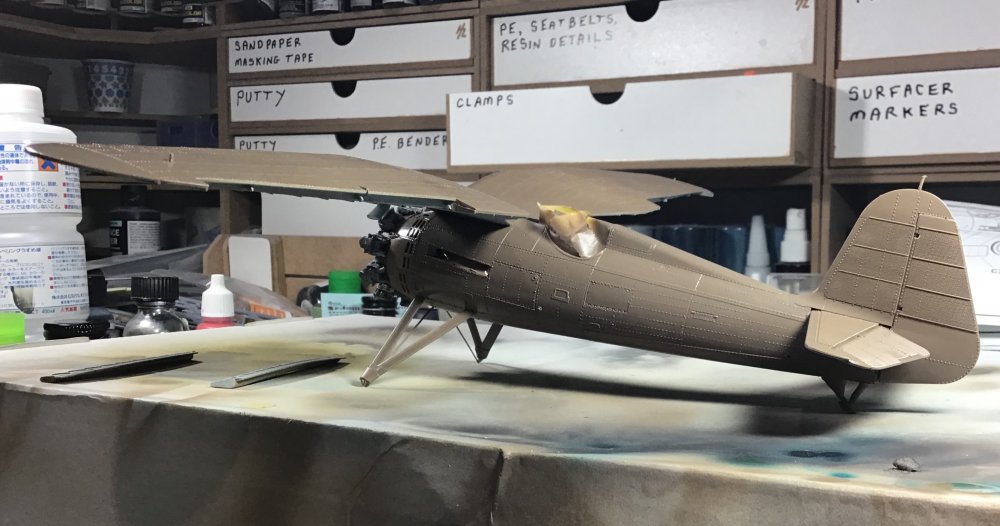
-
Anyone who fetches Guinness from a refrigerator is on my naughty list. Guinness is consumed at room temperature, oh yee of little training.
-
I'm fixin' to tear up now...
-
IBG models PZL P.11c. Finished
Clunkmeister replied to Clunkmeister's topic in LSM 1/35 and Larger Work In Progress
Mark, I'd say there are only a couple things that i'd certyainly change. And even at that, it's really up to the builder and where you want to go with it, because it presents well OOB. 1. Gun Barrels They are prominent on this plane. Plastic parts are OK and you need to drill the muzzles, but the barrels have slotted cooling shrouds over them, and those never represent well in plastic. Use the Master Barrel Kit. 2. Venturi Tube. The hourglass venturi tube on the side of the fuselage is pretty much universal on smaller aircraft from the 1930s through to the 1950s. That's one of those parts that's not able to be well represented in plastic without much work. Definitely AM and the Master Barrel set has one in it. 3. Seatbelts. Like all PE belts, I personally detest even the best of them. I used them here for this OOB build, but I'd go HGW, RB, or any good quality textile belt. I'm sure there's plenty people can change, but in my opinion, the rest of the kit is of the highest quality, and of the highest useability -
What is on your bench right now ? Share a picture :)
Clunkmeister replied to Martinnfb's topic in Modelling Discussion
Outstanding pictures Carl! I love it! -
What is on your bench right now ? Share a picture :)
Clunkmeister replied to Martinnfb's topic in Modelling Discussion
Carl, my friend, this is truly, truly epic. I’m most impressed. Where do you sit? Is there a path for ingress/egress? Possibly a trap door in the roof? However you do it, it demonstrated unique skill, ability, determination, and athleticism... Now just don’t look at my bench it wants to be yours when it grows up. -
German Pak 40 gun and crew diorama, Russia 1943.
Clunkmeister replied to BradG's topic in LSM Armour Finished Work
I have the same issue with my figures, Brad, except mine always appear glossy no matter how much flatcoat I airbrush on. One T-28 I have has a couple guys climbing in, and no matter what I do with them,. the LOOK like toy soldiers. -
IBG models PZL P.11c. Finished
Clunkmeister replied to Clunkmeister's topic in LSM 1/35 and Larger Work In Progress
I'm going to use the Master barrel kit for my second build. It has the brass venturi tube, which to me is worth the price in itself. -
IBG models PZL P.11c. Finished
Clunkmeister replied to Clunkmeister's topic in LSM 1/35 and Larger Work In Progress
I have one for my Silver Wings kit. I'm keeping it for that. -
IBG models PZL P.11c. Finished
Clunkmeister replied to Clunkmeister's topic in LSM 1/35 and Larger Work In Progress
quite honestly Rob, other than as a time saver, I don't think you'd even need the Yahu panel. It goes together quite nicely as is. -
1/18 Focke-Wulf Fw190C V18 'Känguruh'
Clunkmeister replied to airscale's topic in LSM 1/35 and Larger Work In Progress
Nice profile, Martin. Now that you make note of the obvious, you can see the A-3/4 shining through plain as day. I totally missed it myself. You had done this in 1/32 if I remember and you saying how you turned over every rock looking for information. -
IBG models PZL P.11c. Finished
Clunkmeister replied to Clunkmeister's topic in LSM 1/35 and Larger Work In Progress
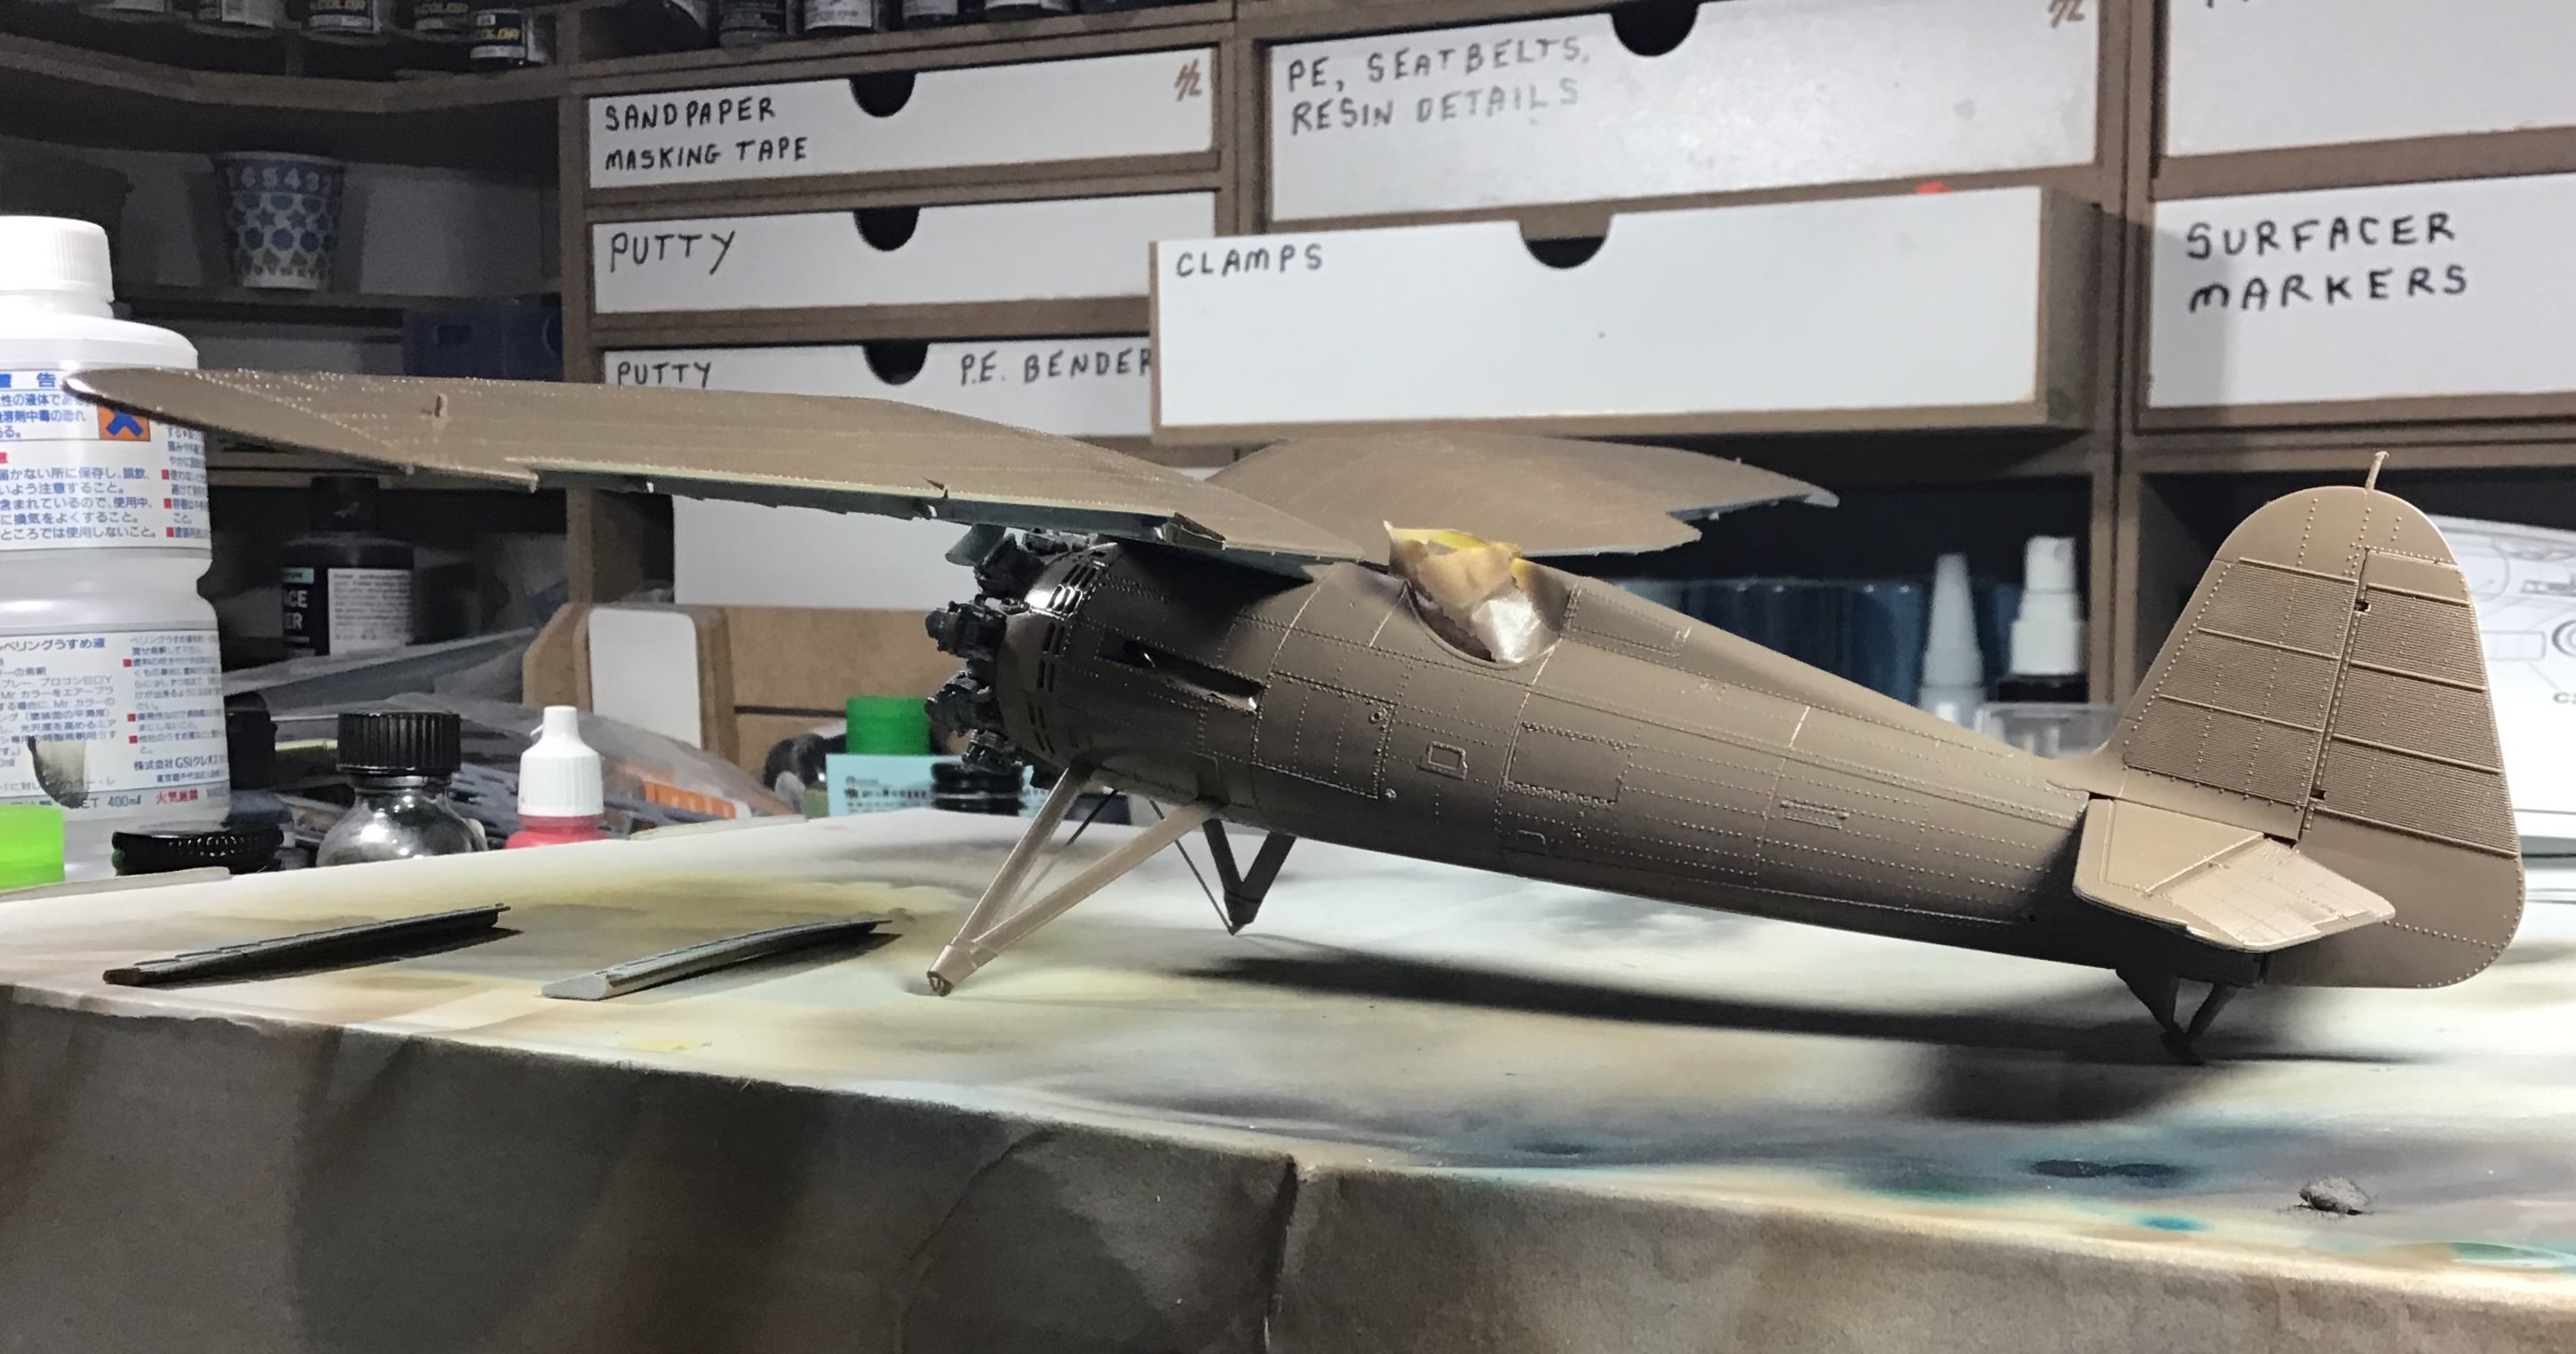
Well, I ordered some supposedly exact match Hataka light Polish khaki for this OOB build review, and I Donny, it seems way to brown to me. In person, it’s BROWN. Here in the pictures, it’s not so bad. But I’m gonna go with it and see what we got. Next, a couple good highlights and lowlights, followed by a wash. We’ll see. PZL #2 = NMF.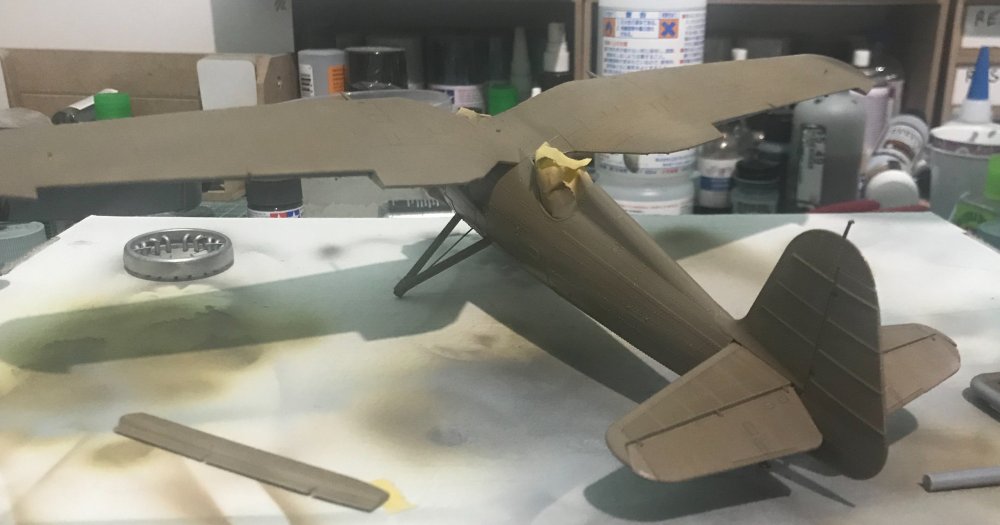
-
IBG models PZL P.11c. Finished
Clunkmeister replied to Clunkmeister's topic in LSM 1/35 and Larger Work In Progress
I expect they’ll lay down nicely. Plenty of MicroSet and Sol. -
IBG models PZL P.11c. Finished
Clunkmeister replied to Clunkmeister's topic in LSM 1/35 and Larger Work In Progress
So I've received my second kit in the mail. WOOHOO! Once I'm done this OOB build, we're gonna see what we can do to spruce this thing up into a winner. -
1/18 Focke-Wulf Fw190C V18 'Känguruh'
Clunkmeister replied to airscale's topic in LSM 1/35 and Larger Work In Progress
Very nice Peter! Your last two masterpieces took my breath away, and I expect this one will as well. Martin is certainly an 190 expert, the man truly lives and breathes the type. Ok, I may slightly exaggerate, but he forgot more about the 190 than I'll ever know. One thing I've been wanting to ask is, Do you slim the core models down at all before you apply the Litho Plate, or is it negligable enought to not really bother? -
IBG models PZL P.11c. Finished
Clunkmeister replied to Clunkmeister's topic in LSM 1/35 and Larger Work In Progress
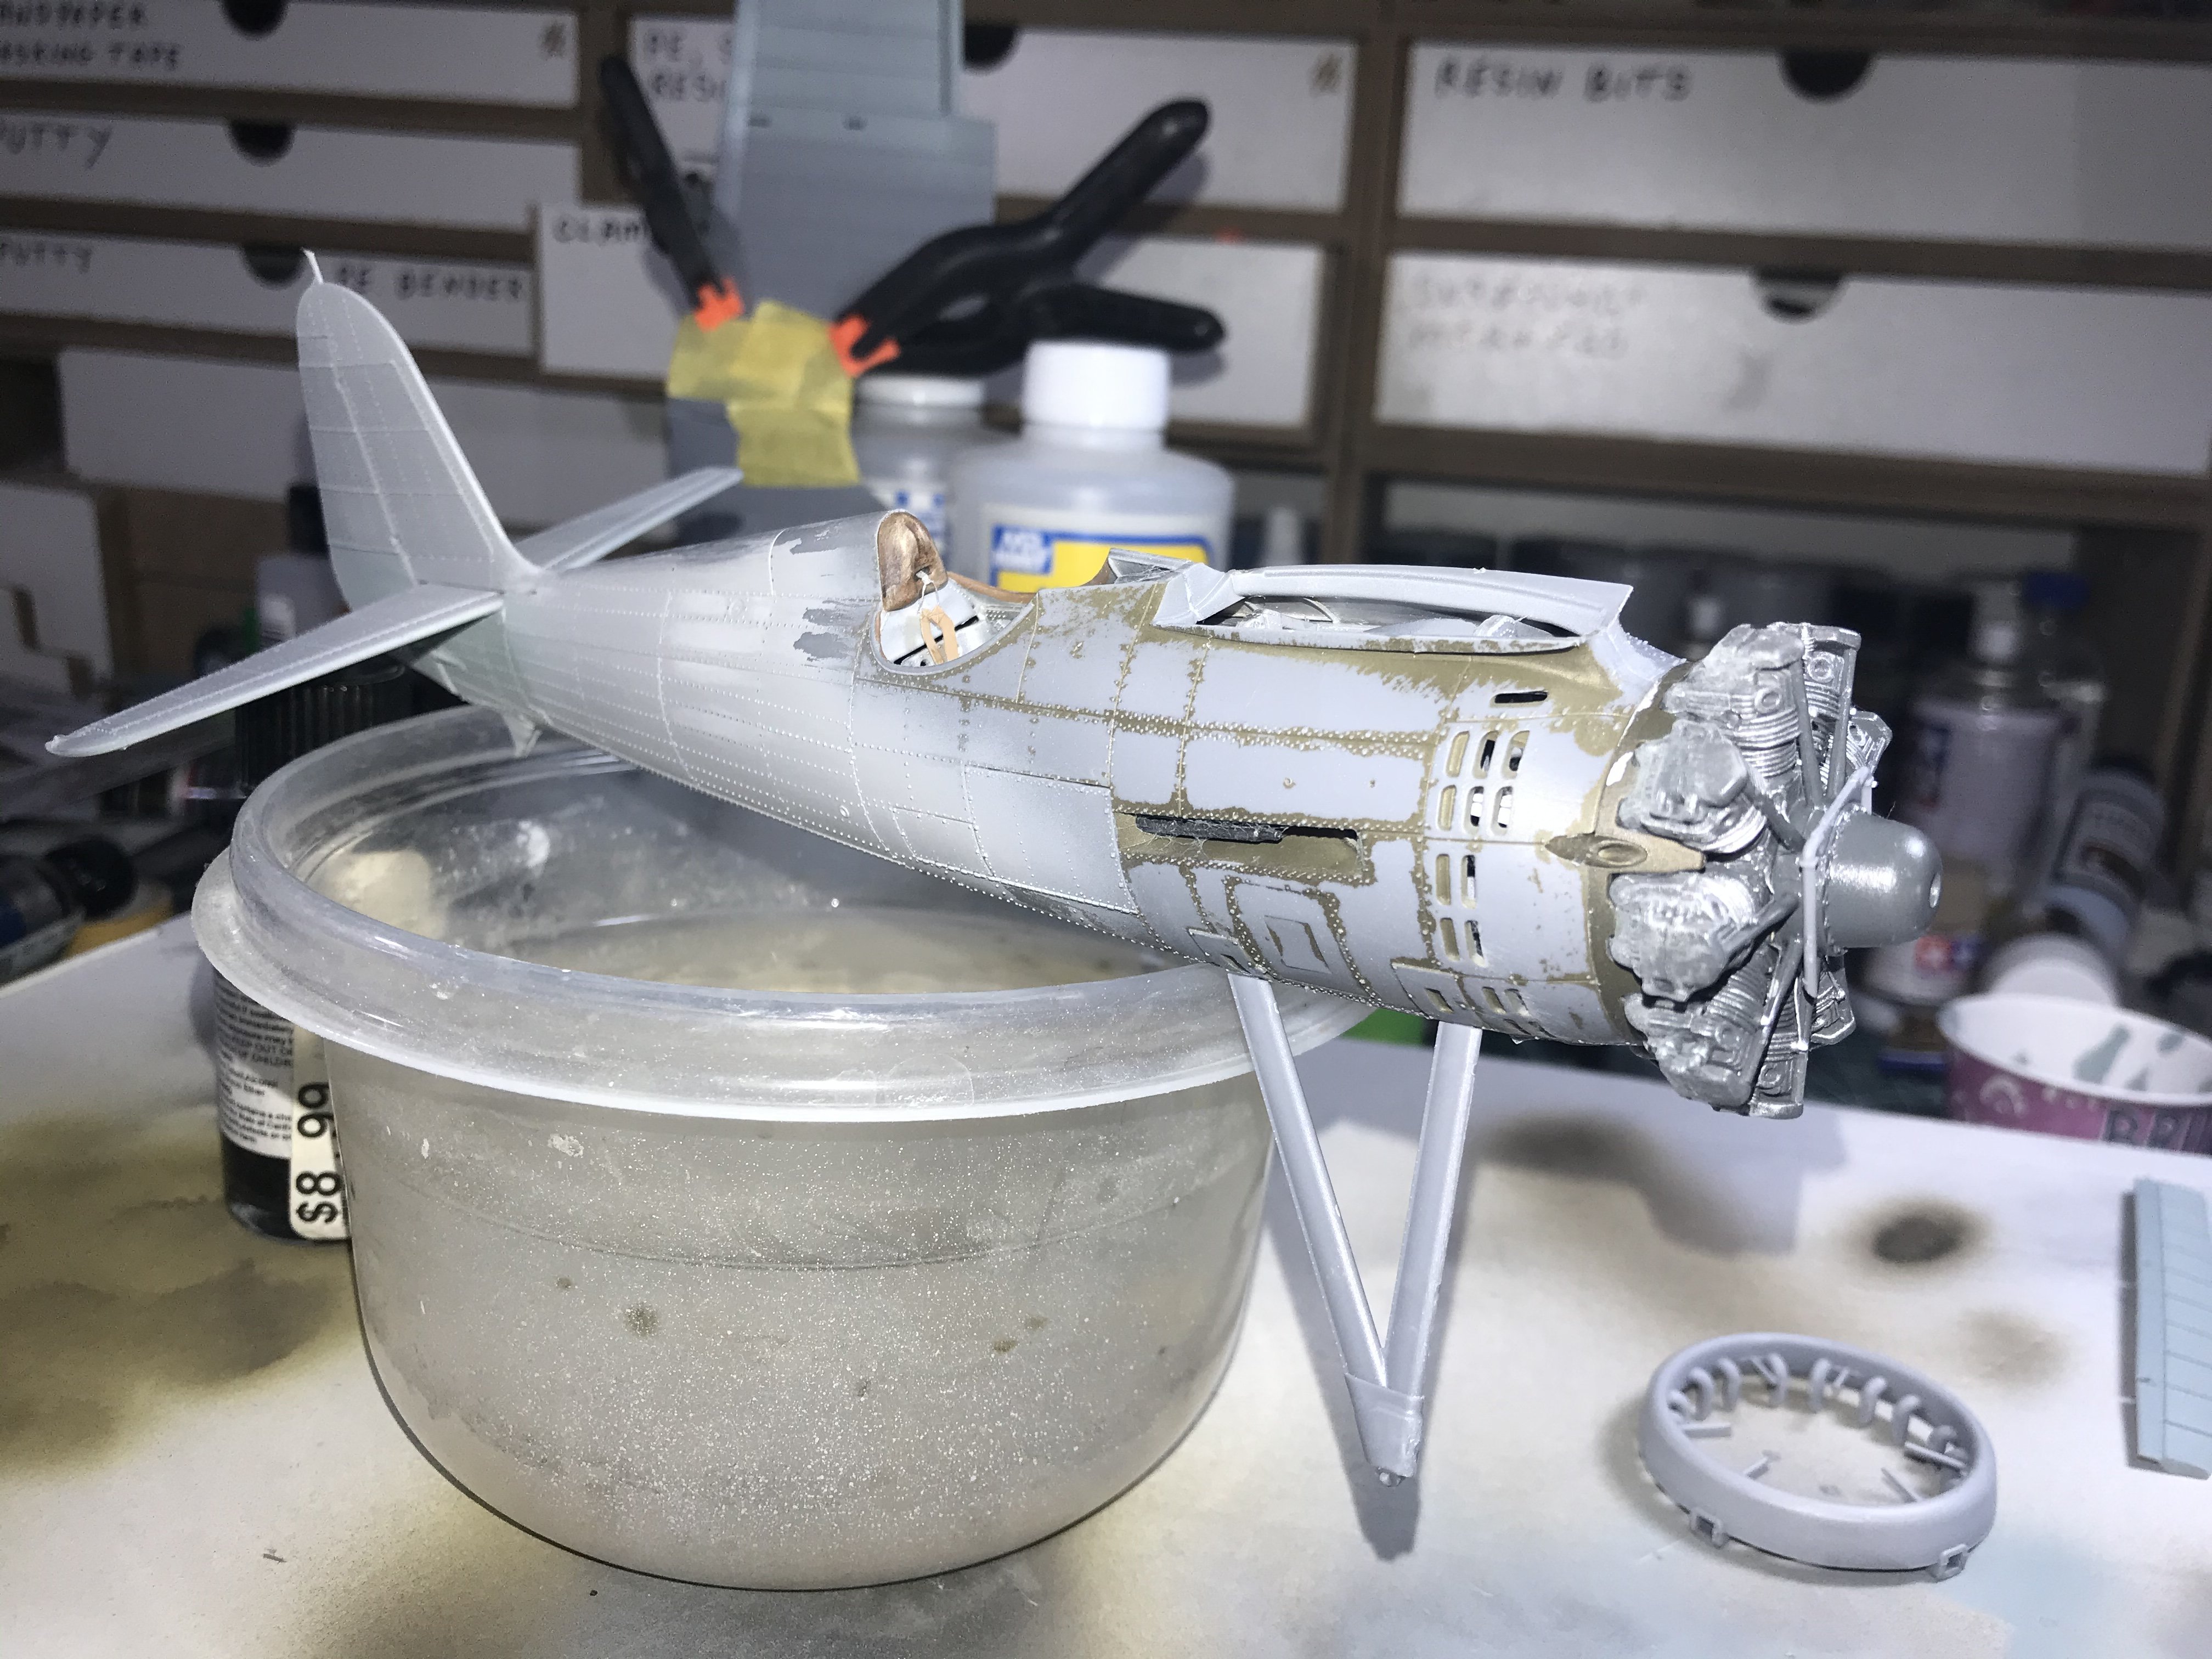
Thanks Hubert, I’ll fix the engine. Now’ SA good time, even though for all intents and purposes, the crankcase will be hidden. The wing gun covers actually aren’t bad at all. You just must be sure to install them before you glue the wing halves together. The wing fit is actually really nice except for the curve of the top outer wings being a bit much. By about .3mm. The fit on the edges is bang on brilliant, so if you just clamp the middle of the join for the glue to dry, all is well. Before I left the house today, I checked the fit of the entire wing to the fuselage, and it is splendid. I’ll try again tonight with the struts temporarily attached. Then I can check the bottom for gaps. But the topside is perfect. Most of these issues on any other kit would be a non event. But with the PZL, we don’t want to damage that beautiful surface detail, so we go slow and careful when joining major components together. I can’t stress enough how much I’m enjoying this build. I’m a huge Silver Wings fan, but this kit is so much more refined. Even the gap on the fin fairing we previously discussed is completely missed on the other kit. -
IBG models PZL P.11c. Finished
Clunkmeister replied to Clunkmeister's topic in LSM 1/35 and Larger Work In Progress
I must say that I’m truly Blessed to be building this model, folks. The little PZL has proven to be THE mojo restorer I truly needed, made all the better by what is decidedly one of the nicest and most rewarding kits to build I’ve ever experienced. It’s not a shake the box kit by any stretch, matter of fact, it’s going to take some serious modeling skill to build, but if you have the skill set and can work with PE, this little kit will deliver in every way. So far it’s been honest and straightforward in a way that it gives you exactly what you put into it. If you let the carpet monster rule, it’ll eat you alive. But if you take precautions, be careful and methodical, this kit will reward you with serious satisfaction around every single corner. I’ve received PMs and emails from many members here telling me they’ve ordered this kit simply because of what they see unfolding in front of them, and I promise you, you won’t be disappointed. Once yours arrives, drop what you’re doing and build it. You’ll love it. You’ll build up a neat little Polish fighter that as far as airplanes go, just looks “right”. What can I say? I’m thrilled!
-
If your posing it in flight, Tony, those intake covers may prove a bit of an issue. Unless there’s a towline attached? I’d like to see that one........
-
1/32 Revell Bristol Beaufighter build
Clunkmeister replied to CrankyCrafstman's topic in LSM 1/35 and Larger Work In Progress
As Martin is apt to say, "Holy Smokin' Josef!" Amazing work, Ron! Shaking my head and mumbling to myself