


BevanBrooks
-
Posts
432 -
Joined
-
Last visited
Content Type
Profiles
Forums
Events
Gallery
Everything posted by BevanBrooks
-
1/32 Revell Heinkel 219 wip
BevanBrooks replied to BevanBrooks's topic in LSM 1/35 and Larger Work In Progress
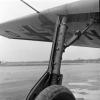
Small update but a milestone none the less. Airframe is pretty much complete, little bit of tidy up around the vertical stabilisers and tailplane joint but nothing major. The lower nacelle to wing joint was pretty good I used liquid polly to fill the small gaps which worked a treat. The only annoying thing was a join going straight through some hatches on the top join. The joint itself was a bit of a pain but I got there. Re scribed the hatches and tore a little filler out.... don't you just love that when it happens!! Used some brass tube for the cannon barrels with BMF around the ends.... probably not the best solution but should look better than the kit ones under some paint. All in all this has been a pleasure to build so far. -
WNW Roland D.VIa
BevanBrooks replied to Steven Robson's topic in LSM 1/32 and Larger Aircraft Ready for Inspection
Awesome work Steven great work on the woodgrain. Also very nice photography Cheers Bevan -
Thanks everyone appreciated.......certainly getting some mileage out of this! I'll have to post something else soon. Thanks again.
-
1:32 Hasegawa Bf109 G-14 Farnborough
BevanBrooks replied to rieser's topic in LSM 1/35 and Larger Work In Progress
Hey mate, nice to see something different from the norm. Tell me, is there much tonal variation in the yellow..... kinda hard to make out on the monitor. Nice touch on the flaps. Looking forward to more............. Bevan -
1/32 Revell Heinkel 219 wip
BevanBrooks replied to BevanBrooks's topic in LSM 1/35 and Larger Work In Progress
Thanks guy's..... Hi Wingco, no I didn't shorten the gear legs, not that concerned about it, as long as it looks like a 219 I'm a happy camper! Hi Jeroen, funny thing, the gear legs come in two halves and when I glued them I thought "How am I going to sand the seem line out?" Well some of the glue seeped out so got a number 11 blade and stabbed at it to produce the "weld" line you see in the pictures beats sanding in my book and adds a little more interest. -
1/32 Revell Heinkel 219 wip
BevanBrooks replied to BevanBrooks's topic in LSM 1/35 and Larger Work In Progress
Cheers Matt and Grant. Work has progressed to the wheel bays, landing gear etc. RLM 02 was mixed 50/50 Tamiya xf22 and Gunze H70 thinned with gp thinner. Highlights are straight H70. Washed with a mix of black and burnt umber oil paint and dry brushed with humbrol enamel and white oil paint, I can't remember the humbrol number. You'd think I'd have learnt by now to jot down some notes lol. Scratches as usual for me are done with sharp Derwent coloured pencils as well as Prismacolour water colour pencils (black and umber). A little 2b grey lead for metal chips. -
1/32 Revell Heinkel 219 wip
BevanBrooks replied to BevanBrooks's topic in LSM 1/35 and Larger Work In Progress
Just added a wash to the leather headrests and while I was at it a wash also to the HGW belts. I let it settle into the detail then washed the excess off straight away as not to discolour the belts too much. Apologies for the photos, they were taken in the moment with my Samsung Cheers Bevan -
Hi Wingco57, yes I did apply it freehand. I usually rub any overspray off with 3000 pads lightly though!
-
1/32 Revell Heinkel 219 wip
BevanBrooks replied to BevanBrooks's topic in LSM 1/35 and Larger Work In Progress
Hi Nick, a scheme out of the box I think. Thanks mate. -
1/32 Revell Heinkel 219 wip
BevanBrooks replied to BevanBrooks's topic in LSM 1/35 and Larger Work In Progress
Thanks guys comments much appreciated. Harvy, good spot. Its only dry fitted at the moment so no biggy to pull the seats and add a wash to the headrests. Dave, Jeroen, dont hold your breath. Im a notoriously slow builder but will try to keep it moving at a reasonable pace. -
Hi guy's this is the cockpit of the 219 from Revell. Paints used are Gunze acrylics with a little Tamiya as well. Details were picked out with Humbrol enamels. I replaced the molded levers with brass wire and white glue for knobs. I also added some fictitious wiring for added interest and used HGW's 219 belt set. I found them fairly fiddly but well worth the effort. Chips/scratches were done with Derwent coloured pencils as well as 2b grey lead. Washes with oils, dry brushing with oils as well. Testors Dull Coat for final finish. Hope you enjoy the pics cheers Bevan
-
First of all thanks to everybody for your kind comments, appreciated. Matt, the oil paint was firstly added as a wash/filter using black and burnt umber and dabbed off rather than wiped in the direction of the airflow to get a more random effect. I re cleared it and added pin washes. final use of oils was over the flat coat, dot filter using white. Only the second time using this method so I was a little nervous as I had it looking pretty good and didn't want to ruin it. This was used over the MG cover, engine cowling, rear canopy section, fuselage spine and from the wing roots out to the cannon covers. Hope this helps cheers Bevan
-
Hi Dave, thanks. Yep thinking about it got a D9 in the stash, hardest part is deciding on a scheme!
-
Hi Daywalker glad you like it. Yes I did use oils (white) but only on the fuselage spine, from the wing root to the outer cannon covers, rear canopy section and mg cover and the cowling ..... I think!
-
Hi guy's. I finished Blue 8 a wile ago now and thought I'd share some photos. She was painted with Gunze acrylics and weathered with oils, pastels and coloured pencils. Final flat coat is Testors Dullcoat. Apart from brass tubing gun barrels and scratching the outboard cannon fairings, I built it oob. I did spend a lot of time aligning the cowling to the fuselage and luckily didn't need any filler. Phew!! Decals are from Eagle Cals. Sorry for the furryish photos.........don't know what's going on there they seem fine on HS. I have done a little more with the weathering since these were taken and finished the antenna lead in wire to the fuselage. Hope you enjoy the pics cheers Bevan
-
Nice work on the camo.....cheers Bevan
-
Nice job on that. I think the stars'n'bars look great with that scheme............well done Cheers Bevan
-
Hi Matt glad you like it. The RLM 76 got a bit of pre-shading with white and grey in the centre of each panel leaving the bare plastic for panel lines as I think black or dark greys are to bold for this. Oversprayed with very thin 76 (Gunze acrylic) to get the desired effect. Upper camo colours were sprayed with no pre-shading. The patchy look to the colours was achieved by using thin layers of paint built up more in some areas and less in others letting the underlying plastic show through just a little. There is no post-shading to these colours. Now it was given a couple of coats of automotive acrylic clear thinned with gp thinner. This is great because it dries almost instantaneously. Decals and more clear. Next was an oil wash, but instead of wiping it off I stippled it with a rolled up bit of rag to try and get a more randome effect. Let the oil set up and more clear this time for a panel line wash. Ok now flat coat, Testors Dull Coat, 4-5 misty coats. All the scuff-scratches are Derwent coloured pencils, exhaust is a combo of airbrush and pastel dust, chipping is mainly 2b lead pencil. Somewhere along the way I used a 3000 pad to expose some of the rivet detail. HTH cheers Bevan
-
Sorry my bad. too used to Hyperscale I guess
-
Hi fellow modelers, after the great response to my post below I thought I would post some more photos of white 12 Thanks for looking cheers Bevan
-
Thanks to everyone for your kind comments much appreciated, cheers Bevan
-
Thanks very much Wumm much appreciated. This was a commission for a guy in the States she's been gone for about a month now.....still grieving ha ha!
-
Hi guy's, my first post on this site. Paints used are Gunze acrylics thinned with gp thinner. Weathering achieved with oils and pastels. scratches, scuffs done with very sharp Derwent colour pencils as well as 2b grey lead Also tried water colour pencils-prisma colour (thanks Ralph)for selected oil and fuel stains. Seat harness fashioned out of lead foil with fine wire buckles Decals used are from Eagle Strike, Eagle Parts resin spinner as well as fully riveted. Hope you enjoy the pics cheers Bevan