


GazzaS
-
Posts
6,396 -
Joined
-
Last visited
Content Type
Profiles
Forums
Events
Gallery
Posts posted by GazzaS
-
-
Amazing!
-
 2
2
-
-
21 hours ago, Wumm said:
Alt or Neu Sonder 250?
That's a fantastic find, the new Dragon incarnation of the Alt recon SPW goes for around $100 AU. And the older Neu variant is getting really hard to find.
S
Neu.
-
2
-
-
Hi Hummm....
Another B-25 from HK Models... supposedly coming in March.

Unfortunately....
They offered this one, too:

-
 2
2
-
-
1 hour ago, Rowdy said:
Now off to bed!
Excellent! Love the paint modulation and your mottle.
-
4
-
 1
1
-
-
Thank you, Jeff. I never made much effort to get a pilot list of the Jasta. But even if I did, there's nothing to tie the plane to other than the city colors and conjecture. I really would have loved to have had a name.
-
3
-
-
I'm glad you were able to save the decals, Rob.
For me... I will never, ever mask over decals. If you want to lift a bad decal, it will fight tenaciously to remain in place. But if you take all possible masking precautions, they will jump off the model as if it were about to explode.
-
4
-
-
Well, for me it's this one:
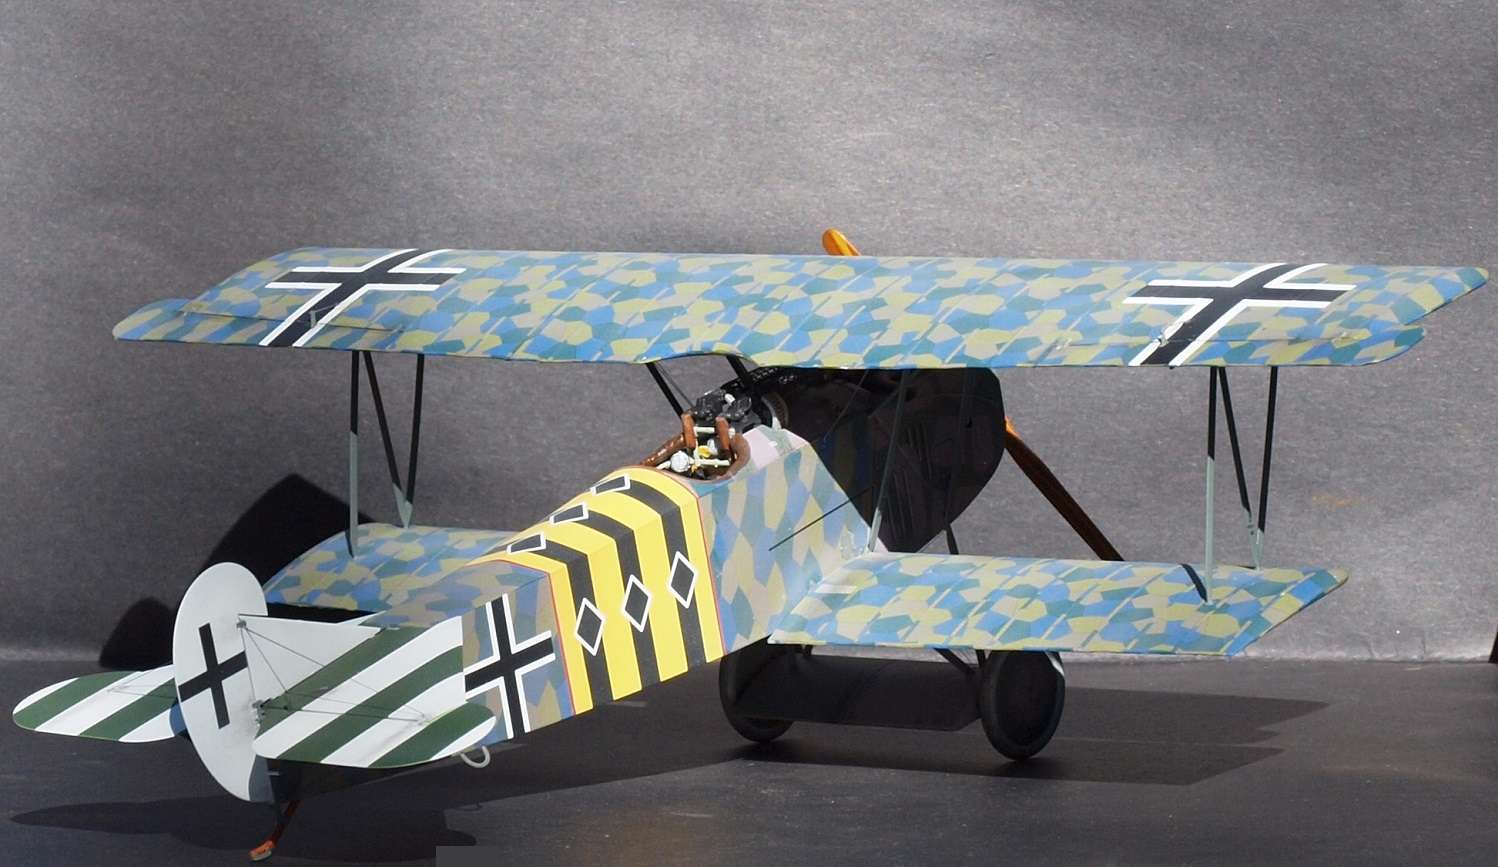
I researched it from one B&W photo with no helpful caption. I spent many hours poring over German civic heraldry to get the colors for the fuselage band.
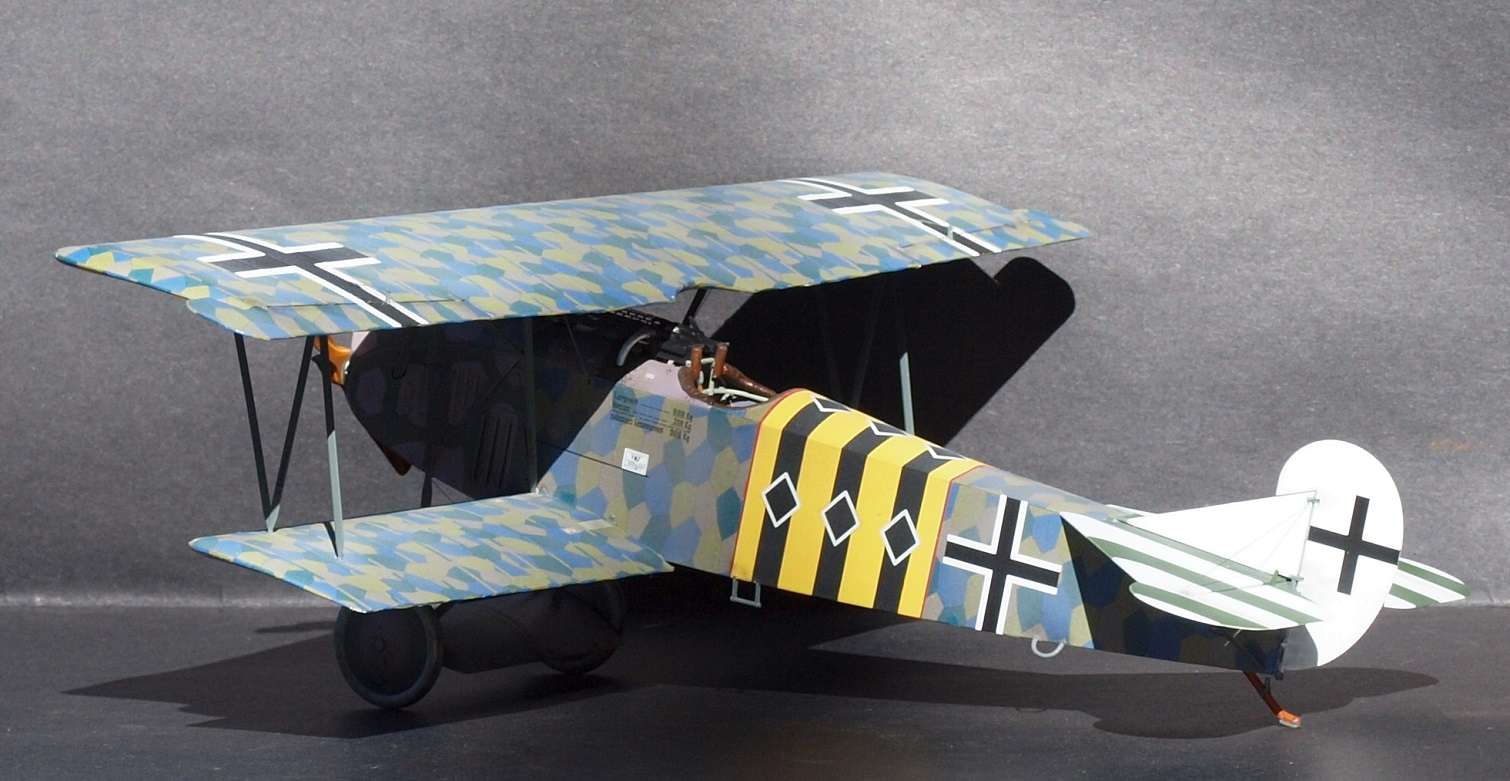
I also got a lucky bit of help from a published author of WWI aircraft related books on the Jasta tail which helped me confine my heraldic researched to the German state of Saxony.
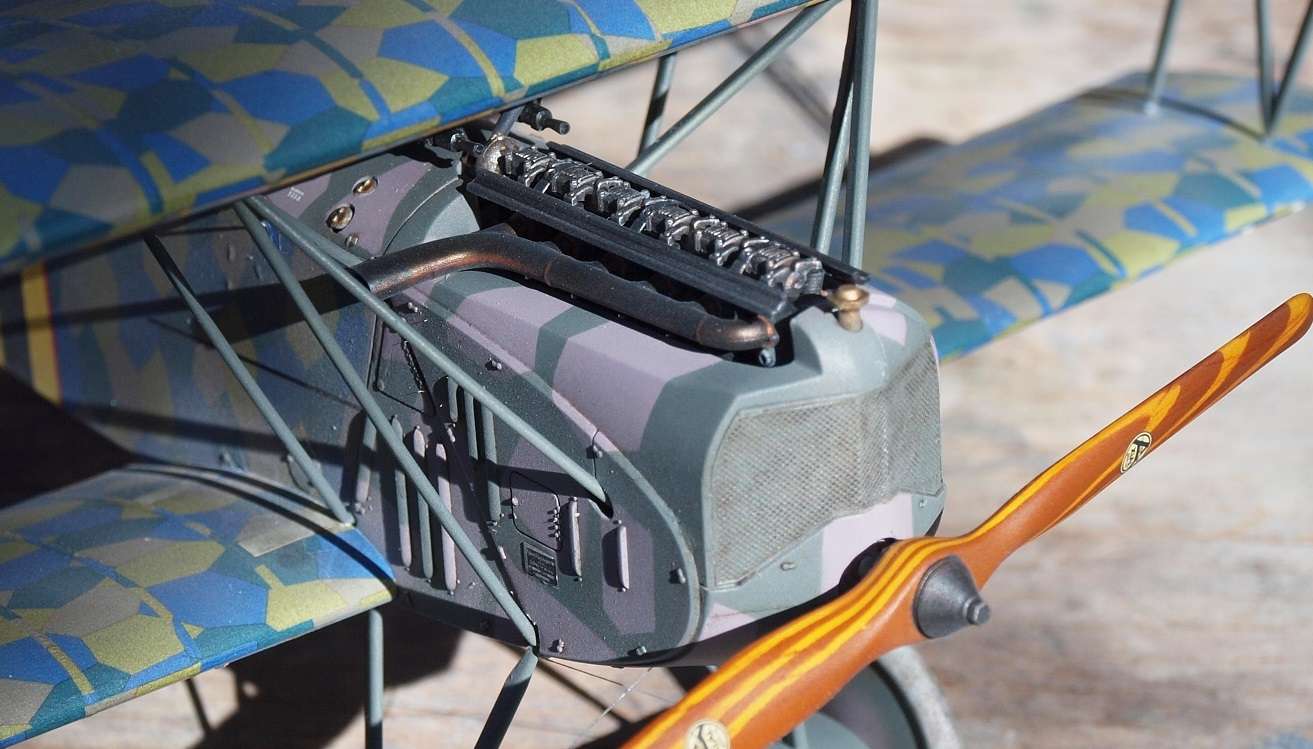
It cost me two WNW Fokkers to make this kit, as I ruined the first.
And I'll never know how close my research took me to the real colors. But the result was worth it.
-
14
-
1
-
-
My problem is when 'deals' come along. A large portion of my stash is second-hand kits that I got usually for 1/2 or less of retail. For instance, Saturday I bought a Dragon Sturmhaubitze 42' w/Zimmerit and a Dragon SdKfz 250/9 in 1/35 scale for under $31 US. Usually, one of my club members will send an e-mail to all of the members listing what he wants to sell. By sending an e-mail. stuff gets set aside for you before the meeting. Apparently I beat 7 other guys to the Sturmhaubitze. I really should neaten up and take a pic or three of my stash for you guys.
-
4
-
-
Looking good!

-
3
-
-
23 hours ago, CrankyCrafstman said:
Hey all
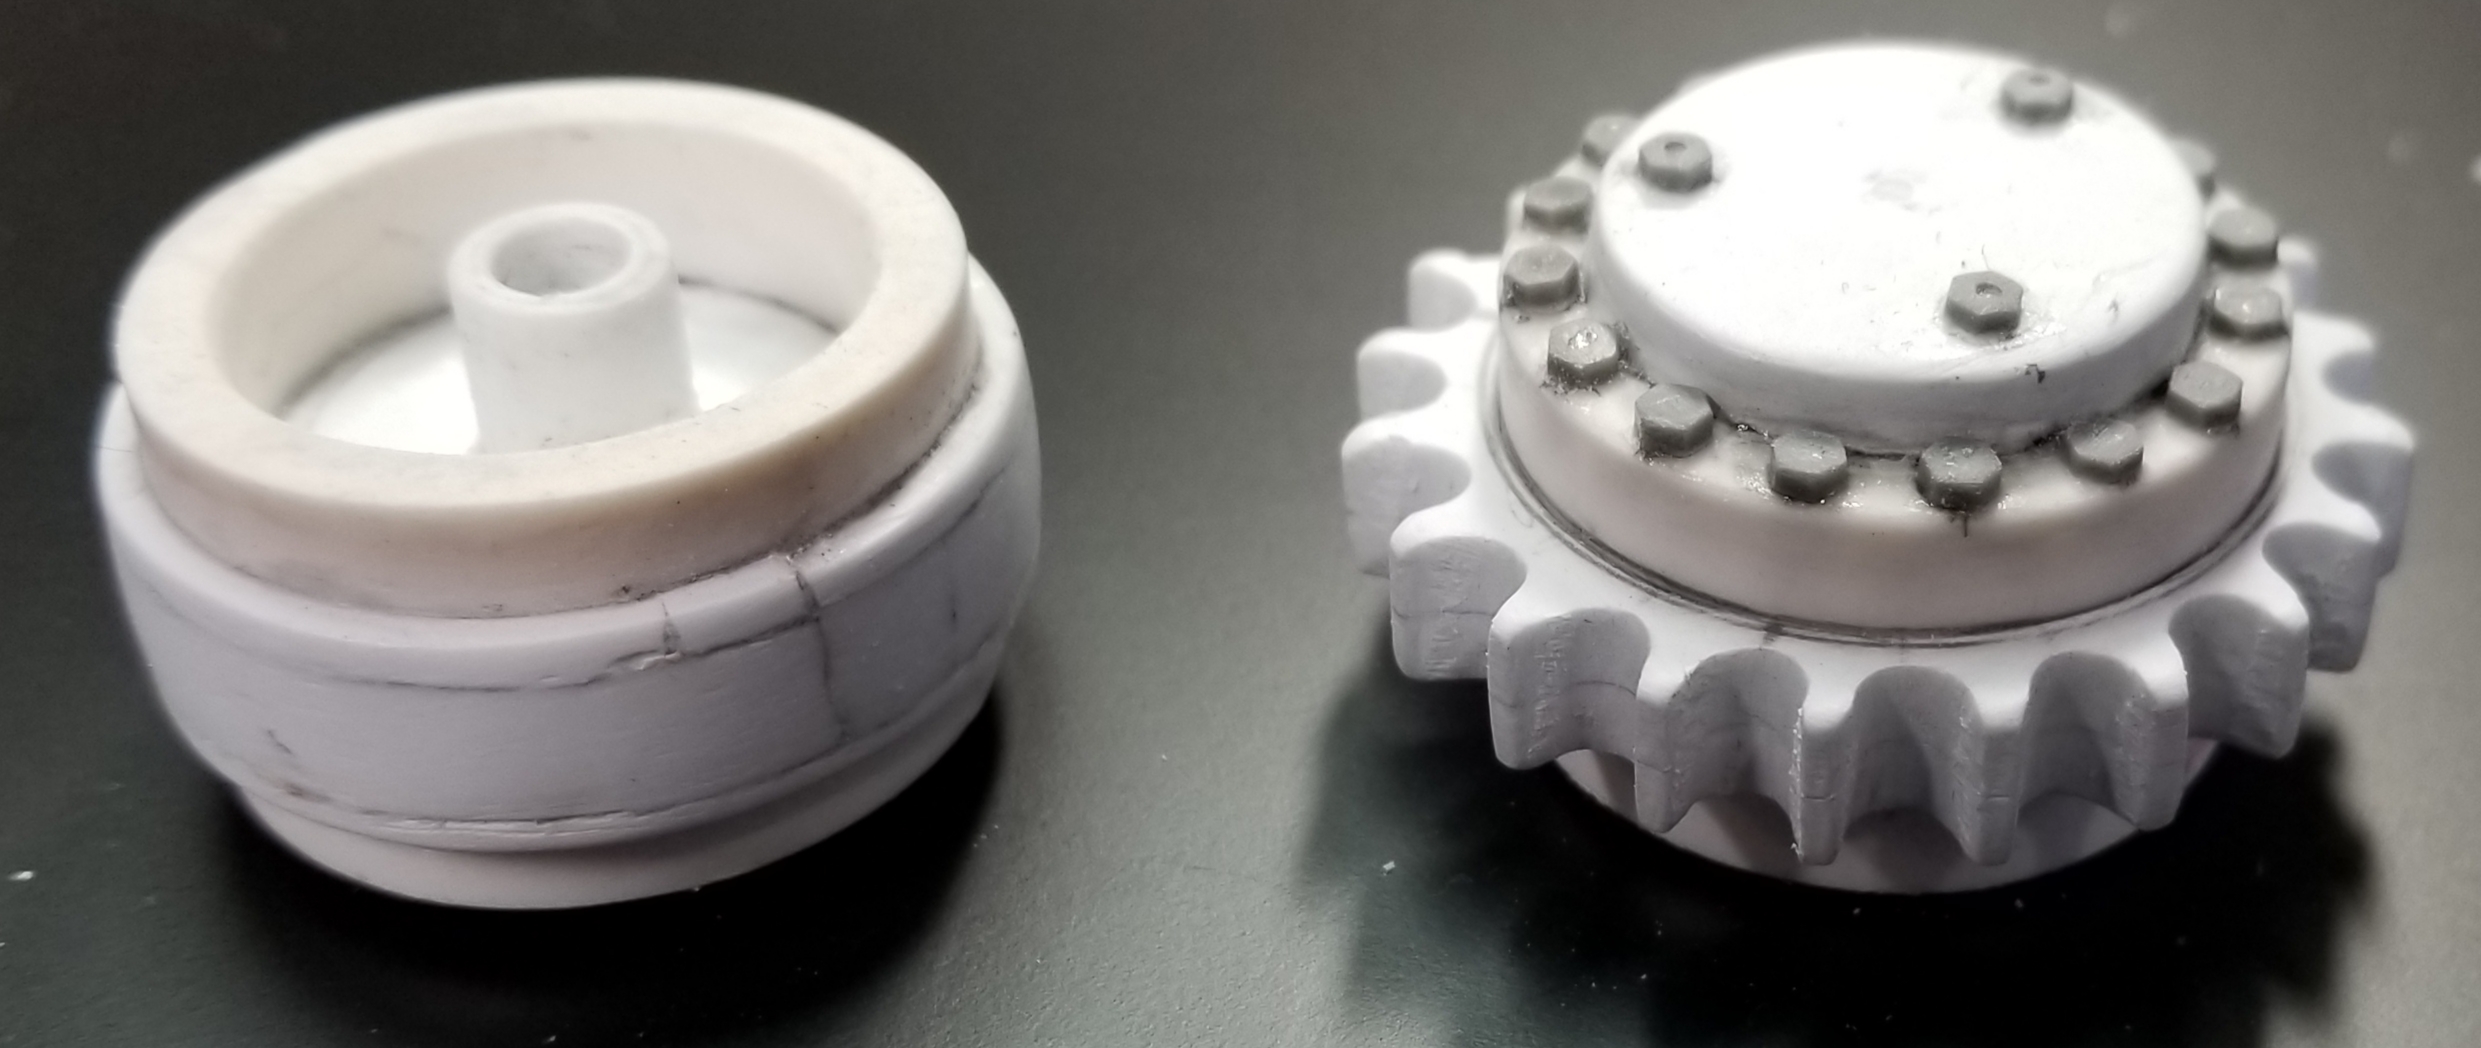
Another small update for you all. I have one of the drive sprockets done.
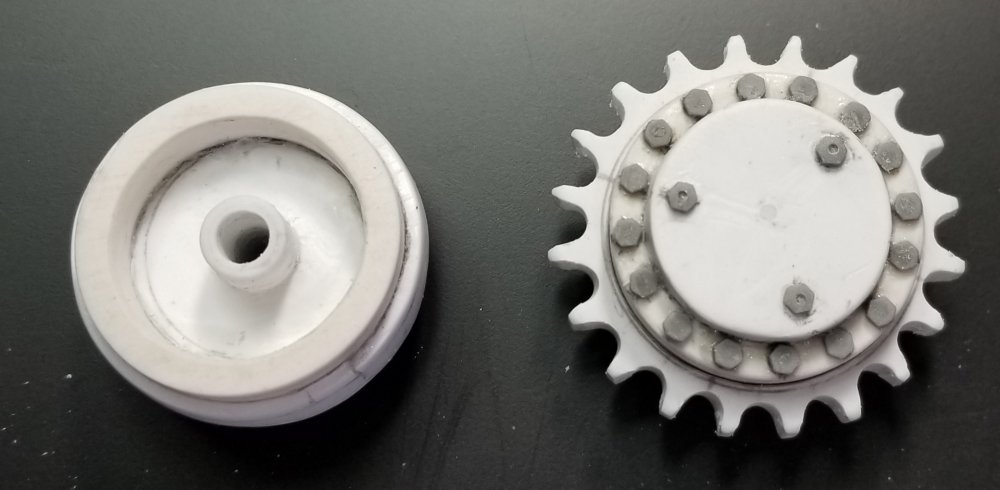 this view shows the drive sprocket and the idler together. I made the sprocket out of the same 3/4" PVC pipe that I used for the idler. The teeth are made from some 1/8" thick plastic sheet glued together to make it 1/4" wide. I drilled out the notches for the track link pins with a 1/8" diameter drill bit, all 20 of them. I then ground out the center of the sprocket teeth to the OD of the PVC pipe. I glued this to the center of the peice of pipe, I then sanded it to the correct diameter. I added a piece of 1/8" thick plastic sheet cut to the ID of the pipe and glued on to the outer edge of the sprocket and some 7/32" & 9/32" diameter plastic tube to create the hub. To this I added some 2.6mm Meng bolt heads, and presto chango you have a drive sprocket...lol
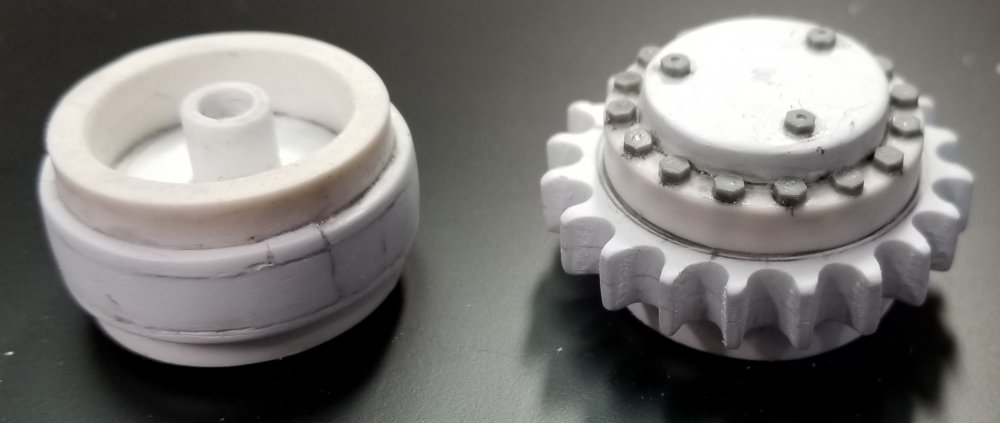 more of a side view of the two.
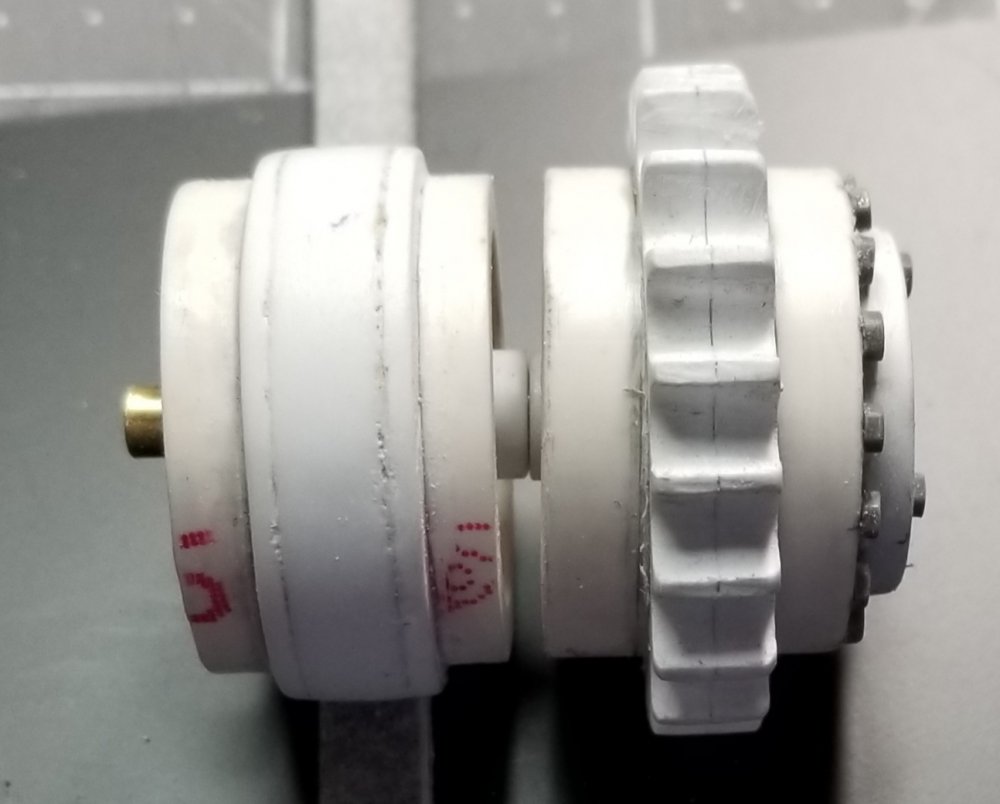 end view of the idler and the drive sprocket.
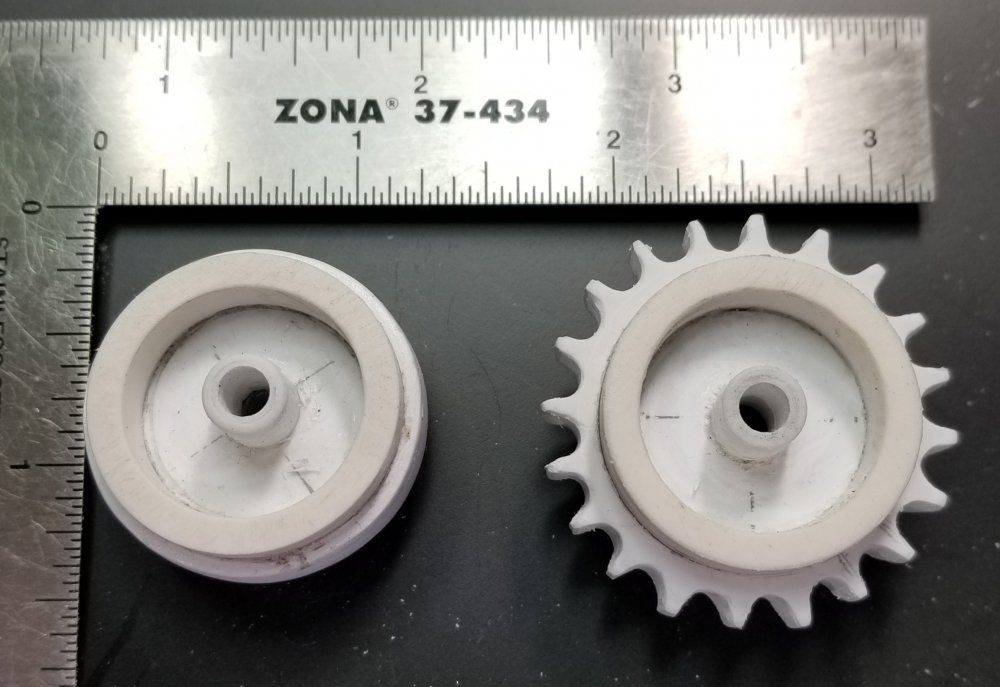 this view shows them next to a scale.
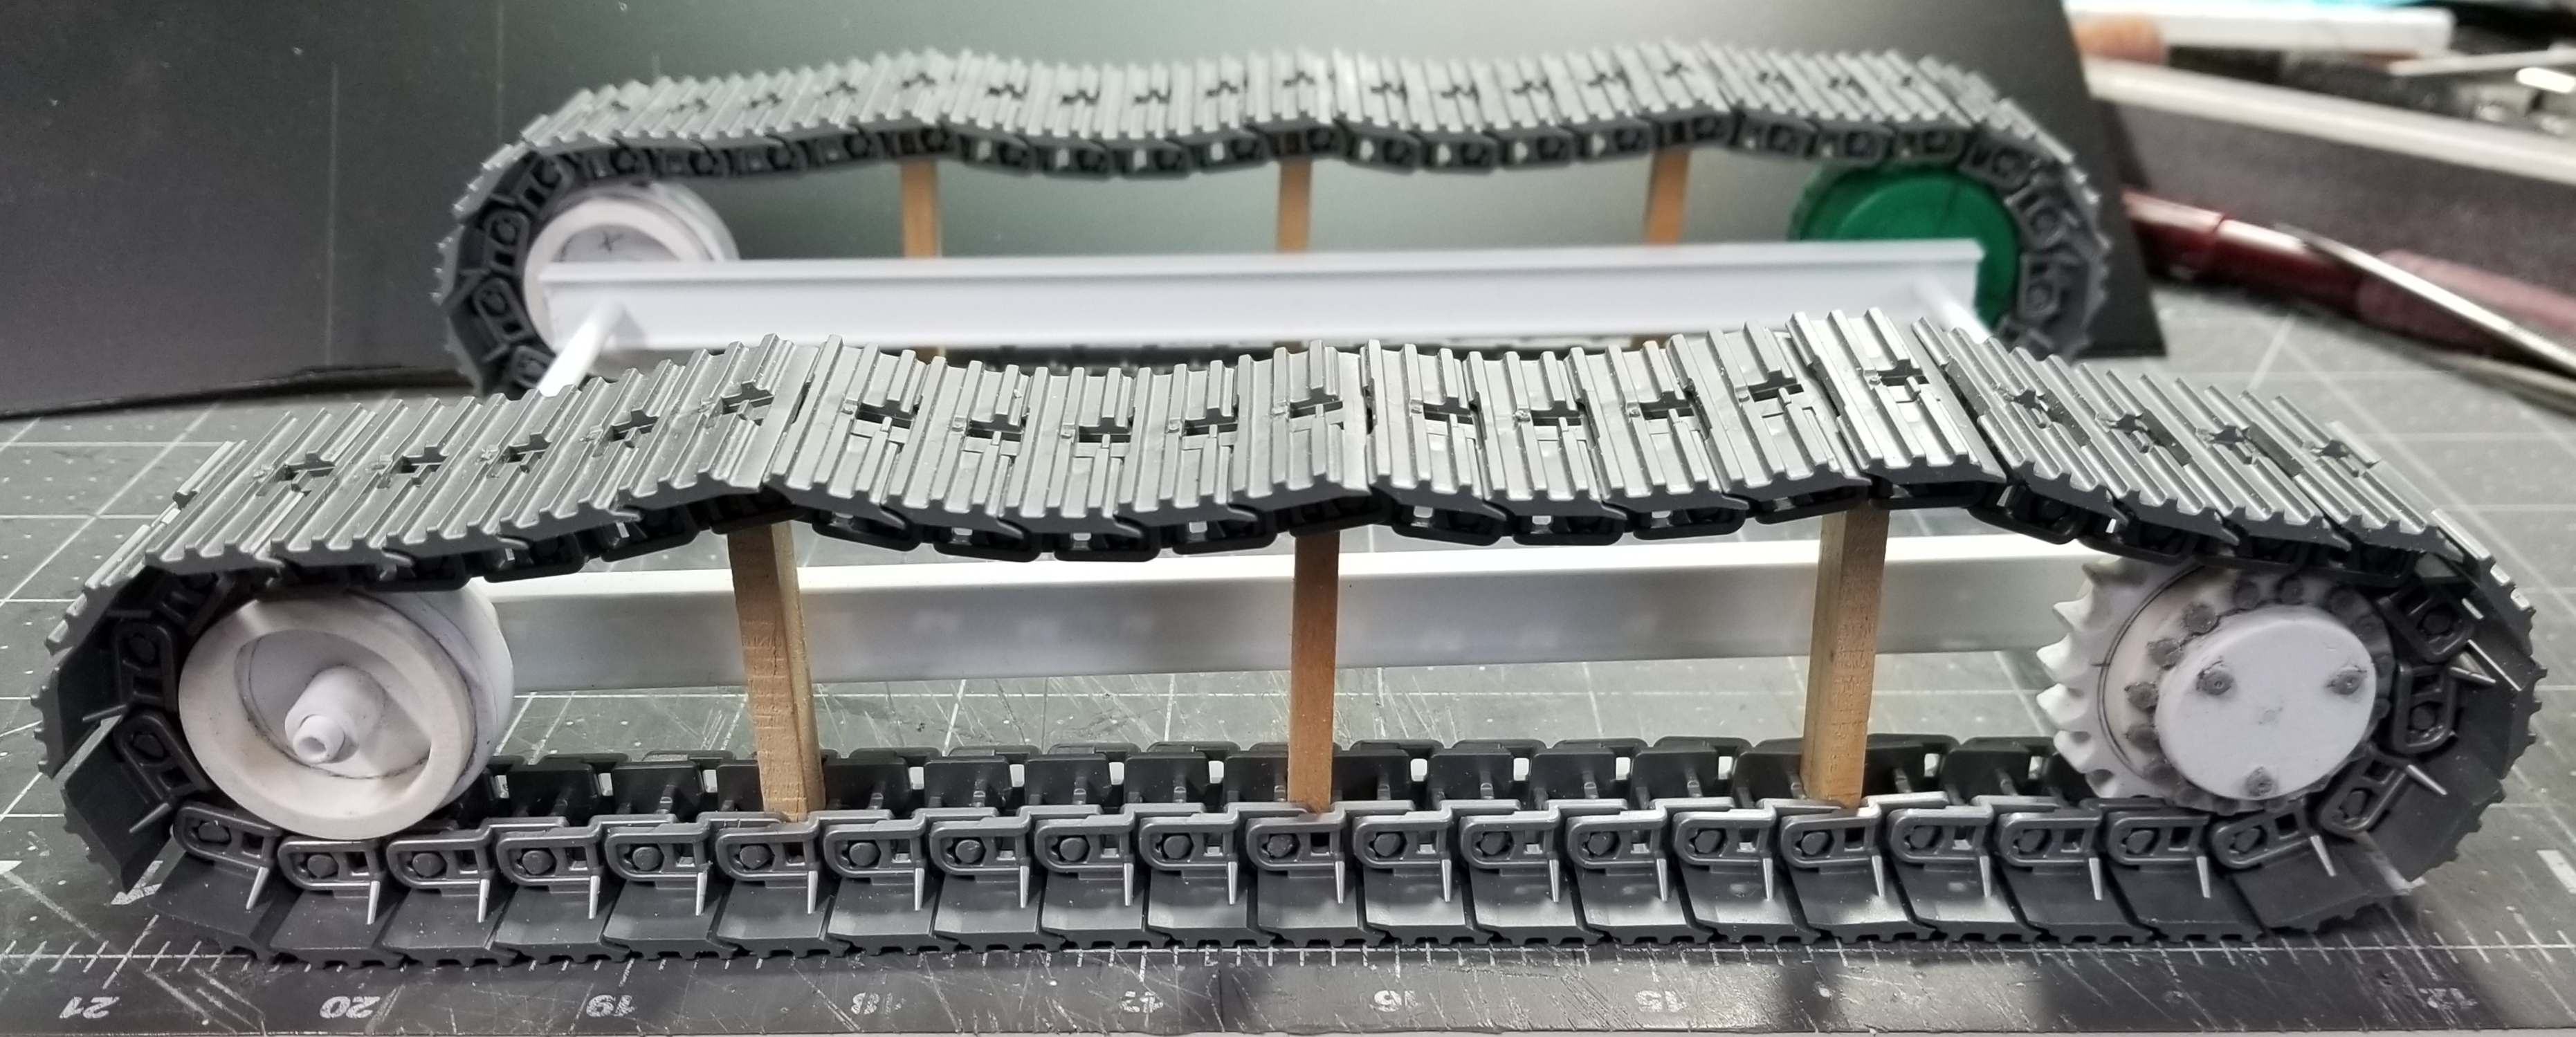
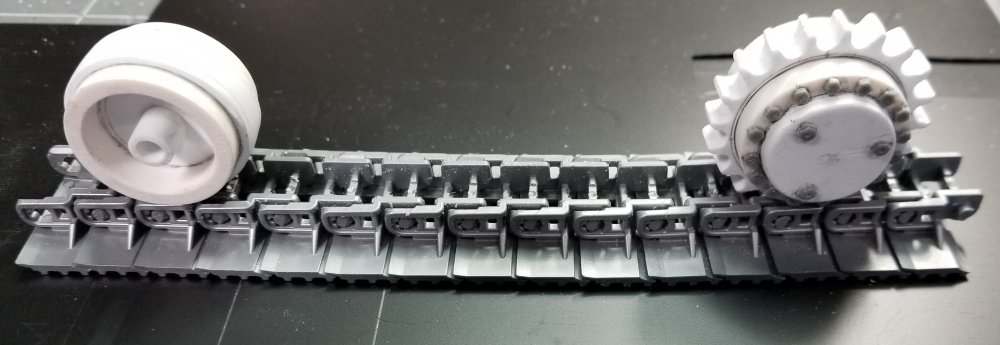 this view shows them sitting on some of the track peices.
 this view shows the idler and the drive sprocket in place in the tracks. Well that's it for now be back soon.
Ron G

-
2
-
-
Holy, holy smokes!
-
5
-
-
I should be doing a stock take... but I fear my stash will have increased beyond 70 kits.
-
2
-
3
-
-
16 minutes ago, Kaireckstadt said:
Good ideas, Gaz! And what about small Tamiya-Tape stripes? Or is it too thick?
Cheers KaiYes, too thick. And too textured. I don't like depending on tape for permanent things.
-
1
-
-
Looking good, Rob. Gonna be a stand-out!
-
3
-
1
-
-
7 hours ago, Kaireckstadt said:
Interesting idea, Gaz!
With what kind of Decals will you do that?
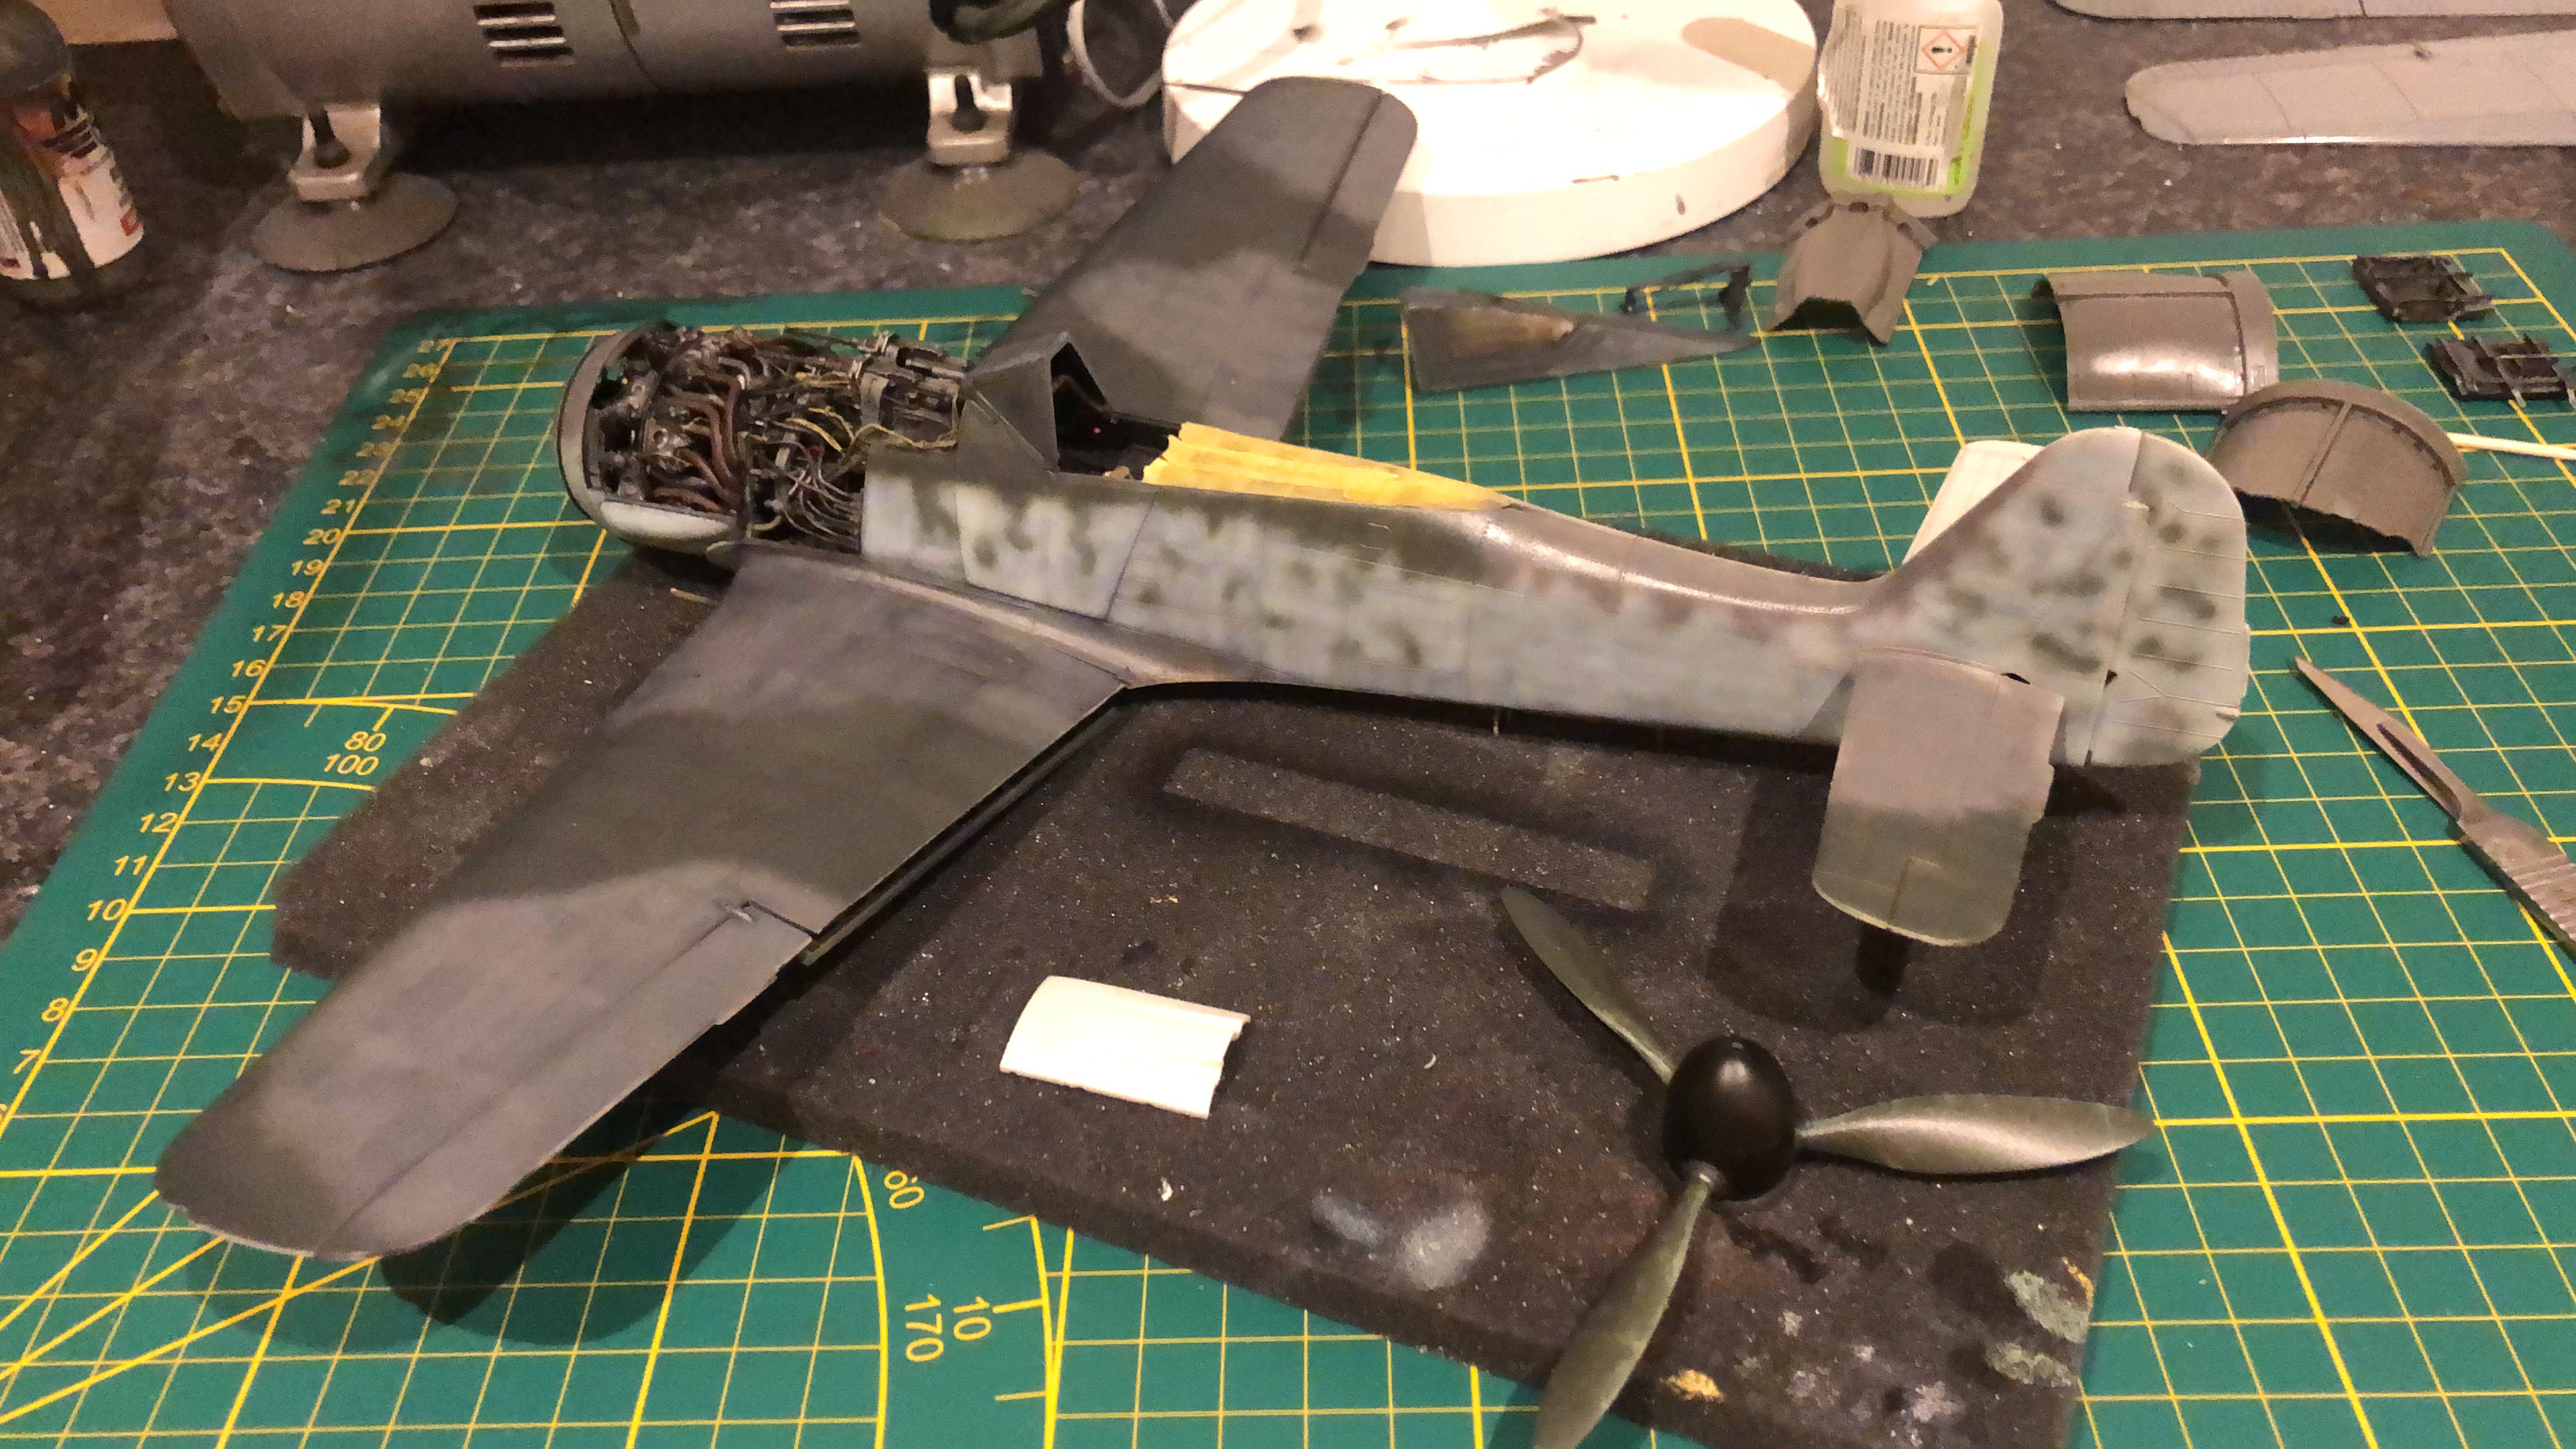
Well.... the idea is subtlety. I can either use some Archer raised line decals... or just plain decal paper. I've even toyed with the idea of using some WNW rib tape decals, but I think they may be too wide. They've be covered with paint, but be big enough to show with weathering. I did it with paint once, but wasn't satisfied with the result.
-
1
-
-
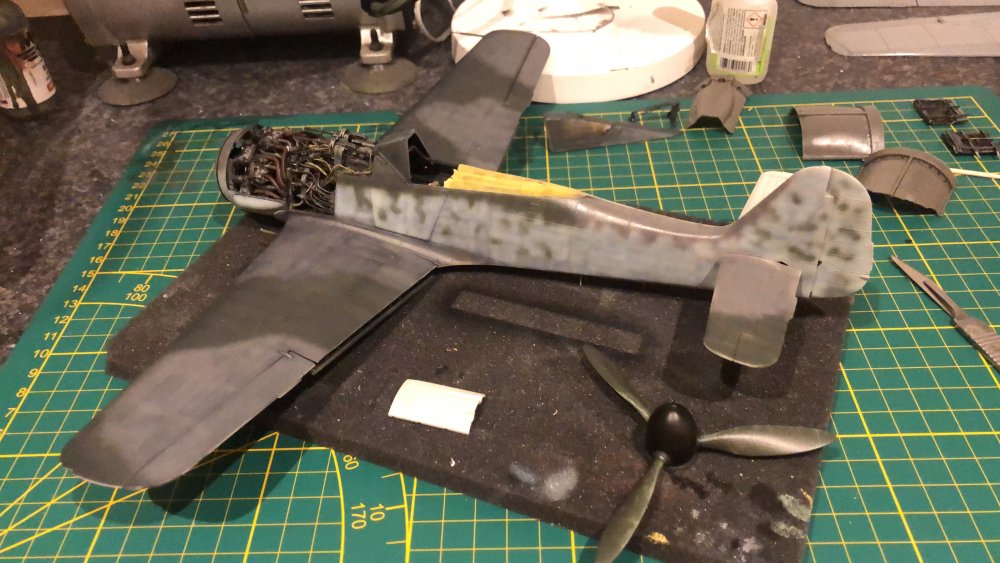
Taking a break from scribing, filling and rescribing. Over it at the moment.
So I decided to work on the 1970's looking control surfaces.
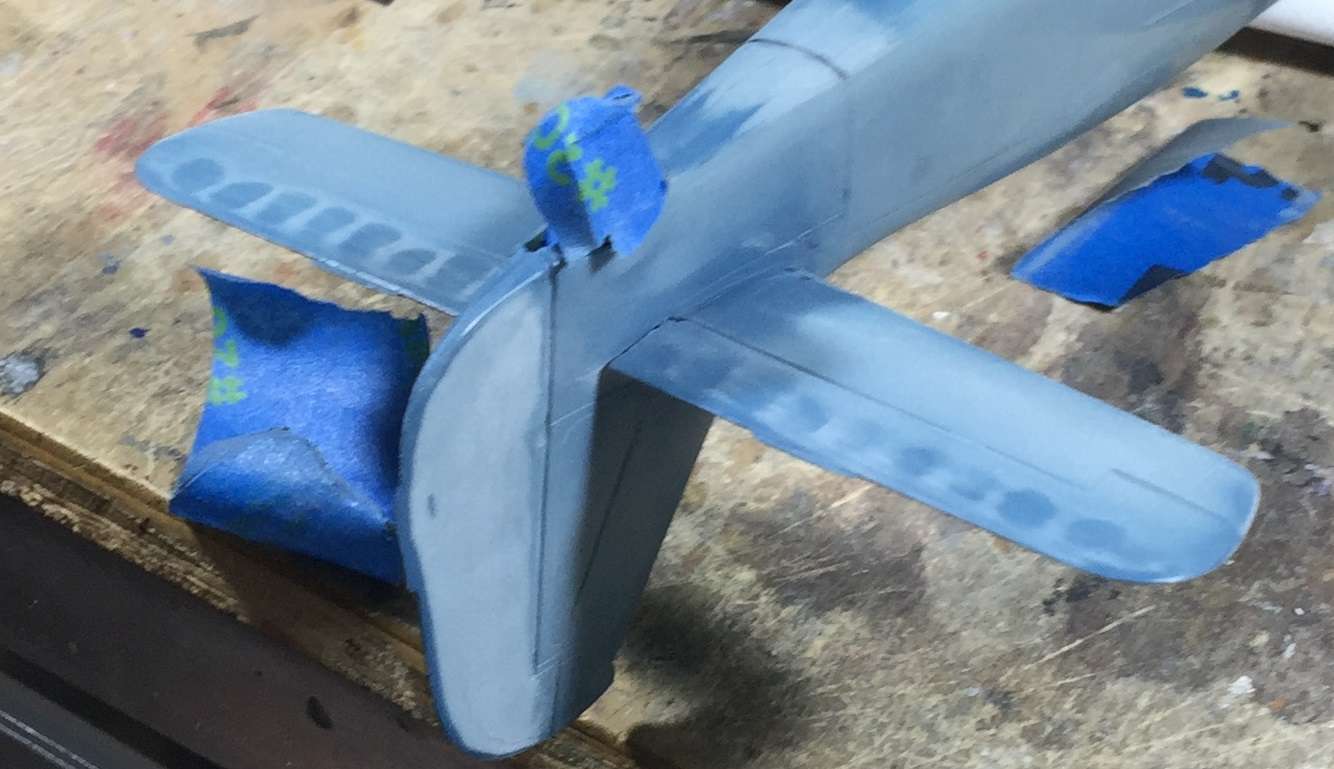
From the best period photos I can gather, there should only be fine stitching lines over flat surfaces. So, I'll do it with decals.
-
1
-
-
Since I'm here...
I'm reading:

And
-
5
-
-
Ooh, sorry brother! I hope it sets up soon.
-
4
-
1
-
-
That is a fantastic scene, KStadt! Everything looks great!
-
3
-
-
On 2/4/2021 at 11:54 AM, krow113 said:
All I could add is physical suggestions.
Secure the model some how , so you hands are free.
Stabilize your forearms , lay them flat or somehow get them relaxed in a solid position.
It takes 30-60 seconds to scribe that line, if ya gotta glue your arms to the table for that then ....what are you waiting for!
Those are great suggestions I hadn't hear before. Will give them a try. Thank you,
-
1
-
-
1 hour ago, Martinnfb said:
is it only me, who's ripping the parts out of sprues like an animal ?
")

When you can't find your sprue cutters?
-
1
-
10
-
-
Excellent, Rob!
-
3
-
1
-
-
6 hours ago, BlrwestSiR said:
I will often tape the metal ruler I have to the model. This keeps it in place and I don't have my fingers in the way.
Also, are you using light passes with the scriber or doing a single heavy pass? Doing multiple light passes gives you better control if you're not doing that already.
Otherwise, lasers?

Carl
I guess I'm not really doing anything different from anyone else. Thank you for the help.
-
1
-
-
18 hours ago, DocRob said:
I use Dymo tape for these occasions.
Cheers Rob
13 hours ago, Bomber_County said:I use a flexible erasure shield, very thin stainless steel, was used on drawing boards......
 8 hours ago, Spitfire said:
Dymo tape for me also, plus Lion Roar scribing templates and Airwaves radius scribing templates, for the actual scribing I use a Bare Metal Scriber. I have also use the flexible Tamiya masking tape with some sucess.
Cheers
Dennis
1 hour ago, Bill_S said:What are you using as a scribe, Gaz? I got the UMM ones and I love them. I use dymond tape with them.
Thank you for your replies everyone. I must have failed to make myself clear. I have all kinds of straight edges, flexible metal as well as Dymo tape and Tamiya flexible tape. I have an UMM scriber, razor saw blades, pin vise with needle.
What I don't have is steady, or small hands. The proximity to the fuselage is kicking my ass. In open areas, I can fix and refix my faults as long as I have patience.
I'm sure I'm not alone with this problem. There must be an answer.
-
2
-


Soo.... What did you just get???
in Modelling Discussion
Posted
A gift arrived from the Canada Today:
Thank you to AlanG!