CrankyCrafstman
-
Posts
1,350 -
Joined
-
Last visited
Content Type
Profiles
Forums
Events
Gallery
Everything posted by CrankyCrafstman
-
That's great Harv. Ron G
-
Hey Peter Yes they do, but there more expensive $3.19 for a two pack.
-
Go to usagundamstore. Type in infini. And scrole down till you get to the zebra sticks. There $2.99 per two pack. Get a 100, 150, and 220 thats what I use the most. Ron G
-
Opps, sorry its www.usagundamstore.com Ron G
-
Hey Harv The best are Infini sanding sticks. They make sponge, sponge sheets, sft sticks and hard (zebra) sticks. They are fantastic and last a very long time. They are a bit hard to find here in the States, I go through YSA Gundam store. The zebra sticks are my go to sanding sticks. They rznge from 100 grit to 800 grit. You can get most of tgere stuff from Micromark, but they don't have the zebra sticks. I would be lost with out these. Ron G
-
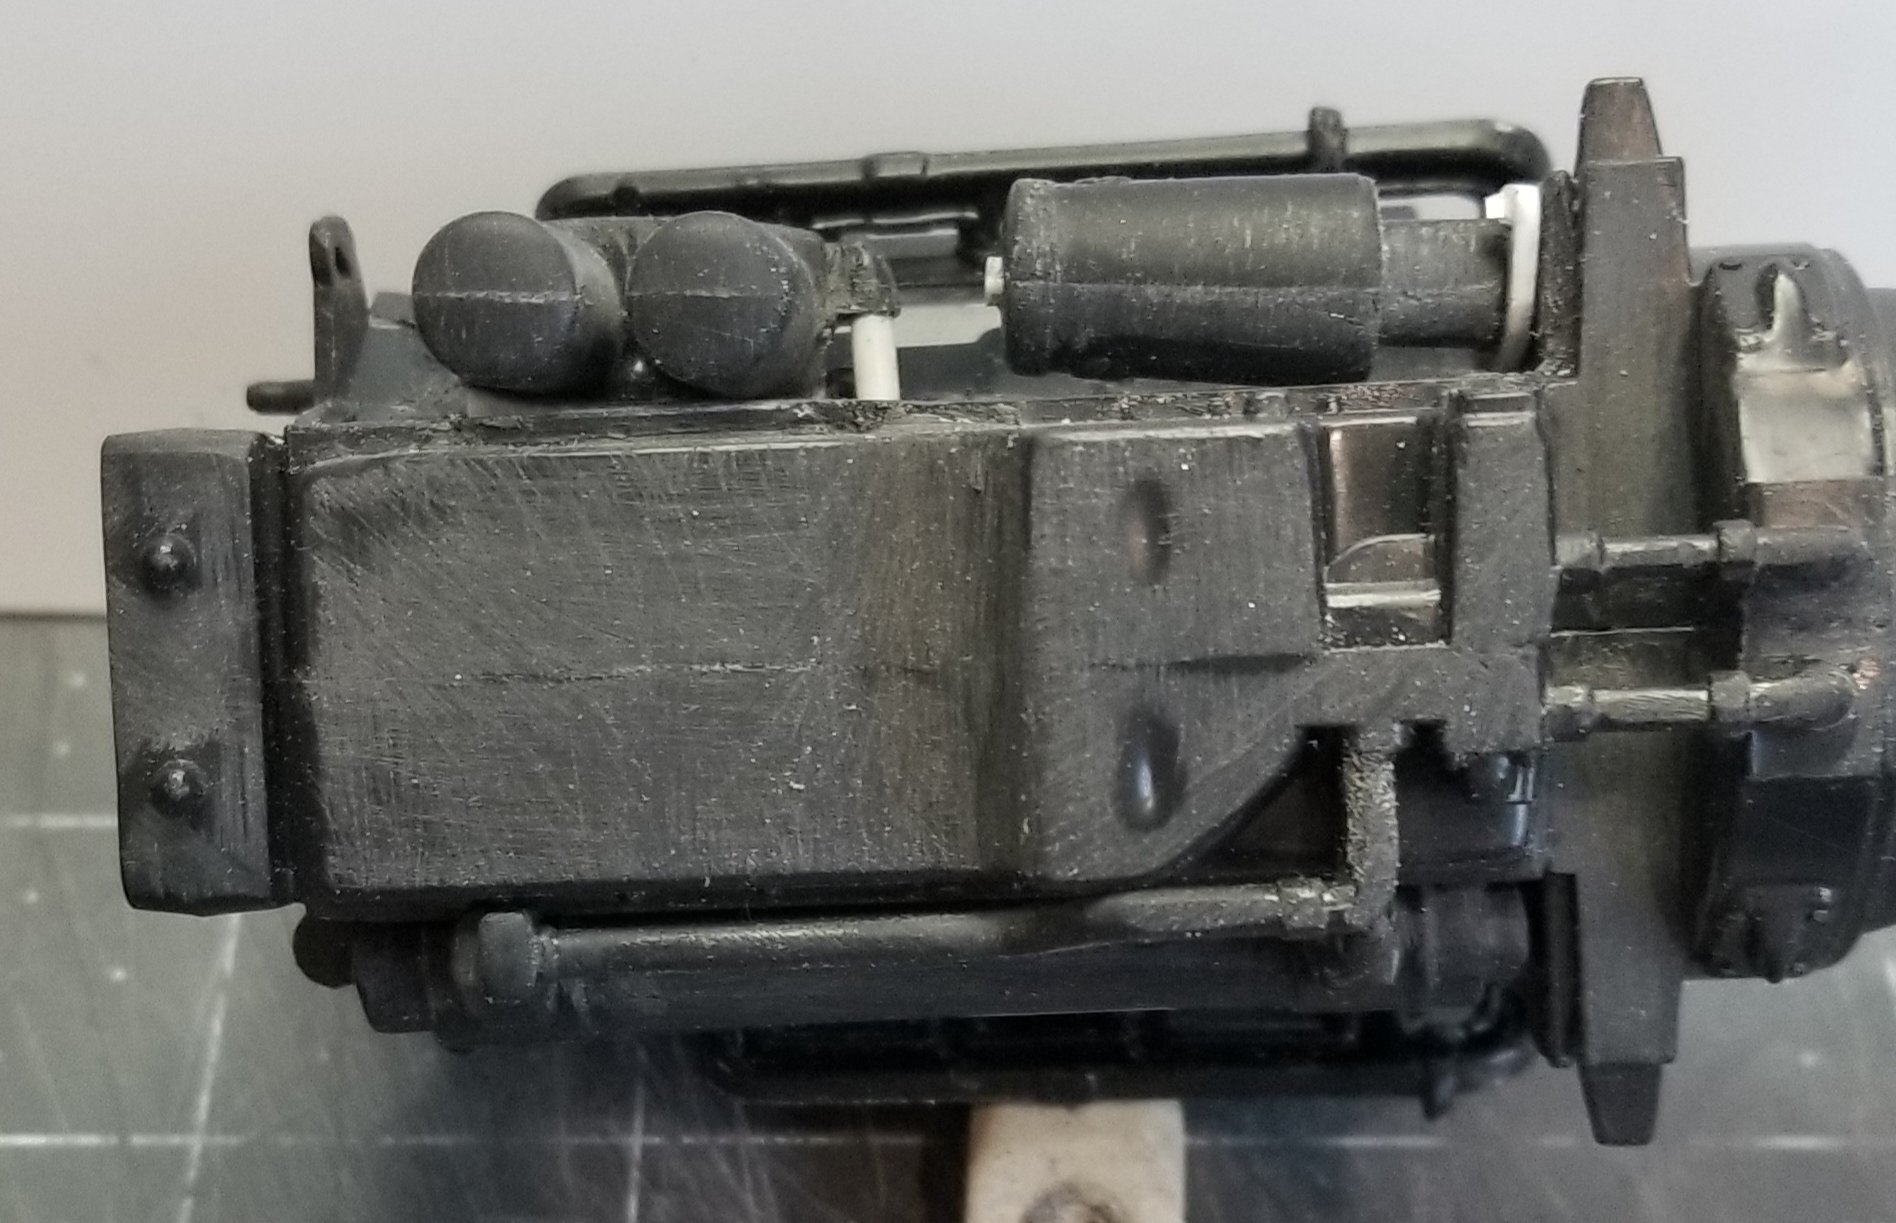
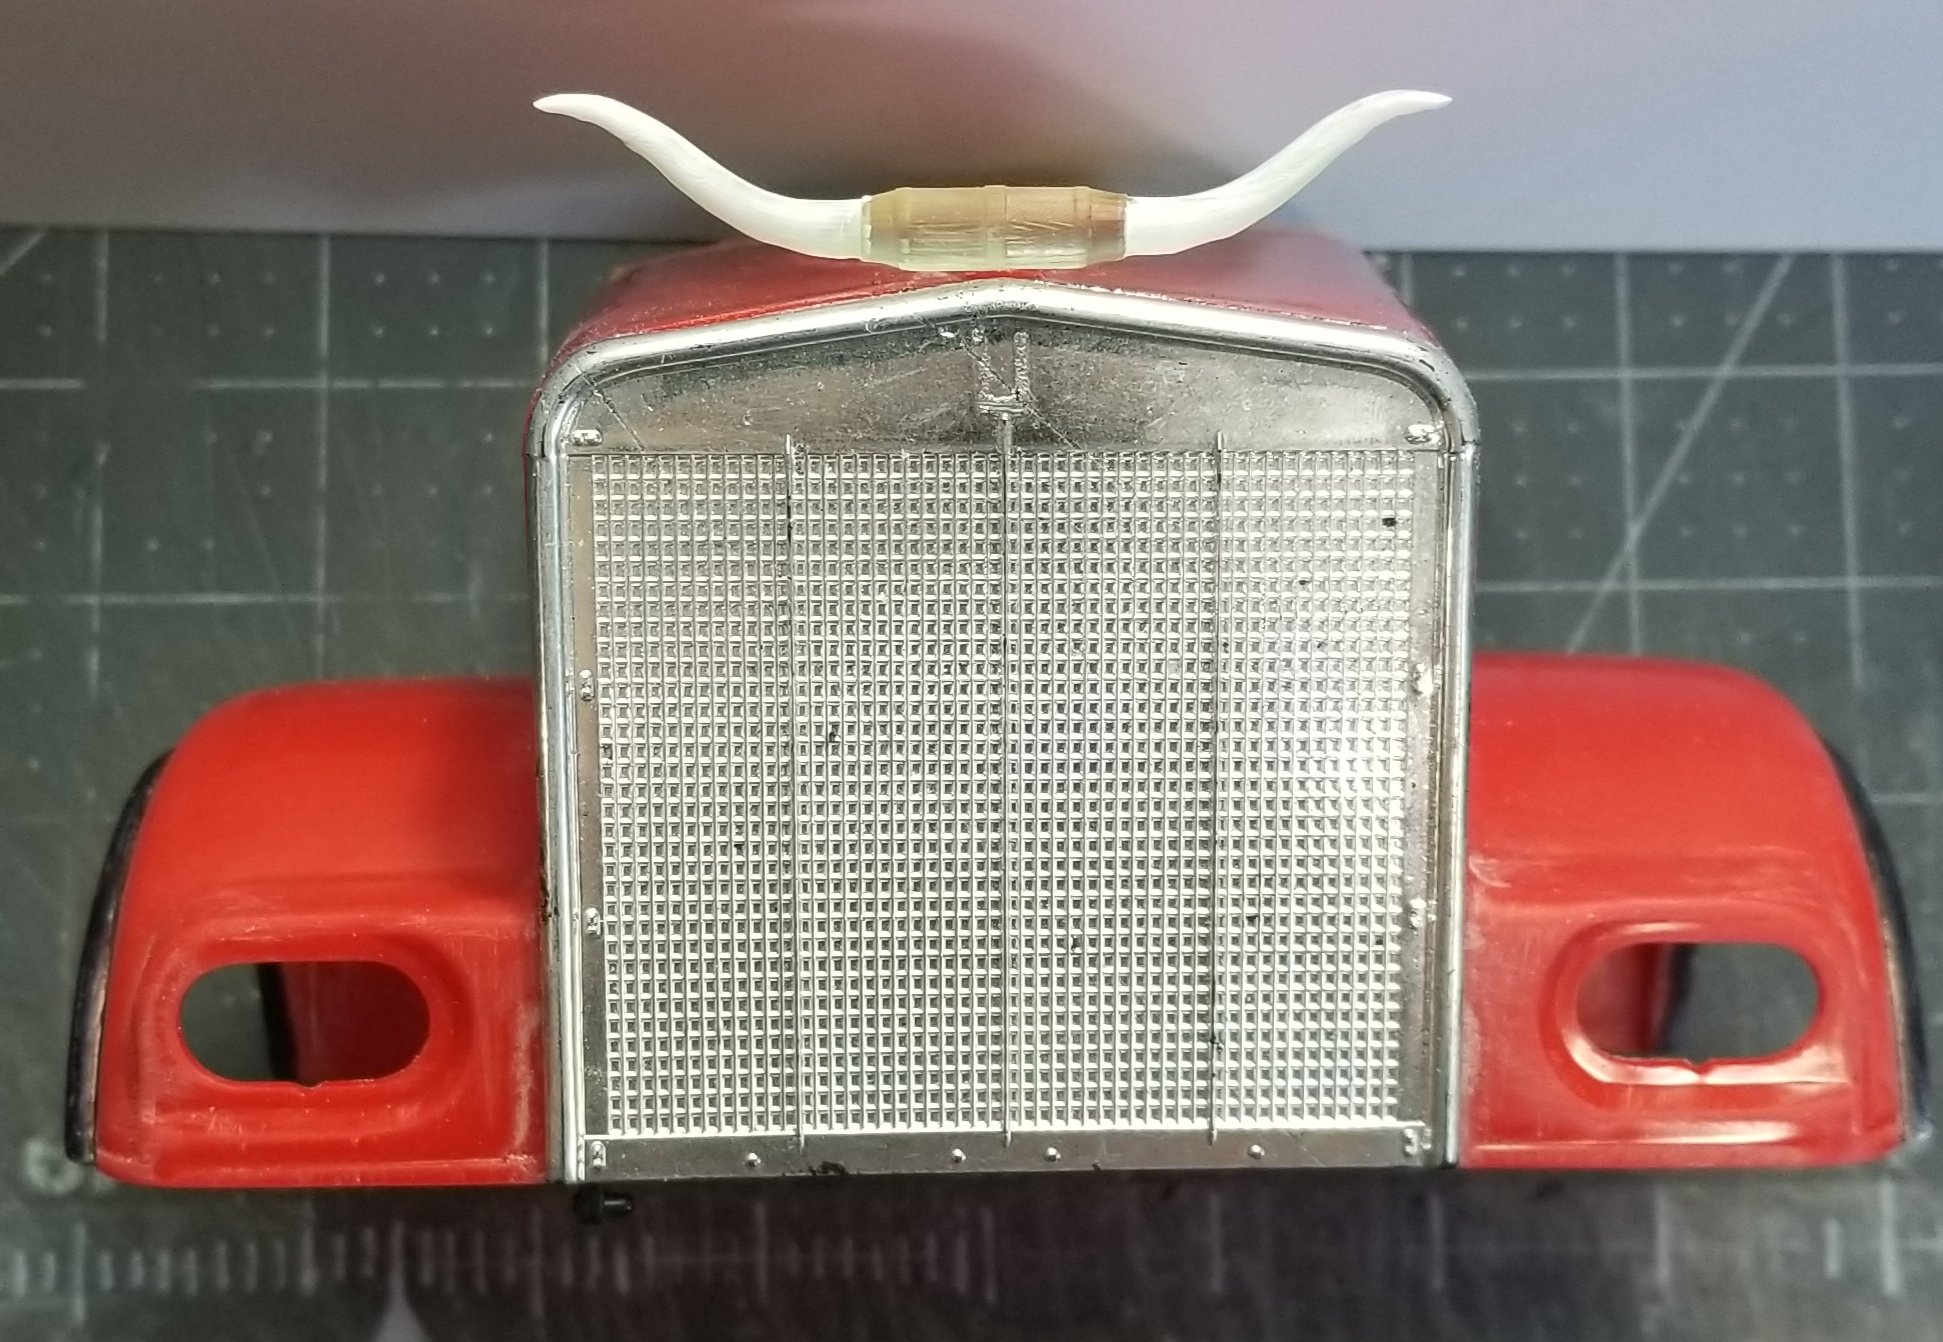
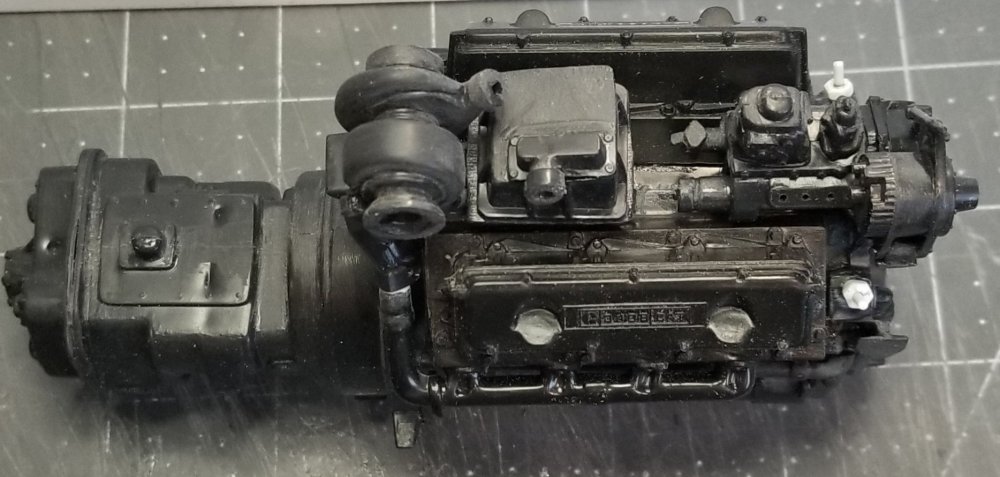
 Hey guys I've been working on the Cat 3406 V8 for the Kenworth. I had two engines, the one from the Peterbilt and the one from the Kenworth. I cut out the cast on oil filters and starter from both engines. I shaved them down the middle, sanded them smooth then glued them together. This gave me a complete oil filter system and a starter. I also cut out the other side of the block and used this peice to fill in the hole from were I cut out he oil filter and starter. this view shows the new oil filter and starter attached to the engine block. You can see the area where I repaired the engine block behind the filters and starter. this view shows the other side of the engine block. Lots of clean up on these parts to get rid of parting lines. this view shows how I modified the intake so I can add the intercooler pipes to the radiator intercooler. this view shows how the new oil filter and starter look like from the bottom. I still have to fill in those two depressions in the oil pan. how about these for a hood ornament.. The guy who printed these (3D printed) there supposed to be 1/24 scale he is doing me a set at about 75% this size, because I think these are a bit to big. He printed me some batteries but mistakenly did them at 1/24 scale, so he's redoing them for me for free. I'll post pictures when they get here. Ron G
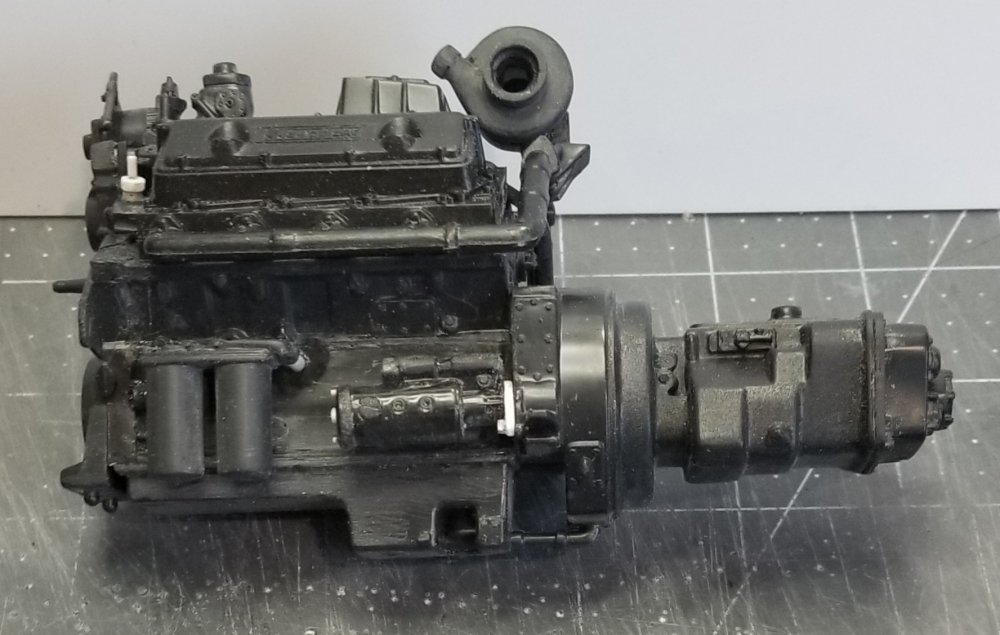


-
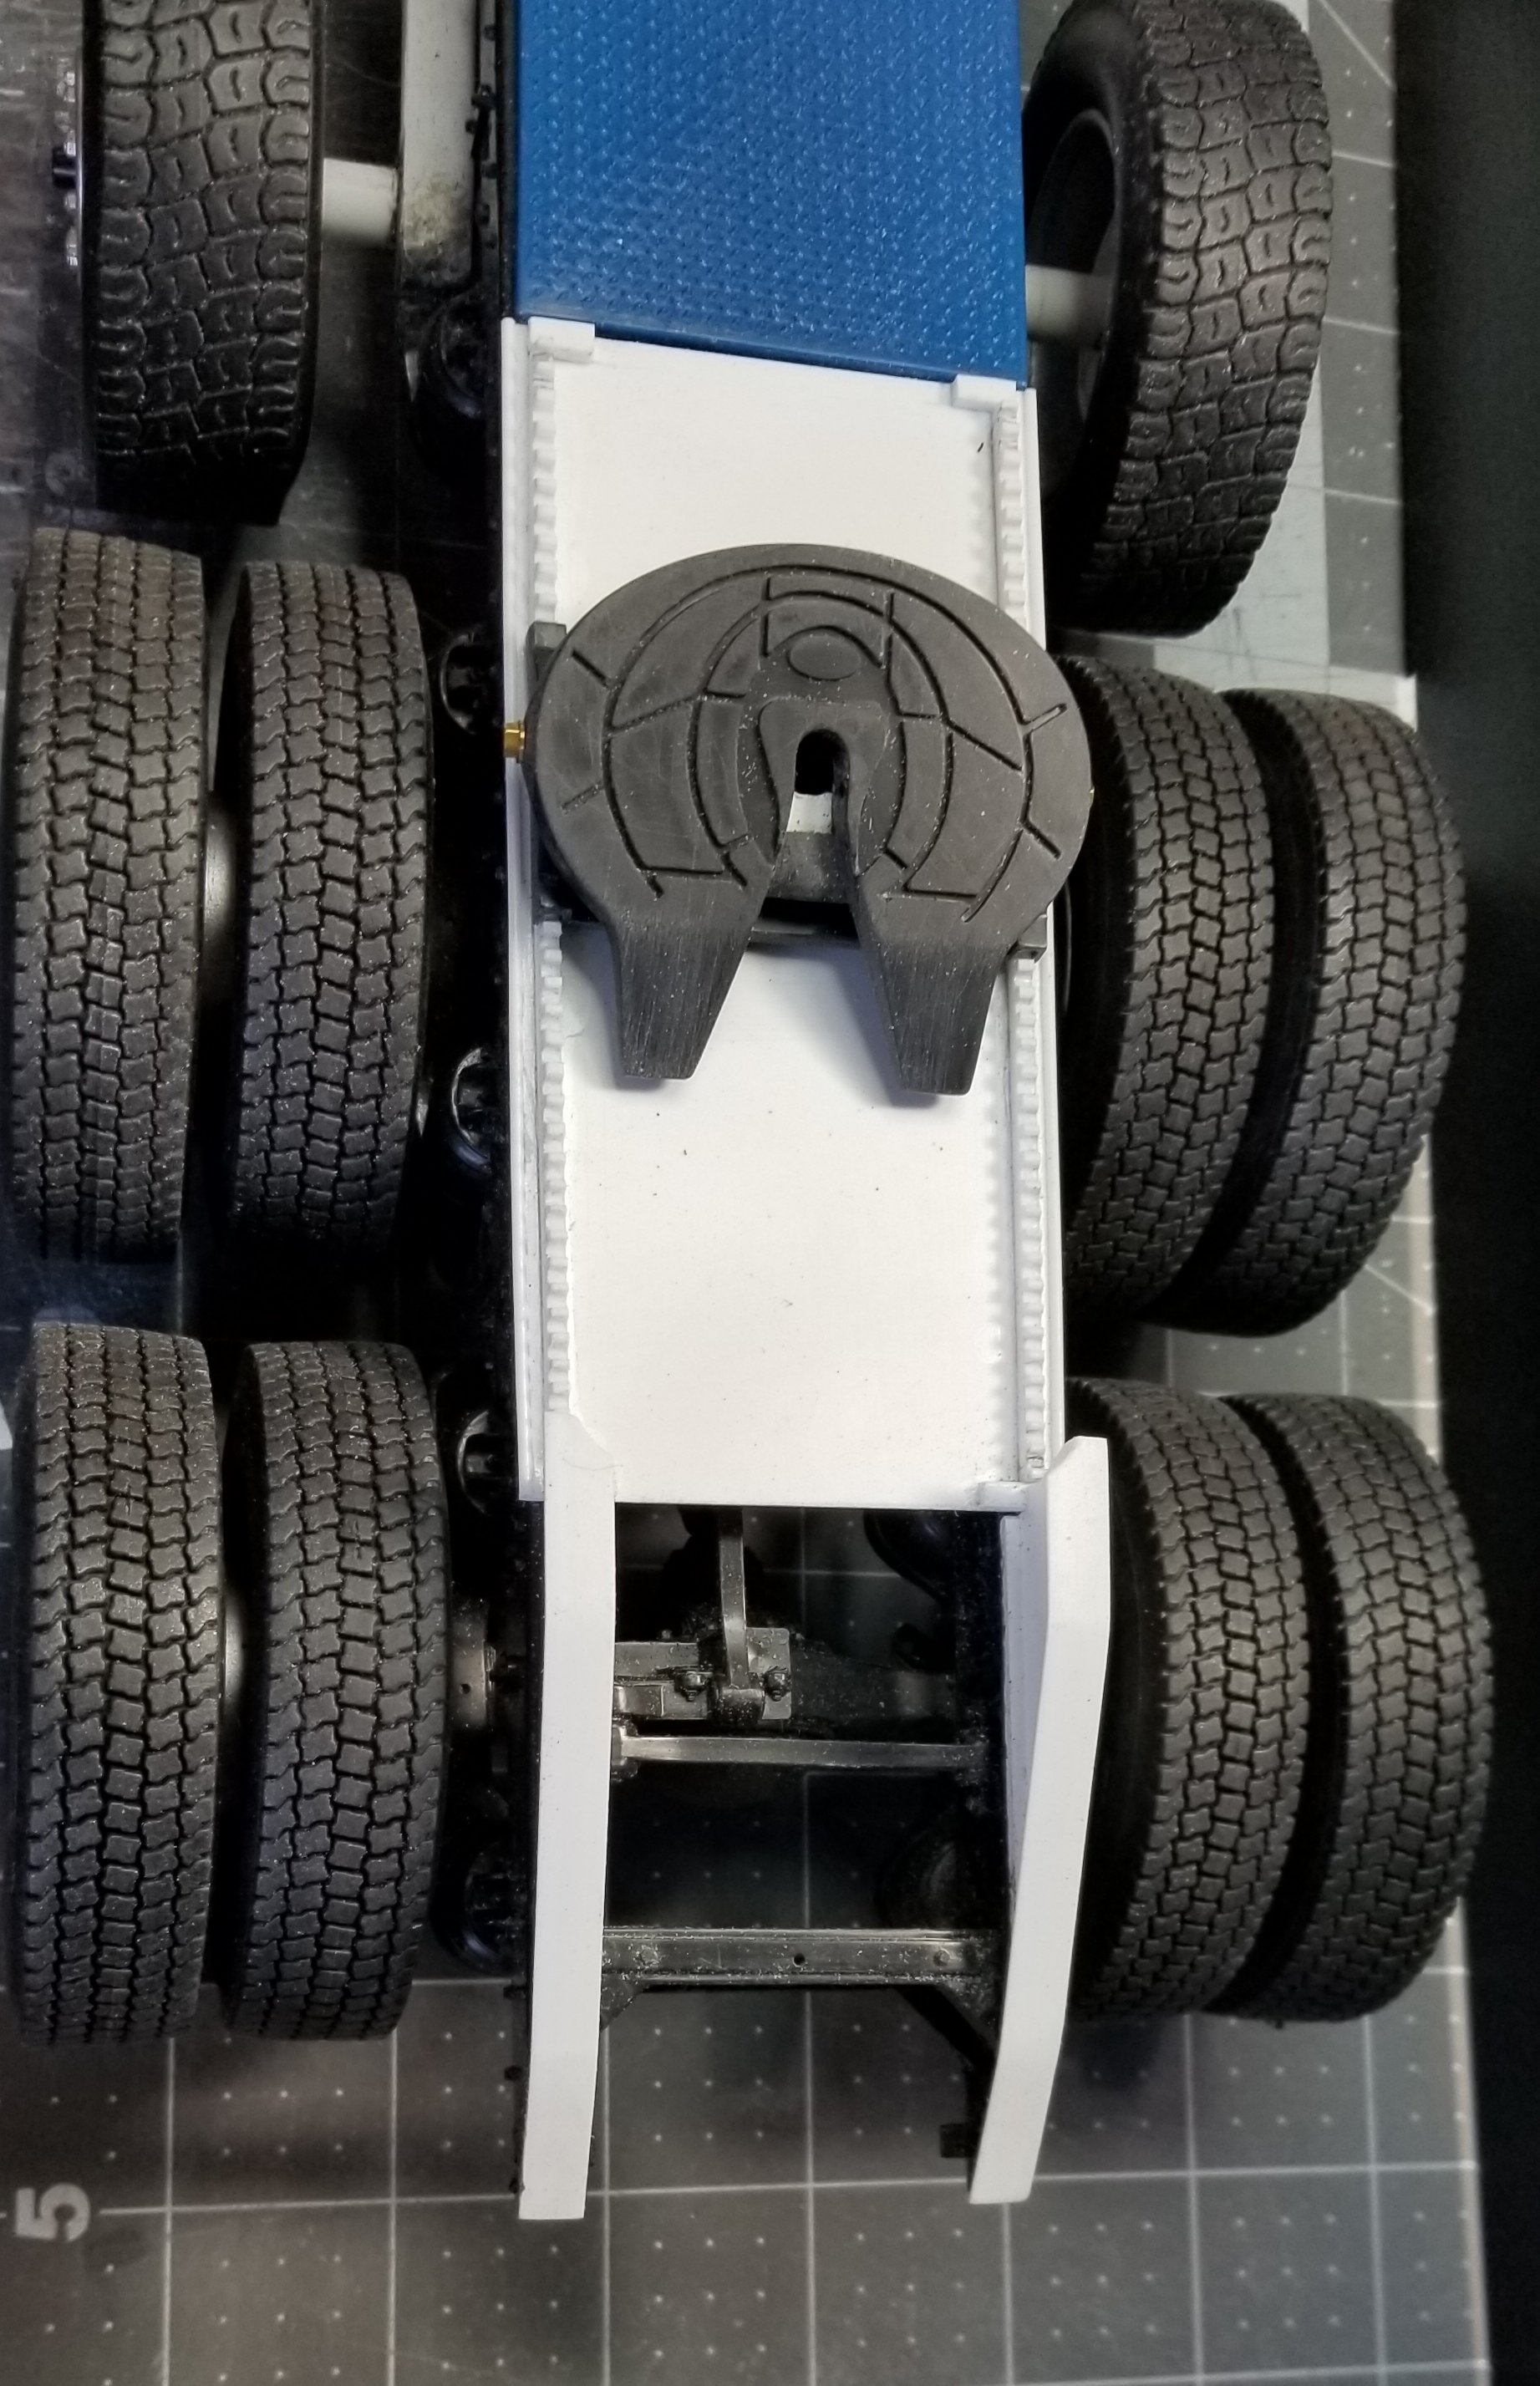
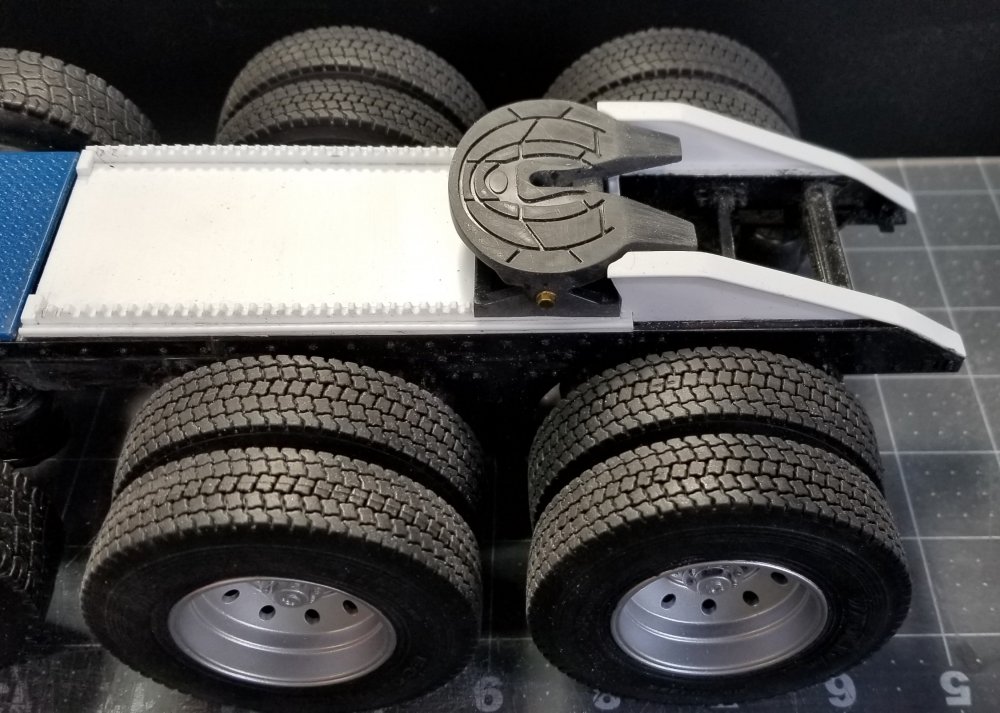
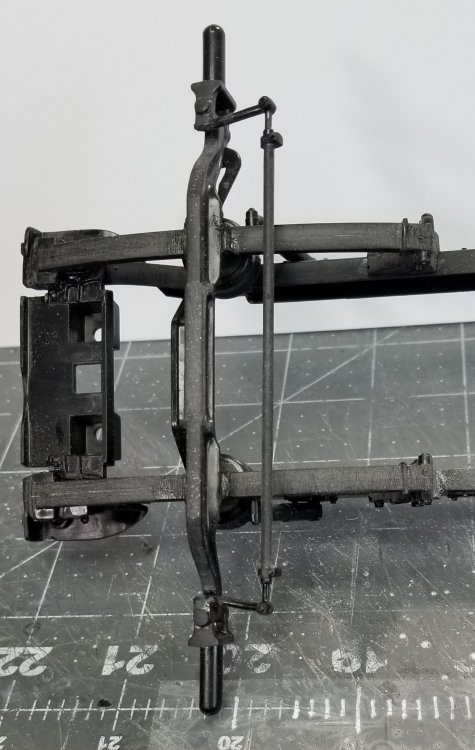
Hey guys Gazzas: it's going to be painted to match the truck, although I my do the doors in polished aluminum. Ok I got some more work done on the big KW. I made a new fifth wheel mounting plate with scratch built gear racks (real pain in the posterior!) and lowboy trailer neck ramps. this view shows the rear of the truck with the scratch built lowboy neck ramps, movable fifth wheel and custom mounting plate and gear rack. view looking down on the fifth wheel setup. this view shows how the fifth wheel fits to the neck ramps. side view of the whole rig. view looking down on the big KW. Well that's it for now be back soon. Ron G


-
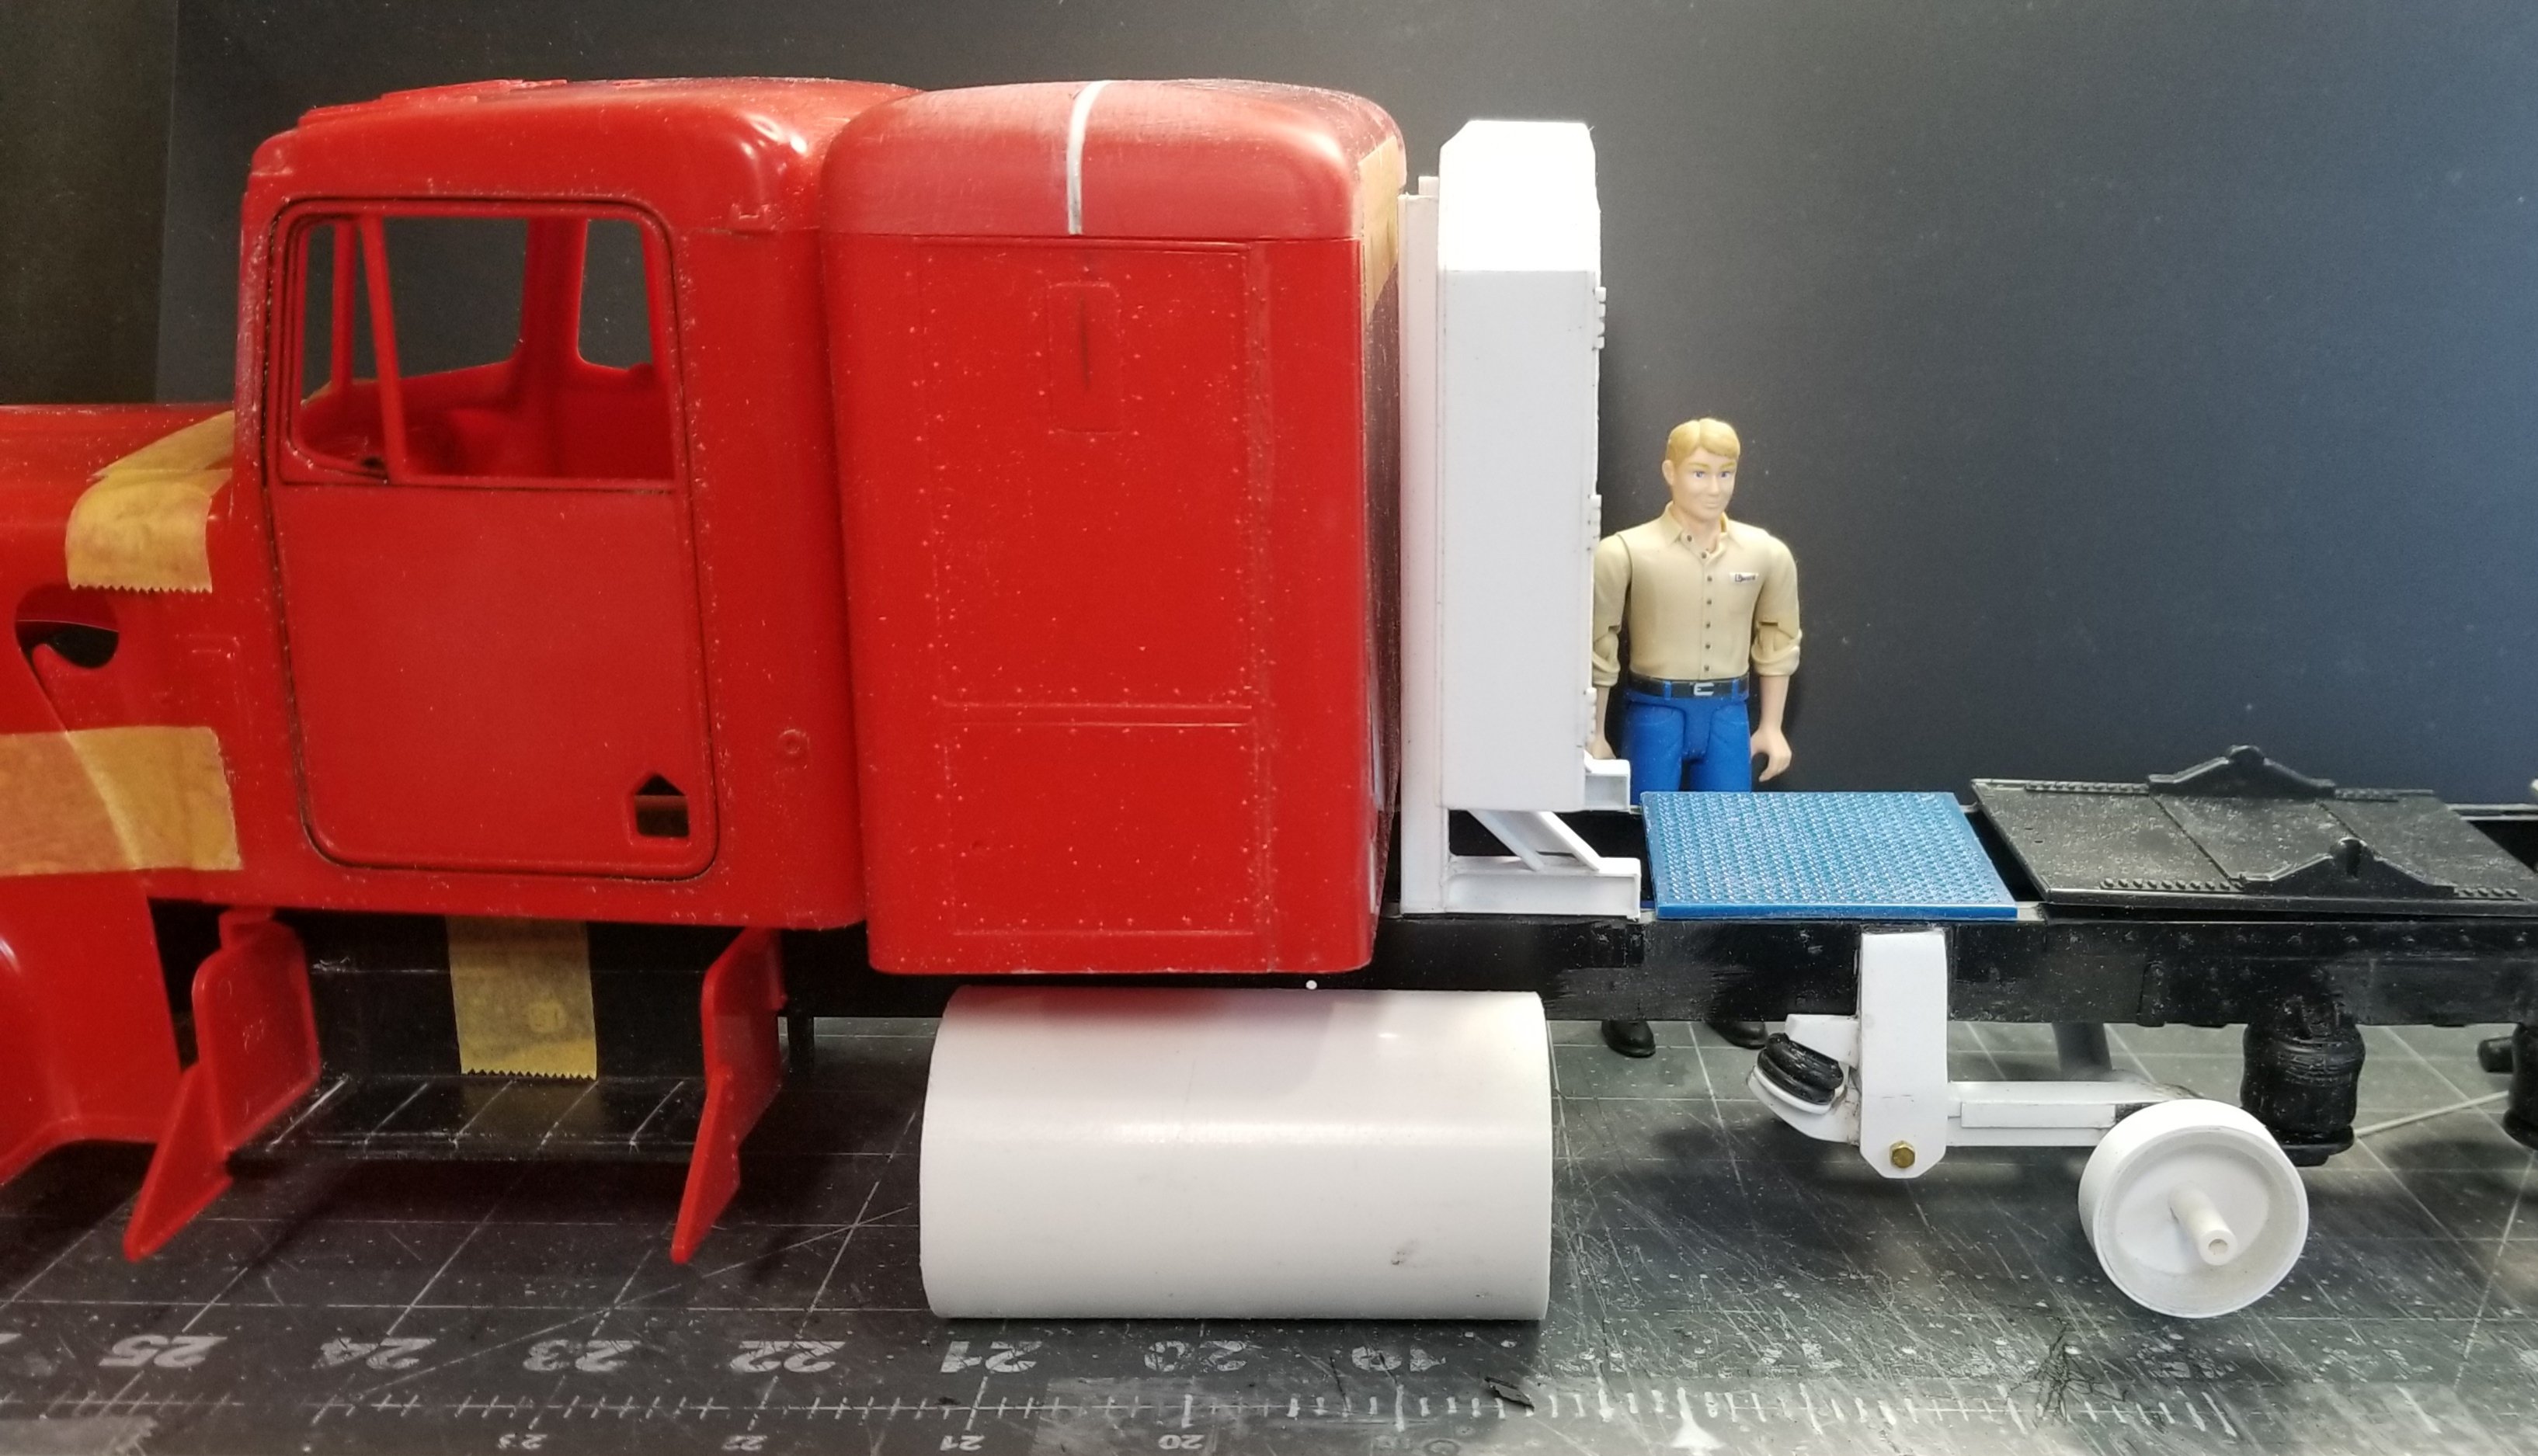
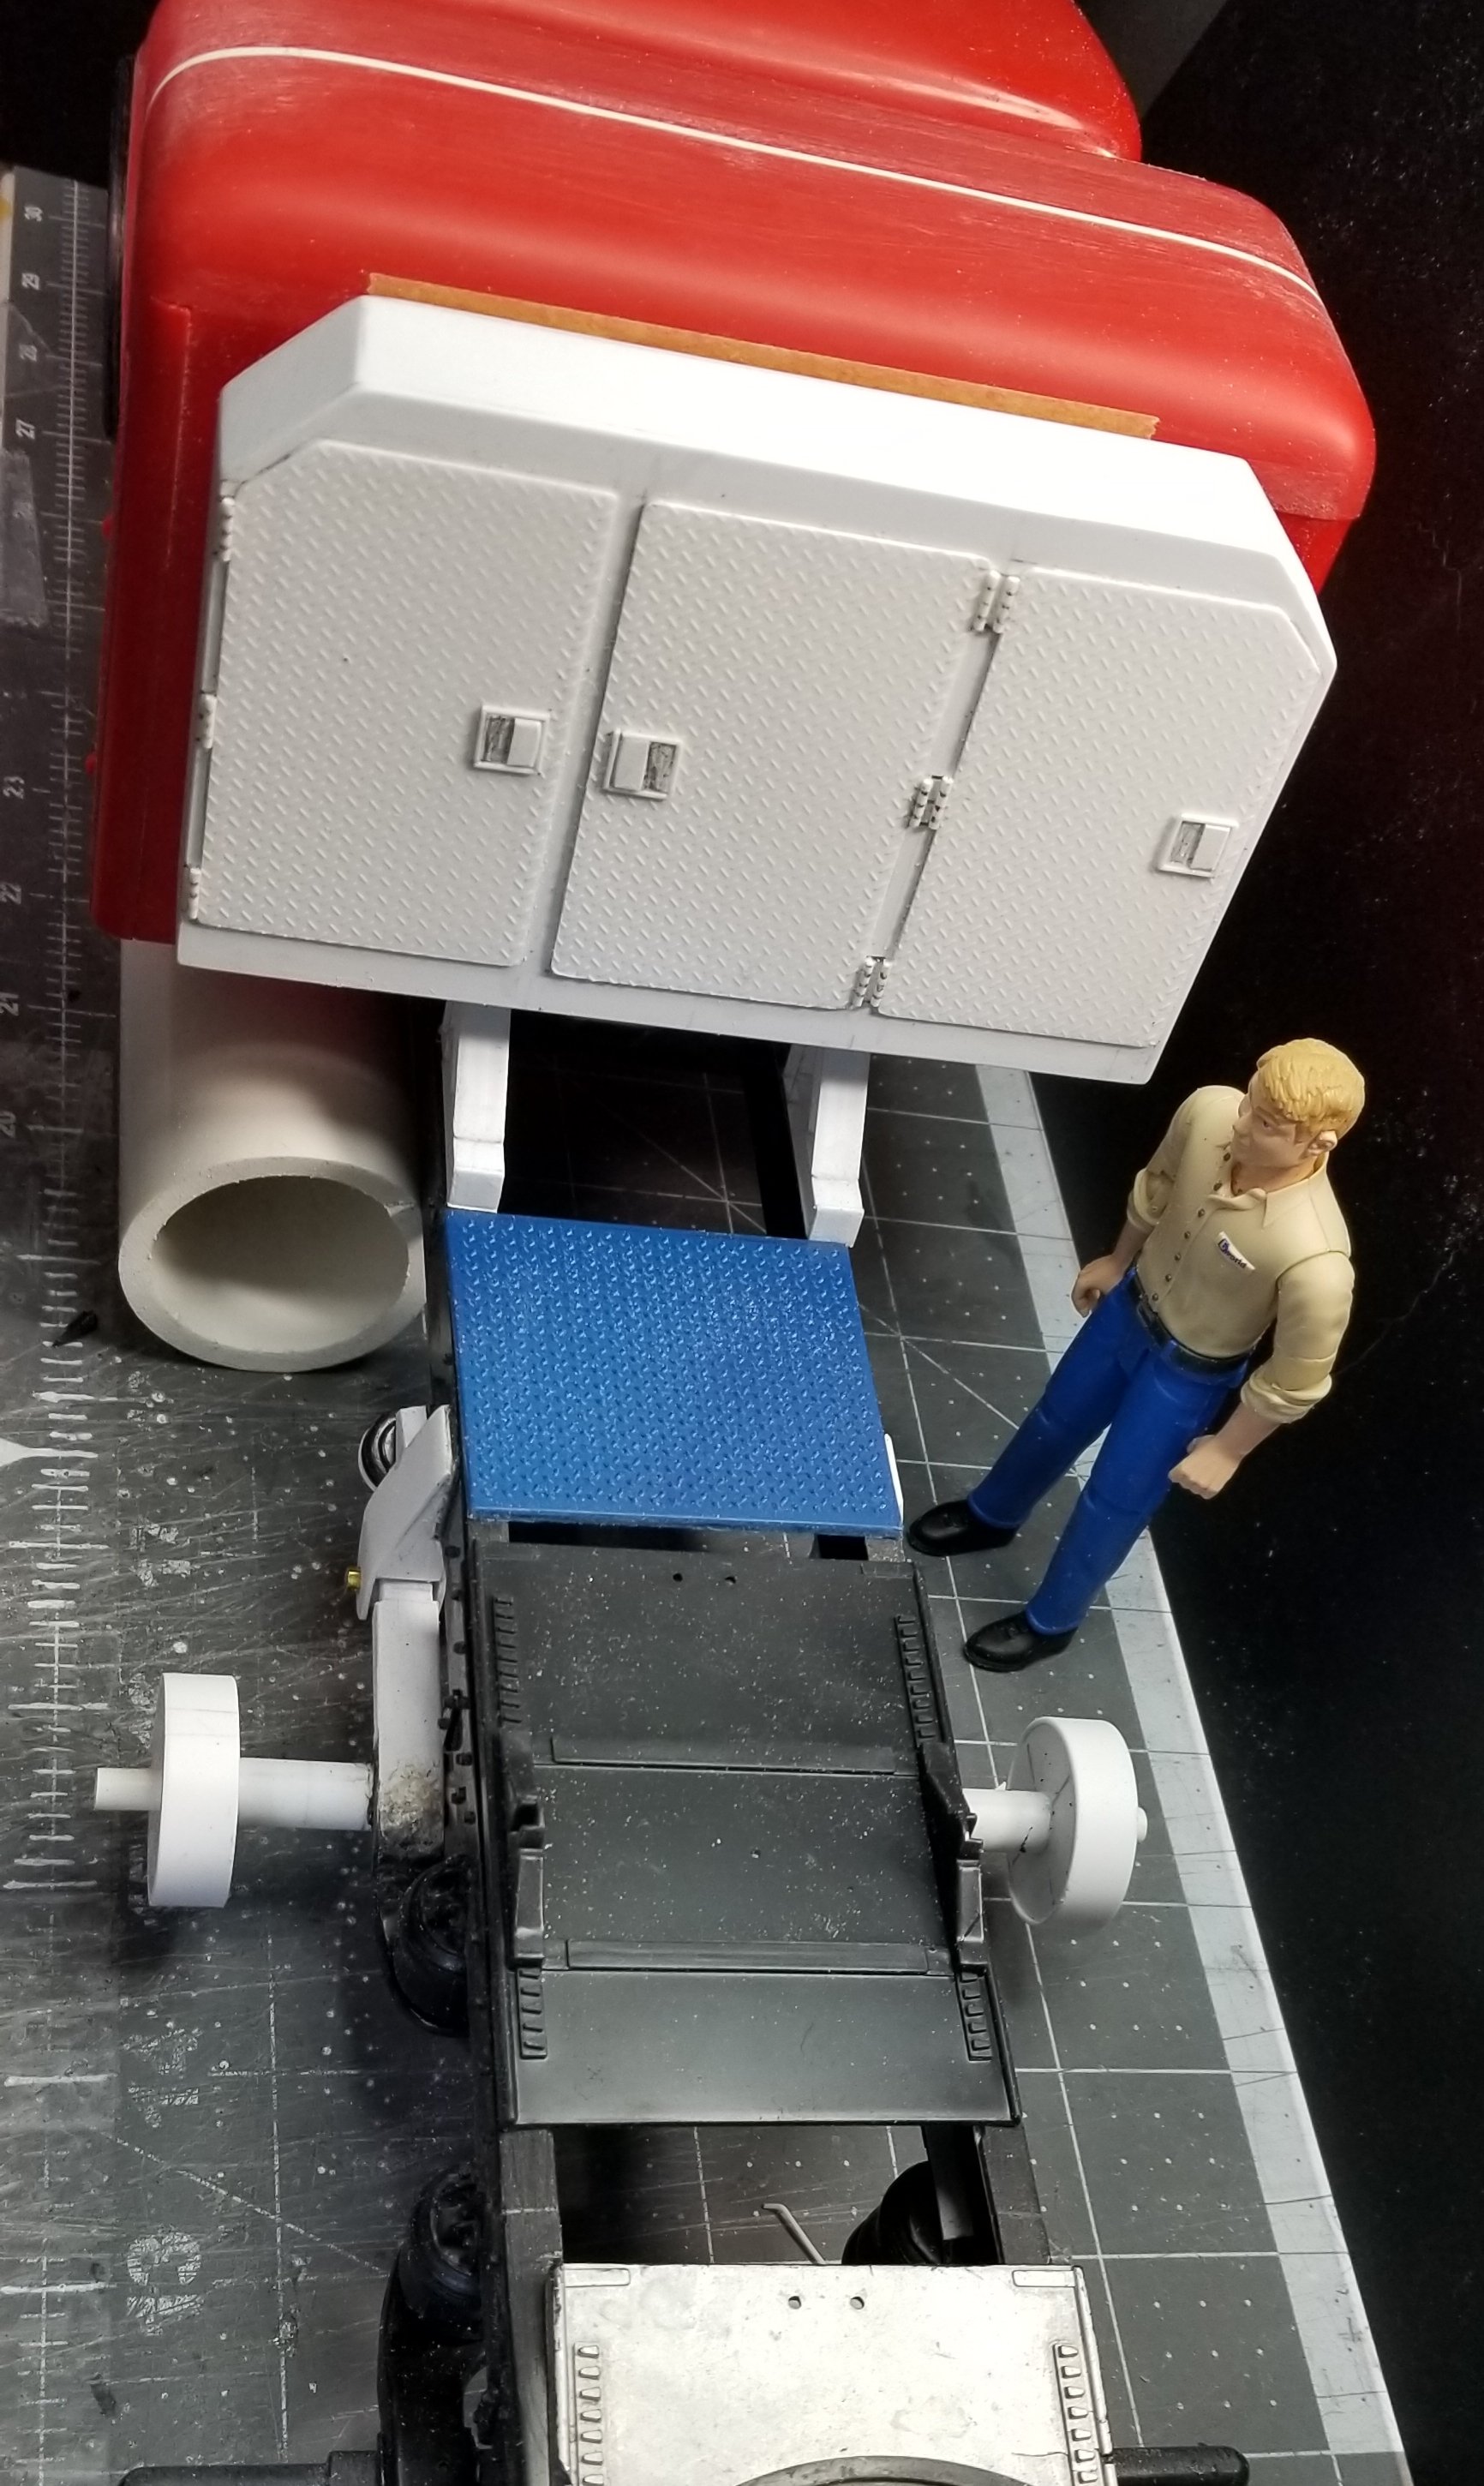
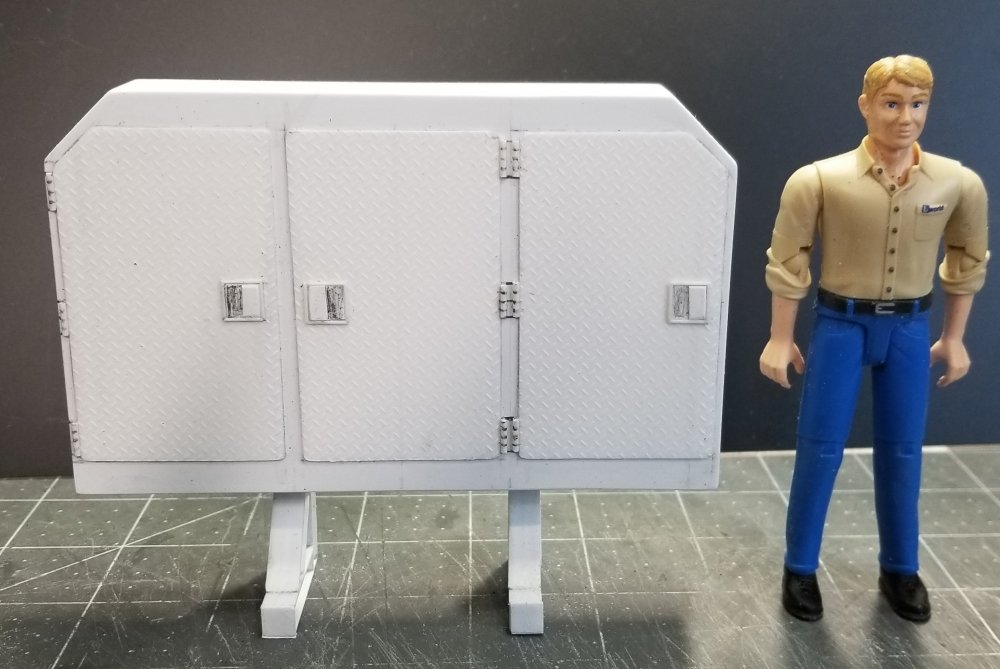
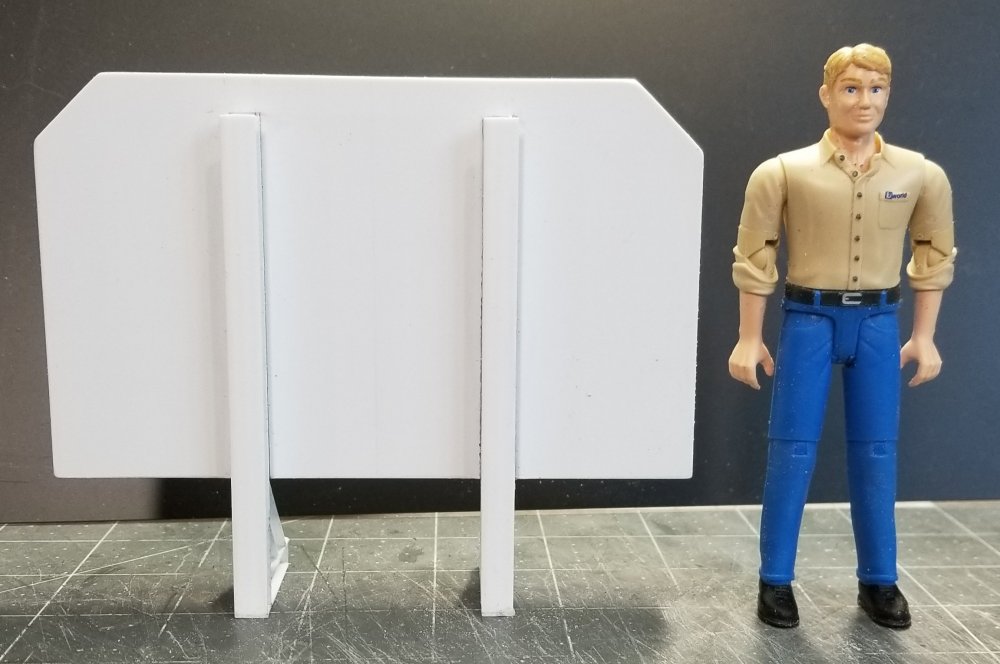
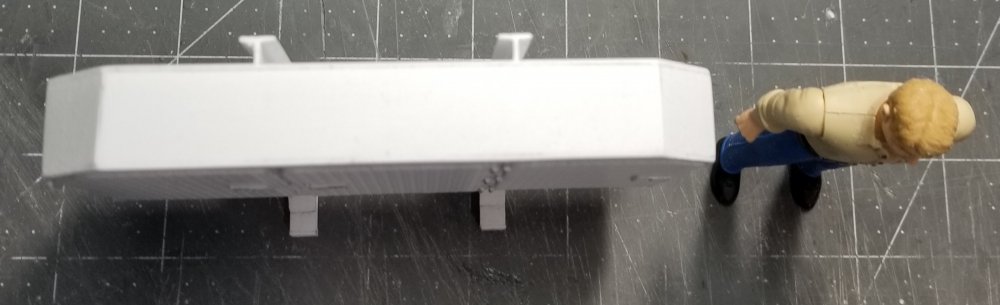
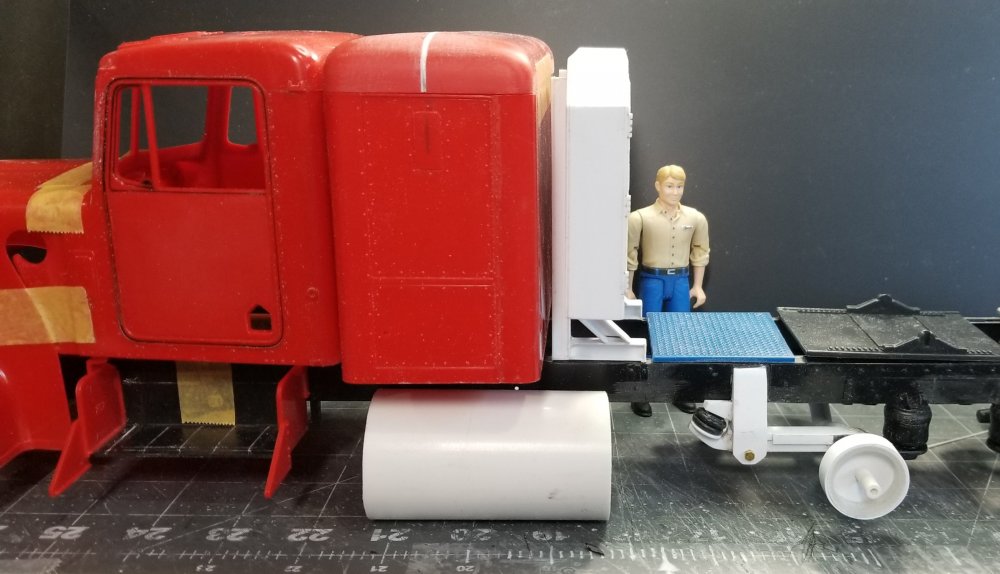
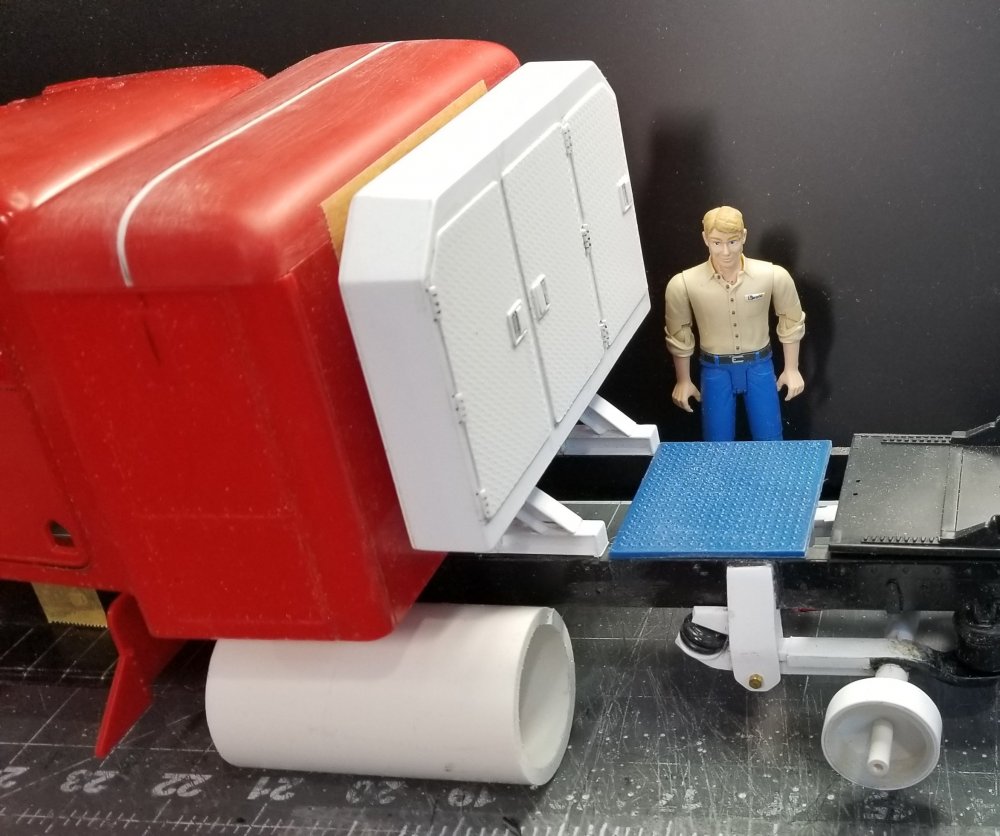
Hey all I have the headache rack done. I just need to go over it with some filler and do some sanding. this view shows the rear of the headache rack. The doors are diamond plate with custom door handles and hinges. side view of the headache rack. It's a scale 12" deep. this view shows the front of the headache rack and the mounting brackets. top view of the headache rack. side view of the truck with the headache rack in place. another view of the headache rack on the truck. view looking forward of the headache rack and truck. Well that's it for now be back with more updates soon. Ron G


-
Thanks alot guys Ron G
-
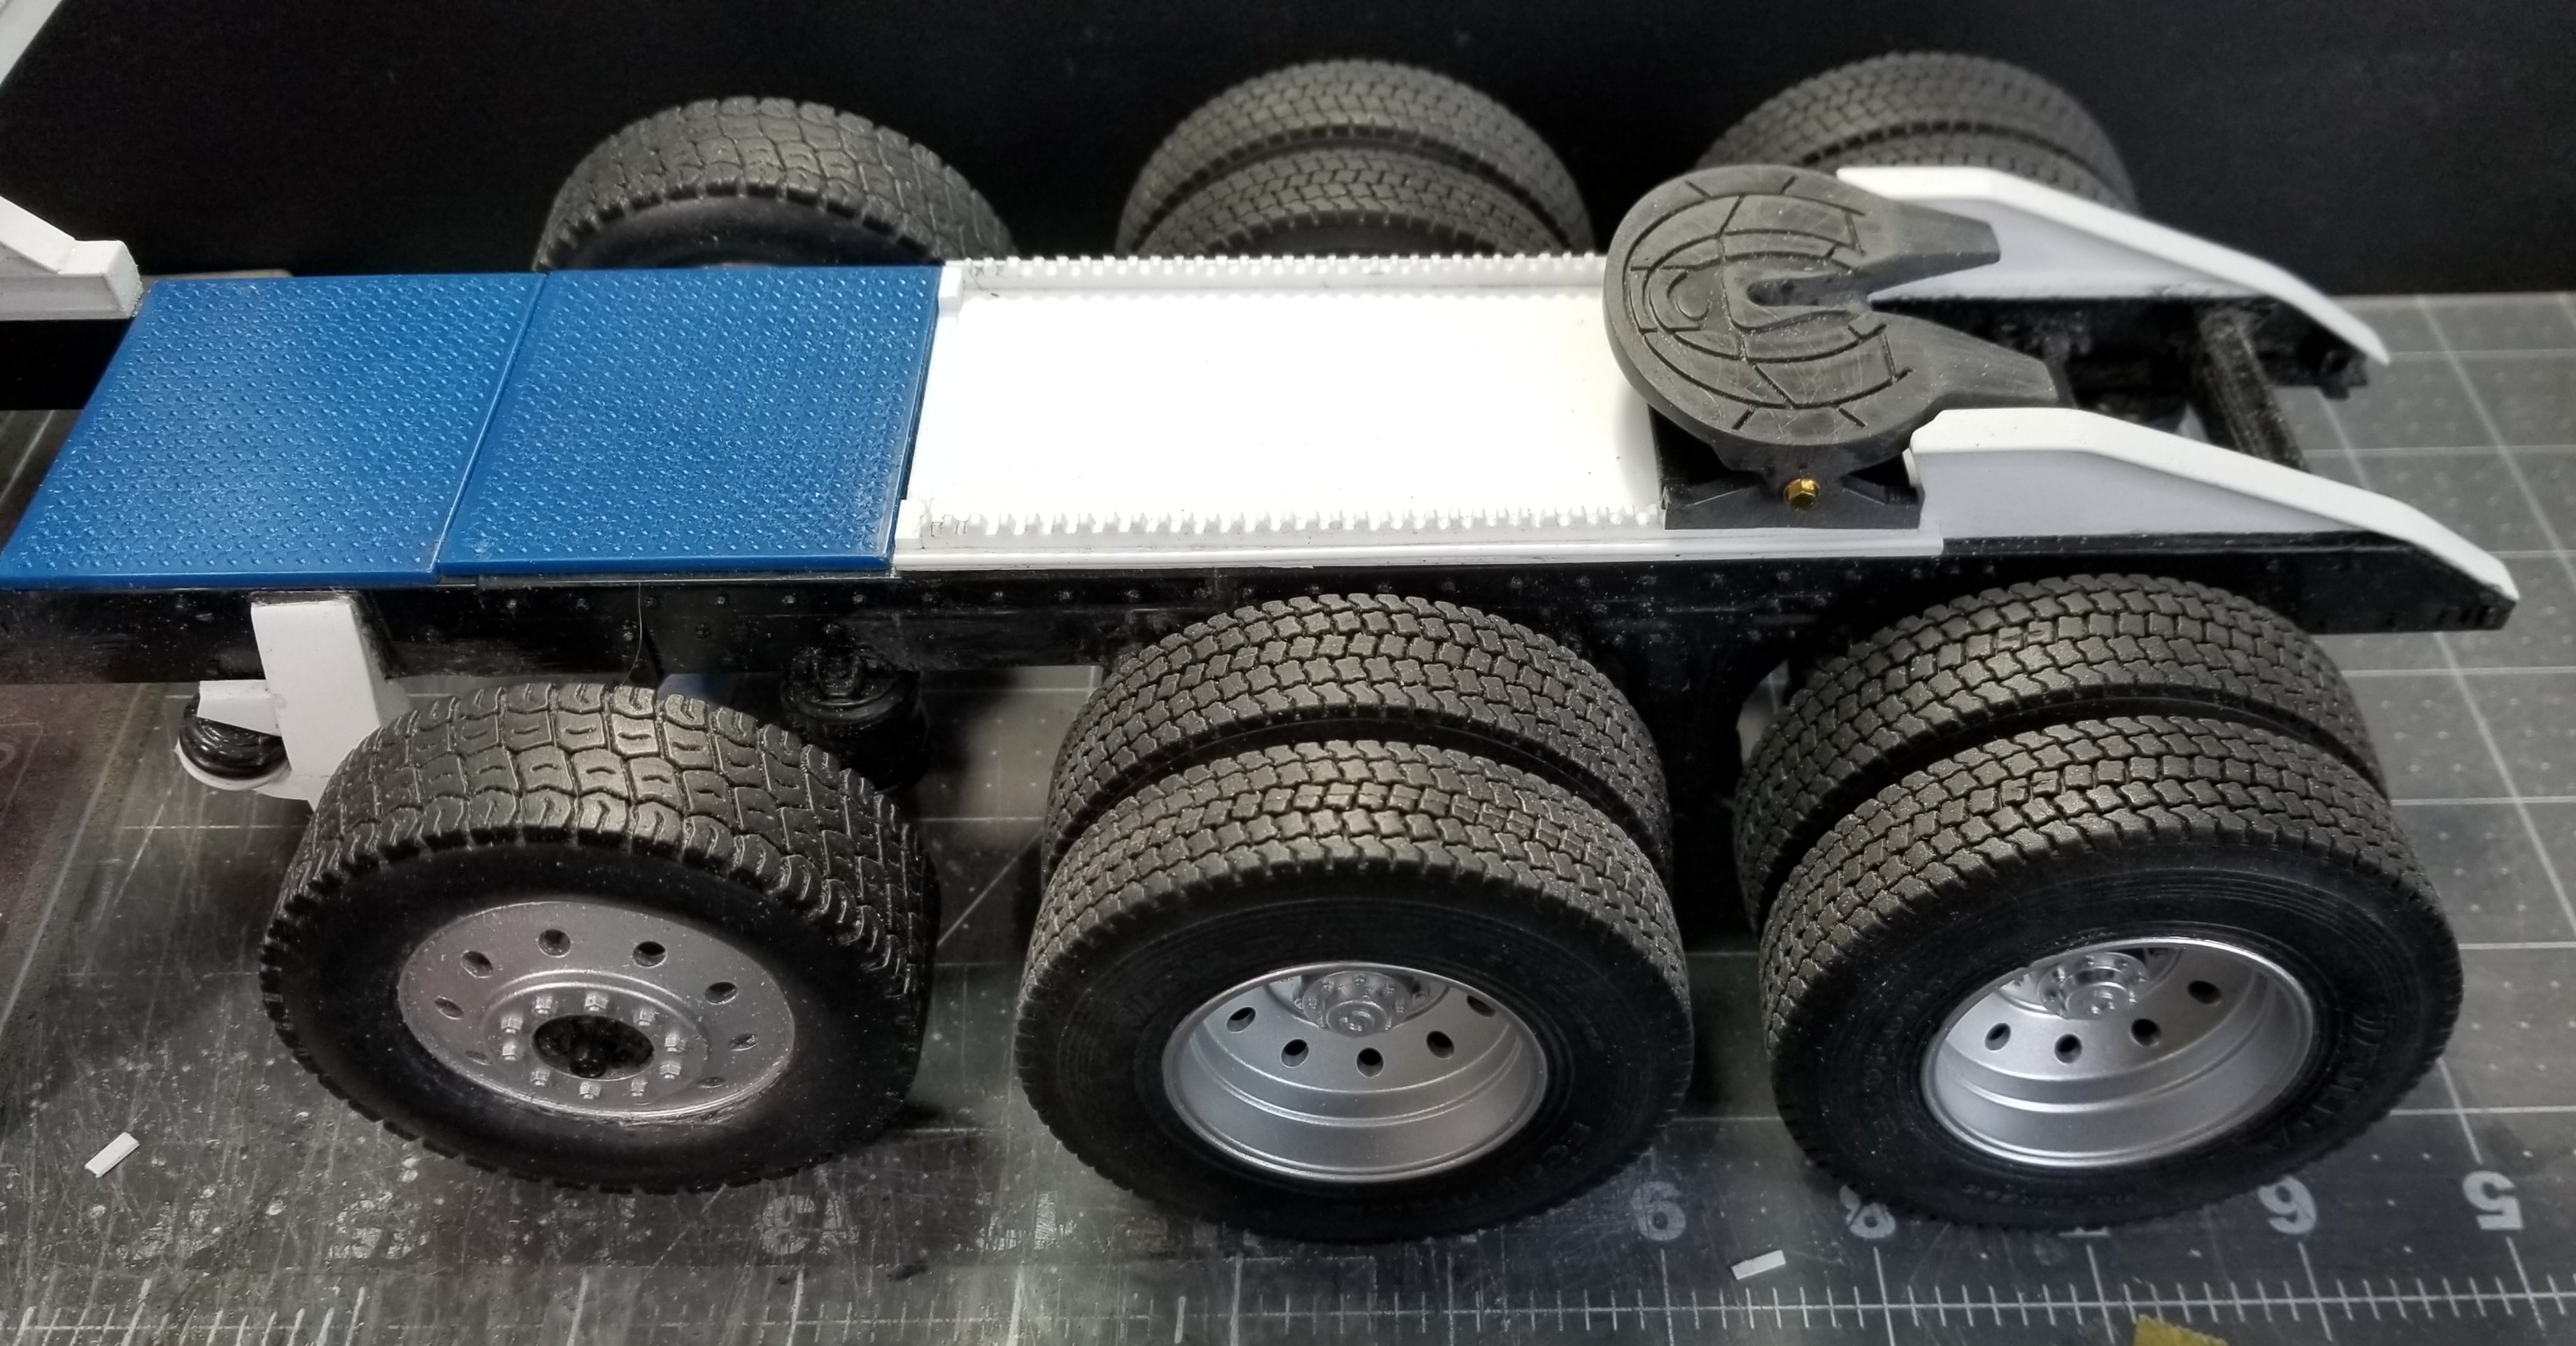
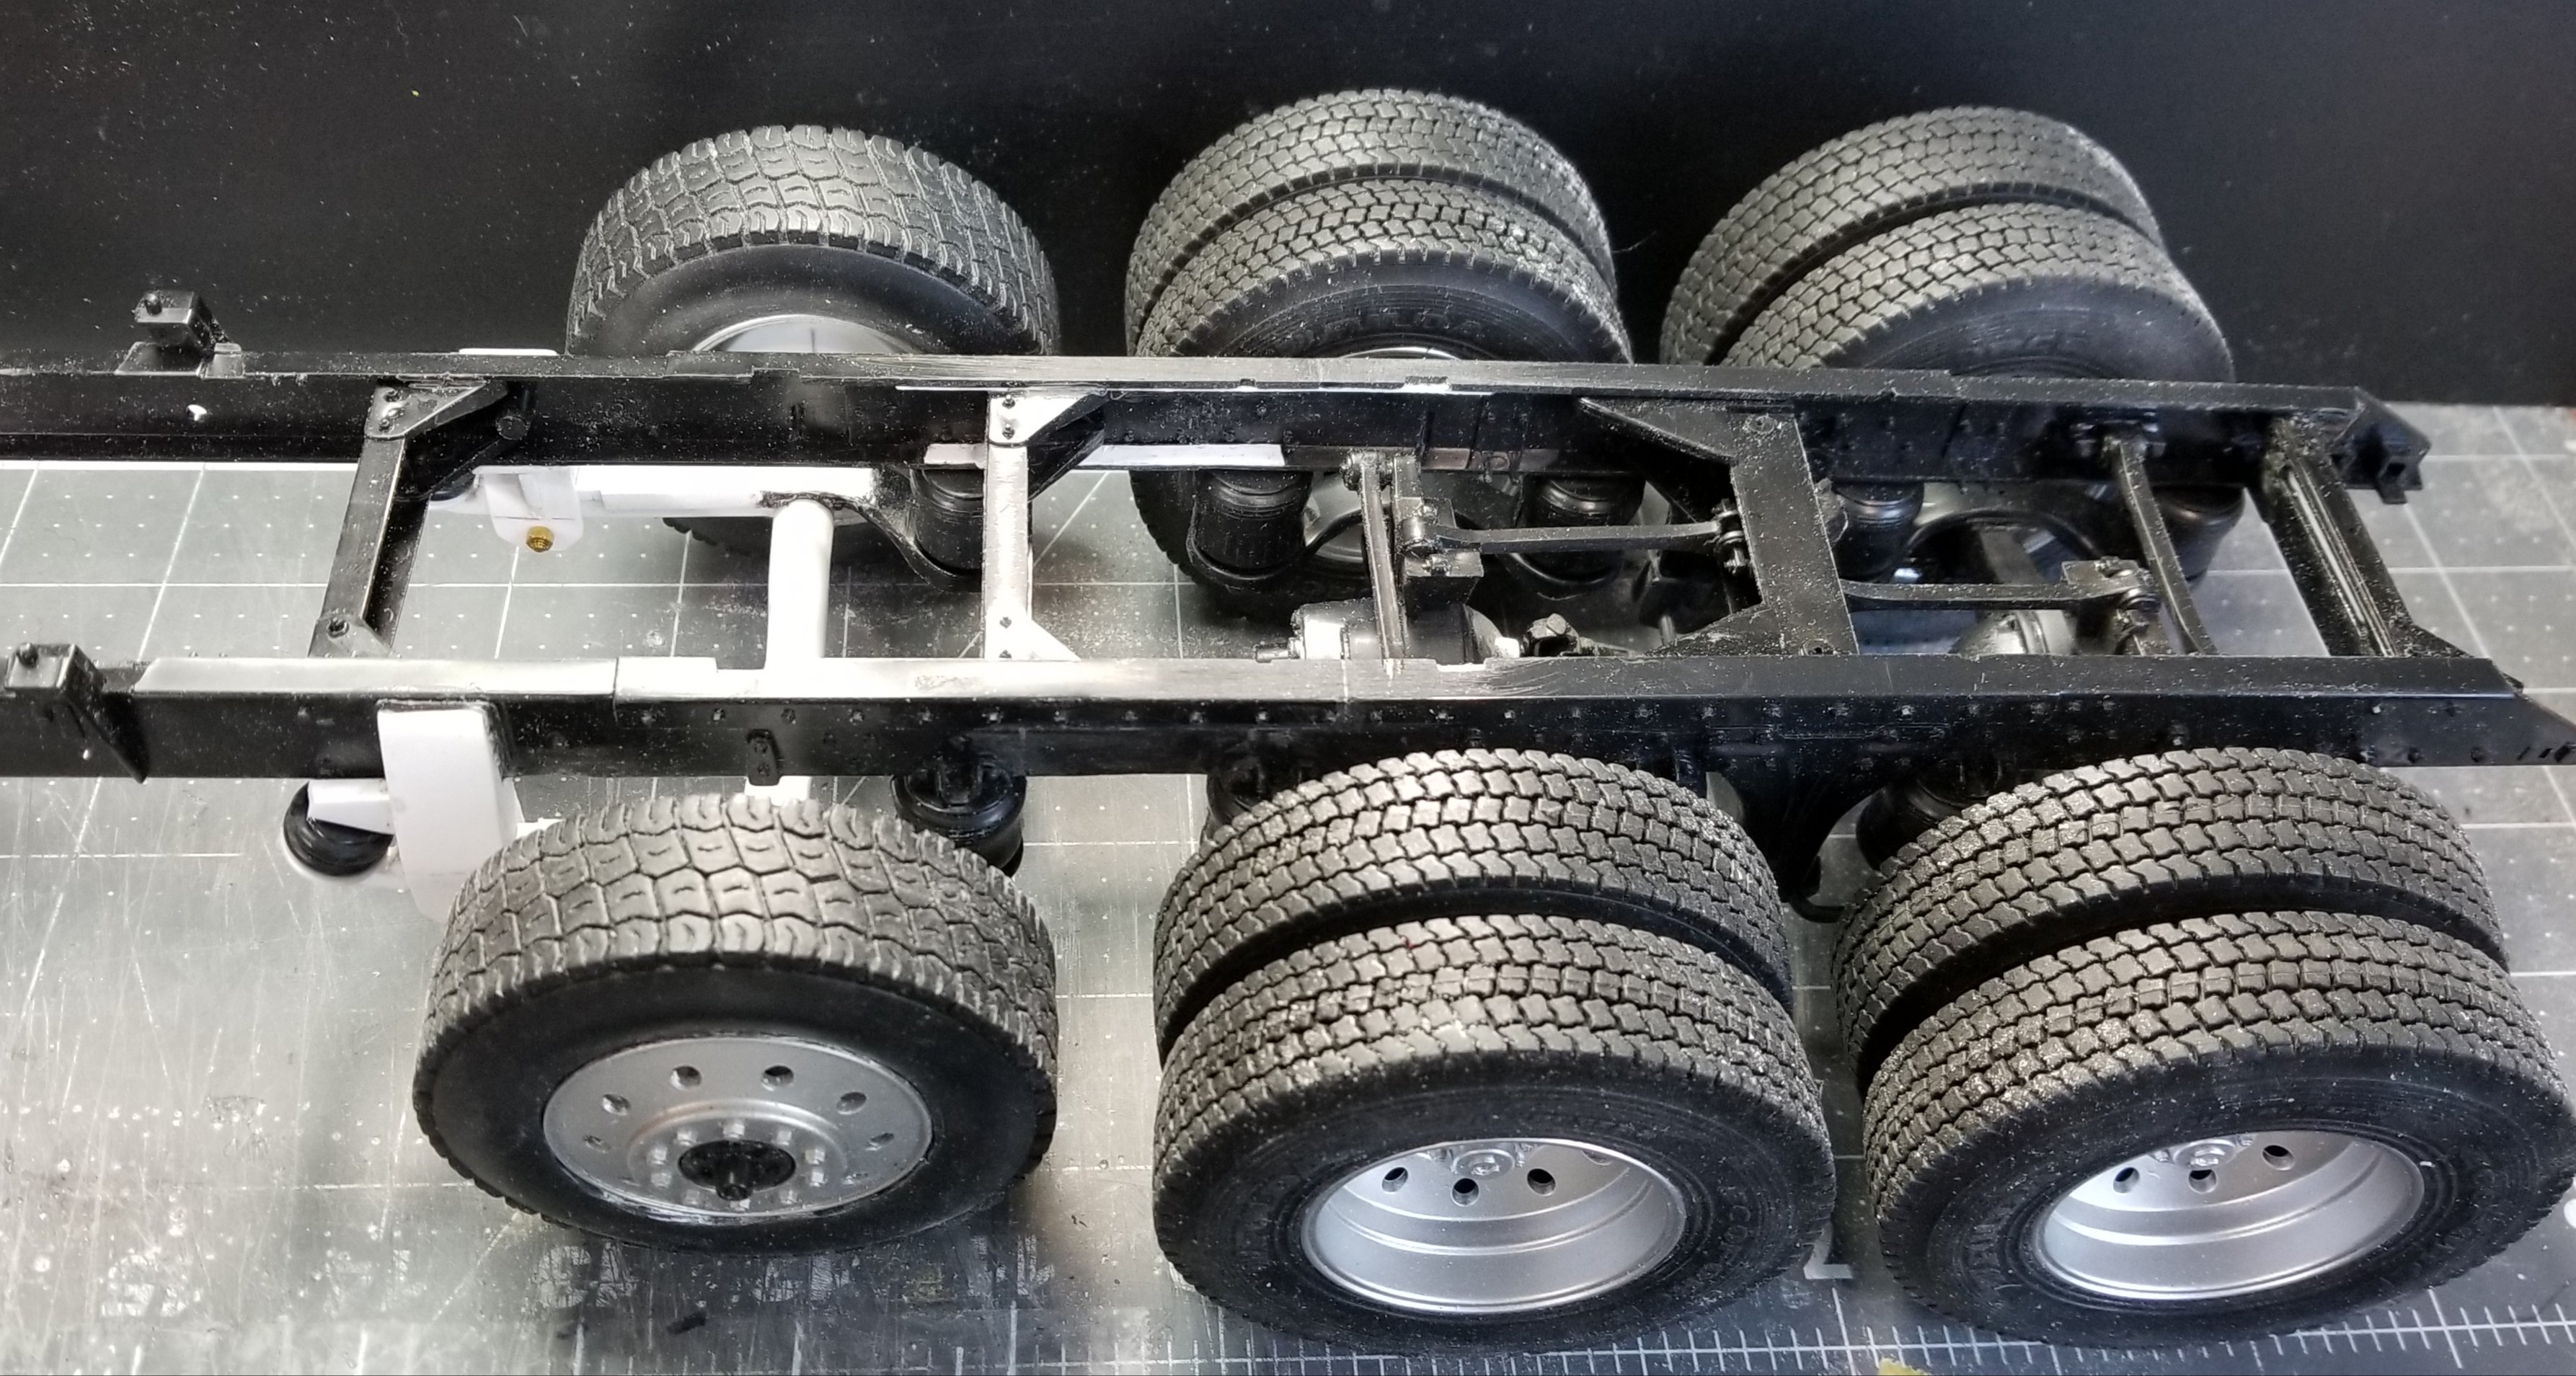
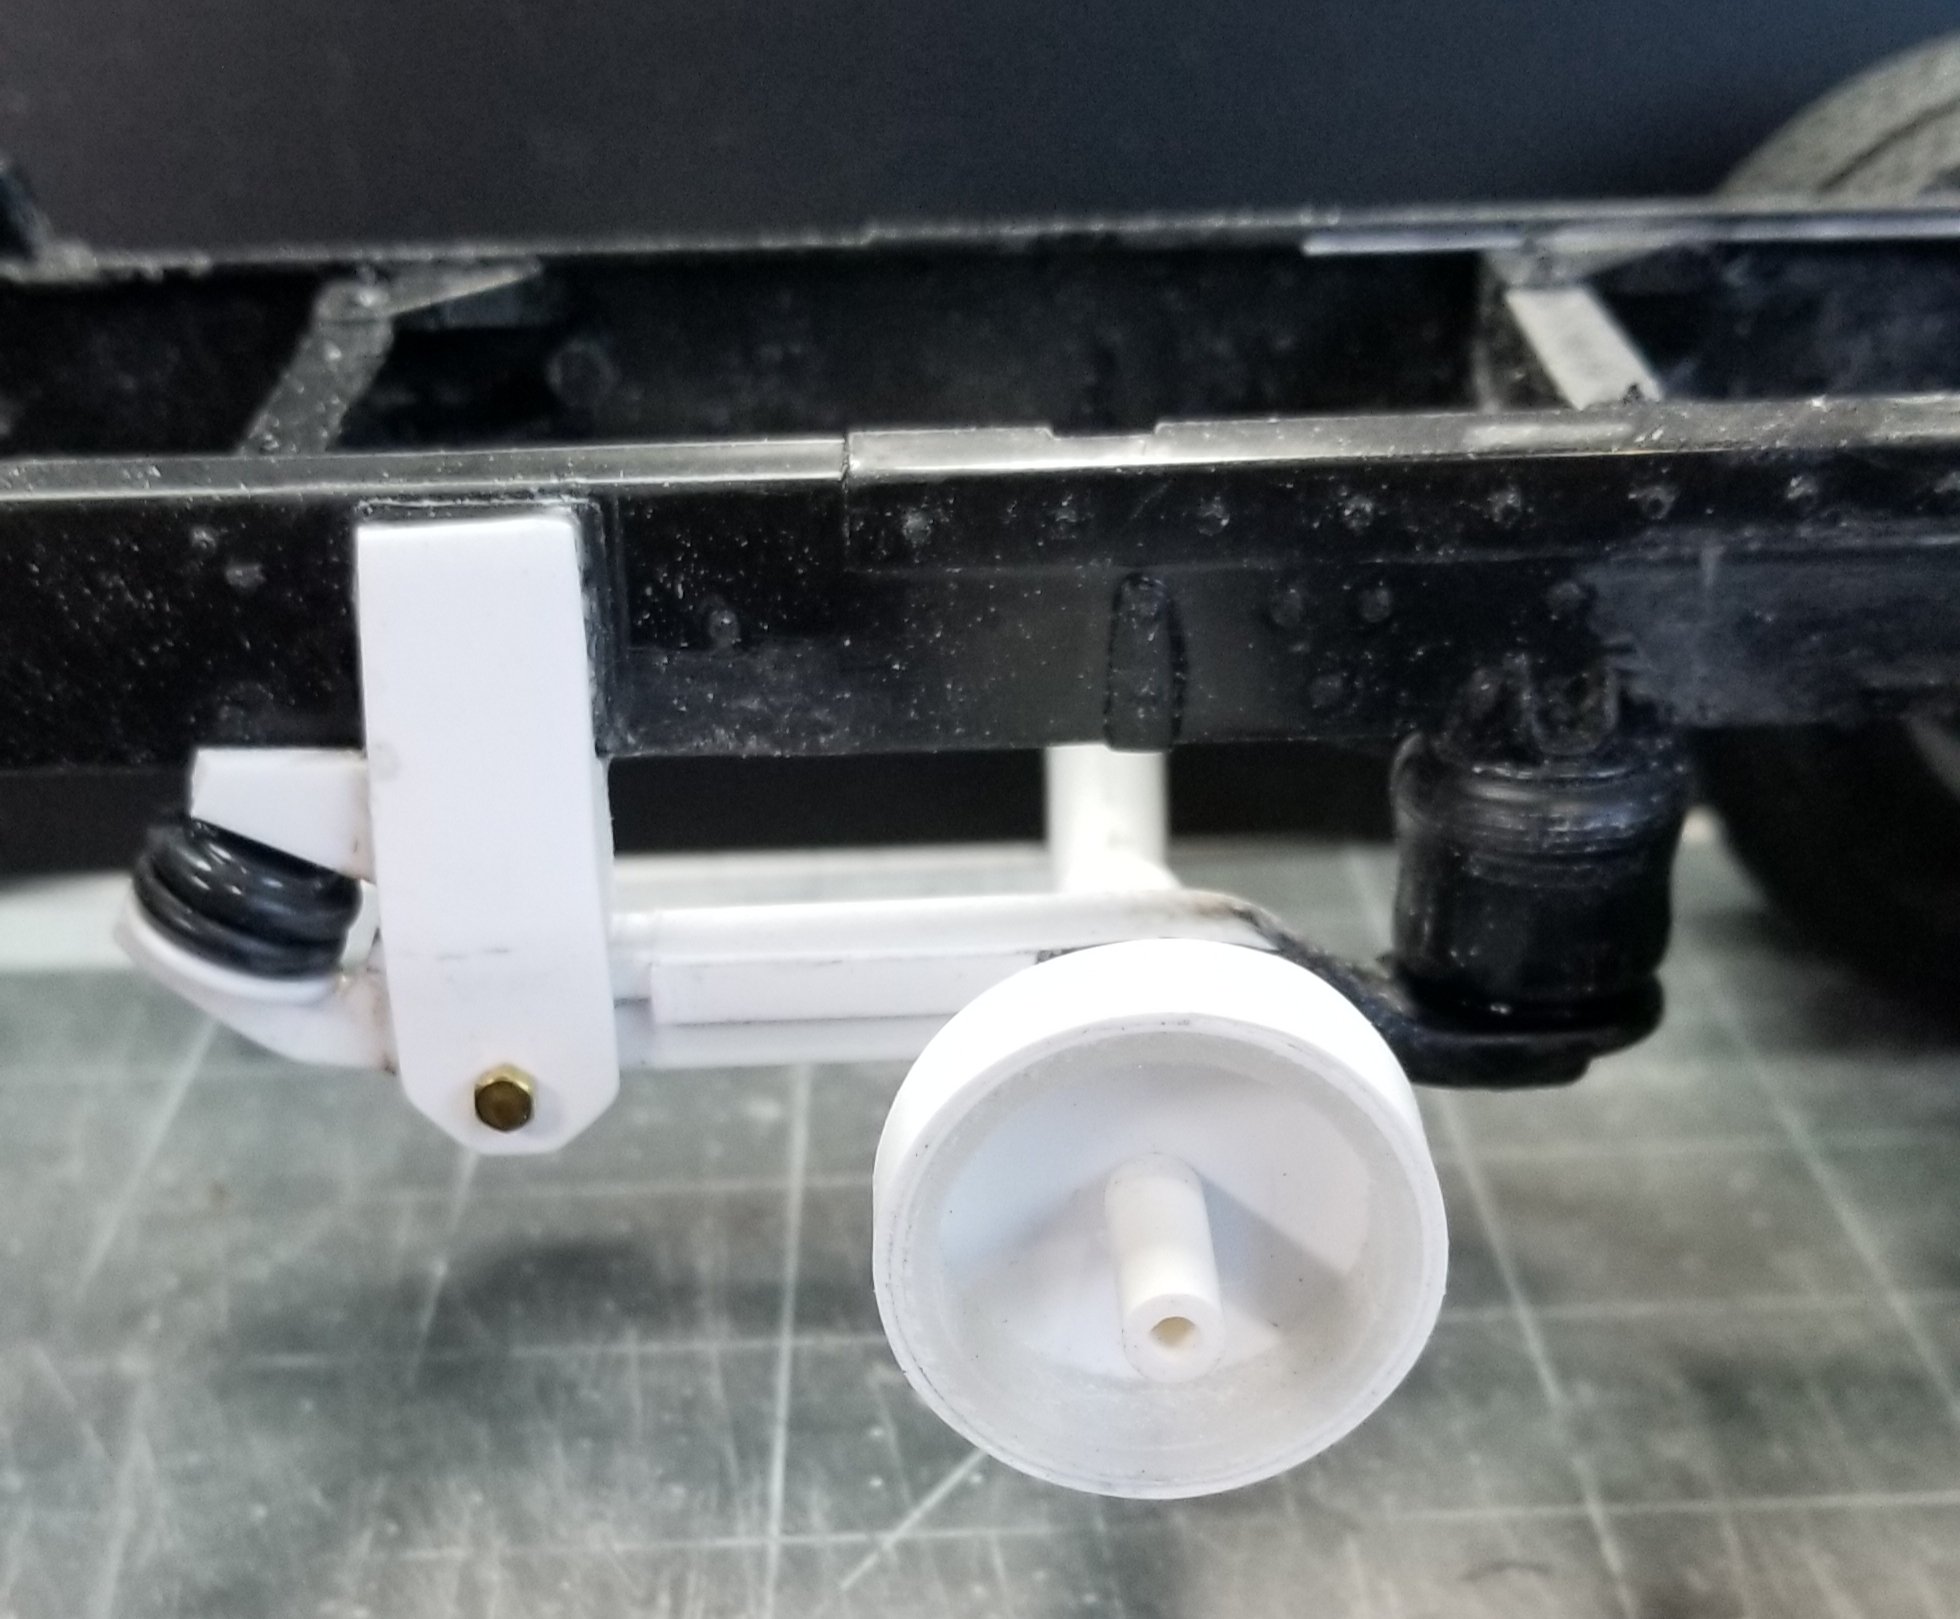
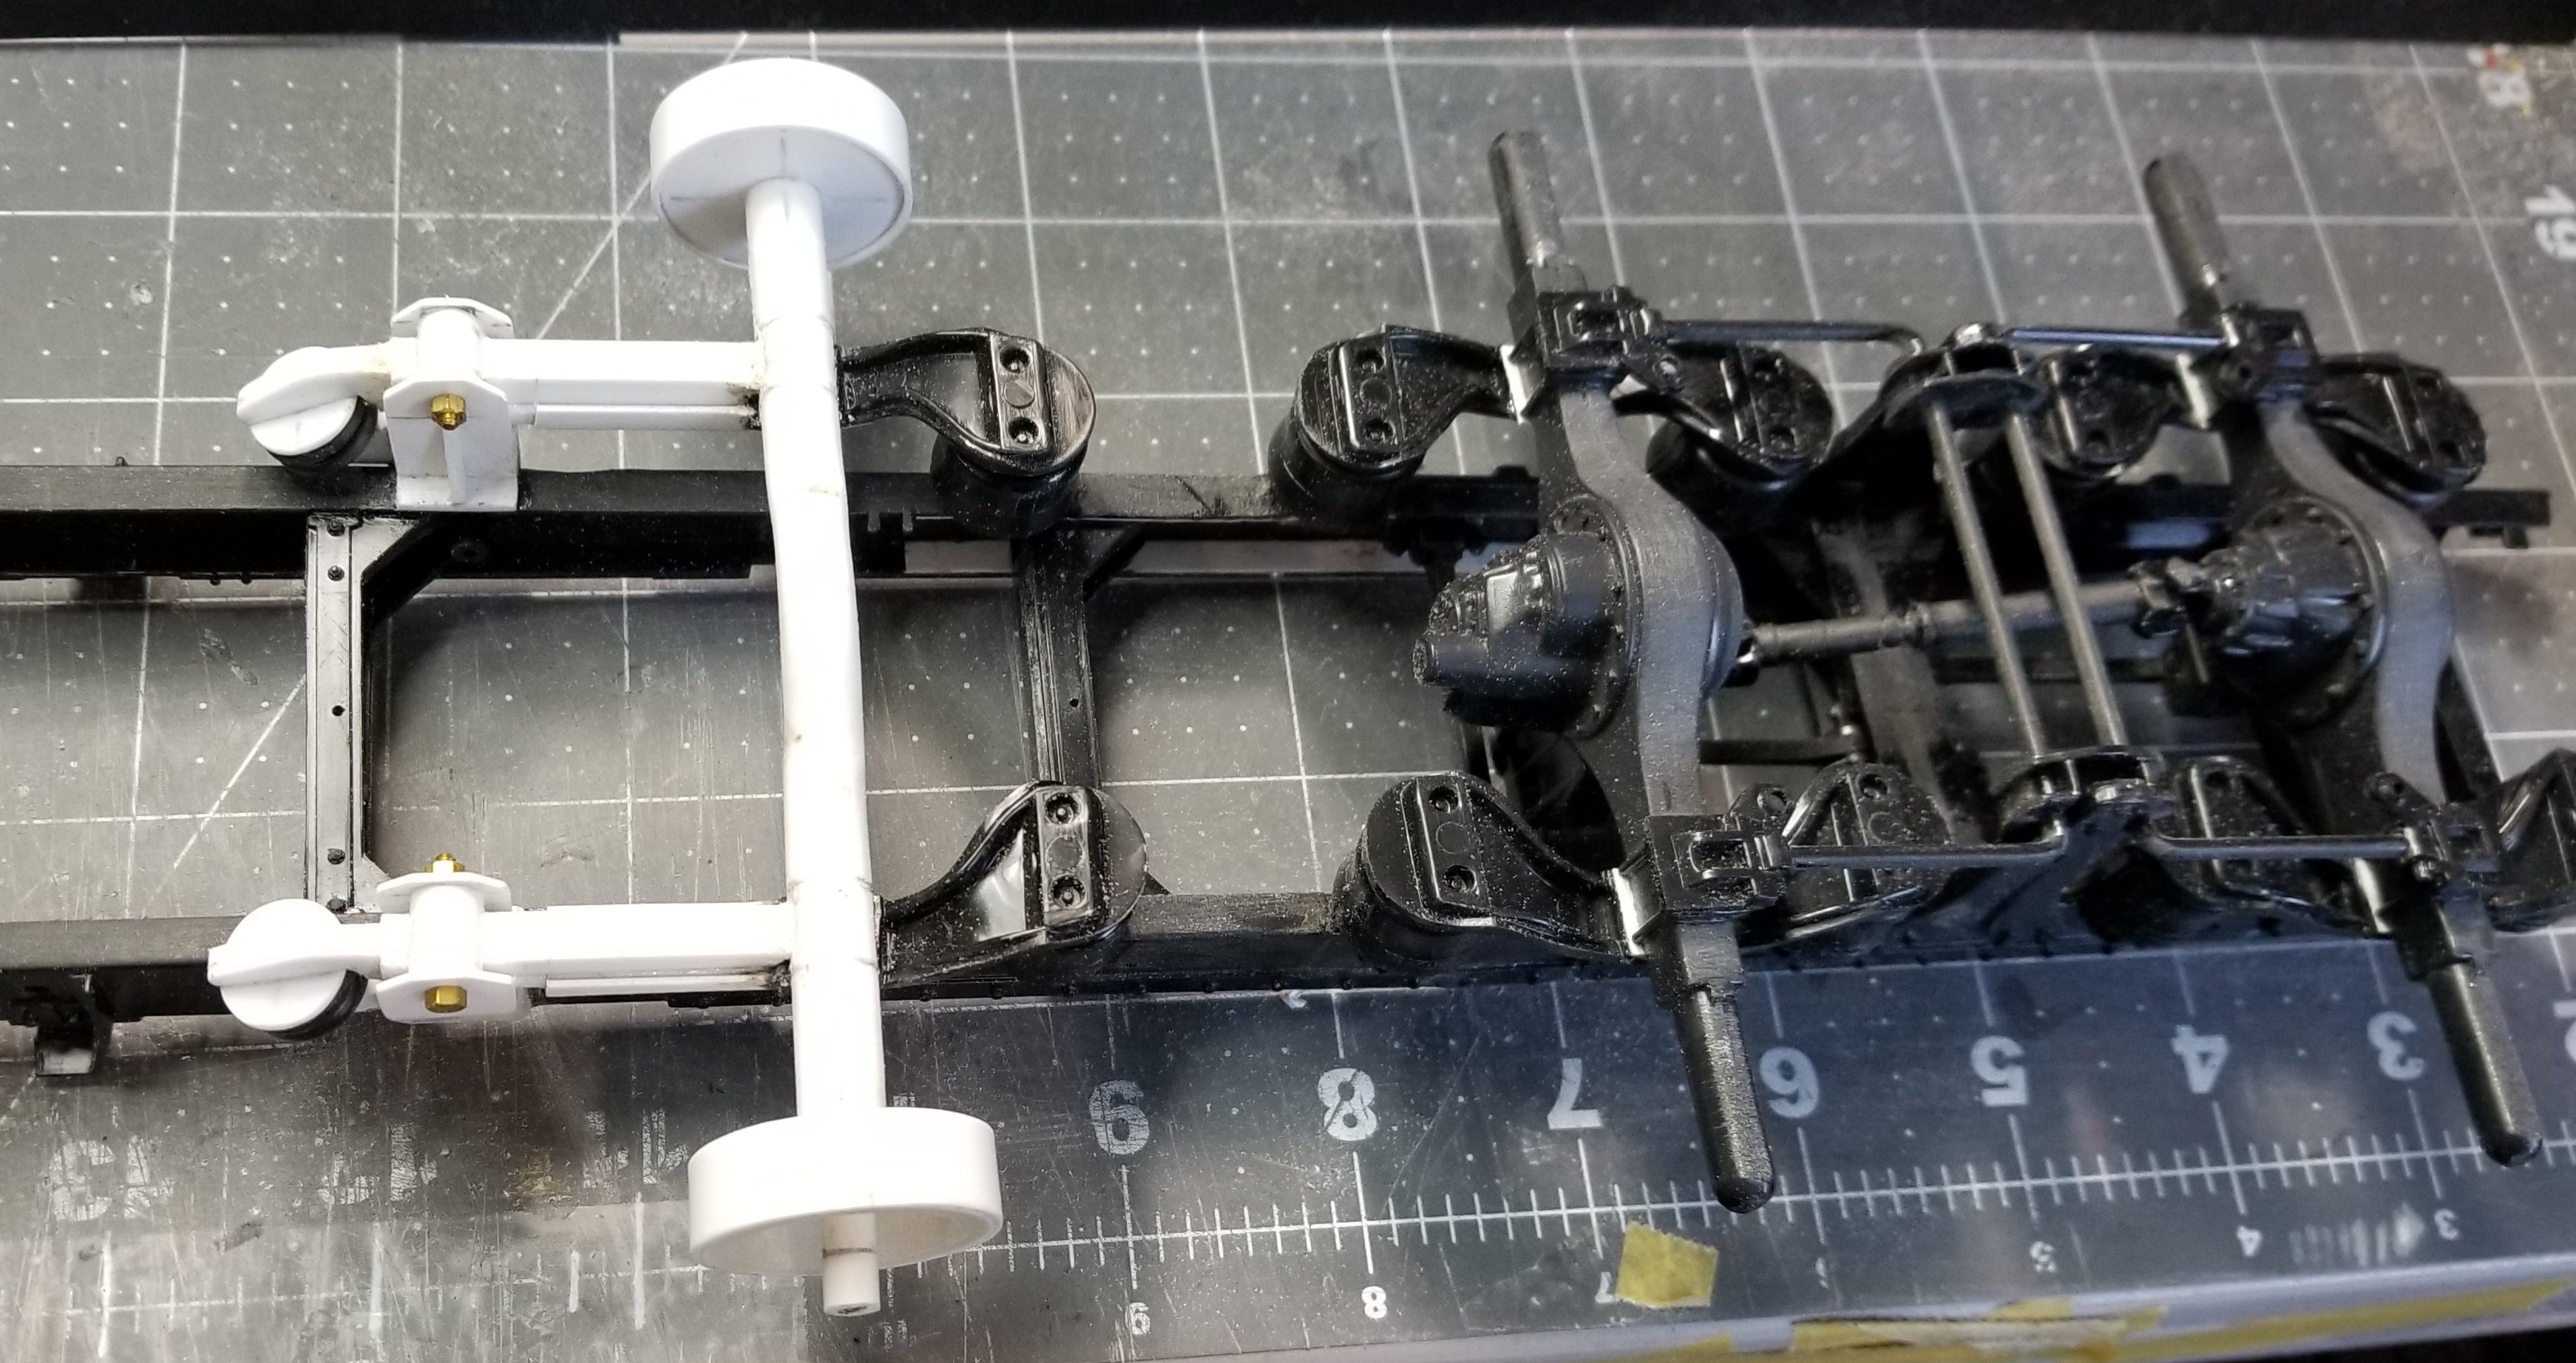
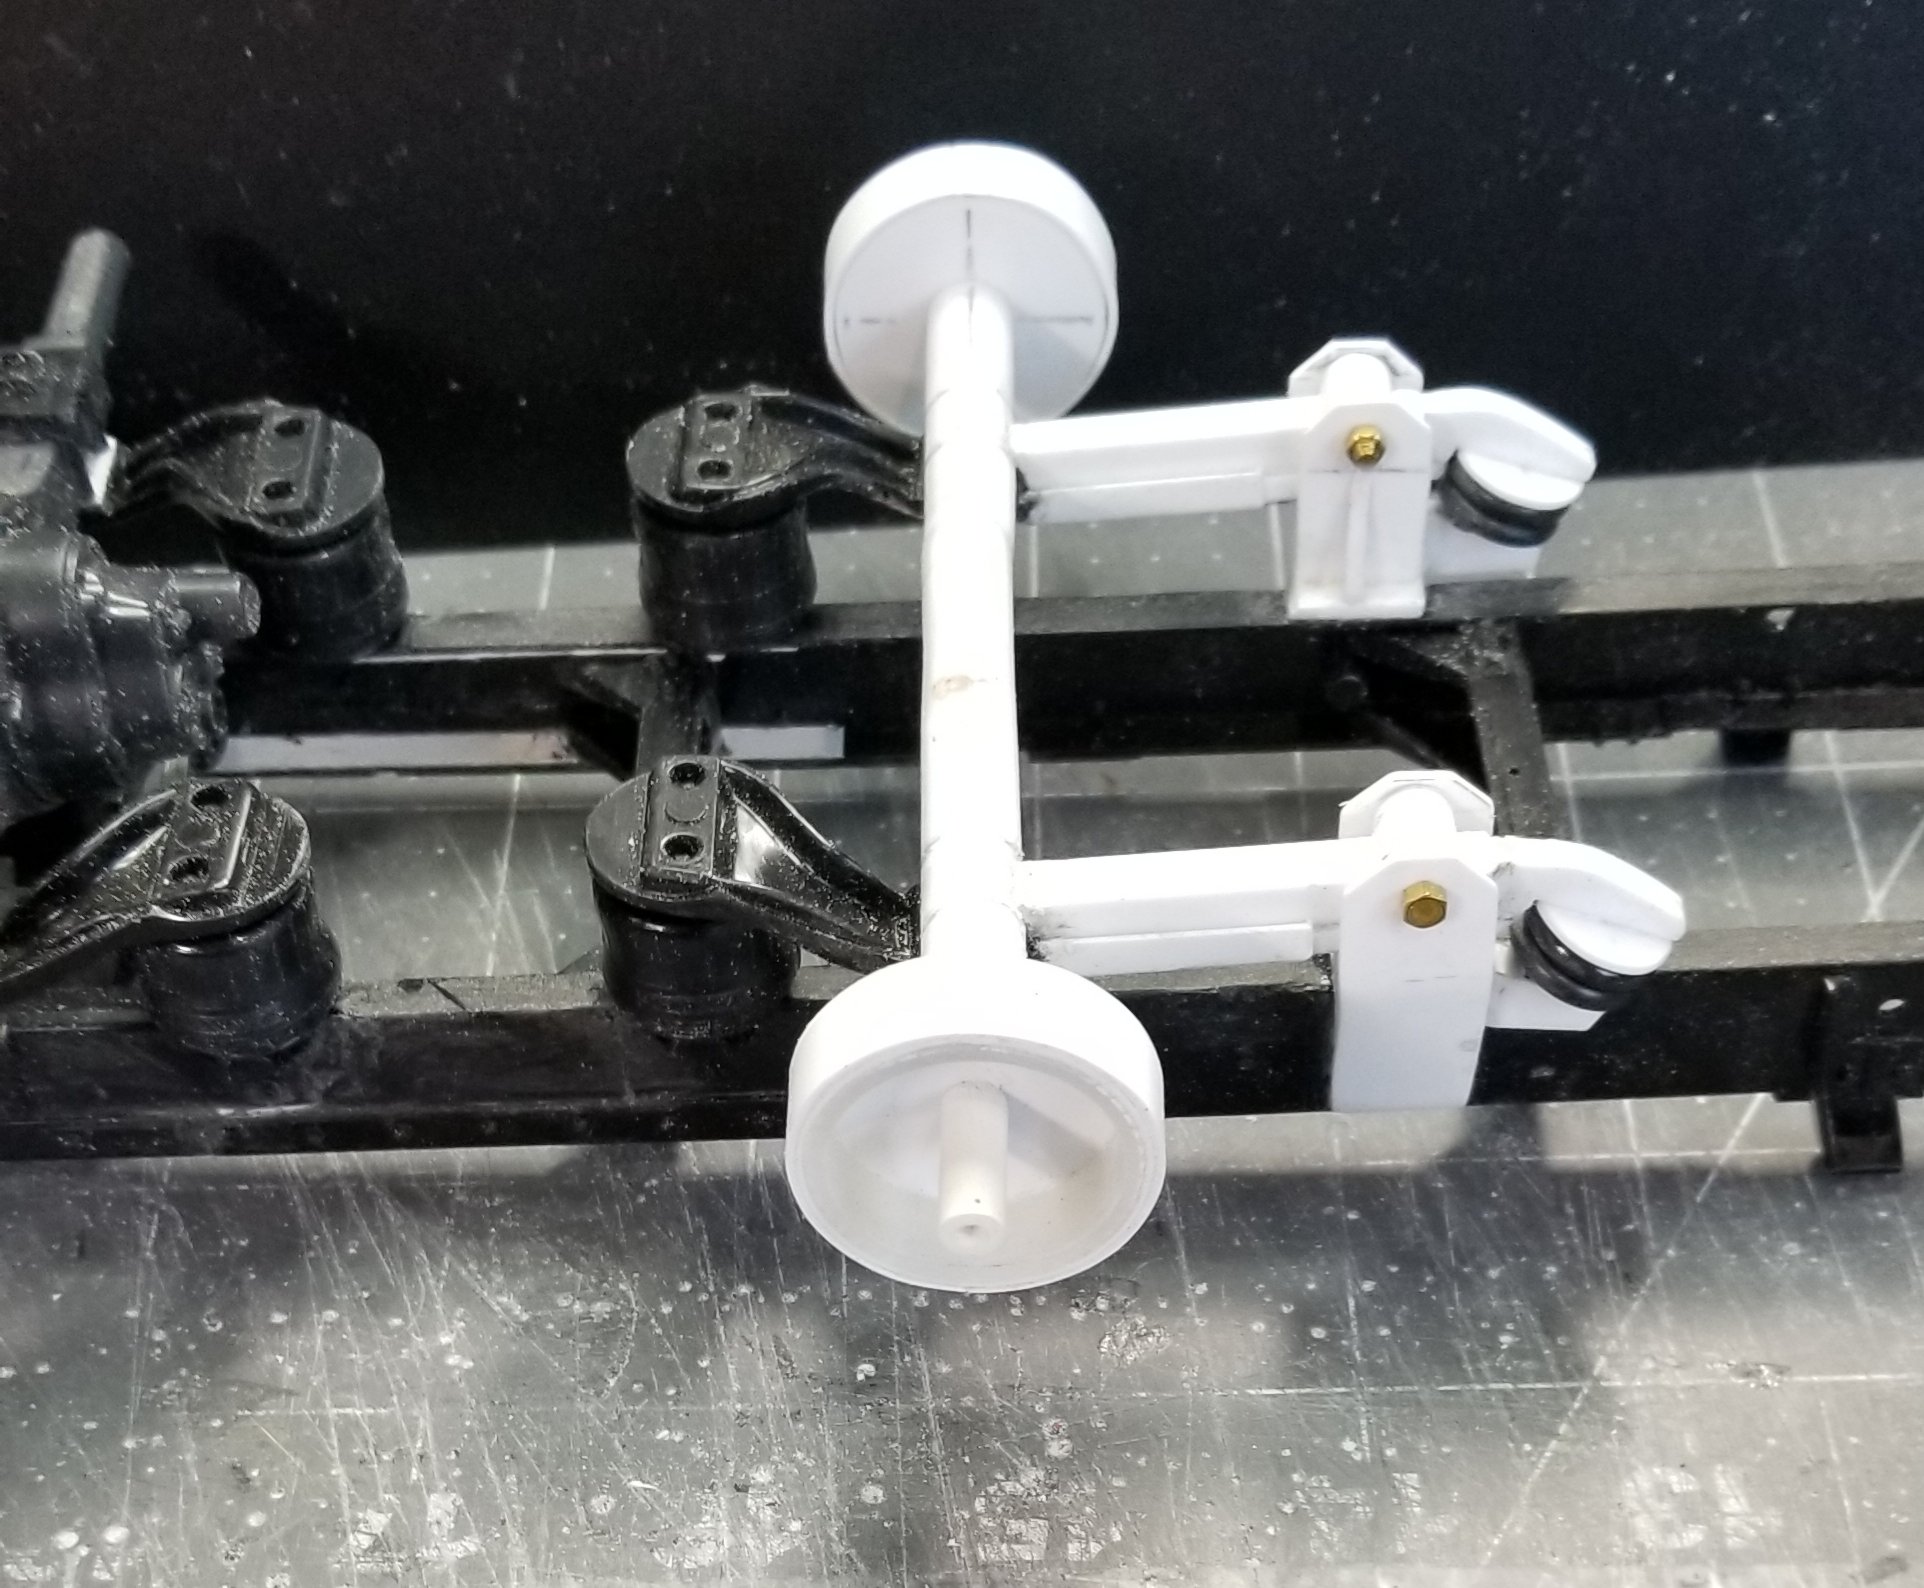
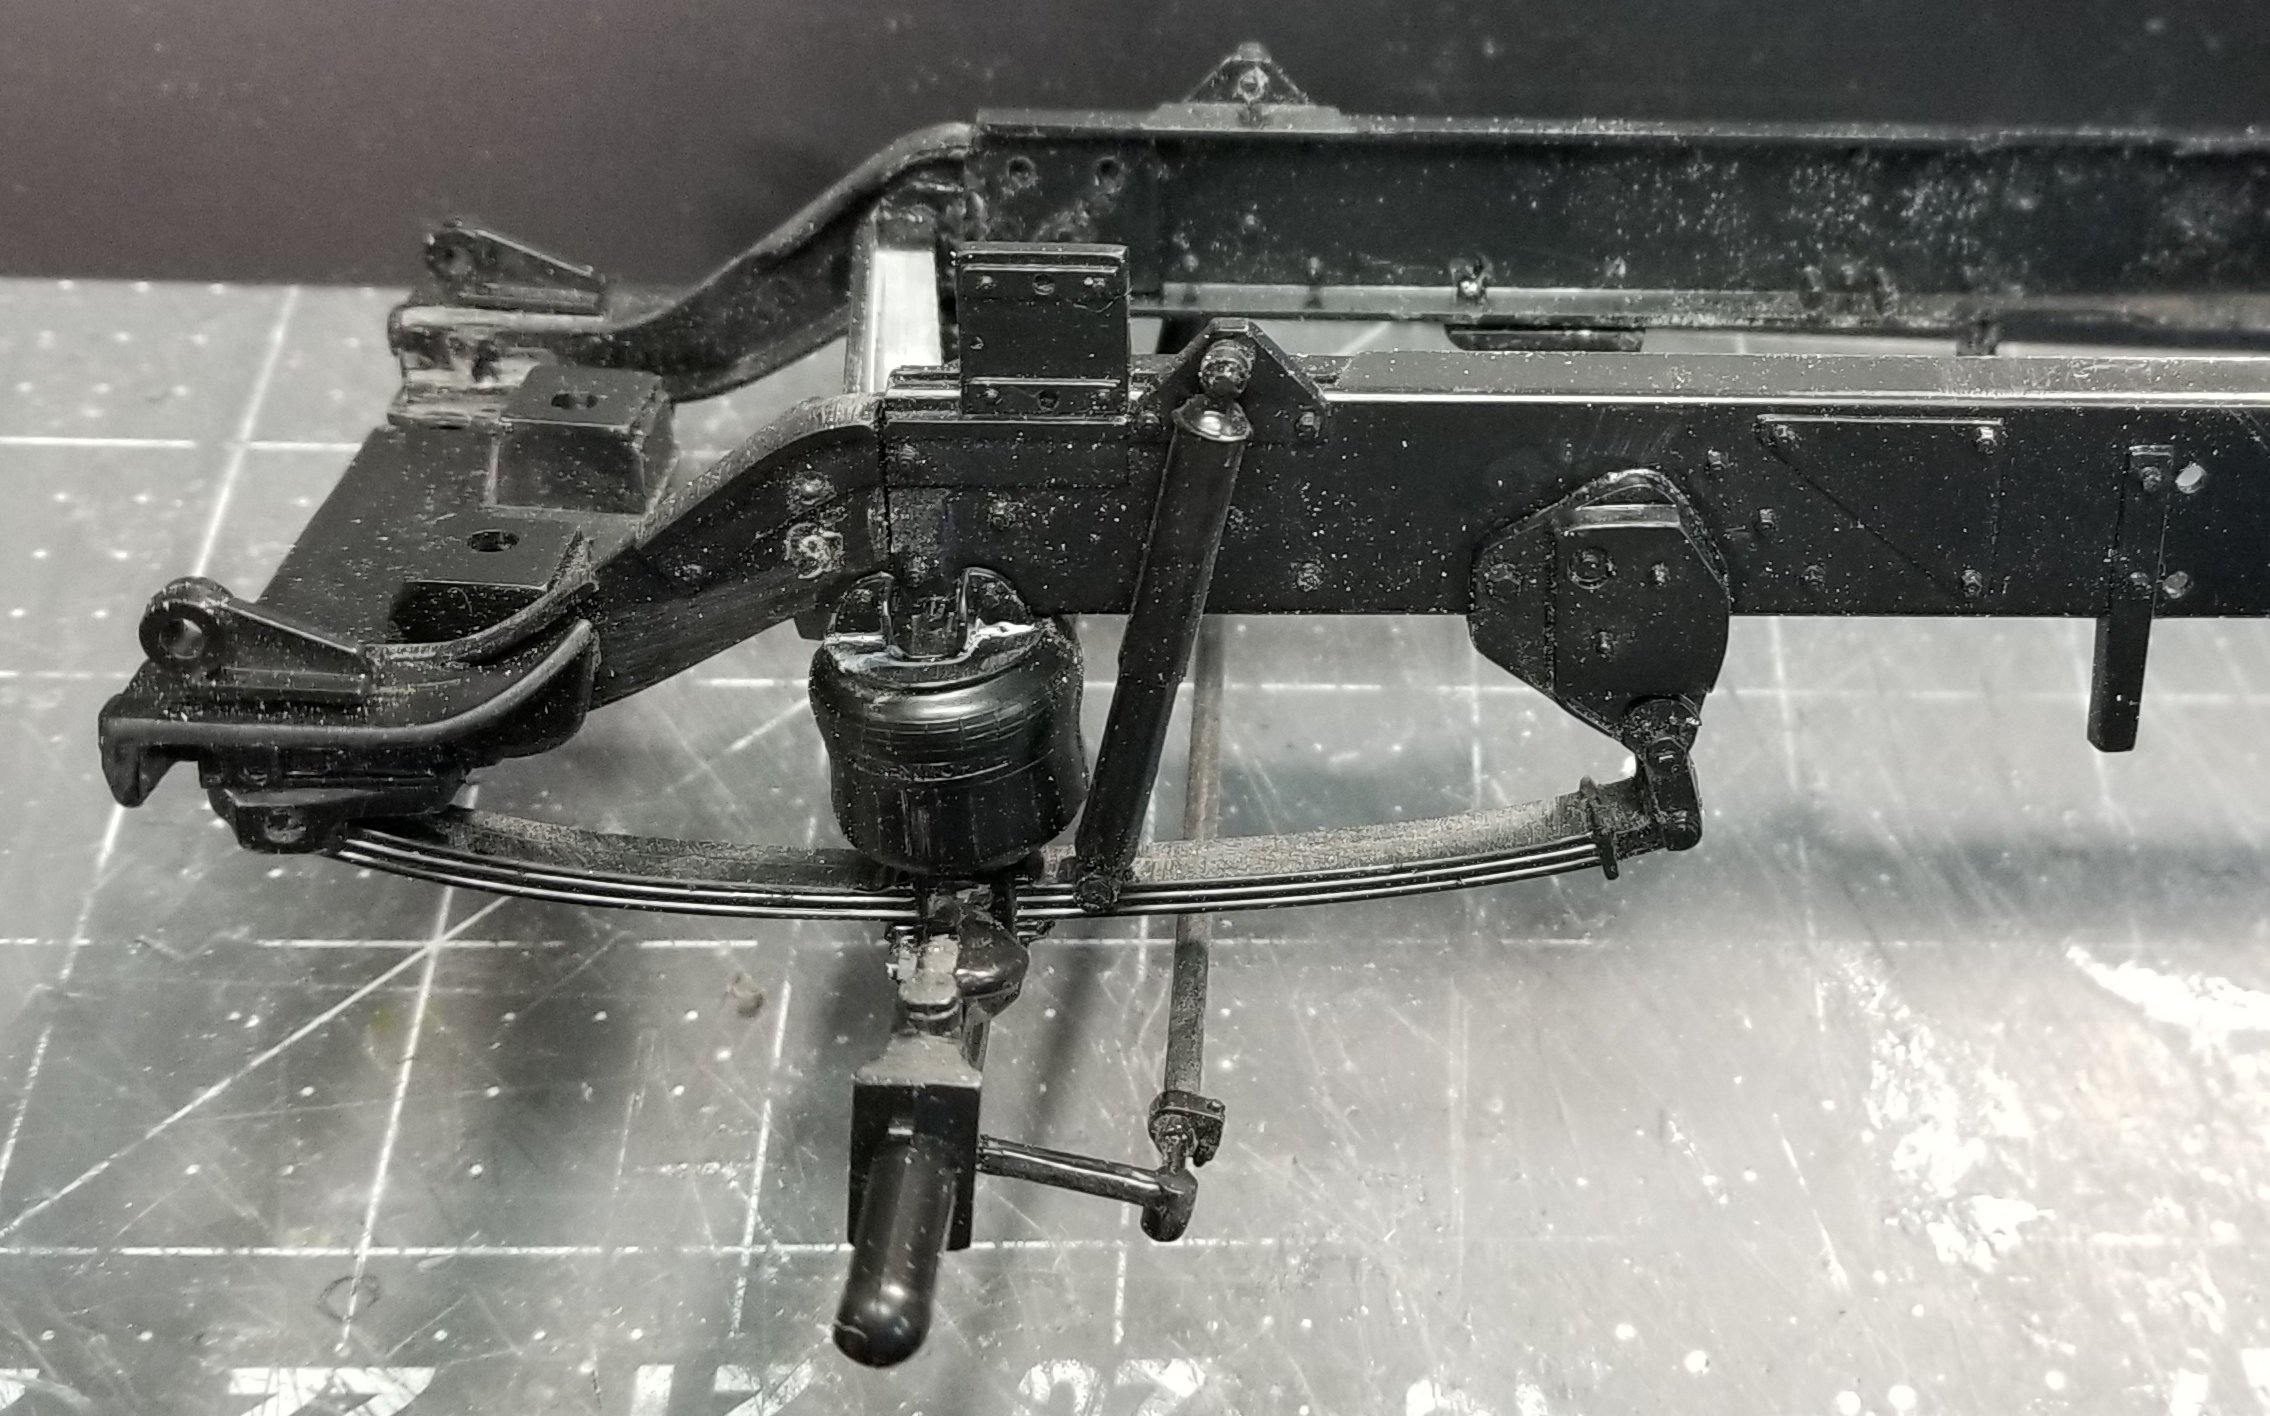
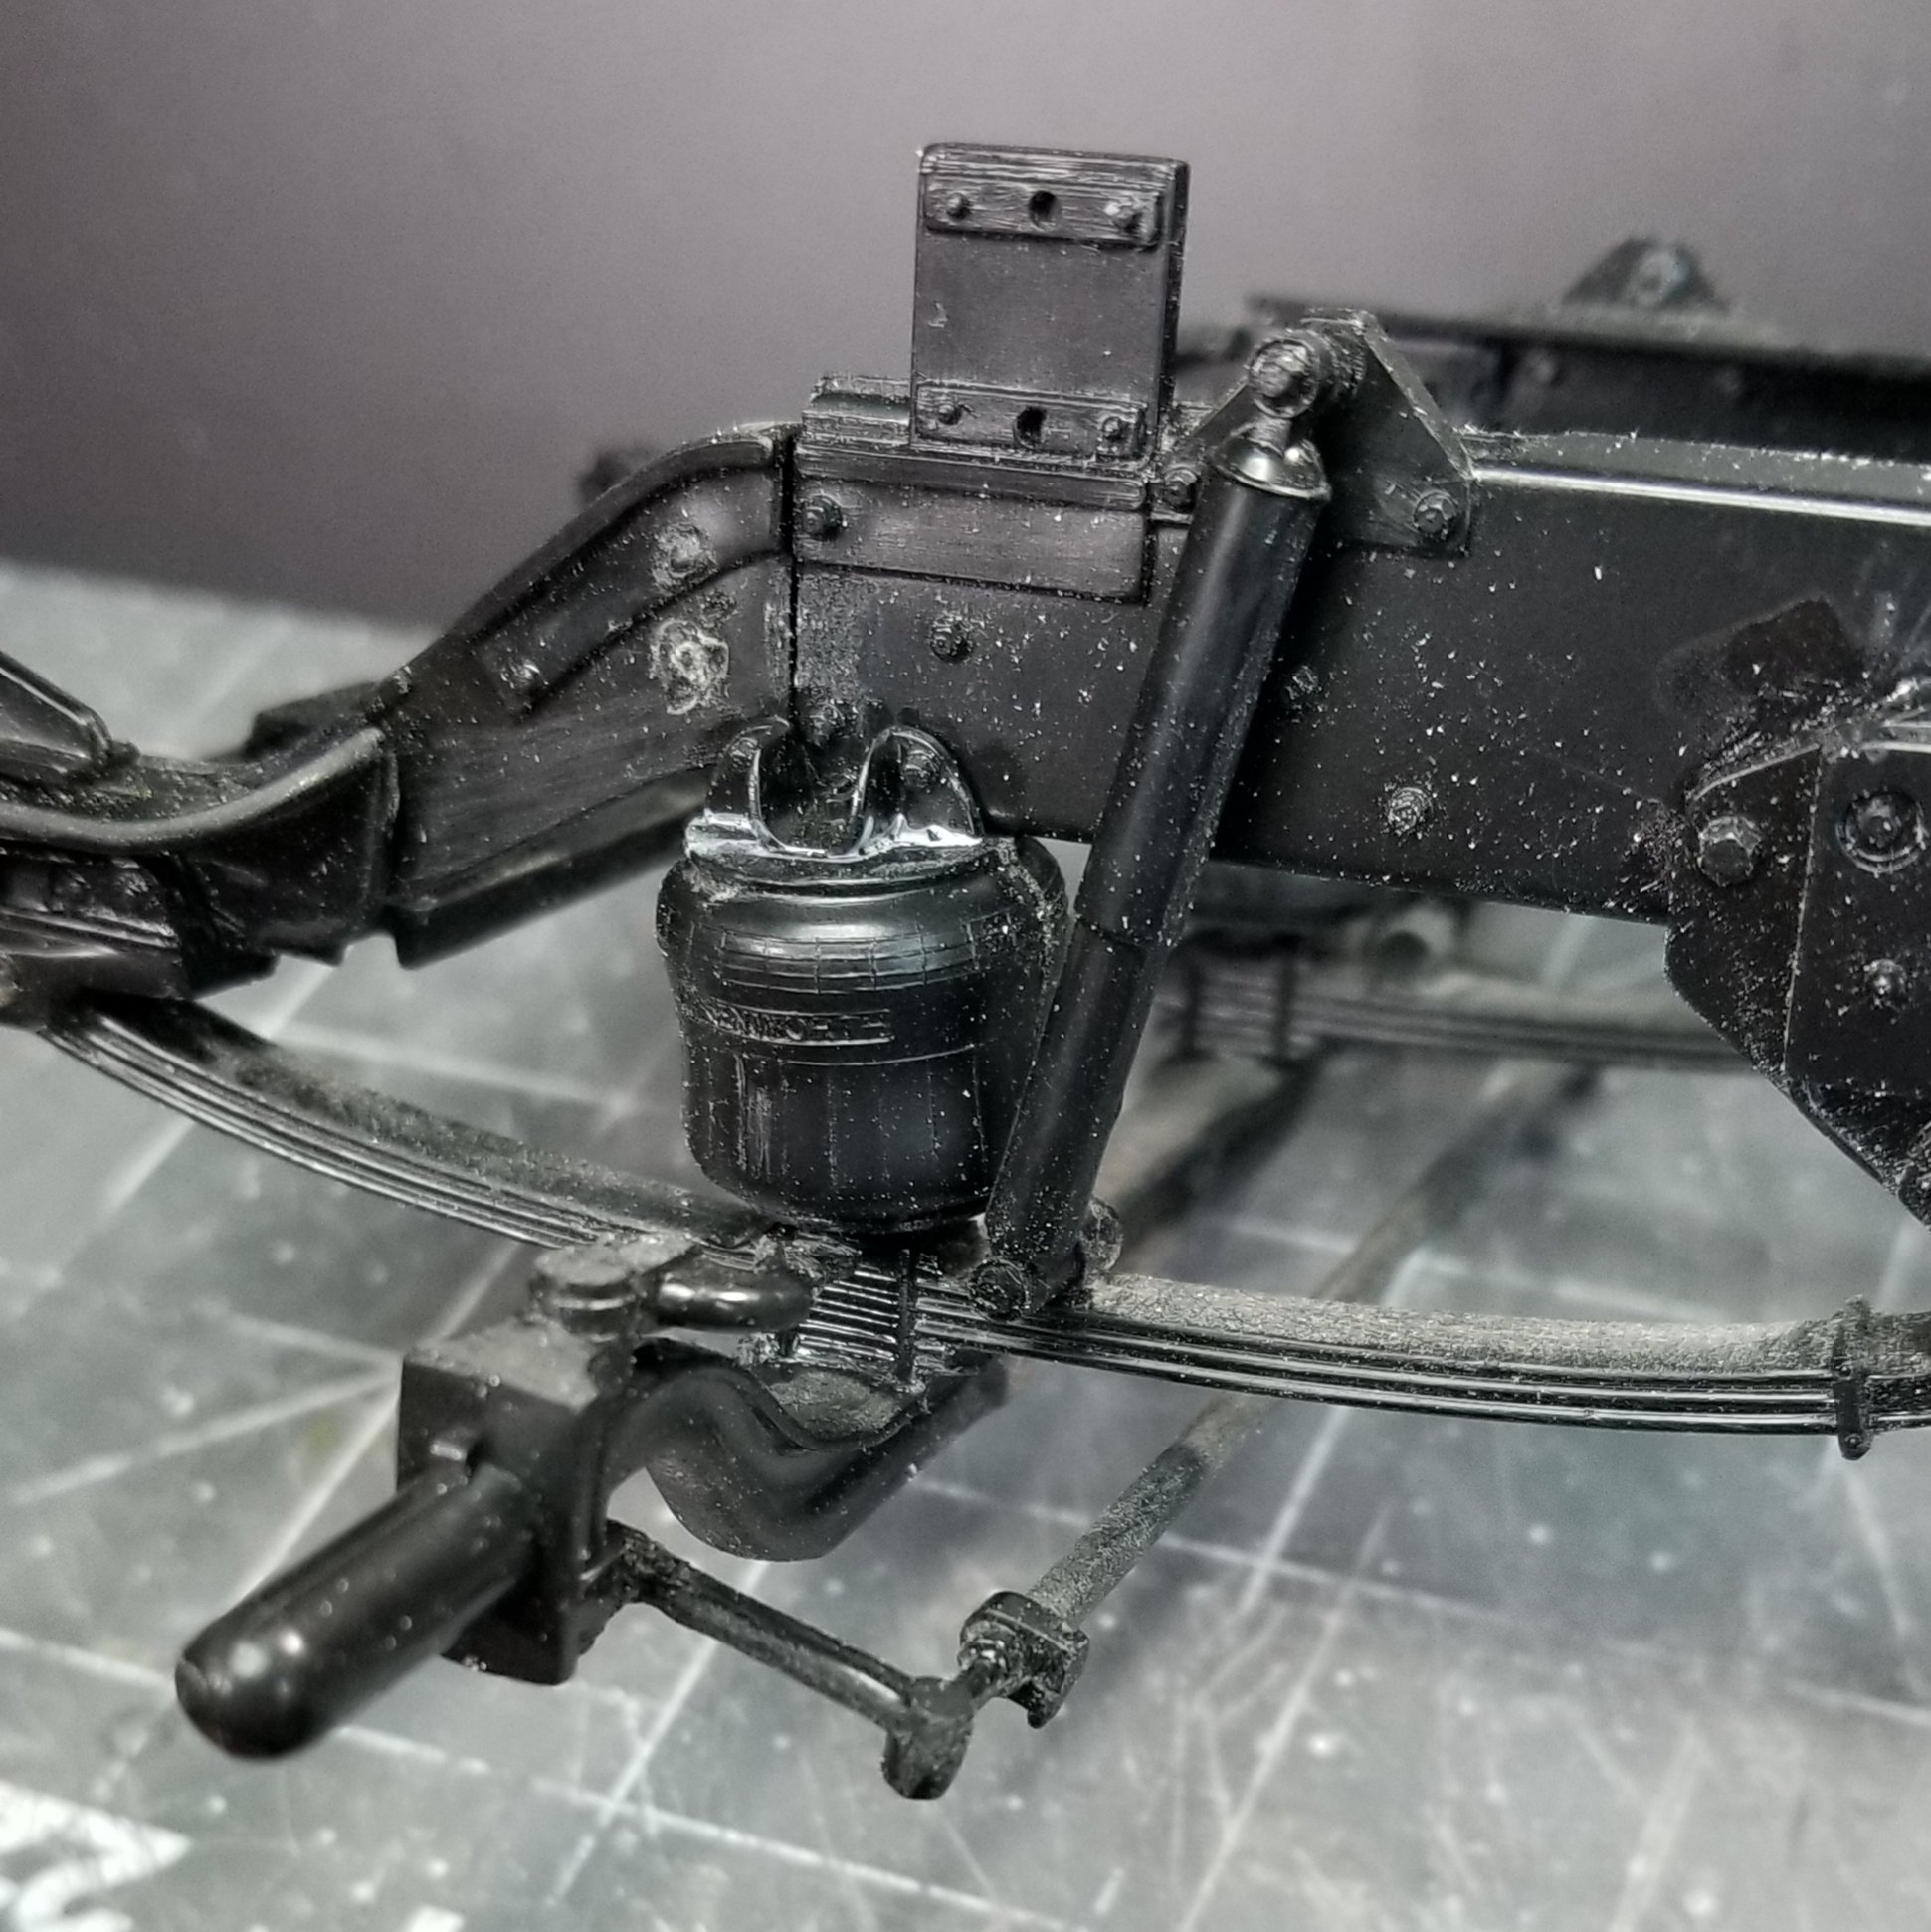
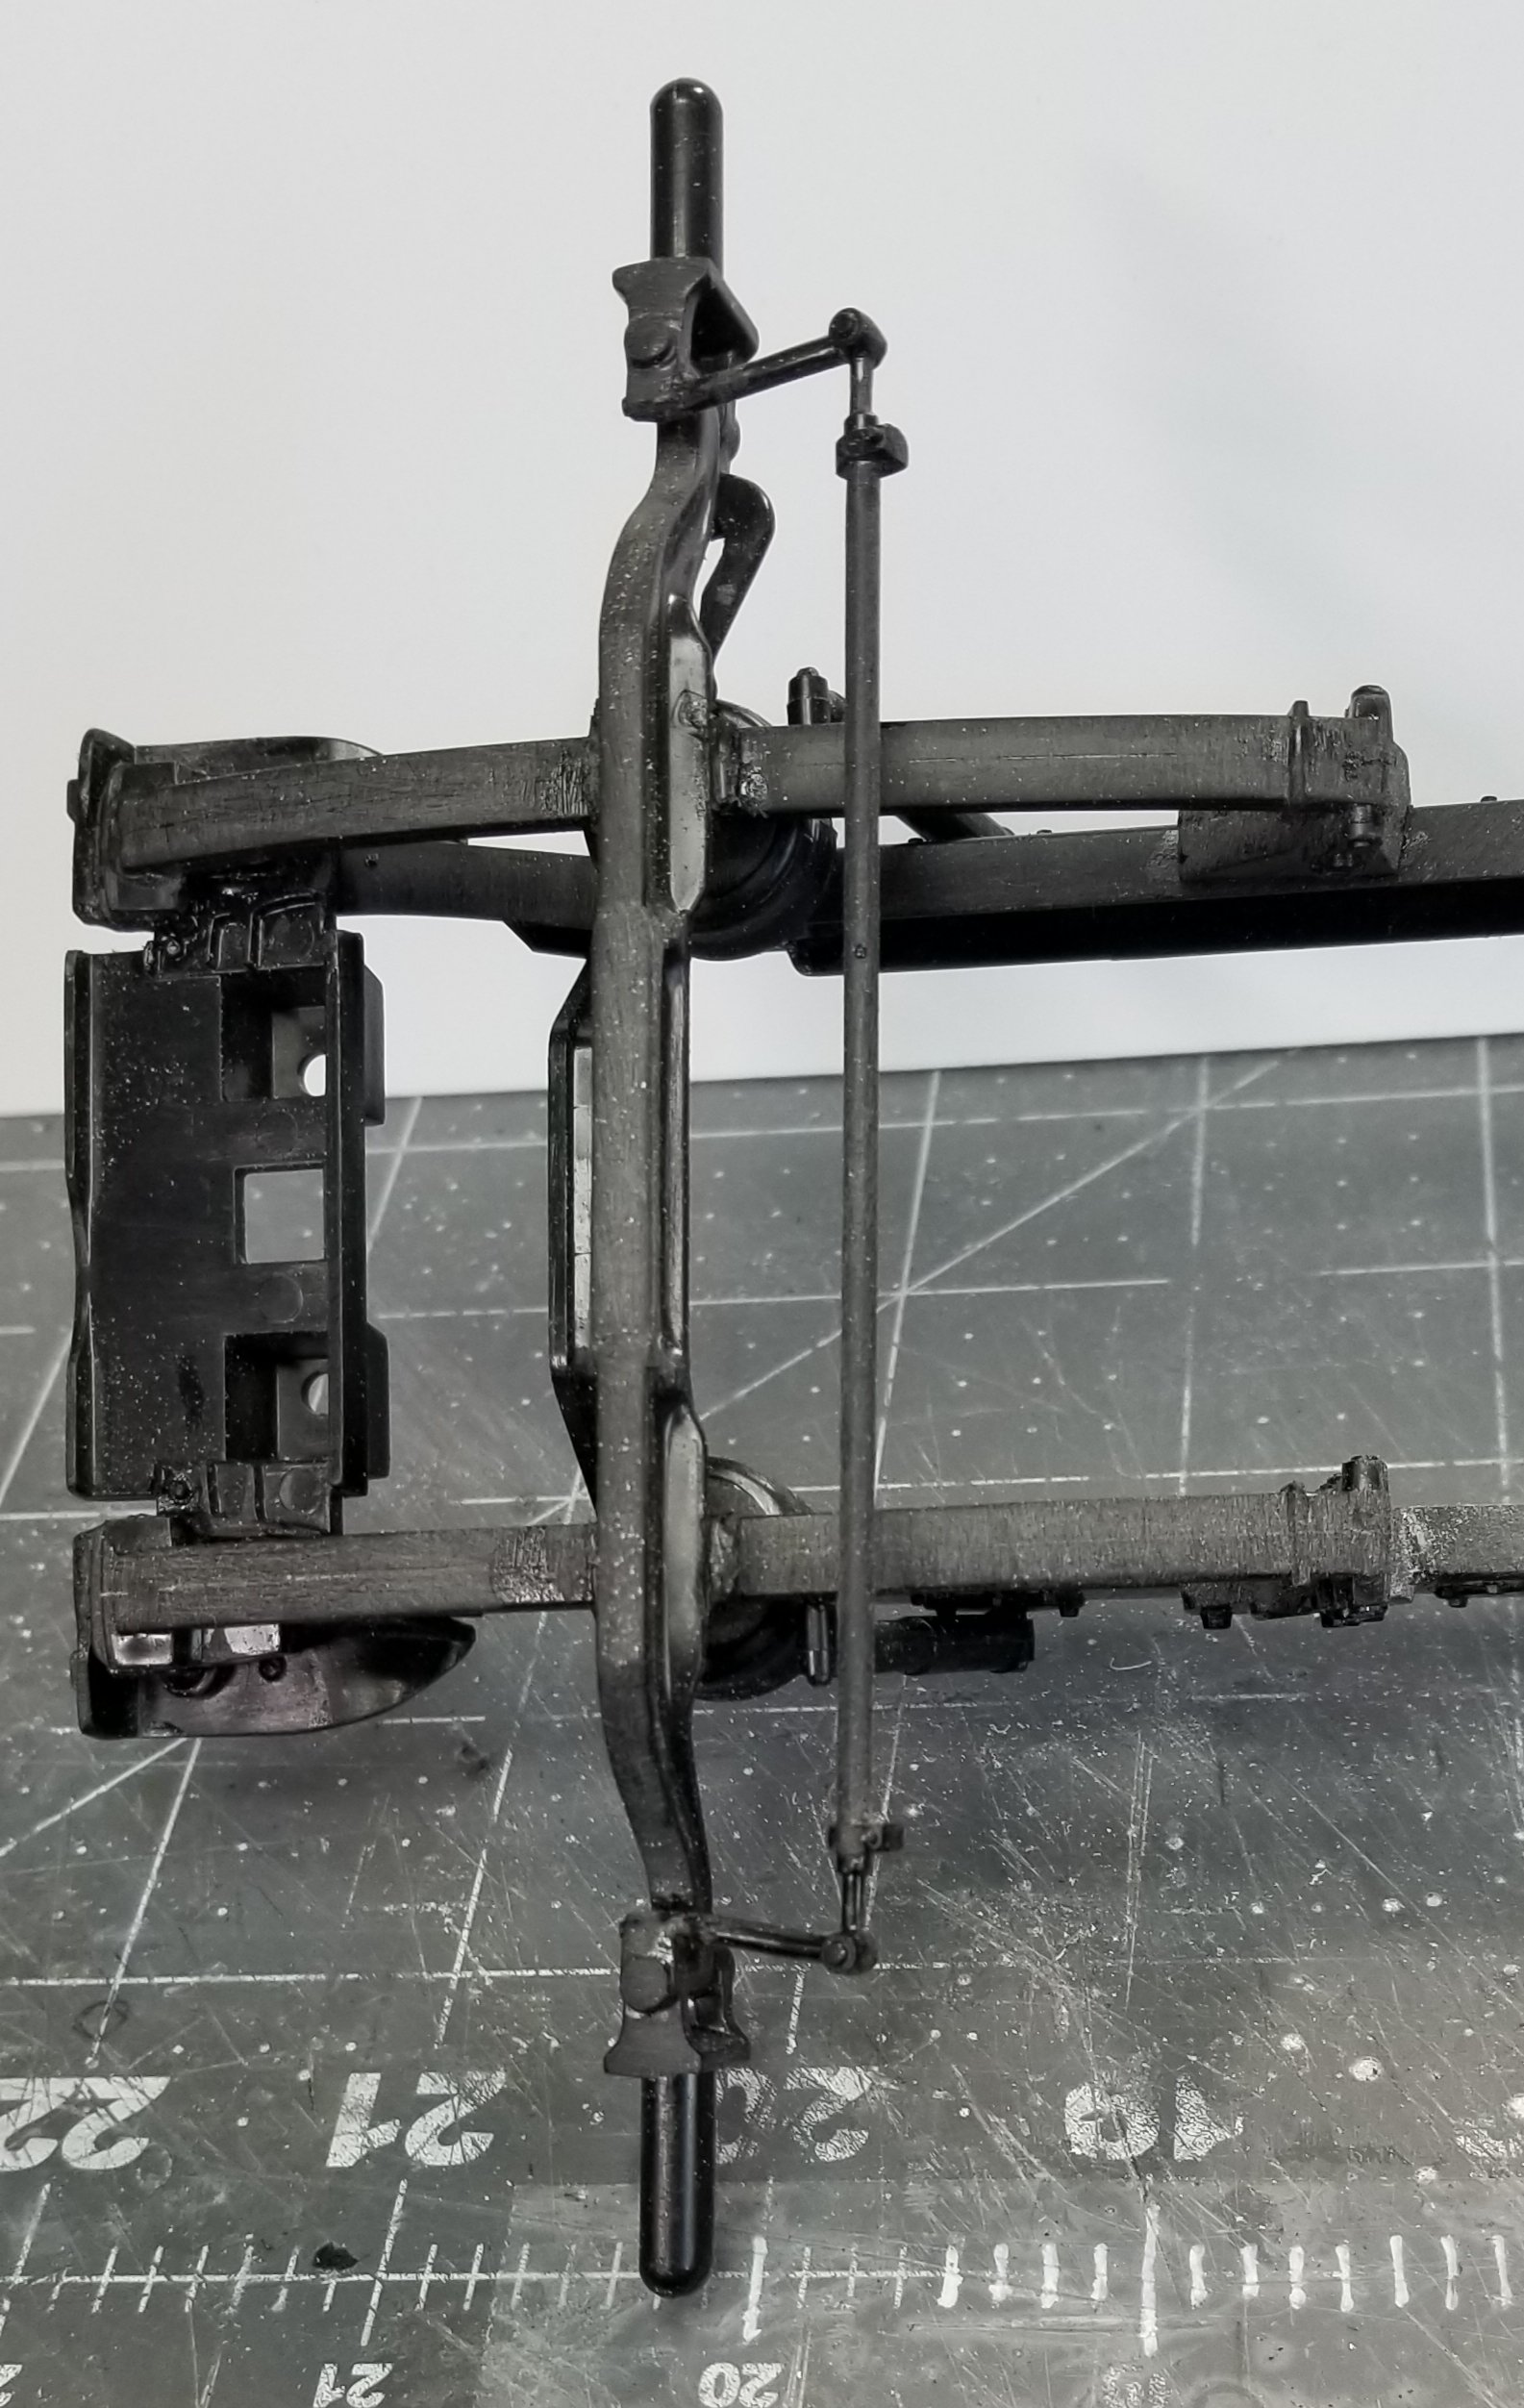
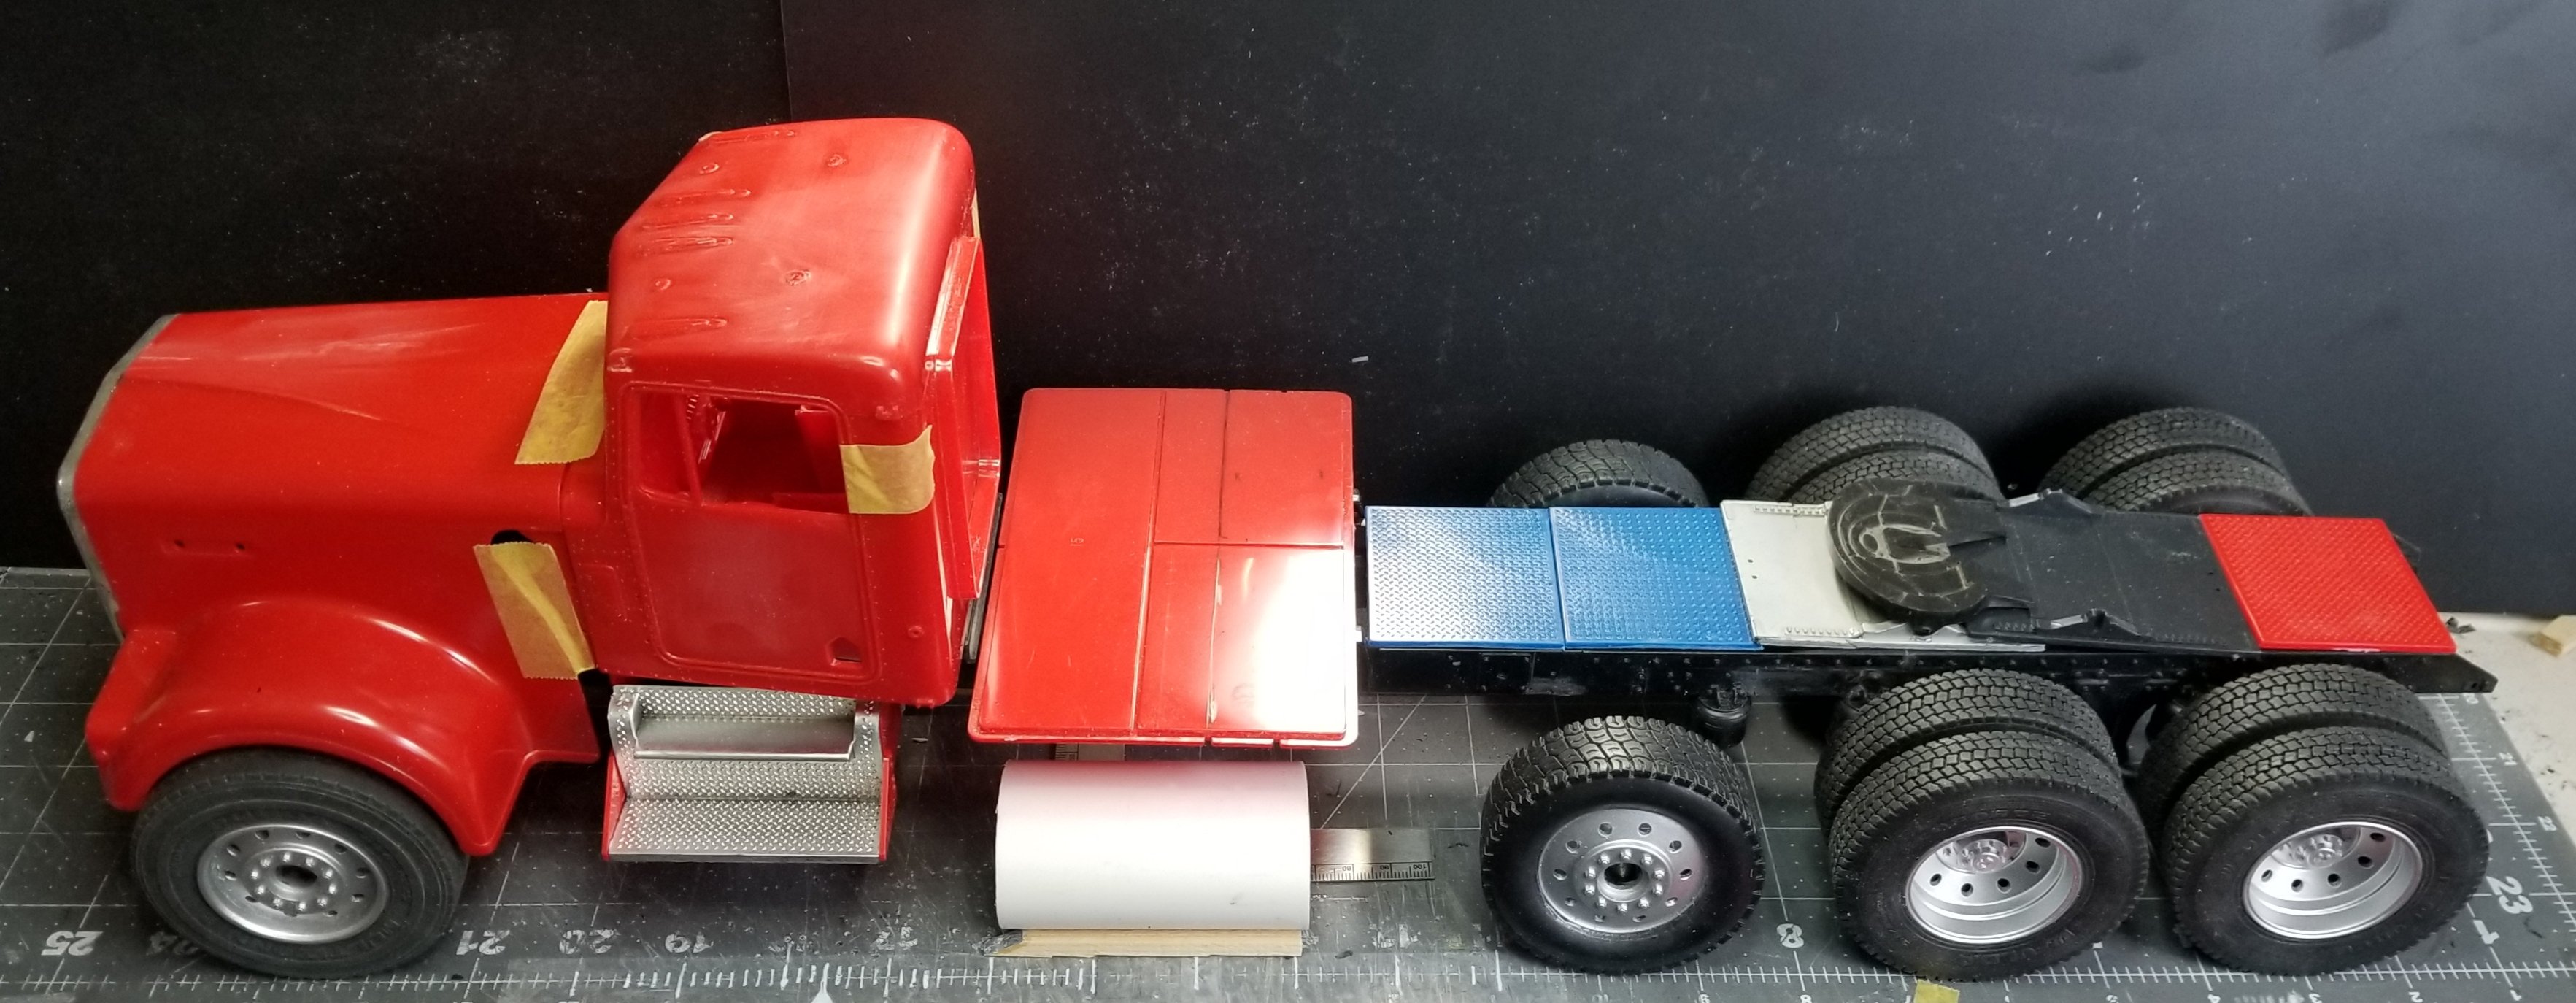
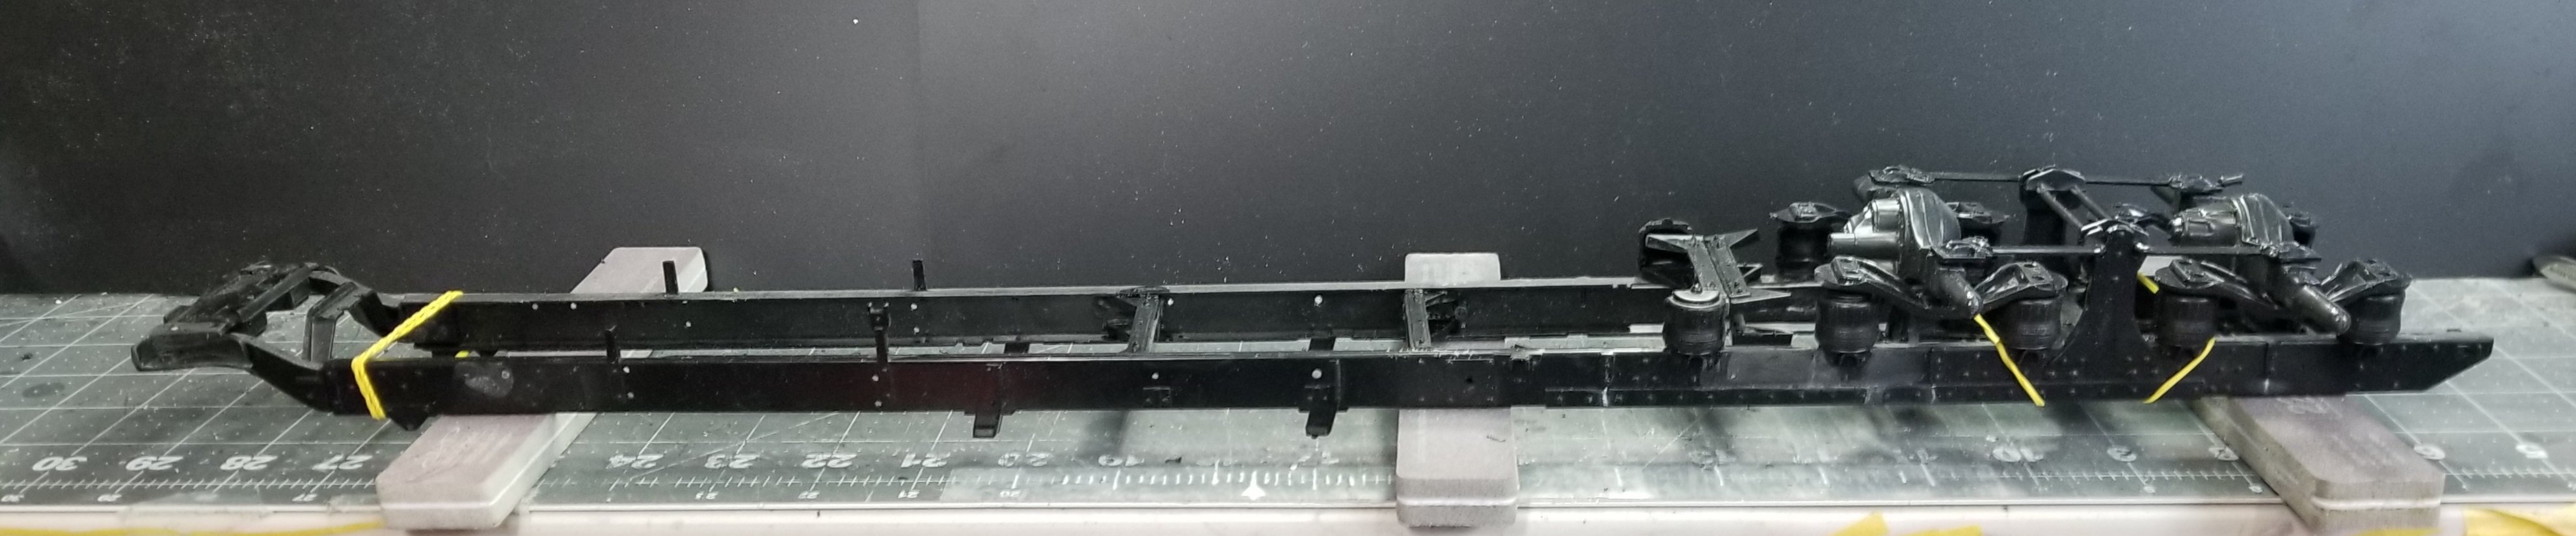
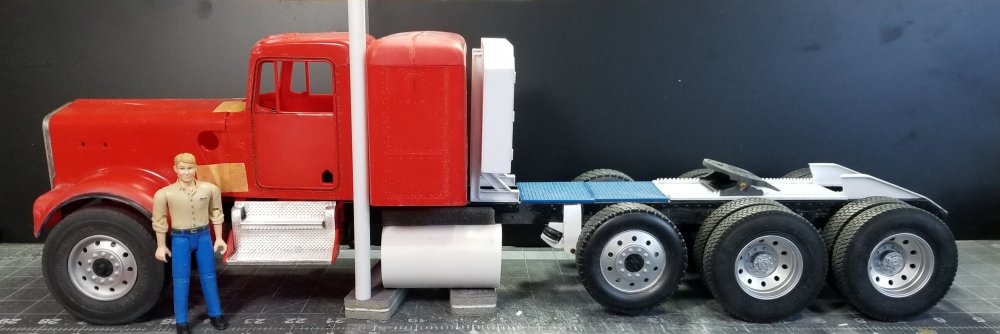
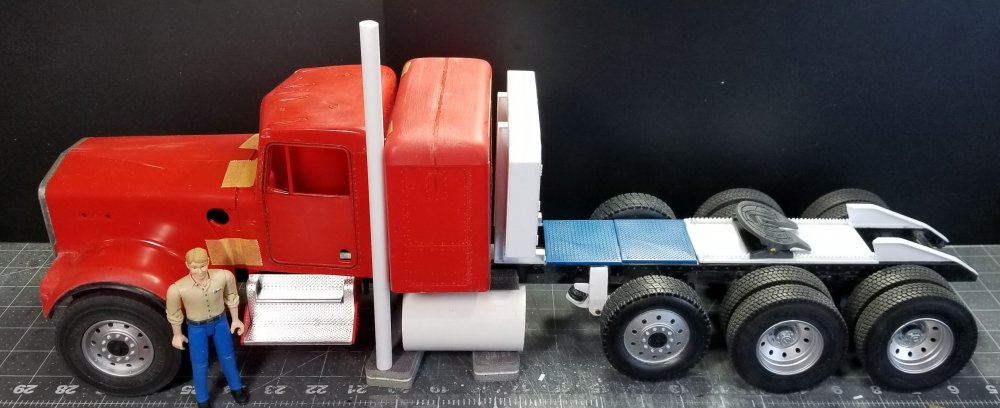
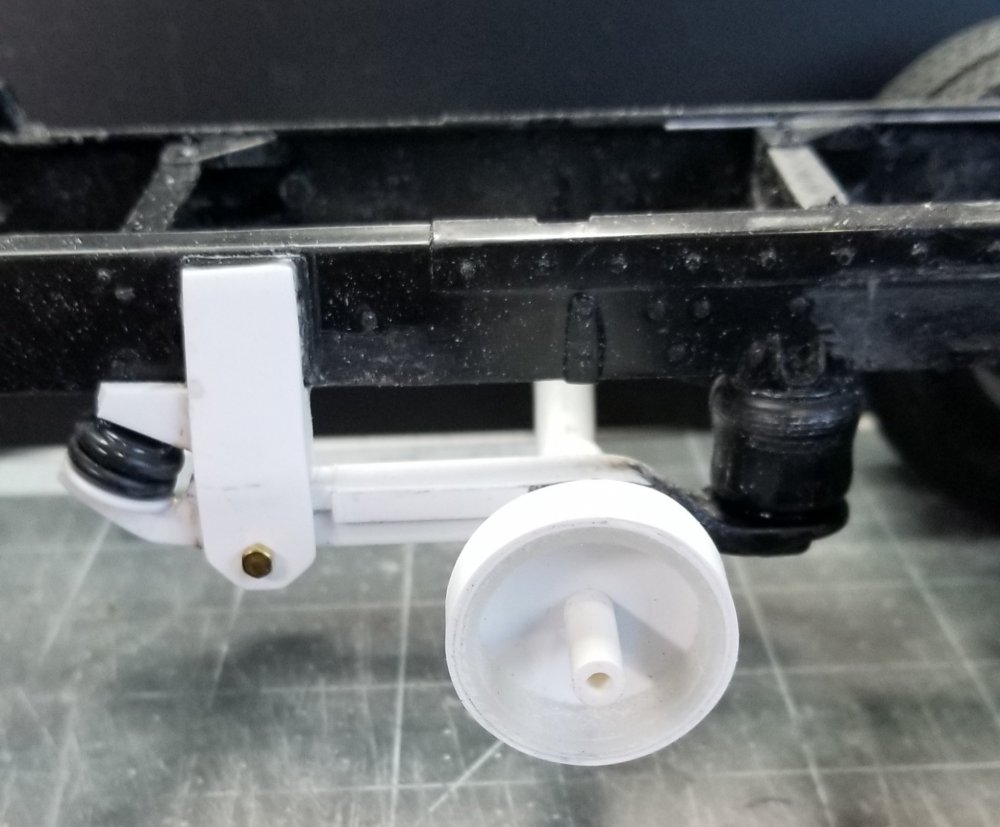
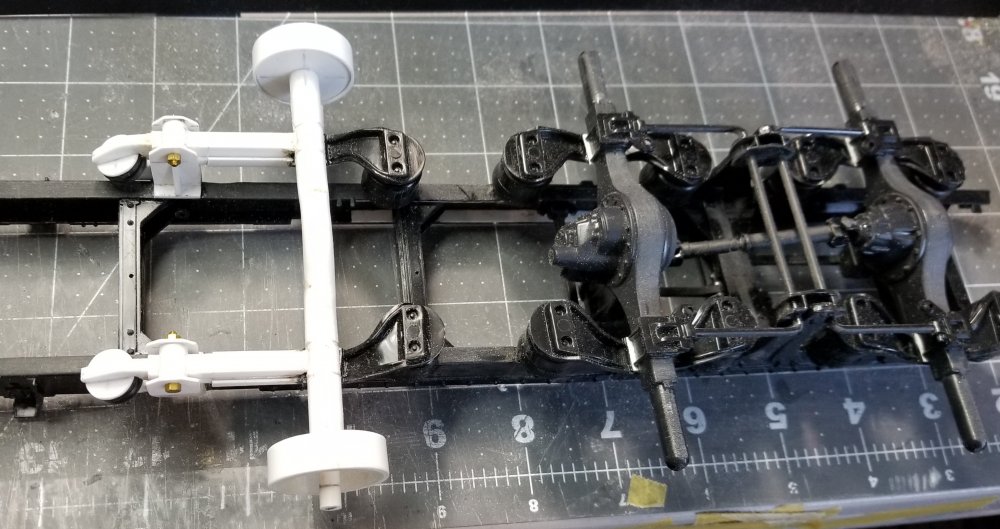
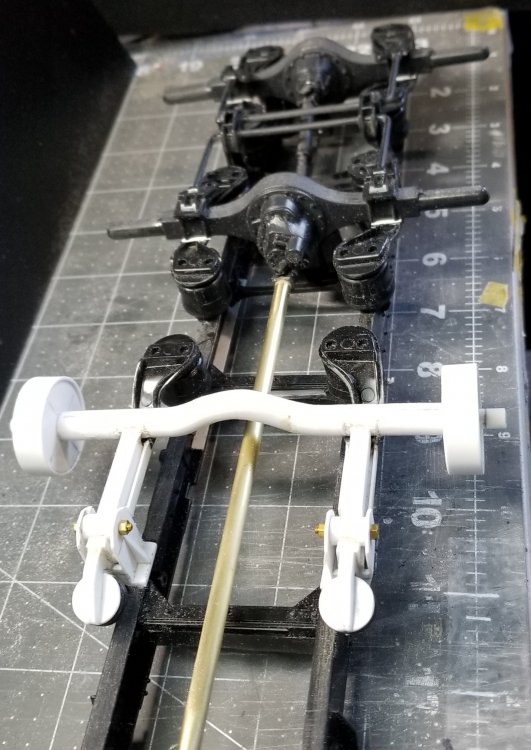
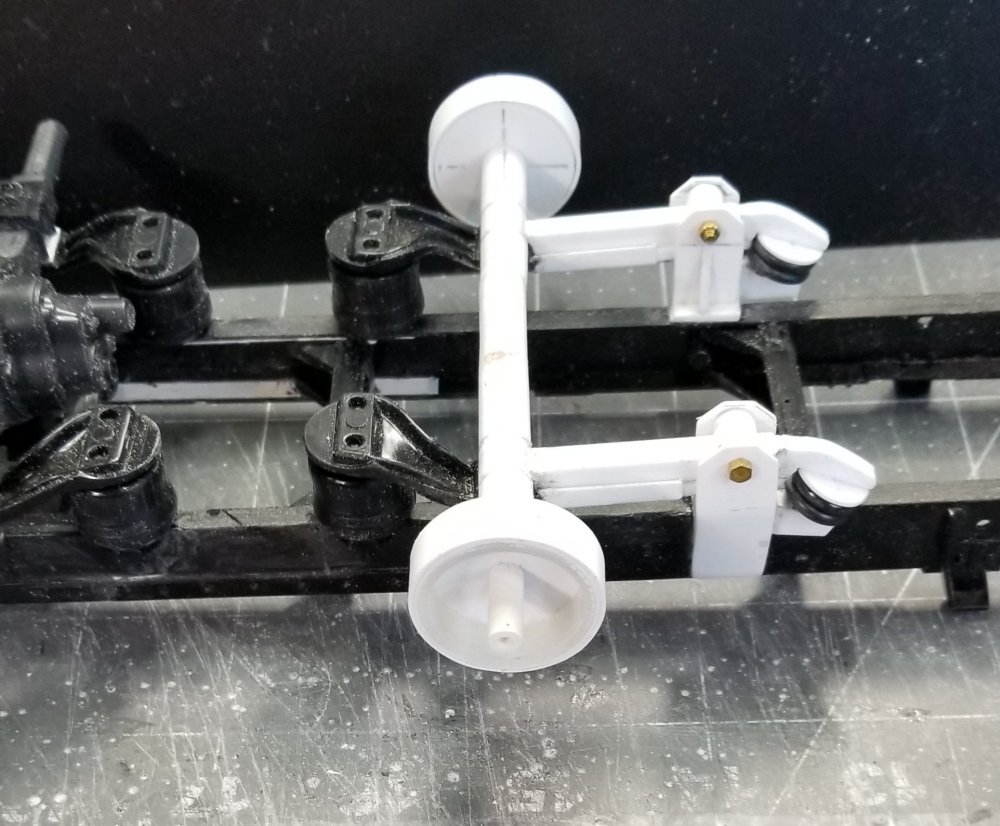
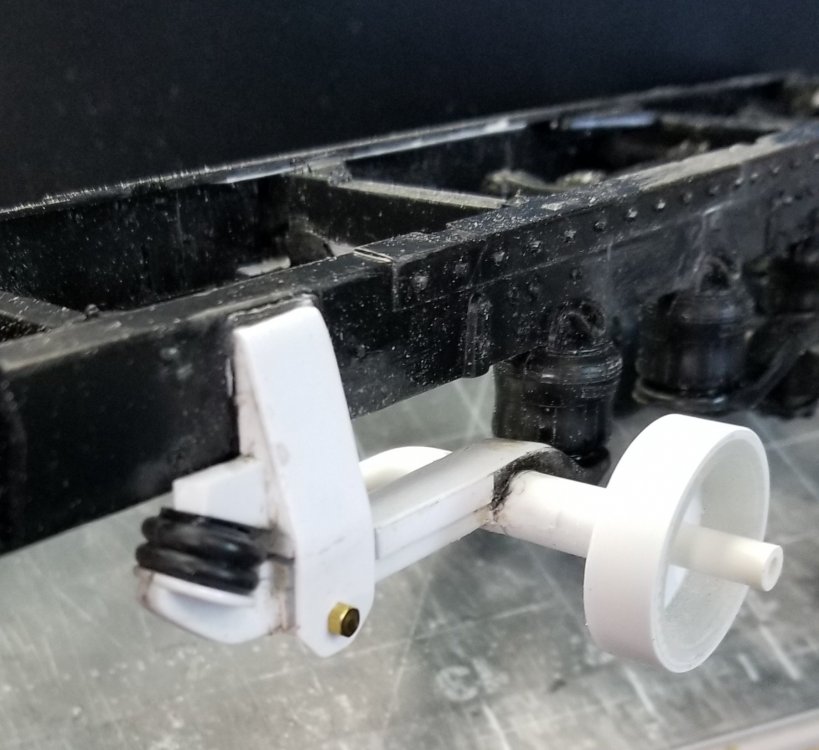
Hey all Ok, I have the lift axle done, except for some final details to the mounting brackets. this view shows the lift axle and the drives. this view shows the lift axle with the brake drums attached. I need to add some rib detail to the mounting brackets. view of the lift axle from the bottom. this view shows that the lift axle clears the drive shaft. view of the lift axle from the other side. this view shows the air bags from the 1/24 Italeri Western Star kit that I used for the axle air lift bags. view of the lift air bags from the front. this view shows the air bags that I added to the front suspension. closer view of the front air bags. view of the front axle from the bottom. this view shows what the big KW will look like. view from the top, the lead holders are there to represent the headache rack position. I have scale rolled aluminum fenders for the drives and the lift axle, also a drop visor and Texas bumper in aluminum coming in the mail. Well that's it for now be back with more updates soon. Ron G


-
Hey Harv That's a good price. Ron G
-
Hey all I have the lift axle fabricated. I still need to fab up the mounting brackets and lift air bags, brakes, etc. I didn't get any pictures today, but I'll take some tomorrow. Ron G
-
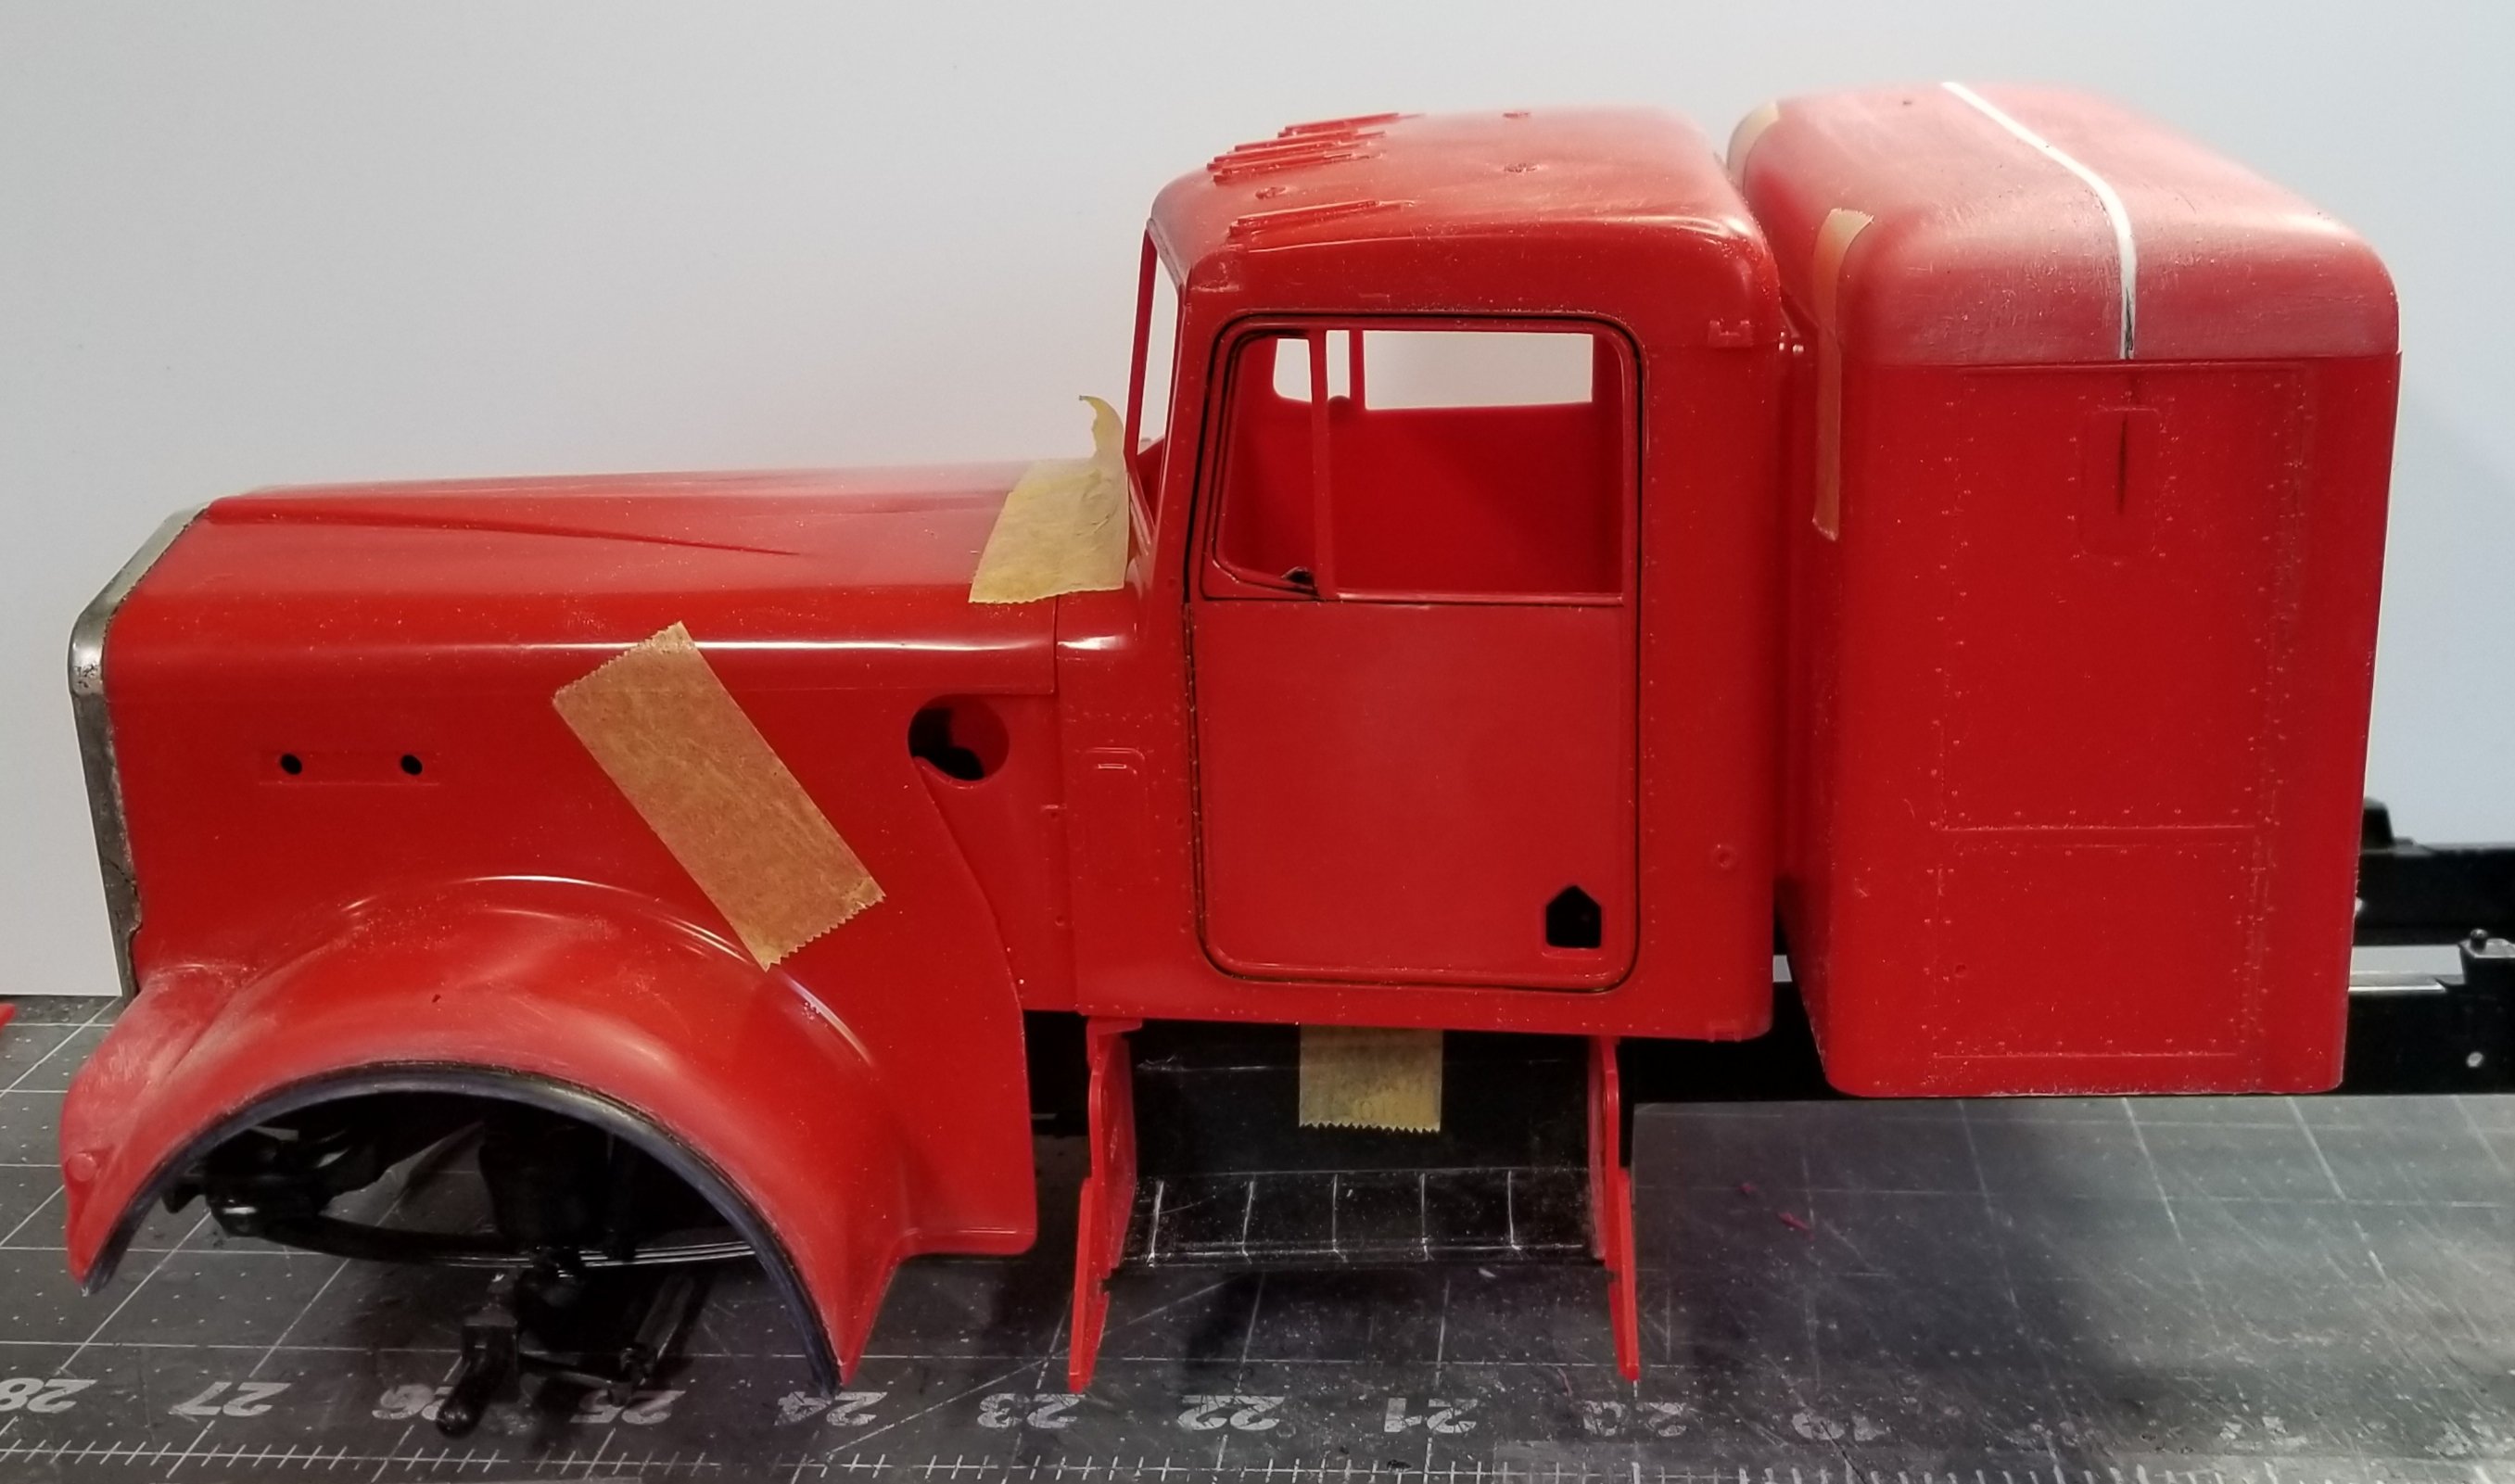
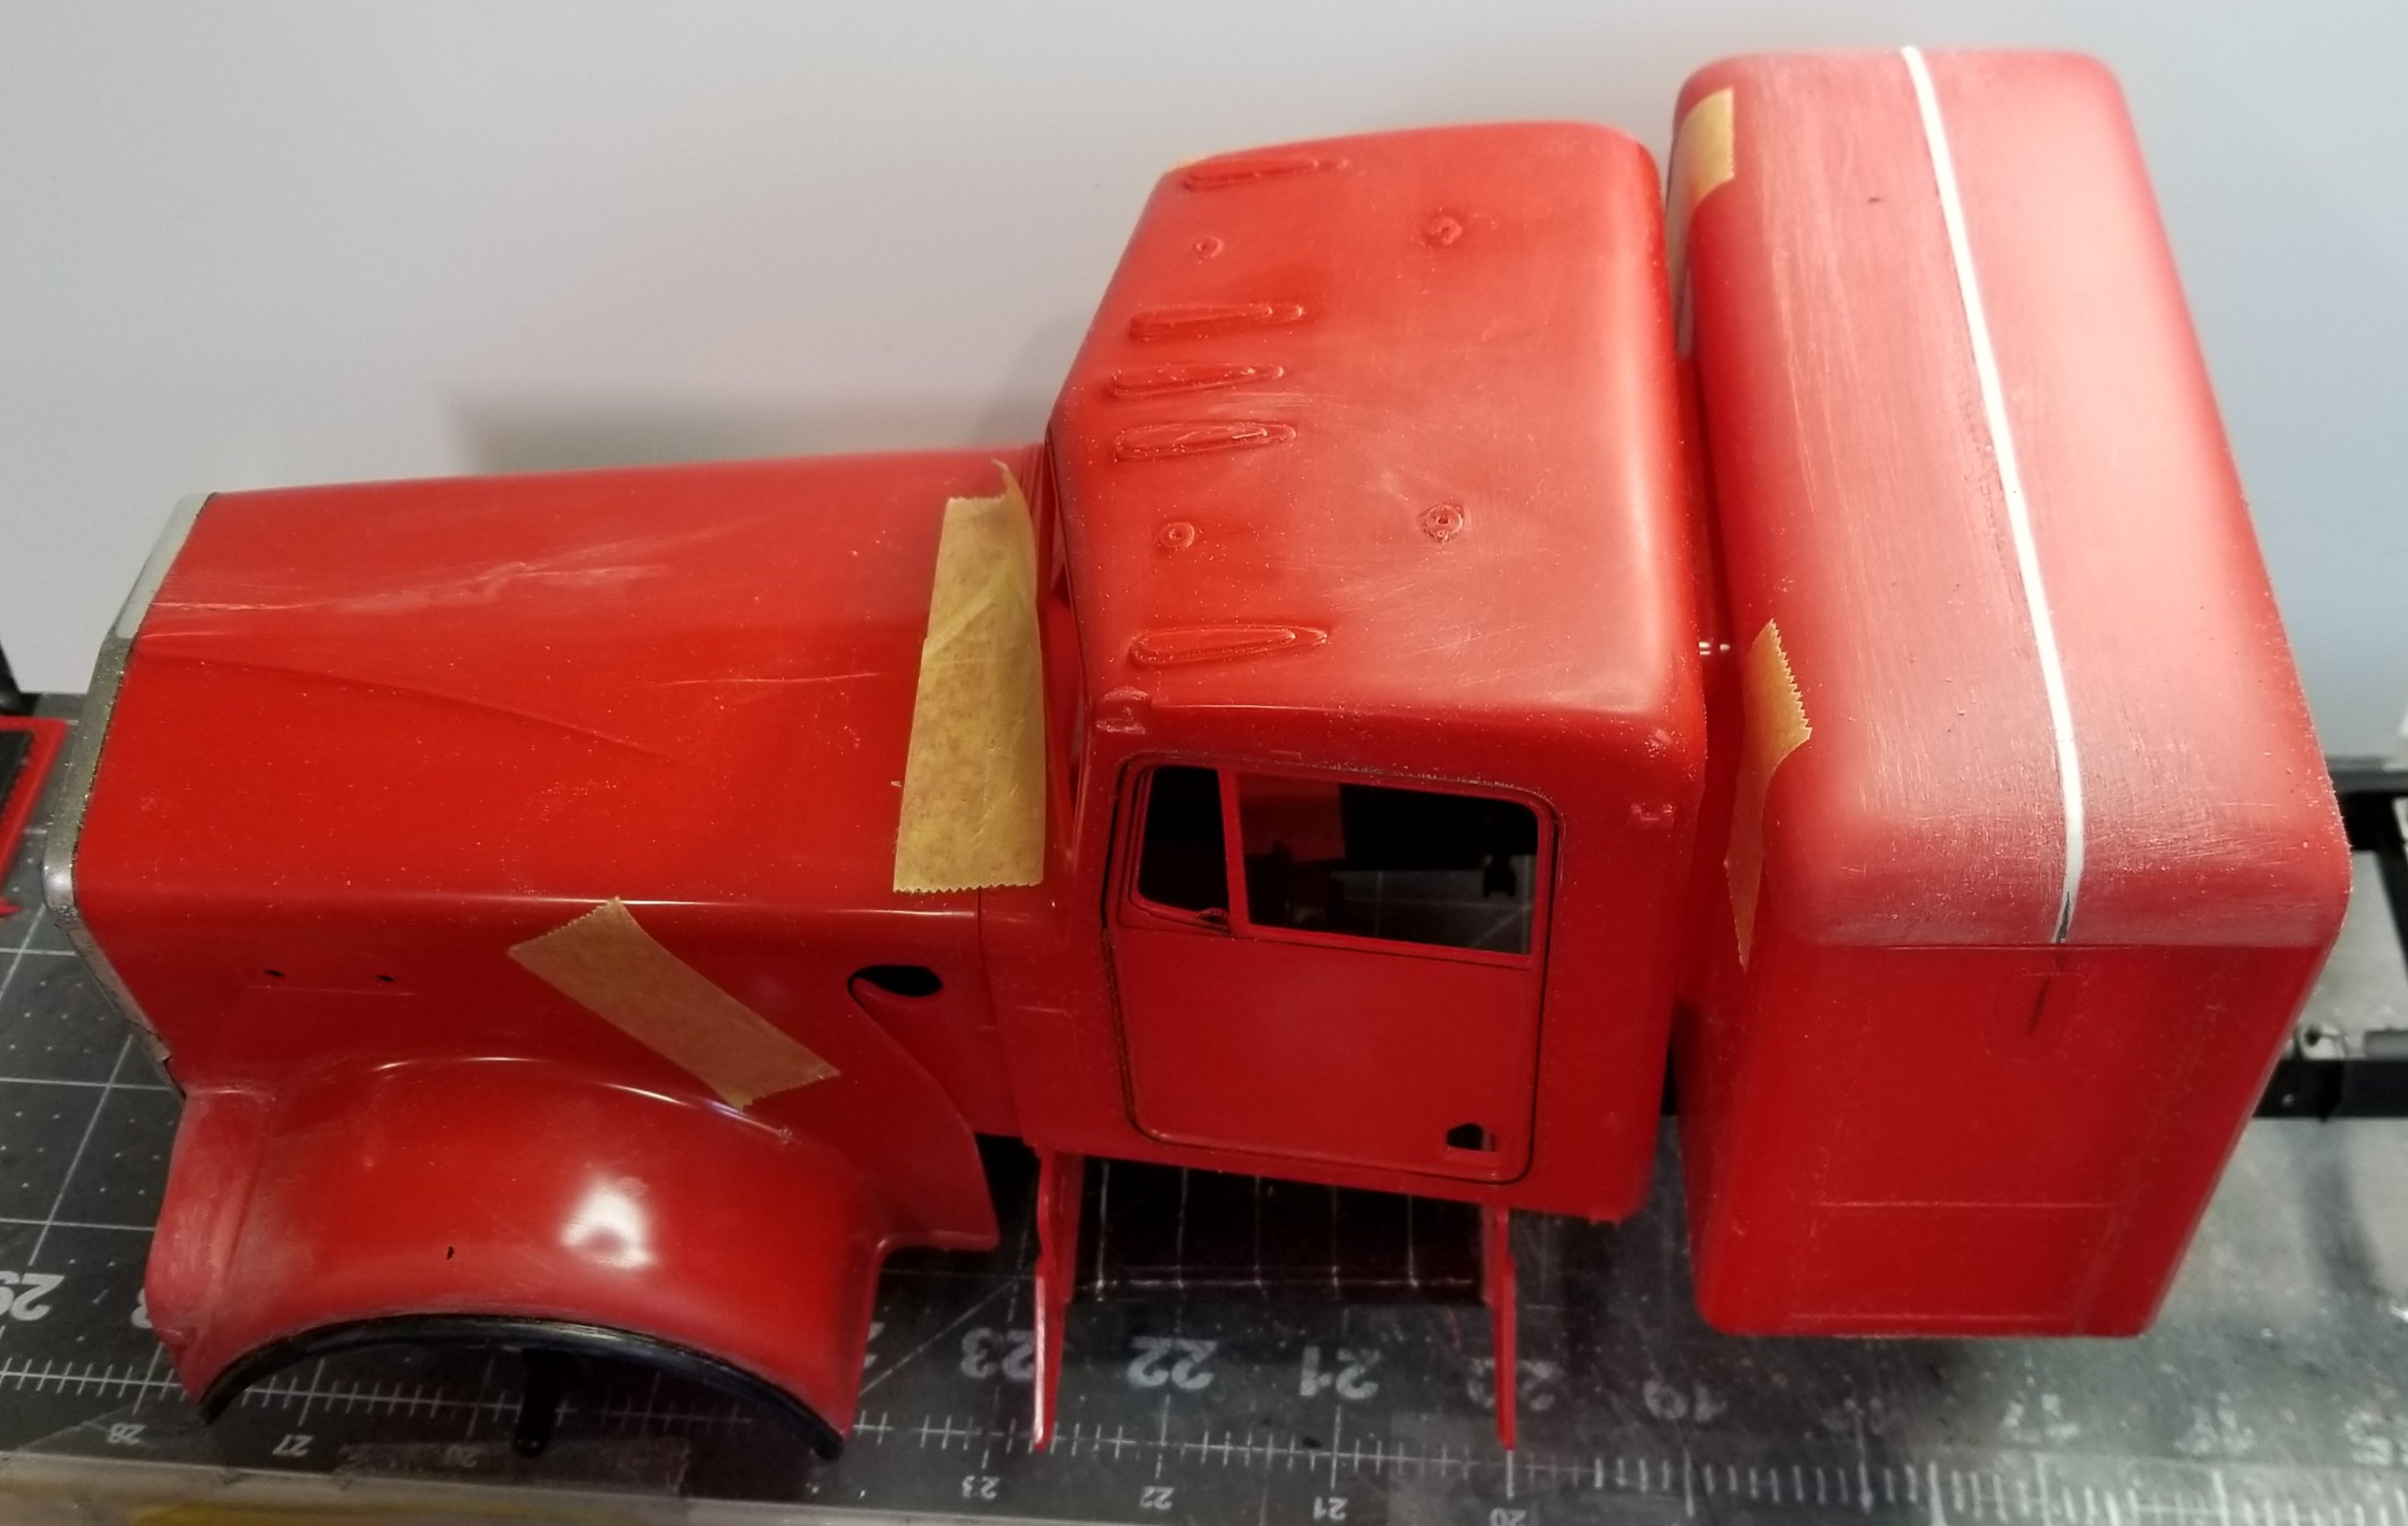
Hey all Well I have the 36" sleeper done. I cut 2 scale feet out of the kit sleeper to create this. This view shows the 36" sleeper in place on the frame. I have to cut off the rear sleeper mounts from the frame and move them forward to fit the new 36" sleeper. another view of the sleeper. You can see the fender rubber lips that I added to the front fenders after grinding the opening bigger to fit the large front floats. Well that's it for now be back soon. Ron G


-
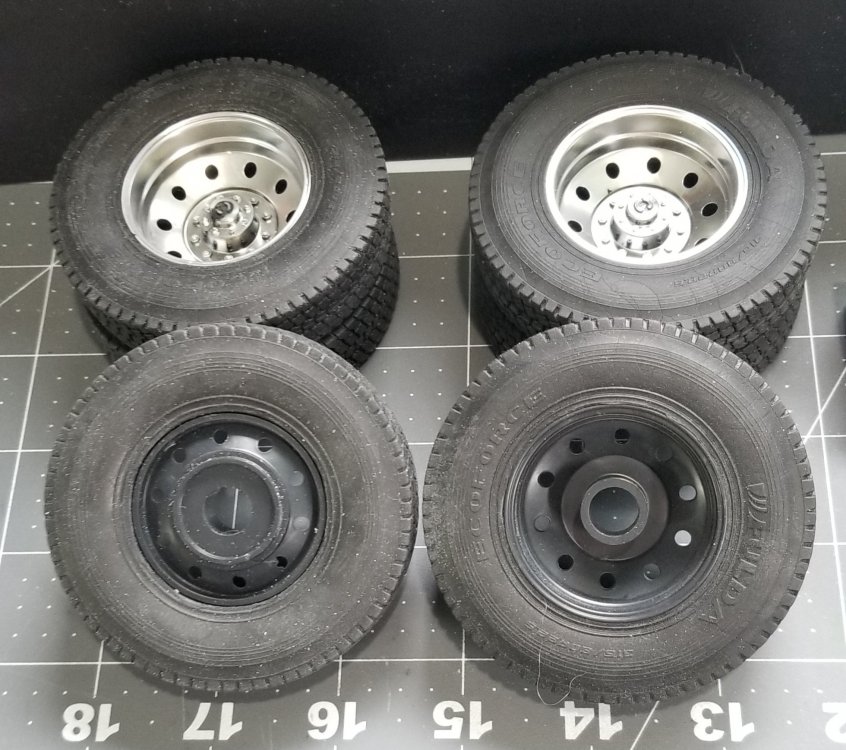
Ok here goes, I think I got this right 1) 1/25 AMT Kenworth W925 - using this for the tractor for my Michigan gravel train. 2) 1/25 AMT (2) gravel trailers, front one will be stock length out of the box, rear one will be shortened to 18' length, with custom made dolly for the Michigan gravel train. 3) 1/25 Revell Peterbilt 359 tri-axle heavy haul tractor built from the Revell "can do" wrecker kit. With custom tanks, headache rack, etc. 4) 1/25 AMT Peterbilt 359 "California hauler" made into a dump truck with dump bed from AMT Autocar dump truck kit. 5) 1/25 AMT Caterpillar D8 bulldozer, with custom R.O.P.S., and fully plumbed and wired with custom 3D printed tracks. 6) 1/25 scale custom made from scratch, 3D printed and what ever I could find from the scrape box stuff. XL120 Specialized drop nose lowboy trailer, with 2 axle jeep and 2 axle nitrogen stinger/booster. With tractor it's just barely under 5.0 feet long! 7) custom made from scratch Caterpillar 374 FL excavator with tracks from Bruder to go on the XL120 lowboy trailer. 8) 1/24 6 axle 48' flat bed trailer built from scratch with real wood decking and custom rolled steel loads. 9) 1/24 Italeri Peterbilt 378 tri-axle heavy haul with 36" sleeper, Cat Ci5 twin turbo engine from Moluminum, headache rack and alot of extras. 10) 1/24 Italeri Mack Superliner II built as a Australian road train puller. It's got a Mack E9 V8 with Mack 12spd trans. 6 spoke color matched wheels fully wired and plumbed. I have a 1/24 tri-axle Italeri fuel tanker to go with this, just need two more plus dollys and I got me a road train! 11) 1/24 Italeri Western Star fairly simple build on this one. It will have a series 60 Detroit diesel, I swapped engines with the one from the Peterbilt. 12) 1/24 AMT Peterbilt 378 being built as a long nose 379 fully wired and plumbed. 13) 1/16 Monogram Peterbilt 359 short hood, with functioning front steering, custom and 3D printed Cummins NTC-400, opening cab and sleeper doors, fully wired and plumbed. 14) 1/16 Monogram Kenworth W900 Conventional being built as a tri-axle heavy haul tractor. This has the kit Caterpillar 3408 V8 engine. It will be fully wired and plumbed, but no functioning steering or doors. This will eventually have a 1/16 scale Diecast Masters XL120 lowboy trailer (supposed to be coming around Christmas time) to pull the 1/16 Caterpillar 336 excavator that I have from Bruder, yeah its a kids toy, but I can modify it to look alot more real. 15) 1/24 Italeri Peterbilt 377 (this is the kit that got all this started) left over from 20 plus years ago that I'm going to do as a single axle daycab tractor. WHEW!!!! I also have 12 or more 1/32 and 1/24 scale plane kits to finish too! Lets see I'm 71 years old now so I think I'll probably get done when I'm about 250 years old...lol😁 Ron G
-
Hey Peter Well since I'm retired I have all day to work on my models. I usually start around 11:00 or 12:00 and work to around 5:00pm. When I was younger and working I only got to work on them on the weekends. My wife still works. She works for FCA (Chrysler) but shes furlowed at home on the computor (Cad designer) so she keeps occupied and out of my hair...lol Ron G
-
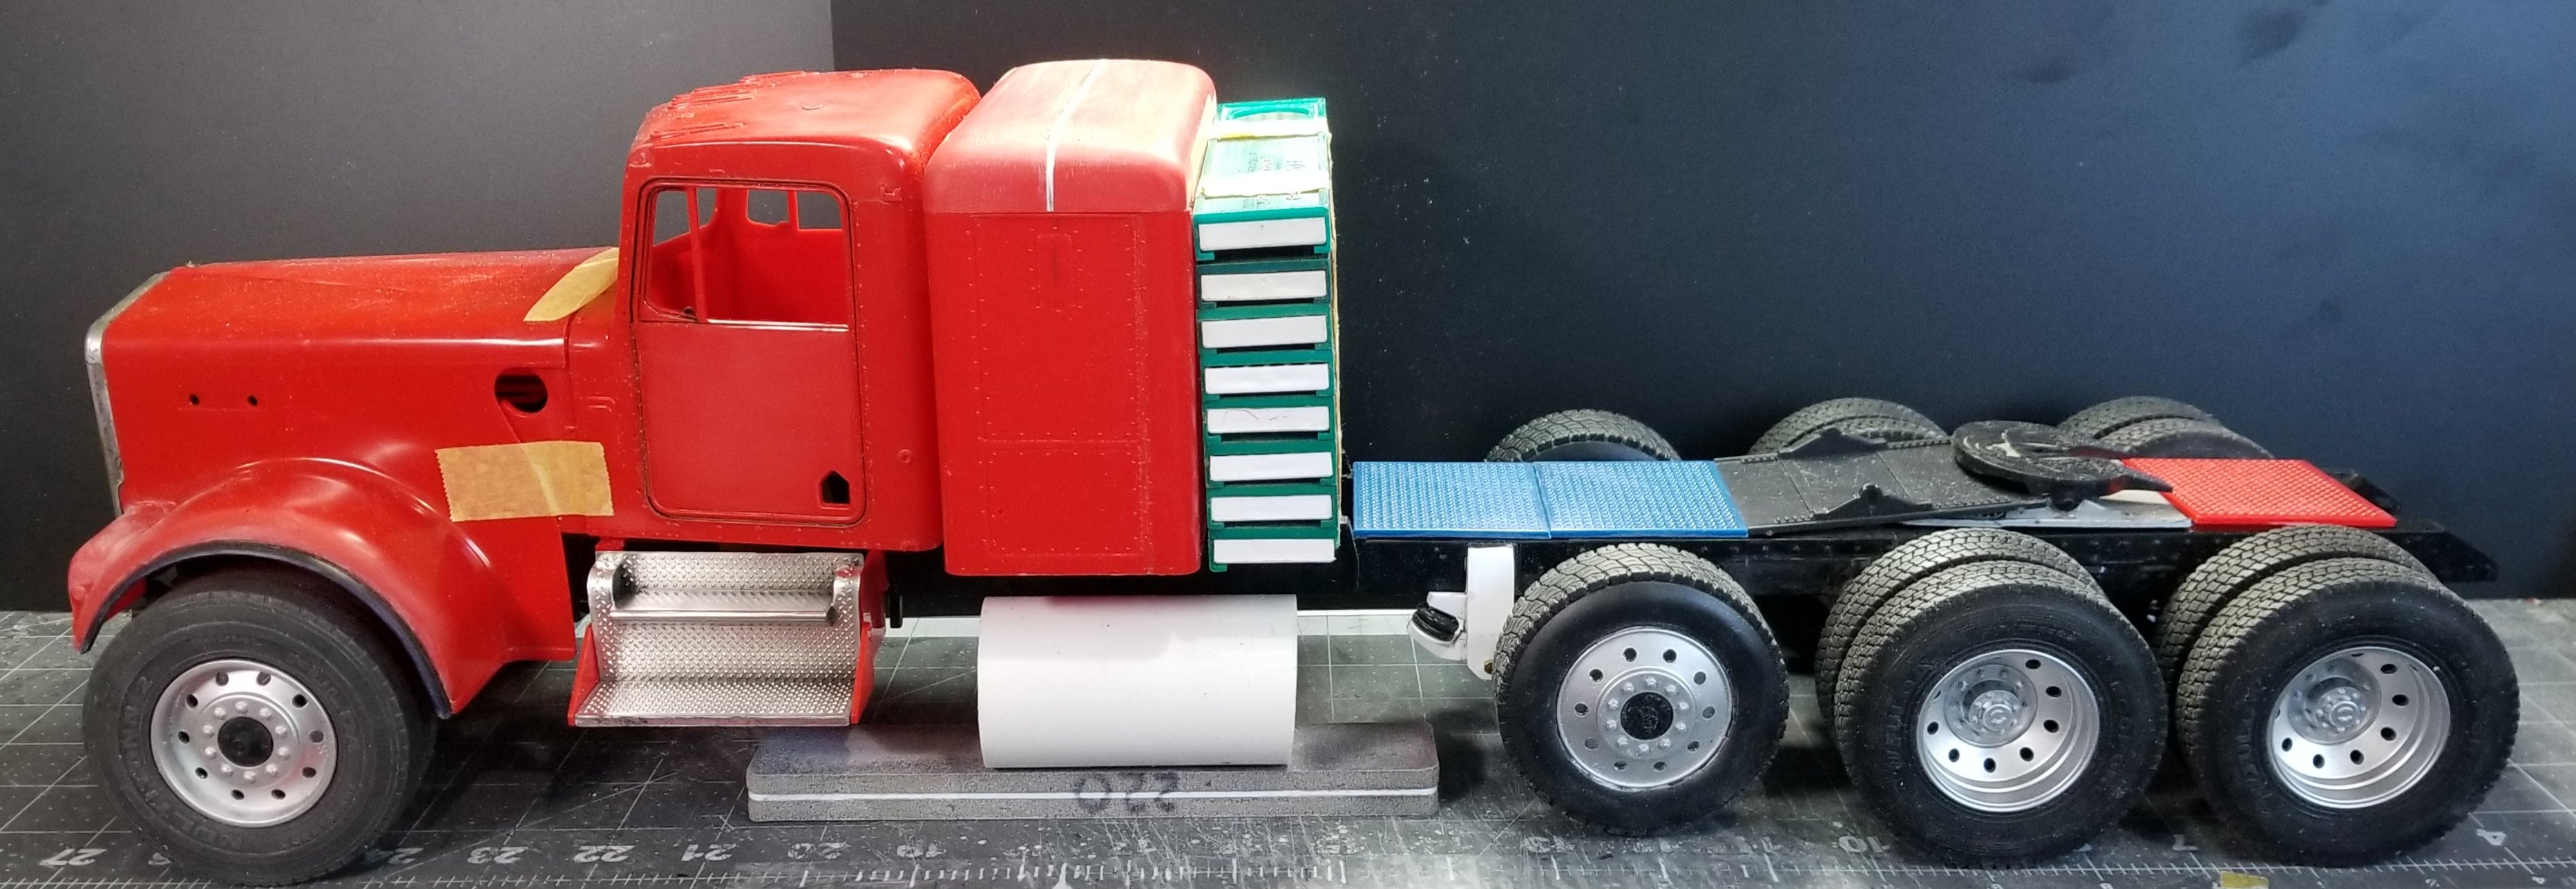
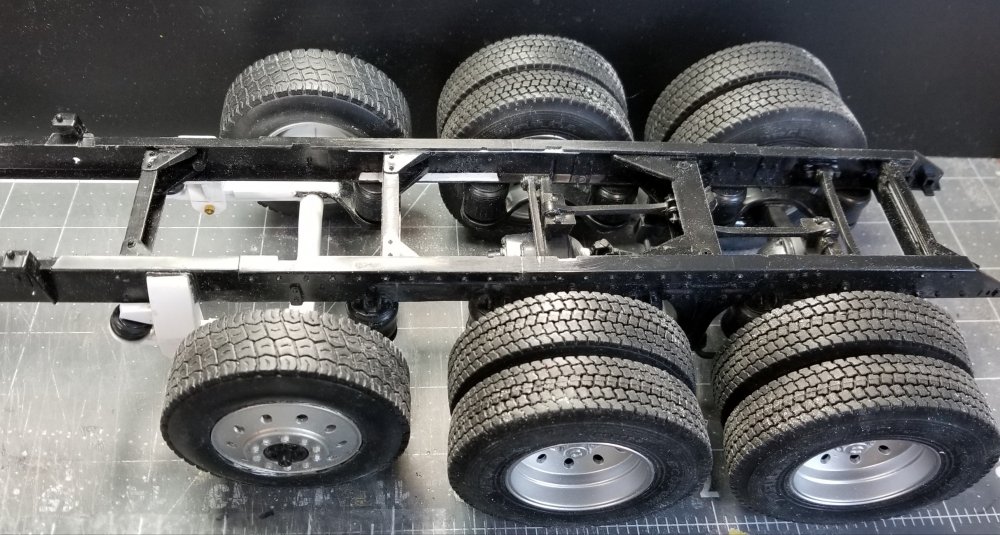
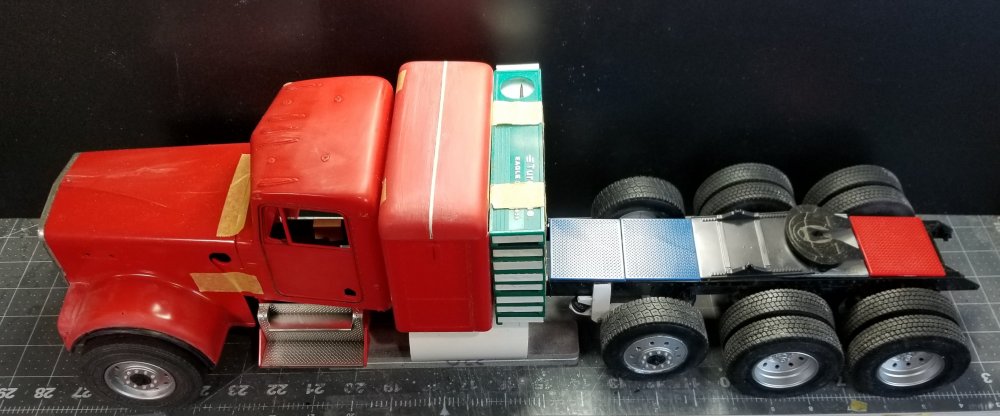
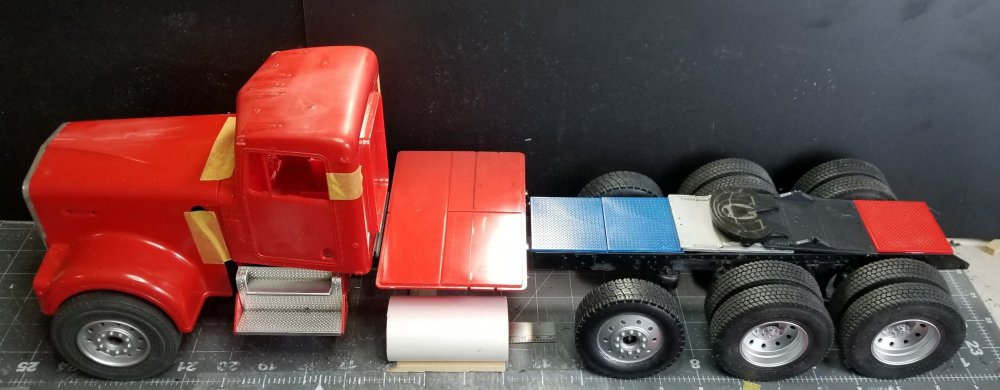
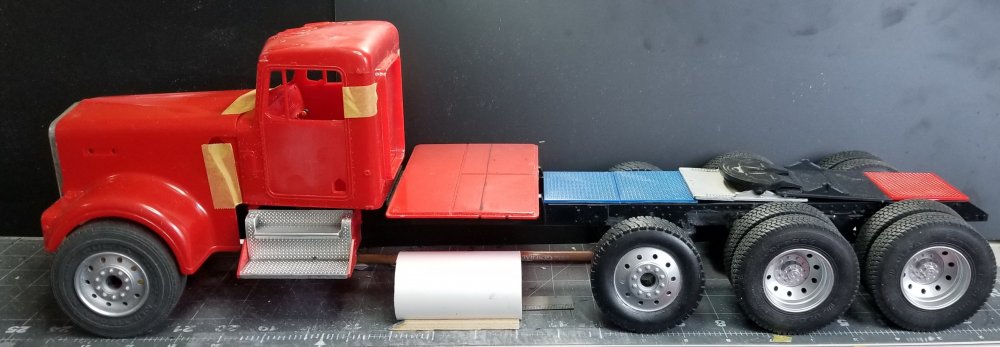
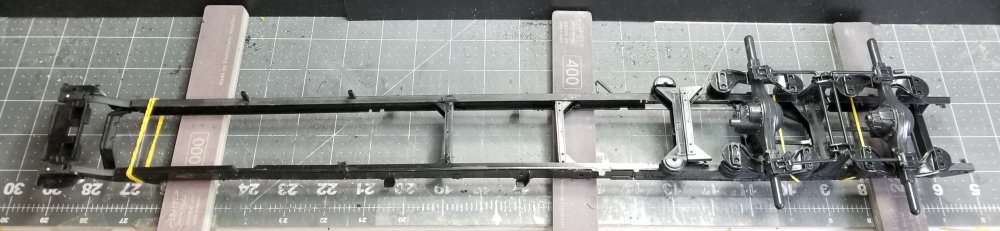
Hey all Got some more work done on the frame. this view shows the drivers side battery box. this view shows the frame and rear wheels/tires. this view shows the drivers side battery box with the cover off. The wooden block is representing one of the (4) batteries that will be in here, the other sides box will house one of the air tanks. this view shows the truck partially assembled for pictures. The sleeper floor will be shortened to a 36" sleeper and a headache rack will be added. another view of the KW 900L heavy haul tractor. Ron G


-
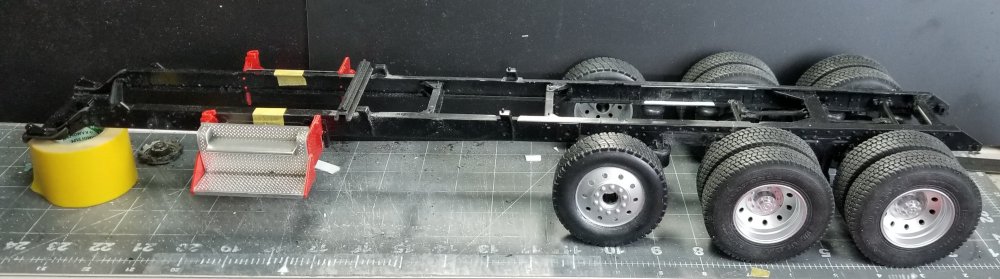
Hey all Small update, I've got the frame stretched and assembled. Took a couple of pictures while the glue dries. the axles are only there for pictures. view of the bottom of the frame. Ron G

-
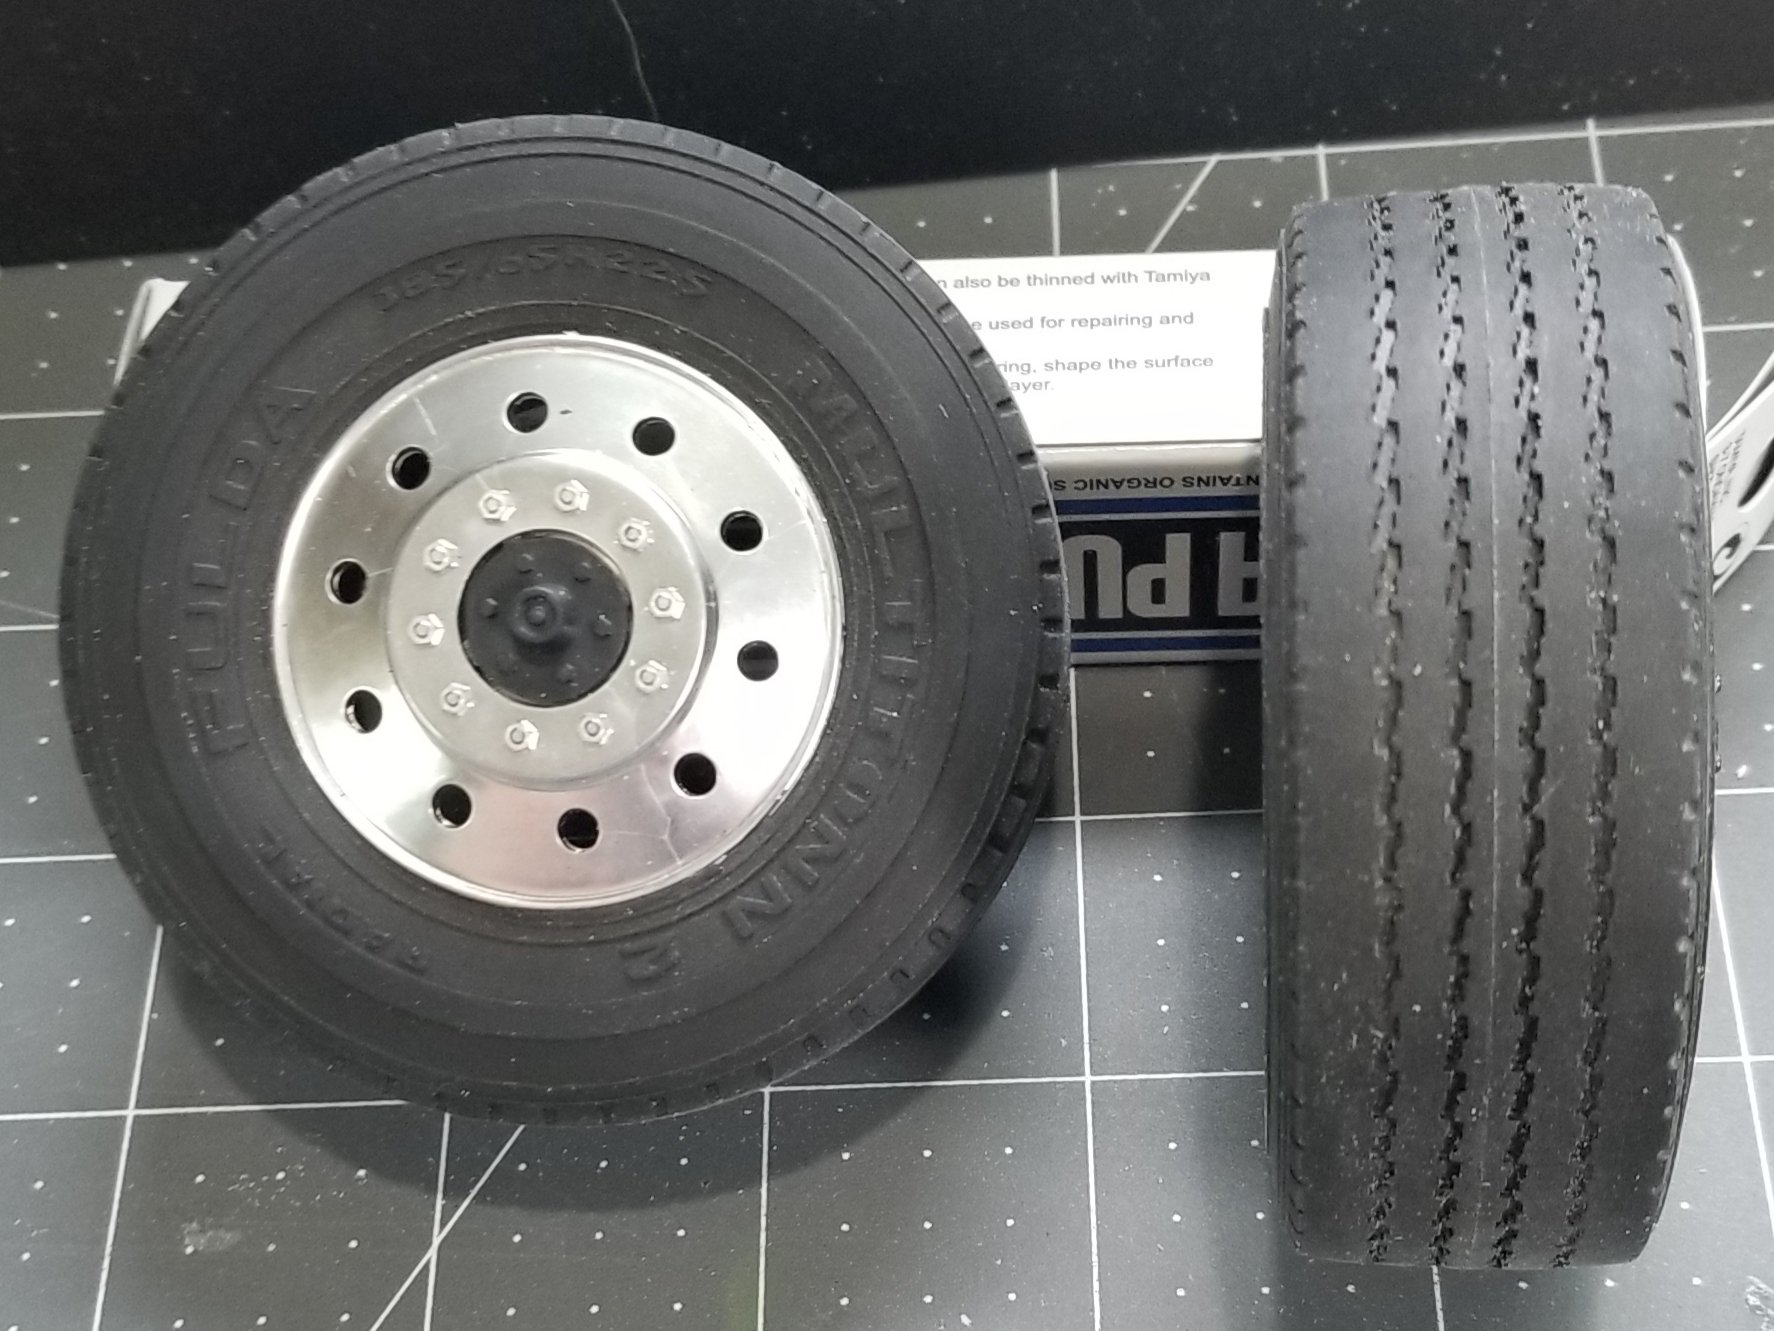
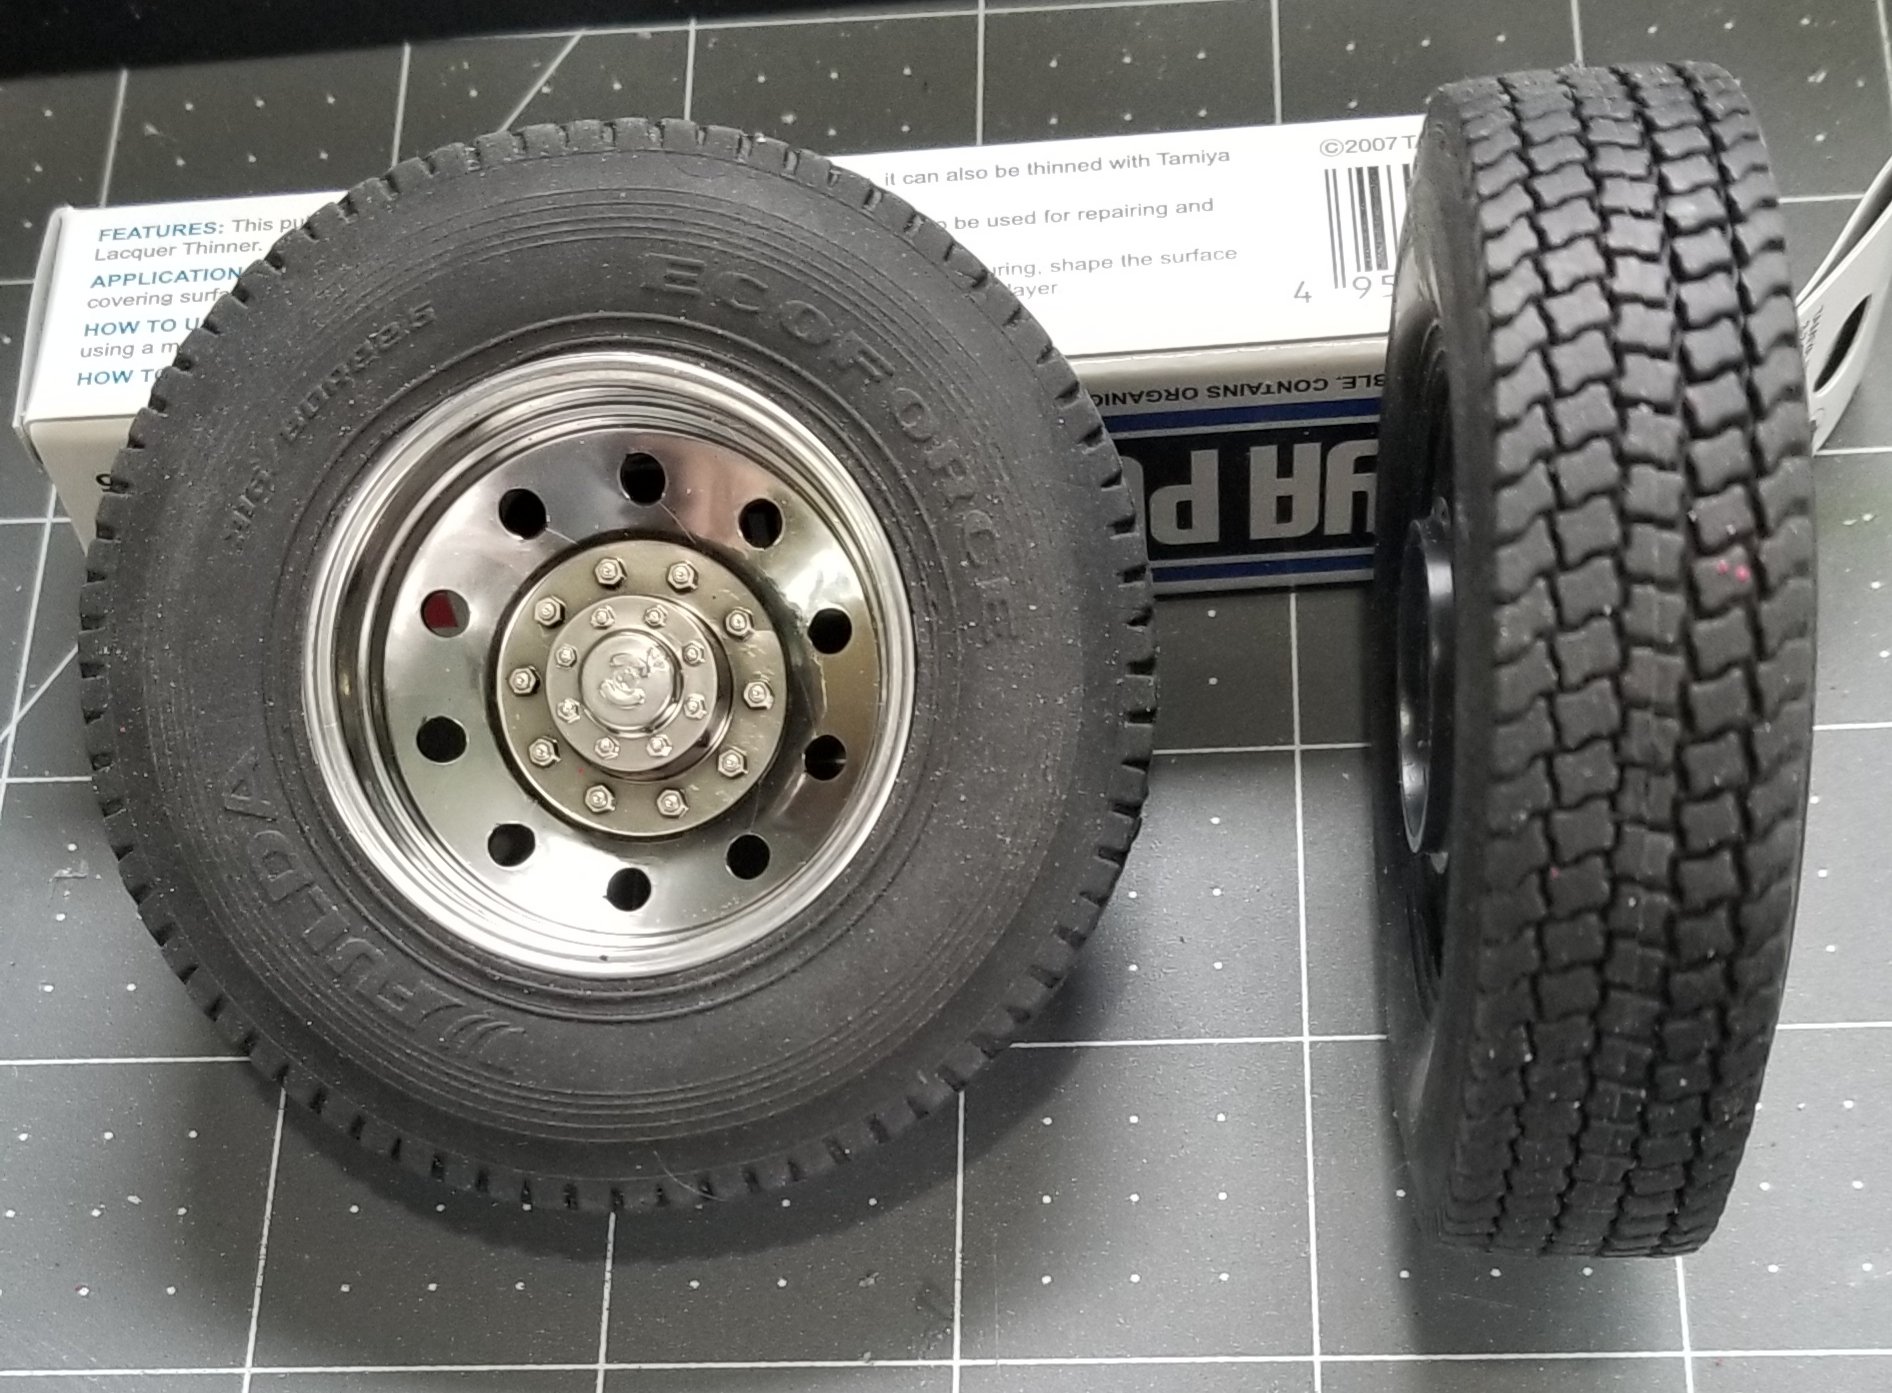
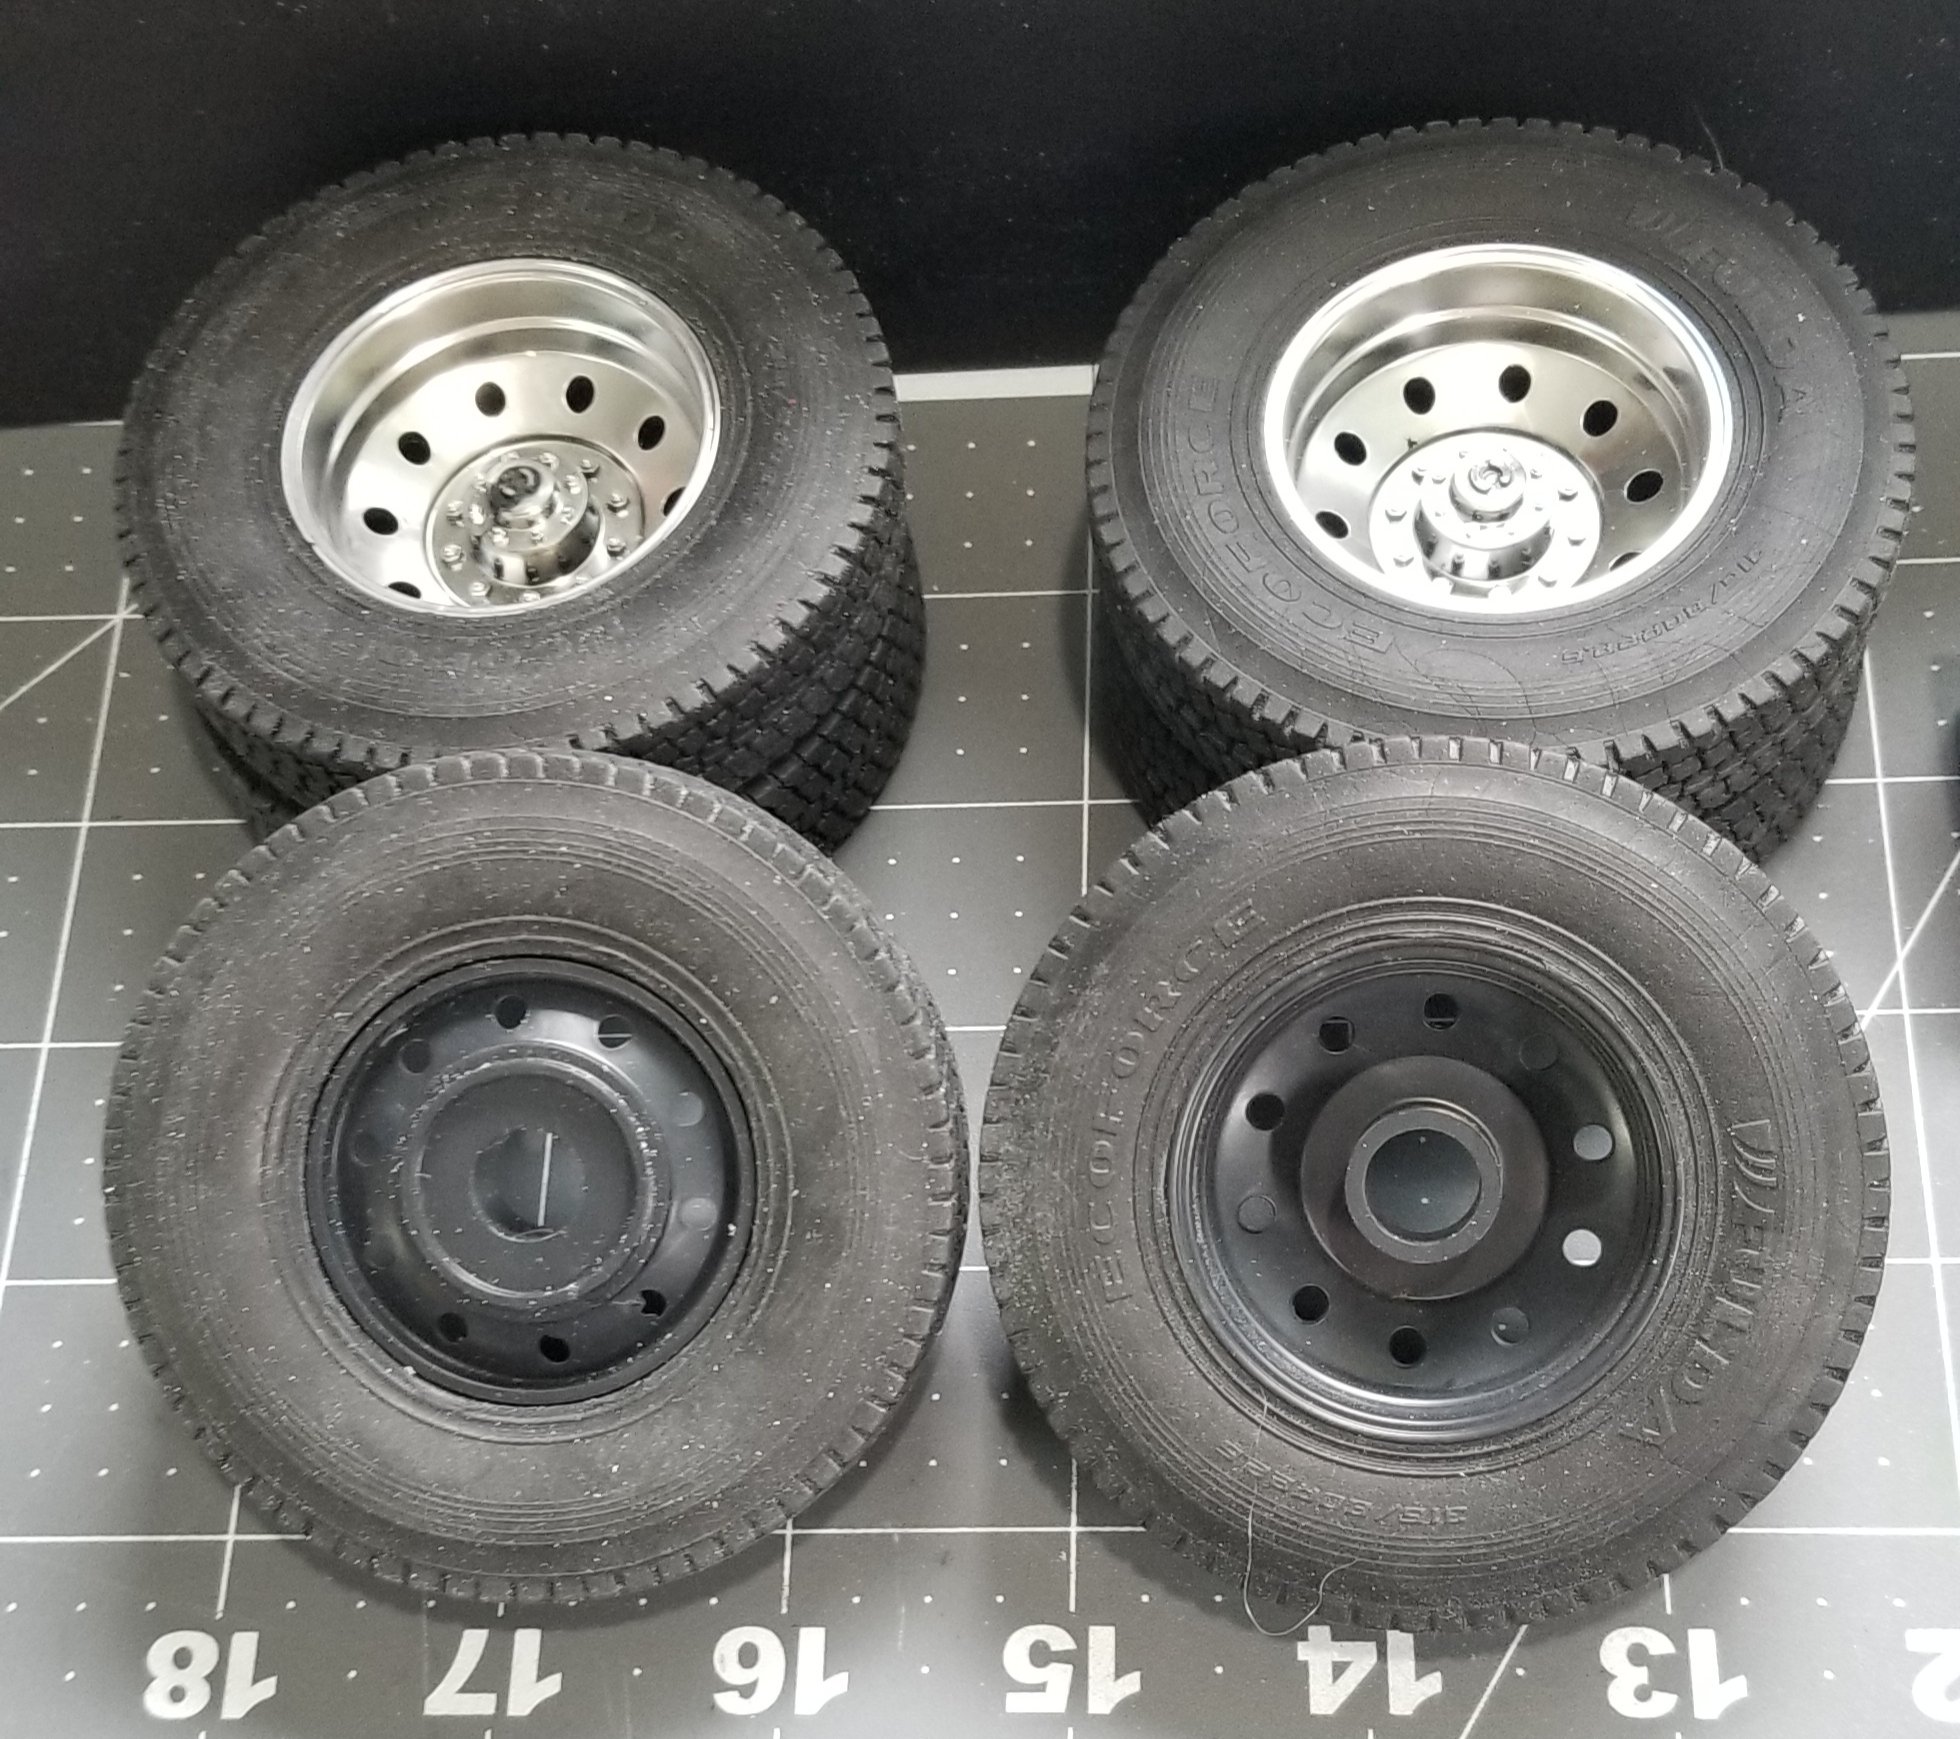
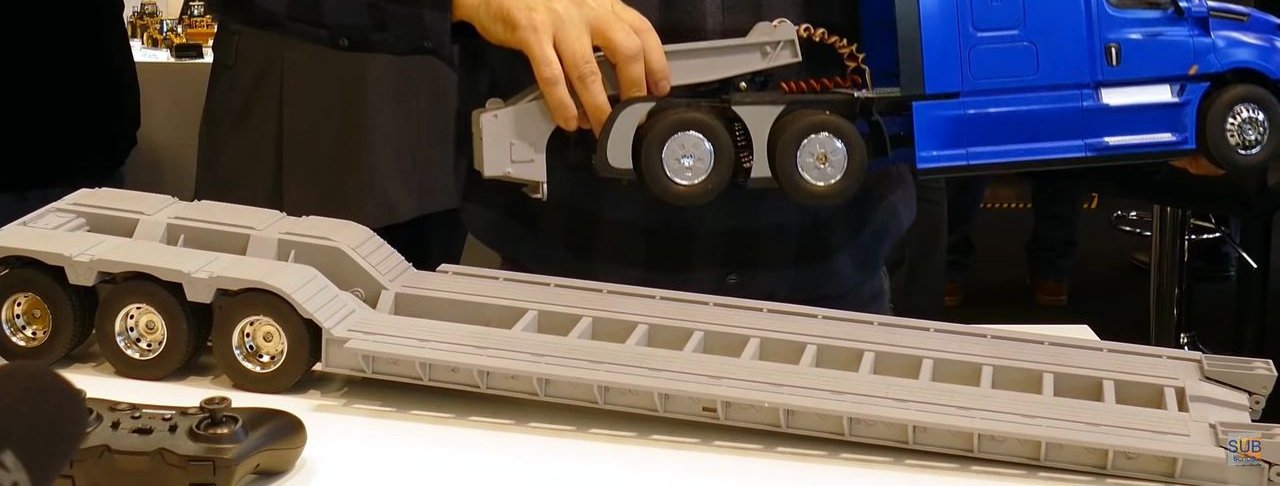
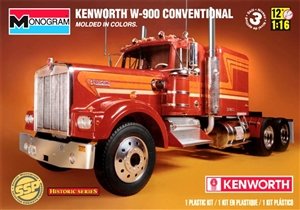
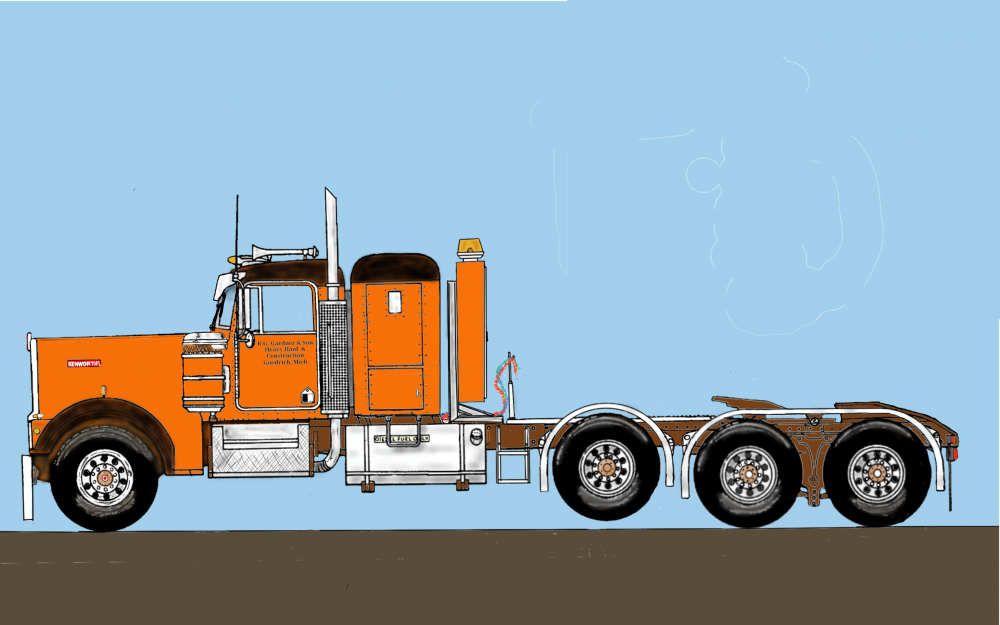
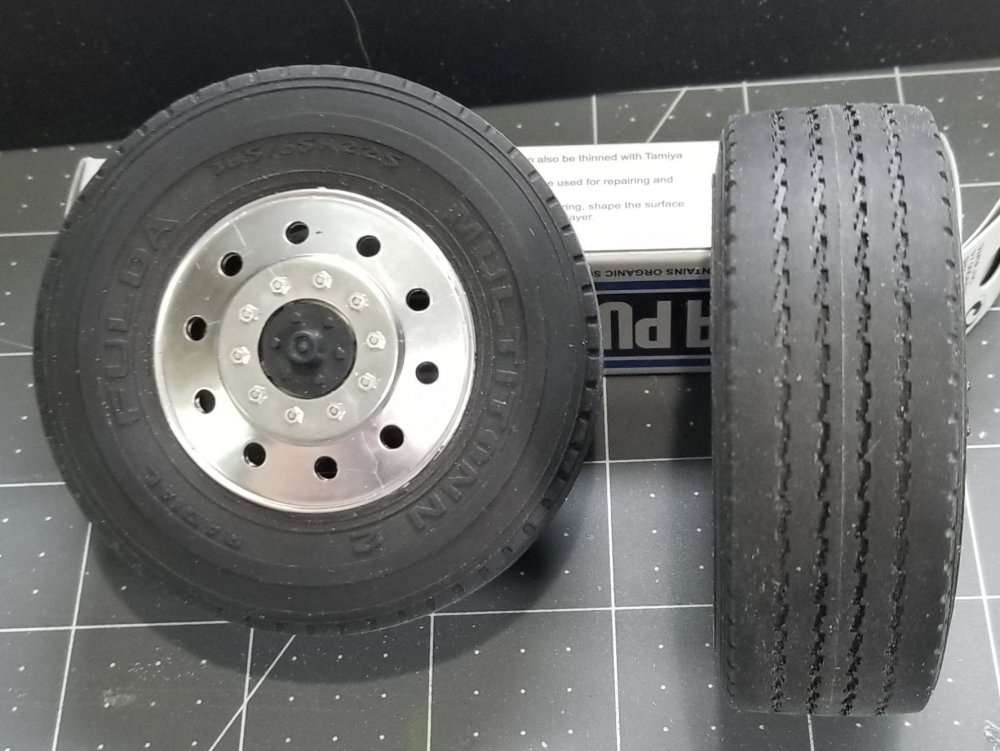
Hey guys Yeah I know another one...it's a disease...please I need help...lol😁 Ok now that thats over. I'm starting a build thread on a 1/16 scale Monogram Kenworth W900 Conventional kit. I plan on doing it as a tri-axle heavy haul, with custom made headache rack, custom made air lift axle, decals from Jerry at modeltruckin.com. I'm using the kit Caterpillar 3408 V8 engine, but I'm fully plumbing it with custom Cat oil and fuel filter decals. It's going to have aftermarket 385/65R 24.5 front floats, 385/55R 22.5 super singles for the lift axle and 12.00R 24.5 drive tires. I'm using the kit wheels, but I had to customize them to fit the front floats and the super single tires. I've started in on the frame construction. This kit had a flaw when I got it, the passenger side frame rail was a short shot . I was devastated because these kits are scarce as hens teeth, or OH MY GOD! expensive on Ebay. So, I found a guy on YouTube that was making a custom stretched KW and I asked him if he had any left over parts and viola! He came through, he sent me a bunch of parts both rear frame rail sections, extra cross members and extra air bags. Here are some pictures to look at. this is the kit I'm using for this build. this view shows what I'm trying to accomplish. this view shows the front float tires and wheels this view shows the super singles for the lift axle. this view shows the drive tires this is another view of the drive tires and wheels. this view shows the new, but not out yet, (it's coming around Christmas time) Diecast Masters XL120 Specialized lowboy trailer in 1/16 scale. It's going to be for their 1/16 RC Freightliner Cascadia (the blue truck in the photo). If this is anywhere near as good as their 1/50 scale diecast one, I'll be using it for the Big KW's trailer, along with a Bruder Cat 336 excavator for the load. Yeah this is going to be HUGE! front view of the trailer. rear view of the trailer. Well that's it for now be back soon with more updates Ron G


.jpeg.b2a38e6dba3b8e907393f782fcddae8b.jpeg)
.jpeg.83f398850a7a2a6dad5790ec4caf5913.jpeg)
-
Hey Gunns Bits and pieces from the parts bin, internet, 3d printed, scratch built and basically anything that looks appropriate and I can make work. Ron G
-
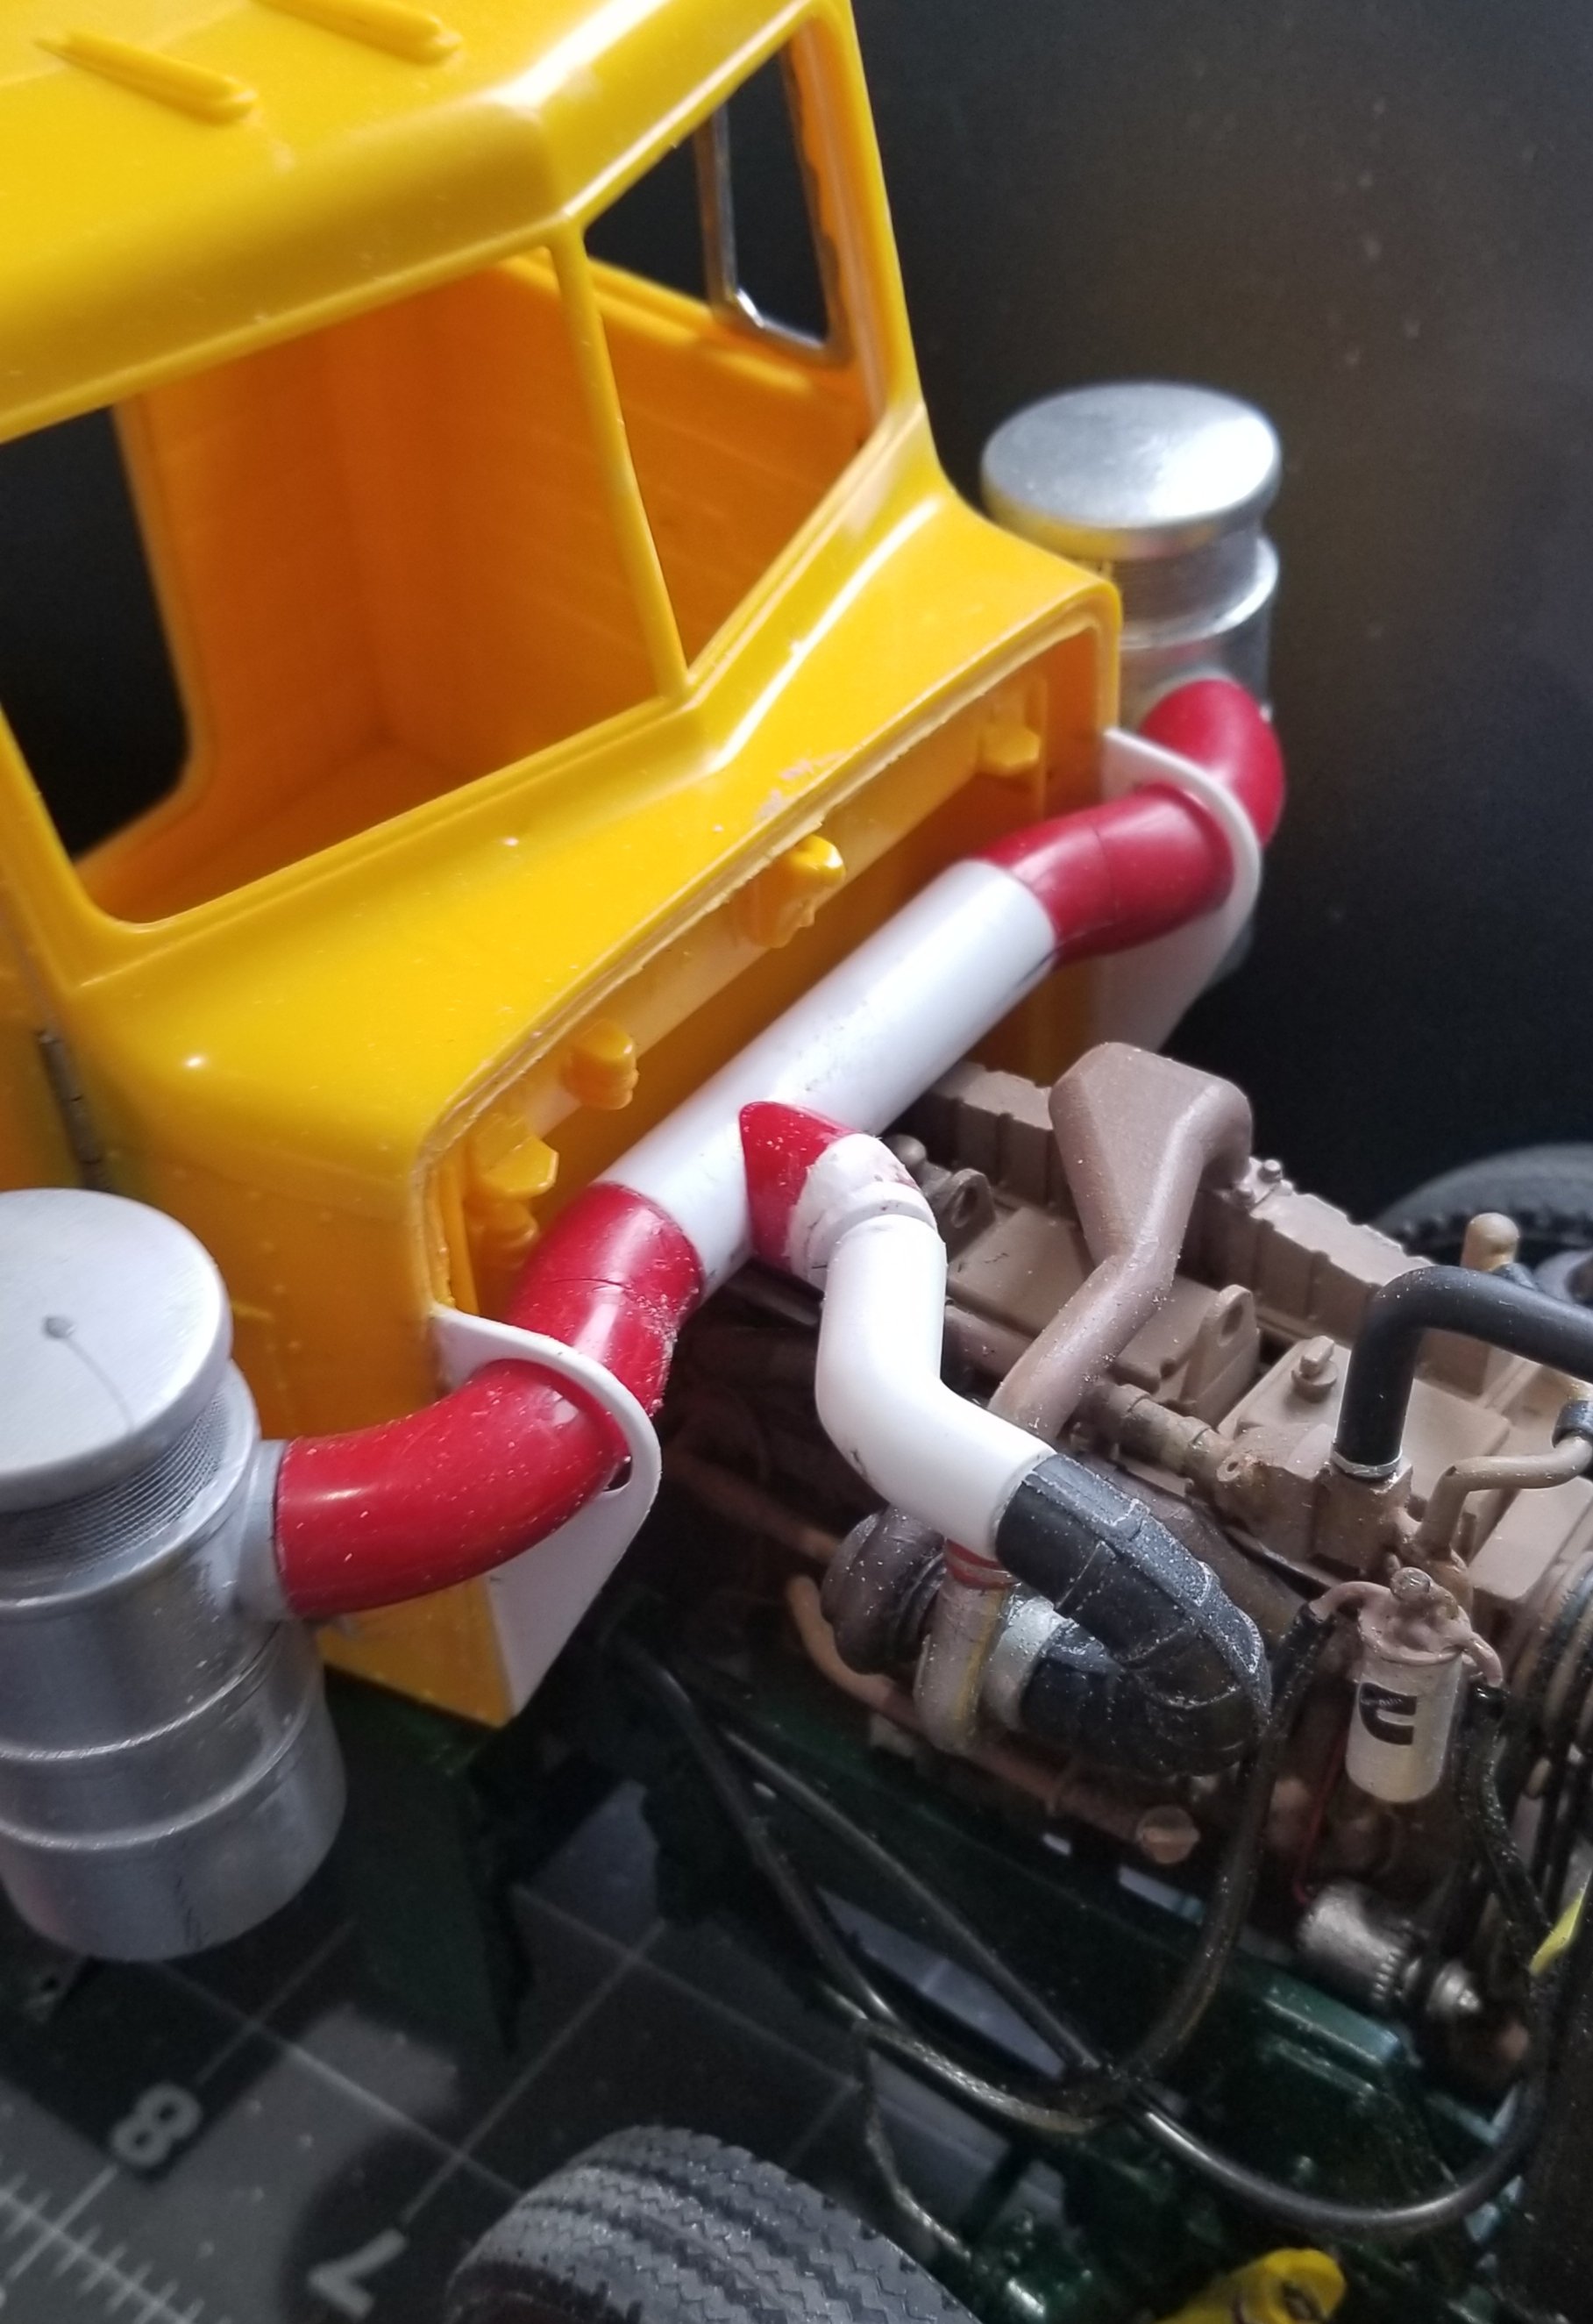
Hey all Small update. Just some pictures of the air intake tubes and ends. this view shows the left and right air cleaners connected by the intake tubing. this view shows the intake tubes and ends. The red peices need to be modified to look like the black connector attached to the turbo. Ron G

-
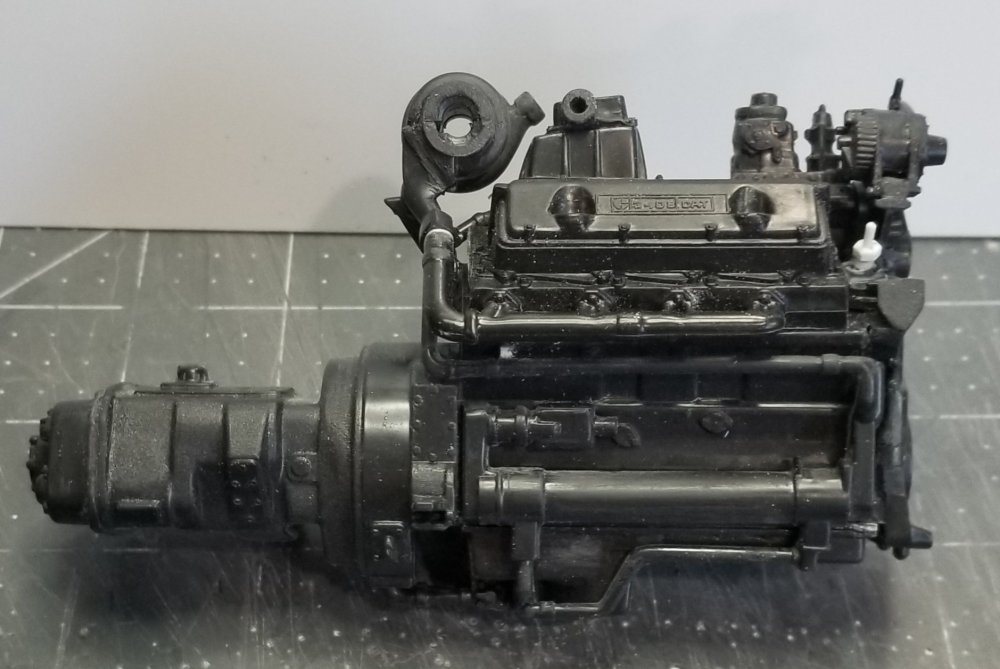
I'm way ahead of you budy...lol. Right know I'm working on the sleeper doors and the air cleaner intake tubes. I got the 1/16 Monogram Kenworth W900 in the mail it's going to be a (4) axle heavy haul with a air lift lift axle. I have the tires and wheels, actually I have to modify the wheels to fit the tires. Thare 12.00/R24.5 drives, around a 385/55R22.5 super singles for the lift axle and 385/65R24.5 front floats, real heavy duty! My main problem is the passenger side frame rail was miss formed from the factory (short shot), but I have a contact from YouTube thats going to help out with a replacement rail. I will be doing a build on this big KW, after I finish the big Pete...yeah finish something, that's a laff...lol Ron G
-
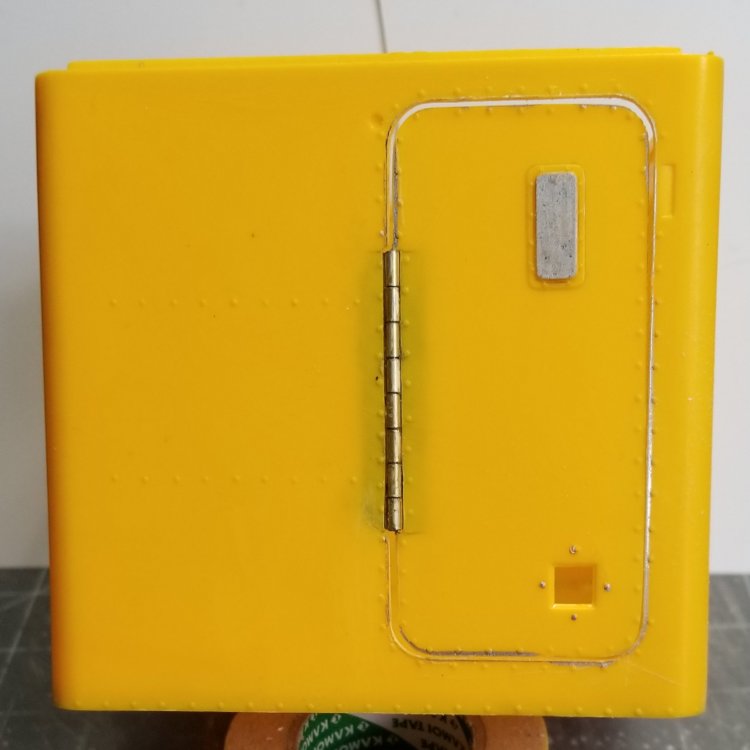
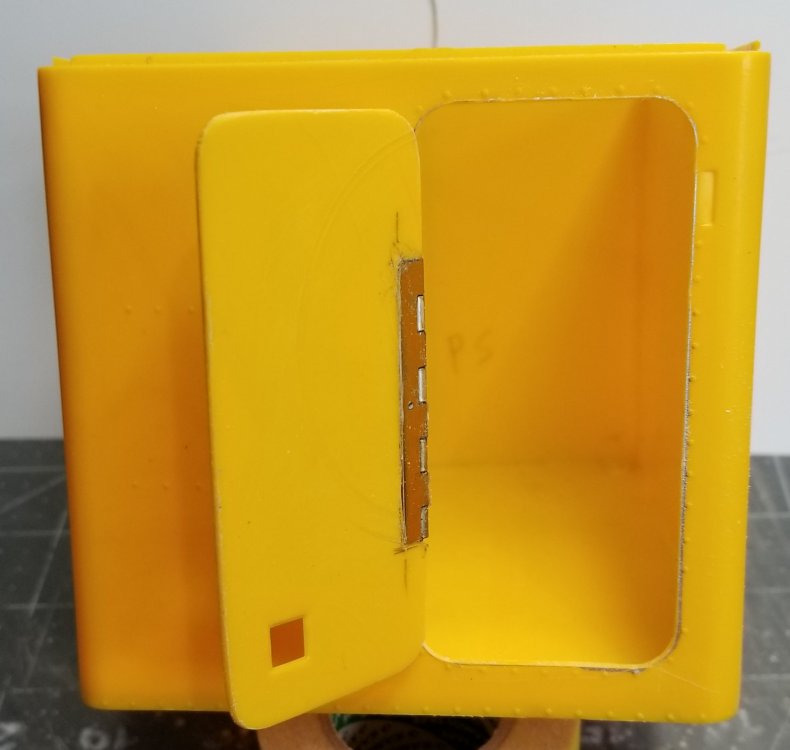
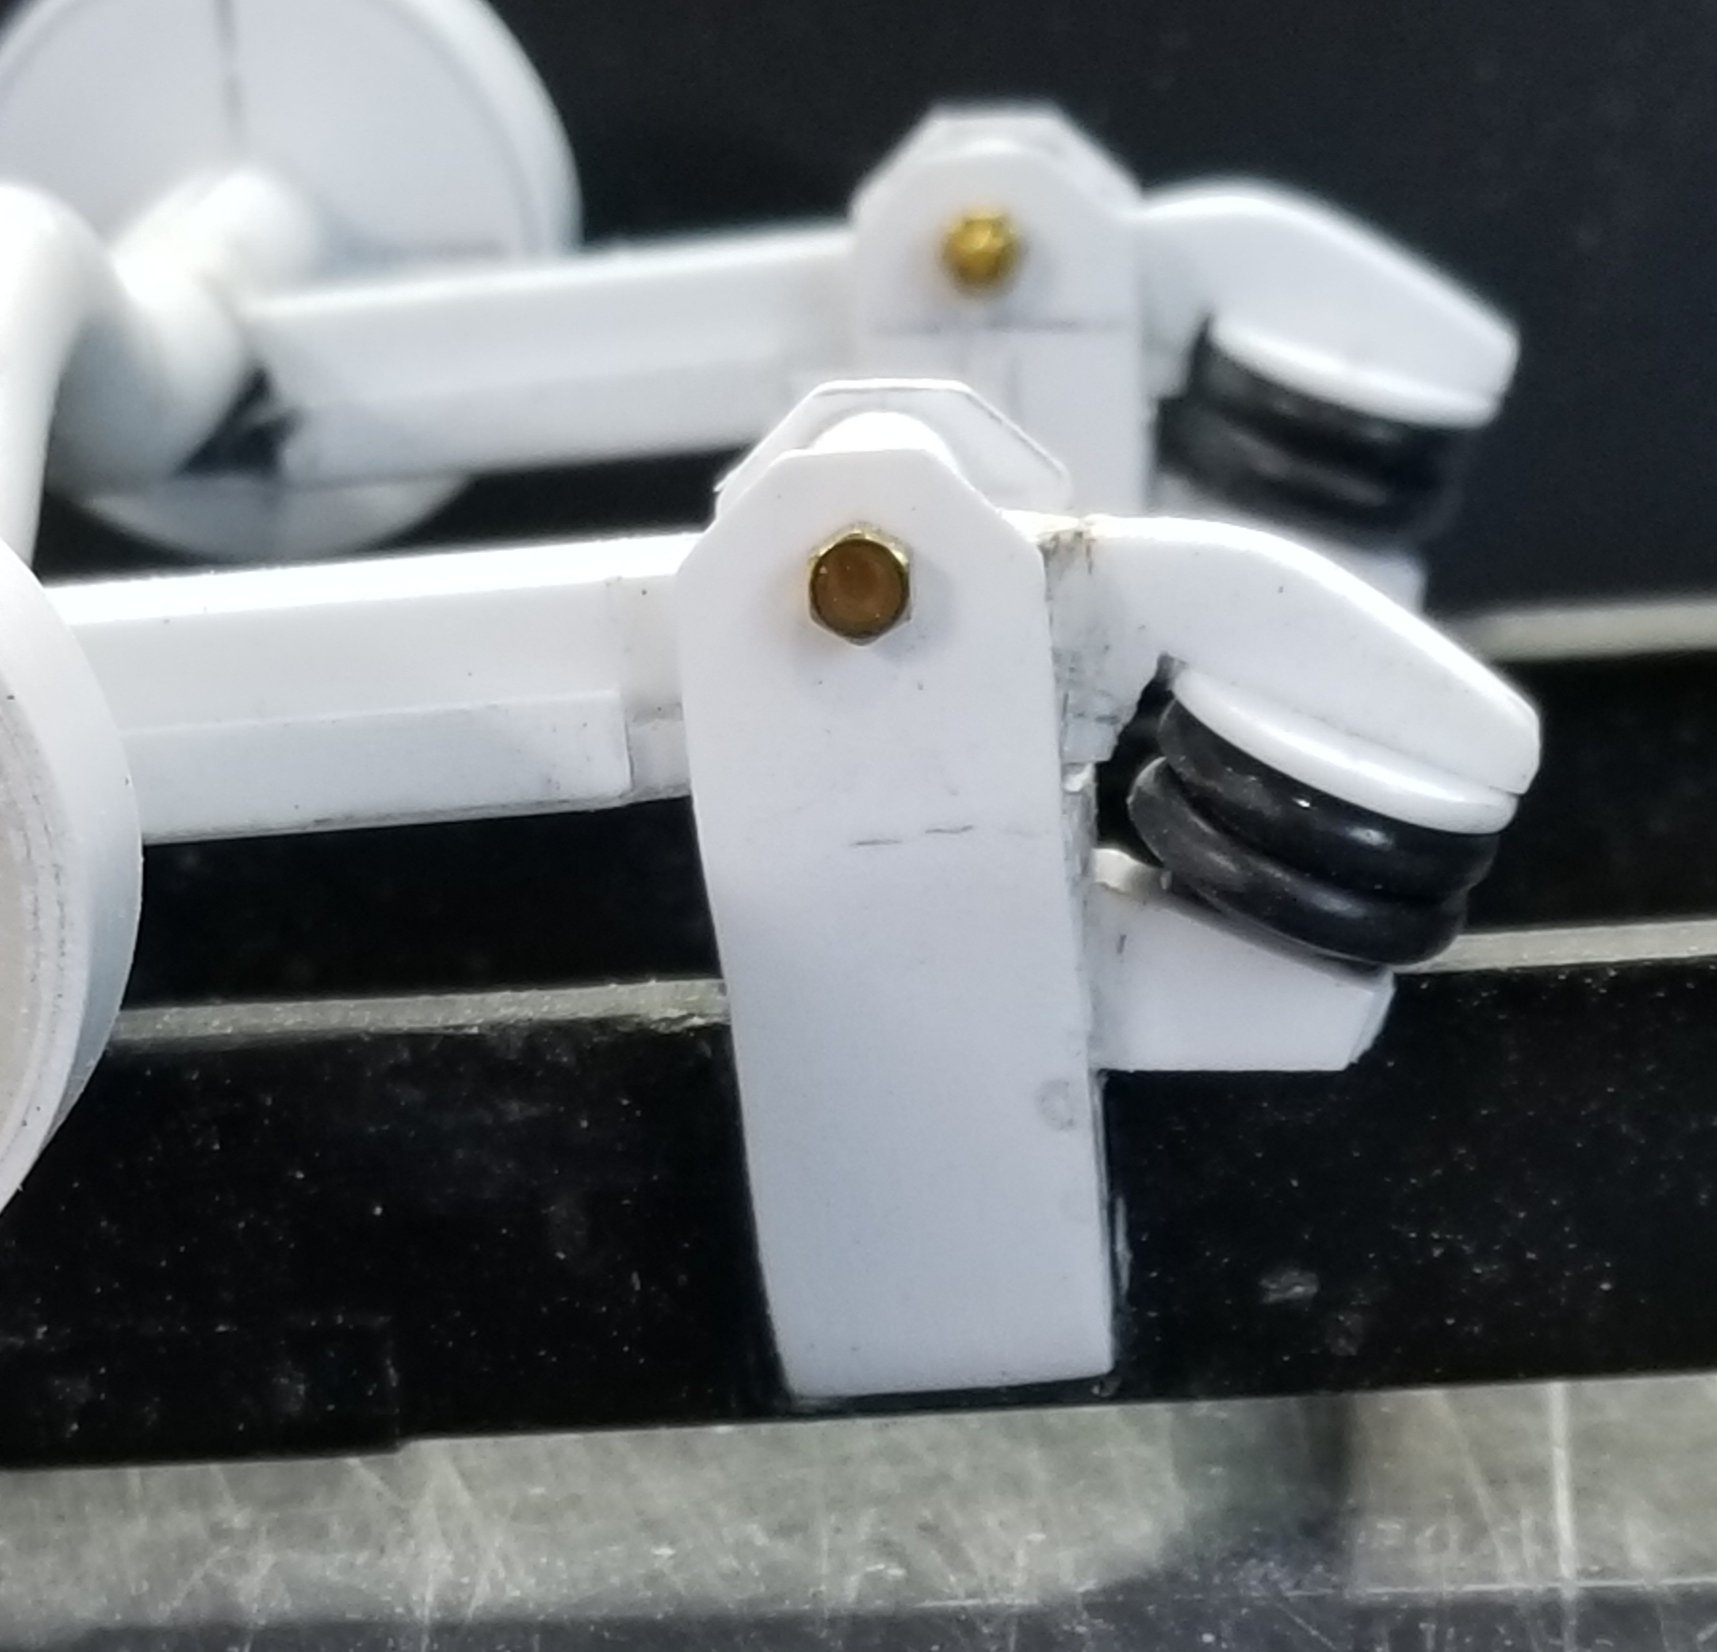
Hey guys Short update. this view shows the drivers side door mounted to the sleeper. this view shows the drivers side door opened. I still have to do the other side and add the trim lips, like the ones I did on the cab. Ron G