CrankyCrafstman
-
Posts
1,350 -
Joined
-
Last visited
Content Type
Profiles
Forums
Events
Gallery
Everything posted by CrankyCrafstman
-
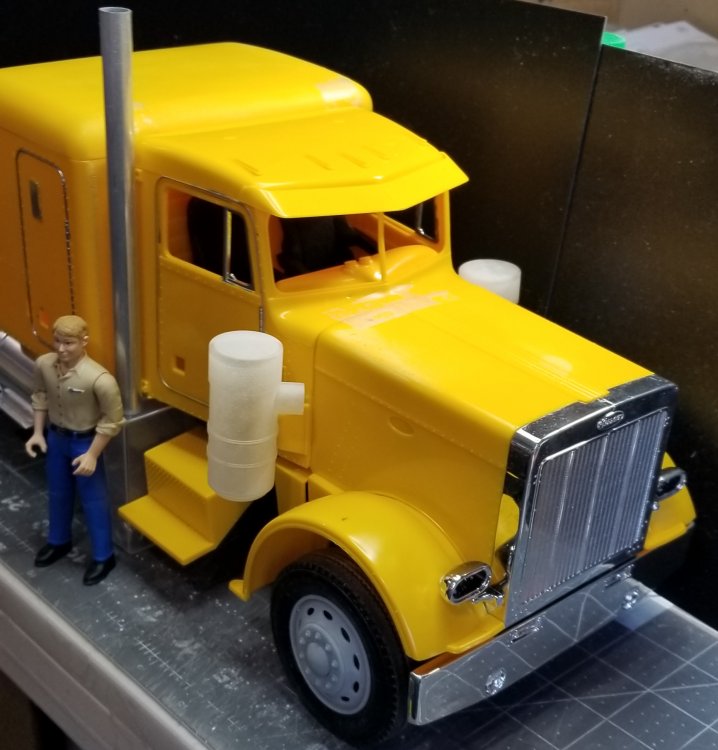
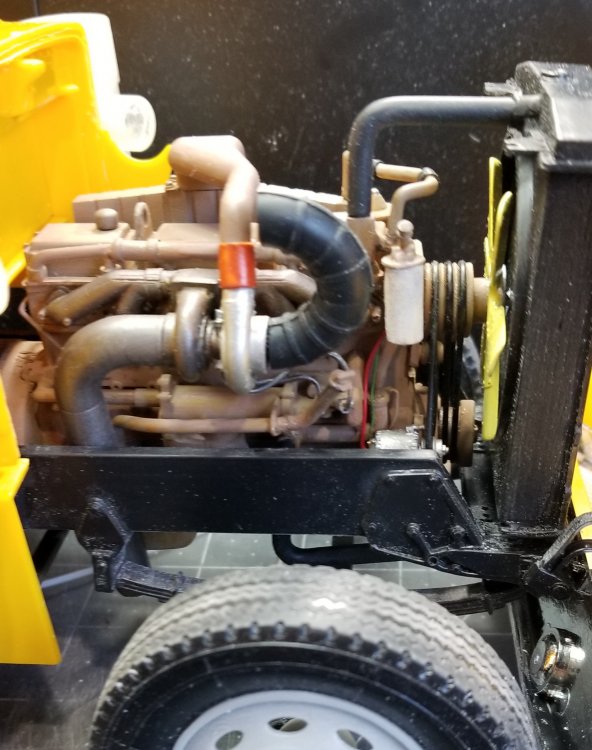
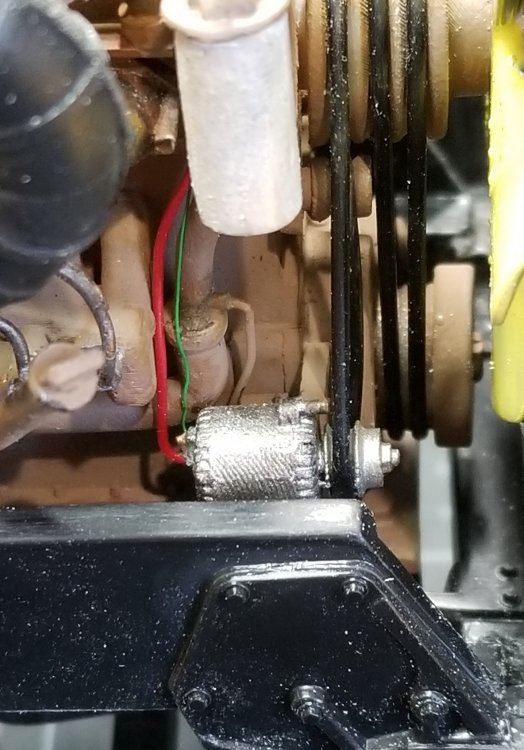
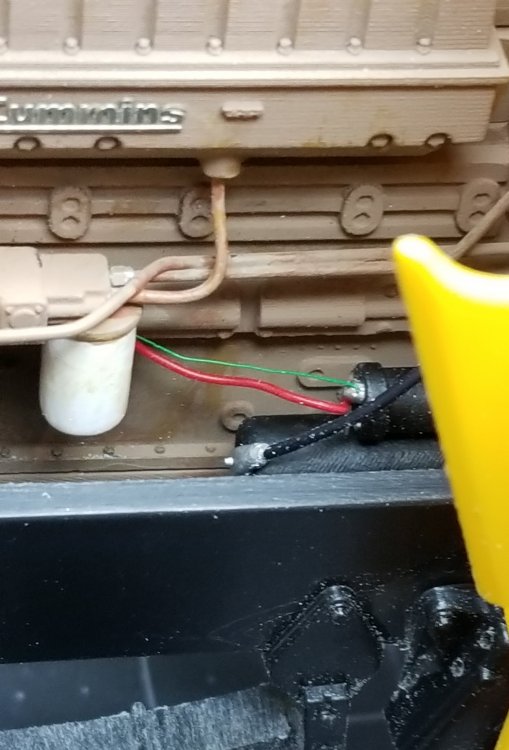
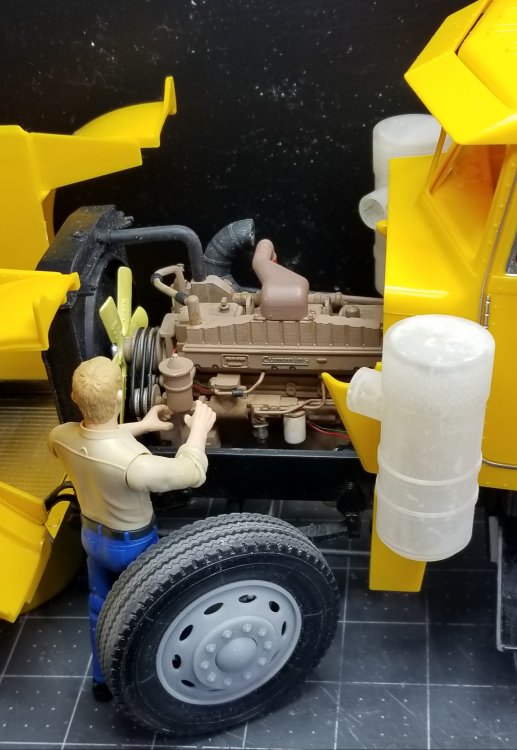
 Hey guys Here are some more pictures for yous to look at. this view shows the 3D printed air cleaners. another view of the air cleaners. this view shows the engine, I modified the turbo intake and exhaust manifold and custom made air intake rubber elbows to look more like a big cam set up. this view shows the fan belts that I made from 1.5mm diameter rubber tubing. this view shows the wires from the starter to the alternator l. this view shows the wires from the alternator to the starter. this view shows Mr. Bruder working on the engine...lol. well that's it for now be back soon with more. Ron G
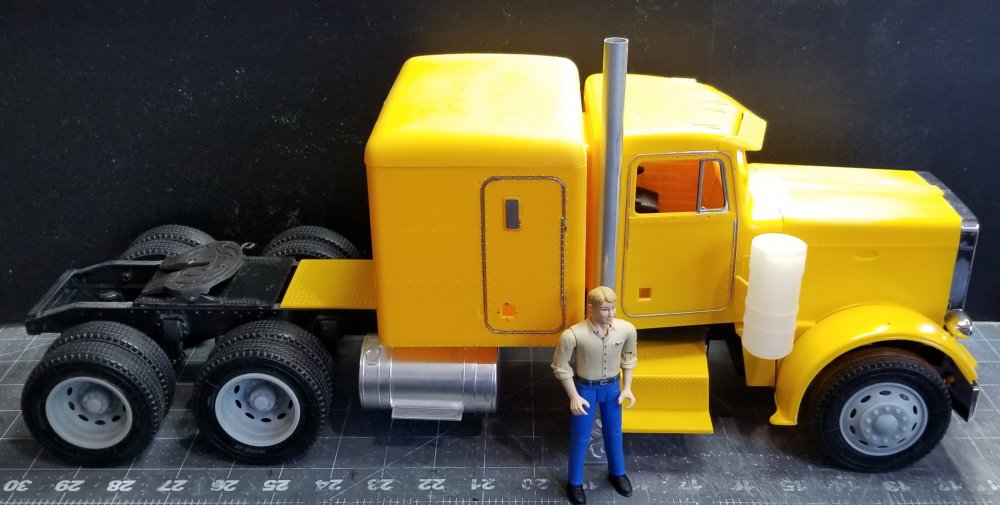

-
Thanks Jeff
-
Small update. Found some decals to make truck look better, what do you think? I also got some scrole work decals in gold to match the outline strips. Now, I have some scratch building to do so I'm going down to the work bench, see you later Ron G

-
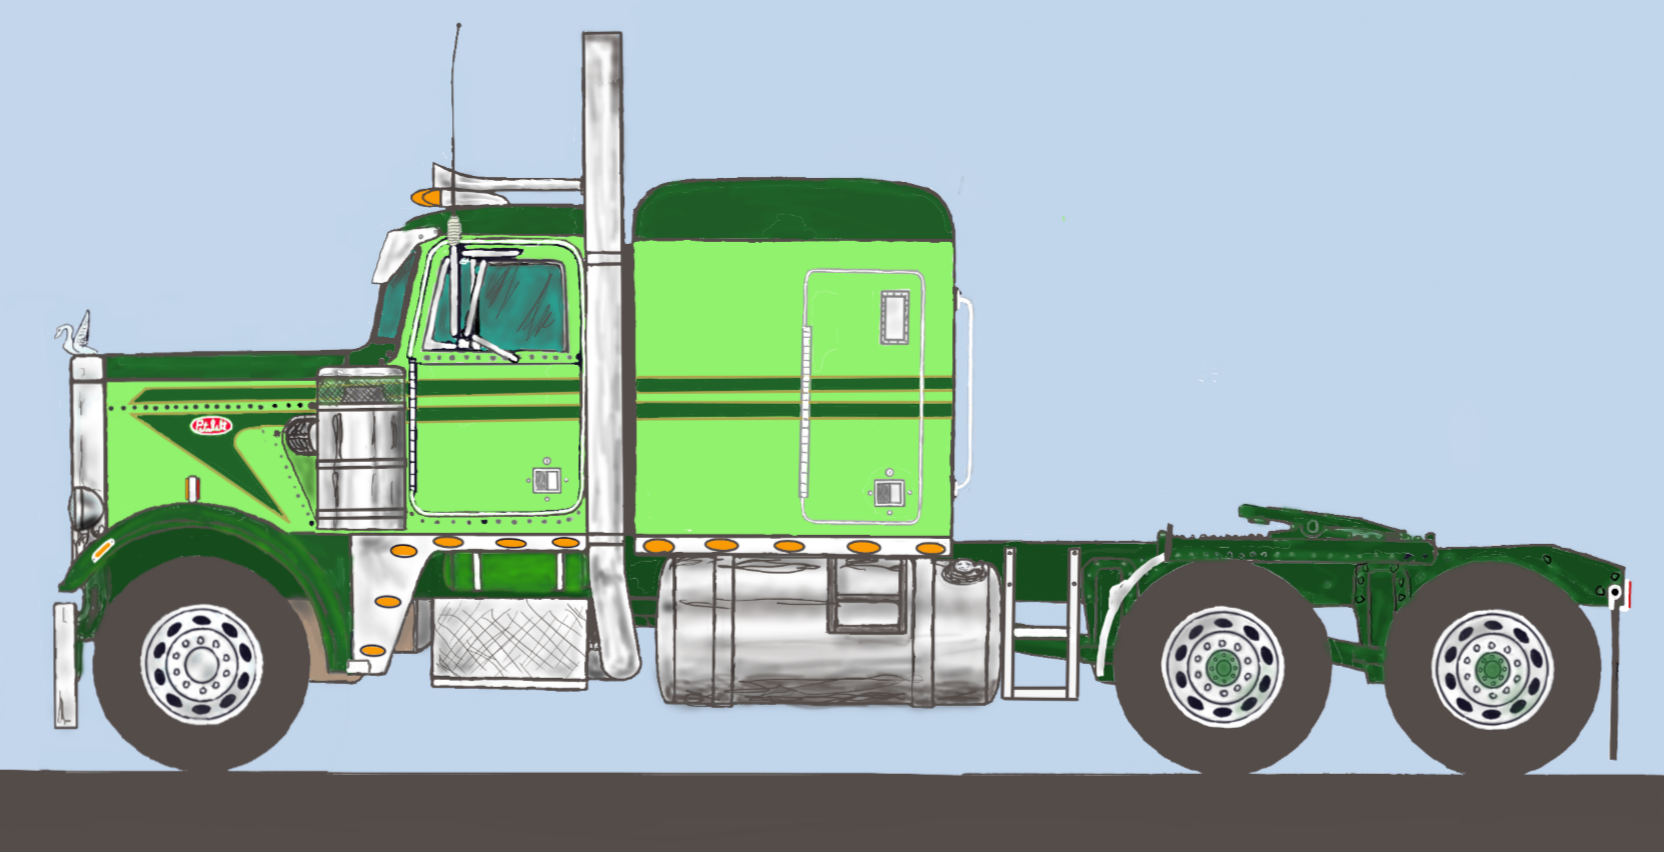
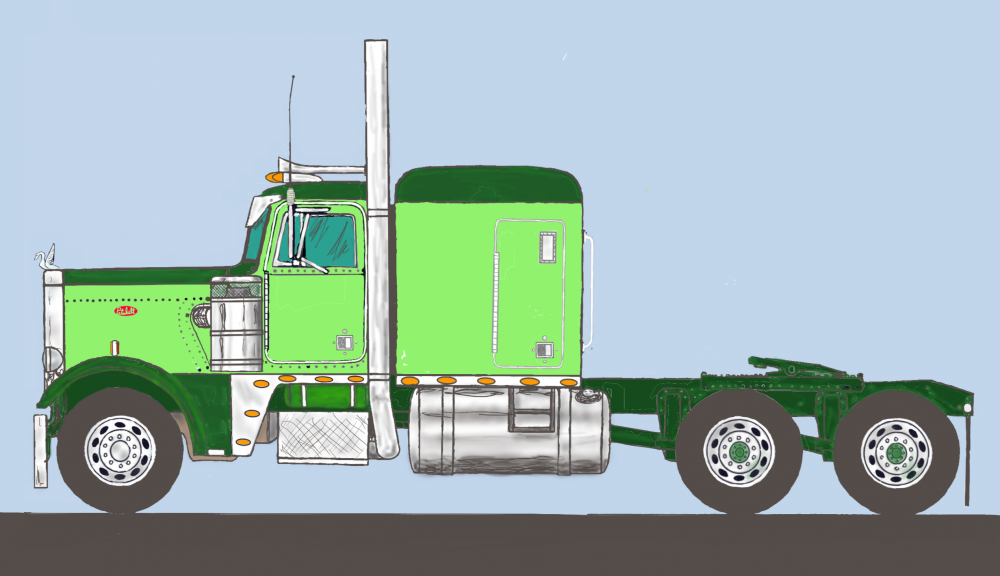
Here is a picture of the paint scheme. It will be Tamiya x-5 D. Green for the frame, lower areas and roofs, and Tamiya x-15 L. Green for the cab, hood and sleeper. There wont be much chrome, mostly polished or natural aluminum. I'm going to be weathering it, just enough to make it look real, it is after all a work truck. Ron G
-
Thanks guys
-
Hey guys No update, just some more pictures. Ron G

-
Got it, thanks Jeff
-
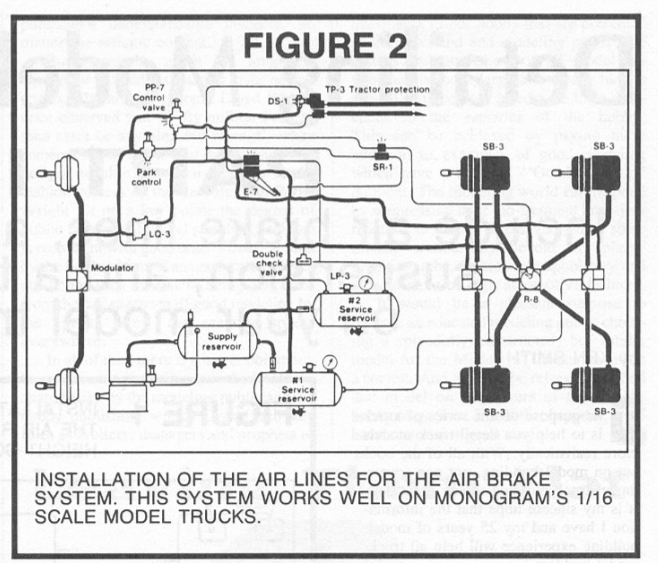
Thanks for the reply Jeff. So would there only be one inlet line and one outlet line on the first wet/supply tank? And would the outlet line go to the second wet/supply tank? And would the two reservoir tanks be fed from this second tank? I hate to be a pest about this, but I want this build to be as accurate as possible. Thanks Ron G
-
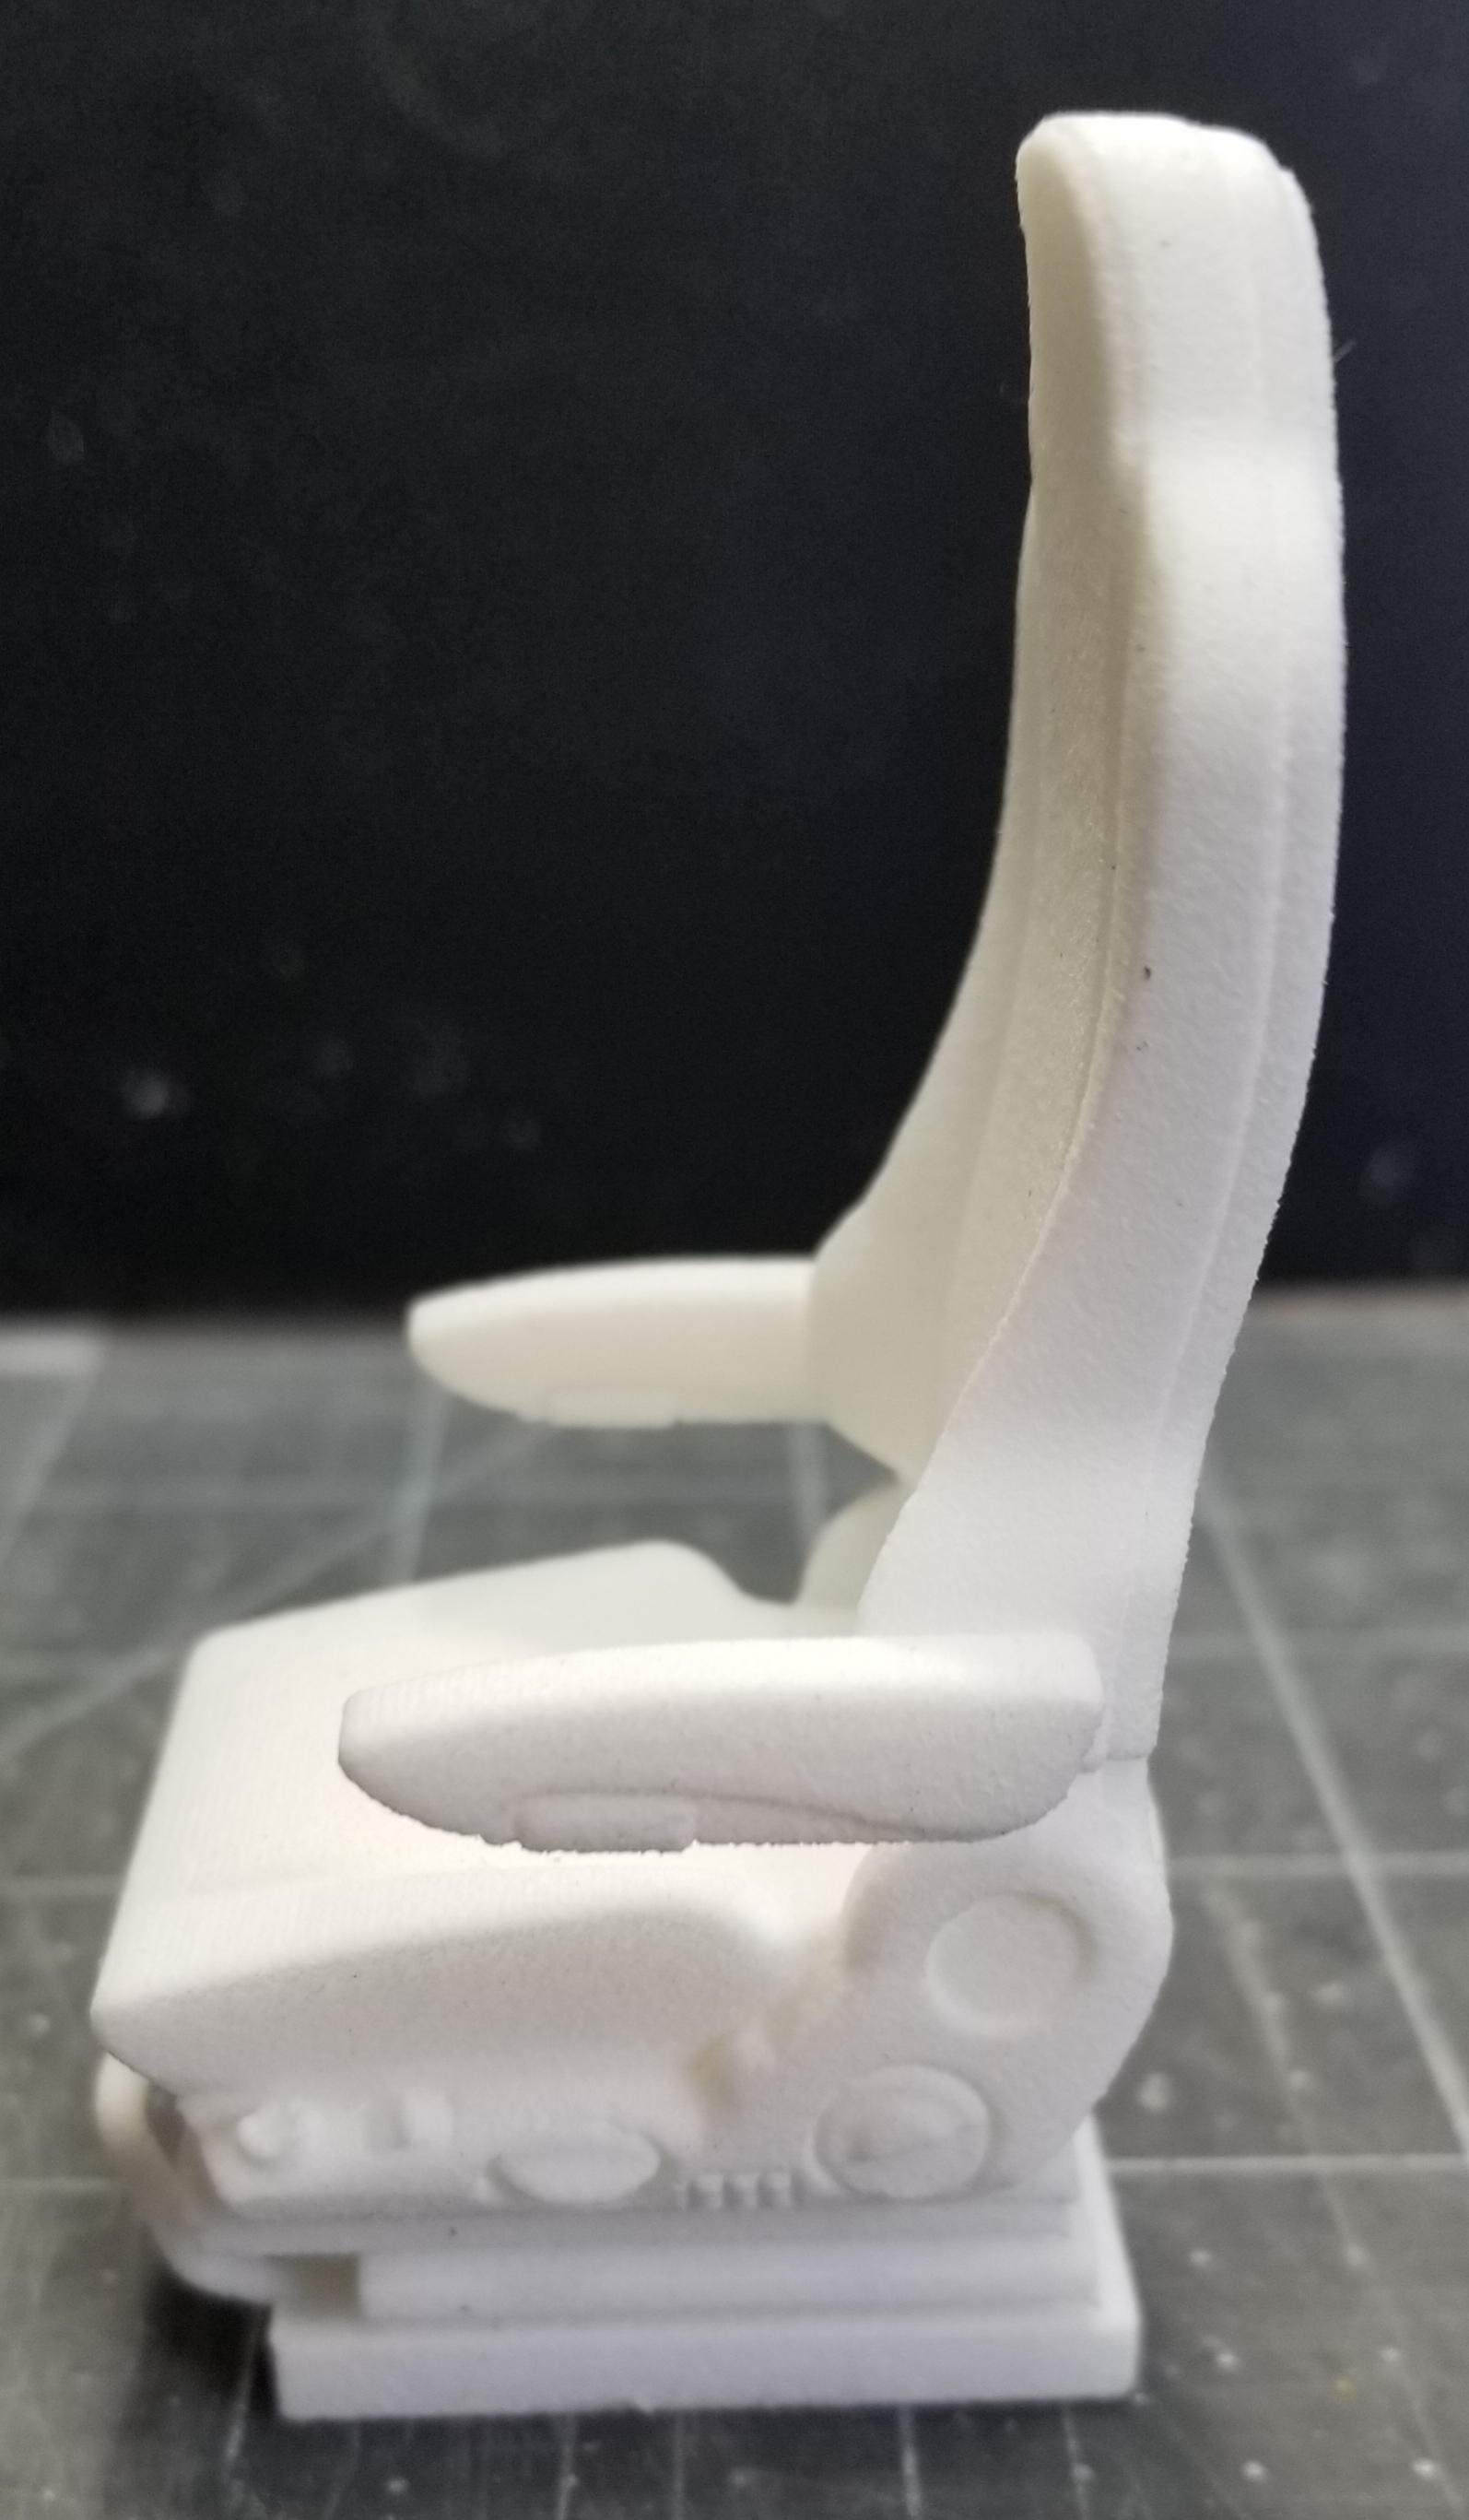
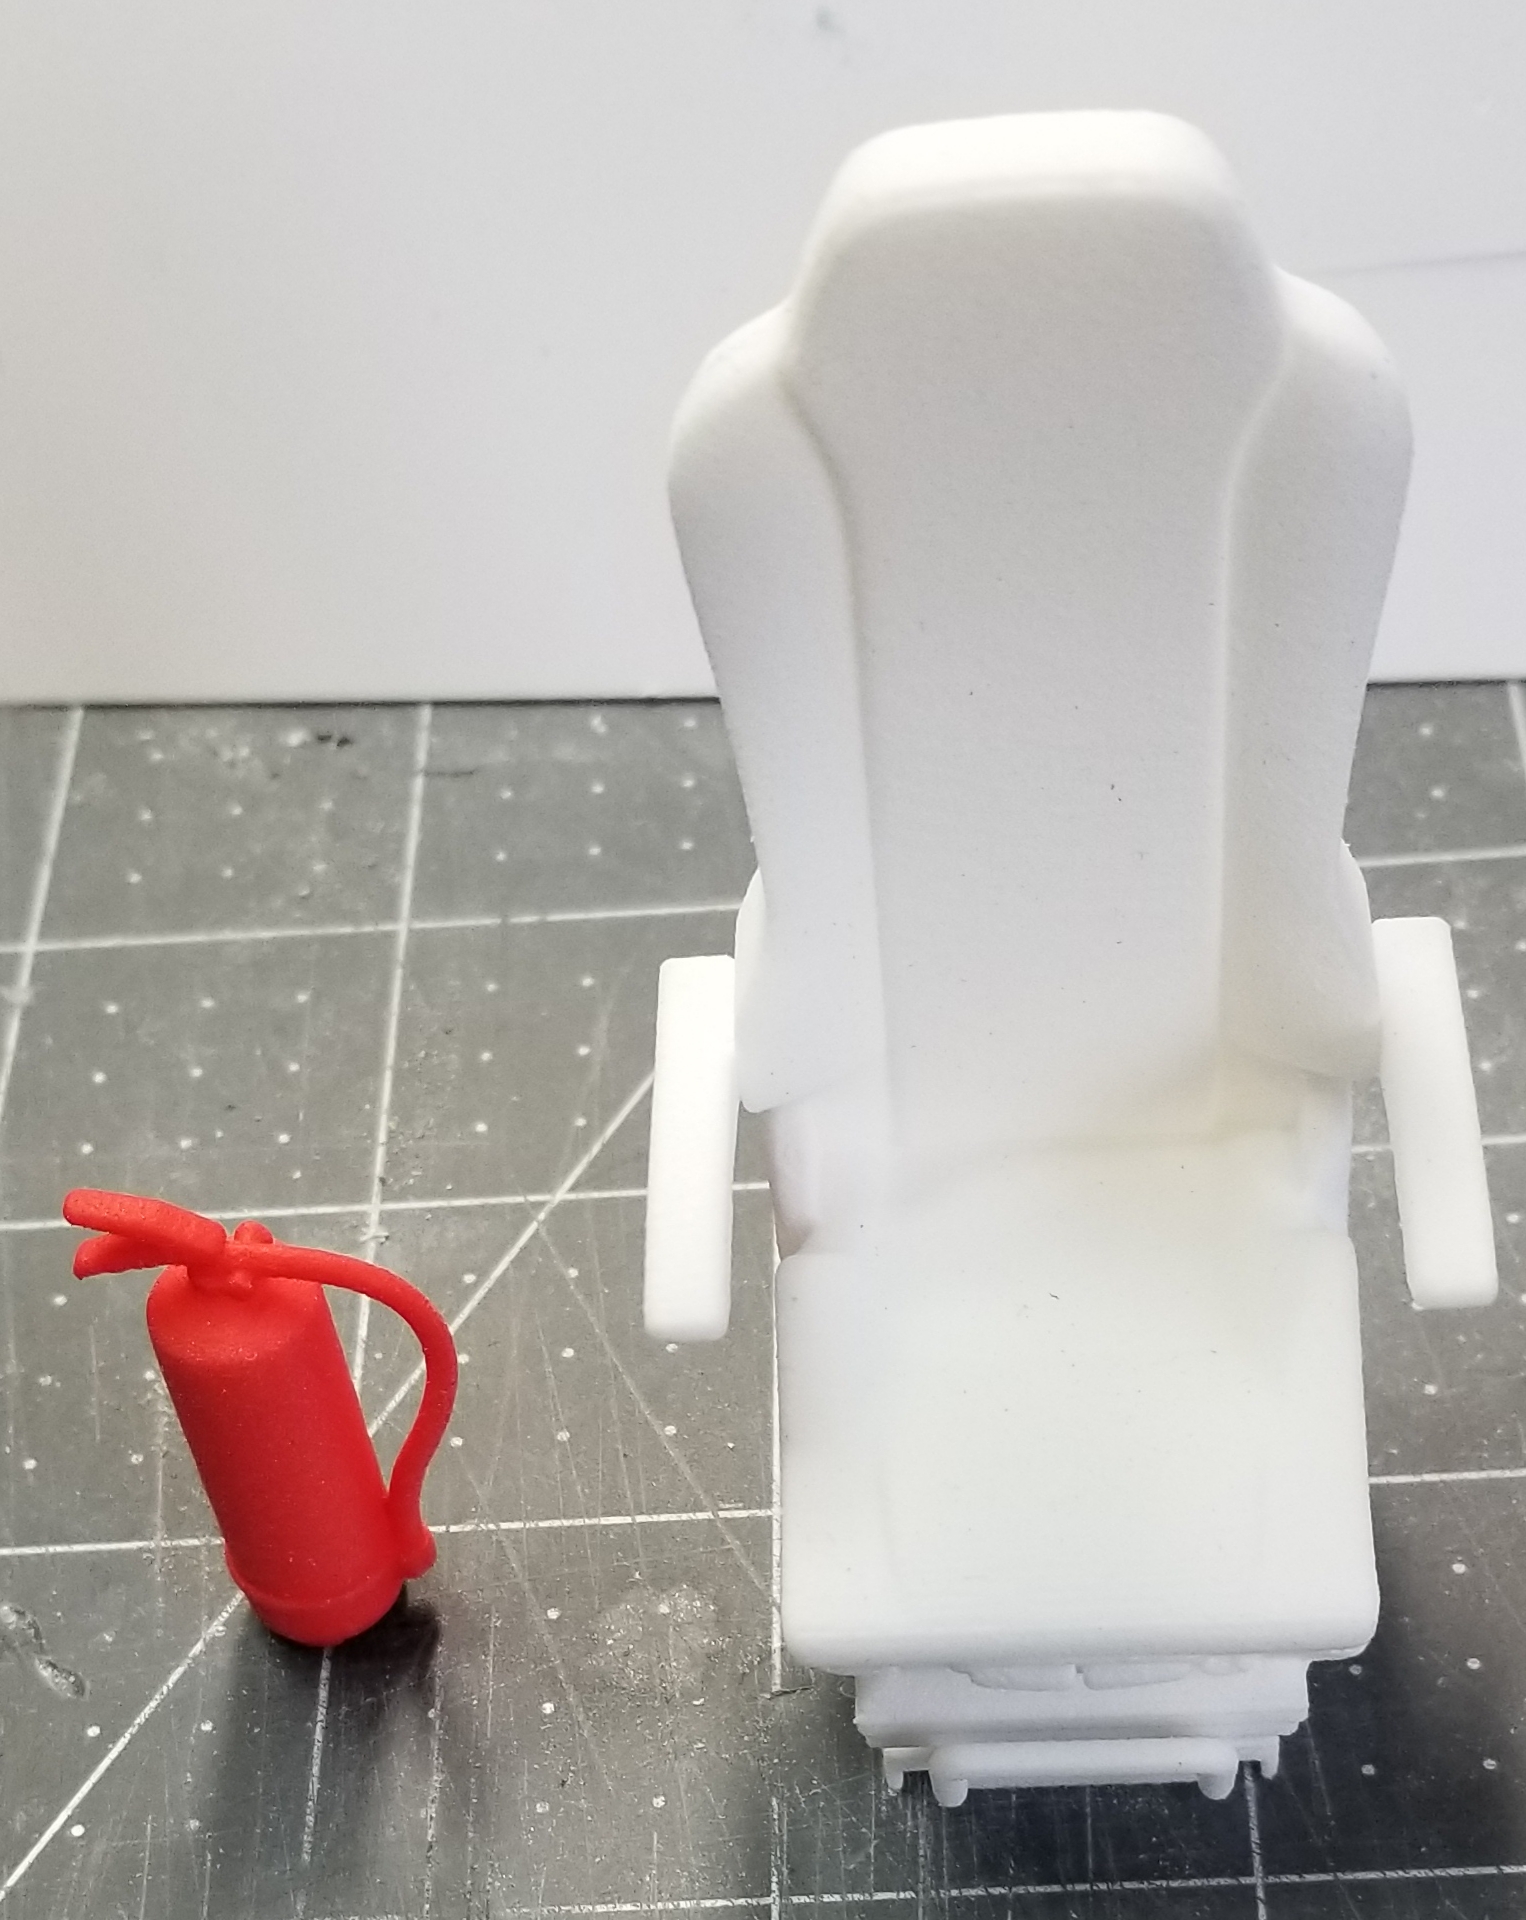
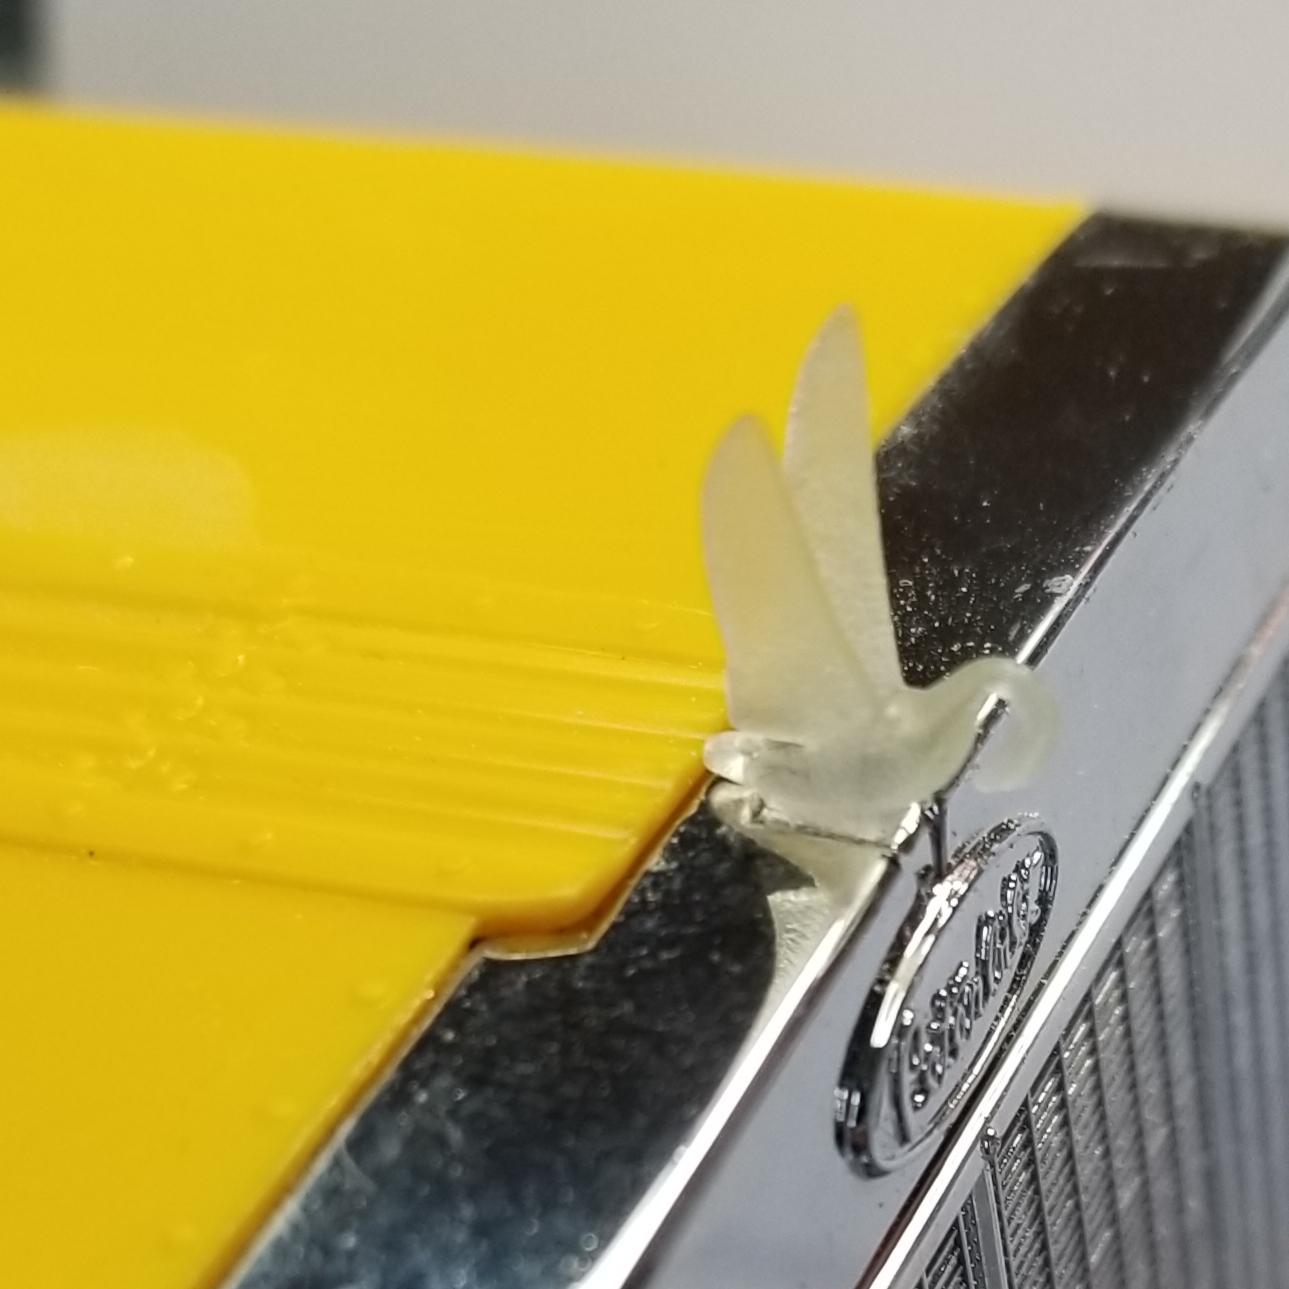
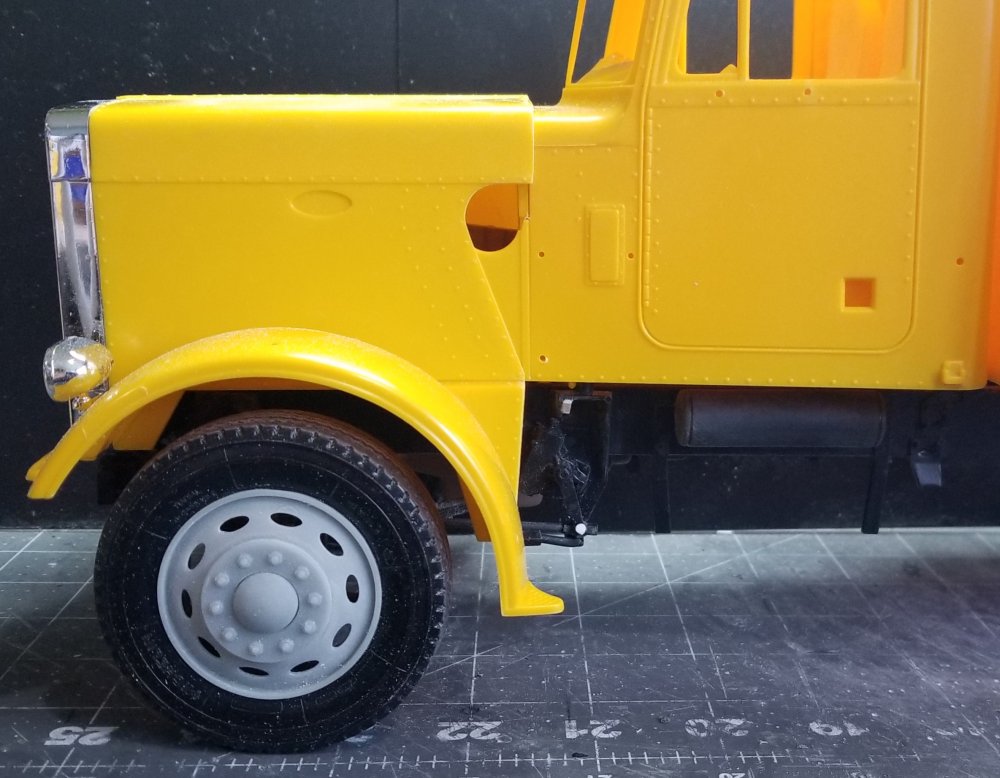
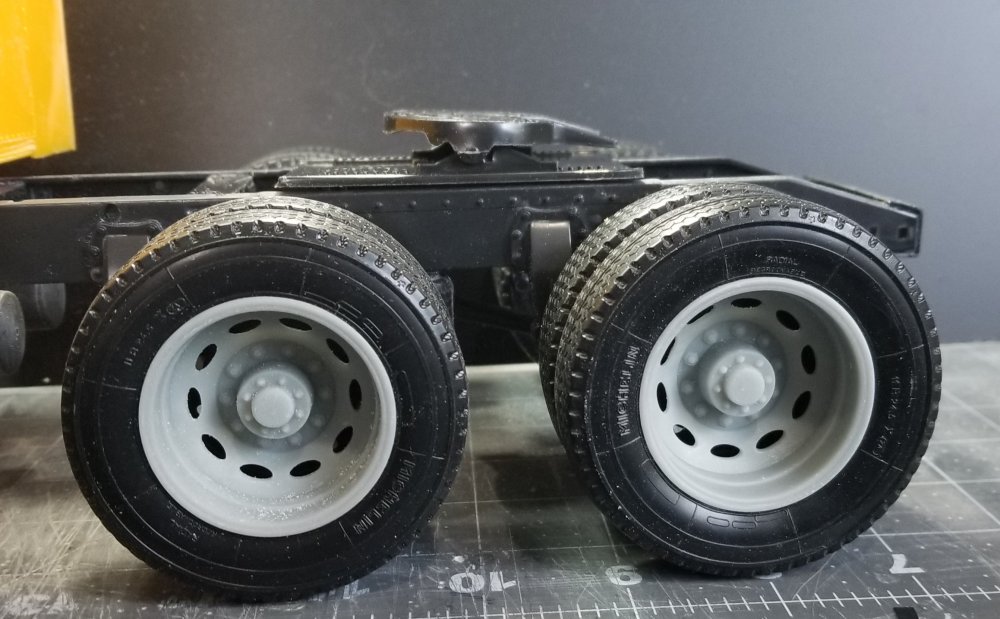
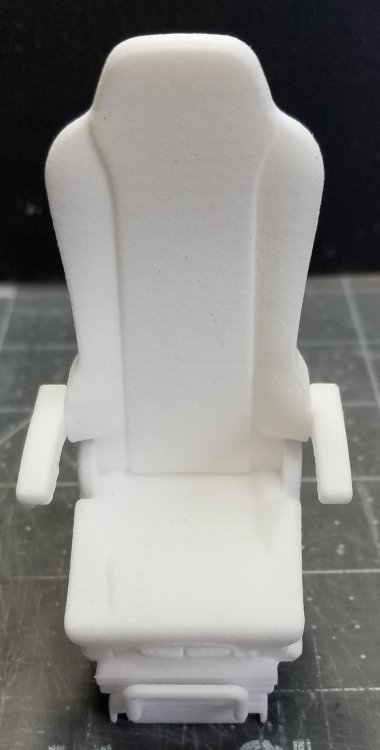
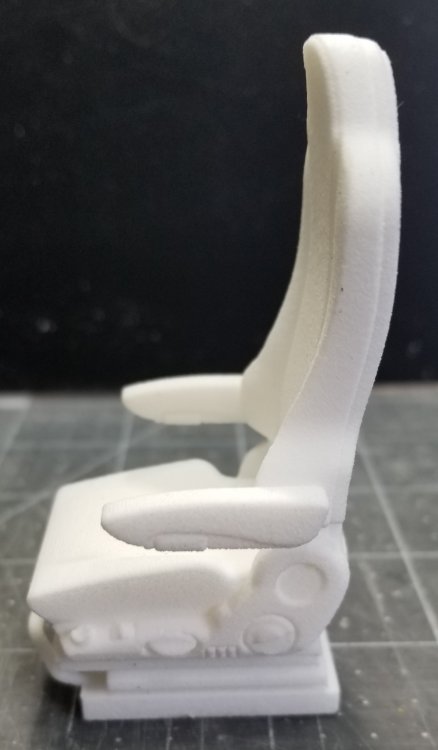
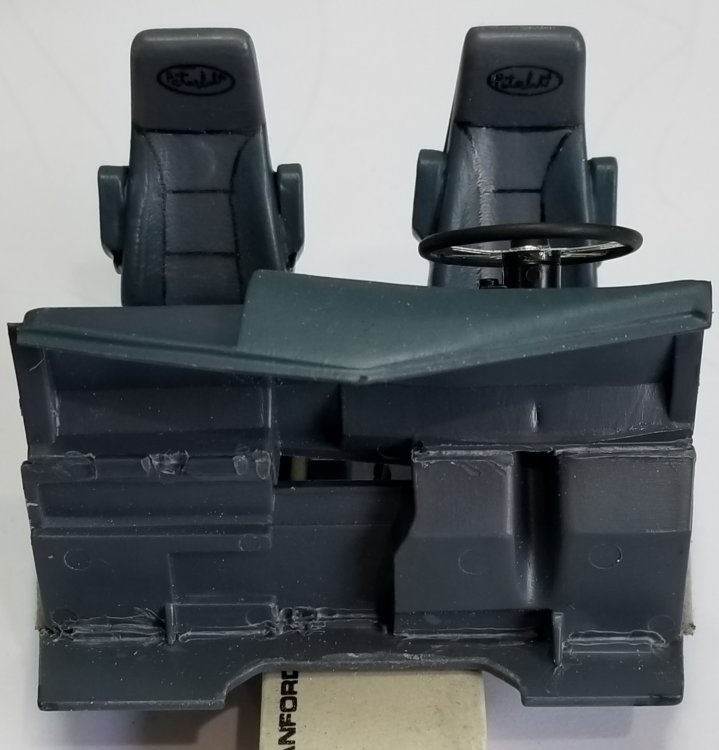
Thanks guys Small update, got some parts for the big Pete from Ebay and Shapeways. 3D printed swan hood ornament. This was described as being 1/24 scale, but it sure looks right for 1/16th. 3D printed fire extinguisher for cab. 3D printed Grammer air ride seats. side view of the seat. 3D printed oval slot Peterbilt rear rims. front 3D printed Peterbilt rims with moon caps. Ron G


-
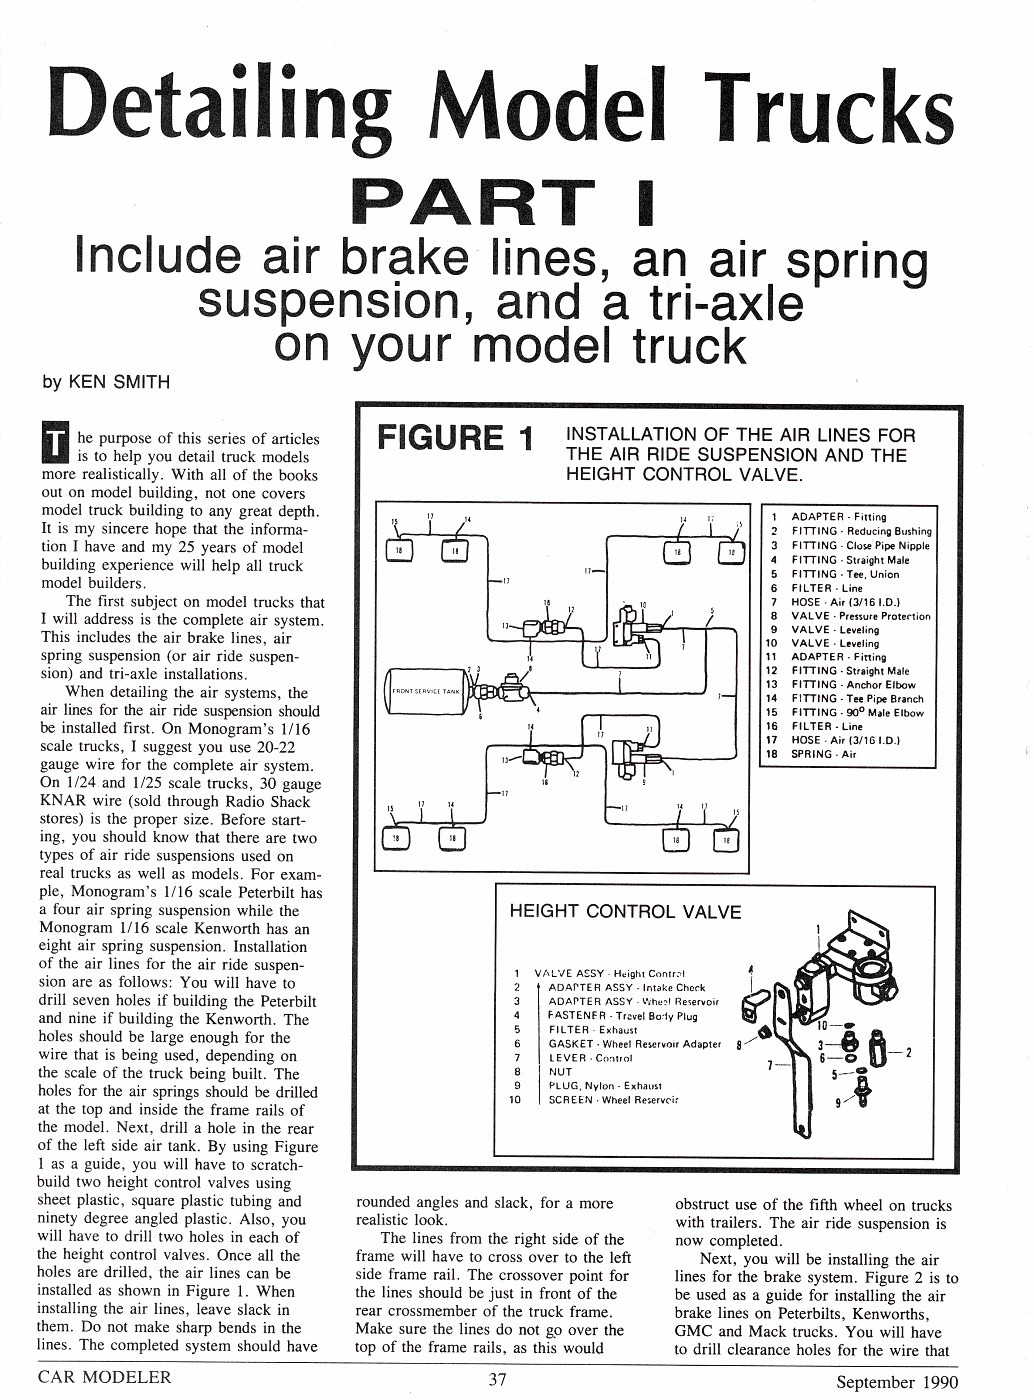
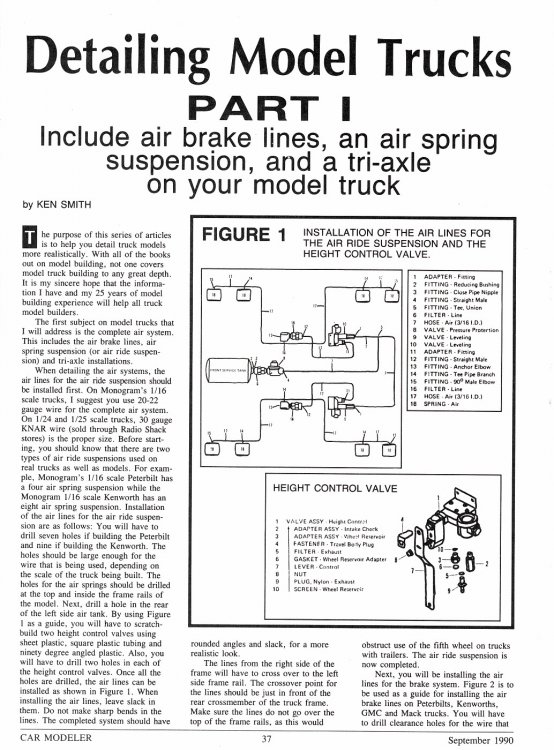
Hey Jeff This is the plumbing diagram I'm using. (blown up view of lower picture) Is the supply reservoir what you call the wet tank? And if so what I'm guessing is the two front tanks are the wet tank/tanks that feed the #1 & #2 service tanks? Correct? as I said before any help would be greatly appreciated. And good luck on trying to fit in smaller home, I know it ain't easy...lol Ron G

-
Thanks guys
-
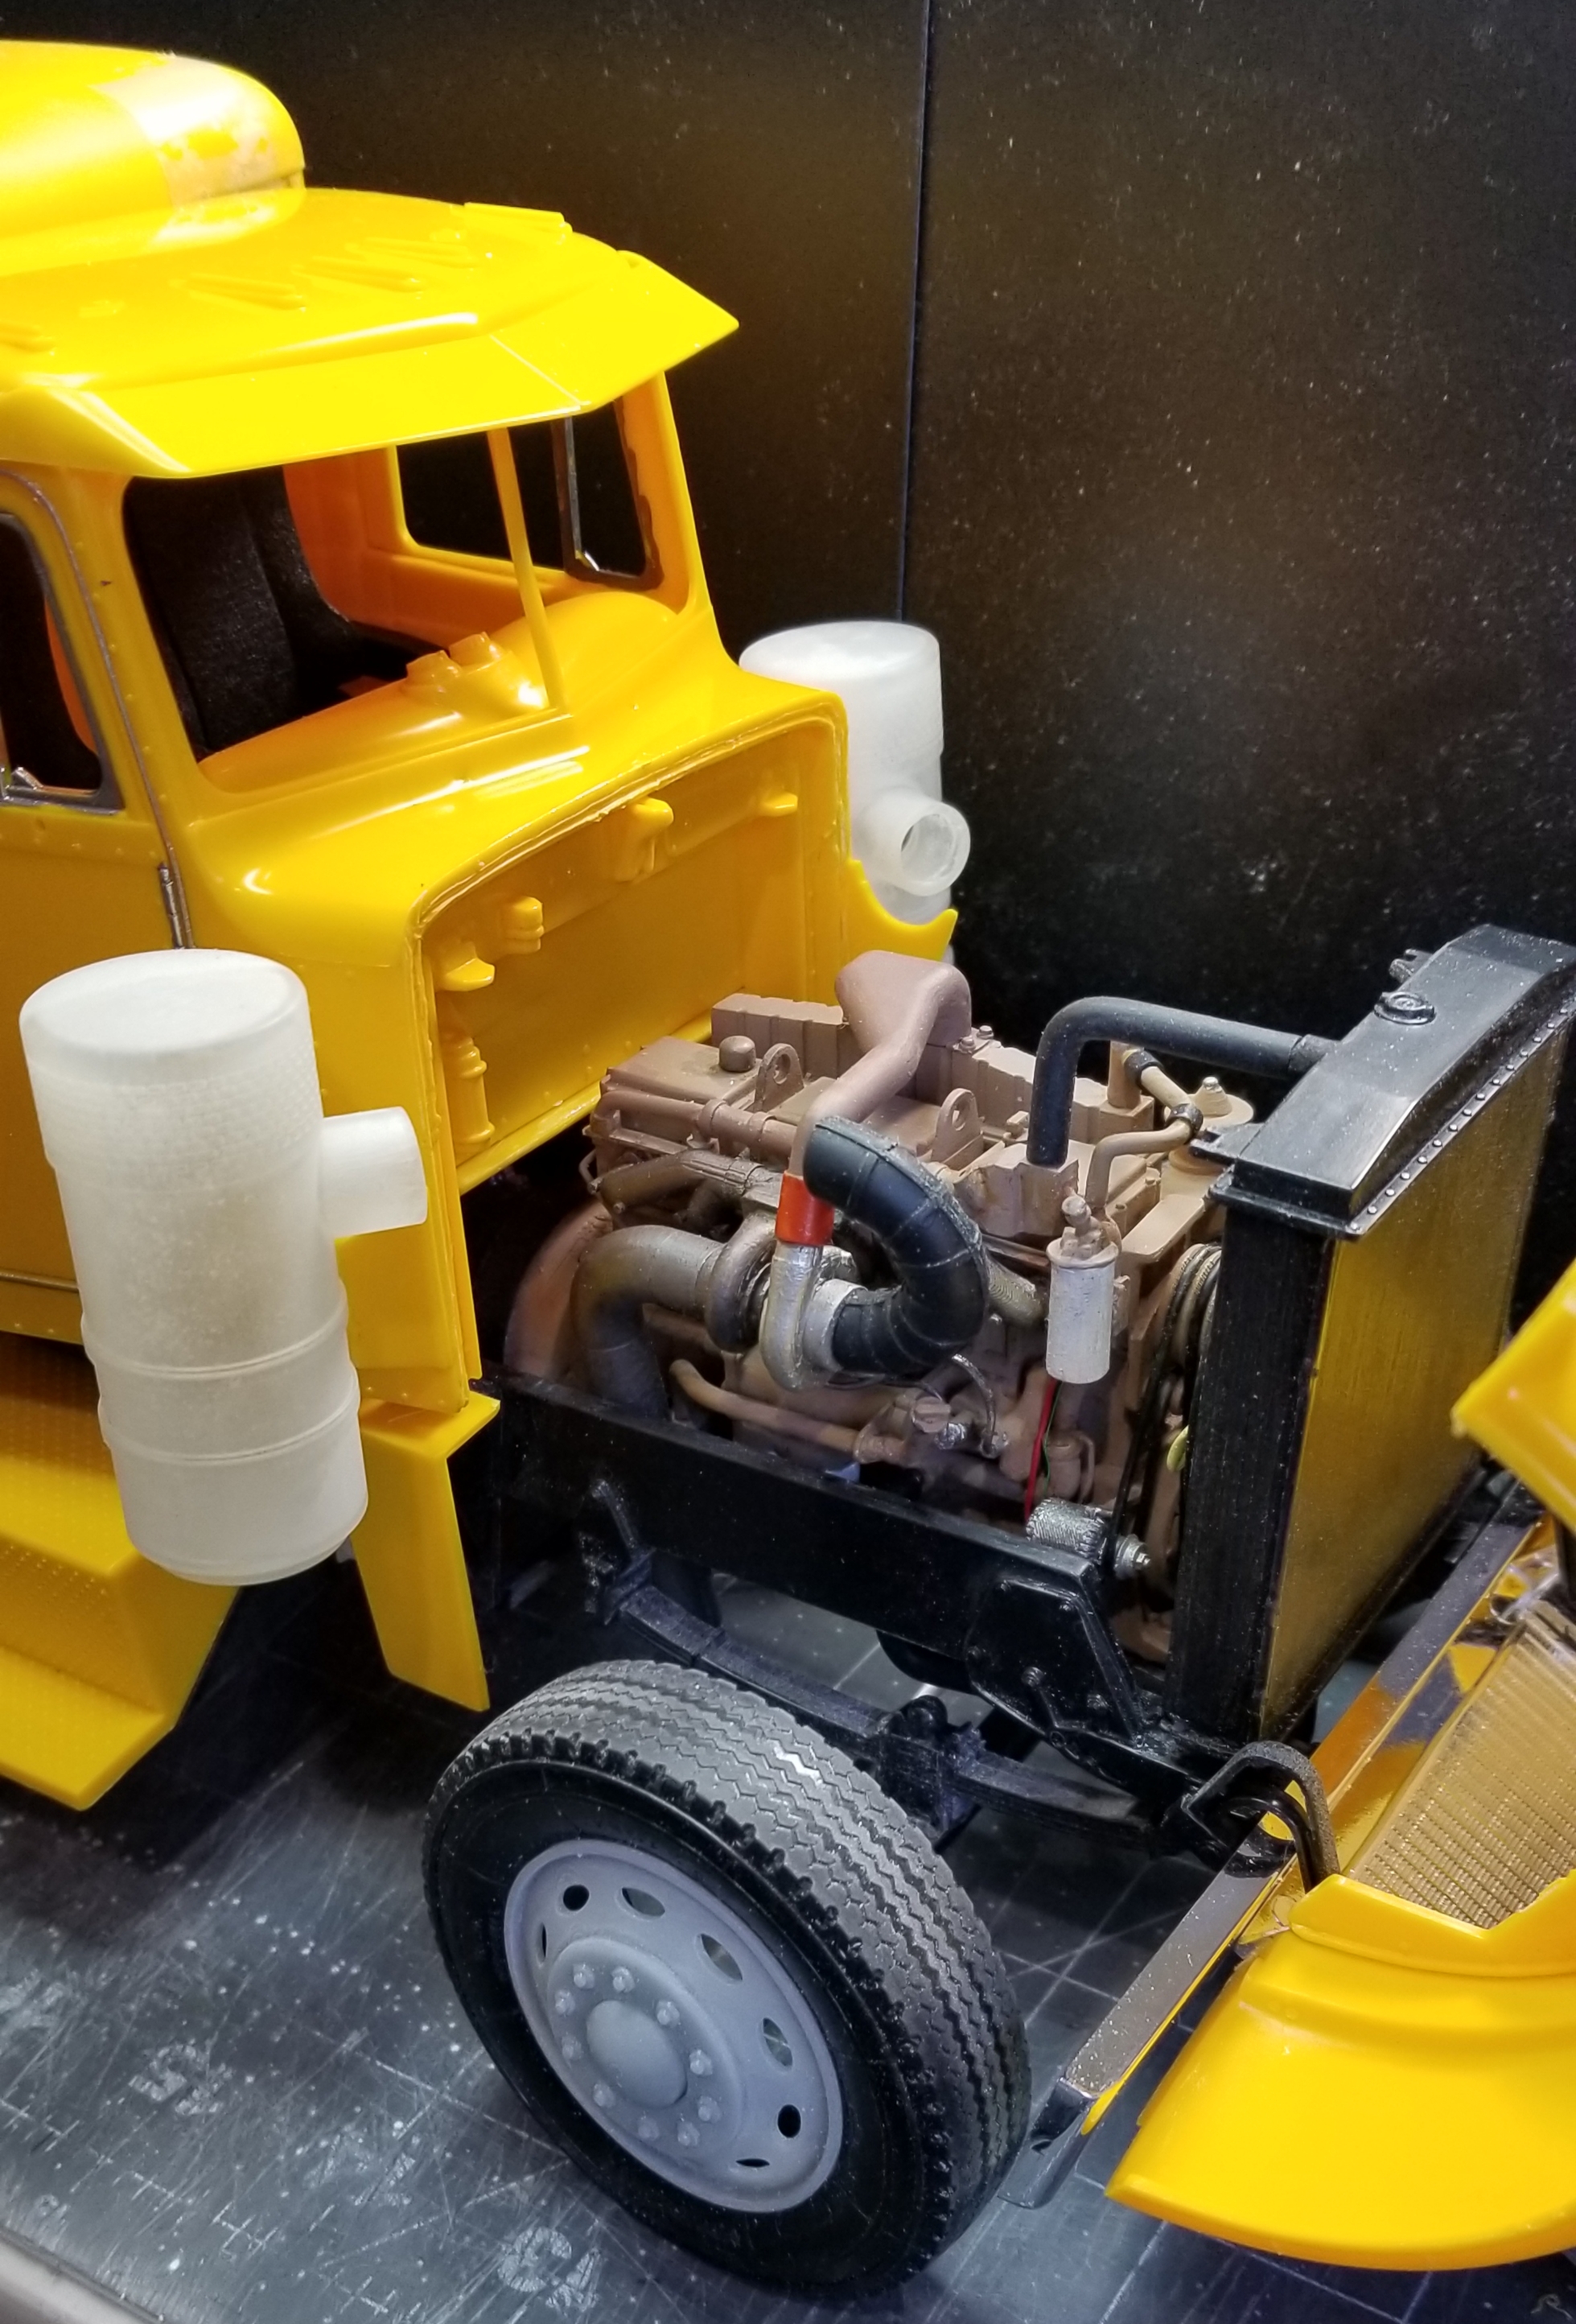
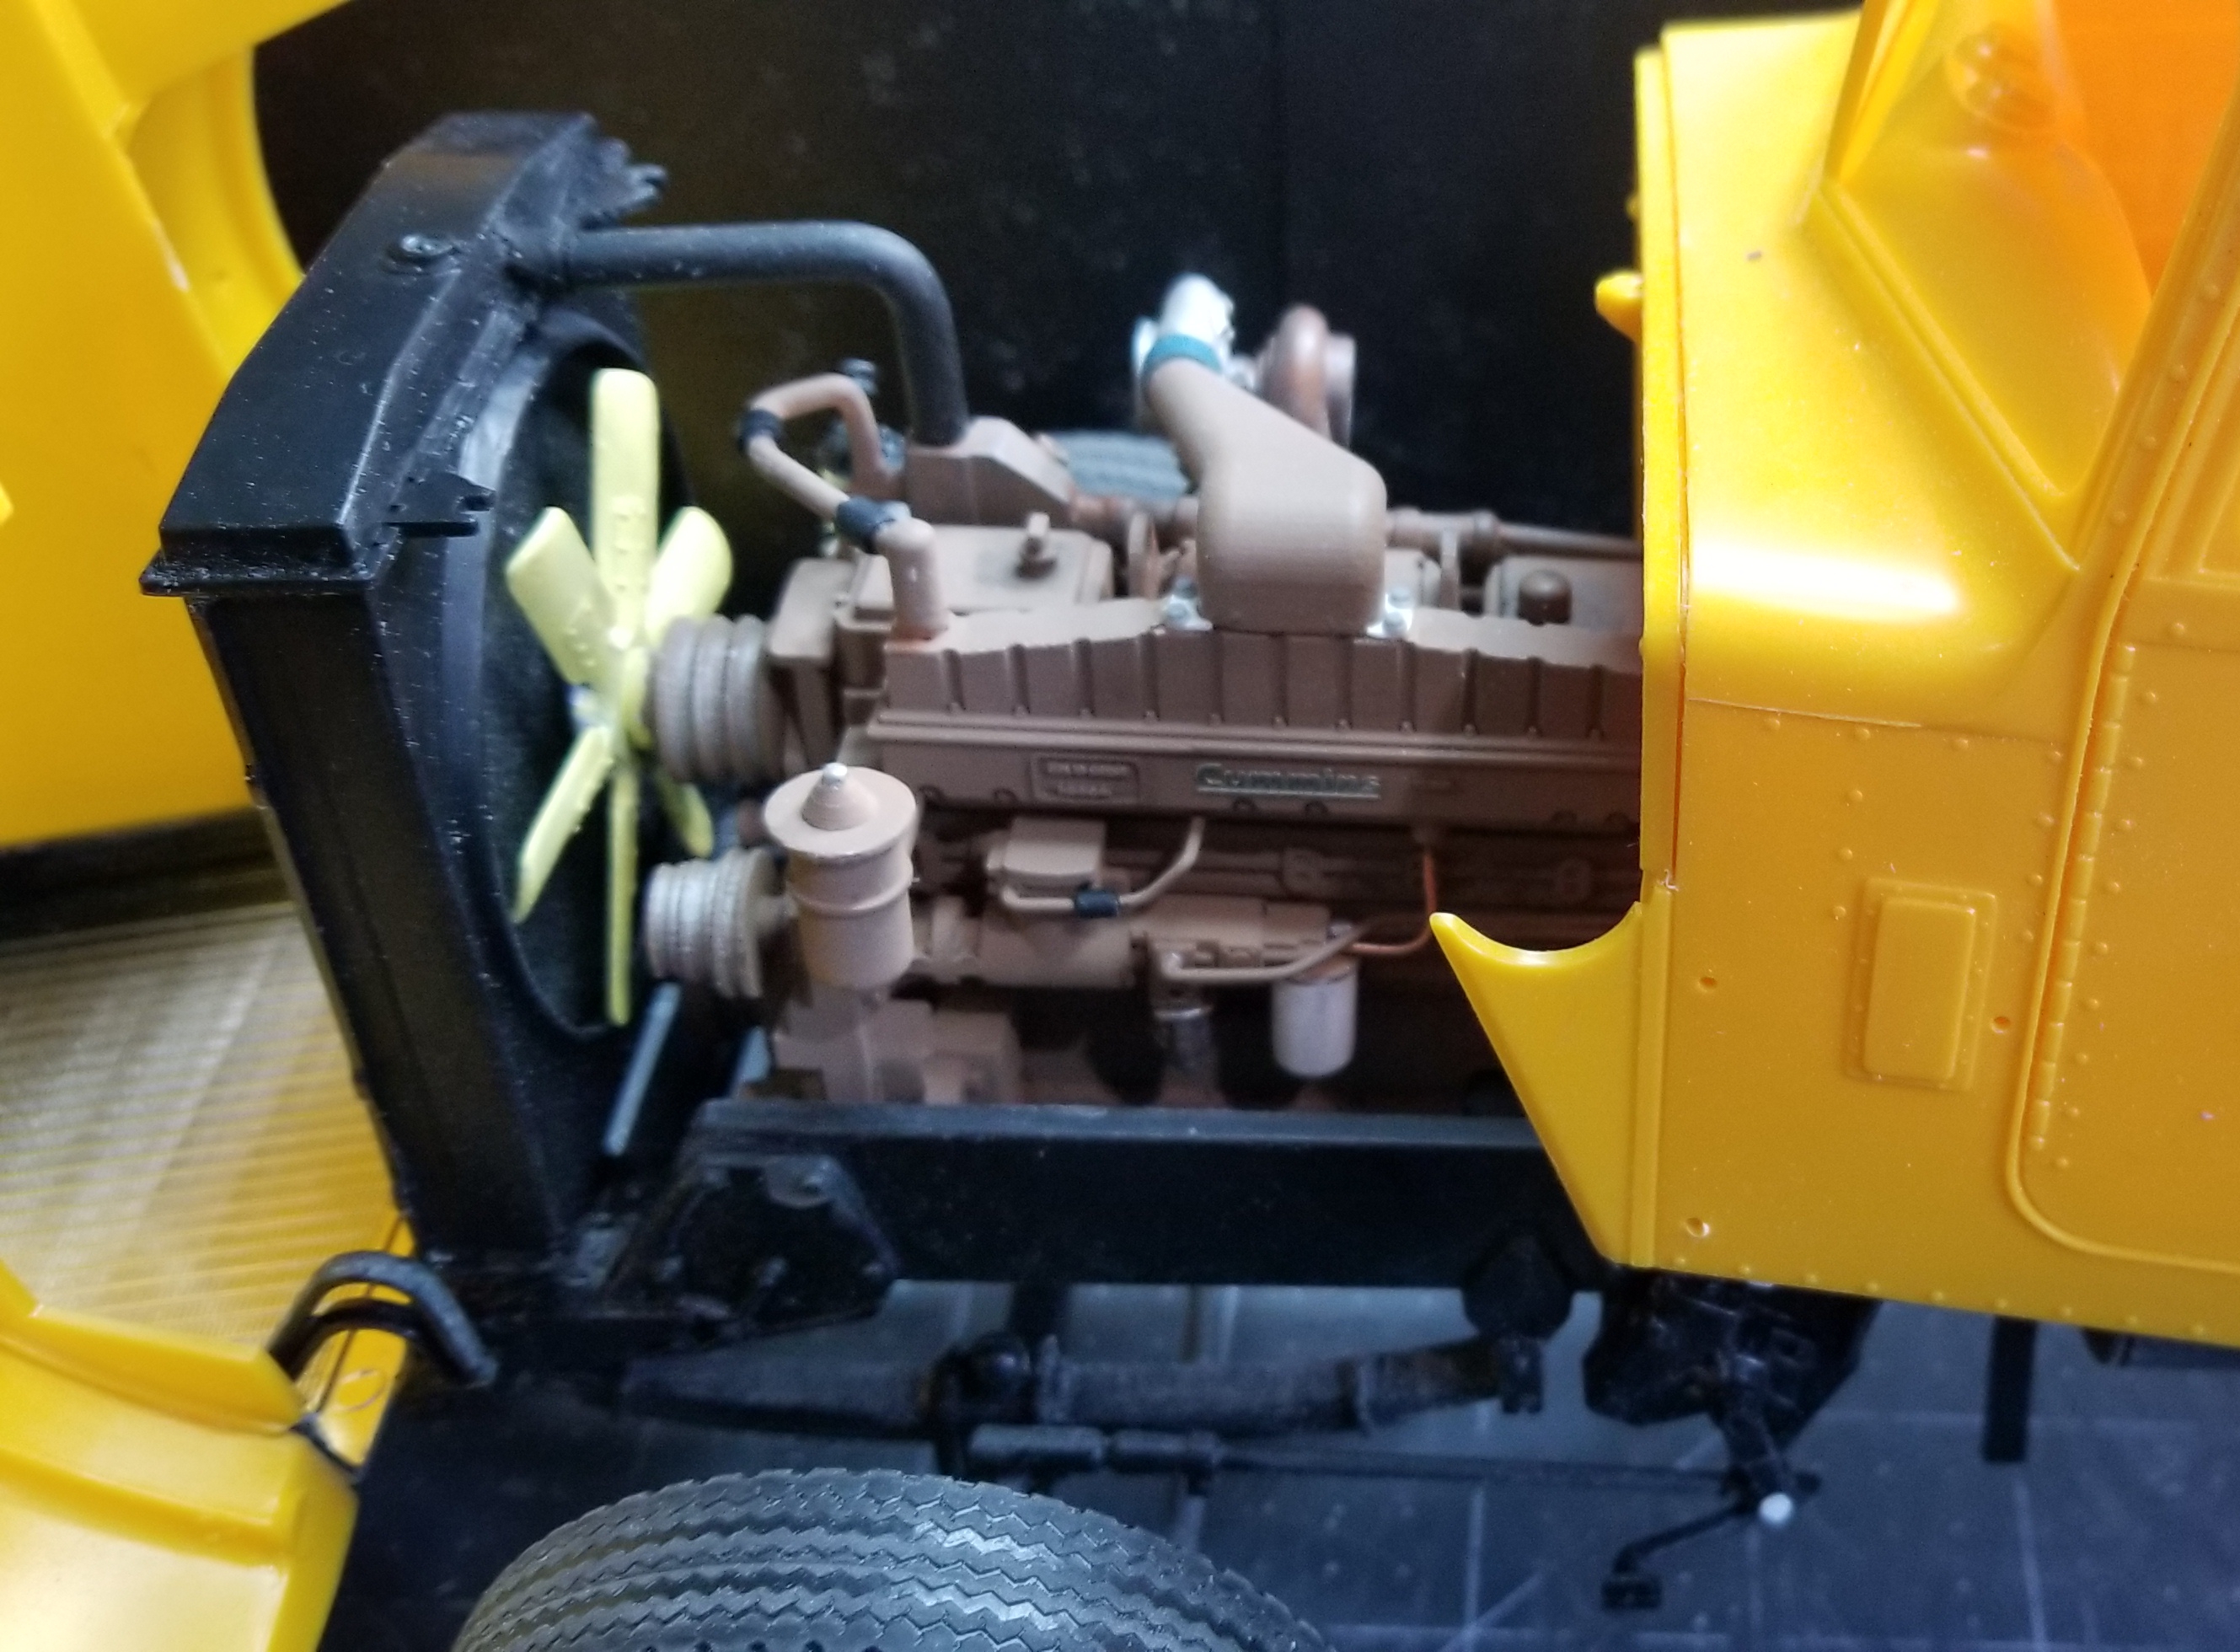
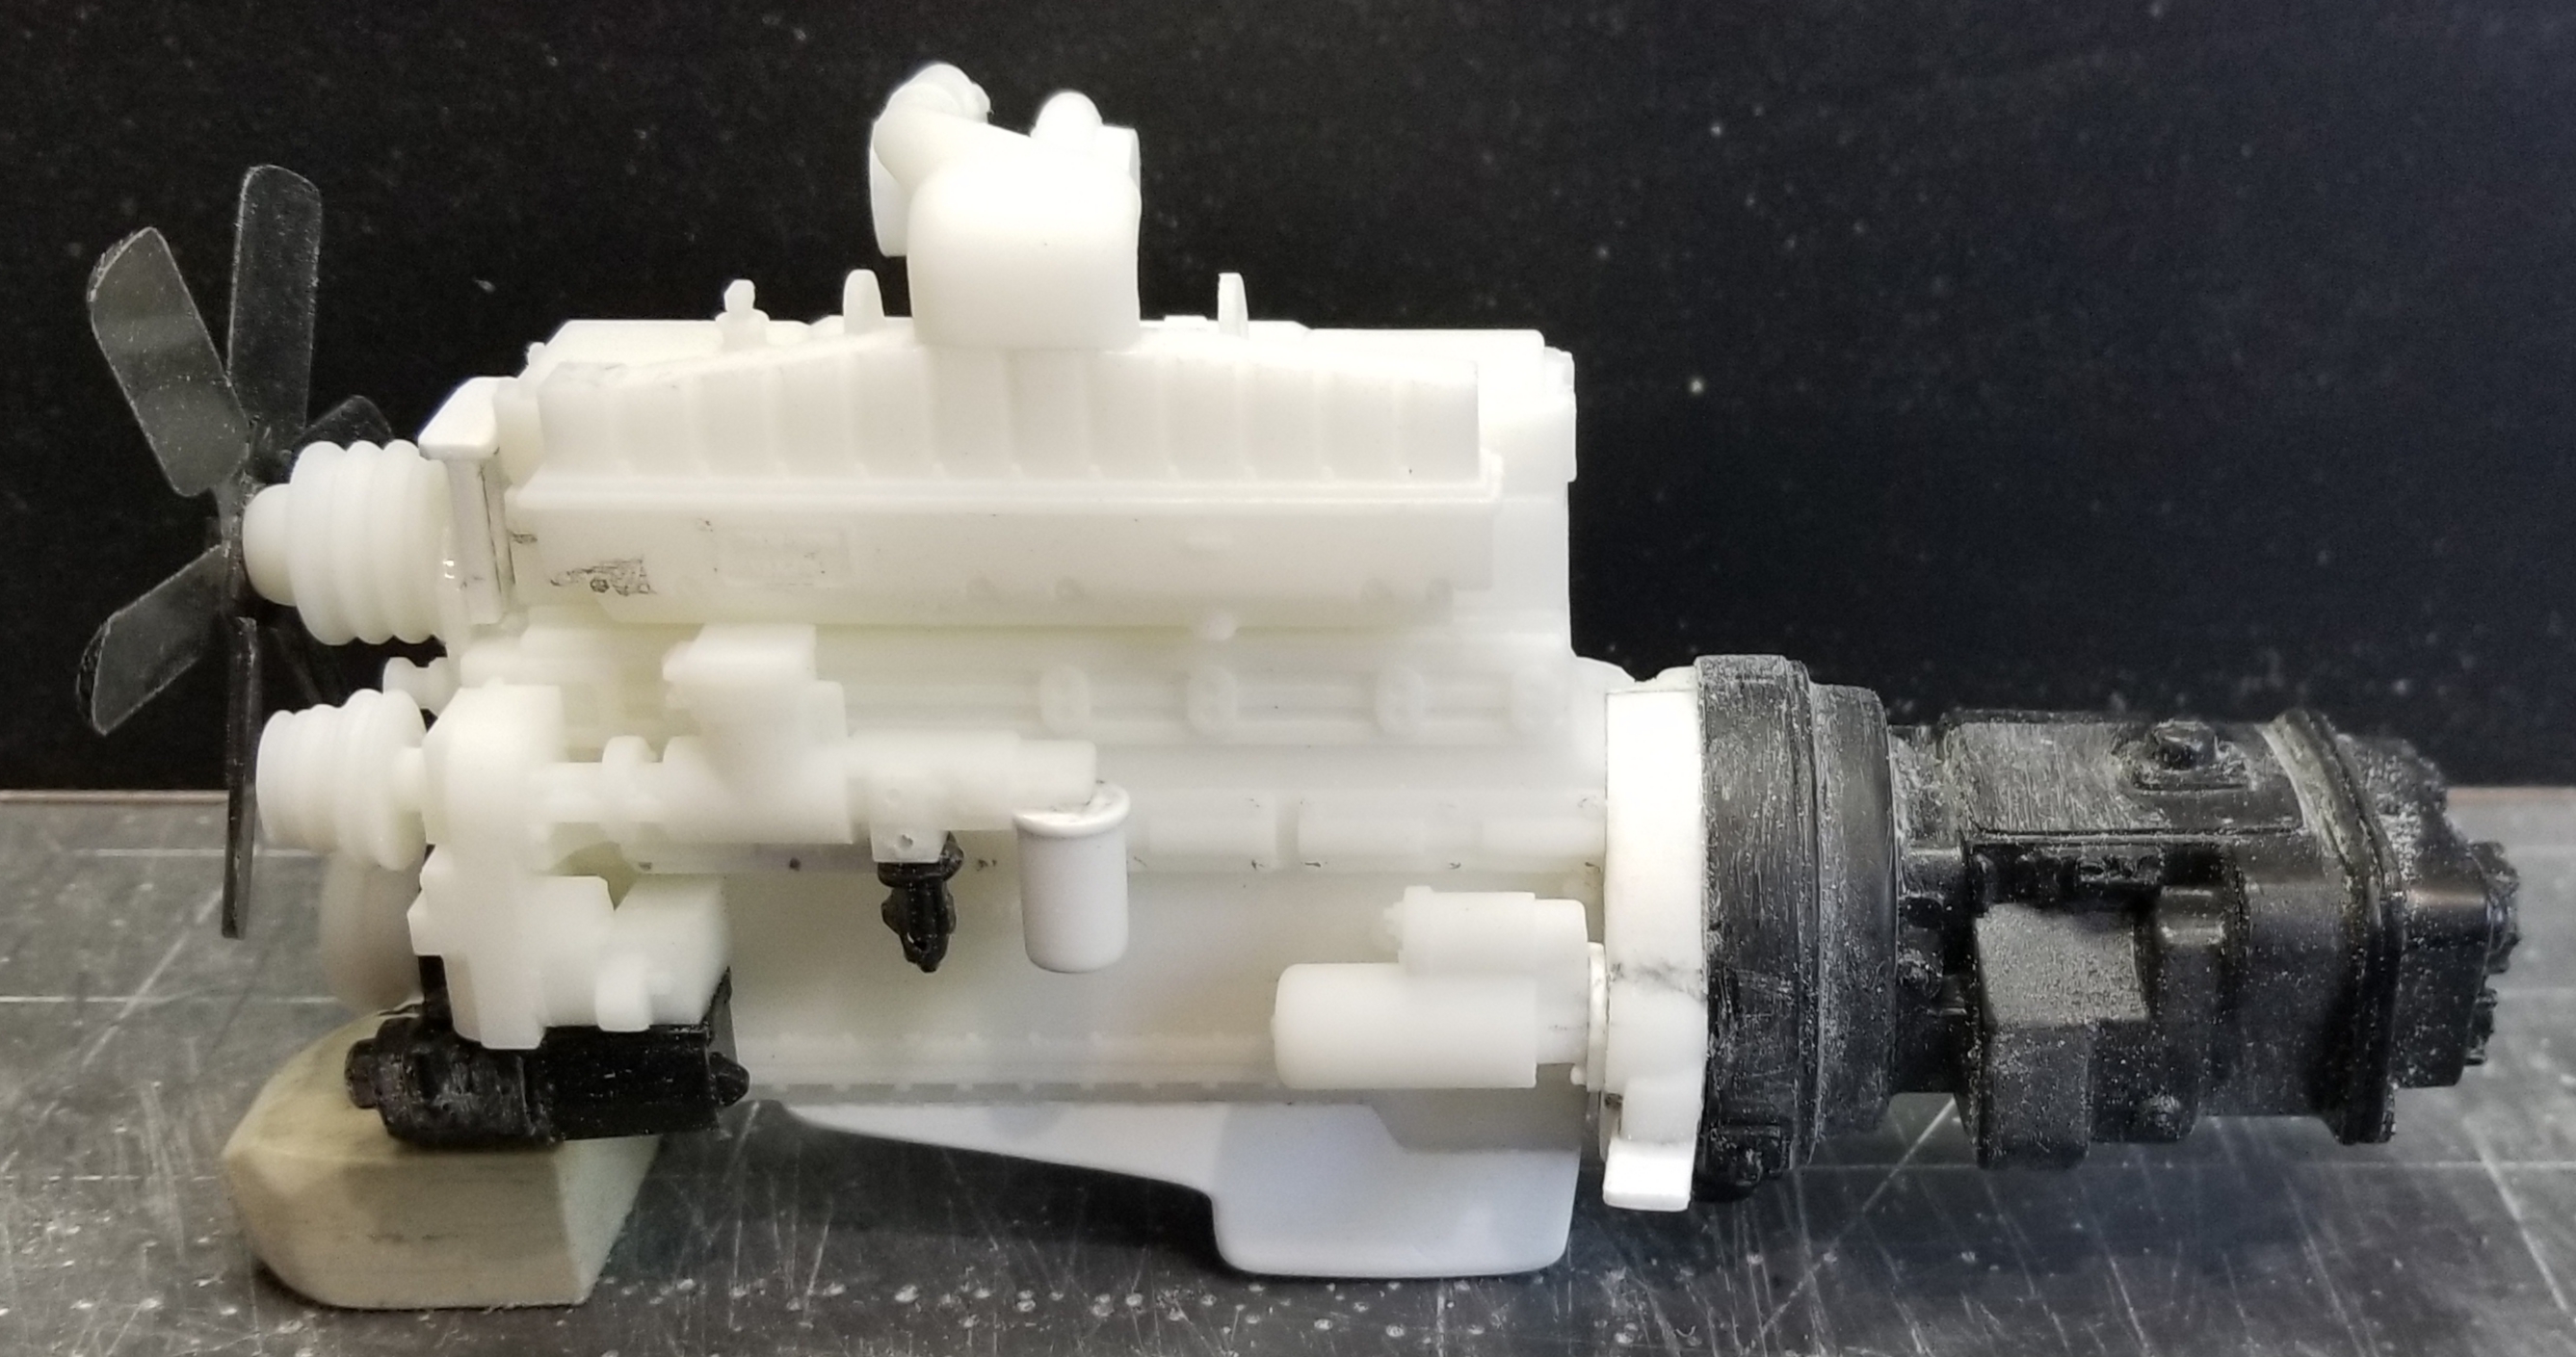
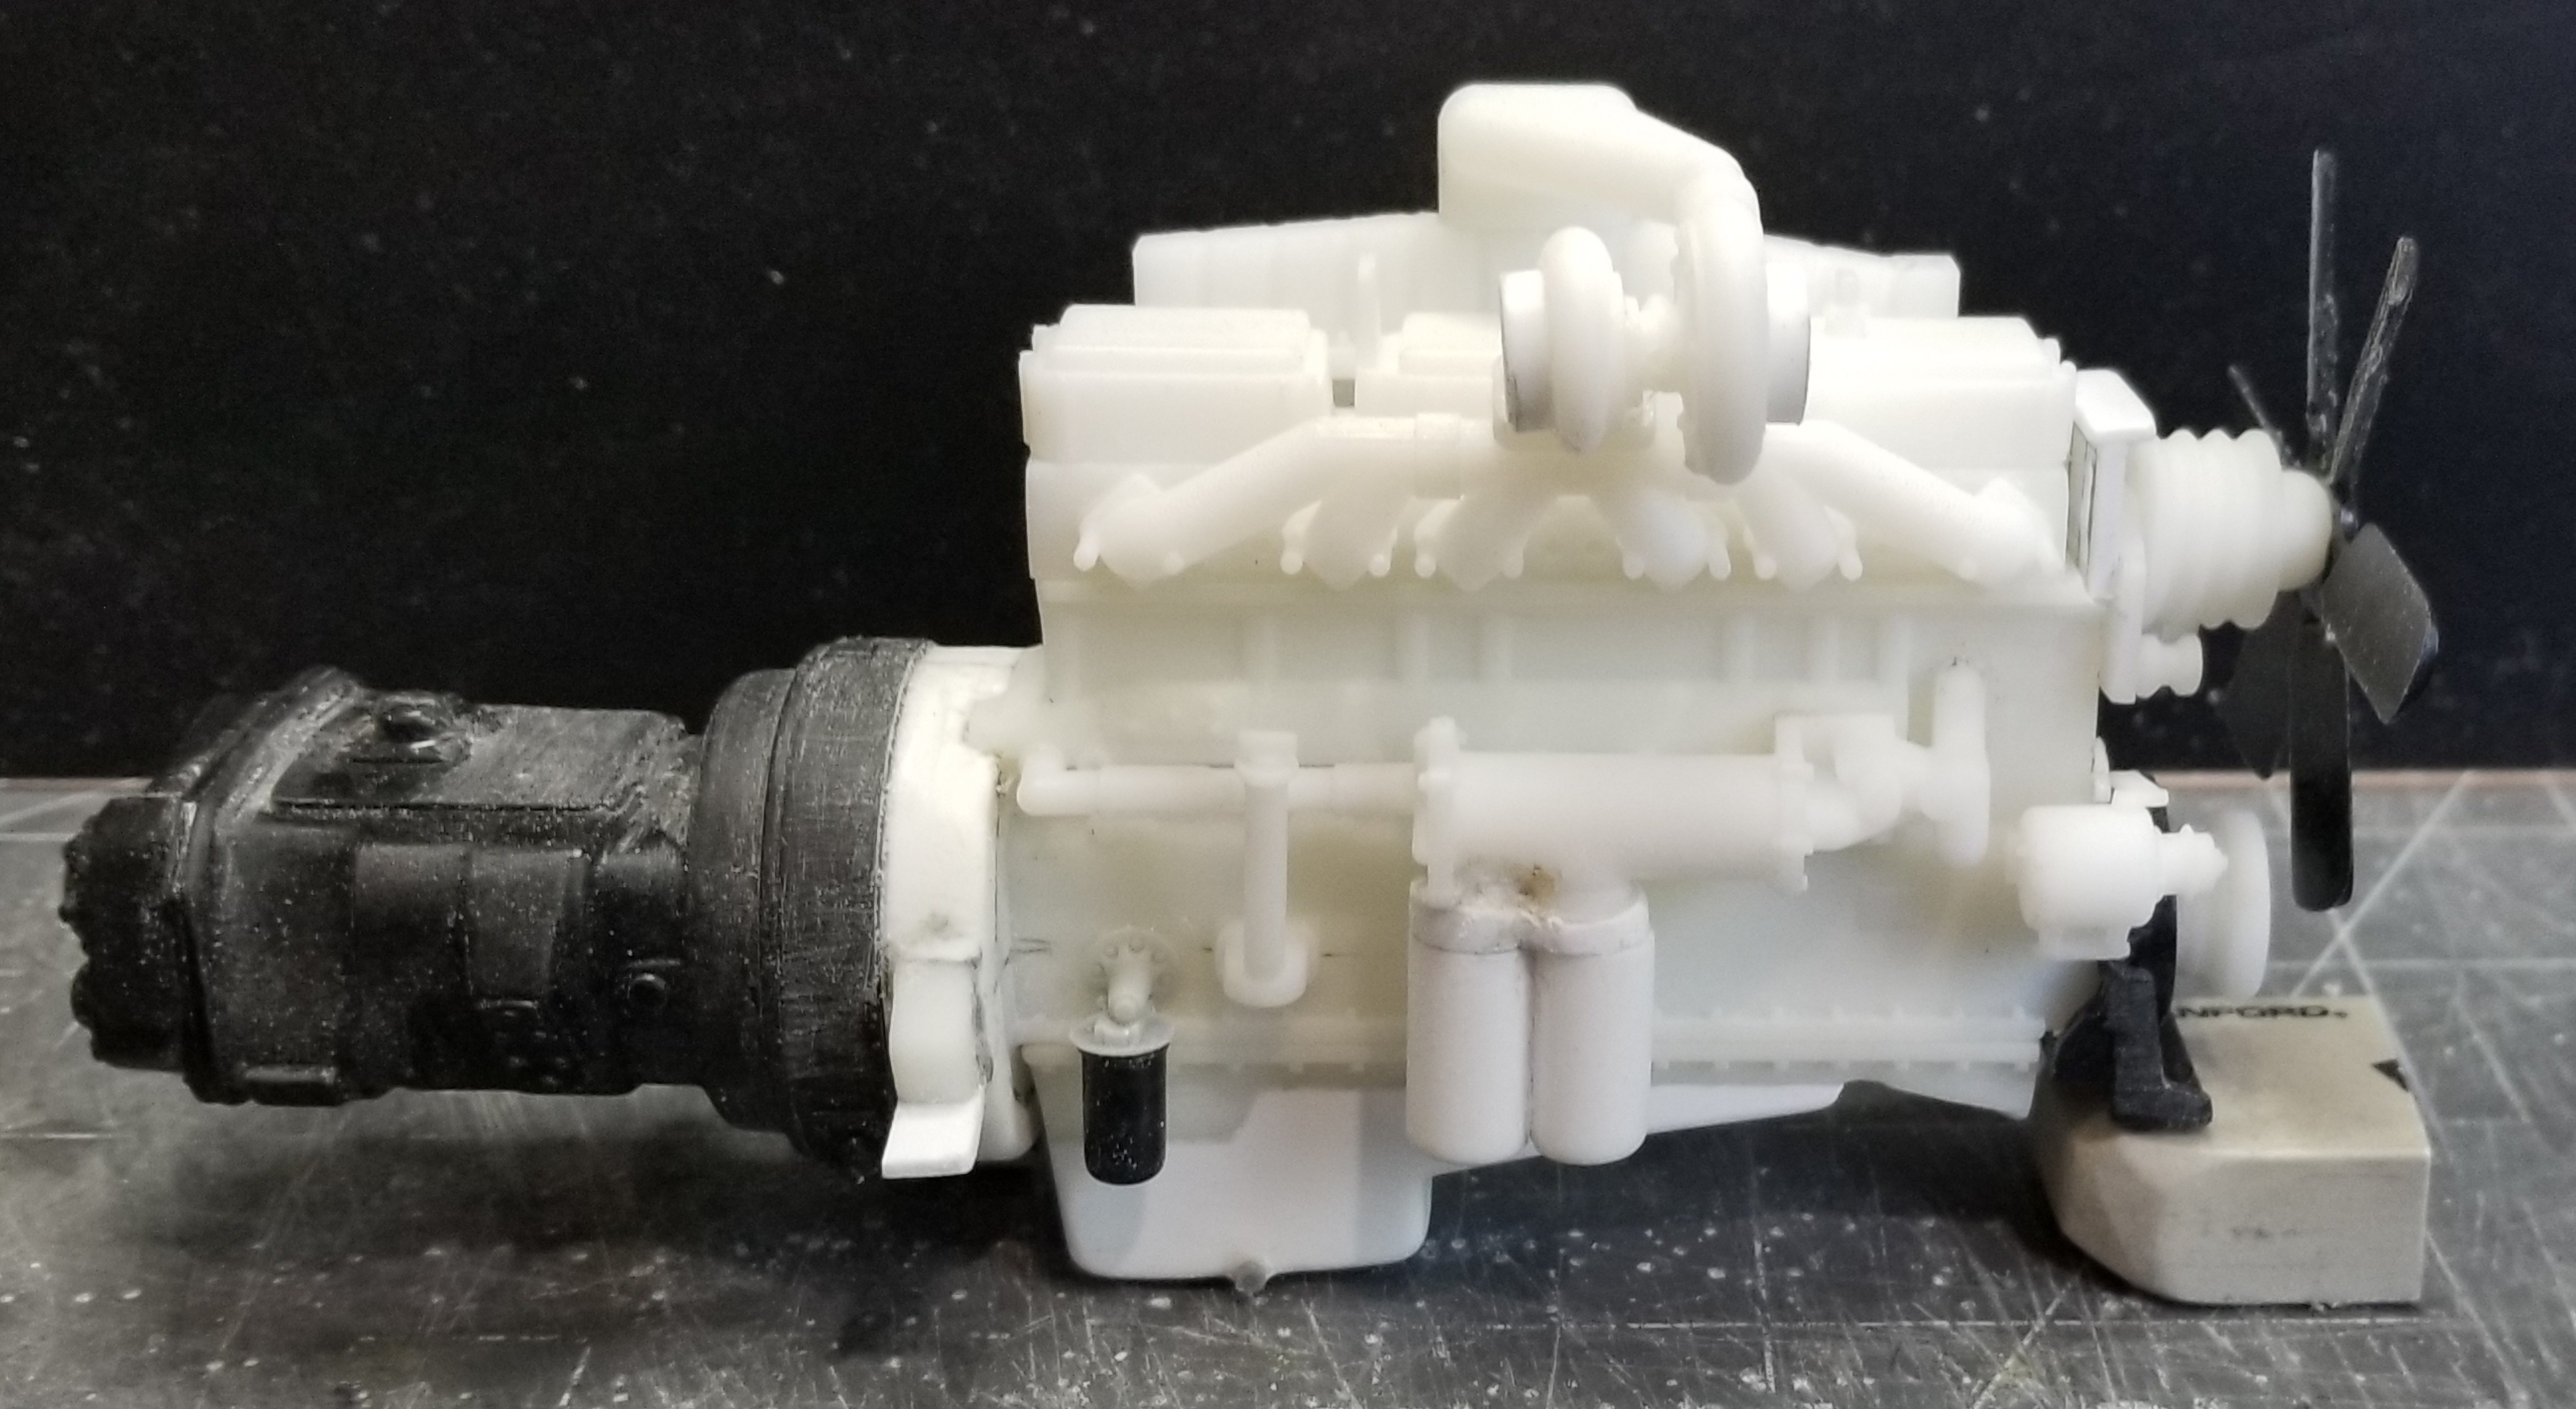
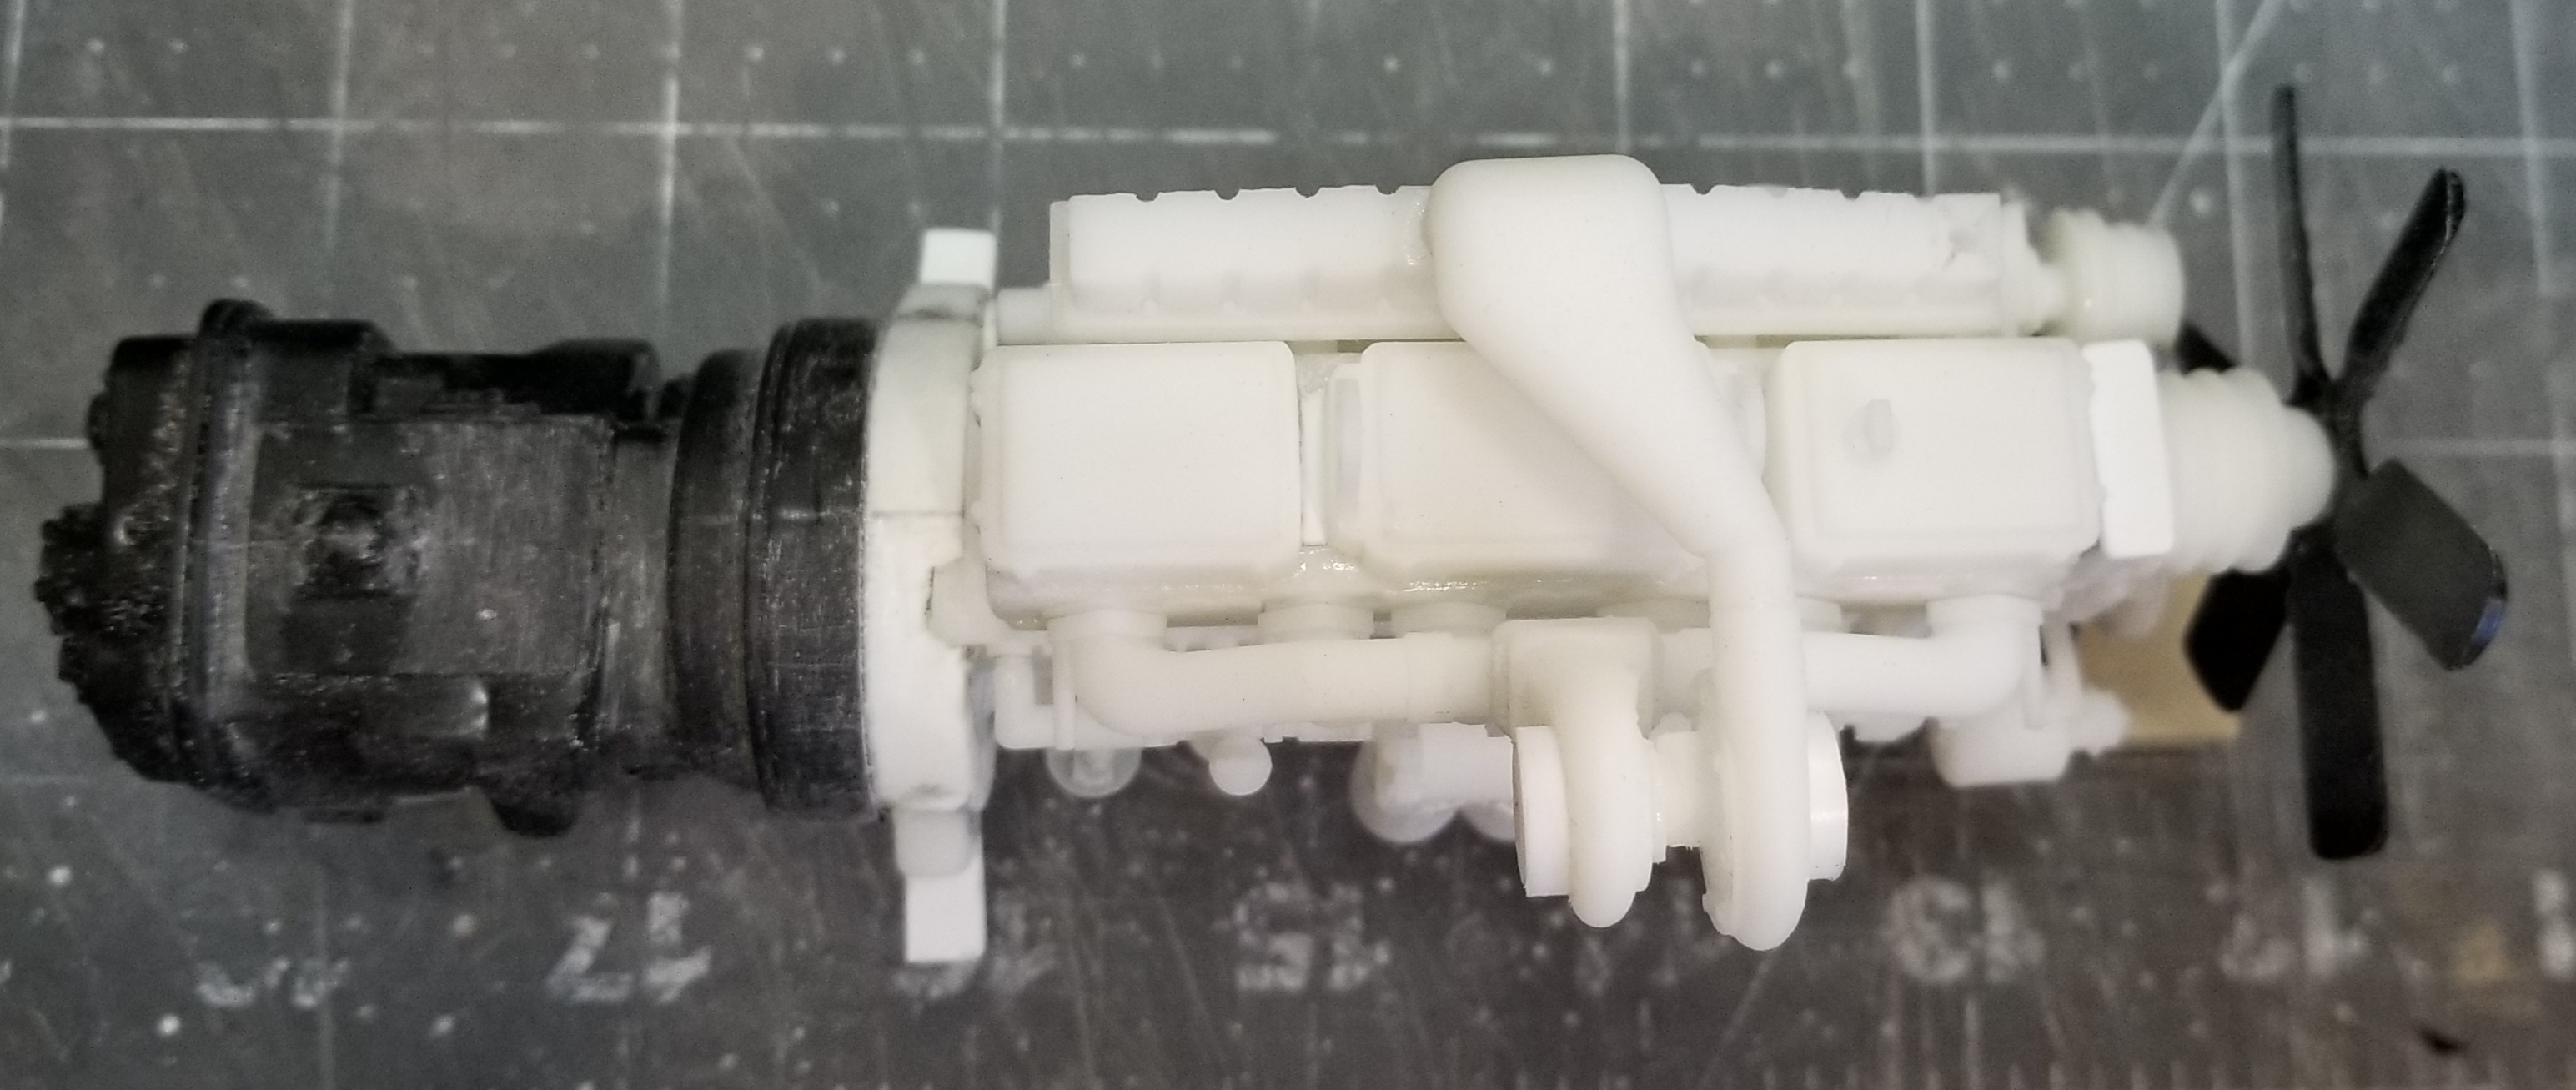
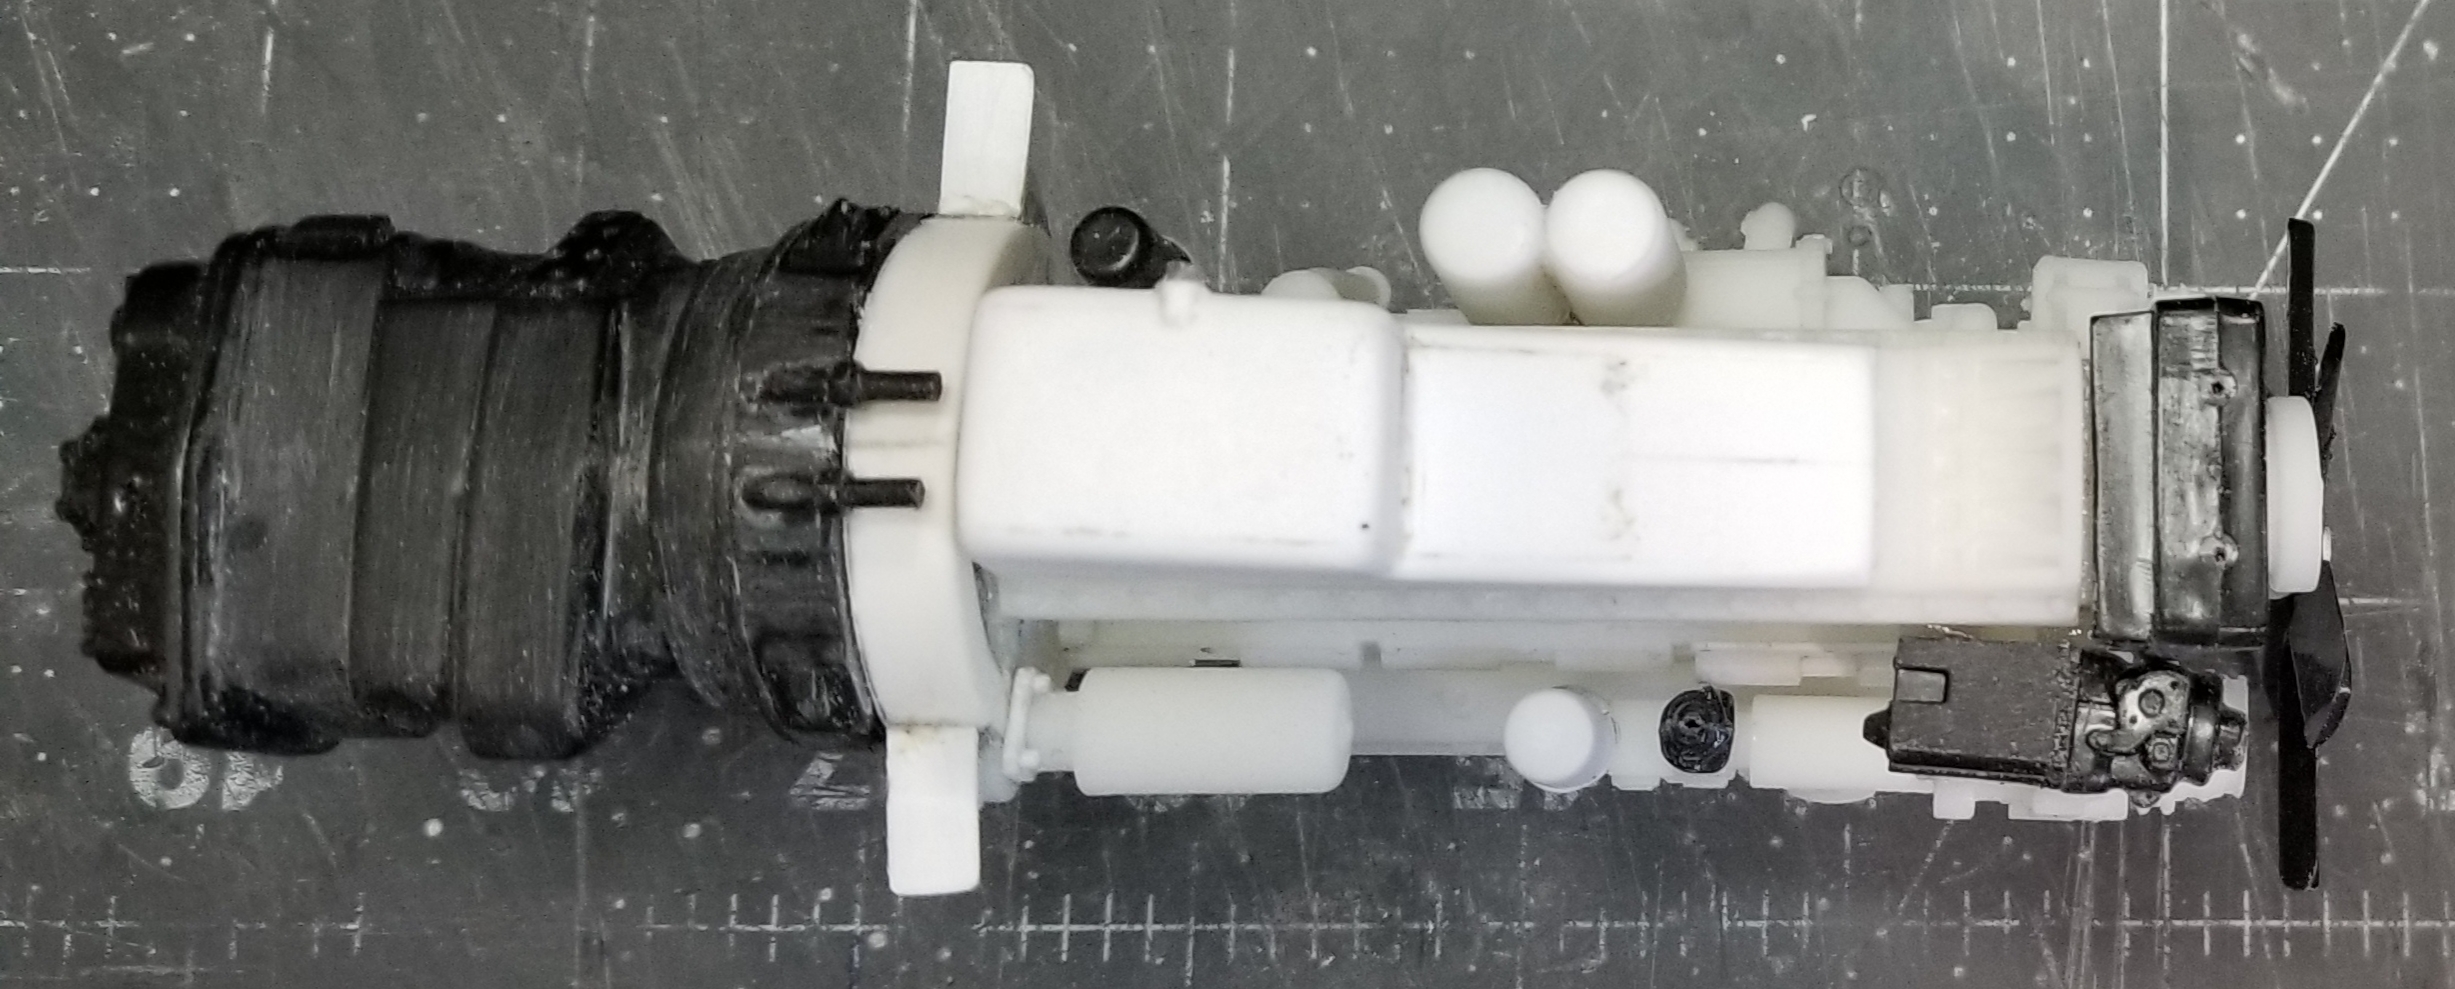
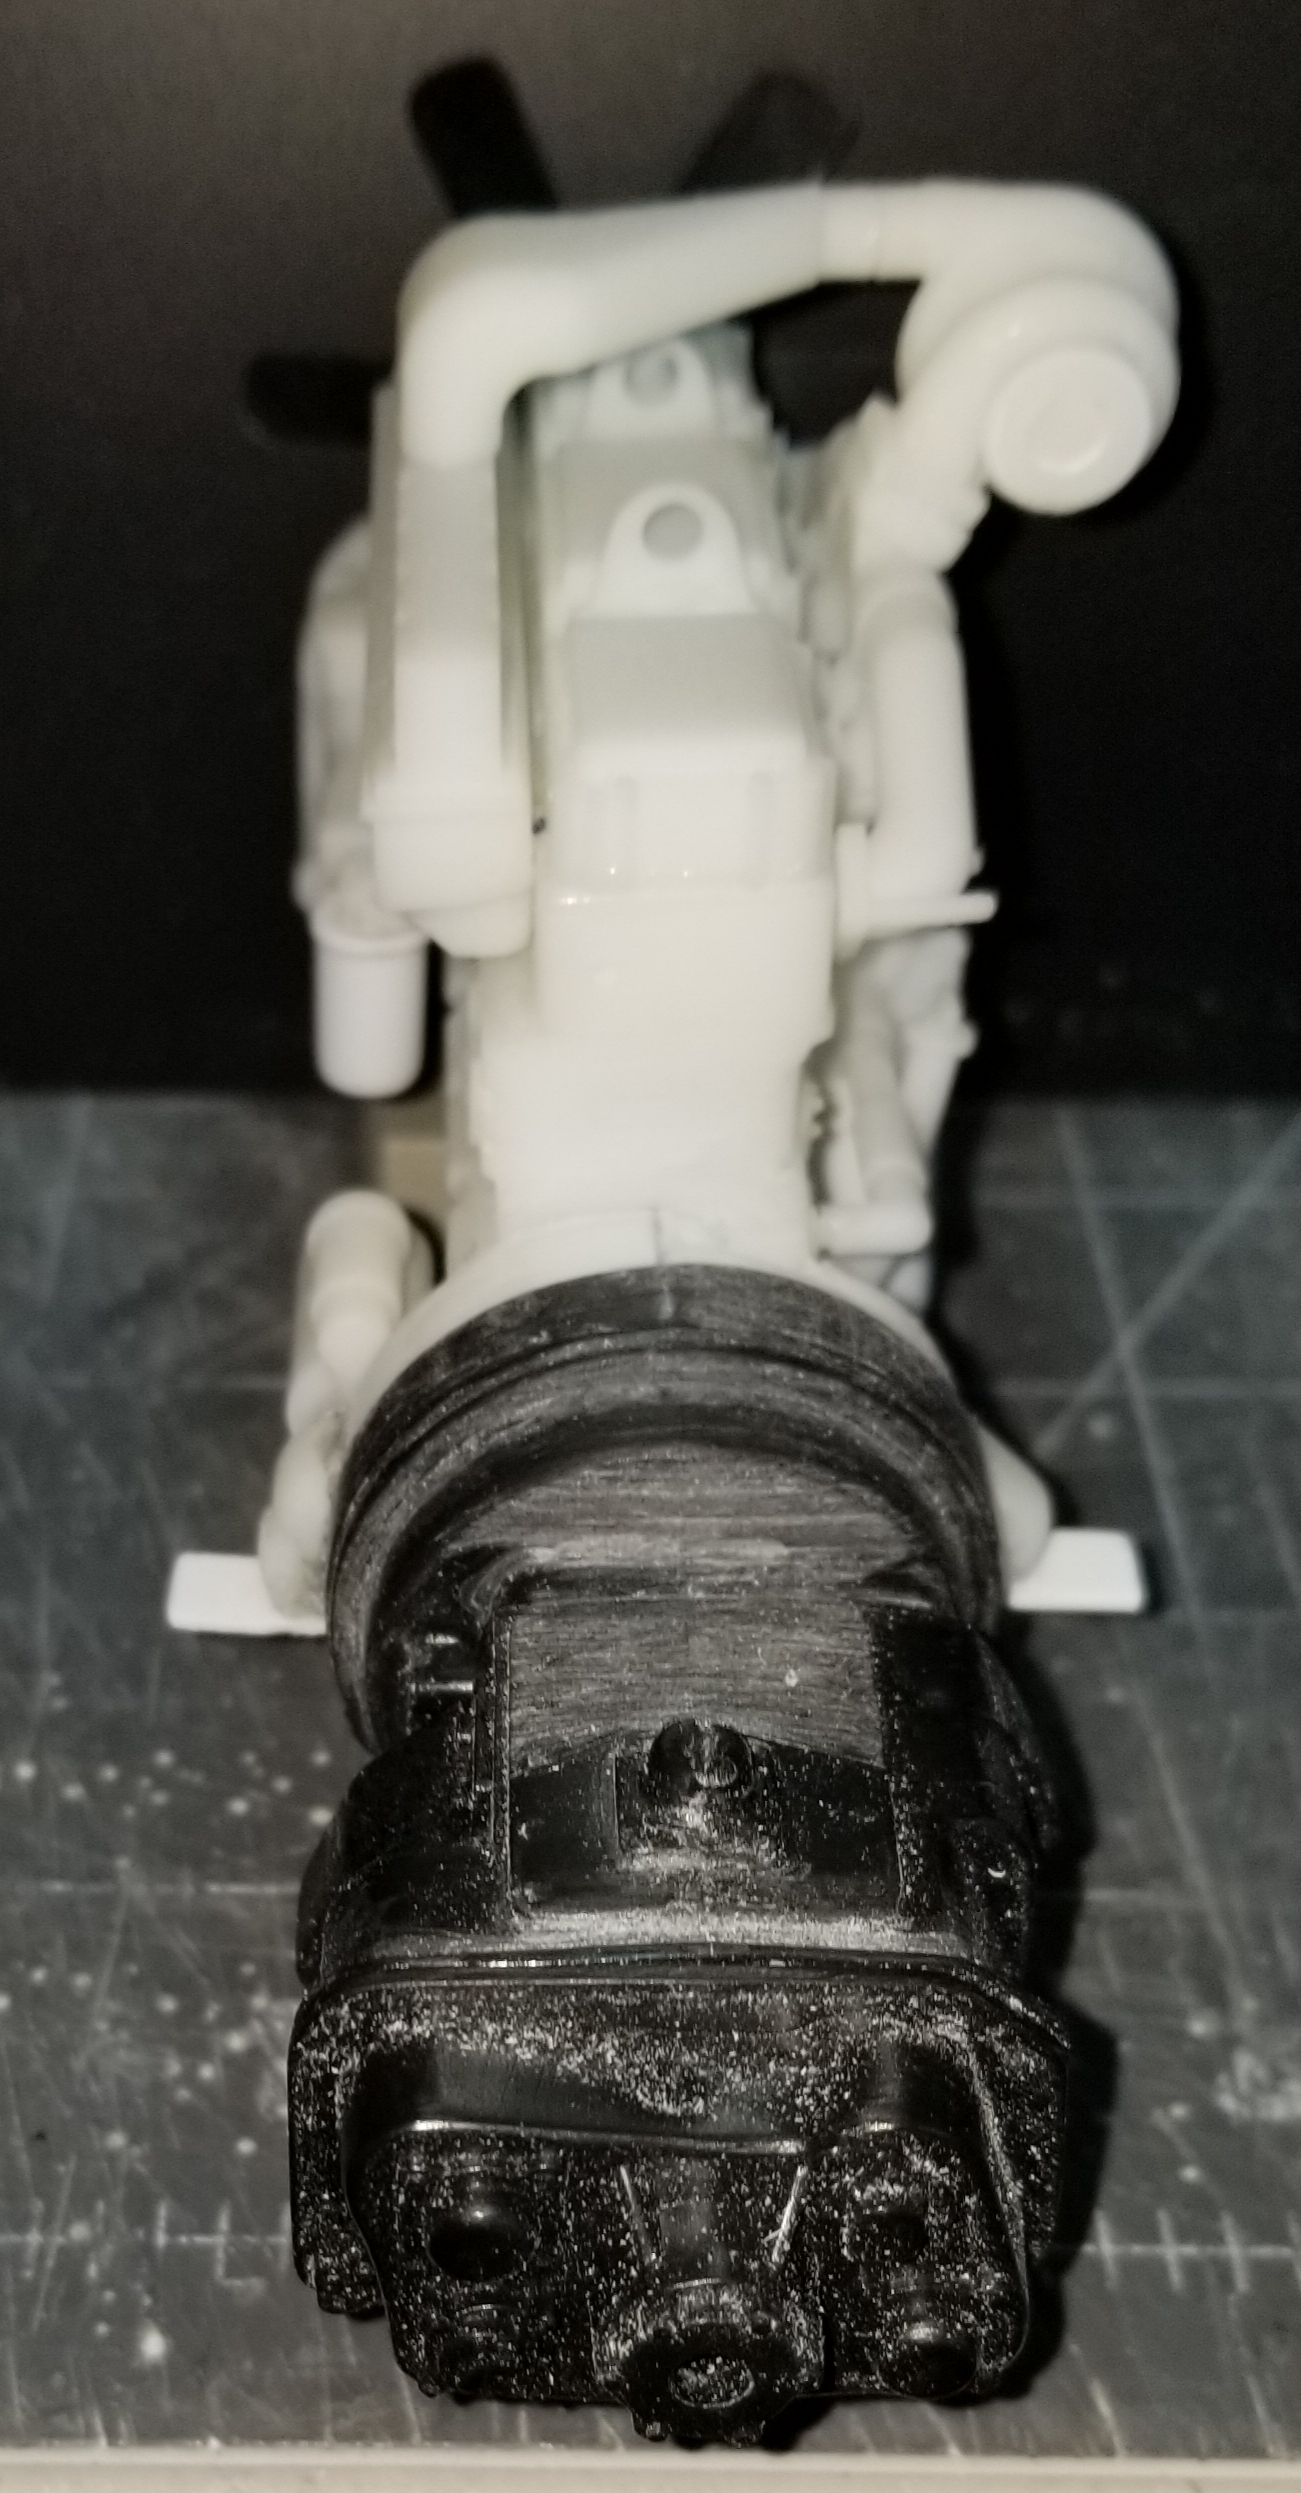
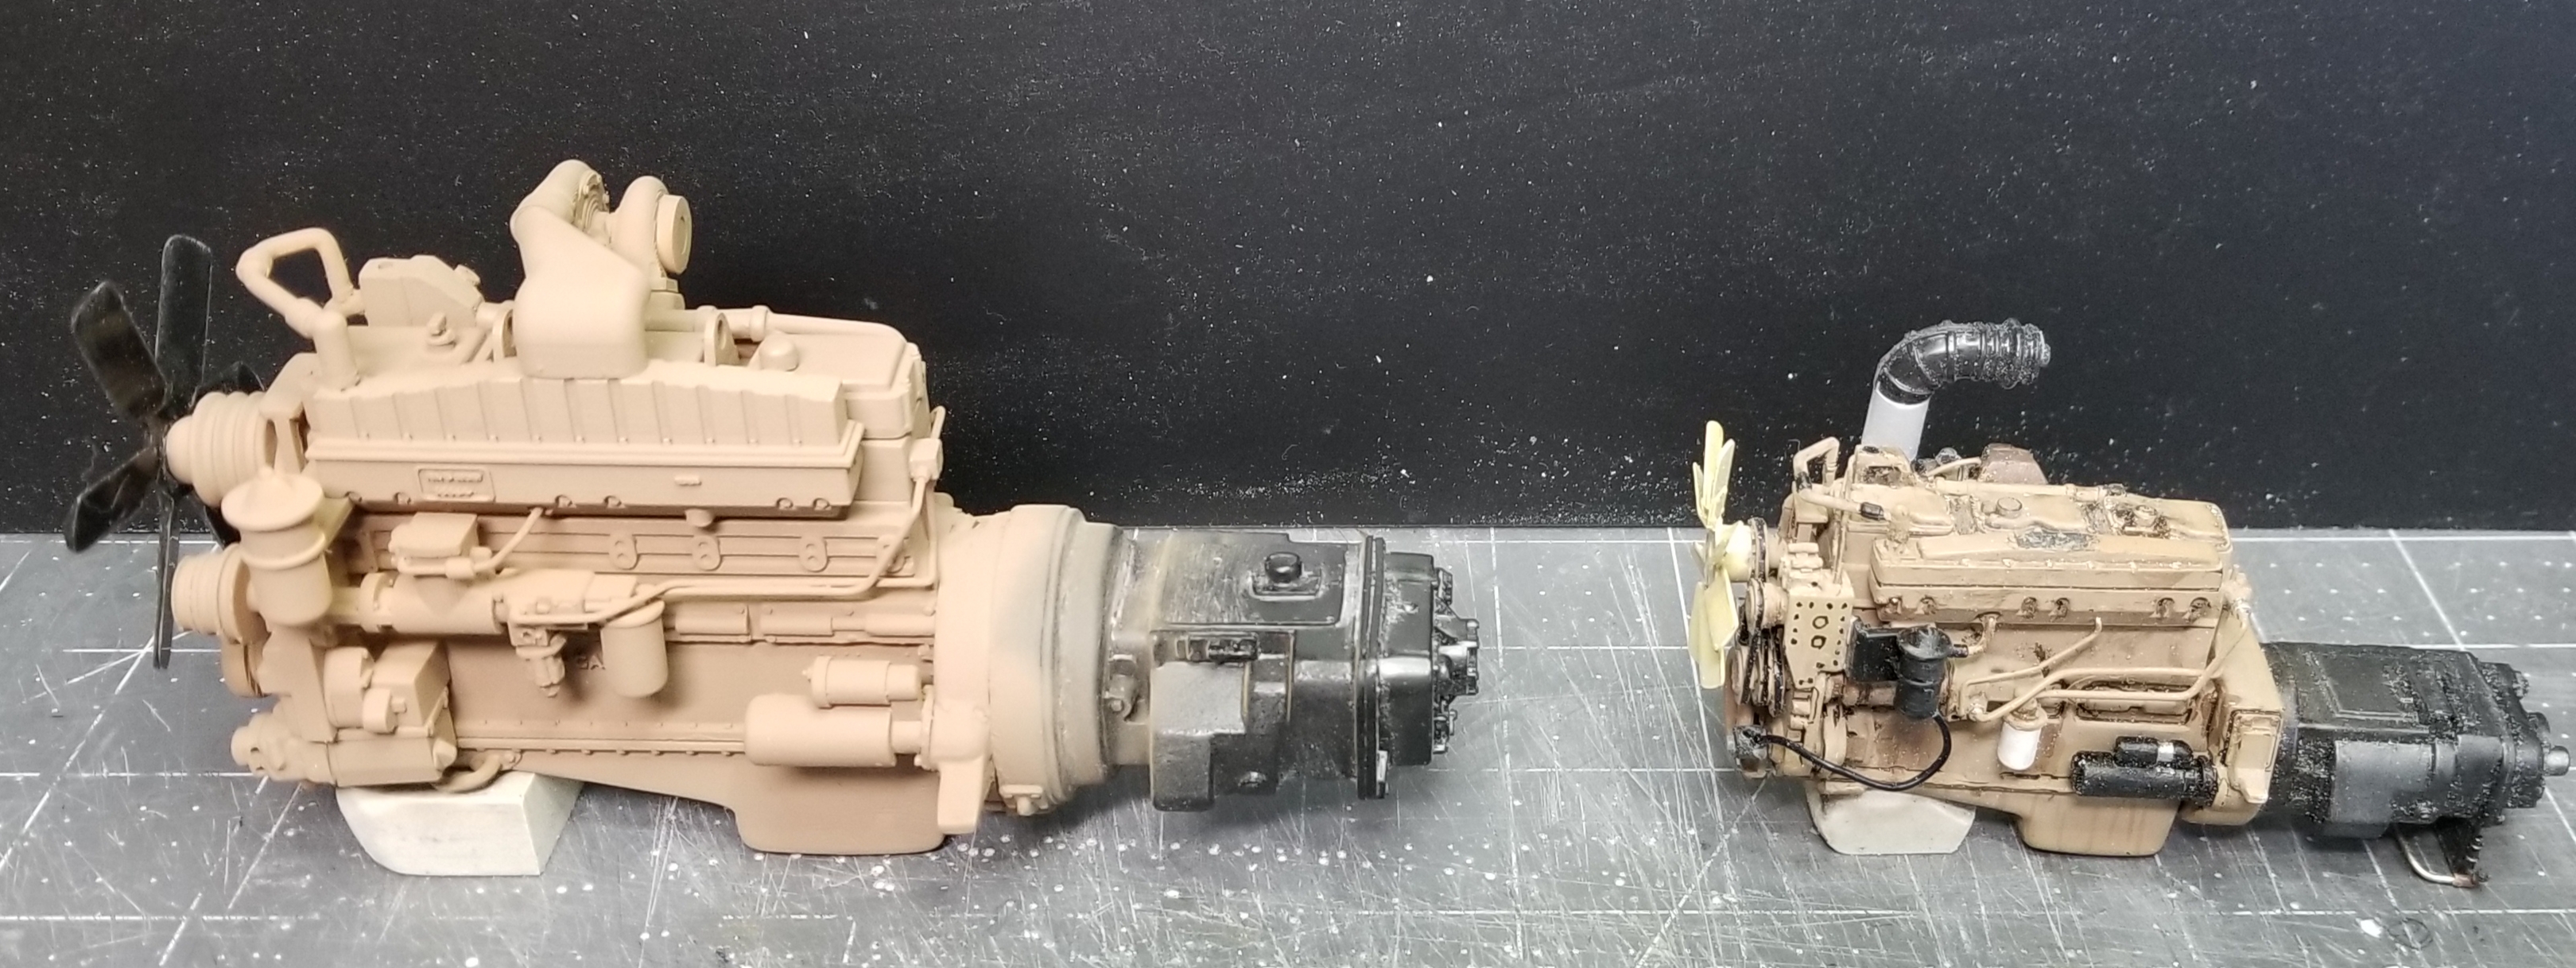
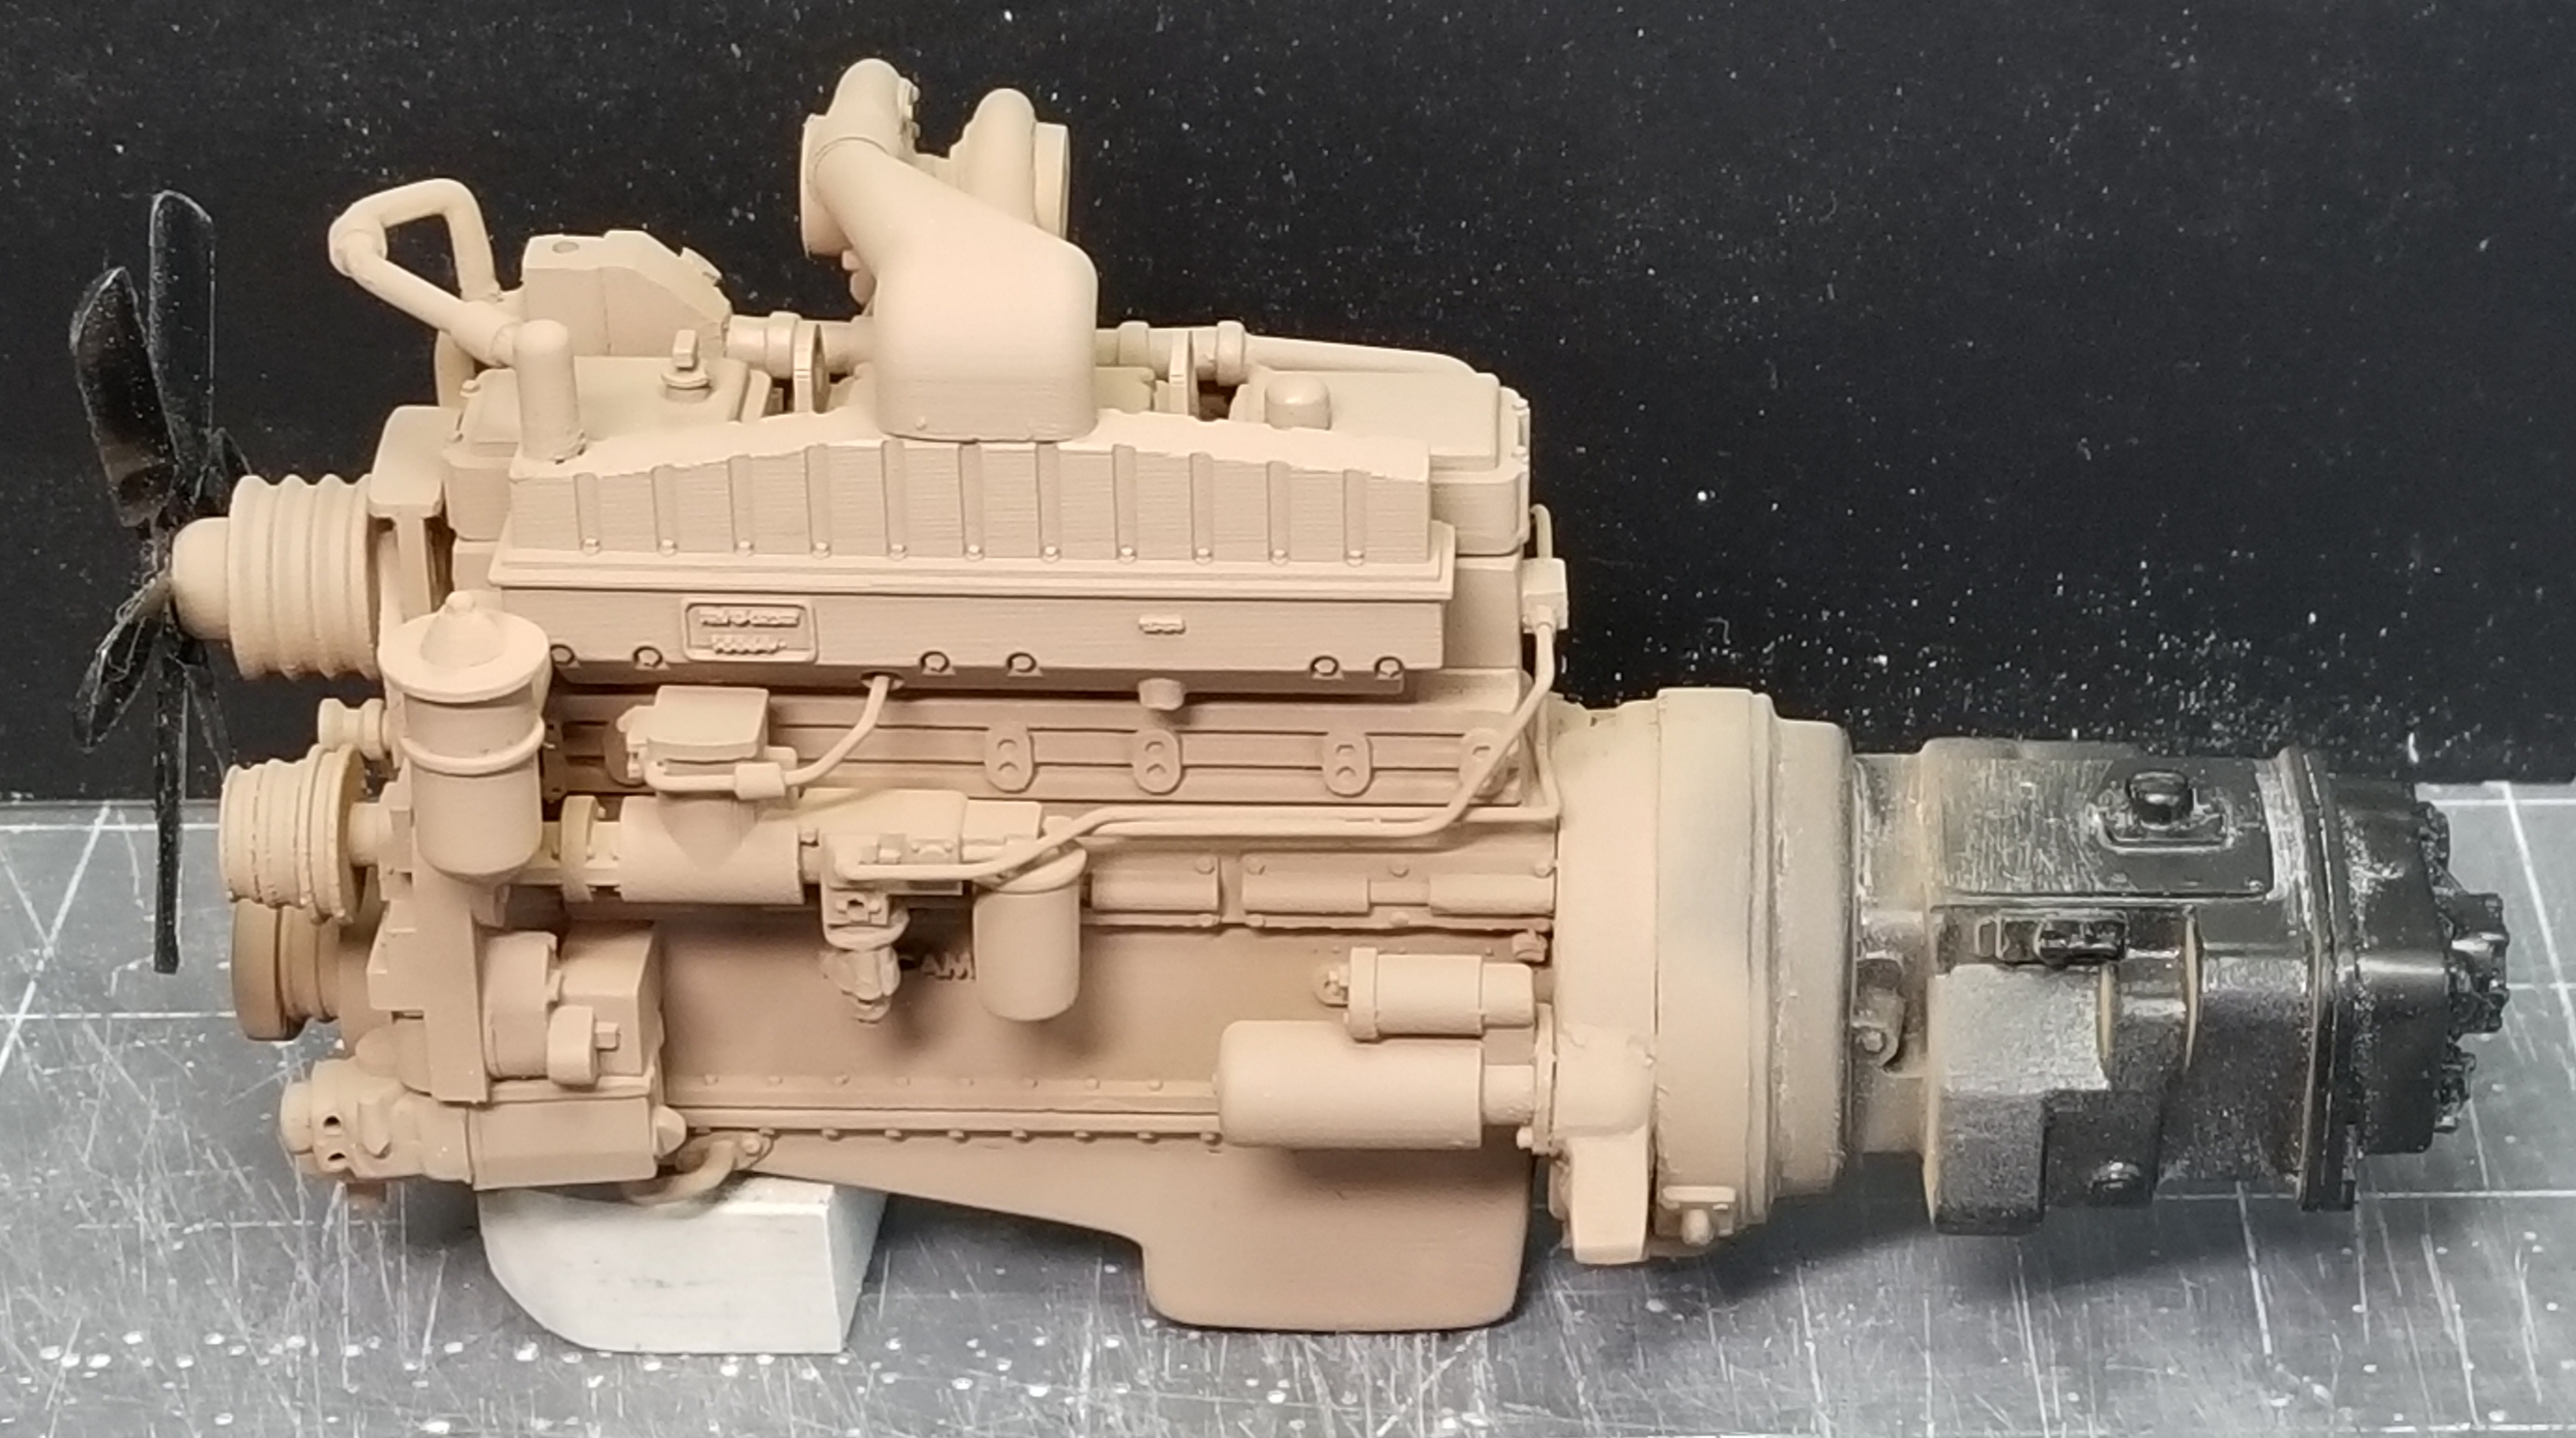
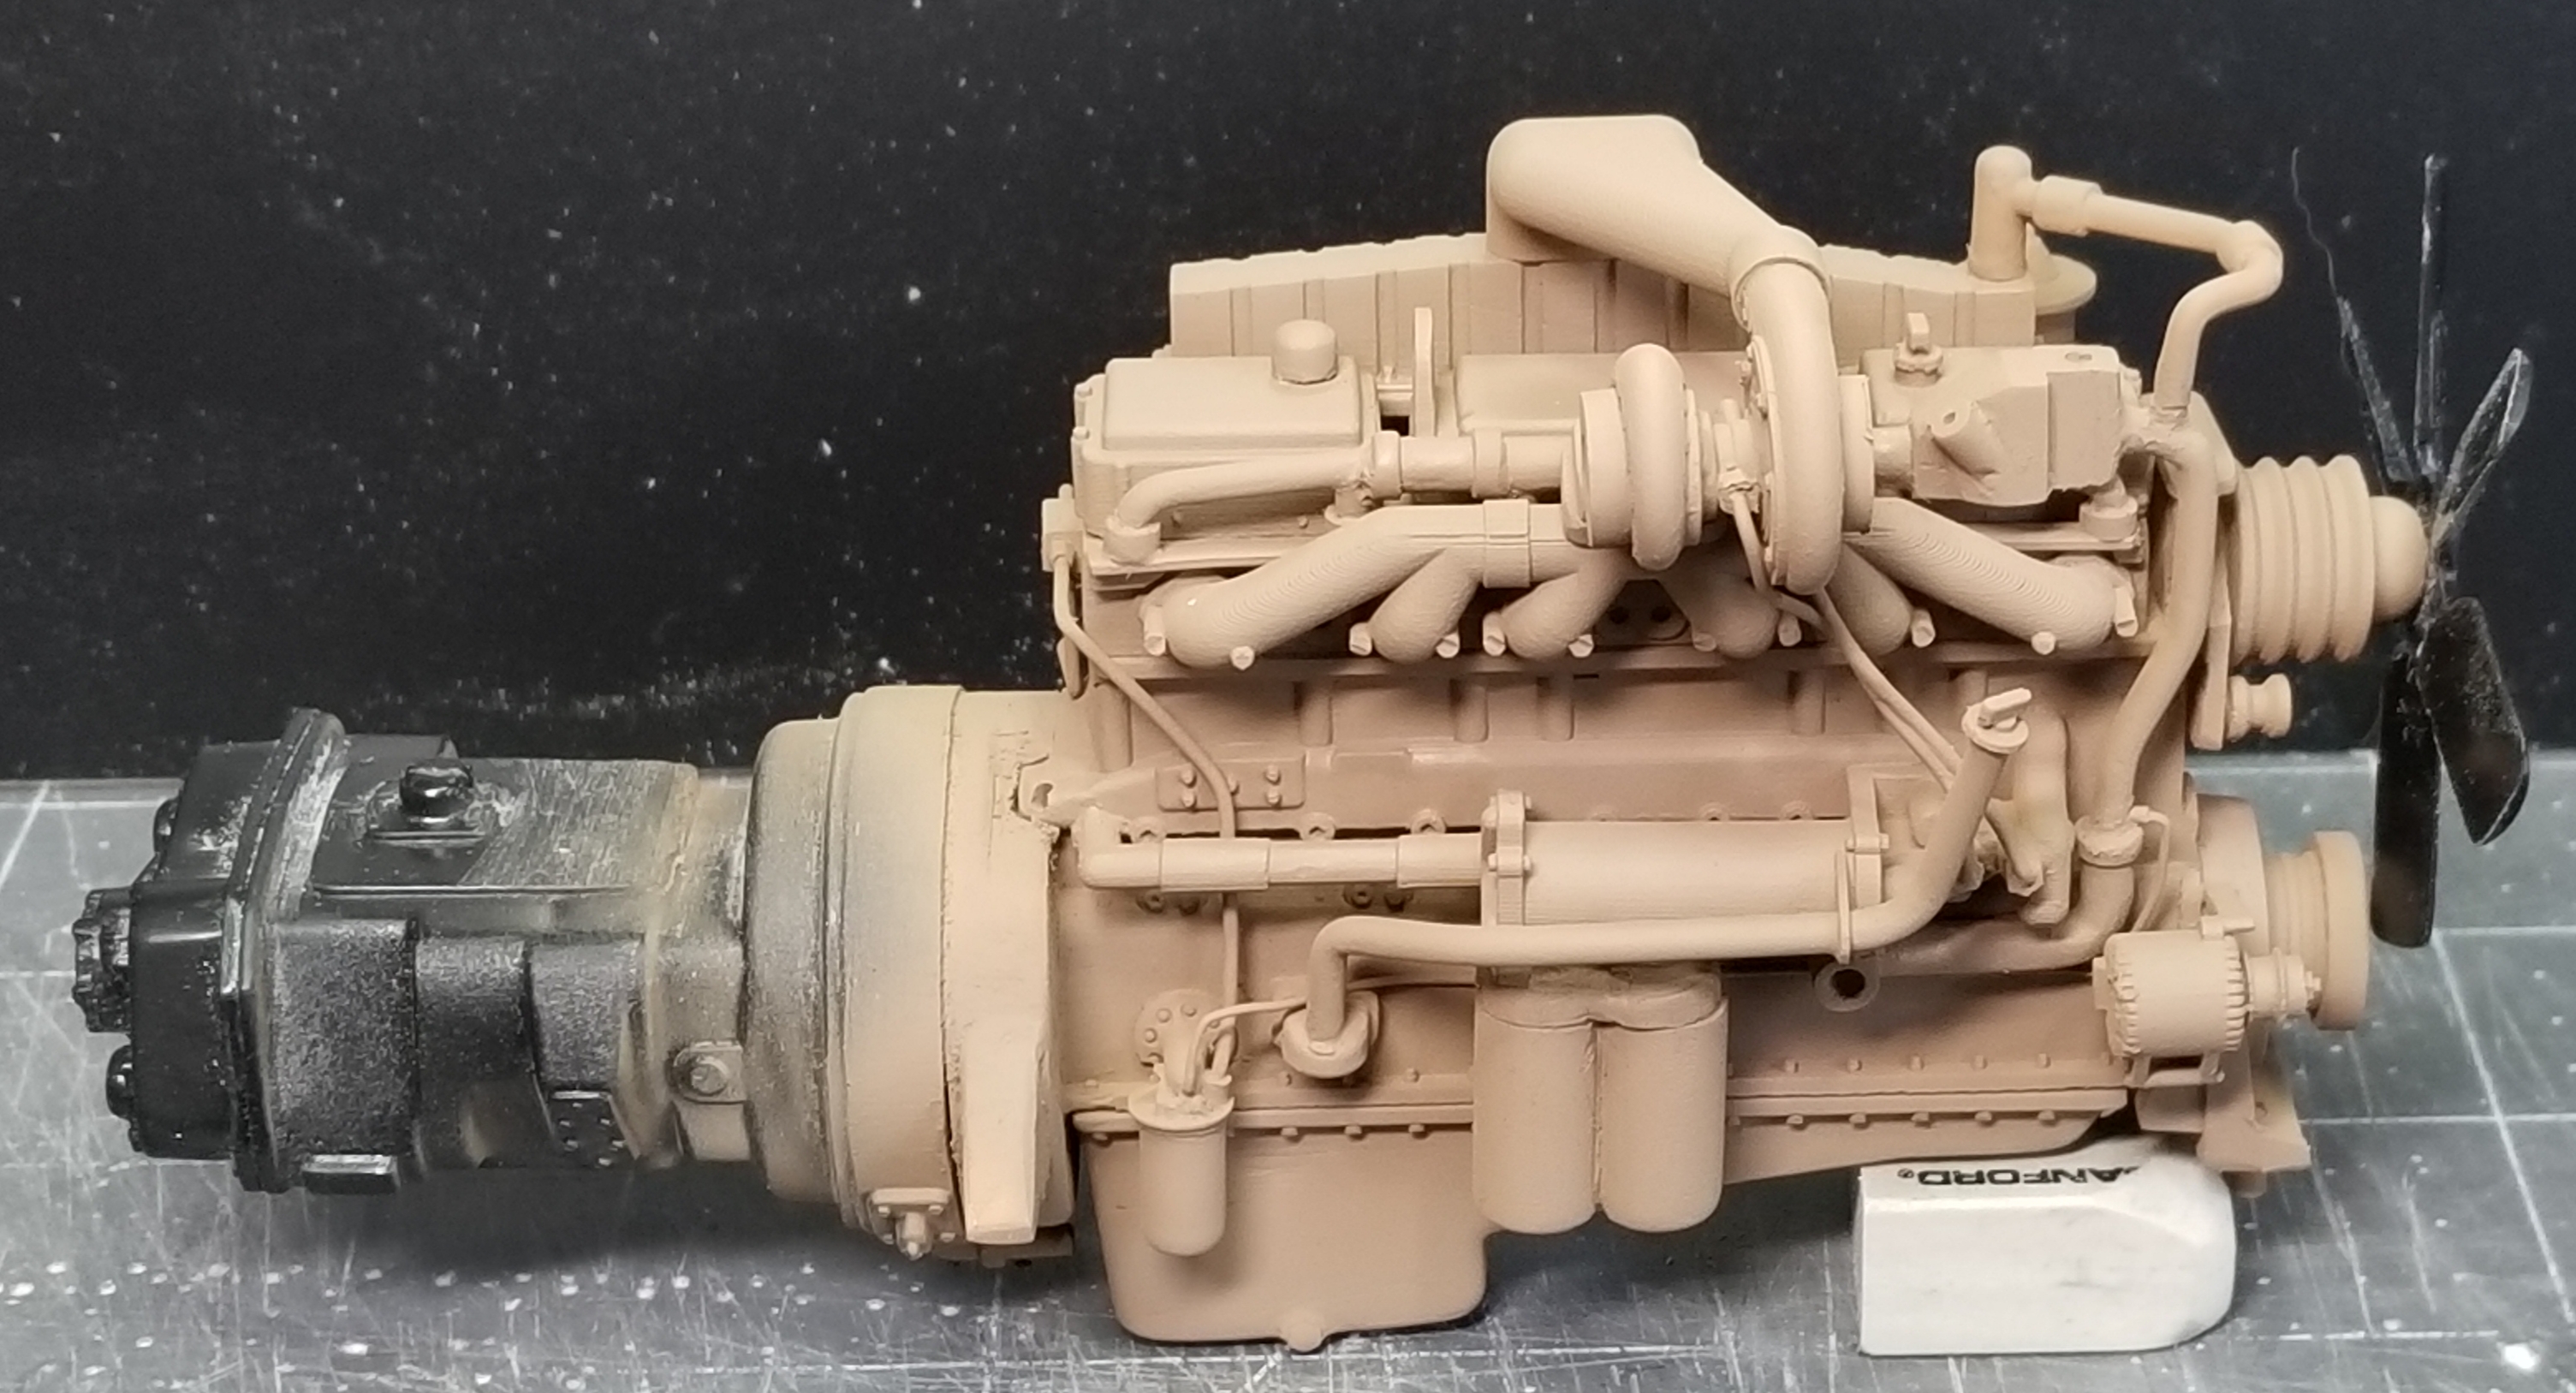
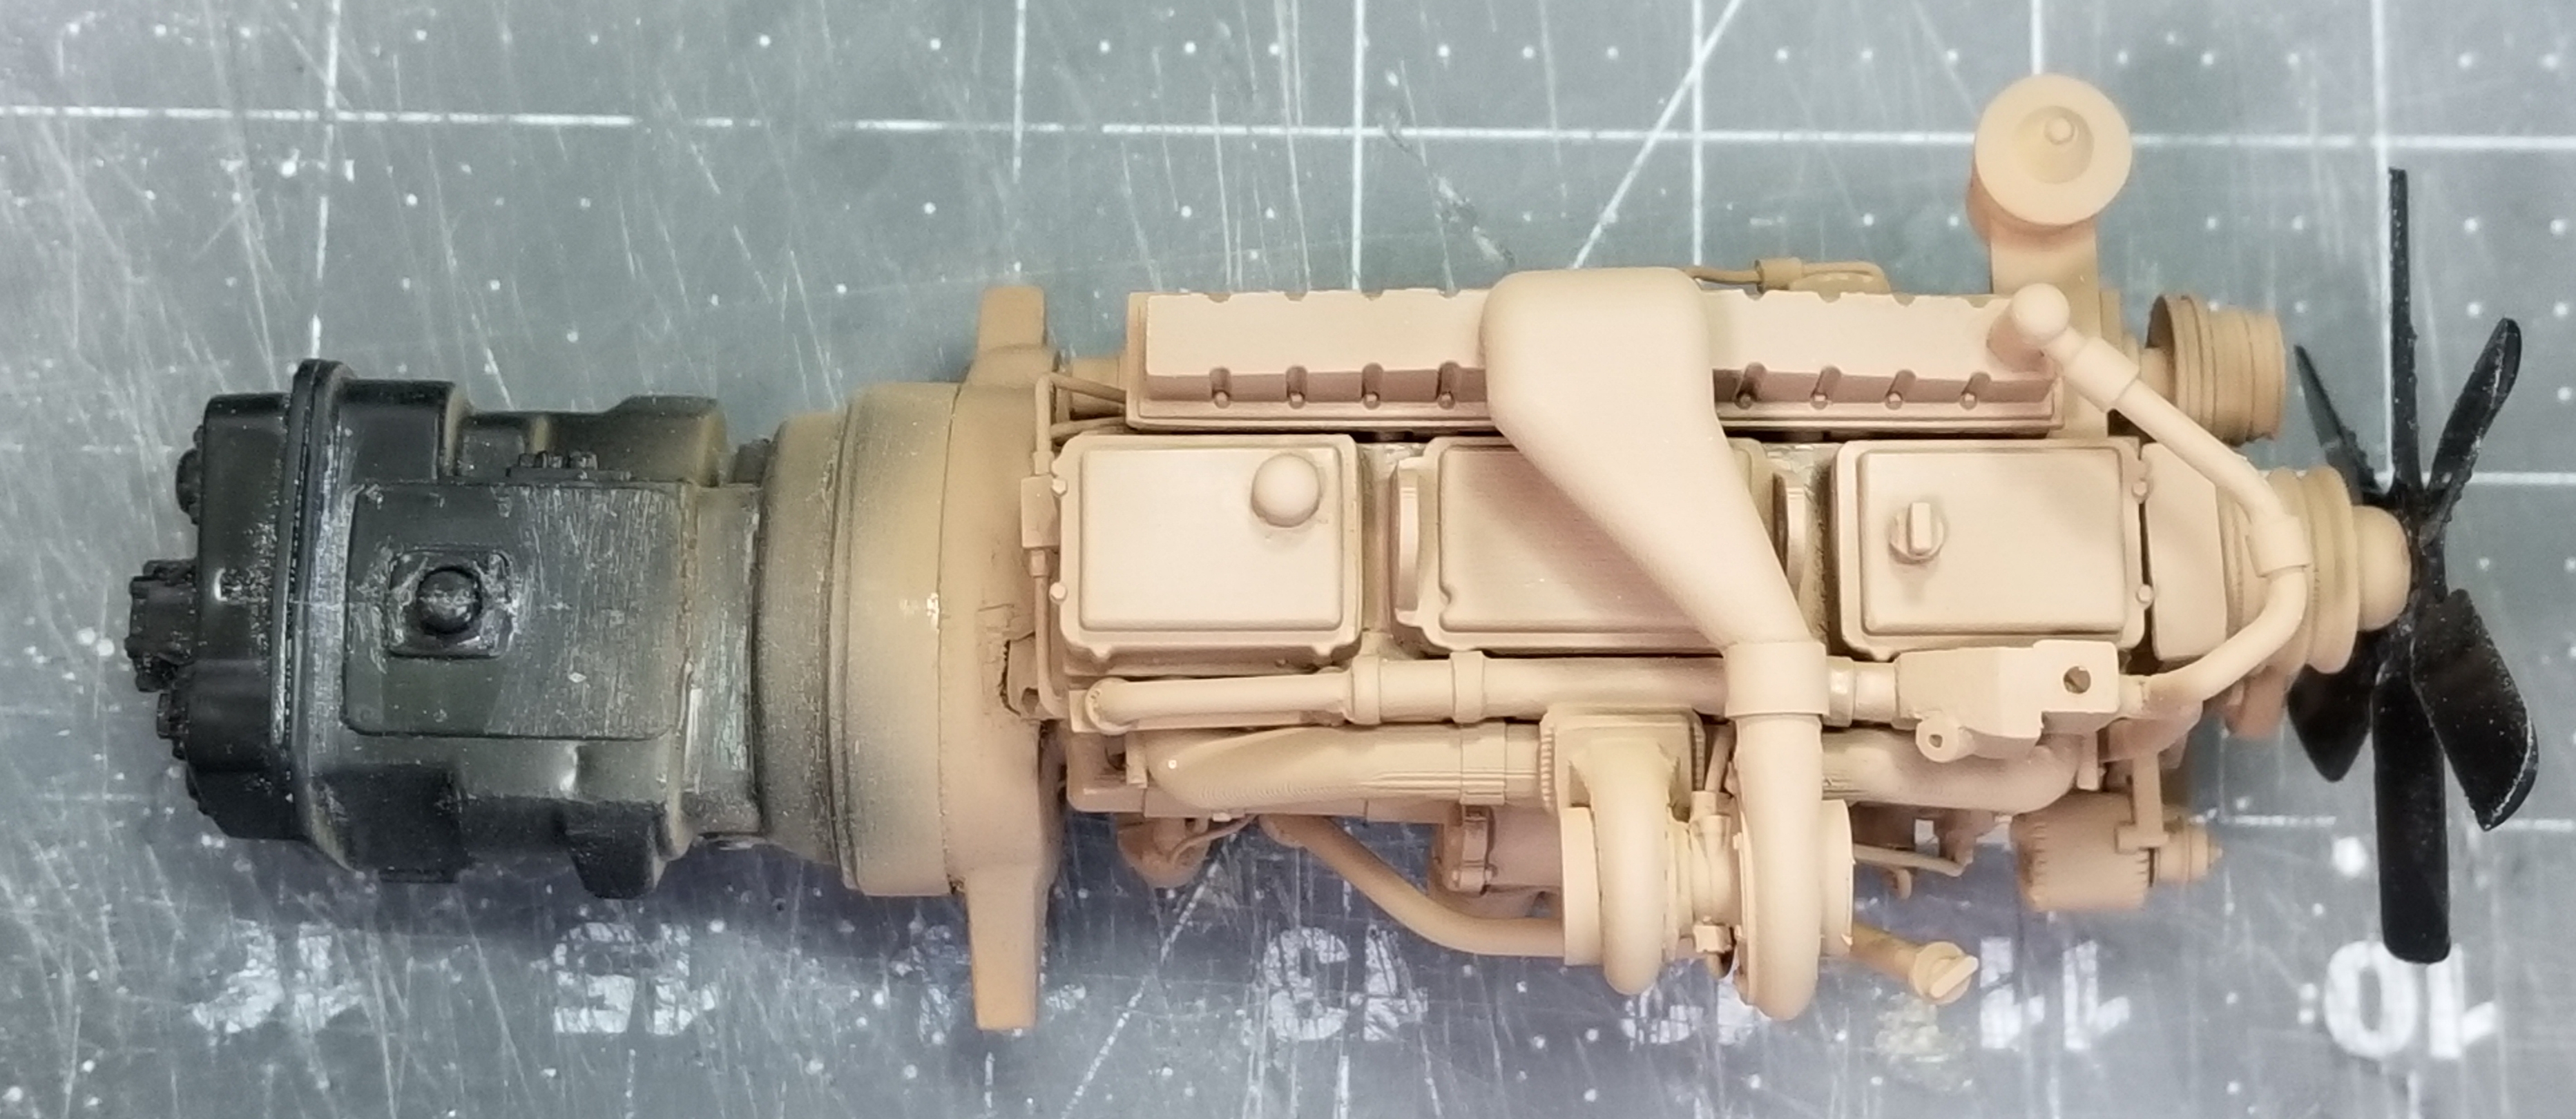
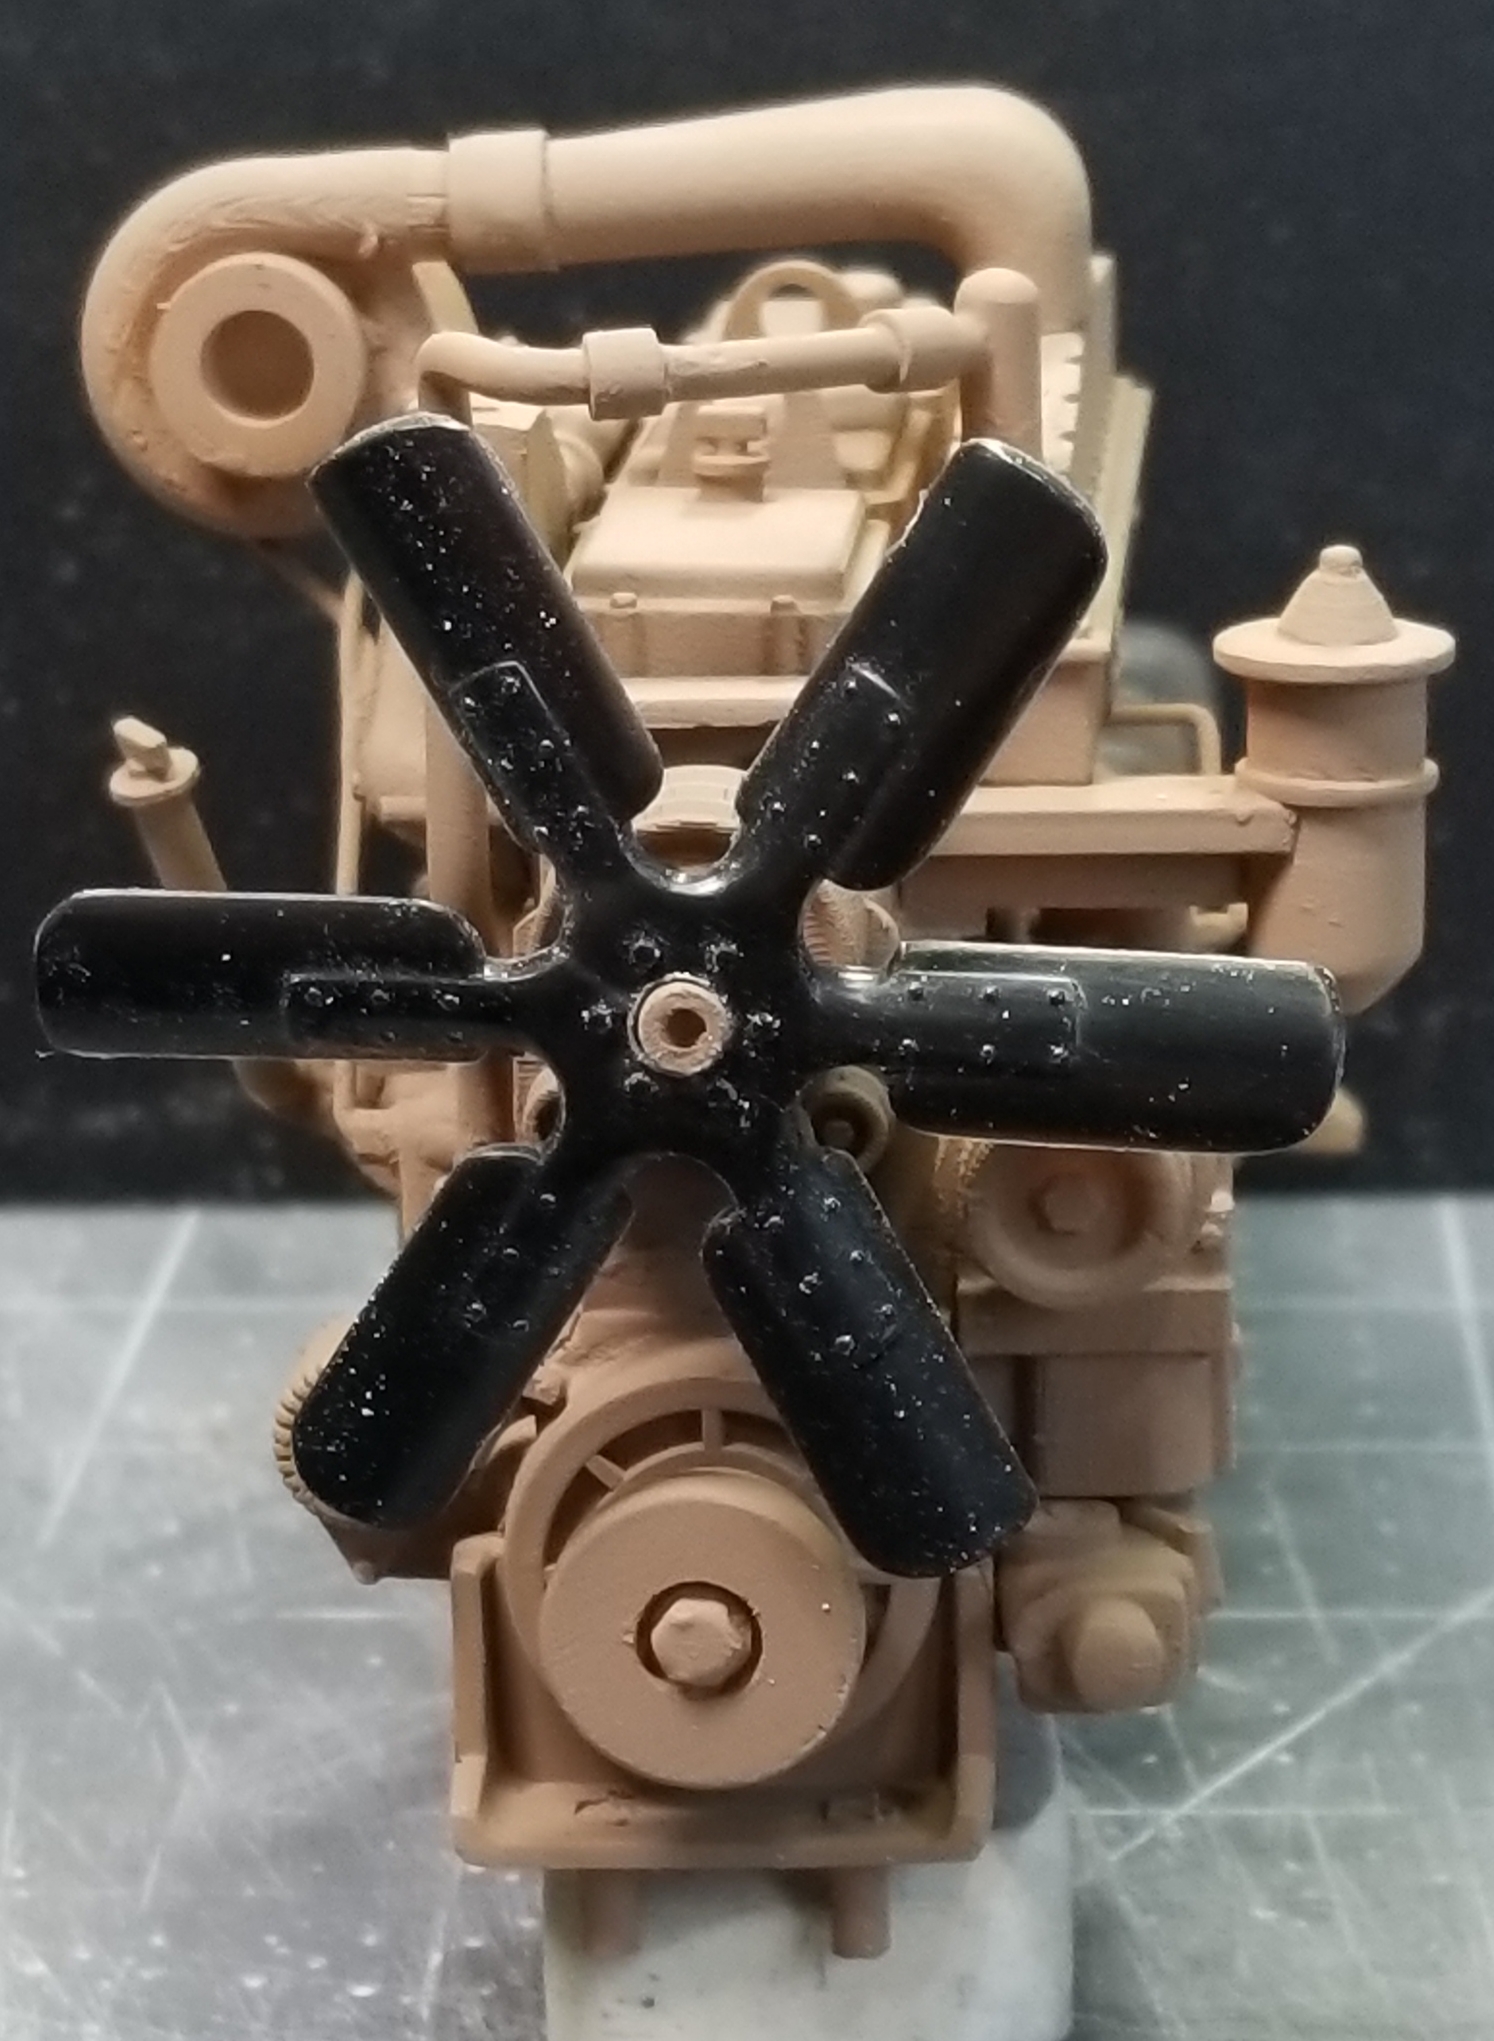
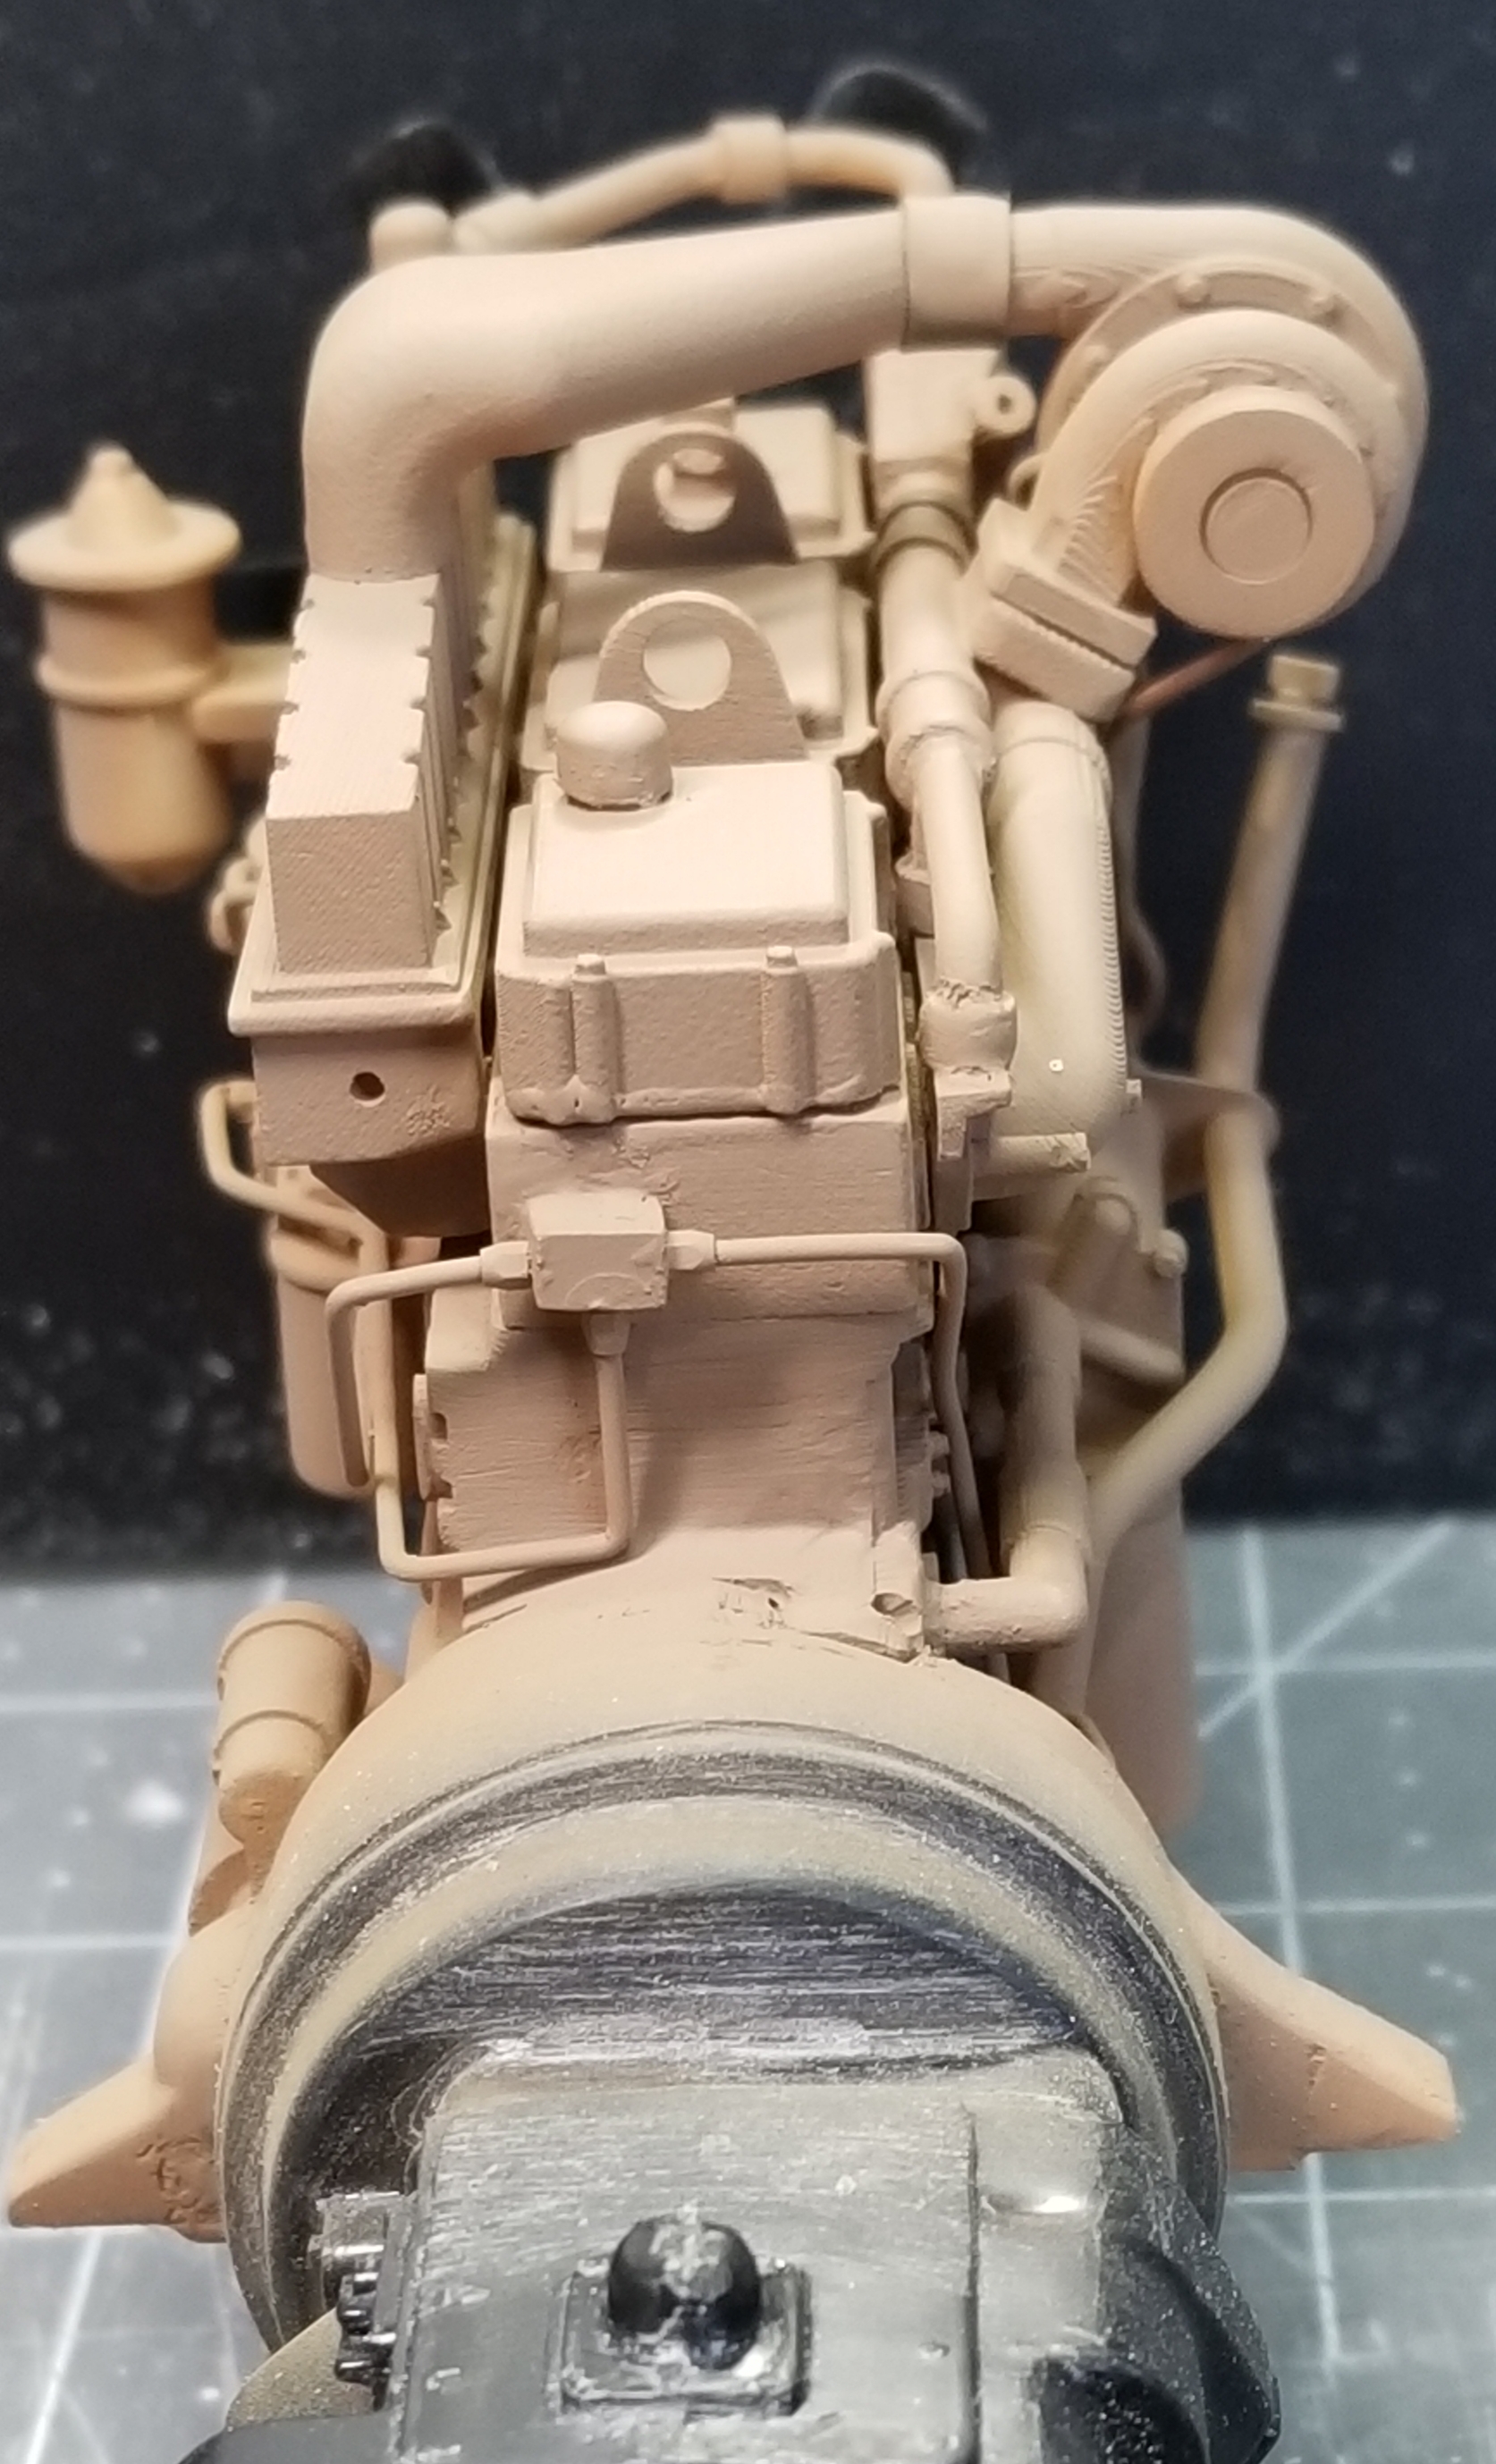
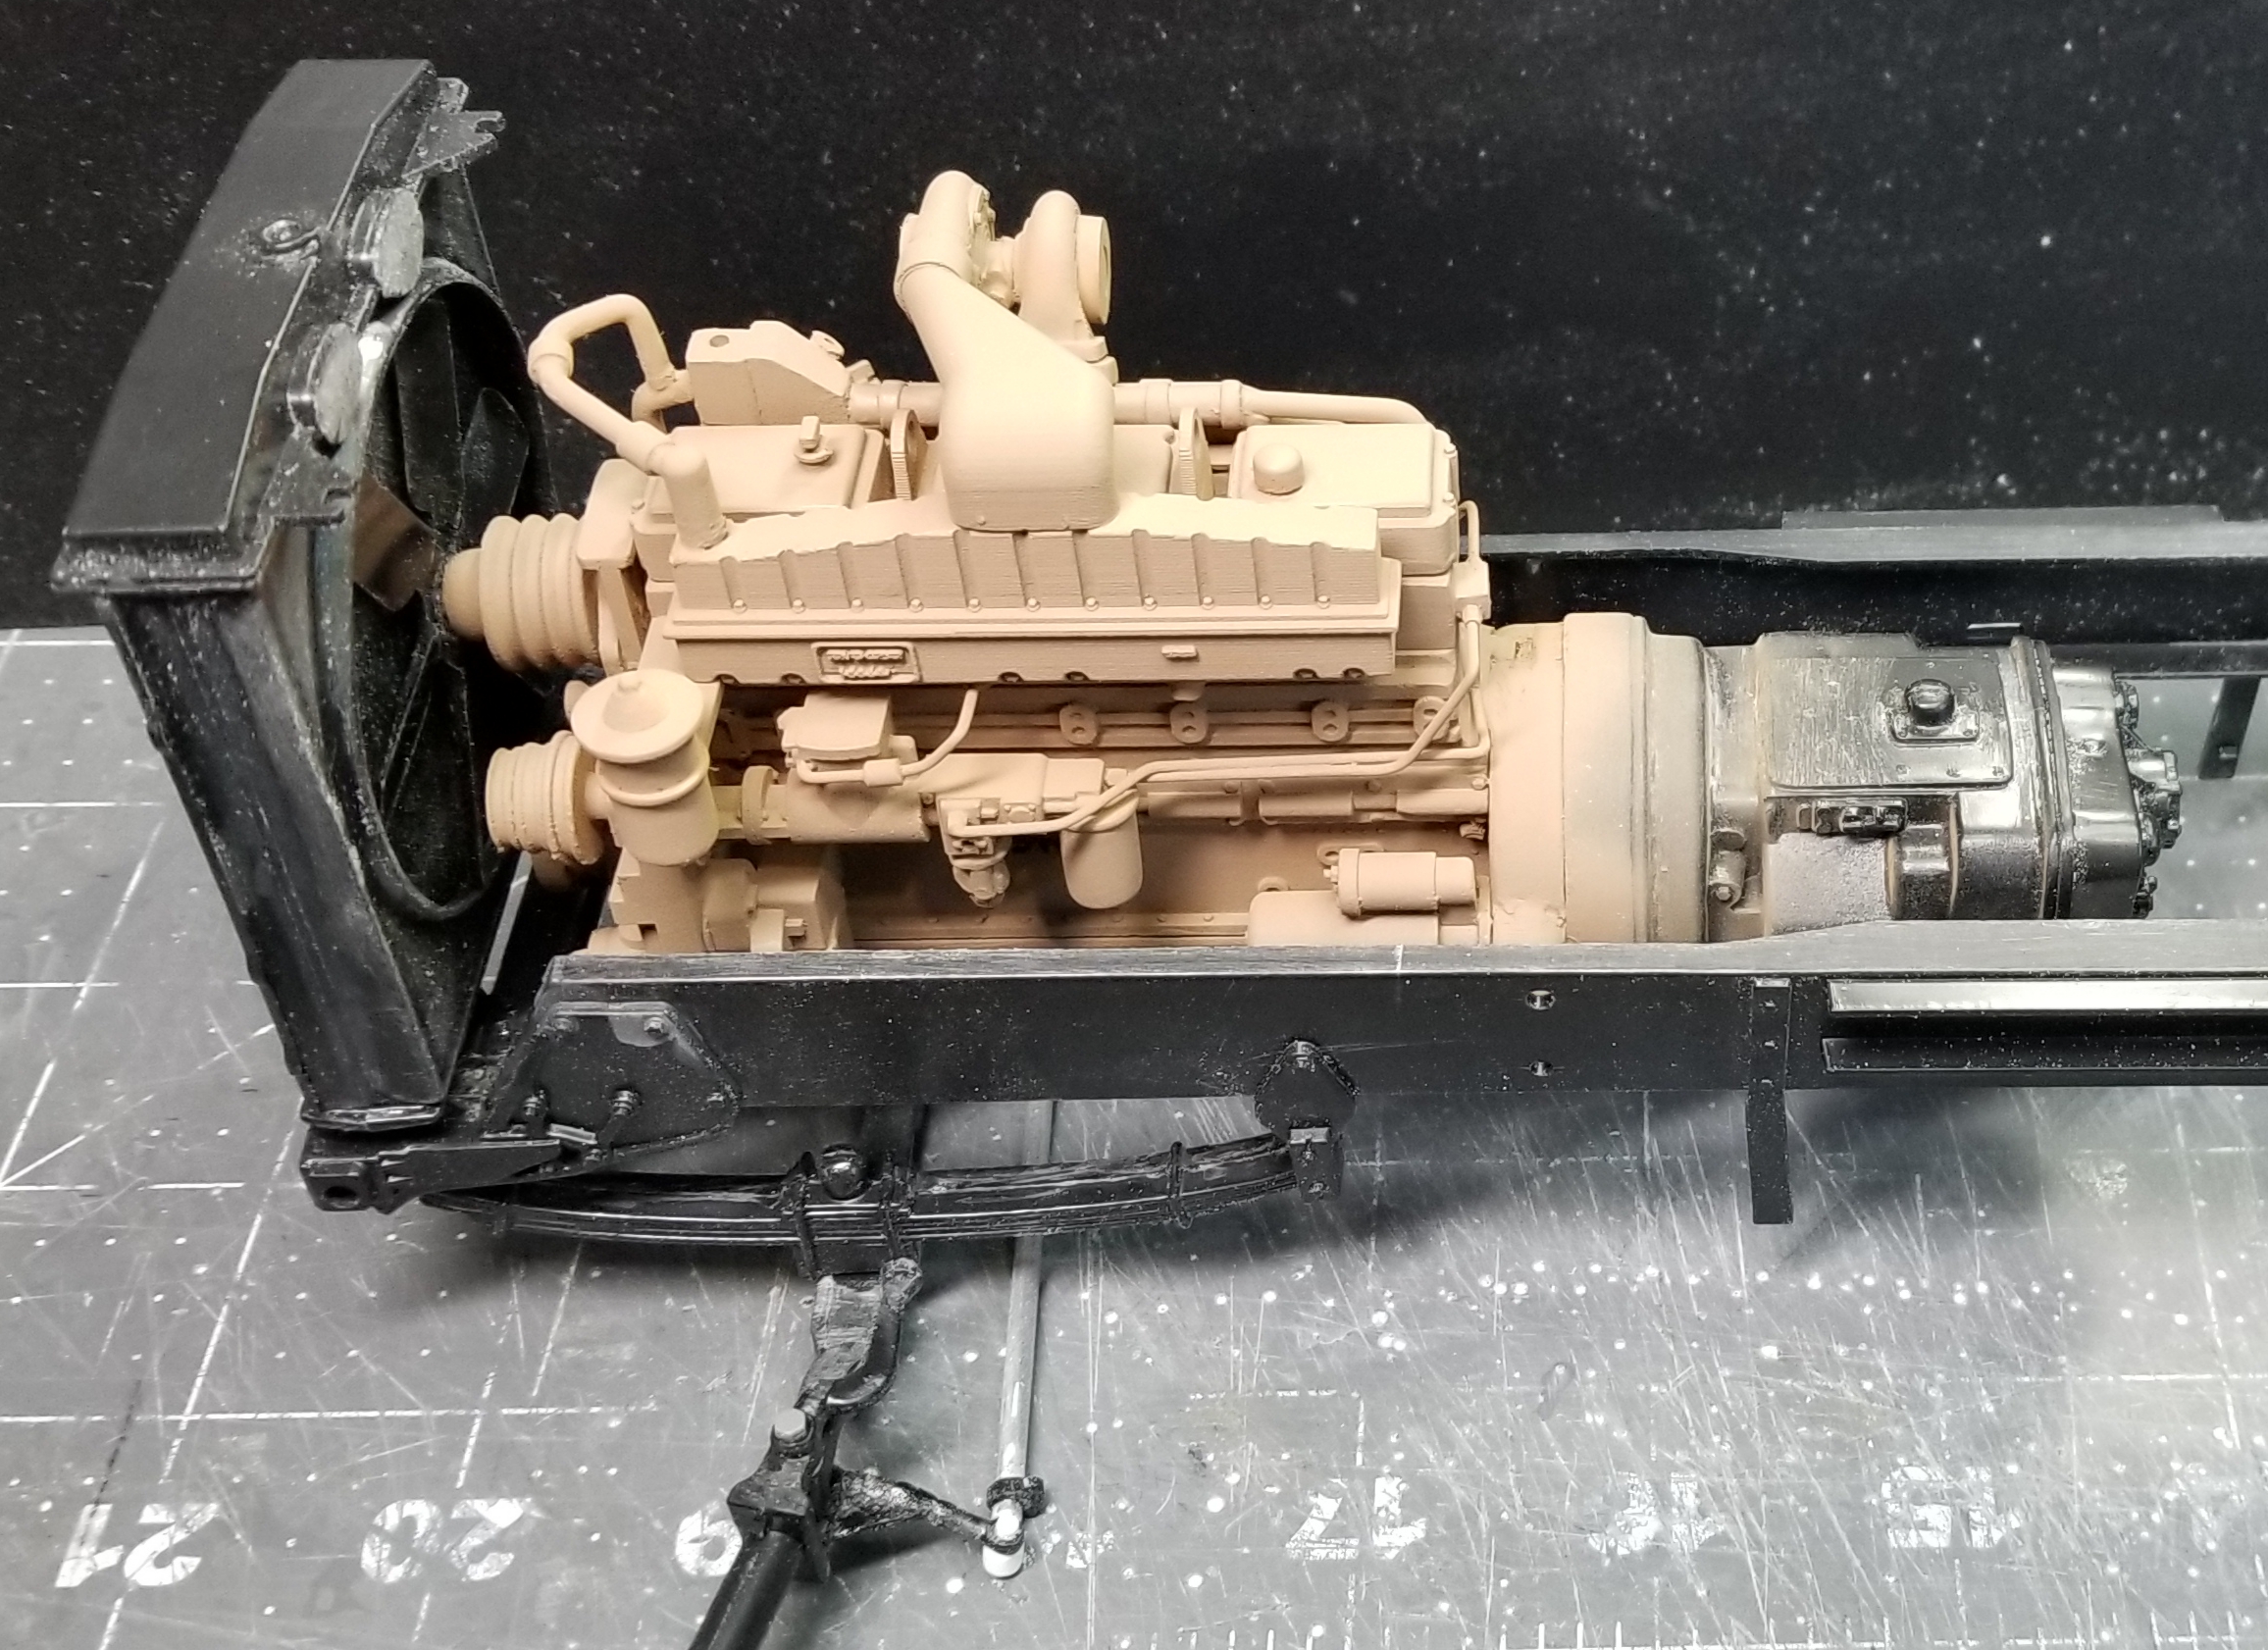
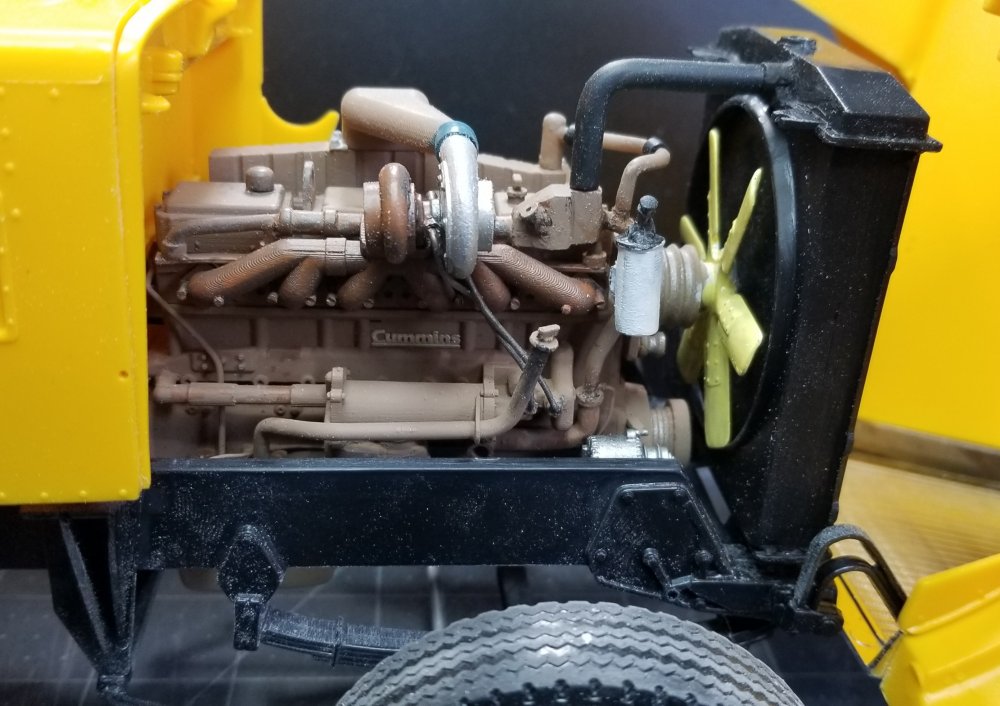
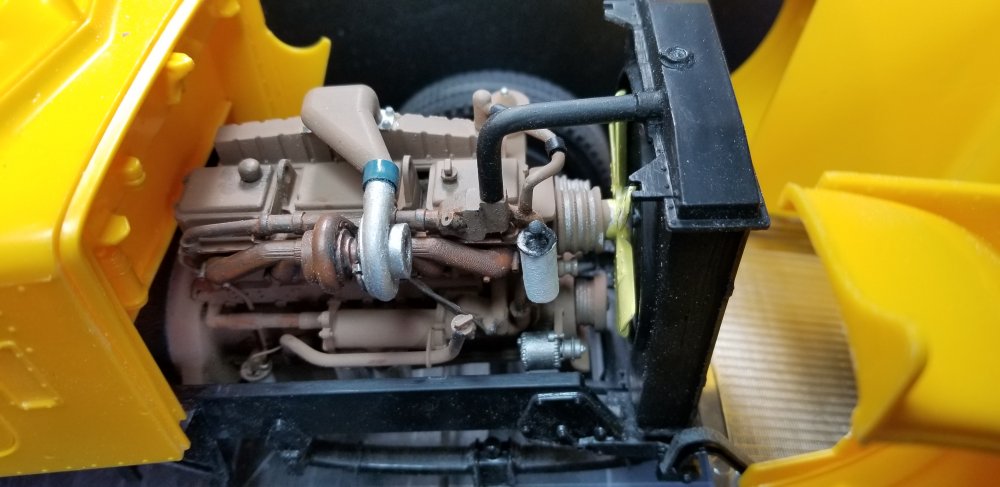
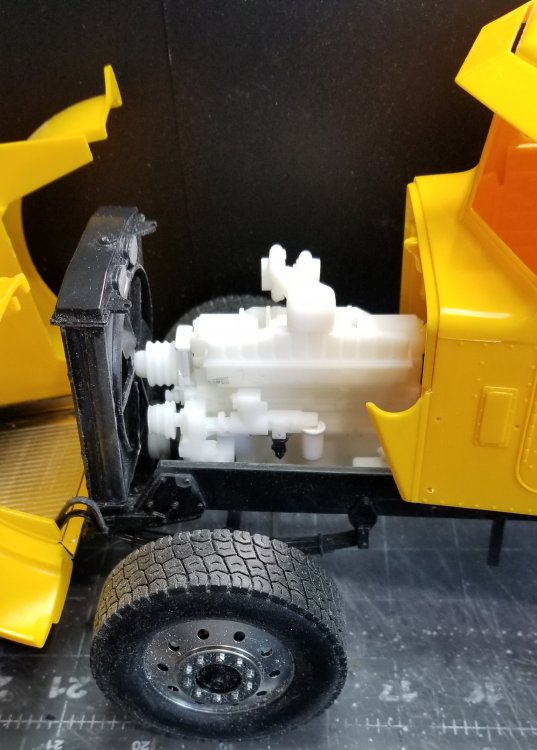
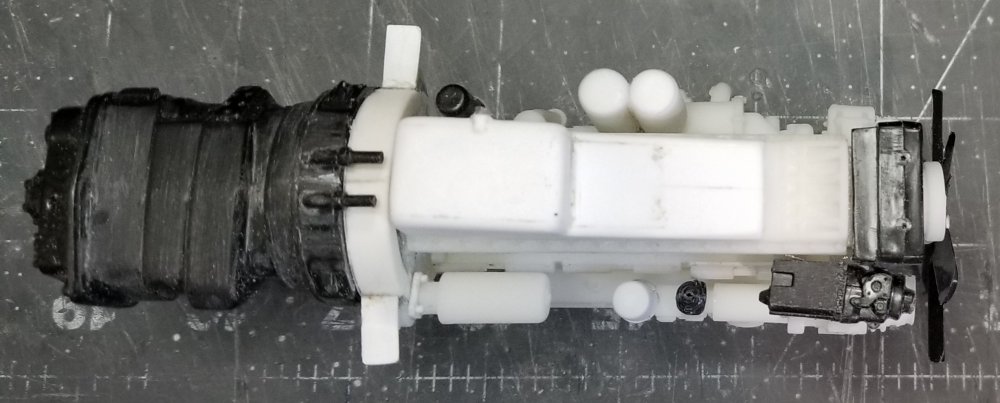
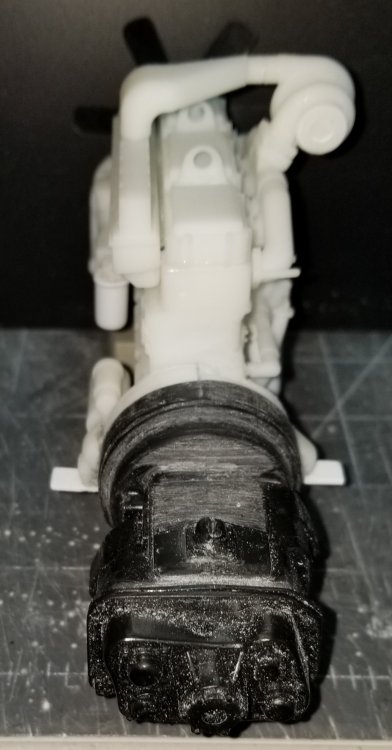
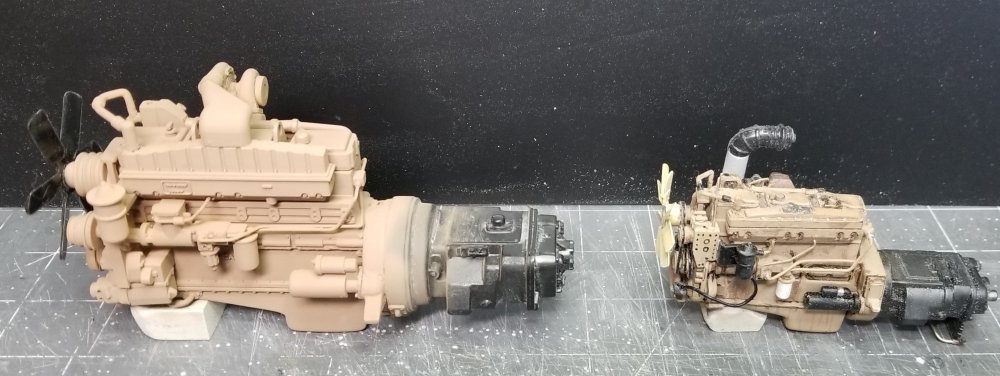
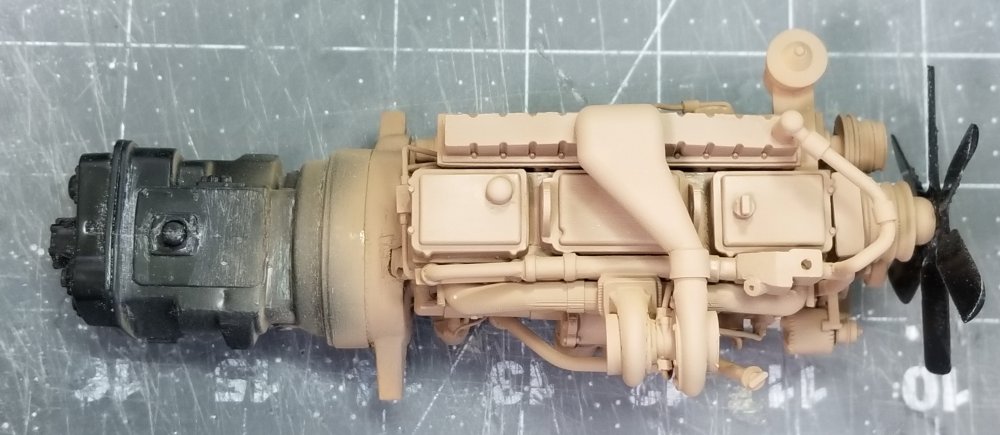
Thanks guys I have done some more work on the Pete. I purchased a 3D printed Cummins NTA855 big cam from a guy, Chucky's precision pullers & parts, I believe he is in Iowa. The engine is pretty nicely detailed, but it was missing some of the real engines components. So, I had to make them from scratch. They weren't really hard to make, just time consuming. I have the frame, cab, hood and sleeper assembled. this view shows the tractor temporarily assembled for pictures. this view shows the engine sitting in the frame and the front floats that are from a 1/16 Ertl dump truck. left side view of the Cummins NTA855 with the kits transmission installed. right side view of engine showing the oil filters. I added the rear filter (it only comes with one) and the water removale filter (the small black one) the fan is from the kit. top view of the engine. bottom view of the engine. I had to modify the oil pan ( it comes with one for a farm tracter) front view showing the kit fan. rear view of engine. I added some more components to the engine and painted it with custom blended Cummins beige Tamiya paint. this view shows the 1/16 scale Cummins NTA855 big cam on the left and the 1/24 scale Italeri Cummins NTC-400 on the right. this view shows the fuel filter that I added plus the fuel and air lines. You can also see the water crossover pipe at the upper left, also I made a power steering fluid reservoir from scratch. this view shows the small filter at the rear of the engine. I modified the oil dip stick tube, moved it forward to clear the exhaust down pipe. Between the exhaust manifold and the three heads I added from scratch a water manifold and lower pipe that connects to the radiator. I based this off of the 1/24 Italeri Cummins. Also I added the turbo oil lines. this view shows the crossover pipe to the water manifold. this view shows the fan, I still need to add the fan clutch and paint it yellow/white. this view shows the tee fitting I made from scratch to connect the fuel lines. this view shows the engine sitting in the frame. Well that's it for now be back with more updates soon. Ron G


-
Enough said! RonG
-
Pocher 1932 Rolls Royce
CrankyCrafstman replied to slash1953's topic in LSM 1/35 and Larger Work In Progress
Welcome on board! Sweet build. Ron G -
Thanks guys
-
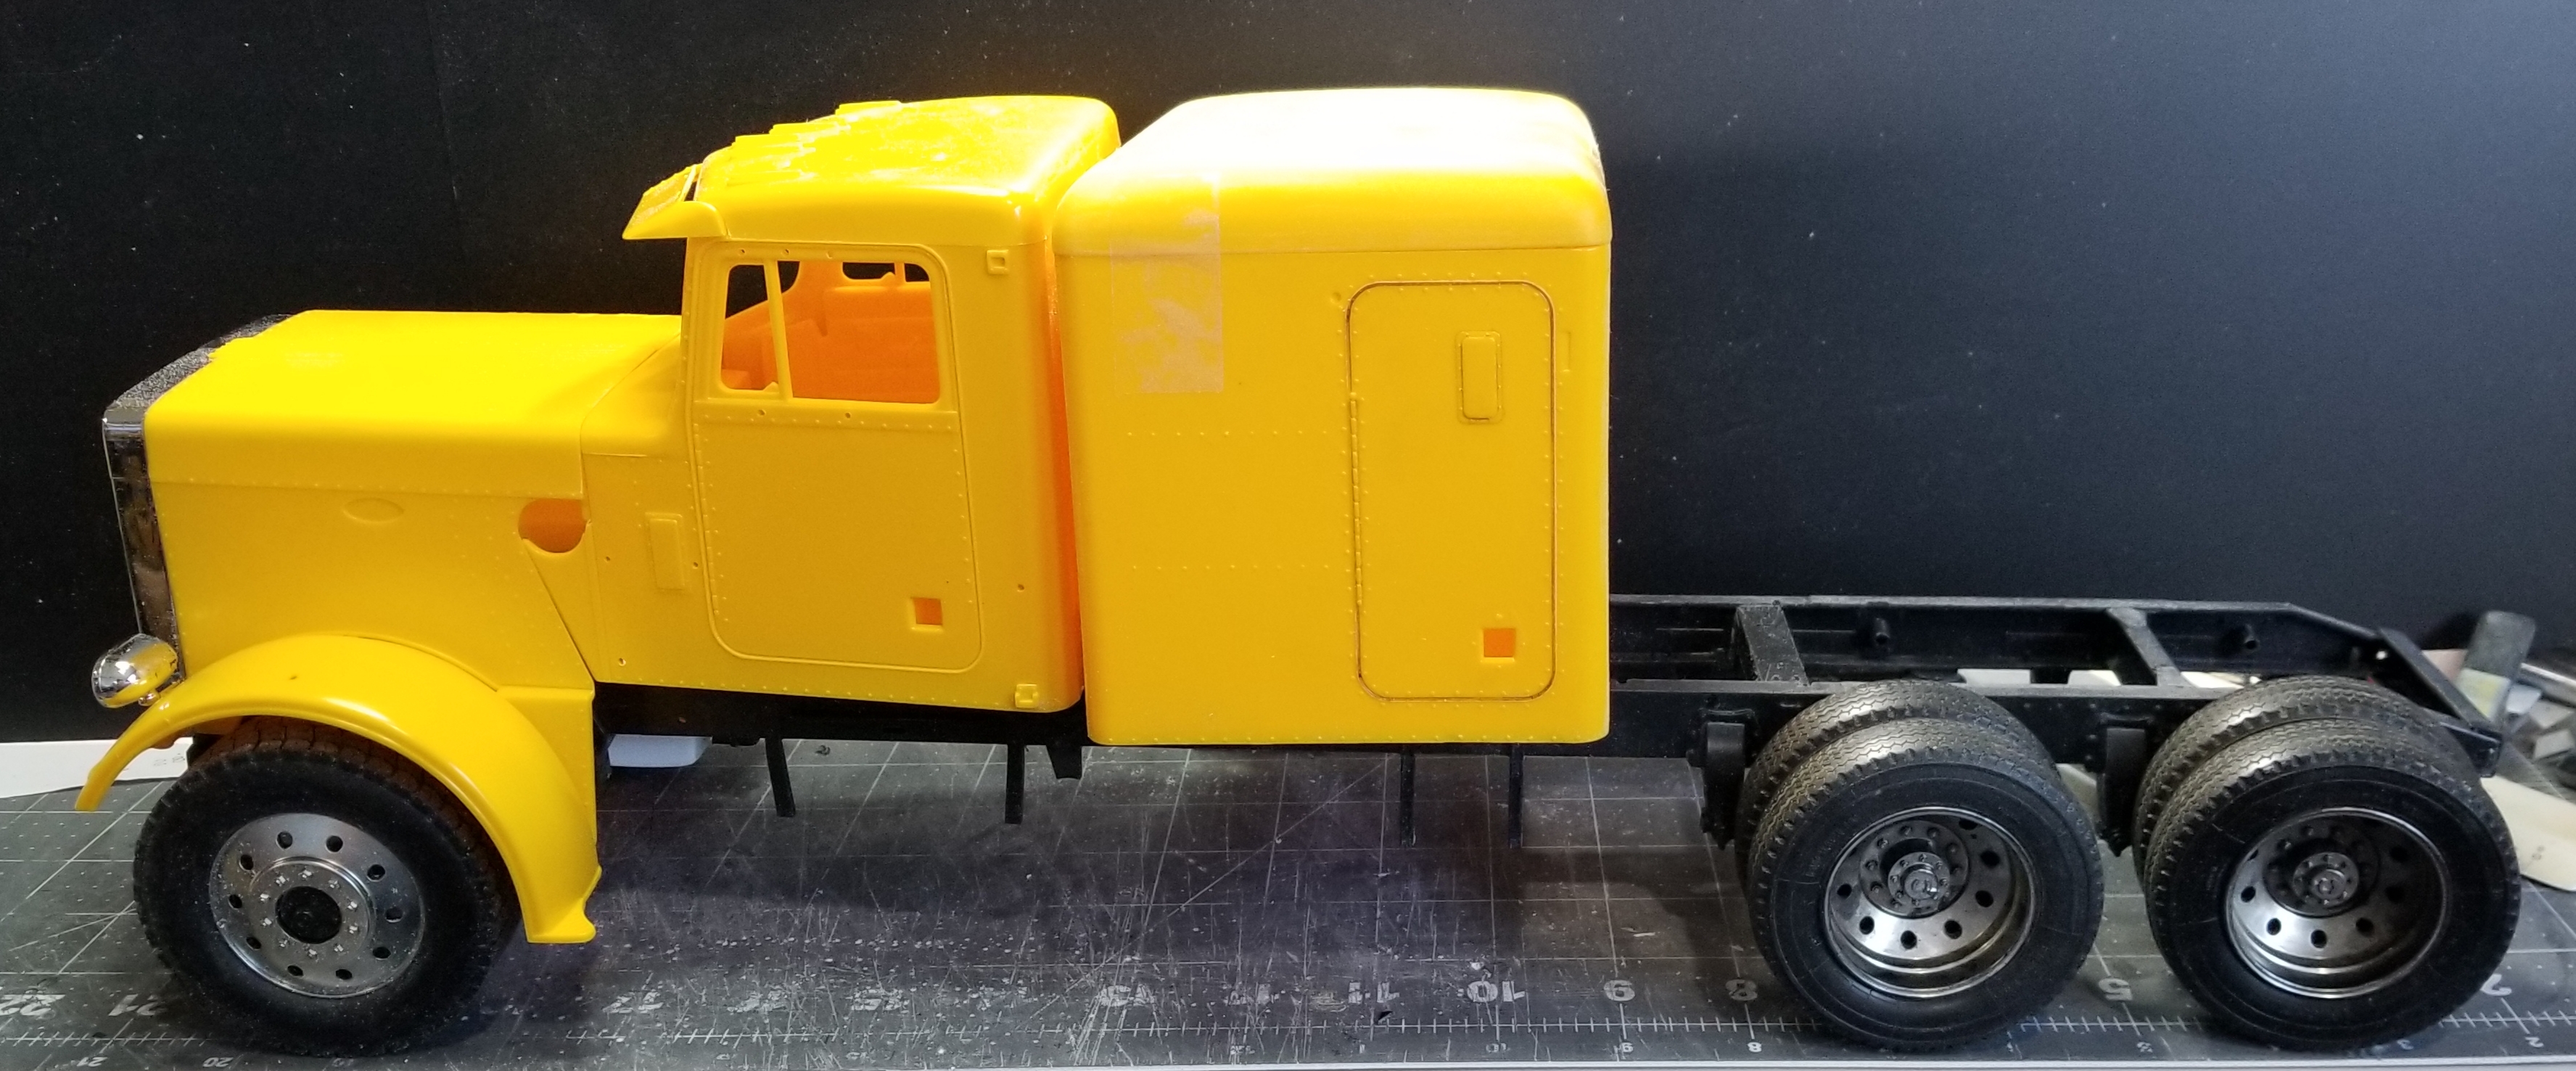
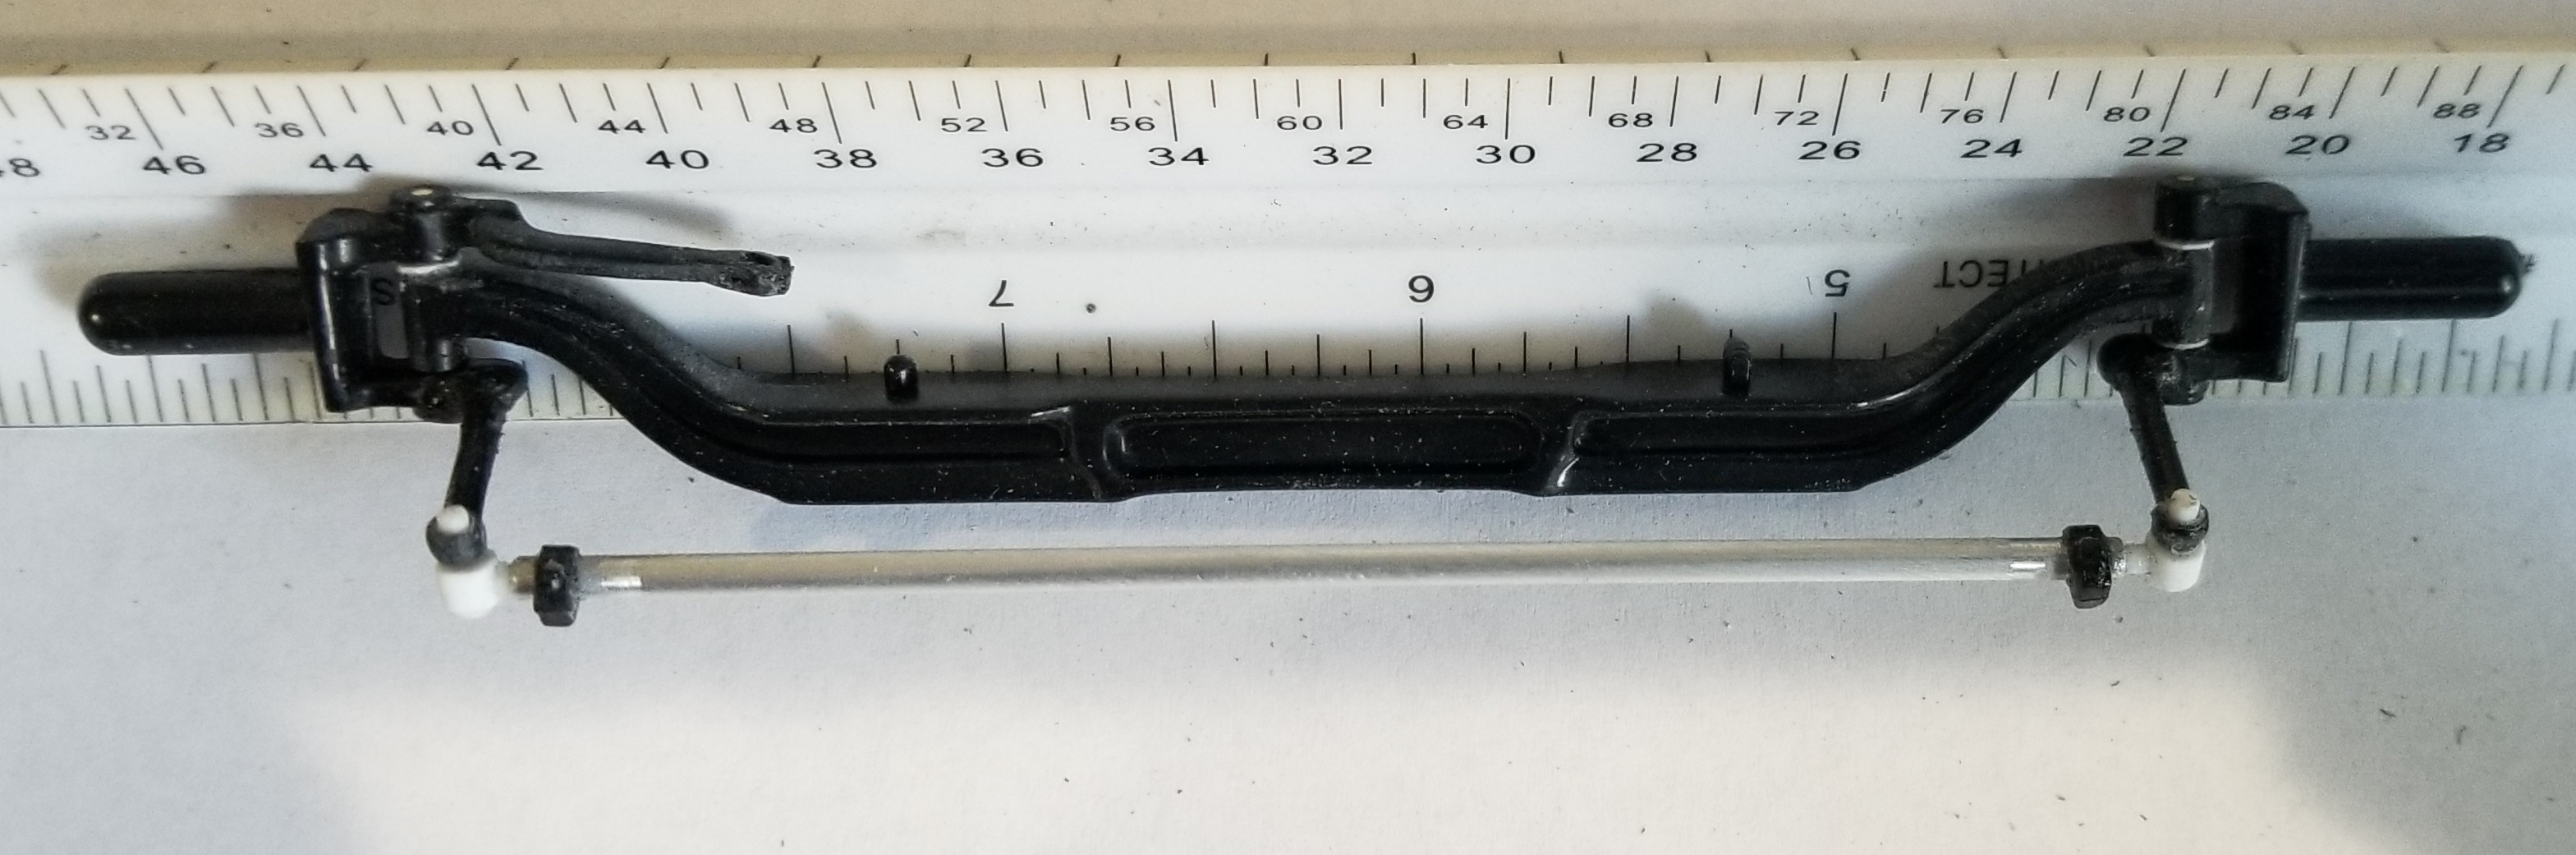
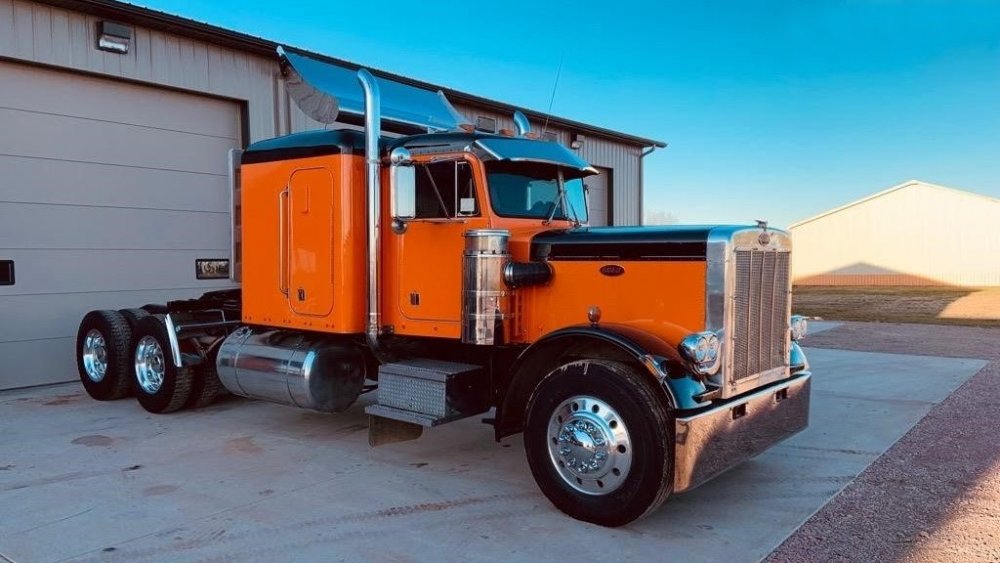
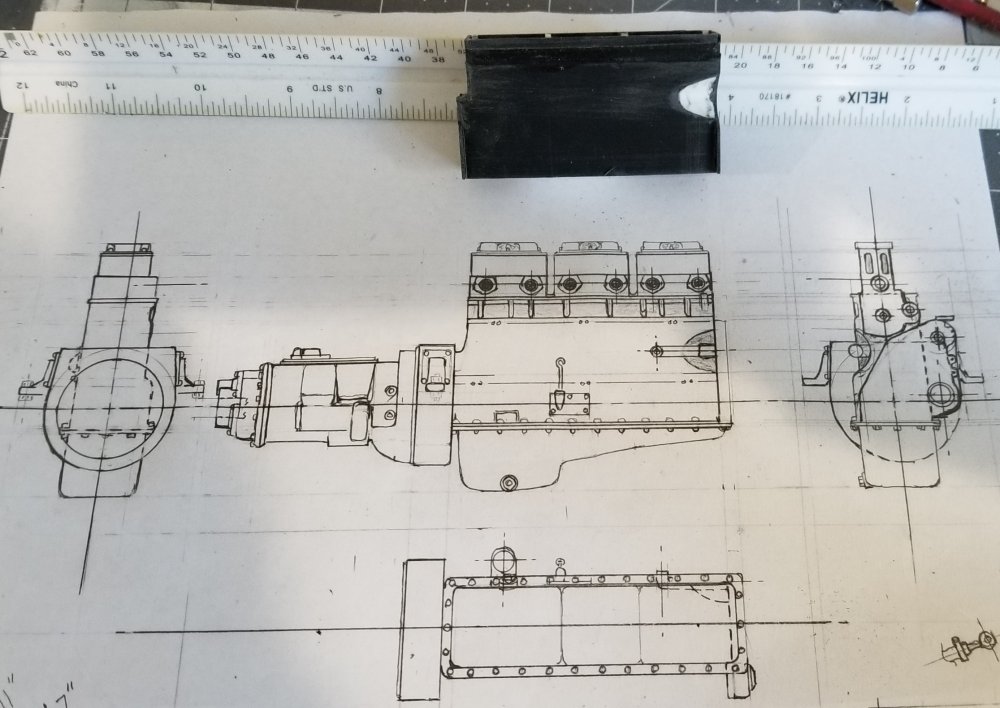
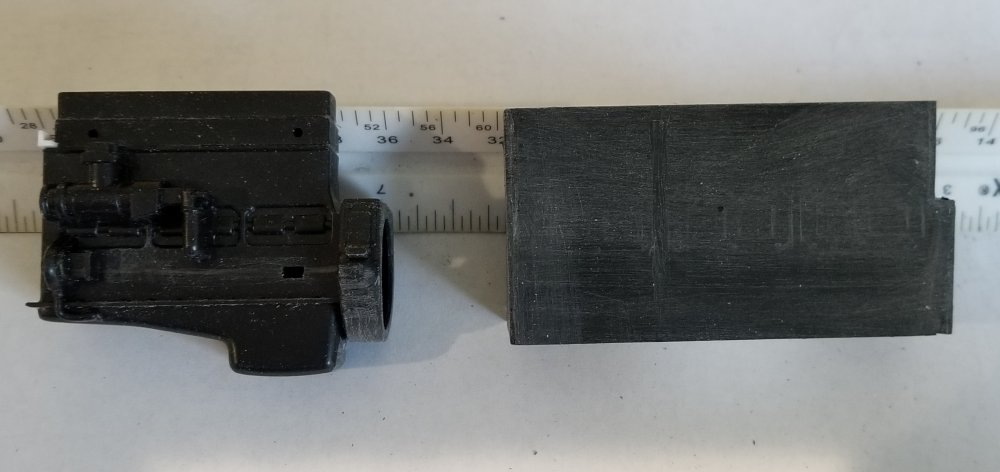
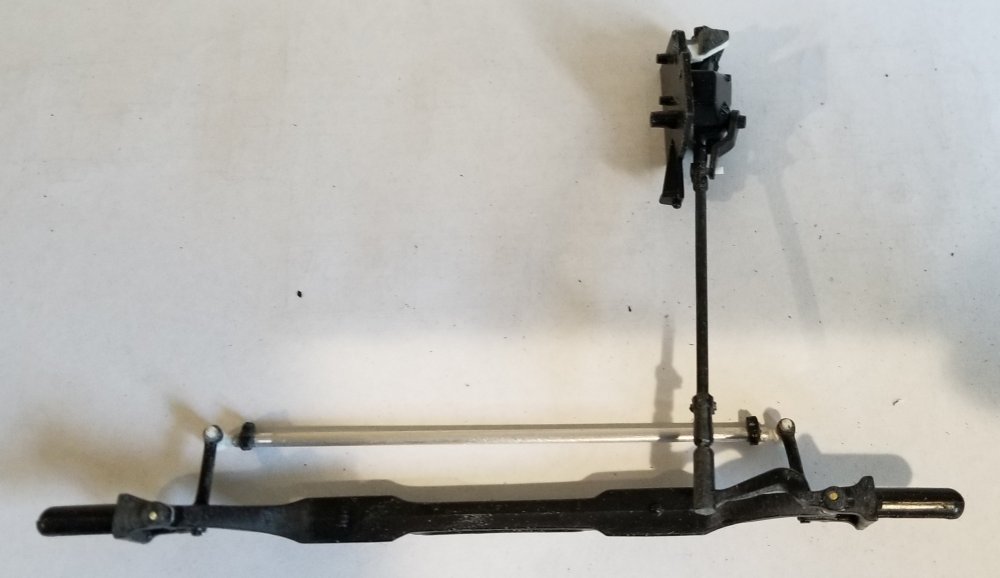
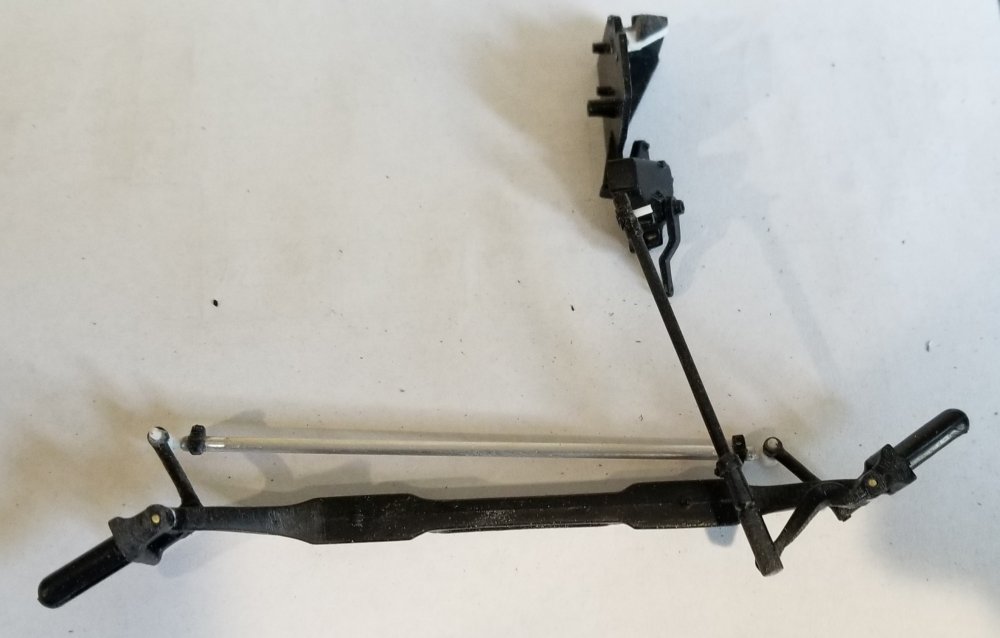
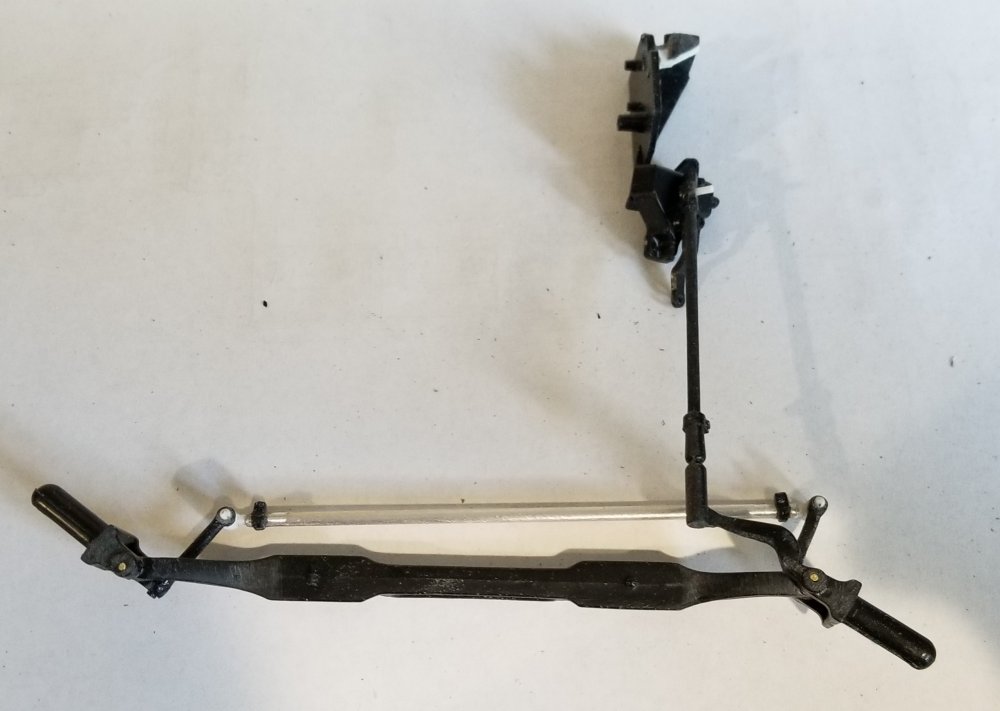
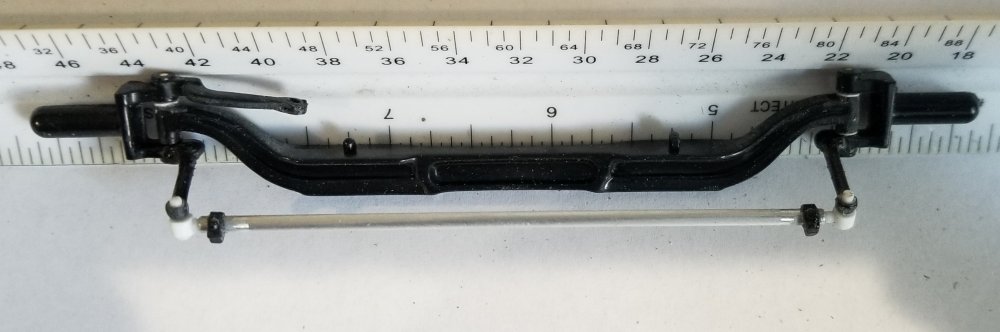
Hey guys I kinda started on this, Monograms 1/16 Peterbilt 359 119" bbc with 63" flat top sleeper. I ordered some custom 3D printed Peterbilt oval hole wheels. I'd like to find some front floats and some more aggressive rear rubber. Things I'm planning on doing to this rig: 1) already did the front steering. 2) custom made Cummins NTC-400 big cam with the kit transmission. 3) 8" (1/2" actual size) custom made stacks. 4) opening doors on the cab and sleeper. 5) detailed cab and sleeper interior. 6) 3D printed chrome air cleaners. 7) custom drop visor and Texas bumper. 8) full air, fuel, oil and electric lines. 9) ???? this is the kit I'm using, got it off of Ebay. this is the paint scheme I'm shooting for. this is my drawing of the Cummins NTC-400 and the start I made on the block. this view shows the 1/16 block on the left and the 1/24 Italeri block I'm using to scale up on the right. the other side of the blocks. top view of the blocks. this view shows the start I made on making the front axle steerable. this view shows it turned to the left. this view shows it turned to the right. View of the front axle from the rear. Well that's it for now be back with more updates soon. Ron G


-
Hey all This showed up on my porch this afternoon. Got it off of ebay. I'm going to be doing an in progress build on this...along with all of the umpteen other builds I have going. Not going to be to fancy, just detailed to the max, basically a really sweet working truck. Ron G

-
Thanks guys
-
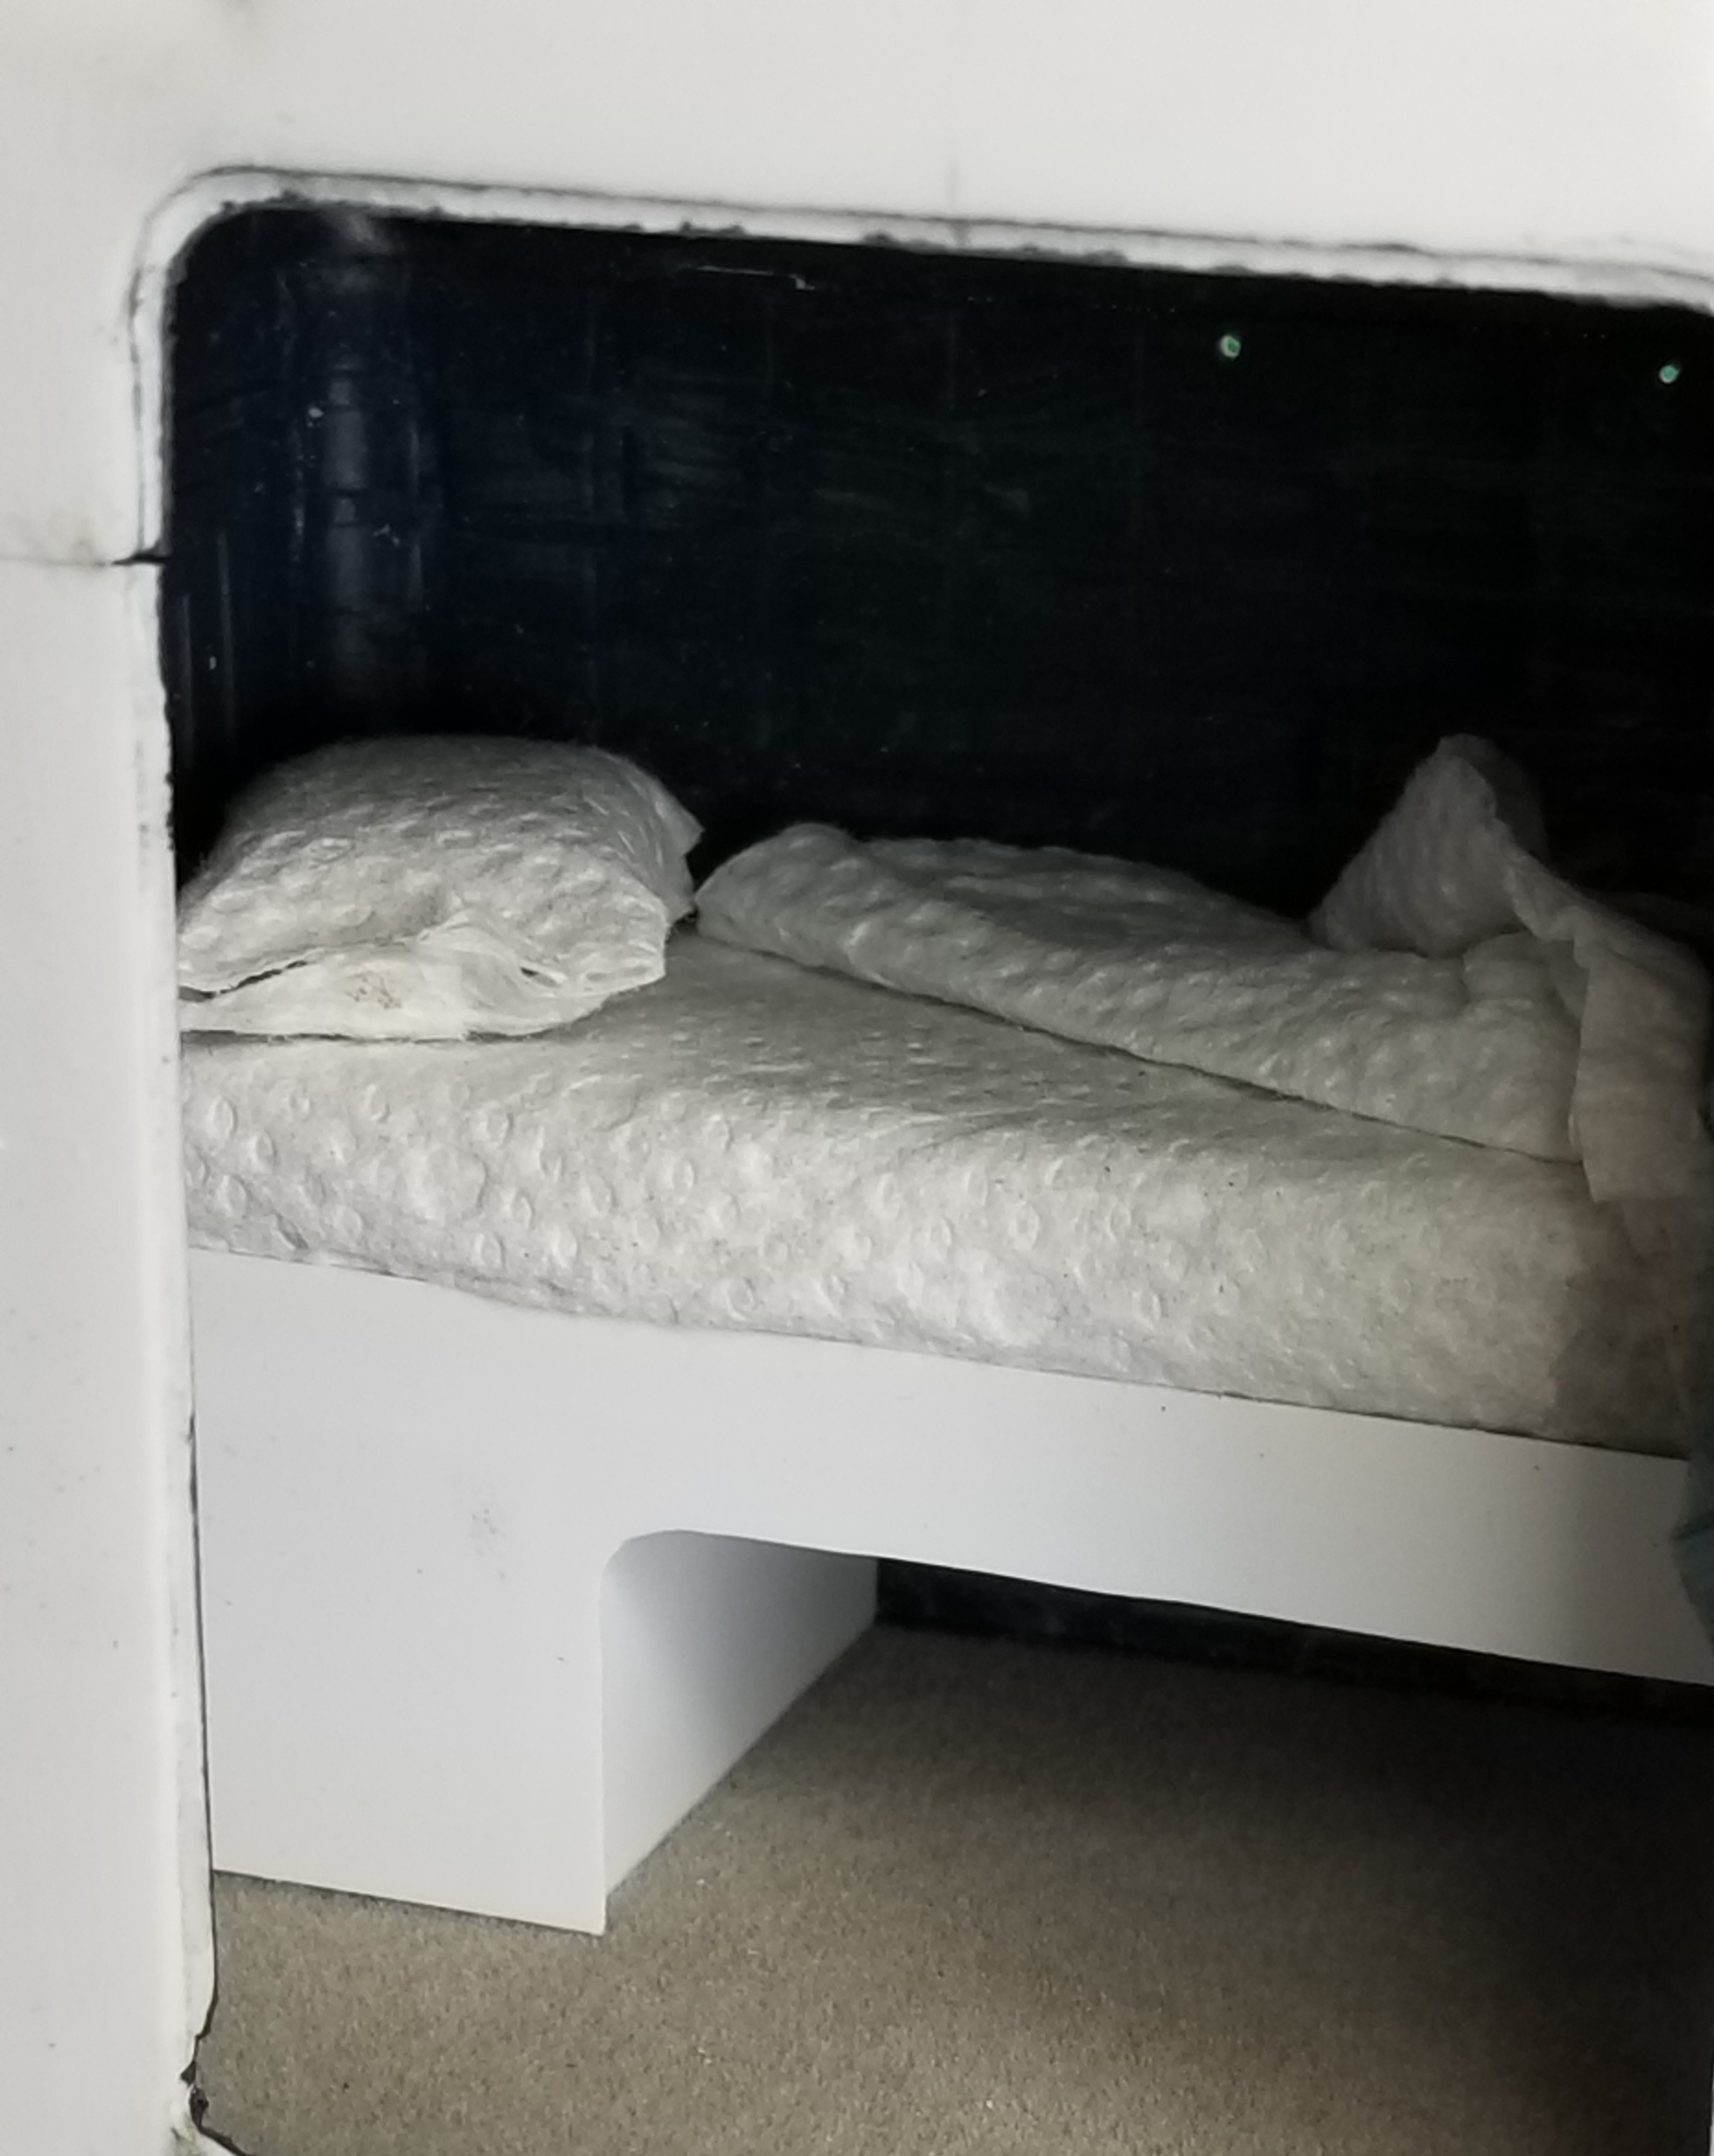
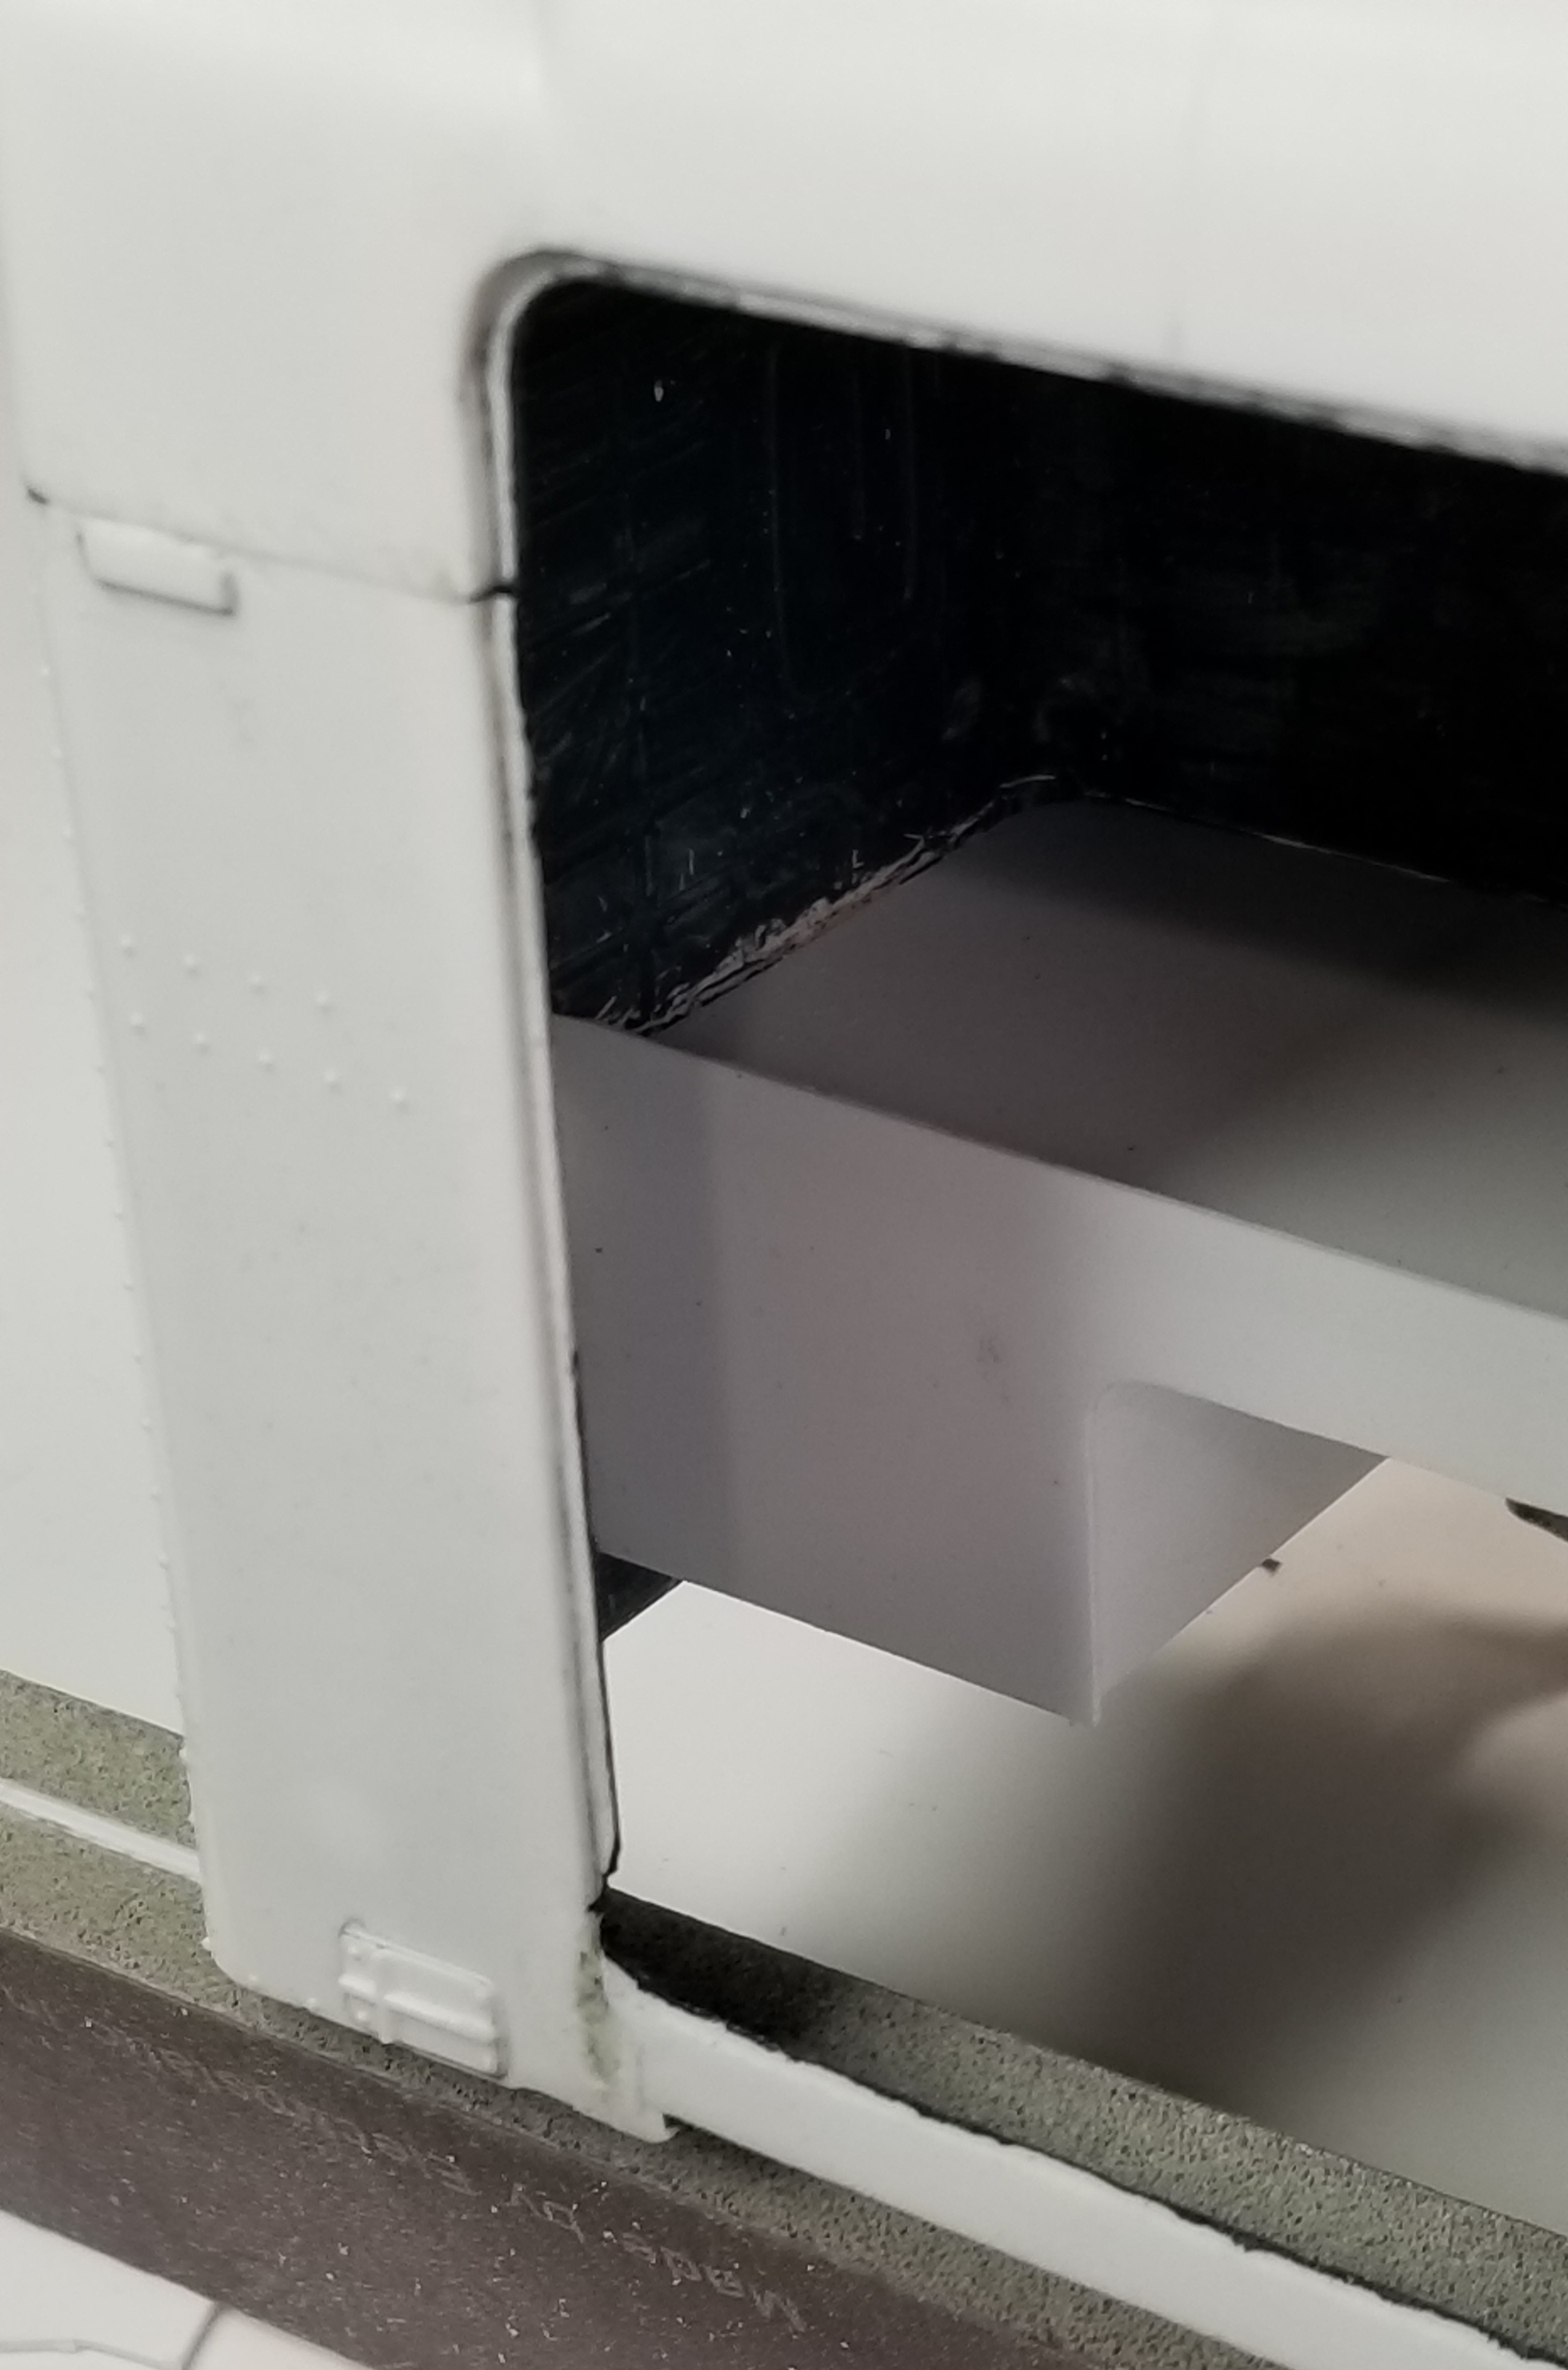
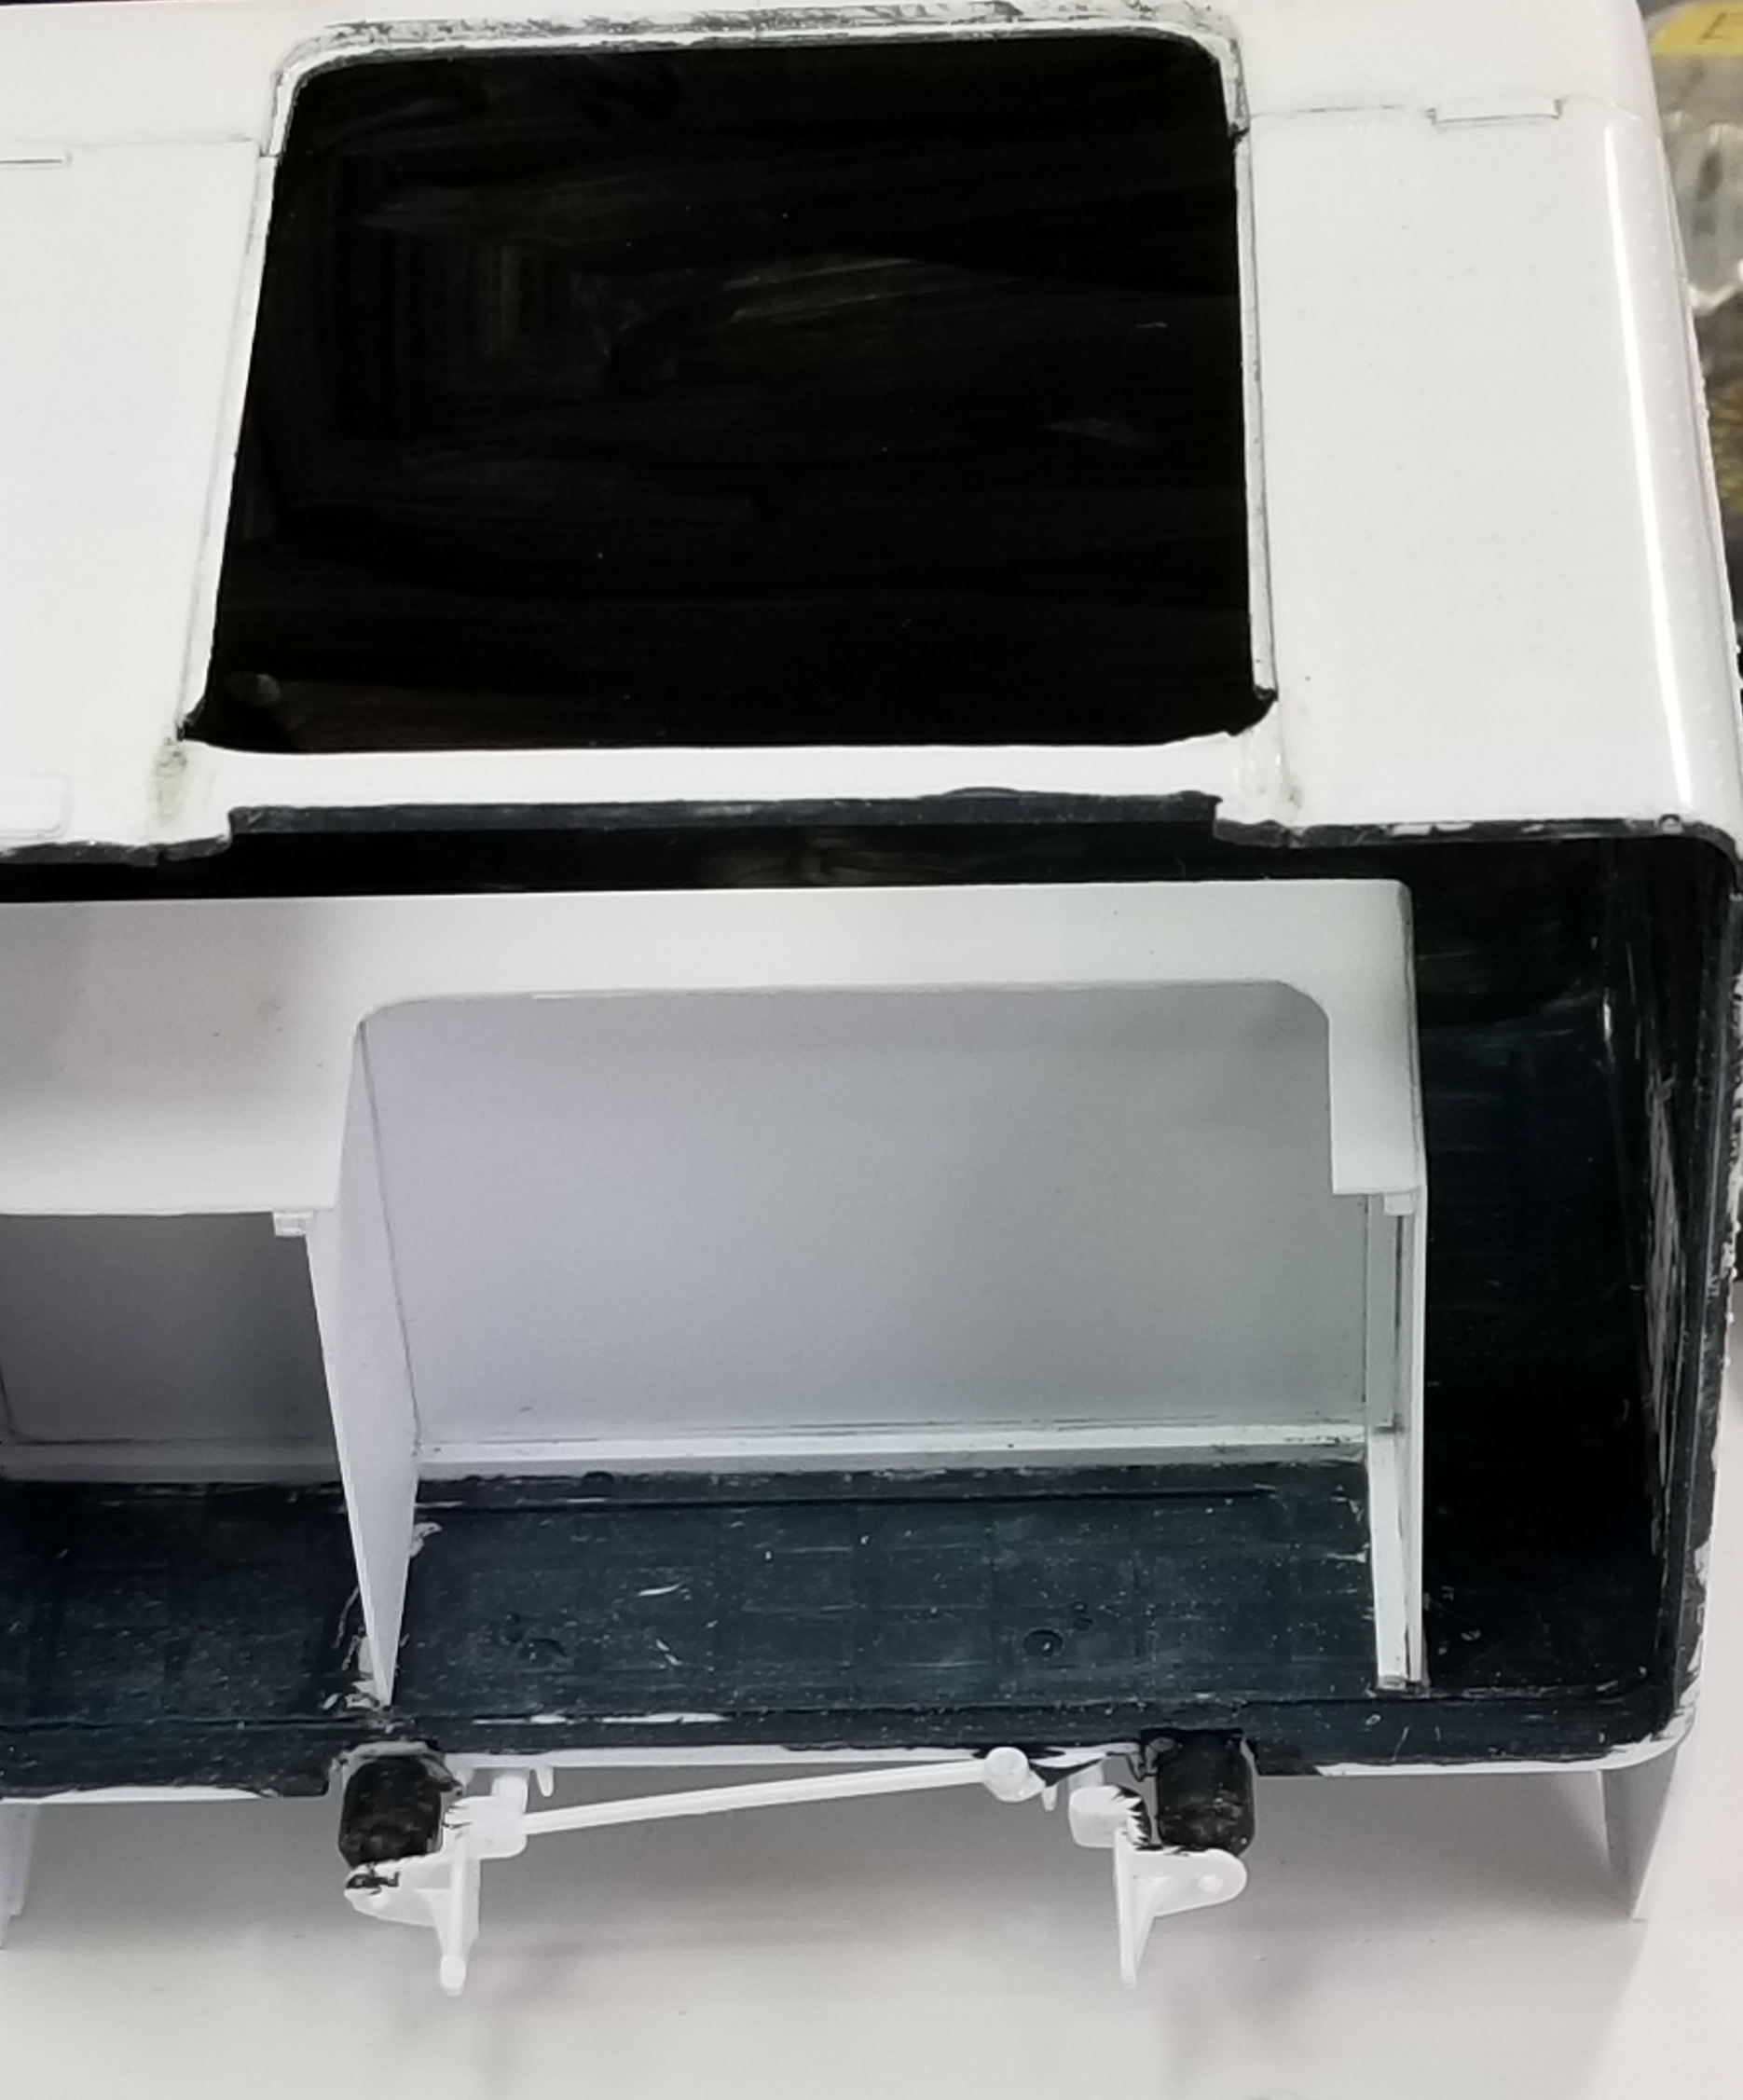
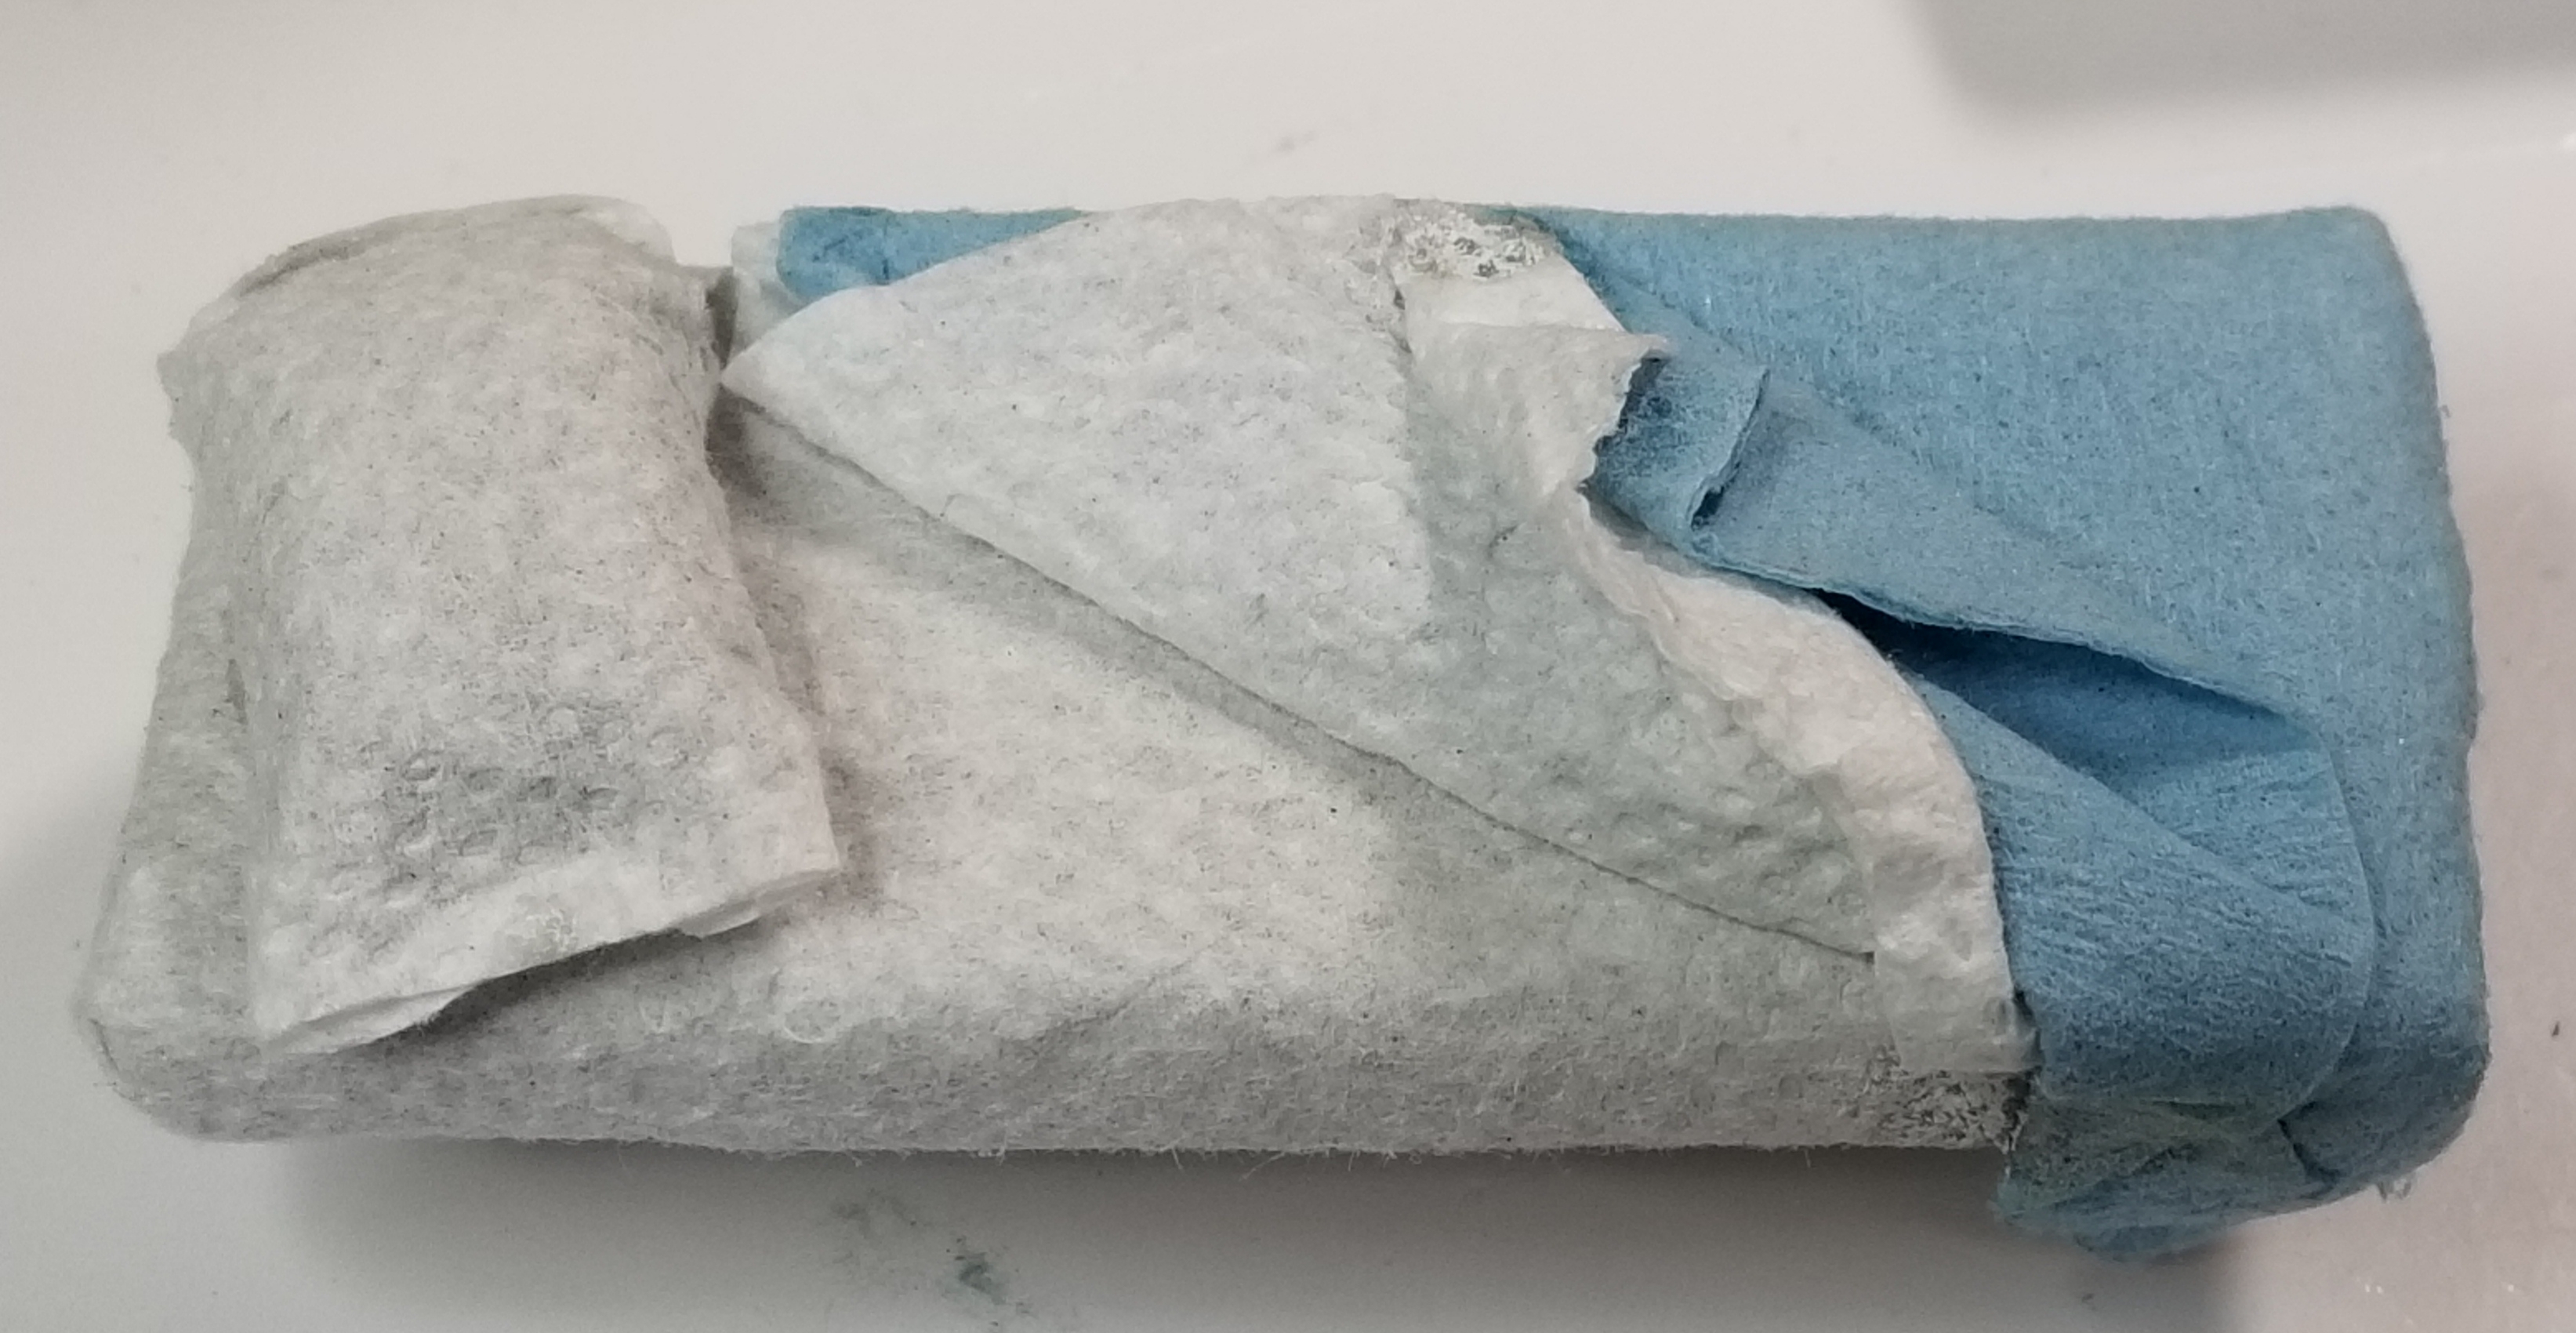
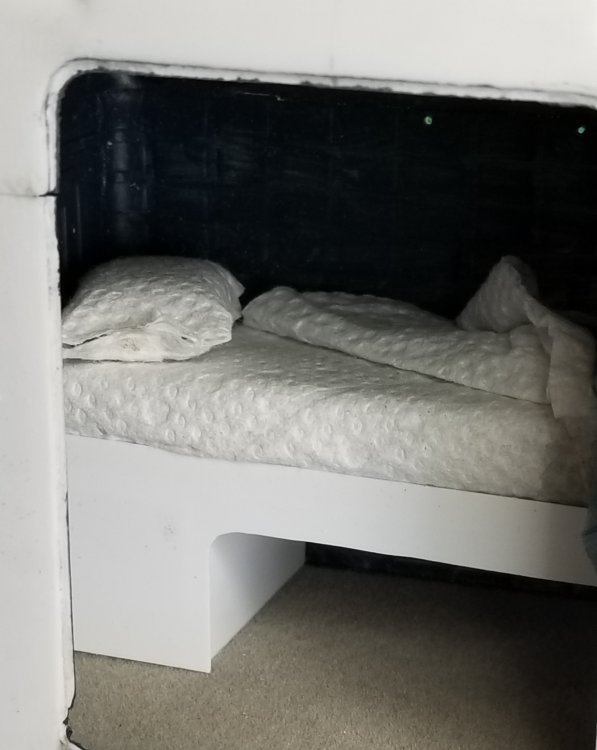
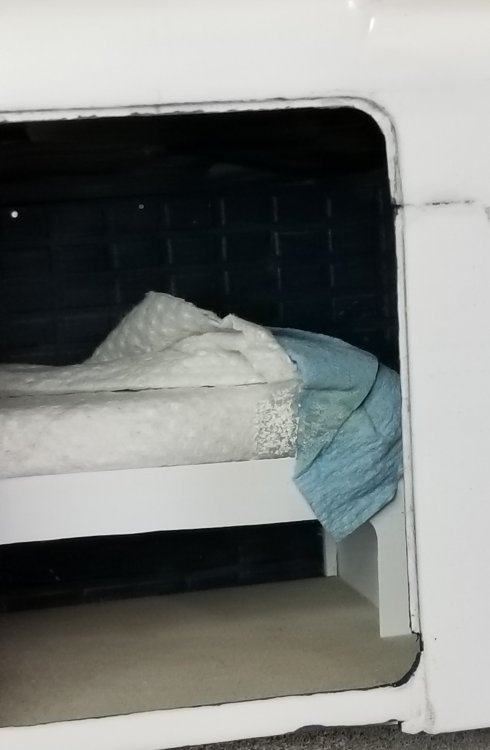
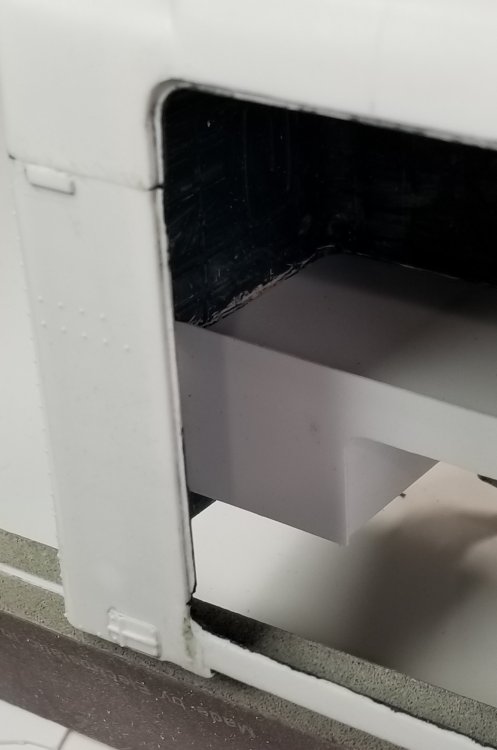
Thanks guys Some more work done on the interior. I totally remade the bed. I used two of the kit mattresses glued back to back to make it thicker (this trucker, like me has a bad back...lol). You can just see the pillow that I made with a piece of foam rubber for a pillow and covered in a piece of paper towel for a pillow case. this view shows the blanket, made from blue paper shop towel, and both sheets, made from paper towel. this view shows the bed support structure and it covers the bunk heater area (that you won't see). this view shows the other side of the bed support structure. bottom view of the bed support structure. I have to paint all of this. this view shows just the bed, sheets, blanket and pillow. this view shows the carpet added to the sleeper floor. Now I have to figure out what color to paint this rig. Dark blue with light blue frame? Red with black uppers and fenders with black frame? Pink with purple poka dots...lol. Give me some ideas guys? Ron G


-
Nice job on that spit Vandy ol boy! Ron G
-
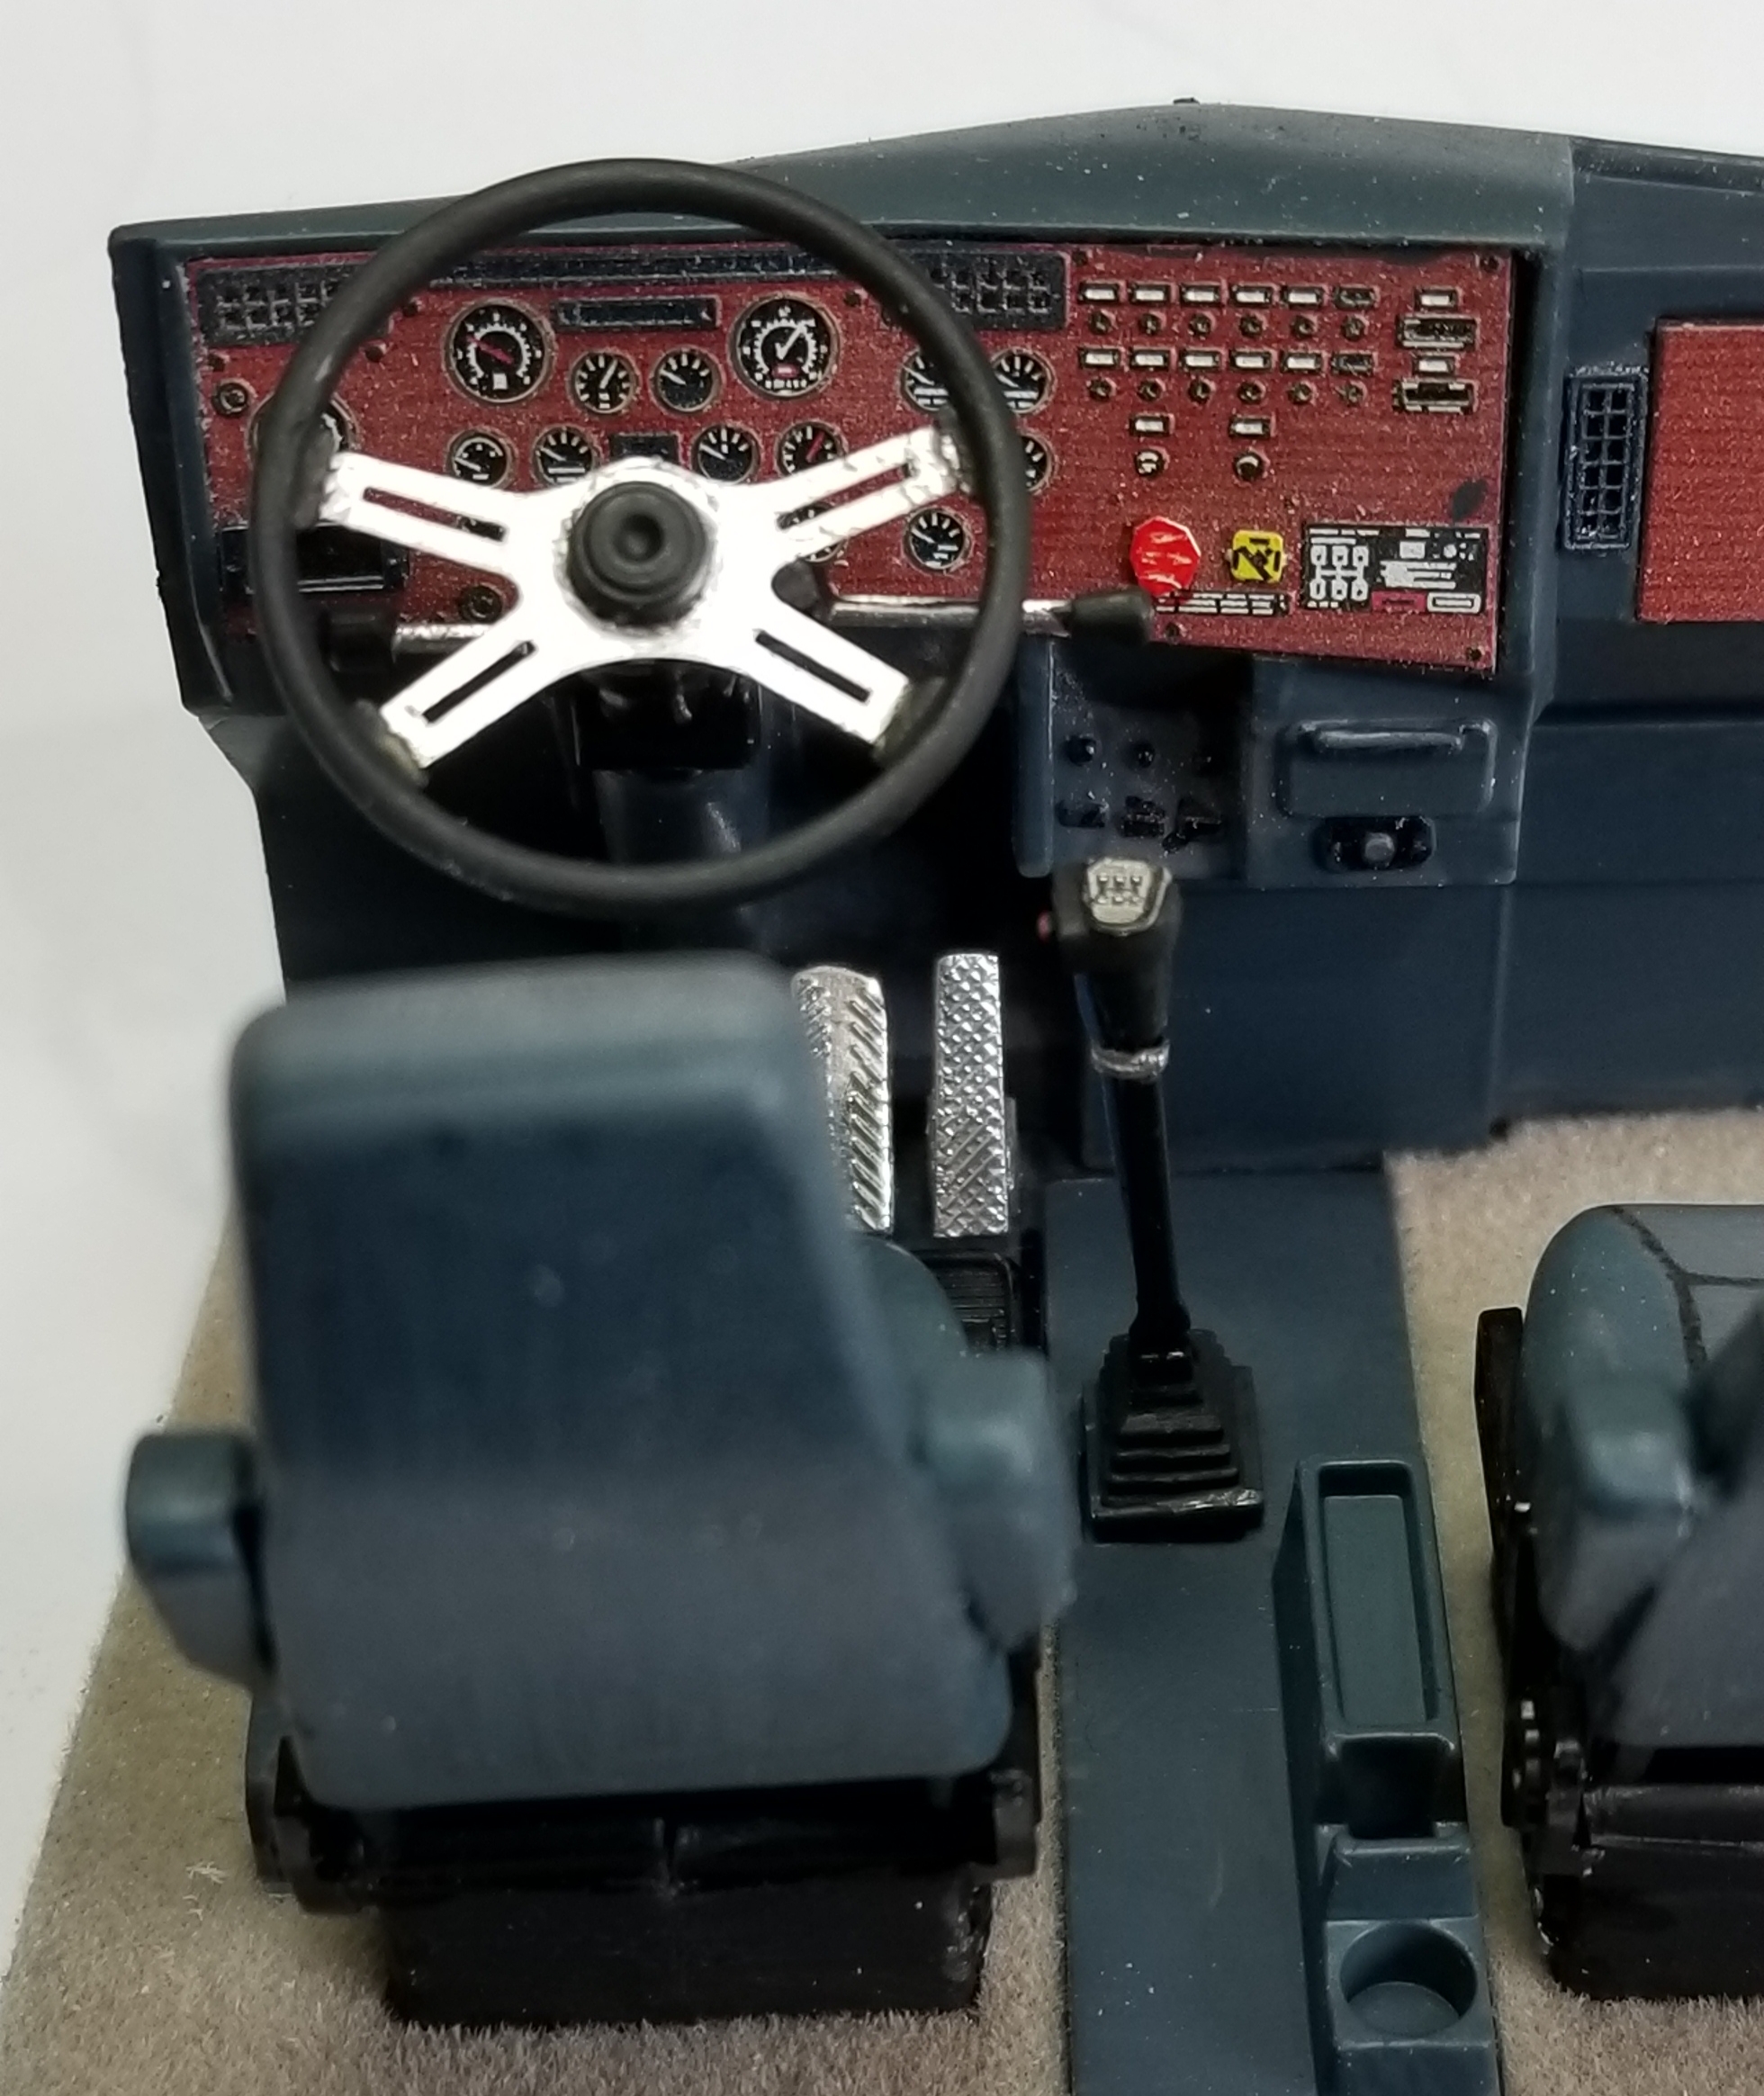
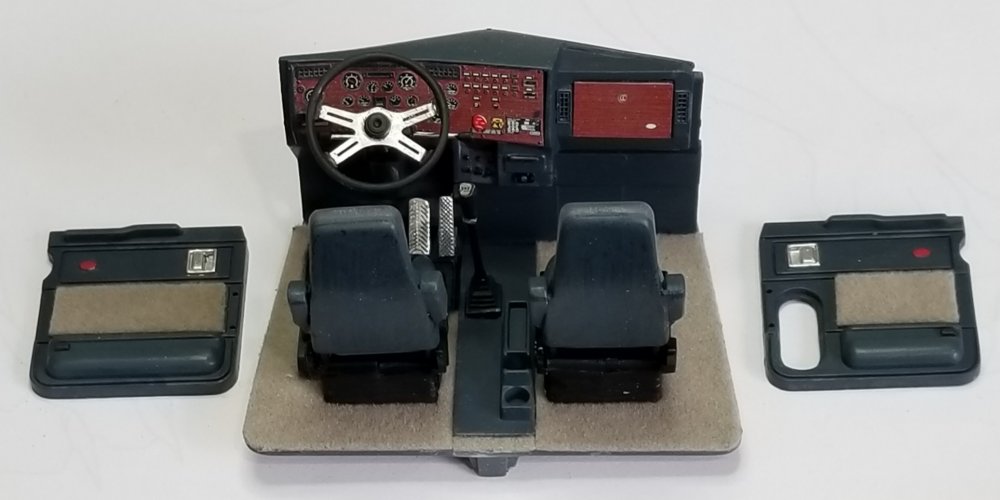
Hey guys Small update, I have been working on the interior. I have the interior almost done. I added some carpet to the door panels. this view shows the Czech Model Trucks instrument panel, air knobs, glove box and gear knob installed. this view shows the detail I added to the seats, I did this with a 0.1 mm Molotow black marker and paint, a little hard to see but if you zoom in you can see it. this view shows the Czech Model Trucks 4 spoke steering wheel center I added to the kits steering wheel ring. I still have to add some clear acrylic gloss to the gauge faces. Well that's it for now be back soon with more. Ron G

-
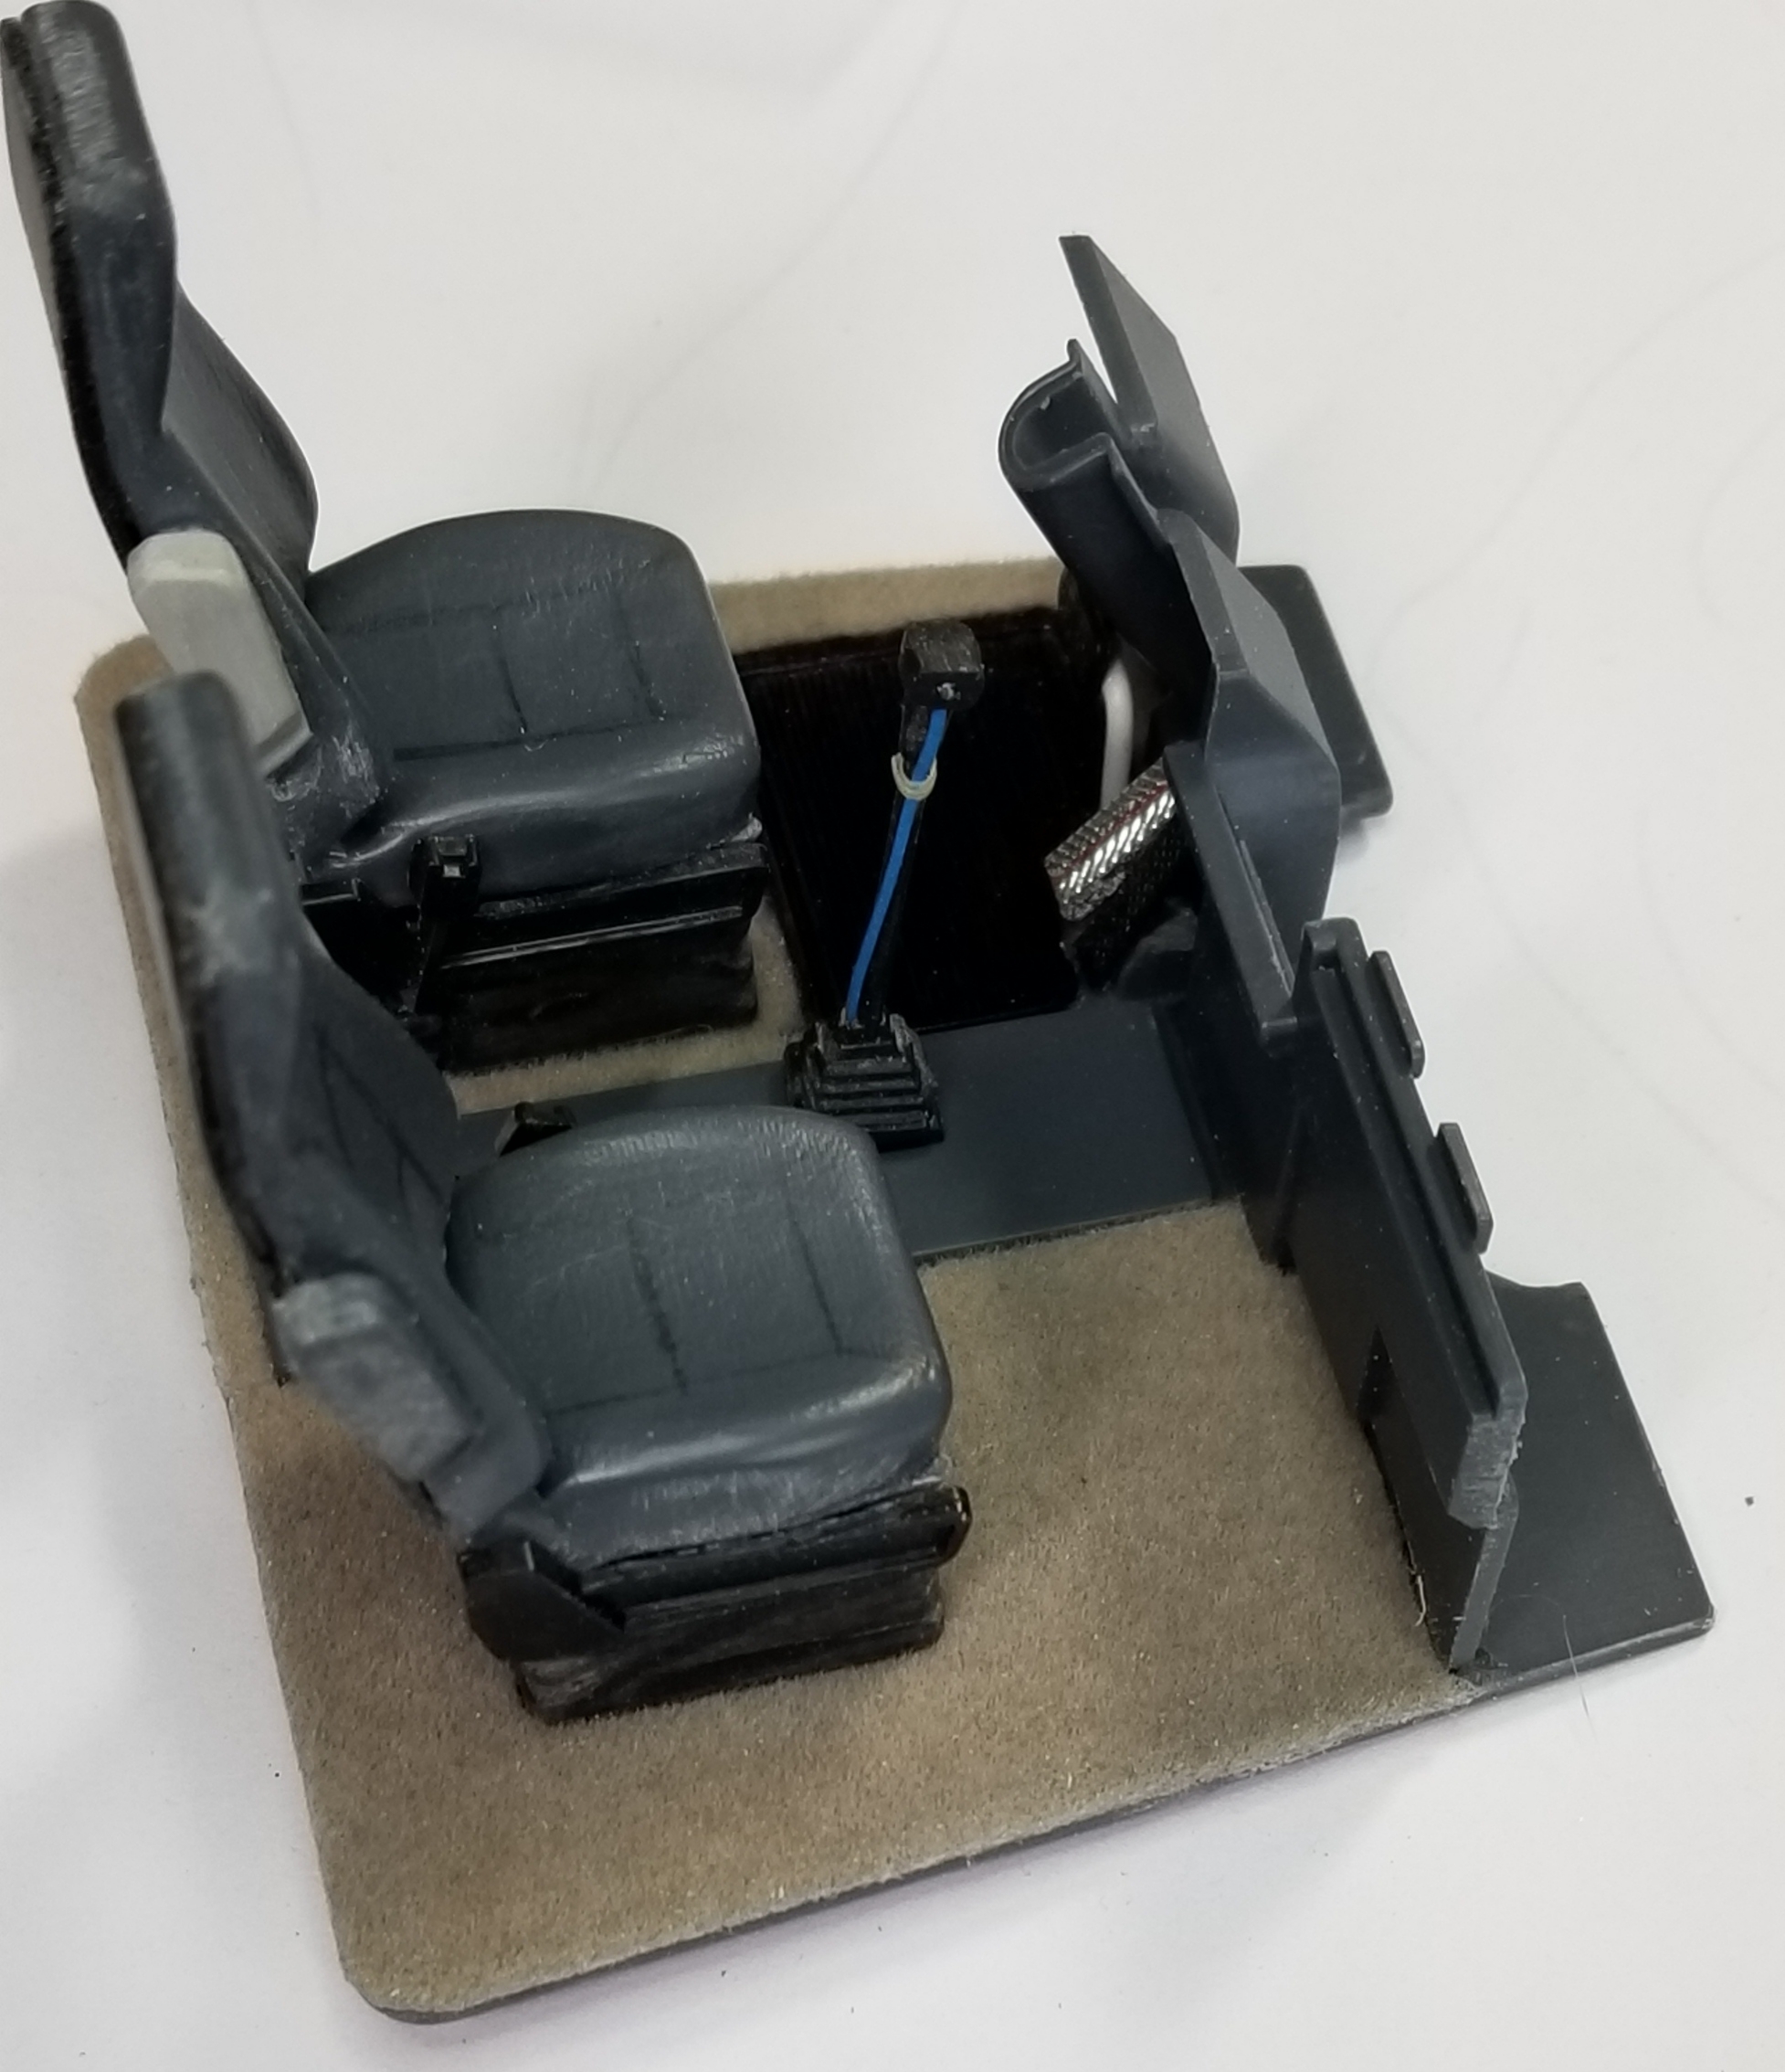
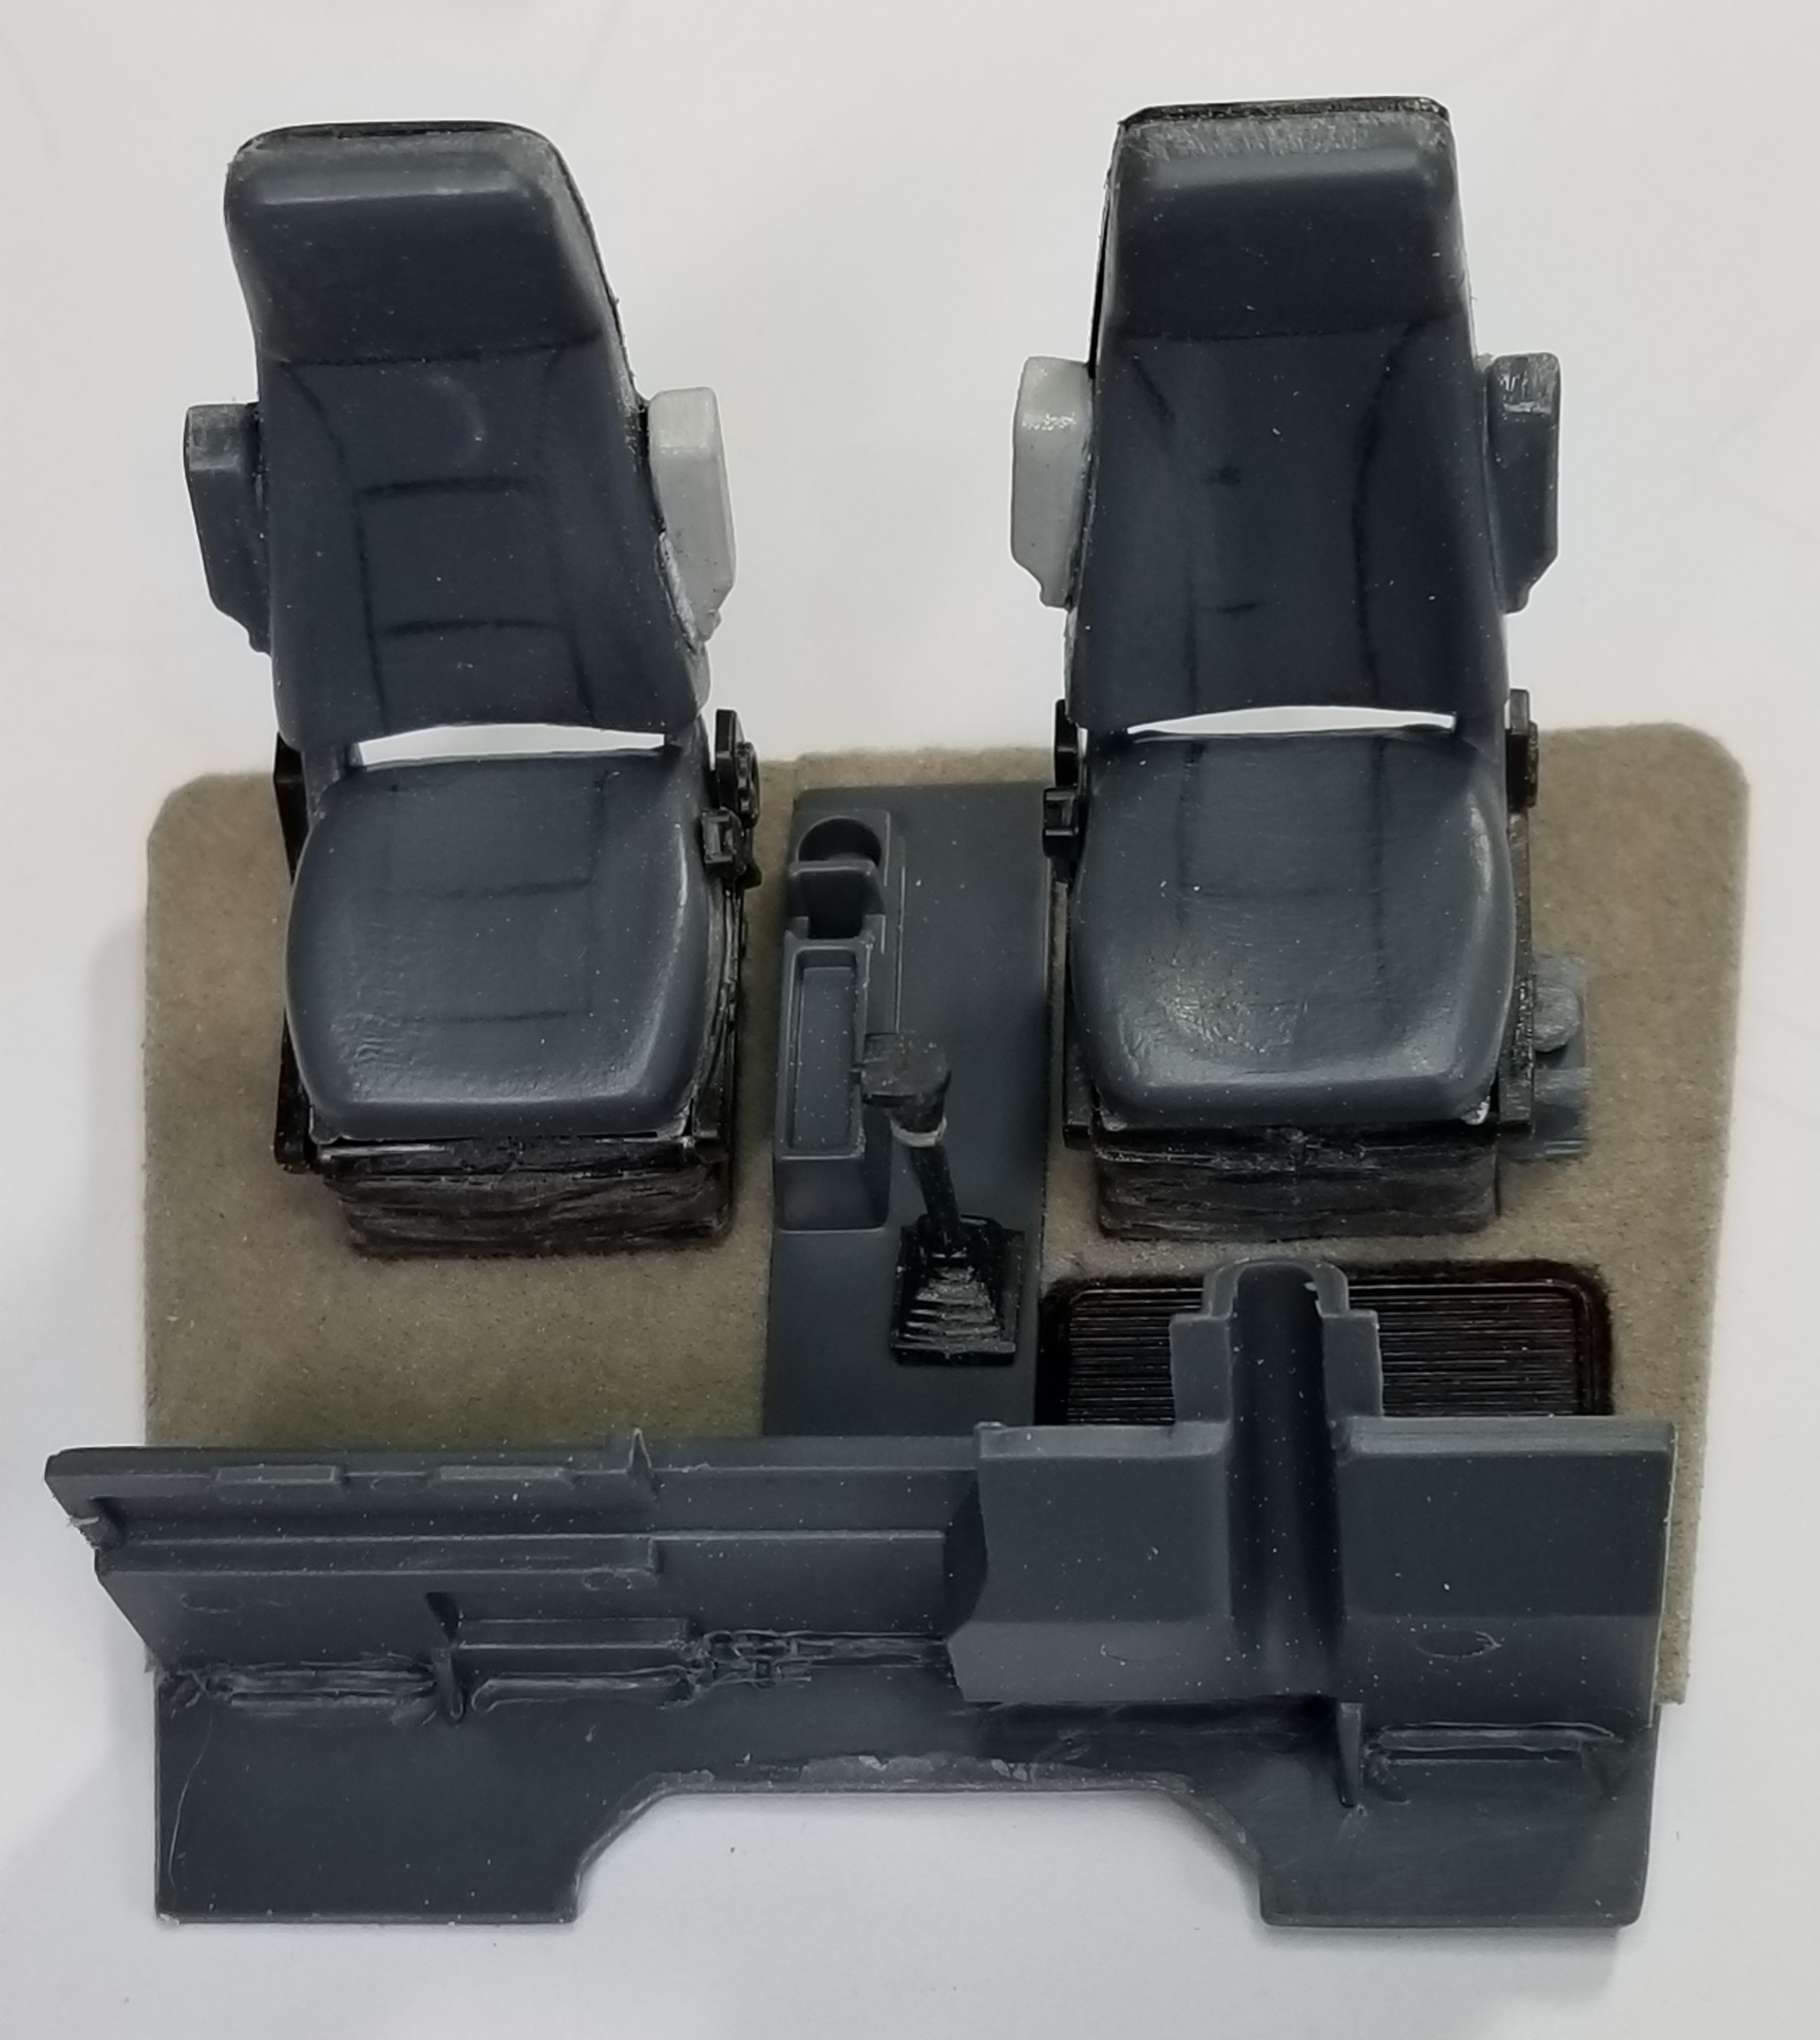
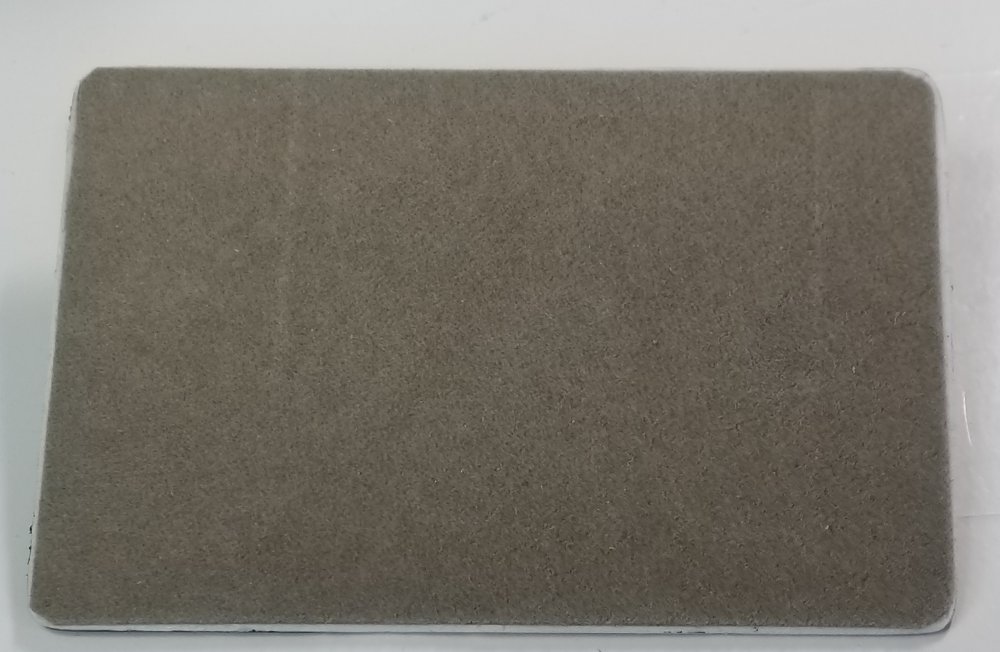
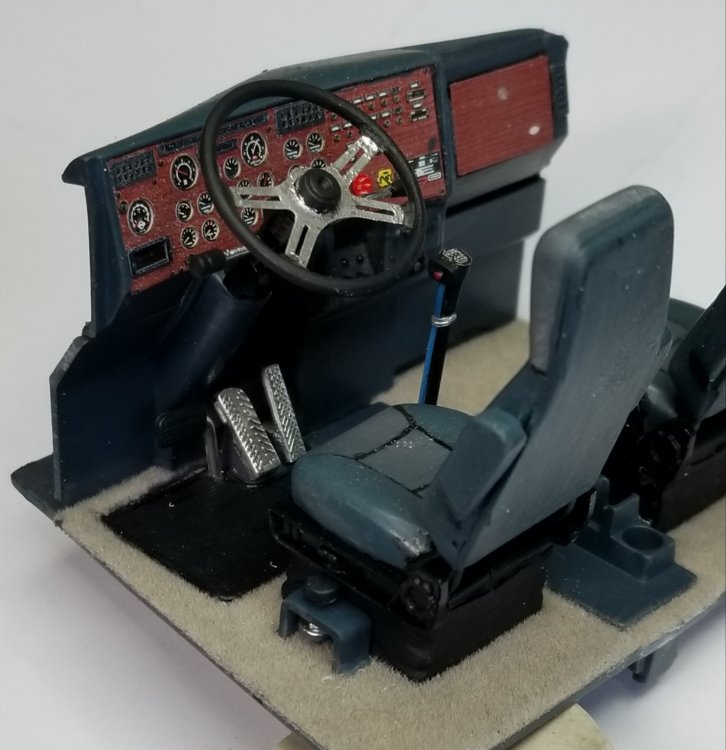
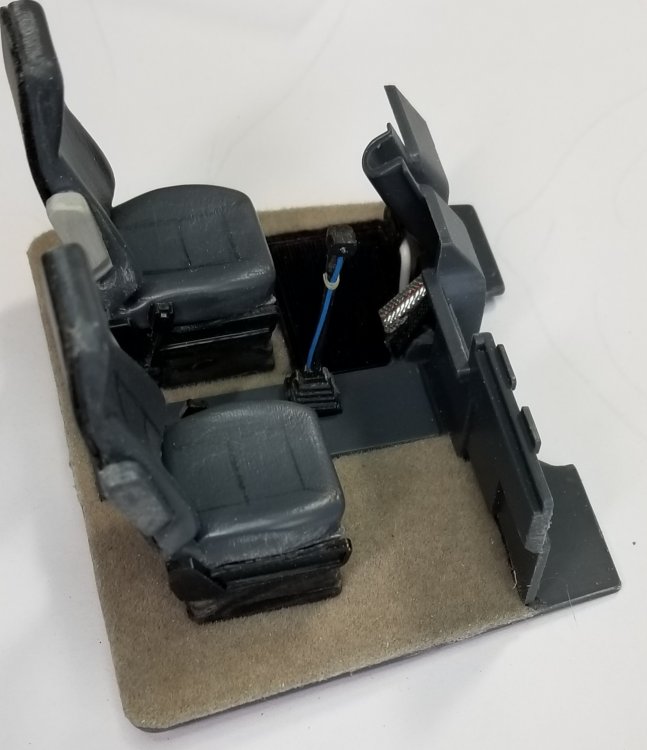
Thanks guys I did some work on the interior. I add some very thin grey velour with adhesive backing to make the carpet. I got these off of Amazon, I got 2 sheets 8 1/2 x 11 of grey, dark charcoal, dark brown, medium brown, light brown, beige and dark wine red. It works great for carpeting on 1/25-1/24 models, and it sticks pretty good. this view shows the arm rests I added to the inner sides of the seats, also the seat backs that I added. The velour carpeting looks kinda beige, but it is light grey. this view shows the clutch, brake and gas/fuel pedels that I added. this view shows the small blue wire that I added to the shifter column and the retainer I made for it from some 1/64" tape. I plan on carving some seat cushion detail into both seats. You can just barely see the pencil lines I added to the seats for this purpose. I have both photo etch sets for the 1/24 Italeri Peterbilt 379/377 from Czech model trucks, so the instrument panel will be photo etch along with the steering wheel center, shift and air knobs, plus all of the exterior photo etch, alot of bending but it will be worth it in the end. Ron G


- 51 replies
-
- 10
-

-

-
Thanks guys
-
Yeah I meant the H34
-
Thanks Jeff