CrankyCrafstman
-
Posts
1,350 -
Joined
-
Last visited
Content Type
Profiles
Forums
Events
Gallery
Everything posted by CrankyCrafstman
-
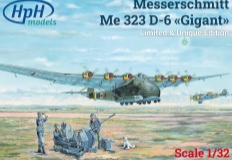
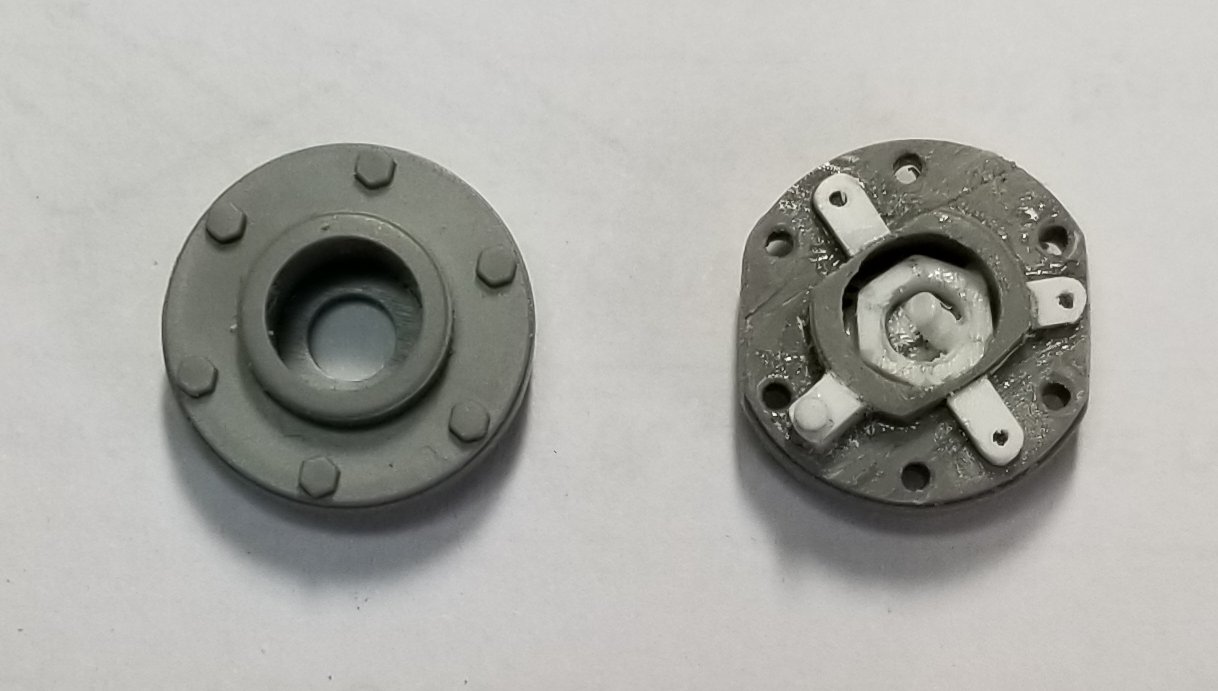
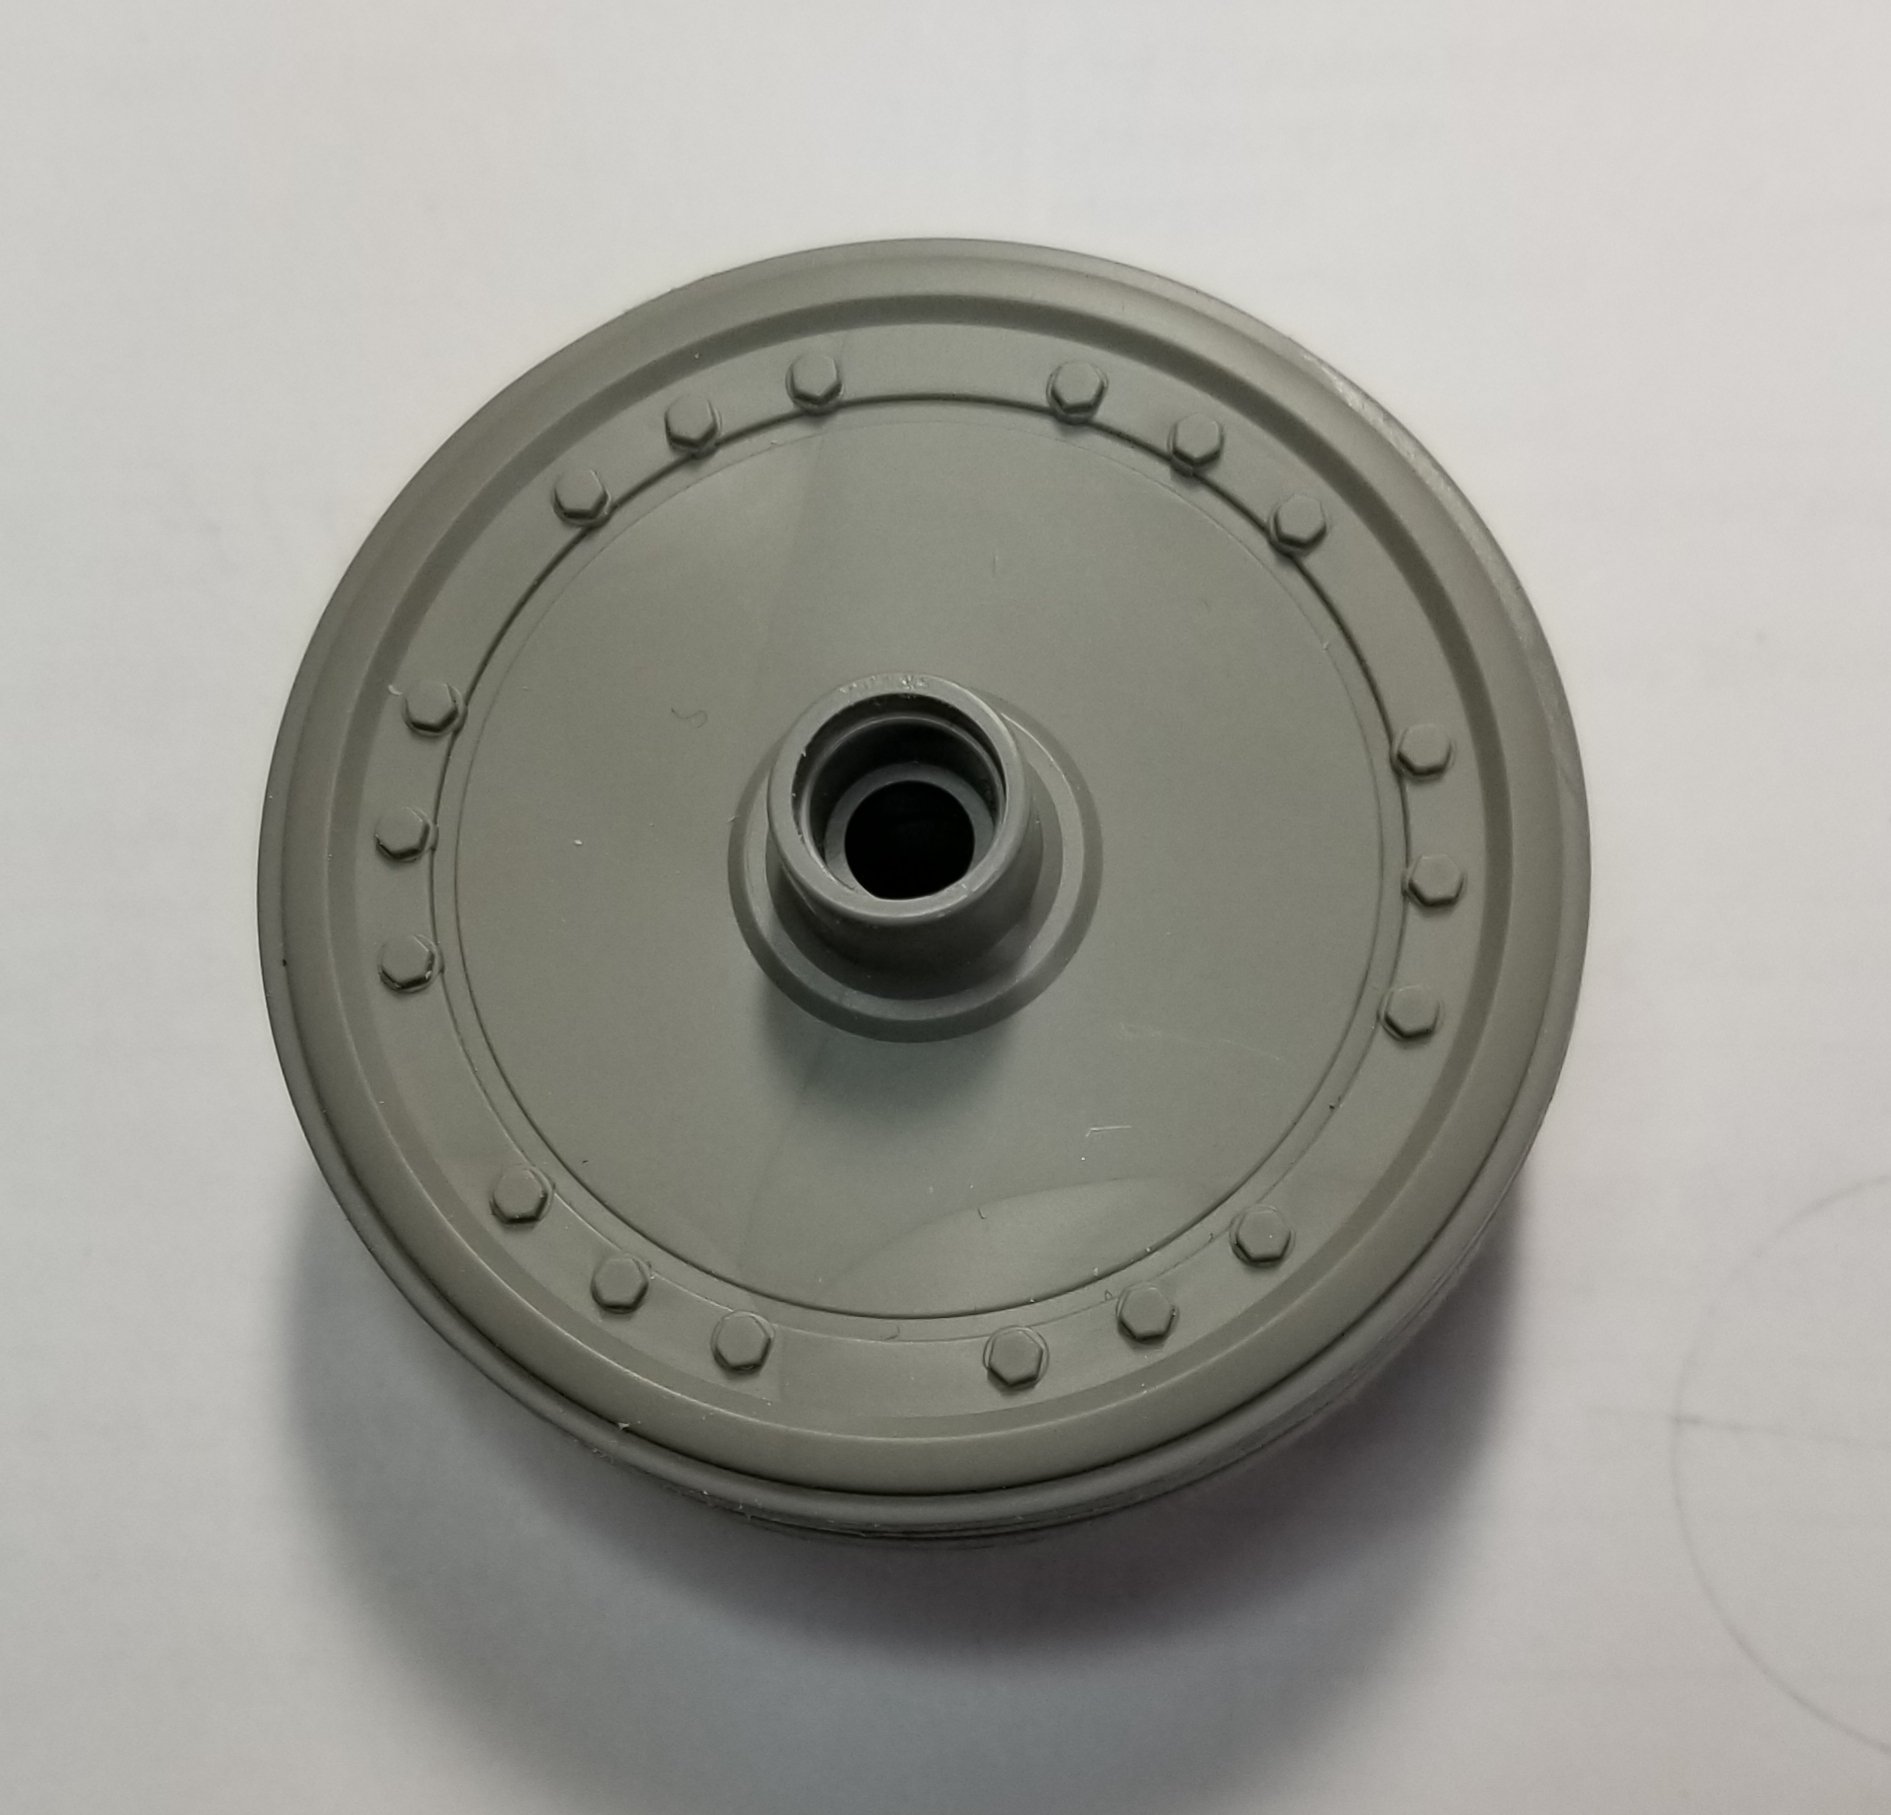
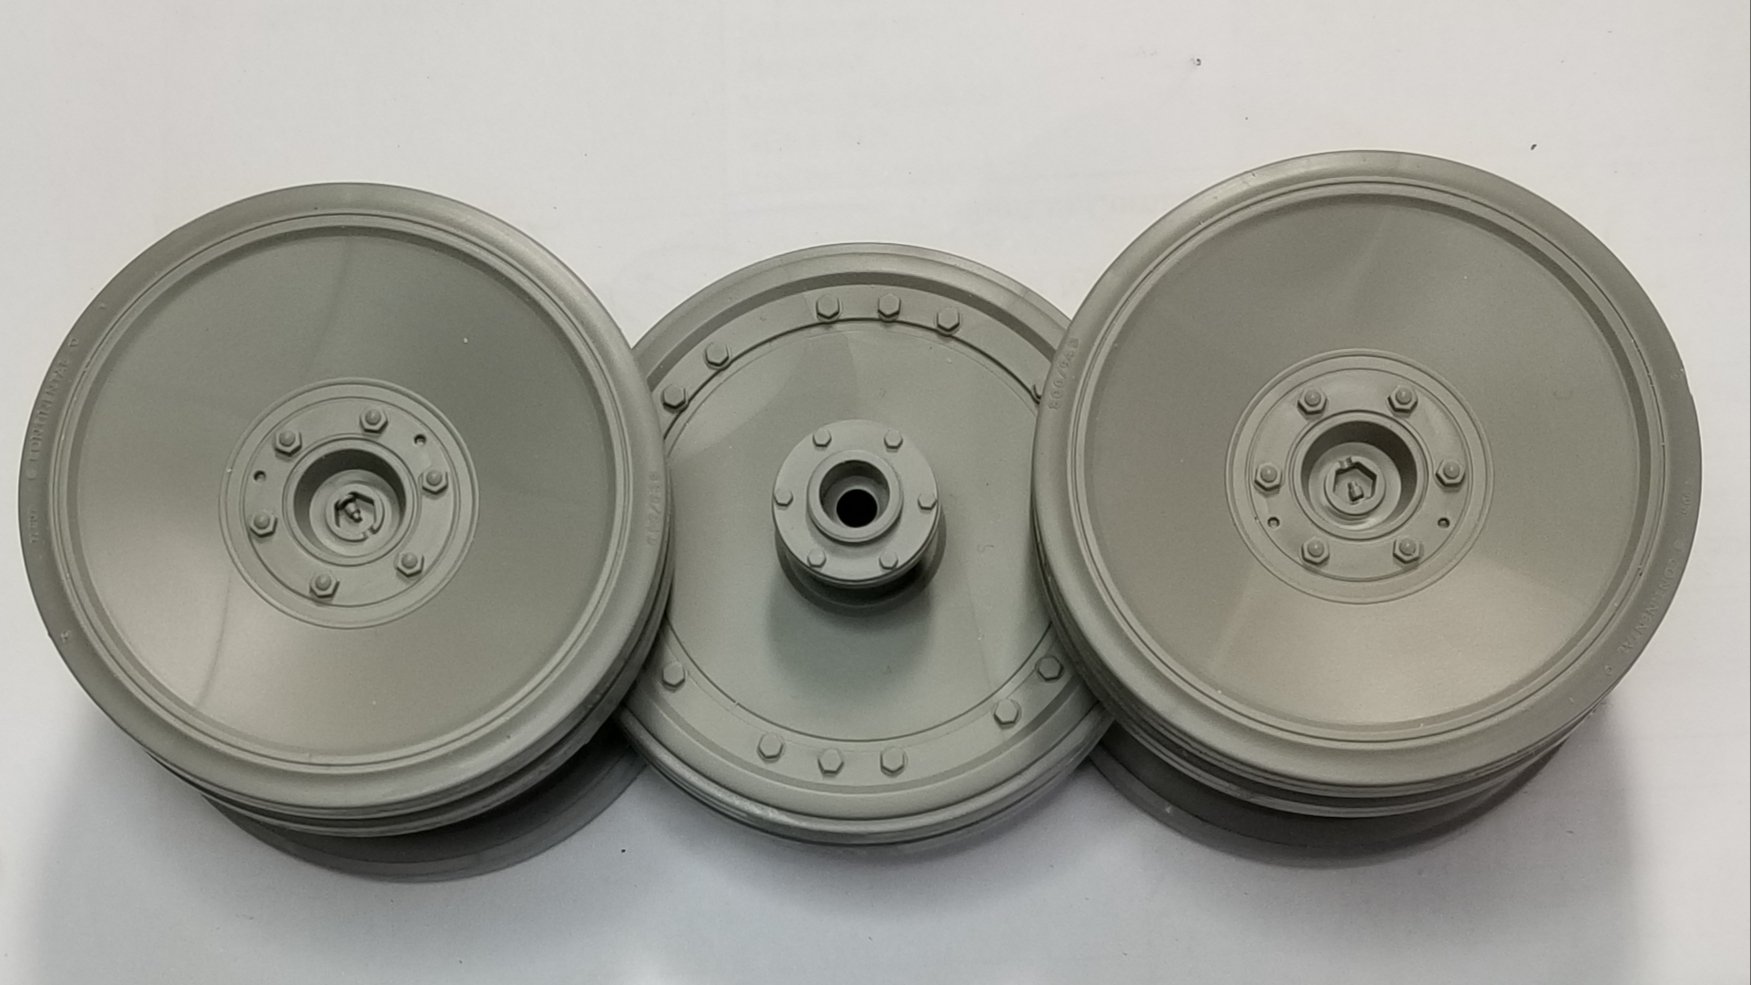
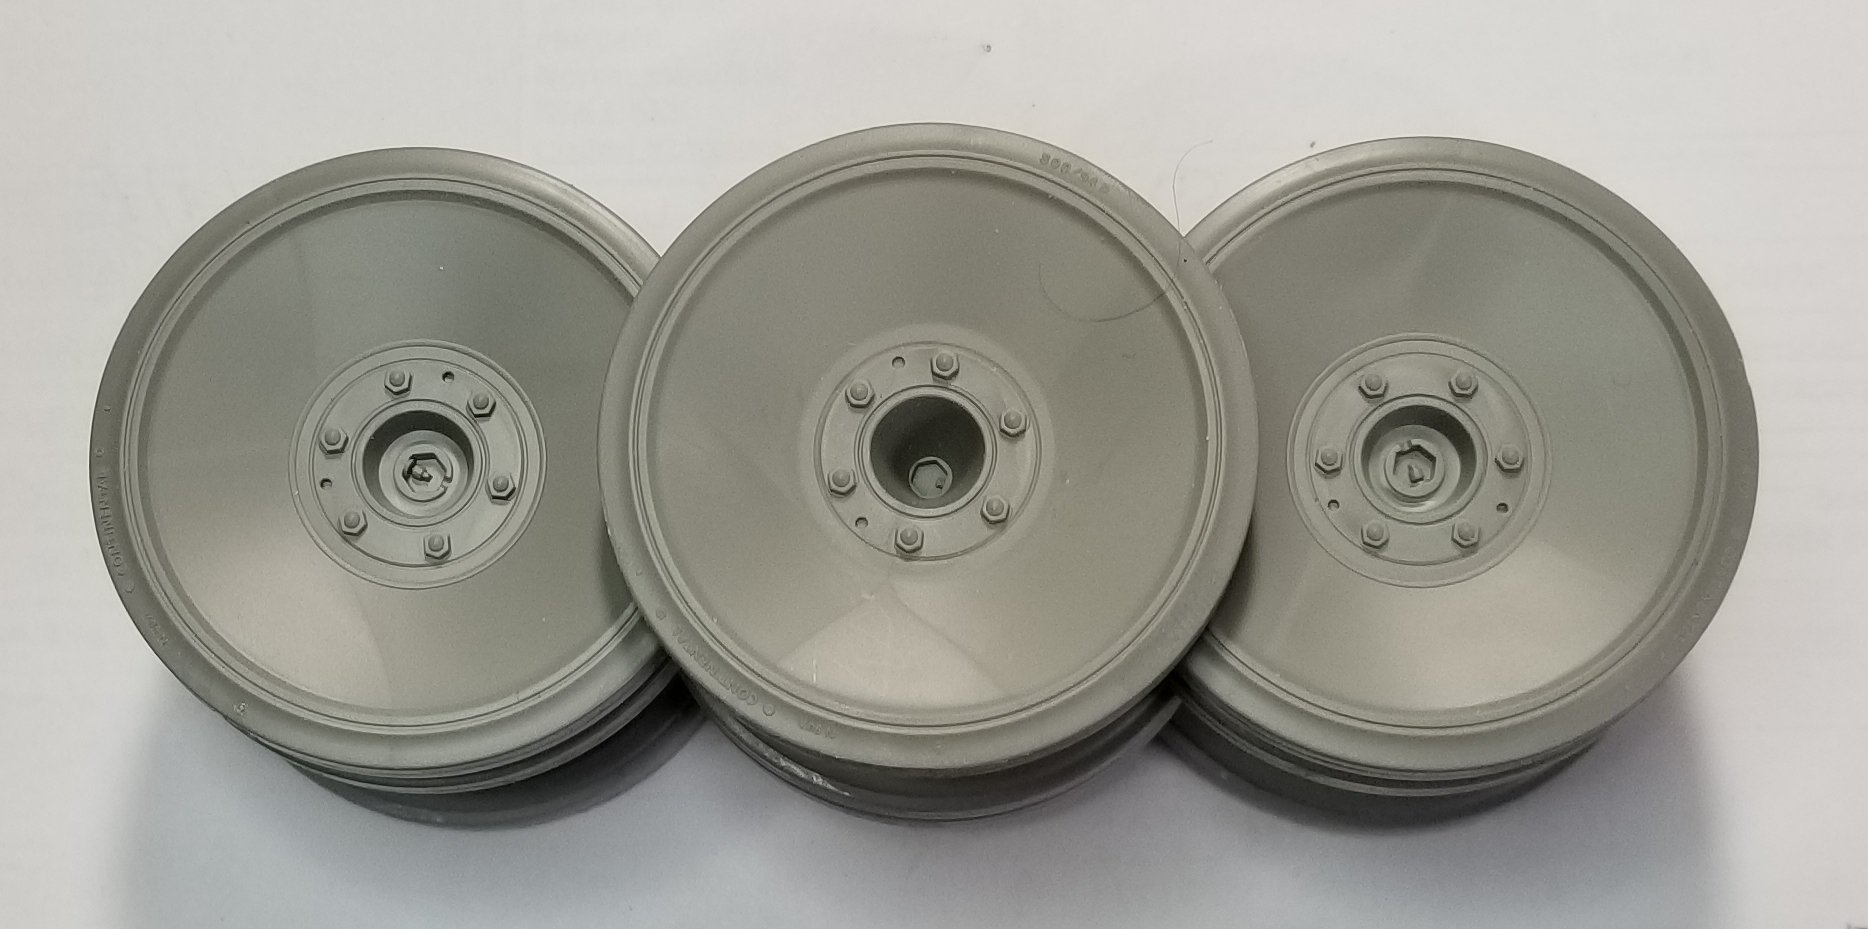
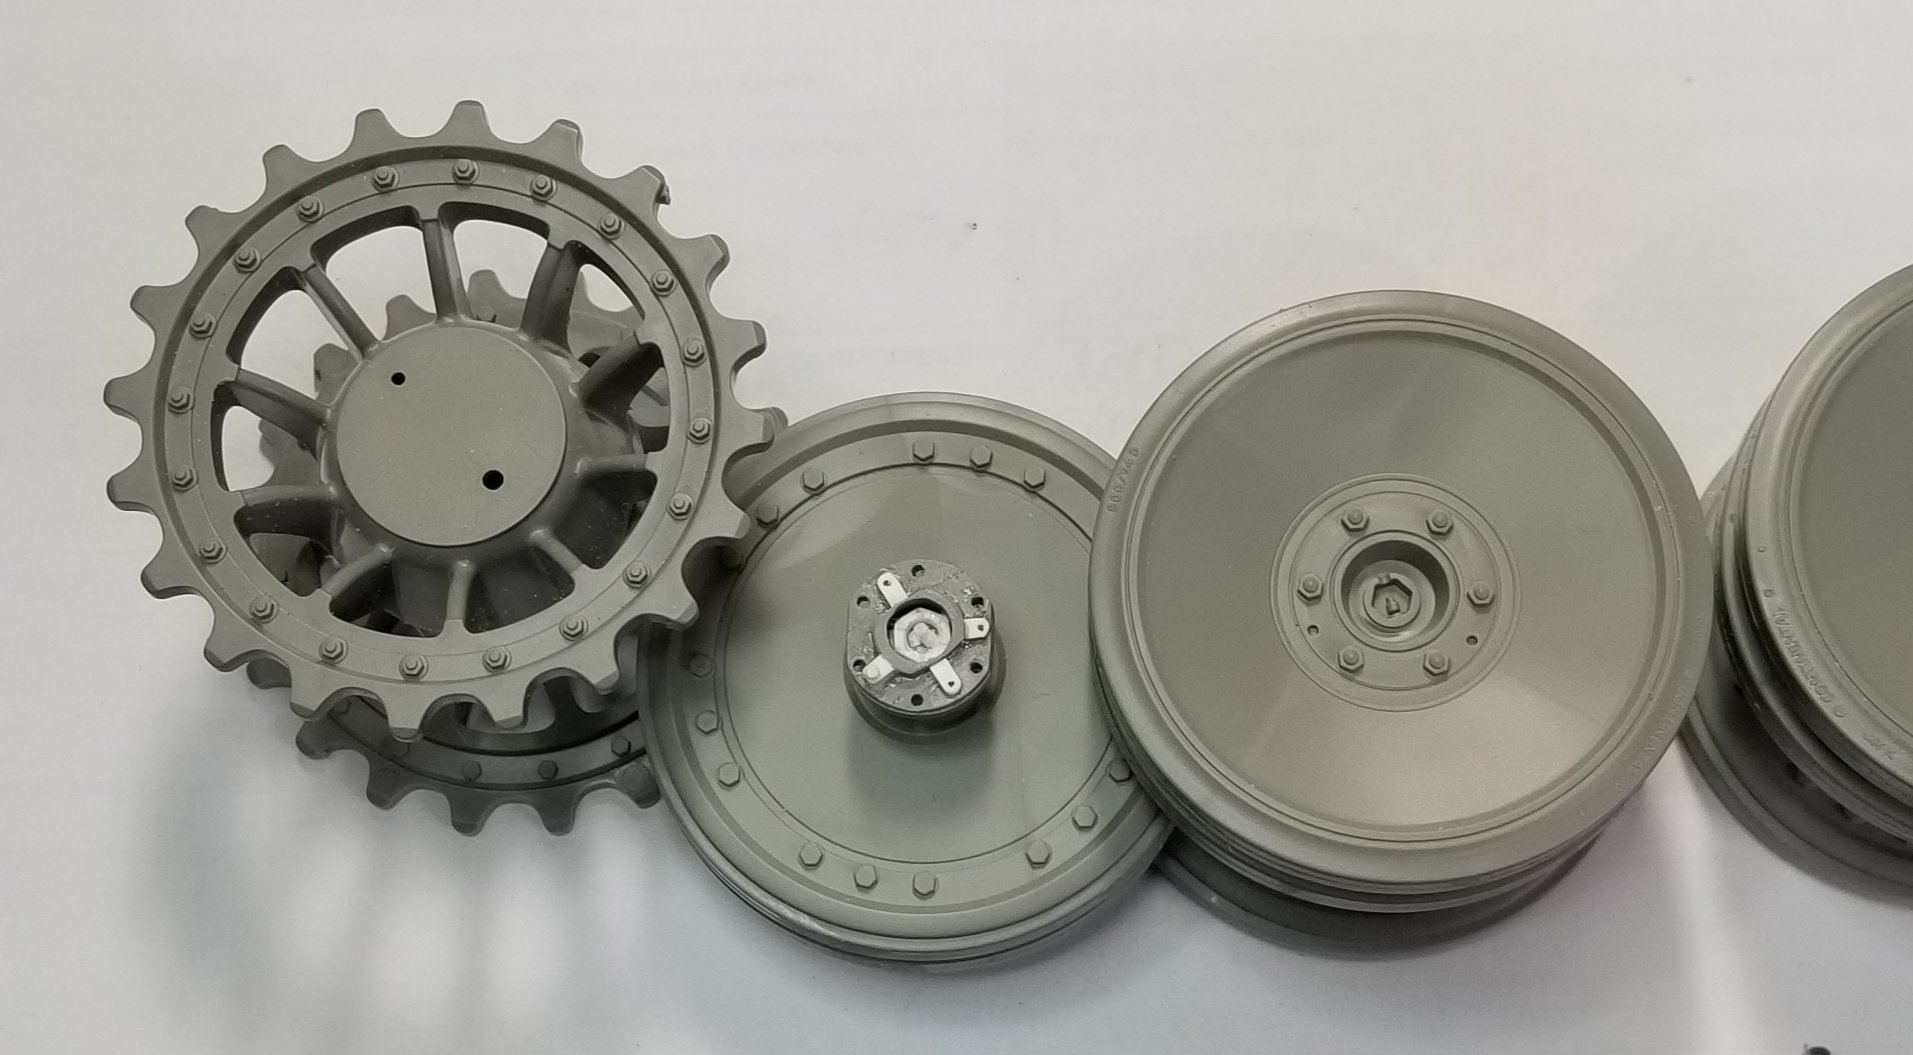
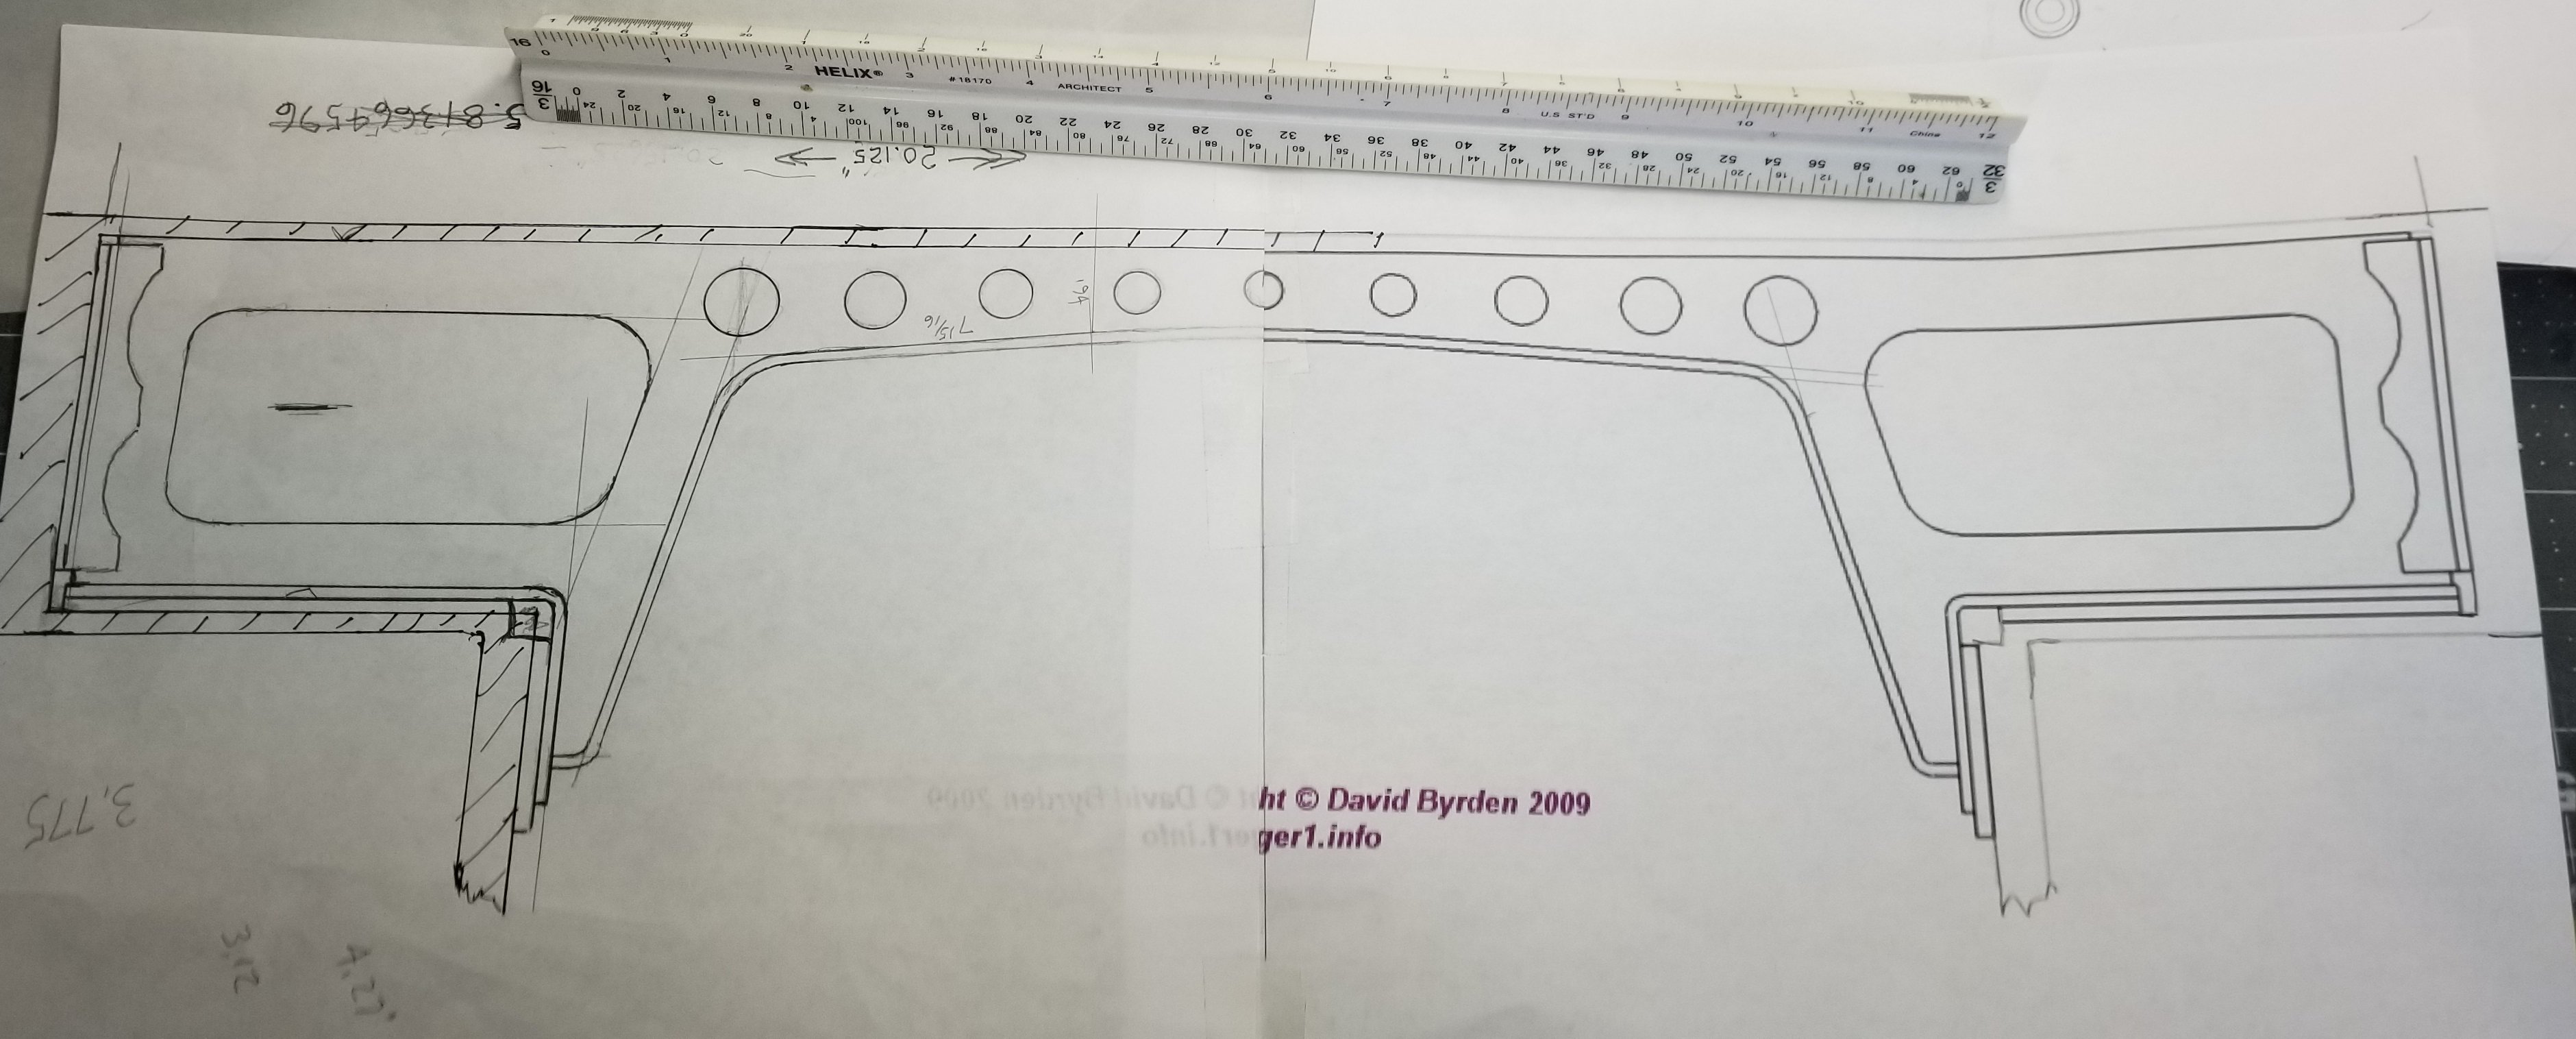
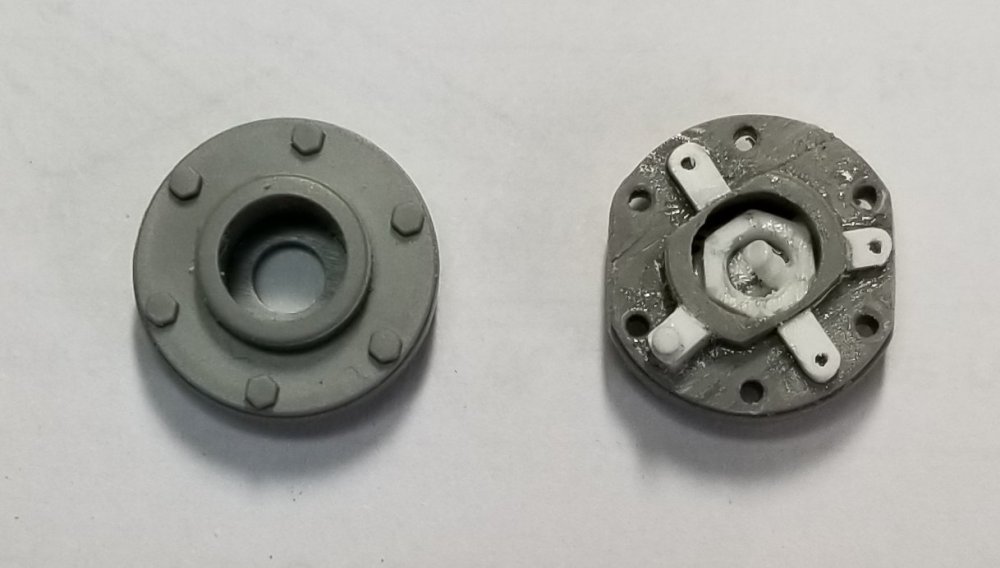
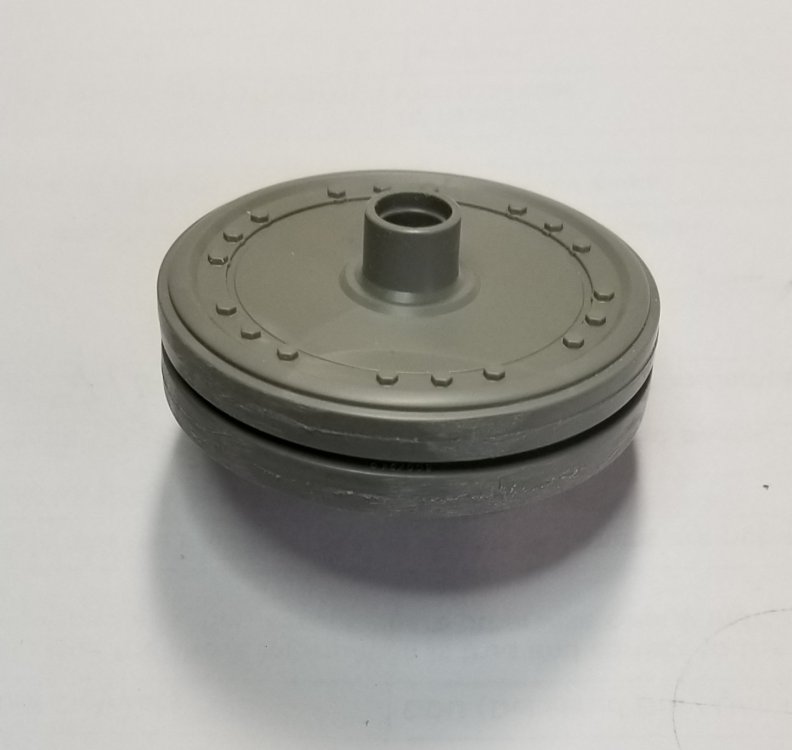
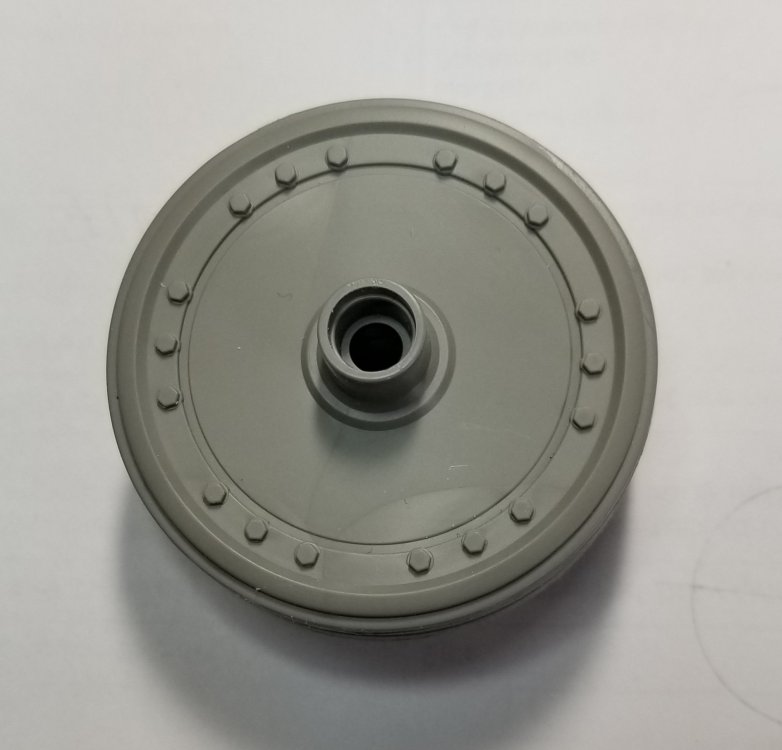
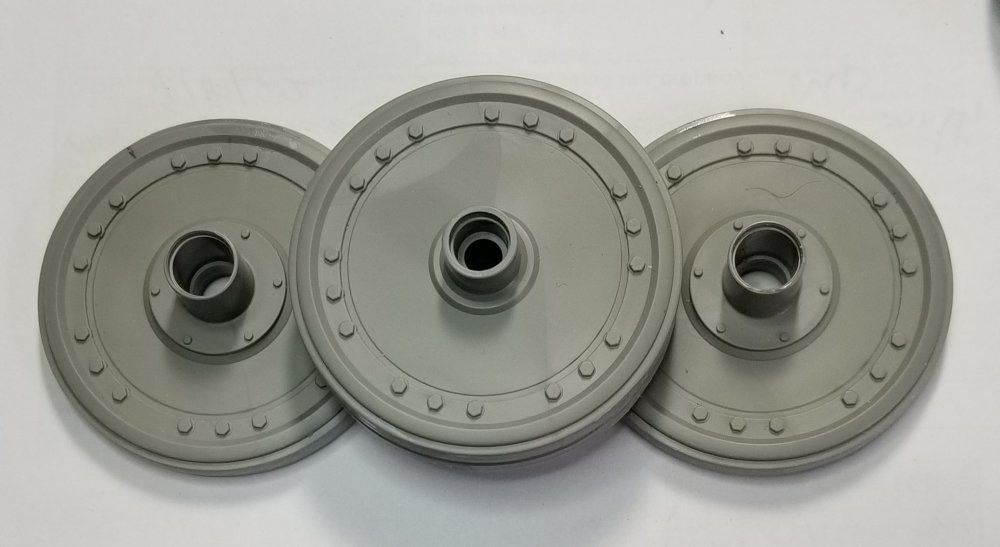
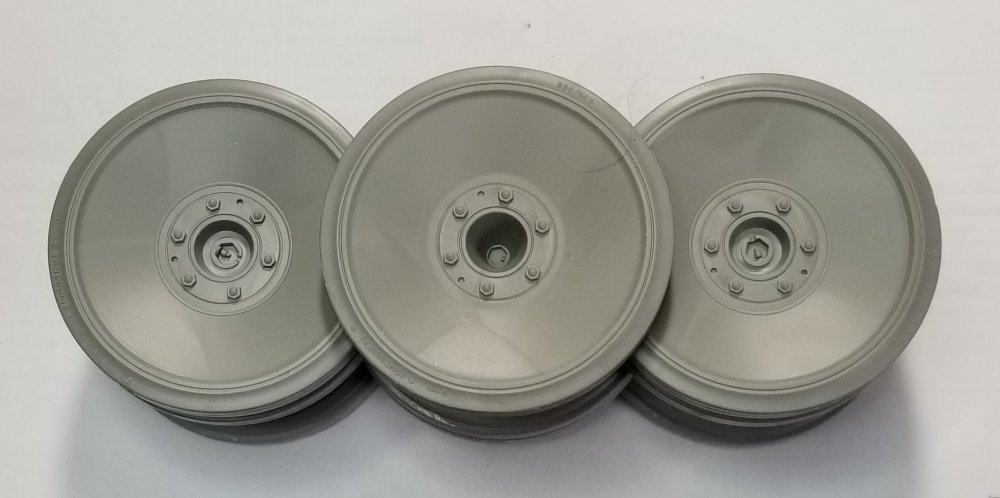
 Hey all Got some more work done on this beast. After doing some research on the Tiger info site. I found out that on most of these early Tigers the crew would remove the two front outer wheels, because they would scoop mud up and jam it into the rest of the road wheels and it would cake up and jam up the works. So what you would see was the flange that the wheel would bolt to instead of the wheel. This kit does not allow you to leave the front outer wheels off with out a little modification. Here's how I did this. This picture is a drawing of the flange that the front road wheel bolts to. (Fom Tiger info) This view shows the kit part N5 on the left. On the right is how I modified it to look like the above drawing. This view shows kit parts N2 & N4 that make up an "A" wheel, also N6 & N8 that make up a "B" wheel. These two get glued together. This view shows this assembly straight on. This view shows the A-B assembly flanked by two N7 & N9 assemblies. These are the inner most wheels. This same view now has two assemblies made up of a R1 & R3 and a R2 & R4. The middle one has a part N5 flange on it (un modified). This same view now has an outer wheel made up of a N1 & a N3. If your confused how do you think I feel! 48 road wheels made from two parts 96 pieces. Yicks!This view shows where the modified part N5 goes in the whole scheme of things. Well that's it for now be back with more updates soon. Ron G


-
Hey Carl Yeah I saw that. It's to convert it to a mid version Tiger 1. I did order some stuff from AFV Modeller, but it's stock in the New York customs, has been for over a month. Ron G
-
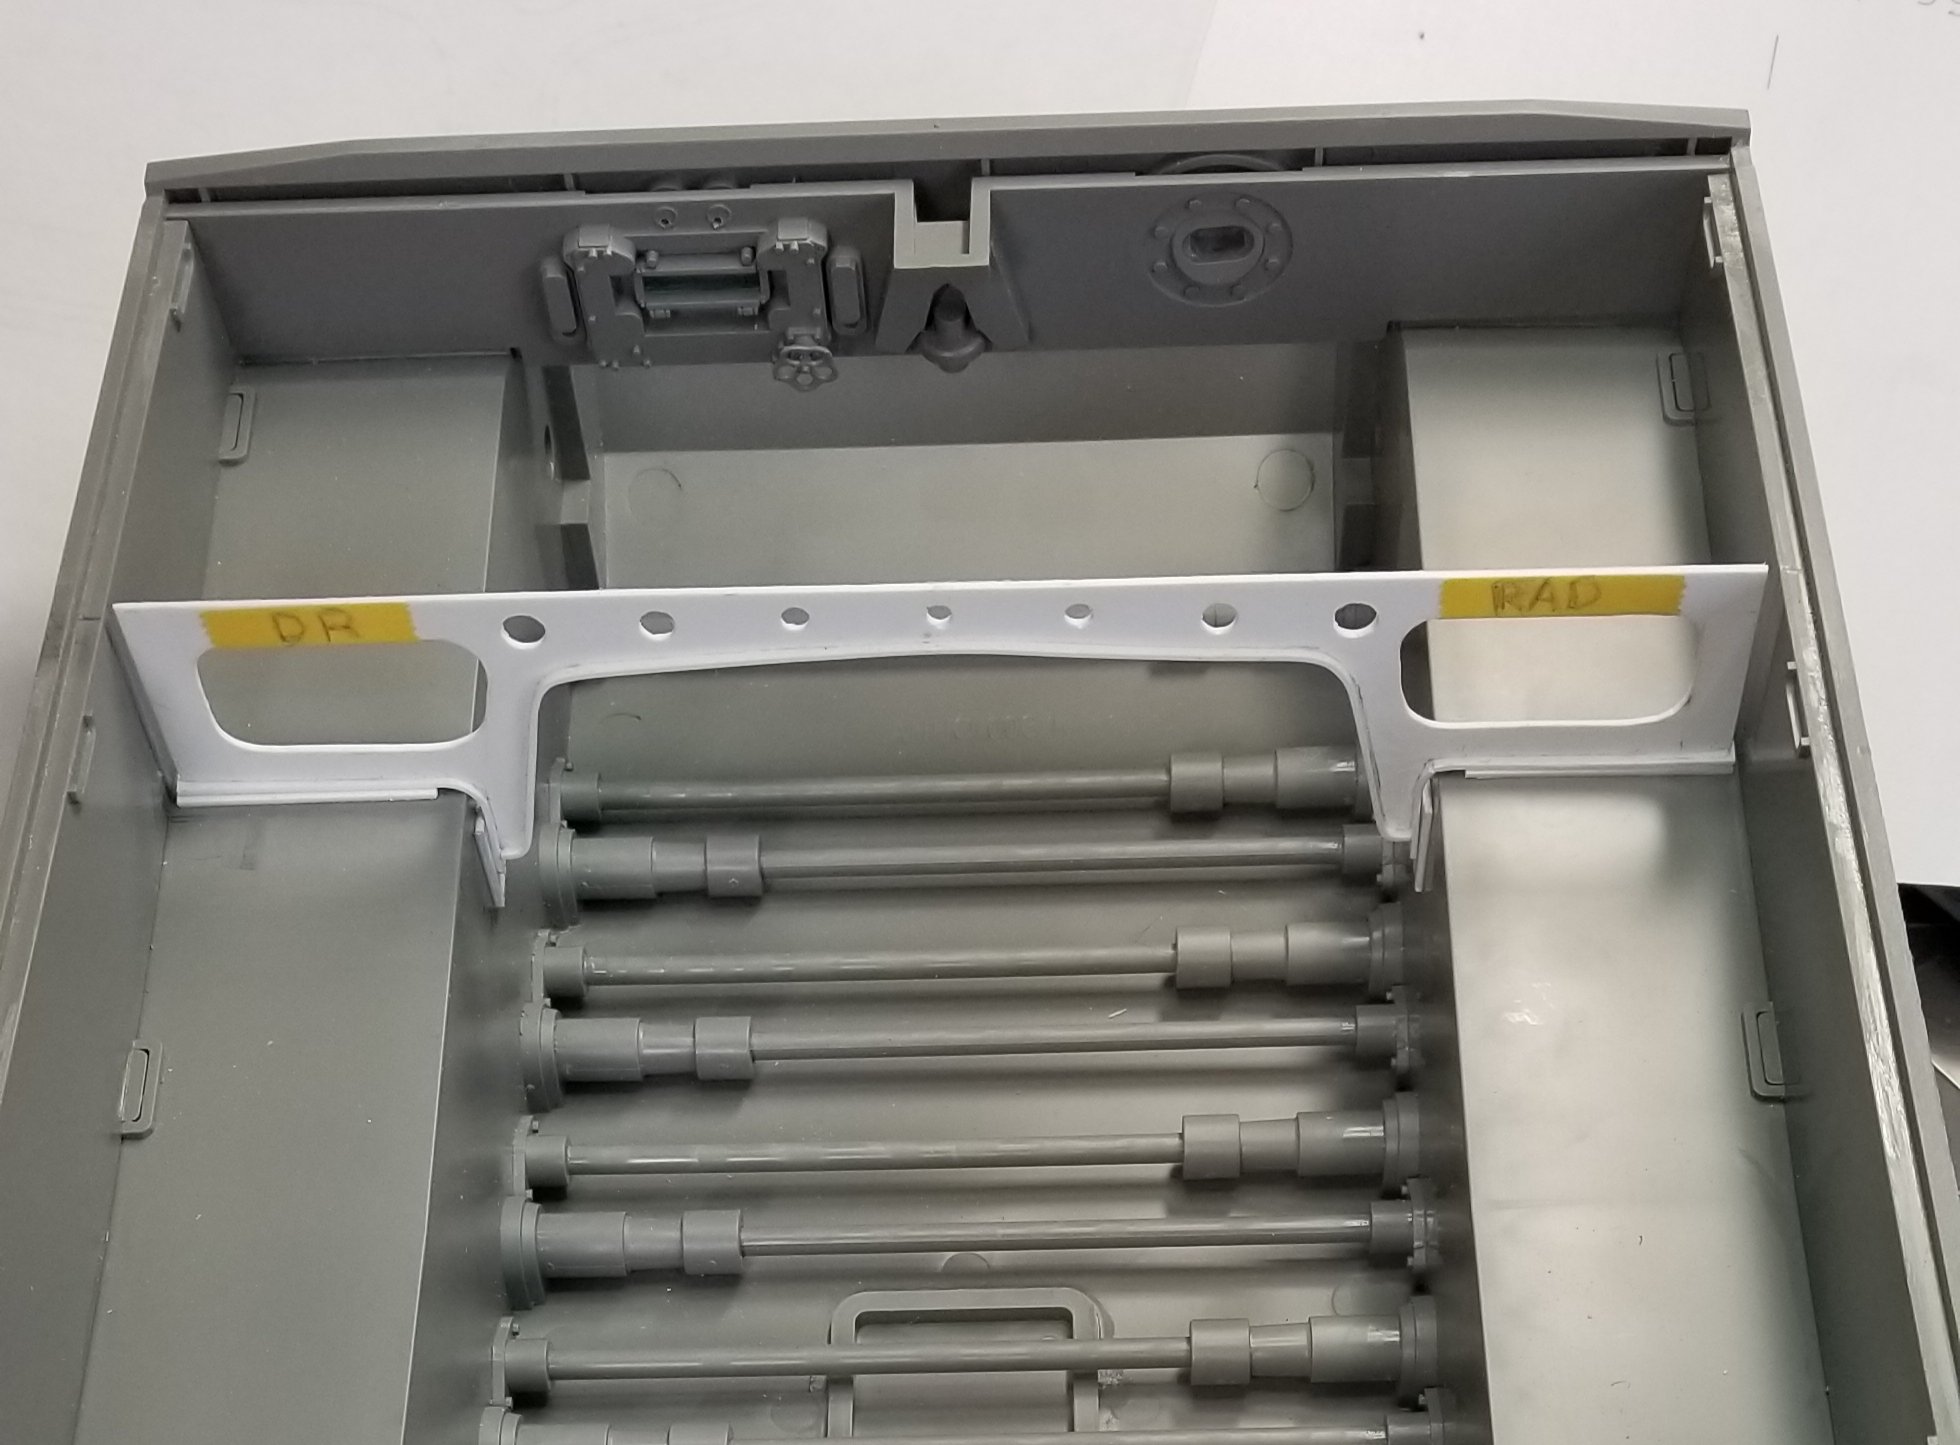
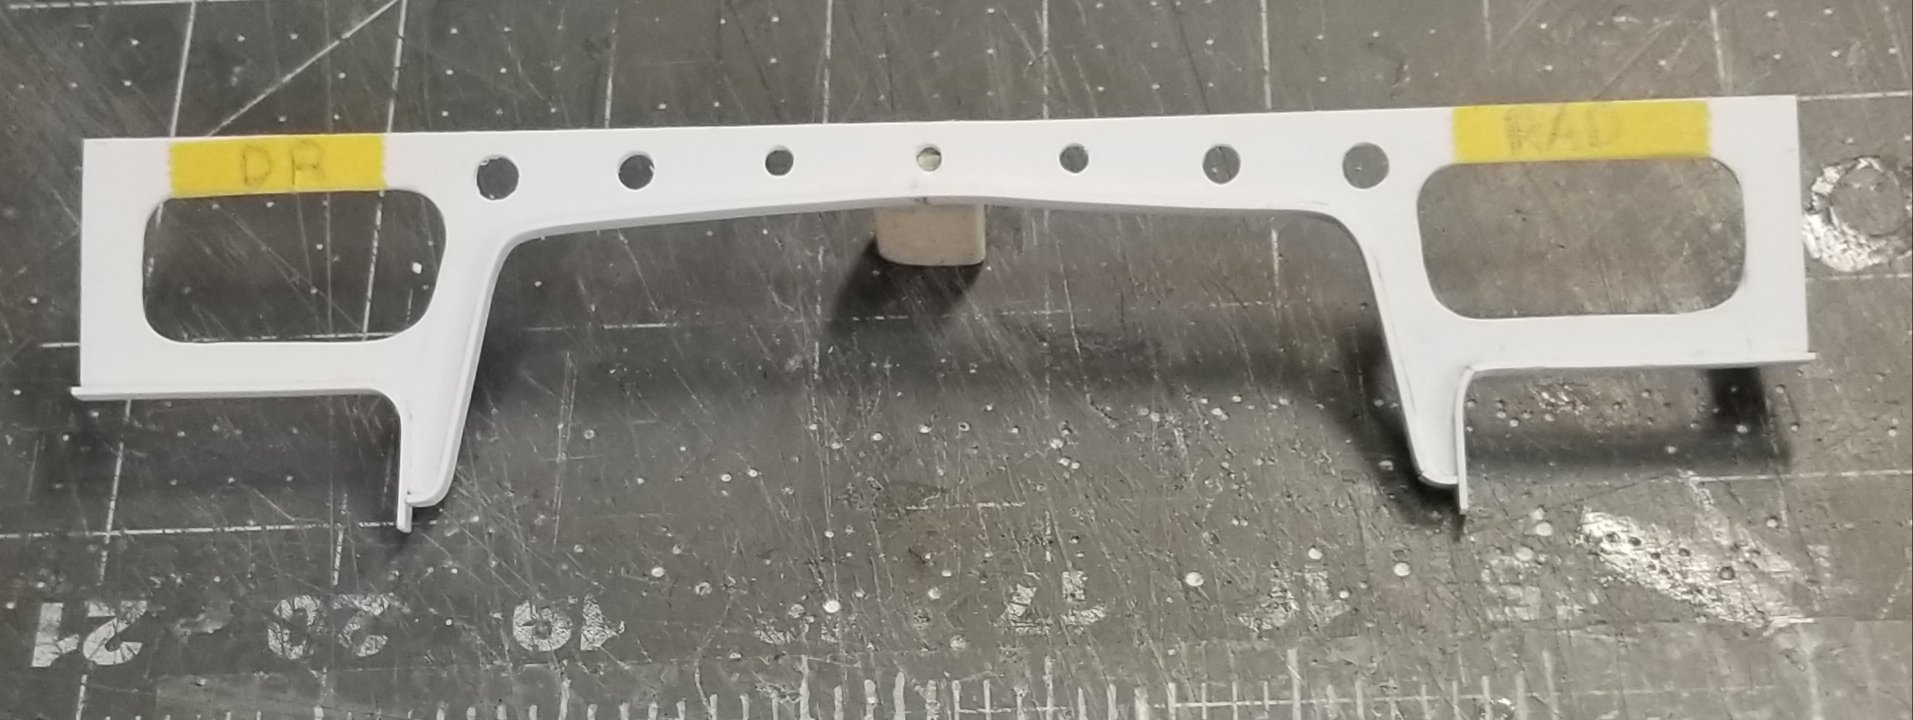
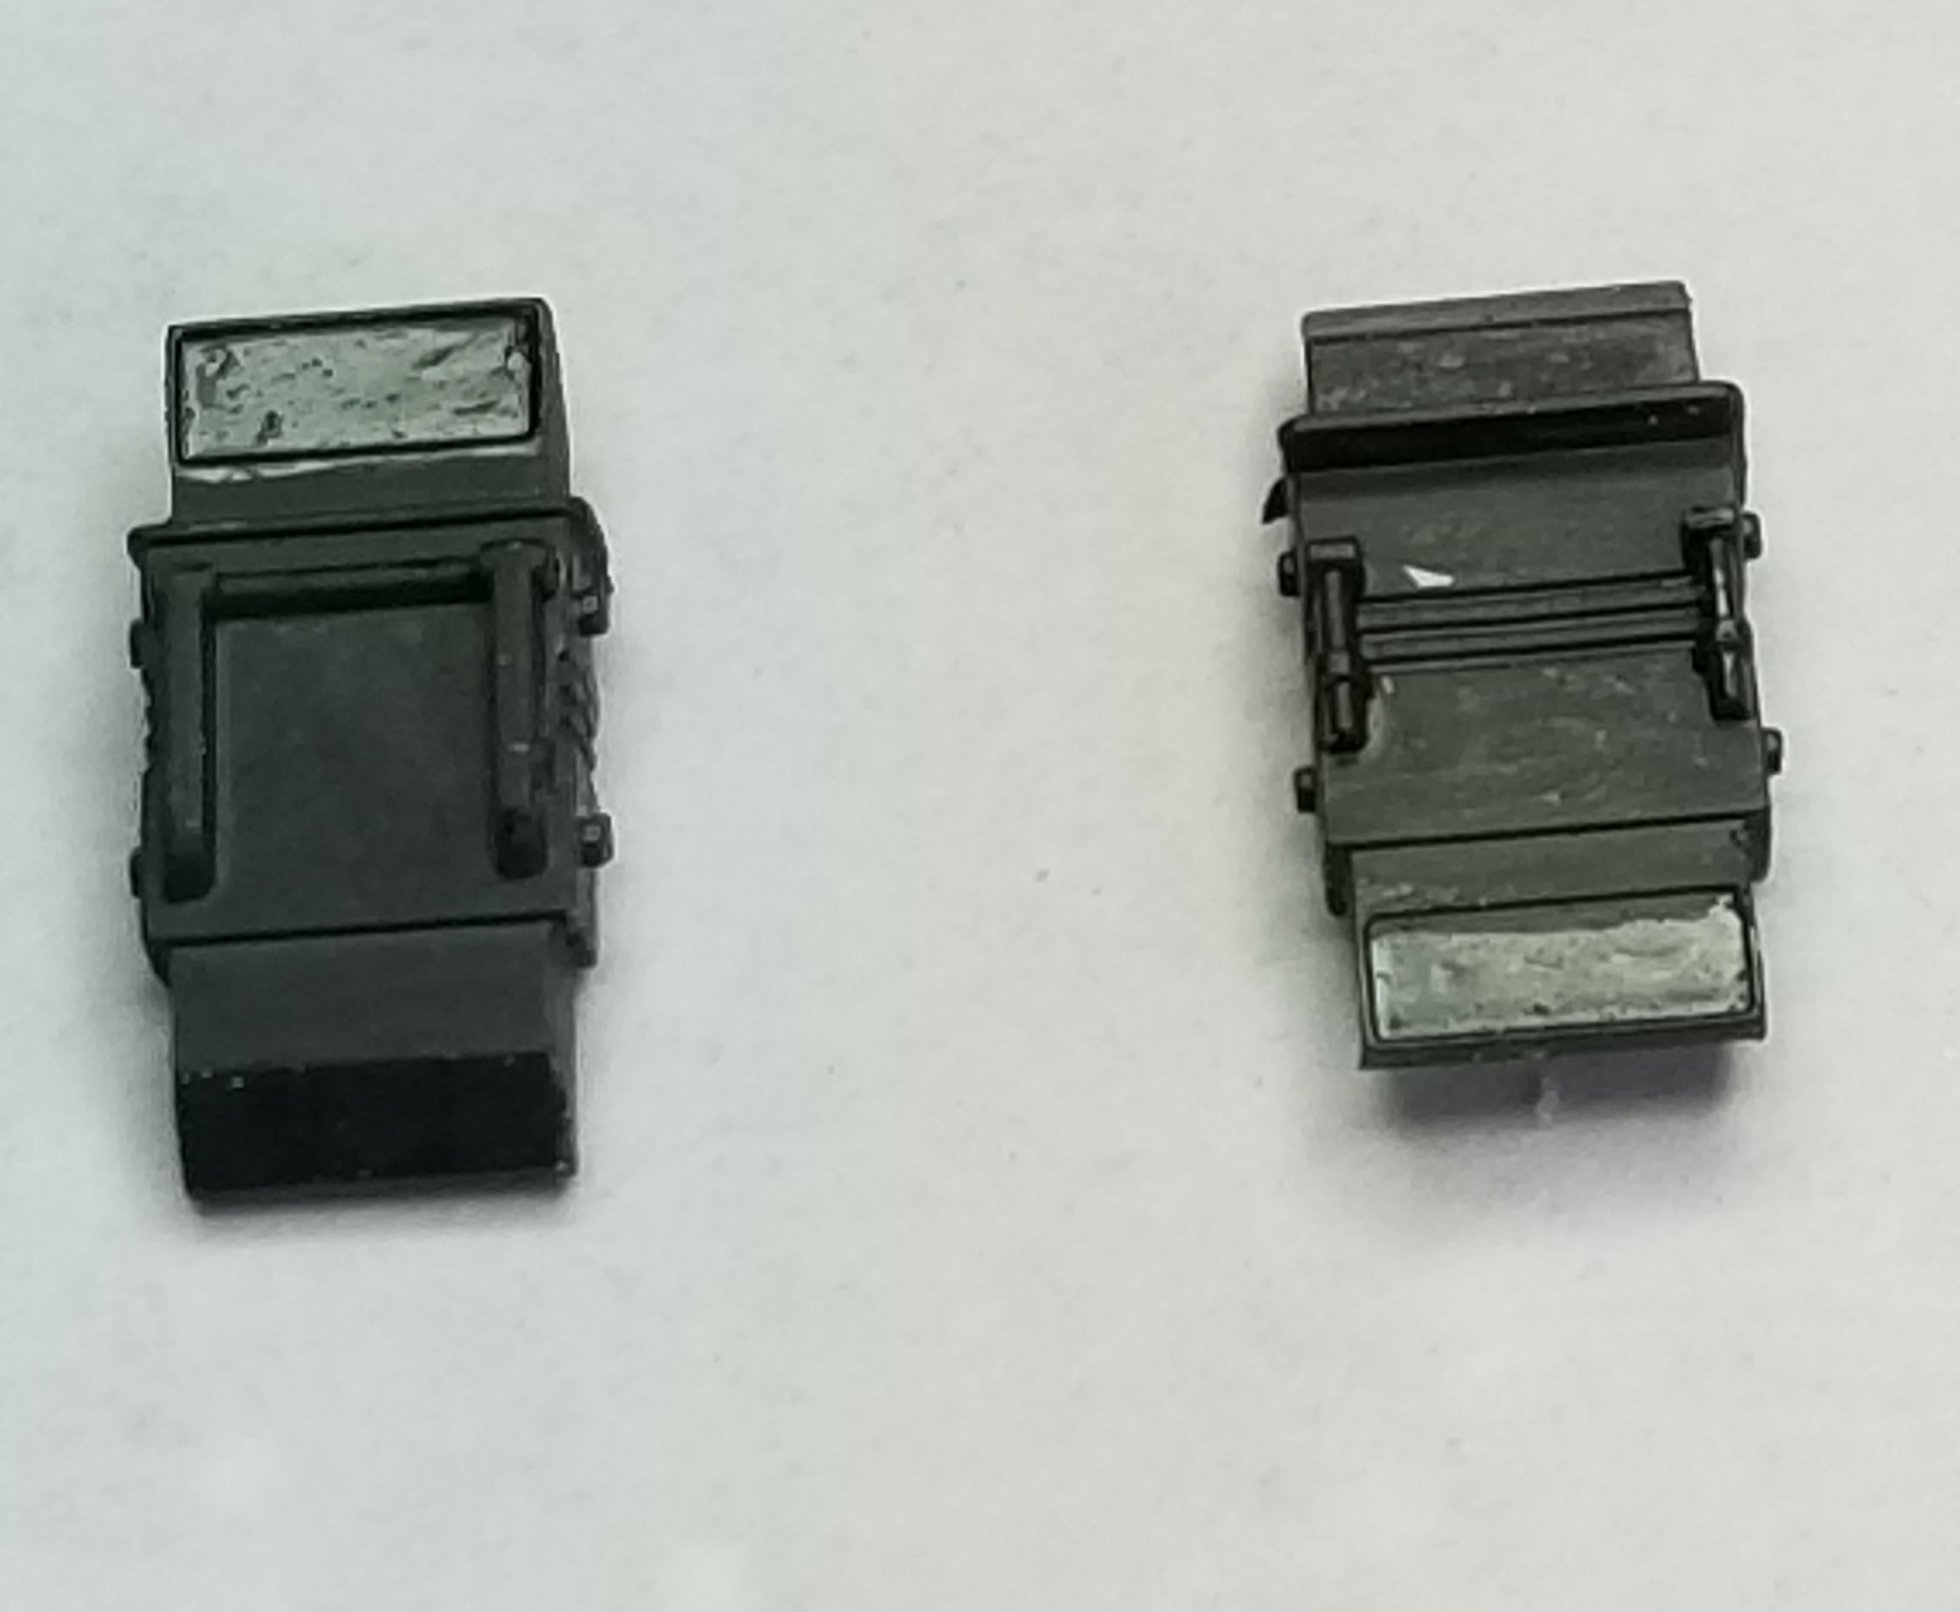
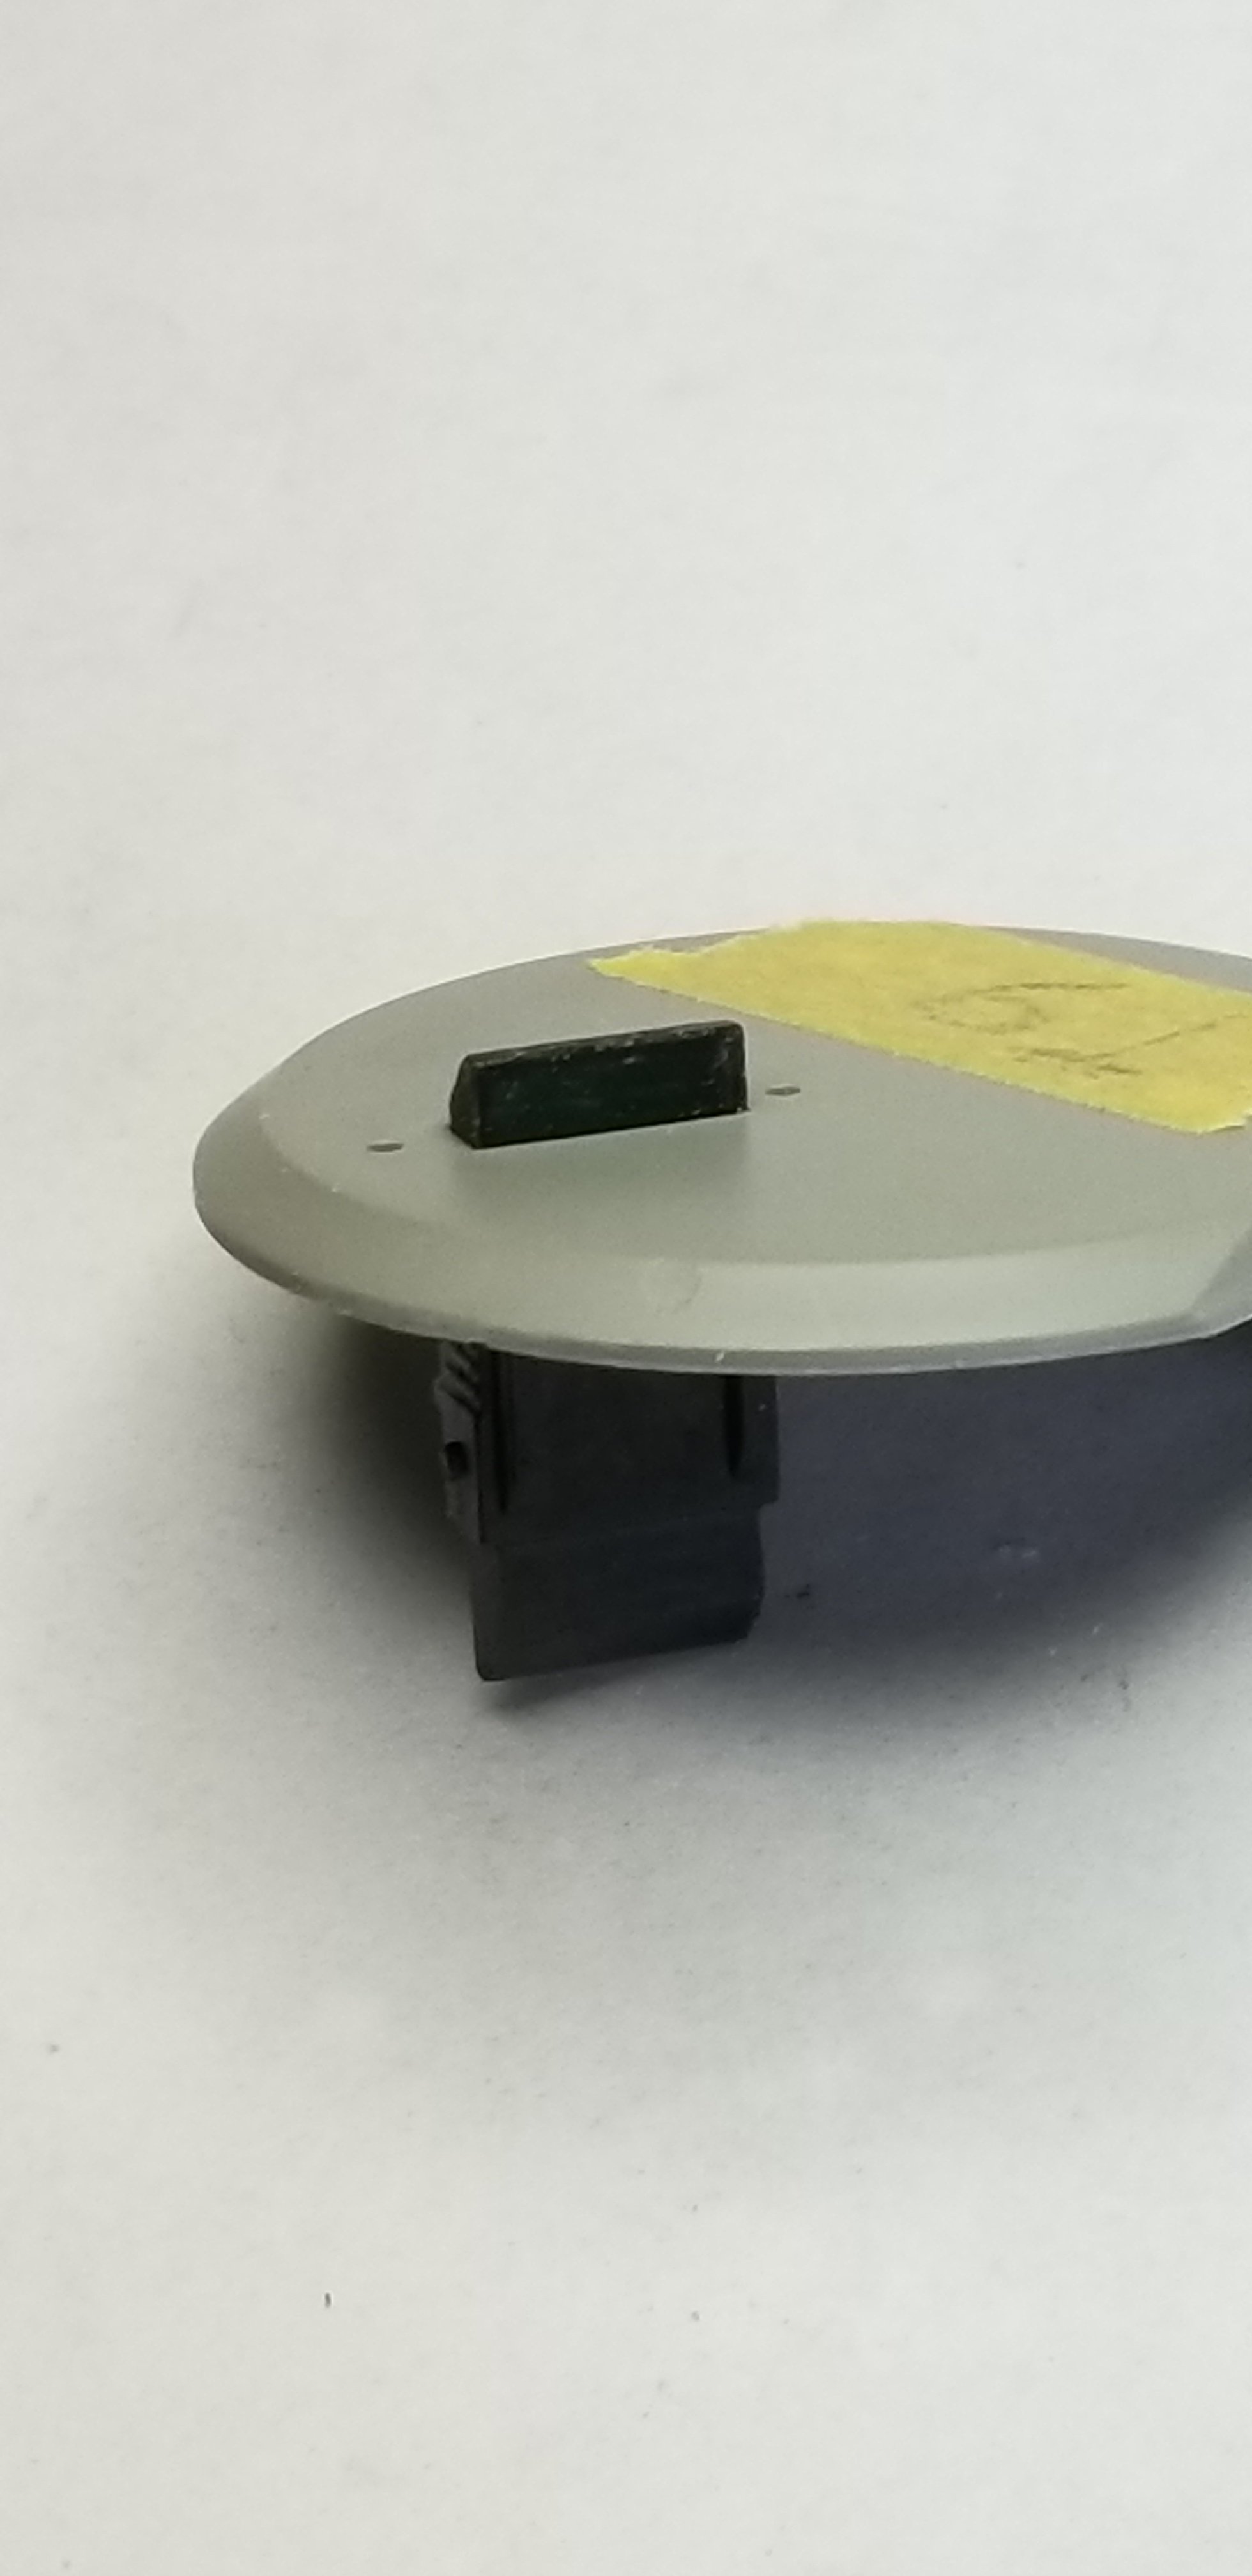
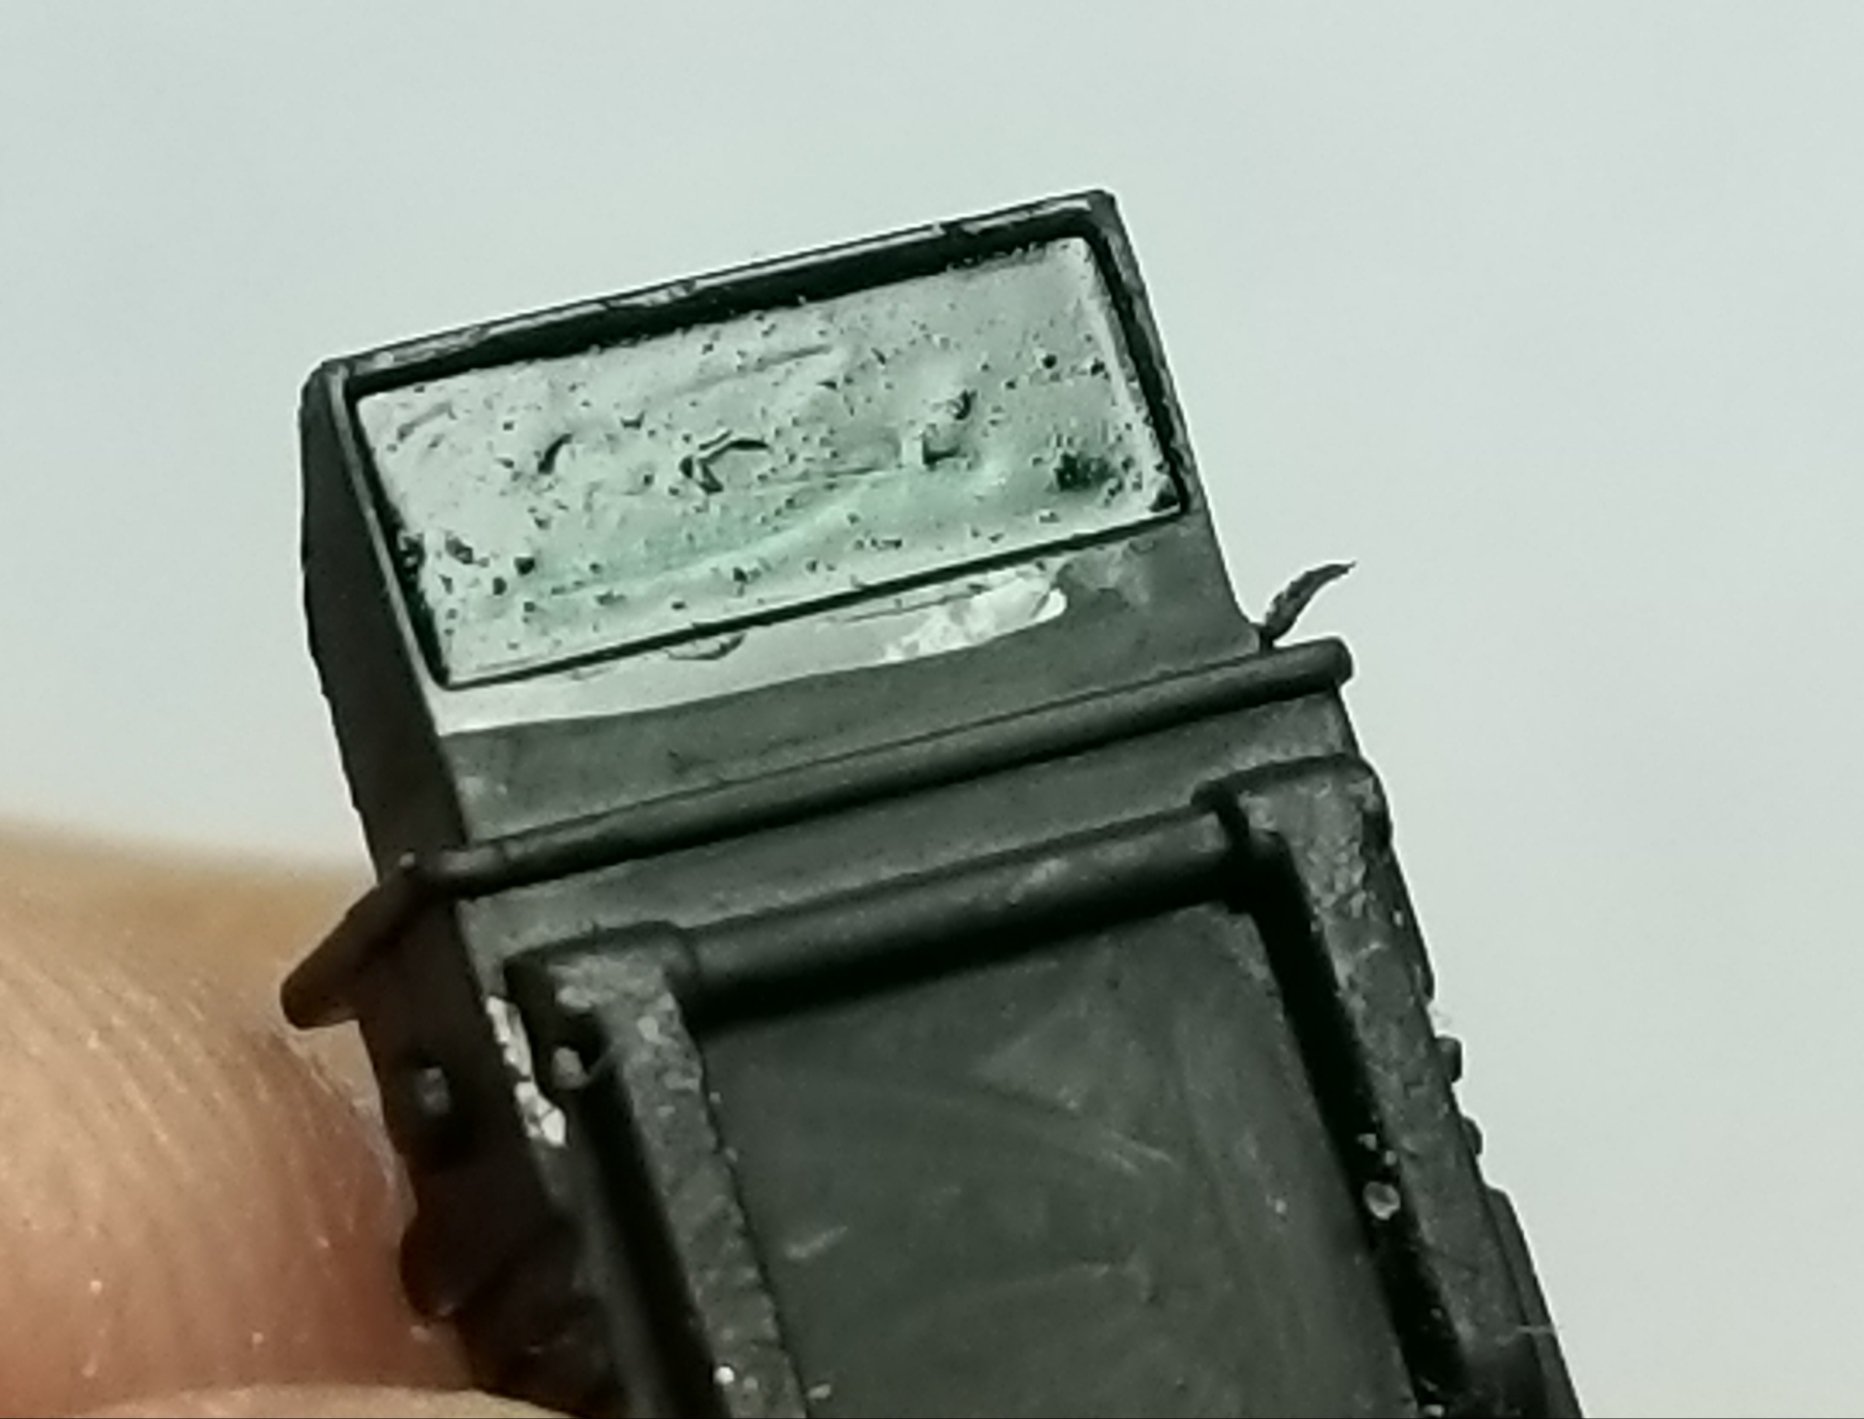
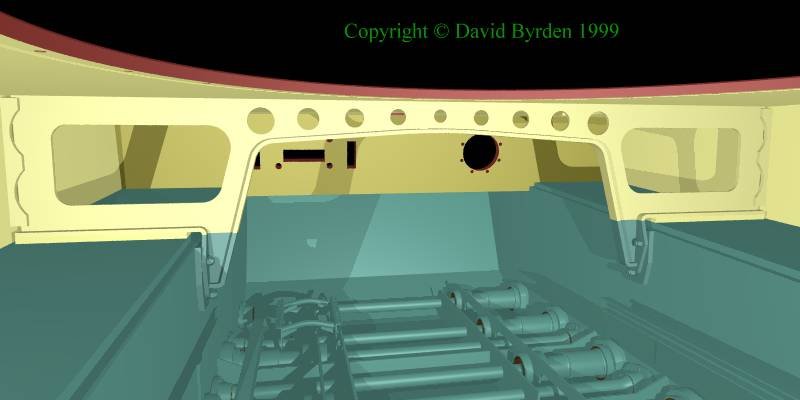
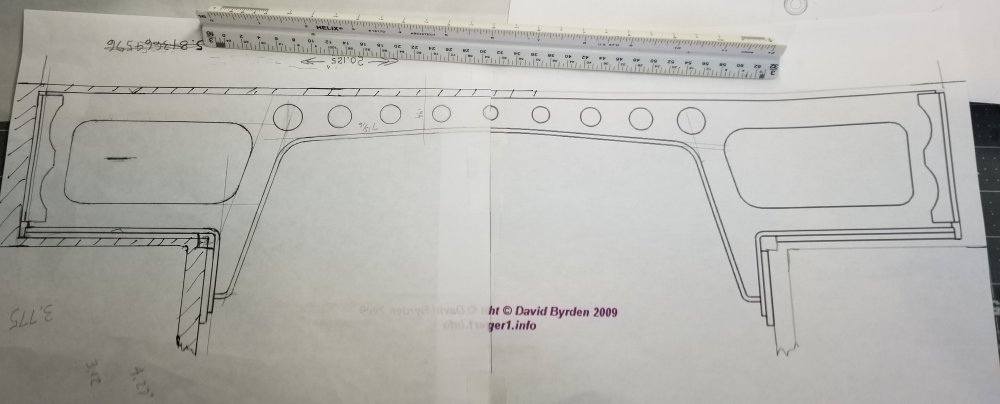
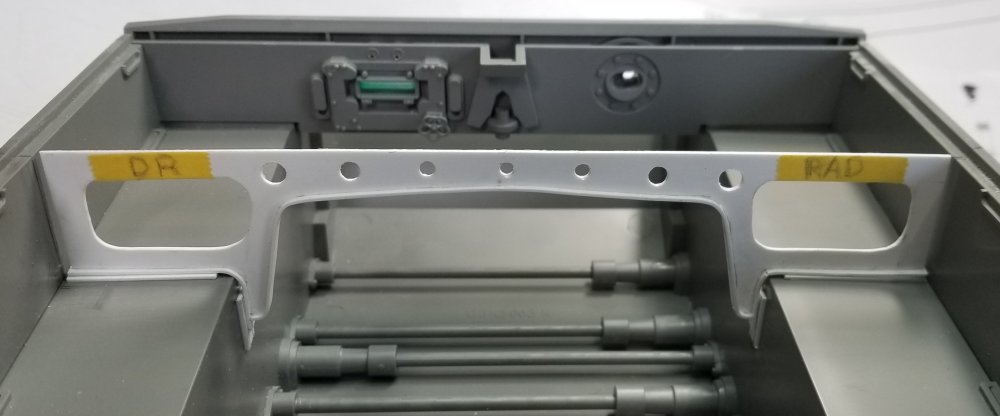
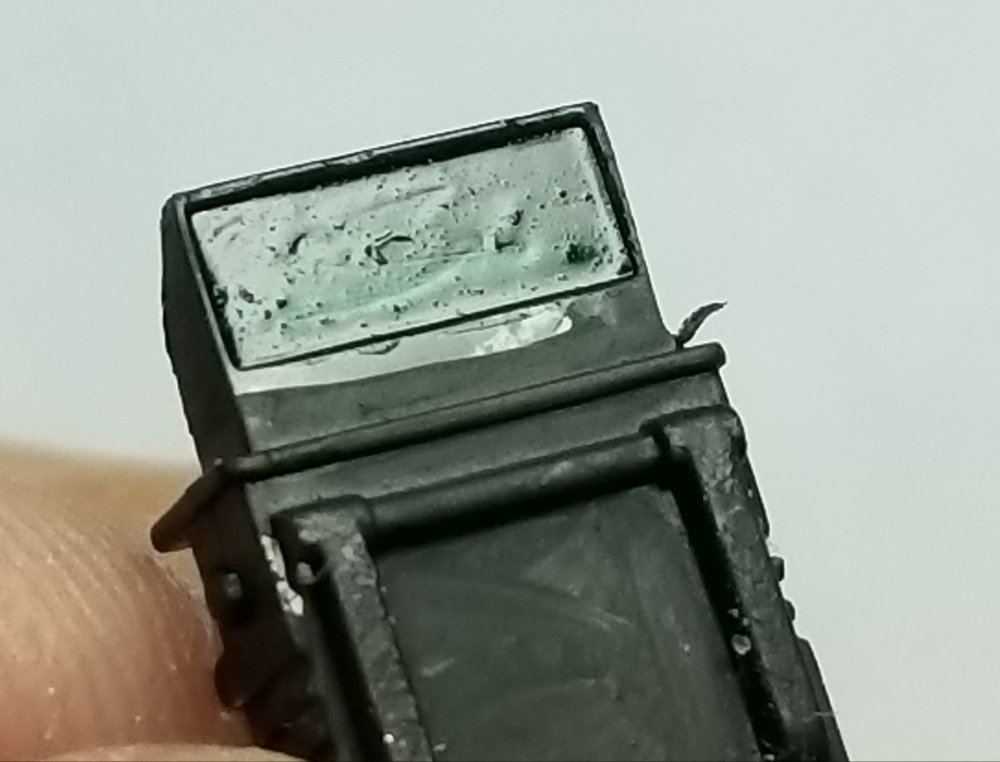
Hey guys I did some more work on the Tiger today. Not on the kit persay, but on modifications to it. I decided to add some basic detail to the interior of this kit, since it has absolutely nothing in there, except for a few parts. I went to the "Tiger info site by David Bryden" to get some information on the interior. I downloaded some pictures of the roof support brace. And I'm in the process of making one out of plastic card stock. This picture shows the roof support brace that I got from David Brydens site. As you can see it has 9 holes. I screwed up and did 7 UUGGGHH!!!! This picture shows the radio operators side of the support. This picture shows the drivers side of the support. This view shows the drawing I made from the photos. I had to rescale this into 1/16 scale. Since I'm a retired automotive engineer it was pretty easy to rescale it. this view shows the part I made in place in the tank. This view shows how I messed up the holes, but I wasn't going to start over again on a part that will barely be visible. This view shows the part a little clearer. This view shows the driver and radio operators periscopes. I painted these flat black with greenish/blue optics. This view shows the periscope in the hatch. Close up view of the greenish/blue optic. Well that's it for now be back soon with more updates. Ron G


-
Thanks guys Hey Carl where did you get the masks? Ron G
-
Don't wait to long he's almost out of em.
-
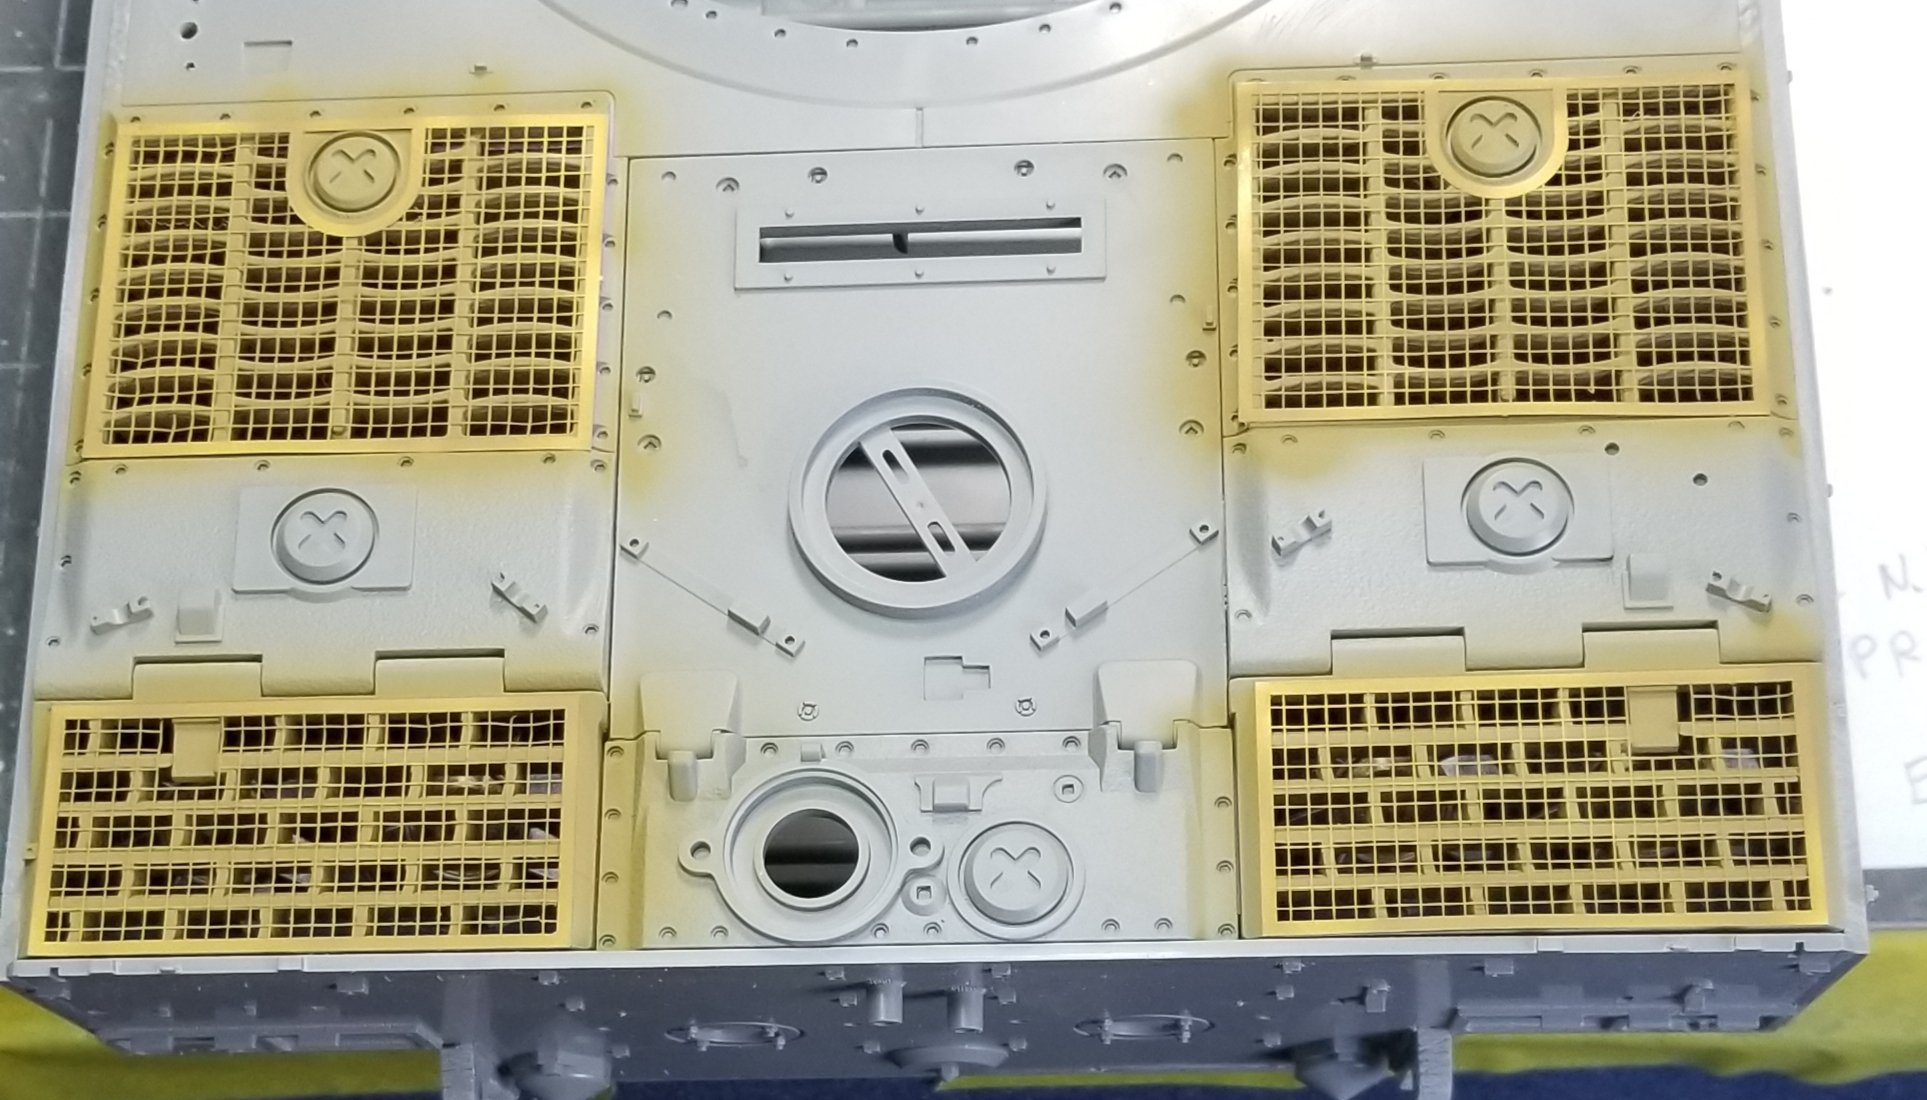
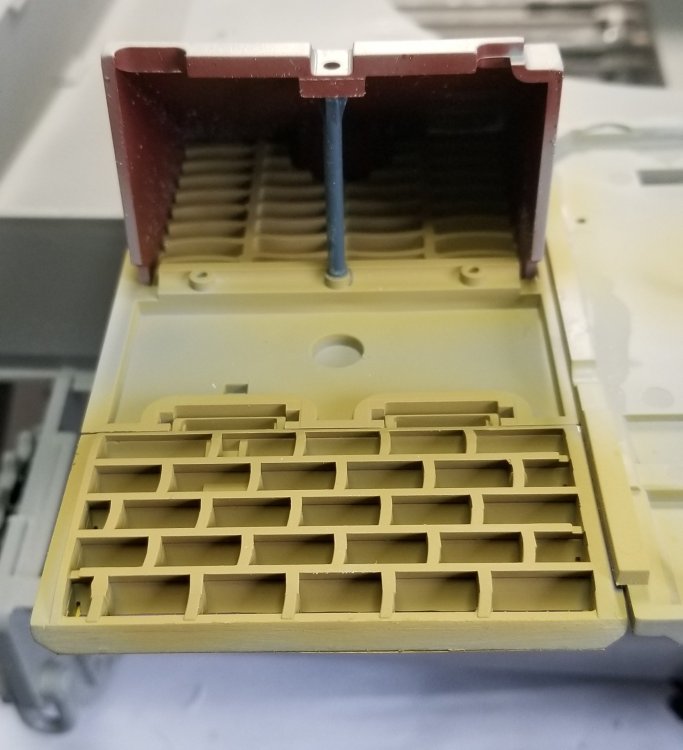
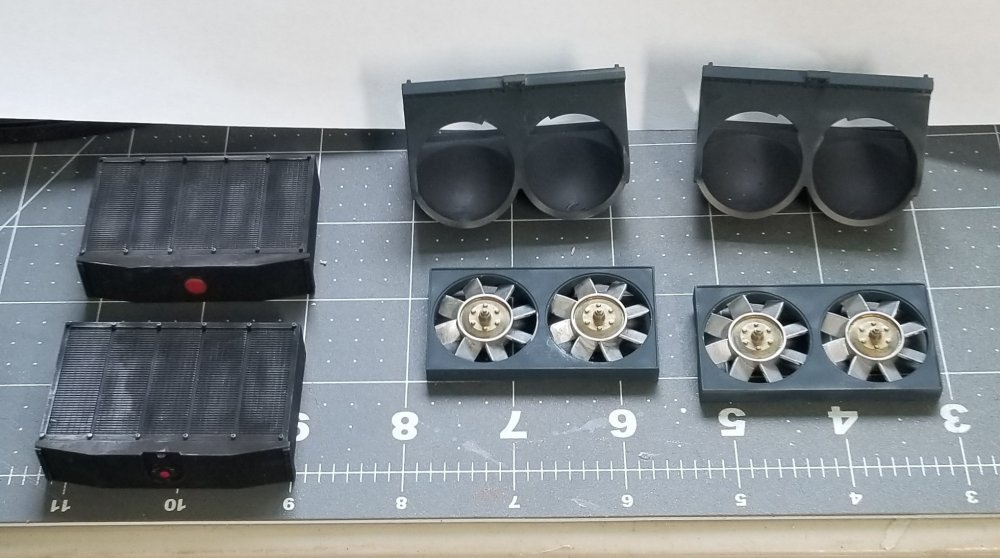
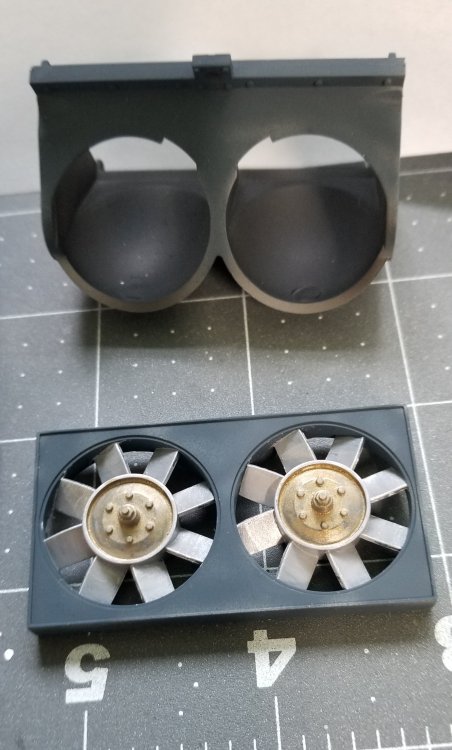
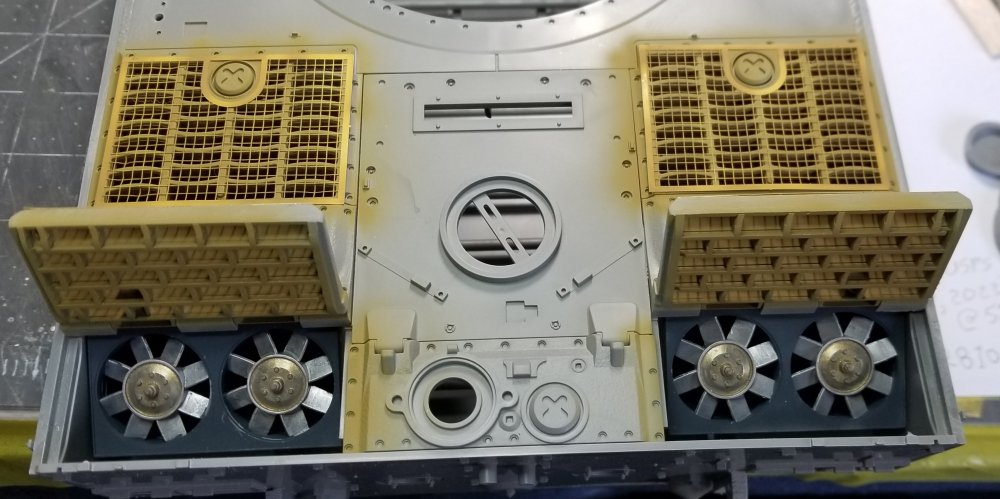
Hey all I got some more work done on the Tiger. I have the upper deck of the hull mostly put together. This view shows the duct work thats under the grill, I painted these in red oxide primer. This view shows the radiators and the cooling fans and ducts. This view shows the fans and ducts. I painted these German blue/grey with silver fan blades and gold centers. This view shows the left and right radiators. I painted these flat black, dry brushed with silver. This view shows the fans under the grills. The grills open up, but after you add tge pipes for tge Fifel air cleaners, they don't. This view shows the rear deck grills with the kit supplied PE screens. I painted these now as a primer for the photo etch, also so when I paint the whole tank I won't have to flood this area with paint This view shows the underside of the deck. I painted this from this side so that when I paint the whole tank later on I wouldn't have to spray so much paint on these grills that I end up over painting the detail below them. I'm using Tamiya paint. I made my own mix of 4-XF4 (yellow green), 2-XF52 (flat earth), 1-XF60 (dark yellow) & 1-XF49 (khaki) for my RAL 8000 Well that's it for now be back soon with more. Ron G


-
This is looking mighty fine Ernie. Ron G
-
Thanks guys
-
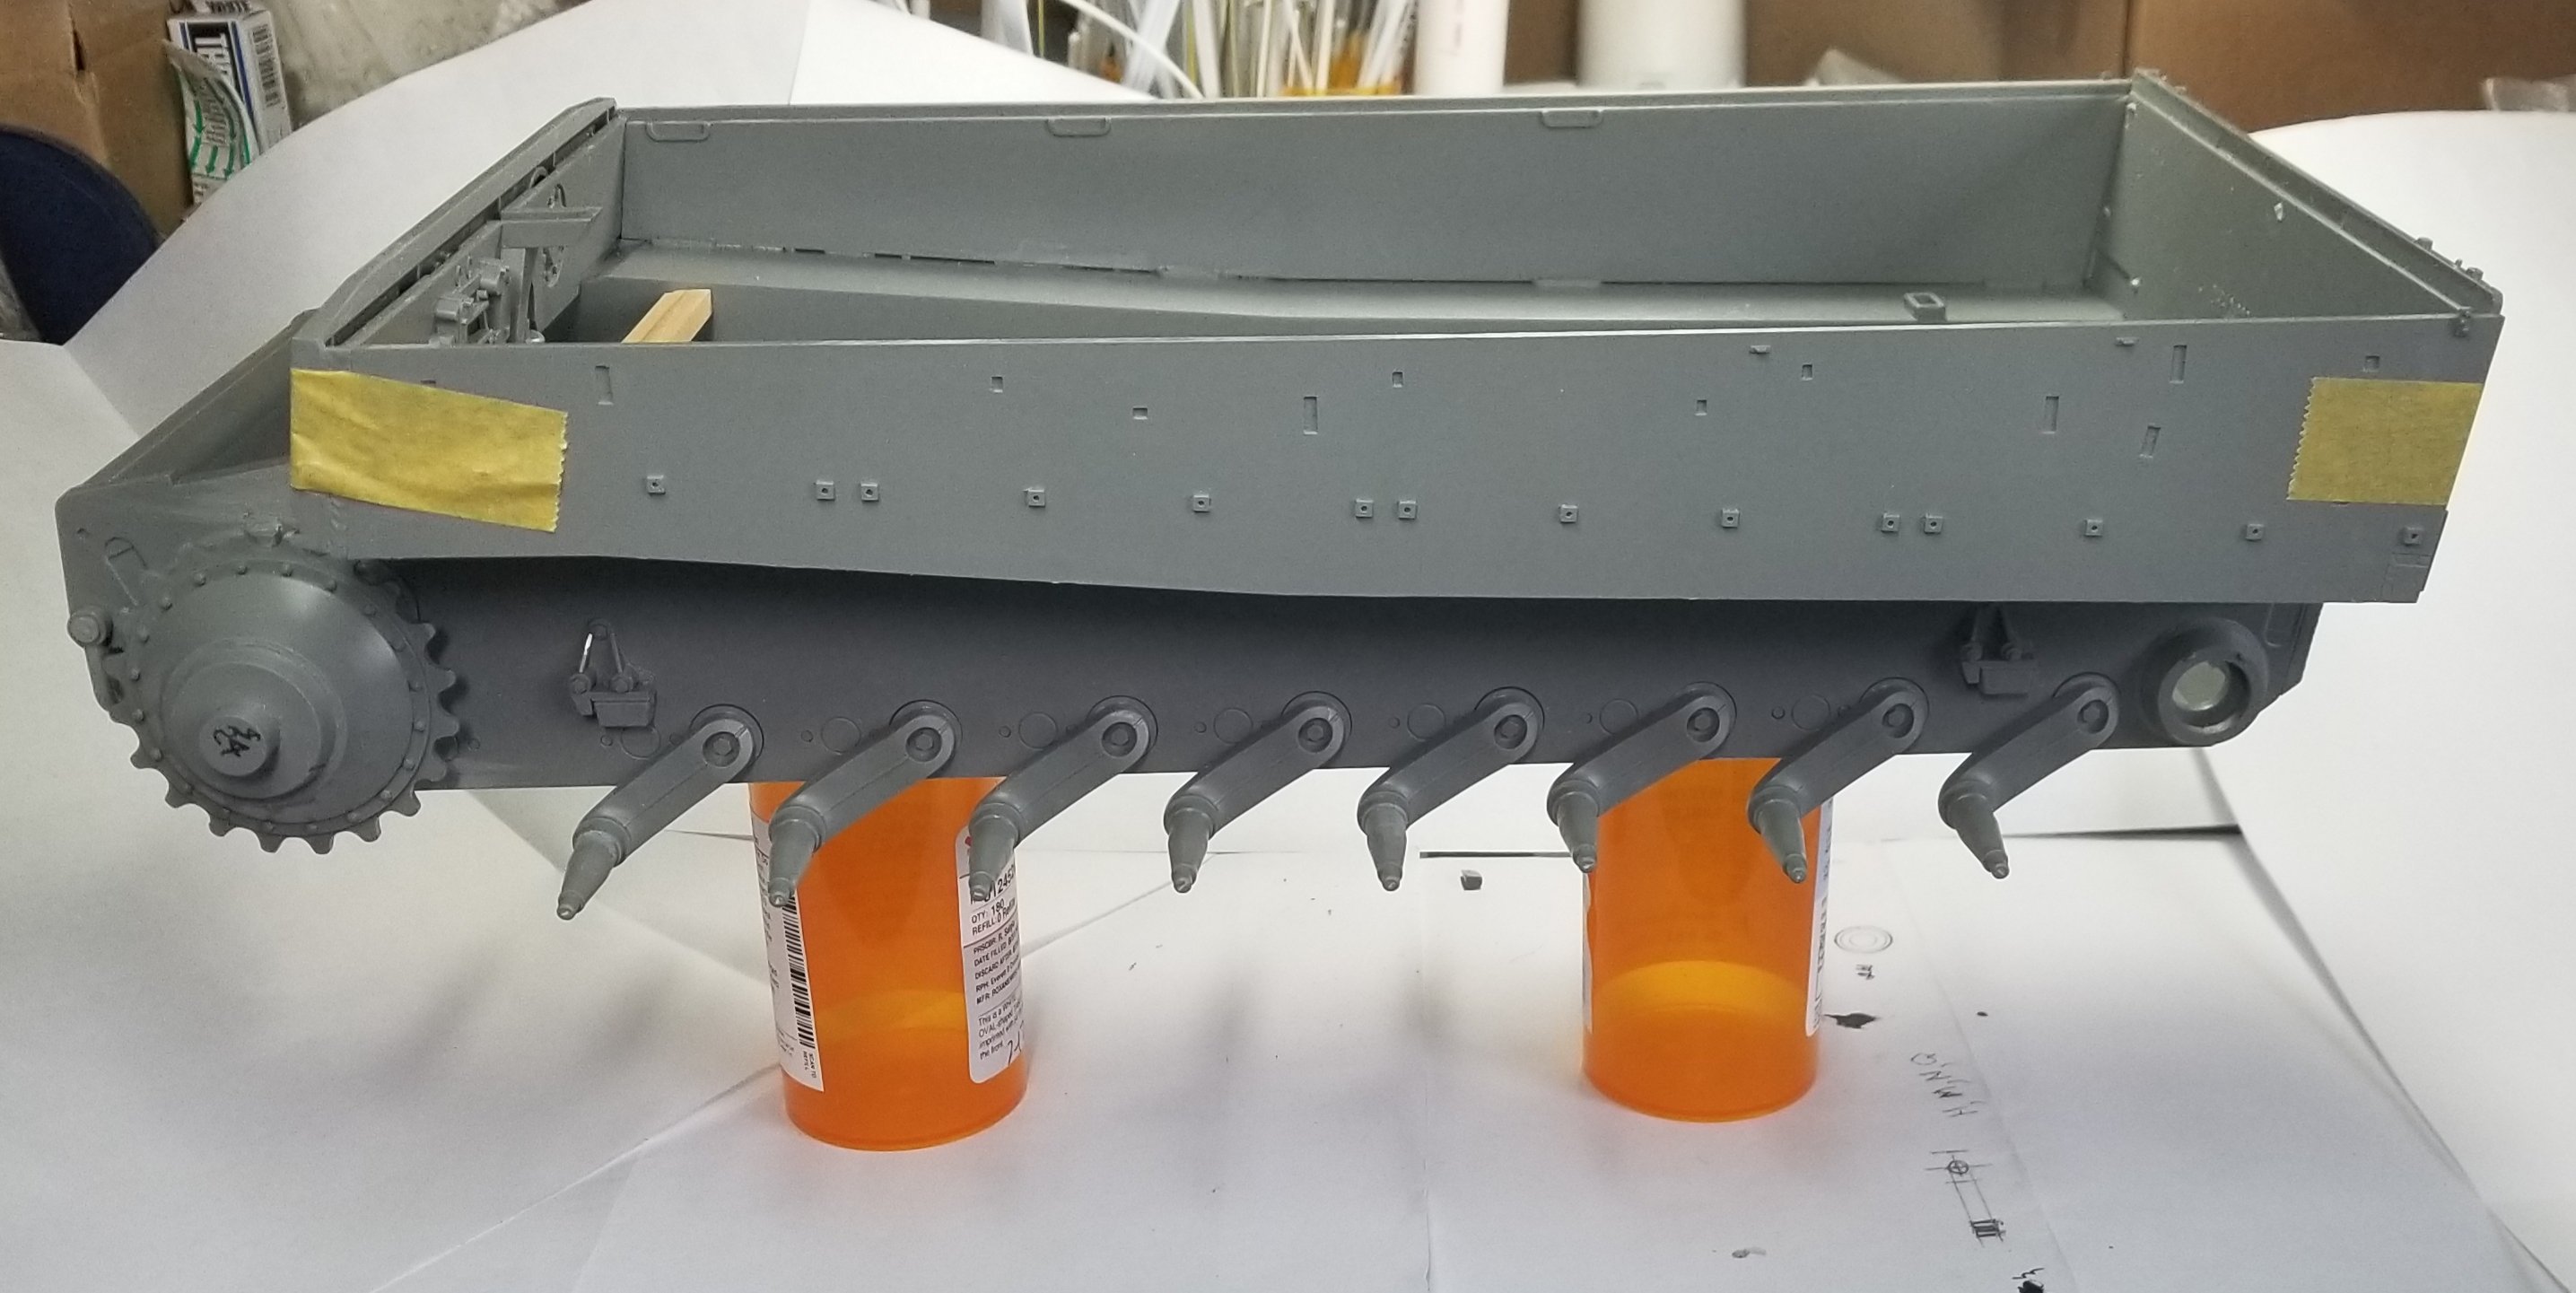
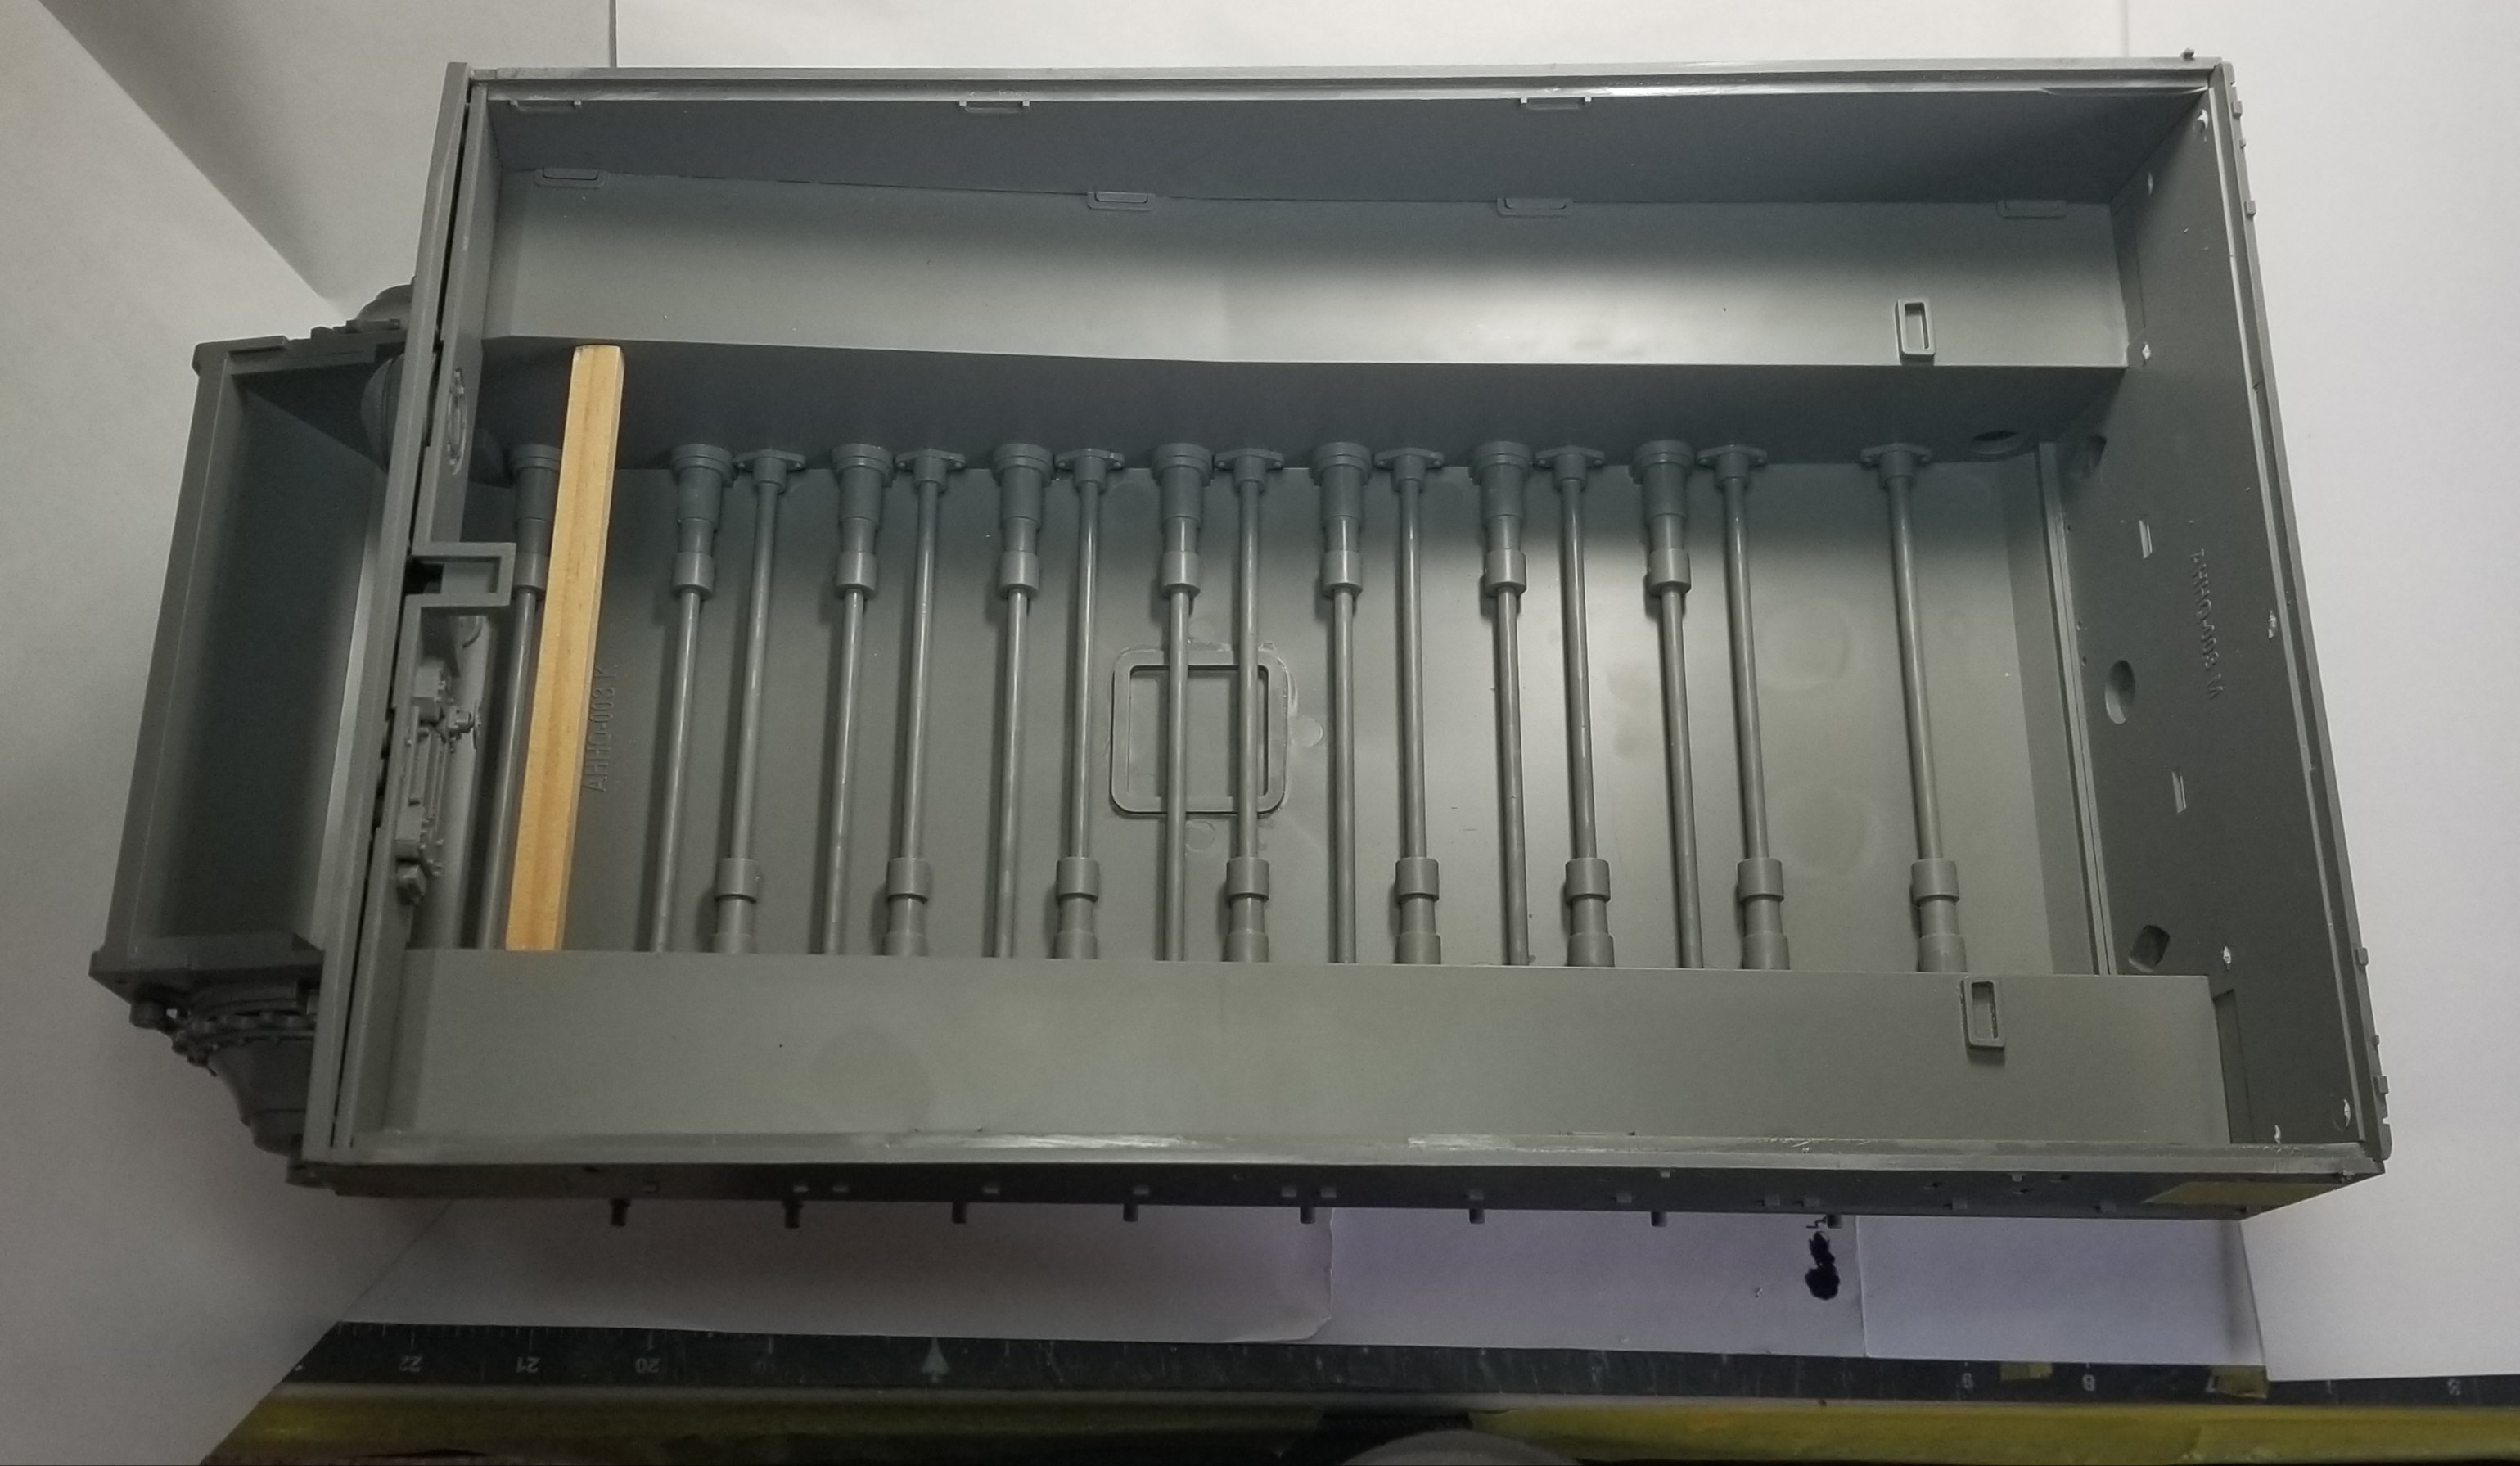
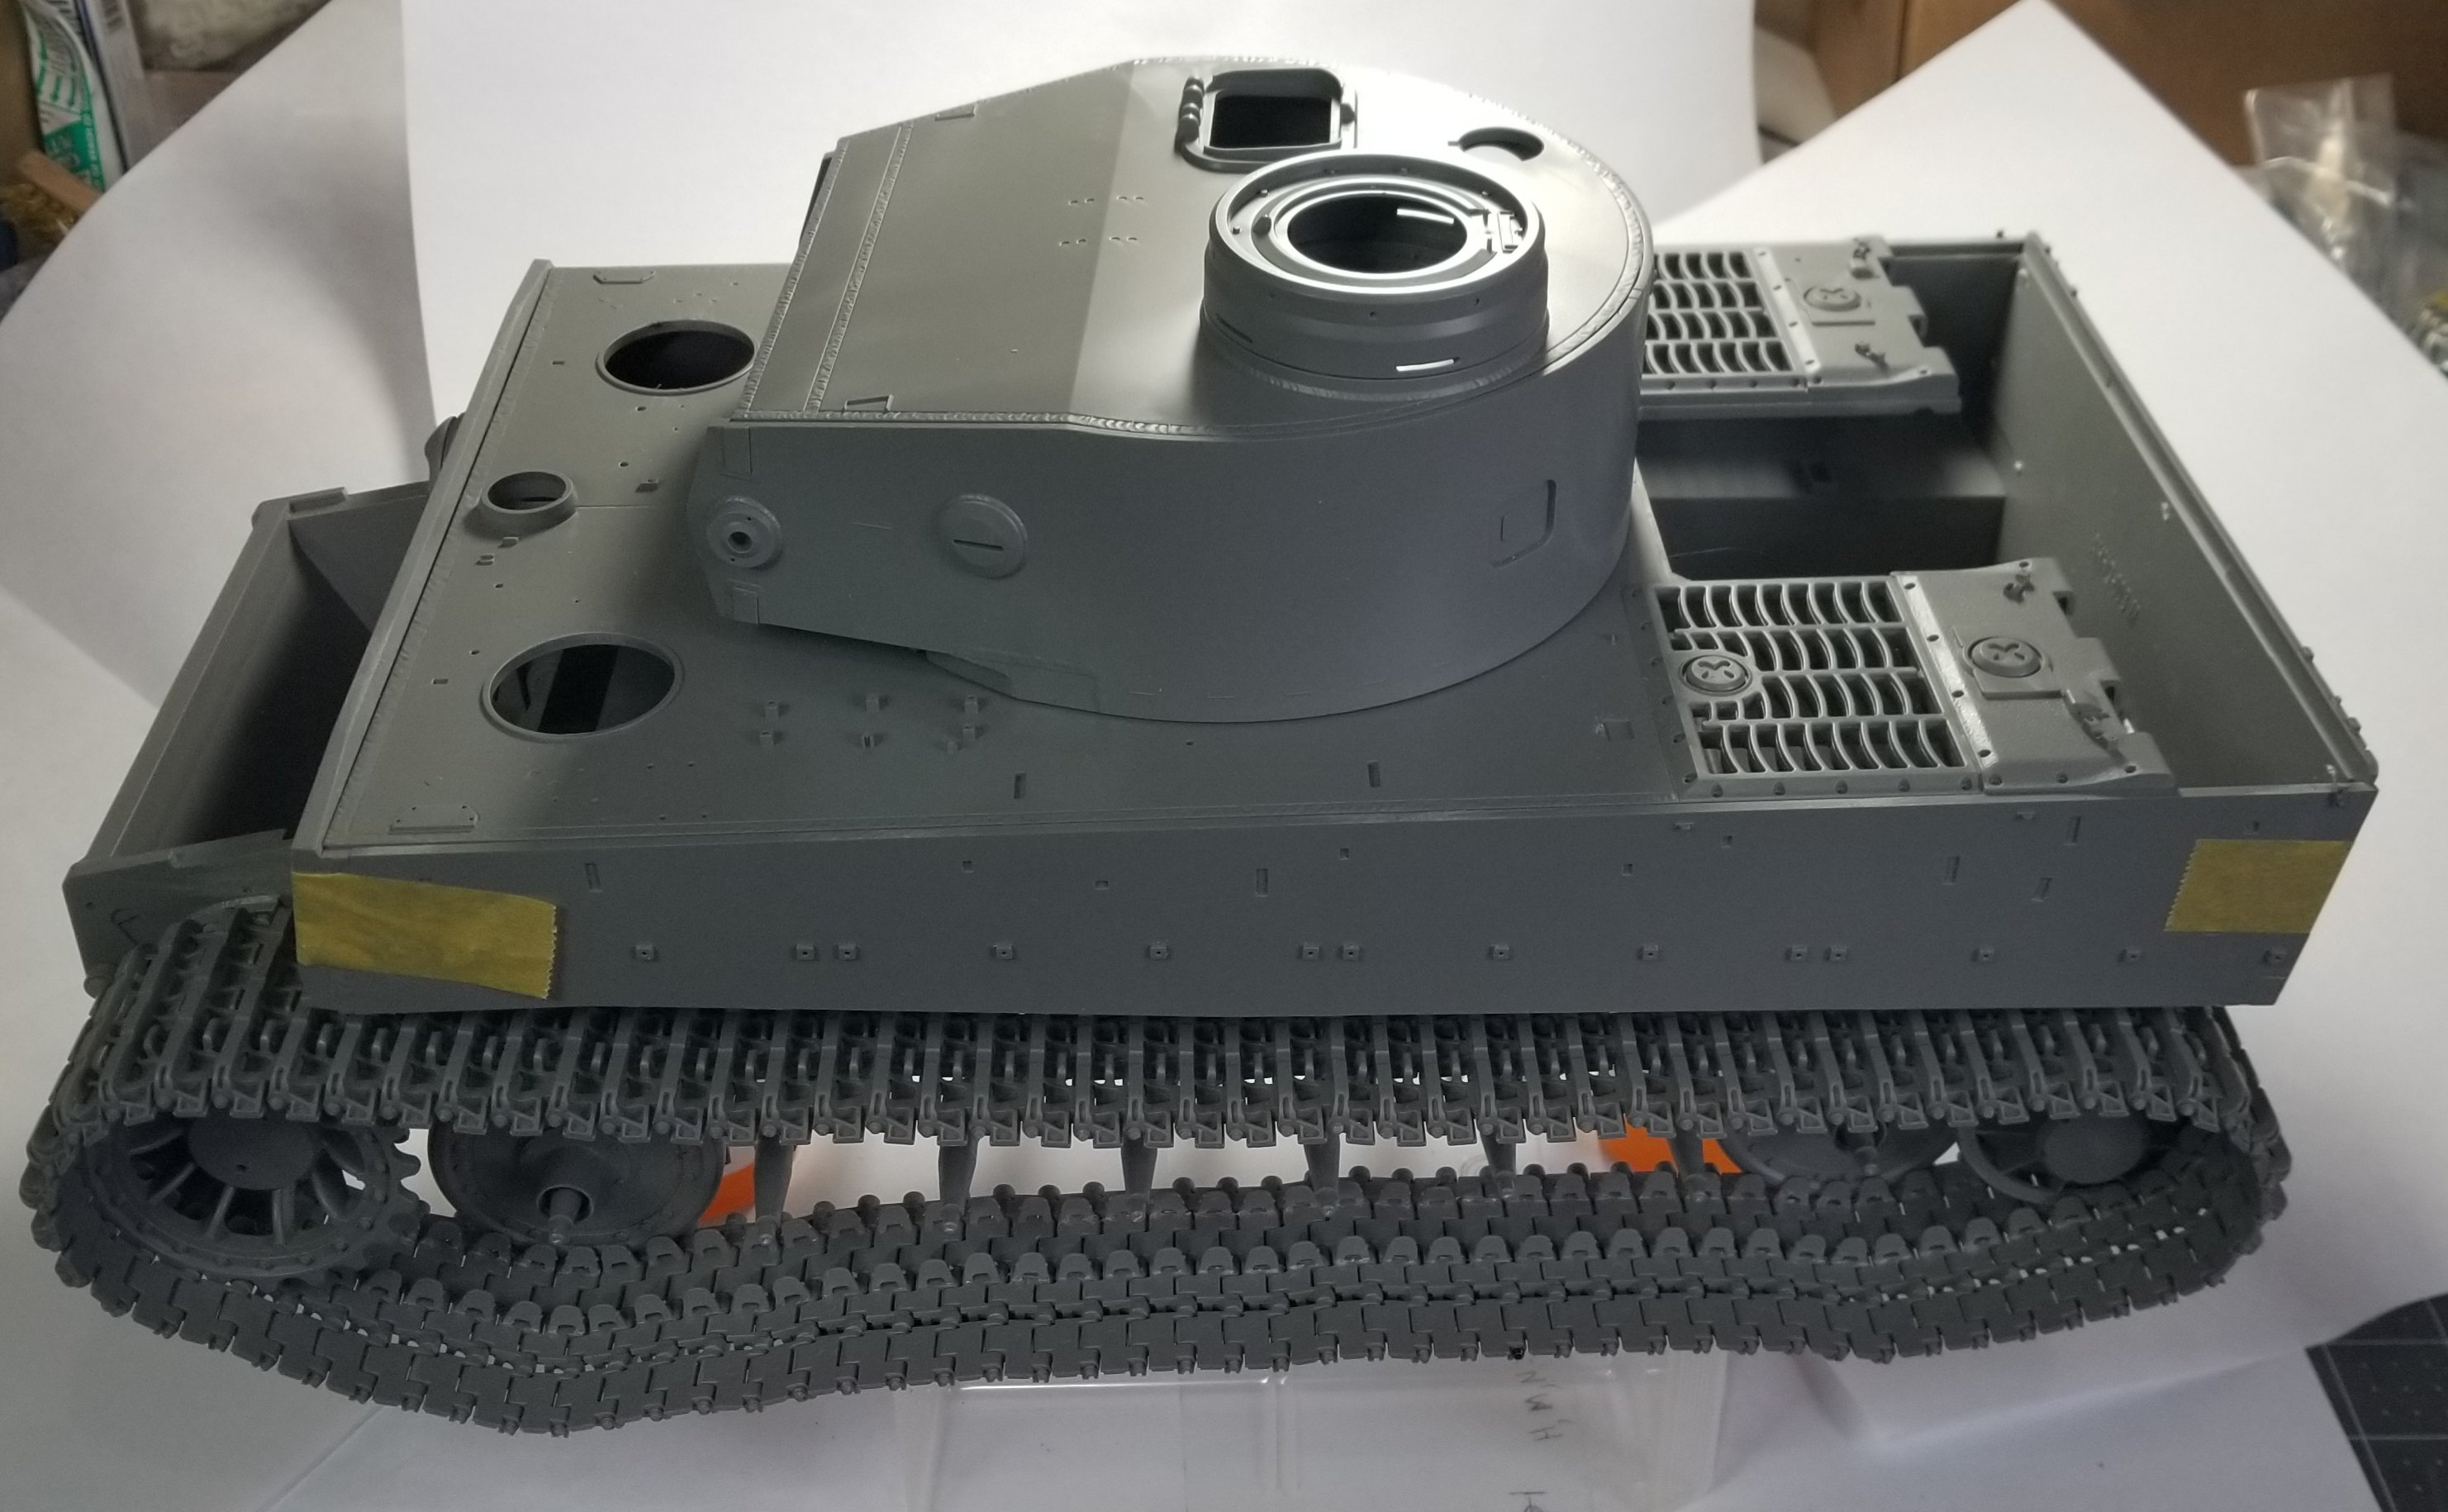
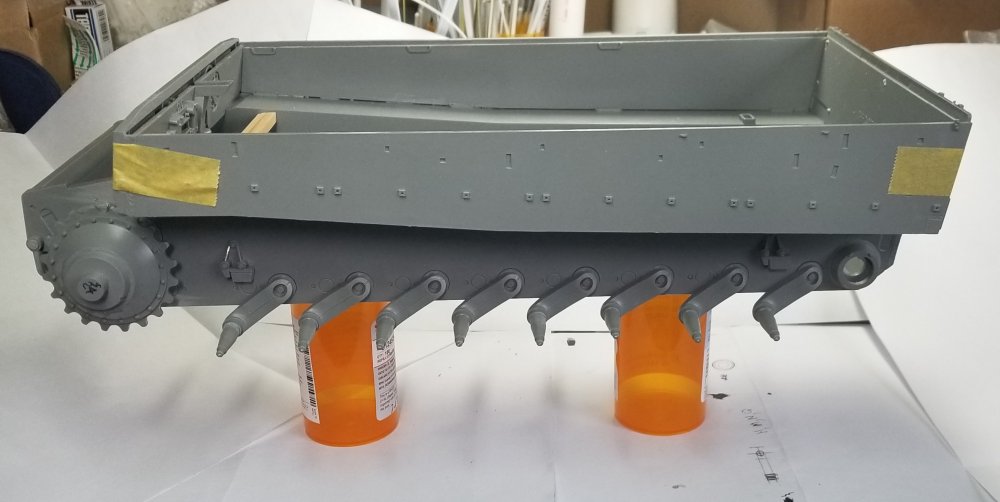
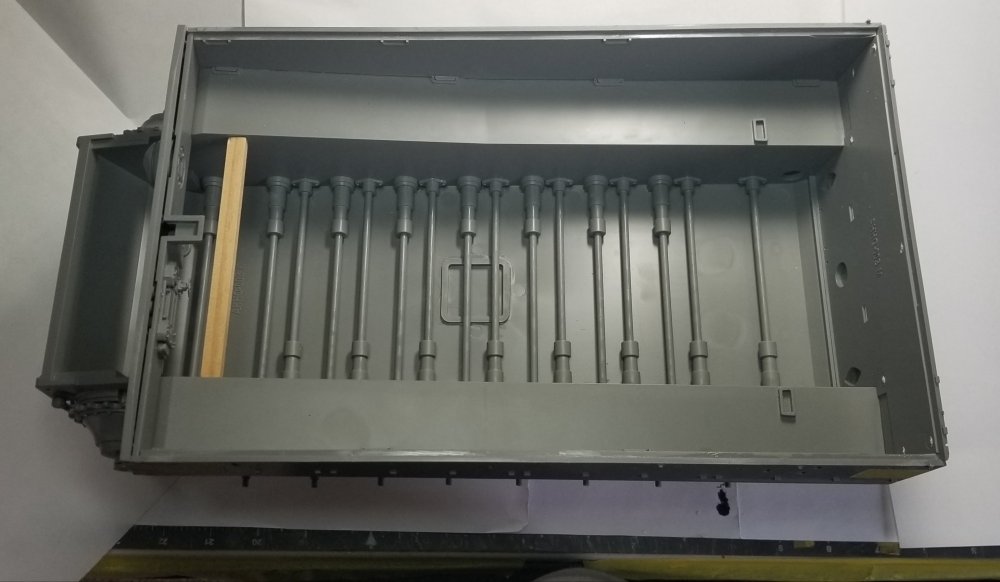
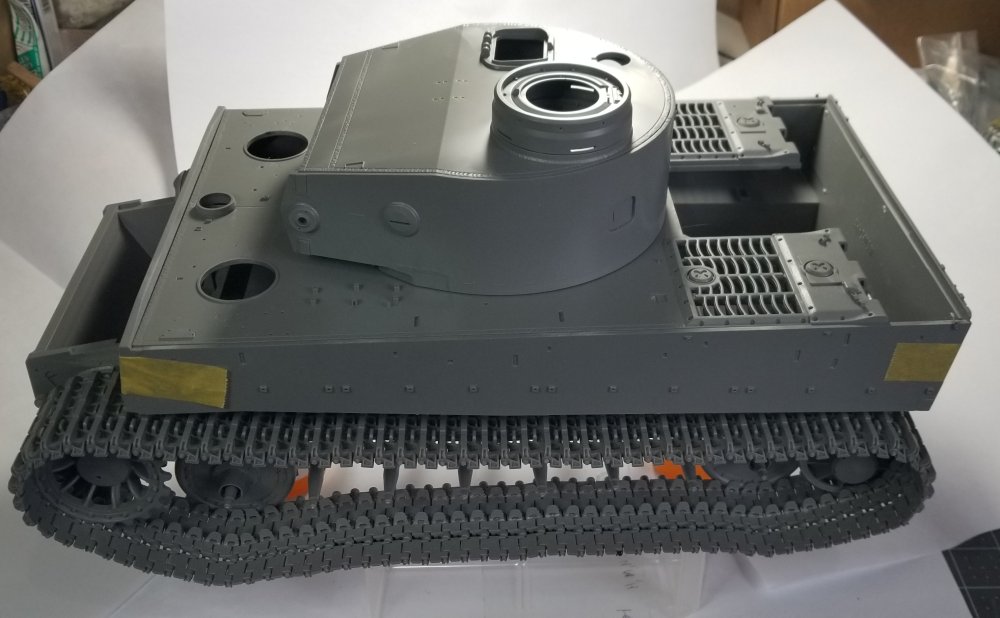
Hey all I'm back. I had the procedure done on my left eye. Its called a "super-k". He put numbing drops in my eye, then took what looked like a plastic tool (my eyes were pretty blurry) so I could not tell and started scraping the surface of my eye. OUCH!!!!! It hurt like hell even with the numbing drops. Anyway I can see a little better, it's not perfectly clear but he said it would take a couple of weeks for it to clear up. So on to modeling stuff. I have the lower hull done, to a point. There are still a few items to add, but they need to be painted first. This view shows the lower hull partly assembled. View from the top showing the torsion bars Side view showing the drive sprocket, some wheels and the idler wheel. view from above with the upper deck and turret in place. This view shows the tracks temporarily assembled for photo. Those damn guide horns are awful! They keep falling off!. I have to figure out how to fix thus problem, before I start on the other side of the tracks (ALL 96 OF THEM ALONG WITH THE 192 GUIDE HORNS!!!!) Well that's it for now be back with more soon.

-
The trick is the multi color fur paint job to fool her. Ron G
-
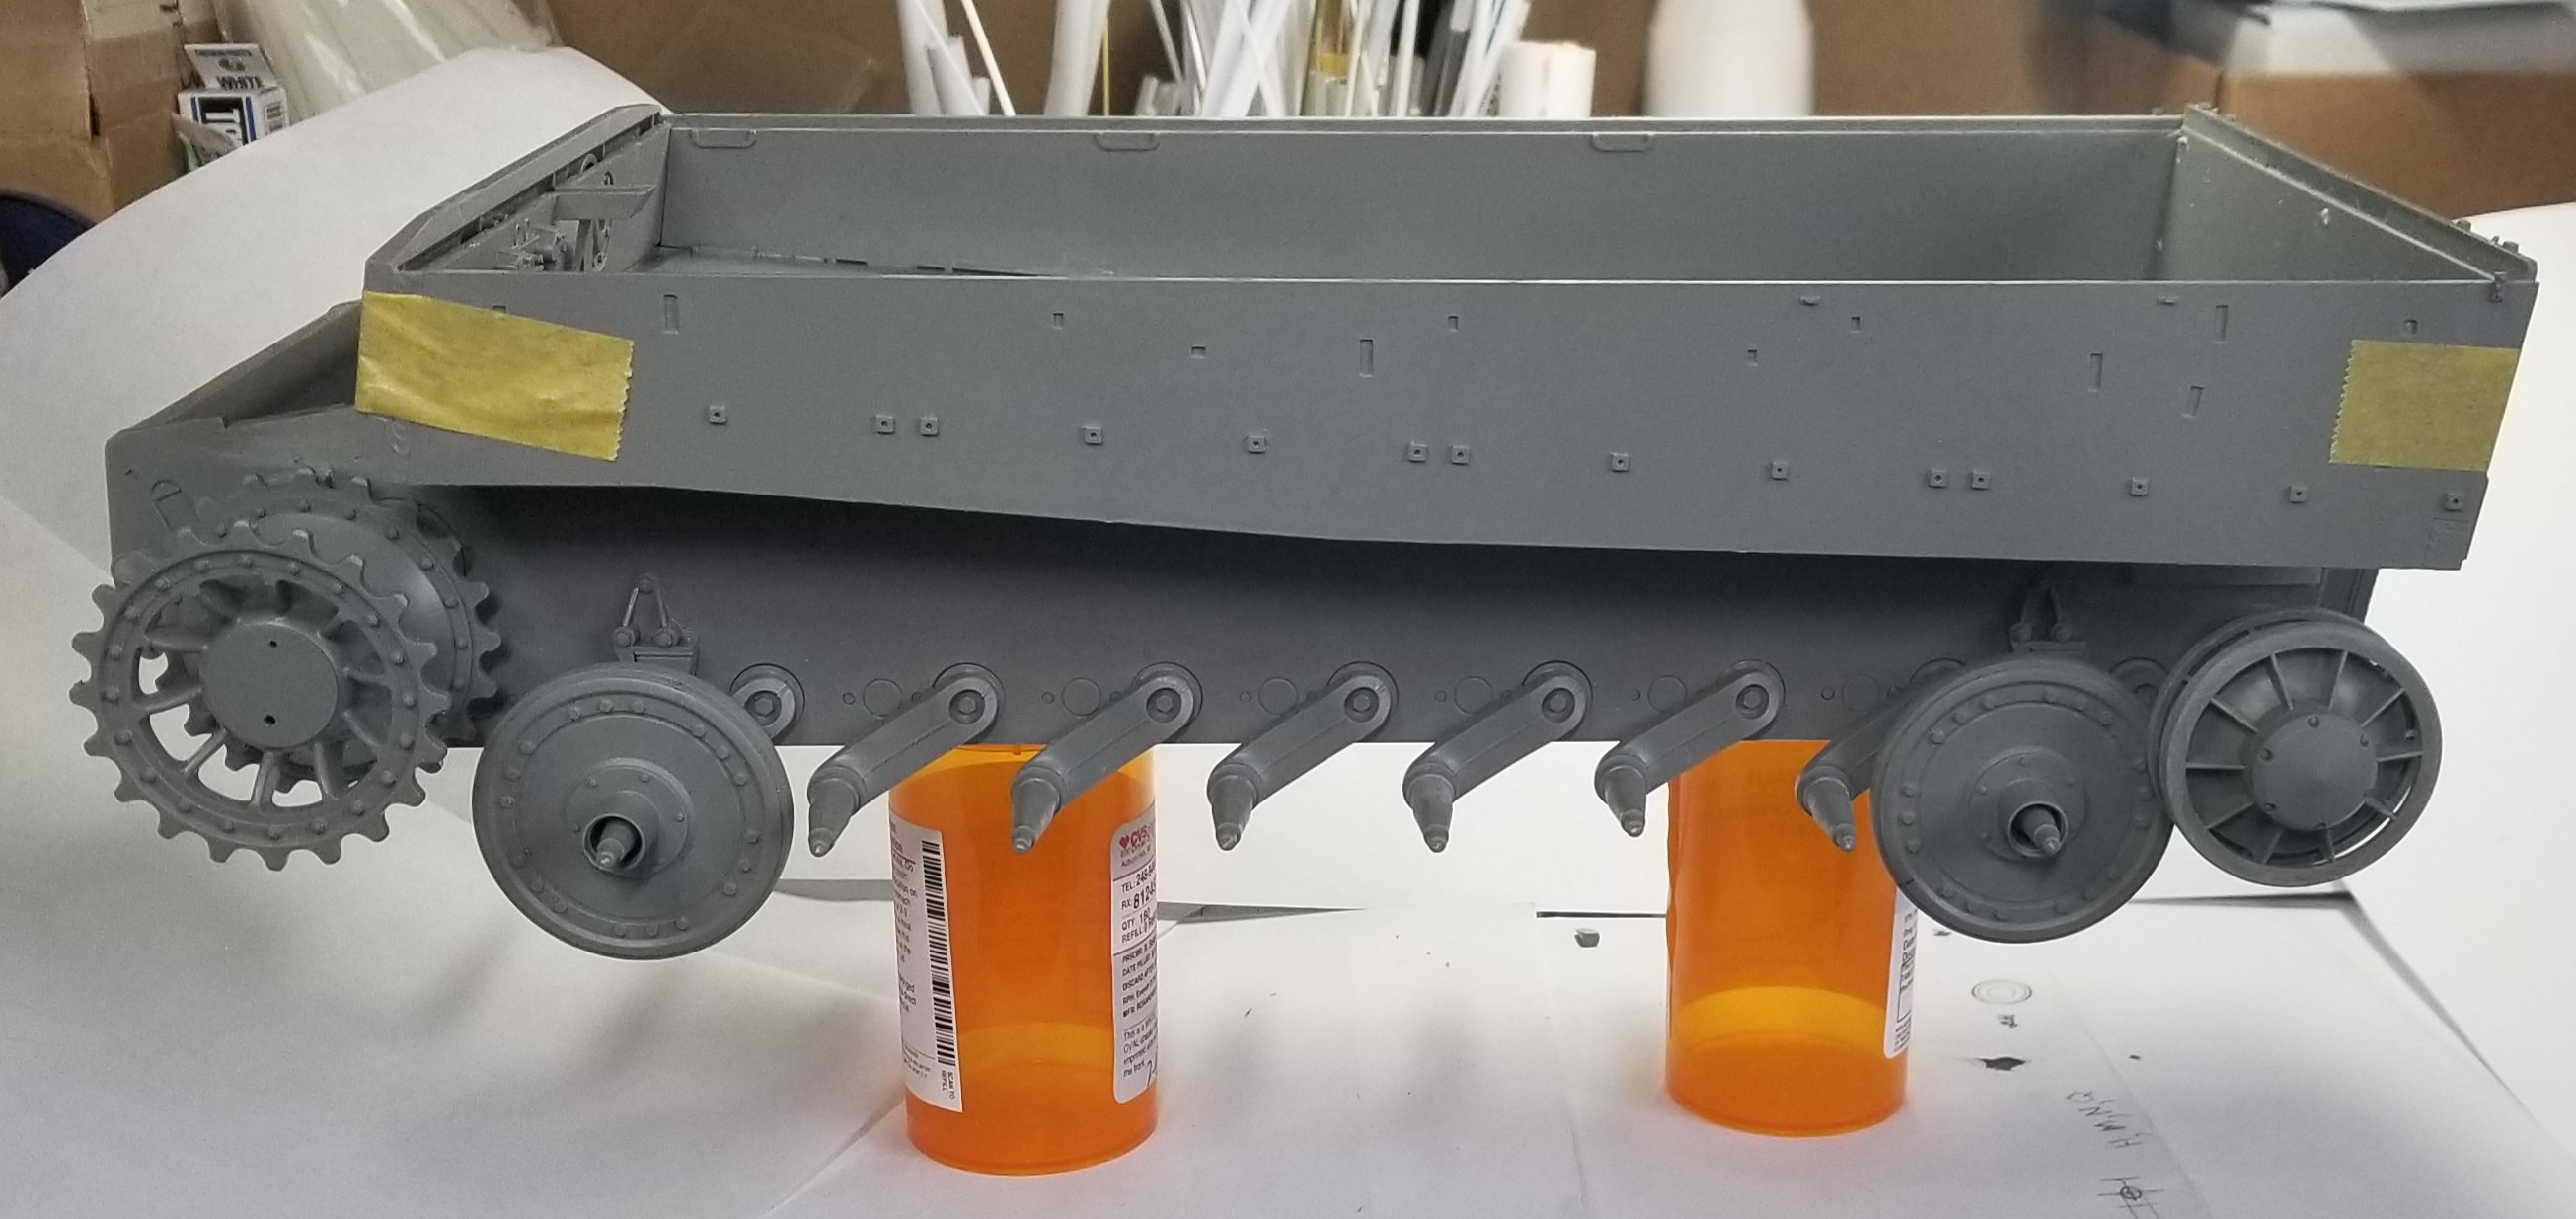
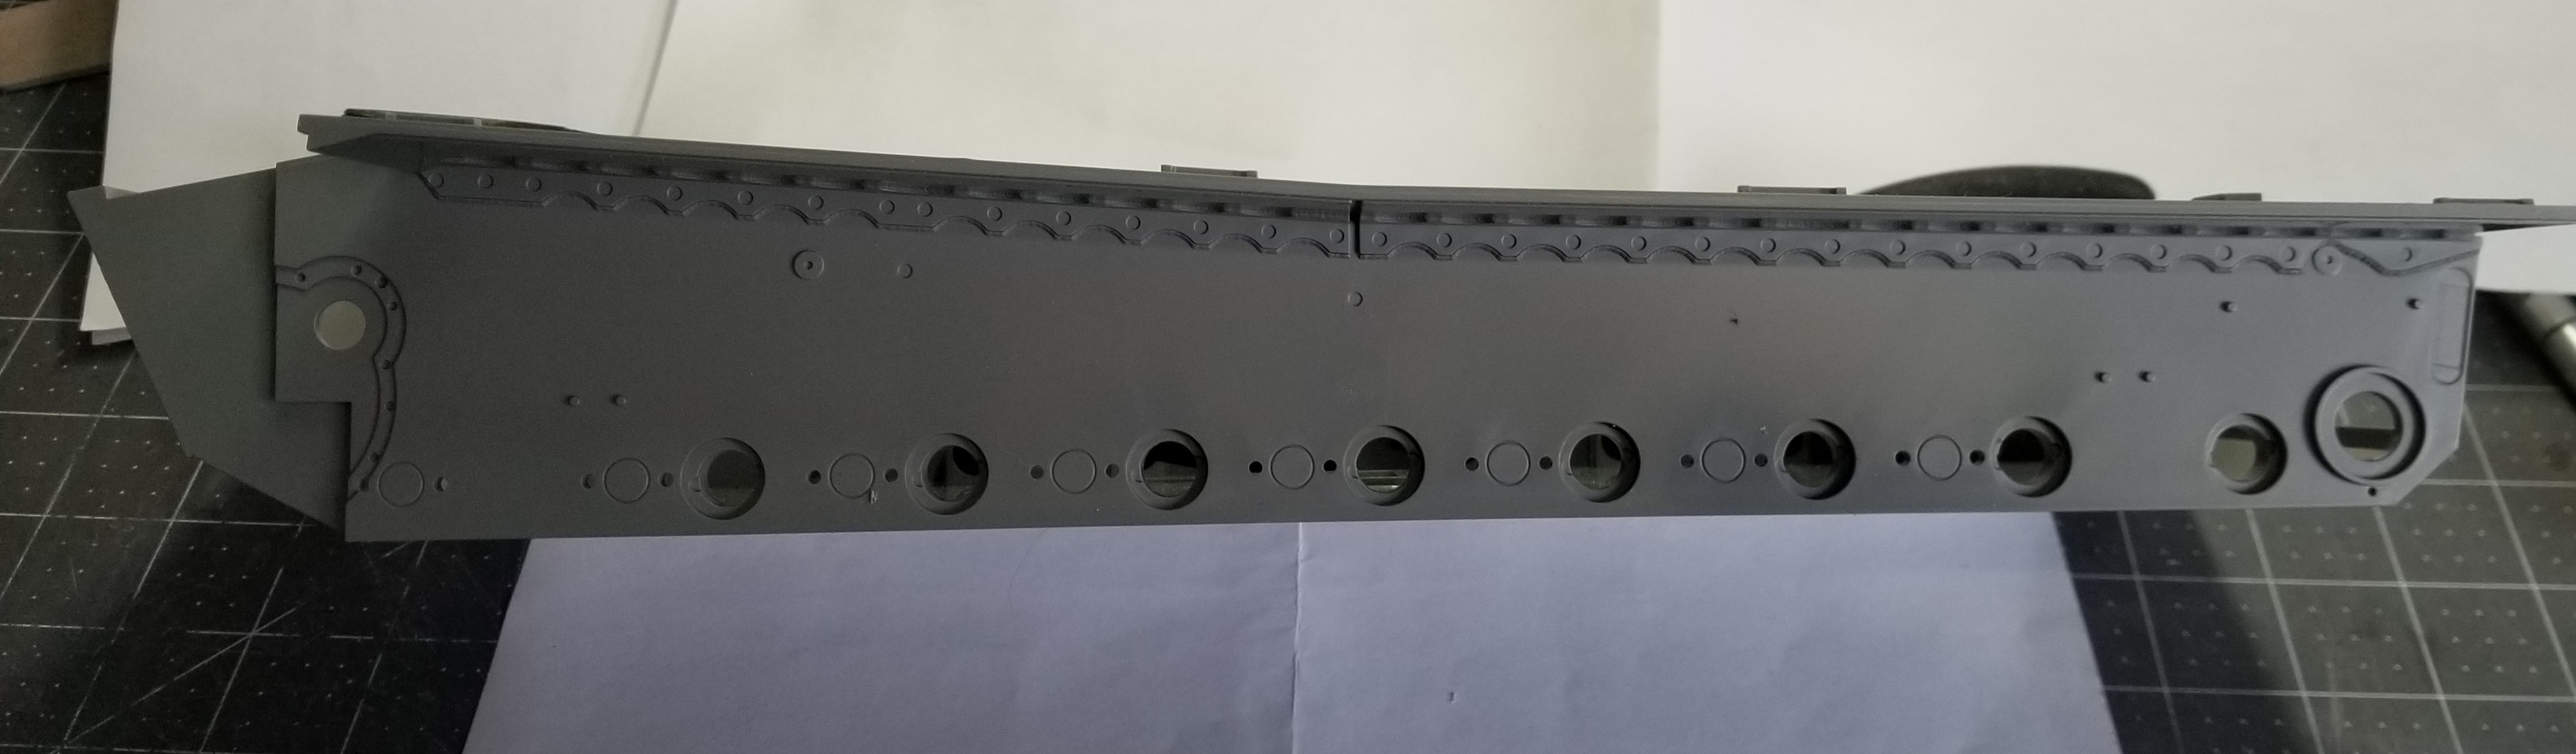
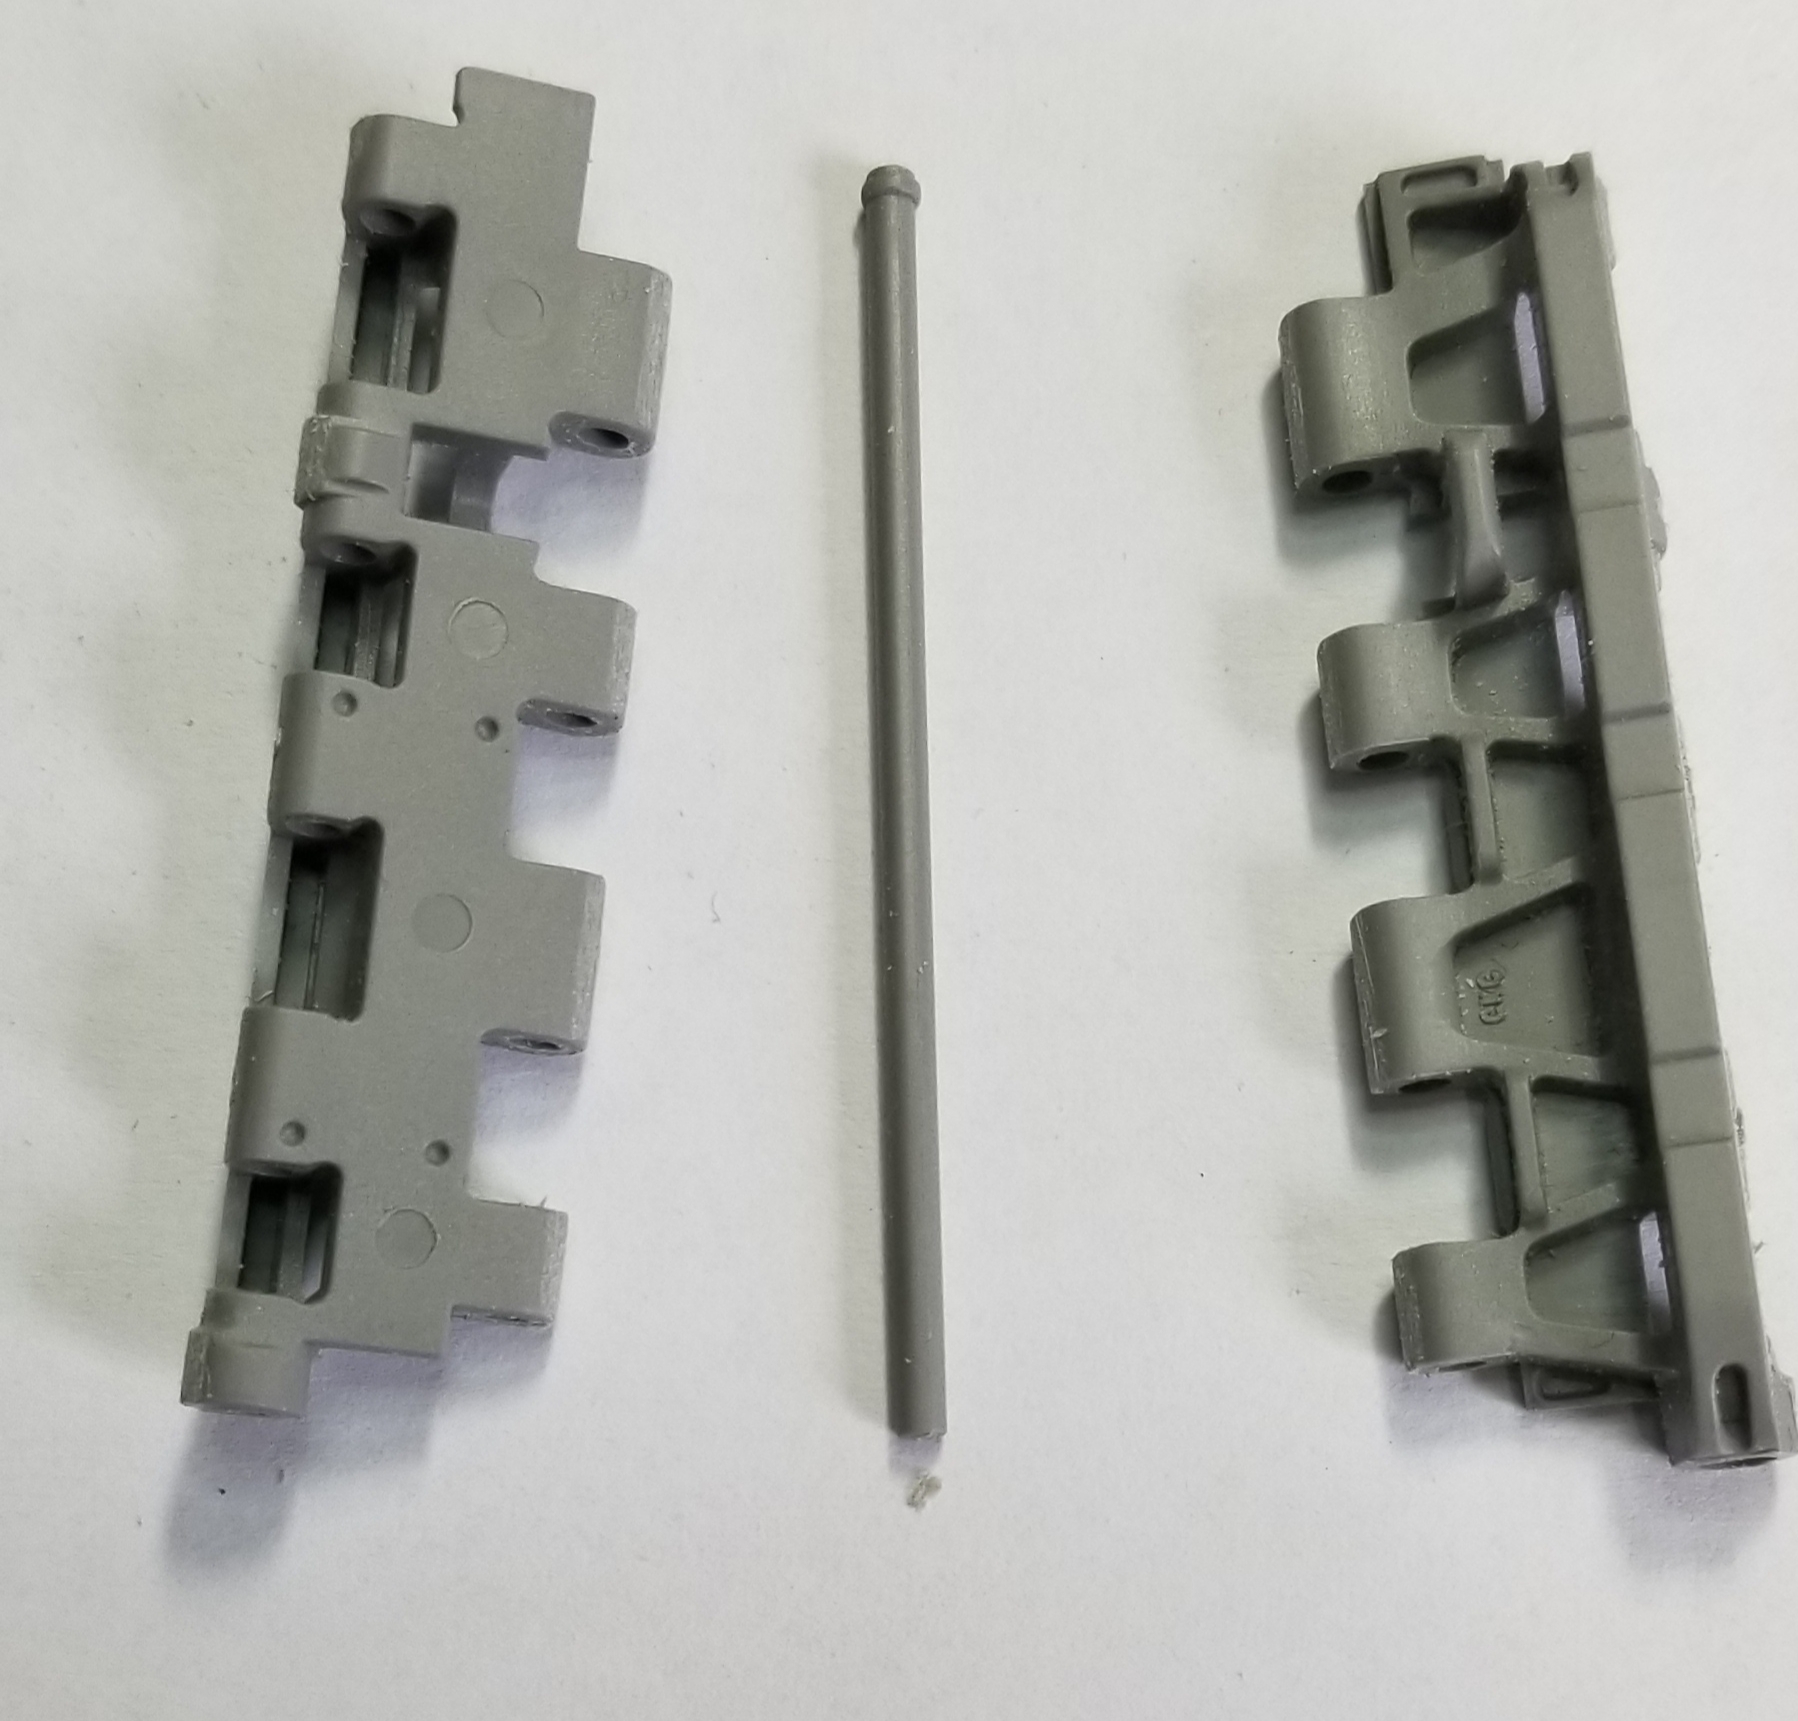
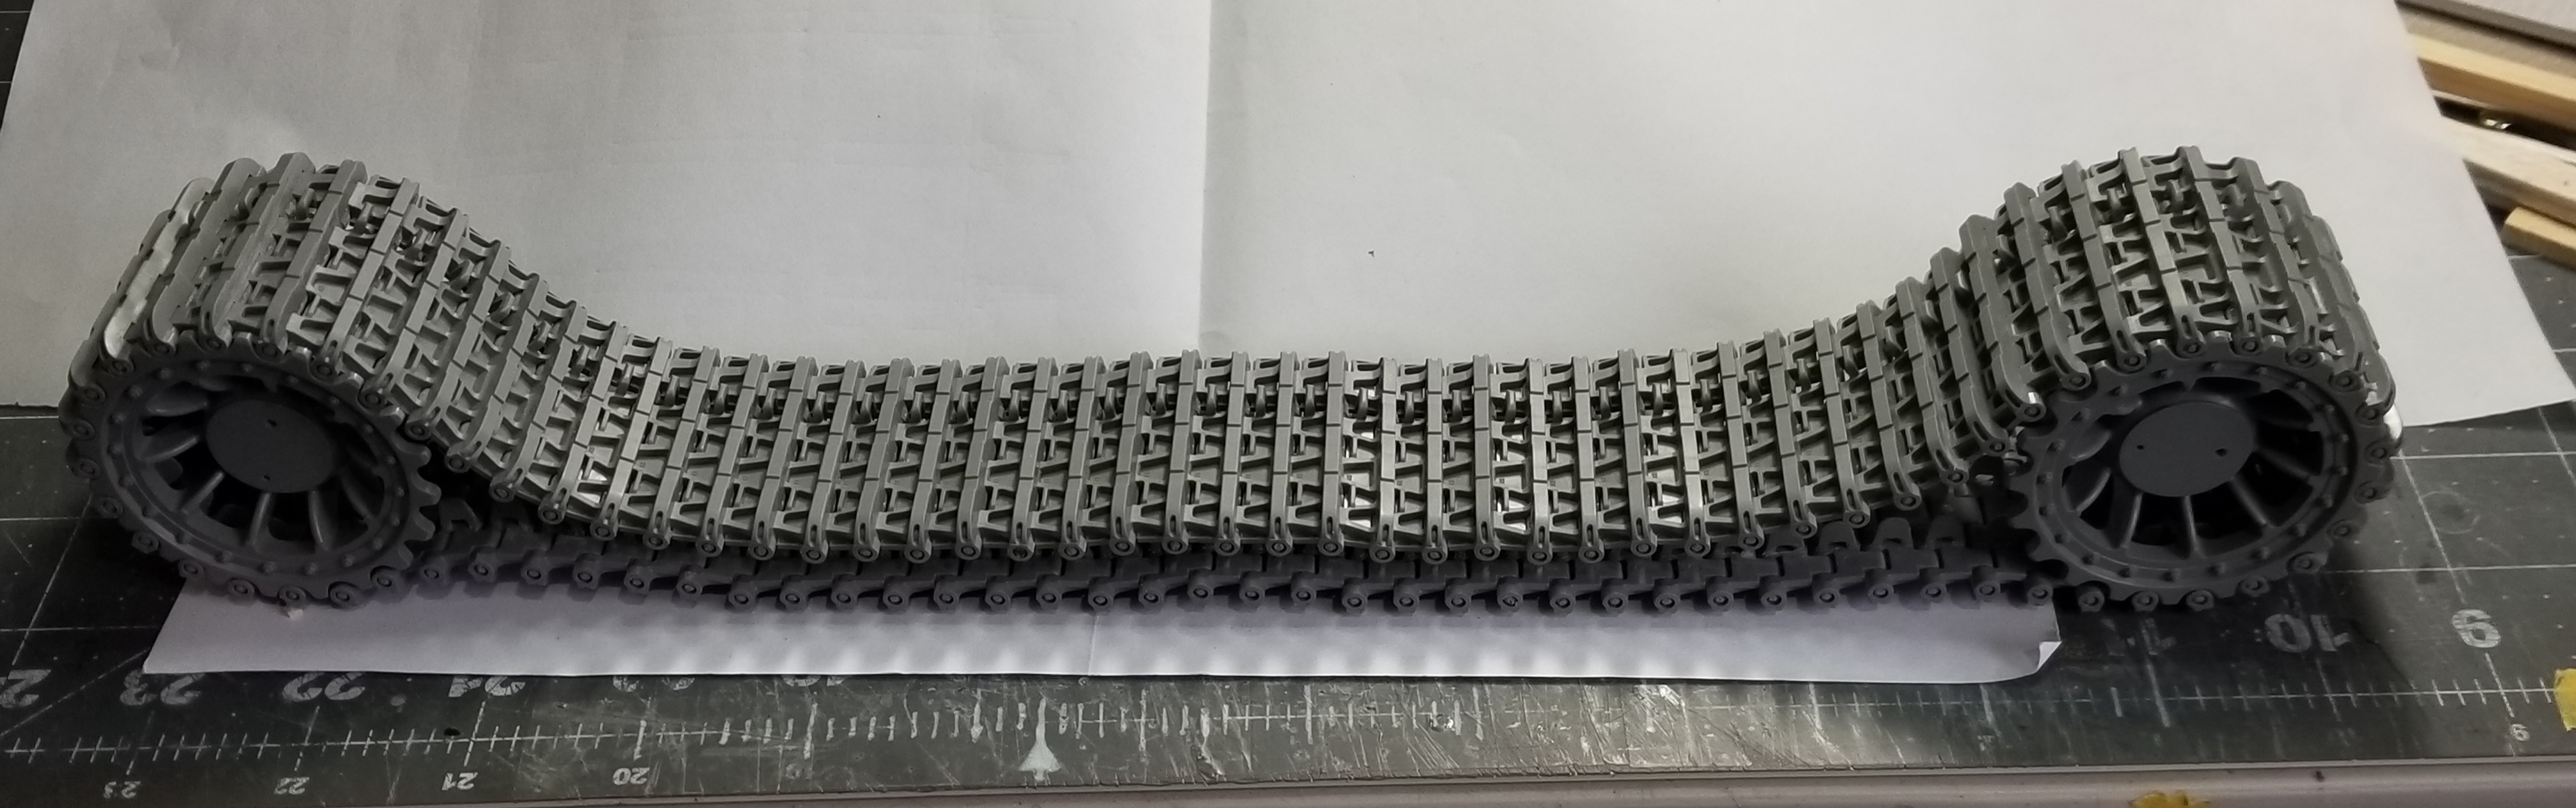
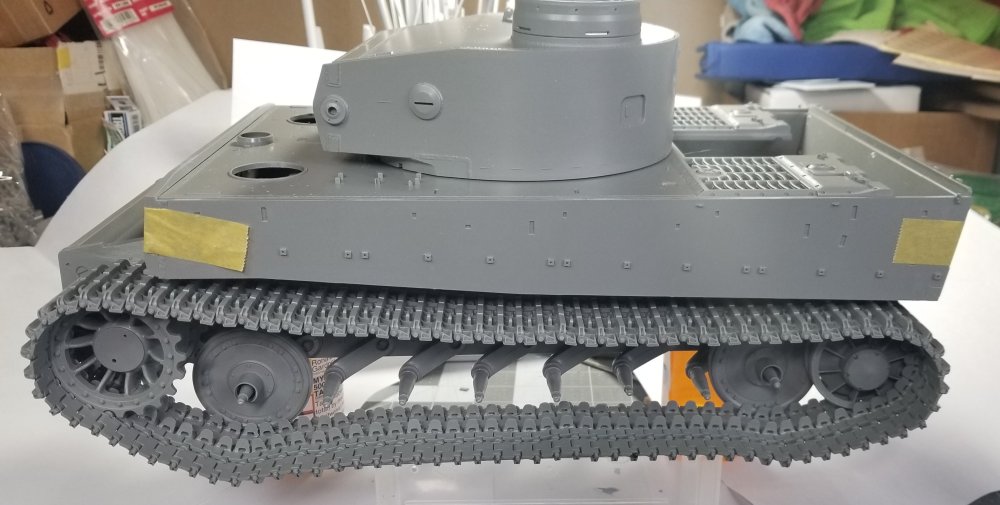
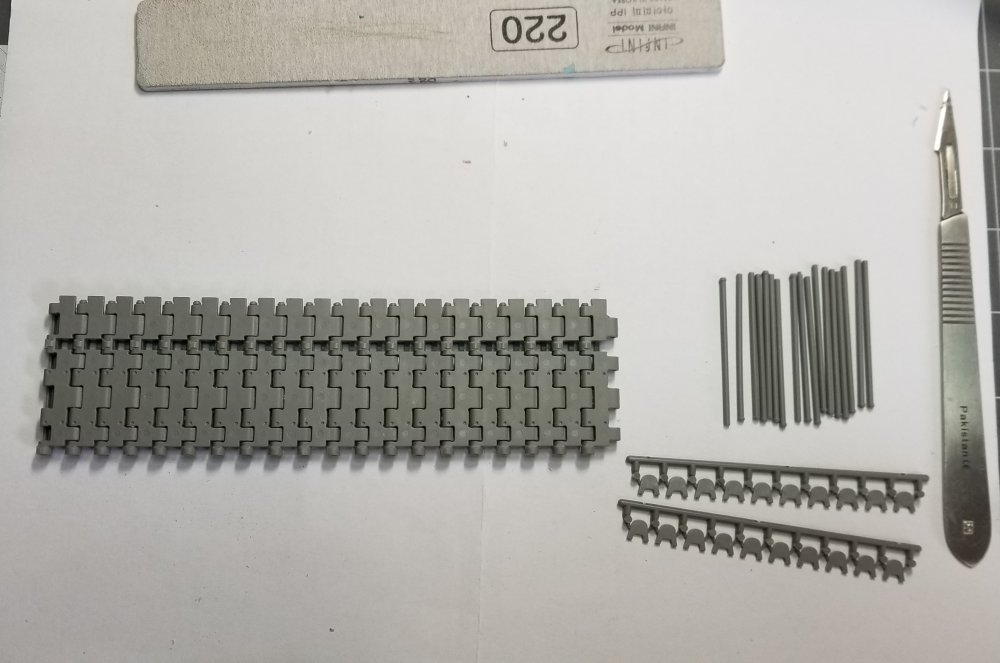
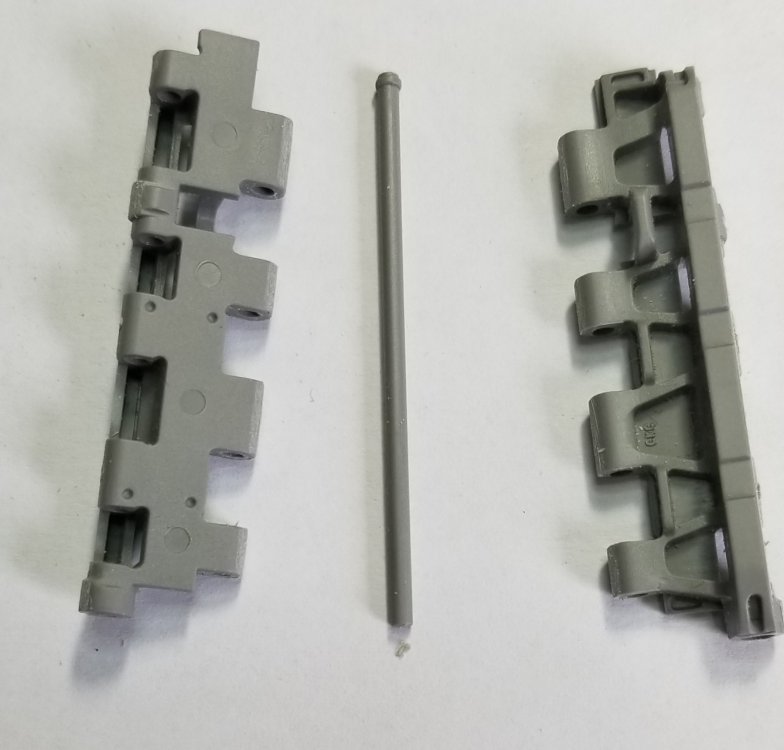
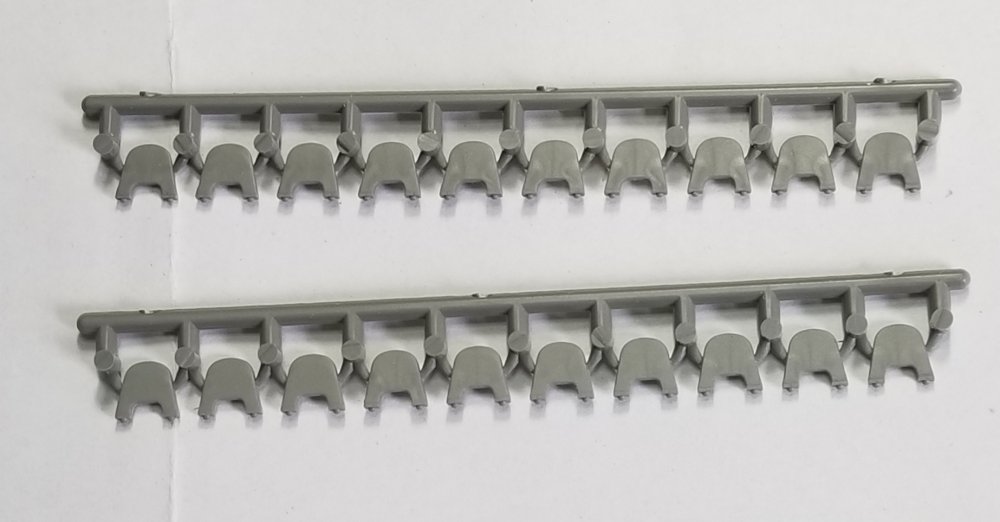
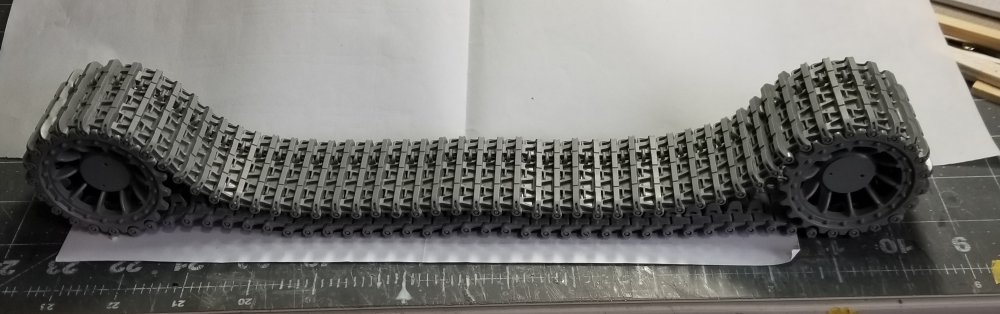
Hey all Yeah I know it's not Saturday, but better late than never. I was tied up all weekend because we bought a new motorhome a 2023 Winnebago Navion. It's between a class "B" & a class "C" on a Mercedes Benz diesel chassis. It's really the wife's, she's been wanting one for two years now, so she's taking her buyout from Salantis (Chrysler) and that will pay for half of it. So back to modeling. Here are some pictures of all the track components. Here's a little comparison between the Trumpeter Panzer IV and the Tiger. There approximately the same width and length. Side view of the Tiger hull. This view shows the track shoes, track pins and track guide horns. And there are a lot of these to put together!!!! this view shows two of the track shoes and a track pin. These are the track guide horns. These are a real PAIN IN THE ASS! To put on. You have to be careful not to get glue in the joint were the track pins are, or you will glue the tracks together. Andy really messed up on these. He should have made the locating pins on the guide horns at least twice as long so that the glue has something to bite into, as they are they are VERY fragile. this view shows one side put together all 96 of them! Well that's it for now be back with more soon. Ron G


-
1/16 Takom Willys 1/4 Ton 4x4 G503 MB Jeep
CrankyCrafstman replied to Axeman's topic in LSM 1/35 and Larger Work In Progress
WOW! Amazing work. That's going to be quite nice when you get it done. Ron G -
Thanks Peter
-
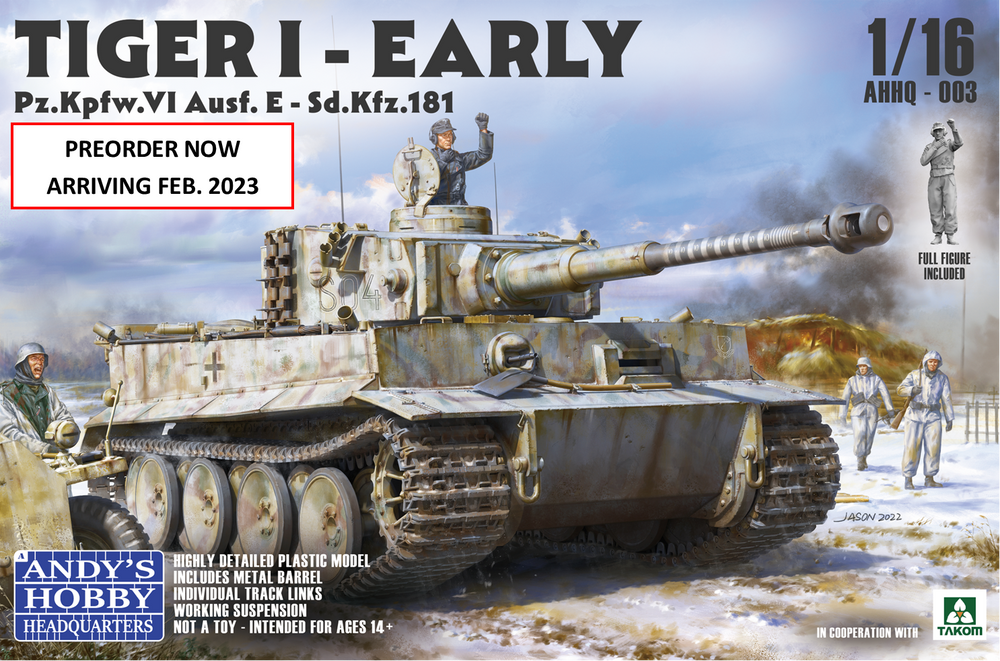
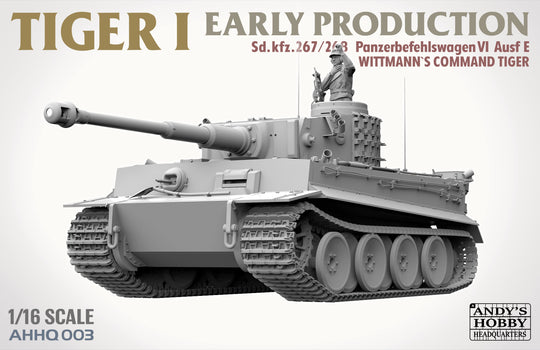
Hey all I'm back, I hope, I put the 1/16th Trumpeter Panzer IV Ausf H on hold for now. I know I haven't done anything on it since Thanksgiving. I've been having trouble with my eyes again. I have Anterior Basement Membrane Dystrophy in both eyes. I'm going in for surgery on my left eye on May 3rd. I'm really hoping that this will clear up my blurry, watery eyes for good, because right now I can't see crap! I can't drive, so that means I can't ride my Harley . So I figured I would start on somthing and see (ha ha) if I can do it. The Panzer IV has to much tricky detail work for me right now. Long story short her is my build on the new Andys Hobby Headquarters 1/16 th scale Tiger VI Ausf E early. It's a much simpler build, no interior to deal with. I started by working on the tracks. You need to remove them from their sprue gates. There are 210 individual tracks that have 5 attachment points each two on one side three on the other. So after three hours of cutting and sanding I have them ready for the pins and guide horns, what a major pain in the ASS!!! I still have to cut all the pins off of their sprues and clean them up, plus I still have all the guide horns (two rows each) to do the same. AAGGGGHHH!!!! I don't have any pictures because I ran out of patients and quit and went back upstairs to calm down. I will take some on Saturday and post them for you guys to look at. By for now see you later. I need a drink! Ron G
-
I just meant that politics controls everything. Government makes laws that effect prices, etc. etc.
-
Ahhh! Politics isn't it great.
-
Hey Carl I have the Sherman kit M4A3 7M/105. It is basically a 1/35 scale kit scaled up to 1/6 scale, and it is HUGE!!! RON G
-
It's a great kit, but watch out for fit issues with the engine parts. Ron G
-
It is styrene plastic, just like the tiger vi I have. It does have some odd issues like early type all metal tracks with the late turret. I wish Andy would have done a M4A3 hvss 76 (w) instead, it would be more like what was actually used during WW2. The easy 8 didn't really show up till the US got into Germany towards the end of the war. Ron G
-
Hey guys I received this from Andy about two weeks ago. I plan on doing a build on this, probably after I finish the 1/16 Panzer iv ausf h. This is a pretty nice kit, though there are a lot of sceptics out there. It my not be absolutely perfect if your a rivet counter, but it will make a nice big kitty! Ron G
-
Hey Panzer That's a pretty good kit from everything I understand. It's a little brother to the 1/16 one I'm doing from Trumpeter. Ron G
-
The cat or the toilet paper?...lol
-
Don't forget these were nothing more than gliders that the Germans added motors to. Ron G
-
Ernie would need to build a pull barn just to store it in...lol
-
Hey Ernie Great job on the helldiver. I think I found your next big build. This thing will be huge!, but I know you can put your touch on it and make it a real show peice. Ron G