kahunaminor
-
Posts
443 -
Joined
-
Last visited
Content Type
Profiles
Forums
Events
Gallery
Everything posted by kahunaminor
-
Tamiya Spitfire MK XVIe
kahunaminor replied to Peterpools's topic in LSM 1/35 and Larger Work In Progress
Hi Peter, I get my 96% iso from my local chemist here at home. You may have to source it from a similar vendor and not sure if there are an restrictions in your neck of the woods as far as it being a possible precursor for drug manufacture? If I may also suggest you look at SMS paints, an acrylic lacquer of Australian origin (similar to MRP)but found in a number of worldwide locations. There is an excellent range, premixed and matched for use straight out of the bottle. The inventor is very easy to contact and get advice. https://www.scalemodeller.com.au Regards, Kent -
Tamiya Spitfire MK XVIe
kahunaminor replied to Peterpools's topic in LSM 1/35 and Larger Work In Progress
Another great display of craftsmanship Peter, I am enjoying following your work. I too have this kit and it languishes at about the same stage as yours did on the bottom of page 2 for the past 6 years! I hit the same hurdle with the wing inserts and without neither mojo nor room, consigned it to the shelf of procrastination. The build log can be found in my signature block (complete with photobucket watermarks). I have recently added some new display cabinets which allow me to display my 1/32 builds. Your build has stirred the pot and I think I am now ready to continue. Thanks for the opportunity and I look forward to seeing further work on this one. Regards, Kent -
Good choice Gaz! I have this in “the stash”, so looking to pick up any tips I can! Regards, Kent
-
Meng 1/24 Ford GT40
kahunaminor replied to Peterpools's topic in LSM 1/35 and Larger Work In Progress
Nice change of pace Peter! I can also recommend the movie as I think both main characters are well portrayed. I must admit to having eyed this to add to my limited stash of modern vehicle, being the recent Tamiya Ford GT issue. I will be following with interest. Regards, Kent -
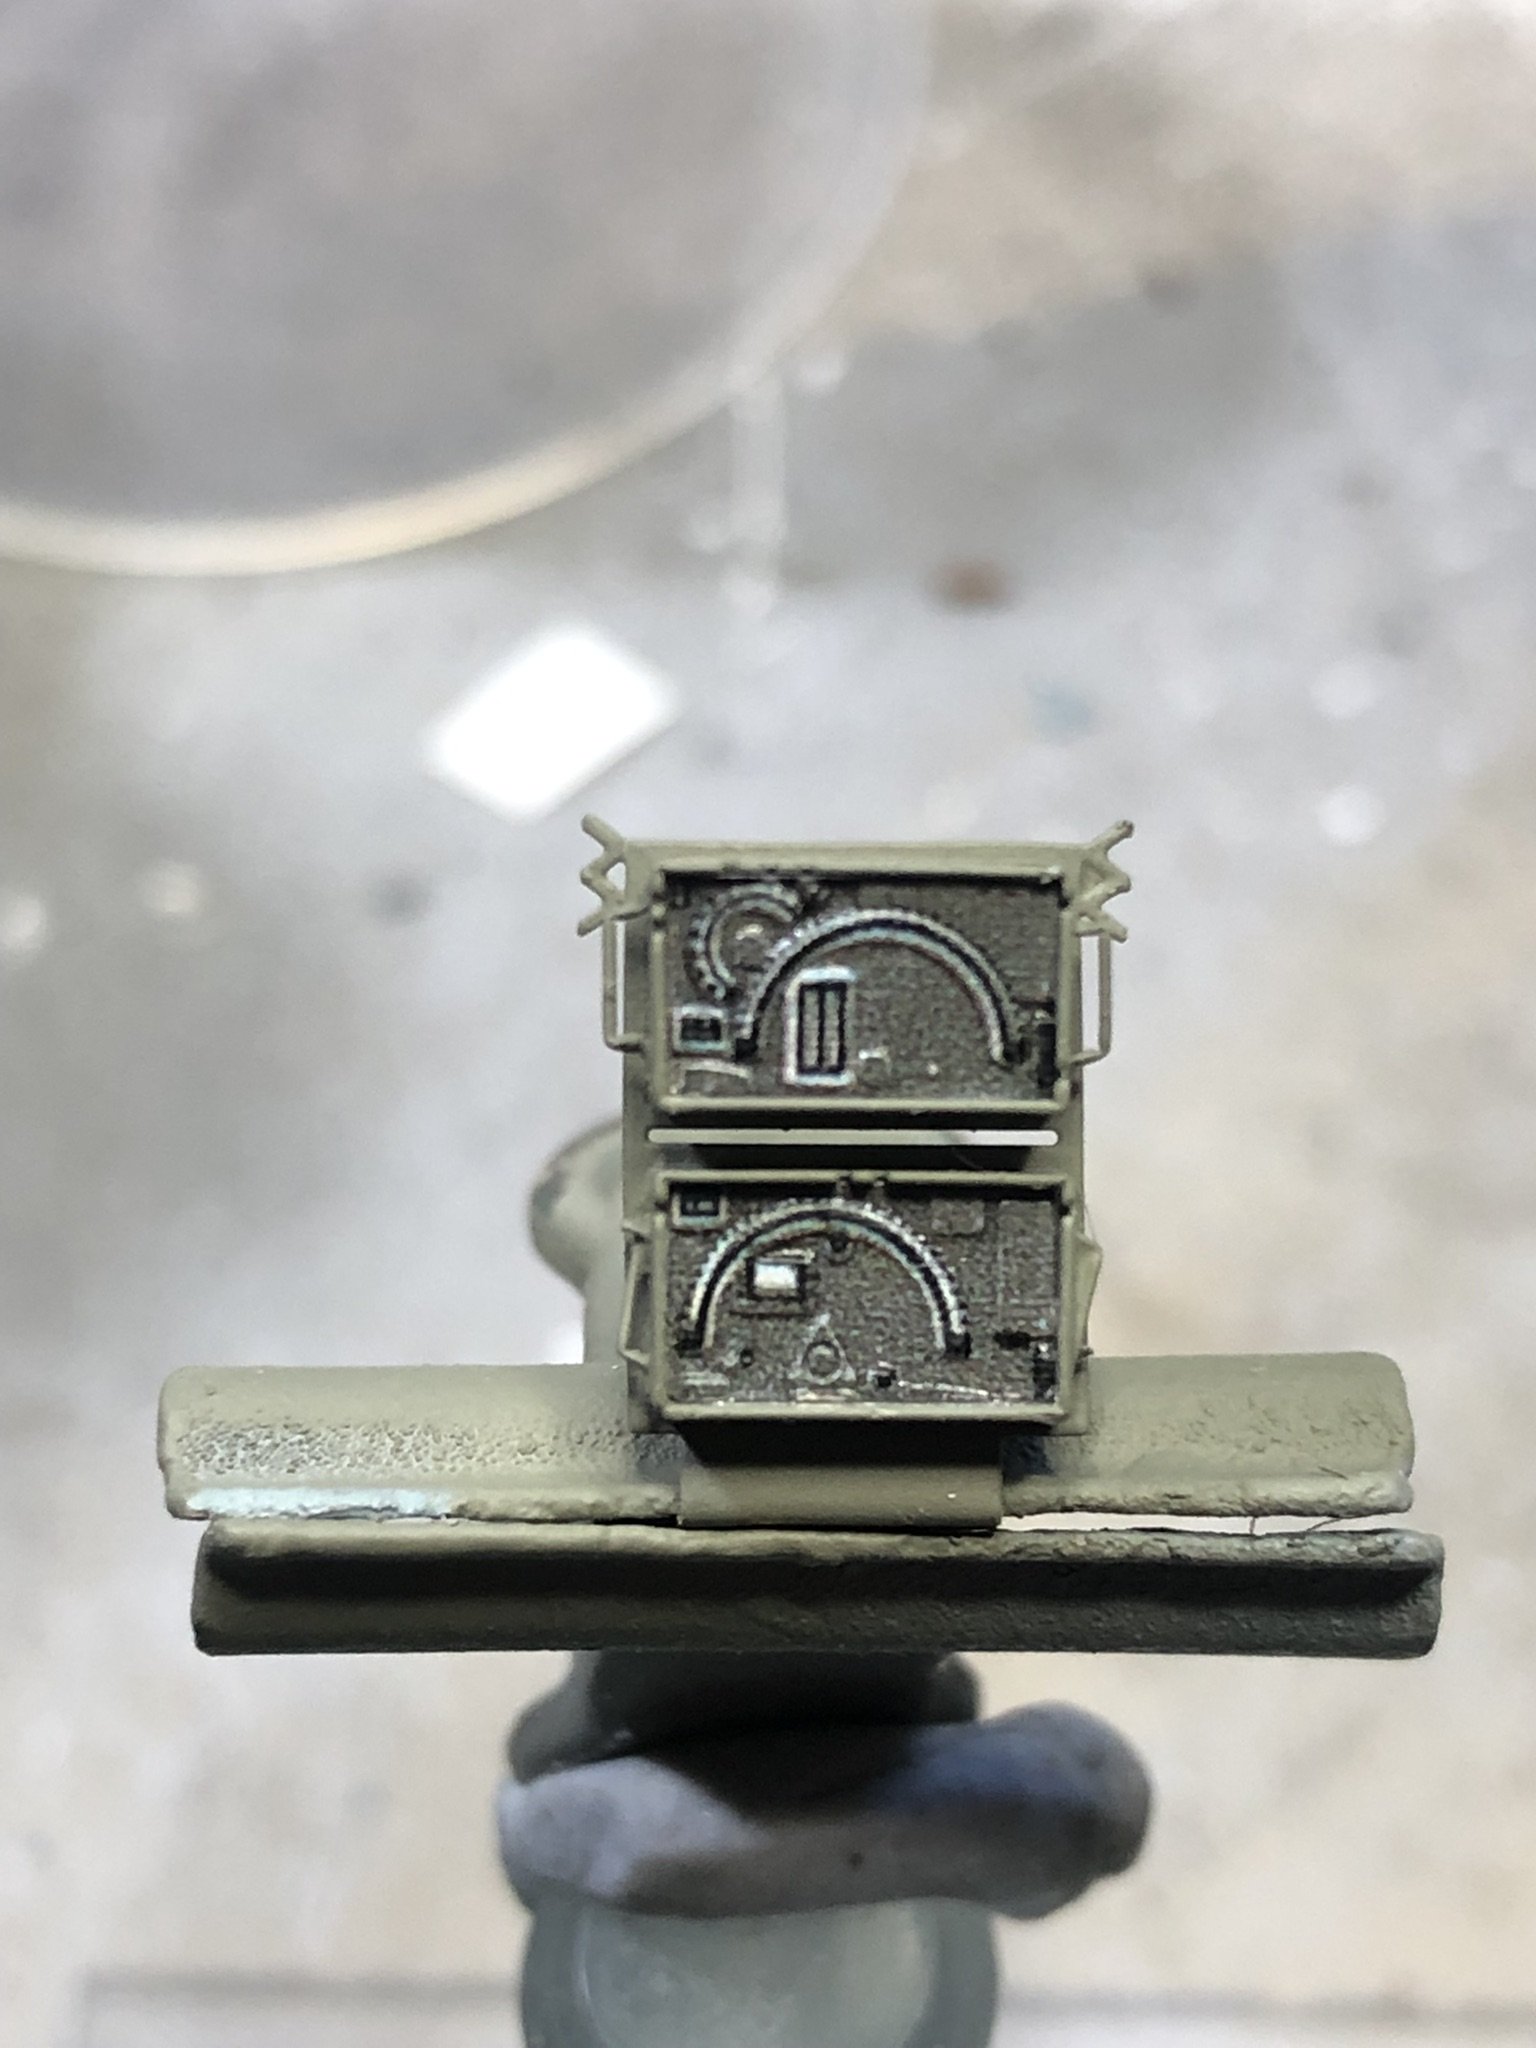
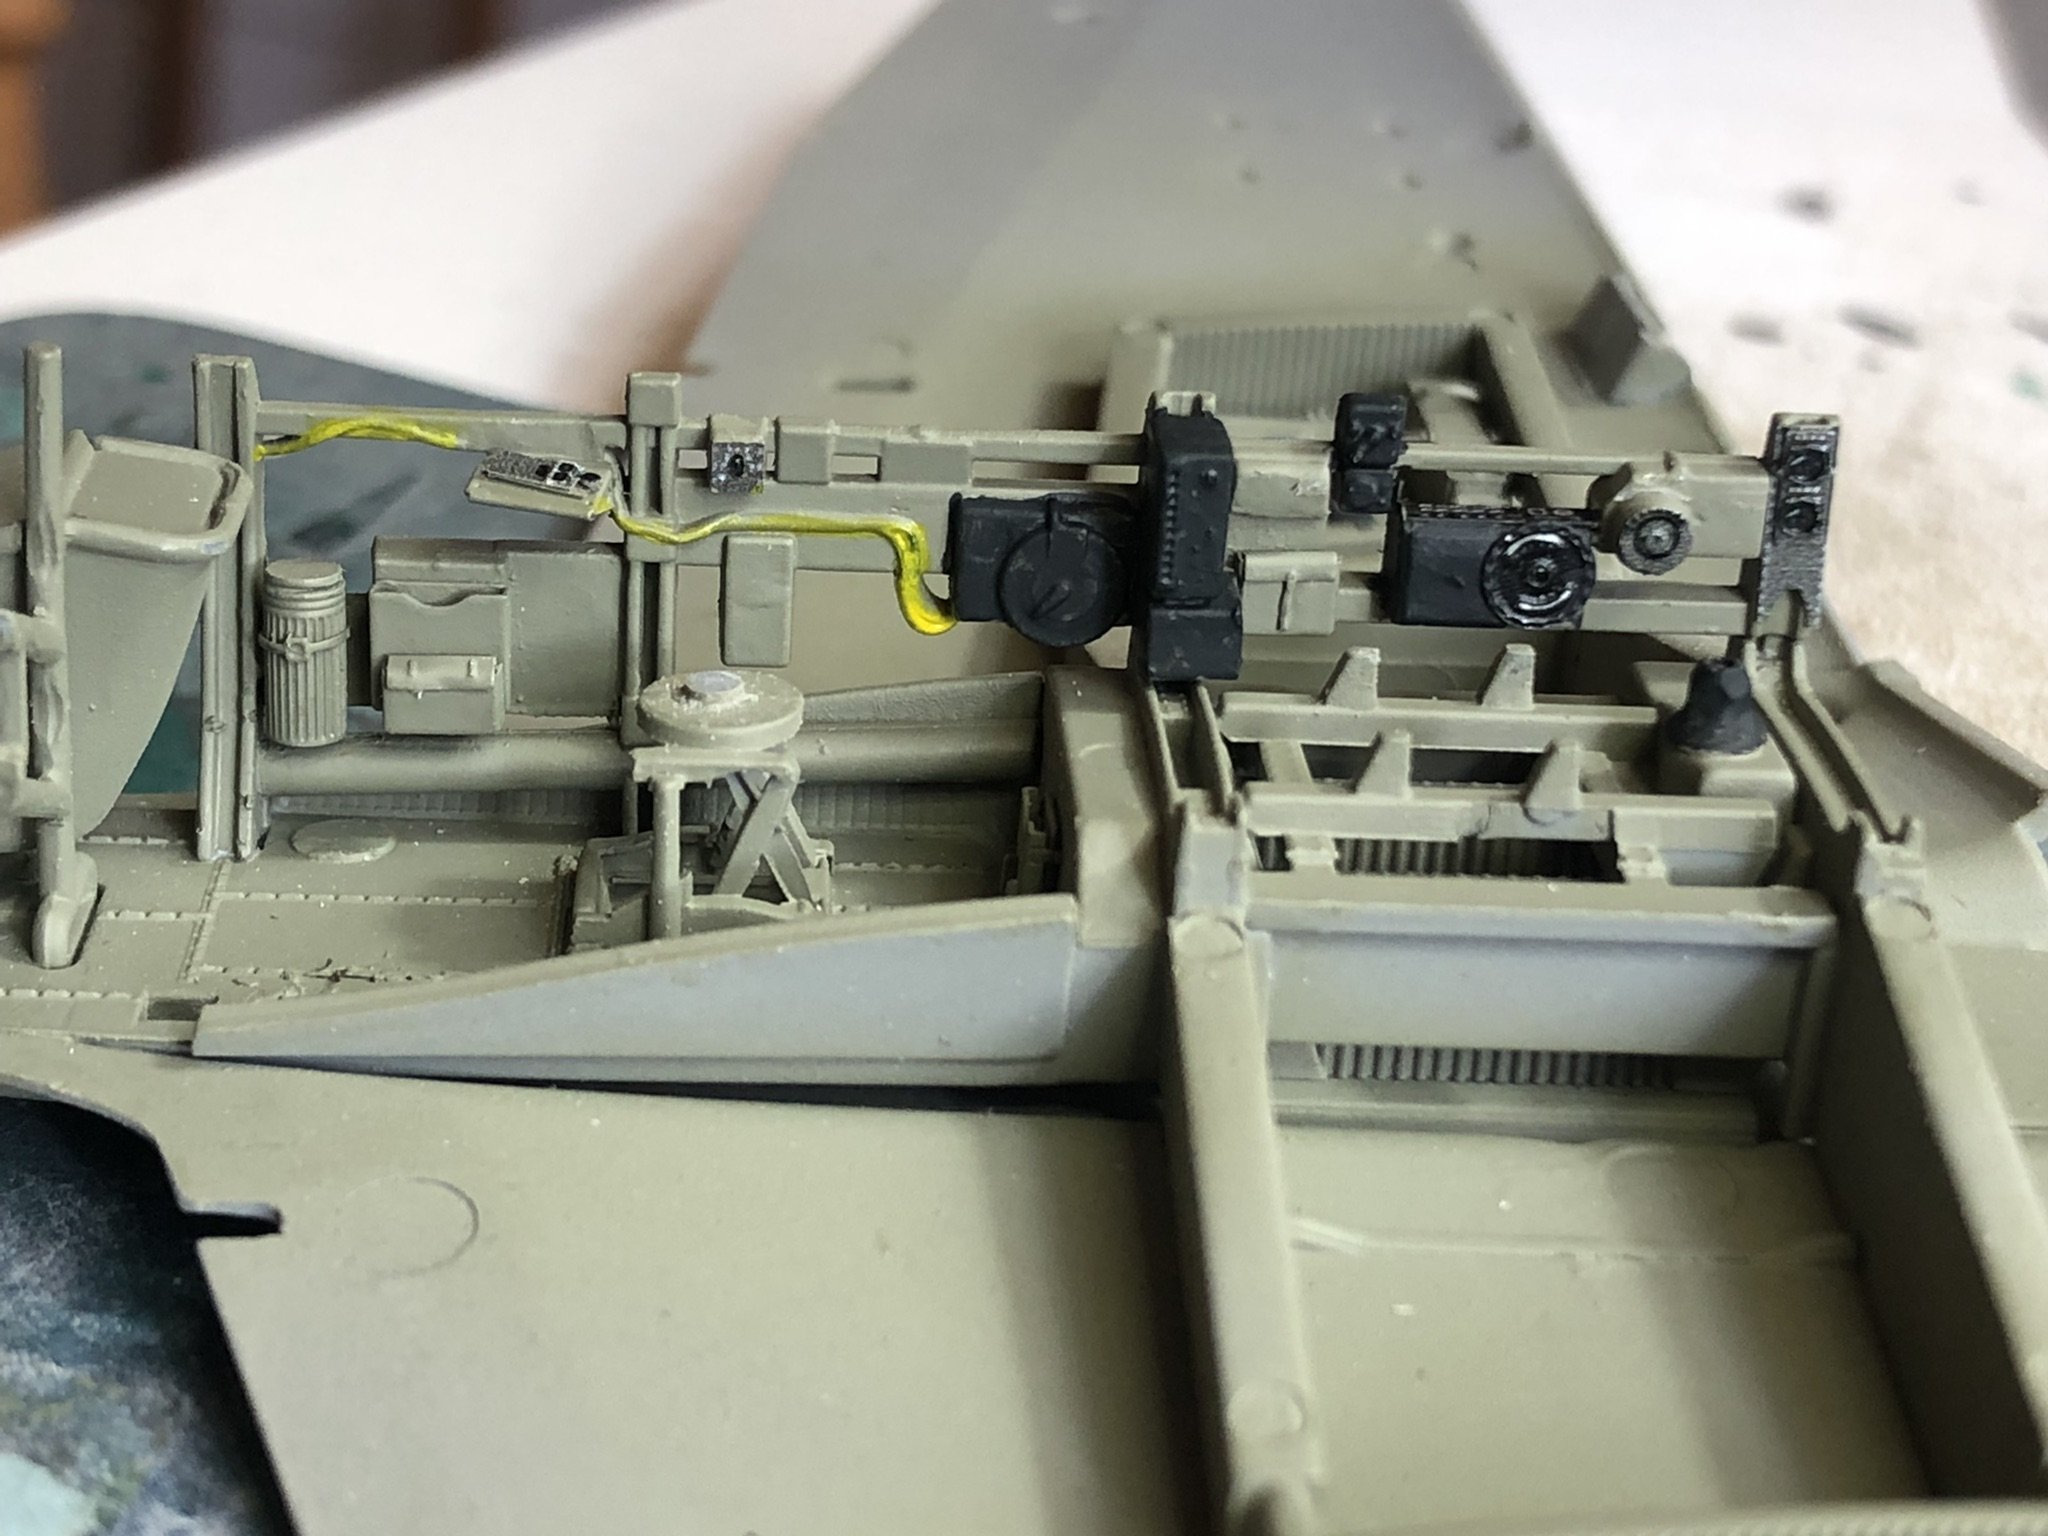
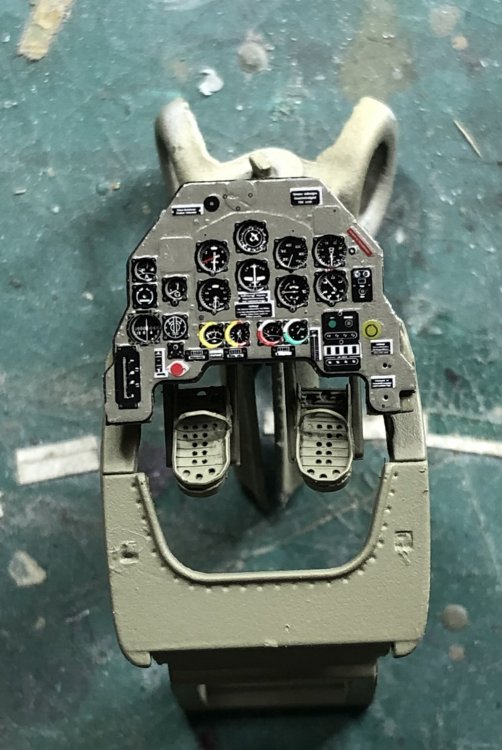
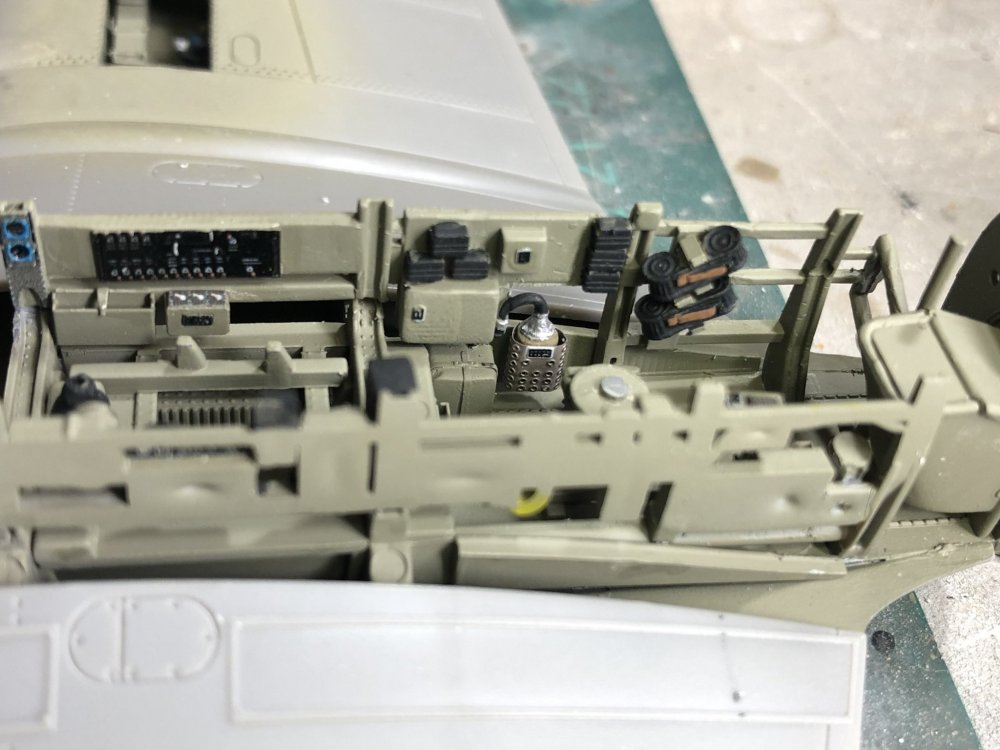
Nice work on the cockpit components Phil, I like the additional wiring in the front/back of the IP. Regards, Kent
-
Rob, If you need plans let me know and I will email you a set. Just PM me your email. Kent
-
Rob This was my first attempt at riveting as a full project. There are some errors here and there, but overall it came out well. Preparation is the key to success methinks. The actual act of applying the rivets is simple. The measuring and drawing on the lines in pencil just needs patience. I think it is the mental jump that is the hardest part! Having looked at the Phantom stencils, you have patience in spades! Best of luck, Kent
-
Done - F-4EJ Kai Phantom - The Last of it's Kind ZM 1/48
kahunaminor replied to DocRob's topic in LSM 1/48 Work in Progress
Classic stuff Rob! Very intense watching all the work that went into the paint and stencils. I do like the comment about F1 mechanics! You should be justifiably proud of adding this one to your cabinet. Regards, Kent -
Thanks Rob, I would have to say yes to the riveting. Cannot really be seen in iPhone photos but IRL it is certainly visible and subtle enough to make a pleasing difference. Regards, Kent
-
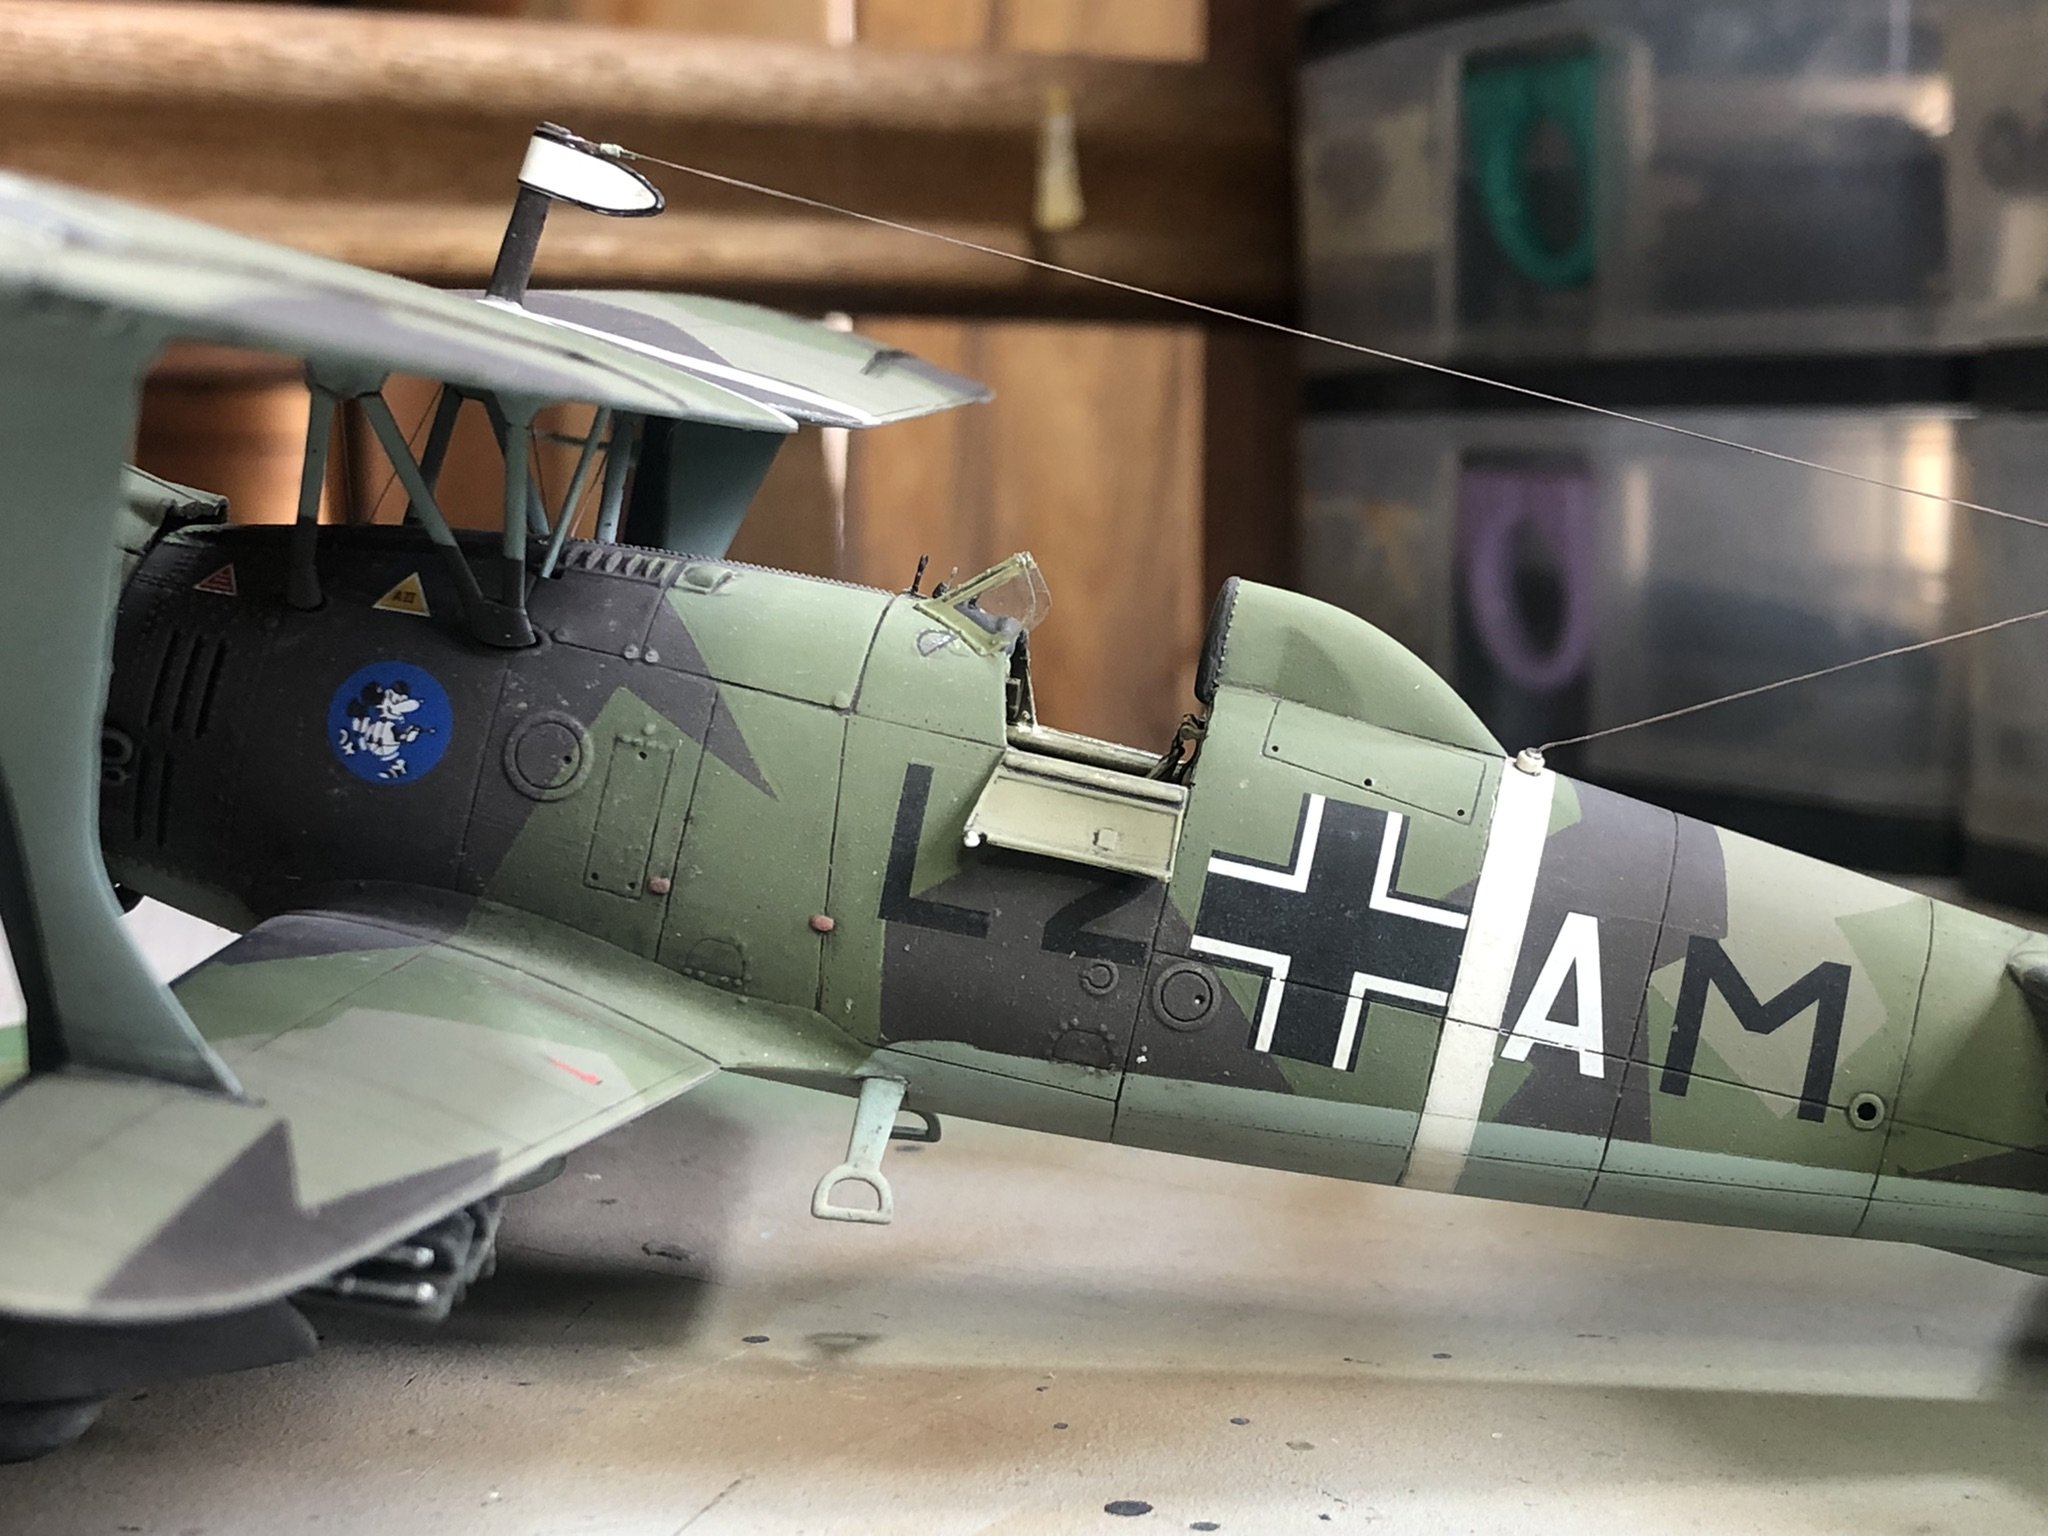
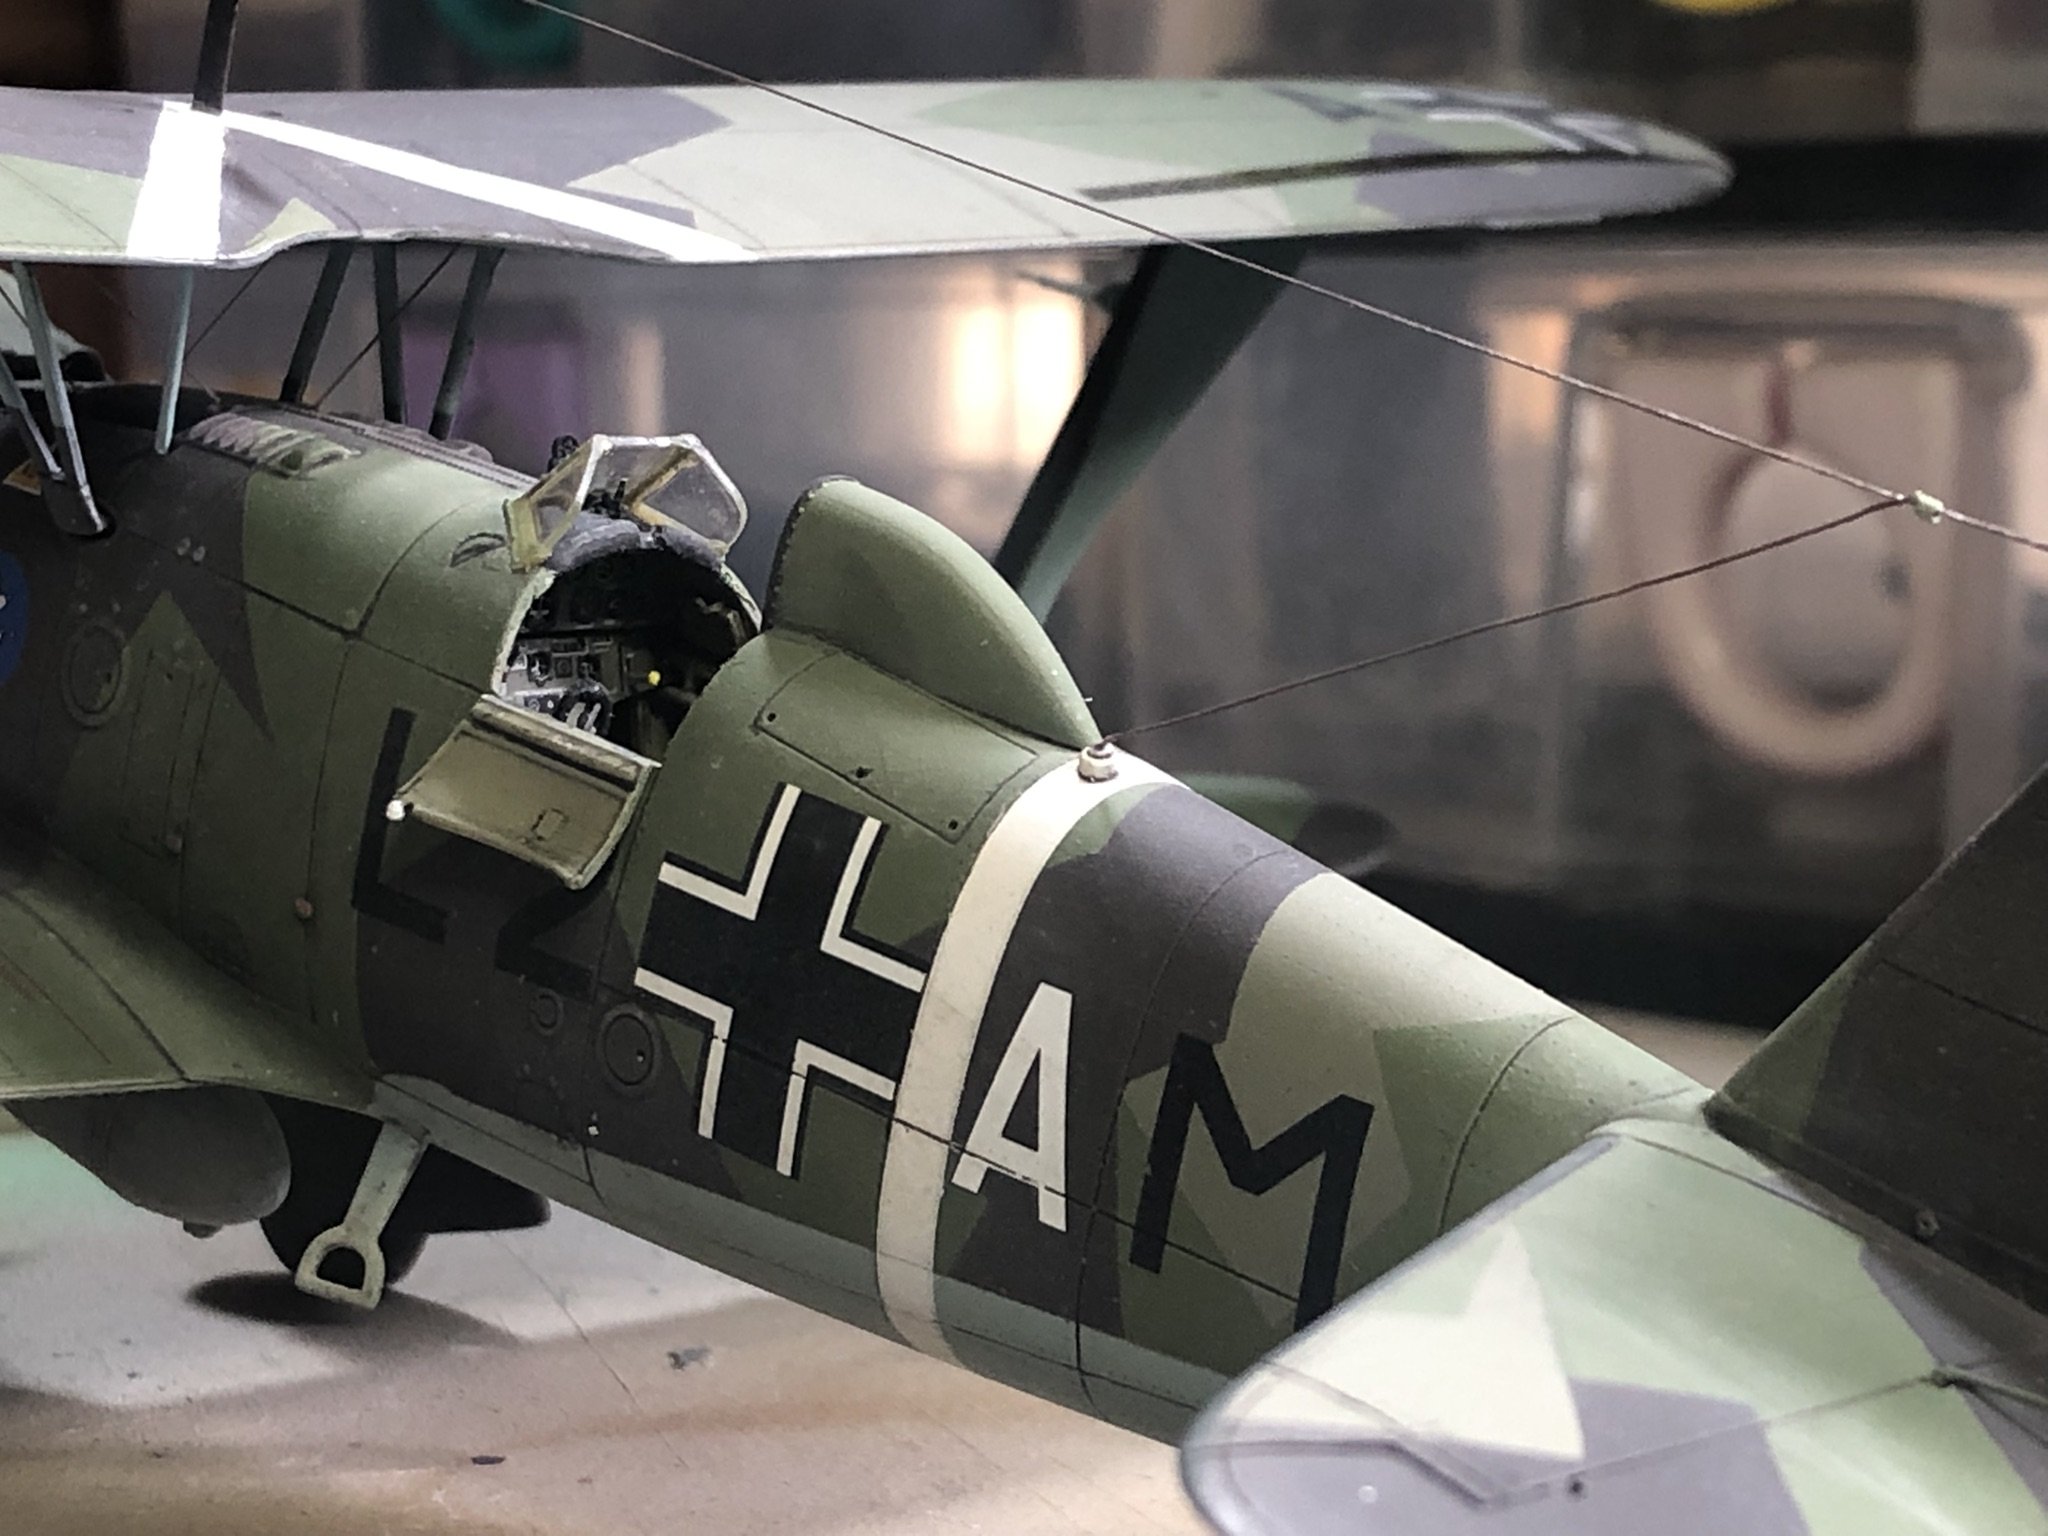
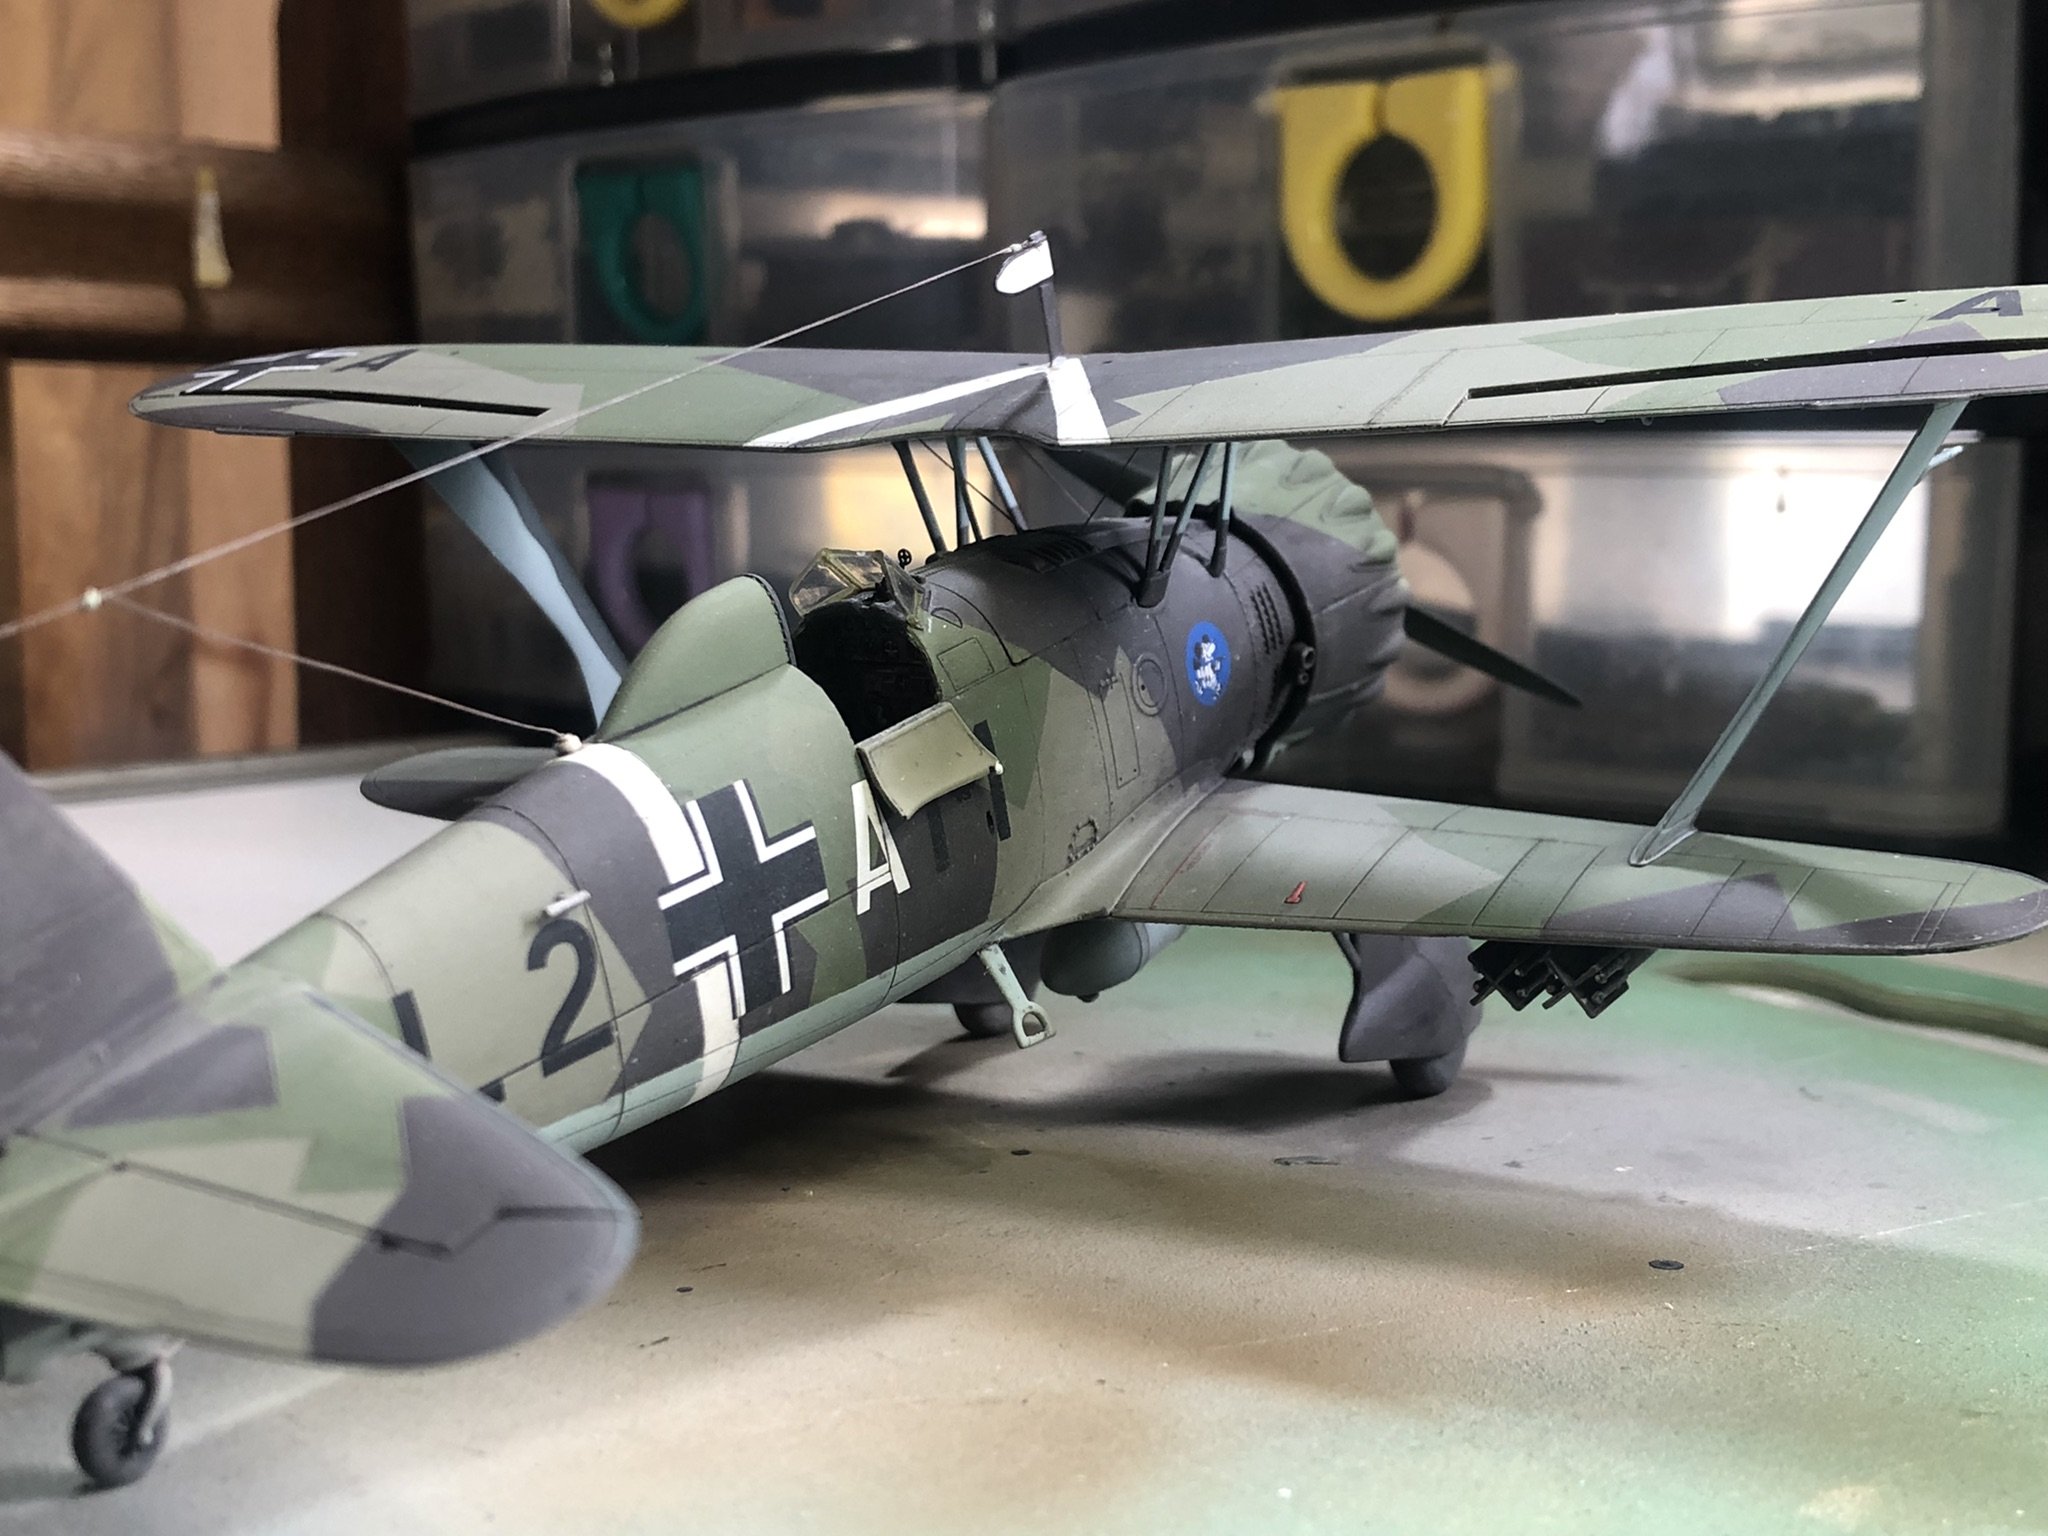
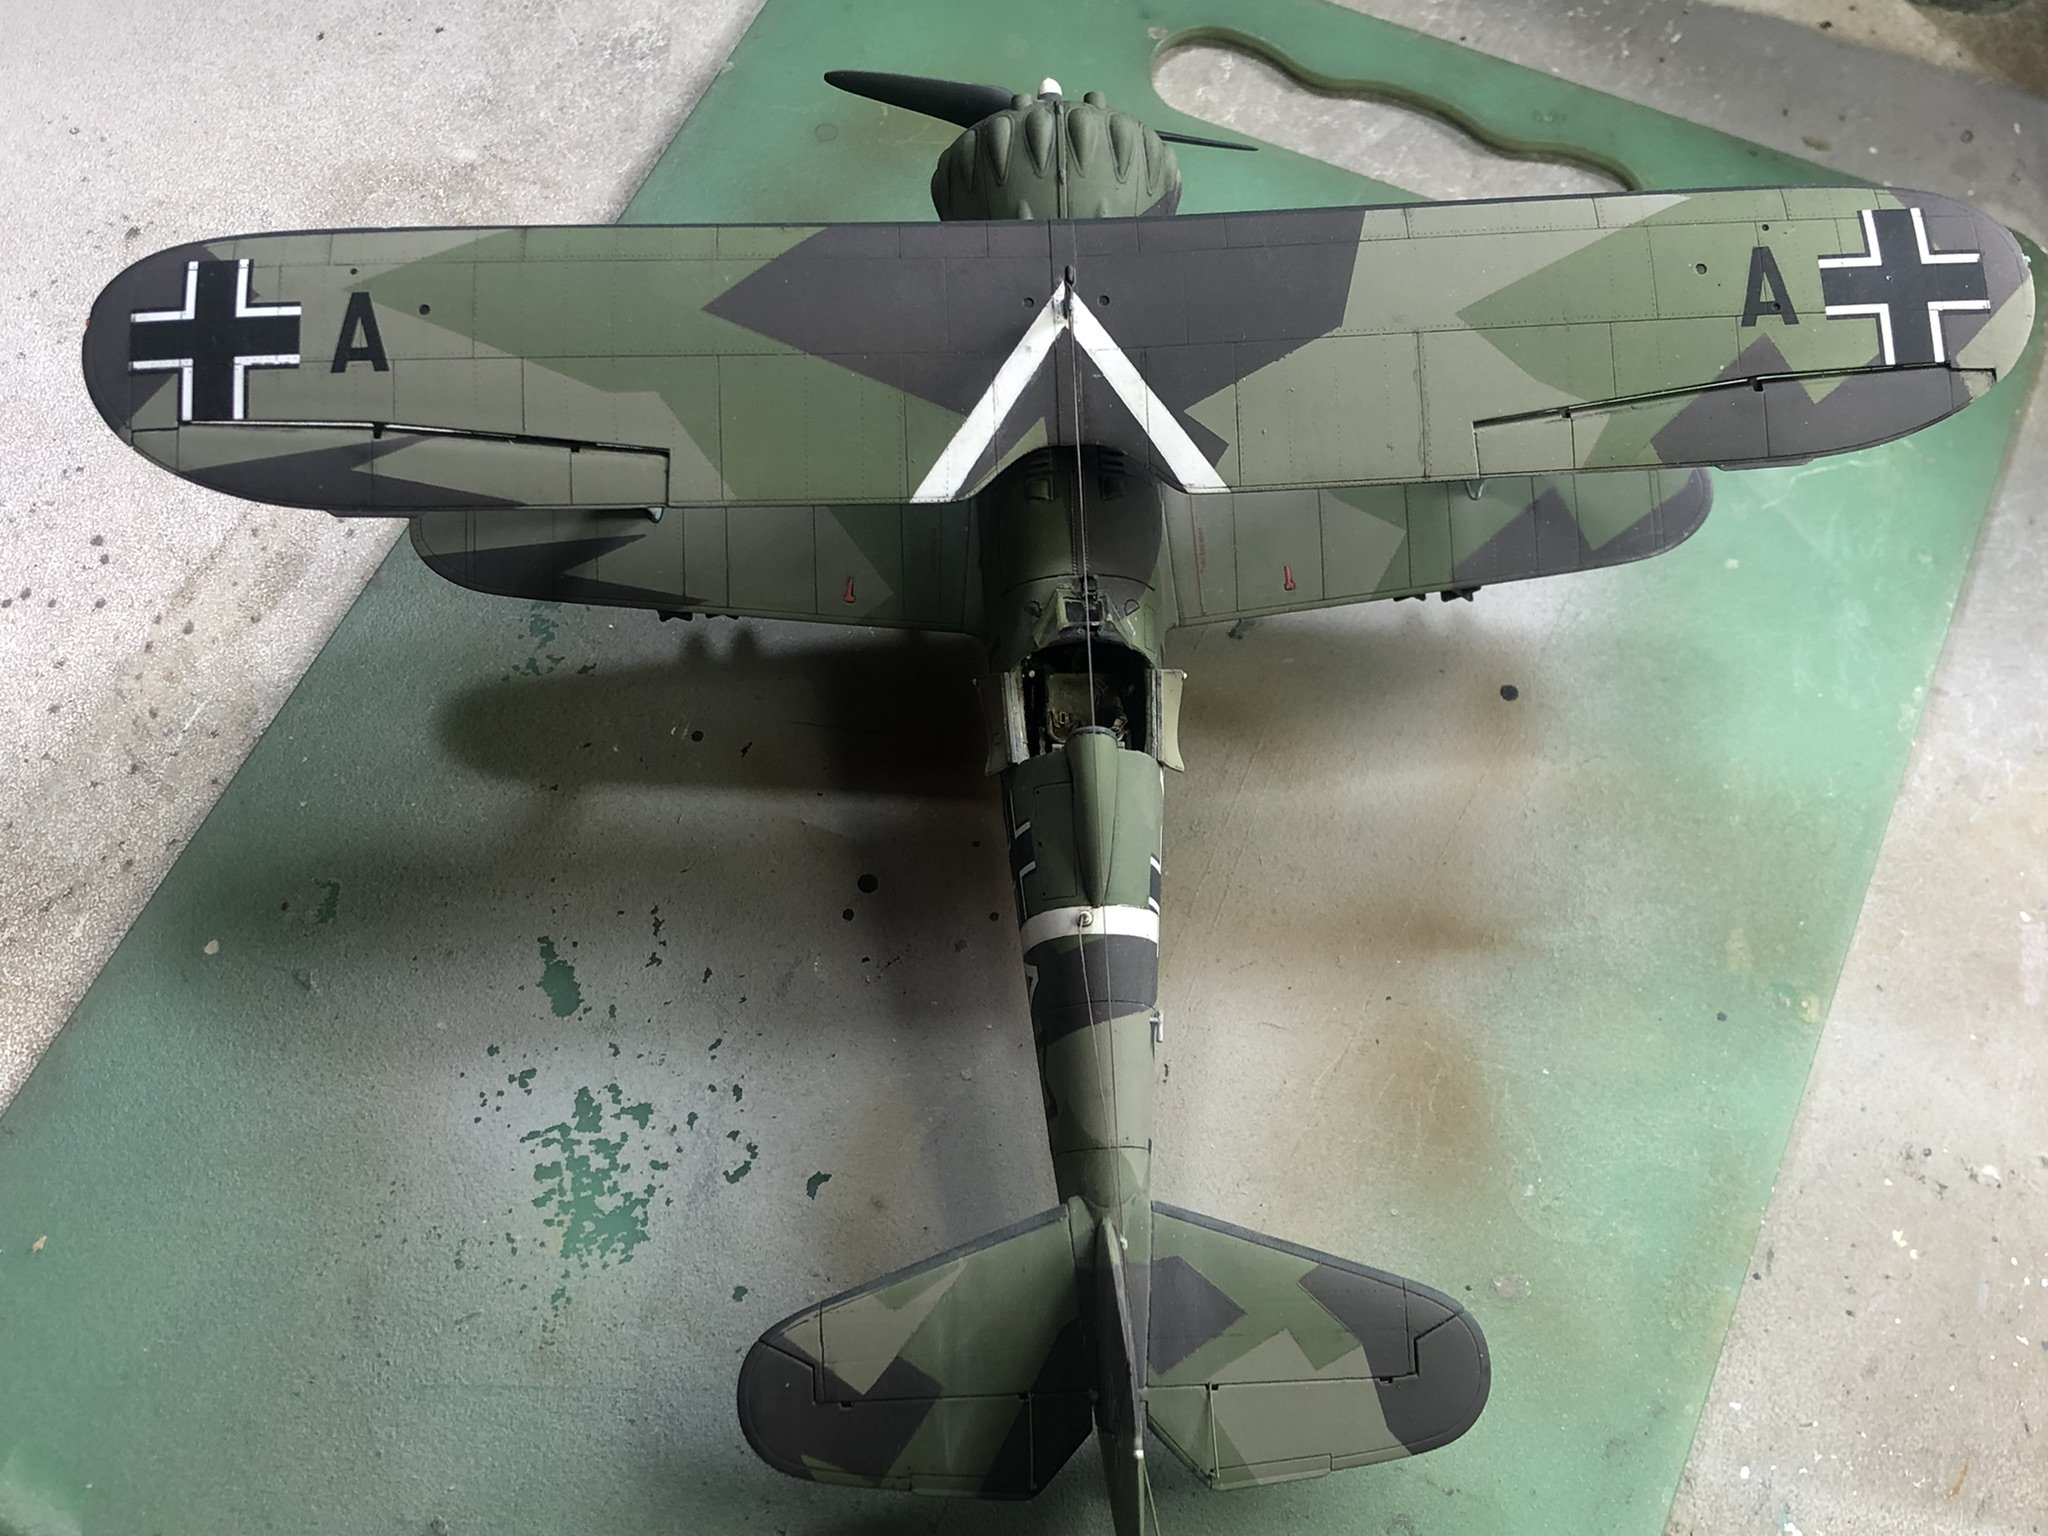
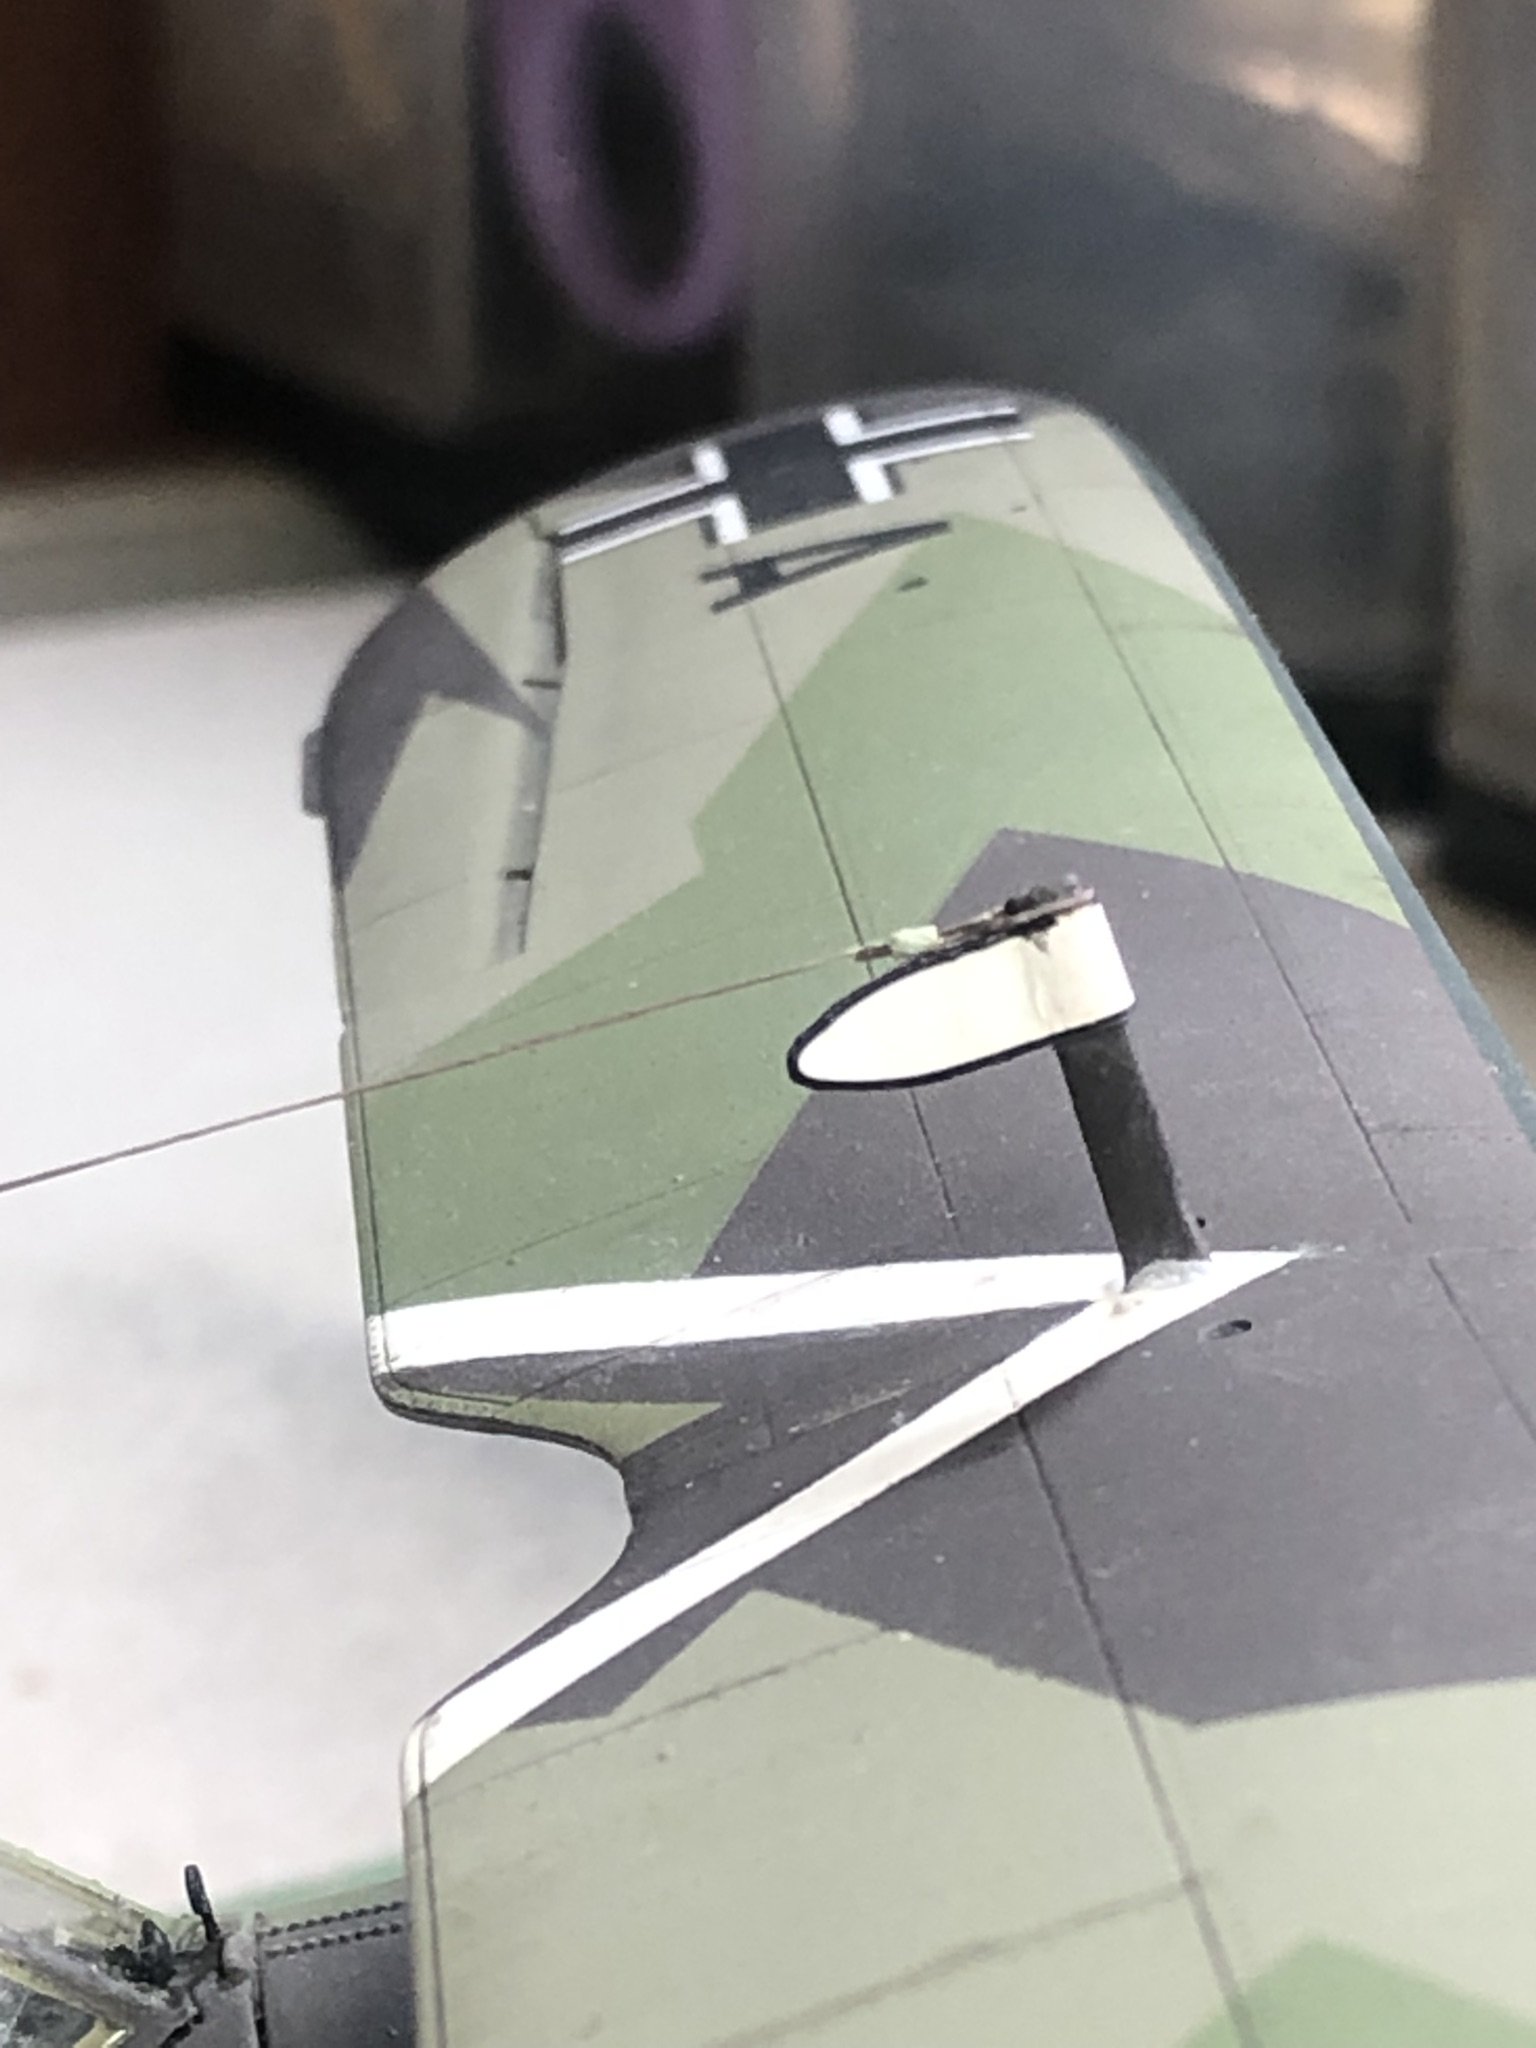
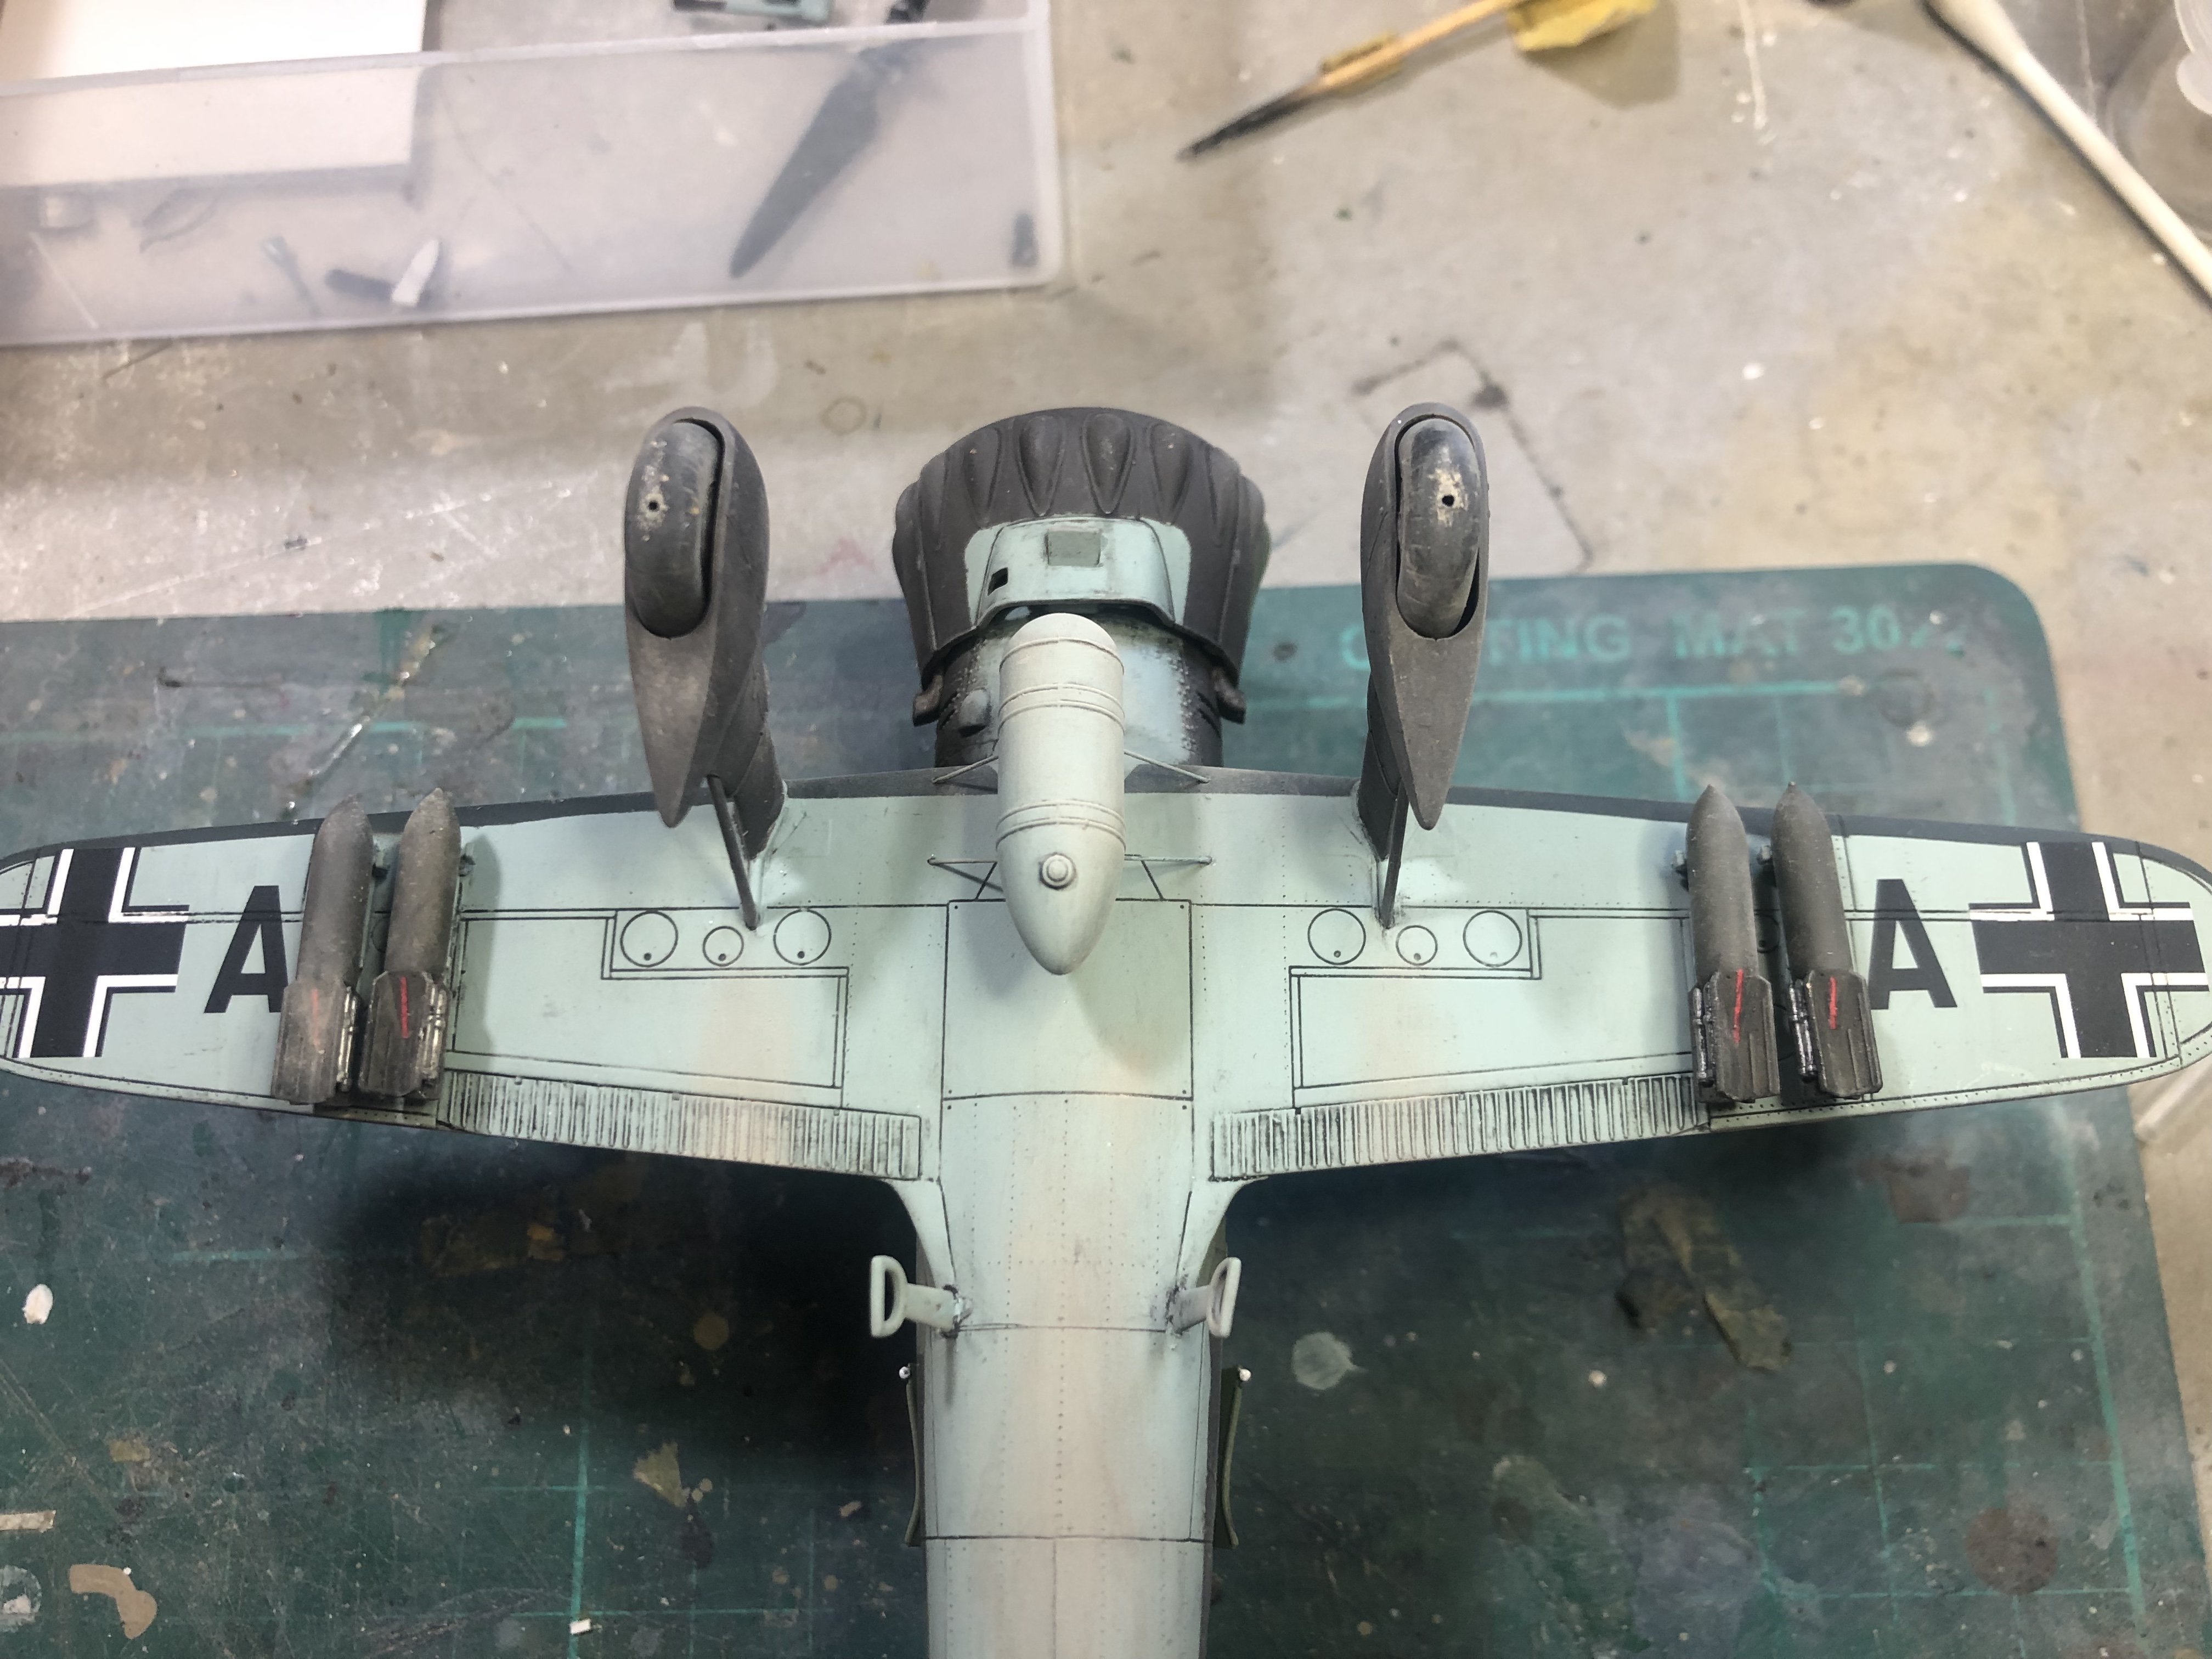
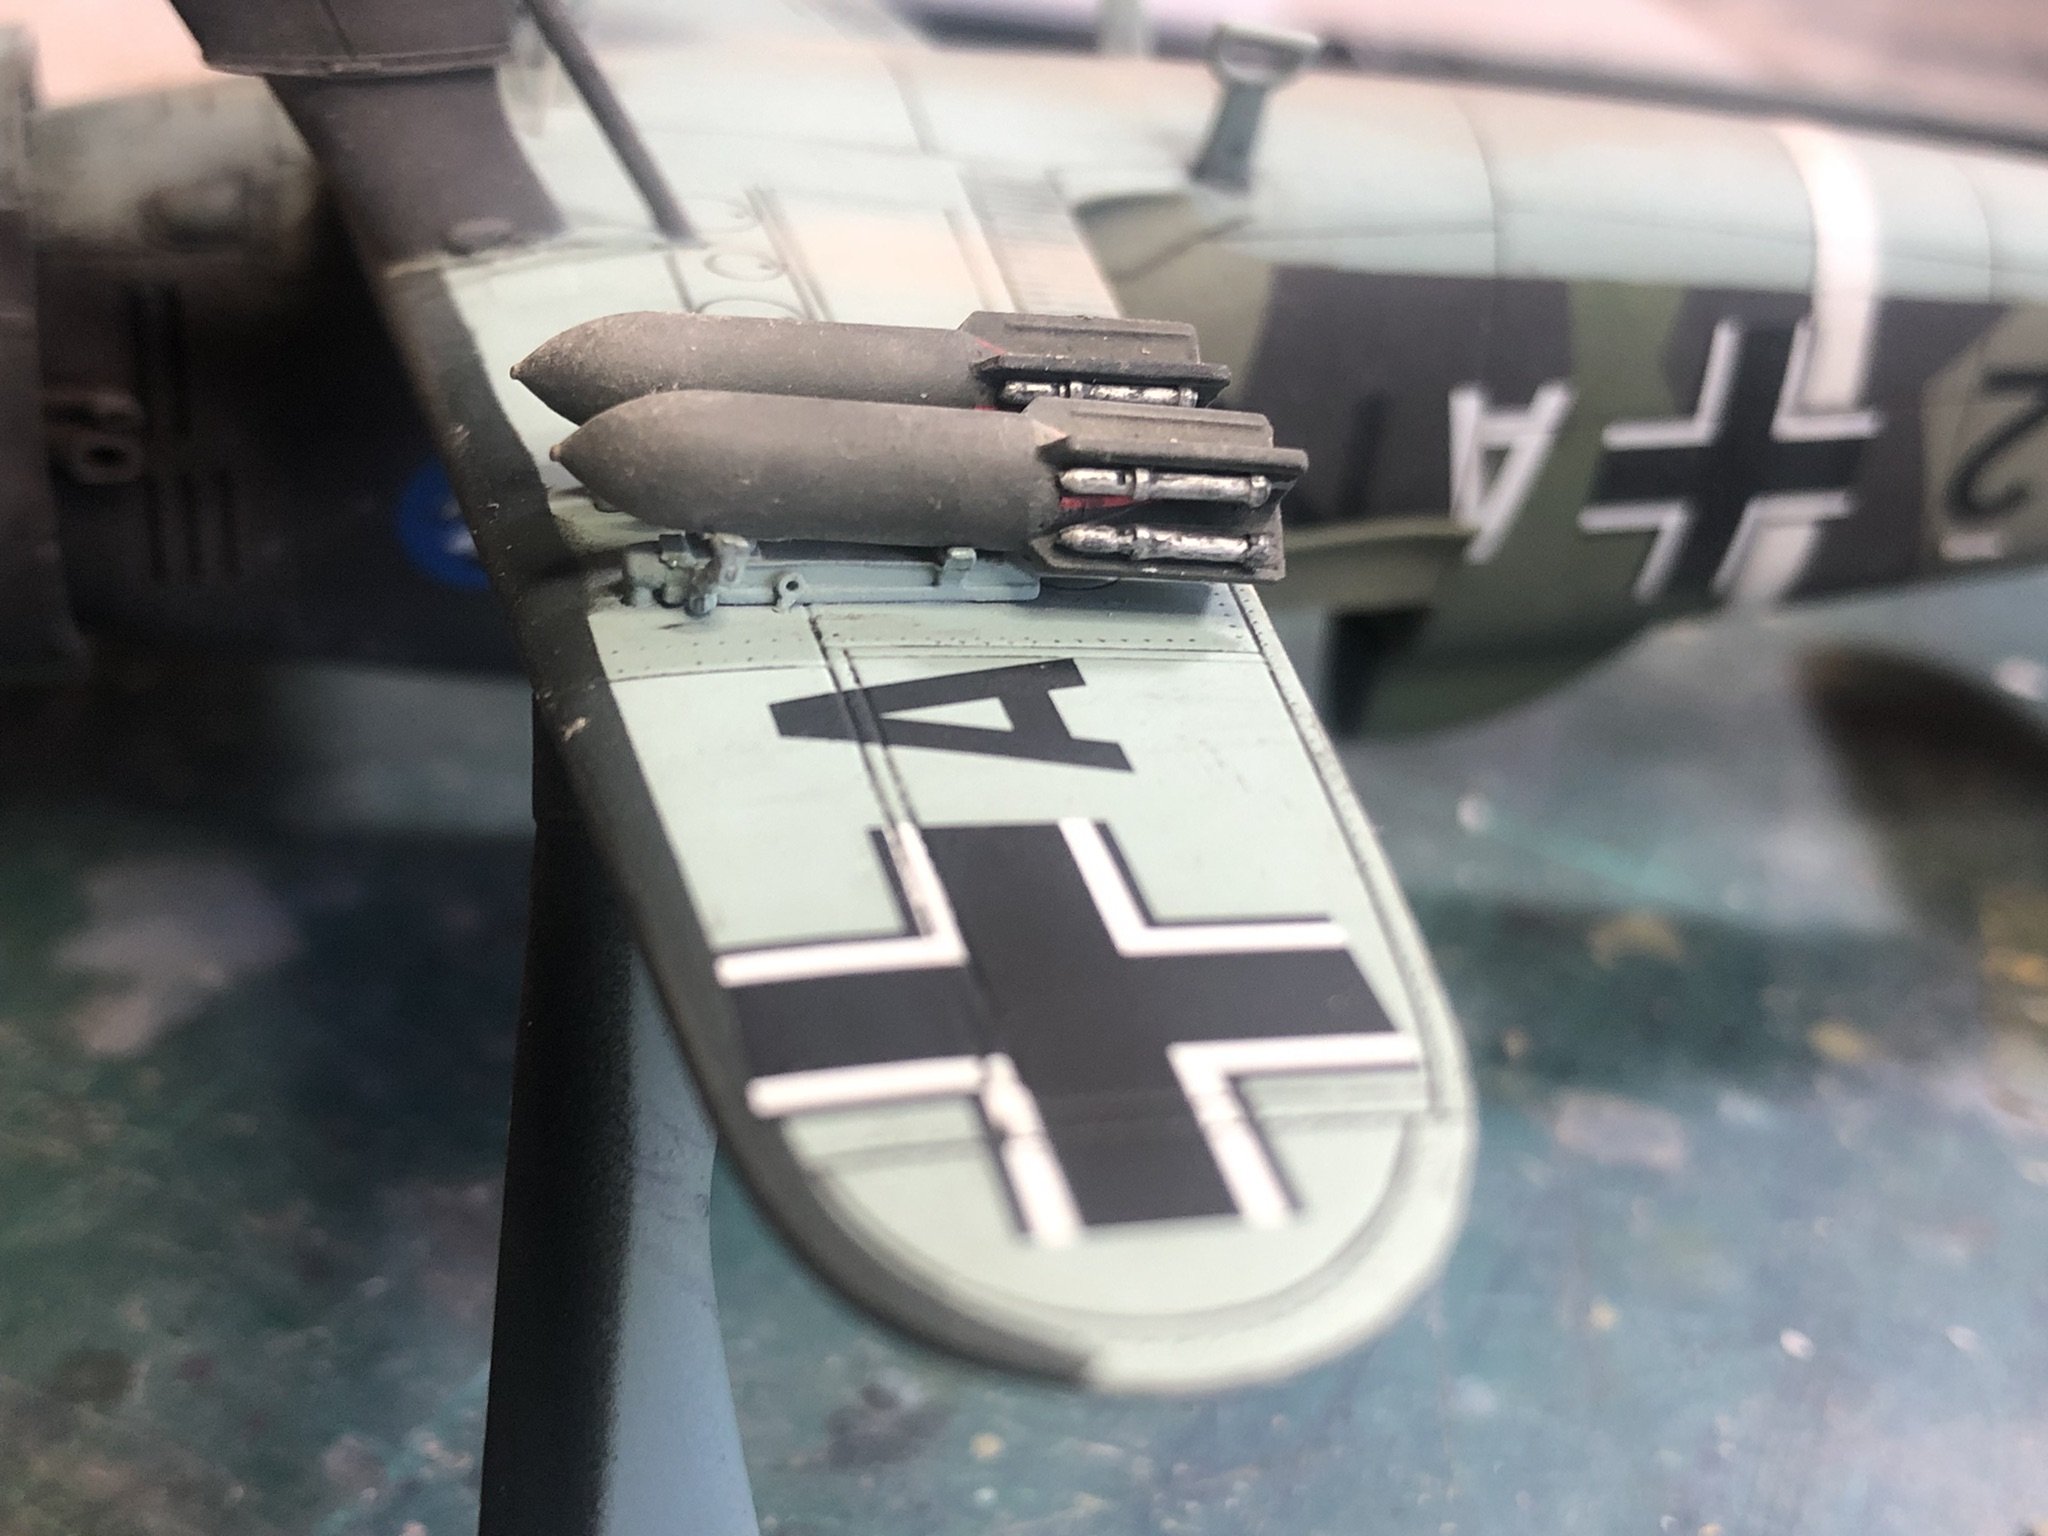
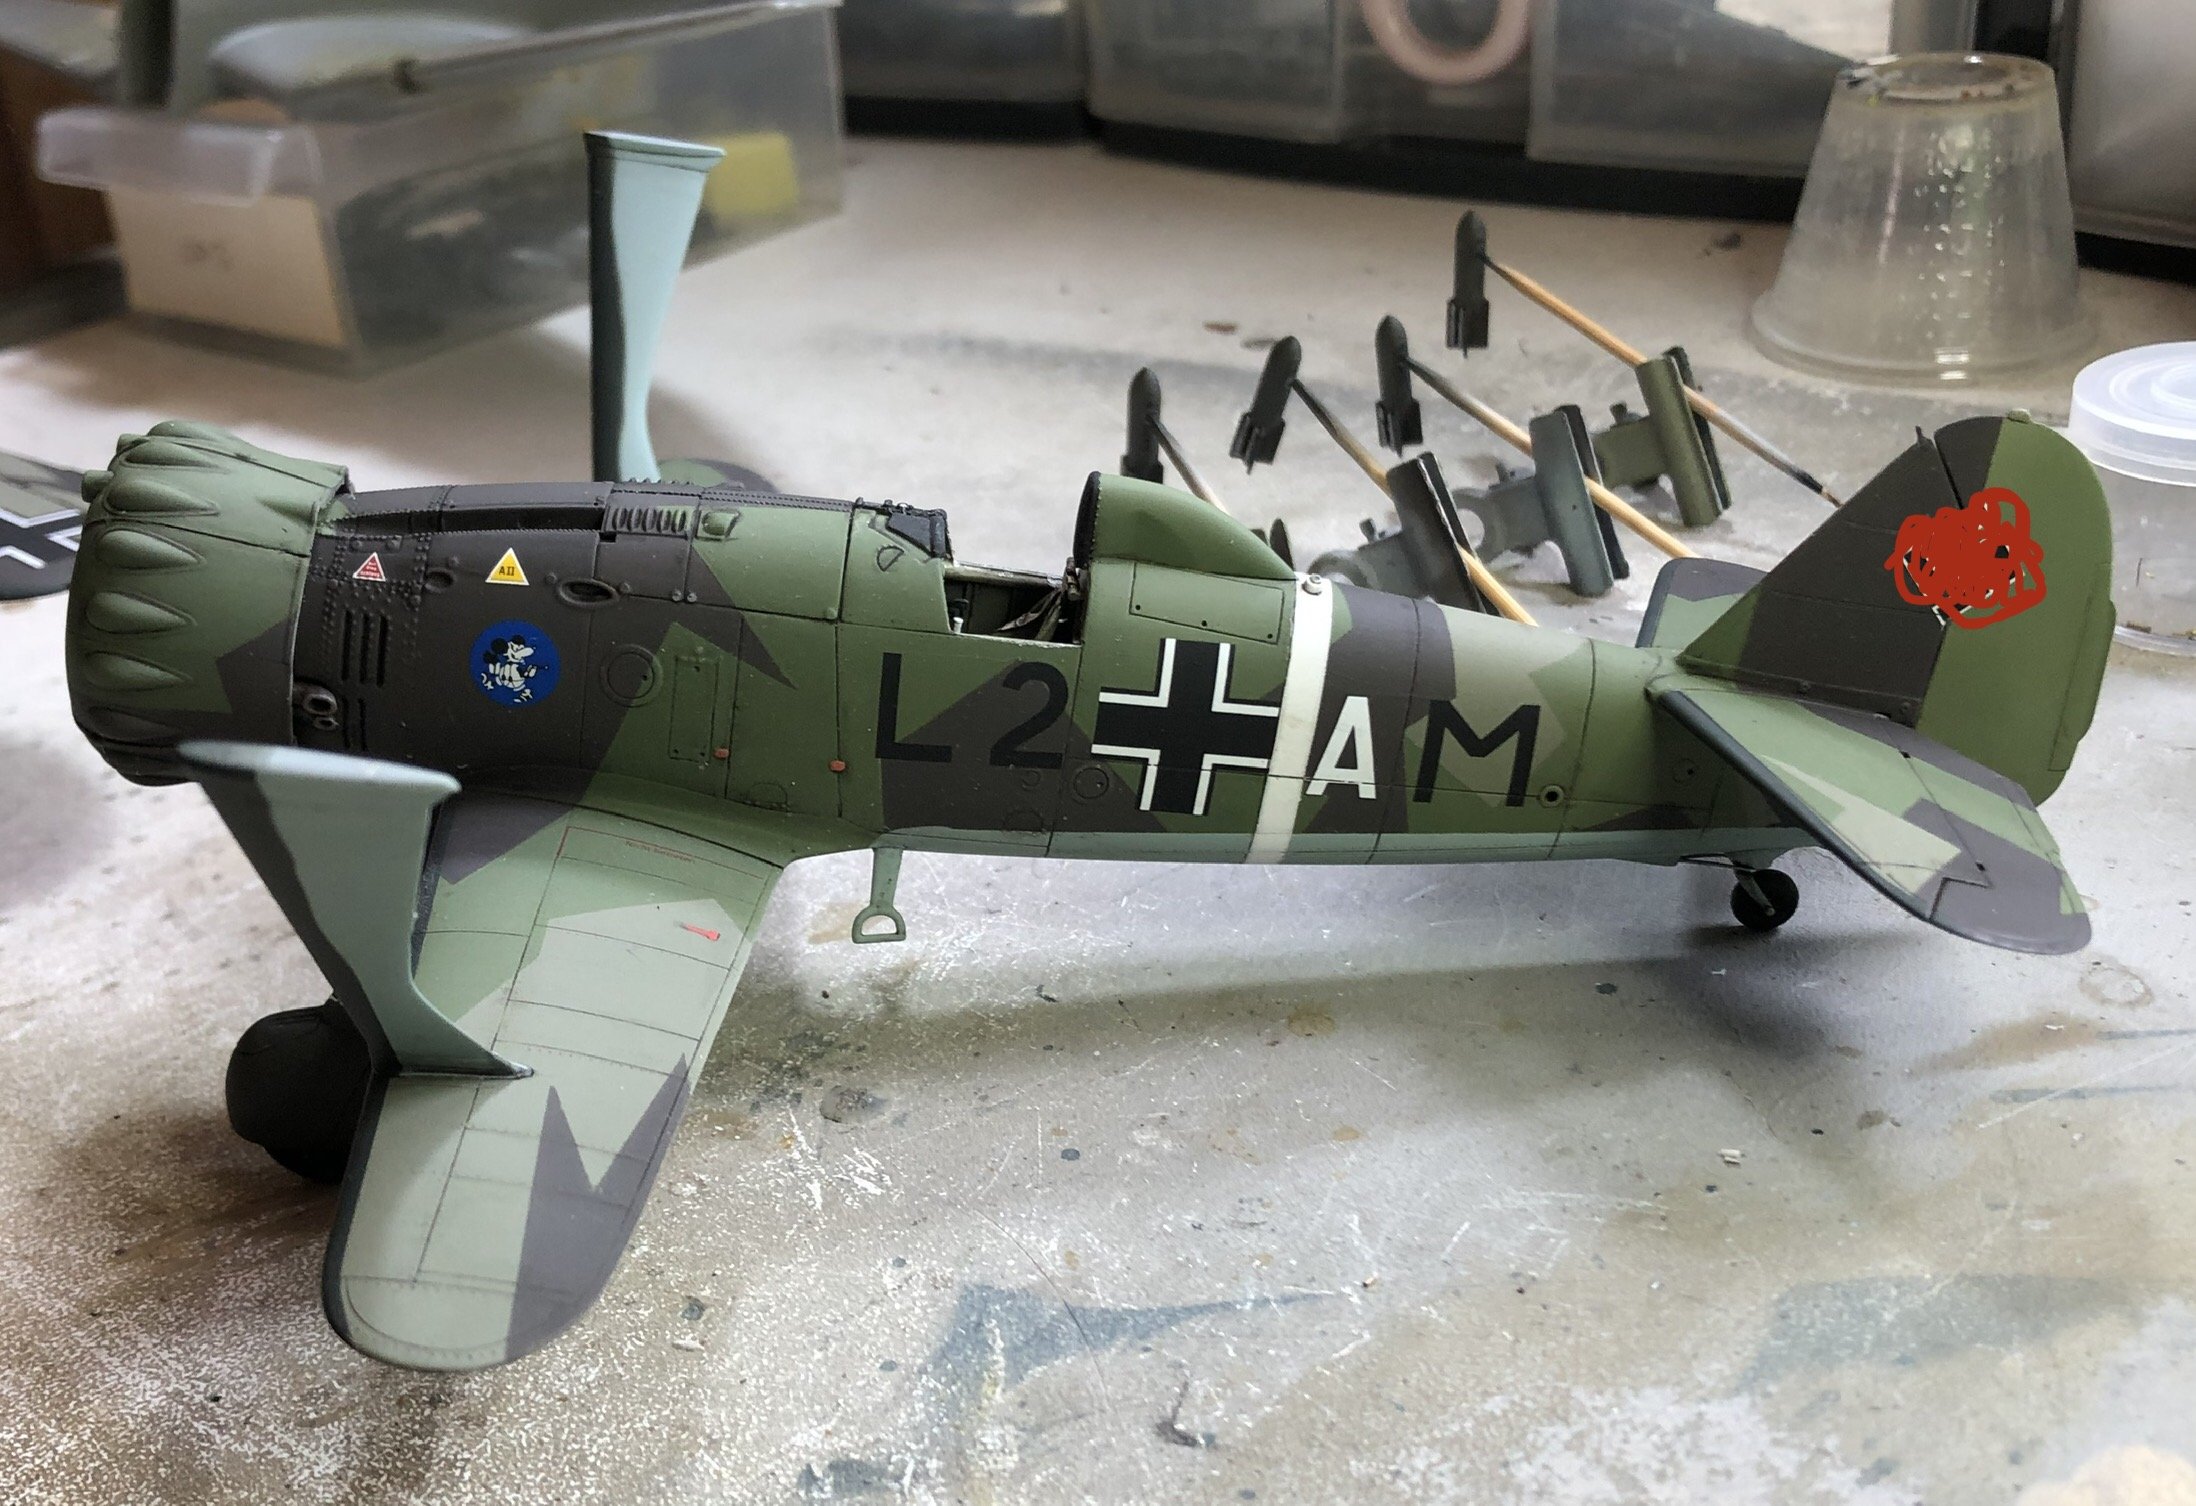
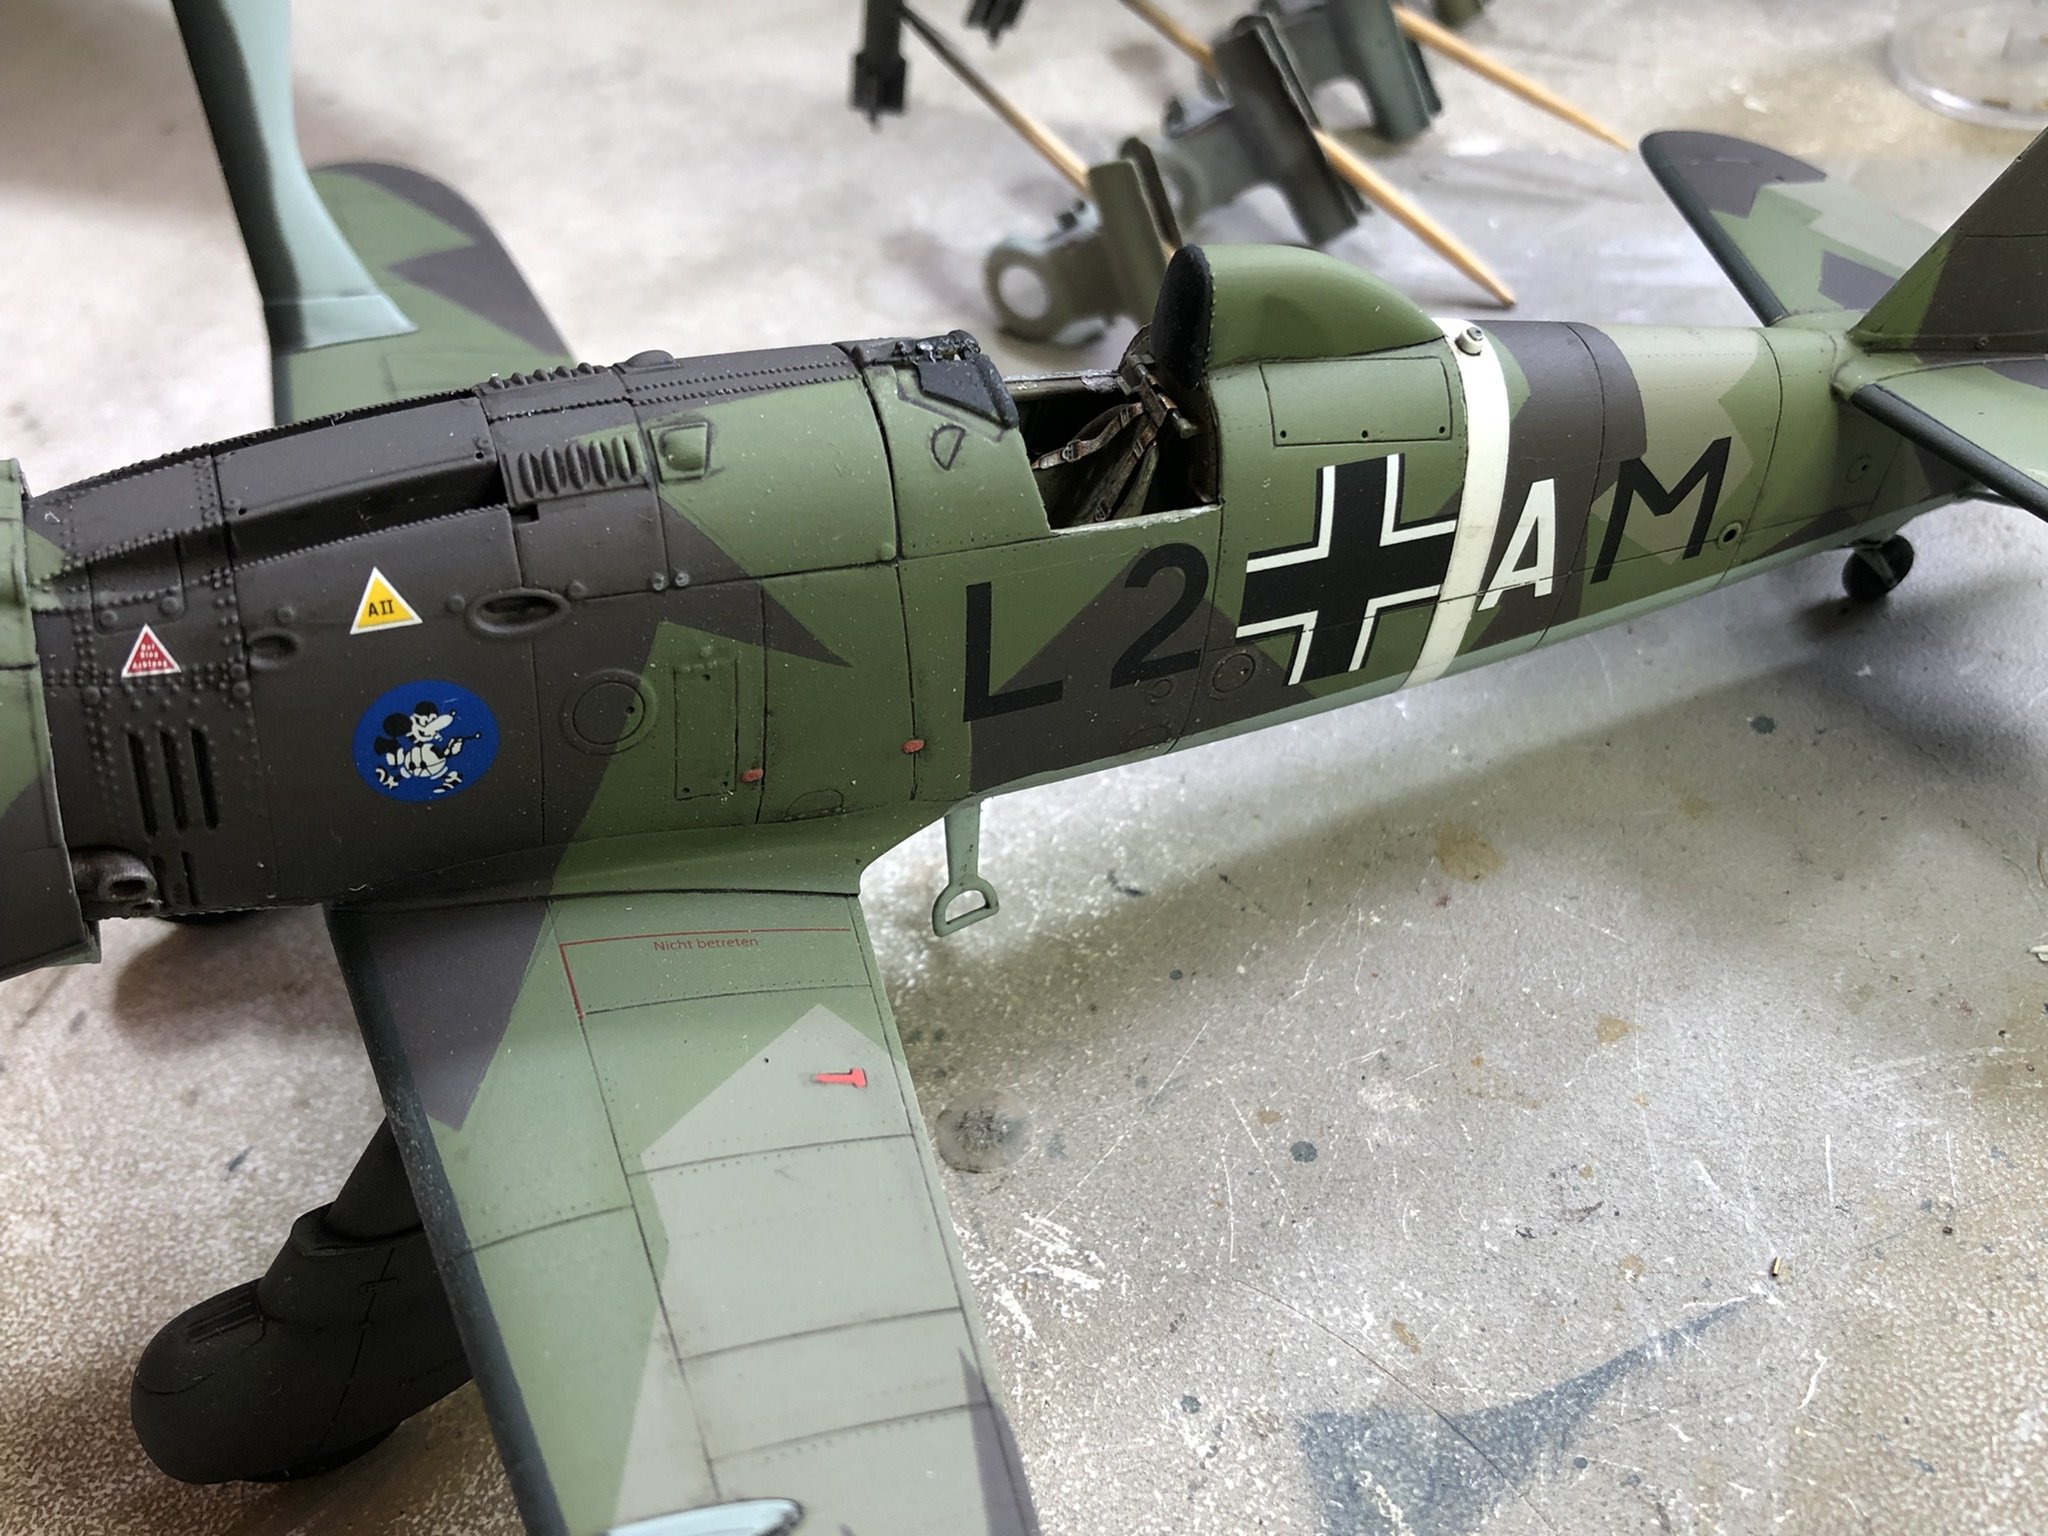
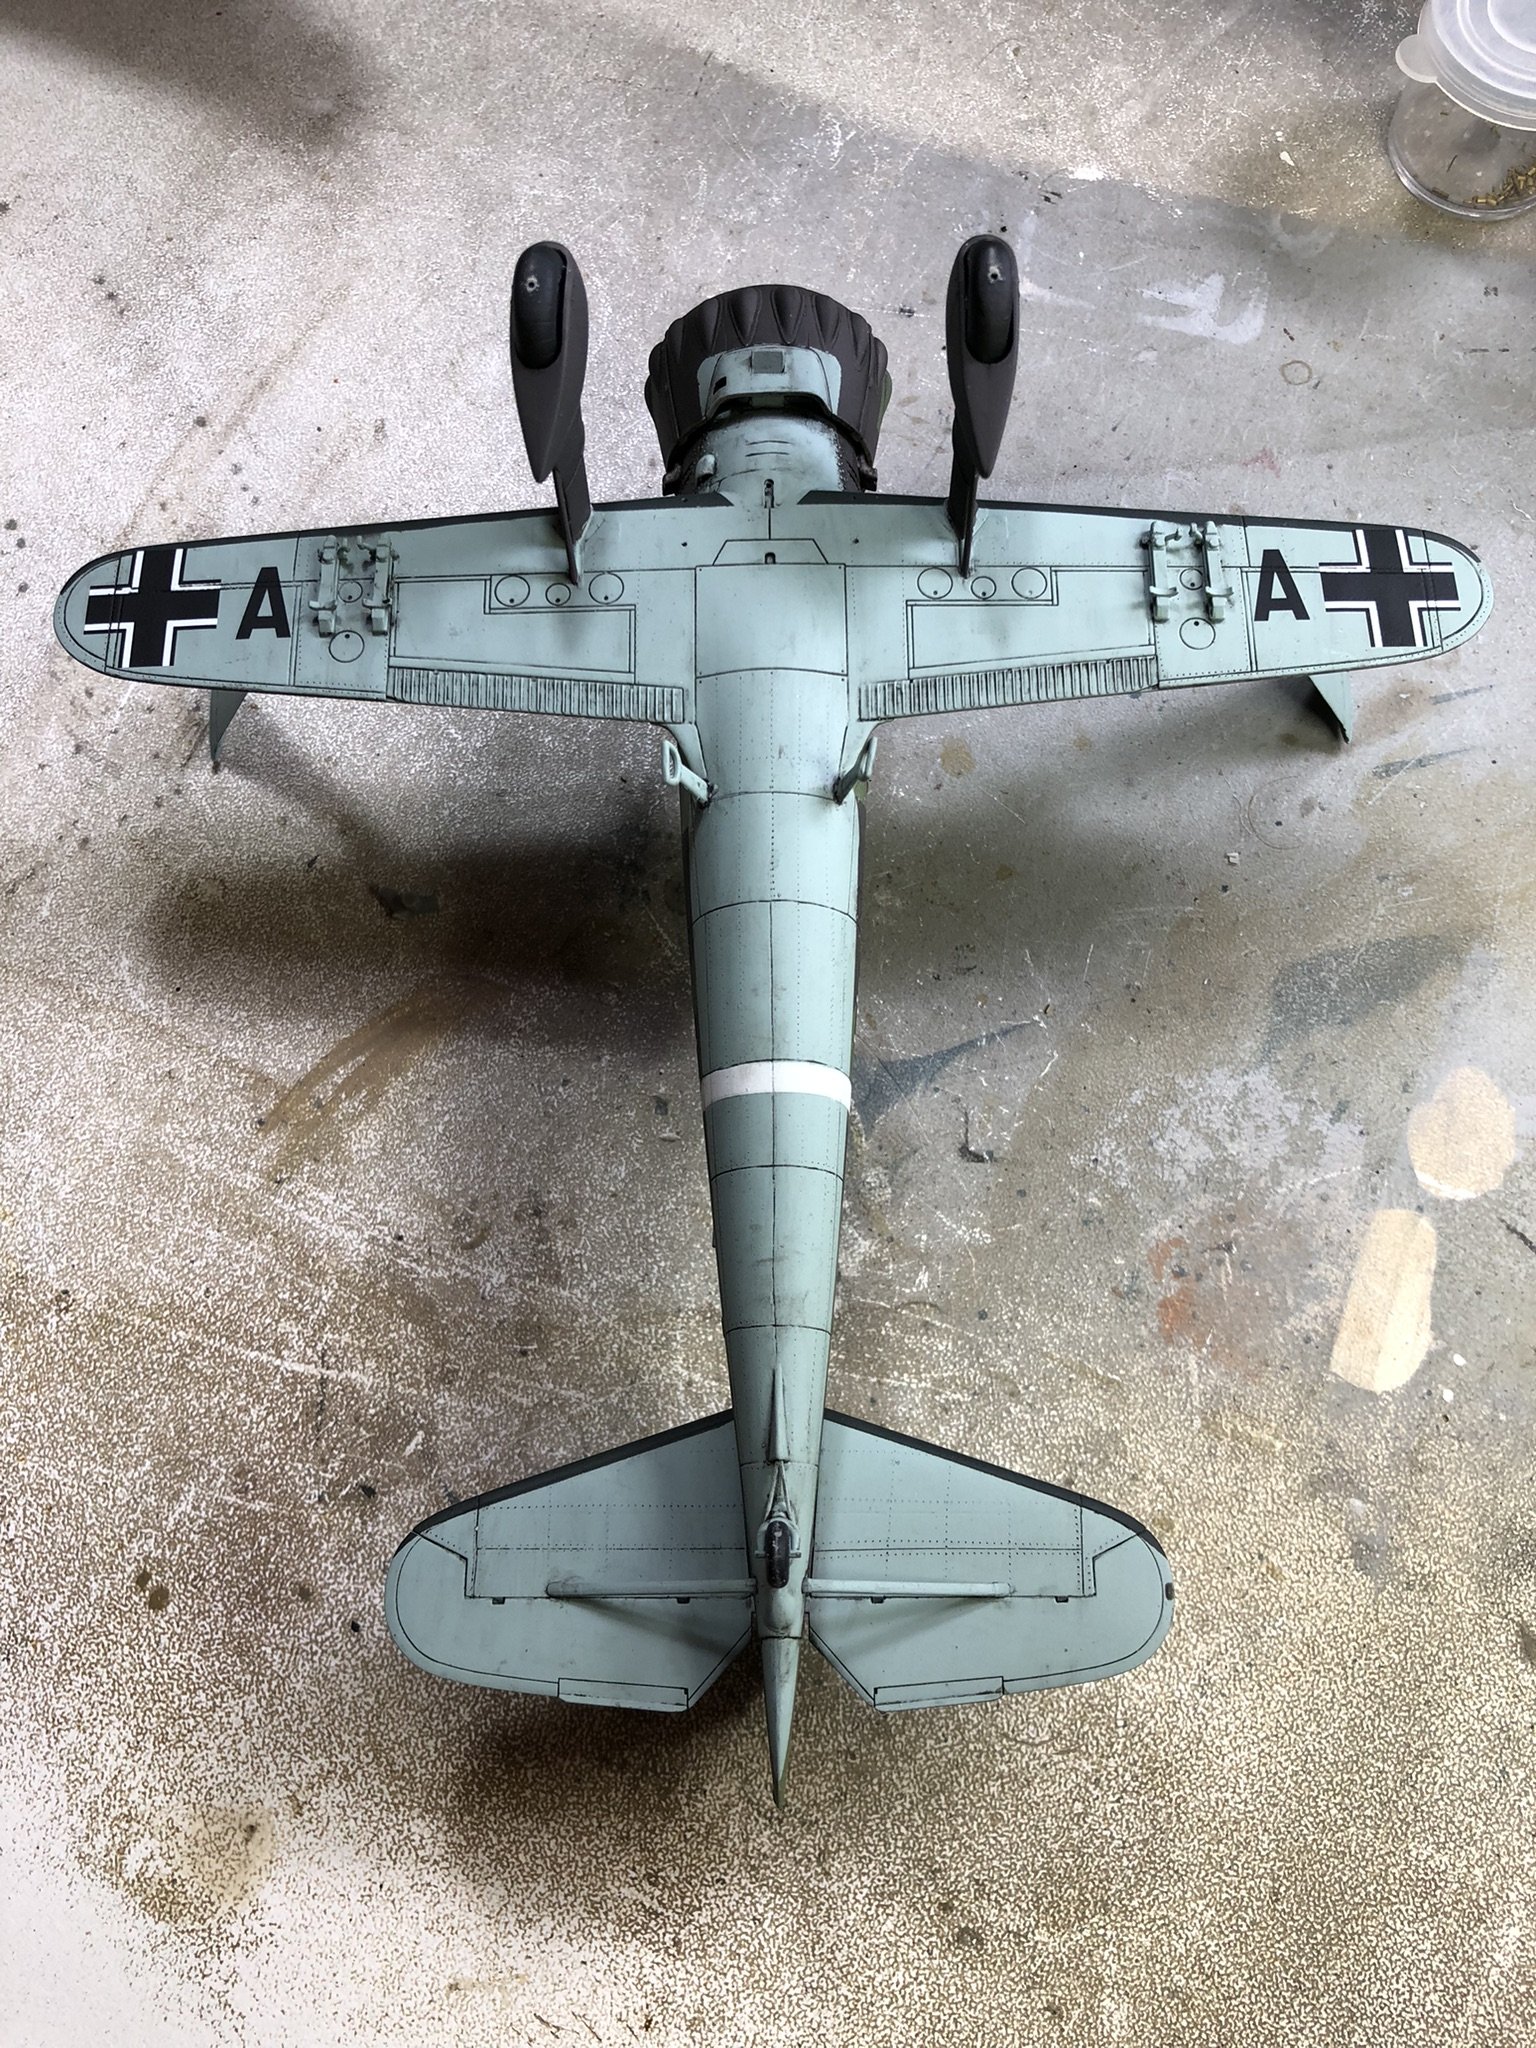
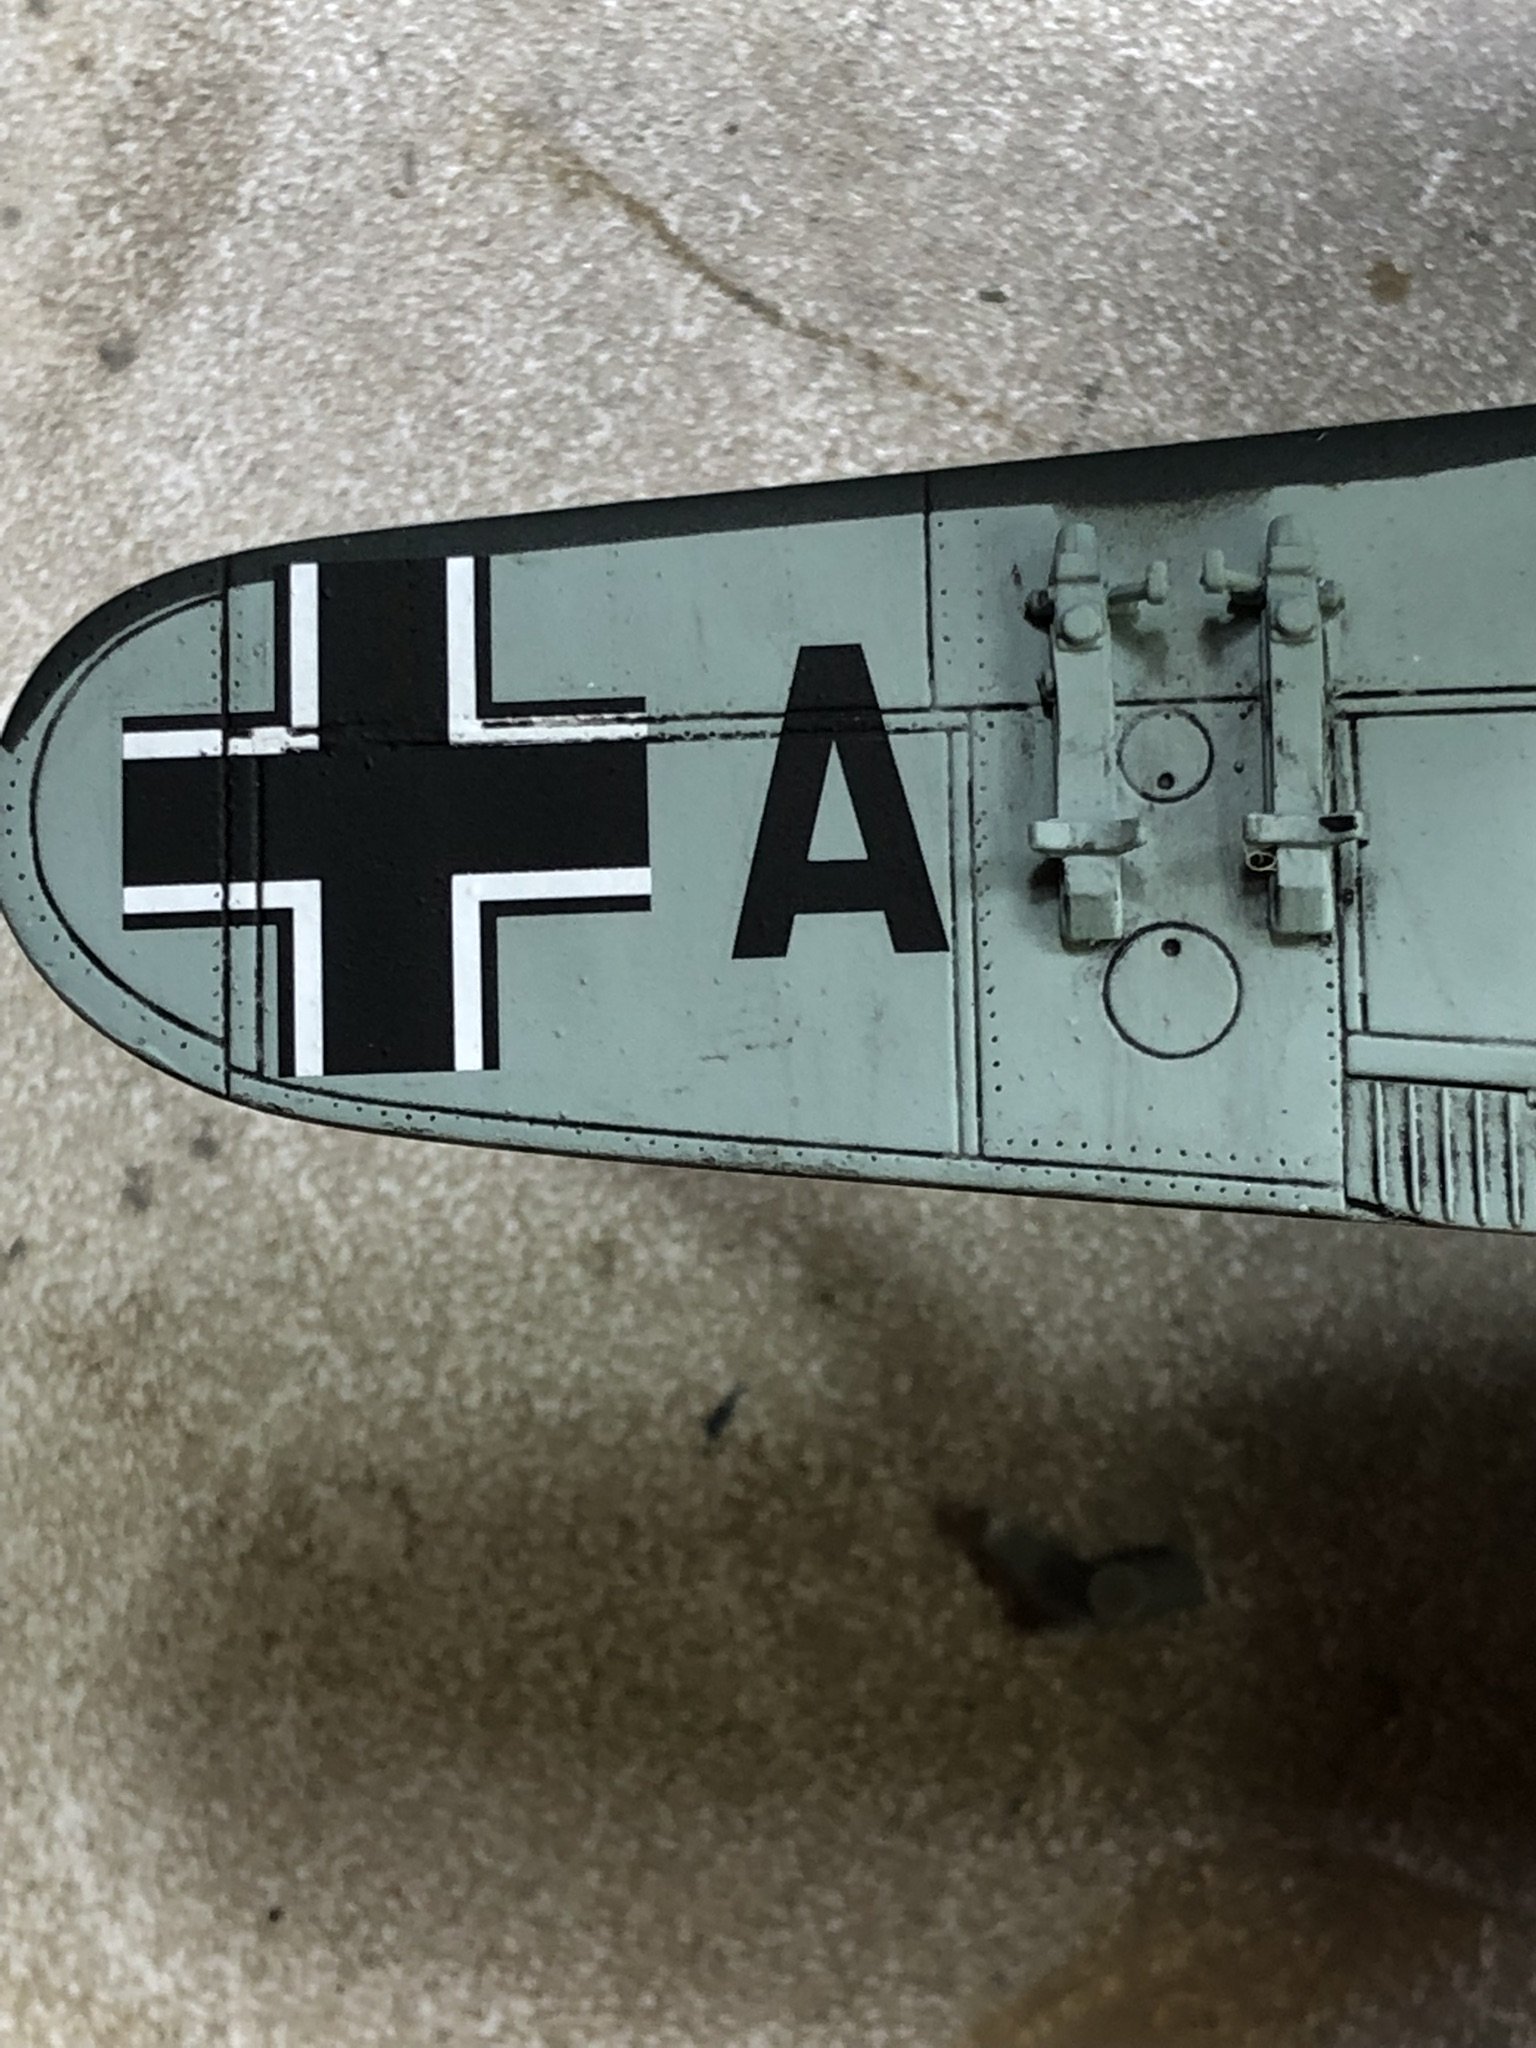
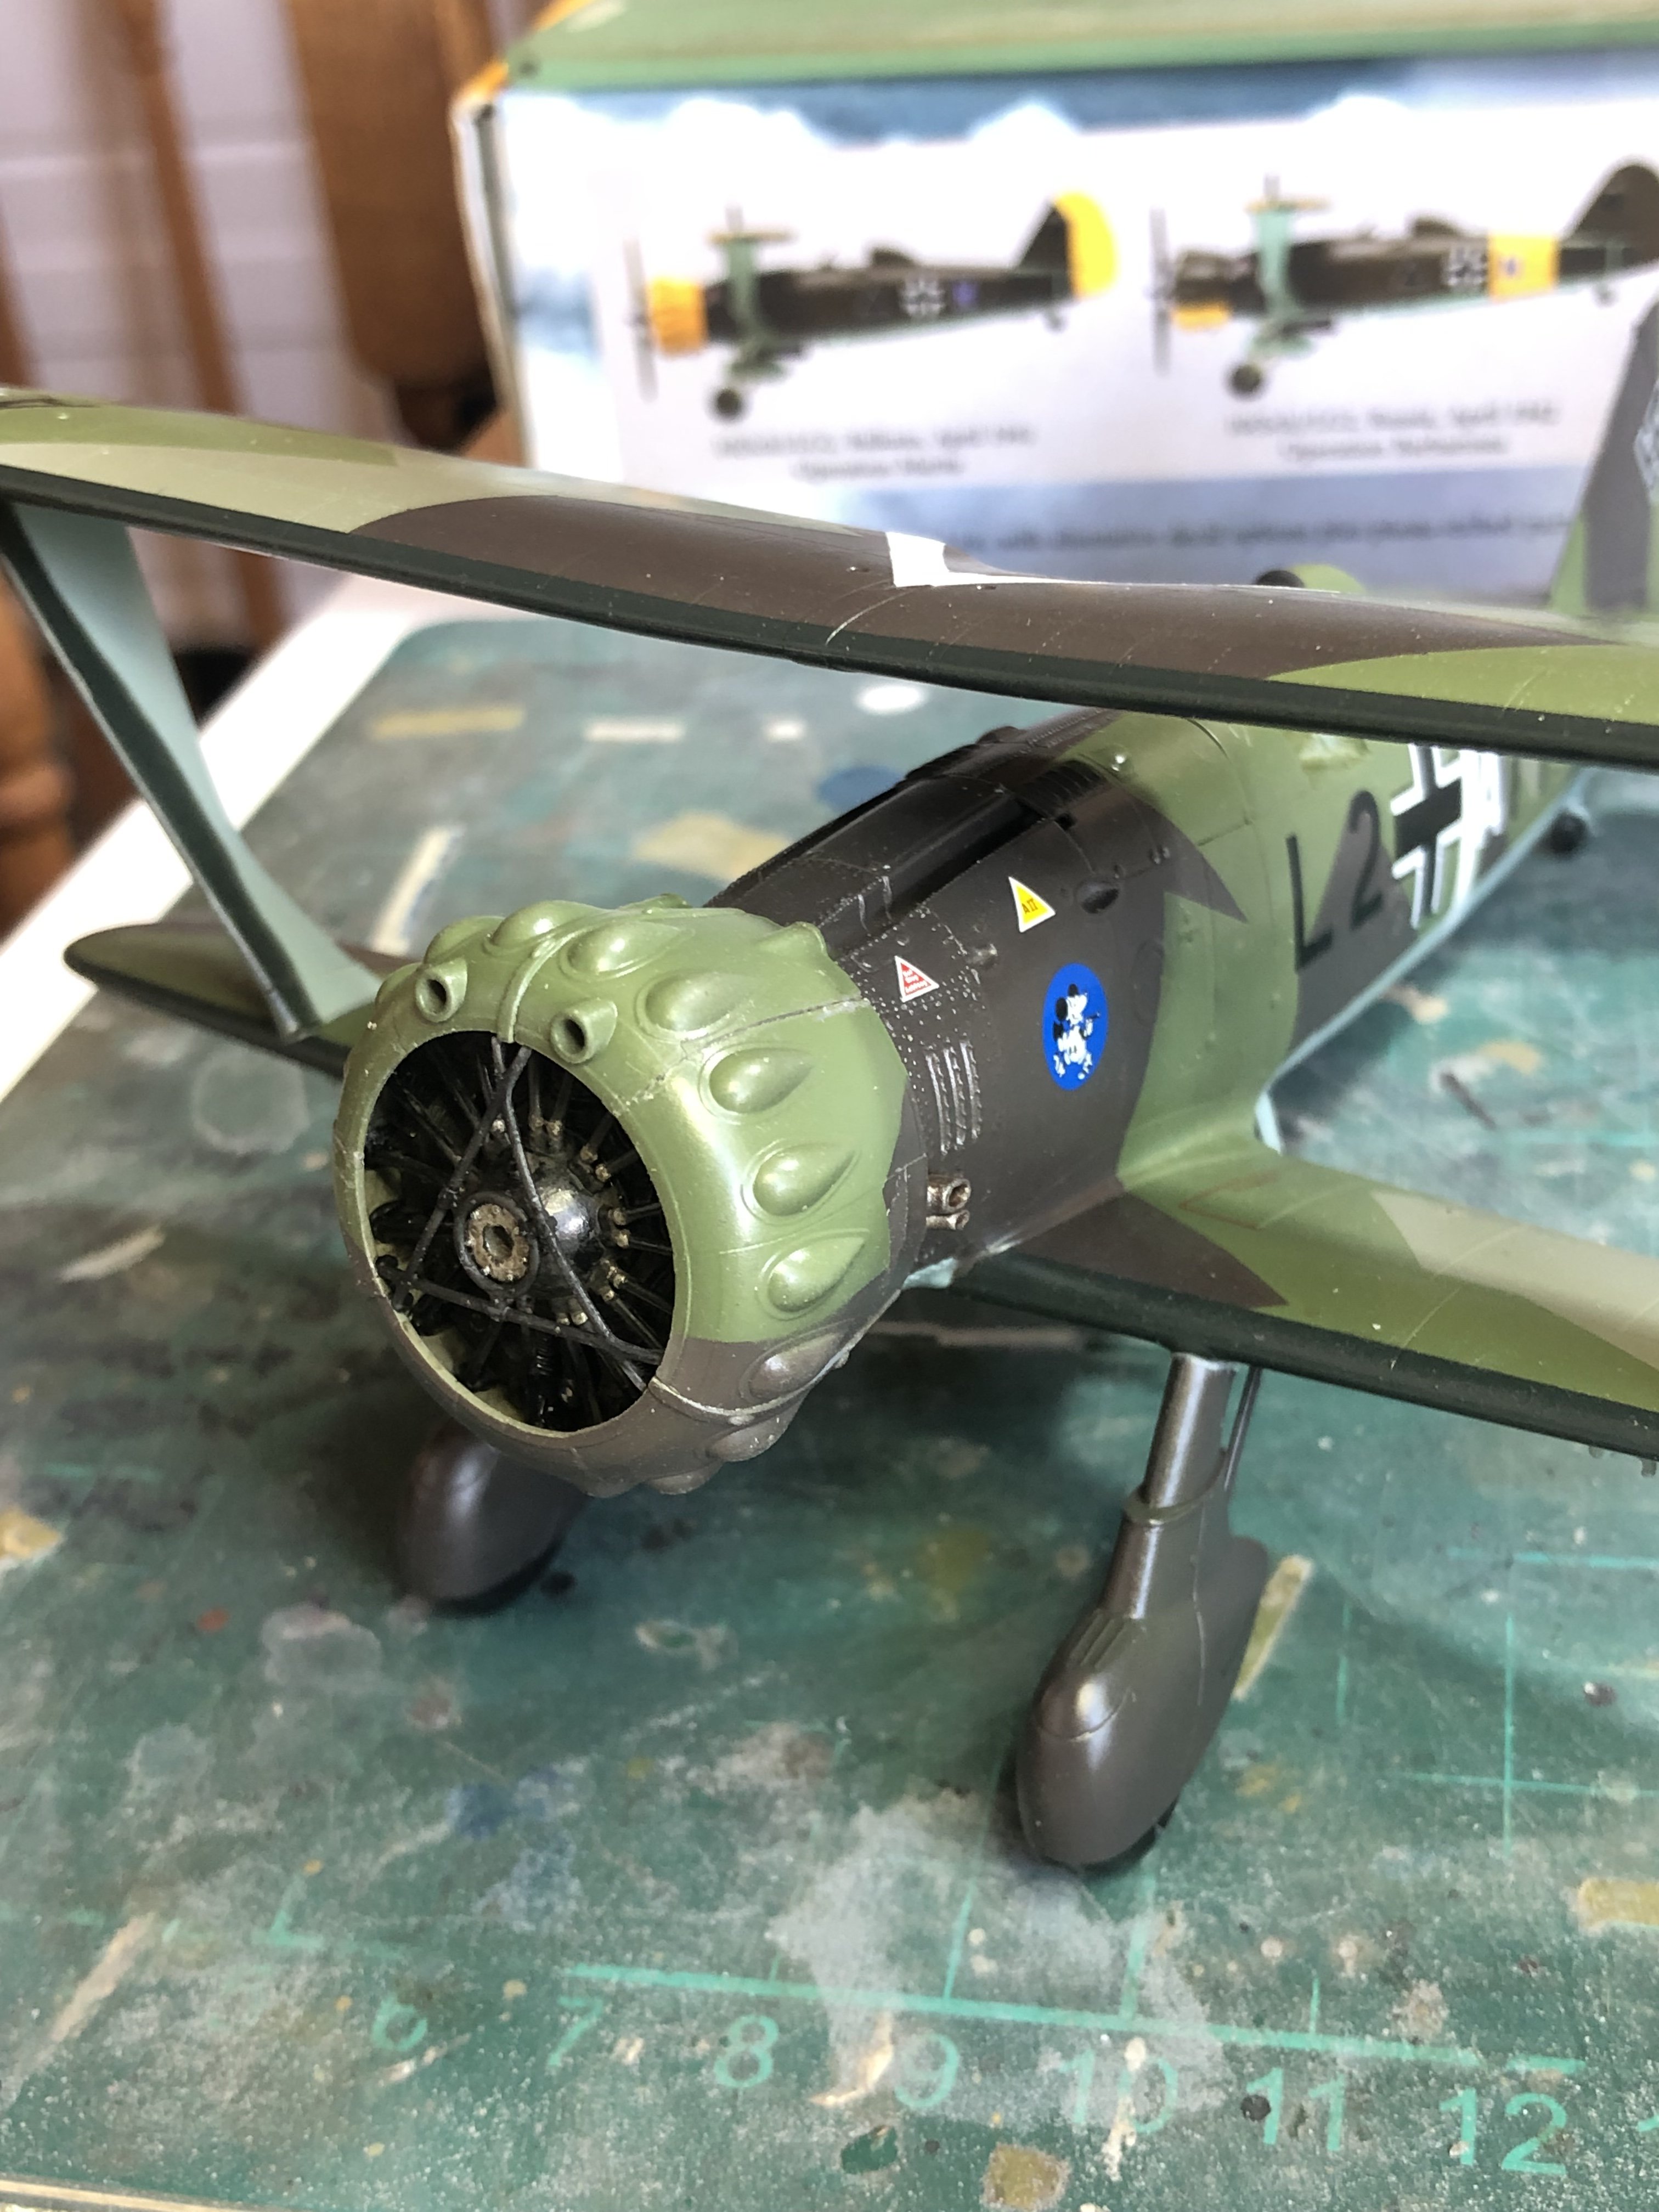
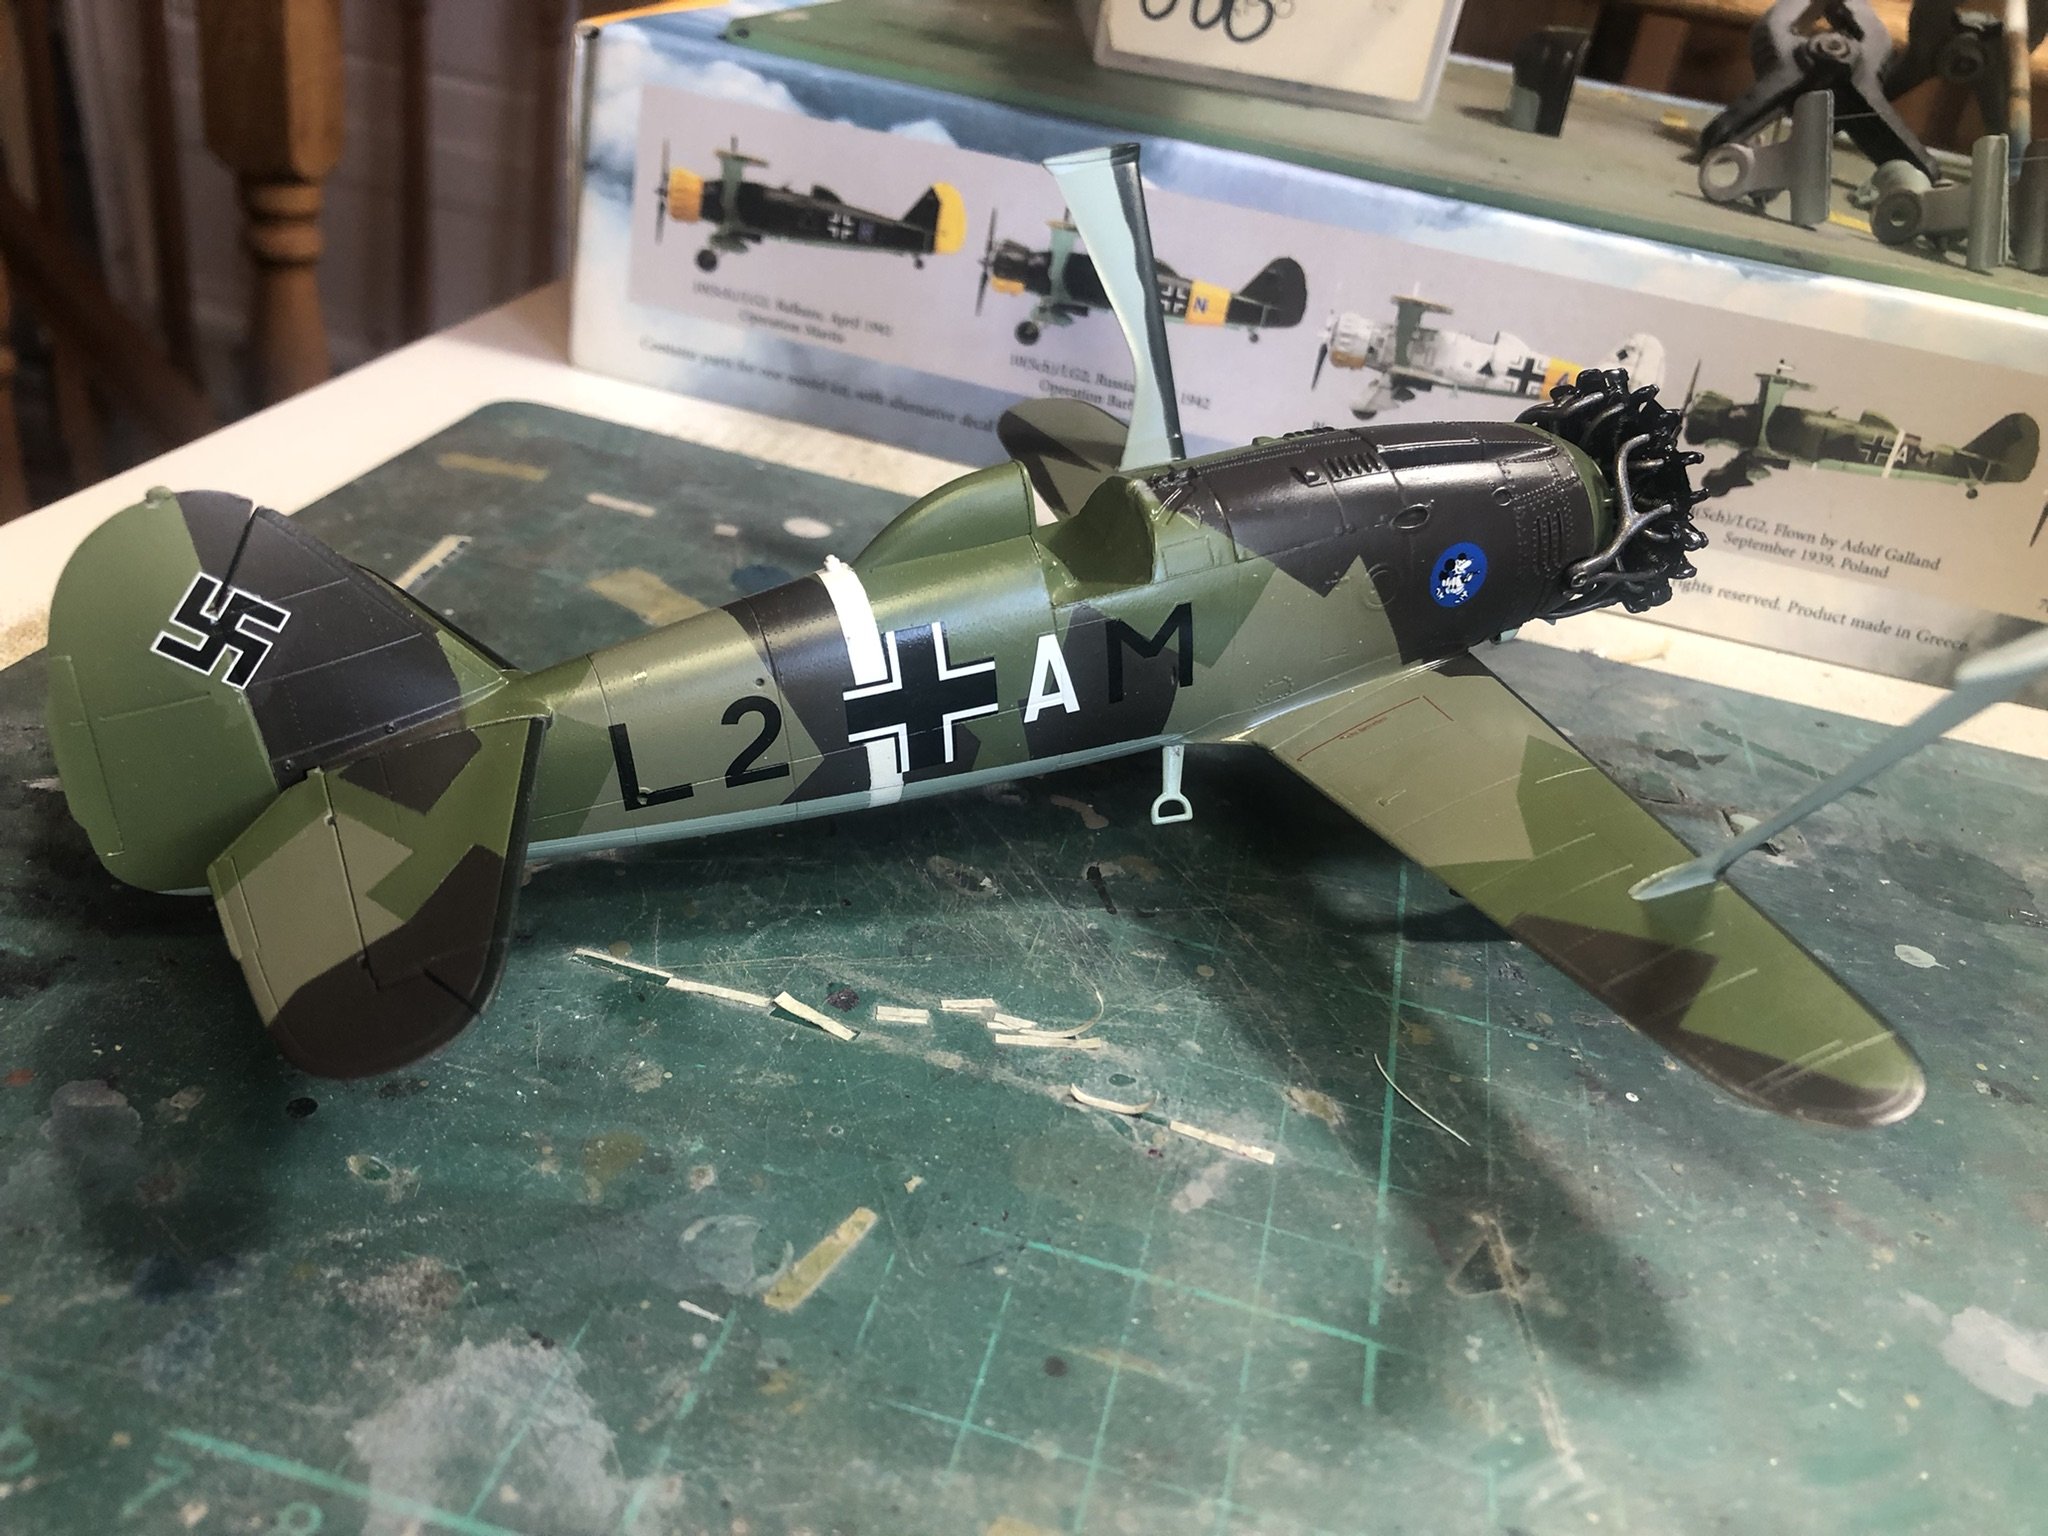
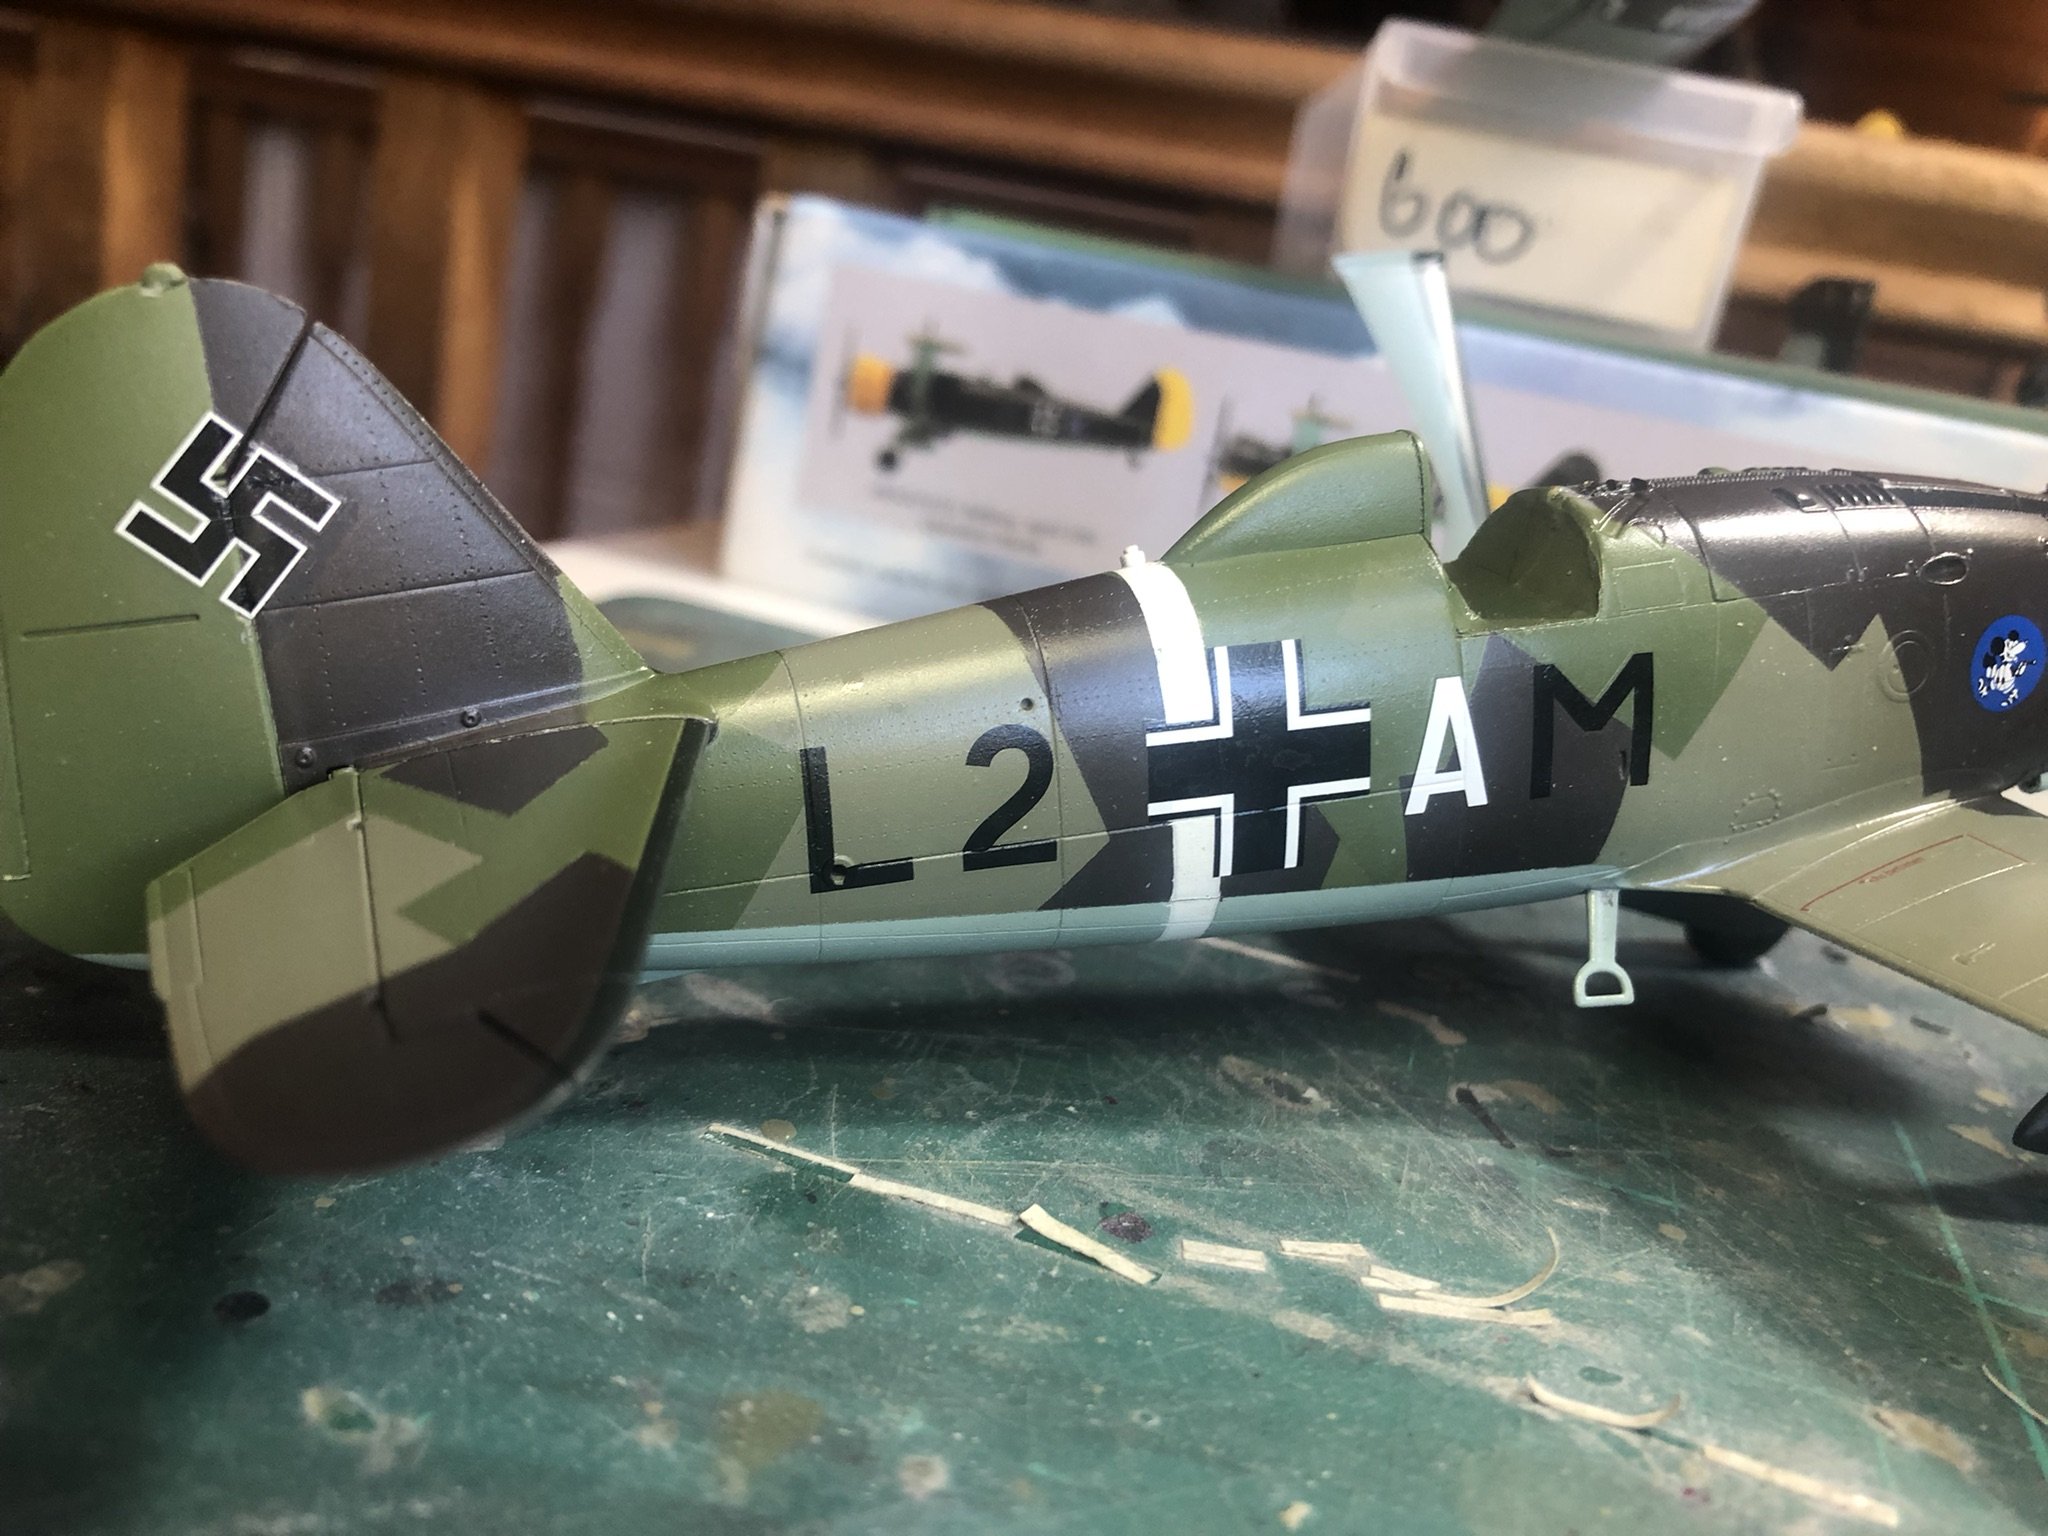
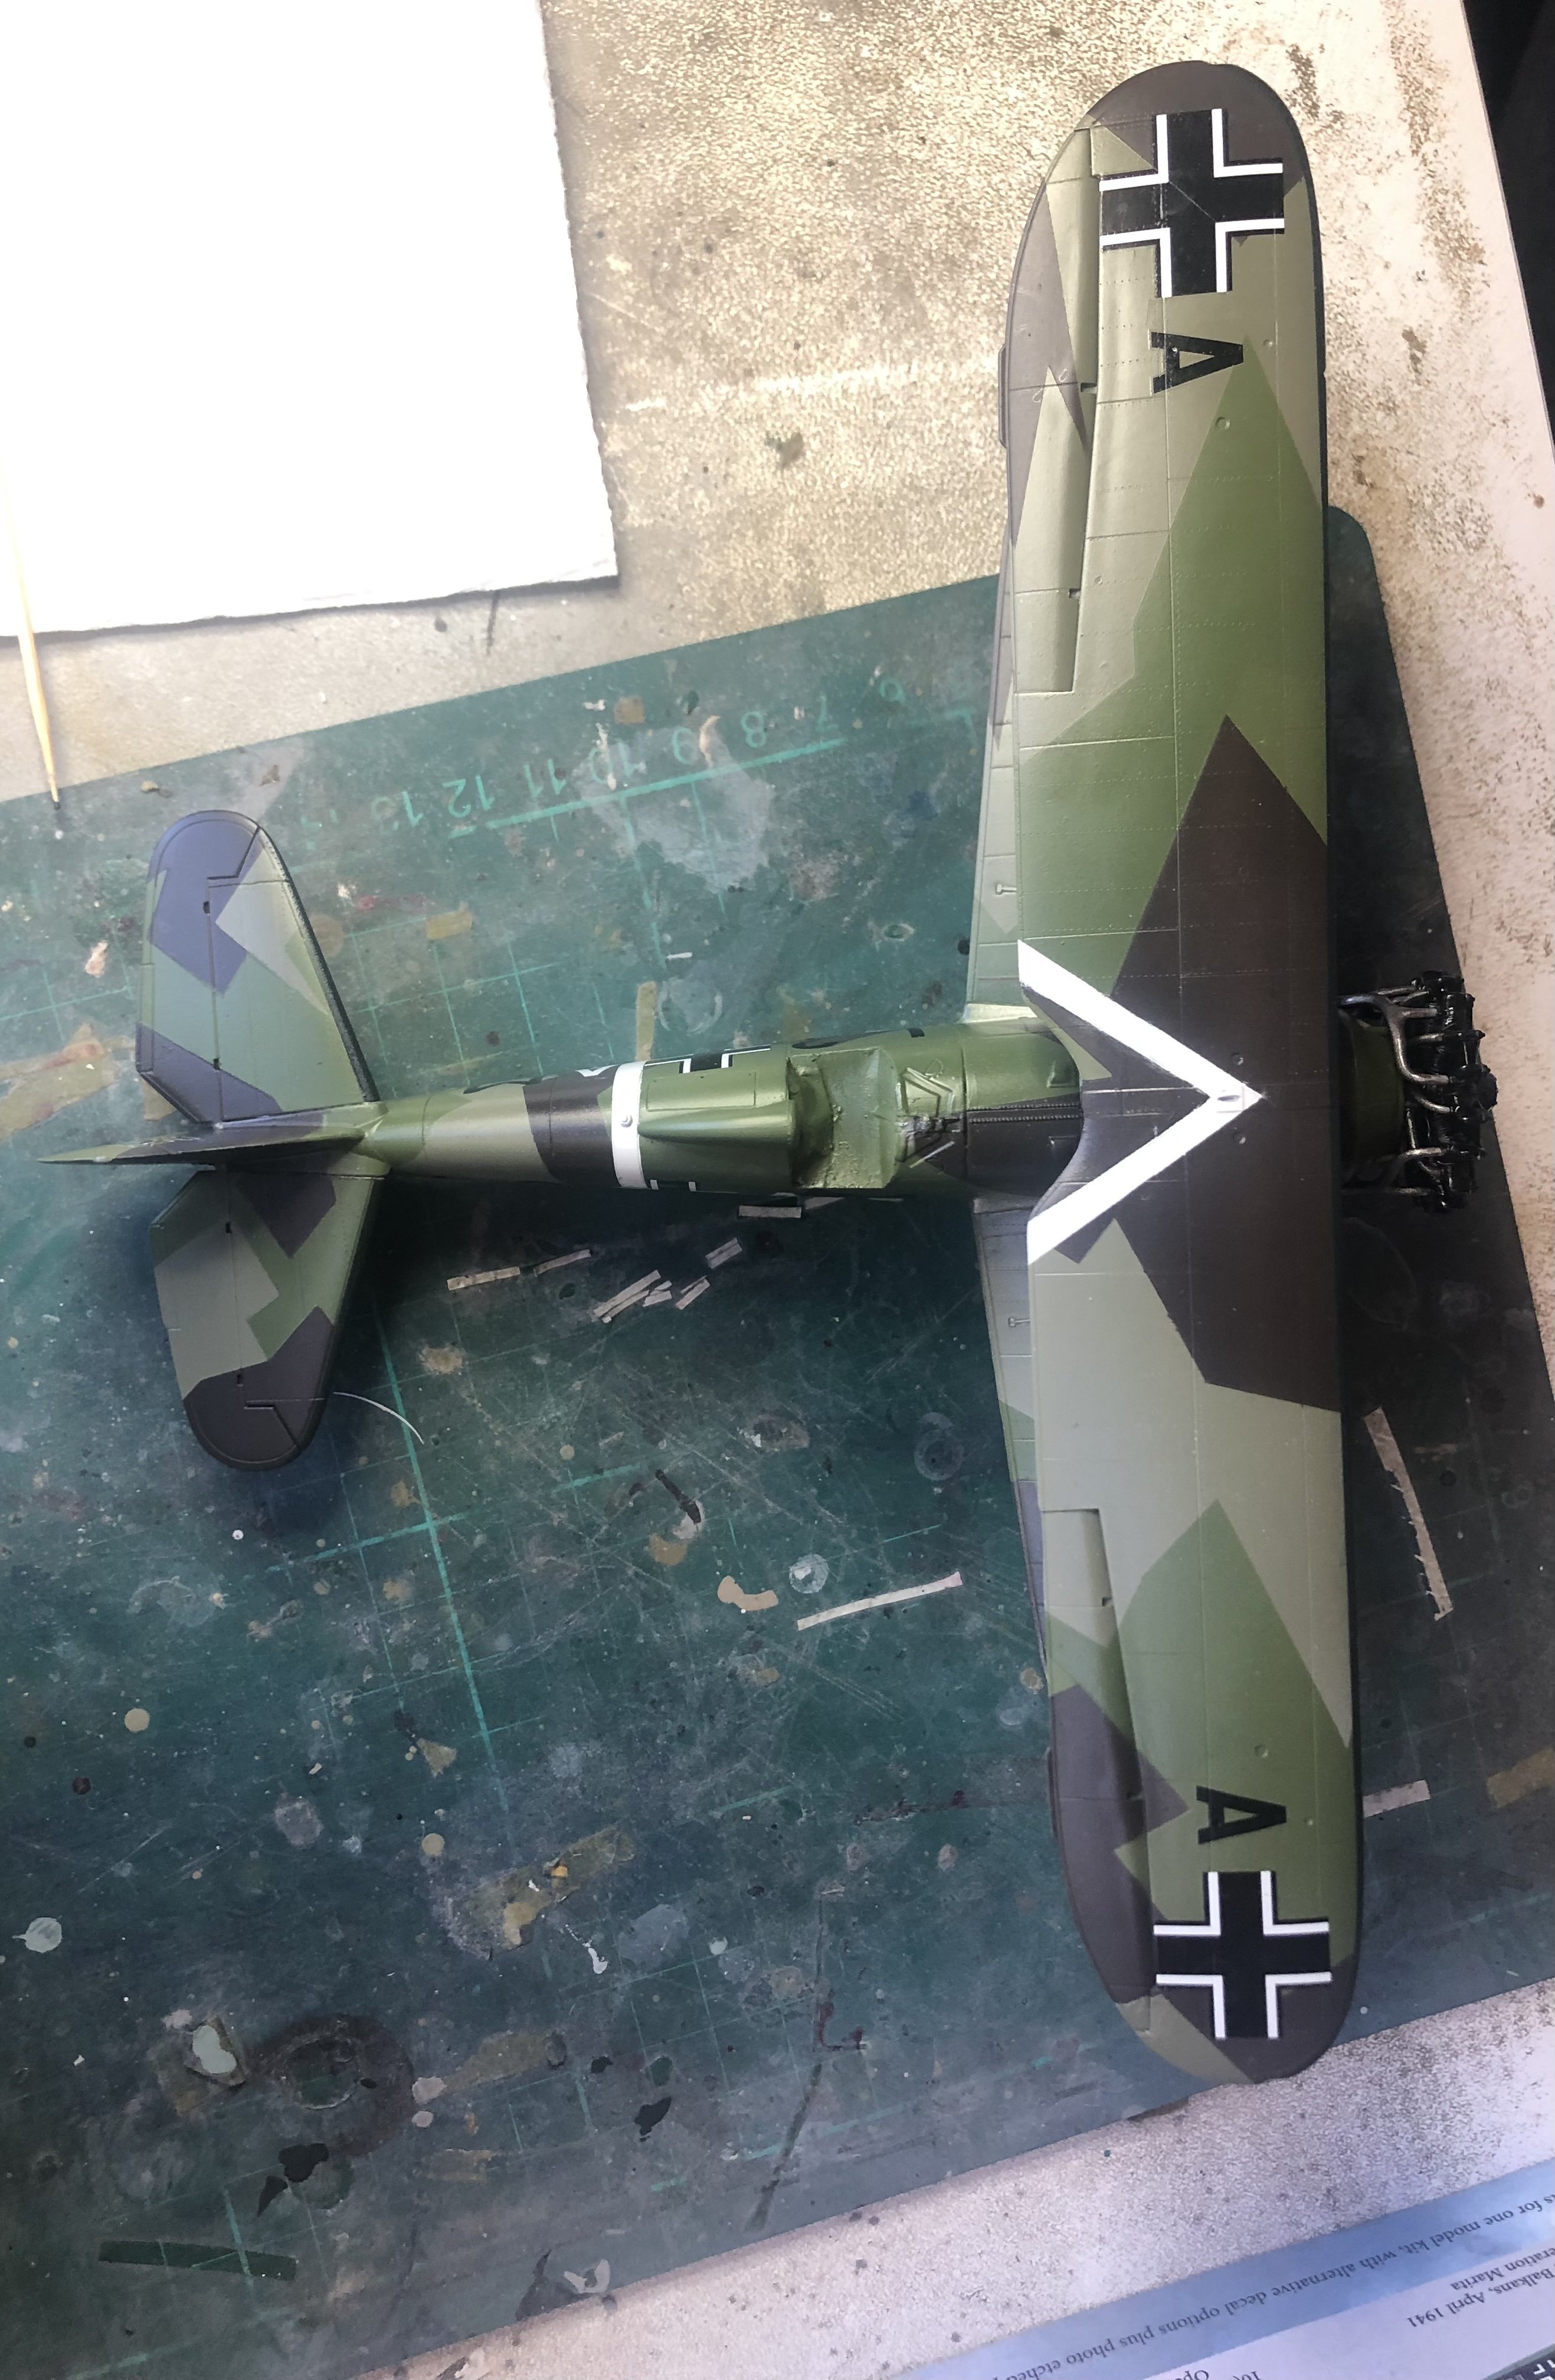
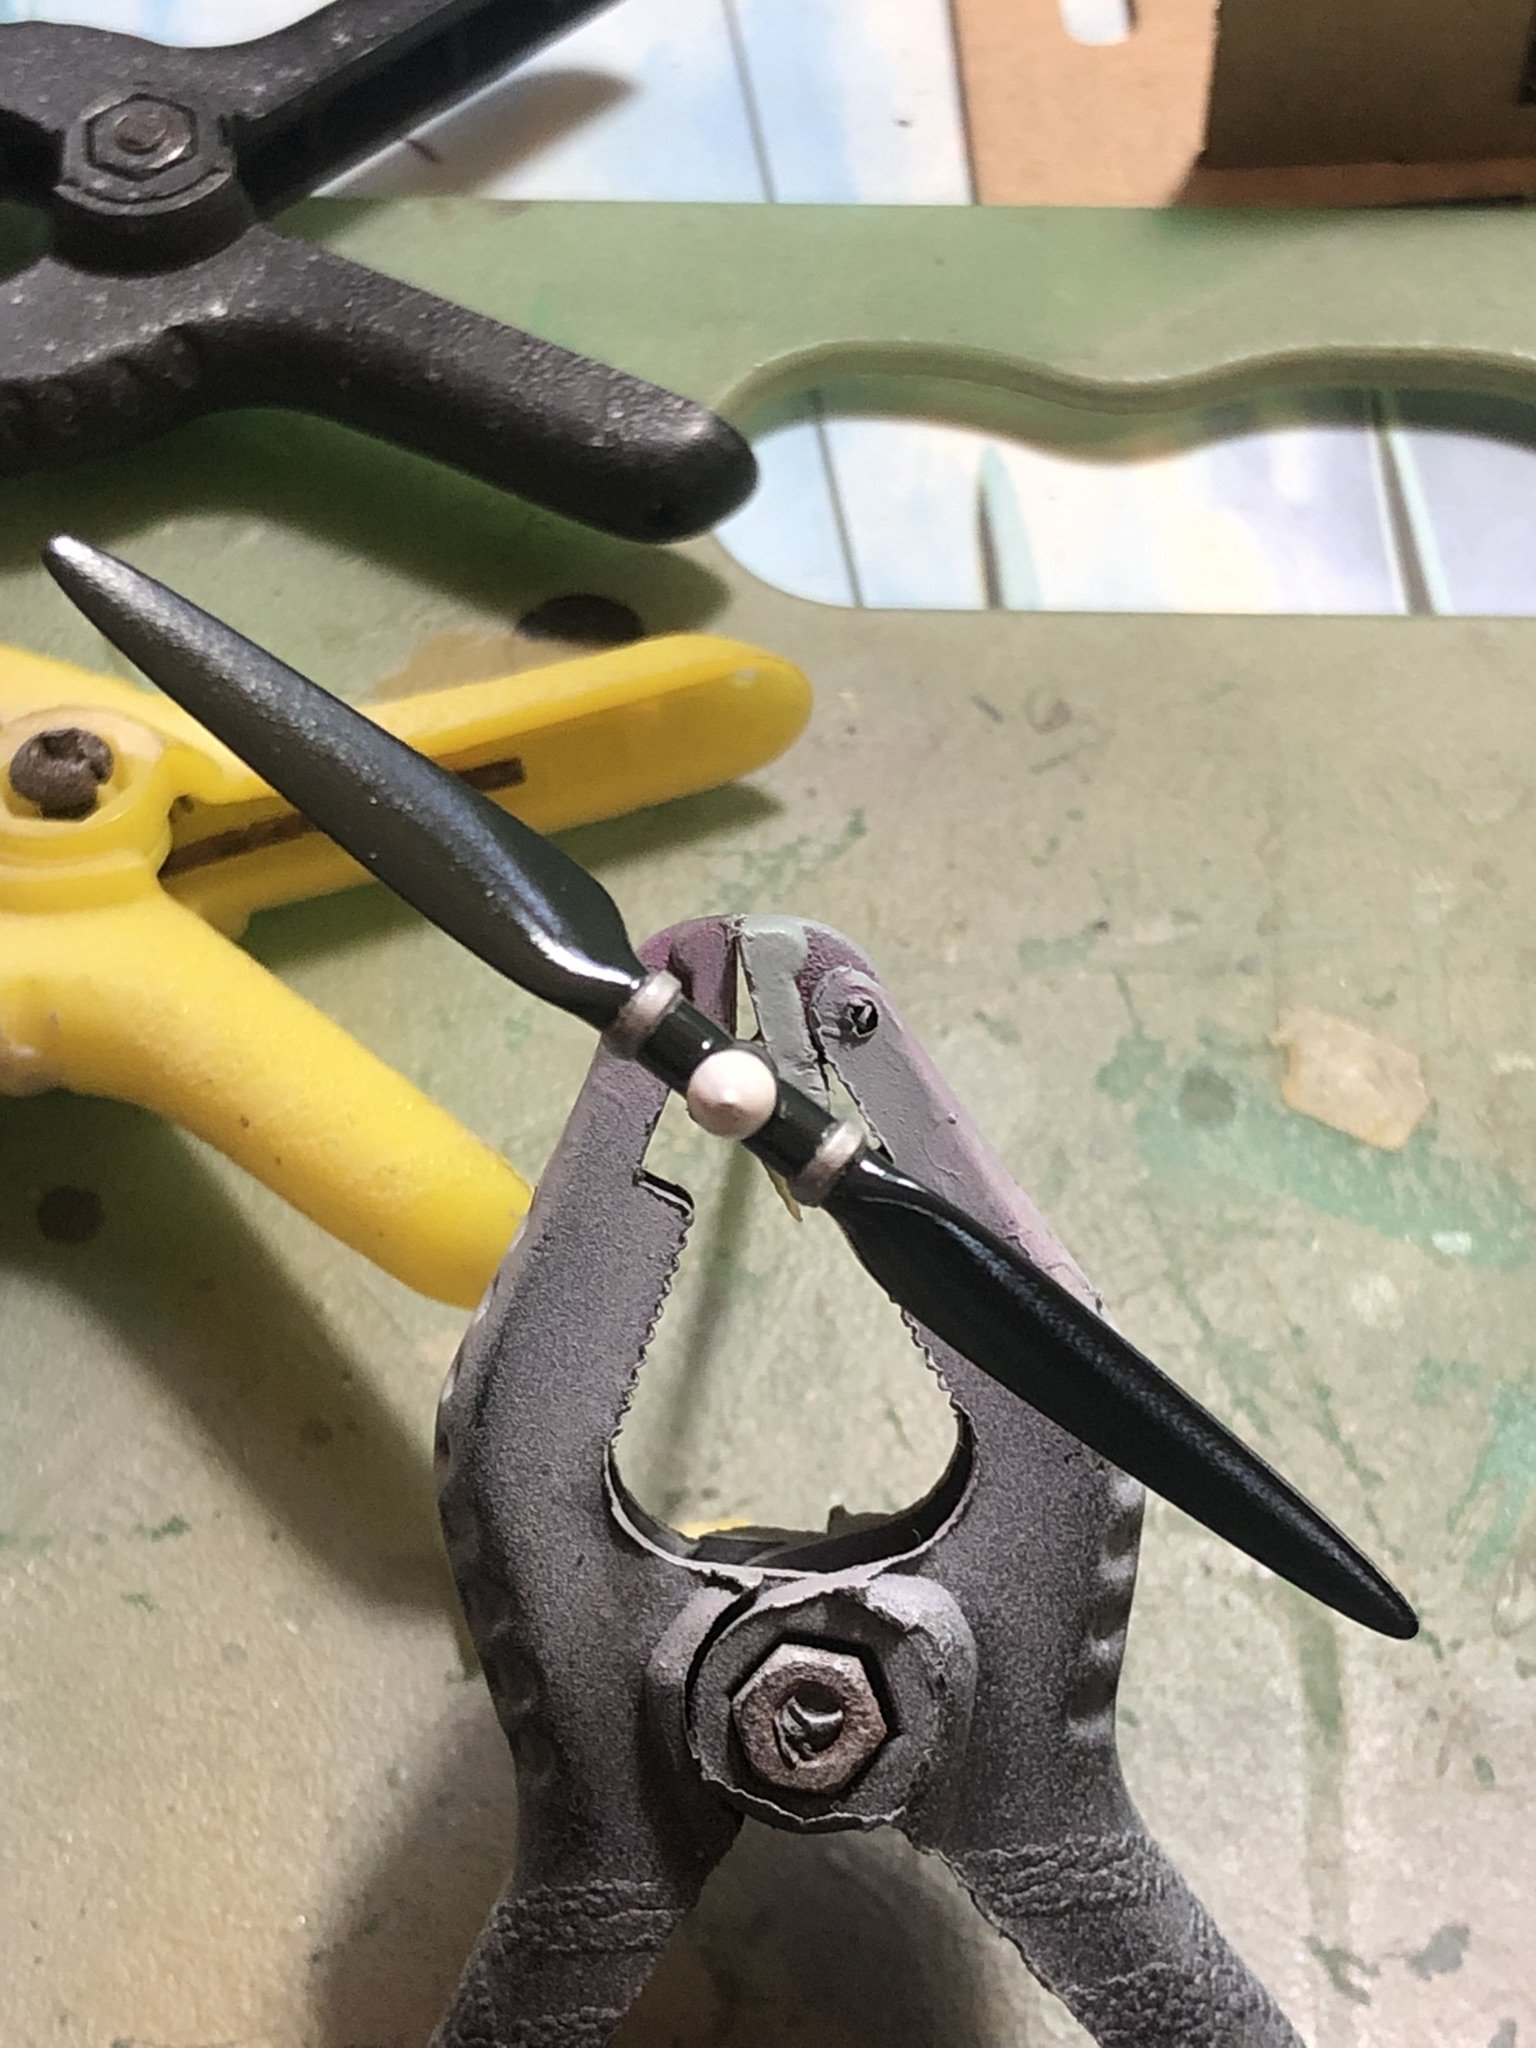
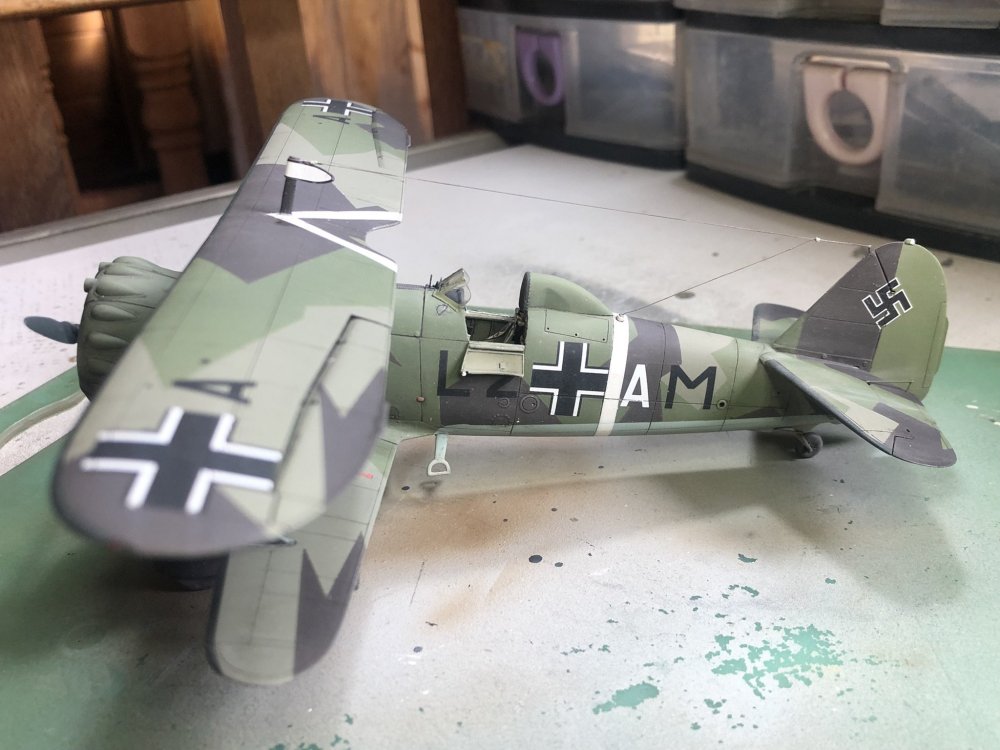
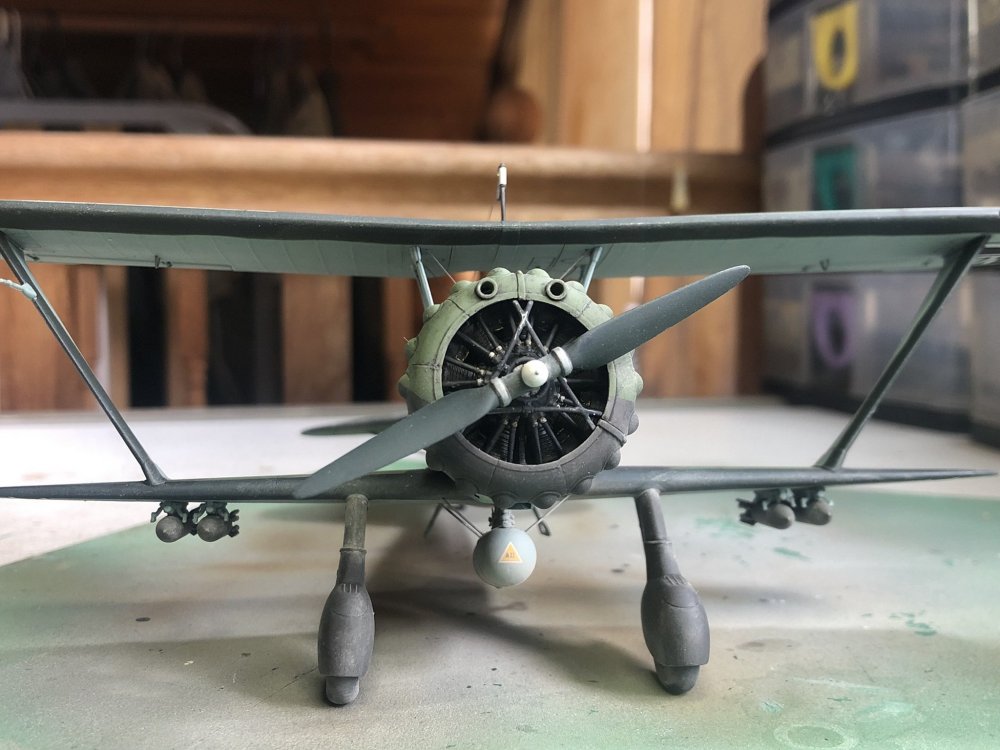
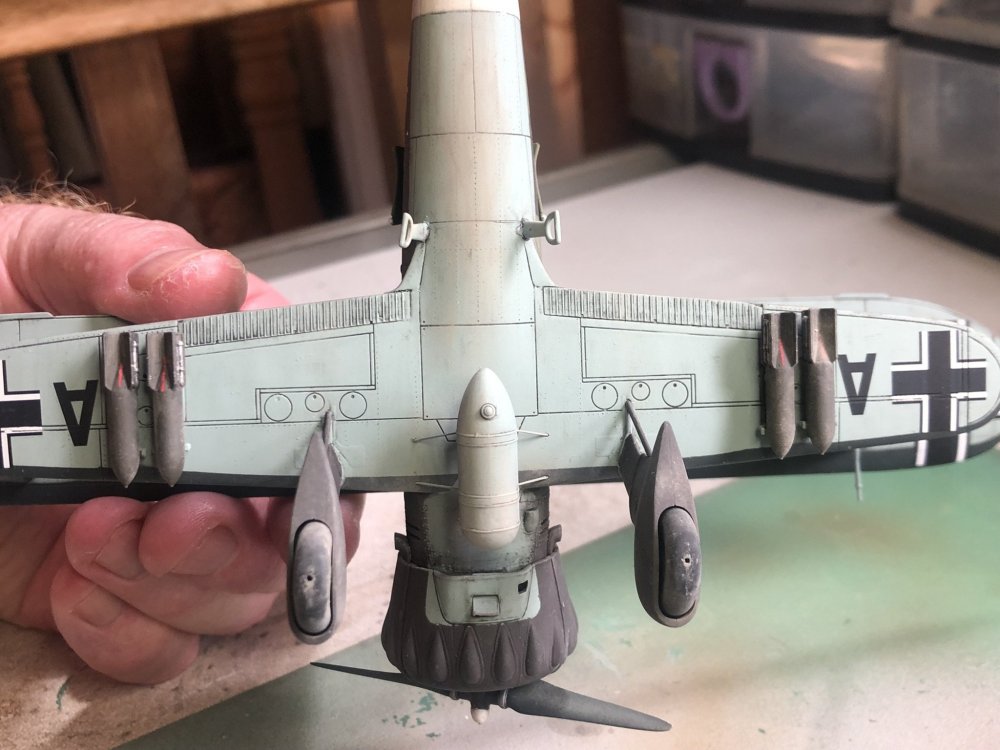
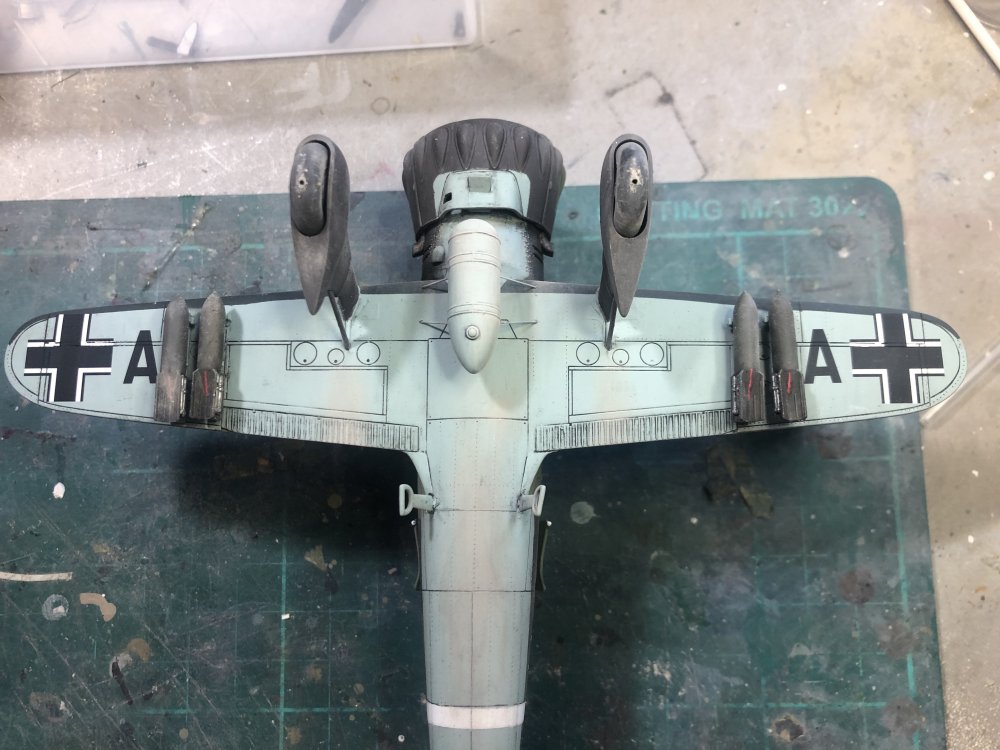
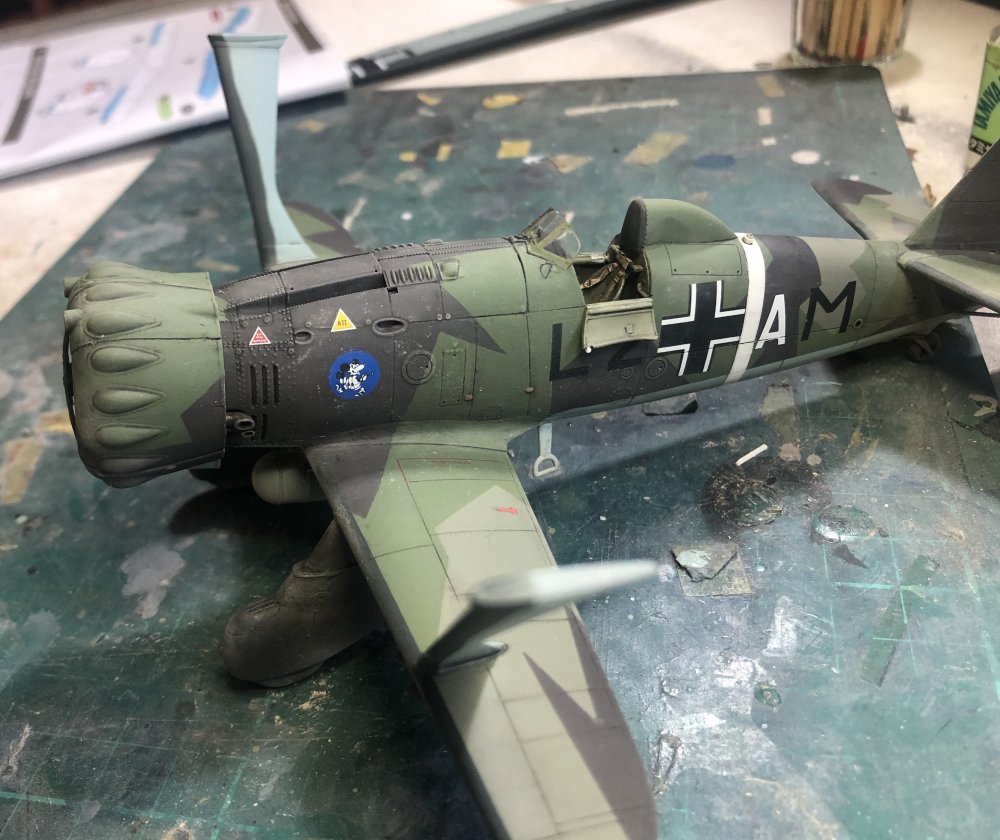
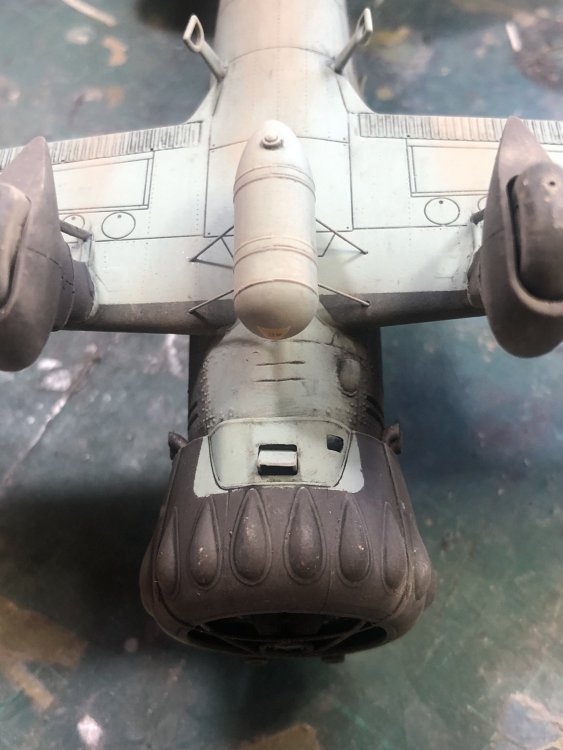
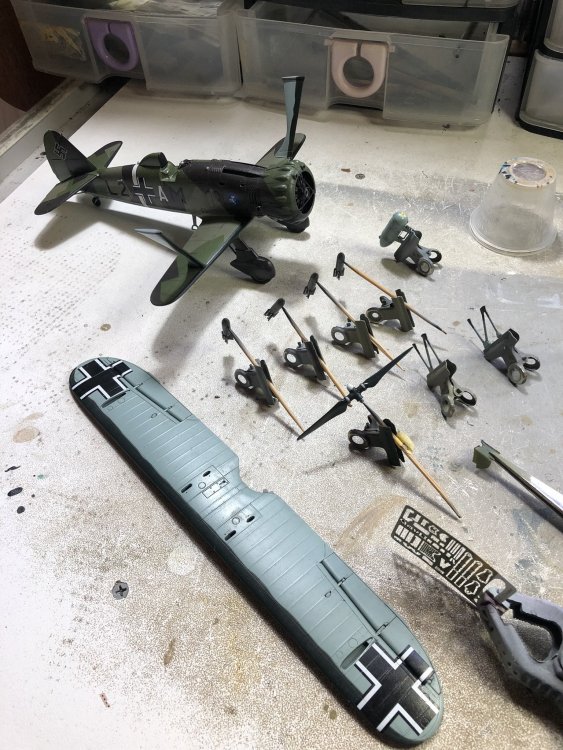
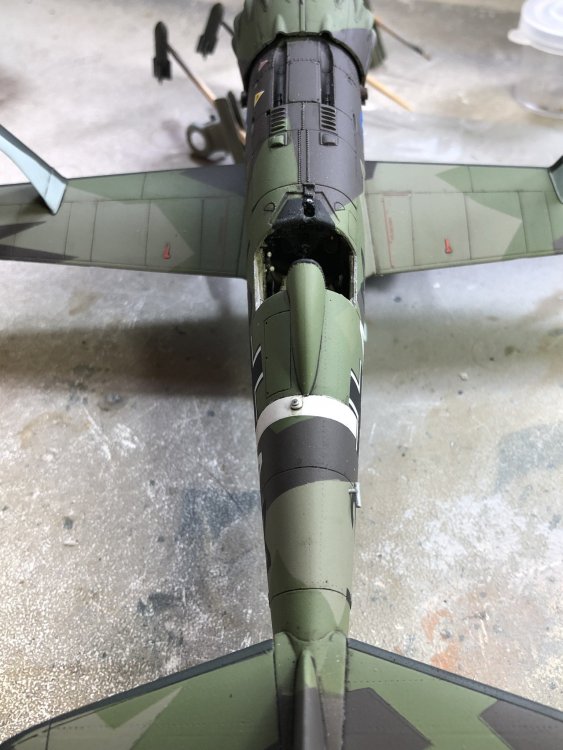
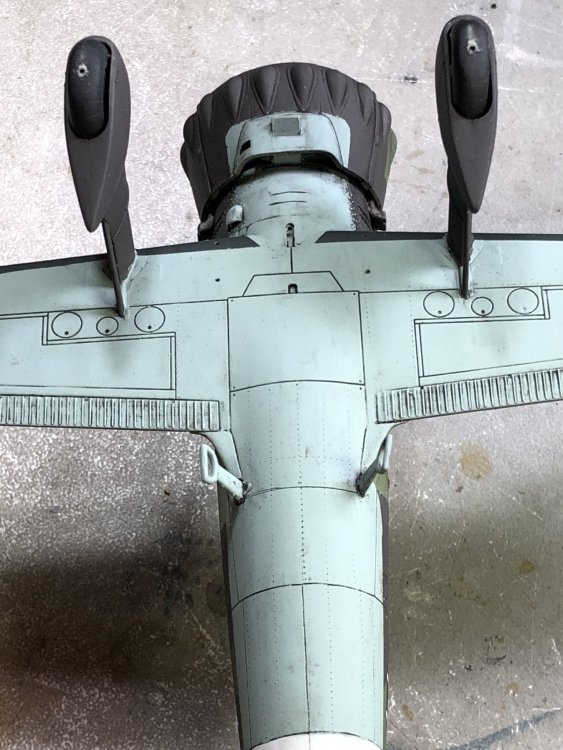
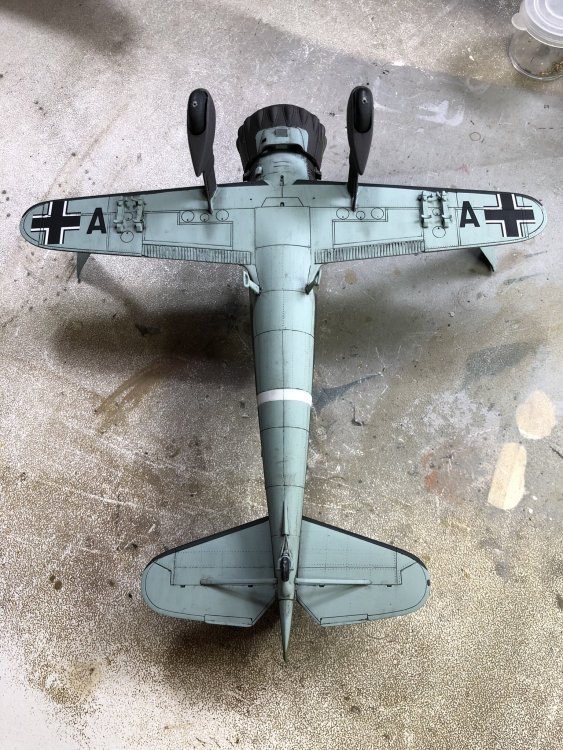
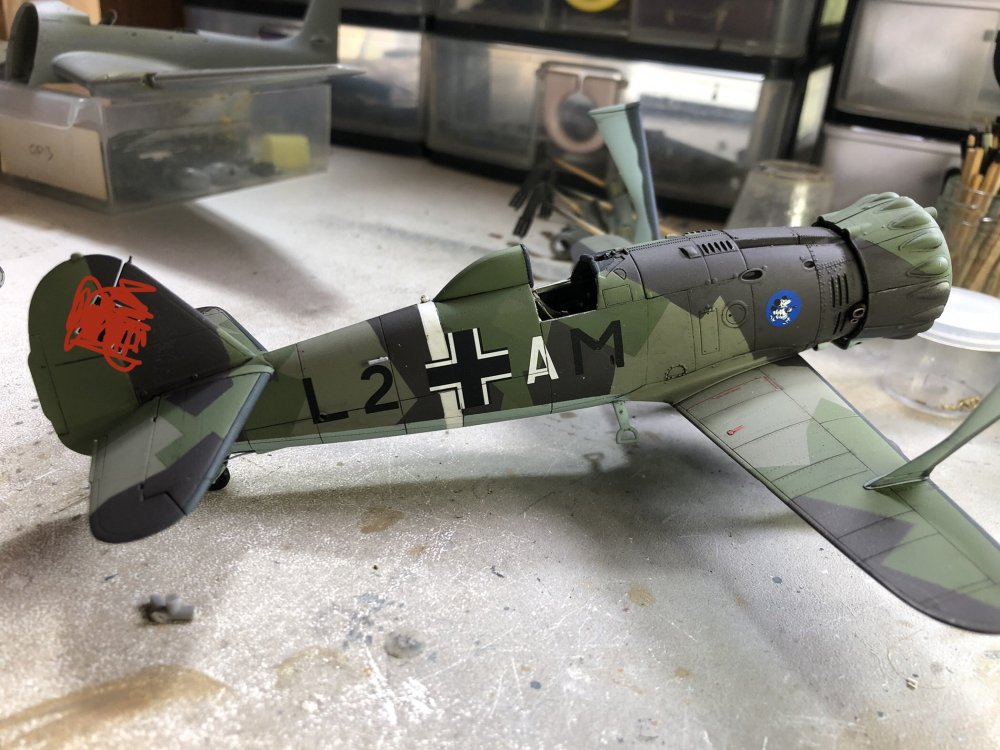
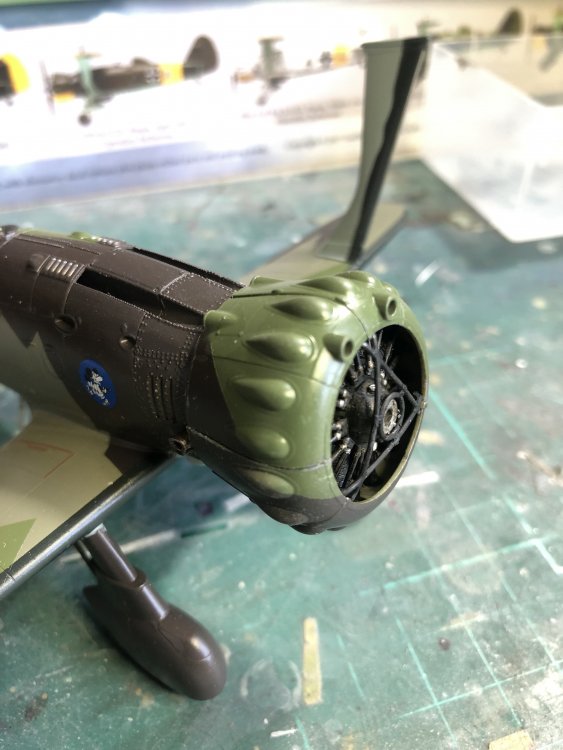
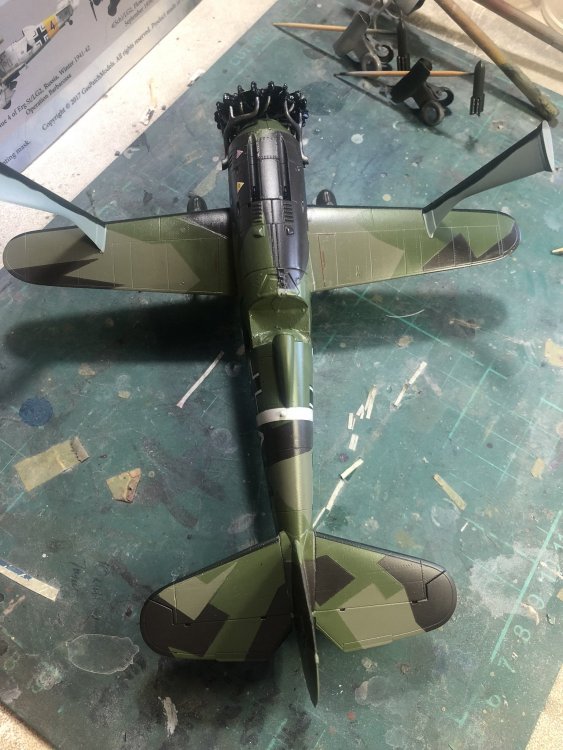
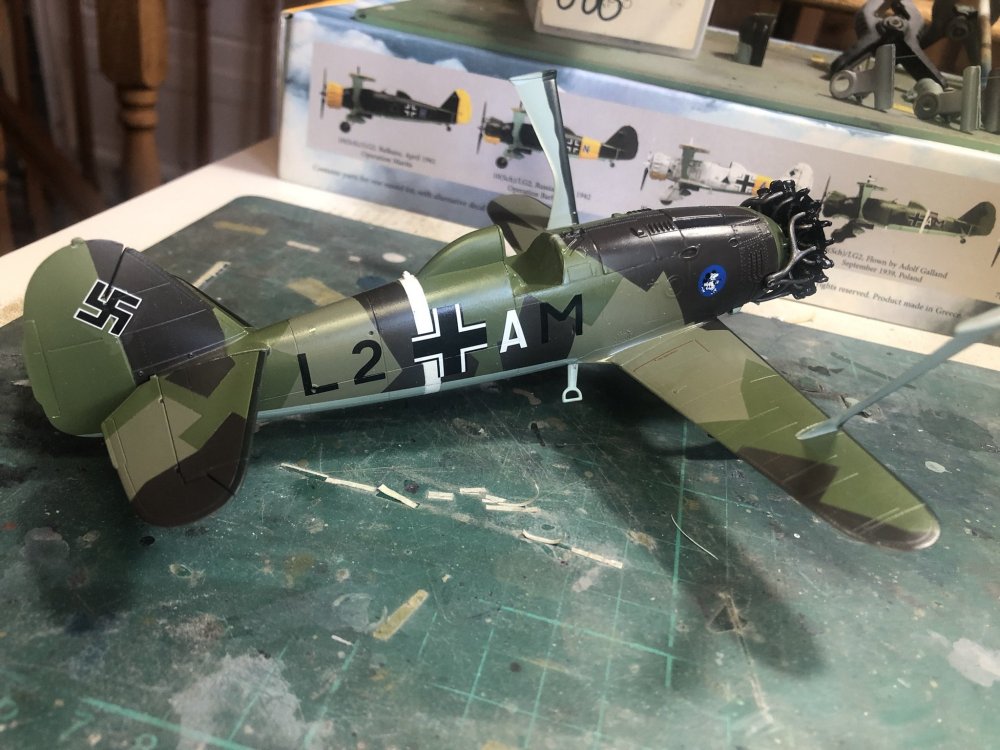
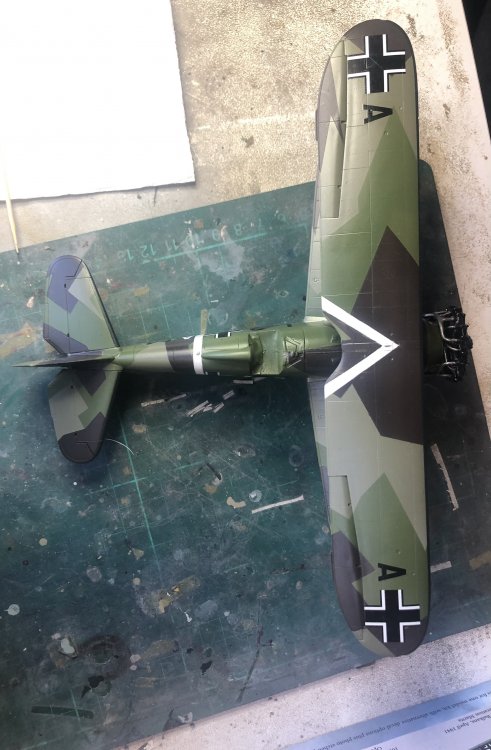
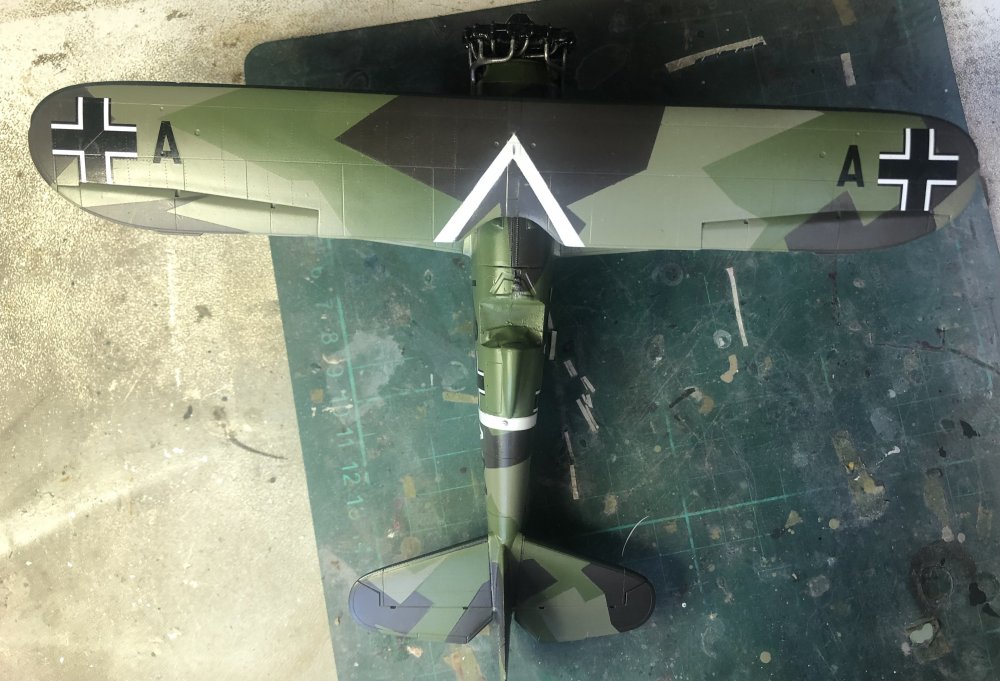
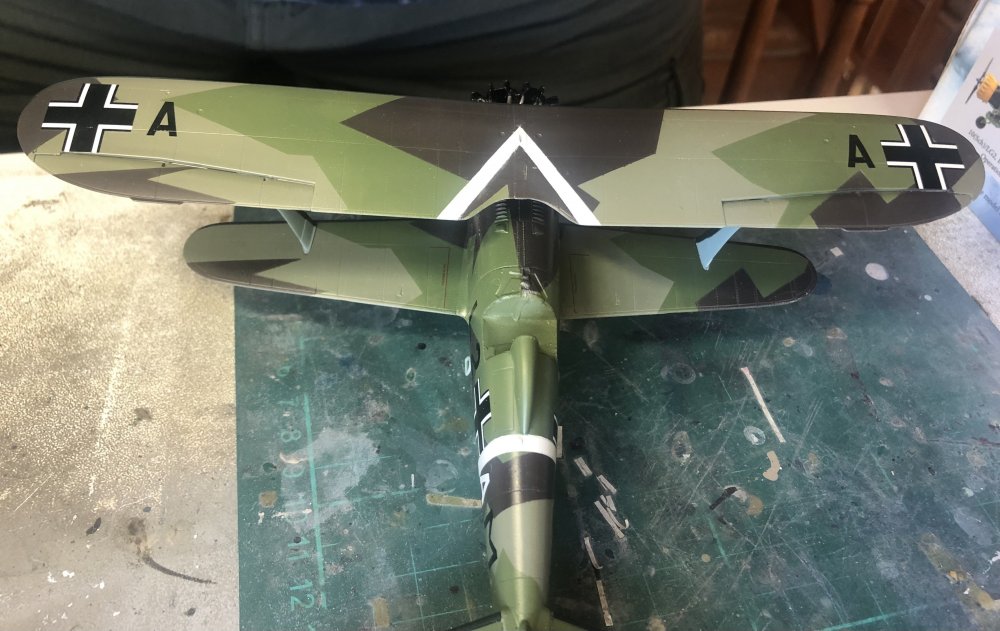
Aaaand I’m spent! Many thanks to those that have followed along this little journey. Finished off the build with Eziline antennas. I used 0.06mm brass tube as connectors/insulators and painted them light grey. The gunsight PE was added and more Eziline for the rigging between fuselage and upper wing. A couple of small glue spots were covered with Dullcote, the light earth pigment stains removed on the lower wings and those bombs aligned. Last item was the prop and calling it done. Regards and thanks again, Kent


-
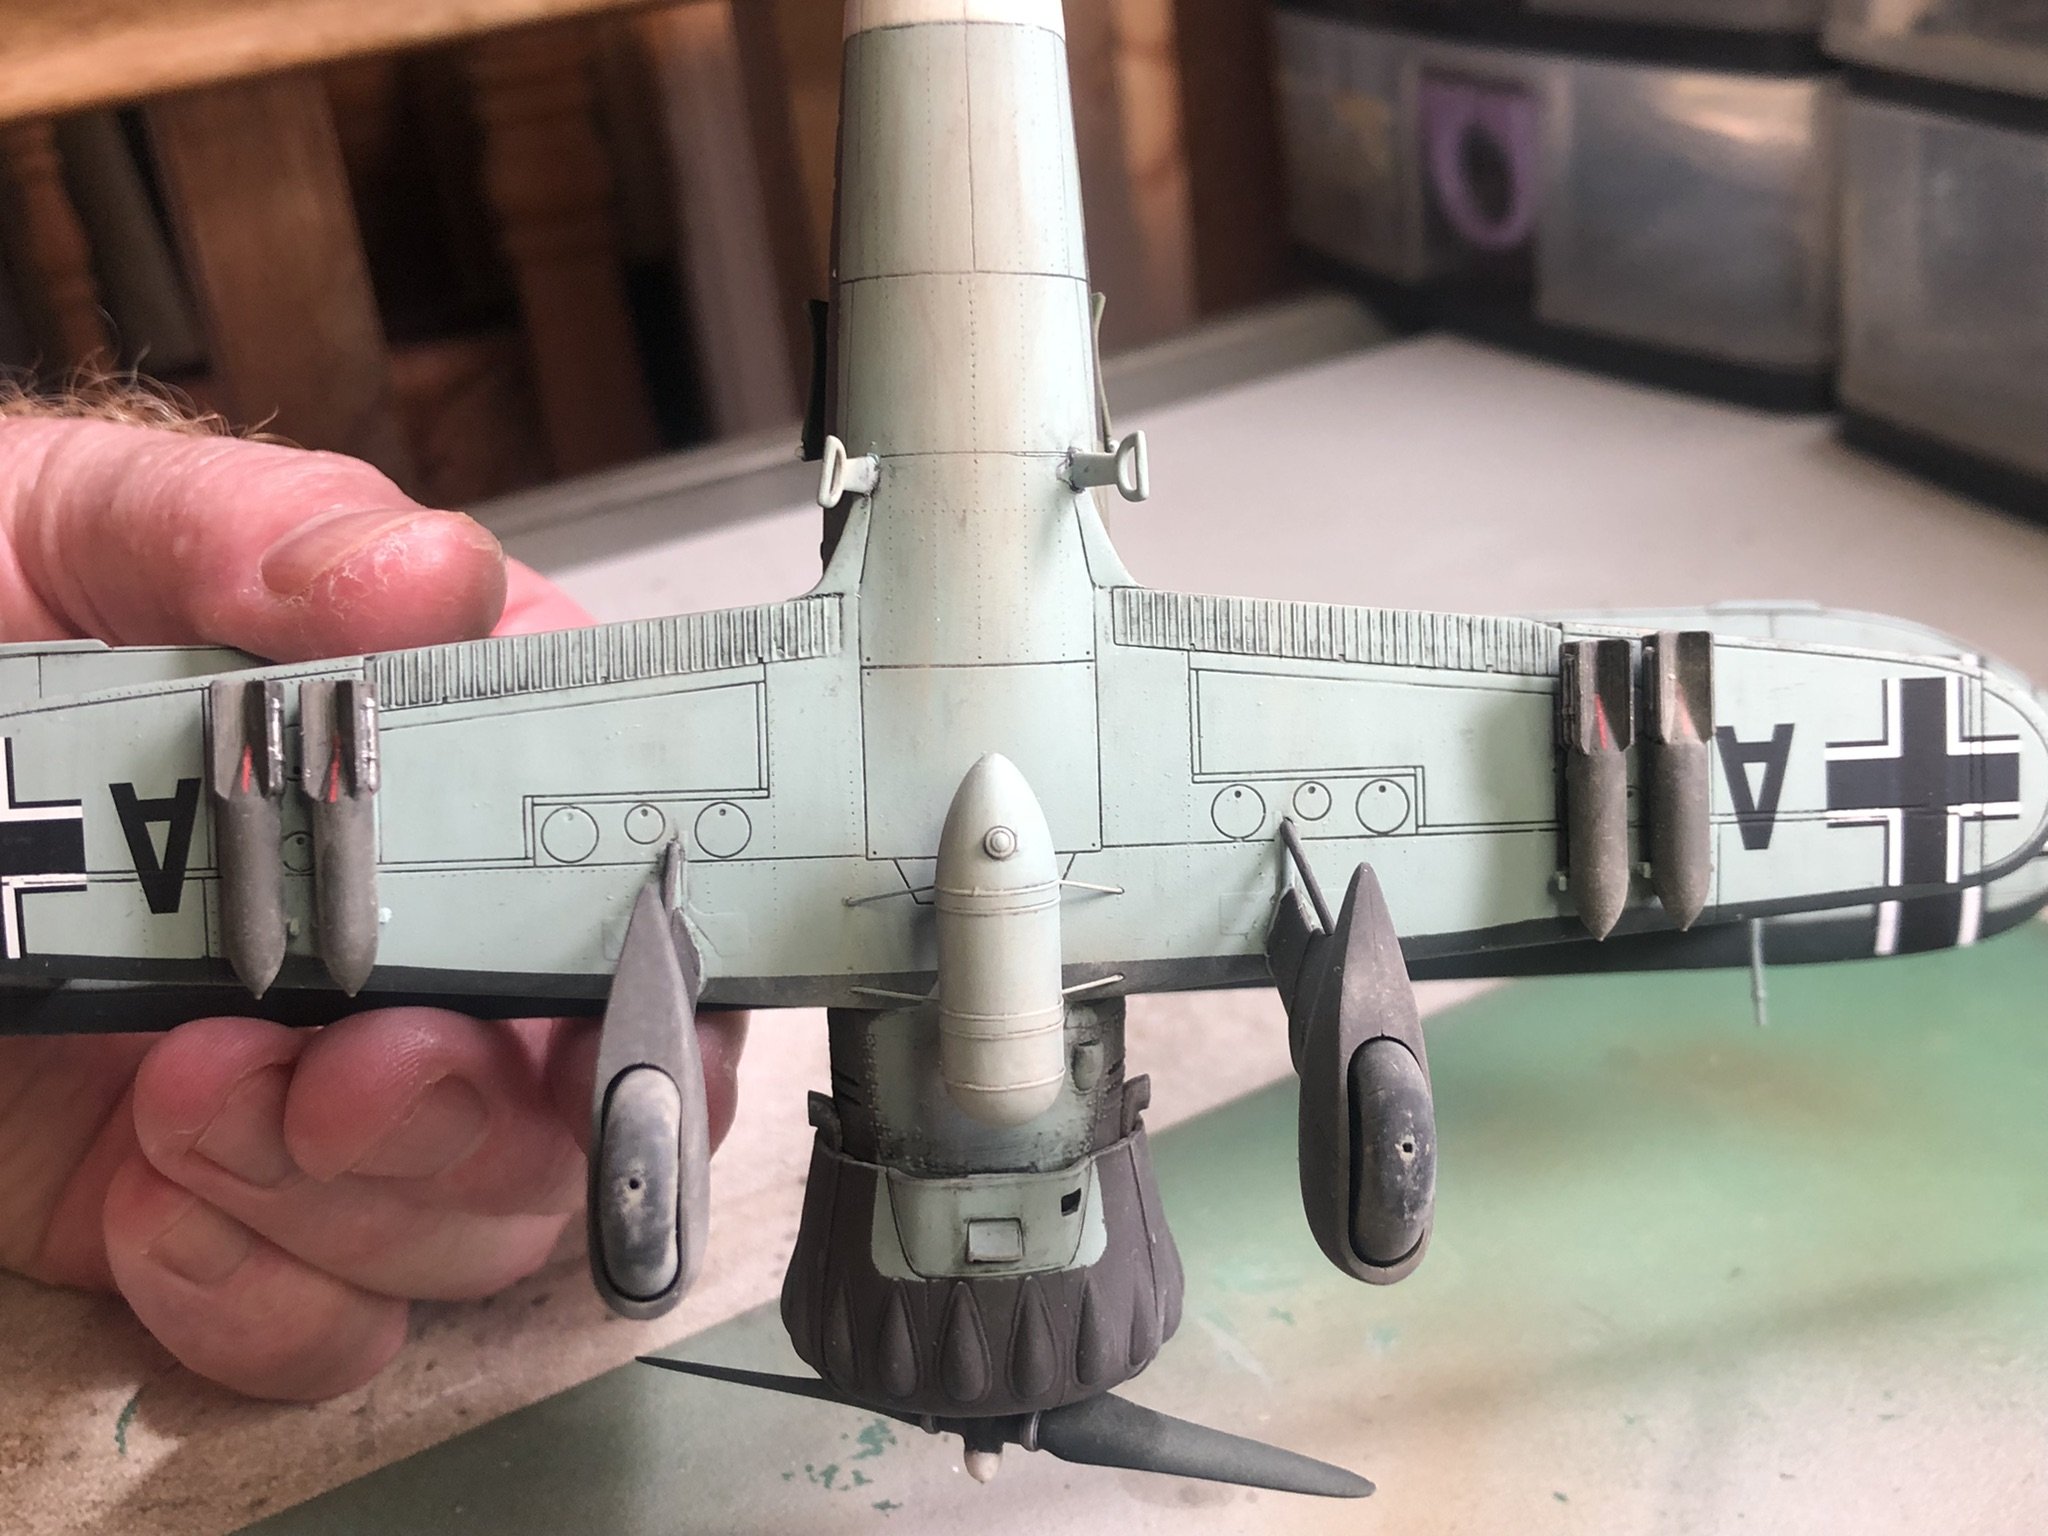
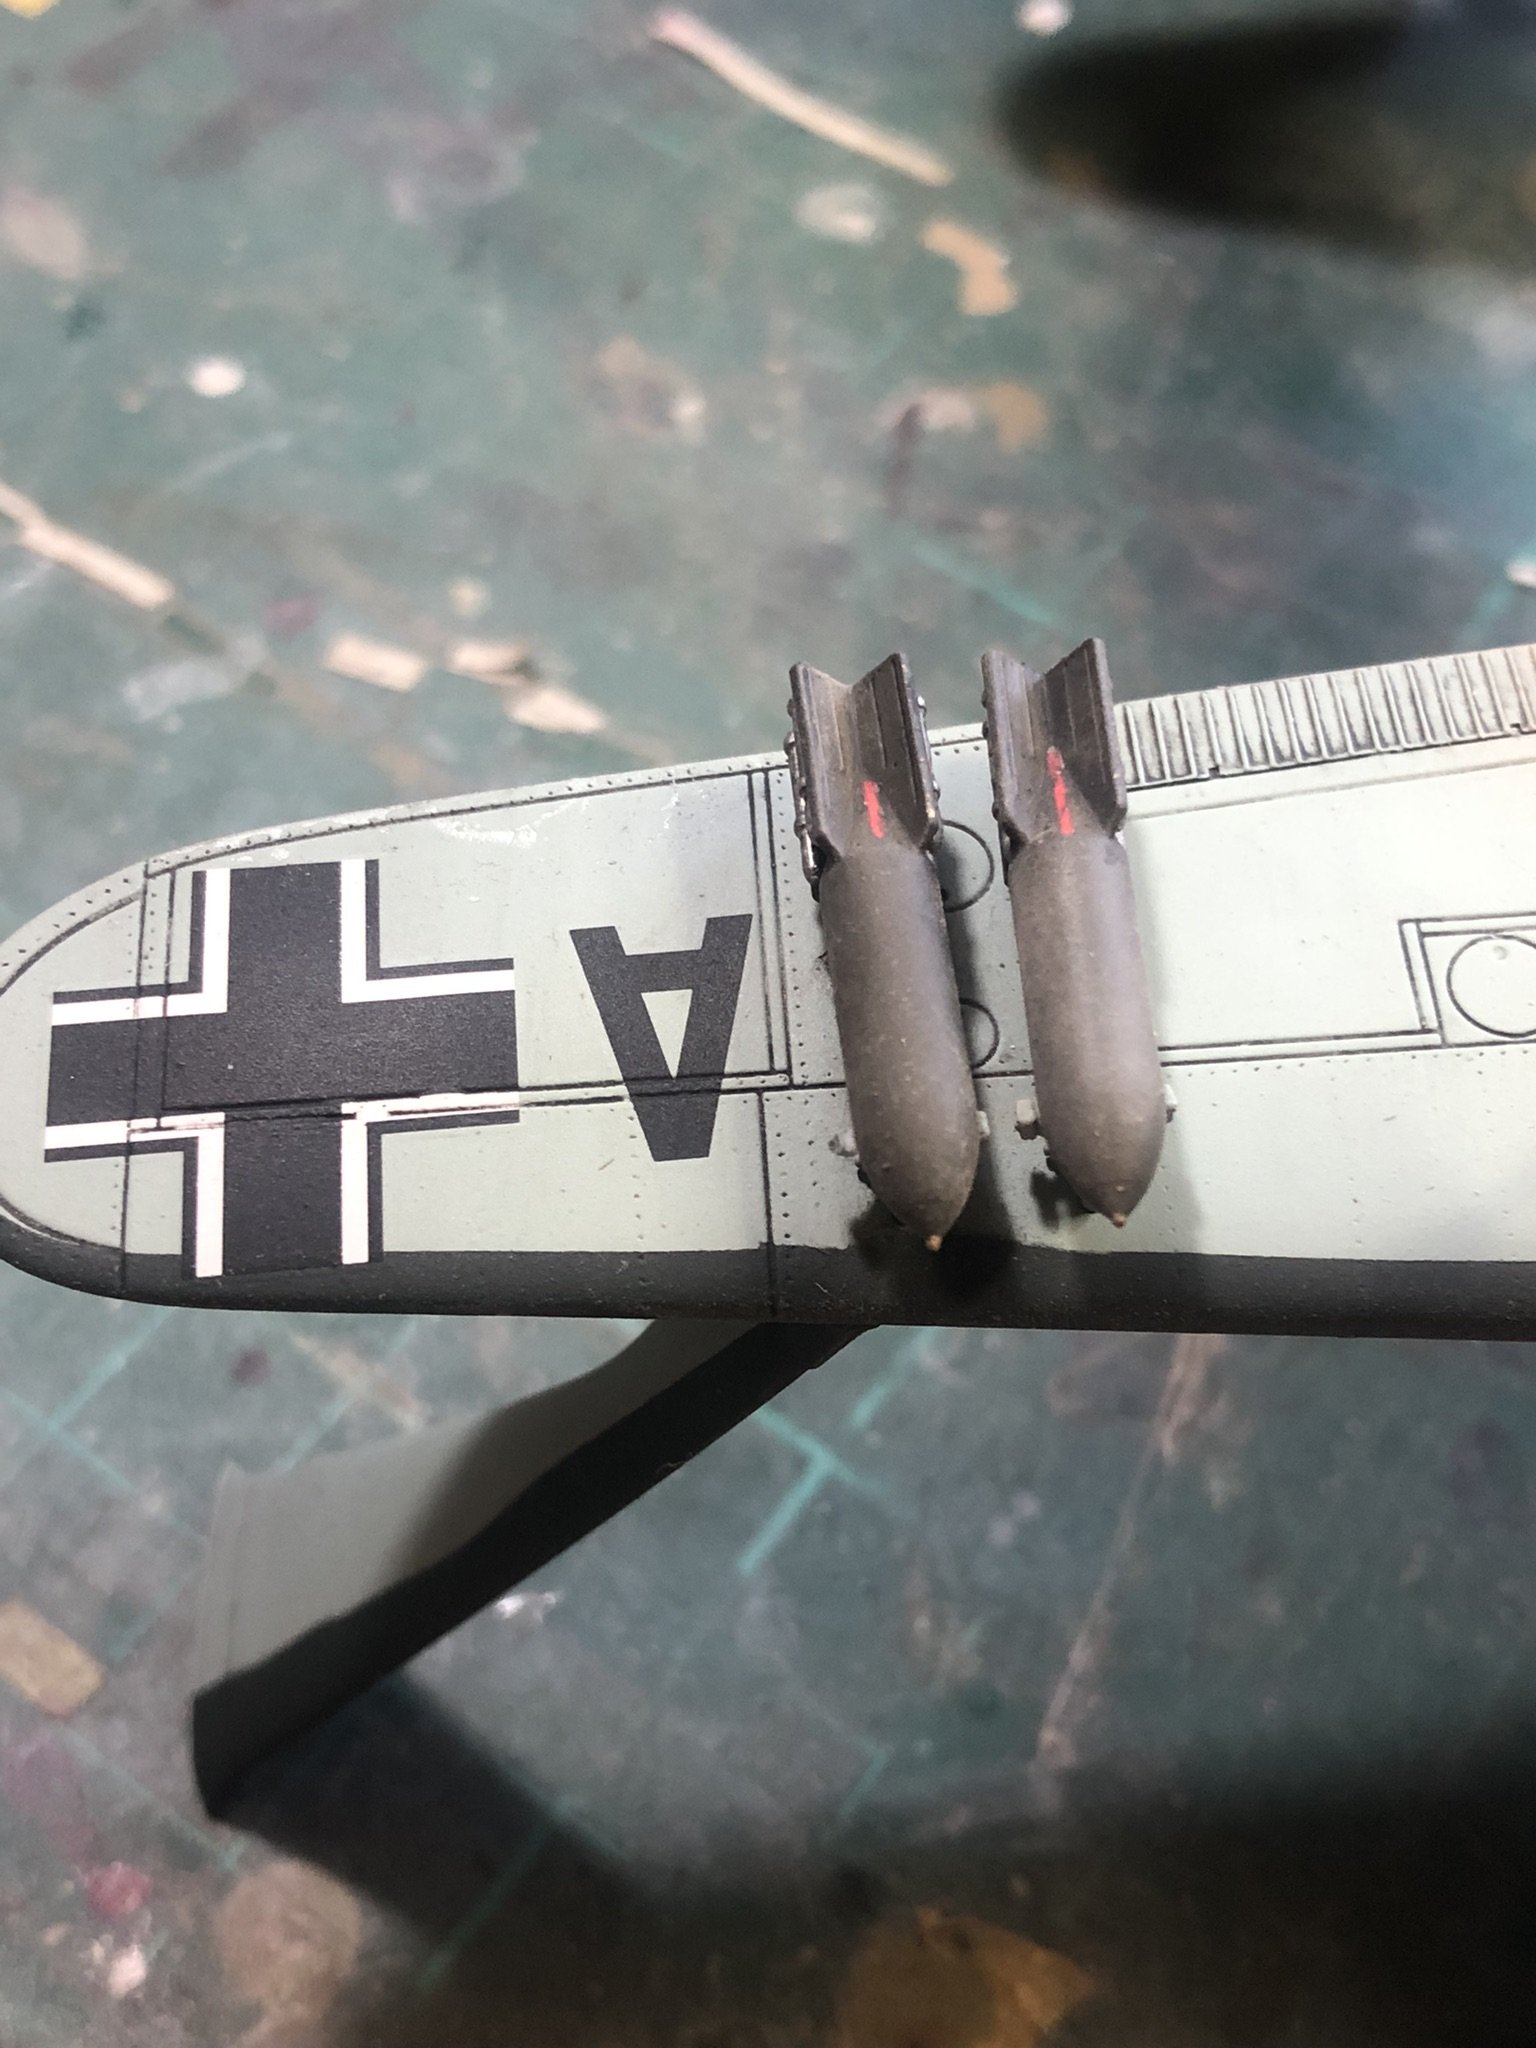
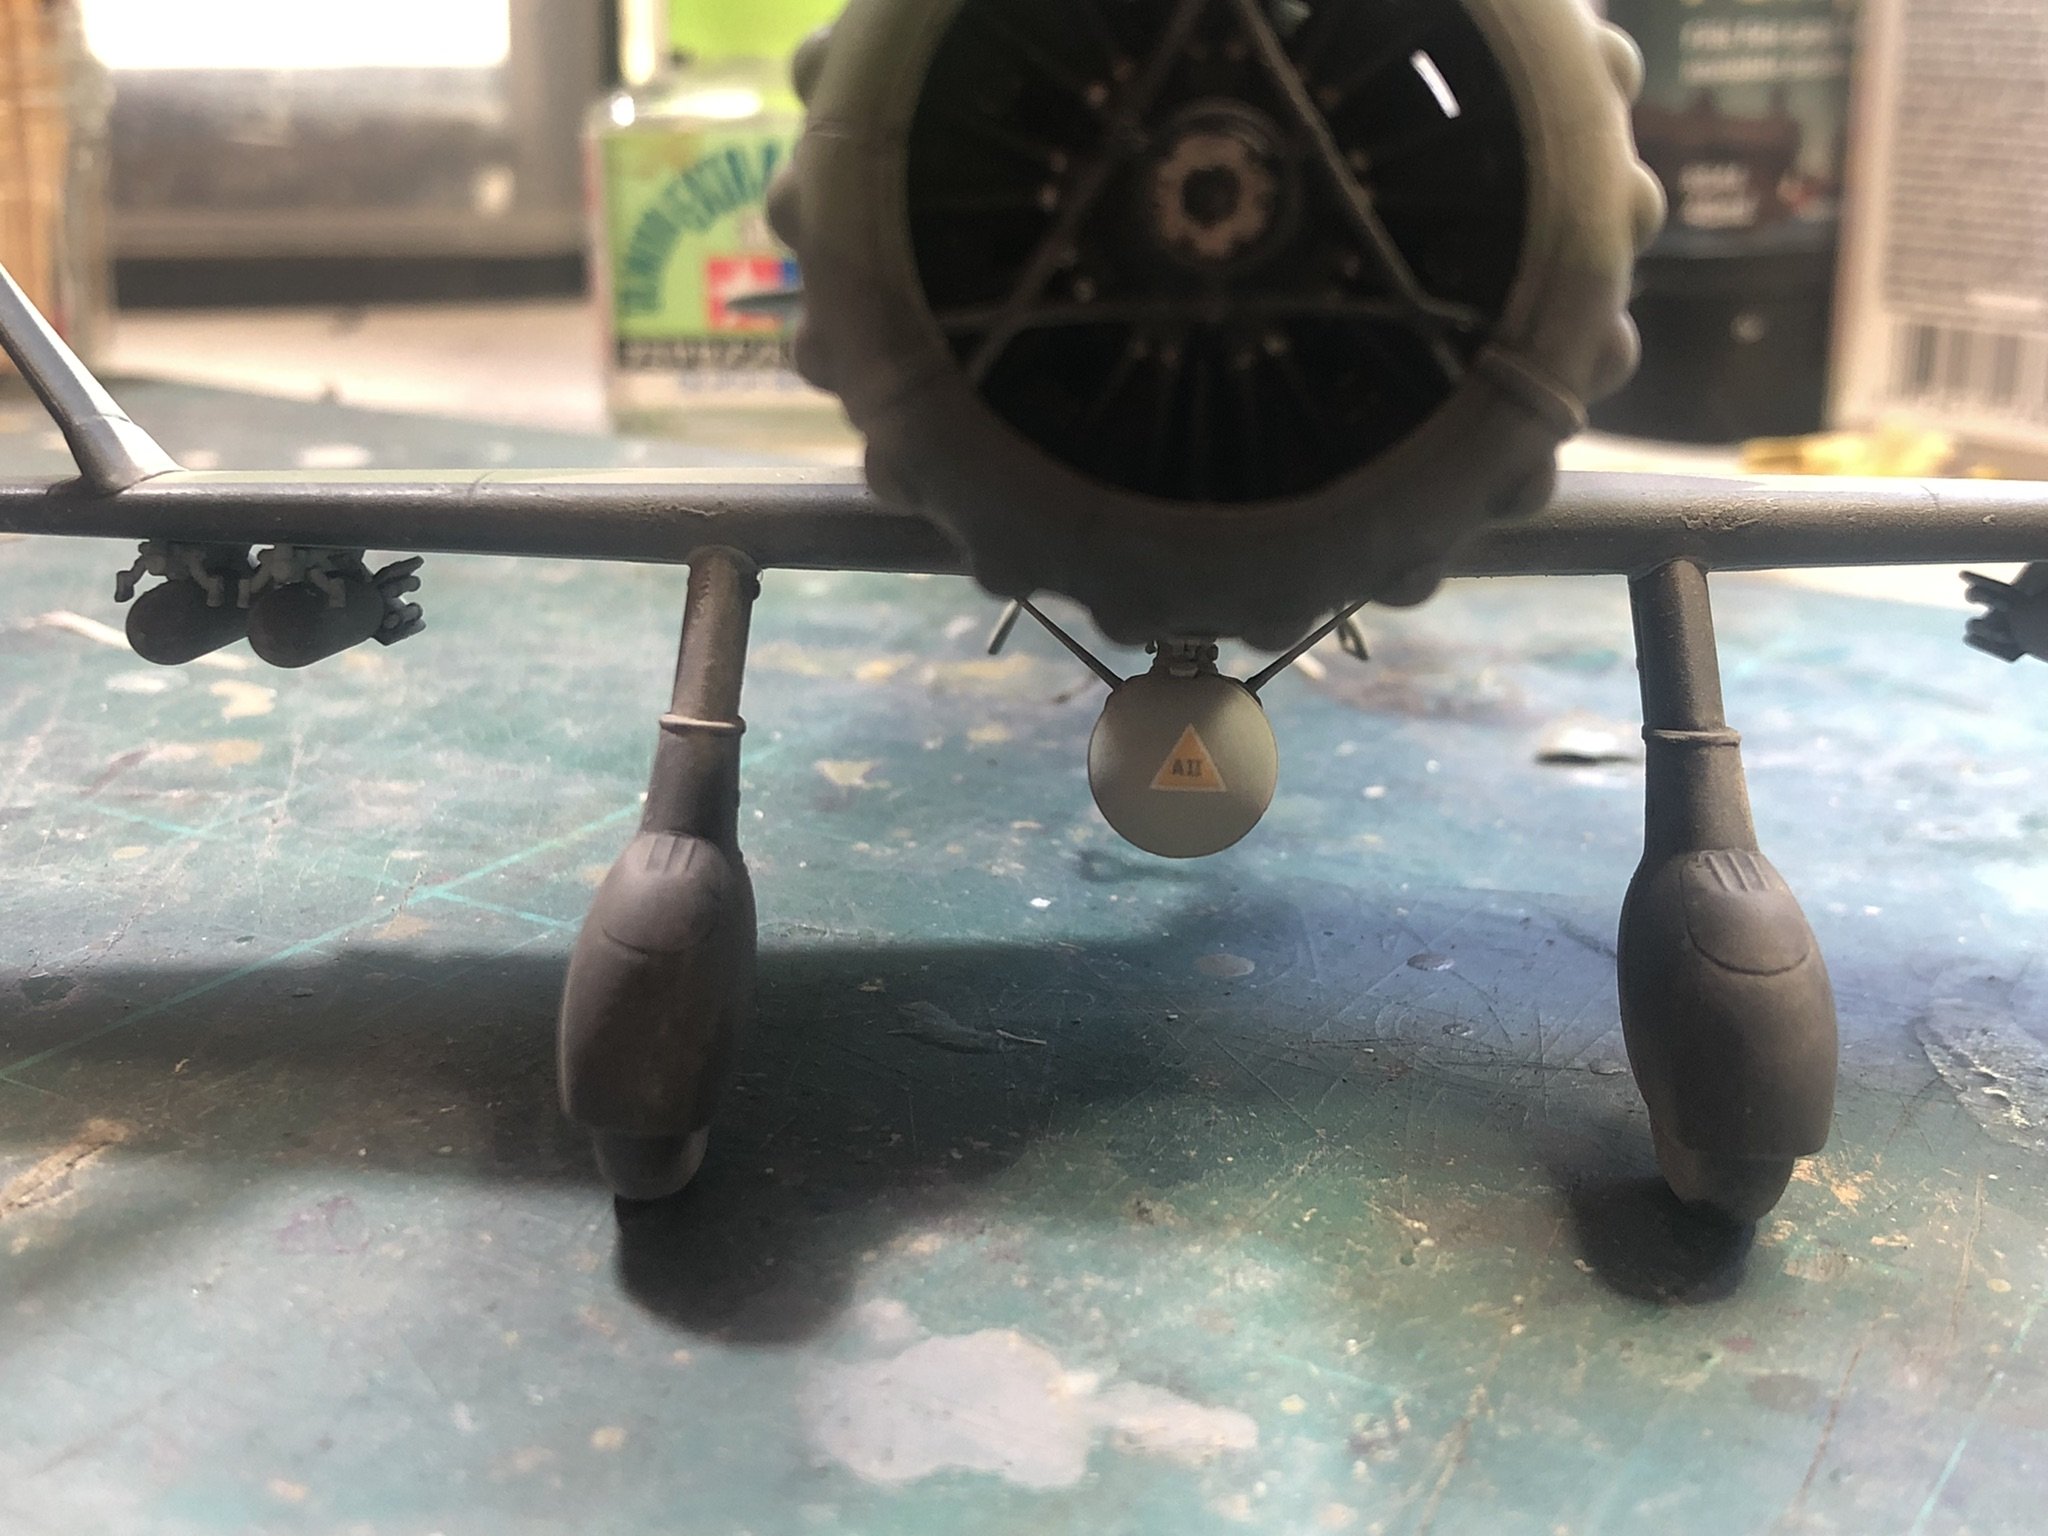
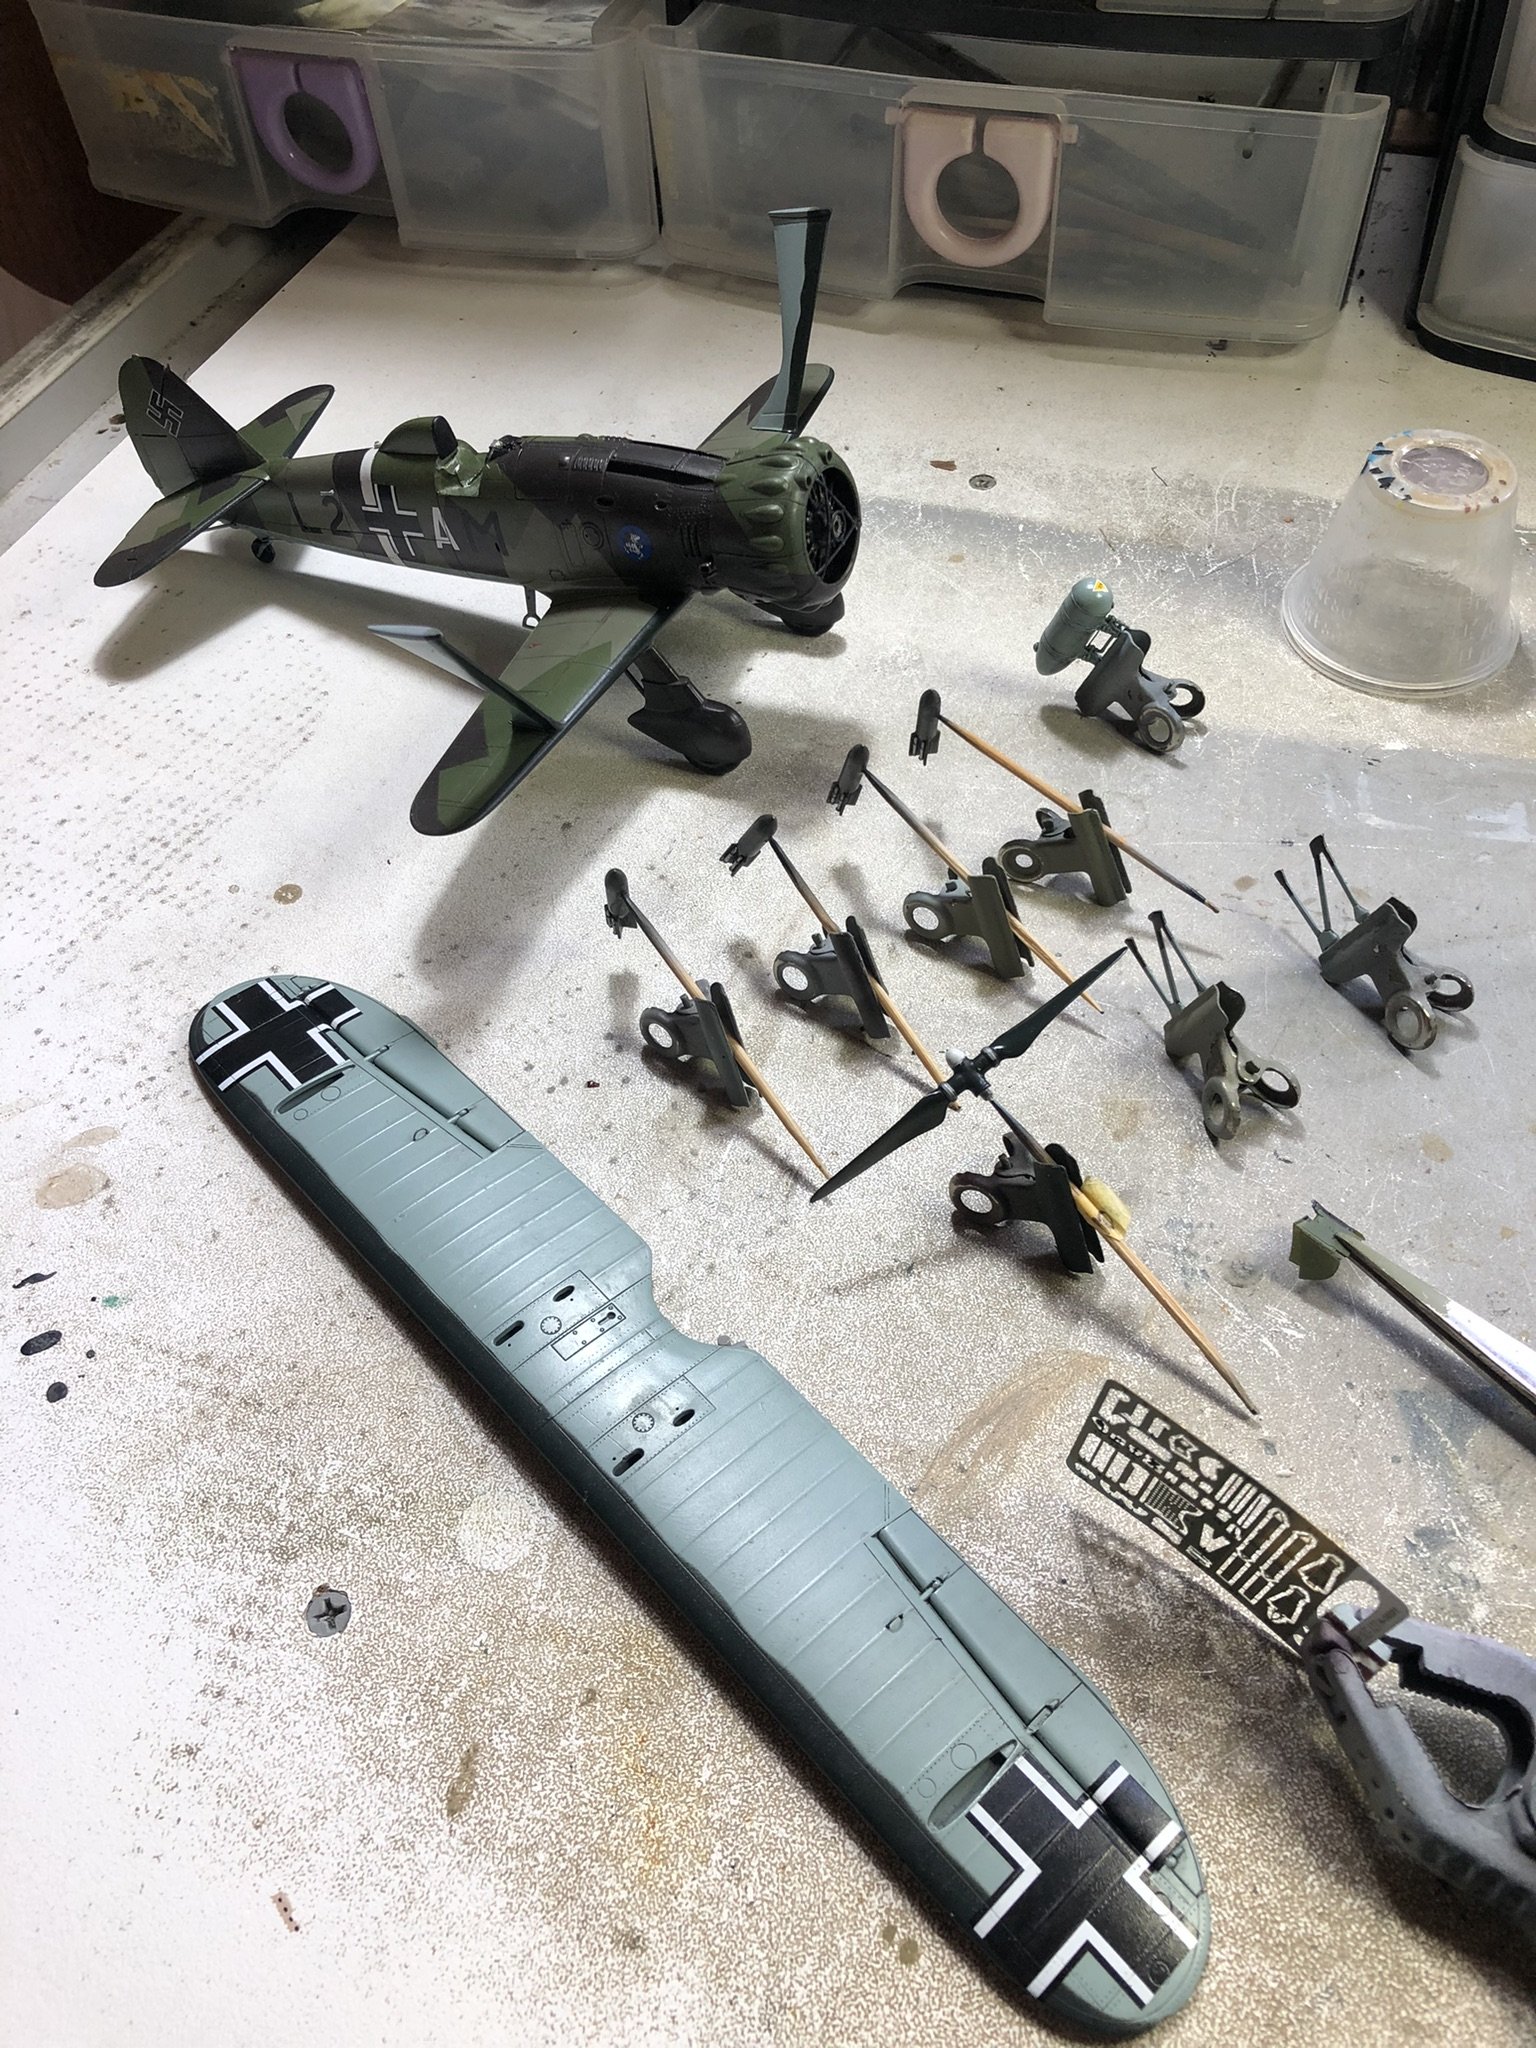
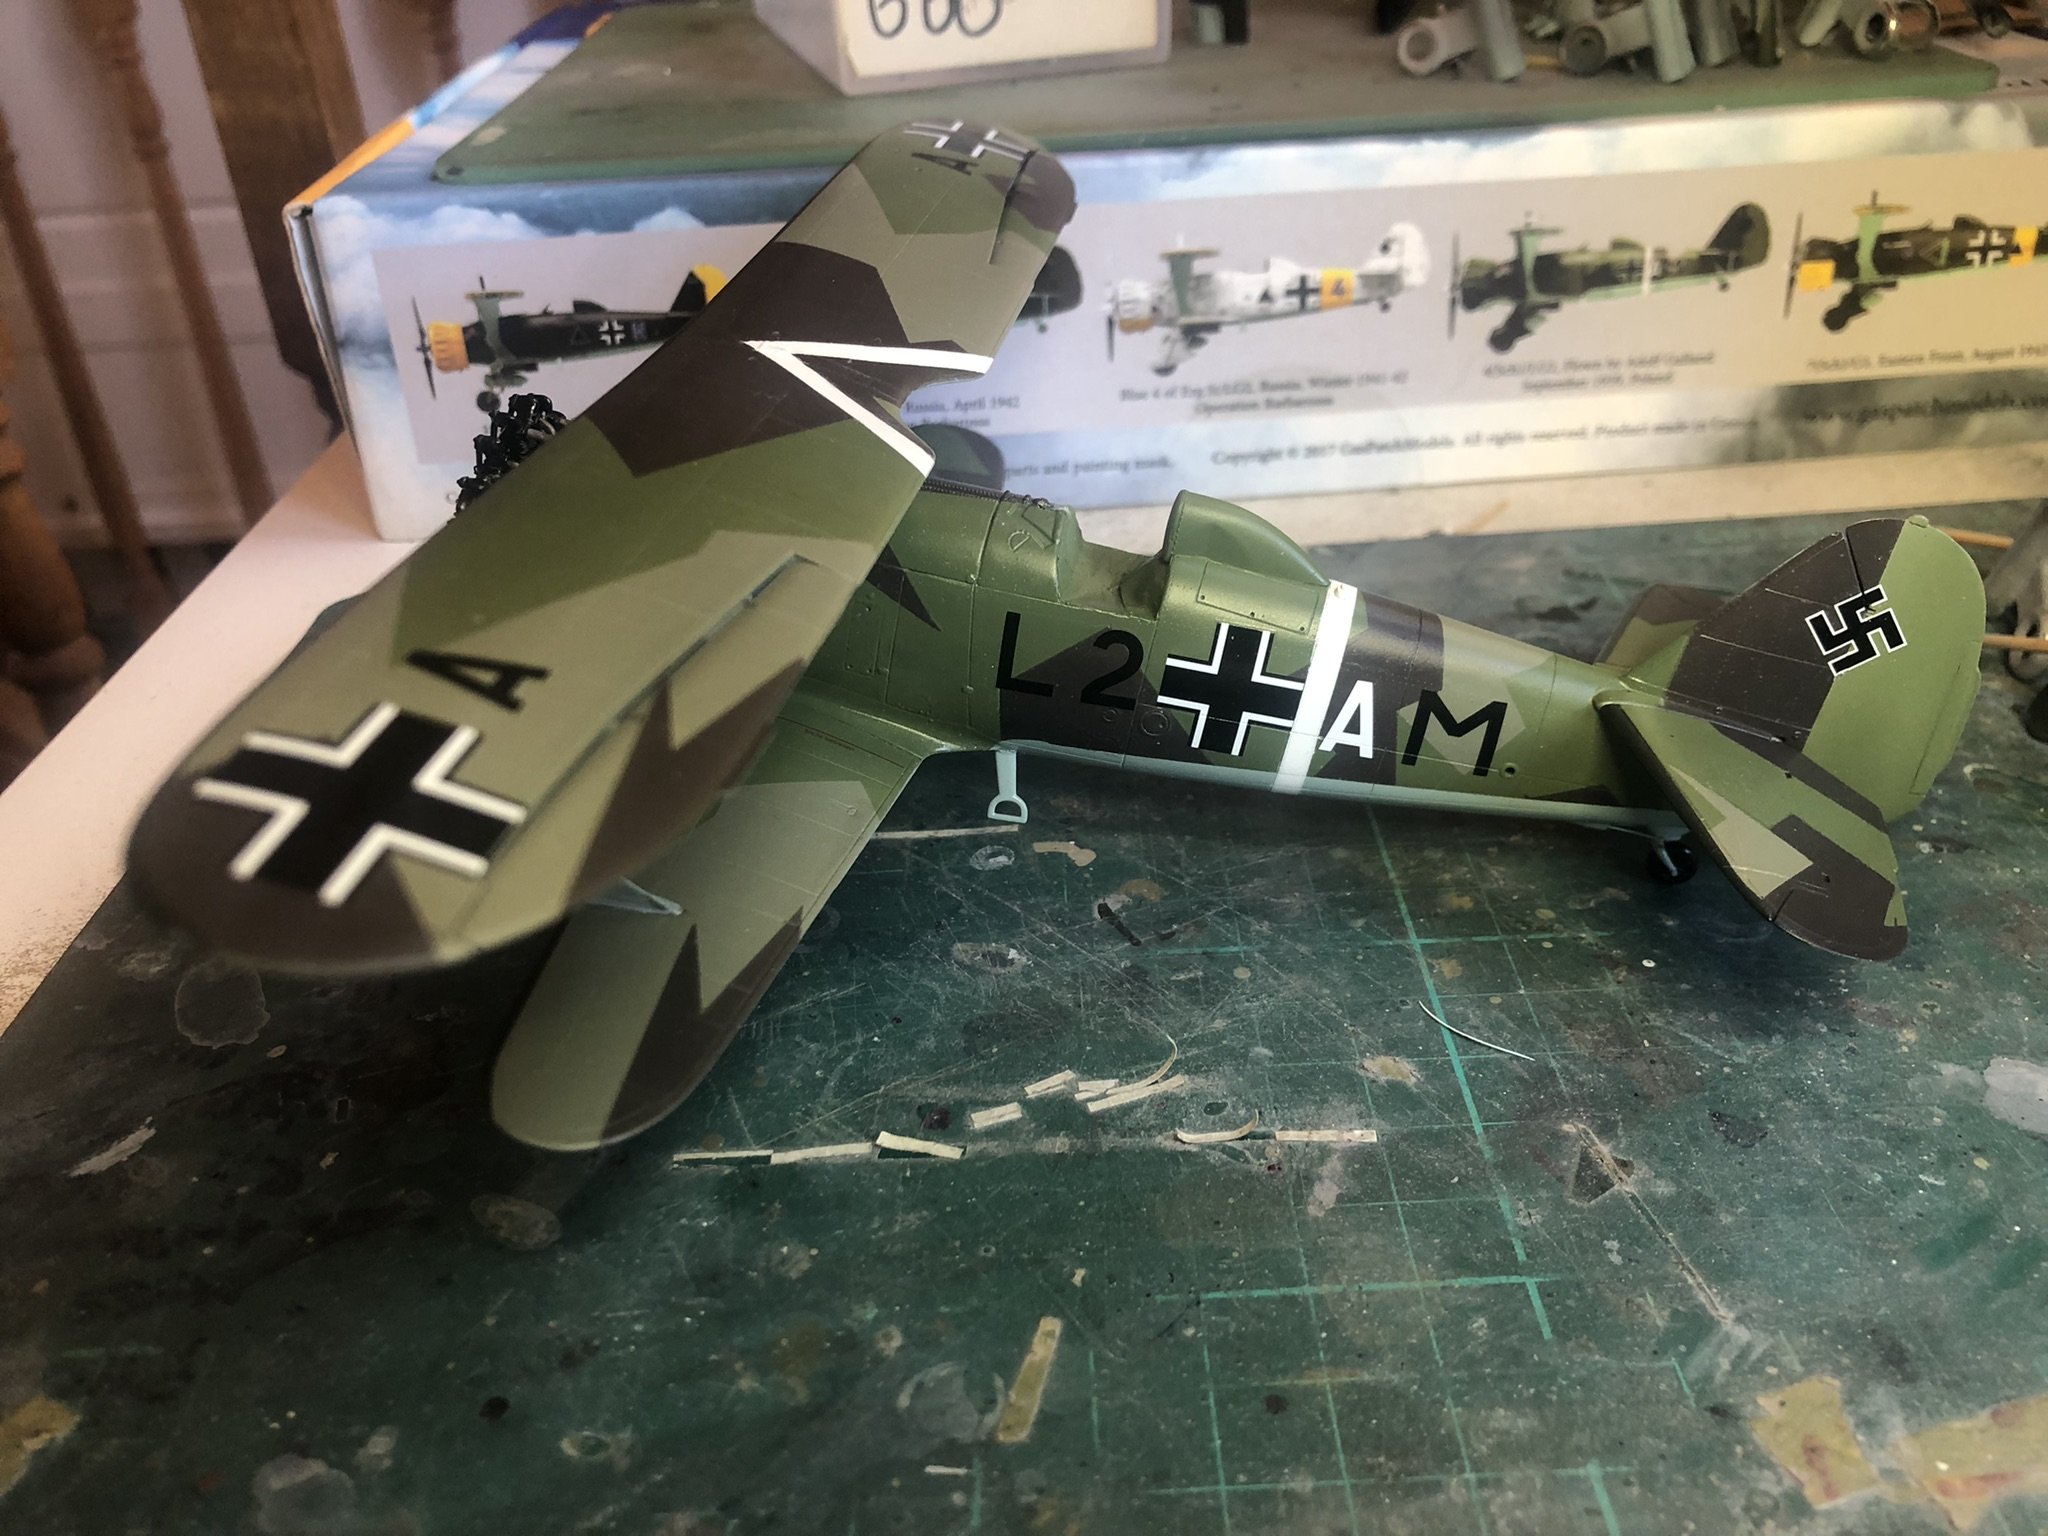
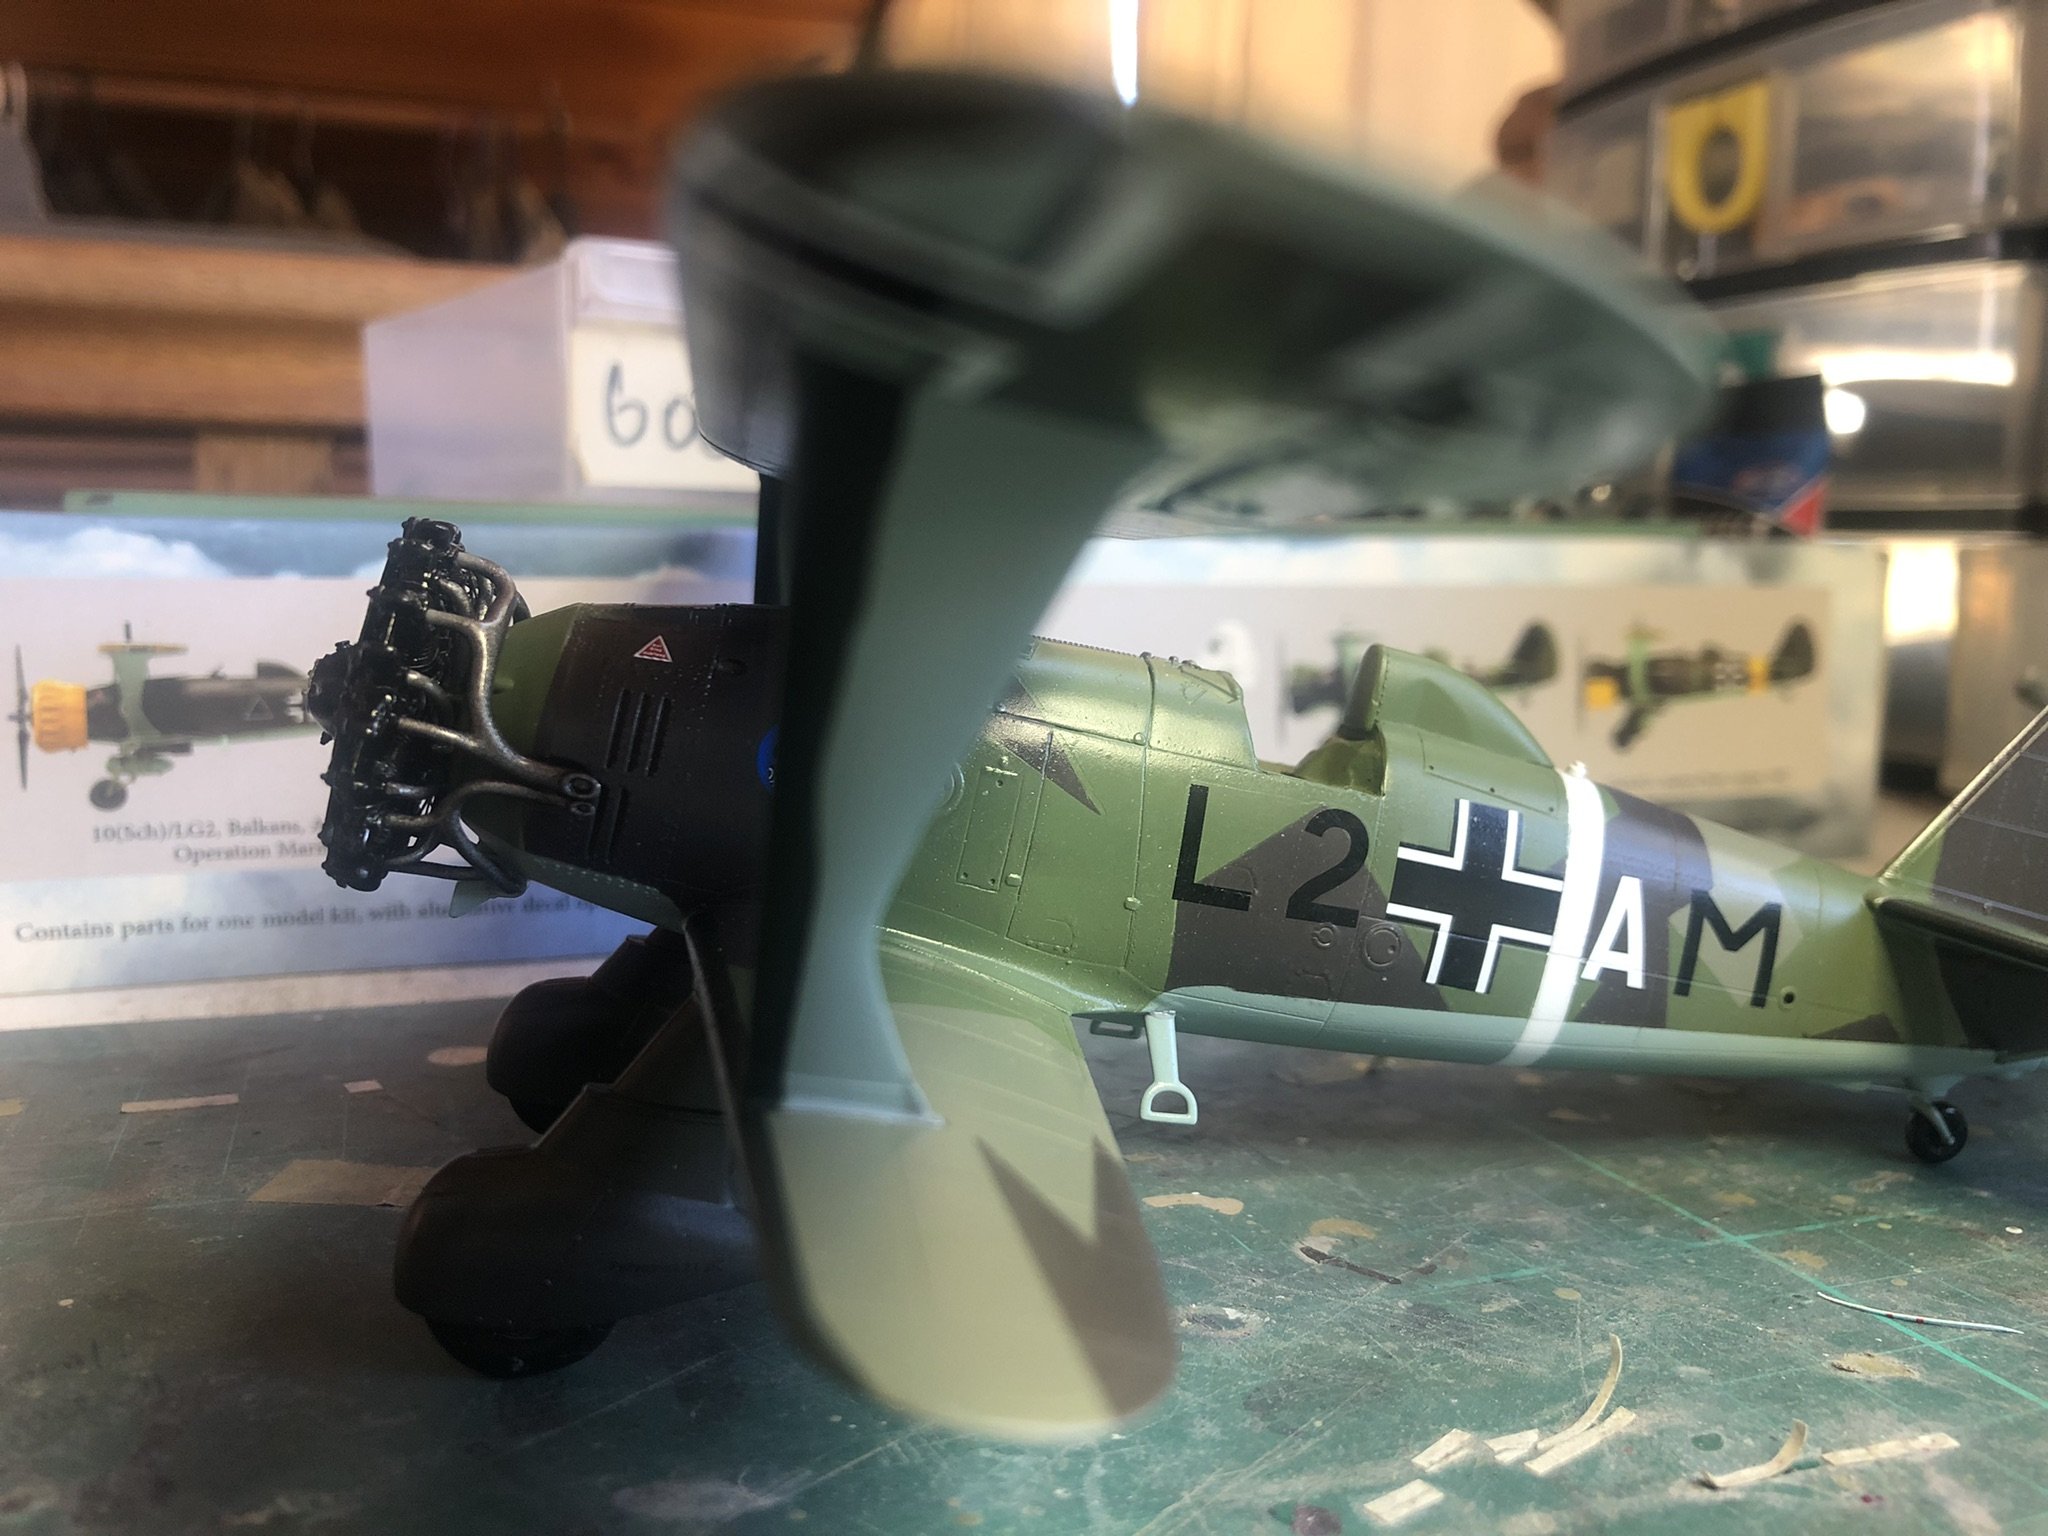
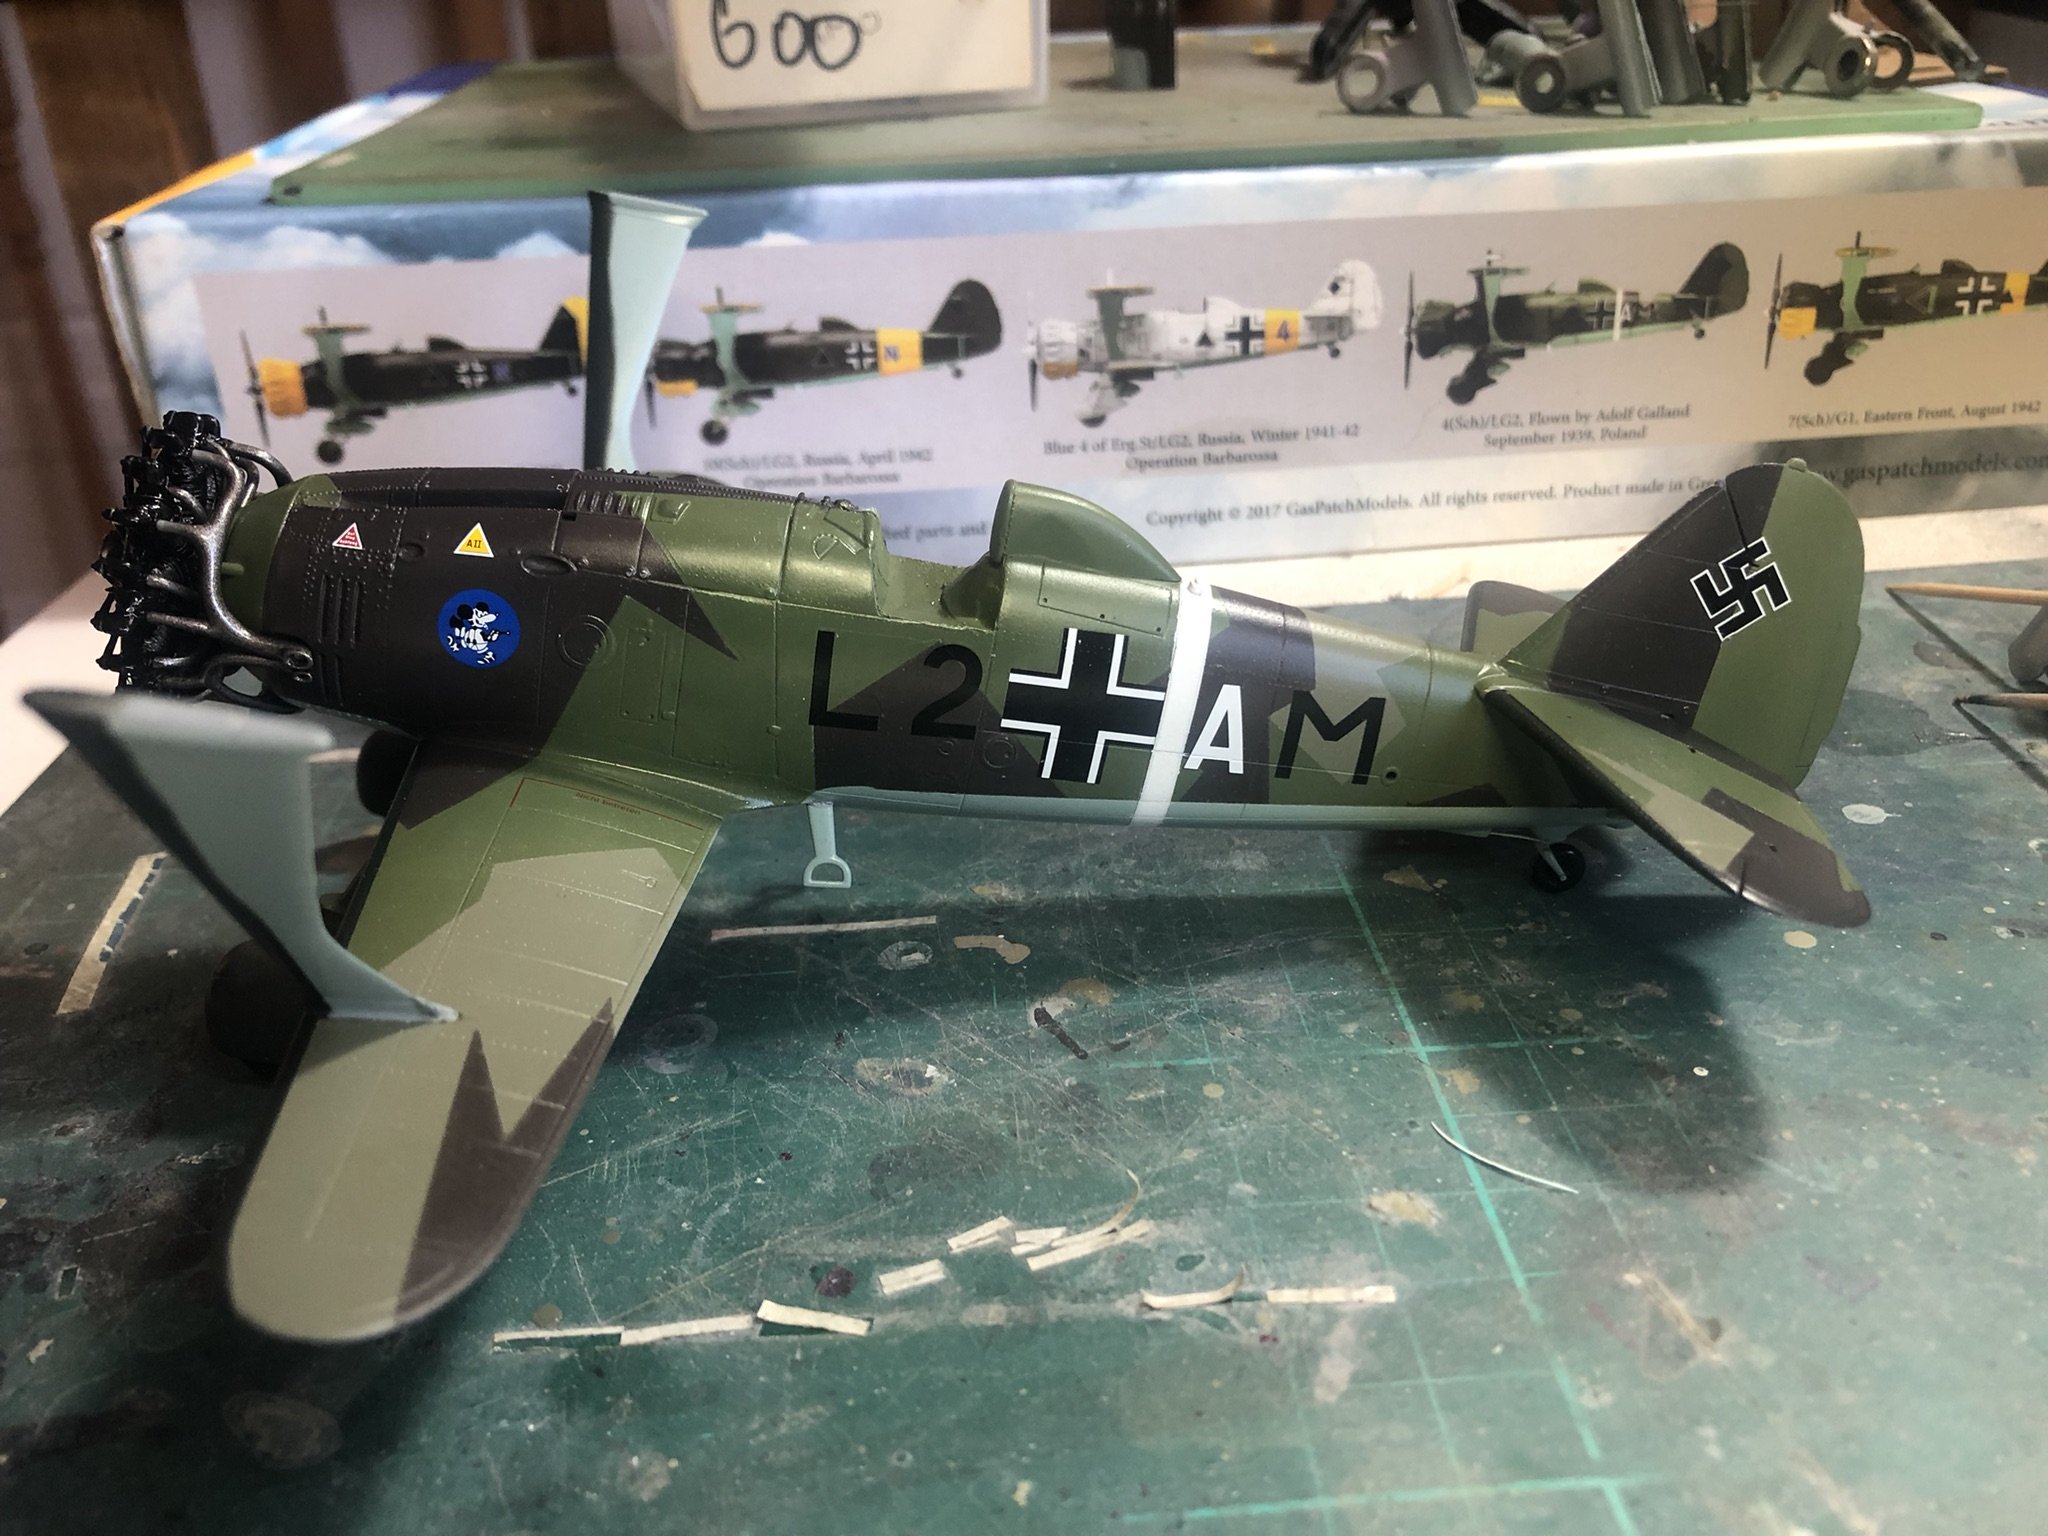
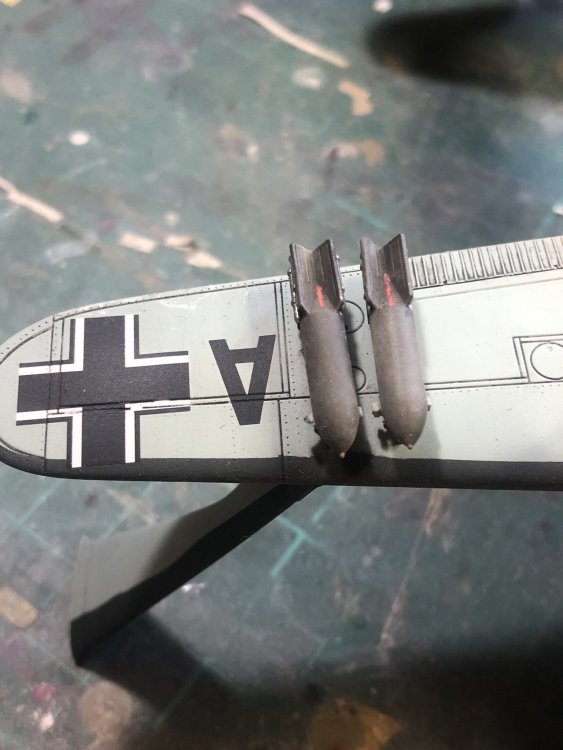
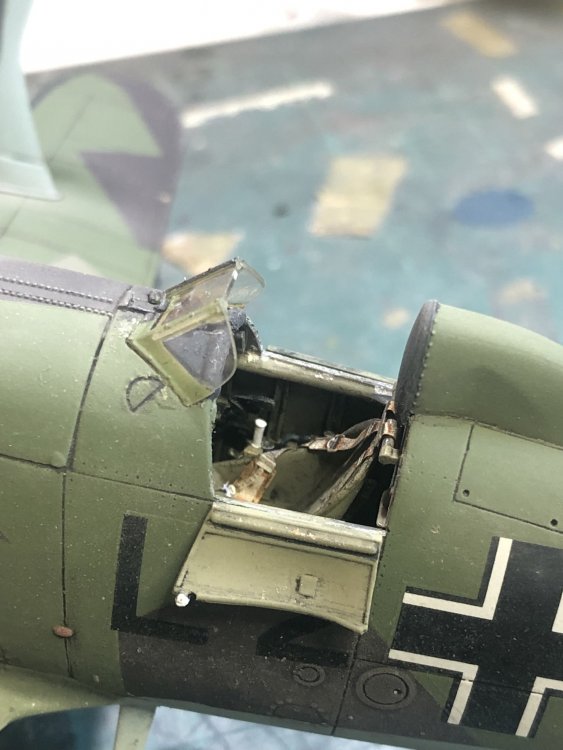
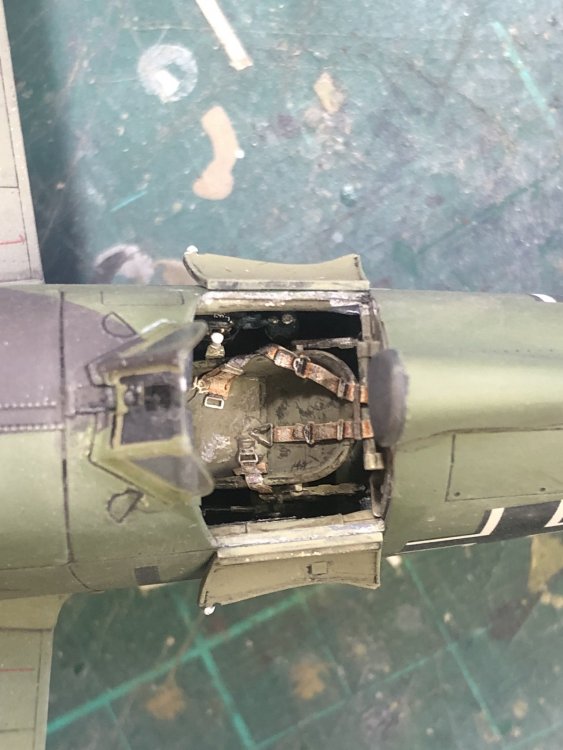
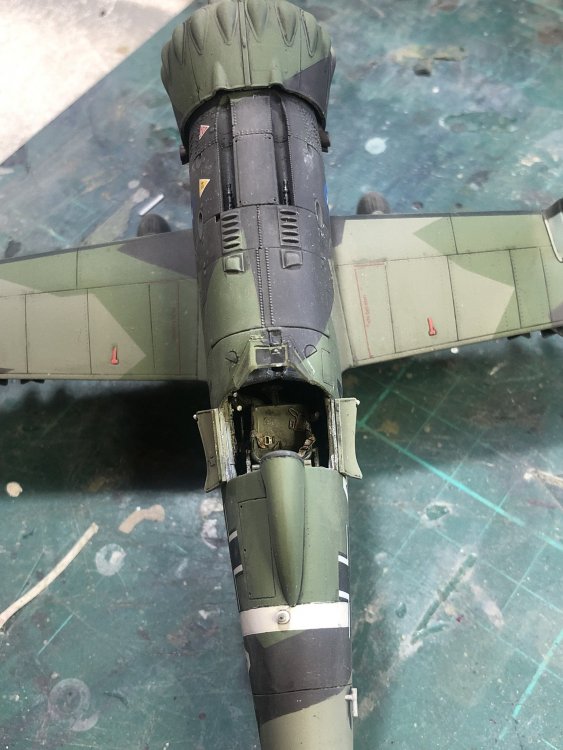
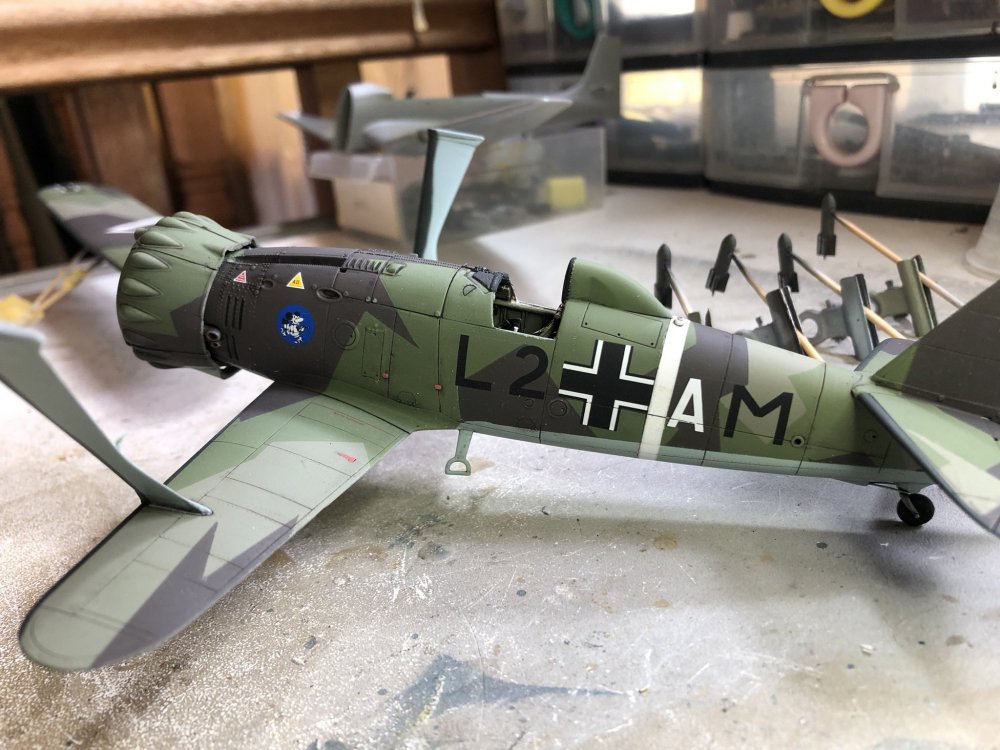
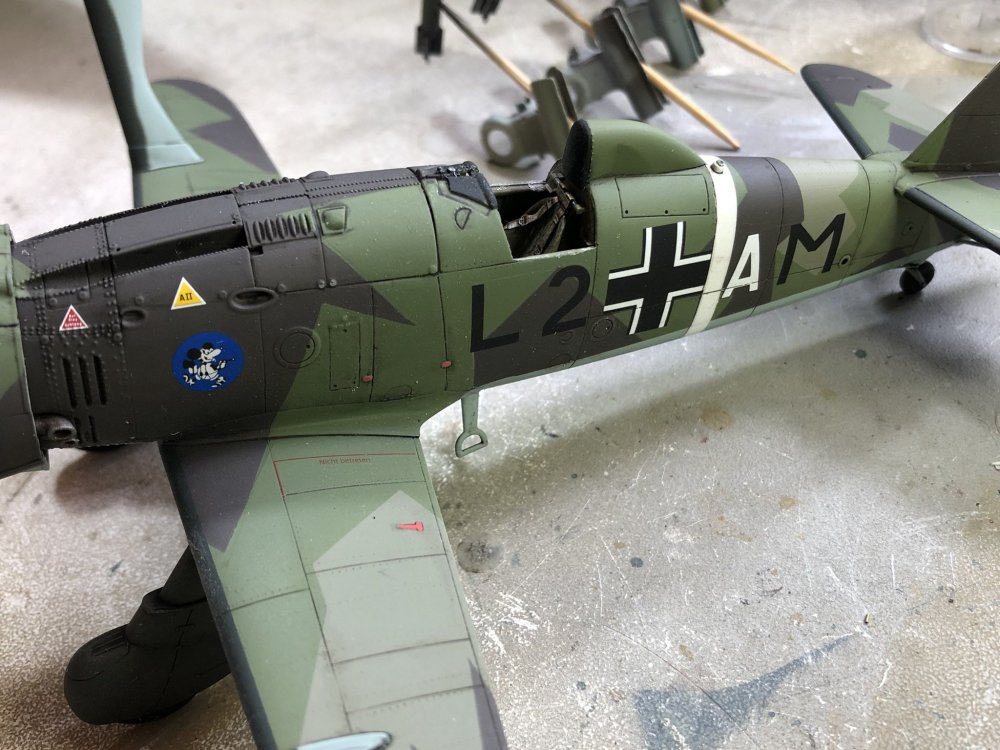
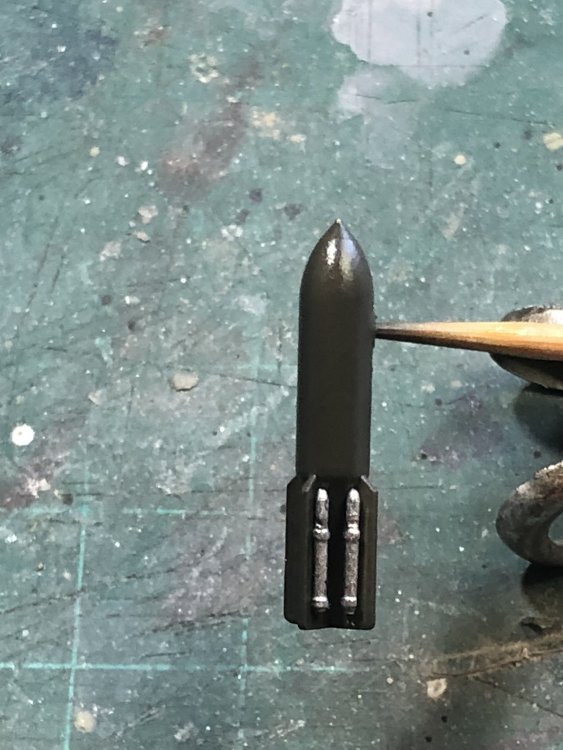
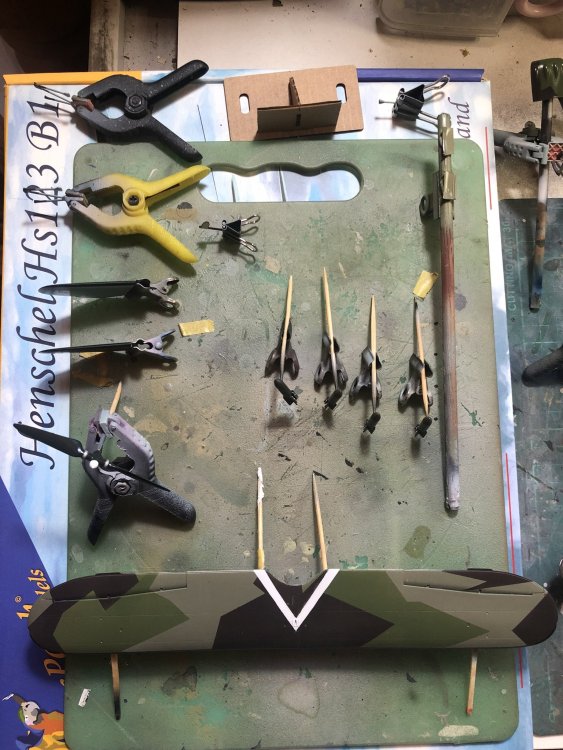
Closer to the finish. I added the bombs, fuel tank and associated fixings. The windscreen is on and some fiddly gunsight PE added with a tad to go. I wanted a very sparse weathering finish and used some AK European Earth around the undersides and Smoke pigments as an exhaust stain. Not sure I like it. Your thoughts? Maybe some delicate oil.fuel stains? The cockpit masking is off and the pilot doors added. I was going to use the Eduard PE ones but I like the kit ones better. Bombs are Eduard Brassin. I broke some of the sway braces off in handling and had to rebuild a couple. I hope to have this into the cabinet for the weekend. Regards, Kent


-
Thanks Gaz, I did the art cover up for FB and nowI cannot undo it! Well I probably can but don’t know how! Regards, Kent
-
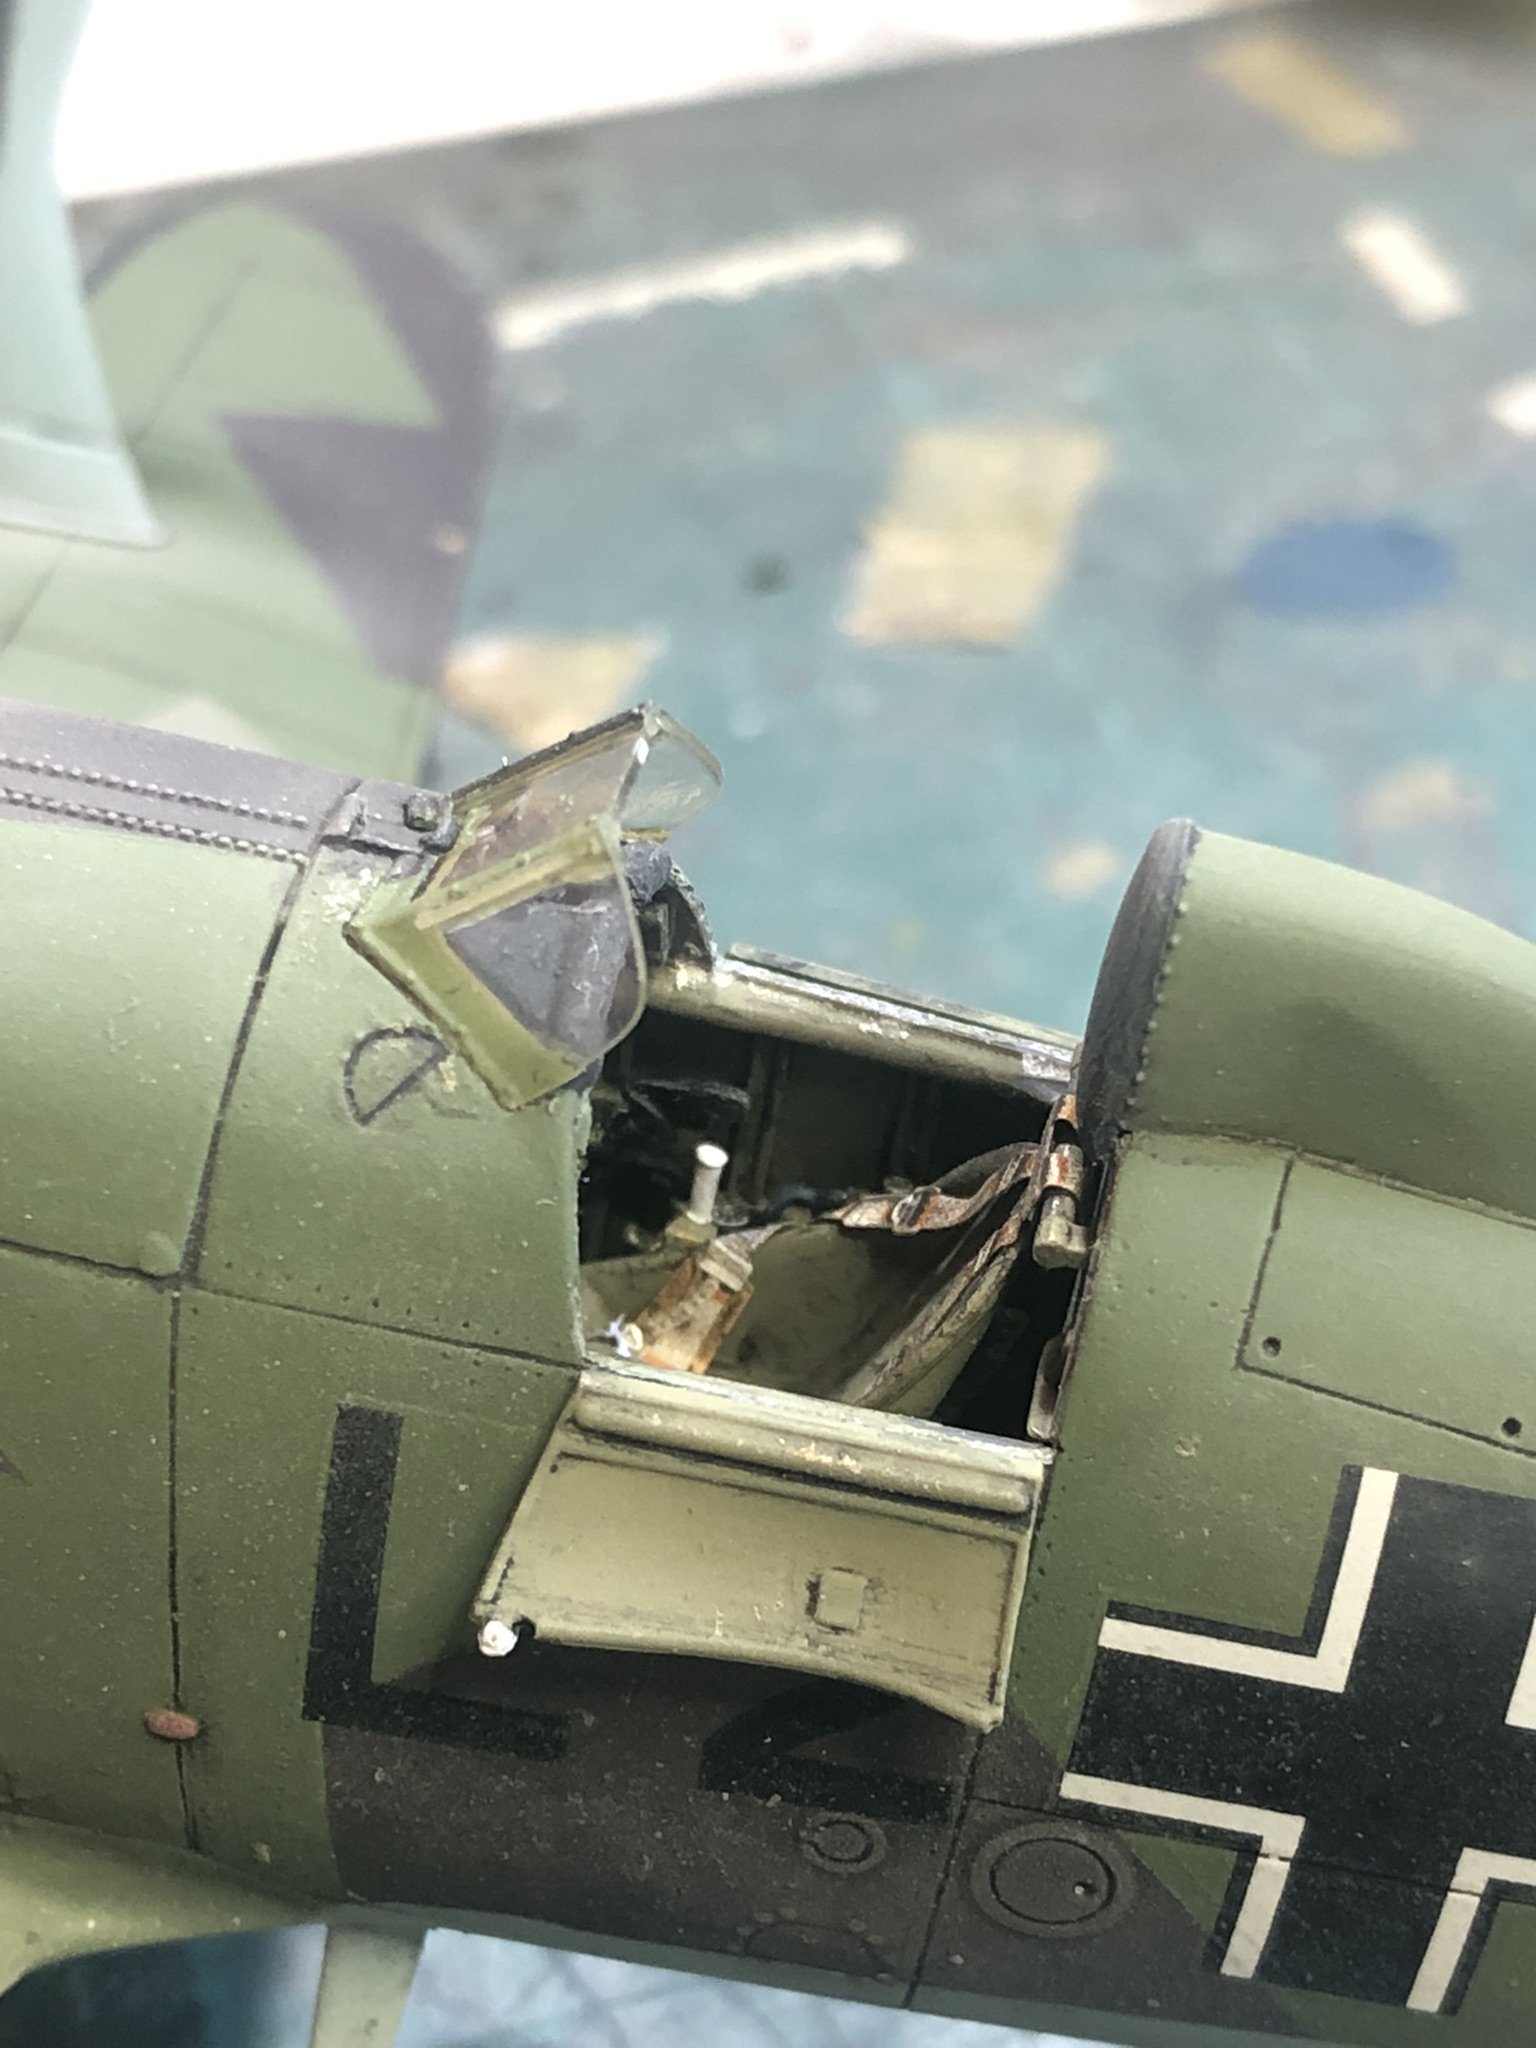
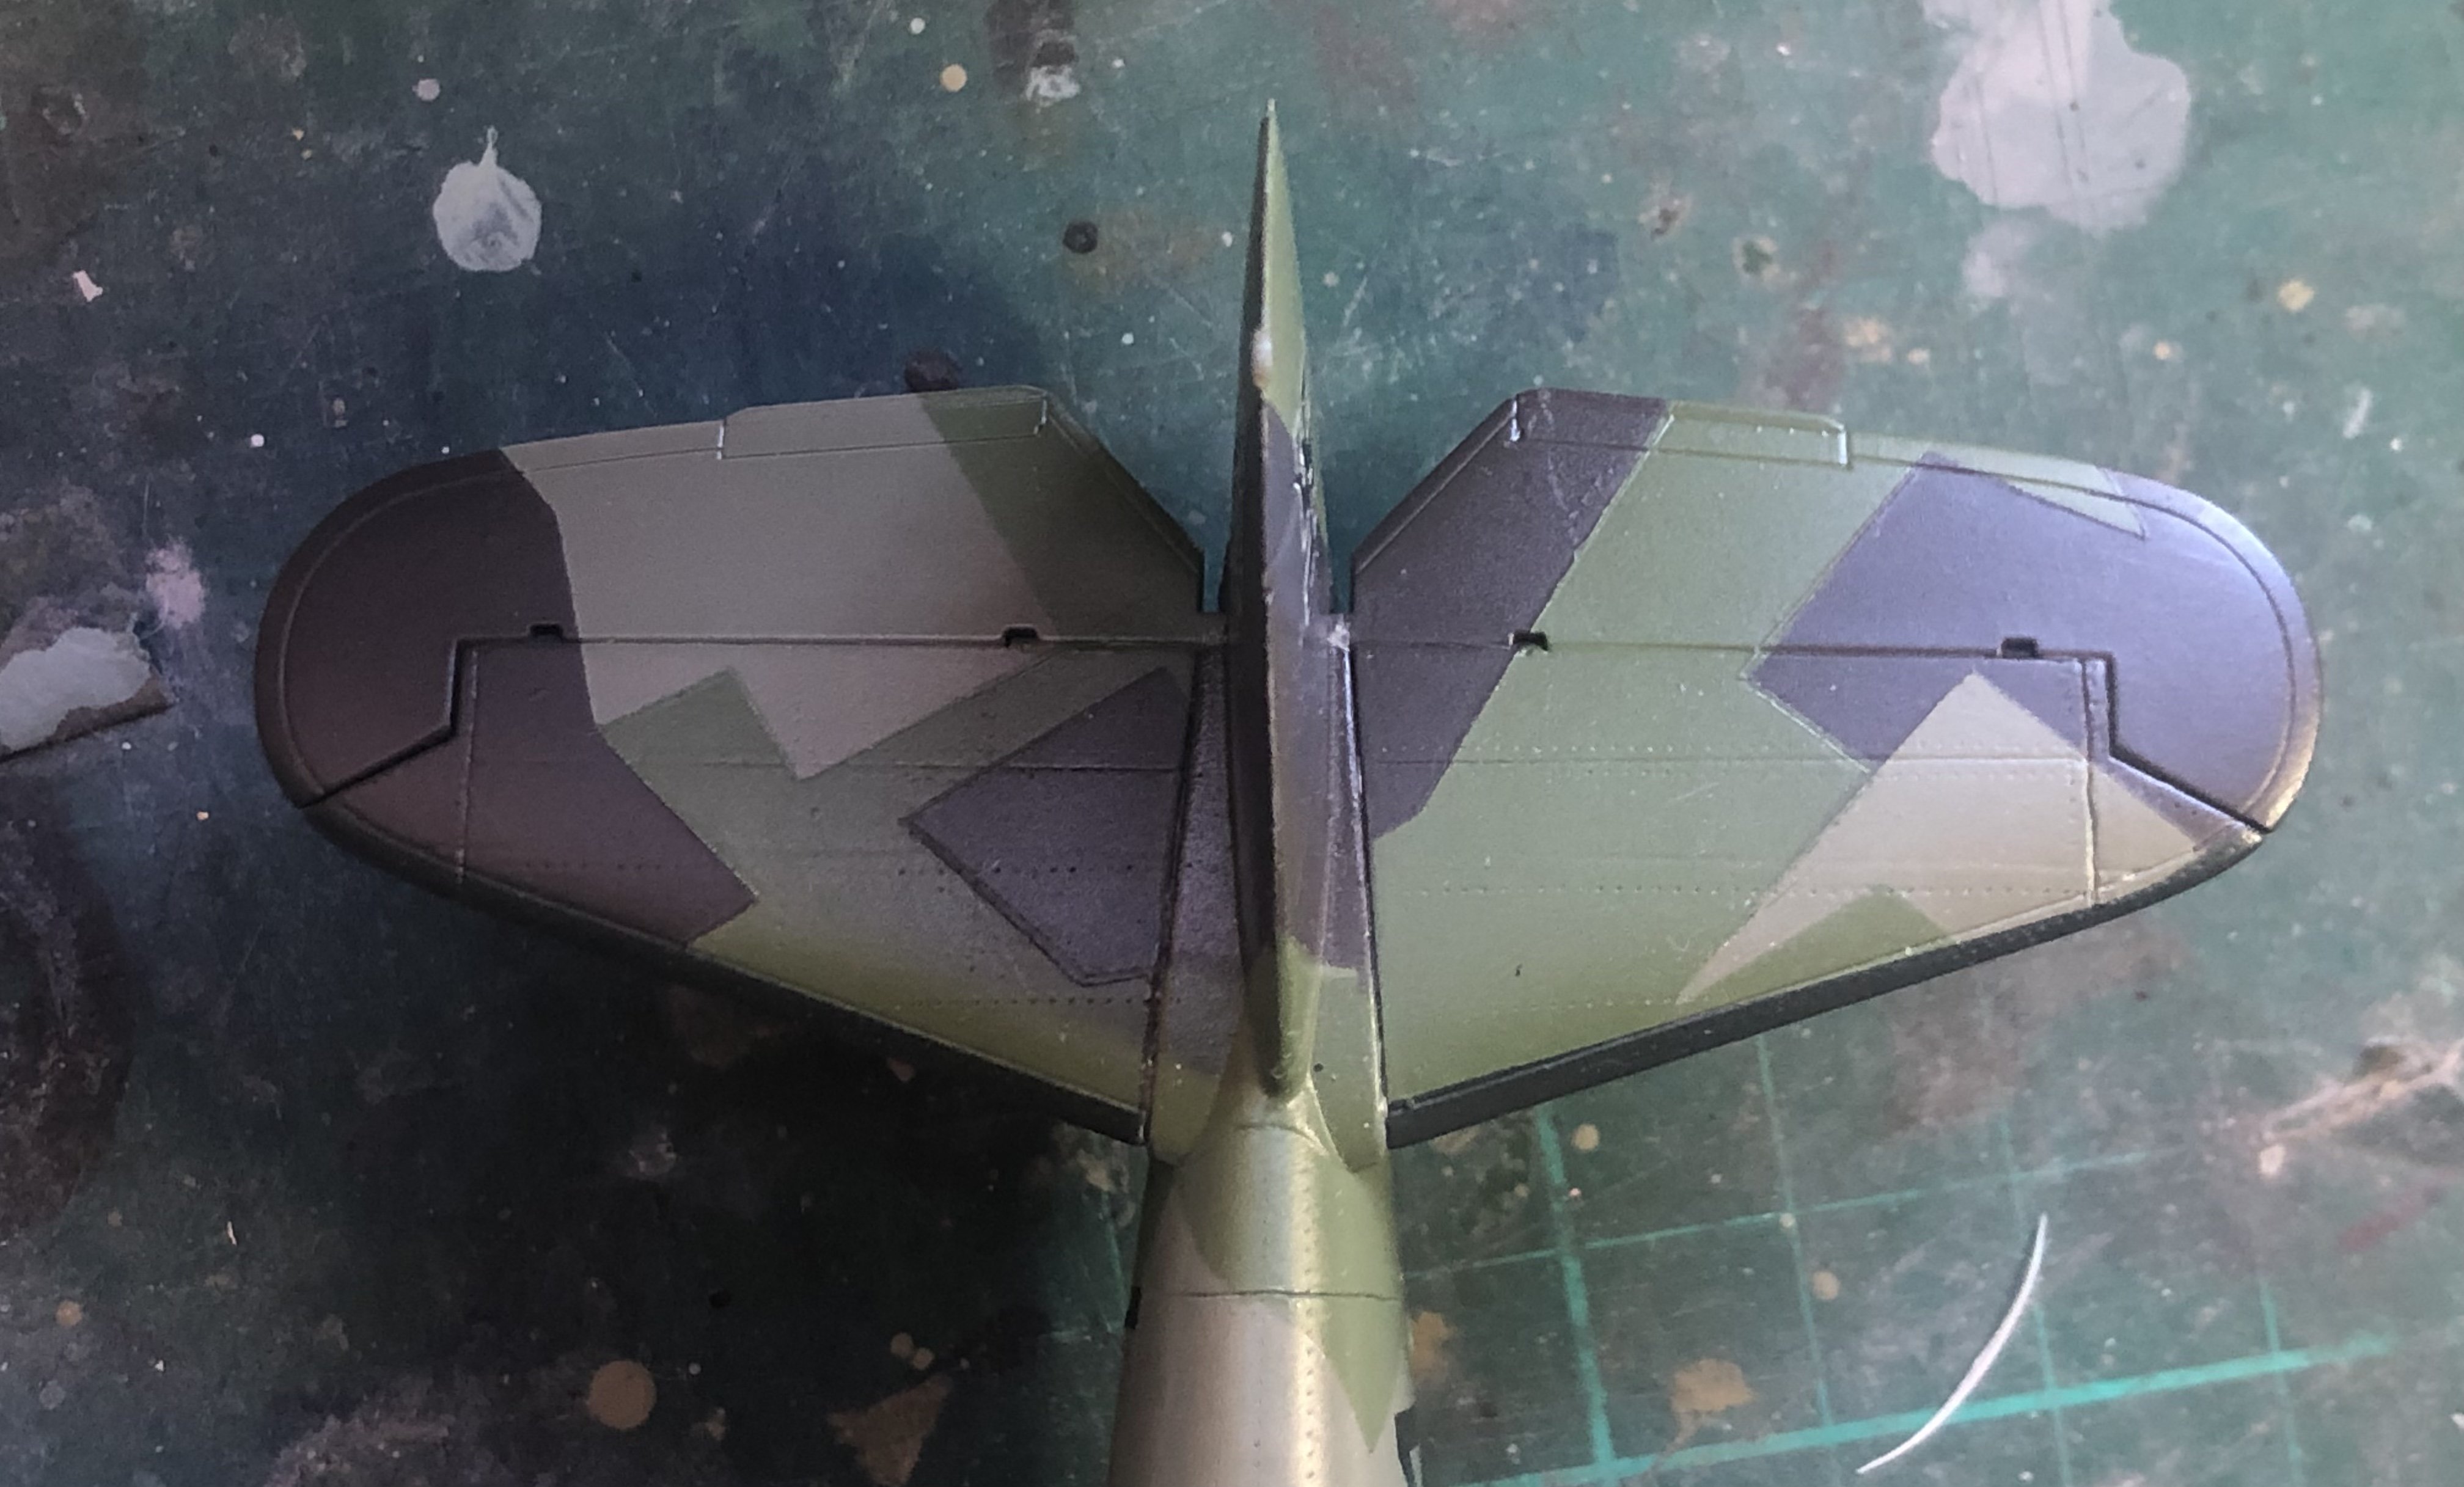
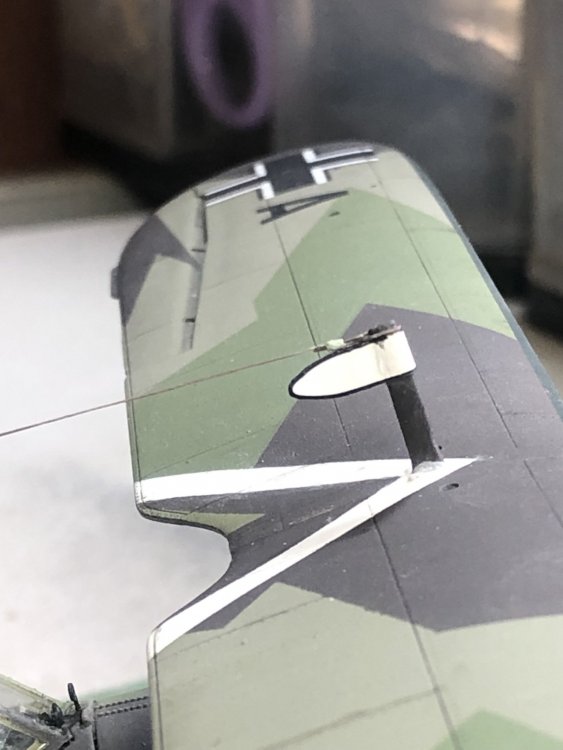
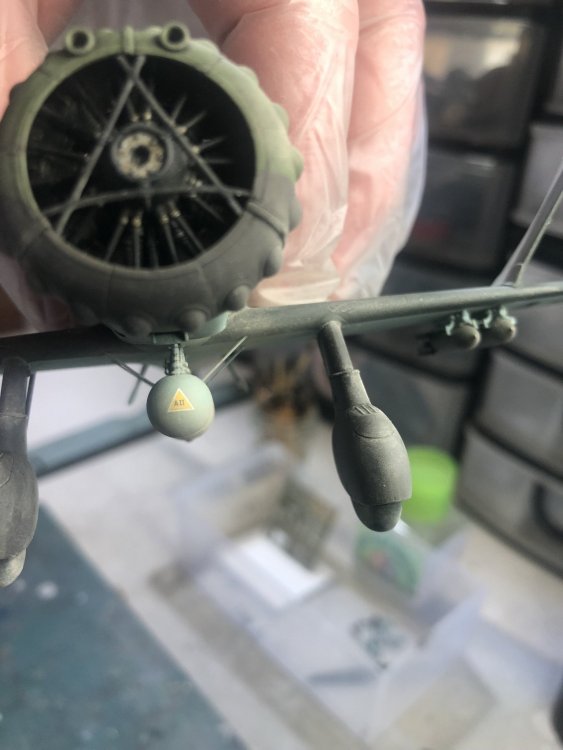
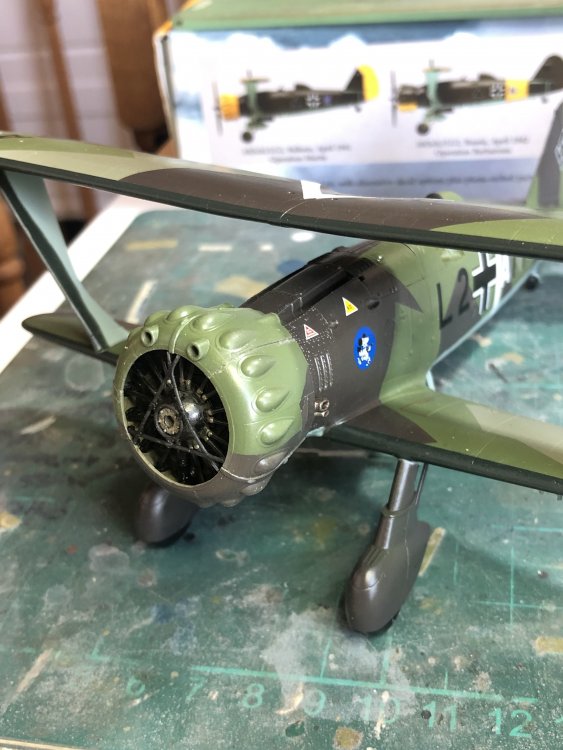
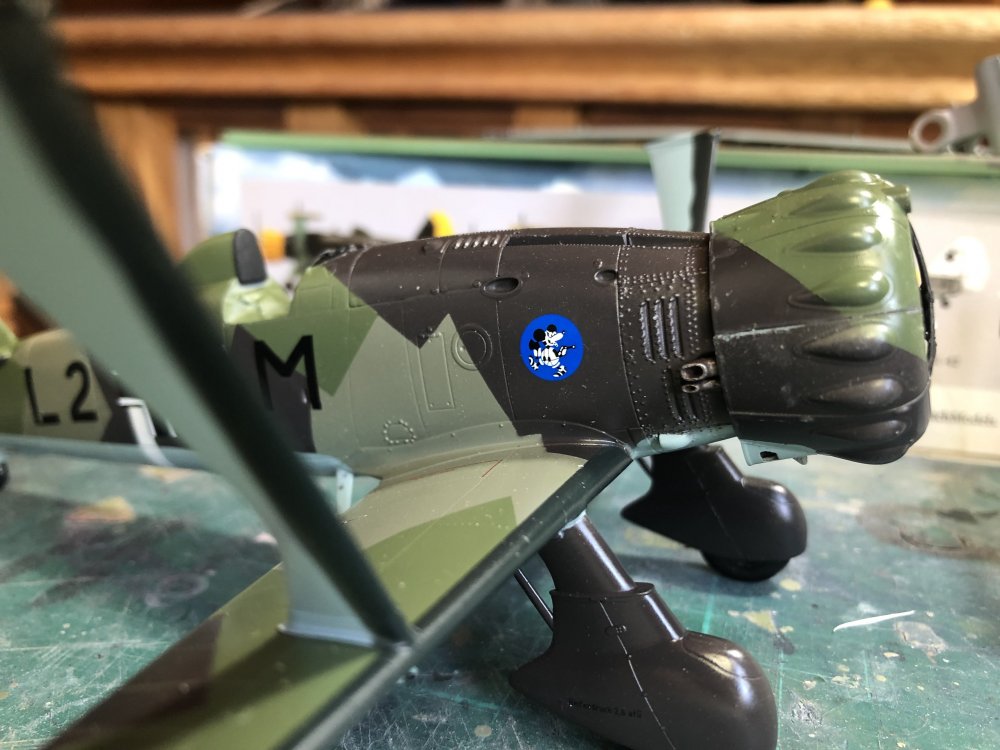
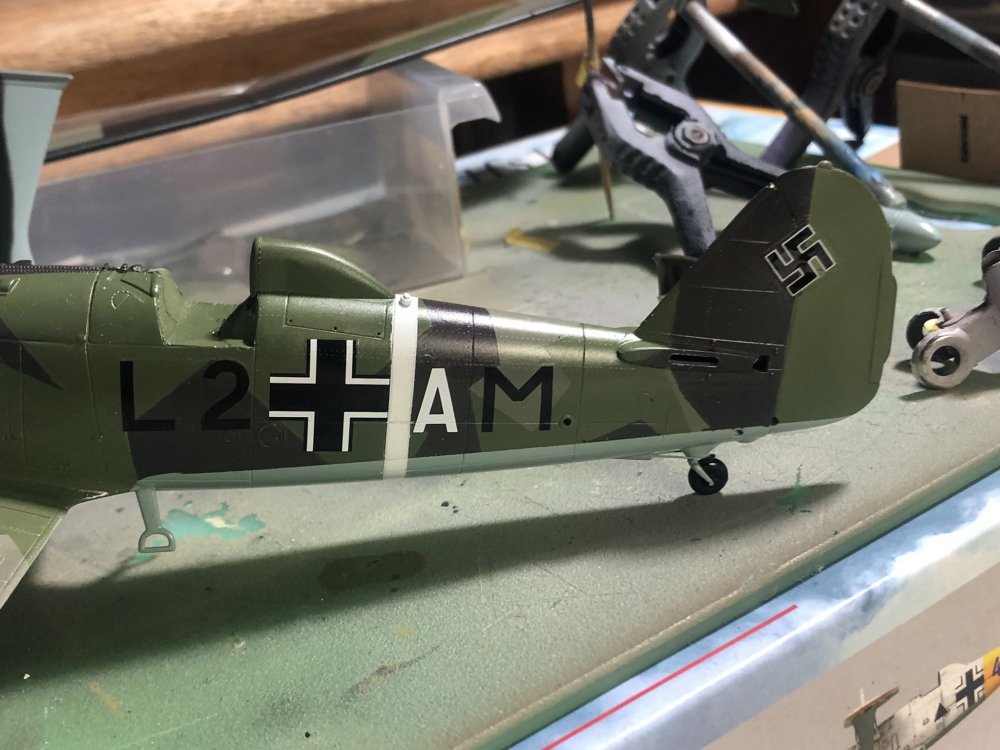
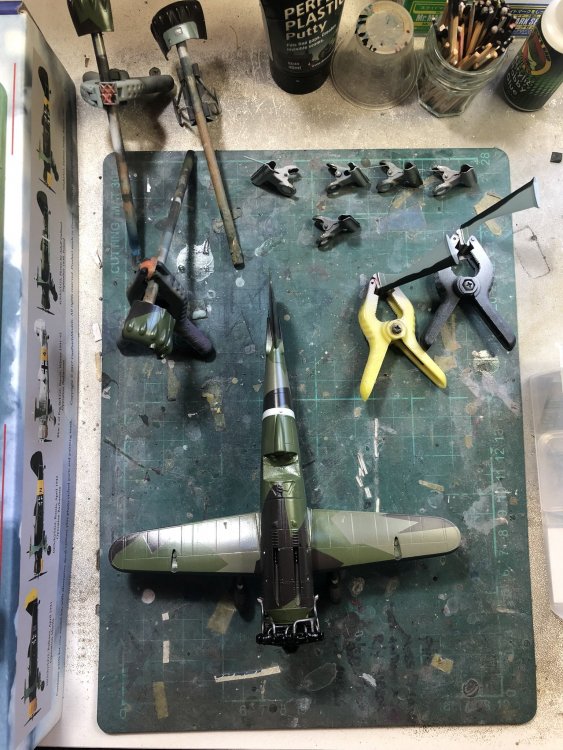
Welcome back and many thanks for the great feedback! Well progress has been tempered by lack of mojo for this build and concentrating on getting the Ju87 to a good point. However, back to the HS 123! The build has now been washed (AK enamel panel line washes) and flat coated (Testors Dullcote) and approaches the final stretch. I have removed the masking from the cockpit area and have some minor touch ups. A few extraneous parts to go, minor rigging and final assembly. It will get some restrained weathering, mainly around the lower areas, as these were fairly new birds but still operated from rough landing strips. Regards,


-
Done - F-4EJ Kai Phantom - The Last of it's Kind ZM 1/48
kahunaminor replied to DocRob's topic in LSM 1/48 Work in Progress
Phreaking awesomeness! -
Dragon Messerschmitt Me-110D 1./Ergänzungs-Zerstörergruppe Værløse 1/48
kahunaminor replied to GazzaS's topic in Non LSM 'WIP
Glad to see you have kept yourself busy! I can only echo all of the above, great composition, colours and build. Well done matey. Kent -
I got a bit sidetracked with another project (first time you’ve heard that right?). The Hs123 is ready for washes, just going to pause it for a while longer to get over the hump on this Airfix Ju87B-1 for an upcoming club contest.


-
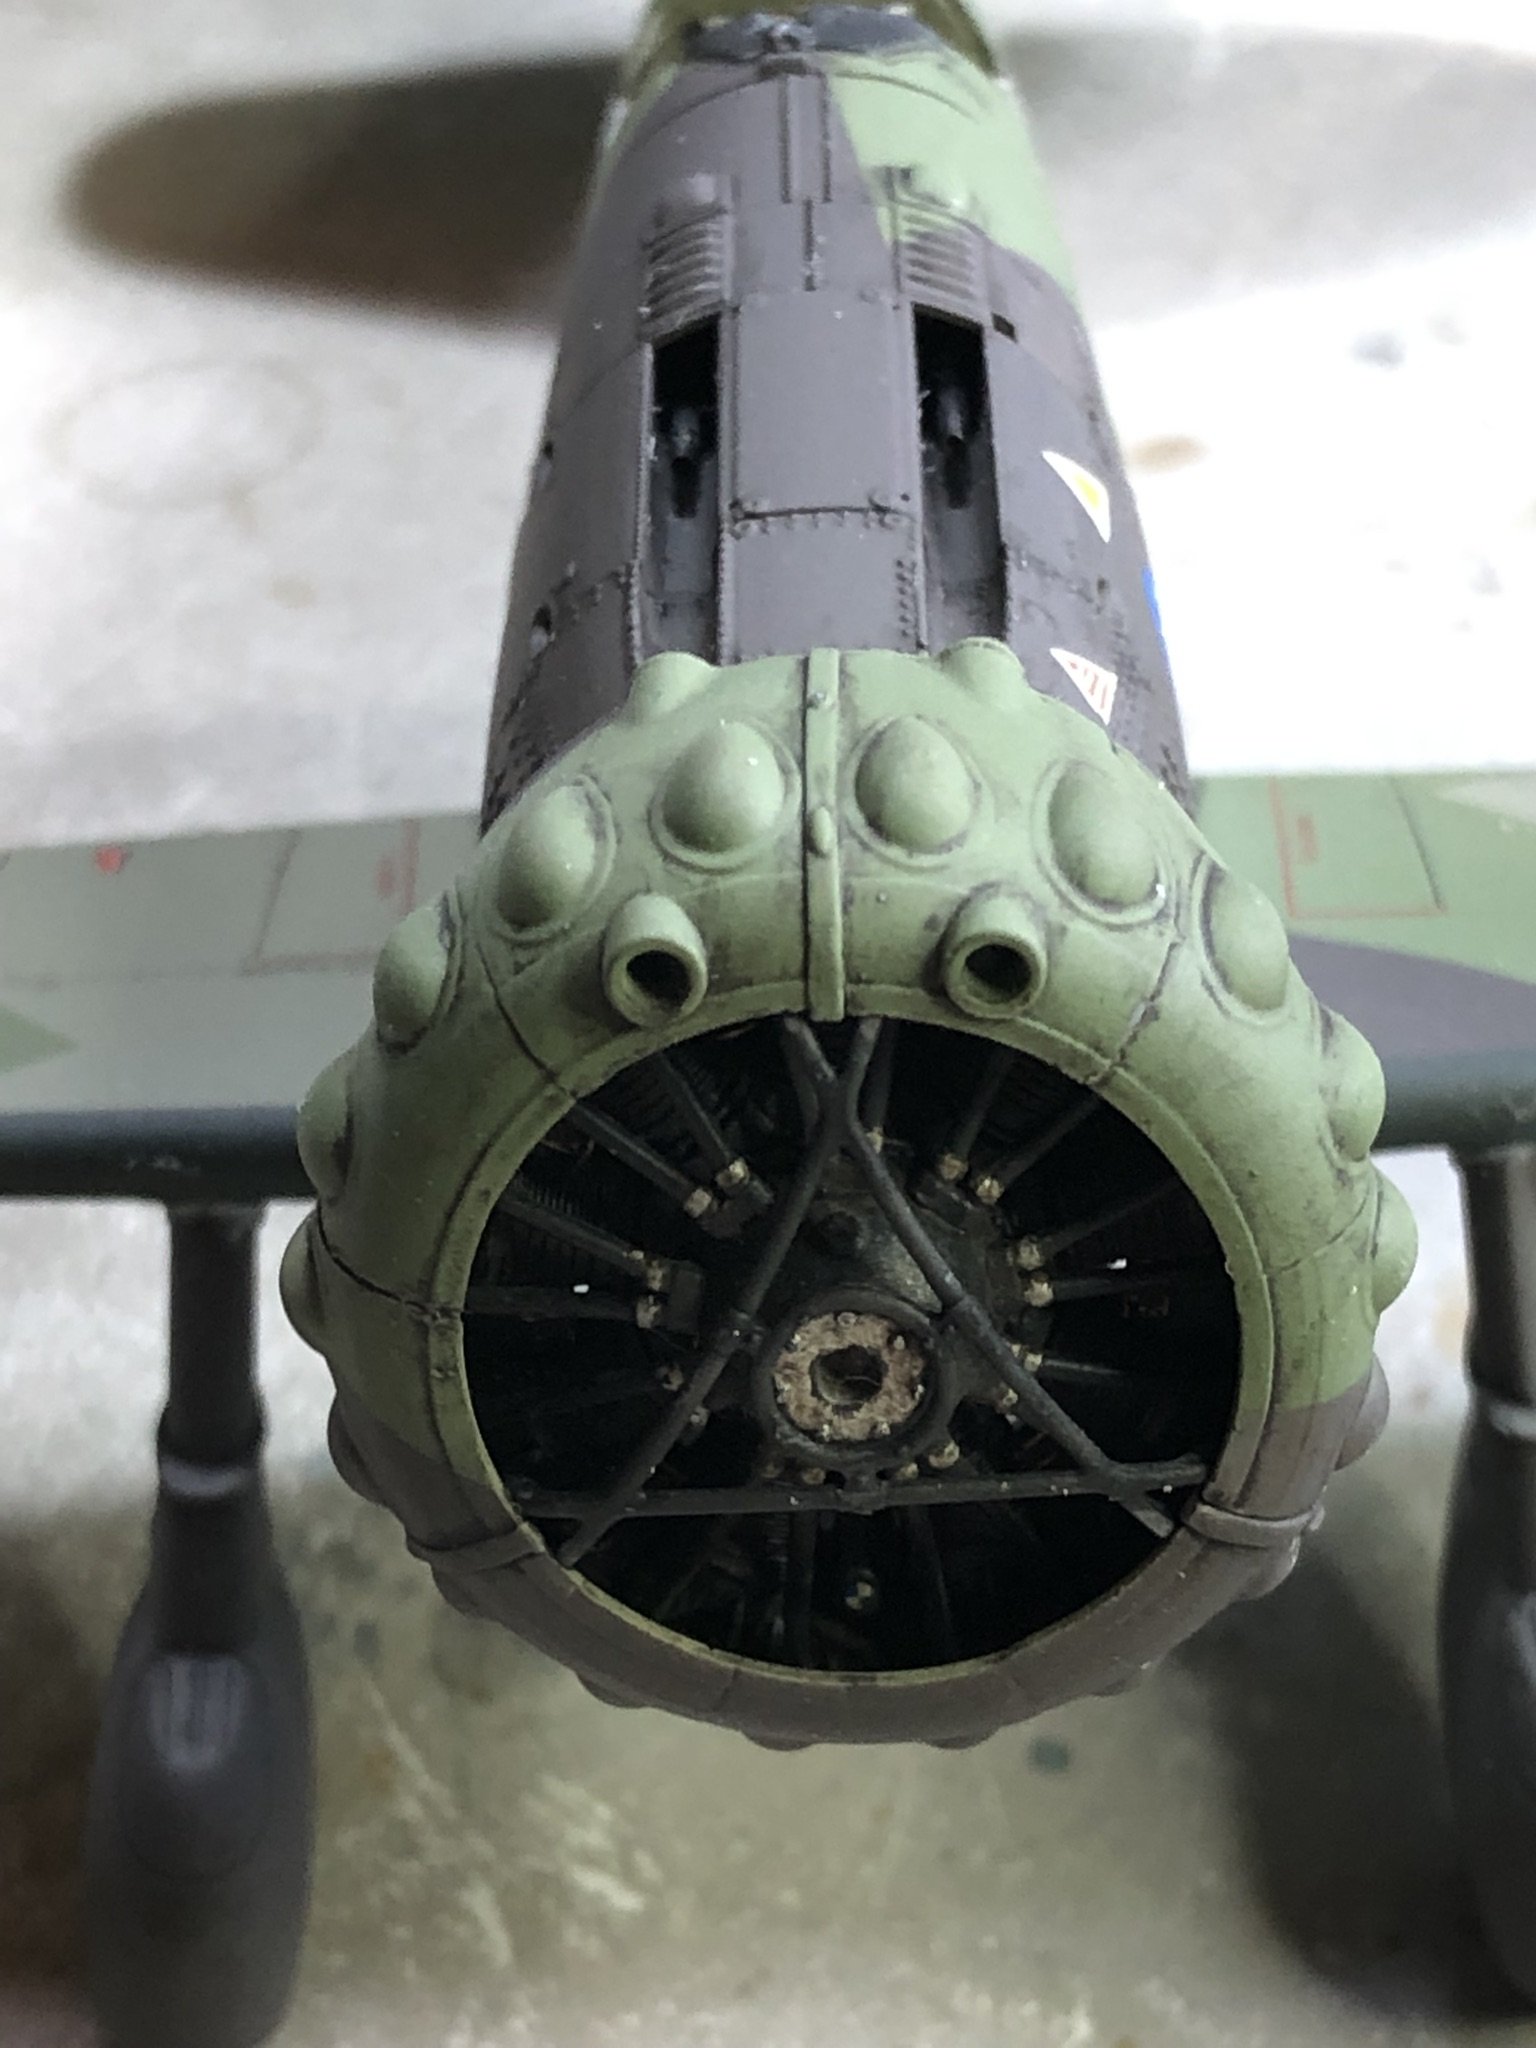
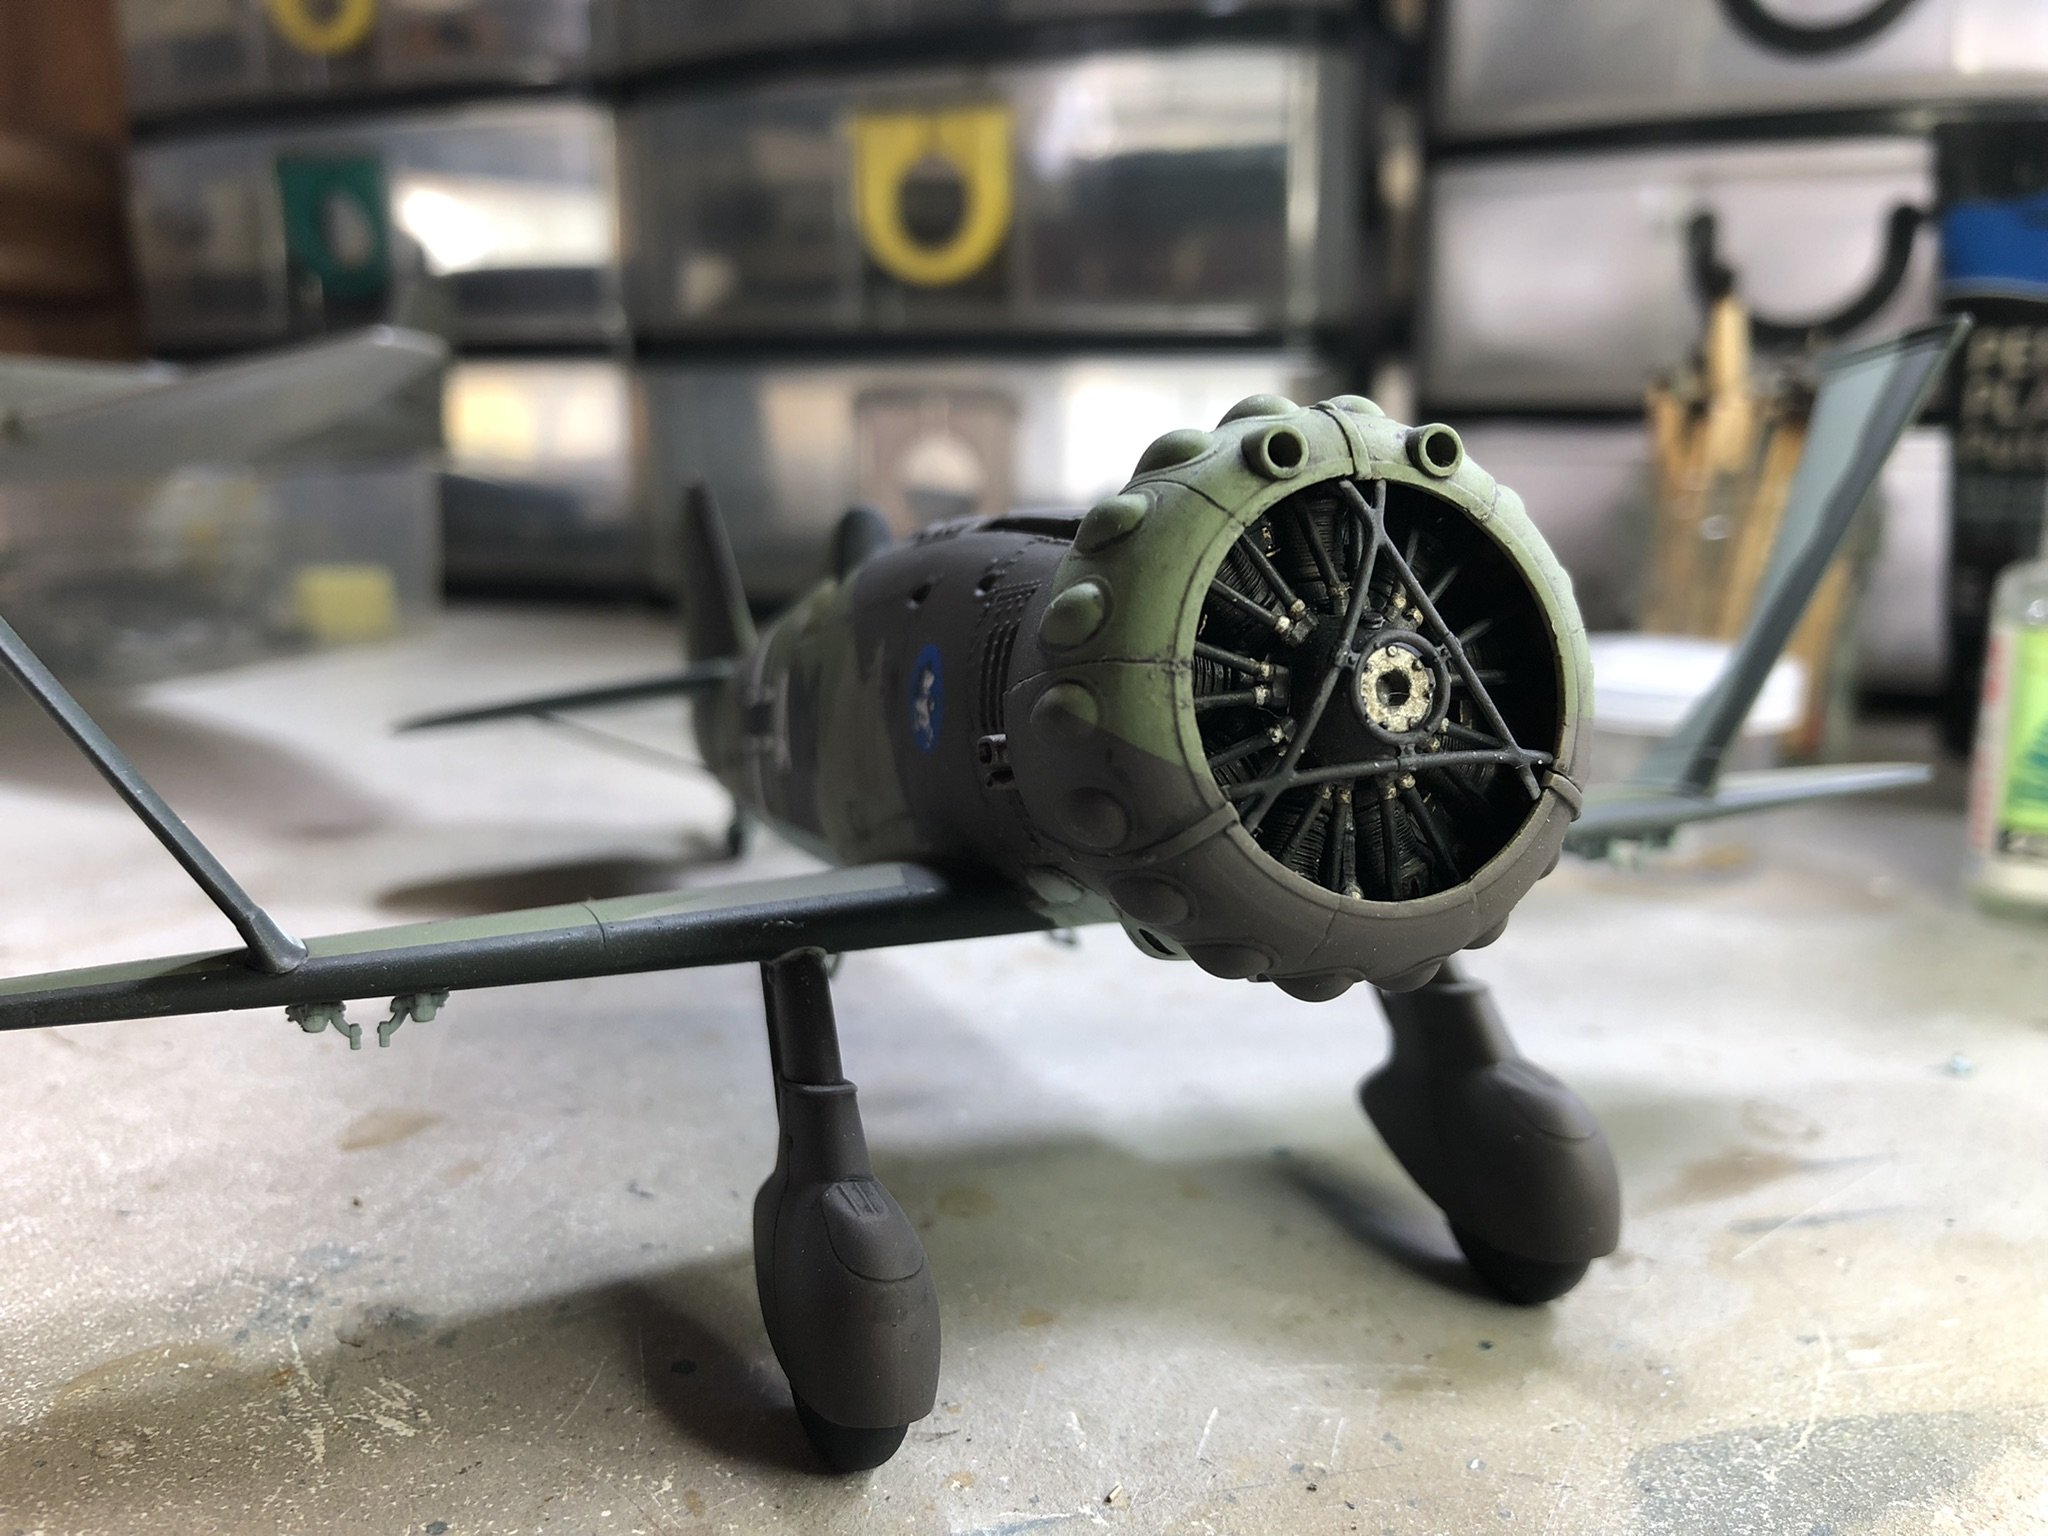
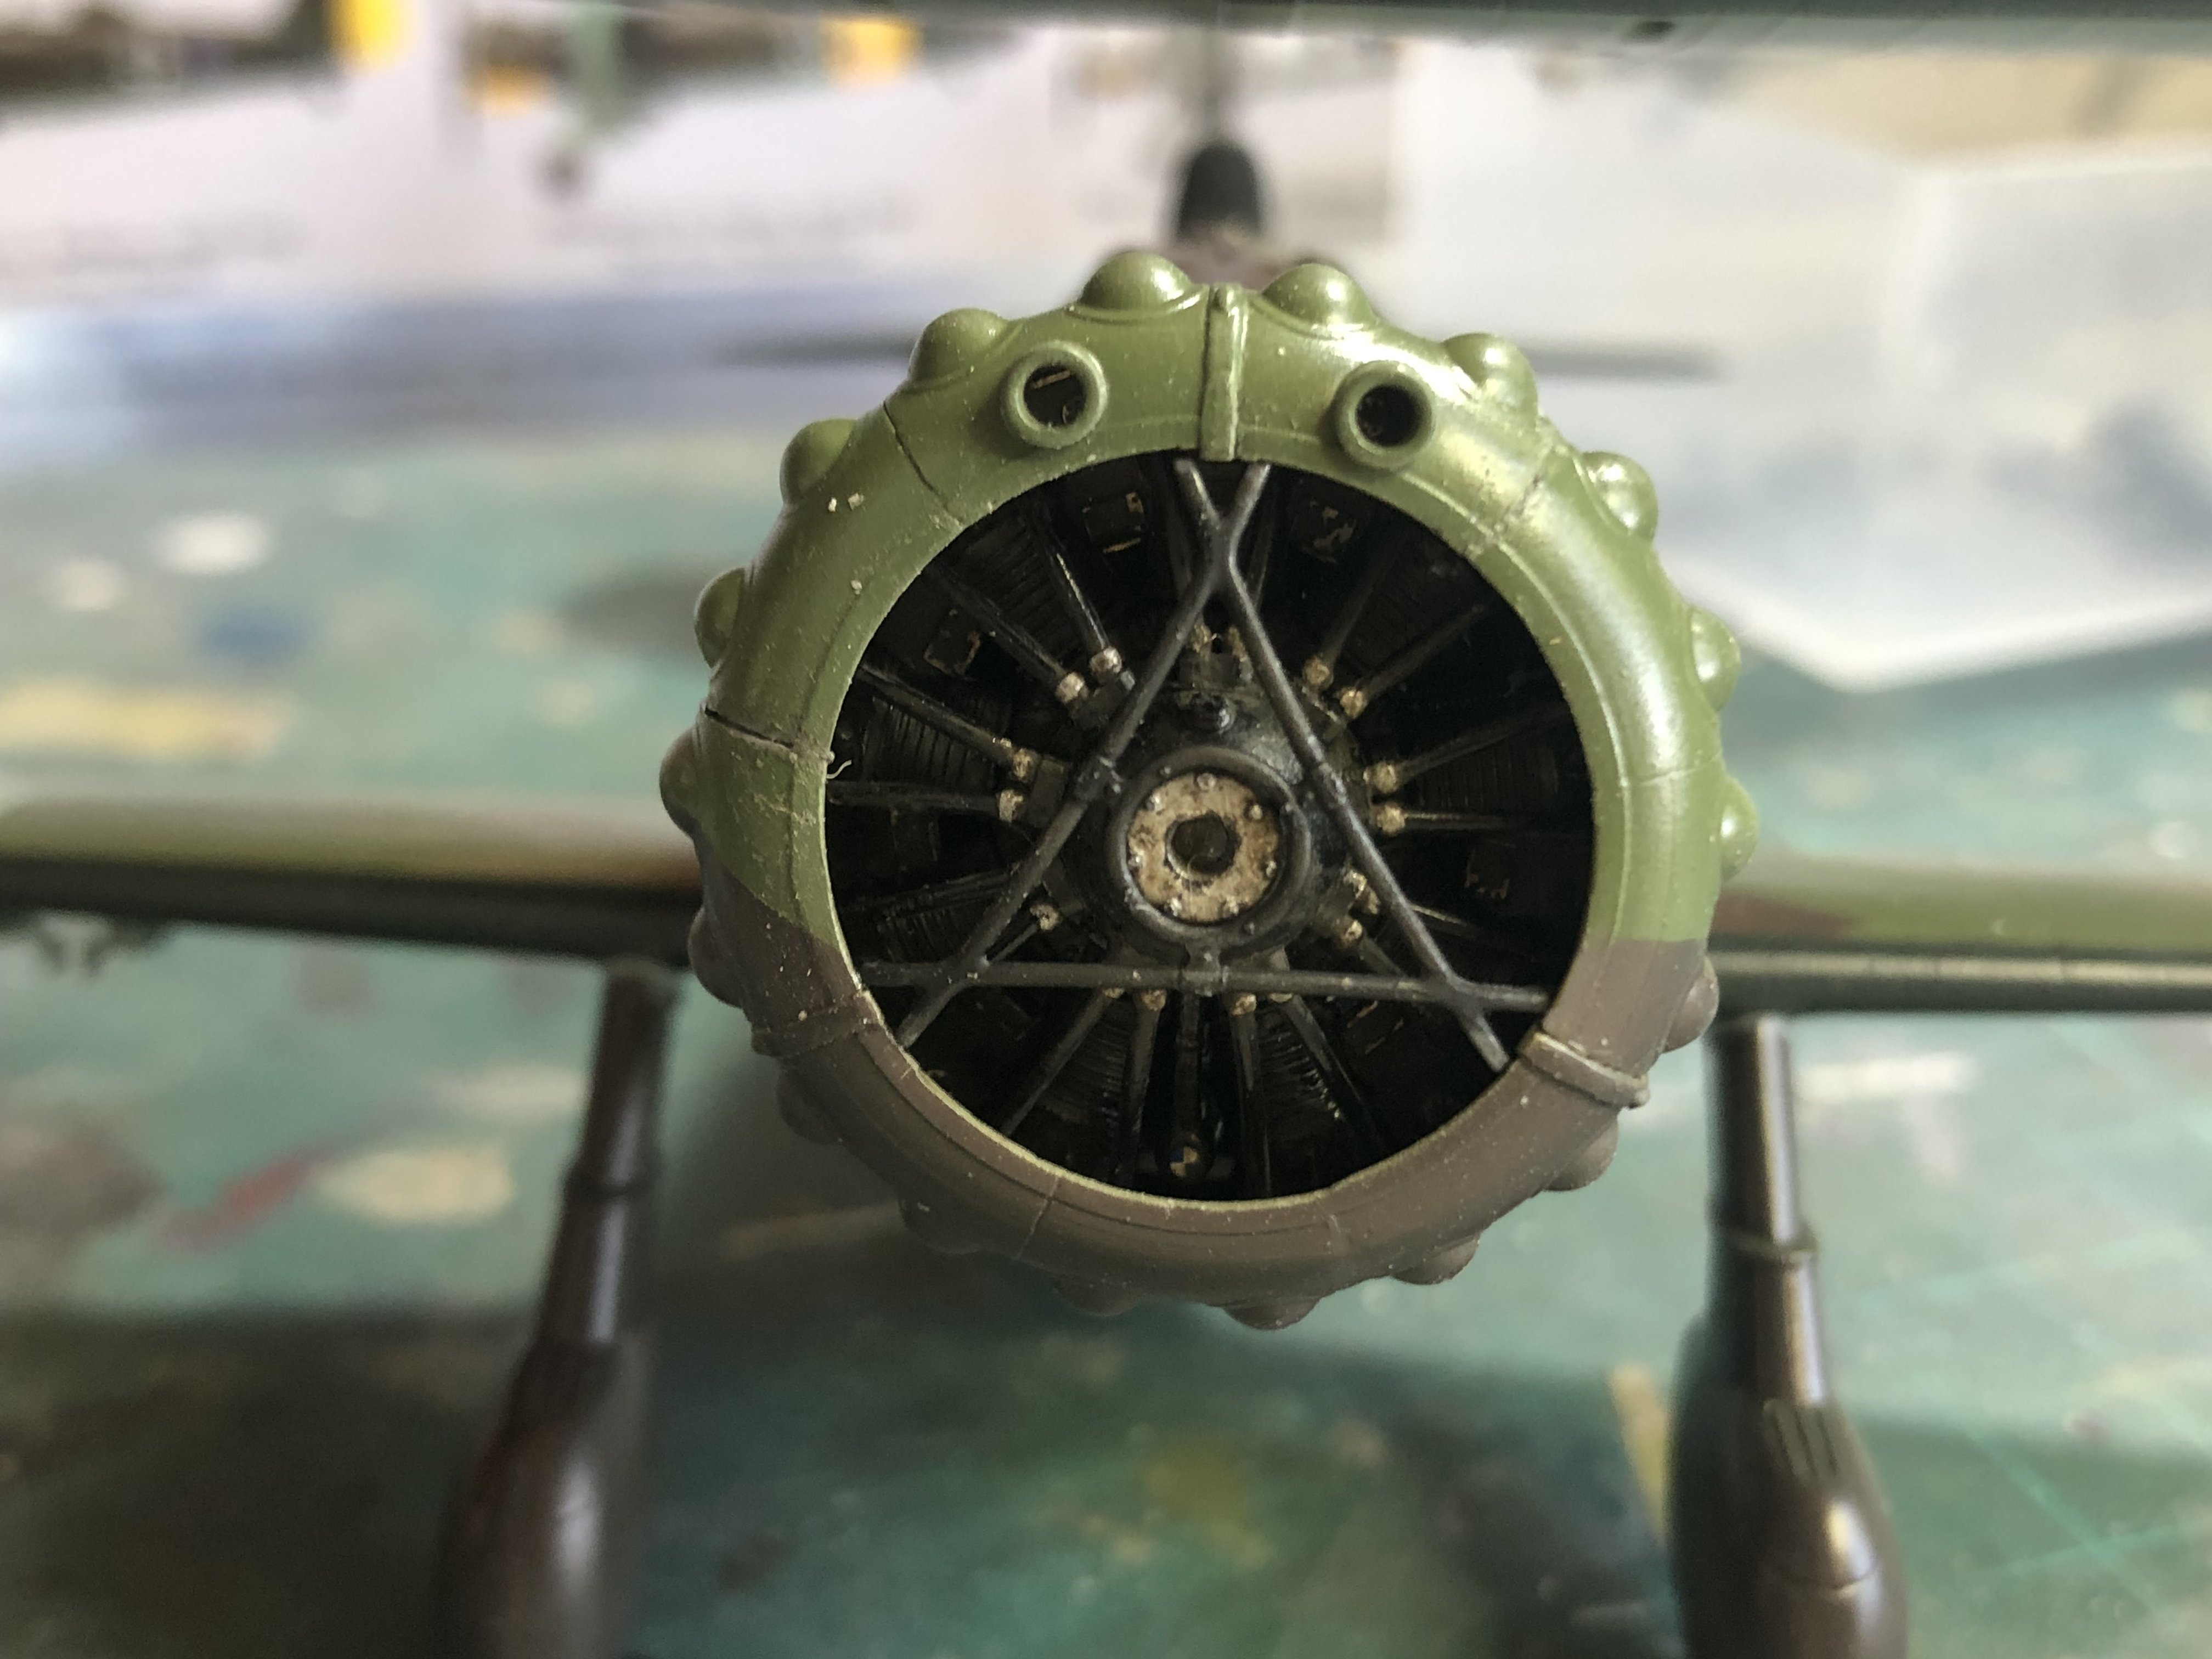
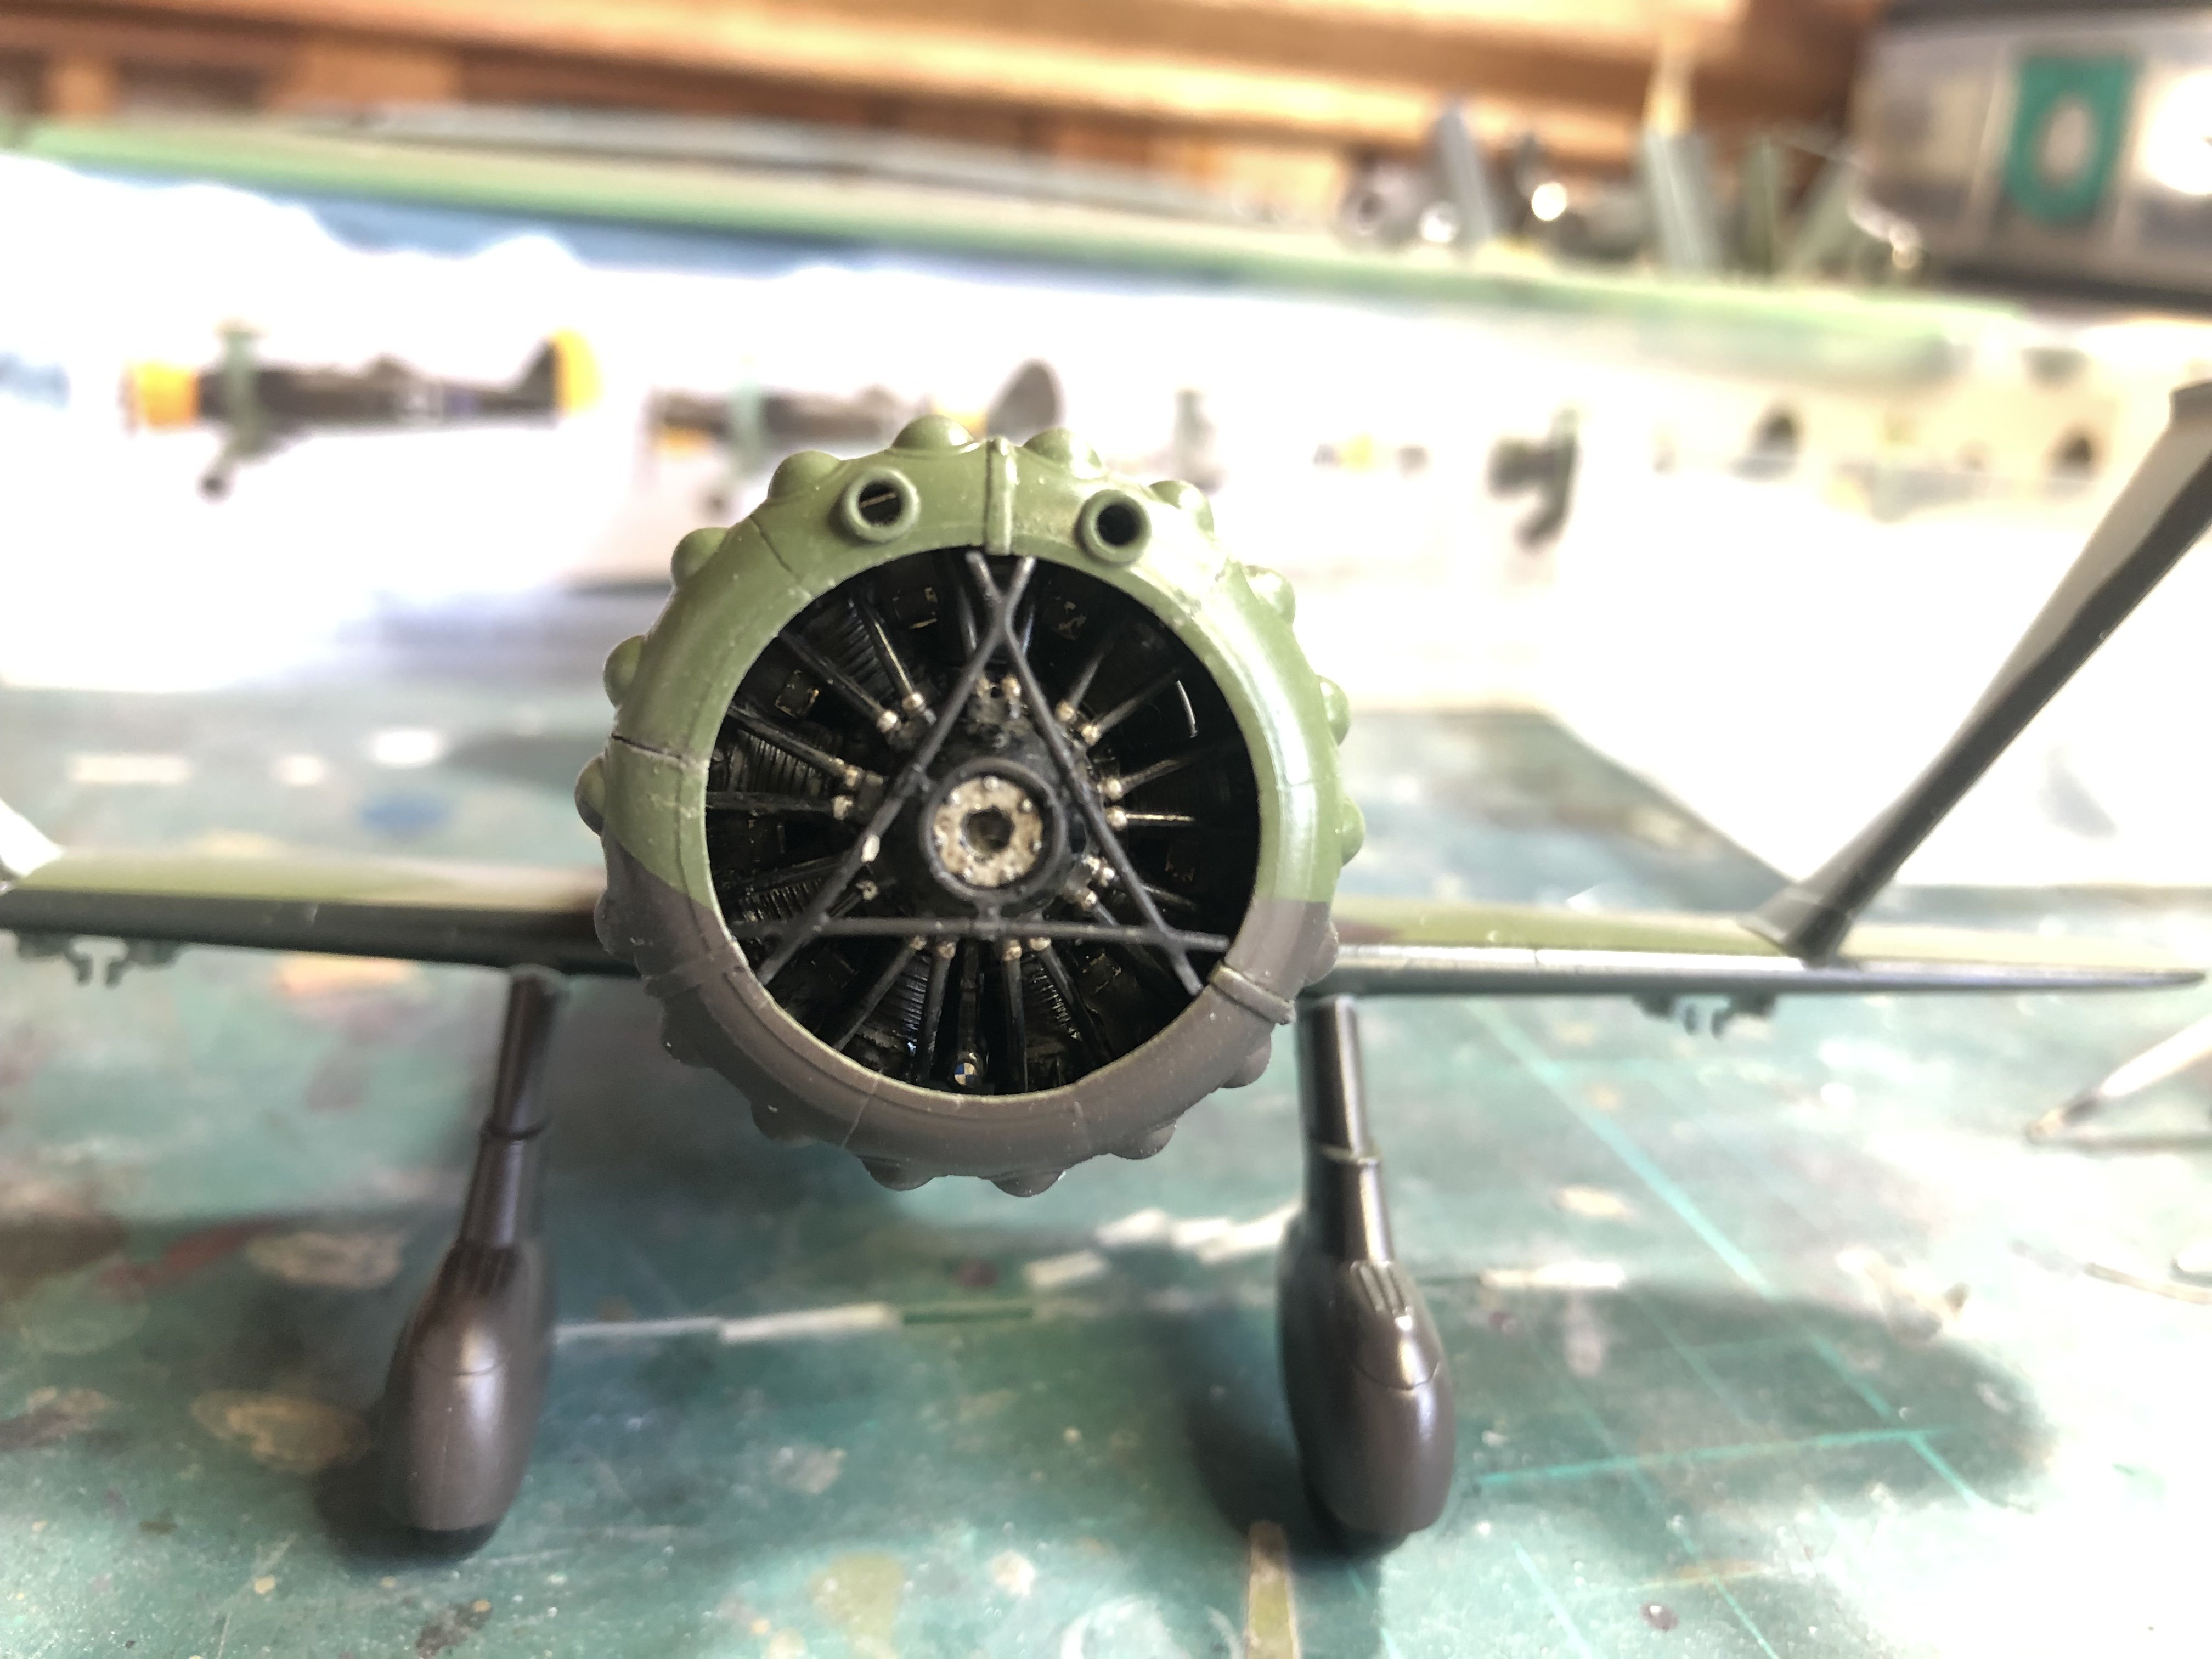
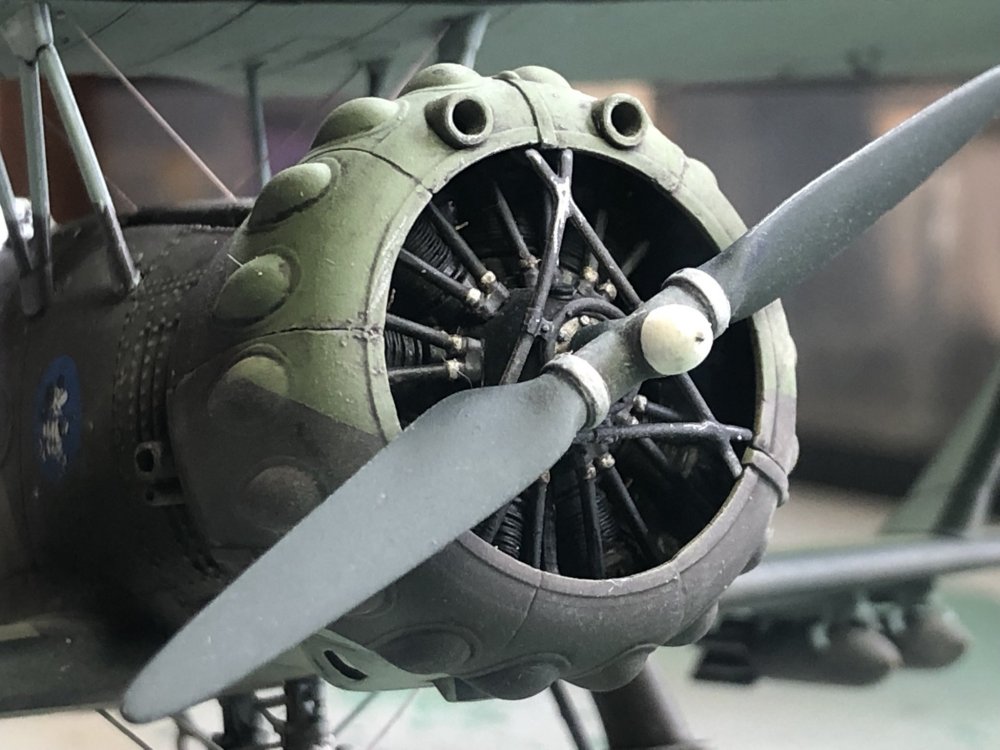
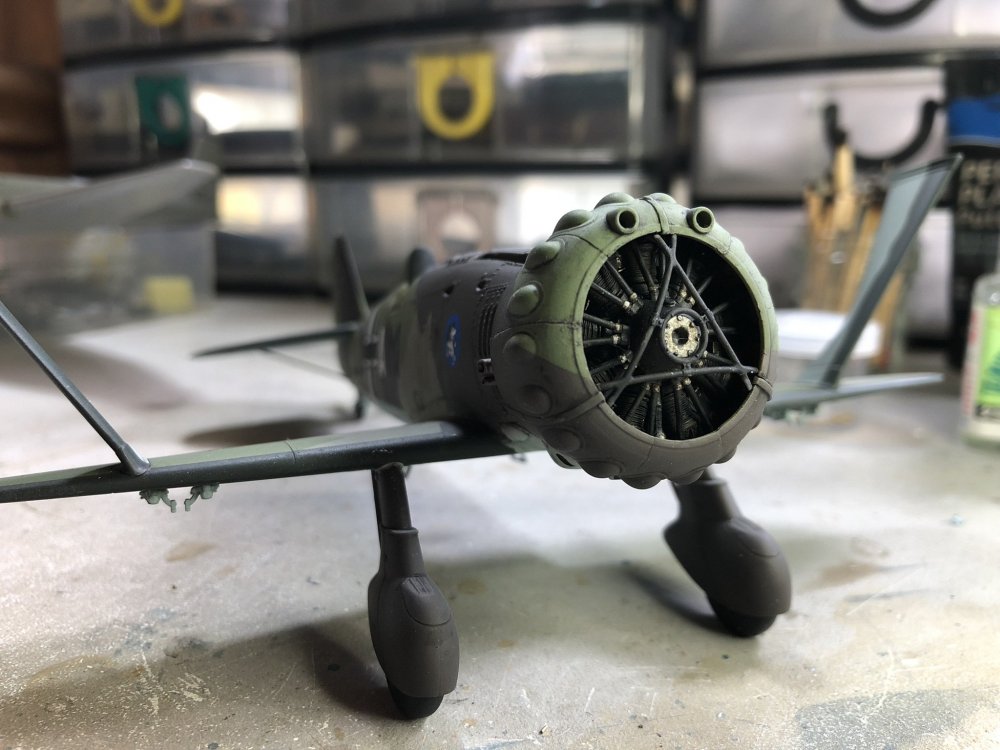
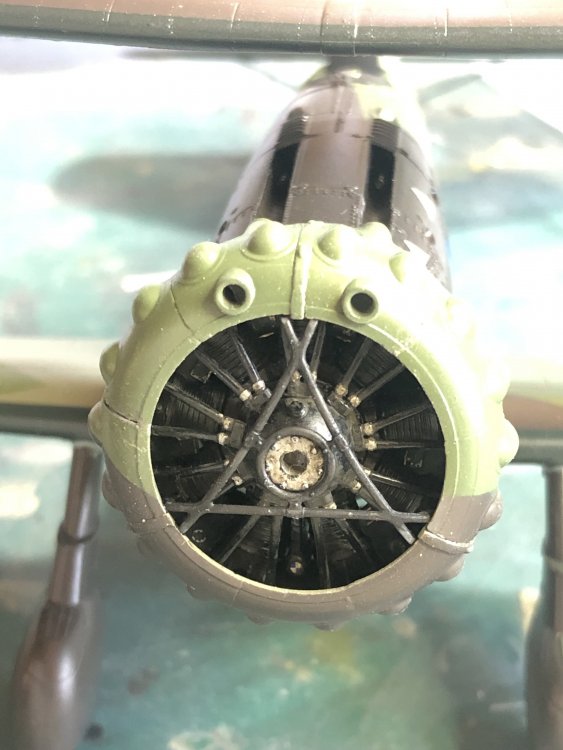
The cowling is on but not without a small struggle (self induced). To fit the cowling you will need to sand the tops of the cylinder heads slightly to allow them to seat into the cowling bumps. It was a case of sand test fit, finagle, sand some more. I got most of the cowlings with a snug fit but a couple remained a little gappy. The end result here is not bad but better than V1.0!


-
Guilty of possessing the ICM A4; A5 and SH C4 and D2/4 so I have just enough the start!
-
Two thumbs up from me Phil! Makes me want to scratch my own Ju-88 itch from the pile!
-
Done - F-4EJ Kai Phantom - The Last of it's Kind ZM 1/48
kahunaminor replied to DocRob's topic in LSM 1/48 Work in Progress
Very, very nice work and I am not a true fast mover builder. I can also attest AK Extreme Metals, I love them! Kent -
Ugly but interesting. I have almost got one for myself couple of times as I like some esotericism in the builds. Kent
-
Gotta love a make over! Best of luck and see it in all its glory on the other side.
-
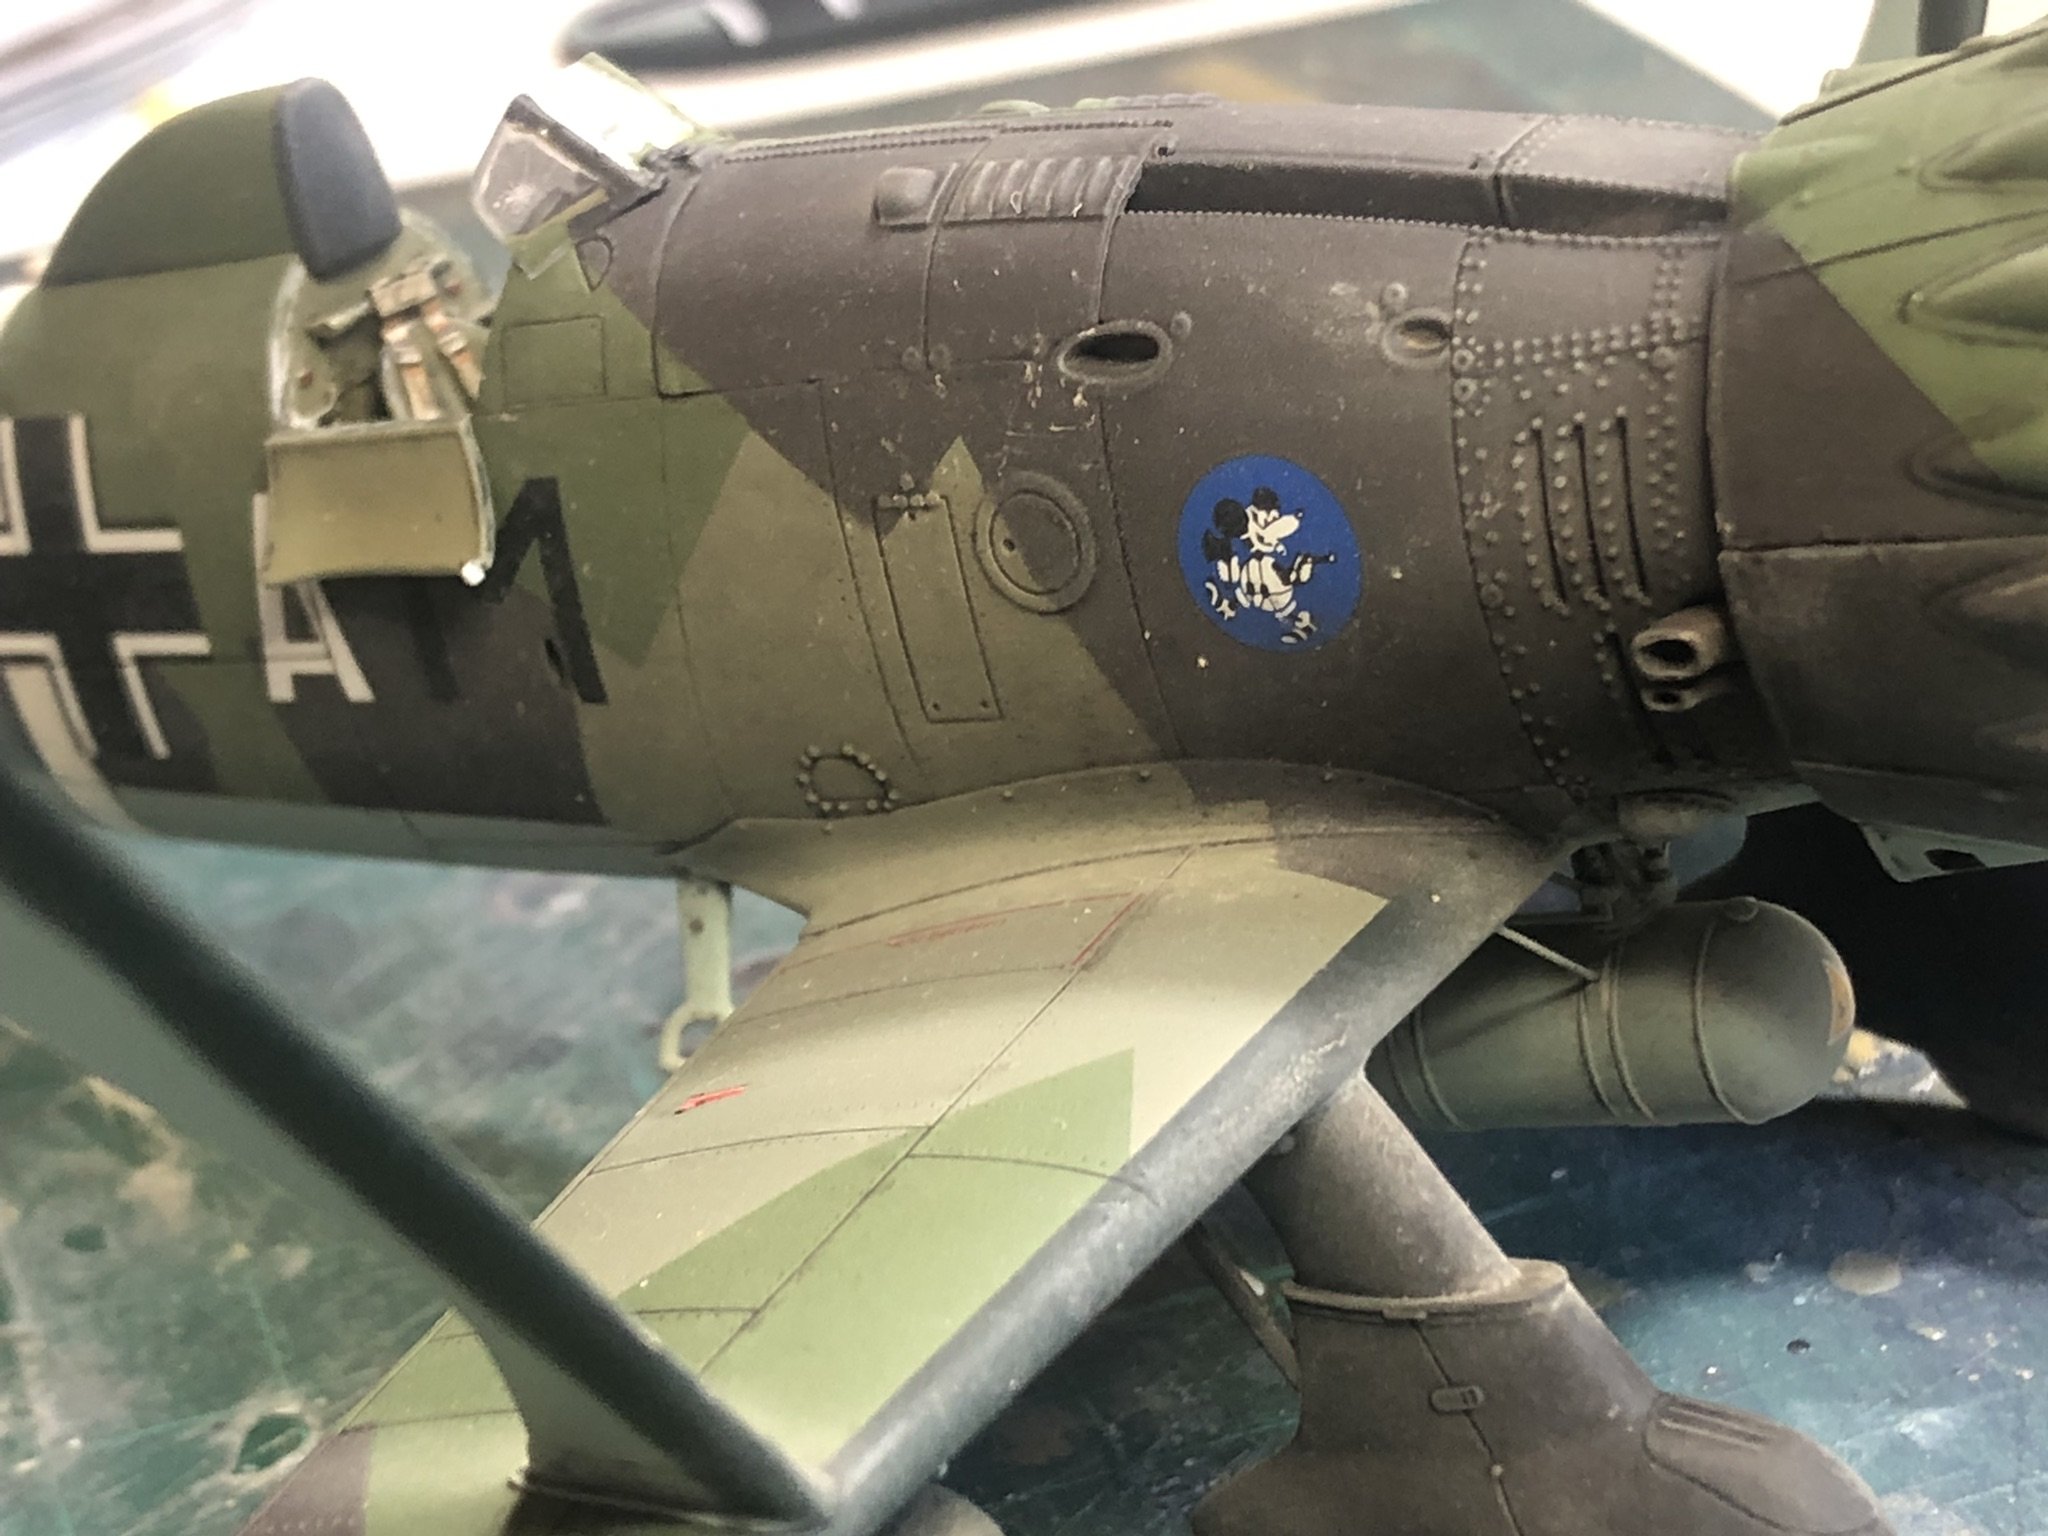
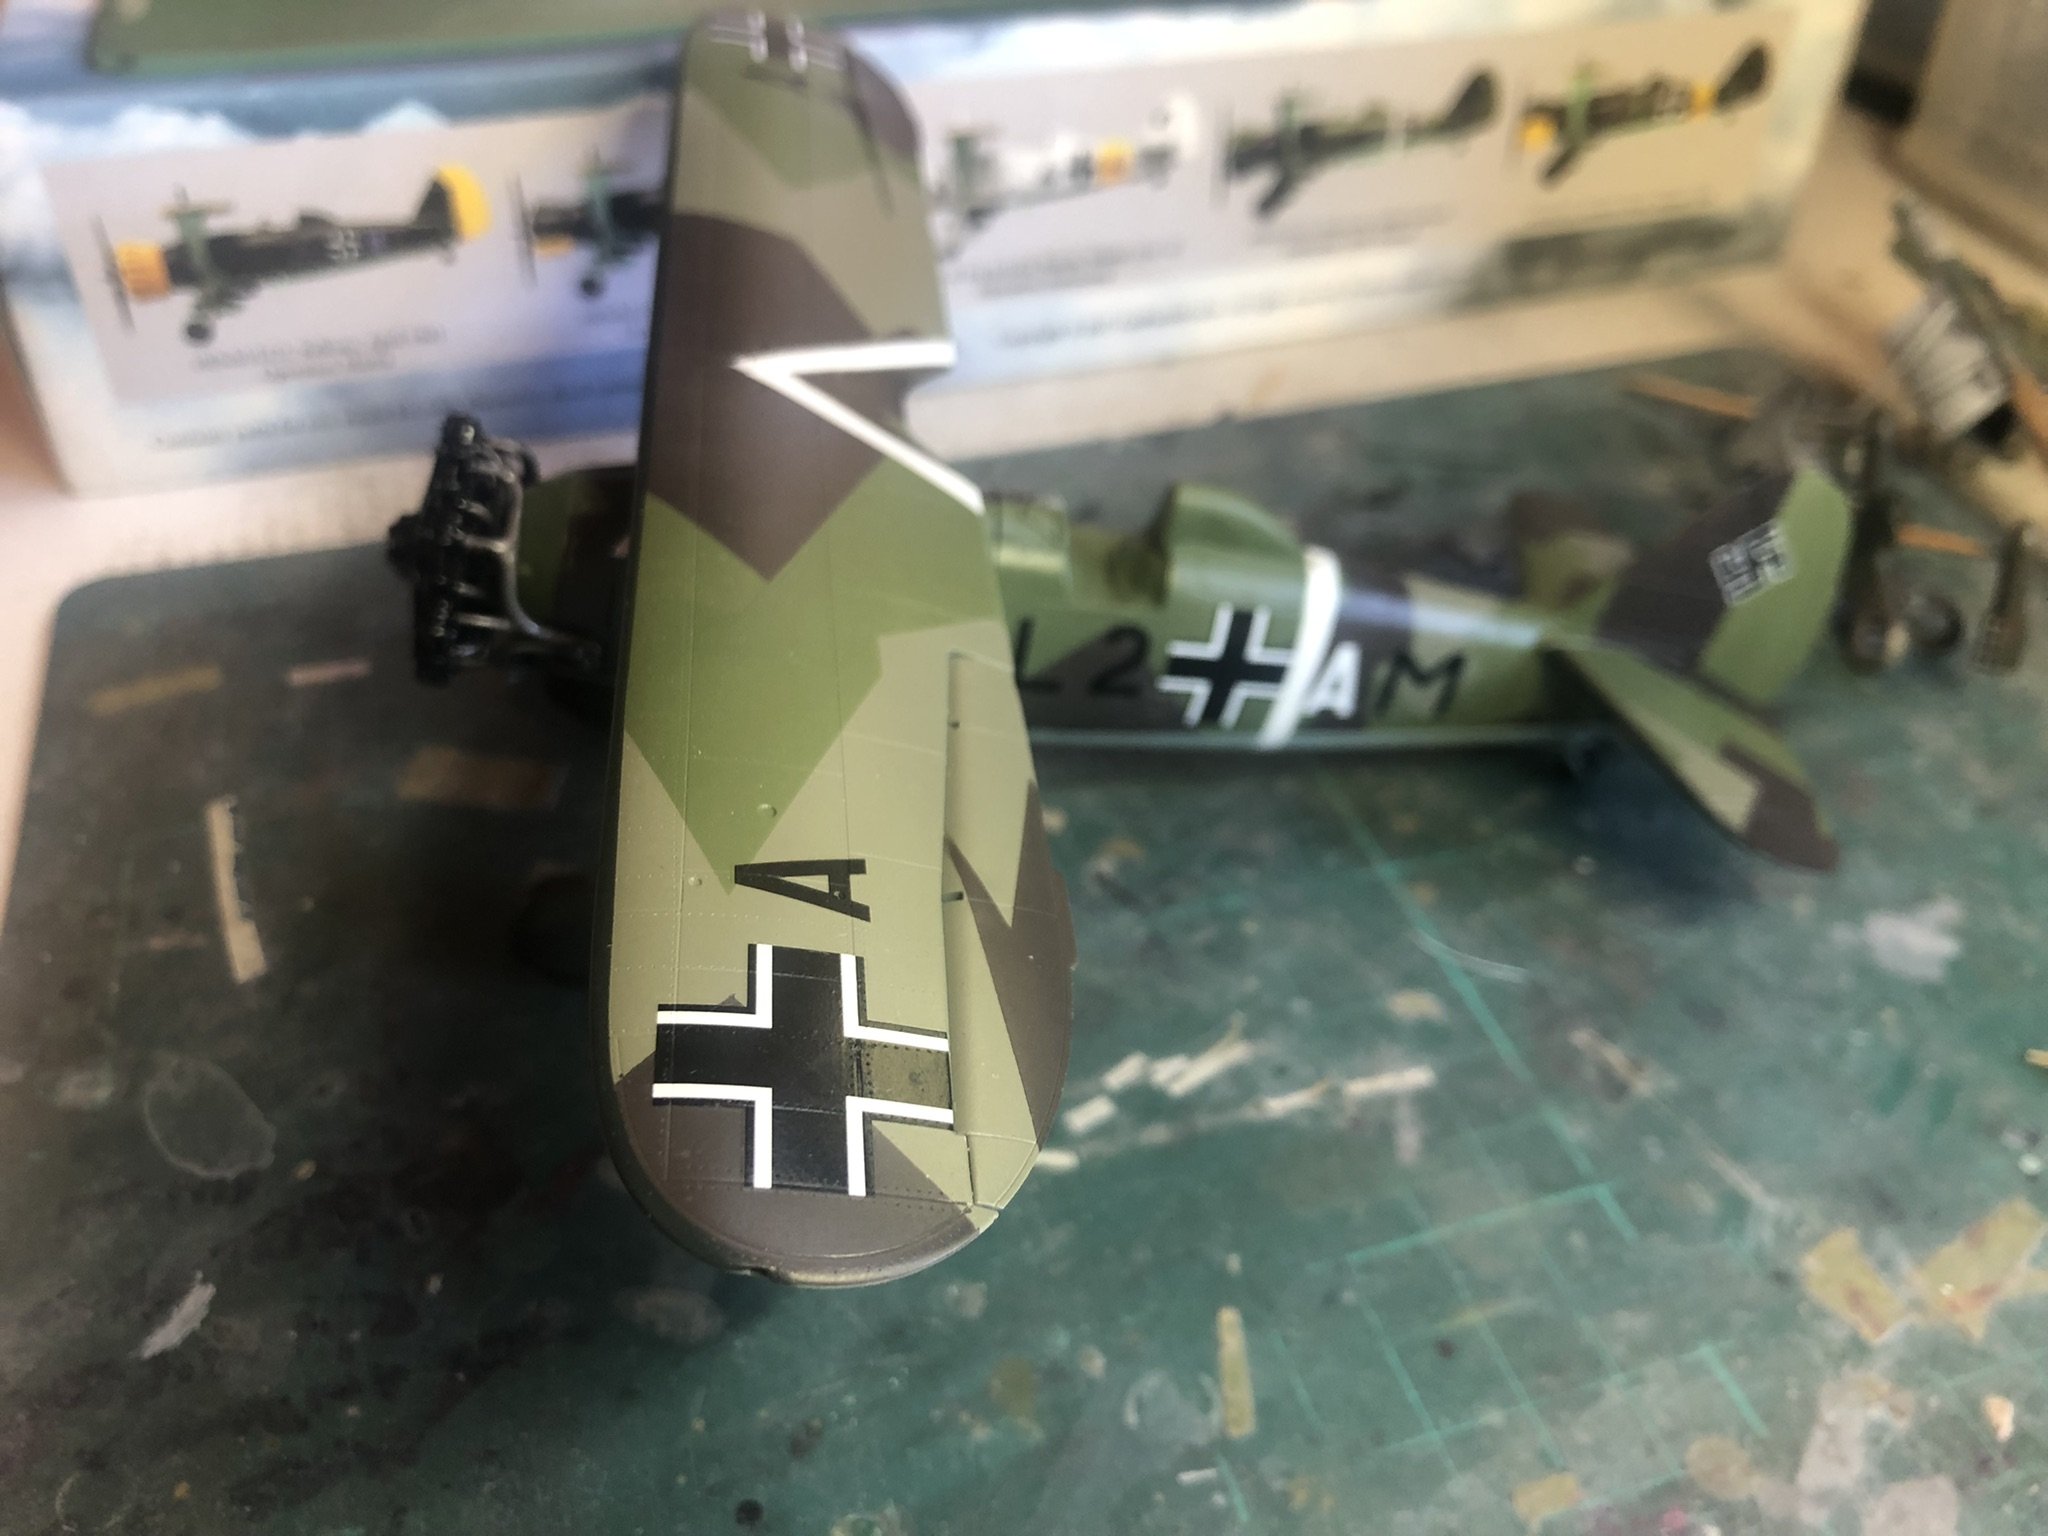
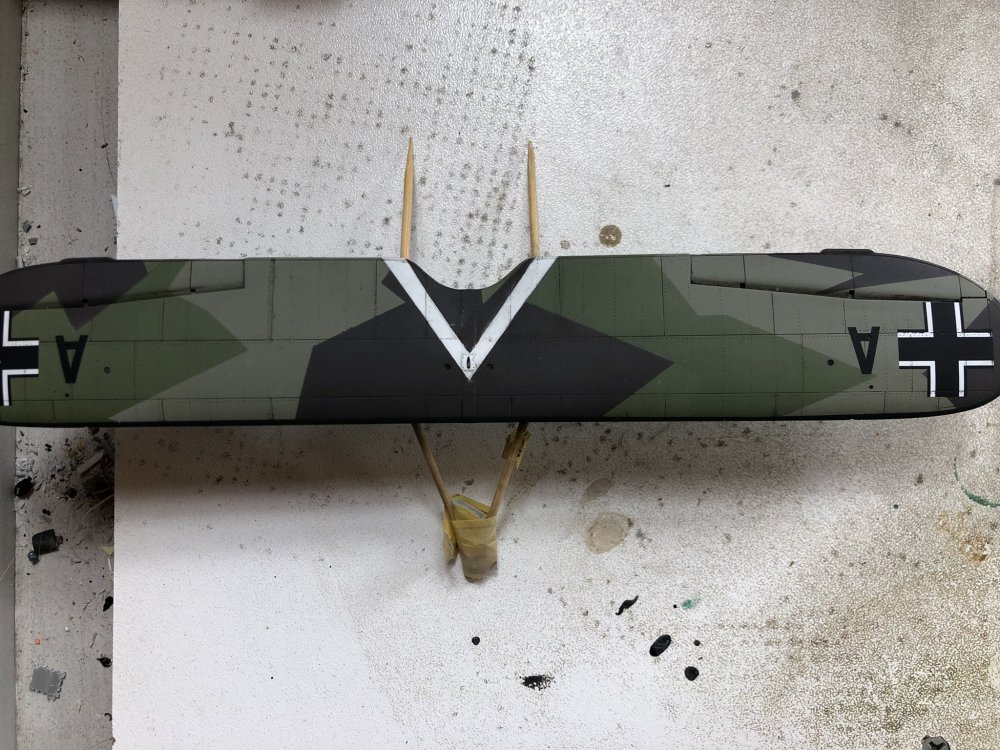
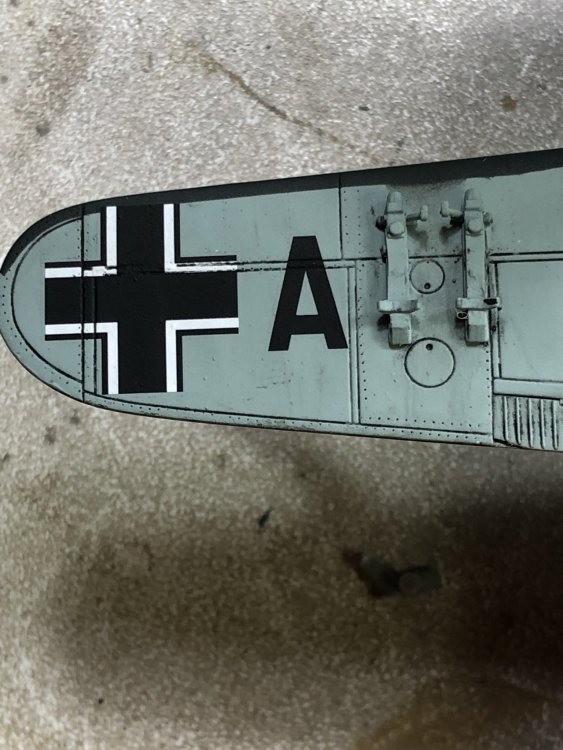
Thanks all, So decals are complete. I botched the “Junkers” logo on the prop so it goes without! The Gaspatch decals worked flawlessly with Mr Mark Setter/Softer (except the aforementioned logos). The rear stabs are now fully attached and the upper wing just dry fit for practice. There are some touch ups with RLM65 to be done here and there. Some new bomb sway braces to replace some broken ones (4 in fact-that will teach me to attach danglies too early!). Next up washes and weathering. Happy New Year, Kent


-
Not much progress as I have been busy with Xmas and the kids. I have completed the prop, bombs and laid down a Glosscote layer in prep for decals and a wash. Merry Xmas to you all, safe holidays and a better New Year! Regards, Kent


-
Looking terrific Peter! I must admit that I did have a guilty small chuckle at your misfortune. Forgive me! As you say that is two parts you can say “Here’s some I prepared earlier!” Regards, Kent